Zhongshan City Richsound Electronic DS413 Docking Speaker with Bluetooth / Bluetooth Speaker User Manual
Zhongshan City Richsound Electronic Industrial Ltd. Docking Speaker with Bluetooth / Bluetooth Speaker
UserManual.wiki
>
Zhongshan City Richsound Electronic
>
DS413 User Manual
Manual
Navigation menu
Upload a User Manual
Namespaces
Wiki Guide
HTML
PDF
Info
Views
User Manual
Discussion / Help
Navigation
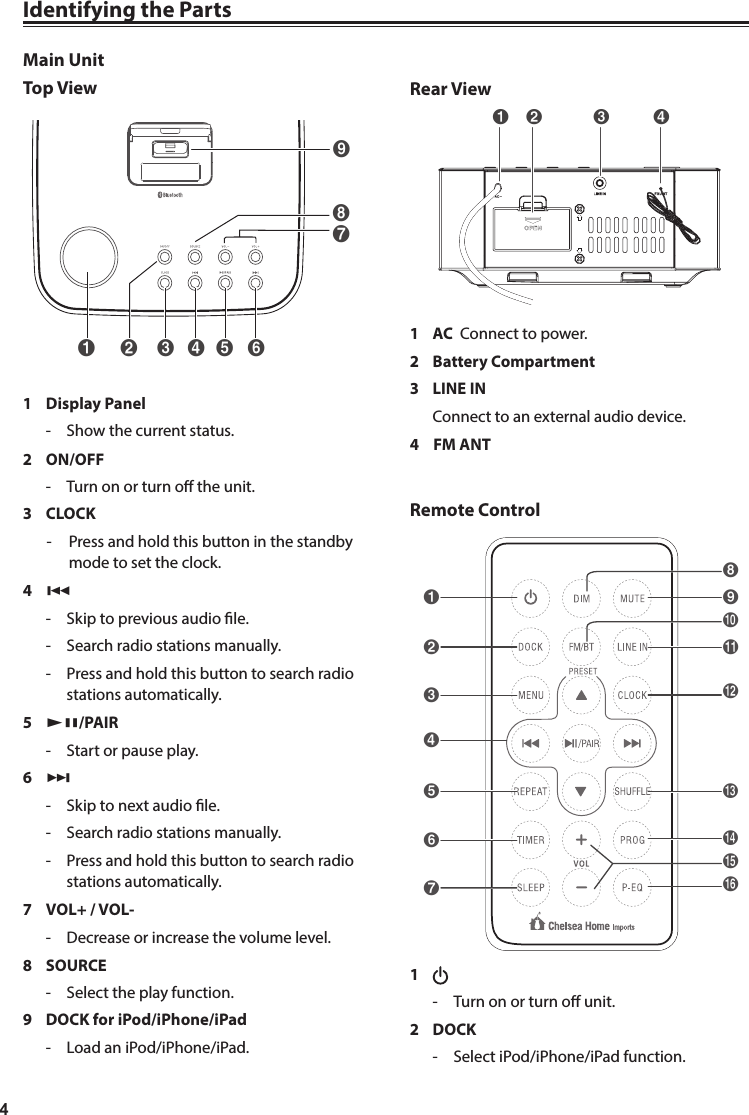

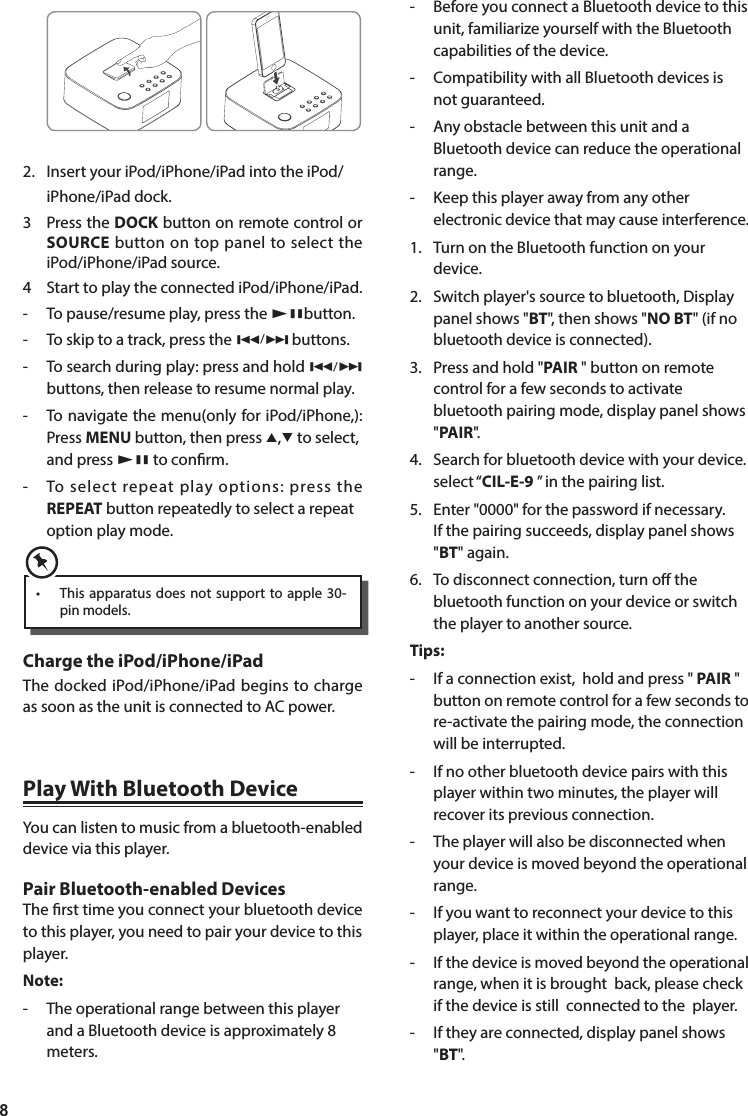
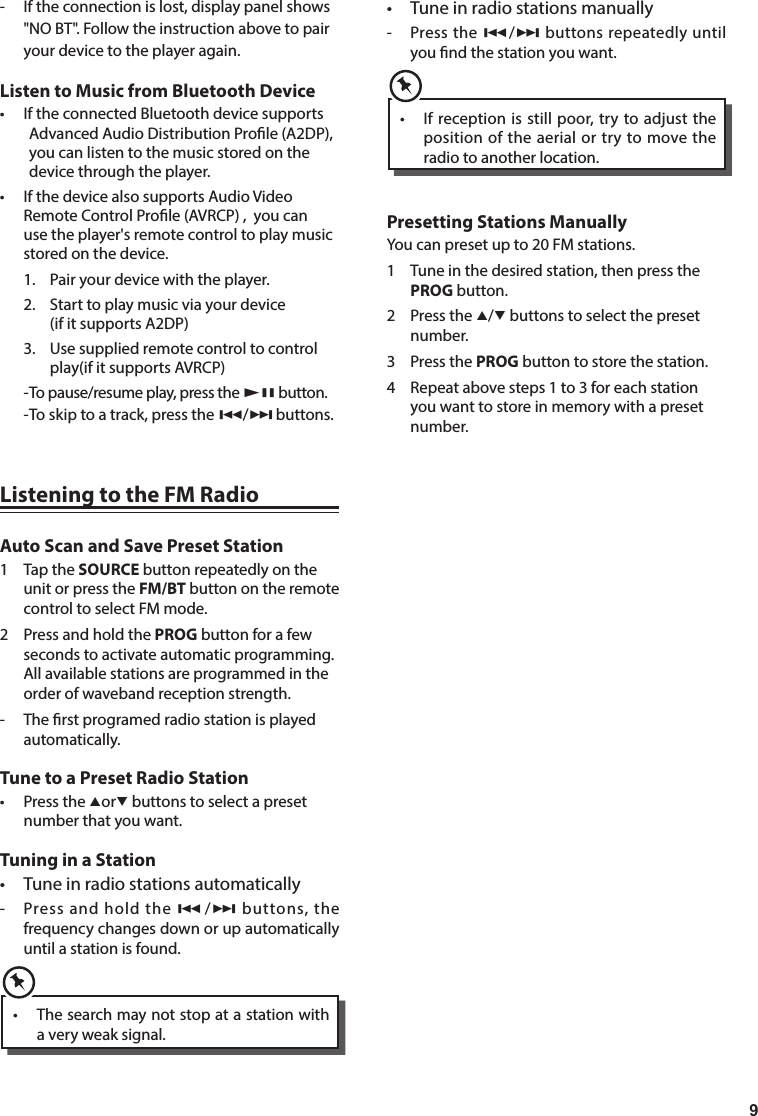
![7EN- Press the CLOCK button to show the current time on the display for few seconds.Set the alarm timerIn standby mode, you can use the daily timer setting to turn the unit on automatically at a certain time everyday under standby mode. • Howevertheclockmustbesetcorrectlyforthe timer function to work.1 In standby mode, press and hold the TIMER button for about 2s , then press /buttons to select an alarm sound source: FM tuner .2 Press the TIMER button, volume indicator will blink. Set the alarm volume with the button or button.3 Press the TIMER button, hour indicator will blink. Set the hour with the button or button.4 Press the TIMER button, minute indicator will blink. Set the minute with the button or button.5 Press the TIMER button, the selected time is set. 6 Press the TIMER button to toggle the daily timer on or o.Adjust Display BrightnessPress DIM repeatedly to select dierent levels of display brightness. Adjust Volume Level- During play, press the VOL+/- buttons to increase/decrease the volume level.- During play, press the MUTE button to mute or restore sound. Press this button again to cancel the eect. Select a Preset Sound EectDuring play, press the P-EQ button repeatedly to select: [FLAT], [POP], [CLASSIC], [ROCK], [JAZZ]Set the sleep timerThis unit can switch to standby automatically after a set period of time.1 Press SLEEP repeatedly to select a set period of time (in minutes). - When the sleep timer is activated, the display show , the volume will gradually decrease before the unit power o.2 Press SLEEP repeatedly until [OFF] is displayed.- When the sleep timer is deactivated, disappears on the display.Select repeat play options1. During play, press the REPEAT button once on the remote control, the unit will play the current track repeatedly.2. Press the REPEAT button twice, the unit will play all tracks repeatedly.3. Press the REPEAT button once more again, The repeat function will turn o.4 Press the SHUFFLE button , the unit will shue play all tracks.Play from an External Audio DeviceYou can listen to an external audio device through this unit.1 Connect the audio player.- Connect the 3.5mm cable to the LINE IN socket on the rear of unit and to the headphone socket on the audio player.2 Press the LINE IN button to select the LINE IN source.3 Start to play on the audio player.Play from iPod/iPhone/iPadiPod/iPhone/iPad OperationUsing the iPod/iPhone/iPad dock, you can use the unit to play music les stored on your iPod/iPhone/iPad.Listen to the iPod/iPhone/iPadYou can enjoy audio from iPod/iPhone/iPad through this unit.1. Press down docking cover of the unit to ip the docking cover up.](https://usermanual.wiki/Zhongshan-City-Richsound-Electronic/DS413/User-Guide-2136458-Page-8.png)