Zipit Wireless ZWP1 Z3 Wireless Messenger 3 User Manual
Zipit Wireless, Inc. Z3 Wireless Messenger 3
UserManual.wiki
>
Zipit Wireless
>
ZWP1 User Manual
User Manual
Navigation menu
Upload a User Manual
Namespaces
Wiki Guide
HTML
PDF
Info
Views
User Manual
Discussion / Help
Navigation

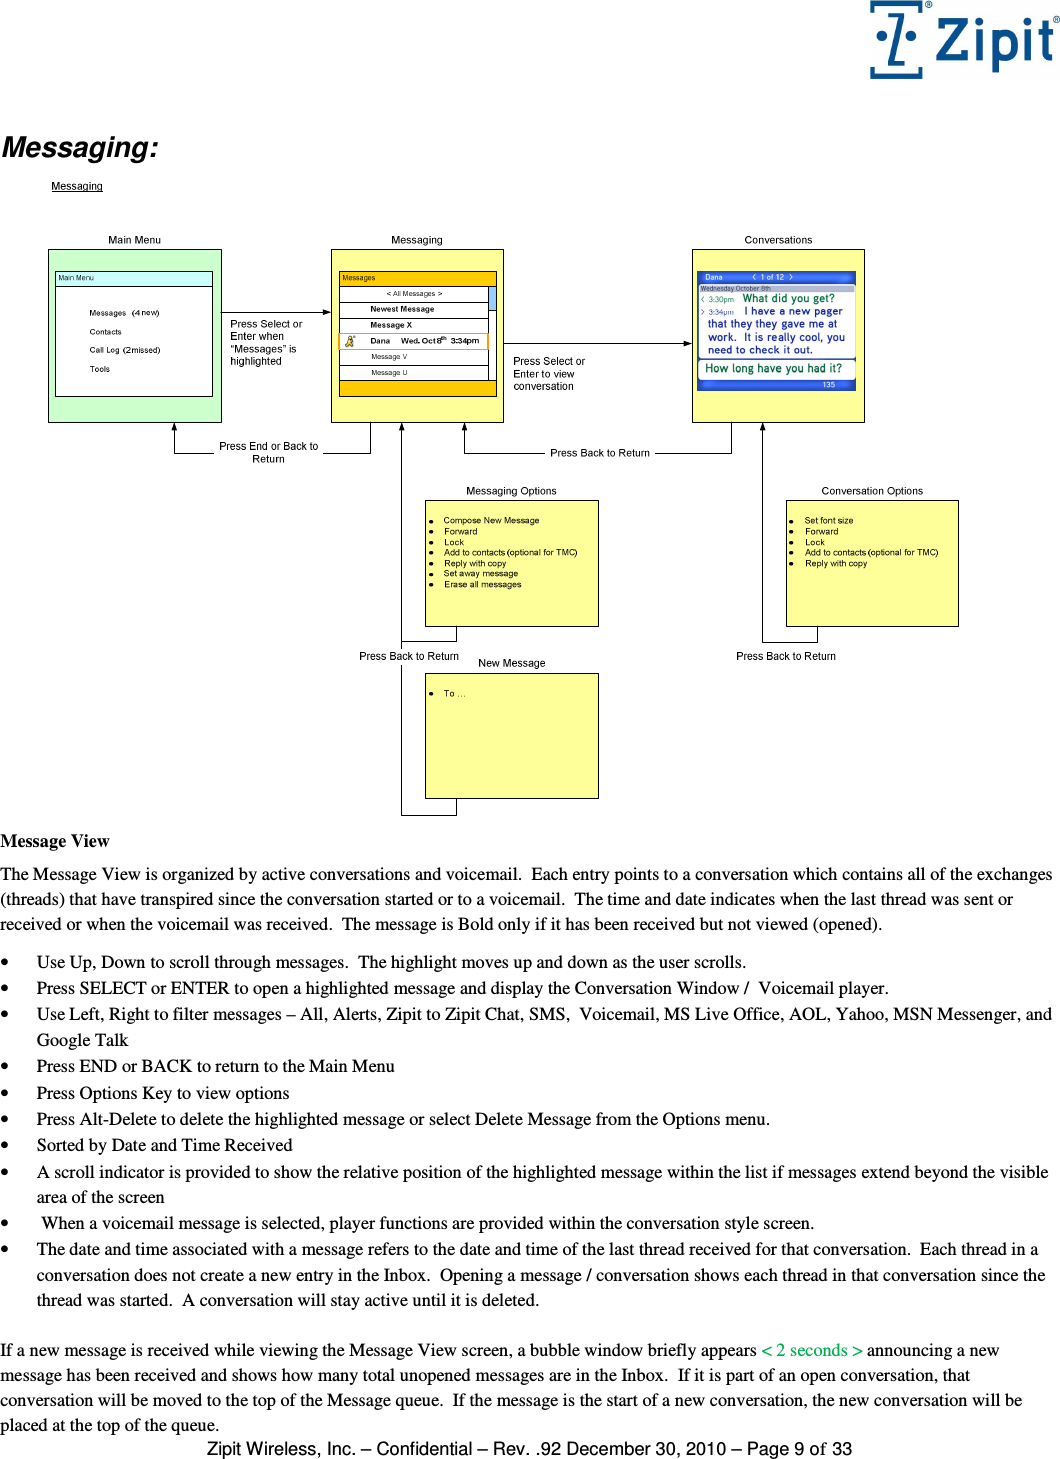
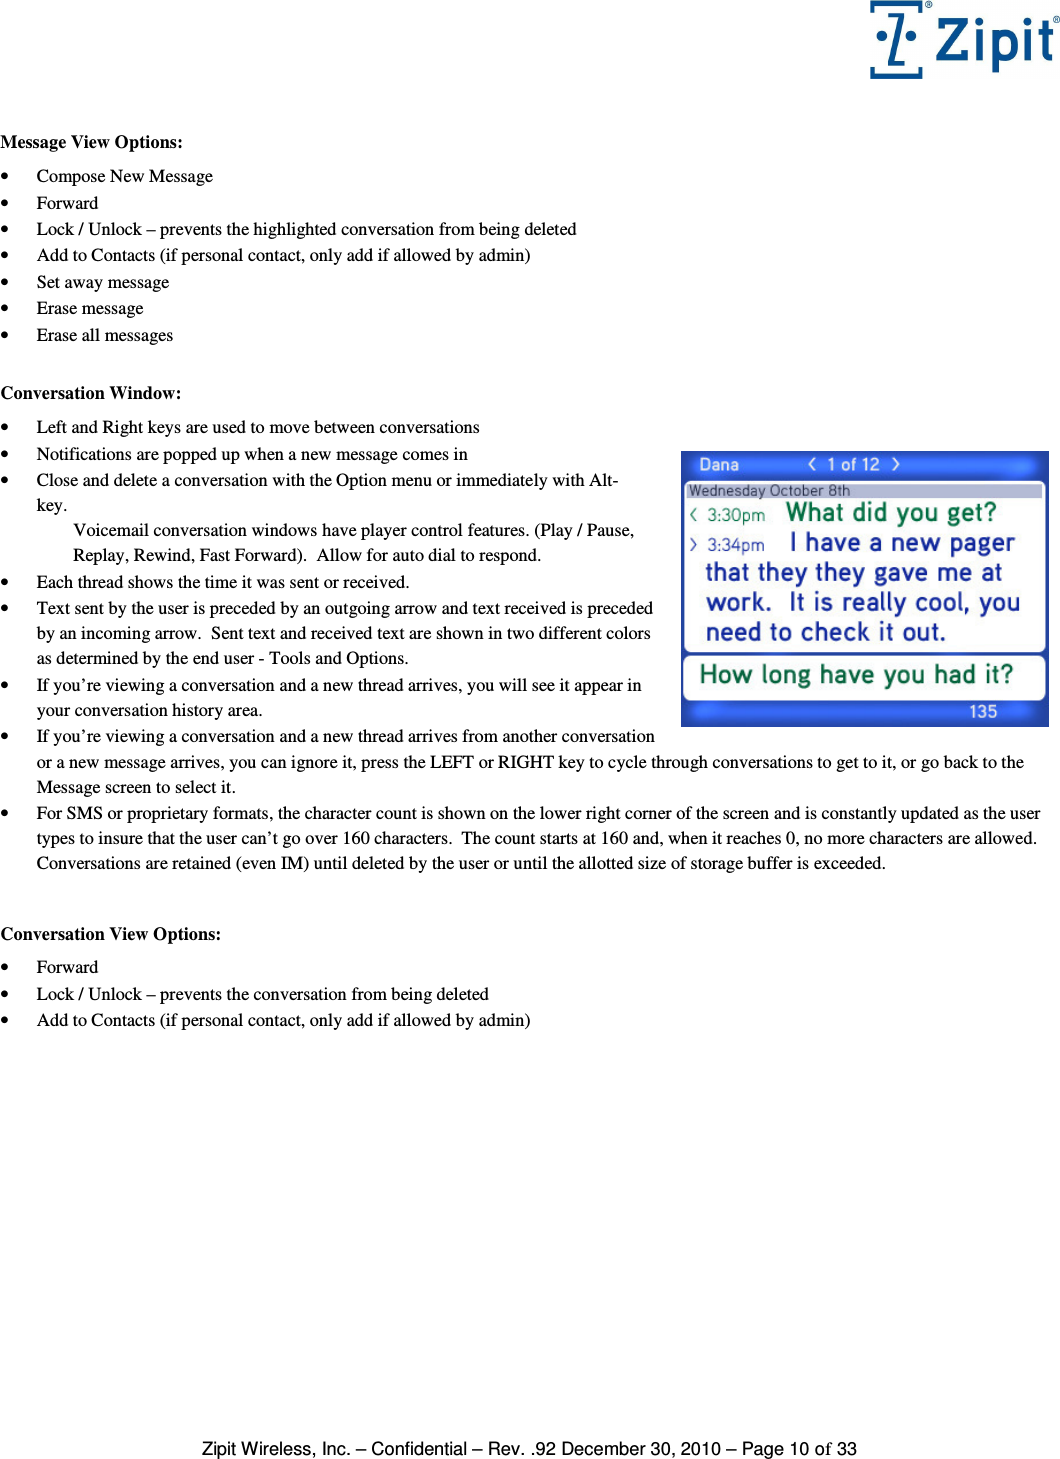
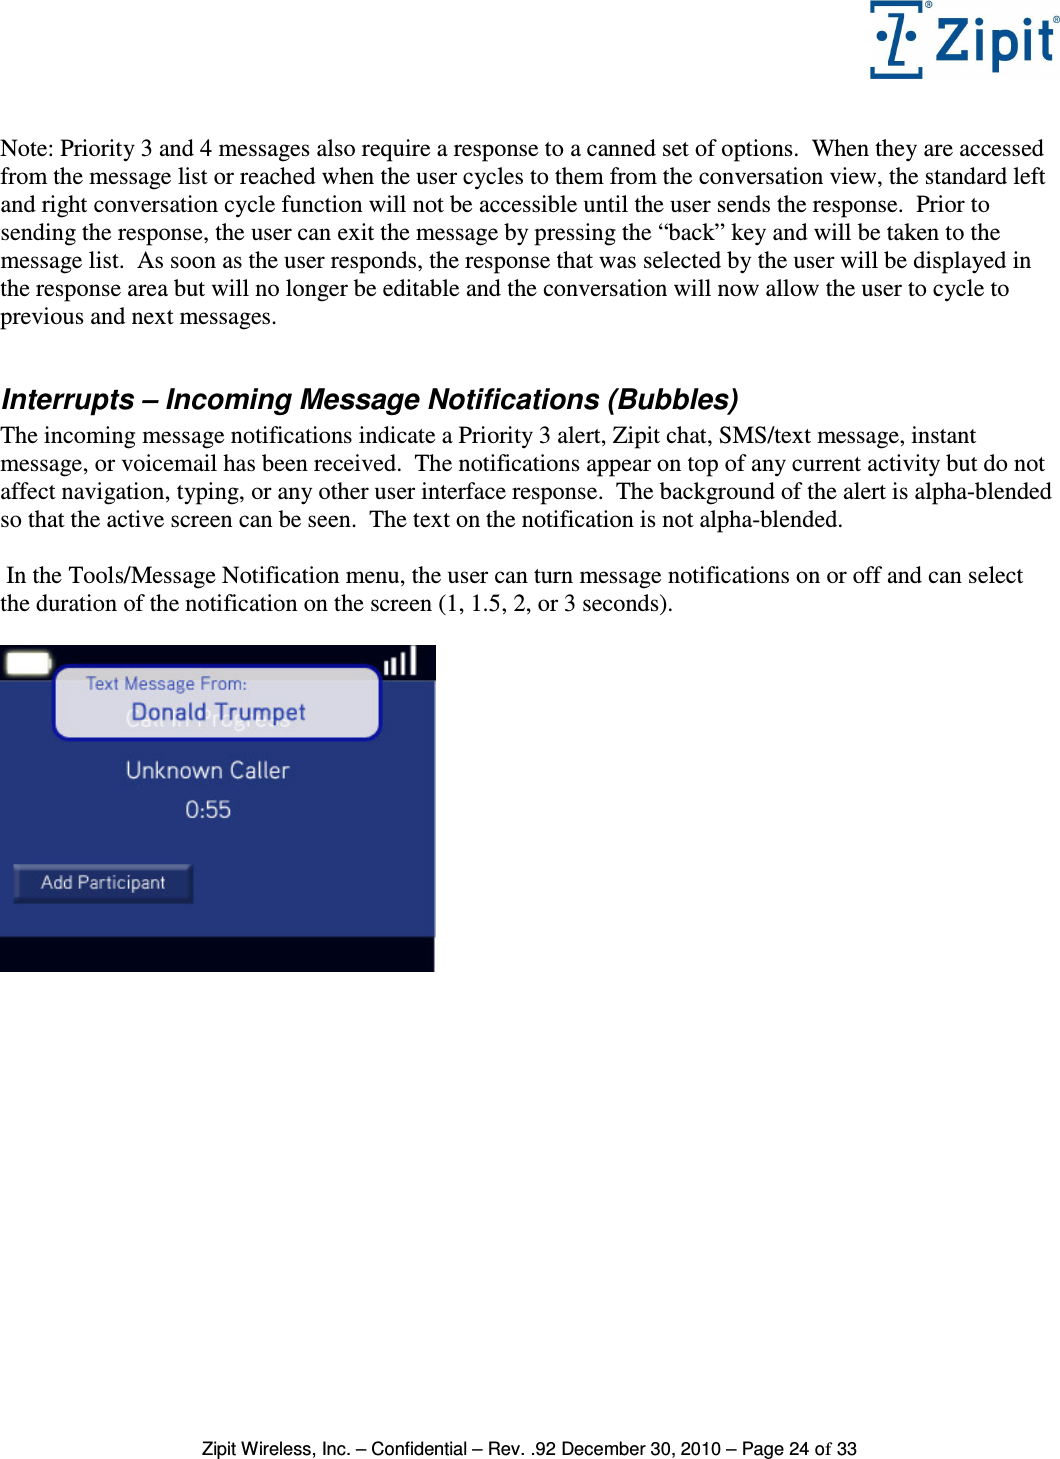
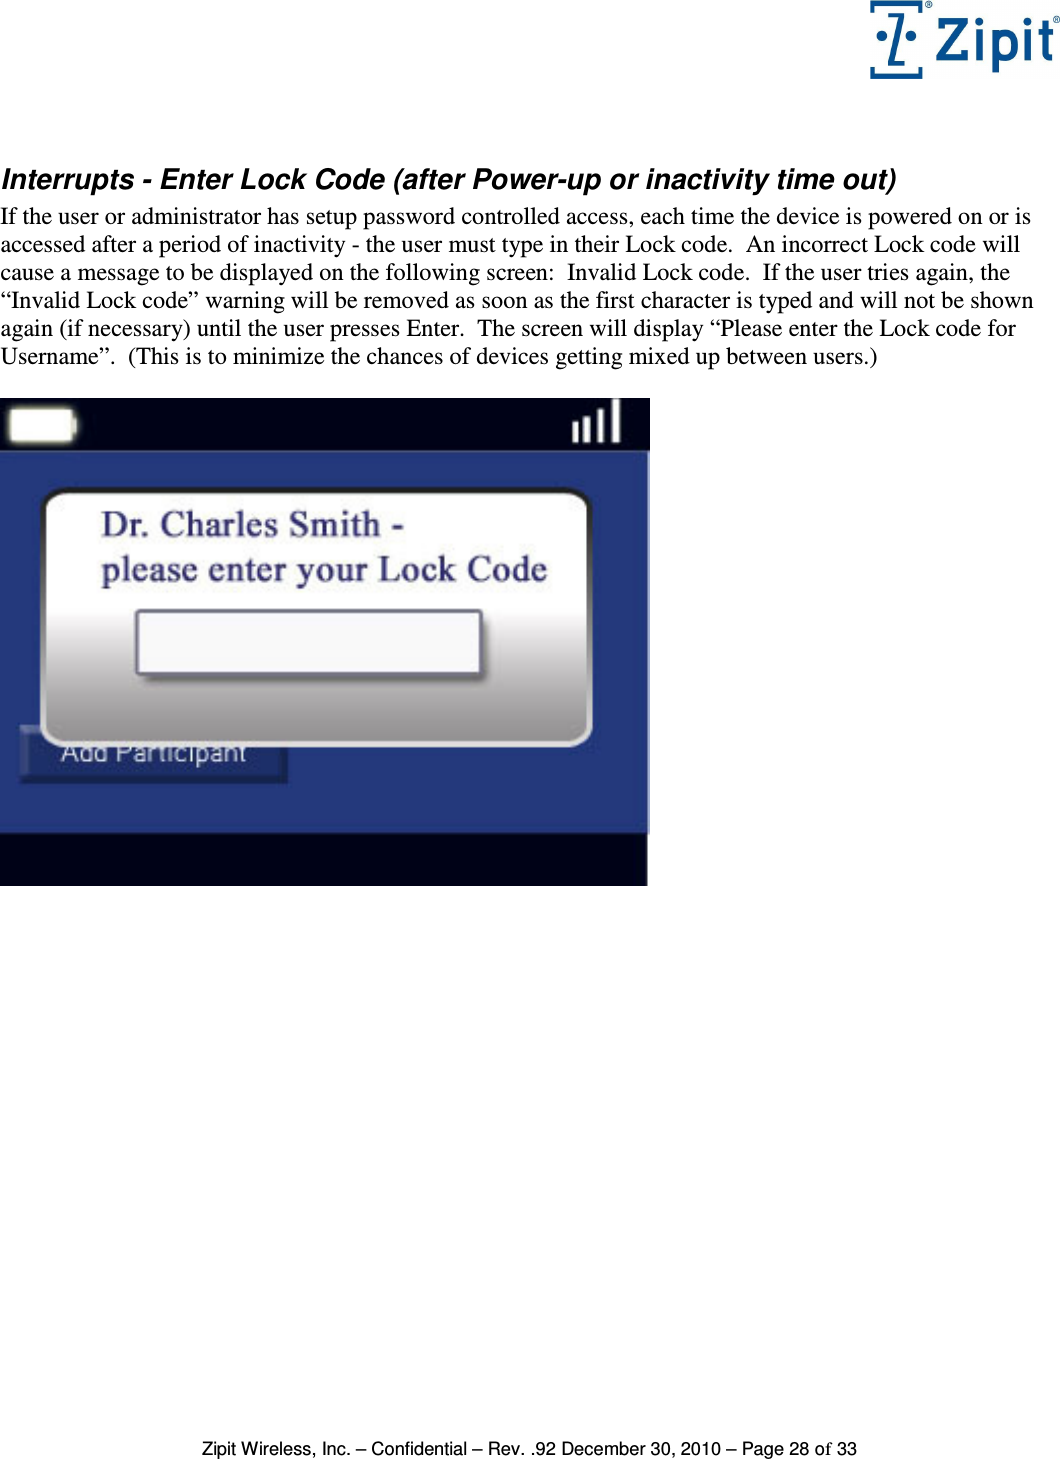
![Zipit Wireless, Inc. – Confidential – Rev. .92 December 30, 2010 – Page 23 of 33 Interrupts – Incoming Zipit Direct Alert (Priority 1 or 2) A Priority 1 or 2 Alert is presented as a special conversation style window that appears in front of any screen that is currently displayed. All other functions are blocked (with the exception of an in-progress phone call), until the Alert is acknowledged. [fg refine definition of times] If a critical page is not answered within 15 seconds, an audible and vibration alert is generated and then repeated at 15 second intervals indefinitely or until the user presses any key. If a call is in progress, the Alert appears, but the user can end the call when done and then address the Alert. A high priority alert will block the screen from any other activity until acknowledged or until the message expires. Once a high priority alert expires, the alert will disappear from the screen but will still be available for review from the message list. Priority 1 and 2 alerts have the following attributes: The user can not cycle left or right to get to a new conversation unless the alert had previously been acknowledged and the alert was accessed through the message list. The header will include a red emergency icon and the word “Emergency”. The message area will be preceded by the Time, Date, and Name of the Sender (or type of sender in the event of a 3rd party process – Amcom, dial-back, etc.) Messages of 250 characters or less will be fully visible on the screen. Messages that are between 250 and 500 characters will be viewable within a scrollable window. Each P1 and P2 alert will always include a list of 1 or more canned responses that the recipient is required to choose from in order to remove the Alert. The list is created by the sender. If no list is provided, the recipient will be presented with the words “OK” that they must select. The canned responses can be viewed by pressing the left or right keys to cycle through the possible responses. After the user has responded to the message, the window will disappear and the device will return to the screen that was displayed prior to the alert. Once an alert has been read and is later accessed from the message list, it will operate similarly to any other conversation window. The user can cycle to the previous and next conversations by pressing left or right. The response that was selected by the user will be displayed in the response area but will no longer be editable. If the message expired before a response was given, the response area will be replaced with the text “This message expired – no response provided.”](https://usermanual.wiki/Zipit-Wireless/ZWP1/User-Guide-1404241-Page-23.png)