ZyXEL Communications MAX207HW2 WiMAX MIMO 2.5GHz Indoor Multiple-user CPE User Manual Quick Start Guide
ZyXEL Communications Corporation WiMAX MIMO 2.5GHz Indoor Multiple-user CPE Quick Start Guide
Contents
- 1. Manual 1
- 2. Manual 2
- 3. Manual 3
Manual 1
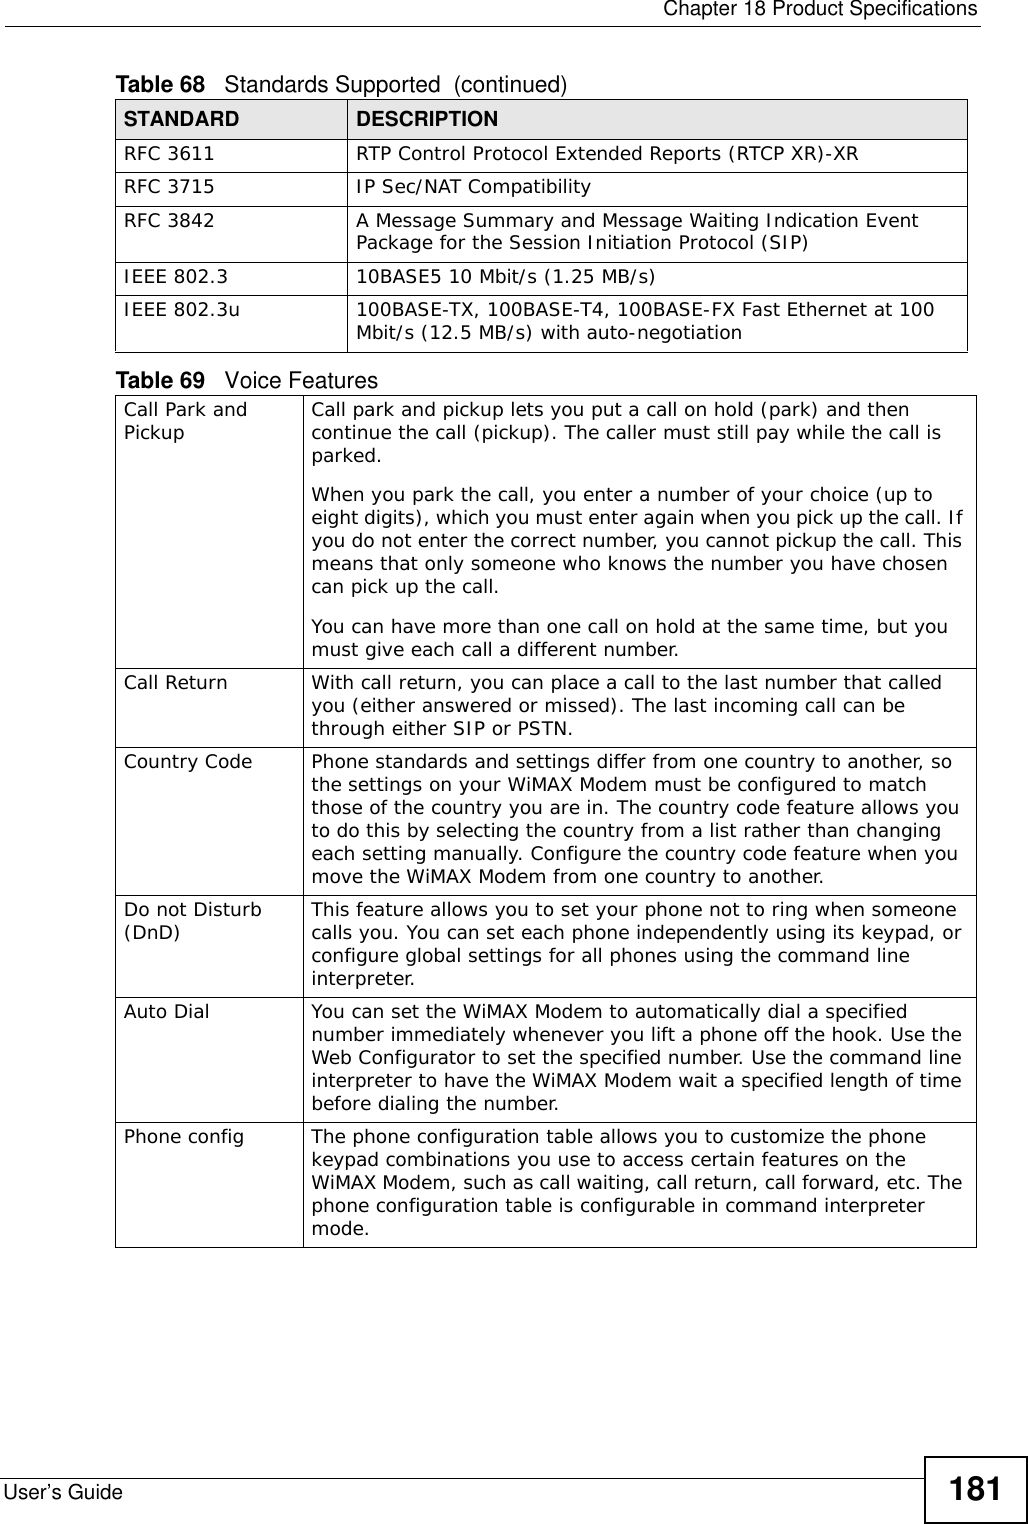
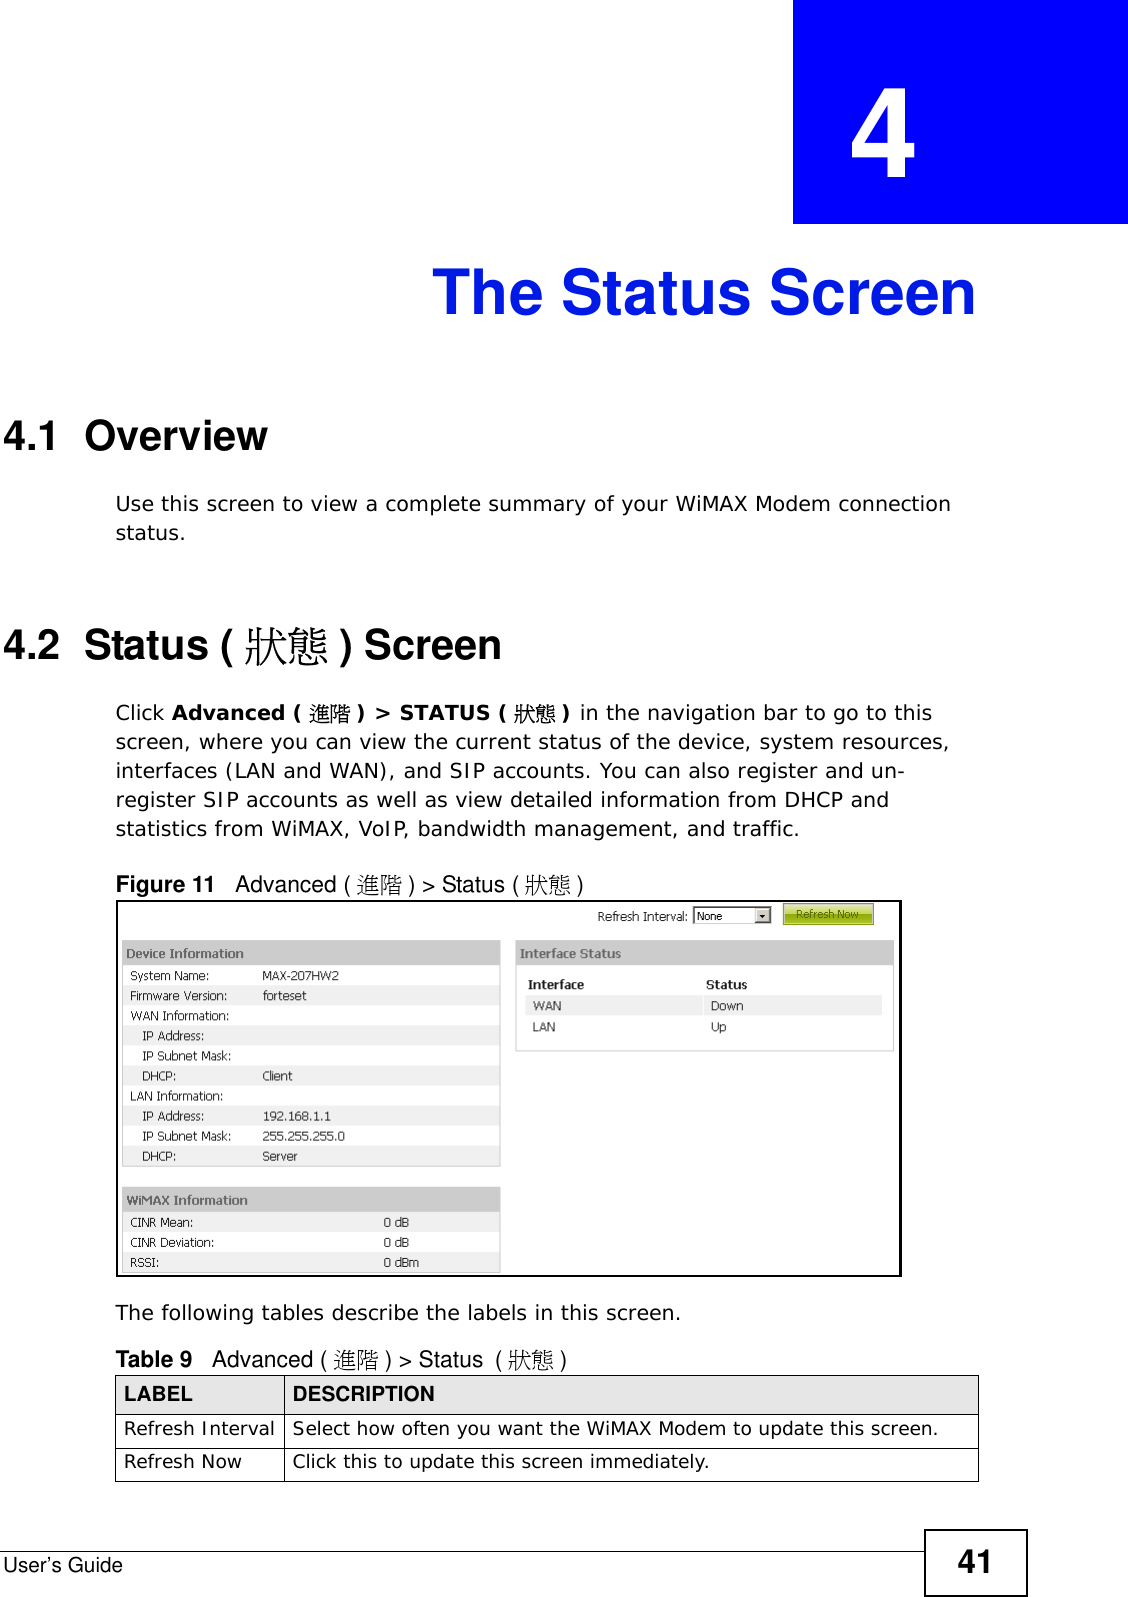
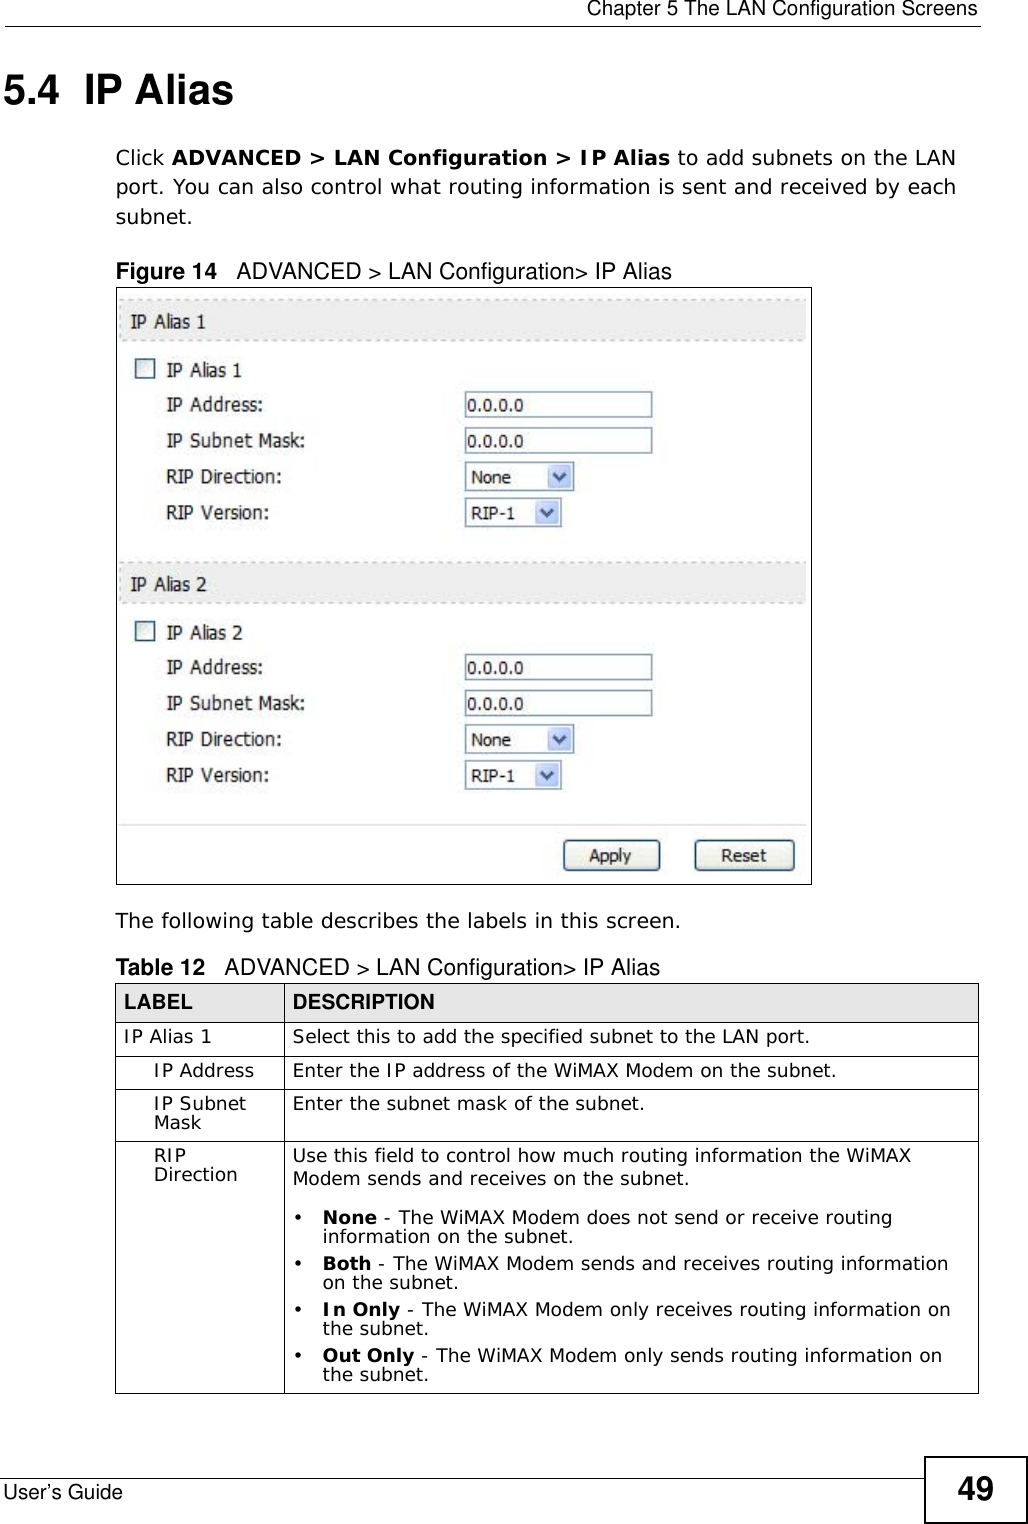
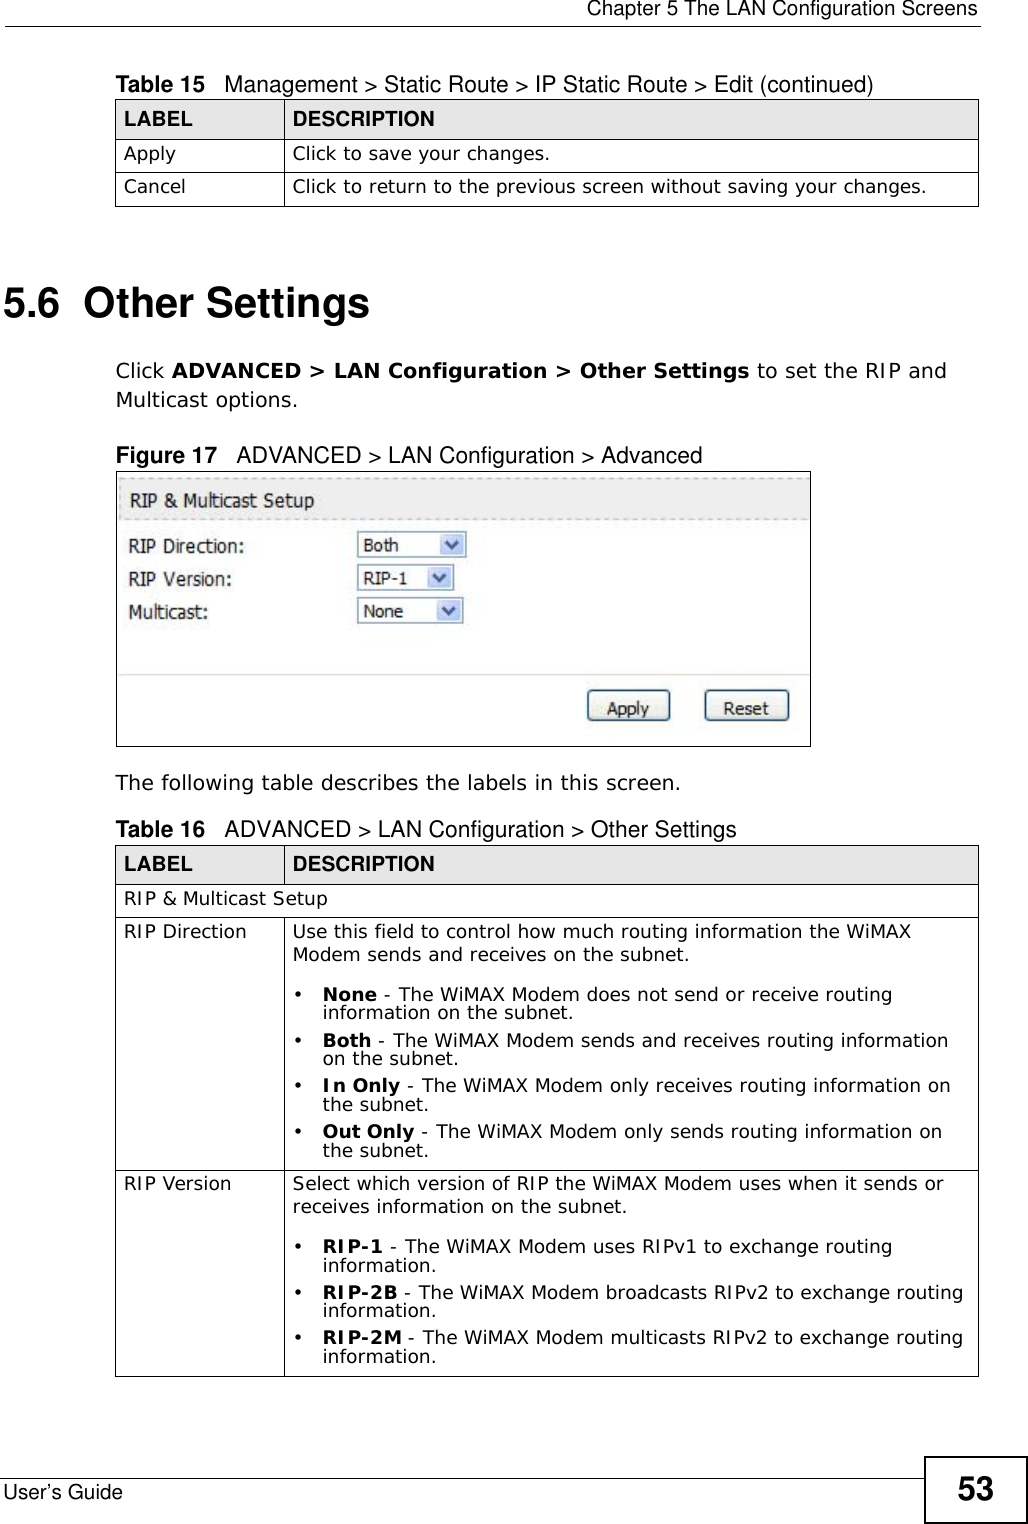
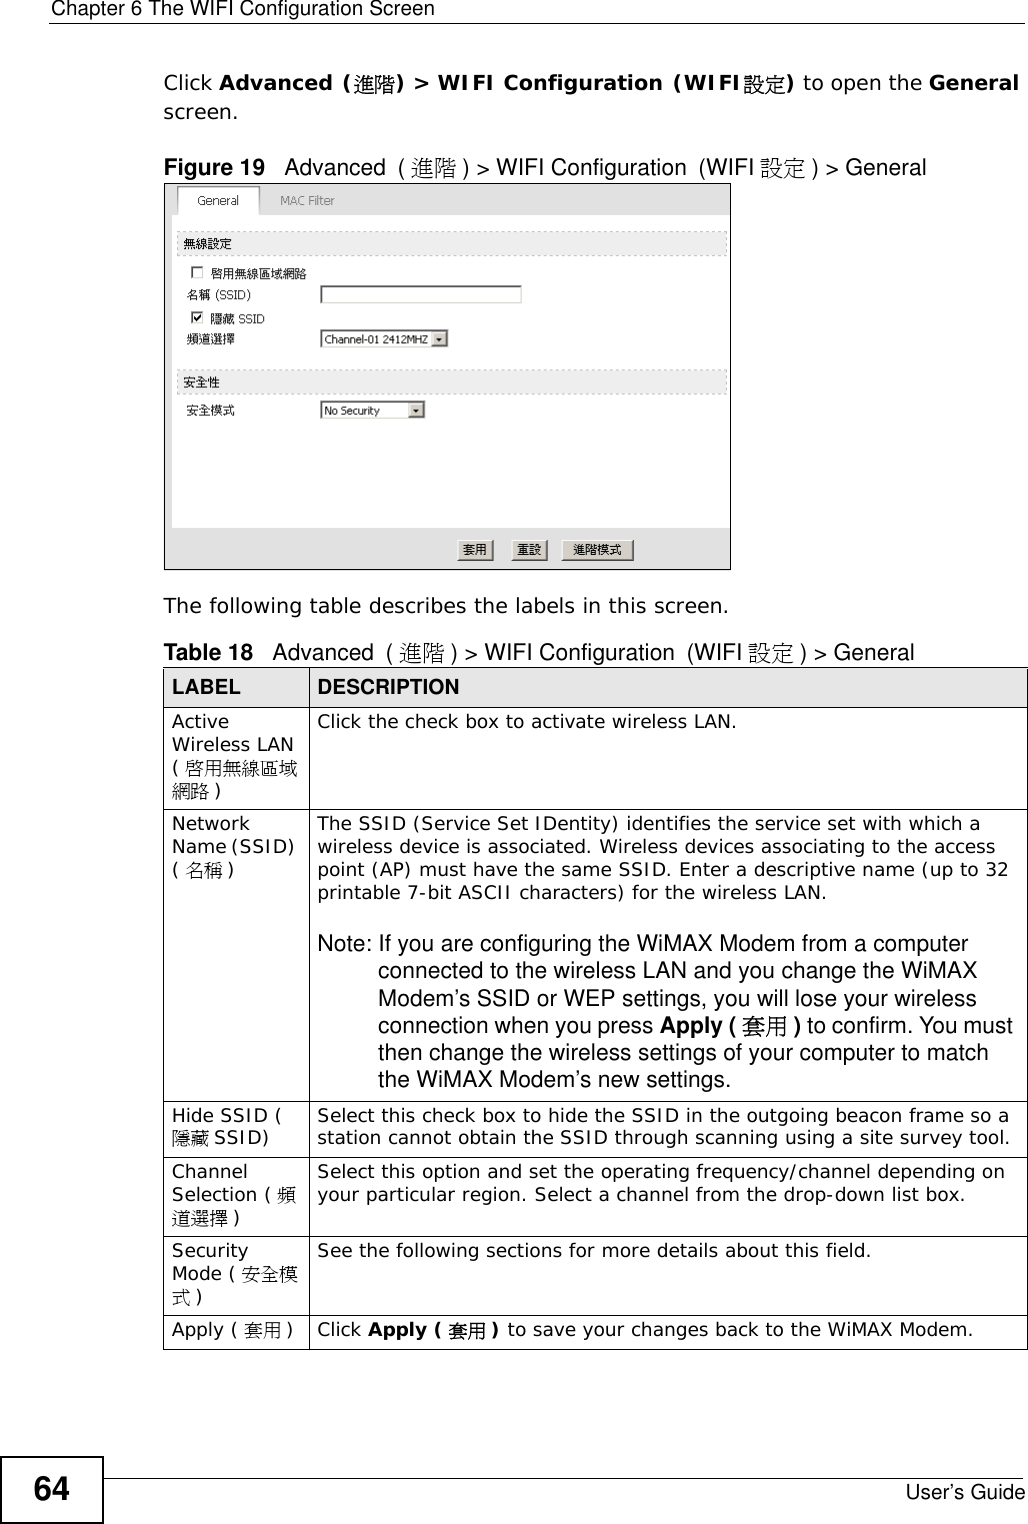
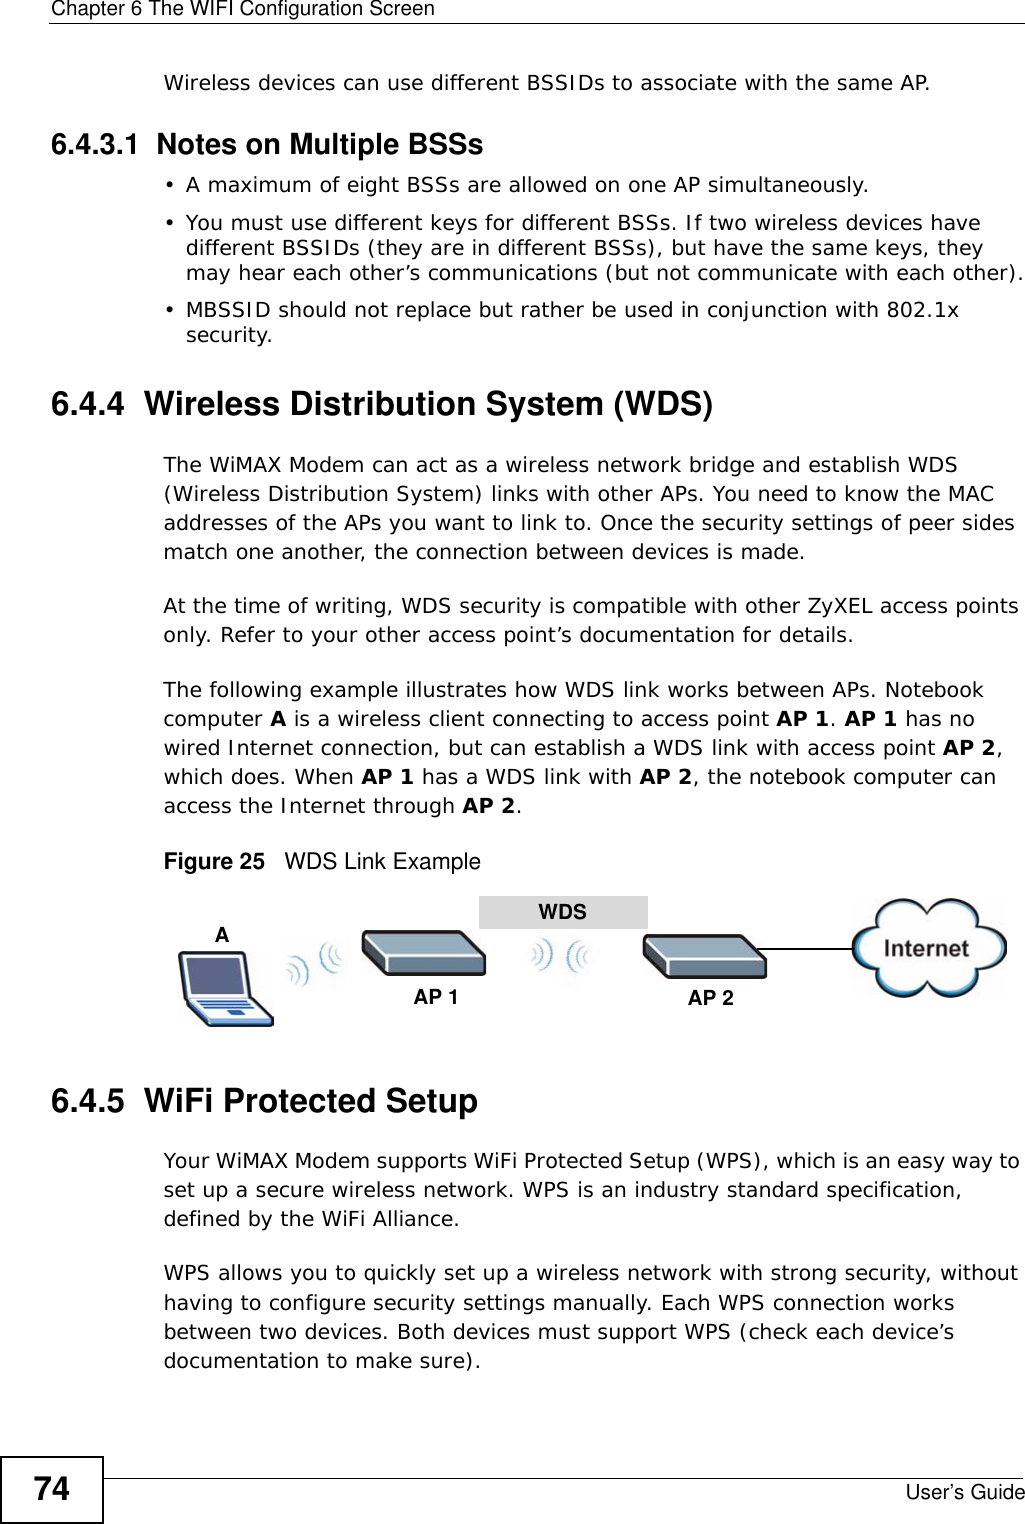
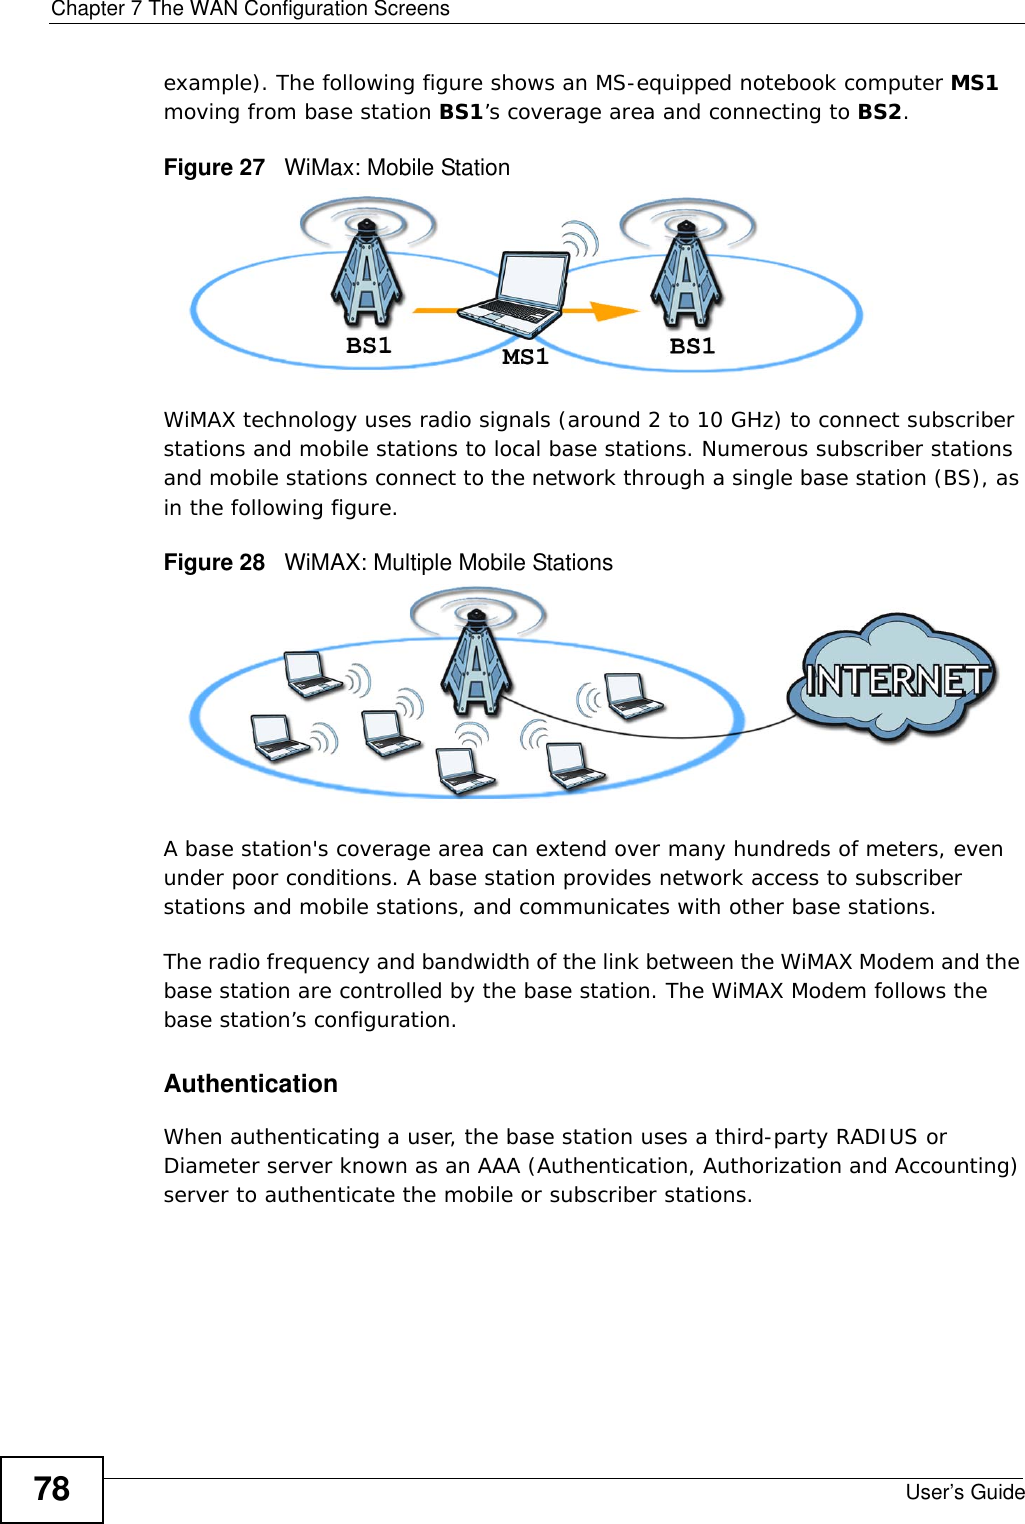
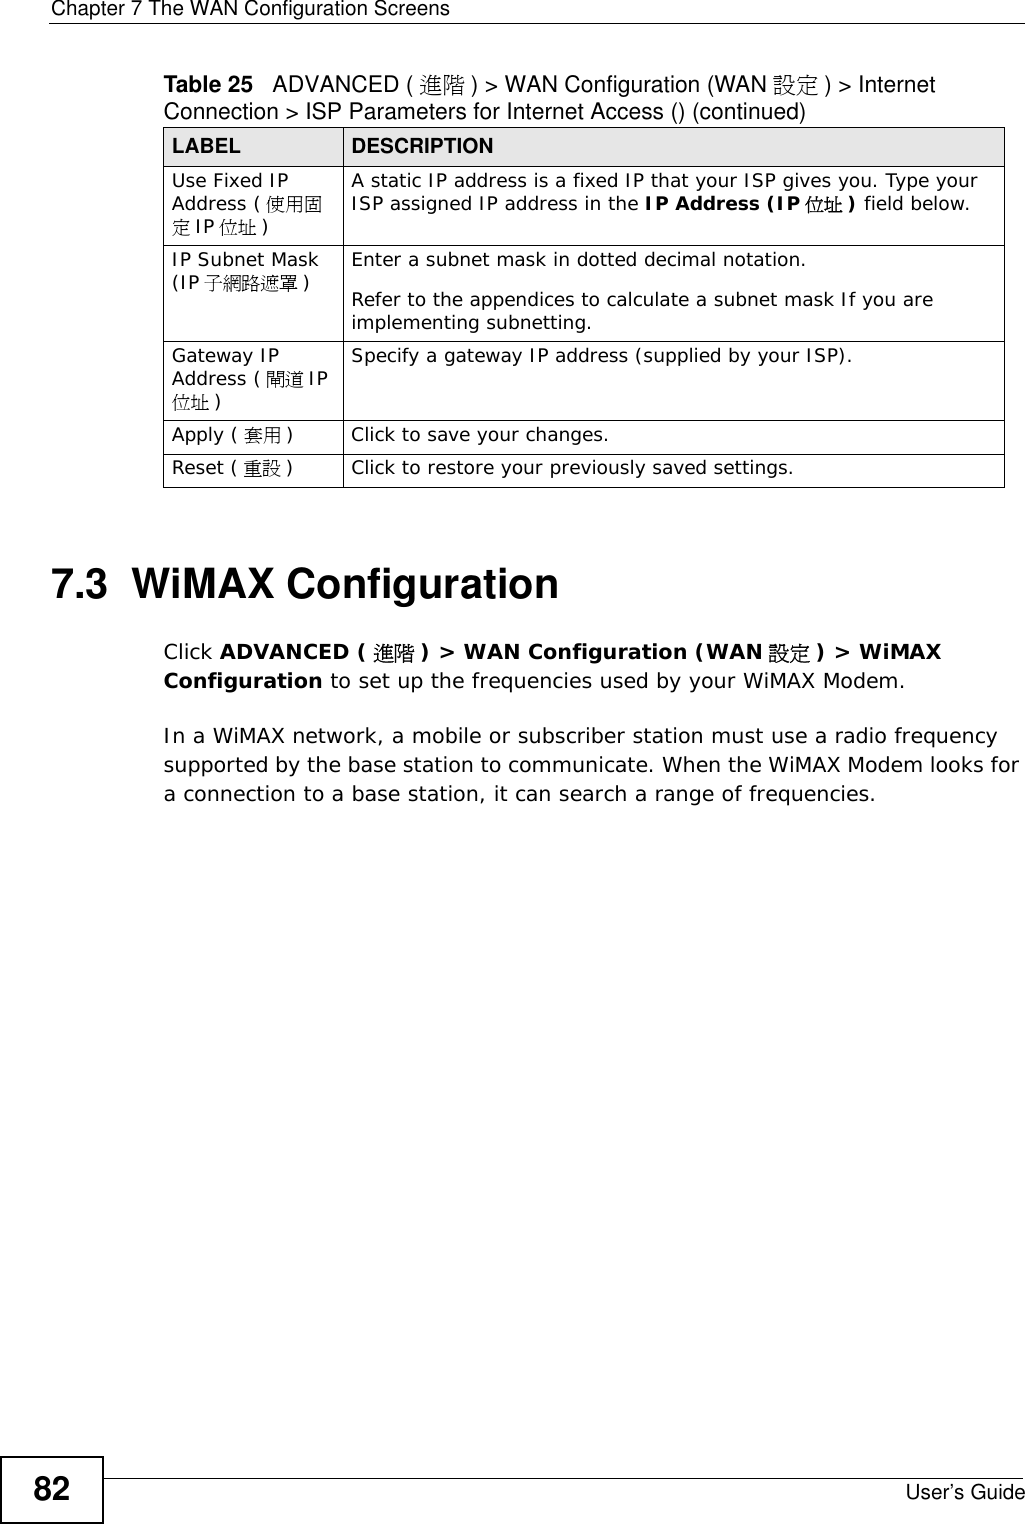
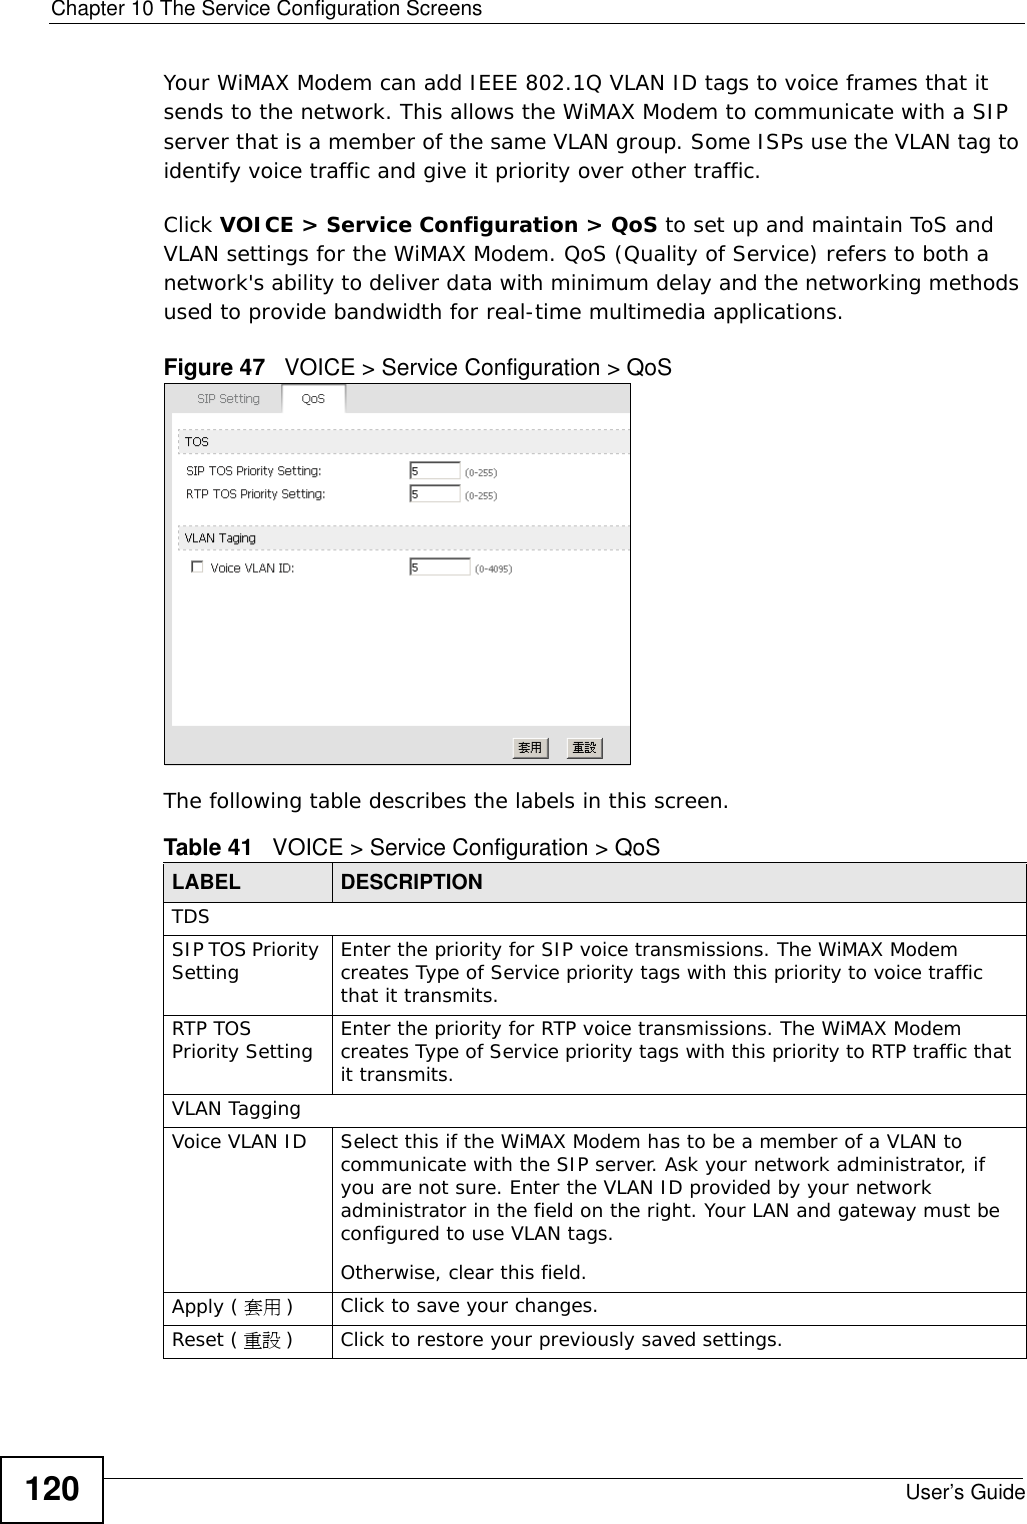
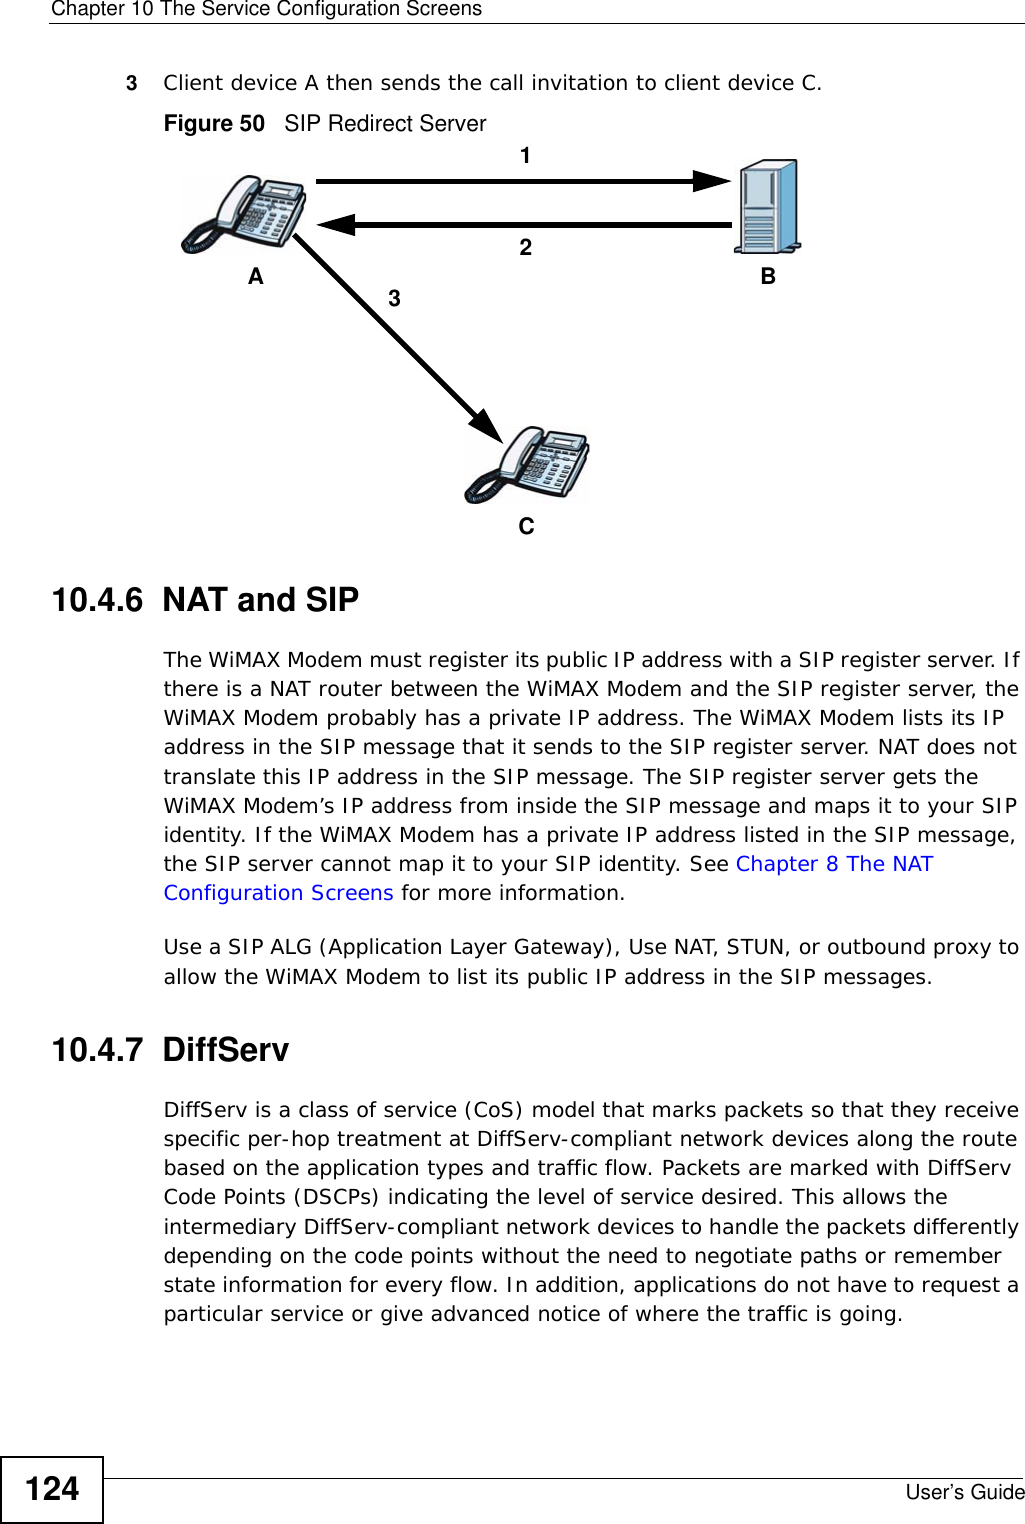
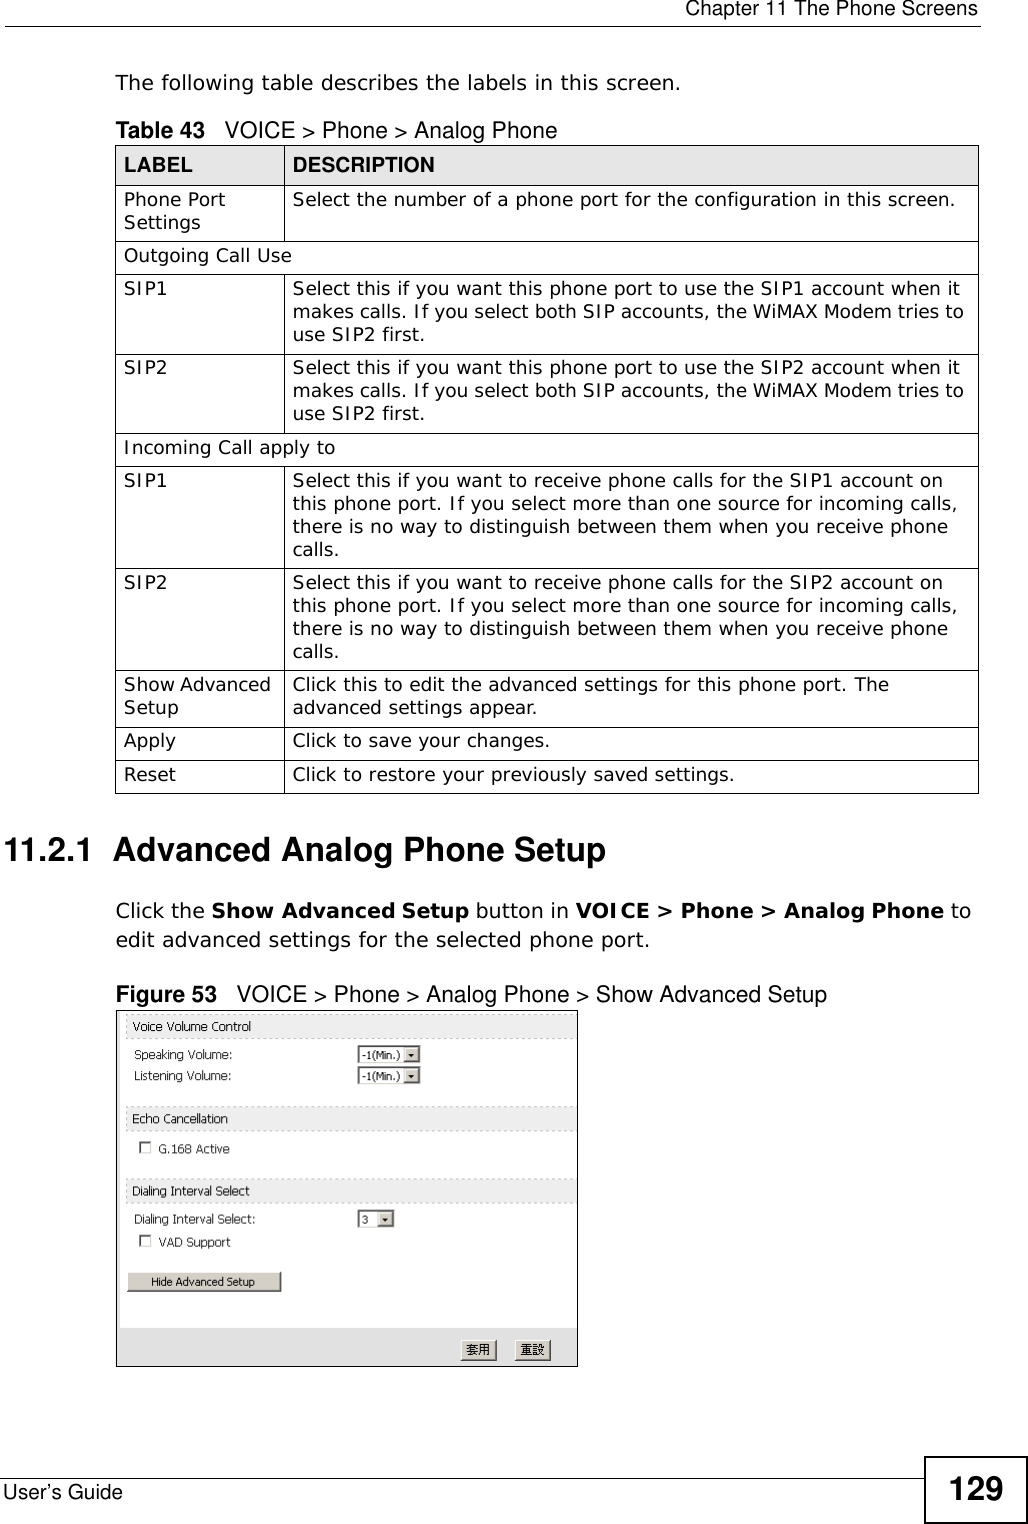
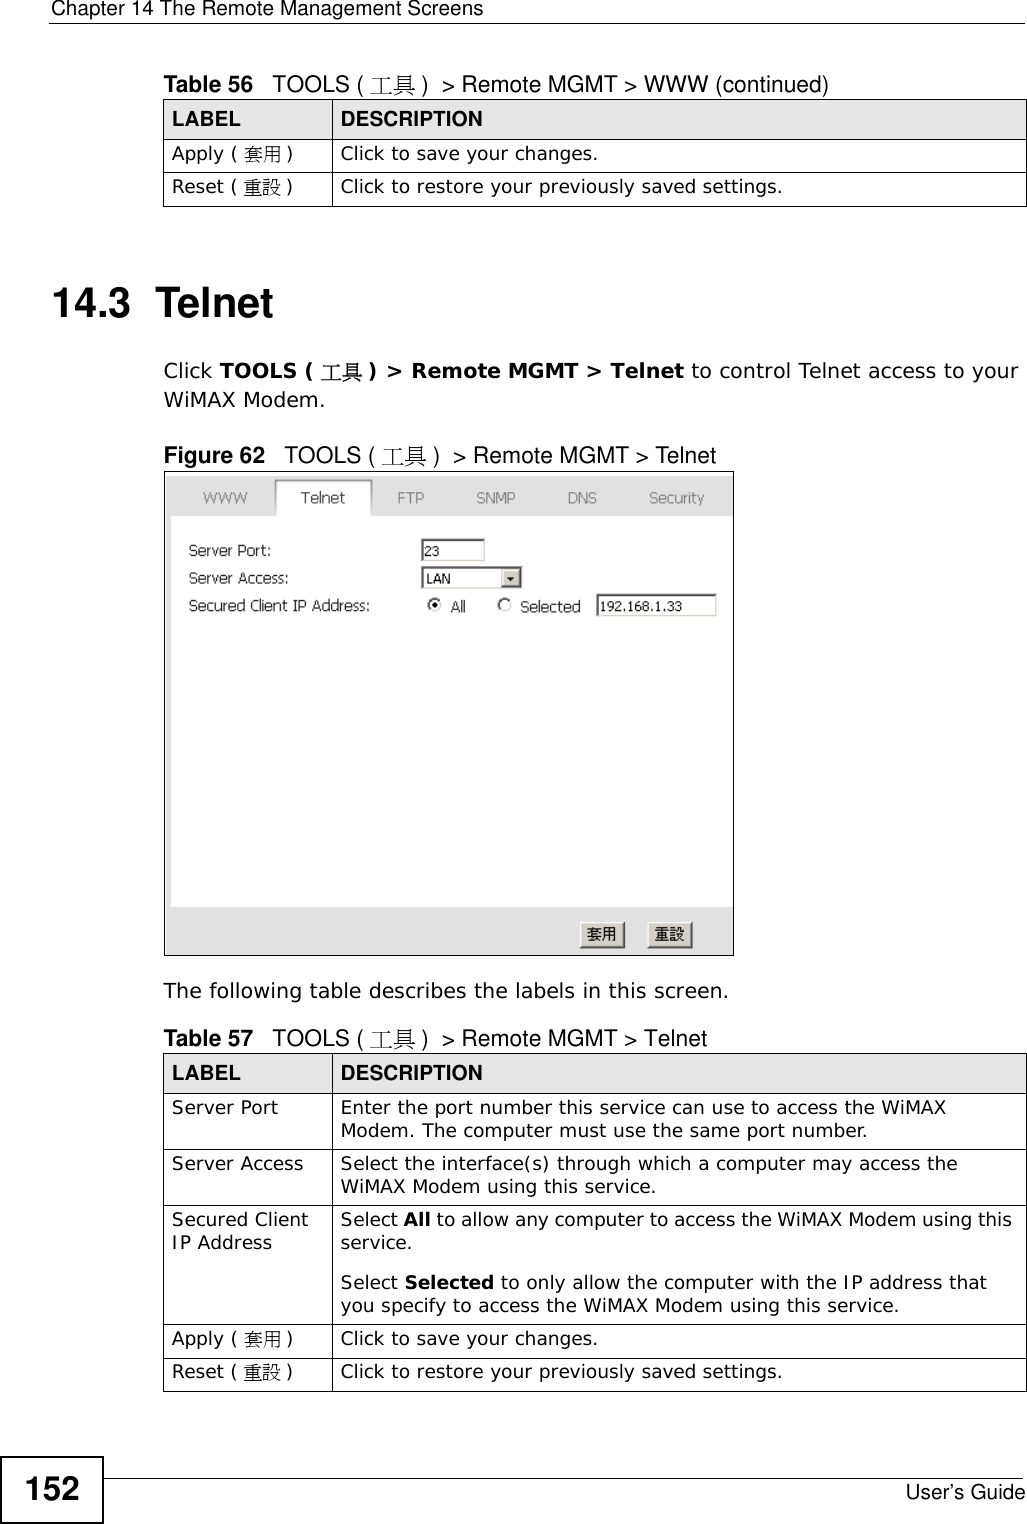
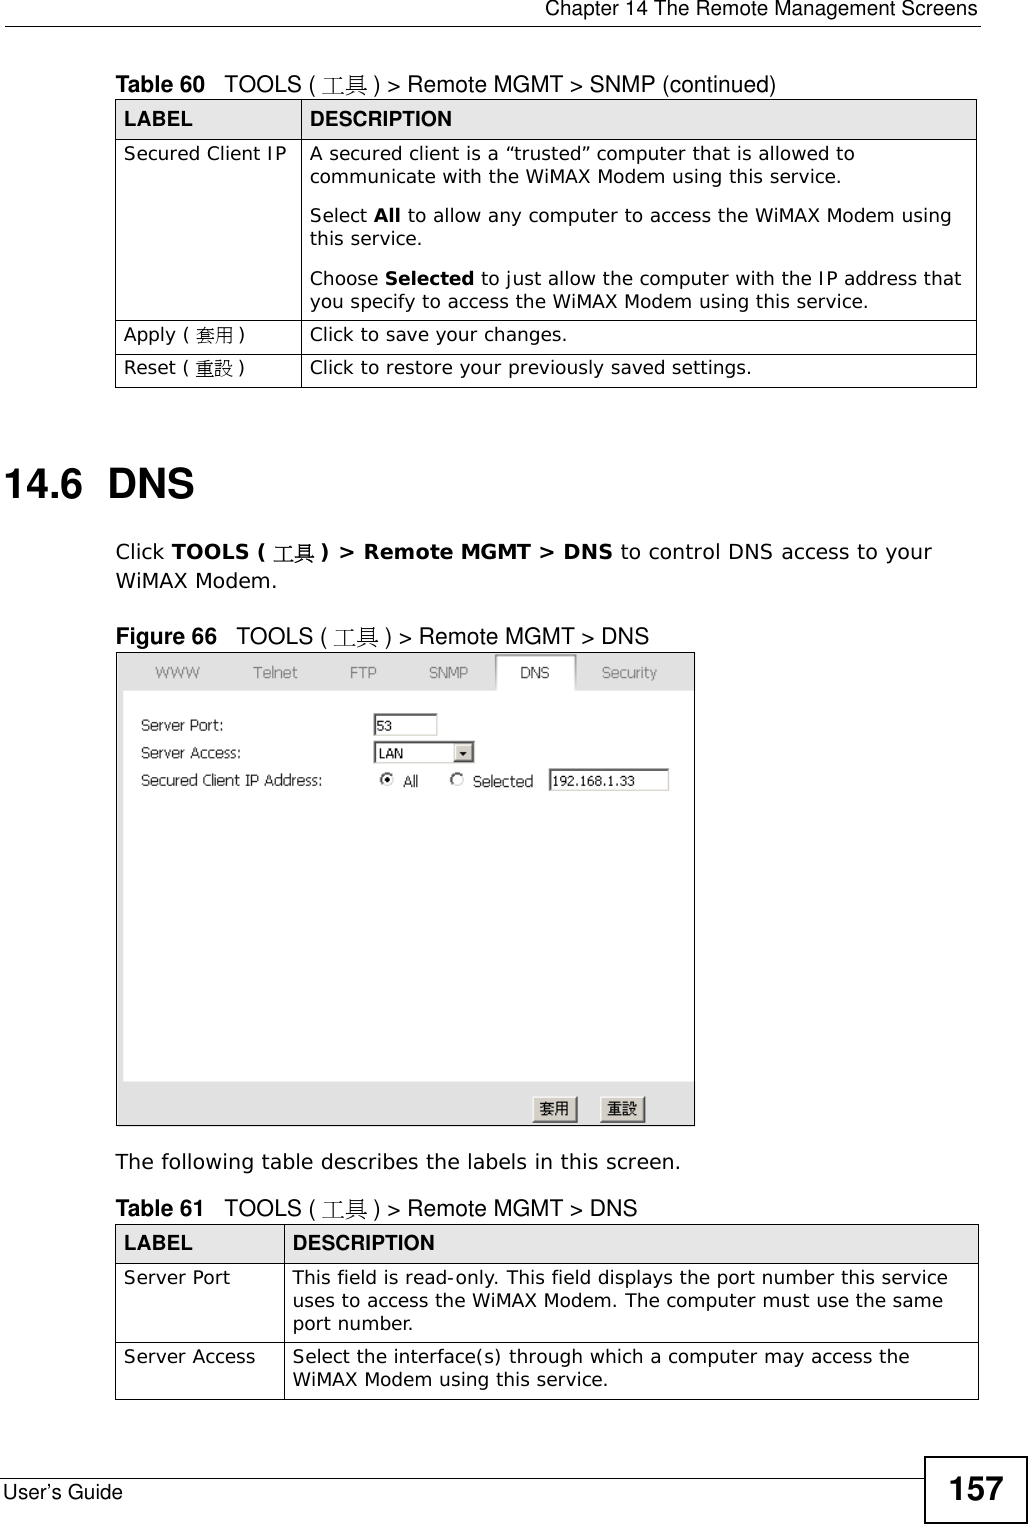
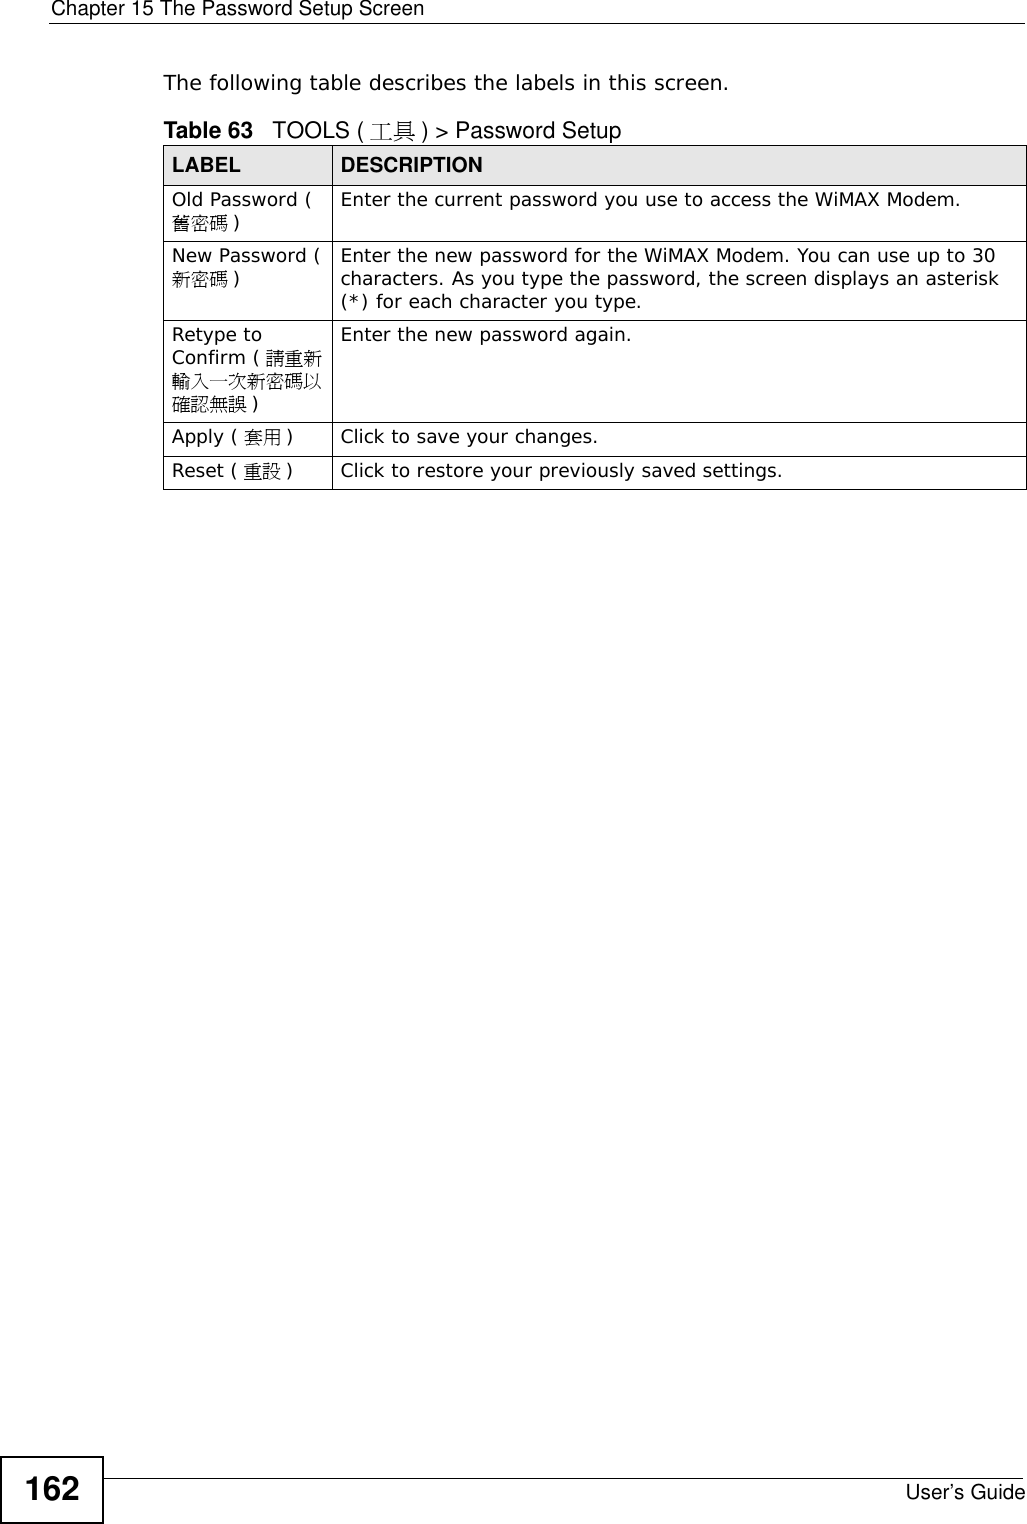
![Document ConventionsUser’s Guide 5Document ConventionsWarnings and NotesThese are how warnings and notes are shown in this User’s Guide. Warnings tell you about things that could harm you or your WiMAX Modem.Note: Notes tell you other important information (for example, other things you may need to configure or helpful tips) or recommendations.Syntax Conventions• The MAX-207HW2 may be referred to as the “WiMAX Modem”, the “device”, the “system” or the “product” in this User’s Guide.• Product labels, screen names, field labels and field choices are all in bold font.• A key stroke is denoted by square brackets and uppercase text, for example, [ENTER] means the “enter” or “return” key on your keyboard.• “Enter” means for you to type one or more characters and then press the [ENTER] key. “Select” or “choose” means for you to use one of the predefined choices.• A right angle bracket ( > ) within a screen name denotes a mouse click. For example, TOOLS > Logs > Log Settings means you first click Tools in the navigation panel, then the Logs sub menu and finally the Log Settings tab to get to that screen.• Units of measurement may denote the “metric” value or the “scientific” value. For example, “k” for kilo may denote “1000” or “1024”, “M” for mega may denote “1000000” or “1048576” and so on.• “e.g.,” is a shorthand for “for instance”, and “i.e.,” means “that is” or “in other words”.](https://usermanual.wiki/ZyXEL-Communications/MAX207HW2.Manual-1/User-Guide-1139778-Page-4.png)
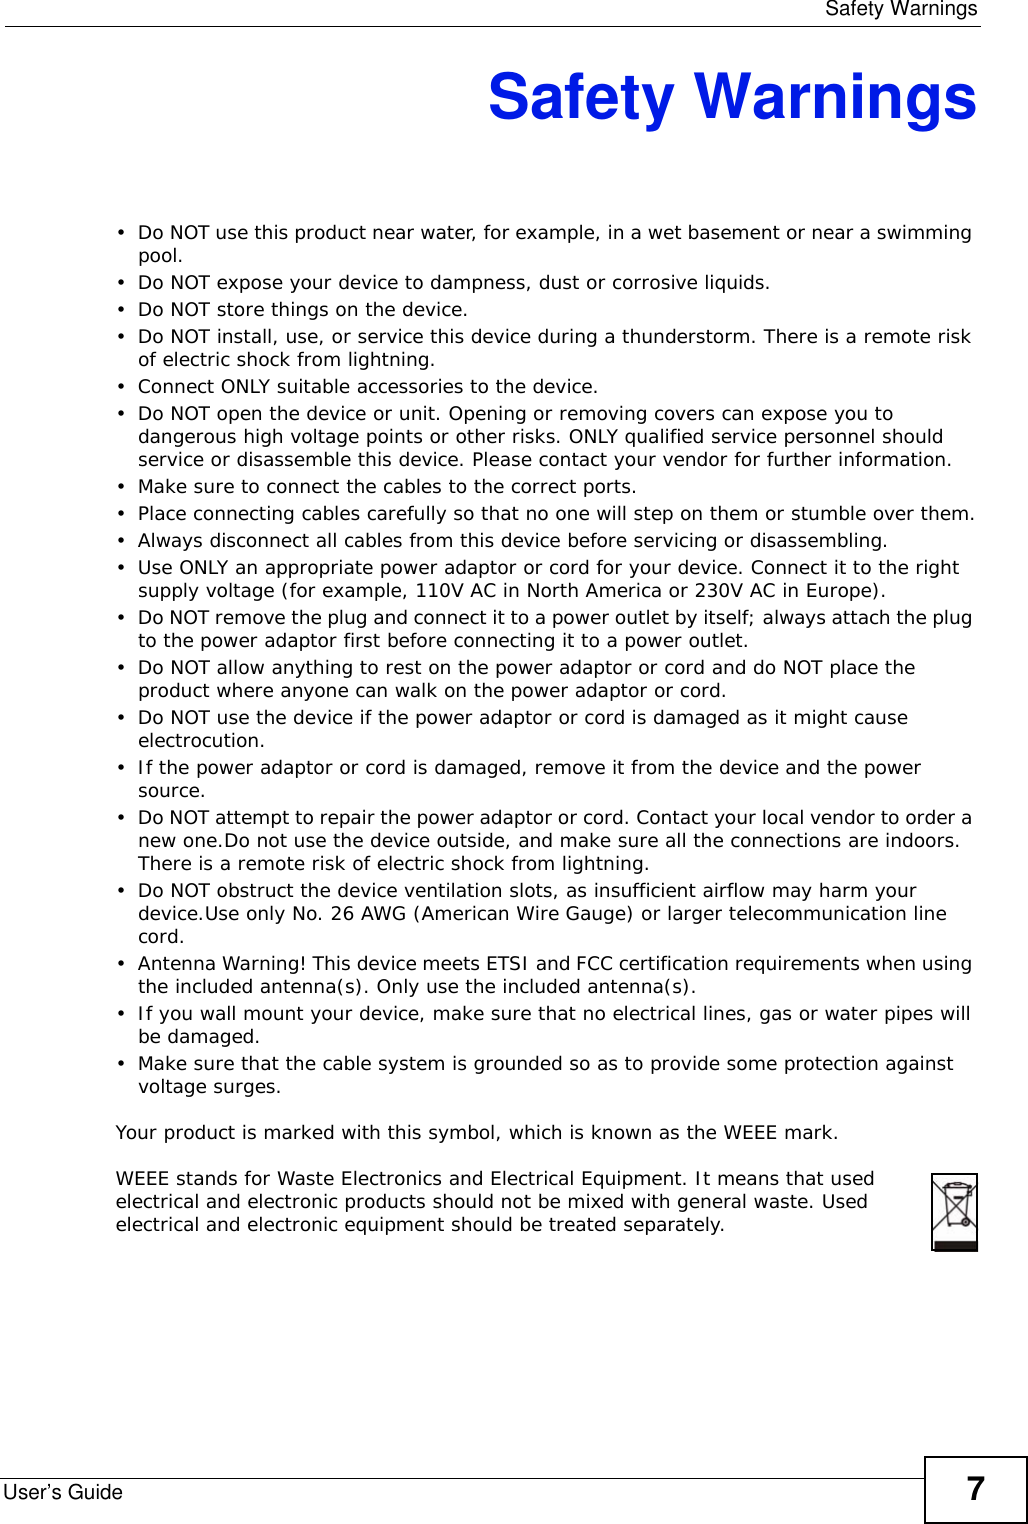


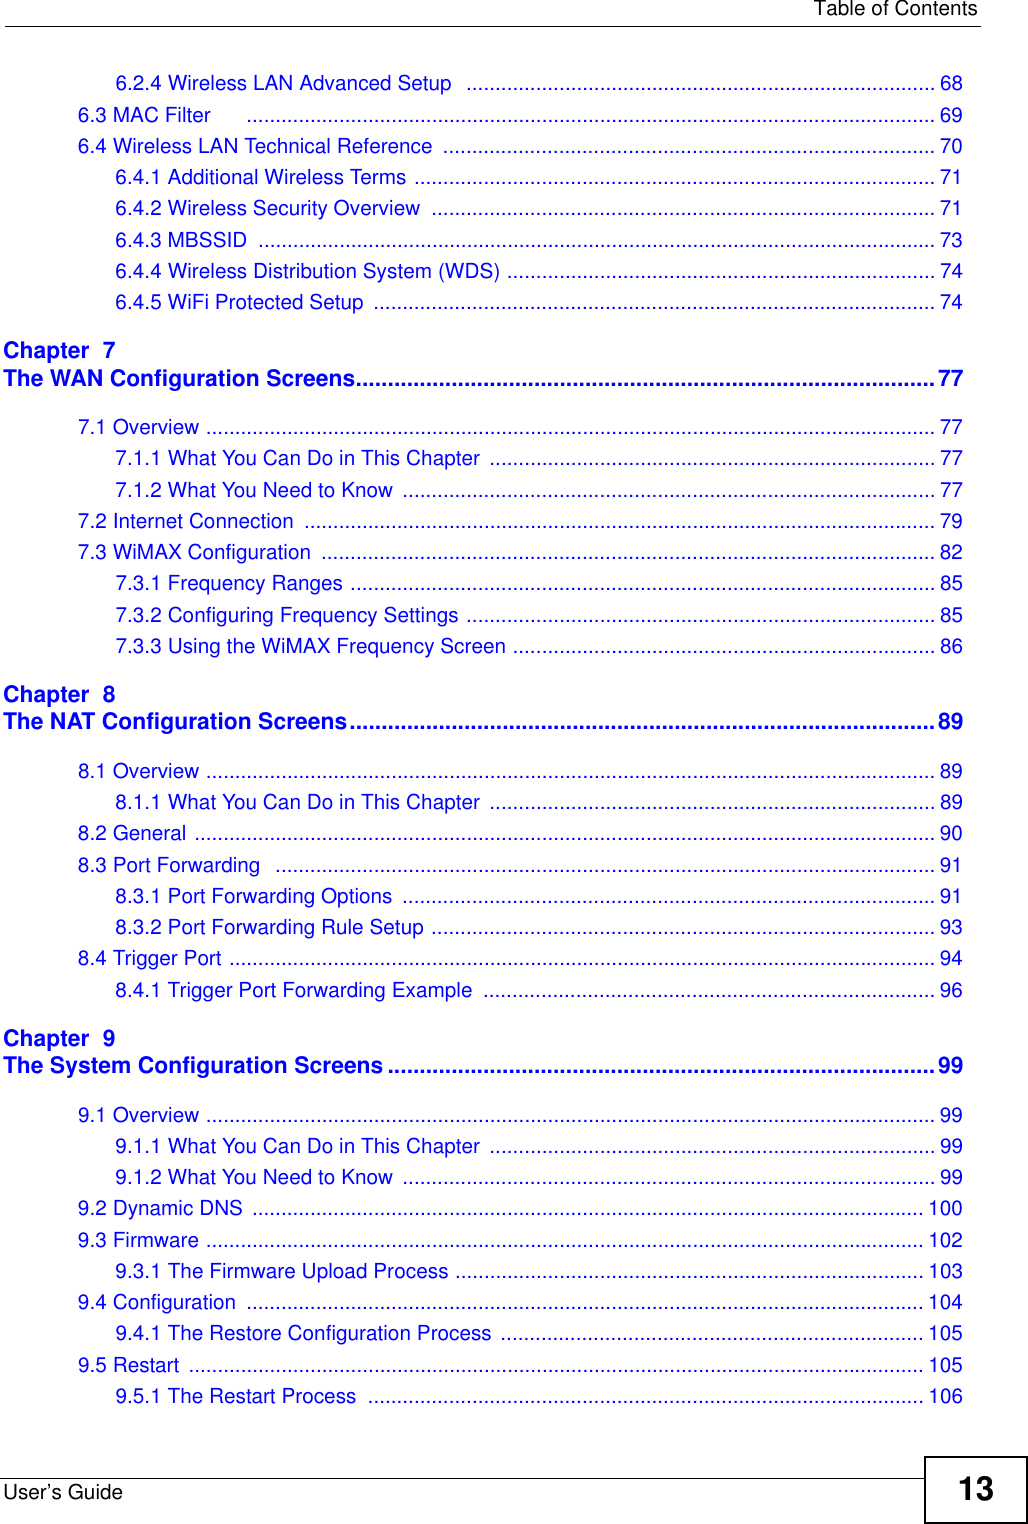


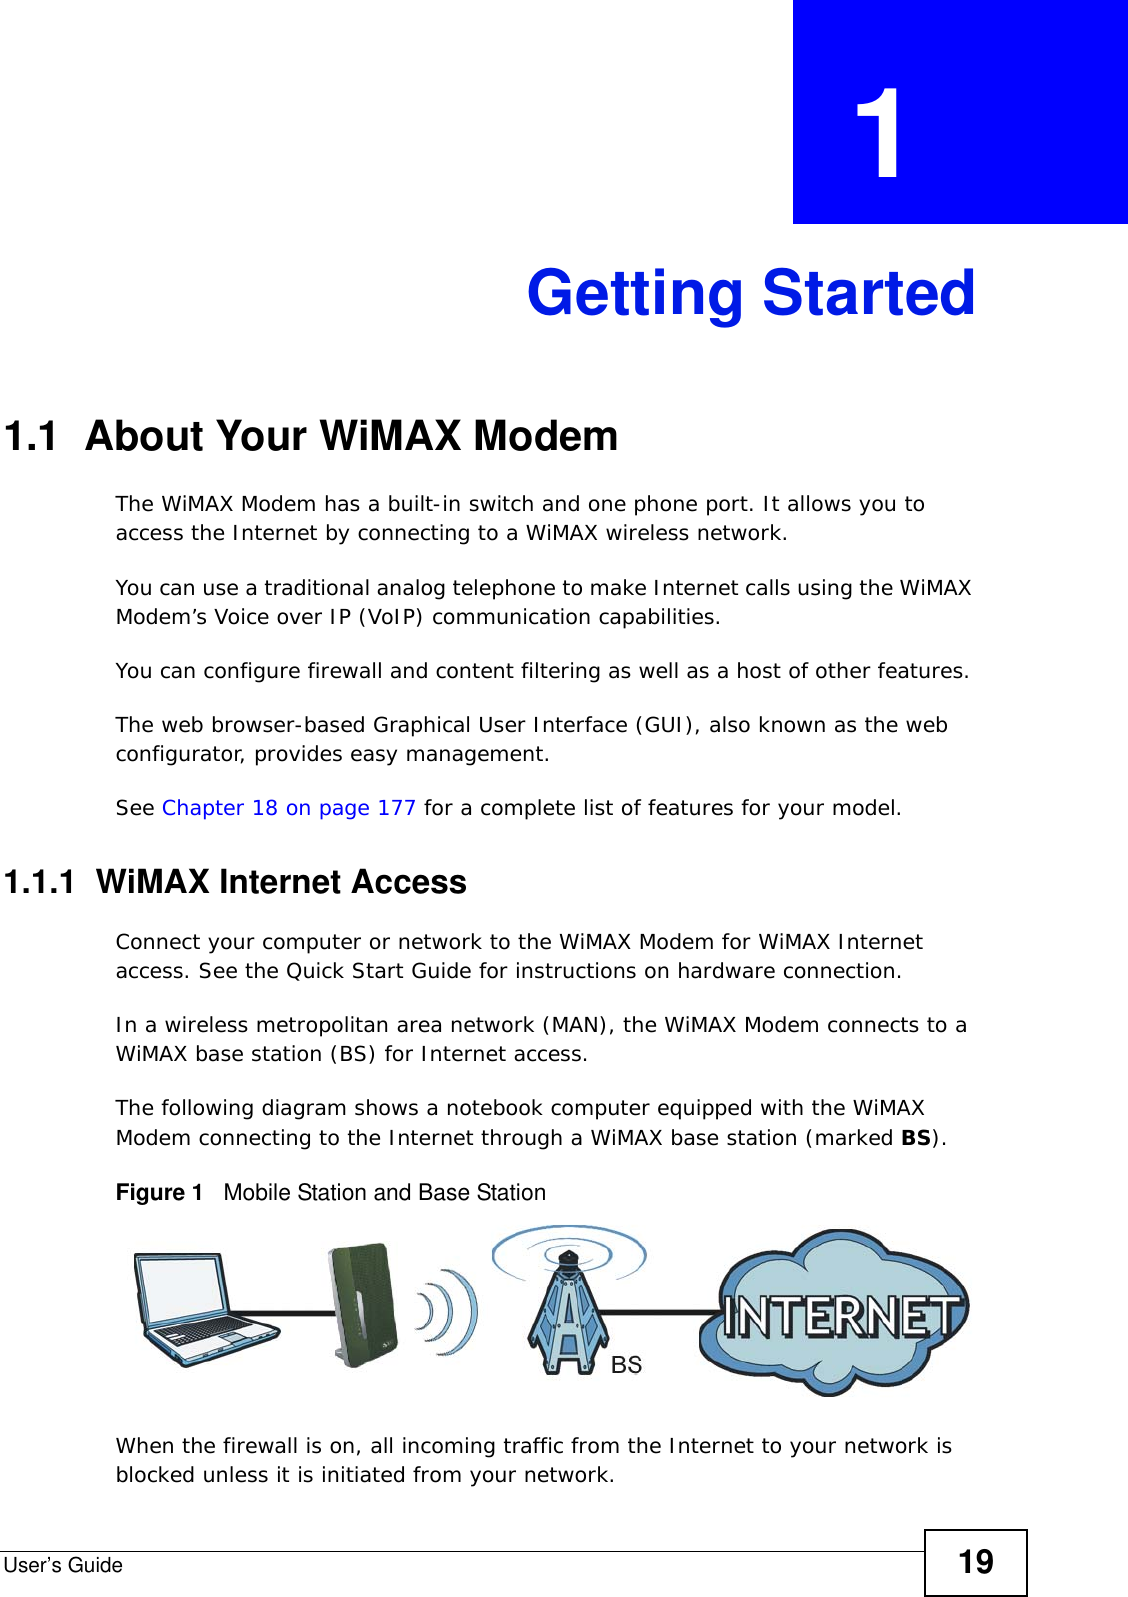
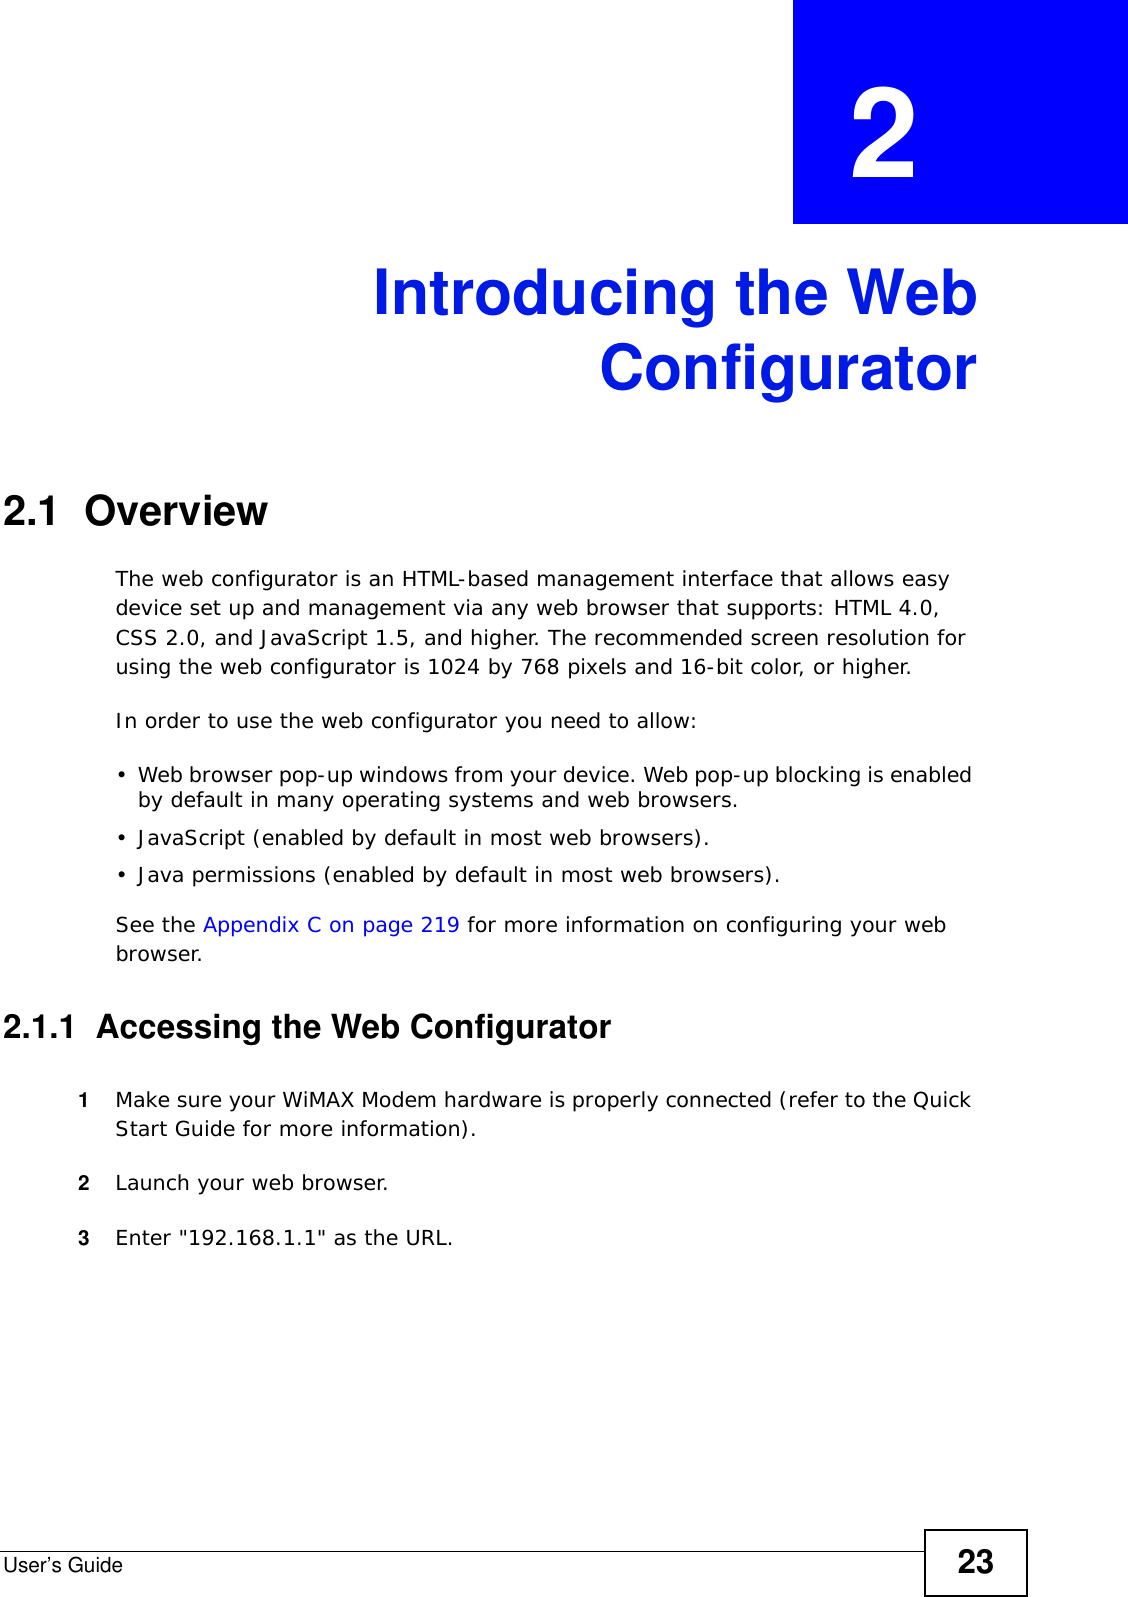

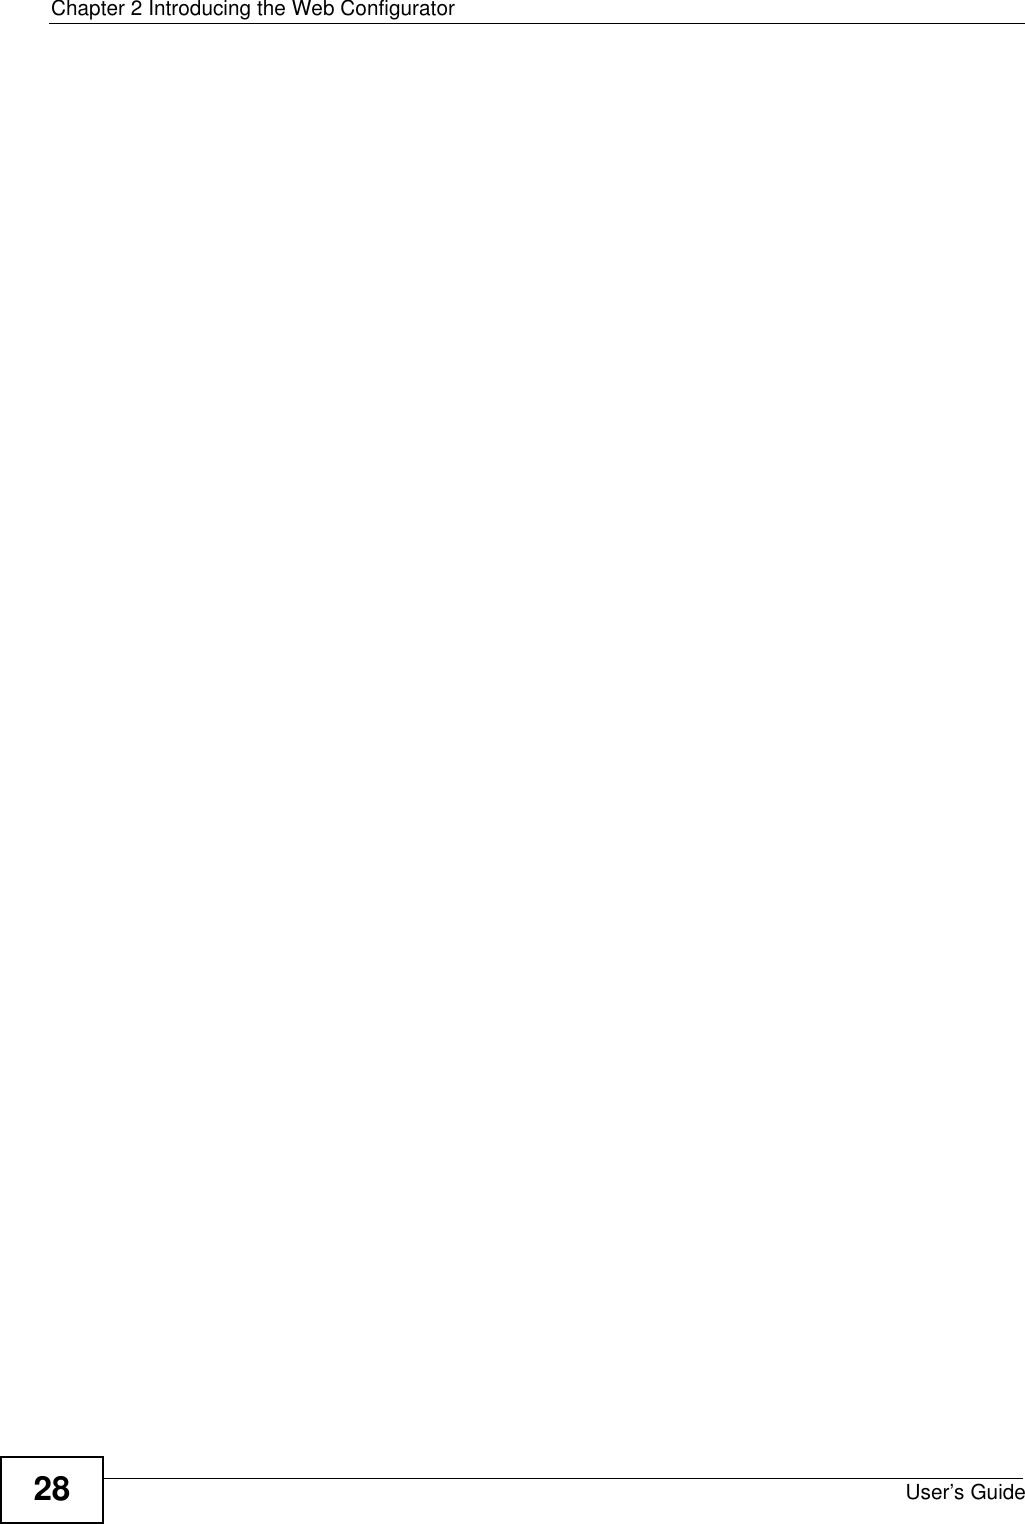
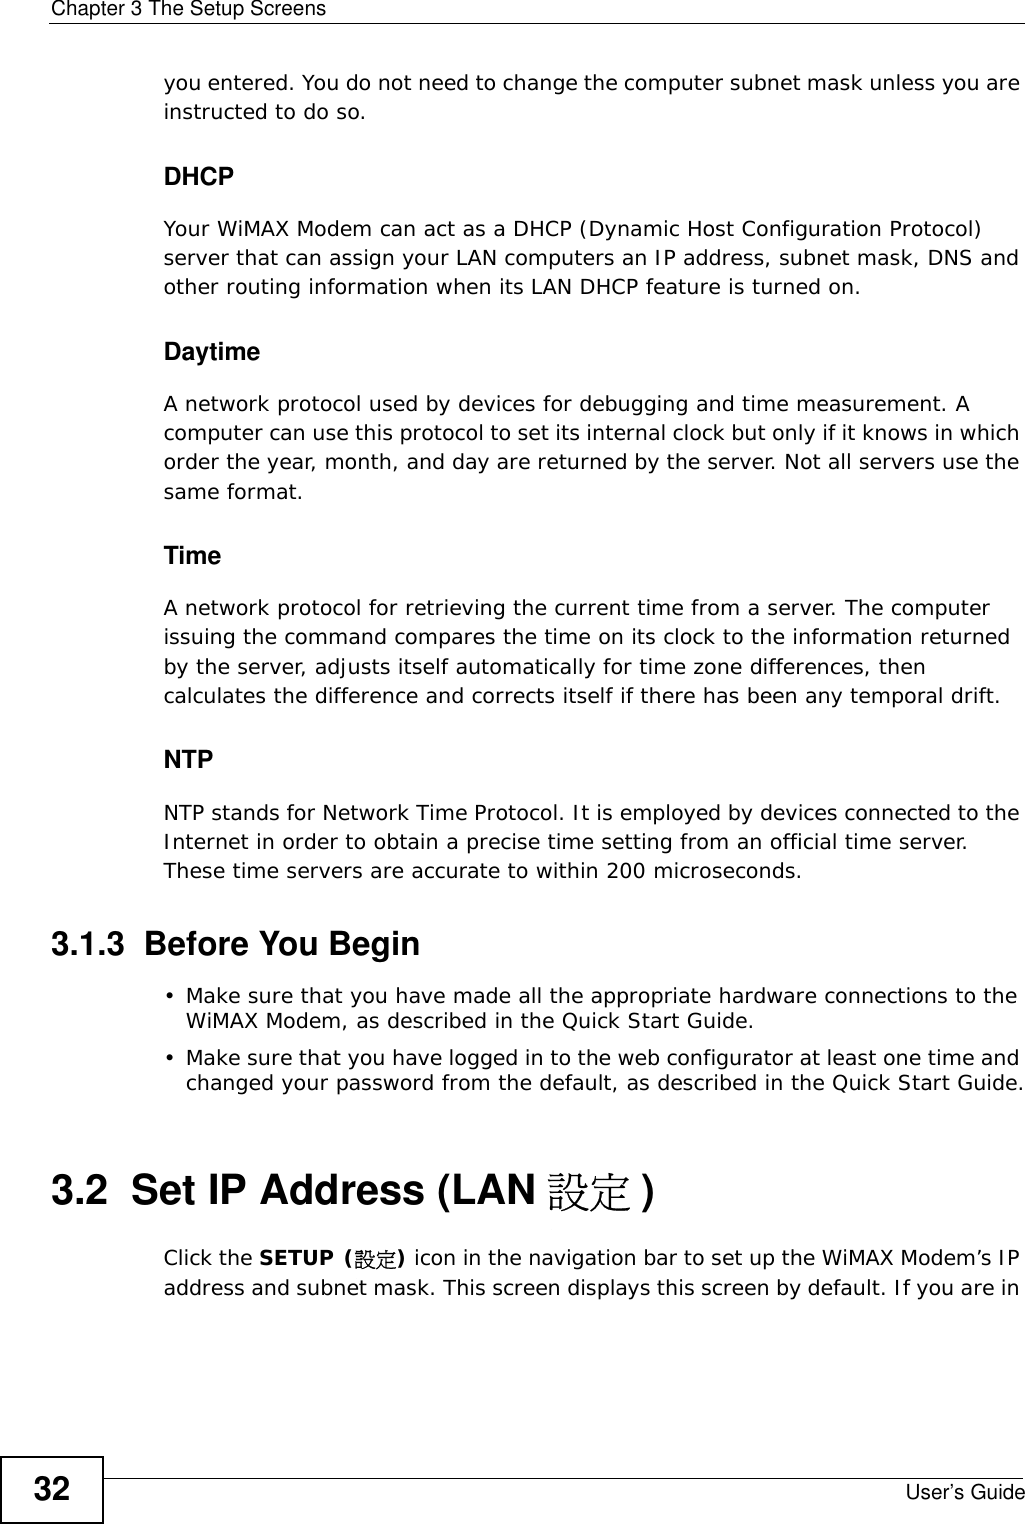
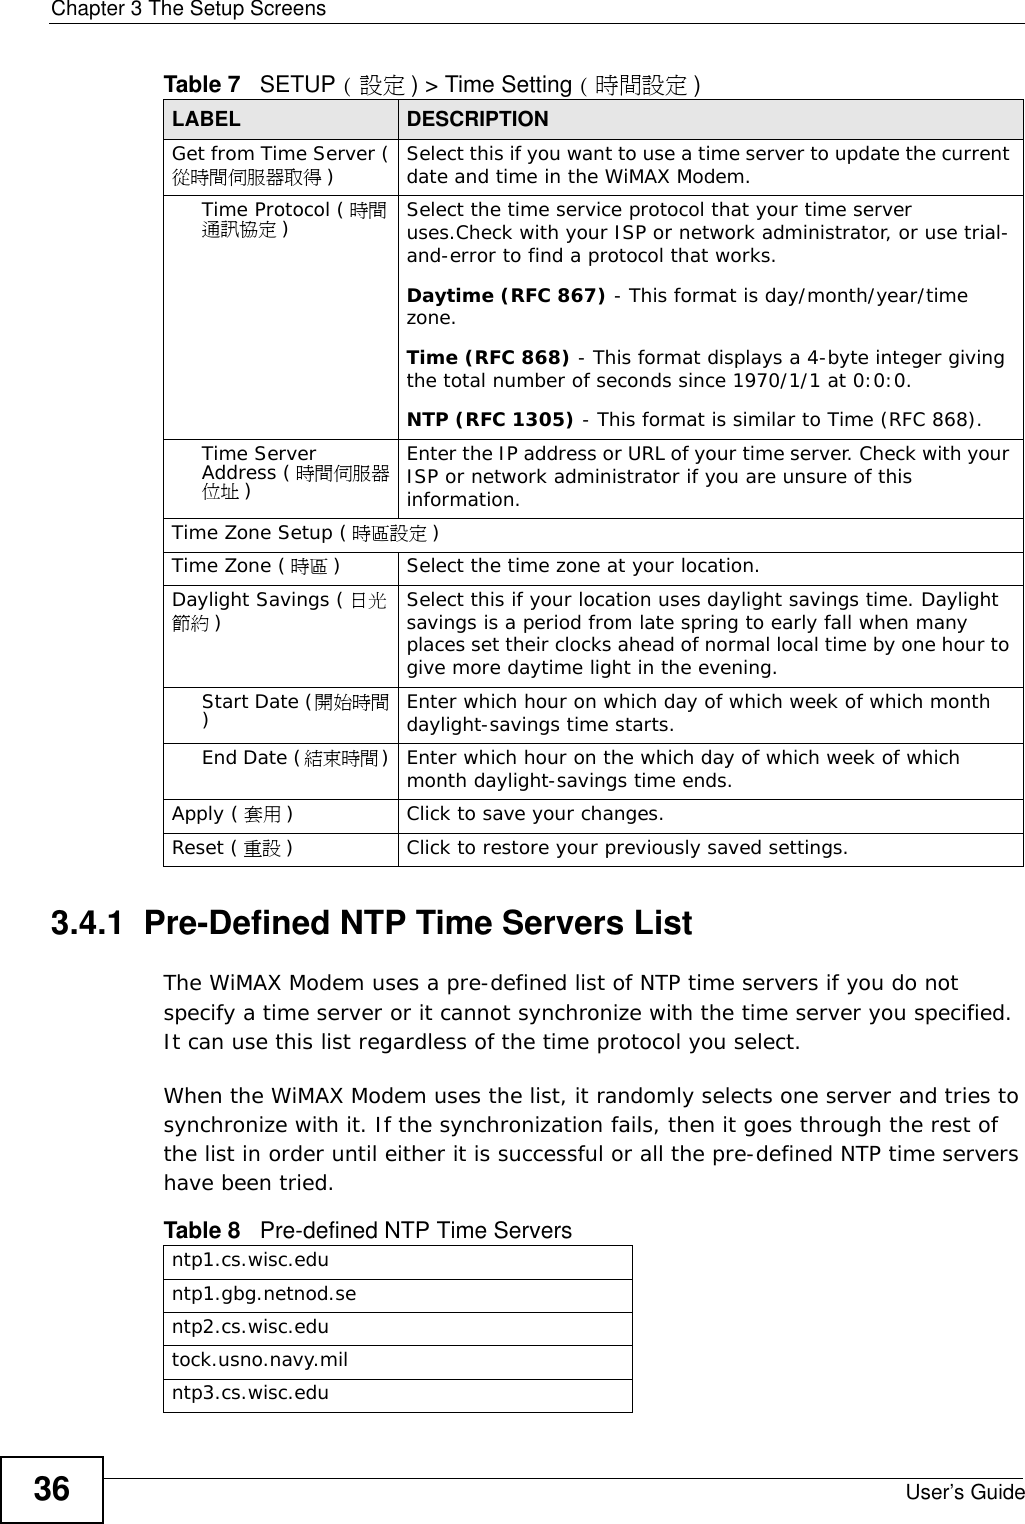


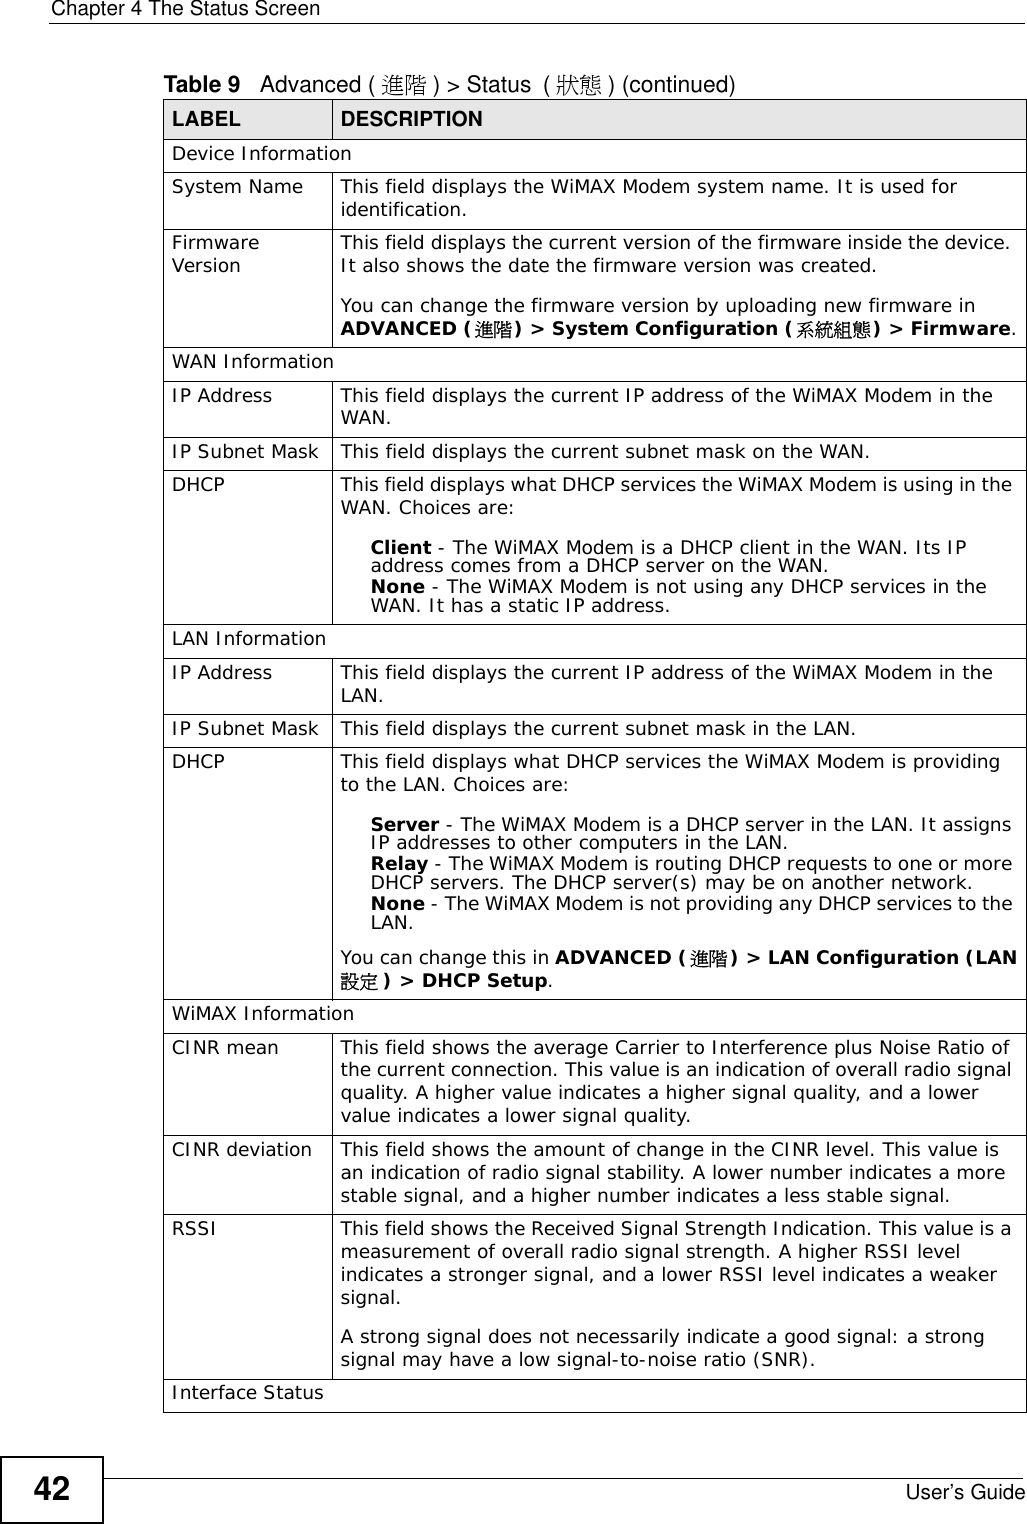
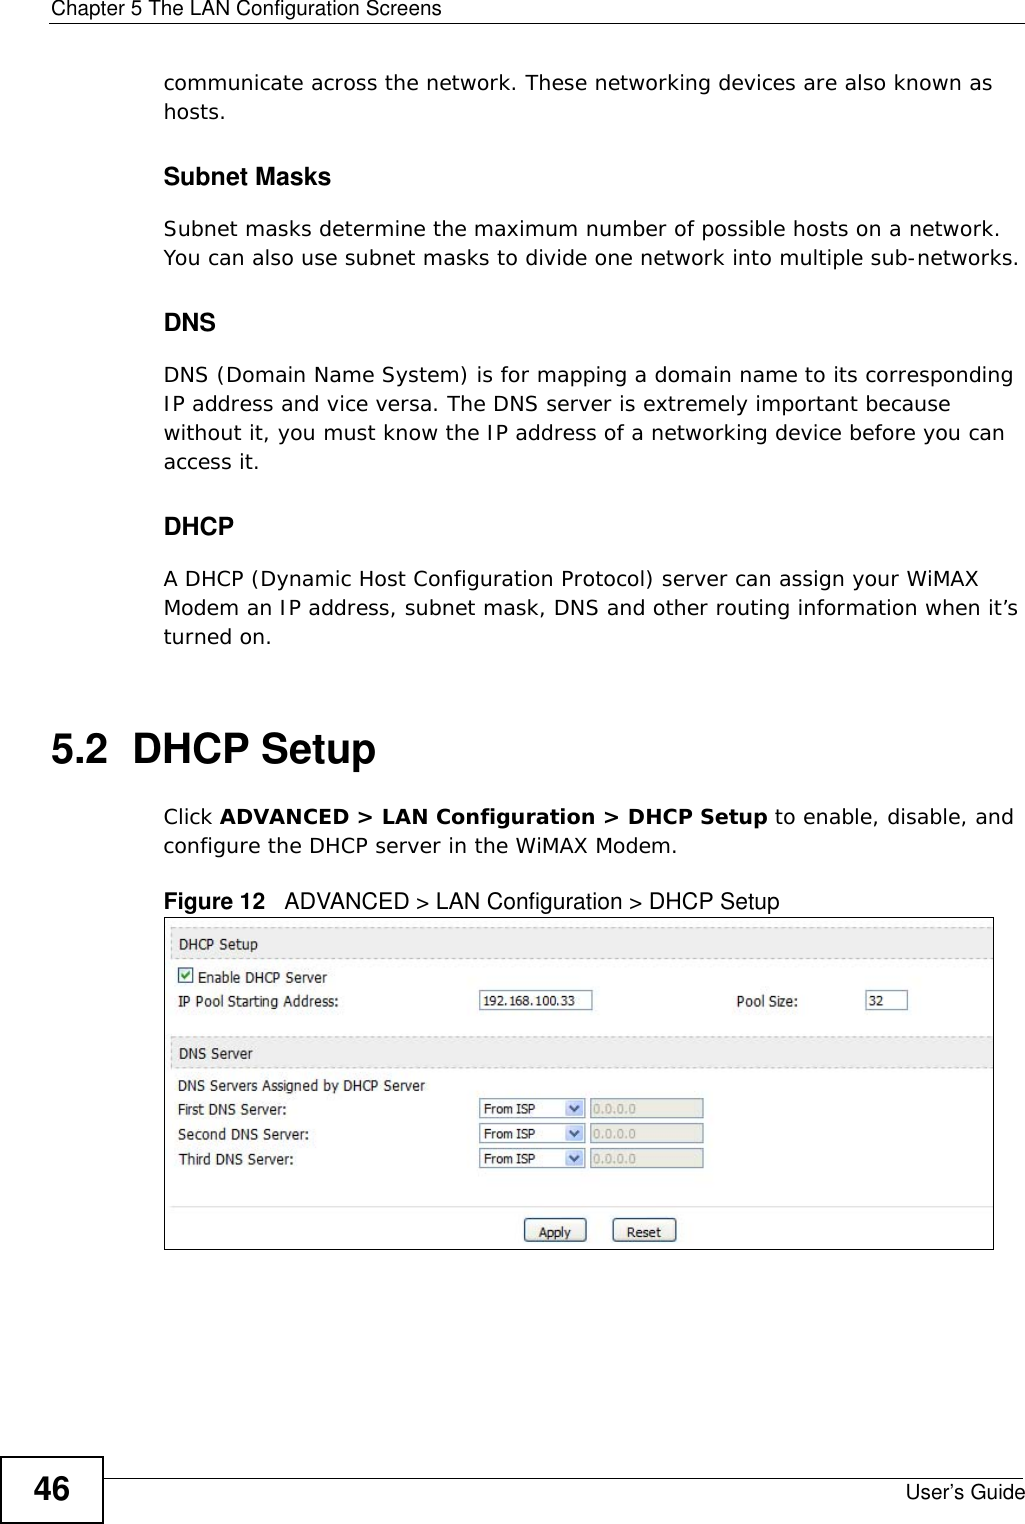
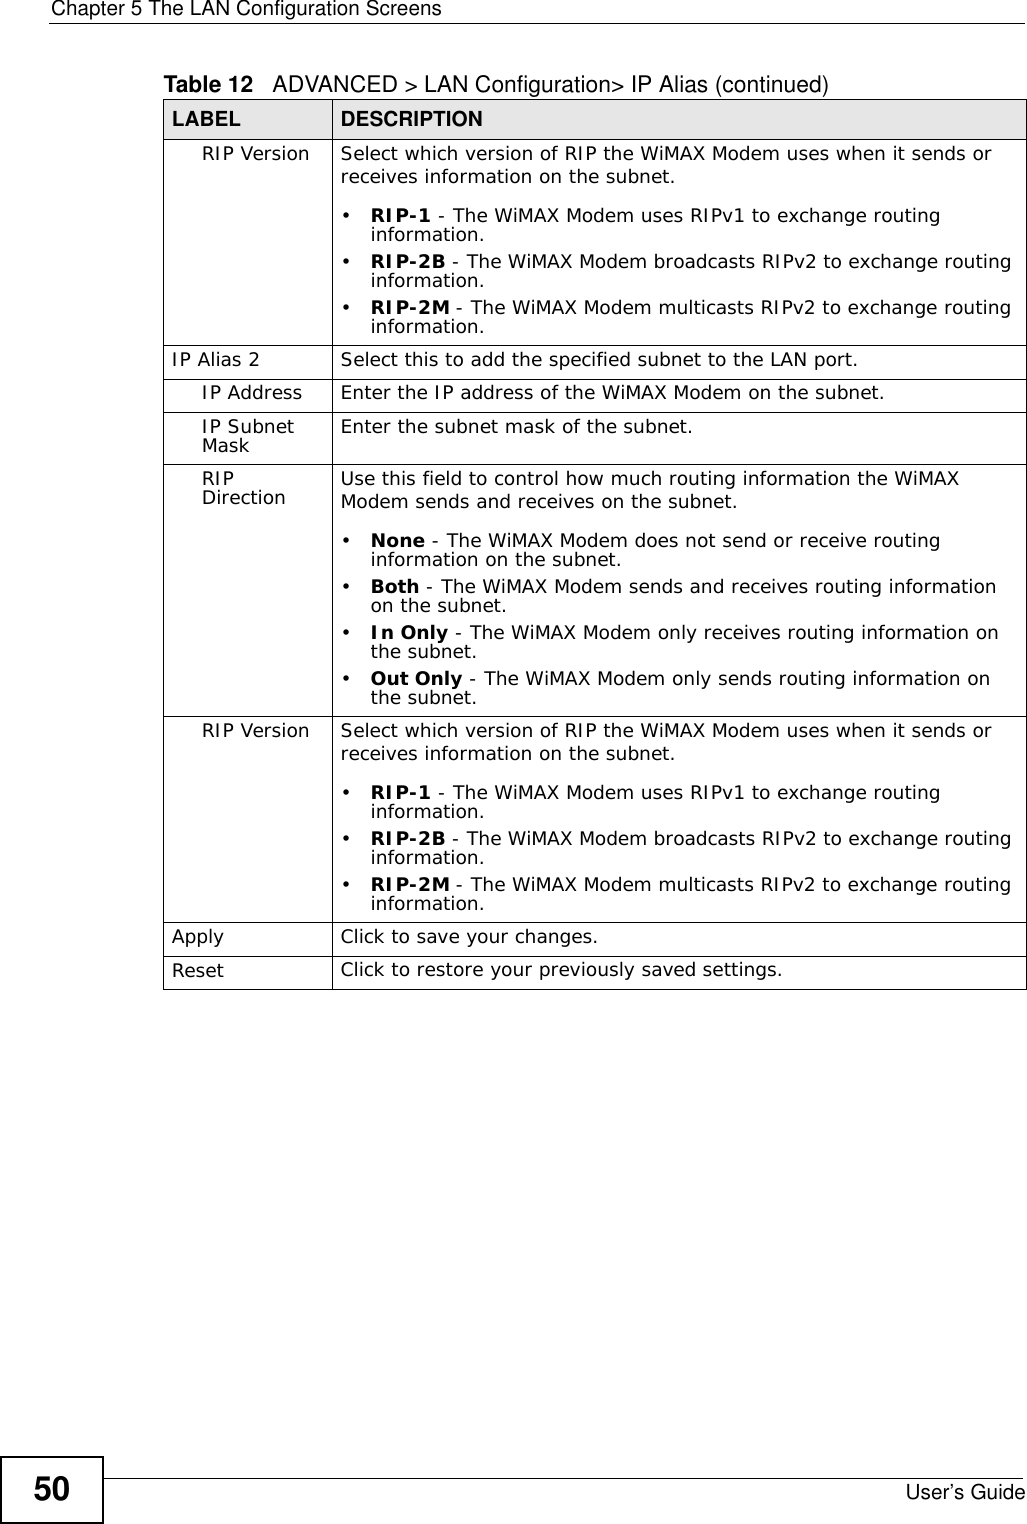
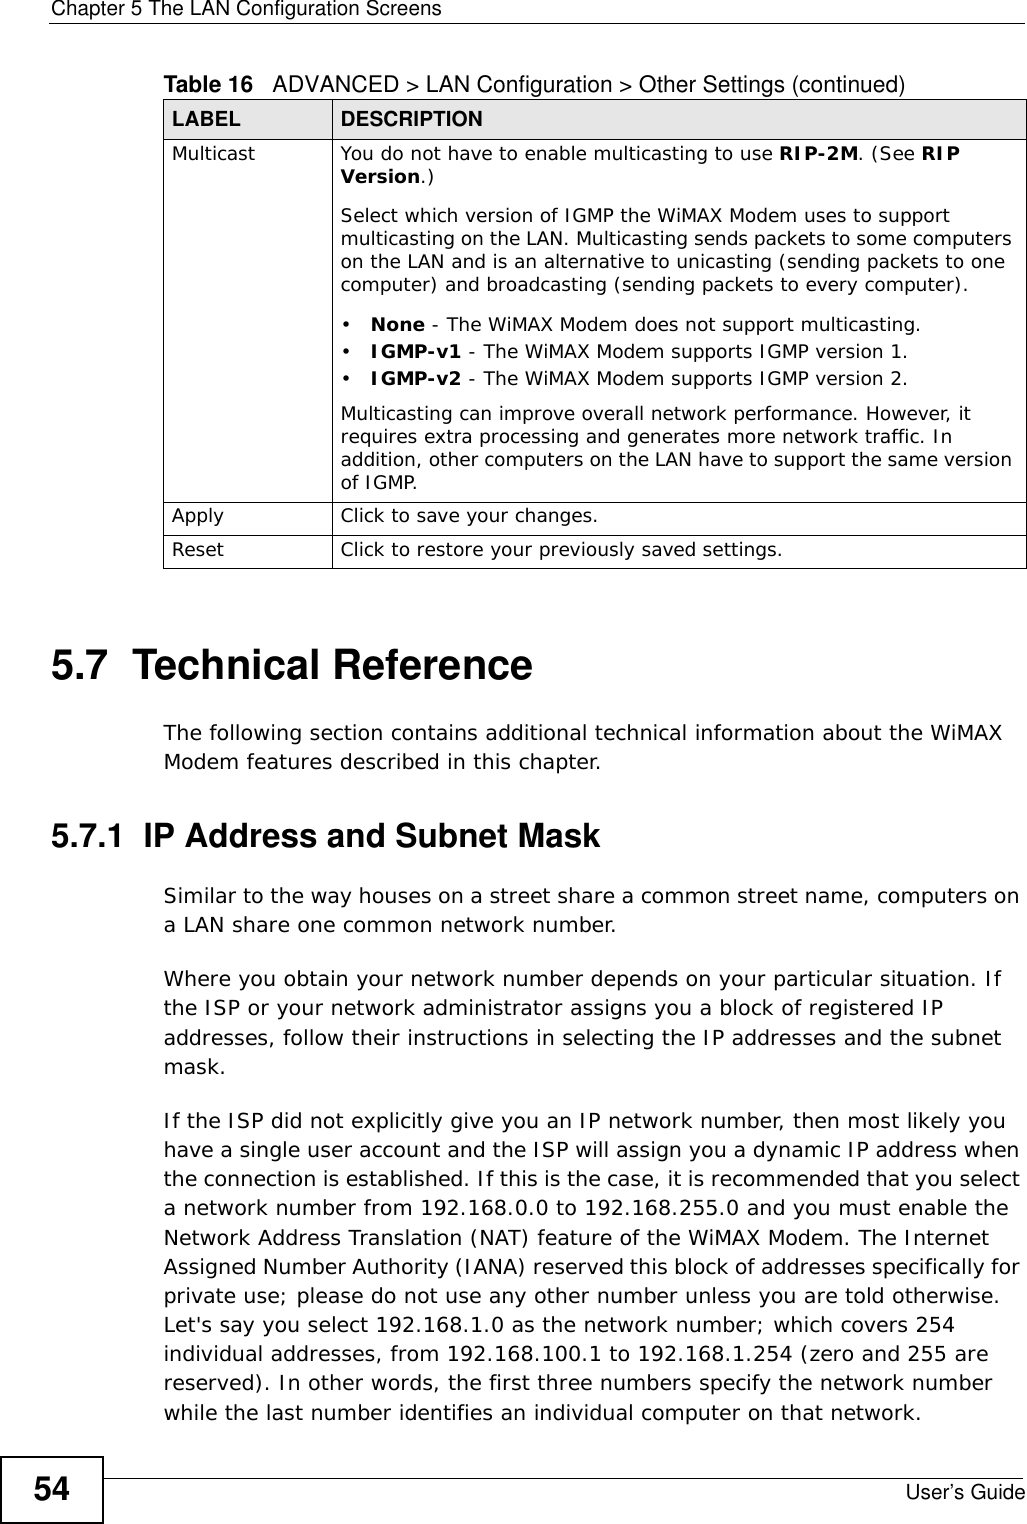


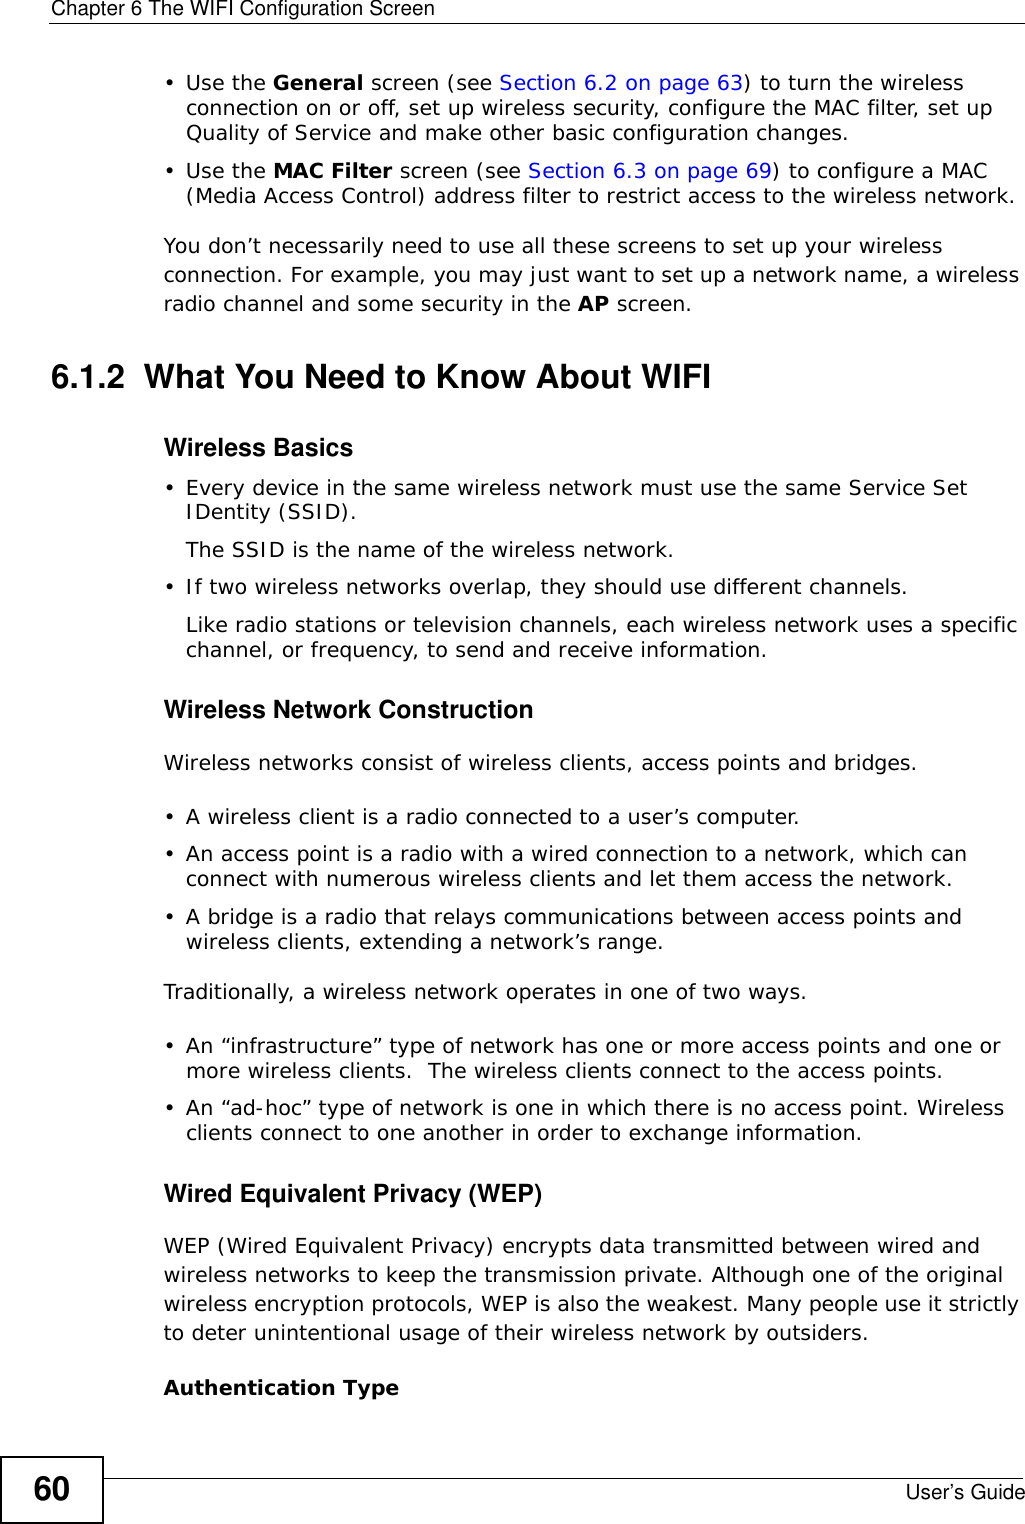

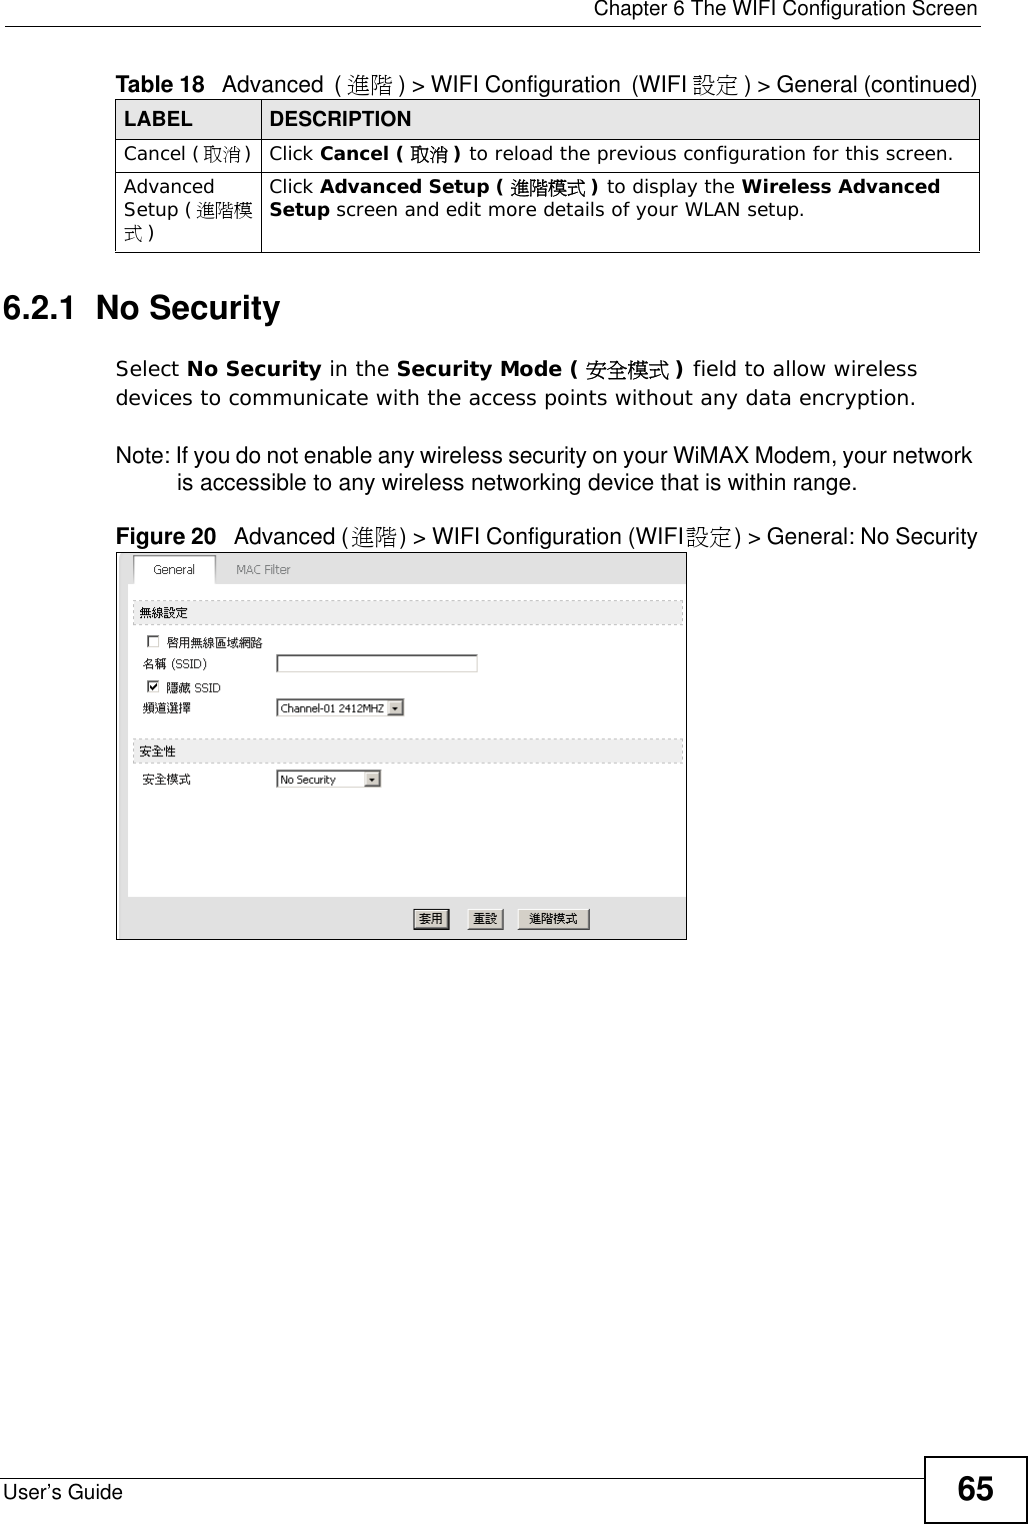

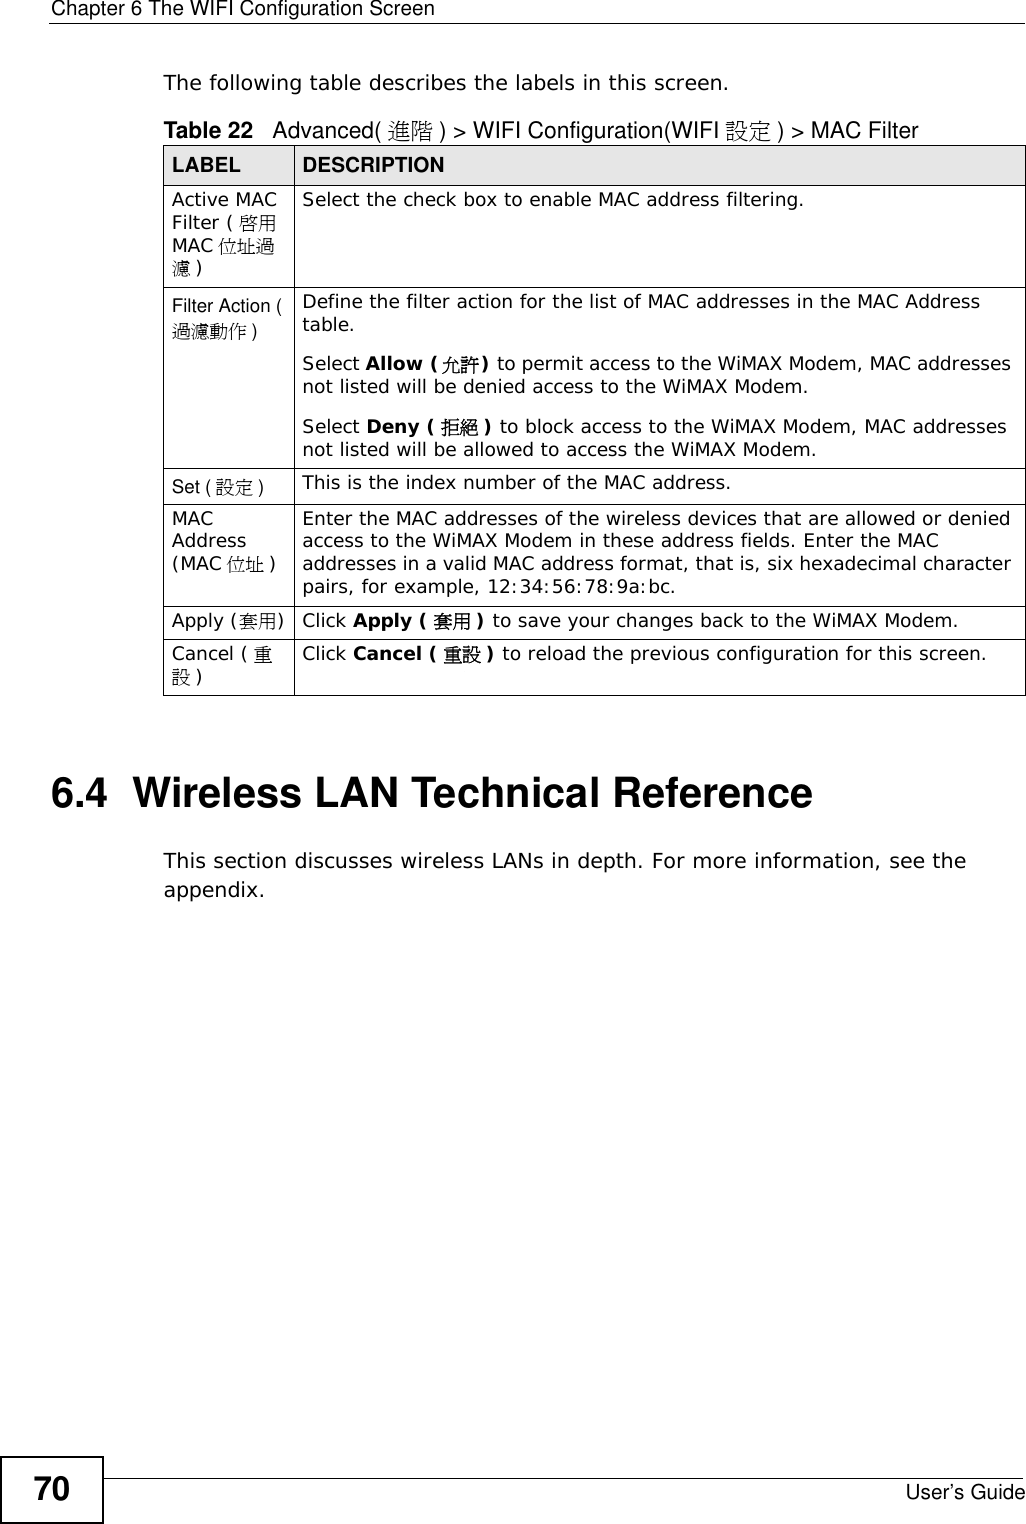

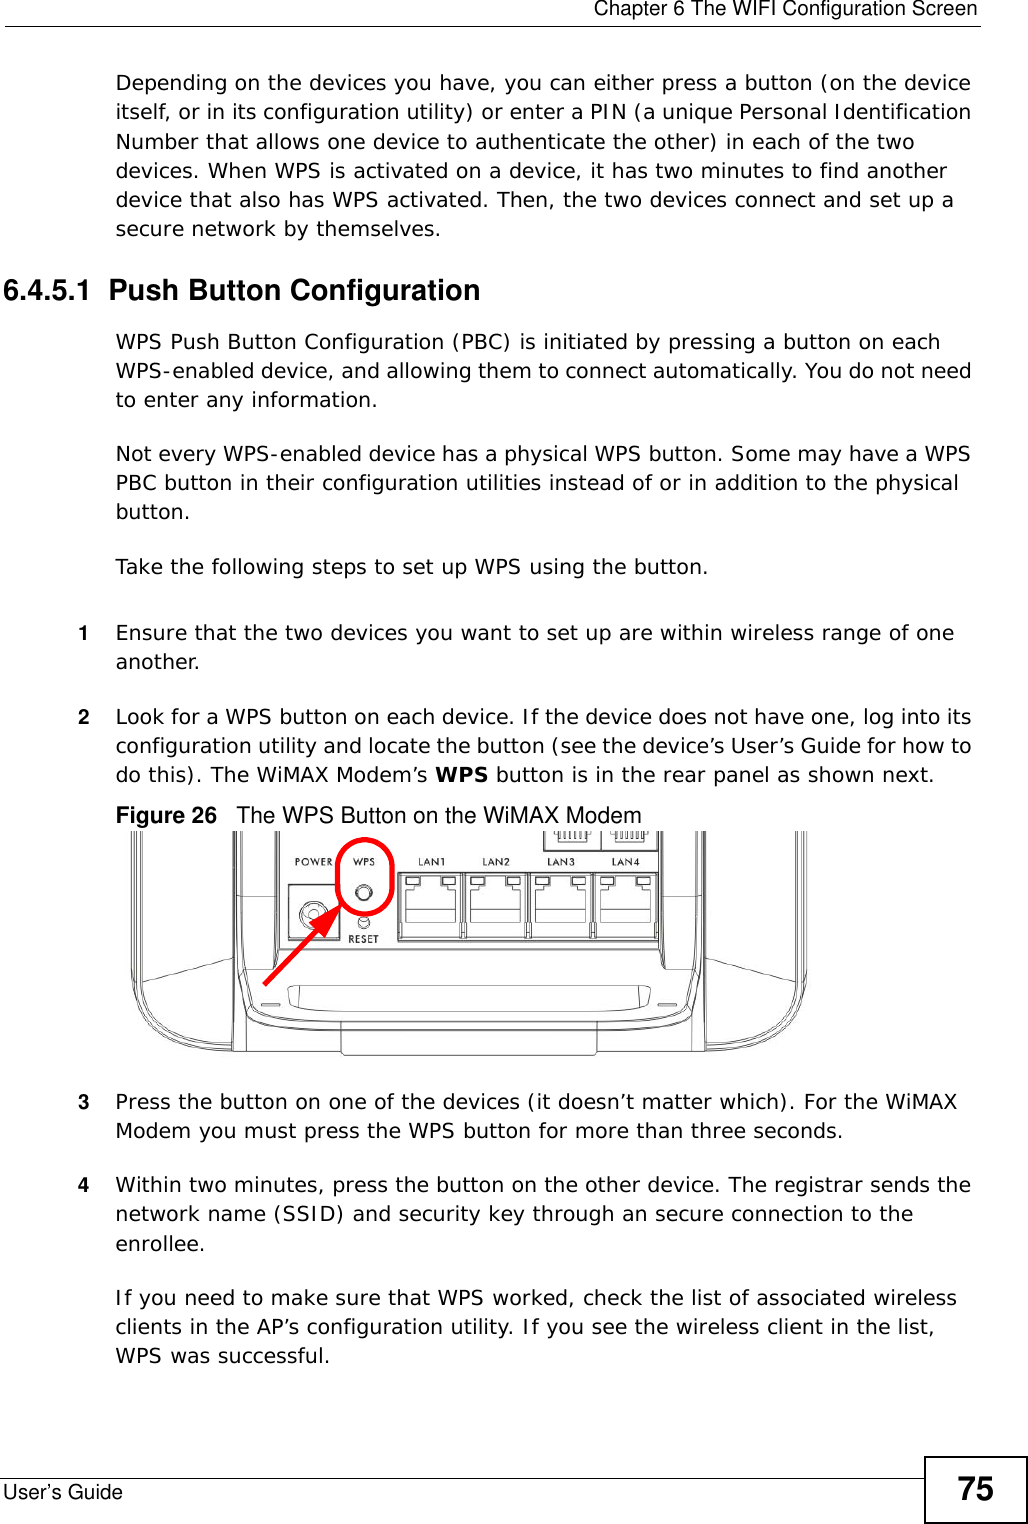
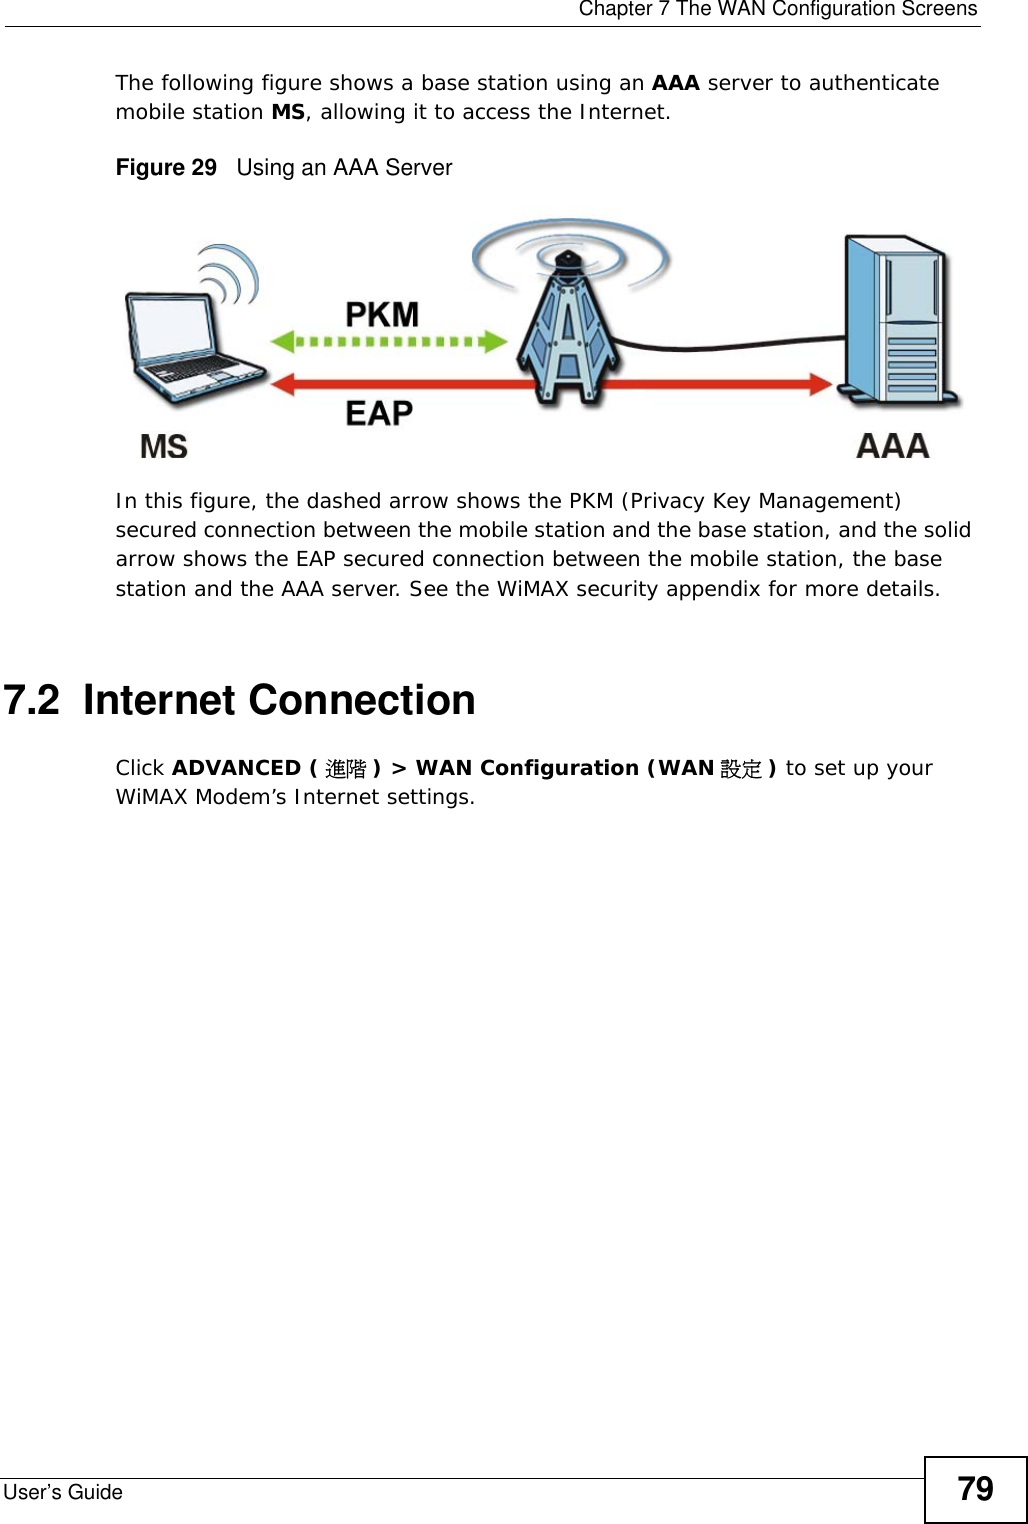
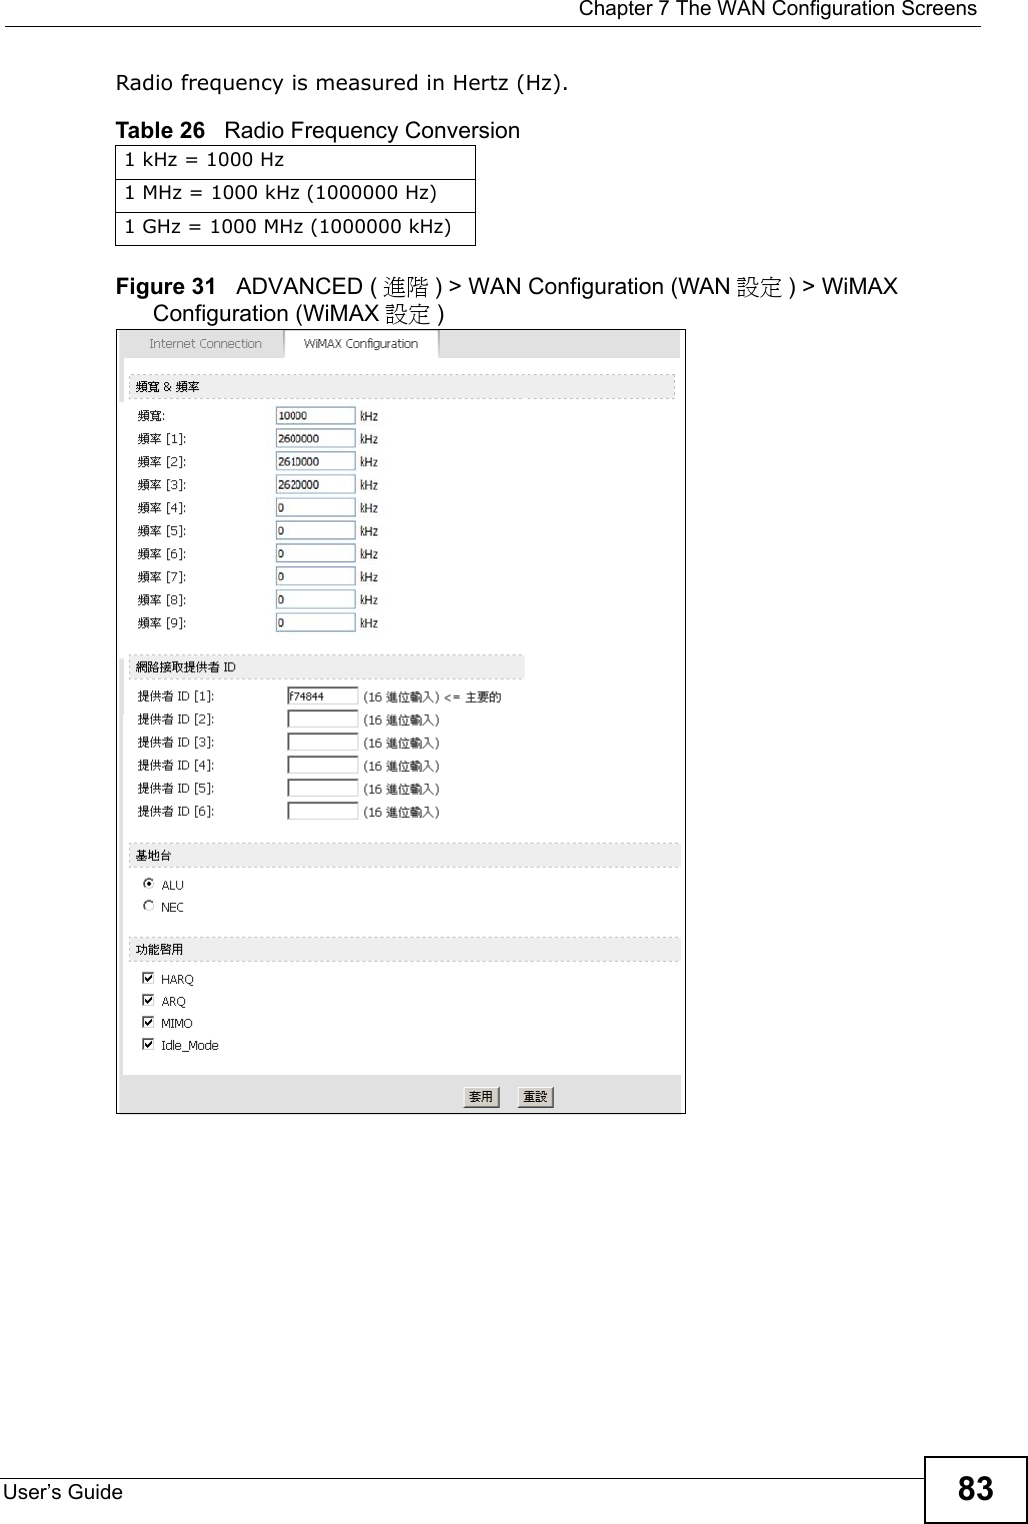


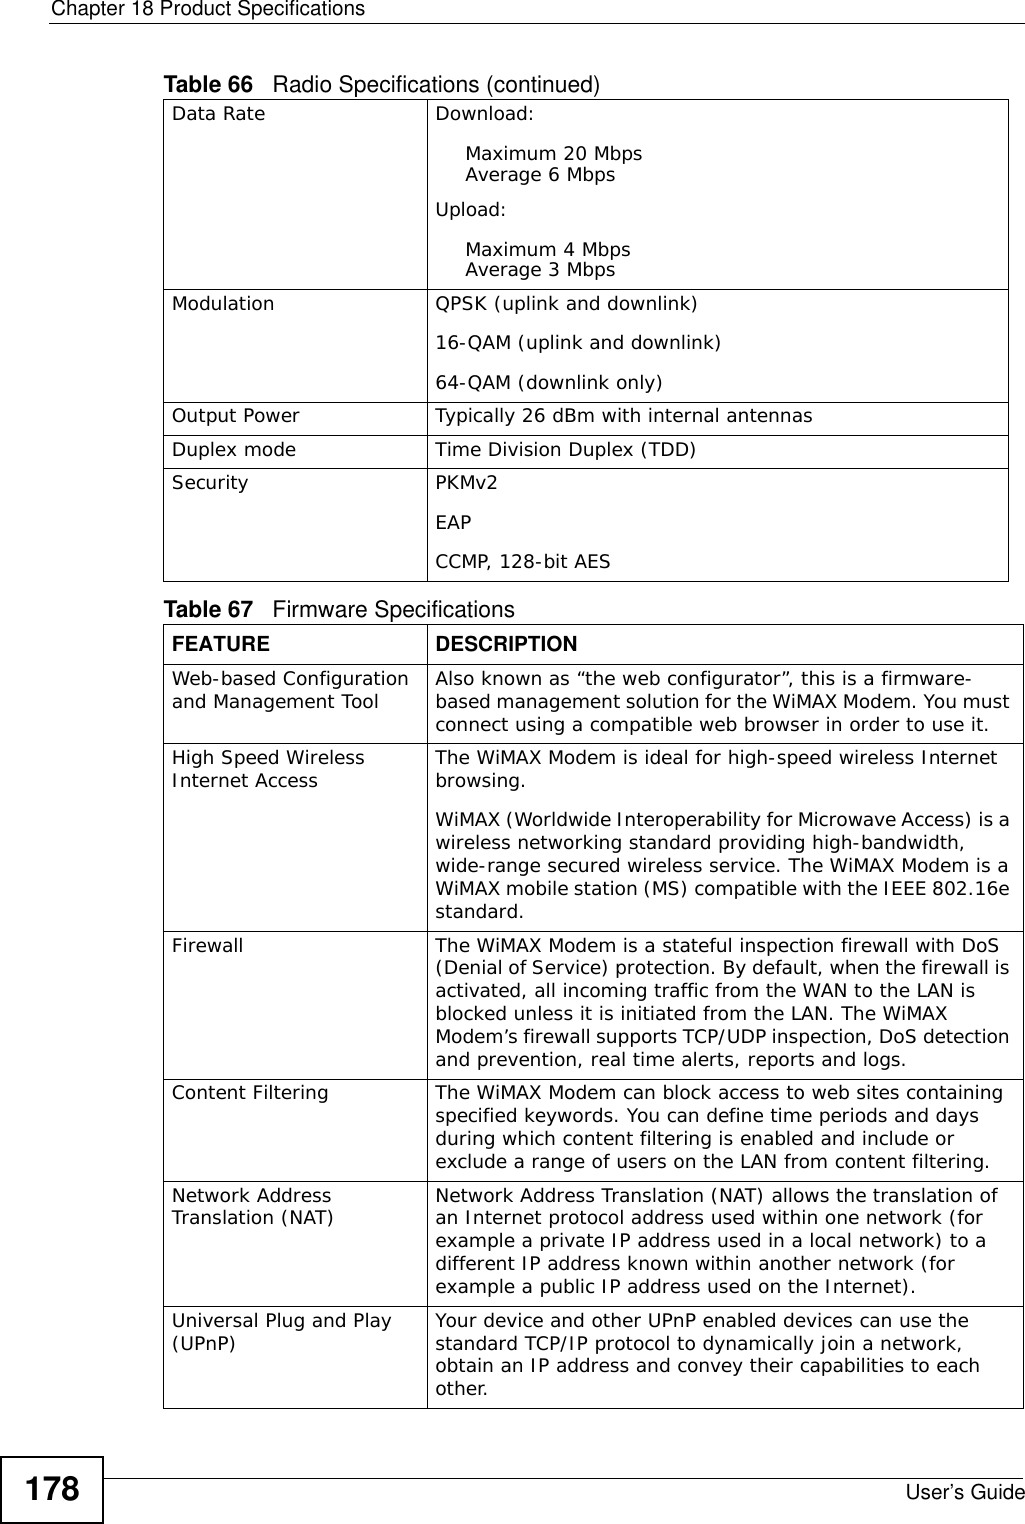
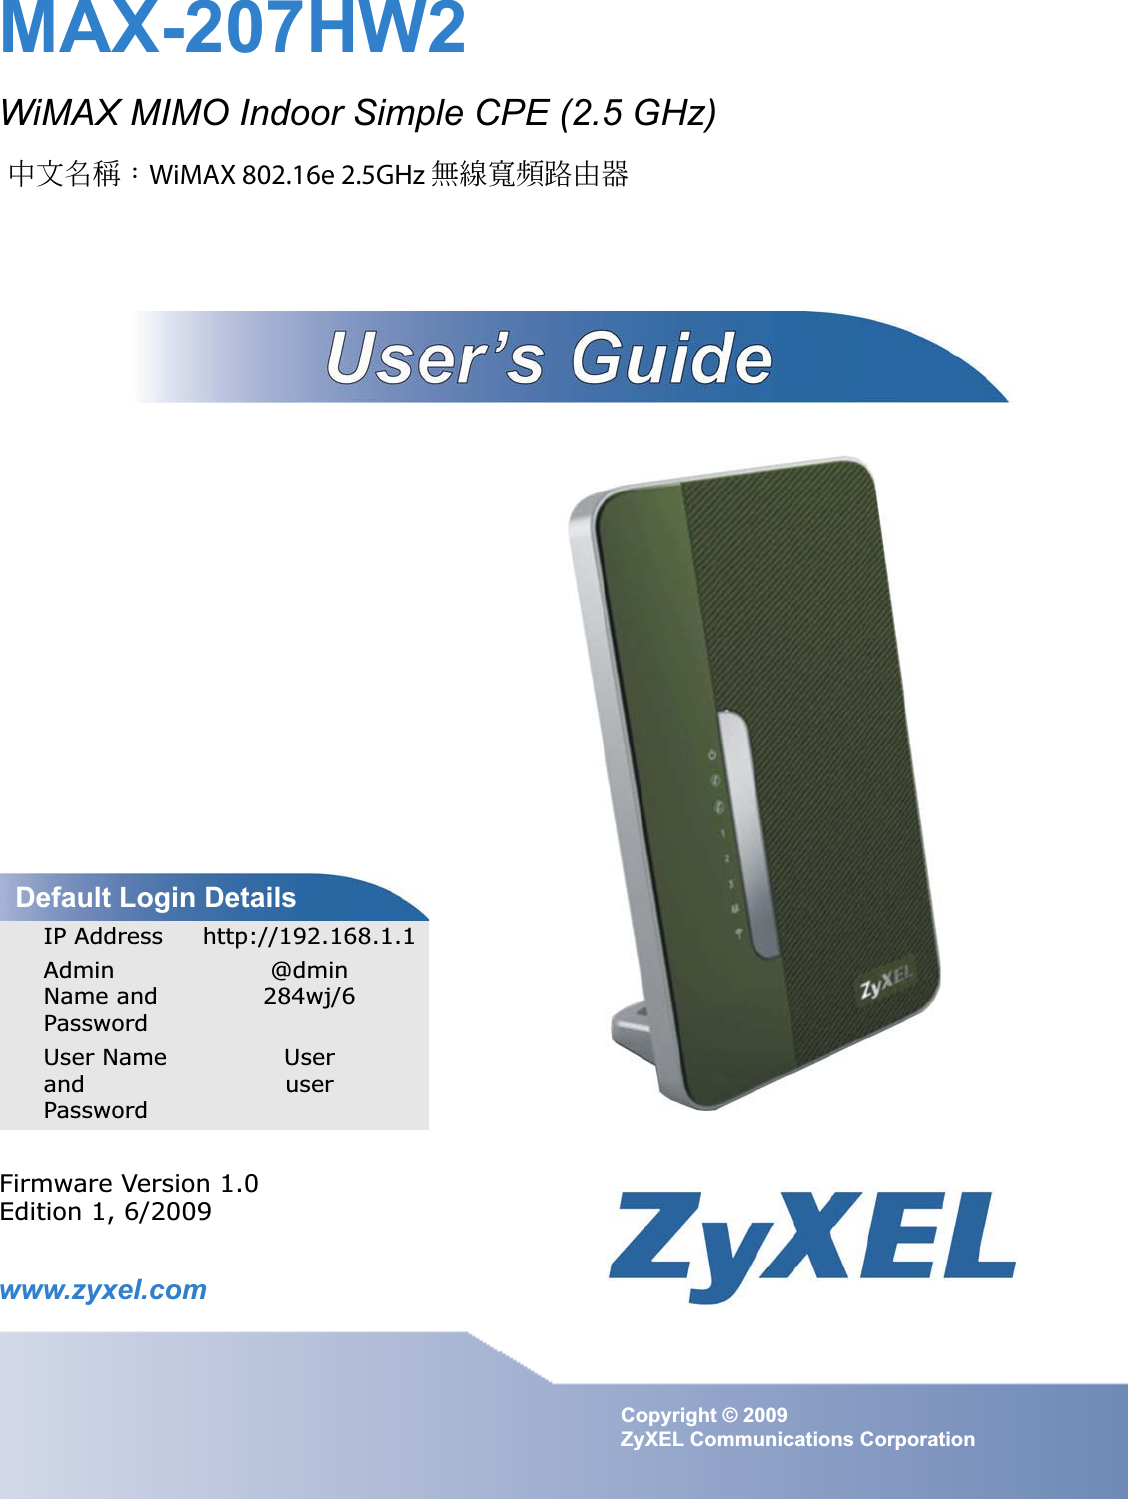
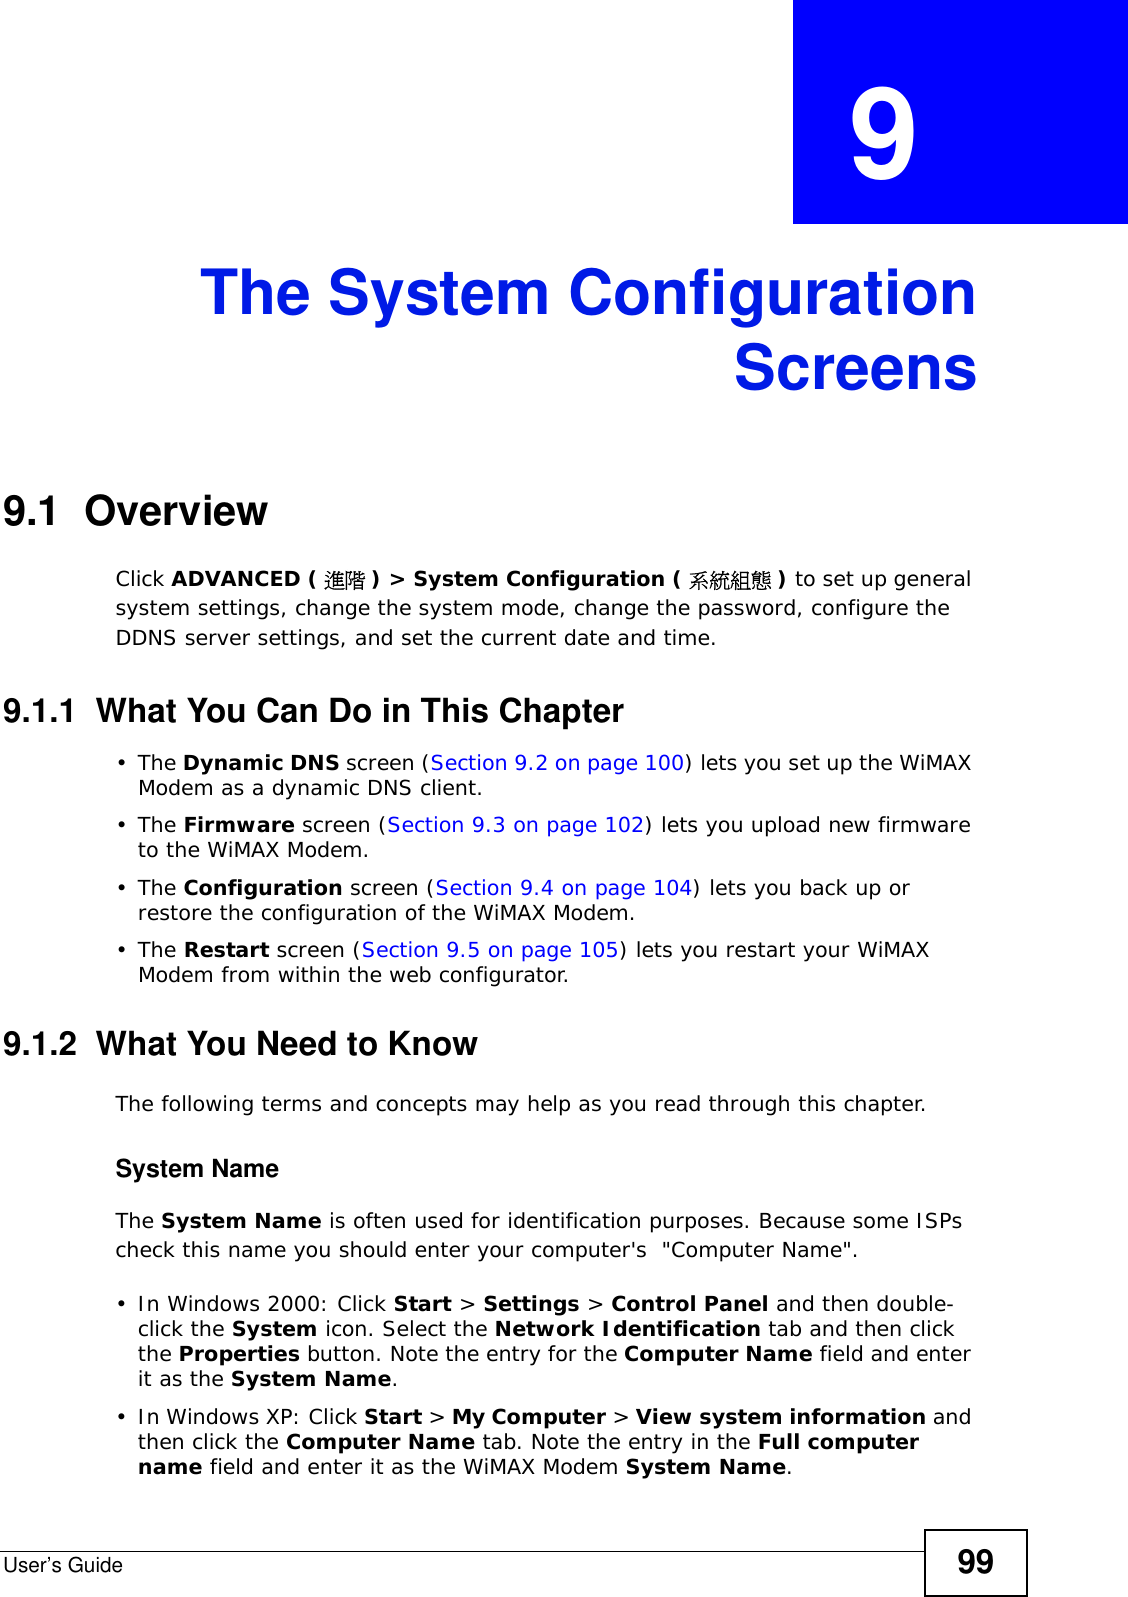
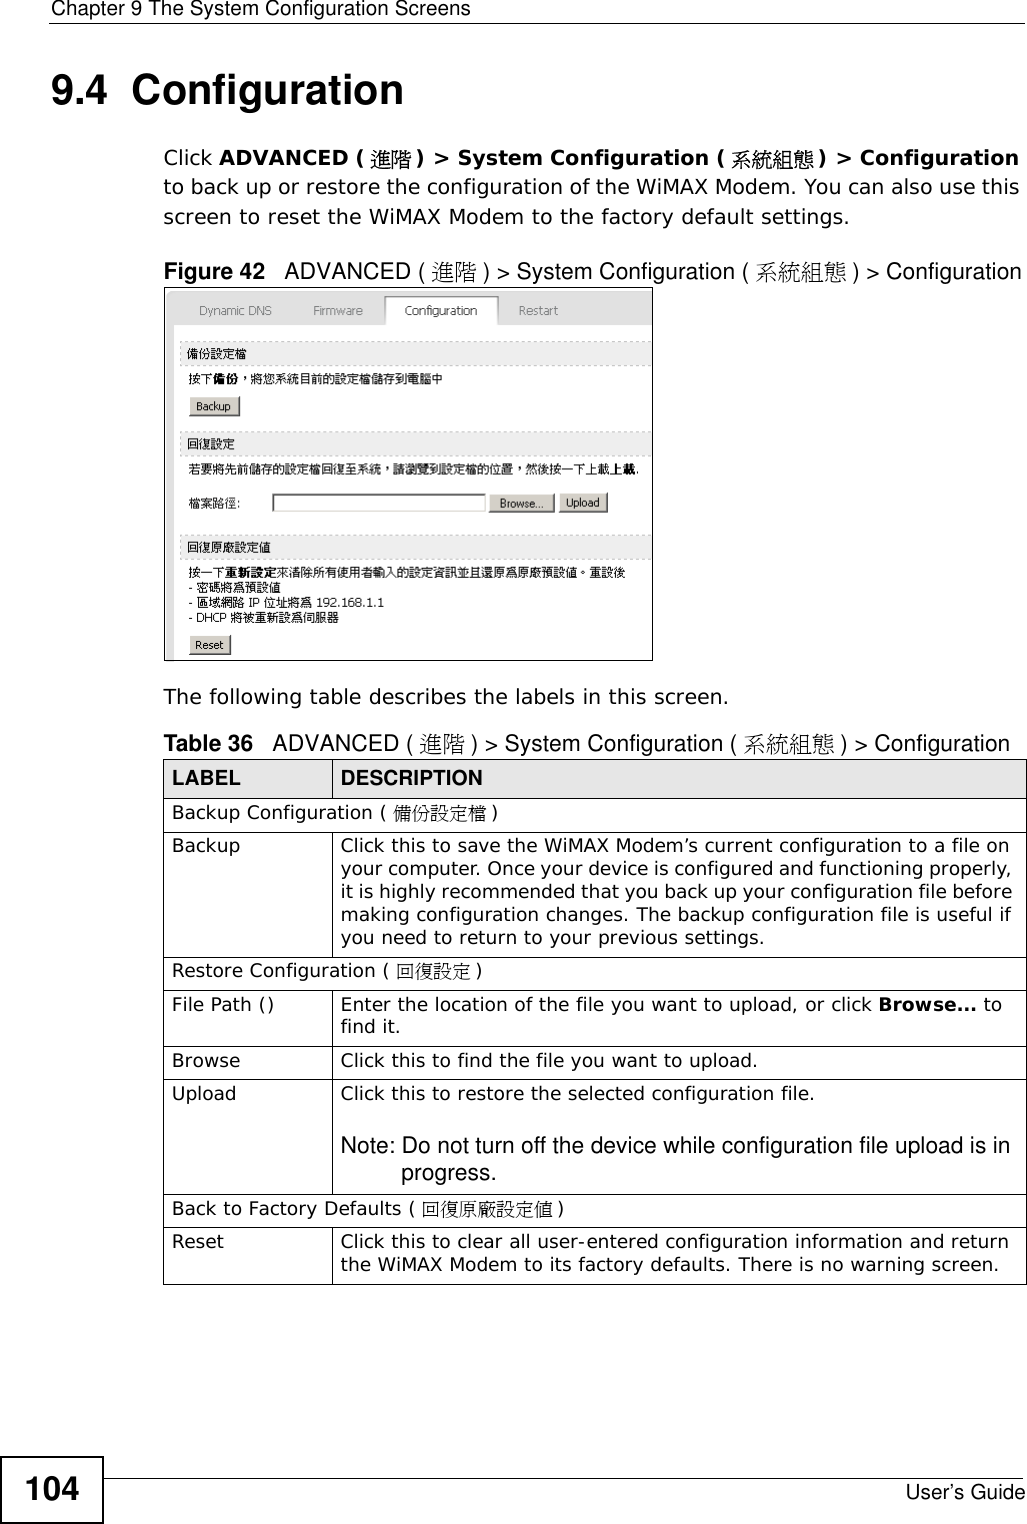
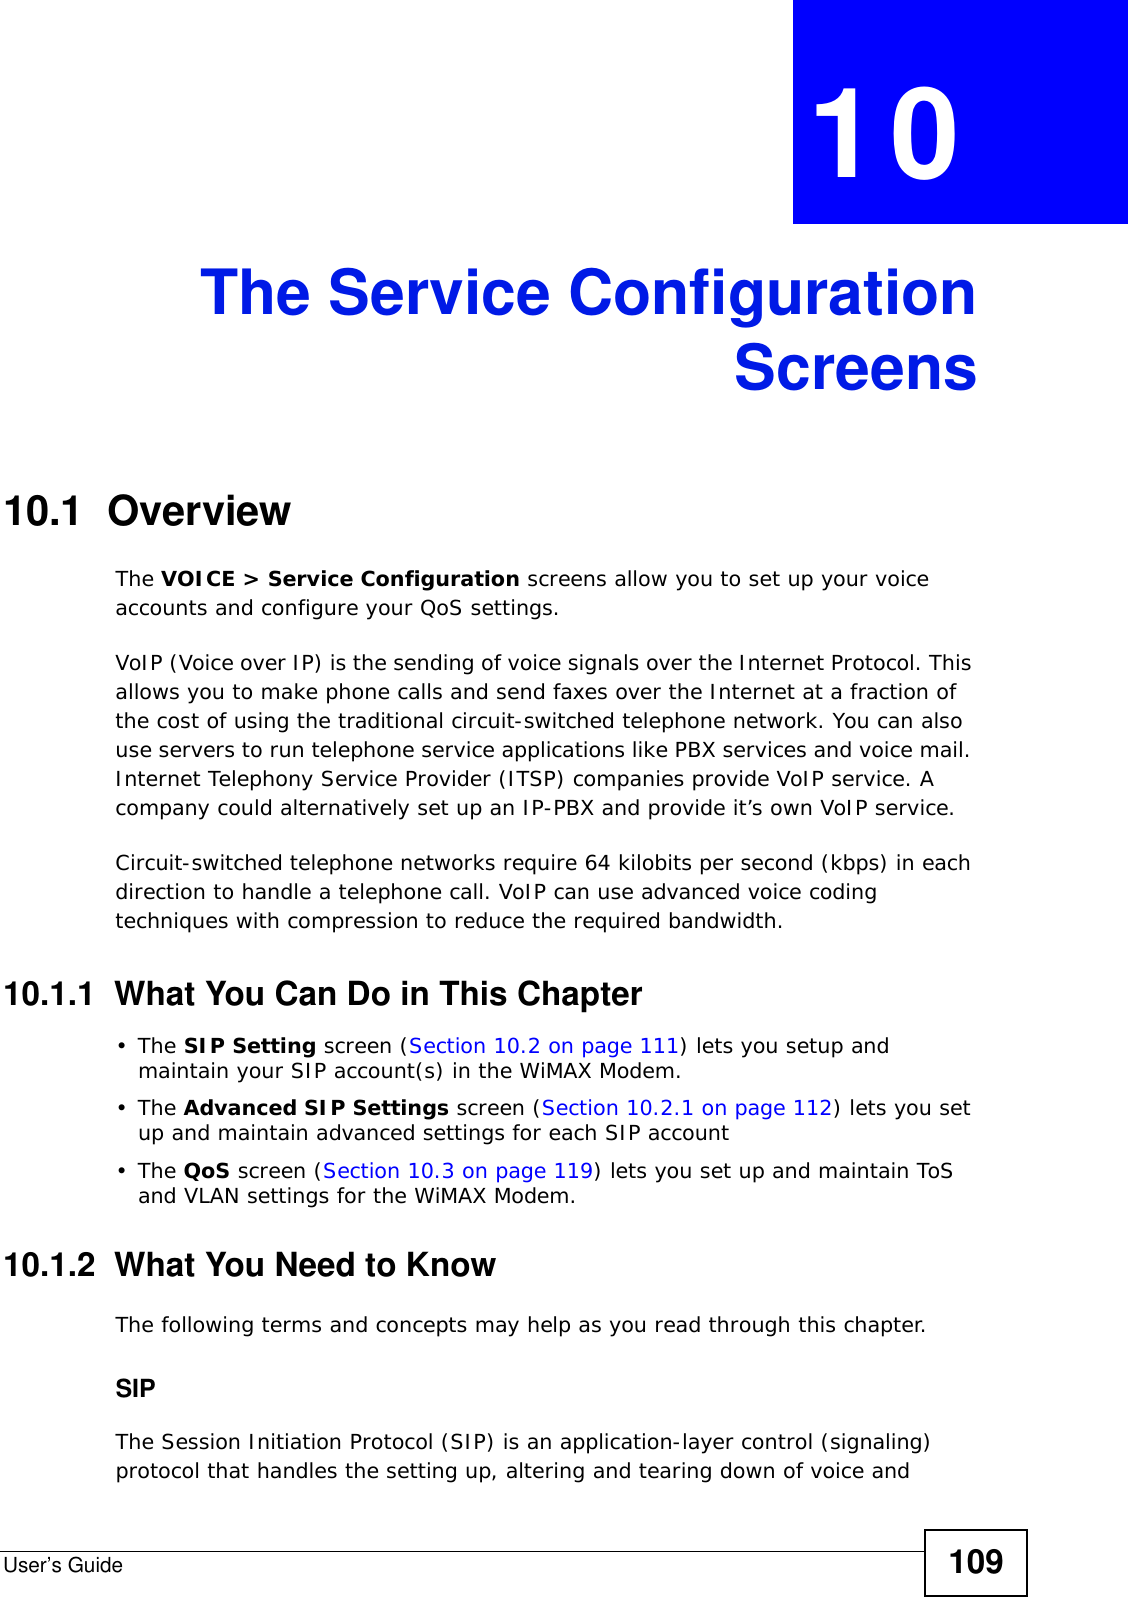
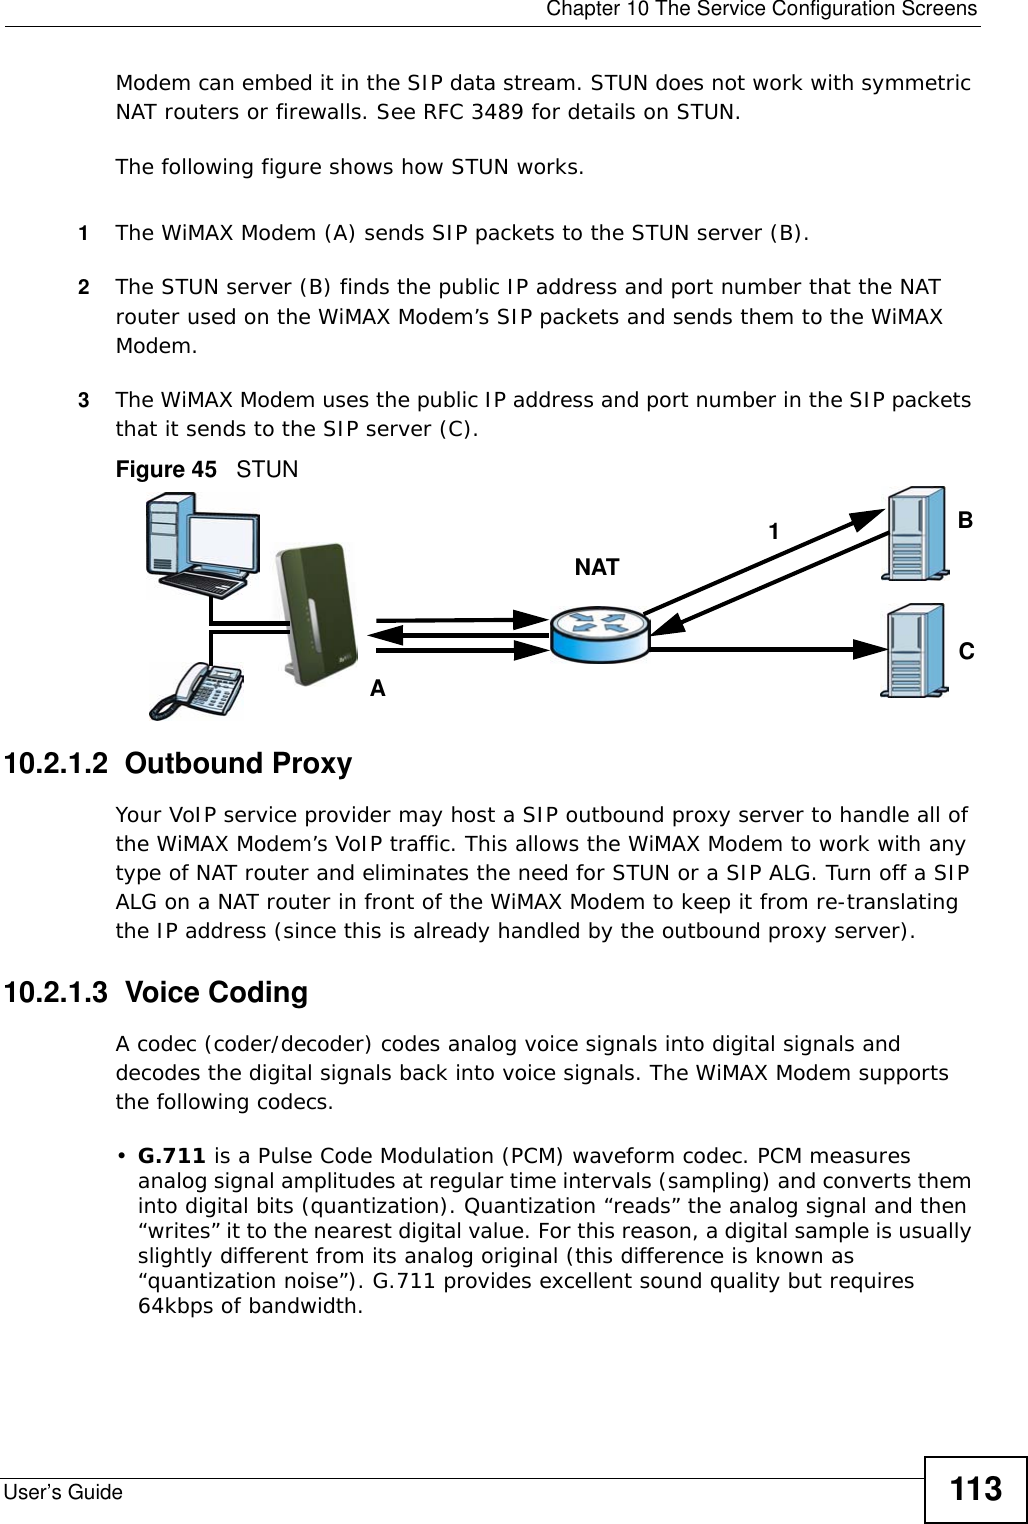
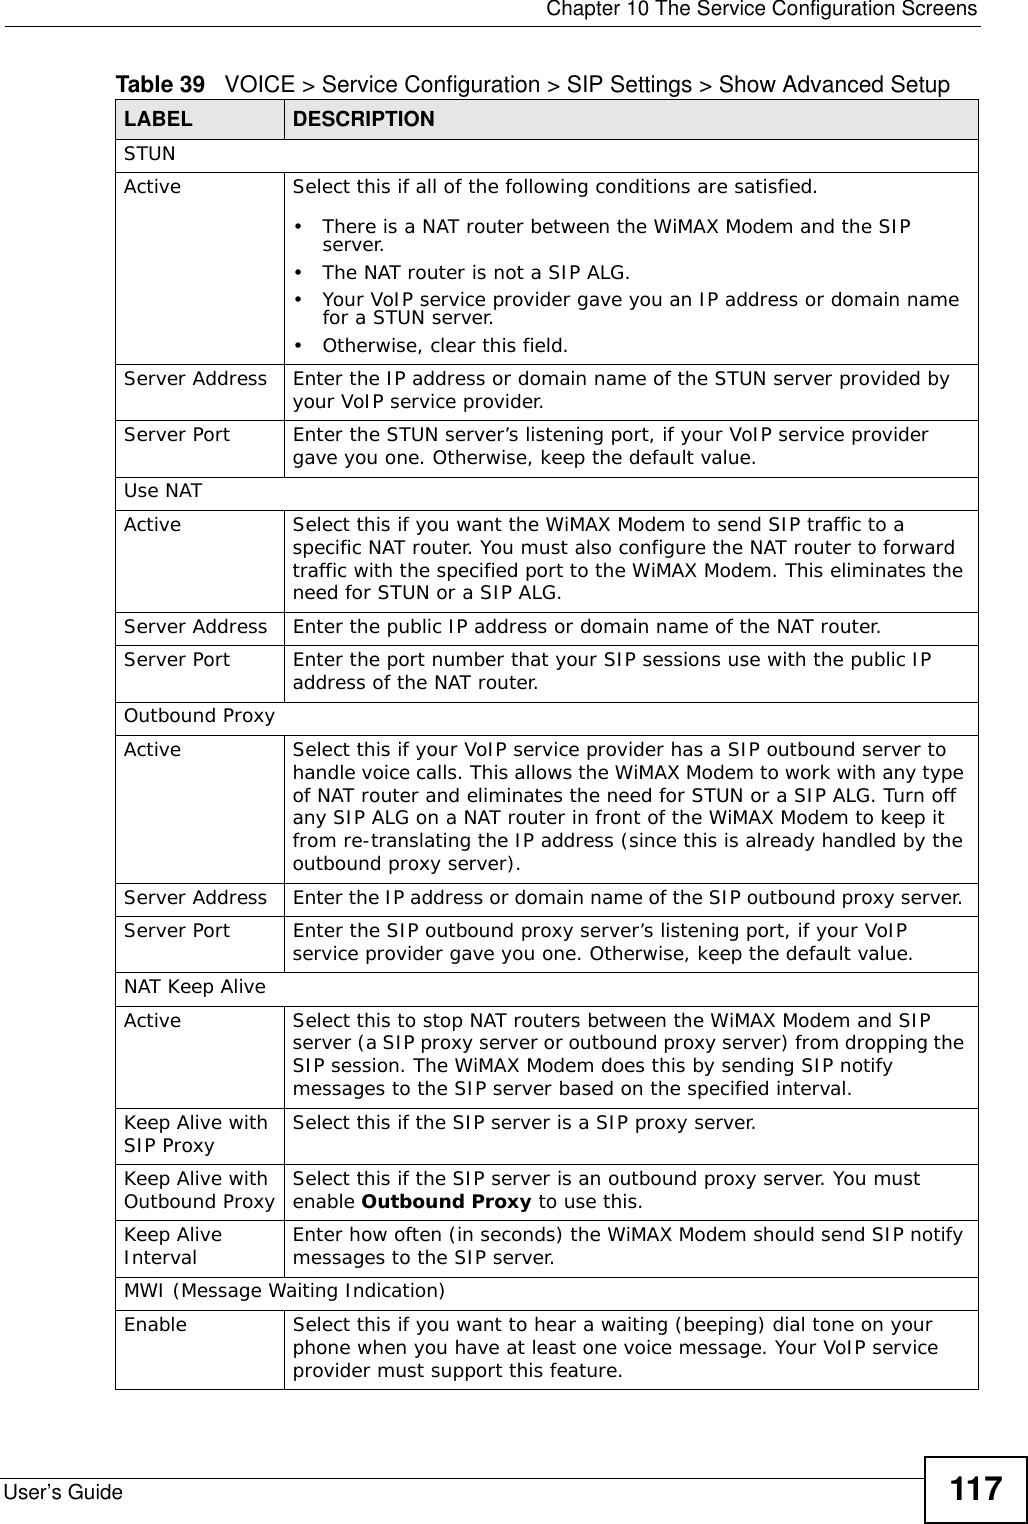
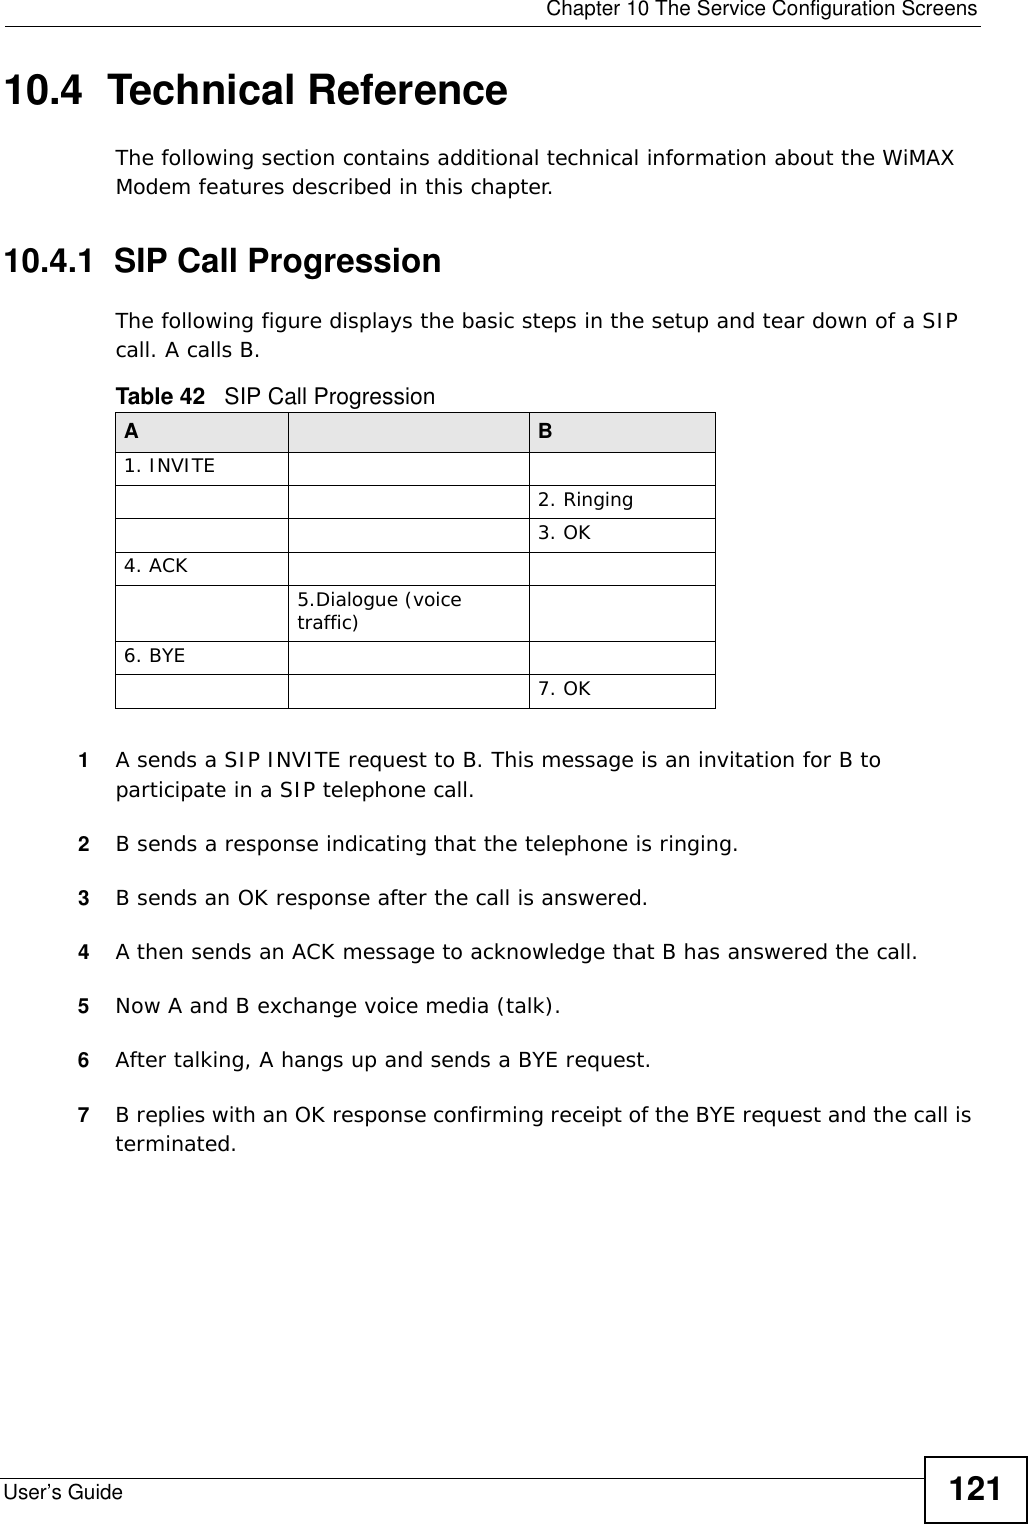
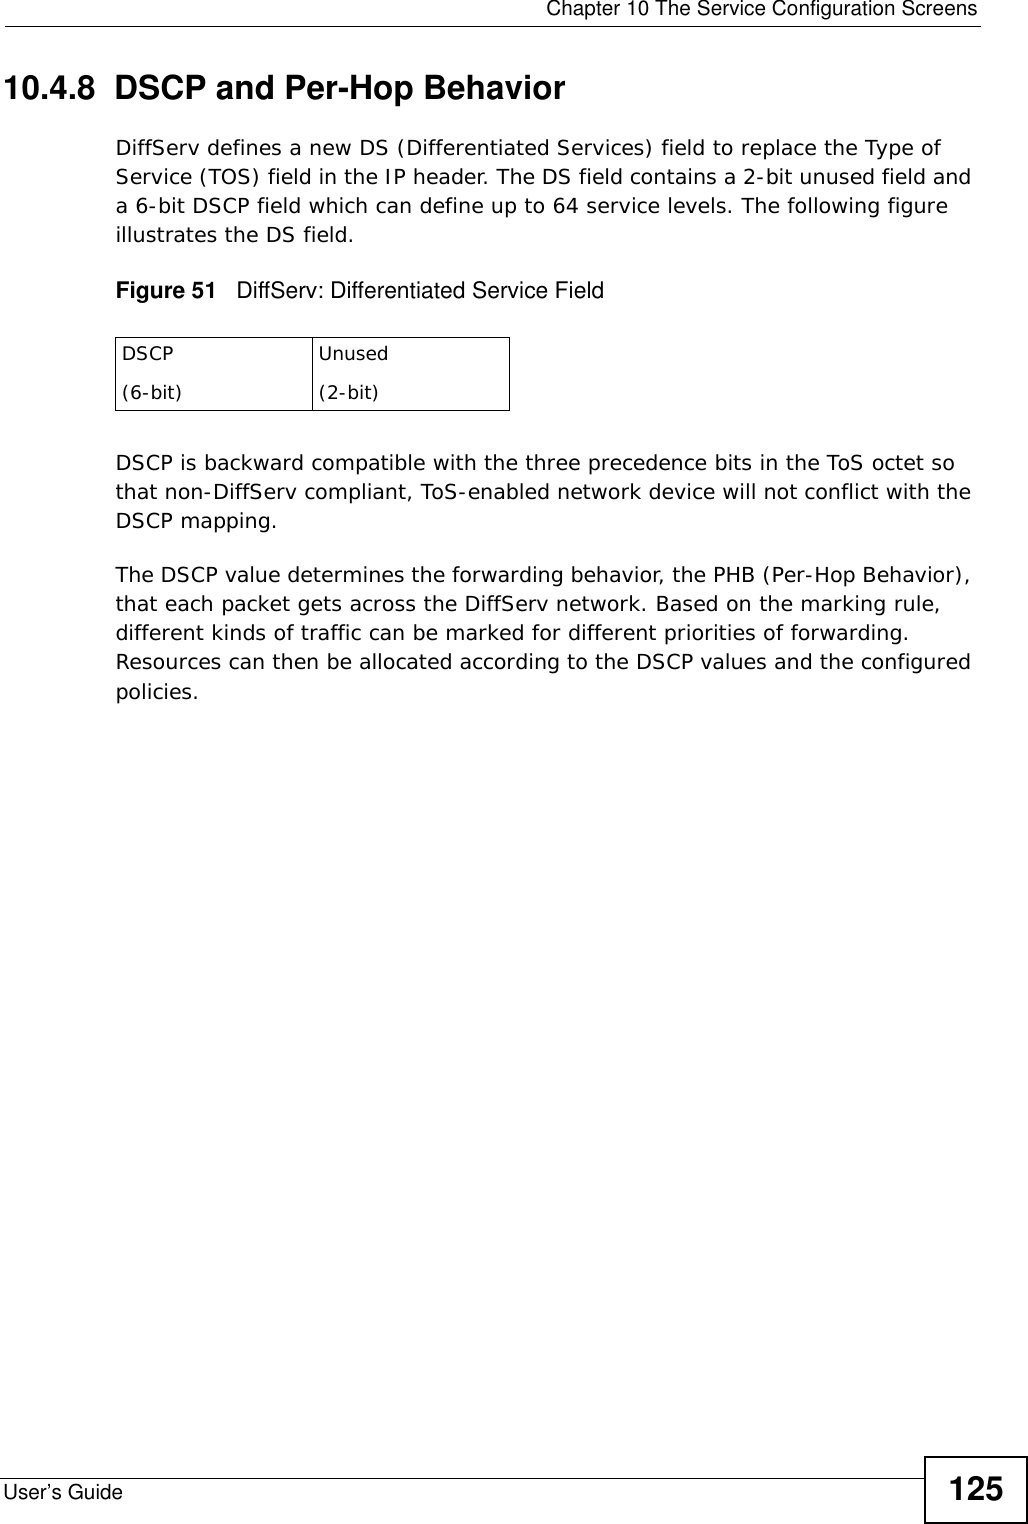
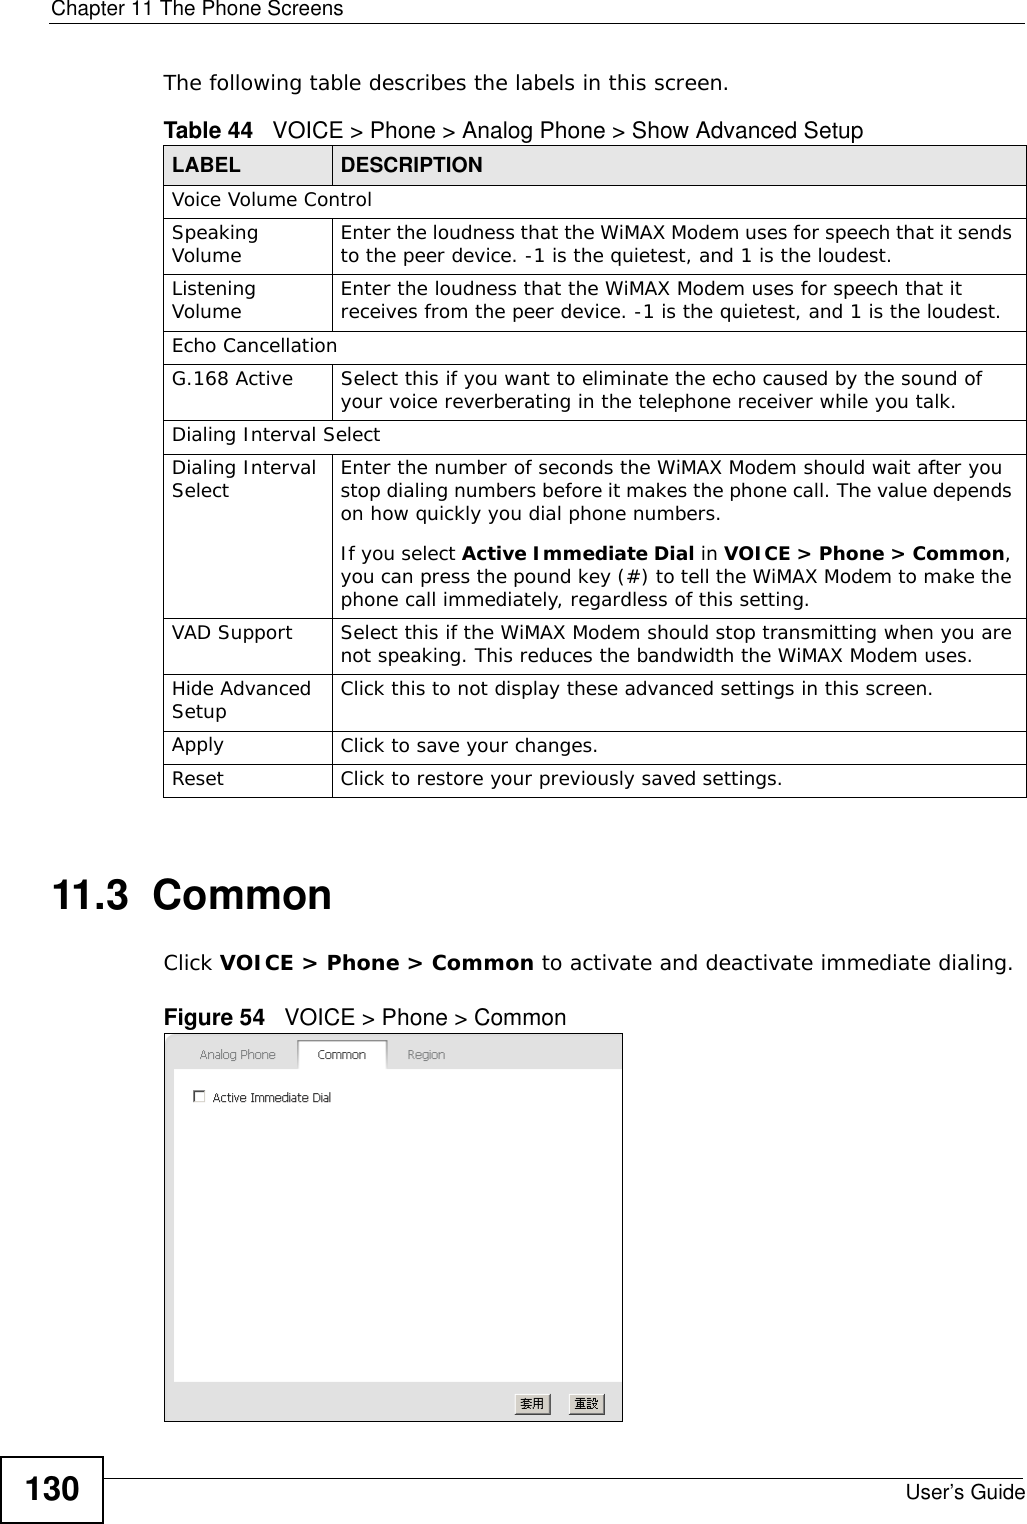
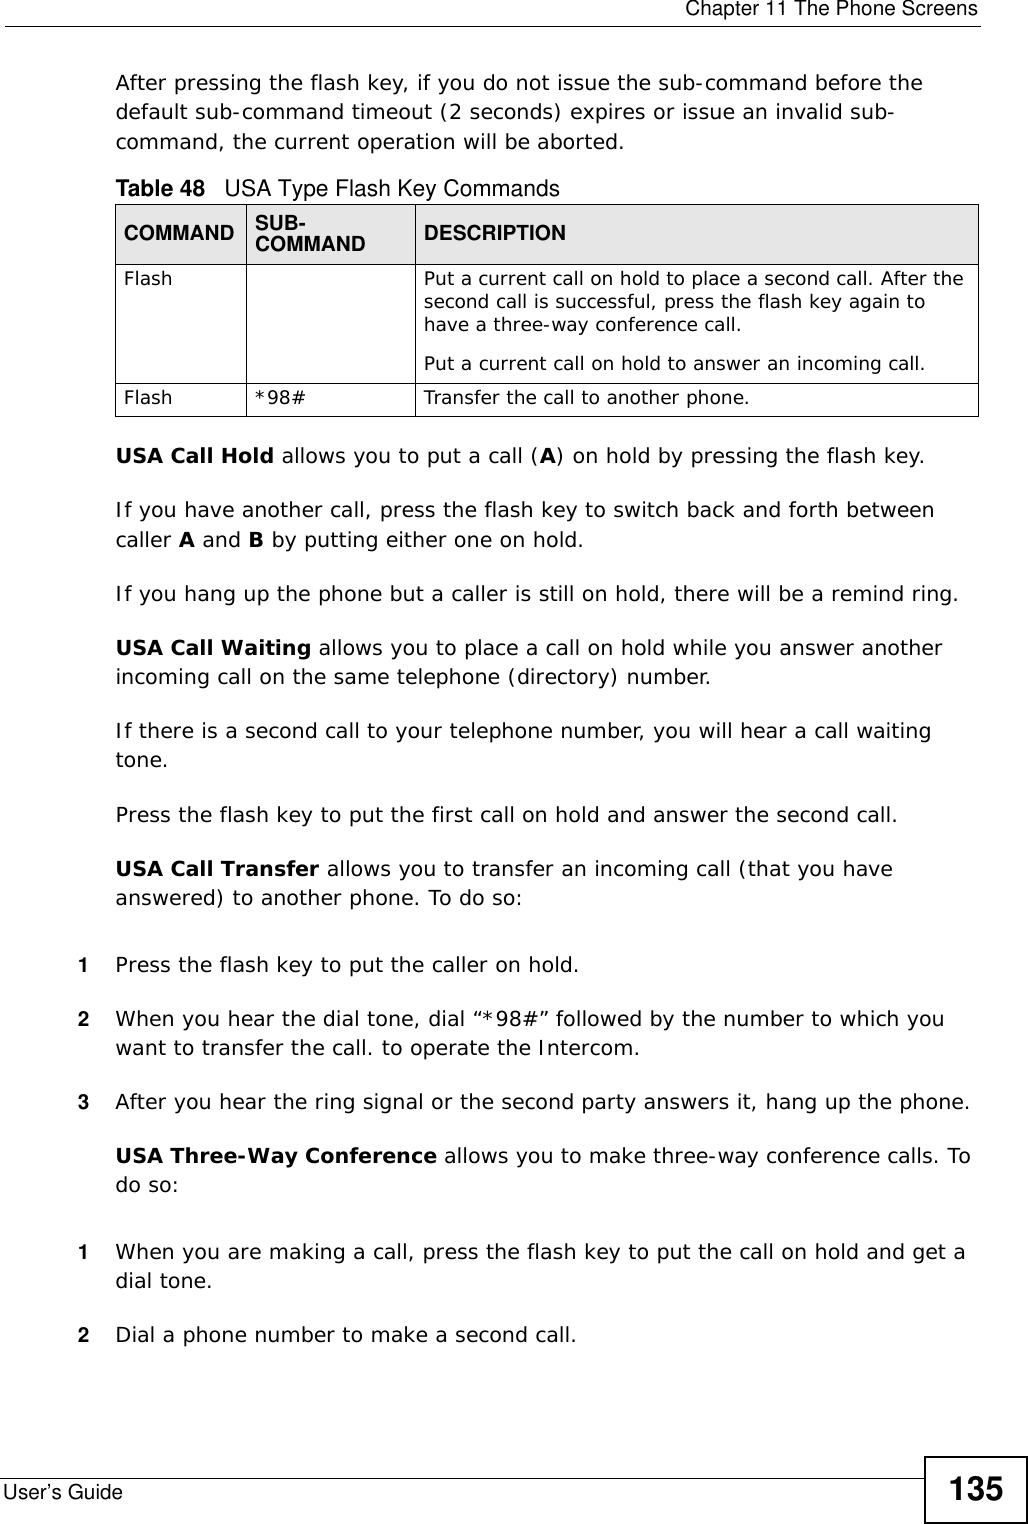
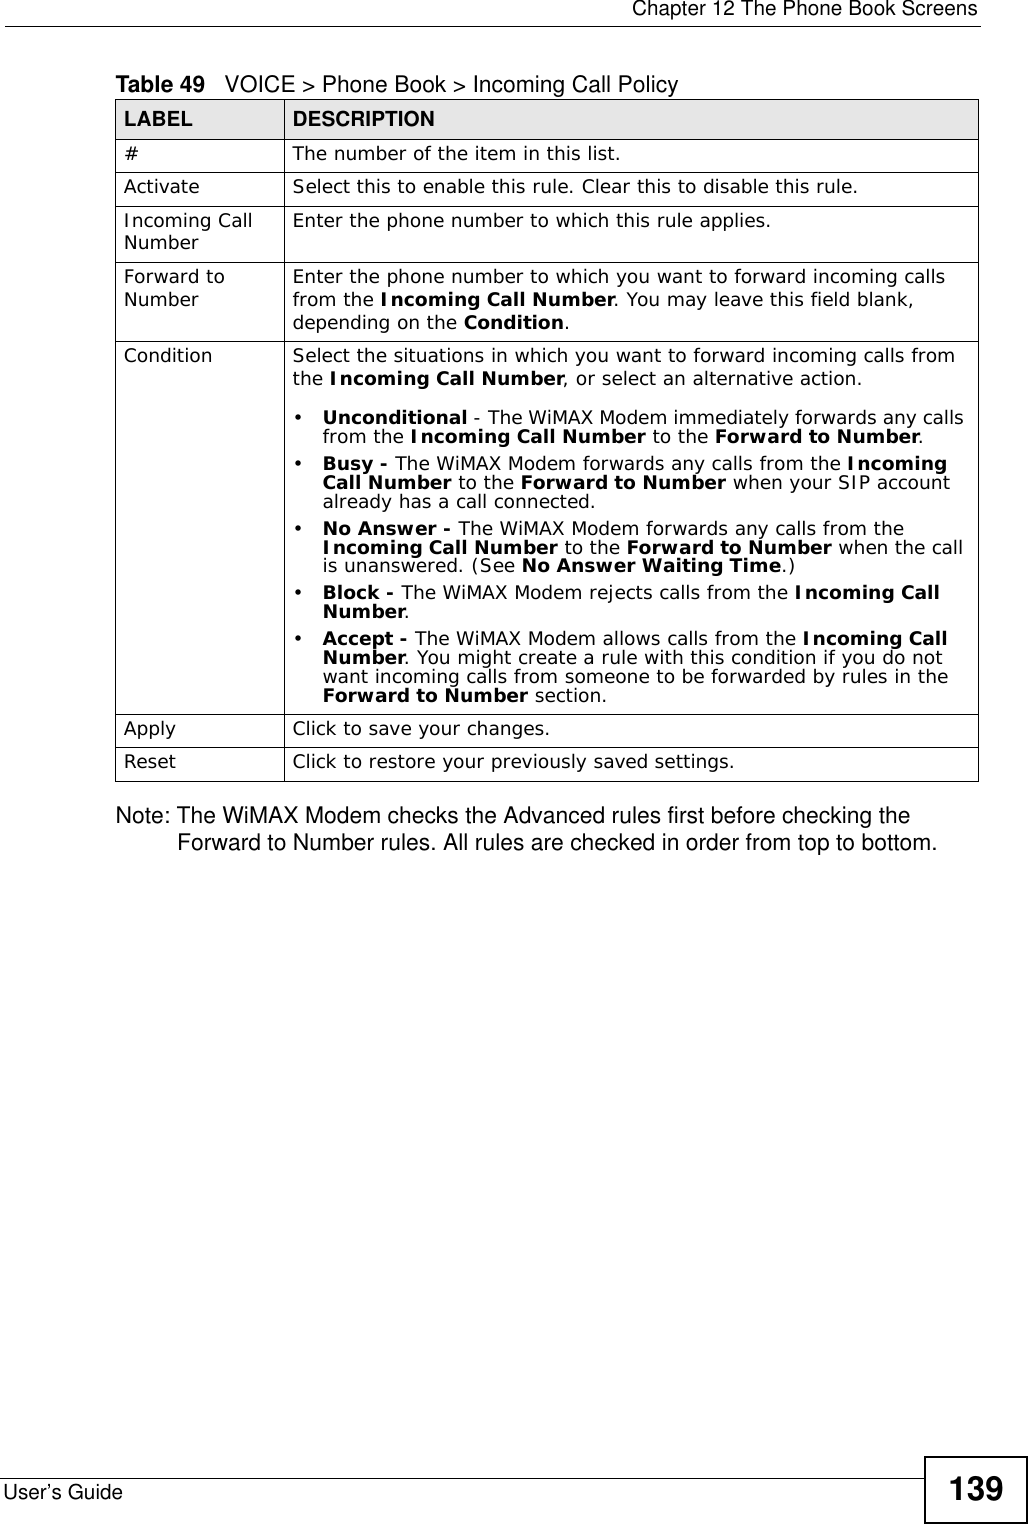
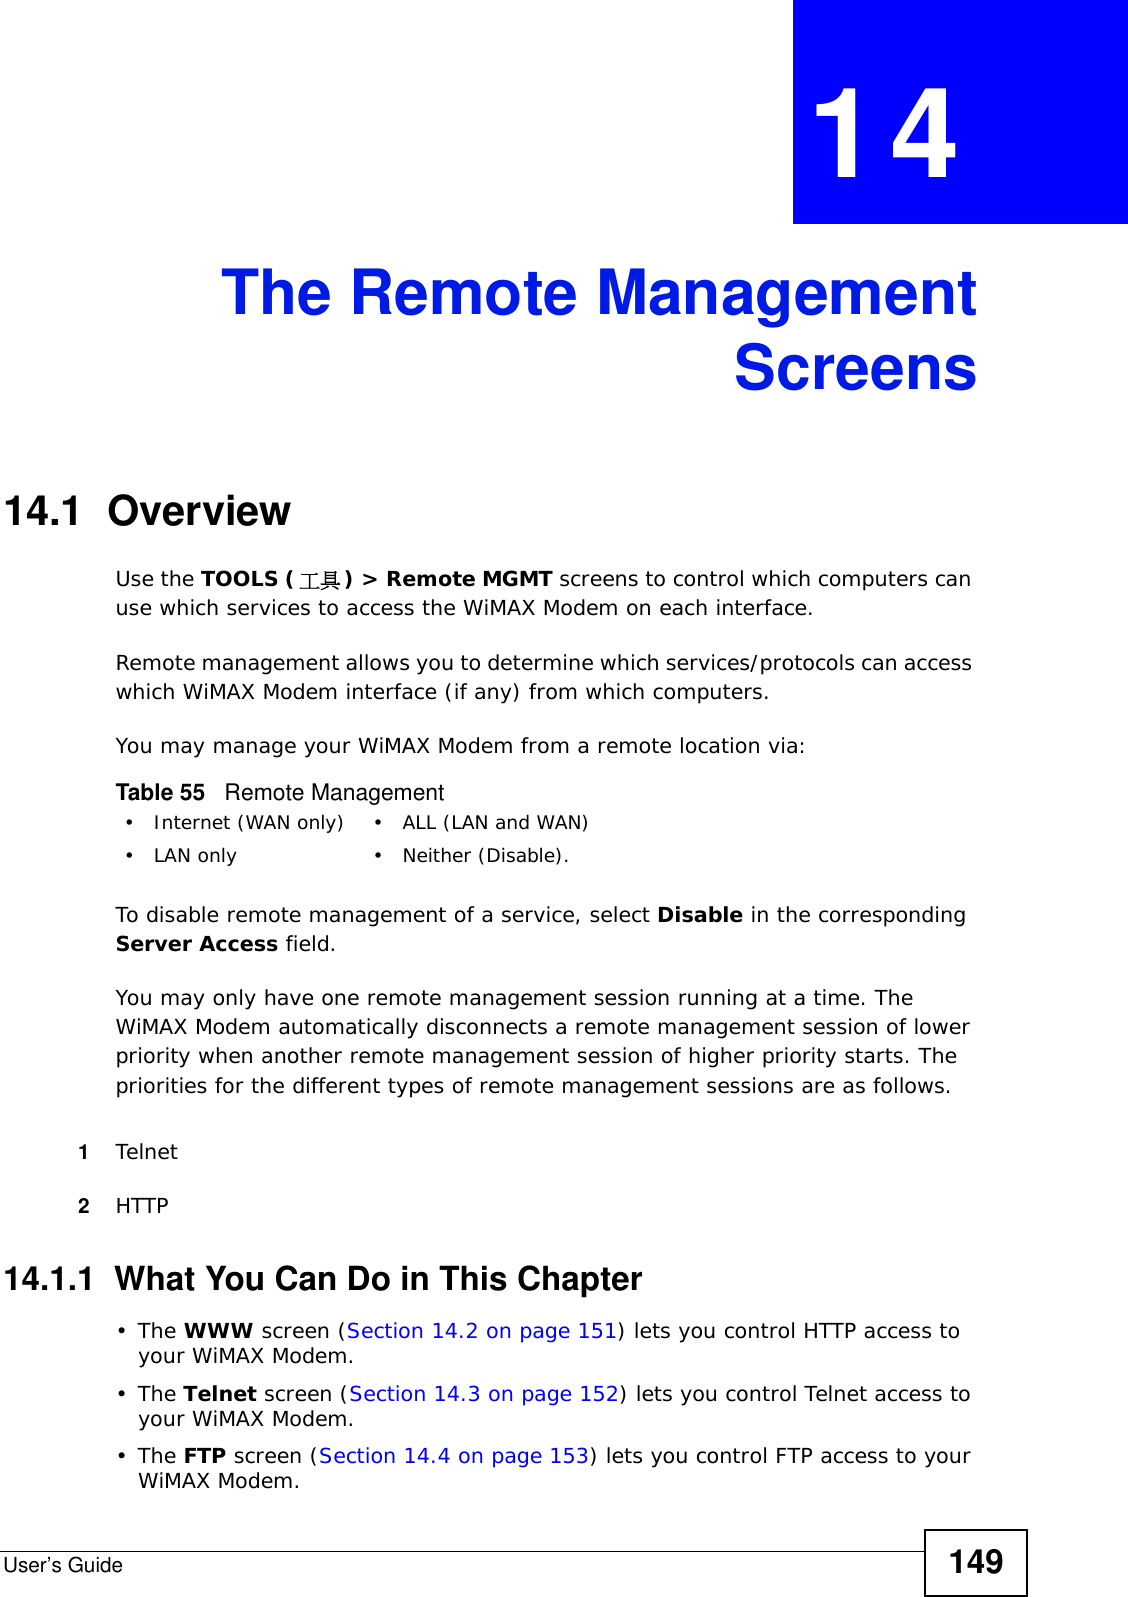
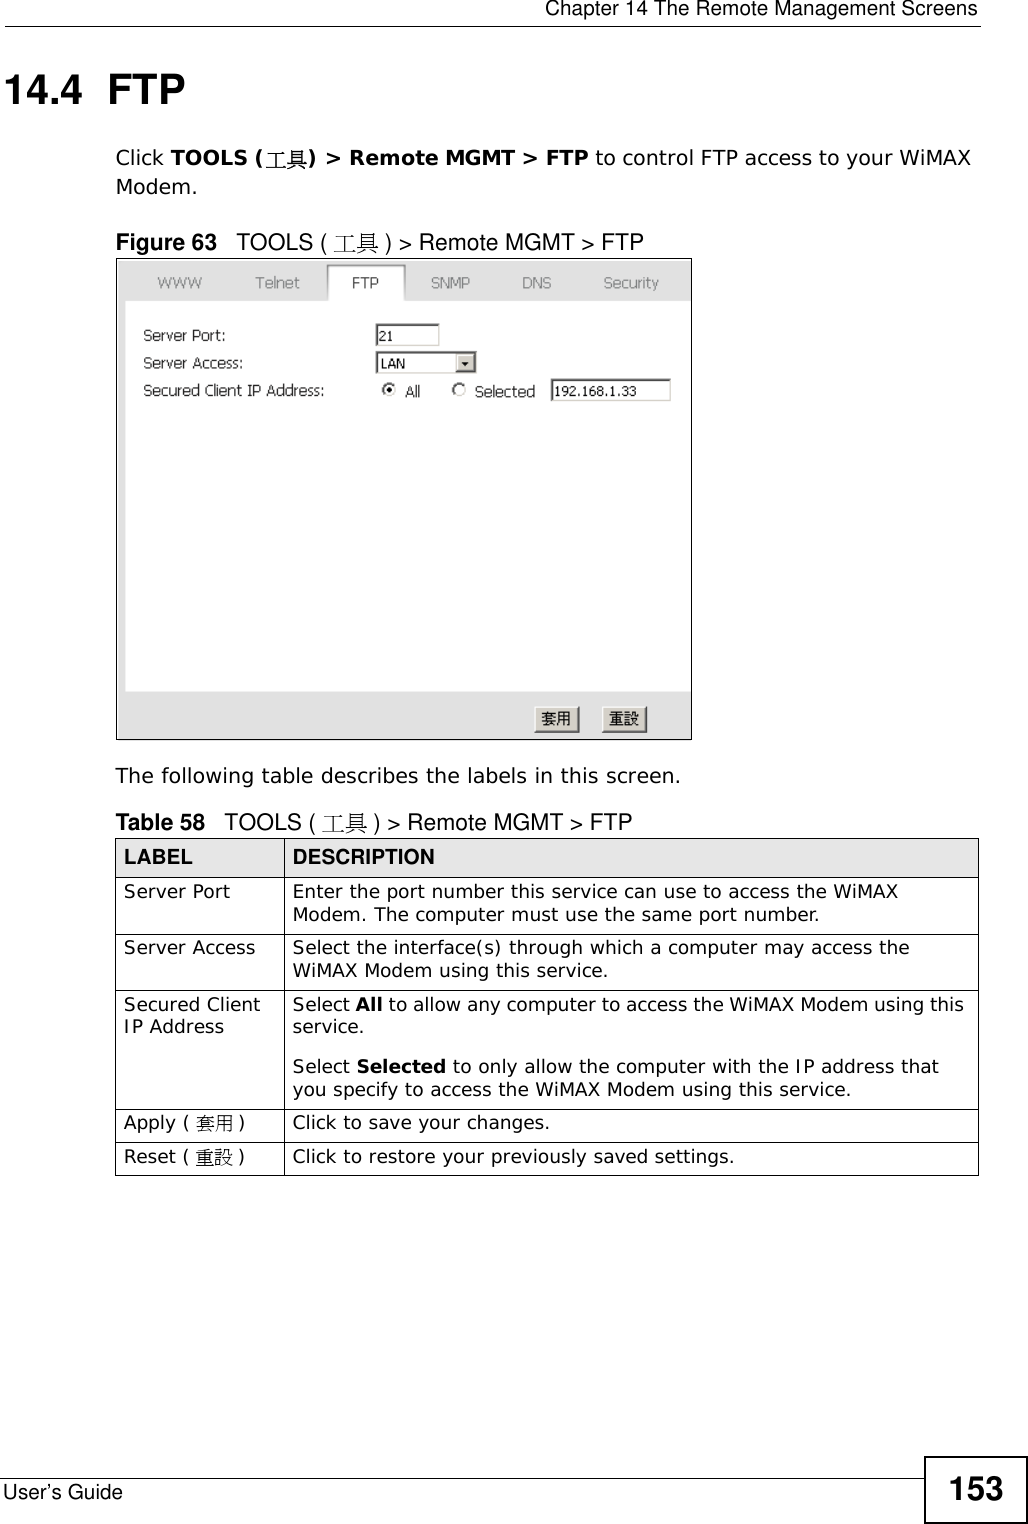
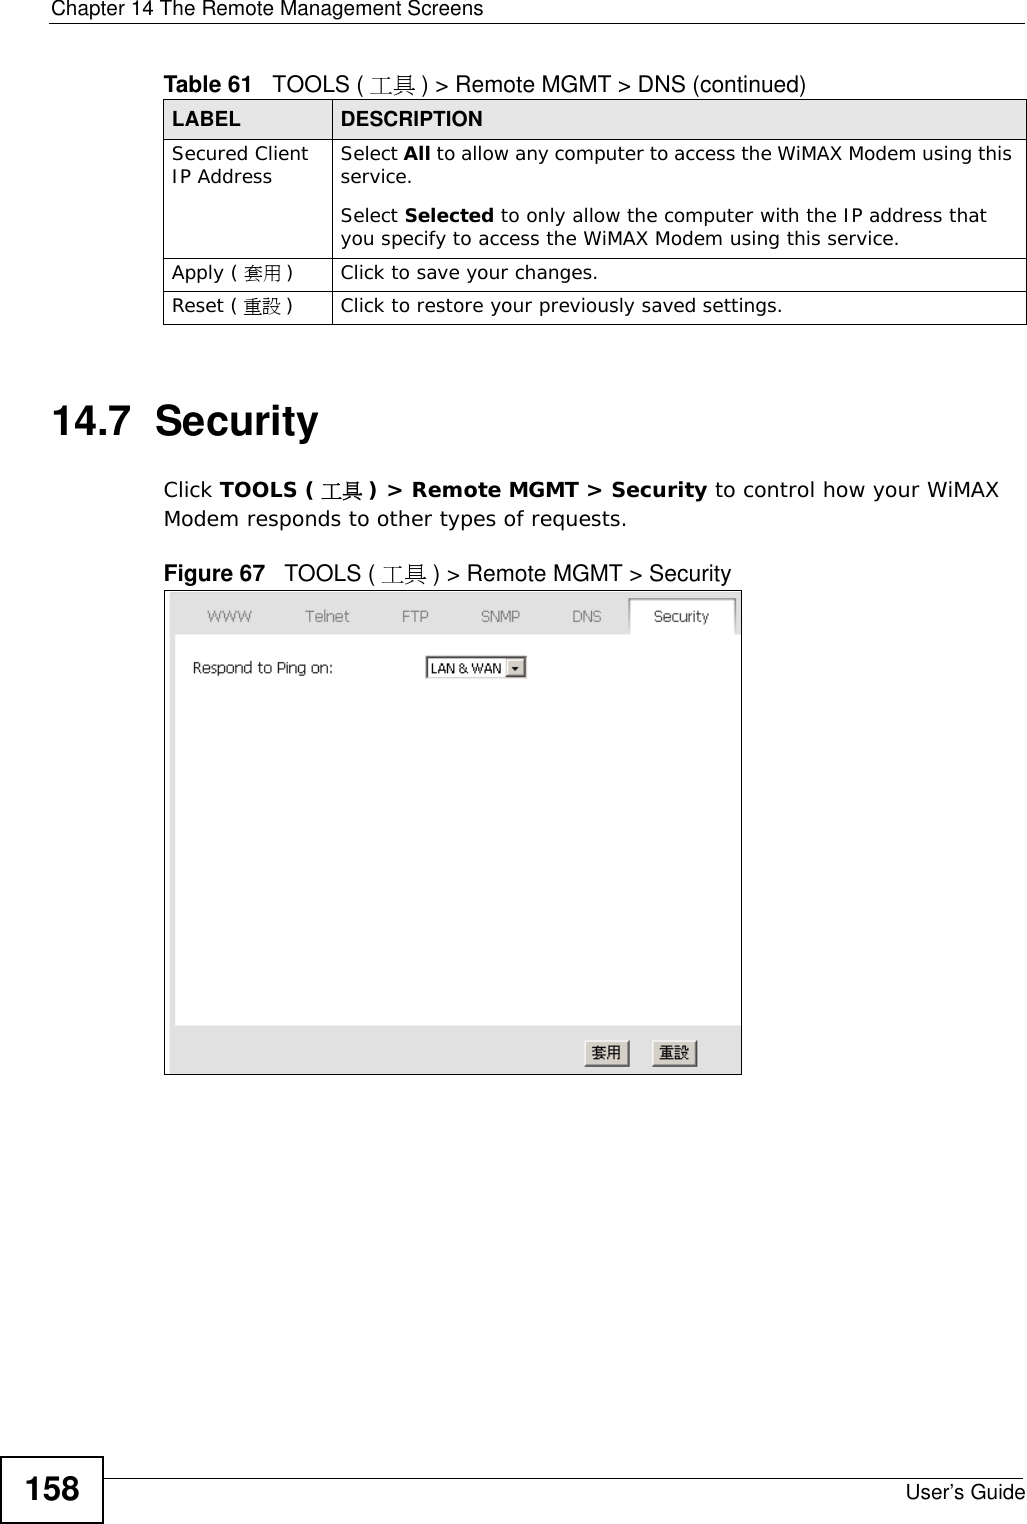
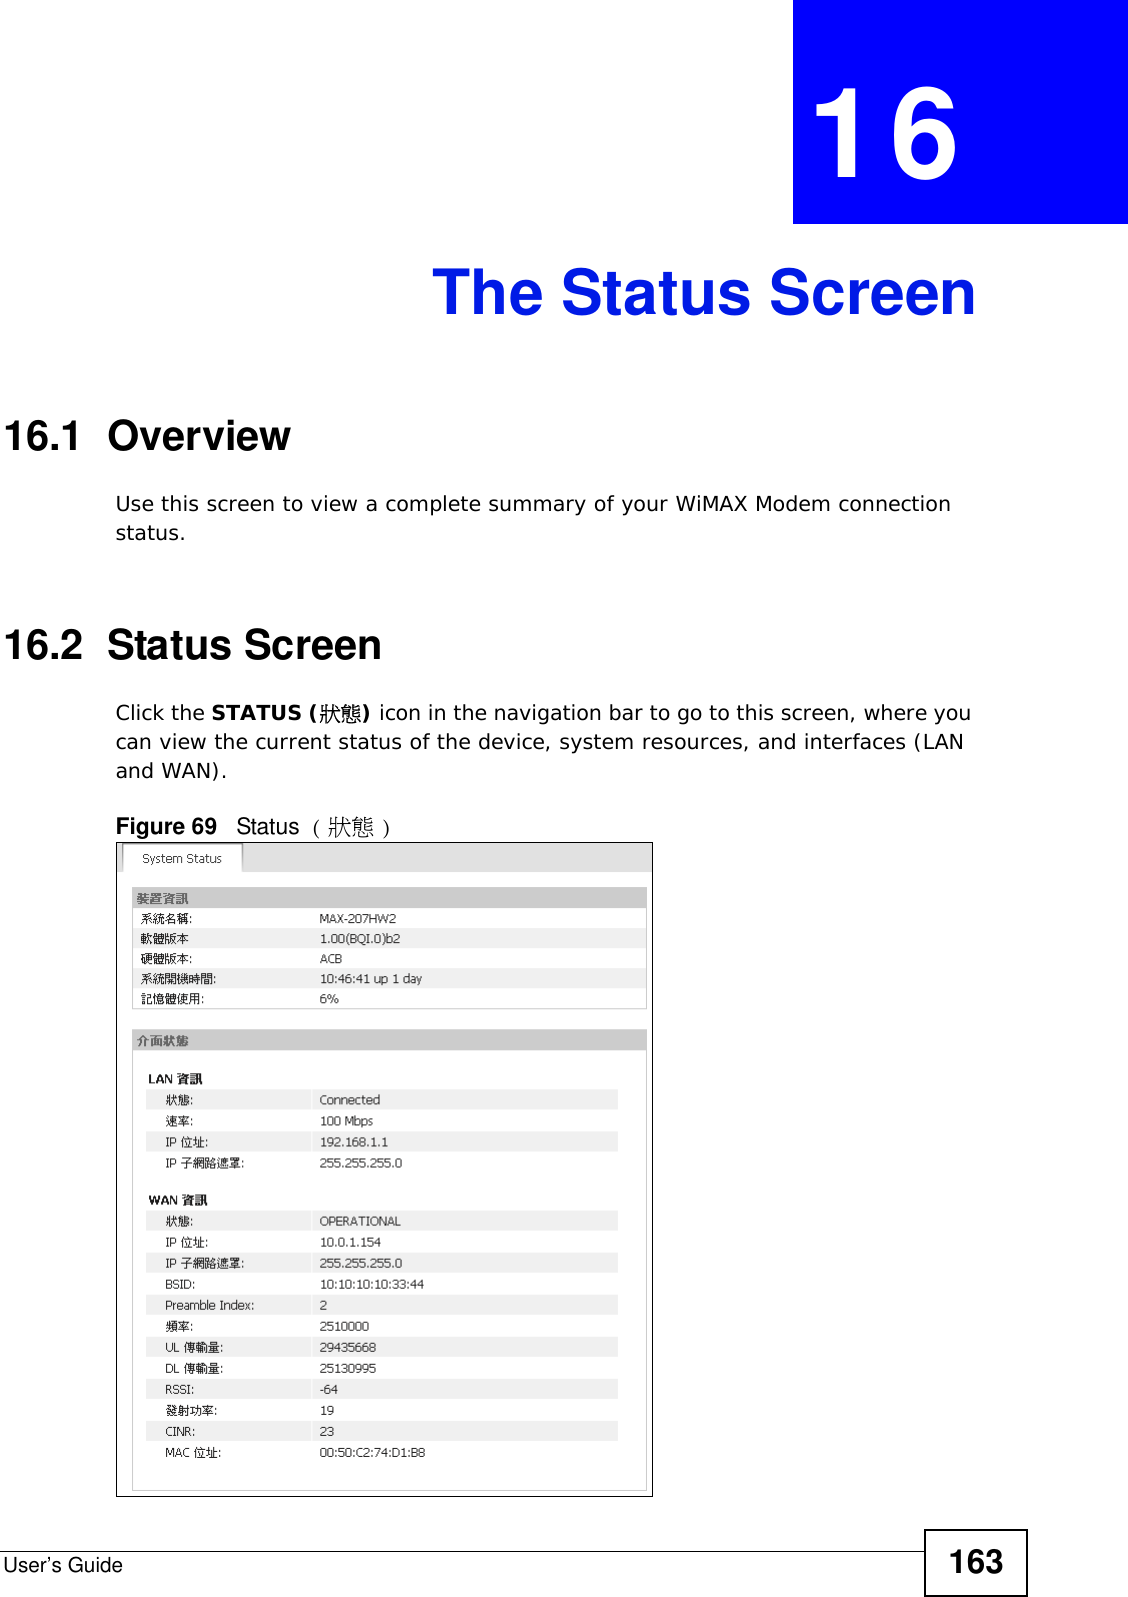
![Chapter 7 The WAN Configuration ScreensUser’s Guide86Note: It may take several minutes for the WiMAX Modem to find a connection.• The WiMAX Modem searches the DL Frequency ( 頻率 ) settings in ascending numerical order, from [1] to [9].• If you enter a 0 in a DL Frequency (頻率) field, the WiMAX Modem immediately moves on to the next DL Frequency ( 頻率 ) field.• When the WiMAX Modem connects to a base station, the values in this screen are automatically set to the base station’s frequency. The next time the WiMAX Modem searches for a connection, it searches only this frequency. If you want the WiMAX Modem to search other frequencies, enter them in the DL Frequency ( 頻率 ) fields.The following table describes some examples of DL Frequency ( 頻率 ) settings.7.3.3 Using the WiMAX Frequency ScreenIn this example, your Internet service provider has given you a list of supported frequencies: 2.51, 2.525, 2.6, and 2.625. 1In the DL Frequency [1] (頻率[1]) field, enter 2510000 (2510000 kilohertz (kHz) is equal to 2.51 gigahertz).2In the DL Frequency [2] (頻率 [2]) field, enter 2525000.3In the DL Frequency [3] (頻率[3]) field, enter 2600000.4In the DL Frequency [4] (頻率[4]) field, enter 2625000.Leave the rest of the DL Frequency ( 頻率 ) fields at zero. Table 28 DL Frequency Example SettingsEXAMPLE 1 EXAMPLE 2DL Frequency [1] (頻率 [1]): 2500000 2500000DL Frequency [2] (頻率 [2]): 2550000 2550000DL Frequency [3] (頻率 [3]): 0 2600000DL Frequency [4] (頻率 [4]): 00The WiMAX Modem searches at 2500000 kHz, and then searches at 2550000 kHz if it has not found a connection.The WiMAX Modem searches at 2500000 kHz and then at 2550000 kHz if it has not found an available connection. If it still does not find an available connection, it searches at 2600000 kHz.](https://usermanual.wiki/ZyXEL-Communications/MAX207HW2.Manual-1/User-Guide-1139778-Page-85.png)
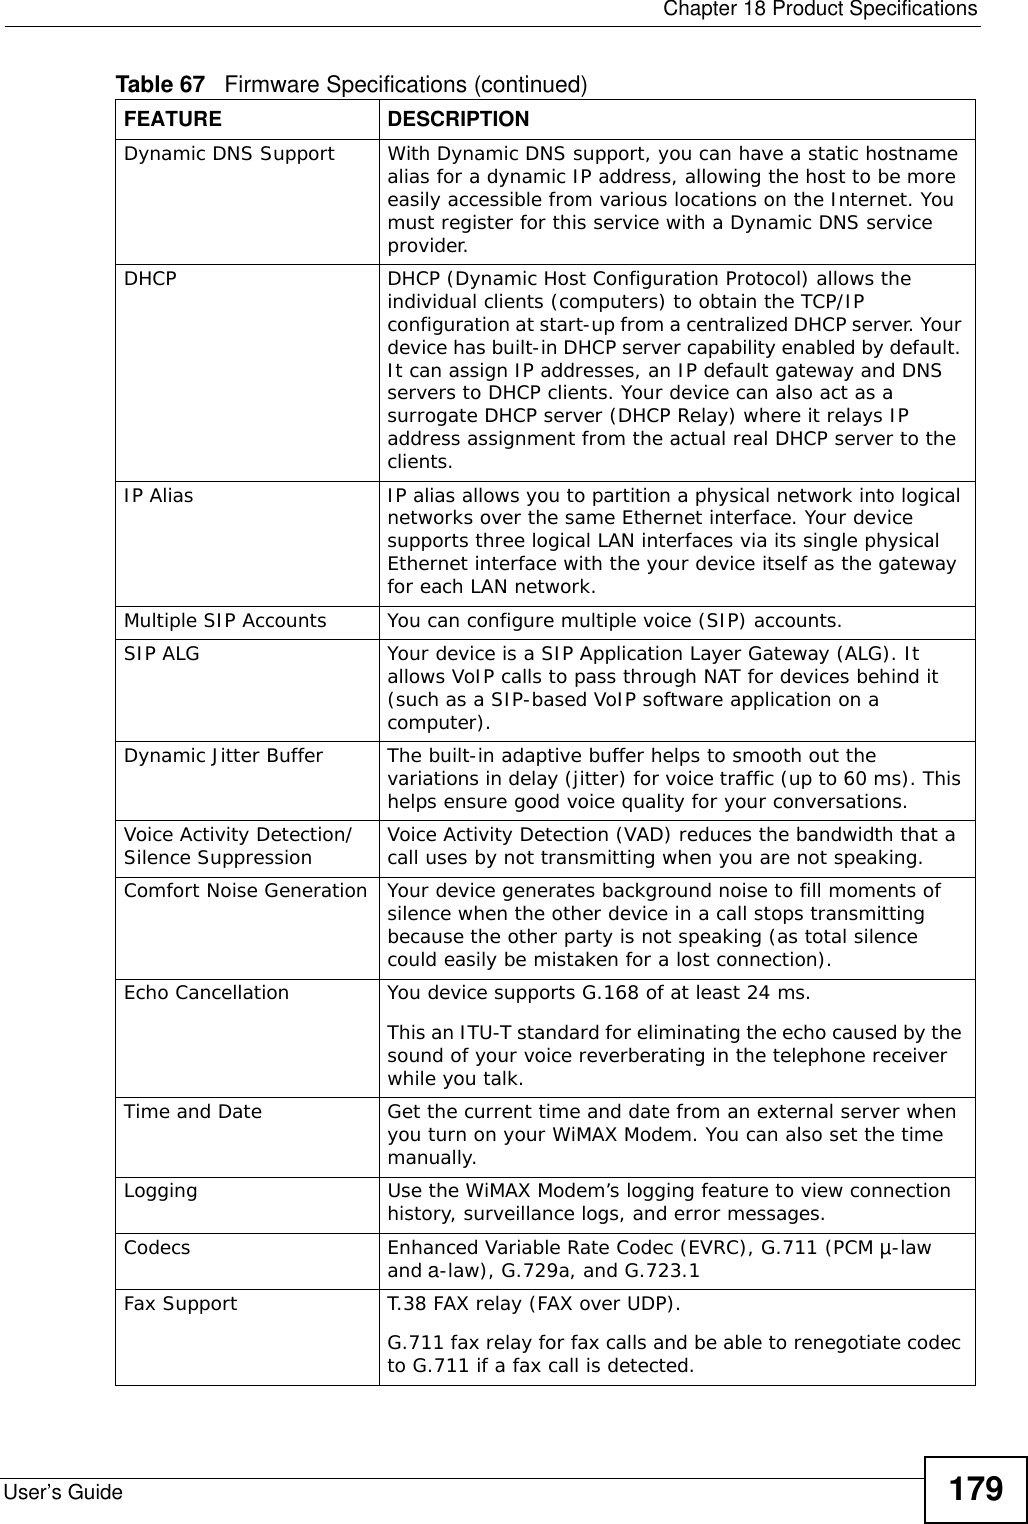
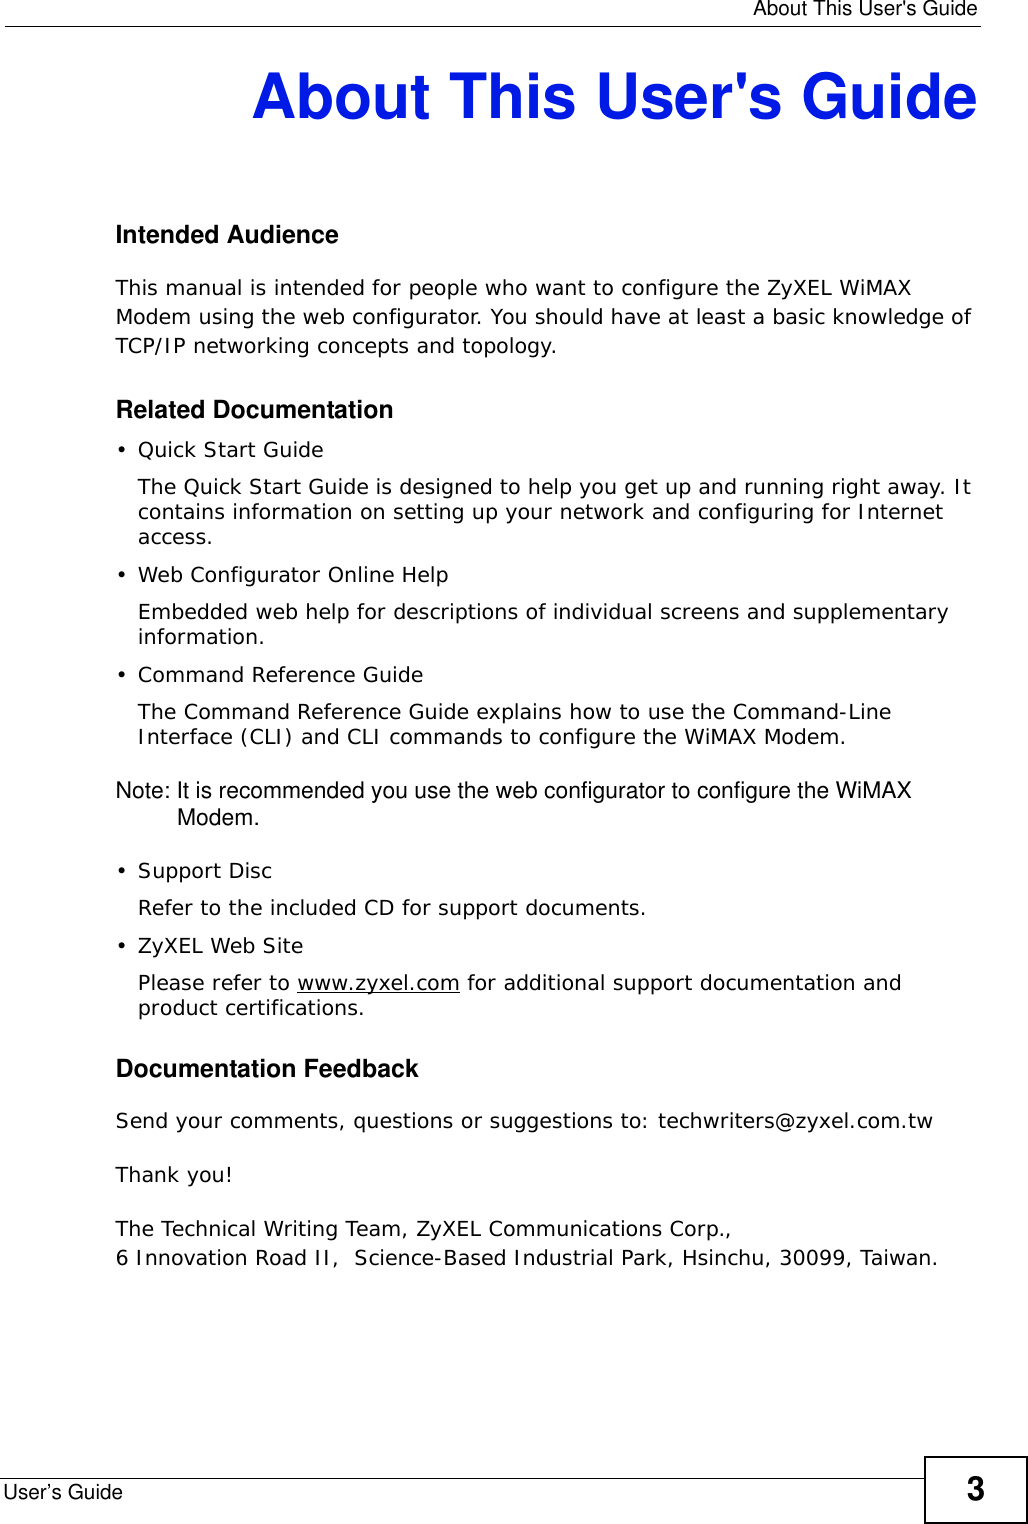
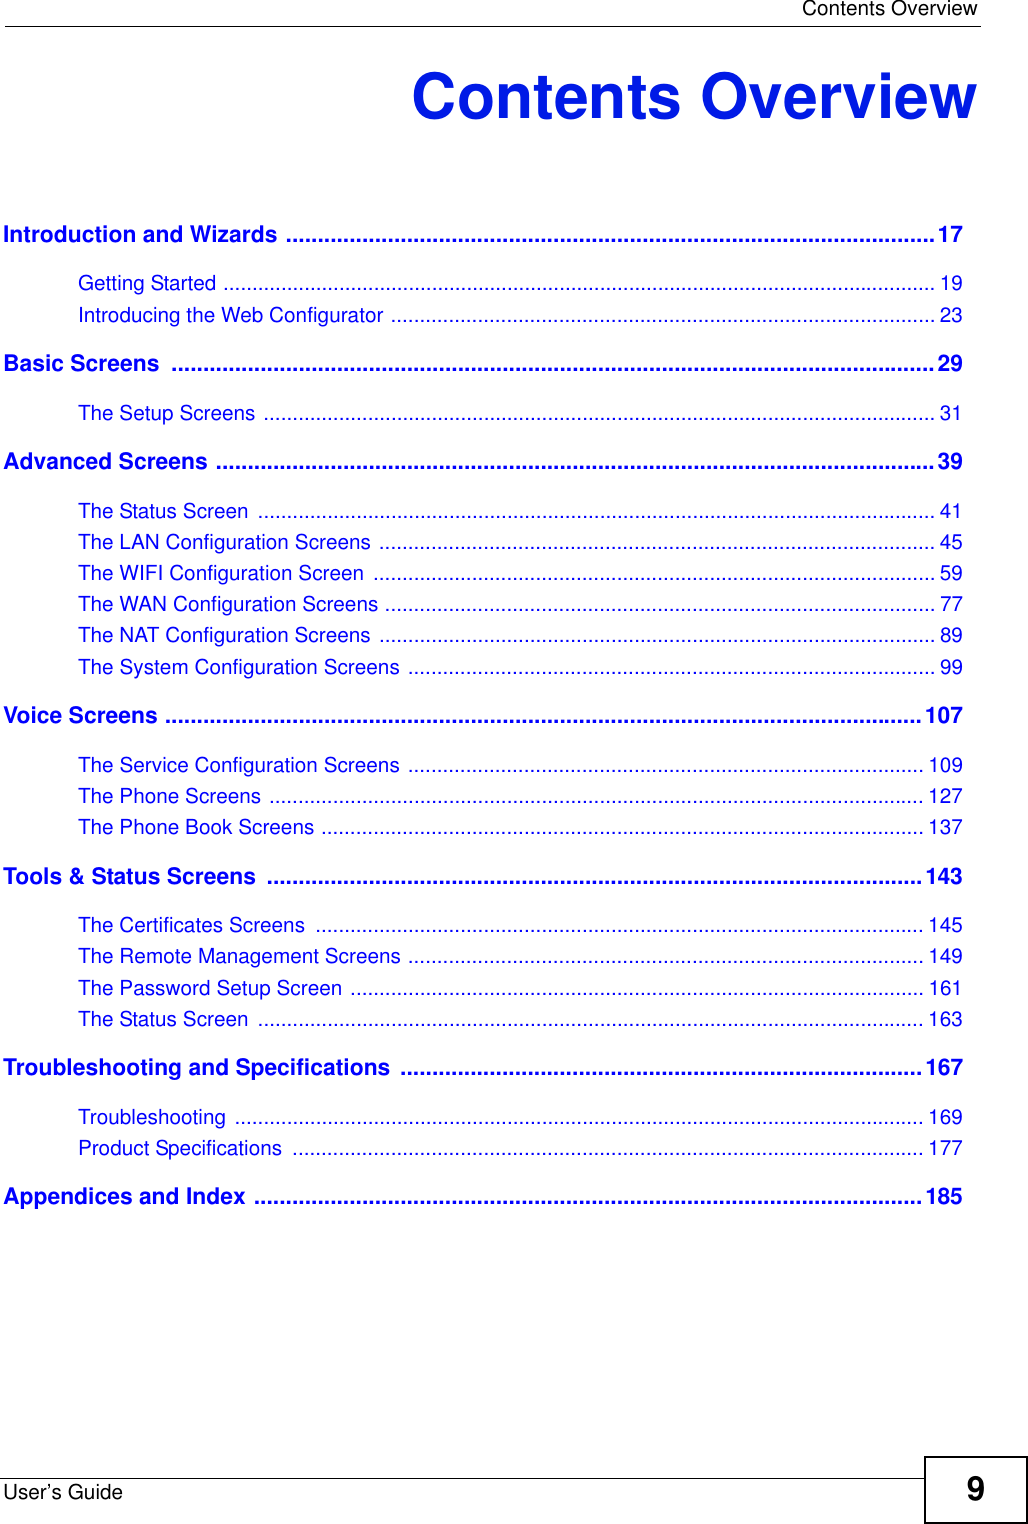
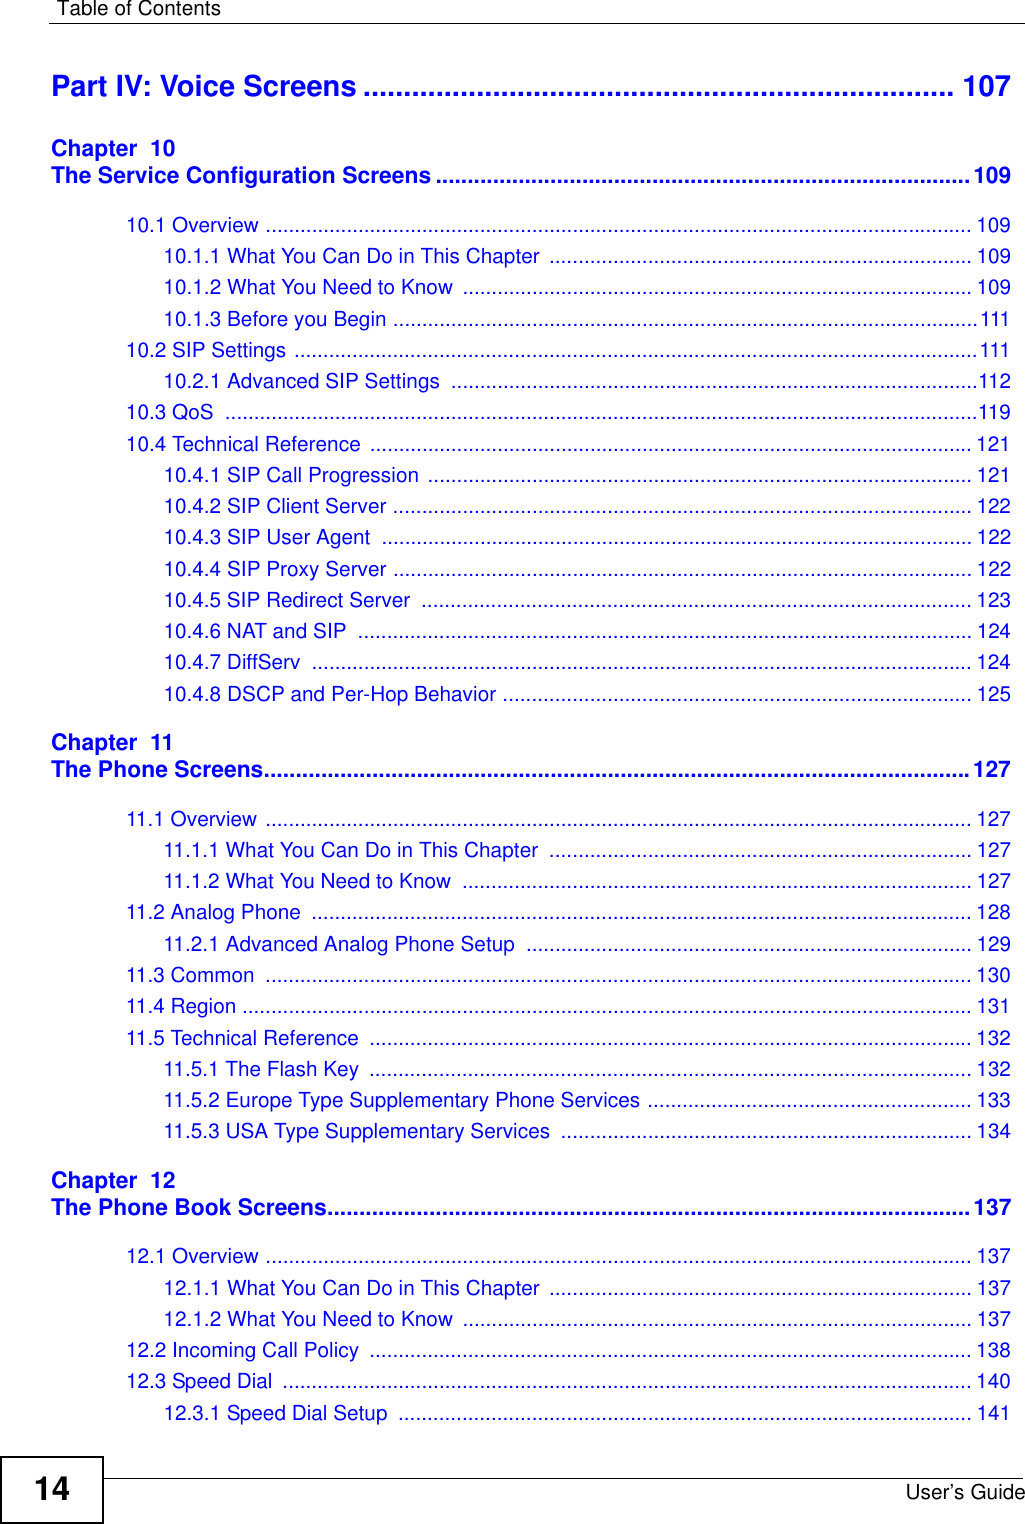
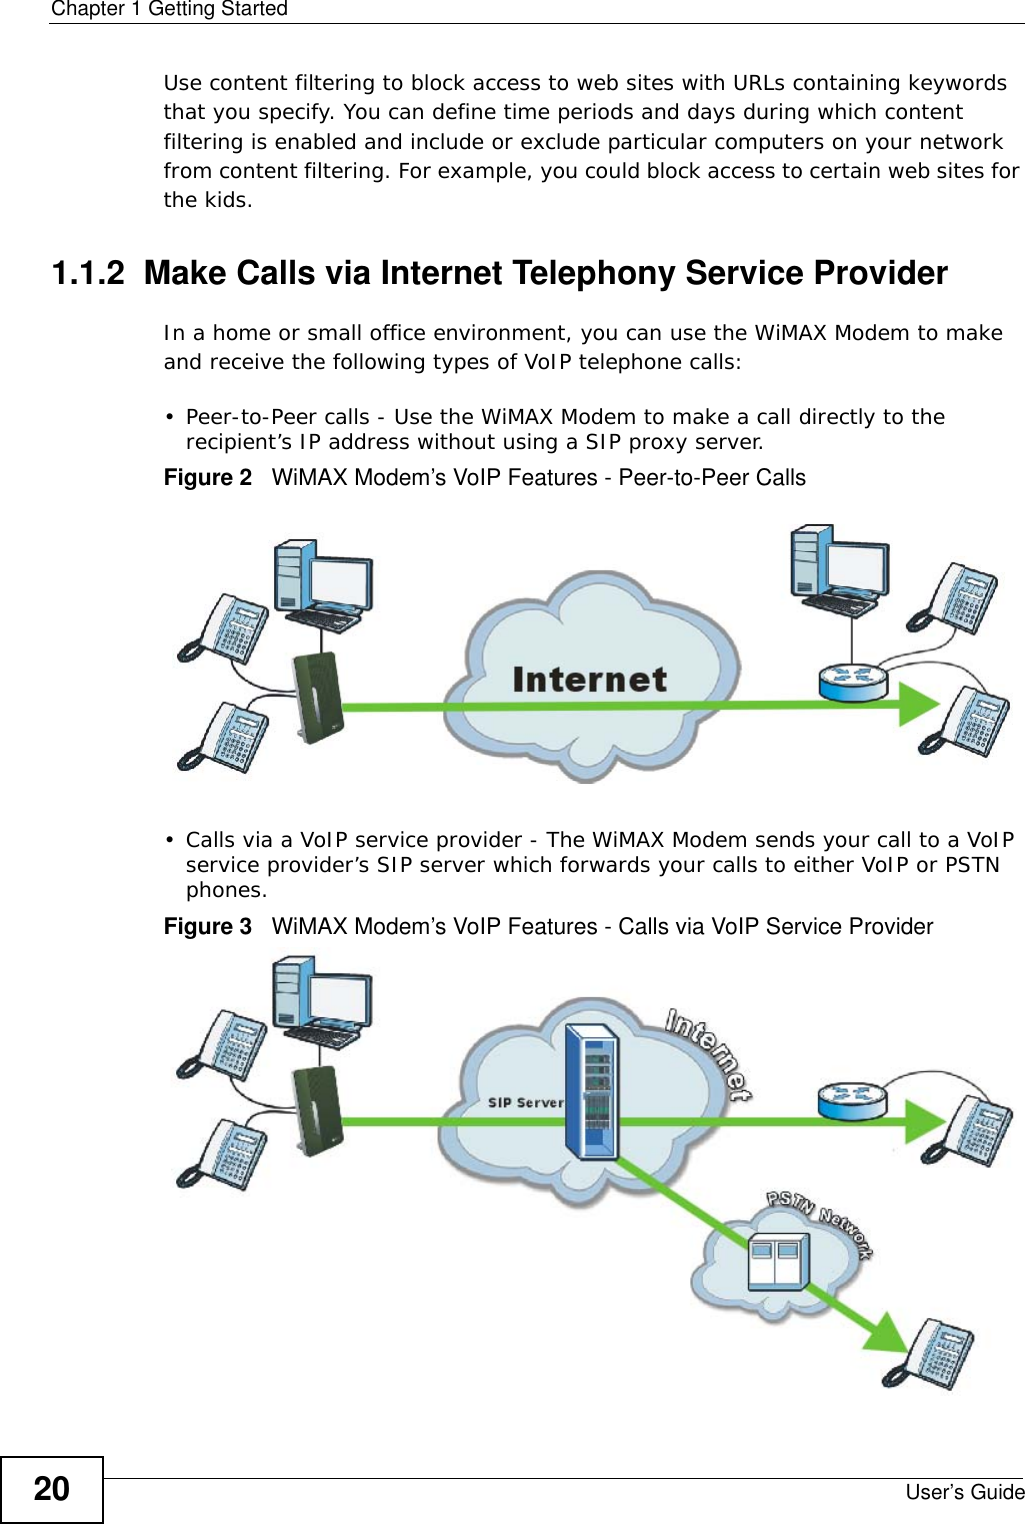
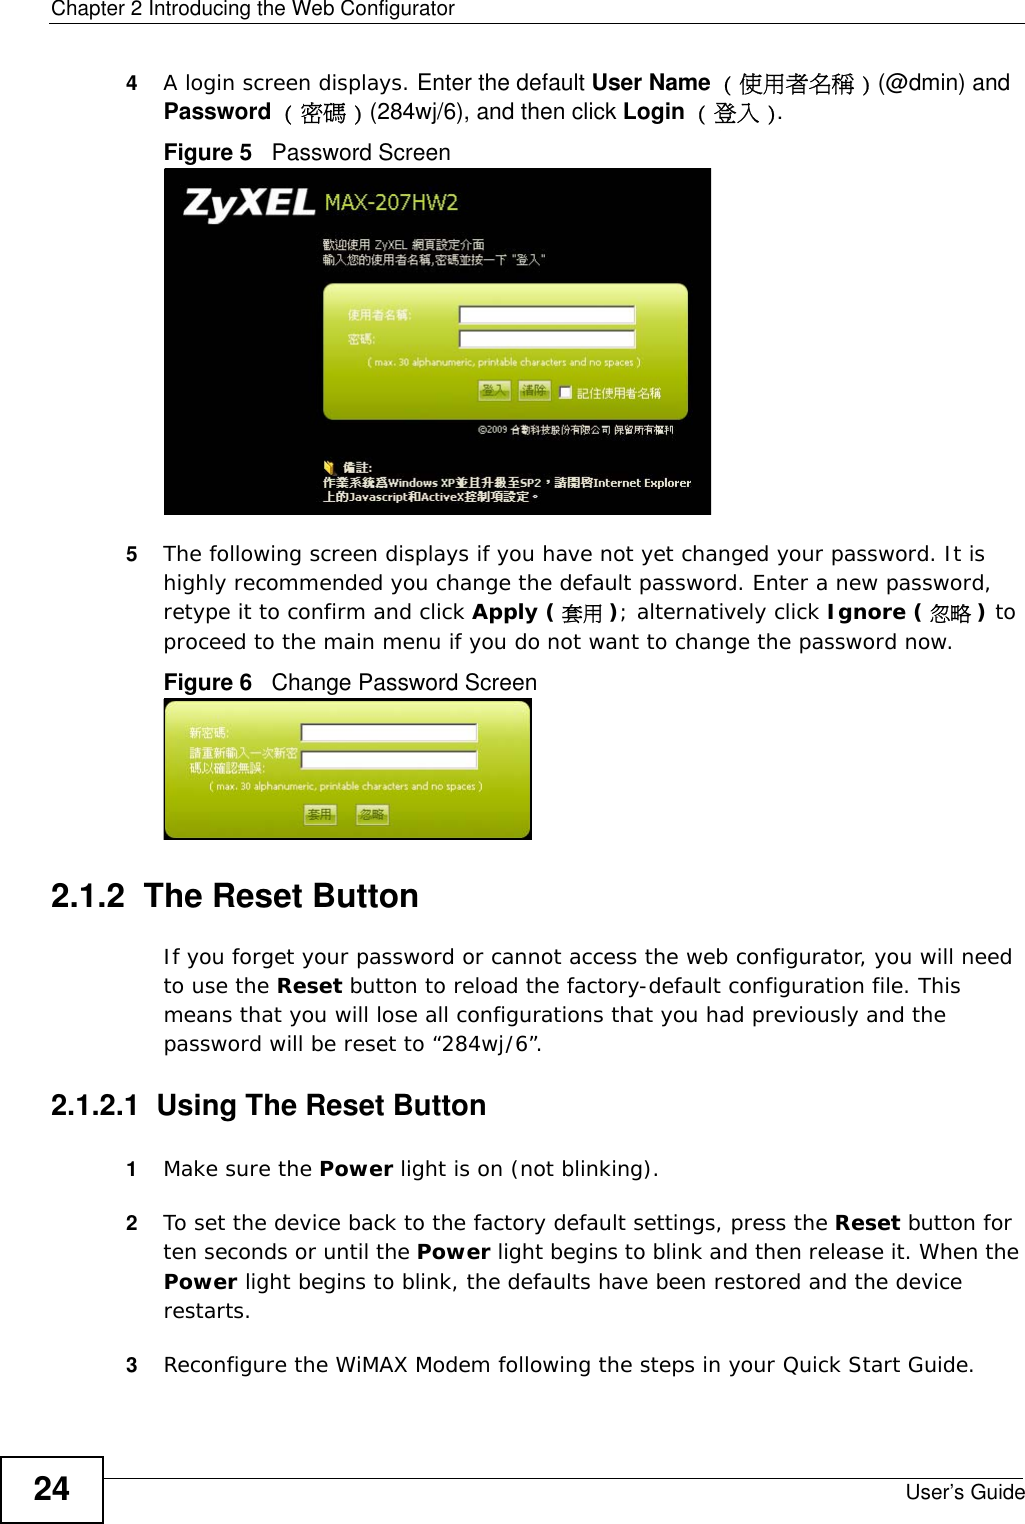
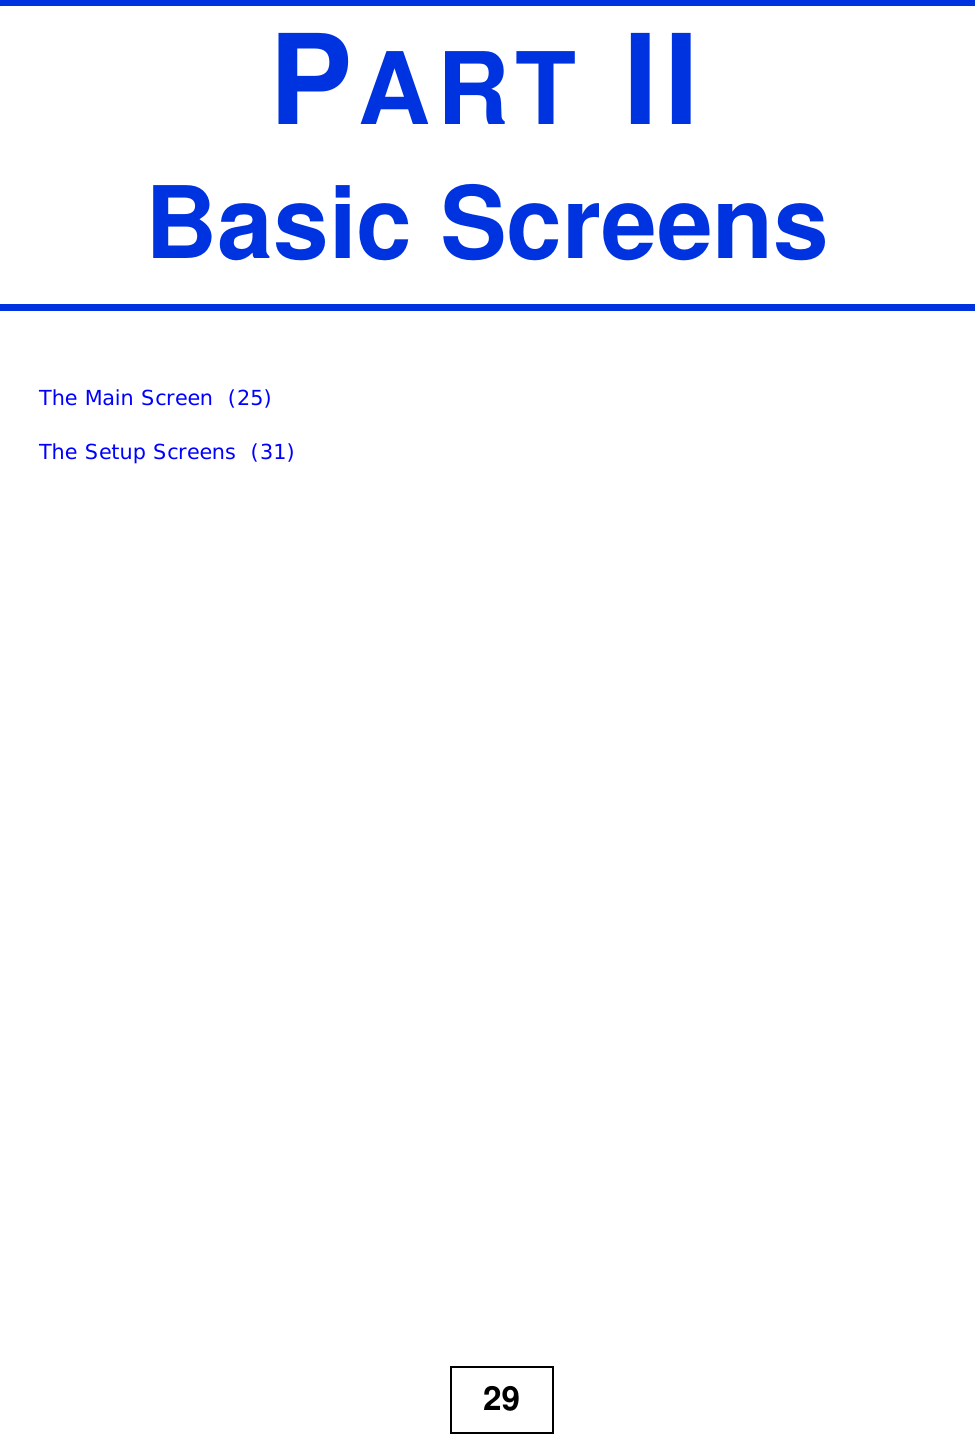
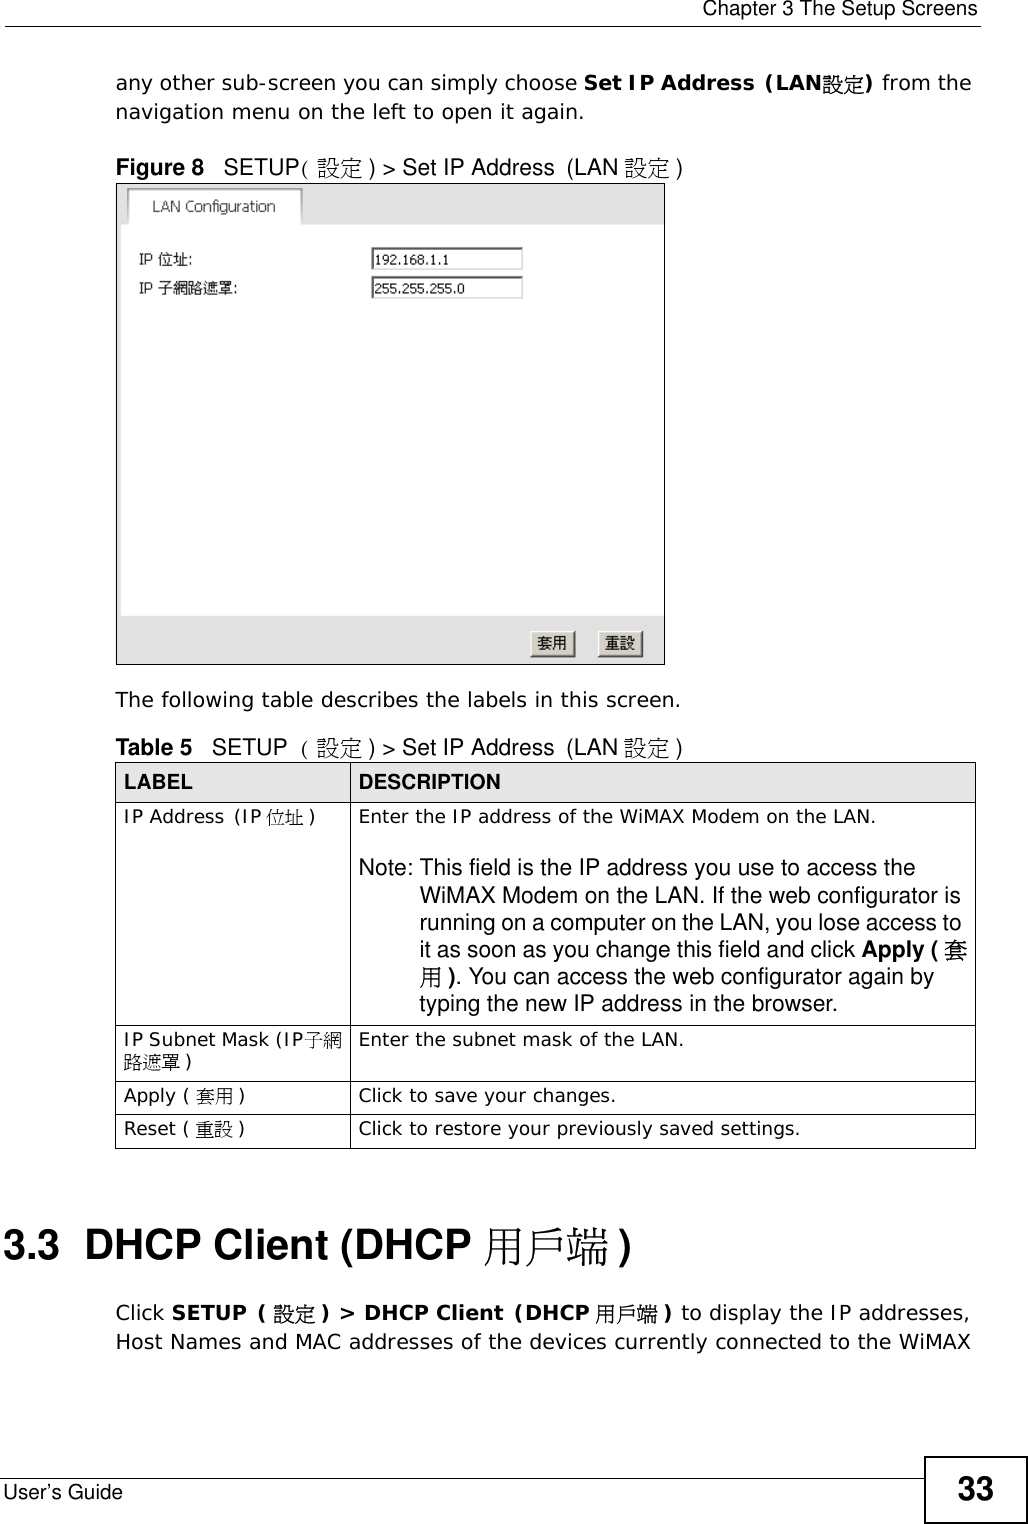
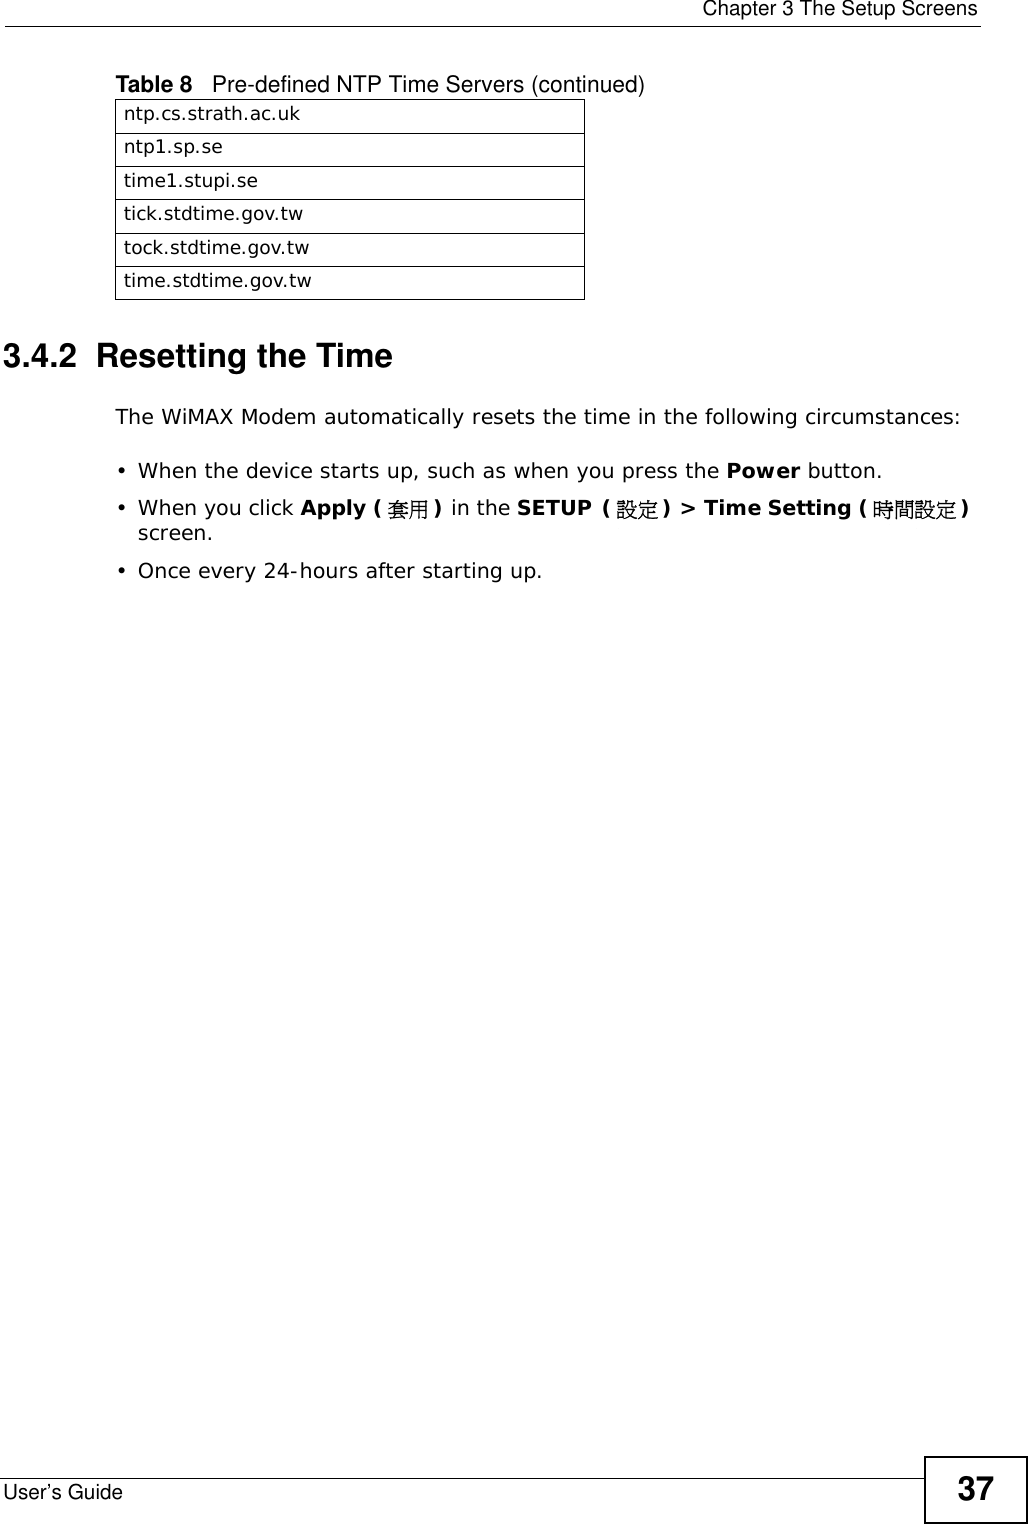
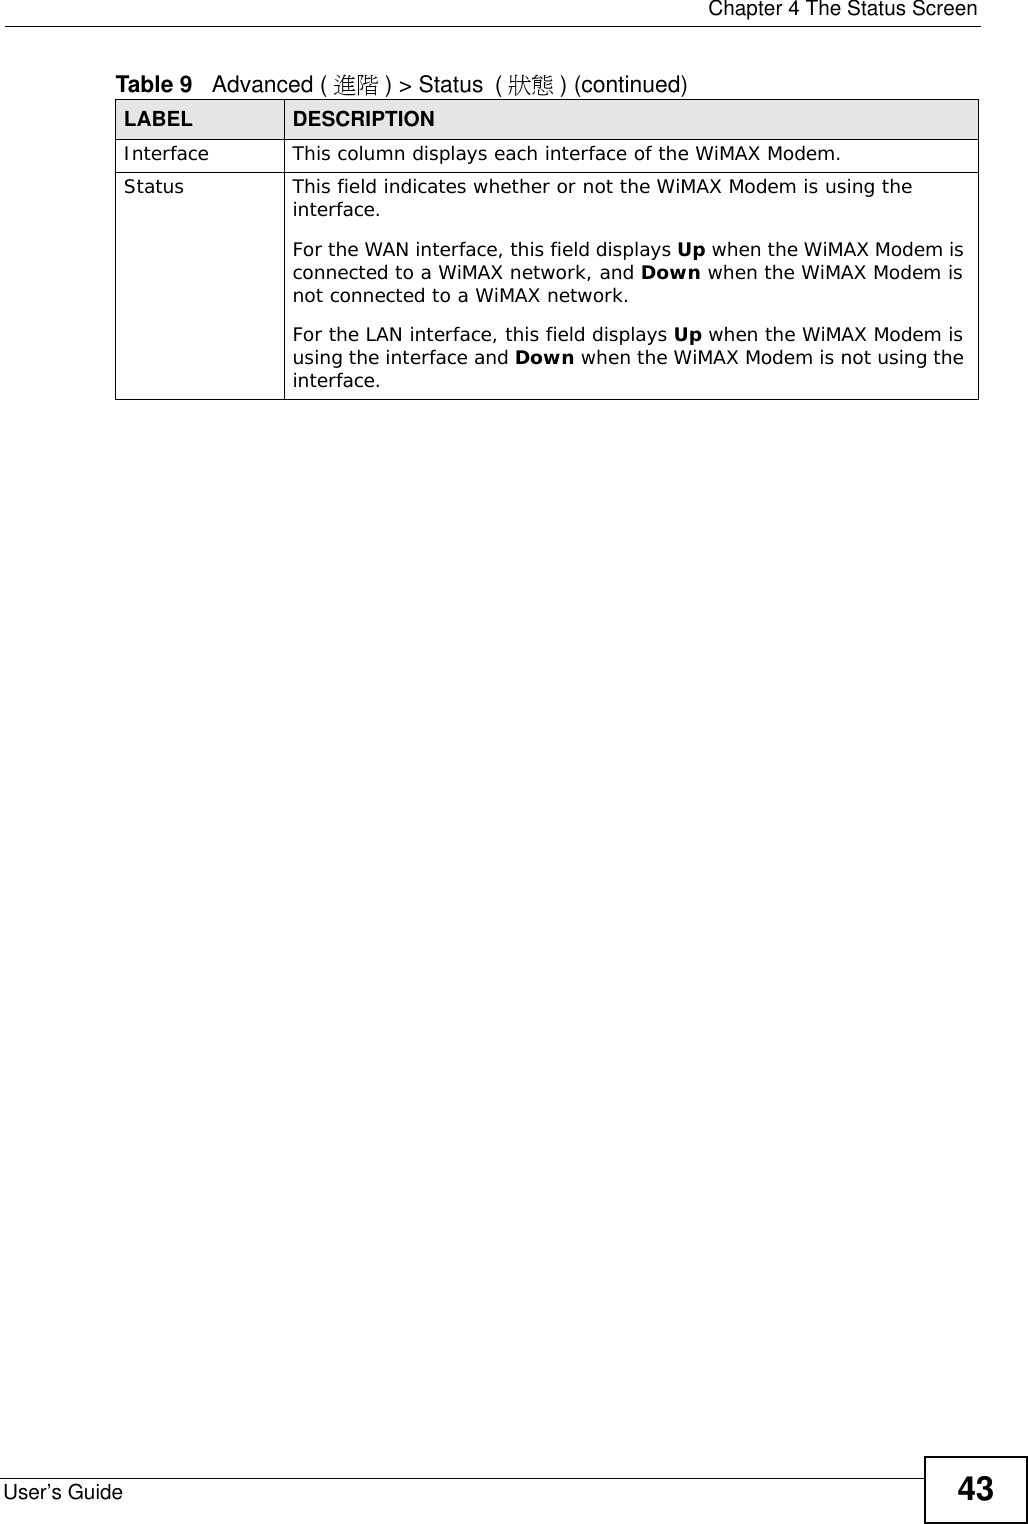
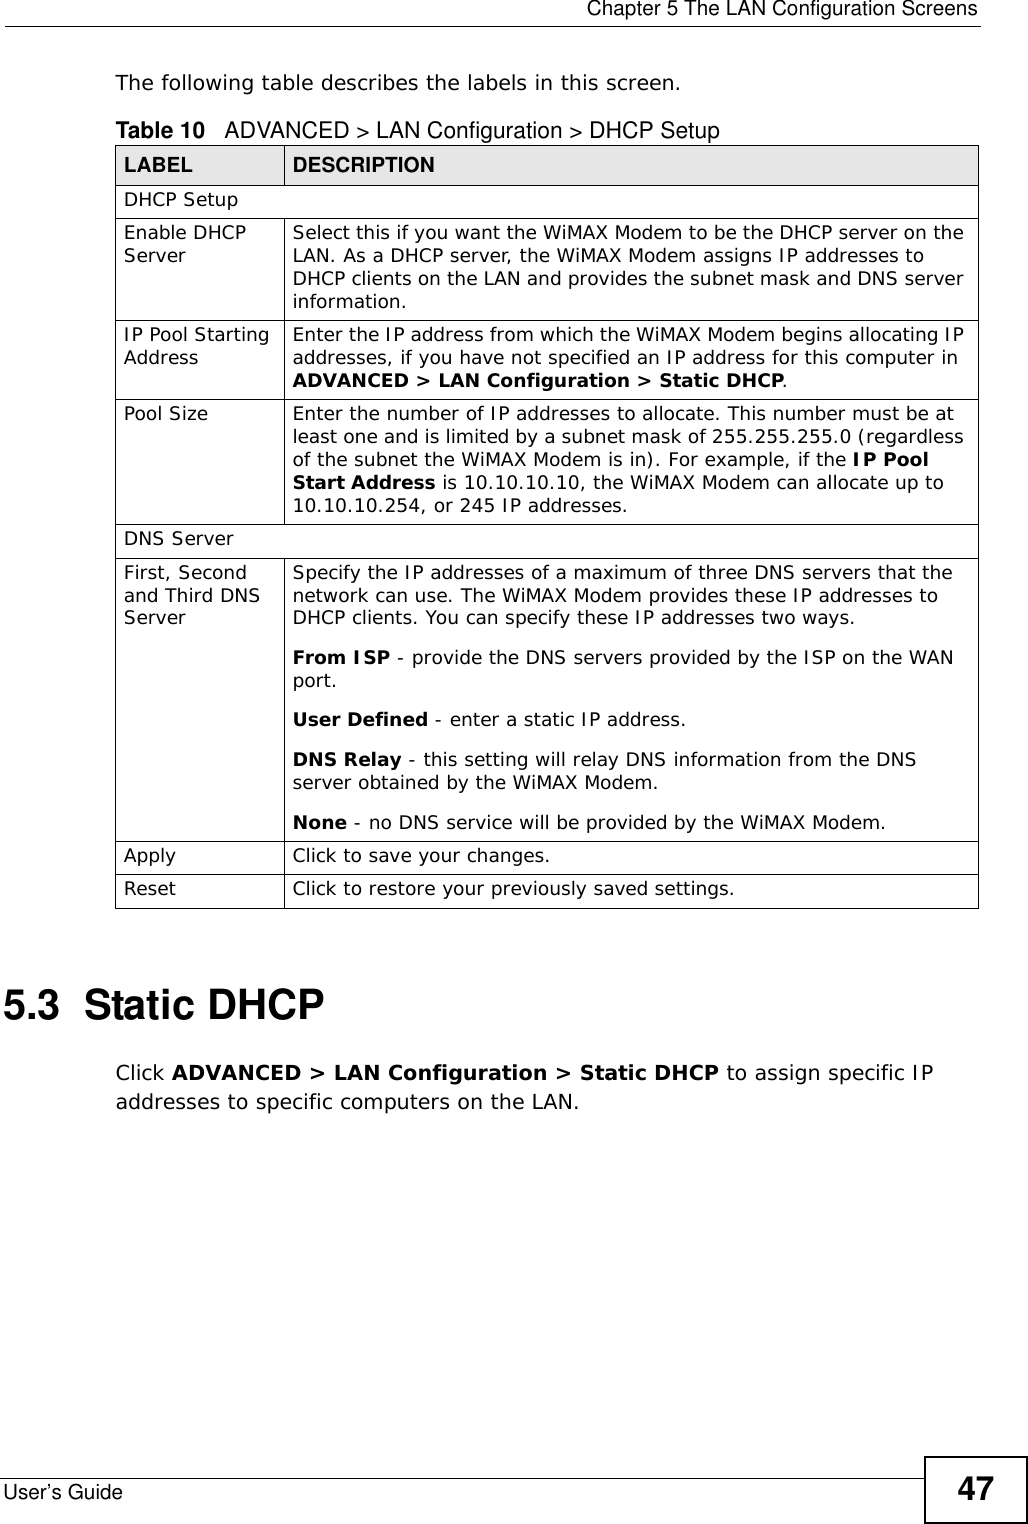
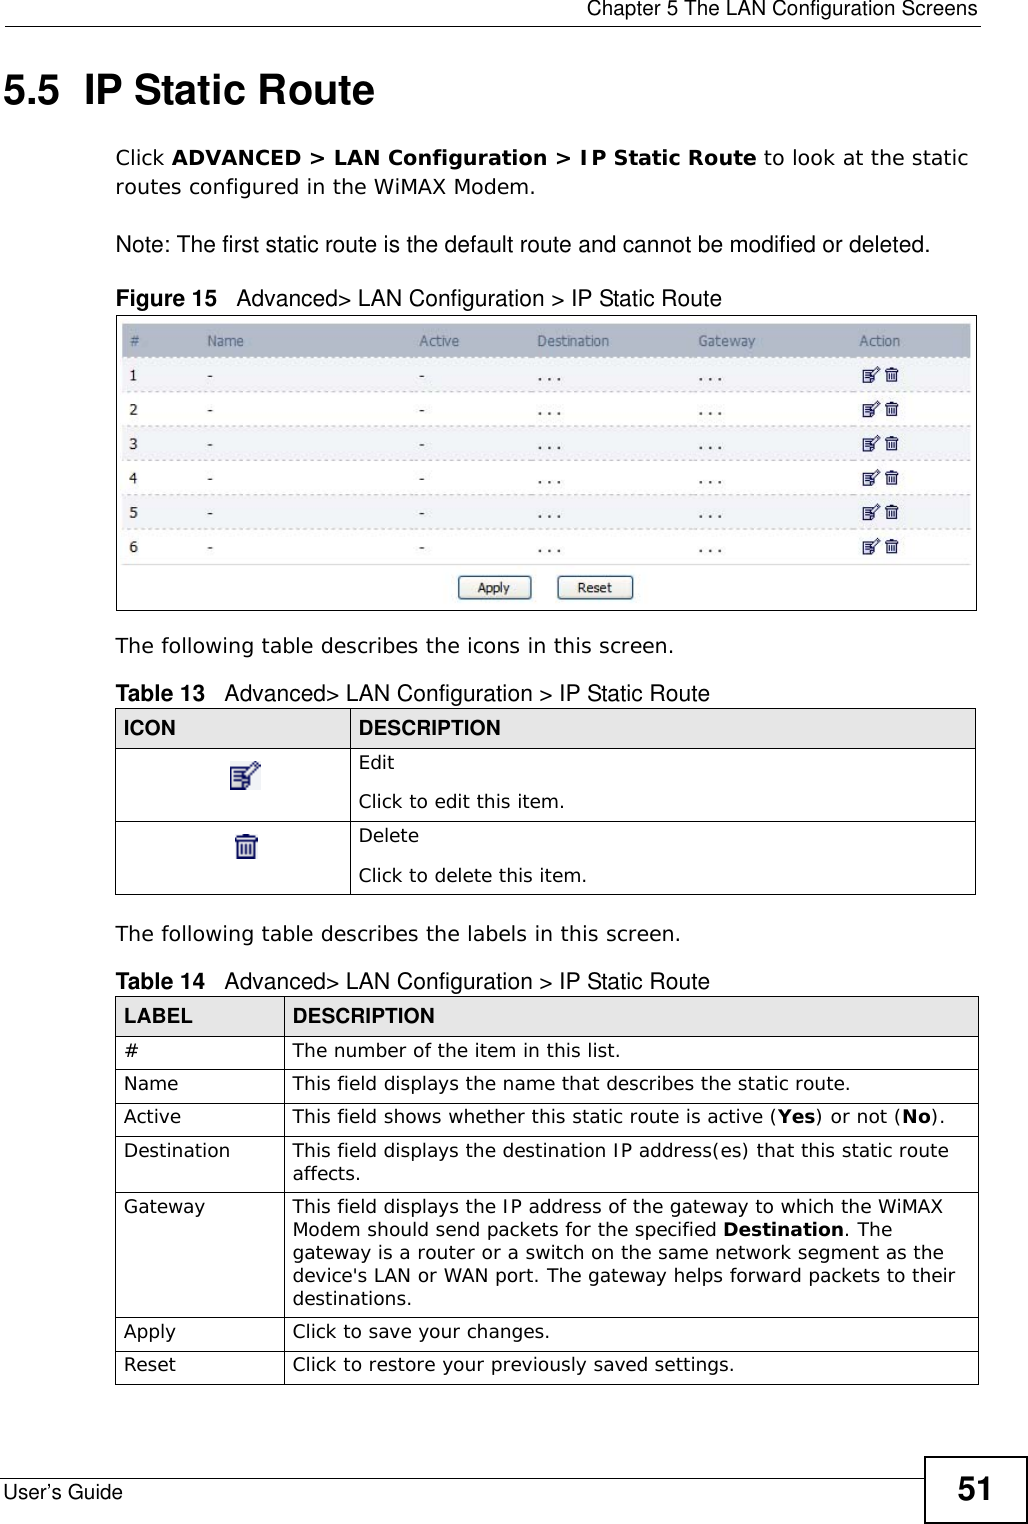
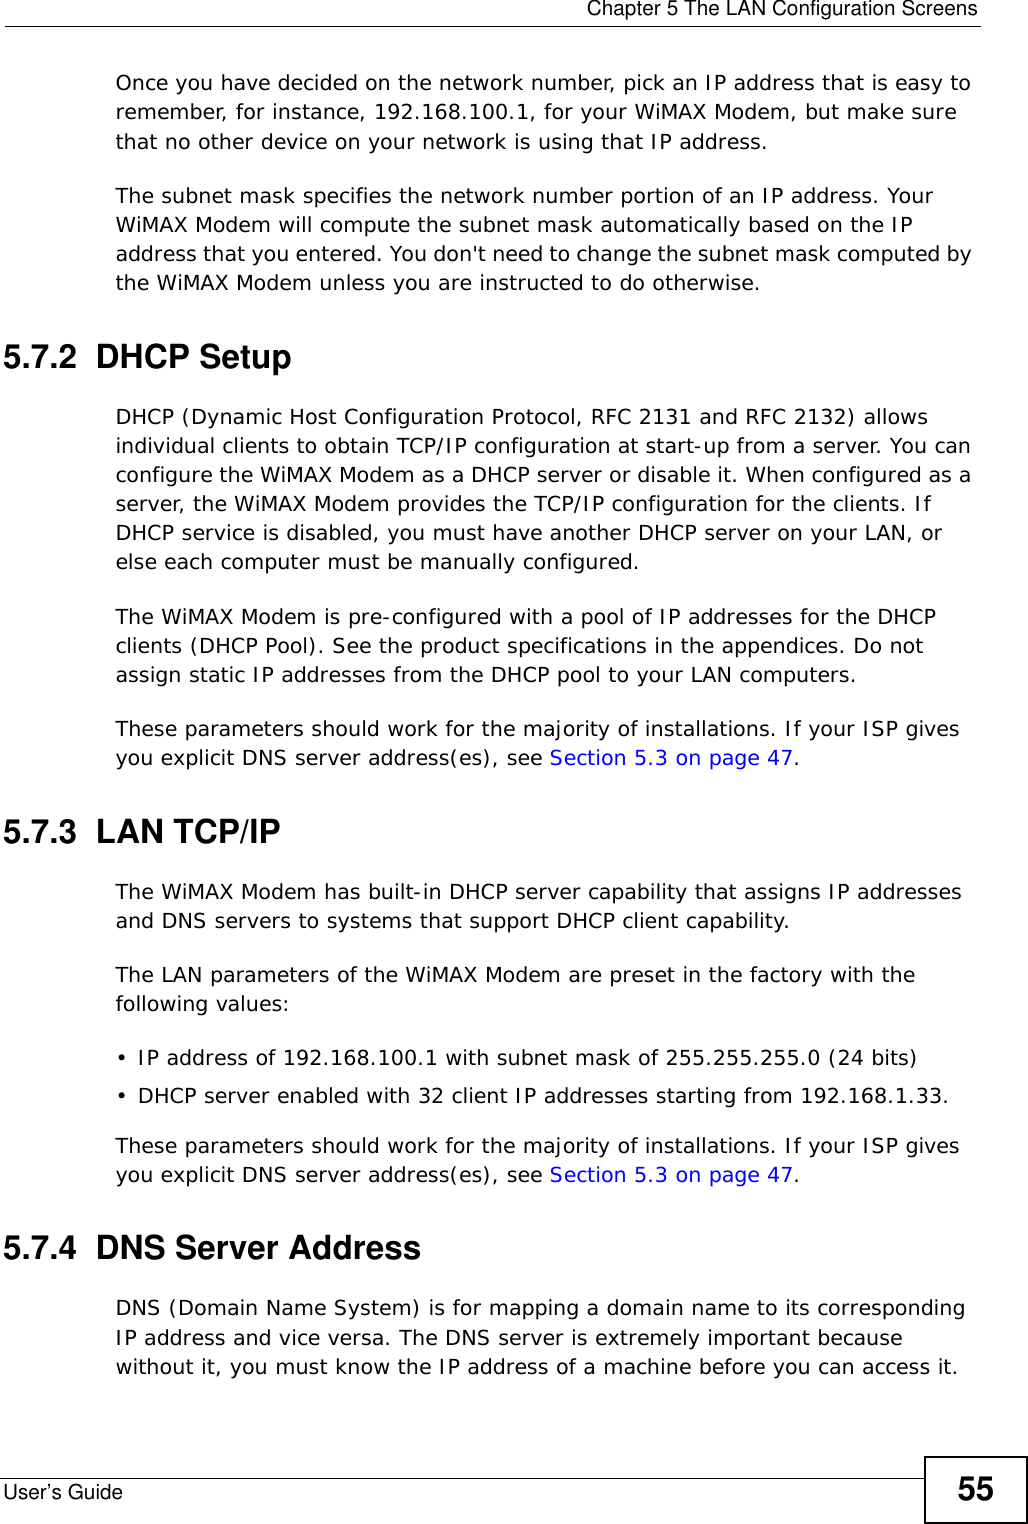
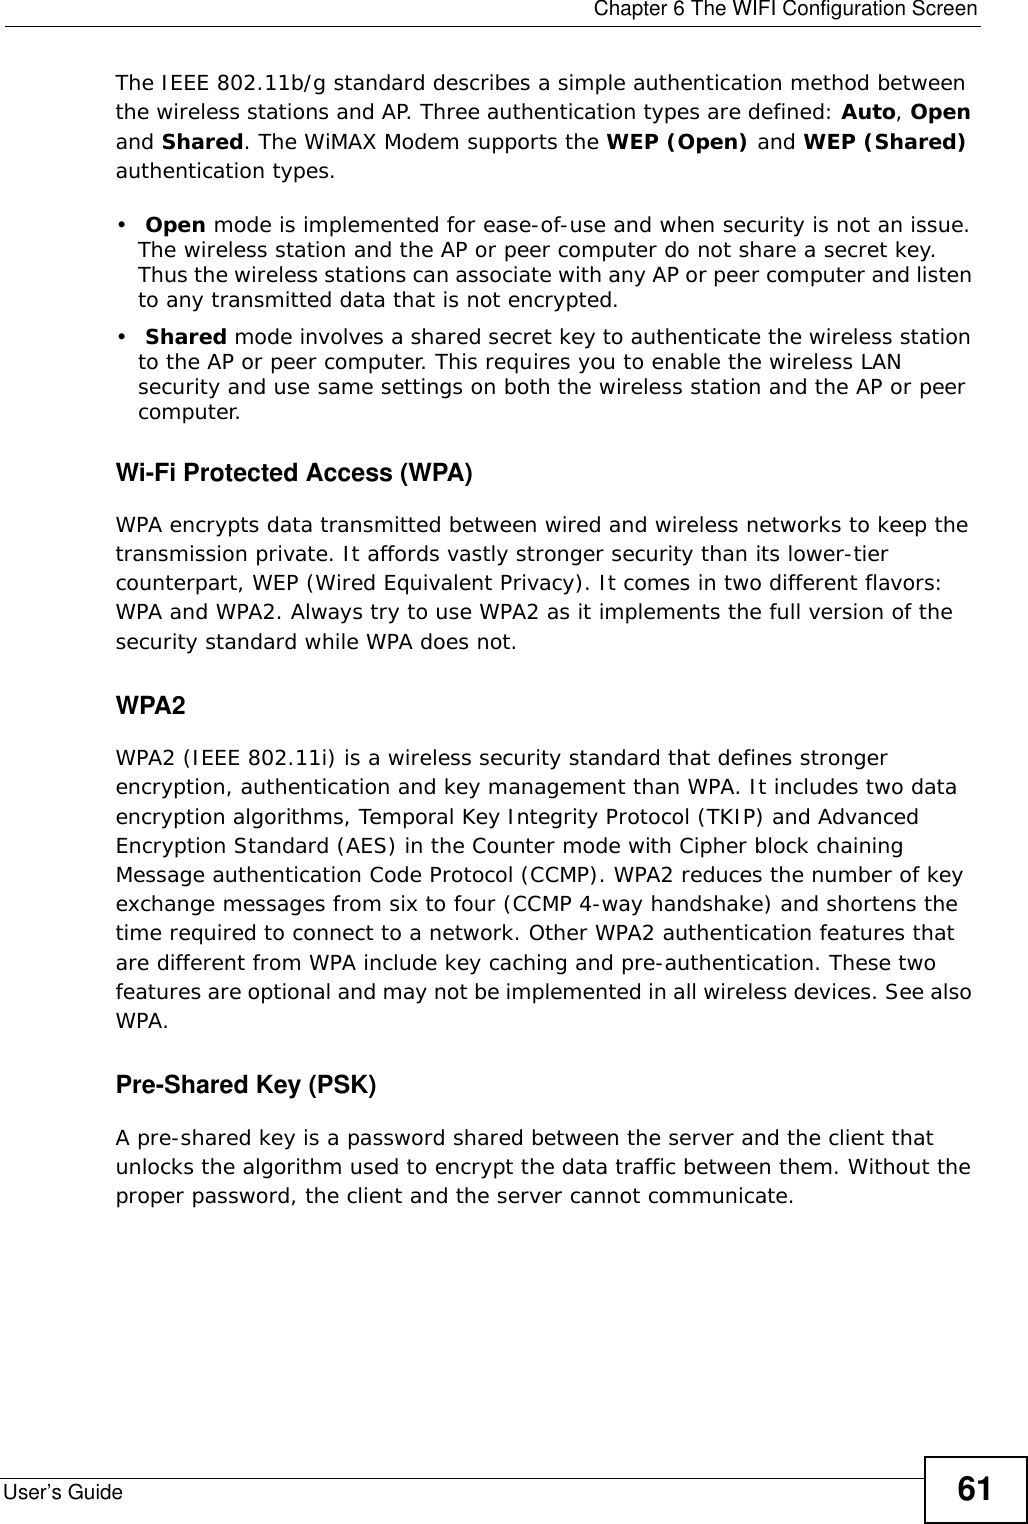
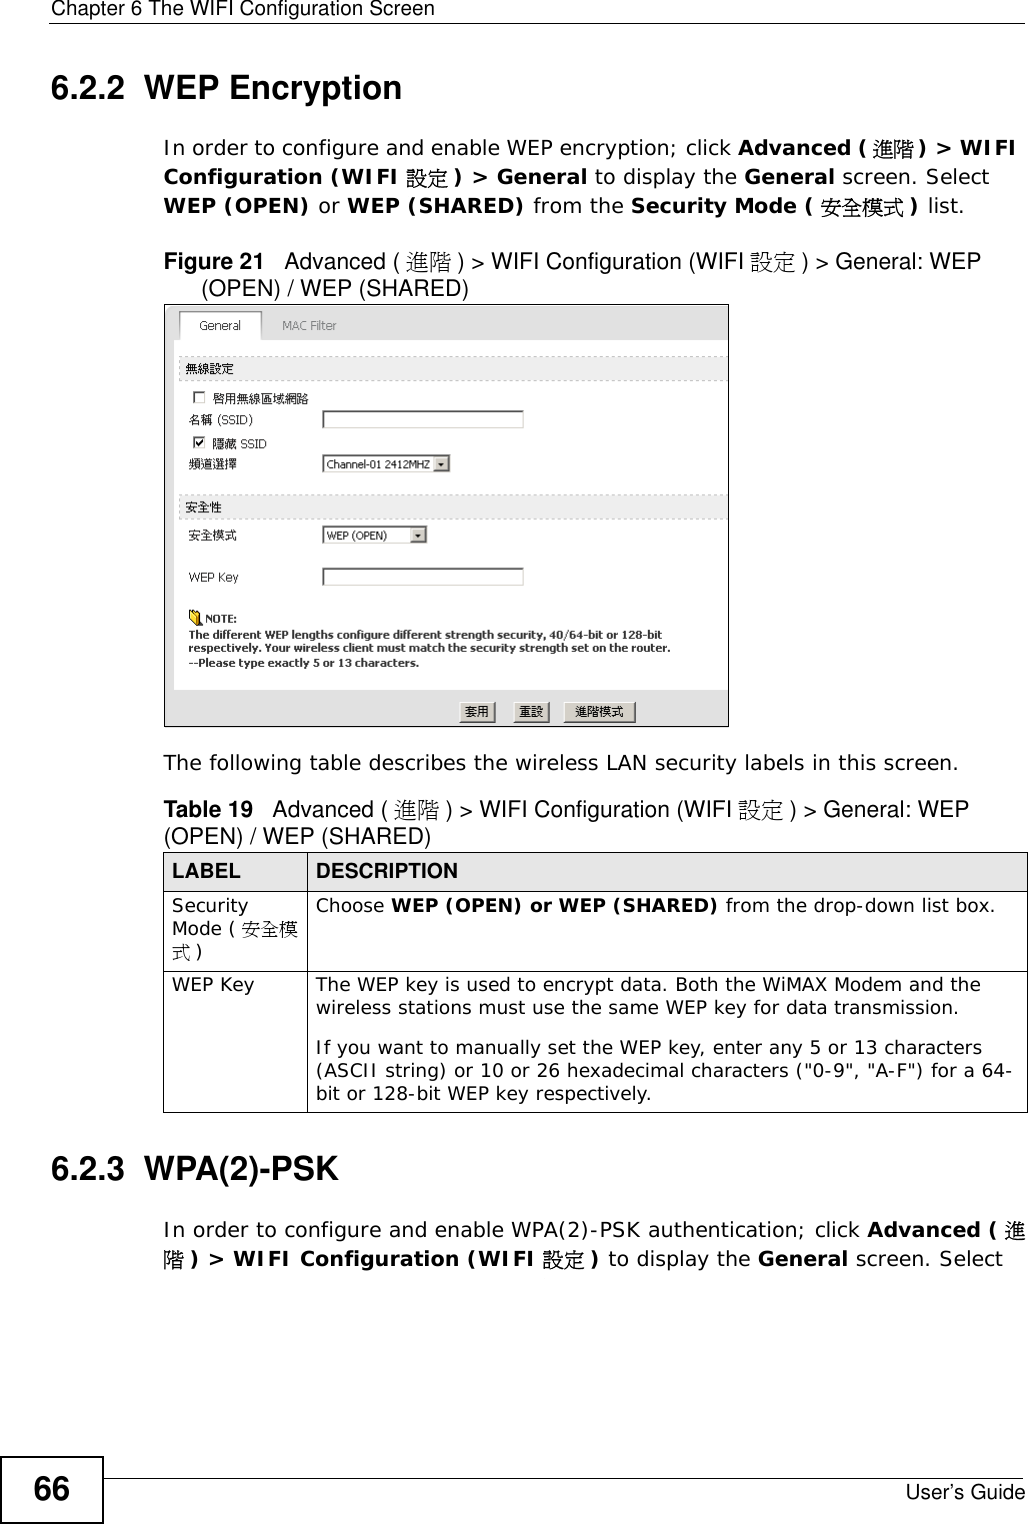
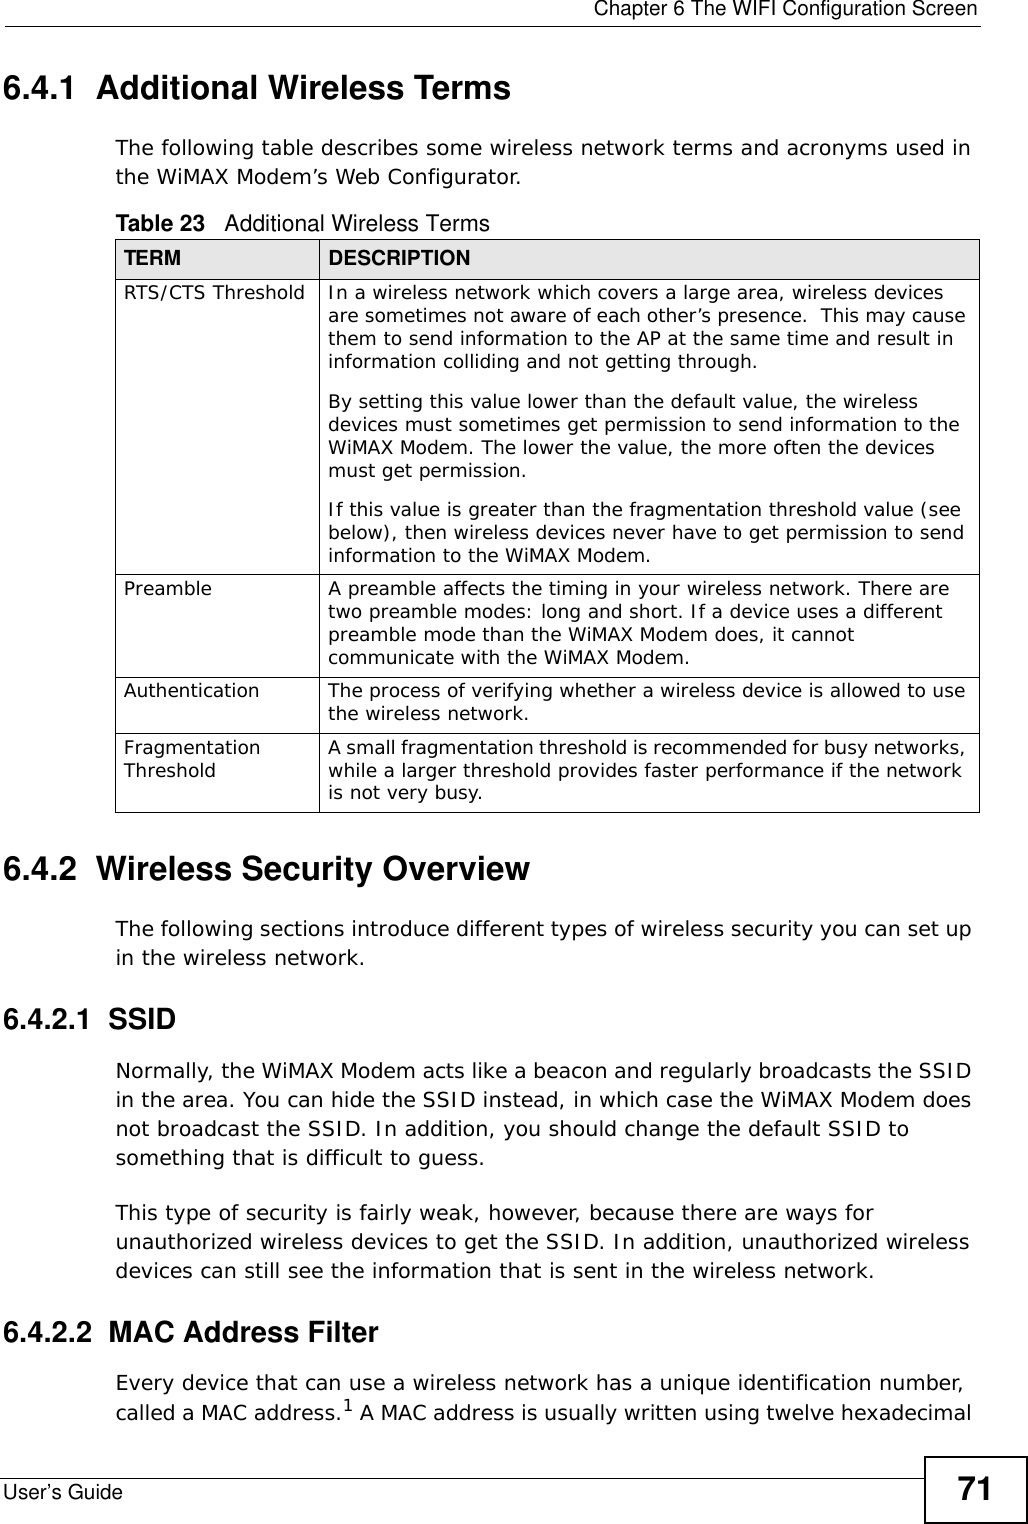
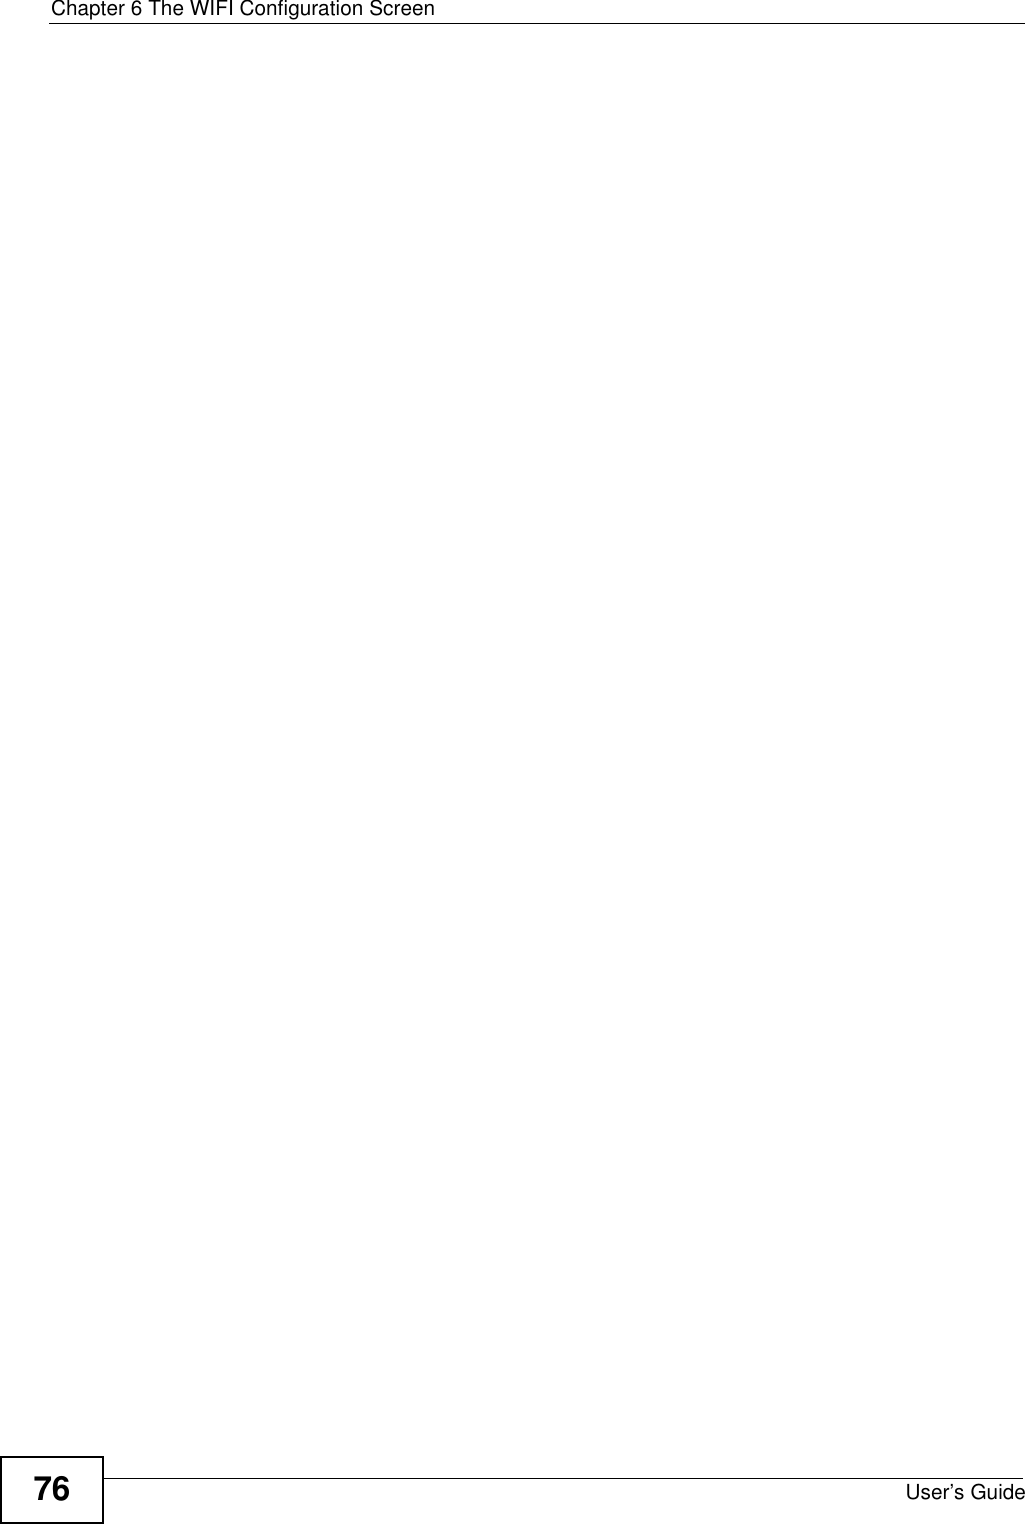
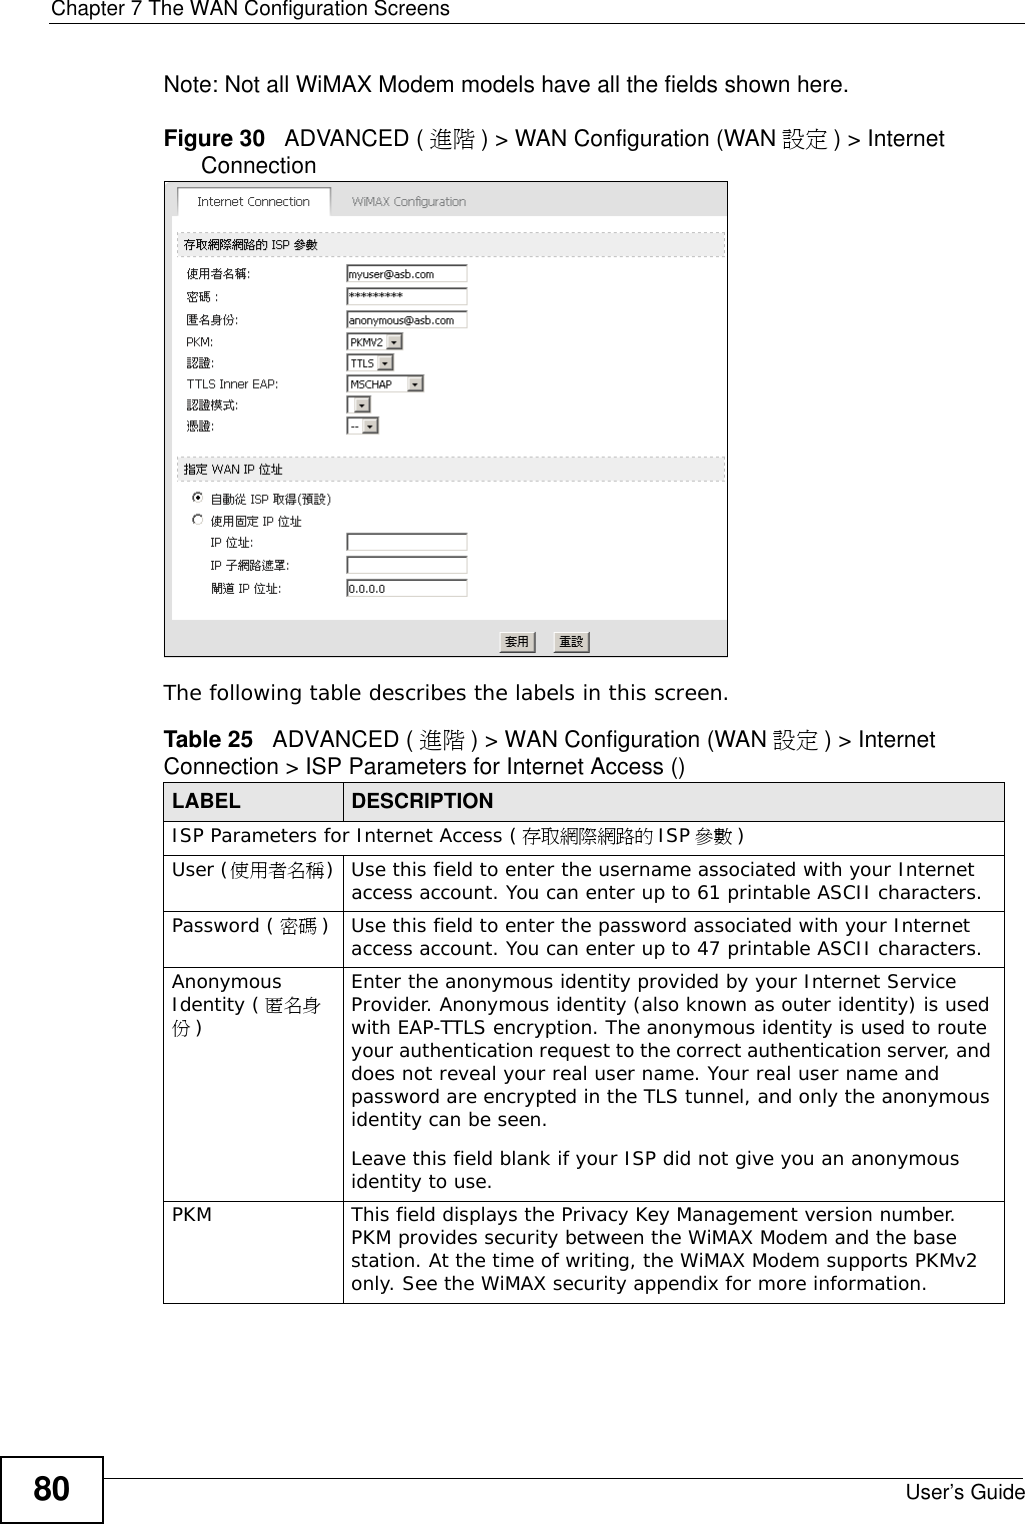
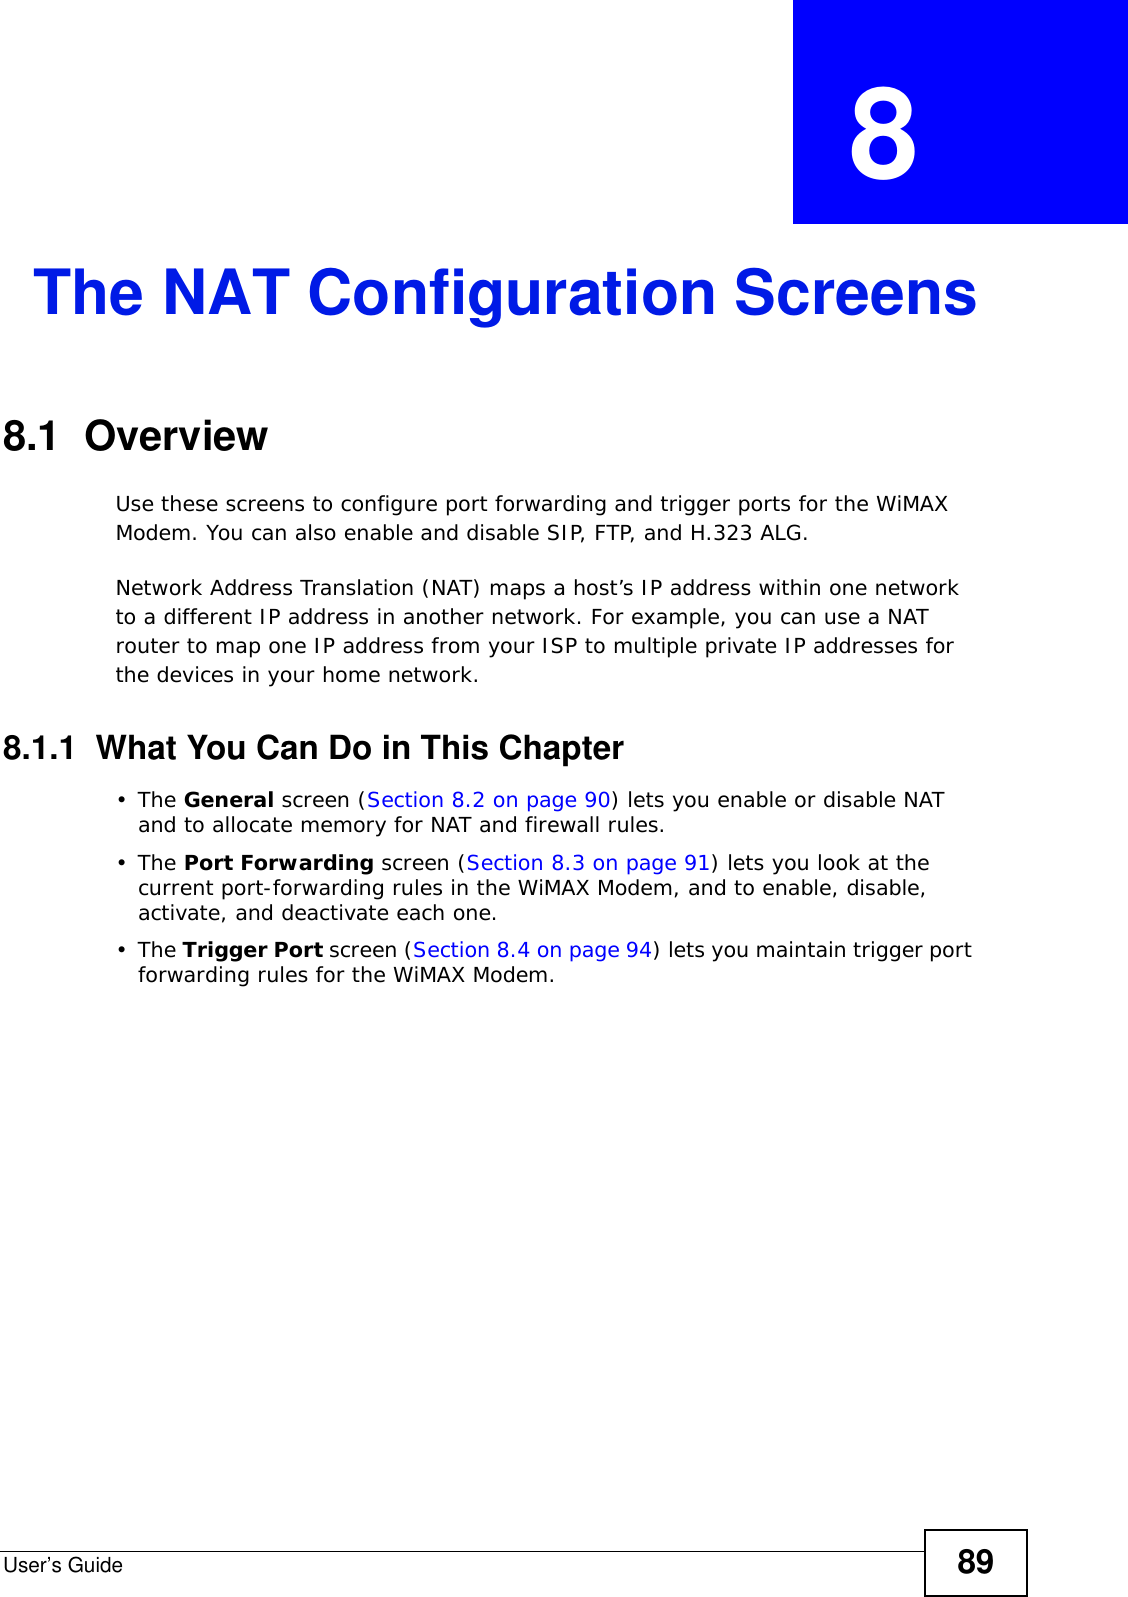
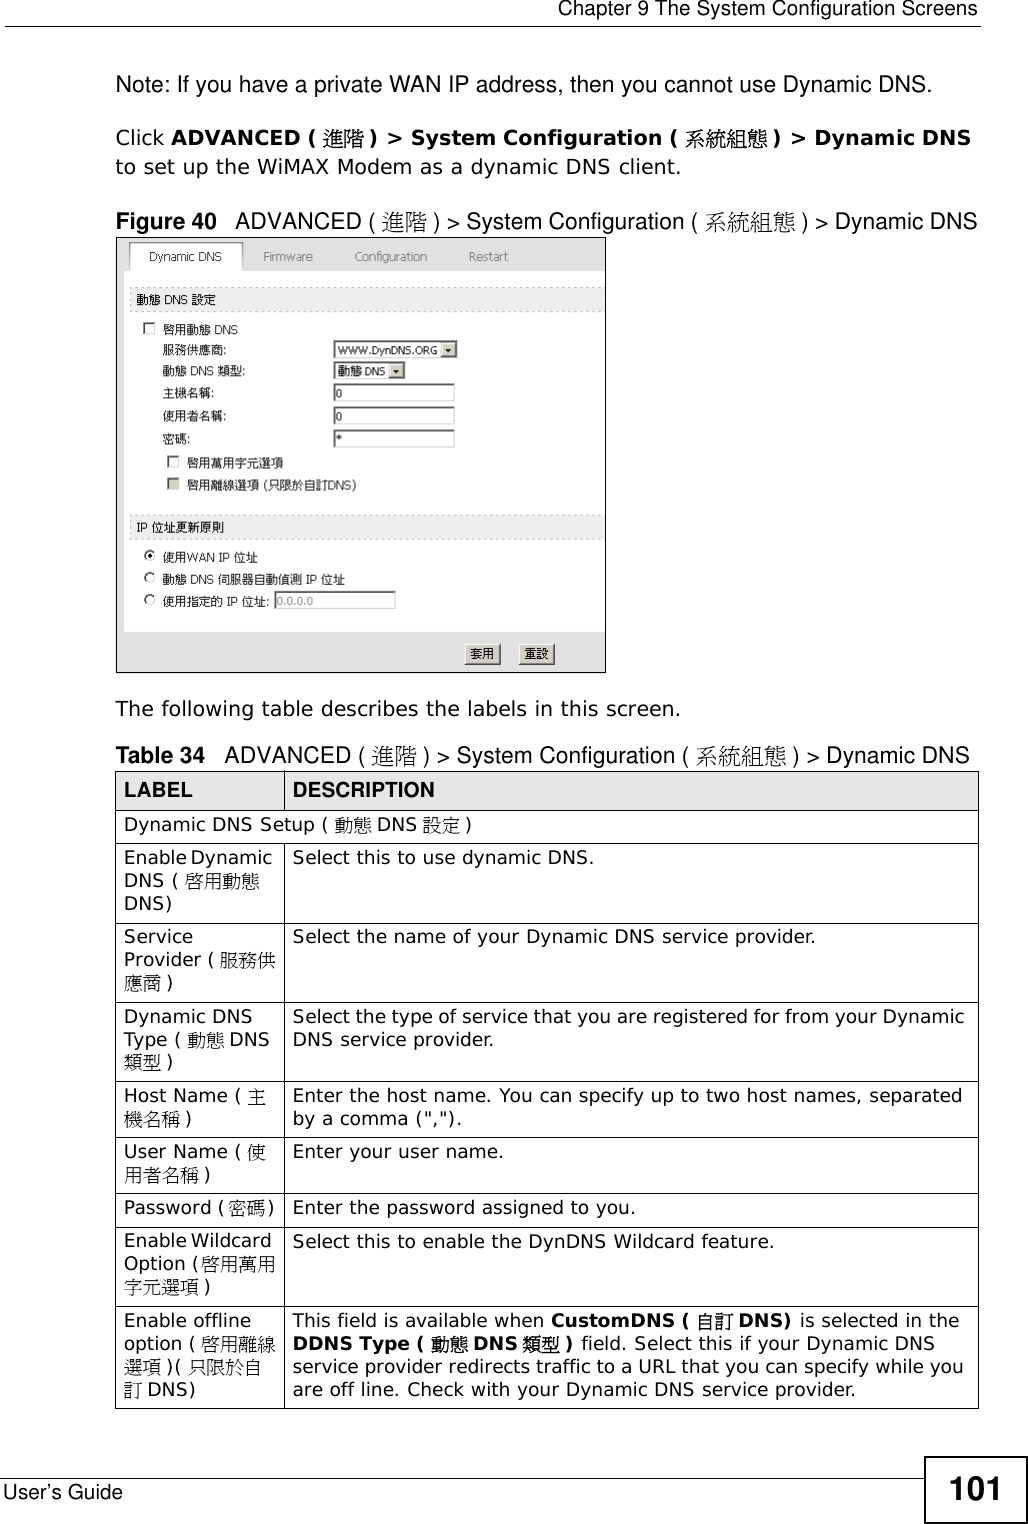
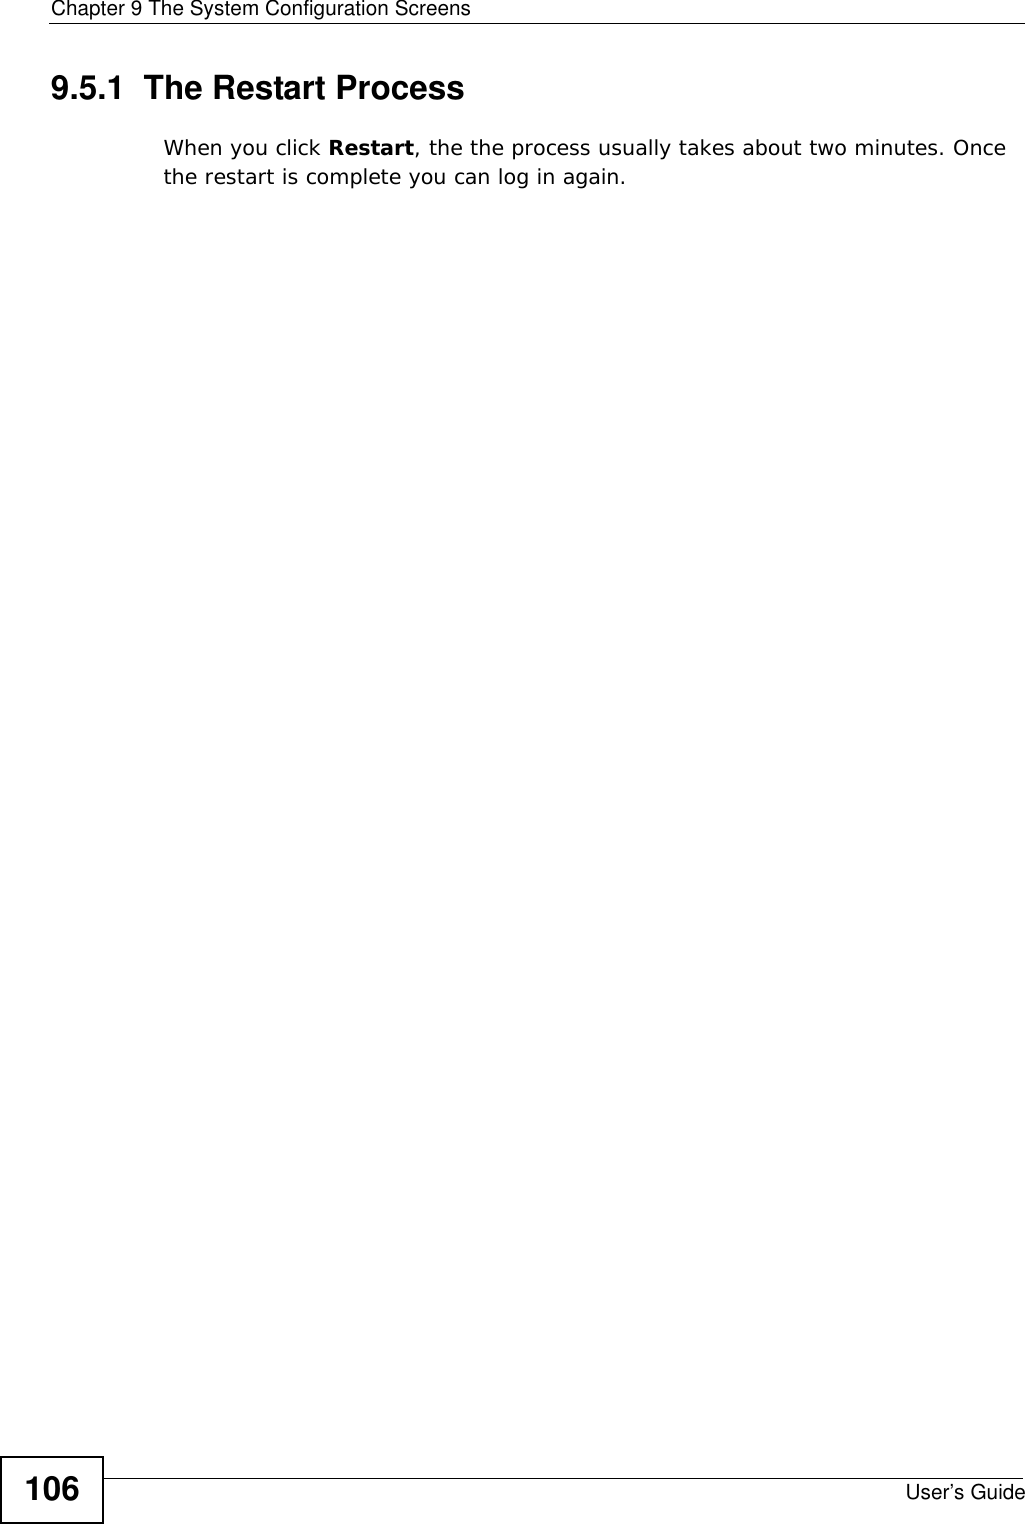
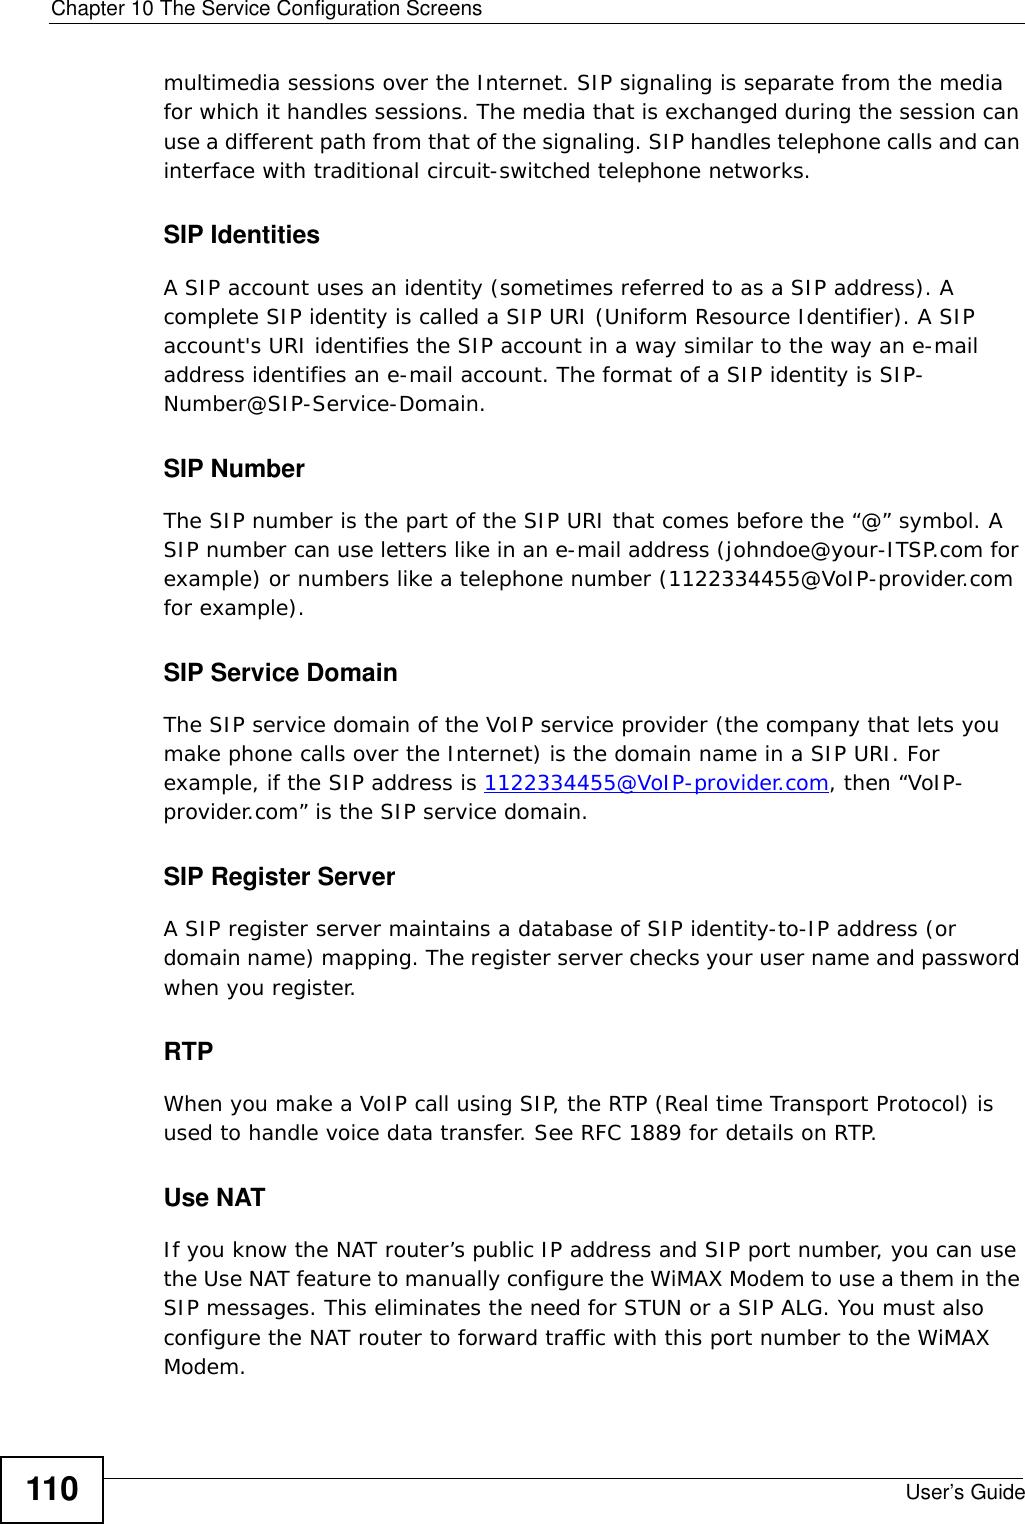
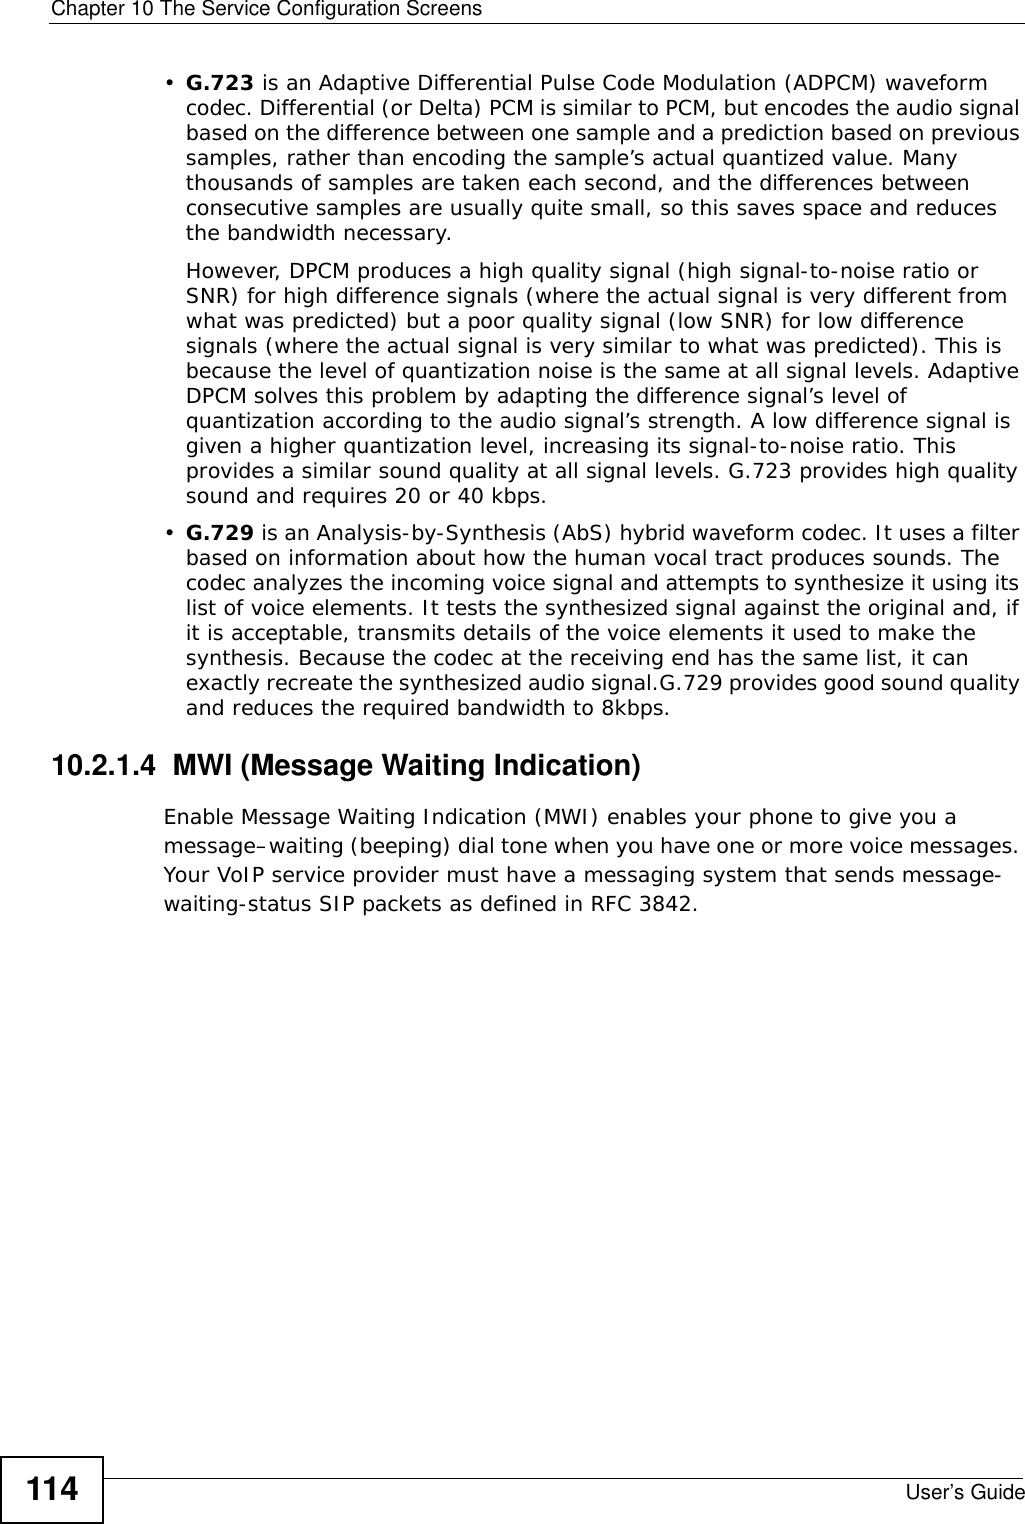
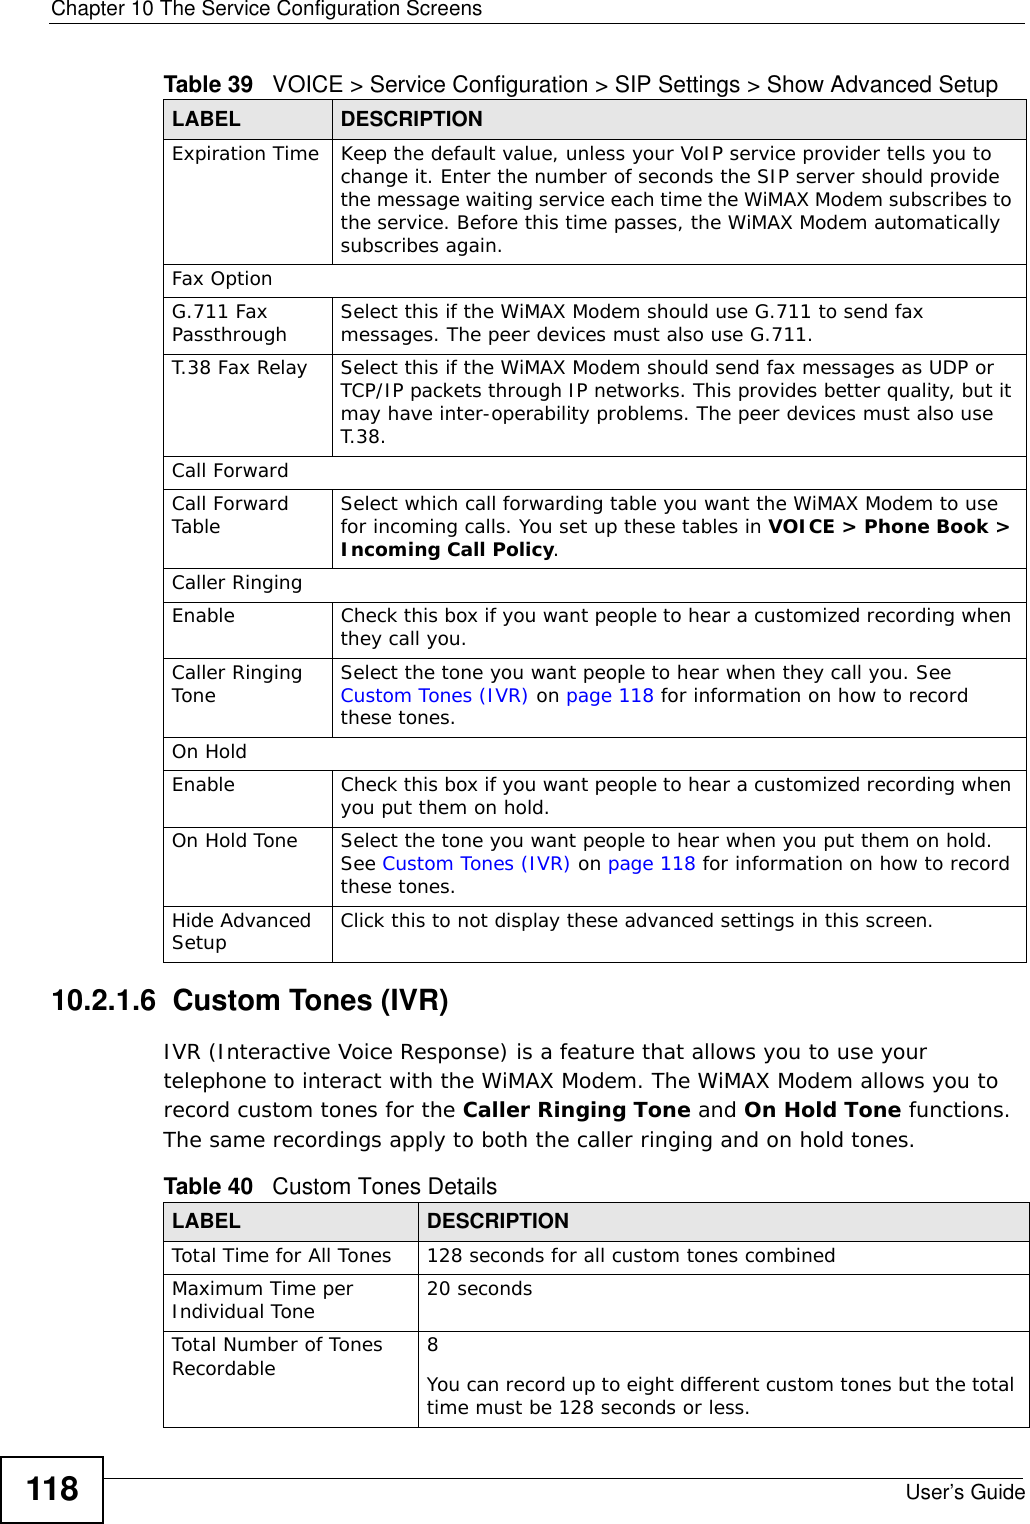
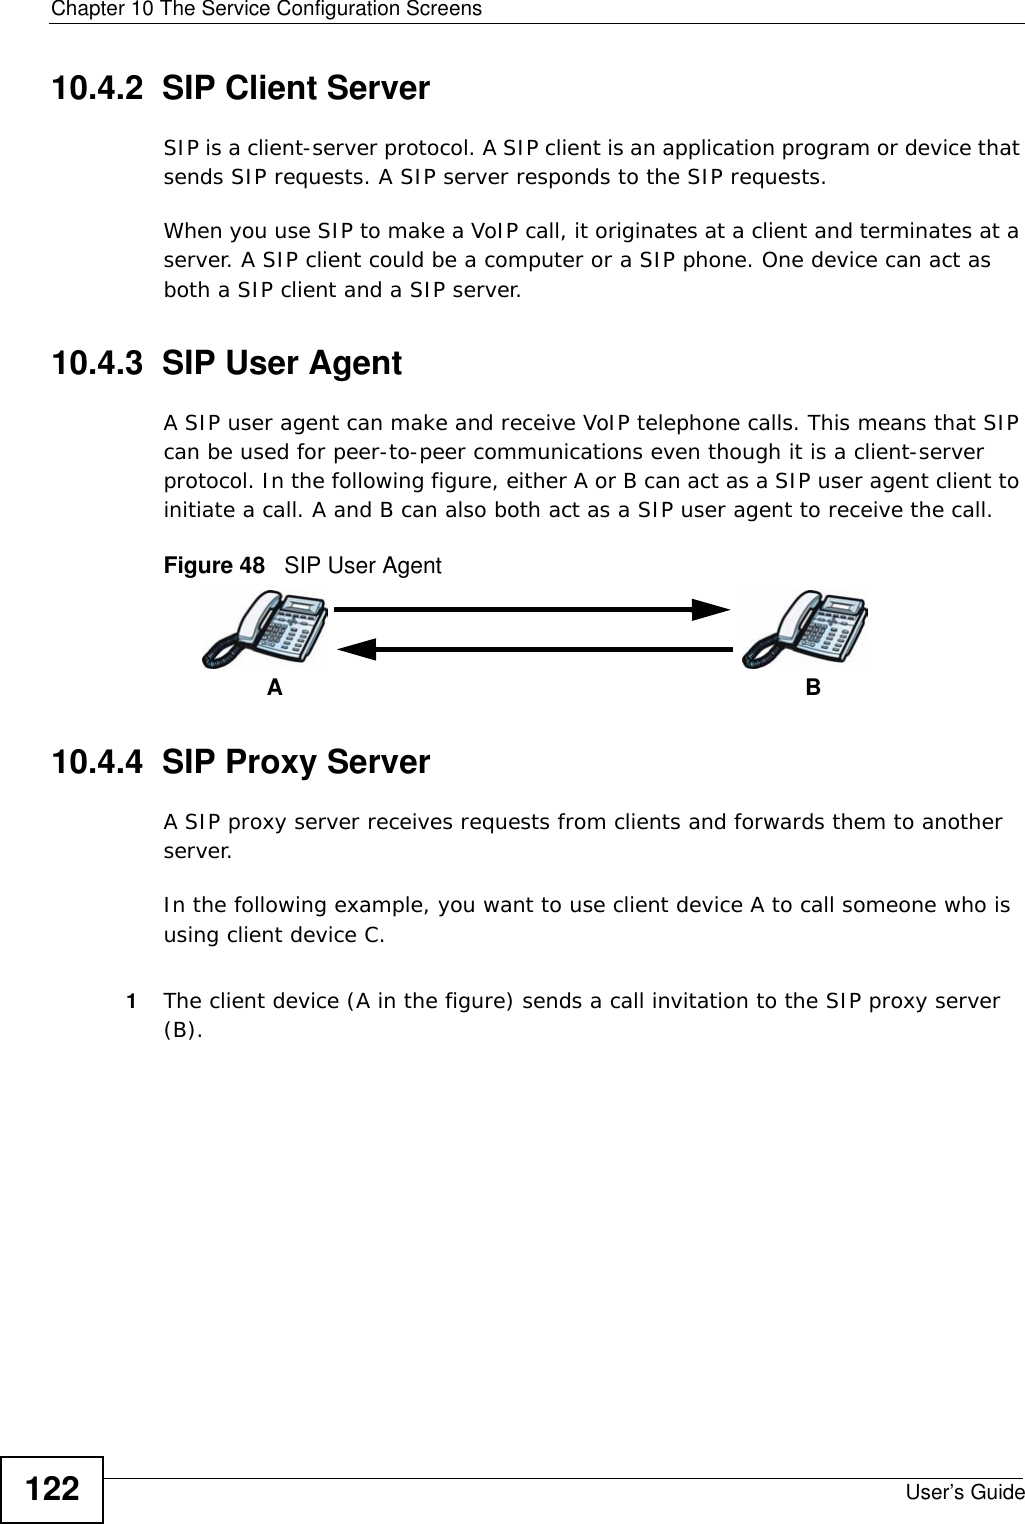
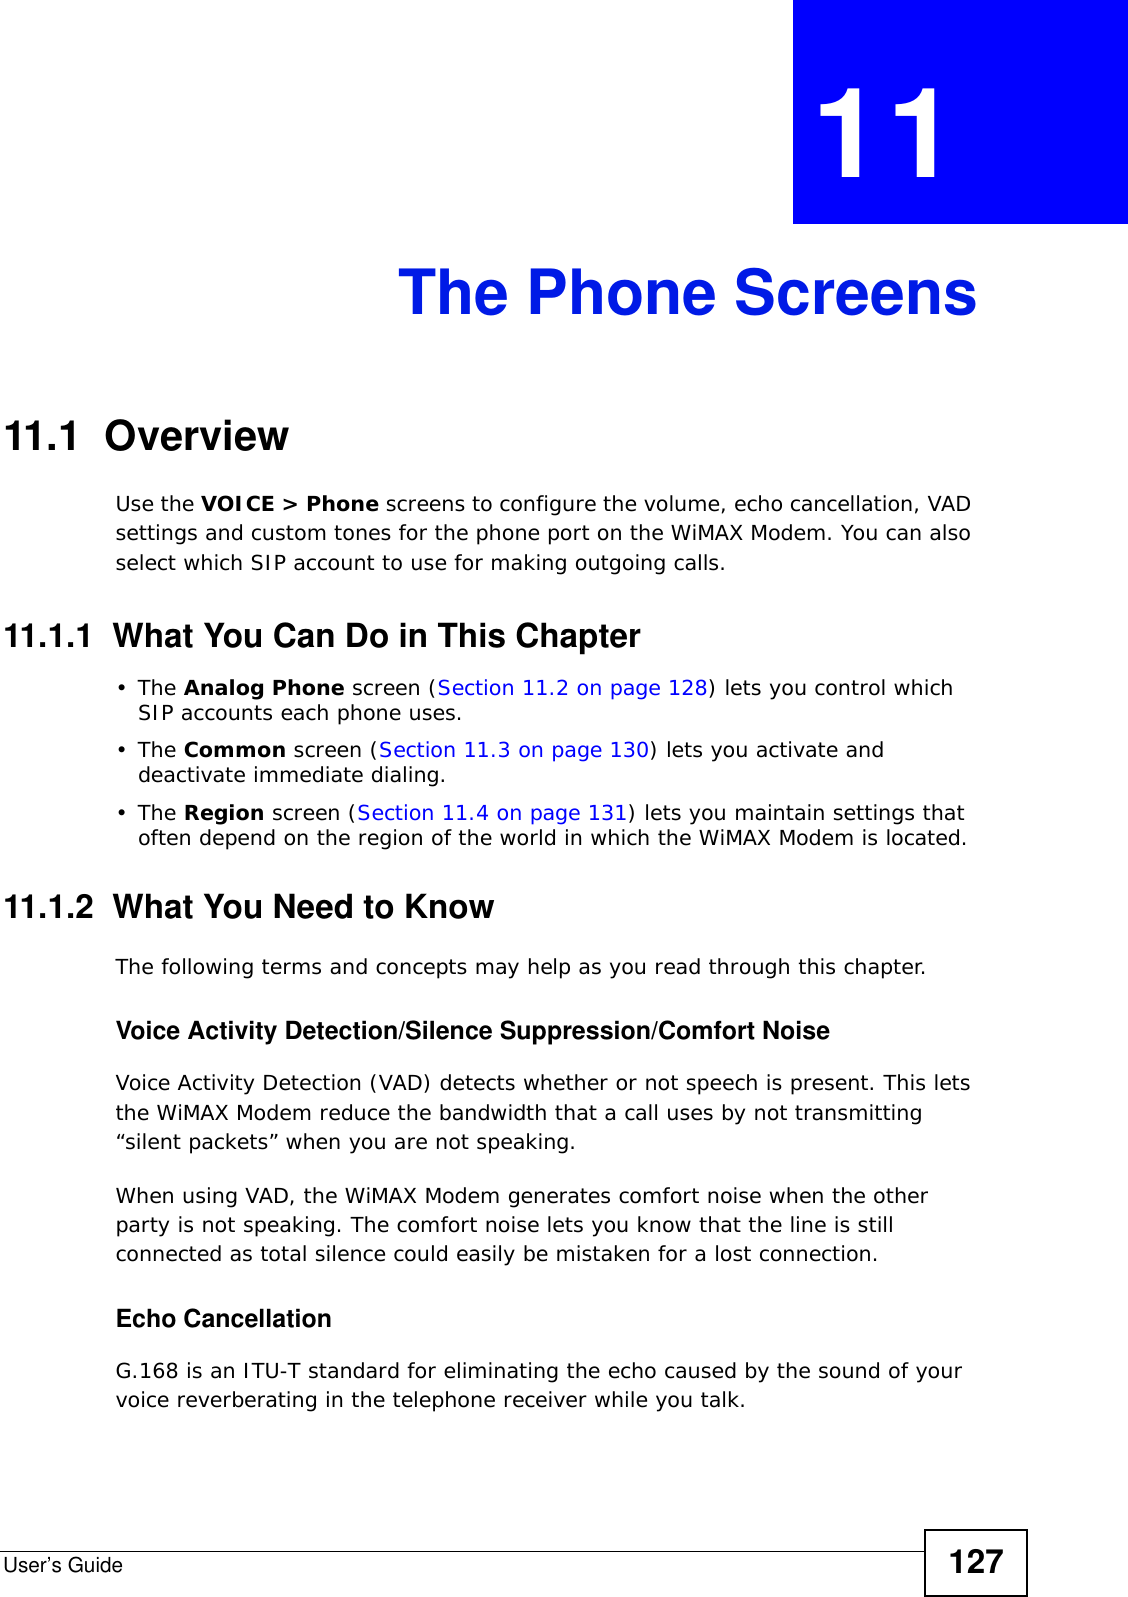
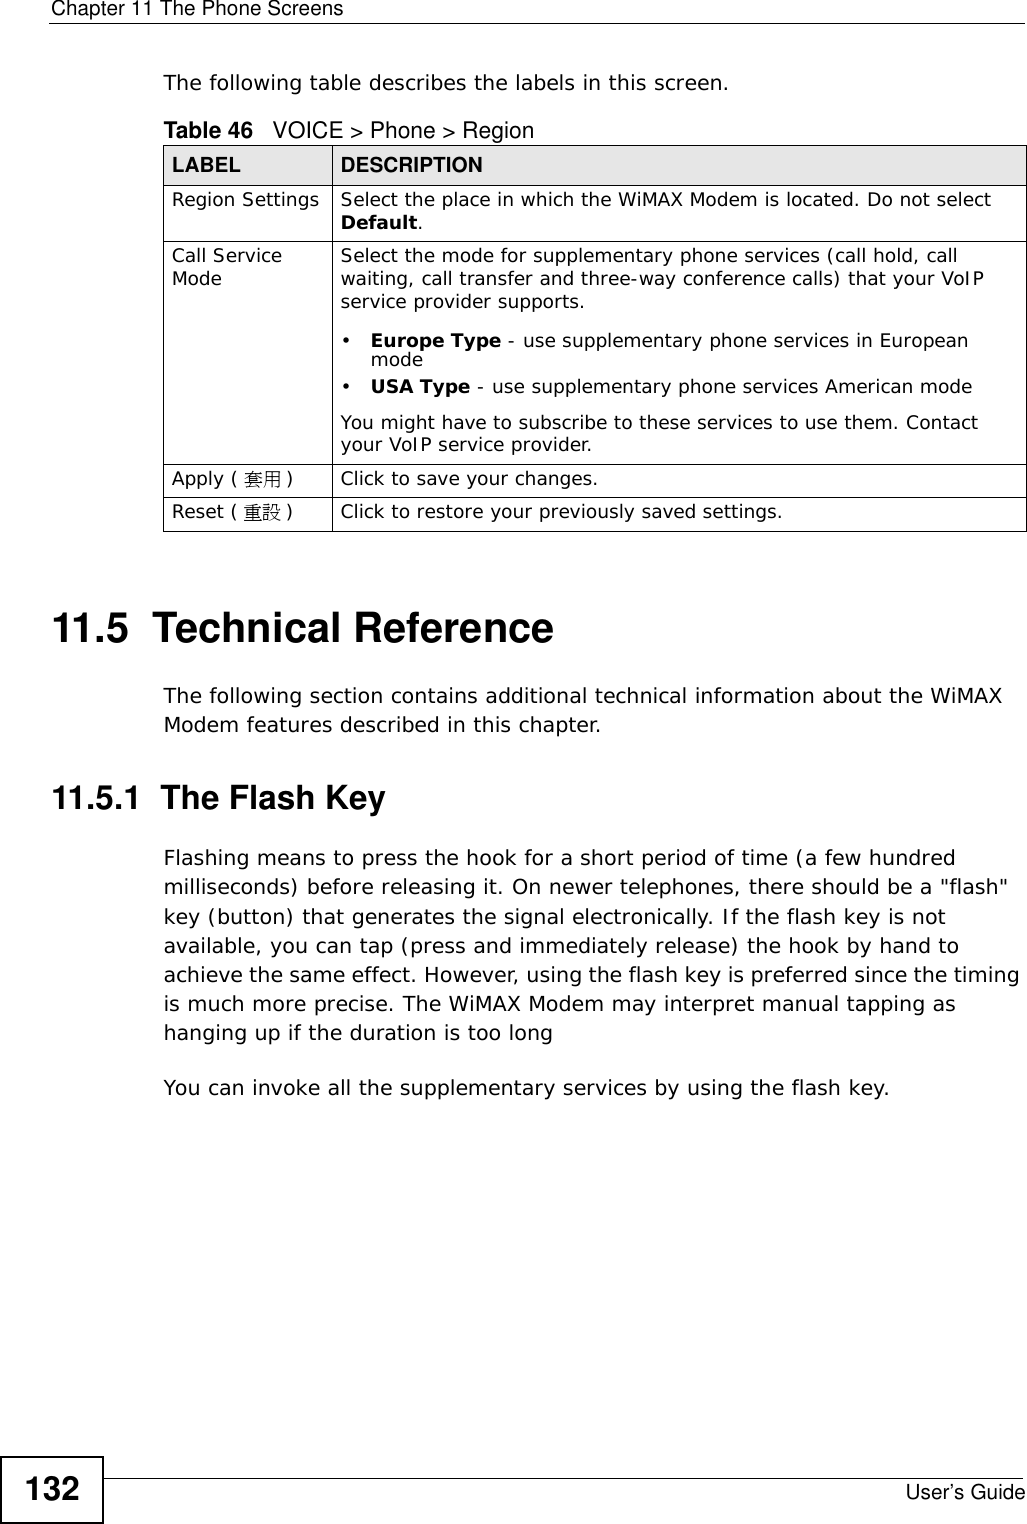
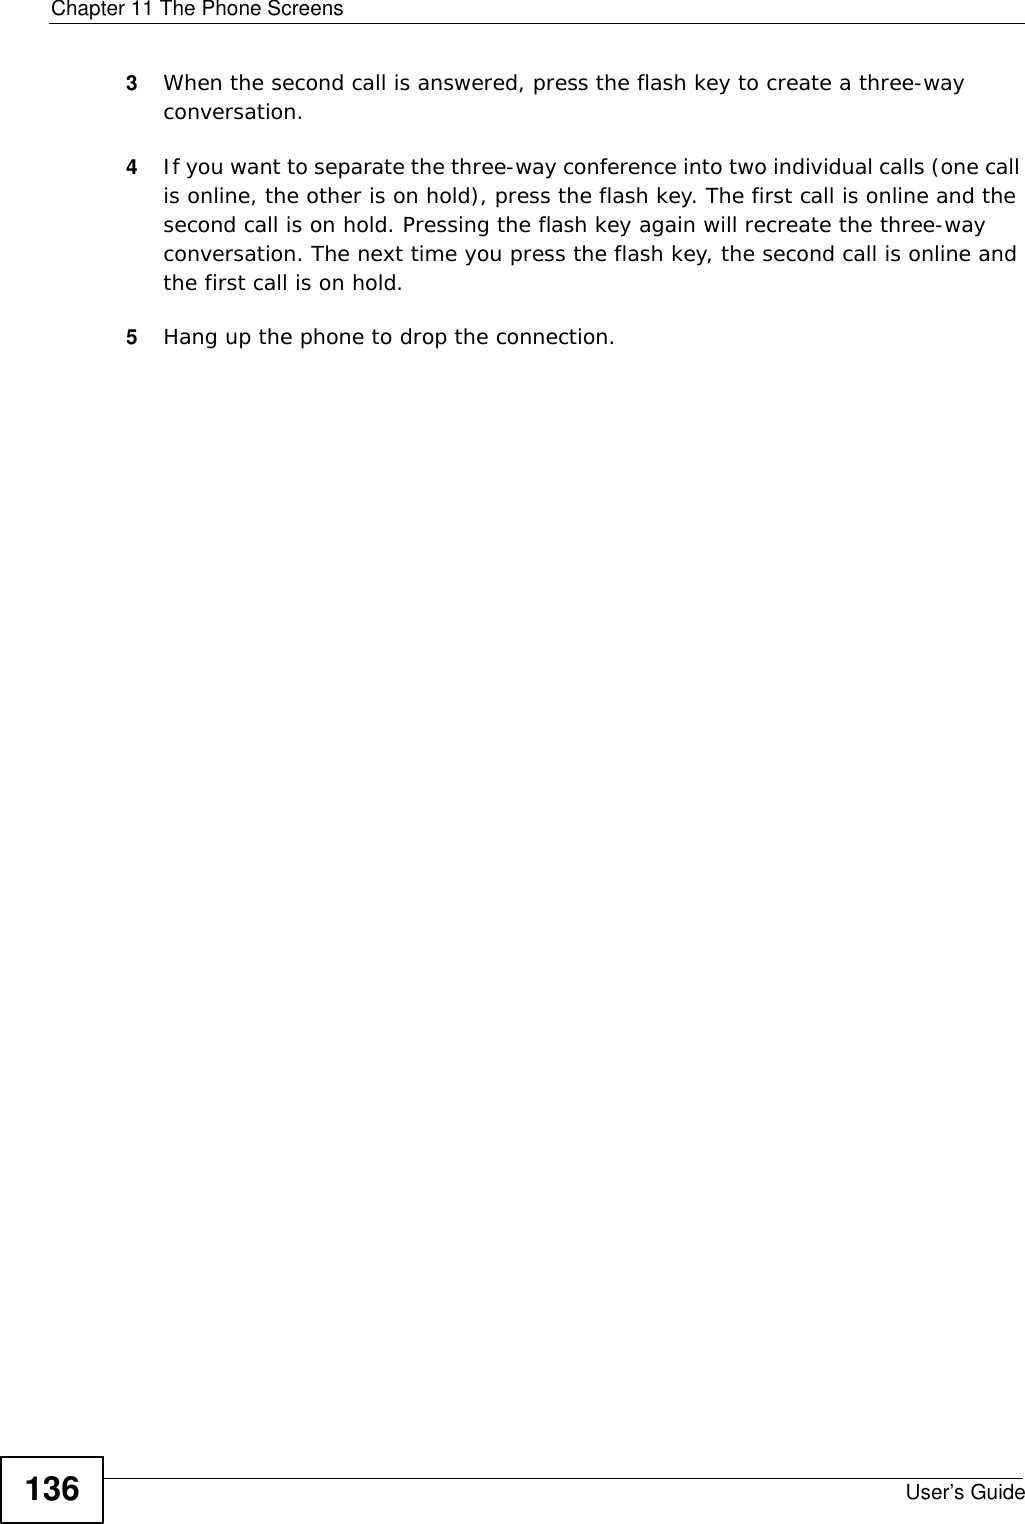
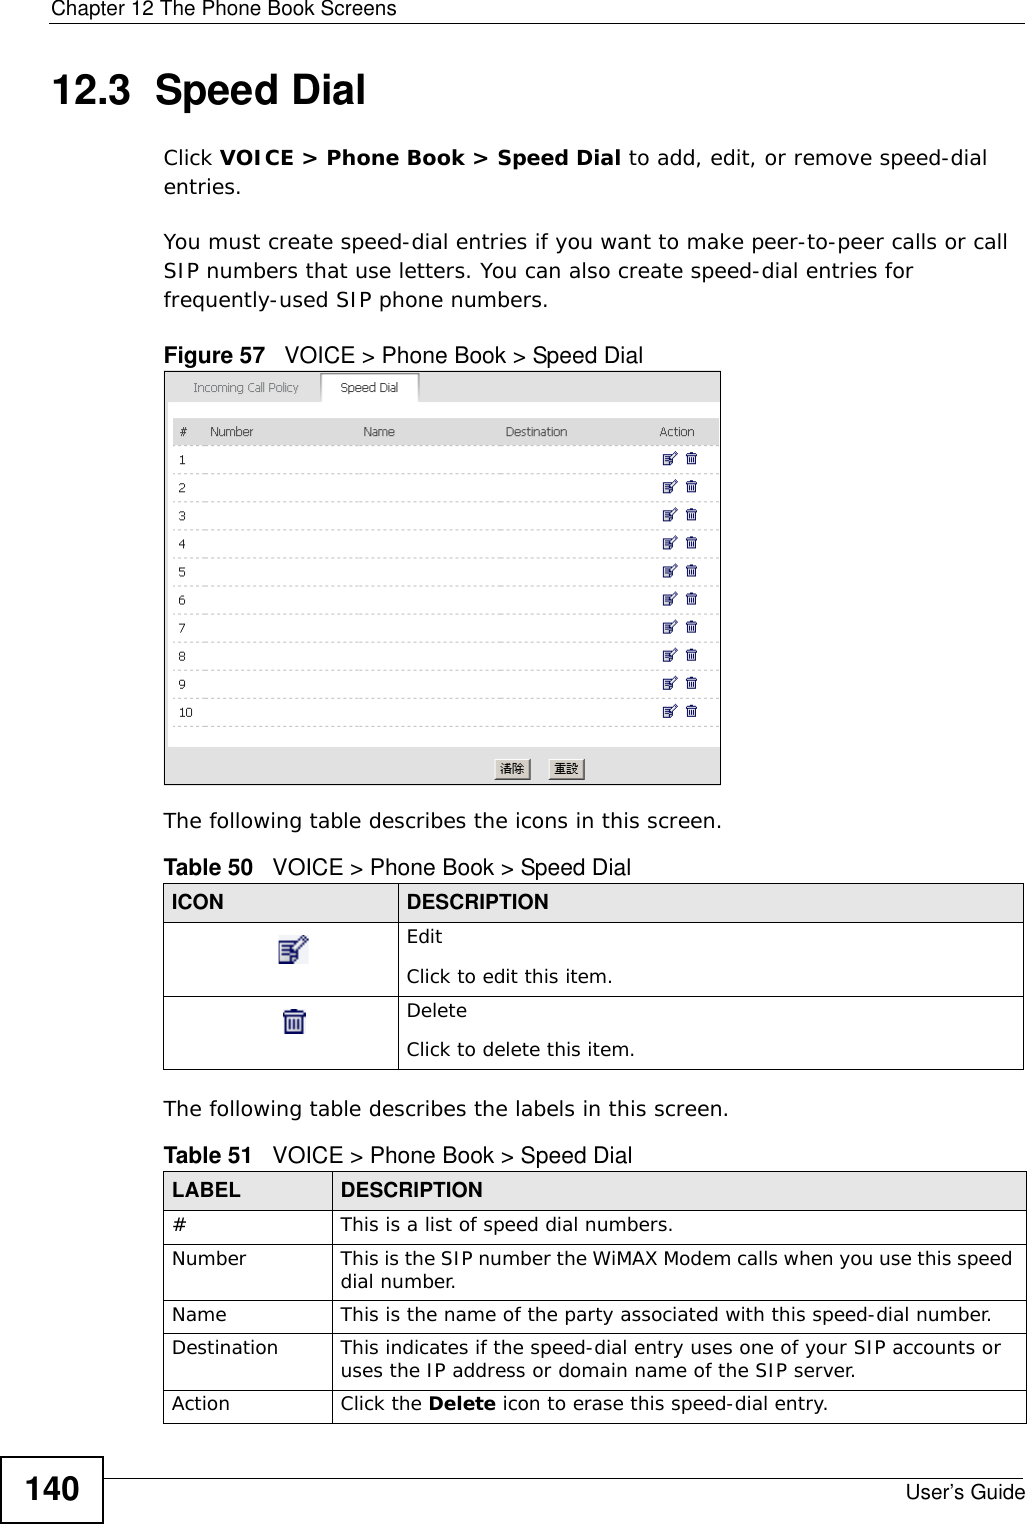
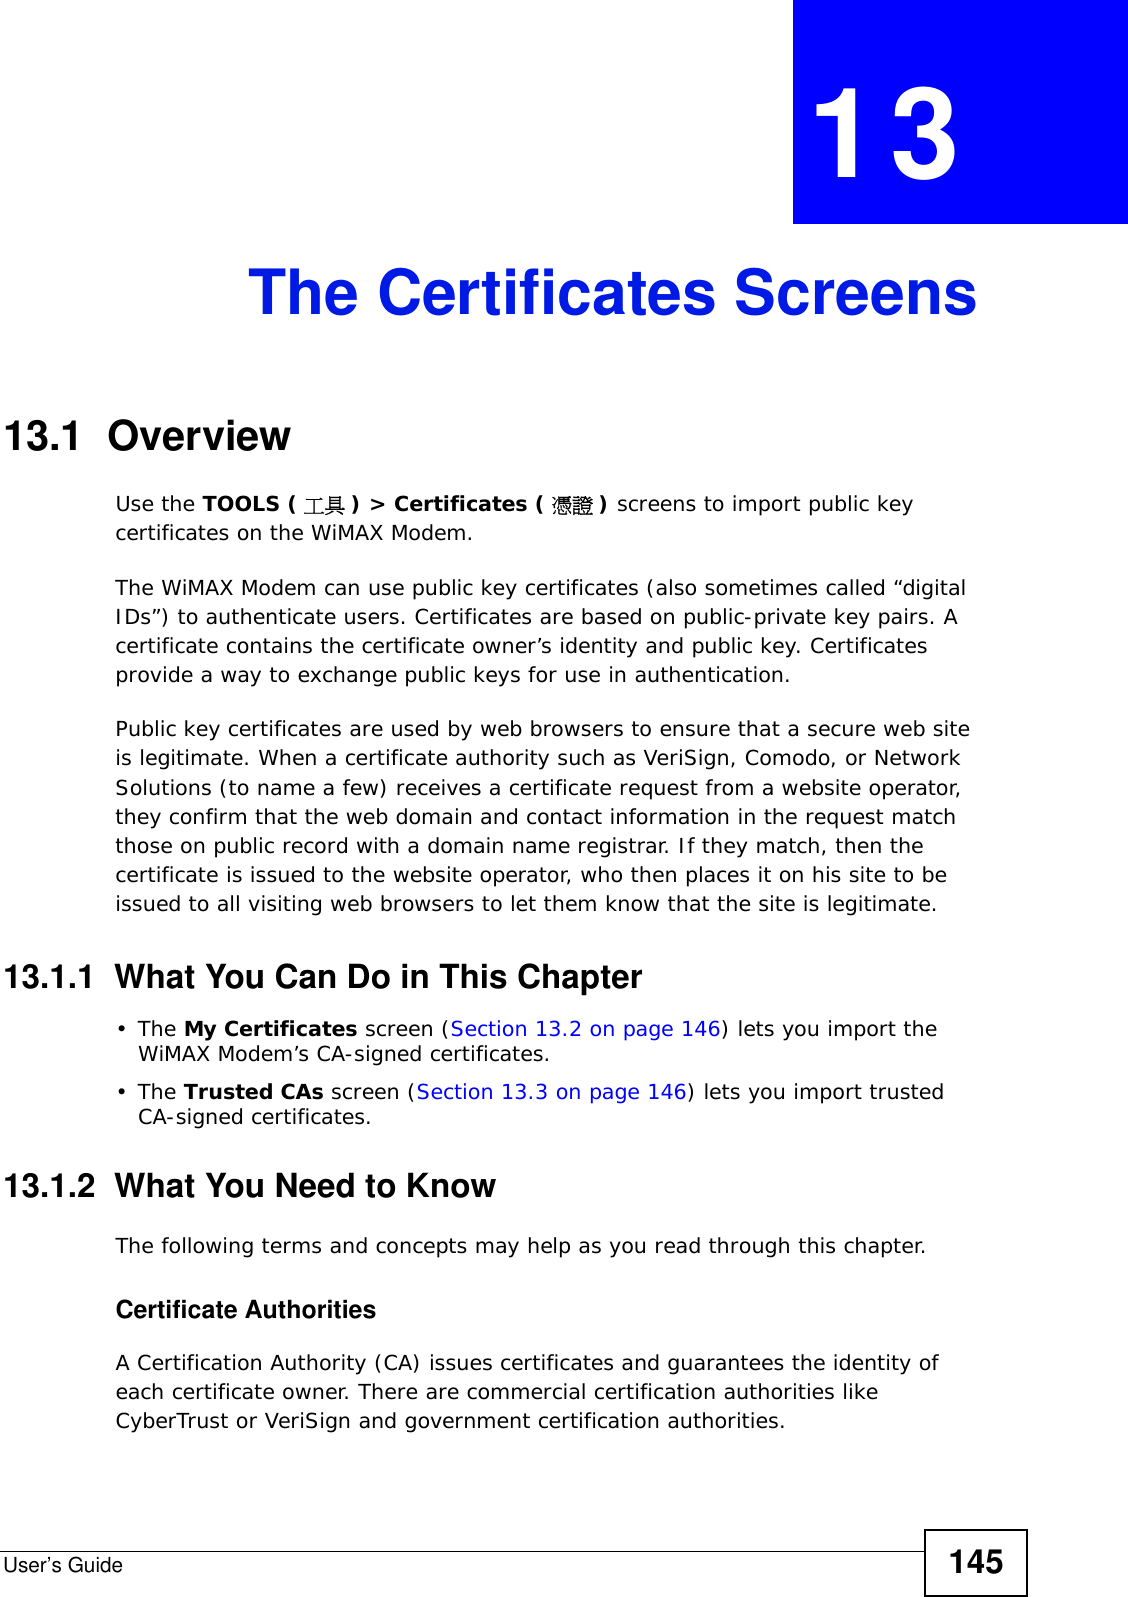
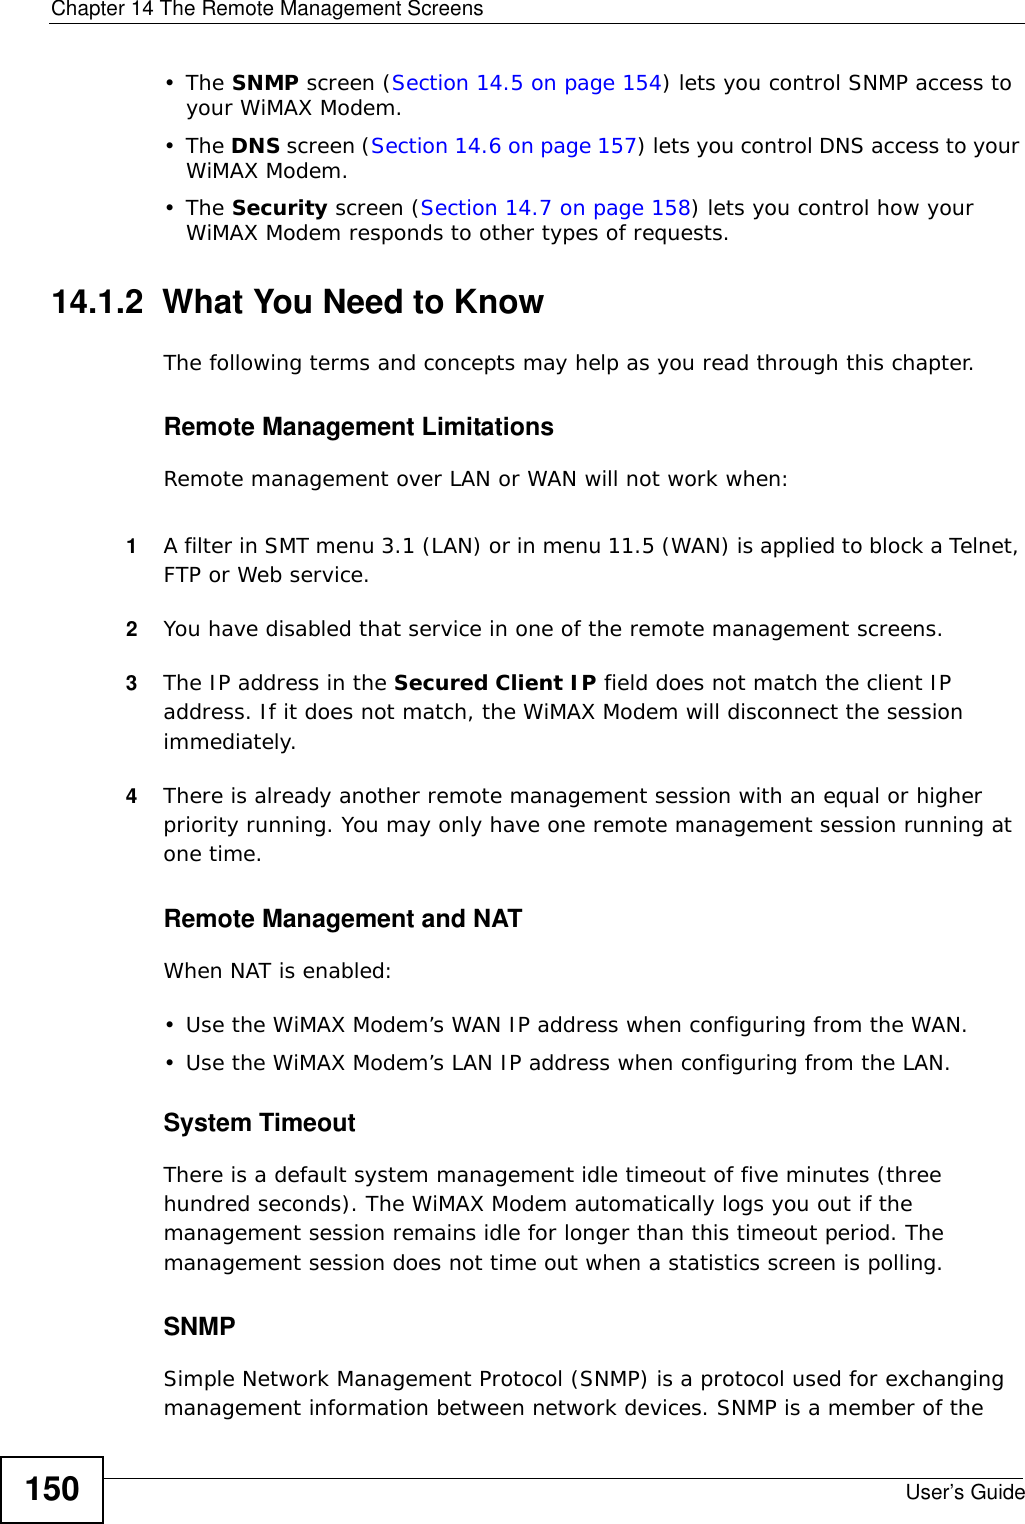
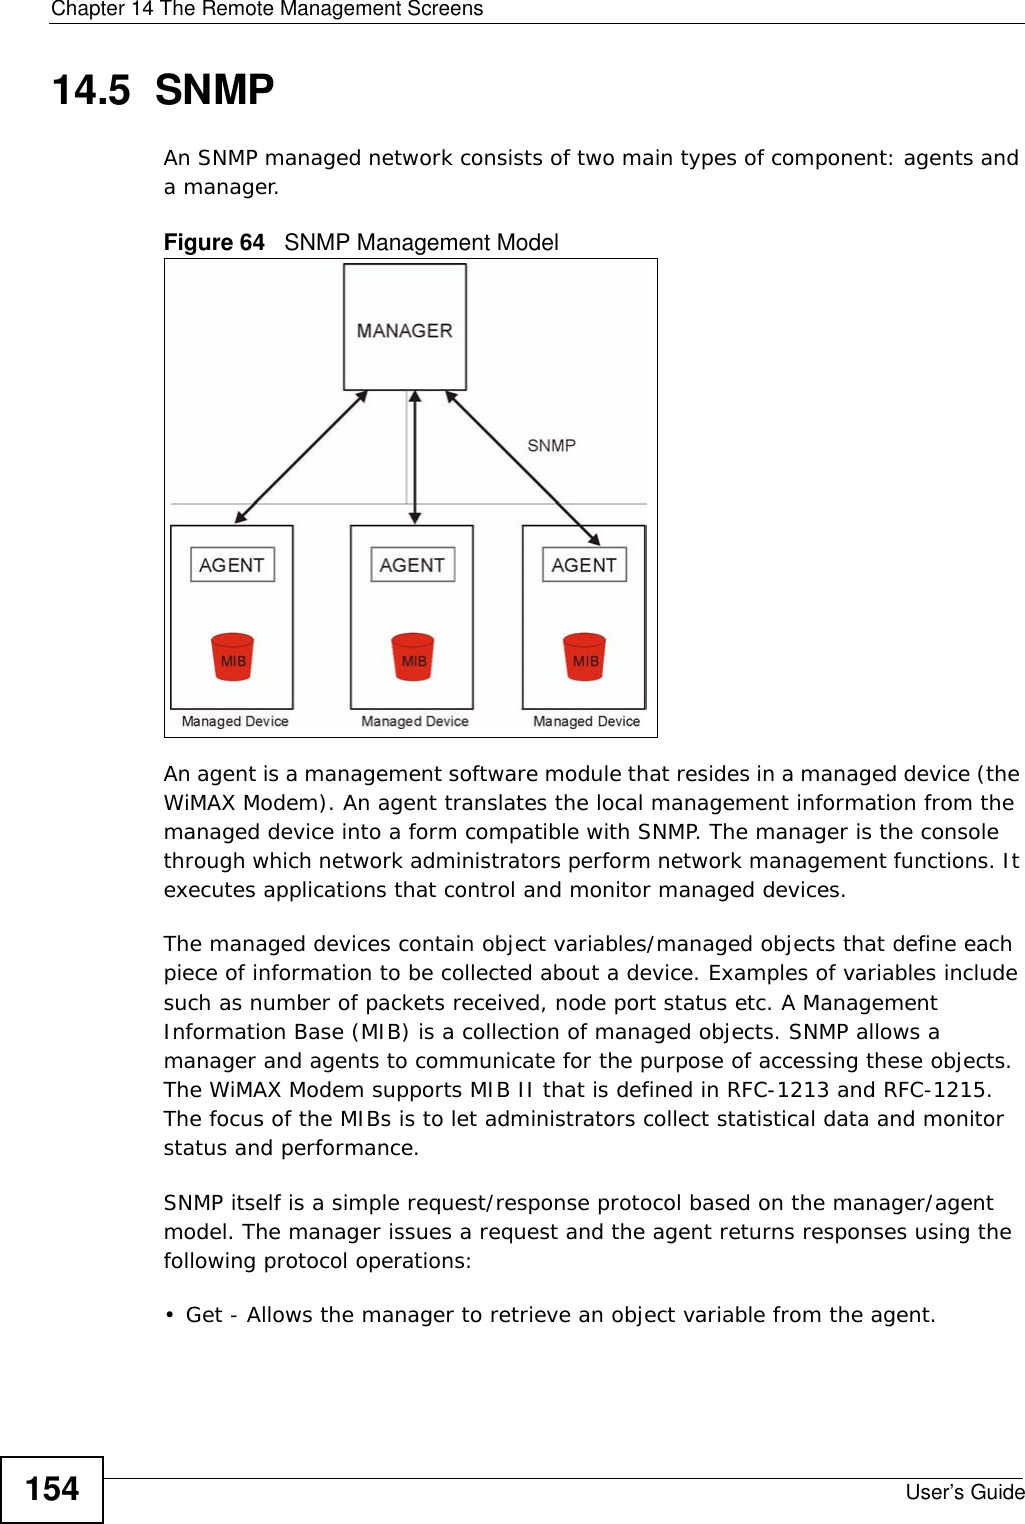
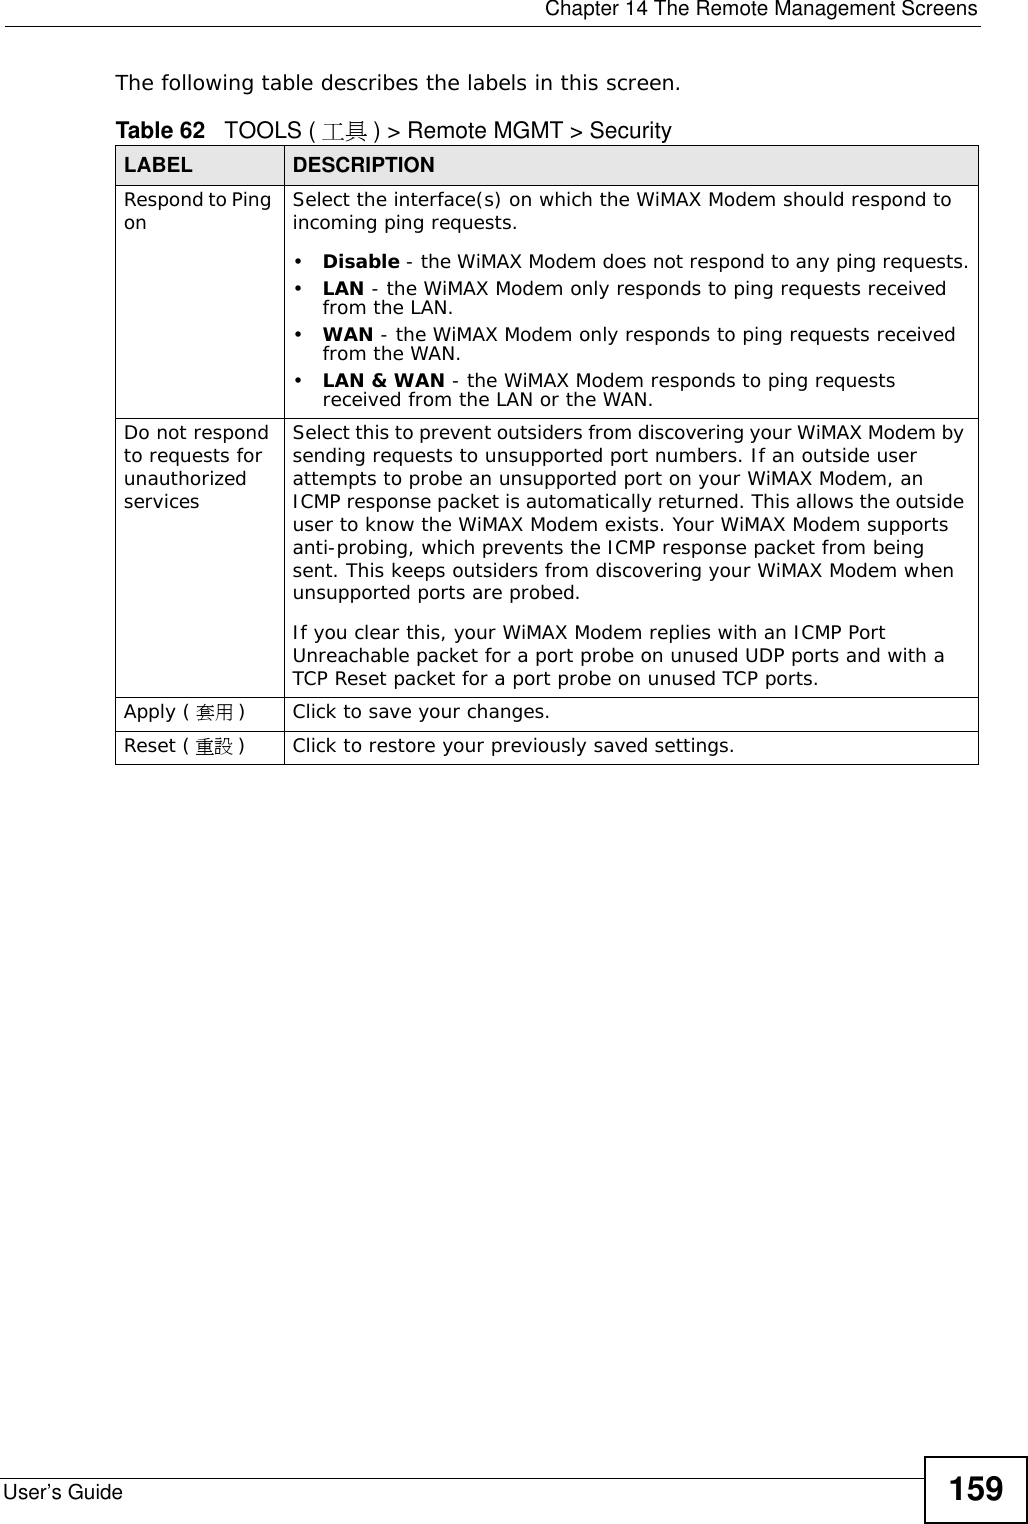
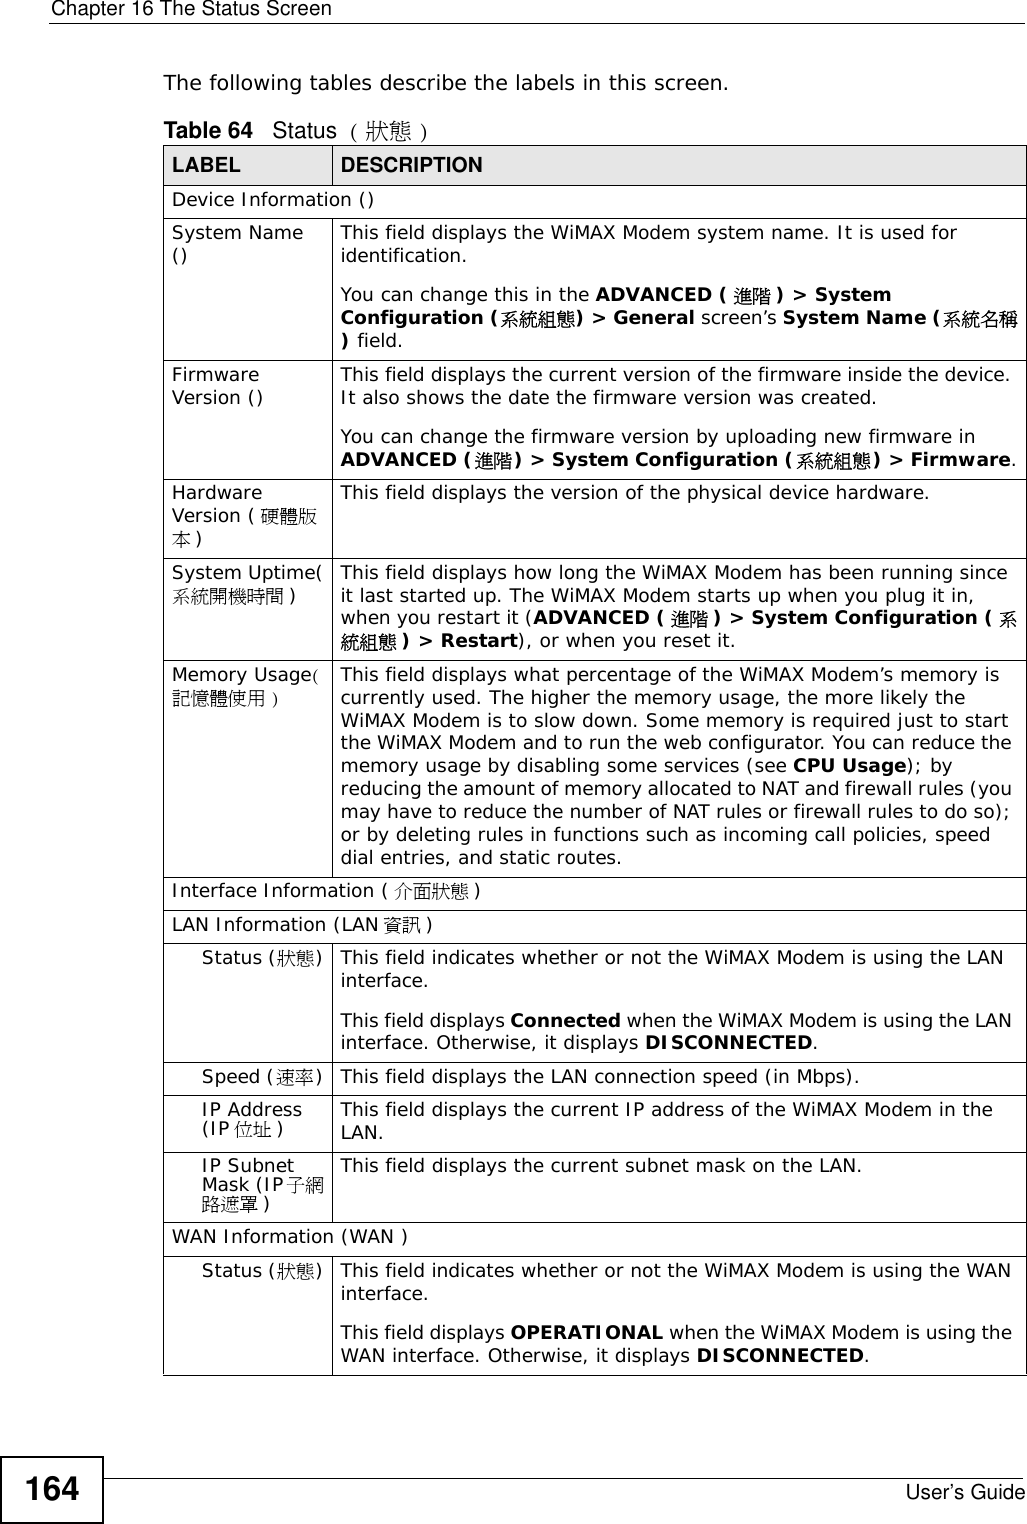
![Chapter 7 The WAN Configuration ScreensUser’s Guide 875Enter the ID of your service provider you were given in the Service Provider ID [1] ( 提供者 ID[1]) field.6Configure the Base Station ( 基地台 ) (ALU in this example) and Function Enabling ( 功能啟動 ) (All of the four options are selected in this example) fields.The screen appears as follows.Figure 33 Completing the WiMAX Frequency Screen7Click Apply ( 套用 ). The WiMAX Modem stores your settings. When the WiMAX Modem searches for available frequencies, it scans all frequencies from DL Frequency [1] (頻率[1]) to DL Frequency [4] (頻率[4]). When it finds an available connection, the fields in this screen will be automatically set to use that frequency.](https://usermanual.wiki/ZyXEL-Communications/MAX207HW2.Manual-1/User-Guide-1139778-Page-86.png)


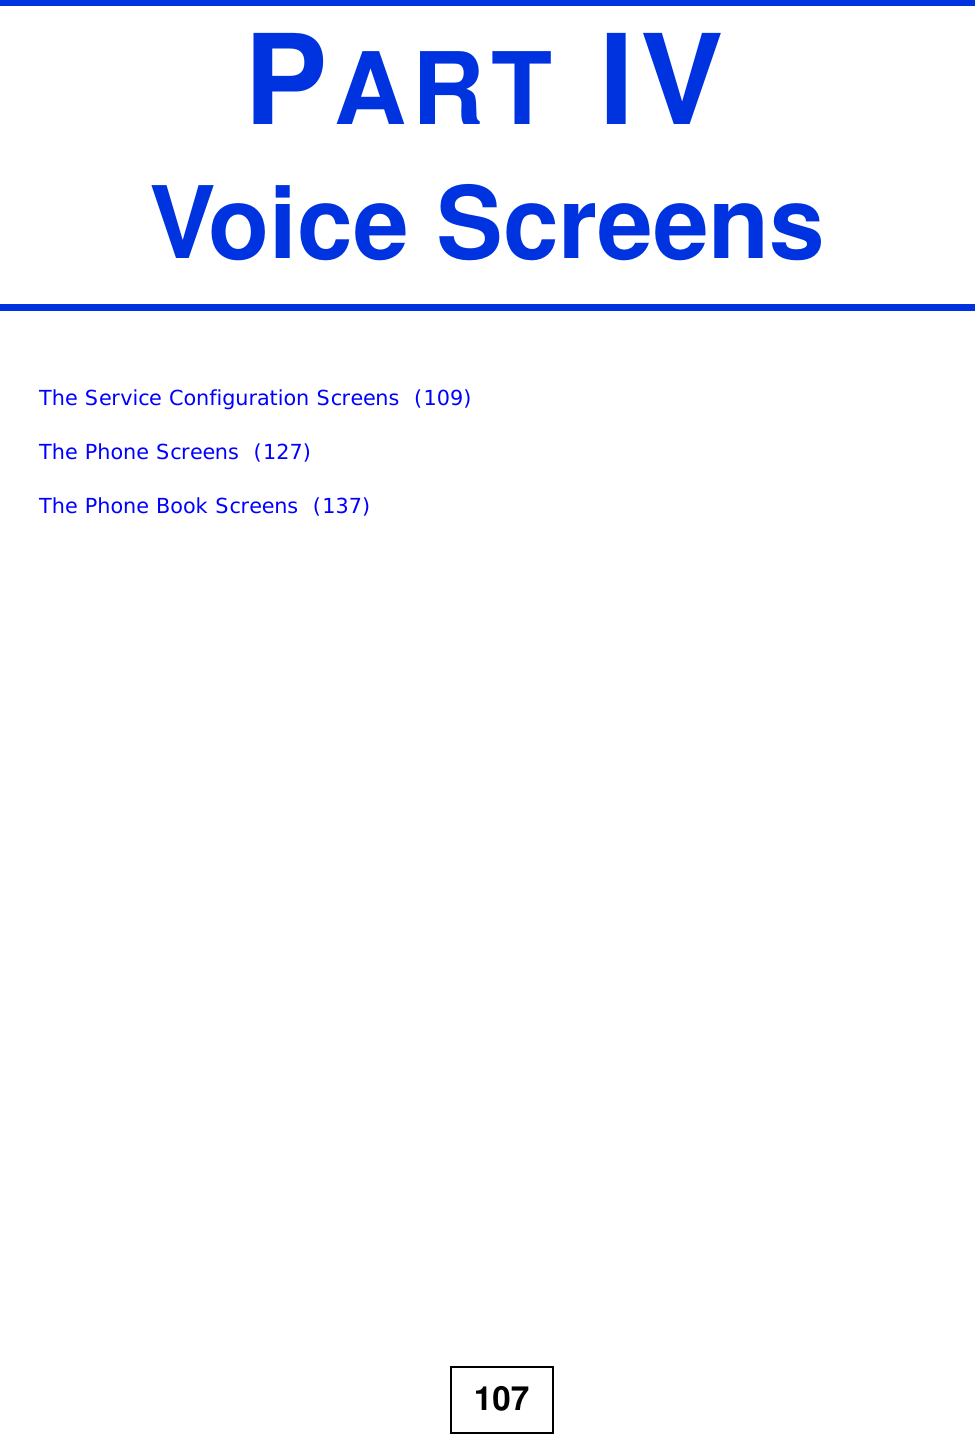
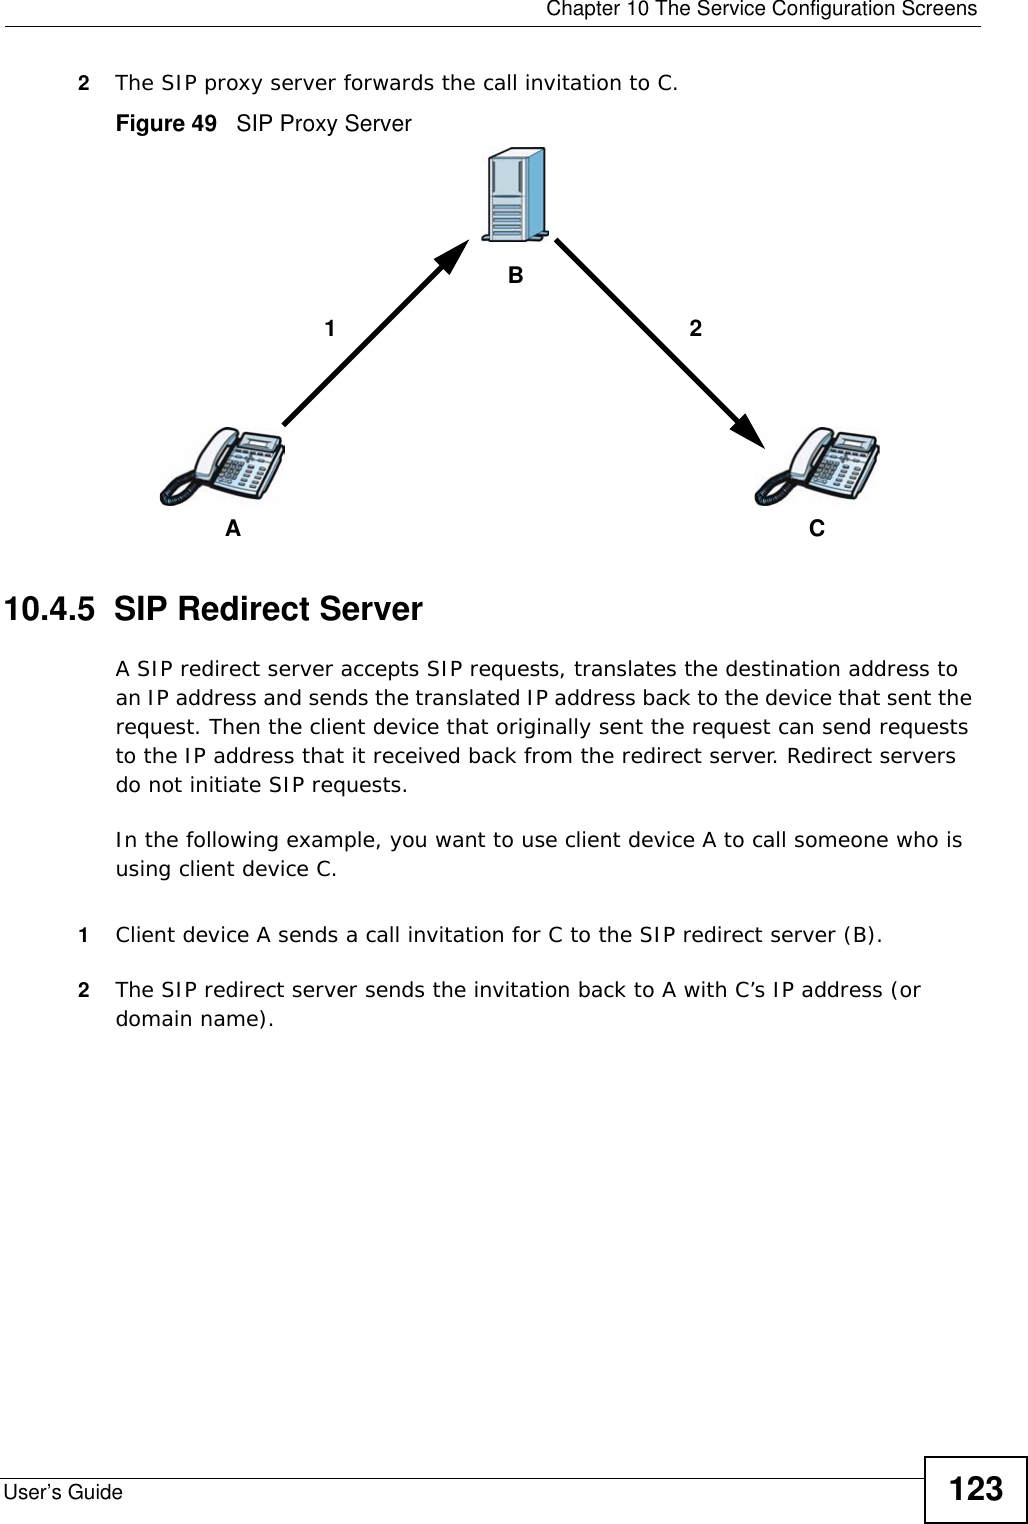


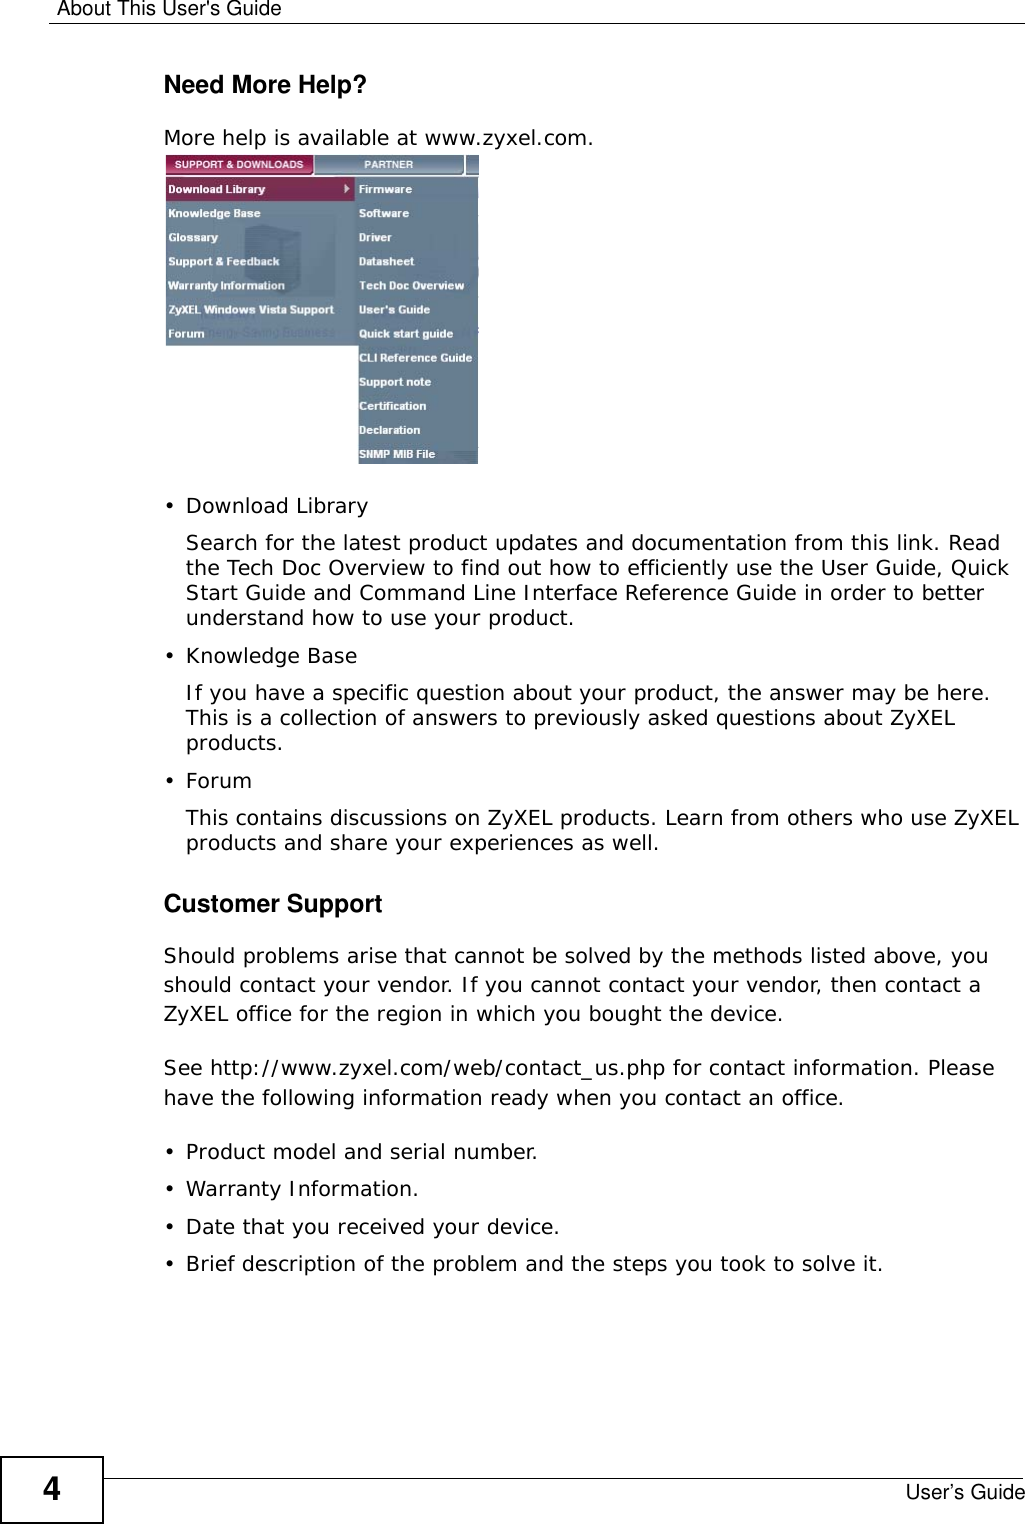
![Chapter 17 TroubleshootingUser’s Guide 171• If you changed the IP address (Section 3.2 on page 32), use the new IP address.• If you changed the IP address and have forgotten it, see the troubleshooting suggestions for I forgot the IP address for the WiMAX Modem.2Check the hardware connections, and make sure the LEDs are behaving as expected. See the Quick Start Guide and Section 1.2.1 on page 21.3Make sure your Internet browser does not block pop-up windows and has JavaScript and Java enabled. See Appendix C on page 219.4If there is a DHCP server on your network, make sure your computer is using a dynamic IP address. Your WiMAX Modem is a DHCP server by default.If there is no DHCP server on your network, make sure your computer’s IP address is in the same subnet as the WiMAX Modem. See Appendix D on page 229.5Reset the WiMAX Modem to its factory defaults, and try to access the WiMAX Modem with the default IP address. See Section 9.5 on page 105.6If the problem continues, contact the network administrator or vendor, or try one of the advanced suggestions.Advanced Suggestions• Try to access the WiMAX Modem using another service, such as Telnet. If you can access the WiMAX Modem, check the remote management settings and firewall rules to find out why the WiMAX Modem does not respond to HTTP.• If your computer is connected wirelessly, use a computer that is connected to a LAN/ETHERNET port.I can see the Login screen, but I cannot log in to the WiMAX Modem.1Make sure you have entered the user name and password correctly. The default user name is @dmin, and the default password is 284wj/6. These fields are case-sensitive, so make sure [Caps Lock] is not on.2You cannot log in to the web configurator while someone is using Telnet to access the WiMAX Modem. Log out of the WiMAX Modem in the other session, or ask the person who is logged in to log out.3Disconnect and re-connect the power adapter or cord to the WiMAX Modem.4If this does not work, you have to reset the WiMAX Modem to its factory defaults. See Section 9.4 on page 104.](https://usermanual.wiki/ZyXEL-Communications/MAX207HW2.Manual-1/User-Guide-1139778-Page-170.png)
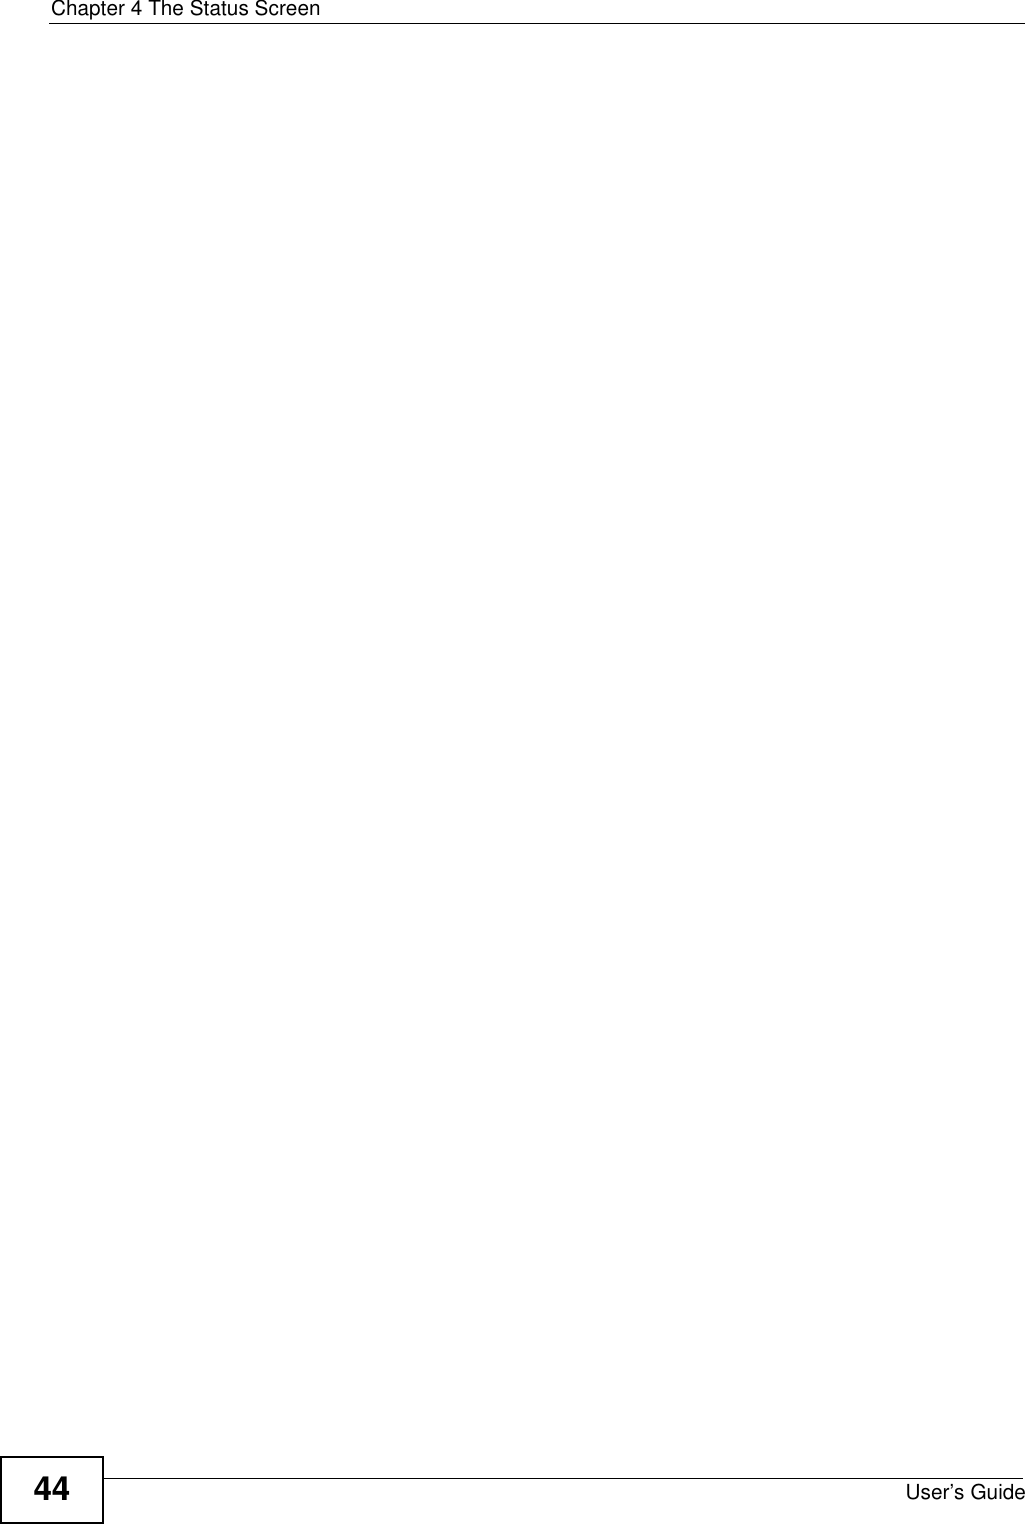
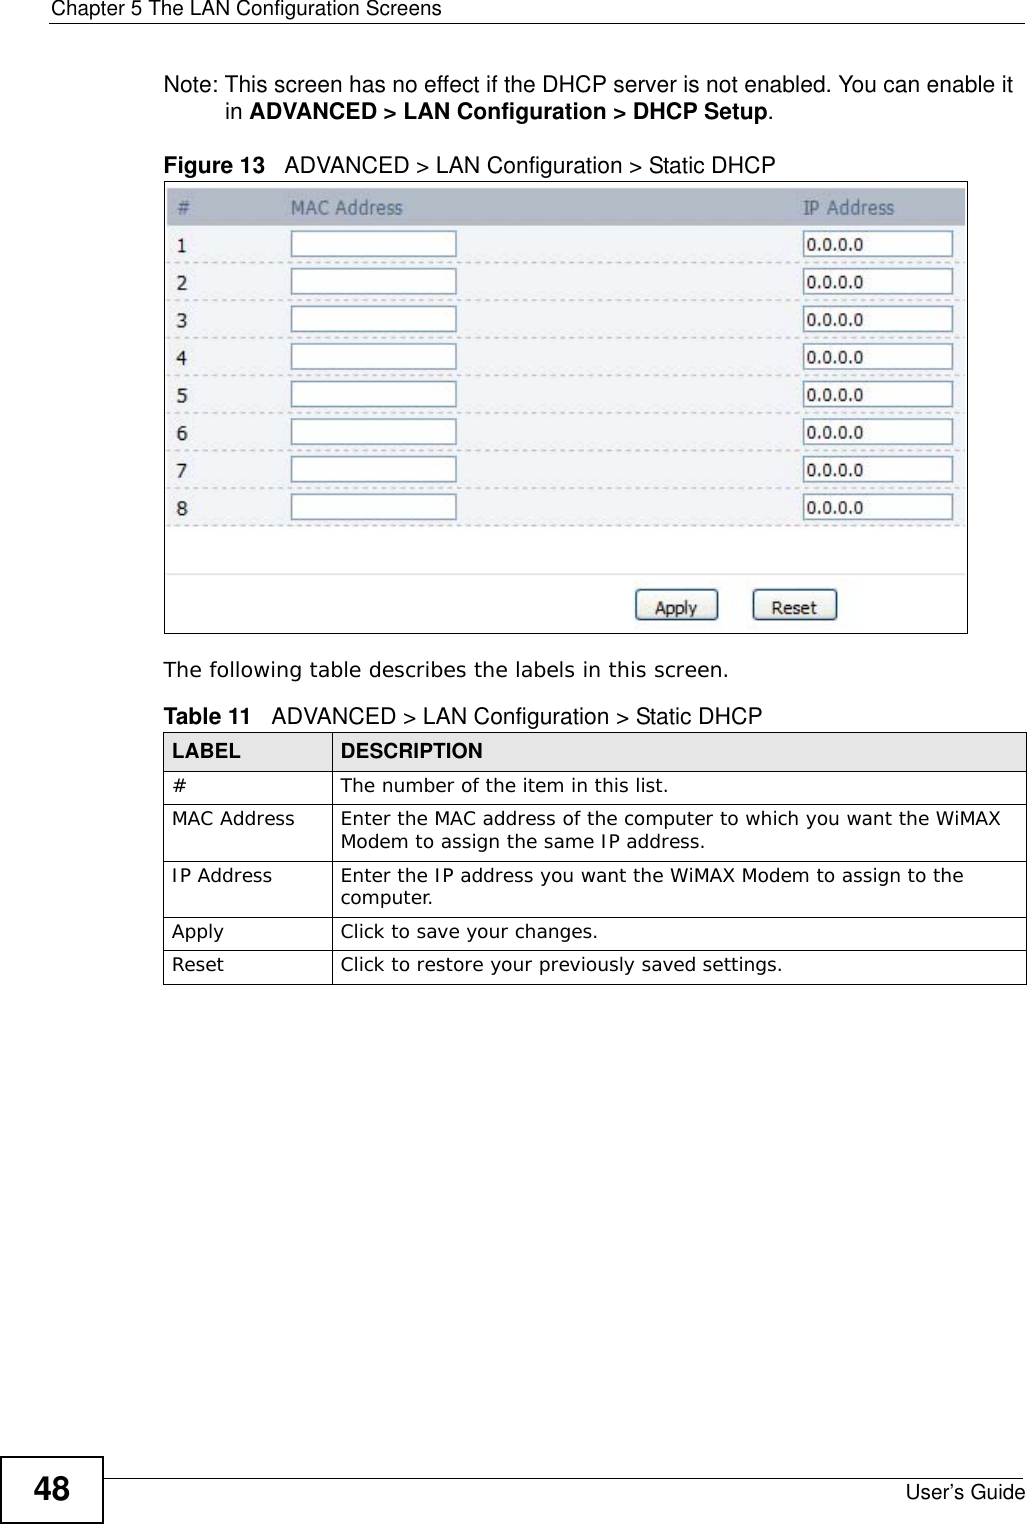
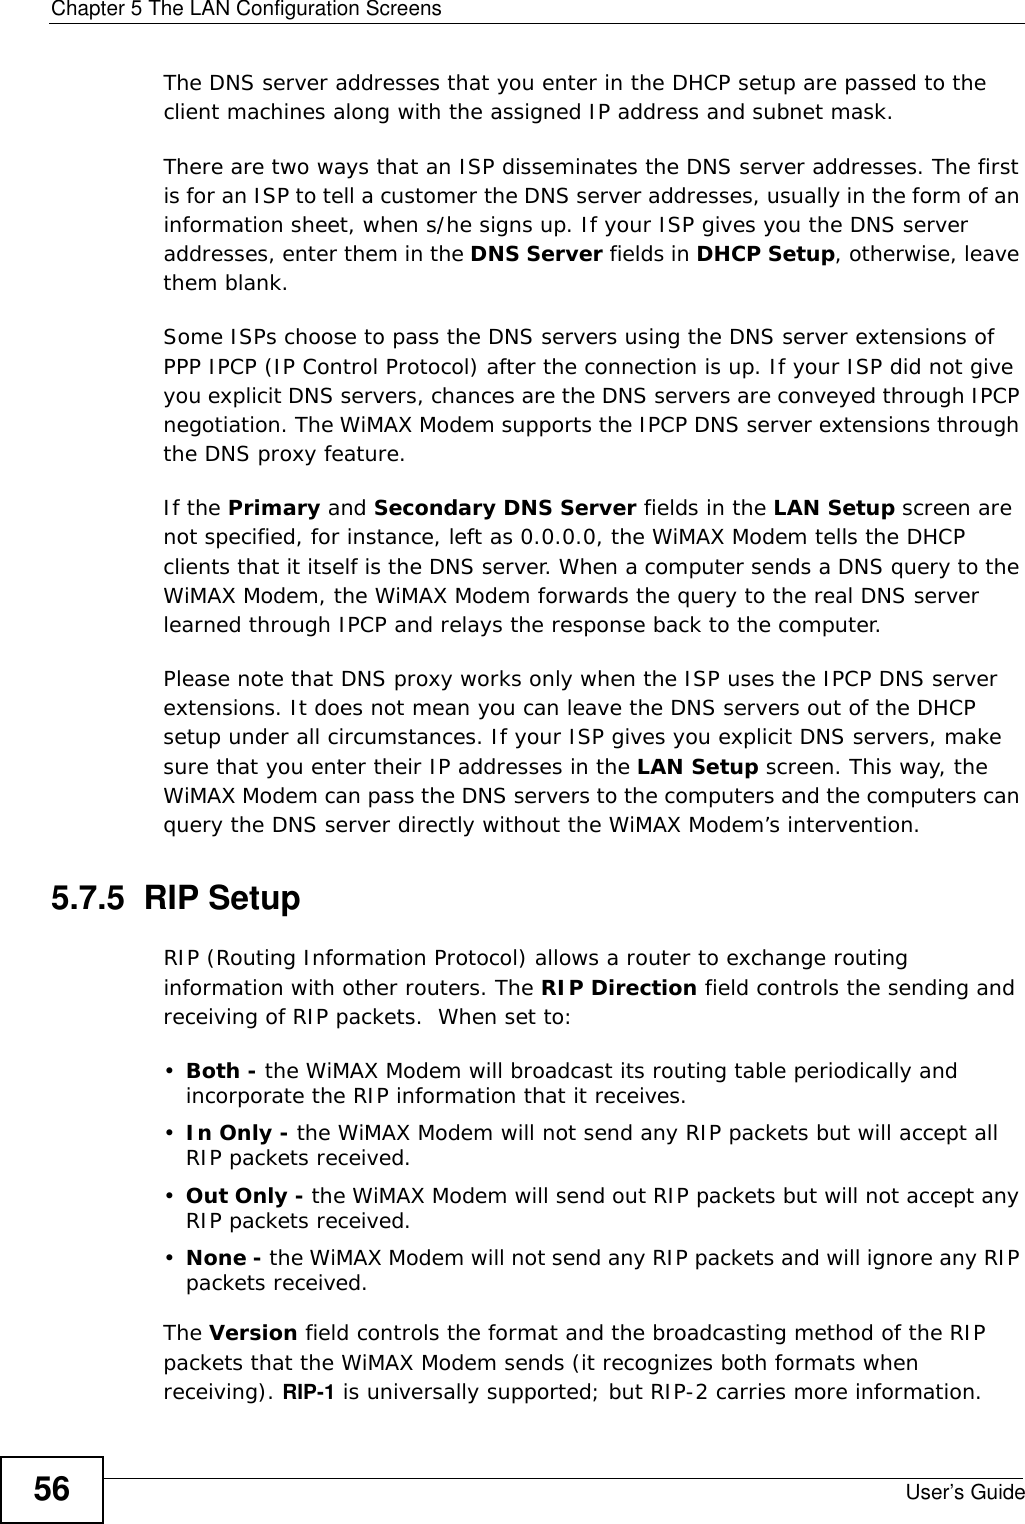
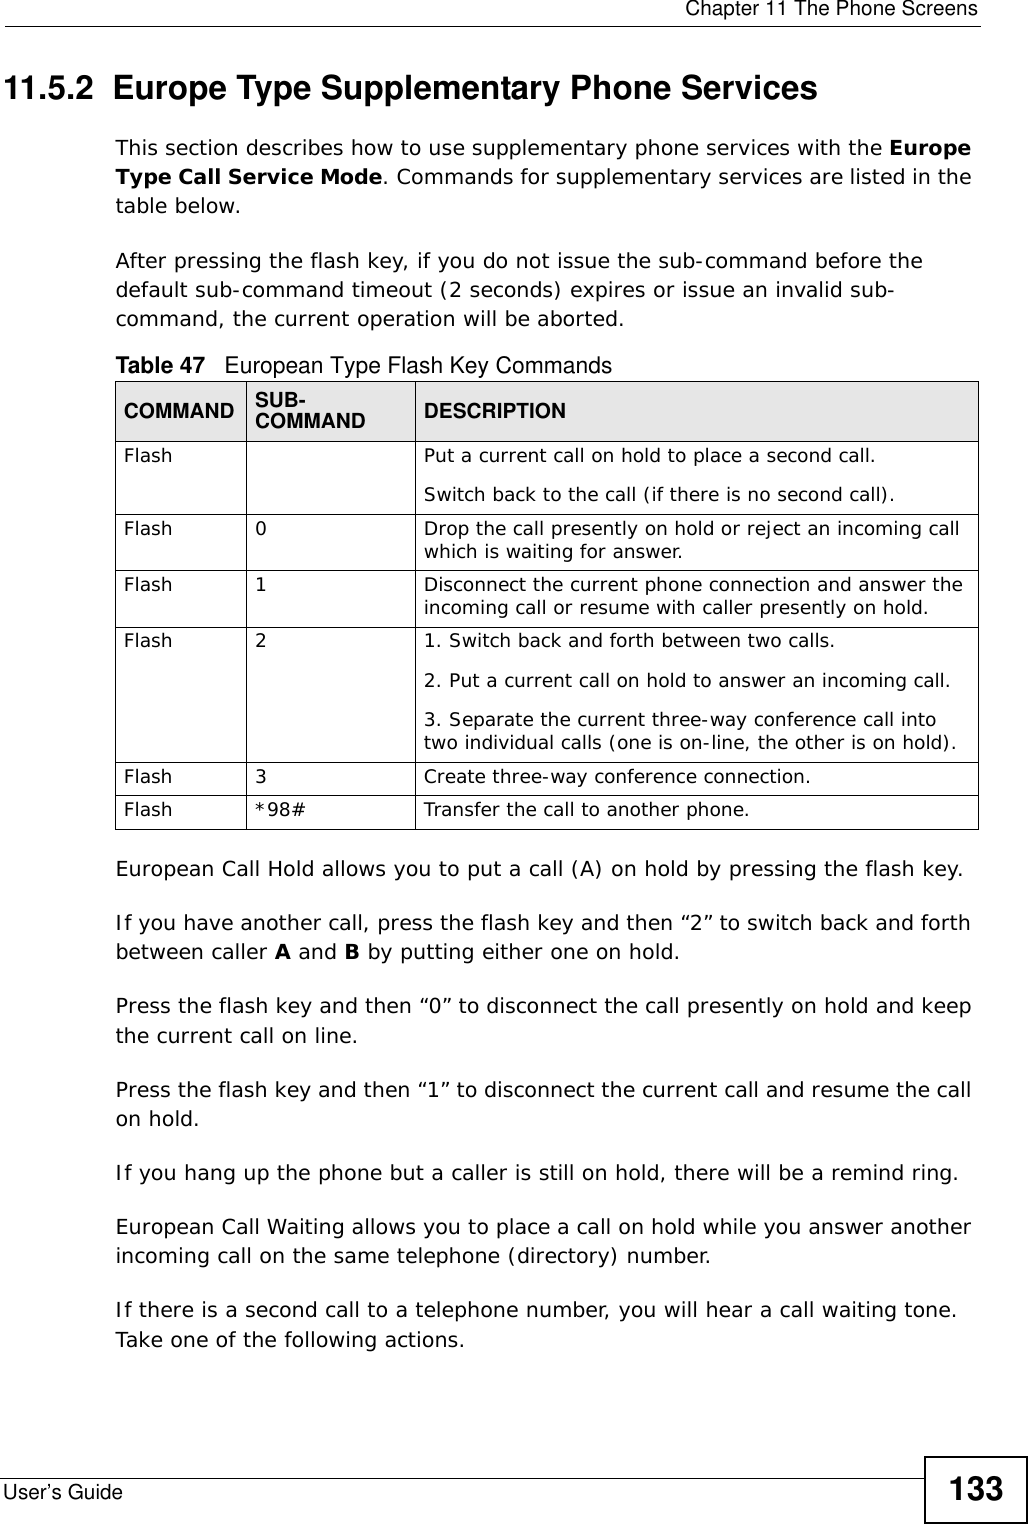
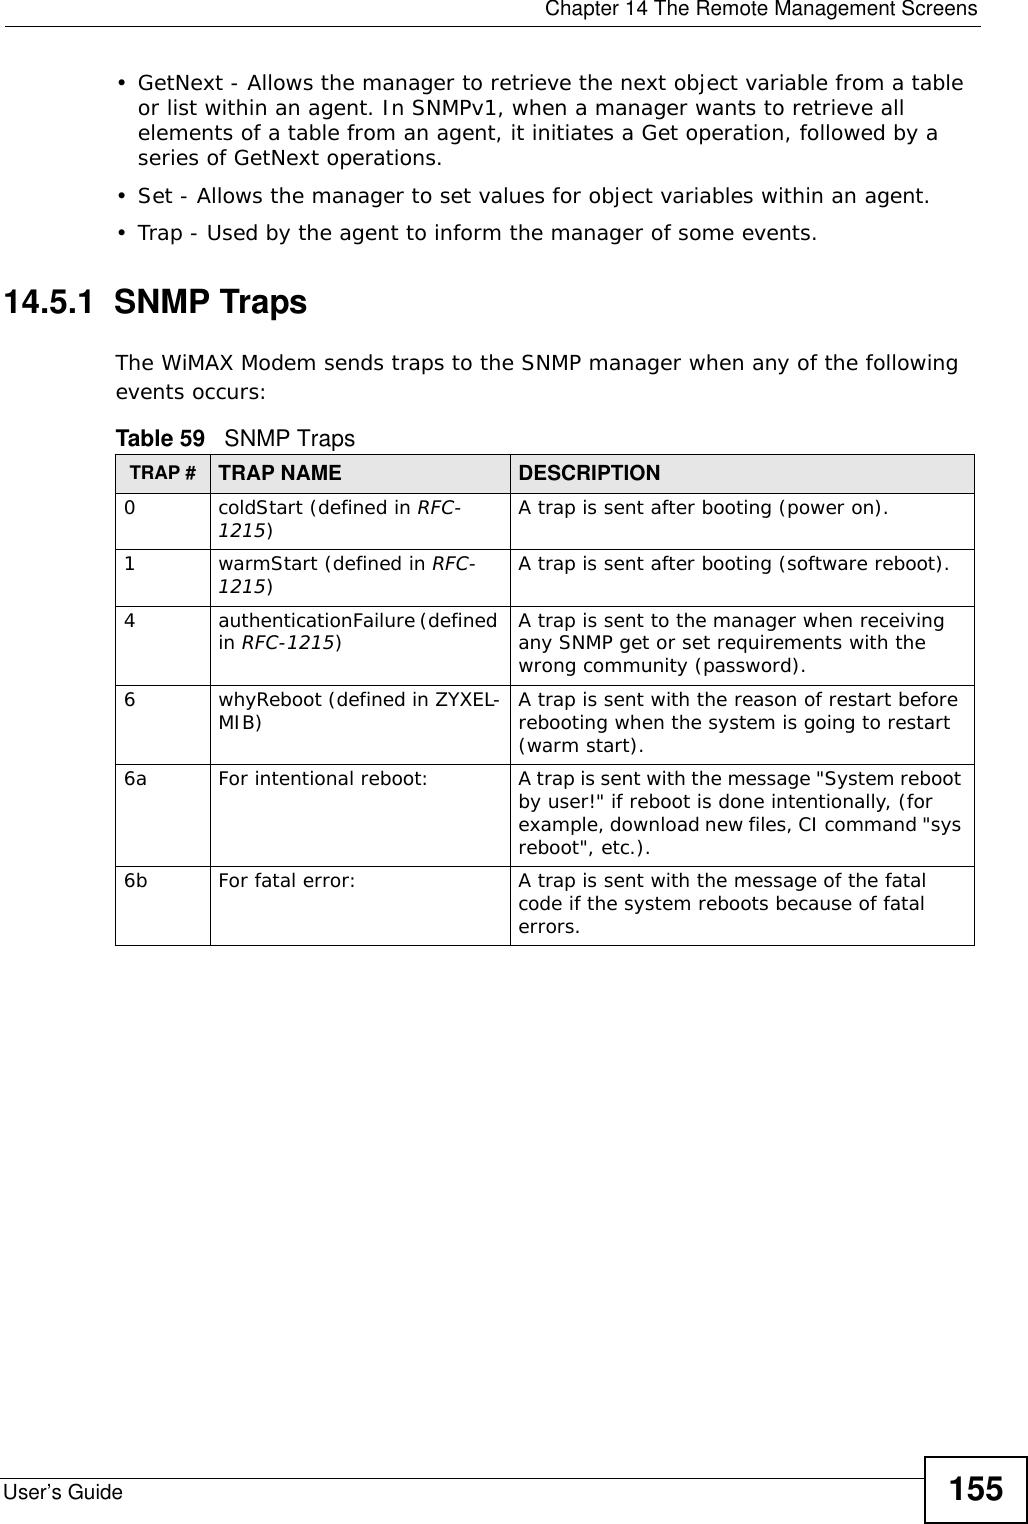
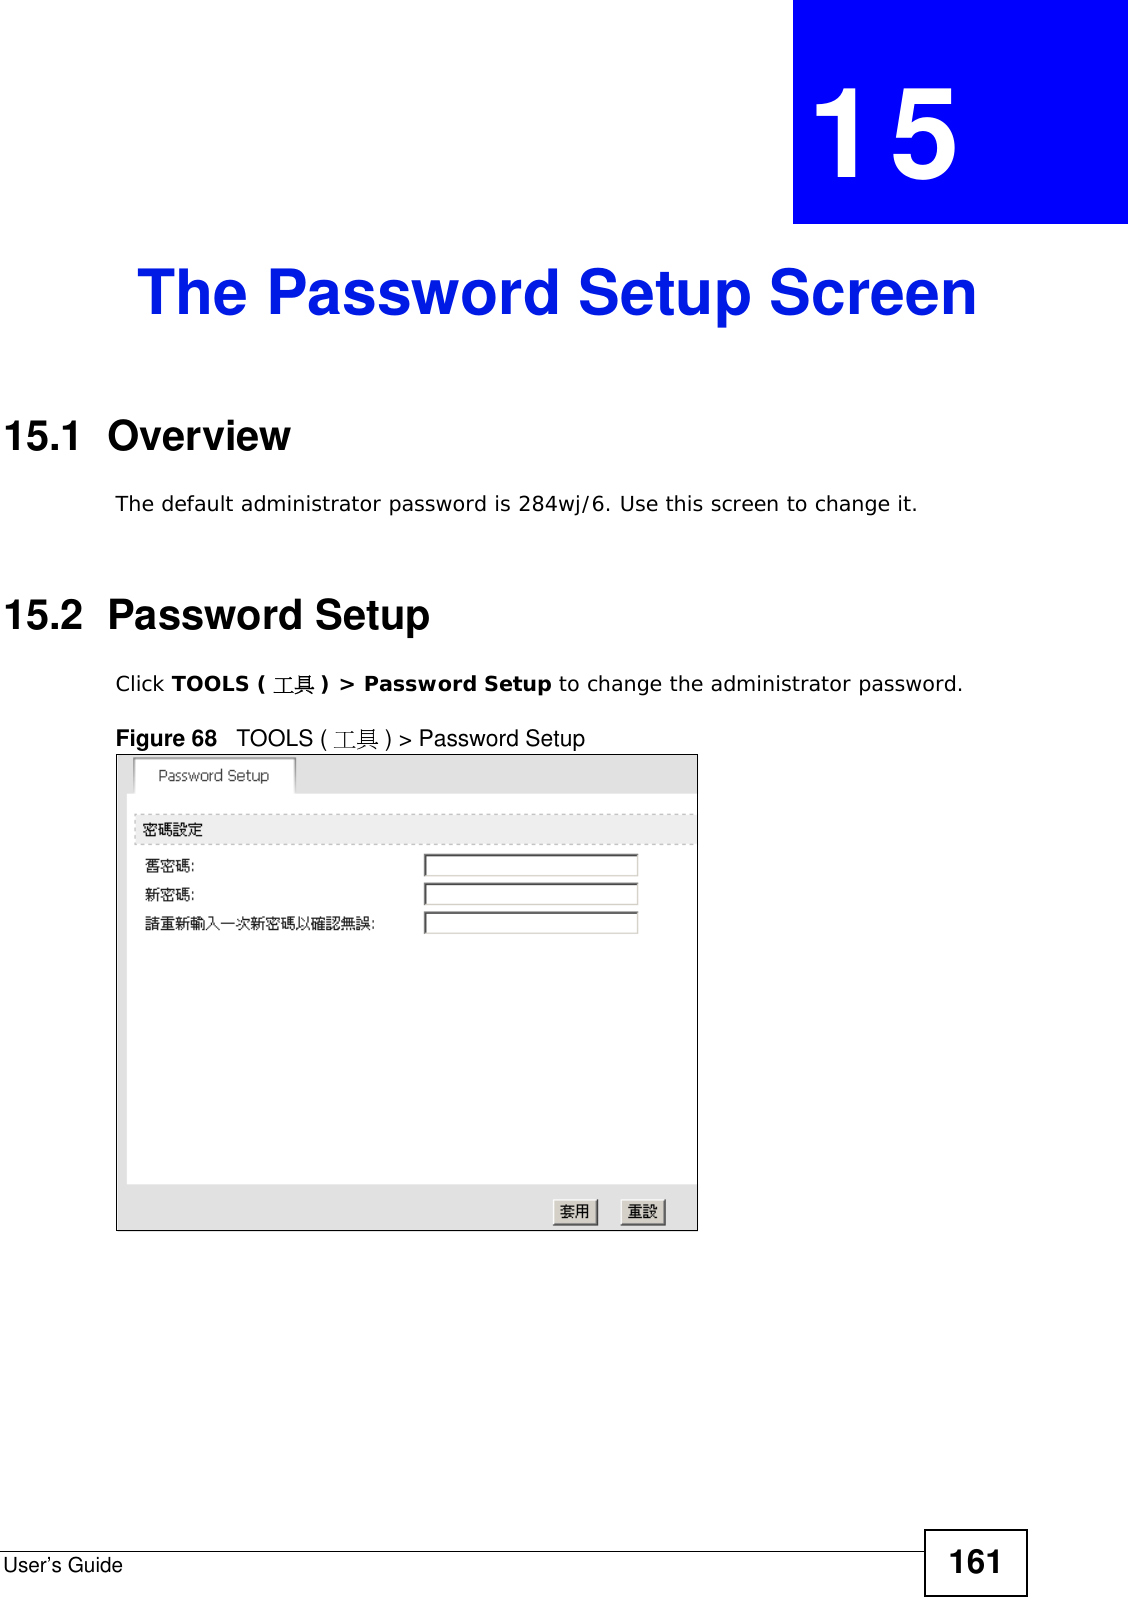
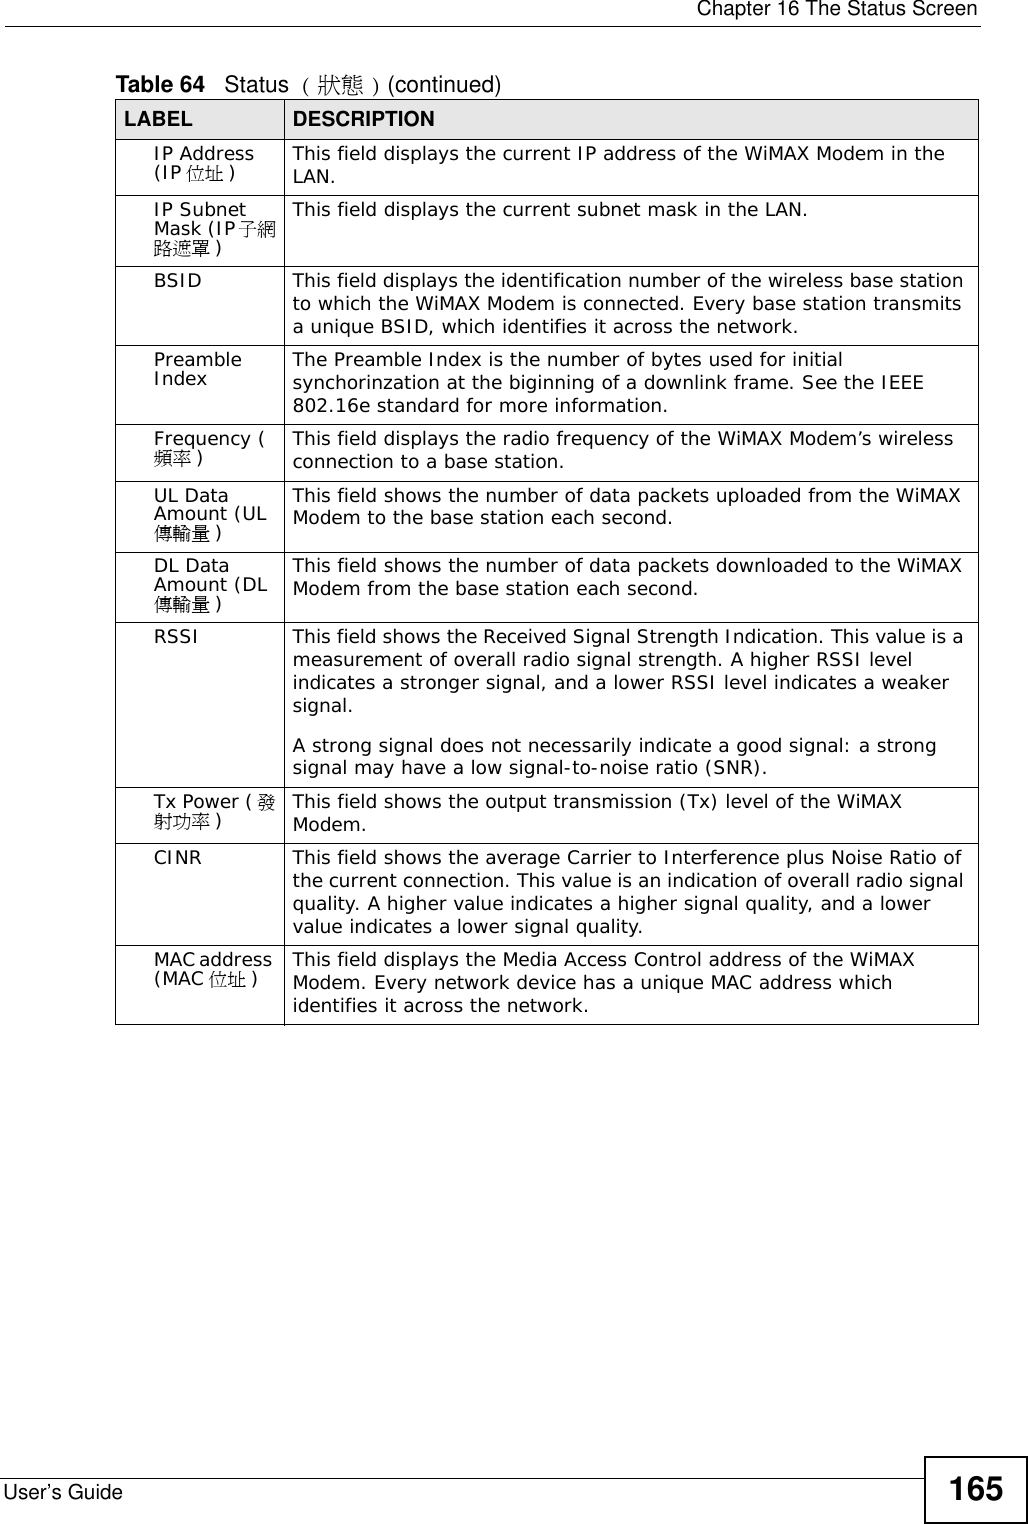
![Chapter 17 TroubleshootingUser’s Guide172I cannot Telnet to the WiMAX Modem.See the troubleshooting suggestions for I cannot see or access the Login screen in the web configurator. Ignore the suggestions about your browser.17.3 Internet AccessI cannot access the Internet.1Check the hardware connections, and make sure the LEDs are behaving as expected. See the Quick Start Guide and Section 1.2.1 on page 21.2Make sure you entered your ISP account information correctly in the wizard. These fields are case-sensitive, so make sure [Caps Lock] is not on.3Check your security settings. In the web configurator, go to the Status screen. Click the WiMAX Profile link in the Summary box and make sure that you are using the correct security settings for your Internet account.4Check your WiMAX settings. The WiMAX Modem may have been set to search the wrong frequencies for a wireless connection. In the web configurator, go to the Status screen. Click the WiMAX Site Information link in the Summary box and ensure that the values are correct. If the values are incorrect, enter the correct frequency settings in the ADVANCED (進階) > WAN Configuration (WAN設定) > WiMAX Configuration screen. If you are unsure of the correct values, contact your service provider.5If you are trying to access the Internet wirelessly, make sure the wireless settings in the wireless client are the same as the settings in the AP.6Disconnect all the cables from your WiMAX Modem, and follow the directions in the Quick Start Guide again.7If the problem continues, contact your ISP.I cannot access the Internet any more. I had access to the Internet (with the WiMAX Modem), but my Internet connection is not available any more.](https://usermanual.wiki/ZyXEL-Communications/MAX207HW2.Manual-1/User-Guide-1139778-Page-171.png)