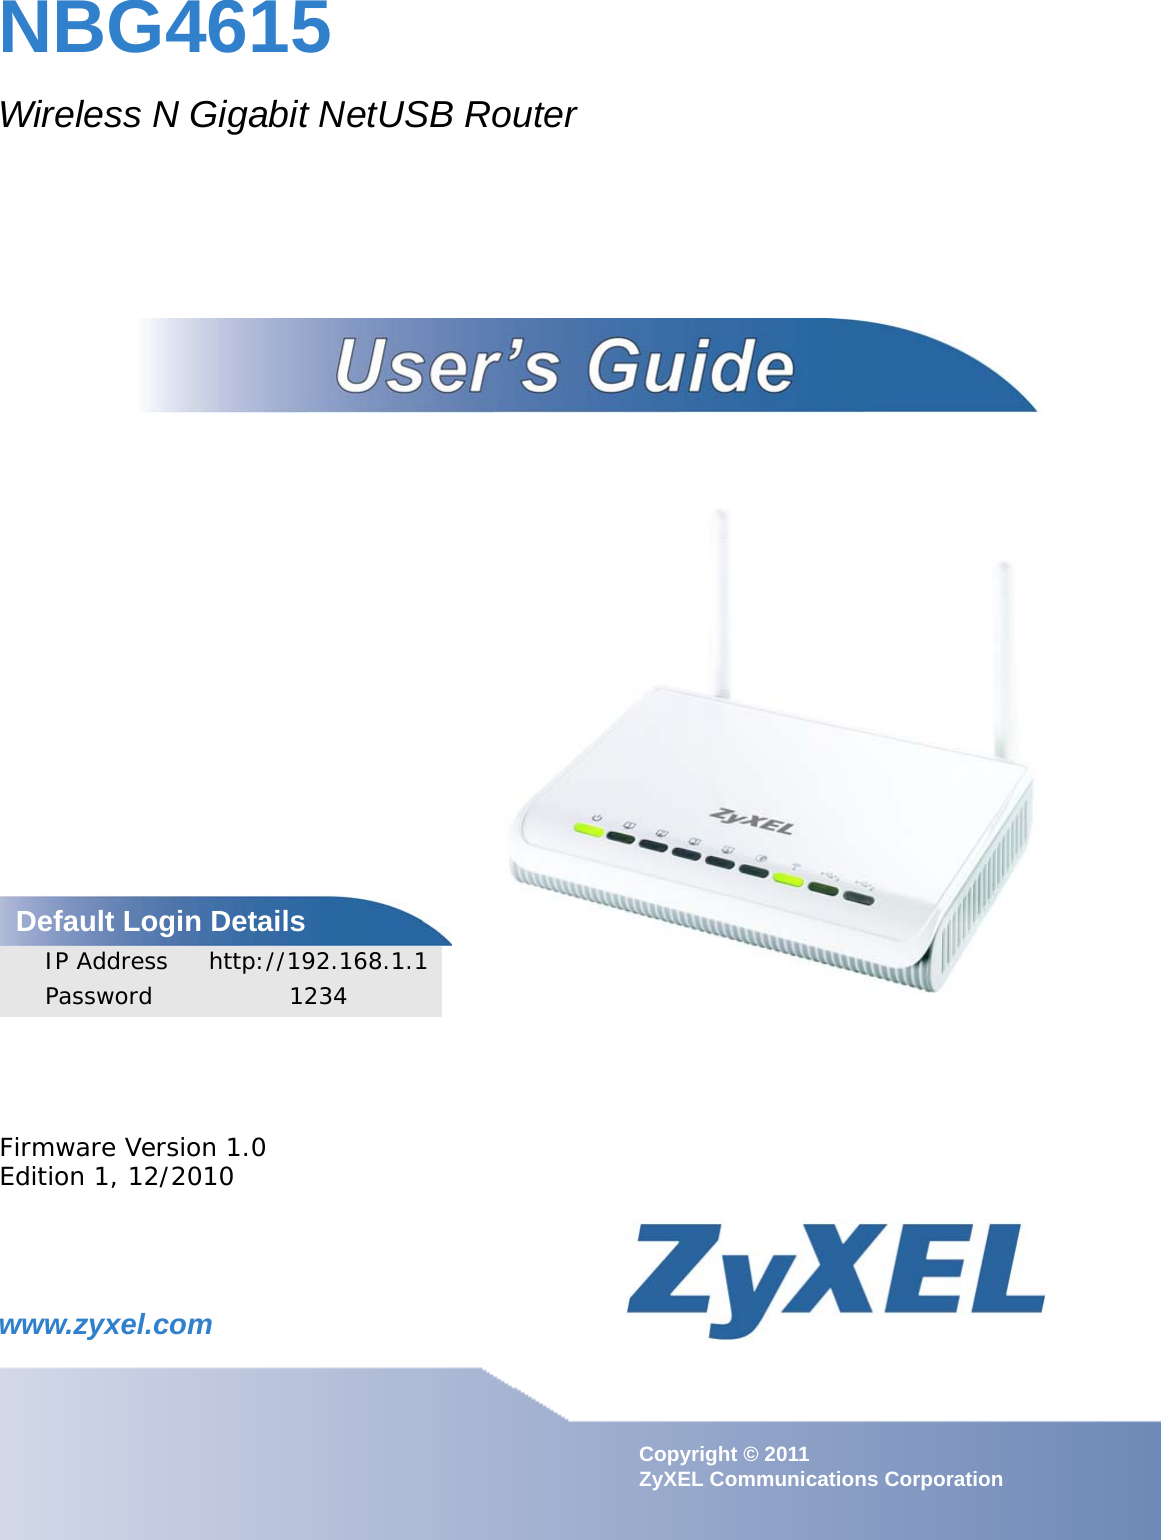
ZyXEL Communications NBG4615 Wireless N Gigabit NetUSB Router User Manual 1
ZyXEL Communications Corporation Wireless N Gigabit NetUSB Router 1
UserManual.wiki
>
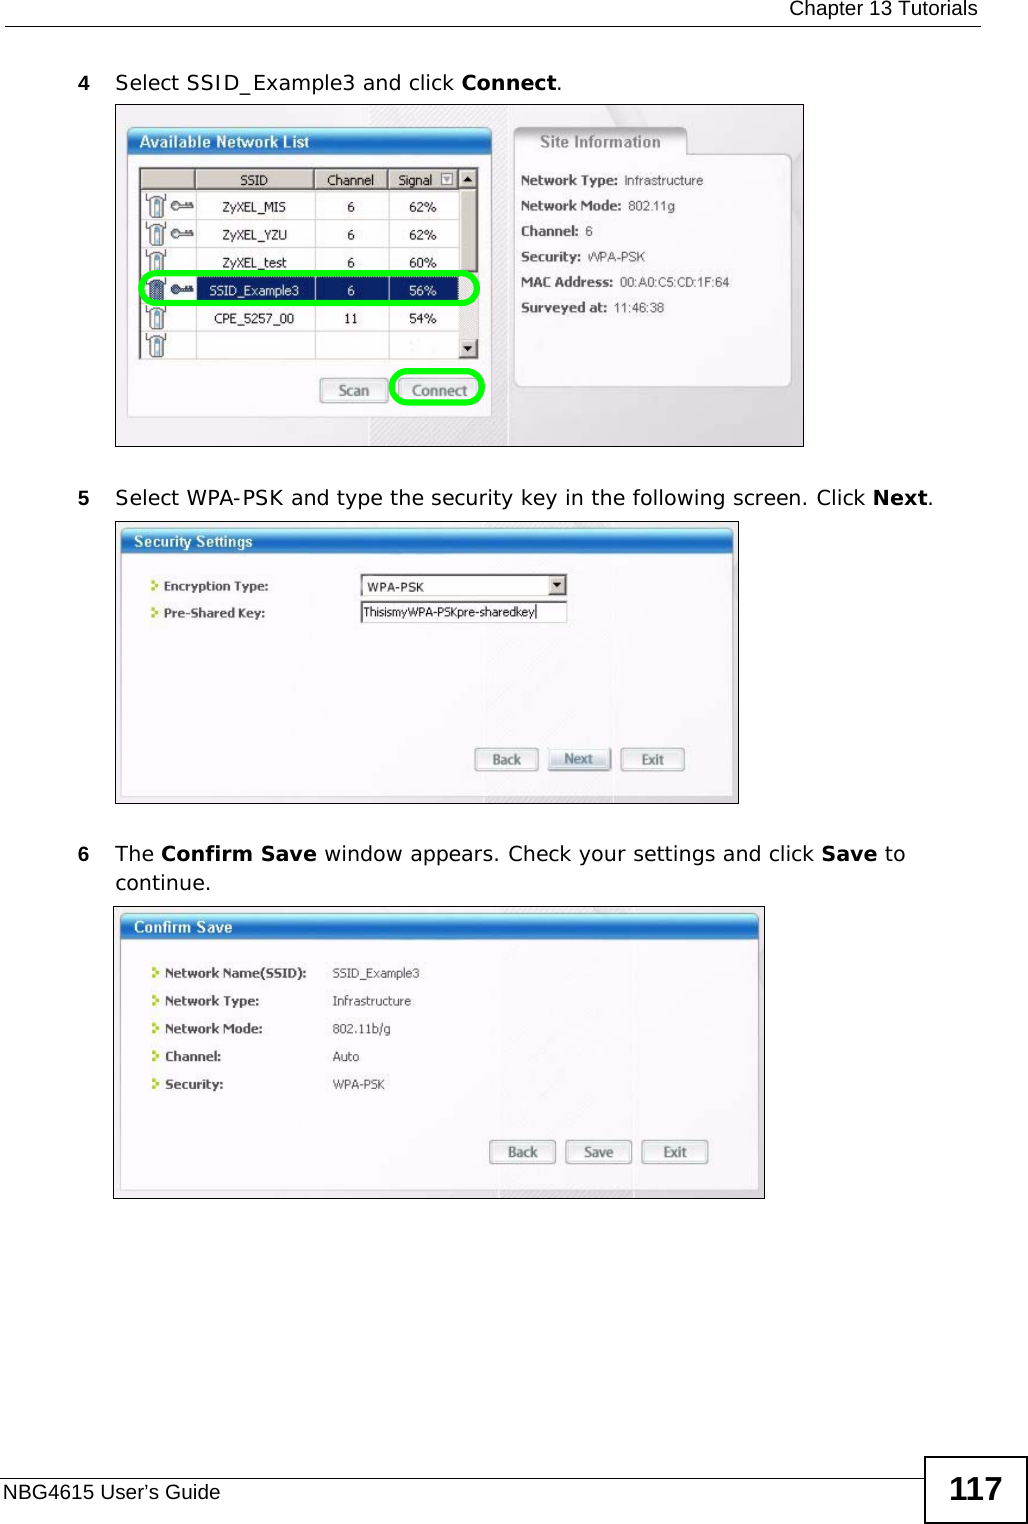
ZyXEL Communications
>
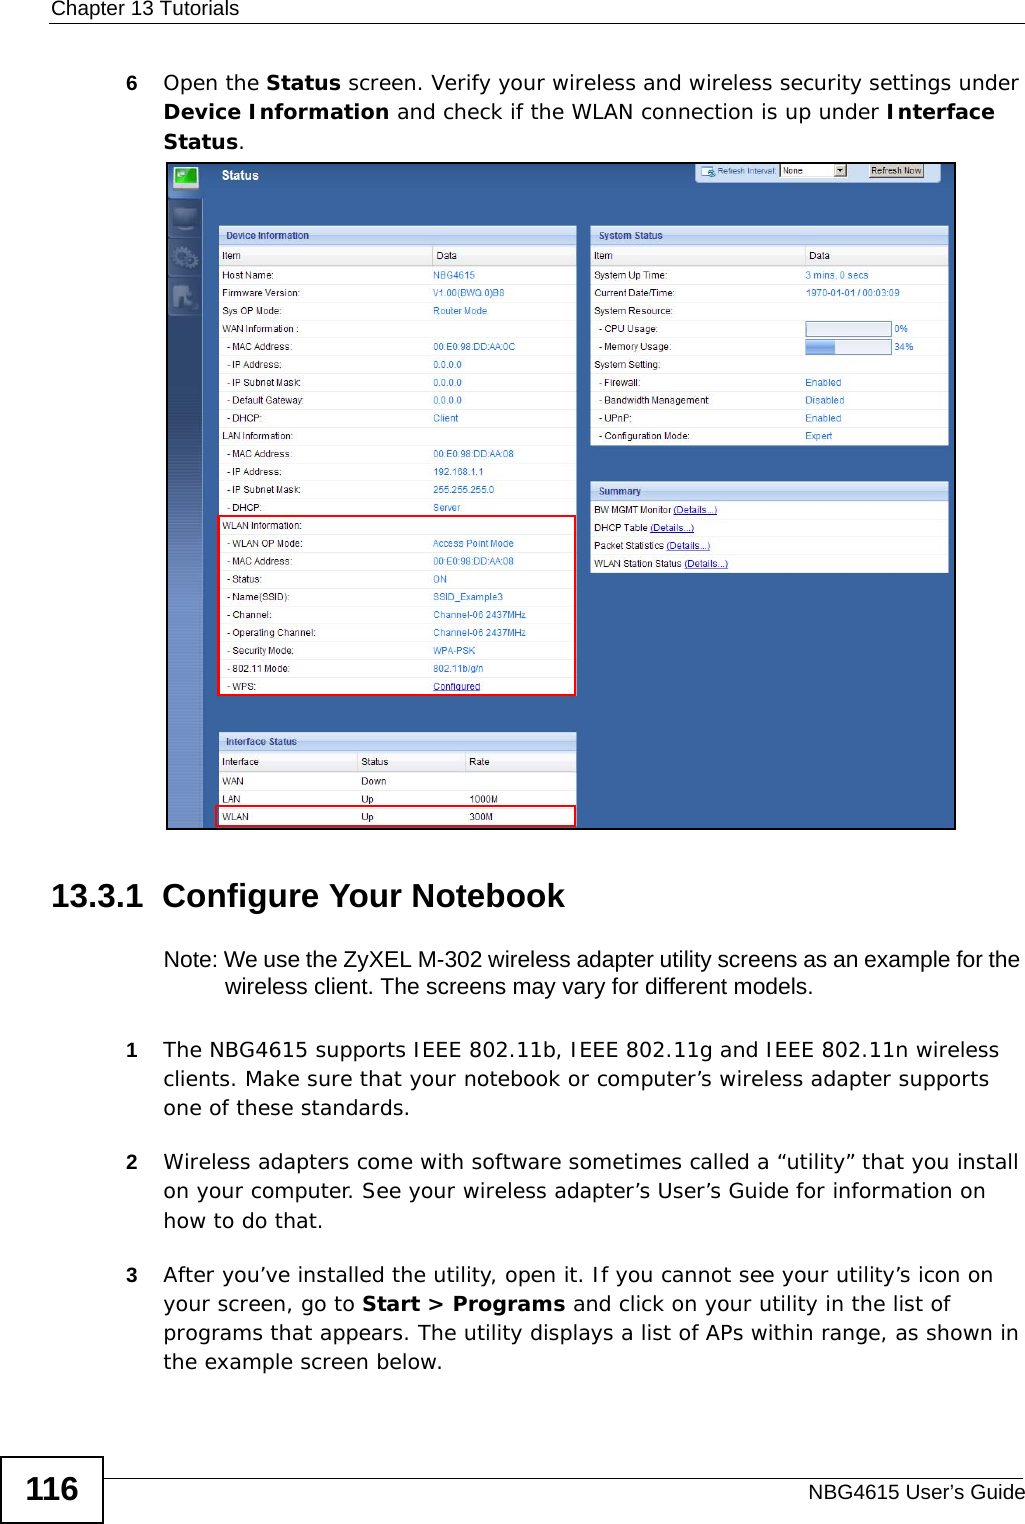
NBG4615 User Manual
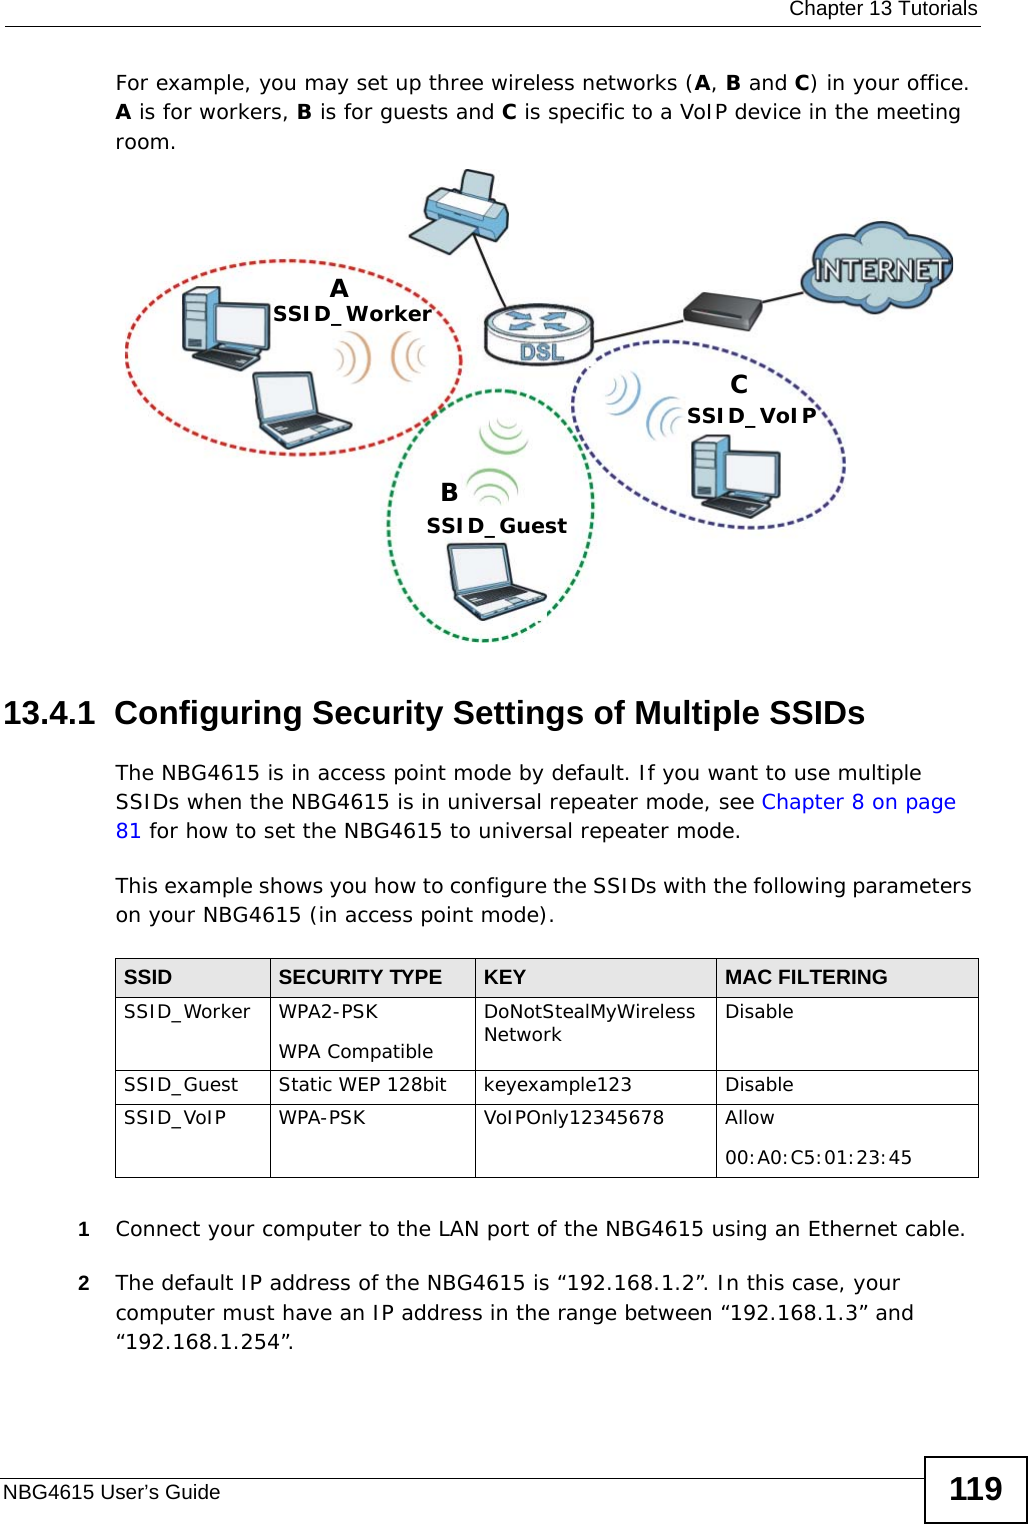
>
User manual -1
Contents
1.
User manual -1
2.
User manual -2
3.
User manual -3
User manual -1
Navigation menu
Upload a User Manual
Namespaces
Wiki Guide
HTML
PDF
Info
Views
User Manual
Discussion / Help
Navigation
![About This User's GuideNBG4615 User’s Guide 3About This User's GuideIntended AudienceThis manual is intended for people who want to configure the NBG4615 using the Web Configurator. You should have at least a basic knowledge of TCP/IP networking concepts and topology.Tips for Reading User’s Guides On-ScreenWhen reading a ZyXEL User’s Guide On-Screen, keep the following in mind:• If you don’t already have the latest version of Adobe Reader, you can download it from http://www.adobe.com.• Use the PDF’s bookmarks to quickly navigate to the areas that interest you. Adobe Reader’s bookmarks pane opens by default in all ZyXEL User’s Guide PDFs.• If you know the page number or know vaguely which page-range you want to view, you can enter a number in the toolbar in Reader, then press [ENTER] to jump directly to that page.• Type [CTRL]+[F] to open the Adobe Reader search utility and enter a word or phrase. This can help you quickly pinpoint the information you require. You can also enter text directly into the toolbar in Reader.• To quickly move around within a page, press the [SPACE] bar. This turns your cursor into a “hand” with which you can grab the page and move it around freely on your screen.• Embedded hyperlinks are actually cross-references to related text. Click them to jump to the corresponding section of the User’s Guide PDF.Related Documentation•Quick Start Guide The Quick Start Guide is designed to help you get your NBG4615 up and running right away. It contains information on setting up your network and configuring for Internet access.• Supporting DiscThe embedded Web Help contains descriptions of individual screens and supplementary information.• Support DiscRefer to the included CD for support documents.](https://usermanual.wiki/ZyXEL-Communications/NBG4615.User-manual-1/User-Guide-1406734-Page-3.png)
![Document ConventionsNBG4615 User’s Guide6Document ConventionsWarnings and NotesThese are how warnings and notes are shown in this User’s Guide. Warnings tell you about things that could harm you or your device.Note: Notes tell you other important information (for example, other things you may need to configure or helpful tips) or recommendations.Syntax Conventions• The NBG4615 may be referred to as the “NBG4615”, the “device”, the “product” or the “system” in this User’s Guide.• Product labels, screen names, field labels and field choices are all in bold font.• A key stroke is denoted by square brackets and uppercase text, for example, [ENTER] means the “enter” or “return” key on your keyboard.• “Enter” means for you to type one or more characters and then press the [ENTER] key. “Select” or “choose” means for you to use one of the predefined choices.• A right angle bracket ( > ) within a screen name denotes a mouse click. For example, Maintenance > Log > Log Setting means you first click Maintenance in the navigation panel, then the Log sub menu and finally the Log Setting tab to get to that screen.• Units of measurement may denote the “metric” value or the “scientific” value. For example, “k” for kilo may denote “1000” or “1024”, “M” for mega may denote “1000000” or “1048576” and so on.• “e.g.,” is a shorthand for “for instance”, and “i.e.,” means “that is” or “in other words”.](https://usermanual.wiki/ZyXEL-Communications/NBG4615.User-manual-1/User-Guide-1406734-Page-6.png)