ZyXEL Communications P660WTXV2 802.11g Wireless ADSL2+ Router User Manual SMG 700 User s Guide V1 00 Nov 2004
ZyXEL Communications Corporation 802.11g Wireless ADSL2+ Router SMG 700 User s Guide V1 00 Nov 2004
Contents
- 1. Users manual1
- 2. Users manual2
- 3. Users manual3
Users manual2
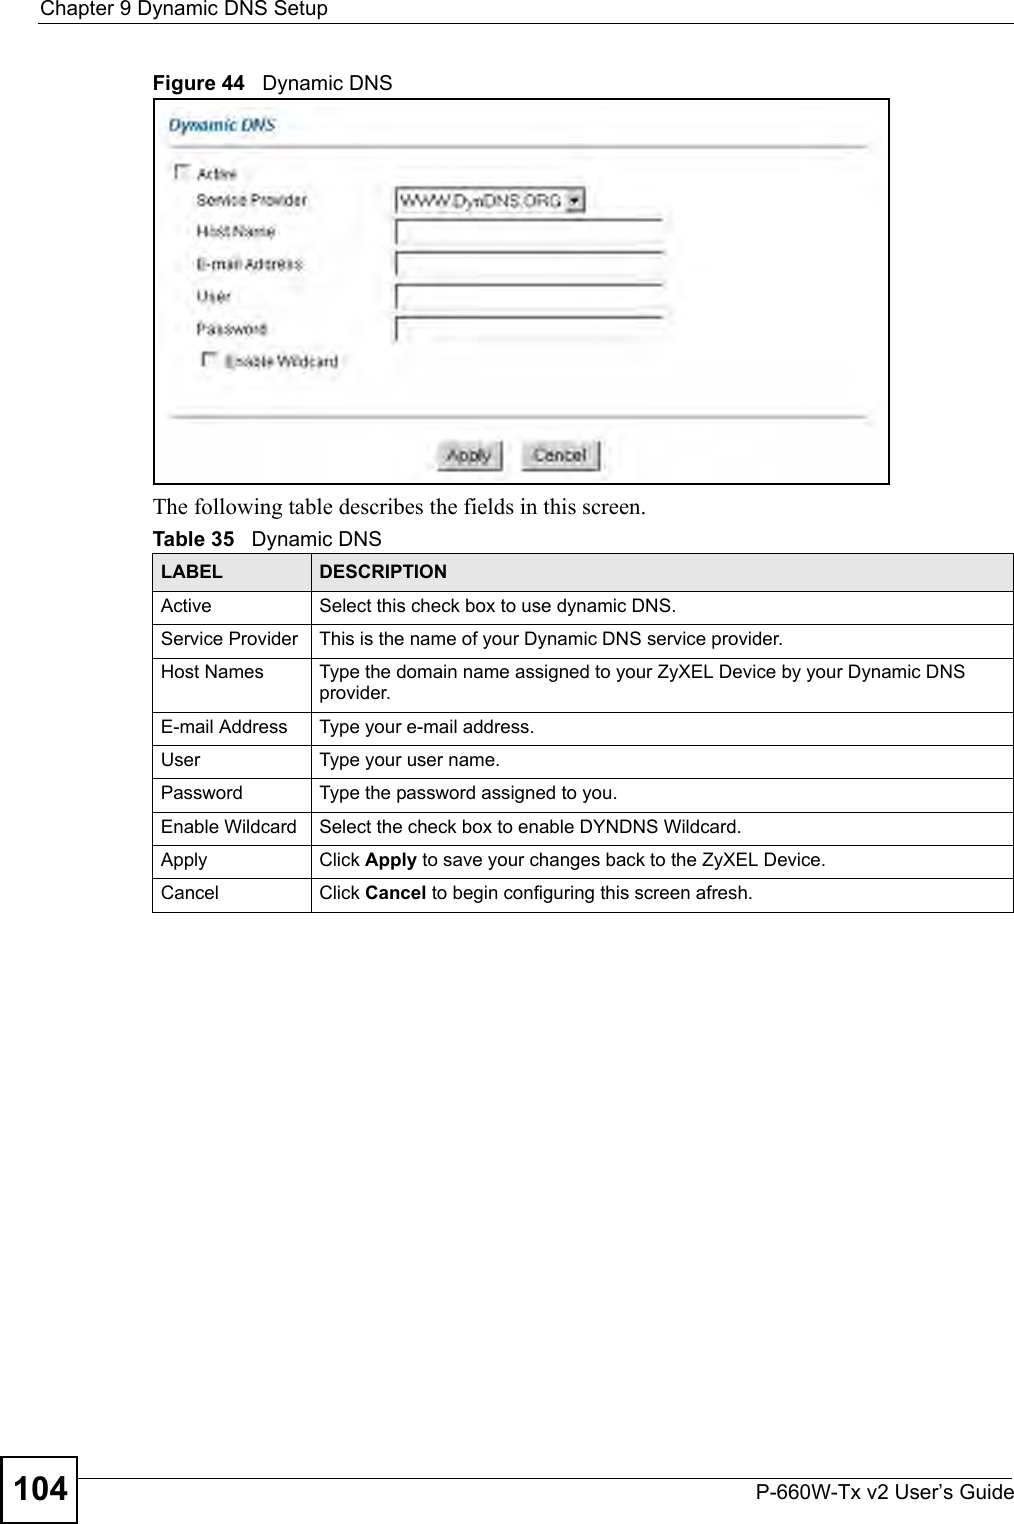

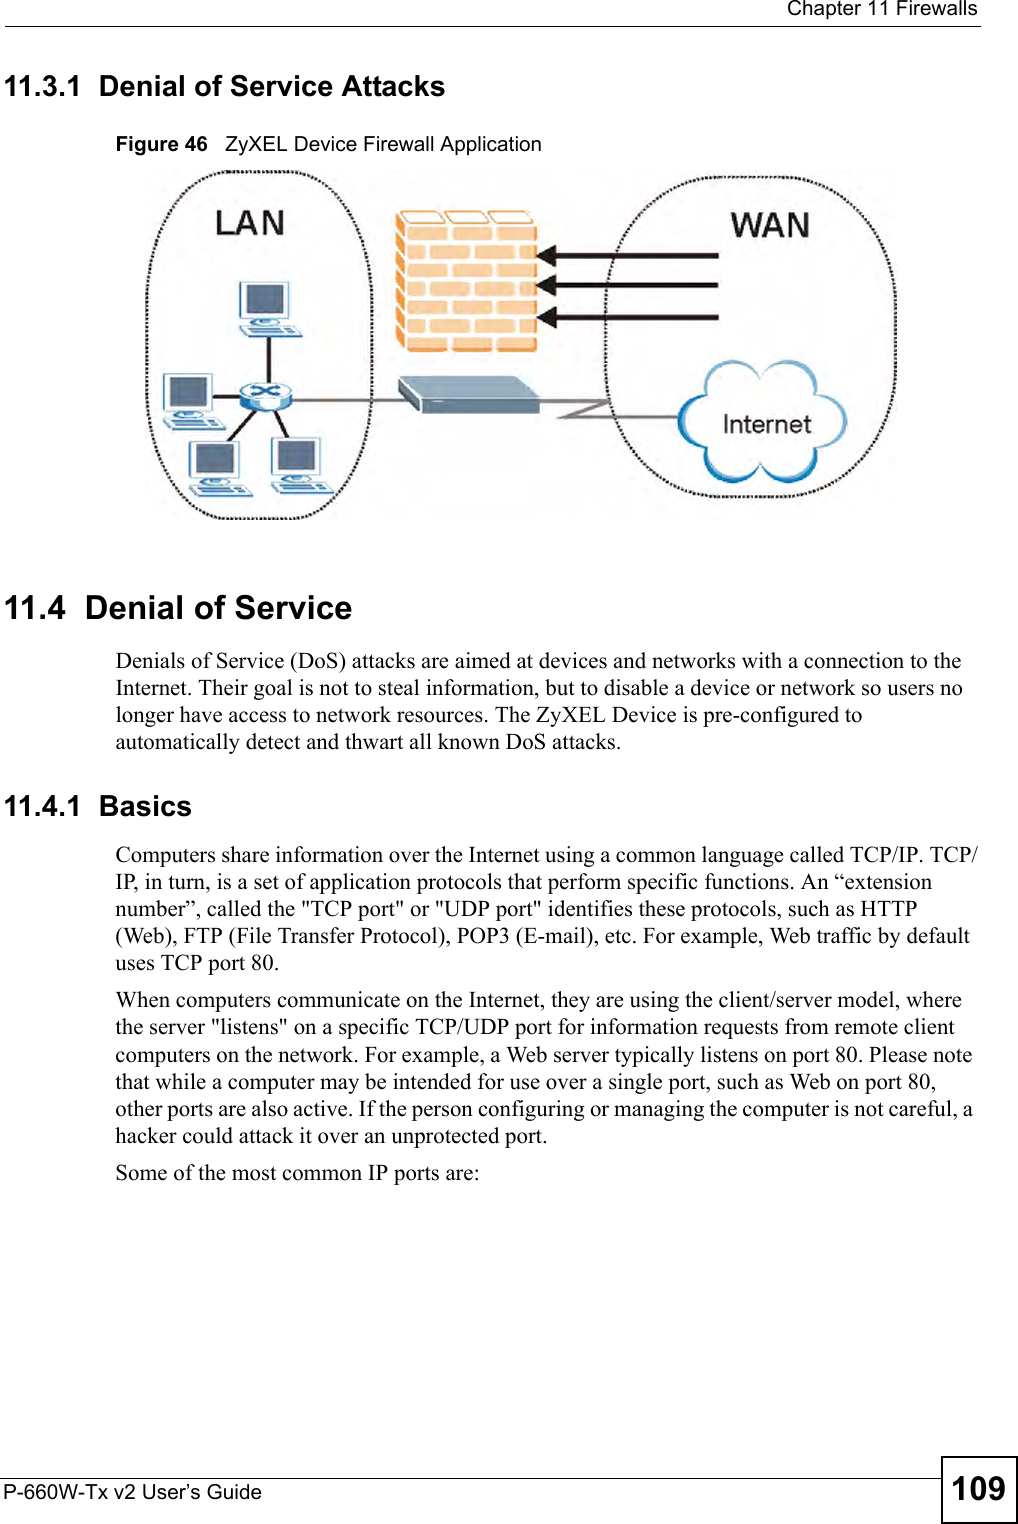
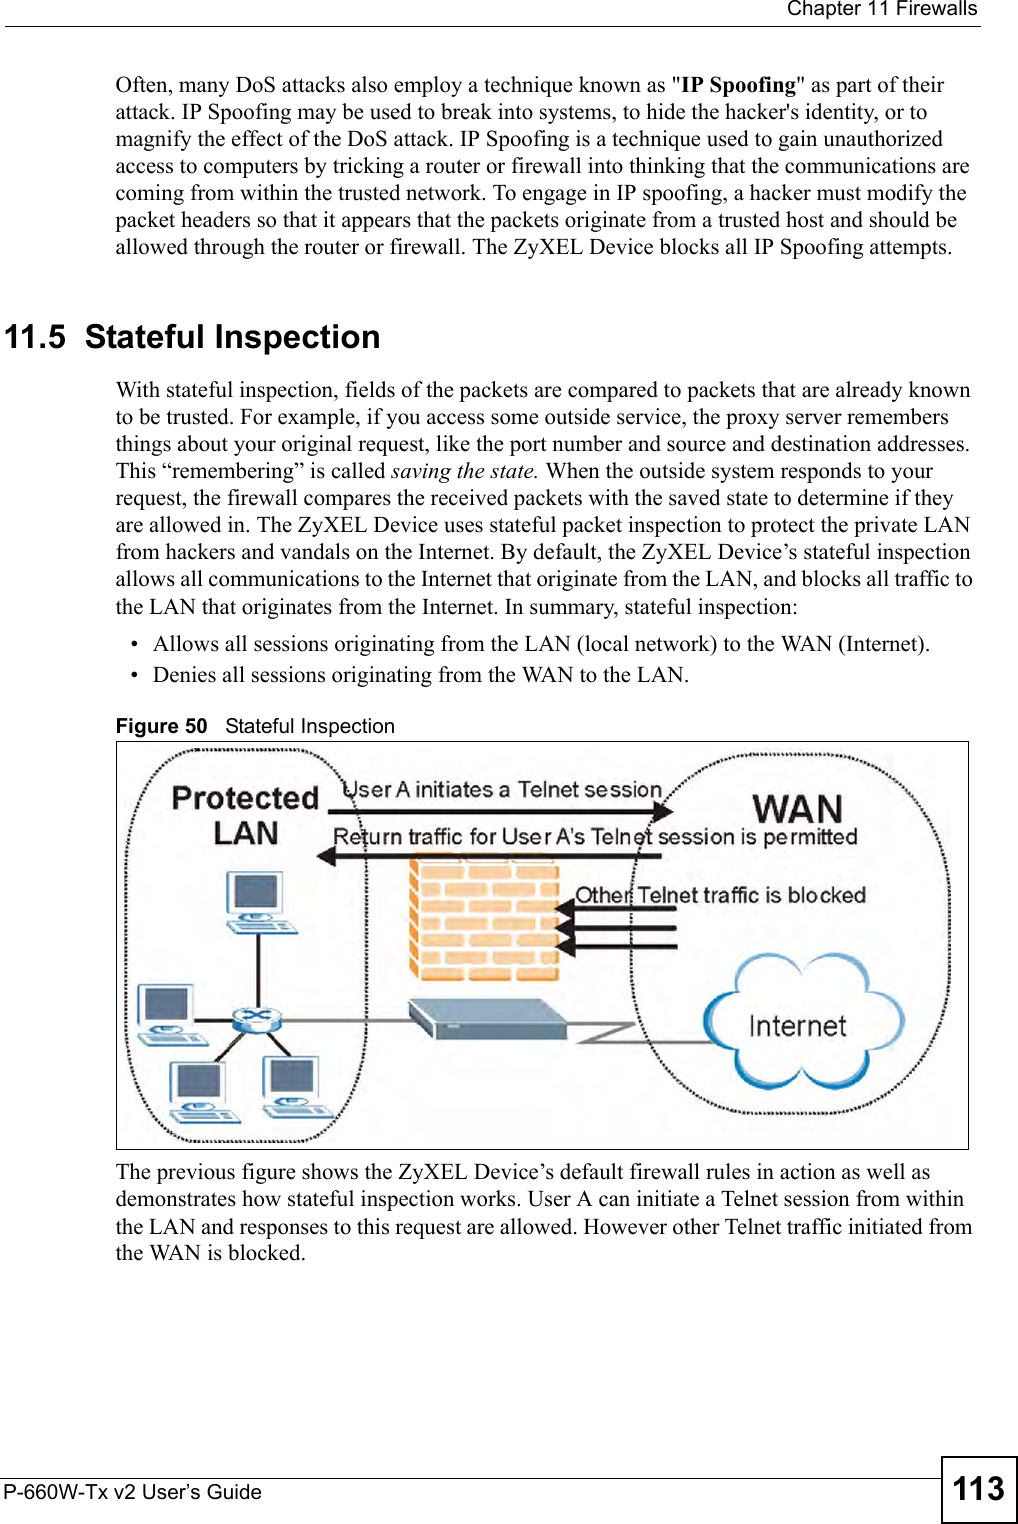


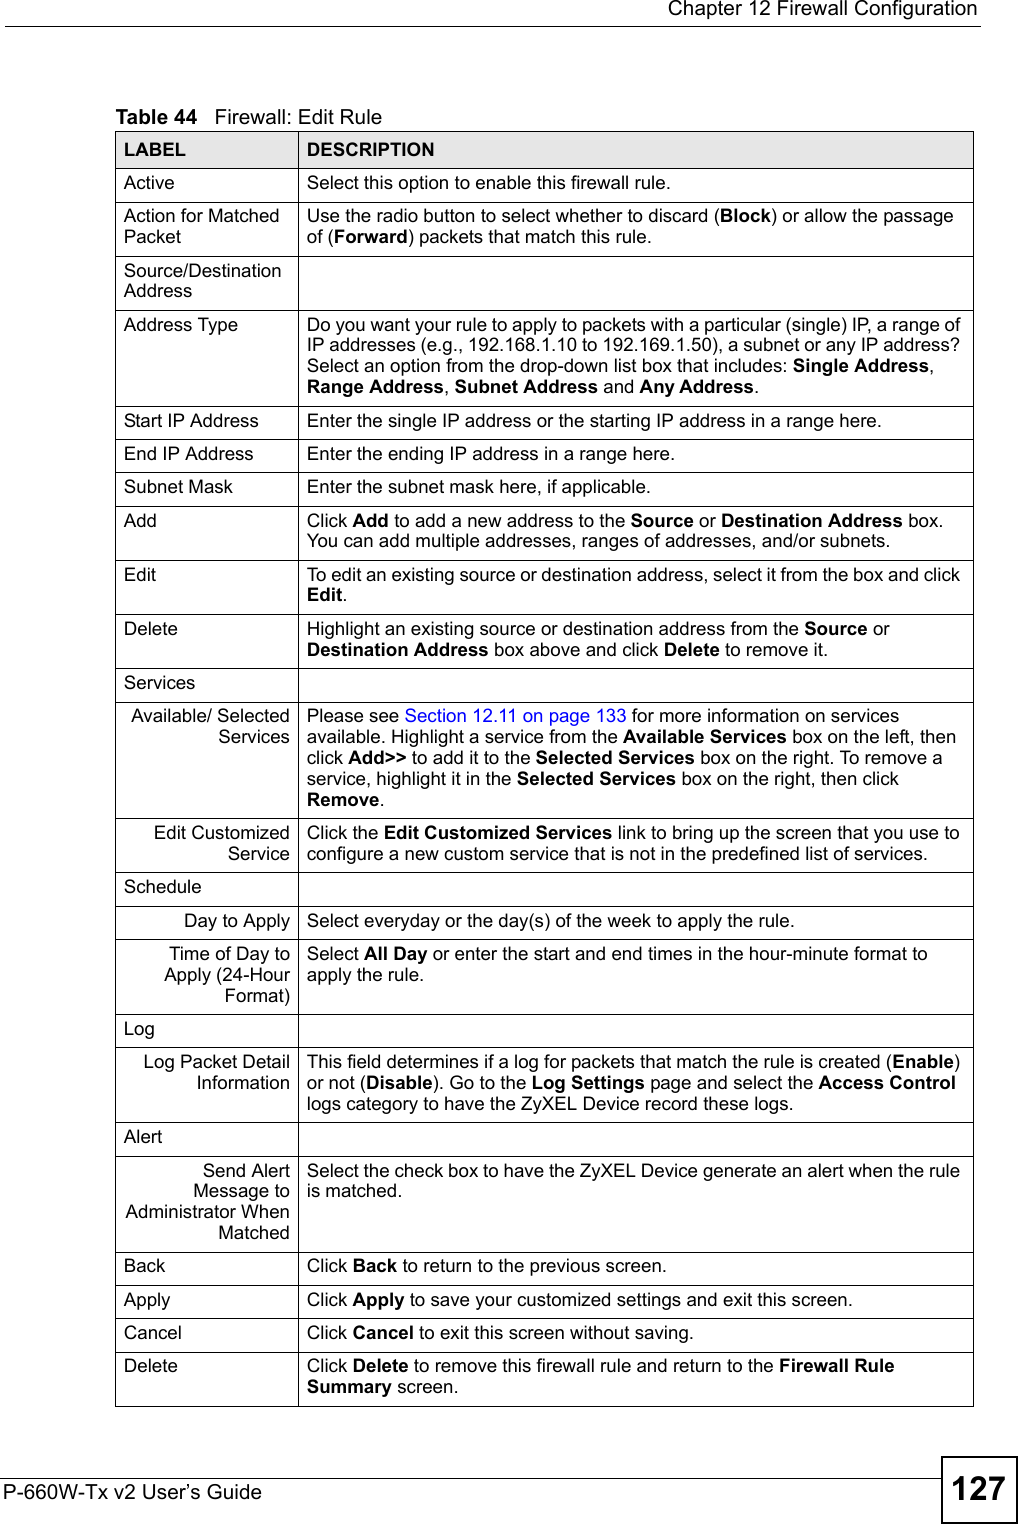
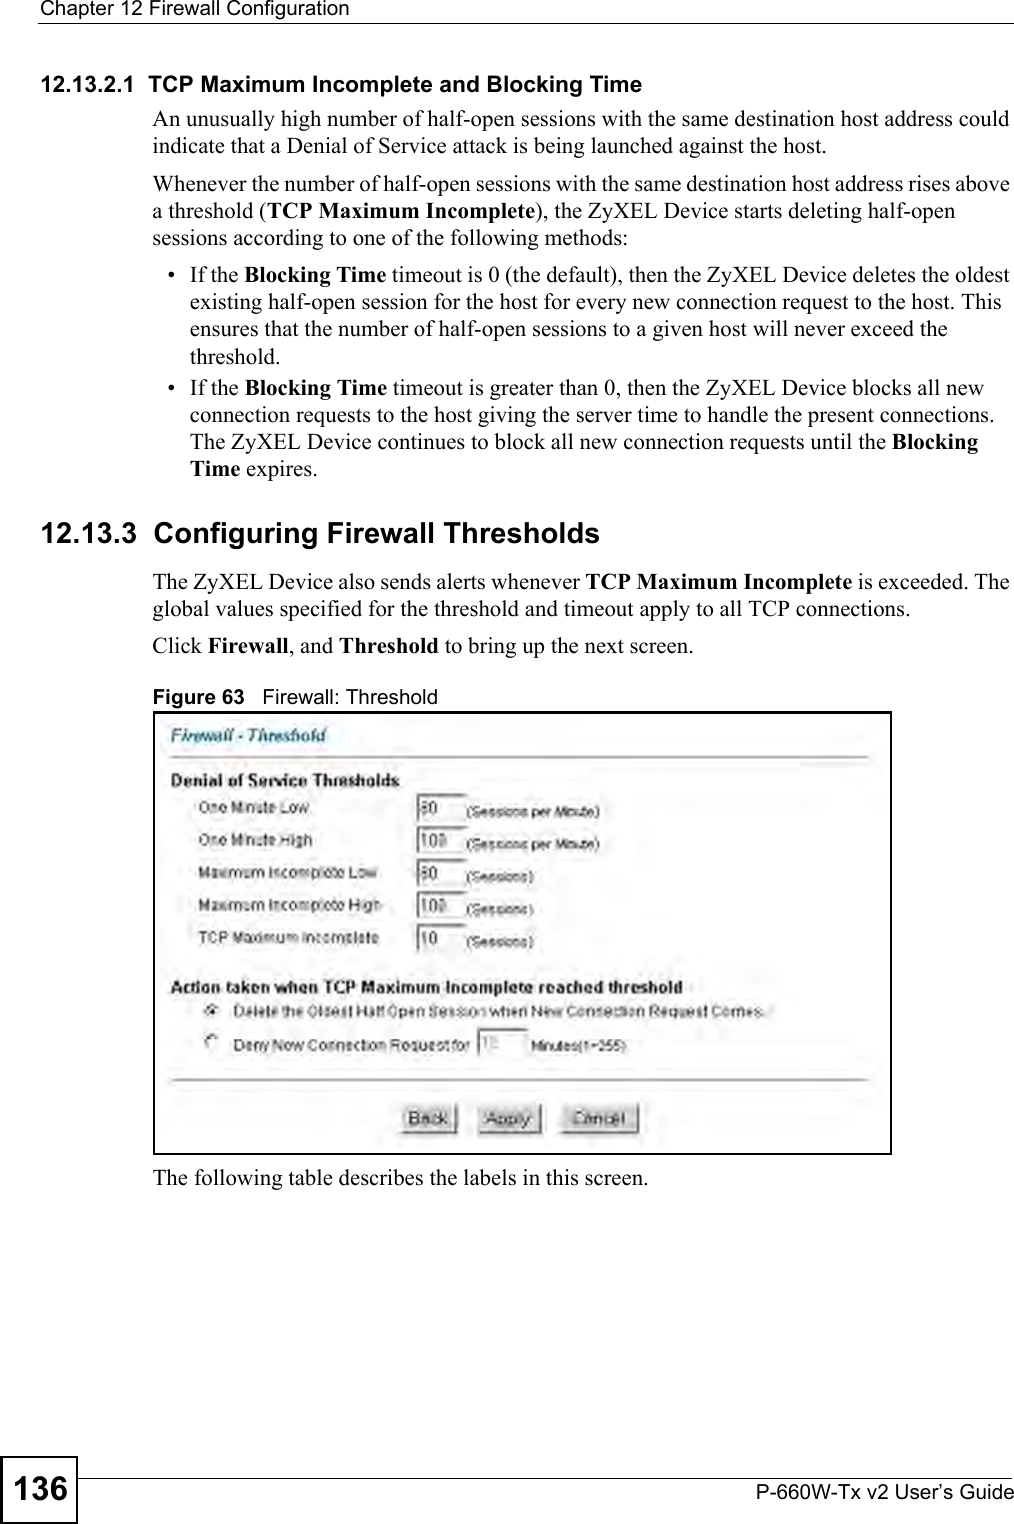
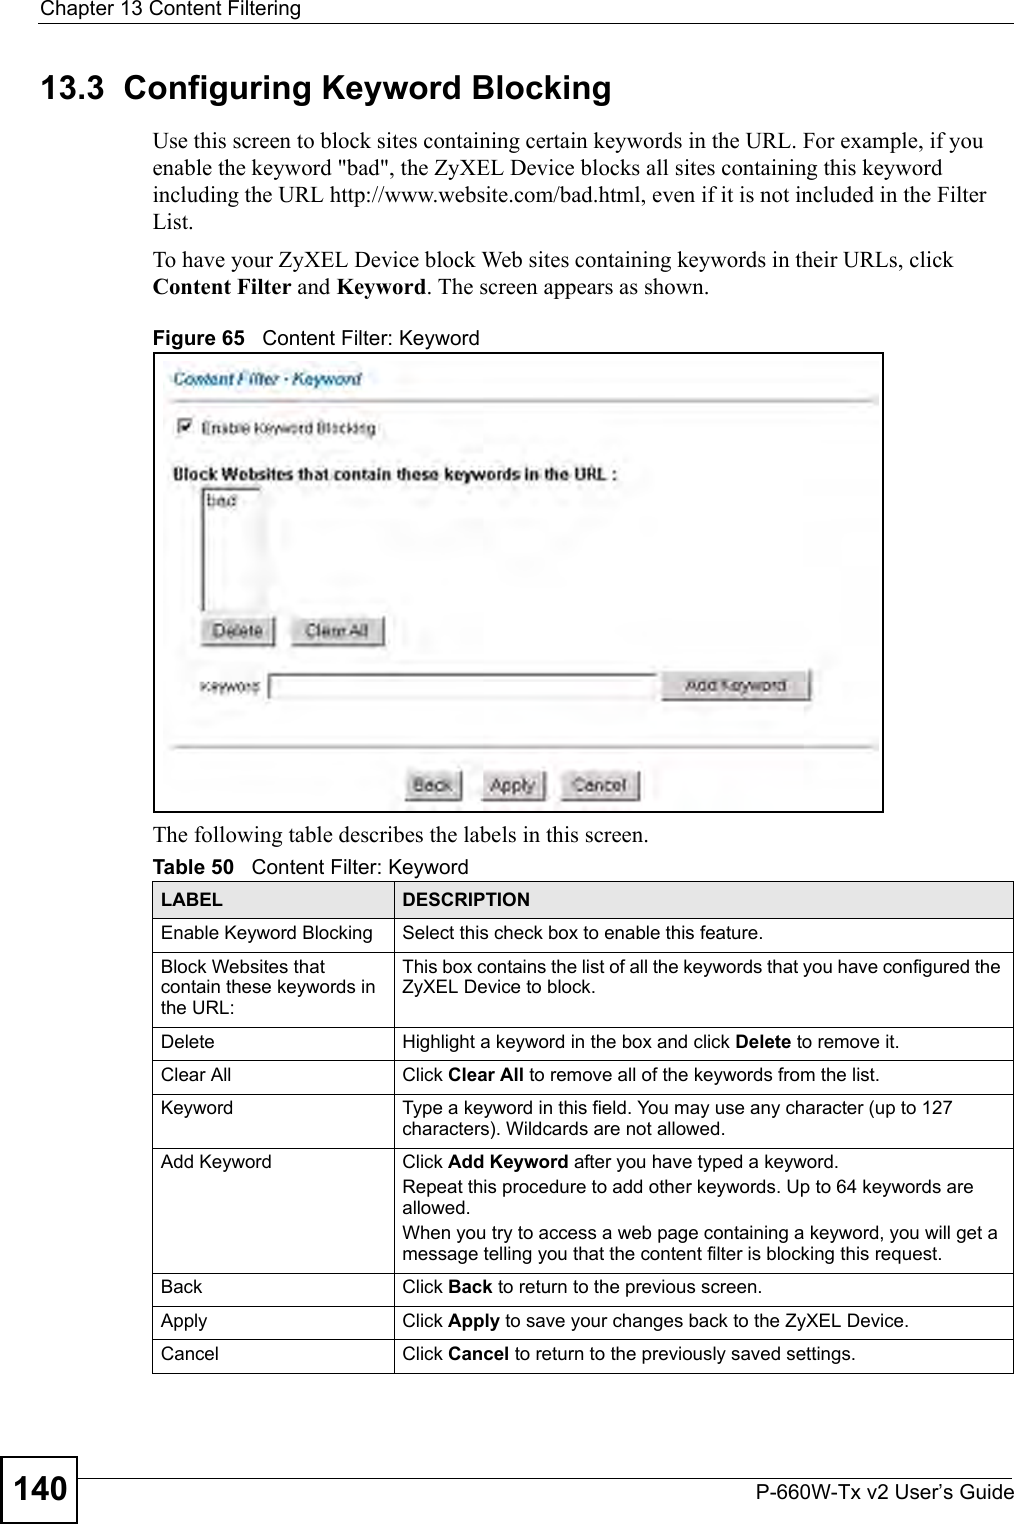
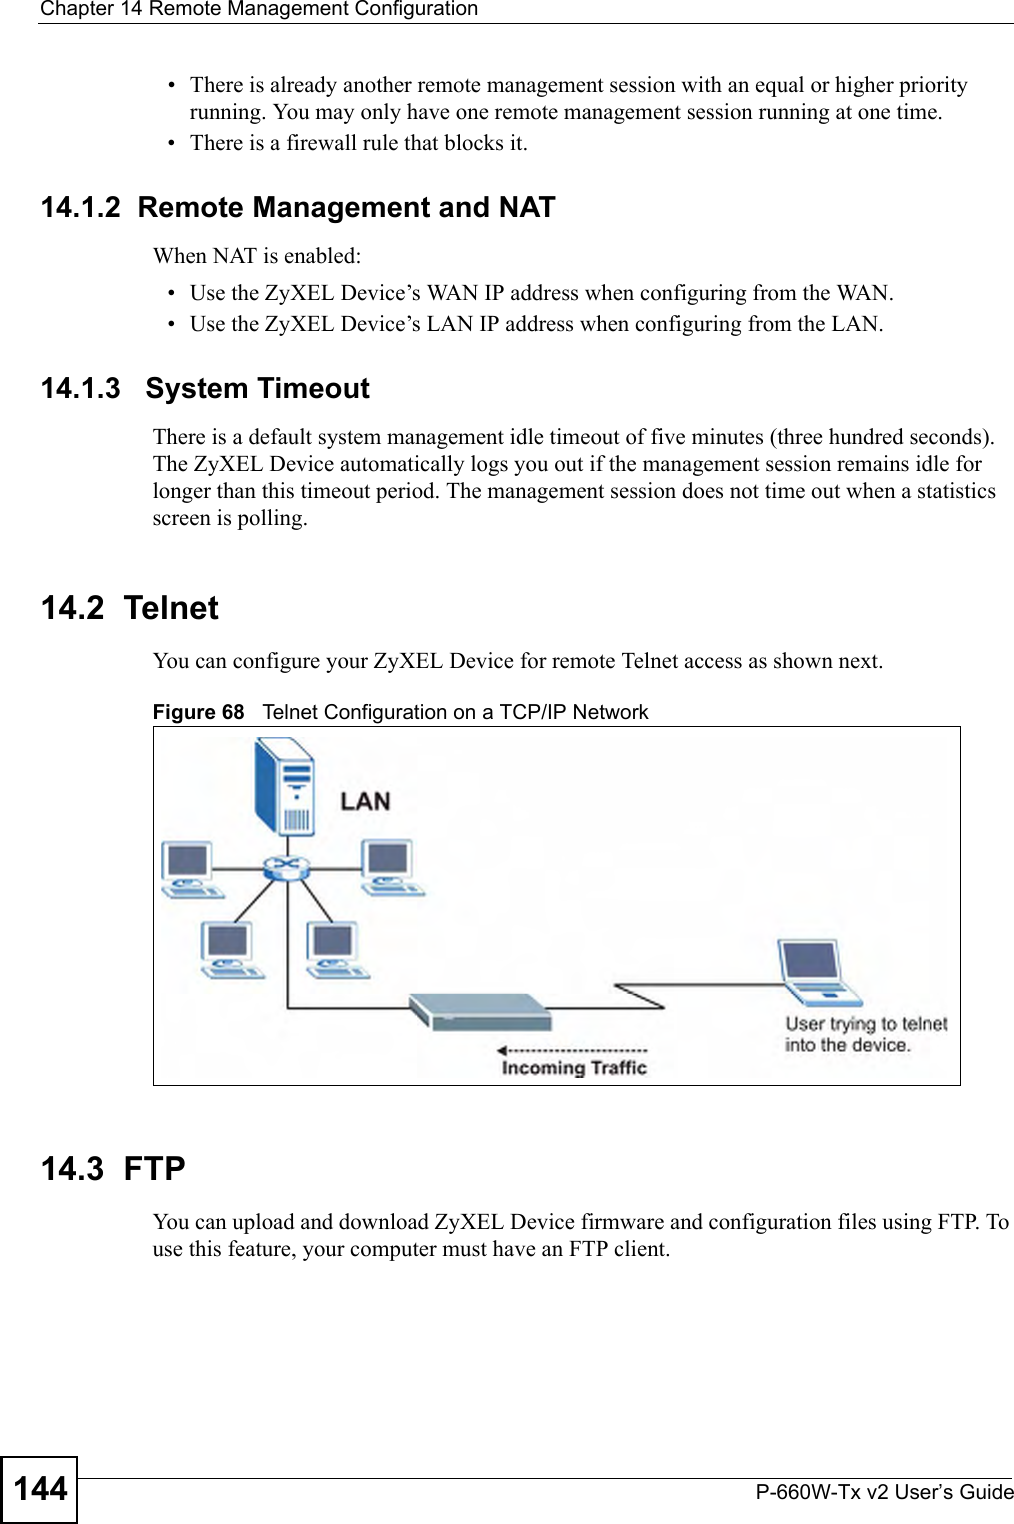
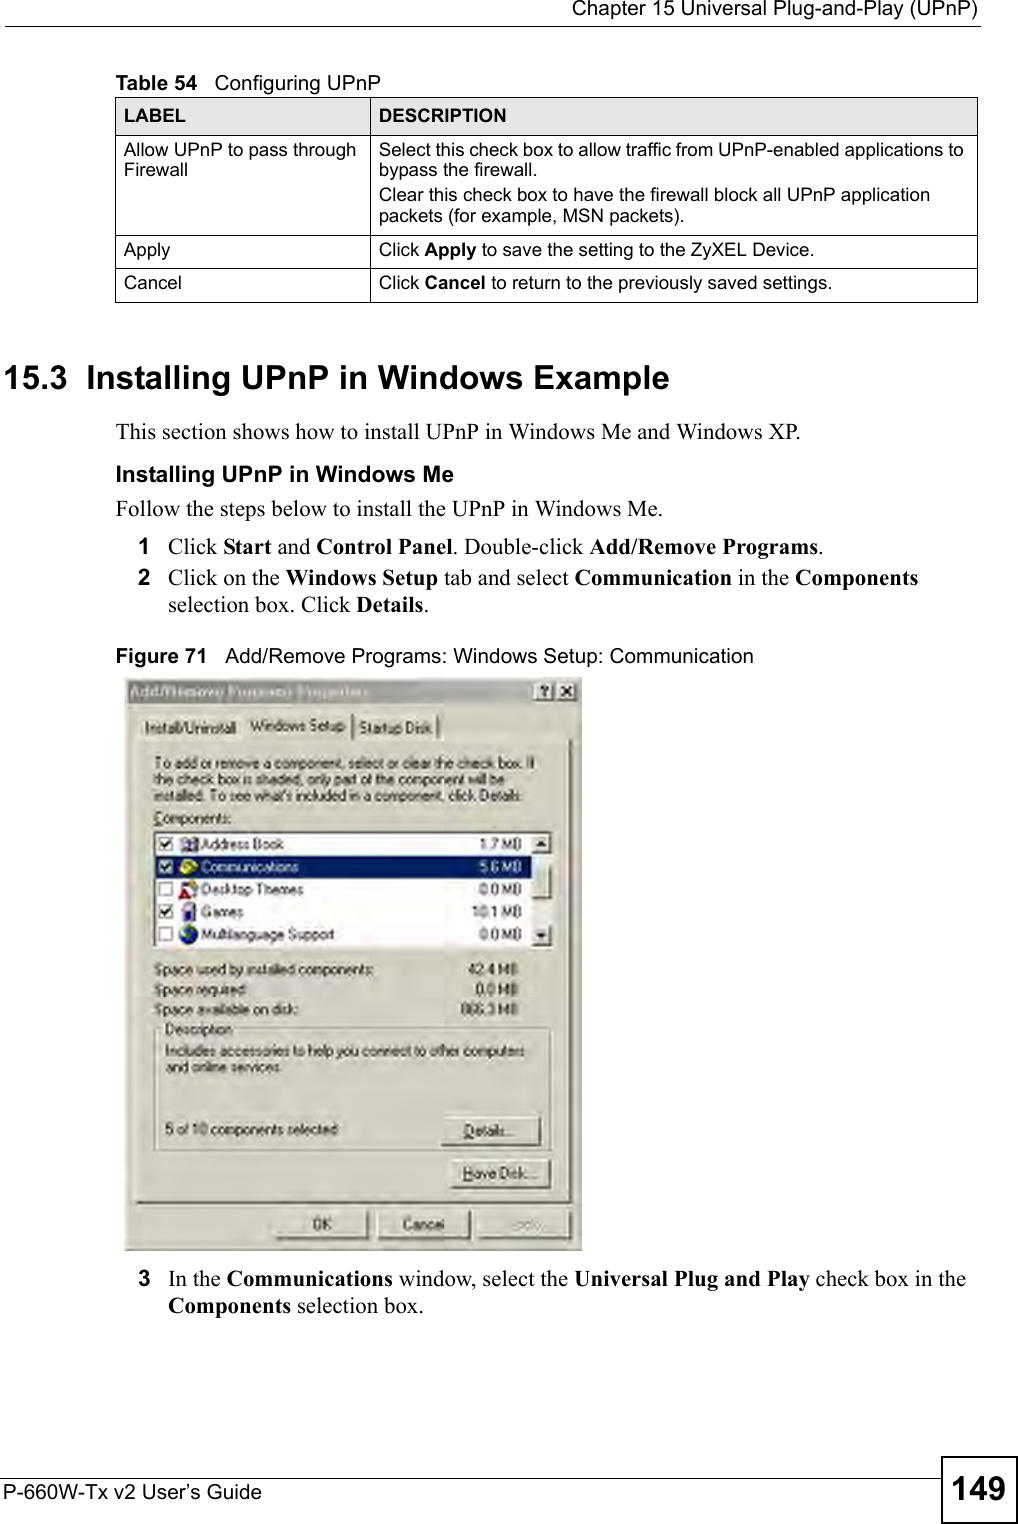
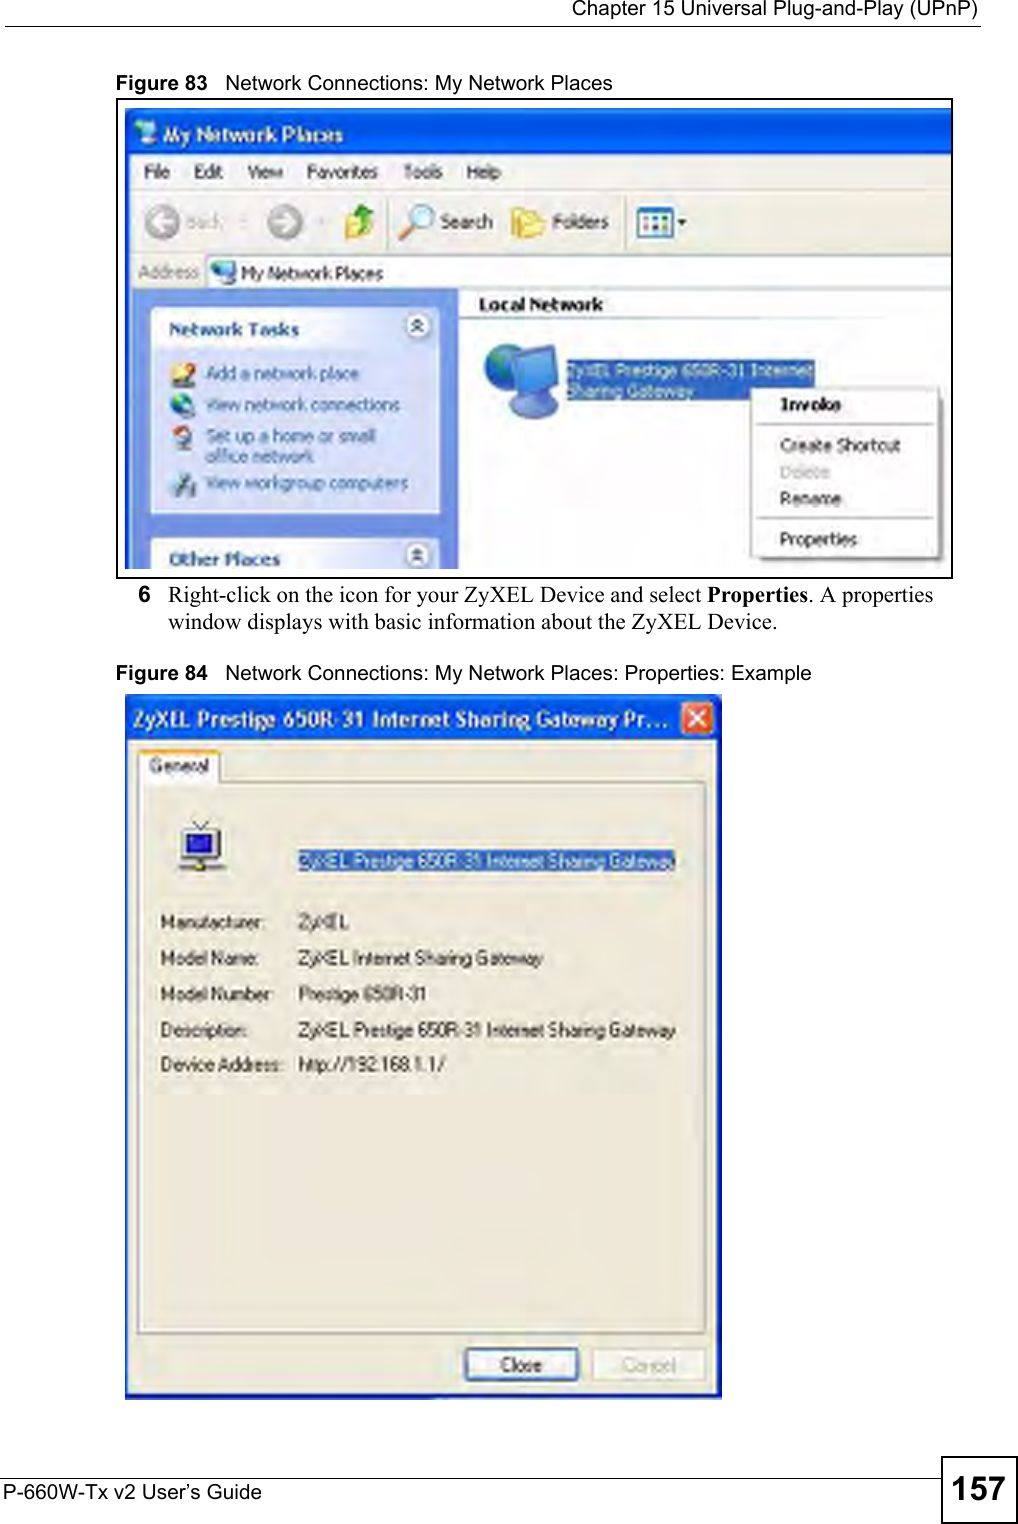
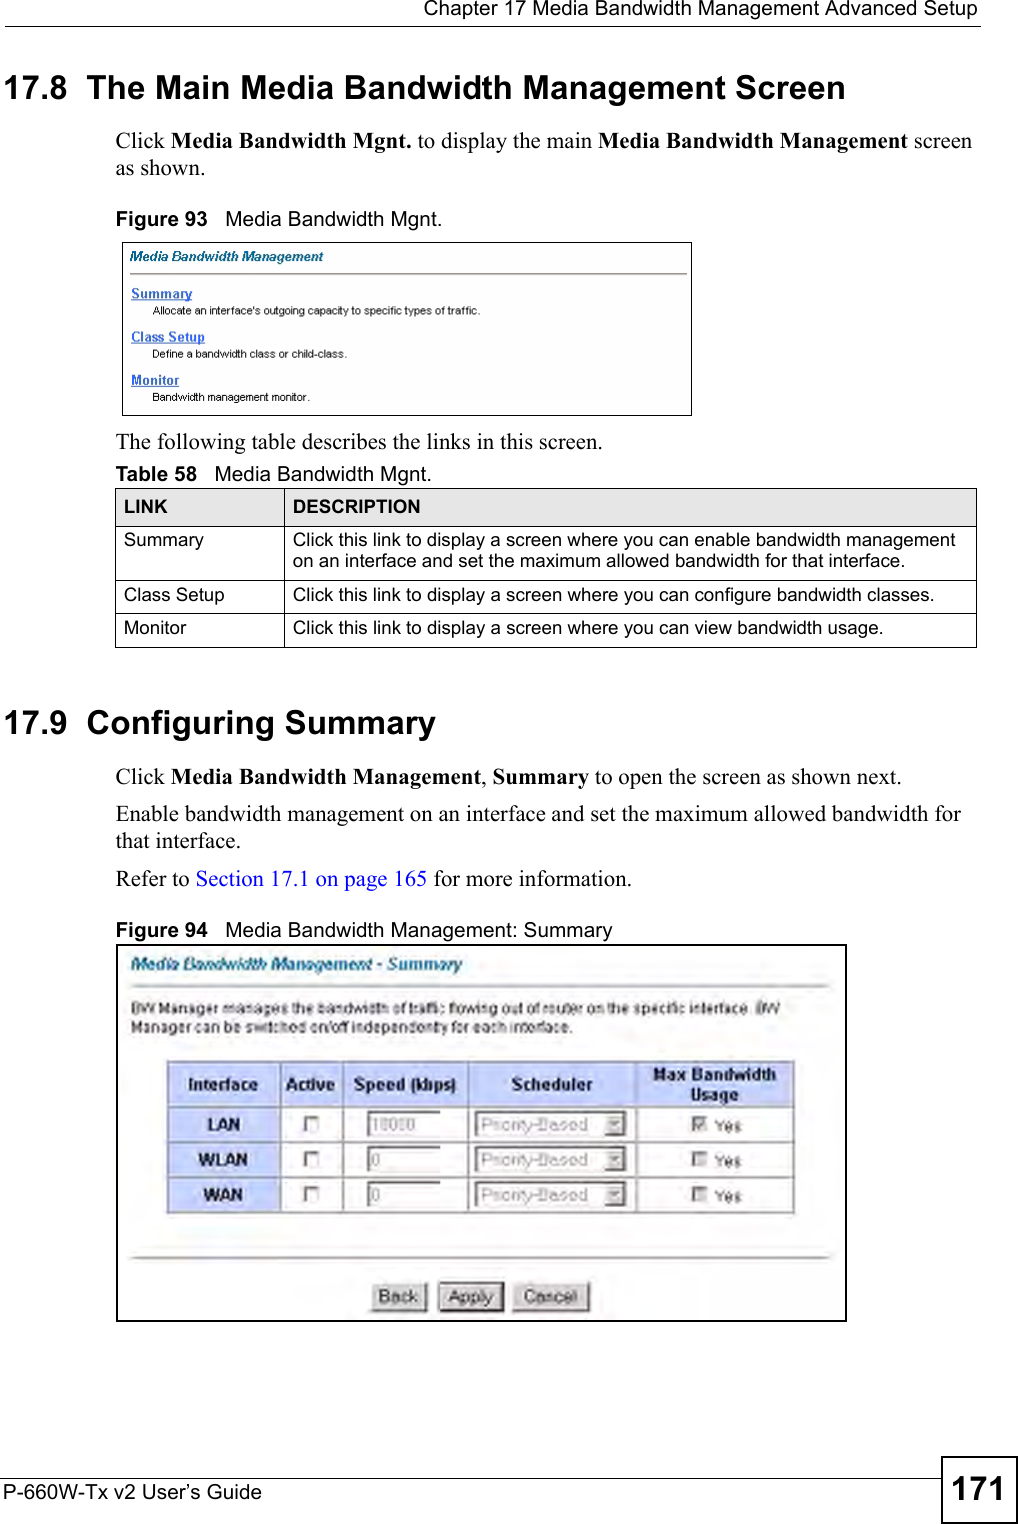
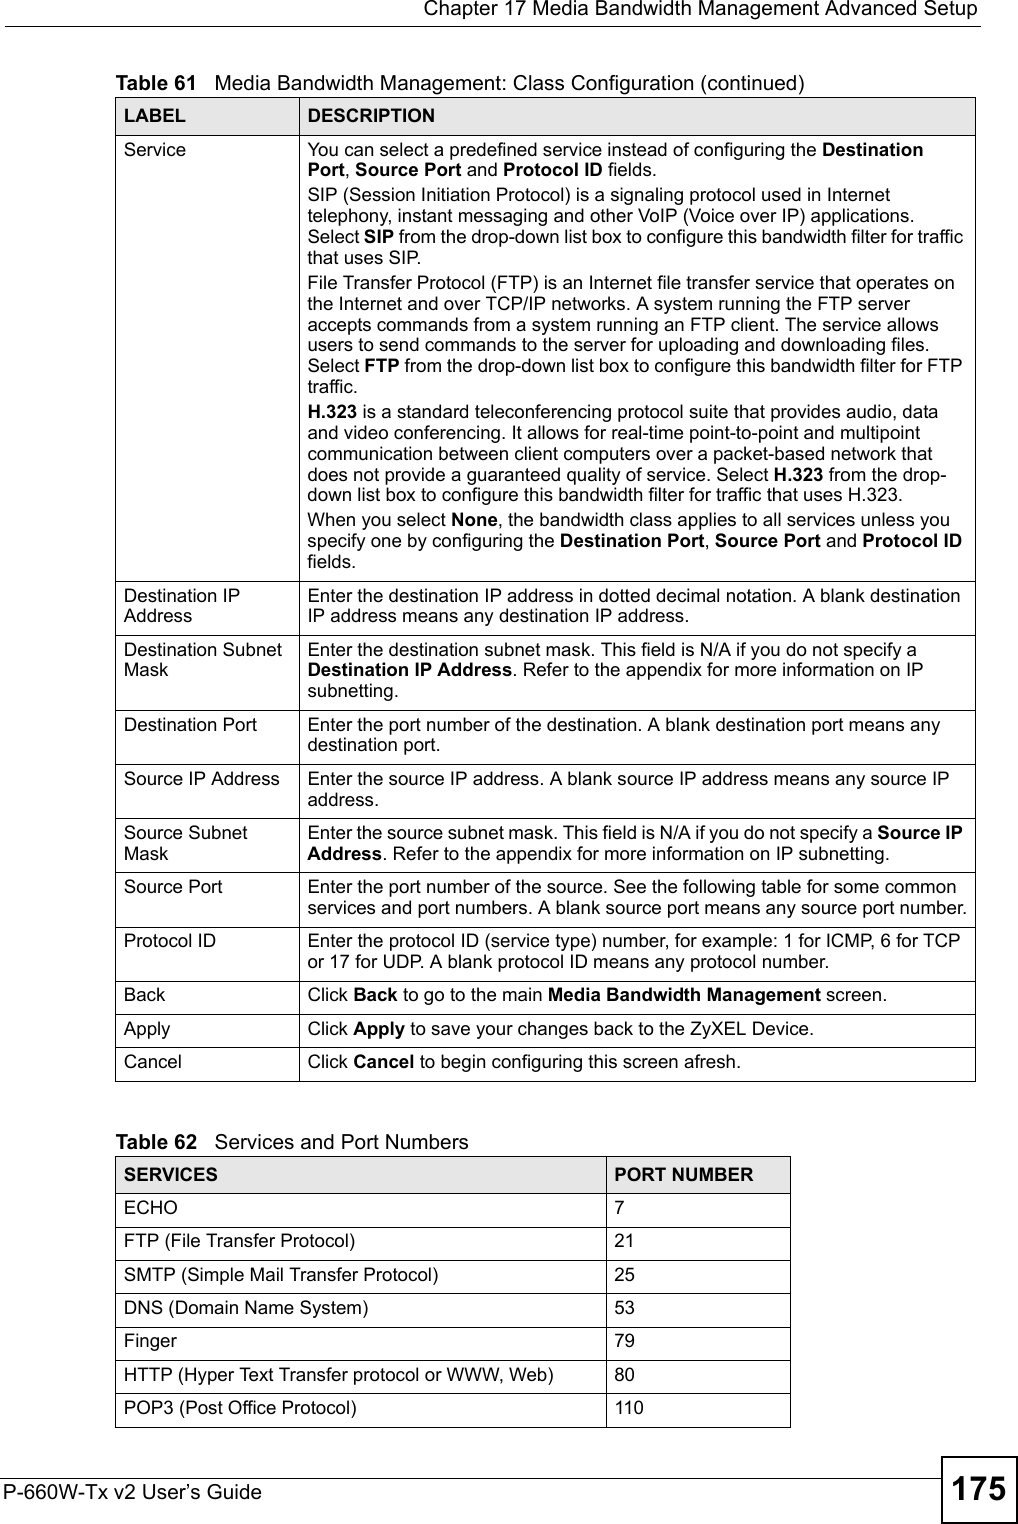
![Chapter 12 Firewall ConfigurationP-660W-Tx v2 User’s Guide13412.12 Anti-Probing If an outside user attempts to probe an unsupported port on your ZyXEL Device, an ICMP response packet is automatically returned. This allows the outside user to know the ZyXEL Device exists. The ZyXEL Device supports anti-probing, which prevents the ICMP response packet from being sent. This keeps outsiders from discovering your ZyXEL Device when unsupported ports are probed. Internet Control Message Protocol (ICMP) is a message control and error-reporting protocol between a host server and a gateway to the Internet. ICMP uses Internet Protocol (IP) datagrams, but the messages are processed by the TCP/IP software and directly apparent to the application user. Refer to Section 11.1 on page 107 for more information. Click Firewall in the navigation panel and click Anti Probing to display the screen as shown. Figure 62 Firewall: Anti ProbingThe following table describes the labels in this screen.Table 47 Firewall: Anti ProbingLABEL DESCRIPTIONRespond to PING onThe ZyXEL Device does not respond to any incoming Ping requests when Disable is selected. Select LAN to reply to incoming LAN Ping requests.Select WAN to reply to incoming WAN Ping requests. Otherwise select LAN & WAN to reply to both incoming LAN and WAN Ping requests. Do not respond to requests for unauthorized services.Select this option to prevent hackers from finding the ZyXEL Device by probing for unused ports. If you select this option, the ZyXEL Device will not respond to port request(s) for unused ports, thus leaving the unused ports and the ZyXEL Device unseen. By default this option is not selected and the ZyXEL Device will reply with an ICMP Port Unreachable packet for a port probe on its unused UDP ports, and a TCP Reset packet for a port probe on its unused TCP ports. Note that the probing packets must first traverse the ZyXEL Device 's firewall mechanism before reaching this anti-probing mechanism. Therefore if the firewall mechanism blocks a probing packet, the ZyXEL Device reacts based on the firewall policy, which by default, is to send a TCP reset packet for a blocked TCP packet. You can use the command "sys firewall tcprst rst [on|off]" to change this policy. When the firewall mechanism blocks a UDP packet, it drops the packet without sending a response packet.Back Click Back to return to the previous screen. Apply Click Apply to save your changes back to the ZyXEL Device.Reset Click Reset to begin configuring this screen afresh.](https://usermanual.wiki/ZyXEL-Communications/P660WTXV2.Users-manual2/User-Guide-934343-Page-34.png)
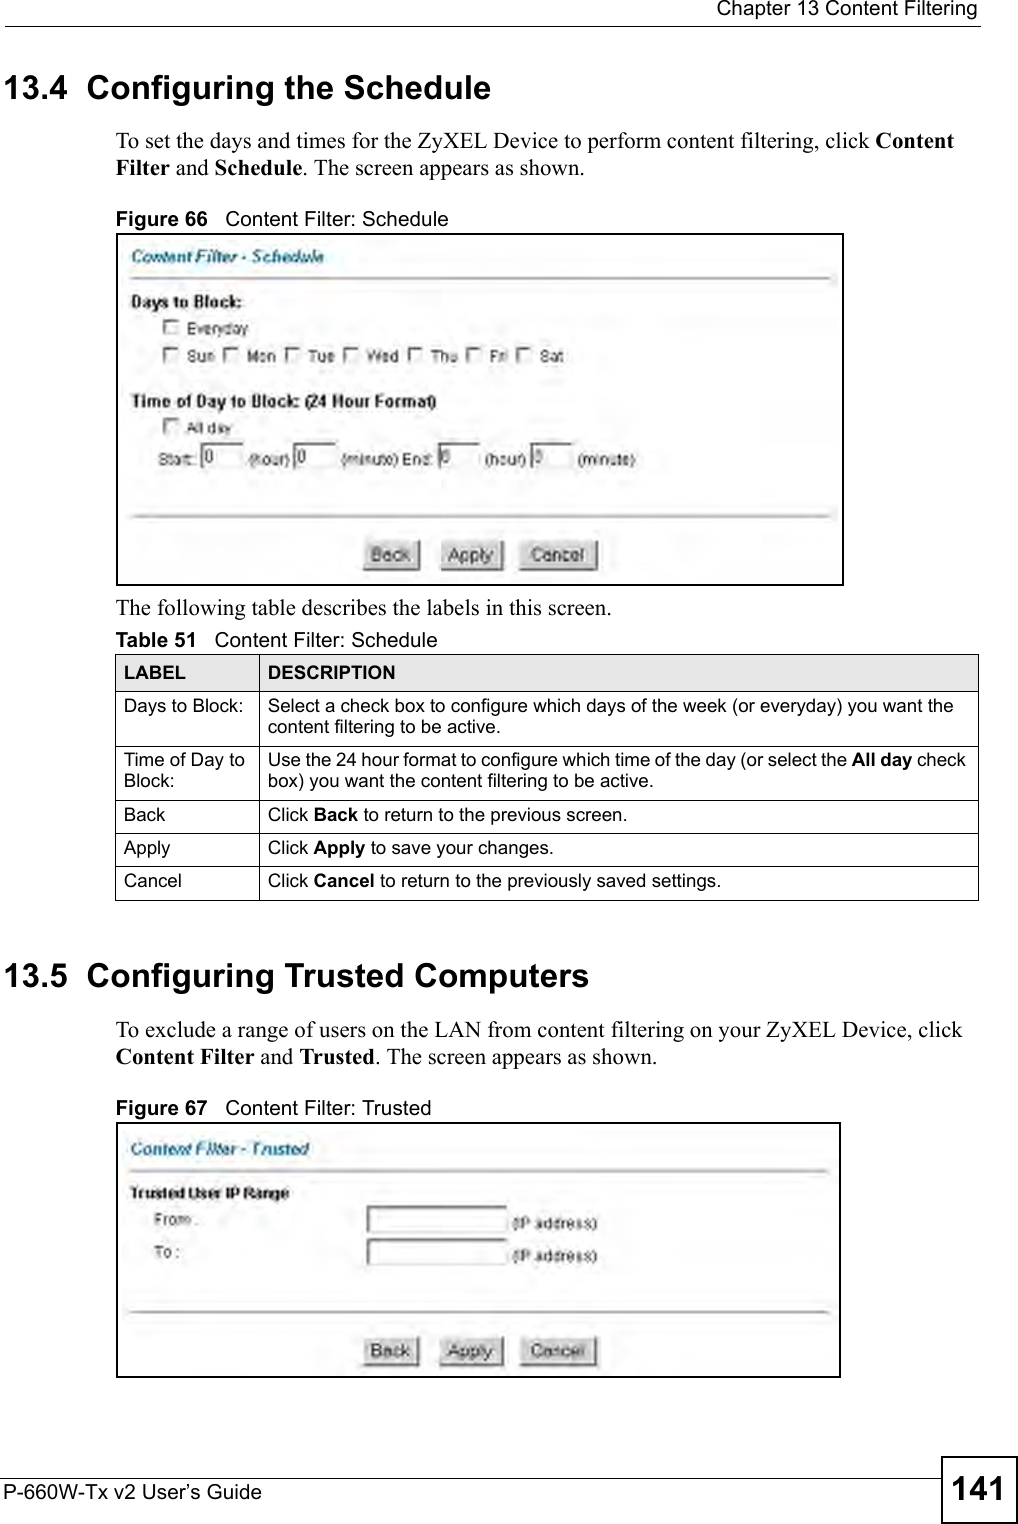
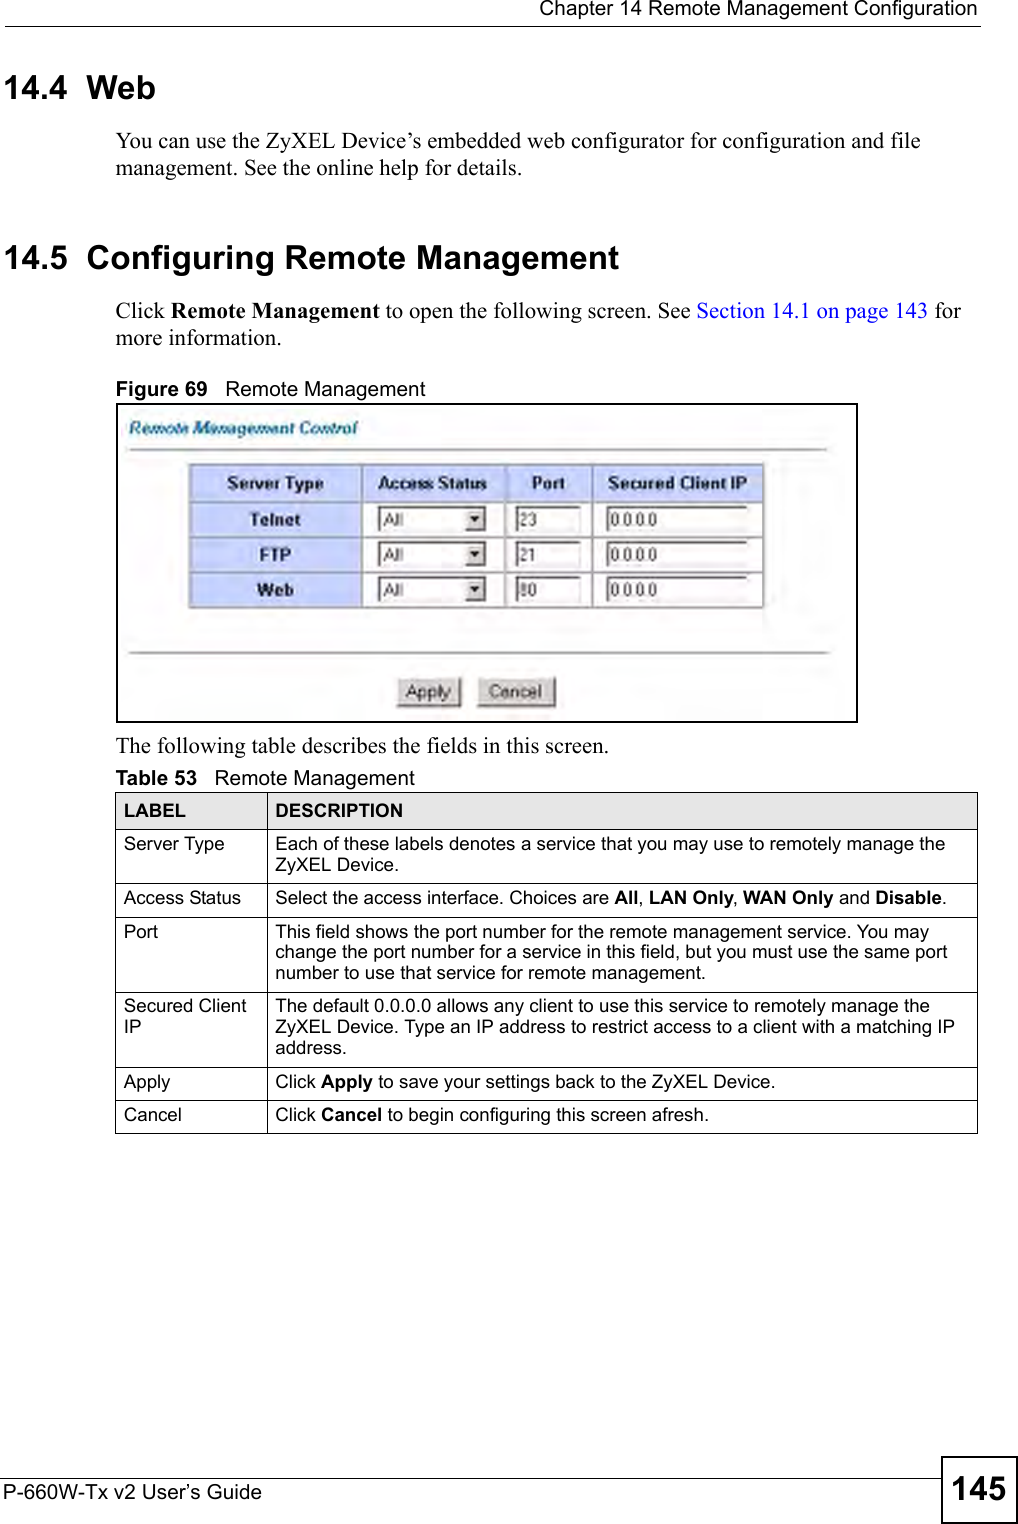


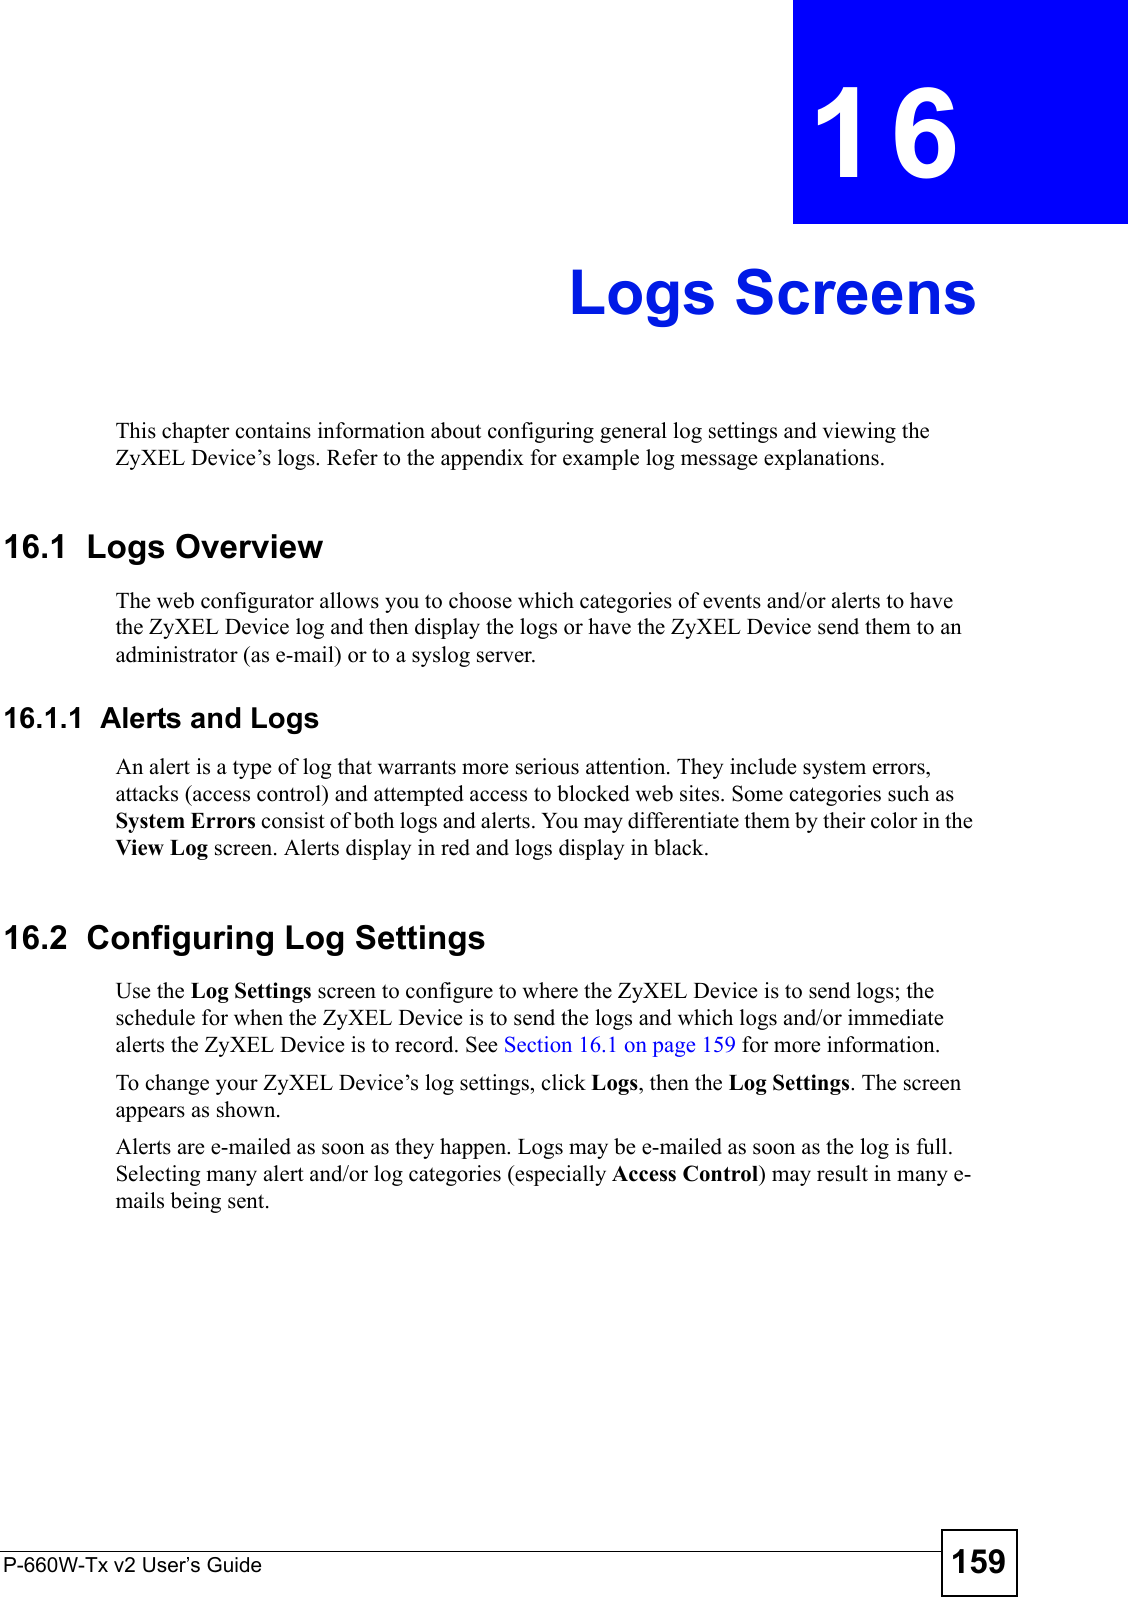

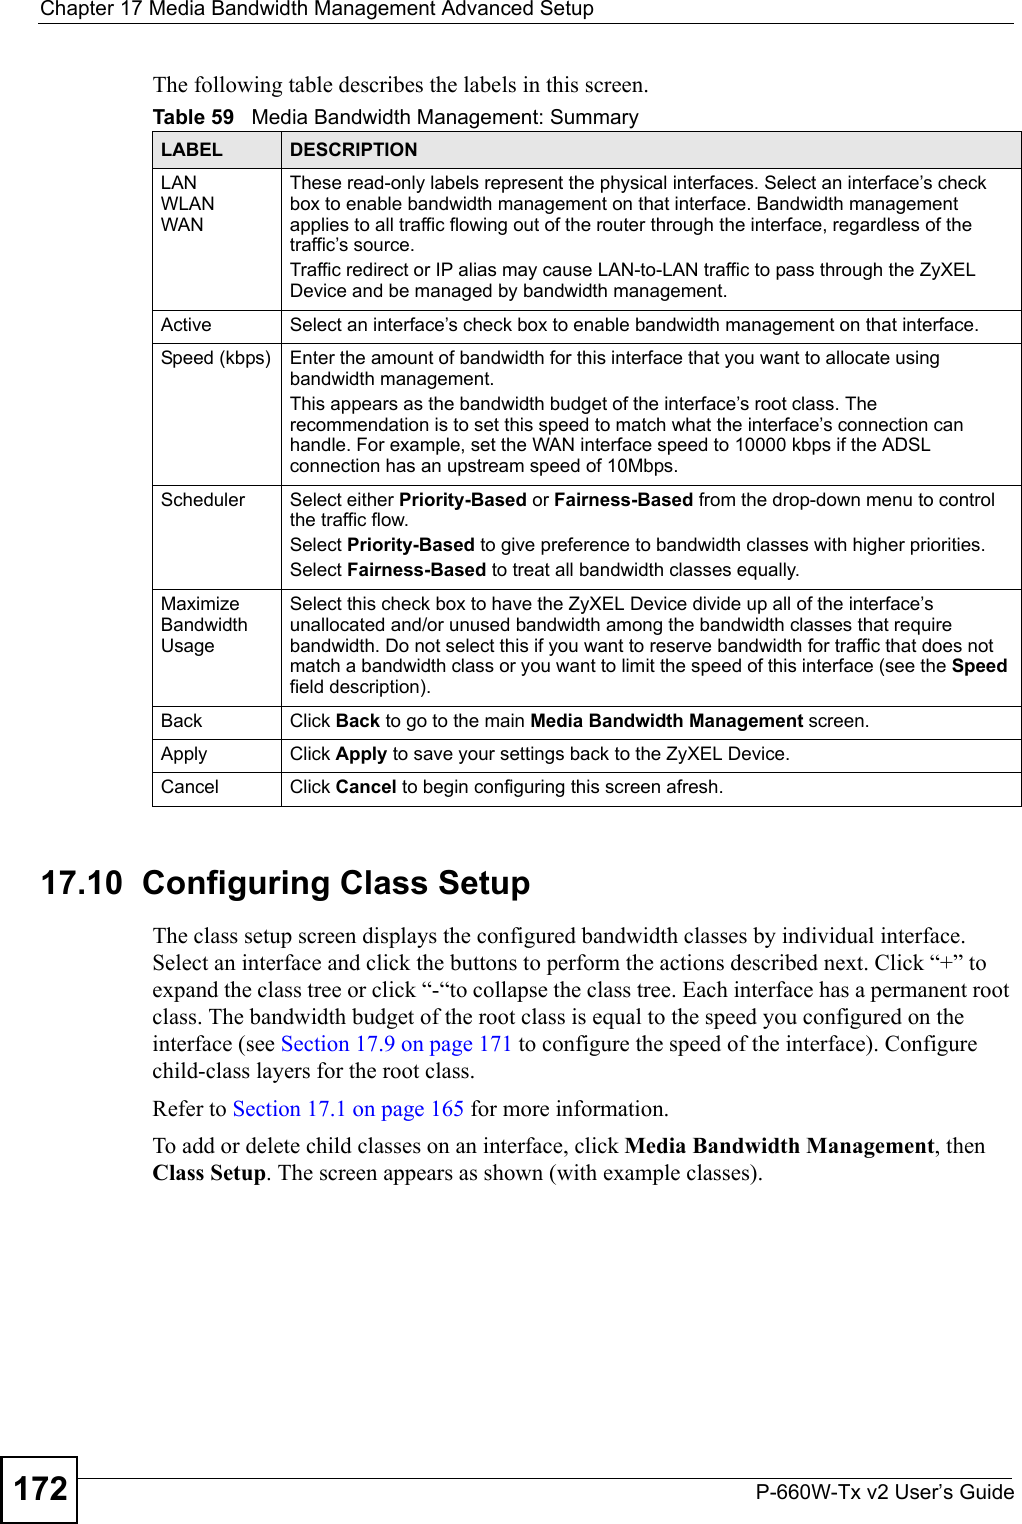


![Chapter 18 MaintenanceP-660W-Tx v2 User’s Guide 19118.8.1 Filename Conventions The configuration file (also known as the romfile or ROM) contains the factory default settings in the screens such as password, ZyXEL Device setup, IP Setup, and so on. Once you have customized the ZyXEL Device’s settings, they can be saved back to your computer under a filename of your choosing.ZyNOS (ZyXEL Network Operating System, sometimes referred to as the “ras” file) is the system firmware and has a “bin” filename extension. 18.8.1.1 Example FTP Commandsftp> put firmware.bin rasThis is a sample FTP session showing the transfer of the computer file “firmware.bin” to the ZyXEL Device.ftp> get config config.romThis is a sample FTP session saving the current configuration to a file called “config” on your computer.If your (T)FTP client does not allow you to have a destination filename different than the source, you will need to rename them as the ZyXEL Device only recognizes “config” and “ras”. Be sure you keep unaltered copies of both files for later use.1Be sure to upload the correct model firmware as uploading the wrong model firmware may damage your device.18.8.2 FTP Command Line Procedure 1Launch the FTP client on your computer.2Enter open, followed by a space and the IP address of your ZyXEL Device. 3Press [ENTER] when prompted for a username.4Enter your password as requested (the default is “1234”).5Enter bin to set transfer mode to binary.6Use put to transfer files from the computer to the ZyXEL Device, for example, put firmware.bin ras transfers the firmware on your computer (firmware.bin) to the ZyXEL Device and renames it to “ras”. Similarly, put config.rom config transfers the configuration file on your computer (config.cfg) to the ZyXEL Device and renames Table 73 Filename Conventions FILE TYPE INTERNAL NAMEEXTERNAL NAME DESCRIPTIONConfiguration File config *.rom This is the configuration (config) filename on the ZyXEL Device. Uploading the config file replaces the specified configuration file system, including your ZyXEL Device configurations, system-related data (including the default password), the error log and the trace log.Firmware ras *.bin This is the generic name for the ZyNOS firmware on the ZyXEL Device.](https://usermanual.wiki/ZyXEL-Communications/P660WTXV2.Users-manual2/User-Guide-934343-Page-91.png)


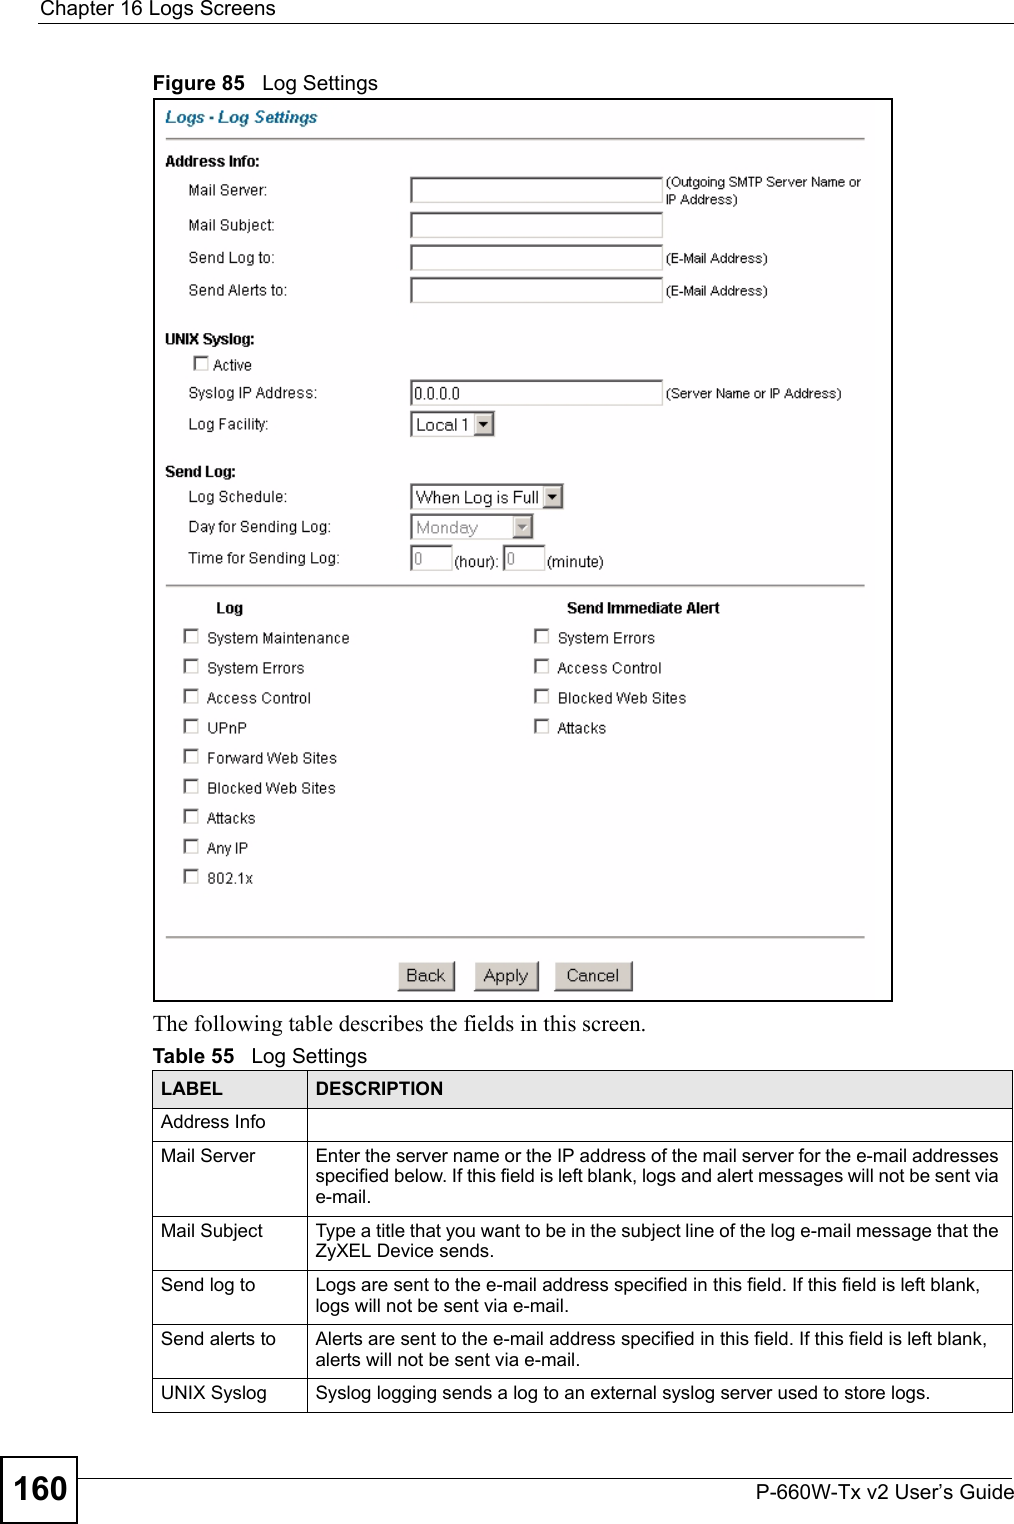
![Chapter 19 TroubleshootingP-660W-Tx v2 User’s Guide 1976If the problem continues, contact the network administrator or vendor, or try one of the advanced suggestions.Advanced Suggestions• Try to access the ZyXEL Device using another service, such as Telnet. If you can access the ZyXEL Device, check the remote management settings, and firewall rules to find out why the ZyXEL Device does not respond to HTTP. • If your computer is connected to the WA N port or is connected wirelessly, use a computer that is connected to a LAN/ETHERNET port.VI can see the Login screen, but I cannot log in to the ZyXEL Device.1Make sure you have entered the user name and password correctly. The default password is 1234. These fields are case-sensitive, so make sure [Caps Lock] is not on. 2You cannot log in to the web configurator while someone is using Telnet to access the ZyXEL Device. Log out of the ZyXEL Device in the other session, or ask the person who is logged in to log out. 3Turn the ZyXEL Device off and on. 4If this does not work, you have to reset the ZyXEL Device to its factory defaults. See Section 19.1 on page 195.VI cannot Telnet to the ZyXEL Device. See the troubleshooting suggestions for I cannot see or access the Login screen in the web configurator. Ignore the suggestions about your browser.VI cannot use FTP to upload / download the configuration file. / I cannot use FTP to upload new firmware.See the troubleshooting suggestions for I cannot see or access the Login screen in the web configurator. Ignore the suggestions about your browser.19.3 Internet AccessVI cannot access the Internet.](https://usermanual.wiki/ZyXEL-Communications/P660WTXV2.Users-manual2/User-Guide-934343-Page-97.png)
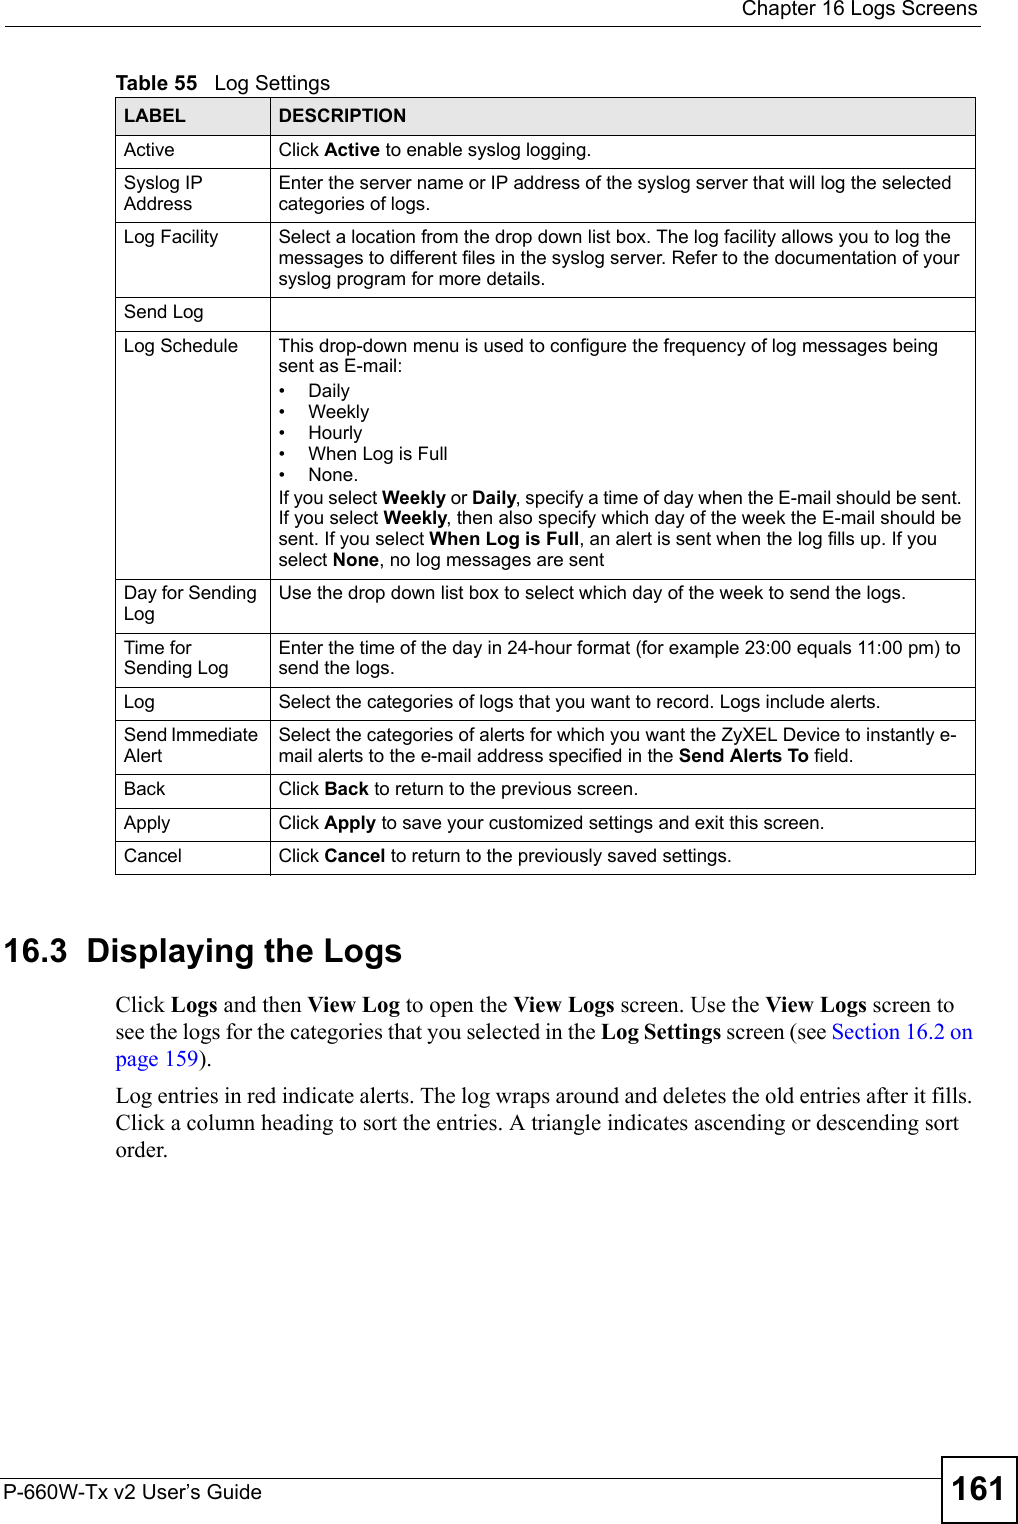
![Chapter 19 TroubleshootingP-660W-Tx v2 User’s Guide1981Check the hardware connections, and make sure the LEDs are behaving as expected. See the Quick Start Guide and Section 19.1 on page 195.2Make sure you entered your ISP account information correctly in the wizard. These fields are case-sensitive, so make sure [Caps Lock] is not on.3If you are trying to access the Internet wirelessly, make sure the wireless settings in the wireless client are the same as the settings in the AP. 4Disconnect all the cables from your ZyXEL Device, and follow the directions in the Quick Start Guide again.5If the problem continues, contact your ISP. VI cannot access the Internet anymore. I had access to the Internet (with the ZyXEL Device), but my Internet connection is not available anymore.1Check the hardware connections, and make sure the LEDs are behaving as expected. See the Quick Start Guide and Section 19.1 on page 195. 2Turn the ZyXEL Device off and on. 3If the problem continues, contact your ISP. VThe Internet connection is slow or intermittent.1There might be a lot of traffic on the network. Look at the LEDs, and check Section 19.1 on page 195. If the ZyXEL Device is sending or receiving a lot of information, try closing some programs that use the Internet, especially peer-to-peer applications. 2Check the signal strength. If the signal strength is low, try moving the ZyXEL Device closer to the AP if possible, and look around to see if there are any devices that might be interfering with the wireless network (for example, microwaves, other wireless networks, and so on).3Turn the ZyXEL Device off and on. 4If the problem continues, contact the network administrator or vendor, or try one of the advanced suggestions.Advanced Suggestions• Check the settings for bandwidth management. If it is disabled, you might consider activating it. If it is enabled, you might consider changing the allocations.19.4 Reset the ZyXEL Device to Its Factory Defaults If you reset the ZyXEL Device, you lose all of the changes you have made. The ZyXEL Device re-loads its default settings, and the password resets to 1234. You have to make all of your changes again.](https://usermanual.wiki/ZyXEL-Communications/P660WTXV2.Users-manual2/User-Guide-934343-Page-98.png)