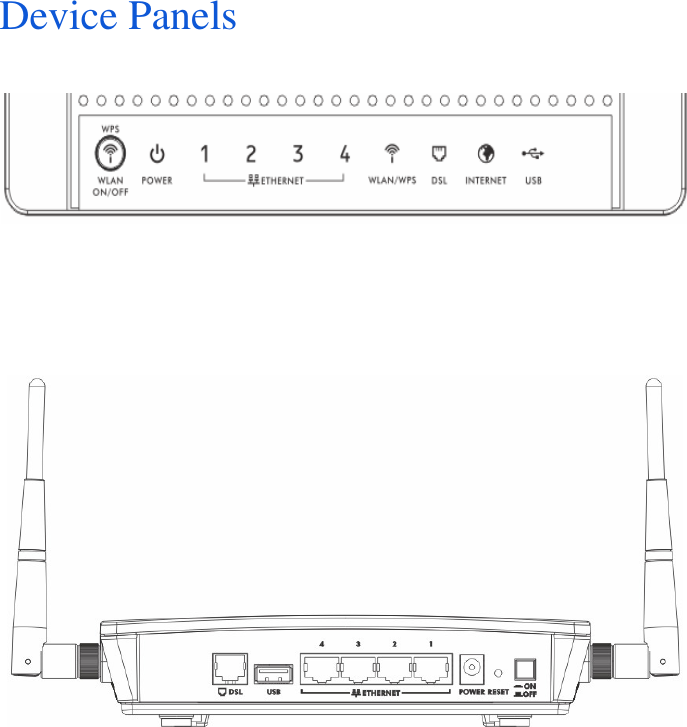
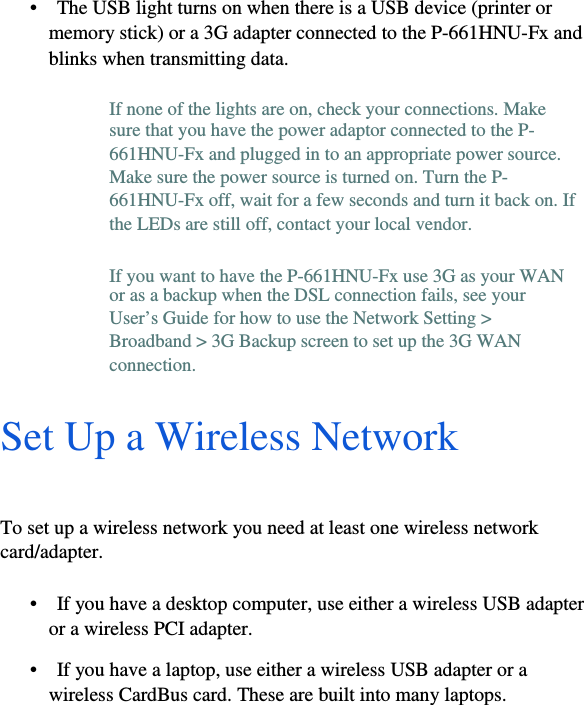
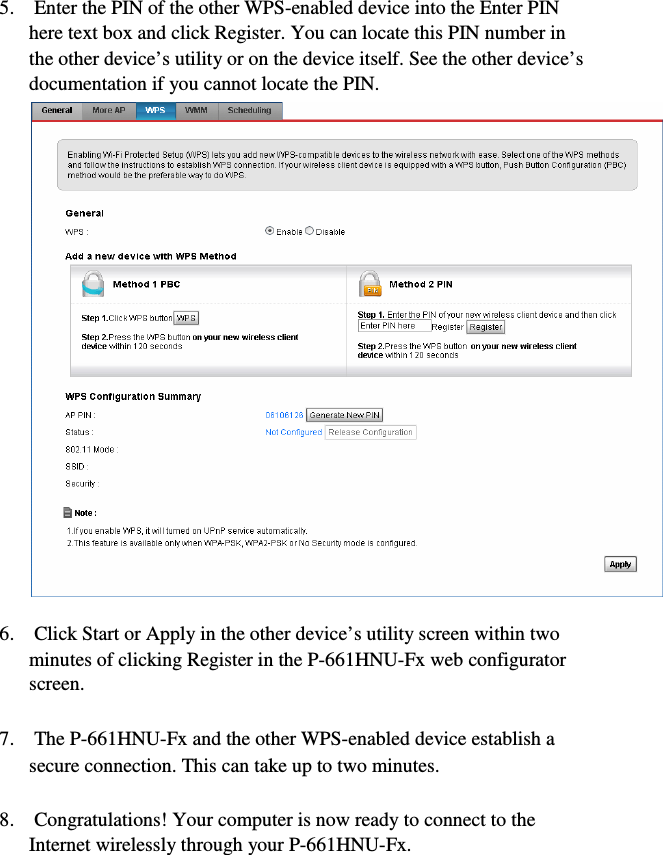
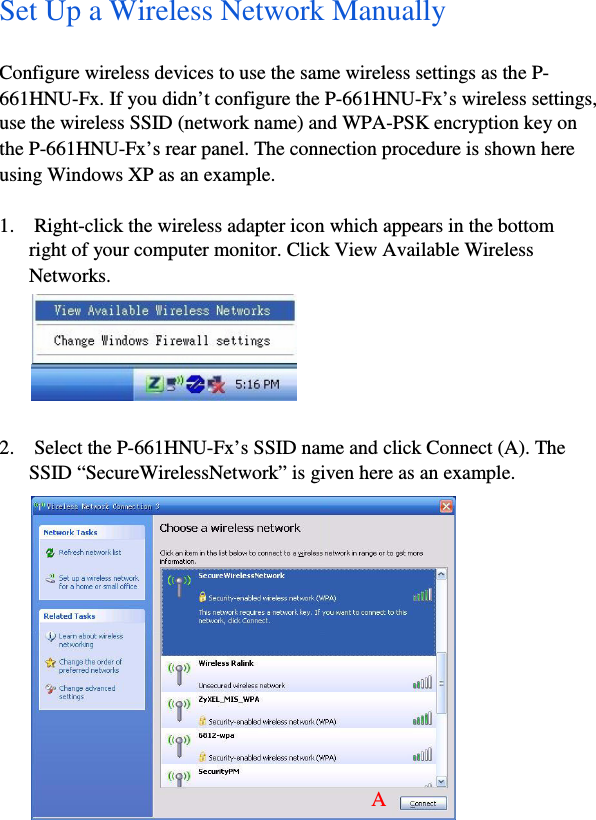
ZyXEL Communications P661HNUF1 802.11n Wireless ADSL2+ 4-port Security Gateway User Manual
ZyXEL Communications Corporation 802.11n Wireless ADSL2+ 4-port Security Gateway Users Manual
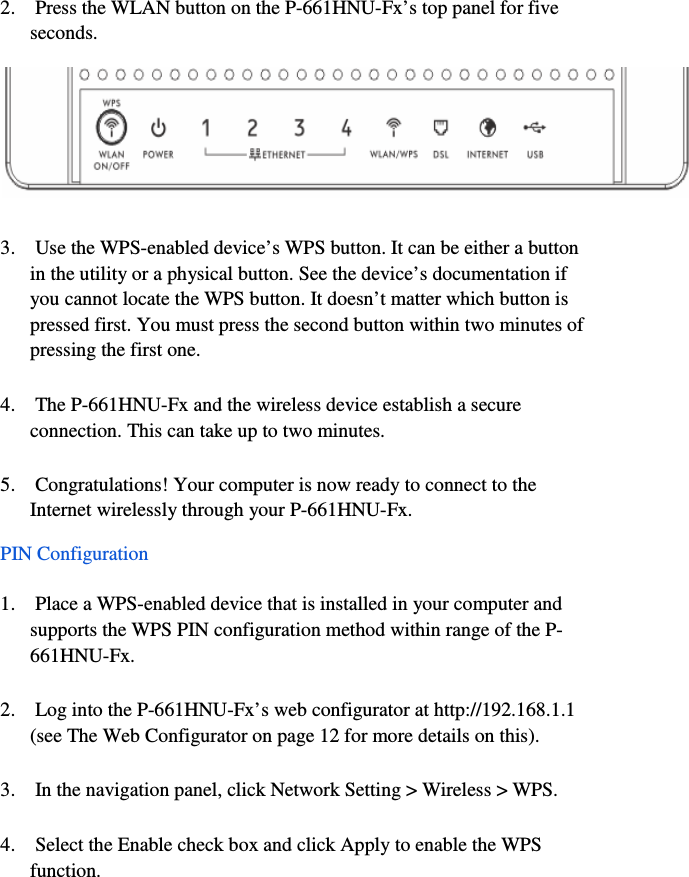
UserManual.wiki
>
ZyXEL Communications
>
P661HNUF1 User Manual
user manual
Navigation menu
Upload a User Manual
Namespaces
Wiki Guide
HTML
PDF
Info
Views
User Manual
Discussion / Help
Navigation

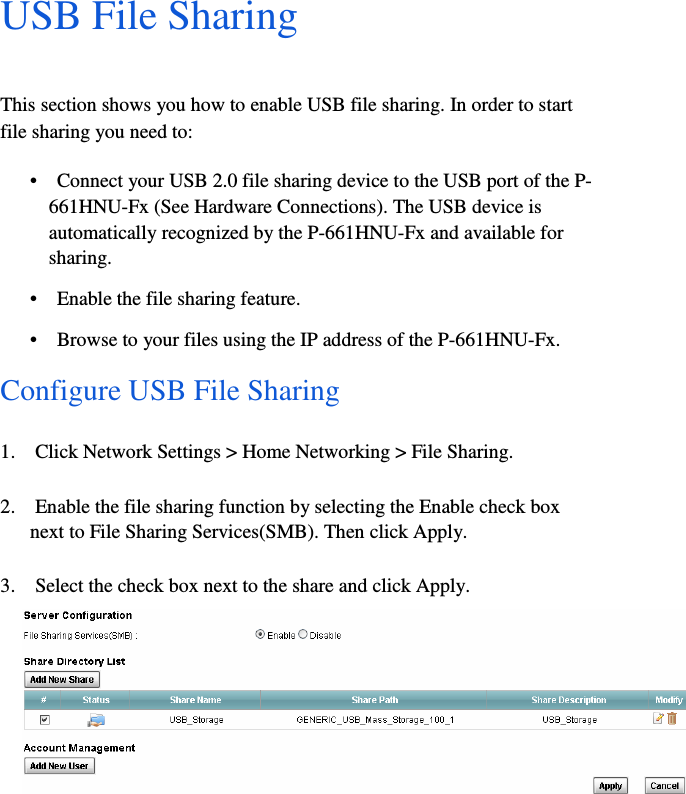
![14 Browse to the USB File Share 1. In Windows Explorer’s Address bar type a double backslash “\\” followed by the IP address of the P-661HNU-Fx (192.168.1.1 is the default) and hit [ENTER]. 2. The files on the USB file sharing device connected to the P-661HNU- Fx are now part of your file structure and you can manage those files just like any other files on your computer. You can also configure share path (optional) for your share. Refer to the User’s Guide for a detailed information. Viewing a Product’s Certifications 1. Go to www.zyxel.com. 2. Select your product from the drop-down list box on the ZyXEL home page to go to that product's page. 3. Select the certification you wish to view from this page.](https://usermanual.wiki/ZyXEL-Communications/P661HNUF1/User-Guide-1365059-Page-14.png)