ZyXEL Communications WRE2206 Wireless N300 Range Extender User Manual WRE2205
ZyXEL Communications Corporation Wireless N300 Range Extender WRE2205
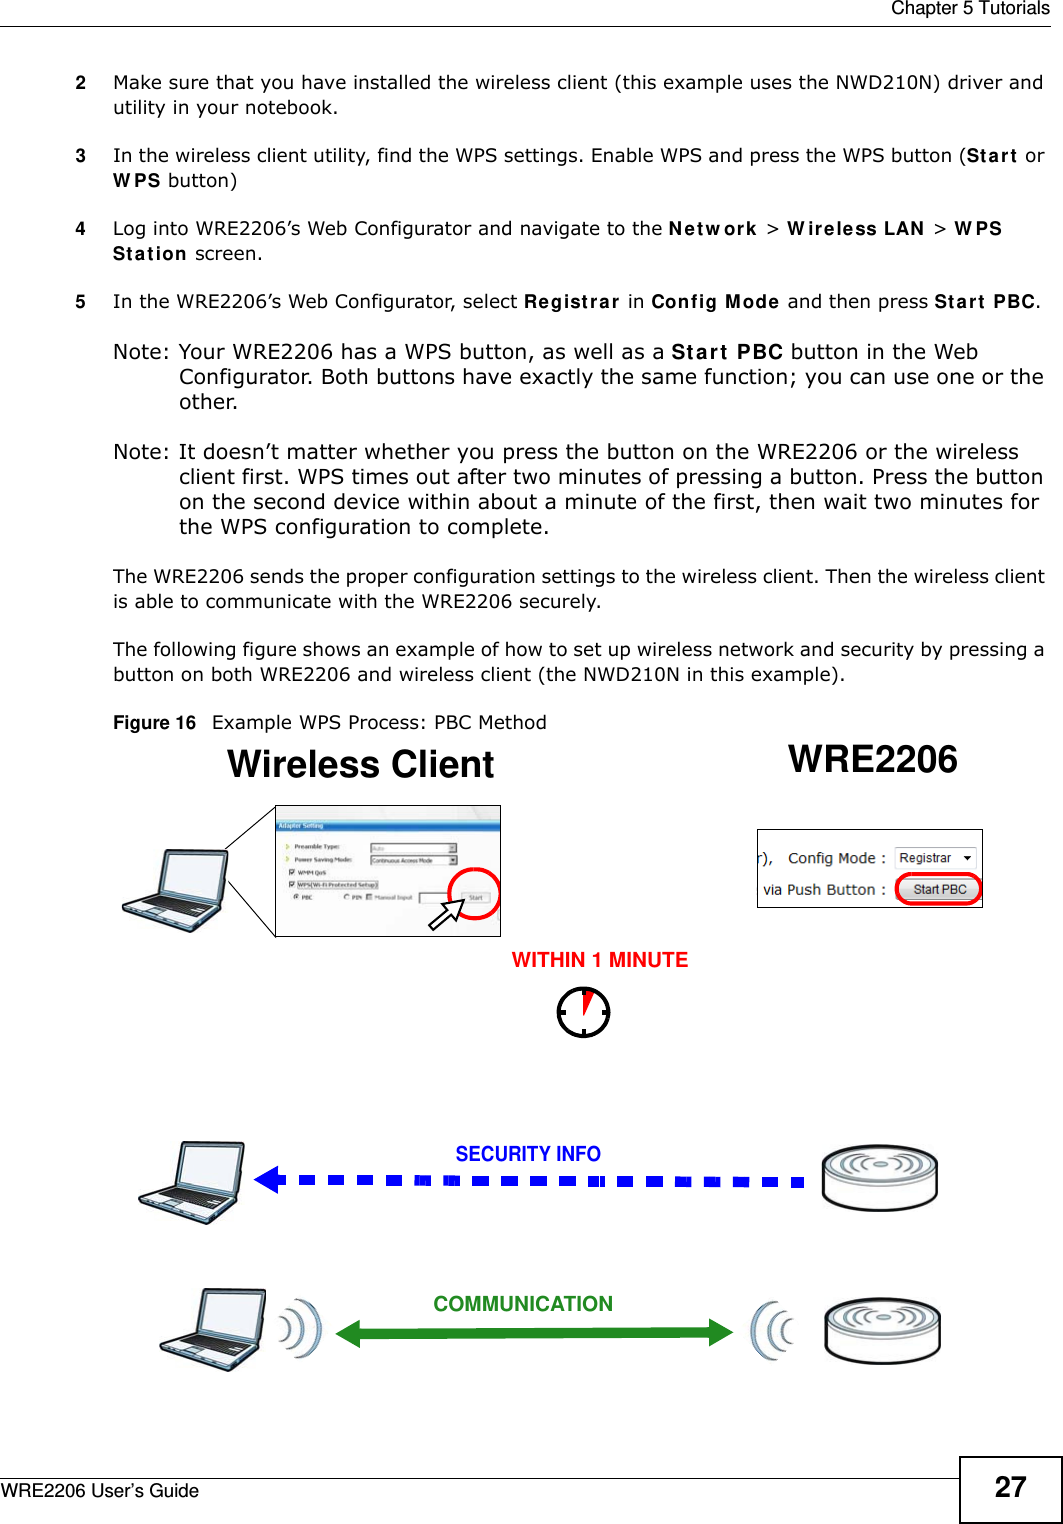
UserManual.wiki
>
ZyXEL Communications
>
WRE2206 User Manual
User Manual.pdf
Navigation menu
Upload a User Manual
Namespaces
Wiki Guide
HTML
PDF
Info
Views
User Manual
Discussion / Help
Navigation


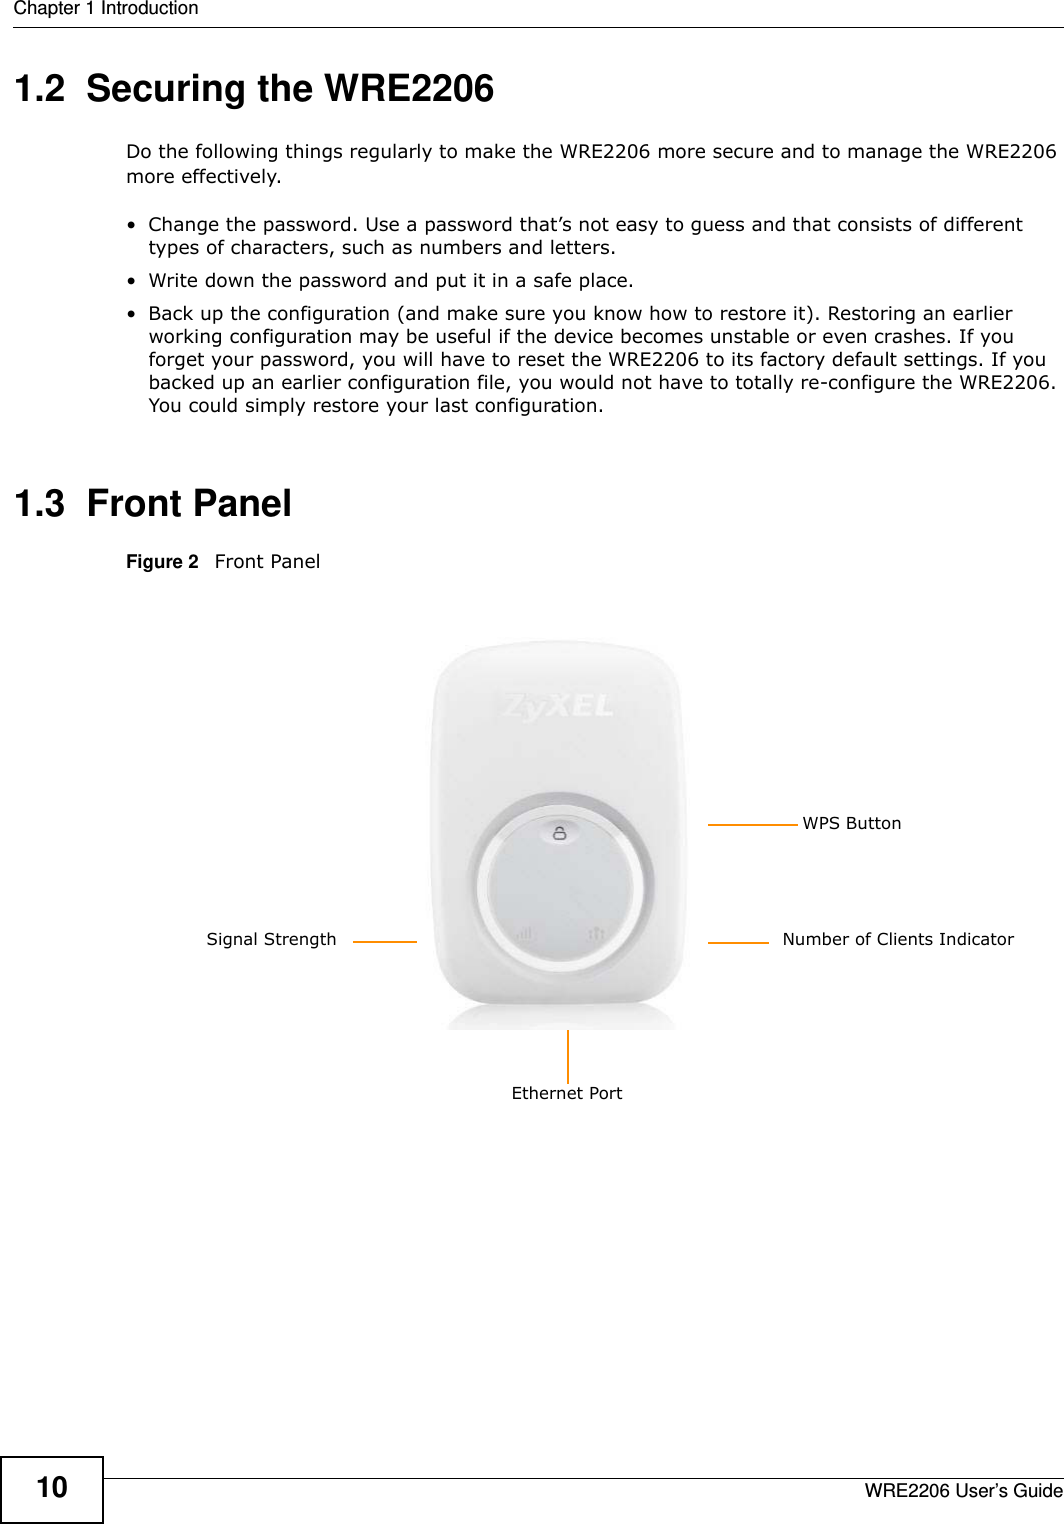


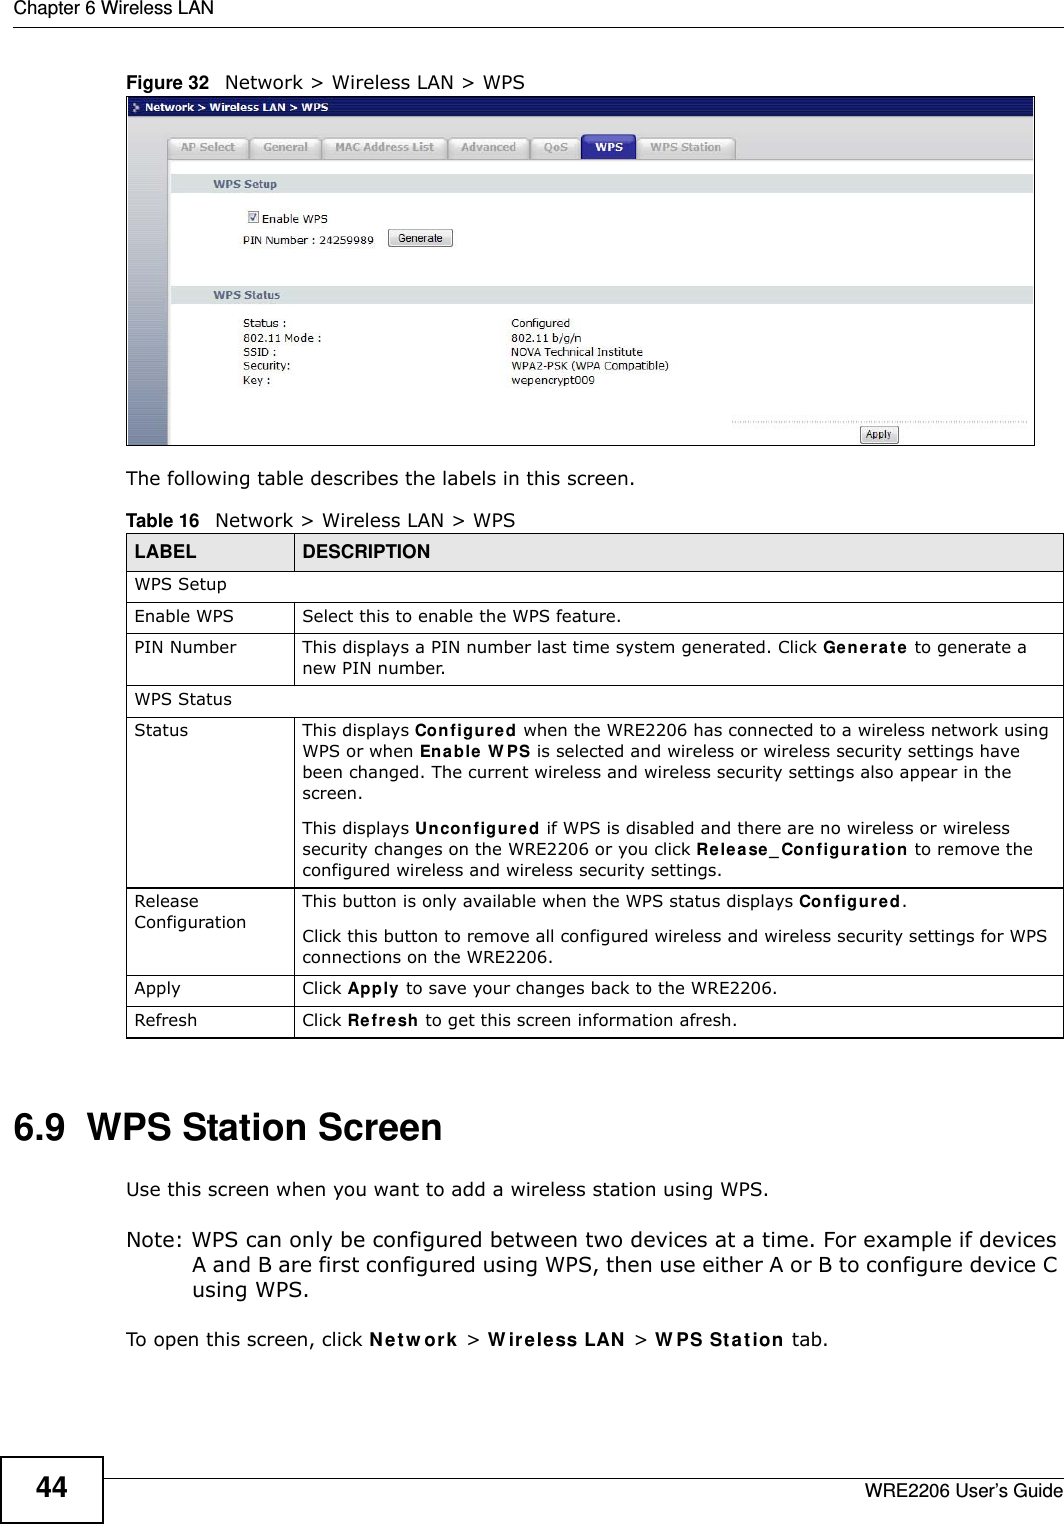
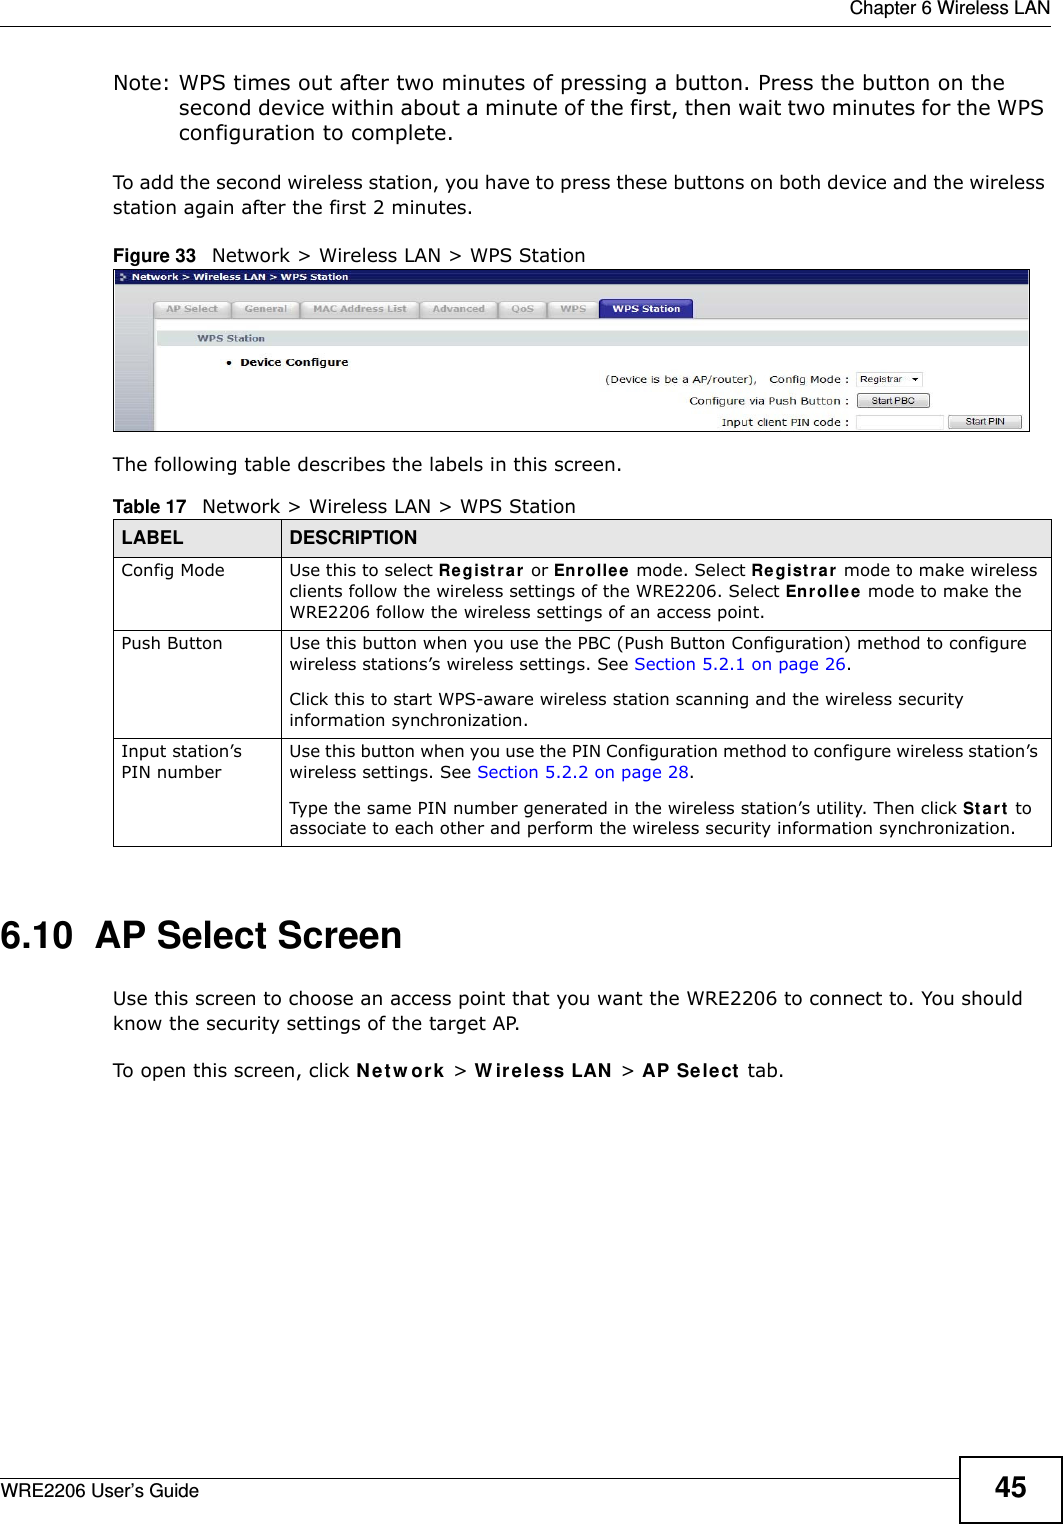
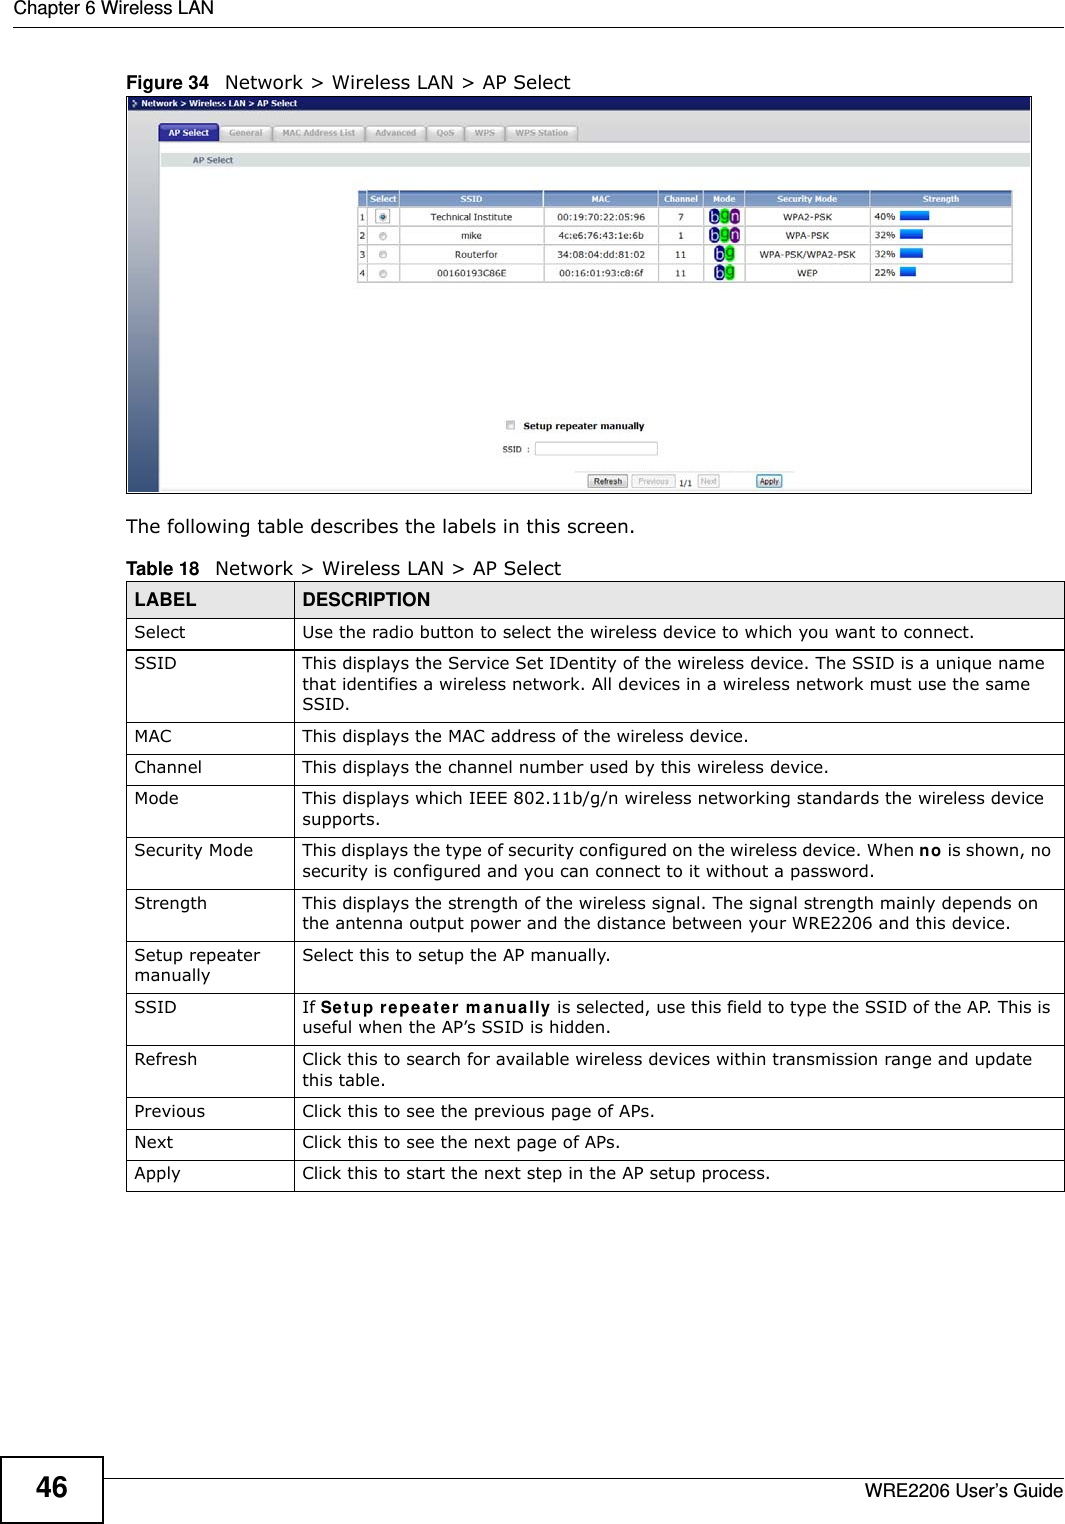
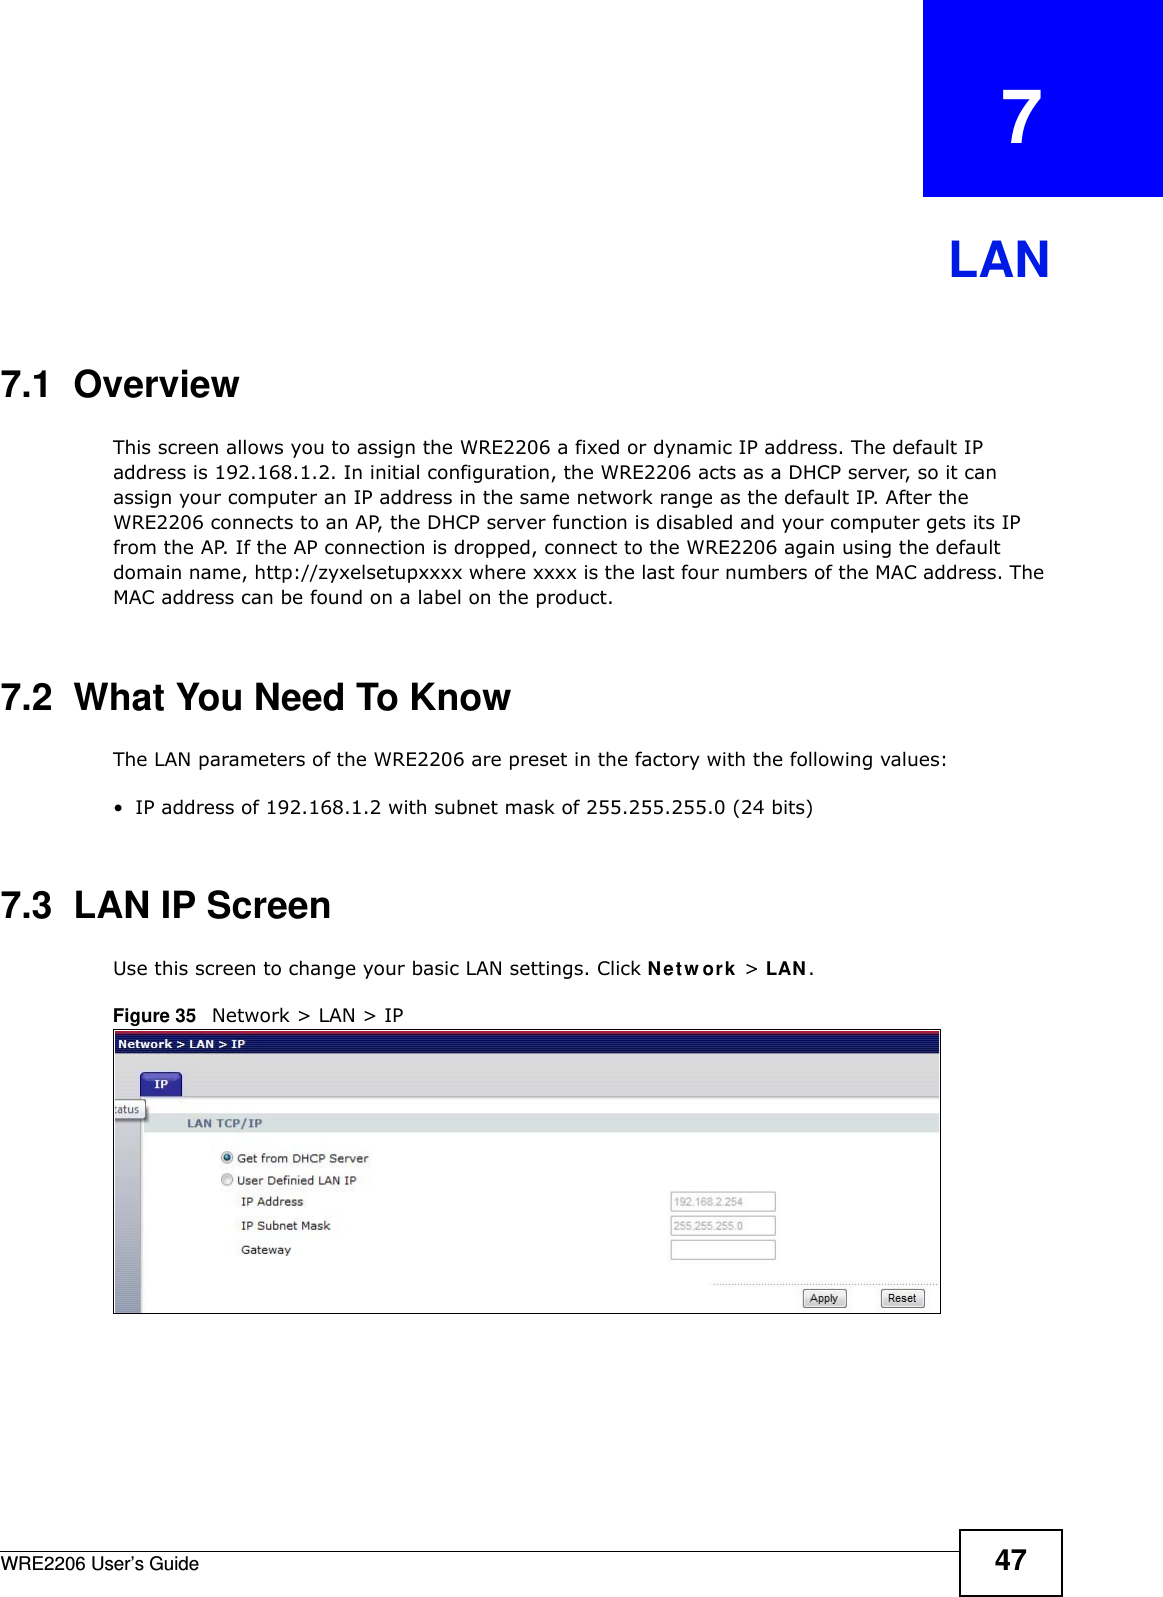
![Chapter 10 TroubleshootingWRE2206 User’s Guide58• If you changed the IP address and have forgotten it, see the troubleshooting suggestions for I don’t know the IP address of my WRE2206.2Check the hardware connections, and make sure the LEDs are behaving as expected. See the Quick Start Guide. 3Make sure your Internet browser does not block pop-up windows and has JavaScript and Java enabled.4Make sure your computer is in the same subnet as the WRE2206. (If you know that there are routers between your computer and the WRE2206, skip this step.)• If there is a DHCP server on your network, make sure your computer is using a dynamic IP address. • If there is no DHCP server on your network, make sure your computer’s IP address is in the same subnet as the WRE2206.5Reset the device to its factory defaults, and try to access the WRE2206 with the default IP address.6If the problem continues, contact the network administrator or vendor, or try one of the advanced suggestions.Adva n ced Sugge st ions• If your computer is connected wirelessly, use a computer that is connected to a LAN /ETH ERNET port.I can see the Login screen, but I cannot log in to the WRE2206.1Make sure you have entered the password correctly. The default username is adm in and default password is 1 2 3 4 . This field is case-sensitive, so make sure [Caps Lock] is not on. 2This can happen when you fail to log out properly from your last session. Try logging in again after 5 minutes.3Disconnect and re-connect the power adaptor or cord to the WRE2206. 4If this does not work, you have to reset the device to its factory defaults. See Section 10.4 on page 60.10.3 Internet AccessI cannot access the Internet.1Check the hardware connections, and make sure the LEDs are behaving as expected. See the Quick Start Guide.](https://usermanual.wiki/ZyXEL-Communications/WRE2206/User-Guide-2621979-Page-58.png)