Adobe Using Director 11.5 User Guide En
User Manual: adobe Adobe Director - 11.5 - User Guide Free User Guide for Adobe Director Software, Manual
Open the PDF directly: View PDF ![]() .
.
Page Count: 504 [warning: Documents this large are best viewed by clicking the View PDF Link!]
- Contents
- Chapter 1: Getting started
- Chapter 2: Workspace
- Introduction
- User Interface enhancements
- Undo multiple actions
- Understanding the Director metaphor
- Navigating the Director workspace
- Getting to know the workspace
- Getting to know window types
- Using the Stage
- Using the Score
- Using the Control panel
- Using the Cast window
- Using the Property inspector
- Using the Script window
- Using the Message window
- Customizing your workspace
- Working with Xtra extensions
- Connecting to the Internet
- Chapter 3: Score, Stage, and Cast
- Using the Tool palette with the Stage
- Setting Stage properties
- Using multiple Score windows
- Changing Score settings
- Selecting, editing, and adding frames in the Score
- About cast members
- Using the Cast window
- Setting Cast window preferences
- Naming cast members
- Selecting cast members in the Cast window
- Copying cast members
- Moving cast members within the Cast window
- Organizing cast members within the Cast window
- Switching from one Cast window view to another
- Working with Cast panel groups
- Managing casts
- Managing casts in older Director movies
- Using Cast window controls
- Change the cast displayed in the current Cast window
- Open a cast in a new Cast window
- Select the previous or next cast member
- Move a selected cast member to a new position in the Cast window (Thumbnail view) or to the Stage
- Enter a cast member name
- Edit a cast member script
- View cast member properties
- View the cast member number
- Using Cast List view
- Using Cast Thumbnail view
- Launching external editors
- Managing external casts
- Creating libraries
- Setting cast member properties by using Lingo or JavaScript syntax
- Setting Xtra cast member properties
- Chapter 4: Sprites
- About sprites
- Creating sprites
- Setting sprite general preferences
- Selecting sprites
- Naming sprites
- Finding sprites
- Creating sprite channel names
- Layering sprites
- Displaying and editing sprite properties
- Locking and unlocking sprites
- Positioning sprites
- Controlling the entrance of a sprite on the stage
- Controlling the duration of a sprite on the stage
- Splitting and joining sprites
- Changing the appearance of sprites
- Using sprite inks
- Assigning a cast member to a sprite with Lingo or JavaScript syntax
- Exchanging cast members
- Chapter 5: Animation
- About animation
- About tweening in Director
- Tweening the path of a sprite
- Accelerating and decelerating sprites
- Tweening other sprite properties
- Suggestions and shortcuts for tweening
- Changing tweening settings
- Switching a sprite’s cast members
- Editing sprite frames
- Frame-by-frame animation
- Shortcuts for animating with multiple cast members
- Using film loops
- Setting film loop properties
- Step-recording animation
- Real-time recording animation
- Linking a sequence with Paste Relative
- Animating sprites with Lingo or JavaScript syntax
- Chapter 6: Bitmaps
- Introduction
- About importing bitmaps
- Using animated GIFs
- Using the Paint window
- Using Paint window tools and controls
- Select an irregular area
- Select a rectangular area
- Select the location of the registration point
- Erase
- Move the view of the Paint window
- Zoom in or out on an area
- Select a color in a cast member
- Fill all adjacent pixels of the same color with the foreground color
- Enter bitmap text
- Draw a 1-pixel line in the current foreground
- Spray variable dots of the foreground color
- Brush strokes of the foreground color
- Select a new brush type
- Paint shapes or lines
- Select a foreground and destination color for color-shifting inks
- Select the foreground and background colors
- Select a pattern for the foreground color
- Select a line thickness
- Change the color depth of the current cast member
- Select a Paint window ink
- Using the Lasso tool
- Using the Marquee tool
- Using the Airbrush tool
- Using the Brush tool
- Using rulers in the Paint window
- Zooming in and out in the Paint window
- Using Paint window tools and controls
- Changing selected areas of a bitmap
- Flipping, rotating, and applying effects to bitmaps
- Using Auto Distort
- Changing registration points
- Changing size, color depth, and color palette for bitmaps
- Controlling bitmap images with Lingo or JavaScript syntax
- Change the image assigned to a bitmap cast member
- Specify the background or foreground of a bitmap sprite
- Capture the current graphic contents of the Stage
- Creating image objects
- Editing image objects
- Draw a line on an image object
- Draw a rectangle on an image object
- Determine the color of an individual pixel of an image object or set that pixel’s color
- Copy part or all of an image object into a different image object
- Make a new image object from the alpha channel information of a 32-bit image object
- Using gradients
- Using patterns
- Creating a custom tile
- Using Paint window inks
- Using onion skinning
- About the Paste As PICT option
- Setting and changing bitmap cast member properties
- Setting and changing PICT cast member properties
- Setting Paint window preferences
- Compressing bitmaps
- Working with Adobe Fireworks
- Bitmap filters
- Install a filter
- Create a filter
- Apply a filter
- Modify a filter
- Modify filters using Lingo/JavaScript
- Re-order filters applied to a sprite
- Enable or disable all filters for a sprite
- Enable or disable a filter applied to a sprite, using Lingo/JavaScript
- Remove filters applied to a sprite
- Remove a filter applied to a sprite, using Lingo/JavaScript
- Find filters applied to a sprite
- Create custom filters
- Using filters to create animated effects
- Chapter 7: Vector Shapes
- About vector shapes
- Drawing vector shapes
- Editing vector shapes
- Adjust the outline of a vector shape
- Add a point in the middle of a shape
- Add a new point that is connected to a certain end point
- Join two curves
- Split two curves
- Change the registration point
- Change a vector shape cast member’s registration point in Lingo or JavaScript syntax
- Close or open vector shapes
- Close a shape with Lingo or JavaScript syntax
- Scale a vector shape
- Defining gradients for vector shapes
- Controlling vector shapes with Lingo or JavaScript syntax
- Setting vector shape properties
- Using shapes
- Setting shape cast member properties
- Chapter 8: Color, Tempo, and Transitions
- Introduction
- Controlling color
- Setting palette cast member properties
- About tempo
- Using transitions
- Chapter 9: Text
- About text
- Embedding fonts in movies
- Creating text cast members
- Editing and formatting text
- Creating a hypertext link
- Working with fields
- Using editable text
- Converting text to a bitmap
- Mapping fonts between platforms for field cast members
- Setting text or field cast member properties
- Formatting chunks of text with Lingo or JavaScript syntax
- Formatting text or field cast members with Lingo or JavaScript syntax
- Controlling scrolling text with Lingo or JavaScript syntax
- Checking for specific text with Lingo or JavaScript syntax
- Modifying strings with Lingo or JavaScript syntax
- Unicode support in Director
- Chapter 10: Using Flash, Flash Components, and Other Interactive Media Types
- Introduction
- Using Flash Content
- Adding a Flash content cast member
- Editing a Flash cast member
- Controlling Flash content with Lingo or JavaScript syntax
- Controlling Flash content appearance with Lingo or JavaScript syntax
- Streaming Flash content with Lingo or JavaScript syntax
- Playback Flash content with Lingo or JavaScript syntax
- Using Lingo or JavaScript syntax with Flash variables
- Sending messages from Flash content using getURL
- Sending XML Data from Flash to Director
- Using Flash objects in script
- Using the Flash local connection object
- Using Flash Media Server
- Create a NetConnection object
- Create a NetStream object
- Create a global NetConnection object that does not require a sprite reference
- Create a global NetStream object that does not require a sprite reference
- Send text messages with the NetStream object
- Associate a video camera with the NetStream object
- Associate a microphone with the NetStream object
- Publish a video, audio, or other data stream with the NetStream object
- Play a non-video data stream from the server with the NetStream object
- Create a script reference to the video clip object in the Flash sprite
- Play a video stream through the video clip object
- Using the Flash Settings panel
- Playback performance tips for Flash content
- Using Director movies within Director movies
- Setting linked Director movie properties
- Using ActiveX controls
- Using Flash components
- Button component
- CheckBox component
- DateChooser component
- Label component
- List component
- NumericStepper component
- RadioButton component
- ScrollPane component
- TextArea component
- TextInput component
- Tree component
- Chapter 11: Sound and Synchronization
- About sound and synchronization
- Importing internal and linked sounds
- Audio mixers and sound objects
- Audio mixer
- Sound object
- Create a mixer
- Add a sound object to a mixer
- Apply filters to a sound object or mixer
- Play a mixer or sound object
- Export a mixer or sound object
- Modify mixer, sound object, or filter properties
- Activate a mixer
- Reset a mixer
- Mix MP4 movie sound with other sounds
- Create a mixer asset reference
- Setting sound cast member properties
- Controlling sound in the Score
- Looping a sound
- Using sound in Windows
- Playing sounds with Lingo or JavaScript syntax
- About Shockwave Audio
- Compressing internal sounds with Shockwave Audio
- Streaming linked Shockwave Audio and MP3 audio files
- Playing audio with Lingo or JavaScript syntax
- Synchronizing media
- Synchronizing sound with Lingo or JavaScript syntax
- Accessibility
- Chapter 12: Using Digital Video
- About digital video
- Importing digital video formats
- Adding an MP4Media member to a movie
- Using the video windows
- Playing digital video Direct To Stage
- Controlling digital video in the Score
- Playing digital video with Lingo or JavaScript syntax
- Setting QuickTime digital video cast member properties
- Controlling QuickTime with Lingo or JavaScript syntax
- Using Windows Media files in Director
- Using DVD media content in Director
- Cropping digital video
- Using digital video on the Internet
- Synchronizing video and animation
- Using RealMedia content in Director
- System requirements
- RealMedia sample file
- About RealMedia streams in Director
- Creating RealMedia cast members
- Obtaining dynamic RealMedia cast member properties
- The RealMedia tab in the Property inspector
- About RealMedia behaviors
- Using RealMedia behaviors
- The RealMedia viewer
- Publishing Shockwave content with RealMedia
- Using Lingo or JavaScript syntax sound elements with RealMedia
- Chapter 13: Behaviors
- About behaviors
- Attaching behaviors
- Changing the order of attached behaviors
- Getting information about behaviors
- Creating and modifying behaviors
- Writing behaviors with Lingo or JavaScript syntax
- Setting up a Parameters dialog box
- Setting behavior properties with script
- Customizing a behavior’s property
- Creating an on getPropertyDescriptionList handler
- Including a description for the Behavior inspector
- Example of a complete behavior
- Sending messages to behaviors attached to sprites
- Using inheritance in behaviors
- Chapter 14: Navigation and User Interaction
- About navigation and user interaction
- Creating basic navigation controls with behaviors
- Adding push buttons, radio buttons, and check boxes
- Jumping to locations with Lingo or JavaScript syntax
- Detecting mouse clicks with Lingo or JavaScript syntax
- Making sprites editable and draggable
- Making sprites editable or moveable with Lingo or JavaScript syntax
- Checking which text is under the pointer with Lingo or JavaScript syntax
- Responding to rollovers with Lingo or JavaScript syntax
- Finding mouse pointer locations with Lingo or JavaScript syntax
- Checking keys with Lingo or JavaScript syntax
- Equivalent cross-platform keys
- Identifying keys on different keyboards
- About animated color cursors
- Creating an animated color cursor cast member
- Using an animated color cursor in a movie
- Chapter 15: 3D Basics
- Chapter 16: The 3D Cast Member, 3D Text, and 3D Behaviors
- Chapter 17: Working with Models and Model Resources
- Chapter 18: Controlling the 3D World
- Chapter 19: Movies in a Window
- Chapter 20: Using Xtras
- Using the XML Parser Xtra
- Using the MUI Xtra
- Using the Physics (Dynamiks) Xtra
- Chapter 21: Making Director Movies Accessible
- Introduction
- Using the Accessibility Behavior library
- Accessibility scripting with Lingo or JavaScript syntax
- Initialize the text-to-speech software
- Determine the number of available voices
- Return a property list that describes the name, gender, age, and index number of the current voice
- Return a list of property lists that describes all the available voices
- Set a particular voice as the current voice
- Begin speech synthesis
- Temporarily pause the speech
- Resume the speech
- Stop speech synthesis
- Check whether the speech is currently speaking, paused, or stopped
- Set the volume of the voice
- Set the pitch of the voice
- Determine the chronological number of the current word within the string being spoken
- Deploying accessible movies
- Chapter 22: Managing Memory
- Chapter 23: Managing and Testing Director Projects
- Chapter 24: Packaging Movies for Distribution
- Introduction
- About distributing movies
- Shockwave player browser compatibility
- Using the lingo.ini file to run startup scripts
- Previewing a movie in a browser
- About Xtra extensions
- Managing Xtra extensions for distributed movies
- About Distribution formats
- Creating Shockwave content
- Using default Publish settings
- Changing Publish settings
- Using dswmedia folders and the support folder to publish Shockwave content
- Using linked media when testing Shockwave content
- Converting movies created in previous versions of Director
- About projectors
- Creating projectors
- About cross-platform projectors
- Processing movies with Update Movies
- Exporting digital video and frame-by-frame bitmaps
- Setting QuickTime export options
- About organizing movie files
- Chapter 25: Using Shockwave Player
- About Shockwave Player
- Streaming movies
- About network operations
- Setting movie playback options
- Setting Shockwave playback options
- About creating multiuser applications
- About streaming with the Score and behaviors
- Checking whether media elements are loaded with Lingo or Java Script syntax
- Downloading files from the Internet with Lingo or JavaScript syntax
- Execute a network script operation
- Cancel a network operation in progress
- Retrieve a file as text
- Retrieve and play a new Shockwave movie from the network
- Open a URL in the user’s browser
- Preload a file from the server into the browser’s cache
- Test whether getNetText(), preloadNetThing, or gotoNetMovie operations are complete
- Post information using HTTP post/get abilities to a server and retrieve a response
- Retrieving network operation results with Lingo or JavaScript syntax
- Using Lingo or JavaScript syntax in different Internet environments
- Testing your movie
- Cross-domain policy
- About downloading speed
- Index

Using
ADOBE® DIRECTOR®11.5
Last updated 9/28/2011
Copyright
© 2009 Adobe Systems Incorporated. All rights reserved.
Using Adobe® Director® 11.5 for Windows® and Mac OS
If this guide is distributed with software that includes an end user agreement, this guide, as well as the software described in it, is furnished under license and
may be used or copied only in accordance with the terms of such license. Except as permitted by any such license, no part of this guide may be reproduced, stored
in a retrieval system, or transmitted, in any form or by any means, electronic, mechanical, recording, or otherwise, without the prior written permission of Adobe
Systems Incorporated. Please note that the content in this guide is protected under copyright law even if it is not distributed with software that includes an end
user license agreement.
The content of this guide is furnished for informational use only, is subject to change without notice, and should not be construed as a commitment by Adobe
Systems Incorporated. Adobe Systems Incorporated assumes no responsibility or liability for any errors or inaccuracies that may appear in the informational
content contained in this guide.
Please remember that existing artwork or images that you may want to include in your project may be protected under copyright law. The unauthorized
incorporation of such material into your new work could be a violation of the rights of the copyright owner. Please be sure to obtain any permission required
from the copyright owner.
Any references to company names in sample templates are for demonstration purposes only and are not intended to refer to any actual organization.
This work is licensed under the Creative Commons Attribution Non-Commercial 3.0 License. To view a copy of this license, visit
http://creativecommons.org/licenses/by-nc-sa/3.0/us/
Adobe, the Adobe logo, Director, and Shockwave, are either registered trademarks or trademarks of Adobe Systems Incorporated in the United States and/or
other countries.
Mac OS is a trademark of Apple Inc., registered in the United States and other countries. Windows is either a registered trademark or a trademark of Microsoft
Corporation in the United States and/or other countries. All other trademarks are the property of their respective owners.
Bitstream is a trademark or a registered trademark of Bitstream Inc.
This product contains either BSAFE and/or TIPEM software by RSA Security, Inc.
This product includes software developed by the Apache Software Foundation (http://www.apache.org).
Adobe Flash 9 video compression and decompression is powered by On2 TrueMotion video technology. © 1992-2005 On2 Technologies, Inc. All Rights
Reserved. http://www.on2.com.
Portions of this product contain code that is licensed from Gilles Vollant.
Portions of this product contain code that is licensed from Nellymoser, Inc. (www.nellymoser.com)
Sorenson Spark™ video compression and decompression technology licensed from Sorenson Media, Inc.
Copyright © 1995-2002 Opera Software ASA and its supplier. All rights reserved.
MPEG Layer-3 audio coding technology licensed from Fraunhofer IIS and Thomson. mp3 Surround audio coding technology licensed from Fraunhofer IIS,
Agere Systems and Thomson. mp3PRO audio coding technologies licensed from Coding Technologies, Fraunhofer IIS and Thomson Multimedia.
PhysX is a trademark or registered trademark of NVIDIA Corporation in the United States and/or other countries.
Adobe Systems Incorporated, 345 Park Avenue, San Jose, California 95110, USA.
Notice to U.S. Government End Users. The Software and Documentation are “Commercial Items,” as that term is defined at 48 C.F.R. §2.101, consisting of
“Commercial Computer Software” and “Commercial Computer Software Documentation,” as such terms are used in 48 C.F.R. §12.212 or 48 C.F.R. §227.7202,
as applicable. Consistent with 48 C.F.R. §12.212 or 48 C.F.R. §§227.7202-1 through 227.7202-4, as applicable, the Commercial Computer Software and
Commercial Computer Software Documentation are being licensed to U.S. Government end users (a) only as Commercial Items and (b) with only those rights
as are granted to all other end users pursuant to the terms and conditions herein. Unpublished-rights reserved under the copyright laws of the United States.
Adobe Systems Incorporated, 345 Park Avenue, San Jose, CA 95110-2704, USA. For U.S. Government End Users, Adobe agrees to comply with all applicable
equal opportunity laws including, if appropriate, the provisions of Executive Order 11246, as amended, Section 402 of the Vietnam Era Veterans Readjustment
Assistance Act of 1974 (38 USC 4212), and Section 503 of the Rehabilitation Act of 1973, as amended, and the regulations at 41 CFR Parts 60-1 through 60-60,
60-250, and 60-741. The affirmative action clause and regulations contained in the preceding sentence shall be incorporated by reference.

iii
Last updated 9/28/2011
Contents
Chapter 1: Getting started
Installation . . . . . . . . . . . . . . . . . . . . . . . . . . . . . . . . . . . . . . . . . . . . . . . . . . . . . . . . . . . . . . . . . . . . . . . . . . . . . . . . . . . . . . . . . . . . . . . . . . . . . . . . . . . . 1
Adobe Help . . . . . . . . . . . . . . . . . . . . . . . . . . . . . . . . . . . . . . . . . . . . . . . . . . . . . . . . . . . . . . . . . . . . . . . . . . . . . . . . . . . . . . . . . . . . . . . . . . . . . . . . . . . 2
Resources . . . . . . . . . . . . . . . . . . . . . . . . . . . . . . . . . . . . . . . . . . . . . . . . . . . . . . . . . . . . . . . . . . . . . . . . . . . . . . . . . . . . . . . . . . . . . . . . . . . . . . . . . . . . . 2
What's new . . . . . . . . . . . . . . . . . . . . . . . . . . . . . . . . . . . . . . . . . . . . . . . . . . . . . . . . . . . . . . . . . . . . . . . . . . . . . . . . . . . . . . . . . . . . . . . . . . . . . . . . . . . 5
Chapter 2: Workspace
Introduction . . . . . . . . . . . . . . . . . . . . . . . . . . . . . . . . . . . . . . . . . . . . . . . . . . . . . . . . . . . . . . . . . . . . . . . . . . . . . . . . . . . . . . . . . . . . . . . . . . . . . . . . . . 8
User Interface enhancements . . . . . . . . . . . . . . . . . . . . . . . . . . . . . . . . . . . . . . . . . . . . . . . . . . . . . . . . . . . . . . . . . . . . . . . . . . . . . . . . . . . . . . . . . . 8
Undo multiple actions . . . . . . . . . . . . . . . . . . . . . . . . . . . . . . . . . . . . . . . . . . . . . . . . . . . . . . . . . . . . . . . . . . . . . . . . . . . . . . . . . . . . . . . . . . . . . . . . . 9
Understanding the Director metaphor . . . . . . . . . . . . . . . . . . . . . . . . . . . . . . . . . . . . . . . . . . . . . . . . . . . . . . . . . . . . . . . . . . . . . . . . . . . . . . . . 10
Navigating the Director workspace . . . . . . . . . . . . . . . . . . . . . . . . . . . . . . . . . . . . . . . . . . . . . . . . . . . . . . . . . . . . . . . . . . . . . . . . . . . . . . . . . . . 11
Getting to know the workspace . . . . . . . . . . . . . . . . . . . . . . . . . . . . . . . . . . . . . . . . . . . . . . . . . . . . . . . . . . . . . . . . . . . . . . . . . . . . . . . . . . . . . . . 11
Getting to know window types . . . . . . . . . . . . . . . . . . . . . . . . . . . . . . . . . . . . . . . . . . . . . . . . . . . . . . . . . . . . . . . . . . . . . . . . . . . . . . . . . . . . . . . 12
Using the Stage . . . . . . . . . . . . . . . . . . . . . . . . . . . . . . . . . . . . . . . . . . . . . . . . . . . . . . . . . . . . . . . . . . . . . . . . . . . . . . . . . . . . . . . . . . . . . . . . . . . . . . 13
Using the Score . . . . . . . . . . . . . . . . . . . . . . . . . . . . . . . . . . . . . . . . . . . . . . . . . . . . . . . . . . . . . . . . . . . . . . . . . . . . . . . . . . . . . . . . . . . . . . . . . . . . . . 14
Using the Control panel . . . . . . . . . . . . . . . . . . . . . . . . . . . . . . . . . . . . . . . . . . . . . . . . . . . . . . . . . . . . . . . . . . . . . . . . . . . . . . . . . . . . . . . . . . . . . . 17
Using the Cast window . . . . . . . . . . . . . . . . . . . . . . . . . . . . . . . . . . . . . . . . . . . . . . . . . . . . . . . . . . . . . . . . . . . . . . . . . . . . . . . . . . . . . . . . . . . . . . . 18
Using the Property inspector . . . . . . . . . . . . . . . . . . . . . . . . . . . . . . . . . . . . . . . . . . . . . . . . . . . . . . . . . . . . . . . . . . . . . . . . . . . . . . . . . . . . . . . . . 20
Using the Script window . . . . . . . . . . . . . . . . . . . . . . . . . . . . . . . . . . . . . . . . . . . . . . . . . . . . . . . . . . . . . . . . . . . . . . . . . . . . . . . . . . . . . . . . . . . . . . 22
Using the Message window . . . . . . . . . . . . . . . . . . . . . . . . . . . . . . . . . . . . . . . . . . . . . . . . . . . . . . . . . . . . . . . . . . . . . . . . . . . . . . . . . . . . . . . . . . . 23
Customizing your workspace . . . . . . . . . . . . . . . . . . . . . . . . . . . . . . . . . . . . . . . . . . . . . . . . . . . . . . . . . . . . . . . . . . . . . . . . . . . . . . . . . . . . . . . . . 24
Working with Xtra extensions . . . . . . . . . . . . . . . . . . . . . . . . . . . . . . . . . . . . . . . . . . . . . . . . . . . . . . . . . . . . . . . . . . . . . . . . . . . . . . . . . . . . . . . . . 28
Connecting to the Internet . . . . . . . . . . . . . . . . . . . . . . . . . . . . . . . . . . . . . . . . . . . . . . . . . . . . . . . . . . . . . . . . . . . . . . . . . . . . . . . . . . . . . . . . . . . 30
Chapter 3: Score, Stage, and Cast
Using the Tool palette with the Stage . . . . . . . . . . . . . . . . . . . . . . . . . . . . . . . . . . . . . . . . . . . . . . . . . . . . . . . . . . . . . . . . . . . . . . . . . . . . . . . . . 32
Setting Stage properties . . . . . . . . . . . . . . . . . . . . . . . . . . . . . . . . . . . . . . . . . . . . . . . . . . . . . . . . . . . . . . . . . . . . . . . . . . . . . . . . . . . . . . . . . . . . . . 33
Using multiple Score windows . . . . . . . . . . . . . . . . . . . . . . . . . . . . . . . . . . . . . . . . . . . . . . . . . . . . . . . . . . . . . . . . . . . . . . . . . . . . . . . . . . . . . . . . 34
Changing Score settings . . . . . . . . . . . . . . . . . . . . . . . . . . . . . . . . . . . . . . . . . . . . . . . . . . . . . . . . . . . . . . . . . . . . . . . . . . . . . . . . . . . . . . . . . . . . . . 34
Selecting, editing, and adding frames in the Score . . . . . . . . . . . . . . . . . . . . . . . . . . . . . . . . . . . . . . . . . . . . . . . . . . . . . . . . . . . . . . . . . . . . . 34
About cast members . . . . . . . . . . . . . . . . . . . . . . . . . . . . . . . . . . . . . . . . . . . . . . . . . . . . . . . . . . . . . . . . . . . . . . . . . . . . . . . . . . . . . . . . . . . . . . . . . 35
Using the Cast window . . . . . . . . . . . . . . . . . . . . . . . . . . . . . . . . . . . . . . . . . . . . . . . . . . . . . . . . . . . . . . . . . . . . . . . . . . . . . . . . . . . . . . . . . . . . . . . 47
Using Cast List view . . . . . . . . . . . . . . . . . . . . . . . . . . . . . . . . . . . . . . . . . . . . . . . . . . . . . . . . . . . . . . . . . . . . . . . . . . . . . . . . . . . . . . . . . . . . . . . . . . 53
Using Cast Thumbnail view . . . . . . . . . . . . . . . . . . . . . . . . . . . . . . . . . . . . . . . . . . . . . . . . . . . . . . . . . . . . . . . . . . . . . . . . . . . . . . . . . . . . . . . . . . . 55
Launching external editors . . . . . . . . . . . . . . . . . . . . . . . . . . . . . . . . . . . . . . . . . . . . . . . . . . . . . . . . . . . . . . . . . . . . . . . . . . . . . . . . . . . . . . . . . . . 56
Managing external casts . . . . . . . . . . . . . . . . . . . . . . . . . . . . . . . . . . . . . . . . . . . . . . . . . . . . . . . . . . . . . . . . . . . . . . . . . . . . . . . . . . . . . . . . . . . . . . 57
Creating libraries . . . . . . . . . . . . . . . . . . . . . . . . . . . . . . . . . . . . . . . . . . . . . . . . . . . . . . . . . . . . . . . . . . . . . . . . . . . . . . . . . . . . . . . . . . . . . . . . . . . . . 58
Setting cast member properties by using Lingo or JavaScript syntax . . . . . . . . . . . . . . . . . . . . . . . . . . . . . . . . . . . . . . . . . . . . . . . . . . . 59
Setting Xtra cast member properties . . . . . . . . . . . . . . . . . . . . . . . . . . . . . . . . . . . . . . . . . . . . . . . . . . . . . . . . . . . . . . . . . . . . . . . . . . . . . . . . . . 60

iv
USING DIRECTOR 11.5
Contents
Last updated 9/28/2011
Chapter 4: Sprites
About sprites . . . . . . . . . . . . . . . . . . . . . . . . . . . . . . . . . . . . . . . . . . . . . . . . . . . . . . . . . . . . . . . . . . . . . . . . . . . . . . . . . . . . . . . . . . . . . . . . . . . . . . . . . 61
Creating sprites . . . . . . . . . . . . . . . . . . . . . . . . . . . . . . . . . . . . . . . . . . . . . . . . . . . . . . . . . . . . . . . . . . . . . . . . . . . . . . . . . . . . . . . . . . . . . . . . . . . . . . 61
Setting sprite general preferences . . . . . . . . . . . . . . . . . . . . . . . . . . . . . . . . . . . . . . . . . . . . . . . . . . . . . . . . . . . . . . . . . . . . . . . . . . . . . . . . . . . . 62
Selecting sprites . . . . . . . . . . . . . . . . . . . . . . . . . . . . . . . . . . . . . . . . . . . . . . . . . . . . . . . . . . . . . . . . . . . . . . . . . . . . . . . . . . . . . . . . . . . . . . . . . . . . . . 62
Naming sprites . . . . . . . . . . . . . . . . . . . . . . . . . . . . . . . . . . . . . . . . . . . . . . . . . . . . . . . . . . . . . . . . . . . . . . . . . . . . . . . . . . . . . . . . . . . . . . . . . . . . . . . 65
Finding sprites . . . . . . . . . . . . . . . . . . . . . . . . . . . . . . . . . . . . . . . . . . . . . . . . . . . . . . . . . . . . . . . . . . . . . . . . . . . . . . . . . . . . . . . . . . . . . . . . . . . . . . . 66
Creating sprite channel names . . . . . . . . . . . . . . . . . . . . . . . . . . . . . . . . . . . . . . . . . . . . . . . . . . . . . . . . . . . . . . . . . . . . . . . . . . . . . . . . . . . . . . . . 66
Layering sprites . . . . . . . . . . . . . . . . . . . . . . . . . . . . . . . . . . . . . . . . . . . . . . . . . . . . . . . . . . . . . . . . . . . . . . . . . . . . . . . . . . . . . . . . . . . . . . . . . . . . . . 67
Displaying and editing sprite properties . . . . . . . . . . . . . . . . . . . . . . . . . . . . . . . . . . . . . . . . . . . . . . . . . . . . . . . . . . . . . . . . . . . . . . . . . . . . . . . 67
Locking and unlocking sprites . . . . . . . . . . . . . . . . . . . . . . . . . . . . . . . . . . . . . . . . . . . . . . . . . . . . . . . . . . . . . . . . . . . . . . . . . . . . . . . . . . . . . . . . 72
Positioning sprites . . . . . . . . . . . . . . . . . . . . . . . . . . . . . . . . . . . . . . . . . . . . . . . . . . . . . . . . . . . . . . . . . . . . . . . . . . . . . . . . . . . . . . . . . . . . . . . . . . . . 73
Controlling the entrance of a sprite on the stage . . . . . . . . . . . . . . . . . . . . . . . . . . . . . . . . . . . . . . . . . . . . . . . . . . . . . . . . . . . . . . . . . . . . . . 77
Controlling the duration of a sprite on the stage . . . . . . . . . . . . . . . . . . . . . . . . . . . . . . . . . . . . . . . . . . . . . . . . . . . . . . . . . . . . . . . . . . . . . . . 78
Splitting and joining sprites . . . . . . . . . . . . . . . . . . . . . . . . . . . . . . . . . . . . . . . . . . . . . . . . . . . . . . . . . . . . . . . . . . . . . . . . . . . . . . . . . . . . . . . . . . . 79
Changing the appearance of sprites . . . . . . . . . . . . . . . . . . . . . . . . . . . . . . . . . . . . . . . . . . . . . . . . . . . . . . . . . . . . . . . . . . . . . . . . . . . . . . . . . . . 79
Using sprite inks . . . . . . . . . . . . . . . . . . . . . . . . . . . . . . . . . . . . . . . . . . . . . . . . . . . . . . . . . . . . . . . . . . . . . . . . . . . . . . . . . . . . . . . . . . . . . . . . . . . . . . 85
Assigning a cast member to a sprite with Lingo or JavaScript syntax . . . . . . . . . . . . . . . . . . . . . . . . . . . . . . . . . . . . . . . . . . . . . . . . . . . 88
Exchanging cast members . . . . . . . . . . . . . . . . . . . . . . . . . . . . . . . . . . . . . . . . . . . . . . . . . . . . . . . . . . . . . . . . . . . . . . . . . . . . . . . . . . . . . . . . . . . . 89
Chapter 5: Animation
About animation . . . . . . . . . . . . . . . . . . . . . . . . . . . . . . . . . . . . . . . . . . . . . . . . . . . . . . . . . . . . . . . . . . . . . . . . . . . . . . . . . . . . . . . . . . . . . . . . . . . . . 90
About tweening in Director . . . . . . . . . . . . . . . . . . . . . . . . . . . . . . . . . . . . . . . . . . . . . . . . . . . . . . . . . . . . . . . . . . . . . . . . . . . . . . . . . . . . . . . . . . . 90
Tweening the path of a sprite . . . . . . . . . . . . . . . . . . . . . . . . . . . . . . . . . . . . . . . . . . . . . . . . . . . . . . . . . . . . . . . . . . . . . . . . . . . . . . . . . . . . . . . . . 91
Accelerating and decelerating sprites . . . . . . . . . . . . . . . . . . . . . . . . . . . . . . . . . . . . . . . . . . . . . . . . . . . . . . . . . . . . . . . . . . . . . . . . . . . . . . . . . 92
Tweening other sprite properties . . . . . . . . . . . . . . . . . . . . . . . . . . . . . . . . . . . . . . . . . . . . . . . . . . . . . . . . . . . . . . . . . . . . . . . . . . . . . . . . . . . . . 93
Suggestions and shortcuts for tweening . . . . . . . . . . . . . . . . . . . . . . . . . . . . . . . . . . . . . . . . . . . . . . . . . . . . . . . . . . . . . . . . . . . . . . . . . . . . . . 93
Changing tweening settings . . . . . . . . . . . . . . . . . . . . . . . . . . . . . . . . . . . . . . . . . . . . . . . . . . . . . . . . . . . . . . . . . . . . . . . . . . . . . . . . . . . . . . . . . . 94
Switching a sprite’s cast members . . . . . . . . . . . . . . . . . . . . . . . . . . . . . . . . . . . . . . . . . . . . . . . . . . . . . . . . . . . . . . . . . . . . . . . . . . . . . . . . . . . . 95
Editing sprite frames . . . . . . . . . . . . . . . . . . . . . . . . . . . . . . . . . . . . . . . . . . . . . . . . . . . . . . . . . . . . . . . . . . . . . . . . . . . . . . . . . . . . . . . . . . . . . . . . . 95
Frame-by-frame animation . . . . . . . . . . . . . . . . . . . . . . . . . . . . . . . . . . . . . . . . . . . . . . . . . . . . . . . . . . . . . . . . . . . . . . . . . . . . . . . . . . . . . . . . . . . 96
Shortcuts for animating with multiple cast members . . . . . . . . . . . . . . . . . . . . . . . . . . . . . . . . . . . . . . . . . . . . . . . . . . . . . . . . . . . . . . . . . . 97
Using film loops . . . . . . . . . . . . . . . . . . . . . . . . . . . . . . . . . . . . . . . . . . . . . . . . . . . . . . . . . . . . . . . . . . . . . . . . . . . . . . . . . . . . . . . . . . . . . . . . . . . . . . 99
Setting film loop properties . . . . . . . . . . . . . . . . . . . . . . . . . . . . . . . . . . . . . . . . . . . . . . . . . . . . . . . . . . . . . . . . . . . . . . . . . . . . . . . . . . . . . . . . . 100
Step-recording animation . . . . . . . . . . . . . . . . . . . . . . . . . . . . . . . . . . . . . . . . . . . . . . . . . . . . . . . . . . . . . . . . . . . . . . . . . . . . . . . . . . . . . . . . . . . 101
Real-time recording animation . . . . . . . . . . . . . . . . . . . . . . . . . . . . . . . . . . . . . . . . . . . . . . . . . . . . . . . . . . . . . . . . . . . . . . . . . . . . . . . . . . . . . . . 102
Linking a sequence with Paste Relative . . . . . . . . . . . . . . . . . . . . . . . . . . . . . . . . . . . . . . . . . . . . . . . . . . . . . . . . . . . . . . . . . . . . . . . . . . . . . . 102
Animating sprites with Lingo or JavaScript syntax . . . . . . . . . . . . . . . . . . . . . . . . . . . . . . . . . . . . . . . . . . . . . . . . . . . . . . . . . . . . . . . . . . . . 103
Chapter 6: Bitmaps
Introduction . . . . . . . . . . . . . . . . . . . . . . . . . . . . . . . . . . . . . . . . . . . . . . . . . . . . . . . . . . . . . . . . . . . . . . . . . . . . . . . . . . . . . . . . . . . . . . . . . . . . . . . . 104
About importing bitmaps . . . . . . . . . . . . . . . . . . . . . . . . . . . . . . . . . . . . . . . . . . . . . . . . . . . . . . . . . . . . . . . . . . . . . . . . . . . . . . . . . . . . . . . . . . . . 104
Using animated GIFs . . . . . . . . . . . . . . . . . . . . . . . . . . . . . . . . . . . . . . . . . . . . . . . . . . . . . . . . . . . . . . . . . . . . . . . . . . . . . . . . . . . . . . . . . . . . . . . . . 105
Using the Paint window . . . . . . . . . . . . . . . . . . . . . . . . . . . . . . . . . . . . . . . . . . . . . . . . . . . . . . . . . . . . . . . . . . . . . . . . . . . . . . . . . . . . . . . . . . . . . 106
Changing selected areas of a bitmap . . . . . . . . . . . . . . . . . . . . . . . . . . . . . . . . . . . . . . . . . . . . . . . . . . . . . . . . . . . . . . . . . . . . . . . . . . . . . . . . . 114
Flipping, rotating, and applying effects to bitmaps . . . . . . . . . . . . . . . . . . . . . . . . . . . . . . . . . . . . . . . . . . . . . . . . . . . . . . . . . . . . . . . . . . . 114
Using Auto Distort . . . . . . . . . . . . . . . . . . . . . . . . . . . . . . . . . . . . . . . . . . . . . . . . . . . . . . . . . . . . . . . . . . . . . . . . . . . . . . . . . . . . . . . . . . . . . . . . . . . 115

v
USING DIRECTOR 11.5
Contents
Last updated 9/28/2011
Changing registration points . . . . . . . . . . . . . . . . . . . . . . . . . . . . . . . . . . . . . . . . . . . . . . . . . . . . . . . . . . . . . . . . . . . . . . . . . . . . . . . . . . . . . . . . 116
Changing size, color depth, and color palette for bitmaps . . . . . . . . . . . . . . . . . . . . . . . . . . . . . . . . . . . . . . . . . . . . . . . . . . . . . . . . . . . . . 117
Controlling bitmap images with Lingo or JavaScript syntax . . . . . . . . . . . . . . . . . . . . . . . . . . . . . . . . . . . . . . . . . . . . . . . . . . . . . . . . . . . 118
Using gradients . . . . . . . . . . . . . . . . . . . . . . . . . . . . . . . . . . . . . . . . . . . . . . . . . . . . . . . . . . . . . . . . . . . . . . . . . . . . . . . . . . . . . . . . . . . . . . . . . . . . . 121
Using patterns . . . . . . . . . . . . . . . . . . . . . . . . . . . . . . . . . . . . . . . . . . . . . . . . . . . . . . . . . . . . . . . . . . . . . . . . . . . . . . . . . . . . . . . . . . . . . . . . . . . . . . 123
Creating a custom tile . . . . . . . . . . . . . . . . . . . . . . . . . . . . . . . . . . . . . . . . . . . . . . . . . . . . . . . . . . . . . . . . . . . . . . . . . . . . . . . . . . . . . . . . . . . . . . . 124
Using Paint window inks . . . . . . . . . . . . . . . . . . . . . . . . . . . . . . . . . . . . . . . . . . . . . . . . . . . . . . . . . . . . . . . . . . . . . . . . . . . . . . . . . . . . . . . . . . . . . 125
Using onion skinning . . . . . . . . . . . . . . . . . . . . . . . . . . . . . . . . . . . . . . . . . . . . . . . . . . . . . . . . . . . . . . . . . . . . . . . . . . . . . . . . . . . . . . . . . . . . . . . . 127
About the Paste As PICT option . . . . . . . . . . . . . . . . . . . . . . . . . . . . . . . . . . . . . . . . . . . . . . . . . . . . . . . . . . . . . . . . . . . . . . . . . . . . . . . . . . . . . . 129
Setting and changing bitmap cast member properties . . . . . . . . . . . . . . . . . . . . . . . . . . . . . . . . . . . . . . . . . . . . . . . . . . . . . . . . . . . . . . . . 129
Setting and changing PICT cast member properties . . . . . . . . . . . . . . . . . . . . . . . . . . . . . . . . . . . . . . . . . . . . . . . . . . . . . . . . . . . . . . . . . . 130
Setting Paint window preferences . . . . . . . . . . . . . . . . . . . . . . . . . . . . . . . . . . . . . . . . . . . . . . . . . . . . . . . . . . . . . . . . . . . . . . . . . . . . . . . . . . . 130
Compressing bitmaps . . . . . . . . . . . . . . . . . . . . . . . . . . . . . . . . . . . . . . . . . . . . . . . . . . . . . . . . . . . . . . . . . . . . . . . . . . . . . . . . . . . . . . . . . . . . . . . 131
Working with Adobe Fireworks . . . . . . . . . . . . . . . . . . . . . . . . . . . . . . . . . . . . . . . . . . . . . . . . . . . . . . . . . . . . . . . . . . . . . . . . . . . . . . . . . . . . . . 132
Bitmap filters . . . . . . . . . . . . . . . . . . . . . . . . . . . . . . . . . . . . . . . . . . . . . . . . . . . . . . . . . . . . . . . . . . . . . . . . . . . . . . . . . . . . . . . . . . . . . . . . . . . . . . . . 135
Chapter 7: Vector Shapes
About vector shapes . . . . . . . . . . . . . . . . . . . . . . . . . . . . . . . . . . . . . . . . . . . . . . . . . . . . . . . . . . . . . . . . . . . . . . . . . . . . . . . . . . . . . . . . . . . . . . . . 150
Drawing vector shapes . . . . . . . . . . . . . . . . . . . . . . . . . . . . . . . . . . . . . . . . . . . . . . . . . . . . . . . . . . . . . . . . . . . . . . . . . . . . . . . . . . . . . . . . . . . . . . 150
Editing vector shapes . . . . . . . . . . . . . . . . . . . . . . . . . . . . . . . . . . . . . . . . . . . . . . . . . . . . . . . . . . . . . . . . . . . . . . . . . . . . . . . . . . . . . . . . . . . . . . . . 154
Defining gradients for vector shapes . . . . . . . . . . . . . . . . . . . . . . . . . . . . . . . . . . . . . . . . . . . . . . . . . . . . . . . . . . . . . . . . . . . . . . . . . . . . . . . . . 156
Controlling vector shapes with Lingo or JavaScript syntax . . . . . . . . . . . . . . . . . . . . . . . . . . . . . . . . . . . . . . . . . . . . . . . . . . . . . . . . . . . . 157
Setting vector shape properties . . . . . . . . . . . . . . . . . . . . . . . . . . . . . . . . . . . . . . . . . . . . . . . . . . . . . . . . . . . . . . . . . . . . . . . . . . . . . . . . . . . . . . 157
Using shapes . . . . . . . . . . . . . . . . . . . . . . . . . . . . . . . . . . . . . . . . . . . . . . . . . . . . . . . . . . . . . . . . . . . . . . . . . . . . . . . . . . . . . . . . . . . . . . . . . . . . . . . . 158
Setting shape cast member properties . . . . . . . . . . . . . . . . . . . . . . . . . . . . . . . . . . . . . . . . . . . . . . . . . . . . . . . . . . . . . . . . . . . . . . . . . . . . . . . 158
Chapter 8: Color, Tempo, and Transitions
Introduction . . . . . . . . . . . . . . . . . . . . . . . . . . . . . . . . . . . . . . . . . . . . . . . . . . . . . . . . . . . . . . . . . . . . . . . . . . . . . . . . . . . . . . . . . . . . . . . . . . . . . . . . 160
Controlling color . . . . . . . . . . . . . . . . . . . . . . . . . . . . . . . . . . . . . . . . . . . . . . . . . . . . . . . . . . . . . . . . . . . . . . . . . . . . . . . . . . . . . . . . . . . . . . . . . . . . 160
Setting palette cast member properties . . . . . . . . . . . . . . . . . . . . . . . . . . . . . . . . . . . . . . . . . . . . . . . . . . . . . . . . . . . . . . . . . . . . . . . . . . . . . . 168
About tempo . . . . . . . . . . . . . . . . . . . . . . . . . . . . . . . . . . . . . . . . . . . . . . . . . . . . . . . . . . . . . . . . . . . . . . . . . . . . . . . . . . . . . . . . . . . . . . . . . . . . . . . 170
Using transitions . . . . . . . . . . . . . . . . . . . . . . . . . . . . . . . . . . . . . . . . . . . . . . . . . . . . . . . . . . . . . . . . . . . . . . . . . . . . . . . . . . . . . . . . . . . . . . . . . . . . 172
Chapter 9: Text
About text . . . . . . . . . . . . . . . . . . . . . . . . . . . . . . . . . . . . . . . . . . . . . . . . . . . . . . . . . . . . . . . . . . . . . . . . . . . . . . . . . . . . . . . . . . . . . . . . . . . . . . . . . . 175
Embedding fonts in movies . . . . . . . . . . . . . . . . . . . . . . . . . . . . . . . . . . . . . . . . . . . . . . . . . . . . . . . . . . . . . . . . . . . . . . . . . . . . . . . . . . . . . . . . . . 175
Creating text cast members . . . . . . . . . . . . . . . . . . . . . . . . . . . . . . . . . . . . . . . . . . . . . . . . . . . . . . . . . . . . . . . . . . . . . . . . . . . . . . . . . . . . . . . . . 176
Editing and formatting text . . . . . . . . . . . . . . . . . . . . . . . . . . . . . . . . . . . . . . . . . . . . . . . . . . . . . . . . . . . . . . . . . . . . . . . . . . . . . . . . . . . . . . . . . 178
Creating a hypertext link . . . . . . . . . . . . . . . . . . . . . . . . . . . . . . . . . . . . . . . . . . . . . . . . . . . . . . . . . . . . . . . . . . . . . . . . . . . . . . . . . . . . . . . . . . . . . 182
Working with fields . . . . . . . . . . . . . . . . . . . . . . . . . . . . . . . . . . . . . . . . . . . . . . . . . . . . . . . . . . . . . . . . . . . . . . . . . . . . . . . . . . . . . . . . . . . . . . . . . . 182
Using editable text . . . . . . . . . . . . . . . . . . . . . . . . . . . . . . . . . . . . . . . . . . . . . . . . . . . . . . . . . . . . . . . . . . . . . . . . . . . . . . . . . . . . . . . . . . . . . . . . . . 183
Converting text to a bitmap . . . . . . . . . . . . . . . . . . . . . . . . . . . . . . . . . . . . . . . . . . . . . . . . . . . . . . . . . . . . . . . . . . . . . . . . . . . . . . . . . . . . . . . . . 184
Mapping fonts between platforms for field cast members . . . . . . . . . . . . . . . . . . . . . . . . . . . . . . . . . . . . . . . . . . . . . . . . . . . . . . . . . . . . 184
Setting text or field cast member properties . . . . . . . . . . . . . . . . . . . . . . . . . . . . . . . . . . . . . . . . . . . . . . . . . . . . . . . . . . . . . . . . . . . . . . . . . . 185
Formatting chunks of text with Lingo or JavaScript syntax . . . . . . . . . . . . . . . . . . . . . . . . . . . . . . . . . . . . . . . . . . . . . . . . . . . . . . . . . . . . 187
Formatting text or field cast members with Lingo or JavaScript syntax . . . . . . . . . . . . . . . . . . . . . . . . . . . . . . . . . . . . . . . . . . . . . . . . 188
Controlling scrolling text with Lingo or JavaScript syntax . . . . . . . . . . . . . . . . . . . . . . . . . . . . . . . . . . . . . . . . . . . . . . . . . . . . . . . . . . . . . 189

vi
USING DIRECTOR 11.5
Contents
Last updated 9/28/2011
Checking for specific text with Lingo or JavaScript syntax . . . . . . . . . . . . . . . . . . . . . . . . . . . . . . . . . . . . . . . . . . . . . . . . . . . . . . . . . . . . . 190
Modifying strings with Lingo or JavaScript syntax . . . . . . . . . . . . . . . . . . . . . . . . . . . . . . . . . . . . . . . . . . . . . . . . . . . . . . . . . . . . . . . . . . . . 190
Unicode support in Director . . . . . . . . . . . . . . . . . . . . . . . . . . . . . . . . . . . . . . . . . . . . . . . . . . . . . . . . . . . . . . . . . . . . . . . . . . . . . . . . . . . . . . . . . 190
Chapter 10: Using Flash, Flash Components, and Other Interactive Media Types
Introduction . . . . . . . . . . . . . . . . . . . . . . . . . . . . . . . . . . . . . . . . . . . . . . . . . . . . . . . . . . . . . . . . . . . . . . . . . . . . . . . . . . . . . . . . . . . . . . . . . . . . . . . . 194
Using Flash Content . . . . . . . . . . . . . . . . . . . . . . . . . . . . . . . . . . . . . . . . . . . . . . . . . . . . . . . . . . . . . . . . . . . . . . . . . . . . . . . . . . . . . . . . . . . . . . . . . 194
Adding a Flash content cast member . . . . . . . . . . . . . . . . . . . . . . . . . . . . . . . . . . . . . . . . . . . . . . . . . . . . . . . . . . . . . . . . . . . . . . . . . . . . . . . . 195
Editing a Flash cast member . . . . . . . . . . . . . . . . . . . . . . . . . . . . . . . . . . . . . . . . . . . . . . . . . . . . . . . . . . . . . . . . . . . . . . . . . . . . . . . . . . . . . . . . . 197
Controlling Flash content with Lingo or JavaScript syntax . . . . . . . . . . . . . . . . . . . . . . . . . . . . . . . . . . . . . . . . . . . . . . . . . . . . . . . . . . . . . 198
Controlling Flash content appearance with Lingo or JavaScript syntax . . . . . . . . . . . . . . . . . . . . . . . . . . . . . . . . . . . . . . . . . . . . . . . . 198
Streaming Flash content with Lingo or JavaScript syntax . . . . . . . . . . . . . . . . . . . . . . . . . . . . . . . . . . . . . . . . . . . . . . . . . . . . . . . . . . . . . 200
Playback Flash content with Lingo or JavaScript syntax . . . . . . . . . . . . . . . . . . . . . . . . . . . . . . . . . . . . . . . . . . . . . . . . . . . . . . . . . . . . . . . 200
Using Lingo or JavaScript syntax with Flash variables . . . . . . . . . . . . . . . . . . . . . . . . . . . . . . . . . . . . . . . . . . . . . . . . . . . . . . . . . . . . . . . . . 201
Sending messages from Flash content using getURL . . . . . . . . . . . . . . . . . . . . . . . . . . . . . . . . . . . . . . . . . . . . . . . . . . . . . . . . . . . . . . . . . 203
Sending XML Data from Flash to Director . . . . . . . . . . . . . . . . . . . . . . . . . . . . . . . . . . . . . . . . . . . . . . . . . . . . . . . . . . . . . . . . . . . . . . . . . . . . 205
Using Flash objects in script . . . . . . . . . . . . . . . . . . . . . . . . . . . . . . . . . . . . . . . . . . . . . . . . . . . . . . . . . . . . . . . . . . . . . . . . . . . . . . . . . . . . . . . . . 205
Using the Flash local connection object . . . . . . . . . . . . . . . . . . . . . . . . . . . . . . . . . . . . . . . . . . . . . . . . . . . . . . . . . . . . . . . . . . . . . . . . . . . . . . 207
Using Flash Media Server . . . . . . . . . . . . . . . . . . . . . . . . . . . . . . . . . . . . . . . . . . . . . . . . . . . . . . . . . . . . . . . . . . . . . . . . . . . . . . . . . . . . . . . . . . . . 210
Using the Flash Settings panel . . . . . . . . . . . . . . . . . . . . . . . . . . . . . . . . . . . . . . . . . . . . . . . . . . . . . . . . . . . . . . . . . . . . . . . . . . . . . . . . . . . . . . . 212
Playback performance tips for Flash content . . . . . . . . . . . . . . . . . . . . . . . . . . . . . . . . . . . . . . . . . . . . . . . . . . . . . . . . . . . . . . . . . . . . . . . . . 213
Using Director movies within Director movies . . . . . . . . . . . . . . . . . . . . . . . . . . . . . . . . . . . . . . . . . . . . . . . . . . . . . . . . . . . . . . . . . . . . . . . . 214
Setting linked Director movie properties . . . . . . . . . . . . . . . . . . . . . . . . . . . . . . . . . . . . . . . . . . . . . . . . . . . . . . . . . . . . . . . . . . . . . . . . . . . . . 215
Using ActiveX controls . . . . . . . . . . . . . . . . . . . . . . . . . . . . . . . . . . . . . . . . . . . . . . . . . . . . . . . . . . . . . . . . . . . . . . . . . . . . . . . . . . . . . . . . . . . . . . . 216
Using Flash components . . . . . . . . . . . . . . . . . . . . . . . . . . . . . . . . . . . . . . . . . . . . . . . . . . . . . . . . . . . . . . . . . . . . . . . . . . . . . . . . . . . . . . . . . . . . 218
Button component . . . . . . . . . . . . . . . . . . . . . . . . . . . . . . . . . . . . . . . . . . . . . . . . . . . . . . . . . . . . . . . . . . . . . . . . . . . . . . . . . . . . . . . . . . . . . . . . . . 221
CheckBox component . . . . . . . . . . . . . . . . . . . . . . . . . . . . . . . . . . . . . . . . . . . . . . . . . . . . . . . . . . . . . . . . . . . . . . . . . . . . . . . . . . . . . . . . . . . . . . . 222
DateChooser component . . . . . . . . . . . . . . . . . . . . . . . . . . . . . . . . . . . . . . . . . . . . . . . . . . . . . . . . . . . . . . . . . . . . . . . . . . . . . . . . . . . . . . . . . . . . 223
Label component . . . . . . . . . . . . . . . . . . . . . . . . . . . . . . . . . . . . . . . . . . . . . . . . . . . . . . . . . . . . . . . . . . . . . . . . . . . . . . . . . . . . . . . . . . . . . . . . . . . 225
List component . . . . . . . . . . . . . . . . . . . . . . . . . . . . . . . . . . . . . . . . . . . . . . . . . . . . . . . . . . . . . . . . . . . . . . . . . . . . . . . . . . . . . . . . . . . . . . . . . . . . . 226
NumericStepper component . . . . . . . . . . . . . . . . . . . . . . . . . . . . . . . . . . . . . . . . . . . . . . . . . . . . . . . . . . . . . . . . . . . . . . . . . . . . . . . . . . . . . . . . 228
RadioButton component . . . . . . . . . . . . . . . . . . . . . . . . . . . . . . . . . . . . . . . . . . . . . . . . . . . . . . . . . . . . . . . . . . . . . . . . . . . . . . . . . . . . . . . . . . . . 230
ScrollPane component . . . . . . . . . . . . . . . . . . . . . . . . . . . . . . . . . . . . . . . . . . . . . . . . . . . . . . . . . . . . . . . . . . . . . . . . . . . . . . . . . . . . . . . . . . . . . . 231
TextArea component . . . . . . . . . . . . . . . . . . . . . . . . . . . . . . . . . . . . . . . . . . . . . . . . . . . . . . . . . . . . . . . . . . . . . . . . . . . . . . . . . . . . . . . . . . . . . . . . 233
TextInput component . . . . . . . . . . . . . . . . . . . . . . . . . . . . . . . . . . . . . . . . . . . . . . . . . . . . . . . . . . . . . . . . . . . . . . . . . . . . . . . . . . . . . . . . . . . . . . . 235
Tree component . . . . . . . . . . . . . . . . . . . . . . . . . . . . . . . . . . . . . . . . . . . . . . . . . . . . . . . . . . . . . . . . . . . . . . . . . . . . . . . . . . . . . . . . . . . . . . . . . . . . 236
Chapter 11: Sound and Synchronization
About sound and synchronization . . . . . . . . . . . . . . . . . . . . . . . . . . . . . . . . . . . . . . . . . . . . . . . . . . . . . . . . . . . . . . . . . . . . . . . . . . . . . . . . . . . 240
Importing internal and linked sounds . . . . . . . . . . . . . . . . . . . . . . . . . . . . . . . . . . . . . . . . . . . . . . . . . . . . . . . . . . . . . . . . . . . . . . . . . . . . . . . . 240
Audio mixers and sound objects . . . . . . . . . . . . . . . . . . . . . . . . . . . . . . . . . . . . . . . . . . . . . . . . . . . . . . . . . . . . . . . . . . . . . . . . . . . . . . . . . . . . . 241
Setting sound cast member properties . . . . . . . . . . . . . . . . . . . . . . . . . . . . . . . . . . . . . . . . . . . . . . . . . . . . . . . . . . . . . . . . . . . . . . . . . . . . . . . 244
Controlling sound in the Score . . . . . . . . . . . . . . . . . . . . . . . . . . . . . . . . . . . . . . . . . . . . . . . . . . . . . . . . . . . . . . . . . . . . . . . . . . . . . . . . . . . . . . 244
Looping a sound . . . . . . . . . . . . . . . . . . . . . . . . . . . . . . . . . . . . . . . . . . . . . . . . . . . . . . . . . . . . . . . . . . . . . . . . . . . . . . . . . . . . . . . . . . . . . . . . . . . . 245
Using sound in Windows . . . . . . . . . . . . . . . . . . . . . . . . . . . . . . . . . . . . . . . . . . . . . . . . . . . . . . . . . . . . . . . . . . . . . . . . . . . . . . . . . . . . . . . . . . . . 246
Playing sounds with Lingo or JavaScript syntax . . . . . . . . . . . . . . . . . . . . . . . . . . . . . . . . . . . . . . . . . . . . . . . . . . . . . . . . . . . . . . . . . . . . . . . 246
About Shockwave Audio . . . . . . . . . . . . . . . . . . . . . . . . . . . . . . . . . . . . . . . . . . . . . . . . . . . . . . . . . . . . . . . . . . . . . . . . . . . . . . . . . . . . . . . . . . . . 248

vii
USING DIRECTOR 11.5
Contents
Last updated 9/28/2011
Compressing internal sounds with Shockwave Audio . . . . . . . . . . . . . . . . . . . . . . . . . . . . . . . . . . . . . . . . . . . . . . . . . . . . . . . . . . . . . . . . . 248
Streaming linked Shockwave Audio and MP3 audio files . . . . . . . . . . . . . . . . . . . . . . . . . . . . . . . . . . . . . . . . . . . . . . . . . . . . . . . . . . . . . . 249
Playing audio with Lingo or JavaScript syntax . . . . . . . . . . . . . . . . . . . . . . . . . . . . . . . . . . . . . . . . . . . . . . . . . . . . . . . . . . . . . . . . . . . . . . . . 250
Synchronizing media . . . . . . . . . . . . . . . . . . . . . . . . . . . . . . . . . . . . . . . . . . . . . . . . . . . . . . . . . . . . . . . . . . . . . . . . . . . . . . . . . . . . . . . . . . . . . . . . 251
Synchronizing sound with Lingo or JavaScript syntax . . . . . . . . . . . . . . . . . . . . . . . . . . . . . . . . . . . . . . . . . . . . . . . . . . . . . . . . . . . . . . . . . 252
Accessibility . . . . . . . . . . . . . . . . . . . . . . . . . . . . . . . . . . . . . . . . . . . . . . . . . . . . . . . . . . . . . . . . . . . . . . . . . . . . . . . . . . . . . . . . . . . . . . . . . . . . . . . . . 252
Chapter 12: Using Digital Video
About digital video . . . . . . . . . . . . . . . . . . . . . . . . . . . . . . . . . . . . . . . . . . . . . . . . . . . . . . . . . . . . . . . . . . . . . . . . . . . . . . . . . . . . . . . . . . . . . . . . . . 253
Importing digital video formats . . . . . . . . . . . . . . . . . . . . . . . . . . . . . . . . . . . . . . . . . . . . . . . . . . . . . . . . . . . . . . . . . . . . . . . . . . . . . . . . . . . . . . 253
Adding an MP4Media member to a movie . . . . . . . . . . . . . . . . . . . . . . . . . . . . . . . . . . . . . . . . . . . . . . . . . . . . . . . . . . . . . . . . . . . . . . . . . . . . 254
Using the video windows . . . . . . . . . . . . . . . . . . . . . . . . . . . . . . . . . . . . . . . . . . . . . . . . . . . . . . . . . . . . . . . . . . . . . . . . . . . . . . . . . . . . . . . . . . . . 255
Playing digital video Direct To Stage . . . . . . . . . . . . . . . . . . . . . . . . . . . . . . . . . . . . . . . . . . . . . . . . . . . . . . . . . . . . . . . . . . . . . . . . . . . . . . . . . 255
Controlling digital video in the Score . . . . . . . . . . . . . . . . . . . . . . . . . . . . . . . . . . . . . . . . . . . . . . . . . . . . . . . . . . . . . . . . . . . . . . . . . . . . . . . . . 256
Playing digital video with Lingo or JavaScript syntax . . . . . . . . . . . . . . . . . . . . . . . . . . . . . . . . . . . . . . . . . . . . . . . . . . . . . . . . . . . . . . . . . . 256
Setting QuickTime digital video cast member properties . . . . . . . . . . . . . . . . . . . . . . . . . . . . . . . . . . . . . . . . . . . . . . . . . . . . . . . . . . . . . . 258
Controlling QuickTime with Lingo or JavaScript syntax . . . . . . . . . . . . . . . . . . . . . . . . . . . . . . . . . . . . . . . . . . . . . . . . . . . . . . . . . . . . . . . 259
Using Windows Media files in Director . . . . . . . . . . . . . . . . . . . . . . . . . . . . . . . . . . . . . . . . . . . . . . . . . . . . . . . . . . . . . . . . . . . . . . . . . . . . . . . 261
Using DVD media content in Director . . . . . . . . . . . . . . . . . . . . . . . . . . . . . . . . . . . . . . . . . . . . . . . . . . . . . . . . . . . . . . . . . . . . . . . . . . . . . . . . 263
Cropping digital video . . . . . . . . . . . . . . . . . . . . . . . . . . . . . . . . . . . . . . . . . . . . . . . . . . . . . . . . . . . . . . . . . . . . . . . . . . . . . . . . . . . . . . . . . . . . . . . 265
Using digital video on the Internet . . . . . . . . . . . . . . . . . . . . . . . . . . . . . . . . . . . . . . . . . . . . . . . . . . . . . . . . . . . . . . . . . . . . . . . . . . . . . . . . . . . 266
Synchronizing video and animation . . . . . . . . . . . . . . . . . . . . . . . . . . . . . . . . . . . . . . . . . . . . . . . . . . . . . . . . . . . . . . . . . . . . . . . . . . . . . . . . . . 267
Using RealMedia content in Director . . . . . . . . . . . . . . . . . . . . . . . . . . . . . . . . . . . . . . . . . . . . . . . . . . . . . . . . . . . . . . . . . . . . . . . . . . . . . . . . . 267
Using Lingo or JavaScript syntax sound elements with RealMedia . . . . . . . . . . . . . . . . . . . . . . . . . . . . . . . . . . . . . . . . . . . . . . . . . . . . . 277
Chapter 13: Behaviors
About behaviors . . . . . . . . . . . . . . . . . . . . . . . . . . . . . . . . . . . . . . . . . . . . . . . . . . . . . . . . . . . . . . . . . . . . . . . . . . . . . . . . . . . . . . . . . . . . . . . . . . . . 279
Attaching behaviors . . . . . . . . . . . . . . . . . . . . . . . . . . . . . . . . . . . . . . . . . . . . . . . . . . . . . . . . . . . . . . . . . . . . . . . . . . . . . . . . . . . . . . . . . . . . . . . . . 279
Changing the order of attached behaviors . . . . . . . . . . . . . . . . . . . . . . . . . . . . . . . . . . . . . . . . . . . . . . . . . . . . . . . . . . . . . . . . . . . . . . . . . . . 281
Getting information about behaviors . . . . . . . . . . . . . . . . . . . . . . . . . . . . . . . . . . . . . . . . . . . . . . . . . . . . . . . . . . . . . . . . . . . . . . . . . . . . . . . . 281
Creating and modifying behaviors . . . . . . . . . . . . . . . . . . . . . . . . . . . . . . . . . . . . . . . . . . . . . . . . . . . . . . . . . . . . . . . . . . . . . . . . . . . . . . . . . . . 282
Writing behaviors with Lingo or JavaScript syntax . . . . . . . . . . . . . . . . . . . . . . . . . . . . . . . . . . . . . . . . . . . . . . . . . . . . . . . . . . . . . . . . . . . . 285
Setting up a Parameters dialog box . . . . . . . . . . . . . . . . . . . . . . . . . . . . . . . . . . . . . . . . . . . . . . . . . . . . . . . . . . . . . . . . . . . . . . . . . . . . . . . . . . 285
Setting behavior properties with script . . . . . . . . . . . . . . . . . . . . . . . . . . . . . . . . . . . . . . . . . . . . . . . . . . . . . . . . . . . . . . . . . . . . . . . . . . . . . . . 286
Customizing a behavior’s property . . . . . . . . . . . . . . . . . . . . . . . . . . . . . . . . . . . . . . . . . . . . . . . . . . . . . . . . . . . . . . . . . . . . . . . . . . . . . . . . . . . 286
Creating an on getPropertyDescriptionList handler . . . . . . . . . . . . . . . . . . . . . . . . . . . . . . . . . . . . . . . . . . . . . . . . . . . . . . . . . . . . . . . . . . . 287
Including a description for the Behavior inspector . . . . . . . . . . . . . . . . . . . . . . . . . . . . . . . . . . . . . . . . . . . . . . . . . . . . . . . . . . . . . . . . . . . . 288
Example of a complete behavior . . . . . . . . . . . . . . . . . . . . . . . . . . . . . . . . . . . . . . . . . . . . . . . . . . . . . . . . . . . . . . . . . . . . . . . . . . . . . . . . . . . . . 288
Sending messages to behaviors attached to sprites . . . . . . . . . . . . . . . . . . . . . . . . . . . . . . . . . . . . . . . . . . . . . . . . . . . . . . . . . . . . . . . . . . . 290
Using inheritance in behaviors . . . . . . . . . . . . . . . . . . . . . . . . . . . . . . . . . . . . . . . . . . . . . . . . . . . . . . . . . . . . . . . . . . . . . . . . . . . . . . . . . . . . . . . 292
Chapter 14: Navigation and User Interaction
About navigation and user interaction . . . . . . . . . . . . . . . . . . . . . . . . . . . . . . . . . . . . . . . . . . . . . . . . . . . . . . . . . . . . . . . . . . . . . . . . . . . . . . . 293
Creating basic navigation controls with behaviors . . . . . . . . . . . . . . . . . . . . . . . . . . . . . . . . . . . . . . . . . . . . . . . . . . . . . . . . . . . . . . . . . . . . 293
Adding push buttons, radio buttons, and check boxes . . . . . . . . . . . . . . . . . . . . . . . . . . . . . . . . . . . . . . . . . . . . . . . . . . . . . . . . . . . . . . . . 294
Jumping to locations with Lingo or JavaScript syntax . . . . . . . . . . . . . . . . . . . . . . . . . . . . . . . . . . . . . . . . . . . . . . . . . . . . . . . . . . . . . . . . . 294
Detecting mouse clicks with Lingo or JavaScript syntax . . . . . . . . . . . . . . . . . . . . . . . . . . . . . . . . . . . . . . . . . . . . . . . . . . . . . . . . . . . . . . . 296

viii
USING DIRECTOR 11.5
Contents
Last updated 9/28/2011
Making sprites editable and draggable . . . . . . . . . . . . . . . . . . . . . . . . . . . . . . . . . . . . . . . . . . . . . . . . . . . . . . . . . . . . . . . . . . . . . . . . . . . . . . . 297
Making sprites editable or moveable with Lingo or JavaScript syntax . . . . . . . . . . . . . . . . . . . . . . . . . . . . . . . . . . . . . . . . . . . . . . . . . . 297
Checking which text is under the pointer with Lingo or JavaScript syntax . . . . . . . . . . . . . . . . . . . . . . . . . . . . . . . . . . . . . . . . . . . . . 298
Responding to rollovers with Lingo or JavaScript syntax . . . . . . . . . . . . . . . . . . . . . . . . . . . . . . . . . . . . . . . . . . . . . . . . . . . . . . . . . . . . . . 298
Finding mouse pointer locations with Lingo or JavaScript syntax . . . . . . . . . . . . . . . . . . . . . . . . . . . . . . . . . . . . . . . . . . . . . . . . . . . . . . 299
Checking keys with Lingo or JavaScript syntax . . . . . . . . . . . . . . . . . . . . . . . . . . . . . . . . . . . . . . . . . . . . . . . . . . . . . . . . . . . . . . . . . . . . . . . . 299
Equivalent cross-platform keys . . . . . . . . . . . . . . . . . . . . . . . . . . . . . . . . . . . . . . . . . . . . . . . . . . . . . . . . . . . . . . . . . . . . . . . . . . . . . . . . . . . . . . . 299
Identifying keys on different keyboards . . . . . . . . . . . . . . . . . . . . . . . . . . . . . . . . . . . . . . . . . . . . . . . . . . . . . . . . . . . . . . . . . . . . . . . . . . . . . . 300
About animated color cursors . . . . . . . . . . . . . . . . . . . . . . . . . . . . . . . . . . . . . . . . . . . . . . . . . . . . . . . . . . . . . . . . . . . . . . . . . . . . . . . . . . . . . . . 300
Creating an animated color cursor cast member . . . . . . . . . . . . . . . . . . . . . . . . . . . . . . . . . . . . . . . . . . . . . . . . . . . . . . . . . . . . . . . . . . . . . . 301
Using an animated color cursor in a movie . . . . . . . . . . . . . . . . . . . . . . . . . . . . . . . . . . . . . . . . . . . . . . . . . . . . . . . . . . . . . . . . . . . . . . . . . . . 302
Chapter 15: 3D Basics
Introduction . . . . . . . . . . . . . . . . . . . . . . . . . . . . . . . . . . . . . . . . . . . . . . . . . . . . . . . . . . . . . . . . . . . . . . . . . . . . . . . . . . . . . . . . . . . . . . . . . . . . . . . . 304
What you need to know . . . . . . . . . . . . . . . . . . . . . . . . . . . . . . . . . . . . . . . . . . . . . . . . . . . . . . . . . . . . . . . . . . . . . . . . . . . . . . . . . . . . . . . . . . . . . 304
About 3D in Director . . . . . . . . . . . . . . . . . . . . . . . . . . . . . . . . . . . . . . . . . . . . . . . . . . . . . . . . . . . . . . . . . . . . . . . . . . . . . . . . . . . . . . . . . . . . . . . . 304
The 3D Xtra extension . . . . . . . . . . . . . . . . . . . . . . . . . . . . . . . . . . . . . . . . . . . . . . . . . . . . . . . . . . . . . . . . . . . . . . . . . . . . . . . . . . . . . . . . . . . . . . . 305
Using the Shockwave 3D window . . . . . . . . . . . . . . . . . . . . . . . . . . . . . . . . . . . . . . . . . . . . . . . . . . . . . . . . . . . . . . . . . . . . . . . . . . . . . . . . . . . . 306
Using the Property inspector for 3D . . . . . . . . . . . . . . . . . . . . . . . . . . . . . . . . . . . . . . . . . . . . . . . . . . . . . . . . . . . . . . . . . . . . . . . . . . . . . . . . . . 307
Using rendering methods . . . . . . . . . . . . . . . . . . . . . . . . . . . . . . . . . . . . . . . . . . . . . . . . . . . . . . . . . . . . . . . . . . . . . . . . . . . . . . . . . . . . . . . . . . . 309
Using 3D anti-aliasing . . . . . . . . . . . . . . . . . . . . . . . . . . . . . . . . . . . . . . . . . . . . . . . . . . . . . . . . . . . . . . . . . . . . . . . . . . . . . . . . . . . . . . . . . . . . . . . 310
3D behaviors . . . . . . . . . . . . . . . . . . . . . . . . . . . . . . . . . . . . . . . . . . . . . . . . . . . . . . . . . . . . . . . . . . . . . . . . . . . . . . . . . . . . . . . . . . . . . . . . . . . . . . . . 311
3D text . . . . . . . . . . . . . . . . . . . . . . . . . . . . . . . . . . . . . . . . . . . . . . . . . . . . . . . . . . . . . . . . . . . . . . . . . . . . . . . . . . . . . . . . . . . . . . . . . . . . . . . . . . . . . . 312
The 3D world . . . . . . . . . . . . . . . . . . . . . . . . . . . . . . . . . . . . . . . . . . . . . . . . . . . . . . . . . . . . . . . . . . . . . . . . . . . . . . . . . . . . . . . . . . . . . . . . . . . . . . . . 312
Chapter 16: The 3D Cast Member, 3D Text, and 3D Behaviors
Introduction . . . . . . . . . . . . . . . . . . . . . . . . . . . . . . . . . . . . . . . . . . . . . . . . . . . . . . . . . . . . . . . . . . . . . . . . . . . . . . . . . . . . . . . . . . . . . . . . . . . . . . . . 315
3D cast members . . . . . . . . . . . . . . . . . . . . . . . . . . . . . . . . . . . . . . . . . . . . . . . . . . . . . . . . . . . . . . . . . . . . . . . . . . . . . . . . . . . . . . . . . . . . . . . . . . . . 315
Model resources . . . . . . . . . . . . . . . . . . . . . . . . . . . . . . . . . . . . . . . . . . . . . . . . . . . . . . . . . . . . . . . . . . . . . . . . . . . . . . . . . . . . . . . . . . . . . . . . . . . . . 316
Models . . . . . . . . . . . . . . . . . . . . . . . . . . . . . . . . . . . . . . . . . . . . . . . . . . . . . . . . . . . . . . . . . . . . . . . . . . . . . . . . . . . . . . . . . . . . . . . . . . . . . . . . . . . . . . 317
Shaders . . . . . . . . . . . . . . . . . . . . . . . . . . . . . . . . . . . . . . . . . . . . . . . . . . . . . . . . . . . . . . . . . . . . . . . . . . . . . . . . . . . . . . . . . . . . . . . . . . . . . . . . . . . . . 318
Textures . . . . . . . . . . . . . . . . . . . . . . . . . . . . . . . . . . . . . . . . . . . . . . . . . . . . . . . . . . . . . . . . . . . . . . . . . . . . . . . . . . . . . . . . . . . . . . . . . . . . . . . . . . . . 319
Motions . . . . . . . . . . . . . . . . . . . . . . . . . . . . . . . . . . . . . . . . . . . . . . . . . . . . . . . . . . . . . . . . . . . . . . . . . . . . . . . . . . . . . . . . . . . . . . . . . . . . . . . . . . . . . 320
Lights . . . . . . . . . . . . . . . . . . . . . . . . . . . . . . . . . . . . . . . . . . . . . . . . . . . . . . . . . . . . . . . . . . . . . . . . . . . . . . . . . . . . . . . . . . . . . . . . . . . . . . . . . . . . . . . 320
Cameras . . . . . . . . . . . . . . . . . . . . . . . . . . . . . . . . . . . . . . . . . . . . . . . . . . . . . . . . . . . . . . . . . . . . . . . . . . . . . . . . . . . . . . . . . . . . . . . . . . . . . . . . . . . . 321
Groups . . . . . . . . . . . . . . . . . . . . . . . . . . . . . . . . . . . . . . . . . . . . . . . . . . . . . . . . . . . . . . . . . . . . . . . . . . . . . . . . . . . . . . . . . . . . . . . . . . . . . . . . . . . . . . 322
Creating 3D text . . . . . . . . . . . . . . . . . . . . . . . . . . . . . . . . . . . . . . . . . . . . . . . . . . . . . . . . . . . . . . . . . . . . . . . . . . . . . . . . . . . . . . . . . . . . . . . . . . . . . 322
Modifying 3D text . . . . . . . . . . . . . . . . . . . . . . . . . . . . . . . . . . . . . . . . . . . . . . . . . . . . . . . . . . . . . . . . . . . . . . . . . . . . . . . . . . . . . . . . . . . . . . . . . . . 323
Script and 3D text . . . . . . . . . . . . . . . . . . . . . . . . . . . . . . . . . . . . . . . . . . . . . . . . . . . . . . . . . . . . . . . . . . . . . . . . . . . . . . . . . . . . . . . . . . . . . . . . . . . 324
Using 3D behaviors . . . . . . . . . . . . . . . . . . . . . . . . . . . . . . . . . . . . . . . . . . . . . . . . . . . . . . . . . . . . . . . . . . . . . . . . . . . . . . . . . . . . . . . . . . . . . . . . . . 326
Chapter 17: Working with Models and Model Resources
Introduction . . . . . . . . . . . . . . . . . . . . . . . . . . . . . . . . . . . . . . . . . . . . . . . . . . . . . . . . . . . . . . . . . . . . . . . . . . . . . . . . . . . . . . . . . . . . . . . . . . . . . . . . 331
About models and model resources . . . . . . . . . . . . . . . . . . . . . . . . . . . . . . . . . . . . . . . . . . . . . . . . . . . . . . . . . . . . . . . . . . . . . . . . . . . . . . . . . . 331
Model resources . . . . . . . . . . . . . . . . . . . . . . . . . . . . . . . . . . . . . . . . . . . . . . . . . . . . . . . . . . . . . . . . . . . . . . . . . . . . . . . . . . . . . . . . . . . . . . . . . . . . . 331
Primitives . . . . . . . . . . . . . . . . . . . . . . . . . . . . . . . . . . . . . . . . . . . . . . . . . . . . . . . . . . . . . . . . . . . . . . . . . . . . . . . . . . . . . . . . . . . . . . . . . . . . . . . . . . . 332
Cast member methods . . . . . . . . . . . . . . . . . . . . . . . . . . . . . . . . . . . . . . . . . . . . . . . . . . . . . . . . . . . . . . . . . . . . . . . . . . . . . . . . . . . . . . . . . . . . . . 338

ix
USING DIRECTOR 11.5
Contents
Last updated 9/28/2011
Models . . . . . . . . . . . . . . . . . . . . . . . . . . . . . . . . . . . . . . . . . . . . . . . . . . . . . . . . . . . . . . . . . . . . . . . . . . . . . . . . . . . . . . . . . . . . . . . . . . . . . . . . . . . . . . 339
Shaders . . . . . . . . . . . . . . . . . . . . . . . . . . . . . . . . . . . . . . . . . . . . . . . . . . . . . . . . . . . . . . . . . . . . . . . . . . . . . . . . . . . . . . . . . . . . . . . . . . . . . . . . . . . . . 344
Textures . . . . . . . . . . . . . . . . . . . . . . . . . . . . . . . . . . . . . . . . . . . . . . . . . . . . . . . . . . . . . . . . . . . . . . . . . . . . . . . . . . . . . . . . . . . . . . . . . . . . . . . . . . . . 351
Groups . . . . . . . . . . . . . . . . . . . . . . . . . . . . . . . . . . . . . . . . . . . . . . . . . . . . . . . . . . . . . . . . . . . . . . . . . . . . . . . . . . . . . . . . . . . . . . . . . . . . . . . . . . . . . . 353
Modifiers . . . . . . . . . . . . . . . . . . . . . . . . . . . . . . . . . . . . . . . . . . . . . . . . . . . . . . . . . . . . . . . . . . . . . . . . . . . . . . . . . . . . . . . . . . . . . . . . . . . . . . . . . . . . 356
Animation modifiers . . . . . . . . . . . . . . . . . . . . . . . . . . . . . . . . . . . . . . . . . . . . . . . . . . . . . . . . . . . . . . . . . . . . . . . . . . . . . . . . . . . . . . . . . . . . . . . . . 361
Motions . . . . . . . . . . . . . . . . . . . . . . . . . . . . . . . . . . . . . . . . . . . . . . . . . . . . . . . . . . . . . . . . . . . . . . . . . . . . . . . . . . . . . . . . . . . . . . . . . . . . . . . . . . . . . 368
About lights and cameras . . . . . . . . . . . . . . . . . . . . . . . . . . . . . . . . . . . . . . . . . . . . . . . . . . . . . . . . . . . . . . . . . . . . . . . . . . . . . . . . . . . . . . . . . . . . 369
Light properties . . . . . . . . . . . . . . . . . . . . . . . . . . . . . . . . . . . . . . . . . . . . . . . . . . . . . . . . . . . . . . . . . . . . . . . . . . . . . . . . . . . . . . . . . . . . . . . . . . . . . 369
Light methods . . . . . . . . . . . . . . . . . . . . . . . . . . . . . . . . . . . . . . . . . . . . . . . . . . . . . . . . . . . . . . . . . . . . . . . . . . . . . . . . . . . . . . . . . . . . . . . . . . . . . . 371
Cameras . . . . . . . . . . . . . . . . . . . . . . . . . . . . . . . . . . . . . . . . . . . . . . . . . . . . . . . . . . . . . . . . . . . . . . . . . . . . . . . . . . . . . . . . . . . . . . . . . . . . . . . . . . . . 372
Collada models . . . . . . . . . . . . . . . . . . . . . . . . . . . . . . . . . . . . . . . . . . . . . . . . . . . . . . . . . . . . . . . . . . . . . . . . . . . . . . . . . . . . . . . . . . . . . . . . . . . . . . 376
Google SketchUp models . . . . . . . . . . . . . . . . . . . . . . . . . . . . . . . . . . . . . . . . . . . . . . . . . . . . . . . . . . . . . . . . . . . . . . . . . . . . . . . . . . . . . . . . . . . . 377
Chapter 18: Controlling the 3D World
Introduction . . . . . . . . . . . . . . . . . . . . . . . . . . . . . . . . . . . . . . . . . . . . . . . . . . . . . . . . . . . . . . . . . . . . . . . . . . . . . . . . . . . . . . . . . . . . . . . . . . . . . . . . 380
3D Lingo or JavaScript syntax events . . . . . . . . . . . . . . . . . . . . . . . . . . . . . . . . . . . . . . . . . . . . . . . . . . . . . . . . . . . . . . . . . . . . . . . . . . . . . . . . . 380
Collisions . . . . . . . . . . . . . . . . . . . . . . . . . . . . . . . . . . . . . . . . . . . . . . . . . . . . . . . . . . . . . . . . . . . . . . . . . . . . . . . . . . . . . . . . . . . . . . . . . . . . . . . . . . . 381
Vector math . . . . . . . . . . . . . . . . . . . . . . . . . . . . . . . . . . . . . . . . . . . . . . . . . . . . . . . . . . . . . . . . . . . . . . . . . . . . . . . . . . . . . . . . . . . . . . . . . . . . . . . . . 383
Transforms . . . . . . . . . . . . . . . . . . . . . . . . . . . . . . . . . . . . . . . . . . . . . . . . . . . . . . . . . . . . . . . . . . . . . . . . . . . . . . . . . . . . . . . . . . . . . . . . . . . . . . . . . . 384
Rendering functionality . . . . . . . . . . . . . . . . . . . . . . . . . . . . . . . . . . . . . . . . . . . . . . . . . . . . . . . . . . . . . . . . . . . . . . . . . . . . . . . . . . . . . . . . . . . . . . 388
Chapter 19: Movies in a Window
Introduction . . . . . . . . . . . . . . . . . . . . . . . . . . . . . . . . . . . . . . . . . . . . . . . . . . . . . . . . . . . . . . . . . . . . . . . . . . . . . . . . . . . . . . . . . . . . . . . . . . . . . . . . 394
About MIAWs . . . . . . . . . . . . . . . . . . . . . . . . . . . . . . . . . . . . . . . . . . . . . . . . . . . . . . . . . . . . . . . . . . . . . . . . . . . . . . . . . . . . . . . . . . . . . . . . . . . . . . . 394
Creating or declaring a MIAW . . . . . . . . . . . . . . . . . . . . . . . . . . . . . . . . . . . . . . . . . . . . . . . . . . . . . . . . . . . . . . . . . . . . . . . . . . . . . . . . . . . . . . . . 395
Opening and closing a MIAW . . . . . . . . . . . . . . . . . . . . . . . . . . . . . . . . . . . . . . . . . . . . . . . . . . . . . . . . . . . . . . . . . . . . . . . . . . . . . . . . . . . . . . . . 395
Setting the window size and location for a MIAW . . . . . . . . . . . . . . . . . . . . . . . . . . . . . . . . . . . . . . . . . . . . . . . . . . . . . . . . . . . . . . . . . . . . . 396
Controlling the appearance of a MIAW . . . . . . . . . . . . . . . . . . . . . . . . . . . . . . . . . . . . . . . . . . . . . . . . . . . . . . . . . . . . . . . . . . . . . . . . . . . . . . 397
Controlling MIAW layering . . . . . . . . . . . . . . . . . . . . . . . . . . . . . . . . . . . . . . . . . . . . . . . . . . . . . . . . . . . . . . . . . . . . . . . . . . . . . . . . . . . . . . . . . . . 400
MIAW events . . . . . . . . . . . . . . . . . . . . . . . . . . . . . . . . . . . . . . . . . . . . . . . . . . . . . . . . . . . . . . . . . . . . . . . . . . . . . . . . . . . . . . . . . . . . . . . . . . . . . . . . 400
Listing the current MIAWs . . . . . . . . . . . . . . . . . . . . . . . . . . . . . . . . . . . . . . . . . . . . . . . . . . . . . . . . . . . . . . . . . . . . . . . . . . . . . . . . . . . . . . . . . . . 401
Controlling interaction between MIAWs . . . . . . . . . . . . . . . . . . . . . . . . . . . . . . . . . . . . . . . . . . . . . . . . . . . . . . . . . . . . . . . . . . . . . . . . . . . . . . 401
Chapter 20: Using Xtras
Using the XML Parser Xtra . . . . . . . . . . . . . . . . . . . . . . . . . . . . . . . . . . . . . . . . . . . . . . . . . . . . . . . . . . . . . . . . . . . . . . . . . . . . . . . . . . . . . . . . . . . 403
Using the MUI Xtra . . . . . . . . . . . . . . . . . . . . . . . . . . . . . . . . . . . . . . . . . . . . . . . . . . . . . . . . . . . . . . . . . . . . . . . . . . . . . . . . . . . . . . . . . . . . . . . . . . 409
Using the Physics (Dynamiks) Xtra . . . . . . . . . . . . . . . . . . . . . . . . . . . . . . . . . . . . . . . . . . . . . . . . . . . . . . . . . . . . . . . . . . . . . . . . . . . . . . . . . . . 419
Chapter 21: Making Director Movies Accessible
Introduction . . . . . . . . . . . . . . . . . . . . . . . . . . . . . . . . . . . . . . . . . . . . . . . . . . . . . . . . . . . . . . . . . . . . . . . . . . . . . . . . . . . . . . . . . . . . . . . . . . . . . . . . 425
Using the Accessibility Behavior library . . . . . . . . . . . . . . . . . . . . . . . . . . . . . . . . . . . . . . . . . . . . . . . . . . . . . . . . . . . . . . . . . . . . . . . . . . . . . . . 425
Accessibility scripting with Lingo or JavaScript syntax . . . . . . . . . . . . . . . . . . . . . . . . . . . . . . . . . . . . . . . . . . . . . . . . . . . . . . . . . . . . . . . . 430
Deploying accessible movies . . . . . . . . . . . . . . . . . . . . . . . . . . . . . . . . . . . . . . . . . . . . . . . . . . . . . . . . . . . . . . . . . . . . . . . . . . . . . . . . . . . . . . . . 432
Chapter 22: Managing Memory
About managing memory . . . . . . . . . . . . . . . . . . . . . . . . . . . . . . . . . . . . . . . . . . . . . . . . . . . . . . . . . . . . . . . . . . . . . . . . . . . . . . . . . . . . . . . . . . . 434
How Director unloads items from memory . . . . . . . . . . . . . . . . . . . . . . . . . . . . . . . . . . . . . . . . . . . . . . . . . . . . . . . . . . . . . . . . . . . . . . . . . . . 434

x
USING DIRECTOR 11.5
Contents
Last updated 9/28/2011
Loading and unloading individual cast members . . . . . . . . . . . . . . . . . . . . . . . . . . . . . . . . . . . . . . . . . . . . . . . . . . . . . . . . . . . . . . . . . . . . . 435
Preloading digital video . . . . . . . . . . . . . . . . . . . . . . . . . . . . . . . . . . . . . . . . . . . . . . . . . . . . . . . . . . . . . . . . . . . . . . . . . . . . . . . . . . . . . . . . . . . . . 436
Chapter 23: Managing and Testing Director Projects
Managing Director projects . . . . . . . . . . . . . . . . . . . . . . . . . . . . . . . . . . . . . . . . . . . . . . . . . . . . . . . . . . . . . . . . . . . . . . . . . . . . . . . . . . . . . . . . . 437
About testing movies to avoid problems . . . . . . . . . . . . . . . . . . . . . . . . . . . . . . . . . . . . . . . . . . . . . . . . . . . . . . . . . . . . . . . . . . . . . . . . . . . . . 438
Printing movies . . . . . . . . . . . . . . . . . . . . . . . . . . . . . . . . . . . . . . . . . . . . . . . . . . . . . . . . . . . . . . . . . . . . . . . . . . . . . . . . . . . . . . . . . . . . . . . . . . . . . 439
Resources . . . . . . . . . . . . . . . . . . . . . . . . . . . . . . . . . . . . . . . . . . . . . . . . . . . . . . . . . . . . . . . . . . . . . . . . . . . . . . . . . . . . . . . . . . . . . . . . . . . . . . . . . . . 440
Chapter 24: Packaging Movies for Distribution
Introduction . . . . . . . . . . . . . . . . . . . . . . . . . . . . . . . . . . . . . . . . . . . . . . . . . . . . . . . . . . . . . . . . . . . . . . . . . . . . . . . . . . . . . . . . . . . . . . . . . . . . . . . . 441
About distributing movies . . . . . . . . . . . . . . . . . . . . . . . . . . . . . . . . . . . . . . . . . . . . . . . . . . . . . . . . . . . . . . . . . . . . . . . . . . . . . . . . . . . . . . . . . . . 441
Shockwave player browser compatibility . . . . . . . . . . . . . . . . . . . . . . . . . . . . . . . . . . . . . . . . . . . . . . . . . . . . . . . . . . . . . . . . . . . . . . . . . . . . . 442
Using the lingo.ini file to run startup scripts . . . . . . . . . . . . . . . . . . . . . . . . . . . . . . . . . . . . . . . . . . . . . . . . . . . . . . . . . . . . . . . . . . . . . . . . . . 442
Previewing a movie in a browser . . . . . . . . . . . . . . . . . . . . . . . . . . . . . . . . . . . . . . . . . . . . . . . . . . . . . . . . . . . . . . . . . . . . . . . . . . . . . . . . . . . . . 442
About Xtra extensions . . . . . . . . . . . . . . . . . . . . . . . . . . . . . . . . . . . . . . . . . . . . . . . . . . . . . . . . . . . . . . . . . . . . . . . . . . . . . . . . . . . . . . . . . . . . . . . 443
Managing Xtra extensions for distributed movies . . . . . . . . . . . . . . . . . . . . . . . . . . . . . . . . . . . . . . . . . . . . . . . . . . . . . . . . . . . . . . . . . . . . . 444
About Distribution formats . . . . . . . . . . . . . . . . . . . . . . . . . . . . . . . . . . . . . . . . . . . . . . . . . . . . . . . . . . . . . . . . . . . . . . . . . . . . . . . . . . . . . . . . . . 445
Creating Shockwave content . . . . . . . . . . . . . . . . . . . . . . . . . . . . . . . . . . . . . . . . . . . . . . . . . . . . . . . . . . . . . . . . . . . . . . . . . . . . . . . . . . . . . . . . 446
Using default Publish settings . . . . . . . . . . . . . . . . . . . . . . . . . . . . . . . . . . . . . . . . . . . . . . . . . . . . . . . . . . . . . . . . . . . . . . . . . . . . . . . . . . . . . . . 446
Changing Publish settings . . . . . . . . . . . . . . . . . . . . . . . . . . . . . . . . . . . . . . . . . . . . . . . . . . . . . . . . . . . . . . . . . . . . . . . . . . . . . . . . . . . . . . . . . . . 447
Using dswmedia folders and the support folder to publish Shockwave content . . . . . . . . . . . . . . . . . . . . . . . . . . . . . . . . . . . . . . . . 454
Using linked media when testing Shockwave content . . . . . . . . . . . . . . . . . . . . . . . . . . . . . . . . . . . . . . . . . . . . . . . . . . . . . . . . . . . . . . . . 455
Converting movies created in previous versions of Director . . . . . . . . . . . . . . . . . . . . . . . . . . . . . . . . . . . . . . . . . . . . . . . . . . . . . . . . . . . 455
About projectors . . . . . . . . . . . . . . . . . . . . . . . . . . . . . . . . . . . . . . . . . . . . . . . . . . . . . . . . . . . . . . . . . . . . . . . . . . . . . . . . . . . . . . . . . . . . . . . . . . . . 458
Creating projectors . . . . . . . . . . . . . . . . . . . . . . . . . . . . . . . . . . . . . . . . . . . . . . . . . . . . . . . . . . . . . . . . . . . . . . . . . . . . . . . . . . . . . . . . . . . . . . . . . . 458
About cross-platform projectors . . . . . . . . . . . . . . . . . . . . . . . . . . . . . . . . . . . . . . . . . . . . . . . . . . . . . . . . . . . . . . . . . . . . . . . . . . . . . . . . . . . . . 460
Processing movies with Update Movies . . . . . . . . . . . . . . . . . . . . . . . . . . . . . . . . . . . . . . . . . . . . . . . . . . . . . . . . . . . . . . . . . . . . . . . . . . . . . . 461
Exporting digital video and frame-by-frame bitmaps . . . . . . . . . . . . . . . . . . . . . . . . . . . . . . . . . . . . . . . . . . . . . . . . . . . . . . . . . . . . . . . . . 462
Setting QuickTime export options . . . . . . . . . . . . . . . . . . . . . . . . . . . . . . . . . . . . . . . . . . . . . . . . . . . . . . . . . . . . . . . . . . . . . . . . . . . . . . . . . . . 463
About organizing movie files . . . . . . . . . . . . . . . . . . . . . . . . . . . . . . . . . . . . . . . . . . . . . . . . . . . . . . . . . . . . . . . . . . . . . . . . . . . . . . . . . . . . . . . . 464
Chapter 25: Using Shockwave Player
About Shockwave Player . . . . . . . . . . . . . . . . . . . . . . . . . . . . . . . . . . . . . . . . . . . . . . . . . . . . . . . . . . . . . . . . . . . . . . . . . . . . . . . . . . . . . . . . . . . . 466
Streaming movies . . . . . . . . . . . . . . . . . . . . . . . . . . . . . . . . . . . . . . . . . . . . . . . . . . . . . . . . . . . . . . . . . . . . . . . . . . . . . . . . . . . . . . . . . . . . . . . . . . . 466
About network operations . . . . . . . . . . . . . . . . . . . . . . . . . . . . . . . . . . . . . . . . . . . . . . . . . . . . . . . . . . . . . . . . . . . . . . . . . . . . . . . . . . . . . . . . . . . 467
Setting movie playback options . . . . . . . . . . . . . . . . . . . . . . . . . . . . . . . . . . . . . . . . . . . . . . . . . . . . . . . . . . . . . . . . . . . . . . . . . . . . . . . . . . . . . . 467
Setting Shockwave playback options . . . . . . . . . . . . . . . . . . . . . . . . . . . . . . . . . . . . . . . . . . . . . . . . . . . . . . . . . . . . . . . . . . . . . . . . . . . . . . . . . 468
About creating multiuser applications . . . . . . . . . . . . . . . . . . . . . . . . . . . . . . . . . . . . . . . . . . . . . . . . . . . . . . . . . . . . . . . . . . . . . . . . . . . . . . . 469
About streaming with the Score and behaviors . . . . . . . . . . . . . . . . . . . . . . . . . . . . . . . . . . . . . . . . . . . . . . . . . . . . . . . . . . . . . . . . . . . . . . . 469
Checking whether media elements are loaded with Lingo or Java Script syntax . . . . . . . . . . . . . . . . . . . . . . . . . . . . . . . . . . . . . . . . 470
Downloading files from the Internet with Lingo or JavaScript syntax . . . . . . . . . . . . . . . . . . . . . . . . . . . . . . . . . . . . . . . . . . . . . . . . . . 470
Retrieving network operation results with Lingo or JavaScript syntax . . . . . . . . . . . . . . . . . . . . . . . . . . . . . . . . . . . . . . . . . . . . . . . . . 473
Using Lingo or JavaScript syntax in different Internet environments . . . . . . . . . . . . . . . . . . . . . . . . . . . . . . . . . . . . . . . . . . . . . . . . . . . 473
Testing your movie . . . . . . . . . . . . . . . . . . . . . . . . . . . . . . . . . . . . . . . . . . . . . . . . . . . . . . . . . . . . . . . . . . . . . . . . . . . . . . . . . . . . . . . . . . . . . . . . . . 476

xi
USING DIRECTOR 11.5
Contents
Last updated 9/28/2011
Cross-domain policy . . . . . . . . . . . . . . . . . . . . . . . . . . . . . . . . . . . . . . . . . . . . . . . . . . . . . . . . . . . . . . . . . . . . . . . . . . . . . . . . . . . . . . . . . . . . . . . . . 476
About downloading speed . . . . . . . . . . . . . . . . . . . . . . . . . . . . . . . . . . . . . . . . . . . . . . . . . . . . . . . . . . . . . . . . . . . . . . . . . . . . . . . . . . . . . . . . . . 478
Index ...............................................................................................................479

1
Last updated 9/28/2011
Chapter 1: Getting started
If you haven’t installed your new software, begin by reading some information on installation and other preliminaries.
Before you begin working with your software, take a few moments to read an overview of Adobe® Help and of the many
resources available to users. You have access to instructional videos, plug-ins, templates, user communities, seminars,
tutorials, RSS feeds, and much more.
Installation
Requirements
❖To review complete system requirements and recommendations for your Adobe® software, see the Read Me file on
the installation disc.
Install the software
1Close any other Adobe applications open on your computer.
2Insert the installation disc into your disc drive, and follow the onscreen instructions.
Note: For more information, see the Read Me file on the installation disc.
Activate the software
If you have a single-user retail license for your Adobe software, you will be asked to activate your software; this is a
simple, anonymous process that you must complete within 30 days of starting the software.
For more information on product activation, see the Read Me file on your installation CD, or visit the Adobe website
at www.adobe.com/go/activation.
1If the Activation dialog box isn't already open, choose Help > Activate.
2Follow the onscreen instructions.
Note: If you want to install the software on a different computer, you must first deactivate it on your computer. Choose
Help > Deactivate.
Register
Register your product to receive complimentary installation support, notifications of updates, and other services.
❖To register, follow the onscreen instructions in the Registration dialog box, which appears after you install and
activate the software.
If you postpone registration, you can register at any time by choosing Help > Registration.

2
USING DIRECTOR 11.5
Getting started
Last updated 9/28/2011
Read Me
The installation disc contains the Read Me file for your software. (This file is also copied to the application folder
during product installation.) Open the file to read important information about topics such as the following:
•System requirements
•Installation (including uninstalling the software)
•Activation and registration
•Font installation
•Troubleshooting
•Customer support
•Legal notices
Adobe Help
Adobe Help resources
Documentation for your Adobe software is available in a variety of formats.
In-product and Web Help
In-product Help provides access to all documentation and instructional content available at the time the software
ships. It is available through the Help menu in your Adobe software.
Web Help includes all the content from in-product Help, plus updates and links to additional instructional content
available on the web. Find Web Help for your product in the Adobe Help Resource Center, at
www.adobe.com/go/documentation.
Think of Help, both in the product and on the web, as a hub for accessing additional content and communities of users.
The most complete and up-to-date version of Help is always on the web.
Adobe PDF documentation
The in-product Help is also available as an Adobe PDF that is optimized for printing. Other documents, such as
installation guides and white papers, may also be provided as PDFs.
All PDF documentation is available through the Adobe Help Resource Center at www.adobe.com/go/documentation.
To see the PDF documentation included with your software, look in the Documents folder on the installation or
content DVD.
Resources
Extras
You have access to a wide variety of resources that will help you make the most of your Adobe software. Some of these
resources are installed on your computer during the setup process; additional helpful samples and documents are
included on the installation or content disc. Unique extras are also offered online by the Adobe Exchange community
at www.adobe.com/go/exchange.

3
USING DIRECTOR 11.5
Getting started
Last updated 9/28/2011
Installed resources
During software installation, a number of resources are placed in your application folder. To view those files, navigate
to the application folder on your computer.
•Windows®: [startup drive]\Program Files\Adobe\[Adobe application]
•Mac OS®: [startup drive]/Applications/[Adobe application]
Samples Sample files include more complicated designs and are a great way to see new features in action. These files
demonstrate the range of creative possibilities available to you.
DVD content
The installation or content DVD included with your product contains additional resources for use with your software.
Adobe Exchange
For more free content, visit www.adobe.com/go/exchange, an online community where users download and share
thousands of free actions, extensions, plug-ins, and other content for use with Adobe products.
Adobe Design Center
Adobe Design Center offers articles, inspiration, and instruction from industry experts, top designers, and Adobe
publishing partners. New content is added monthly.
You can find hundreds of tutorials for design products and learn tips and techniques through videos, HTML tutorials,
and sample book chapters.
New ideas are the heart of Think Tank, Dialog Box, and Gallery:
•Think Tank articles consider how today’s designers engage with technology and what their experiences mean for
design, design tools, and society.
•In Dialog Box, experts share new ideas in motion graphics and digital design.
•The Gallery showcases how artists communicate design in motion.
Visit Adobe Design Center at www.adobe.com/designcenter.
Adobe Developer Center
Adobe Developer Center provides samples, tutorials, articles, and community resources for developers who build rich
Internet applications, websites, mobile content, and other projects using Adobe products. The Developer Center also
contains resources for developers who develop plug-ins for Adobe products.
In addition to sample code and tutorials, you'll find RSS feeds, online seminars, SDKs, scripting guides, and other
technical resources.
Visit Adobe Developer Center at www.adobe.com/go/developer.
Customer support
Visit the Adobe Support website (www.adobe.com/go/support) to find troubleshooting information for your product
and to learn about free and paid technical support options. Follow the Training link for access to Adobe Press books,
a variety of training resources, Adobe software certification programs, and more.

4
USING DIRECTOR 11.5
Getting started
Last updated 9/28/2011
Downloads
Visit www.adobe.com/go/downloads to find free updates, tryouts, and other useful software. In addition, the
Adobe Store (www.adobe.com/go/store) provides access to thousands of plug-ins from third-party developers,
helping you to automate tasks, customize workflows, create specialized professional effects, and more.
Samples
Samples (.dir Files) that demonstrate various features in Director are included as part of the product DVD under the
Goodies section. The following samples are also installed in the Director installation directory under /Adobe Director
11/Configuration/Tutorials/
•The 3dSave_w3dTextureEditor.dir file demonstrates 3D textures. Load any w3d file, modify the texture properties,
and save it using the savew3d(filename) method .
•The Rigid Body Proxy Shapes.dir file demonstrates 3D Physics. The various rigid body shapes that can be created
are demonstrated in this sample.
createRigidBody() Creates #dynamic and #static rigid bodies.
createProxyTemplate() Creates a proxy template ( a pre-computed proxy that can be saved and used later ) based
on the model resource.
addProxyTemplate() Adds the created proxy to a specified 3d world that you can use later.
loadProxyTemplate() Loads the proxy that was saved earlier in the 3d world; returns a handler for the proxy loaded
from the 3d world.
createRigidbodyFromProxy() Creates #dynamic and #static concave rigid bodies from the proxy templates.
The movie also demonstrates visualizing the created proxy using rb.properties of the rigid body.
•The resources that you require for the following tutorials are available in the Proudct Resources section at
http://www.adobe.com/support/documentation/en/director.
This tutorial requires the following movies:
•Magic_start.dir
•Magic_finished.dir
•Basic_Finished.dir
•Basic_Start.dir
Adobe Labs
Adobe Labs gives you the opportunity to experience and evaluate new and emerging technologies and products from
Adobe.
At Adobe Labs, you have access to resources such as these:
•Prerelease software and technologies
•Code samples and best practices to accelerate your learning
•Early versions of product and technical documentation
•Forums, wiki-based content, and other collaborative resources to help you interact with like-minded developers

5
USING DIRECTOR 11.5
Getting started
Last updated 9/28/2011
Adobe Labs fosters a collaborative software development process. In this environment, customers quickly become
productive with new products and technologies. Adobe Labs is also a forum for early feedback, which the Adobe
development teams use to create software that meets the needs and expectations of the community.
Visit Adobe Labs at www.adobe.com/go/labs.
User communities
User communities feature forums, blogs, and other avenues for users to share technologies, tools, and information.
Users can ask questions and find out how others are getting the most out of their software. User-to-user forums are
available in English, French, German, and Japanese; blogs are posted in a wide range of languages.
To participate in forums or blogs, visit www.adobe.com/communities.
What's new
Adobe® Director® 11.5.8 software and Adobe Shockwave® Player help you create and publish compelling interactive
experiences for the Internet, Mac OS® and Windows® platforms, DVDs, and CDs.
Top new features of Adobe Director 11.5.9
Parallax mapping Parallax mapping is an enhancement of Normal/Bump Mapping technique. This technique
provides more apparent depth and greater realism with less impact on the performance. For more information, see
Parallax Mapping.
Cube mapping Cube mapping is a method of using a six-sided cube as the shape of the map. The model is projected
onto the six faces of a cube and stored as six square textures, or unfolded into six regions of a single texture. For more
information, see Cube Mapping.
Normal mapping Normal mapping is a technique used for showing finer details like lighting of bumps and dents
without using additional polygons. For more information, see Normal Mapping.
Render to texture Render Textures are textures that are created and updated at runtime. For more information, see
Render Texture.
Importing Collada models Adobe Director now provides support for importing Collada-based models. For more
information, see Collada models.
Top new features of Adobe Director 11.5.8
Character Controller capabilities Make your games with a finer control of characters and rigid bodies and make all of
them interact with each other. For more information, see Character Controller methods.
Cloth simulation capabilities Start using the cloth simulation techniques to incorporate flags and banners in your
game. For more information, see Cloth methods.
Cross domain policy enhancements Cross-domain policy changes have been made in Adobe Director to support
media-based cross-domain checks for the Flash cast members.
A new flash cast member property cdpCheckMode has been made available, which can be set to either
#useMediaPolicy (to use the Flash player's cross-domain checks) or #useSWPolicy (to use the Shockwave player's
cross-domain checks).

6
USING DIRECTOR 11.5
Getting started
Last updated 9/28/2011
For more information, see Cross-domain policy.
3D Hardware Anti-aliasing In Adobe Director, for hardware anti-aliasing support in Shockwave 3D asset,
antiAliasingMode property can be set for anti-aliasing the 3D Sprites. For more information, see antiAliasingMode.
Improvements in audio compression Audio compression properties have been added in the Publish dialog settings.
The supported format for audio compression is:
•Wav files 8-bit, 16-bit with (22050, 44100, or 48000) Hz frequency-mono or stereo.
Support for Flash Player 10/ActionScript 3 movies You can import all your Flash ActionScript 3 swf files into Adobe
Director as cast members. The following new APIs have been introduced:
•newProxyCallback()
•stage (Flash Sprite property)
Support for Flex/FlashBuilder The swf files produced from Flex Builder 3 and Flash Builder 4 can be imported into
Adobe Director as cast members.
Mac 64-bit support for Shockwave Players Safari 4.x is available as a universal binary application, which has support
for x86_64. Snow Leopard (10.6.x) has native support for 64-bit applications. Hence, when you launch an application,
the application is launched in an x86_64 mode if the application has support for that mode. Adobe Director now
supports running the Shockwave player in a 64-bit Safari browser.
Top new features of Adobe Director 11.5
Enriched audio capabilities Make your games sound as real as they look with 5.1-channel surround sound, real-time
mixing, audio effects, and DSP filters. For more information, see “Audio mixers and sound objects” on page 241.
Enhanced video capabilities Enhance your user’s multimedia experience using H.264-video integration that provides
full-screen, high-definition video in multimedia applications and games. For more information, see “Using Digital
Video” on page 253.
New 3D importer for SketchUp Rapidly create rich 3D environments using the many ready-made 3D models available
through Google SketchUp. For more information, see “Google SketchUp models” on page 377.
Streaming support Stream audio and video over the Internet using RTMP support. For more information, see
“Streaming members” on page 254.
New data type Access and manipulate binary data using the ByteArray data type. For more information, see the
What’s New With Director Scripting section of the Scripting Dictionary.
Enhanced physics engine Support for dynamic concave rigid bodies. For more information, see “Dynamic concave
rigid bodies” on page 421.
Enhanced productivity Support for multiple undo/redo operations. For more information, see “Undo multiple
actions” on page 9.
Cross domain policy For more information, see “Cross-domain policy” on page 476.
Enhancements to the text engine
•Open Type Font (OTF) embedding support on Macintosh OS.
•Class-based kerning support.
•Hinting support at a member level. For more information, see “Font hinting” on page 181.

7
USING DIRECTOR 11.5
Getting started
Last updated 9/28/2011
Enhancements to platform and browser support
•Macintosh OSX 10.5 (authoring and runtime) support.
•Firefox 3.0 support.
For more information, see the Read Me file.

8
Last updated 9/28/2011
Chapter 2: Workspace
Introduction
The Adobe® Director® workspace is designed to make the most efficient use of the space on your screen. Windows, also
called panels, can be organized into tabbed panel groups, and panel groups can be docked together. To make the most
of the features in Director, you should take a few minutes to understand how to navigate and customize your
workspace.
As you get to know the workspace, you will also learn about the features that Director has to offer. For example,
learning about the Script window and the Message window can help those who are new to scripting in Director. If you
have not scripted in Director before and would like to start, be sure to read about the Script window and the Message
window.
Before you begin working in Director for the first time, you should also understand the movie metaphor that Director
is based on. By understanding this metaphor, you can more easily recognize components of your workspace, such as
the Stage and Cast window.
User Interface enhancements
The following enhancements have been made to the user interface in Director 11.
•Tabbed layout in the center docking channel. Document windows appear as separate tabs in the center docking
channel. Stage, Score, and all media editors are the default document windows. The Stage and Score windows can
be docked together by pressing Ctrl and then dropping the Score window over the Stage window.
•Floating and unfloating windows. The Float and Unfloat options in the Options menu enable you to float or
unfloat a tool window.
Floating windows are tool windows that can be grouped with other tool windows but cannot be grouped with any
document windows.
Unfloated tool windows are document windows that layer with, and can be docked with other unfloated tool
windows.
•Message and Cast Windows as tool windows. By default, the Message and Cast windows appear as tool windows.
As floating windows, they can be also be docked in the docking channels. You can convert them to document
windows by using the Unfloat option.
•The Stage and Score panels can be docked together. The location of the Score in relation to the Stage can now be
customized. The splitter bar can be used to resize the Stage and Score. The Score can also be undocked from the
Stage and placed in separate windows (when not in maximized tab view mode) or tabs (in maximized tab view
mode). To place them in separate tabs, exit the maximized tabbed view, undock the Stage and Score, and return to
the maximized tabbed view.
•Media editors are no longer grouped. New media editors appear as separate tabs in the maximized tabbed view.
Windows users can add new tabs for a media editor by clicking the Plus button.

9
USING DIRECTOR 11.5
Workspace
Last updated 9/28/2011
•Exiting and re-entering the tabbed view. Windows®’ users can exit the tabbed document mode by clicking the
Restore button. Mac® users can use the Break Apart Tabbed Documents option in the Window menu to enter into
the untabbed mode, where all the tabs from the tabbed document window are split up into separate windows. To
re-enter the tabbed mode, Windows users click the maximize box on any document window, and Mac users use
the Tab Documents Together option in the Window menu. If the Score and Stage are docked together in the
maximized tabbed view, they will continue to be docked even after you exit that mode.
•The debugger is now a separate window from the script window. When you open the debugger window and click
the Stage in the maximized tabbed view, the debugger window is relocated to the back of the Stage. It can be brought
to front by using the shortcut Ctrl+F11 or Cmd+F11.
•Collapsing a panel. To collapse a panel, you have to click the title of the panel, unlike in previous versions where
clicking on any portion of the title bar collapsed the panel.
•MIAWs are not present in tabs and remain as separate document windows like the debugger. Only MIAWS created
as tool MIAWS can be docked in the docking channels.
•MIAWS behind the Stage can be brought to front using the open() lingo function for MIAWS.
Undo multiple actions
Director lets you undo multiple actions in the following windows:
•Script window
•Field window
•Text window
•Paint window
For all other windows, only one level of undo is supported.
Undo actions
Do one of the following:
•Click Edit > Undo Text. Repeat this step as many times as necessary.
•(Windows) Use the Ctrl+Z keyboard shortcut as many times as necessary.
(Mac) Use the Command+Z keyboard shortcut.
Redo undid actions
To reverse the undo operation on one or more actions, do the following:
•Click Edit > Redo Text. Repeat this step as many times as necessary.
•(Windows) Use the Ctrl+Y keyboard shortcut as many times as necessary.
(Mac) Use the Command+Shift+Z keyboard shortcut.

10
USING DIRECTOR 11.5
Workspace
Last updated 9/28/2011
Set undo preferences
Optionally, specify the number of recent actions that you want to be available for the undo operation. The default value
is 25. Do the following:
1Click Edit > Preferences > General.
2In the General Preferences dialog box, enter a number in Levels Of Undo.
3Click OK.
Understanding the Director metaphor
The Director user interface is designed around a movie metaphor. Each project you create can be thought of as a movie,
with a cast of characters, a Score, a Stage where the action takes place, and a director (you, the author). Each media
element that appears in your movie (sound, video, images, text, buttons, and so on) can be thought of as a member of
the movie’s cast. In Director, the Cast window is where you view the list of media elements that appear in your movie.
As with a real movie, each Director movie has a Score. However, the Score of a Director movie contains more than just
music. The Score window in Director contains information about when and where each of the cast members appears
on the Stage. The Score describes the action that happens in the movie.
The action in a Director movie takes place in a window called the Stage. To create a Director movie, you add cast
members (media elements) to the Cast window by creating them in Director or importing them. Next, you place them
on the Stage as sprites. A sprite is simply a copy of a cast member that appears on the Stage. Then you refine the actions
of the sprites by editing them on the Stage or in the Score.
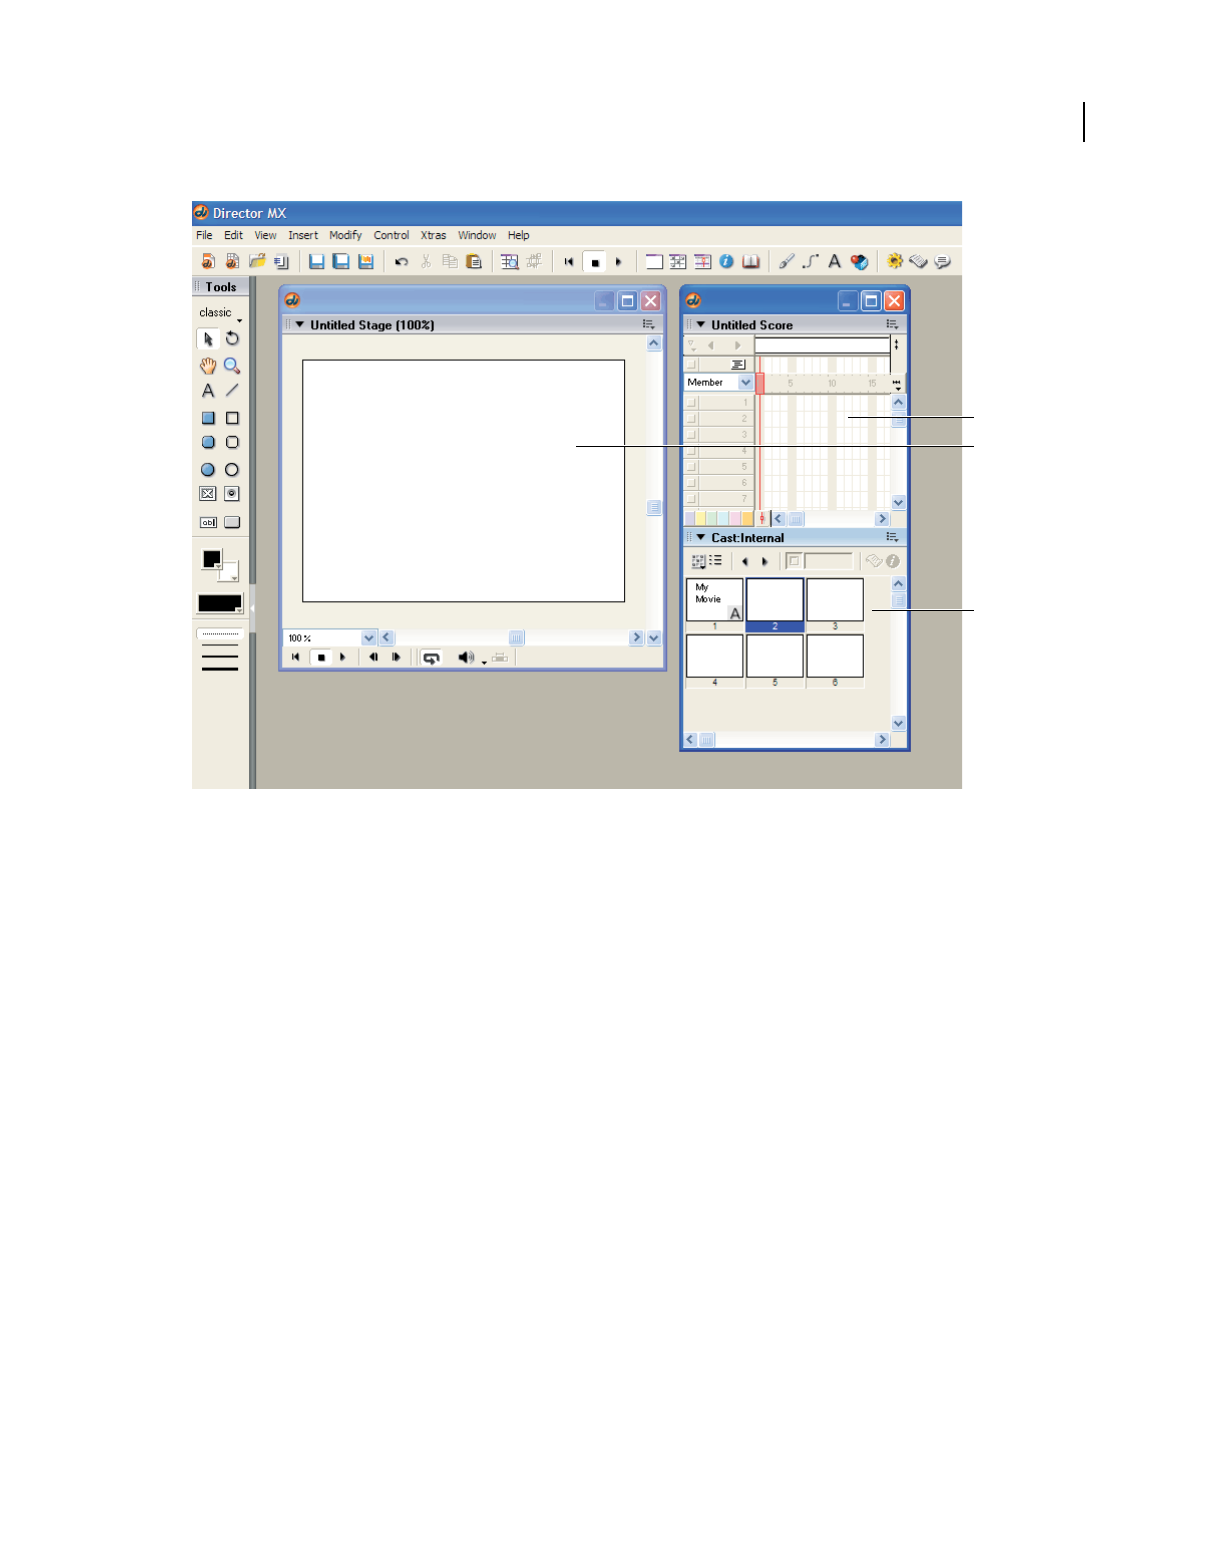
11
USING DIRECTOR 11.5
Workspace
Last updated 9/28/2011
The Cast window, the Stage, and the Score in Director
A. Score B. Stage C. Cast
Navigating the Director workspace
When you first start Director, several windows open in the default workspace. The Tool palette and the Stage are stand-
alone windows. Other windows are docked together. For example, the Score and the Cast window are docked together
by default. In the right docking channel, you can find the Property inspector, along with a group of windows called
Design and another group of windows called Code.
Getting to know the workspace
When creating and editing a basic movie, you typically work in four of the windows that appear in the default
workspace: the Stage, the Score, the Cast window, and the Property inspector. From the Cast window, you import,
create, and edit the cast members (media elements) of your movie. In the Property inspector, you control the
properties of the cast members. With the Score and the Stage, you control how, where, when, and for how long those
media elements appear in your movie.
A
B
C
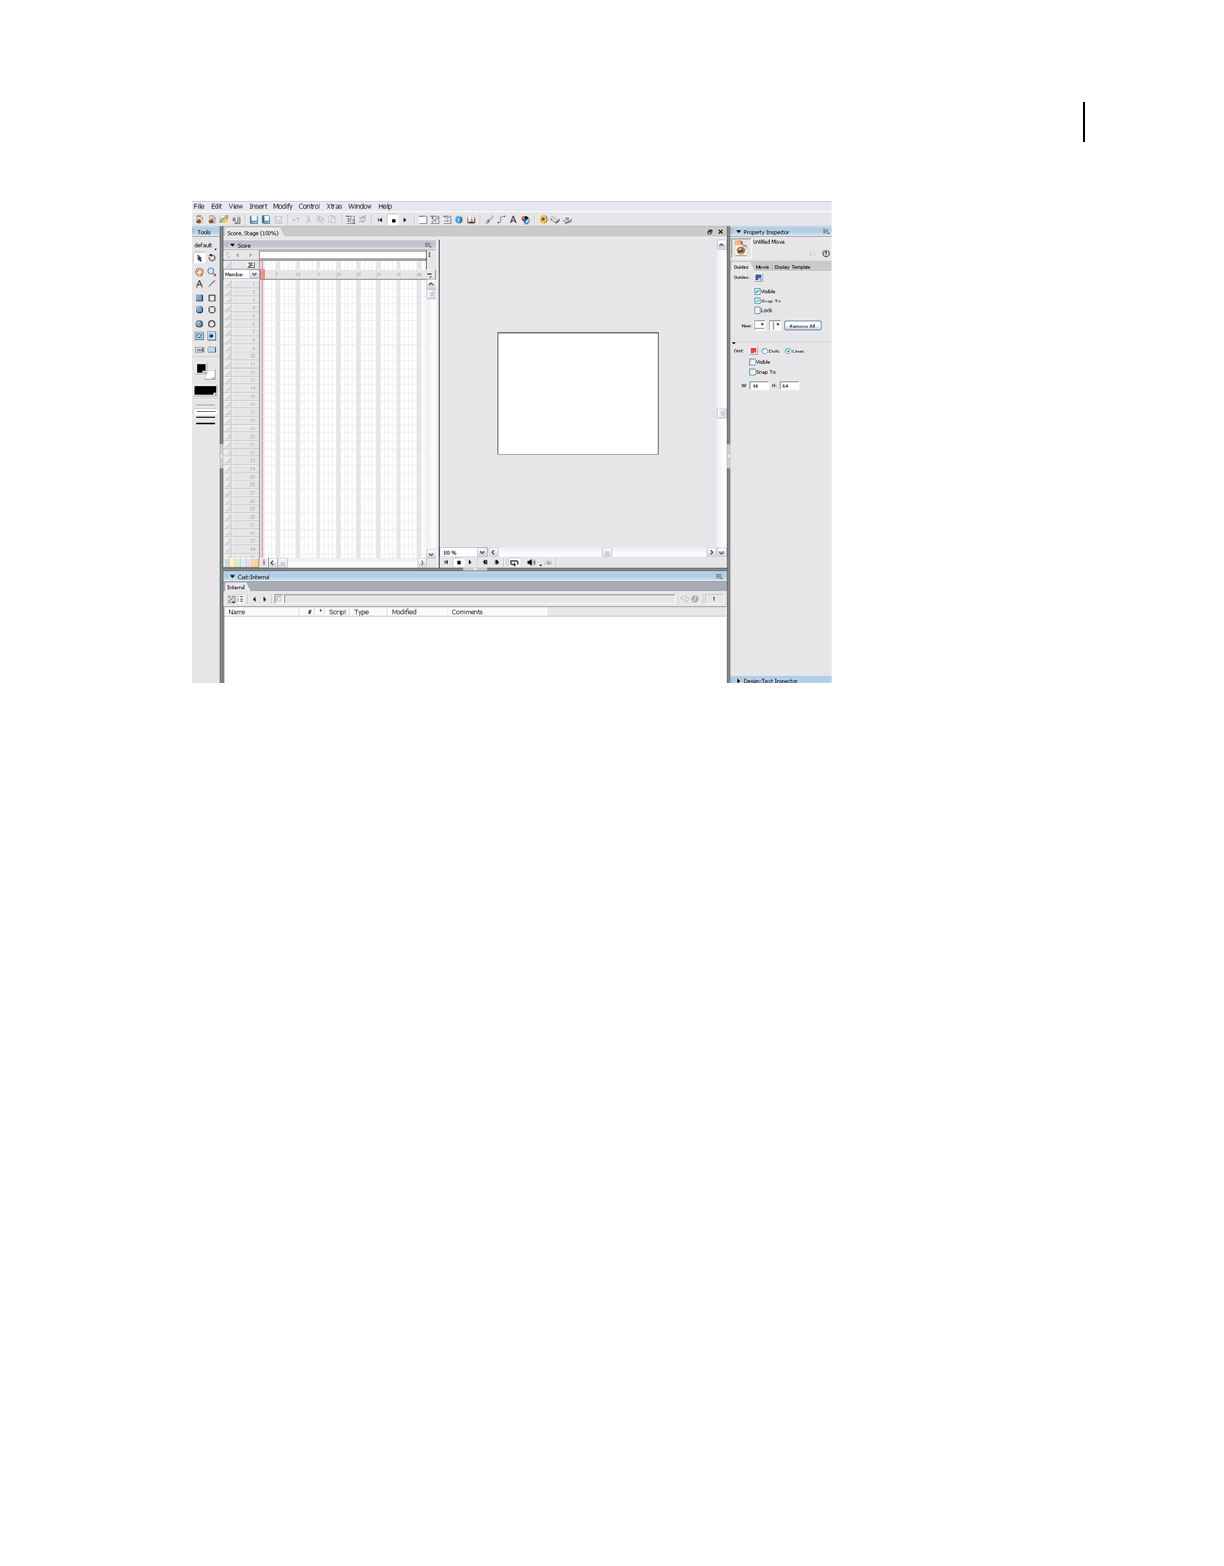
12
USING DIRECTOR 11.5
Workspace
Last updated 9/28/2011
The default Director workspace (Windows platform)
Manipulating the default workspace
The default workspace is designed for most people who are new to using Director. You can manipulate the default
workspace to suit your needs. For example, you can display additional windows as you need them or hide windows to
keep your workspace clean and easy to work with. You can also control how windows display their contents by
changing window preferences.
Display or hide a window
1Open the Window menu.
2Select one of the window names. A check mark or bullet mark next to a window name indicates that the window is
currently displayed.
For information on customizing your workspace further, see “Customizing your workspace” on page 24.
Change window preferences
1Select Edit > Preferences.
2Select one of the following commands: General, Score, Sprite, Cast, Paint, Editors, or Script.
These commands all open dialog boxes that allow you to modify the behavior of windows. The General command
controls windows in general. Other commands control a specific window or set of windows. (The Network
command is also available, but it does not control window preferences. Rather, it controls Internet connection
settings.)
Getting to know window types
There are two types of windows in Director: document windows and tool windows. You typically use document
windows to create or edit content; you use tool windows to view or modify properties of that content.

13
USING DIRECTOR 11.5
Workspace
Last updated 9/28/2011
For example, the Paint window is a document window that allows you to create and edit images. In contrast, the
Property inspector is a tool window that allows you to change the properties of an image that you created in the Paint
window, and to change properties of other content.
Both types of windows are available from the Window menu.
Document windows include the following:
•Stage
•Score
•Cast
•Various media editors (for example, Text, QuickTime®, and DVD)
Tool windows include the following:
•Property inspector
•Tool palette
•Text inspector
•Control panel
Using the Stage
The Stage is the part of a movie that your users will see. You use the Stage to determine where media elements (cast
members) should appear onscreen. When you determine where you want the cast member to appear, you place a copy
of that cast member, called a sprite, on the Stage.
During authoring, you can define the properties of the Stage, such as its size and color. For example, as you work on
your movie, you can make the Stage either larger or smaller than its original size. You can also scale the coordinates
for the sprites on the Stage, so that they continue to fill the entire screen. Guides, grids, and Align and Tweak windows
are available to align sprites on the Stage.
Moving around on the Stage
A large-sized Stage sometimes does not fit in your workspace. If you can see only part of your Stage at one time, you
can move to a different part of the Stage whenever you need to.
1If the Stage is not already displayed, select Window > Stage.
2Do one of the following:
•From the Tool palette, select the Hand tool.
•Press and hold the Spacebar.
3Place the hand on the Stage, and click and drag to move the Stage.
Increasing or decreasing your view of the Stage
You can author in Director on a zoomed Stage—one that is either larger or smaller than the normal size of the movie.
The Stage’s title bar indicates the Stage size, expressed as a percentage of the normal Stage size.
When you change the size of the Stage, any guides or grids used to assist with alignment also scale to the zoomed size,
and you can manipulate sprites in the same way that you would on a Stage that is not zoomed.
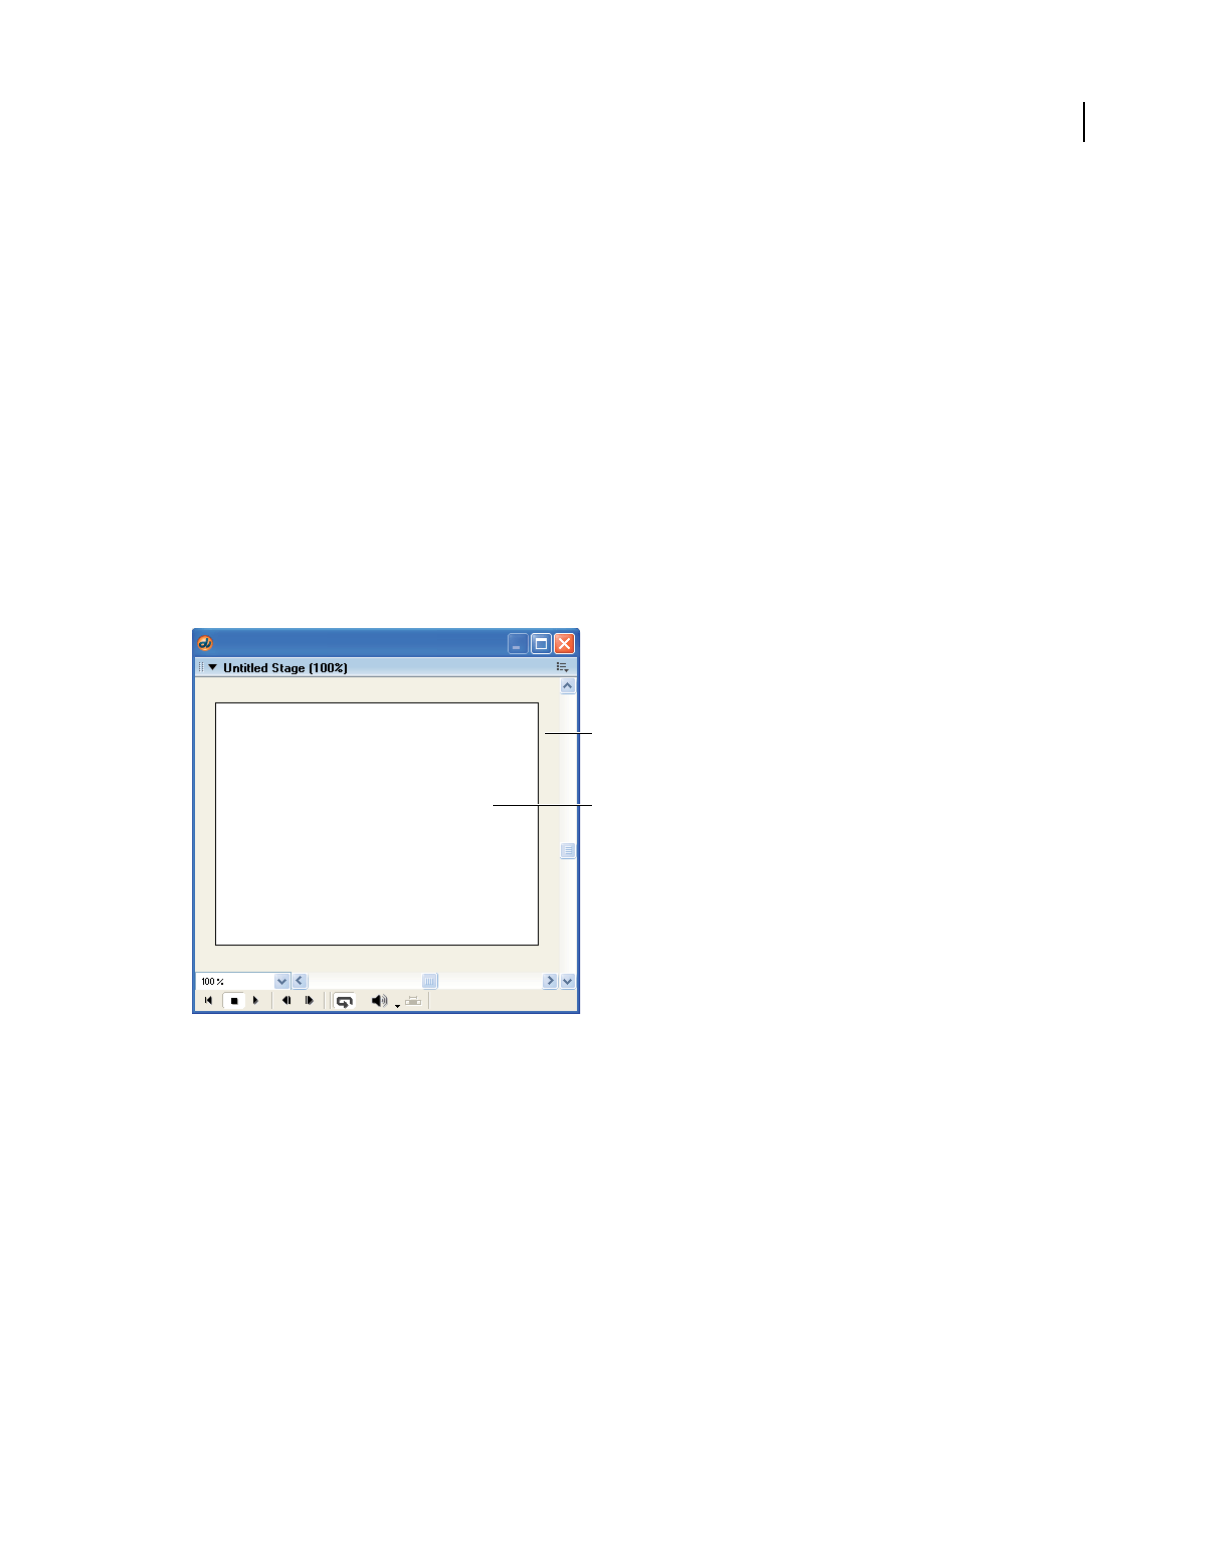
14
USING DIRECTOR 11.5
Workspace
Last updated 9/28/2011
Zoom in on the Stage
1From the Tool palette, select the Magnifying Glass tool.
2Click the Stage until it reaches the desired size.
Zoom out from the Stage
1From the Tool palette, select the Magnifying Glass tool.
2
Press and hold the Alt key (Windows) or the Option key (Mac), and then click the Stage until it reaches the desired size.
Using the offstage canvas
The Stage includes an offstage canvas area within the Stage window but outside of the active movie area. This canvas
area is useful for assembling your sprites, either before or after they appear on the Stage.
The offstage canvas is also useful as a way to preload content. For example, you can place sprites on the offstage canvas.
There, they are loaded into memory and are ready to play immediately when needed in a subsequent frame of the
movie.
The offstage canvas and the onstage canvas
A. Offstage canvas B. Onstage canvas
Using the Score
Like the Stage, the Score provides a view of your movie. The Stage provides a graphical view. The Score provides a view
of the movie’s timeline. The Stage displays the point in time that is selected within the Score.
The Score organizes and controls a movie’s content over time in rows called channels. The Score includes many Sprite
channels for the movie’s sprites. Sprite channels are numbered and control when sprites appear in the movie.
Additionally, the Score includes effects channels that control the movie’s tempo, sound, color palettes, transitions, and
scripted behaviors.
The Score displays channels in the order shown in the following figure. Only the Sprite channels are displayed by
default.
A
B
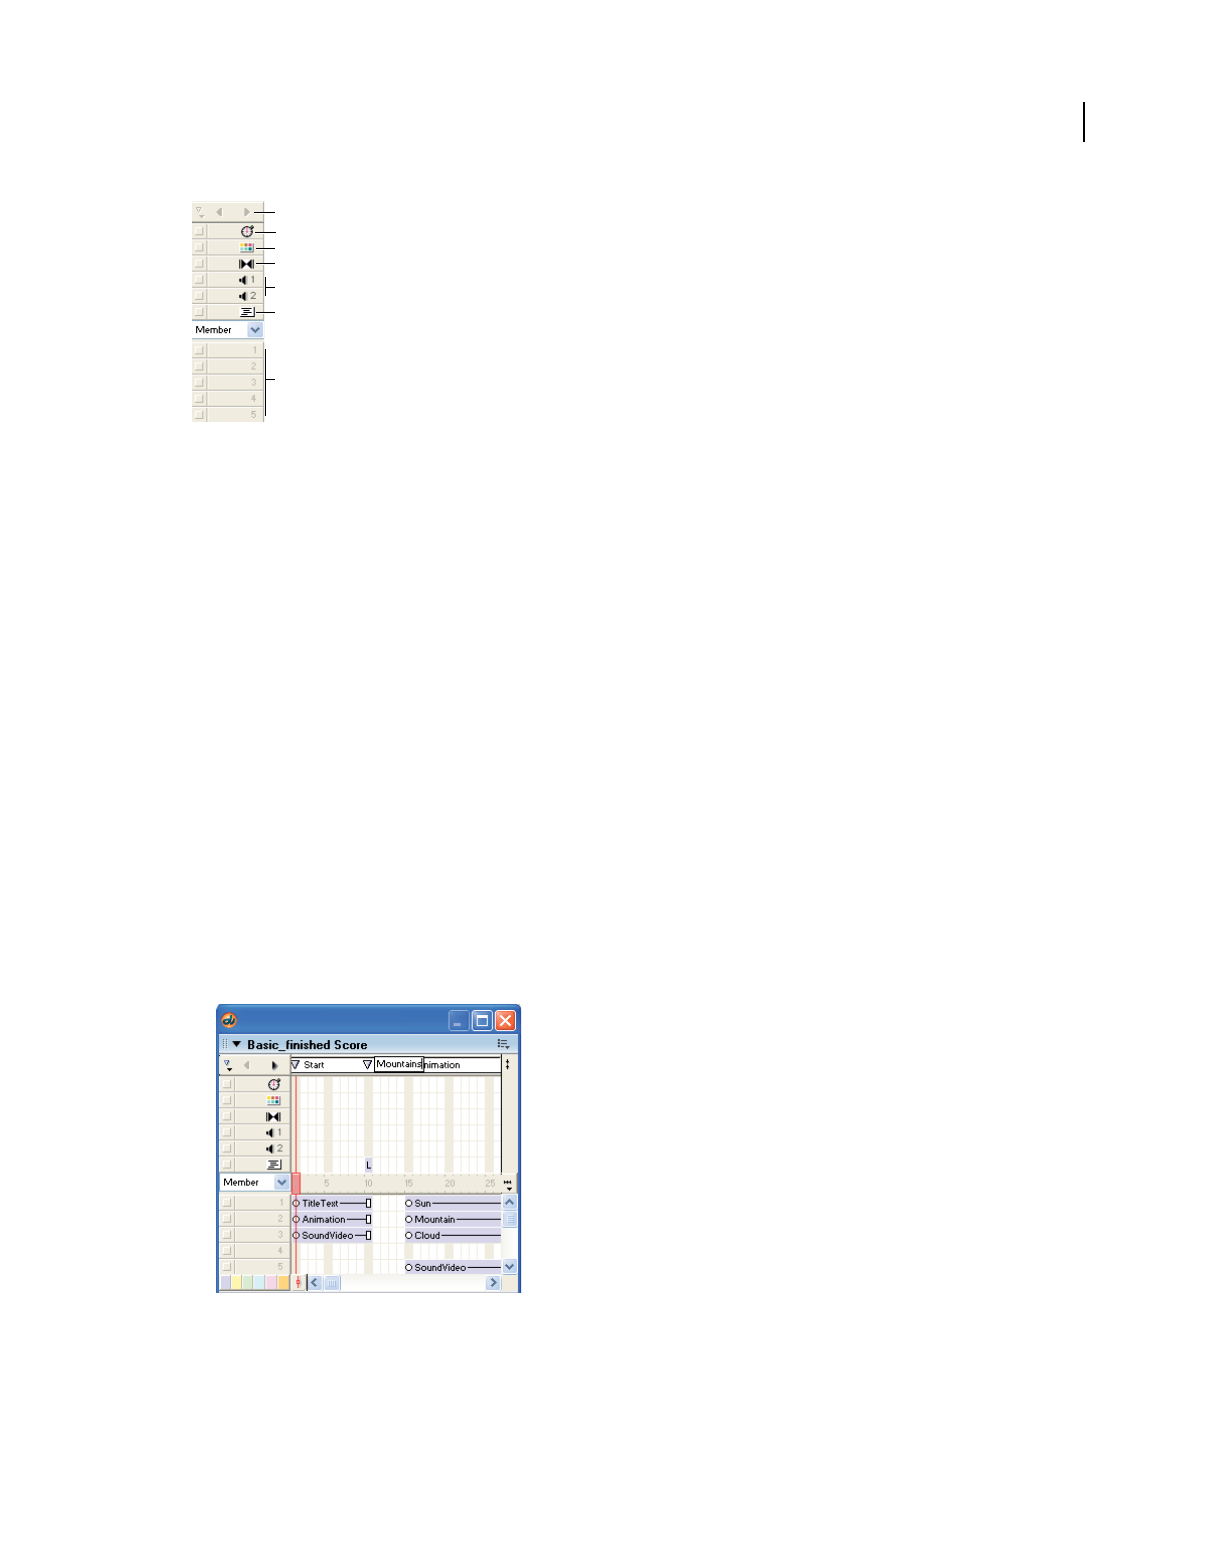
15
USING DIRECTOR 11.5
Workspace
Last updated 9/28/2011
Effects and sprite channels in the Score
A. Markers channel B. Tempo channel C. Palette channel D. Transition channel E. Sound channels F. Behavior channel G. Sprite channels
The rows of the Score contain channels. The columns of the Score contain frames. A frame in a movie represents a
single point in time, which is similar in theory to a frame in a celluloid film. Frame numbers are listed above the
columns in the Score.
A red vertical line, called the playhead, moves across the frames in the Score to indicate which point in time is currently
displayed on the Stage. You can also click any frame in the Score to move the playhead to that frame, and you can drag
the playhead backward or forward through frames.
Navigating the Score
The first channel in the Score is the marker channel. It contains markers that identify important points in time, such
as the beginning of a new scene. Markers help you make quick jumps to specific frames in a movie. If you need to jump
to a frame that is not marked with a marker, you can also move the playhead.
Create a new marker
1If the Score is not already displayed, select Window > Score.
2Display the frame that you want to mark with a marker.
3Directly above the frame that you want to mark, click the white bar in the Marker channel.
4Select the New Marker text, and type a new name for the marker.
A new marker on a frame in the Score
Jump to a marker in the Score
1On the Marker channel, open the Markers menu.
A
B
C
D
E
F
G
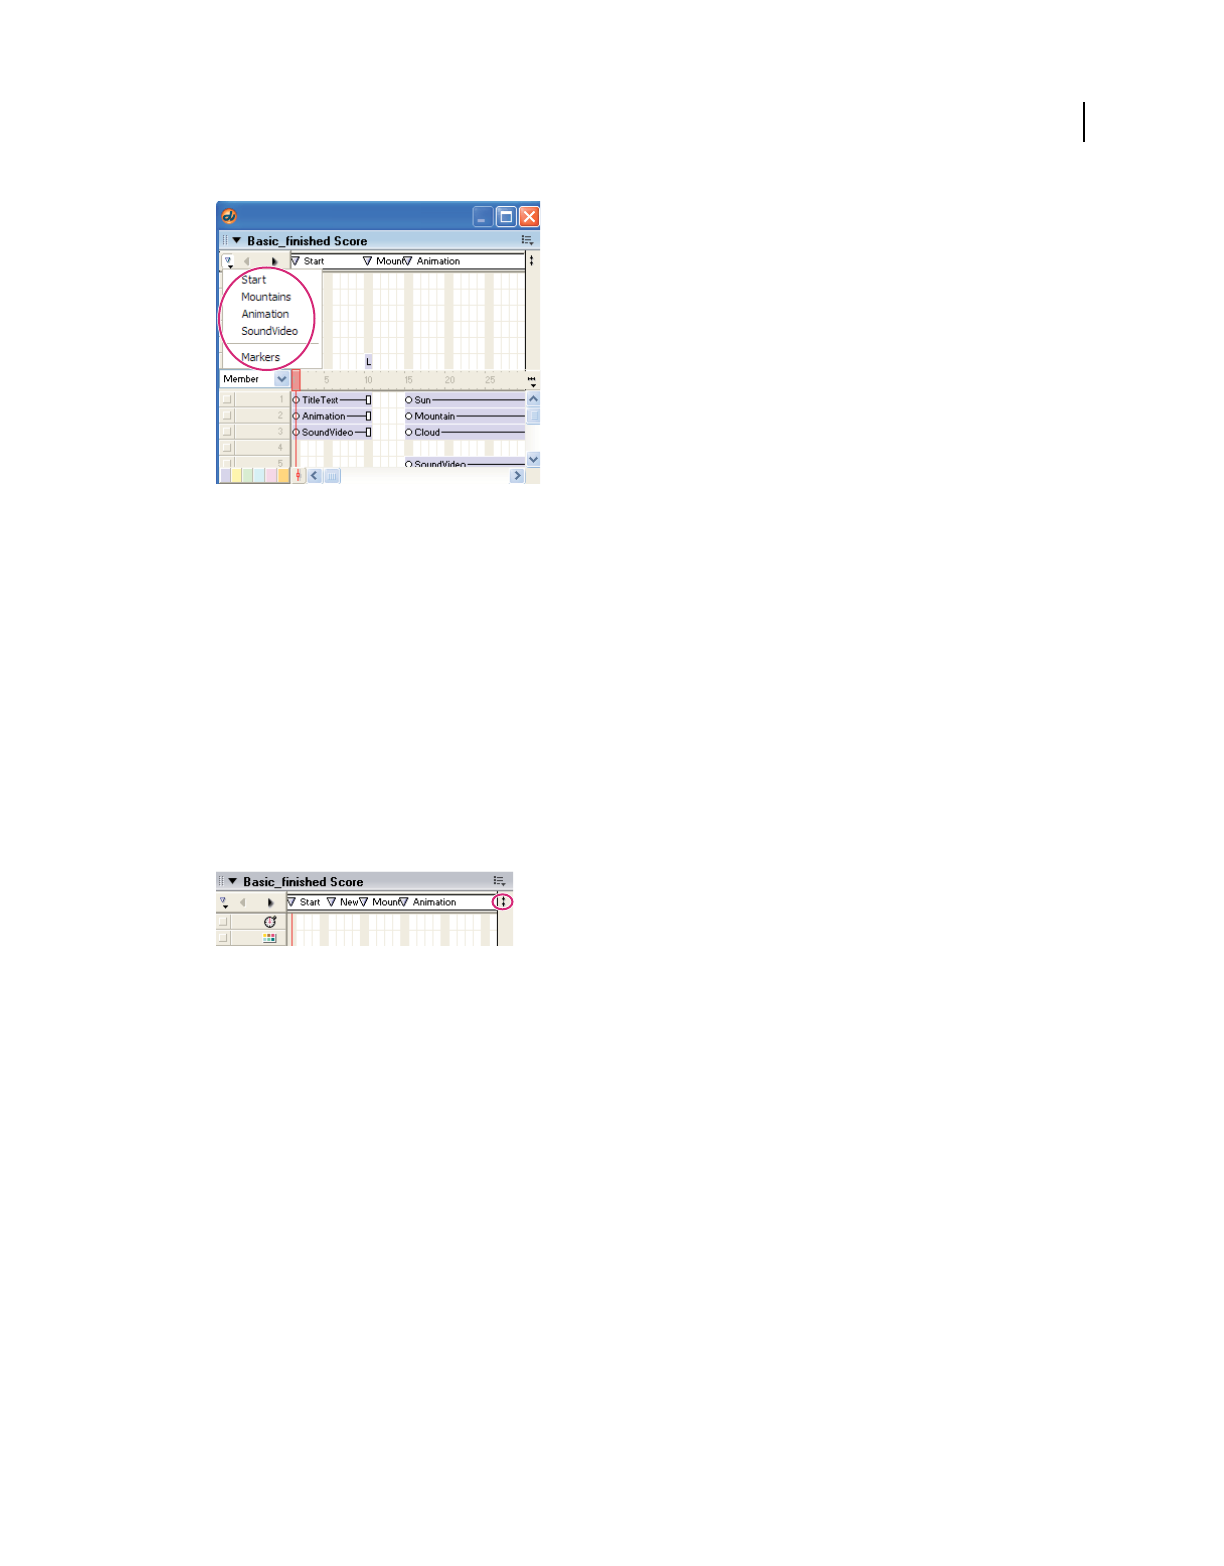
16
USING DIRECTOR 11.5
Workspace
Last updated 9/28/2011
Markers menu
2Select the name of the marker that you want to jump to.
Jump to a frame in the Score
❖Click the frame that you want to jump to.
Showing and hiding the effects channels
The effects channels—like tempo, transition, and sound—can be either displayed or hidden. When you begin working
with Director, you may want to have the effects channels shown at all times. As you become comfortable with Director,
you can hide the effects channels until you need to use them. Settings on the effects channels remain in place even when
the channels are hidden from view.
❖Click the Hide/Show Effects Channels button in the upper-right corner of the Score to change the display.
Hide/Show Effects Channels button
Setting the number of sprite channels
Although the Score can include as many as 1000 sprite channels, most movies use as few as possible to improve
performance in the authoring environment and during playback. Sprites in higher channels appear on the Stage in
front of sprites in lower channels. You use the Property inspector’s Movie tab to control the number of channels in the
Score for the current movie.
1Make sure that the Score is the active window.
2In the Property inspector, select the Movie tab.
3On the Movie tab, in the Channels text box, enter a number from 1 to 1000.
The numbered sprite channels in the Score increase or decrease, according to the number in the Channels text box.
Turning channels on and off
To hide the contents of any channel on the Stage, or to disable the contents if they are not visible sprites, use the button
to the left of the channel. When you turn off an effects channel, the channel’s data has no effect on the movie. You
should turn off Score channels when testing performance or working on complex overlapping animations.
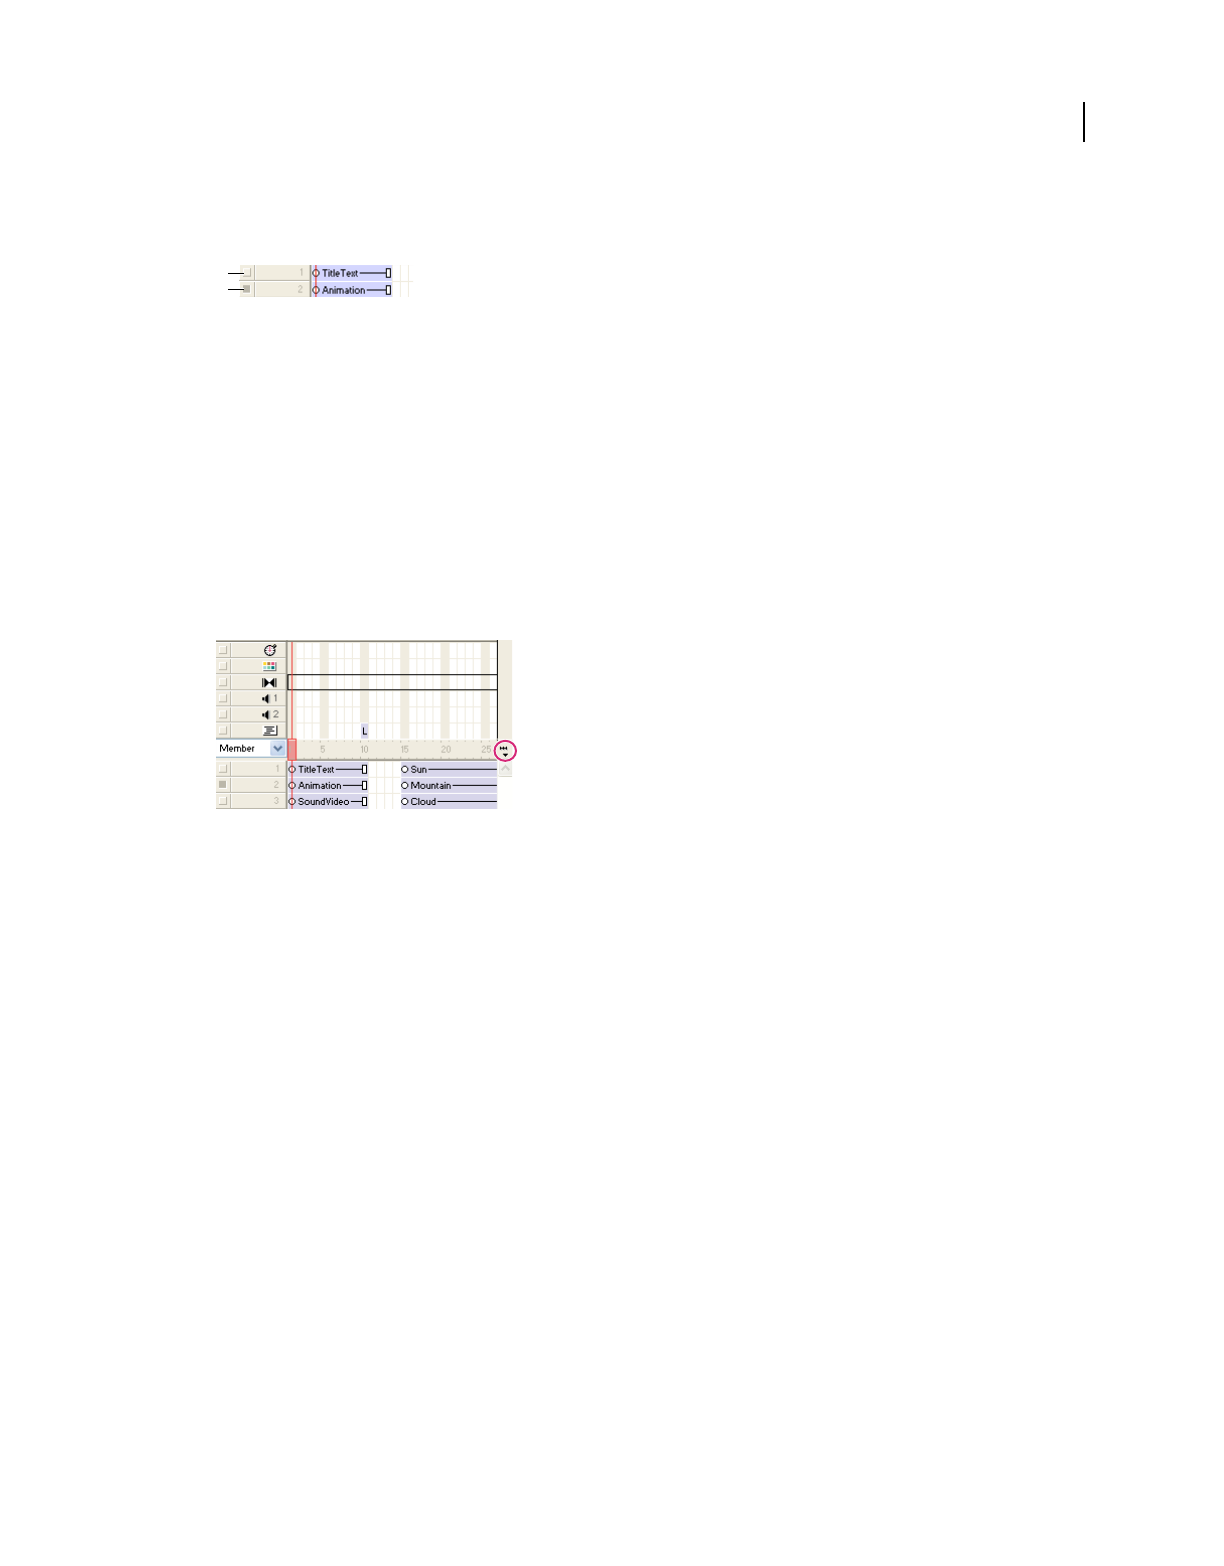
17
USING DIRECTOR 11.5
Workspace
Last updated 9/28/2011
Turn off a Score channel
❖Click the gray button to the left of the channel. A darkened button indicates that the channel is off.
A. This channel is on B. This channel is off
Turn multiple Score channels off and on
1Press and hold the Alt key (Windows) or the Option key (Mac).
2
Click a channel that is on to turn all of the other channels off, or click a channel that is off to turn the other channels on.
Changing your view of the Score
To narrow or widen the Score, you change the zoom percentage. Zooming in widens each frame, which lets you see
more data in a frame. Zooming out shows more frames in less space and is useful when moving large blocks of Score
data.
1On the right side of the Score, click the Zoom Menu button.
Zoom Menu button
2Select a size from the Zoom menu. Sizes are displayed as a percentage of full size.
Using the Control panel
The Control panel governs how movies play back in the authoring environment. You can jump to specific frames
within the movie, control how many frames per second play on the Stage, and change the volume at which sounds play.
You can also use the Control panel to start, stop, and rewind movies on the Stage.
Displaying the Control panel
Part of the Control panel, called the Control toolbar, is docked to the bottom of the Stage for easy access. To use all of
the buttons on the Control panel, you can also display the full Control panel as a floating window.
Display or hide the Control panel
❖Select Window > Control Panel.
Display or hide the Control toolbar
❖Select View > Control Toolbar.
A
B

18
USING DIRECTOR 11.5
Workspace
Last updated 9/28/2011
Controlling movie playback
As you build a movie, you may want to check your progress periodically by watching the movie on the Stage. You can
use the Control panel for this purpose.
Start, stop, or rewind a movie
1If the Control panel is not already displayed, select Window > Control Panel.
2On the Control panel, click the Rewind, Stop, or Play button. These three buttons appear on the far left side of the
Control panel.
Change the volume at which sounds play
❖On the Control panel, click the Volume button, and then select a volume level from the menu.
Movie playback options in the floating Control panel
A. Volume button B. Rewind, Stop, and Play buttons
Navigating frames in a movie
As you build a movie, you sometimes need to check individual frames or examine transitions from one frame to the
next. The Control panel allows you to check these details.
Step through a movie one frame at a time
❖On the Control panel, click the Step Forward button.
Go to a specific frame in a movie
❖Enter a frame number in the frame counter, and press Enter (Windows) or Return (Mac).
Frame navigation options in the floating Control panel
A. Step Forward button B. Frame counter
Using the Cast window
The Cast window contains the cast members of your movie. You can use the Cast window to create or import new cast
members, to view existing cast members, and to control the properties of each cast member.
As you work in Director, expect to use two types of cast members:
•Cast members can be the media elements of your movie, such as sounds, text, graphics, animation, and video. These
cast members are placed on the Stage as sprites.
•Some cast members may appear in the Score but not on the Stage. These cast members include scripts, palettes,
fonts, and transitions, which you can use in the effects channels on the Score.
A
B
BA
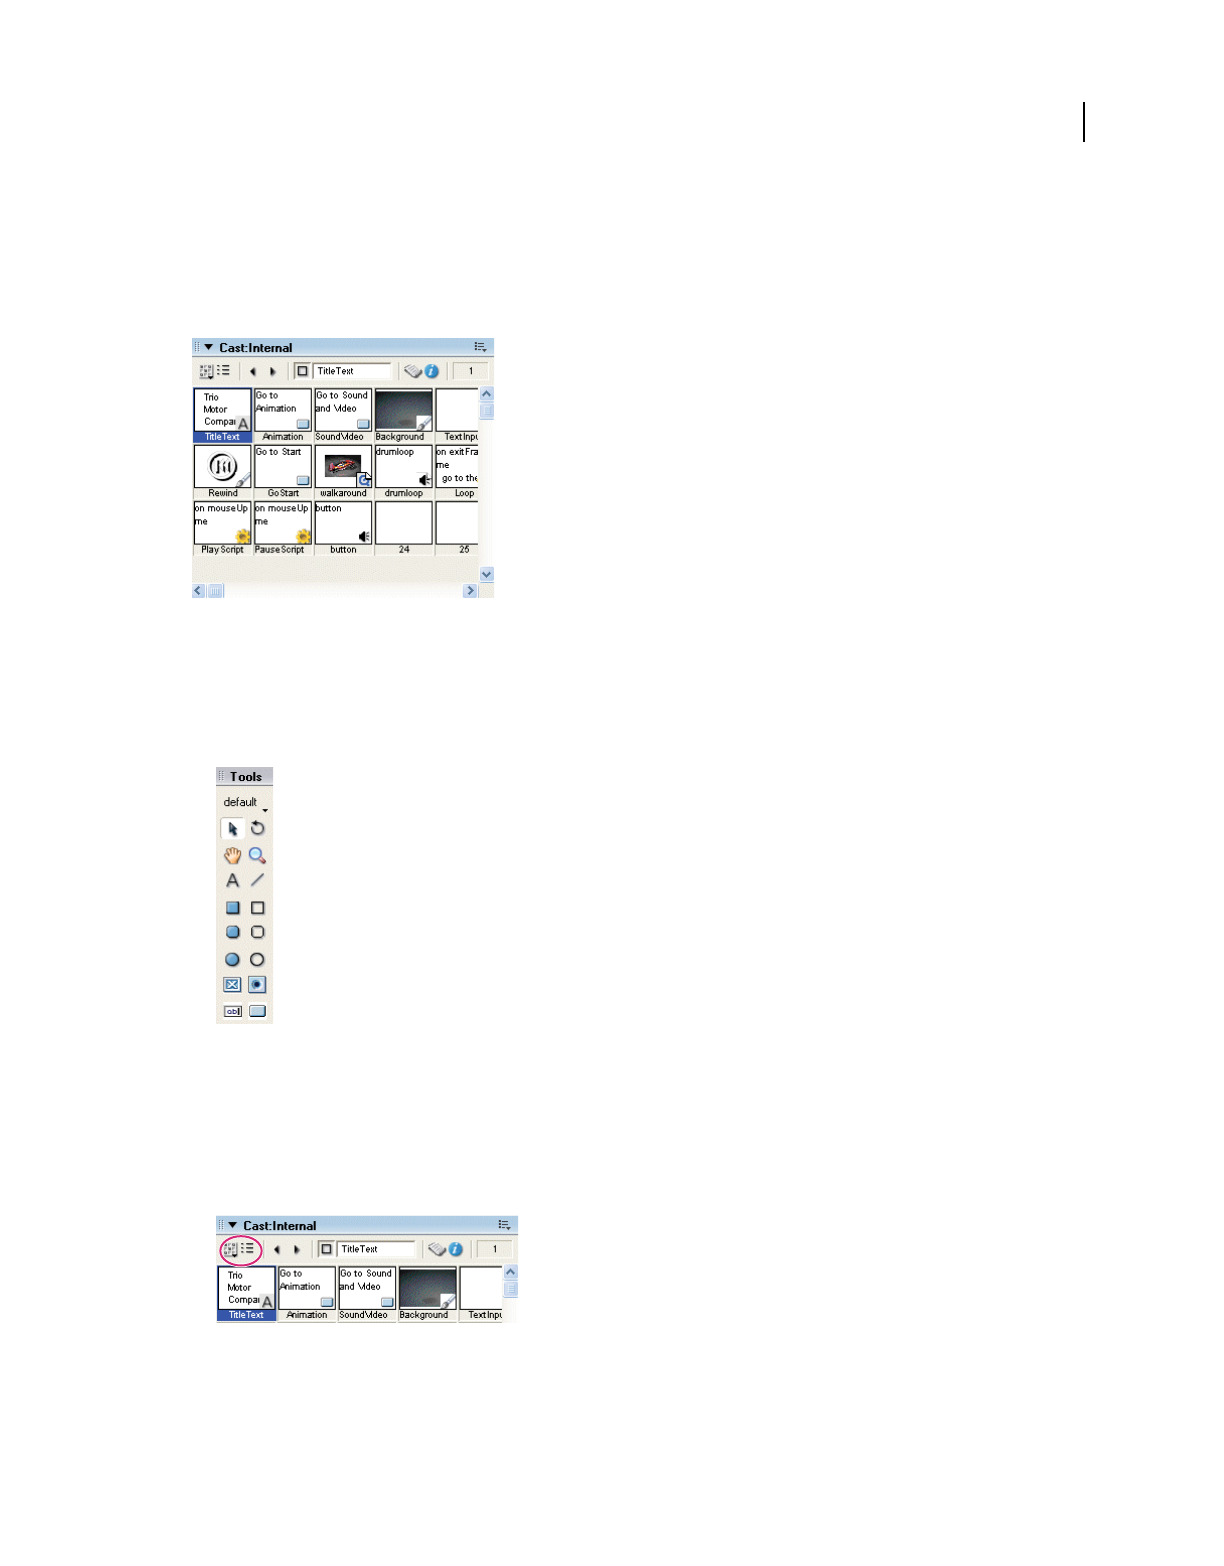
19
USING DIRECTOR 11.5
Workspace
Last updated 9/28/2011
In the Cast window, you can create or import new cast members to appear as sprites on the Stage. Creating a Director
movie consists largely of defining sprites’ properties, where they appear, when they appear in the movie, and how they
behave. Different sprites can be created from a single cast member. Each sprite can have its own values for different
properties, and most changes to these properties do not affect the cast member. Most changes to a cast member,
however, will change the sprites created from that cast member.
The Cast window filled with cast members
Create a new cast member
1If the Cast window is not already displayed, select Window > Cast.
2On the Tool palette, select a text, drawing, or control button.
Text, drawing, and control buttons
3Click the Stage to place the new cast member in the Cast window.
Import a cast member from an existing media file
1If the Cast window is not already in thumbnail view, click the Cast View Style button.
Cast View Style button
2In thumbnail view in the Cast window, right-click an empty cast member, and select Import.
3Navigate to a media file, select the file, and click the Import button.
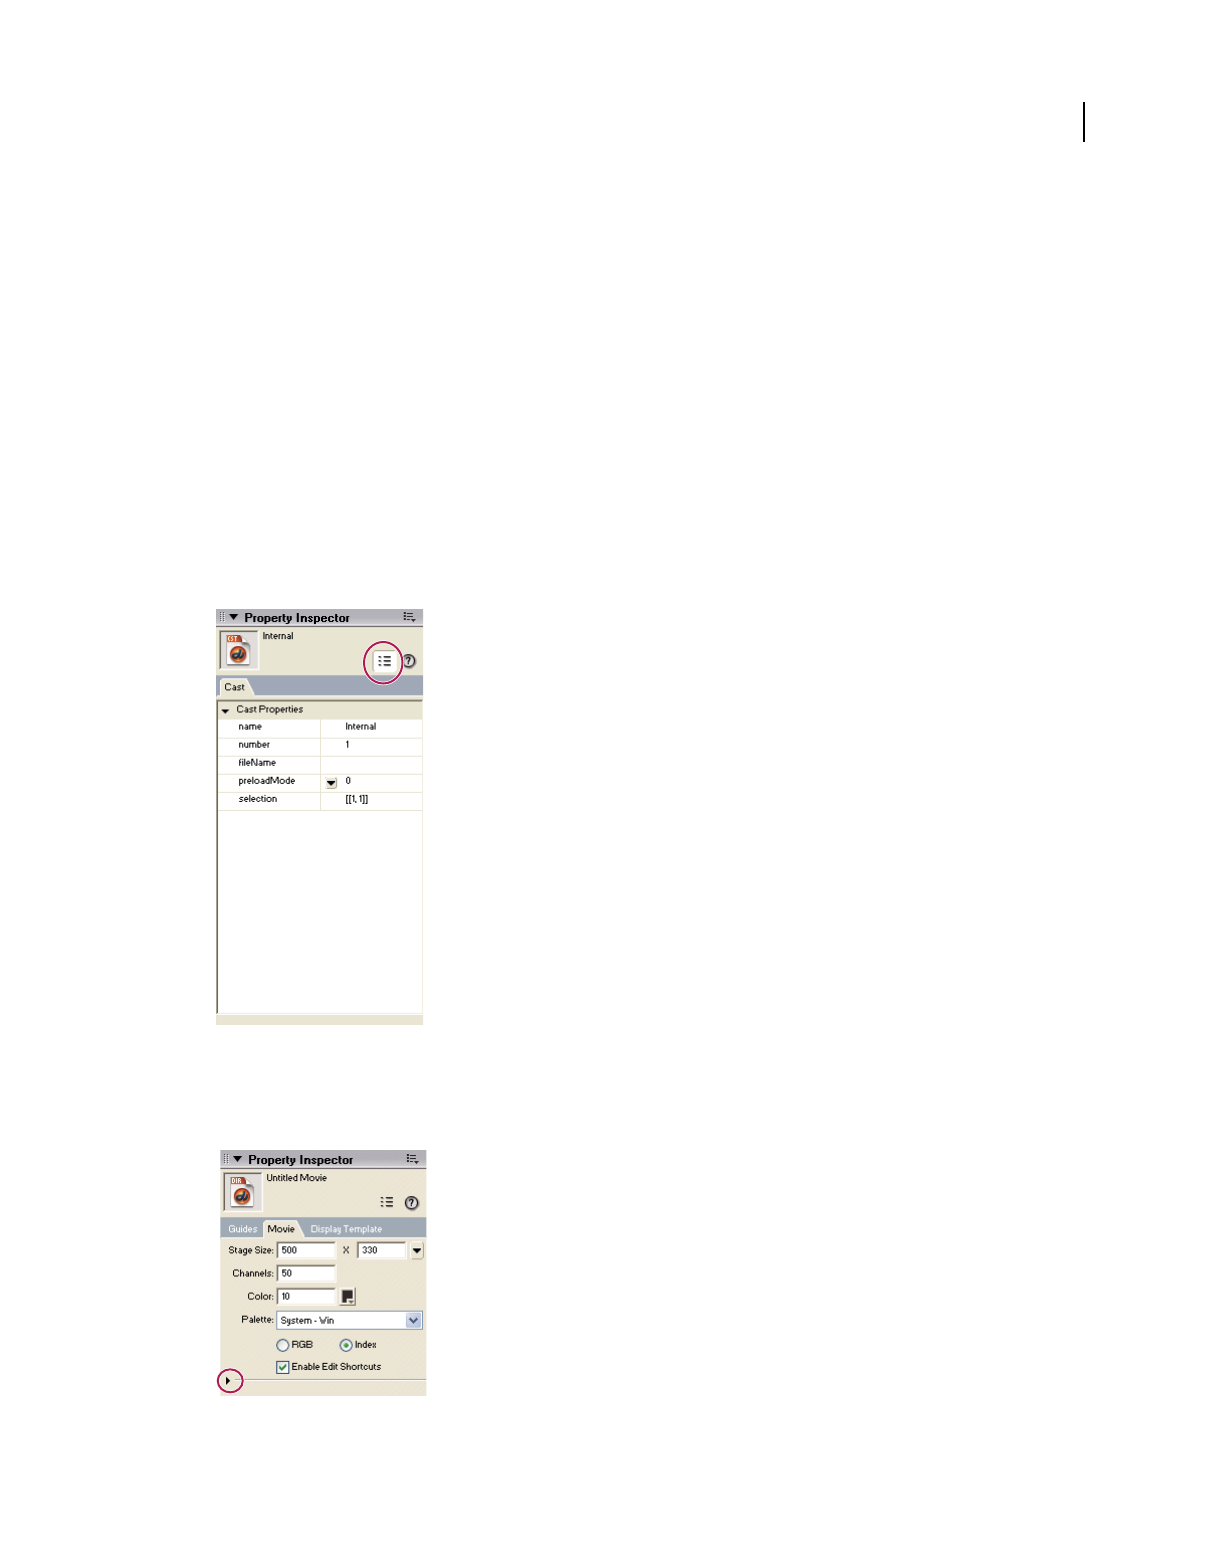
20
USING DIRECTOR 11.5
Workspace
Last updated 9/28/2011
Using the Property inspector
Every cast member and sprite in a movie has properties. You can view and change these properties by using the
Property inspector. In addition to cast members and sprites, the entire movie also has a set of properties. The Property
inspector displays a Movie tab, where you can view and change these properties.
Controlling your view of the Property inspector
Like other windows in Director, the Property inspector allows you to control its appearance. You can choose between
a list view and a graphical view. You can also save space by showing only the most frequently used options in the
Property inspector, or you can show the full set of options.
Switch between a list view and a graphical view
1If the Property inspector is not already displayed, select Window > Property Inspector.
2Near the top of the Property inspector, click the List View Mode button.
List View Mode button
Show more or less information in the Property inspector
❖Click the expander arrow in the Property inspector.
Expander arrow
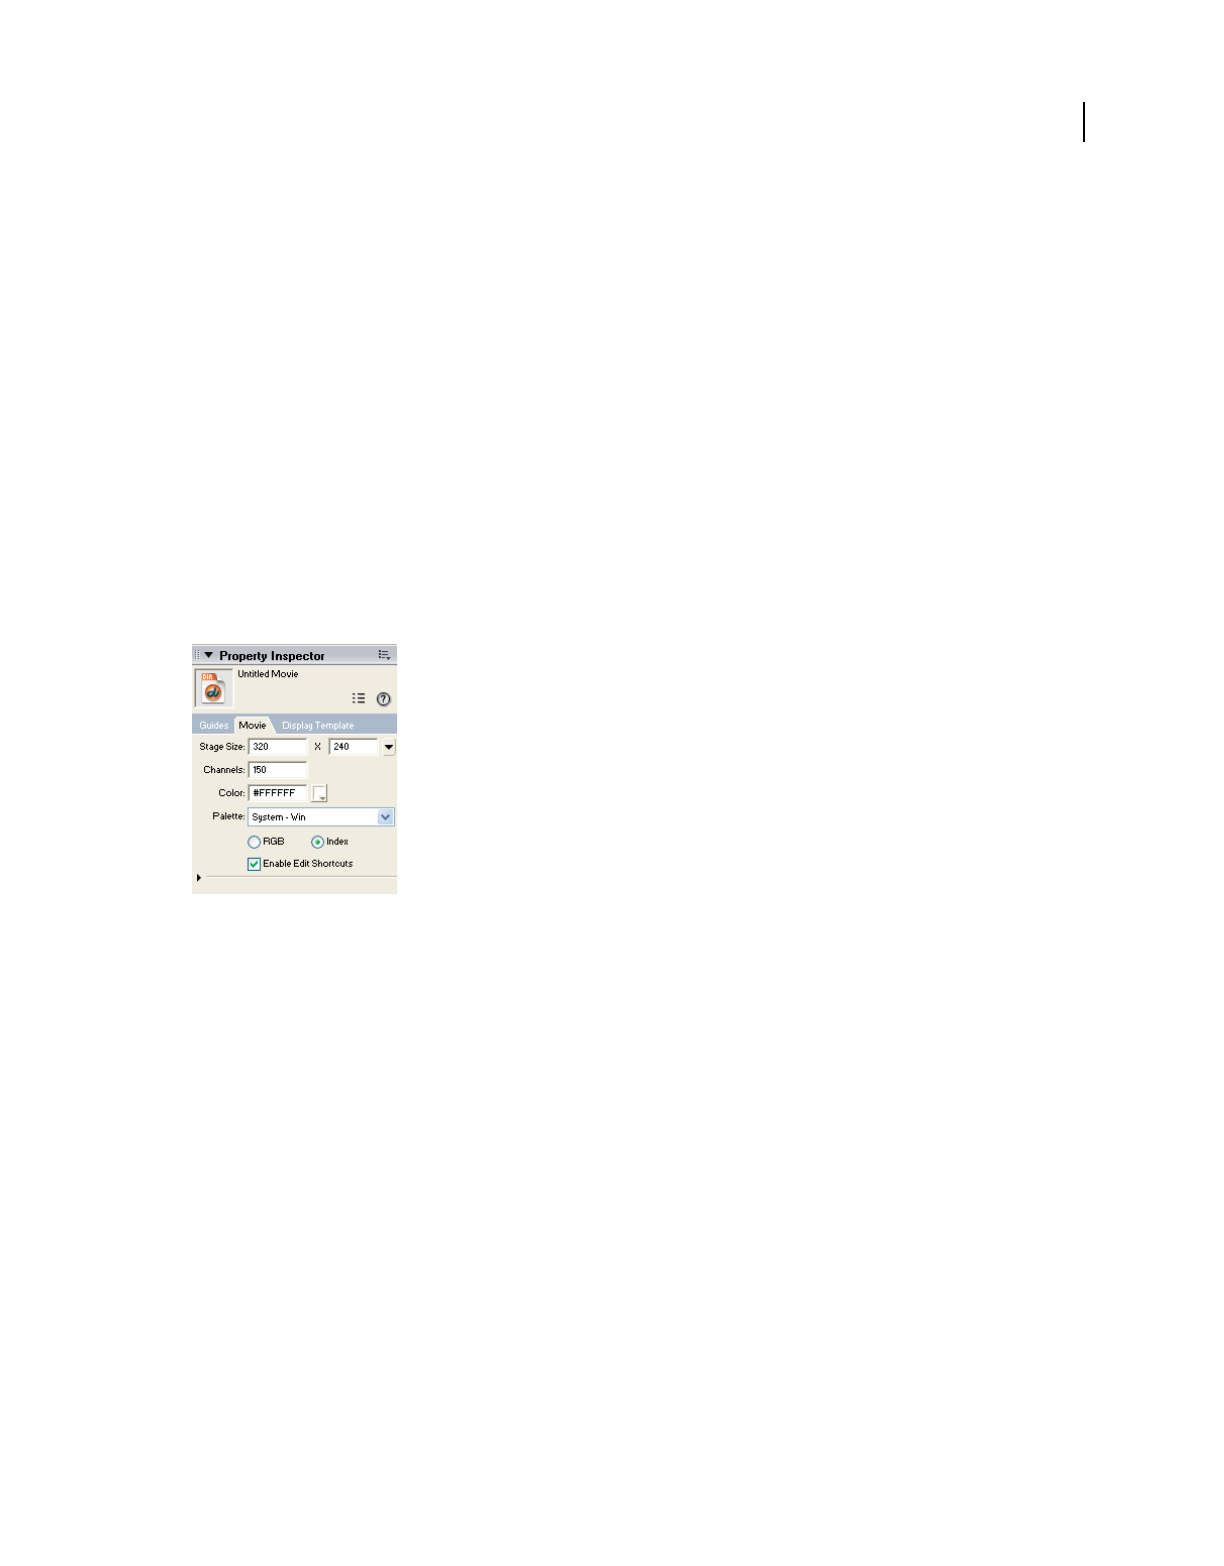
21
USING DIRECTOR 11.5
Workspace
Last updated 9/28/2011
Setting cast member and sprite properties
Each time you select a sprite, cast member, or multiple sprites and cast members, your view of the Property inspector
changes. New options and tabs appear, depending on what you have selected. If you select multiple sprites and cast
members, the Property inspector displays only the properties that apply to all the selected items.
1Do one of the following:
•On the Stage or in the Score, select a sprite.
•In the Cast window, select a cast member.
2In the Property inspector, change one of the properties.
3Click the Stage to enter your selection. Then look on the Stage to see the effect of the new property.
Setting movie properties
On the Movie tab, you can control how colors are defined, the size and location of the Stage, the number of channels
in the Score, copyright information, and font mapping. The Movie tab is available whenever an item on the Stage or
in the Score is selected. You do not have access to the Movie tab when a cast member is selected.
The Movie tab in the Property inspector
1Make sure that the Property inspector is in graphical view, and select the Movie tab.
2In the Stage Size row, select a preset value or enter values in the Width and Height text boxes to set the size of the
Stage.
3In the Channels text box, specify the number of channels in the Score.
4In the Color text box, enter an RGB value for the color of the Stage, or double-click the color icon and select a color.
5In the Palette box, select a color palette for the movie. This palette remains selected until Director encounters a
different palette setting in the Palette channel.
6To determine how the movie assigns colors, select either RGB or Index.
RGB Makes the movie assign all color values as absolute RGB values.
Index Makes the movie assign color according to its position in the current palette.
Enable Editing Shortcuts Enables or disables the ability to use standard editing shortcuts for cut, copy and paste
operations with editable text and field members on the Stage
7In the Preferred 3D Renderer box, select a default renderer used to draw 3D sprites within the movie, if that
renderer is available on the client computer.
OpenGL Specifies the openGL drivers for hardware acceleration that work with Mac and Windows platforms.
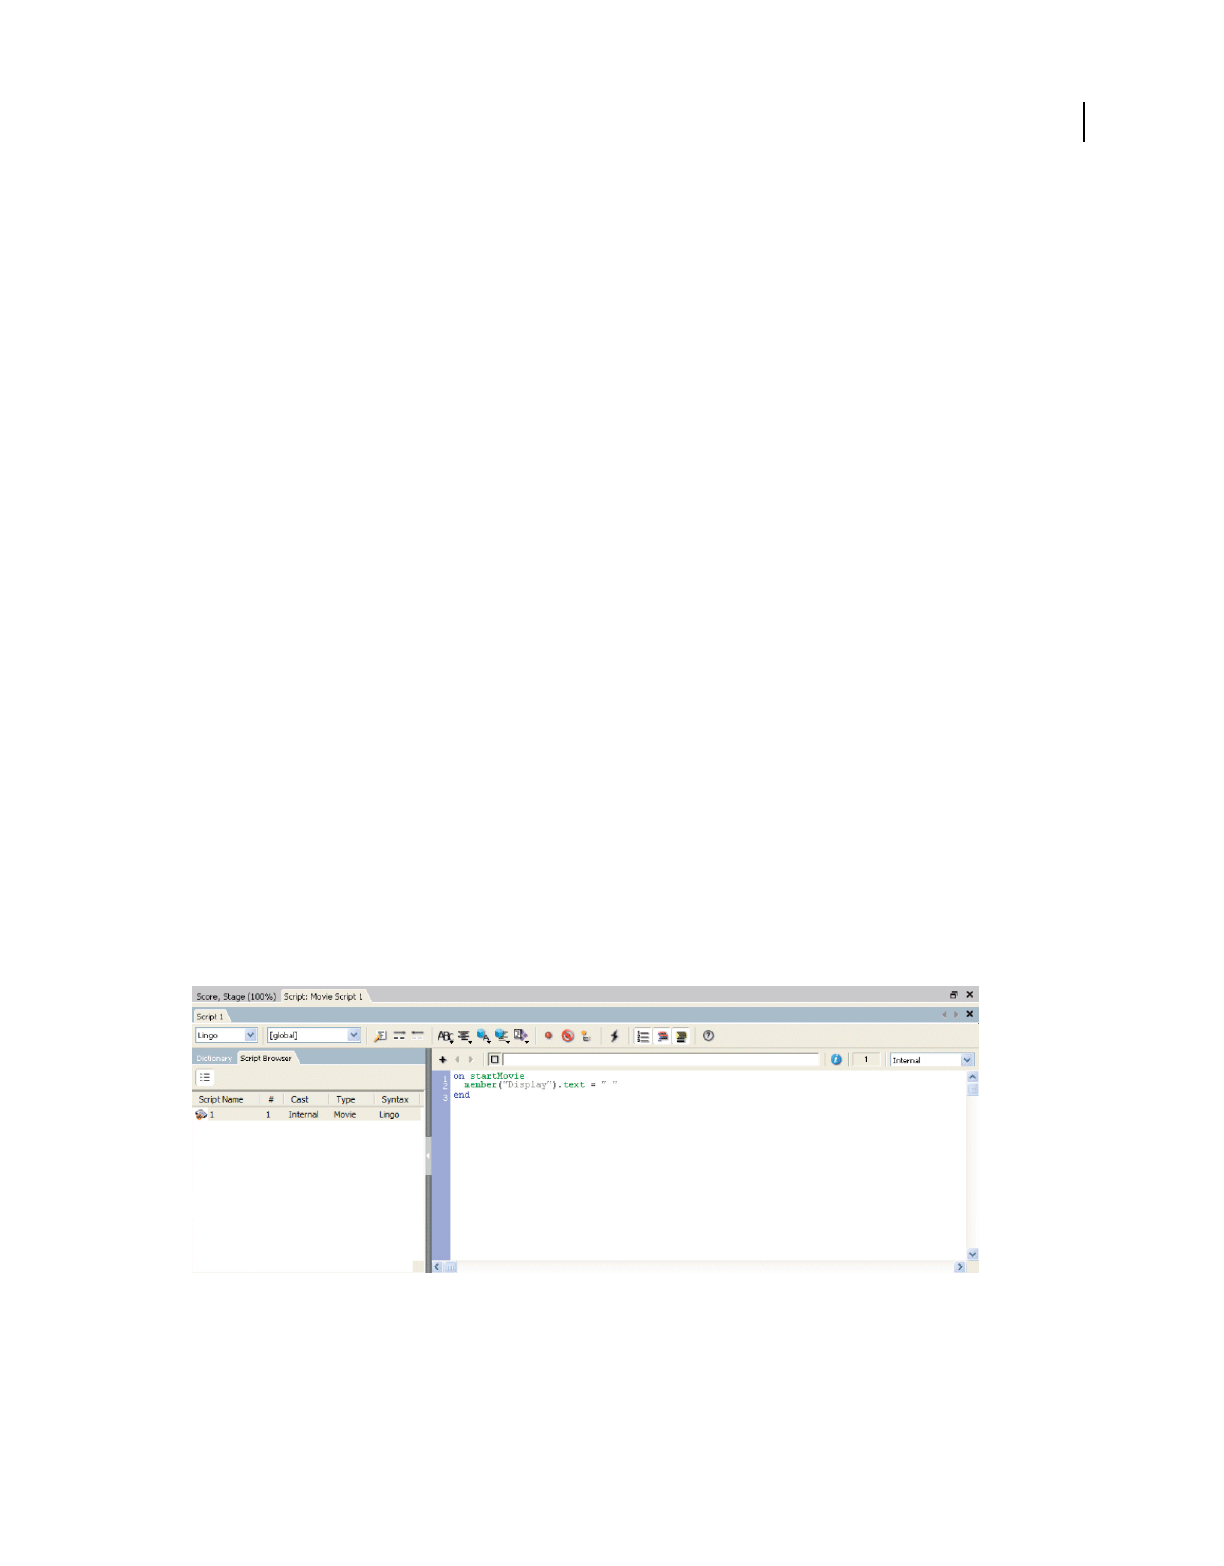
22
USING DIRECTOR 11.5
Workspace
Last updated 9/28/2011
#DirectX9.0 Specifies the DirectX® 9 drivers for hardware acceleration that work only with Windows platforms.
#auto sets the renderer to DirectX 9. In MacTel, only #OpenGL renderer is available.
DirectX 7.0 Specifies the DirectX 7 drivers for hardware acceleration that work only with Windows platforms.
DirectX 5.2 Specifies the DirectX 5.2 drivers for hardware acceleration that work only with Windows platforms.
Software Specifies the Director built-in software renderer that works with Mac and Windows platforms.
Auto Specifies that the most suitable renderer should be selected. This option is the default value for this property.
Note: If the preferred renderer is not available on the client computer, the movie selects the most suitable available
renderer.
8In the About and Copyright boxes, enter copyright and other information about the movie.
This information is important if your movie will be downloaded from the Internet and saved on a user’s system.
9To save the current font map settings in a text file named Fontmap.txt, click Save. To load the font mapping
assignments specified in the selected font map file, click Load.
Note: More advanced movie properties are available on the Display Template tab, next to the Movie tab in the Property
inspector. For example, you can control the location of the Stage on a user’s screen by using the Display Template tab in
the Property inspector.
Using the Script window
The Script window in Director allows you to add advanced, scripting-based interactivity to movies. In the Script
window, you can code in either Lingo or JavaScript™ syntax. Lingo is the traditional scripting language of Director. Java
Script syntax was recently introduced to support multimedia developers who prefer working with Java Script.
By scripting in the Script window, you can accomplish many of the same tasks that you can in the graphical interface
of Director—such as moving sprites on the Stage or playing sounds. But much of the usefulness of scripting is in the
flexibility that it brings to a movie. Instead of playing a series of frames exactly as the Score dictates, a movie can have
scripts that control frame play in response to specific conditions and events.
The Script window
Here are a few examples of what you can do with scripts:
•Control the movement of a sprite based on whether the user clicks a specific button.
•Control when a sound plays, based on how much of the sound has already streamed from the Internet.
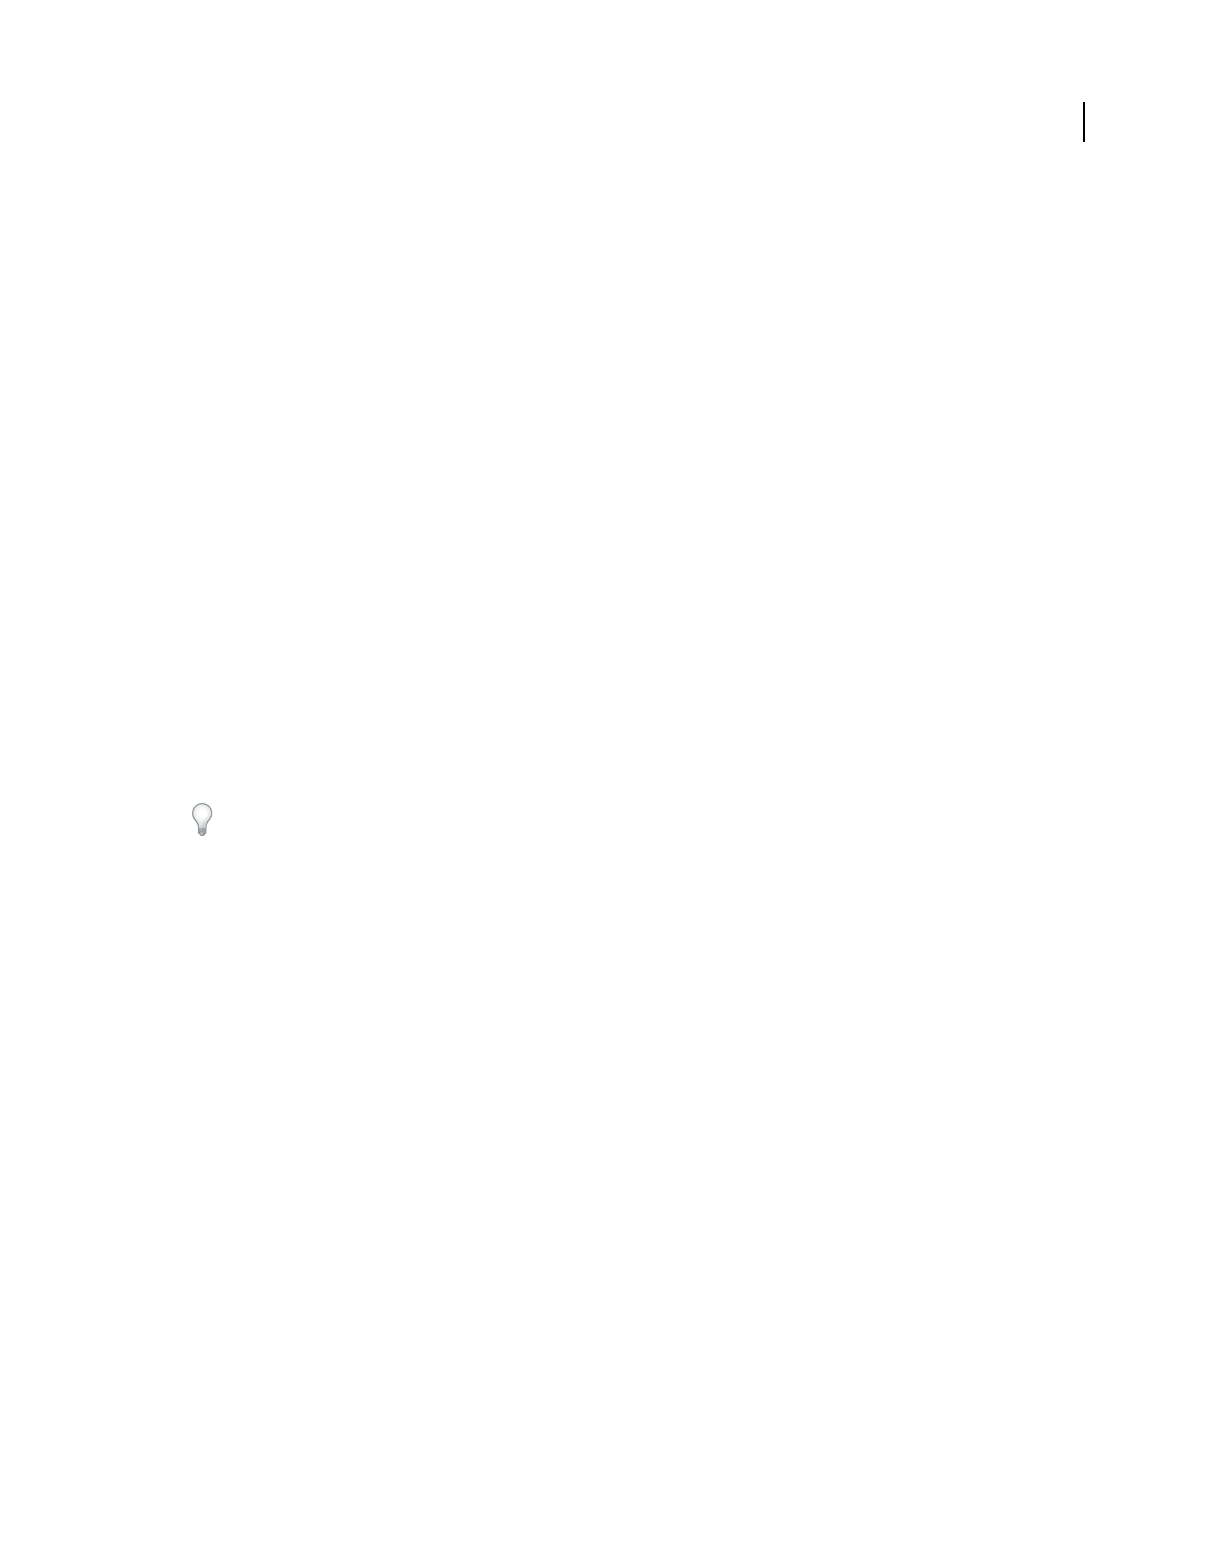
23
USING DIRECTOR 11.5
Workspace
Last updated 9/28/2011
•Create animation, stream movies from the web, perform navigation, format text, and respond to user actions with
the keyboard and mouse.
•Create and manage data arrays, perform mathematical operations, and combine strings of text.
For more complete information on scripting in Director, see the Scripting Reference topics in the Director Help Panel.
Note: In addition to the Script window, where you can create your own scripts, Director includes a set of prepackaged
instructions, called behaviors, that you can simply drag to sprites and frames. Behaviors let you add script-based
interactivity without writing scripts. For more information on behaviors, see “Behaviors” on page 279.
Opening and closing multiple script windows
Multiple scripts can be opened as different tabs in the script window. Because the Script window can accommodate
only a fixed number of tabs, some of the tabs get hidden when the number of tabs exceed the space limit. You can
navigate to the hidden tabs using the > and < Browse Script tab icons.
When you open multiple Script windows, only the first instance of the Script window contains the Explorer panel. To
display the Explorer panel in the other windows, double-click the Arrow icon in the splitter bar between the script
editor and the Explorer panel.
Open multiple Script windows
Do one of the following:
•From the Script window select Windows > New script window.
•Press Alt+w+n.
You can use the Alt+w+n shortcut key to open additional instances of any active window.
Close a Script tab
1Click the tab of the script window that you want to close.
2Do one of the following:
•Click the X button corresponding to the tab.
•Right-click the tab area, and select Close <script type:script name>.
Using the Message window
The Message window supports testing and debugging in Director. These features are especially important as you add
script-based interactivity to your movies. Like the Script window, the Message window offers both Lingo and Java
Script syntax. The Message window offers two modes—a standard mode and a trace mode.
•In standard mode, you can enter script into the Input pane to test the result before you add it to the movie. In this
mode, the Message window helps you test scripting results immediately, instead of having to play the whole movie
to check the results.
•In trace mode, you can play a movie and watch the Output pane to see script as it runs in the movie. In this mode,
the Message window helps you find the source of bugs in your movie by showing you what script is running when
an error occurs.
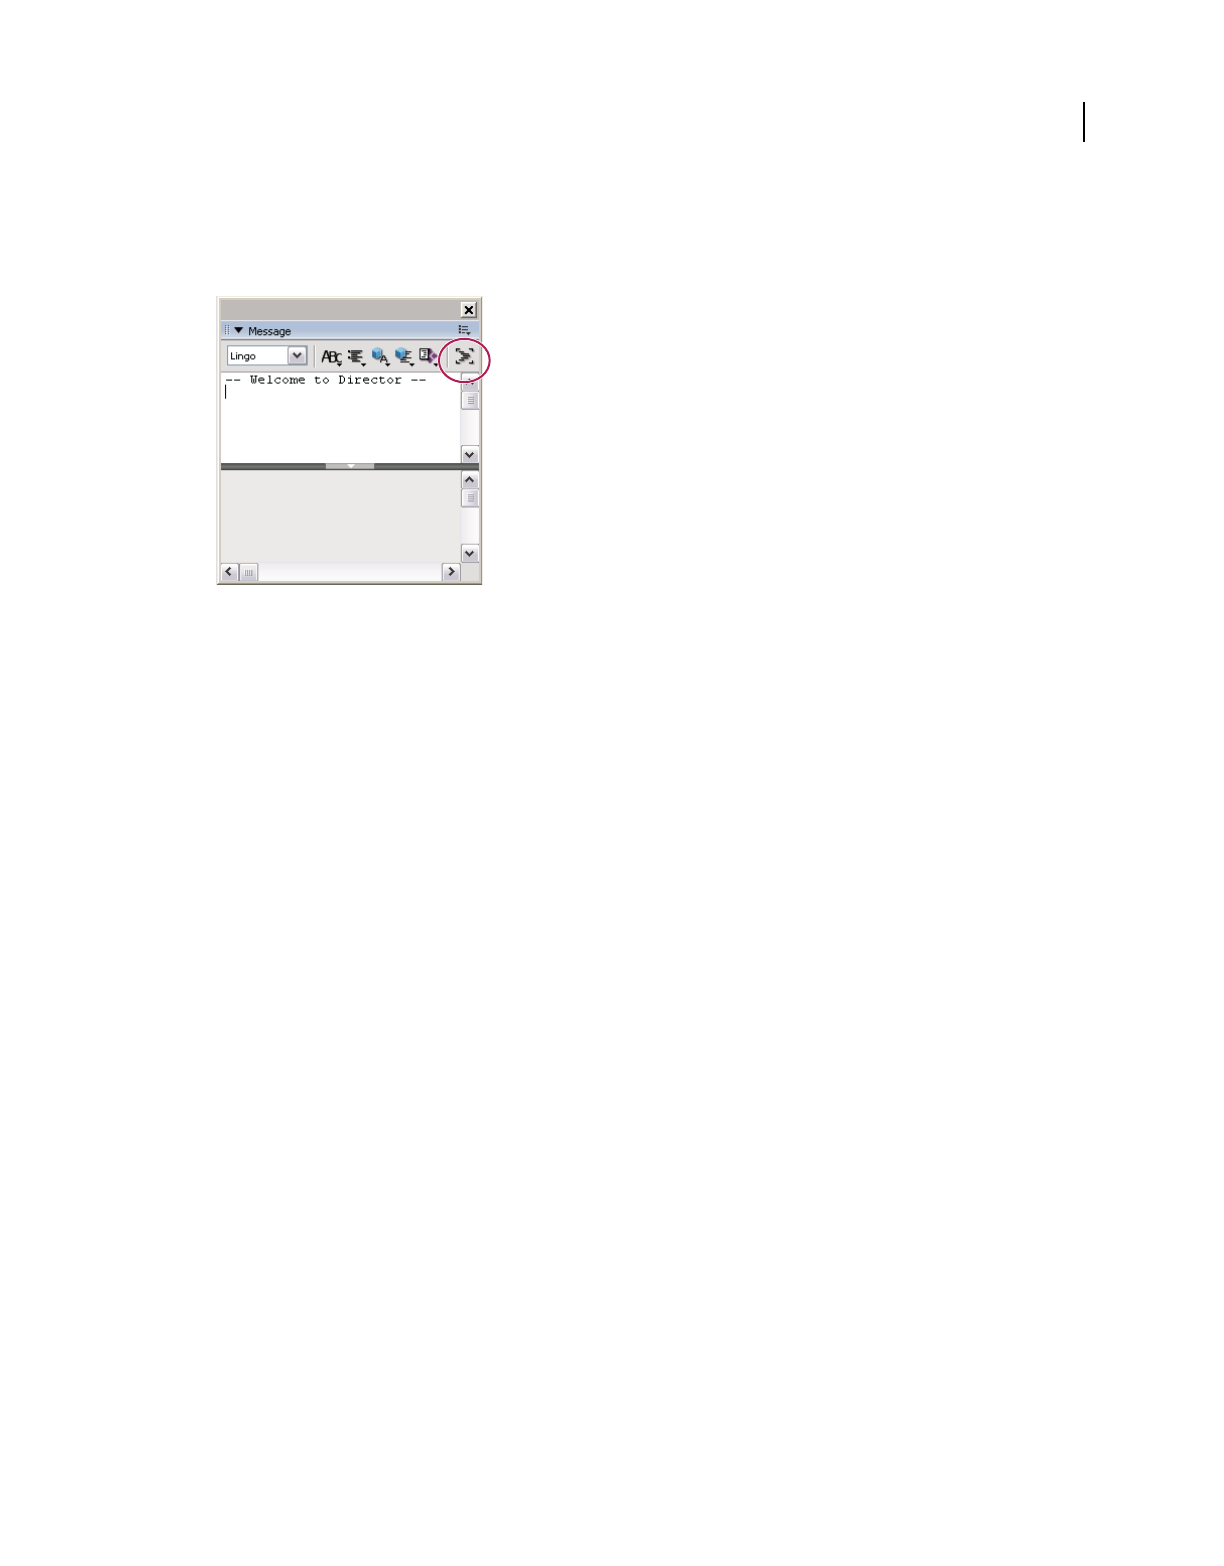
24
USING DIRECTOR 11.5
Workspace
Last updated 9/28/2011
Switch between standard and trace modes
1If the Message window is not already displayed, select Window > Message.
2In the Message window, click the Trace button.
Trace button
When the Trace button is indented, the Message window is in trace mode.
For more information on how to use the Message window for testing and debugging, see the Scripting Reference topics
in the Director Help Panel.
Customizing your workspace
In Director, some windows (panels) can be grouped together into a tabbed set of panels called a panel group. Director
comes preconfigured with several default panel groups, but you can customize panel groups to maximize your
productivity. Whether you use the defaults or create customized panel groups, you can display or hide panel groups,
just as you do with standard windows.
To make the most efficient use of your workspace, Director also supports default and customized docking of panel
groups. You can dock panel groups to each other or to one of the docking channels. (Docking channels are available
only in Windows.) After you customize the panel groups, you can save the workspace layout as a panel set. With panel
sets, you can switch between different layouts to suit different types of work.
Most panels or panel groups have a header bar that displays the name and includes the following features: an expander
arrow to collapse and expand the panel or panel group, a gripper to dock and undock the panel or panel group, and an
Options menu for managing the panel or panel group.
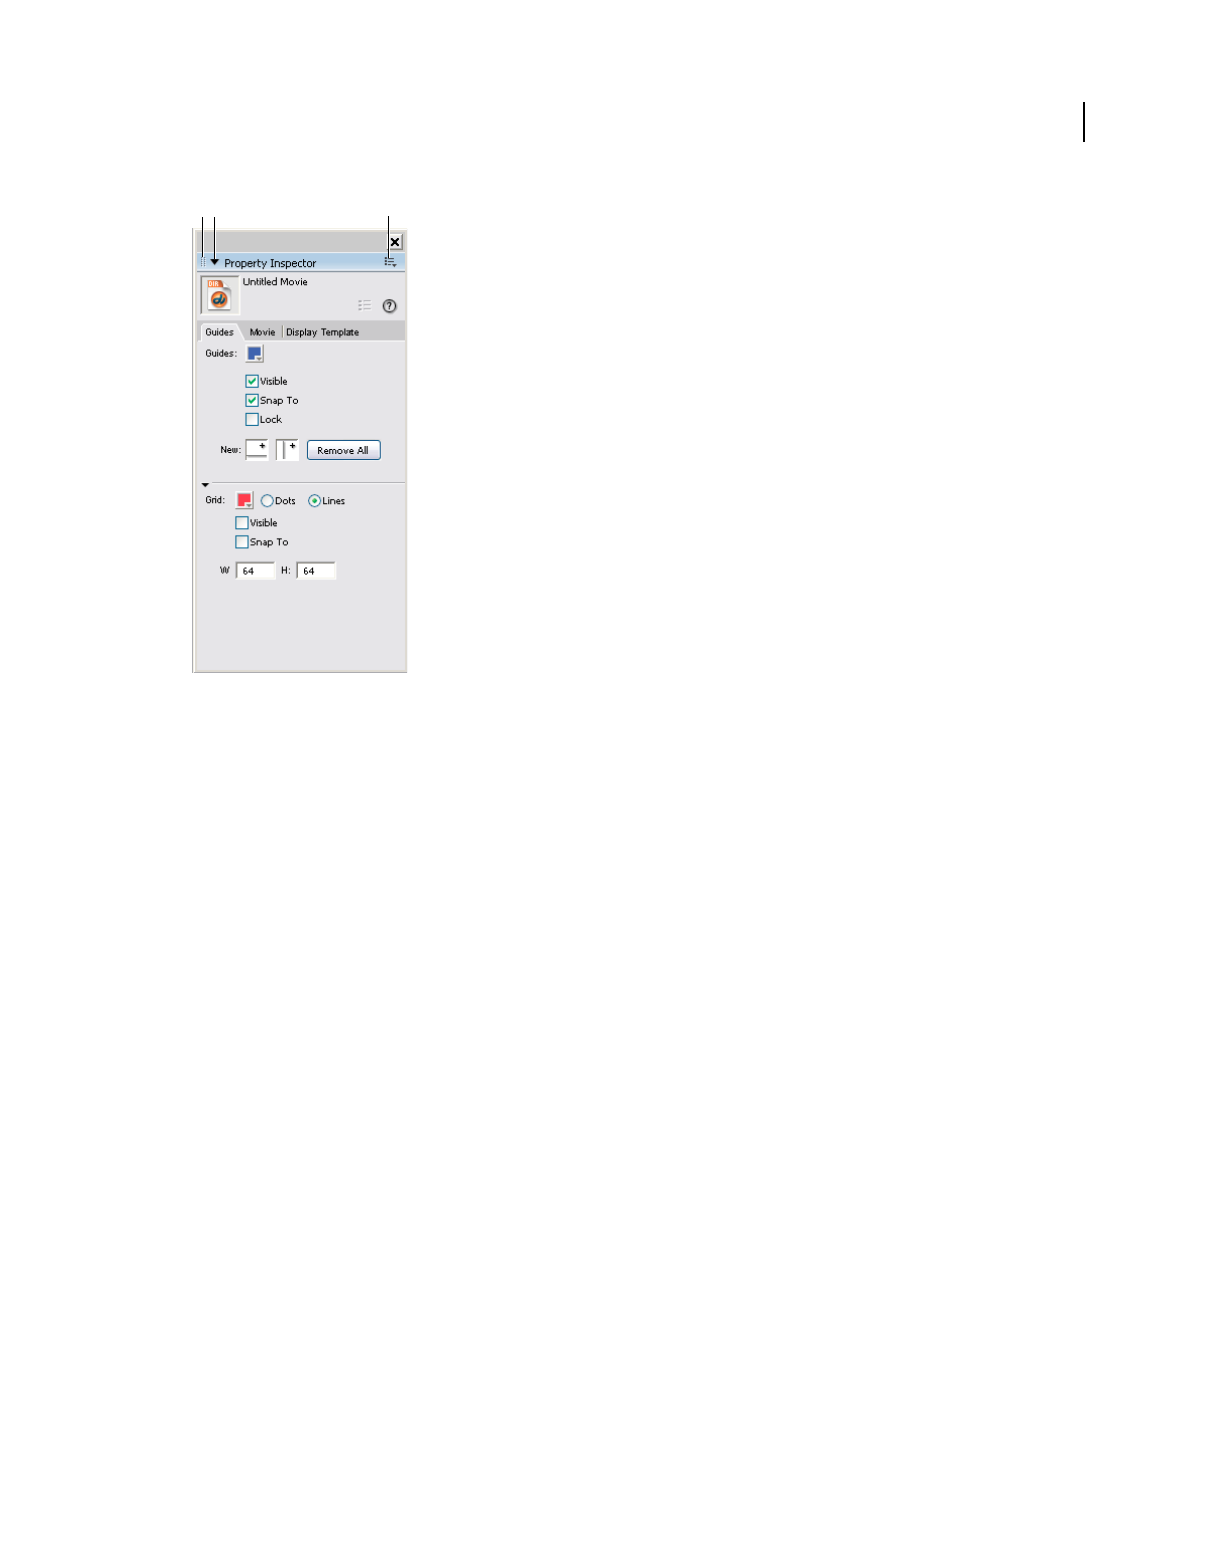
25
USING DIRECTOR 11.5
Workspace
Last updated 9/28/2011
Features in the header bar
A. Gripper to dock and undock panels or panel groups B. Expander arrow to collapse and expand panels or panel groups C. Options menu
button
Customizing panel groups
Director comes preconfigured with several default panel groups. Some of these panel groups contain multiple panels
on tabs. For example, the Design panel group has three tabs—Text Inspector, Align, and Tweak. Other panel groups,
such as the Property inspector, contain only one panel.
You can use the default panel groups or customize panel groups to fit your preferences. To customize, you can move
a tab from one panel group to another, or you can separate a tab and create a new stand-alone panel.
Panels that you can combine in a tabbed panel group are restricted by window type and functionality. The following
combinations are allowed:
•Casts with other casts
•Media editor windows with other media editors (for example, Vector Shape with Shockwave® 3D)
•Script windows with media editors (for example, Script with Paint)
•Tool windows with other tool windows (for example, Text inspector with Memory inspector windows)
You cannot place the Property inspector, Tool palette, Stage, Score, or Message window in a tabbed panel group. They
must remain stand-alone panels.
Move a panel to a different panel group
1Select a stand-alone panel or a panel within a panel group.
2From the Options menu, select Group [panel name] With, where [panel name] is the name of the panel that you
selected.
AB C
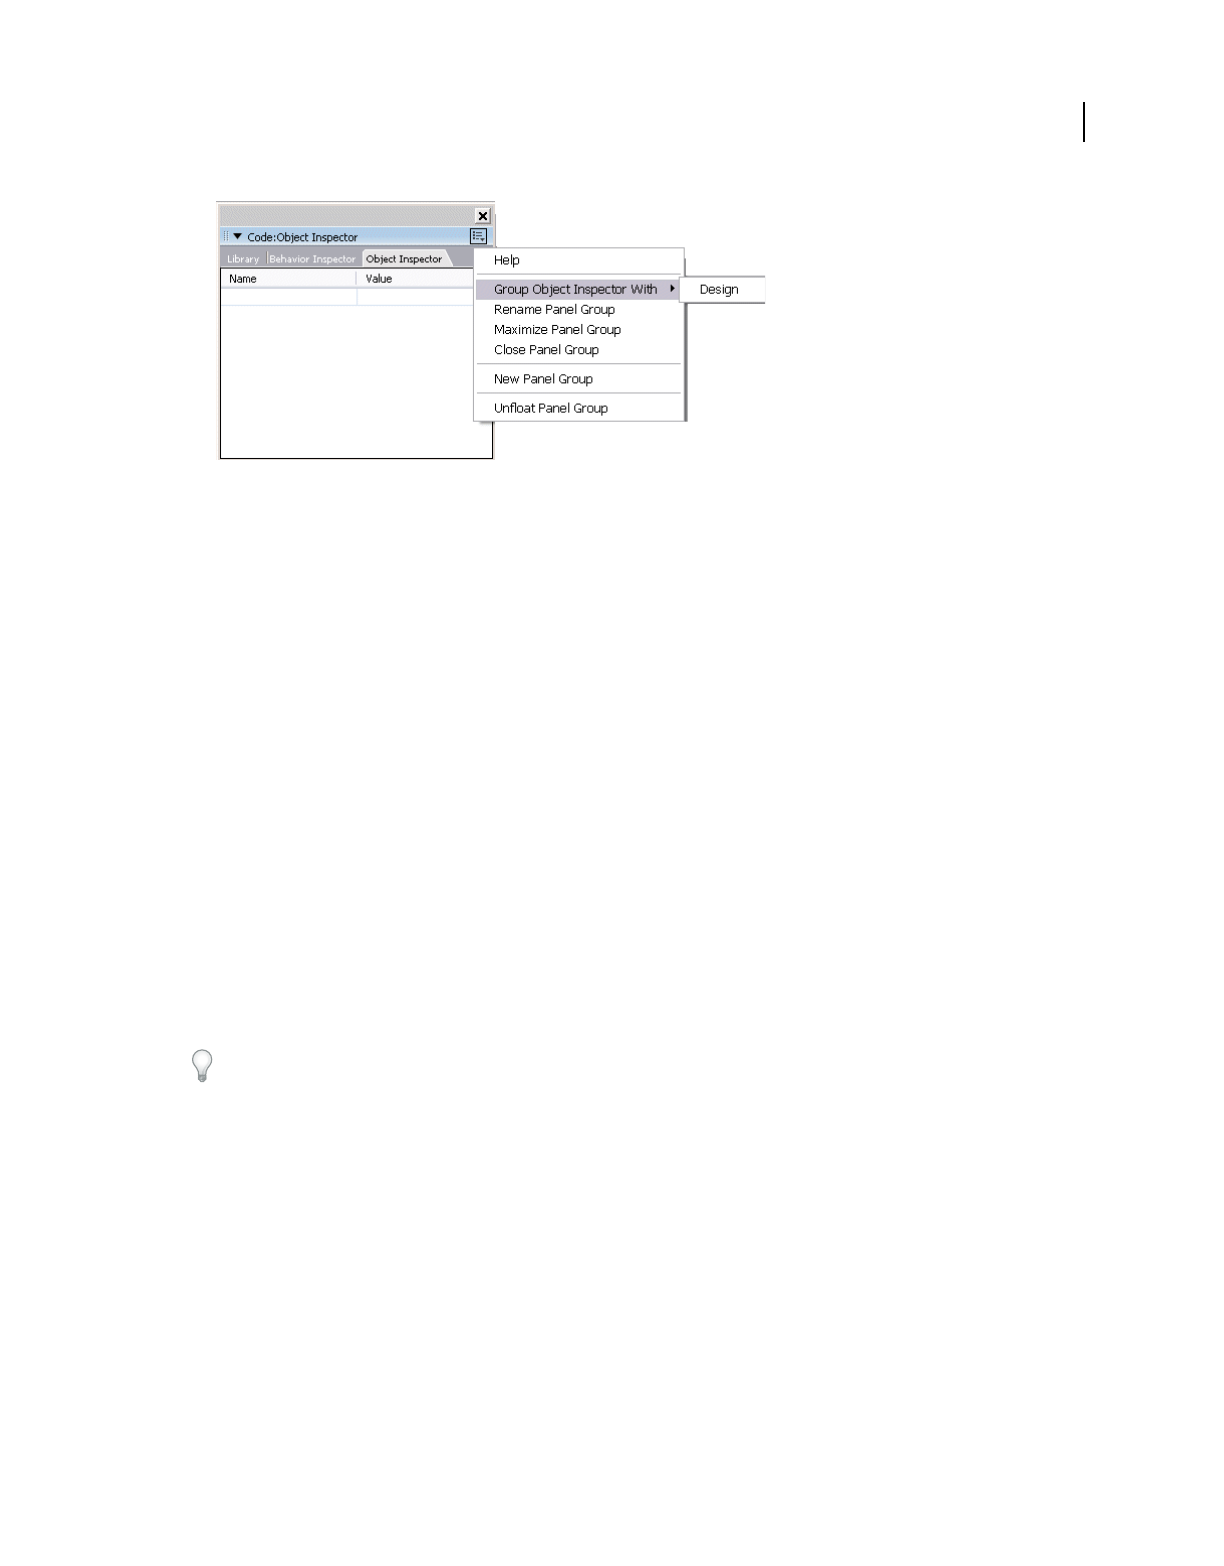
26
USING DIRECTOR 11.5
Workspace
Last updated 9/28/2011
Select Group [panel name]
Note: If Group [panel name] With is not available on the Options menu, then the panel cannot be moved to a new
panel group.
3From the Group [panel name] With menu, do one of the following:
•To move the panel to an existing tabbed panel group, select a panel group name.
•To move the panel to a new standalone panel, select New Panel Group.
Note: The New Panel Group option is dimmed if the panel is already a stand-alone panel.
Rename a panel group
1From a panel group’s Options menu, select Rename Panel Group.
2In the Rename Panel Group dialog box, enter a new name for the panel group, and click OK.
Rearrange the order of tabs within a panel group
1Select a tab within a panel group.
2From the panel group’s Options menu, select Group [panel name] With, where [panel name] is the name of the tab
that is selected.
3From the Group [panel name] With menu, select the same panel group that already contains the tab.
The tab is moved to the last (rightmost) position in the panel group.
When you customize your panel groups, it is a good idea to save your new layout for later use. See “Docking panel
groups” on page 26.
Docking panel groups
You can dock stand-alone panels and panel groups in two ways: to each other and to the docking channels. (Docking
channels are available only in Windows and cannot be used for docking document windows.) In Windows, the
docking channels run along the left and right sides of the application window. The area between these docking
channels is called the View Port.
Docking is restricted by window type. In both Mac and Windows versions of Director, document windows can be
docked together (for example, the Stage with the Cast window), and tool windows can be docked together (for
example, the Property inspector with the Behavior inspector). A document window cannot be docked with a tool
window.
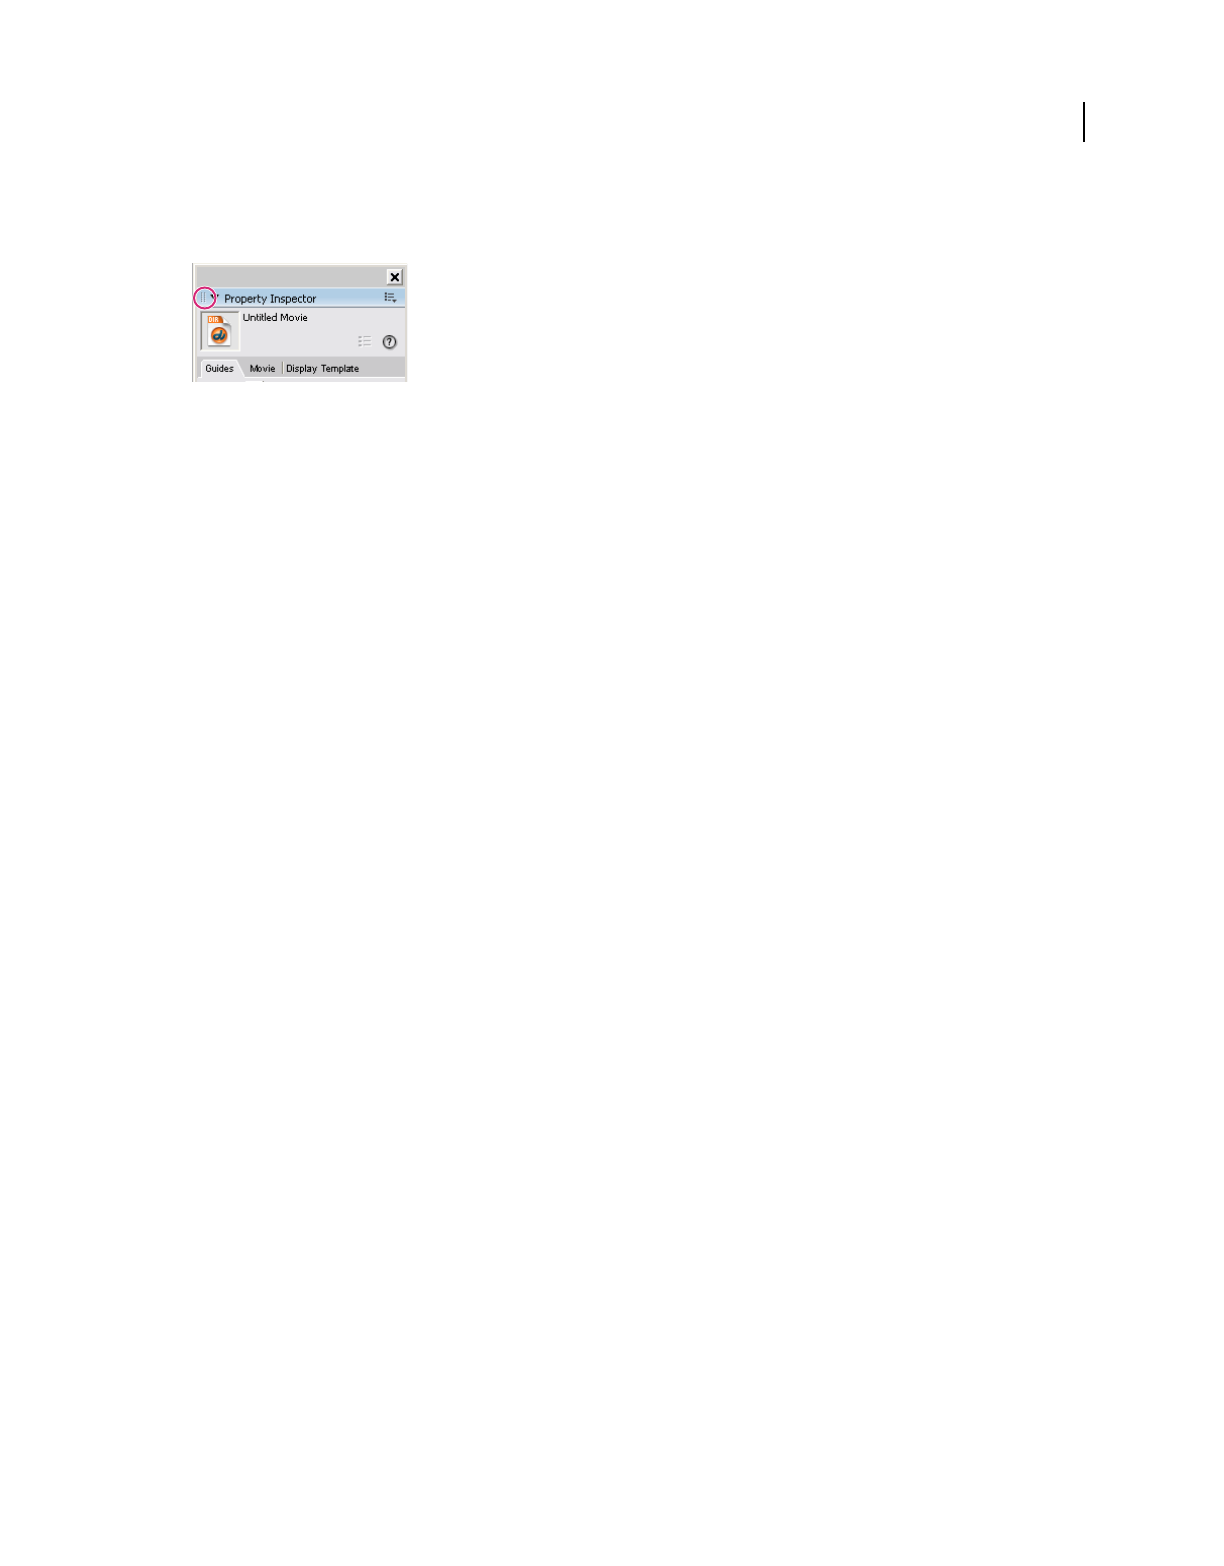
27
USING DIRECTOR 11.5
Workspace
Last updated 9/28/2011
Dockable panels and panel groups have a header bar just below their title bar, as shown in the following illustration.
Panels and panel groups that do not have this header bar are not dockable.
A header bar with a gripper, indicating that the panel is dockable
Dock a panel or panel group
❖On the header bar below the title bar, click and drag the gripper to another dockable panel group or to one of the
docking channels. When you see a thick black line where you want to place the panel or panel group, release the
gripper.
Note: The Tool palette cannot be docked with other windows. It can be docked only to a docking channel in Windows.
Undock a panel or panel group
❖On the header bar below the title bar, click and drag the gripper until the panel or panel group is separated from its
docking location, and release the gripper.
Saving panel sets
You can save your current workspace layout as a panel set. Later, you can open that panel set to return to the workspace
layout. You can manage your workspace by saving multiple panel sets, removing panel sets that you no longer use, and
restoring the default panel set.
Save a panel set
1Select Window > Panel Sets > Save Panel Layout.
2Name the panel layout, and click OK.
Open a saved panel set
Do one of the following:
•To switch to a customized layout, select Window > Panel Sets, and select one of the saved panel sets.
•To return to the default layout, select Window > Panel Sets > Default.
Remove a panel set
1Select Window > Panel Sets > Remove Panel Set.
2From the Panel Set list, select the panel set that you want to remove.
3Click Remove.
Opening, closing, and collapsing panel groups
Panels groups can be open, closed, or collapsed. Open panel groups can float on the workspace or (only in Windows)
be docked to one of the docking channels. Collapsed panel groups are still available on the workspace with only the
header bar displayed. Closed panel groups are removed entirely from the workspace.

28
USING DIRECTOR 11.5
Workspace
Last updated 9/28/2011
Close a panel group
❖From the Options menu, select Close Panel Group.
Open a panel group
❖From the Window menu, select one of the panels in the panel group.
When you display one of the panels in a panel group, the entire panel group is displayed.
Collapse or expand a panel group
❖Click the expander arrow or the panel group’s title in the header bar.
Click to expand or collapse a panel
Close or collapse a docked collection of panel groups
•If the panel groups are docked to each other, click the Close button in the title bar.
•If the panel groups are docked to the docking channel (Windows only), click the arrow in the center of the docking
channel’s separator bar.
Close all tool panels and docking channels
❖Select Window > Hide Panels.
Working with Xtra extensions
Xtra extensions are software components that extend Director functionality. Some Xtra extensions are installed with
Director and others are available separately for download and installation. If you know the C programming language,
you can create custom Xtra extensions. For information on creating custom Xtra extensions, see the Adobe Xtras
Developers Support page in the Director Support Center at www.adobe.com/support/xtras/.
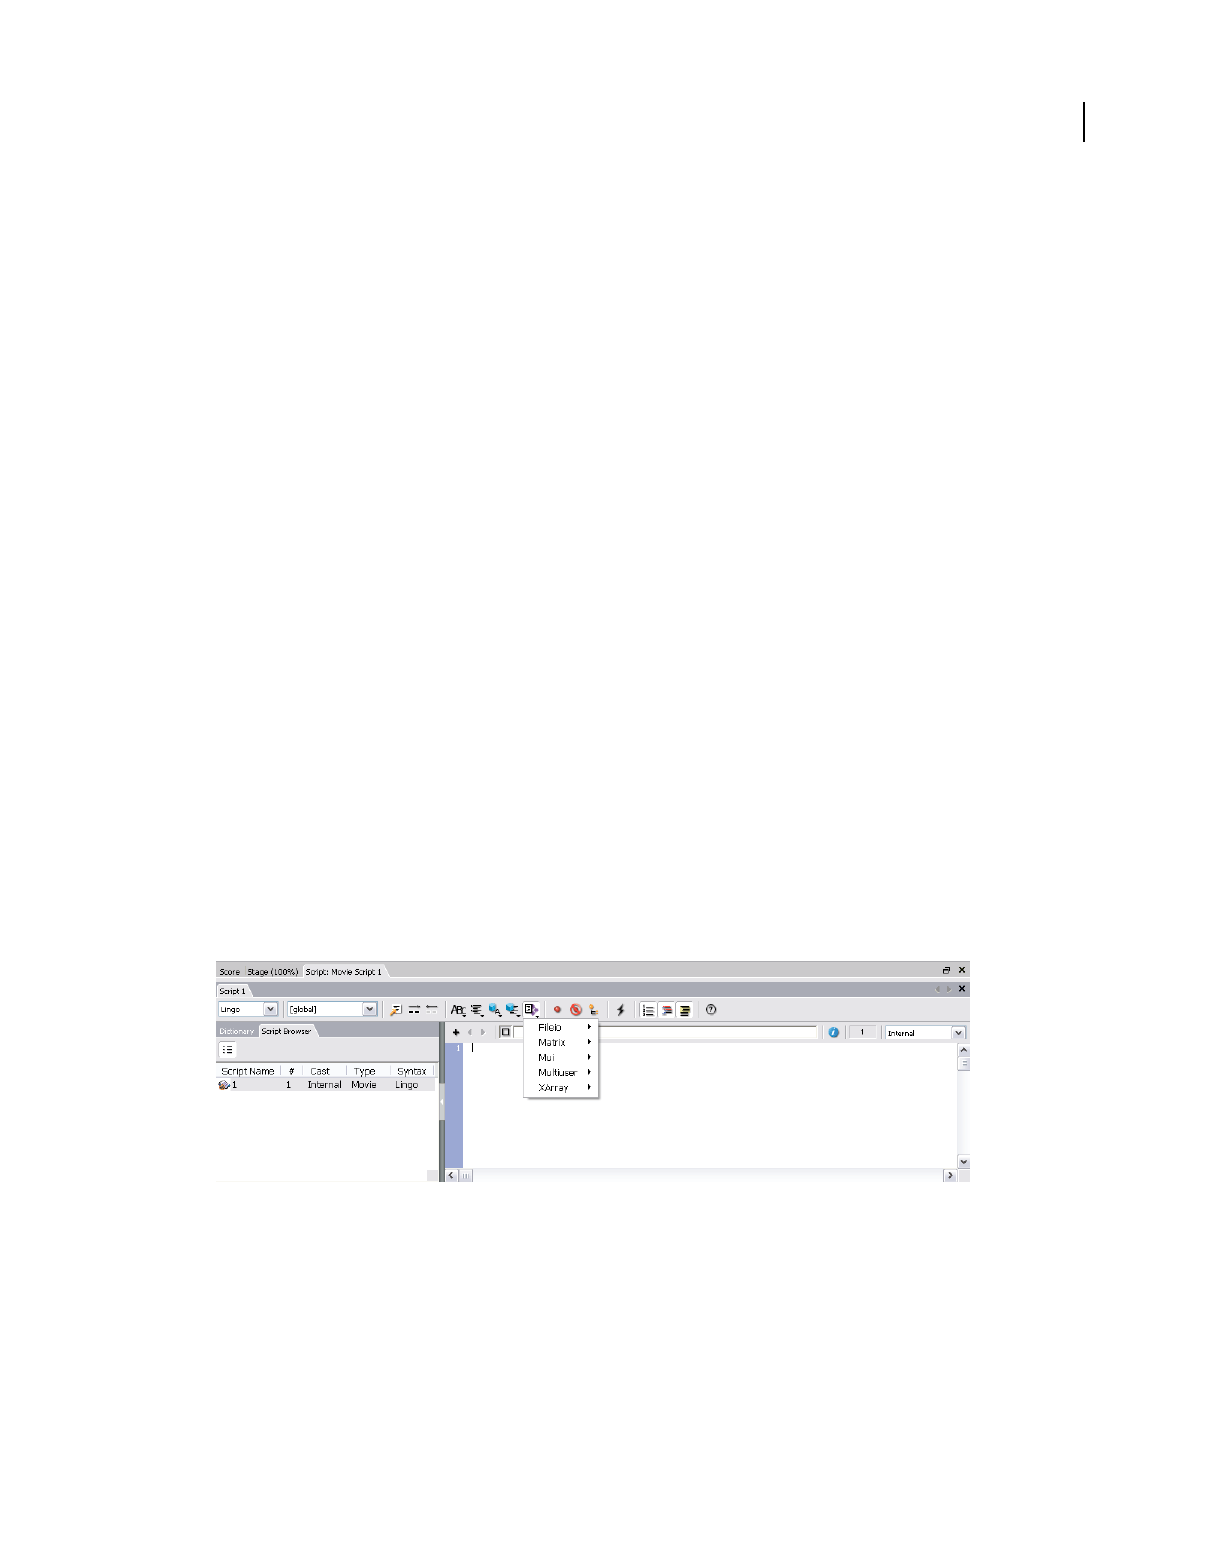
29
USING DIRECTOR 11.5
Workspace
Last updated 9/28/2011
Xtra extensions provide several types of additional functionality. After they are installed, they are available for your
use whenever you open Director. Xtra extensions can bring the following elements into Director:
Media Introduce additional media types as cast members into your movie.
Scripting Access additional Lingo or JavaScript™ syntax if you script in Director.
Transitions Choose from additional transitions between movie scenes.
Tools Use additional tools to make the authoring process easier.
Adding media
Xtra extensions can import media as cast members into Director. Some of these media Xtra extensions are built into
Director, such as Adobe Flash®, Vector Shape, and Animated GIF. Other media Xtra extensions come from third-party
developers. These include databases, 3D graphics processors, special types of graphics, and so on.
Display the media Xtra extensions that are available for your movie
❖Select Insert > Media Element.
The Media Element submenu displays all of the built-in media Xtra extensions. If a media element appears in this
list, then you can import files of this type as cast members.
Note: Third-party media Xtra extensions might not appear here and might require implementation through scripting.
Adding script
Scripting Xtra extensions make additional objects, methods, and properties available in Director. The built-in
NetLingo scripting Xtra extension, for example, allows you to control Internet functions.
Display the scripting Xtra extensions that are available for your movie
1If the Script window is not already open, select Window > Script.
2Click the Scripting Xtras button.The Scripting Xtras menu displays all of the installed scripting Xtra extensions.
The Script window with the Scripting Xtras menu
3Click one of the scripting Xtra extensions to see all of the methods and properties that are included with that Xtra
extension.
For more information on the objects, methods, and properties in standard Director scripting Xtra extensions, see the
Scripting Reference topics in the Director Help Panel.
Deleting scripts
You can delete scripts using the Explorer panel.

30
USING DIRECTOR 11.5
Workspace
Last updated 9/28/2011
Do one of the following:
•In the script browser, right-click a script entry and select Delete.
•In the list view of the Script Explorer, select a script and press Delete.
Note: When you delete a script that is open, the tab corresponding to the script is also removed from the Script window.
If the open script you deleted was the only script in your movie, the Script window is disabled, and the tab in which the
script appeared displays the text "Script". To enable the text editor, click the Plus sign in the script editor panel.
Adding transitions
Transition Xtra extensions provide additional transitions beyond the predefined transitions that are available in
Director. You can access these additional transitions in the same place that you access the standard transitions.
Display transition Xtra extensions that are available for your movie
1Select a frame in the Score.
2Select Modify > Frame > Transition.
The Frame Properties: Transition dialog box shows all of the transitions that you can use in your movie, including
the transition Xtra extensions.
Distributing Xtra extensions
When you distribute a movie, you must package your media Xtra extensions, scripting Xtra extensions, and transition
Xtra extensions along with the movie. If you do not package the Xtra extensions with the movie, your users will not be
able to view all of the movie’s content or use all of its features. Xtra extensions can be packaged with projectors, or your
user can download your required Xtra extensions from the Internet.
If your user is missing an Xtra extension that Director requires, an alert appears when the movie opens. For missing
transition Xtra extensions, the movie performs a simple cut transition instead. For missing media Xtra extensions,
Director displays a red X as a placeholder for the cast member.
For more information on distributing Xtra extensions with your movie, see “Packaging Movies for Distribution” on
page 441.
Connecting to the Internet
Director can connect to the Internet to import media files and retrieve data. If you plan to access files remotely while
using Director, follow the steps here before you try to connect to the Internet. Use the settings in the Network
Preferences dialog box to control how the connection works and to define a preferred browser.
1Select Edit > Preferences > Network.
Note: On Mac OS X operating systems, select Director > Preferences > Network instead.
2In the Preferred Browser text box, type the file path to your preferred web browser, or click the Browse button and
navigate to the correct file path.
By specifying this file path, you select which web browser should open on your system when you play a movie that
is programmed to open a web browser.
3Select or clear Launch When Needed. When this option is selected, web browser launching is enabled.

31
USING DIRECTOR 11.5
Workspace
Last updated 9/28/2011
4In the Disk Cache Size text box, type the maximum number of kilobytes that you want Director to use to cache data
from the Internet on your hard disk.
To immediately empty the cache, click Clear.
5To specify how often cached data is compared with the same data on the server, select one of the following Check
Documents options:
Once Per Session Checks for data revisions only once from the time you start to the time you quit Director. This
option improves performance but might not always display the most current version of a page.
Every Time Checks for changes whenever you request a page. This option slows performance but ensures that you
are always viewing the most current version of a page.
6To specify the configuration of your system’s proxy server, select one of the following Proxies options:
No Proxies Specifies that you have a direct connection to the Internet.
Manual Configuration Allows you to customize proxy settings for your system. Enter the HTTP or FTP location
and port number of your proxy server.
Browsers usually do not require proxy servers to interact with the network services of external sources. However,
in some network configurations where a firewall blocks the connection between the browser software and a remote
server, interaction with a proxy might be required.
A firewall protects information in internal computer networks from external access, and in doing so, it can limit
the ability to exchange information. To overcome this limitation, browser software can interact with proxy
software. A proxy server interacts with the firewall and acts as a conduit, providing a specific connection for each
network service protocol. If you are running browser software on an internal network from behind a firewall, you
need the name and associated port number for the server running proxy software for each network service.
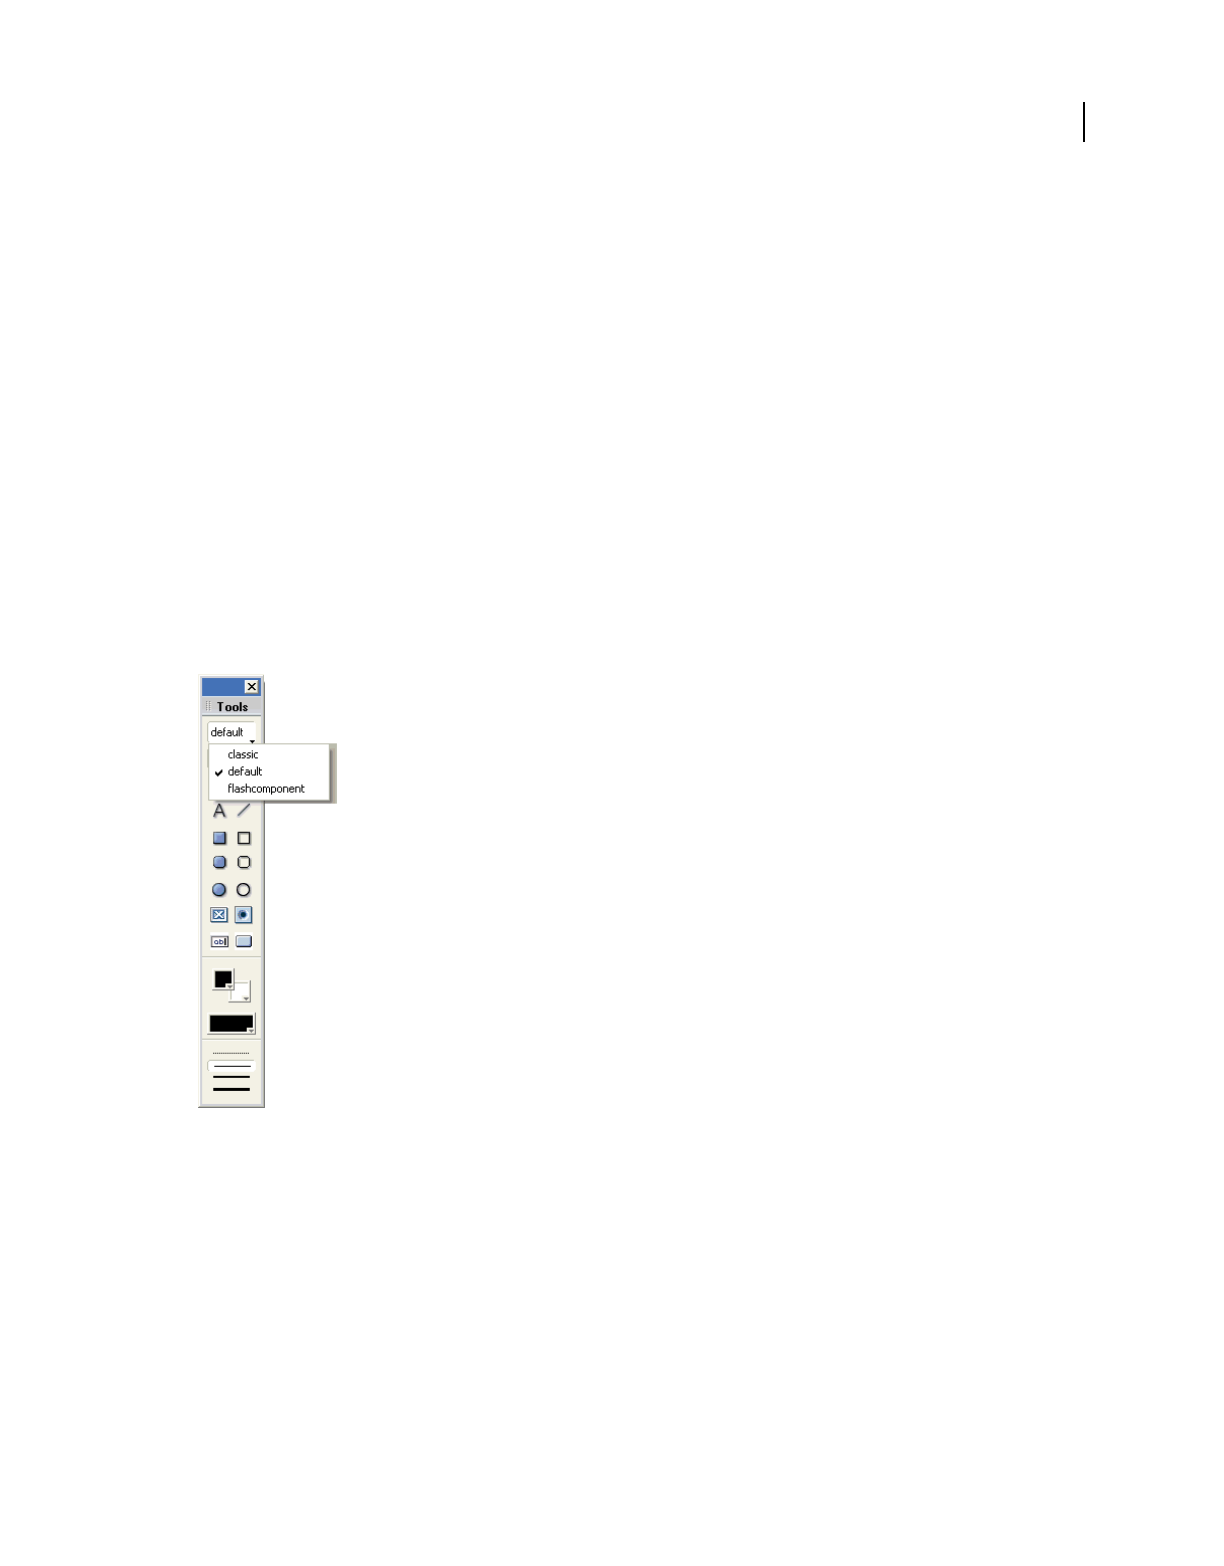
32
Last updated 9/28/2011
Chapter 3: Score, Stage, and Cast
This chapter describes how to use three of the most important windows in Adobe® Director®: the Score, the Stage, and
the Cast windows.
Using the Tool palette with the Stage
The Tool palette contains useful tools for creating and manipulating sprites on the Stage. It also contains drawing tools
and elements that you can place directly on the Stage.
Three views are available for the Tool palette: Default, Classic, and Flash® component. Each view contains some of the
same tools, including arrow, hand, and magnifying glass tools.
•The Flashcomponent view primarily contains Flash components.
•The Default view combines some Flash components and some Classic items.
Default view
1If the Tool palette is not available, select Window > Tool Palette.
2Click on the Tool palette View menu and select a view.
3(Windows® only) To dock the Tool palette, drag the palette, using the palette gripper, over a docking channel. A
placement preview line or rectangle appears when the palette can be docked.

33
USING DIRECTOR 11.5
Score, Stage, and Cast
Last updated 9/28/2011
Setting Stage properties
When active, the Stage has three tabs in the Property inspector that are available at all times: Display Template, Movie,
and Guides.
•The Display Template tab lets you set properties for Movies in a Window. For more information, see “Movies in a
Window” on page 394.
•The Movie tab lets you set the properties of the movie on the Stage. These properties include color definitions, size
and location of the Stage while the movie plays, and channels in the movie’s Score.
•The Guides tab lets you control the guides and grid that appear on the Stage to assist with movie authoring. The
bottom half of the Guides tab contains grid settings.
Setting guides and grid properties
Guides are horizontal or vertical lines that you can either drag around the Stage or lock in place to assist with sprite
placement. The Guides tab also lets you activate the grid. The grid contains cell rows and columns of a specified height
and width that you use to assist in visually placing sprites on the Stage. Moving a sprite with the Snap To Grid or Snap
To Guides feature selected lets you snap the sprite’s edges and registration point to the nearest grid or guide line. (For
more information about sprites, see “Sprites” on page 61.)
You must create guides before they become available. To do so, use the Guides tab on the Property inspector. The grid
is always available. Guides and the grid are visible only during authoring. When you are not using the guides or the
grid, you can hide them.
1With the Property inspector open, click the Guides tab.
2To create and set guide properties, click the Guide Color box to select a different color.
3Select the options you prefer. You can make the guides visible, lock them, or make the sprites snap to the guides.
4To add a guide, move the pointer over the new horizontal or vertical guide, and then drag the guide to the Stage.
Numbers in the guide tooltip indicate the distance, in pixels, that the guide is located from the top or left edge of
the Stage.
5Make selections from the following:
•To reposition a guide, move the pointer over the guide. When the sizing handle appears, drag the guide to its
new position.
•To remove a guide, drag it off the Stage.
•To remove all guides, click Remove All on the Guides tab in the Property inspector.
6To set grid properties, with the Property inspector open, click the Guides tab.
•To change the grid color, click the Grid Color box and select a different color.
•Select to make the grid visible and to make the sprites snap to the grid.
•Enter values in the W and H text boxes to change the width and height of the grid.
•Select to display the grid as dots or lines.

34
USING DIRECTOR 11.5
Score, Stage, and Cast
Last updated 9/28/2011
Using multiple Score windows
You can view and work in different parts of a movie at the same time by opening additional Score windows. If your
sprite spans many frames in the Score, for example, you can open a second Score window to work on another place in
the movie without scrolling. You can also drag sprites from one Score window to another.
1Activate the current Score window.
2Select Window > New Score Window.
You can scroll in this window to a different location in the Score.
Changing Score settings
Set preferences for the Score to control the appearance of the Score and the information that appears in numbered
sprite channels. By doing so, you can display a script preview and cast member information.
1Select Edit > Preferences > Score (Windows) or Director > Preferences > Score (Mac®).
2The Extended display option lets you display information about sprites in the Score. For more information, see
“Displaying sprite labels in the Score” on page 71. To specify what information appears in the numbered sprite
channels when Extended display is on, select from the following options:
Name Displays sprites by name, if they have names assigned to them.
Cast Member Displays the cast member number, name, or both.
Behaviors Displays the behaviors attached to the sprite.
Ink Mode Displays the type of ink applied to the sprite.
Blend Displays the blend percentage applied to the sprite.
Location Shows the sprite’s x and y screen coordinates.
Change in Location Shows the change in x and y coordinates relative to the previous cast member in that channel.
3To display the first few lines of the selected script in a box at the top of the Score, select Script Preview.
4To display the cast member’s name and number when the pointer is held over a sprite for a few seconds, select Show
Data Tips.
To change when a sprite span starts in the score, use Edit > Preferences > Sprite (Windows) or Director > Preferences
> Sprite (Mac®). For more information, see “Sprites” on page 61.
Selecting, editing, and adding frames in the Score
You can select a range of frames in the Score and then copy, delete, or paste all the contents of the selected frames.
1Double-click in the frame channel to select frames.
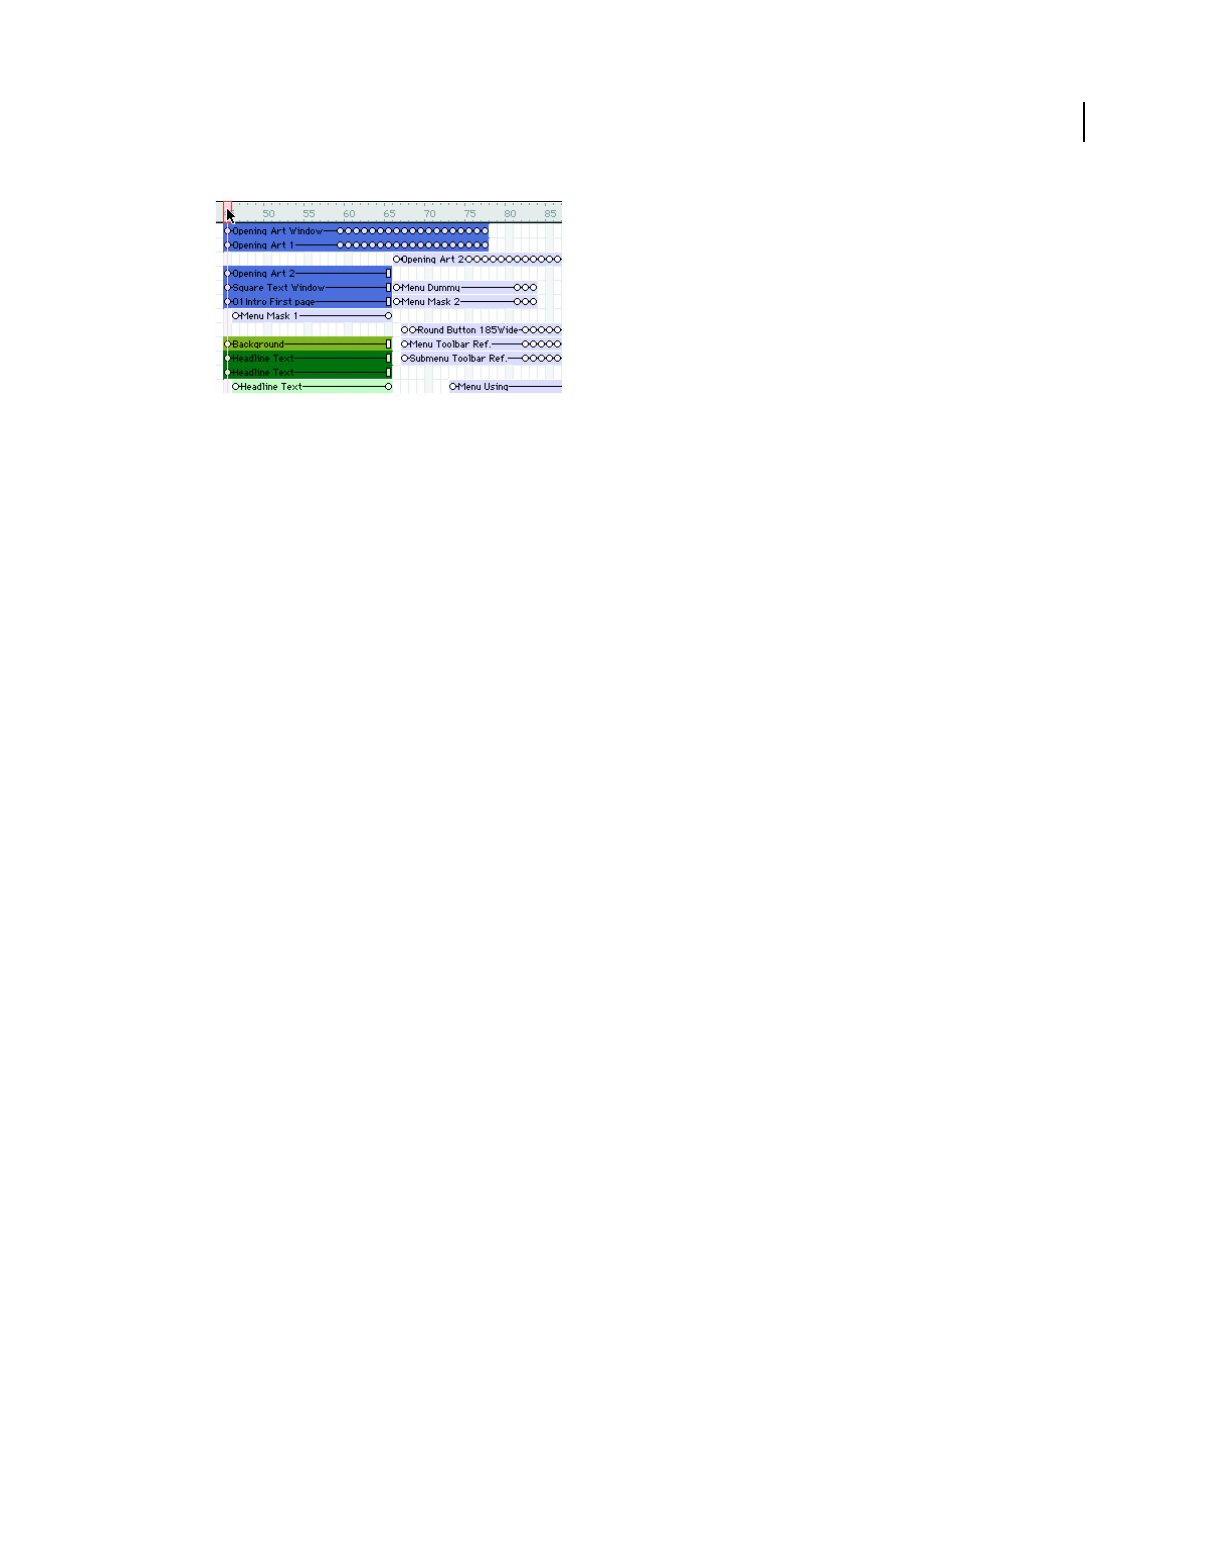
35
USING DIRECTOR 11.5
Score, Stage, and Cast
Last updated 9/28/2011
Double-click here to select all sprites in a frame, including markers, special effects, and sounds. Double-click and drag to select a range of
frames.
2Do one or more of the following:
•To move or copy frames, select Edit > Cut Frames or Edit > Copy Frames.
•To delete frames, select Edit > Clear Frames, or press the Delete key on your keyboard.
If you cut, clear, or delete the selected frames, Director removes the frames and closes up the empty space.
Note: To delete a single frame, select Insert > Remove Frame.
3To paste frames that you have cut or copied, select any frame or sprite, and select Edit > Paste Sprites.
If there aren’t enough empty frames available for the entire sprite to be pasted, the Paste Options dialog box
appears. Choose how to paste the sprites.
Overwrite Existing Sprites Copies the entire sprite over the frames of any existing sprites
Truncate Sprites Being Pasted
Pastes the sprite into the number of available empty frames by shortening its frame span.
Insert Blank Frames To Make Room Inserts frames into the Score so the entire sprite can fit without being truncated
or overwriting other sprites.
4To add frames, select a frame in the Score.
5Select Insert > Frames and enter the number of frames to insert.
The new frames appear to the right of the selected frame. Sprites in the frames you select are extended (tweened).
For more information about tweening, see “Animation” on page 90.
About cast members
Cast members are the media and other assets in your movie. They can be bitmaps, vector shapes, text, scripts, sounds,
Adobe Flash content or components, DVD content, QuickTime® movies, Windows Media video or audio, Shockwave®
Player 3D content, rich text, sounds of various formats, and more. When you place a cast member on the Stage or in
the Score, you create a sprite. For more information about sprites, see “Sprites” on page 61.
Use windows called Cast windows to group and organize your cast members. To populate casts, import and create cast
members. You can create and use multiple casts in a movie, and you can group multiple Cast windows together in a
tabbed panel layout.

36
USING DIRECTOR 11.5
Score, Stage, and Cast
Last updated 9/28/2011
Cast window with tabs in Thumbnail view
You can create and edit cast members in Director by using basic tools and media editors such as the Paint and Text
windows, or you can edit cast members by using external editors. In addition, you can import cast members from
almost every popular media format into a movie file. For some media types, you can link cast members as external files
located on a disk or the Internet. Linked cast members can be updated dynamically.
The Property inspector contains asset management fields for cast members on the Member tab. These fields let you
name cast members, add comments about them, and view information such as creation and modification dates and
file size.
Casts can be internal (stored inside the movie file and exclusive to that movie) or external (stored outside the movie
file and available for sharing with other movies). When you create a new movie, an empty internal cast is created
automatically. When you open the Cast window, the cast is in the default List view. For more information about Cast
window views, see “Switching from one Cast window view to another” on page 51.
Cast window in List view
External casts are also useful for creating groups of commonly used cast members. Use external casts to switch large
groups of cast members in a single step. For example, to switch the text cast members in your movie from English to
French, switch the cast that the movie uses, rather than changing each individual cast member.
Using external casts can keep the movie size small for downloading. This is because an external cast can be downloaded
separately from the movie file if or when it is needed.
Creating new casts
Before assembling a large number of cast members, it’s good practice to create the casts that are necessary to keep them
organized. Sort casts by type, edit cast properties, and use external casts for storing and sharing common media
elements.
Create as many casts as necessary. The number of casts does not affect the size of a movie for downloading.
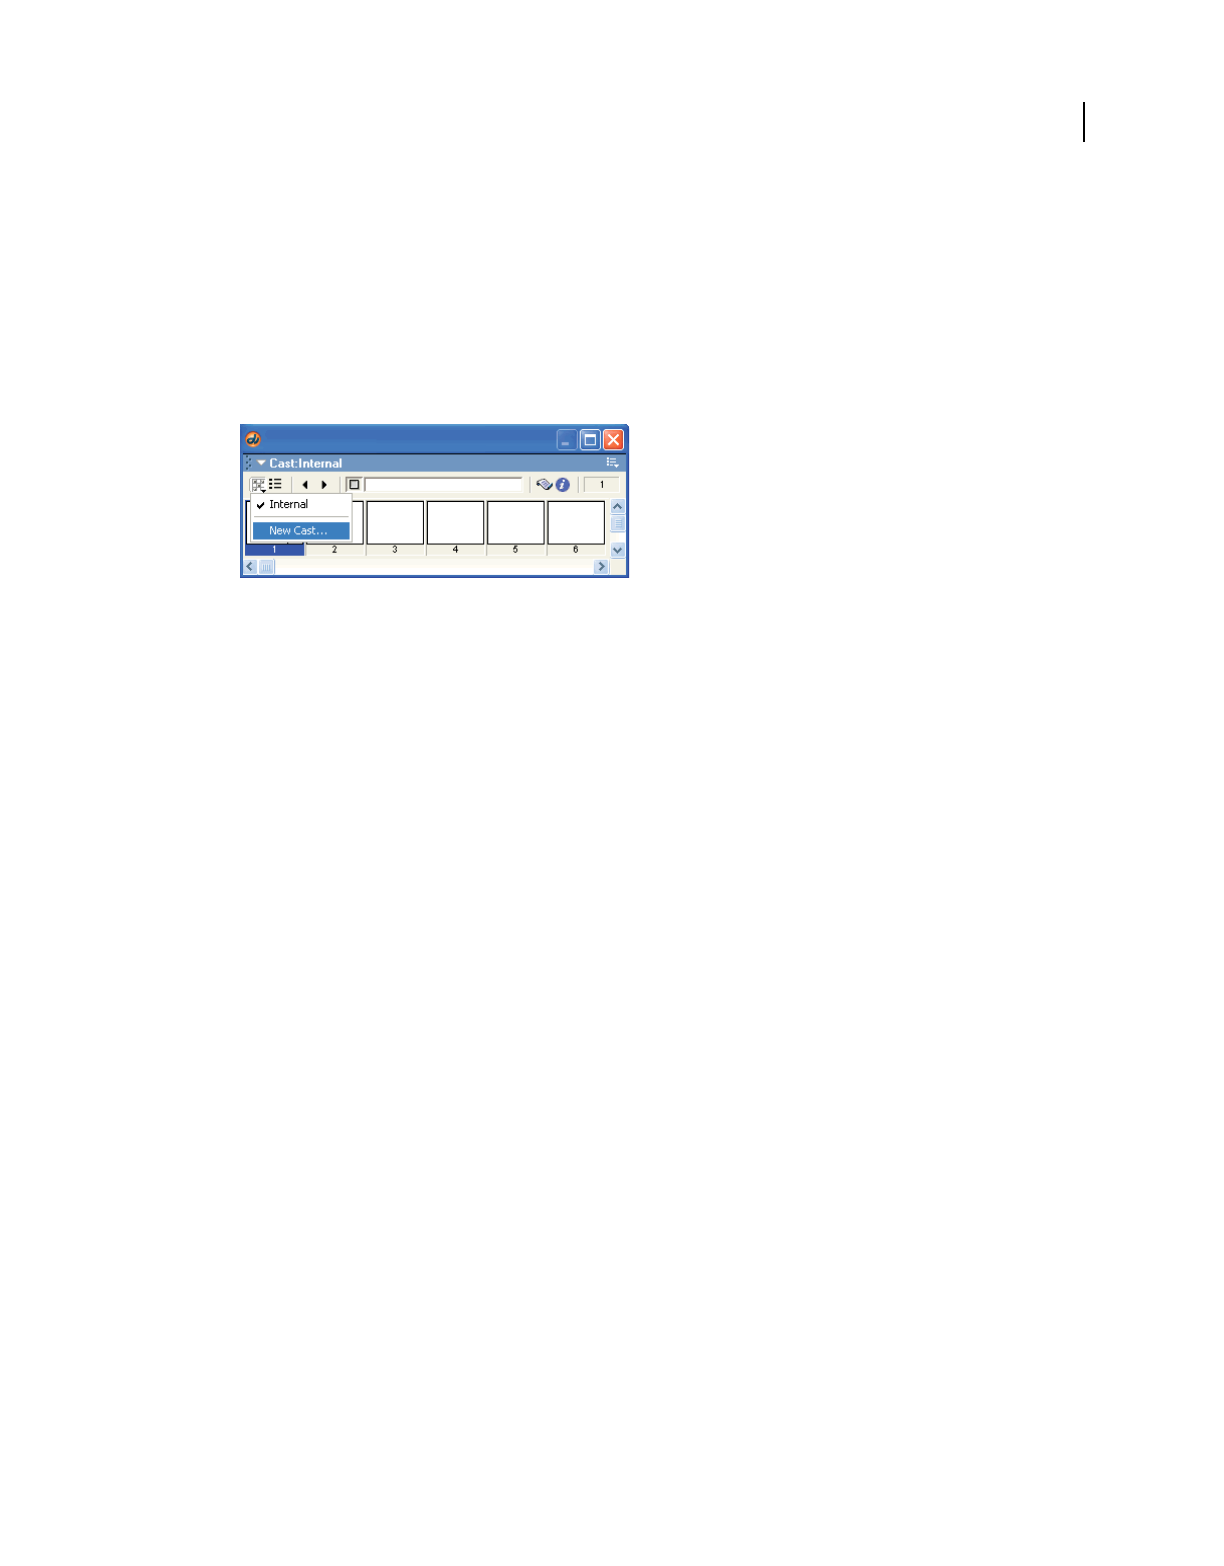
37
USING DIRECTOR 11.5
Score, Stage, and Cast
Last updated 9/28/2011
You can include as many as 32,000 cast members in a single cast, but it’s usually best to group media such as text,
buttons, and images logically in a few different casts for each movie.
1Do one of the following:
•Select File > New > Cast.
•Select Modify > Movie > Casts to open the Movie Casts dialog box, and click the New button.
•In the Cast window, click the Cast button and select New Cast from the menu. (See “Using Cast window
controls” on page 52.)
Cast button
2In the New Cast dialog box, type a name for the new cast.
3Specify how to store the cast:
Internal Stores the cast within the movie file. This option makes the cast available only to the current movie.
External Stores the cast in a separate file outside the movie file. This option makes the cast available for sharing
with other movies. For information about internal and external casts, see “Managing external casts” on page 57.
4If you chose External and you don’t want to use the cast in the current movie, deselect the Use In Current Movie
option.
Note: You can link the external cast to your movie later. See “Managing external casts” on page 57.
5Click Create.
The cast is created and appears as a tabbed panel in the Cast window.
Note: Creating a new cast by selecting Modify > Movie > Casts doesn’t automatically display a tabbed panel. To
display the tabbed panel, click the Cast button and select the cast you created from the menu.
6If you created an external cast, select File > Save while its Cast window is active, and then save the cast.
Creating cast members
You can create several types of cast members in Director. Director includes editors to create and edit common media
such as video, text, shapes, and bitmaps. You can also define external editors to launch from Director when you
double-click a cast member, and you can edit almost any type of supported media. For more information, see
“Launching external editors” on page 56.
You can also import cast members. For more information, see “Importing cast members” on page 42.
Create a new cast member from the Insert menu
1Open the Cast window for the cast member you are creating.
To place a cast member in a specific position in the Cast window, select the position in Thumbnail view. For more
information, see “Using Cast Thumbnail view” on page 55. Otherwise, Director places the new cast member in the
first empty position or after the current selection in the Cast window.

38
USING DIRECTOR 11.5
Score, Stage, and Cast
Last updated 9/28/2011
2Select Insert > Media Element, and then select the type of cast member to create.
For more information about each choice, see the following:
•“Using the Paint window” on page 106
•“Using the Color Palettes window” on page 164
•“Streaming linked Shockwave Audio and MP3 audio files” on page 249
•“Creating text cast members” on page 176
•“Embedding fonts in movies” on page 175
•“Creating an animated color cursor cast member” on page 301
•“Drawing vector shapes” on page 150
•“Using Flash Content” on page 194
•“Using Windows Media files in Director” on page 261
•“Using DVD media content in Director” on page 263
•“Importing digital video formats” on page 253
•“Using animated GIFs” on page 105
3To create a control or button, do one of the following:
•Select Insert > Control > Push Button, Radio Button, or Check Box to create a button cast member and a sprite
on the Stage. For more information, see “Using shapes” on page 158.
•Select Insert > Control > Field to create a field cast member. Creating a field cast member also creates a sprite
on the Stage. For more information, see “Working with fields” on page 182.
•(Windows only) Select Insert > Control >ActiveX to create an ActiveX cast member. For more information, see
“Using ActiveX controls” on page 216.
Note: You can also use Flash components to create controls and buttons. See “Selecting Flash components” on
page 218.
Create a cast member in a media editing window
1Open a media editing window by selecting Window and then selecting the type of cast member you want to create
(Paint, Vector Shape, Text, Windows Media, DVD, and so on).
2Click the New Cast Member button to create a cast member of the corresponding type. The cast member is added
to the most recently active Cast window.
New Cast Member button
Create a cast member using the Script window
1Select Window > Script.
2Click the New Cast Member button to create a script cast member.
Create a cast member on the Stage
1Open the Tool palette, if it is not already open, by selecting Window > Tool Palette.
2Using the tools in the Tool palette, create content directly on the Stage. Each object you create automatically
becomes a cast member.
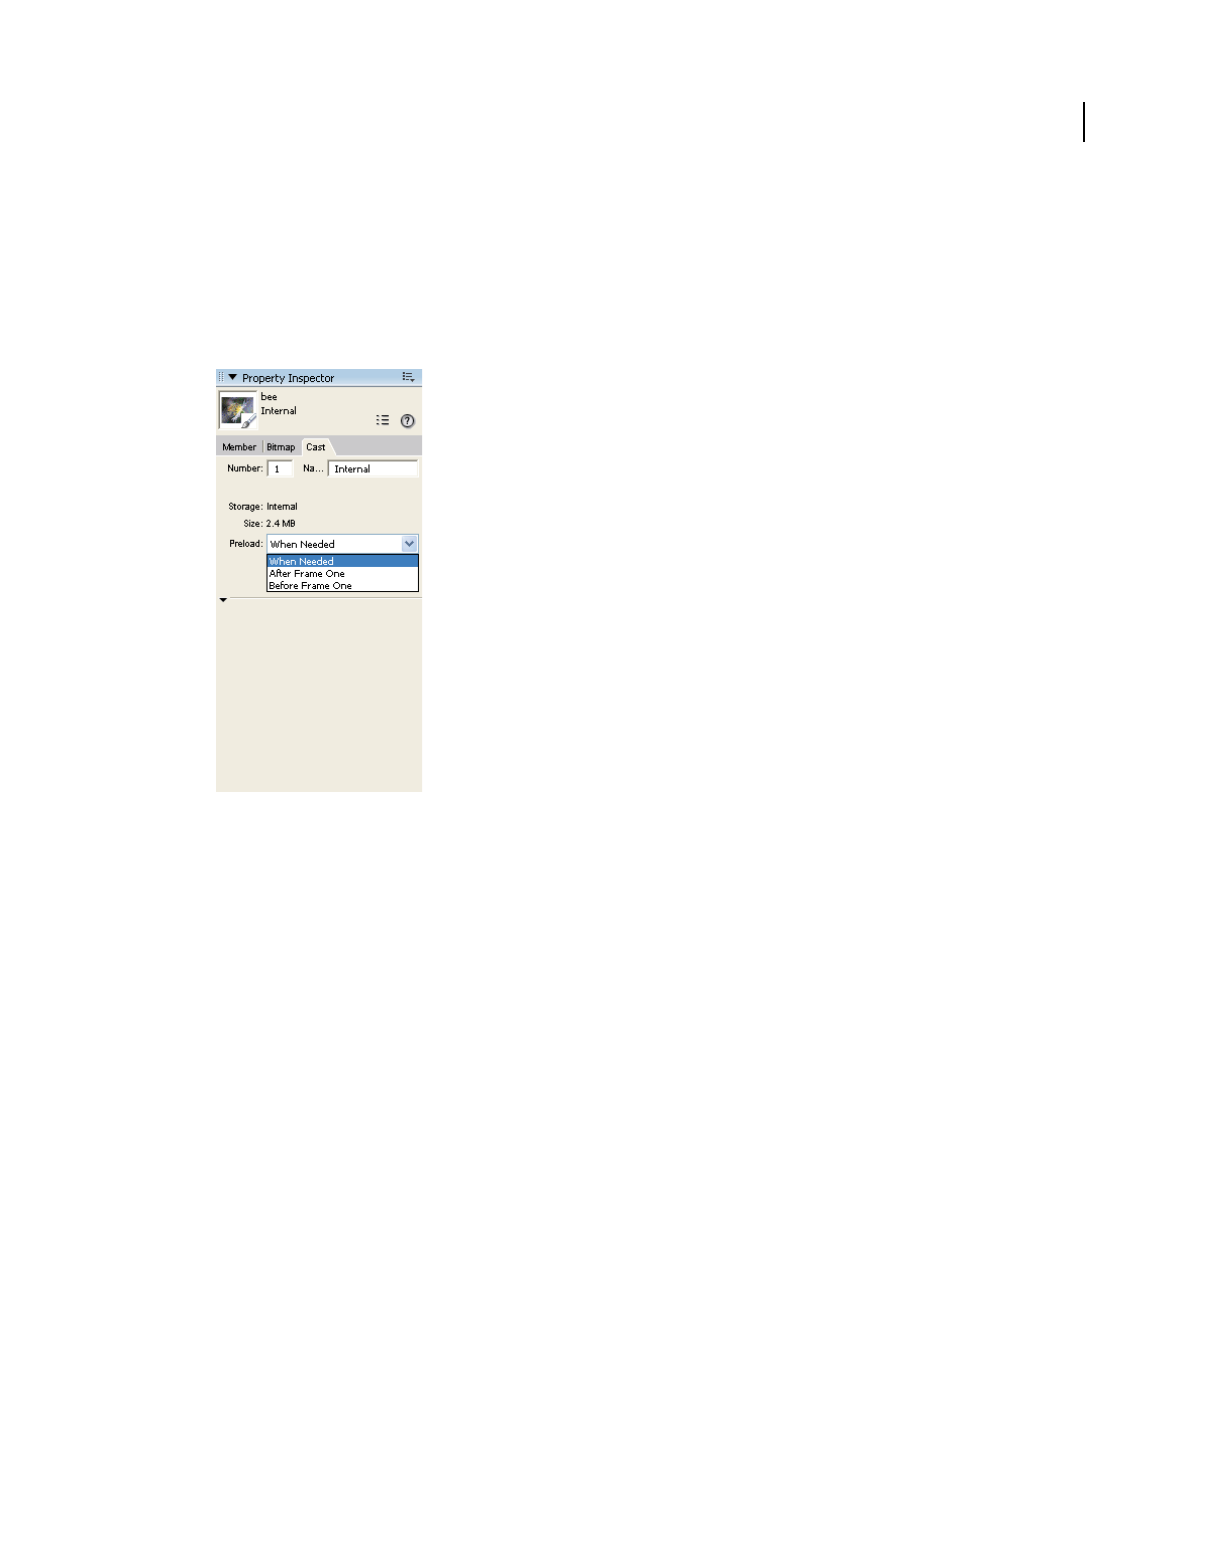
39
USING DIRECTOR 11.5
Score, Stage, and Cast
Last updated 9/28/2011
Note: Cast members created on the Stage are automatically placed in the Score.
Changing Cast properties
Use the Property inspector to change the name of a Cast and to define how its cast members are loaded into memory.
1With the Cast window as the active window, open the Property inspector and click the Cast tab.
The Cast tab in the Property inspector
2To change the name of the current cast, enter the new name in the Name text box.
3Select a Preload option to define how cast members are loaded into memory when the movie runs:
When Needed Loads each cast member into memory when it is required by the movie. This setting can slow down
the movie while it plays, but it causes the movie to begin playing sooner. This setting is the best choice when
controlling cast members that load with Lingo or JavaScript™ syntax.
After Frame One Loads all cast members (except those required for frame 1) when the movie exits frame 1. This
setting can ensure that the first frame appears as quickly as possible, and it might be the best choice if the first frame
of the movie is designed to remain onscreen for a number of seconds.
Before Frame One Loads all cast members before the movie plays frame 1. This setting causes the movie to take
longer to start playing, but it provides the best playback performance if there is enough memory to hold all cast
members.
Viewing and setting cast member properties
You can display and set properties for individual cast members, or for multiple cast members at once, even if the cast
members are different types. In both cases, use the Property inspector.
You can also set cast member properties by using Lingo or JavaScript syntax (see “Setting cast member properties by
using Lingo or JavaScript syntax” on page 59).
1Select one or more cast members.
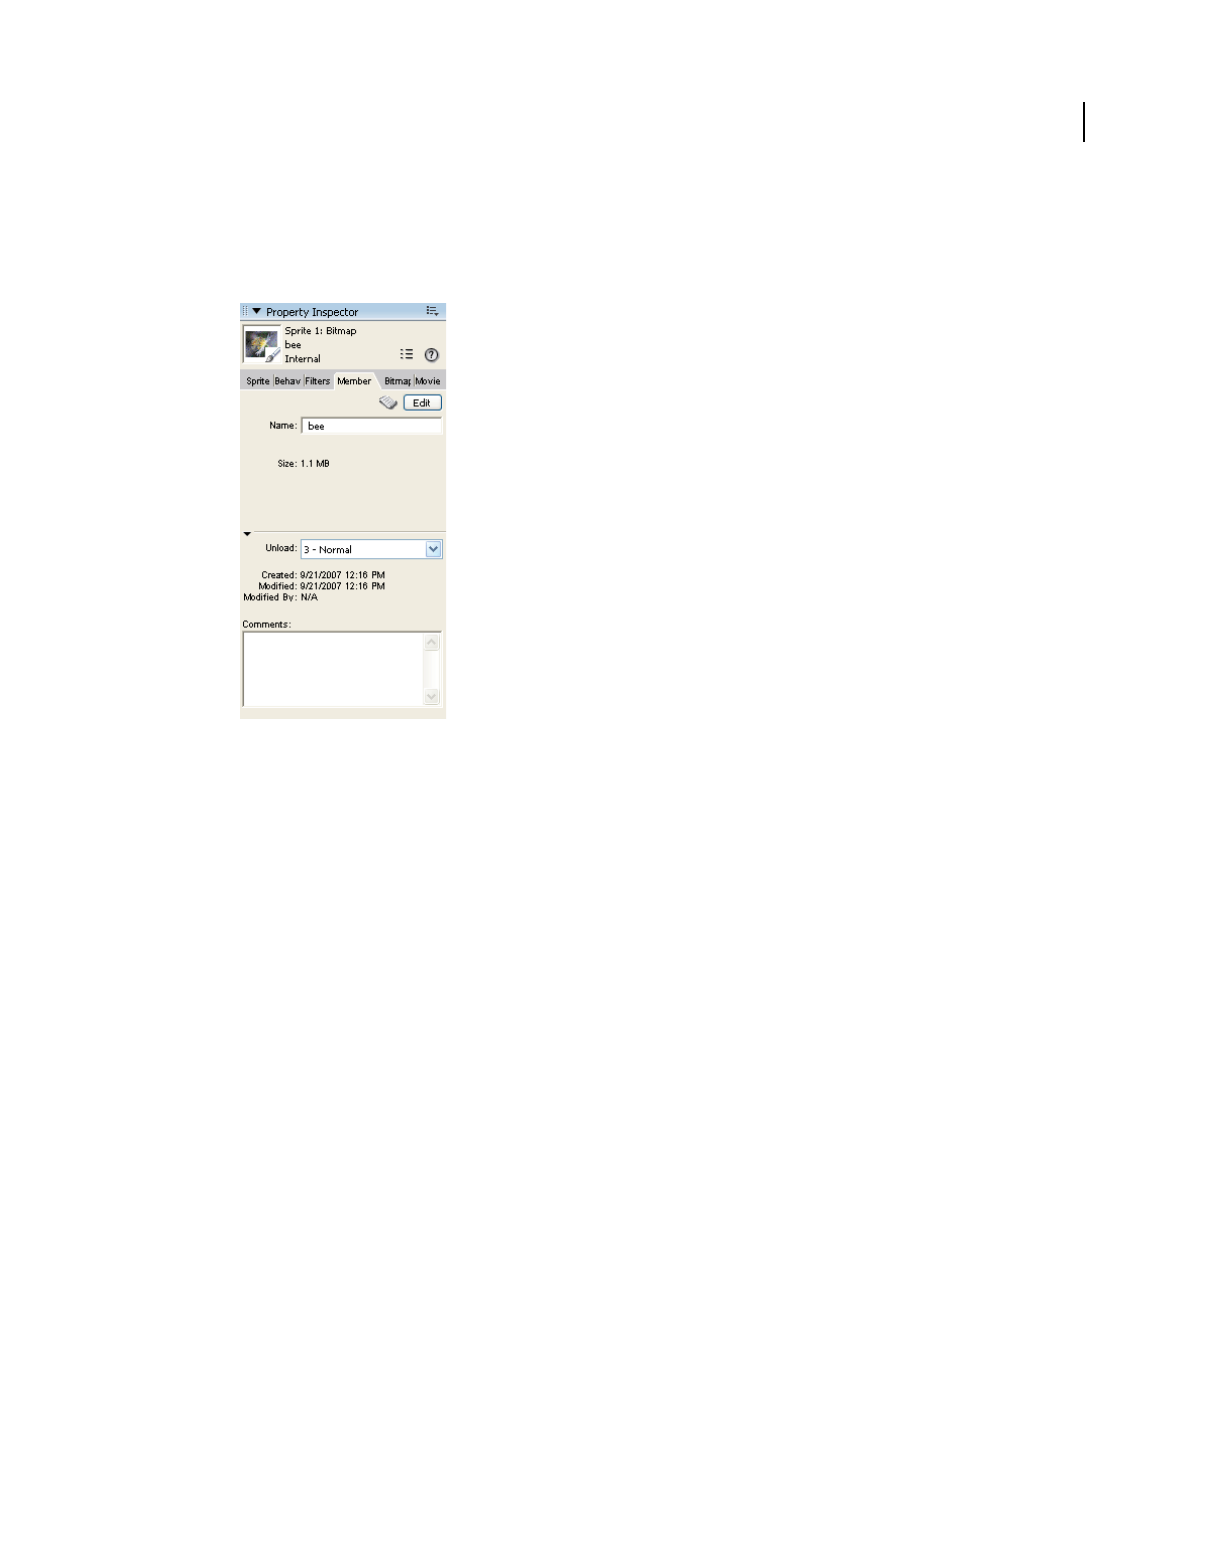
40
USING DIRECTOR 11.5
Score, Stage, and Cast
Last updated 9/28/2011
2Do one of the following:
•If the Property inspector is open, click the Member tab.
•If the Property inspector is not open, select Window > Property Inspector, and click the Member tab.
The Member tab in the Property inspector
If you’ve selected multiple cast members, the information that is common to all the selected cast members appears.
Any changes you make apply to all the selected cast members.
3Display the Graphical view on the Member tab. The Member tab displays the following items:
•Editable fields to view or change the cast member’s name (the Name text box), a Comments text box to enter
text that appears in the Comments column of the Cast List window, and an Unload menu that lets you select
how to remove a cast member from memory. For more information about using the Unload menu, see
“Controlling cast member unloading” on page 46.
•View-only fields that indicate the cast member’s size, when the cast member was created and modified, and the
name of the person who modified the cast member.
For an Xtra cast member, the information in the Property inspector is determined by the developer of the Xtra.
Some Xtra extensions have options in addition to those listed here. For non-Adobe Xtra extensions, see the
documentation supplied by the developer.
More Help topics
“Using animated GIFs” on page 105
“Embedding fonts in movies” on page 175
“Using Flash Content” on page 194
“Setting and changing bitmap cast member properties” on page 129
“Setting vector shape properties” on page 157
“Synchronizing media” on page 251
“Setting film loop properties” on page 100

41
USING DIRECTOR 11.5
Score, Stage, and Cast
Last updated 9/28/2011
“Setting palette cast member properties” on page 168
“Setting and changing PICT cast member properties” on page 130
“Specify a shape’s fill in Lingo or JavaScript syntax” on page 159
“Setting sound cast member properties” on page 244
“Setting text or field cast member properties” on page 185
“Setting transition cast member properties” on page 174
“Setting Xtra cast member properties” on page 60
“Creating an animated color cursor cast member” on page 301
“Streaming linked Shockwave Audio and MP3 audio files” on page 249
“Setting Flash component parameters” on page 220
“Setting Windows Media properties” on page 261
“Setting QuickTime digital video cast member properties” on page 258
Launching cast member editors
You can open any cast member in the appropriate editor directly from the Cast window. You can use the Director
internal media editors, such as the Text, Paint, or Vector Shape window, or you can specify external editors for certain
types of cast members. For more information, see “Launching external editors” on page 56.
Do one of the following:
•Double-click a cast member in the Cast window.
•Double-click a sprite that contains the cast member in the Score or on the Stage. See “Sprites” on page 61.
Finding cast members
You can search for cast members by name, type, and color palette. You can search for selected cast members used in
the Score, such as when you are preparing a movie for distribution. You can also search for cast members not used in
the Score, for example to clean up a movie and reduce the space and memory required to save and run the movie.
Before releasing a movie, it’s a good idea to remove unused cast members to make the movie as small as possible for
downloading.
1Select Edit > Find > Cast Member.
2In the Find Cast Member dialog box, select a Cast window to search from the Cast pop-up menu. To search every
cast in the movie, select All Casts.
3Select a search option:
•Select Name, and enter search text in the text box. For example, to search for a group of related cast members
that share a common element in their names, you might enter the word Bird to search for cast members named
Bird 1, Bird 2, and Bird 3.
•Select Type, and select an option from the menu to search for cast members by media type.
•Select Palette, and select an option from the menu. You can use this option to search for and resolve palette
conflicts.

42
USING DIRECTOR 11.5
Score, Stage, and Cast
Last updated 9/28/2011
•Select Usage to locate all cast members that aren’t used in the Score. Cast members that you find with this option
might be used in the movie by a script.
4When Director displays the specified cast member, do one of the following:
•Select a cast member on the list, click Select to close the dialog box, and select the cast member in the Cast
window.
•Click Select All to close the dialog box and select all listed cast members in the Cast window.
Find a cast member in the Score
1Select a cast member to search for in the cast or the Score. If you select a sprite that includes multiple cast members,
Director searches for the first cast member in the sprite. To select a cast member other than the first, open the sprite
to select the cast member. (For information about selecting sprites, see “Selecting sprites” on page 62.)
2Select Edit > Find > Selection, or press Control+Shift+F (Windows) or Command+Shift+F (Mac).
Director searches the Score and highlights the first Score cell it finds.
3Select Edit > Find Again to find the next occurrence of the cast member in the Score.
Importing cast members
Importing lets you create cast members from external media. You can either import data into a Director movie file or
create a link to the external file and re-import the file each time the movie opens. Linked files let you display dynamic
media from the Internet, such as sports scores, sounds, and weather pictures. Linking makes downloading movies
faster. For more information about linked files, see “About linking to files” on page 45.
Director can import cast members from almost every popular media file format. See “About import file formats” on
page 44.
You can import files by using the Import dialog box, by dragging files from the desktop to a Cast window, or by using
Lingo or JavaScript syntax.
1In Thumbnail view, select an empty position in a cast.
If no cast position is selected, Director places the new cast member in the first available position in the current cast
in Thumbnail view. In List view, Director places the new cast member at the end of the list.
2Select File > Import.
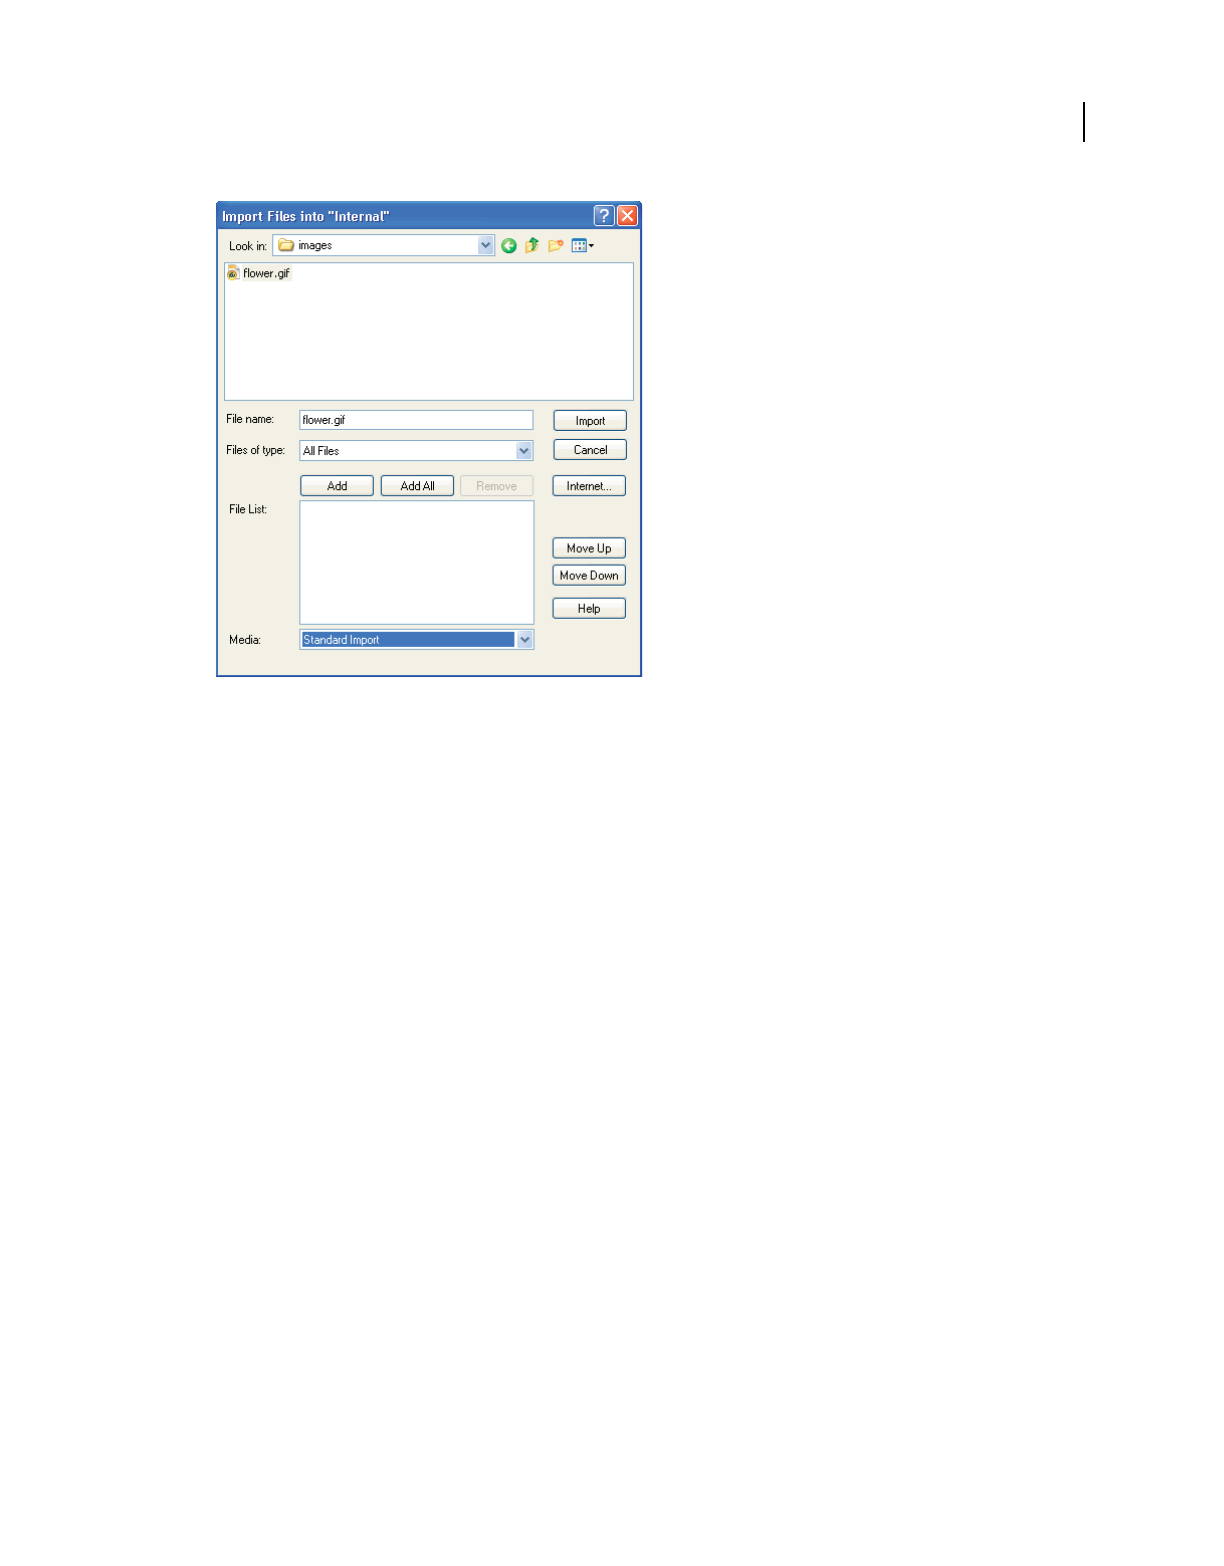
43
USING DIRECTOR 11.5
Score, Stage, and Cast
Last updated 9/28/2011
Importing cast members
3Do one of the following:
•To import a file from the Internet, click Internet and enter a URL in the Find URL text box.
•
To import local files, select the type of media to import from the Files of Type (Windows) or the Show (Mac) menu.
4To select files to import, do one of the following:
•Double-click a file.
•Select one or more files, and click Add.
•Click Add All.
You can switch folders and import files from different folders at the same time.
Note: You can import a text file as a text or a script. To add the same text file as text and as a script, you must repeat
the procedure to add the text file in the other format. Unlike previous versions of Director, you will not be able to add
the text file twice to the import dialog box, and import each instance in a different format.
5From the Media menu at the bottom of the dialog box, specify how to treat imported media:
Standard Import Imports all selected files, storing them inside the movie file but not updating them when changes
are made to the source material. If you select the option to import from the Internet in step 3 and an Internet
connection is available, Director retrieves the file immediately.
Note: All digital video files, such as DVD, Windows Media, QuickTime, RealMedia®, and so on, are linked
automatically to the original external file (see the next option, Link to External File), even if you select Standard
Import.
Link To External File Creates a link to the selected files and imports the data each time the movie runs. If you choose
to import from a URL through the Internet, the media is dynamically updated. For more information, see “About
linking to files” on page 45.
Note: Text and RTF files are always imported and stored inside the movie file (see the Standard Import option), even
if you select Link To External File.

44
USING DIRECTOR 11.5
Score, Stage, and Cast
Last updated 9/28/2011
Include Original Data For Editing Preserves the original data in the movie file for use with an external editor.
When this option is selected, Director keeps a copy of the original cast member data and sends the original to the
external editor when you edit the cast member. This option preserves all the editor’s capabilities. For example, if
you specify Photoshop to edit PICT images, Director maintains all the Photoshop object data. For more
information, see “Launching external editors” on page 56.
Import PICT File As PICT Prevents PICT files from being converted to bitmaps.
6When you finish selecting the files, click Import.
If you’ve imported a bitmap with a color depth or color palette that differs from the current movie, the Image
Options dialog box appears for entering additional information. See “Choosing import image options” on page 45.
More Help topics
“About importing bitmaps” on page 104
“Importing internal and linked sounds” on page 240
“Using Director movies within Director movies” on page 214
“Importing internal and linked sounds” on page 240
“Importing text” on page 177
“Using animated GIFs” on page 105
“Using Flash Content” on page 194
“Importing Windows Media” on page 261
“Using DVD media content in Director” on page 263
“Using Flash components” on page 218
Import files by dragging
1In the Explorer (Windows) or on the system desktop (Mac), select files to import.
2Drag the files from the desktop to the desired position in the Cast window Thumbnail view or to the Cast window
List view.
If you drag the files to List view, the imported files are added at the bottom of the list.
Import files with Lingo or JavaScript syntax
❖Use the importFileInto method to import a file. Set the fileName Cast Member property to assign a new file to
a linked cast member. For more information about this property, see the Scripting Reference topics in the Director
Help Panel.
About import file formats
Director can import files in all the formats listed in the following table. For information about additional file formats
Director might support, see the Director Support Center website at www.adobe.com/support/director.
German: http://www.adobe.com/de/support/
French: http://www.adobe.com/fr/support/
Japanese: http://www.adobe.com/jp/support/
45
USING DIRECTOR 11.5
Score, Stage, and Cast
Last updated 9/28/2011
About linking to files
When Link To External File is selected in the Import dialog box, Director re-imports media every time a movie runs.
(To open the Import dialog box, select File > Import). Linking makes it easy to use bulky media such as long sounds
and is especially useful for showing media that changes frequently from the Internet. Linking also makes downloading
movies faster because users can choose to view linked files, so the files do not download unless they’re needed.
When you link to an external file, Director creates a cast member that stores the name and location of the file. Saving
a movie saves only the link to the linked cast member. Keep linked files in a folder that’s close to the original movie
file. Paths are restricted to 4096 characters by the system. URLs can be as many as 260 characters. If you store a file that
is too many folders away from the movie or you use a very long URL, it might not link correctly.
When distributing movies with linked media, use the following guidelines:
•If you distribute a movie, you also must include all linked cast member files, and they must be in their expected
locations.The Copy Linked And Dependent Files option in the Publish Settings dialog box ensures that the linked
media are automatically placed in the relative location during publishing. If you have disabled the Copy Linked And
Dependent Files option, copy the linked files to the same folder as the projector or in a folder inside the Projector
folder. The behavior is the same as in Director MX 2004 if this option is disabled. In addition, the Xtra extensions
that are used to import the media must be present when the movie runs (either on the user’s computer or included
in your movie). For more information, see “Setting Xtra cast member properties” on page 60.
•When you link to media on the Internet, the media must be present at the specified URL when the movie runs.
Provide for link failure because you can’t guarantee that an Internet transaction will be successful.
•To retrieve media from the Internet during playback, Director requires that the projector include certain Xtra
extensions. To include these Xtra extensions automatically, click Add Network in the Movie Xtras dialog box.
Movies playing in web browsers do not require these Xtra extensions.
Note: Select Edit > Preferences > Network to define standard network settings for the Director authoring environment.
If you are using a Mac OS® X operating system, select the Director menu, instead of the Edit menu, to access
Preferences.
Choosing import image options
If you import a bitmap cast member with a color depth or color palette that is different from that of the Stage (the
current movie), Director lets you select the image’s color depth and color palette. You can choose to import the bitmap
at its original color depth or at the Stage color depth. (The Stage color depth is the same as the system color depth.)
You can also choose to import the image’s color palette or remap the image’s colors to a palette in the movie.
Type of file Supported formats
Animation and multimedia Flash movies, animated GIF, PowerPoint® presentations, Director movies, Director external cast files
Image BMP, GIF, JPEG, LRG (xRes), Photoshop 3.0 (or later), MacPaint, PNG, TIFF, PICT, Targa
Multiple-image file Windows only: FLC, FLI
Mac only: PICS, Scrapbook
Sound AIFF, WAV, MP3 audio, Shockwave Audio, Sun™ AU, uncompressed and IMA compressed
Digital Video DVD, Windows Media (WMV), QuickTime, AVI, RealMedia®
Text RTF, HTML, ASCII (often called Text Only), Lingo, or JavaScript syntax
Palette PAL, Photoshop® CLUT

46
USING DIRECTOR 11.5
Score, Stage, and Cast
Last updated 9/28/2011
In many cases, it’s easiest to change the image’s color depth to the depth of the movie and remap the image to the color
palette that is used in the rest of the movie. For more information about controlling color in Director, see “Color,
Tempo, and Transitions” on page 160.
If you change 16-, 24-, or 32-bit cast members to 8 or fewer bits, you must remap the cast members to an existing color
palette.
Select bitmap image options for importing
1Import a bitmap image by selecting File > Import. (See “Importing cast members” on page 42.)
2If the Image Options dialog box appears while you are importing a bitmap image using File > Import, select one of
the following Color Depth options:
Image Specifies the color depth and palette of the image.
Stage Specifies the color depth of the current Stage.
3Select a Palette option to change palette settings for 2-, 4- or 8-bit images:
Import Imports the image with its color palette. The palette appears as a new cast member immediately following
the bitmap cast member.
Remap To Replaces the image’s colors with the most similar solid colors in the palette you select from the menu.
4Select Image options:
Trim White Space Removes any white pixels from the edges of the image. Deselect this option to preserve the white
canvas around an image.
Dither Blends the colors in the new palette in the Palette section to approximate the original colors in the graphic.
5To apply the current settings to all the remaining files that you selected for importing, select Same Settings For
Remaining Images.
Controlling cast member unloading
When Director runs low on memory, it removes cast members from memory. Use the Property inspector to specify
the priority with which a cast member is removed from memory. When a cast member is available in memory, it
appears almost instantly. When the cast member needs to be loaded from disk, the loading can cause a delay. Set your
cast members so that frequently used cast members remain in memory as long as possible.
These settings are the same for all types of cast members.
1Select the cast members in the Cast window.
2
On the Property inspector Member tab, display the Graphical view, and then select an option from the Unload menu:
3—Normal Sets the selected cast members to be removed from memory after any priority 2 cast members are
removed.
2—Next Sets the selected cast members to be among the first removed from memory.
1—Last Sets the selected cast members to be the last removed from memory.
0—Never Sets the selected cast members to be retained in memory. These cast members are never unloaded.
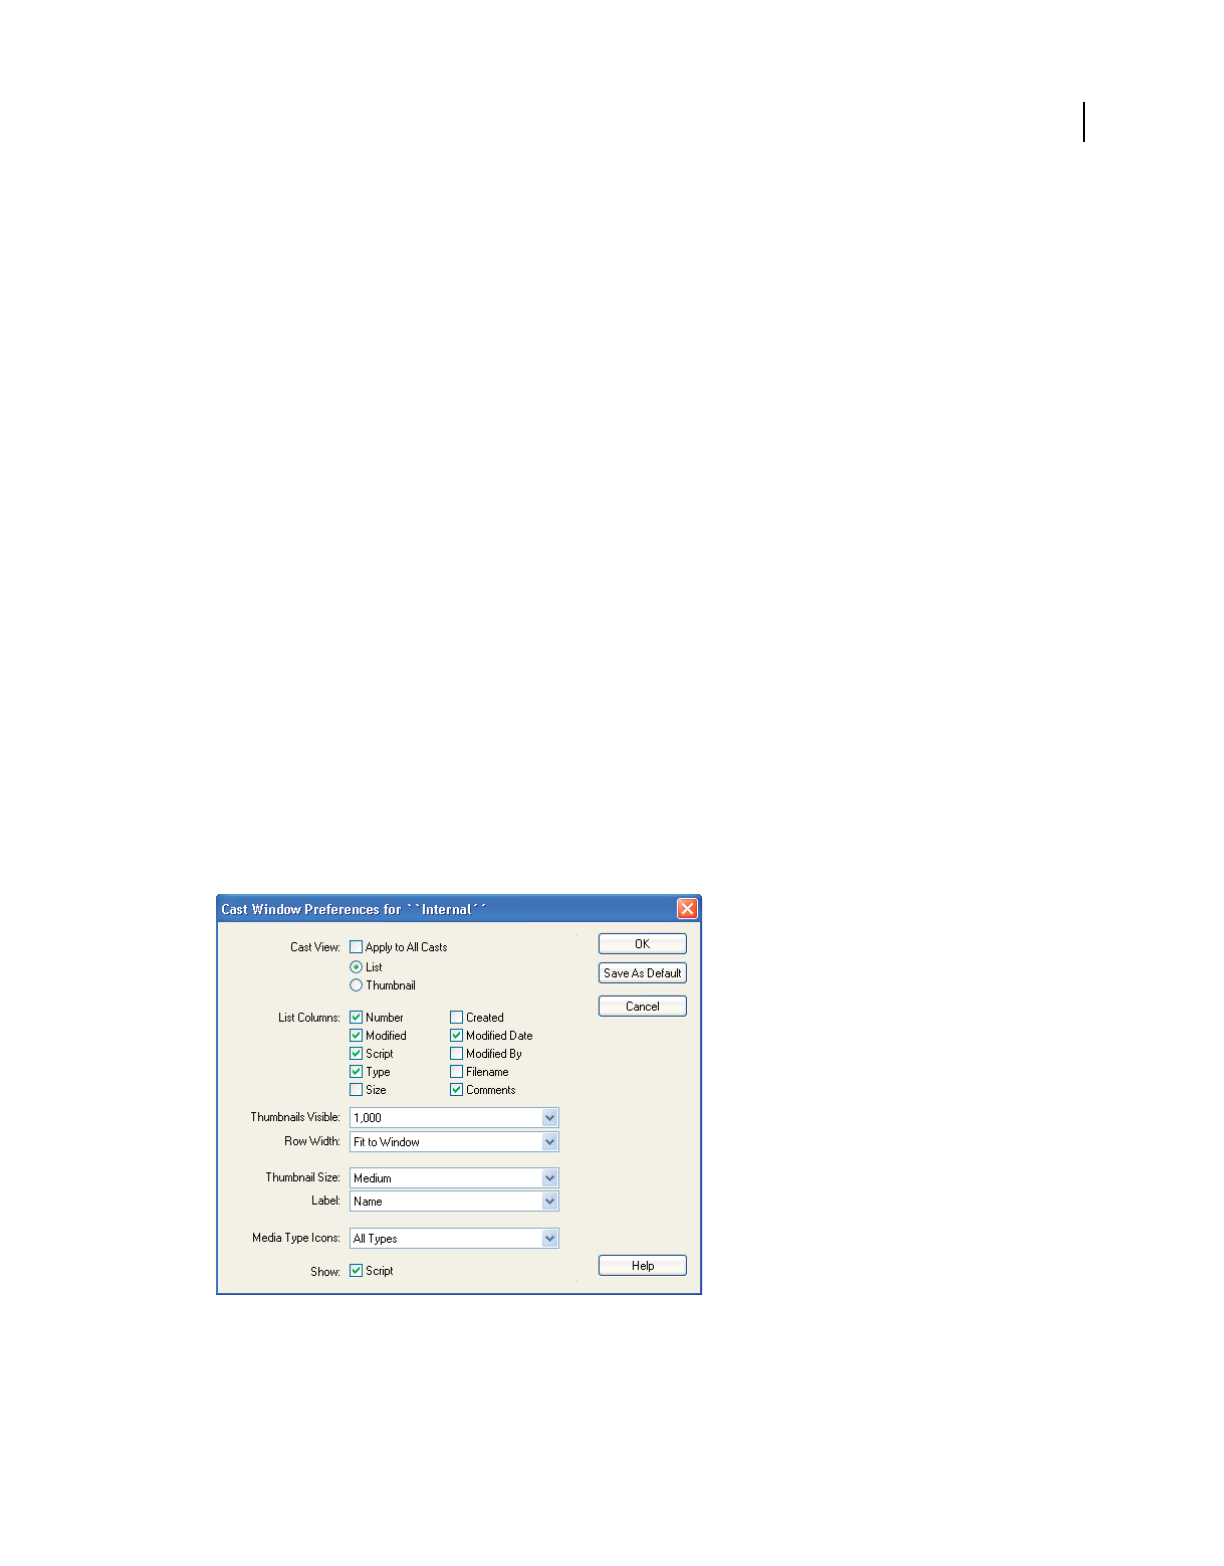
47
USING DIRECTOR 11.5
Score, Stage, and Cast
Last updated 9/28/2011
Using the Cast window
In the Cast window, you can view the cast in either the default List view or the Thumbnail view. (To change the default
so that the Cast window opens in Thumbnail view, see “Setting Cast window preferences” on page 47.)
You can do the following in the Cast window:
•Organize and display all media in a movie.
•Move groups of cast members.
•Start editors for cast members.
•Launch the Property inspector to view, add, and change comments about your cast members and to view and
modify cast member properties.
•Group multiple casts in a tabbed view using panel groups (see “Working with Cast panel groups” on page 51).
To view the Cast window, select Window > Cast or press Control+3 (Windows) or Command+3 (Mac). If there is
more than one cast in the movie, specify which Cast window to open by selecting a cast name from the Cast submenu.
Setting Cast window preferences
Use the Cast window preferences settings to control the appearance of the current Cast window or, if desired, all Cast
windows. You can set different preferences for each Cast window. The title bar of the dialog box displays the name of
the Cast window preferences you are changing.
1Select a Cast window to change, or a click a tab within a Cast panel group.
2Select Edit > Preferences > Cast.
Note: If you are using a Mac OS X operating system, select the Director menu, instead of the Edit menu, to access
Preferences.
Cast window preferences
3To set the Cast window to appear in either List or Thumbnail view, select the appropriate Cast View option.
4If you want your preferences to apply to all Cast windows, select Apply To All Casts.

48
USING DIRECTOR 11.5
Score, Stage, and Cast
Last updated 9/28/2011
5To select the columns that appear in Cast List view, select List Columns options. See “Using Cast List view” on
page 53.
6To specify the maximum number of cast members to appear in the Cast window, select a value from the
Thumbnails Visible menu.
This option doesn’t limit the number of cast members that can exist in the cast. If you have a small number of cast
members, you can hide the remaining unused cast positions to make better use of the vertical scroll bar. The default
is 1000.
7To specify the number of thumbnails in each row of the Cast window, select an option from the Row Width menu.
The options for 8 Thumbnails, 10 Thumbnails, and 20 Thumbnails specify fixed-row widths that are independent
of the window size. If the Cast window is smaller horizontally than the width of the cast row, you must use the
horizontal scroll bar to reveal the rest of the cast. The Fit To Window option automatically adjusts the number of
cast members per row to fit in the current width of the Cast window. In this mode, the horizontal scroll bar is
disabled because the entire width of the cast is always in view. The default is Fit To Window.
8To set the size of each cast thumbnail image that appears in the Cast window, select one of the following options
from the Thumbnail Size menu:
Small 44 x 33 pixels
Medium 56 x 42 pixels (default)
Large 80 x 60 pixels
Thumbnails always maintain the standard 4:3 aspect ratio.
If the thumbnails appear fuzzy, they are probably appearing in larger than their original size. To correct this, change
the Cast window preferences thumbnail setting to a smaller size. Click OK when prompted about regenerating
thumbnails.
9To select the display format of the cast member ID that appears below each cast thumbnail image in the Cast
window, select one of the following options from the Label menu:
Number Displays the cast number.
Name Displays the cast name, if one exists; otherwise, this option displays the cast number in decimal format.
Number:Name Displays the cast number in decimal format and the cast name, separated by a colon (:) (for
example, 340:Dancing Potato). If no name exists, this setting displays the cast number in decimal format.
The selected format is also used in other windows, including the Score, whenever a cast ID appears.
10 To specify whether Director displays an icon that indicates the cast member’s type, select one of the following from
the Media Type Icons menu: All Types, All But Text and Bitmap, or None. Icons appear in the lower-right corner
of each cast member
11 To display a script indicator icon in the lower-left corner of each cast member that has a script attached, select
Script.
12 To make your preference settings the default settings, click Save As Default.
Naming cast members
To avoid problems in Lingo or JavaScript syntax when referring to cast members, name them and then refer to them
by name. Naming cast members doesn’t affect Director performance. The name stays the same even if the cast member
number changes.

49
USING DIRECTOR 11.5
Score, Stage, and Cast
Last updated 9/28/2011
Avoid duplicating cast member names. If more than one cast member has the same name, Lingo or JavaScript syntax
uses the cast member with the lowest number in the cast.
1Select the cast member in either the List or the Thumbnail view of the Cast window.
2Do one of the following:
•Enter a name in the Cast Member Name text box at the top of the Cast window or in any of the editing windows.
•Enter a name in the Name text box on the Cast or Member tab in the Property inspector.
To name a cast member by using Lingo or JavaScript syntax, set the name Cast Member property. For more
information about this property, see the Scripting Reference topics in the Director Help Panel.
Selecting cast members in the Cast window
Before changing, sorting, or moving cast members, you must select them in the Cast window.
Select a single cast member
Do one of the following:
•In List view, click the name or icon (Windows) or click any part of the text or icon (Mac).
•In Thumbnail view, click the thumbnail image.
Select multiple adjacent cast members
Do one of the following:
•In List view, Shift-click the cast members.
•In Thumbnail view, click the first cast member in the range and then Shift-click the last cast member in the range.
Select multiple nonadjacent cast members
❖In either List or Thumbnail view, Control-click (Windows) or Command-click (Mac) each cast member that you
want to select.
Copying cast members
You can create multiple versions of a cast member in a single cast. You can also copy cast members from one Cast
window to another.
1In either List or Thumbnail view, select the cast members that you want to copy.
2Alt-click (Windows) or Option-click (Mac), and drag the cast member to a new location (Thumbnail view) or to
the bottom of the list (List view).
You can drag the cast member to a location in the same Cast window or to a different Cast window. Director creates
a cast member with a new number. All of its other information is identical to the original.
3If you copied the cast member into the same Cast window, change the name of the copied cast member so that you
(and scripts) can distinguish it from the original. For more information, see “Naming cast members” on page 48.
Moving cast members within the Cast window
When moving a cast member to a new position or a different cast within the Cast window, use Thumbnail view to see
the representation of the cast member’s position.

50
USING DIRECTOR 11.5
Score, Stage, and Cast
Last updated 9/28/2011
Note: When you move a cast member to a new position, Director assigns it a new number and updates all references to
the cast member in the Score. However, Director doesn’t automatically update references to cast member numbers in
Lingo or JavaScript syntax. The best practice is to always name cast members and refer to them by name in scripts that
refer to them.
❖Using Thumbnail view, drag the cast member to a new position in any open Cast window.
In Thumbnail view, a highlight bar indicates where the cast member will be placed. If you drag the cast member
over a position that already contains a cast member, Director places your selected cast member in that position and
moves the existing cast member one position to the right.
In List view, the cast member is added to the bottom of the list.
Cut, copy, and paste cast members to a new position or a different cast
1Select one or more cast members, and then select Cut or Copy from the Edit menu.
2Do one of the following:
•In Thumbnail view, select an empty position in any open Cast window, and then select Edit > Paste.
•In List view, deselect all cast members by clicking anywhere in the window except on a cast member name. Then
select Edit > Paste.
Note: In either Thumbnail or List view, if you paste cast members while other cast members are selected, you will
overwrite the selected cast members.
Move a cast member to a position that is not currently visible in Thumbnail view
1Select the cast member you want to move.
2Scroll the Cast window to display the destination position.
3Drag the Drag Cast Member button to the destination position.
Organizing cast members within the Cast window
The Sort command in the Modify menu helps clean up and organize the Cast window. Use Sort to sort cast members
by their media type, name, size, or usage in the Score. You can also use Sort to remove empty positions in a Cast
window.
When you use the Sort command to organize a Cast window, Director can move cast members to new positions, with
new cast member numbers.
Note: If you’ve written scripts that refer to cast members by number, these scripts can’t find moved cast members. To
avoid this problem, always name your cast members and refer to them by name in your scripts.
If you want to view the cast members in a different sort order without changing cast member numbers, click a column
title in Cast List view. See “Sorting Cast List view columns” on page 54.
1With the Cast window active, select the cast members to sort or select Edit > Select All.
2Select Modify > Sort.
3In the Sort Cast Members dialog box, select one of the following sorting methods:
Usage In Score Places selected cast members that are used in the Score at the beginning of the selection.
Media Type Groups all cast members according to their media type.
Name Groups the selection alphabetically by cast member name.

51
USING DIRECTOR 11.5
Score, Stage, and Cast
Last updated 9/28/2011
Size Arranges the selection with the largest files appearing first.
Empty At End Places all empty cast positions in the selection at the end.
4Click Sort.
Director reorders the cast members according to the sorting method you selected. The Score automatically adjusts
to the new cast member numbers.
Switching from one Cast window view to another
Do one of the following to toggle between List and Thumbnail views of the Cast window:
•Click the Cast View Style button on the Cast window to toggle between the two views.
Cast View Style
•With the Cast window active, select View > Cast, and select either List or Thumbnail.
•Right-click (Windows) or Control-click (Mac) the Cast window, and select either List or Thumbnail.
Working with Cast panel groups
Each Cast panel and panel group has an Options menu located in its upper-right corner. The Options menu contains
items for grouping, closing, and renaming panels.
Use a Cast panel Options menu
❖Click the Options menu control in the upper right of the panel, and select a menu item.
Help Launches the page in the Help system that is relevant to the current panel.
Group [Panel name] With Lets you group the currently selected tab in a panel group with another Cast panel or
panel group.
Rename Panel Group Opens the Rename Panel Group dialog box.
Maximize Panel Group Maximizes the panel group to occupy the entire height of the docking channel.
Close Panel Group Closes the panel group.
Group a Cast panel with another Cast panel or Cast panel group
1Select a Cast panel or a tab within a Cast panel group.
2From the panel’s Options menu, select Group [Panel Name] With, and then select a panel or panel group name
from the submenu that appears.
Remove a panel (tab) from a Cast panel group
1Select a tab within a Cast panel group.
2From the panel group’s Options menu, select Group [Panel Name] With, and then select New Panel Group from
the submenu that appears.
The selected panel opens in its own floating panel. The new panel assumes the name previously assigned to it.
Note: The New Panel Group submenu option is dimmed if the panel group contains only a single panel.
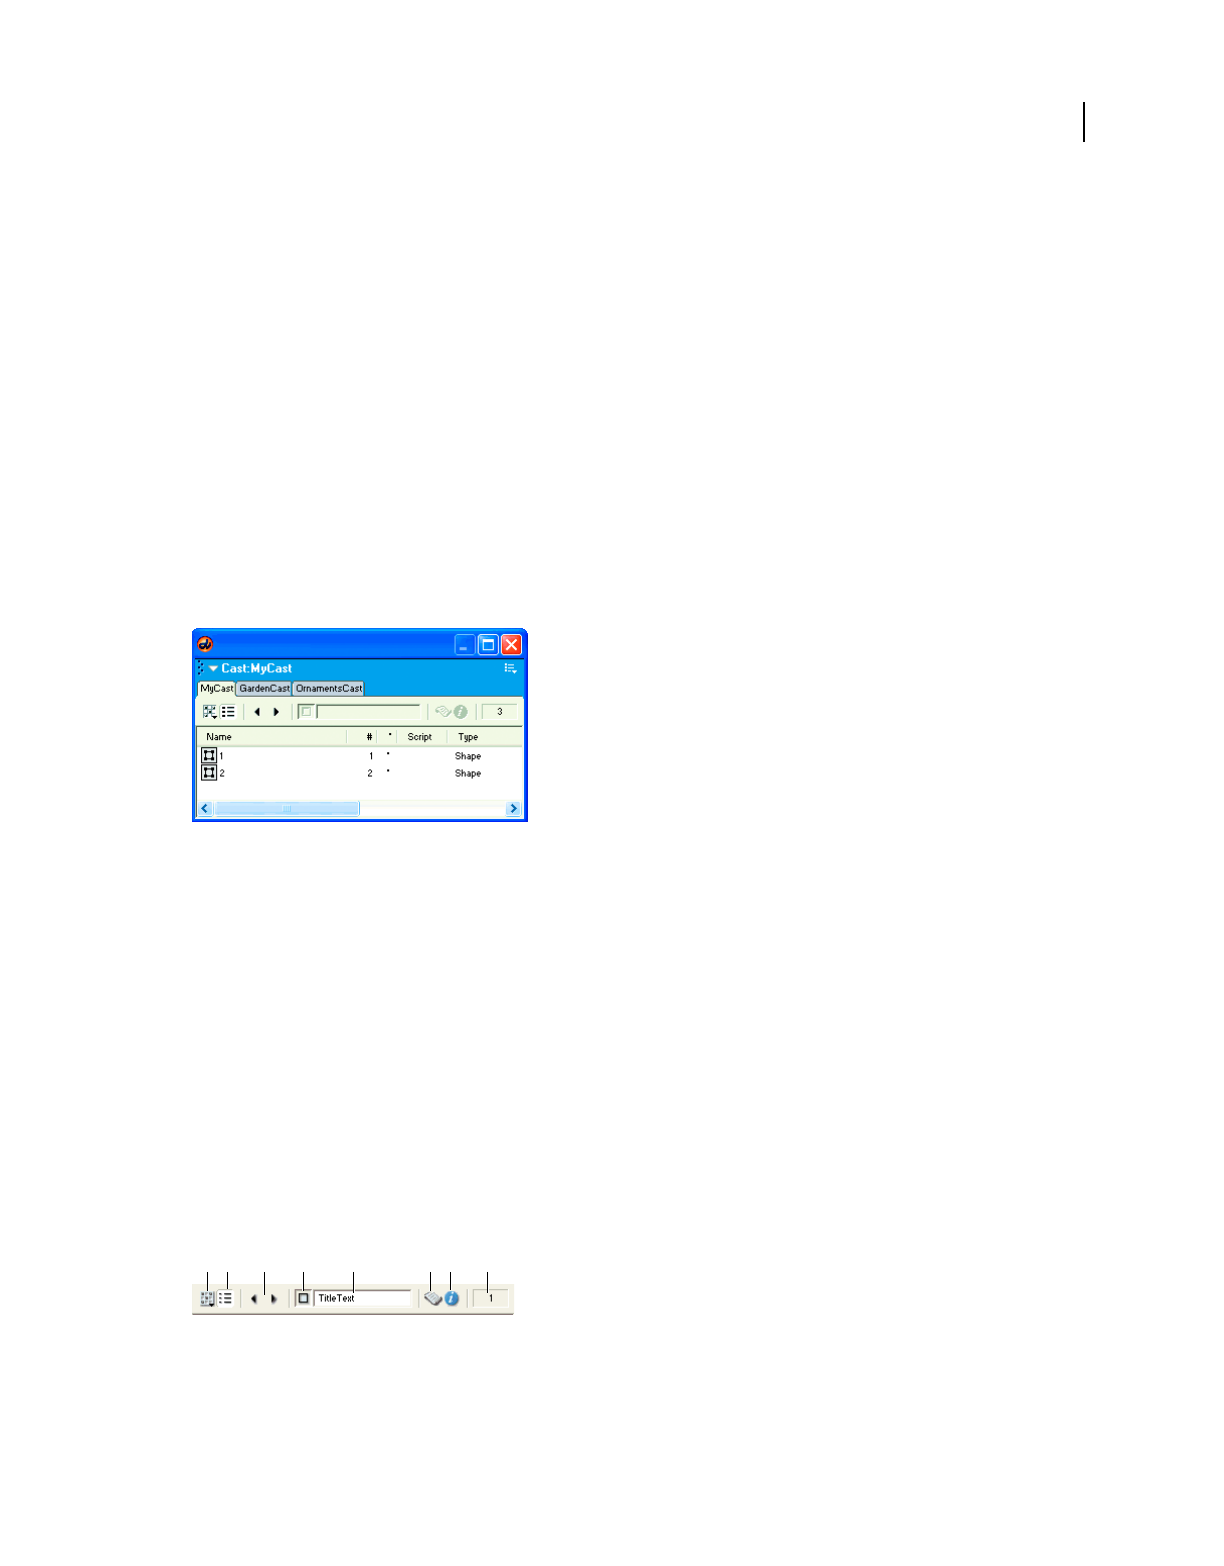
52
USING DIRECTOR 11.5
Score, Stage, and Cast
Last updated 9/28/2011
Rename a Cast panel group
❖Select Rename Panel Group from the panel’s Options menu, and then type a new name for the panel group in the
Rename Panel Group dialog box.
Rearrange the order of tabs within a Cast panel group
1Select a tab within the Cast panel group.
2Select Group [Panel Name] With from the panel group’s Options menu, and then choose the name of the Cast
panel group that contains the selected panel.
The tab is moved to the last (rightmost) position in the panel group.
Note: Save your panel layout if you want to restore your Cast panel configuration the next time you open your file. Select
Window > Panel Sets > Save Panel Layout.
Managing casts
When casts are grouped with other casts, they appear as tabs in the Cast panel group, as shown.
Cast panel group
To save the configuration of your Cast panel tabs, you must save the panel layout before closing your file. When you
open the file again, restore the tab configuration by opening the panel layout you created.
Managing casts in older Director movies
When you open a multicast movie created in a previous version of Director, only the first cast appears in the Cast
window. You can display the remaining casts as tabs in a panel group or in a new Cast window.
•To open the cast as a tabbed panel, in the Cast window, click the Cast button and select the cast.
•To open a cast in a new window, Alt-click (Windows) or Option-click (Mac) the Cast button and select a cast.
Using Cast window controls
The controls at the top of the Cast window are the same in both the List and Thumbnail views. Use the controls to
change the cast that appears in the Cast window, the cast member selection, or the name of a cast member. You can
also use them to move cast members and to open a cast member’s Script window or the Property inspector.
Cast window controls
A. Cast B. Cast View Style C. Previous/Next Cast Member D. Drag Cast Member E. Cast Member Name F. Cast Member Script G. Cast
Member Properties H. Cast Member Number
ABC DEF
GH

53
USING DIRECTOR 11.5
Score, Stage, and Cast
Last updated 9/28/2011
Change the cast displayed in the current Cast window
Do one of the following:
•Click the Cast button and select a cast from the menu.
•Click a tabbed panel to make it active.
•Press Control+Alt (Windows) or Command+Option (Mac) followed by the Right Arrow key or Left Arrow key to
move from tab to tab.
Open a cast in a new Cast window
❖Click the Cast button and select a cast from the context menu.
Select the previous or next cast member
❖Click the Previous Cast Member or Next Cast Member button.
Move a selected cast member to a new position in the Cast window (Thumbnail view) or to
the Stage
❖Drag the Drag Cast Member button to the desired position in the Cast window or to the Stage.
This procedure is useful when the selected cast member has scrolled out of view.
Enter a cast member name
❖Select a cast member and enter the name in the Cast Member Name text box.
Edit a cast member script
❖Select a cast member and click the Cast Member Script button.
View cast member properties
1Select a cast member.
2Do one of the following:
•Click the Cast Member Properties button.
•Right-click (Windows) or Control-click (Mac), and select Cast Member Properties from the context menu.
•Select Window > Property Inspector. The Property inspector displays only those properties associated with the
selected cast member.
For more information, see “Viewing and setting cast member properties” on page 39.
View the cast member number
❖See the Cast Member Number field in the upper-right corner of the Cast window.
Using Cast List view
By default, the Cast List view (the default view in which the Cast window opens) provides seven columns of
information.
54
USING DIRECTOR 11.5
Score, Stage, and Cast
Last updated 9/28/2011
Four additional columns are available in the Cast Window Preferences dialog box. For more information, see “Setting
Cast window preferences” on page 47.
Resizing columns in Cast List view
1Hold the pointer over the column boundary to activate the Resizing tool.
2Drag the column to the desired size.
Sorting Cast List view columns
You can sort the Cast List view columns in ascending and descending order by clicking the column title. When you
sort the Cast List window by clicking the column title, you’re changing the way in which the information appears but
not changing any cast member attributes.
About cast member order in Cast List view
In List view, the cast member order doesn’t always correspond to the member’s physical location in the cast.
When you work in List view, keep the following in mind:
•In List view, Director places new cast members at the end of the list, and the cast member number becomes the first
available number after the current selection.
•You can use Thumbnail view to reorder (and renumber) cast members by dragging them to different locations in
the window. You can’t reorder cast members by dragging in List view.
Column Title Column Information
Name The name of the cast member and an icon that describes the cast member type. For information about
what the icons represent, see “Using Cast Thumbnail view” on page 55.
#The number that is assigned to the cast member. This number represents the order in which this cast
member appears in Thumbnail view.
* An asterisk (*) in this column indicates the cast member has changed, but you have not yet saved those
changes.
Script The word Member in this column means the cast member contains a script.
The word Movie in this column means the cast member is a movie script.
The word Behavior in this column means the cast member is a Behavior.
You can use the Script icon to view the script or behavior.
Type The cast member type.
Modified The date and time the cast member was changed.
Comments Displays text entered in the Comments text box on the Property inspector Member tab.
Column Title Column Information
Size The size in bytes, kilobytes, or megabytes.
Created The date and time the cast member was created.
Modified By Who modified the cast member. This value comes from the user login name (Windows) or the Sharing
setup name (Mac).
Filename The full path to the cast member if it is a linked asset.
55
USING DIRECTOR 11.5
Score, Stage, and Cast
Last updated 9/28/2011
Using Cast Thumbnail view
Cast Thumbnail view shows a very small version of the cast member, along with an icon that represents the cast
member media type, as shown in the following table:
Turn off or on the display of cast member icons in Thumbnail view and change the Cast window display
❖Select Edit > Preferences > Cast (Windows) or Director > Preferences (Mac). For more information, see “Setting
Cast window preferences” on page 47.
Icon Cast member type Icon Cast member type
Animated GIF Behavior
Bitmap Button
Check box Custom cursor
Digital video DVD
Field Film loop
Flash component Flash movie
Font Linked bitmap (all linked cast member icons are changed in the
same way)
Movie script OLE
Palette Parent script
PICT QuickTime video
Radio button RealMedia
Shape Shockwave 3D
Shockwave Audio Sound
Text Transition
Vector shape Windows Media
Xtra
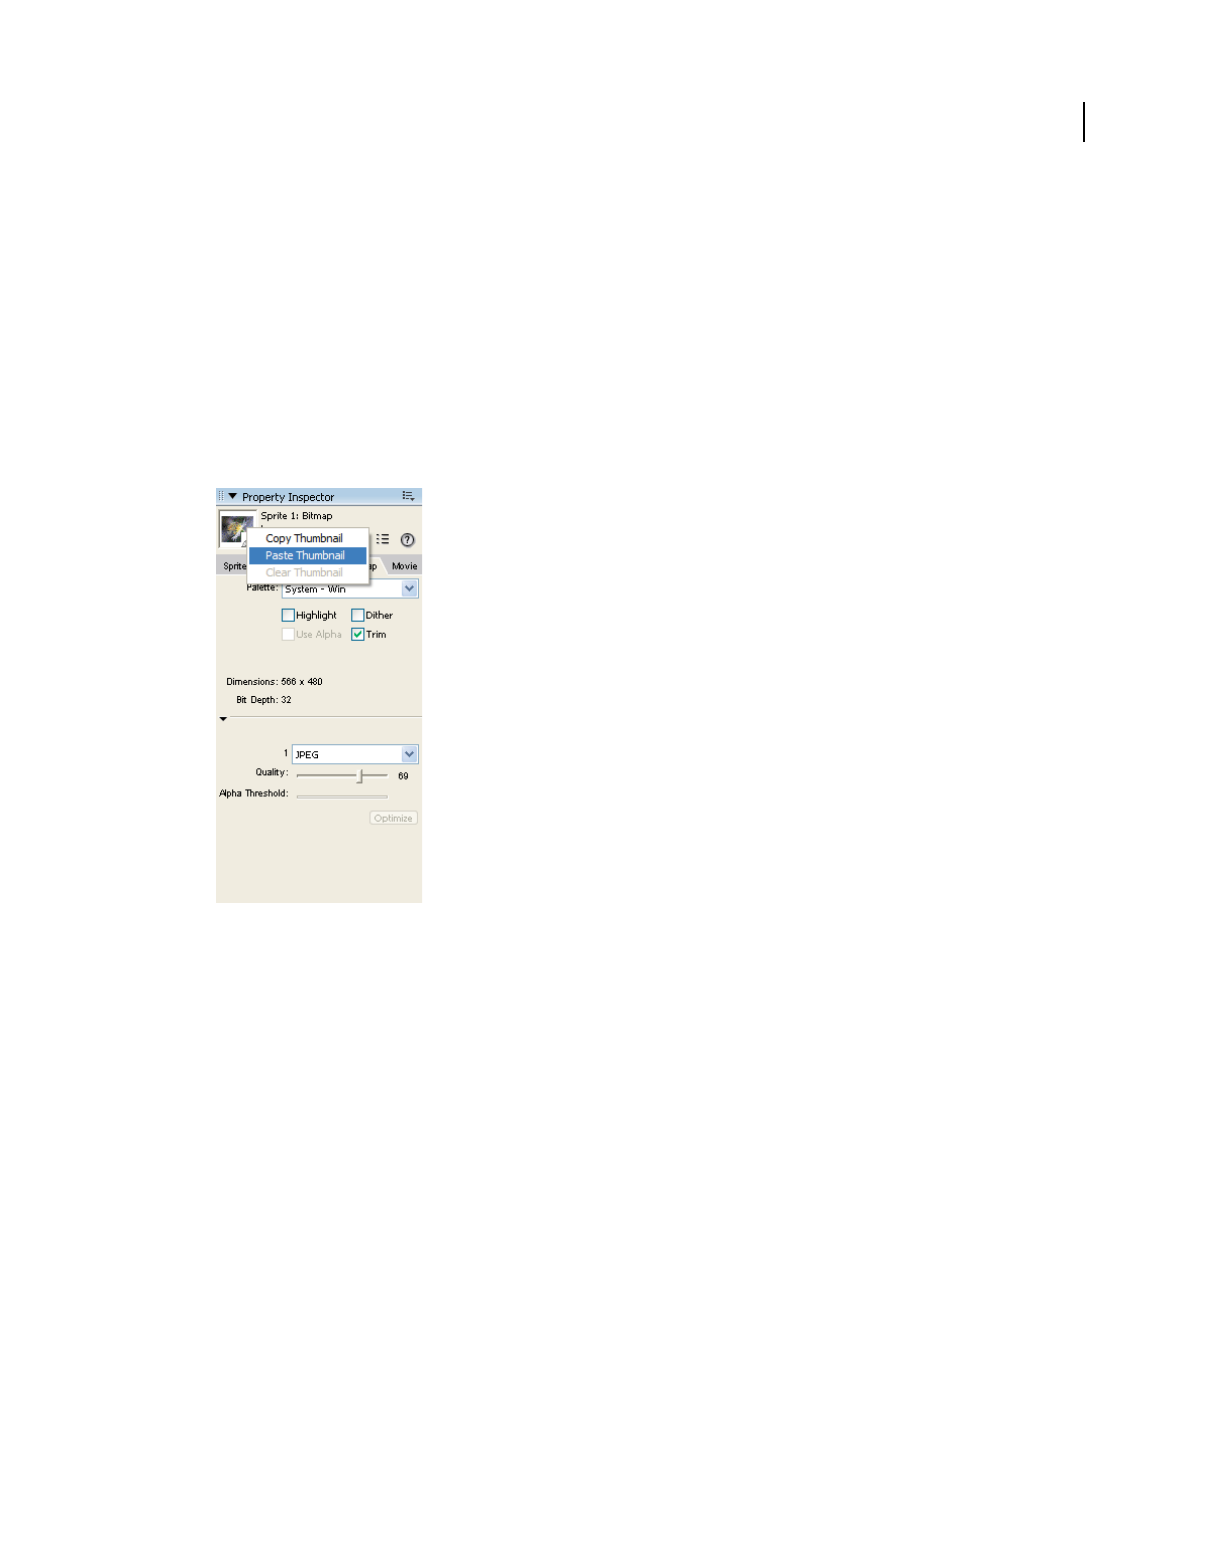
56
USING DIRECTOR 11.5
Score, Stage, and Cast
Last updated 9/28/2011
Creating a custom cast member thumbnail
Note: For most cast members, Director displays a scaled version as the thumbnail unless you define a custom thumbnail.
Creating a custom thumbnail is useful for behaviors that you want to identify in the Library palette, because behaviors
have no identifying image.
1Select a bitmap image and copy it to your system’s Clipboard.
You can copy the image from any bitmap editor, including the Paint window. The image can be of any size, but
smaller images look better because they require less scaling.
2Select any cast member in the Cast window and open the Property inspector.
3Right-click (Windows) or Control-click (Mac) the Thumbnail window.
Paste a thumbnail
4From the context menu, select Paste Thumbnail.
The image from the Clipboard replaces the current cast member thumbnail, creating a custom thumbnail.
Note: You can also use text as a thumbnail. Create and copy text instead of an image from any bitmap editor and follow
the same steps.
Launching external editors
You can specify external applications to edit many types of media. The Editors Preferences dialog box lists all the types
of media for which you can define an external editor. After you set up an external editor for a particular media type,
Director starts the application when you edit a cast member of that type. When you finish editing a cast member in an
external editor and then save and close the file, Director re-imports the cast member media.
You can easily edit Flash cast members by using the launch-and-edit feature in Director. For more information, see
“Editing a Flash cast member” on page 197.
To use an external editor for an imported cast member, select Include Original Data For External Editing during
import. For more information, see “Importing cast members” on page 42.

57
USING DIRECTOR 11.5
Score, Stage, and Cast
Last updated 9/28/2011
You can’t define an external editor for any cast member created by an Xtra, such as text, vector shapes, and custom
pointers.
Define an external editor
1Select Edit > Preferences > Editors.
Note: If you are using a Mac OS X operating system, select the Director menu, instead of the Edit menu, to access
Preferences.
2Select a type of media for which you want to define an external editor.
3Click Edit.
4Click Browse or Scan to locate the application. You can specify any application capable of editing the selected type
of media.
5To determine which editor appears when you double-click a cast member, do one of the following:
•If you prefer to make changes inside Director and only occasionally want to use the external editor, select Use
Internal Editor.
•If you prefer to use the external editor to make changes to the cast member, select Use External Editor.
Launch an external editor
1Select a cast member of a media type for which you have defined an external editor, and do one of the following:
•If you specified Use External Editor when you defined the external editor for this media type, double-click the
cast member.
•Select Edit > Launch External Editor.
•While the cast member is selected and the Cast window is active, right-click (Windows) or Control-click (Mac)
and select Launch External Editor from the context menu.
Director launches or switches to the application that created the cast member, sending the original data to the
external editor.
Note: If you specified an external editor and you want to edit a cast member with the Director internal editors, select
the cast member and select Edit > Edit Cast Member.
2Edit the cast member.
If you change an image in the Paint window and then edit the image with an external editor, all changes that were
made in the Paint window (except registration points) are lost.
3Save and close the file. Director re-imports the cast member.
Managing external casts
An external cast is a separate file that must be explicitly linked to a movie for the movie to use its cast members.
If you link an external cast to a movie, Director opens the cast every time it opens the movie. If you don’t link an
external cast to a movie, you must open and save the file separately. You can use unlinked external casts as libraries to
store commonly used elements for authoring, such as scripts, buttons, and so on. For more information, see “Creating
libraries” on page 58.

58
USING DIRECTOR 11.5
Score, Stage, and Cast
Last updated 9/28/2011
When you distribute a movie that uses an external cast, you must include the external cast file. The Copy Linked And
Dependent Files option in the Publish Settings dialog box ensures that the linked media are automatically placed in
the relative location during Publishing. If you have disabled the Copy Linked And Dependent Files option, copy the
linked files to the same folder as the projector or in a folder inside the Projector folder. For disk-based movies, the cast
must be in the same relative path in your files as it was when the movie was created. For Shockwave Player movies on
the web, the cast must be at the specified URL.
Create an external cast
1Select File > New > Cast.
2Type a name for the new cast.
3Specify that the cast be stored as an external cast.
If you don’t want to use the cast in the current movie, deselect the Use In Current Movie option.
4Click Create.
The cast is created, and a Cast window for the cast appears in List view. For more information, see “Using the Cast
window” on page 47.
5Select File > Save while the Cast window is active, and save the cast in the desired directory.
Link an external cast to a movie
1Select Modify > Movie > Casts.
2In the Movie Casts dialog box, click Link.
3Locate and select the external cast you want, and click Open.
You can link to casts on your local disk or to casts that are stored at any URL. Click Internet and enter a URL (in
the Find URL text box) for a linked external cast.
Unlink a cast from a movie
1Select Modify > Movie > Casts.
2In the Movie Casts dialog box, select the external cast.
3Click Remove.
Save a movie and all linked or unlinked open casts
❖Select File > Save All.
Note: To use a cast member from an external cast without creating a link to the external cast, first copy the cast
member to an internal cast or to a different linked external cast.
Creating libraries
A library is a special type of unlinked external cast that appears in the Library palette. When you drag a cast member
from an external cast library to the Stage or Score, Director automatically copies the cast member to one of the movie’s
internal casts. Libraries are useful for storing any type of commonly used cast members, especially behaviors. A library
cannot be linked to a movie. For more information, see “Attaching behaviors” on page 279.

59
USING DIRECTOR 11.5
Score, Stage, and Cast
Last updated 9/28/2011
When you create a library, it appears in the Library List menu in the Library palette.
1Create an external cast file, using the procedure under “Creating new casts” on page 36. Do not select Use In
Current Movie.
2With the Cast window for the external cast active, select File > Save, and place the external cast in the Libs folder in
the Director application folder.
3Restart Director. The cast that you just created appears in the Library palette.
Setting cast member properties by using Lingo or
JavaScript syntax
Lingo or JavaScript syntax lets you control and edit cast members by setting their properties. Some properties are
available for every type of cast member, and other properties are available only for specific cast member types. For
more information about these properties, see the Scripting Reference topics in the Director Help Panel.
Specify the cast member’s content
❖Set the media Cast Member property.
Specify the cast member’s name
❖Set the name Cast Member property.
Set the contents of the cast member’s comments field
❖Set the comments Cast Member property. You can store any text information that you find useful, and access it at
runtime by getting the comments property.
Specify the cast member’s purge priority
❖Set the purgePriority Cast Member property.
Specify the content of the script that is attached to the cast member
❖Set the scriptText Cast Member property.
Specify the file that is assigned to a linked cast member
❖Set the fileName Cast Member property.
For additional cast member properties that you can test and set by using Lingo or JavaScript syntax, see the
properties in the Scripting Reference topics in the Director Help Panel.

60
USING DIRECTOR 11.5
Score, Stage, and Cast
Last updated 9/28/2011
Setting Xtra cast member properties
Xtra cast members have the same Name and Unload properties as other cast members, and they also contain an extra
panel of options that is accessible from the Property inspector. To set cast member properties, use the Member tab and
the custom tab for the type of cast member you are working with. The Member tab contains an Edit button and might
contain a More Options button, depending on the type of Xtra. Use the Edit button to edit the cast member with its
default editor. Use the More Options button to display the Cast Member Properties dialog box for the current cast
member.
The custom tab for the type of cast member you are working with might also contain a More Options button. This
button displays the Cast Member Properties dialog box for the current cast member.
The Xtra developer determines the content of the Properties dialog box. For non-Adobe Xtra extensions, refer to the
developer’s documentation that the developer supplies.
1Select an Xtra cast member.
2Open the Property inspector and click the Member tab.
The Member tab displays the following information about the member:
•The cast member name
•The name of the cast that contains the cast member
•The size in kilobytes
•The creation date
•The date the cast member was last modified
•The name of the user who last modified the cast member
3Use the Name field to view or edit the cast member name.
4To specify how Director removes cast members from memory if memory is low, select options from the Unload
menu. For information about these options, see “Controlling cast member unloading” on page 46.
5To set special options for the current Xtra cast member, click the custom tab for the cast member you are working
with. Some types of Xtra cast members also have a More Options button on this tab. Use this button to set any
properties of the cast member that are not displayed on the tab.

61
Last updated 9/28/2011
Chapter 4: Sprites
About sprites
A sprite is an object that controls when, where, and how cast members appear in an Adobe® Director® movie. Multiple
sprites can use the same cast member. You can also switch cast members assigned to a sprite as the movie plays. Use
the Stage to control where a sprite appears, and use the Score to control when it appears in your movie.
Sprites appear on the Stage layered according to the channel in which they are assigned in the Score. Sprites in higher-
numbered channels appear in front of sprites in lower-numbered channels. A movie can include as many as 1000 sprite
channels. Use the Movie tab of the Property inspector to control the number of channels.
Sprite properties include the sprite’s size and location, the cast member assigned to the sprite, the sprite’s name, and
the frames in which the sprite occurs. Different properties can alter the appearance of a sprite. You can rotate, skew,
flip, and change the color of sprites without affecting cast members. You can change sprite properties with the Property
inspector or Lingo or JavaScript syntax.
The Filters property of a sprite enables you to apply effects to any non-Direct To Score sprite, using the Filters tab in
the Property inspector. For more information about filters, see “Bitmap filters” on page 135.
You can also give each sprite a unique name. You can assign a name by using the Property inspector, and then view the
sprite by name in the Score and on the Stage. Assigning a name lets you refer to the sprite by that name in Lingo or
JavaScript™ syntax and not just by the channel number that it occupies. You can move a sprite to a different channel and
not worry about changing scripts. Editing scores and code scripts is much easier when you refer to a sprite by its name.
In Lingo or JavaScript syntax, some properties are available only for certain types of sprites. Such properties typically
are characteristics that are related to the specific sprite type. For example, Lingo or JavaScript syntax has several digital
video properties that determine the contents of tracks in digital video sprites.
Creating sprites
Create a sprite by dragging a cast member to either the Stage or the Score; the sprite appears in both places. New sprites,
by default, span 30 frames.
1Click to select the frame in the Score where you want the sprite to begin.
2From the Cast window, in either List or Thumbnail view, do one of the following:
•Drag a cast member to the position on the Stage where you want to place the sprite.
•Drag a cast member to the Score. Director places the new sprite in the center of the Stage.
•To create a sprite one frame long, press Alt (Windows®) or Option (Mac®) and drag a cast member to the Stage
or Score.

62
USING DIRECTOR 11.5
Sprites
Last updated 9/28/2011
Setting sprite general preferences
Use the Sprite Preferences dialog box to control the way sprites behave and appear in the Score window and on the
Stage.
1Select Edit > Preferences > Sprite.
Note: If you are using a Mac OS® X operating system, select the Director menu, instead of the Edit menu, to access
Preferences.
2To set the effect of selecting a sprite on the Stage, choose a Stage Selection option:
Entire Sprite Selects the sprite in all frames that it occupies.
Current Frame Only Selects only the current frame of the sprite.
3To determine the appearance and behavior of sprites yet to be created, select the following Span Defaults
options.These options don’t change settings for existing sprites.
Display Sprite Frames Turns on Edit Sprite Frames for all new sprites. See “Editing sprite frames” on page 95.
Tweening Turns on tweening for all properties that can be tweened. This option is on by default. With this option
off, sprites must be manually tweened when new frames or keyframes are added to the sprite. For additional
information about tweening, see “Animation” on page 90.
4To determine the length of sprites measured in frames, select a Span Duration option from the following:
Frames Defines the default number of frames for sprites.
Width Of Score Window Sets the sprite span to the visible width of the Score window.
Terminate At Markers Makes new sprites end at the first marker.
5To specify the frame used as the beginning of a sprite span when you create or edit new sprites on the Stage, select
a Span Starts option:
Previous Marker Sets the sprite span to begin at the sprite’s previous marker.
Current Frame Sets the sprite span to begin at the current frame.
First Frame In Score Window Sets the sprite span to begin at the first frame in the current Score window.
Selecting sprites
To edit or move a sprite, you must select it. You can select sprites, frames within sprites, and groups of sprites in several
ways.
Use the Arrow tool on the Tool palette to select sprites before most operations. You can also select sprites with the
Rotate and Skew tool to enable rotation and skewing. See “Rotating and skewing sprites” on page 81.
When selecting sprites, you often want to select a certain frame or range of frames within the sprite instead of the entire
sprite. When you make certain changes to a frame within a sprite, it becomes a selectable object called a keyframe. See
“Editing sprite frames” on page 95.
A selected sprite appears on the Stage with a double border. When you select a single frame within a sprite, the sprite
appears on the Stage with a single border.
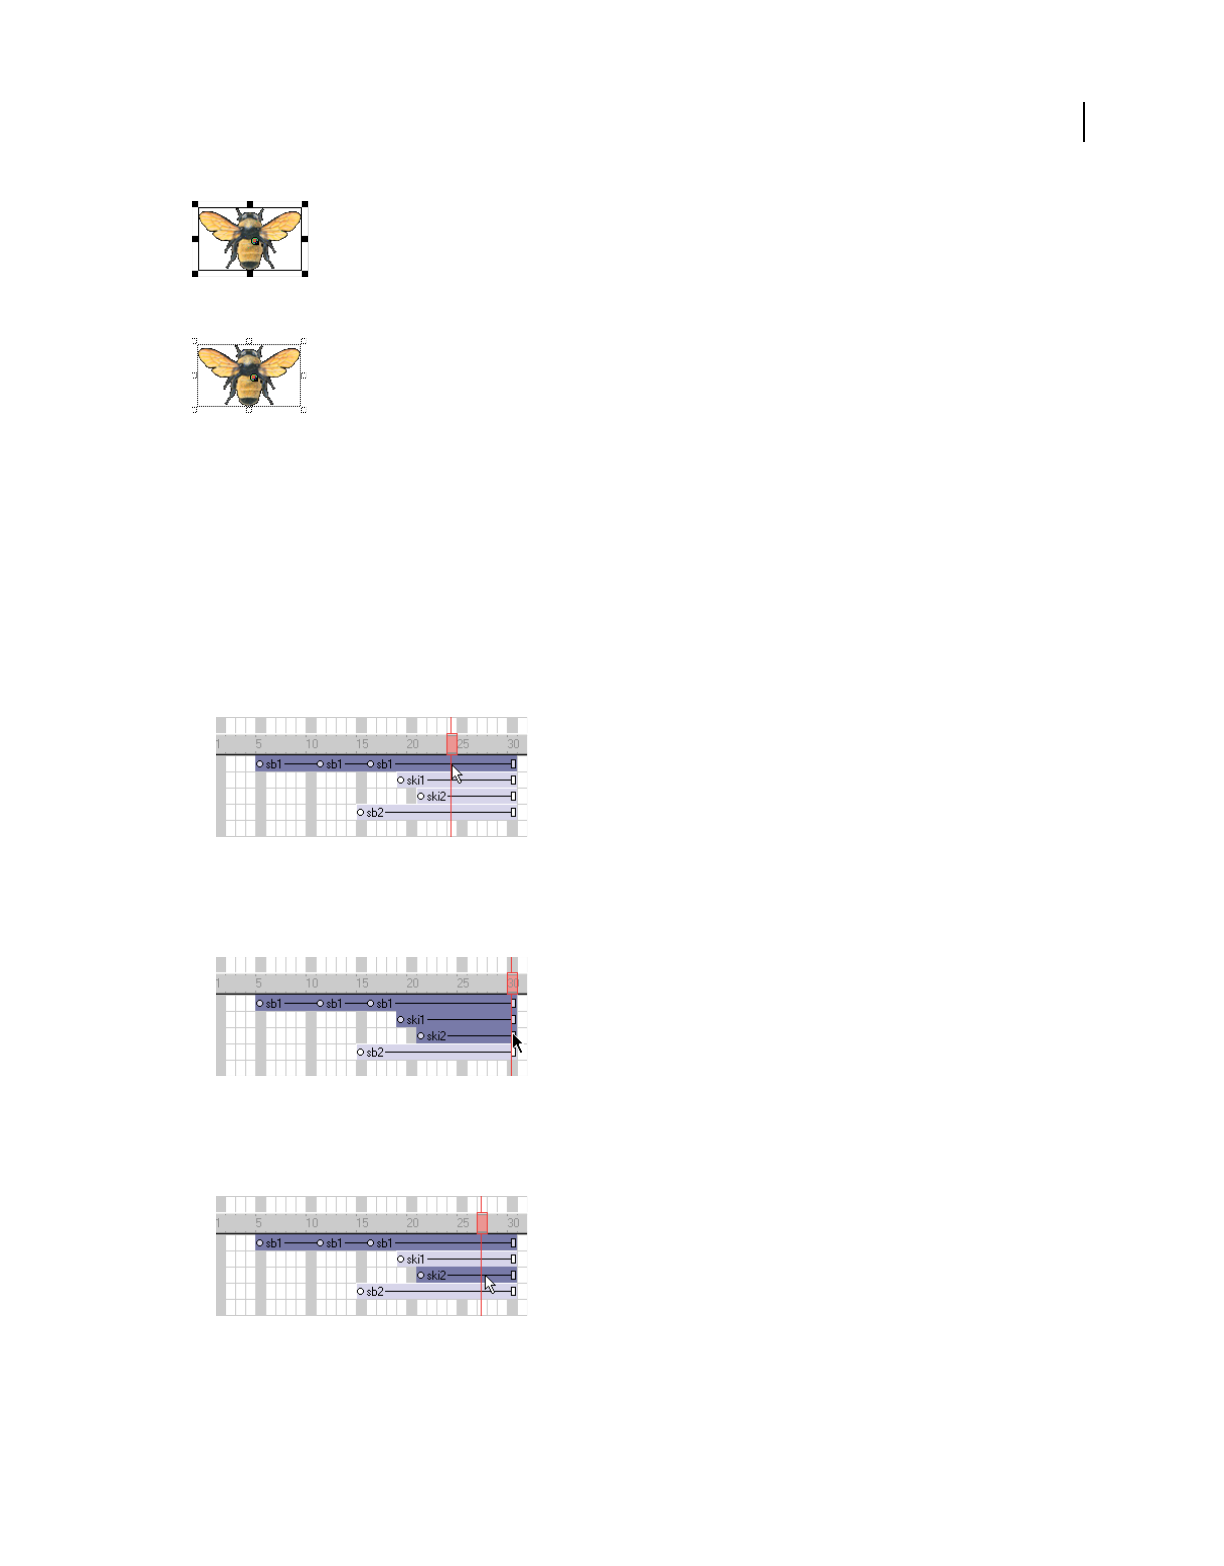
63
USING DIRECTOR 11.5
Sprites
Last updated 9/28/2011
Entire sprite selected
Single frame within sprite selected
Select sprites
Do one of the following:
Note: The following techniques select an entire sprite only if Edit Sprite Frames is not enabled for the sprites you select.
•On the Stage, click a sprite to select the entire sprite span.
You can change sprite preferences so that selecting a sprite on the Stage selects only the current frame instead of
the entire sprite. See “Setting sprite general preferences” on page 62.
•In the Score, click the horizontal line within a sprite bar. Don’t click the keyframes, the start frame, or the end frame.
Horizontal line within a sprite bar
•To select a contiguous range of sprites either on the Stage or in the Score, select a sprite at one end of the range and
then Shift-click a sprite at the other end of the range. You can also drag to select all the sprites in an area.
Contiguous range of sprites selected
•To select sprites that are not contiguous, Control-click (Windows) or Command-click (Mac) the discontiguous
sprites.
Non-contiguous sprites selected
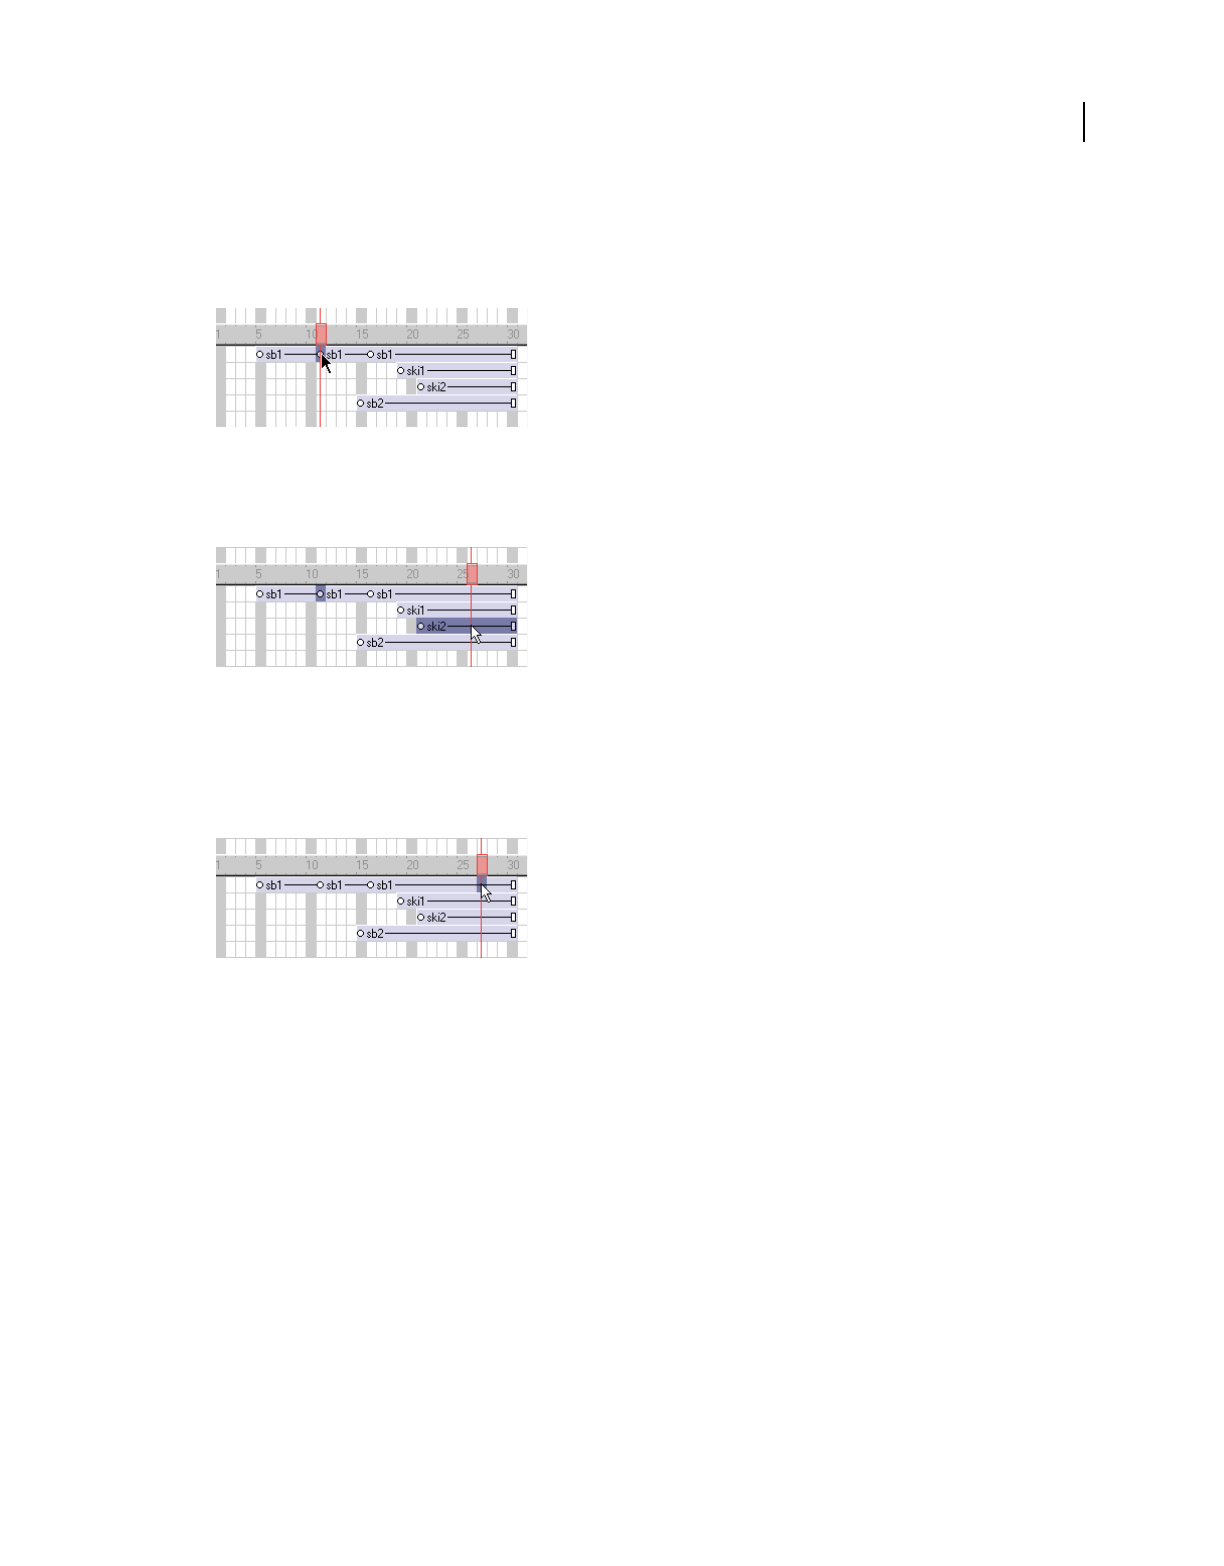
64
USING DIRECTOR 11.5
Sprites
Last updated 9/28/2011
Select a keyframe
Do one of the following:
•To select only a keyframe, click the keyframe indicator.
Keyframe selected
•To select a keyframe and sprites at the same time, Control-click (Windows) or Command-click (Mac) the keyframe
and the sprites.
Keyframe and sprites selected
Select a frame within a sprite that is not a keyframe
Do one of the following:
•In the Score, Alt-click (Windows) or Option-click (Mac) the frame within the sprite.
Frame within a sprite selected
•On the Stage, Alt-click (Windows) or Option-click (Mac) to select only the current frame of the sprite. The sprite
appears on the Stage with a single border.
Select all the sprites in a channel
❖Click the channel number at the left side of the Score.
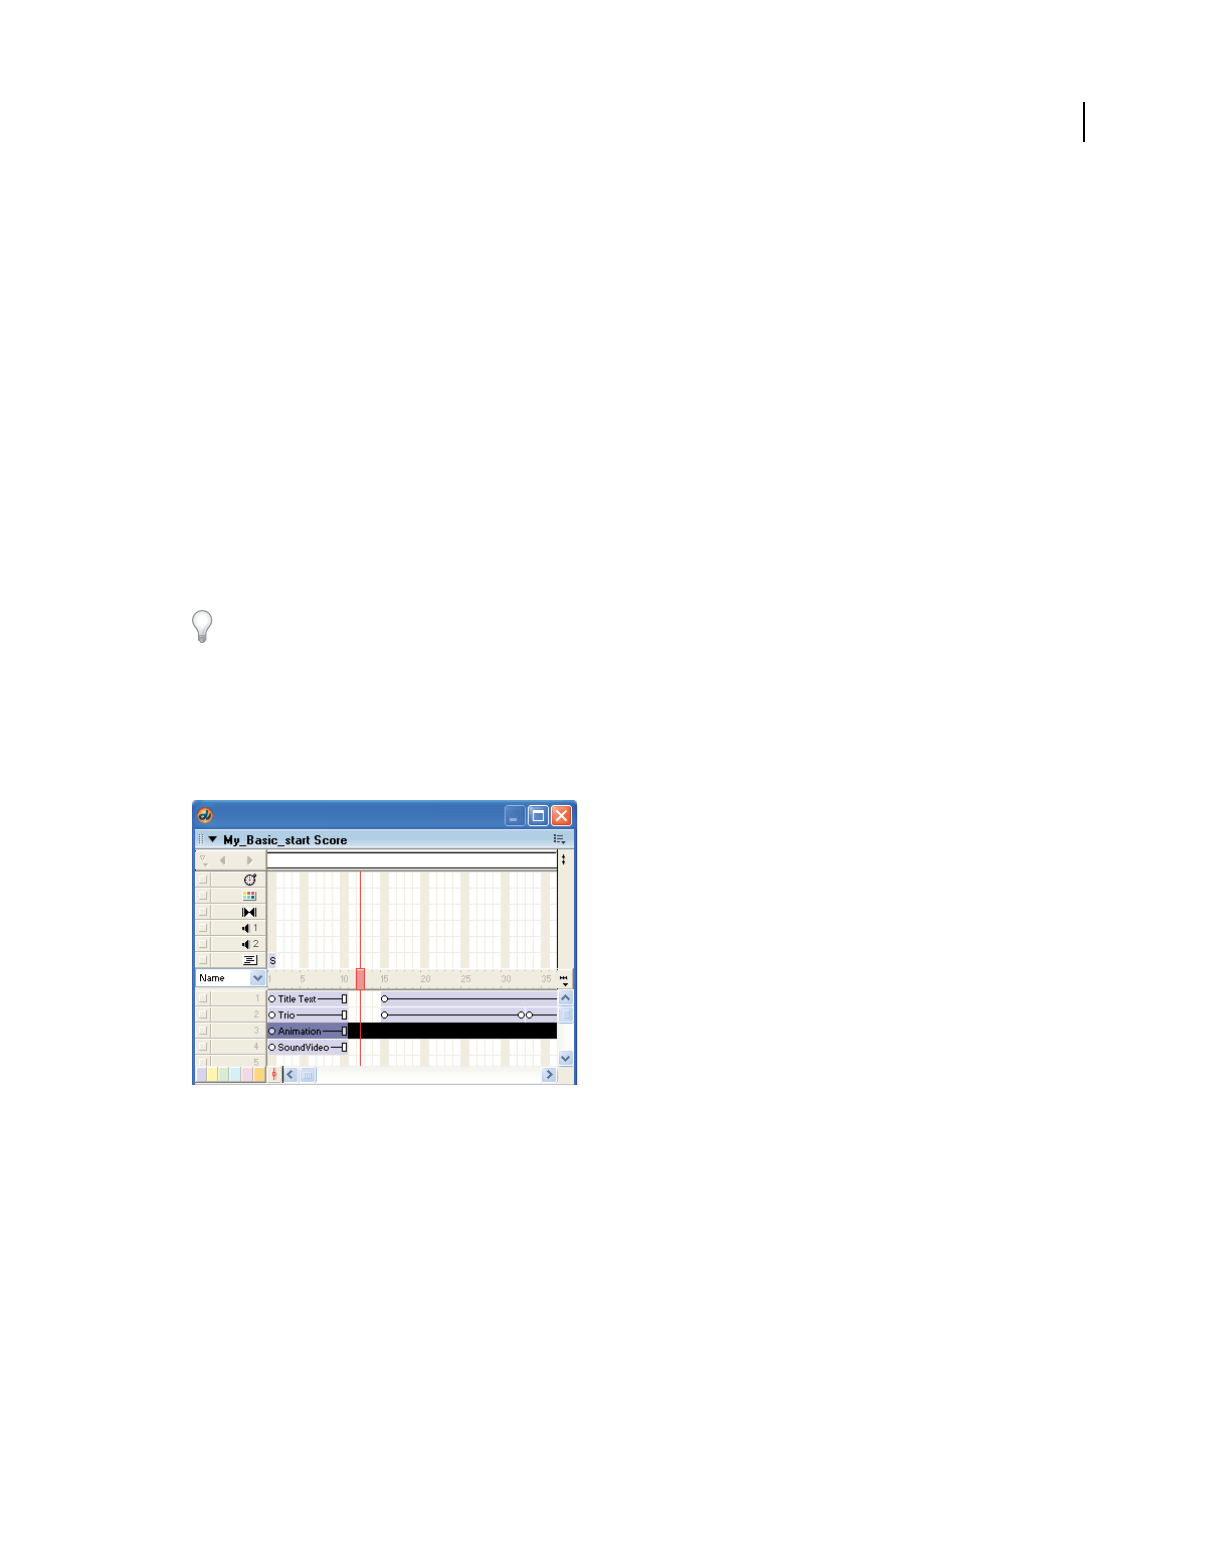
65
USING DIRECTOR 11.5
Sprites
Last updated 9/28/2011
Naming sprites
Assign a name to a sprite by using the Property inspector and then view the sprite by name in the Score and on the
Stage. Assigning a name lets you refer to the sprite by that name in Lingo or JavaScript syntax and not just by the
channel number that it occupies. You can move a sprite to a different channel and not worry about changing scripts
that once referred to the sprite by its channel number. The sprite name is different from a cast member name because
a sprite is an instance of that cast member. If you want the sprite name to be displayed in the Score and Stage, select
Edit > Preferences > Score > Name. (If you are using a Mac OS X operating system, select the Director menu, instead
of the Edit menu, to access Preferences.) For more information, see “Changing Score settings” on page 34.
Name a sprite by using the Property inspector
1Select a sprite in the Score or on the Stage.
2Select Window > Property Inspector, and select the Sprite tab.
3Enter a name for the selected sprite in the Name text box.
Consider naming the sprite with an easily recognizable name that will be easy to script.
View a sprite in the Score by its name
1In the Score, select the Sprite labels menu.
2Select Name. All the sprites in the Score appear with their sprite name listed.
Sprites listed with their names
View a sprite on the Stage by its name
❖Select a sprite on the Stage. The sprite name appears on the second line of the sprite overlay.
Edit the name of a sprite
1Select the sprite and open the Property inspector.
2Enter a name in the Name text box.

66
USING DIRECTOR 11.5
Sprites
Last updated 9/28/2011
Setting the Sprite name property in Lingo or JavaScript syntax
The new sprite name property is accessible as a standard sprite property. The name property can be read at all times,
but names can be assigned only by script when in Score recording mode.
The syntax is as follows:
put sprite(1).name -- this displays the name in the message window.
You can also refer to the sprite by using its given name when evoking script commands on the sprite. For example:
sendSprite ("pete", #handlername) -- call the "handlername" method in sprite("pete")
put sprite("somename").rect -- display the sprite's rect
To find out which sprite is targeted for a particular name, you can use the following expression:
sprite("myName").spriteNum
To create a name for a sprite, the assignment must be made in Score recording mode. Note that you don’t have to use
the updateFrame command, but the record frame must be a frame where the sprite exists in the Score, as follows:
beginrecording
sprite(2).name = "tubular"
endrecording
For more information about this property, see the Scripting Reference topics in the Director Help Panel.
Finding sprites
You can search for and find sprites by name. When you have many sprites in a movie, searching for a sprite by name
is easier and more efficient than searching by channel name or number.
1Select Edit > Find > Find Sprite. The Find Sprite dialog box opens with a list of the named sprites in the current cast.
Note: Only the sprites that you have already named appear in the list.
2In the Name text box, type the name of the sprite that you want to find.
You can type only the first letters to limit the list to sprites that start with those letters.
3Select Name if you want to sort the sprites by name; select Number to sort the sprites by channel number.
4Select the sprite that you want to find and click Select. The Score opens at the location of the selected sprite.
Creating sprite channel names
You can also name sprite channels. When authoring sprites in Lingo or JavaScript syntax, you often must work in a
particular channel or manage several different channels. Naming a sprite channel can expedite your work when
authoring and managing many composite layers.
1Double-click a channel in the Score sprite channel column.
2Type a name for the channel and press Enter.
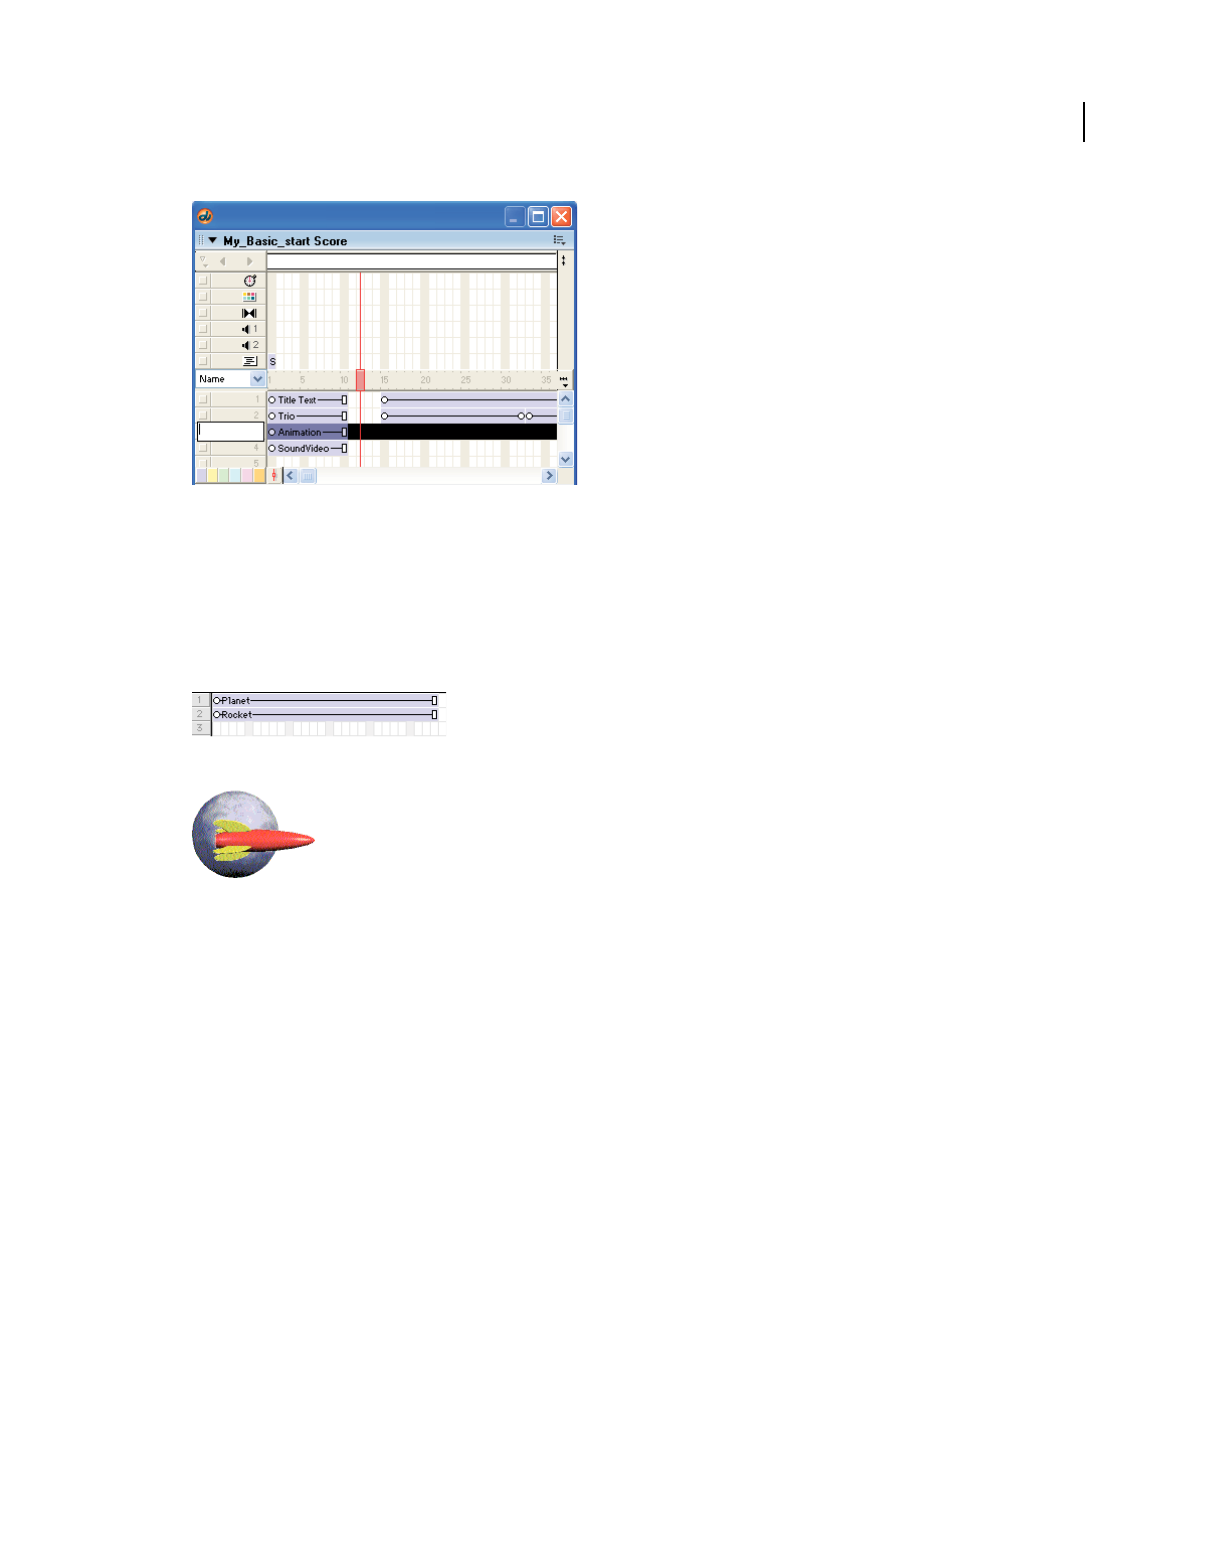
67
USING DIRECTOR 11.5
Sprites
Last updated 9/28/2011
Naming channels
Layering sprites
A sprite appears in front of other sprites on the Stage according to its channel. Sprites in higher-numbered channels
appear in front of sprites in lower-numbered channels.
The rocket in channel 2 appears in front of the planet in channel 1.
1In the Score, select the sprite. To select the contents of an entire channel, click the channel number at the left side
of the Score.
2Do one of the following:
•Select Modify > Arrange, and select a command from the submenu to change the order of sprites.
•Drag the sprite in the Score from one channel to another.
•If you selected a channel, drag its contents to another channel.
Note: If you give each sprite a unique name, you don’t need to update any scripts you have written when you move a
sprite to a new channel. For more information, see “Naming sprites” on page 65.
Displaying and editing sprite properties
As you work with sprites in your movie, be sure to monitor and possibly modify sprite properties. Use one or more of
the following methods:
•The Property inspector
•The Sprite toolbar, which includes a subset of Sprite text boxes found in the Property inspector
•The Sprite Overlay, which appears directly on the Stage the most commonly used properties for selected sprites
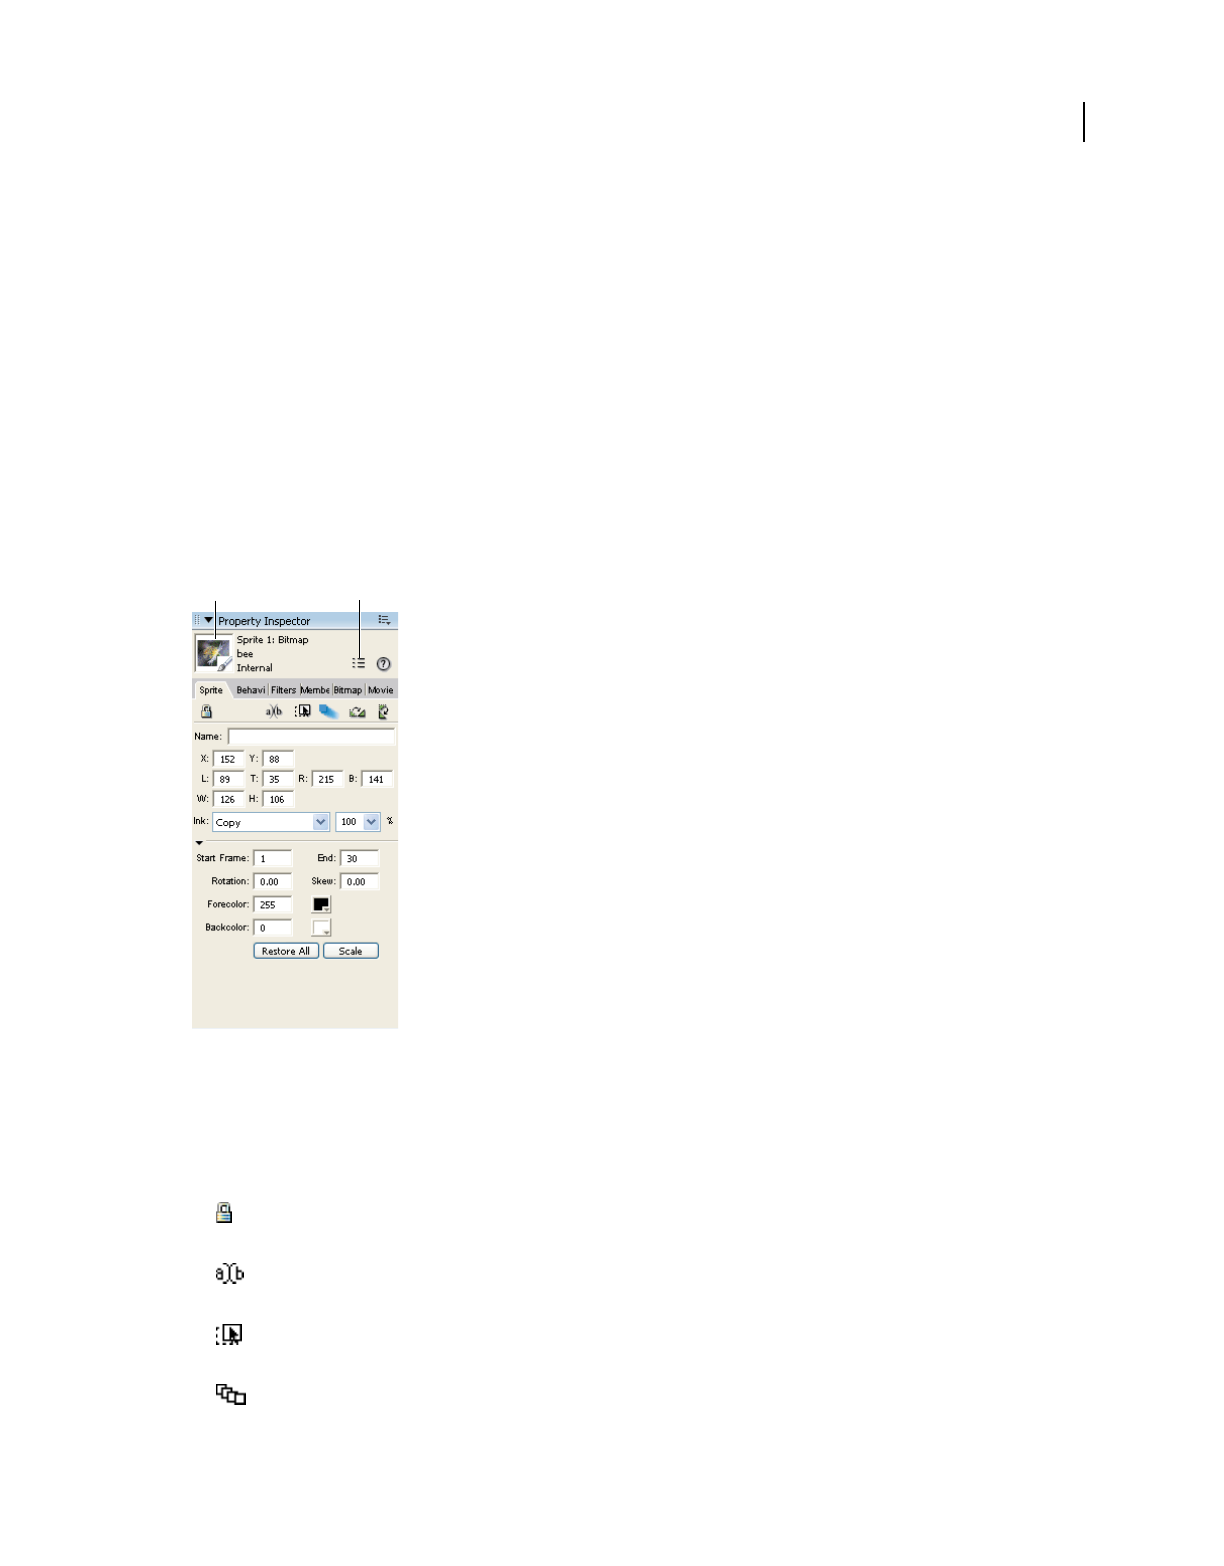
68
USING DIRECTOR 11.5
Sprites
Last updated 9/28/2011
•Sprite labels, which appear within the sprite bars in the Score and let you view important sprite properties
•Script in Lingo or JavaScript syntax
Displaying and editing sprite properties in the Property inspector
Depending on your preference, you can use either the Sprite toolbar or the Property inspector to perform many of the
same procedures.
1Select one or more sprites on either the Stage or the Score.
2If the Property inspector is not open, select Window > Property Inspector.
The Property inspector opens with focus on the Sprite tab. The Graphical view is the default view. You can toggle to
the List view by clicking the List View Mode icon.
The Property inspector displays settings for the current sprite. If you select more than one sprite, the Property
inspector displays only their common settings.
Editing sprites in the Property inspector
A. Thumbnail B. List View Mode icon
A thumbnail image of the sprite’s cast member appears in the upper-left corner of the Property inspector.
Note: To open a window for editing the sprite’s cast member, double-click the thumbnail image.
❖Edit any of the following sprite settings in the Property inspector:
Lock Changes the sprite to a locked sprite so it can’t be changed. See “Locking and unlocking sprites” on
page 72.
Editable Applies only to text sprites and lets you edit the selected text sprite on the Stage during playback. See
“Selecting and editing text on the Stage” on page 178.
Moveable Lets you position the selected sprite on the Stage during playback. For more information, see
“Visually positioning sprites on the Stage” on page 74.
Trails Makes the selected sprite remain on the Stage, leaving a trail of images along its path as the movie plays.
If Trails is not selected, the selected sprite is erased from previous frames as the movie plays.
A B

69
USING DIRECTOR 11.5
Sprites
Last updated 9/28/2011
Flip Horizontal and Flip Vertical Reverse the sprite horizontally or vertically to form an inverted image. See
“Flipping sprites” on page 83.
The Name text box Lets you enter a name for the sprite. For more information, see “Naming sprites” on page 65.
Reg Point Horizontal (X) and Vertical (Y) Display the location of the registration point in pixels from the upper-left
corner of the Stage. See “Editing sprite properties with Lingo or JavaScript syntax” on page 72.
Left (L), Top (T), Right (R), and Bottom (B) Show the location of the edges of the sprite’s bounding rectangle.
Width (W) and Height (H) Show the size of the sprite’s bounding rectangle in pixels.
Ink menu Displays the ink of the current sprite and lets you select a new ink color. See “Using sprite inks” on
page 85.
Blend Determines the blend percentage of the selected sprites. See “Setting blends” on page 84.
Start Frame and End Frame Display the start and end frame numbers of the sprite. Enter new values to adjust how
long the sprite plays. See “Controlling the duration of a sprite on the stage” on page 78.
Rotation Rotates the sprite by the number of degrees you enter. See “Rotating and skewing sprites” on page 81.
Skew Slants the sprite by the number of degrees you enter. See “Rotating and skewing sprites” on page 81.
Forecolor and Backcolor color boxes Determine the colors of the selected sprite. See “Changing the color of a
sprite” on page 83.
Restore All Reverts the height and width to that of the cast member.
Scale Opens the Scale Sprite dialog box, where you can resize the selected sprite. See “Resizing and scaling sprites”
on page 80.
Displaying sprite properties in the Sprite toolbar
The Sprite toolbar displays a subset of the same information and text boxes found on the Sprite tab in the Property
inspector. Use either the Sprite toolbar or the Property inspector.
Show or hide the Sprite toolbar in the Score
❖While the Score is active, select View > Sprite Toolbar.
Using the Sprite Overlay
The Sprite Overlay displays important sprite properties directly on the Stage. You can open editors, inspectors, and
dialog boxes to change sprite properties by clicking the corresponding icons in the Sprite Overlay.
Display the Sprite Overlay when a sprite is selected
❖Select View > Sprite Overlay > Show Info.
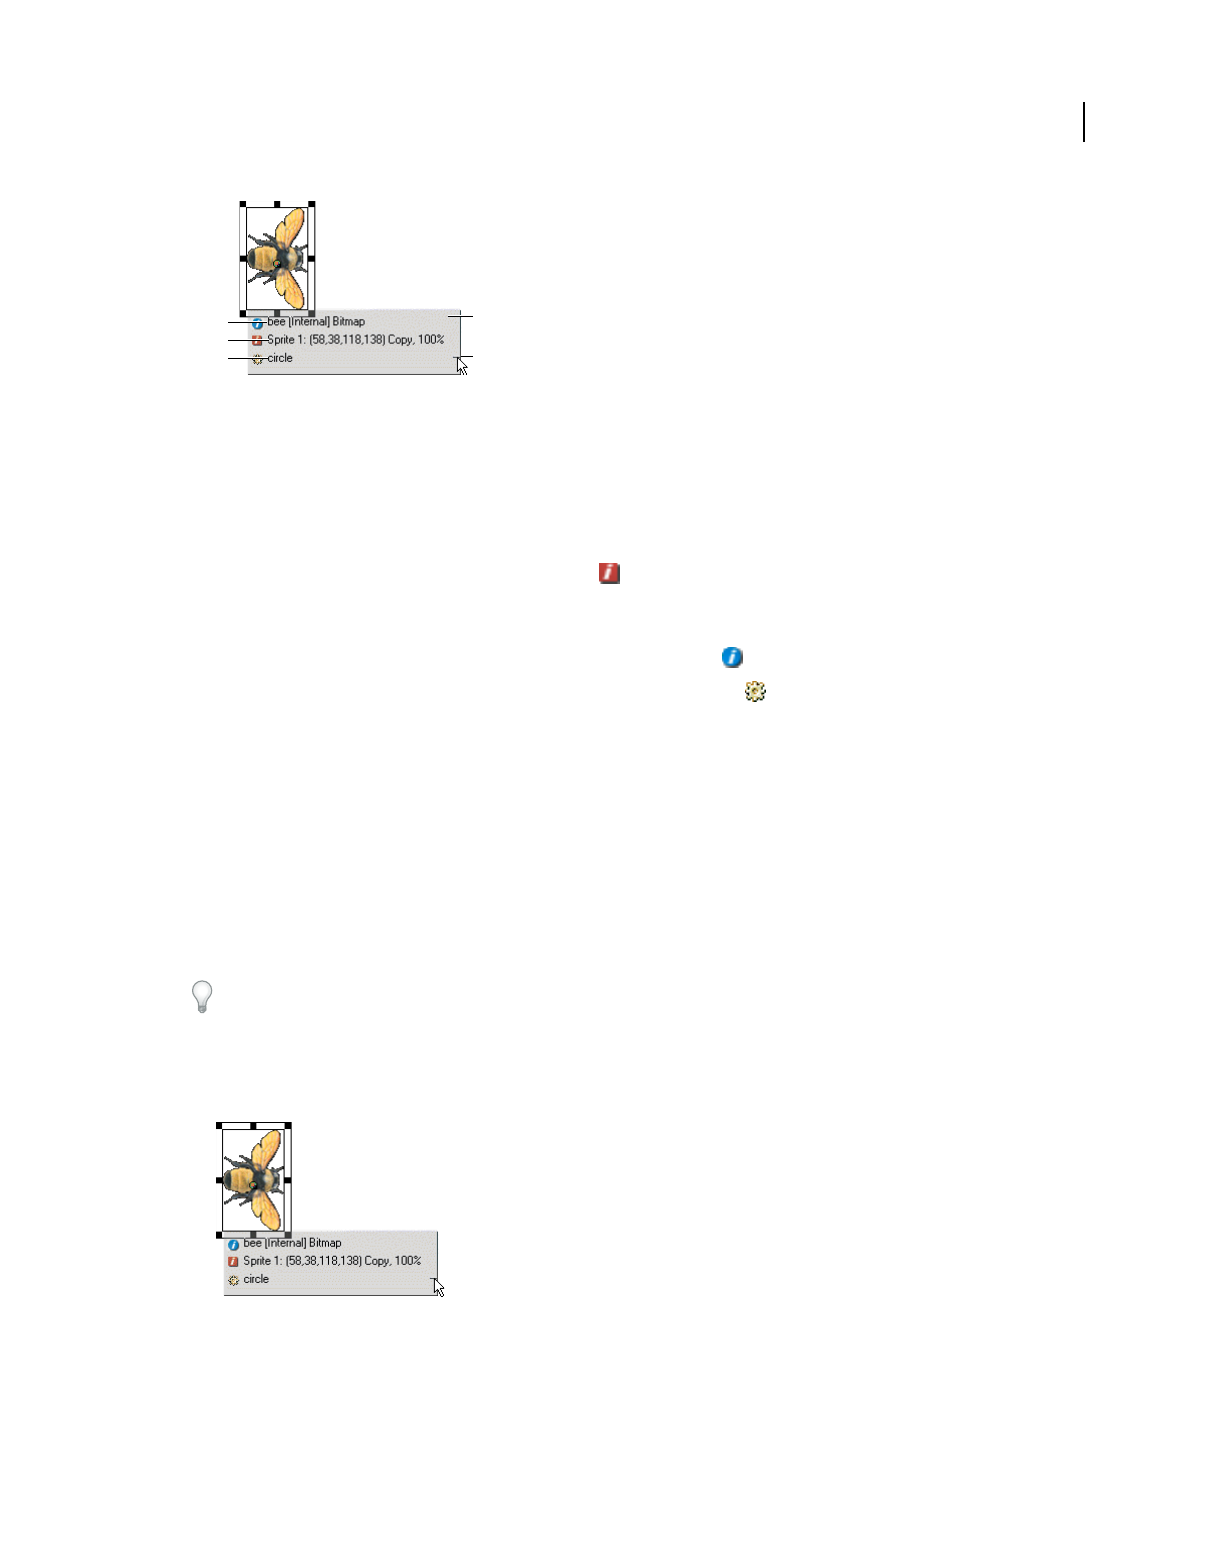
70
USING DIRECTOR 11.5
Sprites
Last updated 9/28/2011
Sprite Overlay
A. Name, cast, and media type of sprite’s cast member B. Channel number; left, top, right, and bottom coordinates; ink; and blend settings
C. Attached behavior(s) D. Sprite Overlay E. Overlay opacity control
Change how the overlay appears
1Click the sprite on the Stage to select it.
2In the Sprite Overlay, click the icon that represents the data you want to edit:
•To edit the Sprite’s cast member, click this icon to open the tab in the Property inspector that applies to this
type of sprite. For example, clicking this icon displays the Vector tab for a vector sprite, the Text tab for a text
sprite, and so on.
•To open the Sprite tab in the Property inspector, click this icon .
•To open the Behavior tab in the Property inspector, click this icon . See “Behaviors” on page 279.
Change the Sprite Overlay’s appearance to suit your preference
1Select View > Sprite Overlay > Settings.
2Select a Display option to determine when sprite properties are visible and active:
Roll Over Displays sprite properties only when the pointer is over a single sprite.
Selection Displays sprite properties when you select a sprite.
All Sprites Displays sprite properties for all sprites on the Stage.
3Use the Text Color box to select the color for text that appears in the Sprite Overlay.
If the Stage has a dark background, changing the color of the text to a light color lets you read the sprite information
in the overlay.
Change the opacity of the Sprite Overlay
❖Drag up or down the small thin line that appears on the right edge of the Sprite Overlay.
Adjust opacity of the Sprite Overlay
A
B
C
D
E

71
USING DIRECTOR 11.5
Sprites
Last updated 9/28/2011
Displaying sprite labels in the Score
Sprite labels appear in the Score’s sprite bars and display key information about the sprite in relation to the movie. For
example, if you detect a strange blip caused by an ink effect, you can select Ink from the Sprite Label menu and quickly
locate the problem in those sprites that have Ink properties by sorting the Ink label. You can select the way information
appears in channels by selecting from the available sprite labels. For example, you can use the Extended display option
to display the precise location of a sprite in every frame.
Display sprite labels
1With the Score as the active window, do one of the following:
•Select View > Sprite Labels.
•Right-click (Windows) or Control-click (Mac) on any Score channel, and select Sprite Labels.
2Select from the following options:
•Keyframes
•Changes Only (shown at 800%)
•Every frame (shown at 800%)
•First frame
•None
Many options are useful only when the Score is zoomed to 400% or 800%.
Change sprite label options
❖Select a display option from the Display menu in the Score or from the View > Display menu.
Name Displays the name of the sprite.
Cast Member Displays the name and number of the sprite’s cast member.
Behavior Displays the behavior that is assigned to the sprite.
Location Displays the x and y coordinates of the sprite’s registration point.
Ink Displays the ink effect that is applied to each sprite.
72
USING DIRECTOR 11.5
Sprites
Last updated 9/28/2011
Blend Displays the blend percentage.
Extended Displays any combination of display options. Select options by selecting Edit > Preferences > Score. (If
you are using a Mac OS X operating system, select the Director menu, instead of the Edit menu, to access
Preferences.)
Editing sprite properties with Lingo or JavaScript syntax
You can use Lingo or JavaScript syntax to check and edit sprite properties with scripts as the movie plays.
Note: Sprite properties changed with Lingo are not saved in the Score unless you’re using Score recording.
Check a property value
❖Use the put method or check in the Watcher window. For more information, see the Scripting Reference topics in
the Director Help Panel.
Edit a property
❖Use the equals (=) operator or the set command to assign a new value to the property. For more information, see
the Scripting Reference topics in the Director Help Panel.
Locking and unlocking sprites
During authoring, you can lock sprites to avoid inadvertent changes to the sprite. When you lock a sprite, you can no
longer change its settings, although you still see it represented on the Stage and in the Score. While preserving the
settings of your locked sprites, you can continue to create and edit unlocked sprites.
Locking sprites is not supported during playback.
Note: If you try to perform an operation on a group of locked and unlocked sprites, a message appears that indicates the
operation will affect only the unlocked sprites.
Lock a sprite
In the Stage or the Score, select one or more sprites to lock, and do one of the following:
•Select Modify > Lock Sprite.
•On the Sprite tab of the Property inspector, click the padlock icon.
•Right-click (Windows) or Option-click (Mac), and select Lock Sprite from the context menu.
In the Score, a locked sprite appears with a padlock in front of its name. On the Stage, a locked sprite appears with a
padlock in its upper-right corner.
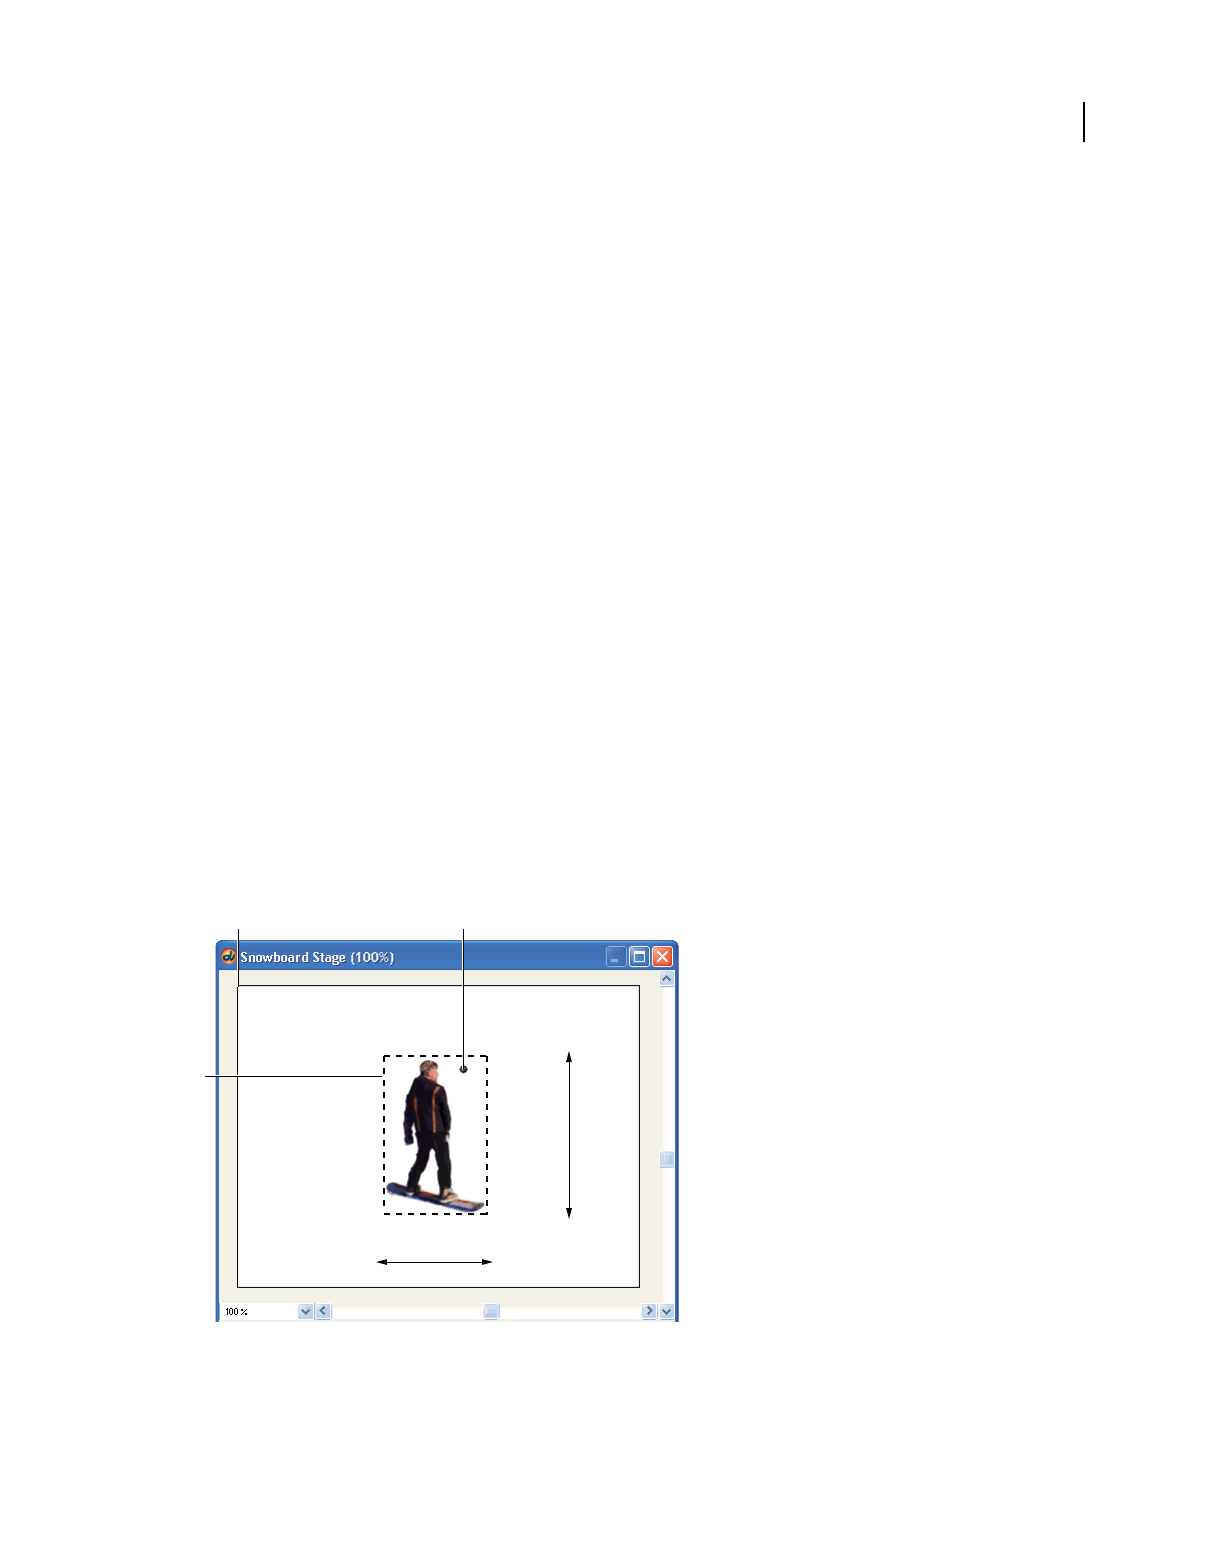
73
USING DIRECTOR 11.5
Sprites
Last updated 9/28/2011
Select a locked sprite on the Stage
❖Hold down the L key while selecting the sprite.
Unlock a sprite
1In the Score or on the Stage, select one or more sprites to unlock.
2Do one of the following:
•Select Modify > Unlock Sprite.
•On the Sprite tab in the Property inspector, click the padlock icon.
•Right-click (Windows) or Option-click (Mac), and select Unlock Sprite from the context menu.
Positioning sprites
The easiest way to position a sprite is to simply drag the sprite into place on the Stage. To position a sprite more
precisely, do any of the following:
•Set a sprite’s position on the Stage by entering coordinates in the Property inspector.
•Use the Tweak window.
•Use guides or the grid.
•Use the Align window.
•Use the arrow keys to manually move a selected sprite.
•Set the sprite’s coordinates in Lingo or JavaScript syntax.
The following diagram shows all the sprite coordinates you can specify:
Sprite coordinates
A. Top B. Bottom C. Right D. Left E. Width F. 0,0 Upper-left corner of the Stage G. Bounding rectangle H. Height I. Registration point
(X,Y)
A
B
CD
E
F
G
H
I

74
USING DIRECTOR 11.5
Sprites
Last updated 9/28/2011
Director places the image of a cast member on the Stage by specifying the location of its registration point. For many
cast members, such as bitmap or vector shapes, the registration point is in the center of the bounding rectangle by
default. For other types of cast members, the registration point is at the upper-left corner. (For instructions on
changing the location of the registration point of bitmap cast members, see “Changing registration points” on
page 116. For instructions on changing a vector shape cast member’s registration point, see “Editing vector shapes” on
page 154.)
Visually positioning sprites on the Stage
Position sprites on the Stage by dragging them or by using the arrow keys.
Visually position a sprite on the Stage
1Select Window > Stage to display the Stage.
2Do one of the following on the Stage:
•Drag a sprite to a new position. Hold down Shift to limit the movement to horizontal or vertical straight lines.
•Select a sprite and use the arrow keys to move the selected sprite 1 pixel at a time. Hold down Shift as you press
an arrow key to move the selection 10 pixels at a time.
Visually position a sprite on the Stage during playback
1Select a sprite that you want to position during playback.
2On the Sprite tab in the Property inspector, click Moveable. See “Displaying and editing sprite properties in the
Property inspector” on page 68.
3Begin playing back the movie.
4On the Stage, drag the sprite to the new position.
Positioning sprites with the Property inspector
Use the Property inspector to specify the exact coordinates of a sprite.
1With the Property inspector open and in Graphical view, select a sprite to re-position.
2On the Sprite tab in the Property inspector, specify the sprite coordinates in pixels, with 0,0 at the upper-left corner
of the Stage, as follows:
•Specify attributes in the X and Y text boxes to change the horizontal and vertical coordinates of the registration
point.
•Specify coordinates in the W and H text boxes to change the width and height of the sprite.
•Specify values in the L, T, R, and B text boxes to change the left, top, right, and bottom edges of the sprite’s
bounding rectangle, respectively.
To move the sprite without resizing it, adjust only the x and y coordinates.
Positioning sprites with the Tweak window
Use the Tweak window when you want to move sprites by a certain number of pixels.
1Select Modify > Tweak.
2Select the sprite or sprites you want to move, as described in “Selecting sprites” on page 62.

75
USING DIRECTOR 11.5
Sprites
Last updated 9/28/2011
3In the Tweak window, drag the point on the left side of the window or enter the number of pixels in the text boxes
for horizontal and vertical change, and then click Tweak.
4If you want to repeat the move, click Tweak again.
Positioning sprites by using guides, the grid, or the Align window
On the Stage, you can align sprites by using guides, the grid, or the Align window.
The grid consists of cell rows and columns of a specified height and width that you use to assist in visually placing
sprites on the Stage. The grid is always available.
Guides are horizontal or vertical lines you can either drag around the Stage or lock in place to assist you with sprite
placement. You must create guides before they become available.
Moving a sprite with the Snap To Grid or Snap To Guides feature selected lets you snap the sprite’s edges and
registration point to the nearest grid or guide line. When you’re not using the guides or the grid, you can hide them.
Guides and the grid are visible only during authoring.
You can create and modify the guides and the grid from the Property inspector or by using menu commands.
Add and configure guides
1With the Property inspector open, click the Guides tab.
The top half of the tab contains settings for Guides.
2To change the guide color, click the Guide Color box and select a different color.
3Select the desired options to make the guides visible, to lock them, and to make the sprites snap to the guides.
4To add a guide, move the cursor over the new horizontal or vertical guide, and then drag the guide to the Stage.
Numbers in the guide tooltip indicate the distance, in pixels, where the guide is located from the top or left edge of
the Stage.
5To reposition a guide, move the pointer over the guide. When the sizing handle appears, drag the guide to its new
position.
6To remove a guide, drag it off the Stage.
7To remove all guides, click Remove All on the Guides tab in the Property inspector.
Display guides and align sprites
1If guides don’t appear on the Stage, select View > Guides and Grid > Show Guides.
2If Snap To Guides is not selected, select View > Guides and Grid > Snap To Guides.
3Move a sprite on the Stage near a guide line to make the sprite snap to that exact location.
Display a grid and align sprites
1If grid lines don’t appear on the Stage, select View > Guides and Grid > Show Grid.

76
USING DIRECTOR 11.5
Sprites
Last updated 9/28/2011
Grid displayed
2If Snap To Grid is not selected, select View > Guides and Grid > Snap To Grid.
3Move a sprite on the Stage near a grid line to make the sprite snap to that exact location.
Note: Press the G key while moving or resizing a sprite to temporarily turn Snap To Grid off or on.
Configure the grid
1With the Property inspector open, click the Guides tab.
The bottom half of the Guides tab contains Grid settings.
2To change the grid color, click the Grid Color box and select a different color.
3Select options to make the grid visible and to make the sprites snap to the grid.
4To change the width and height of the grid, enter values in the W and H text boxes.
5Select the desired options to display the grid as dots or lines.
Align sprites using the Align window
1On the Stage or in the Score, select the sprites to align.
Select entire sprites, keyframes, or frames within sprites in as many different frames or channels as you need. All of
the elements align to the last sprite or frame selected.
2Select alignment buttons to modify the selected objects:
•For Align, select Align Left Edge, Align Horizontal Center, Align Right Edge, Align Horizontal RegPoint, Align
Top Edge, Align Vertical Center, Align Bottom Edge, or Align Vertical RegPoint.
•For Distribute, select Distribute Left Edge, Distribute Horizontal Center, Distribute Right Edge, Distribute
Horizontal RegPoint, Distribute Width, Distribute Horizontally Across Stage, Distribute Top Edge, Distribute
Vertical Center, Distribute Bottom Edge, Distribute Vertical RegPoint, Distribute Height, or Distribute
Vertically Across Stage.
Positioning sprites with Lingo or JavaScript syntax
Script lets you control a sprite’s position by setting the sprite’s coordinates on the Stage. You can also test a sprite’s
coordinates to determine a sprite’s current position and whether two sprites overlap.
Check the location of a sprite’s registration point or bounding rectangle on the Stage
❖Test the bottom, left, loc, locH, locV, right, or top sprite property.
The bottom, left, right, and top sprite properties determine the location of the sprite’s individual edges. For
more information about these properties, see the Scripting Reference topics in the Director Help Panel.
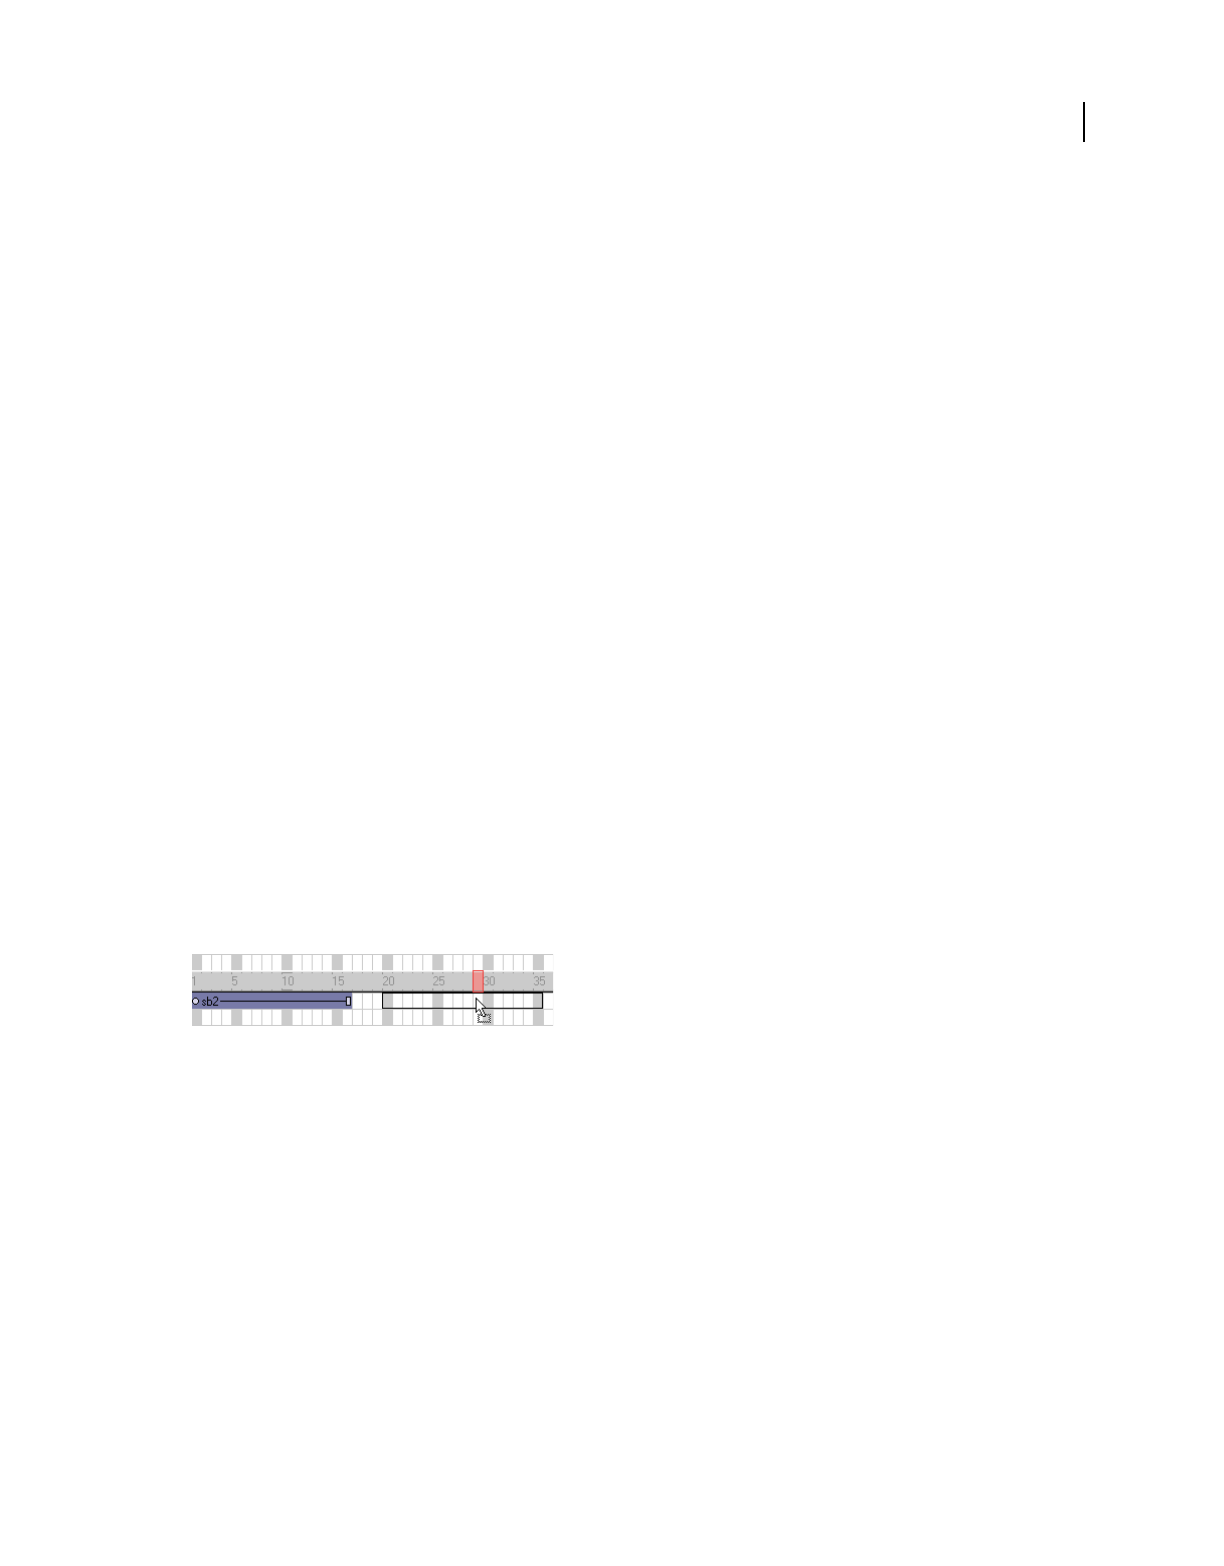
77
USING DIRECTOR 11.5
Sprites
Last updated 9/28/2011
Place a sprite at a specific location
❖Set one of the following properties. For more information about these properties, see the Scripting Reference topics
in the Director Help Panel.
The loc sprite property Sets the horizontal and vertical distance from the upper-left corner of the Stage to the
sprite’s registration point. The value is given as a point.
The locV sprite property Sets the number of pixels from the top of the Stage to a sprite’s registration point.
The locH sprite property Sets the number of pixels from the left of the Stage to a sprite’s registration point.
The rect sprite property Sets the location of the sprite’s bounding rectangle on the Stage.
The quad sprite property Sets the location of the sprite’s bounding rectangle on the Stage. You can specify any four
points. The points don’t have to form a rectangle. The quad sprite property can set the sprite’s coordinates as precise
floating-point numbers.
Determine whether two sprites overlap
❖Use the sprite...intersects operator to determine whether a sprite’s bounding rectangle touches the bounding
rectangle of a second sprite. Use the sprite...within operator to determine whether a sprite is entirely within a
second sprite. For more information about these operators, see the Scripting Reference topics in the Director Help
Panel.
Controlling the entrance of a sprite on the stage
A sprite controls where and when media appear on the Stage. You change when a sprite appears on the Stage by
moving the sprite to different frames in the Score and by changing the number of frames the sprite spans. You can
either drag sprites to new frames or copy and paste them. Copying and pasting is easier when moving sprites more
than one screen width in the Score. You can also copy and paste to move sprites from one movie to another.
Note: When you copy a sprite from one movie to another, save the source movie first.
Moving a sprite in the Score
Change when a sprite appears on the Stage
1Select Window > Score to display the Score.
2Select a sprite or sprites, as described in “Selecting sprites” on page 62.
3Drag the sprite to a different frame.
To move a sprite without spreading it over additional frames, hold down the Spacebar and drag. This technique is also
useful for moving any sprite that consists mostly (or entirely) of keyframes.
Copy or move sprites between frames
1Select a sprite or sprites, as described in “Selecting sprites” on page 62.
2Select Edit > Cut Sprites or Edit > Copy Sprites.
3Position the pointer where you want to paste the sprite, and select Edit > Paste Sprites.
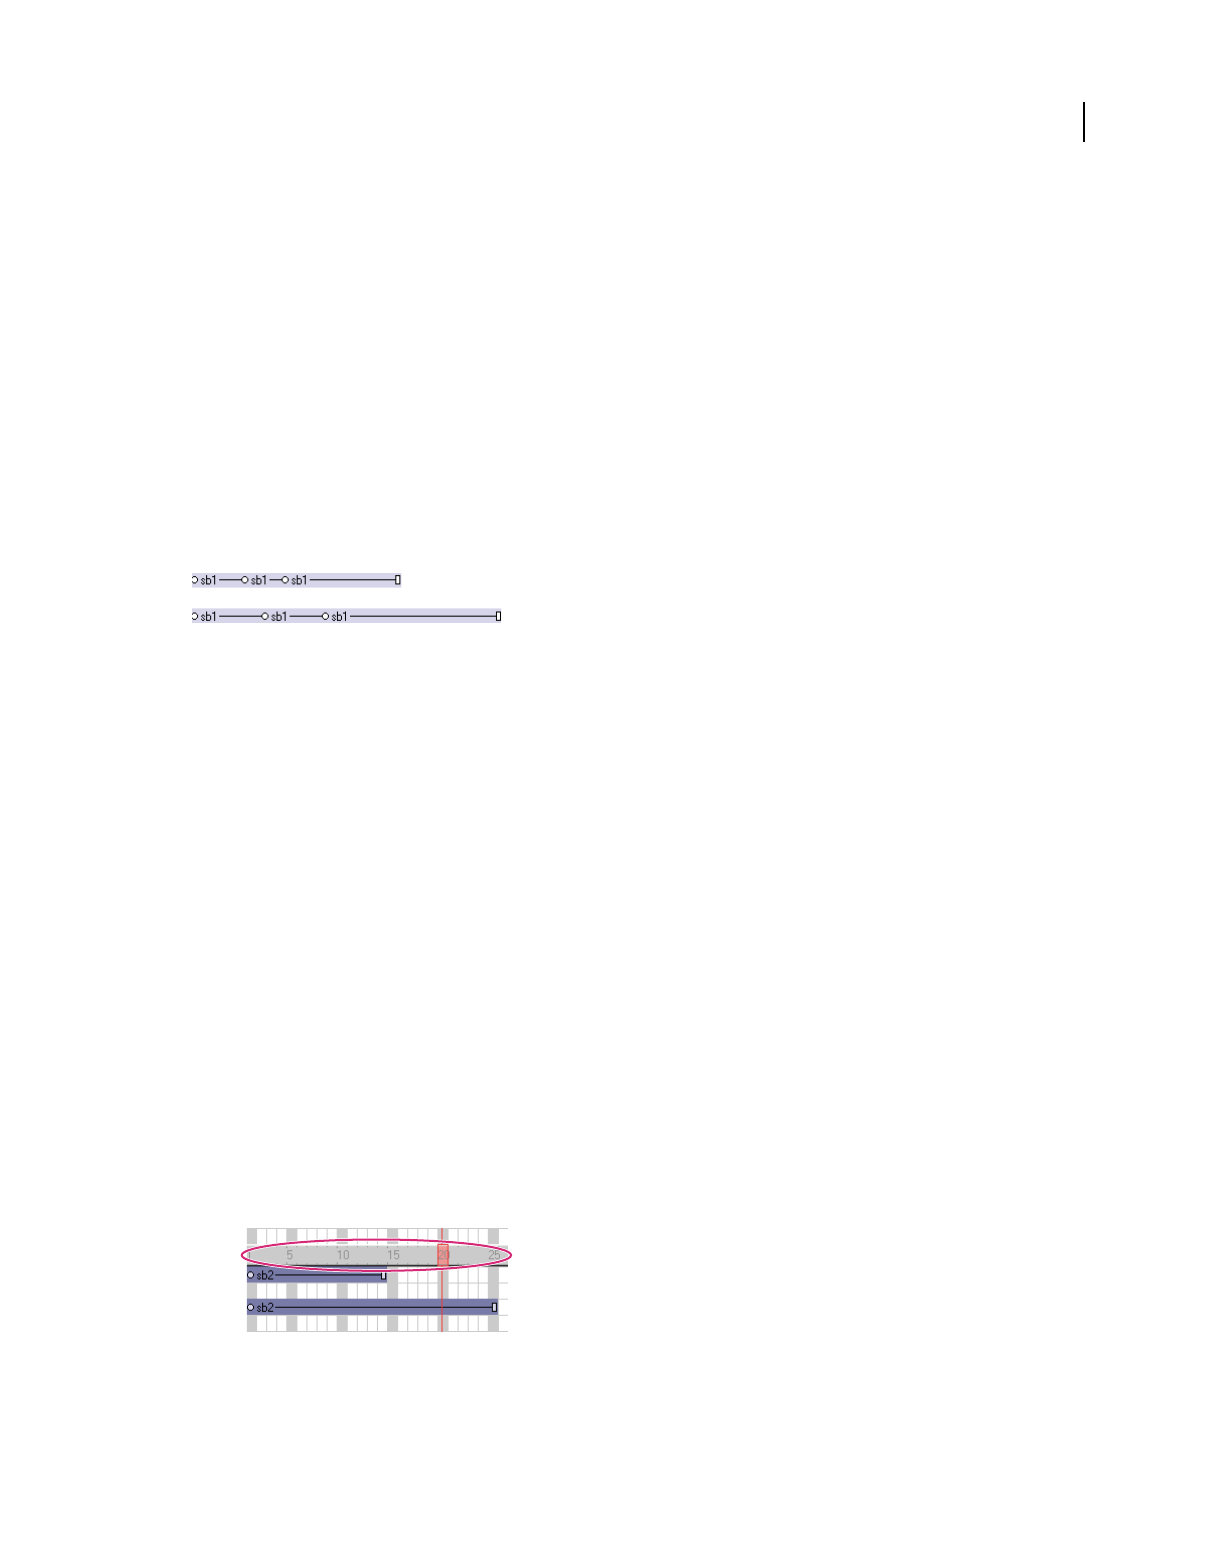
78
USING DIRECTOR 11.5
Sprites
Last updated 9/28/2011
If the pasting will overwrite existing sprites, select one of the following Paste options in the Paste Options dialog box:
Overwrite Existing Sprites Replaces the sprites with the content of the Clipboard.
Truncate Sprites Being Pasted Pastes the Clipboard contents in the space available without replacing existing sprites.
Insert Blank Frames To Make Room Adds new frames for the contents of the Clipboard.
Note: Copies of locked sprites are unlocked when they are copied.
Controlling the duration of a sprite on the stage
By default, Director assigns each new sprite a duration of 30 frames. You can change the duration of a sprite—that is,
the amount of time the sprite appears in a movie—by adjusting its length, changing the number of frames in which it
appears, or by using the Extend command.
Director maintains the spacing proportions of keyframes when a sprite is lengthened. For a description of keyframes,
see “Animation” on page 90.
Extend or shorten a sprite
1Select Window > Score to display the Score.
2Do one of the following:
•Drag the start or end frames.To extend a one-frame sprite, Alt-drag (Windows) or Option-drag (Mac).
•To extend a sprite and leave the last keyframe in place, Alt-drag (Windows) or Option-drag (Mac) a keyframe
at the end of the sprite.
•To extend a sprite and leave all keyframes in place, Control-drag (Windows) or Command-drag (Mac) the end
frame.
•Enter new values in the Start and End text boxes on the Sprite tab in the Property inspector to change the start
and end frames.
Extend a sprite to the current location of the playhead
1Select the sprite or sprites to extend.
2Click the frame channel to move the playhead:
•To extend the sprite, move the playhead past the right edge of the sprite.
Frame channel
•To shorten the sprite, move the playhead to the left of the sprite’s right edge, inside the sprite.
•To move the sprite’s start frame, place the playhead to the left of the sprite.
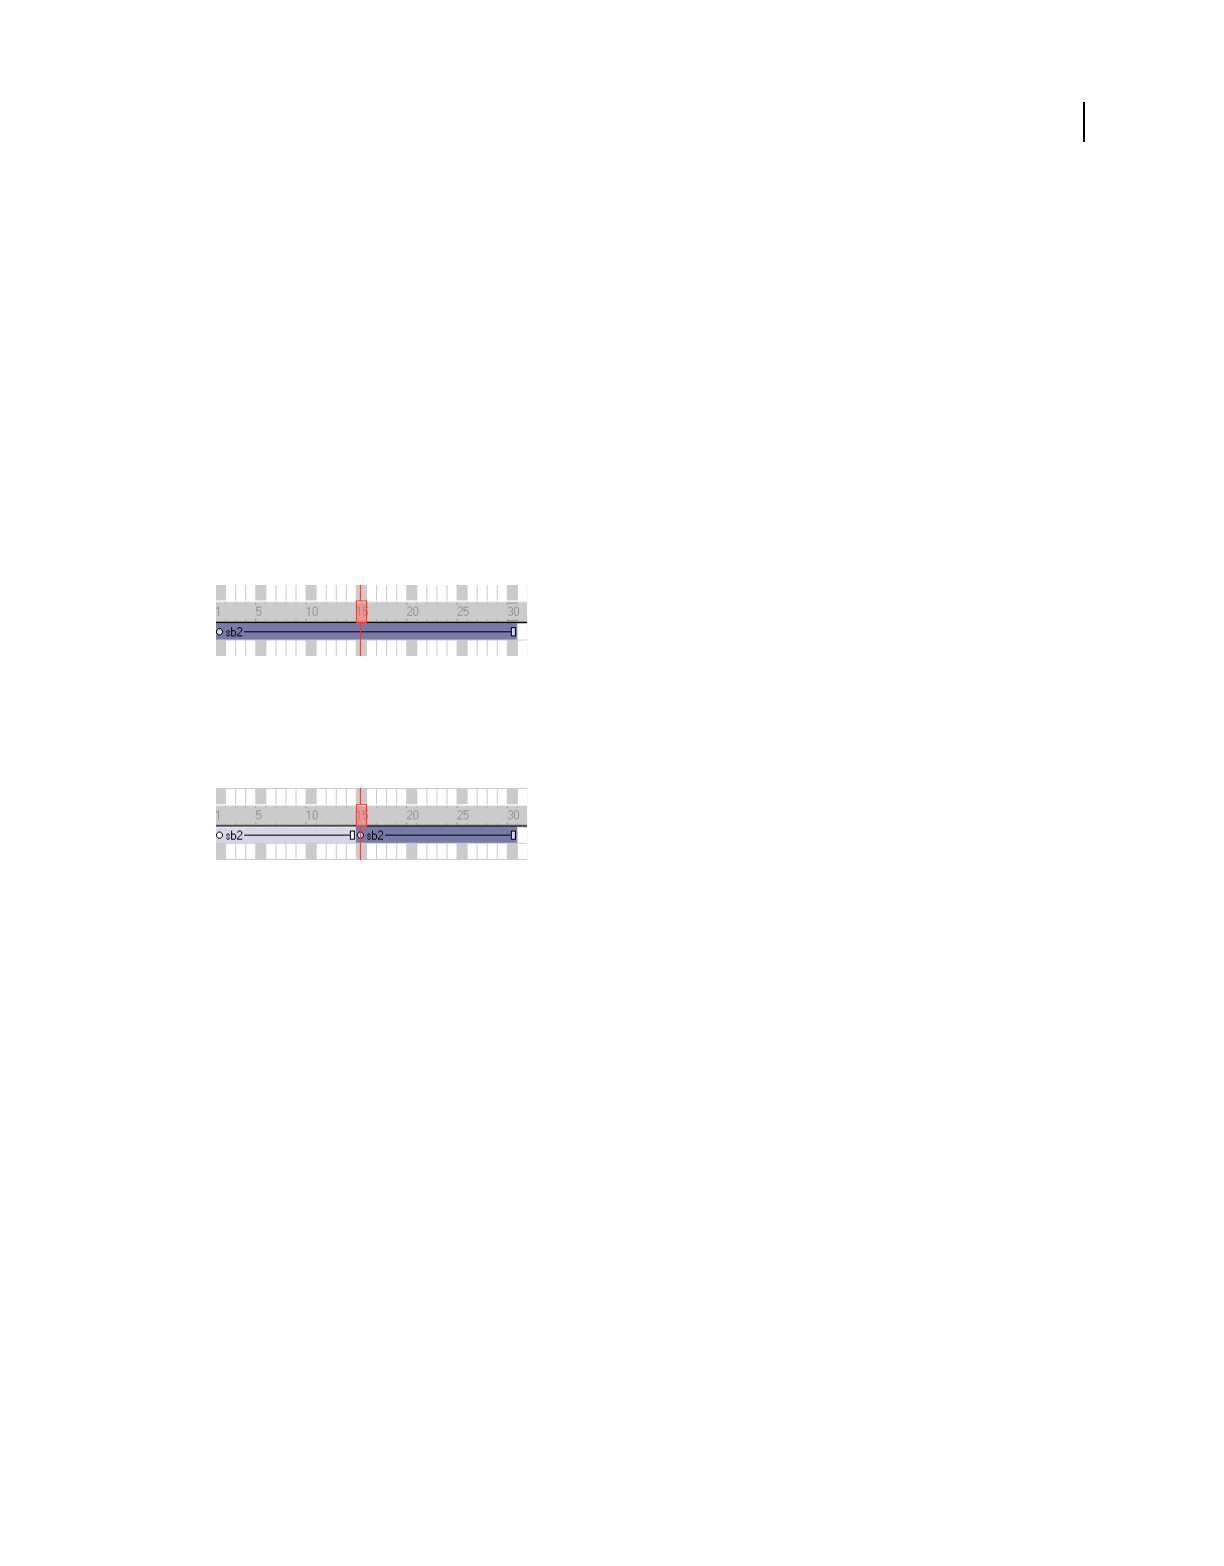
79
USING DIRECTOR 11.5
Sprites
Last updated 9/28/2011
3Select Modify > Extend Sprite.
Splitting and joining sprites
You might need to split an existing sprite into two separate sprites or join separate sprites. If, for example, you created
a complex animation as separate sprites and now want to move the entire sequence in the Score, you would join the
sprites. Splitting and joining also lets you update movies created with older versions of Director that might have several
fragmented sprites.
Split an existing sprite
1In the Score, click the frame within a sprite where you want the split to occur.
The playhead moves to the selected frame.
Playhead at the selected frame
2Select Modify > Split Sprite.
Director splits the sprite into two new ones.
Sprite split into two
Join separate sprites into a single sprite
1Select the sprites you want to join, as described in “Selecting sprites” on page 62.
Director fills the gaps between the selected sprites. You can also select sprites in several channels. Director joins
selected sprites in each individual channel.
2Select Modify > Join Sprites.
Changing the appearance of sprites
You can change the appearance of sprites on the Stage without affecting the cast member assigned to the sprite. You
can resize, rotate, skew, flip, and apply new foreground and background colors to sprites. Applying these changes
allows you to reuse the same cast member to create several different versions of an image. For example, you can create
a flipped and rotated sprite with a new color. Because each cast member adds to downloading time, reusing cast
members in this way reduces the number of cast members in your movie and causes it to download faster. Reusing the
same cast member for multiple sprites also reduces the amount of memory required.
80
USING DIRECTOR 11.5
Sprites
Last updated 9/28/2011
Resizing and scaling sprites
You can resize sprites directly on the Stage by dragging their handles. To resize the sprite precisely, enter coordinates
or scale sprites by a specified percentage on the Sprite tab in the Property inspector. You can also set the sprite’s size
with Lingo or JavaScript syntax.
Changing a sprite’s size on the Stage does not change the size of the cast member that is assigned to the sprite. The size
of the sprite is not affected if you resize its cast member.
In some cases, resizing bitmap sprites can cause noticeable delays. If a bitmap sprite must be of a particular size,
properly size the cast members that appear in the sprite. You can do this with Modify > Transform Bitmap or in any
image-editing program. Scaling and resizing sprites works best with vector shapes.
Note: The procedure for resizing a rotated or skewed sprite is different from the following procedures. For more
information, see “Rotating and skewing sprites” on page 81.
Resize a sprite by dragging its handles
1Select the sprite.
2On the Stage, drag any of the sprite’s resize handles. To maintain the sprite’s proportions, hold down Shift while
dragging.
Scale a sprite by pixels or by an exact percentage
1Select the sprite you want to scale and click the Sprite tab of the Property inspector (Graphical view).
2Click the Scale button.
3In the dialog box, enter new values to scale the sprite by doing one of the following:
•Specify a pixel size in the Width or Height text boxes. If Maintain Proportions is selected, all text boxes that can
be updated adjust to reflect the new scaled size. If Maintain Proportions is not selected, you can specify new
proportions in the Width and Height text boxes.
•Enter a percentage in the Scale text box.
4Click OK.
The sprite is scaled relative to its current size, not to the size of its parent cast member.
Sprite scaled
Restore a sprite to its original dimensions
Do one of the following:
•On the Sprite tab in the Property inspector (Graphical view), click Restore All.
•Select Modify > Transform > Reset Width and Height or Reset All.
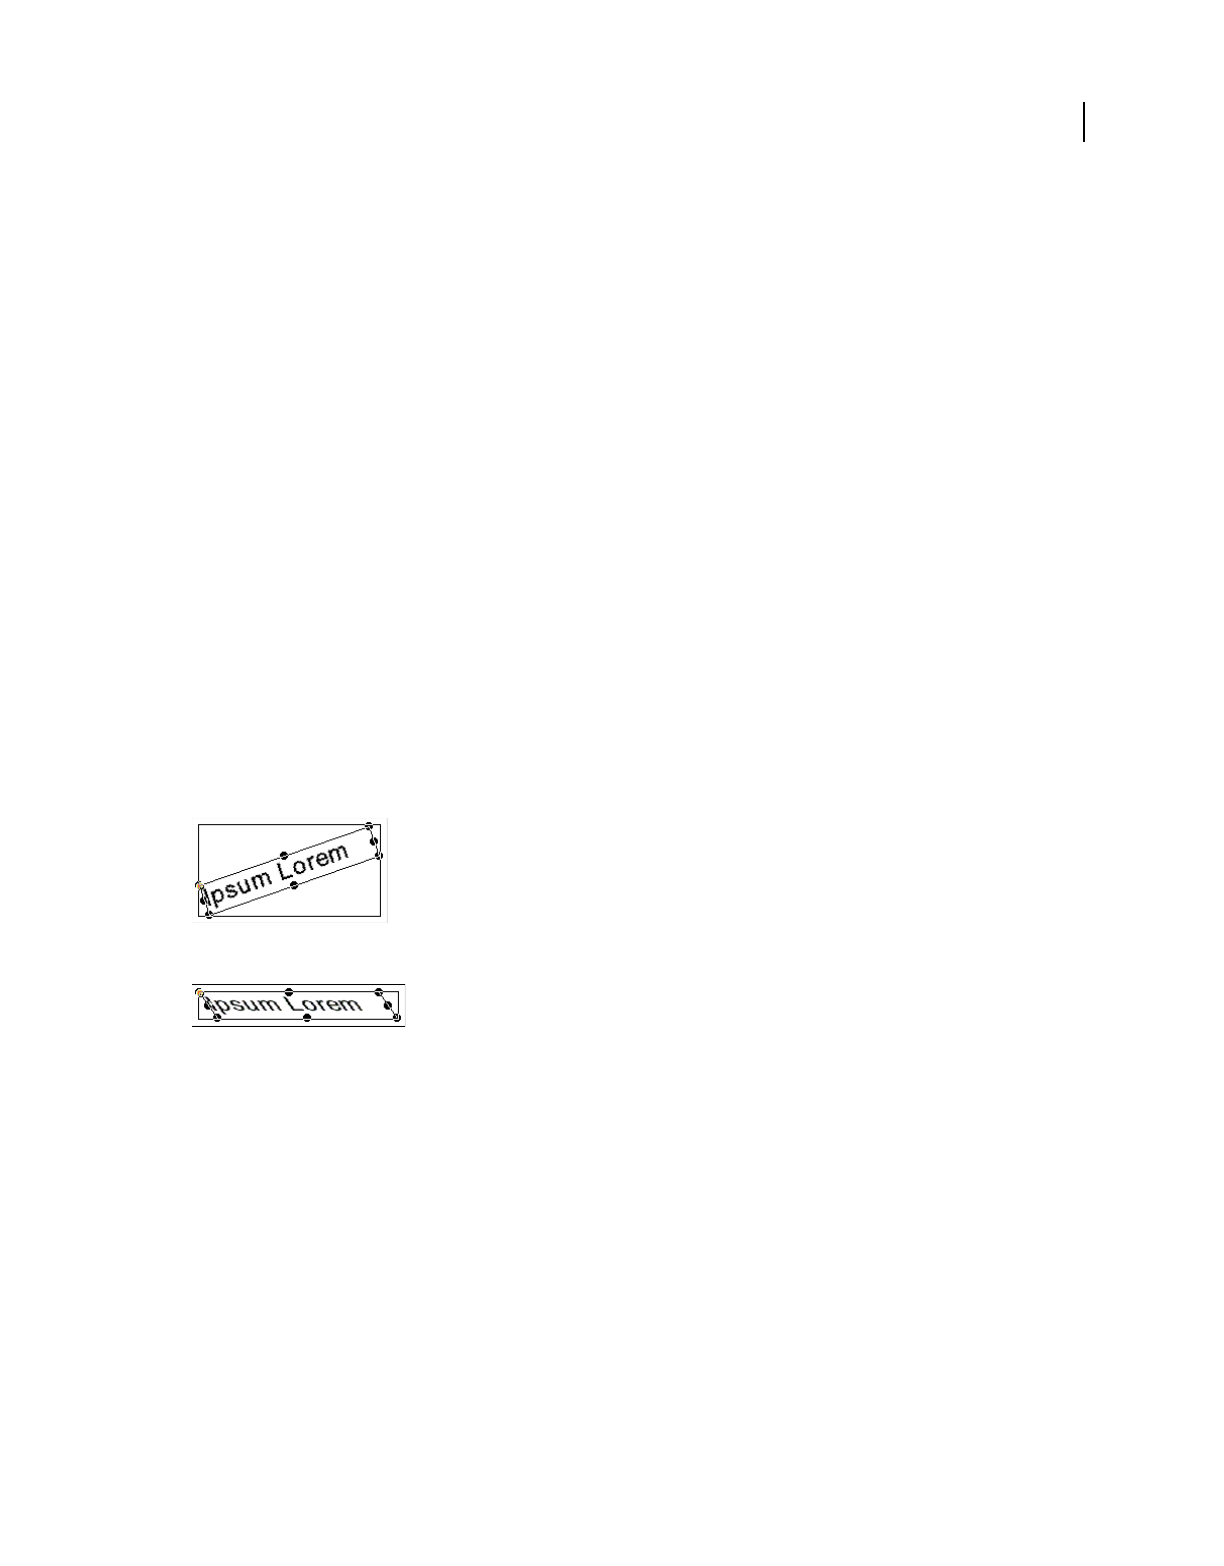
81
USING DIRECTOR 11.5
Sprites
Last updated 9/28/2011
Resize a sprite’s bounding rectangle with script
❖Set the sprite’s quad or rect sprite property. For more information about these properties, see the Scripting
Reference topics in the Director Help Panel.
The rect sprite property determines the coordinates of a sprite’s bounding rectangle. The coordinates are given as
a rect value, which is a list of the left, top, right, and bottom coordinates.
Change a sprite’s height or width with script
❖Set the height or width sprite property. For more information about these properties, see the Scripting Reference
topics in the Director Help Panel.
Rotating and skewing sprites
You can rotate and skew sprites to turn and distort images and to create dramatic animated effects. You rotate and
skew sprites on the Stage by dragging. To rotate and skew sprites more precisely, use Lingo or JavaScript syntax or the
Property inspector to enter degrees of rotation or skew. The Property inspector is also useful for rotating and skewing
several sprites at once by the same angle.
Director can rotate and skew bitmaps, text, vector shapes, Flash® content, QuickTime® videos, and animated GIFs.
Director rotates a sprite around its registration point, which is a marker that appears on a sprite when you select it with
your mouse. By default, Director assigns a registration point in the center of all bitmaps. You can change the location
of the registration point by using the Paint window. For more information, see “Changing registration points” on
page 116.
Rotation changes the angle of the sprite. Skewing changes the corner angles of the sprite’s rectangle.
Rotated sprite
Skewed sprite
After a sprite is rotated or skewed, you can still resize it.
Director can automatically change rotation and skew from frame to frame to create animation. See “Tweening other
sprite properties” on page 93.
Rotate or skew a sprite on the Stage
1Select a sprite on the Stage.
2Select Window > Tool Palette to display the Tool palette.
3Click the Rotate And Skew tool in the Tool palette.
You can also press Tab while the Stage window is active to select the Rotate tool.
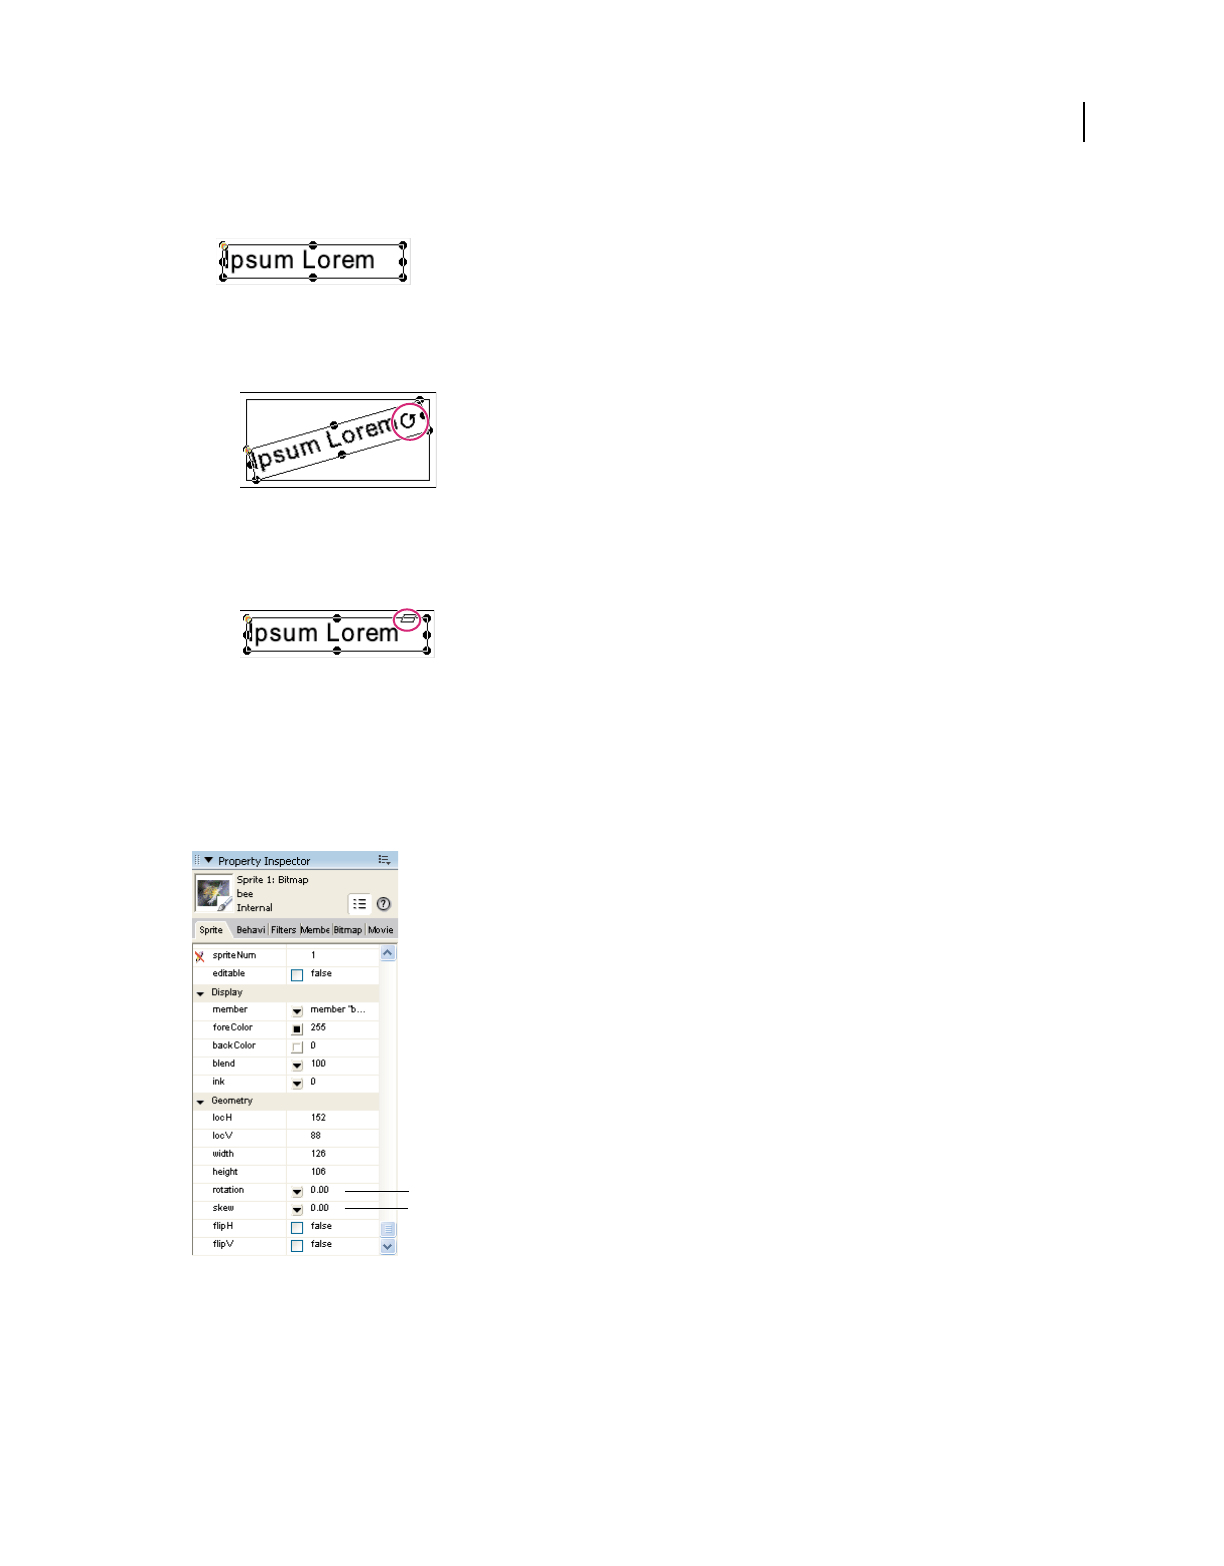
82
USING DIRECTOR 11.5
Sprites
Last updated 9/28/2011
The handles around the sprite change to indicate the new mode.
4Do either of the following:
•To rotate the sprite, move the pointer inside the sprite and drag in the direction you want to rotate.
Pointer
•To skew the sprite, move the pointer to the edge of the sprite until it changes to the skew pointer, and then drag
in the direction you want to skew.
Pointer
Rotate or skew a sprite with the Property inspector
1Select the sprite you want to rotate or skew and click the Sprite tab in the Property inspector (List view).
2To rotate the selected sprite, display the Rotation menu and enter the number of degrees in the Rotation text box.
3To skew the selected sprite, display the Skew menu and enter the number of degrees in the Skew text box.
Rotating or skewing a sprite in the Property inspector
A. Rotate B. Skew
Resize a rotated or skewed sprite
Do one of the following:
•Click the Rotate And Skew tool and drag any of the sprite’s handles. Use Alt-drag (Windows) or Option-drag (Mac)
to maintain the sprite’s proportions as you resize.
A
B
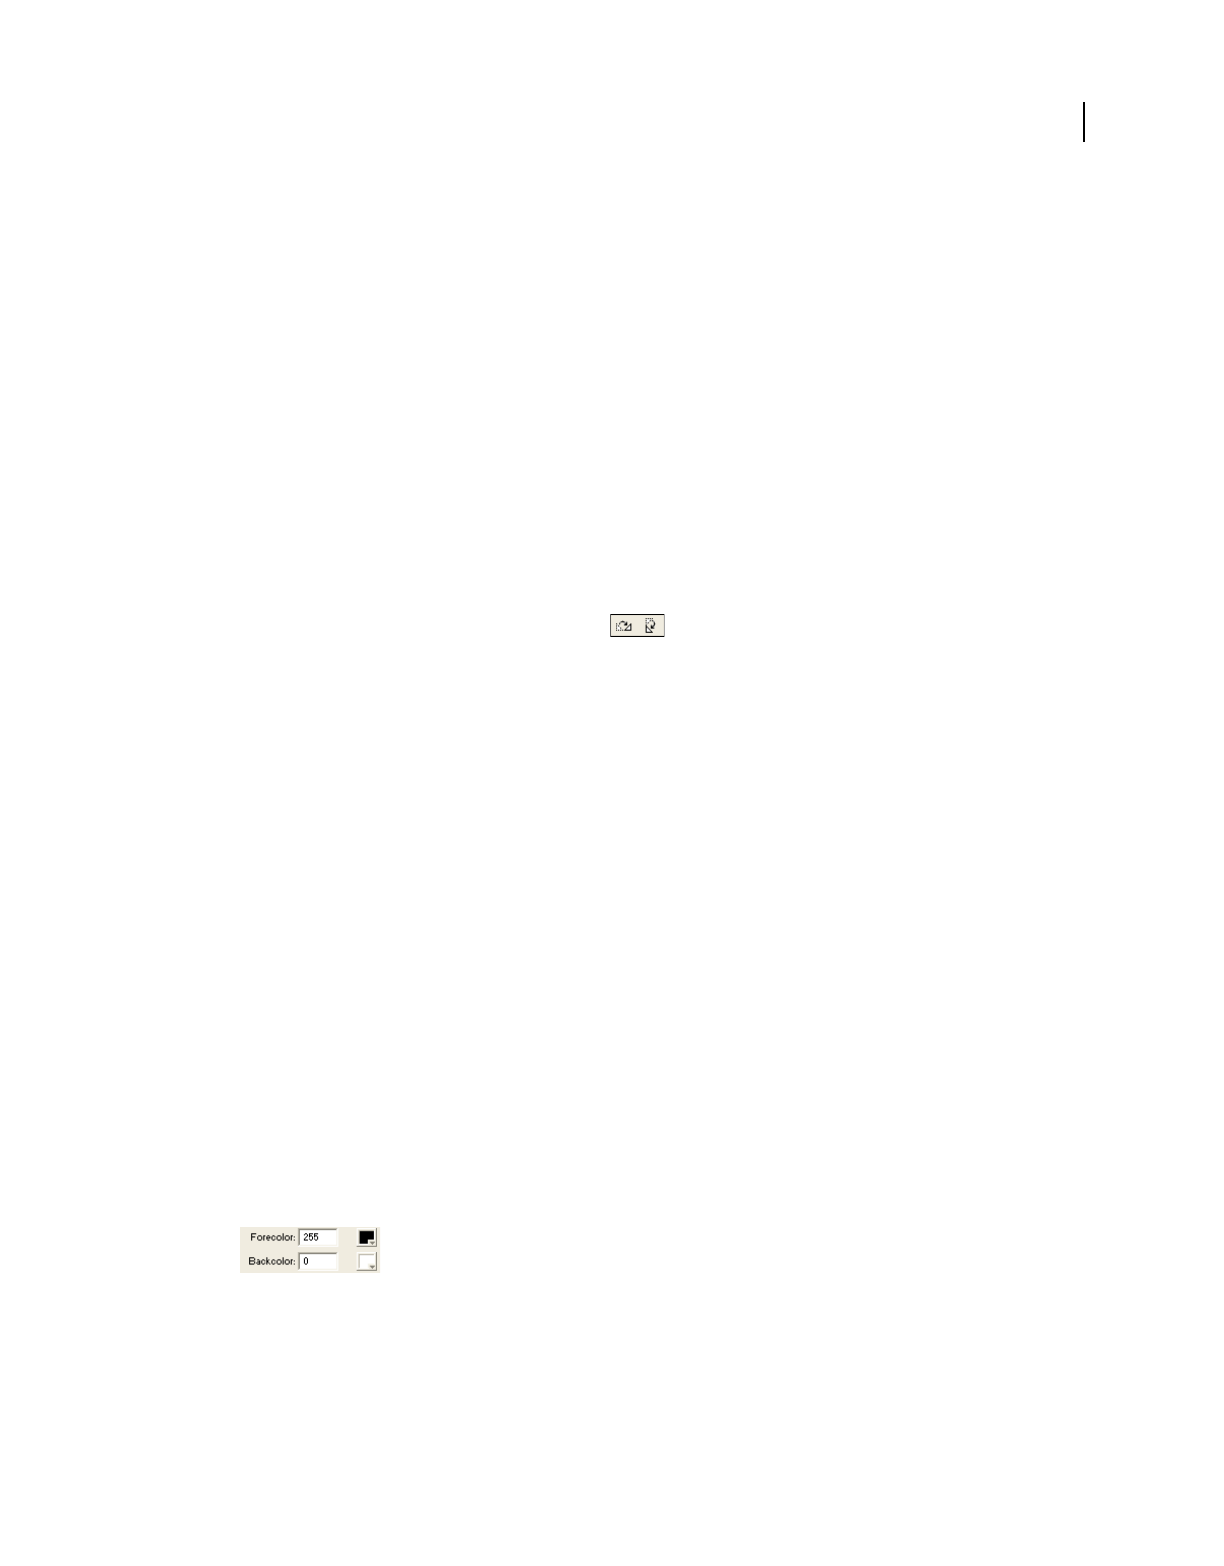
83
USING DIRECTOR 11.5
Sprites
Last updated 9/28/2011
•Enter new values on the Sprite tab in the Property inspector.
Director resizes the sprite at the current skew or rotation angle.
Restore a skewed or rotated sprite to its original orientation
❖Select Modify > Transform > Reset Rotation And Skew or Reset All.
Skew a sprite with script
❖Set the skew sprite property. For more information about this property, see the Scripting Reference topics in the
Director Help Panel.
Flipping sprites
Flipping a sprite creates a horizontally or vertically inverted image of the original sprite.
1Select a sprite.
2Do any of the following:
•Click the Flip Vertical or Flip Horizontal button on the Sprite tab in the Property inspector to flip the
sprite without moving the registration point or changing the current skew or rotation angles.
•Select Modify > Transform > Flip Horizontal In Place or Flip Vertical In Place to flip the sprite so that its
bounding rectangle stays in place and the registration point is moved, if necessary.
•Select Modify > Transform > Mirror Horizontal or Mirror Vertical to flip the sprite without moving the
registration point but inverting the skew and rotation angles.
Changing the color of a sprite
You can tint or color sprites by selecting new foreground and background colors from the Property inspector or by
using Lingo or JavaScript syntax. Selecting a new foreground color changes black pixels within the sprite to the selected
color and blends dark colors with the new color. Selecting a new background color changes white pixels within the
sprite to the selected color and blends light colors with the new color.
Director can animate foreground and background color changes in sprites, shifting gradually between the colors you
specify in the start and end frames of a sprite. See “Tweening other sprite properties” on page 93.
To reverse the colors of an image, change the foreground color to white and the background color to black.
Change the color of a sprite
1Select a sprite.
2Do one of the following:
•Select colors from the Forecolor and Backcolor boxes on the Sprite tab in the Property inspector.
Selecting colors
•Enter RGB values (hexadecimal) or palette index values (0-255) for the foreground and background colors on
the Sprite tab in the Property inspector.
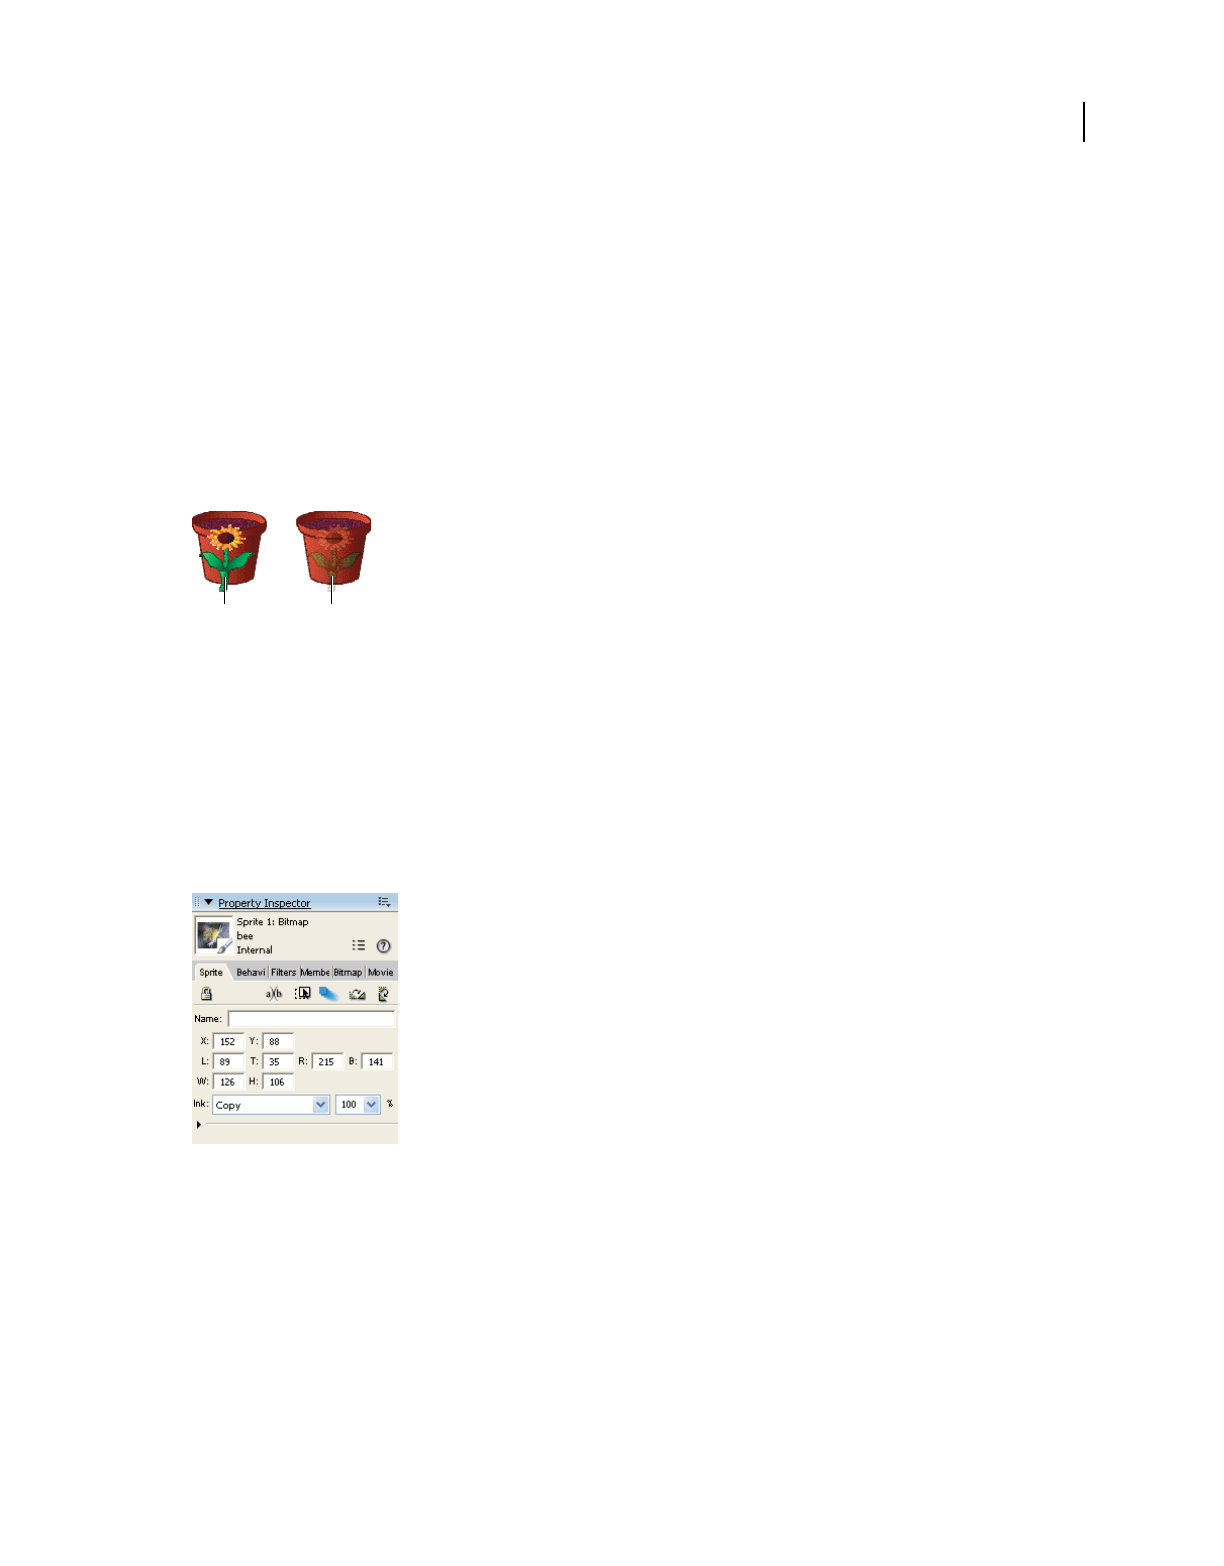
84
USING DIRECTOR 11.5
Sprites
Last updated 9/28/2011
Change the color of a sprite with Lingo or JavaScript syntax
Set the appropriate sprite property:
•The color sprite property sets the sprite’s foreground color. The value is an RGB value. For more information
about this property, see the Scripting Reference topics in the Director Help Panel.
•The bgColor sprite property sets the sprite’s background color. The value is an RGB value. For more information
about this property, see the Scripting Reference topics in the Director Help Panel.
Setting blends
You can use blending to make sprites transparent. To change a sprite’s blend setting, use the Sprite tab in the Property
inspector.
A. Blend setting of 100% B. Blend setting of 30%
Director can gradually change blend settings to make sprites fade in or out. See “Tweening other sprite properties” on
page 93.
The Blend percentage value affects only Copy, Background Transparent, Matte, Mask, and Blend inks.
Set blending for a sprite
1Select the sprite.
2Select a percentage from the Blend menu in the Property inspector, or enter a blend percentage between 0 and 100.
Specifying blend percentage
Set blending with Lingo or JavaScript syntax
❖Set the blend sprite property. For more information about this property, see the Scripting Reference topics in the
Director Help Panel.
AB
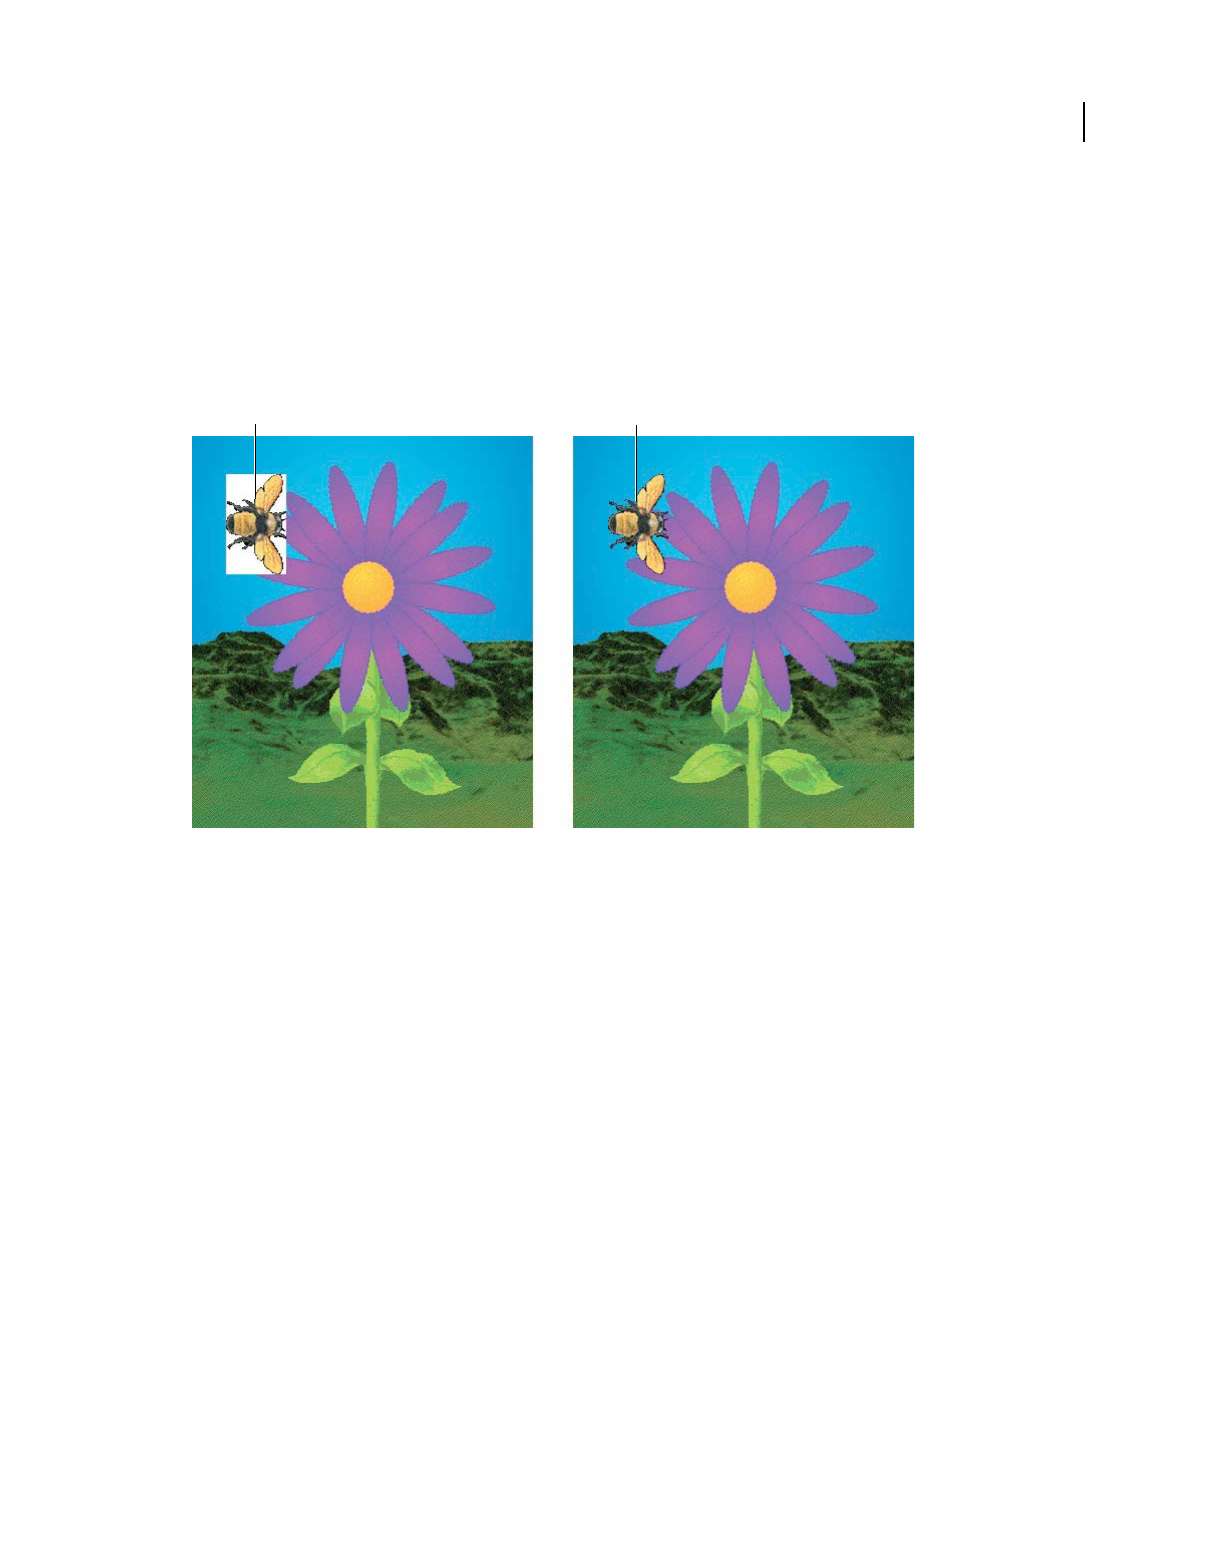
85
USING DIRECTOR 11.5
Sprites
Last updated 9/28/2011
Using sprite inks
You can change a sprite’s appearance on the Stage by applying inks. Sprite inks change the display of a sprite’s colors.
Inks are most useful for hiding white bounding rectangles around images, but they can also create many compelling
and useful color effects. Inks can reverse and alter colors, make sprites change colors depending on the background,
and create masks that obscure or reveal portions of a background.
Change the ink for a sprite in the Property inspector or with Lingo or JavaScript syntax.
Changing sprite inks
A. Sprite with Copy ink B. Sprite with Matte ink
To achieve the fastest animation rendering on the screen, use Copy ink; other ink types might have a slight effect on
performance.
Change a sprite’s ink with the Property inspector
1Select the sprite.
2Select the desired type of ink from the Ink menu on the Sprite tab in the Property inspector.
Change a sprite’s ink with script
❖Set the sprite’s ink sprite property. For more information about this property, see the Scripting Reference topics in
the Director Help Panel.
Note: If Background Transparent and Matte inks don’t seem to work, the background of the image might not be true
white. Also, if the edges of the image have been blended or are fuzzy, applying these inks might create a halo effect. Use
the Paint window or an image-editing program to change the background to true white and harden the edges. You
can also re-create the image with an alpha channel (transparency) and re-import the image.
Using Mask ink to create transparency effects
To reveal or tint certain parts of a sprite, use Mask ink. Mask ink lets you define a mask cast member, which controls
the degree of transparency for parts of a sprite.
AB
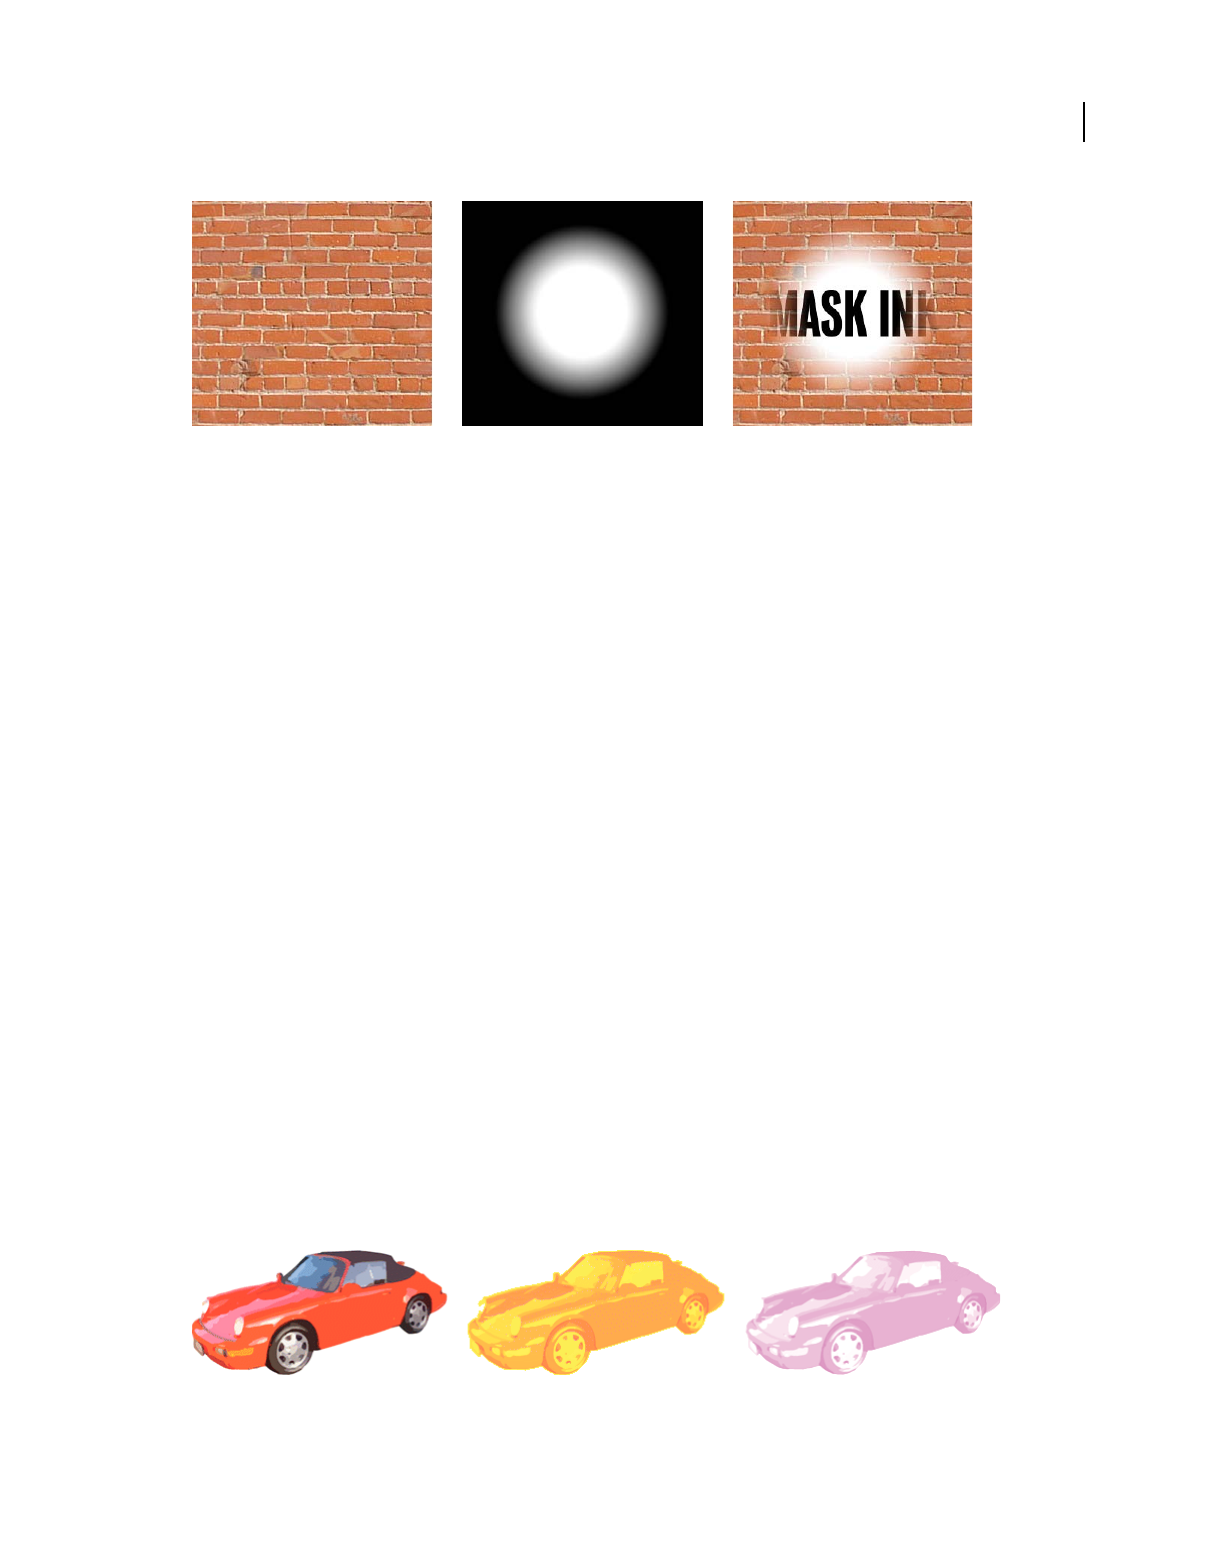
86
USING DIRECTOR 11.5
Sprites
Last updated 9/28/2011
The original cast member, its mask, and the sprite with Mask ink applied.
Black areas of a mask cast member make the sprite completely opaque in those areas, and white areas make it
completely transparent (invisible). Colors between black and white are more or less transparent. Darker colors are
more opaque.
When creating a bitmap mask for a sprite, use a grayscale palette if the mask cast member is an 8-bit (or less) image.
An 8-bit mask affects only the transparency of the sprite and does not affect the color. Director ignores the palette of
mask cast members that are less than 32-bit images, so using a grayscale palette lets you view the mask in a meaningful
way. If your mask cast member is a 32-bit image, the colors of the mask tint the sprite’s colors.
If you don’t need variable levels of opacity, use a 1-bit mask cast member to conserve memory and disk space.
There are many ways to use Mask ink. The following procedure explains the most basic method.
1Decide which cast member you want to mask.
The cast member can be a bitmap of any depth.
2In the next position in the same cast, create a duplicate of the cast member to serve as the mask.
The mask cast member can actually be any image, but a duplicate of the original is usually the most useful.
3Edit the mask cast member in the Paint window or any image editor.
Black areas of the mask make the sprite completely opaque in those areas, and white areas make it completely
transparent (invisible).
4Drag the original cast member to the Stage or Score to create a sprite.
5Make sure the new sprite is selected, and select Mask Ink from the Ink menu on the Sprite tab in the Property
inspector.
Only the parts of the sprite that are revealed by the mask are visible on the Stage.
About Darken and Lighten inks
Darken and Lighten inks provide a great control over a sprite’s RGB properties. Use them to create color effects in
sprites varying from subtle to surreal.
Darken and lighten inks

87
USING DIRECTOR 11.5
Sprites
Last updated 9/28/2011
Darken and Lighten each change how Director applies the foreground and background color properties of a sprite.
Darken makes the background color equivalent to a color filter through which the sprite is viewed on the Stage.
Lighten tints the colors in a sprite lighter as the background color gets darker. For both inks, the foreground color is
added to the image to the degree allowed by the other color control. Neither ink has any effect on a sprite until you
change the foreground or background color from the default settings of black and white.
Darken and Lighten are especially useful for animating unusual color effects. Because the foreground and background
color properties of the sprite control the effects, you can animate color shifts to create dazzling effects without having
to manually edit colors in a cast member. See “Tweening other sprite properties” on page 93.
Ink definitions
The following definitions describe all available ink types:
Copy Displays all the original colors in a sprite. All colors, including white, are opaque unless the image contains alpha
channel effects (transparency). Copy is the default ink and is useful for backgrounds or for sprites that don’t appear in
front of other artwork. If the cast member is not rectangular, a white box appears around the sprite when it passes in
front of another sprite or appears on a nonwhite background. Sprites with the Copy ink animate faster than sprites
with any other ink.
Matte Removes the white bounding rectangle around a sprite. Artwork within the boundaries is opaque. Matte
functions much like the Lasso tool in the Paint window in that the artwork is outlined rather than enclosed in a
rectangle. Matte, like Mask, uses more RAM than the other inks, and sprites with this ink animate more slowly than
other sprites.
Background Transparent Makes all the pixels in the background color of the selected sprite appear transparent and
permits the background to be seen.
Transparent Makes all light colors transparent so you can see lighter objects beneath the sprite.
Note: When you apply transparent ink to a vector-shape sprite filled with gradient colors and then add a filter, the sprite
becomes subtly colored.
Reverse Reverses overlapping colors. When applied to the foreground sprite, where colors overlap, the upper color
changes to the chromatic opposite (based on the color palette currently in use) of the color beneath it. Pixels that were
originally white become transparent and let the background show through unchanged. Reverse is good for creating
custom masks.
Ghost Like Reverse, Ghost reverses overlapping colors, except nonoverlapping colors are transparent. The sprite is not
visible unless it is overlapping another sprite.
Not Copy Reverses all the colors in an image to create a chromatic negative of the original.
Not Transparent, Not Reverse, Not Ghost These types are all variations of other effects. The foreground image is first
reversed, and then the Copy, Transparent, Reverse, or Ghost ink is applied. These inks are good for creating odd
effects.
Mask Determines the exact transparent or opaque parts of a sprite. For Mask ink to work, you must place a mask cast
member in the Cast window position immediately following the cast member to be masked. The black areas of the
mask make the sprite opaque, and white areas are transparent. Colors between black and white are more or less
transparent; darker colors are more opaque. See “Using Mask ink to create transparency effects” on page 85.
Blend Ensures that the sprite uses the color blend percentage that is specified on the Sprite tab in the Property
inspector. See “Setting blends” on page 84.
Darkest Compares RGB pixel colors in the foreground and background and uses the darkest pixel color.
Lightest Compares RGB pixel colors in the foreground and background and uses the lightest pixel color.

88
USING DIRECTOR 11.5
Sprites
Last updated 9/28/2011
Add Creates a new color that is the result of adding the RGB color value of the foreground sprite to the color value of
the background sprite. If the value of the two colors exceeds the maximum RGB color value (255), Director subtracts
256 from the remaining value so the result is between 0 and 255.
Add Pin Similar to Add. The foreground sprite’s RGB color value is added to the background sprite’s RGB color value,
but the color value is not allowed to exceed 255. If the value of the new color exceeds 255, the value is reduced to 255.
Subtract Subtracts the RGB color value of the foreground sprite’s color from the RGB value of the background sprite’s
color to determine the new color. If the color value of the new color is less than 0, Director adds 256 so the remaining
value is between 0 and 255.
Subtract Pin Subtracts the RGB color value of pixels in the foreground sprite from the value of the background sprite.
The value of the new color is not allowed to be less than 0. If the value of the new color is negative, the value is set to 0.
Darken Changes the effect of the foreground and background color properties of a sprite to create dramatic color
effects that generally darken and tint a sprite. Darken ink makes the background color equivalent to a color filter
through which the sprite is viewed on the Stage. White provides no filtering. Black darkens all color to pure black. The
foreground color is then added to the filtered image, which creates an effect that is similar to shining a light of that
color onto the image. Selecting Darken ink has no effect on a sprite until you select non-default foreground and
background colors. See “About Darken and Lighten inks” on page 86.
Lighten Changes the effect of the foreground and background color properties of a sprite so that it is easy to create
dramatic color effects that generally lighten an image. Lighten ink makes the colors in a sprite lighter as the
background color gets darker. The foreground color tints the image to the degree allowed by the lightening. See “About
Darken and Lighten inks” on page 86.
Note: Mask and Matte use more memory than other inks because Director must duplicate the mask of the artwork.
Assigning a cast member to a sprite with Lingo or
JavaScript syntax
Several script properties specify the cast member that is assigned to a sprite. You can use these properties to determine
a sprite’s cast member and switch the sprite’s cast members as the movie plays.
Specify the cast member, including its cast
❖Set the member sprite property. For more information about this property, see the Scripting Reference topics in the
Director Help Panel.
Setting this property is the most reliable way to specify a sprite’s cast member. You can also set the memberNum sprite
property, but this is reliable only when the new cast member is in the same cast as the current cast member.
Determine which cast contains the cast member assigned to a sprite
❖Test the castLibNum sprite property. For more information about this property, see the Scripting Reference topics
in the Director Help Panel.
This procedure is useful for updating movies that serve as templates.

89
USING DIRECTOR 11.5
Sprites
Last updated 9/28/2011
Exchanging cast members
The Exchange Cast Members command changes the cast member associated with a particular sprite to the currently
selected cast member. In other words, it replaces the member reference for the selected sprite with the member
reference of the selected cast member.
This command modifies the selected sprites in the Score; it doesn’t modify cast members. The command is enabled
only when both a sprite and a cast member are selected.
If multiple cast members are selected, the command associates only the first selected cast member with the sprite.
You can execute this command while the movie is playing.
1Select a sprite in the Score.
2Select a cast member in the Cast window. Be sure it is not the cast member that is already associated with the sprite.
3Select Edit > Exchange Cast Members.
The selected cast member is associated with the sprite.
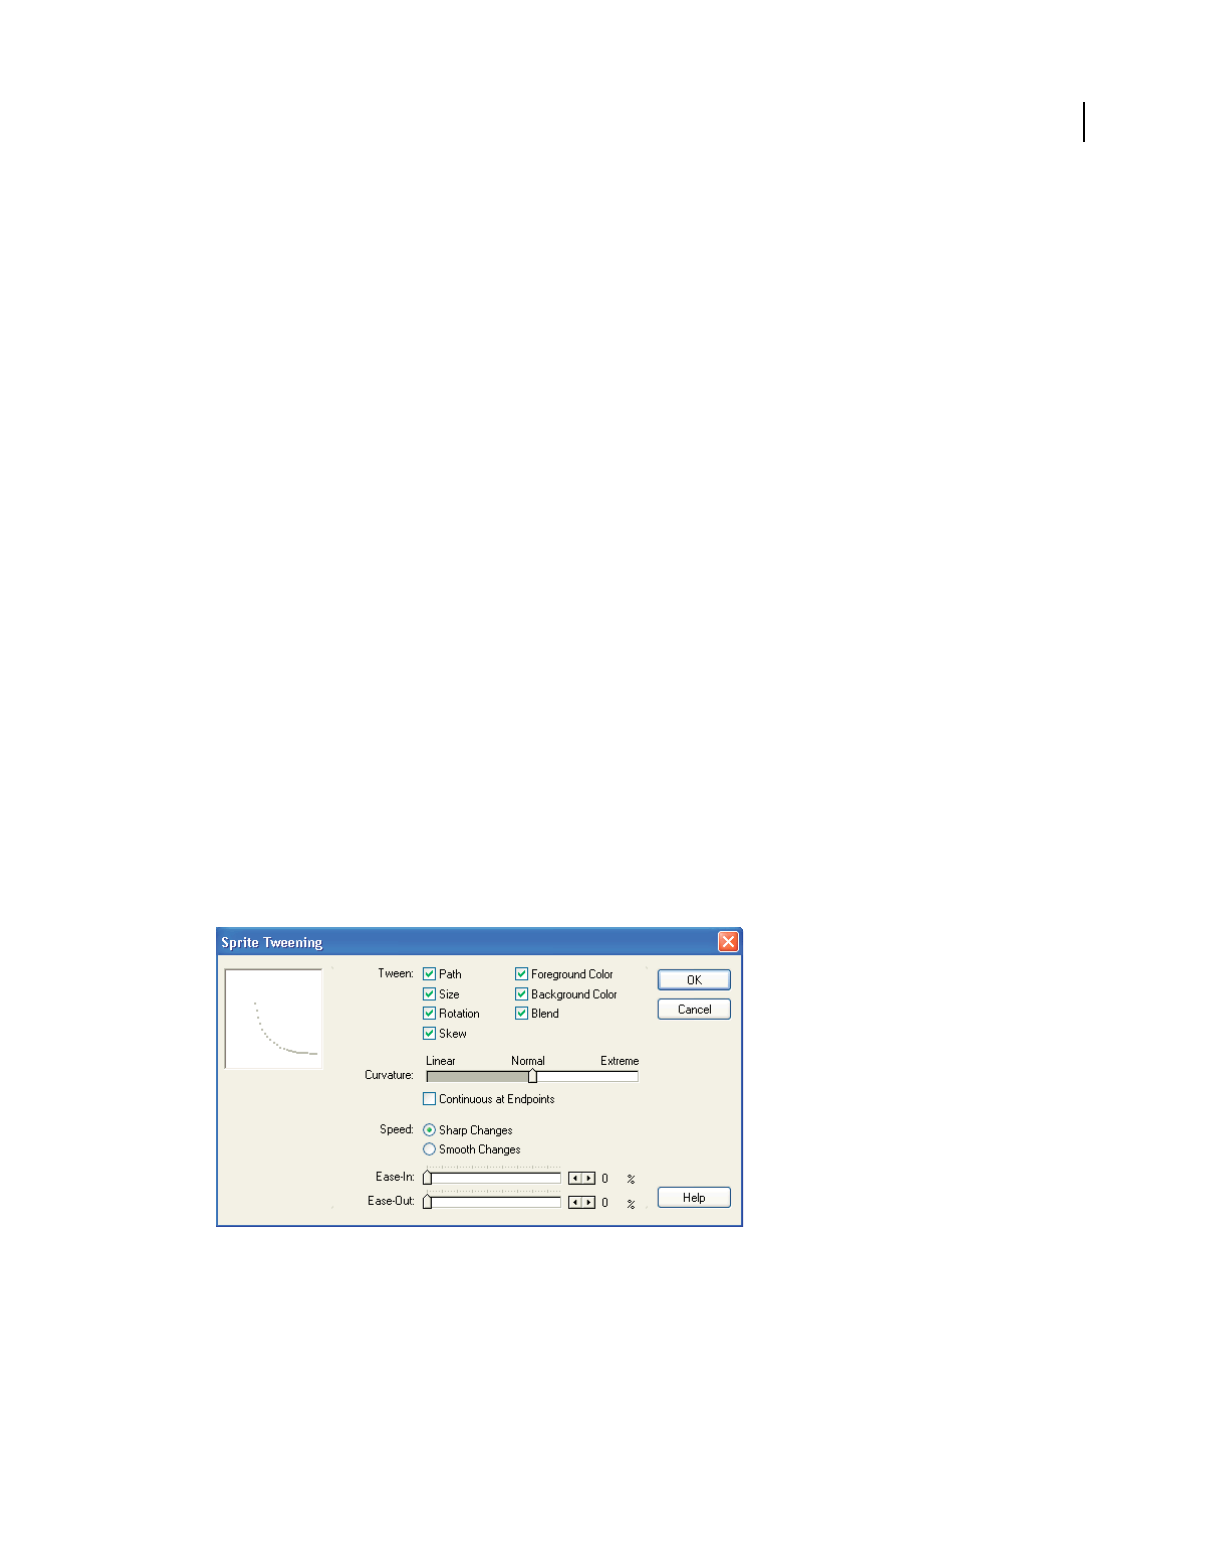
90
Last updated 9/28/2011
Chapter 5: Animation
About animation
Animation is the appearance of an image changing over time. The most common types of animation in Adobe®
Director® involve moving a sprite on the Stage (tweening animation) and using a series of cast members in the same
sprite (frame-by-frame animation).
•Tweening is a traditional animation term that describes the process in which a lead animator draws the animation
frames (called keyframes) where major changes take place. Assistants draw the frames in between. Tweening in
Director lets you define properties for sprite keyframes, and Director changes the properties in the frames in
between. Tweening is very efficient for adding animation to movies for websites, because no additional data needs
to download when a single cast member changes.
•Frame-by-frame animation involves manually creating every frame in an animation, whether that involves
switching cast members for a sprite or manually changing settings for sprites on the Stage.
Other forms of animation include making a sprite change size, rotate, change colors, or fade in and out.
About tweening in Director
To use tweening in Director, you define properties for a sprite in frames called keyframes and let Director change the
properties in the frames in between.
To specify tweening properties for a sprite, use the Sprite Tweening dialog box.
❖Select a sprite, and then select Modify > Sprite > Tweening.
Sprite Tweening dialog box
A keyframe usually indicates a change in sprite properties. Properties that can be tweened are position, size,
rotation, skew, blend, and foreground and background color. Each keyframe defines a value for all of these
properties, even if you explicitly define only one.
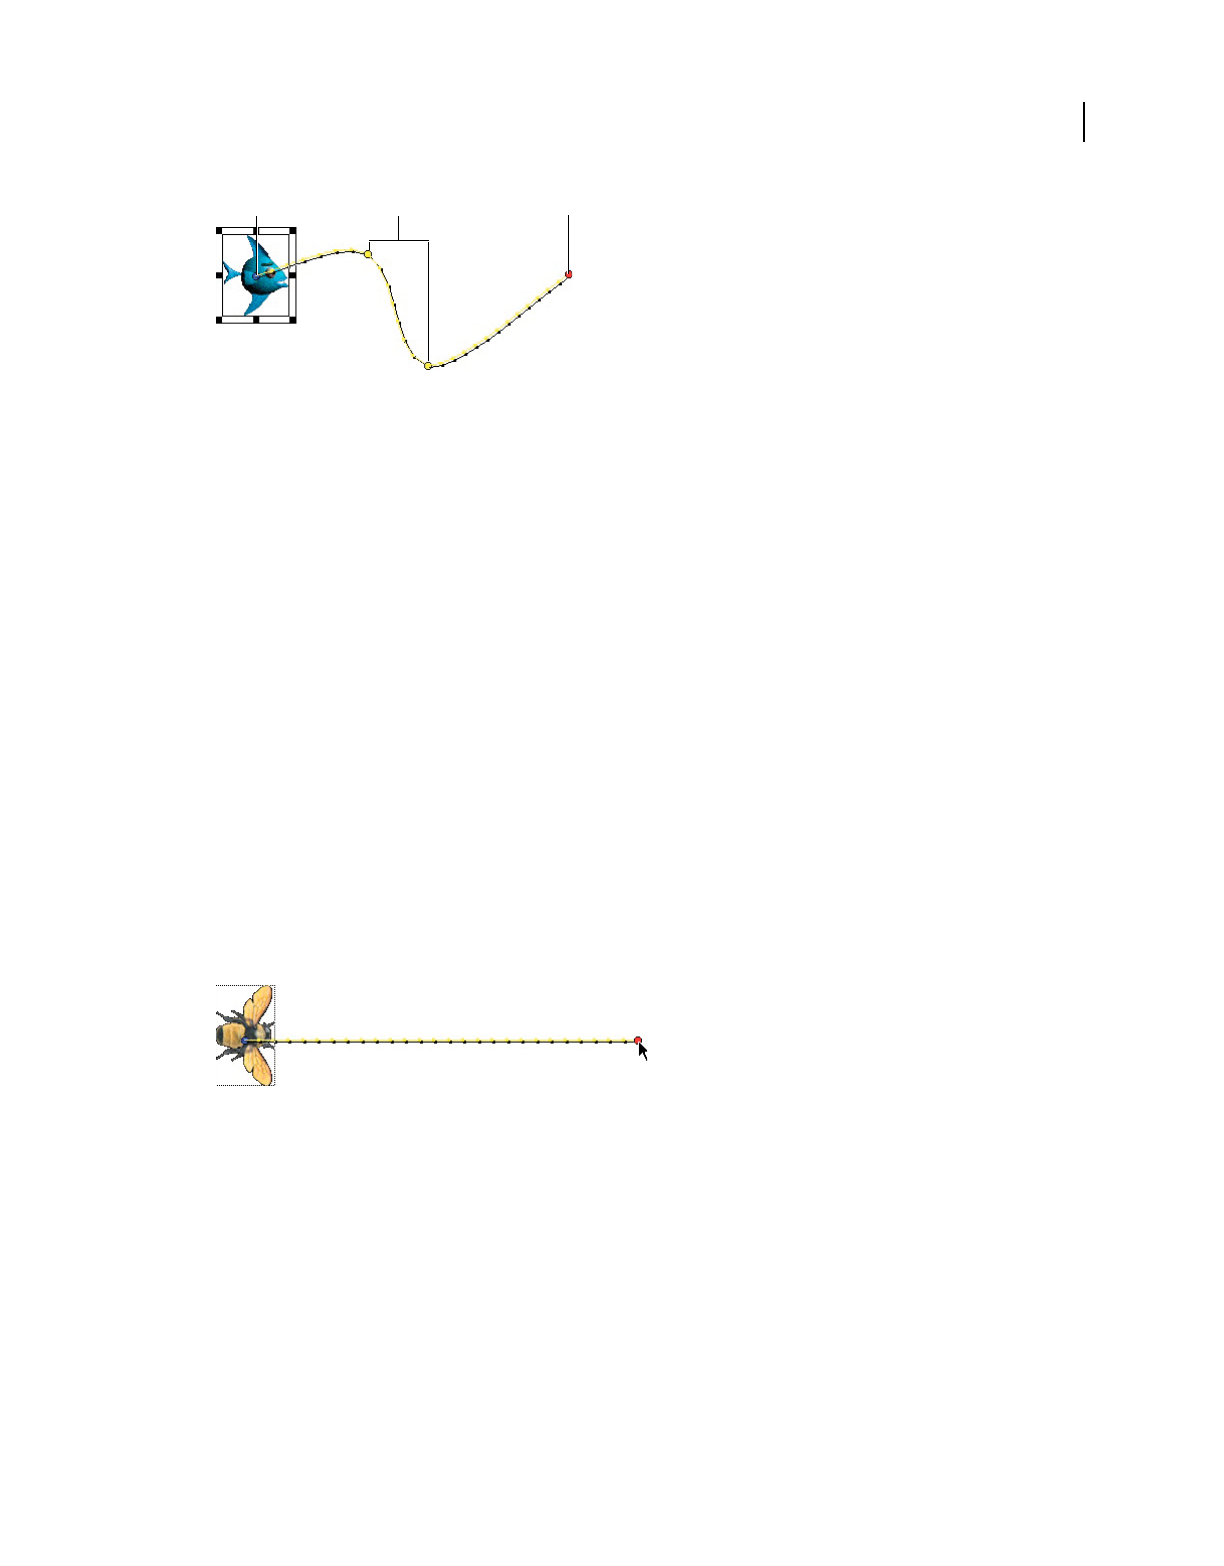
91
USING DIRECTOR 11.5
Animation
Last updated 9/28/2011
A. Start frame B. Keyframes C. End frame
Tweening the path of a sprite
Sprite paths are the lines Director displays on the Stage to show the movement of a sprite. Sprite paths are controlled
by the Sprite Overlay Settings dialog box. You can change settings to make the paths appear for all sprites, for selected
sprites, or only when the pointer rolls over a sprite. For more information, see “Displaying sprite properties in the
Sprite toolbar” on page 69.
You can tween a sprite directly on the Stage by editing the sprite’s path, which Director displays on the Stage. Adjust
the path by dragging keyframe indicators.
1Place a sprite on the Stage where you want the path to start. If the sprite is already on the Stage, select it.
This places the start frame of the sprite in the proper location. The start frame is also the first keyframe of the sprite.
2If necessary, select View > Sprite Overlay > Show Paths.
The Show Paths option is on by default. With this option turned on, Director displays the paths of moving sprites
on the Stage. Keyframes appear as hollow circles. Small tick marks show the sprite’s position in tweened frames.
3Insert keyframes in any additional frames where you want the sprite’s animation path to change.
4Drag the red handle within the sprite to the place on the Stage where you want the sprite’s path to end.
The red handle represents the sprite’s location in the end frame. For bitmaps, the red handle is usually in the center
of the image. For vector shapes and other media types, the handle is often in the upper-left corner.
The path of the sprite
Director displays the path the sprite follows. The tick marks along the path show the sprite location in each frame
in between.
5To make the sprite’s path curve between more points, hold down the Alt key (Windows®) or Option key (Mac®) and
move the pointer on the Stage over a tick mark. When the pointer changes color, drag the tick mark to a new
location.
AB C
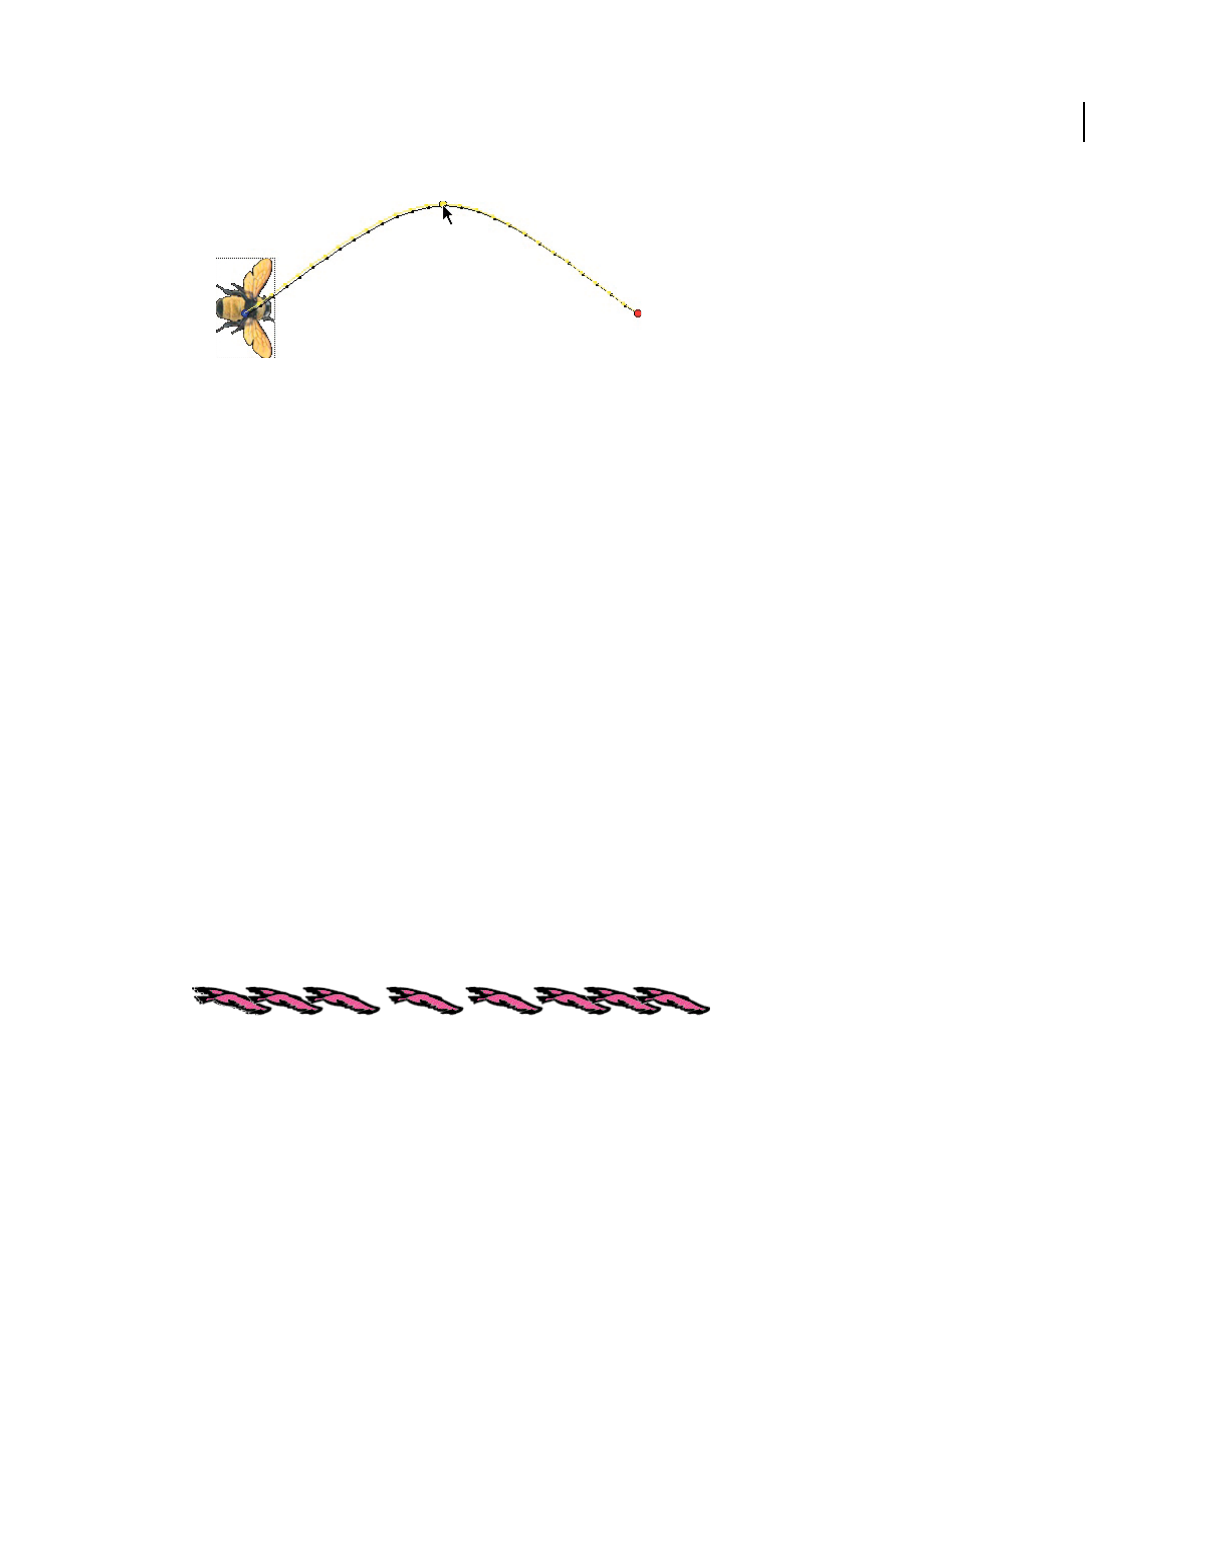
92
USING DIRECTOR 11.5
Animation
Last updated 9/28/2011
Curved path of a sprite
This creates a new keyframe and records the new location. Repeat this step to create additional keyframes.
6To make the property changes defined by a keyframe occur at a different time, drag the keyframe in the Score to a
new frame within the sprite.
7To change the degree of curvature between keyframes, select Modify > Sprite > Tweening and adjust the Curvature
slider. To make the sprite move in the same direction at the beginning and end, select Continuous At Endpoints in
the Sprite Tweening dialog box. This creates a circular motion. For more information, see “Changing tweening
settings” on page 94.
Accelerating and decelerating sprites
To create more natural motion in tweened sprites, use the following settings in the Sprite Tweening dialog box:
•Ease-In and Ease-Out control how a sprite moves from its start frame to its end frame, regardless of how many
keyframes are in between. Ease-In makes a sprite move more slowly in the beginning frames. Ease-Out makes the
sprite slow down in the ending frames. This setting makes the sprite move more like an object in the real world.
•The Speed settings control how Director moves a sprite between each keyframe. The Sharp Changes option is the
default setting. Using this option, Director calculates how to move the sprite between each pair of keyframes
separately. If a sprite’s keyframes are separated by unequal numbers of frames in the Score, or by different amounts
of space on the Stage, abrupt changes in speed might occur as the sprite moves between keyframe locations. Smooth
out these speed changes by selecting the Smooth Changes option.
Sprite with modified ease-in and ease-out settings
1Use one of the tweening methods to create a moving sprite.
2Select View > Sprite Overlay > Show Paths to see how far the sprite moves between each frame.
3Select the sprite and select Modify > Sprite > Tweening.
4Use the Ease-In and Ease-Out sliders to specify the percentage of the sprite’s path through which the sprite should
accelerate or decelerate.
5Select a speed setting:
Sharp Changes Moves the sprite between keyframe locations without adjusting the speed.
Smooth Changes Adjusts the sprite’s speed gradually as it moves between keyframes.

93
USING DIRECTOR 11.5
Animation
Last updated 9/28/2011
Tweening other sprite properties
In addition to tweening a sprite’s path, Director can tween the size, rotation, skew, blend, and foreground and
background color of a sprite. Tweening size works best for vector-based cast members created in the Vector Shape
window or in Adobe® Flash® (bitmaps can become distorted when resized). Director can tween all of these properties
at once.
To make a sprite fade in or out, tween blend settings. To make sprites spin or tilt, use rotation. To create gradual shifts
in color, you can tween color settings.
Tween color settings
Note: To prevent Director from tweening a certain sprite property, select Modify > Sprite > Tweening and turn off any of
the tweening options.
1If the Score isn’t open, select Window > Score.
2Position a sprite on the Stage and make sure it spans all the frames in which you want the sprite to change.
3Select the start frame of the sprite.
4To tween size, scale the sprite or resize the sprite on the Stage. For more information, see “Resizing and scaling
sprites” on page 80.
5To define the beginning property settings, click the Sprite tab of the Property inspector and do any of the following:
•To make the sprite fade in or out, enter a blend setting in the Property inspector (in List view). Enter 0 to make
the sprite fade in or 100 to make it fade out. For more information, see “Setting blends” on page 84.
•To tween rotation or skew, manually rotate or skew the sprite to the beginning position on the Stage or enter an
angle in the Property inspector. For more information, see “Rotating and skewing sprites” on page 81.
•To tween color, use the color boxes in the Property inspector to open the color palette for foreground and
background color, or enter the RGB values for a new color in the boxes at the right (List view) or left (Graphical
view).
6In the Score, select the end frame of the sprite and select Insert > Keyframe.
The end frame is not a keyframe unless you insert one there.
7Make sure that only the keyframe is selected (not the entire sprite), and then enter the ending values of the sprite
properties you are tweening.
For example, if you entered a blend setting of 0 in the first frame, you could enter a blend setting of 100 in this frame.
8If necessary, create additional keyframes in the sprite and enter new values for the tweened properties.
9To make the property changes defined by a keyframe occur at a different time, drag a keyframe in the Score to a
new frame within the sprite.
10 To view the tweening, rewind and play the movie.
Director gradually changes the value of the tweened property in the frames between the keyframes.
Suggestions and shortcuts for tweening
•For smoother movements, tween across more frames, increasing the tempo if necessary.

94
USING DIRECTOR 11.5
Animation
Last updated 9/28/2011
•To achieve some types of motion, you might need to split the sprite and tween the sprites separately. For more
information, see “Accelerating and decelerating sprites” on page 92.
•To quickly make duplicates, Alt-drag (Windows) or Option-drag (Mac) keyframes. This technique is useful when
you want the start and end frames to have the same settings. This shortcut also provides a quick way to create a
complex path. Insert a single keyframe, drag several duplicates to the proper frames, and then select the various
keyframes and set positions on the Stage.
•To extend the sprite and leave the last keyframe in place, Alt-drag (Windows) or Option-drag (Mac) a keyframe at
the end of a sprite.
•To move many keyframe positions at once, Control-click (Windows) or Command-click (Mac) multiple keyframes
to select them, and then move the sprite on the Stage.
•To make the animation look smoother, use an image editor to blur the edges of bitmaps.
•When tweening sprites that have a series of cast members, consider using a film loop instead. For more
information, see “Using film loops” on page 99.
•To make a sprite jump instantly between settings in different keyframes, turn off all tweening options.
Changing tweening settings
You can turn tweening on and off for certain properties and control the curve of a tweening path and the way the speed
changes as a sprite moves. For information about creating tweened animation, see “Tweening the path of a sprite” on
page 91.
1Select a tweened sprite on the Stage or in the Score.
2Select Modify > Sprite > Tweening to open the Sprite Tweening dialog box.
The diagram in the upper-left corner of the Sprite Tweening dialog box shows the sprite’s path as specified by the
Curvature, Speed, Ease-In, and Ease-Out settings. This doesn’t show the actual path of the sprite, just the type of
curve it follows.
If the start and end points of the sprite are the same, the diagram is circular, indicating that the sprite travels in a
circle when tweened. If the start and end points are not the same, the diagram describes a curved path, indicating
that the sprite ends at a point different from the starting point.
3To change which properties of the sprite are tweened, change the values for Tween.
A check mark indicates that the property will be tweened. The available properties are Path, Size, Rotation, Skew,
Foreground Color, Background Color, and Blend.
4To change how the sprite curves between the positions defined by keyframes, adjust the Curvature slider.
Linear Makes the sprite move in a straight line between the keyframe positions.
Normal Makes the sprite follow a curved path inside the keyframe positions.
Extreme Makes the sprite follow a curved path outside the keyframe positions.
5To make the sprite move smoothly through start and end frames when it moves in a closed path, select Continuous
At Endpoints.
6To define how the tweened sprite positions change between keyframes, select a Speed option. For more
information, see “Accelerating and decelerating sprites” on page 92.
Sharp Changes Makes the changes in position occur abruptly.
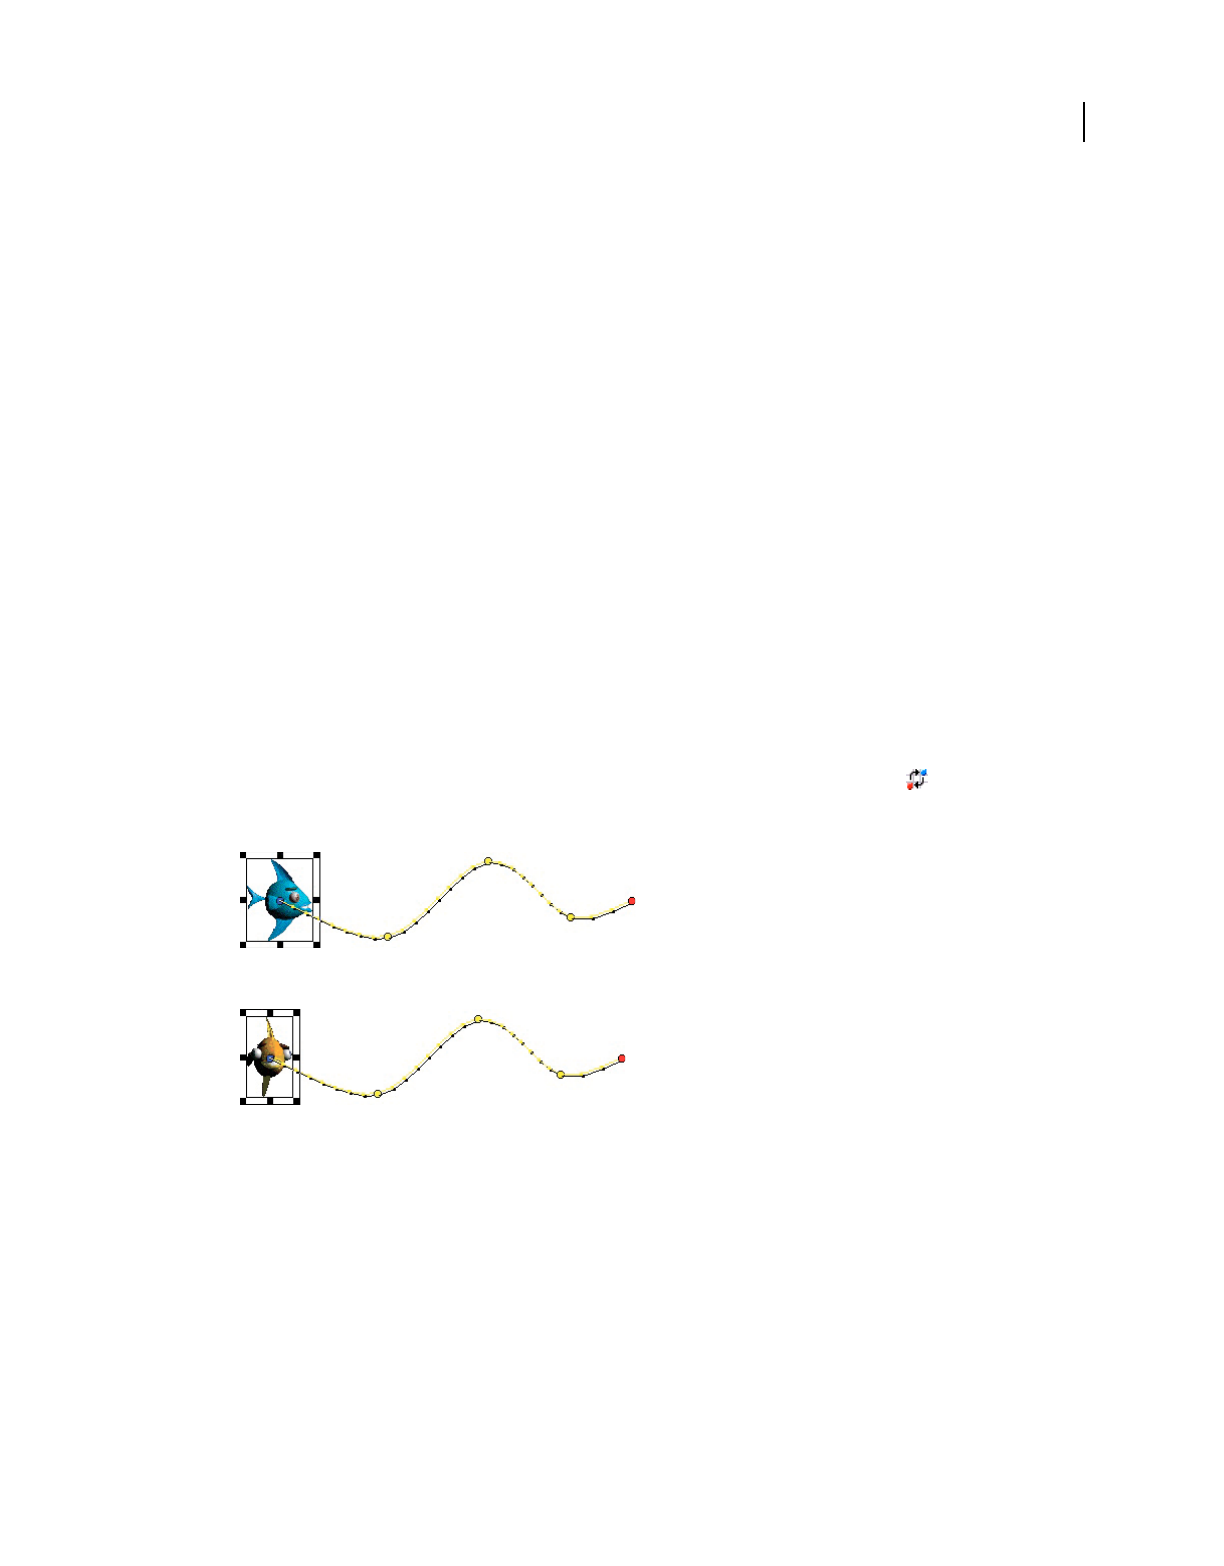
95
USING DIRECTOR 11.5
Animation
Last updated 9/28/2011
Smooth Changes Makes the changes in position occur gradually.
7To define how tweened sprite positions change over the whole length of the sprite, use the sliders to change the
values for Ease-In and Ease-Out.
Ease-In Defines the percentage of the sprite span through which the sprite accelerates.
Ease-Out Defines the percentage of the sprite span through which the sprite decelerates.
Switching a sprite’s cast members
To show different content while maintaining all other sprite properties, exchange the cast member assigned to a sprite.
This technique is useful when you have tweened a sprite and you decide to use a different cast member. When you
exchange the cast member, the tweening path stays the same.
1To change a cast member in every frame, select an entire sprite. To change a cast member only in certain frames,
select part of a sprite.
To select part of a sprite, press Alt and click the first frame that you want to select. Then press Control+Alt
(Windows) or Option+Alt (Mac) and click each additional frame that you want to select.
2Open the Cast window and select the cast member you want to use next in the animation.
3Do one of the following:
•Select Edit > Exchange Cast Members.
•Click the Exchange Cast Members button on the Director toolbar (Window > Toolbar).
If you selected an entire sprite, Director replaces the cast member for the entire sprite.
Before cast members are exchanged, the sprite moves like this.
After cast members are exchanged, the sprite still moves in the same way, but it displays a different cast member.
You can also use Lingo or JavaScript™ syntax to switch the cast member assigned to a sprite. For more
information, see “Assigning a cast member to a sprite with Lingo or JavaScript syntax” on page 88.
Editing sprite frames
To change how a sprite is selected and how keyframes are created, use the Edit Sprite Frames option. Use this option
with sprites that have animation that must be adjusted frequently; it is especially useful for cell animation in which
each frame contains a different cast member in a different position.
Ordinarily, clicking a sprite on the Stage or in the Score selects the entire sprite.
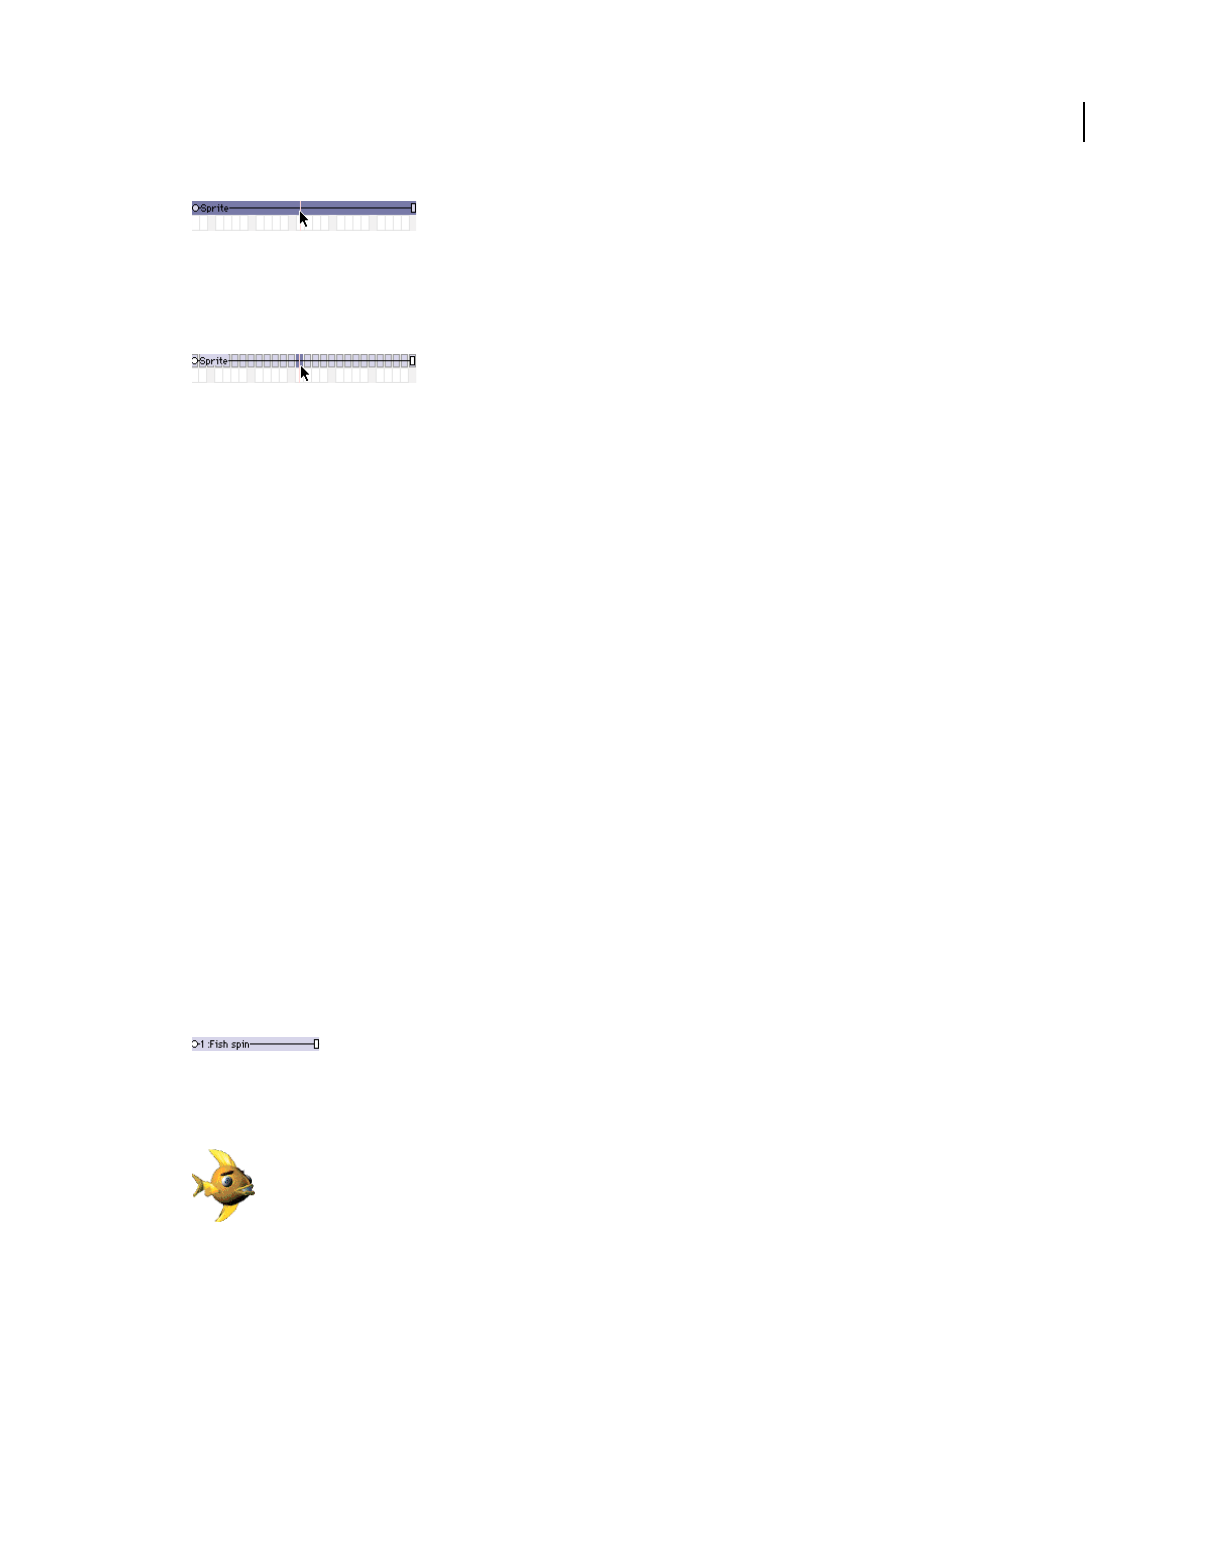
96
USING DIRECTOR 11.5
Animation
Last updated 9/28/2011
Entire sprite selected
When Edit Sprite Frames is turned on for a certain sprite, clicking the sprite selects a single frame. Any change you
make to a tweenable property, such as moving a sprite on the Stage, defines a new keyframe.
A single frame selected
Use Edit Sprite Frames
Do one of the following:
•Select a sprite or sprites and select Edit > Edit Sprite Frames.
•Alt-double-click (Windows) or Option-double-click (Mac) a frame within the sprite.
Return sprites to their normal state
Do one of the following:
•Select sprites and select Edit > Edit Entire Sprite.
•Alt-double-click (Windows) or Option-double-click (Mac) a frame within the sprite.
Frame-by-frame animation
To create animation that is more complex than is possible with simple tweening, you can use a series of cast members
in frame-by-frame animation. Sprites usually refer to only one cast member, but they can refer to different cast
members at different times during the life of the sprite.
For example, an animation of a man walking may display several cast members showing the man in different positions.
By placing all the images in a sequence within a single sprite, you can work with the animation as if it were a single
object.
Single sprite in the Score
A single sprite can display several cast members.
Sprite animating
Use this approach sparingly for movies that are downloaded from the Internet, because all cast members must be
downloaded before the animation can run. As an alternative to this type of animation, consider using vector shapes,
rotation and skewing on bitmap cast members, or Flash content. For more information, see “Using Flash, Flash
Components, and Other Interactive Media Types” on page 194.

97
USING DIRECTOR 11.5
Animation
Last updated 9/28/2011
You can create multiple-cast-member animations in a variety of ways in Director. The following procedure explains a
basic approach. The Cast To Time command provides an effective shortcut. For more information, see “Shortcuts for
animating with multiple cast members” on page 97.
Note: The best way to prepare cast members for use in multiple-cast-member animation is with onion skinning in the
Paint window. For more information, see “Using onion skinning” on page 127.
Animate a sprite with multiple cast members
1Create a sprite by placing the first cast member in the animation on the Stage in the appropriate frame.
2Change the length of the sprite as needed.
Drag the start or end frame in the Score, or enter a new start or end frame number in the Sprite Inspector.
3Select View > Display > Cast Member.
This setting displays the name of the cast member on each sprite. For more information, see “Displaying sprite
labels in the Score” on page 71.
4Select View > Sprite Labels > Changes Only.
This setting changes the view of the Score to show the name of each sprite’s cast member when it changes. This
makes it easy to identify frames where the cast member changes. For more information, see “Displaying sprite labels
in the Score” on page 71. You can zoom the Score to 800% so the frames are wide enough to display the cast member
information.
5Select Edit > Edit Sprite Frames.
Edit Sprite Frames makes it easier to select frames within a sprite. For more information, see “Editing sprite frames”
on page 95.
6Select the frames in the sprite where you want a different cast member to appear.
7Open the Cast window and select the cast member you want to use next in the animation.
8Select Edit > Exchange Cast Members.
Director replaces the cast member in the selected frame with the cast member selected in the Cast window.
9Repeat steps 6-8 to complete the animation. Select Edit > Edit Entire Sprite when you are done.
Sometimes a series of cast members placed in the Score jumps unexpectedly when you play the movie. This occurs
because the cast members’ registration points are not aligned properly. When you exchange cast members, Director
places the new cast member’s registration point precisely where the previous cast member’s registration point was.
By default, Director places registration points in the center of a bitmap cast member’s bounding rectangle.
For information about aligning registration points, see “Changing registration points” on page 116. You can also
align sprites relative to their bounding rectangles. For more information, see “Positioning sprites by using guides,
the grid, or the Align window” on page 75.
Shortcuts for animating with multiple cast members
The Cast To Time and Space To Time commands are both useful shortcuts for animating with multiple cast members.
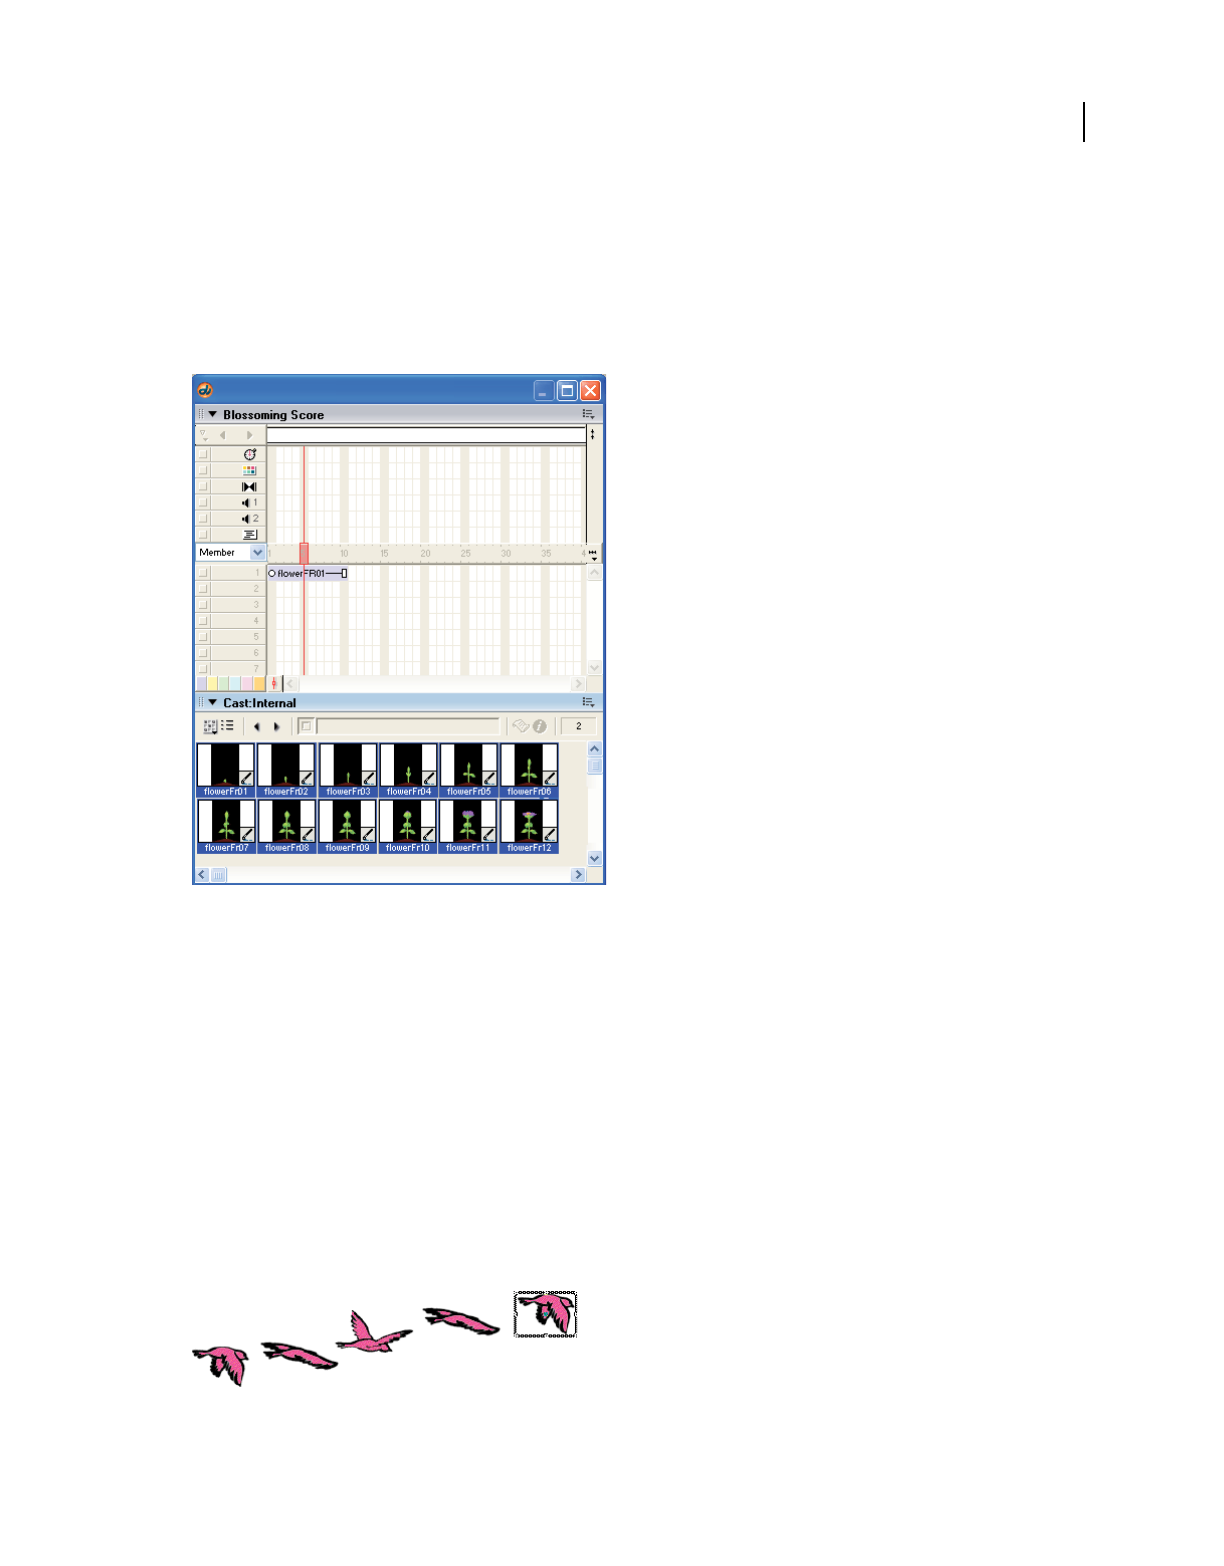
98
USING DIRECTOR 11.5
Animation
Last updated 9/28/2011
Using the Cast To Time command
To move a series of cast members to the Score as a single sprite, use the Cast To Time command (Modify > Cast To
Time), which is one of the most useful methods for creating animation with multiple cast members. Typically, you
create a series of images and then use the Cast To Time command to quickly place them in the Score as a single sprite.
The Director onion skinning feature is also useful for creating and aligning a series of images for use in animation. For
more information, see “Using onion skinning” on page 127.
Cast To Time places selected cast members in the Score as a single sprite.
1Select the frame in the Score where you want to place the new sprite.
2Make the Cast window active.
3Select the series of cast members to be placed in the new sprite.
4Select Modify > Cast To Time, or hold down Alt (Windows) or Option (Mac) and drag the cast members to the
Stage.
The selected series of cast members becomes a single sprite.
Using the Space To Time command
To move sprites from adjacent channels to a single sprite, use the Space To Time command (Modify > Space To Time).
This method is convenient when you want to arrange several images on the Stage in one frame and then convert them
to a single sprite.
Arrange sprites on the Stage in a single frame.

99
USING DIRECTOR 11.5
Animation
Last updated 9/28/2011
Space To Time converts sprites from adjacent channels to a single sprite.
Onion skinning provides a benefit in the Paint window similar to that provided by Space To Time on the Stage. For
more information, see “Using onion skinning” on page 127.
1Select Edit > Preferences > Sprite and set Span Duration to 1 frame.
Set the span duration to any setting you like, but Space To Time works best with shorter sprites.
Note: If you are using a Mac OS® X operating system, select the Director menu, instead of the Edit menu, to access
Preferences.
2Select an empty frame in the Score. This is usually at the end of the Score.
3Drag cast members onto the Stage to create sprites where you want them to appear in the animation.
As you position the sprites on the Stage, Director places each sprite in a separate channel. Make sure all the sprites
are in consecutive channels.
4Select all the sprites that are part of the sequence in the Score or on the Stage.
5Select Modify > Space To Time to open the Space To Time dialog box.
6In the Separation text box, enter the number of frames you want between each cast member. Director rearranges
the sprites in sequence from left to right in a single sprite.
Note: Space To Time is a fast way to set up keyframes for a sprite to move along a curve. Arrange the cast members in
one frame, select Modify > Space To Time, and add 10 to 20 cells between each cast member to produce a smooth
curve.
Using film loops
A film loop is an animated sequence that you can use like a single cast member. For example, to create an animation
of a bird flying across the Stage, you can create a film loop of the sequence of cast members that shows the bird flapping
its wings. Instead of using the frame-by-frame technique, create a sprite containing only the film loop and then
animate it across as many frames as you need. When you run the animation, the bird flaps its wings and at the same
time moves across the Stage.
You can also use film loops to consolidate Score data. Film loops are especially helpful when you want to reduce the
number of sprite channels you are using. You can combine several Score channels into a film loop in a single channel.
Note: Filters may not work as intended when applied to film loops.
To determine if a film loop is cropped or scaled within a sprite’s bounding rectangle and to make the film loop repeat
or mute its sounds, you use the Film Loop Cast Member properties. For more information, see “Setting film loop
properties” on page 100.

100
USING DIRECTOR 11.5
Animation
Last updated 9/28/2011
Film loops are useful for animating repetitive motions and combining sprites
1In the Score, select the sprites you want to turn into a film loop.
Use sprites in as many channels as you need in film loops (including the sound channel). Select sequences in all the
channels you want include in the film loop. To select sprite fragments, first select a sprite and select Edit > Edit
Sprite Frames. Control-click (Windows) or Command-click (Mac) to select sequences that are not in adjacent
channels.
2Select Insert > Film Loop.
3Enter a name for the film loop.
Director stores all the Score data and cast member references as a new film loop cast member.
Note: Drag a selection from the Score to the Cast window to quickly create a film loop cast member in that position.
A film loop behaves just like any other cast member, with a few exceptions, as follows:
•When you step through an animation that contains a film loop (either by using Step Forward or Step Backward
or by dragging the playhead in the Score), the film loop doesn’t animate. Animation occurs only when the movie
is running.
•You can’t apply ink effects to a film loop. If you want to use ink effects with a film loop, you need to apply them
to the sprites that make up the animation before you turn the animation into a film loop.
•Lengthening or shortening a sprite that contains a film loop doesn’t affect how fast the film loop plays. It changes
the number of times the film loop cycles.
Director provides three other ways of incorporating a completed animation into a movie as a discrete element:
you can export it as a digital video (QuickTime® or AVI) or a DIB file (BMP), save and import it as a linked
Director movie, or play it in a window in another Director movie.
Note: If you need to edit a film loop and you have deleted the original Score data that it was based on, you can
restore the Score data for editing. Copy the film loop cast member to the Clipboard, select a cell in the Score, and
then paste. Director pastes the original Score data instead of the film loop.
Setting film loop properties
To determine if a film loop is cropped or scaled within a sprite’s bounding rectangle and to make the film loop repeat
or mute its sounds, set properties for the film loop cast member.
1Select a film loop cast member.
2To display the Property inspector, select Modify > Cast Member > Properties, or Window > Property Inspector.
3If necessary, click the Member tab and display the Graphical view.
The following noneditable settings are displayed:
•The cast member size in kilobytes
•The cast member creation and edit dates
•The name of the last person who modified the cast member

101
USING DIRECTOR 11.5
Animation
Last updated 9/28/2011
4To view or edit the cast member name, use the Name text box.
5To add comments about the cast member, use the Comments text box.
6To specify how Director removes the cast member from memory if memory is low, select one of the following
options from the Unload menu:
3—Normal Sets the selected cast members to be removed from memory after all priority 2 cast members have been
removed.
2—Next Sets the selected cast members to be among the first removed from memory.
1—Last Sets the selected cast members to be the last removed from memory.
0—Never Sets the selected cast members to be retained in memory; these cast members are never unloaded.
7Click the Film Loop tab and display the Graphical view.
8To determine how the film loop appears within the sprite bounding rectangle, select Framing options from the
following:
Crop Makes the movie image appear at its default size. Any portions that extend beyond the sprite’s rectangle are
not visible.
Center Available only if Crop is selected. It determines whether transformations occur with the cast member
centered within the sprite or with the cast member’s upper-left corner aligned with the sprite’s upper-left corner.
Scale Fits the movie inside the bounding rectangle.
9To determine how the film loop plays back, use the following settings:
Audio Plays the sound portion of the film loop. Turn this option off to mute sounds.
Loop Replays the film loop continuously from the beginning to the end and back to the beginning.
Step-recording animation
Step recording is a process of animating one frame at time. Record the position of a sprite in a frame, step forward to
the next frame, move the sprite to its new position, step forward to the next frame, and so on until you have completed
the animation. This method is useful for creating sprites that follow irregular paths.
1Place sprites on the Stage where you want the animation to begin.
2Select all the sprites you want to animate.
3In the Score, click the frame where you want animation to begin.
4Select Control > Step Recording.
The step-recording indicator appears next to the channel numbers for the sprites being recorded, and the selection
border widens.
5Press 3 on the numeric keypad (make sure Number Lock is off) or click the Step Forward button in the Control
panel.
Note: You can display the Control panel at the bottom of the Stage or in a floating panel.
The movie advances to the next frame. If you reach the last frame of a sprite, Director extends the sprites being
recorded into the new frame.
Note: Recording stops as soon as you move the animation in any way other than stepping (such as using Rewind, Play,
or Back).

102
USING DIRECTOR 11.5
Animation
Last updated 9/28/2011
6Drag the sprite to reposition it.
You can also stretch the sprite, exchange cast members, or change any property.
7Repeat steps 5 and 6 until you have completed the sequence you want to record.
8Select Control > Step Recording again to stop recording.
You can also rewind the movie to stop recording.
Real-time recording animation
You can create animation by recording the movement of a sprite as you drag it across the Stage. The real-time
recording technique is especially useful for simulating the movement of a pointer or for quickly creating a complex
motion for later refinement.
For better control when you are recording in real time, use the Tempo control in the Control panel to record at a speed
that is slower than normal.
Note: The Control panel attached to the bottom of the Stage doesn’t include tempo settings. Tempo settings are available
only from the floating panel version of the Control panel.
1Select one or more sprites on the Stage or in the Score.
Recording begins at the playhead. It is best to select a sprite in a channel that contains no other sprites later in the
movie.
To record in a specific range of frames, select the frames, and then click the Selected Frames Only button in the
Control panel.
2Select Control > Real-Time Recording.
The real-time recording indicator appears next to the channel numbers for the sprite being recorded, and a red and
white selection frame appears around the sprite. Recording begins as soon as you drag the sprite on the Stage, so be
prepared to move the mouse.
3Drag the sprite on the Stage to record a path for the sprite.
Director records the path.
4Release the mouse button to stop recording.
The movie continues to play until you stop it.
Note: If you select Trails for the sprite, you can also use real-time recording to simulate handwriting.
Linking a sequence with Paste Relative
Paste Relative automatically aligns the start frame of one sprite with the end frame of the preceding sprite. It is useful
for extending animations across the Stage.
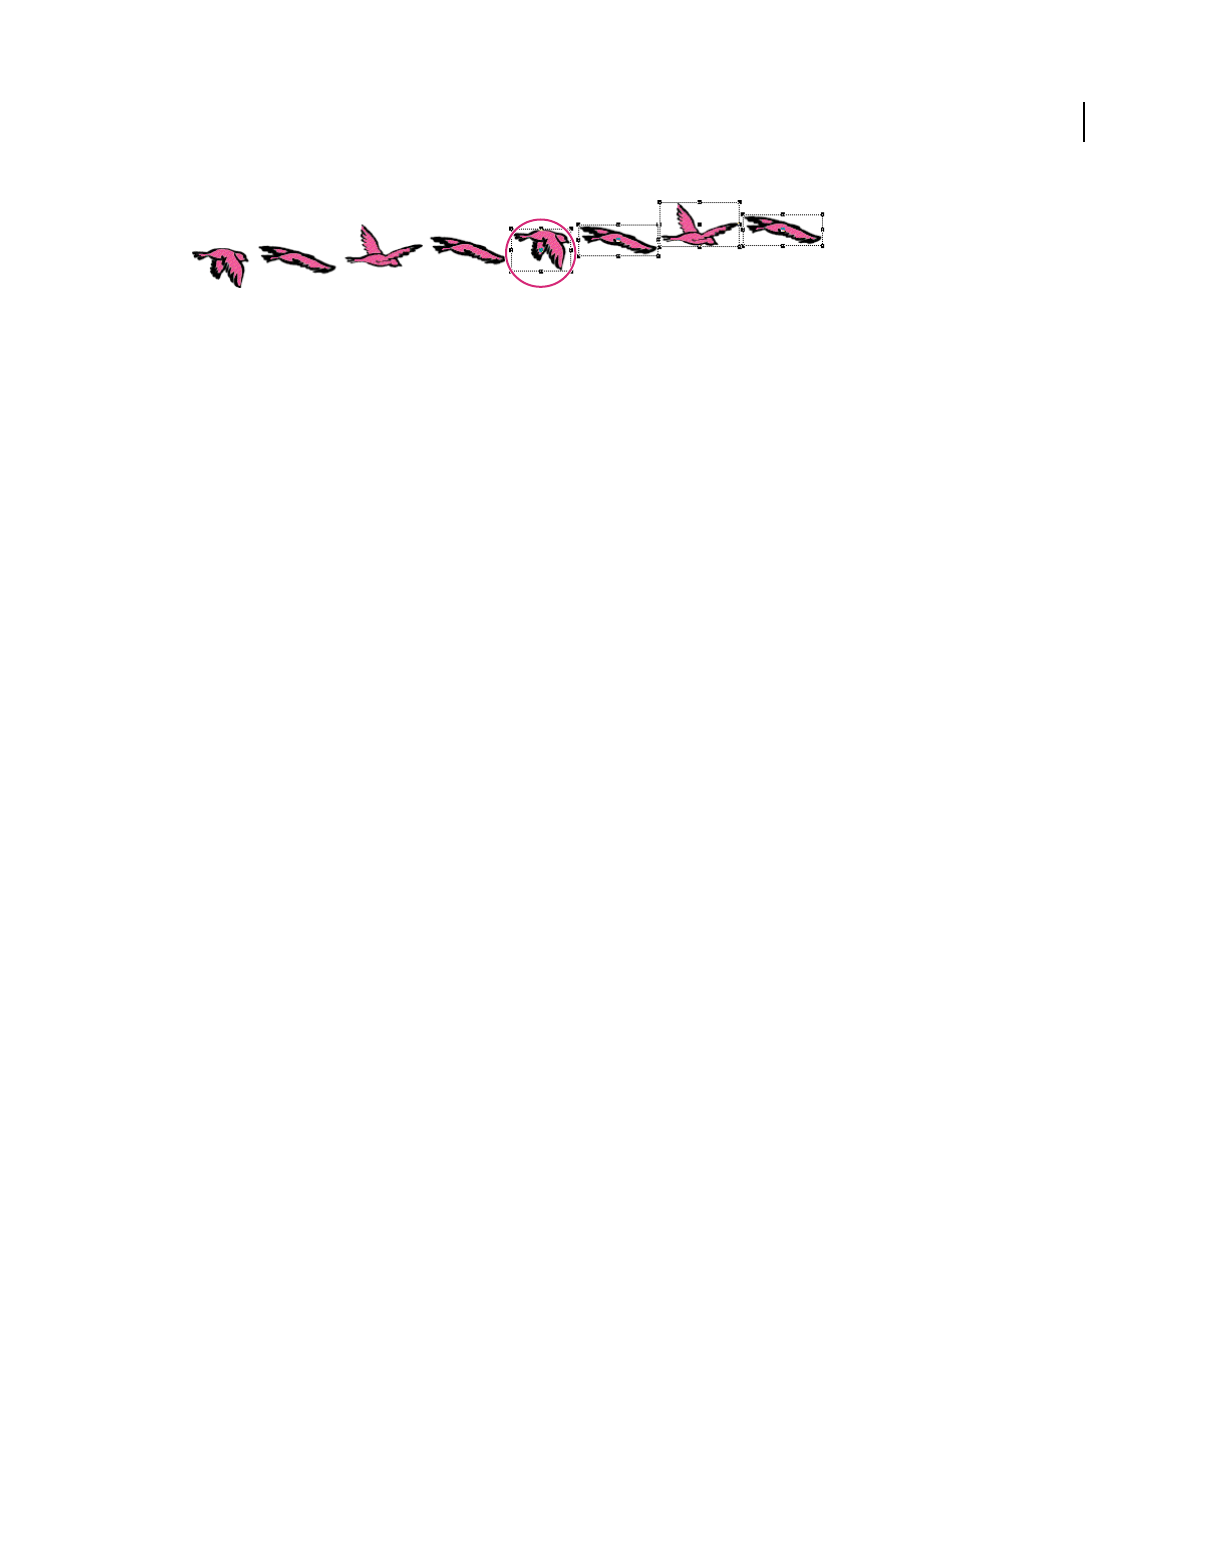
103
USING DIRECTOR 11.5
Animation
Last updated 9/28/2011
The first sprite ends here, and the pasted sprite begins.
1Select a sprite in the Score.
2Select Edit > Copy Sprites.
3Select the cell immediately after the last cell in the sprite.
4Select Edit > Paste Special > Relative.
Repeat the process as many times as you need to create one continuous animation across the Stage.
Animating sprites with Lingo or JavaScript syntax
Lingo or JavaScript syntax can create animation regardless of the settings in the Score. This allows you to create or
modify animation depending on movie conditions.
To move a sprite on the Stage, use a script that controls the sprite’s location. For more information, see the Scripting
Reference topics in the Director Help Panel.
To animate a sprite by switching the sprite’s cast members, change the sprite’s member property. For more information
about this property, see the Scripting Reference topics in the Director Help Panel.
104
Last updated 9/28/2011
Chapter 6: Bitmaps
Introduction
Bitmaps and vector shapes are the two main types of graphics used with Adobe® Director®. A bitmap defines an image
as a grid of colored pixels, and it stores the color for each pixel in the image. A vector shape is a mathematical
description of a geometric form that includes the thickness of the line, the fill color, and additional features of the line
that can be expressed mathematically. For more information about vector shapes, see “Vector Shapes” on page 150.
Bitmaps are suited for continuous tone images such as photographs. You can easily make minute changes to a bitmap
by editing single pixels, but resizing the image can cause distortion as the pixels are redistributed. Anti-aliasing is a
Director feature that blends the bitmap’s colors with background colors around the edges to make the edge appear
smooth instead of jagged. A vector shape is most appropriate for a simple, smooth, and clean-looking image. It
typically includes less detail than a bitmap, but you can resize it without distortion.
Vector image (top) and bitmap image (bottom)
A bitmap typically requires more RAM and disk space than a comparable vector shape. If not compressed, bitmaps
take longer than vector shapes to download from the Internet. Director offers compression control to reduce the size
of bitmaps in movies that you package to play on the web. For more information about bitmap compression, see
“Compressing bitmaps” on page 131.
You can create bitmaps in the Paint window or import them from image editors in most of the popular formats,
including GIF and JPEG. Director can also import bitmaps with alpha channel (transparency) data and animated GIFs.
The Paint window includes a variety of tools for editing and applying effects to bitmaps.
About importing bitmaps
Importing bitmaps is similar to importing other types of media. If you import a bitmap with a color palette or depth
different from that of the current movie, the Image Options dialog box appears. You must choose to import the bitmap
at its original color depth or at the current system color depth. If you are importing an 8-bit image, you have the choice
of importing the image’s color palette or remapping the image to a palette that is already in Director. For more
information, see “Choosing import image options” on page 45.
Director can import images with alpha channel (transparency) effects, which are 32 bits. If you reduce the image to a
lower color depth, Director removes all the alpha channel data.

105
USING DIRECTOR 11.5
Bitmaps
Last updated 9/28/2011
When importing bitmaps, you should always consider that they display on the screen at your monitor’s resolution
(generally 72 to 96 dots per inch). Higher-resolution images that you place on the Stage in Director might appear much
larger than you expect. Other applications, particularly those focused on creating images for print, let you work on the
screen with high-resolution images at reduced sizes. Within Director, you can scale high-resolution images to the right
size, but this might reduce the quality of the image. Also, high-resolution images use extra memory and storage space,
even after they’ve been scaled.
If you are working with a high-resolution image, convert it to between 72 and 96 dots per inch with your image-editing
program before you import it into Director.
Director supports JPEG compression at runtime for internal cast members that are imported through the Standard or
Include Original Data For Editing import options. A JPEG file that’s imported with either of these options contains
both the original compressed bits and decompressed bits. After it’s imported, the JPEG file decompresses in the
authoring environment. The cast member size displays the member’s size in RAM after it’s decompressed. Because the
amount of RAM required to display a JPEG file is larger than its size on disk, you can expect that the JPEG cast member
size is larger in the Cast Properties window.
Director takes advantage of compressed JPEG data at runtime. The original compressed data bits are saved in
Shockwave® content or a projector (if the Shockwave compression option is on). If you edit the member within
Director in the Paint window, the compressed data is lost. An alert appears before the data is overwritten.
If the Shockwave compression option is on, Director also compresses bitmaps into the JPEG format. For more
information about bitmap compression, see “Compressing bitmaps” on page 131.
Using animated GIFs
You can import an animated GIF into Director with File > Import, similar to how you import any other bitmap cast
member. The only difference is that when the Select Format dialog box appears, you select Animated GIF.
Director supports both the GIF89a and GIF87 formats. GIFs must have a global color table to be imported. You can
import an animated GIF within a movie file or link to an external file. You also have the choice of importing the first
frame of an animated GIF as a still image. As with an ordinary bitmap, you place an animated GIF in the Score in a
sprite channel and extend it through all the frames in which you want it to appear. An animated GIF can play at the
same frame rate as the Director movie, at a different rate that you specify, or at its original rate.
Director does not support the following inks for animated GIFs: Background Transparent, Reverse, Not Reverse,
Darkest, Lightest, Add, Add Pin, Subtract, and Subtract Pin.
You can make an animated GIF play Direct To Stage, meaning that it immediately appears on the Stage instead of
being first composed in an offscreen buffer with other sprites. A Direct To Stage GIF takes less time to load, but you
can’t place other sprites in front of it or use any ink effect.
Set properties for an animated GIF
1To specify how Director removes the cast member from memory if memory is low, select an option from the
Unload menu on the Member tab of the Property inspector (Graphical view). For more information, see
“Controlling cast member unloading” on page 46.
2To achieve the fastest playback rate, click the Animated GIF tab and select DTS (Direct To Stage).
When Direct To Stage is on, you can use only Copy ink and you can’t place any sprites on top of the animated GIF
sprite.
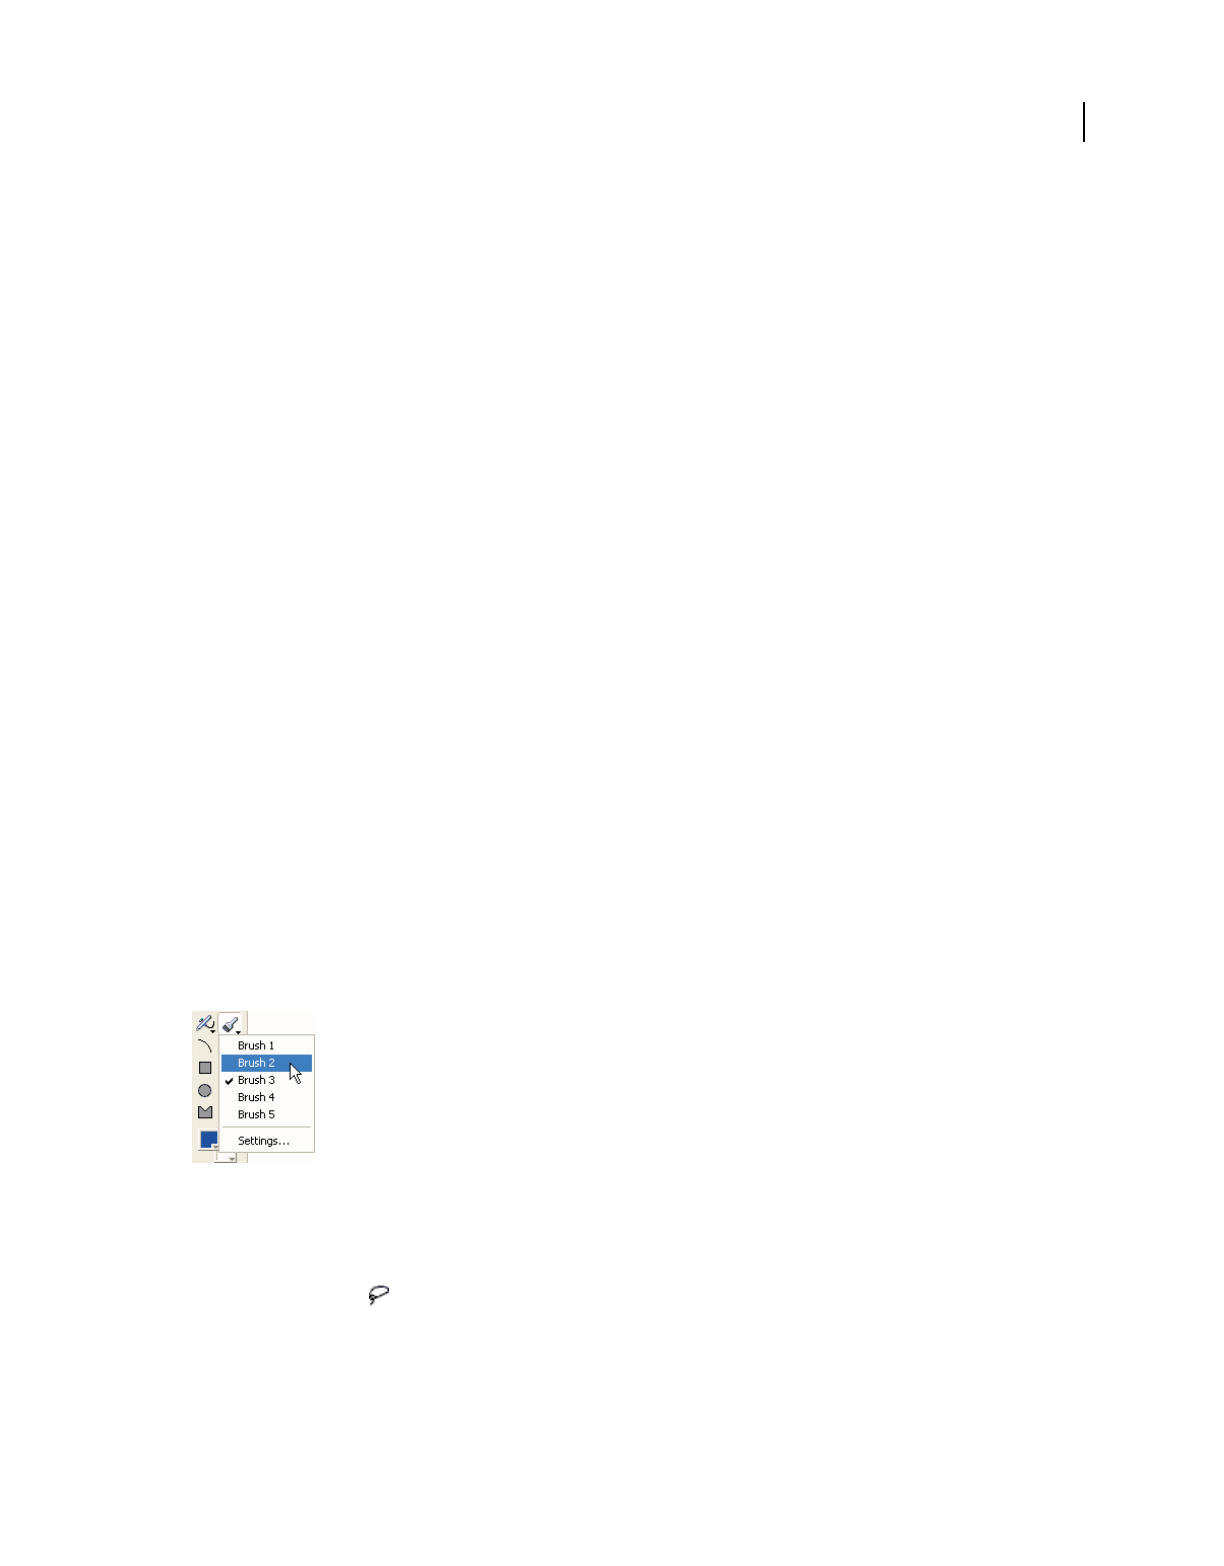
106
USING DIRECTOR 11.5
Bitmaps
Last updated 9/28/2011
3Select a Rate option from the Rate menu:
Normal Plays at the GIF’s original rate, which is independent of the Director movie. The GIF can’t exceed the
Director frame rate.
Fixed Plays at the frame rate you enter in the FPS text box.
Lock-Step Plays at the same rate as the Director movie.
4To set additional animated GIF settings, click More.
•To change the file of a linked external cast member, enter a new pathname in the Import text box or click Browse
to select a new file.
•To import a file from the Internet, click Internet and enter a new URL in the File URL text box.
Using the Paint window
The Paint window has a complete set of paint tools and inks for creating and changing bitmap cast members for
movies. Anything you draw in the Paint window becomes a cast member. When you make a change to a cast member
in the Paint window, the cast member is instantly updated in the Paint window and everywhere it appears on the Stage.
To open the Paint window, do any of the following:
•Select Window > Paint.
•Click the Paint window icon on the toolbar.
•Press Control-5 (Windows®) or Command-5 (Mac®).
•Double-click a bitmap sprite on the Stage or in the Score, or double-click the sprite’s cast member in the Cast
window.
Using Paint window tools and controls
If an arrow appears in the lower-right corner of a tool, click it and hold down the mouse button to display a menu of
options for that tool.
Paint window tools and controls
Select an irregular area
Do one of the following:
•Click the Lasso tool in the Paint window, and drag to enclose the pixels you want to select.
The Lasso selects only those pixels of a color that are different from the color the Lasso was on when you first started
dragging it.
•Press Alt (Windows) or Option (Mac) while dragging to create a polygon selection. Every time you click, you create
a new angle in the selection polygon.
107
USING DIRECTOR 11.5
Bitmaps
Last updated 9/28/2011
•Click the Lasso tool, and hold down the mouse button to select new settings from the pop-up menu. See “Using the
Lasso tool” on page 110.
Select a rectangular area
Do one of the following:
•Click and drag the Marquee tool in the Paint window.
•Double-click the Marquee tool to select the entire bitmap.
•Click the Marquee tool, and hold down the mouse button to select new settings from the pop-up menu. See “Using
the Marquee tool” on page 111.
Select the location of the registration point
Do one of the following:
•Click the Registration Point tool , and click the spot where you want to set the registration point.
•Double-click the Registration Point tool to set the registration point in the center of the image. See “Changing
registration points” on page 116.
Erase
Do one of the following:
•Click and drag the Eraser tool to erase pixels.
•Double-click the Eraser tool to erase the cast member.
Move the view of the Paint window
Do one of the following:
•Click and drag the Hand tool to move the visible portion of the image within the Paint window.
•Shift-drag to move straight horizontally or vertically.
Press the Spacebar to temporarily activate this tool while using other paint tools.
Zoom in or out on an area
❖Click the Magnifying Glass tool, and click in the Paint window to zoom in. Shift-click to zoom out. For more
information, see “Zooming in and out in the Paint window” on page 113.
Select a color in a cast member
1Click the Eyedropper tool.
2Do one of the following:
•Click a color to select it as the foreground color.
•Shift-click a color to select it as the background color.
•Alt-click (Windows) or Option-click (Mac) to select the destination color for a gradient.
Press the D key to temporarily activate the Eyedropper tool while using other paint tools.
Fill all adjacent pixels of the same color with the foreground color
•Click the Bucket tool, and click the area you want to fill.
108
USING DIRECTOR 11.5
Bitmaps
Last updated 9/28/2011
•To open the Gradient Settings dialog box, double-click the Bucket tool.
Enter bitmap text
Do one of the following:
•Click the Text tool , and then click in the Paint window and begin typing.
•Select character formatting with the Modify > Font command.
Bitmap text is an image. Before you click outside the text box, you can edit text you’ve typed by using the Backspace
key (Windows) or Delete key (Mac). After you click outside the text box, you can’t edit or reformat bitmap text.
Draw a 1-pixel line in the current foreground
❖Click the Pencil tool , and drag it in the Paint window. To constrain the line to horizontal or vertical, Shift-click
and drag.
If the foreground color is the same as the color underneath the pointer, the Pencil tool draws with the background
color.
Spray variable dots of the foreground color
•Click the Airbrush tool and drag it in the Paint window.
•Click the Airbrush tool, and hold down the mouse button to select a new brush type from the menu. Select Settings
to change the selected brush. See “Using the Airbrush tool” on page 111.
Brush strokes of the foreground color
❖Click the Brush tool , and drag it in the Paint window. To constrain the stroke to horizontal or vertical, Shift-
click and drag.
Select a new brush type
❖Click the Brush tool, and hold down the mouse button to select a new brush type from the menu. Select Settings to
change the selected brush. See “Using the Brush tool” on page 112.
Paint shapes or lines
❖Click and drag the shape tools. To constrain lines to horizontal or vertical, ovals to circles, and rectangles to squares,
Shift-click and drag.
Drag the shape tools
A. Shape tools B. Other line width
The filled tools create shapes that are filled with the foreground color and the current pattern. The line-width
selector determines the thickness of lines.
A
B
109
USING DIRECTOR 11.5
Bitmaps
Last updated 9/28/2011
Select a foreground and destination color for color-shifting inks
❖Click the color box on the left to select a foreground color. Click the color box on the right to select a
destination color.
These colors affect the Gradient, Cycle, and Switch inks. Each of these inks uses a range of colors that shifts between
the foreground color and the destination color. For more information, see “Using gradients” on page 121 and
“Using Paint window inks” on page 125.
Select the foreground and background colors
•Use the Foreground Color menu to select the primary fill color (used when the pattern is solid and the ink is
Normal).
Foreground and Background color menus
A. Foreground color B. Background color
•Use the Background Color menu to select the secondary color (the background color in a pattern or text).
Select a pattern for the foreground color
Do one of the following:
•To change the pattern palette, select Pattern Settings at the bottom of the Patterns pop-up menu.
Patterns
•To define a tile (a pattern that is based on a rectangular section of an existing cast member), select Tile Settings from
the Patterns menu. For more information, see Editing patterns and Creating a custom tile.
Select a line thickness
Do one of the following:
•Click the None, One-, Two-, or Three-Pixel Line button.
•Double-click the Other Line Width button to open the Paint Window Preferences dialog box, and assign a width
to the line.
AB
110
USING DIRECTOR 11.5
Bitmaps
Last updated 9/28/2011
Change the color depth of the current cast member
❖Double-click the Color Depth button to open the Transform Bitmap dialog box.
The button displays the color depth of the current cast member. For more information, see “Changing size, color
depth, and color palette for bitmaps” on page 117.
Select a Paint window ink
❖Select the type of ink from the Ink menu at the lower left of the window.
Ink menu
For more information, see “Using Paint window inks” on page 125.
Using the Lasso tool
Use the Lasso tool to select irregular areas or polygons. After you select artwork, it can be dragged, cut, copied, cleared,
or modified with the effects on the Paint toolbar. The Lasso tool selects only those pixels of a color that are different
from the color that the Lasso tool was on when you first started dragging it. Use the Lasso menu to change Lasso
settings.
Select an irregular area with the Lasso tool
❖Drag with the Lasso tool to enclose the pixels you want to select.
Select a polygon area with the Lasso tool
1Press Alt (Windows) or Option (Mac) while clicking the first point.
2Click the remaining points.
3Double-click the last point.
Change Lasso tool settings
1Hold down the mouse button while the pointer is on the Lasso tool.
2Select an option from the Lasso menu:
Shrink Causes the lasso to tighten around the selected object so that only the object is selected.
No shrink Lets you select the entire area you drag around. The lasso selects whatever is inside the selected area.
See Thru Lasso Causes your selection to become transparent, as if the Transparent ink effect was applied.

111
USING DIRECTOR 11.5
Bitmaps
Last updated 9/28/2011
Using the Marquee tool
The Marquee tool selects artwork in the Paint window. After you select artwork, it can be dragged, cut, copied, cleared,
or modified with the commands on the Paint toolbar. Use the Marquee menu to change Marquee settings.
Select with the Marquee tool
❖Drag to select a rectangular area.
Select the entire bitmap
❖Double-click the Marquee tool.
Stretch or compress art that is selected with the Marquee tool
❖Hold down Control (Windows) or Command (Mac) while dragging a border of the selected area. Hold down Shift
at the same time to maintain proportions.
Move a selection
Do any of the following:
•Click and drag the selection.
•Shift-drag to limit the movement to horizontal or vertical.
•Use the arrow keys to move the selection one pixel at a time.
Make a copy of artwork that is selected with the Marquee tool
❖Hold down Alt (Windows) or Option (Mac) while dragging the selection.
Change marquee settings
❖Click the Marquee tool, hold down the mouse button, and select from the following options:
Shrink Causes the rectangle to shrink around the selected artwork.
No Shrink Lets you select everything within the marquee.
Lasso Tightens the marquee around the object in the same way as the Lasso tool and selects the pixels according to
the color of the pixel beneath the cross hair when you start the drag.
See Thru Lasso Modifies the selection function so that pixels with the same color as the first pixel selected are
excluded in the selection.
Using the Airbrush tool
The Airbrush tool sprays the currently selected color, ink, and fill pattern. To modify the spray, select the ink effects
from the Ink menu in the Paint window. The longer you hold the Airbrush tool in one spot, the more it fills in the area.
When you hold down the mouse button when the pointer is positioned on the Airbrush tool, the Airbrush menu
appears. You can define each of the five settings in the menu, so you can have several types of spray available without
opening the Airbrush Settings dialog box.
Use the Airbrush tool
❖Click the Airbrush tool and drag it in the Paint window.

112
USING DIRECTOR 11.5
Bitmaps
Last updated 9/28/2011
Define airbrush settings
1Click the Airbrush tool, and hold down the mouse button.
2Select the menu item for which you want to define settings.
3Open the menu again, and select Settings from the Airbrush menu. Enter values for the options in the Airbrush
Settings dialog box.
You can also double-click the Airbrush tool to open the Airbrush Settings dialog box.
4Use the Flow Rate slider to control how quickly the airbrush covers an area with paint. To change the flow, drag the
Flow Speed slider.
5Use the Spray Area slider to set the size of the airbrush’s spray area.
6Use the Dot Size slider to set the size of the dots that the airbrush sprays.
7Use the following Dot Options to specify how dots spray from the airbrush:
Uniform Spray Causes the airbrush to spray drops of uniform size.
Random Sizes Sprays randomly sized drops.
Current Brush Sprays drops shaped the same as the current airbrush.
Using the Brush tool
Use the Brush tool to brush strokes with the current color, ink, and fill pattern. To select a different size and brush
shape, make selections in the Brush Settings dialog box. Your selections are assigned to the menu item in the menu
and remain in effect until you change them. Because each of the five settings in the menu can be defined, you can have
several types of spray available without opening the Brush Settings dialog box.
Use the Brush tool
❖Click the Brush tool, and drag it in the Paint window.
Change brush settings
1Click the Brush tool, and hold down the mouse button.
2Select the menu item for which you want to define settings.
3Open the menu again, and select Settings from the Brush menu. Enter values for the options in the Brush Settings
dialog box. (You can also double-click the Brush tool to open the Brush Settings dialog box.)
4To select from the default brush shapes, select Standard from the menu, and click a brush shape in the chart below
the menu.
5To create a new brush shape, select Custom from the menu, and select the brush shape you want to modify from
the chart below the menu.
6Edit the current brush shape by clicking the magnified image of the brush shape. Clicking a blank pixel fills it, and
clicking a filled pixel makes it blank. Clicking outside the Brush Shapes dialog box places the pixels on the point
where you click on the screen. Use the following editing controls to change the brush shape:
Right and left arrows Move the brush shape one pixel to the right or left.
Up and down arrows Move the brush shape up or down one pixel.
The black and white square Reverses the colors of the brush shape (for example, black becomes white and white
becomes black).
Copy Copies the brush shape to the Clipboard.
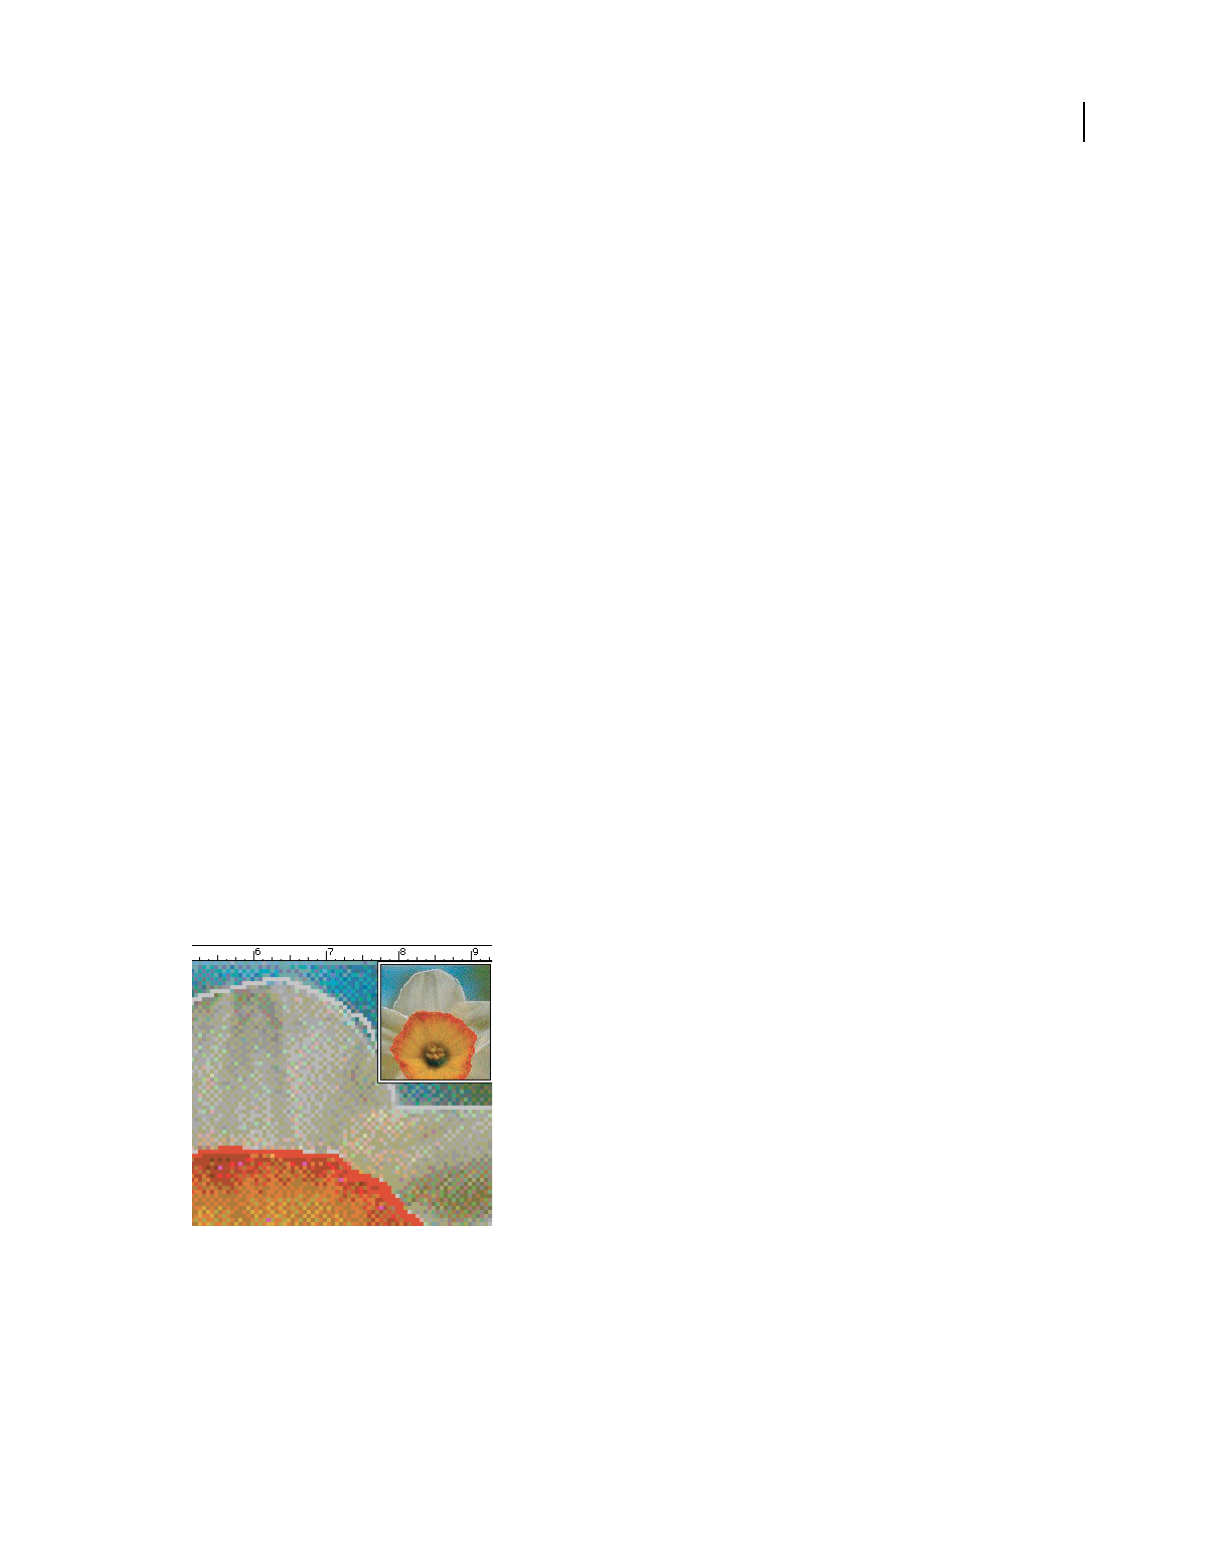
113
USING DIRECTOR 11.5
Bitmaps
Last updated 9/28/2011
Paste Pastes the brush into the custom set of brush shapes.
Using rulers in the Paint window
The Paint window has vertical and horizontal rulers to help you align and size your artwork.
Hide or show the rulers in the Paint window
❖Select View > Rulers.
Change the location of the zero point
Do one of the following:
•Drag along the ruler at the top or side of the window.
•Drag into the window to align the zero point with a specific point in the cast member.
Zooming in and out in the Paint window
Use the Magnify tool or the Zoom commands on the View menu to zoom in or out at four levels of magnification.
Zoom in or out
Do one of the following:
•Click the Magnify tool, and click the image. Click again to increase the magnification. Shift-click to zoom out.
•Select Zoom In or Zoom Out from the Paint window’s Options menu.
•Select View > Zoom, and select the level of magnification.
•Press Control + the Plus (+) key (Windows) or Command + the Plus (+) key (Mac) to zoom in, or Control + the
Minus (-) key (Windows) or Command + the Minus (-) key (Mac) to zoom out.
•Control-click (Windows) or Command-click (Mac) the image to zoom in on a particular place.
Magnified image
Return to normal view
Do one of the following:
•Click the normal-sized image in the upper-right corner.
•Select View > Zoom > 100%.
114
USING DIRECTOR 11.5
Bitmaps
Last updated 9/28/2011
Changing selected areas of a bitmap
After you select part of an image in the Paint window with the Lasso or Marquee tool, you can change the selected area.
Reposition the selected area
1Move the cross hair inside the selected area (the cross hair becomes an arrow pointer).
2Drag the selected area.
Specify how a selected area behaves when you drag it
Use the following key combinations:
•To make a copy of the selected area as you drag, Alt-drag (Windows) or Option-drag (Mac) the selection.
•(Marquee tool only) To stretch the selection, Control-drag (Windows) or Command-drag (Mac) the selection.
•(Marquee tool only) To stretch the selection proportionally, Control-Shift-drag (Windows) or
Command-Shift-drag (Mac) the selection.
•(Marquee tool only) To copy and stretch the selection, Control-Alt-drag (Windows) or Command-Option-drag
(Mac) the selection.
•To constrain the movement of the selection to horizontal or vertical, Shift-drag the selection.
•To move the selection one pixel at a time, use the arrow keys.
Flipping, rotating, and applying effects to bitmaps
The toolbar at the top of the Paint window contains buttons to apply effects to bitmaps. Before using any of these
options, you must select part of the bitmap with the Lasso or Marquee tool. Effects that change the shape of the
selection work only when the selection is made with the Marquee tool. Effects that change colors within the selection
work with the Marquee and the Lasso tools.
Lingo or JavaScript™ syntax can flip and rotate bitmaps by flipping and rotating bitmap sprites. For more information,
see “Rotating and skewing sprites” on page 81 and “Flipping sprites” on page 83.
Note: To repeat any of these effects after using them, press Control+Y (Windows) or Command+Y (Mac).
Flip, rotate, skew, or apply effects to part of a bitmap
1Select part of a bitmap in the Paint window with the Marquee tool.
2Use any of the following effects:
•To flip the selection, click the Flip Horizontal button to flip right to left, or click the Flip Vertical button
to flip top to bottom.
•To rotate the selection 90BADCHAR counterclockwise or 90BADCHAR clockwise, click the Rotate Left or
Rotate Right buttons
, respectively.
•To rotate the selection by any amount in either direction, click the Free Rotate button , and drag the rotate
handles in any direction. (You can also rotate a sprite that contains a bitmap instead of the bitmap. For more
information, see “Rotating and skewing sprites” on page 81.
•To skew the selection, click the Skew button , and drag any of the skew handles.

115
USING DIRECTOR 11.5
Bitmaps
Last updated 9/28/2011
•To warp the shape of the selected area, click the Warp button , and drag any handle in any direction.
•To create a perspective effect, click the Perspective button , and drag one or more handles to create the effect
you want.
•To create an outline around the edges of the selected artwork, click the Trace Edges button .
Apply color effects to a selected area
1Select an area within a bitmap cast member by using either the Marquee or the Lasso tool.
2Use any of the following effects:
•To soften the edges of the selected artwork, click the Smooth button . This effect works only with 8-bit cast
members.
•To reverse the colors of the selected area, click the Invert button .
•To increase or reduce the brightness of the selected area, click the Lighten Color or Darken Color button .
This effect works on 8-bit (256 color) images only.
•To fill the selected area with the current foreground color and pattern, click the Fill button .
•To change all pixels of the foreground color within the selection to the currently selected destination color, click
the Switch Colors button
.
Using Auto Distort
Use Auto Distort to create animations that show bitmap cast members gradually changing from frame to frame. Auto
Distort generates intermediate cast members for any cast member that is free-rotated, made into a perspective, slanted,
distorted, or skewed.
Cast members created with Auto Distort after using the perspective effect.
1Select the portion of a bitmap cast member you want to change.
2Use the Free Rotate, Perspective, Skew, Distort, or Stretch button to change the image.
3Without deselecting the changed image, select Xtras > Auto Distort.
4In the Auto Distort dialog box, enter the number of cast members to create, and click the Begin button.
Director generates new cast members with an intermediate amount of change applied to each one. The new cast
members appear in the first available cast positions.
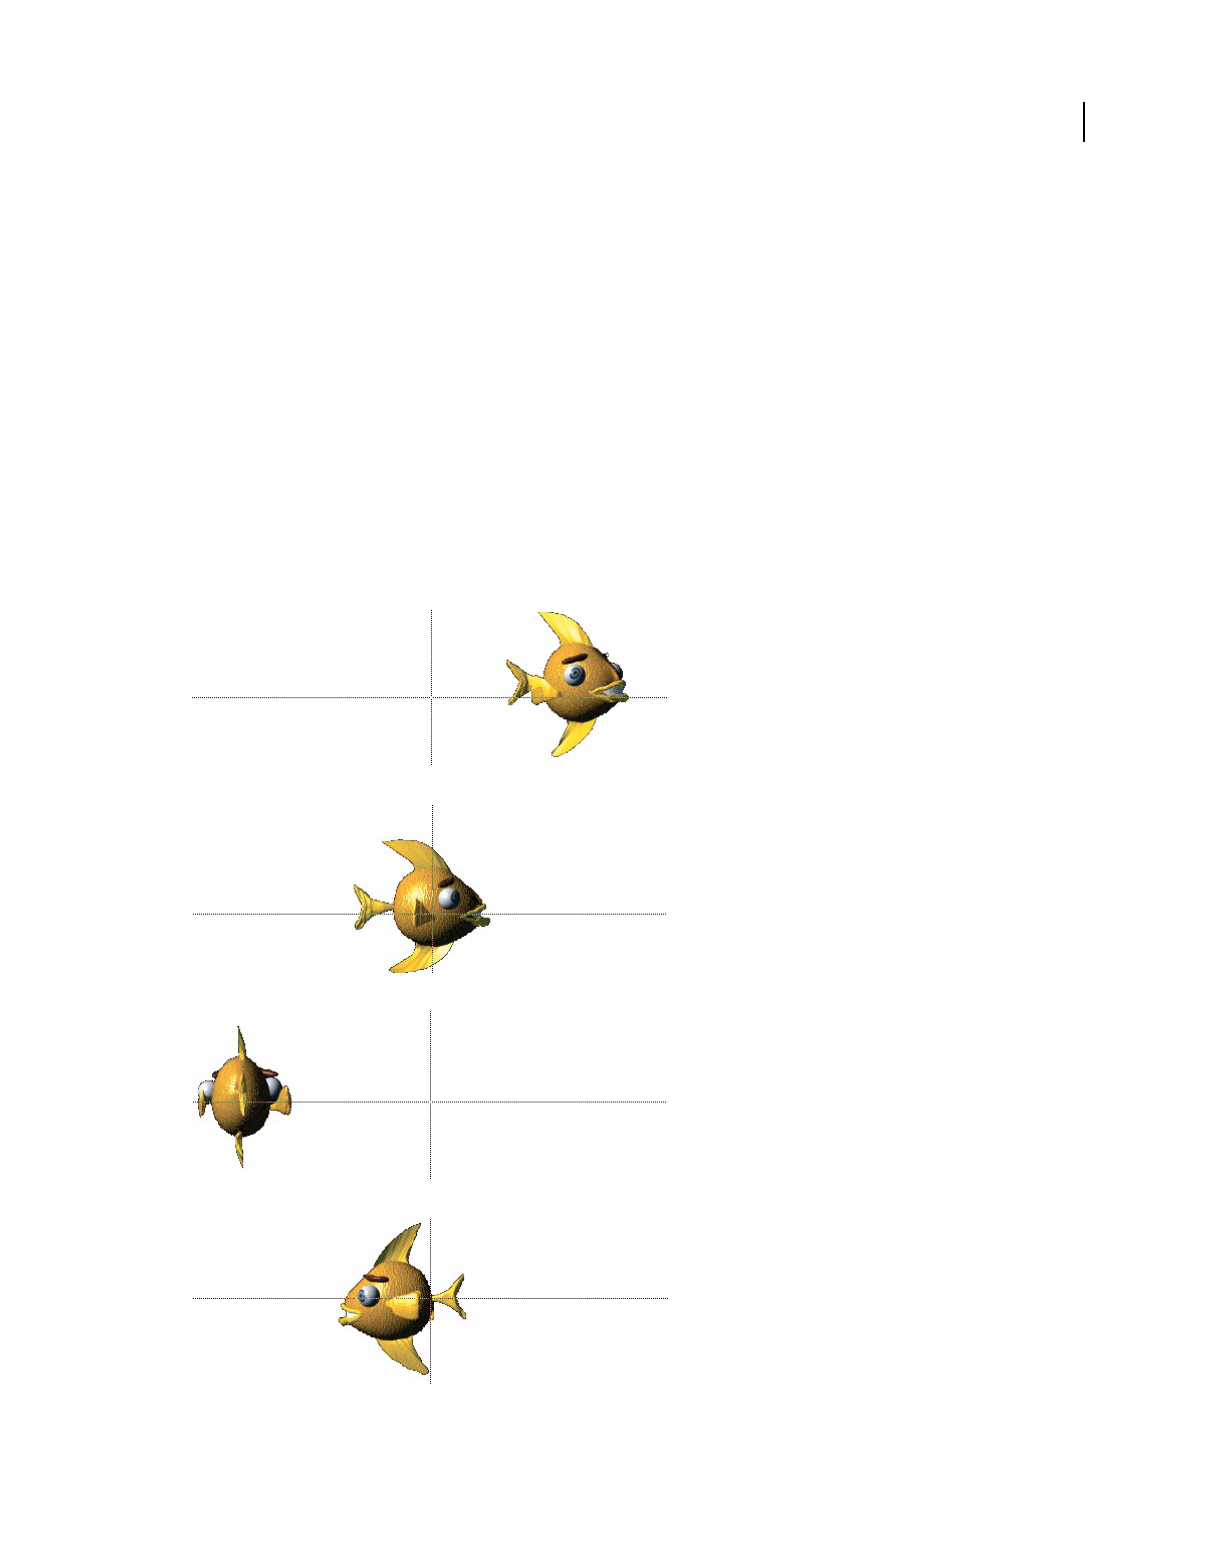
116
USING DIRECTOR 11.5
Bitmaps
Last updated 9/28/2011
Changing registration points
A registration point is a marker that appears on a sprite when you select it with your mouse. (Registration points don’t
appear on unselected sprites or when a movie is playing.) Registration points provide a fixed reference point within an
image, which helps you to align sprites and control them from Lingo or JavaScript syntax. Registration points are
crucial to precisely placing vector shapes, bitmaps, and all cast members that appear on the Stage.
By default, Director assigns a registration point in the center of all bitmaps, but for many types of animation, you might
want to move the registration point. To do this, use the Registration Point tool.
You can edit a bitmap’s registration point in the Paint window or by using Lingo or JavaScript syntax.
Moving the registration point is useful for preparing a series of images for animation. When you use Cast To Time or
exchange cast members, Director places a new cast member’s registration point precisely where the previous one was
located. By placing the registration point in the different locations, you can make a series of images move around a
fixed position without having to manually place the sprites on the Stage. Use onion skinning to set registration points
when images are placed in relation to each other. For more information, see “Using onion skinning” on page 127.
With the registration points set as shown, the series of fish swim in a circle without any tweening or manual placement of sprites.

117
USING DIRECTOR 11.5
Bitmaps
Last updated 9/28/2011
Set a registration point
1Display the cast member you want to change in the Paint window.
2Click the Registration Point tool
The dotted lines in the Paint window intersect at the registration point. The default registration point is the center
of the cast member.
The pointer changes to a cross hair when you move it to the Paint window.
3Click a location in the Paint window to set the registration point.
You can also drag the dotted lines around the window to reposition the registration point.
Note: To reset the default registration point at the center of the cast member, double-click the Registration Point tool.
Set a bitmap’s registration point with Lingo or JavaScript syntax
❖Set the regPoint cast member property. Set the centerRegPoint property to specify whether Director
automatically centers the registration point if the bitmap is edited. For example, you can set the regPoint cast
member property using the following:
Lingo:
member("bitmapMemberName").regPoint = point(10,10)
JavaScript:
member("bitmapMemberName").regPoint = point(10,10);
For more information, see the Scripting Reference topics in the Director Help Panel.
Changing size, color depth, and color palette for
bitmaps
Use Transform Bitmap to change the size, color depth, and palette of selected cast members. Any change you make to
a cast member’s color depth or palette affects the cast member itself—not only its appearance on the Stage. You can’t
undo changes to the color depth and palette. If you want to keep a cast member’s original bitmap unchanged but
temporarily apply a different palette, use the Member tab in the cast member’s Property inspector. To change the size
of only the sprite on the Stage, use the Sprite tab in the sprite’s Property inspector.
You can also remap images to new palettes with an image-editing program such as Fireworks®.
The Transform Bitmap dialog box displays values for the current selection. If you select more than one cast member,
a blank value indicates that cast members in the selection have different values. To maintain a cast member’s original
value, leave that value blank in the dialog box.
1Select the bitmap cast members to change.
2Select Modify > Transform Bitmap.
3To change the size of the bitmap, do one of the following:
If multiple cast members are selected, you can resize all the cast members to the dimensions you enter.
•Enter new measurements (in pixels) in the Width and Height text boxes.
•Enter a scaling percentage in the Scale text box.
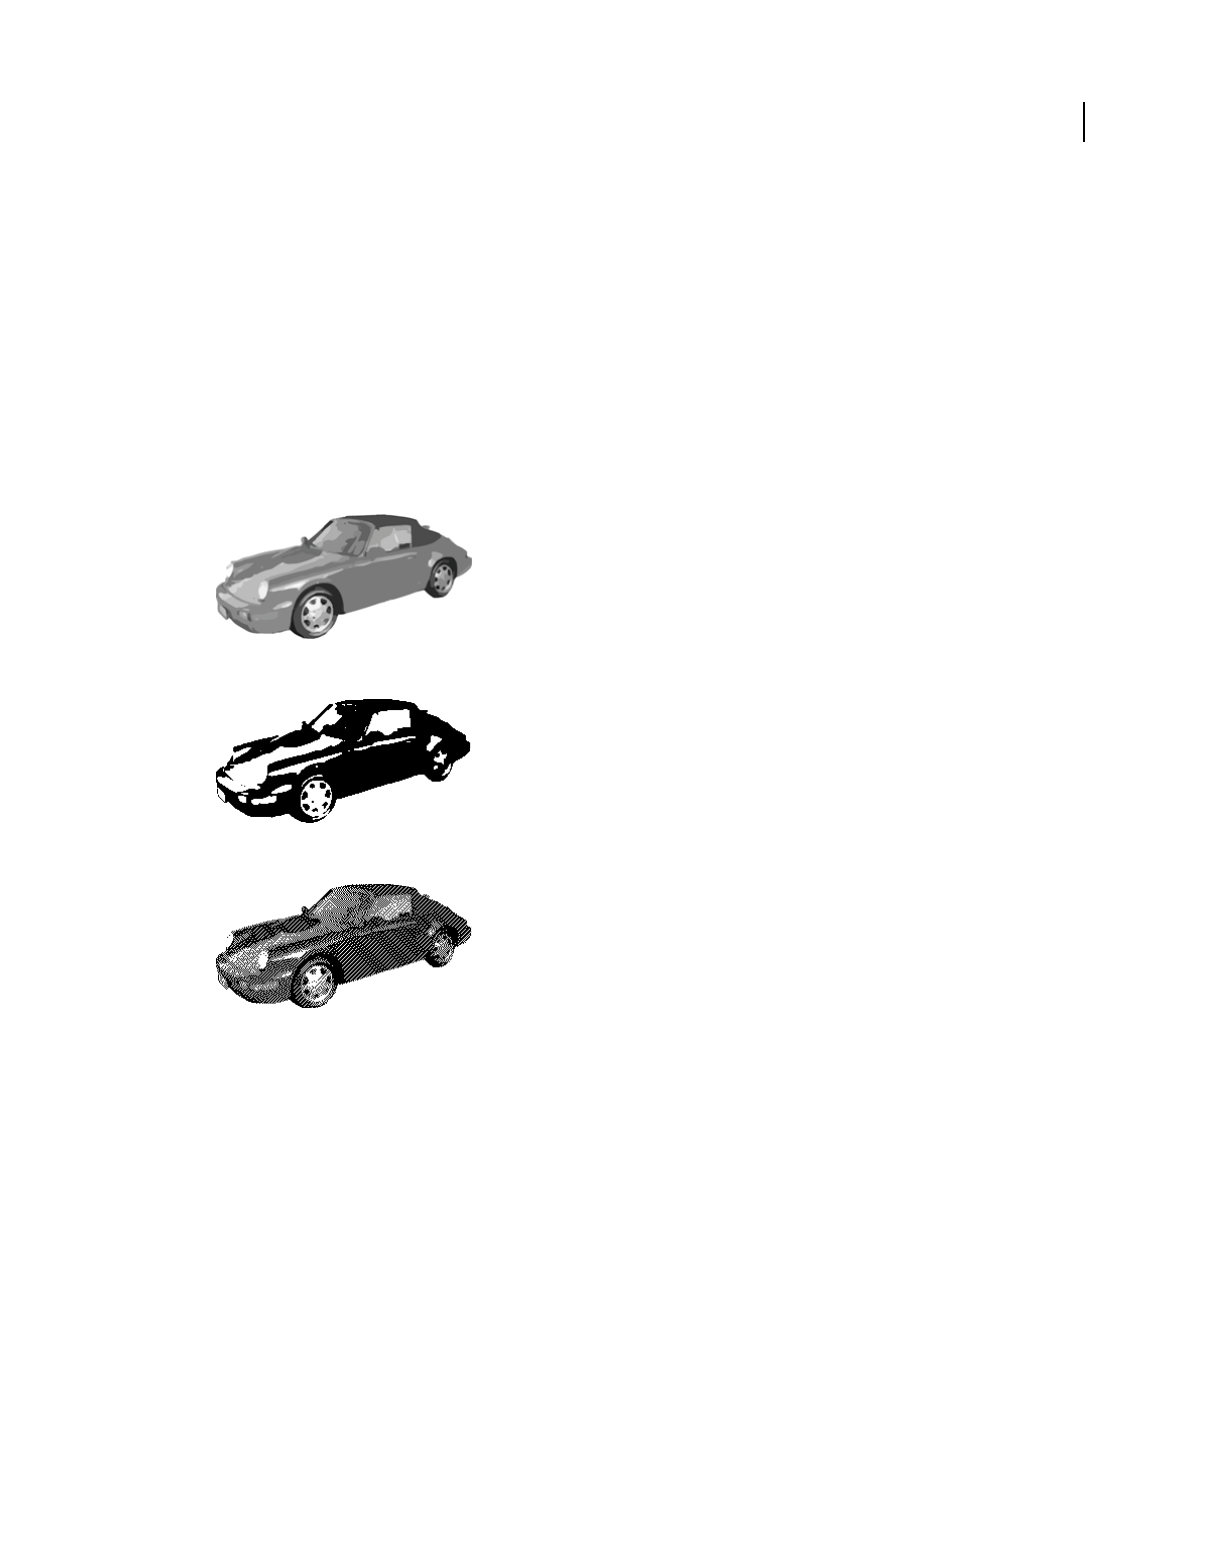
118
USING DIRECTOR 11.5
Bitmaps
Last updated 9/28/2011
Select Maintain Proportions to keep the width and height of the selected cast member in proportion. If you change the
width, the proportional height is automatically entered in the Height text box. If you use Transform Bitmap to change
several cast members at once, be sure to deselect Maintain Proportions. If you don’t, all cast members are resized to
the values in the Width and Height text boxes.
1To change the color depth, select an option from the Color Depth pop-up menu.
For more information about the color depth of bitmap cast members, see “Controlling color” on page 160.
2To change the palette, select a palette from the Palette menu and select one of the following remapping options:
Remap Colors Replaces the original colors in the graphic with the most similar solid colors in the new palette. This
is the preferred option in most cases.
Dither Blends the colors in the new palette to approximate the original colors in the graphic.
256 grays
Remapped to closest colors in black and white
Dithered in black and white
3Click Transform to execute the changes.
The settings you select in the Transform Bitmap dialog box can’t be undone.
Controlling bitmap images with Lingo or JavaScript
syntax
Lingo or JavaScript syntax lets you control bitmap images in two ways. First, you can perform simple operations that
affect the content of entire image cast members. These operations include changing the background and foreground
colors in addition to switching the image that appears in a specific cast member with that of another cast member. Each
of these operations manipulates a property of the entire image cast member.

119
USING DIRECTOR 11.5
Bitmaps
Last updated 9/28/2011
Second, you can use Lingo or JavaScript syntax to perform fine manipulations of the pixels of an image or to create
entirely new images. When you use script, you can be extremely flexible about which images you display. You can
create images based on dynamic information, such as user input, or based on any other factors you want to include.
To perform this kind of image operation, Lingo or JavaScript syntax works with image objects. For more information,
see “Creating image objects” on page 119.
Change the image assigned to a bitmap cast member
❖Set the picture cast member property. For more information, see the Scripting Reference topics in the Director
Help Panel.
Specify the background or foreground of a bitmap sprite
❖Set the backColor or foreColor sprite property. For more information about these properties, see the Scripting
Reference topics in the Director Help Panel.
Capture the current graphic contents of the Stage
❖Set a bitmap’s picture cast member property to the Stage’s picture property. For more information, see the
Scripting Reference topics in the Director Help Panel.
For example, the member("Archive").picture = (the stage).picture statement makes the current image
of the Stage the image for the bitmap cast member Archive.
Creating image objects
An image object can be either a self-contained set of image data or a reference to the image data of a cast member or
of the Stage. If an image object is created by referring to a cast member, the object contains a reference to the image of
the member. The following statement creates an image object that contains a reference to the image of the cast member
called Boat.
myImage = member("Boat").image
Because the image object myImage contains a reference to the cast member Boat, any changes you make to the object
are reflected in the cast member. These changes are also reflected in any sprites made from that cast member.
You can also create an image object that contains a reference to the graphic contents of the Stage as follows:
myImage = window("stage").image
Any changes to this image object are reflected on the Stage.
❖To create an image object that is a self-contained set of image data instead of a reference to a cast member, you must
tell the script what kind of image you want to create. You must provide the parameters that describe the size and
bit depth of the image you are creating.
The following statement creates an image object that contains a 640 x 480 pixel, 16-bit image:
myImage = image(640, 480, 16)
Editing image objects
After you create an image object, its data can be edited with a variety of scripting commands that are designed to
manipulate the pixels of the image. You can crop images, draw new pixels on them, copy sections of them, and work
with mask and alpha channel information. For more information, see the Scripting Reference topics in the Director
Help Panel.

120
USING DIRECTOR 11.5
Bitmaps
Last updated 9/28/2011
Draw a line on an image object
❖Use the draw() method. You must specify the locations of each end of the line in addition to the line’s color.
The following statement draws a line on the previously created 640 x 480 image object myImage, running from 20
pixels inside the upper-left corner to 20 pixels inside the lower-right corner, and colors it blue:
myImage.draw(20, 20, 620, 460, rgb(0, 0, 255))
Draw a rectangle on an image object
❖Use the fill() method. You provide the same information as for the draw method, but Director draws a rectangle
instead of a line.
The following statement draws a red 40 x 40 pixel rectangle near the upper-left corner of the image object myImage:
myImage.fill(rect(20, 20, 60, 60), rgb(255, 0, 0))
Determine the color of an individual pixel of an image object or set that pixel’s color
❖Use the getPixel or setPixel method.
Copy part or all of an image object into a different image object
❖Use the copyPixels() method. This method requires you to specify the image from which you are copying, the
rectangle to which you are copying the pixels, and the rectangle from which to copy the pixels in the source image.
The following statement copies a 40 x 40 rectangle from the upper-left area of the image object myImage and puts
the pixels into a 40 x 40 rectangle at the lower right of the 300 x 300 pixel object called myNewImage:
myNewImage.copyPixels(myImage, rect(260, 260, 300, 300), rect(0, 0, 40, 40))
When using copyPixels(), you can specify optional parameters that tell the script to modify the pixels you’re
copying before drawing them into the destination rectangle. You can apply blends and inks, change the foreground
or background colors, specify masking operations, and more. You specify these operations by adding a property list
at the end of the copyPixels() method.
The following statement performs the same operation as the previous example and directs the script to use the
Reverse ink when rendering the pixels into the destination rectangle:
myNewImage.copyPixels(myImage, rect(260, 260, 300, 300), rect(0, 0, 40, 40), [#ink:
#reverse])
Make a new image object from the alpha channel information of a 32-bit image object
❖Use the extractAlpha() method, which can be useful for preserving the alpha channel information of a 32-bit
image object that you plan to reduce to a lower bit depth. Reducing the bit depth can delete the alpha information.
The following statement creates a new image object called alphaImage from the alpha channel information of the
32-bit image object called myImage:
alphaImage = myImage.extractAlpha()
There are many more image-editing operations available through Lingo or JavaScript syntax. For a complete list,
see the Scripting Reference topics in the Director Help Panel.
121
USING DIRECTOR 11.5
Bitmaps
Last updated 9/28/2011
Using gradients
Director can create gradients in the Paint window. You can use gradients with the Brush tool, the Bucket tool, the Text
tool, or any of the filled shape tools. Typically, a gradient consists of a foreground color at one side (or the center) of
an image and another color, the destination color, at the other side (or outside edge) of the image. Between the
foreground and destination colors, Director creates a blend of the two colors.
1Select the Brush tool, the Bucket tool, or one of the filled shape tools.
2Select the type of gradient from the Gradient menu.
Gradient menu
Selecting a gradient type automatically sets the current Paint window ink to Gradient. You can also select Gradient ink
from the Ink menu at the bottom left of the Paint window to create a gradient with all the current settings.
To manually specify a gradient, select Gradient Setting from the menu. For more information, see “Editing gradients”
on page 121.
1Select a foreground color from Gradient Colors menu on the left.
The foreground color is the same color that is specified for the Paint window.
A. Foreground color B. Destination color
2Select a destination color from the Gradient Colors menu on the right.
The destination color is the color of the gradient when it completes the color transition.
3Use the current tool in the Paint window.
Director uses the gradient you’ve defined to fill the image.
4To stop using a gradient, select Normal from the Ink menu. For more information, see Using Paint window inks.
Editing gradients
You can change gradients before using them by changing the settings in the Gradient Settings dialog box. In the Gradient
Settings dialog box, you set the foreground and background colors as well as the pattern to use with your gradient. Several
menus control the style of your gradient fill. Each choice you make is immediately previewed on the left.
1Select Gradient Settings from the Gradient Colors menu.
Gradient menu
2To determine whether the gradient is created with the pattern you select with the Patterns menu in the Paint
window or with a dithered pattern, select a Type option:
Dither Produces a smooth transition between colors. If you select Dither, only dithering options appear in the
Method menu.
Pattern Uses the current pattern for the color transition. If you select Pattern, only pattern options appear in the
Method menu.
AB

122
USING DIRECTOR 11.5
Bitmaps
Last updated 9/28/2011
3To determine how a gradient shifts between colors, select an option from the Method pop-up menu.
If you select Dither as the Type option, the following choices are available:
Best Colors Ignores the order of the colors in the palette. Instead, it uses only colors that create a continuous blend
from foreground to background colors and blends them with a dithered pattern. Dithering creates color from two
or more colors of pixels interspersed together.
Adjacent Colors Uses all colors between the foreground and background colors and blends them with a dithered
pattern.
Two Colors Uses only the foreground and background colors and blends them with a dithered pattern.
One Color Uses only the foreground color and fades it with a dithered pattern.
Standard Colors Ignores all colors between the foreground and background colors and adds several blended colors
with a dithered pattern to create the gradient.
Multi Colors Ignores all the colors between the foreground and background colors and adds several blended colors
with a randomized dithered pattern to create a smooth gradient.
If you select Pattern as the Type option, the following options are available:
Best Colors Ignores the order of the colors in the palette and uses only colors that create a continuous blend of the
foreground and background colors.
Best Colors Transparent Ignores the order of the colors in the palette and uses only colors that create a continuous
blend of the foreground and background colors. White pixels in patterns created with this method are transparent.
Adjacent Colors Uses all the colors in the palette between the foreground and background colors for the gradient.
Adjacent Colors Transparent Uses all the colors in the palette between the foreground and background colors for
the gradient. White pixels in patterns that are created with this method are transparent.
4To determine the way the gradient fills an area in the Paint window, select an option from the Direction menu:
Top To Bottom Puts the foreground color at the top and the destination color at the bottom.
Bottom To Top Puts the foreground color at the bottom and the destination color at the top.
Left To Right Puts the foreground color on the left and the destination color on the right.
Right To Left Puts the foreground color on the right and the destination color on the left.
Directional Lets you determine the direction of the gradient. You set the direction of the gradient in the Paint
window with the paint tool used to fill the area.
Shape Burst (Mac only) Creates a gradient that starts at the edge of the area and moves toward the center. The
foreground color begins at the edge and the destination color appears in the center.
Sun Burst Begins with the foreground color at the edge of the area and moves in concentric circles to the
destination color at the center.
5To control how colors cycle in a gradient, select a Cycles option:
Sharp Cycles have a banded appearance; smooth cycles go from foreground to destination and then back to
foreground.
One Cycles the gradient once through the range of colors you define.
Two Sharp Cycles through the range of colors from foreground to destination twice.
Two Smooth Cycles the gradient from foreground to destination and then from destination to foreground.
Three Sharp Cycles the gradient from foreground to destination three times.

123
USING DIRECTOR 11.5
Bitmaps
Last updated 9/28/2011
Three Smooth Cycles the gradient from foreground to destination, destination to foreground, and foreground to
destination.
Four Sharp Cycles the gradient from foreground to destination four times.
Four Smooth Cycles the gradient from foreground to destination, destination to foreground, foreground to
destination, and destination to foreground.
6To select how colors are distributed between the foreground and destination colors of the gradient, select a Spread
option:
Equal Provides even spacing of colors between the foreground and destination colors.
More Foreground Increases the amount of the foreground color in the gradient.
More Middle Increases the amount of the middle color in the gradient.
More Destination Increases the amount of the destination color in the gradient.
7To determine whether the full range of the gradient is created over the paint object, the cast member, or the entire
Paint window, select a Range option:
Paint Object Paints the full gradient as the fill or brush stroke of the object, regardless of the object’s location in the
Paint window.
Cast Member Paints the full gradient within the size of the cast member.
Window Paints a full gradient only if the object is the length or width of the entire window; otherwise, it paints a
partial gradient that corresponds to the object’s location in the window.
8To select a foreground, background, or destination color for the gradient, use the appropriate color picker.
The foreground color is the starting color of the gradient, and the destination color is the ending color. Background
color has no effect unless you are using a pattern.
9To select a pattern, use the Patterns menu.
Using patterns
You can select among three sets of patterns that are included with Director or create custom patterns. The patterns you
change or edit in the Paint window don’t affect the patterns that are available for shapes.
1Select the Brush tool, the Bucket tool, or one of the filled shape tools.
2Select the type of pattern from the Patterns menu.
To manually specify a pattern, select Pattern Settings from the menu. For more information, see “Editing patterns” on
page 123.
Editing patterns
Change patterns before using them by changing the settings in the Pattern Settings dialog box. Each change you make
is immediately previewed.
1Select Pattern Settings from the bottom of the Patterns menu.
2Select an option from the menu at the top of the Pattern Settings dialog box:
•To select one of the standard, noneditable sets of patterns, select QuickDraw, Grays, or Standard.
•To edit a pattern, select Custom. Custom is an editable copy of the Standard palette set.
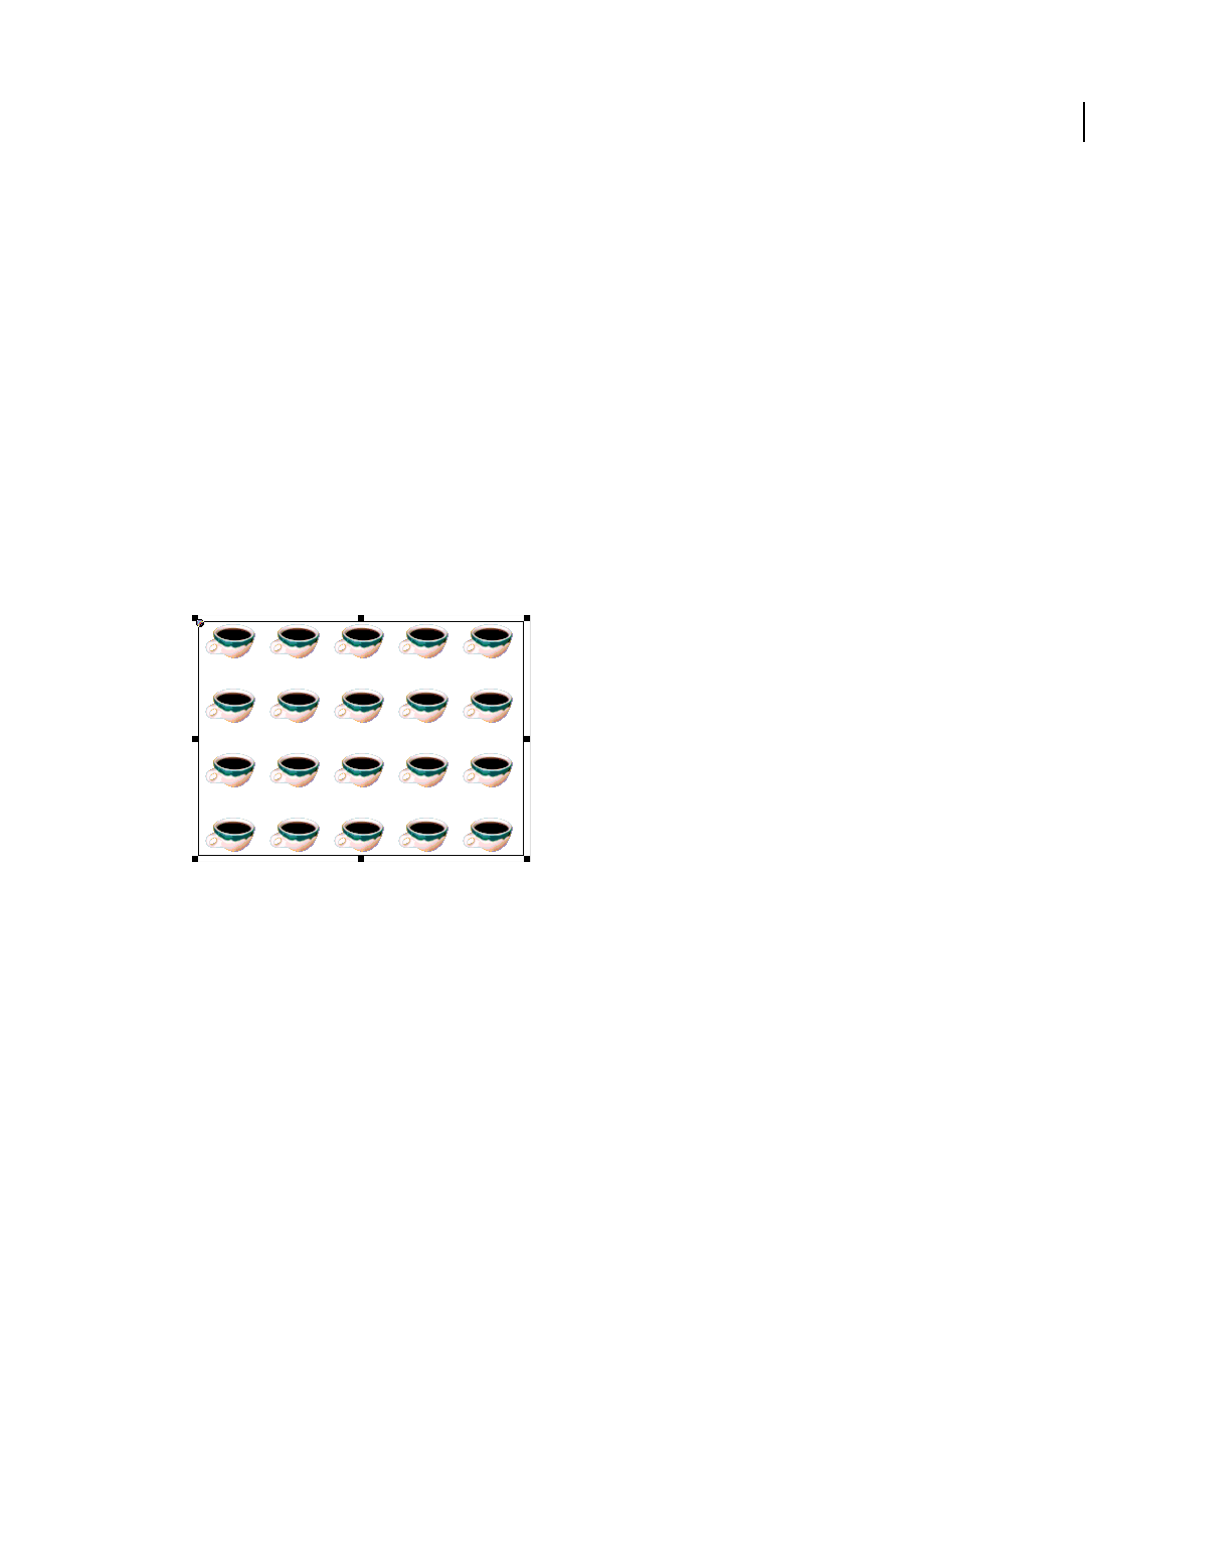
124
USING DIRECTOR 11.5
Bitmaps
Last updated 9/28/2011
3Select the pattern to edit or use the Copy and Paste buttons to move an existing pattern to one of the empty tile
positions.
4Use any of the following methods to edit the pattern:
•Click the magnified image of the pattern. Click a blank pixel to fill it, and click a filled pixel to make it blank.
•Click the right, left, up, and down arrows to move the pattern one pixel in any direction.
•Click the Black and White square to reverse the colors of the pattern (for example, black becomes white, and
white becomes black).
Creating a custom tile
Custom tiles provide an effective way of filling a large area with interesting content without using much memory or
increasing the download time. They are especially useful for large movies on the web. A custom tile uses the same
amount of memory no matter what size area it fills.
A custom tile
1Create a bitmap cast member to use as a tile, and display it in the Paint window.
2Click the pattern box in the Paint window, and select Tile Setting from the bottom of the Patterns menu.
3Click an existing tile position to edit.
The existing tiles appear next to the Edit label. You must replace one of the built-in tiles to create a new one. To
restore the built-in tile for any tile position, select it, and click Built-in.
4Click Cast Member.
The cast member appears in the box at the lower left. The box at the right shows how the image appears when it is
tiled. The dotted rectangle inside the cast member image shows the area of the tile.
To select a different cast member for the tile, use the arrow buttons to the right of the Cast Member button to move
through the movie’s cast members.
5Drag the dotted rectangle to the area of the cast member you want tiled.
6Use the Width and Height controls to specify the size of the tile.
The new tile appears in the tile position you selected. Use it in the Paint window or from the Tool palette to fill
shapes.

125
USING DIRECTOR 11.5
Bitmaps
Last updated 9/28/2011
Using Paint window inks
Use Paint window inks to create color effects for bitmap cast members. Paint window inks are different from sprite
inks, which affect entire sprites and don’t change cast members.
You can select an ink effect from the Ink menu at the bottom of the Paint window.
The result of the ink you select depends on whether you are working in color or in black and white. Some inks work
better when painting with patterns, and others work better when painting with solid colors.
Normal The default ink. It is opaque and maintains the color of the current foreground color and pattern.
Transparent Makes the background color of patterns transparent, so artwork drawn previously in the current cast
member can be seen through the pattern.
Ink B&W Color Works with
Normal Solids and patterns
Transparent Patterns
Reverse Solids and patterns
Ghost Solids (B&W) and patterns (color)
Gradient Brush, Bucket, shape tools
Reveal Brush, shape tools
Cycle Solids and patterns
Switch Brush
Blend Solids and patterns
Darkest Patterns
Lightest Patterns
Darken Brush
Lighten Brush
Smooth Brush
Smear Brush
Smudge Brush
Spread Brush
Clipboard Brush

126
USING DIRECTOR 11.5
Bitmaps
Last updated 9/28/2011
Reverse Makes overlapping colors reverse. Any pixel in the foreground art that was originally white becomes
transparent. Any pixel that was black reverses the color of the background art.
Ghost Ghost ink in black and white creates an image that can be seen only when drawn over a black background. In
color, Ghost ink draws with the current background color.
Gradient Lets you paint with the gradient fill that you selected in the Gradient Settings dialog box. For more
information, see “Using gradients” on page 121. A gradient fill is one that progresses from one color, called the
foreground color, to another color, called the destination color. You can paint with Gradient ink using the Brush tool,
the Bucket tool, and the shape tools.
Reveal Works indirectly with the art in the previous cast position. Imagine the previous cast member’s artwork
covered with a white area. Reveal ink erases the white area to show the artwork in the previous window. Reveal ink can
be used to create specific shapes from shades created with the Airbrush tool. Because it is impossible to mask certain
shapes for the airbrush, spray an area with the airbrush first; then, in the next cast member, paint the shapes you need
with a Reveal ink. As you paint your object, you expose the airbrush pattern in the previous window.
Cycle A color ink. As you draw with Cycle ink, the colors change as the ink progresses through the palette. The
beginning and ending points of the color cycle are determined by the foreground and destination colors. If you want
to cycle through the whole palette, select white as the foreground color and black as the destination color. This ink
works only when your computer is set to 256 colors.
Switch Changes any pixel that is the current foreground color to the current gradient destination color as you paint
over pixels of that color.
Blend Creates a translucent color ink. You can see the background object, but its color is blended with the foreground
object’s color. Select the percentage of blend in the Paint Window Preferences dialog box.
Darkest A useful ink for coloring black-and-white artwork. For example, if you paint yellow over black and white,
black remains black because it is darker than yellow, and white becomes yellow because yellow is darker than white.
Lightest A useful ink for coloring black-and-white artwork. For example, if you paint yellow over black and white,
black objects become yellow when painted with the Lightest ink effect, and white remains white because it is lighter
than yellow.
Darken Makes colors darker. The more times you click with the Brush tool, the darker the area becomes. The colors
of the foreground, background, and destination inks have no effect on Darken. Darken creates an effect that is the same
as reducing a color’s brightness with the controls in the Color Palettes window. You can change the rate of this ink
effect in the Paint Preferences dialog box.
Lighten Makes colors lighter. The more times you click with the Brush tool, the lighter the area becomes. The color of
the foreground, background, and destination inks have no effect on Lighten. Lighten creates an effect that is the same
as increasing a color’s brightness with the controls in the Color Palettes window. You can change this ink effect in the
Paint Preferences dialog box.
Smooth Blurs existing artwork when it is painted with the Brush tool. Unlike Smear and Smudge, it is not directional.
The color of the foreground, background, and destination inks have no effect on Smooth. Use it to smooth out jagged
edges.
Smear Works with the Brush tool and functions like mixing paint. Any area you drag across with a Smear ink spreads
in the direction of the brush, fading as it gets farther from the source. The color of the foreground, background, and
destination inks have no effect on Smear ink.
Smudge A color ink for the Brush tool that is similar to Smear ink. It also functions like mixing paint. The colors fade
faster as they are spread. The color of the foreground, background, and destination inks have no effect on Smudge ink.
Spread Works with the Brush tool in color. Whatever is under the Brush tool when you start to drag is picked up as
the ink for the brush. Copies of what is beneath the brush are pushed across the window as you draw.
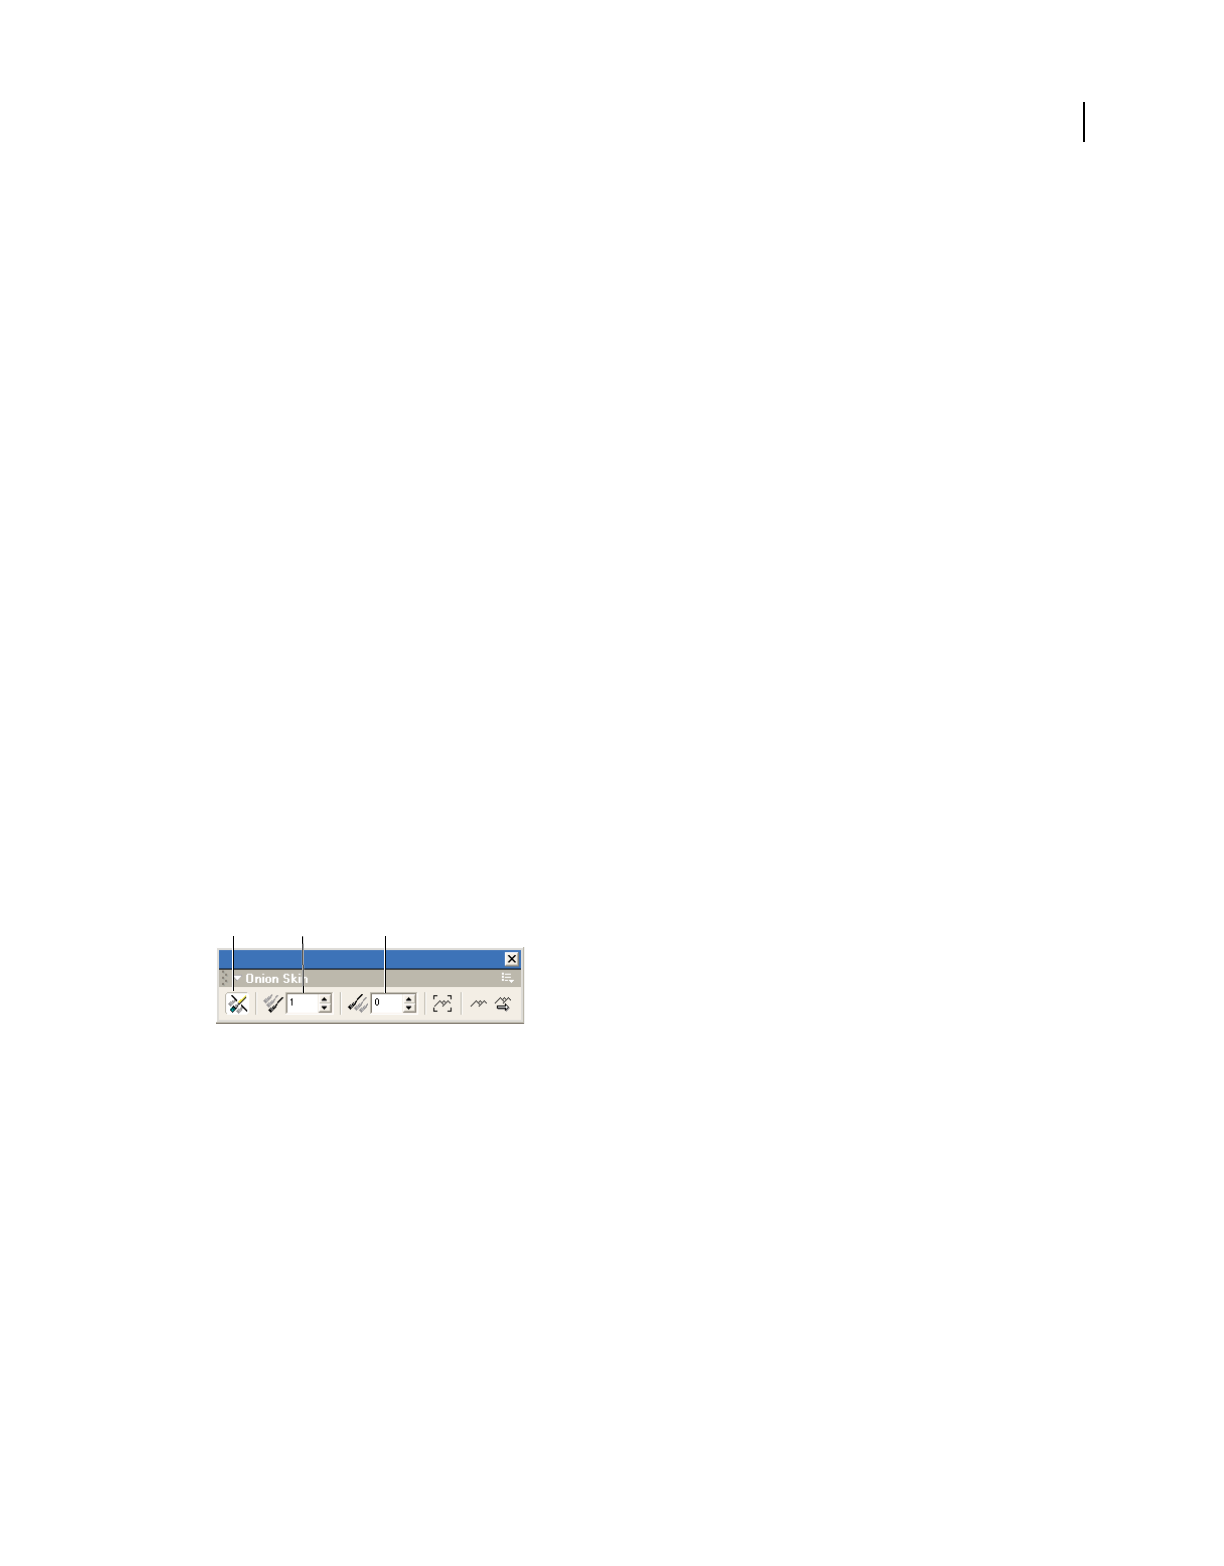
127
USING DIRECTOR 11.5
Bitmaps
Last updated 9/28/2011
Clipboard Uses the current contents of the Clipboard as a pattern to paint with. The Clipboard contents must
originate in Director.
Using onion skinning
Onion skinning derives its name from a technique used by conventional animators, who would draw on thin onion skin
paper so that they could see through it to one or more of the previous images in the animation.
With onion skinning in Director, you can create or edit animated sequences of cast members in the Paint window,
using other cast members as a reference. Reference images appear dimmed in the background. When you work in the
Paint window, you can view not only the current cast member that you’re painting but also one or more cast members
that are blended into the image.
Use onion skinning to do the following:
•Trace over an image or create a series of images all in register (aligned) with a particular image.
•See previous images in the sequence, and use those images as a reference while you are drawing new ones.
•Create a series of images based on another parallel animation. The series of images serves as the background while
you paint a series of foreground images.
Onion skinning uses registration points to align the current cast member with the previous ones you selected. Be
careful not to move registration points for cast members after onion skinning. If you do, the cast members might not
line up the way you want. For more information, see “Changing registration points” on page 116.
You must have created some cast members to use onion skinning.
Activate onion skinning
1Open the Paint window, and select View > Onion Skin. The Onion Skin toolbar appears.
Onion skin toolbar
A. Toggle Onion Skinning B. Preceding Cast Member C. Following Cast Member
2Click the Toggle Onion Skinning button at the far left of the toolbar to enable onion skinning.
Define the number of preceding or following cast members to display
1Open the Paint window, and select View > Onion Skin. The Onion Skin toolbar appears.
2If necessary, click the Toggle Onion Skinning button on the Onion Skin toolbar to activate onion skinning.
3Specify the number of preceding or following cast members you want to display.
•To specify the number of preceding cast members to display, enter a number in the Preceding Cast Members
text box.
•To specify the number of following cast members to display, enter a number in the Following Cast Members
text box.
ABC
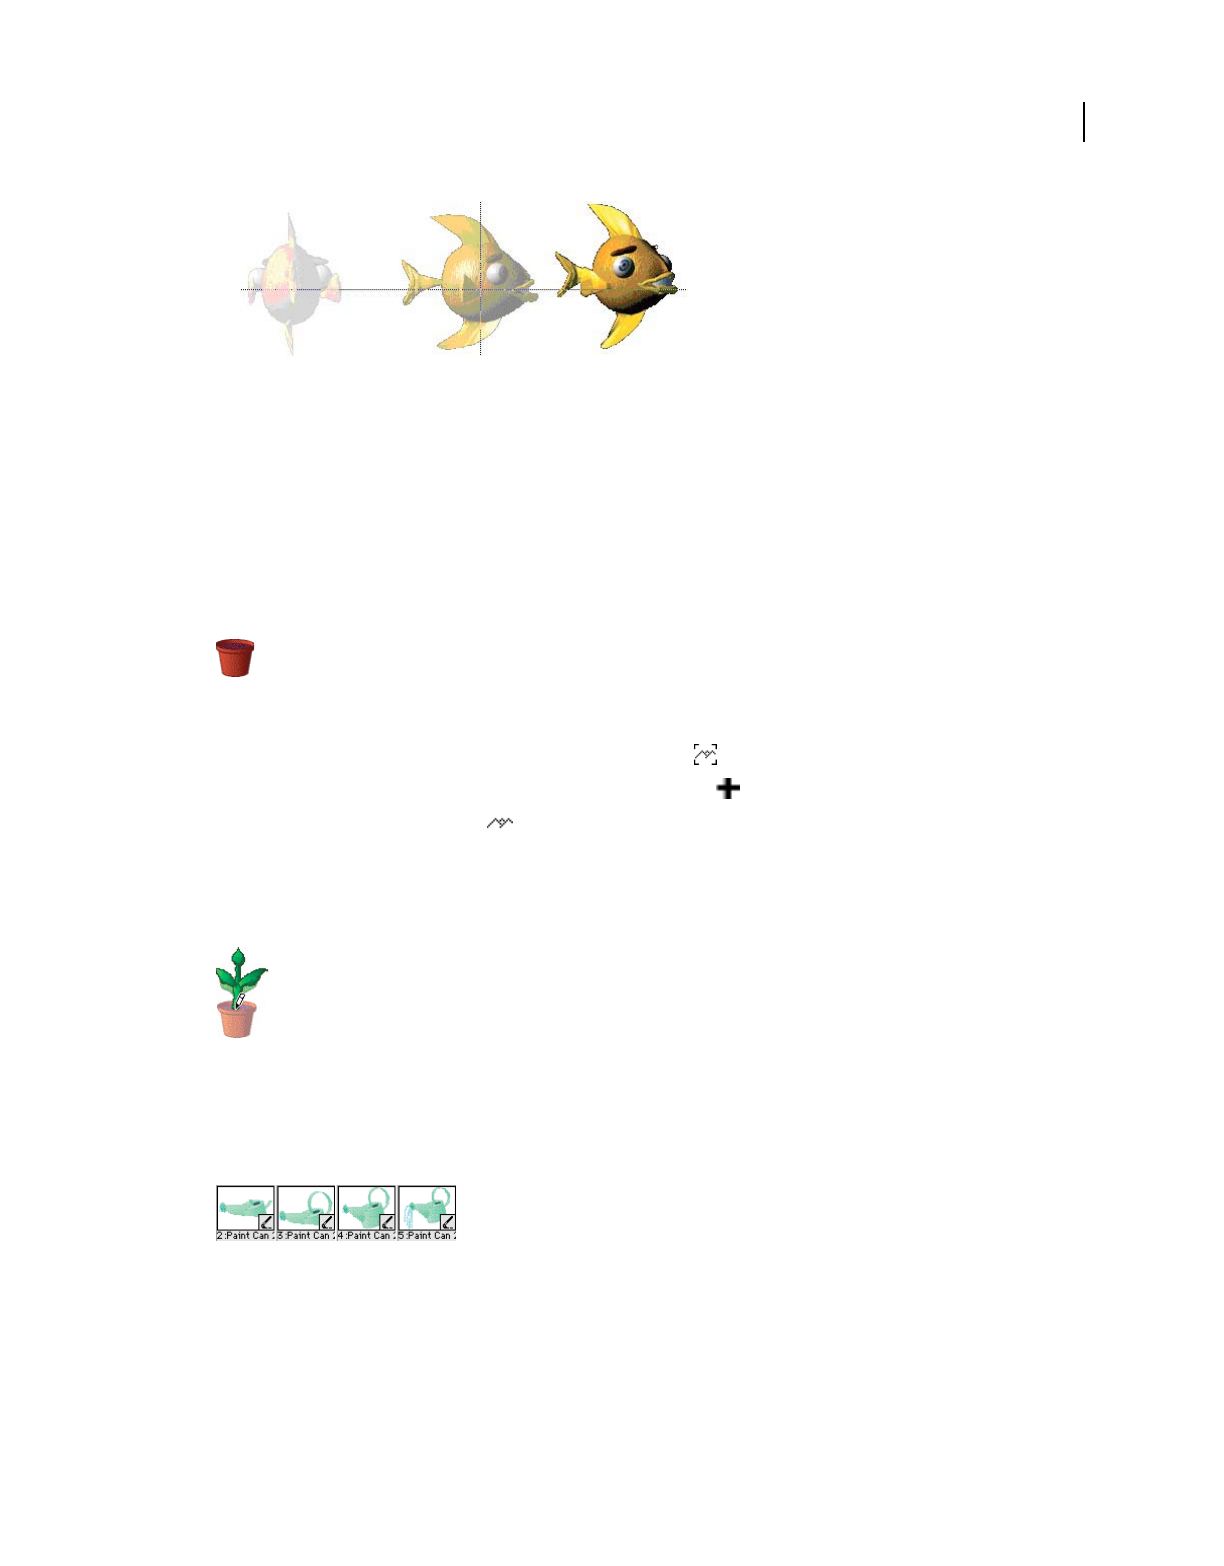
128
USING DIRECTOR 11.5
Bitmaps
Last updated 9/28/2011
Registration point. Two preceding cast members shown with onion skinning and registration points.
The specified number of cast members appear as dimmed images behind the current cast member. The order is
determined by the position in the cast.
Create a new cast member by tracing over a single cast member as a
background image
1Open the Paint window, and select View > Onion Skin to open the Onion Skin toolbar.
2In the Paint window, open the cast member that you want to use as the reference image or background.
3If necessary, click the Toggle Onion Skinning button on the Onion Skin toolbar to activate onion skinning.
4To set the background image, click the Set Background button on the Onion Skin toolbar.
5To create a new cast member, click the New Cast Member button in the Paint window.
6Click the Show Background button on the Onion Skin toolbar.
The original cast member appears as a dimmed image in the Paint window. You can paint on top of the original
cast member’s image.
7Paint the new cast member, using the background image as a reference.
Use a series of images as a background while painting a series of foreground
images
1In the Cast window, arrange the series of cast members you want to use as your background.
Arrange the series of cast members for the background
Cast members in the foreground and the background series must be adjacent to each other in the cast.
2Open the Paint window, and select View > Onion Skin to open the Onion Skin toolbar.
3If necessary, click the Toggle Onion Skinning button on the Onion Skin toolbar to activate onion skinning.
Make sure all values in the Onion Skin toolbar are set to 0.

129
USING DIRECTOR 11.5
Bitmaps
Last updated 9/28/2011
4Open the cast member you want to use as the first background cast member in the reference series. Click the Set
Background button.
5Select the position in the cast where you want the first cast member in the foreground series to appear. Click the
New Cast Member button in the Paint window to create a new cast member.
The first cast member in the foreground series can be located anywhere in any cast.
6Click the Show Background button to reveal a dimmed version of the background image.
7Click the Track Background button on the Onion Skin toolbar.
8Paint the new cast member, using the background image as a reference.
9When you finish drawing the cast member, click the New Cast Member button again to create the next cast
member.
When Track Background is enabled, Director advances to the next background cast member in the series. Its image
appears in the background in the Paint window.
10 Repeat step 8 until you finish drawing all the cast members in the series.
About the Paste As PICT option
Use the Paste A Pict option to paste a PICT image into the cast and have it remain in PICT format.
Note: If you paste a PICT image into the cast by using the Paste command in the Edit menu, Director converts it to a
bitmap. If you want the artwork to remain in PICT format, use Paste As PICT when you paste it into the cast.
There are several reasons for using Paste As PICT. PICT cast members might occupy less memory than bitmap cast
members. Some PICT cast members, such as compound images that consist of lines, shapes, and text, can stretch and
scale more smoothly than bitmap cast members. PICT cast members also look better when printed on a laser printer.
However, PICT cast members animate more slowly than bitmap cast members, and they don’t support ink effects.
When you use color cycling or palette transitions, PICT cast members might have unexpected results.
Setting and changing bitmap cast member properties
Change the properties of a bitmap cast member to view important information, change a cast member’s name, select
alpha settings, or turn on highlighting and dithering.
1Select a bitmap cast member, and click the Member tab in the Property inspector, using the Graphical view.
The Member tab displays the following:
•A text box to view or change the cast member’s name, a Comments text box to enter text that appears in the
Comments column of the Cast List window, and an Unload menu that lets you determine how to remove a cast
member from memory.
•View-only fields that indicate when the cast member was created and modified and the name of the person who
modified the cast member.
2If the bitmap cast member is linked to an external file, the full path for the file appears in the Name text box. To
choose a different file to link to the cast member, either type a new filename into the text box, or click the Browse
button (...) and select the path to the new filename.

130
USING DIRECTOR 11.5
Bitmaps
Last updated 9/28/2011
3Click the Bitmap tab, using the Graphical view.
4To invert the current cast member when the user clicks it, select Highlight.
Use this option to create buttons. Even if Highlight When Clicked is selected, the cast member does not do anything
unless it is controlled by a behavior or a script.
5To make Director approximate an original color in the bitmap if there is a palette problem, select Dither. When a
color is not available because of a palette conflict, Dither displays a pattern of pixels of similar colors. If this option
is off, Director uses the color in the current palette that is closest to the original.
6If the imported bitmap has a white canvas that you want to remove, select Trim. If you want to retain the white
canvas, deselect Trim.
7To make Director use the alpha channel (transparency) data in the cast member, select Use Alpha.
This option is on by default for all imported cast members with alpha channel data.
8To determine how a transparent area receives a mouse click, use the Alpha Threshold slider to specify a value.
Any area with a greater degree of opacity than the specified threshold can receive a mouse click.
9To assign a different palette to an 8-bit cast member while maintaining the cast member’s original palette
references, select a new palette from the Palette menu.
Setting and changing PICT cast member properties
Use PICT cast member properties to change the names of PICT cast members and to set their properties.
1Select a PICT cast member, and open the Property inspector in Graphical view.
2To view or edit the cast member name, use the Name text box on the Member tab.
3To specify how Director removes the cast member from memory if memory is low, select an option from the
Unload menu. For more information, see “Controlling cast member unloading” on page 46.
Setting Paint window preferences
Use Paint window preferences to modify the settings of several tools and drawing methods in the Paint window.
1Select Edit > Preferences > Paint.
Note: If you are using a Mac OS® X operating system, select the Director menu, instead of the Edit menu, to access
Preferences.
2To make tools remember the last color or ink used, select the following options:
Remember Color Remembers the last color used with a tool. The color remains selected for the next time you use
the Brush or Airbrush tools.
Remember Ink Remembers the last ink used with a tool. The ink remains selected for the next time you use any tool.
3To control the way colors cycle when you draw with Cycle ink, select one of the following options:
Repeat Sequence Causes colors to cycle from the foreground color to the destination color and then repeat from
foreground to destination.

131
USING DIRECTOR 11.5
Bitmaps
Last updated 9/28/2011
Reverse Sequence Causes colors to cycle from the foreground color to the destination color and then from
destination to foreground.
4To set a line width that is thicker than the widths available in the Paint window, use the Other Line Width slider to
enter a value.
The width you set is the width that appears when you draw a line after selecting Other Line Width.
5To set the opacity of a color when using the Blend ink effect in the Paint window, use the Blend slider to enter a
value.
You can vary the blend value between 0 and 100%.
6To set the rate at which artwork changes when you use the Darken or Lighten effects in the Paint window, use the
Lighten or Darken slider to enter a value.
7To determine how colors are used when using Smooth, Lighten, Darken, or Cycle effects, select one of the following
Interpolate By options:
Color Value Ignores the order of the colors in the palette and produces a continuous blend of the foreground and
destination colors.
Palette Location Uses all the colors in the palette between the foreground and destination colors.
Compressing bitmaps
If you plan to distribute your movie over the Internet, you can compress your bitmap images to ensure faster
downloading. Director lets you compress images at the movie level and for individual cast members. Bitmap
compression set at the cast member level overrides compression settings at the movie level.
In addition to Director standard compression, you can use JPEG compression and specify a range of image quality. If
you have Fireworks installed, you can use the Optimize In Fireworks button to start Fireworks and then dynamically
apply compression settings while viewing how your image looks at those settings. When you determine the most
suitable compression level, Director remembers the settings you established in Fireworks.
Compress a bitmap at the cast member level
1Select bitmap cast members or sprites, and click the Bitmap tab in the Property inspector.
If you selected multiple cast members or sprites, the Property inspector displays the compression setting if it is the
same for each selected object. If the compression settings are not the same, the Compression menu is blank.
2Click the Compression menu, and do one of the following:
•To compress selected bitmaps using the same settings as those established for movie-level compression, select
Movie Setting. For more information, see the information about the Compression tab under Changing Publish
settings.
•To use the standard Director compression, select Standard.
•To use JPEG compression, select JPEG, and move the slider bar to the desired level of compression. The higher
the number you specify, the less your bitmap is compressed (that is, 100 indicates no compression).
Movie Setting is usually the default compression setting, except under certain conditions when the compression
feature is disabled or when Director controls image-compression choices. For example, when the image is a JPEG,
the compression setting defaults to JPEG compression. You can’t select another compression option.

132
USING DIRECTOR 11.5
Bitmaps
Last updated 9/28/2011
Similarly, the Compression setting defaults to Standard compression, and you can’t change this setting when the
cast member is any of the following:
•An 8-bit cast member created in the Paint window
•A GIF imported as a bitmap with no alpha channel information
•An 8-bit PNG
•A linked cast member or a cast member created with script
Note: If you open a Director 7 movie in Director 11, bitmap cast members are assigned Movie Setting as the default.
Compression settings at the movie level, which are set in the Publish Settings dialog box, default to the Standard
compression setting. This ensures the movie plays as it did in Director 7.
Compress bitmaps at the movie level
1Select File > Publish Settings.
The Publish Settings dialog box appears.
2On the Compression tab, make a selection from the Image Compression menu, and click OK.
•To use the standard Director compression, select Standard.
•To use JPEG compression, select JPEG, and move the slider bar to the desired level of compression. The higher
the number you specify, the less your bitmap is compressed (that is, 100 indicates no compression).
Note: Director saves the publish settings when you save the movie.
Working with Adobe Fireworks
You can combine the power of Fireworks and Director. Fireworks lets you export graphics and interactive content into
Director. The export process preserves the behaviors and slices of the graphic. You can safely export sliced images with
rollovers and even layered images. Director users can take advantage of the optimization and graphic design tools of
Fireworks without compromising quality.
Placing Fireworks files into Director
Director can import flattened images from Fireworks, such as JPEGs and GIFs. It can also import 32-bit PNG images
with transparency. For sliced, interactive, and animated content, Director can import Fireworks HTML.
Exporting graphics with transparency
In Director, transparency can be achieved by importing 32-bit PNG images. You can export 32-bit PNG graphics with
transparency from Fireworks.
1In Fireworks, select Window > Optimize, change the export file format to PNG 32, and set Matte to transparent.
2Select File > Export.
3Select Images Only from the Save As Type menu. Name the file, and click Save.

133
USING DIRECTOR 11.5
Bitmaps
Last updated 9/28/2011
Exporting layered and sliced content to Director
By exporting Fireworks slices to Director, you can export sliced and interactive content such as buttons and rollover
images. By exporting layers to Director, you can export layered Fireworks content such as animations.
1In Fireworks, select File > Export.
Note: You can also click the Quick Export button and select Source As Layers or Source As Slices from the Director
menu. Select Source As Layers if you are exporting an animation, and select Source As Slices if you are exporting
interactive content such as buttons.
2Select Director from the Save As menu.
3In the Export dialog box, type a filename, and select a destination folder.
4Select one of the following options from the Source menu:
Fireworks Layers Exports each layer in the document. Select this option if you are exporting layered content or an
animation.
Fireworks Slices Exports the slices in the document. Select this option if you are exporting sliced or interactive
content such as rollover images and buttons.
5Select Trim Images to automatically crop the exported images to fit the objects on each frame.
6Select Put Images In Subfolder to select a folder for images.
7Click Save.
Importing Fireworks files into Director
In Director, you can import flattened images that you have exported from Fireworks, such as JPEGs, GIFs, and 32-bit
PNGs. You can also import Fireworks layers, slices, and interactive elements by inserting Fireworks HTML.
Import a flattened Fireworks image
1In Director, select File > Import.
2Navigate to the desired file, and click Import.
3Change options, if you wish, in the Image Options dialog box. For information about each option, see “Choosing
import image options” on page 45.
4Click OK.
The imported graphic appears in the cast as a bitmap.
Import layered, sliced, or interactive Fireworks content
1In Director, select Insert > Fireworks > Images from Fireworks HTML.
Note: The location and name of this menu command might be different, depending on your version of Director.
The Open Fireworks HTML dialog box appears.
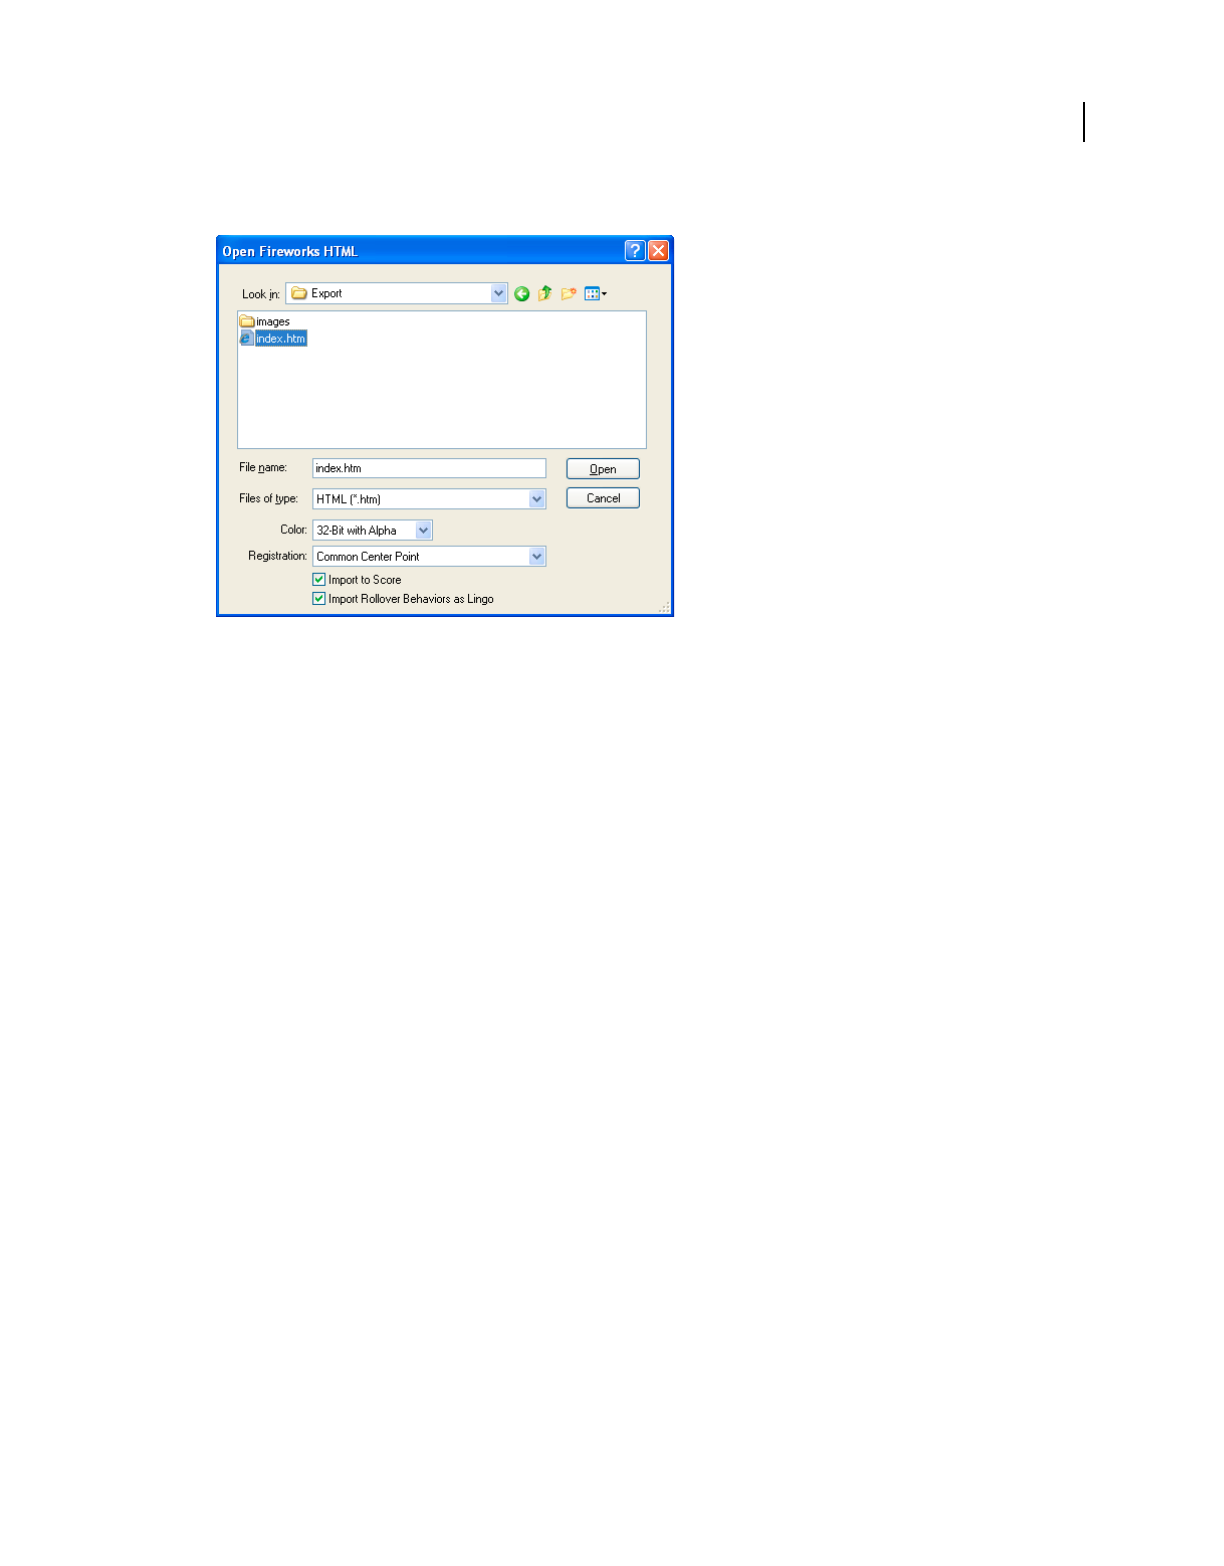
134
USING DIRECTOR 11.5
Bitmaps
Last updated 9/28/2011
2Locate the Fireworks HTML file you exported for use in Director.
3Change the following options if you wish:
Color Lets you specify a color depth for the imported graphics. If the graphics contain transparency, select 32-bit
color.
Registration Lets you set the registration point for the imported graphics.
Import Rollover Behaviors As Lingo Converts Fireworks behaviors to Lingo code.
Import To Score Places cast members into the Score when they’re imported.
4Click Open.
The graphics and code from the Fireworks HTML file are imported.
Note: If you are importing a Fireworks animation, drag keyframes in Director to offset the timing of each imported
layer as necessary.
Editing Director cast members in Fireworks
Using launch-and-edit integration, you can make changes to Director cast members by starting Fireworks and editing
them from inside Director. You can also start Fireworks from inside Director to optimize cast members.
1In Director, right-click (Windows) or Control-click (Mac) the graphic in the Cast window.
2Select Launch External Editor from the context menu.
Note: If Fireworks does not start as your external image editor, select Edit > Preferences > Editors in Director, and set
Fireworks as the external editor for bitmap graphic file types. (If you are using a Mac OS X operating system, select
the Director menu, instead of the Edit menu, to access Preferences.)
The file opens in Fireworks, and the document window indicates that you are editing a file from Director.
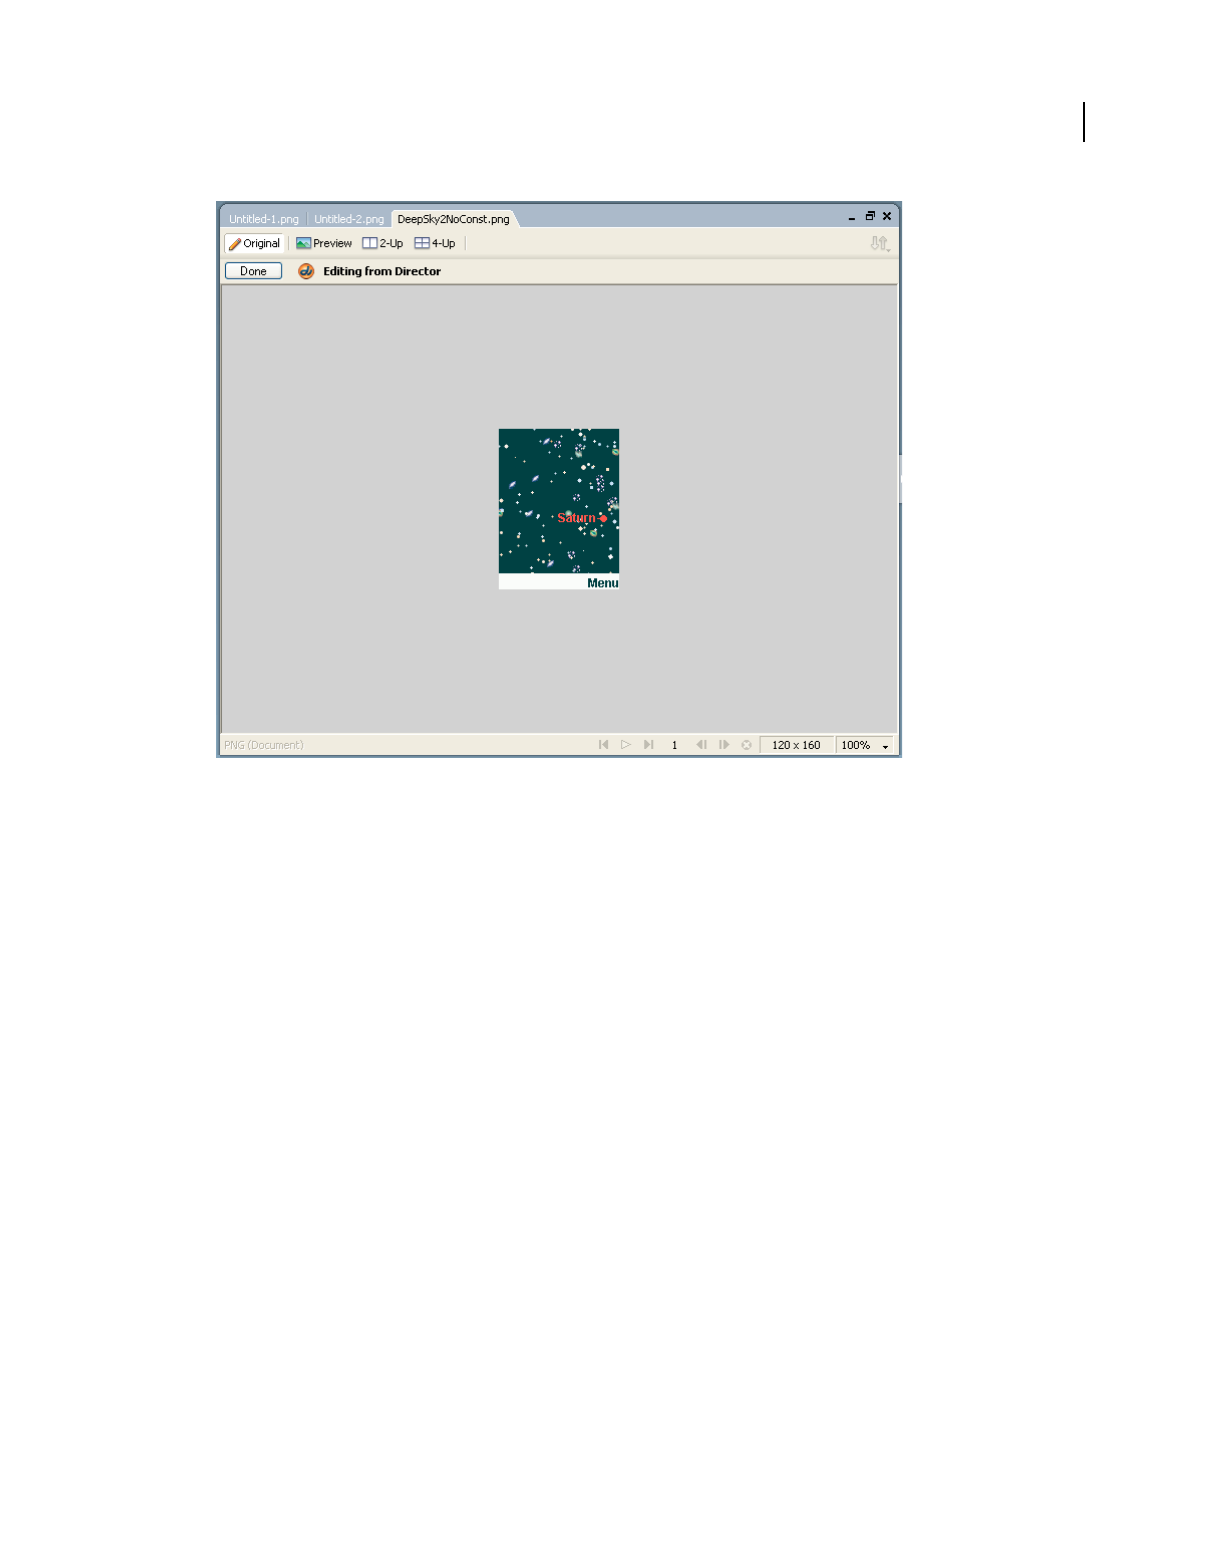
135
USING DIRECTOR 11.5
Bitmaps
Last updated 9/28/2011
Editing a Director file in Fireworks
3Make changes to the image, and click Done when you finish.
Fireworks exports the new graphic to Director.
Optimizing cast members in Director
You can start Fireworks from Director to make quick optimization changes to selected cast members.
1In Director, select the cast member in the Cast window, and click Optimize In Fireworks on the Bitmap tab in the
Property inspector.
2In Fireworks, change the optimization settings as desired.
3Click Update when you finish. Click Done if the MIX Editing dialog box appears.
The image is exported back to Director, using the new settings.
Bitmap filters
Bitmap filters are plug-in image editors that apply effects to image files such as GIF, PNG, JPG, PSD, text, QD and
vector shapes, SWF, BMP, and AVI. You can install Photoshop®-compatible filters to change images within Director.
For the bitmap filter effect to be visible, the bit-depth of the image should be at least 24. For images with a bit-depth
value lesser than 16, the filter effect will not be visible.

136
USING DIRECTOR 11.5
Bitmaps
Last updated 9/28/2011
Original image
Filtered image
You can apply a filter to a selected portion of a bitmap image, to an entire cast member, or to several cast members at once.
Install a filter
❖Place the filter in the Xtras folder in the Director application folder. For more information about installing Xtra
extensions, see the Getting Started topics in the Director Help Panel.
You can work with filters through the user interface or through scripting. Filters added through the user interface
can be accessed through scripting by using the filterList property of the sprite to which the filters are applied.
Note: duplicate() function does not work for filterlist.
Create a filter
You can create filters two ways:
•Use an external bitmap editor to install the filter
•Write Lingo or JavaScript syntax
Create a filter for a sprite using Lingo/JavaScript
In Lingo
MyFilter=filter(#BlurFilter) OR
MyFilter = filter(#BlurFilter, [#BlurX:5, #BlurY:5])
In JavaScript
var MyFilter = filter(symbol("BlurFilter")); OR
var MyFilter=filter(symbol("BlurFilter"),
propList("BlurX",5,"BlurY",5));
var MyFilter=filter(symbol("BlurFilter"),
propList(symbol("BlurX"),5,symbol("BlurY"),5));
Apply a filter
Use the method you prefer to apply filters to sprites in a Director movie:
•Use the Filters tab in the Property inspector
•Write Lingo or JavaScript syntax
You can also apply filters to a sprite after applying an ink to the sprite.
Filters are not supported on film loops.
Note: Filters applied to DTS-enabled sprites are not reflected.

137
USING DIRECTOR 11.5
Bitmaps
Last updated 9/28/2011
Apply a filter to a sprite
1Do one of the following:
•Open a Score, select a sprite, and in the Property Inspector click the Filters tab.
•In the Stage window, right-click a sprite, and select Filters. The Property inspector appears with the Filters tab
selected.
2Click the Filters popup .
3Select a filter from the pop-up menu. The filter is applied to the selected sprite.
4Use the controls that appear in the panel below to customize the filter to your requirements.
Apply a filter to a sprite, using Lingo/JavaScript
In Lingo
sprite(1).filterlist.append(MyFilter)
In JavaScript
sprite(1).filterlist.append(MyFilter) ;
or
append the filter to a filterlist at some specified position in the filterlist:
sprite(1).filterlist.addAt(2,MyFilter) OR sprite(1).filterlist.addAt(-2,MyFilter)
Apply a filter to an image of a member, using Lingo/JavaScript
In Lingo
img = sprite(1).member.image
fltr = filter(#BlurFilter)
img.applyFilter(fltr)
In JavaScript
img = sprite(1).member.image;
fltr = filter(symbol("BlurFilter"));
img.applyFilter(fltr);
Apply a filter to part of an image or sprite
img = sprite(1).member.image
fltr = filter(#BlurFilter)
img.applyFilter(fltr,rect(0,0,50,50))
Note: Filters that are DTS-enabled are not applied.
Modify a filter
1Do one of the following:
•Open a Score, and select a sprite to which you have applied filters.
•In the Stage window, right-click a sprite to which you have applied filters.
The Property Inspector lists the filters in the Filters tab.
2Select the filter, and modify the filter settings using the controls in the panel below. The modified filter is applied
to the selected sprite.
138
USING DIRECTOR 11.5
Bitmaps
Last updated 9/28/2011
Note: You can also re-order the sequence in which filters selected for a sprite are applied to the sprite by clicking the filter
and then using the Shuffle Up and Shuffle Down keys on top of the panel.
Modify filters using Lingo/JavaScript
Blur filter
The Blur filter softens the edges and details of sprites. Applying a blur to a sprite can make it appear as if it is behind
other sprites, or make a sprite appear to be in motion.
You can produce blurs that range from a softly unfocused look to a Gaussian blur, a hazy appearance that is like
viewing an image through semi-opaque glass. When the Quality property of this filter is set to 1, the result is a softly
unfocused look. When the Quality property is set to 3, it approximates a Gaussian blur filter.
Blur filter applied to a text sprite
Property summary
Lingo Syntax:
MyFilter=filter(#BlurFilter)
or
MyFilter = filter(#BlurFilter, [#BlurX:5, #BlurY:5, #quality:1])
Java Script Syntax:
var MyFilter = filter(symbol("BlurFilter"));
or
var MyFilter=filter(symbol("BlurFilter"),
propList(symbol("BlurX"),5,symbol("BlurY"),5), symbol("quality"),1);
Glow Filter
The Glow filter lets you apply a color all around the edges of a sprite and to add a glow effect to various sprites. You
can set the style of the glow in several ways, including inner or outer glow and knockout mode.
Glow filter applied to a text sprite
Property Description Value Range Default
BlurX:Number The amount of
horizontal blur.
0-255 5
BlurY:Number The amount of
vertical blur.
0-255 5
Quality:Number The number of times
to perform the blur.
0-15 1

139
USING DIRECTOR 11.5
Bitmaps
Last updated 9/28/2011
Property summary
Lingo Syntax:
MyFilter=filter(#GlowFilter)
or
MyFilter = filter(#GlowFilter, [#Color:color(255,0,0), #alpha:1, #BlurX:5, #BlurY:5,
#strength:1, #quality:2, #inner:0, #knockOut:1])
Java Script Syntax:
var MyFilter = filter(symbol("GlowFilter"));
or
var MyFilter1 = filter(symbol("GlowFilter"), propList("color", color(255,0,0), "alpha", 1,
"blurX",5,"blurY",5,"strength",1,"quality",2, "inner", 1, "knockout", 1));
or
propList(symbol("color"), color(255,0,0), symbol("alpha"), 1,
symbol("blurX"),5,symbol("blurY"),5,symbol("strength"),1,symbol("quality"),2,
symbol("inner"), 1, symbol("knockout"), 1));
var MyFilter2 = filter(symbol("GlowFilter"),
Bevel filter
Use the BevelFilter class to add a bevel effect to a variety of sprites. A bevel effect gives sprites a three-dimensional look.
You can customize the look of the bevel with different highlight and shadow colors, the amount of blur on the bevel,
the angle of the bevel, the placement of the bevel, and a knockout effect.
Bevel filter applied to a text sprite
Property Description Value Range Default
BlurX:Number The amount of horizontal blur. 0-255 6
BlurY:Number The amount of vertical blur. 0-255 6
quality:Number The number of times to perform the blur. 0-15 1 (low)
strength:Number The strength of the imprint or spread. The higher the
value, the more color is imprinted and the stronger the
contrast between the glow and the background.
0-10 2
color:Color The color of the glow. RGB (FF,0,0)
alpha:Number The alpha transparency value for the color. 0-255 255
knockout:Boolean Specifies whether the object has a knockout effect. The
value true makes the object's fill transparent and
reveals the background color of the document.
True/false false
inner:Boolean Specifies whether the glow is an inner glow. The value
true indicates an inner glow. The default is false, an
outer glow (a glow around the outer edges of the
sprite).
True/false false

140
USING DIRECTOR 11.5
Bitmaps
Last updated 9/28/2011
Property summary
Lingo Syntax:
MyFilter=filter(#BevelFilter)
or
MyFilter1 = filter(#BevelFilter, [#distance:5, #angle:5, #angle:40,
#highlightColor:color(255,0,0), #highlightAlpha:1, #shadowColor:color(0,255,0),
#shadowAlpha:0.5, #strength:1, #quality:2, #knockout:1, #inner:1])
Java Script Syntax:
var MyFilter = filter(symbol("BevelFilter"));
or
var MyFilter1 = filter(symbol("BevelFilter"),
propList(symbol("distance"),5,symbol("blurX"),10,symbol("blurY"),5,
symbol("angle"),50,symbol("strength"),4, symbol("highlightColor"),color(255,0,0),
symbol("highlightAlpha"), 0.5, symbol("shadowColor"),
color(0,255,0),symbol("quality"),3,symbol("knockout"),true,symbol("inner"),false));
or
var MyFilter2 =
filter(symbol("BevelFilter"),propList(symbol("distance"),5,symbol("blurX"),10,symbol("blurY"
),5, symbol("angle"),50,symbol("strength"),4, symbol("highlightColor"),color(255,0,0),
symbol("highlightAlpha"), 0.5, symbol("shadowColor"), color(0,255,0),symbol("quality"),3,
symbol("knockout"),true,symbol("inner"),false));
Property Description Value Range Default
BlurX:Number The amount of horizontal blur. 0-255 4
BlurY:Number The amount of vertical blur. 0-255 4
quality:Number The number of times to perform the blur. 0-15 1 (low)
strength:Number The strength of the imprint or spread. The higher the
value, the more color is imprinted and the stronger the
contrast between the glow and the background.
0-10 1.0
strengthPercent:
Number
0-1000 100
shadowColor:Color The shadow color of the bevel. RGB (0,0,0)
shadowAlpha:Number The alpha transparency value of the shadow color. 0-255 255
highlightColor:Number The highlight color of the bevel in the format
0xRRGGBB.
RGB (FF,FF,FF)
highlightAlpha:Number The alpha transparency value of the highlight color in
the format.
0-255 255
angle:Number The angle of the bevel. 0-360 45
distance:Number The offset distance of the bevel. -32 to +32 4
inner:Number 0-2 (0:Outer, 1:Inner, 2:Full) 1
knockout:Boolean Applies a knockout effect (true), which effectively
makes the sprite's fill transparent and reveals the
background color of the document.
True/false 1 (inner)
141
USING DIRECTOR 11.5
Bitmaps
Last updated 9/28/2011
Adjust Color filter
Use the Adjust Color filter to adjust the brightness, contrast, hue, and saturation of the selected sprite.
Adjust Color filter effect applied to a text sprite
Property summary
Lingo Syntax:
MyFilter=filter(#AdjustColorFilter)
or
MyFilter = filter(#AdjustColorFilter, [#contrast:5, #brightness:5, #saturation:-100, #hue:-180])
Java Script Syntax:
var MyFilter = filter(symbol("AdjustColorFilter"));
or
var MyFilter1 = filter(symbol("AdjustColorFilter"),
propList("brightness",5,"contrast",5,"saturation",50,"hue",50));
or
var MyFilter2 = filter(symbol("AdjustColorFilter"),
propList(symbol("saturation"),5,symbol("hue"),5,
symbol("brightness"),45,symbol("contrast"),40));
Gradient Glow filter
Use the Gradient Glow filter to apply a gradient glow effect to a variety of sprites. A gradient glow is a realistic-looking
glow with a color gradient that you can control. You can apply a gradient glow around the inner or outer edge of a
sprite or on top of a sprite.
Gradient glow filter applied to a text sprite
Gradient glow filter applied to a text sprite
Property Description Value Range Default
brightness:Number Adjusts the brightness of an image. -100 to 100 0
contrast:Number Adjusts the highlights, shadows, and
midtones of an image.
-100 to 100 0
saturation:Number Adjusts the intensity of a color. -100 to 100 0
hue:Number Adjusts the shade of a color. -180 to 180 0

142
USING DIRECTOR 11.5
Bitmaps
Last updated 9/28/2011
Property summary
Lingo Syntax:
MyFilter=filter(#GradientGlowFilter)
or
fil2 = filter(#GradientGlowFilter,[#distance:4,#BlurX:10, #BlurY:10,#quality:10, #angle:0,
#strength:10,#inner:0,#colorList:[newColorRatio(color(255,0,0),10),
newColorRatio(color(123,123,0),10)]])"
Java Script Syntax:
var MyFilter = filter(symbol("GradientGlowFilter"));
or
var fil2 = filter(symbol("GradientGlowFilter"), propList(symbol("BlurX"),20,
symbol("BlurY"),20, symbol("quality"), 10, symbol("distance"), 20, symbol("angle"), 30,
symbol("strength"), 40, symbol("strengthPercent"), 90, symbol("knockout"), 0, symbol("inner"),
1, symbol("colorList"),list(newColorRatio(color(255,0,0),10),
newColorRatio(color(123,123,0),10))));
Gradient bevel filter
Use the Gradient Bevel filter to apply a gradient bevel effect to various sprites. A gradient bevel is a beveled edge that
is enhanced with gradient color on the outside, inside, or top of an object. Beveled edges make objects look three-
dimensional.
Property Description Value Range Default
BlurX:Number The amount of horizontal blur. 0-255 4
BlurY:Number The amount of vertical blur. 0-255 4
quality:Number The number of times to apply the filter. 0-15 1 (low)
strength:Number The strength of the imprint or spread. 0-10 1
strengthPercent:Number 0-1000 100
colorList:List of new color
ratios
A list of newColorRatio values that defines a gradient. [newColorRatio(
Color(255,255,2
55), 0, 0),
newColorRatio(
Color(0, 0, 0),
255, 255)]
angle:Number The angle of the bevel. 0-360 45
distance:Number The offset distance of the glow. +32 to -32 4
inner:Number Indicates whether or not the shadow is an inner shadow. 0-2 (0:Outer, 1:Inner,
2:Full)
0 (outer)
knockout:Boolean Applies a knockout effect (true), which effectively makes the
sprite's fill transparent and reveals the background color of the
document.
True/false false

143
USING DIRECTOR 11.5
Bitmaps
Last updated 9/28/2011
Gradient bevel filter applied to a text sprite
Property summary
Lingo Syntax:
MyFilter=filter(#GradientBevelFilter)
or
fil1 = filter(#GradientBevelFilter,[#distance:4,#BlurX:10, #BlurY:10,#quality:1, #distance:7,
#angle:45, #strength:10,#inner:0,#colorList:[newColorRatio(color(255,0,0),255),
newColorRatio(color(0,255,0),255)]])"
Java Script Syntax:
var MyFilter = filter(symbol("GradientBevelFilter"));
or
var fil2 = filter(symbol(""GradientBevelFilter""), propList(symbol(""BlurX""),20,
symbol(""BlurY""),20, symbol(""quality""), 10, symbol(""distance""), 20, symbol(""angle""),
30, symbol(""strength""), 40, symbol(""strengthPercent""), 90, symbol(""knockout""),
0,symbol(""inner""), 1, symbol(""colorList""),list(newColorRatio(color(255,0,0),10),
newColorRatio(color(123,123,0),10))));
newColorRatio():
Property Description Value Range Default
BlurX:Number The amount of horizontal blur. 0-255 4
BlurY:Number The amount of vertical blur. 0-255 4
quality:Number The number of times to apply the filter. 0-15 1 (low)
strength:Number The strength of the imprint or spread. The higher the
value, the more color is imprinted and the stronger the
contrast between the glow and the background.
0-10 1
strengthPercent:Number 0-1000 100
colorListList of new color
ratios
A list of newColor ratio values to use in the gradient. [newColorRatio(Color(2
55,255,255), 0, 255),
newColorRatio(Color(25
5,00 255), 128, 0),
newColorRatio(Color(00
, 00, 00), 255, 255)]
angle:Number The angle of the bevel. 0-360 45
distance:Number The offset distance of the glow. -32 to +32 4
inner:Number The placement of the bevel effect. 0-2 (0:Outer, 1:Inner,
2:Full)
0 (Outer)
knockout:Boolean Applies a knockout effect (true), which effectively makes
the object's fill transparent and reveals the background
color of the document.
True/false false

144
USING DIRECTOR 11.5
Bitmaps
Last updated 9/28/2011
This is a combination of color, ratio and alpha properties, which is specified as part of the Gradient Bevel and Gradient
Glow filters.
Lingo Syntax:
newColorRatio(color(255,0,0), 24, 255)
ColorRatio object has the following properties:
Color
Ratio
Alpha
Drop Shadow filter
Use the Drop Shadow filter to add a drop shadow to a variety of sprites. Several style options are available, including
inner or outer shadow and knockout mode.
Drop shadow filter applied to a text sprite
Property summary
Lingo Syntax:
MyFilter=filter(#DropShadowFilter)
Property Description Value Range Default
BlurX:Number The amount of horizontal blur. 0-255 4
BlurY:Number The amount of vertical blur. 0-255 4
quality:Number The number of times to apply the filter. 0-15 1 (low)
strength:Number The strength of the imprint or spread. The
higher the value, the more color is
imprinted and the stronger the contrast
between the glow and the background.
0-10 1.0
strengthPercent:
Number
0-1000 100
color:Color The color of the shadow. RGB (0,0,0)
alpha:Number The alpha transparency value for the
shadow color.
0-255 255
angle:Number The angle of the bevel. 0-360 45
distance:Number The offset distance of the glow. -255 to +255 4
knockout:Boolean Applies a knockout effect (true), which
effectively makes the sprite's fill
transparent and reveals the background
color of the document.
True/false false
inner:Boolean Indicates whether or not the shadow is an
inner shadow.
True/false false
hideObject:
Boolean
Indicates whether or not the sprite is
hidden.
True/false false
145
USING DIRECTOR 11.5
Bitmaps
Last updated 9/28/2011
or
MyFilter1 = filter(#DropShadowFilter, [#distance:5, #angle:5, #color:color(20,20,30),
#alpha:0.5, #blurX:3, #blurY:50, #strength:3, #quality:3, #inner:1, #knockout:1,
#hideObject:1])
Java Script Syntax:
var MyFilter = filter(symbol("DropShadowFilter"));
or
var MyFilter1 = filter(symbol("DropShadowFilter"),
propList("distance",5, "angle",5, "color",color(20,20,30), "alpha",0.5, "blurX",3,
"blurY",50, "strength",3, "quality",3, "inner",1, "knockout",1, "hideObject",1));
or
var MyFilter2 = filter(symbol("DropShadowFilter"),
propList(symbol("shadowColor"),0xff0000,symbol("alphas"),list(20,30)));
Convolution Matrix filter
Use the Convolution Matrix filter to apply a matrix convolution filter effect. A convolution combines pixels in the
input image with neighboring pixels to produce an image. A wide variety of imaging operations can be achieved
through convolutions, including blurring, edge detection, sharpening, embossing, and beveling.
Convolution matrix filter for emboss effect applied to an image.
Original image
Property summary
Property Description Value Range Default
matrix:newMatrix The newMatrix object specifying values to be used
for matrix transformation.
1x1 matrix of value 1
bias:Number Add to the result of the matrix transformation -127 to +127 0
Divisor:Number The divisor used during matrix transformation 1-255 1
146
USING DIRECTOR 11.5
Bitmaps
Last updated 9/28/2011
Lingo Syntax:
-- This is an Embossing Effect
myList = [-2, -1, 0,-1, 1, 1, 0, 1, 2]
myMatrix = newMatrix(3,3,myList)
--myMatrix.setVal(3,3,0) -- Another way to set particular matrix element value
myFilter = filter(#ConvolutionMatrixFilter,[#matrix:myMatrix,#Bias:20, #Divisor:1,
#Color:rgb(251,0,0), #Alpha:128,#Clamp:1,#preserveAlpha:1])
sprite(1).filterlist.append(myFilter)
JavaScript Syntax:
// This is an Embossing Effect
myList = list(-2, -1, 0,-1, 1, 1, 0, 1, 2);
myMatrix = newMatrix(3,3,myList);
//myMatrix.setVal(3,3,0); // Another way to set particular matrix element value
myFilter =
filter(symbol("ConvolutionMatrixFilter"),propList(symbol("matrix"),myMatrix,symbol("Bias"),2
0,
symbol("Divisor"),1, symbol("Color"),rgb(251,0,0),
symbol("Alpha"),128,symbol("Clamp"),1,symbol("preserveAlpha"),1));
sprite(1).filterlist.append(myFilter);
Displacement Map filter
The Displacement Map filter uses the pixel values from the specified bitmap member’s image to perform a
displacement of a sprite. You can use this filter to achieve a warped or mottled effect.
Displacement map filter applied to an image sprite
Color:Color Color to substitute for pixels. RGB (0,0,0)
Alpha: Number The alpha transparency value of the substitute color 0-255 0
Clamp: Boolean Indicates whether the image should be clamped True/false true
PreserveAlpha:
Boolean
Indicates what the convolution applies to. True/false true
Property Description Value Range Default

147
USING DIRECTOR 11.5
Bitmaps
Last updated 9/28/2011
Property summary
Lingo Syntax:
MyFilter = filter(#DisplacementMapFilter, [#map:member("map"), #mapX:0, #mapY:0,
#componentX:#red, #componentY:#blue, #scaleX:20, #scaleY:20])
sprite("target").filterlist.append(MyFilter)
JavaScript Syntax:
MyFilter = filter(symbol("DisplacementMapFilter"),
propList(symbol("map"),member("map"), symbol("mapX"),0, symbol("mapY"),0,
symbol("componentX"),symbol("red"),
symbol("componentY"),symbol("blue"), symbol("scaleX"),20, symbol("scaleY"),20));
sprite("target").filterlist.append(MyFilter);
Re-order filters applied to a sprite
1Do one of the following:
•Open a Score, and select a sprite to which you have applied filters.
•In the Stage window, right-click a sprite to which you have applied filters.
The Property Inspector lists the filters in the Filters tab.
2Select the filter that you want to re-order.
3Use the Shuffle Up and Shuffle Down buttons to move the filter to a required position on the list.
Property Description Value Range Default
map:Member Bitmap member containing the Displacement map data. Bitmap Member
References
mapX - number Offset of left corner of the target image from the left corner of the map
image.
0
mapY - number Offset of top corner of the target image from the top corner of the map
image.
0
Comp X:Symbol Describes which color channel to use in the map image to displace the X
result.
#none, #red, #green,
#blue, #alpha.
#none.
Comp Y:Symbol Describes which color channel to use in the map image to displace the Y
result.
#none, #red, #green,
#blue, #alpha.
#none.
Scale X: Number The multiplier to use to scale the X displacement result from the map
calculation
0
Scale Y: Number The multiplier to use to scale the Y displacement result from the map
calculation
0
Mode: Number Determines what Director should do in any empty spaces created by pixels
being shifted away. To display the original pixels (filter mode Ignore), to
wrap the pixels around from the other side of the image (filter mode Wrap
which is the default), to use the nearest shifted pixel (filter mode Clamp), or
to fill in the spaces with a color (filter mode Color. For scripting, values can
be defined as 0(Wrap), 1(Clamp), 2(Ignore), 3(Color
0(Wrap), 1(Clamp),
2(Ignore), 3(Color)
0 (Wrap)
color:Color Specifies the color to use for out-of-bounds displacements. RGB (0,0,0)
alpha:Number Specifies the alpha value to use for out-of-bounds displacements. 0-255 0

148
USING DIRECTOR 11.5
Bitmaps
Last updated 9/28/2011
Enable or disable all filters for a sprite
By default, all filters applied to sprites are enabled.
1Click to select the frame in a Score where the sprite has been created. The Filters tab appears in the Property
Inspector.
2Click the Filters tab. All filters applied to the sprite or cast member appear.
3Click the Filters popup, and select Disable All. The effects of all filters applied to the selected sprite or cast member
are no longer visible. A red cross mark appears beside the filter title in the Filters tab.
4Click the Filters popup, and select Enable All. A green check mark appears beside the filter title in the Filters tab.
Enable or disable a filter applied to a sprite, using Lingo/JavaScript
//Enable Filter 1
sprite(1).filterlist[1].Enabled=true
//Disable Filter 1
sprite(1).filterlist[1].Enabled=false
Remove filters applied to a sprite
You can remove a specific filter you have applied to a sprite or remove all filters applied to a sprite.
1In the Property Inspector, click the Filters tab. All filters applied to a selected sprite are listed.
2Do one of the following:
•Select a filter from the list, click the Plus button and select Remove Filter from the pop-up menu. The selected
filter is removed from the list.
•Click the Plus button and select Remove All Filters from the pop-up menu. All filters are removed from the list.
Remove a filter applied to a sprite, using Lingo/JavaScript
In Lingo
- sprite(1).filterlist.deleteAt(sprite(1).filterlist.count()) OR
- sprite(1).filterlist.deleteAt(2) OR
- sprite(1).filterlist.deleteall() OR
- sprite(1).filterlist.deleteAt(-5)
In JavaScript
sprite(1).filterlist.deleteAt(sprite(1).filterlist.count());
Find filters applied to a sprite
Put sprite(1).filterlist[1].filtertype
Create custom filters
Create custom filters by writing an Xtra that implements the IMoaBitmapFilter interface. Custom filters appear in the
Filters tab. To modify their properties, use options in the filters tab.
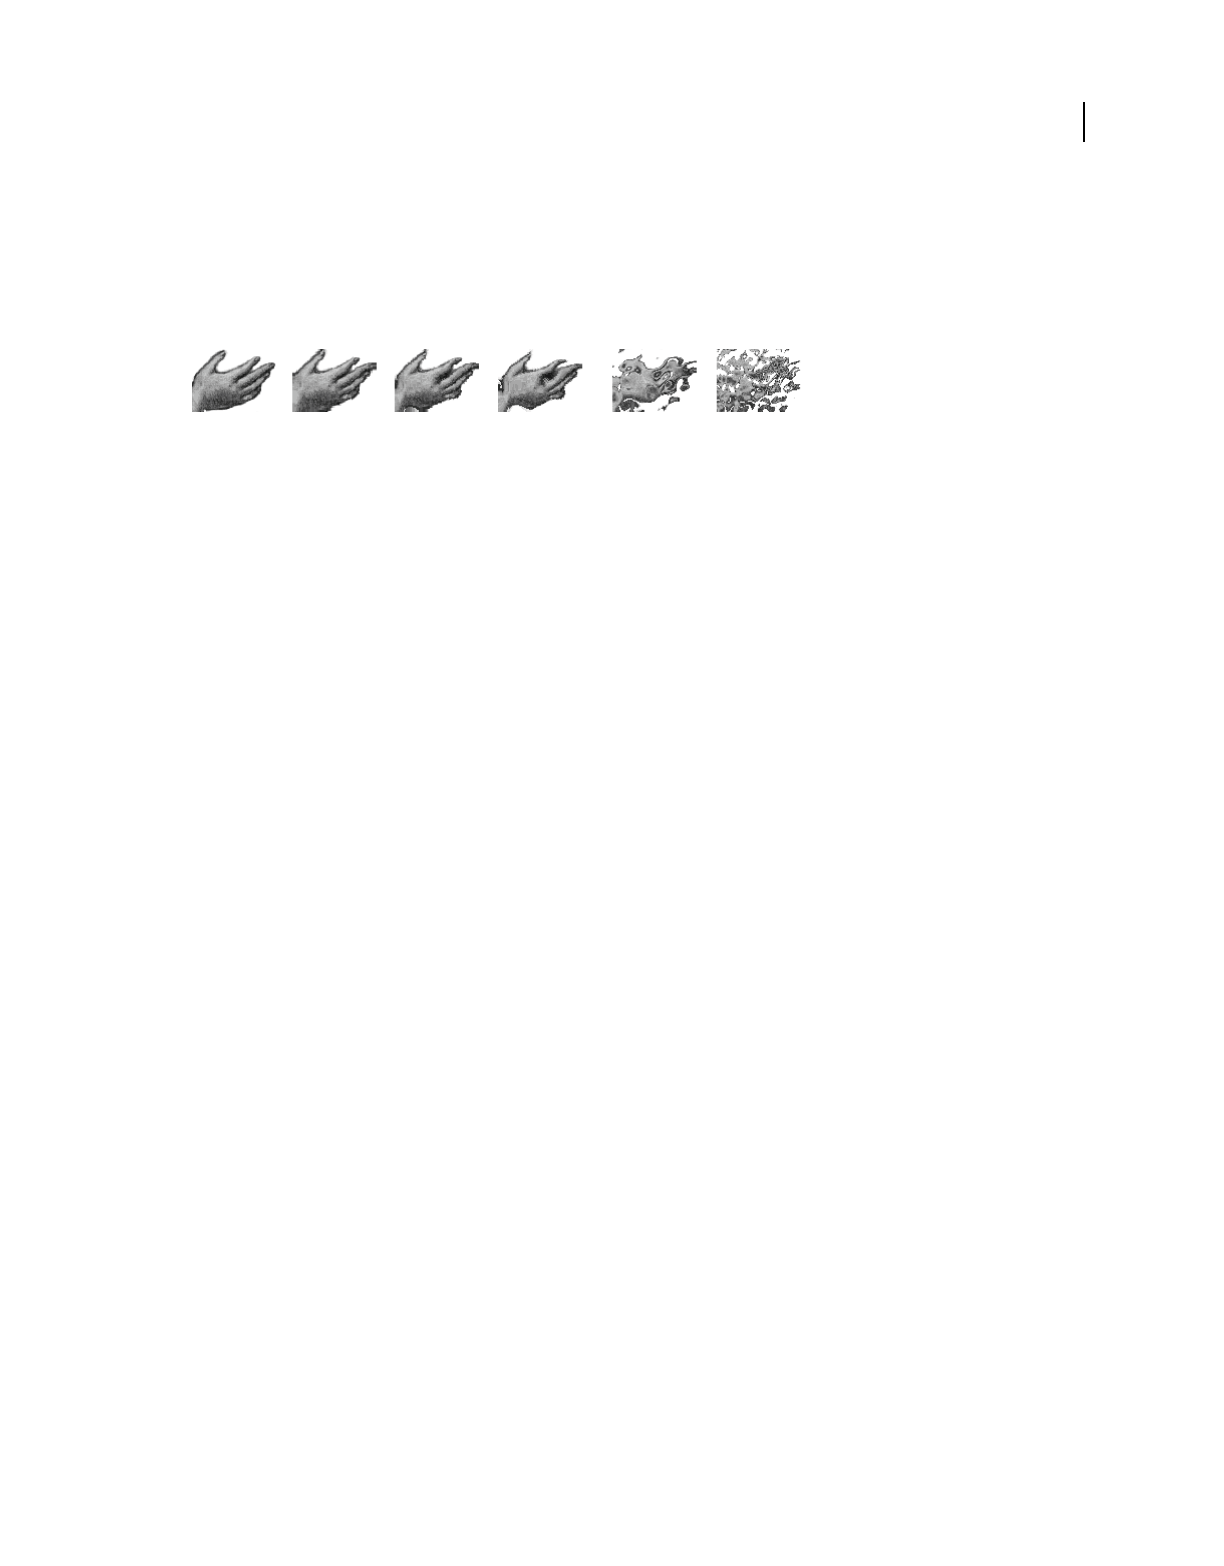
149
USING DIRECTOR 11.5
Bitmaps
Last updated 9/28/2011
Using filters to create animated effects
You can use Auto Filter to create dramatic animated effects with bitmap filters. Auto Filter applies a filter
incrementally to a series of cast members. You can use it either to change a range of selected cast members or to
generate a series of new filtered cast members based on a single image. When you define a beginning and ending
setting for the filter, Auto Filter applies an intermediate filter value to each cast member.
You can tween a bitmap filter with Auto Filter.
Note: Most filters don’t support auto-filtering. The Auto Filter dialog box lists only those filters that support it.
1Select a bitmap cast member or a range of cast members, and select Xtras > Auto Filter.
If you want to change only a portion of a bitmap cast member, use the Marquee or the Lasso tool in the Paint
window to select the part you want to change.
2In the Auto Filter dialog box, select a filter.
3Click Set Starting Values, and use the filter controls to enter filter settings for the first cast member in the sequence.
When you finish working with the filter controls, the Auto Filter dialog box reappears.
4Click Set Ending Values, and use the filter controls to enter filter settings for the last cast member in the sequence.
5Enter the number of new cast members you want to create. The text box is not available if you selected a range of
cast members.
6Click Filter to begin the filtering.
A message appears to show the progress. Some filters are complex and require extra time for computing.
Auto Filter generates new cast members and places them in empty cast positions after the selected cast member. If you
selected a range of cast members, no new cast members appear, but the cast members in the range you selected are
changed incrementally

150
Last updated 9/28/2011
Chapter 7: Vector Shapes
About vector shapes
Vector shapes and bitmaps are the two main types of graphics used with Adobe® Director®. A vector shape is a
mathematical description of a geometric form that includes the thickness of the line, the fill color, and additional
features of the line that can be expressed mathematically. A bitmap defines an image as a grid of colored pixels, and it
stores the color for each pixel in the image. For more information about using bitmaps in Director, and how they
compare to vector shapes, see “Bitmaps” on page 104.
You can create vector shapes in the Director Vector Shape window by defining points through which a line passes. The
shape can be a line, a curve, or an open or closed irregular shape that can be filled with a color or gradient. You can
also use Lingo or JavaScript™ syntax to dynamically create and control vector shapes. You can create a vector shape
entirely with script or modify an existing one as the movie plays.
Because vector shapes are stored as mathematical descriptions, they require less RAM and disk space than an
equivalent bitmap image, and they download faster from the Internet.
Drawing vector shapes
You create vector shapes with drawing tools in the Vector Shape window. You can use the Pen tool to create irregular
shapes or use the shape tools to create rectangles and ellipses. A vector shape can include multiple curves, and you can
split and join the curves. Shape properties such as fill color, stroke color, and stroke width are set at the cast-member
level and not for individual curves.
When you create vector shapes, you create vertices, which are fixed points. You can also create handles, which are
points that determine the degree of curvature between vertices. These curves are known as Bézier curves. A vertex
without a handle creates a corner.
As you draw vector shapes, control handles appear on the vertices: round curve points for vertices with handles and
square corner points for vertices without handles.
Control handles on vertices
•The first vertex in a curve is green.
•The last vertex in a curve is red.
•All other vertices are blue.
•Unselected vertices are solid.
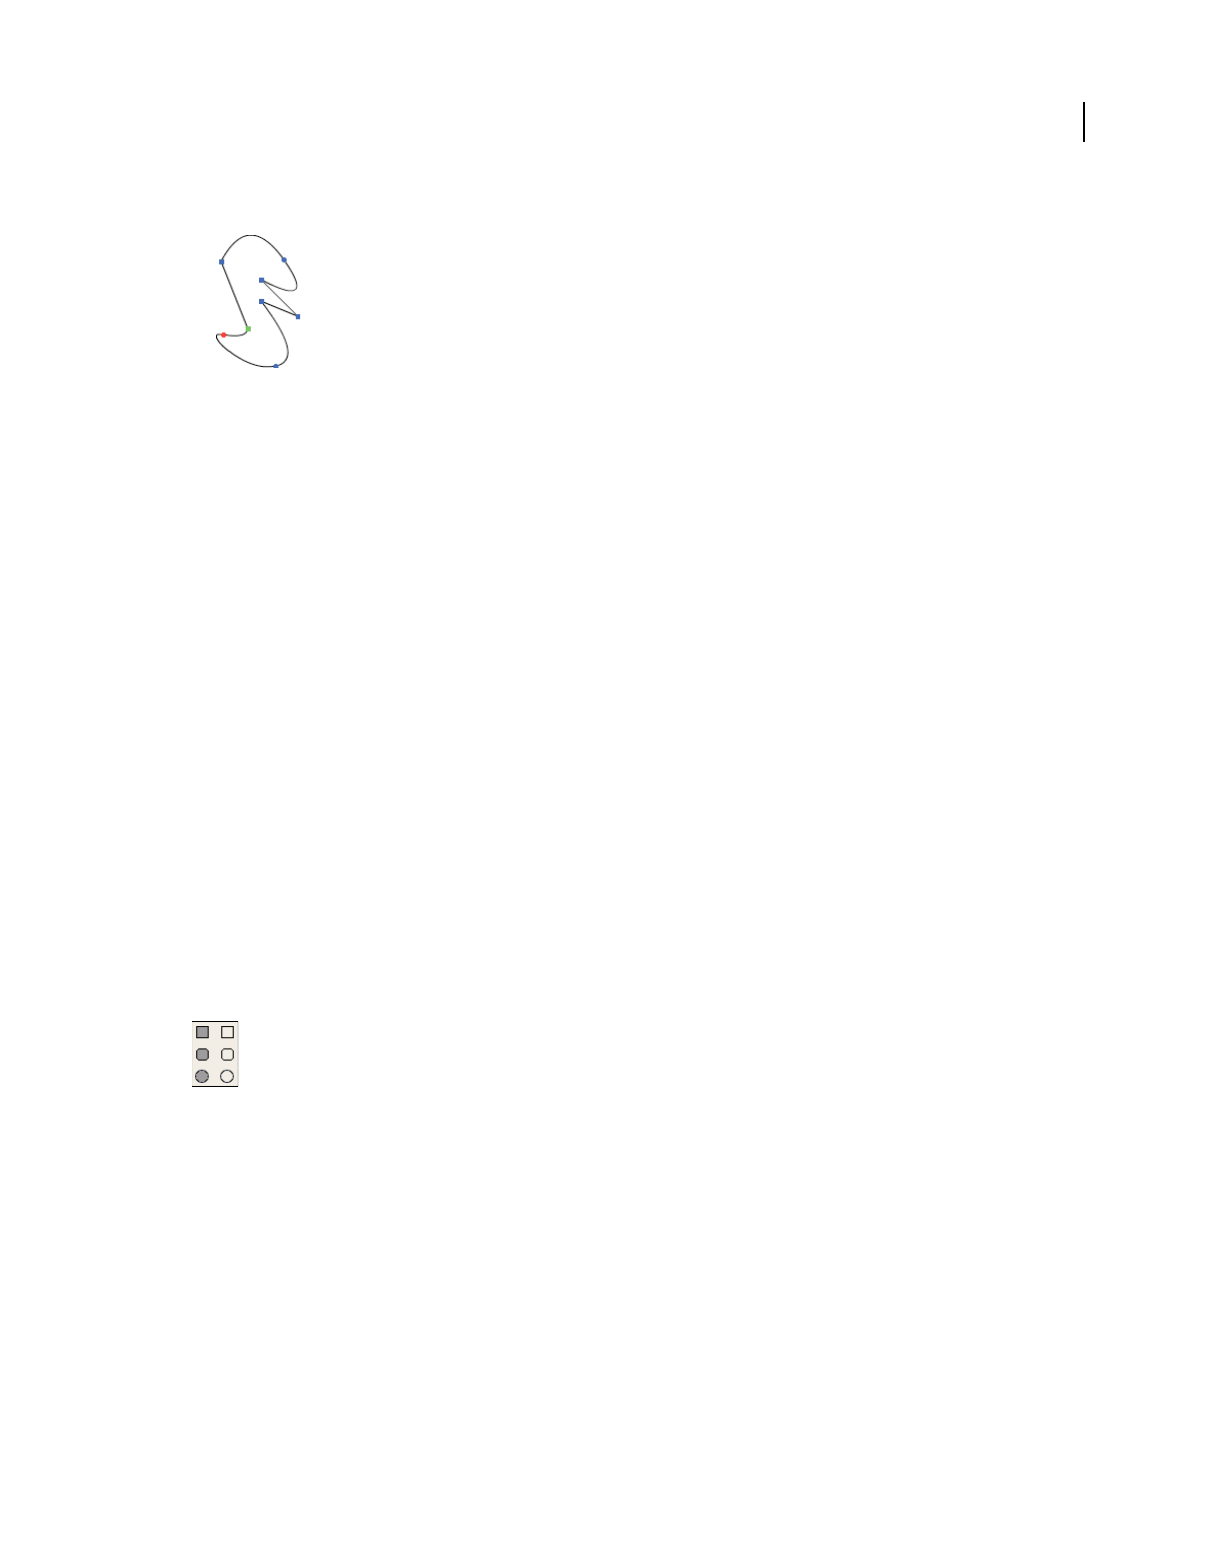
151
USING DIRECTOR 11.5
Vector Shapes
Last updated 9/28/2011
•Selected vertices are unfilled.
To open the Vector Shape window, Select Window > Vector Shape.
Zooming in and out in the Vector Shape window
You can use the Magnify tool or the Zoom commands on the View menu to zoom in or out at four levels of
magnification.
Zoom in or out
Do one of the following:
•Select View > Zoom and then select the level of magnification.
•Right-click (Windows®) or Control-click (Mac®) and select Zoom In or Zoom Out from the context menu.
•Press Control + the Plus (+) key (Windows) or Command + the Plus (+) key (Mac) to zoom in, or Control + the
Minus (-) key (Windows) or Command + the Minus (-) key (Mac) to zoom out.
Return to normal view
❖Select View > Zoom > 100%.
Using vector shape drawing tools
Use the tools in the Vector Shape window to draw free-form shapes or geometric figures. You can define a shape with
the Pen tool by creating curve or corner points that the lines pass through.
To draw regular shapes, use the Rectangle, Rounded Rectangle, and Ellipse tools.
Rectangle, Rounded Rectangle, and Ellipse tools
Create a vector shape by using the Pen tool
1In the Vector Shape window, click the New Cast Member button.
2Click the Pen tool and begin to draw:
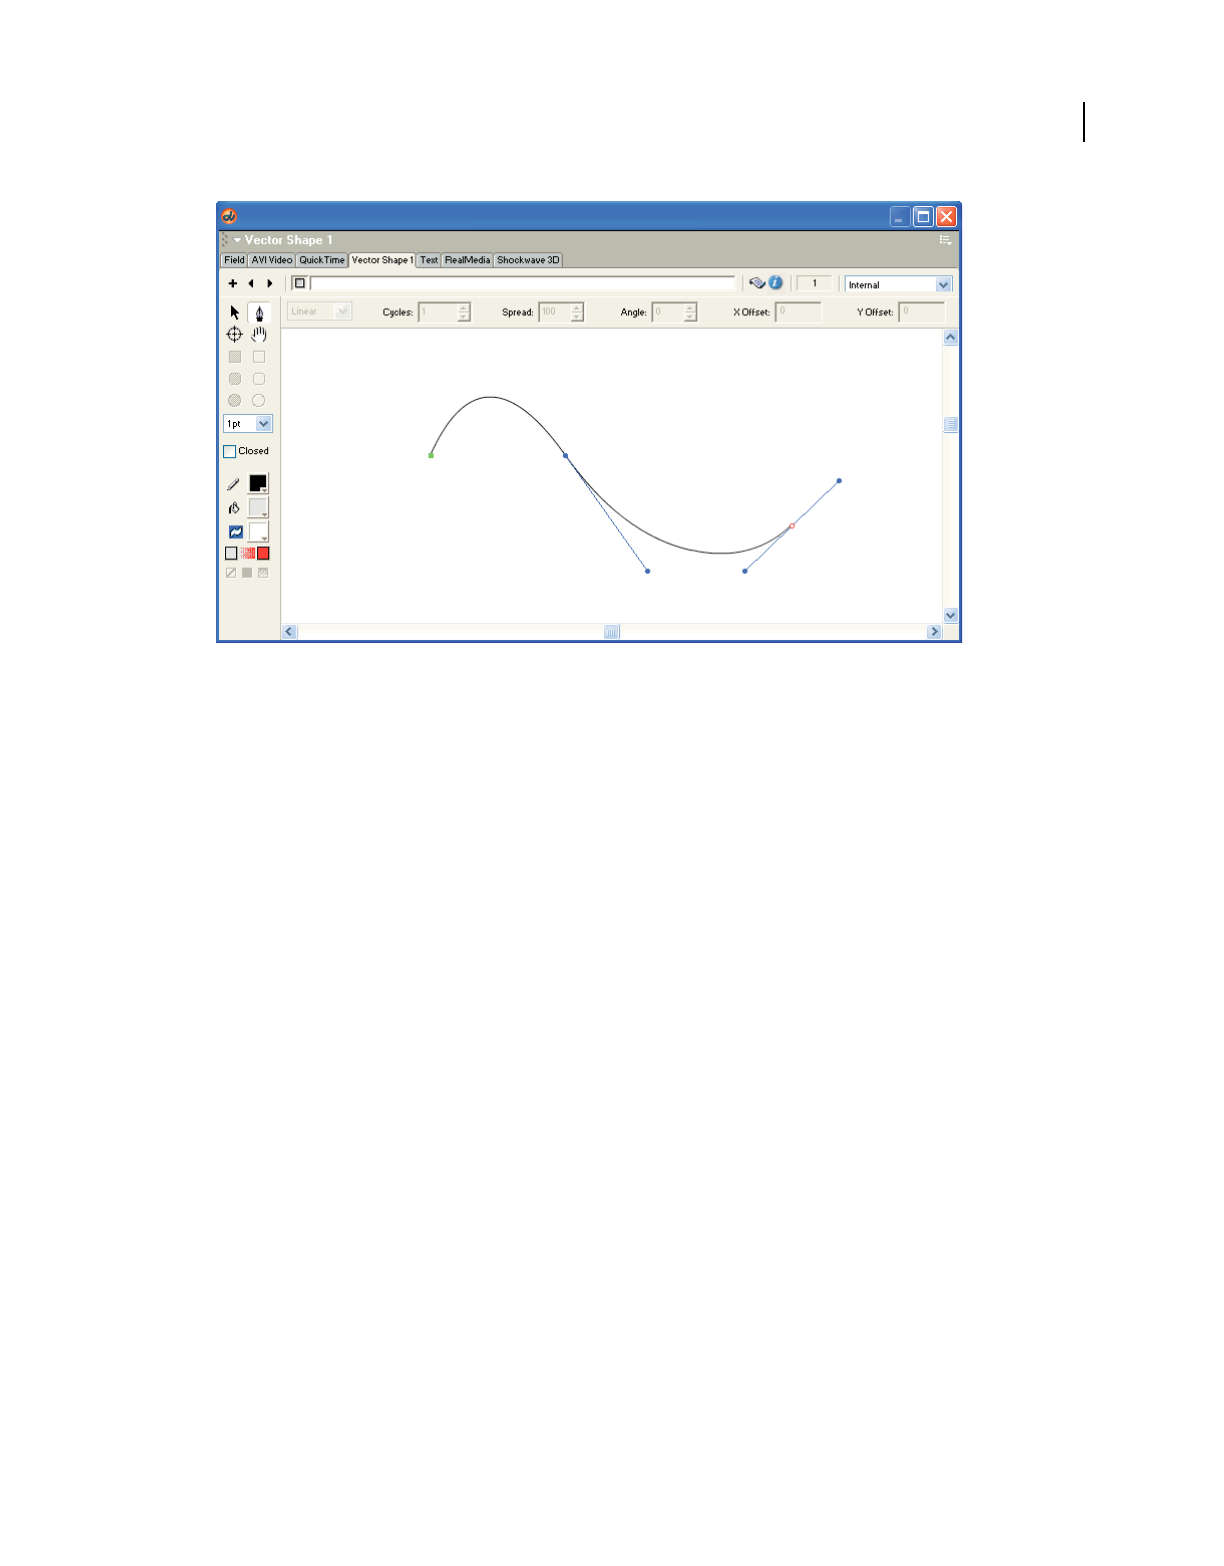
152
USING DIRECTOR 11.5
Vector Shapes
Last updated 9/28/2011
Drawing with the Pen tool
•To create a corner point, click once.
•To create a curve point, click and drag. Dragging creates control handles that define how the line curves through
the point that you define.
•To constrain a new point to vertical, horizontal, or a 45BADCHAR angle, hold down Shift while clicking.
Draw by using a basic shape tool
1In the Vector Shape window, click the New Cast Member button.
2Select the Filled or Unfilled Rectangle, Rounded Rectangle, or Ellipse tool.
3Hold down the mouse button to start a shape, drag to draw, and release the mouse button to end the shape.
To constrain a rectangle to a square, or to constrain an ellipse to a circle, hold down Shift while dragging.
Select a vertex or vertices
Do one of the following:
•To select one vertex, select the Arrow tool and click the vertex.
•To select multiple vertices, either select the Arrow tool and hold Shift while clicking the vertices, or click and drag
a selection rectangle over the vertices (marquee-select).
•To select all the vertices in a curve, select the Arrow tool and double-click one of the vertices in the curve.
Create multiple curves
Do one of the following:
•If you use the Pen tool, double-click the last vertex drawn. The next vertex starts a new curve.
•With no vertices selected, use the Pen tool to start a new curve.
•To create two separate curves from one, select two adjacent vertices in a curve and select Modify > Split Curve.
•If the current shape is empty or closed, select one of the shape tools and draw a new shape.
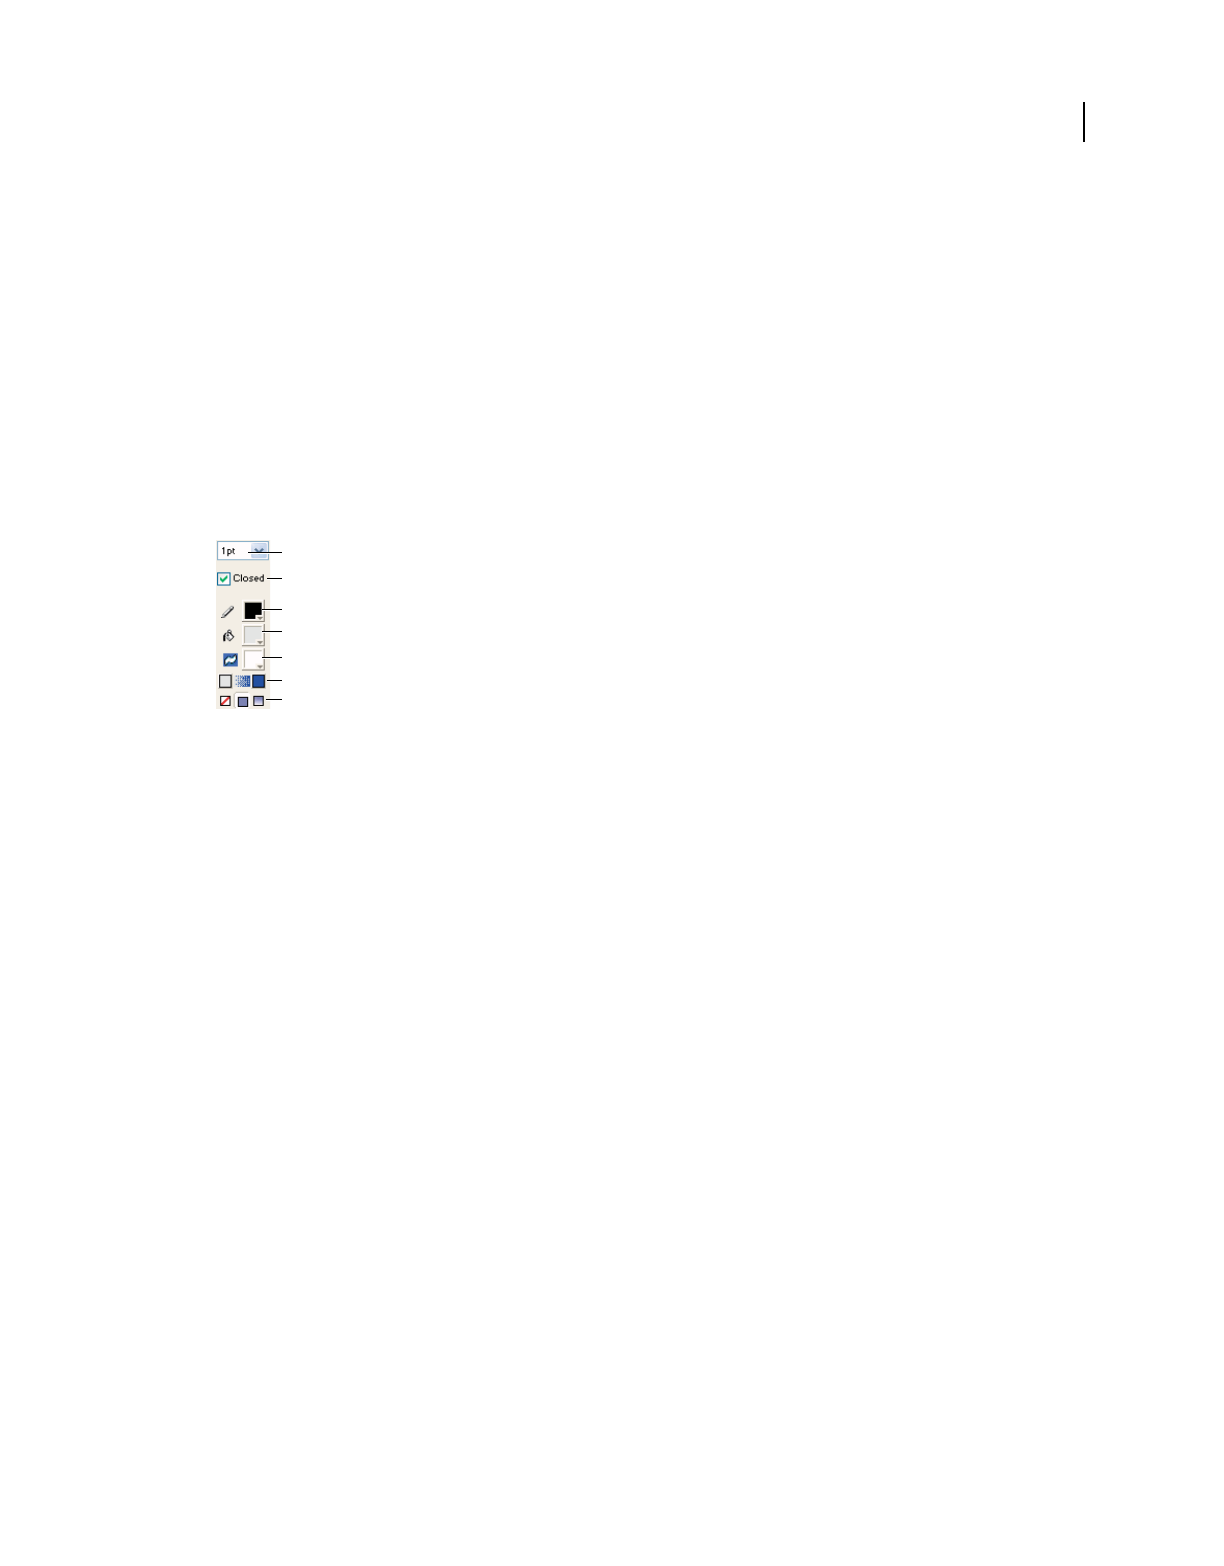
153
USING DIRECTOR 11.5
Vector Shapes
Last updated 9/28/2011
Note: If you create multiple shapes in the Vector Shape window, Director treats all the shapes as one if you change
shape attributes. If, for example, you create 10 open shapes in one Vector Shape window and select Close, Director
closes all 10 shapes.
Choosing fill and line settings for vector shapes
Use controls in either the Vector Shape window or Lingo or JavaScript syntax to choose a vector shape’s fill color, line
width and color, and background color. The background is the area outside of a vector shape but within the cast
member’s bounding rectangle.
Because a vector shape is a single object, you don’t need to select any part of the vector shape.
1Open a vector shape in the Vector Shape window.
2Select fill and line settings by using the appropriate controls at the left of the window.
Controls for fill and line settings
A. Line width B. Closed control C. Line color D. Fill color E. Background color F. Gradient color controls G. Fill type controls
•To set the line width, select a point size option from the Line Width menu.
•To close or open vector shapes, select or deselect the Closed option. (For more information, see “Editing vector
shapes” on page 154.)
•To choose the line color, select a color from the Line Color menu.
•To choose the fill color, select a color from the Fill Color menu.
•To set the background color, select a color from the Background Color menu. Choosing a background color that
matches the color of the background results in better performance than using Background Transparent ink.
•To set gradient fill colors, select colors from the Gradient Colors control. For more information about creating
gradient fill, see “Editing vector shapes” on page 154.
•To set the fill type, select from the following Fill type control options: No Fill, Solid, or Gradient.
Specifying vector shape fills and strokes with Lingo or JavaScript syntax
You can script in Lingo or JavaScript syntax to specify a vector shape’s fills and strokes.
Specify the strokes that form a vector shape in script
❖Set the strokeColor and strokeWidth cast member properties. For more information about these properties, see
the Scripting Reference topics in the Director Help Panel.
Specify a vector shape’s fill in script
❖Set the fillColor, fillMode, fillOffset, and fillScale cast member properties. For more information about
these properties, see the Scripting Reference topics in the Director Help Panel.
A
B
C
D
E
F
G

154
USING DIRECTOR 11.5
Vector Shapes
Last updated 9/28/2011
Editing vector shapes
To edit vector shapes, use the Vector Shape window. Change vector shapes by moving, adding, or deleting control
points and changing the way they control curves. You can also change the way a vector shape is placed on the Stage by
moving its registration point, using either the Vector Shape window or Lingo or JavaScript syntax.
Adjust the outline of a vector shape
1Open a vector shape in the Vector Shape window.
2Click the Arrow tool and make any of the following changes:
•To move a curve or corner point, drag it to any location.
•To move multiple points, Shift-click to select all the points you want to move, and then drag any one of the
selected points.
•To drag a single curve within a shape, select the Arrow tool and drag the curve. If the curve is filled, click
anywhere within the filled area and drag the curve.
•To adjust a curve, select a curve point and drag a control handle.
By default, the two control handles remain at a 180BADCHAR angle from each other. If you want to drag one
control handle independently from the other one, hold down Control (Windows) or Command (Mac) when
you drag it. To constrain the control handles to vertical, horizontal, or a 45BADCHAR angle, hold down Shift
as you move the handles.
•To change a corner point to a curve point, Alt-click (Windows) or Option-click (Mac) and drag away from the
handle to extend a control handle.
•To change a curve point to a corner point, drag the control handles directly over the curve point.
•To delete a point, select the point and press Backspace (Windows) or Delete (Mac).
•To move the window view without using the scroll bars, click the Hand tool and drag anywhere inside the shape.
Add a point in the middle of a shape
1Open a vector shape in the Vector Shape window.
2Click the Pen tool.
3If the shape is closed, move the pointer over a line until it changes and then click the mouse button. If the shape is
open, hold down Alt (Windows) or Option (Mac) and move the pointer over a line until it changes; then click the
mouse button.
Add a new point that is connected to a certain end point
1Click the Arrow tool and select an end point.
2Click the Pen tool, and click the location where you want to add the next point.
Join two curves
1Select a vertex in each curve.
If you select two endpoint vertices, you join them. If you select points in the middle of the curve, you join the start
of the second curve to the end of the first curve.
155
USING DIRECTOR 11.5
Vector Shapes
Last updated 9/28/2011
2Select Modify > Join Curves.
Split two curves
❖Select two adjacent vertices, and select Modify > Split Curves.
Change the registration point
1Click the Registration Point tool
The dotted lines in the window intersect at the registration point. The default registration point is the center of the
cast member.
The pointer changes to a cross hair when you move it to the window.
2Click to set the new registration point.
You can also drag the dotted lines around the window to reposition the registration point.
3To reset the default registration point at the center of the cast member, double-click the Registration Point tool.
Change a vector shape cast member’s registration point in Lingo or JavaScript
syntax
❖Set the regPoint or regPointVertex cast member property. Test the centerRegPoint property to determine
whether Director automatically recenters the registration point when the cast member is edited. (If you specify a
value for regPointVertex, any values in the regPoint and centerRegPoint properties are ignored.) For more
information about these properties, see the Scripting Reference topics in the Director Help Panel.
Close or open vector shapes
❖Select or deselect the Closed check box at the left side of the window.
If the shape is closed, Director draws a line between the last and first points defined. If it’s open, Director removes
the line between the last and first points.
Close a shape with Lingo or JavaScript syntax
❖Set the closed cast member property to true. For more information about this property, see the Scripting
Reference topics in the Director Help Panel.
Scale a vector shape
❖Control-Alt-drag (Windows) or Command-Option-drag (Mac) to proportionally resize a vector shape.
You can also enter a scaling percentage for a vector shape by using the Cast Member Properties dialog box. For
more information, see “Setting vector shape properties” on page 157.
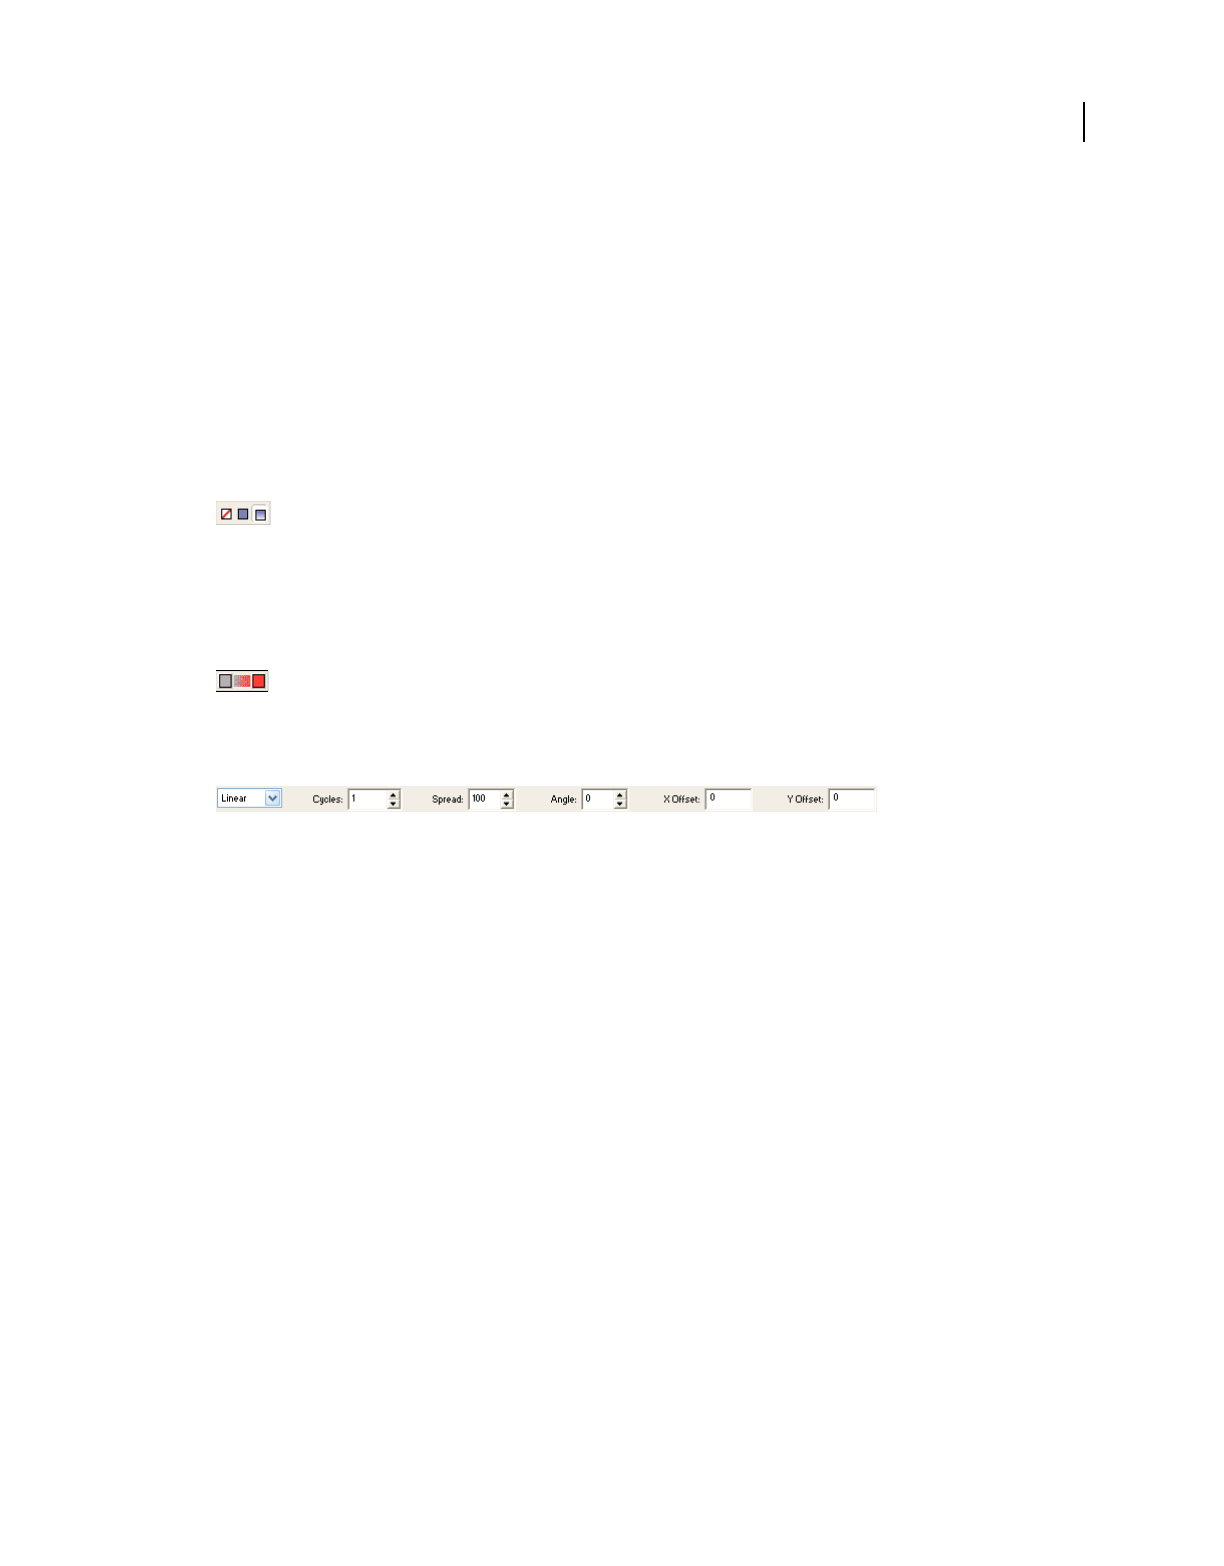
156
USING DIRECTOR 11.5
Vector Shapes
Last updated 9/28/2011
Defining gradients for vector shapes
Use controls in the Vector Shape window or Lingo or JavaScript syntax to specify the type of gradient, how it is placed
within a shape, and how many times it cycles within the shape. A gradient for a vector shape shifts between the fill color
and the end color you define. You can create linear or radial gradients. Changes you make to vector shape gradients
have no effect on gradients for bitmaps in the Paint window. You can fill only closed vector shapes with gradients.
Define a gradient for a vector shape
1Create a closed vector shape in the Vector Shape window.
2Click the Gradient button in the Fill type controls.
Gradient button in the Fille type controls
3To select colors for the gradient, click the color box on the left side of the Gradient Colors control and select a
starting color from the Color menu. To select the ending color, repeat this step, using the color box on the right side
of the Gradient Colors control.
Gradient Colors control
4Select Linear or Radial from the Gradient Type menu at the top of the window.
5To define the number of times the gradient should change colors within the shape, use the Cycles control.
6To specify the rate at which the gradient shifts between colors, use the Spread control to enter a percentage.
A setting of 100% uses the entire width or height of the shape to gradually shift colors. Lower settings make the shift
more abrupt. For settings over 100%, the end color is reached at a theoretical location beyond the edges of the shape.
7To rotate the gradient within the shape, use the Angle control to enter the number of degrees.
This setting affects only linear gradients.
8To offset the gradient within the shape, enter X Offset (horizontal) and Y Offset (vertical) values.
Specify a gradient in Lingo or JavaScript syntax
❖Set the fillColor, fillDirection, fillMode, fillOffset, fillScale, gradientType, and endColor cast
member properties. For more information about these properties, see the Scripting Reference topics in the Director
Help Panel.

157
USING DIRECTOR 11.5
Vector Shapes
Last updated 9/28/2011
Controlling vector shapes with Lingo or JavaScript
syntax
Use script to modify a vector shape by setting properties and using methods related to the shape’s vertices. For more
information about the following properties, expressions, and methods, see the Scripting Reference topics in the
Director Help Panel.
•To display a list that contains the location of each vertex and control handle in a vector shape, test the vertexList
property.
•To access a vertex directly, use the vertex chunk expression.
•To add or delete a vertex, use the addVertex() or deleteVertex() method.
•To move a vertex or a vertex handle, use the moveVertex() or moveVertexHandle() method.
•To display the vertex list for a vector shape, test the curve property.
•To add a new shape to the vector shape, use the newCurve() method.
•To display or specify the registration point for the vector shape’s cast member, test or set the regPointVertex
property.
•To display or specify the point around which a vector shape scales and rotates, test or set the originMode property.
Setting vector shape properties
Use the Property inspector to view and change settings for selected vector shape cast members. In addition to setting
standard name and unload properties, you can specify anti-aliasing based on system performance and how the shape
fits within the bounding rectangle.
1Select a vector shape cast member and click the Member tab on the Property inspector.
2To specify how Director removes the cast member from memory if memory is low, be sure you’re in Graphical view
and select an option from the Unload menu. For more information, see “Controlling cast member unloading” on
page 46.
3To set specific vector shape settings, click the Vector tab.
4To set the stroke color, choose a color from the Color menu, or enter a color value in the Stroke Color text box.
5To set the width of the stroke, use the Width slider.
6To set the fill color, select a color from the Color menu, or enter a color value in the Fill Color text box.
7To set the type of fill, select one of these three options: No Fill, Solid, or Gradient.
8To change the setting for anti-aliasing, click Anti-alias.
A check mark indicates that Anti-alias is on.
9To specify how vector shapes are scaled on the Stage, select an option from the Scale Mode pop-up menu.
Show All Maintains the vector shape’s aspect ratio and, if necessary, fills in any gap along the horizontal or vertical
dimension, using the vector shape’s background color.
No Border Maintains the vector shape’s aspect ratio by cropping the horizontal or vertical dimension as necessary
without leaving a border.
Exact Fit Stretches the vector shape to fit the sprite exactly, disregarding the aspect ratio.

158
USING DIRECTOR 11.5
Vector Shapes
Last updated 9/28/2011
Auto Size Adjusts the vector shape’s bounding rectangle to fit the movie when it is rotated, skewed, or flipped.
No Scale Places the vector shape on the Stage with no scaling. The movie stays the same size, no matter how you
resize the sprite, even if it means cropping the vector shape.
10 To change the size of the cast member, either enter a percentage in the Percentage text box (Graphical view) or use
the Scale slider (List view) to determine a percentage.
Using shapes
Shape cast members are the same nonanti-aliased shapes that were available in older versions of Director. Shapes are
different cast member types than vector shapes. Similar to vector shapes, they are very memory-efficient.
Shapes are images you create directly on the Stage with the Line, Rectangle, Rounded Rectangle, and Ellipse tools on
the Tool palette. Fill shapes with a color, pattern, or custom tile. Shapes require even less memory than vector shapes,
but Director does not anti-alias shapes, so they don’t appear as smooth on the Stage as vector shapes. Use shapes for
creating simple graphics and backgrounds when you want to keep your movie as small as possible. Shapes are
especially useful for filling an area with a custom tile to create an interesting background that downloads quickly from
the Internet. For more information, see “Creating a custom tile” on page 124.
1Select a frame in the Score where you want to draw a shape.
2Select a shape, color, line thickness, and pattern setting with the controls in the Tool palette. (To open the Tool
palette, select Window > Tool Palette, and select either Classic or Default view; shapes are not available in the Flash®
component view.)
3Click a tool and then drag on the Stage to draw the shape.
The new shape appears on the Stage and in the Cast window.
Setting shape cast member properties
Use cast member properties to view and change settings for selected shape cast members. You can change the type of
shape and choose a new fill color or pattern. You can also use Lingo or JavaScript syntax to control shape cast member
properties.
View or change shape cast member properties
1Select a shape cast member and open the Property inspector in Graphical view.
2Use the Name text box on the Member tab to view or edit the cast member name.
3To specify how Director removes the cast member from memory if memory is low, select an option from the
Unload menu. For more information, see “Controlling cast member unloading” on page 46.
4To change the type of shape, click the Shape tab and select an option from the Shape menu.
5To fill the shape with the current color and pattern, select Filled.
Specify a shape’s type in Lingo or JavaScript syntax
❖Set the shapeType cast member property. For more information about this property, see the Scripting Reference
topics in the Director Help Panel.

159
USING DIRECTOR 11.5
Vector Shapes
Last updated 9/28/2011
Specify a shape’s fill in Lingo or JavaScript syntax
❖Set the filled and pattern shape cast member properties. For more information about these properties, see the
Scripting Reference topics in the Director Help Panel.
Specify the line size for a shape in Lingo or JavaScript syntax
❖Set the lineSize cast member or sprite property. For more information, see the Scripting Reference topics in the
Director Help Panel.

160
Last updated 9/28/2011
Chapter 8: Color, Tempo, and Transitions
Introduction
Several behind-the-scenes functions in Adobe® Director® are important to the appearance and performance of a movie.
To control the way Director manages colors, it’s important to understand the difference between RGB and index color,
and how to assign colors to various elements in your movie. See “Controlling color” on page 160.
To control the speed at which your movie plays, use settings in the tempo channel. For more information, see “About
tempo” on page 170.
To make scenes in your movie flow together without creating the animation yourself, use predefined transitions. For
more information, see “Using transitions” on page 172.
All these features involve using the channels at the top of the Score.
Controlling color
Selecting colors for movie elements is as simple as making a selection from a menu. To make sure that the colors you
select appear correctly on as many systems as possible, it helps to understand how Director controls color.
Director provides a variety of color controls. The following list describes the most important color controls:
•Use the Movie tab in the Property inspector to change modes for selecting colors. Click either the RGB or Index
radio button. (RGB assigns to the movie all color values as absolute RGB values. Index assigns color to the movie
according to its position in the current palette.)
•Use the pop-up Color menu to select colors for movie elements. The Color menu is available throughout the
Director application—for example, in the Tool palette.
•Use Transform Bitmap to re-map bitmap images to new palettes and change their color depth. You can also make
the same changes when you import a bitmap. For more information, see “Changing size, color depth, and color
palette for bitmaps” on page 117, and “About importing bitmaps” on page 104.
•Use the Score’s palette channel to change the movie’s color palette as a movie plays.
•Use the Color Palettes window to change the colors in a color palette or to create a custom color palette cast
member.
Specifying palette index and RGB color
Director can use either palette index values or RGB values to specify colors. RGB values are much more reliable and
accurate for specifying colors than palette index values. Most web pages use RGB values.
Director identifies a palette index color by the number of its position in a set of colors called a color palette. Color
number 12, for example, might be blue. If a different palette is active, color number 12 might be red. When a computer
is set to display 256 colors or fewer, it can display only the colors in the palette that is currently active in the system.
This means that images created to display with the colors of one palette do not appear correctly when a different palette
is active. If you use palette index color in a movie and then switch palettes during the movie, or if you don’t confirm
that the correct palette is active, the images in your movie might appear with the wrong colors.

161
USING DIRECTOR 11.5
Color, Tempo, and Transitions
Last updated 9/28/2011
Director identifies an RGB color as a set of hexadecimal numbers that specify the amounts of red, green, and blue
required to create the color. When a computer is set to display thousands or millions of colors, Director always displays
RGB colors accurately. When a computer is set to 256 colors, Director finds the closest color in the current color palette
to approximate the RGB color.
To choose the color mode for the current movie, use the Color Mode settings on the Movie tab of the Property
inspector. When you select RGB, all the colors you select from the Color menu in Director are specified in RGB values.
When you select Index, the colors you choose are specified according to their position in the current palette. The Color
menu indicates which method is being used.
1Display the Movie tab of the Property inspector.
Property inspector - Movie tab
A. Stage color B. Color mode settings
2Select either RGB or Index.
Changing the color depth of a movie
When you save a Director movie in Windows®, it is set to the same color depth as the system on which you are
authoring. Use Lingo or JavaScript™ syntax to reset the system color depth to match the color depth of a movie. For
more information, see the Scripting Reference topics in the Director Help Panel.
If you want to set the color depth of a movie without using script, use system utilities to change the color depth of your
system before you save the movie file.
On a Mac®, you can also make the movie reset the system color depth by selecting Edit > Preferences > General and
selecting Reset Monitor To Movie’s Color Depth. (If you are using a Mac OS® X operating system, select the Director
menu, instead of the Edit menu, to access Preferences.)
Choosing colors for movie elements
Use the Color menu to select colors for movie elements such as the Stage, vector shapes, and the foreground and
background of sprites. For some elements, such as Stage and sprite colors, you can also enter hexadecimal values for
any RGB color. The Color menu displays the colors in the current palette. The 16 larger color boxes at the top of the
menu identify your favorite colors.
A
B
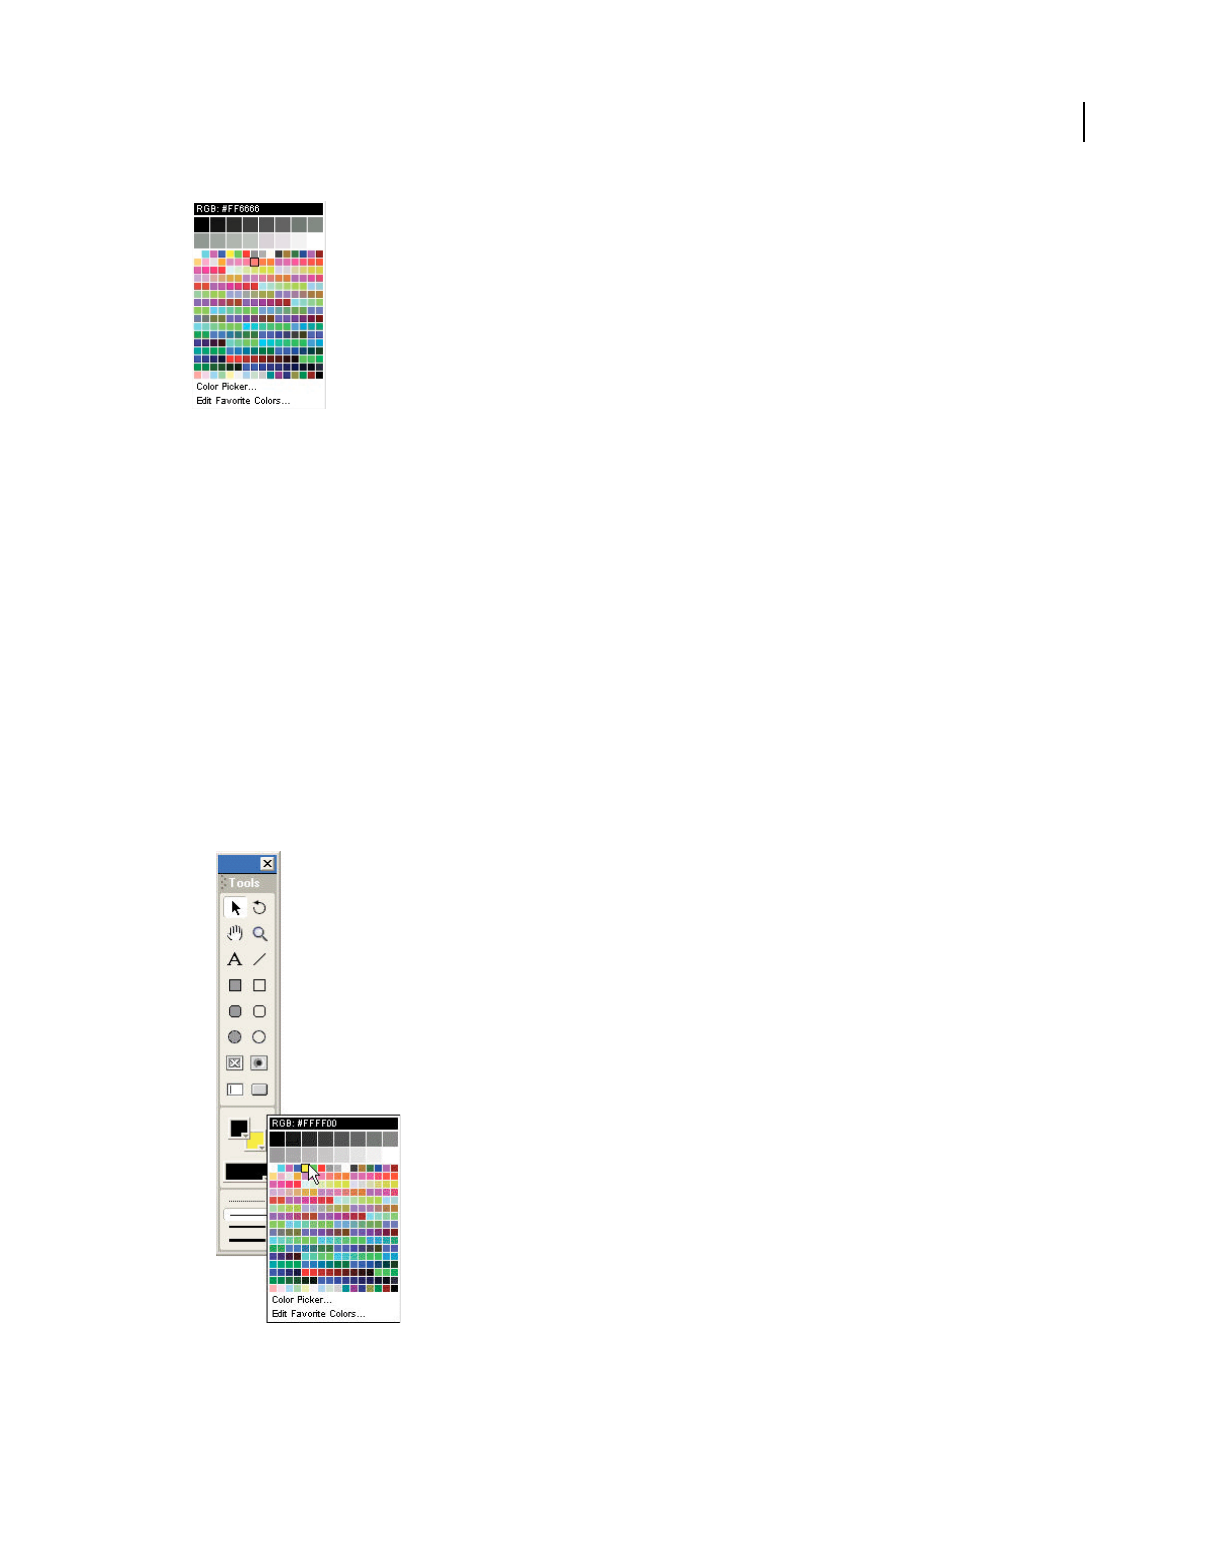
162
USING DIRECTOR 11.5
Color, Tempo, and Transitions
Last updated 9/28/2011
Color menu
If the movie is set to specify colors as RGB values, selecting a color from the Color menu specifies the RGB value of the
color, not its index value. (For an explanation of the difference between index and RGB color, see “Specifying palette
index and RGB color” on page 160.) The bar at the top of the Color menu indicates whether the movie is set to RGB
or index color.
If you want to select a color that is not in the current palette (and therefore not available on the Color menu), use the
system color picker to specify any color. You can also change the set of colors available on the Color menu by
displaying a different color palette.
Open the Color menu
1Do one of the following:
•Select a sprite and display the Sprite tab of the Property inspector.
•Select Window > Tool Palette.
2Click and hold the mouse button while pointing at the Foreground Color and Background Color buttons.
Note: To open the Color menu in the opposite mode (RGB or index), hold down the Alt key (Windows) or Option key
(Mac) while clicking the color box.
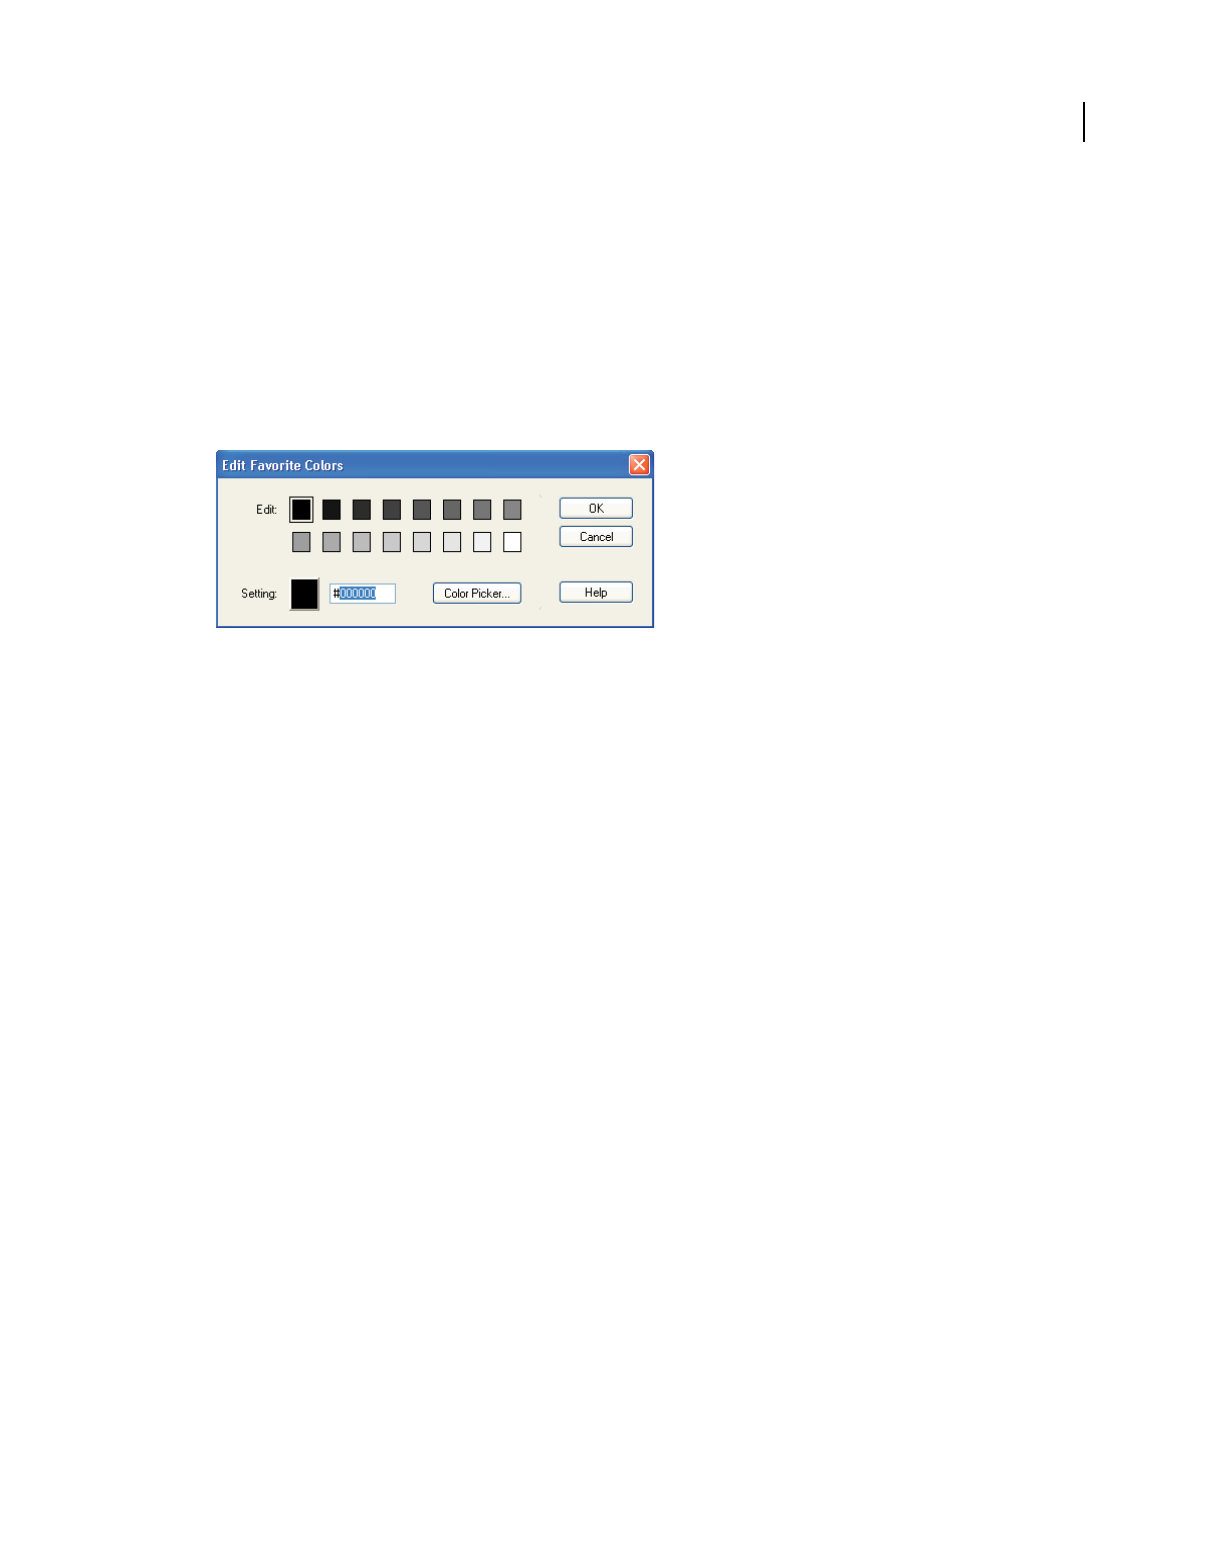
163
USING DIRECTOR 11.5
Color, Tempo, and Transitions
Last updated 9/28/2011
Select colors not on the Color menu
1Open the Color menu.
2Click Color Picker.
3Use the color picker to select colors.
Edit the favorite colors on the Color menu
1Open the Color menu.
2Select Edit Favorite Colors.
Edit Favorite Colors dialog box
3Select the color box you want to change.
4Select a new color for the box, using one of the following options:
•Click the color box to open the Color menu and select a color from the current palette.
•Enter an RGB value for a color in the box to the right of the color box.
•Click Color Picker and then use the system color picker to specify a new color.
5Click OK.
Change the color palette displayed on the Color menu
1Select Window > Color Palettes or double-click the mouse button on the Foreground Color and Background Color
buttons in the Tool palette.
2Select a color palette from the Palette menu.
Changing color palettes during a movie
The palette channel in the Score determines which palette is active for a particular frame in a movie. To define the
palette that is active in a particular frame of a movie, use Modify > Frame > Palette. When the playhead reaches the
frame with the palette change, Director switches to the new palette.
The settings in the palette channel have no effect on a movie playing in a web browser. Do not use any of these settings
for movies on the web.
For a stand-alone disk-based movie that takes over the entire screen, changing palettes during a movie is a viable
option for displaying 8-bit graphics with the best possible colors.
If you place a cast member that has its own custom palette on the Stage—and if it’s the first cast member that has a
different palette in the frame—Director automatically assigns the new palette to the palette channel. The new palette
becomes the active palette unless you clear it from the palette channel or replace it with a different palette, and it
remains in effect until you set a different palette in the palette channel.
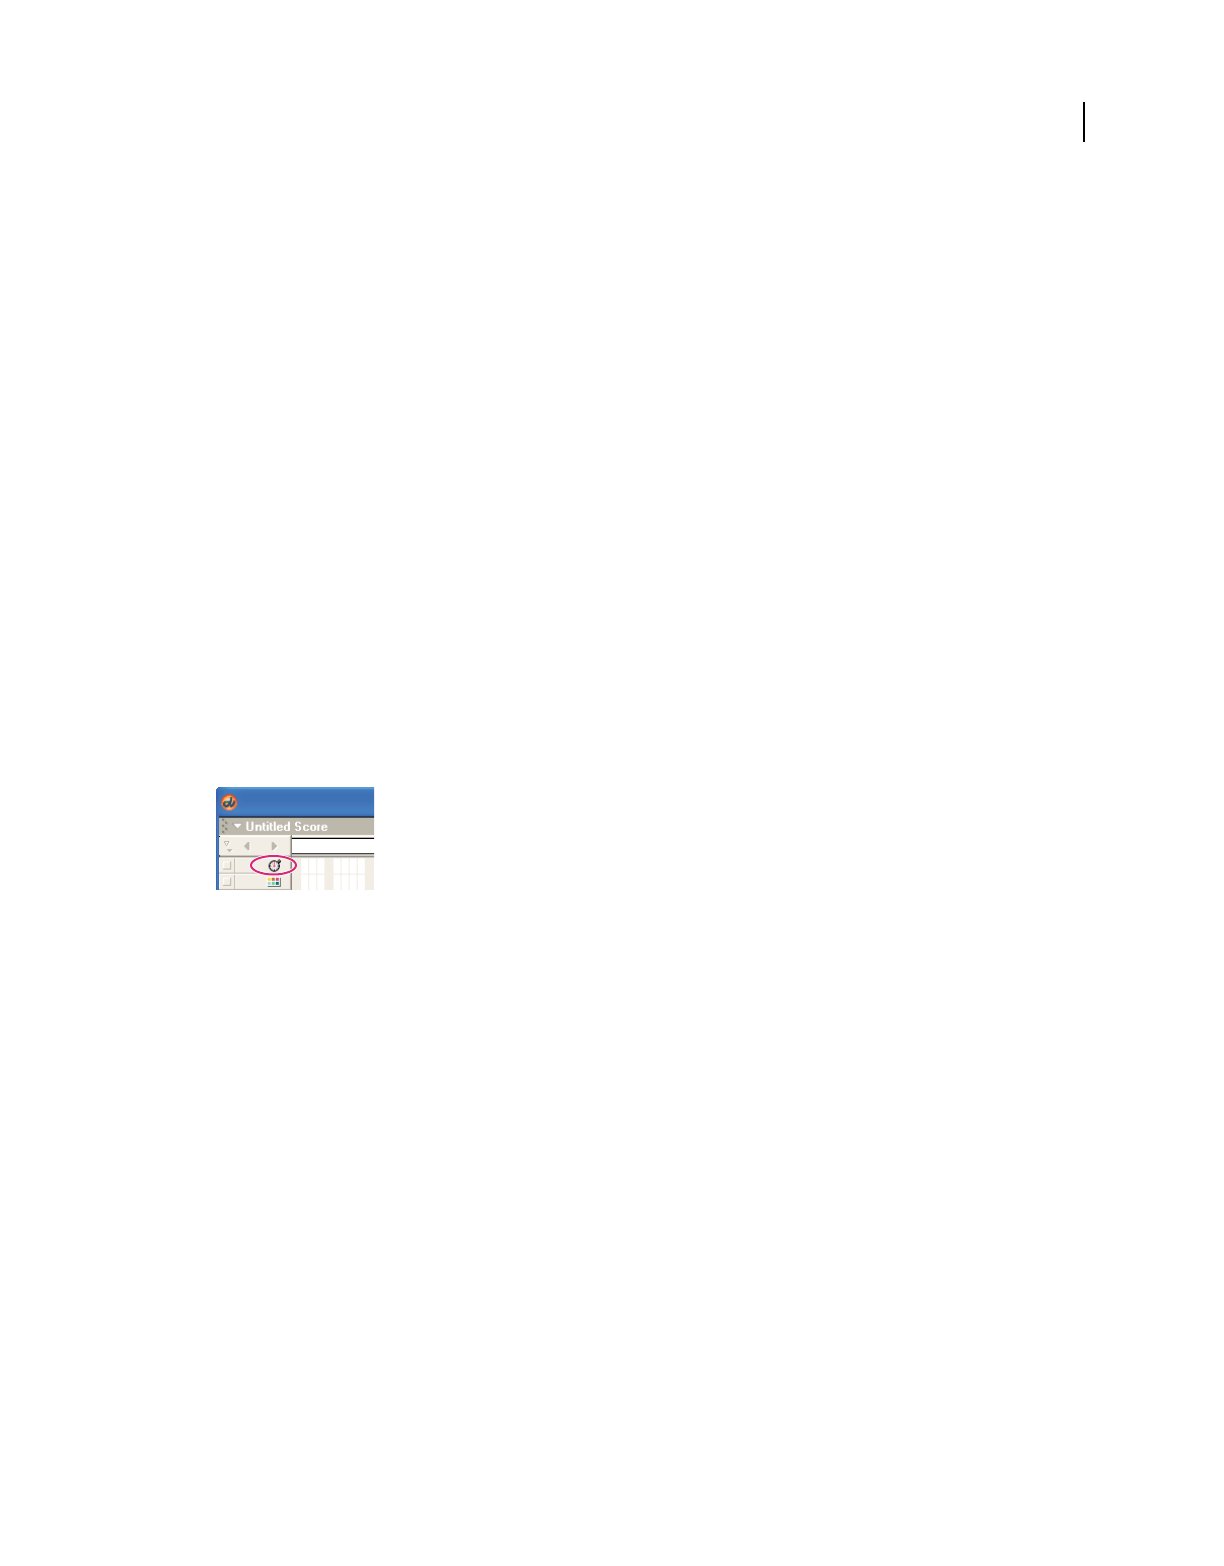
164
USING DIRECTOR 11.5
Color, Tempo, and Transitions
Last updated 9/28/2011
Only one palette can be active at any time. If an 8-bit image appears with the wrong colors, it requires a different
palette. For more information, see “Solving color palette problems” on page 168.
Director contains several color palettes. The Windows and Mac system palettes are the default selections. Web216 is
nearly identical to the palettes used by Microsoft® Internet Explorer®. Use it for any movie you plan to play in a browser.
Any additional palettes you create or import appear as cast members.
While working on a movie, you can change the active palette in the authoring environment by selecting a new palette
in the Color Palettes window. The palette that is active in the authoring environment while you work does not change
the palette in the movie you’re working on. Any settings in the palette channel reset the active palette as soon as the
movie plays.
Specify a palette
1In the Score, do one of the following:
•Double-click the cell in the palette channel where you want the new palette setting to appear.
•Right-click (Windows) or Control-click (Mac) the cell in the effects channel where you want the new palette
setting to appear, and then select Palette from the Context menu.
•Select the cell in the effects channel where you want the new palette setting to appear, and then select Palette
from the Score window’s Options menu.
•Select a frame in the palette channel, and select Modify > Frame > Palette.
(If you don’t see the palette channel, the effects channel is hidden. To display it, click the Hide/Show Effects
Channel tool in the upper-right corner of the Score window.)
Palette channel
2Select the options you want to use in the Frame Properties: Palette dialog box.
•Select a new palette.
•Specify how you want Director to manage the palette change. For example, to hide a palette change within a fade,
first select a new palette from the pop-up menu. Select the Palette Transition option, and then select Fade To
Black or Fade To White. Use the Rate slider to set the speed of the fade.
To stop the movie while the palette changes, first select a new palette from the Palettes menu. Select the Palette
Transition option, and then select Between Frames. Use the Rate slider to set the speed of the transition.
3Click Set.
The palette you select now appears in the cell that you selected in the Score’s palette channel. The setting remains
in effect in the movie until you set a different palette in the palette channel.
Using the Color Palettes window
Use the Color Palettes window to change and rearrange color palettes and to determine which colors in a palette are
used in an image.
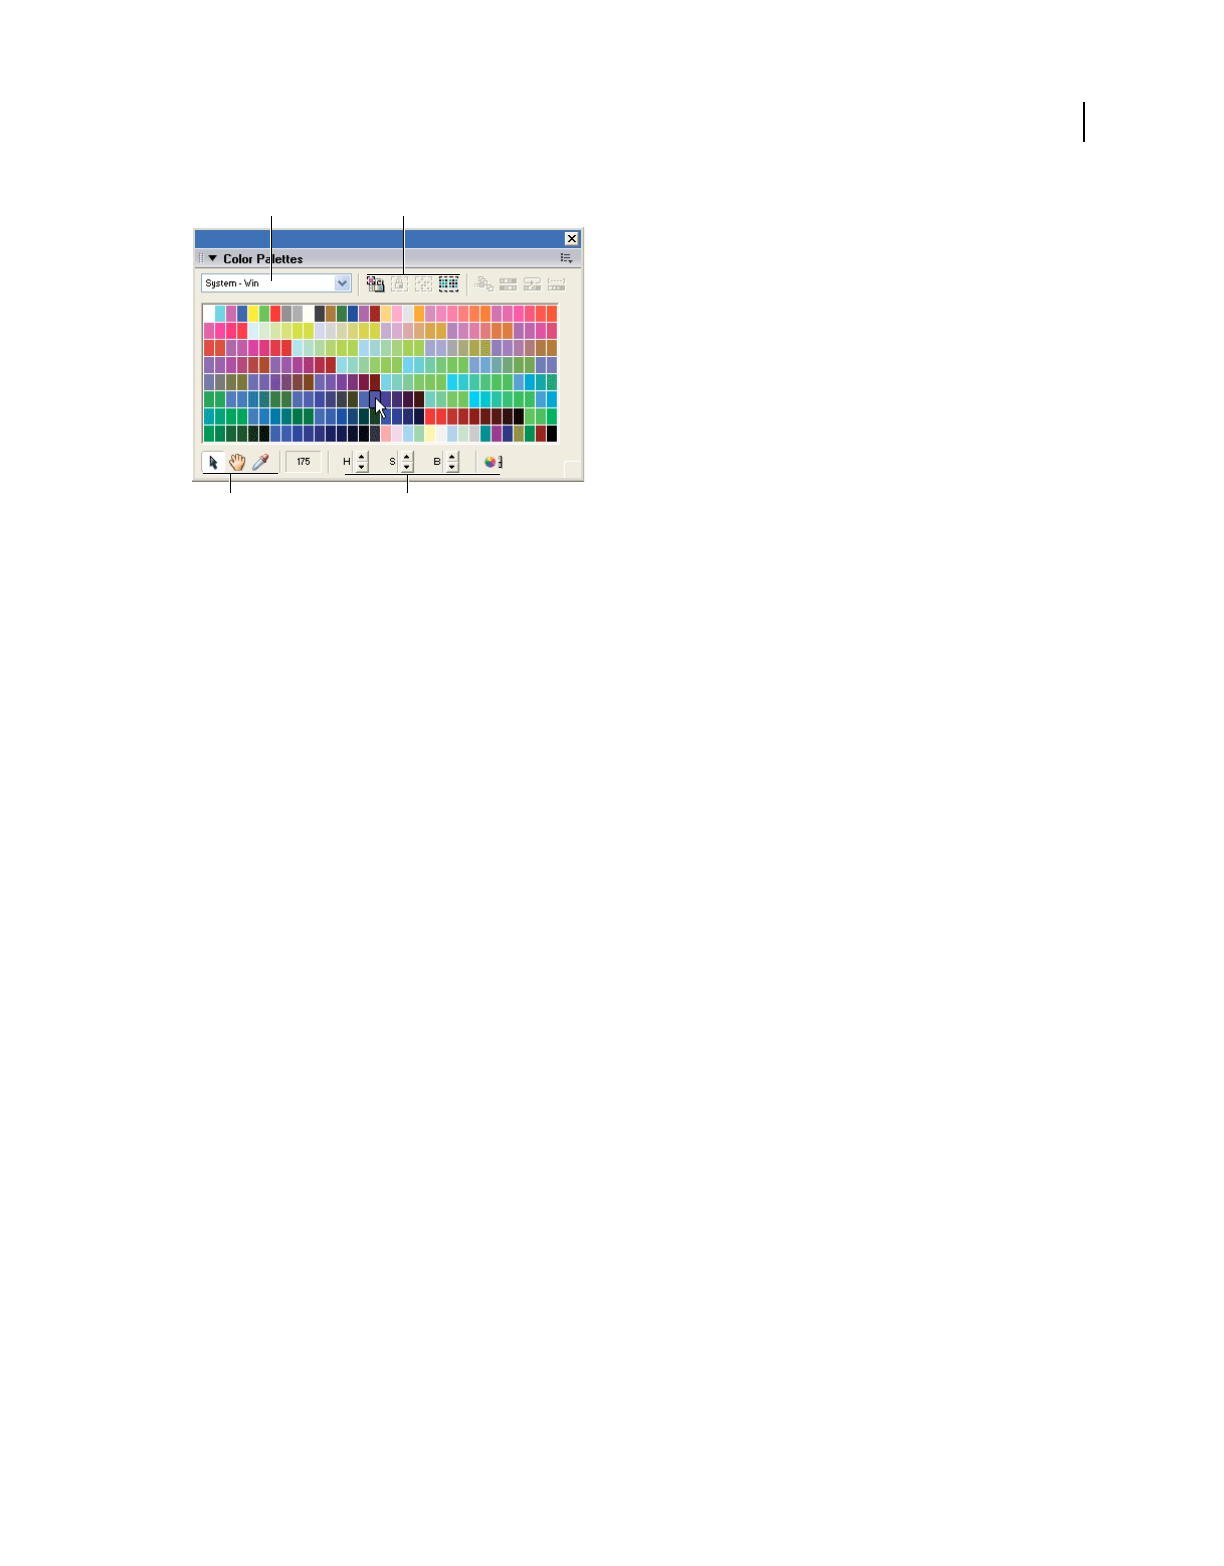
165
USING DIRECTOR 11.5
Color, Tempo, and Transitions
Last updated 9/28/2011
A. Select a palette to change B. Define a new color C. Reserve, select, and rearrange colors D. Tools
If you add new palettes to your movie from other graphics applications, those palettes appear in the palette list and in
the Cast window.
The row of buttons on the right side of the Color Palettes window are for reserving, selecting, and rearranging colors
in the current palette. If you attempt to change one of the nine built-in palettes, Director creates a copy of the palette
for you to modify.
Note: Selecting a new palette in the Color Palettes window doesn’t change the palette for the movie or any frame in the
movie. Use the Movie tab in the Property inspector to select the movie color palette, or select Modify > Frame Palette to
change the color palette at a particular frame.
When you modify a palette, all the cast members using the palette also change, so be sure to retain a copy of the original
palette.
Open the Color Palettes window
❖Select Window > Color Palettes.
Edit a palette already used in a movie
1Select Window > Color Palettes.
2Select the palette you want to edit from the Palettes menu.
3Double-click any color within the palette.
Director makes a copy of the palette and prompts you to enter a name.
4Enter a name, and press OK.
5Edit the palette. See “Changing colors in a color palette” on page 167.
6Select all the cast members that use the old version of the palette, or use Find to locate all the cast members that use
a particular palette.
7Select Modify > Transform Bitmap and select the options you prefer.
AB
CD
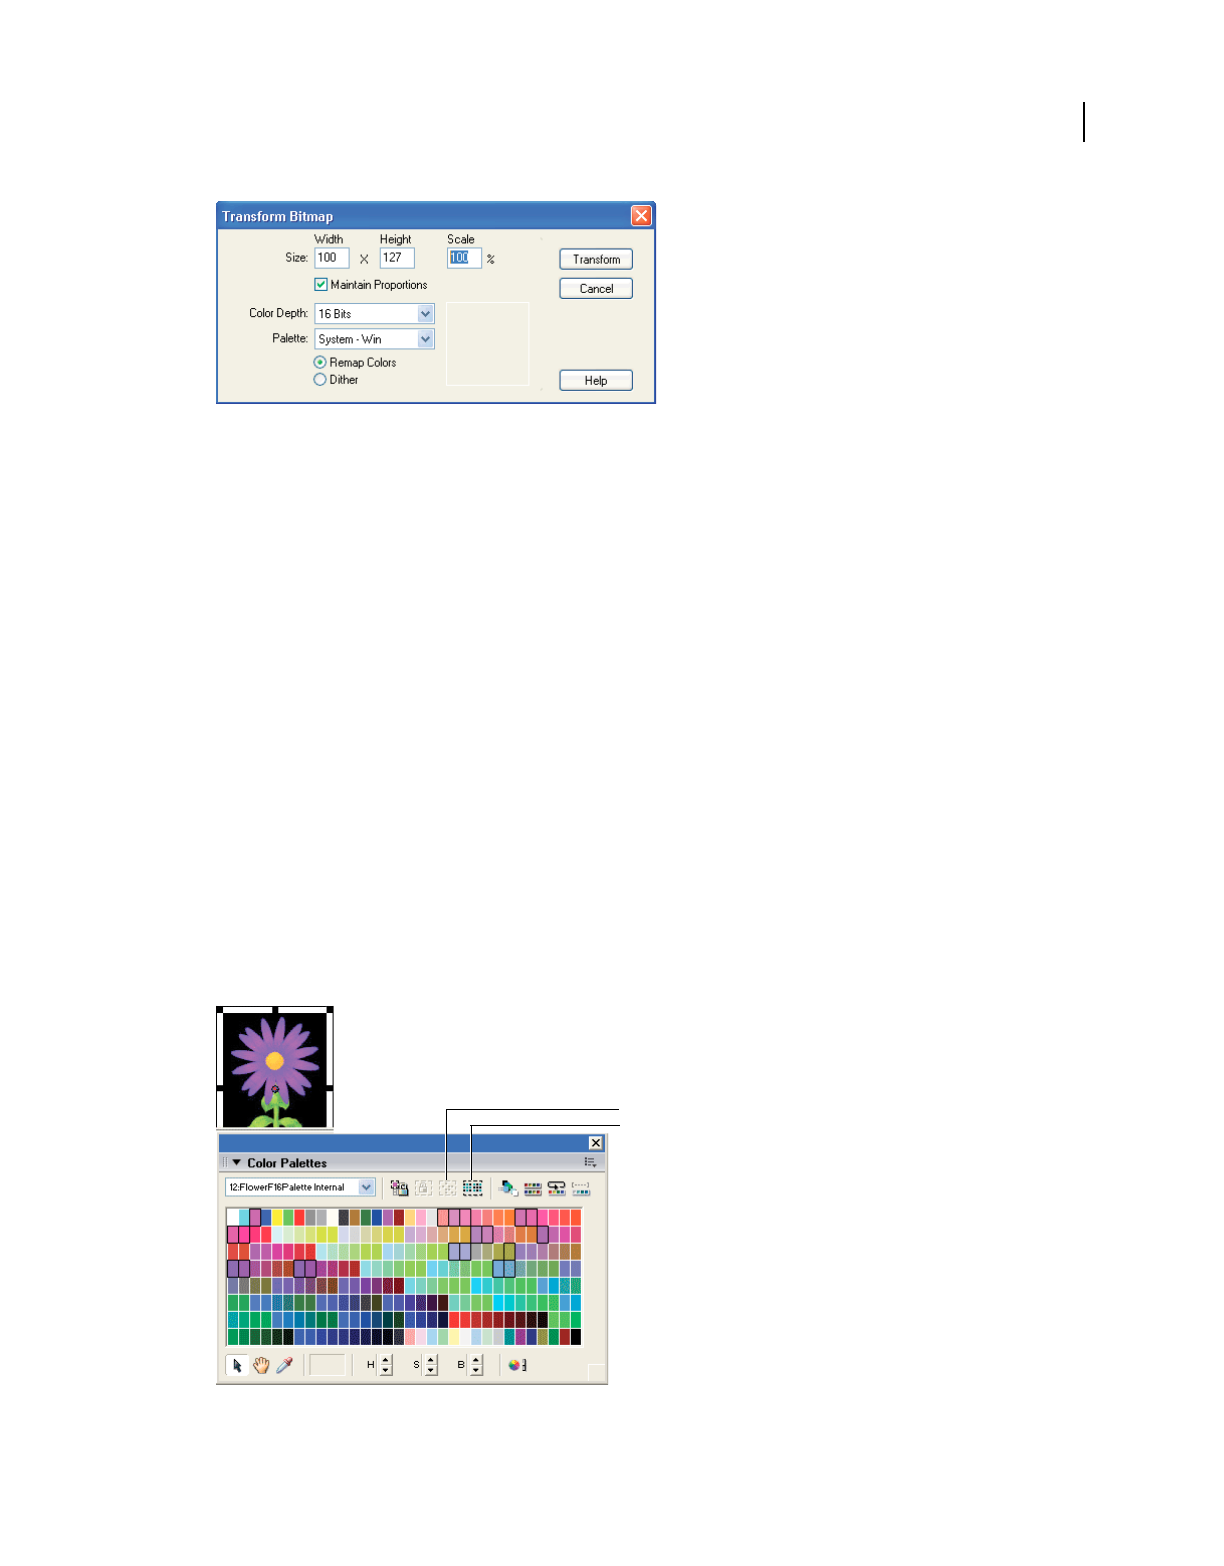
166
USING DIRECTOR 11.5
Color, Tempo, and Transitions
Last updated 9/28/2011
Transform Bitmap dialog box
Note: Be sure to select Remap Colors, not Dither.
8Click Transform to remap all the cast members to the new palette.
Select one or more colors
1Click a color in the Color Palettes window. If the selection arrow is inactive, click the Arrow tool at the bottom of
the window.
2To select a range, drag across colors or click the first color in the range, and then Shift-click the last.
3Control-click (Windows) or Command-click (Mac) to select multiple discontiguous colors.
Match the color of any pixel on the Stage with the same color in the palette
1Click the Eyedropper tool.
2Drag any color in the Color Palettes window to any point on the Stage.
The selection in the Color Palettes window and the foreground color in the Tool palette change to the color at the
pointer location.
Select colors in the palette used by the current cast member
1In the Cast window, select the cast member.
2Select Window > Color Palettes.
Select colors used by the current cast member
A. Select Used button B. Invert Selection button
A
B
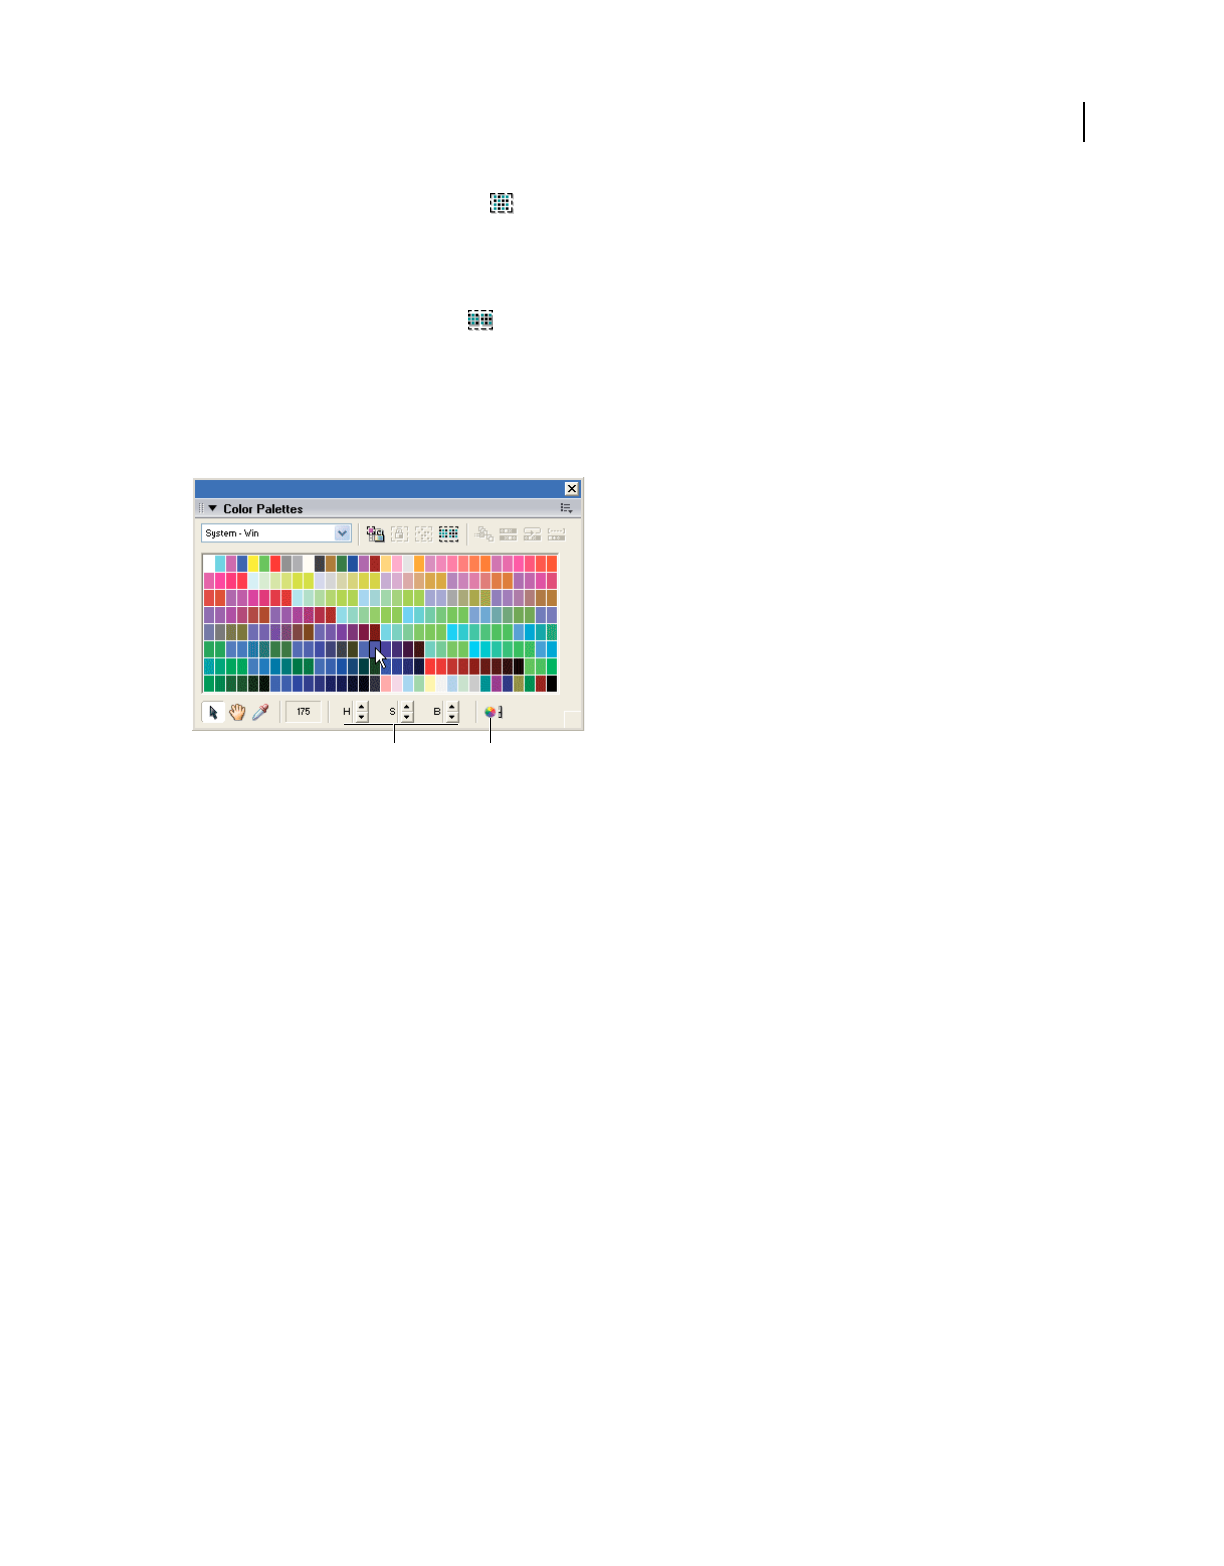
167
USING DIRECTOR 11.5
Color, Tempo, and Transitions
Last updated 9/28/2011
3Click the Select Used Colors button in the Color Palettes window.
4In the Select Colors Used In Bitmap dialog box, click Select.
Select all colors not currently selected
❖Click the Invert Selection button in the Color Palettes window.
Changing colors in a color palette
You can define a new color for a color palette by selecting a color you want to change and then using the controls at
the bottom of the Color Palettes window or the system color.
Change colors in a color palette
A. Define a new color by hue, saturation, and brightness B. Open the color picker
1Select Window > Color Palettes.
2Select the palette you want to change from the Palette menu.
3Select a color within the palette to change.
If you attempt to change one of the default palettes, Director makes a copy of the palette and prompts you to enter
a name.
4To change the color by using the H, S, and B (hue, saturation, and brightness) controls, click the arrows next to the
controls.
Hue The color that is created by mixing primary colors.
Saturation A measure of how much white is mixed in with the color. A fully saturated color is vivid; a less-saturated
color is a washed-out pastel or, in the case of black, a shade of gray.
Brightness Controls how much black is mixed in with a color. Colors that are very bright have little or no black. As
more black is added, the brightness is reduced, and the color gets darker. If brightness is reduced to 0, regardless of
the values set for hue or saturation, the color is black.
5To change the color by using the system color picker, click the Color Picker button.
For instruction on using the Windows or Mac color picker, see your system documentation.
Controlling color palettes with Lingo or JavaScript syntax
By using the puppetPalette method, you can change the current palette and specify how quickly a new palette fades
in. This method is useful when you want to change the palette to suit changing conditions in the movie without
entering a new frame. For example, you can change the palette when you switch a cast member assigned to a sprite.
AB

168
USING DIRECTOR 11.5
Color, Tempo, and Transitions
Last updated 9/28/2011
The new palette remains in effect until a new puppetPalette method is issued, a new palette is set in the palette
channel, or a new movie starts.
For more information about this method, see the Scripting Reference topics in the Director Help Panel.
Solving color palette problems
When images in your movie appear with the wrong colors, you probably have the wrong color palette active. Color
palette problems occur only if you are using 8-bit bitmaps and you want your movie to appear correctly on 256-color
systems (8-bit bitmaps always appear correctly on computers that are set to display thousands or millions of colors).
Eight-bit bitmaps don’t store information about actual colors; they identify colors by referring to positions in the
current color palette. When saving an 8-bit bitmap, a graphics program creates a palette with the colors required for
that particular image. This palette is saved with the file. For a bitmap to appear with the proper colors, the palette must
be active when the bitmap appears in a Director movie. Only one palette can be active. In Director movies, it’s often
necessary to display more than one 8-bit bitmap on the screen at one time. In those cases, all the images must refer to
the same palette.
To solve color palette problems, use the following guidelines:
•To avoid color problems in movies for the web, map all 8-bit bitmaps in your movie to the Web216 color palette
that is built in to Director. This is essentially the same palette used by Microsoft® Internet Explorer®.
•Don’t attempt to change palettes while a movie is playing in the browser. The browser, not the Director movie,
controls the palette. Browsers ignore all palette channel settings.
•Make sure that all the 8-bit images on the Stage at the same time refer to the same palette.
•If bitmaps are not dithering or remapping to the current palette, make sure that the Remap Palettes If Needed
option on the Movie tab of the Property inspector is selected.
•Make sure you are aware of all changes in the palette channel. For example, when a cast member you are placing
on the Stage has a palette different from the currently active palette, Director adds the new palette to the palette
channel. If you don’t realize that this has happened, you might find the palette changing unexpectedly when the
movie plays.
•For disk-based movies, simplify your work and avoid frequent palette changes by mapping all the images in your
movie to as few palettes as possible.
•Re-map existing cast members to a new color palette by using the Modify > Transform Bitmap command.
•If the Import option for Palette in the Image Options dialog box is not available while you are importing an image,
the image’s palette might not meet standard system requirements.
Note: Use an image editor to make sure the image’s palette meets the following requirements: The palette must contain
exactly 16 or 256 colors. The first and last colors in the palette must be black or white, and there must be only one black
and one white in the entire palette.
•Don’t change colors that are used by your system software for interface elements. In Windows, these colors always
appear as the first 10 and the last 10 colors in the palette.
Setting palette cast member properties
When you create a color palette in the Color Palettes window or import a bitmap with its own palette, the palette
appears in a cast as an ordinary cast member. Use cast member properties to name the palette and to specify how it is
unloaded from memory.
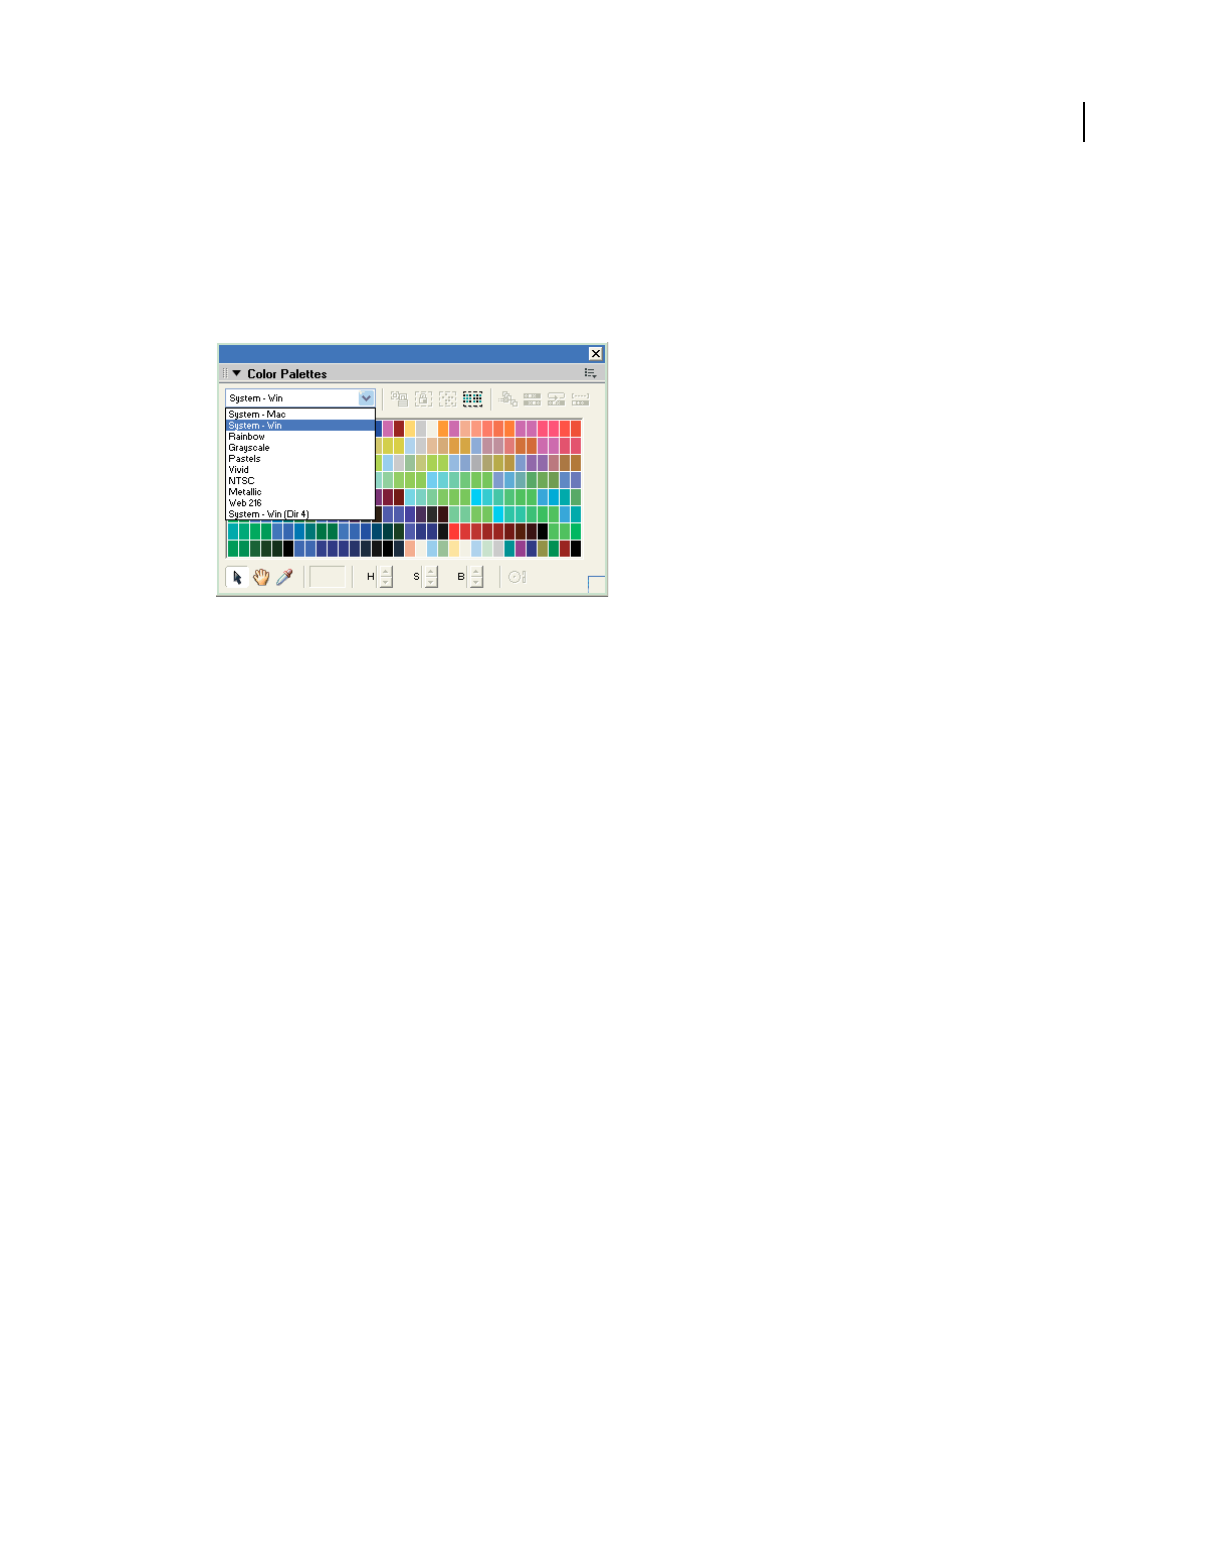
169
USING DIRECTOR 11.5
Color, Tempo, and Transitions
Last updated 9/28/2011
Create a color palette as a cast member
1If the Cast window is not already open, select Window > Cast.
2Select Window > Color Palettes.
The Color Palettes window appears.
Color Palettes window
3From the Palette menu, select the palette that you want to use to create a new palette cast member.
4Double-click any color within the palette.
Director makes a copy of the palette and prompts you to enter a name.
5In the Create Palette dialog box, enter a name and click the OK button.
In the Color dialog box, make any changes you want and click OK.
The new color palette appears in the Cast window.
View or change color palette cast member properties
1Select a color palette cast member.
2To display the Property inspector, select Modify > Cast Member > Properties, or select Window > Property
Inspector.
3If necessary, click the Member tab and display the Graphical mode.
The following noneditable settings appear:
•The cast member size in kilobytes
•The cast member creation and edit dates
•The name of the person who last modified the cast member
4To view or edit the cast member name, use the Name text box.
5To add comments about the cast member, use the Comments text box.
6To specify how Director removes the cast member from memory if memory is low, select one of the following
options from the Unload menu:
3—Normal Sets the selected cast members to be removed from memory after any priority 2 cast members have
been removed.
2—Next Sets the selected cast members to be among the first removed from memory.
1—Last Sets the selected cast members to be the last removed from memory.

170
USING DIRECTOR 11.5
Color, Tempo, and Transitions
Last updated 9/28/2011
0—Never Sets the selected cast members to be retained in memory. These cast members are never unloaded.
7To modify the colors in the palette, click Edit.
About tempo
Tempo is the number of frames per second that Director tries to play. You can control tempo by using the Score tempo
channel or the puppetTempo method.
Director tempo settings control the maximum speed at which the playhead moves from frame to frame. The tempo
doesn’t affect the duration of any transitions set in the transition channel, nor does it control the speed at which a
sound or digital video plays. Tempo settings don’t always control animated GIFs. For more information, see “Using
animated GIFs” on page 105.
Settings in the tempo channel can also make a movie pause and wait for a mouse click or key press. For information
about making a movie wait for a cue point in a sound or video, see “Synchronizing media” on page 251.
For simple movies, using the tempo channel is often the best way to define tempos. For more sophisticated control of
the speed of a movie, use the puppetTempo method to control tempo.
You can’t make a movie go faster than the computer allows. Many factors can make movies play more slowly than the
specified tempo, including the following:
•Playing the movie on a slower computer
•Making the movie wait for cast members to download from a slow Internet connection
•Animating several large sprites at the same time
•Animating stretched sprites
•Color depth differences between the movie and monitor
•Animating sprites that have blend values
Specifying tempo properties
It’s best to begin a movie with a tempo setting in the first cell of the tempo channel. If you don’t set a tempo until later
in the movie, the beginning tempo is determined by the setting in the floating Control panel. Director plays a movie
at the tempo you’ve set until it encounters a new tempo setting in the tempo channel or until a puppetTempo method
is issued.
Enter tempo changes in the tempo channel at the top of the Score. (If you don’t see the tempo channel, the effects
channel is hidden. To display it, click the Hide/Show Effects Channel tool in the upper right of the Score window.)
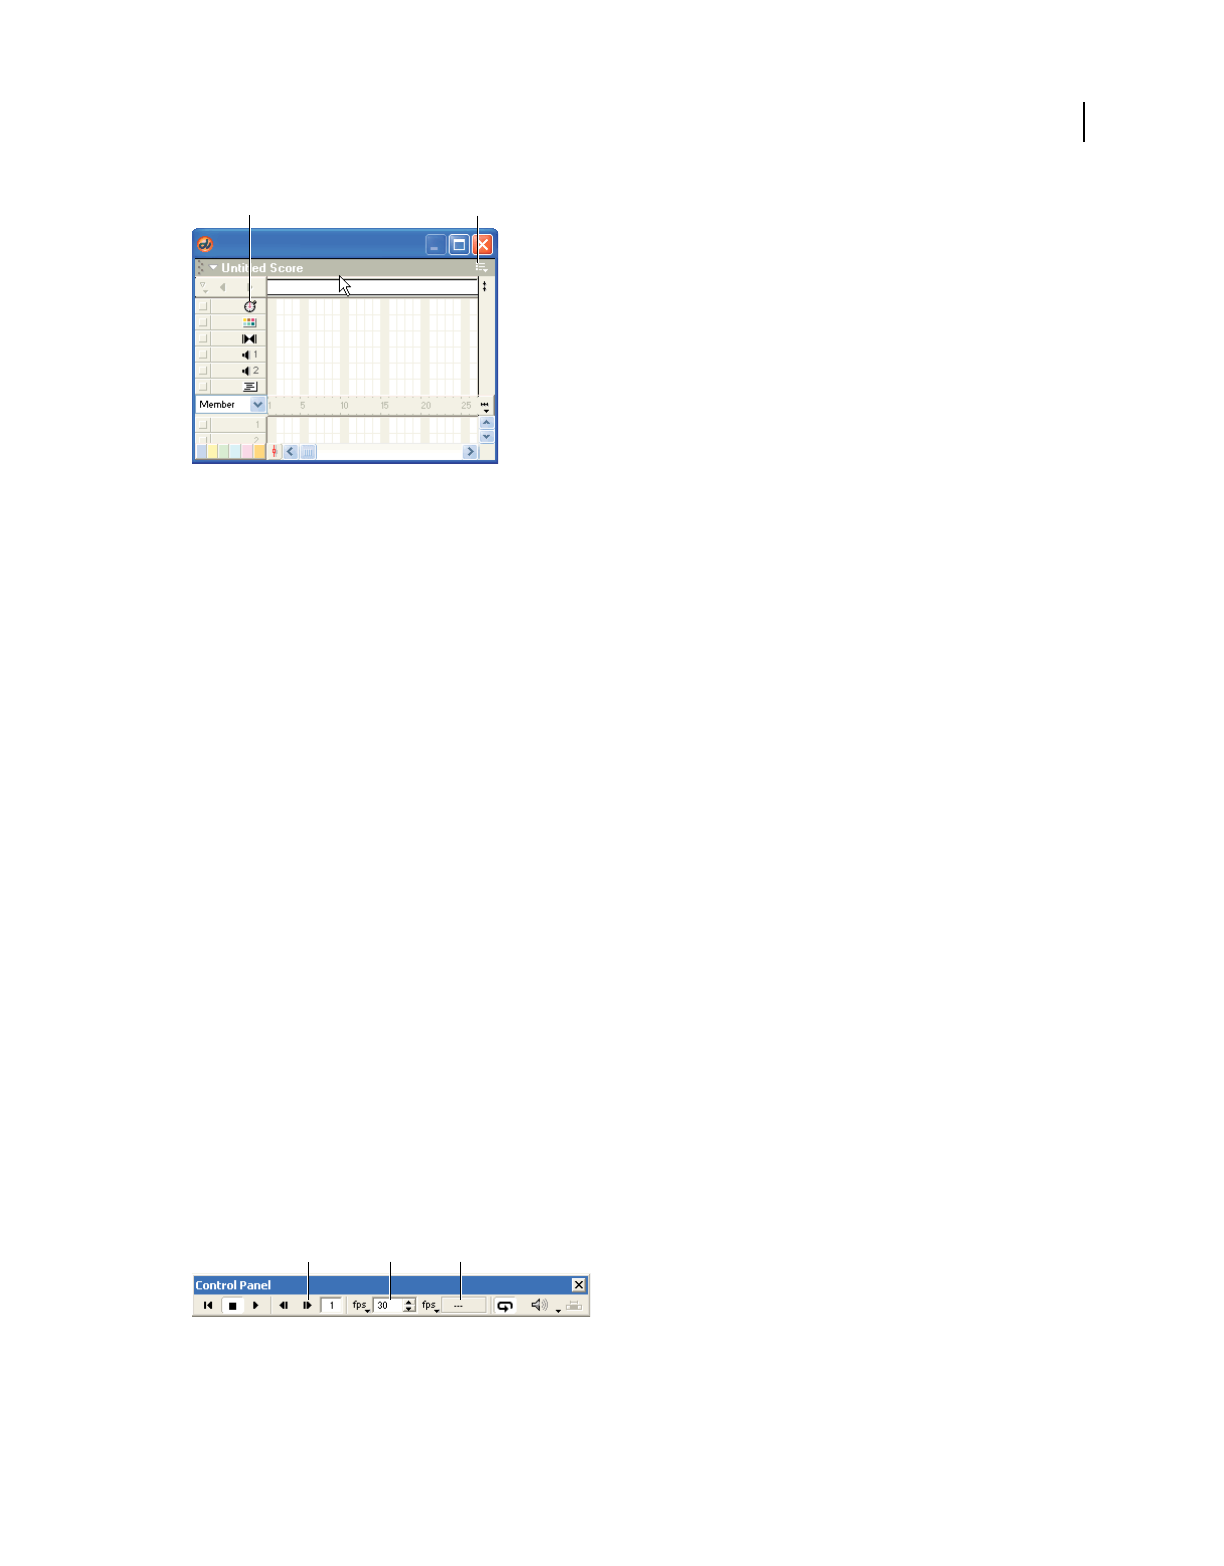
171
USING DIRECTOR 11.5
Color, Tempo, and Transitions
Last updated 9/28/2011
A. Tempo channel B. Click here to show or hide the effects channels
1In the Score, do one of the following:
•Double-click the cell in the tempo channel where you want the new tempo setting to appear.
•Right-click (Windows) or Control-click (Mac) the cell in the effects channel where you want the new tempo
setting to appear, and then select Tempo from the Context menu.
•Select a frame in the tempo channel, and select Modify > Frame > Tempo.
If you don’t see the tempo channel, the effects channel is hidden. To display it, click the Hide/Show Effects Channel
tool in the upper-right corner of the Score window.
2Select the option you want to use in the Frame Properties: Tempo dialog box.
•To set a new tempo for the movie, select Tempo, and then use the Tempo arrows or drag the slider.
•To pause the movie at the current frame for a certain length of time, select Wait, and then use the Wait arrows
or drag the slider.
•To pause the movie until the user clicks the mouse or presses a key, select Wait For Mouse Click or Key Press.
•To pause the movie until a sound or digital video cue point passes, select Wait For Cue Point and select a channel
and cue point. For more information, see “Synchronizing media” on page 251.
3Click OK.
A number that matches the setting you’ve selected appears in the tempo channel. If you can’t read the number, you
might need to zoom the Score. To do so, click the Zoom Menu button at the right edge of the sprite channel, or
select View > Zoom. Then select a percentage from the menu.
Comparing actual speed with tempos
It’s good practice to test the performance of your movie on a system that is similar to that of your users. Make sure the
movie plays well on the slowest systems likely to be used.
The tempo you’ve set and the actual speed of a movie both appear in the floating Control panel.
A. Step Forward B. Tempo setting C. Actual tempo
AB
ABC

172
USING DIRECTOR 11.5
Color, Tempo, and Transitions
Last updated 9/28/2011
Note: The Control panel attached to the bottom of the Stage does not include tempo settings. Tempo settings are available
only from the floating (detached) version of the Control panel. To detach the Control panel from the Stage, right-click
(Windows) or Control-click (Mac) the Control panel. In the context menu, select Detach Control Panel.
1Play the movie from start to finish, and then rewind it to the beginning.
2Use the Step Forward button to step through the movie frame by frame.
3In each frame, compare the tempo setting shown in the floating Control panel with the actual speed shown there.
If you haven’t recorded the actual speed of a movie in a particular frame, the actual tempo field displays two dashes (--).
Locking frame durations
To make Director play a movie at the same tempo on all types of computers, use the Lock Frame Durations option in
the Movie Playback Properties dialog box (see “Setting movie playback options” on page 467). For frames without
tempo settings, Director uses the current tempo. Lock Frame Duration prevents a movie from playing too fast on a fast
system, but it cannot prevent a movie from playing slowly on a slow system.
1Select Modify > Movie > Playback.
2Select Lock Frame Durations.
Controlling tempo with Lingo or JavaScript syntax
To override the tempo set in the movie’s tempo channel, use the puppetTempo() method. This approach is useful
when you want to change the movie’s tempo in response to conditions that you can’t control, such as the type of
computer the movie is playing on or a user’s action.
The puppetTempo() method doesn’t retain control of the tempo channel. If the movie encounters any tempo settings
in the tempo channel, the puppetTempo() settings are overridden.
For more information about puppetTempo(), see the Scripting Reference topics in the Director Help Panel.
Using transitions
Transitions create brief animations that play between frames to create a smooth flow as sprites move, appear, or
disappear or as the entire Stage changes. Director provides dozens of transitions built into the application, and many
third-party Xtra extensions also include transitions. For example, you can dissolve from one scene to the next, display
a new scene strip by strip, or switch to a scene as though revealing it through venetian blinds. You can also use many
of the transitions to make individual elements appear or disappear from the screen.
After they are defined, transitions appear in the Cast window as cast members. You can place them in the transition
channel and drag them from the cast to the Score.
Creating transitions
Like tempos, palettes, sounds, and behaviors, transitions have a channel set aside for them in the Score.
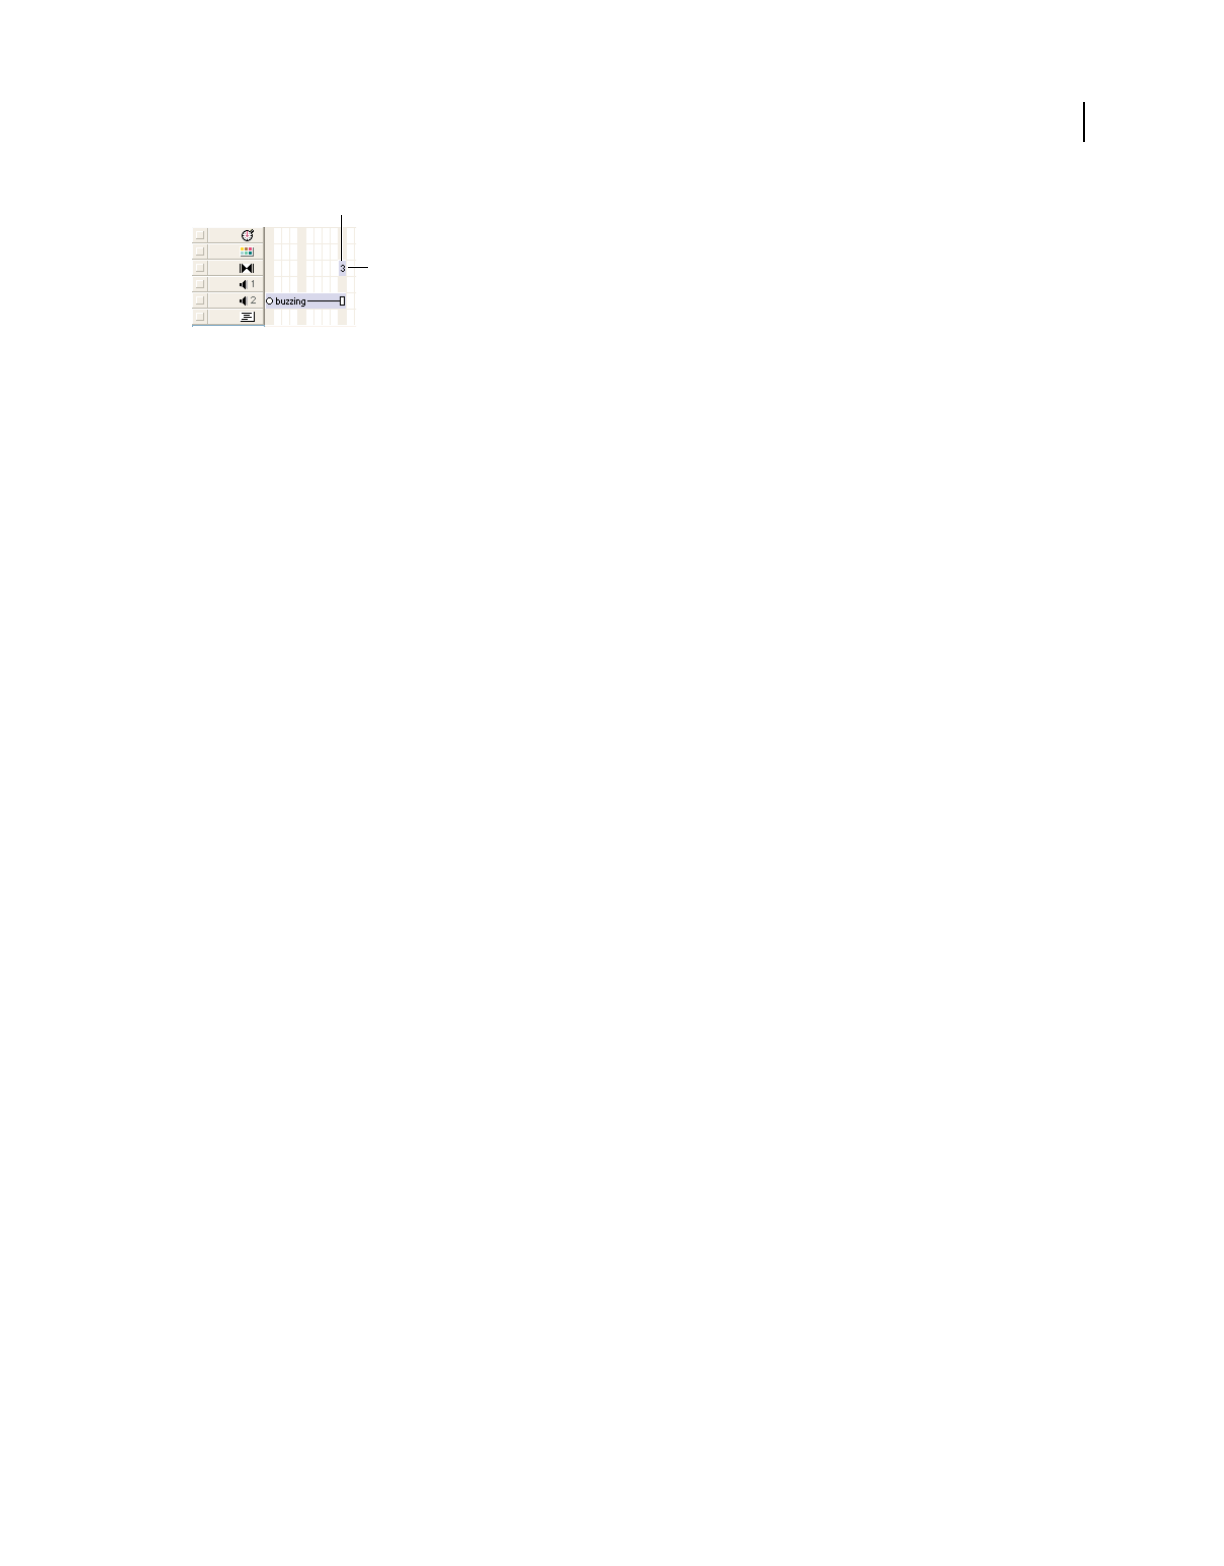
173
USING DIRECTOR 11.5
Color, Tempo, and Transitions
Last updated 9/28/2011
A. Transition channel B. Transition
A transition always takes place between the end of the current frame and the beginning of the frame where the
transition is set. If you want to create a dissolve between two scenes, set the transition in the first frame of the second
scene, not in the last frame of the first scene.
1In the transition channel, select the frame in which you want the transition to occur.
2Select Modify > Frame > Transition, or double-click the frame in the transition channel.
3In the Frame Properties Transition dialog box, select a category if desired, and then select the transition you want.
To quickly scroll through transitions, type the first letter of the transition’s name.
Many transitions have default settings for Duration and Smoothness. You can adjust the sliders to change the
settings.
For many transitions, you can also select whether the transition affects the entire Stage or only the area that’s
changing.
Note: Xtra transitions might offer additional options provided by the developer. If the Options button is available
when you select an Xtra transition, click it to view and change the transition options.
4Click OK.
Director displays the cast member number that corresponds to the transition in the transition channel, and the
transition also appears in the cast.
Tips for using transitions
•To play a sound while a transition occurs, place the sound in the frame immediately before the transition.
•The Dissolve Pixels, Dissolve Pixels Fast, or Dissolve Patterns transitions might look different on Windows and
Mac systems. Test to ensure satisfactory results.
•If you export a movie that contains transitions as a digital video or PICS file, the transitions might not be preserved.
•A transition that occurs while a sound or digital video is decompressing might require more system resources than
are available. This might cause the sound to stop playing. If you notice this behavior while testing on low-end
systems, try making the transition shorter, and avoid complex transitions such as Dissolve.
•Avoid looping on a frame that contains a transition. Playing a transition continuously might cause performance
issues.
•Options become available only when transition Xtra extensions are available.
Using transition Xtra extensions
You can add custom transitions that are available as transition Xtra extensions. Transition Xtra extensions appear in
the Frame Properties: Transitions dialog box. Transition Xtra extensions are often more complex than the transitions
that are provided with Director and might include an additional dialog box for specialized settings.
❖Place the transition Xtra in the Xtras folder in the Director application folder. The transition Xtra must be present
when the movie runs.
A
B

174
USING DIRECTOR 11.5
Color, Tempo, and Transitions
Last updated 9/28/2011
Controlling transitions with Lingo or JavaScript syntax
To set a transition with script, use the puppetTransition() method. This method gives you the flexibility to select a
transition that is appropriate for current movie conditions or to apply a transition to sprites before the playhead exits
the current frame.
For example, use the puppetTransition() method to specify one of several transitions, depending on which sprites
are on the Stage when the playhead enters a new frame, or to apply a transition to a new sprite when it appears but the
playhead doesn’t exit the frame.
The puppetTransition() method applies only to the frame in which you issue the method. You do not need to
explicitly return control of the transition channel to the Score after the transition occurs.
The puppetTransition() method’s parameters perform the same functions as the options in the Frame Properties:
Transition dialog box.
For more information about puppetTransition(), see the Scripting Reference topics in the Director Help Panel.
Setting transition cast member properties
1Select a transition cast member.
2To display the Property inspector, select Modify > Cast Member > Properties, or select Window > Property
Inspector.
3If necessary, click the Member tab and display the Graphical mode.
The following noneditable settings appear:
•The cast member size in kilobytes
•The cast member creation and edit dates
•The name of the person who last modified the cast member
4To view or edit the cast member name, use the Name text box.
5To add comments about the cast member, use the Comments text box.
6To specify how Director removes the cast member from memory if memory is low, select one of the following
options from the Unload menu:
3—Normal Sets the selected cast members to be removed from memory after any priority 2 cast members have
been removed.
2—Next Sets the selected cast members to be among the first removed from memory.
1—Last Sets the selected cast members to be the last removed from memory.
0—Never Sets the selected cast members to be retained in memory; these cast members are never unloaded.
7If you are using an Xtra transition, click Options to set values that are specific to the Xtra transition. The developer
of the Xtra determines the contents of the Options dialog box. See the documentation supplied with the Xtra.

175
Last updated 9/28/2011
Chapter 9: Text
About text
Adobe® Director® creates text that is editable, anti-aliased, and compact for fast downloading of outline fonts on both
the Mac® and Windows® platforms. By combining these features with any of the animation capabilities of Director,
such as rotation, you can create wonderful text effects in your Director movies.
You can embed fonts in a movie to ensure that text appears in a specific font when a movie is delivered, regardless of
which fonts are available on the user’s computer.
Most of the high-quality text you see in web browsers is actually a GIF or JPEG graphic, and takes longer to download
than Director text.
Director provides many ways to add text to a movie. You can either create new text cast members within Director or
import text from an outside source such as a document stored on the Internet. You can import plain text, RTF, or
HTML documents. After text is part of your movie, you can format the text in a variety of ways by using the Director
formatting tools. Director offers standard professional formatting functions, including alignment, tabs, kerning,
spacing, subscripts, superscripts, color, and so on. You can also create hypertext links for any text.
Text in Director is editable when you are working on your movie and, optionally, while a movie plays.
You can also script in Lingo or JavaScript™ syntax to control text. For example, you can use script to edit the text in
existing cast members, specify text formatting such as font and size, and interpret strings that users enter.
To create the smallest possible text cast members, use field text. Field text is standard text controlled by your system
software, as is the text that you see in dialog boxes and menu bars. Director does not anti-alias field text or support
paragraph formatting and tabs for fields. As with regular text, script can control field text and specify whether field text
is editable while a movie plays.
Regular text is best suited for large type that you want to look as good as possible. In contrast, field text is an excellent
choice for large blocks of smaller text in standard fonts (such as Times or Helvetica) that don’t need to be anti-aliased.
The position of text in a text sprite might change after the movie is upgraded. This may cause position-related Lingo
functions to fail.
Embedding fonts in movies
Before creating text or field cast members, it’s a good practice to embed the fonts you want to use in the movie.
Embedding fonts makes Director store all font information in the movie file so that a font appears correctly even if it’s
not installed in a user’s system. Because embedded fonts are available only to the movie, there are no legal obstacles to
distributing fonts in Director movies.
Embedded fonts appear in a movie as cast members and work on Windows and Mac computers. The size of the
embedded fonts depends on the character sets chosen to be recorded.
To speed up movie downloading, keep a file size small by specifying a subset of characters to include. If you do not
embed fonts in a movie, Director substitutes available system fonts.
After you embed a font in a movie file, the font appears on all the movie’s font menus, and you can use it as you would
any other font.

176
USING DIRECTOR 11.5
Text
Last updated 9/28/2011
When you open a movie created in a previous version of Director with the entire font set embedded in it, the characters
of the font are represented by the character sets that they belong to in the Font Cast Member Properties dialog. This is
also true for embedded partial character sets.
When you edit partial character sets from a previous version using the Font Cast Member Properties dialog, the entire
character set to which the partial character sets belonged to get recorded. If you press Cancel, the embedded fonts
remain unchanged for the characters recorded in the previous version.
Embed a font in a movie
1Select Insert > Media Element > Font.
2From the Original Font menu, select a font that is currently installed on your system.
(You can’t embed a font that is not installed on your system. Only fonts that appear in the Original Font menu are
available to be embedded.)
In the New Font Name text box, the name of the font is followed by an asterisk (*). This name appears on all font
menus in Director. In most cases, you should not change the name of a font.
3The left list box enlists the scripts that are present in the selected font. Double click the script that you want to
embed in the font.
4Partial Set lets you select exactly which characters are included. If you select Partial, enter the characters to be
included in the text box on the right.
Embed a font in a movie with Lingo or JavaScript syntax
❖Use the recordFont method. For more information about this method, see the Scripting Reference topics in the
Director Help Panel.
Creating text cast members
You can create text within Director or import text from external files. Director provides two ways to create text cast
members: directly on the Stage or in the Text window.
Create text cast members directly on the Stage
1Select the Text tool in the Tool palette.
Note: The Text tool is available when the Tool palette is in Classic or Default view. When in Flashcomponent mode,
the tool becomes a textInput Flash® component.
2Drag the text pointer across the Stage and release the mouse button to create a text cast member.
You can’t adjust the height of the text object at this point; the height adjusts automatically when you add text.
When you release the mouse button, a text insertion point appears in the area you defined.
3Enter text.
The new text cast member appears in the first available position in the current cast, and the sprite is placed in the
first open cell in the current frame in the Score.
177
USING DIRECTOR 11.5
Text
Last updated 9/28/2011
Create text cast members in the Text window
1Select Insert > Media Element > Text.
If the Text window is already open, click the New Cast Member button to create a new text cast member.
2Enter text in the Text window.
The text you enter appears in the first available cast position, but it is not automatically placed on the Stage.
3To change the width of the cast member, drag the bar at the right edge of the cast member.
Drag
Importing text
You can import text from any application that saves text in rich text format (RTF), in plain text (ASCII), or from
HTML documents. Use the standard importing procedure with File > Import to import any RTF, ASCII, or HTML
document. To import an HTML document from the Internet, click the Internet button in the Import dialog box (File
> Import), and then enter a URL in the File URL text box.
Text and RTF files are always imported and stored inside the movie file, even if you select Link To External File.
When you import text from an HTML document, Director recognizes many standard tags and parameters, including
tables, and approximates the formatting. Director doesn’t recognize embedded objects other than tables, and it doesn’t
support nested tables. It also doesn’t recognize APPLET, FORM, FRAME, INPUT, or IMAGE tags.
Director ignores any tags it does not recognize. For HTML files that are updated frequently, make sure you’re satisfied
with the formatting when importing.
When you import text from an RTF file, Director recognizes most standard RTF formatting, but it doesn’t import
pictures embedded in the file.
The amount of text in a cast member is limited only by the memory that is available in the playback system.
Importing text with Lingo or JavaScript syntax
You can import text in the following ways by scripting in Lingo or JavaScript syntax:
•To import text from a URL, use the getNetText() method. For more information about this method, see the
Scripting Reference topics in the Director Help Panel.
•To import text from an external file from a URL or the local computer, select or create a text cast member and set
its fileName property to the name of the external file that contains the text. For more information about this
property, see the Scripting Reference topics in the Director Help Panel.
•To import text from a file on disk, use the getPref() method. If no setPref method has already written such a
file, the getPref() method returns VOID. For more information about this method, see the Scripting Reference
topics in the Director Help Panel.
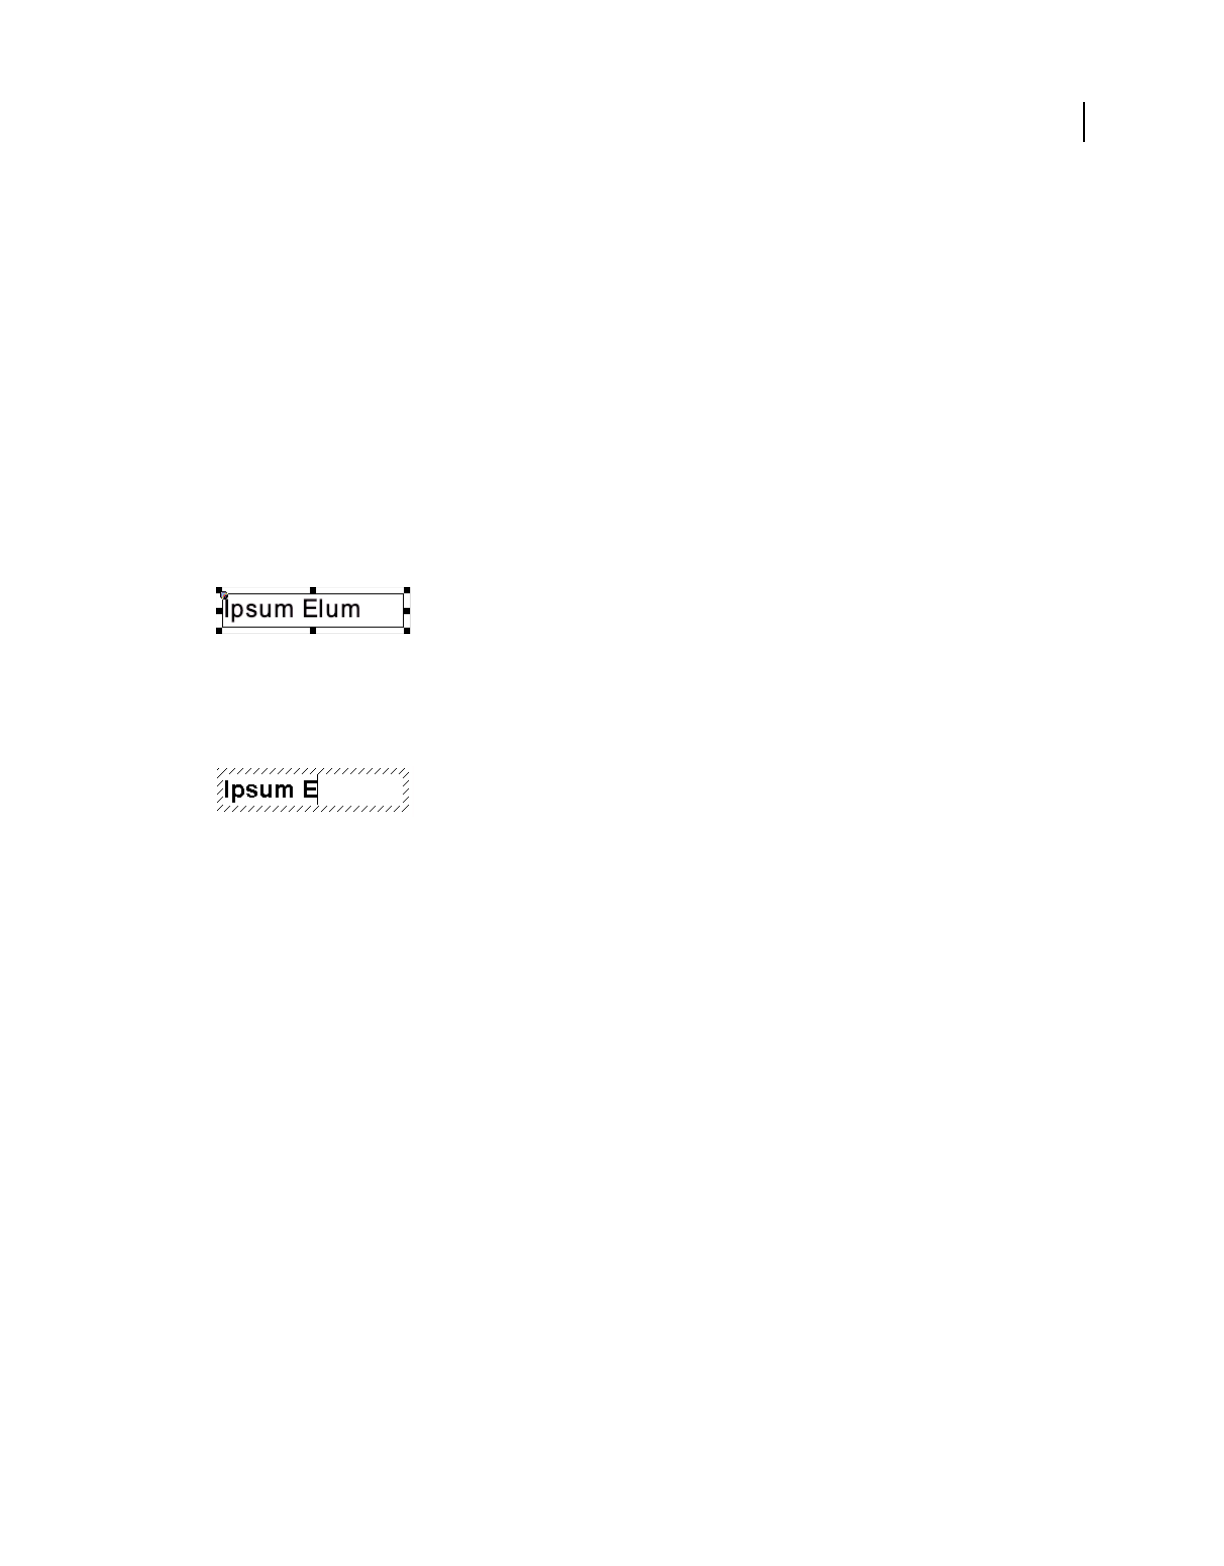
178
USING DIRECTOR 11.5
Text
Last updated 9/28/2011
Editing and formatting text
Director offers several ways to edit and format text. You can edit text directly on the Stage and format it with the Text
inspector, or use the Text window to work in a more traditional text editing environment. The Font and Paragraph
dialog boxes contain many of the same formatting controls as the Text window and the Text inspector. Select the most
convenient option for your work style.
Selecting and editing text on the Stage
For basic text editing, it’s fastest to edit text directly on the Stage.
Edit text on the Stage
1Click a text cast member on the Stage to select it as a sprite.
The text sprite appears as a normal sprite with double borders.
Normal sprite with double borders
2Click twice to edit the text.
An insertion point appears in the text, and you can begin editing.
Edit text
3Use the Text inspector (Window > Text Inspector) to reformat the text.
You can also use the Modify > Font and Modify > Paragraph commands to reformat selected text.
When you make a change, Director updates all sprites that display the text cast member.
Note: If you’re changing the background color of text, you have two options. To change the background color of the
cast member, double-click the text sprite on the Stage and assign a value from the Color box on the Tool palette. You
can also tint the sprite’s background, which blends the background color of the cast member with the background color
of the sprite. To apply this effect, select the sprite, and select a background color on the Property inspector’s Sprite tab.
Edit text on the Stage during playback
1Select a text sprite, and click Editable on the Property inspector’s Sprite tab. For more information, see “Displaying
and editing sprite properties in the Property inspector” on page 68.
2Begin playing back the movie.
3On the Stage, click to edit the text.
Formatting characters
After you create text cast members for your movie, you can set the font, style, size, line spacing, and color. The
following procedure uses the Font dialog box, but many of the same options are available in the Text inspector and the
Text window.
1Double-click a text sprite or cast member.
179
USING DIRECTOR 11.5
Text
Last updated 9/28/2011
2Select Modify > Font to open the Font dialog box.
3Select from the following options in the Font dialog box:
•To specify the font, select a font from the list of available fonts. Be sure to use embedded fonts for movies that
you intend to distribute (for more information, see “Embedding fonts in movies” on page 175).
•To use bold, italic, underline, superscript, subscript, or strikeout for text, click the appropriate box.
•To change the point size of text, increase or decrease the size with the Size option.
•To change the distance between lines of text, increase or decrease the spacing with the Spacing option.
•To specify kerning between selected characters, use the Kerning option to specify the number of points. This
setting supplements the standard kerning that is applied to the entire cast member in the Text tab of the Property
Inspector. For more information, see “About kerning” on page 181.
•To change the text color, click the Color box and select a color from the Color menu.
Note: When you right-click the text and select Font from the pop-up menu, only the first 255 fonts are displayed. To
search for the other fonts, select Font at the end of the font list.
Formatting paragraphs
You can specify the alignment, indentation, tabs, and spacing for each paragraph in a text cast member. The following
procedure explains how to format paragraphs while you work in the Text window, but many of the same formatting
options are available in the Text inspector and the Paragraph dialog box.
1Double-click the text sprite in the Score or the text cast member in the Cast window to open the Text window.
2If the ruler is not visible, select View > Rulers.
3Place the insertion point in the paragraph you want to change, or select multiple paragraphs.
4To define tabs, use any of the following options:
•Set a tab by clicking the Tab button until the type of tab you want appears. Then click the ruler to place the tab.
Adjust ruler to place the tab
A. Tab button B. Left tab C. Center tab D. Right tab E. Decimal tab
•Move a tab by dragging the tab marker on the ruler.
•Remove a tab by dragging the tab marker up or down off the ruler.
5To set margins, drag the indent markers on the ruler.
Set margins
A. Left indent only B. First-line indent C. Right indent D. Left and first-line indent
6To set line spacing, change the setting with the Line Spacing control.
ABCDE
ABC
D
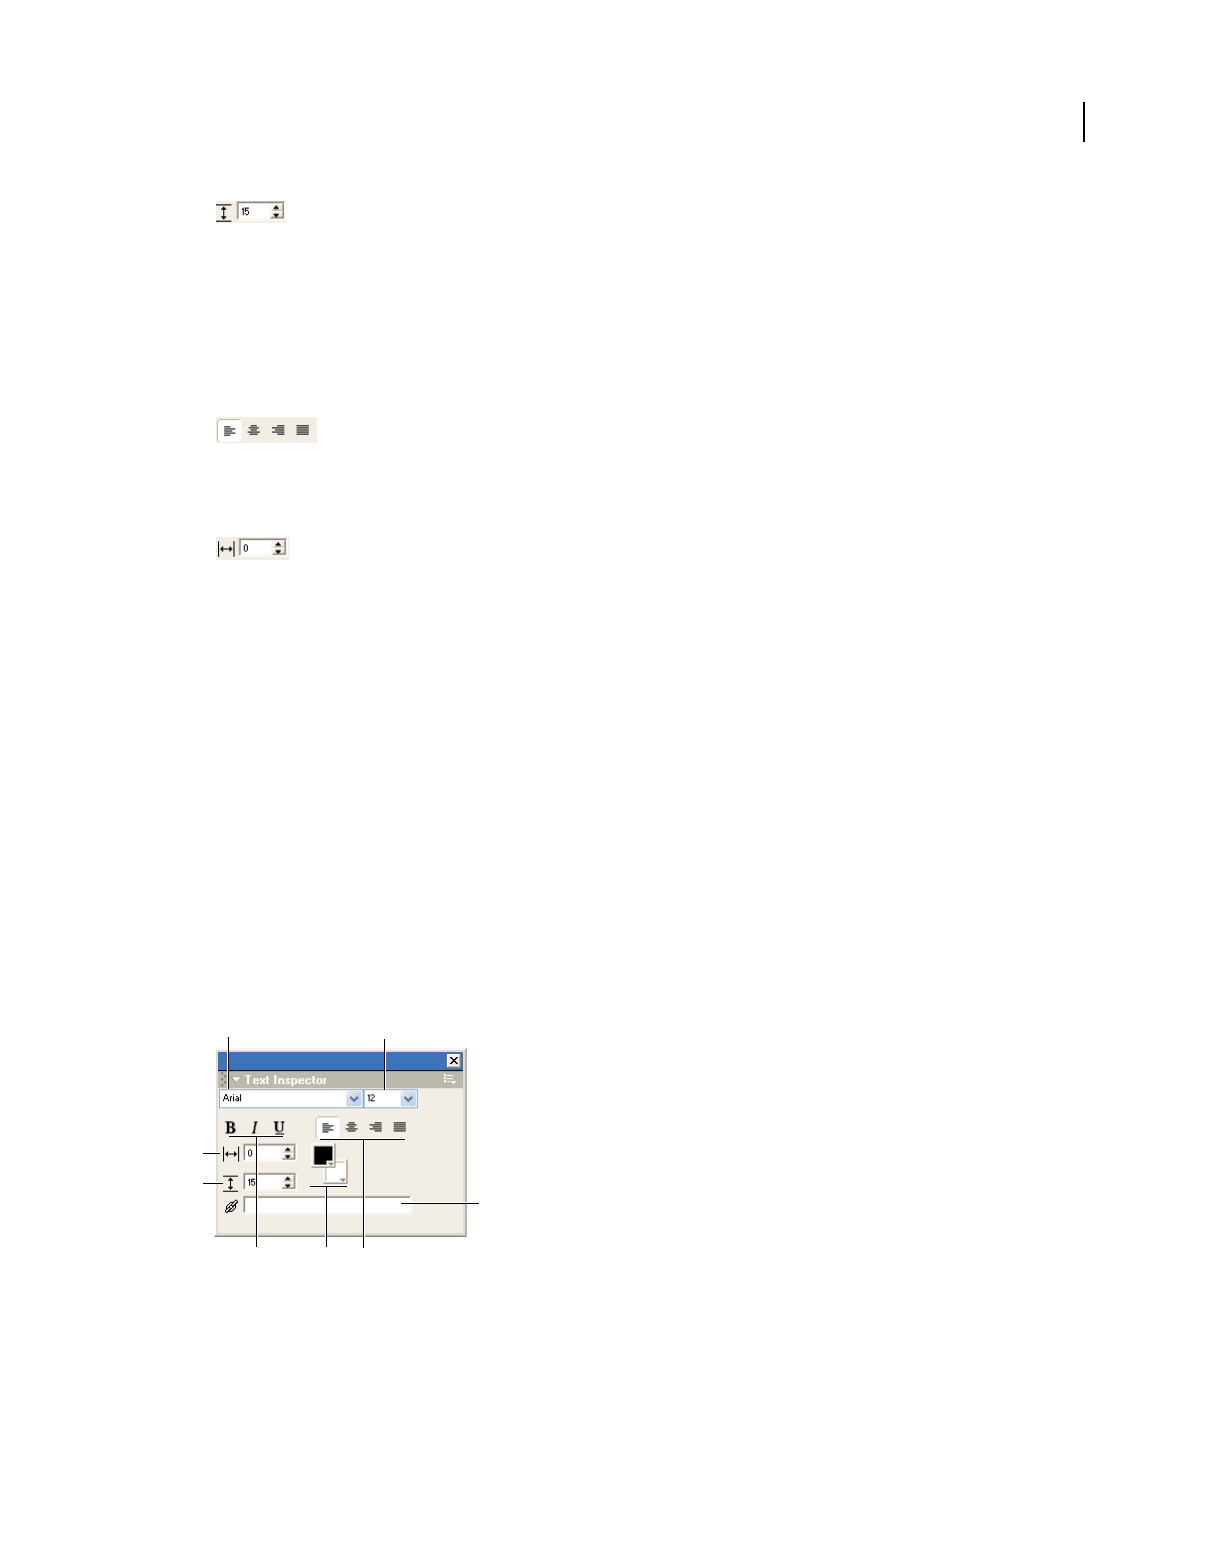
180
USING DIRECTOR 11.5
Text
Last updated 9/28/2011
Line Spacing control
Director adjusts line spacing to match the size of the text you are using.
If you change the line spacing setting, Director stops making automatic adjustments. To resume automatic
adjustments of spacing, enter 0 in the Line Spacing text box.
7To set paragraph alignment, click one of the alignment buttons.
Alignment buttons
8To change the kerning of selected characters, change the value of the Kerning option.
Kerning option
9Set spacing before and after paragraphs by selecting Modify > Paragraph and by using the Spacing Before and
Spacing After options.
Formatting entire cast members
Director can quickly apply formatting changes to entire cast members, a process that is much faster than manually
opening each cast member and applying changes. Any change you apply to a cast member affects all the text within
the cast member.
1In a Cast window or on the Stage, select all of the cast members you want to change.
2Use the Text inspector, Modify > Font, or Modify > Paragraph to make formatting changes.
Formatting with the Text inspector
The Text inspector provides many useful formatting controls in a compact window for use on the Stage or with entire
cast members in the Cast window.
Text inspector
A. Font B. Size C. Kerning D. Line spacing E. Hyperlink F. Character formatting G. Foreground and Background Colors H. Alignment
options
Most of the formatting controls also appear at the top of the Text window and in the Font and Paragraph dialog boxes.
❖Select Window > Text Inspector, or press Control+T (Windows) or Command+T (Mac).
AB
C
D
E
FGH
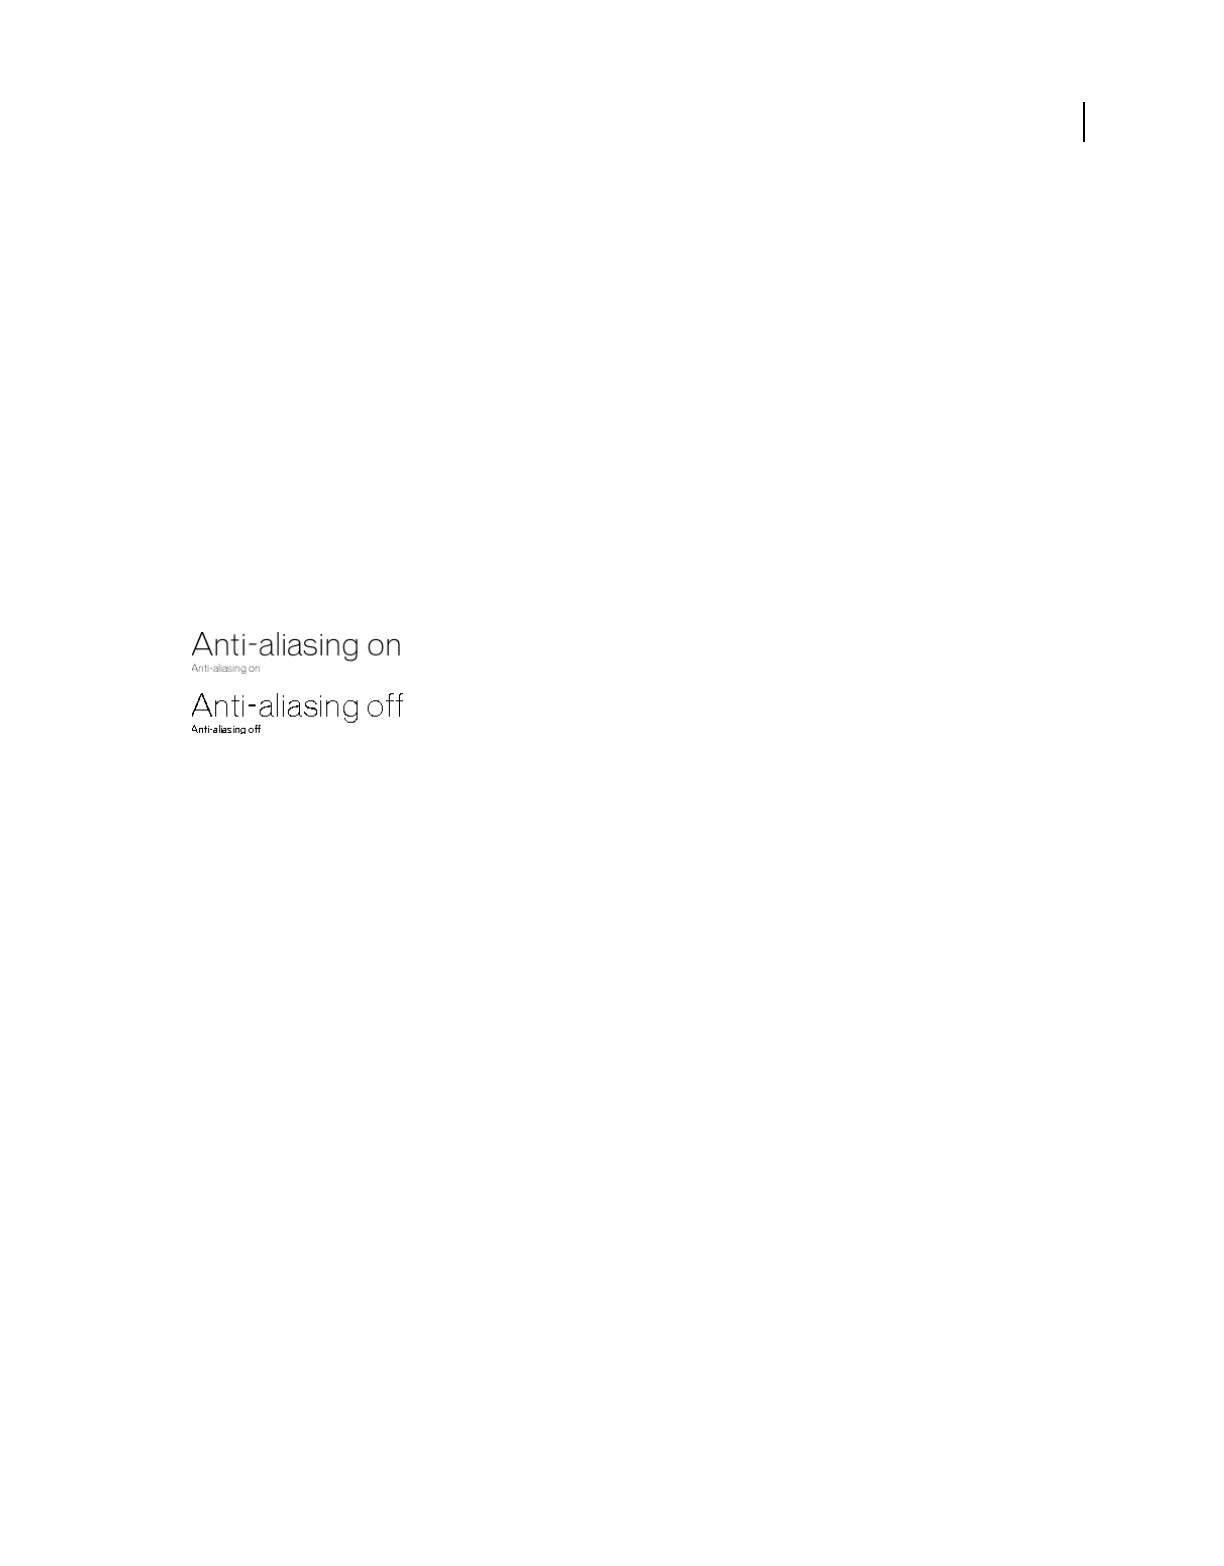
181
USING DIRECTOR 11.5
Text
Last updated 9/28/2011
Font hinting
Font hinting uses mathematical instructions to adjust the display of an outline font, such that it is aligned with a
rasterized grid. Hinting ensures that text is clear and legible for human readers at small screen sizes and low
resolutions, with or without anti-aliasing. You can change this setting using the Text tab of the Property inspector (for
more information, see “Setting text or field cast member properties” on page 185).
Director provides different hinting options that you can use to optimize the display of text.
About anti-aliased text
Anti-aliased text is text that uses color variations to make its jagged angles and curves look smoother. Director uses the
font file information for anti-aliasing by default. You can change this setting using the Text tab of the Property
inspector (for more information, see “Setting text or field cast member properties” on page 185).
Using anti-aliased text dramatically improves the quality of large text on the Stage, but it can blur or distort smaller
text. Experiment with the size settings to get the best results for the font you are using.
Director can anti-alias all fonts.
Anti-aliasing fonts
About kerning
Kerning is a specialized form of spacing between certain pairs of characters that look best when they overlap slightly,
such as A and W (AW). Kerning dramatically improves the appearance of large text for headlines, but it often doesn’t
improve the appearance of text at small font sizes.
If the Kerning option is selected on the Property inspector’s Text tab, Director kerns all the characters in the cast
member according to standard kerning tables (for more information, see “Setting text or field cast member properties”
on page 185). The setting you enter in the Kerning text box in the Text window or Font dialog box supplements the
standard kerning. (For more information, see “Formatting characters” on page 178.)
Finding and replacing text
Use the Find > Text command to quickly search for and replace text in the Text, Field, or Script window. All searches
start at the insertion point and search forward.
1Select Window > Text, Window > Field, or Window > Script to open the window in which you want to search.
2Place the insertion point at the position where you want the search to begin.
3Select Edit > Find > Text.
4In the Find box, enter the text for which you want to search.
5In the Replace box, enter the text you want to use in place of the found text.
6Click Replace All to replace all instances of the found text with the text in the Replace box field.
7To specify the cast members to search, select a Search option:
Cast Member [Cast Member Name] Limits the search to the current cast member.
Cast [Cast Name] Limits the search to cast members in the current cast.

182
USING DIRECTOR 11.5
Text
Last updated 9/28/2011
All Casts Extends the search to all cast members in all casts.
8Set additional search options.
Wrap-Around Specifies whether Director returns to the beginning of text after it reaches the end. If you select this
option but not All Casts, Director continues searching from the top of the current text after it reaches the bottom
of the window. If you select both options, Director searches all cast members of the same type (either text, field, or
script, depending on where you initiated the search), beginning with the currently selected cast member and
returning to the first cast member of that type if necessary.
Whole Words Only Searches only for occurrences of the specified whole word.
Case Sensitive Searches only for text with the same capitalization as the text in the Find box.
Creating a hypertext link
In the Text inspector, you can turn any selected range of text into a hypertext link that links to a URL or initiates other
actions. Director automatically adds standard hypertext link formatting (blue underlining) to the selected text. You
can turn off this formatting in the Property inspector’s Text tab. For more information, see “Setting text or field cast
member properties” on page 185.
The following procedure describes how to add a hypertext link to selected text. To make a hypertext link active, you
must write an on hyperlinkClicked event handler. For more information, see the Scripting Reference topics in the
Director Help Panel.
You can enter any string in the Hyperlink text box; it does not have to be a URL. The string can’t contain a double
quotation mark or the script continuation character.
1Select the text you want to define as a hypertext link.
2Select Window > Text Inspector to open the Text inspector.
3In the Hyperlink Data text box, enter the URL to which you want to link or the message you want to send to the
onhyperlinkClicked handler. Then press Enter (Windows) or Return (Mac).
Working with fields
Working with field cast members is similar to working with text. As with text cast members, you edit fields on the Stage
or in a window, and apply formatting with the Text inspector. You can’t apply spacing, tabs, or indents to individual
paragraphs within fields. Alignment settings apply to every paragraph in the field.
Create a field cast member
1Do one of the following:
•Select Insert > Control > Field.
•While in Classic mode, click the Field tool in the Tool palette, and drag on the Stage to define the area of the field.
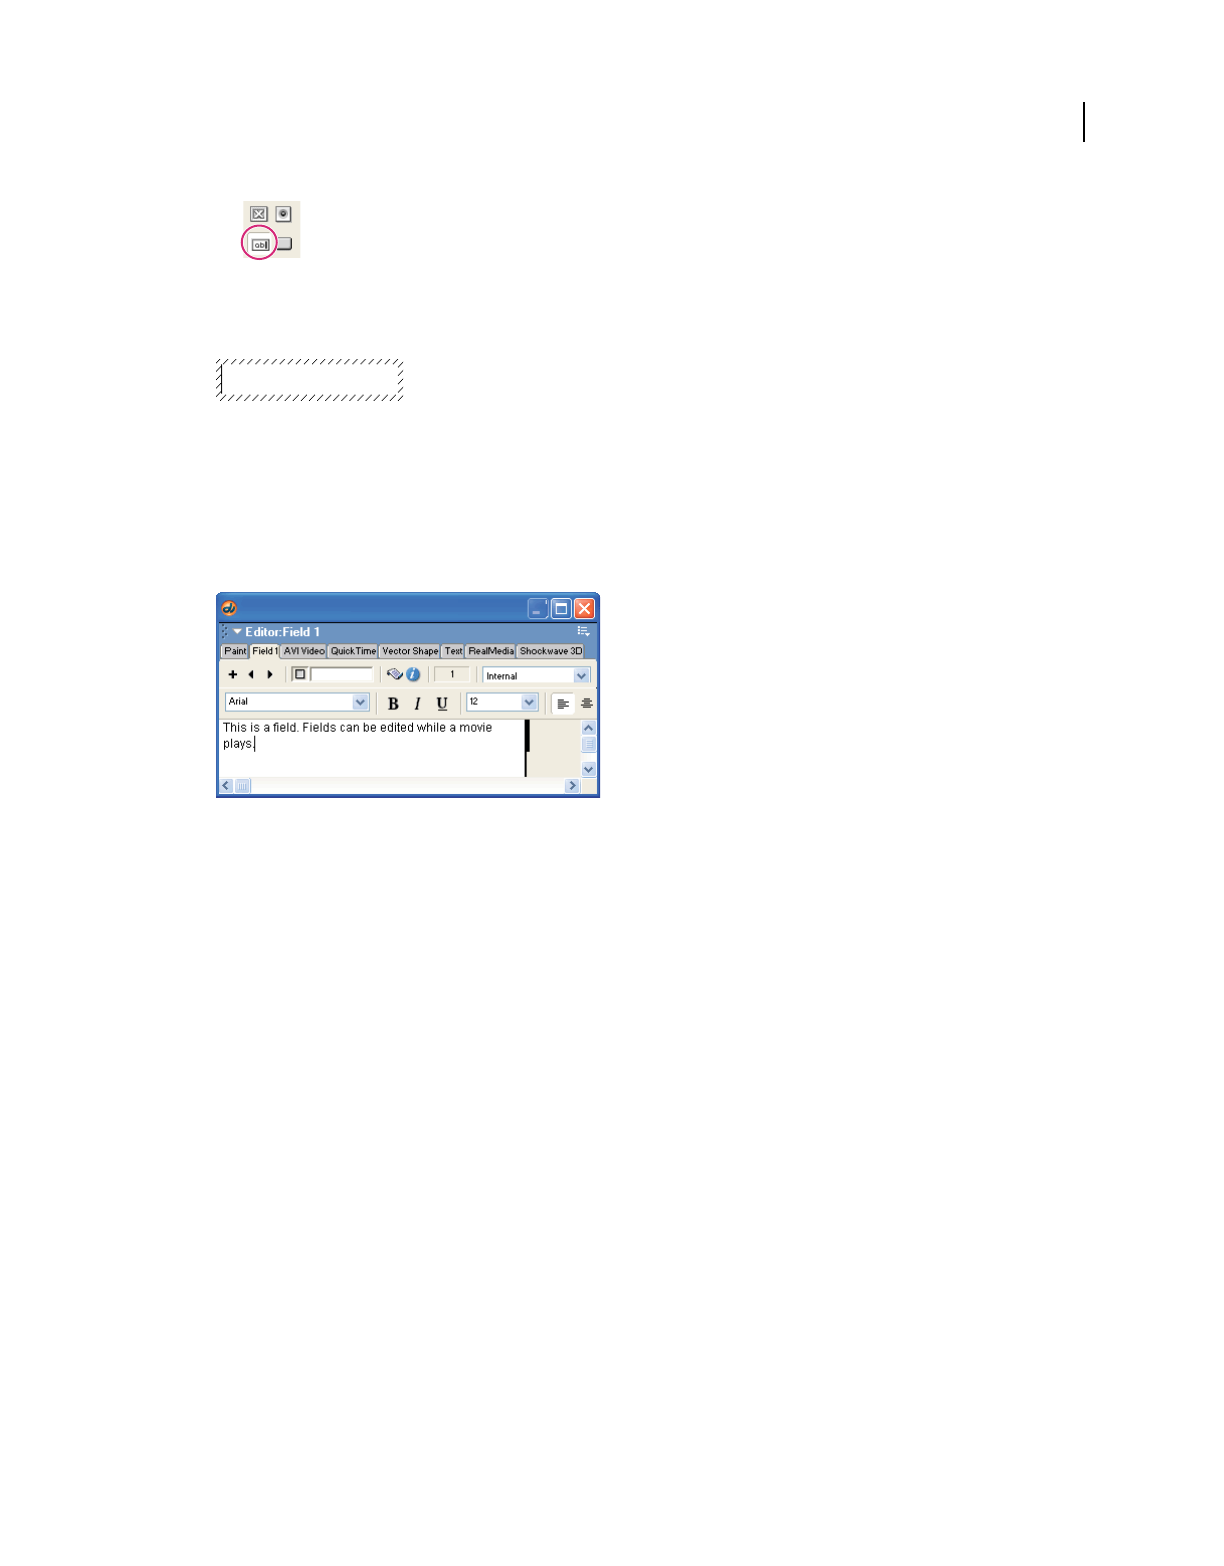
183
USING DIRECTOR 11.5
Text
Last updated 9/28/2011
Field tool
The field is created, and an insertion point is placed at the beginning of the field.
Insertion point for text
2Enter the text for the field. When you finish, click outside the field to exit the field.
Specify field settings
❖Select Window > Field, or double-click a field cast member in the Cast window.
Field cast member
If necessary, use the Previous Cast Member and Next Cast Member buttons to navigate to the field you want to edit.
For more information, see “Setting text or field cast member properties” on page 185.
Using editable text
Editable text lets users enter text on a web page, customize a game, and so on. When text is editable, editing the text
changes the text cast member and all the text in the sprites where the cast member appears.
You can make text editable and let users tab between editable sprites from script or the Property inspector. (For more
information, see “Setting text or field cast member properties” on page 185.)
You can make a text sprite completely editable or editable only in a certain range of frames in the Score.
Make a text sprite editable in a range of frames
1Select a range of frames within a sprite.
Select an entire sprite, or Shift-Alt-click (Windows) or Shift-Option-click (Mac) to select frames within a sprite.
2Click the Property inspector’s Text or Field tab by using the Graphical view.
3Click Editable.

184
USING DIRECTOR 11.5
Text
Last updated 9/28/2011
Control whether text is editable with Lingo or JavaScript syntax
❖Set the editable property. For more information about this property, see the Scripting Reference topics in the
Director Help Panel.
Specify whether pressing the Tab key opens the next sprite for editing
❖Set the autotab property. For more information about this property, see the Scripting Reference topics in the
Director Help Panel.
Converting text to a bitmap
Use the Convert Bitmap command to change a text or field cast member to a bitmap. The converted graphic can then
be edited in the Paint window. After you convert a cast member to a bitmap graphic, you can’t undo the change.
This command works only with text and field cast members. You can’t convert a shape to a bitmap.
1In the Cast window, select the cast members to convert.
2Select Modify > Convert To Bitmap.
Mapping fonts between platforms for field cast
members
Director uses a file named Fontmap.txt to map fonts in fields between the Windows and Mac platforms. When you
create a new movie, Director looks for Fontmap.txt in the same folder as the Director application.
The version of Fontmap.txt that is included with Director assigns fonts as shown in the following table. These settings
provide the best equivalents of common system fonts on both platforms.
Fontmap.txt also determines the scaling of fonts and how special characters such as bullets and symbols are translated
between platforms. Again, the default settings are correct for nearly all applications, but you can edit the settings if
necessary
Windows font Mac font
Arial Helvetica
Courier Courier
Courier New Courier
MS Serif New York
MS Sans Serif Geneva
Symbol Symbol
System Chicago
Terminal Monaco
Times New Roman Times (because Times New Roman is larger than Times, Fontmap.txt
assigns a smaller point size.)

185
USING DIRECTOR 11.5
Text
Last updated 9/28/2011
You can also load and save fontmaps by using the Property inspector.
Save and load fontmaps
1Click on the Stage and select Window > Property Inspector. Make sure that the Property inspector is in graphical
view.
2Select the Movie tab from the Property inspector.
3In the Font Map area near the bottom of the Movie tab do one of the following:
•Click the Save button. A dialog box opens that prompts you to enter a name for the fontmap and to select a folder
in which to save the fontmap file.
•Click the Load button. In the dialog box that opens, enter the name for the fontmap or browse for the file.
Setting text or field cast member properties
Use the Property inspector to view and change settings for selected text cast members. In addition to standard Name
and Unload properties, you can specify whether text is editable while the movie plays, improve performance with pre-
rendering, and control anti-aliasing and kerning.
1Select a text cast member in the Cast window.
2To display the Property inspector, perform one of the following actions:
•Select Modify > Cast Member > Properties.
•Select Window > Property Inspector.
3Click the Member tab, if it’s not already selected, using the Graphical view.
The following noneditable settings appear:
•The cast member size in kilobytes
•The cast member creation and edit dates
•The name of the person who last modified the cast member
4To view or edit the cast member name, use the Name text box.
5To add comments about the cast member, use the Comments text box.
6To specify how Director removes the cast member from memory if memory is low, select an option from the
Unload menu. For more information, see “Controlling cast member unloading” on page 46.
7To change the text of the cast member, click Edit.
8Click the Property inspector’s Text or Field tab by using the Graphical view.
9To determine how Director places text within the boundaries of the cast member, select a Framing option:
Adjust to Fit Expands the text box vertically when text that is entered extends beyond the current size of the box.
Scrolling Attaches a scroll bar to the right side of the text box. This is useful when there is a large amount of text.
The scroll bar is drawn Direct To Stage, which means that even if another cast member is in front of a cast member
that contains a scroll bar, the scroll bar appears in the front.
Fixed Retains the original size of the text box. If you enter text that extends beyond the limits of the box, the text is
stored but doesn’t appear. You can set up scrolling with some script in Lingo or JavaScript syntax. (For more
information, see “Controlling scrolling text with Lingo or JavaScript syntax” on page 189.)

186
USING DIRECTOR 11.5
Text
Last updated 9/28/2011
Limit to Field Size (Available only for field cast members) Displays only the amount of text that fits within the
field’s bounding rectangle.
10 To set editing and display options, select from the following options:
Editable Makes the cast member editable while the movie plays. (For more information, see “Using editable text”
on page 183.)
Wrap Increases the vertical size of the text box or field on the Stage so that all text is visible.
Tab Advances the text insertion point to the next editable sprite on the Stage when the user presses Tab.
DTS (Direct To Stage) (Text cast members only) Makes text display more quickly by rendering it directly to the
Stagewithout composing it with other sprites. Selecting the DTS option prevents other sprites from appearing over
the text and limits the ink options to Copy.
Use Hypertext Styles (Text cast members only) Makes hypertext links appear as they would in a web browser (with
blue underlining), and then appear in red after the link has been visited. (For more information, see “Creating a
hypertext link” on page 182.)
11 To make text of a text cast member appear on the Stage more quickly, select a pre-render option. Pre-rendering
controls when text buffers are created.
Without pre-rendering, large amounts of anti-aliased text can cause a noticeable delay when the text is displayed
for the first time. When a pre-render option is selected, text buffers are created when the current text member is
loaded, instead of when the member first appears on the Stage.
Select a pre-render option from the Pre-Render menu:
None Provides no pre-rendering.
Copy Ink Optimizes the pre-rendering for Copy Ink. (This option renders text more quickly than Other Ink.)
Other Ink Pre-renders the text for all other ink types.
If you select a pre-render option, you can make text appear on the Stage even more quickly by selecting Save
Bitmap. See “Using the Save Bitmap feature for pre-rendered text” on page 187.
12 To control how Director anti-aliases text for a text cast member, select an Anti-Alias option:
Auto Uses the font file information for anti-aliasing.
Grayscale All Enables grayscale anti-aliasing for all text members.
Subpixel All Enables sub-pixel anti-aliasing for all text members.
Grayscale Larger Than Enables grayscale anti-aliasing for font sizes greater than the specified threshold.
None Turns off anti-aliasing for the current cast member.
Anti-aliasing dramatically improves the appearance of large text, but it can blur or distort smaller text. Experiment
with the size setting to get the best results for the font you are using. (For more information, see “About anti-aliased
text” on page 181.)
13 To control how Director kerns text, select a Kerning option. (Kerning often does not improve the appearance of
text at small point sizes. For more information, see “About kerning” on page 181.)
All Text Kerns all the text in the cast member according to the standard kerning table.
Larger Than Kerns only text that is larger than the point size entered in the Points text box.
None Turns off kerning for the current cast member.

187
USING DIRECTOR 11.5
Text
Last updated 9/28/2011
14 To add borders and shadings (field cast members only), select options from the Box Shadow, Border, Drop Shadow,
and Margin menus.
15 To control how Director performs font hinting for a text cast member, select one of the following hinting options:
Auto Uses the information in the font file for hinting.
Algorithmic Uses the text engine for the hinting operation.
TVMode Symmetrizes characters horizontally and vertically and uses the text engine for hinting.
None Turns off hinting for the current cast member.
Using the Save Bitmap feature for pre-rendered text
The Save Bitmap feature works with pre-render options to display a buffer image of your text while your user waits for
the actual text to load. This feature is useful when you’re working with a large amount of anti-aliased text. (The Save
Bitmap feature is different from the Convert To Bitmap menu command, which converts a text cast member into a
bitmap image.)
You can also use the Save Bitmap feature with pre-render options if you’re using special text characters for an audience
that is not equipped to display them. For example, using Save Bitmap enables a non-Japanese system to display a text
sprite that contains Japanese characters. Using the Save Bitmap option adds to the file size. The feature works with
static text but not with editable or scrolling text.
1Select the text sprite.
2On the Property inspector’s Text tab, select from the Pre-Render pop-up menu:
•If the text sprite’s ink is Copy Ink, select Copy Ink.
•If the text sprite’s ink is any type of ink other than Copy Ink, select Other Ink.
For this procedure to work, you must make the correct selection from the Pre-Render menu. To determine the
Sprite’s ink, see the Sprite tab of the Property inspector.
3Select Save Bitmap.
Formatting chunks of text with Lingo or JavaScript
syntax
The Director interface lets you format a variety of text characteristics, such as the font, size, style, and line spacing.
Using Lingo or JavaScript syntax, you can format text dynamically as the movie plays. You can also use script to rapidly
format text during authoring.
Formatting text with Lingo or JavaScript syntax
Lingo or JavaScript syntax can format text in an entire cast member or any specific chunk of text. Use the following
properties:
•To select or identify a chunk of text in a field cast member, use the selStart and selEnd cast member properties.
These properties identify the first and last characters of a text selection.
•To refer to a selected chunk of text, use the selection cast member property.
•To specify the font for a text cast member, field cast member, or chunk expression, set the font cast member
property.

188
USING DIRECTOR 11.5
Text
Last updated 9/28/2011
•To specify the character size for a text cast member, field cast member, or chunk expression, set the fontSize
property.
•To specify the line spacing for a field cast member, set the lineHeight property.
•To specify the style for a text cast member, field cast member, or chunk expression, set the fontStyle property.
•To specify the drop shadow size for the characters in a field cast member, set the boxDropShadow property.
•To specify additional spacing to be applied to a chunk expression in a text cast member, set the charSpacing
property.
•To specify the foreground color for a field cast member, set the foreColor property.
For more information about these properties, see the Scripting Reference topics in the Director Help Panel.
Applying paragraph formats with Lingo or JavaScript syntax
Lingo or JavaScript syntax can control paragraph formatting such as alignment and indenting for a chunk expression:
•To set text alignment for a text or field cast member, set the alignment property.
•To set line spacing in points for a text cast member, set the fixedLineSpace property.
•To add pixels below paragraphs in a text cast member, set the bottomSpacing property.
•To add pixels above paragraphs in a text cast member, set the topSpacing property.
•To specify line spacing in a field cast member, set the lineHeight property.
•To add pixels to the first indent in a chunk expression in a text cast member, set the firstIndent property.
•To set the left indent (in pixels) of a chunk expression in a text cast member, set the leftIndent property.
•To set the right indent (in pixels) of a chunk expression in a text cast member, set the rightIndent property.
•To specify or obtain a list of tabs that are in a chunk expression in a text cast member, set or test the tabs property.
For more information about these properties, see the Scripting Reference topics in the Director Help Panel.
Formatting text or field cast members with Lingo or
JavaScript syntax
In addition to formatting text in any chunk expression, Lingo or JavaScript syntax can specify anti-aliasing and kerning
for an entire text cast member and control the appearance of the text’s bounding rectangle.
Setting anti-aliasing and kerning with Lingo or JavaScript syntax
You can use Lingo or JavaScript syntax to specify anti-aliasing and kerning for a text cast member as follows:
•To specify whether Director anti-aliases text in a text cast member, set the antiAliasType cast member property.
•To specify the size at which anti-aliasing in a text cast member takes effect, set the antiAliasThreshold cast
member property. You have to specify this threshold when you set the antiAliasType to
#GrayscaleLargerThanAlias.
•To specify automatic kerning for a text cast member, set the kerning cast member property.
•To specify the size at which automatic kerning for a text cast member takes effect, set the kerningThreshold cast
member property.

189
USING DIRECTOR 11.5
Text
Last updated 9/28/2011
For more information about these properties, see the Scripting Reference topics in the Director Help Panel.
Formatting text boxes with Lingo or JavaScript syntax
Lingo or JavaScript syntax can specify the type of box that surrounds a text or field cast member. For field cast
members, script can also specify box characteristics such as borders, margins, drop shadows, and height.
•To specify the type of box around a text or field, set the boxType cast member property.
•To specify the size of the border around a field, set the border field cast member property.
•To specify the size of the margin inside a field’s box, set the margin field cast member property.
•To specify the size of the drop shadow for a field’s box, set the boxDropShadow field cast member property.
•To specify the height of a field’s box on the Stage, set the pageHeight field cast member property.
For more information about these properties, see the Scripting Reference topics in the Director Help Panel.
Setting text autotabbing and wrapping with Lingo or JavaScript syntax
Lingo or JavaScript syntax can set text autotabbing and wrapping.
•To specify autotabbing for text or field cast members, set the autoTab cast member property.
•To specify whether lines wrap in a field cast member, set the wordWrap cast member property.
For more information about these properties, see the Scripting Reference topics in the Director Help Panel.
Controlling scrolling text with Lingo or JavaScript
syntax
You can script in Lingo or JavaScript syntax to scroll text and determine the location of specific text within the text box
for text and field cast members. For example, the following statement sets the scrollTop value for the text cast
member called Discussion to 0, which makes its first line appear at the top of its scrolling field:
member("Discussion").scrollTop = 0
This procedure can be useful for making a scrolling field automatically scroll back to the top. For more information
about the following methods and properties, see the Scripting Reference topics in the Director Help Panel.
•To scroll up or down by a specific number of pages in a text or field cast member, use the scrollByPage method.
•To scroll up or down by a specific number of lines in a text or field cast member, use the scrollByLine method.
•To determine the number of lines that appear in a field cast member on the Stage, set the lineCount cast member
property. (This property doesn’t apply to text cast members.)
•To determine a line’s distance from the top edge of a field cast member, use the linePosToLocV() method.
•To determine the number of the line that appears at a specific vertical position in a field cast member, use the
locVToLinePos() method. (This measures the distance from the top of the cast member, not what appears on the
Stage.)
•To determine the point in a field cast member that is closest to a specific character, use the charPosToLoc()
method.
•To determine the character that is closest to a specific point in a field cast member, use the locToCharPos()
method.

190
USING DIRECTOR 11.5
Text
Last updated 9/28/2011
•To check or set the distance from the top of the line that is currently visible to the top of the box for a scrolling field
cast member, test or set the scrollTop cast member property.
Checking for specific text with Lingo or JavaScript
syntax
The script operators contains and the equals symbol (=) are useful for checking strings. The contains operator
compares two strings to see whether one string contains the other. The equals symbol operator can determine whether
a string is exactly the same as the contents of a field cast member. Use these operators to check whether a specified
string is in a field cast member. For more information, see the Scripting Reference topics in the Director Help Panel.
You can also use script to evaluate strings returned by the text property of a text or field cast member. For more
information about this property, see the Scripting Reference topics in the Director Help Panel.
Modifying strings with Lingo or JavaScript syntax
At some point, you might want to update and change text. For more information, see the Scripting Reference topics
in the Director Help Panel.
•To set the entire content of a text or field cast member, set the text cast member property to a new chunk of text.
The chunk can be a string or another text cast member.
•To combine character strings, use the & and && operators. The & operator attaches the second string to the end of
the first string. The && operator includes a space between two strings when they are combined.
•To insert a string of characters into another string, use the text property. For example, sprite(1).text =
sprite(1).text + "someWord".
•To delete a chunk expression from a string of text, use the delete method.
Unicode support in Director
Unicode is an industry text-encoding standard that lets computers consistently represent and manipulate text
expressed in any of the world's writing systems.
Adobe Director supports Unicode and provides support for multilingual data in movies. Using Director, you can
create and view movies containing text in languages other than English.
Director uses UTF-8 encoding for Unicode support. External data formats that are supported are DBCS, UTF-8, UTF
16, and UTF 32.
Previous versions of Xtras should be upgraded using the XDK provided with Director to make them Unicode-
compliant. For more details, refer to the XDK documentation.
You can use Director's Unicode support to perform tasks such as creating cast members, creating external casts, adding
comments for a cast member, naming files, and linking casts in any language. Unicode support in scripting helps you
to create variables, function names, and strings in multiple languages.

191
USING DIRECTOR 11.5
Text
Last updated 9/28/2011
Limitations of Unicode support in Director
•Languages written right-to-left are not supported.
•Unicode names for HTTP paths are not supported.
•You cannot name a scripting Xtra as a Unicode string using the 'kMoaMmDictType_MessageTable' registry key.
Also, you cannot expose lingo functions named in Unicode by using the scripting Xtras.
•3D model names are not supported in Unicode.
•The .x32 file on Windows and the .xtra file on Mac that is copied into the configuration Xtras folder should not
have a Unicode name.
•Because browsers support only ASCII characters in the URL, you cannot play a Director movie in the following
scenarios:
•Playing a movie published to the internet using a Unicode name.
•Playing a movie with a Unicode name downloaded from the browser.
•Playing a Shockwave® movie that has an external cast or is an externally linked cast member with a Unicode name
accessed from a URL.
•To view Unicode text correctly in the Shockwave® Player, users must install the required fonts on their computer.
Creating Director movies in multiple languages
You can use Director's Unicode support to create movies in languages other than English.
1Select the language from the language bar (Windows) or International settings (OS X 10.4 for Mac®s with Intel®
processors).
2Open Director.
3Open a text field (such as a text editor or script editor) in which you want to type in the selected language.
4From the font options in the text editor, select a font for the selected language. For the script editor or message
window, select Edit > Preferences > Script, and click the Font button in the Script Window Preferences dialog box
to set the font.
5Start typing content in the selected language.
Before you input and display multilingual text in your document, configure the regional language or locale settings on
your computer to add the required languages for keyboard input.
Viewing Director movies in multiple languages
To view Director movies created in any of the Unicode-compliant languages, you must have the required fonts and
language packs installed on your computer.
Setting up input languages on Windows
The Microsoft® Windows® XP Service Pack 2 (SP2), Microsoft Windows 2000, and Windows Vista™ operating systems
have Regional and Language settings, which can be used to add additional languages for keyboard input. These
languages and speech settings appear in the Language bar on the desktop. After you select a language and set up a
localized keyboard, you can start typing the required text in the document. The keyboard layouts are defined by
Microsoft.
1Install the required fonts in the Windows Fonts directory. For east-Asian languages like Japanese, Chinese (S and
T), and Korean, install the corresponding language packs.

192
USING DIRECTOR 11.5
Text
Last updated 9/28/2011
2On your computer, open the Control Panel and double-click the Regional And Language Options icon to open the
Regional And Language Options dialog box.
3Click the Languages tab.
4Click the Details button to open the Text Services And Input Languages dialog box.
5In the Settings tab, click the Add button.
6Select a language from the Input language list.
7Click OK. The selected language is included in the Installed services list.
8Select the desired language in the Default input language list.
9Click Apply and click OK to save the settings and close the Text Services And Input Languages dialog box.
10 Click the Regional Options tab, and then choose the language you selected in the default input language list.
Click Apply and then click OK to save the settings and close the Regional And Language Options dialog box. The
Language bar or the Input Method Editor (IME) appears in the system tray of your computer.
Storing text in any character set
In Director 11, strings must contain only valid UTF-8 characters. This limitation causes problems if you want to
represent non-UTF-8 characters in Lingo. Also, reading or writing binary data to a file is not possible in Director 11.
As a solution, Director 11.5 provides a new Lingo object called ByteArray. The ByteArray object can be used to store
text in any character set, as well as non-text data. In addition, it also enhances some of the existing Director Xtras.
Use ByteArray to do the following:
•Represent non-UTF-8 strings or any binary data
•Devise a framework to serialize the state of a Lingo/JavaScript object
•Read/write binary data, or a mix of binary and text data, from a file
•Handle text files for any character set
•Download or upload non-UTF-8 data from the Internet
•Implement algorithms in Lingo that require byte-level access. For example, implement an encryption algorithm in
Lingo.
Character sets in Lingo
Lingo exposes methods for querying the supported character sets on a system.
Director supports a subset of the style character-set definitions specified by the IANA
(www.iana.org/assignments/character-sets). Character sets of ten languages are supported.
Character-set conversion rules
The rules for character conversion are as follows:
•The default character set in all cases is UTF-8.
•If a character cannot be represented in the specified character set, Director substitutes it with the "?" character.
•Best practice is to use UTF-8 encoding wherever possible and to check the support status of a character set before
using it.

193
USING DIRECTOR 11.5
Text
Last updated 9/28/2011
XML Xtra
XML documents can be created using any encoding, and encoding information is embedded using this XML
declaration tag:
<?xml version="1.0" encoding="utf-8"?>
Further, XML documents can potentially embed binary data blobs inside them, making it impossible to represent the
entire XML document using UTF-8.
Director 11.5 introduces a new method in the XML parser to handle byte arrays. The XML parser uses the XML
declaration tag of the document to identify the text encoding of a document.
Setting up input languages on OS X 10.4 for Macs with Intel processors
It is not necessary to install language packs on OS X 10.4 for Macs with Intel processors, which come equipped with
language packs.
1Click System Preferences to open the System Preferences dialog box.
2Click International. The International dialog box appears.
3Click Input Menu.
4Select a language from the list that appears.
5Close the Input Menu.

194
Last updated 9/28/2011
Chapter 10: Using Flash, Flash
Components, and Other Interactive Media
Types
Introduction
To add complex media and new capabilities to your Adobe® Director® movie, you can use Flash® content, Flash
components, other Director movies, and ActiveX controls. Each of these multimedia formats has interactive
capabilities that are preserved by Director.
Flash content in a Director movie provides a vector-based, scalable, interactive animation that is optimized for use on
the web.
Director provides you with a set of Flash built-in components, which are movie clips with defined parameters. Use
these components to add user interface elements, such as buttons and check boxes to your movies. You can use these
components and set properties and events without having Flash installed.
Director movies within other Director movies simplify complex productions. A linked movie appears within another
movie as a single cast member. This eliminates the need to manage extra cast members and Score data. Using discrete
movies also helps you manage file size for easier downloading.
ActiveX controls in Director can manage ActiveX application resources from within a movie. ActiveX controls provide
a variety of features, including web browsing, spreadsheet functions, and database management. ActiveX controls
function as normal sprites in a movie. ActiveX controls work only in Director for Windows® and only in projectors.
Using Flash Content
You can incorporate Flash vector-based animation in your Director movies and projectors simply by importing Flash
content into Director and using it like any other cast member. Effects that once required multiple versions of a bitmap
cast member, such as blending one shape into another, can be accomplished with a single, small Flash file.
Director can import Flash 2 files or later. Director supports the features of Flash 9, including access to Flash Media
Server. However, Flash 9 movies with AS3 or Flex components may not work as intended in Director.
In Director, you can control nearly every Flash property (including playing, rewinding, stepping forward and
backward through all Flash content, adjusting quality settings, and turning sound on or off) by using Lingo or Java
Script syntax.
In Flash, you can create cross-platform Windows and Mac® movies and then play or manipulate them in Director. You
can create Flash content that communicates with your Director movie by sending events that Director scripts can
capture and process. You can store entire Flash files in the Director cast file, or you can link to external Flash content.
Director automatically loads the Flash content it encounters in the Score into memory from disk, from a network drive,
or from anywhere on the Internet.

195
USING DIRECTOR 11.5
Using Flash, Flash Components, and Other Interactive Media Types
Last updated 9/28/2011
Flash content is particularly effective for use in Shockwave® Player content, because as vector-based media, it is
extremely small and therefore loads much more quickly than most other media types. Because Flash content is vector-
based, you can scale and rotate the Flash content while still maintaining their sharpness. For example, you can create
splash screens for your Shockwave Player content that loads quickly and entertains your users while the rest of the
Director movie streams into memory, or you can create interactive maps in Flash that users can pan across or zoom
in on to reveal details with vector-based precision.
Director uses the Flash asset commonPlayer. The commonPlayer property applies to all Flash assets, Vector shapes,
and Flash components. It lets you load multiple Flash sprites into one instance of the Flash Player rather than requiring
one Flash Player for each Flash sprite on the Stage. The commonPlayer feature is designed to provide better Flash
playback performance in Director projects that use large numbers of Flash assets.
Note: commonPlayer is not supported in Director11.
Adding a Flash content cast member
All Flash cast members added to a Director movie must have been created with Flash 2.0 or later and saved in the Flash
format (SWF).
Use the following procedure to create a Flash cast member and set properties for it at the same time. You can also
import a cast member by using the Import command or by dragging and dropping an SWF file to the Director Cast
window.
1Select Insert > Media Element > Flash Movie.
2In the Flash Asset Properties dialog box, select the Flash movie (SWF) file you want to add to your Director cast.
•To add a file from your computer or from a network drive, click Browse, select the file, and click Open. Because
Director creates a relative link to the file, it must maintain the same location relative to the Director file or the
link becomes invalid.
•To add a file from a location on the Internet, click Internet, type the URL of the file, and click OK.
•Type the pathname or the URL of the file in the Link File box.
3Set Media options:
Linked Leaves the actual media of the Flash content stored in an external file. When a sprite created with this cast
member appears on the Stage in a Director movie, the file is loaded automatically into memory in the location
specified in the Link File box. Deselect Linked to copy the Flash content into the cast.
Preload Requires Director to load all the Flash content into memory before playing the movie’s first frame.
Deselect Preload to start playing the movie immediately, while continuing to stream the cast member into memory.
This option is available only if you selected Linked. If the Flash file is internal instead of linked, it must load
completely into memory before beginning to play.
4Select Playback options to control how a Flash content sprite plays in a Director projector, in Shockwave content,
and while you are authoring in Director:
Image Displays the image of the Flash content when it plays. When Image is deselected, the Flash movie is invisible.
Sound Enables any sound in the Flash content to play. When Sound is deselected, the movie plays without sound.
Paused Displays only the first frame of the movie without playing the movie. When Paused is deselected, the movie
begins playing immediately when it appears on the Director Stage.
Loop Makes the movie play again from frame 1 once it finishes. When Loop is deselected, the movie plays once and
stops.

196
USING DIRECTOR 11.5
Using Flash, Flash Components, and Other Interactive Media Types
Last updated 9/28/2011
Direct To Stage Displays the movie when it appears on the Stage with the fastest, smoothest playback. Deselect
Direct To Stage to have Director apply ink effects and perform compositing of the sprite with other sprites in a
memory buffer before actually displaying it. The disadvantages of the Direct To Stage option are that the movie
always appears on top of other sprites, regardless of the channel in which it appears in the Score, and ink effects
don’t work.
5Specify a Scale value by typing the percentage to scale the cast member.
6Specify a Quality value:
•Select a high-quality setting to have the Flash content play with anti-aliasing turned on, which slows down
performance. Select Auto-High to have Director start playing the movie with anti-aliasing on. Turn it off if it
can’t play the movie at the required frame rate.
•Select a low-quality setting to turn off anti-aliasing but speed up performance. Select Auto-Low to have Director
start playing the movie without anti-aliasing. Turn on anti-aliasing if it can do so and continue playing the movie
at the required frame rate.
7Select a Scale Mode value to control how the Flash content sprites are scaled on Stage:
Show All Maintains the movie’s aspect ratio and, if necessary, fills in any gaps along the horizontal or vertical
dimension, using the movie’s background color.
No Border Maintains the movie’s aspect ratio by cropping the horizontal or vertical dimension as necessary
without leaving a border.
Exact Fit Stretches the movie to fit the sprite exactly, disregarding the aspect ratio.
Auto-Size Adjusts the sprite’s bounding rectangle to fit the movie when it is rotated, skewed, or flipped. This option
always sets the scale to 100% in the Director score.
No Scale Places the movie on the Stage with no scaling. The movie stays the same size regardless of how you resize
the sprite, even if it means cropping the movie.
8Select a Rate value to control the tempo at which Director tries to play Flash content:
Normal Plays the Flash content at the tempo stored in Flash content.
Fixed Plays the movie at the rate you specify by typing a value in the entry box.
Lock-Step Plays a frame of the Flash content for each Director frame.
Note: Flash content does not play faster than the frame rate set in the Director movie. You can also use Lingo or
JavaScript™ syntax to adjust these and other properties of the Flash content.
About using Flash content in a Director movie
Once you have added Flash content to the Director cast, use it in your movie by dragging it to the Stage and positioning
it where you want it. You can then use the Flash content sprite in much the same way that you use other sprites.
When working with Flash content on the Stage, keep the following points in mind:
•Flash content animation plays only as long as the Flash content sprite is actually on the Stage. (Flash content
resembles digital video and sound sprites in this regard.)
•Because Flash content uses a vector graphics format, you can stretch the application’s sprite without loss of clarity.
•You can rotate, skew, scale, or flip Flash content just as you would for a vector shape or bitmap.
•If the movie is set up to play Direct To Stage, the movie always appears on top of other sprites, regardless of the
channel in which it is placed, and ink effects are ignored.

197
USING DIRECTOR 11.5
Using Flash, Flash Components, and Other Interactive Media Types
Last updated 9/28/2011
•Only the Copy, Background Transparent, and Blend options work with Flash content when the sprite is not played
Direct To Stage.
•Blend and color settings are supported for Flash sprites, just as they are for vector shapes.
Editing a Flash cast member
If you have Flash MX or later installed, you can launch the Flash authoring tool from within Director to edit your Flash
cast members.
Do one of the following:
•Double-click the Flash cast member in the cast or a Flash sprite in the Score or on the Stage.
•Select Edit > Launch External Editor while a Flash cast member is selected.
If Flash MX or later is installed and the Flash source file (FLA) is specified in the Property inspector, Flash starts with
the source file open for editing, and changes are immediately reflected in Director when the Flash file is saved in Flash.
If the source file is not specified in the Property inspector, a dialog box appears for locating the source file. If Flash MX
or later is not installed, the Flash properties dialog box opens instead.
Specify a source file (FLA) path for an SWF cast member before initiating a
launch and edit session
1Select the SWF cast member in the cast.
2Open the Property inspector.
3Select the Flash tab.
4Enter the path in the Filename field or browse to the file.
If you install Flash MX or later before installing Director, Flash is added automatically to the list of external editors
when you install Director. If you install Flash after installing Director, you can enable Flash launch and edit by adding
Flash to the list of external editors.
Note: The name of the folder containing the Flash file to be edited must be in English. If you try to edit a Flash file in a
folder that has a Unicode name, Director stops responding.
Add Flash to the list of external editors
1Select Edit > Preferences > Editors.
Note: If you are using a Mac OS® X operating system, select the Director menu, instead of the Edit menu, to access
Preferences.
2Select Flash, and click Edit.
3Select Use External Editor, and click Browse.
4Browse to the location of your Flash application.
5Select the Flash application file, and click Open.
6Click OK, and then click OK again.
Flash starts when you double click a Flash cast member.

198
USING DIRECTOR 11.5
Using Flash, Flash Components, and Other Interactive Media Types
Last updated 9/28/2011
Controlling Flash content with Lingo or JavaScript
syntax
Lingo or JavaScript syntax gives you precise control over the way Director streams and displays Flash content. Use
these scripts to check and control cast member streaming, to zoom and colorize the Flash asset, and to pan the Flash
image.
When a movie is playing, Lingo or JavaScript syntax can change the Flash cast member’s properties. Some cast member
properties, such as the flashRect and frameRate cast member properties, are valid only after the Flash content
header has streamed into memory.
The following Lingo or JavaScript syntax lets you manage how Director uses Flash content. For more information, see
the Scripting Reference topics in the Director Help Panel.
•To control whether changes to a Flash cast member immediately appear in sprites that use the cast member, set the
cast member’s broadcastProps property.
•To control whether Flash content is stored in an external file, set the linked property.
•To control which frame of Flash content is used for the Flash contents thumbnail image, set the posterFrame
property.
•To display a list of Flash content’s current property settings in the Message window, use the showProps method.
Controlling Flash content appearance with Lingo or
JavaScript syntax
Lingo or JavaScript syntax can control how a Flash content appears on the Stage and which part of the Flash content
appears in its sprite’s bounding rectangle. Lingo or JavaScript syntax can also skew, rotate, scale, and flip the Flash
content.
Director supports only the Copy Transparent, Background Transparent, and Blend inks for Flash sprites when the
sprite is not played Direct To Stage.
Flipping, rotating, and skewing Flash sprites
Lingo or JavaScript syntax can flip, rotate, and skew Flash sprites as the movie plays. For more information, see the
Scripting Reference topics in the Director Help Panel.
•To flip a Flash sprite, set the flipH and flipV sprite properties.
•To skew a Flash sprite, set the skew sprite property.
•To rotate a Flash sprite, set the rotation property. Set the obeyScoreRotation property to specify whether a
Flash sprite obeys the rotation specified in the Score.
If obeyScoreRotation is set to TRUE, Director ignores the cast member’s rotation property and obeys the Score
rotation settings instead.
Colorizing and blending Flash sprites
Use Lingo or JavaScript syntax to change a sprite’s color and blend as the Director content plays. For more
information, see the Scripting Reference topics in the Director Help Panel.

199
USING DIRECTOR 11.5
Using Flash, Flash Components, and Other Interactive Media Types
Last updated 9/28/2011
Specify the color of a Flash sprite
❖Set the color sprite property.
Specify the blend for a Flash sprite
❖Set the blend sprite property.
Scaling Flash content
You can use Lingo or JavaScript syntax to scale Flash cast members and sprites. For more information, see the Scripting
Reference topics in the Director Help Panel.
Control the scaling of Flash content
❖Set the scale and scaleMode properties.
Set the scale percentage of Flash content within its sprite’s bounding rectangle
❖Set the viewScale property.
Obeying the Flash content cursor settings
Flash content can be designed to use different cursors depending on which part of the Flash content the mouse pointer
is rolled over. To allow a Flash sprite to use the cursor settings defined in the Flash content, attach the Flash Cursor
behavior to the Flash sprite.
To write your own script to test the cursor settings of the Flash content, use the getFlashProperty() method and
test for the #cursor property. For more information about this method, see the Scripting Reference topics in the
Director Help Panel.
Controlling the Flash content bounding rectangle and registration points
Use Lingo or JavaScript syntax to control the Flash content bounding rectangle and Flash content registration points.
For more information, see the Scripting Reference topics in the Director Help Panel.
•To control which part of the Flash content appears within its sprite’s bounding rectangle, set the viewH, viewpoint,
viewScale, and viewV properties.
•To control the default size for all new Flash sprites, set the defaultRect property. Use the defaultRectMode
property to control how the default size is set.
•To determine the original size of a Flash cast member, test the flashRect property.
•To specify the Flash content registration point where scaling and rotation occur, set the originH, originMode,
originPoint, and originV properties.
•To center a Flash cast member’s registration point after resizing the cast member, set the centerRegPoint
property to TRUE.

200
USING DIRECTOR 11.5
Using Flash, Flash Components, and Other Interactive Media Types
Last updated 9/28/2011
Placing Flash content on the Stage
Lingo or JavaScript syntax can set whether Flash content appears at the front of the Stage and whether specific areas
of Flash content and the Stage overlap. For more information, see the Scripting Reference topics in the Director Help
Panel.
•To determine whether Flash content plays in front of all other layers on the Stage and whether ink effects work, set
the directToStage property.
•To determine which Stage coordinate coincides with a specified coordinate in Flash content, use the
flashToStage() method.
•To determine which Flash content coordinate coincides with a specified coordinate on the Director Stage, use the
stageToFlash method.
•To improve performance for a Director movie that uses static (not animated) Flash content, set the static
property.
•To control whether the Flash content graphics are visible, set the imageEnabled property.
•To control whether the Flash content plays sounds, set the sound property.
•To control whether Director uses anti-aliasing to render Flash content, set the quality property.
Streaming Flash content with Lingo or JavaScript syntax
In addition to the Lingo or JavaScript syntax that lets you stream many of the Director media types, Director lets you
control and monitor streaming Flash content. For general information about using script to stream media in Director,
see “Using Shockwave Player” on page 466. For more information about specific Lingo or JavaScript syntax methods
and properties, see the Scripting Reference topics in the Director Help Panel.
•To specify whether a linked movie streams or not, set the preLoad property.
•To specify how much of a Flash cast member streams into memory at one time, set the bufferSize Cast Member
property.
•To check how many bytes of Flash content have streamed into memory, test the bytesStreamed property.
•To determine how much Flash content is currently streamed, test the percentStreamed property or check the
streamSize method.
•To set when Director attempts to stream part of Flash content, set the streamMode property.
•To clear an error setting for streaming Flash content, use the clearError method.
•To determine whether an error occurred while streaming Flash content, use the getError() method.
•To check the current state of a streaming file, test the state property.
•To attempt to forcibly stream a specified number of bytes of Flash content, use the stream method.
Playback Flash content with Lingo or JavaScript syntax
Lingo or JavaScript syntax lets you control how Flash content plays back and whether the Flash content retains its
interactivity.

201
USING DIRECTOR 11.5
Using Flash, Flash Components, and Other Interactive Media Types
Last updated 9/28/2011
Controlling Flash content playback with Lingo or JavaScript syntax
Use Lingo or JavaScript syntax to control the Flash content tempo; to specify which frame plays; and to start, stop,
pause, and rewind the Flash content. For more information, see the Scripting Reference topics in the Director Help
Panel.
•To control the tempo of Flash content, set the fixedRate and playBackMode properties.
•To determine the original frame rate of Flash content, test the frameRate property.
•To determine the number of frames in Flash content, test the frameCount property.
•To determine the frame number associated with a label in Flash content, use the findLabel() method.
•To play Flash content starting from a specified frame, set the frame property or use the goToFrame() method.
•To set whether Flash content starts playing immediately when the Flash sprite appears on the Stage, set the
pausedAtStart property.
•To check whether Flash content is playing or paused, test the playing property.
•To rewind Flash content to frame 1, use the rewind sprite method.
•To stop Flash content at its current frame, use the stop method.
•To stop Flash content at its current frame but let any audio continue to play, use the hold method.
•To specify a separate time line within a Flash cast member as the target of subsequent script sprite methods, use the
tellTarget() and endTellTarget() methods.
•To call a series of actions that reside in a frame of a Flash application sprite, use the callFrame() method.
Controlling Flash content interactivity with Lingo or JavaScript syntax
Lingo or JavaScript syntax can control whether Flash content remains interactive. For more information, see the
Scripting Reference topics in the Director Help Panel.
•To control whether the actions in Flash content are active, set the actionsEnabled property to TRUE.
•To control whether buttons in Flash content are active, set the buttonsEnabled property.
•To control when Flash content detects mouse clicks or rollovers, set the clickMode property.
•To control whether clicking a button in Flash content sends events to sprite scripts, set the eventPassMode
property.
•To determine which part of Flash content is directly over a specific point on the Stage, use the hitTest method.
•To check whether the mouse pointer is over a button in Flash content, test the mouseOverButton property.
Using Lingo or JavaScript syntax with Flash variables
Earlier Director releases required using the getVariable() and setVariable() methods to access Flash variables.
Director now lets you access Flash variables and execute methods directly on the Director sprite.
Set a Flash variable
❖Use the following syntax:

202
USING DIRECTOR 11.5
Using Flash, Flash Components, and Other Interactive Media Types
Last updated 9/28/2011
spriteReference.myFlashVariable = "newValue"
For example, the following expression sets the Flash variable called myColorSwatch to red on the sprite called
myFlashSprite:
sprite("myFlashSprite").myColorSwatch = "red"
Get the value of a Flash variable
❖Use the following syntax:
put spriteReference.myFlashVariable
For example, the following expression gets the value of the Flash variable called myColorSwatch on the sprite called
myFlashSprite:
put sprite("myFlashSprite").myColorSwatch
Execute a Flash method
❖Use the following syntax:
spriteReference.myFlashMethod()
For example, the following expression calls the method setColorSwatch on the sprite called myFlashSprite:
sprite("myFlashSprite").setColorSwatch("blue")
For more information, see “Using Flash objects in script” on page 205.
You can also use the following two sprite methods to access ActionScript variables in Flash sprites: getVariable()
and setVariable(). For more information, see the Scripting Reference topics in the Director Help Panel.
•To return a string that contains the current value of a Flash sprite variable, use the following statement:
spriteReference.getVariable("variableName", TRUE)
The parameter TRUE is the default, and is therefore optional.
•To return a reference to the value of a Flash variable instead of the variable’s literal value, add a value of FALSE
to the end of the method. This lets you get or set the value of the variable simply by using the reference.
myVariableReference = spriteReference.getVariable( "variableName", FALSE)
Once you have created the reference to the variable, test it with the following statement:
put myVariableReference
-- value
•To set the current value of a Flash sprite variable to a specified string, use the following statement:
spriteReference.setVariable( "variableName", "newValue" )
Note: Be sure to pass the Flash variable’s name and value as strings in both the getVariable() and
setVariable() methods. Failure to do so results in script errors when the methods are executed.

203
USING DIRECTOR 11.5
Using Flash, Flash Components, and Other Interactive Media Types
Last updated 9/28/2011
Sending messages from Flash content using getURL
A Flash sprite can send messages to Director in the form of a string by using the Flash ActionScript getUrl() method.
The string can be an event message sent either to the scripting engine of Director at the movie level (for example, a
movie script), or at the sprite level, received only by the behavior located on the Flash sprite sending the message. The
message can also be a simple string such as “Hello Director” received by an on getURL handler in a movie script.
In Flash, you create a button or frame and then assign it a getURL() action in which you specify the message you want
the Flash sprite to send to Director.
Sending simple messages and script statements
You can send simple strings or script statements from Flash content to a Director movie. To pass more complicated
strings, see “Sending script statements with arguments” on page 204.
Have Flash content to generate a message for Director
1In Flash, add the getURL function to your ActionScript code.
2As the URL parameter of the getURL function, enter the Director script statement you want Flash to send to the
movie.
Handle a message string passed by Flash content
1Specify the message string in the Flash content.
For example, in Flash, you could specify the following string as the URL parameter of the getURL function:
Hello World
In Flash, the ActionScript would look like this:
getURL("Hello World");
2In Director, include an on getURL handler to receive and read the string passed by the Flash content.
For example, in Director, you could enter the following handler in a movie script:
on getURL me, stringFromFlash
_movie.go("stringFromFlash")
end
When the on getURL handler receives the text string (“Hello World”), it reads the string and then jumps to the
frame labeled Hello World in the Director Score.
Set up a script statement for execution at the Movie level
1In Flash, specify an event message by specifying the word lingo followed by a colon, the name of a handler you write
in Director, and a parameter (if any) to pass with the event.
For example, in Flash, you could specify the following statement as the URL parameter of the getURL function:
lingo: myDirectorScript
In Flash, the ActionScript would look as follows:
getURL("lingo:myDirectorScript");
Note: Using lingo with getURL fully supports sending Lingo, not JavaScript, syntax. However, you can send JavaScript
syntax method calls to Director because the syntax for calling a method is the same syntax as for calling Lingo
handlers.

204
USING DIRECTOR 11.5
Using Flash, Flash Components, and Other Interactive Media Types
Last updated 9/28/2011
2In Director, include an event handler to execute the statement passed by the Flash content.
For example, in Director, you could write a corresponding handler as follows:
on myDirectorScript
_movie.go("Flash Message Received")
end
When the Director script receives the myDirectorScript message, the movie executes the movie-level Director
script handler and jumps to the frame specified in the handler.
Set up a script statement for execution at the sprite/Behavior level
❖
In Flash, specify a script statement to be sent to a behavior attached to the Flash sprite that the script message is sent from.
To specify the statement, specify the word event, followed by a colon, followed by the script statement that you want
the behavior to execute.
For example, in Flash, you could specify the following statement as the URL parameter of the getURL function:
event: alertMessageReceived
In Flash, the ActionScript would look as follows:
getURL("event:alertMessageReceived");
When Director receives the getURL message from the Flash sprite, the Director movie immediately executes the
script statement.
Sending script statements with arguments
It is possible to send more complicated script statements. Sending handlers with arguments or sending arguments that
contain double quote characters takes more effort to make sure that the script statement is properly formed.
Suppose you have a Director handler in a movie script that adds two numbers and presents an alert with the sum, as
follows:
on addTwoNumbers number1, number2
myResult = number1 + number2
_player.alert(string(myResult))
end
To pass arguments to this script (number1 and number2), include the following statement in your Flash ActionScript:
getURL("lingo:addTwoNumbers 100, 200");
If the arguments are strings, escape the double quote characters by using a backslash character on each double quote
character that you want to be passed through to Director. For example, if you want to send a script statement from the
Flash sprite that directs Director to launch a browser and open adobe.com, you would do the following:
getURL("lingo:gotonetpage(\"http://www.adobe.com\")");
It might be easier to fabricate the script statement in a temporary variable inside the Flash method and then use getURL
on that variable, as follows:
var theString = getURL("lingo:gotonetpage(\"http://www.adobe.com\")");
getURL(theString);
Additionally, you may want to send the value of a Flash variable as part of the script statement. For example, if
myFlashVar in Flash represents an Adobe product such as Director (myFlashVar="director" in ActionScript), you
could form a script statement as follows in your Flash script:

205
USING DIRECTOR 11.5
Using Flash, Flash Components, and Other Interactive Media Types
Last updated 9/28/2011
var theString = getUrl("lingo:gotonetpage(\"http://www.adobe.com/software/" + myFlashVar +
"\")");
getURL(theString);
The resulting URL would be “http://www.adobe.com/software/director” and would be passed to the browser through
Director’s goToNetPage command.
Sending XML Data from Flash to Director
You can send XML data from a Flash sprite or object to a script.
1On the Flash side, use the XMLobject.send ActionScript method.
The XMLobject.send method has a URL and a targetWindow parameter.
2On the Director side, include an on sendXML handler in your script to handle the XML data.
This handler takes the same parameters as the XMLobject.send method, as follows:
on sendXML me, URL, targetWindow, xmlData
The xmlData parameter is the XML data contained in the original XMLObject. You can then add script to the
handler to process the XML data. A common action is to send the XML data to the URL and await the response of
the server located at the URL, as in the following example:
on sendXML me, URL, targetWindow, xmlData
gotoNetPage(URL, targetWindow)
postNetText(URL, xmlData)
end
Using Flash objects in script
With Director, you can create Flash ActionScript objects and access all of their properties and methods. You can create
a wide variety of Flash objects, including arrays, dates, Booleans, XML objects, and net connection objects for use with
Flash Media Server. If you have authored Flash content that contains ActionScript classes that generate custom objects,
you can access those objects in script as well. You can also create references to existing ActionScript objects with the
getVariable() method. For more information about accessing these objects, see “Using Lingo or JavaScript syntax
with Flash variables” on page 201.
When creating Flash objects, create an object within a Flash sprite or create a global Flash object.
•To create a Flash object within a Flash sprite, you must have Flash content in the cast and a Flash sprite on the Stage.
Do not use a Flash cast member created with the method new(#Flash). Doing so creates a Flash cast member shell
that contains no actual internal Flash data. When you create a Flash object within a sprite, the object uses the same
instance of the Flash Player that Director loads when the Flash cast member appears on the Stage.
In your script, use the newObject() method with a sprite reference. If the object you want to create requires
parameters, include them with the newObject() method:
myNewFlashObject = sprite(1).newObject("Array", "apple", "orange", "banana")
In this example, the specified sprite, sprite(1), is the Flash sprite. The object is an array. (In Lingo, arrays are
called lists.) The array contains three strings: "apple", "orange", and "banana".

206
USING DIRECTOR 11.5
Using Flash, Flash Components, and Other Interactive Media Types
Last updated 9/28/2011
•To create a global Flash object, use the newObject() method without a sprite reference. When you do this, Director
loads a special instance of the Flash Player into memory. This way, you can use Flash objects without the need for
a Flash cast member or sprite.
In your script, use the newObject() method without a sprite reference:
myNewFlashObject = newObject("Array", "apple", "orange", "banana")
The Flash asset commonPlayer feature lets you load multiple Flash sprites into one instance of the Flash Player. This
provides better Flash playback performance in Director objects that have a great deal of Flash assets.
Note: If you do not import any Flash cast members, you must manually add the Flash Asset Xtra to your movie’s Xtra
list for global Flash objects to work correctly in Shockwave and projectors. For more information about the movie Xtra
list, see “Packaging Movies for Distribution” on page 441.
The newObject() method creates the object you specify and a reference to it. In the preceding examples, the object is
an array and the reference is stored in the variable named myNewFlashObject. The first parameter included with the
newObject() method is the type of object to create. The subsequent parameters are the values to put into the array.
In this case, the values are a list of names of fruit.
•To access a property of the object, such as the array’s length, refer to the property as a property of the object
reference you created:
put myNewFlashObject.length
-- 3
•To access a part of the object, such as the value of the third item in the array, use the following syntax:
put myNewFlashObject[2]
-- "banana"
Note: The items in an ActionScript array are numbered beginning with zero. The items in a script list are numbered
beginning with one. Be sure to use the correct number when referring to items in arrays or lists.
•To access a method of the object, use the same syntax and specify the method name after the object reference:
myNewFlashObject.sort()
For more information about the types of objects supported by Flash and the methods and properties used to control
them, see the Flash documentation.
Setting callbacks for Flash objects
Some kinds of Flash objects generate events that must be routed to an appropriate script handler. For example, a Flash
Media Server connection object generates an event each time an incoming message is received from the server. You
can set script to route events like this to a specific handler in a specific script object by using the setCallback()
method.
❖To set up a callback for an event from a Flash object, use script similar to this:
myConnection = sprite(1).newObject("NetConnection")
sprite(1).setCallback(myConnection, "onStatus", #dirOnStatusHandler, me)
In the first line of this example, a new netConnection object is created along with a reference to it named
myConnection. The second line calls the handler named dirOnStatusHandler whenever the myConnection
object generates an onStatus event. The argument me indicates that the handler is located in the same script object
that the setCallback() method is being issued in. In this case, that script object is attached to sprite 1.
The callback handler could look like the following:

207
USING DIRECTOR 11.5
Using Flash, Flash Components, and Other Interactive Media Types
Last updated 9/28/2011
on dirOnStatusHandler (me, aInfoObject)
if (aInfoObject[#level] = "error") then
member("chat input").text = "Error sending last message."
end if
end
Using the Flash local connection object
Flash includes an object type called local connection. The Flash local connection object can be very useful for allowing
separate movies on the same computer to connect and to communicate with each other. Because the local connection
object is a Flash object supported in Director, it can allow communication between separate Flash content, Director
movies, or combinations of the two. Use the messaging capability of the local connection object for simple tasks such
as exchanging sprite property data, or for more complex ones such as exchanging chat messages when used in
conjunction with the Flash Media Server. For more information, see “Using Flash Media Server” on page 210.
To use the local connection object, you can either create a global local connection object or associate the object with a
Flash sprite in the Score. Once you have created the object, you can control it entirely through script. The following
are examples of a script that is attached to a Flash sprite in channel 1 of the Score. The script contains a beginSprite
handler and other handlers that manage the local connection object.
Initialize properties
The first thing to do is declare some properties that you will use throughout the local connection script to store
references to the local connection object and two connections (one outgoing and one incoming).
•The property pCon_name stores the name of an outgoing connection
•The property pOtherCon_name stores the name of an incoming connection
•The property pLocalCon stores a reference to the local connection object
The beginning of the script might look like this, including the start of the beginSprite handler:
property pCon_name
property pOtherCon_name
property pLocalCon
on beginSprite (me)
pCon_name = "userA"
pOtherCon_name = "userB"
Creating the local connection object
The next step is to create a new local connection object. Once the object is created, use the setCallback() method to
set up handlers to respond to the events that the local connection object generates. You can use the methods of the
local connection object to connect to other movies and send messages.
❖To create the new local connection object, use the newObject() method:
pLocalConn = sprite(1).newObject("LocalConnection")
This script assigns the property pLocalConn to be a reference to the newly created object.

208
USING DIRECTOR 11.5
Using Flash, Flash Components, and Other Interactive Media Types
Last updated 9/28/2011
Setting up callbacks
The next step is to set up callback handlers with the setCallback() method. Set up a callback for each event you
expect the object to generate. Local connection objects generate onStatus and allowDomain events, as well as an event
for each incoming message received. These incoming message events are named by the string that is passed as the
subject (first parameter) of the message.
To set up each callback, use the setCallback() method and include the name of the local connection object, the name
of the event to respond to, the script handler name, and the script object that contains the handler as arguments with
the method.
1Set up the onStatus callback. An onStatus event is generated each time a message is sent by the local connection
object and contains information about the success or failure of the send operation.
sprite(name).setCallback(pLocalConn, "onStatus", #myOnStatus, me)
This script statement sets a callback for the event named onStatus generated by the object pLocalConn. The script
handler name is myOnStatus and the script object that contains it is the same script object that contains this
setCallback() method, referred to as me. The quotes surround the event name and the pound sign (#) preceding
the handler name. The pound sign converts the handler name to a symbol.
For information on the actual callback handlers, such as the myOnStatus handler, see “Writing callback handlers”
on page 208.
2Set up the allowDomain callback. An allowDomain event is generated each time the local connection object
receives an incoming message.
sprite(name).setCallback(pLocalConn, "allowDomain", #myAllowDomain, me)
In this case, the event name is AllowDomain and the handler name is myAllowDomain.
If the myAllowDomain handler determines that the message is coming from an allowed domain, an event named
with the message subject is generated. When a movie is running from a user’s computer and not in a browser, the
domain is localHost. When the movie is running in a browser, the domain is determined by the server that hosts
the movie, such as adobe.com.
3Set up the callback for these user-defined messages. Decide what string you want to use as your message subjects,
so that you know what the event name will be. In the following example, the user-defined message subject and event
name are incomingMessage:
sprite(name).setCallback(pLocalConn, "incomingMessage", #myIncomingMessage, me)
Writing callback handlers
For callbacks to work, you must write the callback handlers themselves. In this example, the setCallback() methods
are all inside a beginSprite handler. The callback handlers must be outside the beginSprite handler because they
are handlers by themselves. In this example, the callback handlers are located in the same script attached to the Flash
sprite, just after the beginSprite handler.
The onStatus event is generated each time the local connection object sends an outgoing message. The myOnStatus
handler might look like the following:

209
USING DIRECTOR 11.5
Using Flash, Flash Components, and Other Interactive Media Types
Last updated 9/28/2011
on myOnStatus (me, aInfoObject)
if (aInfoObject[#level] = "error") then
member("chat input").text = "Error sending last message."
else
member("chat output").text = member("chat output").text & RETURN & member("chat
input").text
end if
end myOnStatus
Two arguments are passed with the onStatus event by the local connection object. The me argument tells the script
that the event was generated on the same script object that contains the myOnStatus handler. The aInfoObject
argument contains a Flash array object containing information about the status of the message-sending operation. The
handler checks to see if the aInfoObject argument contains an error. In this example, if there is an error, an error
message is displayed in a chat input field. If no error occurs, a text output field is updated with the contents of the chat
input field. For more information about the Flash infoObject, see the Flash Media Server documentation.
The allowDomain event is generated each time the local connection object receives an incoming message. This
provides an opportunity for the myAllowDomain callback handler to determine whether the message is coming from
a trusted domain. The myAllowDomain callback handler must return TRUE in order for the incoming message to be
processed.
The myAllowDomain handler might look like the following:
on myAllowDomain (me, aSendingDomain)
if aSendingDomain = "myDomain.com" then
return TRUE
else
member("chat output").text = & RETURN & "Message received from unapproved domain."
return FALSE
end if
end myAllowDomain
The handler checks that the domain is the one that is expected, and returns TRUE if it is. If the message comes from
another domain, the return value is FALSE.
Once the allowDomain callback has returned TRUE, the local connection object forwards the incoming message to the
callback handler set up for the event. In this example, the subject of the message is incomingMessage and the callback
handler is myIncomingMessage.
The myIncomingMessage handler might look like the following:
on myIncomingMessage (me, aObject, aMessage)
member("chat output").text = & RETURN & aMessage
end myIncomingMessage
This handler appends the incoming message aMessage to the end of a chat output field.
Sending messages and closing the connection
To complete your script, finish the beginSprite handler and write handlers for sending messages from the object and
closing the connection when you are finished using it.
•To finish the beginSprite handler that already contains the newObject() method and all the setCallback()
methods, add a connect() method. This is actually a Flash ActionScript method that you send to the local
connection object you created.

210
USING DIRECTOR 11.5
Using Flash, Flash Components, and Other Interactive Media Types
Last updated 9/28/2011
pLocalConn.connect(pCon_name)
The argument pCon_name gives the actual connection a name, “userA”, that was declared at the beginning of the
script.
•To send messages, write a handler that uses the send() method of the local connection object:
on sendMessage (me, aMessage)
tMessage = pCon_name && ":" && aMessage
pLocalConn.send(pOtherCon_name, "incomingMessage", tMessage)
end sendMessage
The send() method requires three arguments: the recipient of the message, the event to be triggered when the
message is received, and the message itself.
•To close the connection, write a handler that uses the close() method of the local connection object, as follows:
on closeConnection (me)
pLocalConn.close()
end closeConnection
You can call a handler from any other handler by using the following statement:
sendSprite (1, #closeConnection)
You might also use the close() method in an endSprite handler as follows:
on endSprite (me)
pLocalConn.close()
end endSprite
The local connection object is now set up; has handlers for callbacks, sending messages, and closing the connection;
and is ready to be used by the movie.
Using Flash Media Server
Flash Media Server allows Flash content on separate computers to share information, including sound, video, text, and
other data in real time. Use Flash Media Server in Director by using Flash cast members that are designed to work with
the server, or by creating NetConnection and NetStream objects in script that you use to communicate with the
server.
As with any Flash ActionScript object you create by using script, use the exact same methods and properties to
manipulate the object as you would in ActionScript. For a detailed example, see “Using the Flash local connection
object” on page 207. The Adobe Director installation CD for Windows includes Flash Media Server, the Flash Media
Server authoring components for Flash, and documentation. The Adobe Director installation CD for Mac includes the
Flash Media Server authoring components for Flash and documentation.
The steps required to communicate with Flash Media Server are identical to those you would use in ActionScript.
Create a NetConnection object
❖Use the newObject() method.
myNetConObject = sprite(1).newObject("NetConnection")

211
USING DIRECTOR 11.5
Using Flash, Flash Components, and Other Interactive Media Types
Last updated 9/28/2011
Create a NetStream object
❖Use the newObject() method and include the NetConnection object as a parameter:
myStream = sprite(1).newObject("NetStream", myNetConObject)
The NetStream object can send text messages without the need for a Flash sprite on the Stage.
Create a global NetConnection object that does not require a sprite reference
❖Use the newObject() method and omit the sprite reference:
myNetConObject = newObject("NetConnection")
Create a global NetStream object that does not require a sprite reference
❖Use the newObject() method and include the NetConnection object as a parameter and omit the sprite reference:
myStream = newObject("NetStream", myNetConObject)
Send text messages with the NetStream object
❖Use the send method.
myStream.send(handlerName {,p1, ...,pN})
To send audio or video, associate a camera and microphone with the NetStream object.
Associate a video camera with the NetStream object
❖Use the ActionScript attachVideo method.
myStream.attachVideo(source)
Associate a microphone with the NetStream object
❖Use the ActionScript attachAudio method.
myStream.attachAudio(source)
Publish a video, audio, or other data stream with the NetStream object
❖Use the ActionScript publish method.
mystream.publish(whatToPublish)
Play a non-video data stream from the server with the NetStream object
❖Use the ActionScript play method.
mystream.play(whatToPlay)
To receive a video stream from the server, the stream must be attached to a video clip instance in a Flash sprite.
Sample Flash content containing a video clip object is included in the Adobe/Support/Flash/ folder on the Director
installation CD.
Create a script reference to the video clip object in the Flash sprite
❖Use the getVariable() method.

212
USING DIRECTOR 11.5
Using Flash, Flash Components, and Other Interactive Media Types
Last updated 9/28/2011
videoRef = sprite(1).getVariable(nameOfFlashVideoClip, FALSE)
Play a video stream through the video clip object
❖Use the attachVideo() method with the reference to the video clip.
videoRef.attachVideo(source)
For detailed examples of how to use Flash Media Server in Director, see the Director Support Center
(www.adobe.com/support/director/).
Using the Flash Settings panel
When you use a Flash cast member in a Director movie, you can display the Flash Settings panel. The Flash Settings
panel lets users choose privacy, storage, camera, and microphone settings that affect playback of Flash content that
communicates with a Flash Media Server. For more information about the options in the Settings panel, see the Adobe
Flash Player Help section of the Adobe website (www.adobe.com/go/flashplayer_help_en).
Opening the Settings panel
You must have a Flash sprite on the Stage to display the Settings panel. The sprite must be at least as large as the Settings
panel (214x137 pixels). The Flash sprite’s Direct To Stage property must be set to TRUE. Set this property in the Flash
tab of the Property inspector. If the Flash sprite is not set to display Direct To Stage or is too small, the Settings panel
does not appear, but no error occurs.
Display the Settings panel in a Director movie by using the settingsPanel() method. When the panel is displayed,
the user can select settings and then close the panel.
To display the Flash Settings panel, use the following script:
sprite(flashSpriteReference).settingsPanel(integerWhichTabToDisplay)
For more information about the parameters for this method, see the Scripting Reference topics in the Director Help
Panel.
You can invoke the Settings panel by allowing the user to click a button on the Stage that opens the panel. In this case,
use the settingsPanel() method in a mouseUp or mouseDown handler attached to the button sprite. You can use the
settingsPanel() method at any other time to open the panel, depending on how you want to make the panel
available.
Emulating the Flash Player context menu in Shockwave Player
To allow users to access the Settings panel by right-clicking (Windows) or Control-clicking (Mac) on your Flash sprite
when your movie is playing in a browser, you must first disable the context menu that is built into the Shockwave
Player. After the Shockwave Player context menu is disabled, trigger the Flash Settings panel by right-clicking
(Windows) or Control-clicking (Mac).
1Select File > Publish Settings.
2Click the Html tab.
3Deselect the Display Context Menu in Shockwave option. This sets a parameter named swContextMenu in the
Shockwave <Object> and <Embed> tags to FALSE.
4Click OK.

213
USING DIRECTOR 11.5
Using Flash, Flash Components, and Other Interactive Media Types
Last updated 9/28/2011
5Save your movie. Your Publish Settings are saved with the movie.
Once you have disabled the Shockwave Player context menu, you can attach a mouseUp handler to your Flash sprite
that tests for the rightMouseDown property or the controlDown property. In Windows, you can choose to write an
on rightMouseUp handler.
The handler might look like the following:
on mouseUp
if the rightMouseDown or the controlDown then
sprite(1).settingsPanel(0)
end if
end
or
on rightMouseUp
sprite(1).settingsPanel(0)
end
You can also choose to use ActionScript in your Flash content to enable the Settings panel. For more information, see
the Flash documentation.
Playback performance tips for Flash content
Performance of Flash content can vary greatly depending on the options in effect and the playback environment. Use
the following tips to obtain optimal playback performance from Flash:
•If adequate for your needs, use the Low quality setting rather than High. Using Low turns off anti-aliasing, which
in turn, speeds up Flash animation rendering. A handy technique is to switch the quality of the sprite to Low while
displaying a fast-moving animation sequence (such as a spinning logo), and then switch the quality back to High
on the fly as the animation slows down or comes to a stop. This way, performance can be improved during the part
of the sequence where it would be more difficult to perceive the improved quality, without sacrificing quality in the
end result.
•Experiment with different system color depths to see what provides the best performance. For example, some
graphics, such as gradients, display faster at 16 bits.
•Use Copy ink if possible. Transparency, using Background Transparent ink, requires much more processing time.
If your Flash sprite is in the background (no other Director sprites are behind it), use Copy instead of Background
Transparent, and author your Flash content in such a way that its background color is the same as the background
color you chose for your Director Stage.
•Use Direct To Stage if possible. Layering and transparency are not supported in this mode; however, if you just want
to play Flash content within a box with the best performance possible, this may be the best choice.
•Make sure that the Director movie tempo is set high enough. Unless you’re using Direct To Stage, your Flash
content does not play faster than the Director movie frame rate, regardless of the frameRate or fixedRate setting.
For smoothest playback, set the Director frame rate to at least 30 frames per second (fps).
•Use Lock-Step or Fixed playback mode to adjust the Flash content frame rate. Lock-Step gives the best
performance, because playback of the Flash content is synchronized to the Director movie frame for frame.
•Set the static property of the sprite to TRUE if your sprite contains no animation (such as a static block of text)
and doesn’t overlap other moving Director sprites. This keeps Director from redrawing the sprite every frame
unless it moves or changes size.

214
USING DIRECTOR 11.5
Using Flash, Flash Components, and Other Interactive Media Types
Last updated 9/28/2011
•When modifying Flash properties by using script, set the properties for the sprite rather than for the cast member.
Setting the properties for the cast member modifies values at the cast member level and broadcasts the change to
all sprites on the Stage. This overhead can affect performance. If you have only a single sprite for the cast member,
modify the sprite property directly.
•Limit the amount of script that executes while the Flash content plays. Avoid tight repeat loops between frames.
The usual Director performance optimizations apply when using Flash movies.
•If you import compressed SWF files, be aware that Director will use memory for both the compressed and
decompressed versions of the file until the file has been completely decompressed into memory.
Using Director movies within Director movies
You can import a Director movie into another movie as an internal or a linked cast member, using the Import
command. As with other media types, you can link to an external movie file or import the file so that it becomes
internal media. The way you choose to import a movie affects its properties:
•For linked movies, cast member scripts and behaviors (sprite scripts) work as before. (Select Enable Scripts in the
Linked Movie tab of the Property inspector.) Frame and movie scripts do not work. As with other types of linked
media, the external movie file must be present on the system when the host movie plays.
•For movies imported as internal media, the movie appears as a film loop, and interactivity does not work. Use this
mainly for animations.
For both types of imported movies, the host movie controls the tempo settings, palette settings, and transitions.
Settings for these methods in the imported movie are ignored.
Once it is imported, the movie appears as a cast member in the Cast window. The cast members of a movie imported
as internal media also appear in the Cast window. You can animate the cast member just as you would for any graphic
cast member, film loop, or digital video.
Import a Director movie
1Select File > Import.
2From the Files of Type menu, select Director Movie.
3Select a Director movie.
4Select a Media option.
Standard Import Imports all the movie’s cast members into the current cast and creates a film loop that contains
the Score data. Scripts in the imported movie will not work.
Link To External File Creates a cast member that references the external movie file. A linked movie appears as a
single cast member.
5Click Import.
Place a Director movie cast member in the current movie
1Do one of the following:
•For an internal movie, drag the film loop cast member to the Stage or Score.
•For a linked external movie, drag the movie cast member to the Stage or Score.

215
USING DIRECTOR 11.5
Using Flash, Flash Components, and Other Interactive Media Types
Last updated 9/28/2011
2Extend the sprite through all the frames where you want it to appear.
3To change any of the movie’s properties, use the Movie tab of the Property inspector.
See “Setting linked Director movie properties” on page 215.
Setting linked Director movie properties
To determine whether a linked Director movie is cropped or scaled to fit within a sprite’s bounding rectangle, use the
Property inspector. You can also use the Property inspector to enable the movie’s scripts, mute its sounds, and specify
whether it loops.
1Select a linked movie cast member.
2To display the Property inspector, select Modify > Cast Member > Properties, or select Window > Property
Inspector.
3If necessary, display the Member tab in Graphical mode.
The following noneditable settings are displayed:
•The cast member size in kilobytes
•The cast member creation and edit dates
•The name of the person who last modified the cast member
4To view or edit the cast member name, use the Name field.
5To add comments about the cast member, use the Comments field.
6To specify how Director removes the cast member from memory if memory is low, select one of the following
options from the Unload menu:
3—Normal Sets the selected cast members to be removed from memory after any priority 2 cast members have
been removed.
2—Next Sets the selected cast members to be among the first removed from memory.
1—Last Sets the selected cast members to be the last removed from memory.
0—Never Sets the selected cast members to be retained in memory; these cast members are never unloaded.
7Click the Linked Movie tab in Graphical mode.
8To determine how the linked movie appears within the sprite bounding rectangle, select from the following
Framing options:
Crop Displays the movie image at its default size. Any portions that extend beyond the sprite’s rectangle are not
visible.
Center Available only if Crop is selected. It keeps the movie centered within the sprite’s bounding rectangle if you
resize the sprite.
Scale Resizes the movie to fit inside the bounding rectangle.
9To determine how the linked movie plays back, set the following options:
Play Sound Enables the sound portion of the linked movie. Turn this option off to mute sounds.
Loop Replays the linked movie continuously from the beginning to the end and back to the beginning.
Enable Scripts Makes all the scripts in the linked movie work the same way they do when the movie plays by itself.

216
USING DIRECTOR 11.5
Using Flash, Flash Components, and Other Interactive Media Types
Last updated 9/28/2011
If you import a Director movie internally, it is imported as a film loop. In this case, the Linked Movie tab in the
Property inspector is replaced by the Film Loop tab, and the Enable Scripts option is not available.
Using ActiveX controls
In movies that you intend to publish only as projectors for Windows, you can embed ActiveX (formerly known as
OLE/OCX) controls that let you take advantage of the technology and adapt ActiveX controls to make them function
as sprites in Director. You can use ActiveX controls to manage application resources for the hosted ActiveX control,
for instance to manage properties, events, and windows and filing properties. You can also manage resources used by
the ActiveX control within the Director movie. ActiveX controls are prohibited in Shockwave Player.
Note: Not all ActiveX controls expose their methods and properties in all hosts. Test the controls you want to use to see how
they work in Director. Because ActiveX controls are non-Adobe software, Adobe Technical Support does not support them.
Inserting an ActiveX control
You can place ActiveX controls in a Director movie and have them function as sprites. Note that this procedure is
designed only for Director for Windows.
1Make sure that the ActiveX control you want to use in Director is installed on your system.
Most controls have their own installation utilities provided by the manufacturer of the control.
2Select Insert > Control > ActiveX.
3In the dialog box that appears, select the ActiveX control and then click OK. The ActiveX Control Properties dialog
box appears.
(If the ActiveX control does not appear in the list, it may not have been installed properly by the system. You can
attempt to verify this by viewing the list of ActiveX controls in another application, such as Visual Basic.)
The ActiveX Control Properties dialog box lets you edit each ActiveX control and view information regarding each
method that the control supports and each event the control can generate.
4
Set the values for each property in the ActiveX control and then click OK. The ActiveX control now appears in the cast.
5Drag the ActiveX control from the cast to the Stage.
Once the ActiveX control appears on the Stage, it can be repositioned and resized just like any other sprite Xtra.
When you pause the movie, the ActiveX control stays in authoring mode and does not react to mouse or keyboard
events. When you play the movie, the control responds to user input.
Setting ActiveX control properties
An ActiveX control describes its information by using properties such as color, text, font, and so on. Properties can
include visual aspects and also behavioral ones. For example, a button might have a property that indicates whether
the button is momentary or push-on/push-off. An ActiveX control’s properties define its state—some or all of which
properties may persist. Although the control can change its own properties, it’s also possible that the container holding
the control might change a property. In response, the control would change its state, user interface, and so on.
To view and edit the properties of an Active X control that is inserted in a Director movie, use the Properties tab of the
Control Properties dialog box for the ActiveX Xtra. Each property exported by the ActiveX control and its current
value are identified. To edit a value, the user clicks over the existing value and enters the new value.

217
USING DIRECTOR 11.5
Using Flash, Flash Components, and Other Interactive Media Types
Last updated 9/28/2011
In Director, all properties that an ActiveX control exports are properties of the corresponding sprite. The generic
syntax for setting an ActiveX control property is as follows:
sprite(X).propertyName = value
The generic syntax for getting an ActiveX control property is as follows:
value = sprite(X).propertyName
As an example, if the Microsoft® Access™ Calendar control is inserted into a Director movie as the second sprite on the
Score, the following script sets the Year property of the Calendar control to a specific year:
sprite(2).year = 2017
To get the Year property from the same Calendar control and place it into a variable named CalendarYear, use the
following script:
CalendarYear = sprite(2).year
Because some ActiveX control properties are read-only, trying to set their properties causes an error in Director. For
more information, see the documentation for the ActiveX control you are using.
Using ActiveX control methods
An ActiveX control describes its functionality by using methods. Methods are simply functions implemented in the
control that Director can call to perform some action. For example, an edit or other text-oriented control supports
methods that let Director retrieve or modify the current text, perhaps performing such operations as copy and paste.
When you insert an ActiveX control in a Director movie, view the methods exposed by the control by clicking the
Methods tab of the Control Properties dialog box for the ActiveX control. The dialog box displays each method
supported by the ActiveX control and a description of the parameters for each method.
In Director, all methods that an ActiveX control supports are methods for the corresponding sprite. The generic syntax
for calling an ActiveX control method is as follows:
ReturnValue = sprite(N).MethodName(param1, param2, ...)
As an example, if the Microsoft® Access™ Calendar control is inserted into a Director movie as the second sprite on the
Score, the following script would increment the year displayed within the Calendar control:
sprite(2).NextYear()
For the same Calendar control, the following script would decrement the year displayed by the Calendar control:
sprite(2).PrevYear()
Parameters passed to the ActiveX control are automatically converted from their Director data types to equivalent
ActiveX data types. Likewise, the return value is automatically converted from an ActiveX data type to an equivalent
Director data type.
Using ActiveX control events
Each ActiveX control typically generates a variety of events. For example, a button ActiveX control may generate a
click event when the button is pressed, and a calendar ActiveX control may generate a dateChanged event when the
date within the calendar is changed. Director converts any event generated by the ActiveX control to a sprite event that
it can handle. A list of the control’s events appears in the Events tab of the ActiveX Control Properties window.
To respond to an event generated by the ActiveX control, you must write an event handler to capture the event. You
can place these event handlers in movie scripts, sprite behaviors, scripts assigned to cast members, or frame behaviors.
However, you normally place the handler in the behavior attached to the sprite for the ActiveX control.

218
USING DIRECTOR 11.5
Using Flash, Flash Components, and Other Interactive Media Types
Last updated 9/28/2011
As an example, if the Microsoft® Access™ Calendar control is inserted into a Director movie as a sprite on the Score,
the following script would capture the click event from the Calendar control:
on click
-- Do something interesting here.
beep 2
end
A sprite behavior is a good location for this handler.
Using Flash components
Flash components are bundled movie clips with ActionScript programming interfaces. Director comes with a set of
user interface components, including list boxes, radio buttons, check boxes, a scroll pane.
You can also add components to the existing set by creating your own in Flash and dragging and dropping them into
the Director Components folder. The Components folder is a sub-folder under the Configuration folder located in the
directory where you installed Director.
Note: Director supports only those Flash components that are shipped with it. Other Flash components that you add
might not function as expected.
You must restart Director to use newly added components. For more information, see the Flash Documentation
website at www.adobe.com/support/documentation/en/flash/.
Selecting Flash components
You can select Flash components to use in your Director movie by using the Flash component section of the Library
palette. You can also access components on the Tools palette. For more information, see “Selecting components by
using the Tool palette” on page 220.
1Select Window > Library palette.
2Click the Components icon to display a list of Flash components.
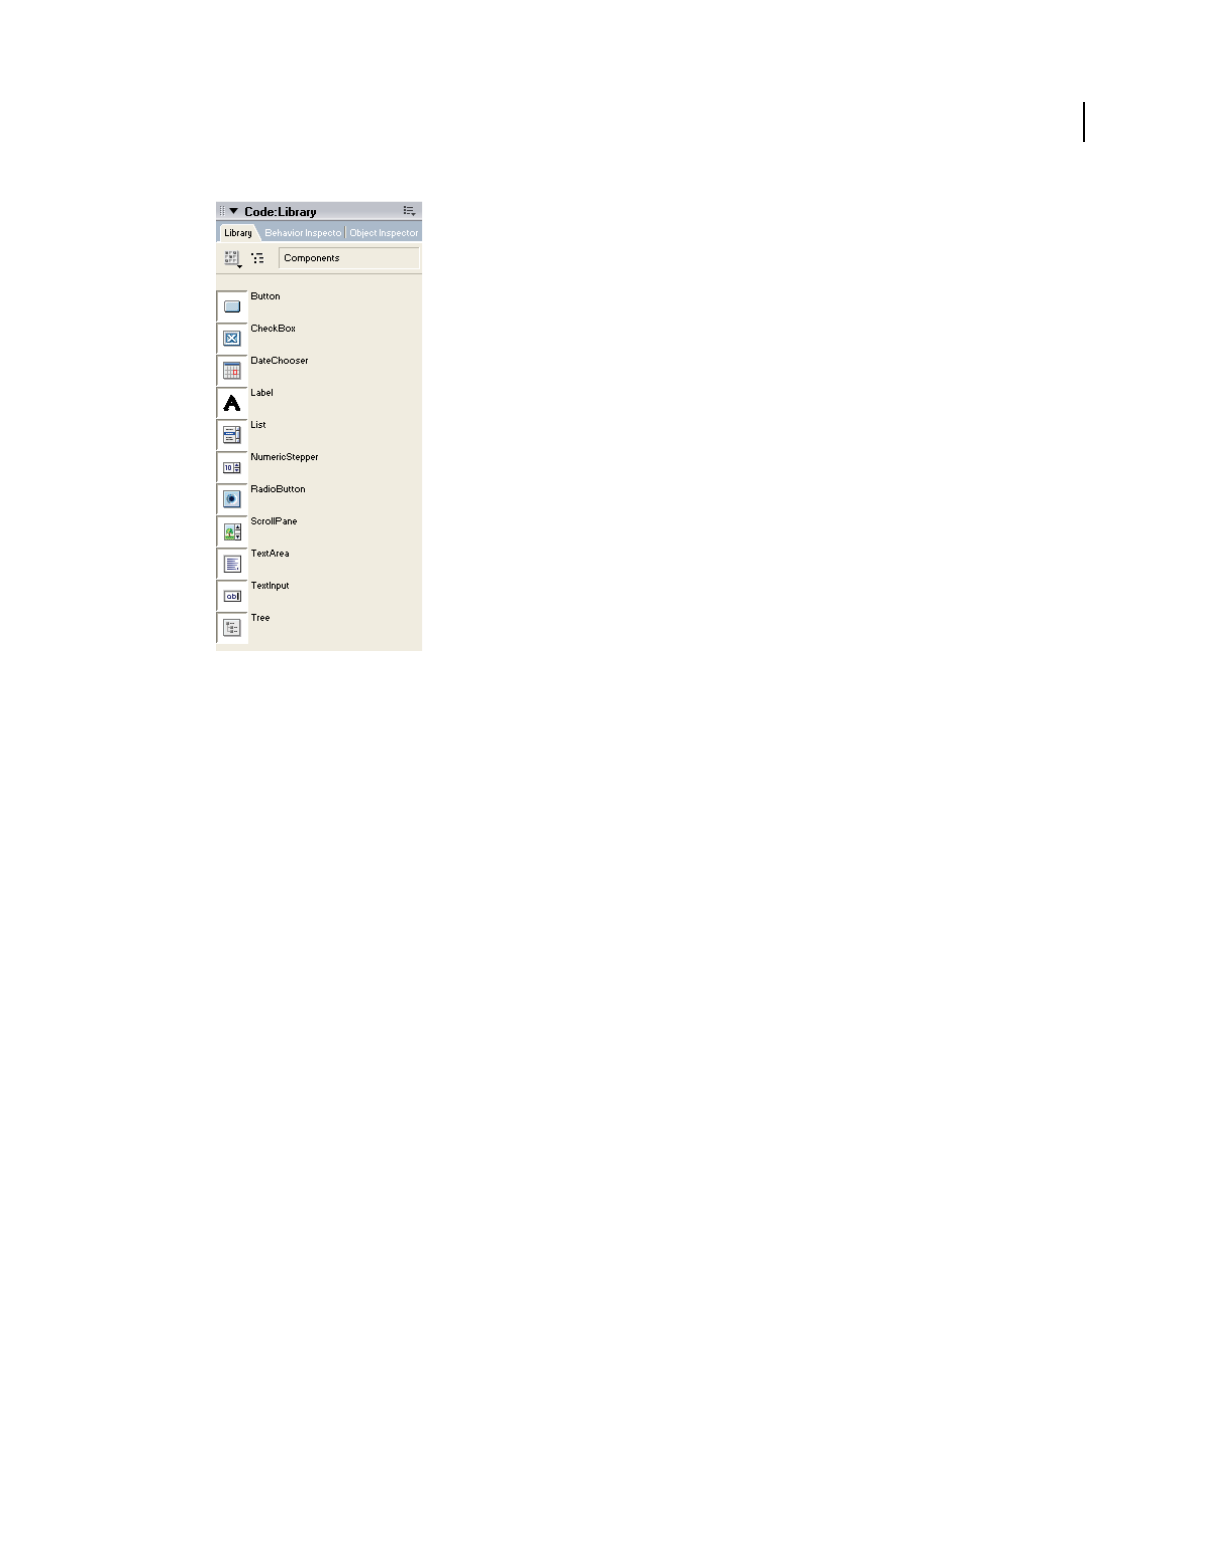
219
USING DIRECTOR 11.5
Using Flash, Flash Components, and Other Interactive Media Types
Last updated 9/28/2011
Library pallete displaying Flash components
3Drag and drop a component to a Cast window slot, the Score, or directly to the Stage.
Director includes the following Flash components:
Button component Creates a button that can be customized to include an icon.
CheckBox component Lets you insert a graphic component that can represent an on or off state.
DateChooser component Lets you insert a graphic calendar of a month. The calendar shows the current date and
lets the user navigate to any new day, month, or year.
Label component Lets you insert a single-line, static text item (not editable).
List component Lets you insert a scrolling list that supports single or multiple selections.
NumericStepper component Inserts a graphic component that lets a user select a number from an ordered set.
RadioButton component Inserts a graphic radio button that represents a single choice within a set of mutually
exclusive choices.
Note: Use the onMouseClick() option when scripting for the radio buttons to ensure that the user can select only one
radio button at a time. Without the scripting, the user can select both radio buttons.
ScrollPane component Lets you display a linked JPEG or SWF file in a scrollable area.
TextArea component An editable, multiline text region. A TextArea component can be enabled or disabled in an
application. In the disabled state, it doesn’t receive mouse or keyboard input.
TextInput component An editable single-line text region. In the disabled state, it doesn’t receive mouse or
keyboard input.
Tree component Lets you create a graphical representation for organizing and manipulating hierarchical data.

220
USING DIRECTOR 11.5
Using Flash, Flash Components, and Other Interactive Media Types
Last updated 9/28/2011
Selecting components by using the Tool palette
You can select some Flash components directly from the Tool palette and drag them to the Stage, Score, or Cast
window.
1If the Tool palette is not active, select Window > Tool Palette.
2Click the arrow on the Tool palette menu and select Flashcomponent.
3Select the component you want and move the cursor to the Stage.
4Click on the Stage where you want the component to appear.
You can resize the component on the Stage. You can also set size and position properties by using the Sprite tab in
the Property inspector. For more information, see “Displaying and editing sprite properties in the Property
inspector” on page 68.
Setting Flash component parameters
Each component has unique parameters that you can set to change its appearance and behavior. A parameter is a
property or method that appears in the Property inspector. The most commonly used properties and methods appear
as authoring parameters. Others must be set by using scripting. After playback has begun, you can get and set
parameters on a sprite instance of a Flash component in much the same way that you customize Flash content. For
more information, see “Using Lingo or JavaScript syntax with Flash variables” on page 201.
Handling Flash component events
All Flash components have events that are broadcast when the user interacts with a component or when something
significant happens to the component, such as when the user presses a key or clicks the mouse. To handle an event,
Flash uses ActionScript code that executes when the event is triggered. You can respond to these events in Director by
writing an event handler in Lingo or JavaScript. See the “Set the Flash Button component events” on page 220 for an
example of changing one component. For complete information about individual components and their properties
and events, see Using Components in the Flash documentation.
Set the Flash Button component events
1In the Stage, Score, or Cast window, select a Button Flash component.
2Open the Property inspector and select the Flash Component tab.
A list appears of events that can be generated by the component. Set the event to true if you want to respond to the
event in Director.
The following example shows how to add a behavior to an instance of the Flash Button component that prints a
message to the Message Window when the button is clicked.
3Place a Button on the Stage and select it.
4Click the Components tab in the Property inspector.
5Set the click event to true.
6In the Behavior inspector, add a new behavior called myClickHandler that contains the following code:
on click
put "Received a click event!"
end

221
USING DIRECTOR 11.5
Using Flash, Flash Components, and Other Interactive Media Types
Last updated 9/28/2011
Button component
The Button component is a resizable rectangular user interface button. You can add a custom icon to a button. You
can also change the behavior of a button from push to toggle. A toggle button stays pressed when clicked and returns
to its up state when clicked again.
A button can be enabled or disabled in an application. In the disabled state, a button doesn’t receive mouse or keyboard
input. An enabled button receives focus if you click it or tab to it.
Button parameters
You can set the following authoring parameters for each Button component instance in the Property inspector or in
the Component Inspector panel:
label Sets the value of the text on the button. The default value is Button.
icon Adds a custom icon to the button. The value is the linkage identifier of a movie clip or graphic symbol in the
library. There is no default value.
toggle Turns the button into a toggle switch. If true, the button remains in the down state when pressed and returns
to the up state when pressed again. If false, the button behaves like a normal push button. The default value is false.
selected If the toggle parameter is true, this parameter specifies whether the button is pressed (true) or released (false).
The default value is false.
labelPlacement Orients the label text on the button in relation to the icon. This parameter can be left, right, top, or
bottom. The default value is right. For more information, see Button.labelPlacement.
You can write scripts to control these and additional options for Button components by using its properties, methods,
and events. For more information, see “Button class” in the Flash documentation.
Using styles with the Button component
You can set style properties to change the appearance of a button instance. If the name of a style property ends in
Color, it is a color style property and behaves differently than non-color style properties.
A Button component supports the following Halo styles:
Style Description
themeColor The background of a component. This is the only color style that doesn’t inherit its value. Possible values
are “haloGreen”, “haloBlue”, and “haloOrange”.
color The text of a component label.
disabledColor The disabled color for text.
fontFamily The font name for text.
fontSize The point size for the font.
fontStyle The font style: either “normal” or “italic”.
fontWeight The font weight: either “normal” or “bold”.
222
USING DIRECTOR 11.5
Using Flash, Flash Components, and Other Interactive Media Types
Last updated 9/28/2011
Property summary for the Button class
Event summary for the Button class
CheckBox component
A check box is a fundamental part of any form or web application. Use check boxes wherever you need to gather a set
of true or false values that aren’t mutually exclusive.
CheckBox parameters
You can set the following authoring parameters for each CheckBox component instance in the Property inspector or
in the Component Inspector panel:
label Sets the value of the text on the check box. The default value is defaultValue.
selected Sets the initial value of the check box to checked (true) or unchecked (false).
labelPlacement Orients the label text on the check box. This parameter can be left, right, top, or bottom; the default
value is right. For more information, see CheckBox.labelPlacement.
You can write scripts to control these and additional options for CheckBox components by using its properties,
methods, and events. For more information, see “CheckBox class” in the Flash documentation.
Using styles with the CheckBox component
You can set style properties to change the appearance of a CheckBox instance. If the name of a style property ends in
Color, it is a color style property and behaves differently than non-color style properties.
A CheckBox component supports the following Halo styles:
Method Description
Button.label Specifies the text that appears within a button.
Button.labelPlacement Specifies the orientation of the label text in relation to an icon.
Button.selected When the toggle property is true, specifies whether the button is pressed (true) or not (false).
Button.toggle Indicates whether the button behaves as a toggle switch.
Method Description
Button.click Broadcast when the mouse is pressed over a button instance or when the Spacebar is pressed.
Style Description
themeColor The background of a component. This is the only color style that doesn’t inherit its value. Possible
values are “haloGreen”, “haloBlue”, and “haloOrange”.
color The text of a component label.
disabledColor The disabled color for text.
fontFamily The font name for text.
fontSize The point size for the font.
223
USING DIRECTOR 11.5
Using Flash, Flash Components, and Other Interactive Media Types
Last updated 9/28/2011
Property summary for the CheckBox class
Event summary for the CheckBox class
DateChooser component
The DateChooser component is a calendar that allows users to select a date. It has buttons that allow users to scroll
through months and click on a date to select it. You can set parameters that indicate the month and day names, the
first day of the week, and any disabled dates. You can also highlight the current date.
The DateChooser can be used anywhere you want a user to select a date. For example, you could use a DateChooser
component in a hotel reservation system with certain dates selectable and others disabled.
DataChooser parameters
You can set the following authoring parameters for each DataChooser component instance in the Property inspector:
monthNames Sets the month names that are displayed in the heading row of the calendar. The value is an array and
the default value is
[“January”,“February”,“March”,“April”,“May”,“June”,“July”,“August”,“September”,“October”,“November”,“Decem
ber”].
dayNames Sets the names of the days of the week. The value is an array and the default value is
[“S”,“M”,“T”,“W”,“T”,“F”,“S”].
firstDayOfWeek Indicates which day of the week (0-6, 0 being the first element of the dayNames array) is displayed in
the first column of the DateChooser. This property changes the display order of the day columns.
disabledDays Indicates the disabled days of the week. This parameter is an array and can have up to seven values. The
default value is [] (an empty array).
showToday Indicates whether or not to highlight today’s date. The default value is true.
You can write script to control these and additional options for the DateChooser component by using its properties,
methods, and events. For more information, see “DateChooser class” in the Flash documentation.
fontStyle The font style: either “normal” or “italic”.
fontWeight The font weight: either “normal” or “bold”.
textDecoration The text decoration: either “none” or “underline”.
Property Description
CheckBox.label Specifies the text that appears next to a check box.
CheckBox.labelPlacement Specifies the orientation of the label text in relation to a check box.
CheckBox.selected Specifies whether the check box is selected (true) or deselected (false).
Event Description
CheckBox.click Triggered when the mouse is pressed over a button instance.
Style Description

224
USING DIRECTOR 11.5
Using Flash, Flash Components, and Other Interactive Media Types
Last updated 9/28/2011
Using styles with the DateChooser component
You can set style properties to change the appearance of a DateChooser instance. If the name of a style property ends
in Color, it is a color style property and behaves differently than non-color style properties.
A DateChooser component supports the following Halo styles:
Property summary for the DateChooser class
Event summary for the DateChooser class
Style Description
themeColor The glow color for the rollover and selected dates. This is the only color style that doesn’t
inherit its value. Possible values are “haloGreen”, “haloBlue”, and “haloOrange”.
color The text of a component label.
disabledColor The disabled color for text.
fontFamily The font name for text.
fontSize The point size for the font.
fontStyle The font style: either “normal” or “italic”.
fontWeight The font weight: either “normal” or “bold”.
textDecoration The text decoration: either “none” or “underline”.
Method Description
DateChooser.dayNames An array indicating the names of the days of the week.
DateChooser.disabledDays An array indicating the days of the week that are disabled for all applicable dates in the date
chooser.
DateChooser.disabledRanges A range of disabled dates or a single disabled date.
DateChooser.displayedMonth A number indicating an element in the monthNames array to display in the date chooser.
DateChooser.displayedYear A number indicating the year to display.
DateChooser.firstDayOfWeek A number indicating an element in the dayNames array to display in the first column of the
date chooser.
DateChooser.monthNames An array of strings indicating the month names.
DateChooser.selectableRange A single selectable date or a range of selectable dates.
DateChooser.selectedDate A Date object indicating the selected date.
DateChooser.showToday A Boolean value indicating whether the current date is highlighted.
Method Description
DateChooser.change Broadcast when a date is selected.
DateChooser.scroll Broadcast when the month buttons are pressed.
225
USING DIRECTOR 11.5
Using Flash, Flash Components, and Other Interactive Media Types
Last updated 9/28/2011
Label component
A label component is a single line of text. You can specify to format the label with HTML. You can also control
alignment and sizing of a label. Label components don’t have borders, cannot be focused, and don’t broadcast any
events.
Use a Label component to create a text label for another component in a form, such as a “Name:” label to the left of a
TextInput field that accepts a user’s name. If you’re building an application using components based on version 2 (v2)
of the Adobe Component Architecture, it’s a good idea to use a Label component instead of a plain text field because
you can use styles to maintain a consistent look and feel.
Label parameters
You can set the following authoring parameters for each Label component instance in the Property inspector or in the
Component Inspector panel:
text Indicates the text of the label; the default value is Label.
html Indicates whether the label is formatted with HTML (true) or not (false). If the html parameter is set to true,
a Label cannot be formatted with styles. The default value is false.
autoSize Indicates how the label sizes and aligns to fit the text. The default value is none. The parameter can be any of
the following four values:
•none—the label doesn’t resize or align to fit the text.
•left—the right and bottom sides of the label resize to fit the text. The left and top sides don’t resize.
•center—the bottom side of the label resizes to fit the text. The horizontal center of the label stays anchored at the
its original horizontal center position.
•right—the left and bottom sides of the label resize to fit the text. The top and right side don’t resize.
Using styles with the Label component
You can set style properties to change the appearance of a label instance. All text in a Label component instance must
share the same style. For example, you can’t set the color style to "blue" for one word in a label and to “ red" for
the second word in the same label.
If the name of a style property ends in Color, it is a color style property and behaves differently than non-color style
properties. A Label component supports the following styles:
Style Description
color The default color for text.
embedFonts The fonts to embed in the document.
fontFamily The font name for text.
fontSize The point size for the font.
fontStyle The font style, either “normal” or “italic”.
fontWeight The font weight, either “normal” or “bold”.
textAlign The text alignment: either “left”, “right”, or “center”.
textDecoration The text decoration, either “none” or “underline”.
226
USING DIRECTOR 11.5
Using Flash, Flash Components, and Other Interactive Media Types
Last updated 9/28/2011
Property summary for the Label class
List component
The List component is a scrollable single- or multiple-selection list box. A list can also display graphics, including other
components.
The List component uses a zero-based index, where the top item displayed is the item with index 0. When adding,
removing, or replacing list items using the List class methods and properties, you may need to specify the index of the
list item.
You can set up a list so that users can make either single or multiple selections. For example, a user visiting an e-
commerce website needs to select which item to buy from a list of 30 items.
You can also design a list that uses custom movie clips as rows so you can display more information to the user. For
example, in an e-mail application, each mailbox could be a List component and each row could have icons to indicate
priority and status.
List component parameters
You can set the following authoring parameters for each List component instance in the Property inspector or in the
Component Inspector panel:
data An array of values that populate the data of the list. The default value is [] (an empty array). There is no equivalent
runtime property.
labels An array of text values that populate the label values of list. The default value is [] (an empty array). There is no
equivalent runtime property.
multipleSelection A Boolean value that indicates whether you can select multiple values (true) or not (false). The
default value is false.
rowHeight Indicates the height, in pixels, of each row. The default value is 20. Setting a font does not change the height
of a row.
You can write scripts to set additional options for List instances using its methods, properties, and events. For more
information, see “List class” in the Flash documentation.
Customizing the List component
You can transform a List component horizontally and vertically both while authoring and at runtime.
When a list is resized, the rows of the list shrink horizontally, clipping any text within them. Vertically, the list adds or
removes rows as needed. Scroll bars position themselves automatically.
Property Description
Label.autoSize A string that indicates how a label sizes and aligns to fit the value of its text property. There are four possible
values: “ none”,“ left”, “ center”, and “ right”. The default value is “ none”.
Label.html A Boolean value that indicates whether a label can be formatted with HTML (true) or not (false).
Label.text The text on the label.

227
USING DIRECTOR 11.5
Using Flash, Flash Components, and Other Interactive Media Types
Last updated 9/28/2011
Using styles with the List component
Set style properties to change the appearance of a List component.
A List component uses the following Halo styles:
Method summary for the List class
Style Description
alternatingRowColors Specifies colors for rows in an alternating pattern. The value can be an array of two or more colors, for
example, 0xFF00FF, 0xCC6699, and 0x996699.
backgroundColor The background color of the list. This style is defined on a class style declaration, ScrollSelectList.
borderColor The black section of a three-dimensional border or the color section of a two-dimensional border.
borderStyle The bounding box style. The possible values are: “none”, “solid”, “inset”, and “outset”. This style is
defined on a class style declaration, ScrollSelectList.
defaultIcon Name of the default icon to use for list rows. The default value is undefined.
rollOverColor The color of a rolled over row.
selectionColor The color of a selected row.
selectionEasing A reference to an easing equation (function) used for controlling programmatic tweening.
disabledColor The disabled color for text.
textRollOverColor The color of text when the pointer rolls over it.
textSelectedColor The color of text when selected.
selectionDisabledColor The color of a row if it has been selected and disabled.
selectionDuration The length of any transitions when selecting items.
useRollOver Determines whether rolling over a row activates highlighting.
Method Description
List.addItem("Labels","Da
ta")
Adds an item to the end of the list.
List.addItemAt() Adds an item to the list at the specified index.
List.getItemAt() Returns the item at the specified index.
List.removeAll() Removes all items from the list.
List.removeItemAt() Removes the item at the specified index.
List.replaceItemAt() Replaces the item at the specified index with another item.
List.setPropertiesAt() Applies the specified properties to the specified item.
List.sortItems() Sorts the items in the list according to the specified compare function.
List.sortItemsBy() Sorts the items in the list according to a specified property.

228
USING DIRECTOR 11.5
Using Flash, Flash Components, and Other Interactive Media Types
Last updated 9/28/2011
Property summary for the List class
NumericStepper component
The NumericStepper component allows a user to step through an ordered set of numbers. The component consists of
a number displayed beside small up and down arrow buttons. When a user pushes the buttons, the number is raised
or lowered incrementally. If the user clicks either of the arrow buttons, the number increases or decreases, based on
the value of the stepSize parameter, until the user releases the mouse or until the maximum or minimum value is
reached.
The NumericStepper handles only numeric data. You must resize the stepper while authoring to display more than
two numeric places (for example, the numbers 5246 or 1.34).
Using the NumericStepper component
The NumericStepper can be used anywhere you want a user to select a numeric value. For example, you could use a
NumericStepper component in a form to allow a user to set their credit card expiration date.
Property Description
List.cellRenderer Assigns the class or symbol to use to display each row of the list.
List.dataProvider The source of the list items.
List.hPosition The horizontal position of the list.
List.hScrollPolicy Indicates whether the horizontal scroll bar is displayed (“ on”) or not (“ off”).
List.iconField A field within each item to be used to specify icons.
List.iconFunction A function that determines which icon to use.
List.labelField Specifies a field of each item to be used as label text.
List.labelFunction A function that determines which fields of each item to use for the label text.
List.length The length of the list in items. This property is read-only.
List.maxHPosition Specifies the number of pixels the list can scroll to the right, when List.hScrollPolicy is set to “
on”
List.multipleSelection Indicates whether multiple selection is allowed in the list (true) or not (false).
List.rowCount The number of rows that are at least partially visible in the list.
List.rowHeight The pixel height of every row in the list.
List.selectable Indicates whether the list is selectable (true) or not (false).
List.selectedIndex The index of a selection in a single-selection list.
List.selectedIndices An array of the selected items in a multiple-selection list.
List.selectedItem The selected item in a single-selection list. This property is read-only.
List.selectedItems The selected item objects in a multiple-selection list. This property is read-only.
List.vPosition Scrolls the list so the topmost visible item is the number assigned.
List.vScrollPolicy Indicates whether the vertical scroll bar is displayed (“ on”), not displayed (“ off”), or displayed when
needed (“ auto”).

229
USING DIRECTOR 11.5
Using Flash, Flash Components, and Other Interactive Media Types
Last updated 9/28/2011
NumericStepper parameters
You can set the following are authoring parameters for each NumericStepper component instance in the Property
inspector:
value Sets the value of the current step. The default value is .
minimum Sets the minimum value of the step. The default value is 0.
maximum Sets the maximum value of the step. The default value is 10.
stepSize Sets the unit of change for the step. The default value is 1.
You can write code to control these and additional options for NumericStepper components by using its properties,
methods, and events.
Customizing the NumericStepper component
You can transform a NumericStepper component horizontally and vertically during authoring and at runtime.
Resizing the NumericStepper component does not change the size of the down and up arrow buttons. If the stepper is
resized greater than the default height, the stepper buttons are pinned to the top and the bottom of the component.
The stepper buttons always appear to the right of the text box.
Using styles with the NumericStepper component
Set style properties to change the appearance of a stepper instance. If the name of a style property ends in Color, it is
a color style property and behaves differently than non-color style properties.
A NumericStepper component supports the following Halo styles:
Property summary for the NumericStepper class
Style Description
themeColor The background of a component. This is the only color style that doesn’t inherit its value.
Possible values are “haloGreen”, “haloBlue”, and “haloOrange”.
color The text of a component label.
disabledColor The disabled color for text.
fontFamily The font name for text.
fontSize The point size for the font.
fontStyle The font style; either “normal” or “italic”.
fontWeight The font weight; either “normal” or “bold”.
textDecoration The text decoration; either “none” or “underline”.
textAlign The text alignment; either “left”, “right”, or “center”.
Property Description
NumericStepper.maximum A number indicating the maximum range value.
NumericStepper.minimum A number indicating the minimum range value.
NumericStepper.nextValue A number indicating the next sequential value. This property is read-only.
230
USING DIRECTOR 11.5
Using Flash, Flash Components, and Other Interactive Media Types
Last updated 9/28/2011
Event summary for the NumericStepper class
RadioButton component
A radio button is a fundamental part of any form or web application. Use radio buttons wherever you want a user to
make one choice from a group of options. For example, use radio buttons in a form to ask which credit card a customer
is using to pay.
RadioButton parameters
You can set the following authoring parameters for each RadioButton component instance in the Property inspector
or in the Component Inspector panel:
label Sets the value of the text on the button; the default value is Radio Button.
data The value associated with the radio button. There is no default value.
groupName The group name of the radio button. The default value is radioGroup.
selected Sets the initial value of the radio button to selected (true) or unselected (false). A selected radio button
displays a dot inside it. Only one radio button within a group can have a selected value of true. If more than one radio
button within a group is set to true, the radio button that is instantiated last is selected. The default value is false.
labelPlacement Orients the label text on the button. This parameter can be left, right, top, or bottom. The default value
is right. For more information, see RadioButton.labelPlacement.
Write scripts to set additional options for RadioButton instances by using the methods, properties, and events of the
RadioButton class. For more information, see “RadioButton class” in the Flash documentation.
Customizing the RadioButton component
You can transform a RadioButton component horizontally and vertically both while authoring and at runtime.
The bounding box of a RadioButton component is invisible and also designates the hit area for the component. If you
increase the size of the component, you also increase the size of the hit area.
If the component’s bounding box is too small to fit the component label, the label clips to fit.
Using styles with the RadioButton component
Set style properties to change the appearance of a RadioButton. If the name of a style property ends in Color, it is a
color style property and behaves differently than non-color style properties.
NumericStepper.previousValue A number indicating the previous sequential value. This property is read-only.
NumericStepper.stepSize A number indicating the unit of change for each step.
NumericStepper.value A number indicating the current value of the stepper.
Event Description
NumericStepper.change Triggered when the value of the step changes.
Property Description
231
USING DIRECTOR 11.5
Using Flash, Flash Components, and Other Interactive Media Types
Last updated 9/28/2011
A RadioButton component uses the following Halo styles:
Property summary for the RadioButton class
Event summary for the RadioButton class
ScrollPane component
The Scroll Pane component displays movie clips, JPEG files, and SWF files in a scrollable area. You can enable scroll
bars to display images in a limited area. You can display content that is loaded from a local location or from over the
Internet. You can set the content for the scroll pane both while authoring and at runtime using scripts.
Using the ScrollPane component
Use a scroll pane to display any content that is too large for the area into which it is loaded.
Style Description
themeColor The background of a component. This is the only color style that doesn’t inherit its value.
Possible values are “haloGreen”, “haloBlue”, and “haloOrange”.
color The text of a component label.
disabledColor The disabled color for text.
fontFamily The font name for text.
fontSize The point size for the font.
fontStyle The font style; either “normal” or “italic”.
fontWeight The font weight; either “normal” or “bold”.
Property Description
RadioButton.data The value associated with a radio button instance.
RadioButton.groupName The group name for a radio button group or radio button instance.
RadioButton.label The text that appears next to a radio button.
RadioButton.labelPlacement The orientation of the label text in relation to a radio button.
RadioButton.selected Sets the state of the radio button instance to selected and deselects the previously selected
radio button.
RadioButton.selectedData Selects the radio button in a radio button group with the specified data value.
RadioButton.selection A reference to the currently selected radio button in a radio button group.
Event Description
RadioButton.click Triggered when the mouse is pressed over a button instance.
232
USING DIRECTOR 11.5
Using Flash, Flash Components, and Other Interactive Media Types
Last updated 9/28/2011
ScrollPane parameters
You can set the following authoring parameters for each ScrollPane component instance in the Property inspector or
in the Component Inspector panel:
contentPath Indicates the content to load into the scroll pane. This value can be a relative path to a local SWF or JPEG
file, or a relative or absolute path to a file on the Internet.
hLineScrollSize Indicates the number of units a horizontal scroll bar moves each time an arrow button is pressed. The
default value is 5.
hPageScrollSize Indicates the number of units a horizontal scroll bar moves each time the track is pressed. The default
value is 20.
hScrollPolicy Displays the horizontal scroll bars. The default value is “auto”.
scrollDrag A Boolean value that allows a user to scroll the content within the scroll pane (true) or not (false). The
default value is false.
vLineScrollSize Indicates the number of units a vertical scroll bar moves each time an arrow button is pressed. The
default value is 5.
vPageScrollSize Indicates the number of units a vertical scroll bar moves each time the track is pressed. The default
value is 20.
vScrollPolicy Displays the vertical scroll bars. The default value is “auto”.
Write code to control these and additional options for ScrollPane components by using its properties, methods, and
events.
Method summary for the ScrollPane class
Property summary for the ScrollPane class
Method Description
ScrollPane.getBytesLoaded() Returns the number of bytes of content loaded.
ScrollPane.getBytesTotal() Returns the total number of content bytes to be loaded.
ScrollPane.refreshPane() Reloads the contents of the scroll pane.
Method Description
ScrollPane.content A reference to the content loaded into the scroll pane.
ScrollPane.contentPath An absolute or relative URL of the SWF or JPEG file to load into the scroll pane.
ScrollPane.hLineScrollSize The amount of content to scroll horizontally when an arrow button is pressed.
ScrollPane.hPageScrollSize The amount of content to scroll horizontally when the track is pressed.
ScrollPane.hPosition The horizontal pixel position of the scroll pane.
ScrollPane.hScrollPolicy The status of the horizontal scroll bar. The default value is “ auto”.
ScrollPane.scrollDrag Indicates whether there is scrolling when a user presses and drags within the ScrollPane (true)
or not (false). The default value is false.
ScrollPane.vLineScrollSize The amount of content to scroll vertically when an arrow button is pressed.
233
USING DIRECTOR 11.5
Using Flash, Flash Components, and Other Interactive Media Types
Last updated 9/28/2011
Event summary for the ScrollPane class
TextArea component
Use a TextArea component wherever you need a multiline text field. If you need a single-line text field, use the
“TextInput component” on page 235. For example, you could use a TextArea component as a comment field in a form.
You could set up a listener that checks if the field is empty when a user tabs out of the field. That listener could display
an error message indicating that a comment must be entered in the field.
TextArea component parameters
You can set the following authoring parameters for each TextArea component instance in the Property inspector or
in the Component Inspector panel:
text Indicates the contents of the TextArea. You cannot enter carriage returns in the Property inspector or
Component Inspector panel. The default value is “” (empty string).
html Indicates whether the text is formatted with HTML (true) or not (false). The default value is false.
editable Indicates whether the TextArea component is editable (true) or not (false). The default value is true.
wordWrap Indicates whether the text wraps (true) or not (false). The default value is true.
Write code to control these and additional options for TextArea components by using its properties, methods, and
events.
Using styles with the TextArea component
The TextArea component supports one set of component styles for all text in the field. However, you can also display
HTML compatible with Flash Player HTML rendering. To display HTML text, set TextArea.html to true.
If the name of a style property ends in Color, it is a color style property and behaves differently than non-color style
properties. For more information, see “Using styles to customize component color and text” in the Flash
documentation.
A TextArea component supports the following styles:
ScrollPane.vPageScrollSize The amount of content to scroll vertically when the track is pressed.
ScrollPane.vPosition The vertical pixel position of the scroll pane.
ScrollPane.vScrollPolicy The status of the vertical scroll bar. The default value is “ auto”.
Method Description
ScrollPane.complete Broadcast when the scroll pane content is loaded.
ScrollPane.progress Broadcast while the scroll bar content is loading.
ScrollPane.scroll Broadcast when the scroll bar is pressed.
Method Description

234
USING DIRECTOR 11.5
Using Flash, Flash Components, and Other Interactive Media Types
Last updated 9/28/2011
Property summary for the TextArea class
Event summary for the TextArea class
Style Description
color The default color for text.
embedFonts The fonts to embed in the document.
fontFamily The font name for text.
fontSize The point size for the font.
fontStyle The font style, either “normal” or “italic”.
fontWeight The font weight, either “normal” or “bold”.
textAlign The text alignment: either “left”, “right”, or “center”.
textDecoration The text decoration, either “none” or “underline”.
Property Description
TextArea.editable A Boolean value indicating whether the field is editable (true) or not (false).
TextArea.hPosition Defines the horizontal position of the text within the scroll pane.
TextArea.hScrollPolicy Indicates whether the horizontal scroll bar is always on (“ on”), never on (“ off”), or turns on when
needed (“ auto”).
TextArea.html A flag that indicates whether the text field can be formatted with HTML.
TextArea.length The number of characters in the text field. This property is read-only.
TextArea.maxChars The maximum number of characters that the text field can contain.
TextArea.maxHPosition The maximum value of TextArea.hPosition.
TextArea.maxVPosition The maximum value of TextArea.vPosition.
TextArea.password A Boolean value indicating whether the field is a password field (true) or not (false).
TextArea.restrict The set of characters that a user can enter into the text field.
TextArea.text The text contents of a TextArea component.
TextArea.vPosition A number indicating the vertical scrolling position.
TextArea.vScrollPolicy Indicates whether the vertical scroll bar is always on (“ on”), never on (“ off”), or turns on when
needed (“ auto”).
TextArea.wordWrap A Boolean value indicating whether the text wraps (true) or not (false).
Event Description
TextArea.change Notifies listeners that text has changed.
235
USING DIRECTOR 11.5
Using Flash, Flash Components, and Other Interactive Media Types
Last updated 9/28/2011
TextInput component
The TextInput is a single-line component that wraps the native ActionScript TextField object. Use styles to customize
the TextInput component. When an instance is disabled, its contents appear in a color represented by the
“disabledColor” style. A TextInput component can also be formatted with HTML, or as a password field that disguises
the text.
Use a TextInput component wherever you need a single-line text field. If you need a multiline text field, use the
“TextArea component” on page 233. For example, you could use a TextInput component as a password field in a form.
You could set up a listener that checks if field has enough characters when a user tabs out of the field. That listener
could display an error message indicating that the proper number of characters must be entered.
TextInput component parameters
You can set the following authoring parameters for each TextInput component instance in the Property inspector or
in the Component Inspector panel:
text Specifies the contents of the TextInput. You can’t enter carriage returns in the Property inspector or Component
Inspector panel. The default value is “” (empty string).
editable Indicates whether the TextInput component is editable (true) or not (false). The default value is true.
password Indicates whether the field is a password field (true) or not (false). The default value is false.
Write scripts to control these and additional options for TextInput components by using its properties, methods, and
events. For more information, see “TextInput class” in the Flash documentation.
Customizing the TextInput component
When a TextInput component is resized, the border is resized to the new bounding box. The TextInput component
doesn’t use scroll bars, but the insertion point scrolls automatically as the user interacts with the text. The text field is
then resized within the remaining area. There are no fixed-size elements in a TextInput component. If the TextInput
component is too small to display the text, the text is clipped.
Using styles with the TextInput component
A TextInput component supports the following styles:
Style Description
color The default color for text.
fontFamily The font name for text.
fontSize The point size for the font.
fontStyle The font style, either “normal” or “italic”.
fontWeight The font weight, either “normal” or “bold”.
textAlign The text alignment: either “left”, “right”, or “center”.
textDecoration The text decoration, either “none” or “underline”.
236
USING DIRECTOR 11.5
Using Flash, Flash Components, and Other Interactive Media Types
Last updated 9/28/2011
Property summary for the TextInput class
Event summary for the TextInput class
Tree component
The Tree component allows a user to view hierarchical data. The tree appears within a box like the List component,
but each item in a tree is called a node and can be either a leaf or a branch. By default, a leaf is represented by a text
label beside a file icon, and a branch is represented by a text label beside a folder icon with a disclosure triangle that a
user can open to expose children. The children of a branch can either be leaves or branches themselves.
The data of a tree component must be provided from an XML data source.
When a Tree instance has focus either from clicking or tabbing, use the following keys to control it:
Property Description
TextInput.editable A Boolean value indicating whether the field is editable (true) or not (false).
TextInput.hPosition The horizontal scrolling position of the text field.
TextInput.length The number of characters in a TextInput text field. This property is read only.
TextInput.maxChars The maximum number of characters that a user can enter in a TextInput text field.
TextInput.maxHPosition The maximum possible value for TextField.hPosition. This property is read-only.
TextInput.password A Boolean value that indicates whether or not the input text field is a password field that hides the
entered characters.
TextInput.restrict Indicates which characters a user can enter in a text field.
TextInput.text Sets the text content of a TextInput text field.
Event Description
TextInput.change Triggered when the Input field changes.
TextInput.enter Triggered when the enter key is pressed.
Key Description
Down arrow Moves selection down one.
Up arrow Moves selection up one.
Right arrow Opens a selected branch node. If a branch is already open, moves to first child node.
Left arrow Closes a selected branch node. If on a leaf node of a closed branch node, moves to parent node.
Space Opens or closes a selected branch node.
End Moves selection to the bottom of the list.
Home Moves selection to the top of the list.
Page Down Moves selection down one page.

237
USING DIRECTOR 11.5
Using Flash, Flash Components, and Other Interactive Media Types
Last updated 9/28/2011
The Tree component can be used to represent hierarchical data such as e-mail client folders, file browser panes, or
category browsing systems for inventory. Most often, the data for a tree is retrieved from a server in the form of XML,
but it can also be well-formed XML that is created while authoring in Director. The best way to create XML for the tree
is to create a Lingo object by using the XML Parser Xtra or an XML object using the Flash Asset Xtra. After you create
a Lingo object that contains an XML data source (or load one from an external source), assign it to
Alert.cancelLabel.
Formatting XML for the Tree component
The Tree component is designed to display hierarchical data structures. XML is the data model for the Tree
component. It is important to understand the relationship of the XML data source to the Tree component.
Consider the following XML data source sample:
<node>
<node label="Mail">
<node label="INBOX"/>
<node label="Personal Folder">
<node label="Business" isBranch="true" />
<node label="Demo" isBranch="true" />
<node label="Personal" isBranch="true" />
<node label="Saved Mail" isBranch="true" />
<node label="bar" isBranch="true" />
</node>
<node label="Sent" isBranch="true" />
<node label="Trash"/>
</node>
</node>
Note: The isBranch attribute is read-only; you cannot set it directly. To set it, call the Tree.setIsBranch() method.
Nodes in the XML data source can have any name. Notice that in the sample each node is named with the generic name
node. The tree reads through the XML and builds the display hierarchy based on the nested relationship of the nodes.
Each XML node can be displayed as one of two types in the Tree: branch or leaf. Branch nodes can contain multiple
child nodes and appear as a folder icon with a disclosure triangle that allows users to open and close the folder. Leaf
nodes appear as a file icon and cannot contain child nodes. Both leaves and branches can be roots; root nodes appear
at the top level of the tree and have no parent.
There are many ways to structure XML. The Tree component is not designed to use all types of XML structures, so it’s
important to use XML that the Tree component can interpret. Do not nest node attributes in a child node. Each node
should contain all its necessary attributes. The attributes of each node should be consistent to be useful. For example,
to describe a mailbox structure with a Tree component, use the same attributes on each node (message, data, time,
attachments, and so on). This allows the tree to know what it expects to render, and allows you to loop through the
hierarchy to compare data.
When a Tree displays a node it uses the label attribute of the node by default as the text label. If any other attributes
exist, they become additional properties of the node’s attributes within the Tree.
Page Up Moves selection up one page.
Control Allows multiple noncontiguous selections.
Shift Allows multiple contiguous selections.
Key Description

238
USING DIRECTOR 11.5
Using Flash, Flash Components, and Other Interactive Media Types
Last updated 9/28/2011
The actual root node is interpreted as the Tree component itself. This means that the firstChild (in the sample,
<node label="Mail">), is rendered as the root node in the Tree view. This means that a tree can have multiple root
folders. In this sample, there is only one root folder displayed in the tree: “Mail”. However, if you were to add sibling
nodes at that level in the XML, multiple root nodes would be displayed in the Tree.
Tree parameters
You can set the following authoring parameters for each Tree component instance in the Property inspector.
multipleSelection A Boolean value that indicates whether a user can select multiple items (true) or not (false). The
default value is false.
rowHeight The height of each row in pixels. The default value is 20.
Write Lingo or JavaScript to control these and additional options for the Tree component by using its properties,
methods, and events.
Unlike with other components, you cannot enter data parameters in the Property inspector for the Tree component.
Customizing the Tree component
You can size a Tree component horizontally and vertically during authoring and at runtime. While authoring, select
the component on the Stage and drag the resize handles. At runtime, use the setSize() method. When a tree isn’t
wide enough to display the text of the nodes, the text is clipped.
Method summary for the Tree class
Method Description
PopUpManager.createPopUp() Adds a node to a tree instance.
Accordion.createSegment() Adds a node at a specific location in a tree instance.
Accordion.destroyChildAt() Specifies whether the folder is a branch (has a folder icon and an expander arrow).
Accordion.getChildAt() Indicates whether a branch is open or closed.
Tree.getDisplayIndex() Returns the display index of a given node.
Tree.getNodeDisplayedAt() Returns the display index of a given node.
Tree.getTreeNodeAt() Returns a node on the root of the tree.
Tree.removeAll() Removes all nodes from a tree instance and refreshes the tree.
Tree.removeTreeNodeAt() Removes a node at a specified position and refreshes the tree.
Tree.setIsBranch() Indicates whether a node is a branch (receives folder icon and expander arrow).
Tree.setIcon() Specifies whether a node is open or closed.
Tree.setIsOpen() Specifies a symbol to be used as an icon for a node.
239
USING DIRECTOR 11.5
Using Flash, Flash Components, and Other Interactive Media Types
Last updated 9/28/2011
Property summary for the Tree class
Event summary for the Tree class
Property Description
Alert.cancelLabel Specifies an XML data source.
Alert.noLabel Specifies the first node at the top of the display.
Alert.okLabel Specifies the selected node in a tree instance.
Tree.selectedNode Specifies the selected nodes in a tree instance.
Event Description
Tree.nodeClose Broadcast when a node is closed by a user.
Tree.nodeOpen Broadcast when a node is opened by a user
Tree.nodeClose Broadcast when a node is closed by a user
Tree.itemRollOver Broadcast when a user rolls over a node
Tree.itemRollOut Broadcast when a user rolls out of a node
Tree.change Broadcast when a user clicks on a node
Alert.click Broadcast when a node is opened by a user.

240
Last updated 9/28/2011
Chapter 11: Sound and Synchronization
About sound and synchronization
Give your movie added appeal by including a sound track, a voice-over, ambient noises, or other sounds.
With Adobe® Director®, you can control when sounds start and stop, how long they last, their quality and volume, and
several other effects. Using Shockwave® Audio (SWA), you can compress sounds for easier distribution and stream
them from an Internet source. You can also incorporate Windows® Media Audio® (WMA) in your Director movies.
The media synchronization features in Director let you synchronize events in a movie to precise cue points embedded
in sound.
Sound makes significant demands on a computer’s processing power. Manage sounds carefully to make sure they
don’t adversely affect your movie’s performance.
Scripting gives Director more flexibility when playing sound and can help overcome performance concerns. Use it to
play sound in ways not possible with the Score alone. Using Lingo or JavaScript syntax, you can do the following:
•Turn sound on and off in response to movie events.
•Control sound volume.
•Control the pan of a sound relative to the pan of a QuickTime® VR movie.
•Control the sound in a Windows Media Audio file.
•Preload sound into memory, queue multiple sounds, and define precise loops.
•Synchronize sound and animation precisely.
Importing internal and linked sounds
Director handles sounds as either internal or linked. You can determine whether a sound is internal or linked when
you import it. Each type of sound has advantages for different situations.
Director stores all the sound data for an internal sound cast member in a movie or cast file and loads the sound
completely into RAM before playing it. After an internal sound is loaded, it plays very quickly. This makes internal
sound best for short sounds, such as beeps or clicks, that recur frequently in your movie. For the same reason, making
a large sound file an internal sound isn’t a good choice because the sound might use too much memory.
Director doesn’t store sound data in a linked sound cast member. Instead, it keeps a reference to a sound file’s location
and imports the sound data each time the sound begins playing. Because the sound is never entirely loaded into RAM,
the movie uses memory more efficiently.
Because Director streams many sounds, it begins playing the sound while the rest of the sound continues to load from
its source, whether on disk or over the Internet. This can dramatically improve the downloading performance of large
sounds. Linked sounds are best for longer sounds such as voice-overs or nonrepeating music.
Director can stream the following sounds:
•QuickTime, Shockwave Audio, and MP3 sounds that are linked from a URL
•QuickTime, Shockwave Audio, MP3, AIFF, and WAV sounds that are linked to a local file

241
USING DIRECTOR 11.5
Sound and Synchronization
Last updated 9/28/2011
Director imports AIFF and WAV sounds (both compressed and uncompressed), AU, Shockwave Audio, and MP3.
For best results, use sounds that have 8- or 16-bit depth and a sampling rate of 44.1, 22.050, or 11.025 kHz.
1Select File > Import and select sound files to import.
2Select a Media option:
Standard Import Makes all the selected sounds internal sound cast members.
Link To External File Makes all the selected sounds linked.
Include Original Data for Editing Lets you edit original sound files in Director.
3Click Import.
Note: If your Mac® computer has an audio input or attached microphone, record sounds directly into a movie’s cast
by selecting Insert > Media Element > Sound. The Sound method opens the Mac sound recording dialog box.
Director for Windows has no equivalent feature.
Audio mixers and sound objects
Audio mixer
A mixer is a container that mixes the sound objects that it contains and plays the resulting output. Because multiple
audio sources are merged into a single audio source, mixers save resources by reducing the amount of data transferred
to the sound card.
Use a mixer to mix audio sources with same or different sampling rates, bit depth, or number of channels. The audio
sources for a mixer can be from different musical instruments, vocalists, members of an orchestra, announcers,
journalists, crowd noises, and so on. You can apply audio filters to the output of a mixer to create a range of effects.
Sound object
A sound object is the audio data that is added to a mixer. Sound objects contain the actual sound data of the audio file
(local or on the network), audio cast member, or streaming member along with modifications like effects. You can
apply audio filters to sound objects.
Create a mixer
1Click Window > Audio Mixer. Alternatively, press Ctrl+Shift+X (Microsoft® Windows XP or Windows Vista).
2In the Audio Mixer Inspector, click and select New Mixer.
The mixer is created and listed in the Mixer Browser area along with its cast member number.
Add a sound object to a mixer
You can add audio cast members as sound objects to a mixer. If the current movie has no audio cast members, import
one or more audio cast members by clicking File > Import.
Follow these steps to add an audio cast member as a sound object to a mixer:
1Select a mixer in the Mixer Browser area and click .
2From the Add Sound submenu, select the audio cast member that you want to add as a sound object.
242
USING DIRECTOR 11.5
Sound and Synchronization
Last updated 9/28/2011
Note: To remove a sound object from a mixer, right-click the sound object and select Remove from the pop-up menu.
Alternatively, select the sound object, click , and choose Remove Item from the pop-up menu.
Apply filters to a sound object or mixer
1Click a mixer or sound object.
2Click . From the Add Filter submenu, select the filter that you want to apply to the mixer or sound object.
You can also apply a filter by right-clicking a mixer, sound object, or Filters under a mixer or sound object, and
choosing a filter from the Add Filter submenu.
3Right-click Filters under a mixer or sound object in the Mixer Browser area, and select one of the following:
Enable All Filters Enables all filters applied to the mixer or sound object.
Disable All Filters Disables all filters applied to the mixer or sound object.
Remove All Filters Removes all filter effects applied to the mixer or sound object.
Note: When you apply filters to a mixer, the filters are applied to all the contained sound objects.
Play a mixer or sound object
Do one of the following:
•
Right-click a mixer or sound object in the Mixer Browser area and select Play, Pause, or Stop from the pop-up menu.
•Select a mixer or sound object. Now use the controls (Play, Pause, and Stop) in the upper-left corner of the
Mixer/Sound Object Properties area.
Note: Filters enabled for the mixer or sound object are applied to it before playback. You can also apply filters to a mixer
or its contained sound objects at run time.
Export a mixer or sound object
You can export a mixer or sound object as a WAV or MP4 file.
1Select a mixer or sound object in the Mixer Browser area.
2Click Export To File.
3Specify a filename and a file type.
4Click Save.
The time required to save a file depends on its size. Functionalities like play, pause, and stop are disabled while a
file is being saved.
Note: While a file is being saved, the Export To File button changes to Stop Export. Click the Stop Export button to cancel
the save operation.
Modify mixer, sound object, or filter properties
1Click a mixer, sound object, or a filter in the Mixer Browser area.
2Modify the properties displayed in the right pane. For example, you can change the loopCount of a sound object
from 1 to 3.
Note: Changes to filter properties apply at run time. Such changes are applicable only for the mixer or sound object to
which the filter is directly applied.

243
USING DIRECTOR 11.5
Sound and Synchronization
Last updated 9/28/2011
To rename a mixer or sound object, enter a new name in the box to the right of playback controls.
Activate a mixer
Activating a mixer sets the state of the mixer to playing. However, the sound objects contained in the mixer do not
start playing automatically. You can activate a mixer only if it is in the paused or stopped state.
Activating a mixer is similar to calling mixerRef.play([]) from a script. Do the following to activate a mixer:
❖Right-click the mixer in the Mixer Browser area and select Activate from the pop-up menu.
Reset a mixer
When you reset a mixer, any changes made to the mixer or its contained sound objects since the last save operation
are reversed. Do the following:
1Select a mixer in the Mixer Browser area.
2Click and select Reset Mixer from the pop-up menu.
Mix MP4 movie sound with other sounds
The video player exposes the soundtracks in the file through its sound objects list. You can mix the sound of the MP4
video by adding these sound objects to the mixer.
Usage
mixer = member(1).mixer
mixer.createSoundObject("so", memberobjref)
mixer.play()
Examples
The following examples mix the sound of the MP4 video with other sound objects in the cast library, namely in
member 3 of the castlib:
-- Lingo syntax
mixer = member(1).mixer
mixer.createSoundObject("test", member(3))
mixer.play()
mixer = sprite(1).mixer
mixer.createSoundObject("test", member(3))
mixer.play()
// JavaScript syntax
mixer = member(1).mixer;
mixer.createSoundObject("test", member(3));
mixer.play();
mixer = sprite(1).mixer;
mixer.createSoundObject("test", member(3));
mixer.play();
Create a mixer asset reference
Use the following syntax to create a mixer asset reference:
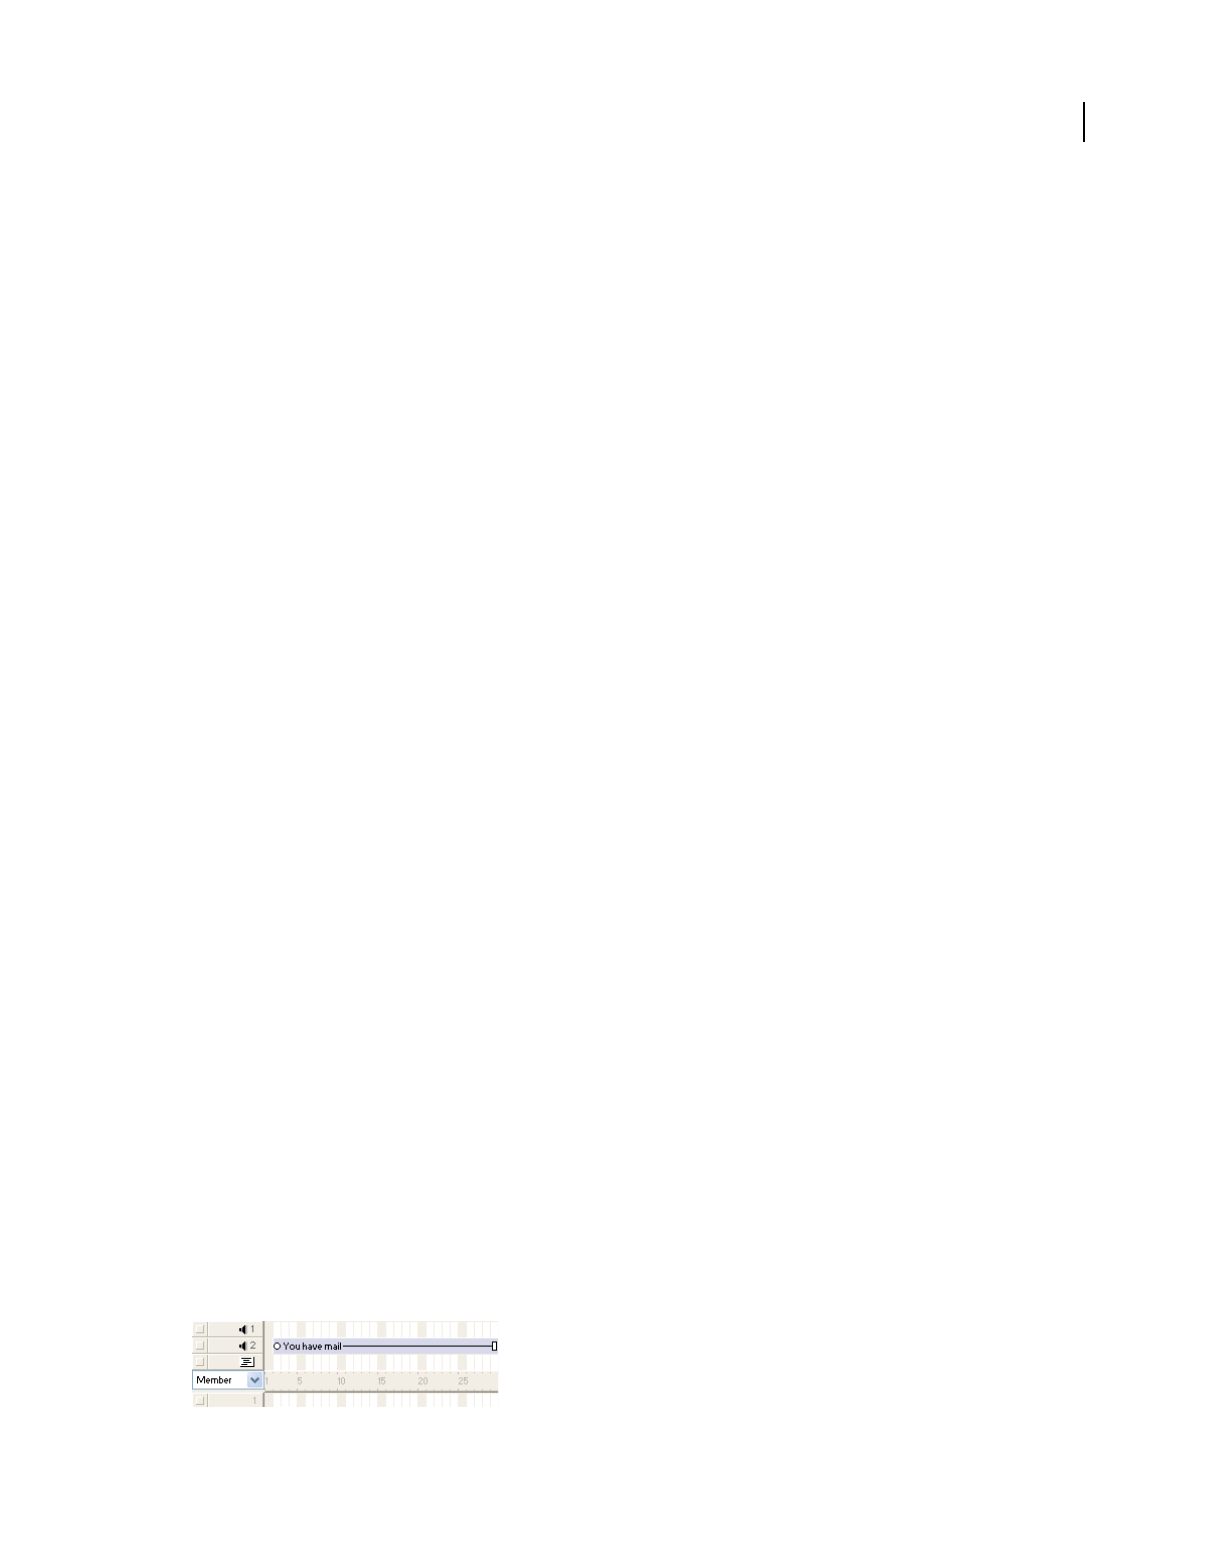
244
USING DIRECTOR 11.5
Sound and Synchronization
Last updated 9/28/2011
Method1: Mixer = new(#Mixer)
Method2: Mixer = member(1)
Examples
-- Lingo syntax
on mouseUP me
mixer1 = new(#mixer) -- Creates a mixer member in the first empty cast member
-- and then returns the reference to mixer1.
end
-- or
on mouseUP me
mixer1 = member(1) -- Assigns the reference of mixer asset in cast member(1)
-- to mixer1.
end
// JavaScript syntax
function mouseUp()
{
mixer1 = _movie.newMember(symbol("mixer"));
}
Setting sound cast member properties
Use sound cast member properties to make a sound loop, change its name, change the external sound file to which it’s
linked (if it’s a linked sound), and set its unload priority.
1Select a sound cast member.
2Click the Sound tab in the Property inspector to display editable and noneditable options.
3To make the sound play continuously, click Loop (for more information, see “Looping a sound” on page 245).
4To play the sound, click the Play button.
5Click the Member tab in the Property inspector to display editable and noneditable options.
6To view or edit the cast member name, use the Name text box.
7To change the external sound file to which the cast member is linked (if it has been imported as a Linked To
External File sound), enter a new path and file in the Filename text box browse to a new file.
8To specify how Director removes the cast member from memory if memory is low, select an option from the
Unload menu. For more information, see “Controlling cast member unloading” on page 46.
Controlling sound in the Score
You control sounds in the Score in much the same way that you control sprites. You place sounds in one of the two
sound channels at the top of the Score and extend the sounds through as many frames as required.

245
USING DIRECTOR 11.5
Sound and Synchronization
Last updated 9/28/2011
Unless you use a behavior or other script to override the Score’s sound channels, sounds play only as long as the
playhead is in the frames that contain the sound. After a sound begins playing, it plays at its own speed. Director can’t
control the speed at which a sound plays. If a sound is not set to loop, it stops playing at the end, even if the sprite
specifies a longer duration. For more information, see “Looping a sound” on page 245.
Note: To speed up or slow down a sound, convert it to a sound-only QuickTime movie and use the playRate sprite
property.
Director supports the following:
•16 sound channels.
•Depths of 8, 16, and 24 bits, and sampling frequencies upto 192 KHz.
•QuickTime, SWA, MP3, AIFF, and WAV audio file types.
•MPEG formats, including MP4 audio files.
You can apply filters to sound objects and mixers using the Audio user interface.
1If the sound channels are not visible, click the Hide/Show Effects Channels button at the upper-right side of the
Score.
2Do any of the following:
•Drag a sound cast member from a Cast window to a frame in one of the sound channels.
•Double-click a frame in the sound channel, and then select a sound from the Frame Properties: Sound dialog
box. You can also preview any sound cast member in the movie from this dialog box.
•Drag a sound to the Stage to place it into the first available sound channel in the current frame of the Score.
3Extend the sound through as many frames as necessary.
New sounds are assigned the same number of frames as is set for sprites in the Sprite Preferences dialog box. You
might need to adjust the number of frames to make the sound play completely, or to change a tempo setting to make
the playhead wait for the sound to finish. For more information, see “Synchronizing media” on page 251.
Note: Sound in the last frame of a movie continues to play (but not loop) until the next movie begins or you exit from
the application. This sound can provide a useful transition while Director loads the next movie.
Looping a sound
You might find that you want to play a sound repeatedly to create a continuous sound effect, such as the sound of a
person walking. A looped sound repeats as long as the playhead is in a frame where the sound is set. See “Importing
internal and linked sounds” on page 240.
1Select a sound cast member.
2On the Sound tab in the Property inspector, select the Loop option.
You can also loop sounds with Lingo or JavaScript syntax. For more information, see “Playing sounds with Lingo
or JavaScript syntax” on page 246.

246
USING DIRECTOR 11.5
Sound and Synchronization
Last updated 9/28/2011
Using sound in Windows
The following issues are specific to managing sound for Windows:
•In Windows, a sound that is already playing in either sound channel overrides the sound in a QuickTime or AVI
video or in Flash® content. It also prevents the video sound from playing even after the sound in the sound channel
stops. However, after the sound in a digital video starts, it overrides a sound in either sound channel.
•To mix QuickTime audio tracks with internal Director sounds, use the soundDevice system property to specify
QT3Mix or install the Microsoft® DirectSound® sound driver software version 5.0 or later (available from
www.microsoft.com), and use the soundDevice property to specify DirectSound. For more information, see the
Scripting Reference topics in the Director Help Panel. (Windows NT 4 does not support DirectSound 5.) Check the
Director Support Center at www.adobe.com/support/director/ for the latest developments related to this issue.
•The default number of sounds that Director can mix in Windows is eight. This number can be decreased by
modifying the value for MixMaxChannels in the Director.ini file in the Director folder.
Playing sounds with Lingo or JavaScript syntax
Lingo or JavaScript syntax lets you play and control sounds regardless of the settings in the Score. Use these scripts to
play sounds, turn them on and off, and play external sounds that aren’t cast members. Using script to play sounds lets
you control the exact timing of when sounds start and stop. Lingo or JavaScript syntax also lets you play only part of
a sound cast member or play several sounds in succession without interruption.
Sounds played by Director play at the volume that is set in the computer’s sound level control. You can use Lingo or
JavaScript syntax to modify the computer’s sound level to suit the needs of your movie or to modify the volume of the
sound channel.
You can also use Lingo or JavaScript syntax to control and stream Shockwave Audio. For more information, see
“Playing audio with Lingo or JavaScript syntax” on page 250.
Playing sound cast members
After you import a sound as a cast member, you can control many aspects of how the sound plays.
Play sound cast members regardless of the settings in the Score
❖Use the queue() and play() methods. The queue() method loads the sound into the Director RAM buffer so
that it can be played immediately when called. The play() method starts playing the sound. If you omit the
queue() method, the sound might not play immediately when called. For more information about these methods,
see the Scripting Reference topics in the Director Help Panel.
The following statements load the sound called Siren into RAM and start playing it in sound channel 1:
sound(1).queue(member("Siren"))
sound(1).play()
Queue more than one sound to play in succession
❖Use the queue() method to list sounds in the order you want them to play. If you queue them before they play,
Director plays the sounds with no pauses between the sounds. After the sounds are queued, you need only one
play() method.
These statements queue the sound members Explosion and Siren and play them in succession in sound channel 2:

247
USING DIRECTOR 11.5
Sound and Synchronization
Last updated 9/28/2011
sound(2).queue(member("Explosion"))
sound(2).queue(member("Siren"))
sound(2).play()
Control how a queued sound plays
❖Include optional parameters in a property list within the queue() method. For more information about this
method, see the Scripting Reference topics in the Director Help Panel.
When you use setPlayList(), any previously set queue of sounds is replaced by the new playlist.
After queuing sounds, you can still control whether the queue is obeyed. You can select to interrupt loops with the
breakLoop() method or to pause playback with the pause() method. The playNext() method lets you skip
immediately to the next sound in the queue. For more information about sound methods, see the Scripting
Reference topics in the Director Help Panel.
Playing external sound files
In addition to playing sounds you have imported as cast members, you can also play external sound files that have not
been imported.
❖Use the sound playFile() method. For more information about this method, see the Scripting Reference topics
in the Director Help Panel.
Playing external sound files from disk minimizes the amount of RAM that is used to play sounds. However, because
the computer can read only one item from disk at a time, loading cast members or playing more than one sound
from disk can cause unacceptable pauses when you use the sound playFile() method.
Controlling sound channels
Use Lingo or JavaScript syntax to make actions in a movie dependent on whether a sound is playing. Lingo or
JavaScript syntax lets you determine whether a sound is playing in a particular sound channel and control how a
channel plays sound. For more information about the following methods and properties, see the Scripting Reference
topics in the Director Help Panel.
•To determine whether a specific channel is playing a sound, use the isBusy() method.
•To turn off the current sound in a specific channel, use the setPlayList() method with [ ] as the new play list.
This deletes the entire sound queue and leaves the current sound playing. Use the stop() method to stop the
currently playing sound.
•To fade a specific channel’s sound in and out, use the fadeTo() method.
•To control a specific sound channel’s volume, specify the volume property.
•To control the left-to-right panning of a sound, specify the pan property.
About Windows Media Audio
Microsoft® Windows Media® Audio (WMA) is an audio codec designed by Microsoft for use with streaming content
at CD quality. It’s designed to resist data loss that can cause signal degradation and can improve download times for
audio. WMA is similar to MP3, with two main advantages: it works better with low bit-rates (8-64 kbts per second)
and it can, in general, produce better quality sound at a given bit-rate than MP3. It is generally recommended for music
and general sounds, but not for voice. You can use WMA content in Director through the Windows Media feature.
You must have the correct decoders installed. For more information about using WMA and Windows Media in
general, see “Using Windows Media files in Director” on page 261.

248
USING DIRECTOR 11.5
Sound and Synchronization
Last updated 9/28/2011
About Shockwave Audio
Shockwave Audio is a technology that makes sounds smaller and plays them faster from disk or over the Internet.
Shockwave Audio can compress the size of sounds by a ratio of up to 176:1 and is streamable, which means Director
doesn’t have to load the entire sound into RAM before it begins playing. Director starts to play the beginning of the
sound while the rest of the sound is still streaming from its source (from a disk or over the Internet). When used
properly, the Shockwave Audio compression and streaming features provide fast playback of high-quality audio, even
for users with relatively slow modem connections to the Internet.
Compression quality in Shockwave Audio
Although Shockwave Audio uses advanced compression technology that alters original sounds as little as possible, the
more a sound is compressed, the more it is changed.
Set the amount of compression by selecting a bit rate setting in any of the Shockwave Audio Xtra extensions. The bit
rate is not related to sampling rates you might have used in other audio programs. Try compressing the same sound
at several different bit rates to see how the sound changes.
Select the bit rate that is appropriate for the intended delivery system (56K modem, ISDN, CD-ROM, broadband, hard
disk, and so on), the type of movie, and the nature of the sound. Voice-over sound quality, for example, might not need
to be as high as that of music. Test the sound on several systems to find the right balance between quality and
performance.
The more compressed a sound is, the faster it streams. If you select to use a high quality and low degree of compression,
a slow delivery system might not send the data fast enough, resulting in gaps during playback. It’s also important to
consider your target audience. For example, using a lower data rate lets you target a wider audience, but at the expense
of audio quality.
Note: Any sound compressed at less than 48 kilobits per second (Kbps) is converted to monaural.
Compressing internal sounds with Shockwave Audio
Shockwave Audio can compress any internal sounds in a movie. Although internal sounds are not streamed,
compressing them with Shockwave Audio dramatically decreases the size of the sound data in a movie, shortens the
download time from the Internet, and saves disk space.
Use Shockwave Audio settings to specify compression settings for internal sound cast members. The selected
compression settings apply to all internal sound cast members. You can’t specify different settings for different cast
members.
You can select compression settings at any time, but compression occurs only when the movie is compressed with the
Create Projector, Save As Shockwave Movie, or Update Movies methods. When you create a projector, Director
compresses sounds only if the Compressed option is turned on in the Projector Options dialog box. Compressing
sounds can substantially increase the time required to compress a Director movie. For more information, see “Creating
projectors” on page 458.
Note: Shockwave Audio does not compress SWA or MP3 audio sounds.

249
USING DIRECTOR 11.5
Sound and Synchronization
Last updated 9/28/2011
When you distribute a movie that contains sounds compressed with Shockwave Audio, the SWA Decompression Xtra
is already included in the Shockwave® Player. If you compress sounds in Shockwave format in a projector, you must
provide the SWA Decompression Xtra for the projector.
1Select File > Publish Settings.
2Select the Shockwave tab.
3Select Compression Enabled to turn on compression.
4Select a setting from the kBits/second menu.
5Select Convert Stereo to Mono if you want to convert a stereo file to monaural.
Streaming linked Shockwave Audio and MP3 audio files
Director streams sounds that have been compressed with Shockwave Audio as well as MP3 audio files, from either a
local disk or a URL. Before you can set up a streaming Shockwave Audio cast member, create a Shockwave Audio or
MP3 file.
Create external Shockwave Audio files
Do one of the following:
•(Windows) Select Xtras > Convert WAV to SWA, and select the WAV files to convert.
•(Mac) Use the Peak LE 2 software to export Shockwave Audio sounds.
For both methods, the audio settings are similar to those for using Shockwave Audio to compress internal sounds.
For more information, see “Compressing internal sounds with Shockwave Audio” on page 248.
Note: Converting WAV to SWA does not compress IMA-compressed sounds.
Stream a linked Shockwave Audio or MP3 sound
1Select Insert > Media Element > Shockwave Audio.
This process creates a cast member that controls the streaming Shockwave Audio.
2In the SWA Cast Member Properties dialog box that appears, click Browse and select a Shockwave Audio file on a
local disk, or enter a URL in the Link Address text box.
Unless you select a file in the same folder as the movie, the movie always links to the exact location that you specify.
3Set the remaining cast member properties in the Property inspector:
•To set the volume of the sound, use the Volume slider in the SWA tab in the Property inspector.
•To select the sound channel for the sound, select a number from the Channel menu in the SWA tab. To avoid
potential conflicts, select Any, which causes the sound to play in the highest-numbered available sound channel.
•To specify the size of the stream buffer, use the Preload option in the SWA tab. Director attempts to load enough
sound data to play for the specified time in seconds. This prevents gaps in sounds that play over slow or
interruption-prone Internet connections.
4Drag the Shockwave Audio cast member to a sprite channel (not to one of the sound channels) to create a sprite.
Extend the sprite through all frames in which the sound should play, or use the tempo channel to make the movie
wait for the end of the sound. For more information, see “Synchronizing media” on page 251.

250
USING DIRECTOR 11.5
Sound and Synchronization
Last updated 9/28/2011
You can’t place streaming audio cast members in the sound channels. The sound streams from the source location
when the movie plays.
Playing audio with Lingo or JavaScript syntax
Use SWA script to preload and control SWA and MP3 sounds and to determine how much sound has streamed over
the Internet.
Script that controls other types of sounds can also control streaming SWA and MP3 sounds by controlling the sound
channel in which the sound plays. For more information about the following methods and properties, see the Scripting
Reference topics in the Director Help Panel.
•To preload part of a streaming sound file into memory, use the preLoadBuffer member method.
•To specify the amount of a streaming cast member to download before playback begins, set the preLoadTime cast
member property.
•To determine what percentage of a streaming sound file has played, test the percentPlayed cast member property.
•To determine the percent of a streaming file that has streamed from an Internet server, test the percentStreamed
cast member property.
•To specify the sound channel in which a streaming sound plays, set the soundChannel property.
•To begin playback of a streaming cast member, use the play member method.
•To pause a streaming sound file, use the pause member method.
•To stop a streaming sound file, use the stop member method.
•To determine the state of a streaming sound file, test the state cast member property.
•To determine whether an error occurred when streaming a sound file, use the getError() method.
•To obtain a string describing an error that occurred when streaming a sound file, use the getErrorString()
method.
•To determine the length of a streaming sound file, use the duration cast member property.
•To determine the bit rate of a streaming sound cast member, test the bitRate cast member property.
•To determine the original bit depth of a streaming sound, test the bitsPerSample property.
•To determine the sample rate of the original sound used for a streaming cast member, test the sampleRate cast
member property.
•To determine the number of channels in a streaming sound, test the numChannels streaming cast member
property.
•To specify a streaming sound’s volume, specify the volume streaming cast member property.
•To specify a streaming sound file’s URL, set the URL cast member property.
•To obtain or set the copyright text in a streaming sound file, test or set the copyrightInfo cast member property.

251
USING DIRECTOR 11.5
Sound and Synchronization
Last updated 9/28/2011
Synchronizing media
To pause the playhead until a specified cue point in a sound or digital video is reached, use the Wait For Cue Point
option in the Tempo dialog box. You can also use this method to wait for the end of the sound or digital video, even if
it has no cue points. Cue points can also be used to trigger events that scripts can interpret. For more information, see
“Synchronizing sound with Lingo or JavaScript syntax” on page 252.
Note: The methods discussed in this section for synchronizing media apply to sound and digital video. For more
information about using video in Director see “Using Digital Video” on page 253.
For example, you can use cue points to make text appear in time with narration. First, use a program such as Adobe
Audition to place cue points in the sound file that correspond to the times when you want the text to appear on Stage.
In Director, use the Tempo dialog box to pause the playhead at the frame where the corresponding text appears until
the voice-over reaches the proper cue point.
(Windows) Use Adobe Audition, Sony SoundForge, Steinberg WaveLab, or GoldWave Digital Audio Ed to define cue
points (called markers or regions within these programs).
(Mac) Use Bias Peak LE to define cue points in AIFF and Shockwave Audio sounds, and in QuickTime digital videos.
You can also use Amadeus Pro for defining cue points in AIFF sounds.
Note: You can insert cue points into QuickTime files only on the Mac; however, the cue points can be used on both
platforms.
AVI digital video does not support cue points.
1Using a supported program, place cue points in a sound file or a QuickTime movie.
Use an audio-editing program to define cue points in sounds and digital videos.
2Import the sound or digital video into Director.
Note: Digital video is always linked, regardless of whether you select the Standard Import option or the Link To
External File option in the Import dialog box.
3Place the sound or digital video in a channel in the Score, and extend it through all the frames in which you want
it to play.
4Double-click the frame in the tempo channel where you want the playhead to wait for a cue point.
5In the Tempo dialog box, select Wait For Cue Point.
6Select the sound or digital video from the Channel menu.
7Select the desired cue point from the Cue Point menu.
Select the End or Next cue point or any named or numbered cue point in the sound or digital video. Director
recognizes the end of a sound regardless of whether you’ve defined cue points.
When the movie plays, the playhead pauses at the frame until the cue point passes.

252
USING DIRECTOR 11.5
Sound and Synchronization
Last updated 9/28/2011
Synchronizing sound with Lingo or JavaScript syntax
By writing script that performs an action when a cue point is reached in a sound or QuickTime file, you can
synchronize a movie with sound or digital video. For more information about the following methods and properties,
see the Scripting Reference topics in the Director Help Panel.
•To set up script that runs when the movie reaches a cue point in a sound or QuickTime file, put the script in an on
cuePassed handler.
•To determine whether a sound or QuickTime file has passed a specific cue point, use the isPastCuePoint()
method.
•To find the ordinal number of the last cue point passed in a sound or QuickTime file, use the mostRecentCuePoint
method.
•To obtain a list of names for the cue points in a specific sound or QuickTime file, test the cuePointNames property.
•To obtain a list of times for cue points in a specific sound or QuickTime file, test the cuePointTimes property.
Accessibility
With scripts and behaviors, you can provide captioning to help users with hearing impairment experience the audio
portions of your movies. For more information, see “Making Director Movies Accessible” on page 425.

253
Last updated 9/28/2011
Chapter 12: Using Digital Video
About digital video
Give your Adobe® Director® movie added appeal by including digital video. Digital video offers high-quality real-time
image animation and sounds and also supports media such as Windows® Media Audio® and video files and DVD
content.
Director supports the following: QuickTime® video and Real Media content (Windows and Mac®) and Windows
Media Video and Audio (WMV and WMA) for Windows only. Director also supports H.264-encoded MP4, F4V, and
FLV file formats. Audio Video Interleave files (AVI) in Windows are supported through the Windows Media Xtra.
The Windows Media Xtra extensions can also support MPEG-1 (including MP3), MPEG-4, WAV, and RIFF.
QuickTime is a multimedia format in its own right. It offers sophisticated sound features and can include graphics in
many formats, including basic navigation of QuickTime VR2 files. For a list of supported QuickTime formats, see the
Apple® Computer website at www.apple.com. To use QuickTime, you must also obtain QuickTime 7 from Apple.
For digital media provided in the DVD format, the Director DVD editor lets you link to, inspect, manipulate, and
access the contents of a DVD. You can link to media on hybrid DVD ROM/Video and regular DVD video discs.
However, you cannot export Director files in the DVD format.
Note: DVD support in Director authoring and playback has specific requirements. See the minimum system requirements
at www.adobe.com/go/sysreqs for more information.
The Director media synchronization features let you synchronize events in a movie to precise cue points embedded in
digital video.
Video can make significant demands on a computer’s processing power. You might need to manage video content
carefully to make sure it does not adversely affect your movie’s performance.
Lingo or JavaScript™ syntax gives Director more flexibility when playing digital video and can help overcome
performance concerns. Use it to play digital video in ways that are not possible with the Score alone. Using Lingo or
JavaScript syntax, you can do the following:
•Precisely synchronize digital video and animation
•Turn digital video on and off on demand and control individual video tracks
•Control QuickTime VR
•Trigger events at key points in time for a video sprite's playback
Note: You can export movies or portions of movies as QuickTime or AVI videos. For more information, see “Exporting
digital video and frame-by-frame bitmaps” on page 462.
Importing digital video formats
When you import Windows Media, DVD content files, AVI, QuickTime, MP4Media, FLV, or RealMedia® content, the
cast members you create always remain linked to the original external file, even if you select the Standard Import
option. When you distribute a movie, you must always include all digital video files along with the movie.
Windows Media playback is not supported on Mac in Director.

254
USING DIRECTOR 11.5
Using Digital Video
Last updated 9/28/2011
Director converts an AVI video to QuickTime when it plays on a Mac.
QuickTime must be installed on a computer in order to author or play back a movie that contains QuickTime digital
video. RealPlayer® 10.5 must be installed on a computer to author or play back a movie that contains RealMedia digital
video.
For security reasons, Shockwave® Player links to media on a local disk only if it is in a folder named dswmedia. To test
movies in a browser locally before uploading them to your Internet server, place the movie, linked casts, and linked
media in folders within a dswmedia folder, and use relative links to refer to them. The Copy Linked And Dependent
Files option in the Publish Settings dialog box ensures that the linked media are automatically placed in the relative
location during publishing. If you have disabled the Copy Linked And Dependent Files option, copy the linked files to
the same folder as the projector or in a folder inside the Projector folder. To make them accessible from your server,
use file and folder names that do not have spaces or capital letters and that have recognized file extensions (such as .dcr
and .gif). For more information, see “Using Shockwave Player” on page 466.
1Select File > Import.
2Select QuickTime, AVI (Windows only), Windows Media (Windows only), MP4Media, FLV, or RealMedia from
the Files Of Type pop-up menu.
Note: Importing DVD content follows a different process than the other digital video formats. For complete
information about importing DVD files, see “Using DVD media content in Director” on page 263.
3Select the digital video files to import.
4Click Import.
If you import an AVI file, select QuickTime or AVI as the import format.
If you select QuickTime, Director imports the video as a QuickTime Asset Xtra, which provides additional playback
options. For more information, see “Setting QuickTime digital video cast member properties” on page 258.
Adding an MP4Media member to a movie
You can add an MP4Media member (MP4/F4V/FLV formats) to a movie by using the Movie object's newMember()
method.
-- Lingo syntax
_movie.newMember(#mp4)
_movie.newMember(#f4v)
_movie.newMember(#flv)
// JavaScript syntax
_movie.newMember("mp4");
_movie.newMember("f4v");
_movie.newMember("flv");
Some of the methods and properties for MP4Media apply only to sprites created from an MP4Media cast member.
Streaming members
Director supports streaming of MP4, F4V, and videos using the RTMP protocol. To use streaming videos, direct the
filename of the MP4/FLV member to a valid target on the Flash Media Server. Streaming of video from the FMS begins
when you put this member on stage.
Place the video files in application/vod/ in the FMS installation directory.

255
USING DIRECTOR 11.5
Using Digital Video
Last updated 9/28/2011
Using the video windows
Whether a digital video is a cast member or a sprite on the Stage, you can preview it in its corresponding video window.
Different versions of the window exist for QuickTime, Windows Media, DVD, RealMedia, MP4Media, FLV, and AVI
digital content.
Click a digital video cast member or sprite and select one of the following menu options:
•Double-click a digital video cast member or sprite to open the Video panel. The Default panel set contains a tab for
each video window.
•If you are working with a QuickTime digital video, a video controller bar appears and lets you start, stop, rewind,
or forward the movie. Windows Media has play, stop, pause, rewind, and fast forward buttons to perform each task.
It also has a time slider that lets you select a time from which the movie should be played. With RealMedia, you can
use control buttons to start, stop, and rewind the movie. The DVD viewer window has Root Menu, Title Menu,
Pause, Stop, Play, Fast Reverse, and Fast Forward control buttons for previewing and interacting with DVD
content.
Playing digital video Direct To Stage
Director can play digital video by using a feature called Direct To Stage (DTS). Direct To Stage lets video drivers
installed on the computer completely control the video playback.
Note: The Direct To Stage feature cannot be used with DVD or RealMedia digital video because DVD is always Direct
To Stage and RealMedia is always non-Direct To Stage.
Direct To Stage often provides the best performance from a digital video, but it has the following disadvantages:
•The digital video always appears in front of all other sprites on the Stage, no matter which channel contains the
sprite.
•
Ink effects do not work, so it is difficult to conceal the video’s bounding rectangle with Background Transparent ink.
When Direct To Stage is off, Director layers a digital video on the Stage exactly the same as other sprites, and
Background Transparent ink works normally. (Matte ink does not work for digital video sprites.)
1Select a digital video cast member or sprite.
2Click the QuickTime or Windows Media tab in the Property inspector.
3Select or deselect Direct To Stage (DTS).
4If the cast member or sprite is a QuickTime video, select a Playback option.
Sync To Soundtrack Makes the digital video skip frames (if necessary) to keep up with its soundtrack. The
digital video might also take less time to play.
Play Every Frame Makes every frame of the digital video appear but doesn’t play the soundtrack because the
video cannot play the soundtrack asynchronously while the video portion plays frame by frame. Depending on
the data rate of the digital video, the sprite might play more smoothly with this option selected, but this is not a
certainty. In addition, playing every frame might cause the digital video to take more time to play.
5If the sprite or cast member is a QuickTime video, select Controls to display a controller bar below the movie to
let the user to start, stop, and step through the movie.

256
USING DIRECTOR 11.5
Using Digital Video
Last updated 9/28/2011
Controlling digital video in the Score
You add a digital video cast member to a Score the same way you would add any other sprite. Digital video sprites begin
playing when the playhead reaches the frame that contains the video sprite. Use the QuickTime or Windows Media
tab in the Property inspector to make QuickTime and Windows Media movies pause or loop. See “Setting QuickTime
digital video cast member properties” on page 258. Use the RealMedia tab in the Property inspector to make
RealMedia movies pause. For more information, see “The RealMedia tab in the Property inspector” on page 272.
If there’s a white bounding rectangle around the video, use the Background Transparent ink to remove it. Inks don’t
work if Direct To Stage is turned on (see “Playing digital video Direct To Stage” on page 255). Matte ink does not work
for any type of digital video.
1Do one of the following:
•Drag a digital video cast member to any sprite channel in the Score.
•Place the digital video cast member directly on the Stage.
2Extend the sprite through as many frames as desired in the Score.
Playing complete digital videos
Similar to sound, a digital video is a time-based cast member. If you place a video in only a single frame of the Score,
the playhead moves to the next frame before Director has time to play more than a brief instant of the video.
To make sure that Director plays an entire digital video, do one of the following:
•Create a tempo setting in the tempo channel by using the Wait For Cue Point option in the Frame Properties:
Tempo dialog box. For more information about setting tempo, see “Specifying tempo properties” on page 170. This
option keeps the playhead from moving to the next frame until a cue point in the video has passed or, if there are
no cue points, until the end of the video is reached. For more information, see “Synchronizing video and
animation” on page 267.
•Use script or behaviors to make the playhead stay in a frame until the end of the video or until a certain cue point
passes. For more information, see “Synchronizing video and animation” on page 267.
•Extend the video through enough frames to give it time to play all the way through.
Playing digital video with Lingo or JavaScript syntax
Lingo or JavaScript syntax can take advantage of the most important and powerful features of digital video. Besides
playing digital video linearly, Lingo or JavaScript syntax can pause, stop, and rewind a video. These abilities are useful
for jumping to segments within a digital video and for emulating a typical digital video Control panel.
Lingo or JavaScript syntax also lets you work with an individual track in a digital video by determining the track’s
content and position and by turning these tracks on and off.
For information about using Lingo or JavaScript syntax with RealMedia movies, see “Using RealMedia content in
Director” on page 267.

257
USING DIRECTOR 11.5
Using Digital Video
Last updated 9/28/2011
Controlling digital video playback with Lingo or JavaScript syntax
The following list provides a general description of how you can control digital video with Lingo or JavaScript syntax.
Note that each media type may have slightly different properties and methods for playback control. For more
information about particular digital video media types, see the Scripting Reference topics in the Director Help panel.
•To turn on looping in a digital video cast member, set the digital video’s loop Cast Member property to TRUE.
•To determine the current time of a digital video sprite, check the sprite’s currentTime property.
•To pause a digital video sprite, set the sprite’s playRate property to 0.
•To start a paused digital video sprite, set the sprite’s playRate property to 1.
•To play a digital video sprite in reverse, set the sprite’s playRate property to -1.
•To rewind a digital video sprite to the beginning, set the sprite’s currentTime property to 0.
•To control a digital video sprite’s playback rate, set the sprite’s playRate property to the desired rate.
•To mix QuickTime audio tracks with internal Director sounds (necessary only in Windows), use the soundDevice
system property to specify QT3Mix.
Determining digital video content with Lingo or JavaScript syntax
The following list describes how script can determine a digital video’s content. For more information, see the Scripting
Reference topics in the Director Help Panel.
•To determine the time units a digital video cast member uses, check the video’s timeScale Cast Member property.
•To determine whether a digital video is QuickTime or Windows Media, check the digital video’s
digitalVideoType Cast Member property.
•To determine the number of tracks in a digital video sprite or cast member, check the digital video’s trackCount
sprite or Cast Member property.
•To determine which type of media a digital video track contains, check the digital video’s trackType sprite or Cast
Member property.
•To determine the start time of a track in a digital video sprite or cast member, check the digital video’s
trackStartTime sprite or Cast Member property.
•To determine the stop time of a track in a digital video sprite or cast member, check the digital video’s
trackStopTime sprite or Cast Member property.
•To determine whether a sprite’s track is enabled to play, check the digital video’s trackEnabled sprite property.
•To obtain the text at the current time from a text track in a digital video sprite, check the digital video’s trackText
sprite property.
•To determine the time of the track before the current time in a digital video, check the digital video’s
trackPreviousSampleTime Cast Member property and trackPreviousKeyTime sprite property.
•To determine the time of the next sample after the current time in a digital video, check the digital video’s
trackNextSampleTime Cast Member property and trackNextKeyTime sprite property.
Turning digital video tracks on and off with Lingo or JavaScript syntax
By turning a digital video’s soundtracks on or off, you can play only the animation or control the sounds that play.
❖Use the setTrackEnabled() method. For more information about this method, see the Scripting Reference topics
in the Director Help Panel.

258
USING DIRECTOR 11.5
Using Digital Video
Last updated 9/28/2011
Setting QuickTime digital video cast member properties
Use cast member properties to control the media in a QuickTime digital video, to specify how it is framed, whether it
plays Direct To Stage, and other important options.
1Select a QuickTime digital video cast member.
2Click the Member tab in the Property inspector to display editable and noneditable options.
3Use the Name text box to view or edit the cast member name.
4To change the external file to which the cast member is linked, enter a new path and file in the Filename text box
or browse to a new file.
5To specify how Director removes the cast member from memory if memory is low, select an option from the
Unload menu. See “Controlling cast member unloading” on page 46.
6Click the QuickTime tab in the Property inspector to set the remaining properties.
7To determine how a movie image appears within the sprite bounding rectangle when the movie is rotated, scaled,
or offset, set the following Framing options:
Crop Displays the movie image at its default size. Any portions that extend beyond the sprite’s rectangle are not
visible. For more information, see “Cropping digital video” on page 265.
Center Available only if Crop is selected. It determines whether transformations occur with the cast member that
is centered within the sprite or with the cast member’s upper-left corner aligned with the sprite’s upper-left corner.
Scale Fits the movie inside the bounding rectangle.
8To determine how the video plays back, set the following options in the upper portion of the window:
Video Displays the video portion of the digital video. If this option is turned off, the video portion does not play.
Deselect this option and select Sound if you want to play only the audio portion of a movie.
Audio Plays the sound portion of the digital video.
DTS (Direct To Stage) Lets QuickTime drivers installed on the computer completely control the video playback. For
more information, see “Playing digital video Direct To Stage” on page 255.
Controls Displays a controller bar at the bottom of the video if Direct To Stage is selected.
Paused Stops the digital video when it first appears on the Stage (while playing the Director movie).
Loop Replays the digital video continuously from the beginning to the end.
Streaming Begins playing the video while the rest of the video continues to load from its source.
9If Direct To Stage is selected, select an option from the Playback menu to specify how to synchronize the video to
its soundtrack:
Sync To Sound Makes the digital video skip frames (if necessary) to keep up with its soundtrack. The digital video
might also take less time to play.
Play Every Frame (No Sound) Makes every frame of the digital video appear but does not play the soundtrack
because the video cannot play the soundtrack asynchronously while the video portion plays frame by frame.
Depending on the data rate of the digital video, the sprite might play more smoothly with this option selected, but
this is not a certainty. In addition, playing every frame might cause the digital video to take more time to play.
10 If Play Every Frame (No Sound) is selected, select the following options from the Rate menu to set the rate at which
a digital video plays:
Normal Plays each frame at its normal rate, and no frames are skipped.

259
USING DIRECTOR 11.5
Using Digital Video
Last updated 9/28/2011
Maximum Plays the movie as fast as possible while still displaying each frame.
Fixed Plays the movie using a specific frame rate. Enter the number of frames per second in the field at the right.
Use this option only for digital videos that use the same frame rate for each frame of the movie.
Controlling QuickTime with Lingo or JavaScript syntax
Use Lingo or JavaScript syntax to control a QuickTime video’s appearance and sound volume. For QuickTime VR, you
can use Lingo or JavaScript syntax to pan a QuickTime VR digital video and specify what happens when the user clicks
or rolls over portions of the video.
You can set the rotation, scale, and translation properties for either a QuickTime cast member or a sprite. For more
information, see the Scripting Reference topics in the Director Help Panel.
•To determine whether a cast member or sprite is a QuickTime VR digital video, test the isVRMovie property.
•To obtain a floating-point value that identifies which version of QuickTime is installed on the local computer, use
the quickTimeVersion() method.
•To control a QuickTime sprite’s sound volume, set the volume sprite property.
•To set the internal loop points for a QuickTime cast member or sprite, set the loopBounds sprite property.
Applying masks for QuickTime
Director provides specific script properties for applying masks to QuickTime digital videos. For more information, see
the Scripting Reference topics in the Director Help Panel.
•To use a black-and-white cast member as a mask for QuickTime media rendered Direct To Stage, set the mask Cast
Member property.
•To control the way Director interprets a QuickTime video’s mask Cast Member property, set the invertMask
property.
Responding to user interaction
Lingo or JavaScript syntax lets you control how QuickTime VR responds when the user clicks a QuickTime VR sprite.
Use script to specify how Director handles image quality, clicks and rollovers on a QuickTime VR sprite, clicks on
hotspots, and interactions with QuickTime VR nodes. For more information, see the Scripting Reference topics in the
Director Help Panel.
•To set the codec quality to use when the user drags on a QuickTime VR sprite, set the motionQuality sprite
property.
•To specify the codec quality to use when a QuickTime VR panorama image is static, set the staticQuality sprite
property.
•To enable or disable a specific hotspot for a QuickTime VR sprite, use the enableHotSpot method.
•To control how Director passes mouse clicks on a QuickTime sprite, set the mouseLevel sprite property.
•To find the approximate bounding rectangle for a specific hotspot in a QuickTime VR sprite, use the
getHotSpotRect() method.
•To specify the name of the handler that runs when the pointer enters a QuickTime VR hotspot that is visible on the
Stage, set the hotSpotEnterCallback QuickTime VR sprite property.

260
USING DIRECTOR 11.5
Using Digital Video
Last updated 9/28/2011
•To find the ID of the hotspot, if any, at a specific point on the Stage, use the ptToHotSpotID() method.
•To specify the name of the handler that runs when the user clicks a hotspot in a QuickTime VR sprite, set the
triggerCallback sprite property.
•To determine the name of the handler that runs when the pointer leaves a QuickTime VR hotspot that is visible on
the Stage, set the hotSpotExitCallback property.
•To specify the ID of the current node that a QuickTime VR sprite displays, set the node QuickTime VR sprite
property.
•To specify the name of the handler that runs after the QuickTime VR sprite switches to a new active node on the
Stage, set the nodeEnterCallback QuickTime VR sprite property.
•To specify the name of the handler that runs when a QuickTime VR sprite is about to switch to a new active node
on the Stage, set the nodeExitCallback QuickTime VR sprite property.
•To determine the type of node that is currently on the Stage, test the nodeType QuickTime VR sprite property.
Rotating and scaling QuickTime video
Lingo or JavaScript syntax can rotate and scale QuickTime videos. For more information, see the Scripting Reference
topics in the Director Help Panel.
•To control the rotation of a QuickTime sprite, set the rotation QuickTime sprite property.
•To control the scaling of a QuickTime sprite, set the scale QuickTime sprite property.
Panning QuickTime VR
Use Lingo or JavaScript syntax to pan a QuickTime VR digital video without the user dragging the image. For more
information, see the Scripting Reference topics in the Director Help Panel.
•To set the current pan of the QuickTime VR sprite, set the pan QuickTime VR sprite property.
•To nudge a QuickTime VR sprite in a specific direction, use the nudge method.
Displaying QuickTime video
Lingo or JavaScript syntax can control how a movie displays QuickTime videos. For more information, see the
Scripting Reference topics in the Director Help Panel.
•To specify the type of warping performed on the panorama of a QuickTime VR sprite, set the warpMode
QuickTime VR sprite property.
•To specify a QuickTime VR sprite’s current field of view, set the fieldOfView QuickTime VR sprite property.
•To swing a QuickTime VR sprite to a specific pan, tilt, or field of view, set the swing method.
QuickTime VR
Use a QuickTime VR movie in a Director movie by inserting it as you would any other QuickTime cast member. To
get the best performance, turn on Direct To Stage. (See “Playing digital video Direct To Stage” on page 255).

261
USING DIRECTOR 11.5
Using Digital Video
Last updated 9/28/2011
Using Windows Media files in Director
Director now fully supports Windows Media Video and Audio formats. Windows Media format is a high-quality,
secure, and comprehensive digital media format available for streaming and download-and-play applications on
Windows systems, set-top boxes, and portable devices. Windows Media format includes Windows Media Audio and
Video codecs, an optional integrated digital rights management (DRM) system, and a file container.
Note: Windows Media is supported on Windows 98, Windows 2000, and Windows XP with DirectX® 8.0 and above.
Windows Media Xtra extensions are part of the standard Shockwave installer. Shockwave content containing Windows
Media content can be viewed in Microsoft® Internet Explorer® 4.01 or later and in Firefox® 2.0 or later. Windows Media
Video and Audio are not supported in Director on the Mac.
Importing Windows Media
You can import Windows Media content into Director as a cast member. Like other cast members, Windows Media
cast members can be placed as sprites in movies.
1Select File > Import.
2Select Windows Media from the Files of Type menu.
3Select the digital video files you want to import.
4Click Import.
A Windows Media cast member appears in the Cast window.
When you import an AVI file (as opposed to a WMV or WMA file), you are prompted to select QuickTime or
Windows Media as the import format.
Note: Importing a media file might fail if the appropriate decoders are not present in the system. Installing DirectX
8.0 or later ensures that you have the right decoders.
Inserting Windows Media
You can also insert Windows Media content into your Director movie. The Insert Windows Media Element opens the
Windows Media Editor and creates an empty Windows Media cast member. By contrast, importing Windows Media
requires the selection of a supported file and does not open the Windows Media Editor.
1Select Insert > Media Element > Windows Media.
A Windows Media icon appears as a cast member in the Cast window, and the Windows Media window opens.
2Select the Windows Media cast member and select Window > Property inspector.
3Click the Member tab in the Property inspector.
4In the Filename text box, choose the file to be associated with the cast member. Type the name of the file, or browse
for the file.
5In the Name text box, type a name for the new Windows Media cast member.
Setting Windows Media properties
You can set Windows Media properties that determine the cast member name, how it is displayed in your movie,
whether audio or video in the sprites created from the Windows Media cast member are on or off, and more.
1Select a Windows Media digital video cast member in the Cast window.

262
USING DIRECTOR 11.5
Using Digital Video
Last updated 9/28/2011
2Click the Member tab in the Property inspector to display editable and noneditable options.
3Use the Name text box to view or edit the cast member name.
4To change the external file to which the cast member is linked, enter a new path and file in the Filename text box
or browse to select a new file.
5To specify how Director removes the cast member from memory if memory is low, select an option from the
Unload menu. For more information, see “Controlling cast member unloading” on page 46.
6Click the Windows Media tab in the Property inspector to set the remaining properties as the following:
Video Turns on or off the video image portion of the Windows Media cast member. If this option is turned off, the
video portion does not play; the audio portion, however, remains unaffected. Deselect this option and select Audio
if you want to play only the audio portion of the Windows Media cast member.
Audio Turns on or off the audio portion of the Windows Media member. If this option is turned off, the audio
portion does not play; the video portion, however, remains unaffected. Deselect this option and select Video if you
want to play only the video portion of the Windows Media cast member.
Loop If checked repeatedly plays the Windows Media cast member from beginning to end.
DTS (Direct To Stage) Allows drivers installed on the computer to completely control playback of the video portion
of the Windows Media cast member. For more information, see “Playing digital video Direct To Stage” on page 255.
Paused (paused at start) If checked, the Windows Media cast member is paused on the first frame of the video. The
audio portion of the cast member is also paused.
Note: A playback rate other than 1.0 might fail if DirectX filters do not support it. Duration and Dimension fields are
not editable.
Using the Windows Media video window
The Windows Media window lets you preview Windows Media audio and video files. You can also control Windows
Media sprites using the this window. For more information, see “Controlling Windows Media sprites using Lingo or
JavaScript syntax” on page 263.

263
USING DIRECTOR 11.5
Using Digital Video
Last updated 9/28/2011
Windows Media window
❖Double-click a Windows Media cast member or sprite.
The Windows Media window provides controls to play, stop, pause, rewind, and fast forward the movie. Using the
slider, you can select a starting play position.
Controlling Windows Media sprites using Lingo or JavaScript syntax
Use Lingo or JavaScript syntax to control Windows Media sprites. The script handlers support the following actions:
play, stop, pause, rewind, and play from one specific time point to another. The Windows Media sprite displays the
attributes, movie duration, elapsed playtime, height, width, and playback state for Lingo or JavaScript syntax scripting.
For more information, see the Scripting Reference topics in the Director Help Panel.
Using DVD media content in Director
You can link DVD media content to a Director movie and use the DVD media editor to inspect that linked content.
However, you can't actually make changes to DVD content within Director. Rather, you can change the attributes of
the DVD media. Either use the Property inspector prior to playback or use Director’s scripting capabilities while the
movie is playing by polling events and modifying properties and methods that affect the linked DVD content.
When linking to DVD media content, that content can reside either on a DVD disc located in the DVD drive or on a
local hard disk in a DVD Volume Folder. For DVD support to be functional in Director, a DVD drive and DVD player
and decoder need to be installed and functional in either case.
Linking to DVD media content
You can link to DVD media content by using the Insert menu or the DVD Editor, or you can use scripting to set the
folder property value. Setting the folder property allows Director to play DVDs from the hard drive or from the relative
location of a movie/projector.

264
USING DIRECTOR 11.5
Using Digital Video
Last updated 9/28/2011
When you create a DVD cast member on a Windows computer by using Director’s user interface, Director first looks
for DVD media in the form of a video_ts folder in the first DVD disk drive that contains a valid DVD disc. If no disk
is found, Director then searches for a video_ts folder at the root of the hard drive. On a Mac computer, a video_ts folder
will only be detected automatically if it resides on a DVD disc in the DVD drive.
Note: If you are using any of the following methods to link DVD media content to your movie, your system must have the
required drivers and decoders necessary to play DVD.
Link DVD media content to a movie by using the Insert menu
❖Select Insert > Media Element > DVD.
Note: Power DVD 7.0 erases the default DVD codec. You may have to re-install the DVD codec if your DVD does not
play. For the list of decoders supported by Director, visit
http://kb.adobe.com/selfservice/viewContent.do?externalId=tn_19151&sliceId=1
Link DVD media content to a movie by using the DVD Editor
1Select Window > DVD.
2Enter a name for the DVD member in the Cast Member Name text box of the DVD Editor. Director creates a new
DVD cast member in the first available Cast slot.
Director attempts to automatically link to available DVD media by using the DVD resources that Director relies on
to support DVD. For Windows, those resources are DirectX/DirectShow, and third-party elements such as DVD
decoders. Some of these decoders, which get installed with DVD players, include WinDVD, PowerDVD, and ATI
DVD. For Mac, Director relies on the Apple® DVD Framework
Set the property value by using a script
Use the following examples as a guide for setting the folder property through scripting. These statements set the
pathname of the DVD folder property.
Windows example
--Lingo syntax
member (2).folder = "C:\myLocalDVDContent\video_ts"
// JavaScript syntax
member (2).folder = "C:\\myLocalDVDContent\video_ts";
Mac example
--Lingo syntax
member (2).folder = "/Volumes/Mac HD/myLocalDVDContent"
// JavaScript syntax
member (2).folder = "/Volumes/Mac HD/myLocalDVDContent";
Note: When creating a DVD cast member, if a video_ts folder cannot be found when the DVD cast member is created,
an error alert will appear that says, “Unable to locate DVD volume.” This alert appears only once per session. At that
point, you can name the new DVD member and then set its folder property to a folder location that contains a valid
video_ts folder.
Two DVDs cannot be played on your computer at the same time. Make sure you are not playing a DVD in Director at
the same time as you are trying to play a DVD in a projector. This would occur if the Preview After Publishing option
is selected in Publish Settings when publishing a projector.

265
USING DIRECTOR 11.5
Using Digital Video
Last updated 9/28/2011
Issues with Mac DVD folder pathnames
On Mac computers, the format of the pathname for the folder property should use a forward slash ( / ) as the path’s
delimiter, instead of the standard Mac delimiter colon ( : ). In addition, /volumes/ should be concatenated at the start
of the pathname of the DVD folder. For example, if the DVD folder is located on the root of the boot drive, it would
look like the following:
member (2).folder = "/Volumes/Mac HD/Test_DVD/video_ts"
When the _movie.path command is used for retrieving the path of the projector or movie on a Mac, it will contain a
colon ( : ) instead of the forward slash ( / ). The use of the colon in the DVD folder’s pathname will cause an error. As
a workaround, developers can use a script to replace the colon characters in the pathname with forward slashes.
Using the DVD video window
You can access, preview, and play DVDs by using the DVD window. You can’t edit the files in the DVD window.
Setting DVD Cast member properties
The DVD Property inspector lets you set the options for audio, volume, and whether or not the cast member pauses
during playing.
1Select a DVD cast member on the Stage or in the cast window.
2Select Window > Property Inspector and click on the DVD tab.
3In Graphical view, set the following properties: Audio, Paused, and Volume.
4In List view, set the following properties:
•angle
•audio
•audiotrack
•folder
•pausedAtStart
•subPicture
•volume
Cropping digital video
Cropping a digital video means trimming the edges off the top or sides of the movie image. Cropping hides the cropped
portions and doesn’t permanently remove them.
Crop a digital video
1Select the cast member in the Cast window.
2Click the QuickTime tab in the Property inspector.
Note: Cropping is prohibited with RealMedia movies.
3Select Crop.
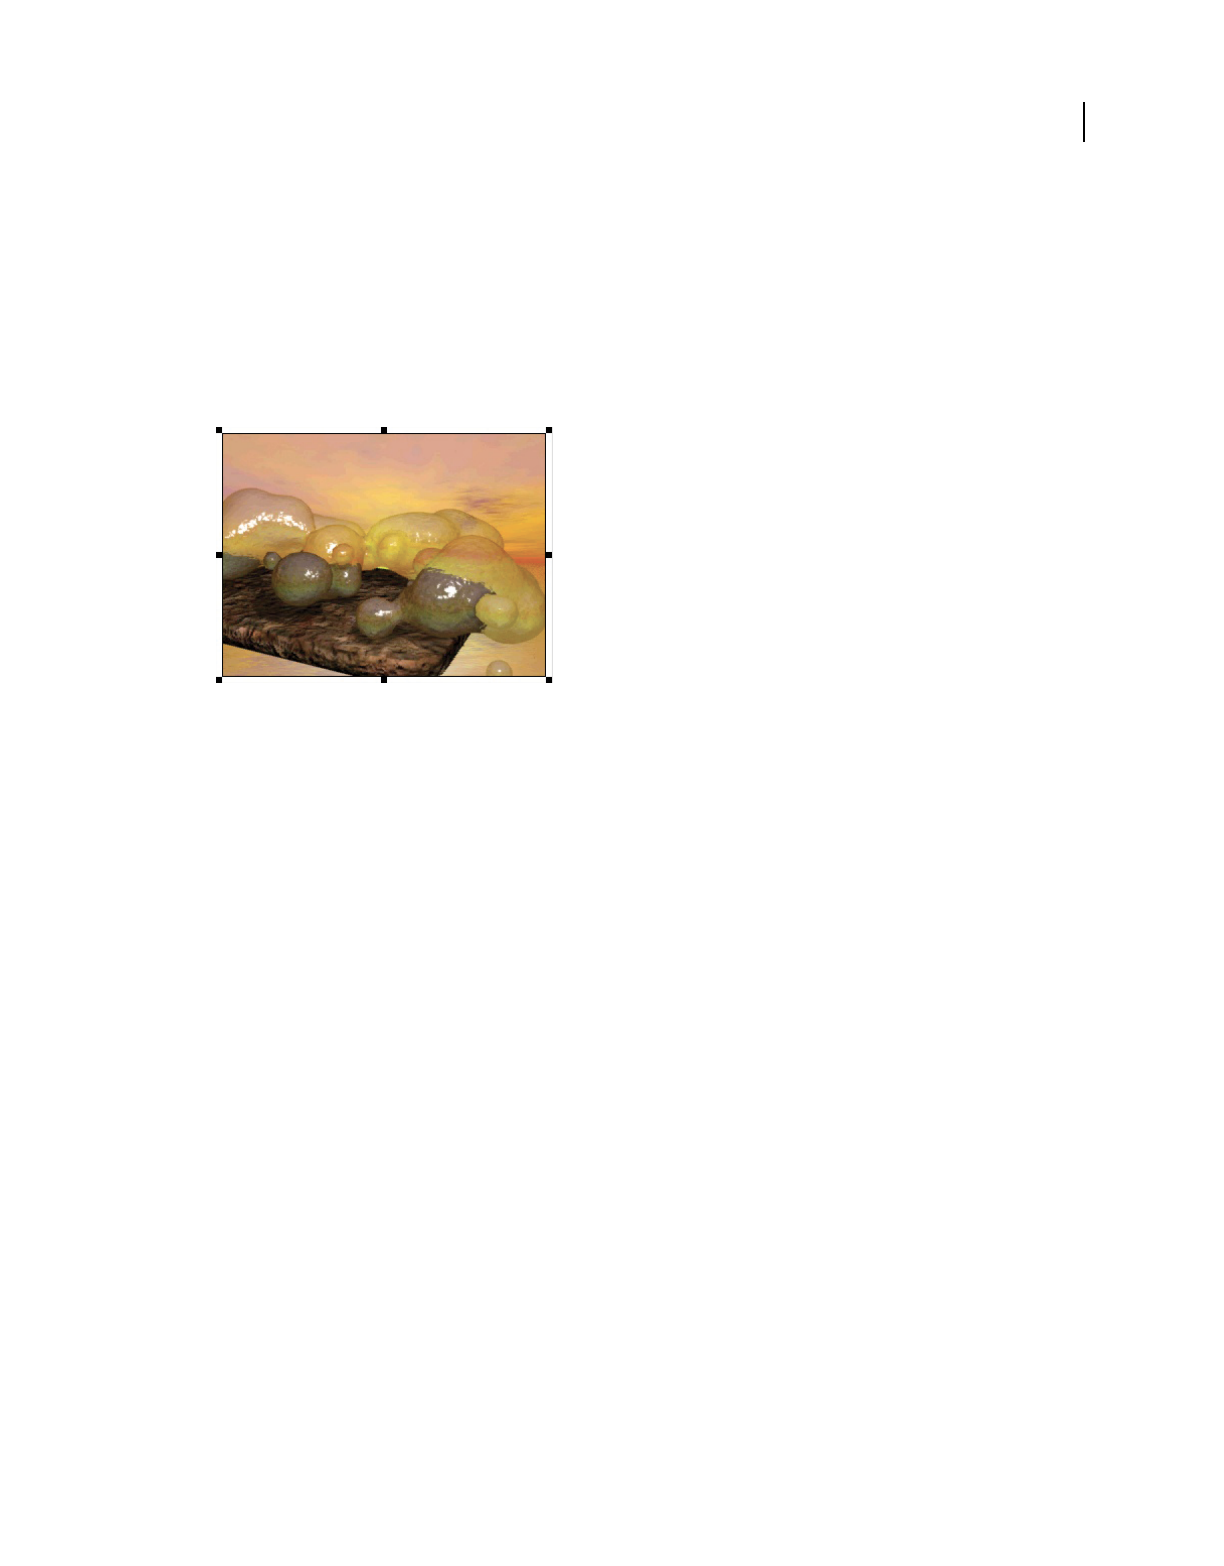
266
USING DIRECTOR 11.5
Using Digital Video
Last updated 9/28/2011
Director retains the movie’s original size if you resize the bounding rectangle; however, the edges of the movie are
clipped if you make the bounding rectangle too small.
4Select Center, if you wish.
Director centers the movie when you resize the bounding rectangle. If Center is not selected, the movie maintains
its original position when you resize its bounding rectangle. Center is available only if Crop is selected.
5Select the video in the Score.
6Go to the Stage and drag any of the handles that appear on the selection rectangle that surrounds the video image.
Example of handles around an image
Director displays only as much of the movie image as can fit in the area that is defined by the selection rectangle.
If you would rather scale the movie than resize it, select Scale instead of Crop on the QuickTime tab in the Property
inspector. Director scales the movie if you resize the bounding rectangle.
Note: If the Stage size is larger than the monitor size, turn off the title bar and the resizable options. The projector
might not display the movie correctly when these options are turned on.
Use Lingo or JavaScript syntax to move the image of a QuickTime video
around within the sprite’s bounding rectangle:
❖Set the digital video’s translation QuickTime sprite or Cast Member property. For more information, see the
Scripting Reference topics in the Director Help Panel.
Using digital video on the Internet
In both stand-alone projectors and movies playing in web browsers, Director can handle digital video the same way it
handles all other media, or it can stream the digital video by using QuickTime 4 or later. You can link the digital video
to a URL, and the movie begins to download and play the digital video when its sprite first appears on the Stage.
For the digital video cast member to stream, you must set its streaming property to TRUE. QuickTime 4 or later must
be installed to enable streaming.
If a streaming QuickTime file contains cue points you want to use, set the text track to be preloaded (use a QuickTime
editor such as MoviePlayerPro to do this). If you do not preload the text track, Director disables the cue points so it
can stream the file without entirely downloading it first.
You can also import a Real Time Streaming Protocol (RTSP) stream as a QuickTime cast member. The rtsp:// URL
must end with the filename extension .mov to indicate that it should be treated as a QuickTime stream.

267
USING DIRECTOR 11.5
Using Digital Video
Last updated 9/28/2011
When you use streaming digital video in a movie that is distributed on the Internet, remember the following points:
•The video begins to play immediately unless the member’s pausedAtStart property is set to TRUE or the
controller member property is set to TRUE.
•After a digital video begins to download, the download continues until it is finished, even if the sprite no longer
appears on the Stage. Use the percentStreamed QuickTime sprite property to test how much of the media has
been downloaded.The feature works with QuickTime videos only. For more information about this property, see
the Scripting Reference topics in the Director Help Panel.
Synchronizing video and animation
To pause the playhead until a specified cue point in digital video is reached, use the Wait For Cue Point option in the
Tempo dialog box. You can also use this function to wait for the end of the digital video, even if it has no cue points.
Cue points can also be used to trigger events that are interpreted by Lingo or JavaScript syntax.
The techniques for synchronizing digital video and animation are the same as those for synchronizing sound and
animation. For more information, see “Synchronizing media” on page 251.
Using RealMedia content in Director
The Director Xtra for RealSystem Streaming Media (Xtra for RealMedia) adds RealAudio® and RealVideo® to the
media types supported by Director and handles the playback of RealMedia content in the Shockwave Player by using
an embedded RealPlayer engine. Support for the RealAudio and RealVideo media types allows Director developers to
add streaming RealMedia content to Shockwave content and manipulate it using the standard controls available in
Director. This content can be viewed by users who have the Shockwave Player and RealPlayer 10.5 installed on their
system.
RealNetworks®, RealAudio, and RealVideo formats are recognized as the standard for streaming media content on the
web today. The ability to add RealMedia content to Shockwave content allows Director developers to take advantage
of the millions of RealPlayer® programs currently in use, and because the Xtra for RealMedia provides an automatic
detection and installation prompt feature for RealPlayer 10.5, there is no risk of locking out users who have already
installed the Shockwave Player. In addition, the Xtra for RealMedia is automatically downloaded and installed the first
time a user attempts to view Shockwave content containing RealMedia content.
You cannot create or edit RealMedia content in Director. RealMedia streaming content is created with RealNetworks
production tools such as RealProducer® Plus and RealProducer Basic. For information about creating content with
these tools, see the RealNetworks website at www.realnetworks.com.
System requirements
To create Shockwave movies containing RealMedia content, the following must be installed:
•Director 11, which includes the Xtra for RealMedia.
•RealPlayer 10.5. (products for RealNetworks are available for download at www.real.com.)
To view Shockwave content containing RealMedia content, the following software must be installed:
•The Shockwave Player

268
USING DIRECTOR 11.5
Using Digital Video
Last updated 9/28/2011
•RealPlayer 10.5. If a user without RealPlayer 10.5 attempts to play Shockwave content containing a RealMedia cast
member, a dialog box asks whether the user wants to go to the RealNetworks website and download RealPlayer 10.5.
•The Xtra for RealMedia (listed in the Movie Xtras dialog box as RealMedia Asset.x32 on Windows) is not part of
the standard Shockwave 11 installation but is available as an Xtra download package from the Adobe website
(www.adobe.com). The first time a user attempts to view Shockwave content containing RealMedia content, the
Shockwave Player automatically downloads and installs this Xtra. (For more information, see “Publishing
Shockwave content with RealMedia” on page 277.)
In addition, viewers of your Shockwave content must have one of the following operating system/browser setups:
•Microsoft® Windows® 98/2000/XP or later with Microsoft Internet Explorer 5.01 with Service Pack 2 or later or
Firefox® 2.0 or later.
The Director license agreement outlines the restrictions and requirements for creating and serving content created
using Director Xtra for RealSystem Streaming Media (referred to as the Xtra for RealMedia in this document and
RealMedia Asset.x32 (Windows) in the Movie Xtras dialog box). Please read the license agreement carefully before
creating Shockwave content using RealMedia content.
Director, Lingo, Shockwave, and Xtra are trademarks of Adobe, Inc. and may be registered in the United States or
in other jurisdictions including internationally. Other product names, logos, designs, titles, words, or phrases
mentioned within this publication may be trademarks, servicemarks, or tradenames of Adobe, Inc. or other entities
and may be registered in certain jurisdictions including internationally.
RealAudio®, RealMedia®, RealNetworks®, RealPix®, RealPlayer, RealOne® Player, RealProducer®, RealProducer Plus,
RealSystem®, RealText®, and RealVideo® are trademarks or registered trademarks of RealNetworks, Inc.
This publication contains links to third-party websites that are not under the control of Adobe, and Adobe is not
responsible for the content on any linked site. If you access a third-party website mentioned in this guide, you do
so at your own risk. Adobe provides these links only as a convenience, and the inclusion of the link does not imply
that Adobe endorses or accepts any responsibility for the content on those third-party sites.
RealMedia sample file
View the RealMedia sample file included on the Director CD or the videotest.rm file included in the RealPlayer
program installation folder.
1Start Director.
2Select File > Import.
3Browse to one of the following test files:
•If you have the Director CD, select a file in the Adobe\Support\RealMedia folder.
•If you don’t have the Director CD, select the videotest.rm file in the RealPlayer 10.5 installation folder.
4Click Import.
5Drag the file to the Stage, and select Control > Play.
After you view the sample file, you are ready to start laying out the other elements of your movie.
About RealMedia streams in Director
Director includes the following RealMedia support:
•The RealMedia tab in the Property inspector
•RealMedia behaviors

269
USING DIRECTOR 11.5
Using Digital Video
Last updated 9/28/2011
•Script elements for RealMedia, including methods and properties
•The RealMedia viewer
Director supports only RealAudio and RealVideo stream formats. Although some other formats might work with
the Xtra for RealMedia, using them could result in significant problems with playback.
RealMedia cast members
RealMedia cast members are always linked cast members. They reference an external stream via a URL (HTTP, RTSP,
or PNM) to a location on the Internet, or to a local file on your hard disk or network file server. RealMedia cast
members are always of type #realMedia.
Sprites created from RealMedia cast members are treated as regular sprites and can be rotated, skewed, stretched,
flipped, colorized, composited with other sprite layers with ink, and manipulated with the Lingo or JavaScript syntax
elements for RealMedia and to standard sprite and cast member script.
All RealMedia properties and methods invoked on a RealMedia sprite invoke the corresponding cast member’s
properties and methods. This is because Director plays back RealMedia files at the cast member level rather than at the
sprite level. For more information, see “RealMedia stream playback” on page 270.
You can have as many RealMedia streams and cast members in your Director movie as you want, as long as you play
them consecutively. This version of Director does not support playing multiple RealMedia cast members concurrently.
RealMedia video
The RealVideo portion of your RealMedia file is rendered offscreen, and there is no Direct To Stage option. This means
that you can layer other sprites on top of your RealMedia sprite. For example, you might do this if you want to display
text across the RealVideo as it plays. You can use Lingo or JavaScript syntax elements to jump forward or backward in
the stream, or grab the current frame of the RealVideo stream and use it as a texture for a 3D object.
RealVideo is fully integrated into the graphics capabilities of Director, and you add RealMedia cast members
containing RealVideo to a movie just as you would add any other cast member. The RealVideo content begins playing
when the playhead reaches the frame containing the RealMedia content, unless the pausedAtStart property of the
sprite or cast member is set to TRUE.
RealMedia audio
You can have the RealAudio portion of your RealMedia cast member processed in one of two ways: by Director (the
default) or by RealPlayer. Your choice depends mainly on whether you want to use Lingo or JavaScript syntax sound
elements.
•If you use Director to process RealAudio in your movie, use Lingo or JavaScript syntax sound methods and
properties to control and manipulate RealAudio, including mixing RealAudio with other Director audio. However,
all RealAudio is played in a single sound channel. If you inadvertently overlap RealMedia cast members in the
Score, and the second RealMedia cast member begins to play before the first cast member is finished, the second
cast member’s sound is played in the same sound channel as the first cast member. This occurs even if you have
assigned a different sound channel to the second cast member. If the RealMedia cast members do not overlap, they
are played in the sound channel specified. (If you do not assign a sound channel to a RealMedia cast member, the
RealAudio is played in the highest available sound channel.)
For more information about working with Director audio, see the Scripting Reference topics in the Director Help
Panel. For information about using standard script sound elements with RealMedia content, see “Using Lingo or
JavaScript syntax sound elements with RealMedia” on page 277.

270
USING DIRECTOR 11.5
Using Digital Video
Last updated 9/28/2011
•If you use RealPlayer native audio to process RealAudio, all script sound elements and the audio property in the
Property inspector are ignored. Enable RealPlayer native audio by setting the realPlayerNativeAudio() method
to TRUE. This method should be executed in a prepareMovie event handler in a movie script. This is a system-level
method that you can set only by using Lingo or JavaScript syntax, so you must set it before the first RealMedia cast
member is encountered in the Score, which causes Director to load the RealPlayer engine. Once the RealPlayer is
loaded, changes to this method are ignored.
For more information about this method, see the Scripting Reference topics in the Director Help Panel.
RealMedia stream playback
In Director, RealMedia playback occurs at the cast member level, not the sprite level. Therefore, if you have two sprites
of a cast member, and you apply a method or property to one of the sprites, the method applies to both sprites. For
example, if you select the Display Real Logo check box (or call the corresponding displayRealLogo script property
in a script) for one of the sprites, the Display Real Logo check box is automatically selected for both of the sprites, and
the RealNetworks logo is displayed when either sprite plays. This is true for all methods and properties, not just the
displayRealLogo property.
If your movie contains multiple RealMedia sprites (not playing at the same time) that reference the same cast member,
consider creating two cast members that reference the same URL. In that way, the sprites can be controlled
independently. Sprites that reference the same cast member are subject to the methods and properties of the member.
Streaming
Streaming is the most efficient and user-friendly method of downloading, viewing, and listening to video and audio
content on the Internet. Users can begin viewing content as soon as a small portion (usually a few seconds) of the file
has downloaded. As the stream plays, the rest of the stream continues to download in the background.
By understanding how the streaming process works in Director, and for RealMedia cast members in particular, you
can minimize the amount of time users must wait before your content begins to play in the browser.
The Shockwave® Player first downloads the Score information, scripts, and information about the size and shape of
each cast member, and then downloads the media in the cast members as they are played in the movie. When a
RealMedia cast member begins to play, the streaming process begins and cycles through the various states. If you are
viewing content in the RealMedia viewer, the mediaStatus property value that corresponds to the state in the
streaming process is displayed in the status bar. For more information about this property, see the Scripting Reference
topics in the Director Help Panel.
During the seeking or buffering state (mediaStatus#buffering), RealMedia cast members are downloading into a
buffer that holds the portion of the stream that is about to play. This initial loading of the buffer causes the delay
between the call to the play method (in the Score or user-initiated) and the actual playing of the stream. Once the
stream begins to play, the information in the buffer is continually updated with the next portion of the stream to be
played, and the stream plays without interruption. For more information, see percentBuffered in the Scripting
Reference topics in the Director Help Panel.
When using Lingo or JavaScript syntax with RealMedia cast members, you need to know which streaming state the
cast member has reached. If you don’t, script errors can result. For complete information about the order of the states
in the streaming process and the impact on RealMedia cast members, see state (RealMedia) and mediaStatus in
the Scripting Reference topics in the Director Help Panel.
RealPlayer, not the Shockwave Player, handles streaming of RealMedia cast members. Because streaming of RealMedia
cast members is independent of the streaming functionality of Director, RealMedia cast members aren’t placed in the
Director cache, and NetLingo does not apply to RealMedia cast members.

271
USING DIRECTOR 11.5
Using Digital Video
Last updated 9/28/2011
Authoring tips
Review the following guidelines before you begin creating RealMedia cast members and assembling your movie.
•Whenever possible, refer to sprites rather than cast members in Lingo or JavaScript syntax. Because future versions
of Director might enable sprite-level playback of RealMedia cast members, referring to sprites may help ensure that
your movies are forward-compatible with Director.
•After you create a RealMedia cast member, play the movie once to obtain and save the duration, height, and
width properties of the RealMedia cast member, and then lay out the rest of your movie. These properties are
unknown until the cast member is played, and the values initially displayed in the Property inspector are
placeholders.
•When using RealMedia cast members, it is a good idea to loop the playing of the cast member or sprite in a limited
number of frames in the movie. The reason for this is that the Score is frame-based not time-based, which makes it
difficult to determine the frame span for the sprite or cast member in the Score. This is true for sprites and cast
members of all media types, but especially for streaming RealMedia sprites and cast members that are subject to
network congestion and rebuffering.
•If the RealMedia cast member in your movie references a local file instead of a remote URL, be sure that the file
path you specified in the Property inspector is relative to the final document, or that you update the file path with
the new location of the file before publishing your movie.
All RealMedia content must live on a server authorized to serve RealMedia streaming content. For more
information about serving RealMedia content, see the RealProducer Help installed with the RealProducer program.
Then visit the developer pages of the RealNetworks website (www.realnetworks.com/devzone).
Creating RealMedia cast members
As with other media types, there are three ways to create a RealMedia cast member: insert the RealMedia content using
Insert > Media element, import the remote or local RealMedia file using File > Import, or use the New Cast Member
(+) Add button in the RealMedia viewer. The instructions for importing remote and local files differ slightly.
When you initially create a RealMedia cast member, the values listed for the height, width, rect, and duration
properties in the Property inspector are placeholder values. The actual values of these properties remain unknown
until the cast member is played and saved for the first time. For more information, see “Obtaining dynamic RealMedia
cast member properties” on page 272.
Before following these instructions, make sure the Property inspector is open (Window > Property Inspector).
Create a RealMedia cast member by sing Insert > Media Element
1Select Insert > Media Element > RealMedia.
2On the Member tab in the Property inspector, enter the name of the RealMedia cast member and enter the URL,
or browse to the location of a local RealMedia file.
3Use the options on the RealMedia tab in the Property inspector to specify the properties of the cast member.
For more information, see “The RealMedia tab in the Property inspector” on page 272.
Create a RealMedia cast member from a remote or local file
1Select File > Import or press Control+R to open the Import File dialog box. Then do one of the following:
•To create a cast member from a remote file, click the Internet button. In the dialog box that appears, enter the
URL where your RealMedia file is located and click OK.
•To create a cast member from a local file, navigate to the RealMedia file you want to import.

272
USING DIRECTOR 11.5
Using Digital Video
Last updated 9/28/2011
2Click Import.
The RealMedia cast member is now listed in the Cast window with a RealMedia icon. The name of the cast member
is automatically entered in the Property inspector’s Name text box, and the URL of the file is automatically entered
in the Name text box on the Property inspector Member tab.
3Specify the properties of the cast member using the Property inspector RealMedia tab. For more information, see
“The RealMedia tab in the Property inspector” on page 272.
Create a RealMedia cast member by using the New Cast Member (+) Add button
1Select Window > RealMedia to open the RealMedia viewer.
2Click the New Cast Member (+) Add button on the RealMedia viewer to create a new cast member.
3On the Member tab in the Property inspector, enter a name for the RealMedia cast member, and enter the URL or
browse to the location of a local RealMedia file.
4Use the options on the Property inspector RealMedia tab to specify the properties of the cast member. For more
information, see “The RealMedia tab in the Property inspector” on page 272.
Obtaining dynamic RealMedia cast member properties
When a RealMedia cast member is initially created, the values that are listed in the Property inspector for the dynamic
properties (height, width, rect, and duration) are placeholder values. After you play the cast member on the Stage
or in the RealMedia viewer, the actual values for the properties are saved and appear in the Property inspector. When
you save the movie, these values are saved with the cast member.
It’s a good idea to obtain and save the actual values of the dynamic RealMedia properties before you begin laying out
your movie. Although you cannot set or change any of these properties, you can adjust the height and width of
RealMedia sprites on the Stage to fit your movie’s proportions. Remember that the actual playback time of a stream
can vary, depending on the level of network congestion and stream rebuffering, and that the duration value of a cast
member referencing a live feed is always 0.
•To play the RealMedia cast member with other elements of your Director movie, drag the RealMedia cast member
to the Stage or Score and select Control > Play. The RealMedia cast member starts to play after the playhead reaches
the frame that contains the cast member, unless the pausedAtStart property for the cast member is set to TRUE.
•To play the cast member without the other elements of your movie, double-click the cast member in the Cast
window and click the Play button in the RealMedia viewer.
The RealMedia tab in the Property inspector
The RealMedia tab in the Property inspector displays the properties of RealMedia cast members. To set or change the
editable properties, use the Property inspector or the script properties for RealMedia. Even if you are not planning to
use the script properties, it’s a good idea to read the script entries for the properties that appear in the Property
inspector because they contain valuable information. For more information, see “Using Lingo or JavaScript syntax
sound elements with RealMedia” on page 277.
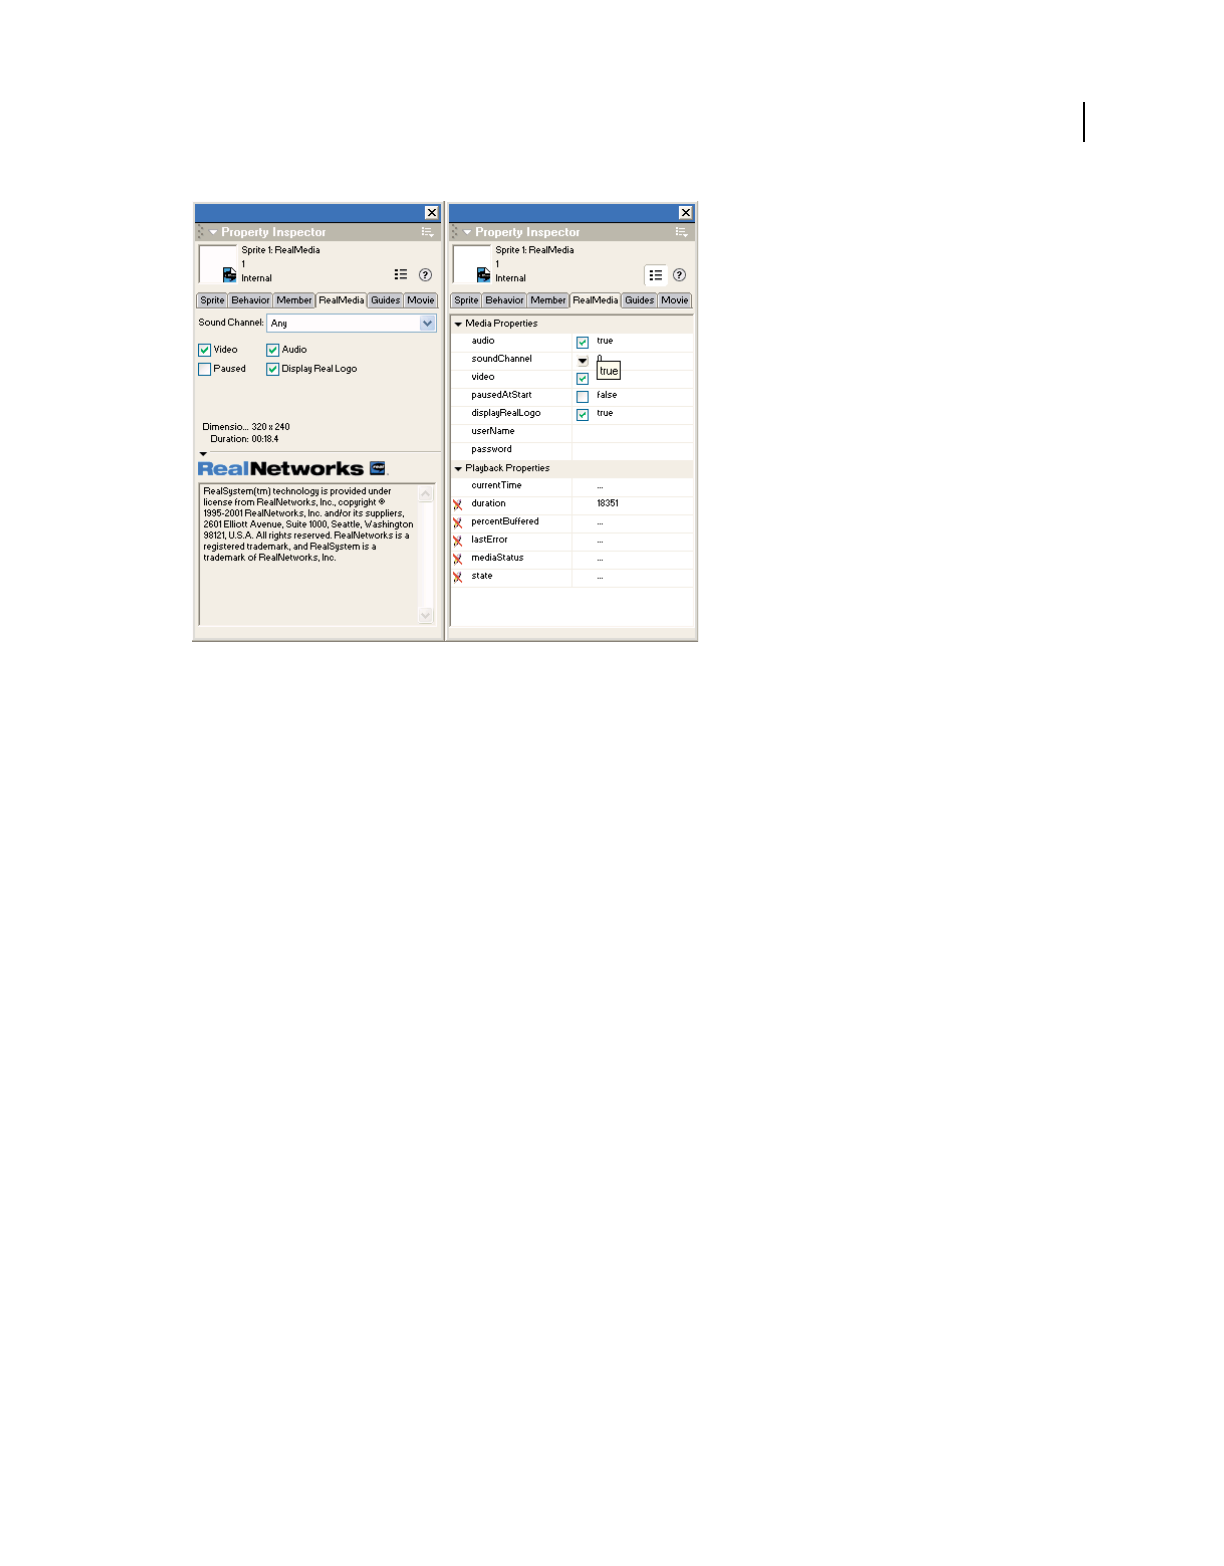
273
USING DIRECTOR 11.5
Using Digital Video
Last updated 9/28/2011
Two views of the RealMedia tab in the Property inspector
You can work with the following media properties:
•audio (RealMedia) specifies whether the audio portion of the RealMedia stream plays (TRUE) or not (FALSE). The
default setting is TRUE. This property has no effect if realPlayerNativeAudio() is enabled.
•soundChannel (RealMedia) specifies the Director sound channel where the RealAudio plays. The default setting
is Any (0), which means the audio plays in the highest available channel. This property has no effect if you enable
realPlayerNativeAudio().
•video (RealMedia) specifies whether the video portion of the RealMedia stream appears (TRUE) or not (FALSE).
The default setting is TRUE.
•pausedAtStart (RealMedia) specifies whether the RealMedia stream begins to play automatically when the
playhead enters the frame span of the RealMedia cast member or sprite (FALSE) or not (TRUE). The default setting
is FALSE.
•displayRealLogo specifies whether the RealNetworks logo appears. When this property is set to TRUE, the
RealNetworks logo appears at the beginning of the stream and when the video is stopped or rewound.
•userName (RealMedia) lets you specify a user name if the cast member references a protected URL. For security
purposes, after a user name has been entered, it cannot be retrieved. If this property has been set, the value that
appears in the Property inspector is ********.
•password allows you to specify a password if the cast member references a protected URL. For security purposes,
after a password has been entered, it cannot be retrieved. If this property has been set, the value that appears in the
Property inspector is ********.
For more information about these properties, see the Scripting Reference topics in the Director Help Panel.
You can work with the following playback properties:
•currentTime (RealMedia) displaysthe current time in the RealMedia stream in milliseconds. Setting this
property in the Property inspector is the same as using the seek method in script.
•duration (RealMedia)
displays the length of the RealMedia stream in milliseconds. This property is unknown
until the movie has been played once and saved. The duration of a live stream is always 0. This property cannot be set.

274
USING DIRECTOR 11.5
Using Digital Video
Last updated 9/28/2011
•percentBuffered displays the percentage of the playback buffer that has been filled with the RealMedia stream.
This property can’t be set.
•lastError displays the last error returned by RealPlayer. This property can’t be set.
•mediaStatus displays the current status of the RealMedia stream. For a list of possible values, see the Scripting
Reference topics in the Director Help Panel. This property cannot be set.
•state displays which state the cast member is currently in the streaming process. For a list of possible values, see
the Scripting Reference topics in the Director Help Panel. This property can’t be set.
For more information, see the Scripting Reference topics in the Director Help Panel.
About RealMedia behaviors
The RealMedia behaviors let you easily add playback controls for RealMedia streams in your movie, using custom
graphics.
The following RealMedia behaviors are listed in the Media > RealMedia section of the Library palette:
RealMedia Target Identifies a RealMedia sprite as the target for RealMedia behaviors that are attached to the graphic,
text, or field sprites for the playback controls. You must attach this behavior to a RealMedia sprite on the Stage before
you can use any of the other RealMedia behaviors. This behavior does not control the RealMedia sprite by itself, but
works with the other RealMedia behaviors to control the sprite.
RealMedia Control Button
Lets a graphic sprite function as a control button for the RealMedia sprite with the RealMedia
Target behavior attached. Possible control button behaviors are Pause, Play, Stop, Small Forward, Small Backward, Large
Forward, Large Backward, Toggle Audio, Audio On, Audio Off, Toggle Video, Video On, and Video Off.
RealMedia Slider Bar Lets a graphic sprite define the horizontal limits of travel for the RealMedia Slider Knob
behavior, which must be used with this behavior. The RealMedia Slider Bar behavior requires that a RealMedia sprite
(with the RealMedia Target behavior attached) be on the Stage.
RealMedia Slider Knob Lets a graphic sprite function as a slider to control and monitor the playback location (current
time) of the RealMedia sprite with the RealMedia Target behavior attached. When the user drags a sprite that has this
behavior attached, a seek action is performed on the stream.
RealMedia Buffering Indicator Lets a text area or field provide a graphical display of the stream-buffering progress of
the RealMedia sprite with the RealMedia Target behavior attached. As stream buffering progresses, the width of the
sprite increases from 0% to 100%.
RealMedia Stream Information Lets a text area or field display text information for the RealMedia sprite with the
RealMedia Target behavior attached. The text information can include one of the following: the percent buffered,
media status, current time, or file location or URL of the RealMedia file.
Using RealMedia behaviors
Attach RealMedia behaviors by dropping the behavior onto the sprite and using the dialog box to assign a group and
other parameters.
The RealMedia Target behavior is the central RealMedia behavior and must be dropped onto the RealMedia sprite
before you can use any other behavior.
The RealMedia Slider Knob and RealMedia Slider Bar behaviors must be used together. If they can’t locate one
another, a one-time error message appears.
1Create a RealMedia sprite on the Stage.

275
USING DIRECTOR 11.5
Using Digital Video
Last updated 9/28/2011
2Select Window > Library Palette, and then select Media > RealMedia from the menu to display the RealMedia
behaviors.
3Drag the RealMedia Target behavior to the RealMedia sprite on the Stage.
4Enter the number of milliseconds for a long and short seek operation, and assign the behavior to a group or accept
the defaults.
The number of milliseconds you specify for a long or short seek is the number that is used by the various forward
and back options of the RealMedia Control Button behavior. Be aware that short seeks are ineffective because the
amount of time it takes the stream to rebuffer is generally longer than the number of milliseconds that are skipped
in the stream.
5Create graphic sprites to act as slider controls and Play, Stop, and Pause buttons for the RealMedia sprite and place
them on the Stage. You can also create a graphic sprite to display the buffering progress of the RealMedia stream.
These sprites should be basic graphic sprites, not functional buttons. The RealMedia behaviors add the button
functionality.
6Drag the RealMedia Control Button, RealMedia Slider Bar, RealMedia Slider, and RealMedia Buffering Indicator
behaviors to the sprites that you created on the Stage, and select the appropriate action and group, using the menu
in the Parameters dialog box.
The group to which you assign the behavior must be the same group you created for the RealMedia Target behavior.
7Create a field on the Stage to display playback information about the RealMedia sprite that is similar to the
information that appears in the status bar of the RealMedia viewer.
8Drag the RealMedia Stream Information behavior to the field; then select the type of information you want to
display and the group that the behavior belongs to in the Parameters dialog box.
You can create as many of these features as you like. You don’t have to use control buttons in movies with
RealMedia cast members if you want to control them from the Score or by using Lingo or JavaScript syntax.
The RealMedia viewer
The RealMedia viewer is a simple media viewer that lets you play RealMedia cast members in isolation from other
elements of your movie. You cannot edit RealMedia cast members in the RealMedia viewer.
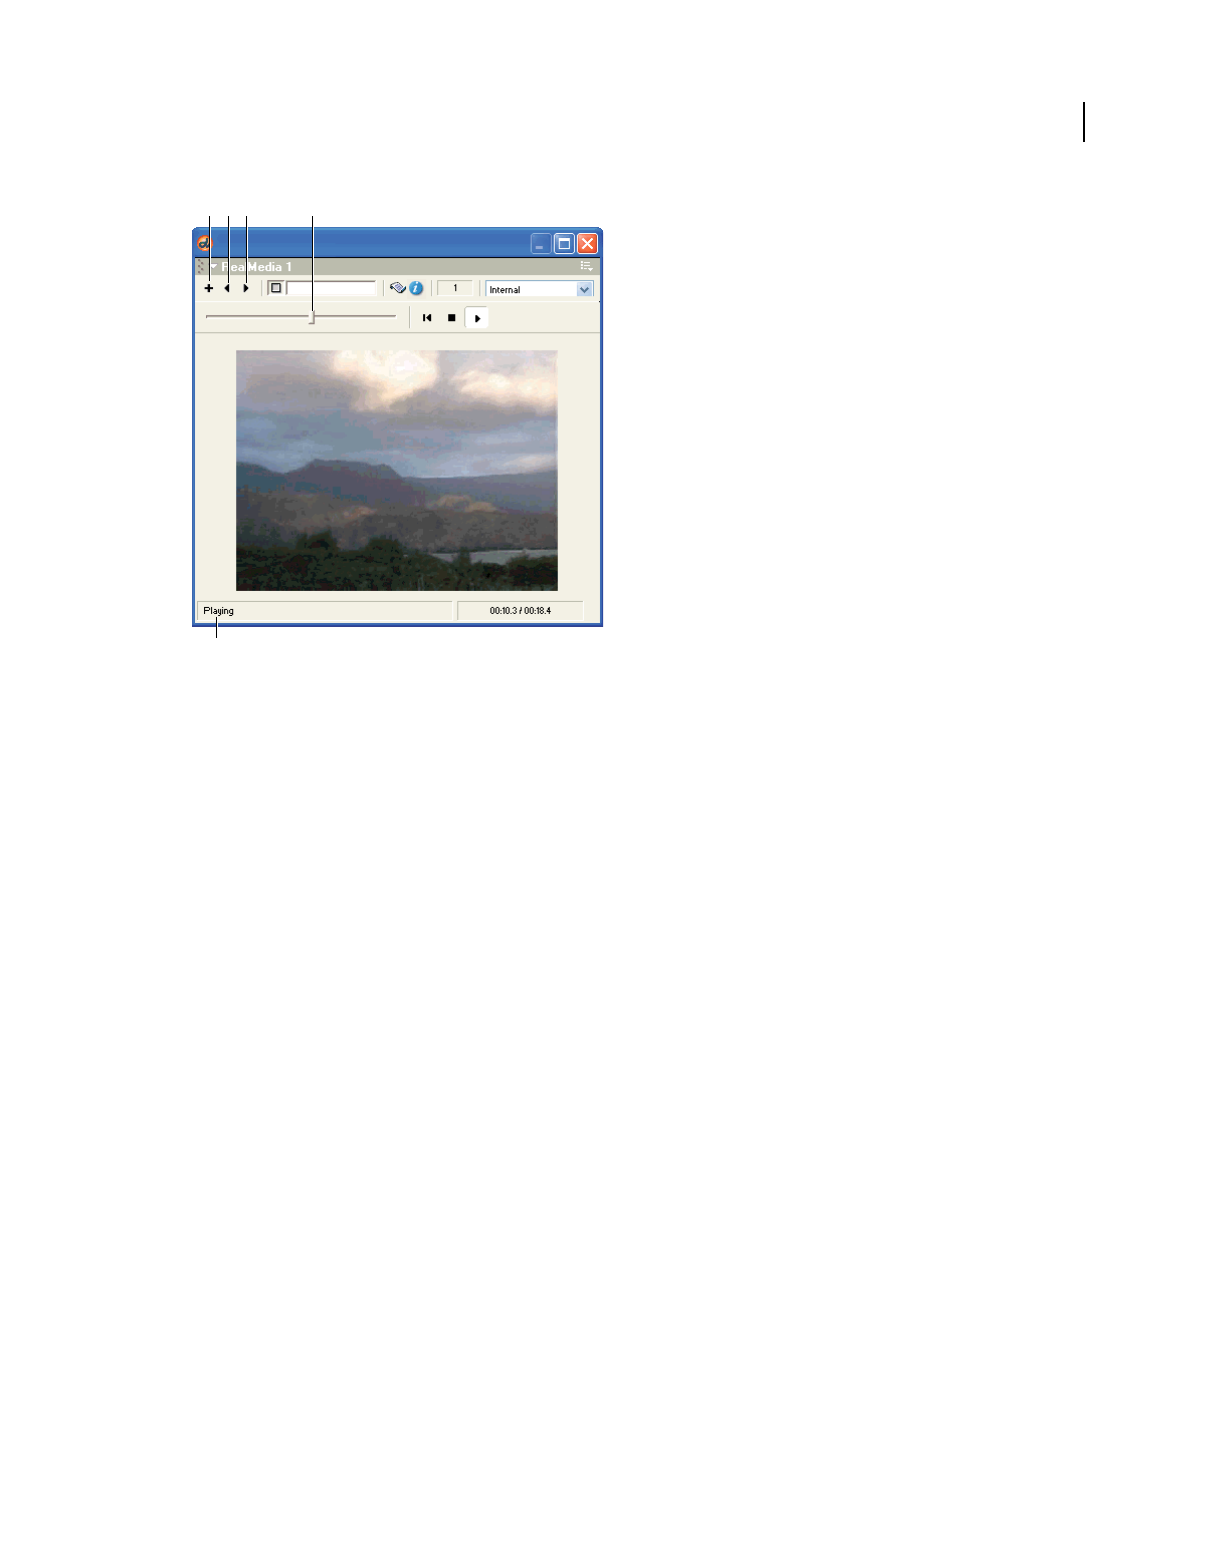
276
USING DIRECTOR 11.5
Using Digital Video
Last updated 9/28/2011
The RealMedia viewer
A. New Cast Member B. Previous Cast Member C. Next Cast Member D. Current Time Controller E. Media status bar
The viewer has the following controls:
New Cast Member (+) (Add button) Lets you create a new RealMedia cast member. Open the Property inspector to
specify the name and filename for the cast member.
Next Cast Member (right arrow) Lets you view the next RealMedia cast member (in the current cast) in the viewer.
Previous Cast Member (left arrow) Lets you view the previous RealMedia cast member (in the current cast) in the
viewer.
Play Initiates the streaming process for the current RealMedia cast member. For more information about the
streaming process, see the state (RealMedia) property in the Scripting Reference topics in the Director Help Panel.
Rewind Stops playback, empties the stream buffer, and resets the stream to the beginning. This is equivalent to the
stop (RealMedia) method in script. For more information about this method, see the Scripting Reference topics in
the Director Help Panel.
Stop Stops the playback but does not reset the stream to the beginning or empty the stream buffer. If the user clicks
Play after clicking Stop, play resumes where it left off, without rebuffering (unless it is a live stream, in which case it
rebuffers to join the live stream in progress). This is equivalent to the pause (RealMedia) method in script. For more
information about this method, see the Scripting Reference topics in the Director Help Panel.
Current Time Controller Lets the user jump (“seek”) to any position in the RealMedia stream. The slider is disabled if
the duration of the stream is not yet known (for example, the first time a stream plays), if mediaStatus is #closed, or
if the cast member references a live feed. If the user drags the slider while the stream is playing, the stream buffers and
automatically starts playing from the new position. However, if the slider is dragged while the stream is paused or
stopped, the user must click the Play button to restart the stream. This is equivalent to the seek method in script. For
more information, see the Scripting Reference topics in the Director Help Panel.
The media status bar Displays the current value of the mediaStatus property on the left, and the current time and
duration of the stream on the right, in the format MM:SS.S or HH:MM:SS.S. If the stream is playing, the status appears
as Playing. For more information about the mediaStatus property, see the Scripting Reference topics in the Director
Help Panel.
AB
CD
E

277
USING DIRECTOR 11.5
Using Digital Video
Last updated 9/28/2011
View a RealMedia cast member in the RealMedia viewer
1Select Window > RealMedia to open the RealMedia viewer.
2Do one of the following:
•Click the Play button to play the RealMedia cast member that is currently on the Stage or selected in the Cast
window.
•Use the Next (right arrow) and Previous (left arrow) buttons to select the RealMedia cast member you want to
view, and click the Play button.
•Double-click a RealMedia cast member in the Cast window.
Publishing Shockwave content with RealMedia
The Xtra for RealMedia is not part of the standard Shockwave, but can be downloaded from the Adobe website. The
first time a user attempts to play Shockwave content that contains a RealMedia cast member, the Shockwave Player
automatically downloads and installs the Xtra for RealMedia if you selected RealMedia Asset.x32 in the Movie Xtras
dialog box.
1Select Modify > Movie > Xtras to display the Movie Xtras dialog box.
2Select RealMedia Asset.x32 in the list.
If RealMedia Asset.x32 does not appear in the list, click the Add button, and select it in the Add Xtras dialog box.
3Select the Include in Projector and Download If Needed options.
Using Lingo or JavaScript syntax sound elements with
RealMedia
All the Lingo or JavaScript syntax elements are documented in the main Director Scripting Reference and are
discussed here only as they pertain to working with RealMedia content. For complete information, see the Director
Scripting Reference.
Supported sound elements
The following Lingo or JavaScript syntax elements operate on a sound channel and are fully supported for sound
channels playing the audio portion of a RealMedia cast member:
•elapsedTime
•fadeIn()
•fadeOut()
•fadeTo()
•pan (Sound Channel)
•soundBusy()
Although you can use the following Lingo or JavaScript syntax elements with a RealMedia cast member, they cause
problems when used on a sound channel. For example, you can use member("Real").stop() but should not use
sound(whichChannel).stop() if the audio portion of a RealMedia cast member uses whichChannel.
•member (sound property)

278
USING DIRECTOR 11.5
Using Digital Video
Last updated 9/28/2011
•pause()
•play()
•stop()
Use the following property on a sound channel playing the audio portion of a RealMedia stream but not directly on
a RealMedia cast member. For example, you can use sound(whichChannel).volume = 200, but not
member("Real").volume = 200.
•volume
You can set the system variable soundEnabled to FALSE to turn off RealAudio, but if you reset it to TRUE, you must
also call the play method to resume playback.
Unsupported sound elements
The following Lingo or JavaScript syntax elements are not supported for RealMedia cast members or for sound
channels playing the audio portion of a RealMedia stream:
•breakLoop()
•channelCount
•endTime
•getPlayList()
•loopCount
•loopEndTime
•loopsRemaining
•loopStartTime
•play()
•playFile()
•playNext()
•queue()
•rewind()
•sampleCount
•setPlayList()
•status (Use the state (RealMedia) or mediaStatus RealMedia cast member properties instead. For more
information about these properties, see the Scripting Reference topics in the Director Help Panel.)

279
Last updated 9/28/2011
Chapter 13: Behaviors
About behaviors
A behavior in Adobe® Director® is prewritten Lingo or JavaScript™ syntax that you use to provide interactivity and add
interesting effects to a movie. You drag a behavior from the Library palette and drop it on a sprite or frame to attach it.
If the behavior includes parameters, a dialog box appears for defining those parameters. For example, most navigation
behaviors let you specify a frame to jump to. You can attach the same behavior to as many sprites or frames as
necessary and use different parameters for each instance of the behavior.
Most behaviors respond to simple events such as a mouse click on a sprite or the entry of the playhead into a frame.
When the event occurs, the behavior performs an action, such as jumping to a different frame or playing a sound.
Director comes packaged with customizable, reusable behaviors for many basic functions. You and other developers
can also create and share your own behaviors by writing Lingo or JavaScript syntax. To modify behaviors, use the
Behavior inspector or Property inspector.
For more information about using included behaviors, see Using Director Behaviors on the Director Support Center
at www.adobe.com/support/documentation/en/director/.
Attaching behaviors
You use the Library palette to display behaviors included in Director.
Director allows you to attach the same behavior to several sprites or several frames at the same time. Attach as many
behaviors as you want to a sprite, but attach only one behavior to a frame. If you attach a behavior to a frame that
already has a behavior, the new behavior replaces the old one. Behaviors attached to frames are best suited to actions
that affect the entire movie. For example, you might attach Loop Until Media in Frame is Available to make
the movie wait while the media for a particular frame downloads.
When you attach a behavior, and the Parameters dialog box appears, the parameters you specify apply to the behavior
only as it is attached to the current sprite or frame. These settings do not affect the way the behavior works when
attached elsewhere. Use the Behavior inspector to change parameters for behaviors attached to sprites or frames.
Once you attach a behavior to a sprite or frame, Director copies the behavior from the Behavior library to the currently
selected cast in the movie. This means you do not have to include the Behavior library when you distribute the movie.
Attach a behavior to a single sprite or frame, using the Library palette
1Select Window > Library Palette.
2Select a library from the Library menu in the upper-left corner of the palette.
3To view a brief description of included behaviors, move the pointer over a behavior icon.
If the behavior includes a longer description, you can view it in the Behavior inspector or in Director Help. For
more information, see “Getting information about behaviors” on page 281. The behaviors included with Director
come with descriptions. Behaviors from other sources may not.
Select Show Names from the Library menu to turn the display of behavior names on or off.
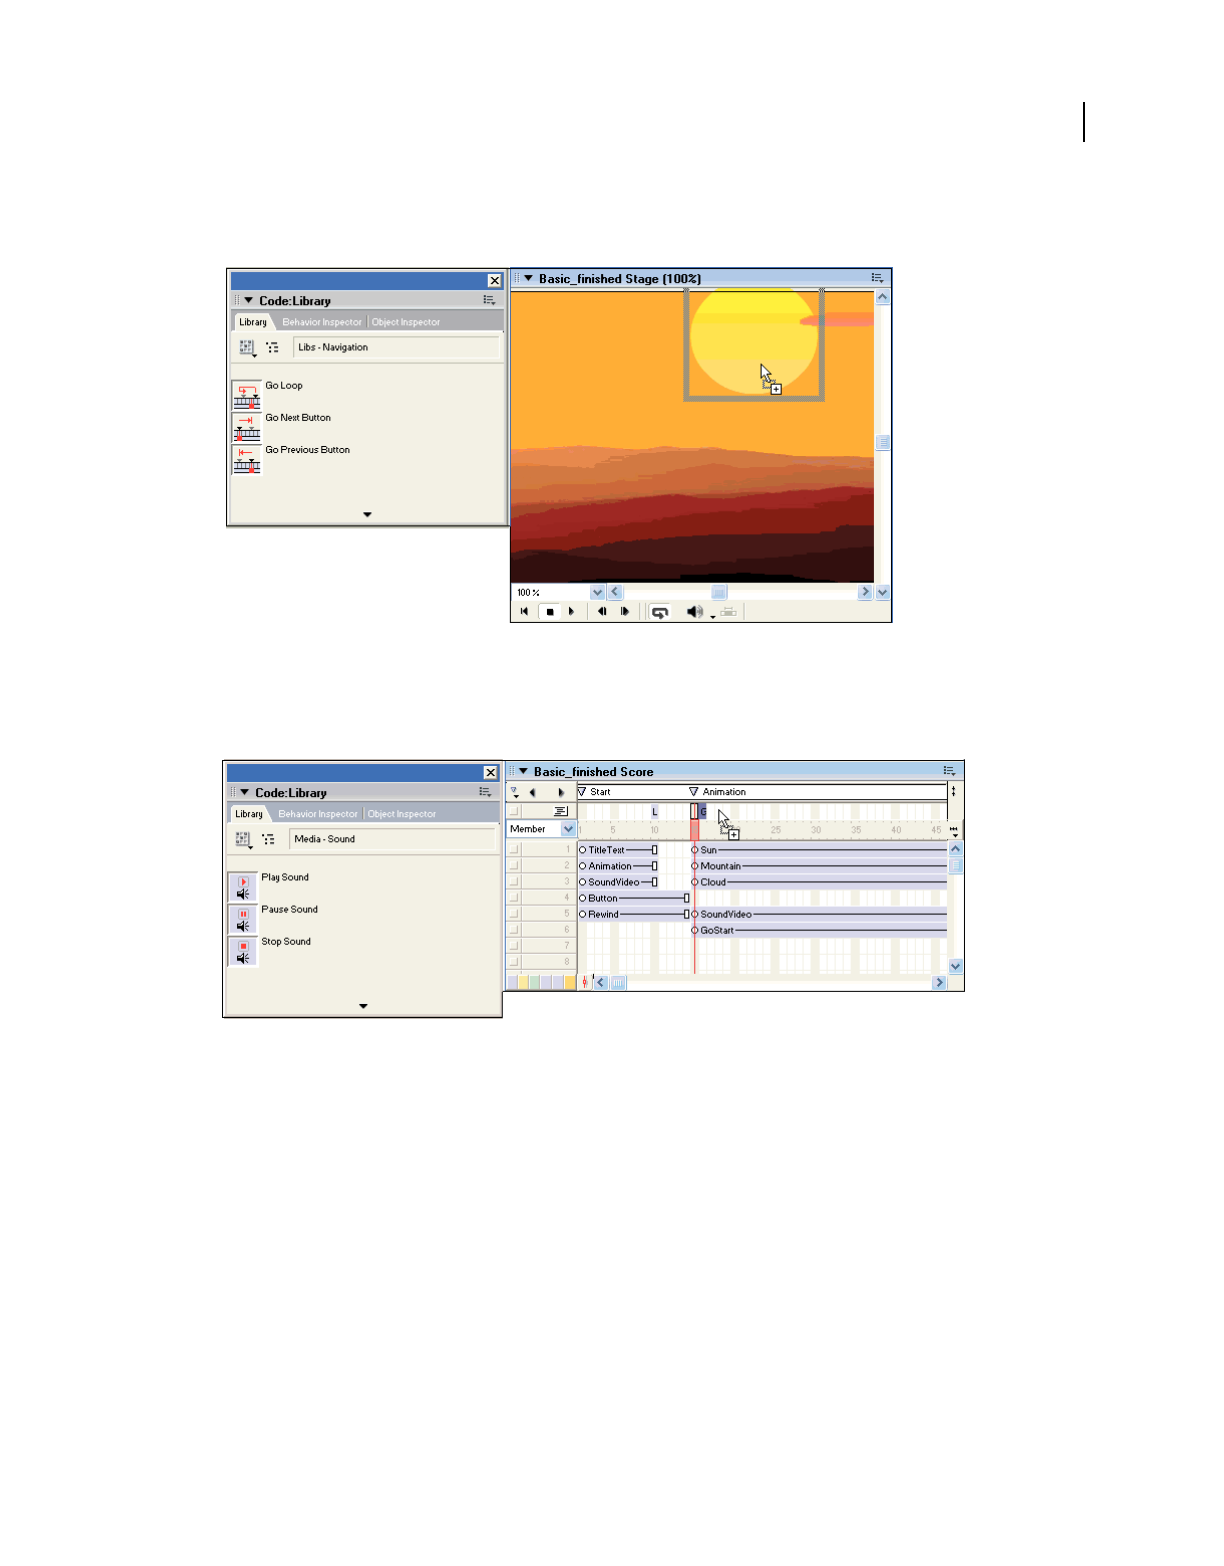
280
USING DIRECTOR 11.5
Behaviors
Last updated 9/28/2011
4To attach a behavior to a single sprite, drag a behavior from the Library palette to a sprite on the Stage or in the
Score, as shown.
A behavior attached to a single sprite
5To attach a behavior to a frame in the behavior channel, drag a behavior from the Library palette to a frame in the
behavior channel, as shown.
A behavior attached to a single frame
6Enter parameters for the behavior in the Parameters dialog box.
Note: If you attach a behavior from a Director library of behaviors, the behavior is copied to the currently active cast.
Attach the same behavior to several sprites at once, using the Library palette
❖Select the sprites on the Stage or in the Score and drag a behavior to any one of them.
Attach behaviors that have already been copied to a cast
1Select Window > Behavior Inspector to open the Behavior inspector.
2Do one of the following:
•Select a sprite or several sprites.
•Select a frame or several frames.
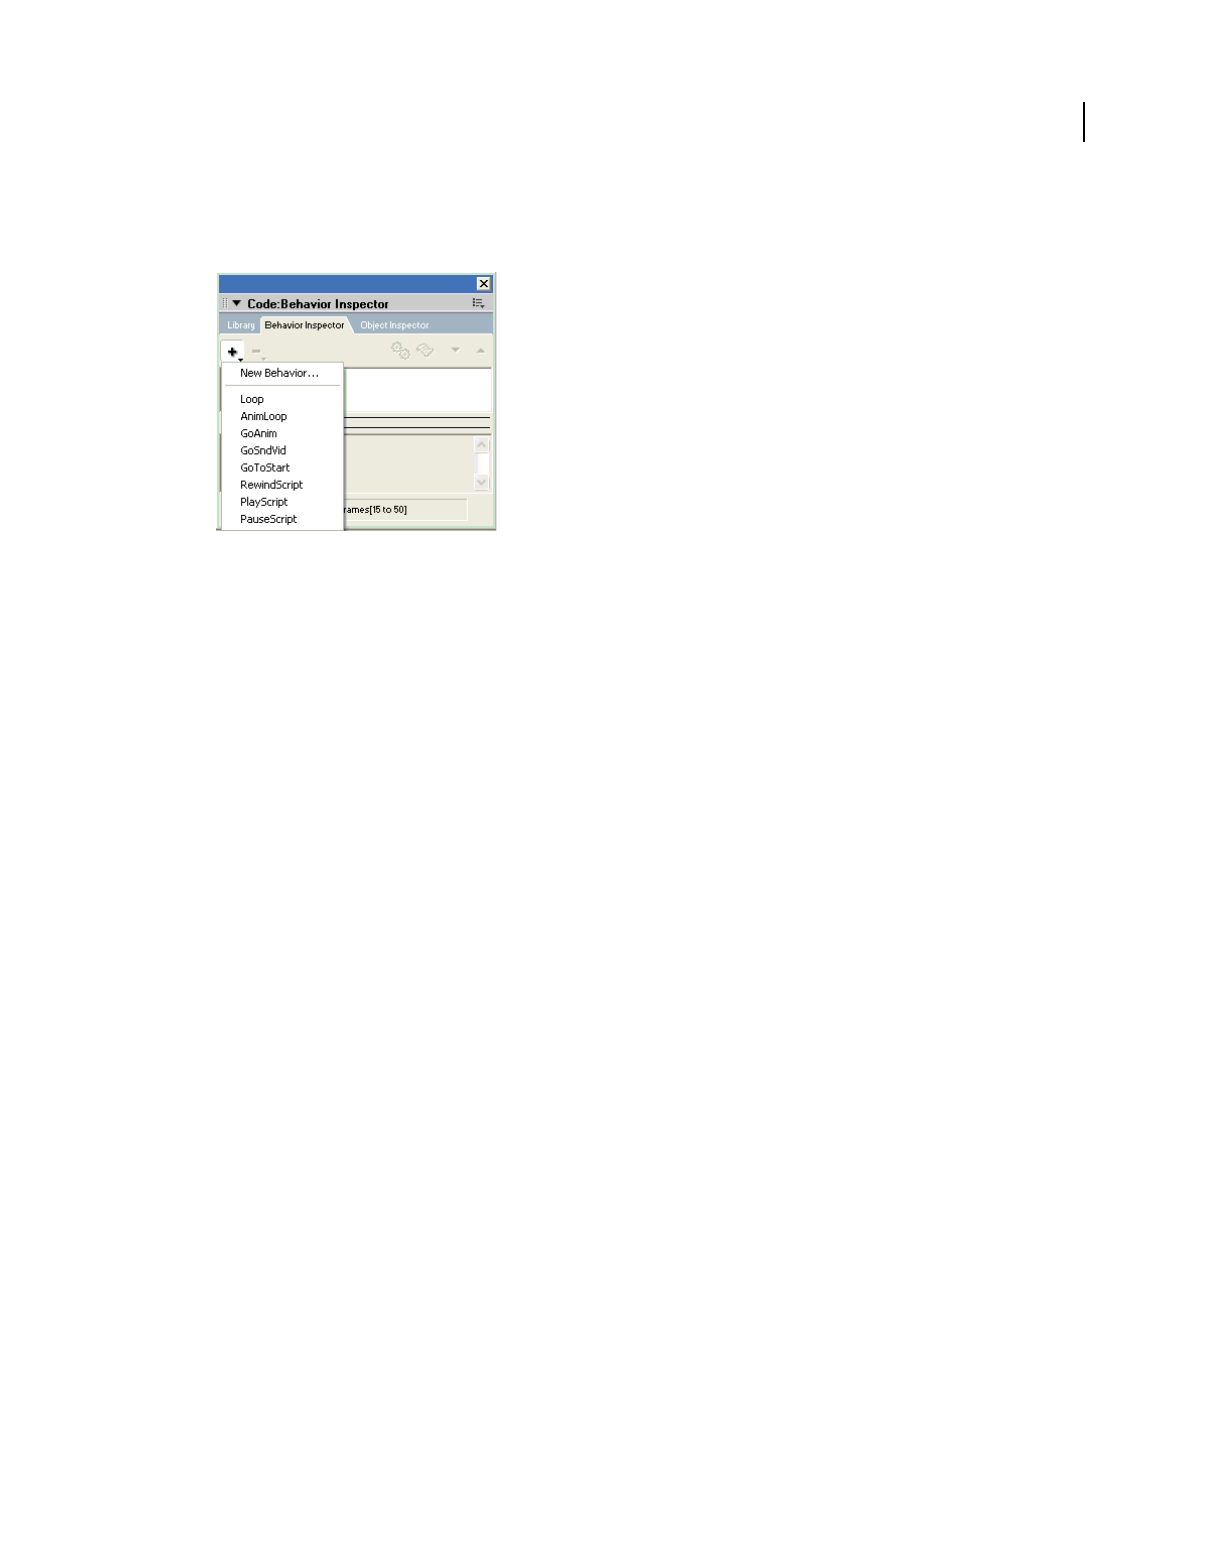
281
USING DIRECTOR 11.5
Behaviors
Last updated 9/28/2011
3Select a behavior from the Behaviors menu.
Director attaches the behavior you select to the sprites or frames, as shown in the example.
Behaviors menu
Note: Some behaviors work only when applied to either a sprite or a frame. For more information, read the behavior
descriptions.
Change parameters for a behavior attached to a sprite or frame
1Select the sprite or frame to which the behavior is attached.
2In the Behavior tab of the Property inspector, use the menus or text boxes to change any parameters.
Changing the order of attached behaviors
Director executes behaviors in the order they were attached to a sprite, and they are listed in this order in the Property
inspector and Behavior inspector. It is sometimes necessary to change the sequence of behaviors so that actions occur
in the correct order.
1Select the sprite in the Score or on the Stage.
2Open the Behavior inspector or click the Behavior tab in the Property inspector.
3Select a behavior from the list.
4Click the up and down arrows in the toolbar to move the selected behavior up or down on the list.
Getting information about behaviors
Behaviors included with Director have brief pop-up descriptions. Some also have longer descriptions and instructions
that you can view in the Behavior inspector. A scrolling pane in the Behavior inspector displays the complete
description provided by the behavior’s author. The Behavior inspector displays only information about a behavior
attached to a sprite or frame.
1Open the Behavior inspector.
2Select a sprite or frame that a behavior has been attached to.
3Click the arrow that expands the Behavior inspector’s description pane.
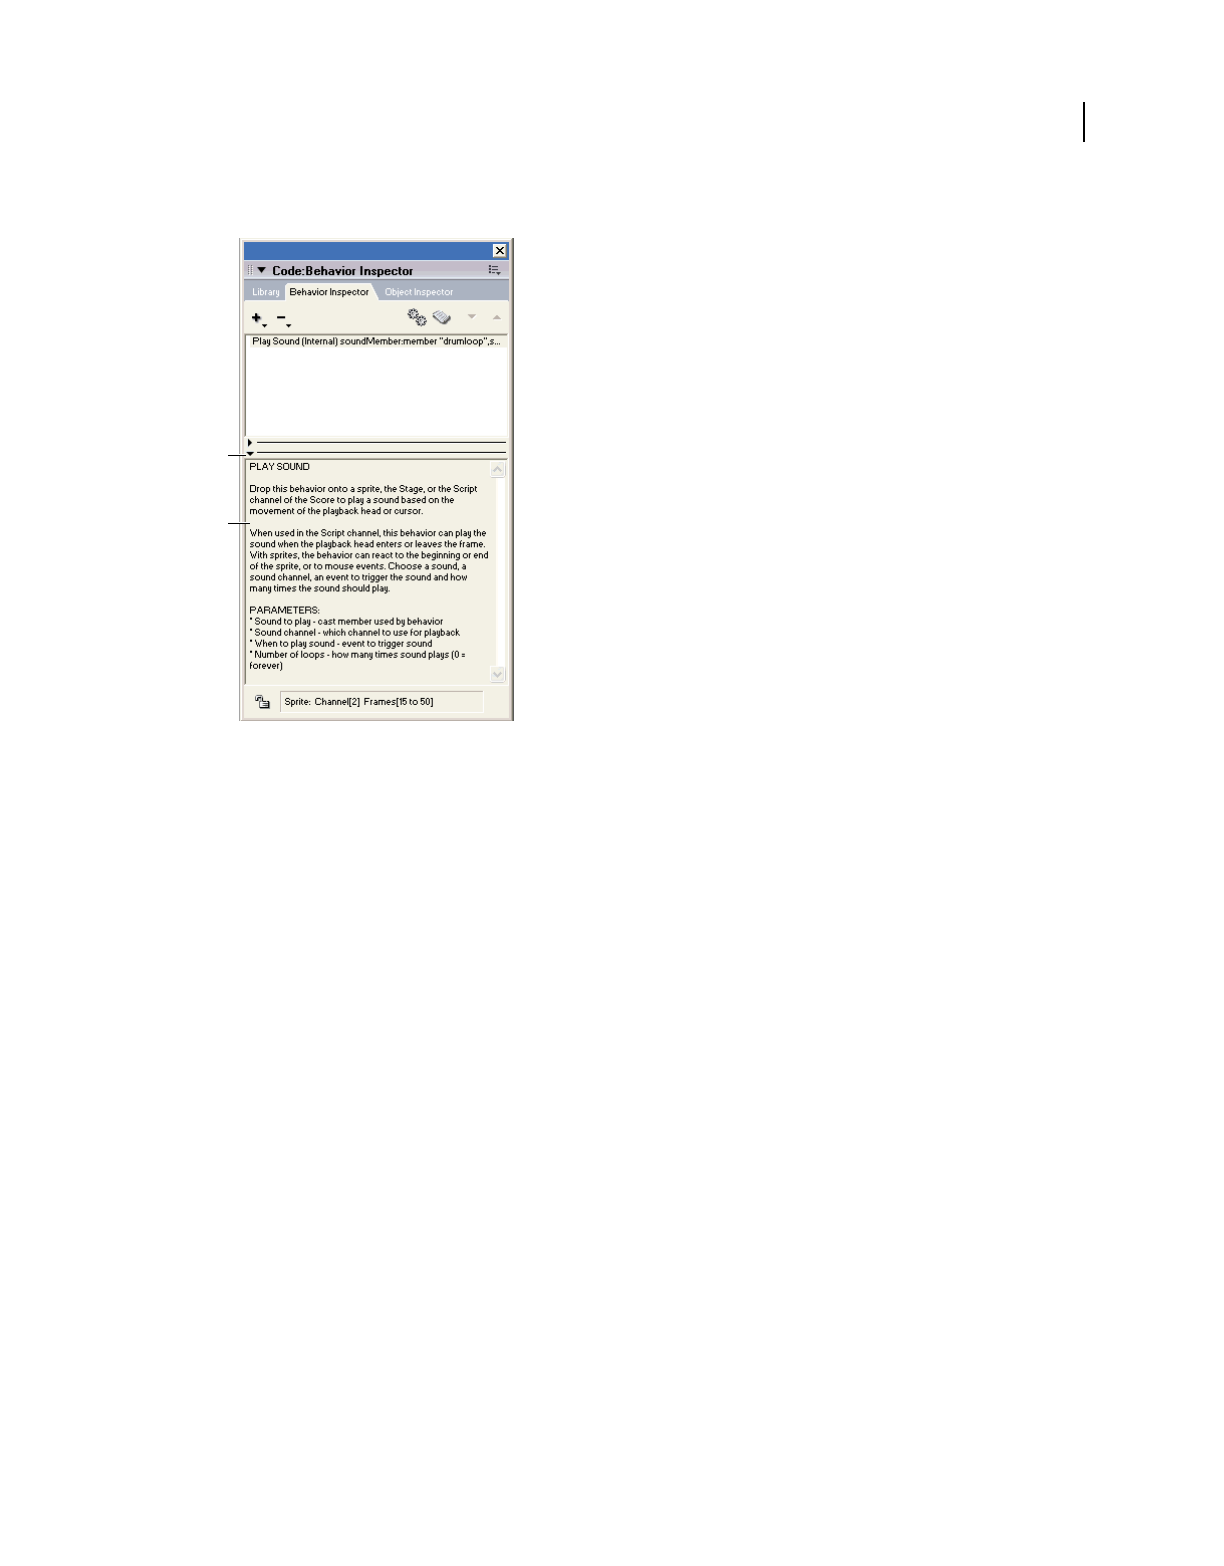
282
USING DIRECTOR 11.5
Behaviors
Last updated 9/28/2011
You can leave the description pane expanded and select different behaviors to see their descriptions.
Behavior inspector
A. Click to expand behavior descriptions B. View behavior description
Creating and modifying behaviors
Use the Behavior Inspector to create a behavior using a menu-based system instead of writing code for the behavior.
You can choose an Event for the behavior and then choose an Action to go with that event using the corresponding
menus. The Behavior inspector lists the most common events. However, the choices of actions are limited. For
advanced behavior, use Lingo or JavaScript.
1Do one of the following:
•To create a new behavior, click the Behaviors menu, select New Behavior, and enter a name for the new behavior.
The behavior appears in the currently selected Cast window in the first empty position. Select an empty cast
position first if you want the behavior to appear in a different place.
•To modify a behavior, select it in the Behavior inspector.
2Click the arrow in the lower left of the Behavior inspector to expand the editing pane.
A
B
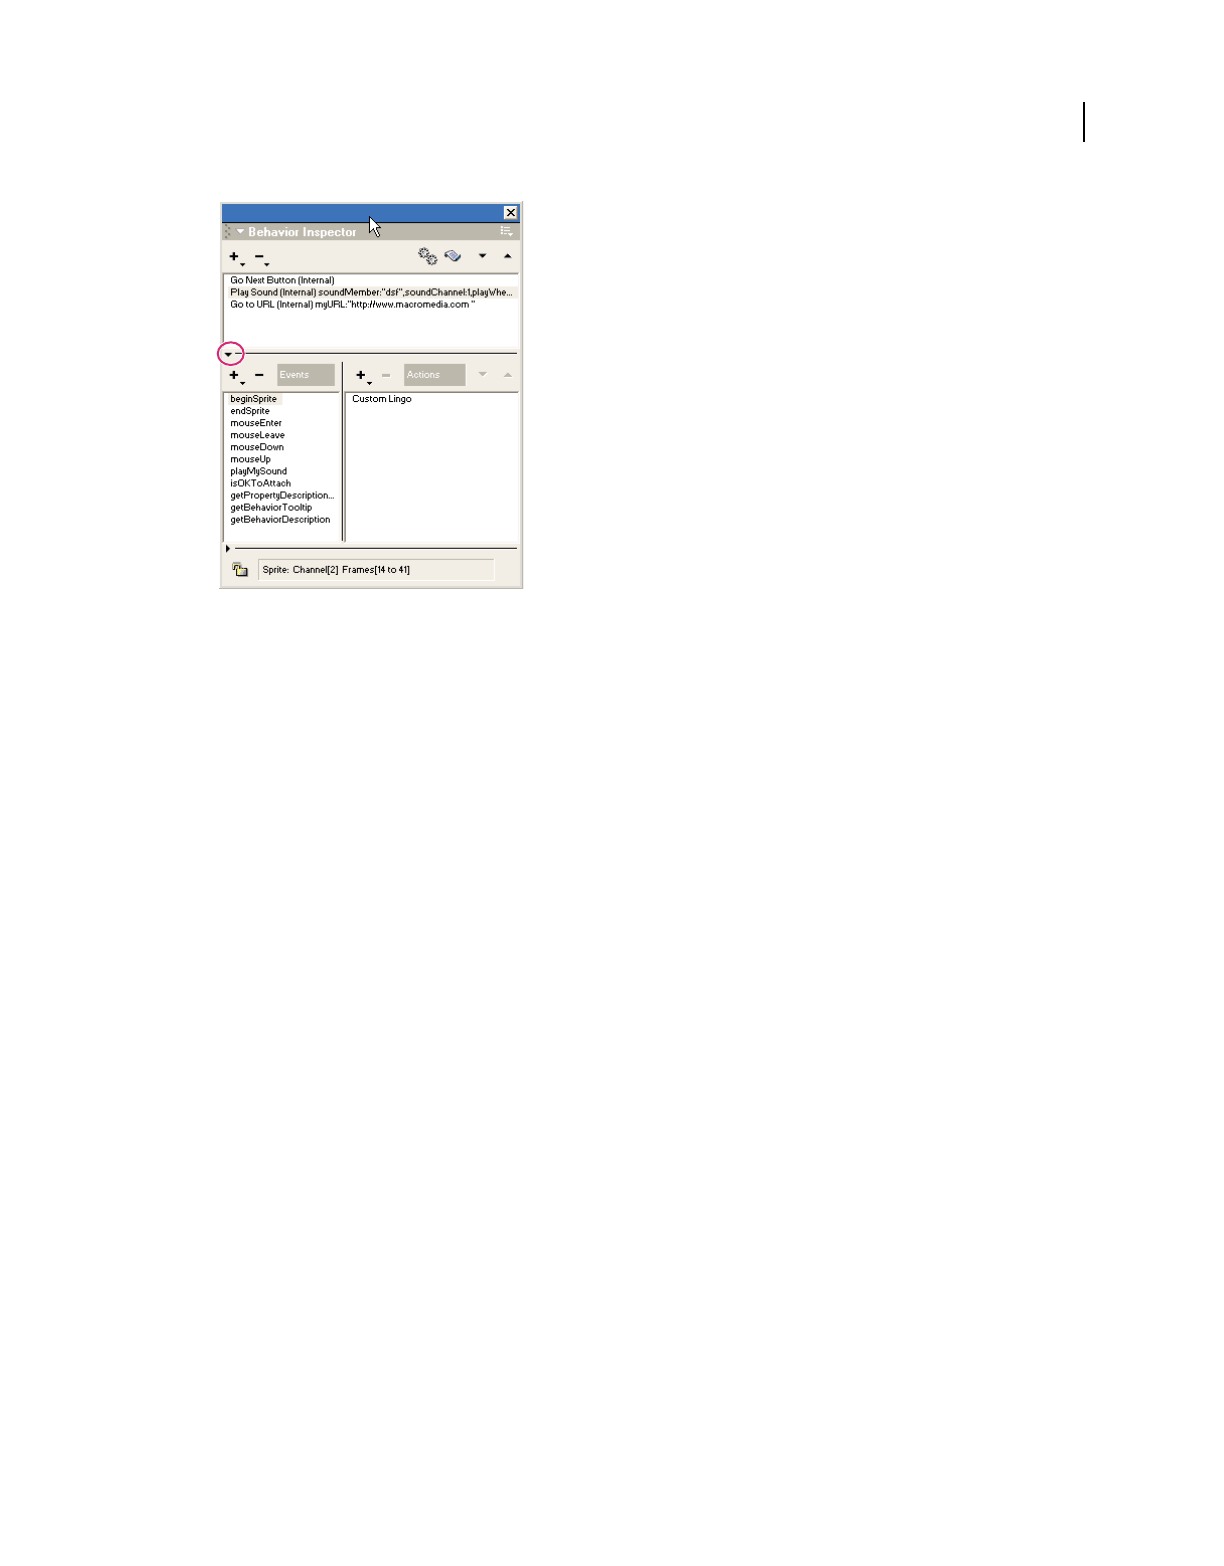
283
USING DIRECTOR 11.5
Behaviors
Last updated 9/28/2011
Expanding the editing pane
The editing pane shows the events and actions in the current behavior. If you are creating a new behavior, no events
or actions appear.
•To add a new event or action group to the behavior, select an event from the Events pop-up menu and then select
actions for the event from the Actions menu. Choose as many actions as you need for a single event.
•To change an existing event or action group, select an event from the list and then add or remove actions in the
Actions list.
•To delete an event or action group, select the event and press Delete.
•To change the sequence of actions in an event or action group, select an event from the Events list, select an
action from the Actions list, and then click the up and down arrows above the Actions list to change the order
of actions.
•To lock the current selection so nothing changes in the Behavior inspector when new sprites are selected, click
the Lock Selection button in the lower left of the expanded Behavior inspector.
If you are familiar with Lingo or JavaScript syntax, you can edit a behavior’s script directly.
Events and actions in the Behavior inspector
The actions and events included with Director are basic building blocks you can use to create simple or complex
behaviors.
The Behavior inspector makes the following events available:
BeginSprite Contains statements that run when the playback head moves to a frame that contains a sprite that was not
previously encountered.
End Sprite Contains the statements that run when the playback head leaves a sprite and goes to a frame in which the
sprite does not exist.
MouseUp Indicates that the mouse button was released.
MouseDown Indicates that the mouse button was clicked.
RightMouseUp Indicates that the right mouse button was released. (On the Mac, Director treats a Control-click the
same as a right mouse click on a Windows® system.)

284
USING DIRECTOR 11.5
Behaviors
Last updated 9/28/2011
RightMouseDown Indicates that the right mouse button was clicked.
MouseEnter Indicates that the pointer entered a sprite’s region.
MouseLeave Indicates that the pointer exited a sprite’s region.
MouseWithin Indicates that the pointer is within the sprite’s region.
KeyUp Indicates that a key was released in a text or field sprite.
KeyDown Indicates that a key was pressed in a text or field sprite.
PrepareFrame Indicates that the playhead has exited the previous frame but has not yet entered the next frame.
EnterFrame Iindicates that the playhead has entered the current frame.
ExitFrame Indicates that the playhead has exited the current frame.
NewEvent Indicates that a specified message was received from a script or behavior. You must specify a name for this
event.
The Behavior inspector makes the following actions available:
Go To Frame Moves the playhead to the specified frame.
Go To Movie Opens and plays the specified movie.
Go To Marker Moves the playhead to the specified marker.
Go To Net Page Goes to the specified URL.
Wait On Current Frame Waits at the current frame until another behavior or script advances to the next frame.
Wait Until Click Waits at the current frame until the mouse button is clicked.
Wait Until Key Press Waits at the current frame until a key is pressed.
Wait For Time Duration Waits at the current frame for the specified time.
Play Cast Member Plays the specified sound cast member.
Play External File Plays the specified external sound file.
Beep Plays the current system beep.
Set Volume Sets the system volume level to the specified setting.
Change Tempo Changes the movie’s tempo to the specified setting.
Perform Transition Performs the specified transition.
Change Palette Changes to the specified palette.
Change Location Moves the current sprite to the specified coordinates.
Change Cast Member Switches the sprite’s cast member to the specified cast member.
Change Ink Switches to the specified ink.
Change Cursor Changes the pointer to a shape you select from the pop-up menu.
Restore Cursor Restores the current system pointer.
New Action Executes any method or sends a message to a handler. You specify the new handler’s name.

285
USING DIRECTOR 11.5
Behaviors
Last updated 9/28/2011
Writing behaviors with Lingo or JavaScript syntax
If you are familiar with Lingo or JavaScript syntax, you can author your own behaviors. A behavior is a Lingo or
JavaScript syntax script with these additional features:
•Each instance of the behavior has independent values for properties. The script uses a property statement to
declare properties that can have independent values in each instance of the behavior. For more information, see the
Scripting Reference topics in the Director Help Panel.
•The same set of handlers can be shared by multiple sprites or frames.
The handlers in a behavior are basically the same as other handlers. Include as many handlers as appropriate to
implement the behavior.
A behavior is usually attached to multiple sprites or frames. As a result, the sprites and frames share the same
handlers. Director tracks instances of the behavior by assigning a reference number to each instance. The variable
me contains the reference for the object that the instance of the behavior is attached to.
In many cases, it is most efficient to create behaviors dedicated to specific tasks and then attach a set of behaviors
that together perform the variety of actions you want.
•The behavior can have parameters that users edit from the Parameters dialog box. The optional on
getPropertyDescriptionList handler sets up the Parameters dialog box. For more information, see the
Scripting Reference topics in the Director Help Panel.
•A description of the behavior can be added to the Behavior inspector. The optional on getBehaviorDescription
handler displays a description of the behavior in the Behavior inspector. For more information, see the Scripting
Reference topics in the Director Help Panel.
•A brief description appears as a tooltip for the behavior in the Library palette if the optional on
getBehaviorToolTip handler that creates the tooltip has been written. For more information, see the Scripting
Reference topics in the Director Help Panel.
Setting up a Parameters dialog box
You can make behaviors more flexible by letting the user customize the behavior’s parameters.
For example, this handler moves the sprite 5 pixels to the right each time the playhead enters a new frame:
if ( sprite(me.spriteNum).locH > window("stage").rect.right ) then
sprite(me.spriteNum).locH = window("stage").rect.left
else
sprite(me.spriteNum).locH = sprite(me.spriteNum).locH + 5
end if
However, users could adjust the speed of each sprite if they could specify how far individual sprites move to the right
in each frame.
To allow users to set different values for a property in different instances of the behavior, the behavior’s script must
have the following:
•A property statement (Lingo) or a var statement (JavaScript syntax) that allows each instance to maintain a
separate value for the property
•An on getPropertyDescriptionListhandler that sets up the property or variable.

286
USING DIRECTOR 11.5
Behaviors
Last updated 9/28/2011
Setting behavior properties with script
Behaviors usually have properties for which each instance of the behavior maintains its own values. (An instance is the
unique instance of the behavior assigned to sprites or frames.) These properties are shared among handlers in a
behavior’s script the same way that properties are shared among handlers in an object.
❖Put the property or var statement at the beginning of the behavior’s script.
A property or var statement starts with the word property or var followed by the names of the individual
properties or variables. For example, the statement property movement declares that movement is a property of
the behavior.
Customizing a behavior’s property
If a behavior’s script includes an on getPropertyDescriptionList handler, Director lets users set the property’s
initial values from the Parameters dialog box. The behavior’s Parameters dialog box opens in three circumstances:
•After the user drags a behavior to a sprite or frame
•When the user double-clicks the behavior in the Behavior inspector dialog box
•When the user clicks the Parameters button in the Behavior inspector
The on getPropertyDescriptionList handler generates a property list that specifies these attributes of the
property or variable:
•The default initial value
•The type of data the property or variable contains, such as Boolean, integer, string, cast member, or a specific type
of cast member
•A comment in the Parameters dialog box to describe what the user is setting
The definition of a behavior’s property or variable must include the property’s or variable’s name, default value, and
data type and the descriptive string that appears in the Parameters dialog box. The definition can also include an
optional specification for the range of values allowed for the property or variable.
The name of the property or variable comes first in the definition. The remainder of the definition is a property list
that assigns a value to each of the property’s or variable’s attributes.
For example, to define the property movement as an integer that can be set to a value from 1 to 10 and whose default
value is 5, use a phrase similar to the one that follows:
#movement: [#default: 5, #format:#integer,
#comment: "Set motion to the right:", #range: [#min:1, #max:10]]
•#movement is the property’s name. A symbol (#) operator must precede the name in the property definition. A
colon separates the name’s definition and the list of parameters.
•#default specifies the property’s default value. This example sets 5 as the default.
•#format specifies the property’s type. This example sets the type as an integer. Some other possible types are
Boolean, string, cast member, event, and sound. For more information, see the Scripting Reference topics in the
Director Help Panel.
•#comment specifies a string that appears next to the parameter in the Parameters dialog box. This example makes
“Set motion to the right” the comment that appears in the Parameters dialog box.
•#range specifies a range of possible values that the user can assign to the property. Specify the possible values as a list.

287
USING DIRECTOR 11.5
Behaviors
Last updated 9/28/2011
To specify a range between a minimum and maximum number, use the form [#min:minimum, #max:maximum].
The example sets the range from 1 to 10. When the range is between a maximum or minimum number, the
Parameters dialog box provides a slider that sets the value.
To specify no range, omit the #range parameter. If the property’s definition does not include #range, a text entry
field appears for the user to enter a value in the Parameters dialog box.
To specify a set of possible choices, use a linear list. For example, the list [#mouseUp, #mouseDown, #keyUp,
#keyDown] makes these four events possible choices for a parameter. When you specify values in a linear list, the
choices appear in a menu in the Parameters dialog box (for this example list, you need to specify #format:
#symbol for the list to display correctly).
As another example, the following statement defines the property whichSound:
description.addProp(#whichSound,[#default: "", #format:#sound, #comment: \
"Which cast member"]
The value #sound assigned to #format provides a menu in the Parameters dialog box that includes every sound
cast member available in the movie.
If the behavior includes a method that plays a sound, this property can be used to specify a sound cast member to
play.
Creating an on getPropertyDescriptionList handler
To build a list of properties for a behavior, add each property to the list that the on getPropertyDescriptionList
handler returns. Then use the return method to return the list.
For example, this handler creates a property list named Description that contains the definitions for movement and
whichSound:
--Lingo syntax
on getPropertyDescriptionList
description = [:]
description[#movement] = \
[#default: 5, \
#format:#integer, \
#comment: "Set motion to the right:", \
#range: [#min:1, #max:10] \
]
description[#noise] = \
[#default:"", \
#format: #sound, \
#comment:"Sound cast member name" \
]
return description
end
// JavaScript syntax

288
USING DIRECTOR 11.5
Behaviors
Last updated 9/28/2011
function getPropertyDescriptionList() {
var description = propList();
var tProp = propList();
tProp.addProp("default",5);
tProp.addProp("format","integer");
tProp.addProp("comment","Set motion to the right:");
var tRange = propList();
tRange.addProp("min",1);
tRange.addProp("max",10);
tProp.addProp("range",tRange);
description.addProp("movement",tProp);
tProp = propList();
tProp.addProp("default","");
tProp.addProp("format","sound");
tProp.addProp("comment","Sound cast member name");
description.addProp("noise",tProp)
return description;
}
Including a description for the Behavior inspector
An on getBehaviorDescription handler in a behavior’s script provides a description that appears in the bottom
pane of the Behavior inspector when the behavior is selected. For example, this handler displays the phrase “This
changes sprite color and position” in the Behavior inspector:
on getBehaviorDescription
return "This changes sprite position"
end
Example of a complete behavior
If the handlers described here were in one behavior, the script would look like the following.

289
USING DIRECTOR 11.5
Behaviors
Last updated 9/28/2011
--Lingo syntax
property movement
property noise
on enterFrame me
if ( sprite(me.spriteNum).locH > window("stage").rect.right ) then
sprite(me.spriteNum).locH = window("stage").rect.left
else
sprite(me.spriteNum).locH = sprite(me.spriteNum).locH + 5
end if
end
on mouseUp me
sprite(me.spriteNum).foreColor = random(255)
sound(noise)
end
on getBehaviorDescription(me)
return "This changes sprite position"
end
on getPropertyDescriptionList(me)
description = [:]
description[#movement] = \
[#default: 5, \
#format:#integer, \
#comment: "Set motion to the right:", \
#range: [#min:1, #max:10] \
]
description[#noise] = \
[#default:"", \
#format: #sound, \
#comment:"Sound cast member name" \
]
return description
end
// JavaScript syntax
function enterFrame() {
if (sprite(spriteNum).locH> _movie.stageRight) {
sprite(spriteNum).locH = _movie.stageLeft
} else {
sprite(spriteNum).locH += movement
}
}
function mouseUp() {
sprite(spriteNum).foreColor = Math.floor(Math.random())*255
sound(noise)
}

290
USING DIRECTOR 11.5
Behaviors
Last updated 9/28/2011
function getBehaviorDescription() {
return "This changes sprite color and position"
}
function getPropertyDescriptionList {
description = new Array();
description["Movement"] = new Array();
description["Movement"]["default"] = 5;
description["Movement"]["format"] = "integer";
description["Movement"]["comnt"] = "Set motion to the right";
description["Movement"]["range"] = new Array();
description["Movement"]["range"]["min"] = 1;
description["Movement"]["range"]["max"] = 10;
description["noise"] = new Array();
description["noise"]["default"] = "";
description["noise"]["format"] = "sound";
description["noise"]["comment"] = "Sound cast member name";
return description;
}
When this behavior is attached to a sprite, each time the playhead enters a frame, the sprite moves to the right by the
amount the user specifies. When the user clicks a sprite, its color changes and a specified sound plays.
Sending messages to behaviors attached to sprites
Script can run handlers in behaviors attached to specific sprites by sending messages to the behaviors attached to one
sprite, all sprites, or several specific sprites.
Sending messages to sprites
The sendSprite method sends a message to a specified sprite. If none of the sprite’s behaviors has a handler that
corresponds to the message, the message passes to the cast member script, the frame script, and then the movie script.
For more information about this method, see the Scripting Reference topics in the Director Help Panel.
For example, this handler sends the custom message bumpCounter and the argument 2 to sprite 1 when the user clicks
the mouse:
--Lingo syntax
on mouseDown me
sendSprite (1, #bumpCounter, 2)
end
// JavaScript syntax
function mouseDown() {
_movie.sendSprite(1, symbol("bumpCounter"), 2);
}
Note: The symbol (#) operator must precede the message in the sendSprite method.

291
USING DIRECTOR 11.5
Behaviors
Last updated 9/28/2011
Sending messages to all sprites
The sendAllSprites method sends a message to every sprite in the frame. If no behavior has a handler that
corresponds to the message, the message passes to the cast member script, the frame script, and then the movie script.
For more information about this method, see the Scripting Reference topics in the Director Help Panel.
For example, this handler sends the custom message bumpCounter and the argument 2 to all sprites in the frame when
the user clicks the mouse button:
--Lingo syntax
on mouseDown me
sendAllSprites (#bumpCounter, 2)
end
// JavaScript syntax
function mouseDown() {
_movie.sendAllSprites(symbol("bumpCounter"), 2);
}
Note: The symbol (#) operator must precede the message in the sendAllSprites method.
Sending messages to specific behaviors only
The call method sends an event to specific behaviors. Unlike the sendSprite method, the call method does not
pass the message to frame scripts, scripts of the cast member, or movie scripts.
Before sending a message to a specific behavior, check the scriptInstanceList sprite property to find a behavior
script reference to use with the call method.
The scriptInstanceList property provides a list of references for the behaviors attached to a sprite while a movie
is playing.
For example, the following handler displays the list of references for all behaviors attached to the same sprite as this
behavior’s handler:
--Lingo syntax
on showScriptRefs me
put sprite(me.spriteNum).scriptInstanceList
end
// JavaScript syntax
function showScriptRefs() {
trace(sprite(spriteNum).scriptInstanceList);
}
The following handler sends the message bumpCounter to the first script reference attached to sprite 1 (the getAt
method identifies the first script reference in the scriptInstanceList):

292
USING DIRECTOR 11.5
Behaviors
Last updated 9/28/2011
--Lingo syntax
on mouseDown me
xref = getAt(sprite(1).scriptInstanceList, 1)
call (#bumpCounter, xref, 2)
end
// JavaScript syntax
function mouseDown() {
xref = sprite(1).scriptInstanceList.getAt(1);
bumpCounter (xref, 2);
}
Note: The symbol (#) operator must precede the message in the call method.
Remove all instances of a sprite while the movie is playing
❖Set the sprite’s scriptInstanceList property to an empty list([]). For more information about this property, see
the Scripting Reference topics in the Director Help Panel.
Using inheritance in behaviors
Behaviors can have ancestor scripts in the same way that parent scripts do. (Ancestor scripts are additional scripts
whose handlers and properties a parent script can call on and use.)
•The ancestor’s handlers and properties are available to the behavior.
•If a behavior has the same handler or property as an ancestor script, then the script uses the property or handler in
the behavior instead of the one in the ancestor.
For more information about the concept of ancestors and inheritance, see the Scripting Reference topics in the
Director Help Panel.
To make a script an ancestor, do one of the following:
•Declare that ancestor is a property in the property statement at the beginning of the behavior’s Score script.
For example, the statement property ancestor declares that ancestor is a property.
•Include a statement that specifies which script is the ancestor. Put the statement in an on beginSprite handler in
the behavior.
For example, the following handler makes the script Common Behavior an ancestor of the behavior when Director
first enters the sprite:
--Lingo syntax
on beginSprite
sprite(me.spriteNum).ancestor = script("Common Behavior").new()
end
This handler will let the behavior also use the handler in the script Common Behavior.

293
Last updated 9/28/2011
Chapter 14: Navigation and User
Interaction
About navigation and user interaction
Adding interactivity lets you involve your audience in your Adobe® Director® movies. Using the keyboard, the mouse,
or both, your audience can download content from the Internet, jump to different parts of movies, enter information,
move objects, click buttons, and perform many other interactive operations.
Unless made to do otherwise, a movie plays through every frame in the Score from start to finish. Behaviors and Lingo
or JavaScript™ syntax script can make the movie jump to a different frame, movie, or URL when a specified event
occurs. With script, you can include simple navigation instructions as part of more complex handlers; you can also
place navigation code in movie scripts and scripts that are attached to cast members such as buttons.
You can add the following other interactive features to your movie:
•Draggable sprites give your audience the ability to move sprites anywhere on the Stage. You can also create
boundaries beyond which sprites cannot move.
•Editable fields in which your audience can enter or edit information.
•Rollovers make certain sprites change in appearance when the mouse pointer passes over them, even if the user has
not clicked the mouse. Using rollovers is an excellent way to give your audience feedback based on their actions.
•The mouse pointer (that is, the cursor) can be changed based on criteria you select. Using script, you can provide
animated cursors or specify one of the standard cursors or a bitmap cast member as a cursor image. For more
information, see the Scripting Reference topics in the Director Help Panel.
•Push buttons, radio buttons, and check boxes provide an easy way to quickly create user interfaces for forms or
applications.
Creating basic navigation controls with behaviors
Director provides behaviors that let you create basic navigation controls without knowing Lingo or JavaScript syntax.
You can use behaviors to move the playhead to a frame number or marker. You can also stop the playhead at any frame
and wait for the user to act.
The following examples explain the basic use of the Hold on Current Frame and Go Next Button behaviors. You
can create custom navigation behaviors or get them from third-party developers. For information about using
behaviors, see “Behaviors” on page 279.
1Create a movie that contains a sprite in frame 1 and at least one marker in a later frame.
2Select Window > Library Palette, and select the Navigation library.
3Drag Hold on Current Frame to frame 1 in the script channel.
Typically, you use this behavior in a frame that requires user interaction such as selecting a menu command.
4Play the movie.
294
USING DIRECTOR 11.5
Navigation and User Interaction
Last updated 9/28/2011
The playhead remains in frame 1 where you attached the behavior. The movie is still playing, but the playhead
remains on the single frame. Use the Go Next Button behavior to send the playhead to a new frame and continue
playing, as described in the following steps.
5Stop the movie.
6Drag the Go Next Button behavior from the Library palette to the sprite in frame 1.
7Rewind and play the movie again.
The playhead is again stopped in the first frame by the Hold on Current Frame behavior.
8Click the sprite to which you attached the Go Next Button behavior.
The playhead jumps to the frame that contains the next marker and continues playing.
Adding push buttons, radio buttons, and check boxes
Director provides several built-in user interface elements for quickly adding interactivity to your movies. These
elements include push buttons, radio buttons, and check boxes.
1Open the Tool palette by selecting Window > Tool Palette.
2Select the Push Button, Radio Button, or Check Box tool in the Tool palette.
A. Check Box B. Radio Button C. Push Button
3Click and drag on the Stage to create the selected button type.
4Type a label in the text area next to the button or check box.
Setting properties for push buttons, radio buttons, and check boxes
When you create a push button, radio button, or check box on the Stage, a Button cast member is added to the Cast.
You can use button cast member properties to change the name and button type of button cast members.
1Select a button cast member (a push button, radio button, or check box) and click the Member tab of the Property
inspector by using the Graphical view.
2To view or edit the cast member name, use the Name text box.
3To specify how Director removes the cast member from memory if memory is low, select an option from the
Unload menu. For more information, see “Controlling cast member unloading” on page 46.
4To change the type of button, click the Button tab and select Push Button, Check Box, or Radio Button from the
Type menu.
Jumping to locations with Lingo or JavaScript syntax
The Lingo or JavaScript syntax navigation features can make a movie jump to other frames, to other movies, or to
Internet movies and web pages. To make a movie appear to pause by looping in one frame or a group of frames, use
script.
AB
C

295
USING DIRECTOR 11.5
Navigation and User Interaction
Last updated 9/28/2011
For more information about specifying the locations of frames, markers, and movies in Lingo and JavaScript syntax,
see the Scripting Reference topics in the Director Help Panel.
Jumping to a different frame
Lingo or JavaScript syntax lets you jump to a different frame in the current movie or in another movie.
•To jump to a specific frame in the current movie, use the go method, and pass it a frame name or number as a
parameter.
For example, the statement go("Begin Over") jumps to the frame labeled Begin Over.
•To jump to the beginning of a different movie or to a specific frame in a different movie, use the go method, and
pass it the name of the movie to jump to and the frame name or number within that movie to jump to.
For example, the statement go("Rosebud", "Citizen_Kane") jumps to a frame labeled Rosebud in the movie
Citizen_Kane.dir.
For more information, see the Scripting Reference topics in the Director Help Panel.
Jumping to a URL
Lingo or JavaScript syntax lets you jump to a URL that represents an Internet movie or a web page.
•To jump to an Internet movie, use the gotoNetMovie method.
For example, the statement gotoNetMovie "http://www.yourserver.com/movies/movie1.dcr" retrieves and
plays the movie named movie1.dcr. For more information about this method, see the Scripting Reference topics in
the Director Help Panel.
•To jump to a web page, use the gotoNetPage method.
For example, the statement gotoNetPage "http://www.yourserver.com/movies/intro.html" displays the
web page named intro.html in a browser window. For more information about this method, see the Scripting
Reference topics in the Director Help Panel.
Looping in a group of frames
Looping within frames lets you create animation that recycles or makes a movie appear to pause. Such looping is useful
for allowing a network operation to complete before the movie proceeds. Looping a movie by jumping from the
current frame back to the first frame in the sequence can create a recycling animation effect.
•To loop within one segment of the Score, use the go loop statement to return to the first marker to the left of the
frame that contains the go loop statement. If there is no previous marker, the playhead jumps to frame 1.
•To pause a movie in one frame but keep it playing so the movie can react to events, use the statement go to the
frame to loop in the current frame.
•To resume playing a movie that is looping in one frame, use the go to the frame + 1 statement.
Jumping away and returning to the original location
You might want a movie to jump to a different frame or a separate movie and then return to the original frame. For
example, at a website that describes the weather, you could jump to a movie segment that explains a weather term and
then return to the original location.

296
USING DIRECTOR 11.5
Navigation and User Interaction
Last updated 9/28/2011
Note: The play - play done functionality is not supported, and therefore cannot be implemented using the Object Model
or the JavaScript syntax. A better way to handle this functionality is to use _movie.go() and set a global variable that
stores a movie and frame number. To return, use _movie.go() and the frameNum and movie stored in the global variable.
•Use the play and play done methods.
The play method branches a movie to another frame, another movie, or a specified frame in another movie. The
play done method remembers the original frame and returns to it without requiring that you specify where to
return.
Use the play and play done methods in the following situations:
•When the movie you want to play does not have instructions about where to return.
•When you want to play several movies sequentially from a single script. When one movie finishes, the movie
returns to the script that issued the play method.
•When you want to put one sequence inside another sequence and easily return to where you were in the outer
sequence.
•When you want to jump to one loop from several different locations.
For more information about these methods, see the Scripting Reference topics in the Director Help Panel.
Detecting mouse clicks with Lingo or JavaScript syntax
Users can click the mouse button in several ways, each of which can be detected by script. Use Lingo or JavaScript
syntax to detect what the user does in each of the following ways. For more information, see the Scripting Reference
topics in the Director Help Panel.
•To determine the last place the mouse was clicked, use the clickLoc() method.
•To determine the last active sprite (a sprite with a script attached) that the user clicked, use the clickOn method.
•To determine whether the last two clicks were a double-click, use the doubleClick method.
•To determine the time since the mouse was last clicked, use the lastClick() method.
•To determine whether the mouse button is pressed, check the mouseDown property.
•To determine whether the mouse button is released, check the mouseUp property.
•To determine whether the user presses the right mouse button (Windows®) or Control-click (Mac®), check the
rightMouseDown property.
•To determine whether the user releases the right mouse button (Windows) or Control-click (Mac), check the
rightMouseUp property.
For example, this handler checks whether the user double-clicked the mouse button and, if so, runs the openWindow
handler:
on mouseDown
if the doubleClick = TRUE then openWindow
end
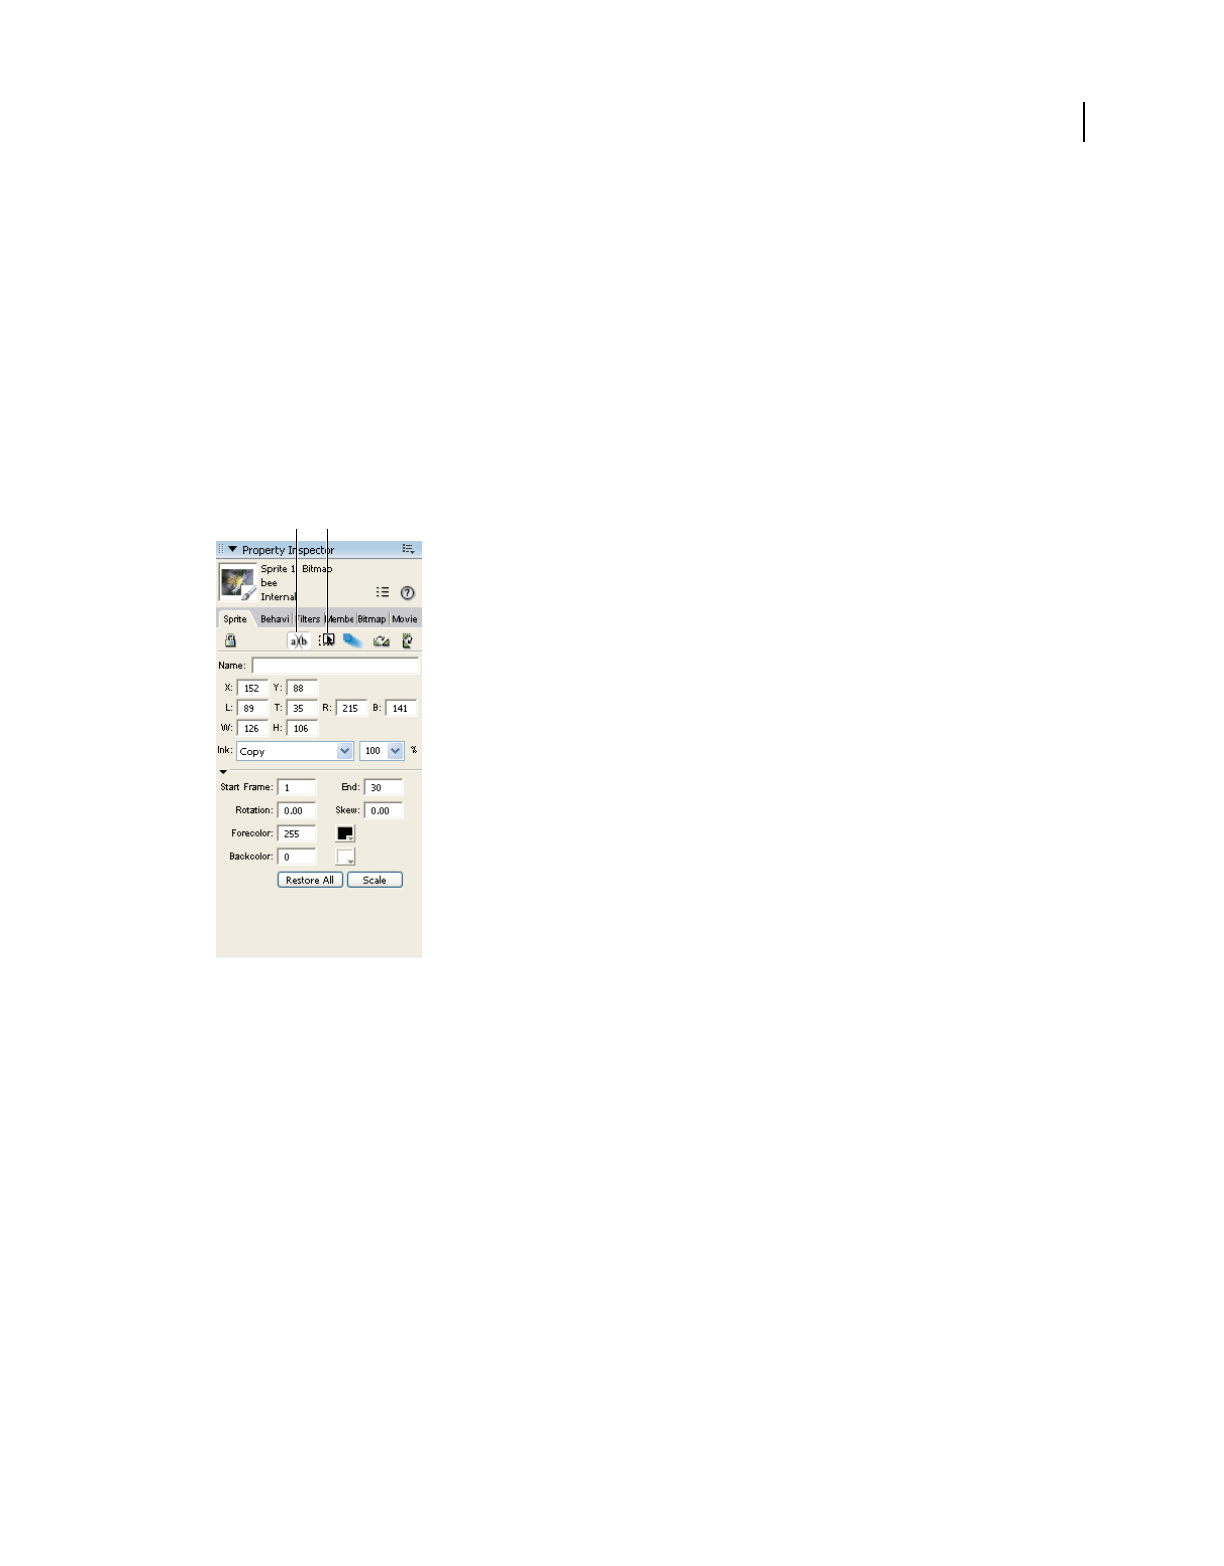
297
USING DIRECTOR 11.5
Navigation and User Interaction
Last updated 9/28/2011
Making sprites editable and draggable
Using the Property inspector, you can make a sprite editable, draggable, or both while your movie is running. For more
information, see “Displaying and editing sprite properties in the Property inspector” on page 68.
Make a sprite draggable on the Stage
❖Click the Moveable button in the Property inspector.
Make a text sprite editable
❖Click the Editable button in the Property inspector.
Editable button in the Property inspector
A. Editable button B. Moveable button
Making sprites editable or moveable with Lingo or
JavaScript syntax
Lingo or JavaScript syntax can make sprites editable or moveable regardless of the settings in the Score. You can also
use script to constrain a moveable sprite to a certain region. For example, you can create a draggable slider with an
indicator that moves across a gauge. For more information, see the Scripting Reference topics in the Director Help
Panel.
•To make a text sprite editable with script, set the text sprite’s editable property to TRUE. For best results, set this
property in a script that is attached to the sprite or the frame where the sprite is located.
•To make a sprite moveable with script, set the moveableSprite spriteproperty to TRUE. For best results, set this
property in a script that is attached to the sprite or the frame where the sprite is located.
•To restrict the registration point of a moveable sprite so it stays within the bounding rectangle of a second sprite,
use the constraint sprite property.
AB

298
USING DIRECTOR 11.5
Navigation and User Interaction
Last updated 9/28/2011
•To constrain a sprite along a horizontal or vertical path, use the constrainH() or constrainV() method.
Checking which text is under the pointer with Lingo or
JavaScript syntax
Lingo or JavaScript syntax can detect which text component in a text or field cast member is currently under the mouse
pointer.
Use script that applies to text and field cast members in the following ways:
•To detect which character in a text or field cast member is under the pointer, use the pointToChar() method.
•To detect which item in a text or field cast member is under the pointer, use the pointToItem() method.
•To detect which word in a text or field cast member is under the pointer, use the pointToWord() method.
•To detect which paragraph in a text or field cast member is under the pointer, use the pointToParagraph()
method.
Use script that applies only to text cast members: To detect whether a specific point is in a hypertext link within a text
cast member and is under the pointer, use the pointInHyperlink() method.
Use script that applies only to the following field cast members:
•To detect which line in a field is under the pointer, use the mouseLine property.
•To detect which word in a field is under the pointer, use the mouseWord property.
For more information, see the Scripting Reference topics in the Director Help Panel.
Responding to rollovers with Lingo or JavaScript syntax
You often want some action to occur when the user rolls the mouse pointer over a sprite or a particular place on the
Stage. You can use Lingo or JavaScript syntax to specify how the movie responds to such rollovers.
Director provides several event handlers that run when the pointer rolls over a sprite. Messages for each of these events
are sent to the sprite script, the script of the cast member, the frame script, and then the movie script. For more
information, see the Scripting Reference topics in the Director Help Panel.
•To set up script that runs when the mouse pointer enters a sprite’s bounding rectangle, place the script in an on
mouseEnter event handler.
•To set up script that runs when the mouse pointer leaves a sprite’s bounding rectangle, place the script in an on
mouseLeave event handler.
•To set up script that runs when the user clicks a sprite, rolls the pointer off the sprite, and then releases the mouse
button, place the script in an on mouseUpOutside event handler.
•To set up script that runs when the mouse pointer is within a sprite’s bounding rectangle when the playhead enters
the frame that contains the sprite, place the script in an on mouseWithin event handler.
The mouseWithin event can occur repeatedly as long as the mouse pointer remains inside the sprite.
•To determine whether the cursor is over a specific sprite, use the rollOver() method.

299
USING DIRECTOR 11.5
Navigation and User Interaction
Last updated 9/28/2011
Finding mouse pointer locations with Lingo or
JavaScript syntax
When working in Director, you sometimes need to determine where the mouse pointer is on the Stage.
Use the mouseH and mouseV properties. For more information about these properties, see the Scripting Reference
topics in the Director Help Panel.
The mouseV property returns the distance, in pixels, between the mouse pointer and the upper-left corner of the Stage.
The mouseH property returns the distance, in pixels, between the mouse pointer and the upper-left corner of the Stage.
The statements put the mouseH and put the mouseV display the mouse pointer’s location in the Message window.
For example, the following handler directs the Message window to display the distance (in pixels) between the pointer
and the upper-left corner of the Stage:
on exitFrame
put(_mouse.mouseH)
put(_mouse.mouseV)
_movie.go(_movie.frame)
end
Checking keys with Lingo or JavaScript syntax
Lingo or JavaScript syntax can detect the last key that the user pressed. For more information, see the Scripting
Reference topics in the Director Help Panel.
•To obtain the ANSI value of the last key that was pressed, use the key property.
•To obtain the keyboard’s numerical (or ASCII) value for the last key pressed, use the keyCode property.
A common place for using key and keyCode is in an on keyDown handler, which instructs the script to check the
value of key only when a key is actually pressed. For example, the following handler in a frame script sends the
playhead to the next marker whenever the user presses Enter (Windows) or Return (Mac):
on keyDown
if the key = RETURN then go to marker (1)
end
Equivalent cross-platform keys
Keys on Windows and Mac computers don’t always directly correspond. This discrepancy can create confusion
because script often uses the same term to refer to corresponding keys on Windows and Mac computers, even though
the key’s name differs on the two platforms.
The following table lists script elements that refer to specific keys and the keys they represent on each platform.
300
USING DIRECTOR 11.5
Navigation and User Interaction
Last updated 9/28/2011
Identifying keys on different keyboards
Characters can vary on different keyboards. Avoid possible confusion by identifying a character by its ASCII value. For
more information, see the Scripting Reference topics in the Director Help Panel.
•To obtain a character’s ASCII value, use the charToNum() method.
For example, the following statement finds the ASCII value for the letter A and displays it in the Message window:
put charToNum("A")
-- 65
•To find out which character corresponds to an ASCII value, use the numToChar() method.
For example, the following statement finds the character that corresponds to the ASCII value 65. The result is the
letter A:
put numToChar(65)
-- A
About animated color cursors
Director supports animated cursors.You can use any 8-bit bitmap source in your Director cast as an image in the
cursor animation, automatically scale images, and generate masks for 16 x16 pixel and 32 x 32 pixel cursors. (Mac
computers don’t support 32 x 32 pixel cursors.)
An animated cursor consists of a series of bitmap cast members. Each bitmap cast member is a frame of the cursor.
You can control the rate at which Director plays the frames of an animated cursor. Using the Cursor Properties Editor,
designate one or more bitmap cast members as frames of a single cursor cast member.
Xtra extensions that support animated cursors
The Director installation program places two animated color cursor files in the Media Support folder within the
Director application’s Xtras folder. The specific files depend on the platform you are using.
Lingo term Windows key Mac key
RETURN Enter Return
commandDown Control Command
optionDown Alt Option
controlDown Control Control
ENTER Enter key on the numeric keypad (during authoring,
pressing Enter starts playing the movie)
Enter key on the numeric keypad (during authoring,
pressing Enter starts playing the movie)
BACKSPACE Backspace Delete

301
USING DIRECTOR 11.5
Navigation and User Interaction
Last updated 9/28/2011
Requirements for animated color cursors
All cast members used for an animated color cursor must meet the following criteria:
•They must be bitmap cast members.
•They must have a color depth of 8 bits (256 colors).
•They must use only the first eight or the last eight colors that are in the standard System - Win palette. These colors
provide the most predictable results when playing back across platforms. Other colors might not appear correctly.
The cast members don’t need to be in sequence in the cast, and they don’t need to be in the same cast.
A cursor’s maximum size depends on the computer:
•With Microsoft® Windows® 98, Windows 2000, and Windows XP, you can create cursors of either 16 x 16 pixels or
32 x 32 pixels (almost always 32 x 32 pixels, but some video cards might support only 16 x 16 pixels).
•With Mac OS® X, you can create cursors of 16 x 16 pixels.
When you create cursors in the Cursor Properties Editor, Director dims any size option that is not available on your
computer.
The 16 x 16 and 32 x 32 pixel sizes are the maximum sizes at which Director can display a cursor on the screen. The
actual cast members you specify for the cursor can be larger than the maximum, and Director scales the cast
members to the appropriate size, maintaining the aspect ratio as it scales them. If you specify a cast member smaller
than the maximum size, Director displays the cast member at its original size, without scaling. For example, if you
select a maximum size of 16 x 16 pixels and specify a cursor that is 12 x 14 pixels, Director displays the cursor at 12
x 14 pixels.
Creating an animated color cursor cast member
Before creating an animated color cursor cast member, make sure that the cast members you want to use in the cursor
are stored in a cast that is linked to the movie. For more information, see “Managing external casts” on page 57.
1Select Insert > Media Element > Cursor to open the Cursor Properties Editor.
2From the Cast menu, select the cast that contains the cast member you want to add as a frame in your cursor.
The cast members used for a single cursor can be stored in different casts.
3Use the < and > buttons to find the cast member you want.
As you click the buttons, the preview shows a thumbnail of the selected cast member. If you don’t see the cast
member you want, the cast member probably isn’t a bitmap or has a color depth greater than 8 bits (256 colors).
The Cursor Properties Editor shows only bitmaps that can be used in an animated color cursor.
You can also enter a cast member number in the Member box and press Tab. Then Director selects the cast member
that has that number or the cast member with the number closest to it.
4Select the cast member you want, and click Add.
Windows PowerPC Purpose
Cursor Options.x32 Cursor Options This file supports the creation of cursors while you author movies in Director. Do not
distribute this file with projectors; it is not licensed for redistribution.
Cursor Asset.x32 Cursor Asset Distribute this file with any movies or projectors that you create by using the
animated color cursors.

302
USING DIRECTOR 11.5
Navigation and User Interaction
Last updated 9/28/2011
The Frame X Of Y text box shows where the cast member falls within an animated series of cursor frames.
5Repeat steps 2 through 4 until you have added all the cast members for the cursor.
In the Cursor Frames area, use the < and > buttons to review the order of the cursor frames. Click the Remove
button to delete the currently selected frame from the cursor. Doing this deletes the cast member only from the
cursor animation, not from the cast.
6In the Interval text box, specify the number of milliseconds that elapse between each frame of the cursor animation.
This interval affects all frames of the cursor and cannot vary for different frames. The cursor frame rate is
independent of the frame rate that is set for the movie by using the tempo channel or the puppetTempo method.
Note: By inserting the same bitmap in multiple frames of the cursor, you can create the illusion of variable-rate cursor
animation.
7In the Hotspot Position text boxes, specify the location of the mouse pointer’s active point.
Director uses this point to track the mouse pointer’s position on the screen. For example, Director uses this point’s
location when it returns values for the mouseH and mouseV properties. The hotspot also determines the point where
a rollover occurs.
The first text box specifies the horizontal (x) location, and the second text box specifies the vertical (y) location. The
upper-left pixel is location 0,0. In a 16 x 16 pixel cursor, the lower-right pixel is location 15,15. You can’t enter a
point that is beyond the bounds of the cursor.
8Click one of the Size options to specify the maximum size of the cursor.
If a Size option is dimmed, your computer does not allow you to create cursors of that size.
9Select the Automask option if you want the white pixels of the cursor frames to be transparent.
Note: The Automask option makes all white pixels transparent. If you want some white pixels to be opaque, you can’t
use white for those pixels, but you can achieve the same effect by using the lightest shade of gray available in the system
palette.
10 Click OK to close the Cursor Properties Editor.
After you create a cursor cast member, use script to switch to the cursor in a movie. See “Using an animated color
cursor in a movie” on page 302.
Using an animated color cursor in a movie
After you add an animated color cursor to the cast, use script to switch to the animated cursor as you would any other
cursor. You can set up an animated cursor as the movie’s cursor or a sprite’s cursor.
To switch to an animated color cursor, use the following method:
cursor (member whichCursorCastMember)
For whichCursorCastMember, substitute a cast member name (surrounded by quotation marks) or a cast member
number. For example, the following sprite script changes the cursor to the cast member named myCursor when the
cursor is over the sprite:
on mouseEnter
cursor (member "myCursor")
end

303
USING DIRECTOR 11.5
Navigation and User Interaction
Last updated 9/28/2011
To reset the cursor to the regular arrow cursor, specify a cursor type of -1 and do not use parentheses. The following
sample sprite script resets the cursor:
on mouseLeave
cursor -1
end
Note: Do not place an animated color cursor cast member on the Stage.
For more information, see the Scripting Reference topics in the Director Help Panel.

304
Last updated 9/28/2011
Chapter 15: 3D Basics
Introduction
Adobe® Director® lets you bring robust, high-performance 3D graphics to the web. With Director, you can develop a
wide spectrum of 3D productions, ranging from simple text handling to interactive product demonstrations to
complete immersive game environments. Using Shockwave® Player, users can view your work on the web with
Microsoft® Internet Explorer®, or other browsers that support web packaging.
Director lets you detect the capabilities of the user’s system and adjust playback demands accordingly. A powerful
computer with 3D hardware acceleration brings the best results, but users can successfully use Director movies with
3D on most Mac® or Windows® hardware platforms. The faster the computer’s graphics processing, the better the
results. The ability to adjust for client-side processing power makes Director ideal for web delivery.
What you need to know
(You can perform many basic 3D operations by using the built-in 3D behaviors in Director. (For more information,
see “Using 3D behaviors” on page 326.) Most complex 3D operations, however, are performed by using either Lingo
or JavaScript™ syntax, the built-in scripting languages of Director. The 3D documentation assumes that you
understand either Lingo or JavaScript syntax. If you have not yet learned Lingo or JavaScript syntax, see the Scripting
Reference topics in the Director Help Panel, which list all of the Lingo and JavaScript syntax methods and properties
that are available in Director. The Scripting Reference topics in the Director Help Panel describe each expression,
illustrate its syntax, and provide examples.
Because 3D is primarily controlled by behaviors and scripts, the 3D methods and properties are described here in
detail. You will find them grouped by category in “The 3D Cast Member, 3D Text, and 3D Behaviors” on page 315,
“Working with Models and Model Resources” on page 331, and “Controlling the 3D World” on page 380.
About 3D in Director
The following are the main components that are common between this and earlier versions of Director:
•The Stage is the authoring area where the Director movie is assembled.
•The Score displays the arrangement of channels that organize, display, and control the movie over time.
Because 3D is primarily script-controlled, it involves much less direct manipulation in the Score than other
Director features.
•The Cast window is where all cast members, including the 3D cast members, are stored.
Cast members are the media in your movies, such as sounds, text, graphics, and 3D scenes.
•Sprites are instances of cast members that appear on the Stage with individual properties and attributes.
A sprite of a 3D cast member displays a particular camera’s view into the 3D world. The 3D cast member contains
models, which are individual objects inside the 3D cast member. For more information about models, see “The 3D
world” on page 312. Also see “3D cast members” on page 315 and “Working with Models and Model Resources”
on page 331.
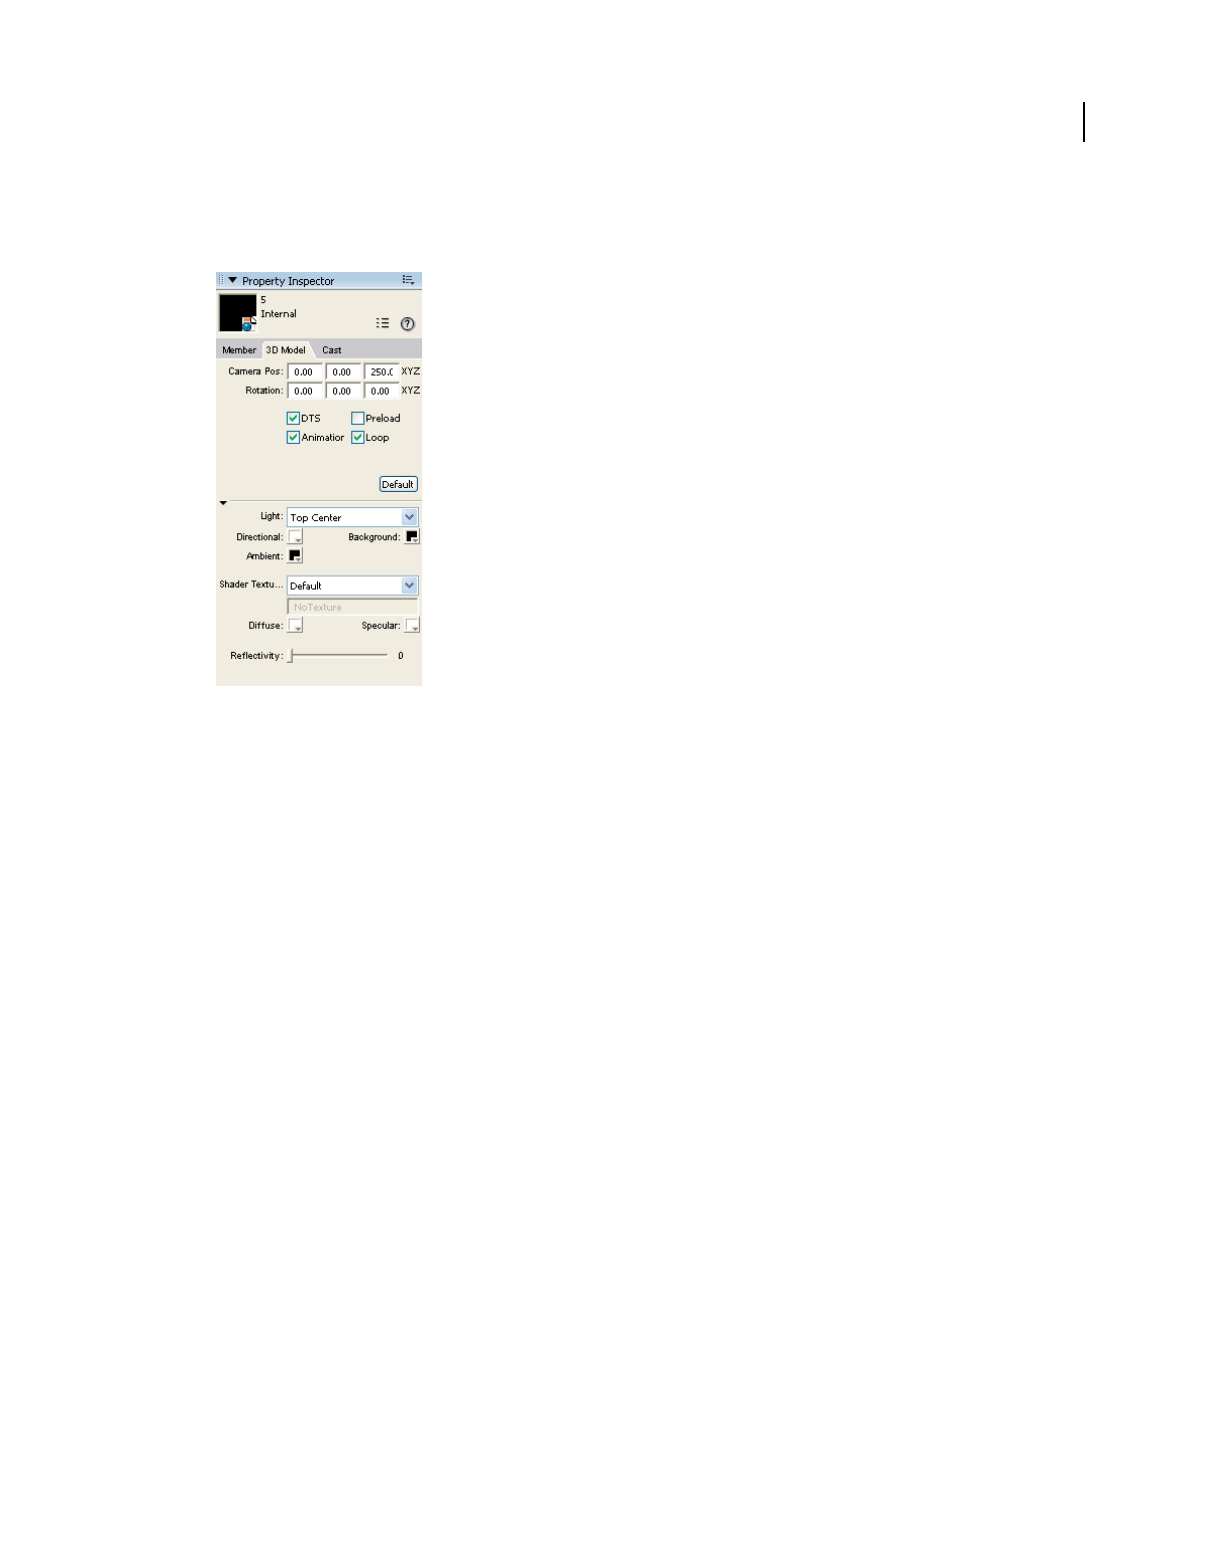
305
USING DIRECTOR 11.5
3D Basics
Last updated 9/28/2011
•The Property inspector is a tabbed panel that lets you view and control properties of multiple objects in your movie.
The Property inspector includes a 3D Model tab. See “Using the Property inspector for 3D” on page 307.
Property inspector - 3D Model tab
•The Behavior library lets you select the behaviors you want to use.
•The Behavior inspector lets you create and modify behaviors.
For an introduction to the Behavior inspector, see “3D behaviors” on page 311. For a full discussion, see “Using 3D
behaviors” on page 326.
•Director provides easy but powerful 3D text handling.
For more information, see “Creating 3D text” on page 322.
•Lingo and JavaScript syntax are the Director scripting languages. They can be used to create movies that are more
complex and interactive.
For detailed Lingo and JavaScript syntax information, see “3D cast members” on page 315, “Working with Models
and Model Resources” on page 331, “About lights and cameras” on page 369, and “Controlling the 3D World” on
page 380.
The 3D methods and properties are covered according to function in each of these sources. They are also presented
in dictionary form with syntax guidelines, definitions, and examples, in the Scripting Reference topics in the
Director Help Panel.
The 3D Xtra extension
The 3D Xtra extension lets you include 3D models in a Director movie. You can import 3D models or worlds created
with a 3D modeling program and use Director to deliver them on the web. You can also combine the abilities of
Director and your 3D modeling software by building a 3D world in your modeling program and adding to it or
modifying it in Director.
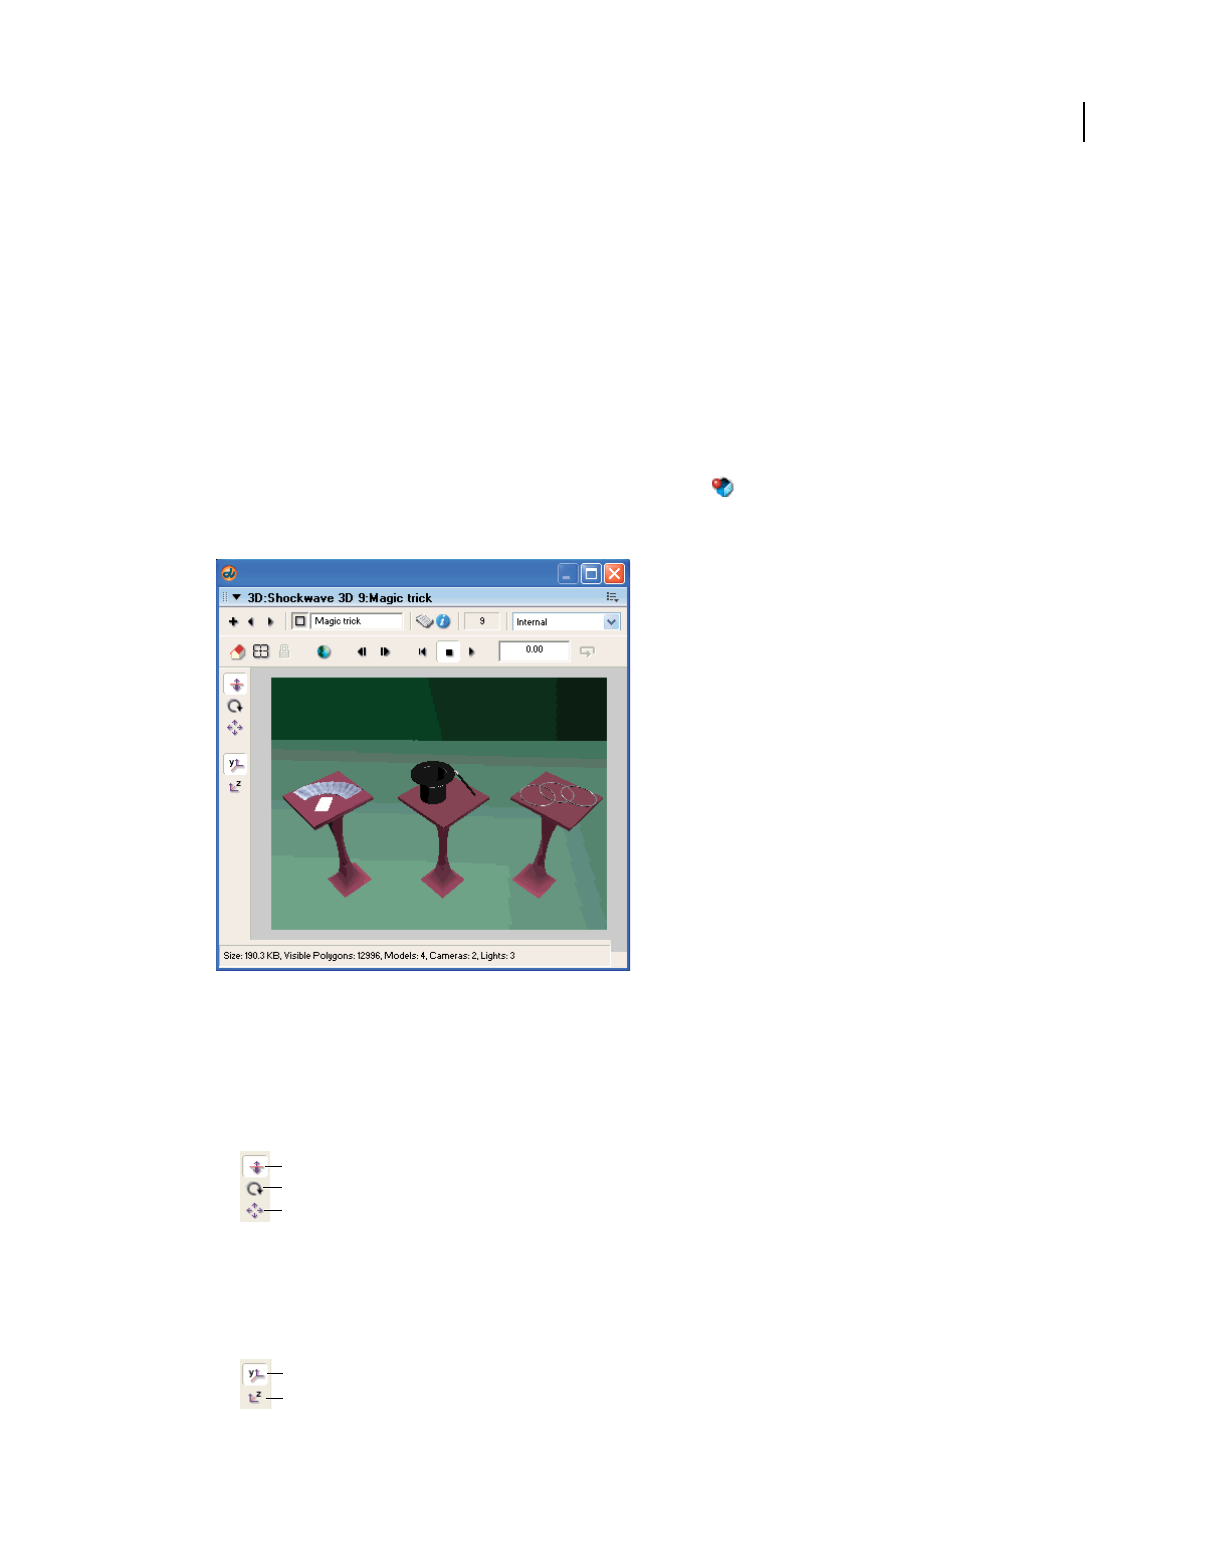
306
USING DIRECTOR 11.5
3D Basics
Last updated 9/28/2011
To use 3D images and text created in third-party rendering software, you must convert the file to the W3D (Web 3D)
format, which Director supports. Typically, each rendering application requires its own specific file converter to create
W3D files. For more information about creating W3D files, see the documentation for your 3D modeling software.
Using the Shockwave 3D window
The Shockwave 3D window provides an easy way for you to inspect a 3D cast member. Some properties of 3D cast
members can also be edited in this window.
1Select a 3D cast member in the cast.
2Click the Shockwave 3D Window button on the Director toolbar.
The Shockwave 3D window appears, displaying the 3D cast member currently selected in the cast.
Shockwave 3D window
3Use the following controls:
•The camera buttons along the side (Dolly, Rotate, and Pan) let you change your viewing angle by zooming in
and out, moving around the world origin, and moving in a straight line horizontally or vertically, respectively.
Hold the Shift key while using these tools to make the camera move faster.
Camera buttons
A. Dolly Camera B. Rotate Camera C. Pan Camera
•The two buttons below the camera buttons let you control whether the y-axis or the z-axis is the up axis when
using the Camera Rotate tool.
A. Camera Y Up B. Camera Z Up
A
B
C
A
B
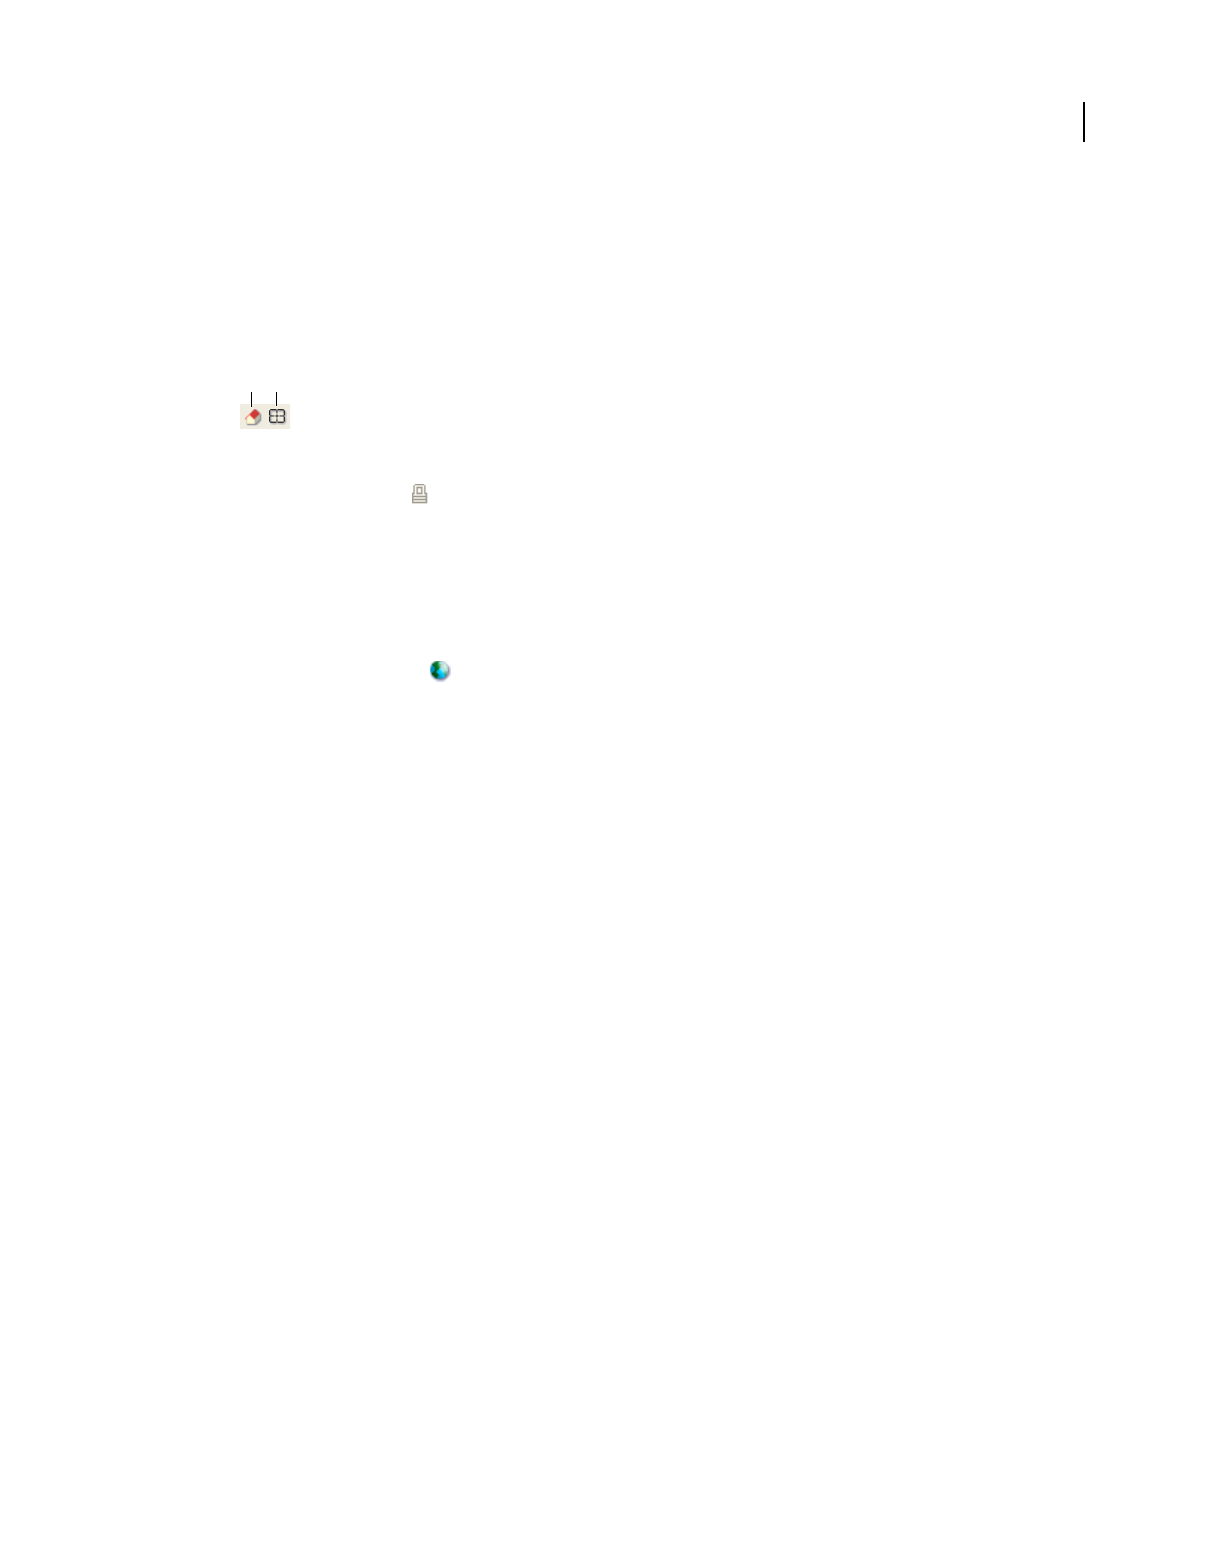
307
USING DIRECTOR 11.5
3D Basics
Last updated 9/28/2011
•The playback buttons let you either play the cast member’s animation at normal speed or step through the
animation, forward or backward, by using mouse clicks to control the the movement.
•The Loop button lets you play animations within the 3D cast member repeatedly.
•The Set Camera Transform and Reset Camera Transform buttons let you set and undo the changes you make
to camera angles for the member’s default camera. Set Camera Transform remembers the current camera
position. Reset Camera Transform restores the camera to the previously remembered position.
A. Reset Camera Transform B. Set Camera Transform
•The Root Lock button fixes an animation in place, so that it doesn’t change its position on the Stage while
playing.
•The field at the top of the Shockwave 3D window shows the name of the cast member on display. The square
button to the left of the text box lets you drag that cast member to the Stage or the Score.
•The New Cast Member, Previous Cast Member, and Next Cast Member buttons at the upper left of the
Shockwave 3D window let you add or display 3D cast members.
•The Reset World button restores the 3D scene to its original state, with all models, cameras, and so on
assuming their original positions.
Using the Property inspector for 3D
With the Property inspector, you can modify the 3D cast member without using script. The 3D Model tab of the
Property inspector offers a simple way to view and control numerous aspects of the 3D world.
1Open the Cast window if it isn’t already open.
2Click the 3D cast member you want to select.
3Click the Property inspector button in the toolbar.
4Click the 3D Model tab in the Property inspector.
The Property inspector should appear in Graphical view. If the Property inspector is in List view, click the List View
Mode icon to toggle the view to Graphical.
AB
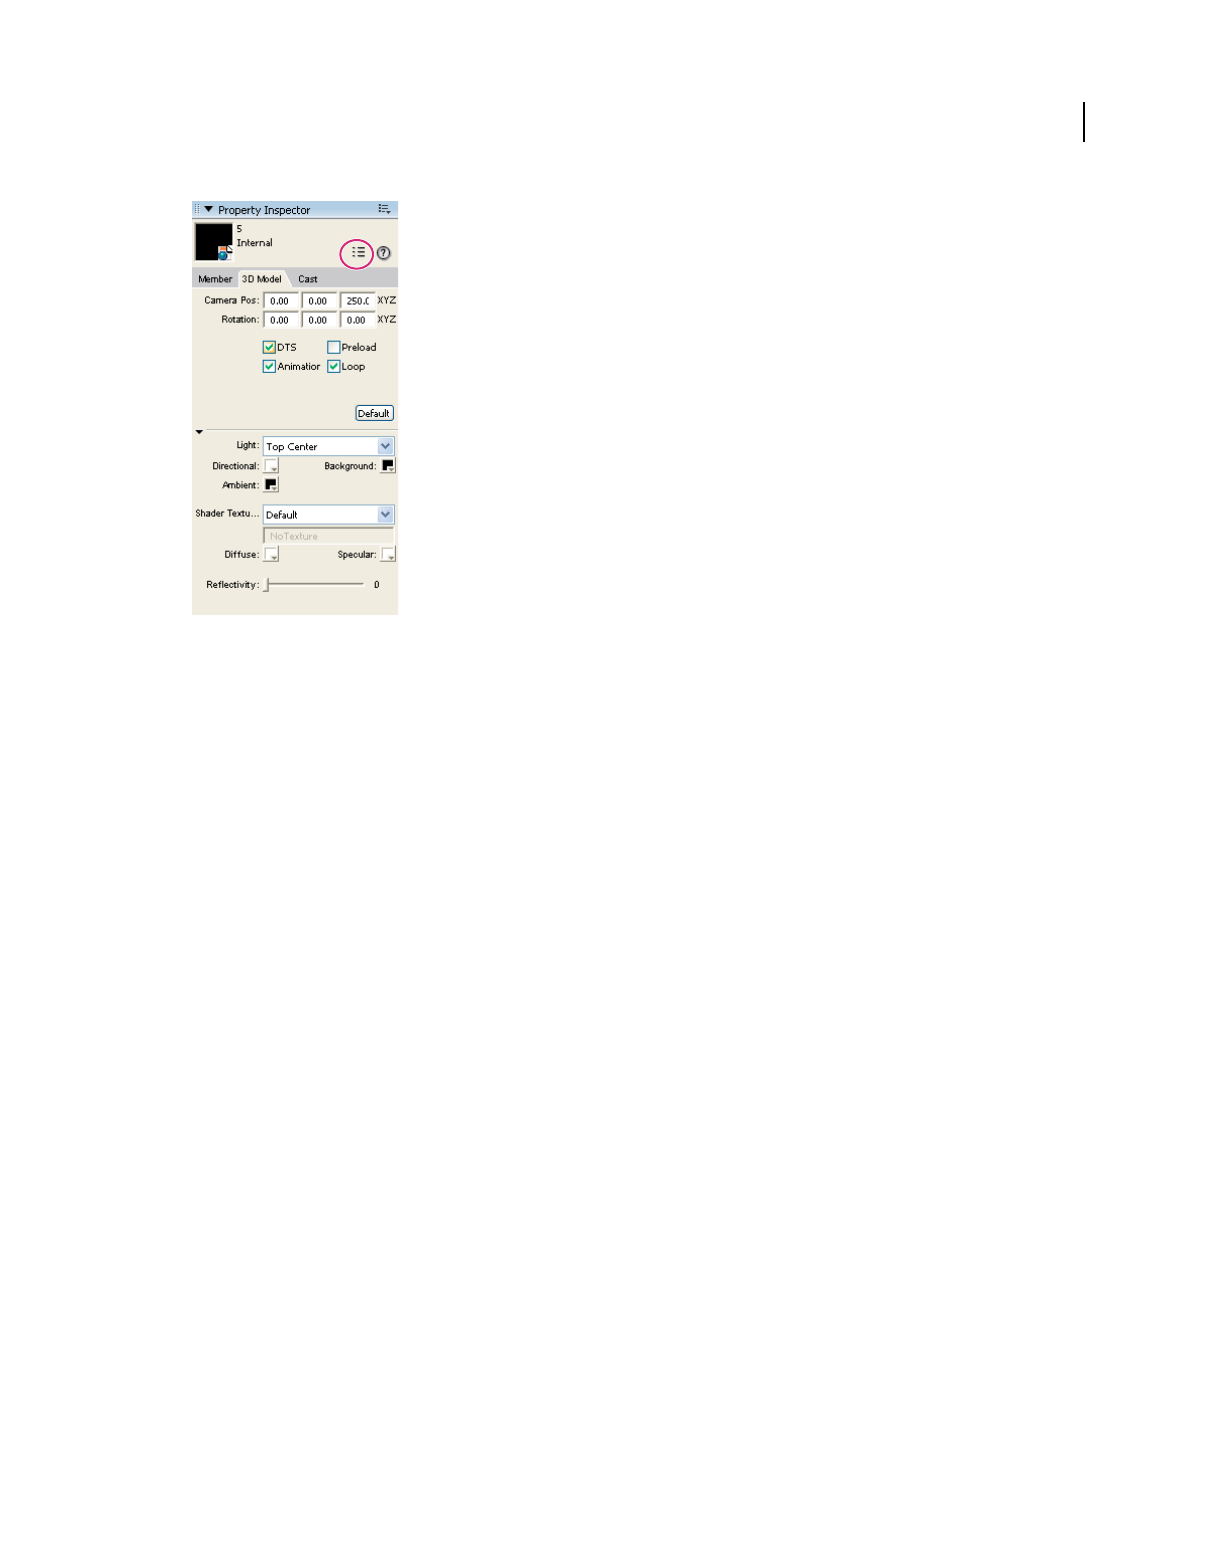
308
USING DIRECTOR 11.5
3D Basics
Last updated 9/28/2011
List View Mode icon
The Property inspector’s 3D Model tab provides the following options:
•The text boxes at the top of the tab show the initial position and orientation of the default camera. The default (0,
0, 0) represents a vantage point looking up the z-axis through the middle of the screen. The values you enter in these
text boxes replace the displayed values and move the camera.
•The Direct To Stage (DTS) option controls whether rendering occurs directly on the Stage (the default) or in the
Director offscreen buffer. The offscreen graphics buffer is where Director calculates which sprites are partly hidden
behind other sprites. When Direct To Stage is on, Director bypasses its offscreen buffer and saves time, increasing
playback speed. However, when Direct To Stage is on, you can’t use the inker modifier on 3D models or place other
sprites on top of the 3D sprite.
•The Preload option controls how media that’s being downloaded to the user’s computer is displayed. The media
can be held back from display until it has been completely streamed into memory, or it can be displayed
progressively on the Stage as data becomes available.
•The Play Animation option controls whether any existing animation, either bones or keyframe, is played or
ignored.
•The Loop option controls whether the animation loops continuously or plays once and stops.
•The Director Light area lets you select one of ten lighting positions to apply to a single directional light. You can
also adjust the color for the ambient light. (Directional light comes from a particular, recognizable direction;
ambient light is diffuse light that illuminates the entire scene.) Finally, you can adjust the background color of the
scene.
•The Shader Texture area lets you work with shaders and textures. A shader determines the method used to render
the surface of a mode. A texture is an image that is applied to the shader and drawn on the surface of the model. All
new models use the default shader until you apply a different shader. Using the Property inspector, you can assign
a texture to the default shader. You can also control the default shader’s specular (highlight) color, its diffuse
(overall) color, and its reflectivity. For more information, see “The 3D world” on page 312 and “Working with
Models and Model Resources” on page 331.

309
USING DIRECTOR 11.5
3D Basics
Last updated 9/28/2011
Using rendering methods
The rendering method refers to the specific way Director displays 3D images on the Stage. The methods available
depend on the type of hardware you have. The rendering methods include the following:
•#auto: Director selects the best method based on the client computer’s specific hardware and drivers.
•#openGL: OpenGL drivers for a 3D hardware accelerator are used. OpenGL is available for the Mac and Windows
platforms.
•#directX9 specifies the DirectX 9 drivers for hardware acceleration that work only with Windows platforms. #auto
sets the renderer to DirectX 9.
•#directX7_0
: DirectX7_0 drivers for a 3D hardware accelerator are used. This option is available for Windows only.
•#directX5_2
: DirectX5_2 drivers for a 3D hardware accelerator are used. This option is available for Windows only.
•#software: The Director built-in software renderer is used. This option is available on the Mac and Windows
platforms.
The rendering method can have a dramatic effect on performance. If your hardware permits you to select different
methods, use the following procedure.
1Select the Stage.
2Open the Property inspector.
3Click the Movie tab.
4Select a rendering method from the menu.
Property inspector - Preferred 3D Renderer
If you don’t select a rendering method, Director defaults to #auto.
The name of the active 3D renderer property appears below the menu. The value of this property indicates which
rendering method is currently being used. This is especially useful when you want to know which renderer is active
while you have #auto selected.

310
USING DIRECTOR 11.5
3D Basics
Last updated 9/28/2011
Using 3D anti-aliasing
Director gives you the ability to use anti-aliasing with 3D cast members in your movies. Anti-aliasing improves the
appearance of graphics by smoothing the lines between shapes or areas of different color so that the lines do not appear
jagged. When you use anti-aliasing with a 3D sprite, the edges of each model in the sprite appear smoother against each
other and against the background. Anti-aliasing of 3D sprites is particularly well-suited for merchandise demos and
other e-commerce applications because its image quality is high and it can be turned on and off, as needed, in real time.
Effects of anti-aliasing
An anti-aliased 3D sprite uses more processor power and memory than one that is not anti-aliased, resulting in lower
frame rates. Because of this, it is recommended that you turn off anti-aliasing for 3D sprites while any part of the sprite
is being moved or animated and turn it back on when the animation is complete. Movies that are designed to animate
quickly and games might work better with anti-aliasing turned off. During authoring, movies that use anti-aliasing
continue to draw heavily on the processor, even after the movie is stopped. You might want to turn off anti-aliasing
each time you stop your movie to ensure that the performance of Director is not affected.
Determining whether anti-aliasing is supported
Not all 3D renderers can perform the additional calculations that anti-aliasing requires. If you have a 3D sprite that
you want to anti-alias, check first that the 3D renderer supports anti-aliasing.The renderers that currently support
anti-aliasing include the Director software renderer, and DirectX® 5.2, DirectX 7.0, and DirectX 9.
If the 3D sprite is in channel 1 of the Score, test the antiAliasingSupported property of sprite 1, as shown in the
following example:
if sprite(1).antiAliasingSupported = TRUE then
Turning on anti-aliasing
If the antiAliasingSupported property is TRUE, turn on anti-aliasing for the 3D sprite by setting the sprite’s
antiAliasingEnabled property to TRUE.
sprite(1).antiAliasingEnabled = TRUE
For example, if you have a 3D sprite in channel 5 and you want to turn on anti-aliasing for the sprite when it first
appears on the Stage, write a beginSprite script and attach it to the sprite. Your script should contain code as shown:
-- Lingo syntax
on beginSprite
-- check whether anti-aliasing is supported by the current 3D renderer
if sprite(5).antiAliasingSupported = TRUE then
-- if it is, turn on anti-aliasing for the sprite
sprite(5).antiAliasingEnabled = TRUE
end if
end beginSprite
// JavaScript syntax
function beginSprite() {
// check whether anti-aliasing is supported by the current 3D renderer
if (sprite(5).antiAliasingSupported) {
// if it is, turn on anti-aliasing for the sprite
sprite(5).antiAliasingEnabled = true;
}
}

311
USING DIRECTOR 11.5
3D Basics
Last updated 9/28/2011
Turning off anti-aliasing
If you plan to animate any part of a 3D sprite, you might want to turn anti-aliasing off temporarily to improve the
animation performance. To do this, set the antiAliasingEnabled property for the sprite to FALSE. Set it back to TRUE
when the animation is complete.
It is a good idea to turn anti-aliasing on and off on separate handlers. For example, you might want to animate a model,
camera, or light while the mouse button is held down and stop the animation when the mouse button is released. In
that case, you would turn off anti-aliasing in a mouseDown handler and turn it back on in a mouseUp handler, as shown
in the following example:
-- Lingo syntax
on mouseDown
-- user interaction/animation is about to start so turn
-- anti-aliasing OFF
sprite(1).antiAliasingEnabled = FALSE
-- start animation
end
on mouseUp
-- stop animation
-- the interaction/animation has ended so turn
-- anti-aliasing ON
sprite(1).antiAliasingEnabled = TRUE
end
// JavaScript syntax
function mouseDown() {
// user interaction/animation is about to start so turn
// anti-aliasing OFF
sprite(1).antiAliasingEnabled = false;
//start animation
}
function mouseUp() {
// stop animation
// the interaction/animation has ended so turn
// anti-aliasing ON
sprite(1).antiAliasingEnabled = true;
}
3D behaviors
The Director Behavior library includes 3D-specific behaviors, which are divided into four types:
•Local behaviors are actions that accept triggers only from the sprite to which they’re attached.
•Public behaviors are actions that accept triggers from any sprite.
•Triggers are behaviors that send signals to a local or public behavior to cause the behavior to execute.
For example, attaching the Create Box action and Mouse Left trigger behaviors to a sprite will cause a box to be
created in the 3D world each time the sprite is clicked with the left mouse button.

312
USING DIRECTOR 11.5
3D Basics
Last updated 9/28/2011
•Independent behaviors are behaviors that perform their actions without a trigger.
The Toon behavior, for example, changes a model’s rendering style to the toon style.
3D text
You can easily create 3D text in Director.
1Create a normal (2D) text cast member.
2Convert the text to 3D by selecting 3D Mode from the Display menu on the Text tab of the Property inspector.
3Set properties of the 3D text by using the 3D Text tab to manipulate the specific properties of the 3D text.
You can also manipulate the text cast member with script or a behavior. For more information, see “Creating 3D text”
on page 322.
The 3D world
Each 3D cast member contains a complete 3D world. It can contain models (the objects that viewers see within the
world) that are illuminated by lights and viewed by cameras. A sprite of a 3D cast member represents a specific
camera’s view into the world. Imagine that the 3D cast member is a room filled with furniture with cameras pointing
in from several windows. A given sprite that is using that cast member will display the view from one of those cameras,
but the room itself (the 3D cast member) remains the same regardless of which view is used.
The key difference between 3D cast members and other cast members is that the models within the 3D world are not
independent entities—they’re not sprites. They are integral parts of the 3D cast member.
Your movies can use 2D and 3D cast members simultaneously. For example, a product demonstration movie might
consist of a 3D cast member that represents the product and one or more 2D controls that allow users a virtual tryout
of the product.
For more detailed information, see “3D cast members” on page 315.
Models and model resources
Models are the objects that users see within the 3D world. Model resources are elements of 3D geometry that can be
used to draw 3D models. A model is a visible object that makes use of a model resource and occupies a specific position
and orientation within the 3D world. The model also defines the appearance of the model resource, such as what
textures and shaders are used. For more information, see “Working with Models and Model Resources” on page 331.
The relationship between a model and a model resource is similar to that between a sprite and a cast member. Model
resource data can be reused because multiple models can use the same model resource in the same way as cast member
data can be reused by multiple sprites. Unlike sprites, however, models don’t appear in and can’t be controlled from
the Score.
For example, a 3D cast member might contain two model resources. One could be the geometry for a car body, and
the other could be the geometry for a car wheel. In order for a complete car to appear visibly in the 3D scene, the model
resource for the car body would be used once, and the model resource for the wheel would be used four times—once
for each wheel.

313
USING DIRECTOR 11.5
3D Basics
Last updated 9/28/2011
Each 3D cast member contains a group object called world, which may contain a tree-like parent-child hierarchy of
nodes, such as models, groups, lights, and cameras. Each node may have one parent and any number of children.
Nodes that have world as an ancestor are rendered. A cast member may also contain nodes that do not have world as
an ancestor, such as nodes with a parent property set to VOID. Nodes such as these are not rendered.
The primary benefit of these parent-child relationships is that they make it easier to move complex models around in
the 3D world and to have the component parts of those models move together in the proper way. In the example of
the car, if the wheels of the car are defined as children of the car model, then moving the car will cause the wheels to
be moved with the car in the expected manner. If no parent-child relationship is defined between the car and the
wheels, moving only the car will cause the wheels to be left behind in their original position in the world.
Lights and cameras
Lights are used to light the 3D world. Without lights, the objects within the world can’t be seen.
Although lights control the appearance of the 3D world, cameras control how a sprite views the 3D world. A 3D sprite
displays a particular camera’s view into the world. For more information, see “About lights and cameras” on page 369.
Groups
A group is a node that has no geometry. A group is used for grouping models, lights, and cameras together so they can
be treated as a single unit. Groups let you rotate or translate their contents as a unit. A group has a name, a transform,
and a parent, and it can have one or more children. It has no other properties. The highest-level group is the group
called world, which is essentially synonymous with the 3D cast member. For more information, see “Groups” on
page 322.
Shaders and textures
A model’s surface color is determined by its shader or shaders. You can draw images on the surface of a model by
applying one or more textures to each shader. For more information, see “Shaders” on page 318 and “Textures” on
page 351.
Modifiers
Modifiers let you control many aspects of how models are rendered and how they behave. When you attach a modifier
to a model, you can then set the properties for that modifier with script. Depending on the type of modifier you use,
setting its properties can give you fine control over the model’s appearance and behavior. Modifiers are described in
“Working with Models and Model Resources” on page 331 and “About lights and cameras” on page 369.
Animation
Director supports complex model animations through the following means:
•The Collision modifier lets models detect and respond appropriately to collisions.
•The Bones player modifier lets models that have a skeletal structure defined in them play back animations of those
skeletons. These animations are created in separate 3D modeling tools.
•The Keyframe player modifier lets models play back time-based animation sequences. These sequences can also be
created in separate 3D modeling tools.
3D animations are called motions and can be initiated by 3D behaviors or script. For more information, see
“Animation modifiers” on page 361 and “Motions” on page 368.

314
USING DIRECTOR 11.5
3D Basics
Last updated 9/28/2011
Saving the 3D world
Changes made to the 3D world can be saved in authoring and projectors. The saved world can be reused as a new cast
member. You must save the Director movie for the changes to the 3D world to get effected.
You can save the 3D world using the saveWorld and savew3d methods. For more information, see the Scripting
Dictionary.

315
Last updated 9/28/2011
Chapter 16: The 3D Cast Member, 3D
Text, and 3D Behaviors
Introduction
Several Adobe® Director® features let you create a 3D movie:
•A 3D cast member contains a complex internal structure that includes model resources, models, lights, and
cameras. Each of these objects has its own array of properties.
•Director lets you convert 2D text to 3D and then work with the 3D text as you would with any other 3D cast
member. You can apply behaviors to the 3D text, manipulate it with Lingo or JavaScript™ syntax, and view and edit
it in the Shockwave® 3D window. You can also add extruded 3D text to a 3D cast member.
•Director comes with a library of behaviors that let you build and control a 3D environment without any knowledge
of Lingo or JavaScript syntax. Although scripting is still required for complex projects, you can build simple 3D
movies with behaviors alone.
3D cast members
Each Director 3D cast member contains an entire 3D world. Each world is a collection of one or more models and
other objects. These objects include the following:
•Model resources are elements of 3D geometry used to render models. The same model resource can be used by
several models in the 3D world.
•Models are visible objects in the 3D cast member that use a model resource geometry. For more information about
models, see “Working with Models and Model Resources” on page 331.
•Shaders are methods of displaying the surface of a model. Shaders control how the surface of the model reflects
light, and whether the surface looks like metal, plaster, or other materials.
•Textures are simple 2D images that are drawn onto the surface of a 3D model. A model’s surface appearance is the
result of the combination of its shader and any textures that have been applied to it.
•Motions are predefined animation sequences that involve the movement of models or model components.
Individual motions can be set to play by themselves or with other motions. For example, a running motion can be
combined with a jumping motion to simulate a person jumping over a puddle.
•Lights are sources of illumination within the 3D world. Lights can be directional, such as a spotlight, or they can be
diffuse.
•Cameras are views into the 3D cast member. Each sprite that uses a given cast member can display the view from a
different camera. For more information about sprites, see “3D Basics” on page 304.
•Groups are clusters of models and lights, cameras or both, that are associated with one another. This makes moving
the associated items much easier. Rather than moving each item separately, you can write Lingo or JavaScript
syntax that moves the group with a single command.
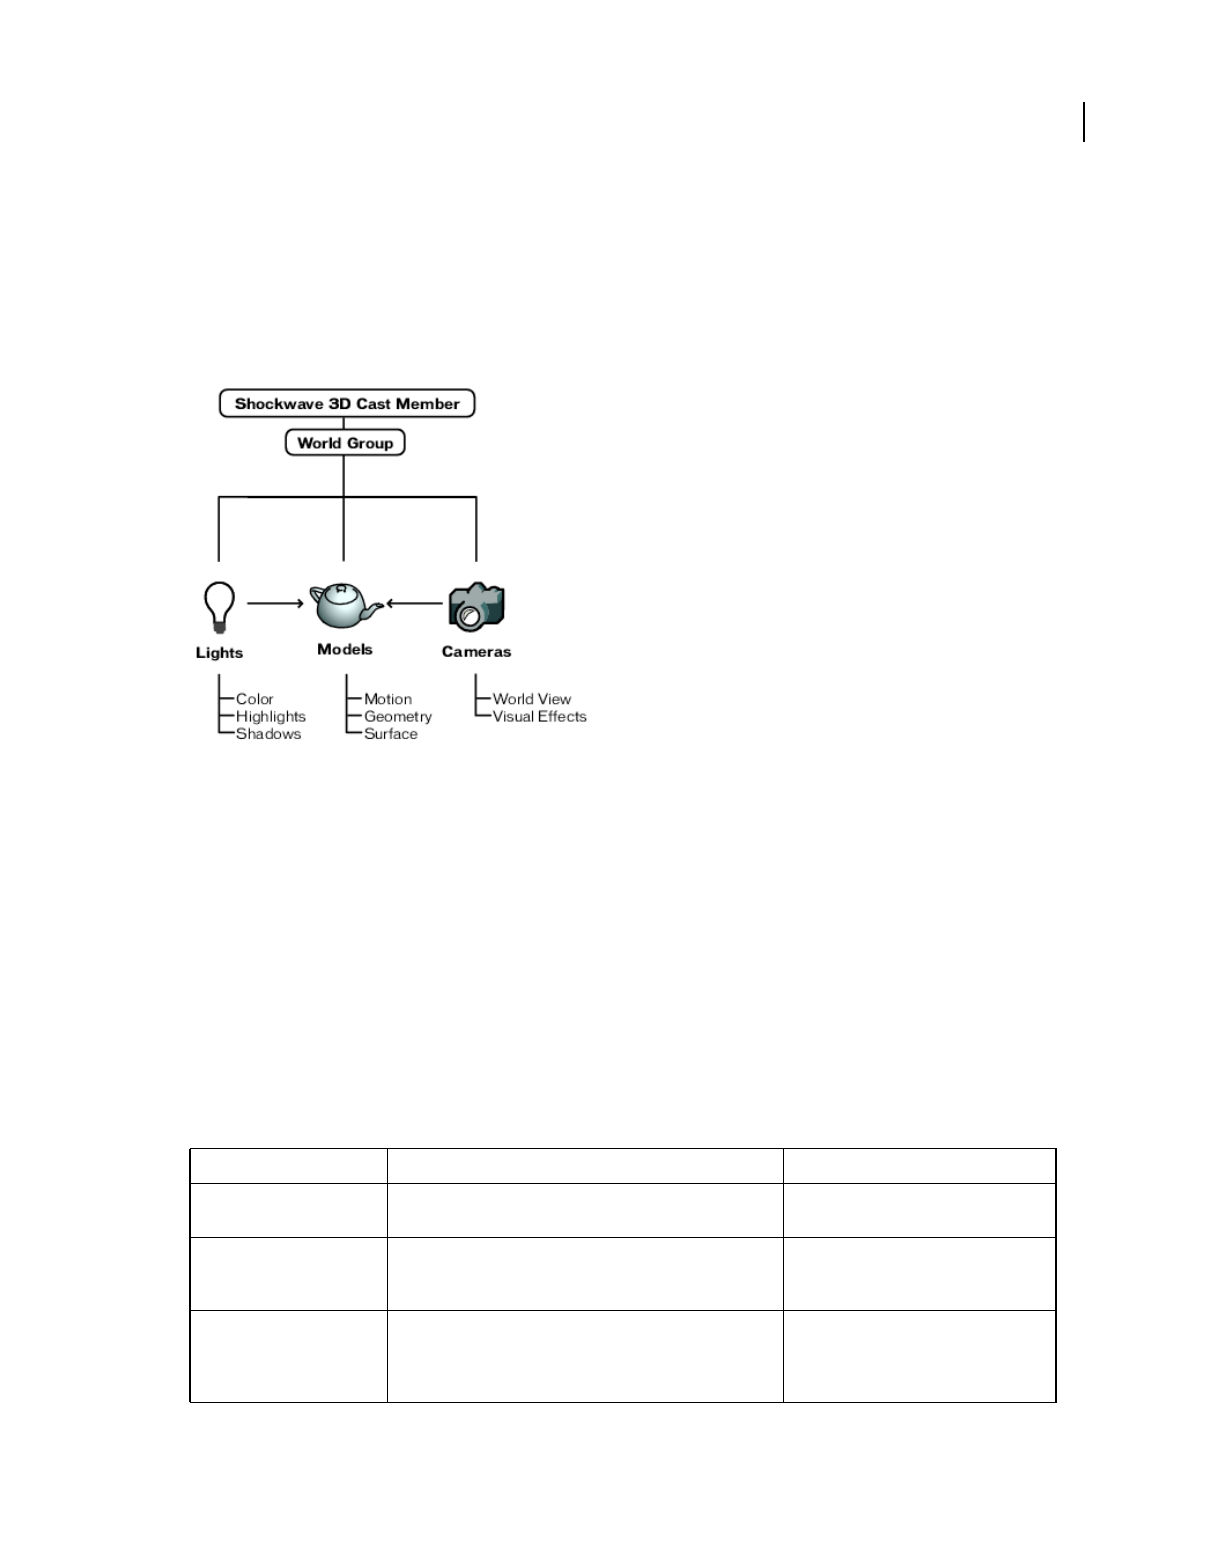
316
USING DIRECTOR 11.5
The 3D Cast Member, 3D Text, and 3D Behaviors
Last updated 9/28/2011
Each model, light, camera, and group within a 3D cast member is referred to as a node. Nodes can be arranged in
parent-child hierarchies. When a parent moves, its children move with it. For example, a car wheel can be a child of a
car body. These parent-child relationships are established in your third-party 3D modeling software or with script.
The following figure shows the relationships between cameras, lights, and models within the 3D cast member; the
relation of a model to a model resource; and the relationships of a model to shaders, textures, and motion.
Note: A member can also contain lights, models, groups, and cameras that have no parent and are therefore not rendered.
A Shockwave 3D cast member
Elements of a 3D scene can be modified and manipulated with 3D behaviors. However, complex work requires
scripting. For more information about behaviors, see “3D behaviors” on page 311. “Model resources” on page 316
describes the methods and properties that can manipulate each type of node in a 3D cast member. For another view of
this material with examples of using individual methods and properties, see the Scripting Reference topics in the
Director Help Panel.
Model resources
Model resources are pieces of 3D geometry that can be used to display 3D models. Model resources are visible only
when they are used by a model. Model resources are reusable, and multiple models can share the same model resource.
Use the following cast member methods and properties to perform basic model resource operations:
Method Function Returns
modelResource. count Returns the number of model resource objects included in the
cast member.
Integer.
modelResource(name)Returns the model resource named name. Returns the model resource object named
name, if it exists. Returns void if the object
does not exist.
modelResource[index]Returns the model resource at the designated position in the
index. The index number can change if model resources are
added or deleted.
Returns the model resource object at that
index number if it exists. Returns void if
the object does not exist at that index
number.
317
USING DIRECTOR 11.5
The 3D Cast Member, 3D Text, and 3D Behaviors
Last updated 9/28/2011
Models
The models in a cast member are the actual visible objects that are seen in the 3D cast member. Models move according
to the motions you assign to them in your 3D modeling software, and according to animation scripts that you write.
Their movement results from repositioning and reorienting their geometries in 3D space.
The following cast member methods and properties can be used to perform basic model operations:
newMesh(name,
numFaces, numVertices,
numNormals numColors,
numTexture
Coordinates)
Creates a new mesh model resource.
numFaces is the user-specified number of triangles.
numVertices is the user-specified number of vertices. A
vertex can be used by more than one face.
numNormals is the user-specified number of normals. Enter 0
or omit this step to use the generateNormals() method.
numColors is the user-specified number of colors. You can
specify a color for each point of a triangle.
numTextureCoordinates is the number of user-specified
texture coordinates. Enter 0 or omit this step to get the default
coordinates.
Returns a new mesh model resource with
a unique name. If the name isn’t unique,
returns a script error.
newModel
Resource(name, type)
Creates a new model resource and adds it to the model
resource object list. The type can be #plane, #box, #sphere,
#cylinder, #extrusion, or #particle.
Returns a new model resource object with
a unique name. If the name isn’t unique,
returns a script error.
newModel
Resource(name, type,
facing)
Creates a new model resource with the specified facing and
adds it to the model resource object list. The type can be
#plane, #box, #sphere, or #cylinder. The facing can be
#front, #back, or#both.
Returns a new model resource object with
a unique name. If the name isn’t unique,
returns a script error.
deleteModel
Resource(name)
Deletes the model resource named name. Script references to
this model resource persist but can do nothing.
TRUE (1) if the model resource named
name existed and was successfully
deleted. FALSE (0) if the model resource
named name doesn’t exist.
deletemodel
Resource(index)
Deletes the model resource with the given index number.
Script references to this model resource persist but can do
nothing.
TRUE (1) if the model resource with this
index number exists. FALSE (0) if the
model resource with this index number
doesn’t exist.
Method Function Returns
model.count Returns the number of model objects included in the cast
member.
Integer.
model(name)Returns the model named name.Returns the model object named name if
it exists. Returns void if the object does
not exist.
model[index]Returns the model at the designated index position. The index
number can change if models lower in the list are deleted.
Returns the model object at that index
number if it exists. Returns void if the
object does not exist at that index
number.
Method Function Returns
318
USING DIRECTOR 11.5
The 3D Cast Member, 3D Text, and 3D Behaviors
Last updated 9/28/2011
Shaders
A shader defines the basic appearance of a model’s surface. You apply textures to shaders. The standard shader is
photorealistic. The following list describes some of the other available shaders:
•#painter, which looks like a painted surface
•#engraver, which looks like an engraved surface
•#newsprint, which looks like a newspaper photograph
Use the following cast member methods and properties to perform basic shader operations:
newModel(name,
modelResource)
Creates a new model named name and adds it to the world.
Fails if a model by that name already exists. The
modelResource argument is optional and can be set at a
later time. If supplied, this second argument must be an
existing model resource object.
Returns a new model with a unique
name. If the name isn’t unique, returns an
error.
deleteModel (name)Deletes the model named name. Script references to this
model persist but can do nothing. Children of the model aren’t
deleted but are re-parented to the world group.
TRUE (1) if the model named name
exists. FALSE (0) if the model named
name doesn’t exist.
deleteModel (index)Deletes the model with the given index number. Script
references to this model persist but can do nothing.
TRUE (1) if the model with this index
number exists. FALSE (0) if the model
with this index number doesn’t exist.
model(name1).clone(name2
)
Creates a copy of the model named name1 and assigns it the
name name2. The new model uses the same model resource
and shader as the original model; changes to the model
resource and shader of the original model appear in the new
model as well.
Returns the model named name2.
model(name1).
cloneDeep(name2)
Creates a copy of the model named name1 and assigns it the
name name2. The new model uses a copy of the original
model’s model resource and shader. Changes to the original
model’s model resource and shader have no effect on the new
model.
Returns the model named name2.
cloneModelFromCast
Member(name1, name2,
member(name3))
Copies the model named name2 (from the member named
name3) into the current member. The new copy is named
name1. This is similar to the cloneDeep() method, but it
copies a model from one cast member to another.
Returns the model named name1.
Method Function Returns
shader.count Returns the number of shader objects included in the cast
member.
Integer.
shader(name)Returns the shader named name. Returns the shader object named name if
it exists. Returns void if the object does
not exist.
shader[index]Returns the shader at the designated position in the index. The
index number can change if shaders are added or deleted.
Returns the shader object at that index
number if it exists. Returns void if the
object does not exist at that index
number.
Method Function Returns
319
USING DIRECTOR 11.5
The 3D Cast Member, 3D Text, and 3D Behaviors
Last updated 9/28/2011
Textures
Textures are 2D images that are drawn on the surface of a 3D model. Textures can be assigned to models in your 3D
modeling software, or you can use any bitmap cast member in your movie. You can also use any image object created
by using Lingo or JavaScript.
Use the following cast member methods and properties to perform basic texture operations:
newShader (name,type)Creates a new shader and adds it to the shader object list. The
type can be #standard, #painter, #engraver, or
#newsprint.
Returns a new shader object with a unique
name. If the name isn’t unique, returns a
script error.
deleteShader (name)Deletes the shader named name. Script references to this
shader persist but can do nothing.
TRUE (1) if the shader named name
exists. FALSE (0) if the shader named
name doesn’t exist.
deleteShader (index)Deletes the shader with the given index number. Script
references to this shader persist but can do nothing.
TRUE (1) if the shader with this index
number exists. FALSE (0) if the shader
with this index number doesn’t exist.
Method Function Returns
texture.count Returns the number of textures in the texture object list of the
cast member.
Integer.
texture(name)Returns the texture object named name.Returns the texture object named name if
it exists. Returns void if the object does
not exist.
texture[index]Returns the texture at the designated position in the index.
The index number can change if textures are added or deleted.
Returns the texture object at that index
number if it exists. Returns void if the
object does not exist at that index
number.
newTexture (name,
type, source)
Creates a new texture named name.
The type can have the following values:
#fromCastmember
#fromImageObject
If type is #from Castmember, source is a cast member
reference. For example, member("concrete") or
member[2,3].
If type is #from ImageObject, source is a script image
object.
Returns a new texture object with a
unique name. If the name isn’t unique,
returns a script error.
deleteTexture (name)Deletes the texture named name. Script references to this
texture persist but can do nothing.
TRUE (1) if the texture named name
exists. FALSE (0) if the texture named
name doesn’t exist.
deleteTexture (index)Deletes the texture with the given index number. Script
references to this texture persist but can do nothing.
TRUE (1) if the texture with this index
number exists. FALSE (0) if the texture
with this index number doesn’t exist.
Method Function Returns

320
USING DIRECTOR 11.5
The 3D Cast Member, 3D Text, and 3D Behaviors
Last updated 9/28/2011
Motions
A motion is an animation of a model. Motions can be shared by multiple models. A 3D cast member contains a palette
of motions that are available to any model in the world.
Use the following cast member methods and properties to perform basic motion operations:
Lights
Lights illuminate models in the 3D world. Each light has a color, direction, intensity, and other characteristics. By
default, each 3D cast member contains one white light, which lets Director users see the models in the cast member
without having to explicitly add a light. This light has a default position of upper center in the world. You can modify
or replace this light with one or more new lights. To turn off the default light, set its color property to color(0,0,0).
Use the following methods and properties to perform basic light operations:
Method Function Returns
motion.count Returns the number of motion objects included in the cast
member.
Integer.
motion(name)Returns the motion named name.Returns the motion object named name if
it exists. Returns void if the object does
not exist.
motion[index]Returns the motion at the designated position in the palette of
available motions.
Returns the motion object at that index
number if it exists. Returns void if the
object does not exist at that index
number.
newMotion (name)Creates a new motion object. Returns a new motion object with a
unique name. If the name isn’t unique,
returns a script error.
deleteMotion (name)Deletes the motion named name. Script references to this
motion persist but return void.
TRUE (1) if the motion named name
exists. FALSE (0) if the motion named
name doesn’t exist.
deleteMotion (index)Deletes the motion at the given index. Script references to this
motion persist but return void.
TRUE (1) if the motion with this index
number exists. FALSE (0) if the motion
with this index number doesn’t exist.
cloneMotionFrom
CastMember (name1,
name2, member(name3))
Copies a motion object from one cast member to another.
Specifically, copies the motion object named name2 (from the
member named name3) into the current member. The new
copy is named name1.
Returns a reference to the newly created
motion object.

321
USING DIRECTOR 11.5
The 3D Cast Member, 3D Text, and 3D Behaviors
Last updated 9/28/2011
Cameras
Cameras provide different views of the 3D world. A 3D cast member can have many cameras. Each sprite that uses the
cast member can display a different camera view of the 3D world.
Use the following cast member methods and properties to perform basic camera operations:
Method Function Returns
light.count Returns the number of light objects included in the cast
member.
Integer.
light(name)Returns the light named name. Returns the light object named name if it
exists. Returns void if the object does not
exist.
light[index]Returns the light at the designated position in the index. The
index number can change if lights are added or deleted.
Returns the light object at that index
number if it exists. Returns void if the
object does not exist at that index
number.
newLight(name, type)Creates a new light and adds it to the light object list. The type
can be #ambient, #directional, #point, or #spot.
Returns a new light object with a unique
name. If the name isn’t unique, returns a
script error.
deleteLight (name)Deletes the light named name. Script references to this light
persist but can do nothing.
TRUE (1) if the light named name exists.
FALSE (0) if the light named name
doesn’t exist.
deleteLight (index)Deletes the light with the given index number. Script
references to this light persist but can do nothing.
TRUE (1) if the light with this index
number exists. FALSE (0) if the light
with this index number doesn’t exist.
Method Function Returns
camera.count Returns the number of camera objects included in the cast
member.
Integer.
camera(name)Returns the camera named name.Returns the camera object named name if
it exists. Returns void if the object does
not exist.
camera[index]Returns the camera at the designated position in the index.
The index number can change if cameras are added or
deleted.
Returns the camera object at that index
number if it exists. Returns void if the
object does not exist at that index
number.
newCamera (name)Creates a new camera and adds it to the camera object list. Returns a new camera object with a
unique name. If the name isn’t unique,
returns a script error.
deleteCamera (name) Deletes the camera named name. Script references to this
camera persist but can do nothing.
TRUE (1) if the camera named name
exists. FALSE (0) if the camera named
name doesn’t exist.
deleteCamera (index)Deletes the camera with the given index number. Script
references to this camera persist but can do nothing.
TRUE (1) if the camera with this index
number exists. FALSE (0) if the camera
with this index number doesn’t exist.

322
USING DIRECTOR 11.5
The 3D Cast Member, 3D Text, and 3D Behaviors
Last updated 9/28/2011
Groups
Groups are collections of models and other objects that are formally associated with one another. These associations
can be created in your 3D modeling software or with script. Each 3D cast member has a default group called world,
which is the cast member.
Groups simplify the rotation and translation of models by letting all members of a group move together with a single
command. A group has a name, a transform, and a parent, and can also have children. It has no other properties.
Use the following cast member methods and properties to perform basic group operations:
Creating 3D text
To create 3D text, first create 2D text, and then convert the text to 3D.
Note: Alternatively, you can use the extrude3d() method of a 3D cast member to create an extruded-text model
resource in the cast member.
1Select Window > Text to open the text editor.
2Select the desired font, size, style, and alignment.
Most standard fonts work well with 3D text. Experiment to get specific results.
3Enter the text. (You can edit the text after you’ve entered it.)
4Drag the text cast member onto the Stage.
Either drag the cast member from the Cast window or drag the Drag Cast Member button next to the Name text
box in the Text window.
5Click the Property Inspector button in the Director toolbar.
6Click the Text tab in the Property inspector.
Method Function Returns
group.count Returns the number of group objects included in the cast
member.
Integer.
group(name)Returns the group named name. Returns the group object named name if it
exists. Returns void if the object does not
exist.
group[index]Returns the group at the designated position in the index. The
index number can change if groups are added or deleted.
Returns the group object at that index
number if it exists. Returns void if the
object does not exist at that index
number.
newGroup(name)Creates a new group and adds it to the group object list. Returns a new group object with a unique
name. If the name isn’t unique, returns a
script error.
deleteGroup (name)Deletes the group named name. Script references to this
group persist but can do nothing.
TRUE (1) if the group named name
exists. FALSE (0) if the group named
name doesn’t exist.
deleteGroup [index]Deletes the group with the given index number. Script
references to this group persist but can do nothing.
TRUE (1) if the group with this index
number exists. FALSE (0) if the group
with this index number doesn’t exist.
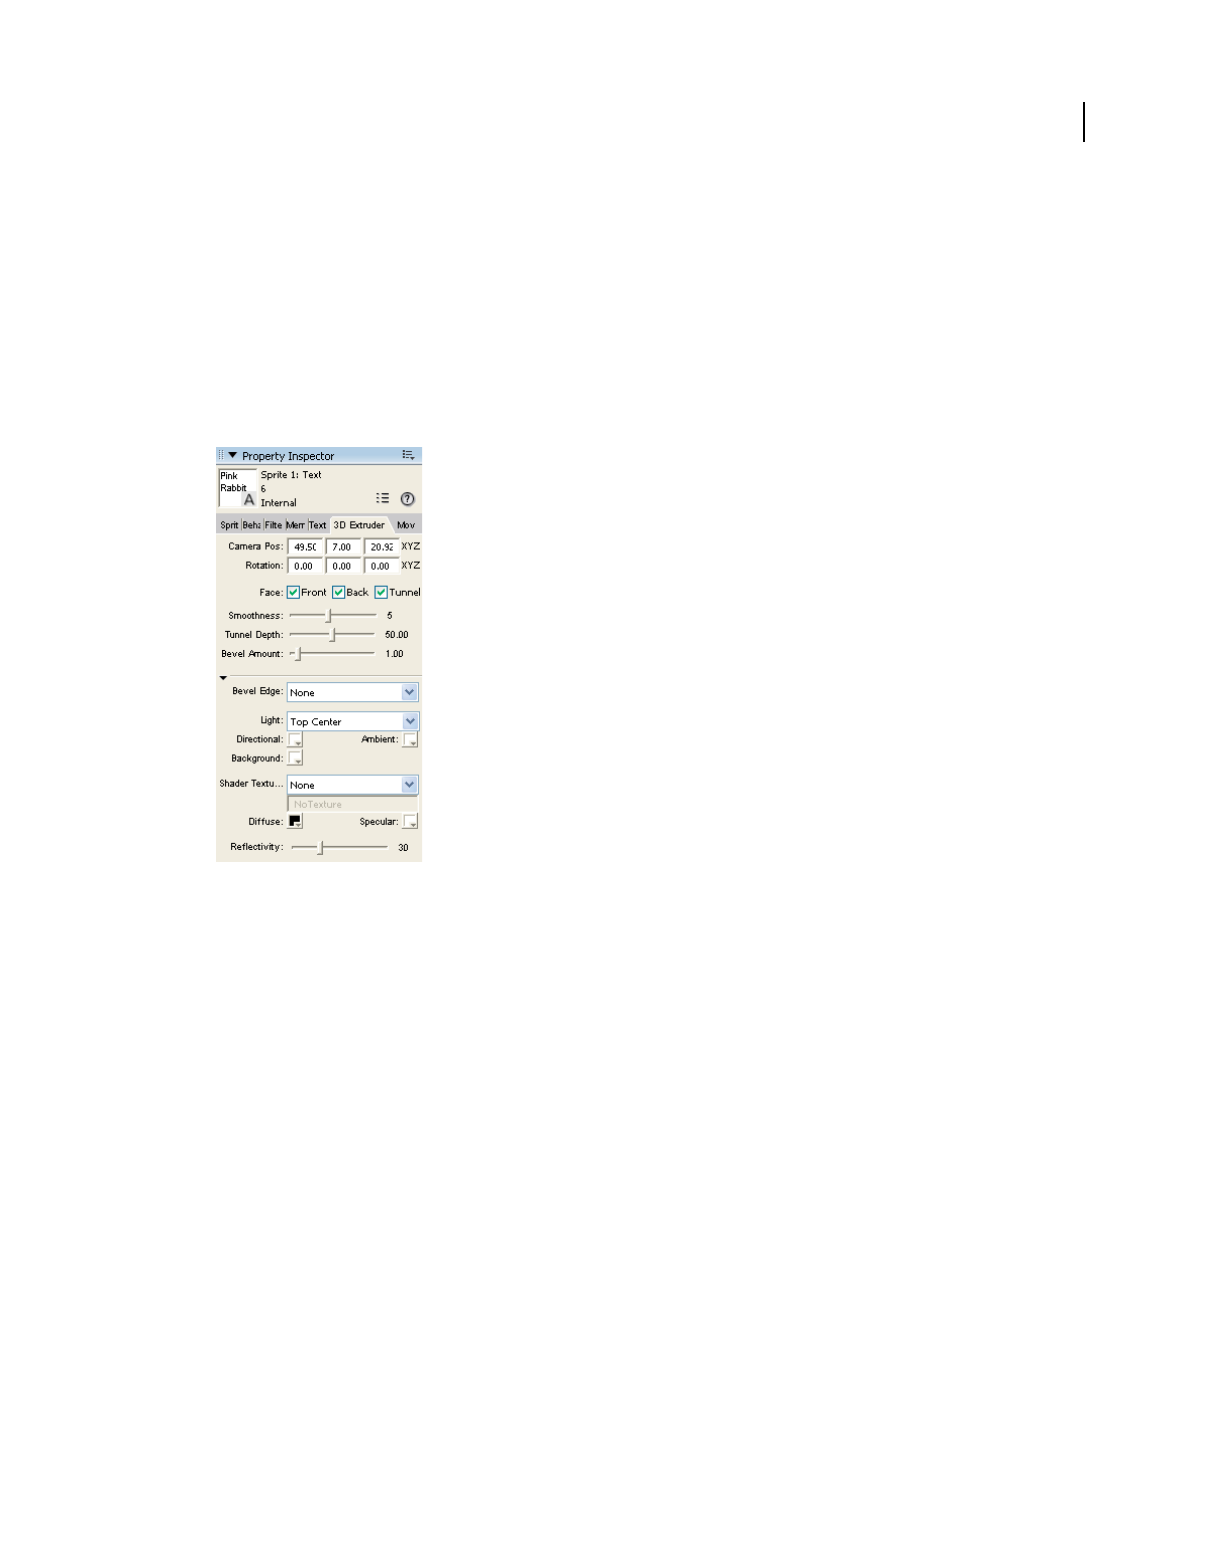
323
USING DIRECTOR 11.5
The 3D Cast Member, 3D Text, and 3D Behaviors
Last updated 9/28/2011
7Select #mode3d Mode from the Display menu.
The text on the screen changes to 3D. See “Modifying 3D text” on page 323 for next steps.
Modifying 3D text
After your 2D text has been changed to 3D, you can modify it.
1Click the Property inspector 3D Extruder tab.
Property inspector - 3D Extruder tab
2Set the camera position and rotation.
As with the standard 3D Property inspector tab, you control camera position and rotation with the values that you
enter in the text boxes at the top of the pane. The default camera position represents a vantage point looking up
through the middle of the scene.
Note: You can also define these settings by using the Shockwave 3D window.
3Select from among the Front Face, Back Face, and Tunnel check boxes.
These options control which sides of the text appear.
4Set the smoothness.
Smoothness determines the number of polygons that are used to construct the text. The more polygons that are
used, the smoother the text appears.
5Set the tunnel depth.
Tunnel depth is the length of the tunnel from the front face to the back face.
6Select a beveled edge type.
Beveling makes the edges of the 3D letters appear rounded or angled. Select Round for rounded edges or Miter for
angled edges.
7Select a bevel amount.

324
USING DIRECTOR 11.5
The 3D Cast Member, 3D Text, and 3D Behaviors
Last updated 9/28/2011
Bevel amount determines the size of the bevel.
8Set up the lighting.
Select a color and position for the text’s default directional light. A directional light is a point source of light and
comes from a specific, recognizable direction. You can also select a color for the ambient and background lights in
the 3D world that the text occupies. Ambient light is diffuse light that illuminates the entire world. Background light
appears to come from behind the camera.
9Apply a shader and a texture.
Shaders and shader properties determine the appearance of the surface of the 3D text model. Textures are 2D
images drawn on the surface of the text. Use the Property inspector to assign a texture to the text’s shader. You can
also control the color of the shader’s specular highlights and its diffuse or overall color and reflectivity.
As with any model, you can apply a texture that uses a bitmap cast member. You can import a bitmap cast member
or create a new one in the Paint window. Be sure to give your bitmap cast member a name if it doesn’t already have
one. To assign this bitmap as the texture, specify it in the Property inspector. Select Member from the Shader
Texture menu, and then enter the name of the member you want to use in the text box to the right of the menu.
Script and 3D text
Director contains methods and properties in Lingo and JavaScript syntax for working with 3D text. Most 3D methods
and properties work with 3D text exactly as with any other object. Properties are also described in the Scripting
Reference topics in the Director Help Panel.
Exceptions
The following methods and properties work differently when used with 3D text.
Type of Script Element
Member property antiAlias
Member property antiAliasThreshold
Member property antiAliasType
Member property picture
Member property preRender
Member property scrollTop
Member property useHypertextStyles
Member property autoTab
Member property boxType #scroll
Member command scrollByPage
Member command scrollByLine
Member function charPosToLoc
Member function linePosToLocV
Member function locToCharPos

325
USING DIRECTOR 11.5
The 3D Cast Member, 3D Text, and 3D Behaviors
Last updated 9/28/2011
Lingo and JavaScript syntax script for 3D text
In addition to working with most existing methods and properties, 3D text also adds some properties of its own. These
properties give you a more precise way to define the characteristics of the text than is possible using the Property
inspector.
These properties can be set while the text is in 2D mode. They have no visible effect until the text appears in 3D mode.
When you access the properties listed in the following table for an extruded 3D text model that you created by using
the extrude3D method, you must refer to the model resource of the text. The Lingo syntax for this is shown in the
following example:
member(whichMember).model[modelIndex].resource.3DTextProperty
For example, to set the bevelDepth property of the first model in cast member 1 to a value of 25, use the following
syntax:
member(1).model[1].resource.bevelDepth = 25
Member function locVToLinePos
Sprite property editable
Sprite function pointInHyperLink
Sprite function pointToChar
Sprite function pointToItem
Sprite function pointToLine
Sprite function pointToParagraph
Sprite function pointToWord
Hypertext Lingo hyperlinkClicked
Hypertext Lingo hyperlink
Hypertext Lingo hyperlinks
Hypertext Lingo hyperlinkRange
Hypertext Lingo hyperlinkState
Type of Script Element
326
USING DIRECTOR 11.5
The 3D Cast Member, 3D Text, and 3D Behaviors
Last updated 9/28/2011
Using 3D behaviors
Director includes a library of behaviors that lets you build and control a 3D environment without any knowledge of
Lingo or JavaScript syntax. Although scripting is still required for complex projects, you can build simple 3D movies
with behaviors alone.
Behavior types
Director provides two types of 3D behaviors: trigger and action. Action behaviors are divided into three types, which
are defined in the following table.
Property Access Description Range or Default
bevelDepth Get and set Degree of beveling on front or back faces. Floating-point value from 1.0 to
100.0
Default is 1.0
bevelType Get and set Type of bevel. #none
#miter
#round
Default is #miter
displayFace Get and set Faces of shape to display. #front
#tunnel
#back
Default is to show all three faces
displayMode Get and set Specifies how the text appears. #modeNormal
#Mode3D
Default is #modeNormal, which is 2D
text
member(1).
extrude3d
(member(2))
Not applicable Creates a new model resource in member 2 by
extruding the text in member 1. Member 1 must
be a text cast member.
Specify an existing 3D cast member
smoothness Get and set Number of subdivisions for curved outlines. Integer from 1 to 100
Default is 5
tunnelDepth Get and set Extrusion depth. Floating-point value from 1.0 to
100.0
Type Function
Trigger behavior A behavior that sends an event, such as a mouse click, to an action behavior
Local action behavior A behavior that is attached to a particular sprite and that can accept triggers only from
that sprite
Public action behavior A behavior that can be triggered by any sprite
Independent action behavior A behavior that needs no trigger
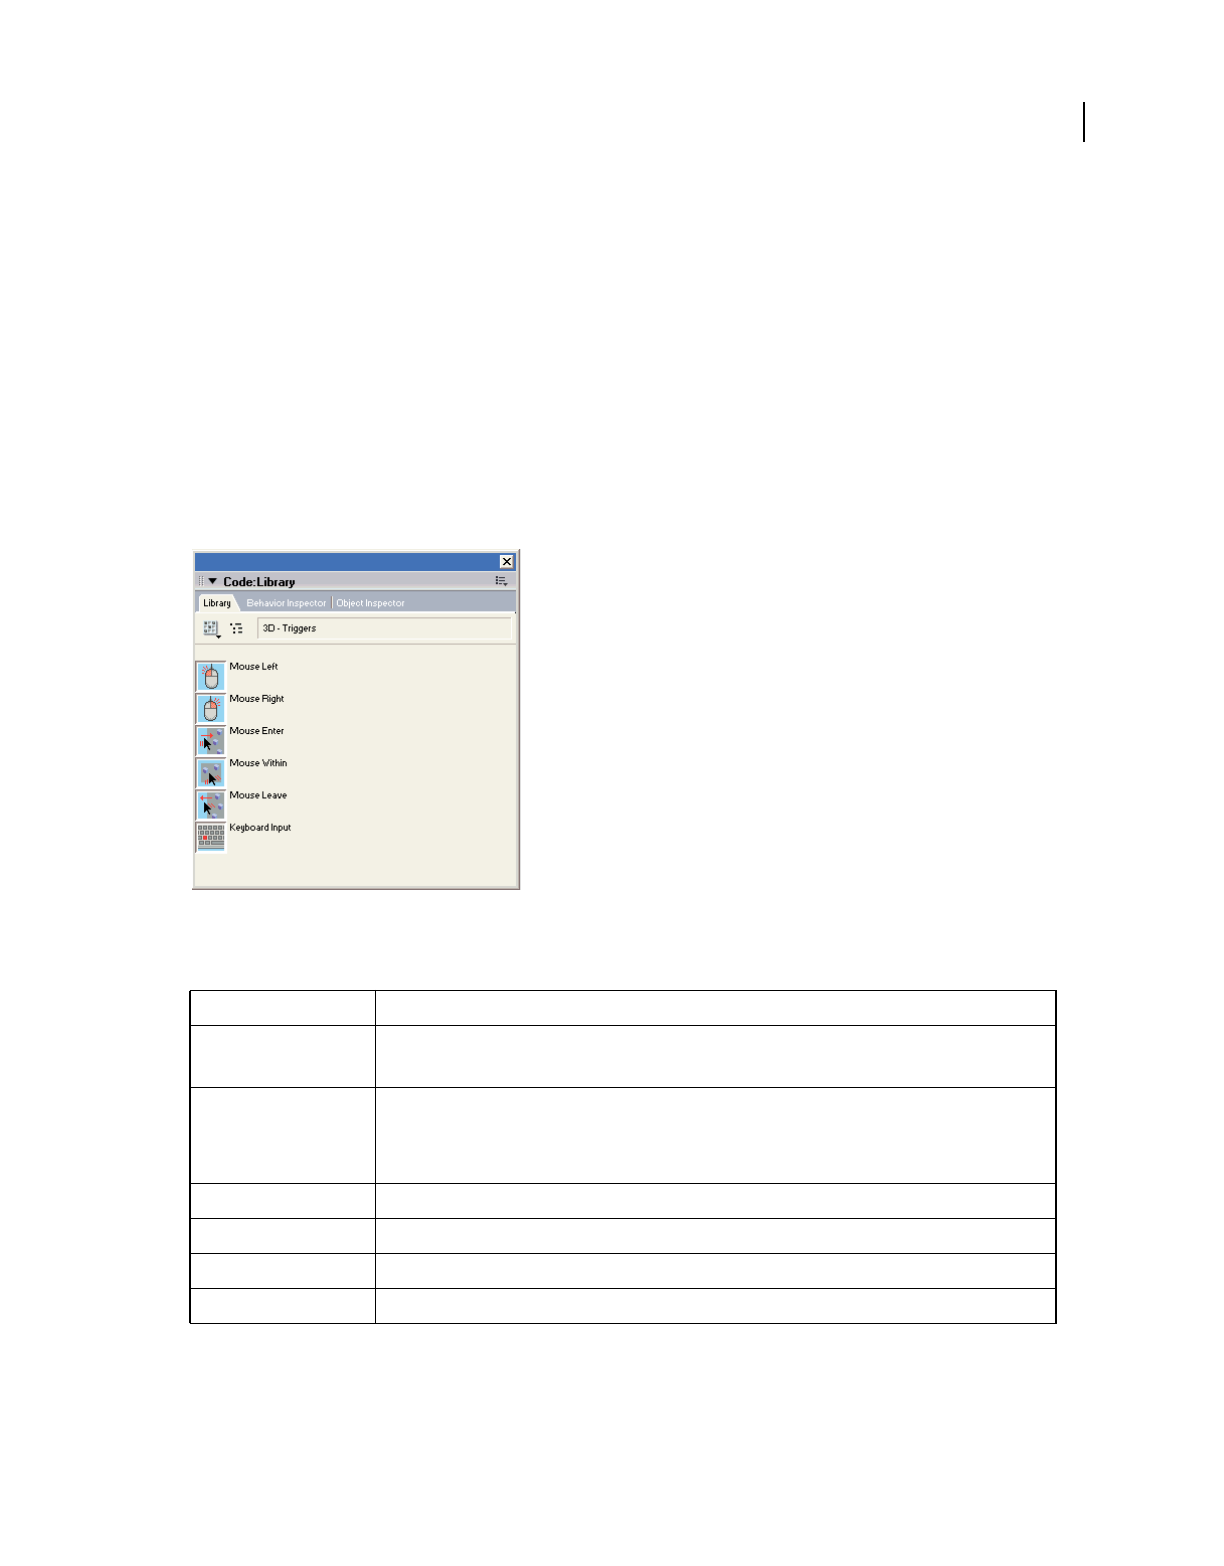
327
USING DIRECTOR 11.5
The 3D Cast Member, 3D Text, and 3D Behaviors
Last updated 9/28/2011
In previous versions of Director, the trigger instruction had to be included as a handler, such as on mouseDown, inside
the behavior. The trigger behavior type makes it easier to reuse action behaviors in different ways with different
triggers. These behaviors can be used with any 3D cast member.
Using the 3D Behavior Library
All 3D behaviors are listed in the Behavior Library. The Behavior Library is divided into two sublibraries: actions and
triggers.
1Click the Library Palette button on the Director toolbar.
2Click the Library List button and select 3D.
3Select Triggers from the 3D submenu.
The trigger behaviors appear, as shown in the following figure:
3D trigger behaviors
The following table describes the available triggers:
You can add modifier keys to any trigger. By doing so, a given trigger can launch two actions, depending on whether
the modifier key is pressed. For example, you can Mouse Left and Mouse Left+Shift as separate triggers.
Name Description
Mouse Left Triggers action when the user presses, holds down, or releases the left mouse button (Windows® ) or the
mouse button (Mac®).
Mouse Right Triggers action when user presses, holds down, or releases the right mouse button. To use on the Mac, you
must set the emulateMultibuttonMouse property to true; then Control-click is interpreted as a right-click. To
use this with Shockwave® Player, you must disable the context menu and pass right-clicks through to the
player.
Mouse Within Triggers an action when the pointer is inside a sprite.
Mouse Enter Triggers an action when the pointer enters a sprite.
Mouse Leave Triggers an action when the pointer leaves a sprite.
Keyboard Input Lets the author specify a given key as a trigger.
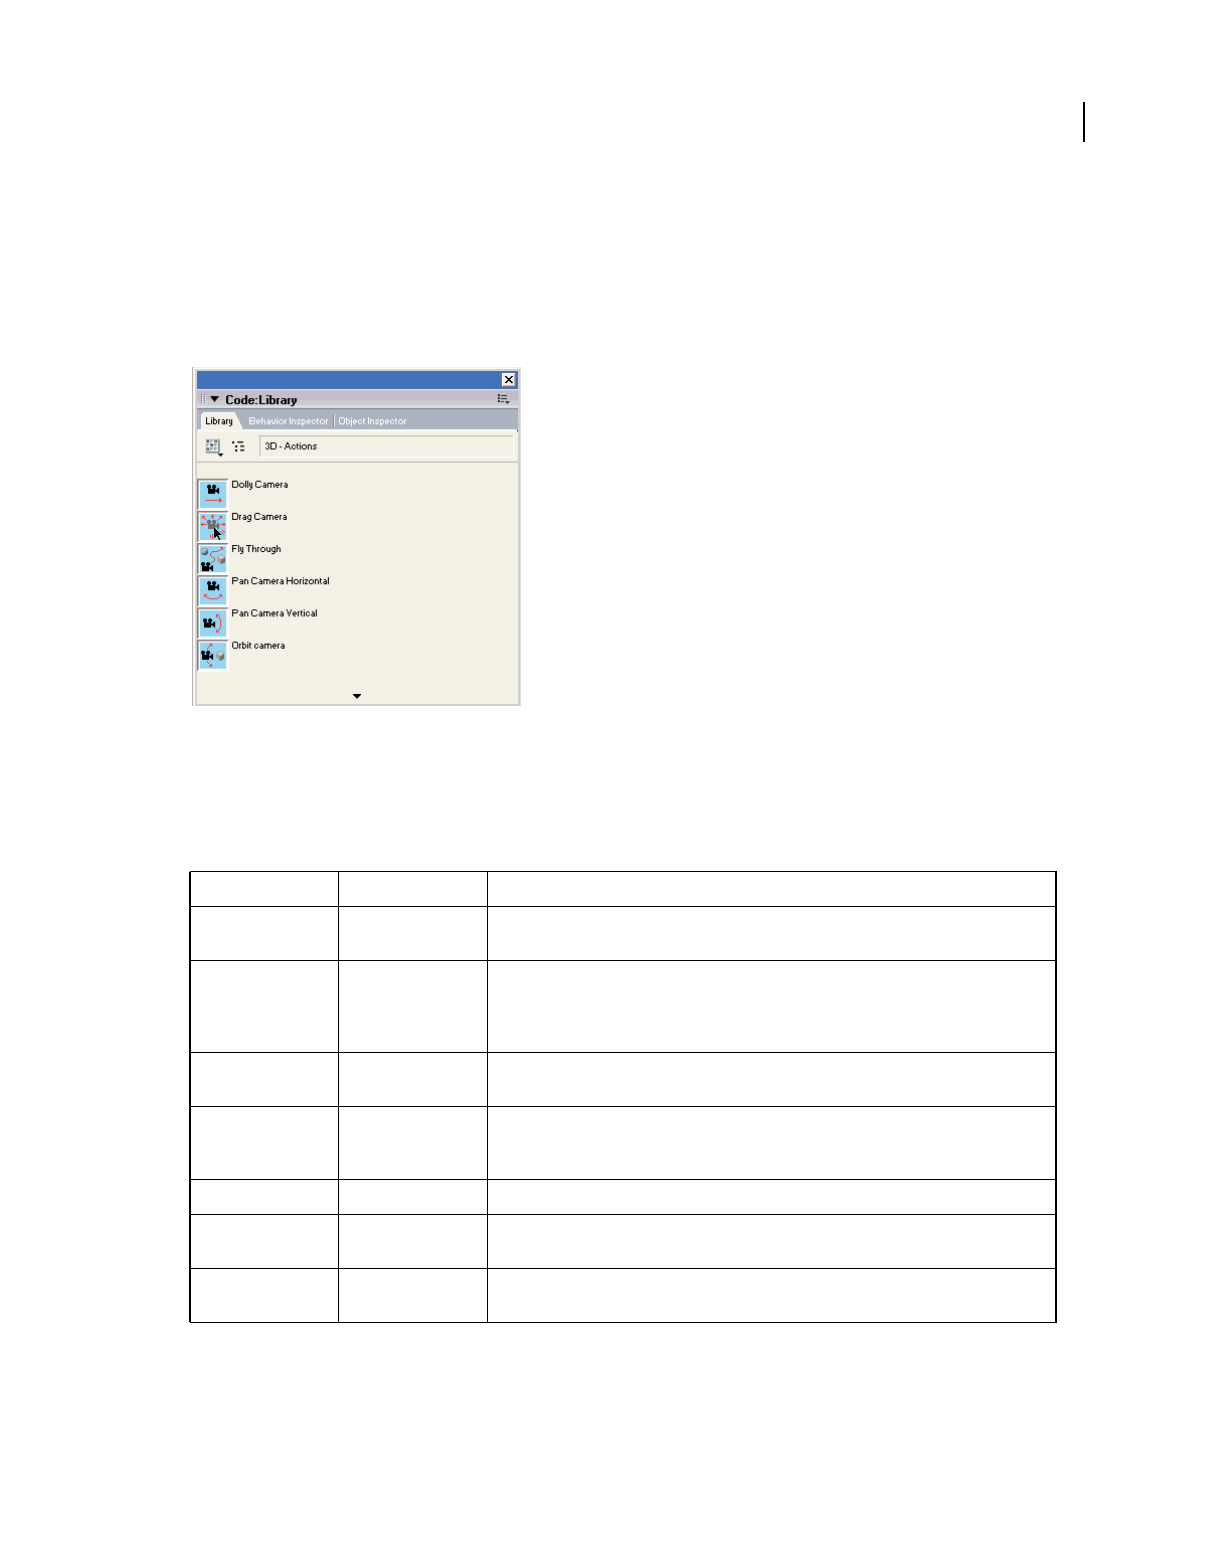
328
USING DIRECTOR 11.5
The 3D Cast Member, 3D Text, and 3D Behaviors
Last updated 9/28/2011
View 3D action behaviors
1Click the Library Palette button on the Director toolbar.
2Click the Library List button and select 3D.
3Select Actions from the 3D submenu.
The action behaviors appear, as shown in the following figure:
3D action behaviors
Local actions
When you attach a local action to a sprite, that action responds only to a trigger that is attached to that same sprite.
The following table describes the available local actions:
Name Effect Description
Create Box Primitive Adds a box to the 3D world each time the trigger action occurs. The author can set the
dimensions and texture.
Create Particle
System
Primitive Creates a particle system whenever the trigger is activated. The user can set the number of
particles; the life span of each particle; the starting and finishing color of particles; and the
angle, speed, and distribution of particles on emission. The user can also set gravity and
wind effects along any axis.
Create Sphere Primitive Adds a sphere to the 3D world each time the trigger action occurs. The author can set the
diameter and texture.
Drag Camera Camera Provides full camera control, including panning (changing the direction in which the
camera is pointing), dollying (moving), and rotating, through a single behavior. Use
separate mouse triggers for panning, zooming, and rotating.
Drag Model Model Lets users move a model in any direction by dragging it with the mouse.
Drag Model to Rotate Model Lets you specify an axis or pair of axes around which you can rotate a model by dragging
the model with the mouse.
Fly Through Camera Simulates flying through the 3D world with a camera. Accepts separate triggers for forward
and reverse travel and for stopping.
329
USING DIRECTOR 11.5
The 3D Cast Member, 3D Text, and 3D Behaviors
Last updated 9/28/2011
Public actions
As with local actions, you can add public actions to a movie by attaching them to any 3D sprite. Unlike local actions,
public actions are triggered whether the trigger is attached to the same sprite as the action or to any other sprite. Public
actions use the same triggers as local actions. The following table describes available public actions:
Independent actions
Independent actions don’t require triggers. The following table describes the available independent actions:
Click Model Go to
Marker
Model Moves the playhead to a marker in the Score when a model is clicked.
Orbit Camera Camera Circles the camera around a model.
Play Animation Model Plays a preexisting animation when the model is clicked. This behavior cannot be used
with 3D text.
Name Effect Description
Dolly Camera Camera Dollies the camera into or out of the 3D scene by a specified amount each time the trigger
action occurs. Dollying in and dollying out require separate triggers.
Generic Do Custom Lets you use the standard triggers to launch custom handlers or execute specific script
methods. Requires knowledge of scripting in Director.
Pan Camera
Horizontal
Camera Pans along the horizontal axis by a specified number of degrees each time the trigger
action occurs. Panning left and panning right require separate triggers.
Pan Camera Vertical Camera Pans along the vertical axis (up and down) by a specified number of degrees each time the
trigger action occurs. Panning up and panning down require separate triggers.
Reset Camera Camera Resets the camera to its initial location and orientation when the trigger action occurs.
Rotate Camera Camera Rotates the camera around the z-axis by a specified number of degrees each time its
trigger is activated. This makes the 3D scene appear to rotate and turn upside down.
Toggle Redraw Drawing Toggles the redraw mode on or off. Turning redraw off produces visible trails as a model
moves through space. Turning redraw on causes the trails to disappear.
Name Effect Description
Automatic Model
Rotation
Motion Automatically rotates a model around a given axis and continues rotating it while the
movie plays. To rotate the model around multiple axes, attach multiple instances of the
behavior to the sprite and select the desired axis for each one.
Level of Detail Model Enables the level of detail (LOD) modifier for the model. Dynamically lowers the number of
polygons used to render the model as its distance from the camera increases. Reduces
demands on the CPU.
Model Rollover
Cursor
Model Changes the mouse pointer to the pointer of your choice when the mouse rolls over the
given model.
Name Effect Description
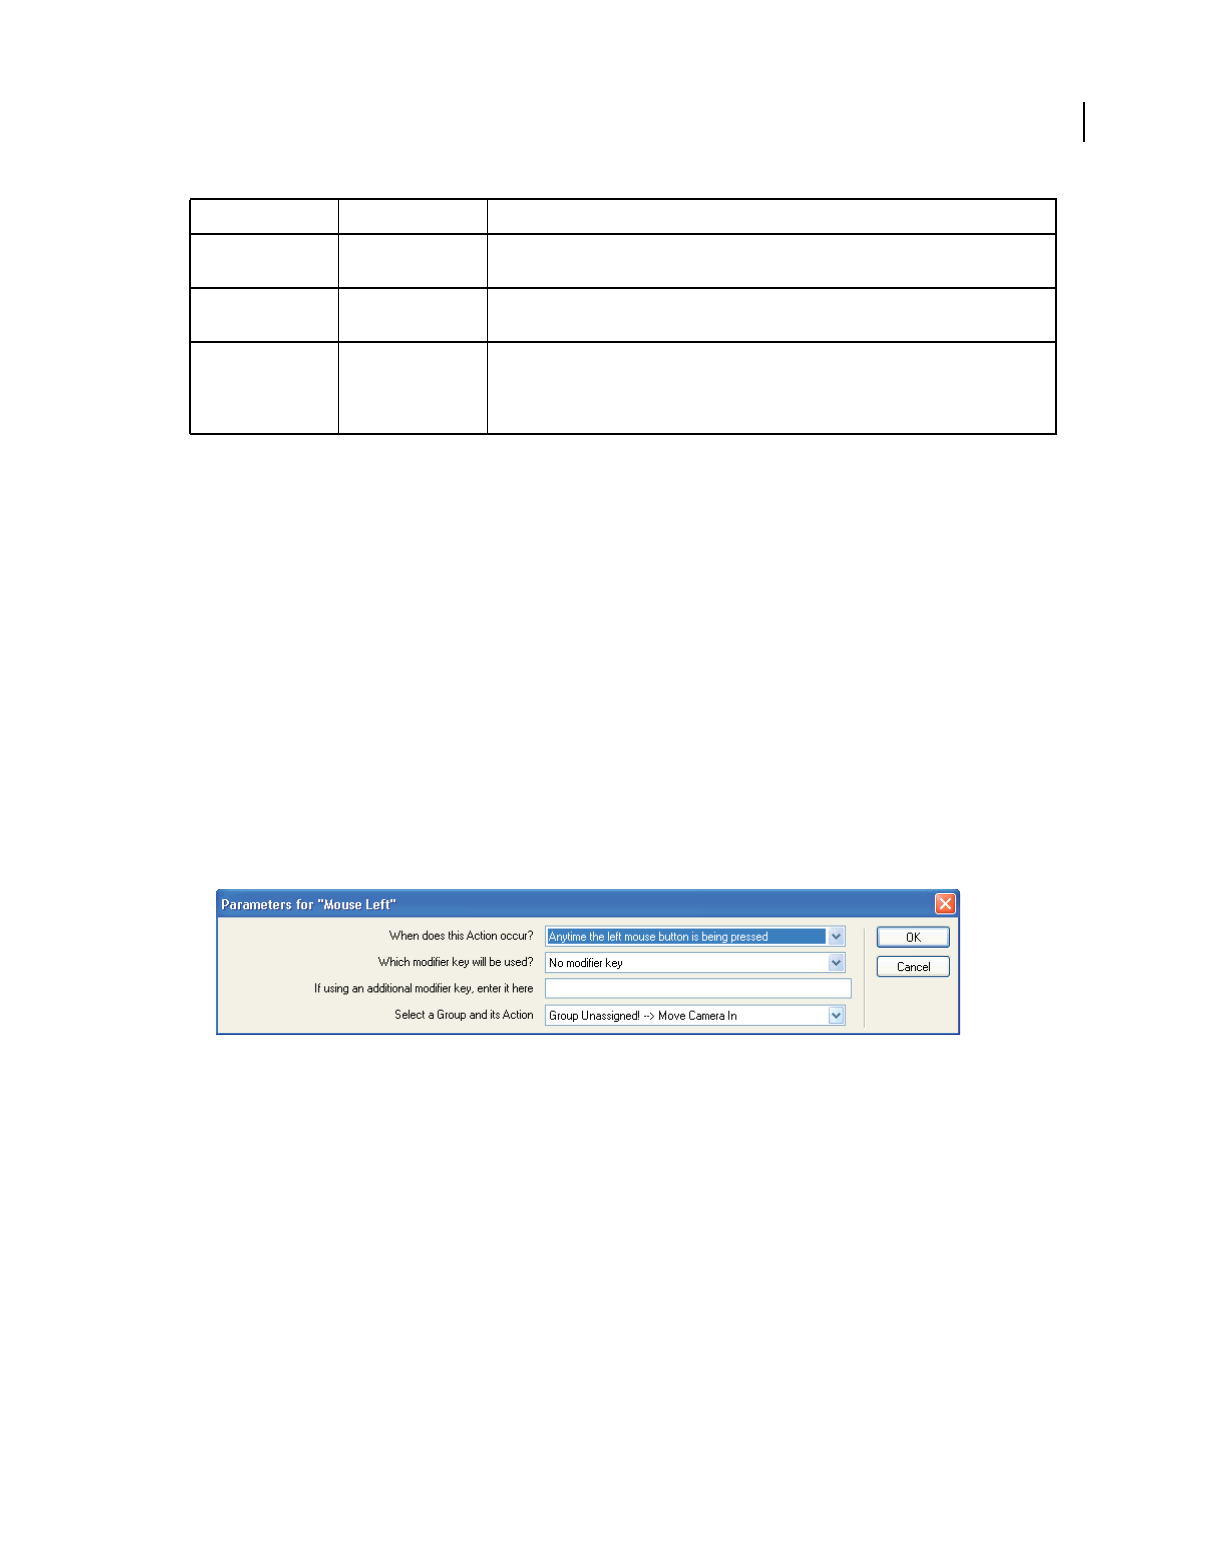
330
USING DIRECTOR 11.5
The 3D Cast Member, 3D Text, and 3D Behaviors
Last updated 9/28/2011
Applying 3D behaviors
Apply 3D behaviors in the same way as you apply standard behaviors in Director. You can attach as many behaviors
to a sprite as needed, but each behavior that requires a trigger must have a unique trigger to activate it.
1Open the Library palette.
2Open the 3D library.
3Attach an action behavior to the sprite, either on the Stage or in the Score.
The Parameters dialog box appears. Use it to control the behavior. Available options vary.
4Specify options in the Parameters dialog box and click OK.
5For local behaviors, attach a trigger behavior to the same sprite. For public behaviors, attach a trigger behavior to a
specific sprite.
The Parameters dialog box appears. Use it to control when the trigger should work; what modifier keys, if any, are
associated with the trigger; and to which sprite group the trigger is assigned. For more information about groups,
see “About behavior groups” on page 330.
The Parameters dialog box
6Specify options in the Parameters dialog box and click OK.
About behavior groups
The Parameters dialog boxes of the local and public action behaviors give you the option to assign the behavior to a
group of behaviors. Groups let a single trigger initiate actions across multiple sprites. To establish a group, select a
name for the group and enter that name in the Parameters dialog box of each behavior that you attach to the sprites in
the group.
Note: A behavior group is not the same as a group node inside a 3D cast member.
Because the triggers are sent to the group name rather than to a specific sprite number, there are no reference changes
to update when a sprite moves from one Score channel to another.
Show Axis Debugging Establishes red, green, and blue lines along the x-, y-, and z-axes, respectively, letting you
see them in the 3D scene.
Subdivision Surfaces Model Enables the subdivision surfaces (SDS) modifier for the given model, which synthesizes
additional detail to smooth out curves as the model’s distance from the camera decreases.
Toon Model Enables the toon modifier, which renders the model in a cartoon style, with a reduced
number of colors and distinct boundaries. The user can set the toon style precisely, by
selecting the number of colors, line color, brightness and darkness of highlights and
shadows, and anti-aliasing.
Name Effect Description

331
Last updated 9/28/2011
Chapter 17: Working with Models and
Model Resources
Introduction
Lights illuminate the 3D world and the models in it. Without lights, the world exists, and actions can take place, but
users see nothing. You can add lights to your 3D world in your 3D modeling application and with the Property
inspector or with Lingo or JavaScript™ syntax.
Cameras act as windows into a 3D world. Each camera that exists in a 3D cast member offers a different view into it,
and each sprite that uses a 3D cast member uses one of these cameras. A camera’s position can be moved with the
Property inspector or the Shockwave® 3D window. You can also use the Adobe® Director® 3D behaviors or Lingo or
JavaScript syntax to add camera and manipulate camera positions.
For more information, see the Scripting Reference topics in the Directory Help Panel.
About models and model resources
Models are the objects you see in the 3D world. You can create models within Director. Spheres, boxes, planes,
cylinders, and particle systems can be created either with Lingo or JavaScript syntax or with Director behaviors. These
simple shapes are called primitives. They are the basic shapes from which more complicated models are built. (Particle
systems are different from the other primitives. Instead of being shapes, they create cascades of moving particles.) You
can also create mesh primitives, which allow you to define any kind of complex shape you wish.
For the most part, you should create complex models outside of Director, use a 3D modeling application, and then
import them into Director in the W3D file format.
Accessing properties and methods of a model or any other node type, such as a light or camera, requires that the node
be on the Stage or explicitly loaded with the preLoad() method.
Model resources
Model resources are 3D geometries defined in 3D modeling software or created in Director by scripting in Lingo or
JavaScript syntax. A model is an object that makes use of a model resource’s geometry and occupies a particular
position and orientation within the 3D world. Model resources are viewable only when in use by a model. Several
models can use the same model resource.
Common model resource properties
All model resources share the following properties:
332
USING DIRECTOR 11.5
Working with Models and Model Resources
Last updated 9/28/2011
The bone.count and getBoneID() properties are available only for model resources that have a type of #fromFile.
They are not available for primitives created with Lingo.
File-defined model resource properties
Model resources defined by a W3D file imported into Director or loaded via script have a type value of #fromfile.
File-defined resources are automatically assigned level of detail (LOD) modifier settings that allow models using those
geometries to adjust their level of detail as needed, depending on the model’s distance from the camera. For more
information, see “Level of detail (LOD) modifier properties” on page 356.
Primitives
Each type of primitive has its own set of methods and properties used to define its appearance.
Use the newModelResource() method to create the various primitives at runtime. Exceptions include mesh model
resources, which require you to use the newMesh() method, and extruder resources, which require you to use the
extrude3D() method of a text cast member.
Sphere properties
Spheres created at runtime aren’t saved with the cast member’s media when the Director movie is saved. Their type
is #sphere. Their surface is generated by sweeping a two-dimensional semicircle arc in the xy plane from startAngle
to endAngle in the y-axis. If startAngle= 0.0 and endAngle = 360.0, a full sphere is generated. If startAngle=
180.0 and endAngle= 360.0, a half sphere is generated.
The following properties can be modified or animated at runtime:
Property Name Access Description Range or Default
name Get Unique string naming model resource. If imported, the name of the
model.
If created by scripting, the
assigned name in the
constructor method.
type Get Type of geometry. #plane
#box
#sphere
#mesh
#cylinder
#particle
bone.count Get Total number of bones in bones hierarchy. Non-negative integer.
model Resource.
getBoneId ("name")
Get Returns a unique ID for the bone named name in this
model’s bone hierarchy. Returns FALSE (0) if no bone
by that name can be found.
None.
333
USING DIRECTOR 11.5
Working with Models and Model Resources
Last updated 9/28/2011
Cylinder properties
Cylinders have a type property of #cylinder. Director generates a cylinder’s surface by sweeping a 2D line around
the z-axis in the xy plane from startAngle to endAngle. If startAngle= 0.0 and endAngle = 360.0, a full cylinder
is generated. If startAngle = 180.0 and endAngle = 360.0, a half cylinder is generated. The following properties
can be modified or animated at runtime.
Box properties
Boxes have a type property of #box. Box properties can be modified or animated at runtime.
Property Access Description Value Range
radius Get and set Radius of the sphere. Positive floating-point value.
The default is 25.0.
resolution Get and set Controls the number of polygons used in the creation of
the sphere surface. The higher the value, the smoother
the surface.
An integer value of 1 or
greater. The default is 20.
startAngle Get and set Starting angle of the sweep. Floating-point value of from
0.0 to 360.0. The default is 0.0.
endAngle Get and set Ending angle of the sweep. Floating-point value of from
0.0 to 360.0. The default is
360.0.
Property Access Description Value Range
topRadius Get and set Radius of the top of the cylinder. Setting this value to 0
produces a cone.
Positive floating-point value.
The default is 25.0.
bottomRadius Get and set Radius of the bottom of the cylinder. Positive floating-point value.
The default is 25.0.
numSegments Get and set Number of polygonal segments from bottom to top. An integer value greater than
0.
resolution Get and set Number of polygonal segments around the
circumference of the circle. Controls the smoothness of
the cylinder’s appearance.
An integer value greater than
1.
height Get and set Height of the cylinder along the z-axis. Positive floating-point value.
The default is 50.0.
topCap Get and set Value indicating whether the top of the cylinder is closed
or open. TRUE = closed.
TRUE or FALSE. The default is
TRUE.
bottomCap Get and set Value indicating whether the bottom of the cylinder is
closed or open. TRUE = closed.
TRUE or FALSE. The default is
TRUE.
Property Access Description Value Range
height Get and set Height of the box, measured along the y-axis. Positive floating-point value.
The default is 50.0.
width Get and set Width of the box, measured along the x-axis. Positive floating-point value.
The default is 50.0.
length Get and set Length of the box, measured along the z-axis. Positive floating-point value.
The default is 50.0.

334
USING DIRECTOR 11.5
Working with Models and Model Resources
Last updated 9/28/2011
Plane properties
Planes are the default Director primitive. Planes, whose type property is #plane, are generated in the xz plane with
script. Plane properties can be modified or animated at runtime.
Mesh generator properties
The mesh generator is the most complex model resource. It allows experienced 3D programmers to create complicated
geometries at runtime.
The mesh generator primitive’s type property is #mesh and is created by the member’s newMesh() method. The
parameters included with that method describe how large the mesh will be.
You can use the mesh deform modifier to manipulate vertex positions at runtime for #mesh or any other type of model
resource. You can also use the #mesh primitive to change mesh properties directly, but this is usually not practical,
because the mesh must be rebuilt mathematically after each modification.
Use the following properties to work with mesh primitives:
top Get and set Value indicating whether the top of the box is closed or
open. TRUE (1) = closed.
TRUE (1) or FALSE (0). The
default is TRUE (1).
bottom Get and set Value indicating whether the bottom of the box is closed
or open. TRUE (1) = closed.
TRUE (1) or FALSE (0). The
default is TRUE (1).
front Get and set Value indicating whether the front of the box is closed or
open. TRUE (1) = closed.
TRUE (1) or FALSE (0). The
default is TRUE (1).
back Get and set Value indicating whether the back of the cylinder is closed
or open. TRUE (1) = closed.
TRUE (1) or FALSE (0). The
default is TRUE (1).
left Get and set Value indicating whether the left end of the box is closed
or open. TRUE (1) = closed.
TRUE (1) or FALSE (0). The
default is TRUE (1).
right Get and set Value indicating whether the right end of the box is
closed or open. TRUE (1) = closed.
TRUE (1) or FALSE (0). The
default is TRUE (1).
lengthVertices Get and set Number of vertices along the length of the box.
Increasing the number of vertices improves lighting
effects.
2 or more. The default is 4.
width Vertices Get and set Number of vertices along the width of the box. Increasing
the number of vertices improves lighting effects.
2 or more. The default is 4.
height Vertices Get and set Number of vertices along the height of the box.
Increasing the number of vertices improves lighting
effects.
2 or more. The default is 4.
Property Access Description Value Range
width Get and set Width of the plane. Positive floating-point value.
The default is 1.0.
length Get and set Length of the plane. Positive floating-point value.
The default is 1.0.
length Vertices Get and set Number of vertices along the length of the plane. 2 or more. The default is 2.
width Vertices Get and set Number of vertices along the width of the plane. 2 or more. The default is 2.
Property Access Description Value Range
335
USING DIRECTOR 11.5
Working with Models and Model Resources
Last updated 9/28/2011
Property Access Description Value Range
vertexList Get and set Vector values for each vertex in the mesh. Several faces
may share a single vertex.
Set the value to the number of
vectors specified in your
newMesh call.
normalList Get and set Vector values for each normal in the mesh. Several faces
may share a single normal. A normalized vector is one in
which all components are of unit length.
You can use the generateNormals() method instead
of specifying normals yourself. In that case, set 0 as the
number of normals in your newMesh() call. The normals
are calculated based on a clockwise vertex winding. That
is to say, if you imagine the vertices being wound down a
spindle, they would be wound from left to right, in a
clockwise manner.
No default. Instead, set the
value to the number of vectors
specified in your newMesh call.
texture
Coordinate List
texcoordlist
Get and set A list of sublists identifying locations in an image used for
texture-mapping a triangle. Each sublist contains two
values between 0.0 and 1.0 that define a location and can
be arbitrarily scaled to any texture size.
No default. Instead, set the
value to the number of two-
element sublists specified in
your newMesh call.
colorList Get and set List identifying every color in the mesh. Any color can be
shared by several faces.
Alternatively, specify texture coordinates for the mesh
faces and apply a shader to models using this model
resource.
No default. Instead, set the
value to the number of colors
specified in your newMesh call.
face.count Get Number of triangles in the mesh. The number of faces specified
in your newMesh call.
face[index].vert
ices
Get and set List indicating which vertices to use for faces at
designated index points.
Set the value to a list of three
integers specifying the
indexes of the vertices in the
vertexList that define this
face.
face[index].
normals
Get and set List indicating which normals to use for faces at
designated index points.
Set the value to a list of three
integers specifying the
indexes of the normals in the
normalList that each point
of the triangle should use.
Don’t set a value if you aren’t
defining your own normals.
336
USING DIRECTOR 11.5
Working with Models and Model Resources
Last updated 9/28/2011
Mesh generator methods
Use the following methods to work with mesh primitives:
Particle system properties
Particle systems are unique among model resources in that they include animation by default. Particle systems, whose
type is #particle, can have an infinite variety of appearances, simulating fire, smoke, running water, and other
streaming or bursting effects.
Use the following properties to work with particle systems:
face [index].
textureCoordinat
es
face[index].
texcoords
Get and set List indicating which texture coordinates to use for faces
at designated index points.
Set the value to a list of three
integers specifying the
indexes of the texture
coordinates in the
textureCoordinates List
that each point of the triangle
should use.
Don’t set a value if you aren’t
defining your own texture
coordinates.
face[index].
colors
Get and set List indicating which colors to use for faces at designated
index points.
Set the value to a list of three
integers specifying the
indexes of the colors in the
colorList that each point of the
triangle should use.
Don’t set a value if you aren’t
defining your own colors.
face[index].shad
er
Get and set Shader used for rendering the face. Shader defined for use with
this face.
Method Description Returns
build() Builds the mesh according to the current property values. (The mesh
construction properties specified in the Mesh generator properties
mesh primitives table have no effect until build() is called.)
Generates a script error if any properties specify an invalid list.
Nothing
generateNormals (style)Generates a new normal for every vertex in every triangle. The style
parameter can be #flat, so that each triangle is clearly delineated, or
#smooth. The method assumes that all triangles were specified in a
clockwise order.
Nothing
Property Access Description Value Range
lifetime Get and set Lifetime of all particles emitted, in milliseconds. Positive integer. The default is
10.000 ms.
colorRange. end Get and set Color value of a particle at the end of its life. Any color value. The default is
color(255, 255, 255).
colorRange.
start
Get and set Color value of a particle at the start of its life. Any color value. The default is
color(255, 255, 255).
Property Access Description Value Range

337
USING DIRECTOR 11.5
Working with Models and Model Resources
Last updated 9/28/2011
tweenMode Get and set The variation of a particle’s color throughout its life. The
change can be based on either velocity or age.
#velocity: Alter particle
color between
colorRange.start and
colorRange.end based on
velocity.
#age:Alter particle color
between
colorRange.start and
colorRange.end based on
the particle’s lifetime.
sizeRange. start Get and set The size of a particle at the start of its life. Positive integer.
The default is 1.
sizeRange. end Get and set Size of a particle at the end of its life. The size is linearly
interpolated between startSize and endSize.
Positive integer. The default is
1.
blendRange.
start
Get and set Opacity of a particle at the start of its life. Any value between 0.0 and
100.0.
blendRange. end Get and set Opacity of a particle at the end of its life. Any value between 0.0 and
100.0.
texture Get and set Texture to use when drawing each particle. The default is
void.
Texture object.
emitter.
numParticles
Get and set Number of particles in a burst or stream. Positive integer. The default is
1000.
emitter.mode Get and set Mode in which particles are emitted. #burst:All particles emitted
at once.
#stream:X particles emitted
per frame with X
equalingemitter.
numParticles/(lifetime
*milliseconds
PerFrame).
Note:
milliseconds PerFrame is
the time elapsed between
rendered frames.
emitter.loop Get and set TRUE (1) or FALSE (0) value indicating whether
particles die (FALSE) or are recycled (TRUE).
0 or 1.
emitter.
direction
Get and set Vector of original emission. At 1,0,0, the default, particles
are emitted randomly over a sphere.
Any vector.
emitter. region Get and set Point, line, or region from which particles are emitted. Possible values:
single vector for point source.
two vectors for line segment.
four vectors for quadrilateral.
emitter.distribu
tion
Get and set Half the angle over which particles are distributed,
measured from the top of the screen.
0 to 180.
emitter. path Get and set Vector positions that define the path the particles follow. Vector list.
emitter. path
Strength
Get and set Degree to which particles remain on a path. Percentage between 0.0 and
100.0.
Property Access Description Value Range
338
USING DIRECTOR 11.5
Working with Models and Model Resources
Last updated 9/28/2011
The extruder model resource
You can create extruder model resources only by using an existing text cast member. In many cases, you may choose
to use the 3D text capabilities of the Property inspector instead.
Creating an extruder model resource is simple. If member 1 is a text cast member and member 2 is a 3D cast member,
use the following script:
member(1).extrude3d(member(2))
This generates a model resource in member 2 that is an extrusion of the 2D text in member 1.
Extruder model resources inherit all the 3D-related properties of the source text cast member.
For example:
mr = member("text").extrude3d(member("3D"))
put mr.smoothness
-- 5
put mr.tunnelDepth
-- 50
Cast member methods
If the models and model resources you need aren’t contained in a particular cast member, the following methods let
you create models and model resources by using other 3D cast members at runtime:
emitter.min
Speed
Get and set Minimum emission speed. (Particles are emitted at
random speeds between a minimum and a maximum.)
Settable value. The default is
1.0.
emitter.max
Speed
Get and set Maximum emission speed. (Particles are emitted at
random speeds between a minimum and a maximum.)
Settable value. The default is
1.0.
emitter.drag Get and set A drag value affecting simulation at each animation step. Percentage between 0.0 and
100.0.
emitter.gravity Get and set Vector representing simulated gravity. The vector’s
length indicates its strength.
Any vector.
emitter.wind Get and set A vector representing simulated wind pushing particles in
a given direction. The vector’s length indicates its
strength.
Any vector.
Property Access Description Value Range
339
USING DIRECTOR 11.5
Working with Models and Model Resources
Last updated 9/28/2011
Models
Models can be referred to by name or number. Models can be added to or removed from the world at any time.
Method Description Returns
loadFile (fileName,
Overwrite,
GenerateUnique Names)
This method loads a W3D format file from fileName, adds all models
as children of the world, and updates all palettes.
You can call this method only if the cast member’s state property is
either -1, meaning that an error occurred during a previous attempt to
load the file, or 4, meaning that media loading is complete. If an attempt
is made to call loadFile while the cast member is streaming media in,
a script error is generated.
Overwrite is an optional variable that can be TRUE (1) or FALSE
(0):
TRUE (1) means the old world is replaced by the contents of the file.
FALSE (0) means the new file is merged into the existing world.
GenerateUniqueNames is a variable that has no meaning unless
Overwrite is FALSE (0).
If Overwrite is FALSE (0), then if GenerateUniqueNames is TRUE
(1), all new elements sharing the same name as existing elements are
assigned a new, algorithmically determined unique name.
If GenerateUniqueNames is FALSE (0), all existing elements sharing
the same name as new elements being read into the file are replaced by
the new elements.
Nothing if the operation is
successful, or a script error if
the operation fails.
cloneModelFrom
Castmember (name, model,
castmember)
Performs a deep clone of a model from one cast member and puts it into
another cast member.
The model, its resources, its children, and its children’s resources all are
put into the new cast member.
A model object.
cloneMotion
FromCastMember (name,
motion, castmember)
Performs a deep clone of a motion from one cast member and puts it
into another cast member.
A motion object.
newModel Resource(name,
type)
Creates a new model resource and adds it to the model resource palette.
The type can be #plane, #box, #sphere, #cylinder, or #particle.
The type cannot be #mesh. To create a new mesh model resource, use
the newMesh method detailed below.
New model resource object.
newMesh(name, numFaces,
numVertices, numNormals
numColors, numTexture
Coordinates)
Creates a new mesh model resource.
numFaces is the user-specified number of triangles.
numVertices is the user-specified number of vertices. A vertex can be
used by more than one face.
numNormals is the user-specified number of normals. Enter 0 or omit
this step to use the generateNormals() method.
numColors is the user-specified number of colors. You can specify a
color for each point of a triangle.
numTextureCoordinates is the number of user-specified texture
coordinates. Enter 0 or omit this step to get the default coordinates.
New mesh model resource.
340
USING DIRECTOR 11.5
Working with Models and Model Resources
Last updated 9/28/2011
In the member’s parent-child hierarchy, each model can have a maximum of one parent, but it can have an unlimited
number of children. Models with no parent can exist in the 3D world but are not rendered. A child’s position and
orientation depend on its parent’s position and orientation, and it changes when the position and orientation of the
parent changes. Models can have any other group, light, camera, or model as their parent, or they can have no parent
specified. In this case, their transform property describes their position and rotation in the 3D world, and is identical
to their getWorldTransform() property. All models that have parents have a relationship both to their immediate
parent and to the world parent. You can add or remove models from the 3D world at any time by using the
addToWorld() or removeFromWorld() methods.
For example, if the first child of the model named car1 is a wheel model, the following transform script would refer
to the position of the wheel relative to the model named car1:
car1.child[1].transform.position
To refer to the position of the wheel model relative to the world itself, use getWorldTransform():
car1.child[1].getWorldTransform().position
Node types
A model is one of four types of objects that share the same transform, parent, and child properties. The others are
cameras, lights, and groups. Models, cameras, lights, and groups are generically referred to as node types or nodes.
Nodes can be each other’s parents or children, as long as any one node has exactly one parent. A node can have any
number of children. A model, for example, can be the child of a light and the parent of a group.
Model properties
The following properties of a model determine its particular appearance and relationship to the rest of the 3D world:
Property Access Description Value
name Get Unique string name. Any string.
parent Get and set This model’s parent; either another object or the 3D cast
member itself.
An object or cast
member.
child.count Get Number of children (but not grandchildren) of a given model. An integer.
transform Get and set Transform object representing this model’s position and
orientation relative to its parent’s position and orientation:
transform.position gives the relative position.
transform.rotation gives the relative rotation.
Set: a transform
object.
Get: reference to a
transform object.
userData Get and set A property list containing all properties assigned to the model.
Users can add, remove, get, and set properties on this list.
The default list
includes the
properties assigned in
the 3D modeling tool.
Additional properties
may also be added.
resource Get and set Model resource object defining model’s geometry. Model resource
object.
shaderList Get and set List of all shaders used by the model. Setting this property to a
single shader sets every element of the shaderList to that
shader.
List.

341
USING DIRECTOR 11.5
Working with Models and Model Resources
Last updated 9/28/2011
Model methods
Use the following methods to work with models:
shaderList.
count
Get Number of shaders the model uses. Positive integer.
shaderList.
[index]
Get and set Provides access to a particular shader used in a specific region
of the model.
List.
shader Get and set Provides access to the first shader in the shader list. Shader object.
bounding Sphere Get A list containing a vector and a floating-point value. The vector
represents the world position and the value represents the
radius of a bounding sphere surrounding the model and all its
children.
[vector (0,0,0),
0.0].
world Position Get and set Position of the model in world coordinates. Shortcut for the
method node.getWorldTransform
().position.
Vector object.
visibility Get and set The way in which the sides of the model’s resource are drawn.
The choices are as follows:
#none, in which no polygons are drawn and the model is
invisible.
#front, in which only polygons on the outer surface of the
model are drawn, so that, if the camera were inside the model,
the model wouldn’t be seen. Also known as “back face culling,”
this option optimizes performance.
#back, in which only polygons on the inside of the object are
drawn, so that if the camera were outside the model, the
model wouldn’t be seen.
#both, in which all polygons are drawn and the model is
visible regardless of orientation. This might solve drawing
problems, but it can also affect performance because twice as
many polygons must be drawn.
The default is #front.
#none:
#front
#back
#both
debug Get and set Value indicating whether debug information is drawn for this
model. If the value is TRUE (1), lines from the x, y, and z axes
are drawn sprouting up from the model to indicate its
orientation, and a bounding sphere is drawn around the
model.
TRUE (1) or FALSE
(0). The default is
FALSE (0).
bounding Sphere Get A list containing a vector and a floating-point value. The vector
represents the position of the model in world space, and the
floating-point value represents the radius of the bounding
sphere that contains the model and its children.
bounding Sphere
pointAt
Orientation
Get and set A list of two orthogonal vectors,
[objectRelativeDirecton, objectRelativeUp], that
control how the model’s pointAt() method works.
pointAt
Orientation
Property Access Description Value

342
USING DIRECTOR 11.5
Working with Models and Model Resources
Last updated 9/28/2011
Method Description Returns
addChild(aNode,
preserveWorld)
Adds aNode to this model’s list of children. An equivalent operation is
to set aNode.parent to equal this model.
The preserveWorld argument is optional. It can have two values:
#preserveWorld or #preserveParent. If the value is
#preserveWorld (he default), the world transform of the child being
added remains intact. If the value is #preserveParent, the child’s
existing transform is interpreted as parent-relative.
Nothing.
child[index]Returns the child at the specified position in the index. Node object.
child(name)Returns the child named name. Node object.
clone(name) Clones a model named name, adds it to the child list of the model’s
parent, and adds it to the world.
The clone shares the same model resource, shader list, and parent as
the original model, but it has unique copies of the model’s transform
and modifier properties.
All children of the model are automatically cloned. This can be avoided
by removing the children, performing the cloning operation, and then
adding the children back.
If the name is omitted or is “”, the clone isn’t added to the model
palette, has no parent, and has no children. This option lets you quickly
create temporary model instances.
Model object.
cloneDeep(name) Clones both the model and the model resource used by the model’s
children. Modifications to the clones’ resource don’t affect the source
model’s resource.
This is a more memory-intensive operation than clone(name).
Model object.
addtoWorld() Adds the model to the currently active 3D world, setting its parent as
“world.” Equivalent to model.parent=member("scene").group
("world")
All newly created models are added to the world by default, without it
being necessary to use this method.
Nothing.
remove FromWorld() For models whose parent hierarchy terminates in the world, this sets
their parent to void and removes them from the world. Otherwise it
does nothing.
Nothing.
isInWorld() Returns a Boolean value indicating if the model is currently in the
world (TRUE) or not (FALSE). This is useful for detecting if a given node's
parent-hierarchy tree terminates with the world group object or not.
TRUE (1) or FALSE (0).
registerScript
(eventName, handlerName,
scriptInstance)
Registers a handler named handlerName that is called in the
scriptInstance when the member method sendEvent() is called
with eventName as an argument.
If scriptInstance is 0, a movie script handler is called.
The user defines what eventName is. The eventName specified can be
one of a default set of events or a user-defined custom event. The
default events are #collideAny, #collideWith, #animationStarted,
#animationEnded, #timeMS.
Nothing.
addModifier (symbol)Adds the modifier symbol.TRUE (1) if symbol is a valid
modifier.
FALSE (0) if symbol is not a
valid modifier.

343
USING DIRECTOR 11.5
Working with Models and Model Resources
Last updated 9/28/2011
Moving models
Because the 3D world has no absolute frame of reference, moving and rotating is much more complex than in 2D,
where all movement is in relation to screen position.
removeModifier (symbol)Removes the first modifier identified by symbol.TRUE (1) if symbol is a valid
modifier and attached to the
model
FALSE (0) if symbol is not a
valid modifier or is not
attached to the model.
update() Updates animation timing without rendering again.
Used to force update of bone positions in an animation while inside a
script call.
TRUE (1) or FALSE (0).
translate (direction
Vector, relativeTo)
Moves the model directionVector.length() in the direction of the vector
directionVector. The relativeTo argument is optional and
defaults to #self.
Nothing.
translate (x,y,z,
relativeTo)
Moves the model distance x along the x-axis, distance y along the y-
axis, and distance z along the z-axis. The relativeTo argument is
optional and defaults to #self.
This method can also be written as
translate(vector(x,y,z)relativeTo).
Nothing.
rotate(x,y,z,
relativeTo)
Rotates the model by x° around the x-axis, y° around the y-axis, and
z° around the z-axis.
The relativeTo argument is optional and defaults to #self. If
included, it defines the coordinate space of the axes.
This method can also be written as
rotate(vector(x,y,z) relativeTo).
Nothing.
rotate (position, axis,
angle, relativeTo)
Rotates the model around the axis vector in the specified position and
in the specified number of degrees. The relativeTo argument is
optional and defaults to #self.
Nothing.
scale(uniform Scale)Scales the model the same amount in all directions. Nothing.
scale(x, y, z) Scales the model by a factor of x in the x dimension, y in the y
dimension, and z in the z dimension. Scaling is applied in
object-relative space.
Nothing.
pointAt(world Position,
worldUp)
Points the node’s “front” at the world position and then tries to align
the node’s “up” with the worldUp specified, and that the node’s “front”
and “up” are determined by the node’s pointAtOrientation
property.
Both the object-relative axes are defined by the
pointAtOrientation property. Default values are an object-relative
forward direction of vector (0, 0, -1) and an object-relative up
direction of vector (0, 1, 0).
Nothing.
getWorld Transform() Calculates and returns a transform that converts object-relative
positions for this model into world-relative positions.
A transform object.
Method Description Returns

344
USING DIRECTOR 11.5
Working with Models and Model Resources
Last updated 9/28/2011
In 3D, everything is drawn relative to the camera’s frame of reference. If the camera is behind an object, when the
object moves to the left relative to the center of the world (the world origin), it appears to move toward the right of the
screen.
Each piece of position and orientation information can be expressed relative to one or more frames of reference. A
model’s transform property, for instance, expresses its position and rotation relative to the model’s parent. In general,
there are four frames of reference to consider: relative to the object (model, light, camera) itself, relative to the object’s
parent, relative to the world, and relative to some other object.
•Object-relative: When you create a model in a 3D-modeling program, you build it relative to its own frame of
reference. For instance, when you create a model of a car, the front of the car may be pointed along its z-axis and
the antenna may be pointed along its y-axis. To move such a car forward (along its z-axis) regardless of which
direction it is pointing relative to the camera or the world, use car.translate(0,0,10). To turn the car left, use
car.rotate(0,45,0).
The car model might have wheel models as children. To rotate the wheel of a car relative to itself, rather than relative
to its parent (the car), use the following script:
wheel.rotate(0,10,0)
or
car.child[1].rotate(0,10,0, #self)
where the fourth parameter of the rotate method is the object the rotation should be relative to.
•Parent-relative: A model’s transform property expresses its position and rotation relative to the model’s parent. If
you want the wheels of the car to move outward regardless of how the wheels are turned, use
car.child[1].translate(10,0,0,#parent) or car.child[1].transform.translate(10,0,0). If you
want a planet model that is a child of the sun to orbit around the sun, use planet.rotate(0,5,0, #parent).
•World-relative: If you want the car to move along the world’s x-axis regardless of which way it is facing, use
model.translate(10,0,0,#world). If you want to rotate the car 20° around the world y-axis, with the rotation
taking place at the world location vector (10, 10, 10), use model.rotate(vector(10,10,10), vector(0,1,0),
20, #world).
•Relative to another object: If you want to move an object so that it goes toward the right edge of the screen, use
model.translate (vector(10,0,0), sprite(1).camera). If you want to rotate the object parallel to the
camera and around the center of the screen, use model.rotate(vector(0,0,0), vector(0,0,1), 20,
sprite(1).camera).
Shaders
A model resource defines a model’s shape, and shaders define the model’s surface colors and reflectivity. You can use
just one shader or more than one. Each mesh in a model resource can have its own shader. For example, a box might
have six different shaders, one for each mesh (a box is actually composed of six plane meshes carefully arranged). If
you do not specify a shader, the default #standard shader is used. If the shader’s properties are modified, the change
affects all models that use that shader.
Models that are created with script are assigned the standard shader. You can replace the default shader of a model
with any of the other types of shaders.

345
USING DIRECTOR 11.5
Working with Models and Model Resources
Last updated 9/28/2011
Properties of the standard shader
The standard shader makes the surface of a model appear in a photorealistic style. Use the following properties to work
with the standard shader:
Property Name Access Description Default
name Get The string name of this shader. None.
ambient Get and set A color object describing the surface's reaction to
ambient light.
color(63,63, 63)
diffuse Get and set A color object describing the surface's reaction to
diffuse light. Ambient and diffuse color objects
together describe a model resource’s base color.
color(255,
255,255)
specular Get and set A color object describing the surface's specular
highlight color. This setting has an effect only if there
are lights in the scene whose specular property is TRUE
(1).
color(255,
255,255)
shininess Get and set An integer between 0 and 100 that indicates how shiny
a surface is.
30.0
emissive Get and set A color object describing the color of light this object
seems to give off. This does not turn the surface using
this shader into a light source; it just gives it the
appearance of being one.
color(0,0,0)
blend Get and set An integer between 0 and 100 indicating how
transparent (0) or opaque (100) this surfaces is.
Unlike with a texture that includes alpha information,
this setting affects the entire surface uniformly.
100
transparent Get and set This property controls whether or not the model is
blended using alpha values or rendered as opaque. The
default is TRUE (1) (alpha blended). The functionality
of shader.blend depends on
shader.transparent.
TRUE (1)
renderStyle Get and set This property can take the following values:
#fill
#wire
#point
When shader.renderStyle = #fill, the polygons
of the mesh are filled.
When shader.renderStyle = #wire, the polygon
edges of the mesh are rendered.
When shader.renderStyle = #point, the vertices
of the mesh are rendered, provided that #Fill is
supported by the #software renderer. The #point
and #wire values do not work with the software
renderer.
#fill
flat Get and set When shader.flat = TRUE (1), the mesh should
be rendered with flat shading instead of Gouraud
shading, which shades each polygon separately. Flat
shading shades the mesh as a whole.
FALSE (0)
346
USING DIRECTOR 11.5
Working with Models and Model Resources
Last updated 9/28/2011
textureList Get and set A shader can use up to eight layers of textures. This
eight-element list defines which texture is used for
which layer.
Get: Returns a list of texture objects, one per layer.
Set: Specifies a texture object to be applied to all layers.
An argument of void disables texturing for all layers.
void
textureList [index]Get and set A shader can use up to eight layers of textures. This
property gives access to the texture at the indicated
index position.
void
texture Get and set This property allows access to the texture for the first
layer. It is equivalent to textureList[1].
An argument of void can be used to disable texturing
for the first layer.
void
reflectionMap Get and set Get: Returns the texture associated with the third layer.
Set: Specifies a texture to be used in the third layer and
applies the following values:
textureModeList[3] = #reflection
blendFunctionList[3] = #blend
blendSourceList[3] = #constant
blendConstantList[3] = 50.0
void
diffuseLightMap Get and set Get: Returns the texture associated with the second
layer.
Set: Specifies a texture to be used in the second layer
and applies the following values:
textureModeList[2] = #diffuse
blendFunctionList[2] = #multiply
blendFunctionList[1] = #replace
void
specularLight Map Get and set Get: Returns the texture associated with the fifth layer.
Set: Specifies a texture to be used in the fifth layer and
applies the following values:
textureModeList[5] = #specular
blendFunctionList[5] = #add
blendFunctionList[1] = #replace
void
glossMap Get and set Get: Returns the texture associated with the fourth
layer.
Set: Specifies a texture to be used in the fourth layer and
applies the following values:
textureModeList[4] = #none
blendFunctionList[4] = #multiply
void
Property Name Access Description Default
347
USING DIRECTOR 11.5
Working with Models and Model Resources
Last updated 9/28/2011
textureMode List[index]Get and set This property allows access to the texture coordinate
generation method used for a texture at the texture
level and then allows you to change how textures are
applied to a model’s surface. The property can take the
following values:
#none
#wrapPlanar
#wrapCylindrical
#wrapSpherical
#reflection
#diffuseLight
#specularLight
#none
textureMode List Get and set Get: Returns a list of texture coordinate generation
methods, one per layer.
Set: Specifies texture coordinate generation modes to
be applied to all layers.
Possible values are as follows:
#none
#wrapPlanar
#wrapCylindrical
#wrapSpherical
#reflection
#diffuseLight
#specularLight
#none
textureMode Get and set Access to the texture coordinate generation method for
the first layer.
Possible values are as follows:
#none
#wrapPlanar
#wrapCylindrical
#wrapSpherical
#reflection
#diffuseLight
#specularLight
#none
wrapTransform
List[index]
Get and set Access to the texture coordinate generation transform
associated with a specified layer. This transformation
has effect only if the textureModeList[index] is
#wrapPlanar, #wrapSpherical, or
#wrapCylindrical.
Controls the orientation of texture coordinate
generation in model-relative space.
Use this property to change the orientation, offset, and
scale of how the wrapTransformList[index] is
applied on the model.
transform(50.000
0,0.0000,0.0000,
0.0000,
0.0000,50.0000,0
.0000,0.0000,
0.0000,0.0000,50
.0000,0.0000,
0.0000,0.0000,0.
0000,1.0000)
Property Name Access Description Default
348
USING DIRECTOR 11.5
Working with Models and Model Resources
Last updated 9/28/2011
wrapTransform List Get and set Controls the orientation of UV generation in model
space.
Get: Returns a list of texture coordinate generation
transforms, one per layer.
Set: Specifies a texture coordinate generation
transform to be applied to all layers.
transform(50.000
0,0.0000,0.0000,
0.0000,
0.0000,50.0000,0
.0000,0.0000,
0.0000,0.0000,50
.0000,0.0000,
0.0000,0.0000,0.
0000,1.0000)
wrapTransform Get and set Access to the texture coordinate generation transform
for the first layer.
Controls the orientation of the UV generation in model
space.
transform(50.000
0,0.0000,0.0000,
0.0000,
0.0000,50.0000,0
.0000,0.0000,
0.0000,0.0000,50
.0000,0.0000,
0.0000,0.0000,0.
0000,1.0000)
texture TransformList Get and set Access to the list of texture coordinate modifier
transforms, one per texturing layer.
The textureTransform is applied to all texture
coordinates regardless of the textureMode property
setting. This is the last modification of the texture
coordinates before they are sent to the renderer. Allows
you to manipulate the scale, orientation, and positional
offsets of the source image before it’s wrapped.
WrapTransformList changes the projection of the
transformed texture.
The textureTransform matrix operates on the
texture in textureImage space, which is defined to
exist only on the x,y plane. Rotations about the z-axis
are rotated around the (0,0) point, which maps to the
upper-left corner of the texture. Translating by integers
when textureRepeat is TRUE (1) has no effect,
because the width and height of the textures are
defined to be 1.0 in textureImage space. Care must
be taken not to scale any dimension (even z) by 0.
Identity transform.
textureTransform
List[index]
Get and set Access to the texture coordinate modifier transform
associated with a specified layer.
Identity transform.
texture Transform Get and set Access to the texture coordinate modifier transform for
the first layer.
Identity transform.
Property Name Access Description Default
349
USING DIRECTOR 11.5
Working with Models and Model Resources
Last updated 9/28/2011
blendFunction
List[index]
Get and set Access to the blending method associated with a
texture layer at the position indicated by index, which
must be a positive integer smaller than or equal to 8.
Possible values are as follows:
#replace
#multiply
#add
#blend
#alpha
#constant
For detailed information about all of these options, see
the Scripting Reference topics in the Director Help
Panel.
#multiply
blendFunction Get and set Access to the list of blending methods, #multiply,
#replace, #blend, and #add, for the first layer.
#multiply
blendFunction List Get and set Access to the list of blending methods, #multiply,
#replace, #blend, and #add, for all layers.
#multiply
blendSource List[index]Get and set Access to the blending source associated with a
specified layer.
When the blendFunction property is set to #blend
for the <index>th layer, this results in the <index>th
texture being combined with the result of the previous
layers for the entire texture using a single blending
ratio. The blending ratio, in this case, is the value of
blendConstant for layer <index>. For example, if the
layer at that index position’s blendConstant value is
0.9, the resultant texture will be 90% of the texture at
that index position and 10% of the result of the previous
texture layers
Possible values are #constant and #alpha.
#constant
blendSource List Get and set Access to the blending sources for each layer, providing
that the blend method is set to #blend.
Possible values are #constant and #alpha.
#constant
blendSource Get and set Access to the blending sources for the first layer,
providing that the blend method is set to #blend.
Possible values are #constant and #alpha.
#constant
blendConstant
List[index]
Get and set The blending ratio used for a specific layer when the
blend method is set to #blend and
blendSourceList[index] is set to #constant.
Returns a floating-point value from 0.0 to 100.0.
50.0
blendConstant List Get and set The blending ratio used for any layer when the blend
method is set to #blend and
blendSourceList[index] is set to #constant.
Returns a floating-point value from 0.0 to 100.0.
50.0
blendConstant Get and set The blending ratio used for the first layer when the
blend method is set to #blend and
blendSourceList[index] is set to #constant.
Returns a floating-point value from 0.0 to 100.0.
50.0
Property Name Access Description Default
350
USING DIRECTOR 11.5
Working with Models and Model Resources
Last updated 9/28/2011
Properties of the painter shader
The #painter shader gives the model a painted effect. Use the following properties to work with the painter shader:
textureRepeat
List[index]
Get and set Allows you to get or set the texture clamping behavior
associated with a specified layer. Texture clamping
refers to how a texture clamps to its shader. If the ratio
of the texture to the shader is less than 1 to 1 and
textureRepeatList is set to TRUE (1), the texture
tiles over the shader. If textureRepeatList is set to
FALSE (0), the texture isn’t repeated but appears only
once in one part of the shader.
If the ratio of the texture to the shader is greater than 1
to 1 and textureRepeatList is set to FALSE (0),
the border of the texture is extended past the unit UV
coordinate range.
TRUE (1).
textureRepeat List Get and set Access to the list of texture clamping behaviors, one per
layer.
When set to FALSE (0), the border of the texture is
extended past the unit UV coordinate range.
Get: Returns a list of texture clamping behaviors, one
per layer.
Set: Specifies a texture clamping behavior to be applied
to all layers.
TRUE (1).
textureRepeat Get and set Access to the texture clamping behavior for the first
layer.
When set to FALSE (0), the border of the texture is
extended past the unit UV coordinate range.
TRUE (1).
Property Access Description Default
name Get and set Name of shader. None.
style Get and set Possible values are as follows:
#toon: sharp transitions between available colors.
#gradient: smooth transitions between available
colors.
#blackAndWhite: sharp transitions between black
and white.
#gradient
colorSteps Get and set Number of color steps used for lighting calculations. 2
shadow Percentage Get and set Percentage of lighting intensity that is the threshold
between highlight and shadow.
50
highlight Percentage Get and set Percentage of lighting steps to be treated as highlight. 50
shadowStrength Get and set Factor controlling darkness of shadowed areas. 1.0
highlight Strength Get and set Factor controlling brightness of highlighted areas. 1.0
Property Name Access Description Default
351
USING DIRECTOR 11.5
Working with Models and Model Resources
Last updated 9/28/2011
Properties of the newsprint shader
The #newsprint shader creates a dithering effect similar to a newspaper photograph. Use the following properties to
work with the newsprint shader:
Properties of the engraver shader
The #engraver shader gives the effect of an engraved metal surface. You can control the size and number of etched
lines by adjusting the brightness and density properties, respectively. Use the following properties to work with the
engraver shader:
Textures
Each shader can have textures applied to it. Textures are 2D images drawn on the surface of a model. The appearance
of the model’s surface is the combined effect of the shader and textures applied to it. If you do not specify a texture, a
default red-and-white bitmap is used.
The pixel height and width of the 2D images that you use as textures should be powers of 2 (that is, 2, 4, 8, 16, 32, and
so on). This is because most video cards scale images to powers of 2. If the image used does not have pixel dimensions
that are a power of 2 (values including 2, 4, 8, 16, and so forth), both rendering performance and visual quality will
decrease. In addition, all the textures used in a 3D scene must be able to fit in the computer’s video RAM at the same
time. If not, Director switches to software rendering, which slows performance.
Be aware of the limitations of your video RAM and that of your intended audience. Some video cards have as little as
4 megabytes of video RAM. Carefully budget your total texture size when designing your 3D world.
Texture properties
Use the following properties to work with textures:
Property Access Description Default
name Get and set Name of shader. None.
brightness Get and set Value controlling amount of white in shader. 0.0
density Get and set Value controlling density of dots in newsprint image. 45.0
Property Access Description Default
name Get and set Name of shader. None.
brightness Get and set Value controlling amount of white in shader. 0.0
density Get and set Value controlling number of lines used to shade an area. 40.0
rotation Get and set Angle describing 2D rotational offset for engraving
lines.
0.0
352
USING DIRECTOR 11.5
Working with Models and Model Resources
Last updated 9/28/2011
Property Access Description Default
name Get and set Name of texture. None.
type Get Possible values:
#fromfile: bitmap defined as part of 3D import.
#fromCastmember: bitmap derived from Director cast
member.
#fromImageObject: the texture was created from a
Director image object.
None.
member Get and set If the type is #castmember, this property identifies the
source of the bitmap.
If the type if #fromfile, this property is void.
None.
width Get Width, in pixels. None.
height Get Height, in pixels. None.
quality Get and set Property with the following possible values:
#low: texture is not mipmapped.
#medium: mipmapping is at a low bilinear setting
(default).
#high: the mipmapping is at a high trilinear setting.
For more information, see the Scripting Reference
topics in the Director Help Panel.
#medium
353
USING DIRECTOR 11.5
Working with Models and Model Resources
Last updated 9/28/2011
Texture methods
The pixel height and width of the 2D images you use as textures should be powers of 2 (that is, 2, 4, 8, 16, 32, and so
on). If not, the image will be resized to a dimension that is a power of 2. The scaleDown() method lets you retain
manual control over this procedure at the texture level.
Groups
Groups have many of the same properties and methods as models, except that you need to substitute the word group
for the word model when writing scripts. A group is a node that can have a parent and/or children. These can be
models, lights, cameras, or other groups.
nearFiltering Get and set Determines whether bilinear filtering is used when
rendering a projected texture map that covers more
screen space than the original.
For more information, see the Scripting Reference
topics in the Director Help Panel.
TRUE (1)
compressed Get and set The property can be TRUE (1) or FALSE (0):
TRUE (1): the texture is compressed FALSE (0): the
texture is not compressed
The value changes automatically from TRUE (1) to
FALSE (0) when the texture is to be rendered.
The value can be set to FALSE (0) to decompress or to
TRUE (1) to remove the decompressed representation
from memory.
TRUE (1)
renderFormat Get and set This property determines how many bits are used to
render the texture. It takes the following values:
#default: the texture is rendered based on the value
of the
getRendererServices().textureRenderForma
t property.
#rgbaWXYZ: renders the texture using W bits for the red
channel, X bits for the green channel, Y bits for the blue
channel and Z bits for the alpha channel. This is
available by using the following possible combinations:
#rgba8888
#rgba8880
#rgba5650
#rgba5550
#rgba5551
#rgba4444
#default
Method Description Returns
scaleDown() Reduces the height of the texture to the next lowest power of 2. This is
useful for dynamically resizing textures to fit on a client machine.
Nothing.
Property Access Description Default
354
USING DIRECTOR 11.5
Working with Models and Model Resources
Last updated 9/28/2011
Group properties
The properties of the group determine its particular appearance and relationship to the rest of the 3D world.
Use the following properties to work with groups:
Group methods
Use the following methods to work with groups:
Property Access Description Value
name Get Unique string name. Any string.
parent Get and set This group’s parent; either another object or the 3D cast
member itself.
An object or cast
member.
child.count Get Number of children (but not grandchildren) of a given group. An integer.
transform Get and set Script transform object representing this group’s position and
orientation relative to its parent’s position and orientation.
transform.position gives the relative position.
transform.rotation gives the relative rotation.
Set: a transform
object.
Get: reference to a
transform object.
userData Get and set A property list containing all properties assigned to the group.
Users can add, remove, get, and set properties on this list.
The default list
includes the
properties assigned in
the 3D modeling tool.
User properties are
then added.
bounding Sphere Get A list containing a vector and a floating-point value. The vector
represents the position of the group in world space. The
floating-point value represents the radius of the bounding
sphere that contains the group and its children.
A list, with the default
value of [vector
(0,0,0), 0.0].
world Position Get Position of the group in world coordinates. A quick shortcut for
group.getWorldTransform(). position
A vector object.
pointAt
Orientation
Get and set A list of two orthogonal vectors,
[objectRelativeDirection, objectRelativeUp],
that control how the groups pointAt() method works.
A vector list.
Method Description Returns
addChild(aNode,
preserveWorld)
Adds aNode to this group’s list of children. An equivalent operation is to set
aNode.parent to equal this group.
The preserveWorld argument is optional. It can have two values:
#preserveWorld or #preserveParent. If the value is
#preserveWorld, the world transform of the child being added remains
intact. If the value is #preserveParent, the child’s existing transform is
interpreted as parent-relative.
Nothing.
child[index]Returns the child at the specified position in the index. Script group object.
child(name)Returns the child named name. Script group object.

355
USING DIRECTOR 11.5
Working with Models and Model Resources
Last updated 9/28/2011
clone(name)Clones a group named name, adds it to group’s parent’s child list, and adds
it to world.
All children of the group are automatically cloned. This can be avoided by
removing the children, performing the cloning operation, and then adding
the children back.
If the name is omitted or is "", the clone isn’t added to the group palette,
has no parent, and has no children. This option lets you quickly create
temporary group instances.
Script group object.
cloneDeep(name)Clones both the group and the parent used by the group’s children.
Modifications to the clones’ resource don’t affect the parent.
This is a more memory-intensive operation than clone(name).
Script group object.
addtoWorld() Adds the group to the currently active 3D world, setting its parent as
“world.”
Equivalent to group.parent=member("scene").group
("world").
All newly created groups are added to the world by default, without it being
necessary to use this method.
Nothing.
remove from world For groups whose parent hierarchy terminates in the world, this sets their
parent to void and removes them from the world. Otherwise it does
nothing.
Nothing.
isInWorld() For groups whose parent hierarchy terminates in the world, the value is
TRUE (1).
TRUE (1) or FALSE (0).
registerScript
(eventName,
handlerName,
scriptInstance)
Registers a handler named handlerName that is called in the
scriptInstance when the member method sendEvent() is called with
eventName as an argument.
If scriptInstance is 0, a movie script handler is called.
The user defines what eventName is. The eventName specified can be one
of a default set of events or a user-defined custom event. The default events
are #collideAny, #collideWith, #animationStarted, #animationEnded,
#timeMS.
Nothing.
translate
(xIncrement,
yIncrement,
zIncrement,
relativeTo)
Moves the group by xIncrement along the x-axis, yIncrement along the
y-axis, and zIncrement along the z-axis.
The relativeTo parameter is optional. It determines how arguments are
interpreted. The possible values are as follows:
#self: the default. Increments are applied relative to the group’s local
coordinate system.
#parent: increments are relative to the group’s parent’s coordinate
system.
#world: increments are relative to the world coordinate system. Equivalent
to #parent if parent is the world.
node (group, light, camera, or group): increments are relative to the
coordinate system of the argument object.
Nothing.
translate (direction
Vector, relativeTo)
Moves the group directionVector.length() in the direction of the
vector directionVector. The relativeTo argument is optional and
defaults to #self.
Nothing.
Method Description Returns

356
USING DIRECTOR 11.5
Working with Models and Model Resources
Last updated 9/28/2011
Modifiers
Modifiers control how a model is rendered or how it animates. They are attached to a model with the addModifier()
method. Once a modifier has been attached, its properties can be manipulated with script.
Level of detail (LOD) modifier properties
The level of detail (LOD) modifier provides per-model control over the number of polygons used to render a model,
by allowing you to reduce the number to a lower value, based on the model’s distance from the camera. This modifier
is attached to all imported models.
The LOD modifier can work in one of two ways: automatically by using the distance from the camera, or manually. To
use manual mode, disable auto mode and then set the properties yourself.
Use the following properties to work with the level of detail modifier:
translate (x,y,z,
relativeTo)
Moves the group distance x along the x-axis, distance y along the y-axis,
and distance z along the z-axis. The relativeTo argument is optional and
defaults to #self.
This method can also be written as
translate(vector(x,y,z) relativeTo).
Nothing.
rotate(x,y,z,
relativeTo)
Rotates the group by x degrees around the x-axis, y degrees around the y-
axis, and z degrees around the z-axis.
The relativeTo argument is optional and defaults to #self. If included,
it defines the coordinate space of the axes.
This method can also be written as
rotate(vector(x,y,z) relativeTo).
Nothing.
rotate (position,
axis, angle,
relativeTo)
Rotates the group around the axis vector in the specified position and in the
specified number of degrees. The relativeTo argument is optional and
defaults to #self.
Nothing.
pointAt(world
Position, worldUp)
Rotates the model until it points at the world-relative position
worldPosition. The optional worldUp argument gives the general position
of the model’s Up axis. The exact position can’t be determined by using this
method.
Both the object-relative axes are defined by the pointAtOrientation
property. Default values are an object-relative forward direction of vector
(0, 0, -1) and an object-relative up direction of vector (0, 1, 0).
Nothing.
getWorld Transform() Calculates and returns a transform that converts object-relative positions
for this group into world-relative positions.
A transform object.
Method Description Returns
357
USING DIRECTOR 11.5
Working with Models and Model Resources
Last updated 9/28/2011
Toon modifier properties
The toon modifier changes a model’s rendering to imitate a cartoon drawing style. Only a few colors are used, and the
model’s shader, texture, and related properties are ignored.
Use the following properties to work with the toon modifier:
Property Access Description Default
whichModel.lod.auto Get and set TRUE (1) means that polygons are automatically
reduced based on the distance from the camera. The
fewer polygons that are drawn, the faster performance
will be. The lod.bias property controls how aggressively
this takes place.
FALSE (0) means that you can control polygon
reduction on a per-model basis, provided you’ve
attached the level of detail modifier to the model. The
level of detail modifier lets you override the default
settings.
To release level of detail data from memory once the
model has been streamed in, set the userData
property sw3D to TRUE (1).
TRUE (1).
whichModel.lod.bias Get and set Aggressiveness with which the level of detail is reduced
when in automatic mode. A value of 0.0 is most
aggressive and removes all polygons. A value of 100.00
should result in no visible degradation of the geometry.
A middle level can be used to remove polygons at
runtime that were not removed during authoring.
A value between 0.0
and 100.0. The
default is 100.0.
whichModel.lod.level Get and set The percentage of the model resource mesh resolution
to use when the automatic mode is FALSE (0).
A value between 0.0
and 100.0. The
default is 100.0.
Property Access Description Default
whichModel.toon. style Get and set The following are the possible values:
#toon: sharp transitions between available colors.
#gradient: smooth transitions between available
colors.
#black and white: sharp transitions between black
and white.
#gradient
whichModel.toon.
colorSteps
Get and set Maximum number of colors available, rounded to the
nearest power of 2, with a limit of 16.
2
whichModel.toon.
shadowPercentage
Get and set The percentage of color steps to be used in shadows. 50
whichModel.toon.
highlightPercentage
Get and set The percentage of color steps to be used in highlight. 50
whichModel.toon.
shadowStrength
Get and set A floating-point value that determines shadow
darkness.
1.0
whichModel.toon.
highlightStrength
Get and set A floating-point value that determines highlight
brightness.
1.0
whichModel.toon.
lineColor
Get and set Color object describing line color. Black
(rgb 0,0,0)
358
USING DIRECTOR 11.5
Working with Models and Model Resources
Last updated 9/28/2011
Inker modifier properties
The inker modifier adds silhouette, crease, and boundary edges to an existing model. Silhouettes are edges along the
border of a model. Crease edges are created when the angle between two areas of the mesh exceeds a given threshold.
Use the following properties to work with the inker modifier:
Subdivision surfaces modifier properties
The subdivision surfaces (SDS) modifier causes the model to be rendered with additional geometric detail in the area
of the model that the camera is currently looking at. The additional detail must be created in a third-party modeling
application (usually by having the 3D application render the extra polygons during export of the model) and imported
into Director along with the 3D cast member. The SDS modifier is available only for models created outside of
Director. The SDS modifier should not be combined with the level of detail or toon modifier on the same model.
Use the following properties to work with the SDS modifier:
whichModel.toon.
silhouettes
Get and set TRUE (1) or FALSE (0) value indicating presence or
absence of lines around silhouettes.
TRUE (1)
whichModel.toon. creases Get and set TRUE (1) or FALSE (0) value indicating whether lines
are drawn when mesh boundaries meet at a crease.
TRUE (1)
whichModel.toon.
creaseAngle
Get and set A floating-point value controlling crease angle
detection.
0.01
whichModel.toon. boundary Get and set TRUE (1) or FALSE (0) value indicating whether lines
are drawn at boundary of surface.
TRUE (1)
Property Access Description Default
whichModel.
inker.lineColor
Get and set Color object describing line color. Black
(rgb 0,0,0)
whichModel. inker.
silhouettes
Get and set TRUE (1) or FALSE (0) value indicating presence or
absence of lines around silhouettes.
TRUE (1)
whichModel. inker.creases Get and set TRUE (1) or FALSE (0) value indicating whether lines
are drawn when mesh boundaries meet at a crease.
TRUE (1)
model.inker. creaseAngle Get and set A floating-point value controlling crease angle
detection.
0.01
whichModel.
inker.boundary
Get and set TRUE (1) or FALSE (0) value indicating whether lines
are drawn at boundary of surface.
TRUE (1)
Property Access Description Default

359
USING DIRECTOR 11.5
Working with Models and Model Resources
Last updated 9/28/2011
Collision modifier properties
The collision modifier allows a model to be notified of and respond to collisions. You can access a model’s collision
modifier properties by using syntax such as model.collision.whichProperty.
Detecting collisions and responding to collisions are separate tasks. If the enabled property is set to TRUE, and a script
has been registered to be notified of collisions by using the setCollisionCallback() method, that script instance
receives a callback. However, the collision isn’t resolved unless the resolve property is also set to TRUE.
This separation is deliberate and valuable: it can be important for a collision to be registered. In a game, for example,
a projectile could strike a wall and the player’s score could be increased. However, in that same game, you might not
want the projectile to bounce off the wall. In that case, you’d set the enabled property to TRUE and set the resolve
property to FALSE.
Collision notification can also be implemented by using registerScript() on a specific model in addition to using
the setCollisionCallback() technique.
Use the following properties to work with the collision modifier:
Property Access Description Default
whichModel.sds.enabled Get and set Enables/disables subdivision surfaces modifier
functionality.
TRUE (1)
whichModel.sds.
subdivision
Get and set The following are the possible values:
#uniform: mesh is uniformly scaled up in detail, with
each face subdivided the same number of times.
#adaptive: additional detail is added only when there
are major orientation changes and only to those areas of
the mesh that are currently visible.
#uniform
whichModel.sds.depth Get and set Maximum recursion depth, with a range of 0 to 5, to
which the subdivision surfaces modifier is applied. At a
value of 0, no change occurs.
1
whichModel.sds.tension Get and set Percentage of matching between modified and original
surfaces.
65
whichModel.sds.error Get and set Percentage of error tolerance. This property applies only
if sds.subdivision equals #adaptive.
0.0
Property Access Description Default
whichModel.collision.enab
led
Get and set TRUE (1) or FALSE (0) value indicating whether
collisions between this model and other models will
trigger a collision event.
TRUE (1)
360
USING DIRECTOR 11.5
Working with Models and Model Resources
Last updated 9/28/2011
Collision modifier methods
Use the following method to work with the collision modifier:
Collision modifier events
The following events are generated when collisions occur:
whichModel.collision.reso
lve
Get and set TRUE (1) or FALSE (0) value indicating whether
collisions are automatically resolved. If the value is TRUE
(1) and if the other model has the collision modifier
applied and has enabled set to TRUE (1), the models
will be moved back to the position of their original
contact.
TRUE (1)
whichModel.collision.immo
vable
Get and set TRUE (1) or FALSE (0) value indicating whether the
model can be moved. If a model cannot be moved, the
3D Xtra can save time by not checking it for collisions
with other models that also have their immovable
property set to TRUE.
FALSE (0)
whichModel.collision.mode Get and set Indicates the geometry to be used in the collision
detection algorithm. Using simpler geometry such as
the bounding sphere leads to better performance. The
possible values for this property are:
#mesh: uses the actual mesh geometry of the model's
resource. This gives one-triangle precision and is usually
slower than #box or #sphere.
#box: uses the bounding box of the model. This is useful
for objects that can fit more tightly in a box than in a
sphere, such as a wall.
#sphere: is the fastest mode, because it uses the
bounding sphere of the model. This is the default value.
Method Description Returns
whichModel.collision.
setCollisionCallback (#handlerName,
scriptObjectName)
If collision.enabled is set to TRUE (1), this
method registers the script instance to receive an event
when a collision occurs. If collision.enabled is set
to FALSE (0), no event occurs. What happens when a
collision occurs depends on the value assigned to the
resolve property. You can override this value by using
the collisionData.resolveA() or
collisionData.resolveB() methods.
The collisionData object will be the second
argument passed to #handlerName in the specified
script object scriptObjectName.
Nothing.
Event Name Description
#collideAny The first event called when any collision occurs.
#collideWith The event called whenever a collision with a specified model occurs. It is implicitly registered for when
setCollisionCallback() is called.
Property Access Description Default

361
USING DIRECTOR 11.5
Working with Models and Model Resources
Last updated 9/28/2011
Animation modifiers
Once you’ve created animations in your modeling software, apply animation modifiers to models to play them back
in Director.
Director supports both model keyframe and character bone animations, and modifiers are available to enable both.
Keyframe animations modify a model’s transform properties over time. Bones animations modify the model’s
geometry over time. Creating bones animation in a 3D modeling application can be complex, but it results in more
natural-looking movements.
The two animation types can be combined. You might, for example, combine a “run in place” bones animation with a
“move around the room” keyframe animation.
Bones animations use the Bones player modifier. Keyframe animations use the Keyframe player modifier. Most
methods and properties are available to both players. Like all modifiers, the bones and keyframe player modifiers can
be attached only to geometric nodes (models). It isn’t possible to keyframe animate a camera or a light
•Motions: A 3D cast member contains a set of motions authored in your 3D-modeling application. For bones
animation, each motion contains a list of tracks, and each track contains the keyframes for a particular bone. A bone
is a segment of the skeleton of a model. For example, track 14 of the motion named Run could be named
RtKneeTrack and move a bone named RtKnee. These names are defined in the 3D modeling application.
•Play list: The Bones player manages a queue of motions. The first motion in the play list is the motion that is
currently playing or paused. When that motion finishes playing, it’s removed from the play list and the next motion
begins. Motions can be added with bonesPlayerOrKeyframePlayer.play("run"), which adds the motion to the
top of the list, or bonesPlayerOrKeyframePlayer.queue("motion"), which adds it to the end of the list. Using
the play method starts the motion immediately. The motion previously at the beginning of the play list is halted
unless autoBlend is turned on. When you use queue, the motion is added to the end of the play list. Motions are
removed from the play list automatically when they are complete. You can remove them explicitly by using
bonesPlayer.playNext().
•Motion blending: If autoblend is TRUE, an ending motion blends smoothly into the next motion using the
bonesPlayerOrKeyframePlayer.blendTime property to determine how long the blend should be. You can
control this manually by setting bonesPlayerOrKeyframePlayer.autoBlend to FALSE and using
bonesPlayerOrKeyframePlayer.blendFactor to control the blend frame by frame.
•Motion mapping: You can create new motions by combining existing motions. For example, a walking motion
could be combined with a shooting motion to produce a walk-and-shoot motion. This is available only with Bones
player animations.
You can add the Keyframe player modifier at runtime to a model created in Director, but you cannot add the Bones
player modifier at runtime. The Bones player modifier is automatically attached to models with bones animation
exported from a 3D-modeling application. Since the required bones information can’t be assigned in Director, it has
to exist before the model is imported into Director.
Bones player methods
Use the following methods to work with bones animations:
362
USING DIRECTOR 11.5
Working with Models and Model Resources
Last updated 9/28/2011
Bones player properties
Use the following properties to work with bones animations:
Method Description Returns
whichModel.bonesPlayer. play("name",
looped, startTime, endTime, playRate,
timeOffset)
Plays the motion named name starting at the time
timeOffset, with the currently playing motion being
pushed down the play list. If looped is FALSE (0), the
preceding motion begins again when this motion
completes.
StartTime can be an integer number of milliseconds,
or it can be the symbol #synchronized. Use
#synchronized to start this new motion at the same
relative time offset to its total duration as the currently
playing motion is to its total duration. The playRate
parameter indicates how fast to play the motion. A
value of 2 doubles the speed of the motion. This value is
multiplied by the value of the
bonesPlayer.playRate property.
If blending is enabled, blending begins the instant
play() is called.
Nothing.
whichModel.bonesPlayer. playNext() Ends the currently playing motion, removes it from the
play list, and begins the next motion.
if blending is enabled, blending begins the instant
playNext() is called.
Nothing.
whichModel.bonesPlayer. queue("name",
looped, startTime, endTime, playRate,
timeOffset)
Adds the specified motion to the end of the play list. The
parameters are same as those for the play() method.
Nothing.
whichModel.bonesPlayer. removeLast() Removes the most recently added motion from the play
list. The motion will be removed from the play list even
if it is also the currently playing motion.
Nothing.
whichModel.bonesPlayer. pause() Pauses the Bones player. Nothing.
Property Access Description Default
whichModel.bonesPlayer.
playing
Get TRUE (1)= playing; FALSE (0)= paused. TRUE (1)
whichModel.
bonesPlayer. playList
Get A linear list of property lists, where each property list
yields the parameters for the currently playing and
queued animations. For example, [[#name:
"Walk_rt_turn", #loop: 0, #startTime: 0,
#endTime: 4000, #scale: 1.0000], [#name:
"Walk", #loop: 1, #startTime: 0, #endTime:
-1, #scale: 1.0000]].
Empty list []
whichModel.
bonesPlayer.
currentTime
Get and set Current local time of motion at the top of the play list, in
milliseconds. The motion’s duration property tells you
how long the animation lasts.
0
whichModel.
bonesPlayer. playRate
Get and set A value indicating how quickly or slowly to play back
the motion. For example, a value of 2.0 doubles the
speed of the motion; a value of 0.5 halves the speed of
the motion. This value is multiplied by the value of the
playRate parameter of the play or queue method.
1.0
363
USING DIRECTOR 11.5
Working with Models and Model Resources
Last updated 9/28/2011
whichModel.
bonesPlayer.
playList.count
Get Current linear list of property lists, with each property
list containing the name of a motion and its playback
properties.
0
whichModel.
bonesPlayer. rootLock
Get and set TRUE means the model’s root bone remains at its
current position. The root bone is the central bone from
which all other bones branch. If this property is set to
TRUE during a walking motion, the model appears to
walk in place.
FALSE
whichModel.
bonesPlayer.
currentLoopState
Get and set A value of TRUE means the top motion in the play list
loops. A value of FALSE turns off looping for the motion
at the top of the play list.
FALSE
whichModel.
bonesPlayer.blendTime
Get and set Length in milliseconds of the period when blending
takes place between motions. The blendTime
property is linked to motion duration. Motion blending
is disabled if blendTime = 0 and autoBlend =
TRUE.
500
whichModel.
bonesPlayer. autoBlend
Get and set If TRUE, automatic linear blending (from 0.0 to 100.0) is
applied over the blend time. Otherwise, blendTime is
ignored, and the amount of blending is user-
determined by the blendFactor property.
TRUE (1)
whichModel.
bonesPlayer.
blendFactor
Get and set The degree of blending between motions, expressed as
a floating-point value between 0.0 and 100.0.
A value of 0.0 uses all the previous motion. A value of
100.0 uses all of the next motion in the play list.
The blend factor can be changed frame by frame to
create custom blending effects.
0
whichModel.
bonesPlayer.
bone[boneID] transform
Get and set A transform relative to the parent bone. You can get and
set the entire transform, but you can’t call any methods
of this property.
Depends on the bone.
whichModel.
bonesPlayer.
bone[boneID]
worldTransform
Get and set A transform relative to the world coordinates. You can
get and set the entire transform to move a bone.
Depends on the bone.
Property Access Description Default
364
USING DIRECTOR 11.5
Working with Models and Model Resources
Last updated 9/28/2011
Bones player events
The following events are generated by bones animations:
whichModel.
bonesPlayer.
positionReset
Get and set TRUE (1) = object returns to starting position at end
of animation.
FALSE (0) = object remains at final animation
position after motion completes.
TRUE (1)
whichModel.
bonesPlayer.
rotationReset
Get and set Normally a model snaps back to its original rotation
after a motion finishes playing. This property maintains
any or all of the rotational changes after playing is
complete.
The values are as follows:
#none
#x
#y
#z
#xy
#xz
#all
#all
whichModel.
bonesPlayer.
lockTranslation
Get and set Defines the axis of translation to ignore when playing
back a motion.
The values are as follows:
#none
#x
#y
#z
#xy
#xz
#all
To keep a model locked to a ground plane with the top
pointing along the z-axis, set lockTranslation to #z.
lockTranslation = #all is equivalent to rootLock
= TRUE (1).
#none
Event name Description
#animation Started This is a system-defined notification event triggered when a motion begins playing. If looping is on, this
event is triggered only by the first playthrough. During a blend of two animations, this event is triggered
as the blend begins.
#animation Ended This is a system-defined notification event triggered when a motion ends. If looping is on, this event is
triggered only by the first playthrough. If blending is on, this event is generated for the first animation
when the blend is complete. There might be some latency because of the overhead of scheduling all
other Director events.
Property Access Description Default
365
USING DIRECTOR 11.5
Working with Models and Model Resources
Last updated 9/28/2011
Keyframe player methods
Use the following methods to work with keyframe animations:
Keyframe player properties
Use the following properties to work with keyframe animations:
Method Description Returns
whichModel.keyframePlayer.play ("name",
looped, startTime, endTime, playRate,
timeOffset)
Plays the motion named name starting at the time
startTime, with the currently playing motion being
pushed down the play list. If looped is FALSE (0), the
preceding motion begins again when this motion
completes.
The startTime parameter can be an integer number
of milliseconds, or it can be the symbol
#synchronized. Use #synchronized to start this
new motion at the same relative time offset to its total
duration as the currently playing motion is to its total
duration. The playRate parameter indicates how fast
to play the motion. A value of 2 doubles the speed of the
motion. This value is multiplied by the value of the
keyframePlayer.playRate property.
If blending is enabled, blending begins the instant
play() is called.
Nothing.
whichModel.keyframePlayer.playNext() Ends the currently playing motion, removes it from the
play list, and begins the next motion.
If blending is enabled, blending begins the instant
playNext() is called.
Nothing.
whichModel.keyframePlayer.queue("name",
looped, startTime, endTime, playRate,
timeOffset)
Adds the specified motion to the end of the play list. The
parameters are same as those for the play() method.
Nothing.
whichModel.keyframePlayer.removeLast() Removes the most recently added motion from the play
list. The motion will be removed from the play list even
if it is also the currently playing motion.
Nothing.
whichModel.keyframePlayer.pause() Pauses the Keyframe player. Nothing.
Property Access Description Returns
whichModel. keyframePlayer.
playing
Get TRUE (1)= playing; FALSE (0)= paused. TRUE (1)
whichModel. keyframePlayer.
playList
Get A linear list of property lists, where each property list
yields the parameters for the currently playing and
queued animations. For example, [[#name:
"Walk_rt_turn", #loop: 0, #startTime: 0,
#endTime: 4000, #scale: 1.0000], [#name:
"Walk", #loop: 1, #startTime: 0,
#endTime: -1, #scale: 1.0000]].
Empty list []
whichModel. keyframePlayer.
currentTime
Get and set Current local time of motion at top of play list, in
milliseconds.
0

366
USING DIRECTOR 11.5
Working with Models and Model Resources
Last updated 9/28/2011
whichModel. keyframePlayer.
playRate
Get and set A value indicating how quickly or slowly to play back
the motion. For example, a value of 2.0 doubles the
speed of the motion; a value of 0.5 halves the speed of
the motion. This value is multiplied by the value of the
playRate parameter of the play or queue method.
1.0
whichModel. keyframePlayer.
playList.count
Get Current number of motions in the play list. 0
whichModel. keyframePlayer.
rootLock
Get and set TRUE (1)= root translational component of the
model remains at its referenced unanimated position
(and therefore cannot disappear offstage).
FALSE (0)
whichModel. keyframePlayer.
currentLoopState
Get and set TRUE (1)= animation loops; FALSE (0)= animation
plays through once.
FALSE (0)
whichModel. keyframePlayer.
blendTime
Get and set Length in milliseconds of the period when blending
takes place between motions. The blendTime
property is linked to motion duration. Motion
blending is disabled if blendTime = 0 and
autoBlend = TRUE.
500
whichModel. keyframePlayer.
autoBlend
Get and set If TRUE, automatic linear blending (from 0.0 to 100.0)
is applied over the blend time. Otherwise, blendTime
is ignored, and the amount of blending is user-
determined by the blendFactor property.
TRUE (1)
whichModel. keyframePlayer.
blendFactor
Get and set The degree of blending between motions, expressed
as a floating-point value between 0.0 and 100.0.
A value of 0.0 uses all the previous motion. A value of
100.0 uses all of the next motion.
The blendFactor can be changed frame by frame to
create custom blending effects.
0
Property Access Description Returns
367
USING DIRECTOR 11.5
Working with Models and Model Resources
Last updated 9/28/2011
Keyframe player events
The following events are generated by keyframe animations:
whichModel. keyframePlayer.
positionReset
Get and set TRUE (1) = object returns to starting position at end
of animation; FALSE (0) = object remains at final
animation position, and begins again from there if
looping is on.
TRUE (1)
whichModel. keyframePlayer.
rotationReset
Get and set Normally a model snaps back to its original rotation
after a motion finishes playing. This property
maintains any or all of the rotational changes after
playing is complete.
The values are as follows:
#none
#x
#y
#z
#xy
#xz
#all
#all
whichModel. keyframePlayer.
lockTranslation
Get and set Defines the axis of translation to ignore when playing
back a motion.
The values are as follows:
#none
#x
#y
#z
#xy
#xz
#all
To keep a model locked to a ground plane with the top
pointing along the z-axis, set lockTranslation to #z.
LockTranslation = #all is equivalent to
rootLock = TRUE (1).
#none
Event name Description
#animation Started This is a system-defined notification event triggered when a motion begins playing. If looping is on,
this event is triggered only by the first playthrough. During a blend of two animations, this event will
be triggered as the blend begins.
#animationEnded This is a system-defined notification event triggered when a motion ends. If looping is on, this event
is triggered only by the first playthrough. If blending is on, this event will be generated for the first
animation when the blend is complete. There may be some latency because of the overhead of
scheduling all other Director events.
Property Access Description Returns

368
USING DIRECTOR 11.5
Working with Models and Model Resources
Last updated 9/28/2011
Mesh deform modifier properties
The mesh deform modifier lets you alter an existing model resource’s geometry at runtime. You can create twist, bend,
and ripple effects. Unlike other modifiers, the mesh deform modifier directly affects model resources as well as the
models that use those resources. For example, if three car models share the same model resource, adding this modifier
to one model and then deforming it will deform all the car models.
The mesh deform modifier is complex and is primarily useful for users with a thorough understanding of 3D geometry.
However, you can take advantage of much of the modifier’s potential by using only the vertexList property.
Use the following properties to work with the mesh deform modifier:
Motions
Motions are simply animations that have been predefined in a 3D-modeling application. They are included in the file
that’s exported from the 3D application and imported into Director.
Motions can be reused on any model in the 3D cast member, as long as the motion is appropriate to the geometry of
the model. The properties and commands that follow can be used with either keyframe or bones motions.
Property Access Description
whichModel. meshDeform.
mesh.count
Get Returns the number of meshes in a model.
whichModel. meshDeform.
mesh[index]. vertexList
Get and set Returns a list of the vertices for the specified mesh. To modify the vertices
in this mesh, set this property to a list of modified vertex positions, or
modify individual vertices by using bracket analysis.
whichModel. meshDeform.
mesh[index]. normalList
Get and set Returns a list of the normals for the specified mesh.
whichModel. meshDeform.
mesh[index]. texture
CoordinateList
Get and set Returns a list of the texture coordinates for the specified mesh.
whichModel. meshDeform.
mesh[index]. face.count
Get Returns the number of triangular faces in a given mesh.
whichModel. meshDeform.
mesh[index].
face[index]
Get Returns a list of three indexes into the vertex, normal, texture coordinate,
and color lists. These indexes correspond to the corners of the face for
the specified mesh.
whichModel. meshDeform.
mesh[index].
face[index].
neighbor[index]
Get Returns a list of lists describing the neighbors of a particular face of a
mesh opposite the face corner specified by the neighbor index
(1,2,3). If the list is empty, the face has no neighbors in that direction.
If the list contains more than one list, the mesh is nonmanifold. This is
rare. Usually the list contains four integer values. The first value is for the
index into the mesh[] list, where the neighbor face lives. The second is
FaceIndex, the index of the neighbor face in that mesh. The third is
vertexIndex, the index within the neighbor face. The last is for
Flipped, which describes whether the neighbor face is oriented in the
same (0) or the opposite (1) way as the original face.
whichModel. meshDeform.
face.count
Get Returns the total number of faces in the model, which is equivalent to
the sum of all the model.meshDeform.mesh[index].face.count
properties in a given model.
369
USING DIRECTOR 11.5
Working with Models and Model Resources
Last updated 9/28/2011
Motion properties
Use the following properties to work with motions:
Motion methods
Use the following method to work with motions:
About lights and cameras
Cameras act as windows into a 3D world. Each camera that exists in a 3D cast member offers a different view into it,
and each sprite that uses a 3D cast member uses one of these cameras. A camera’s position can be moved with the
Property inspector or the Shockwave 3D window. You can also use the Director 3D behaviors or script to manipulate
camera positions. For information about the Property inspector and the Shockwave 3D window, see “3D Basics” on
page 304. For information about behaviors, see “The 3D Cast Member, 3D Text, and 3D Behaviors” on page 315. More
complex manipulations require the use of methods and properties. Accessing the properties and methods of a light or
camera requires that the member be on the Stage or explicitly and completely loaded with the preLoad() method.
When using the preLoad() method, you can verify that the load is complete by testing whether member.state = 4
(loaded).
Lights and cameras have the same transform methods and parent-child properties as models and groups. Lights and
cameras can be added, deleted, cloned, moved, and rotated in the same ways as models and groups. You can access
their names, parents, children, and other properties in the same way you would with models and groups. However,
there are some important differences, which arise from the specific roles that lights and cameras play in the 3D world.
Light properties
Use the following properties to work with lights:
Property Access Returns
name Get Name of motion.
duration Get Time in milliseconds motion needs to play to completion.
type Get The type of motion with the following values:
#keyFrame: suitable for use with the Keyframe player
#bones: suitable for use with the Bones player
#none: no mapping has been made for this motion
The default is #none.
Method Description
map(motion, "bone name") Maps the given motion into the current motion beginning at the named bone.
If no bone name is specified, the mapping begins at the root bone.
The map() method will replace any motion tracks mapped previously to the
specified bone and all of its children. Motion mapping has no effect on motions
that are already on a play list. The map() method does not work with keyframe
animations.

370
USING DIRECTOR 11.5
Working with Models and Model Resources
Last updated 9/28/2011
Property Name Access Description Default
name Get Unique name of this light.
If the light was exported from a 3D modeling package,
the name is the name assigned there.
None
parent Get and set The model, light, camera, or group that is this light’s
parent.
If the light has no parent, it cannot contribute light.
Group
("World")
child.count Get Number of the light’s immediate children (no
grandchildren).
0
transform Get and set Transform object representing light’s position relative to
its parent’s transform.
The transform.position gives the relative position;
transform.rotation gives the relative rotation.
Whichever transform
is required to
represent the light’s
position and
orientation in space.
userData Get and set A property list associated with this light. The list defaults
to the properties assigned in the 3D modeling tool, but
users can add or delete properties at any time.
Properties assigned in
3D modeling tool
type Get and set The type of light. Must be one of the following:
#ambient: applied to all sides of the model
#directional: applied to those parts of the light facing
the light’s direction. Distance to the light isn’t important.
#point: Like a bare light bulb, omnidirectional and
illuminating all parts of the model facing the light.
#spot: Like a spotlight, casting light on model parts that
face it, with brighter illumination the closer the model is.
Similar to #directional, except that the apparent
distance from the light is taken into account.
None
color Get and set Color object defining color and intensity. Ranges from
color(255,255,255), which is pure white to color(0,0,0),
which is no light at all.
color(191,191,
191)
spotAngle Get and set Angle of the light’s projection cone.
If type equals #spot, setting a value less than the umbra
causes a “property not found” error.
90.0
attenuation Get and set A three-value vector controlling the constant, linear, and
quadratic attenuation factors for spotlights.
vector
(1.0,0.0,0.0)
specular Get and set TRUE (1)/FALSE (0) value that controls whether or
not the light produces specular effects on surfaces. The
property is ignored for ambient lights.
Although TRUE (1) is the default, switching to FALSE
(0) may improve performance.
TRUE (1)
spotDecay Get and set TRUE (1)/FALSE (0) value that controls whether or
not spotlight intensity falls off with camera distance.
FALSE (0)
371
USING DIRECTOR 11.5
Working with Models and Model Resources
Last updated 9/28/2011
Light methods
Use the following methods to work with lights:
pointAt Orientation Get and set Two orthogonal vectors
(objectRelativeDirection and
objectRelativeUp) that control how the light’s
pointAt method works.
None
boundingSphere Get A list containing a vector and a floating-point value, with
the vector representing the position and the value
representing the radius of a bounding sphere
surrounding the light and all its children.
[vector (0,0,0),
0.0]
worldPosition Get and set Position of the light in world coordinates. Shortcut for
the method node.getWorldTransform
().position.
Vector object
Method Description Returns
addChild (aNode,
preserveWorld)
Adds the node aNode to this light’s list of children. An equivalent operation is to set
aNode.parent = this light.
The preserveWorld argument is optional. It can have two values:
#preserveWorld or #preserveParent. If the value is #preserveWorld, the
world transform of the child being added remains intact. If #preserveParent,
the child’s transform is interpreted as remaining parent-relative.
Nothing.
child[index]Returns the child at the specified position in the index. Light object.
child(name)Returns a reference to the named child. Light object.
clone(name)Clones a light named name, adds it to the light’s parent’s child list, and adds it to the
world.
All children of the light are automatically cloned. This can be avoided by removing
the children, performing the cloning operation, and then adding the children back.
If the name is omitted or is “”, the clone isn’t added to the light palette, has no
parent, and has no children. This option lets you quickly create temporary light
instances.
Light object.
cloneDeep (name)Clones both the light and all resources used by the light’s children. Light object.
addtoWorld() Adds light to currently active 3D world, setting its parent as “ world”.
All newly created lights are added to the world by default, without it being
necessary to use this method.
Nothing.
removeFromWorld() For lights whose parent hierarchy terminates in the world, this sets their parent to
void and removes them from the world. Otherwise it does nothing.
Nothing.
isInWorld() Returns a Boolean value indicating if the light is currently in the world (TRUE) or not
(FALSE). This is useful for detecting if a given node’s parent-hierarchy tree
terminates with the world group object or not.
TRUE (1) or
FALSE (0)
Property Name Access Description Default
372
USING DIRECTOR 11.5
Working with Models and Model Resources
Last updated 9/28/2011
Cameras
Cameras act as view ports into the 3D world. By default, a newly added camera’s view is positioned at the world’s
origin, the vector (0,0,0), and looks down the negative z-axis. Changing a camera’s transform property affects the
camera’s position and orientation. When a 3D sprite is created from a 3D cast member, the sprite uses one of the cast
member’s cameras. Changing the camera that the sprite is using changes what’s seen in the sprite.
registerScript
(eventName,
handlerName,
scriptInstance)
Registers a handler named handlerName that is called in the scriptInstance
when the member method sendEvent() is called with eventName as an
argument.
If scriptInstance is 0, a movie script handler is called.
The user defines what eventName is. The eventName specified can be one of a
default set of events or a user-defined custom event. The default events are
#collideAny, #collideWith, #animationStarted, #animationEnded, #timeMS.
Nothing.
translate (xIncrement,
yIncrement,
zIncrement,
relativeTo)
Moves the light forward by xIncrement along the x-axis, yIncrement along the
y-axis, and zIncrement along the z-axis.
The relativeTo parameter is optional. It determines how arguments are
interpreted. The possible values are as follows:
#self: the default. Increments are applied relative to the light’s local coordinate
system.
#parent: increments are relative to the light’s parent’s coordinate system.
#world: increments are relative to the world’s coordinate system. Equivalent to
#parent if the parent is the world.
node (model, light, camera, or group): increments are relative to the argument’s
coordinate system.
Nothing.
translate(x,y,z,
relativeTo)
Moves the light distance x along the x-axis, distance y along the y-axis, and
distance z along the z-axis. The relativeTo argument is optional and defaults to
#self.
This method can also be written as
translate (vector(x,y,z) relativeTo)
Nothing.
rotate(x,y,z,
relativeTo)
Rotates the light by x degrees around the x-axis, y degrees around the y-axis, and z
degrees around the z-axis.
The relativeTo argument is optional and defaults to #self. If included, it
defines the coordinate space of the axes.
This method can also be written as rotate (vector(x,y,z) relativeTo).
Nothing.
rotate (position,
axis, angle,
relativeTo)
Rotates the light around the axis vector in the specified position and in the
specified number of degrees. The relativeTo argument is optional and defaults
to #self.
Nothing.
pointAt(world
Position, worldUp)
Points the node’s “front” at the world position and then tries to align the node’s
“up” with the worldUp specified, and that the node’s “front” and “up” are
determined by the node’s pointAtOrientation property. Both the object-
relative axes are defined by the pointAtOrientation property. Default values
are an object-relative forward direction of vector (0, 0, -1) and an object-relative up
direction of vector (0, 1, 0).
Nothing.
getWorld Transform() Calculates and returns a transform that converts object-relative positions for this
light into world-relative positions.
A transform object.
Method Description Returns

373
USING DIRECTOR 11.5
Working with Models and Model Resources
Last updated 9/28/2011
Cameras can also have overlays and backdrops. Overlays are 2D images drawn in front of the camera’s lens. Backdrops
are 2D images drawn behind the 3D scene. Backdrops provide a background image for the scene regardless of which
way the camera is pointing.
Camera properties
Use the following properties to work with cameras:
Property Name Access Description Default
name Get and set Unique name of this camera.
If the camera was exported from a 3D modeling
program, the name is the name assigned there.
None.
parent Get and set The model, light, camera, or group that is this light’s
parent.
If the camera has no parent, it cannot contribute
light.
group
("world")
child.count Get Number of the camera’s immediate children (no
grandchildren).
0
transform Get and set Transform object representing camera’s position
relative to its parent’s transform.
The transform.position property gives the
relative position; transform.rotation gives the
relative rotation.
Identity transform.
userData Get and set A property list associated with this camera. The list
defaults to the properties assigned in the 3D
modeling tool, but users can add or delete
properties at any time.
Properties assigned in 3D
modeling tool.
hither Get and set A specified distance from the camera that defines
the near z-axis clipping of the view frustum. Objects
closer than hither are not drawn.
5.0
yon Get and set A specified distance from the camera that defines
the far z-axis clipping of the view frustum. Objects
farther than yon are not drawn.
3.403e38
rect Get and set The rectangle controlling the screen size and
position of the camera, with the coordinates given
relative to the upper-left corner of the sprite.
rect(0,0,320,200)
projection Angle Get and set The vertical projection angle of the view frustum. 30.0
colorBuffer.
clearAtRender
Get and set TRUE (1) or FALSE (0) value indicating whether
color buffer is or isn’t cleared out after each frame.
If value is set to FALSE (2), the effect is similar to
the trails ink effect, although it requires a semi-
transparent model behind the whole scene.
TRUE (1)
colorBuffer. clearValue Get and set Color object defining color used to clear out buffer if
colorBuffer.clearAtRender is TRUE (1).
color(0,0,0)
fog.enabled Get and set TRUE (1) or FALSE (0) value indicating whether
camera adds fog to the scene.
FALSE (0)
fog.near Get and set Distance to start of fog. 0.0
fog.far Get and set Distance to maximum fog intensity. 1000.0

374
USING DIRECTOR 11.5
Working with Models and Model Resources
Last updated 9/28/2011
fog.color Get and set Color object describing fog color. color(0,0,0)
fog.decayMode Get and set How fog varies between near and far, with the
following possible values:
#linear: density is linearly interpolated between
fog.near and fog.far.
#exponential: fog.far is saturation point;
fog.near is ignored.
#exponential2: fog.near is saturation point;
fog.far is ignored.
#exponential
projection Get and set Method of determining the vertical field of view,
which must be of type #perspective or
#orthographic.
#perspective
fieldOfView Get and set A floating-point value specifying the vertical
projection angle in degrees.
30.0
orthoheight Get and set The number of perpendicular world units that fit
vertically into the sprite.
200.0
rootNode Get and set Property controlling which objects are visible in a
particular camera’s view. Its default value is the
world, so all cameras you create show all nodes
within the world. If you change rootNode to be a
particular node within the world, a sprite of the cast
member will show only the root node and its
children.
group
("world")
overlay[index]. loc Get and set Location, in pixels, of the overlay, as measured from
the upper-left corner of the sprite’s rect to the
overlay[index].source's regPoint.
point(0,0)
overlay[index]. source Get and set Texture object used as the source for this overlay. None.
overlay[index]. scale Get and set Scale value used by a specific overlay in the camera’s
list of overlays.
1.0
overlay[index].
regPoint
Get and set Texture-relative rotation point, similar to a sprite’s
regPoint.
point(0.0)
overlay[index].
rotation
Get and set Rotation value used by a specific overlay in the
camera’s list of overlays.
O, O
overlay[index]. blend Get and set Blend value used by a specific overlay in the
camera’s list of overlays. 100 is fully opaque; 0 is fully
transparent.
100.0
overlay.count Get and set Number of overlays in use on this sprite. 0
backdrop[index].loc Get and set Location, in pixels, of the backdrop, as measured
from the upper-left corner of the sprite’s rect to the
backdrop[index].source's regpoint.
point(0,0)
backdrop[index].source Get and set Texture object used as the source for this backdrop. None.
backdrop[index].scale Get and set Scale value used by a specific backdrop in the
camera’s list of backdrops.
1.0
backdrop[index].rotatio
n
Get and set Rotation value used by a specific backdrop in the
camera’s list of backdrops.
0.0
Property Name Access Description Default
375
USING DIRECTOR 11.5
Working with Models and Model Resources
Last updated 9/28/2011
Camera methods
Use the following methods to work with cameras:
backdrop[index].regPoin
t
Get and set Texture-relative rotation point, similar to a sprite’s
regPoint.
point(O,O)
backdrop[index].blend Get and set Blend value used by a specific backdrop in the
camera’s list of backdrops.
100.0
backdrop.count Get Number of backdrops in use on this sprite. 0
boundingSphere Get A list containing a vector and a floating-point value,
with the vector representing the position and the
value the radius of a bounding sphere surrounding
the camera and all its children.
[vector (0,0,0),
0.0]
worldPosition Get and set Position of the camera in world coordinates.
Shortcut for the method
node.getWorldTransform
().position.
Vector object.
Method Description Returns
addChild(aNode,
preserveWorld)
Adds aNode to this camera’s list of children. An equivalent operation is to set
aNode.parent to equal thisCamera.
The preserveWorld argument is optional. It can have two values:
#preserveWorld or #preserveParent. If the value is #preserveWorld,
the world transform of the child being added remains intact. If
#preserveParent, the child’s transform is interpreted as remaining parent-
relative.
Nothing.
child[index]Returns the child at the specified position in the index. Camera object.
child(name)Returns the child named name. Camera object.
clone(name)Clones a camera named name, adds it to the cameras’s parent’s child list, and
adds it to the world.
All children of the camera are automatically cloned.This can be avoided by
removing the children, performing the cloning operation, and then adding
the children back.
If the name is omitted or is “”, the clone isn’t added to the camera palette, has
no parent, and has no children. This option lets you quickly create temporary
camera instances.
Camera object.
cloneDeep(name)Clones both the camera and all resources used by the camera’s children. Camera object.
addtoWorld() Adds a camera to the currently active 3D world, setting its parent as “ world”
Equivalent to setting the camera's parent to the world group.
All newly created cameras are added to the world by default, without it being
necessary to use this method.
Nothing.
removeFrom World() For cameras whose parent hierarchy terminates in the world, this sets their
parent to void and removes them from the world. Otherwise it does nothing.
Nothing.
isInWorld() Returns a Boolean value indicating if the camera is currently in the world
(TRUE) or not (FALSE). This is useful for detecting if a given node's parent-
hierarchy tree terminates with the world group object or not.
TRUE (1) or
FALSE (0)
Property Name Access Description Default

376
USING DIRECTOR 11.5
Working with Models and Model Resources
Last updated 9/28/2011
Collada models
Adobe Director now provides support for importing Collada-based models.
Note: Support is provided from Collada version 1.4.1 and higher.
The currently supported features of Collada import are:
•Meshes and models
•Cameras
•Lights
•Textures
registerScript
(eventName,
handlerName,
scriptInstance)
Registers a handler named handlerName that is called in the
scriptInstance when the member method sendEvent() is called with
eventName as an argument.
If scriptInstance is 0, a movie script handler is called.
The user defines what eventName is. The eventName specified can be one of
a default set of events or a user-defined custom event. The default events are
#collideAny, #collideWith, #animationStarted, #animationEnded, #timeMS.
Nothing.
translate (direction
Vector, relativeTo)
Moves the camera directionVector.length() in the direction of the
directionVector.
The relativeTo argument is optional and defaults to #self.
Nothing.
translate(x,y,z,
relativeTo)
Moves the camera distance x along the x-axis, distance y along the y-axis, and
distance z along the z-axis.
The relativeTo argument is optional and defaults to #self.
This method can also be written as
translate(vector(x,y,z) relativeTo).
Nothing.
rotate(x,y,z,
relativeTo)
Rotates the camera by x degrees around the x-axis, y degrees around the y-
axis, and z degrees around the z-axis.
The relativeTo argument is optional and defaults to #self. If included, it
defines the coordinate space of the axes.
This method can also be written as
rotate(vector(x,y,z) relativeTo)
Nothing.
rotate (position, axis,
angle, relativeTo)
Rotates the camera around the axis vector in the specified position and in the
specified number of degrees. The relativeTo argument is optional and
defaults to #self.
Nothing.
pointAt(world Position,
worldUp)
Points the camera’s “front” at the world Position and then tries to align the
node’s “up” with the worldUp specified, and that the node’s “front” and “up”
are determined by the node’s pointAtOrientation property.
Both the object-relative axes are defined by the pointAtOrientation
property. Default values are an object-relative forward direction of vector (0,
0, -1) and an object-relative up direction of vector (0, 1, 0).
Nothing.
getWorld Transform() Calculates and returns a transform that converts object-relative positions for
this camera into world-relative positions.
A transform object.
Method Description Returns

377
USING DIRECTOR 11.5
Working with Models and Model Resources
Last updated 9/28/2011
•Bones
•Animation
Import a Collada model
To import a Collada model, perform the following tasks:
1Click File > Import.
2Select the Collada model in the Import Files dialog box, and click Import. Collada model files have a .dae extension.
3Click Import.
Google SketchUp models
Using Google SketchUp, you can create 3D models from scratch or customize models created by others. The
Google
3D Warehouse is one such online repository from where you can download and use SketchUp models.
After a SketchUp model is imported into Director, it can be used like any other Shockwave 3D (W3D) file. You can
apply all available 3D and Physics properties in Director to the imported model.
Import a Google SketchUp model
1Click File > Import.
2Select the SketchUp model in the Import Files dialog box, and click Import. Google SketchUp model files have a
.skp extension.
By default, the Google SketchUp model is imported and stored as a cast member inside the Director movie file.
Choose Link To External File from the Media pop-up menu to import the SketchUp model as an external W3D
file. An updated copy of this external W3D file is imported to the cast every time you run the movie.
3In the Import Options dialog box, specify whether you want to import the hidden groups and layers in the model.
The hidden groups and layers in the Google SketchUp model remain hidden even after they are imported into
Director.
To unhide a model, set the model's visibility to front using model(hiddenModel.visibility=#front). To
unhide invisible faces in a model, use model(modelRef).shader(shaderRef).transparent=0 to set the
transparent property of the shader corresponding to the faces to 0 .
4Specify if the model has two-sided faces. Director imports the two-sided faces in the model as two front-facing
meshes.
Note: If you do not select the Faces Are Two-Sided option, Director imports only the front faces of the SketchUp model.
Information about the back faces is ignored.
5Specify how Director should import the hierarchy of groups in the Google SketchUp file. The SketchUp file can
have multiple models arranged as nested groups.
Original Preserves the original hierarchy. The groups and models in the Google SketchUp file are replicated in the
W3D file.
378
USING DIRECTOR 11.5
Working with Models and Model Resources
Last updated 9/28/2011
Original hierarchy in the SketchUp file imported
Collapsed Models that belong to the same group in the SketchUp file are collapsed into a single model in the W3D
file. Any groups in the hierarchy are ignored during import.
Hierarchy in the SketchUp file collapsed while importing
Flattened Creates a one-to-one mapping of models between the SketchUp and W3D files. Any groups in the
hierarchy are ignored during import.
Hierarchy in the SketchUp file flattened while importing
Single Model Imports all groups and models in the SketchUp file as a single model in the Director W3D file.
Hierarchy in the SketchUp file imported as a single model
6Select the textures in the Google SketchUp model that you want to import.
Import Used And Unused Imports all textures in the SketchUp file.
Import Used Imports only the textures used by the SketchUp model.
None Textures in the SketchUp file are not imported.
7Enter the desired compression level for the imported geometries in the Geometry Quality box. By default, Director
compresses the imported geometries to 75% of their original quality.
Document
Model 1 Group 1 Group 2
Group 3Model 2
Model 4
Model 3
Document
Model 1 Model 2
&
Model 4
Model 3
Document
Model 1 Model 2 Model 3 Model 4
Document
Model 1 &
Model 2 &
Model 3 &
Model 4

379
USING DIRECTOR 11.5
Working with Models and Model Resources
Last updated 9/28/2011
8If you chose to import the model by reference as an external W3D file, enter a name for the file in the
Create
External Link box. This external file is imported afresh to the cast every time you run the movie.
9Click Import.
Import models through scripting
You can also import a Google SketchUp model into Director using the importFileInto() method.
•Use the following syntax to import the model as a cast member inside the Director movie:
member("some3dmember").importFileInto("anypath", [#Linked: 0])
•To import the model by reference (Link To External File), set the value of the Linked property to 1 instead of 0:
member("some3dmember").importFileInto("anypath", [#Linked: 1])

380
Last updated 9/28/2011
Chapter 18: Controlling the 3D World
Introduction
Adobe® Director® provides powerful methods for overall control of the three-dimensional (3D) world, including Lingo
and JavaScript™ syntax for handling new 3D-generated events, selecting models (picking), vector math operations, and
transforms. In addition, the properties and methods of the Director global rendererServices object supply common
rendering properties for all 3D sprites and cast members. Finally, 3D cast member and sprite properties and methods
allow additional control of their content during playback.
The methods and properties that you see here in tabular form are also available with accompanying syntax, definitions,
and examples in the Scripting Reference topics in the Director Help Panel.
3D Lingo or JavaScript syntax events
Event handling lets you use the registerForEvent method to specify a handler to run when a particular event occurs
within a specific cast member. With the registerForEvent method, you specify the type of event that will trigger the
handler, the handler name, and the script object that contains the handler. The Lingo or JavaScript syntax object can
be a child script, an instance of a behavior attached to a sprite, or any other script. If the object isn’t specified, the
handler is called in the first movie script in which it is found.
Use the following methods to set up event handling:
Method Description Returns
registerForEvent
(eventName,
handlerName,
scriptInstance,
model)
The event eventName is one of the following:
#collideAny: Called when any collision occurs.
#collideWith: Called when a collision with a specific model occurs and
implicitly registered when setCollisionCallback(...) is called.
Equivalent to calling model.collision.setCollision Callback.
#timeMS: Sets up a time-based simulation callback using the format
registerForEvent (timeMS, handlerName, scriptInstance)
begin, period, repetitions. The begin and period arguments
are in milliseconds. If repetitions is set to 0, the simulation continues
indefinitely.
#animationStarted: Called whenever a keyFrame or bones motion
begins.
#animationEnded: Called whenever a keyFrame or bones motion ends.
Any user-defined symbol: Registers to receive any user-defined event
sent from a SendEvent call.
TRUE (1) if the operation
succeeds.
FALSE (0) if the operation fails.
unregister
AllEvents()_
Unregisters all events. Nothing.
A script error is generated if the
operation fails.
sendEvent (eventName,
arg1,arg2...)
Sends an event named eventName to all scripts registered to receive it.
Similar to sendAllSprites() except that the event is delivered only to
scripts that are registered to receive it.
Nothing.
A script error is generated if the
operation fails.

381
USING DIRECTOR 11.5
Controlling the 3D World
Last updated 9/28/2011
Collisions
By attaching the collision modifier (#collision) to a model, you can enable that model to automatically respond to
collisions with other models. By using the properties of the collision modifier, you can control the details of how the
model responds to collisions. For more information about collisions, see “Modifiers” on page 356.
Collision properties
When a collision occurs, it generates a collideAny event or a collideWith event.The collideWith event passes an
argument to the handler that is declared with the registerForEvent, registerScript, or setCollisionCallBack
method. This argument is called a collisionData object and contains a property list with detailed information about
the collision.
The following properties are included in the collisionData object passed to the handler:
Collision methods
Collision methods let you override certain aspects of the default behavior set for models during collisions. If neither of
the models involved in the collision has resolve set to TRUE, you can manually resolve the collision using
resolveA(true) for model A or resolveB(true) for model B.
Selecting models
Selecting models (picking) refers to clicking on models in a 3D cast member. Because models are objects that exist
within a 3D cast member and a 3D sprite, they are not normally sensitive to mouse clicks. Normally, only the entire
sprite is sensitive to mouse clicks.
Property Access Description
modelA get One model in the collision.
If the script includes registration for collision with a particular model, modelA
is that model.
modelB get The second model in the collision.
pointOfContact get Vector describing the world-space location of the collision. Available only if
the collision has been resolved. Occurs if the model’s collision modifier
resolve property is TRUE (1) or either the collisionData
resolveA() or collisionData resolveB() method is called.
collisionNormal get Vector indicating the direction of the collision. Available only if the collision
has been resolved. Occurs if the model’s collision modifier resolve
property is TRUE (1) or either the collisionData resolveA() or
collisionData resolveB() method is called.
Method Description Returns
collisionData.resolveA
(trueOrFalse)
Resolves the collision for model A. Nothing
collisionData.resolveB
(trueOrFalse)
Resolves the collision for model B. If the argument is FALSE (0), the
collision won’t be resolved. This overrides any collision.resolve
property set for model B.
Nothing
382
USING DIRECTOR 11.5
Controlling the 3D World
Last updated 9/28/2011
You can use scripts to determine specifically which models have been clicked within a 3D sprite. In practice, this allows
for changing model positions to make it appear that an action such as a button being pushed or a door being opened
has taken place, or to allow the user to select or drag an object. Picking can be accomplished by using cast member or
camera methods.
Camera methods
The following camera methods let you determine which models have been clicked within a 3D sprite. You can also
translate coordinates in 3D space to coordinates in 2D sprite space and vice versa.
Method Description Returns
worldSpaceTo
SpriteSpace
(vector)
Returns the 2D sprite-space coordinates of a point from a 3D world vector. A point.
spriteSpaceTo
WorldSpace (point)
The opposite of the worldSpaceToSpriteSpace (vector), this method
returns a world-space vector on the camera’s projection plane from a sprite-
space point.
Multiple world-space positions can map to the same sprite-space point. A
round-trip
y=worldSpaceToSpriteSpace(x)
z=worldSpaceToSpriteSpace(y)
won’t necessarily result in x=z.
A vector.
modelUnder
Loc(point)
Returns the first model intersected by a ray from a location point within the
rect of the sprite using this camera. The location point is relative to the
upper-left corner of the sprite, in pixels. The ray is cast forward in the direction
the camera is looking.
This method is useful for picking in conjunction with an onMouseDown
handler. For accuracy, be sure to subtract the upper-left corner of the sprite’s
loc from the mouseLoc.
The first model intersected by
the ray.
A value of void means there is
no model under the ray.
modelsUnder
Loc(point,
optionalMax
NumberOf Models)
Returns a list of all models intersected by a ray from a location point within
the rect of the sprite using this camera. The location point is relative to the
upper-left corner of the sprite, in pixels. The ray is cast forward in the direction
the camera is looking.
This method is useful for picking in conjunction with an onMouseDown
handler. For accuracy, be sure to subtract the upper-left corner of the sprite’s
loc from the mouseLoc.
The first model intersected by
the ray or a list of up to the
specified maximum.
If no maximum is specified, the
method returns all models
under the ray.
A value of void means there
is no model under the ray.
modelsUnder
Ray(location
Vector, direction
Vector,
optionalMax
NumberOf Models)
Returns a list of models under the ray starting at the vector locationVector
and pointing down the vector directionVector, with both vectors
specified in world-relative coordinates.
The first model intersected by
the ray plus a list of up to the
specified maximum number of
models.
If the maximum number of
models isn’t specified, all
models that the ray intersects
are returned.
383
USING DIRECTOR 11.5
Controlling the 3D World
Last updated 9/28/2011
Vector math
A 3D vector describes both direction and location in 3D space. Vector objects include floating-point values for
position along each of the x-, y-, and z-axes. Vectors can be node- or world-relative. If they are node-relative, their x,
y, and z values are relative to the position of the node. If they are world-relative, their x, y, and z directions are relative
to the world.
Vector math operations perform calculations using each of the x, y, and z values. These calculations are useful for
performing intelligent movement and rotation of models.
Vector creation methods
Use the following methods to create vectors:
Vector properties
Use the following properties to work with vectors:
Vector methods
Use the following methods to work with vectors:
Method Description Returns
vector (x,y,z)Creates a vector from arguments representing all axes. A vector object
random Vector() Creates a vector describing a randomly chosen point on the surface of a unit
sphere. Differs from vector(random(10)/10.0, random(10)/10.0,
random(10)/10.0) because the randomVector() method always results
in a unit vector.
A unit vector
Property Access Description
magnitude get The magnitude of the vector. Equivalent to the length of the vector.
length get The length of the vector. Equivalent to the magnitude of the vector.
[index] get and set Returns the value of a vector at a specified point in an index between 1 and 3.
x get and set The x component of a vector.
y get and set The y component of a vector.
z get and set The z component of a vector.
Method Description Returns
normalize() Normalizes the vector by modifying it into a unit vector of length 1. This is done
by dividing each component of the vector by the vector’s original length. That
original length is the square root of the sum of the squares of each component.
Nothing. Vector is modified.
get Normalized() Returns a normalized version of the vector. A new vector object.
dot(vector2)Returns the dot (inner) product of the first vector and the second vector
(vector2). If both vectors are of unit length, the result is the cosine of the
angle between the two vectors.
Dot product of the two
vectors.
angleBetween
(vector2)
Returns the angle between vector and vector2, in degrees. Value of the angle in degrees.
384
USING DIRECTOR 11.5
Controlling the 3D World
Last updated 9/28/2011
Vector binary operations
Use the following syntaxes to perform additional vector math calculations.
Note: JavaScript does not support these operations for vector objects. In JavaScript, you must write the code to perform
the vector math calculations using the vectors’ x, y, and z coordinates.
Transforms
A transform is a data object describing a model’s position, orientation, and scale in the 3D world. Transform methods
can be used to move a given vector, light, camera, or model from its current location to a new one.
cross(vector2)
or
crossProduct
(vector2)
or
perpendicular
To(vector2)
Returns a vector perpendicular to the original vector and to vector2. A new vector object.
distanceTo
(vector2)
Returns the distance between vector and vector2. If these vectors
represent positions in the 3D world, this is the distance between them.
Floating-point value of
distance.
duplicate() A copy of the vector. A new vector object.
Operator Description Returns
vector1 +vector2 Returns a new vector equaling vector1+vector2 for x equaling 1 through 3. A new vector object
vector1 -vector2 Returns a new vector equaling vector1 -vector2 for x equaling 1 through
3.
A new vector object
vector1* vector2 Returns the product of the two vectors. A floating-point value
vector1/vector2 Not supported. 0
vector2*scalar Returns a new vector equaling vector2 * scalar for x equaling 1 through
3.
A new vector object
vector2/scalar Returns a new vector equaling vector2/scalar. A new vector object
transform* vector Returns a new vector that results from applying the positional and
transformation changes defined by transform to vector. Note that
vector*transform is an invalid operation.
A new vector object
scalar-vector1 Returns a new vector equaling scalar-vector1. A new vector object
vector1-scalar Returns a new vectorequaling vector1-scalar. A new vector object
scalar + vector1 Returns a new vector equaling scalar + vector1. A new vector object
vector1 + scalar Returns a new vector equaling vector1 + scalar. A new vector object
Method Description Returns
385
USING DIRECTOR 11.5
Controlling the 3D World
Last updated 9/28/2011
Transform creation method
Use the transform() method to create a new transform data object.
Transform properties
Use the following properties to work with transforms:
Method Description Returns
transform() Creates a new transform initialized as the identity transform. The identity
transform has no rotation and a vector position of (0,0,0)
A new transform object
Property Access Description Default
position get and set Script vector object describing the position of a
transform with the value vector(xOffset,
yOffset, zOffset). A model.transform position
represents the model’s position in relation to its parent.
vector (0,0,0)
scale get and set Script vector object describing the x, y, and z scale of
the transform with the value vector(xScale,
yScale, zScale).
Scaling is always model-relative.
vector (1,1,1)
rotation get and set Script vector object describing the rotation (in degrees)
of the transform with the value vector(xRotation,
yRotation, zRotation).This value can vary
because of the permissible types of transform
operation. For example, translate followed by
rotate gives a different value than rotate followed
by translate, and the results can’t be differentiated
after the fact from the rotational information alone.
The rotate() and preRotate() methods are the
preferred ways to modify a transform’s orientation.
Rotation is generally relative to the object’s original
orientation at the start of the movie.
vector (0,0,0)
axisAngle get and set A list including a vector and a floating-point value that
describes this transform’s rotation as an axis/angle pair.
The vector represents the direction, and the angle
represents the rotation around the vector.
[vector (1.0000,
0.0000, 0.0000)
A]
386
USING DIRECTOR 11.5
Controlling the 3D World
Last updated 9/28/2011
Transform methods
Use the following methods to work with transforms:
x axis get and set A vector representing the transform’s canonical x-axis
in transform space. Example:
transform.identity()
transform.rotate(0,90,0))
put transform.xaxis
--vector(0,0,-1)
Canonical means reduced to the simplest possible
mathematical expression.
vector (1,0,0)
y axis get and set A vector representing the transform’s canonical y-axis
in transform space. Example:
transform.identity()
transform.rotate(90,0,0)
put transform.yaxis
--vector(0,0,1)
vector (0,1,0)
z axis get and set A vector representing the transform’s canonical z-axis
in transform space. Example:
transform.identity()
transform.rotate(0,90,0)
put transform.zaxis
--vector(1,0,0)
vector (0,0,1)
Property Access Description Default

387
USING DIRECTOR 11.5
Controlling the 3D World
Last updated 9/28/2011
Method Description Returns
rotate (xAngle,
yAngle, zAngle)
Applies a rotation transformation after the current transformation:
model.transform.identity()
model.transform.translate(100,0,0)
model.transform.rotate(0,0,90)
After this series of transformations, performed in this order, the model’s local origin will
be at (0,100,0), assuming the model’s parent is the world.
Nothing
preRotate (xAngle,
yAngle, zAngle)
Applies a rotation transformation before the current transformation:
model.transform.identity()
model.transform.translate(100,0,0)
model.transform.preRotate(0,0,90)
After this series of transformations, performed in this order, the model’s local origin will
be at (100,0,0), assuming the model’s parent is the world.
Nothing
rotate (point,
vector, angle)
Similar to transform.rotate(xAngle, yAngle, zAngle), except that the
arguments are two vectors specifying an axis of rotation as a point and a vector, plus an
angle specifying the clockwise rotation around that axis:
model.transform.identity()
model.transform.translate(-50,0,0)
model.transform.rotate(vector(100,0,0) vector(0,1,0))
After this series of transformations, performed in this order, the model’s local origin will
be at (250,0,0), assuming the model’s parent is the world.
Nothing
preRotate (point,
vector, angle)
Similar to transform.preRotate(xAngle, yAngle, zAngle), except that the
arguments are two vectors specifying an axis of rotation as a point and a vector, plus an
angle specifying the clockwise rotation around that axis:
model.transform.identity()
model.transform.translate(-50,0,0)
model.transform.preRotate(vector(100,0,0) vector(0,1,0))
After this series of transformations, performed in this order, the model’s local origin will
be at (150,0,0), assuming the model’s parent is the world.
Nothing
translate
(xIncrement,
yIncrement,
zIncrement)
Translates the position of the transform relative to the transform’s current orientation:
model.transform.identity()
model.transform.rotate(0,90,0)
model.transform.translate(100,0,0)
After this series of transformations, performed in this order, the model’s local origin will
be at (100,0,0), assuming the model’s parent is the world.
Nothing
preTranslate
(xIncrement,
yIncrement,zIncrem
ent)
Translates the position of the transform before the current transformation:
model.transform.identity()
model.transform.rotate(0,90,0)
model.transform.translate(100,0,0)
After this series of transformations, performed in this order, the model’s local origin will
be at (0,0,100), assuming the model’s parent is the world.
Nothing

388
USING DIRECTOR 11.5
Controlling the 3D World
Last updated 9/28/2011
Transform operator
Use the asterisk (*) to multiply two transforms as follows:
Rendering functionality
The Director global rendererServices object encapsulates information about the functionality common to all 3D
cast members and sprites in a movie. It provides a single place to query for the 3D mesh generators and modifiers
available to all cast members.
multiply
(transform2)
Alters the original transform by applying the positional/rotational/scaling effects of
transform2 to the original transform.
If transform2 describes a rotation of 90° around the x-axis and this transform
describes a translation of 100 units in the y-axis,
transform.multiply(transform2) alters this transform so that it describes a
translation followed by a rotation.
Nothing
preMultiply
(transform2)
Alters the original transform by preapplying the positional/rotational/scaling effects of
transform2 to the original transform.
If transform2 describes a rotation of 90° around the x-axis and this transform
describes a translation of 100 units in the y-axis,
transform.preMultiply(transform2) alters this transform so that it describes a
rotation followed by a translation.
Nothing
interpolate(oTrans
form2,
fPercentage)
Returns a new transform by interpolating from the original transform to transform2
by fPercentage. The value of fPercentage should be between 0 and 100.
A new transform
object
interpolateTo
(oTransform2,
fPercentage)
Modifies the existing transform by fPercentage. The value of fPercentage should
be between 0 and 100.
Nothing
duplicate() Returns a new transform that is a copy of the original transform. A new transform
object
identity Resets the transform to an identity transform:
position: —0,0,0
rotation: 0,00
scale: 1,1,1
Nothing
invert() Turns the transform into the inverse of its previous position and rotation. If you multiply
a vector by a transform, the rotational and positional changes described by the
transform are applied to the vector. Inverting the transform and multiplying the vector
again restores the vector to its original.
Nothing
inverse() Same as invert() except that the original transform is unaffected. A new transform
object
Operator Description Returns
transform1 *
transform2
Returns a new transform that is the product of the two original transforms. Useful for
combining the effects of two transforms.
A new transform object
Method Description Returns
389
USING DIRECTOR 11.5
Controlling the 3D World
Last updated 9/28/2011
Properties of the rendererServices object
The global getRendererServices() object contains a property list with the following properties. For example, use
the syntax getRendererServices().renderer to determine the currently active renderer.
Property Access Description Default
renderer get and set The rasterizer library all 3D sprites use to draw themselves.
This property must be set before any 3D sprite comes into
existence. Its default value is determined by the
preferredRenderer property of the first cast member
loaded from file. This is a run-time property that is not
saved. Possible values are as follows:
#openGL: openGL drivers for a hardware accelerator.
#directX7_0: DirectX7_0 drivers for a hardware
accelerator.
#directX5_2: DirectX5_2 drivers for a hardware
accelerator.
#software: built-in Director software renderer.
None
rendererDeviceList get A list of available rasterizer libraries. Possible values are as
follows:
#openGL: openGL drivers for a hardware accelerator.
#directX7_0: DirectX7_0 drivers for a hardware
accelerator.
#directX5_2: DirectX5_2 drivers for a hardware
accelerator.
#software: built-in Director software renderer.
None
modifiers get A list of modifiers available for 3D cast members. Possible
values are as follows:
#lod
#toon
#sds
#bonesPlayer
#keyframePlayer
#inker
#collision
#meshDeform
None
primitives get A list of basic 3D shapes available for all 3D cast members.
Possible values are as follows:
#box
#sphere
#plane
#particle
#cylinder
None
390
USING DIRECTOR 11.5
Controlling the 3D World
Last updated 9/28/2011
Movie properties
Use the following properties to control which renderer the movie uses:
textureRender Forma
t
get and set A four-digit integer identifying the pixel format used for
textures on the 3D hardware accelerator card. Adjust this
to improved color fidelity or to fit more textures on the
card. You can fit twice as many 16-bit textures as 32-bit
textures in the same space. If a movie tries to use more
textures than will fit on a card at a single time, Director
switches to software rendering.
Possible values are as follows:
#rgba8888: one byte for red, green, blue, and alpha.
#rgba8880: same as above, without alpha opacity.
#rgba5650: 16-bit color with no alpha; 5 bits for red, 6 for
green, 5 for blue.
#rgba5550: 16-bit color with no alpha; 5 bits each for red,
green, and blue.
#rgba5551: 5 bits each for red, green, and blue; 1 bit for
alpha.
#rgba4444: 4 bits each for red, green, blue, and alpha.
#rgba5551
depthBufferDepth get and set Either 16 or 24, depending on the hardware card. Controls
the precision of the hardware depth buffer.
None
colorBufferDepth get Either 16 or 32, depending on the hardware card. Controls
the precision of the hardware output buffer.
None
getHardware Info() get Returns any property list of the specifics of the hardware
card on the client’s machine.
A property list with the following entries:
#present: TRUE (1) if the card is present; FALSE (0) if
the card is absent.
#vendor: the vendor name as a string, with a value of
Unknown if the name can’t be determined.
#model: the name of the model of the hardware card, as
a string.
#maxTextureSize[maxWidth, maxHeight]:
maximum height and width of textures. Textures are
reduced in size if they exceed these maximums.
#supportedTexturePixelFormat: texture pixel
formats supported by card.
#textureUnits: number of texture units the card has.
#depthBufferRange: list of bit-depth resolutions
available.
#colorBufferRange: list of bit-depth resolutions.
Property Access Description Default
391
USING DIRECTOR 11.5
Controlling the 3D World
Last updated 9/28/2011
Cast member properties
You can control most cast member properties by using the Property inspector. For more information, see “Using the
Property inspector for 3D” on page 307.
Use the following properties to work with 3D cast members in script:
Property Access Description
preferred3d
Renderer
get and set The renderer a particular movie prefers. The default value is #auto, which allows the
movie to pick the best available renderer. This property is not the same as the
currentRenderer property. The preferred3dRenderer property stipulates
which renderer the movie prefers, whereas the currentRenderer property gives
the renderer currently in use. The possible values for the preferred3dRenderer
property are as follows:
#openGL: openGL drivers for a hardware accelerator.
#directX7_0: DirectX7_0 drivers for a hardware accelerator.
#directX5_2: DirectX5_2 drivers for a hardware accelerator.
#software: built-in Director software renderer.
active3d Renderer get The renderer the movie is actually using. Equivalent to the rendererServices
object’s currentRenderer property. Possible values are as follows:
#openGL: openGL drivers for a hardware accelerator.
#directX7_0: DirectX7_0 drivers for a hardware accelerator.
#directX5_2: DirectX5_2 drivers for a hardware accelerator.
#software: built-in Director software renderer.
Property Access Description Default
preload get and set TRUE (1) or FALSE (0) specification of whether the
member is preloaded before display and playback or streamed
in during playback. This property is only available for linked
cast members.
None
animation Enabled get and set TRUE (1) or FALSE (0) specification of whether animation,
if any, will play.
TRUE (1)
loop get and set TRUE (1) or FALSE (0) specification of whether animation
loops or not.
TRUE (1)
directToStage get and set TRUE (1) or FALSE (0) specification of whether rendering
occurs directly to the Stage or to the Director offscreen buffer.
If TRUE (1), other sprites that intersect with this sprite may
flicker. If FALSE (0), rendering layers well, but speed
declines.
TRUE (1):
rendering occurs
directly to the Stage
cameraPosition get and set Independent x,y,z translation for the default camera with
values ranging from Float_Min to Float_Max.
vector (0.0, 0.0,
250.0)
cameraRotation get and set Independent x,y,z rotation transforms for the default camera
with values ranging from Float_Min to Float_Max.
vector(0.0, 0.0,
0.0)
ambientColor get and set Light applied to entire scene. rgb(0,0,0)
bgColor get and set Background color in all views. rgb(0,0,0)
directional Color get and set Color of single “default” directional light. rgb(255,
255,255)

392
USING DIRECTOR 11.5
Controlling the 3D World
Last updated 9/28/2011
directional Preset get and set Absolute position of the single “default” directional light:
#None
#TopLeft
#TopCenter
#TopRight
#MiddleLeft
#MiddleCenter
#MiddleRight
#BottomLeft
#BottomCenter
#BottomRight
#TopCenter
specularColor get and set Specular color of the first shader: the color of reflections from
the shader.
rgb(255,
255,255)
reflectivity get and set Reflectivity of the first shader, with values from 0.0 to 100.0.0.0
diffuseColor get and set Diffuse color of the first shader: the shader’s overall color. rgb(255,
255,255)
textureType get and set Default texture type for world. Values are as follows:
#none: no texture.
#default: use original texture from Shader.
#member: use image from specified cast member.
#default
textureMember get and set Name of cast member to use as the source for the default
texture when textureType is set to #member.
No texture
percent Streamed get Percentage of file that has been downloaded, with values from
0 to 100.
None
bytes Streamed get Integer number of bytes that have been downloaded, with
values from 0 to the size of the file in bytes.
None
streamSize get Total size of stream to be downloaded, with values from 0 to
the size of the file in bytes.
None
state get Current state of streaming. Values are as follows:
0: unloaded
1: headerLoading
2: headerLoaded
3: mediaLoading
4: mediaLoaded
-1: error
After state 3 or 4 has been reached, it’s safe to execute script
that manipulates the 3D world. Before then, access to
particular models may fail because those model definitions
may not have been downloaded.
Also, the loadFile() cast member method fails except at
states 0 or 4.
None
Property Access Description Default
393
USING DIRECTOR 11.5
Controlling the 3D World
Last updated 9/28/2011
Cast member methods
The following methods let you reset cast member properties to the original values they had at the time the cast member
was imported into Director:
Sprite properties
You can control the directToStage and bgColor properties using the Property inspector. For more information, see
“Using the Property inspector for 3D” on page 307. Use the following properties to work with 3D sprites in scripts:
Sprite methods
Use the following methods to work with 3D sprites:
Method Description Returns
revertToWorldDefaults() Resets all cast member properties to the values stored in the
original 3D world
Nothing
resetWorld() Resets the 3D cast member to the state it was in when the
movie first loaded
Nothing
Property Access Description Default
directTo Stage get and set TRUE (1) or FALSE (0) specification of whether rendering
occurs directly to the Stage or to the Director offscreen buffer.
If TRUE (1), other sprites that intersect with this sprite may
flicker. If FALSE (0), rendering layers well but speed declines.
TRUE (1):
rendering occurs
directly to the Stage
bgColor get and set Background color in all views. rgb(0,0,0)
camera get and set Determines which camera this sprite is using. None
targetFrame Rate get and set Controls the desired playback speed. If the
useTargetFramerate property is TRUE (1), then the
lod.bias property of all model resources is dynamically
altered until the target frame rate is met.
30
useTarget
FrameRate
get and set If a target frame rate has been set and you want to use it, set
this property to TRUE (1).
TRUE (1)
Method Description Returns
camera(index)Accesses a specific camera in the sprite’s list of views. The camera
requested
addCamera(camera, index)Adds a camera named camera at the specified index number.
If the index number is greater than the number of cameras in
the sprite’s camera count, or if there is no index, the camera is
added to the end of the list.
An error if a camera of
that name can’t be
found
deleteCamera
(cameraOrIndex)
If cameraOrIndex is a camera, the camera by that name is
deleted. If cameraOrIndex is an index number, the camera at
that index number is deleted.
In either case, the cameras after cameraOrIndex move
forward in the list and the camera count is decreased by 1.
An error if a camera of
that name or index
number can’t be
found
cameraCount() Returns the number of cameras in the sprite’s cameraList. An integer

394
Last updated 9/28/2011
Chapter 19: Movies in a Window
Introduction
Adobe® Director® can play several movies simultaneously by creating windows in which additional movies can play. A
movie in a window (MIAW) is a distinct Director movie that retains all its interactivity.
You can use a MIAW to play another movie in a separate window while the main movie plays on the Stage. In addition,
movies in windows and the main movie can communicate and interact with each other. This lets you create a variety
of interactive features, such as an interactive portfolio, a control panel for a second movie or digital video, or a status
display window.
The following list shows the typical workflow for creating and using a movie in a window:
1Set up the movie’s Display Template with default window properties.
2Create and set up the window.
3Assign a movie to the window.
4Open the window.
5Delete the window when the reason for playing the movie no longer applies.
When you create a MIAW, decide how you want to display it, how users should be able to move the window around
the screen and dismiss it, and how the window should appear. You can specify the window’s size and whether the
window is visible, has a frame and title, or is in front of or behind other windows on the screen.
MIAWs cannot be docked with each other if they are document MIAWs. However, if the original MIAWs display
template is set to Tools / Dialog, then it can be docked to the docking channels. As a result, the Docking checkbox in
the Display template tab gets disabled when the "Document" type is selected in the combo box.
MIAWs cannot be added as tabs in the maximized tab view mode. If you click the stage when a MIAW is playing, the
MIAW is reordered to the back of the stage. You must click the Open MIAW button to bring it to the front.
You can create and control movies in windows by using behaviors from the Behavior library or by writing your own
scripts.
Shockwave® Player does not support MIAWs. Use MIAWs only with movies that you intend to distribute as projectors
(see “About Distribution formats” on page 445 and “About projectors” on page 458). However, you can use script to
have Shockwave Player content target a URL in a browser window (see “Jumping to a URL” on page 295).
Note: To open a MIAW in authoring, drop a .dir or .dcr file in the Xtras folder, and the MIAW will appear in the Xtras menu.
About MIAWs
While there is no such thing as a MIAW object, the MIAW name is used to describe this unique combination of
window and movie objects. Most of the properties described in this section are really window properties, but they
apply to a MIAW. MIAWs and windows are not identical, and it is important to keep that in mind.

395
USING DIRECTOR 11.5
Movies in a Window
Last updated 9/28/2011
Creating or declaring a MIAW
You must first explicitly create or declare the MIAW before you can use it or set its properties.
Explicitly declare a new MIAW in Lingo
❖Use the following script:
window().new ("window name")
Explicitly declare a new MIAW in JavaScript syntax
❖Use the following script:
new window("window name");
These statements create a window with the name and title “window name” and assign it the movie “window name”
to play in that window.
Note: When you declare a MIAW, it is added to the player’s window list.
Assigning a filename and title to a MIAW
Although the simple MIAW declaration line works well when the movie and the window title and name are all the
same, you can also explicitly set the filename and title of the MIAW after creating it.
Use a movie’s filename as the argument for the open window method to assign that movie to a window and instruct
Director to use the filename as the window title.
•Use the following script to associate the movie "my_Movie" with the window:
window("window name").filename = "my_Movie"
•Use the following script to assign the window's title to be "window title".
window("window name").title = "window title"
The default behavior of a MIAW is to size itself using the rect property of the movie that is being opened in the
window.
Opening and closing a MIAW
Use the methods in this section to open and close movies in windows. For more information, see the Scripting
Reference topics in the Director Help Panel.
Opening a MIAW
Before you can play a movie in a separate window, you must first open the window explicitly. The window must have
already been declared.
❖Use the following script:

396
USING DIRECTOR 11.5
Movies in a Window
Last updated 9/28/2011
-- Lingo
window().new("movieName")
window("movieName").open()
-or-
window().new("movieName").open()
// JavaScript syntax
new window("movieName");
window("movieName").open();
-or-
new window("movieName").open();
Unless you explicitly preload the movie through scripting, Director doesn’t load the movie into memory until the
window is opened, which can cause a noticeable pause. To load the first frame of the movie, use the preLoadMovie
method.
To specify other window characteristics before or after you open the window and by using the Display Template at
authoring time, see “Window appearance properties” on page 398.
Closing a MIAW
You can close the window for a MIAW but leave the movie in memory, or you can close the MIAW and remove the
movie from memory when it’s no longer in use.
•If you leave a MIAW in memory, you get better performance if the window is reopened; however, the movie still
consumes memory. Use this option if you expect a MIAW to be reopened after it initially runs or if other windows
or global variables refer to the MIAW.
•If you remove a MIAW from memory, performance slows down if the window is reopened; however, it doesn’t
consume memory until the movie is reloaded. Use this option if you don’t expect a MIAW to be reopened after it
initially runs or if you want to optimize memory on the computer running the MIAW.
Close a MIAW but keep it in memory
❖Use the close() method. For example, window("window name").close(). After the window is closed, the
window becomes invisible, but the movie continues playing. (You can also still access it in the windowList.)
Close a MIAW and remove it from memory
❖Use the forget() method. For example, window("window name").forget(). Use this method only if no other
window or global variables still refer to the MIAW. When you remove a MIAW from memory, it is no longer
available in the windowList. For more information about this method, see the Scripting Reference topics in the
Director Help Panel.
Setting the window size and location for a MIAW
Setting the screen coordinates for a MIAW lets you control the size of the window and where it appears. Setting the
coordinates before the movie appears controls the initial position of the window; setting them after the window
appears moves the window.

397
USING DIRECTOR 11.5
Movies in a Window
Last updated 9/28/2011
About rect, drawRect, and stageRect
The rect, drawRect, and sourceRect properties are available off of the stage or the window as follows:
_movie.stage.rect
_movie.stage.drawRect
_movie.stage.sourceRect
window("stage").rect
window("stage").drawRect
window("stage").sourceRect
sourceRect A property of the movie’s stage that indicates the “template” rect position at which the stage should appear.
When a window is opened that is to display a particular movie, that movie’s sourceRect is used to determine the
window’s initial position on the user’s monitor.
Note: The window’s sourceRect property is inherited from the movie that it contains.
rect A property of the window playing a particular movie that indicates the current rect coordinates of the window on
the user’s monitor. This property gets its initial value (when the window is created) from the window’s (or movie’s)
sourceRect property.
The movie’s stage.rect property is inherited from the window that it is playing in.
Note: The width, height, or an offset of a rect returns integers instead of floats, even if floats are used to create the rect.
drawRect A window property that indicates the rect area within the window into which the playing movie is to be
drawn. This property is initially set to rect(0,0,w,h), where w and h are the width and height of the window (by
default, the window is filled with the movie).
Note: The movie’s stage.drawRect property is inherited.
Specify the screen coordinates for a MIAW
Set the rect property to the coordinates of the location where you want the window to appear.
❖Define the coordinates as a rectangle in this order: left, top, right, and bottom, as shown in the following statement:
window("Sample").rect = rect(0, 0, 200, 300)
For your convenience, assign the coordinates to a variable and use the variable in your script statements.
For more information, see the Scripting Reference topics in the Director Help Panel.
Controlling the appearance of a MIAW
Control the appearance of a MIAW by setting different appearance properties using Lingo or JavaScript syntax. You
can also set some default appearance properties by using the Display Template tab in the Property inspector. You can
set the type of window you want—for example, a tool window—and how it will behave and act. For example, a
document window can have a title bar, be resizable, and have a minimize and maximize box. Because the Windows®
and Mac® operating systems handle windows differently, some window properties are only available on the Windows
platform. For more information about Lingo and JavaScript syntax, see the Scripting Reference topics in the Director
Help Panel.

398
USING DIRECTOR 11.5
Movies in a Window
Last updated 9/28/2011
Window appearance properties
Window appearance properties let you customize how your MIAWs look and behave. You can set these properties
using Lingo or JavaScript syntax. The Display Template tab in the Property inspector allows you to define some default
values for a movie’s window appearance properties.
General
General properties let you set what type of MIAW you want, its title, whether it is resizable, and more. Some properties
are for Windows® only.
Title Lets you set the text that appears in the title bar of the window.
Type Determines whether the window is a tool, document, or dialog window type. If Tool is selected, the window can
appear with a short title bar and a small close box. Tool windows do not receive activate or deactivate events because
they are always active. They appear on top of document windows but layer with each other. If Document is selected,
the window can appear with a standard title bar, a close box, and a minimize and maximize box. If Dialog is selected,
the window has a standard title bar and a close box. Dialog windows are always on top and are modal.
Location Determines the distance of the window from the left side and top of the screen. These values specify pixels,
and they apply only if the Stage is smaller than the current monitor’s screen size.
Centered Places the window in the center of the monitor. This option is useful if users might play a movie that was
created for a 13-inch screen on a larger screen or if you are creating a movie on a large screen that will be seen on
smaller screens.
Resizable Determines whether the MIAW is resizable.
Docking Determines whether the MIAW is a dockable when opened for authoring. For more information, see “About
dockable MIAWs” on page 399.
Title bar options
Title bar properties determine the icons that appear in the title bar of a window. These are accessed as part of the
titleBarOptions list.
Maximize Box Determines whether a maximize box appears in the title bar of a window.
Close Box Determines whether a close box appears in the window.
Minimize Box Determines if a minimize box appears in the title bar. For example:
window("window_name").titlebarOptions.minimizebox = true
Visible Determines whether the title bar of a window is visible. When you set this property to false, the other options
remain untouched. The next time the window’s title bar is visible, all other title bar properties are maintained.
Icon
Lets you determine the icon that appears in the title bar of a MIAW. You must select a cast member to act as the icon.
Side Titlebar (Mac only property) Determines whether or not the title bar appears on the top or the left side of the
window.
Appearance options
Appearance properties let you determine how a window looks. For example, if you are designing for a Mac application,
you can set the appearance to mimic a typical Mac window. These properties are accessed as part of the
appearanceOptions list.
Drop Shadow (Mac only) Determines whether there is a shadow around the window. Most Mac windows have it
turned on.

399
USING DIRECTOR 11.5
Movies in a Window
Last updated 9/28/2011
Metal (Mac only) Specifies whether a window has a metal or ice appearance.
Mask Lets you assign a bitmap cast member as a mask for the window. For example:
window("window_name").appearanceOptions.mask = member("my mask")
Drag Mask Lets you use a bitmap cast member as a mask to determine which areas of the window a user can click to
move the window. Use this to create your own custom non-rectangular title bars or to make the entire window
draggable.
Border Sets the type of window border. It can be #none for a borderless window, or #line for a 1-pixel black border.
To create a borderless window, you must set both resizable and titlebarOptions.visible to false, as follows:
window("win").resizable = false
window("win").titlebarOptions.visible = false
window("win").appearanceOptions.border = #none
Live Resize (Mac only) Determines whether the window contents and the size of the window update while the user
drags to resize the window.
About dockable MIAWs
To make tool MIAWs dockable during authoring, set the dockingEnabled property to TRUE. Dockable tool MIAWs
can dock to each other, to other tool windows such as the Property inspector, and to the side channels. They can also
be grouped with other tool windows. Dockable document MIAWs can dock to each other and to other document
windows such as the Stage, Score, and Cast windows, and to all media editors.
Note: Document MIAWs are not dockable. Only tool window MIAWs can be docked.
•To dock a MIAW, drag it to a compatible window by the header bar.
•To group a MIAW, click the Panel menu on the right side of the header bar and select a Panel group.
Window appearance methods
Several new Director window appearance methods apply to MIAWs. For more information about these methods, see
the Scripting Reference topics in the Director Help Panel.
The following are some of these methods with examples:
•minimize() lets you minimize your windows when you make custom title bars.
window ("miaw").minimize()
•maximize() lets you maximize windows when you make custom title bars.
window ("miaw").maximize()
•restore() lets you restore a window after it has been maximized when you make a custom title bar.
window ("miaw").restore()
•notifyUser() allows developers to notify the user that the application needs the user’s attention. On Windows,
the window’s task bar entry blinks. On Mac, the projector’s icon bounces in the dock. The method arguments
areflash count and rate. Setting the flash count to -1 causes the flash or bounce to continue indefinitely
until the user responds.
window("miaw").notifyUser(-1, 10000)
•displaySystemTrayMessage() (Windows only) This method allows users to pop up a balloon tooltip over their
system tray icon. This is enabled only if the systemTrayTooltip property is set to true. The method arguments
are Message Title, Message Content, and display duration.

400
USING DIRECTOR 11.5
Movies in a Window
Last updated 9/28/2011
window("miaw").displaySystemTrayMessage("Message Title", "Message....", 1000);
Setting default MIAW properties using the Display Template
A movie can define the default properties of its window by using the Display Template. When a MIAW is created, the
movie’s Display Template properties determine the initial state and appearance of the window. You can set the Display
Template properties through the Property inspector when authoring a movie. For more information about the
different properties, see “Controlling the appearance of a MIAW” on page 397.
1With a movie open in the Stage, select Window > Property Inspector.
2Click the Display Template tab.
3Set the general properties, Title bar option, and Appearance options.
Controlling MIAW layering
❖Use the moveToFront() and moveToBack() methods. For more information about these methods, see the
Scripting Reference topics in the Director Help Panel.
This code moves a MIAW to the front:
window("miaw").moveToFront()
This code moves a MIAW to the back:
window("miaw").moveToBack()
MIAW events
Lingo and JavaScript syntax provide event handlers for typical events that can occur while a MIAW is playing, such as
the movement of a window by the user. Such a handler is a good place for instructions that you want to run in response
to an event that involves a window.
For example, to cause a sound to play whenever the user closes a MIAW, use the queue() and play() methods in
an on closeWindow handler in a movie script within the movie that plays in the window. The on closeWindow
handler will run whenever the MIAW that contains the handler closes.
Each handler in the following list is followed by the event that triggers it:
on moveWindow A user moves the movie’s window.
on resizeWindow A user resizes the movie’s window.
on zoomWindow The minimize or maximize box of a movie’s window is pressed.
on openWindow The movie’s window is opened.
on closeWindow The movie’s window is closed.
on activateWindow A movie’s window is activated.
on deactivateWindow A movie’s window is deactivated.
on revealWindow A dockable MIAW in authoring is revealed.
on collapseWindow A a dockable MIAW in authoring is collapsed.

401
USING DIRECTOR 11.5
Movies in a Window
Last updated 9/28/2011
on activateApplication The entire application has been activated.
on deactivate Application The entire application has been deactivated.
on trayIconMouseDown (Windows only) This event handler is triggered when a user clicks on the Windows system
tray icon. This event is only meaningful if the systemTrayIcon property is set to true.
on trayIconDoubleClick (Windows only) A user double-clicks the Windows system tray icon. This event is only
meaningful if the systemTrayIcon property is set to true.
on trayIconRightMouseDown (Windows only) A user right-clicks the Windows system tray icon. This event is only
meaningful if the systemTrayIcon property is set to true. For example:
on trayIconRightMouseDown
alert ("right mouse down")
end
For more information, see the Scripting Reference topics in the Director Help Panel.
Listing the current MIAWs
The windowList property displays a list of all known MIAWs in the main movie. For example, the following
statement displays a list of current MIAW names in the Message window:
put_player.windowList
For more information about this property, see the Scripting Reference topics in the Director Help Panel.
Controlling interaction between MIAWs
MIAWs can interact with other MIAWs by accessing a window’s movie property. With a window’s movie, a user can
access the movie’s handlers, variables, members, and so on.
The following are a couple of examples:
Lingo
window("other MIAW").movie.member("temp").name = "changed name"
JavaScript
window("other MIAW").movie.member["temp"].name = "changed name";
or
Lingo
window("other MIAW").movie.someHandler()
JavaScript
window("other MIAW").movie.someHandler();
Global variables can be declared in the main movie (the Stage) or in a MIAW. No matter where they are declared, they
are available to the main movie and to all MIAWs. For more information about global variables, see the Scripting
Reference topics in the Director Help Panel.
A MIAW can also interact with the main movie via window("stage").

402
USING DIRECTOR 11.5
Movies in a Window
Last updated 9/28/2011
For example:
Lingo
window("stage").movie.member(1).name = "changed name"
JavaScript
window("stage").movie.member[1].name = "changed name";
or
Lingo
window("stage").movie.someHandler( )
JavaScript
window("stage").movie.someHandler( );

403
Last updated 9/28/2011
Chapter 20: Using Xtras
Using the XML Parser Xtra
The XML Parser Xtra lets Adobe® Director® movies read, parse, and use the contents of Extensible Markup Language
(XML) documents. Using the XML Parser Xtra requires that you understand the structure and content of the
documents you are parsing. You can then access the XML document’s contents through Lingo or JavaScript™ syntax
or convert the contents to a script list that is meaningful to you and your movie. After your movie has read an XML
document, it can perform actions that you define based on the contents of the document.
For example, an XML document might describe the structure of a molecule for an educational chemistry application.
After the movie has parsed the XML that describes the molecule, it can use that information to draw an accurate visual
representation of the molecule on the screen. In this case, the movie must be programmed to know ahead of time that
the XML document describes a molecule and not a grocery list, in order to make logical use of it.
About XML
XML is similar to HTML in that it uses markup tags to define content. However, HTML has predefined tags that you
can use to format any data. Any application that reads HTML must understand the meaning of tags such as TITLE, P,
and BODY. HTML tags also describe how information appears on the screen. XML, on the other hand, consists of a set
of rules that let you define custom tags and the type of data they can contain, and it has no visual component. With
XML, there is no predefined way to display any given type of data such as molecular structures or grocery lists. An
XML document is merely a container for the data.The Director developer, by knowing the kind of data the XML
document contains, can make intelligent decisions about what the Director movie should do with the information.
One key advantage of XML over a regular text document is that XML is not order-dependent. For example, if an
application refers to the third item in a line of data, inserting new data or making subsequent changes to the way the
data is produced could cause the application to fail. With XML, you can refer to the individual data components by
name. If you insert a new chunk of data before the one in use, the name is still valid. Existing code continues to work,
and the newly inserted data is ignored.
There are many sources of information on the Internet for understanding, creating, and editing XML. The following
websites offer useful information about XML:
•www.xml.com
•www.ucc.ie/xml/
•www.w3.org/TR/REC-xml
•www.w3.org/DOM/

404
USING DIRECTOR 11.5
Using Xtras
Last updated 9/28/2011
Using XML parser objects
The XML Parser Xtra lets Director developers access the nodes of an XML document. A node can be a tag (similar to
an HTML tag, also called an element), character data (text that does not appear inside the angle brackets of a tag), or
a processing instruction (a special type of tag that passes data to the parsing application for special processing). You can
extract information from the XML document by looking at its nodes with Lingo or JavaScript™ syntax. This access to
XML data lets users incorporate XML documents into their movies and selectively extract data from the documents.
An XML document is well formed if it has a coherent nesting structure and no misplaced angle brackets. Some XML
documents can be associated with a document type declaration (DTD) file that describes specific rules for the XML
tags the document uses. The XML Parser Xtra checks that the XML follows the general rules of creating and using XML
tags to ensure that the document is well formed. However, the Xtra does not check the DTD file to ensure that the tags
follow the specific rules described by the DTD. For this reason, the Xtra is called nonvalidating. The creator of the
original XML document must follow the rules described in the DTD. Your Director movie should also include script
that checks for errors in the use of the XML document’s tags.
To use the XML Parser Xtra, create a parser object by using Lingo or JavaScript syntax to assign a new instance of the
Xtra to a variable. This variable now contains the parser object. Use a global variable if you need to access the XML
data from anywhere in the Director movie.
global gParserObject
gParserObject = new(xtra "xmlparser")
The next step is to parse the XML data, using the parseString() method. The data can come from the text of a cast
member or a string variable. To parse XML from a URL, use parseURL() instead. ParseString() and parseURL()
return either VOID, which indicates that the method is successful, or an error code that indicates a problem with the
XML data.
The following script statement sets the variable errCode to the return value of the parseString() method:
errCode = gParserObject.parseString(member("XMLtext").text)
After the XML Parser Xtra parses the data, the parser object contains all the data from the XML document.
The XML data can be considered a tree structure because most documents have tags nested within other tags, with
each tag being like a branch of the tree.
The following example shows a short XML document:
<?xml version="1.0"?>
<e1><tagName attr1="val1" attr2="val2"/><e2>element 2</e2><e3>element 3</e3></e1>
The following example is the same XML with its tree structure shown more clearly:
<?xml version="1.0"?>
<e1>
<tagName attr1="val1" attr2="val2"/>
<e2>element 2</e2>
<e3>element 3</e3>
</e1>
There are two ways to access a parsed XML document. You can use the makeList() method to convert the document
into a nested property list and use the list-access methods of Lingo or JavaScript syntax, or you can use the special script
methods of the XML Parser Xtra to access the parsed data directly.
The following script statement uses the makeList() method to convert the parsed data to a nested property list that
reflects the tree structure of the XML:
theList = gParserObject.makeList()

405
USING DIRECTOR 11.5
Using Xtras
Last updated 9/28/2011
Each element in the document is represented by its own property list, with another property list for each child element
that it contains.
•The name of the element is the property name, and the content of the element is the property value.
•Attributes of an element are stored in a child list with the name !ATTRIBUTES. The property list of attributes
contains the name of each attribute and its value.
•Character data has the property name !CHARDATA, and the value is the string representation of the character
data.
•A processing instruction is a property with the name !PROCINST; its value is another two-element property list.
The first property of this sublist is NAME, and the value is the string that represents the name of the processing
instruction. The second property of the sublist has the name TEXT and contains the rest of the text in the processing
instruction.
The property list resulting from the previous XML example would look like the following code:
["ROOT OF XML DOCUMENT": ["!ATTRIBUTES": [:], "e1": ["!ATTRIBUTES": [:], "tagName":
["!ATTRIBUTES": ["attr1": "val1", "attr2": "val2"]], "e2": ["!ATTRIBUTES": [:], "!CHARDATA":
"element 2"], "e3": ["!ATTRIBUTES": [:], "!CHARDATA": "element 3"]]]]
The following example is the same property list with its nested structure shown more clearly:
["ROOT OF XML DOCUMENT": ["!ATTRIBUTES": [:],
"e1": ["!ATTRIBUTES": [:],
"tagName": ["!ATTRIBUTES": ["attr1": "val1", "attr2": "val2"]],
"e2": ["!ATTRIBUTES": [:], "!CHARDATA": "element 2"],
"e3": ["!ATTRIBUTES": [:], "!CHARDATA": "element 3"]
]
]]
Together, the Lingo or JavaScript syntax statements that create a property list from a string of XML data would look
like the following examples:
global gParserObject
gParserObject = new(xtra "xmlparser")
errCode = gParserObject.parseString(member("XMLtext").text)
theList = gParserObject.makeList()
After this code has been executed, the variable gParserObject contains the parsed node structure of the XML
document, and the variable theList is a property list that contains all the information in the document broken into
property name and value pairs. All the regular script methods for sorting and accessing lists can work normally with
theList.
Using XML document nodes
The XML document can contain different types of nodes. Each node can contain different kinds of data, depending
on the node type. You should check the node type before accessing its data so you know what type of data to expect.
Nodes are read-only, so you can retrieve the type, but you cannot set it.
Use Lingo or JavaScript syntax to access the nodes of an XML document. The following table shows the script terms
that refer to nodes and their properties:

406
USING DIRECTOR 11.5
Using Xtras
Last updated 9/28/2011
Note: The subfield count exists for any field that is accessible with bracket access. You can specify
whichNode.child.count to find how many children are in the specified node.
Using this XML document as a starting point, the following examples demonstrate how to use these script terms to
access the data within various node levels of the XML structure.
The XML looks like the following example:
<?xml version="1.0"?>
<e1>
<tagName attr1="val1" attr2="val2"/>
<e2>element 2</e2>
<e3>element 3</e3>
Here is some text
</e1>
The following script returns the name of the first XML tag:
put gParserObject.child[1].name
-- "e1"
The gParserObject variable contains the parsed XML. When used in the preceding script, it refers to the root node
of the XML document. The script term child[1] refers to the first level of nested tag, which is the e1 tag.
To find out what kind of node the first tag is, use the type method, as shown in the following example:
put gParserObject.child[1].type
-- #element
Node Script Return value if an element Return value if text Return value if Processing
Instruction
type #element #text #procInst
name String representing the name of the
element.
VOID String representing the name of
the processing instruction.
child[N]
(N is an integer)
The Nth child node of the node.
VOID is returned if no Nth child exists or
there is a script error.
VOID VOID
attributeName[N]
(N is an integer)
String representing the name of the Nth
attribute.
VOID is returned if no Nth attribute exists
or there is a script error.
VOID VOID
attributeValue[N]
(N is an integer)
String representing the value of the Nth
attribute.
VOID is returned if no Nth attribute exists
or there is a script error.
VOID VOID
attributeValue[N]
(N is a string)
String representing the value of the
attribute with the name N.
VOID is returned if the node does not have
an attribute named N or there is a script
error.
VOID VOID
text VOID String representing the
character data contained
in this node.
String representing the data
section of the processing
instruction.

407
USING DIRECTOR 11.5
Using Xtras
Last updated 9/28/2011
To refer to the nodes that are nested more than one level deep, use more than one level of child reference. The following
script returns the name of the first tag that is nested within the e1 tag:
put gParserObject.child[1].child[1].name
-- "tagName"
The following script returns the name of the second tag that is nested within the e1 tag:
put gParserObject.child[1].child[2].name
-- "e2"
To refer to the text data that occurs within a particular tag, use the text property. The text is a child node of the tag
that contains it, so you need an additional level of child reference. This script returns the following string, which
appears inside the e2 tag from the previous XML example:
put gParserObject.child[1].child[2].child[1].text
-- "element 2"
In this example, the gParserObject variable refers to the root node of the XML. The child[1] refers to the e1 tag,
which occupies the first level down in the XML’s nested structure. The child[2] refers to the second tag within the
e1 tag, which is the e2 tag. The last child[1] refers to the text within the e2 tag, which is element 2. Finally, the text
property is specified, so the script returns the text of the node rather than any other property of the node.
The fourth child of the e1 tag is a line of text that reads here is some text. This text is a child, as are the XML tags
that precede it. You can get the type of this child the same way you get other children.
The following script returns the type of the fourth child of the e1 tag:
put gParserObject.child[1].child[4].type
-- #text
The following script returns the text of the fourth child of the e1 tag:
put gParserObject.child[1].child[4].text
-- "
here is some text
"
The text element includes the white space for Return, Space, and Tab characters as well as the string "here is some
text".
You can use the script count method to determine the number of children that exist at a particular level of the XML
structure. The following script returns the number of children at the 2nd level in the previous XML example:
put gParserObject.child[1].child.count
-- 4
Accessing attributes
Use the attributeName and attributeValue properties to access the attributes of tags that have values. In the
previous XML example, the first tag nested inside the e1 tag is called tagName and has two attributes called attr1 and
attr2.
The following script uses the attributeName property to return the name of the first attribute of the tag called
tagName, which is the first child of the e1 tag:
put gParserObject.child[1].child[1].attributeName[1]
-- "attr1"
The following script uses the attributeValue property with an integer to return the value of the first attribute of the
tagName tag:

408
USING DIRECTOR 11.5
Using Xtras
Last updated 9/28/2011
put gParserObject.child[1].child[1].attributeValue[1]
-- "val1"
The following script uses the attributeValue property with a string to return the value of the attr1 attribute:
put gParserObject.child[1].child[1].attributeValue["attr1"]
-- "val1"
The following script uses the count method with the attributeName property to return the number of attributes in
the first child of the e1 tag:
put gParserObject.child[1].child[1].attributeName.count
-- 2
Parser objects and XML nodes
As described in earlier sections, the parser object in the gParserObject variable stores the root of the parsed tree of
the XML document. An XML node is a node within the tree. The root node is like an XML node because almost all the
operations on XML nodes can be applied to the root node.
In the previous XML example, the root of the tree is an XML element node named "ROOT OF XML DOCUMENT" that
has no attributes and one child (the e1 tag). You can get the same information about the root node as for any of the
child nodes.
The following script returns the root node’s type, name, and number of children:
put gParserObject.type, gParserObject.name, gParserObject.count(#child)
-- #element "ROOT OF XML DOCUMENT" 1
The main difference between the root node and its child nodes is that several script methods apply to the entire XML
document and operate on the root node only. These methods include doneParsing(), getError(),
ignoreWhiteSpace(), makeList(), parseString(), and parseURL().
Treating white space
The default behavior of the XML Parser Xtra is to ignore character data between XML tags when all the characters are
white space. This type of white space is usually due to return characters and superfluous space characters, but
sometimes it can have meaning to the XML document.
Use the ignoreWhiteSpace() method to change the way the Xtra treats white space. If ignoreWhiteSpace() is set
to FALSE instead of its default value of TRUE, white space between elements is treated as actual data.
The following script statements leave ignoreWhiteSpace() set to the default TRUE value, and parse the given XML
into a list. The sample element has no children in the list.
XMLtext = "<sample> </sample>"
parserObj.parseString(XMLtext)
theList = parserObj.makelist()
put theList
-- ["ROOT OF XML DOCUMENT": ["!ATTRIBUTES": [:], "sample": ["!ATTRIBUTES": [:]]]]
The following script statements set ignoreWhiteSpace() to FALSE, and parse the given XML into a list. The sample
element now has a child that contains one space character.

409
USING DIRECTOR 11.5
Using Xtras
Last updated 9/28/2011
XMLtext = "<sample> </sample>"
parserObj.ignoreWhiteSpace(FALSE)
parserObj.parseString(XMLtext)
theList = parserObj.makelist()
put theList
-- ["ROOT OF XML DOCUMENT": ["!ATTRIBUTES": [:], "sample": ["!ATTRIBUTES": [:], "!CHARDATA":
" "]]]
If there are non-white space characters in a !CHARDATA node, all the characters of the node, including leading and
trailing white space characters, are retained.
XML and character sets
When you use XML, remember that different computer systems use different binary encoding to represent text
characters.
The XML Parser Xtra adheres strictly to the XML specification, which states that XML documents are, by default,
encoded using the UTF-8 character set. If the document is not encoded in UTF-8, it must include a declaration of its
character set in the first line of the document.
The following XML declares the IOS-8859-1 character set, also known as Latin1:
<?xml version="1.0" encoding="ISO-8859-1" ?>
This requirement applies to documents parsed by parseString() as well as files that are parsed by parseURL().
The XML Parser Xtra supports the following character sets:
ISO-8859-1 Also called Latin 1. This is the most common Western encoding used on the web. It matches the default
character set used on Windows® in most Western countries. It does not match the character set used in most Western
versions of the Mac® OS (MacRoman) and does not match character sets commonly used in most non-Western
countries. The first 127 characters (binary codes 1-127) are the same in most countries.
UTF-8 An 8-bit encoding of the Unicode character set. This is the XML default character set.
US-ASCII Supports only 7-bit characters.
EUC-JP The EUC character set, used widely in Japan.
SHIFT_JIS Also used widely in Japan. Shift-JIS is the character set used by default in Japanese versions of Windows and
the Mac OS®.
UTF-16 A 16-bit encoding of the Unicode character set.
For many developers, Latin 1 is the most convenient encoding to use.
Using the MUI Xtra
The MUI Xtra provides fully functional dialog boxes set up the way that you specify. These dialog boxes don’t require
the memory or disk footprint of a MIAW that simulates a dialog box. They also draw the appropriate Windows
controls, follow preferences for dialog box appearance set by the user in Windows 95, and draw with gray-scale
controls on the Macintosh.
Dialog boxes created from the MUI Xtra also provide:
•Horizontal scrolling within editable text fields
•Clipboard operations for editable text

410
USING DIRECTOR 11.5
Using Xtras
Last updated 9/28/2011
•Activation of a default item when the user presses Enter or Return
•Activation of a cancel item when the user presses Esc-period or
•Command-period.
The MUI Xtra supports these dialog box types:
•General purpose dialog boxes that you can set up with any arrangement of buttons, editable fields, labels, sliders,
and pop-ups
•Alerts that offer several possible button and icon combinations
•Standard open file dialog boxes
•Standard save file dialog boxes
•A dialog box for entering a URL
What the MUI Xtra contains
The MUI Xtra contains several components that you can use to create dialog boxes:
•Lingo elements:
•Alert
•FileOpen
•FileSave
•GetItemPropList
•GetUrl
•GetWidgetList
•GetWindowPropList
•Initialize
•ItemUpdate
•New
•Run
•Stop
•WindowOperation
•A predefined list of window properties that you can use as default values for a general purpose dialog box
•A predefined list of properties for components of a general purpose dialog box
Creating dialog boxes
To create dialog boxes from the MUI Xtra:
1Plan and design the dialog box: Determine what users need the dialog box to achieve, the type of interface
components that best accomplish this, and where the data in the dialog box comes from. Sketch a preliminary
dialog box to get a better idea of where options need to appear and how well they fit into the dialog box.
2Decide which type of dialog box to use.:The MUI Xtra provides predefined dialog boxes for entering alerts, opening
and saving files, and for entering URLs. These are relatively easy to create. If none of these types are appropriate,
you can define your own general purpose dialog box.

411
USING DIRECTOR 11.5
Using Xtras
Last updated 9/28/2011
3Use the statement new (xtra "MUI") to create an instance of the MUI Xtra.
4Set up the dialog box.
You can create two types of dialog boxes:
•Standard dialog boxes that you use for alerts, opening and saving files, and opening URLs. When the user clicks a
button, the dialog box responds accordingly and sends the appropriate message back to Director.
Create these by calling the function that creates the specific dialog box.
•General purpose dialog boxes for which you define each attribute and component in the dialog box, and then
explicitly initialize and run the dialog box.
Creating a standard dialog box
Create and customize a standard dialog box by using the function for the specific type of box.
Create an alert
Use the Alert function.
Create an open file dialog box
Use the FileOpen function.
Create a save file dialog box
Use the FileSave function.
Create a dialog box for entering a URL
Use the GetUrl function.
Using a general purpose dialog box
When you use a general purpose dialog box, first set up the dialog box’s overall attributes and components. After the
dialog box’s attributes are set up, use the Initialize, Run, and Stop commands to control the dialog box.
1Create two lists of definitions:
•One list is a property list that contains definitions of overall dialog box attributes such as the name that appears
in the title bar, the box’s size and location, and the handler that runs when an event occurs in the dialog box.
•The other list is a linear list of definitions for each component in the dialog box. Each item in this linear list is a
property list that defines one component of the dialog box.
2Use the Initialize command to specify that these lists are the ones Director should use for definitions of the general
purpose dialog box.
A Lingo statement can’t contain more than 256 characters. Since lists are typically long, it might be necessary to assign
some values to variables and then use the variables in the list.
After the dialog box is defined and initialized, use the appropriate Lingo to open, respond to, and close the dialog box.
•Use the Run command to open a modal dialog box. Use the WindowOperation command with the #show option
to open a non-modal dialog box.
•Use the ItemUpdate command to update the dialog box in response to user actions.
•Respond to user actions by sending events in the dialog box to the handler set up to handle callbacks.

412
USING DIRECTOR 11.5
Using Xtras
Last updated 9/28/2011
•Use the Stop command to close a modal dialog box. Use the WindowOperation command with the #hide option
to close a non-modal dialog box.
Specifying overall dialog box properties
To specify the dialog box’s overall properties, create a property list that sets values for each of the window’s properties.
The GetWindowPropList function returns a predefined list of attributes. It’s usually easiest to obtain a predefined list
from the GetItemPropList function and then modify values as needed.
Before opening the dialog box, use the Initialize command to specify which list Director uses as the source of
definitions for the overall dialog box. The following are the overall dialog box properties and their possible values:
These statements set up a list of overall dialog box properties.
•The first statement creates an instance of the MUI Xtra and assigns it to the variable theBox.
•The second statement assigns a list of predefined values to the variable aWindowPropList.
•The next three statements modify the name, callback, and width properties that were obtained from the
GetWindowPropList function.
•The last statement displays the modified list in the Message window. The result appears at the end of the example.
set theBox = new(xtra "mui")
set aWindowPropList = GetWindowPropList(theBox)
set the name of aWindowPropList = "General Settings"
set the callback of aWindowPropList = "otherCallback"
set the width of aWindowPropList = 200
put aWindowPropList
-- [#type: #normal, #name: "General Settings", #callback: "otherCallback", #mode: #data,
#xPosition: 100, #yPosition: 120, #width: 200, #height: 210, #modal: 1, #toolTips: 0,
#closeBox: 1, #canZoom: 0]
Property Possible Values
#type #alert, #normal, #palette
#name String that contains the window name. Use "" for no name.
#callback Handler that processes the result of the callback. See Sending dialog box events to Director for more information.
#mode #data, #dialogUnit, or #pixel. These set the way that Director lays out the dialog box.
#Xposition Number of pixels that upper left corner of the dialog box appears from the left of the screen. Specify -1 to have the
dialog box appear in the center.
#Yposition Number of pixels that the top of the dialog box appears from the top of the screen. Specify -1 to have the dialog box
appear in the center.
#width Width of the window in pixels. Specify 0 to have the dialog box set its width automatically.
#height Height of the window in pixels. Specify 0 to have the dialog box set its height automatically.
#modal TRUE or FALSE. Sets whether the dialog box is modal.
#toolTips TRUE or FALSE. Sets whether to use tooltips initially. (This is not supported in Version 1.0 of the MUI Xtra. It is reserved
for future use.)
#closeBox TRUE or FALSE. Specifies whether the dialog box has a close box.
#canZoom TRUE or FALSE. Specifies whether the dialog box can zoom.

413
USING DIRECTOR 11.5
Using Xtras
Last updated 9/28/2011
Specifying dialog box content
To specify the content of a general purpose dialog box, create a linear list of definitions for each component of the
dialog box. Each definition is a property list that defines one component. Components appear in the order that they
are listed.
Some components define the structure of the dialog box, such as the beginning and end of the window and the start
and end of horizontal and vertical sets of components. When constructing the dialog box, you must use this overall
framework of components:
Window beginning
Additional components as desired. This can include nested sets of additional horizontal
and vertical groups, horizontal and vertical dividers, labels, and interface features
such as buttons, check boxes, editable fields, and other interface elements.
Window end
To define individual components, create a property list that specifies each component. For convenience, use the
GetItemPropList function obtain a predefined list of values and then modify properties as needed.
The following are properties for general dialog box components and their possible values:
Possible #value settings for general purpose dialog box components
The #value settings for general purpose dialog box components are crucial for the correct display and editing of data
in the dialog box. The following are possible settings for each type of component:
Property Possible value
#value Determines the component’s value type. Possible types are integer, float, or string. See the following section "Possible
#value settings for general purpose dialog box components" for more information about the #value property.
#type One of the supported component types (see Possible component types)
#attributes A list that specifies the component’s attributes. Attributes that you can specify depend on the component’s type. See
Possible attribute settings
#title String used as the title for the component. Specify ""for no title.
#tip String used as the message in a tool tip. . Specify "" for no tool tip. (Tool tips aren’t supported in the initial release of the
MUI Xtra. This is reserved for possible use in future releases.)
#locH The distance of the component’s left edge from the left of the dialog box. There is no need to specify this property if
#data is specified for the dialog box’s #mode property.
#locV The distance of the component’s top from the top of the dialog box. There is no need to specify this property if #data
is specified for the dialog box’s #mode property.
#width The component’s width in pixels. Specify 0 to have Director automatically size the component’s width. There is no need
to specify this property if #data is specified for the dialog box’s #mode property.
#height The component’s height in pixels. Specify 0 to have Director automatically size the component’s height. There is no
need to specify this property if #data is specified for the dialog box’s #mode property.
#enabled TRUE or FALSE. Specify whether the item is enabled.
Component Possible setting for #value Examples
#dividerV (Ignored) (Not applicable)
#dividerH (Ignored) (Not applicable)
#bitmap Cast member 12, "First bitmap castmember",

414
USING DIRECTOR 11.5
Using Xtras
Last updated 9/28/2011
Before opening the dialog box, use the Initialize command to specify which list Director uses as the source of
definitions for the overall dialog box.
Example
These statements specify the components for a general purpose dialog box that contains an editable field and a button.
The dialog box is created from theBox, which is an instance of the MUI Xtra.
The first statement creates a new list named aWindowItemList.
Each subsequent set of statements obtains a predefined list of properties for an individual component, modifies it as
necessary, and then adds the modified list to the overall list of dialog box components.
The final statement displays the new overall list in the Message window. The result appears at the end of the example.
For easier reading, the display has been broken out into separate sections for each item in the list.
number, name, or reference member 12 of castLib "Internal"
#checkBox Boolean TRUE, FALSE
#radioButton Boolean TRUE, FALSE
#PopupList String, integer, or float 1, "Fred", 2.3
#editText String "Edit This Text"
#WindowBegin (Ignored) (Not applicable)
#WindowEnd (Ignored) (Not applicable)
#GroupHBegin (Ignored) (Not applicable)
#GroupHEnd (Ignored) (Not applicable)
#GroupVBegin (Ignored) (Not applicable)
#GroupVEnd (Ignored) (Not applicable)
#label String "label: ", "Long Label Text Here"
#IntegerSliderH Integer 1, 100, 0
#FloatSliderH Float 1.2, 0.0, 12.345
#defaultPushButton (Ignored) (Not applicable)
#cancelPushButton (Ignored) (Not applicable)
#pushButton (Ignored) (Not applicable)
#toggleButton Boolean TRUE, FALSE
Component Possible setting for #value Examples

415
USING DIRECTOR 11.5
Using Xtras
Last updated 9/28/2011
set aWindowItemList = []
-- Set up the beginning of the dialog box
set tempItemPropList = GetItemPropList(theBox)
set the type of tempItemPropList = #windowBegin
append (aWindowItemList, duplicate(tempItemPropList))
-- Set up the beginning of an overall group
set tempItemPropList = GetItemPropList(theBox)
set the type of tempItemPropList = #groupHBegin
append (aWindowItemList, duplicate(tempItemPropList))
-- Set up an editable field
-- This will use default values for text attributes, because no
-- list of values is assigned to the attributes property.
set tempItemPropList = GetItemPropList(theBox)
set the type of tempItemPropList = #editText
set the value of tempItemPropList = "Enter text here"
append (aWindowItemList, duplicate(tempItemPropList))
-- Set up an OK button
set tempItemPropList = GetItemPropList(theBox)
set the type of tempItemPropList = #pushButton
set the title of tempItemPropList = "OK"
append (aWindowItemList, duplicate(tempItemPropList))
-- Set up end of overall group
set tempItemPropList = GetItemPropList(theBox)
set the type of tempItemPropList = #groupHBegin
append (aWindowItemList, duplicate(tempItemPropList))
-- Last, set up end of window
set tempItemPropList = GetItemPropList(theBox)
set the type of tempItemPropList = #windowEnd
append (aWindowItemList, duplicate(tempItemPropList))
put aWindowItemList
-- [
[#value: 0, #type: #WindowBegin, #attributes: [], #title: "title", #tip: "tip", #locH: 20,
#locV: 24, #width: 200, #height: 210, #enabled: 1],
[#value: 0, #type: #GroupHBegin, #attributes: [], #title: "title", #tip: "tip", #locH: 20,
#locV: 24, #width: 200, #height: 210, #enabled: 1],
[#value: "Enter text here", #type: #editText, #attributes: [], #title: "title", #tip: "tip", #locH:
20, #locV: 24, #width: 200, #height: 210, #enabled: 1],
[#value: 0, #type: #pushButton, #attributes: [], #title: "OK", #tip: "tip", #locH: 20, #locV:
24, #width: 200, #height: 210, #enabled: 1],
[#value: 0, #type: #GroupHBegin, #attributes: [], #title: "title", #tip: "tip", #locH: 20,
#locV: 24, #width: 200, #height: 210, #enabled: 1],
[#value: 0, #type: #WindowEnd, #attributes: [], #title: "title", #tip: "tip", #locH: 20, #locV:
24, #width: 200, #height: 210, #enabled: 1]
]
Possible attribute settings
To specify the attributes of a general purpose dialog box component, assign a list of attribute specifications to the
component’s #attributes property.
What you can specify depends on the type of component. The following are possible properties and values you can
specify for a component’s attribute property. The available attributes vary depending on the type of component.
416
USING DIRECTOR 11.5
Using Xtras
Last updated 9/28/2011
Example
The following statement sets up attributes for an editable field:
set the attributes of tempTextItemList = [#textSize:#Normal, #textStyle:[#Normal]]
The following statement sets up attributes for a slider:
set the attributes of tempItemList = [#valueRange: [#min:0.0, #max:100.0, \
#jump:5.0, #acceleration:0.5], #sliderStyle:[#ticks]]
Possible component types
The following are available component types, whether they use a title, and the attributes that you can specify for them.
Attribute Possible values Can be set for
#textSize One of the following: #large, #tiny, #normal(default) Strings
#textStyle A list that includes any of the following attributes: #bold, #italic,
#underline, #plain (default), #inverse (v2)
Strings
#textAlign One of the following: #left, #right, #center (defaults to system language
standard)
Strings
#popupStyle One of the following: #tiny, #cramped, #normal (default) Pop-ups
#valueList A list of values that appear in a pop-up. All values are coerced to strings. For
example, Director treats ['one', #two, 3, 4.0] as four pop-up items, each of
which is treated as a string.
Pop-ups
#valueRange A list of a slider’s minimum, maximum, increment, jump, and acceleration
values. Available properties to set are #min, #max, #increment, #jump, and
#acceleration. This list is the default setting: [#min:0.0, #max:1000.0,
#increment:1.0, #jump:10.0, #acceleration:0.5]
Sliders
#sliderStyle A linear list of one or both of #ticks or #value. Sliders
#layoutStyle A list of values that includes one or more of the following: #minimize,
#lockPosition, #lockSize, #centerH, #right, #left, #centerV, #top, #bottom.
All items that aren’t grouped by the
#groupHBegin, #groupHEnd,
#groupVBegin, or #groupVEnd properties.
#bitmapStyle A property list that specifies that one of the bitmap icons in the MUI Xtra is
to be used as an icon for a general purpose dialog box. The property in the
property list is #bitmapIcon. Possible values are #stop, #note, #caution,
#question, #error. For example, the statement set the attributes of
tempPropItemList= [#bitmapIcon:#caution] sets the caution symbol as the
value for #bitmapStyle.
Bitmaps
Property Title Available attributes
#bitmap No #layoutStyle, #bitmapStyle
#cancelPushButton Yes #textSize, #layoutStyle
#checkBox Yes #textSize, #layoutStyle
#defaultPushButton Yes #textSize, #layoutStyle
#dividerH No #layoutStyle
#dividerV No #layoutStyle
#editText, No #textSize, #justification, #textStyle, #layoutStyle
417
USING DIRECTOR 11.5
Using Xtras
Last updated 9/28/2011
The GetWidgetList function also returns a list of supported general purpose dialog box component types.
Sending dialog box events to Director
Sending dialog events back to Director lets you determine events such as clicking buttons, changing values, or when
the dialog box moves or closes.
When a dialog box event occurs, the callback message includes three arguments:
•The callback event symbol, which identifies the type of event.
•Event-specific information such as the number in the #windowItemList of the item involved in the event
•The new item property list for the affected item
To specify how a general purpose dialog box responds, write Lingo that instructs the movie what to do in response to
an event and then assign that Lingo to the event’s symbol. Specify which handler responds to a dialog box event by
assigning the handler’s name to the dialog box’s #callback property in the list assigned to the #windowPropList.
The following are possible events that a general purpose dialog box can send back to Director to indicate what
happened to the dialog box:
#floatSliderH No #sliderStyle, #valueRange, #layoutStyle
#groupHBegin No None
#groupHEnd No None
#groupVBegin No None
#groupVEnd No None
#IntegerSliderH No #sliderStyle, #valueRange, #layoutStyle
#label No #textSize, #justification, #textStyle, #layoutStyle
#none No #layoutStyle
#popupList No #popupStyle, #valueList, #layoutStyle
#pushButton Yes #textSize, #layoutStyle
#radioButton Yes #textSize, #layoutStyle
#toggleButton Yes #textSize, #layoutStyle
#windowBegin No None
#windowEnd No None
Event What occurred
#itemChanged The item’s value has changed.
#itemClicked The user clicked an item in the dialog box.
#windowOpening The dialog box window opened.
#windowClosed The dialog box window closed.
#windowZoomed The dialog box window was zoomed.
Property Title Available attributes

418
USING DIRECTOR 11.5
Using Xtras
Last updated 9/28/2011
These are some tricks for setting up a callback:
•Store item numbers in global variables when building an item list. To check whether an item is important, compare
eventData to the stored index number.
•Because all buttons have their text in their titles, you can compare the title against text to determine if a particular
button was clicked. For portability and easier localization, store text button titles in global string variables when
setting up a dialog box and to do comparisons.
•Always make sure there is always a way to close a dialog box. Otherwise, it can be impossible to dismiss it.
•Because you can update items, if text changes you can enable an OK button that is unavailable until the text changes.
•Avoid hanging inside a modal dialog by making sure there is an event that can stop the dialog box.
Example
The following handler contains a case statement that responds to an event in a general purpose dialog box. Each
possible event is a condition that Director tests for. The three arguments are the following:
event The type of event.
eventData Specific information about the event.
itemPropList The list of property’s for the item.
#windowResized The dialog box window was resized.
#itemEnteringFocus An item in the dialog box got focus.
#itemLosingFocus An item in the dialog box lost focus.
Event What occurred

419
USING DIRECTOR 11.5
Using Xtras
Last updated 9/28/2011
on theWindowCallback event, eventData, itemPropList
global gMuiSmileDialObj, smileyIndex
if symbolP(event) then -- basic error check
case event of
#itemChanged :
if the type of itemPropList = #IntegerSliderH then
set smileyIndex = the value of itemPropList
smileyUpdate FALSE
end if
#itemClicked :
case ( the type of itemPropList ) of
#bitmap : beep
#defaultPushButton :
if ( the title of itemPropList = "Forward" ) then
smileyIndexIncrement
smileyUpdate TRUE
end if
#pushButton :
if ( the title of itemPropList = "Back" ) then
smileyIndexDecrement
smileyUpdate TRUE
end if
#cancelPushButton :
if ( objectP ( gMuiSmileDialObj ) ) then
stop(gMuiSmileDialObj, 1)
end if
end case
#windowOpening:
#windowClosed:
#windowZoomed :
#windowResized :
otherwise :
end case
end if
end theWindowCallback
Using the Physics (Dynamiks) Xtra
The Physics Xtra is a high-performance tool that helps developers create 3D worlds in which objects interact. The Xtra
performs calculations to determine the results of collisions, factoring in object properties such as mass, velocity, and
rotation. Forces can be applied, and objects can be connected to each other with constraints. The constraints available
are 6 degree of freedom joints, linear joints, angular joints, and spring joints.
Additionally, terrains and raycasting are supported. A terrain is similar to a bumpy plane that is infinite in two
dimensions and defines an elevation along the third. Raycasting is the mechanism of collision detection with rays.
Raycasting can be done against all types of rigid bodies and terrains.
With this Xtra, developers can focus on game play and user interaction, and not worry about creating a real-time
physics engine with Lingo scripts.

420
USING DIRECTOR 11.5
Using Xtras
Last updated 9/28/2011
The Physics (dynamiks) Xtra is a fully integrated rigid body physics simulation engine for Adobe® Director®. The
dynamics Xtra is supported on Windows and MAC platforms.
The physics engine for Director has the following features. Refer to the rest of the chapter for their details.
Physics World
The physics scene is represented by a cast member that can be inserted using the Insert menu in Director (Insert >
Media Element > Physics.)
Initializing and stopping the physics scene simulation
The physics scene should be initialized using the init() method with a reference to the 3D world. The 3D world can
also be an imported w3d file. The physics scene should also be stopped at the end of the simulation using the destroy()
method.
The simulate method has to be called to advance the physics simulation. If an equal time-step is specified, the time slice
specified in the init() method will be used to advance time.
In the automatic mode, the actual lapsed time is used to advance time.
Sub-steps are provided for accuracy.
The co-ordinate system of the physics world is the same as the 3D World in Director, but for an imported w3d scene,
the co-ordinates will be that of the external modeling tool where the scene was created.
World Properties
The various properties supported are mentioned in the chapter. All properties for world are set to zero by default.
World Methods
You can use the methods in the physics world to enable and disable collision detection between rigid bodies.
The physics world has methods to create, delete, and retrieve the following objects:
•Rigid Bodies
•Terrains
•6dof joints (6 degrees of freedom)
•Springs
•Linear Joint or Constraint.
•Angular joint or Constraint
•Raycasting
Rigid Bodies
The objects created in the physics world are rigid bodies that do not change shape. The geometry of the bodies does
not vary for each advance of time in the simulation.
The physics world provides methods to create a static or a dynamic rigid body.
A proxy shape has to be specified for each rigid body for approximating the geometry during the physics simulation.
The supported shapes are axis-aligned bounding box (AABB), sphere, convex hull, and a static concave shape.

421
USING DIRECTOR 11.5
Using Xtras
Last updated 9/28/2011
Rigid body Properties
The rigid body has properties like mass, position, orientation, velocity, and momentum.
All these properties have a default value of zero. Properties like mass have to be set in order to achieve proper
simulation.
Rigid Body Methods
The rigid body has methods to apply force, torque, and impulse.
Dynamic concave rigid bodies
Dynamic concave rigid bodies are created by cutting a body into convex meshes, and then rebuilding the body by
combining the meshes.
Dynamic concave rigid body parameters
The following parameters are required for a dynamic concave rigid body:
1Depth
2Concavity
3Merge Volume
Depth
The Depth parameter specifies the maximum level of recursion for cutting the body. Valid values for this parameter
are integers in the range [0,10].
Note: The value of the Depth parameter does not generally exceed 7.
The concave shape is cut recursively into smaller bodies along a plane. The plane for each cut operation is along the
longest edge of the oriented bounding box of the input mesh.
Concavity
The volume of Concavity is computed as a percentage of the total volume of the input hull. Highly concave tiny
bumps, which are insignificant in relation to the total volume, are ignored. If the volume of Concavity is below a
threshold, it is considered “convex enough” and no further recursions are carried out.
Valid values of the Concavity parameter are real numbers in the range [0,100]. Suggested values for this parameter
are from 0 through 20.
Merge Volume
The Merge Volume parameter determines how the convex meshes are cleaned and combined to form the complete
body. The convex hull pieces created by decomposing the concave body are arranged in descending order of volume.
Beginning with pieces having the largest volume, the volumes of the pieces are compared in sets of two. This procedure
is repeated to determine the volume of the combined body.
If the combined volume is within a specified percentage threshold, the separate pieces are discarded, and the combined
hull is retained. This procedure is repeated until no two hulls can be merged.
Valid values for this parameter are real numbers in the range [0,100]. Suggested values for the Merge Volume
parameter are from 0 through 30.
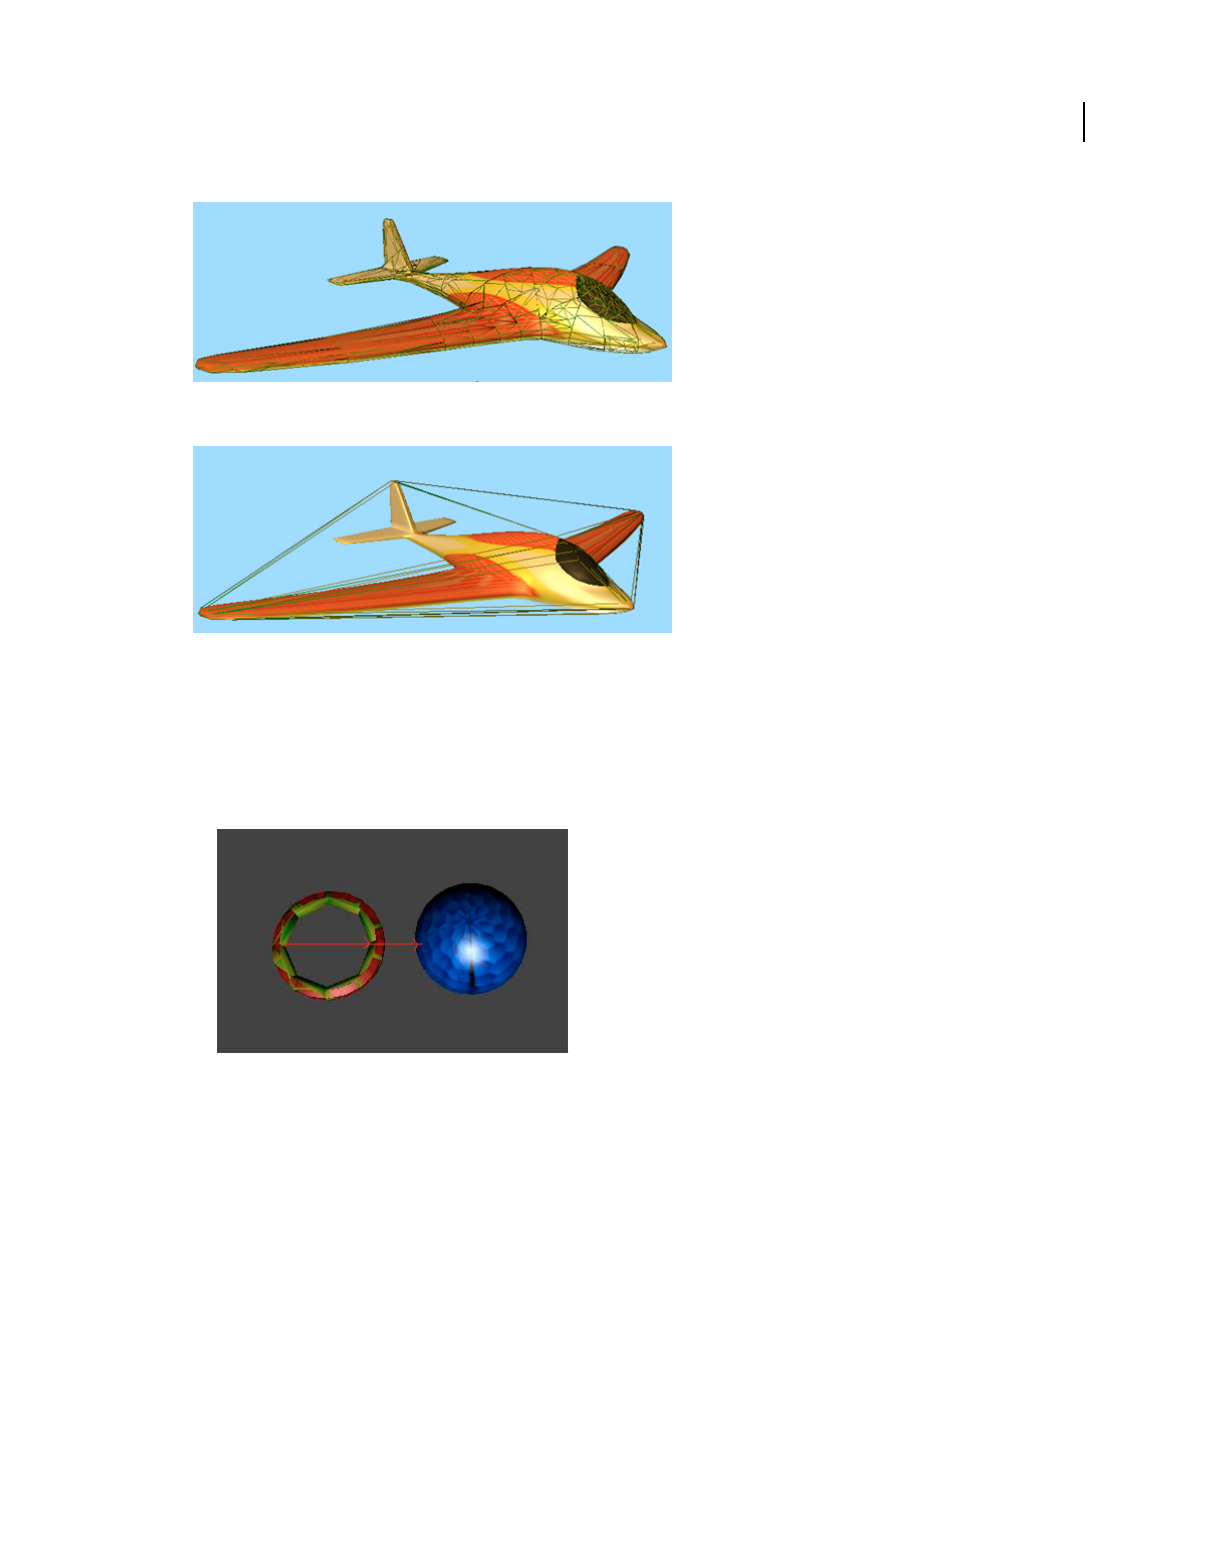
422
USING DIRECTOR 11.5
Using Xtras
Last updated 9/28/2011
Concave rigid body with a concave proxy
Model with a convex proxy
Recommendations
•Tweak the parameters carefully, because a proxy model can affect the performance of Director.
•Ensure that the concave mesh is closed.
•Ray-casting from inside a concave rigid body can cast itself. Keep in mind this scenario while ray-casting.
Ray-casting from a dynamic concave rigid body
Spring
A spring is a constraint that maintains its original rest length on compression and expansion.
A spring can be created between two rigid bodies (static or dynamic), or between a point in the world and a rigid body.
The bodies to which the spring is attached can be changed after creation of the spring.
The physics world provides properties to set/retrieve the rest length, stiffness of the spring, and the damping
coefficient. Flags are provided to enable/disable the compression and expansion force acting on it.
Linear Joint or Linear Constraint
When you apply a linear joint or linear constraint to an object, it is free to move in a linear fashion. The angular
movement is constrained.

423
USING DIRECTOR 11.5
Using Xtras
Last updated 9/28/2011
The physics world uses createLinearJoint() method to create a linear joint that takes the orientation to be constrained
as the parameter. The stiffness and coefficient of damping for the constraint is specified in the constraint descriptor
object.
Angular Joint or Angular Constraint
When you apply an angular joint or angular constraint to an object, it is free to move in an angular fashion. The linear
movement is constrained.
The Physics world uses createAngularJoint() method to create the angular joint that takes the length to be constrained
as the parameter. The stiffness and coefficient of damping for the constraint is specified in the constraint descriptor
object.
Collision Detection
The physics world has methods to enable/disable collision between pairs of rigid bodies. In addition, you can register
for a collision callback handler to be called when there is collision between pairs of bodies.
The contact tolerance, which is the inter-penetration depth, should be set appropriately for proper collision detection
in the simulation.
Terrains
A terrain is similar to a bumpy plane that is infinite in two dimensions and defines an elevation along the third. All
values below the elevation are treated as being inside the terrain volume. A terrain is not a closed shape, but rather the
boundary of a volume that extends downward for a certain distance. This way, fast moving objects do not fall through
the terrain if traveling across its surface in a single time step.
The following are the typical steps to create a terrain in Director:
1Use terrain generator tools and generate the terrain mesh.
2Save the corresponding height map as a director compatible file format.(BMP, JPEG, PNG,etc.) using the terrain
generator tool.
3Import the file into Director and create the height-map matrix by reading the file contents. For example, if you are
using a BMP file, each pixel has to be read and the height has to be computed using the pixel information.
4Create the mesh in director 3D using the height map information.
5Pass the height map matrix to the createTerrainDesc method.
6 DOF joints
This joint type can be configured to model nearly any joint imaginable. Each degree of freedom - both linear and
angular - can be selectively locked or freed, and separate limits can be applied to each. The 6 DOF joint provides motor
drive on all axes independently, and also allows soft limits(limits with springs.)
RayCasting
Raycasting is the mechanism of collision detection with rays. Raycasting can be done against all types of rigid bodies
and terrains.

424
USING DIRECTOR 11.5
Using Xtras
Last updated 9/28/2011
Getting Started with Physics
The following steps are involved in creating a physics simulation
1Create a 3D scene: A physics simulation is intrinsically linked to a 3D world, and each rigid body that is created is
linked to a 3D Model displayed. The 3D scene could be a new scene or an imported w3d scene.
2Create a Physics cast member: Select Physics from the Insert Menu (Insert > Media Element > Physics) to insert the
Physics cast member.
3Initialize the Physics scene using Lingo: Initialize the Physics scene by calling the initialize () method. This
operation links a 3D scene to the Physics world. The Physics scene should be initialized before any other Physics
operation.
4Set the properties of the Physics world using Lingo: The Physics world is initialized with the default set of
properties. You must set the world properties like gravity, contactTolerance, and damping.
5Step the simulation: Call the simulate() method to step the Physics world. Each simulate call updates the Physics
with new positions of the bodies based on mathematical calculations. The appropriate collision responses are also
determined by resolving the collision according to the object properties.
You must call the simulate() method in each exitframe() for a smooth Physics simulation The simulation progresses
based on the timestep and substep values that are set.
6Apply physics to the 3D models: 3D models can be of various geometric shapes. The physics simulation can
approximate the complexity of the model by assigning a proxy geometry while creating the rigid body. The proxy
geometries are box, sphere, convex shape, and concave shape.
You must provide access to this displayed geometry information before creating the rigid body by adding a
#meshdeform modifier to the 3D model.
After the rigid body is created, you can set various properties or apply dynamics to it by using Lingo.
7Stopping the simulation: Call destroy() when the movie is stopped to stop the physics simulation.
Tuning the Physics Engine
The Physics simulation is based on numerous mathematical calculations and you may observe unstable behavior due
to numeric tolerances. The scene will then have to be tuned to achieve a stabler simulation.
You can tune the following parameters:
•contactTolerance of the world and rigid body
•timestep of the world
•substeps of the world.

425
Last updated 9/28/2011
Chapter 21: Making Director Movies
Accessible
Introduction
Adobe® Director® includes features that let you make existing and new movies accessible to users who have hearing,
visual, or mobility impairment.
The U.S. government has stated that multimedia created for the purpose of fulfilling a government contract must be
made accessible to computer users with disabilities. The government requirements include text-to-speech, captioning,
and keyboard navigation features. The full text of the government requirements is available at www.section508.gov/.
You make your Director movies accessible by using behaviors or writing custom scripts. Director includes several
behaviors that let you easily add text-to-speech, captioning, and keyboard navigation to your movies with simple drag-
and-drop procedures. To have more control over accessibility implementation, you can write custom scripts that use
the text-to-speech methods. For more information about text-to-speech script, see “Accessibility scripting with Lingo
or JavaScript syntax” on page 430.
After implementing the accessibility features, you must deploy the movies in a way that ensures that the features will
work for users. For deployment information, see “Deploying accessible movies” on page 432.
Using the Accessibility Behavior library
The Director Library palette includes an Accessibility section that contains behaviors for enabling keyboard
navigation, text-to-speech, and captioning.
•For keyboard navigation, use the Accessibility Target, Accessibility Item or Accessibility Text Edit Item,
Accessibility Keyboard Controller, and Accessibility Group Order behaviors.
•For text-to-speech, use the Keyboard Navigation behaviors, and then add either the Accessibility Speak or
Accessibility Speak Member Text behavior. You can also use the Accessibility Speak Enable/Disable behavior to let
users turn the text-to-speech feature on and off.
•For captioning, use the Keyboard Navigation behaviors and Accessibility Speak behaviors, and then add the
Accessibility Captioning and Accessibility Synch Caption behaviors.
Enabling keyboard navigation
With the Accessibility Behavior library, you can easily make sprites on the Stage navigable with the keyboard. This lets
users select sprites and simulate mouse clicks without using a mouse. For example, if you have four button sprites on
the Stage, you can attach accessibility behaviors that let them be selected by using the Tab key. As each sprite is selected,
it is highlighted with a colored rectangle, called a focus ring, around its bounding rectangle. After a sprite is selected,
the user can press Enter (Windows®) or Return (Mac®) to initiate the same action that a mouse click would initiate on
the sprite.
Most accessibility behaviors cannot be used alone and must be used with other accessibility behaviors. For example,
to enable keyboard navigation, you must use the Accessibility Target, Accessibility Item, Accessibility Text Edit Item,
Accessibility Group Order, and Accessibility Keyboard Controller behaviors together.
426
USING DIRECTOR 11.5
Making Director Movies Accessible
Last updated 9/28/2011
Attach the Accessibility Target behavior
1Create a shape sprite on the Stage using the Rectangle tool in the Tools panel. The accessibility behaviors use this
sprite to create a focus ring around other sprites that you define as navigable with the keyboard. The focus ring
shows which sprite is the current selection during keyboard navigation.
2Move the shape sprite off of the Stage into the area immediately next to the Stage. You can expand the Stage window
to display more of this area if necessary. The other accessibility behaviors move the sprite onto the Stage when
keyboard navigation is used.
A shape sprite off of the visible part of the Stage.
3Select Window > Library Palette.
4Select Accessibility from the Library List menu in the upper-left corner of the Library palette.
5Drag the Accessibility Target behavior onto the shape sprite that is located next to the visible part of the Stage.
6In the dialog box that appears, enter a name for the behavior group.
Because the accessibility behaviors are dependent on one another, a group name is used for all the accessibility
behaviors used in a given scene of your movie. When you attach behaviors to a different scene of your movie, you
might want to use a different group name. For example, you might use Accessibility_Scene_1. In addition, there
should be only one instance of the Accessibility Target behavior in any given scene of your movie.
7Select an initial state for text-to-speech. If you select disabled, you must use the Accessibility Speak Enable/Disable
behavior to let users turn on text-to-speech later. For more information, see “Enabling text-to-speech” on page 428.
8Click OK.
The next part of the process is to attach the Accessibility Keyboard Controller behavior to a sprite.
Attach the Accessibility Keyboard Controller behavior to an off-Stage editable text sprite
This behavior intercepts keystrokes from the keyboard and enables those keyboard events to be used for navigation of
the sprites on the Stage. You attach the Accessibility Keyboard Controller behavior to an editable text sprite that you
place outside the visible part of the Stage.
1Place an editable text sprite on the Stage. Do not use a field sprite.
2Move the text sprite off the Stage into the area immediately below the Stage. Expand the Stage window to display
more of this area if necessary.
3Drag the Accessibility Keyboard Controller behavior from the Library palette to the sprite.

427
USING DIRECTOR 11.5
Making Director Movies Accessible
Last updated 9/28/2011
4In the dialog box that appears, select the accessibility group name for the scene, such as Accessibility_Scene_1.
5Click OK.
6Select the editable text sprite if it is not selected.
7Using the arrow keys, move the sprite until it is no longer on the visible part of the Stage.
Note: If the editable text sprite receives a Return character, its bounding rectangle can expand vertically. To prevent this
from happening and unexpectedly causing the sprite to become visible on the Stage, set the sprite’s Framing property to
Fixed in the Property inspector’s Sprite tab.
Now that the Accessibility Target behavior is attached to the shape sprite and the Accessibility Keyboard Controller
behavior is attached to a text sprite, you are ready to attach the Accessibility Item or Accessibility Text Edit Item
behaviors.
Attach the Accessibility Item or Accessibility Text Edit Item behaviors
To enable navigation to a sprite with the Tab key, attach the Accessibility Item behavior to the sprite. To enable
navigation to an editable text sprite with the Tab key, attach the Accessibility Text Edit Item behavior to the sprite.
1Drag the Accessibility Item or Accessibility Text Edit Item behavior from the Library palette to the designated
sprite.
2In the dialog box that appears, select the same group name that you used when attaching the Accessibility Target
behavior—for example, Accessibility_Scene_1.
3You can specify a script string to be executed when the user presses Enter (Windows) or Return (Mac) while the
sprite is selected. You can use any valid script string, such as a go to frame 20 method or a call to a separate
handler that you have written, such as startAnimation.
4Click OK.
5Repeat this process for each sprite in the scene that you want to be navigable.
Note: The Accessibility Item and Accessibility Text Edit Item behaviors cannot be applied to sprites that have the
Accessibility Target or Accessibility Keyboard Controller behaviors attached. If you are testing your movie while
attaching Accessibility Item or Accessibility Text Edit Item behaviors, you might need to rewind your movie to restore the
shape sprite with the Accessibility Target behavior to its original location.
After all the sprites have had an Accessibility Item or Accessibility Text Edit Item behavior attached to them, you can
add the Accessibility Group Order behavior to each sprite you want to be navigable with the Tab key.
Attach the Accessibility Group Order behavior
This behavior lets you specify the tab order—the order in which each sprite is selected on the Stage when the user
presses the Tab key.
1Drag the Accessibility Group Order behavior from the Library palette to one of the sprites that already has an
Accessibility Item or Accessibility Text Edit Item behavior attached.
2In the dialog box that appears, select the group name that is used by the other accessibility behaviors in the scene,
such as Accessibility_Scene_1.
3Enter the tab order for the sprite. Be sure to number each sprite consecutively and to use each number only once.
When the movie begins playing, the focus ring automatically goes to the sprite with group order 1.
4Click OK.
5Repeat this process for each sprite in the scene that is navigable with the Tab key.

428
USING DIRECTOR 11.5
Making Director Movies Accessible
Last updated 9/28/2011
All the sprites can now be navigated to and activated with the keyboard. You can repeat this process for each scene in
your movie.
Enabling text-to-speech
You can add the ability for your text cast members to be spoken aloud by the computer. You can also specify text to be
spoken when sprites are selected. Because the text-to-speech feature in Director is for the benefit of visually impaired
users, it is designed to be used with the keyboard navigation feature. Each text-to-speech behavior requires that the
Accessibility Target, Accessibility Item or Accessibility Text Edit Item, Accessibility Group Order, and Accessibility
Keyboard Controller also be applied to the appropriate sprites.
The following list describes the three text-to-speech behaviors:
•The Accessibility Speak behavior lets you specify a text string to be spoken when the user navigates to a sprite with
the Tab key.
•The Accessibility Speak Member Text behavior lets you specify a text cast member to be spoken when a user
navigates to a sprite with the Tab key.
•The Accessibility Speak Enable/Disable behavior lets you specify a user event that can turn the text-to-speech
feature on or off.
Attach the Accessibility Speak behavior
1Attach the keyboard navigation behaviors to sprites in your scene. For more information, see “Enabling keyboard
navigation” on page 425.
2Drag the Accessibility Speak behavior from the Library palette to the sprite that should trigger the spoken text when
the user navigates to it with the Tab key. This sprite must already be attached to an Accessibility Item or
Accessibility Text Edit Item and an Accessibility Group Order behavior.
3In the dialog box that appears, select the behavior group name for the scene, such as Accessibility_Scene_1.
4Enter the text to be spoken when the sprite is selected with the Tab key.
5Click OK.
Attach the Accessibility Speak Member Text behavior
You can specify an entire text cast member to be spoken by using this behavior.
1Attach the keyboard navigation behaviors to sprites in your scene. For more information, see “Enabling keyboard
navigation” on page 425.
2Drag the Accessibility Speak Member Text behavior from the Library palette to the sprite that should trigger the
spoken text when the user navigates to it with the Tab key. This sprite must already be attached to an Accessibility
Item or Accessibility Text Edit Item and an Accessibility Group Order behavior.
3In the dialog box that appears, select the behavior group name for the scene, such as Accessibility_Scene_1.
4Enter the name of the text cast member to be spoken when the sprite is selected with the Tab key.
5Click OK.

429
USING DIRECTOR 11.5
Making Director Movies Accessible
Last updated 9/28/2011
Attach the Accessibility Speak Enable/Disable behavior
To let users toggle the text-to-speech feature on and off, add this behavior to a sprite that already has the keyboard
navigation behaviors attached to it.
1Attach the keyboard navigation behaviors to sprites in your scene. For more information, see “Enabling keyboard
navigation” on page 425.
2Drag the Accessibility Speak Enable/Disable behavior from Library palette to the sprite that should toggle the text-
to-speech behaviors.
3In the dialog box that appears, enter the behavior group name for the scene so that this behavior is associated with
the other behaviors in the scene.
4Select an event to toggle the on/off state of the text-to-speech behaviors. This can be a mouse click or the beginning
or ending of the sprite in the Score.
5Select whether to turn speech on or off when the event you selected in the previous step occurs.
6Enter the words to be spoken when text-to-speech is turned on.
7Enter the words to be spoken when text-to-speech is turned off.
Using captioning
Captioning is the practice of displaying text that corresponds to spoken narration or other sounds being played.
The two captioning behaviors are designed to be used together, and each is designed to be used with the keyboard
navigation and text-to-speech behaviors. For information about attaching text-to-speech behaviors, see “Enabling
text-to-speech” on page 428.
To enable captioning, you attach the Accessibility Captioning behavior to an empty text sprite that displays the
captions. Next, you attach the Accessibility Sync Caption behavior to a sprite that has already had speech enabled with
the text-to-speech behaviors.
Attach the Accessibility Captioning behavior
1Place the text sprite that should display caption text on the Stage.
2Drag the Accessibility Captioning behavior from the Library palette to the text sprite.
3In the dialog box that appears, select the behavior group name for the scene so that this behavior is associated with
the other behaviors in the scene.
Attach the Accessibility Sync Caption behavior
1Attach the keyboard navigation behaviors to sprites in your scene. For more information, see “Enabling keyboard
navigation” on page 425.
2Attach the text-to-speech behaviors to sprites in your scene. For more information, see “Enabling text-to-speech”
on page 428.
3Drag the Accessibility Sync Caption behavior from the Library palette to the sprite that triggers the text-to-speech
feature. This could be a text sprite that has the Accessibility Speak behavior attached or another sprite that triggers
speech with the Accessibility Speak Member Text behavior attached.
4In the dialog box that appears, select the behavior group name for the scene so that this behavior is associated with
the other behaviors in the scene.
5In the first At Word text box, enter the starting word number. For example, to begin captioning at the first word of
the spoken text, enter the number 1.

430
USING DIRECTOR 11.5
Making Director Movies Accessible
Last updated 9/28/2011
6In the Initial Words text box, enter the number of words to display after the starting word number that you selected
in the previous step. These words appear in the captioning sprite when the captioning begins. For example, to make
the first section of captioning begin at the first word and end at word 15, enter 1 in the previous step and 15 in the
Initial Words text box.
These words are replaced in the captioning display sprite by later sections of the text being spoken. You select the
number of words in each section by using the remaining text boxes in the dialog box.
7In the next At Word text box, enter the number of the word where the second section of captioning should begin.
For example, to make the second section of captioning begin at word 16 of the spoken text, enter 16 in the text box.
8In the Display How Many Of The Words That Follow text box, enter the number of words to display after the word
number you selected in the previous step. For example, to display 22 words of text after word 16, enter 22 in this
text box.
9In the remaining text boxes, enter the number for the first word of each section, followed by the number of words
for the section. To use more than five sections, drop this behavior on the sprite again. Repeat this procedure as often
as necessary.
Accessibility scripting with Lingo or JavaScript syntax
If you have a basic understanding of Lingo or JavaScript™ syntax, you can write custom scripts to add text-to-speech
functionality to your movies. For more information about Lingo and JavaScript syntax, see the Scripting Reference
topics in the Director Help Panel.
First, you must initialize the speech software.
Initialize the text-to-speech software
❖Use the voiceInitialize() method.
The following frame script tests whether text-to-speech software is installed. If no software is installed, the script
displays an alert dialog box.
on exitFrame
if voiceInitialize() then
_movie.go("Start")
else
alert "Text-to-speech is not available"
end if
end
Determine the number of available voices
❖Use the voiceCount() method.
Return a property list that describes the name, gender, age, and index number
of the current voice
❖Use the voiceGet() method.

431
USING DIRECTOR 11.5
Making Director Movies Accessible
Last updated 9/28/2011
Return a list of property lists that describes all the available voices
❖Use the voiceGetAll() method.
Set a particular voice as the current voice
❖Use the voiceSet() method.
After you select a voice for speech synthesis, you can control the progress of the speech.
Begin speech synthesis
❖Use the voiceSpeak() method.
Temporarily pause the speech
❖Use the voicePause() method.
Some speech engines might continue to speak for several seconds after the pause method is used.
Resume the speech
❖Use the voiceResume() method.
Stop speech synthesis
❖Use the voiceStop() method.
Check whether the speech is currently speaking, paused, or stopped
❖Use the voiceState() method.
Set the volume of the voice
❖Use the voiceSetVolume() method.
Set the pitch of the voice
❖Use the voiceSetPitch() method.
Determine the chronological number of the current word within the string
being spoken
❖Use the voiceWordPos() method.
The following frame script tests whether the current voice is female and starts speech if it is. In this case, the
voiceSpeak() method specifies the text of the cast member named “TextCommentary”.

432
USING DIRECTOR 11.5
Making Director Movies Accessible
Last updated 9/28/2011
on exitFrame
voiceProps = voiceGet()
if voiceProps.gender = "female" then
voiceSpeak(member("TextCommentary").text)
end if
end
For a complete list of script terms that control text-to-speech and keyboard navigation, see the Scripting Reference
topics in the Director Help Panel.
Deploying accessible movies
To successfully deploy an accessible movie, you must become familiar with the Speech Xtra extension’s system
requirements and download procedure, as well as the experience users have with your accessible movie in real-world
situations.
Adding the Speech Xtra
If you use the text-to-speech feature, you need to include the Speech Xtra in your movie’s Xtra extensions list.
Normally, Xtra extensions that are not included in a movie’s default Xtra extensions list are added when a cast member
that requires one is added to the cast. You can view the default Xtra extensions list by opening a new movie and
selecting Modify > Movie > Xtras.
The Speech Xtra is a script-only Xtra, which means that it adds methods and properties to Lingo or JavaScript syntax,
but does not add support for any new cast member types. Because the Speech Xtra is not associated with any kind of
cast member, you must add it to the movie’s Xtra extensions list manually.
1Open the movie.
2Select Modify > Movie > Xtras.
3In the dialog box that appears, click Add.
4In the alphabetical list of Xtra extensions, scroll to Speech, and select the Speech Xtra. (In Windows, the filename
is Speech.x32.)
5Click OK twice to close the dialog boxes.
6Save your movie.
Testing the Speech Xtra
To verify that your computer is configured correctly to let the Speech Xtra work, you can perform a simple test.
❖Type the following script into the Message window:
put voiceInitialize()
If the result is 1, the Speech Xtra is working. If the result is 0, you might not have text-to-speech software installed
on your computer.

433
USING DIRECTOR 11.5
Making Director Movies Accessible
Last updated 9/28/2011
System requirements
Windows computers must have Microsoft® Speech Application Programming Interface (SAPI) 4.0 or later installed.
SAPI 5 is recommended. Windows XP includes SAPI 5, but earlier versions of Windows do not include SAPI by
default. It can be downloaded from the Microsoft website at www.microsoft.com/speech/. A separate screen reader
application is not necessary.
Mac OS8.6 and later include text-to-speech software. No additions are necessary.
Understanding the Xtra download process
Because the Speech Xtra is from Adobe, it is considered a trusted download. The user does not have to interact with
any dialog boxes for the download to occur. When a user encounters accessible Shockwave® Player content for the first
time, the Xtra downloads automatically. The Xtra is approximately 45KB on Windows and 35KB on the Mac. After
the download is complete, the movie begins to play. When the user encounters accessible movies in the future, no
download occurs because the Xtra is already present on the computer.

434
Last updated 9/28/2011
Chapter 22: Managing Memory
About managing memory
Adobe® Director® has effective built-in memory management that is sufficient for most projects. To make memory
available for new sprites, Director simply unloads the cast members used for sprites that are no longer on the Stage.
However, sometimes large cast members, such as high-resolution images, large sounds, or digital video, can take
longer to load or unload than typical, smaller cast members, and this can cause slight delays in movie playback. If you
test your movie on computers with the lowest level of acceptable performance, you can determine whether any of these
delays occur and make changes to correct them.
This chapter describes how Director’s memory management works and the steps you can take to ensure smooth
playback of movies with large amounts of media.
How Director unloads items from memory
By becoming familiar with the way automatic unloading of cast members works in Director, you can make intelligent
choices about when and how to perform memory management tasks yourself.
A cast member is automatically loaded into memory when Director needs to draw a sprite of it on the Stage.
Immediately after being drawn, each cast member is dealt with according to the value of its purgePriority script
property. You can set this property in script or by selecting a number from the Unload menu in the Member panel of
the Property inspector while the cast member is selected in the Cast.
The following are the possible values for purgePriority:
•When cast members with a purgePriority of 3 (default) are no longer on the Stage, they can be unloaded from
memory whenever Director needs memory for other tasks.
•Cast members with a purgePriority of 2 or 1 are unloaded only if memory is very low. They are added to the top
of a list of recently used cast members that Director stores internally. This list is used to further prioritize cast
members. Director assumes that the most recently used cast members are most likely to be used again and unloads
them from memory only after all cast members with a purgePriority value of 3 are unloaded.
•
Cast members with a
purgePriority
of 0 are left in memory and are not added to the recently used cast member list.
Monitoring memory use
The Memory inspector displays information about how much memory is available to Director for your movie, how
much memory different parts of the current movie use, and the total disk space the movie occupies. It also can purge
all removable items from RAM if you are about to perform a memory-intensive operation.
Note: The Memory inspector is not available on Mac®.
1Select Window > Memory Inspector.
2Observe the following memory use indicators:
Total Memory Displays the total system memory available, including the amount of RAM installed on your
computer and any available virtual memory.
Physical Memory Shows the amount of actual RAM installed in the system.

435
USING DIRECTOR 11.5
Managing Memory
Last updated 9/28/2011
Total Used Indicates how much RAM is being used for a movie.
Free Memory Indicates how much more memory is currently available in your system.
Other Memory Indicates the amount of memory used by other applications.
Used By Program Indicates the amount of memory used by Director (excluding the amount of memory used by the
Director application file).
Cast & Score Indicates the amount of memory used by the cast members in the Cast window and the notation in
the Score window. Cast members include all the artwork in the Paint window, all the text in the Text windows, cast
members that use the Matte ink in the Score, thumbnail images in the Cast window, and any sounds, palettes,
buttons, digital video movies, or linked files that are imported into the cast and are currently loaded into memory.
Screen Buffer Shows how much memory Director reserves for a working area while executing animation on the
Stage.
3To remove all items that can be purged from RAM, including all thumbnail images in the Cast window, click Purge.
All cast members that have Unload (purgePriority) set to a priority other than 0–Never (as specified in the
Property inspector’s Member tab) are removed from memory. This procedure is useful for gaining as much
memory as possible before importing a large file. Edited cast members are not purged.
Whenever Director runs low on memory, such as when trying to load many large cast members, other cast members
are automatically unloaded from memory. For more information, see “How Director unloads items from memory” on
page 434.
Using script to change a cast member’s purgePriority property is a good technique for controlling memory
management. However, changes to the purgePriority property do not take effect until the next time a cast member
is used. For example, if you change the property in an exitFrame or enterFrame script in the same frame as one by a
cast member, the cast member is treated as if it had its old priority because all drawing on the screen is done before any
enterFrame or exitFrame scripts are performed.
Loading and unloading individual cast members
You can use script methods to unload cast members that you know are no longer in use to make room for new ones.
You can also force large cast members to load before they are actually needed. This prevents a pause that can occur
when large cast members load normally, just before being drawn on the Stage.
Use the following methods to control cast member loading and unloading:
•To load a specific cast member or set of cast members, use the preLoadMember() method.
•To load all the cast members used in a specific frame or range of frames, use the preLoad method.
•To unload a specific cast member or set of cast members from memory, use the unLoadMember() method.
•To unload all the cast members used in a specific frame of your movie, use the unload method.
•To determine the number of bytes of memory required to display a range of frames, use the ramNeeded() method.
To convert the number of bytes to kilobytes, divide the result by 1024.
•To determine the current amount of available memory, use the freeBytes() or freeBlock() method.
There are several more script terms related to memory management. For a complete list, see the Scripting Reference
topics in the Director Help Panel.

436
USING DIRECTOR 11.5
Managing Memory
Last updated 9/28/2011
Preloading digital video
It is recommended that you do not preload digital video cast members. Digital video is played by streaming the video
file from a disk. As the file is streamed, it is decompressed into memory one section at a time. Preloading a digital video
file causes the entire file to be decompressed into memory at once, which can cause low memory situations on most
computers.
You can cause a digital video to preload only its first segment without consuming unnecessary memory by placing it
in the Score a frame or two before it is actually needed.
1Add a sprite of the digital video to the Score.
2Begin the sprite one or two frames before the frame where you want to display the video.
3Locate this sprite off the Stage except for at least one pixel of one corner of the sprite.
4Set the sprite’s playRate property to 0, which prevents the movie from playing when first loaded.
5In the frame where you want the video to appear, use script to set the sprite’s loc property to place the sprite on the
Stage in the location you select.
6Set the playRate property to 1 to start playing the video.
The video loads its initial segment into memory and is ready to play immediately when your movie reaches the frame
where you want it to appear. Experiment with preloading the video a few frames earlier if you find that preloading has
not yet finished when your movie reaches the frame where the video appears.

437
Last updated 9/28/2011
Chapter 23: Managing and Testing
Director Projects
By carefully managing the resources that go into your Adobe® Director® movies, you can avoid problems that might
arise when you make changes to the movie or change the location of the movie file or its linked media. Good testing
practices can help you discover problems early in the project while they are still small and easily remedied.
This chapter provides a few simple guidelines that can streamline your development process.
Managing Director projects
The following guidelines can help make your project go smoothly:
•Before you begin a project, plan where media should be located when you deploy your movie, and replicate that
organization at the beginning of your project. This prevents the links between your Director movies and external
media files from being broken when you move the project to a different location on a disk or to a different disk
volume.
The following structure is a good example of a simple file organization:
Project Directory
contains:
MyDirectorMovie.dir
Linked_Media subdirectory
contains:
sound files
graphic files
digital video files
other linked assets
•When you work on a large project, plan your basic approach to all aspects of the movie before you start
construction. This way, you can find problems with your strategies before you have invested a lot of time building
on them. Finding problems early in a project makes them much easier to solve.
•Organize the cast members in a logical way. You might choose to group all the cast members of a particular type
together, or you might choose to group the cast members from each scene together. Choose a system that works for
you and that will make it easy to find cast members when your cast becomes large. You can also choose to keep
groups of cast members in separate casts.
•Use the name of the cast member, sprite, or frame marker when referring to these items in scripts. This avoids the
need to change your code if you need to rearrange cast members, sprites, or frames during the project.
For example, the following script refers to a cast member by its number:
member(16).text = "Good planning makes Director projects easy."
If the text cast member 16 has to be moved in the cast, the script becomes invalid.
Instead, use the following script:
member("Output_text").text = "Good planning makes Director projects easy."

438
USING DIRECTOR 11.5
Managing and Testing Director Projects
Last updated 9/28/2011
Naming sprites makes changes to your script even easier. For example, the following script refers to a sprite by its
number:
sprite (1).text
Instead, use the following script:
sprite("input").member.text
When you use the marker name to refer to a frame, you can move the marker without breaking the script.
The following script refers to a frame by its number:
_movie.go(27)
It is better to add a marker to the frame and use the marker name, as in the following script:
_movie.go("Main_menu")
•During work sessions, save your movie file often. Save a copy of the movie after each milestone, such as a day of
work or after adding a significant new feature or section. This way, if problems arise, you can easily compare the
current version of the file to a slightly older version to locate the source of the problem. Keep several copies of your
file at different stages of development in case you need to go back several steps.
About testing movies to avoid problems
While you develop movies, you might encounter some difficulties because creating interesting movies and trying out
new ideas always involves some experimentation. By testing your movies according to the simple guidelines described
in this section, you can prevent problems from becoming obstacles:
•If the main.dir file is linked to a miaw.dir file, upgrade both the files to Director 11 before playing the movie.
•Test early in development to help ensure that you discover any problems while they are still minor. Waiting to test
lets small problems become larger ones as you add features to your movie that depend on problematic functionality
that was implemented earlier.
•Test often during development. Test the functionality of each small part of your movie as you add it rather than
waiting until the movie’s whole feature set is implemented. This way, you know that the most recently implemented
feature is the most likely source of a problem. If you wait to test one feature until after the next feature is
implemented and one of those features exhibits a problem, you have a more complex set of possibilities to evaluate.
•Test on all target platforms. Decide what the minimum system requirements are for the computers used by your
audience. Verify the performance of your movie on the slowest processor that is acceptable. Determine the range
of configurations you have to support (such as Mac® OS, Windows® 2000, and Windows XP), and test enough of
them to ensure success. Be sure to include parameters such as browser software, screen resolution, and available
memory in your testing. This approach helps you find problems that are specific to an operating system or
configuration, which are distinct from authoring errors.
Testing strategies
Use the following to test your movies effectively:
•Testing in the Director authoring environment is different from testing in the Director Projector and Shockwave®
Player environments for online content. The Preview In Browser command demonstrates the true behavior of the
movie in the Shockwave environment.

439
USING DIRECTOR 11.5
Managing and Testing Director Projects
Last updated 9/28/2011
•If you encounter a problem, try to isolate the problem in a new Director file that incorporates only the problem
feature or item. Make a list of the minimum steps that are required to reproduce the problem in a new file. This
process usually reveals the source of the problem and whether the problem is limited to one feature, or if it is caused
by the interaction of two or more features in your movie.
•Try to re-create the problem with different media. Sometimes the source of a problem is within a specific media
item used in your movie.
•Try to re-create the problem on a different computer. This helps isolate problems with the hardware configuration
or with the Director installation on a specific computer. If the problem exists only when the movie is posted to a
server, determine whether the problem exists on only one server or all servers. Occasionally the server’s MIME
types might need editing to include the MIME types for Director. For more information, see Director TechNote
16509, Configuring your server for Shockwave, at http://www.adobe.com/go/tn_16509.
•When you use script, look for typing errors, missing punctuation, or inconsistent naming.
•JavaScript™ syntax is case-sensitive. Classic Lingo is not.
Printing movies
You can print movie content to review it and mark changes, to distribute edits to a team, to make handouts from a
presentation, or to see your work on paper. You can print a movie while in authoring mode in several ways. You can
print any of the following:
•An image of the Stage in standard or storyboard format
•The Score
•The cast member number and contents of text cast members in the Cast window
•All scripts or a range of scripts (movie, cast, the Score, and sprite scripts)
•Cast text, cast art, and cast thumbnails
•The comments in the Markers window
•The Cast window artwork, or the entire Cast window.
You can use script to control printing. For more information, see the Scripting Reference topics in the Director Help
Panel.
Print part of a movie
1Select File > Print.
2To specify what part of the movie to print, select an option from the Print menu. Information that appears in the
Print dialog box depends on the selection to be printed.
Note: Selecting Cast Text on the Print menu prints a table of text cast members, using your printer’s set resolution.
3To specify which frames of your movie are printed, select one of the following Frames options:
Current Frame Prints the frame that is currently on the Stage.
Selected Frames Prints the frames that are selected in the Score.
All Prints all of the frames in your movie.
Range Prints the range of frames specified in the Begin and End text boxes.

440
USING DIRECTOR 11.5
Managing and Testing Director Projects
Last updated 9/28/2011
4To specify which frames in the defined range to print, select one of the following Include options:
Every Frame The default setting; prints every frame that is specified in Range.
One In Every [number] Frames Prints frames at the interval you specify in the text box. For example, if you enter
10, Director prints every tenth frame.
Frames With Markers Prints only the frames that have markers in the Score window.
Frames With Artwork Changes In Channel [number] Prints the frames in which cast members move or in which
new cast members are introduced in the Score. Specify the channel number in the text box.
5To determine the layout of the items to print, click Options and select from the following:
Scale Provides options to print at 100%, 50%, or 25% of the original size.
Frame Borders Creates a border around each frame.
Frame Numbers Prints the frame number with each frame.
Registration Marks Places marks on every page to align the page for reproduction.
Storyboard Format Available only when you select 50% or 25% images to print. This option places marker
comments next to the frame image.
Date And Filename In Header Prints a header, consisting of the name of the Director movie and the current date,
on each page.
Custom Footer Prints a footer on each page. Type the footer in the text box.
The image at the left of the dialog box previews the layout options.
Resources
An index of testing and troubleshooting TechNotes is available at
www.adobe.com/go/learn_director_troubleshoot_en.

441
Last updated 9/28/2011
Chapter 24: Packaging Movies for
Distribution
Introduction
When you finish authoring your Adobe® Director® movie, you have a choice of several ways to prepare it for
distribution. You can distribute a movie in the Shockwave® Player format that plays in a browser, or you can distribute
it as a stand-alone projector. Stand-alone projectors can contain the software necessary to play the movie, or they can
use an installed Shockwave Player to play the movie independent of a browser. You can also export a movie as a digital
video.
Director provides several features to prepare movies for distribution. These features include determining Publish
settings and deciding which Xtra extensions to include, exclude, or download. You can also preview your movie in a
browser and batch-process movie files to compress them and protect them from being edited.
Note: Ensure that your files have write permissions before publishing. Publishing fails for read-only files.
Unicode names for the following are not supported when the movie is run using the HTTP protocol:
•Linked files
•HTML and DCR files
•External casts
•CCT and CXT files
About distributing movies
When you finish creating a movie, you have the following choices about how to distribute it to users:
•Shockwave content is a compressed version of only the movie data.
•A projector is a stand-alone version of a movie. You can include one movie in a projector that links to other external
movies or include several movies in a single projector. The system handles projectors as executable application files.
Movies that are distributed from the Internet can begin playing as soon as the content for the first frame is
downloaded. This process is called streaming. For more information on streaming, see “Setting movie playback
options” on page 467.
❖To create Shockwave content that can play in a web page, use the File > Publish command. Director leaves your
original movie in its DIR format. Director also creates Shockwave content in the DCR format.
If you use the default Publish settings, Director creates an HTML page that is completely configured with EMBED
tags and everything else you need to run your movie in a browser. By default, Director saves all these new files in
the same folder as your original Director movie. For more information about putting your Director movie on the
web, see “Creating Shockwave content” on page 446.
For more information about how to distribute Xtra extensions with projectors, see TechNote 13965 in the Director
Support Center at www.adobe.com/go/director_support. Although the note might refer to Director 7, the
information is the same for more recent versions of Director.

442
USING DIRECTOR 11.5
Packaging Movies for Distribution
Last updated 9/28/2011
Shockwave player browser compatibility
Shockwave Player can play Director movies in the following browsers:
For Microsoft® Windows®:
•Intel Pentium IV 600MHz or higher
•Microsoft® Windows® XP Service Pack 2 or later
•Microsoft Windows Vista
•Microsoft Internet Explorer 6.0 or later
•Firefox 2.0 and 3.0
For Mac OS X with Intel processors:
•Power Macintosh G3 or G4
•Mac OS X 10.4 and 10.5
•Safari 2.0
When it first encounters an HTML page that references Shockwave® content, Internet Explorer for Windows asks the
user for permission to download the Shockwave ActiveX control if it is not already installed. If the user approves, it
downloads and installs the control.
Using the lingo.ini file to run startup scripts
Lingo scripts in the lingo.ini file (in the application folder) are run before Director opens. Ensure that the lingo.ini file
is present in the same folder as the Director.exe file.
Customize the lingo.ini file
1Locate the lingo.ini file in the Director’s installation folder.
2Copy the lingo.ini file to the folder containing the Director.exe file if it is not already there.
3Open the lingo.ini file and enter the Lingo script.
4Close and re-open Director.
Previewing a movie in a browser
You can preview a movie in a browser on your local computer to view JPEG-compressed bitmaps, and to check the
movie design, script, and any other performance issues related to playing a movie in a browser. Previewing a movie
creates a temporary Shockwave (DCR) file that opens in a browser. This temporary file gets deleted after you quit
Director.
Note: When you use the Publish command rather than the Preview In Browser command (with the Preview After
Publishing option selected in the Publish Settings Format tab), you can create permanent DCR and HTML files. These
permanent files (as opposed to temporary ones created simply by using the Preview In Browser command) can then be
placed on a web server for viewing with a browser through http.

443
USING DIRECTOR 11.5
Packaging Movies for Distribution
Last updated 9/28/2011
You might notice that linked media files do not work as expected when you preview a movie in a browser. Because of
security restrictions, movies playing in browsers might not be able to read files from a local disk unless they are in the
dswmedia folder (also called the support folder), which is a subfolder of the folder containing the player. Therefore, to
preview a movie that uses linked media, you might need to put the movie and all of its linked media in the dswmedia
folder.
If the relative files haven’t changed, the movie can open any file in a subfolder of dswmedia. If you move the movie and
its media to another server, the linked media will continue to work if you preserve the same folder structure. For more
information, see “Using dswmedia folders and the support folder to publish Shockwave content” on page 454.
Specify the browser to use for previewing
1Select Edit > Preferences > Network.
Note: If you are using a Mac OS X operating system, select the Director menu, instead of the Edit menu, to access
Preferences.
2In the Preferred Browser box, enter the path to the browser application file.
Preview a movie in a browser
❖Select File > Preview in Browser or press F12.
About Xtra extensions
All Xtra extensions that a movie requires must be installed on your user’s system when the movie runs. When you
distribute a movie, you must either include these Xtra extensions or provide the user with the means to download
them. Using the Movie Xtras dialog box (Modify > Movies > Xtras), you can specify the Xtra extensions to include in
a projector and whether Xtra extensions should download for use with Shockwave content. The Movie Xtras dialog
box contains a list of the most commonly used Xtra extensions. Including all these Xtra extensions ensures that your
movie will work in most cases but makes the projector much larger. To help manage memory, remove Xtra extensions
that you know you aren’t using.
Each time you create a sprite that requires an Xtra extension, Director adds the Xtra extension to the list of required
Xtra extensions in the Movie Xtras dialog box. If you remove the sprite, Director does not remove the Xtra extension
from the list. This is helpful if you later re-create the sprite. Because Director cannot detect Xtra extensions required
in Lingo or JavaScript™ syntax, you must manually add any Xtra extensions required by your scripts to the list in the
Movie Xtras dialog box. For more information, see “Managing Xtra extensions for distributed movies” on page 444.
Managing Xtra extensions controls the size and capabilities of the movie you distribute. Many important features in
Director, such as text and vector shapes, are controlled by Xtra extensions, as is the ability to import all types of linked
media. If you don’t use a feature or import a media type that is controlled by an Xtra extension, don’t distribute the
related Xtra extension with your movie. This is especially true for movies distributed on the Internet.
Including Xtra extensions
The player includes the Xtra extensions that support the most common features and media types. These include text;
vector shapes; Flash® content; BMP, PICT, JPEG, and GIF file importing; sound management; and Shockwave Audio.

444
USING DIRECTOR 11.5
Packaging Movies for Distribution
Last updated 9/28/2011
Xtra extensions not included with the Shockwave Player must be installed in a user’s system before the movie plays.
Use the Download If Needed option in the Movie Xtras dialog box to cause the movie to prompt the user to download
the Xtra. Director downloads Xtra extensions from the URL specified in the Xtrainfo.txt file in the Director application
folder.
Downloading Xtra extensions from projectors requires using Lingo or JavaScript syntax. For more information, see
the Scripting Reference topics in the Director Help Panel.
Xtrainfo.txt includes URLs for all Xtra extensions included with Director, but you might need to manually edit
Xtrainfo.txt to add the URL for third-party Xtra extensions or Xtra extensions not included with Director. Xtrainfo.txt
includes a description of how to enter this information. Xtra developers can also provide installation programs or other
means of modifying Xtrainfo.txt automatically.
If a user chooses to download an Xtra extension, Director retrieves the Xtra extension from the URL specified in
Xtrainfo.txt, using the Verisign download security system. Verisign is a standard means of downloading software from
secure sources.
You can include Xtra extensions in projector files. Select the Include in Projector option in the Movie Xtras dialog box
for any Xtra extension you want to include.
You can also exclude Xtra extensions from projectors. For more information, see “Excluding Xtra extensions from
projectors” on page 460.
Xtra extensions that are usually required for the movie to play back correctly include the following:
•Xtra extensions that create cast members (text, Flash, vector shapes, Windows Media, QuickTime®, and so on)
•Shockwave Audio Xtra extensions (if the movie uses files in the SWA format)
•Transition Xtra extensions (if the movie uses third-party transitions)
•Import Xtra extensions, if the movie uses non-standard types of linked external cast members
•Network Xtra extensions required for a movie to access the Internet
•Scripting Xtra extensions (if the movie uses any special script that requires Xtra extensions)
Managing Xtra extensions for distributed movies
You can manage Xtra extensions for your movie by using the Modify menu.
1Select Modify > Movie > Xtras.
2To add or remove Xtra extensions, do any of the following:
•To add the Xtra extensions required to connect a projector to the Internet, click Add Network.
•To restore the list of default Xtra extensions, click Add Defaults.
•To manually add an Xtra extension to the list (which you would do, for example, if you’ve used Lingo or
JavaScript syntax that requires Xtra extensions), click Add and select from the list of Xtra extensions installed in
your system.
•To delete an Xtra extension from the list, highlight the Xtra extension and click Remove.
•To get information about an Xtra extension (when available), highlight the extension and click Info.
3To change settings for Xtra extensions in the list, select an Xtra extension and select one of the following options:
Include in Projector Specifies to include the selected Xtra extension in any projector that includes the current
movie.

445
USING DIRECTOR 11.5
Packaging Movies for Distribution
Last updated 9/28/2011
Download If Needed Causes the movie to prompt the user to download a required Xtra extension if it is not
installed in the user’s system. The Xtra extension is downloaded from the location specified in the Xtrainfo.txt file
and permanently installed in the user’s system.
4To get information about a selected Xtra extension, click Info.
The information comes from an Internet source. Not all Xtra extensions include information. Third-party Xtra
extensions often include some explanations and information about the developers.
Note: Another way to include Xtra extensions with a movie is to create an Xtras folder containing all required Xtra
extensions in the same folder as a projector file. This allows you to see which Xtra extensions are included without opening
the movie. If you use this method, you cannot include Xtra extensions in the projector file because the movie will fail to
initialize.
About Distribution formats
Director movies play either with the Shockwave Player or through a projector player. The Shockwave Player is a system
component that plays movies in web browsers and also outside browsers as stand-alone applications. A projector
player can play movies only independently of a web browser.
You can distribute movies as Shockwave content (DCR files), projectors, Shockwave projectors, or protected movies
(DXR files). Do not distribute source movies (DIR files) unless you want your users to be able to change the movie in
the Director authoring environment.
•Shockwave content is a compressed version of a movie’s data and does not include a player. Shockwave content is
created primarily to distribute over the Internet for playback in a web browser. The compressed Shockwave content
is useful for distribution on a disk when the movie is contained in a projector. Saving a movie in the Shockwave
format removes all information necessary to edit the movie.
•A projector is a movie intended for play outside of a web browser. A projector can include a player (called the
standard player), Xtra extensions, multiple casts, and linked media in a single file. A projector can also include
several different movie files. Configured in this way, a projector can be a completely stand-alone application.
•A Shockwave projector makes a much smaller projector. A Shockwave projector uses an installed Shockwave Player
on the user’s system to play a movie instead of including the player code in the projector itself. If no Shockwave
Player is installed on the user’s system, the user must download a copy. A Shockwave projector is excellent for
Internet distribution of movies that you don’t intend to play in a web browser.
You can also reduce the file size of a projector by turning on projector options that compress the movie data, the
player code, or both. In Windows, compressing the player code reduces the minimum projector size from
approximately 2.1 MB to 1.1 MB for a projector, and to about 60K for a Shockwave projector.
On the Mac, compressing the player code reduces the minimum projector size from approximately 2.5 MB to 1.2
MB for a projector, and to approximately 12K for a Shockwave projector.
•Protected movies (DXR files) are uncompressed movies that users can’t open for editing. These can be useful when
you want to distribute uncompressed movies on a disk, but you don’t want users to edit the source file. Protected
movies might play faster than Shockwave content from a disk because they do not need to be decompressed. These
movies are preferable if disk space isn’t limited. Like Shockwave content, protected movies do not include the
information necessary to edit the movie or the software that plays the movie. They can be played only by a projector,
a movie in a window, or the Shockwave Player.
Note: To edit a movie packaged for distribution, you must edit the source file (DIR) and create a new movie in one of the
distribution formats. Always save your source files.

446
USING DIRECTOR 11.5
Packaging Movies for Distribution
Last updated 9/28/2011
Using linked media on the Internet
When you distribute a movie on the Internet for playback in a web browser, the linked media must be at the specified
URL when the movie plays. Otherwise, the user receives an error message.
Distributing movies on a disk
Whenever a movie plays from a disk, it accesses all external linked files the same way that it did in the authoring
environment. All linked media (bitmaps, sounds, digital videos, and so on) must be in the same relative location as
they were when you created the movie. The Copy Linked And Dependent Files option in the Publish Settings dialog
box ensures that the linked media are automatically placed in the relative location during Publishing. If you have
disabled the Copy Linked And Dependent Files option in the Publish Settings dialog box, copy the linked files to the
same folder as the projector or in a folder inside the Projector folder.
If your movie includes Xtra extensions, you must include the Xtra extensions in the projector. If a movie distributed
on a disk connects to the Internet in any way, be sure to click the Add Network button in the Movie Xtras dialog box.
Distributing movies on a local network
If you plan to place a movie on a local area network (LAN), all files must be set to read-only, and users must have
read/write access to their system folders. Otherwise, the requirements are the same as for normal disk-based
distribution.
Creating Shockwave content
Save your work as a Shockwave (DCR) movie to prepare it for playback in a Shockwave-enabled web browser, or to
make disk-based movies smaller. Using Shockwave content also prevents your users from editing the movie if they
own Director.
If the Shockwave content you’re creating will be distributed on the Internet and requires any Xtra extensions, make
sure the Xtra extensions are listed in the Movie Xtras dialog box and that Download If Needed is selected for each
required Xtra extension. For more information, see “Managing Xtra extensions for distributed movies” on page 444.
Note: Use Update Movies to convert several movies at once to the Shockwave format. For more information, see “About
cross-platform projectors” on page 460.
For more information about Shockwave content, see “Using Shockwave Player” on page 466.
Using default Publish settings
To create Shockwave content, use the File > Publish command. The default setting creates a Projector file with Preview
enabled.
For more information about changing Publish settings, see “Changing Publish settings” on page 447.
1Select File > Publish.
2Save your movie if prompted to do so.
Director creates and automatically starts a Projector version of your movie.

447
USING DIRECTOR 11.5
Packaging Movies for Distribution
Last updated 9/28/2011
If your movie needs Xtra extensions that fall beyond the range of the default publish settings, (for example, Windows
Media) you will be prompted to add them.
Changing Publish settings
Publish settings let you determine what type of Director movie you want to create and what properties that movie will have.
•Select File > Publish Settings to open the Publish Settings dialog box.
Publish Settings dialog box
•To save any changes you have made, click OK.
•To publish your movie with the selected settings, click Publish.
•To cancel any changes you have made, click Cancel.
•To save the current settings of the selected tab as default settings, click Save As Defaults.
•To return settings of the currently selected tab to their saved default state, click Defaults. To return settings of the
currently selected tab to their original default state, hold down Alt (Windows) or Option (Mac) and click Defaults.
If you have not saved default settings, clicking Defaults without holding down the key returns the settings to their
original default state.
Note: Clicking the Save As Defaults button or the Defaults button on one tab has no effect on any of the other tabs.

448
USING DIRECTOR 11.5
Packaging Movies for Distribution
Last updated 9/28/2011
Selecting a publishing format
Use the Formats tab to select the desired movie format and determine the types of files you wish to publish. Director
includes support for creating cross-platform projectors.
To specify a different location for the published files, click the browse (...) button next to each option. Network paths
are also supported. You can copy the published HTML file and its corresponding Shockwave file to a web server and
access the HTML file by providing the HTTP path in the Internet browser.
•To publish a Windows-based projector on a Mac platform, select the Windows Projector option, and enter a name
for the .exe file. For more information about creating cross-platform projectors, see “About cross-platform
projectors” on page 460.
•To publish a Mac®-based projector on a Windows platform, select the Mac Projector option, and enter a name for
the .osx file. For more information about creating cross-platform projectors, see “About cross-platform projectors”
on page 460.
•To publish a Shockwave file (DCR) without an HTML file, select Shockwave File (DCR), and enter a name for the
.dcr file. You can set additional Shockwave options from the Shockwave tab. For more information, see “Setting
Shockwave options” on page 451.
•To publish Shockwave content with an HTML file, select HTML and enter a name for the HTML file. You can set
additional Shockwave HTML properties from the Html tab. When you select the HTML option, the Shockwave
option is selected automatically. For more information, see “Setting HTML options” on page 452.
•To publish an Image file, select Image file, and enter a name of the .jpg file. You can set additional image options
from this tab. For more information, see “Setting Image options” on page 454.
•If you want to be prompted when you replace existing files, select Confirm when replacing published files.
•To be prompted for the location you want to publish to, select Prompt for location when publishing.
•To automatically save your movie when publishing (instead of being prompted to save), select Automatically Save
When Publishing.
•To automatically preview your movie in a browser after publishing, select Preview After Publishing. This option is
enabled by default.
Note: Director does not support publishing of projectors, HTML, and DCR files from MAC to any mounted drive.
Using the DCR and HTML file format
If you create a DCR file and an HTML file with all of the tags necessary to display your DCR movie, Director does the
following:
•Creates a DCR and HTML file in the same directory as your Director (DIR) movie.
Note: Director creates a CCT file for each external cast and, by default, saves the CCT file in the same folder as the
DCR file. To specify a different file location, hold Alt (Windows) or Option (Mac) when you select File > Publish.
Continue to hold the key for access to dialog boxes that let you specify new paths for both your DCR and CCT files.
•Type a name for the DCR and HTML files, with the appropriate extensions (for example, MyMovie.dcr and
MyMovie.html).
•Sets the DCR movie’s width and height to match the dimensions of the DIR movie.
•Configures the DCR movie and HTML file so that if your users resize their browsers, the DCR movie remains the
same size as the original DIR movie.

449
USING DIRECTOR 11.5
Packaging Movies for Distribution
Last updated 9/28/2011
•Compresses bitmap images and sound by using JPEG compression. If you’ve compressed images for individual cast
members, those settings will override compression Publish settings and be saved only for that movie. A new movie
uses the Default Publish settings, not those set for a specific movie.
Setting Projector options
Use the Projector tab to set options that include how the projector movie appears on the Stage or in a browser, and
what type of player it is shown on.
1Select File > Publish Settings and click the Projector tab.
2Set the options you want. Then click OK to keep your settings and return to the movie, or click Publish to begin the
projector publishing process.
For more information about setting Projector options, see “Creating projectors” on page 458.
Setting Files options
Use the Files tab to set file options for projectors. By default a projector consists of just the current movie, but you can
add external casts to the movie by using this tab. You can also exclude Xtra extensions from your projector.
During publishing in Director, you can use the Copy Linked And Dependent Files feature to copy external cast files,
linked files, and dependent files to the projector or Shockwave file.
Linked cast files and dependent files that are in a relative path are copied to the same relative location to the projector
as they are to the movie file.
Linked cast files and dependent files that are in an absolute path to the movie file are copied to the Linked Files and
Dependent Files folders, which are created automatically in the folder containing the projector. For Shockwave files,
the folders Linked Files and Dependent Files are created within the automatically created dswMedia folder.
If you deselect this option, the behavior is similar to that in Director MX 2004. Refer to the Director MX 2004 User
Guide for details.
Scenario 1: Consider an image file (image1.jpg) placed in a relative path to the movie file (movie1.dir), and imported
as a linked cast member into the movie.
Path of the movie file: C:\movie\movie1.dir
Path of the linked file: C:\movie\images\image1.jpg
When this movie is published to the D:\publish folder, the images folder is automatically copied to the D:\publish
folder for the projector and the D:\publish\dswMedia folder for the Shockwave file.
Path of the projector file: D:\publish\projector.exe
Path of the Shockwave file: D:\publish\movie.dcr
Path of the linked file for the projector: D:\publish\images\image1.jpg
Path of the linked file for the Shockwave file: D:\publish\dswMedia\images\image1.jpg
Scenario 2: Consider an image file (image1.jpg) in an absolute path to the movie file (movie1.dir), and imported as a
linked cast member into the movie.
Path of the movie file: C:\movie\movie1.dir
Path of the linked file: D:\images\image1.jpg

450
USING DIRECTOR 11.5
Packaging Movies for Distribution
Last updated 9/28/2011
When this movie is published to the D:\publish folder, a folder called Linked Files is automatically created in the
publish folder and the linked image is placed inside it. For Shockwave files, the Linked Files folder is created within the
dswMedia folder.
Path of the projector file: D:\publish\projector.exe
Path of the Shockwave file: D:\publish\movie.dcr
Path of the linked file for the projector: D:\publish\Linked Files\image1.jpg
Path of the linked file for the Shockwave file: D:\publish\dswMedia\Linked Files\image1.jpg
Dependent files are handled similarly to linked files during publishing. A folder called Dependent Files is created and
the dependent files are placed inside it.
Set options using the Files tab
1Select File > Publish Settings. The Publish Settings dialog box appears.
2Click the Files tab.
3To set the Primary movie components for your projector, select from the following options:
Include Linked Cast Files Lets you automatically include all linked cast files to the primary movie. Including the
linked cast files in the movie increases its size.
Exclude All Xtras Excludes all Xtra extensions from your projector. If you select this, all Xtras are placed in the Xtras
directory within the directory where the Projector file is published. Consider this option when publishing a movie
in the Projector or Shockwave format. You will not need this option when publishing to a cross-platform projector,
HTML, or image file. For more information, see “Excluding Xtra extensions from projectors” on page 460.
Compress Files (Shockwave format) Lets you compress files for a Shockwave projector as you would for standard
Shockwave content.
Copy Linked And Dependent Files Linked and dependent files are automatically copied to the relative path of the
projector, as they are to the movie file. Linked files and dependent files in an absolute path are copied to the Linked
Folder and Dependent folder, which are automatically created in the movie path during publishing. For Shockwave
files, the linked files and dependent files are created within a folder called dswMedia that is created during
publishing.
External cast files for projector are converted to .CXT files and placed in a path relative to the projector file. For
Shockwave files, the external cast files are converted .CCT files and placed within the dswMedia folder.
4Click Add Dependent Files to add any dependent file to the project. Use the Add Dependent Files dialog box to add
dependent files. Any file other than Xtras, linked files, and linked casts can be considered as a dependent file. This
option is typically used for files referenced through scripting.
If you select a dependent file from a folder that is within the movie folder or its sub folders, the file is published to
a folder relative to the Projector file. If you select a file outside the movie folder, the file is copied to the Dependent
Files folder in the root folder of the Projector file.
When you add Dependent Files, the source of the dependent file, the location to which it will be published, and its
file type appear in the respective columns of the Add Dependent Files area above the button.
5To remove files from the list, Click Remove Files.
6Click Check Files to check whether the dependent files exist in the specified location. If you don’t use this option
to check for the files and missing dependent files are detected, the publishing process stops, a message appears, and
the Publish Settings dialog box opens automatically with the Files tab selected. Files that have been replaced,
deleted, or renamed are indicated with a red-cross mark.

451
USING DIRECTOR 11.5
Packaging Movies for Distribution
Last updated 9/28/2011
Note: If you save the movie without locating and adding the missing files, the next time you open the movie, the movie
is not checked for missing files. The red cross mark is not displayed to indicate the missing files in the Add Dependent
Files list of the Publish Settings dialog box. In addition, alerts for missing files aren’t displayed when you publish the
movie.
7Click Additional Director Movies/Casts. In the Add Files t Projector dialog box, select and add Director Movie or
Cast files to the current projector.
8Click Remove All to delete all additional movies and casts added to the lists.
9Select Play Every Movie In List to play all the movies in your movie list.
10 Select Loop to continuously play the movie until the movie is closed.
11 Do one of the following:
•Click Save As Default to apply the settings to all movies created during the session. These settings are lost after
you close and re-open Director
•Click Defaults to revert to the default settings.
•Click OK to save changes and return to the movie.
•Click Publish to publish the projector with these settings.
•Click Cancel to reject changes and return to the movie.
Setting Shockwave options
Use the Shockwave tab to set options that determine the Shockwave Player version, how images are compressed, how
users interact with the movie once it’s published, and more.
1Select File > Publish Settings and select the Shockwave tab.
2Select the options you want to provide for your users:
Image Compression Standard or JPEG:
•Standard: Select Standard to apply compression techniques used by Director in versions 4 through 7. This
setting is suitable for graphics with few colors.
•JPEG: Select JPEG and specify the image quality setting by moving the slider to a value between 0% and 100%.
The higher the percentage, the less the image is compressed.
Compression Enabled Lets you compress the sound in your movie. Select this option and select the level of
compression from the kBits/second menu. For more information about sound compression, see “Compressing
internal sounds with Shockwave Audio” on page 248.
Convert Stereo To Mono Lets you convert stereo audio to monaural. This option is available only if Shockwave
Audio Compression is enabled.
Enabled Context Menu items: Include Cast Member Comments Lets you include comments you might have
entered in the Comments field of the Property inspector for your cast members. You can then use Lingo or
JavaScript syntax to access the comments in the DCR file.
Allow Movie Scaling Allows a shockwave movie to be resized or stretched in a browser.
•Volume Control Lets users adjust the volume of the movie’s soundtrack
•Transport Control Provides controls for rewinding, stopping, and stepping through the movie.
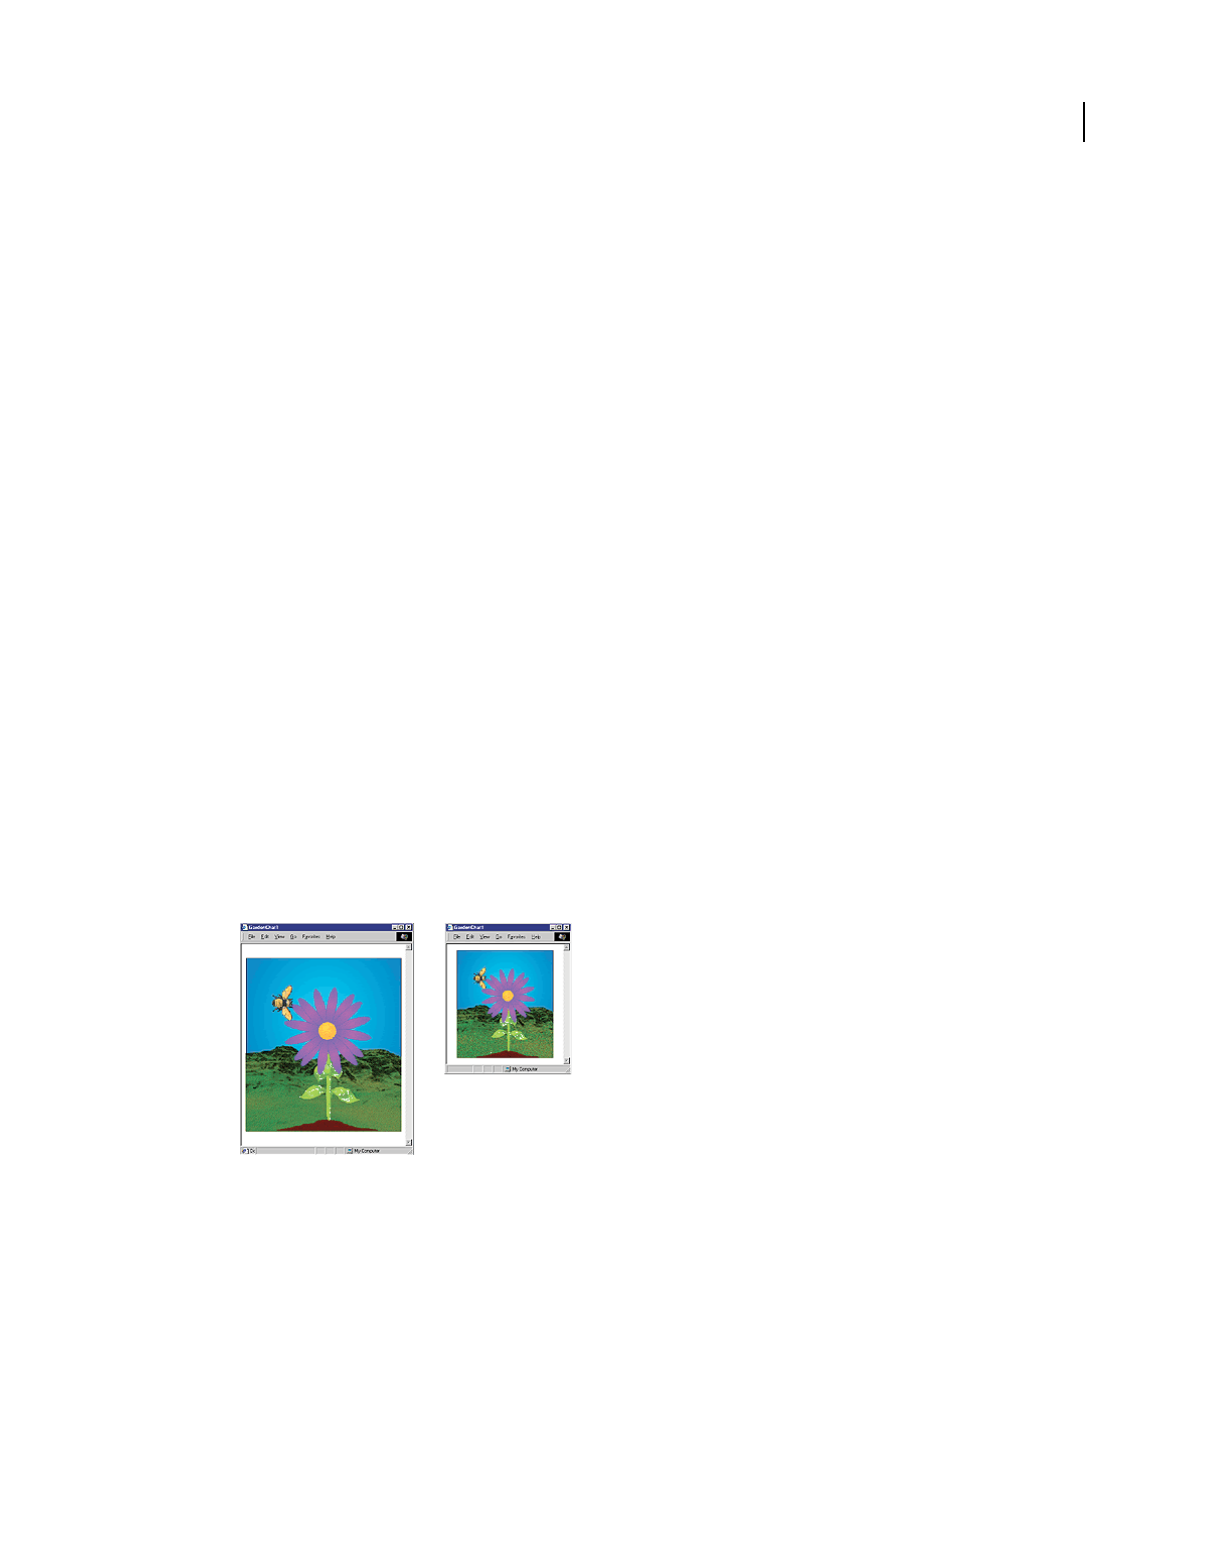
452
USING DIRECTOR 11.5
Packaging Movies for Distribution
Last updated 9/28/2011
Setting HTML options
If users view your movie in browsers, it’s likely they will resize their browsers. The way your movie behaves when the
browser size changes depends on HTML option settings in the Publish Settings dialog box.
1Select File > Publish Settings.
2On the Html tab of the Publish Settings dialog box, select from the Dimensions menu. When you make a selection,
the width and height values default to the movie size.
•To change the background color of your HTML file, either click the Page Background color box and select a
color, or enter a value in the hexadecimal field.
•To make the DCR movie match the dimensions of your DIR movie, select Match Movie in the Dimensions field.
3If you use the default Match Movie setting in the Dimensions field, values in the OBJECT and EMBED tagsin the
HTML file are set to the exact dimension of your movie. To change the dimensions, select either Pixels or Percent
Of Browser Window, and type the new dimensions in the Width and Height fields. Your movie will resize to fit the
new rectangle only if No Stretching is deselected in the Stretch Style menu on the Shockwave tab.
•To create an HTML file with parameters that match the height and width of the movie, select Match Movie.
•To specify height and width values in the HTML file in pixels, select Pixels.
•To specify a percentage in the Width and Height fields, select Percentage Of Browser Window. (To cause
browser resizing to affect the size of the DCR movie, you must specify percentages and select Preserve
Proportions, Stretch To Fill, or Expand Stage Size on the Shockwave tab of the Publish Settings dialog box.)
4On the Html tab, select an option from the Stretch Style menu.
•To specify that your movie should not resize at all, select No Stretching.
•To maintain the same aspect ratio of your original Director movie regardless of the size the user makes the
browser, select Preserve Proportions. The movie will fit within the width and height parameters, as much as
possible, while preserving the movie’s aspect ratio. The movie aligns within the window based on the align tags
that you specify in step 5.
Example of Preserve Proportions
•To change the size of the movie to fit the size of the browser, select Stretch To Fill. Any browser resizing stretches
the movie to fill the width and height parameters. If the aspect ratio of the movie changes, sprites on the Stage
could appear distorted. If you select Stretch To Fill, Director ignores the align tags that you specify in step 5.
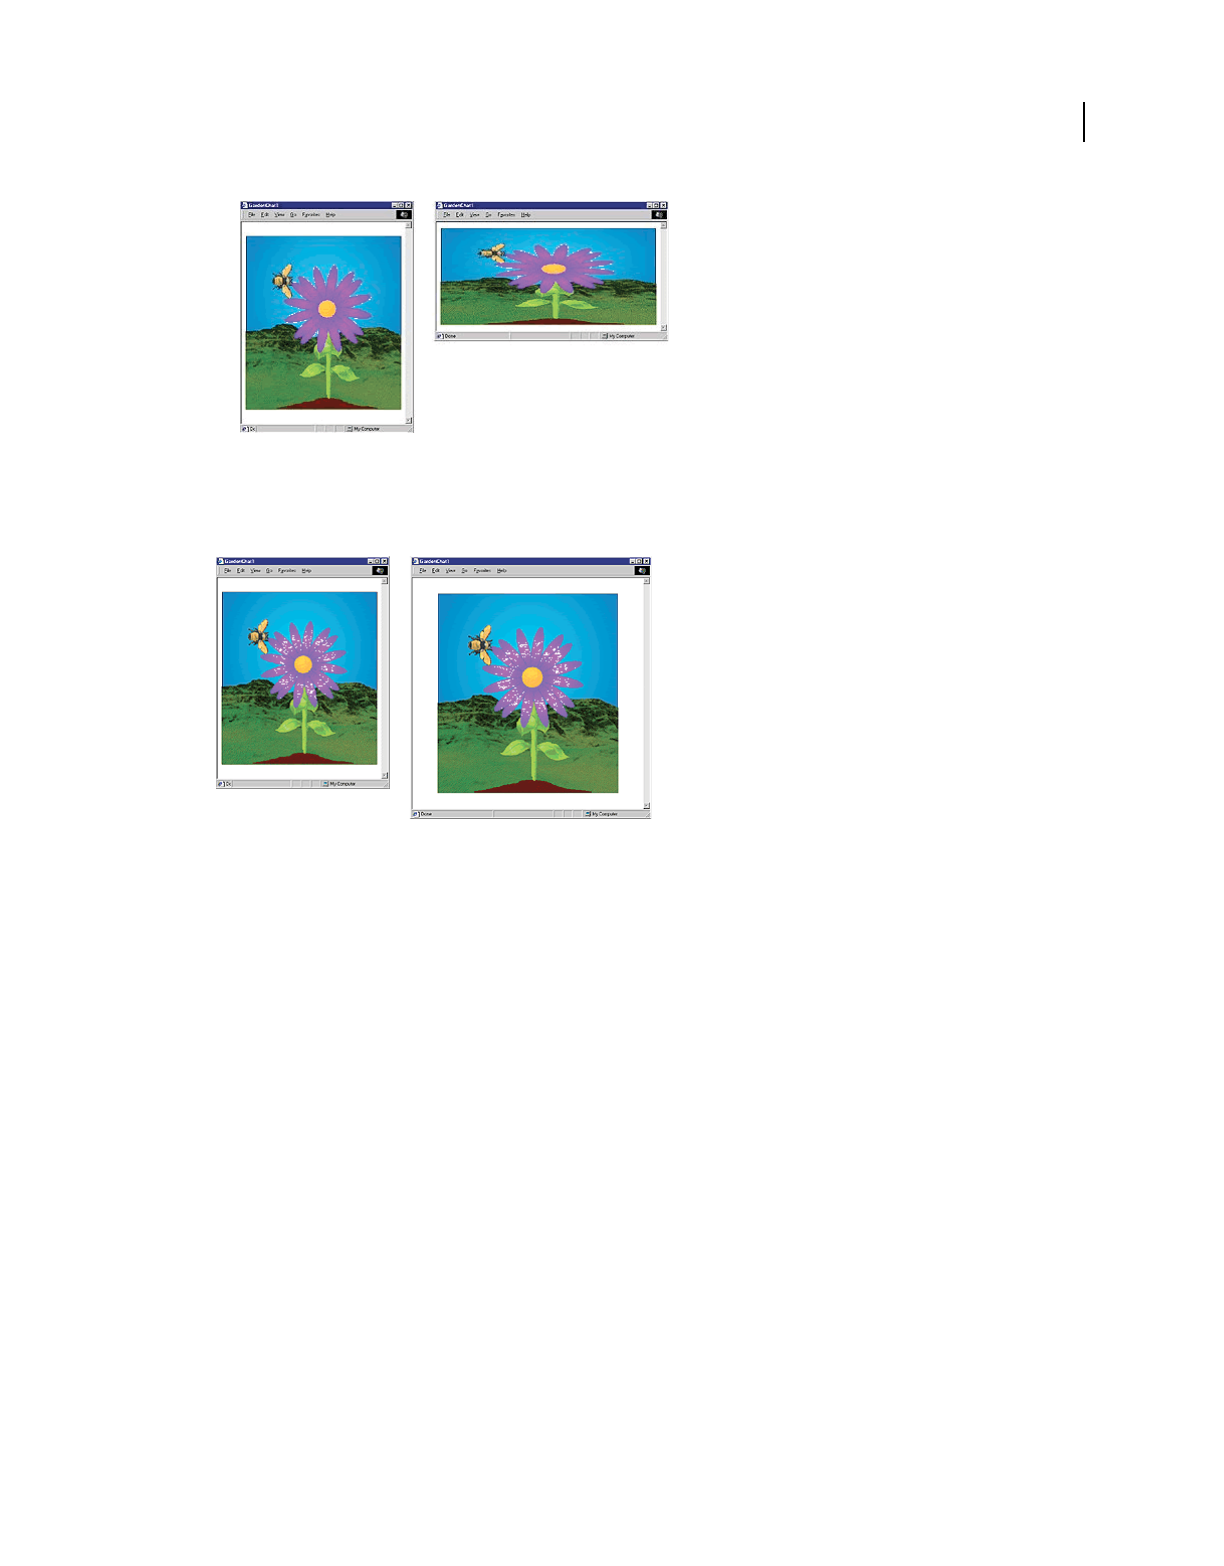
453
USING DIRECTOR 11.5
Packaging Movies for Distribution
Last updated 9/28/2011
Example of Stretch To Fill
To let users resize the Stage without resizing the sprites, select Expand Stage Size. The movie is aligned within the
browser based on the align tags that you specify in step 5.
Example of Expand Stage Size
5To specify align tags for your movie, use the Horizontal Align and Vertical Align menus. You can select left, center,
or right horizontal alignment, and top, center, or bottom vertical alignment.
Note: If you are using a custom template to play a movie on Shockwave 11, you must set the parameter PlayerVersion in
the publishing template to 11. This parameter is set by default to 11 in the publishing template that are provided with the
installer.
The following example describes how to set the parameter for the PlayerVersion:

454
USING DIRECTOR 11.5
Packaging Movies for Distribution
Last updated 9/28/2011
<!-- $TT Shockwave Default $TS -->
<!-- $DS Uses an OBJECT and EMBED tag to display Shockwave.$DF -->
<html>
<head>
<title>$TI</title>
<meta http-equiv="Content-Type" content="text/html; charset=UTF-8">
</head>
<!-- saved from url=(0013)about:internet -->
<body bgColor="$BG">
<object classid="clsid:233C1507-6A77-46A4-9443-F871F945D258"
codebase="http://download.macromedia.com/pub/shockwave/cabs/director/sw.cab#version=11,0,0,0
"
ID=$TI width=$WI height=$HE VIEWASTEXT>
<param name=src value="$MW">
<param name=swRemote value="$PR">
<param name=swStretchStyle value=$SS>
<PARAM NAME="PlayerVersion" VALUE="11">
$PO
<embed src="$MO" $PE width=$WI height=$HE swRemote="$PR" swStretchStyle=$SS
type="application/x-director" PlayerVersion="11"
pluginspage="http://www.macromedia.com/shockwave/download/"></embed>
</object>
</body>
</html>
Setting Image options
You can specify the images that should appear if the user doesn’t have Shockwave Player or the ActiveX control.
1Select File > Publish Settings and select the Image tab.
2Select from following Alternate Shockwave image options
•In the Poster Frame field, enter the frame number from your movie’s Score that you want to appear as a JPEG
image for users who are unable to view your movie.
•To specify compression for the image, move the Quality slider to the desired compression setting. The higher
the percentage, the less the image is compressed.
•To specify that the image downloads as a progressive JPEG, select Progressive. The JPEG will then display at low
resolution and increase in quality as it continues to download. Making a JPEG progressive also reduces its file size.
3Select Publish to publish the movie with the chosen settings or click Cancel to cancel any changes.
4Select Default to return the image options to their default setting.
5Click OK to save the settings and return to the movie.
Using dswmedia folders and the support folder to
publish Shockwave content
Shockwave content is played in safe player mode, which is a feature specific to Director movies. When a movie is played
in safe player mode, the movie can’t read or write files on the user’s local disk, except to get or set a movie’s preferences.

455
USING DIRECTOR 11.5
Packaging Movies for Distribution
Last updated 9/28/2011
Note: When running Shockwave in safe player mode, you can use 'the moviePath' or '_movie.path' directly or assign it to
a variable, but you cannot display the path itself, Any attempts to do so will result in an empty string. This is a security
limitation that prevents displaying the movie's path in that environment,
Use a dswmedia folder to obtain data from a local source while a movie is playing in safe player mode. Director treats
folders named dswmedia as exceptions to the safe player mode feature that normally stops movies from reading data
from any local source. When a movie is running in safe player mode, any linked media or cast files in a dswmedia
folder, or in a subfolder of any depth, can be read. You can use relative links or full file paths to files in dswmedia
folders.
To test movies in a browser locally before uploading them to your web server, place the movie, linked casts, and linked
media in a directory tree within a dswmedia folder and use relative links. The dswMedia folder is automatically created
in the relative path if you have not disabled the option Copy Linked And Dependent Files in the Files tab of the Publish
Settings dialog box.
When you move the movie and its media to a web server for testing, keep the directory structure intact. To ensure the
files are accessible from the server, use file and folder names that do not have spaces or capital letters, and that have
recognized file extensions such as .dcr and .gif.
To access local media while a movie is playing in safe player mode, install the media in a dswmedia folder in a known
location on the user’s computer. This location can be a CD that you provide.
Using linked media when testing Shockwave content
Linked media files do not appear when testing Shockwave content from a local machine. However, when the movie is
uploaded to a server, the media files appear correctly.
Therefore, linked files do not show up when played on a local machine. However, a movie can read files that are stored
in a folder named dswmedia (or a sub folder).
The dswMedia folder is automatically created in the relative path if you have not disabled the option Copy Linked And
Dependent Files in the Files tab of the Publish Settings dialog box.
Use the following procedure to test Shockwave content with linked media when you have disabled the Copy Linked
And Dependent Files option.
1Create a folder named dswmedia.
2Place all linked media in the dswmedia folder or place all files including the Director file in a dswmedia folder.
Note: Be sure to maintain the original file and folder structure of your project.
Converting movies created in previous versions of
Director
Before you can open Director movie files (.dir) and cast files (.cst) from previous versions of Director, you must
upgrade them to the Director 11 file format. If the movie and cast files are previous to version 8.5, you must upgrade
them to the Director 8.5 / 8.5.1/10.X format before you upgrade them to Director 11. You must identify and manually
upgrade casts and movies referenced through scripting.

456
USING DIRECTOR 11.5
Packaging Movies for Distribution
Last updated 9/28/2011
Previous versions of Director use a table called a code page that describes a character set for a particular language and
is used by the operating system to display and print the language properly. Ensure that you choose the correct code
page for a movie during the upgrade process. You won’t be prompted again for the code page after the upgrade.
Note: Director MX2004 on a Japanese operating system uses the "Japanese Shift JIS 932" code page, and on Mac OS, uses
theJapanese (Mac OS) [1] page. If the movie created on this Japanese OS is moved to an English operating system and
upgraded by choosing the default page "ANSI LATIN-1252" code page on Windows or Western (Mac OS Roman) [0] on
Mac OS, the movie may not function as intended.
You must use the respective operating system to upgrade movies and casts created on Windows and Mac-Intel/Mac-
PPC platforms. After the upgrade, you can move the content to the other operating system.
You can update movies to Director by simply opening and saving them, but the Update Movies command is faster for
converting large projects. It’s also more effective for preserving links to external media. For more information, see
“Processing movies with Update Movies” on page 461.
Only movies created with Director 8.5 or later can be included as a file in a projector. Use Lingo to play movies created
with earlier versions.
Upgrade movies and casts by opening them in Director 11
1Do one of the following:
•Select File > Open and select the movie that you want to upgrade.
•Double click the movie that you want to upgrade.
The File Upgrade - Choose Files dialog box appears with the selected movie and all the dependent casts added to
the File List. You must manually add files and casts that are referenced through scripting.
The Choose Files dialog box
2Click Next. The File Upgrade - Configure Settings dialog box appears.
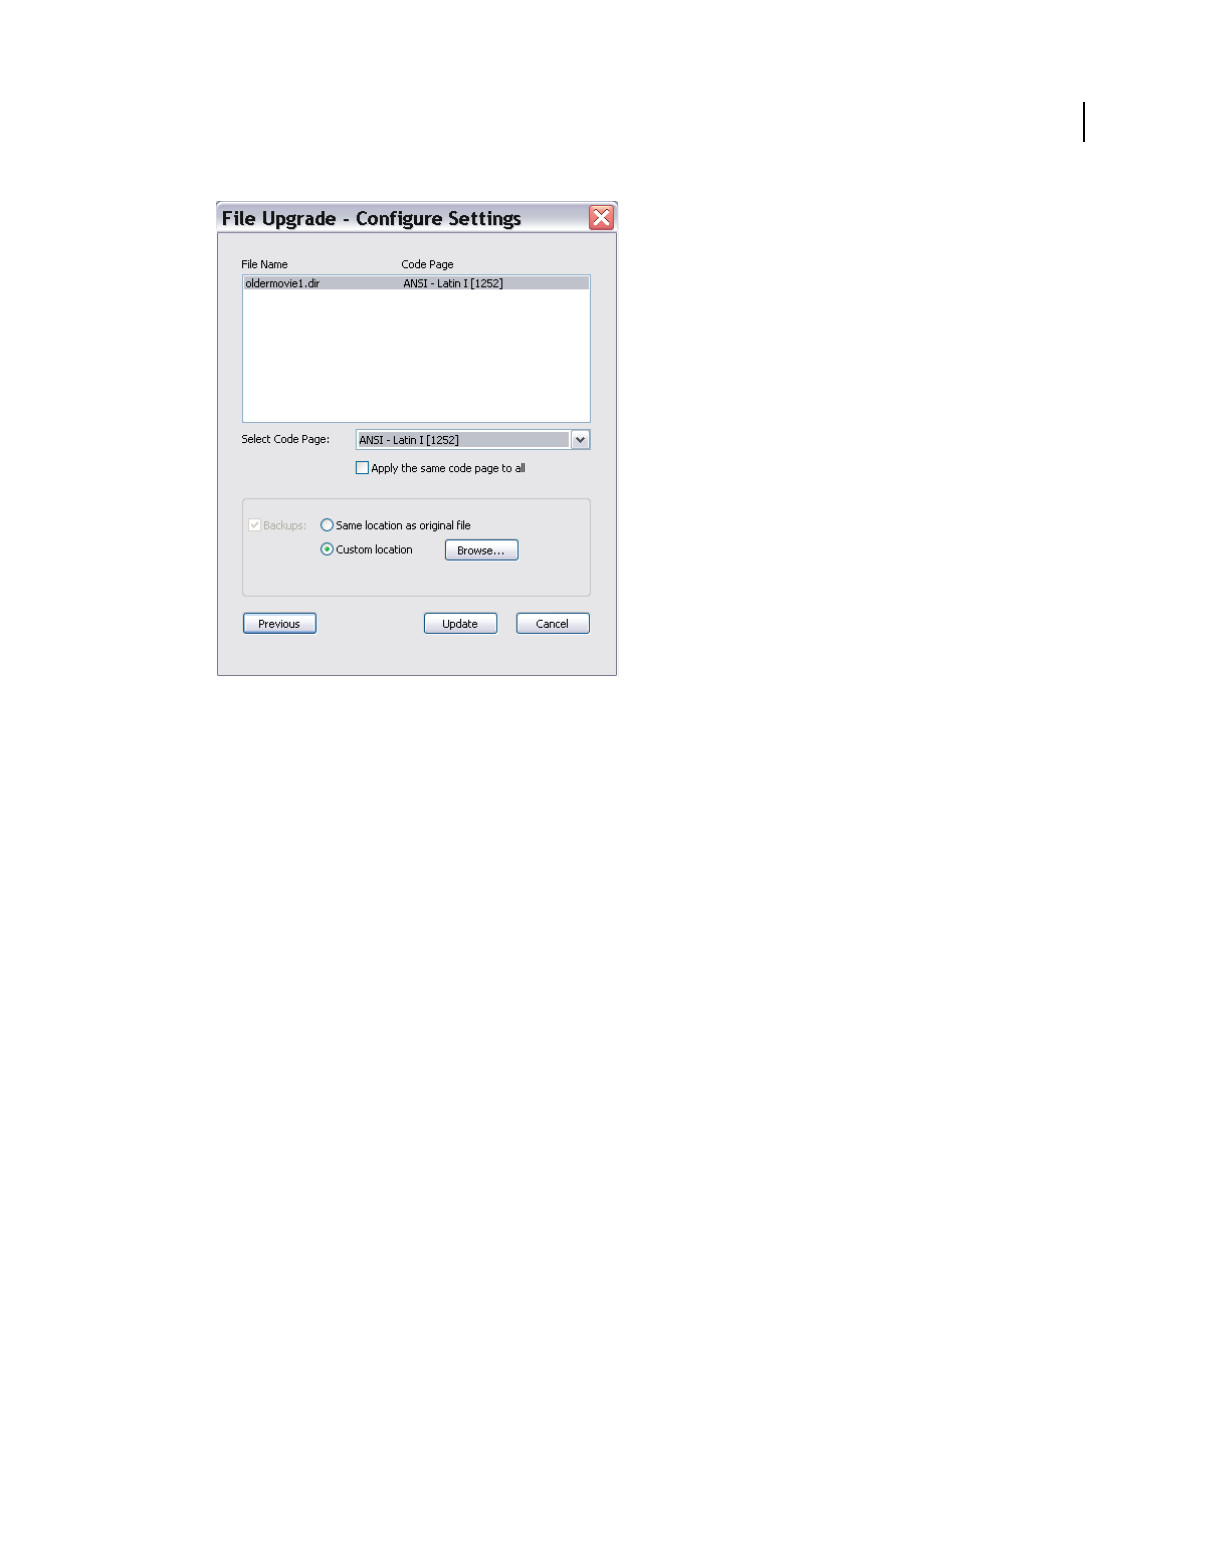
457
USING DIRECTOR 11.5
Packaging Movies for Distribution
Last updated 9/28/2011
The Configure Settings dialog box
3Select the movie for which you want to specify a code page.
4Select a code page for the movie from the Select Code Page pop-up menu. To use the same code page for all the
movies, select Apply The Same Code Page To All.
5To specify a backup location for the original file, select one of the following:
Same location as original file. A folder called backup is created under the same folder as the original movie file.
Custom location. Click Browse to specify another location for the backup.
6Click Update.
Upgrade movies and casts using the Update Movies option
1Select Xtras > Update Movies.
2Select Update from the Actions menu.
3Select Back Up Into Folder, and click Browse to select a location for the backed up files. All the movie files, casts,
and dependent files are backed up with the same folder hierarchy inside the backup folder.
4Click OK.
5In the Choose Files to Update dialog box, add movie files that you want to update, along with their dependent files
and casts.
6Click Update. The Select Code Page dialog box appears.
7For each movie, select the code page that was used to create the previous version. Select Apply To All if you want
the same code page to be used for upgrading all the movies.
8The default code page on the operating system is displayed in the pop-up menu. This may not be the same code
page that was used to create the movie being upgraded.

458
USING DIRECTOR 11.5
Packaging Movies for Distribution
Last updated 9/28/2011
Note: No error message is displayed if you choose the wrong code page. The movie may not appear as intended after
the upgrade.
9Click OK.
About projectors
A projector is a stand-alone version of a movie. Projectors require certain Xtra extensions to use text, Flash content,
connect to the Internet, and use certain other features. Director includes the most common required Xtra extensions
by default. You can include or exclude Xtra extensions for each movie by using the Include in Projector option in the
Movie Xtras dialog box. You can also add Xtra extensions to a projector manually the same way you select movie files.
You can create Mac projectors using a Windows application and create a Windows projector using a Mac application.
For more information, see “About cross-platform projectors” on page 460.
In addition to the standard projector, you can create a fast-start projector, which typically starts faster. A fast-start
projector doesn’t include Xtra extensions inside the projector itself, so there’s nothing to unpack.
Creating projectors
You can include only Director movies in projectors. Use the Update Movies command to convert older movies to the
latest version of Director. For more information, see “Converting movies created in previous versions of Director” on
page 455.
Create a projector
1Select File > Publish Settings.
2From the Formats tab, select Projector in the Publish section of the dialog box.
3From the Player type menu on the Projector tab, select a type of projector from the following:
Standard Includes the uncompressed player code in the projector file. This option starts the movie faster than
other options but creates the largest projector file.
Shockwave Makes the projector use the Shockwave Player installed in a user’s system instead of including the
player code in the projector file. If the Shockwave Player is not available when the movie runs, the movie prompts
the user to download it.
4Select from the following options:
Animate In Background Lets the movie continue playing if a user switches to another application. This is useful if
you want the movie to continue running in the background when its window is not active. If this option is not
selected, the movie pauses when the user switches to another application and resumes when the user switches back.
Full Screen Sets the movie to fill the entire screen when playing.
Center Stage In Monitor Specifies that the movie stays in the center of the screen when playing.
Escape Key Terminates Lets the user press the ESC key to exit the movie.
Reset Monitor To Match Movie’s Color Depth Automatically changes the color depth of your monitor to the color
depth of each movie in the projector play list. For example, if you are working on a color monitor set to 256 colors
and a movie in the play list was created in thousands of colors, the monitor automatically switches to thousands of
colors.

459
USING DIRECTOR 11.5
Packaging Movies for Distribution
Last updated 9/28/2011
Extra Main Memory Sets how much extra main memory is allocated to the projector.
System Temporary Memory (Mac only) Makes Director use available system memory when its own partition is full.
5Once all Projector options are set, click OK or click Default to return the settings to their defaults.
Note: To avoid problems with linked media, create the new projector in its final folder location and don’t move it to a
different folder. Director turns the movies, casts, and included Xtra extensions into a single projector.
You can also set options for the files that are associated with the Projector movie. By default, a projector consists of
just the current movie. However, you can add external cast files and exclude Xtra extensions, among other options.
Set Files tab options
1Select File > Publish Settings.
2On the Formats tab, click the Projector option.
3Click the Files tab.
4To set the Primary movie components, select from the following options:
Include Linked Cast Files Includes any linked cast files in the projector.
Exclude All Xtras Lets you exclude some or all Xtras from your projector. For more information, see “Excluding
Xtra extensions from projectors” on page 460.
Compress File (Shockwave format)
Add Files Lets you select additional Director Movie or Cast files to add to the current projector.
Remove All Deletes all added files.
Play Every Movie In List Ensures all movies in your movie list play.
Loop Sets the movie to keep playing.
5Click OK, Cancel, or Publish.
Create a fast-start projector
1Create a new folder on your computer desktop.
2In Director, select Modify > Movie > Xtras.
3Select the name of each Xtra extension, deselect Include in Projector for each, and then click OK.
4Select File > Save and Compact.
If you are adding multiple movies to the package, repeat steps 2 through 4 for each of the movies.
5Select File > Publish Settings.
6In the Publish Settings dialog box, select the Files tab, choose the movies to include in the projector, and click Add.
7Select Exclude All Xtras.
8Click Options and select one of the following:
Shockwave (Windows) and click OK.
Standard (Mac) and click OK.
9In the Publish Settings dialog box, select a location for the projector to publish, and click Publish.
10 Close the Publish Settings dialog box.

460
USING DIRECTOR 11.5
Packaging Movies for Distribution
Last updated 9/28/2011
11 Exit Director and return to your computer desktop.
12 Start your projector to see it open quickly and play your movies.
Excluding Xtra extensions from projectors
Sometimes it is useful to place any Xtra extensions needed by a projector in an external Xtra extensions directory. Some
reasons for doing this include:
•Xtra extensions stored in a projector must be uncompressed to a separate file each time the projector starts up,
which makes startup slower. If the Xtra extensions are stored in an external directory, the projector starts more
quickly.
•Developers are able to easily track exactly what Xtra extensions versions are provided for the projector.
•Developers can easily update an Xtra extension without having to create a new projector.
•Multiple projectors in the same folder can use the same external Xtra extensions folder.
•Sometimes you need to include other external files (such as an animated GIF) with a projector. These files can be
put in the external Xtra extensions folder instead of in a separate location.
•Shockwave projectors can use the Xtra extensions that were installed with Shockwave player instead of requiring
their own copy.
•Because of the way the movie’s Xtra extensions list is maintained, it’s possible that unnecessary Xtra extensions are
included in a projector. Using external Xtra extensions solves this issue.
•If the Exclude All Xtras option is selected, an Xtras folder outside of the Projector file is created when publishing a
movie.
•Xtra files for Shockwave are downloaded from the server when they are played in a web browser.
About cross-platform projectors
Cross-platform projectors are projectors created on one platform or operating system that can run on another. In
Director’s case, you can create projectors that will play on the Mac OS X system, but are created or authored on a
Windows system and vice versa.
Note: You cannot create Mac Classic projectors on a Windows system.
1Select File > Publish Settings.
2From the Formats tab, select Mac Projector if you are working on a Windows system, or select Windows Projector
if you are working on a Mac.
3Make any other selections you want from the Publish Settings dialog box.
Note: You cannot create custom application icons for a cross-platform projector
4Click Publish.
Note: Avoid long file names and path names when publishing in the OSX format. When long file names and path names
are used, publishing can fail after throwing a cfrg resource missing error.

461
USING DIRECTOR 11.5
Packaging Movies for Distribution
Last updated 9/28/2011
Custom Xtra extensions and cross-platform projectors
To support custom Xtra extensions in cross-platform projectors, consider the following issues:
•Ensure that there is an entry for your Xtra extension in the xtrainfo.txt file that gives the proper filename for the
Xtra extension on each platform. If this information is not provided, the code assumes your Xtra extension exists
only for the current platform.
•To use your custom Windows Xtra extension in a Mac-created projector, put the Xtra extension in the /Cross
Platform Resources/Windows/Xtras/ folder of the Mac Director installation.
•Mac Xtras must have both a data fork and a resource fork. These two fork files aren’t supported on Windows. For
each Mac Xtra extension, two files are created: one for the data fork and one for the resource fork. The names for
these files must be the same as the original Xtra extension name with a suffix (.data for the data fork and .rsrc for
the resource fork). Both of these files are placed in the /Cross Platform Resources/Mac/Xtras/ folder of the
Windows Director installation.
For example, the Mac Xtra called “MyXtra” would have two files on Windows, MyXtra.data and MyXtra.rsrc.
Processing movies with Update Movies
Use the Update Movies command on the Xtras menu to do the following:
•Update movies and casts from older version of Director to the latest file format.
•Compress movies for faster downloading from the Internet.
•Remove redundant and fragmented data in movie and cast files. The Save and Compact and Save As commands
also do this.
•Prevent users from opening movie and cast files.
•Batch process movie and cast files in large projects.
When beginning a project, use Update Movies to convert Director 5 or later version files to the latest file format.
At the end of a project, use Update Movies to compress all your movies and casts at once.
Update and compress movies and casts
1Select Xtras > Update Movies.
2Select one of the following Action options:
Update Converts movies from Director 5 or later versions to the latest file format. As it updates movies, Director
consolidates and removes fragmented data, just as when you use Save As. (To update movies from older versions,
you must first convert them to the Director 5 file format.)
Protect Removes all the data required to edit the movie, but it does not compress the movies further. It adds the
DXR extension to movies, and CXT extension to casts. Protect also flags the movie so it can’t be opened in the
authoring environment.
Convert To Shockwave Movie(s) Rewrites movies and casts in the compressed Shockwave file format and adds the
DCR extension to movies and CCT extension to casts. This options also prevents users from opening the movie or
cast and making changes. Once a movie is compressed, there is no way to recover it back to an editable file, so be
sure to keep the original movie.

462
USING DIRECTOR 11.5
Packaging Movies for Distribution
Last updated 9/28/2011
3Select one of the Original Files options:
Back Up Into Folder Specifies that the original files go in a selected folder. Click Browse to select the folder for the
original files. To avoid overwriting old backups, select a new folder each time you run Update Movies.
Delete Specifies that the newly updated files overwrite the original files. Be very careful when using this option.
Once a file is protected or compressed, you cannot open it again in Director.
4Click OK.
5Select the movies and casts you want to change and click one of the following:
Add Adds the selected files.
Add All Adds all the movies in the current folder. The items you select appear in the file list at the bottom of the
dialog box. You can update movies in different folders at the same time.
Add All Includes Folders (Click before you click the Add All button) Includes any movies or casts inside folders
appearing in the upper list. This option is useful for updating large projects with several levels of folders.
6Click Update.
Director saves new versions of the selected movies with the same names and locations as the original movies. This
ensures that all links and references to other files continue to work properly. Director copies the original movies to
the folder you specified, re-creating their original folder structure. If you didn’t specify a folder for the original
movies, Director prompts you to select one.
Director adds the DCR extension to Shockwave content and the CCT extension to external casts in the Shockwave
format. Protected movies have the DXR extension, and protected casts have the CXT extension.
Exporting digital video and frame-by-frame bitmaps
You can export all or part of a movie as a digital video and then use the digital video in other applications or import it
back into Director. Any interactivity in the movie is lost when it is exported as a digital video. You can also export a
movie or a part of a movie as a series of bitmaps (BMP in Windows, and PICT on the Mac).
You can export QuickTime digital video from either the Windows or the Mac version of Director. QuickTime must
be installed on the system to export as QuickTime (version 4 or later is required for Windows; version 3 or later is
required for Mac). You can export the AVI (Audio-Video Interleaved) format only by using the Windows version of
Director. When you export to AVI, all sounds are lost.
When Director exports animation as a video or bitmaps, it takes snapshots of the Stage moment by moment and turns
each snapshot into a frame in the video or a bitmap file. Sprites animated solely by Lingo or JavaScript syntax are not
exported.
When Director exports video or bitmaps, it always uses the entire Stage.
1Select File > Export.
2From the Export options at the top of the dialog box, select the range of frames you want to export:
Current Frame Exports the current frame on the Stage. This is the default.
Selected Frames Exports the selected frames in the Score.
All Frames Exports all frames.
Frame Range Exports only the range of frames that begin and end with the frame numbers you enter in the Begin
and End boxes.

463
USING DIRECTOR 11.5
Packaging Movies for Distribution
Last updated 9/28/2011
3If you select Selected Frames, All Frames, or Frame Range as the Export option, select one of the following options.
These options don’t work with digital video.
Every Frame Exports all frames in the selected range.
One in Every _ Frames Exports only the frames at the interval you specify in the box.
Frames With Markers Exports frames with markers set in the Score window.
Frames With Artwork Changes In Channel Exports frames only when a cast member changes in the channel you
specify in the box.
4From the Format menu at the bottom of the dialog box, select a format.
•Windows: Video for Windows (AVI), DIB File Sequence (BMP), or QuickTime Movie (MOV)
•Mac: PICT or QuickTime Movie
5If you are exporting video, click the Options button.
6Select the options you want to use and then click OK.
For AVI movies, enter a number of frames per second for Frame Rate.
For information about the QuickTime options, see “Setting QuickTime export options” on page 463.
7In the Export dialog box, click Export.
8Name the file and then click Save.
If you are saving in video format, only one file will be created. If you are saving in BMP or PICT format, Director
automatically creates one file for each frame, attaching the corresponding frame number to each file. For example,
if the name of the exported file is Myfile, frame 1 will be exported to a file named Myfile0001.
Setting QuickTime export options
Use the QuickTime Options dialog box to specify options for exporting a movie as a QuickTime digital video. This
dialog box appears when you click the Options button in the Export dialog box and QuickTime is the specified format.
1Select File > Export.
2Select QuickTime Movie from the Format menu.
3Click Options.
4To set the speed the video will play, select a Frame Rate option:
Tempo Settings Exports the settings in the tempo channel to the QuickTime movie. This setting lets you create a
QuickTime movie at any tempo, even if Director is not capable of playing the movie at that tempo in real time.
The size of an exported QuickTime movie is influenced by the tempo settings, transitions, and palette transitions
in the Director movie. Fast tempos, certain transitions, and palette transitions all increase the size of the QuickTime
movie. The tempo settings determine the number of QuickTime frames per second and the number of frames per
transition. The faster the tempo, the more frames per second.
A movie that would work well with Tempo Settings as the Frame Rate option is one in which the tempos have been
carefully timed. For instance, some frames could be set to a tempo of 10 frames per second, and their QuickTime
frame durations would be exactly one-tenth of a second. Other frames later in the movie could be set to a tempo of
1 frame per second. When the movie is exported, these slower frames would each last precisely for 1 second in the
QuickTime movie.

464
USING DIRECTOR 11.5
Packaging Movies for Distribution
Last updated 9/28/2011
Real Time Lets you export a QuickTime movie that matches the performance of the Director movie as it plays on
your system. (Always play the entire movie with script disabled before using this feature.)
When you export a movie with Real Time selected, each Director frame becomes a QuickTime frame. Each frame
in the QuickTime movie matches the duration of the same frame in the Director movie.
Director will generate as many frames as required to duplicate each transition, up to 30 frames per second. To
increase the number of frames created for any transition, reduce the smoothness of the transition.
This option causes Director to use the actual durations that were stored the last time you played the entire movie,
regardless of the actual tempo settings of the movie.
5To reduce the file size of a QuickTime movie at the expense of quality, select an option from the Compressor menu.
Different options appear on the Compressor menu depending on the video hardware and software available in your
system. Consult your QuickTime documentation.
Animation Compression is for simple animations.
Cinepak Compresses 16- and 24-bit video for playback from CD-ROMs.
Component Video Usually used when capturing from a live video feed.
Graphics compression For exporting single frames of computer graphics.
None Exports with no compression.
Photo-JPEG compression Good for scanned or digitized continuous-tone still images.
Video compression For exporting video clips.
6To determine the compression quality and resulting file size when using the chosen compressor, use the Quality
slider. A higher-quality setting preserves the appearance of the images and motion but increases the size of the file.
A lower-quality setting results in poorer image quality but decreases the size of the file.
7To determine the color depth (the number of colors) of your artwork, select a setting from the Color Depth menu.
The compression method you select determines the color depth options available in this menu.
8To determine the method by which the exported QuickTime movie is resized, select values for Scale. You can select
a percentage from the Scale menu, or you can type pixel dimensions in the fields. By entering the number of pixels,
you can stretch a movie so that it plays in a rectangle that does not adhere to the original aspect ratio.
9To choose which soundtracks are exported with your movie, select Channel 1 or Channel 2. A checked box
indicates that the associated sound channel in the Score is exported with your QuickTime® file.
External sounds (sounds you imported as linked cast members) are not exported when you export a digital video. To
include sound when you export a digital video movie, import the sounds as cast members instead of linking to them.
Looped sounds don’t loop in a movie that you have exported as a digital video. To loop a sound in a movie that you
plan to export as a digital video, trigger the sound by alternating it between the two sound channels.
About organizing movie files
In most cases, you should divide a large production into a series of smaller movies. You can combine as many movies
as you want in a projector, but larger files take longer to save and are cumbersome to work with. Also, movies are easier
to edit if they are organized in discrete sections.
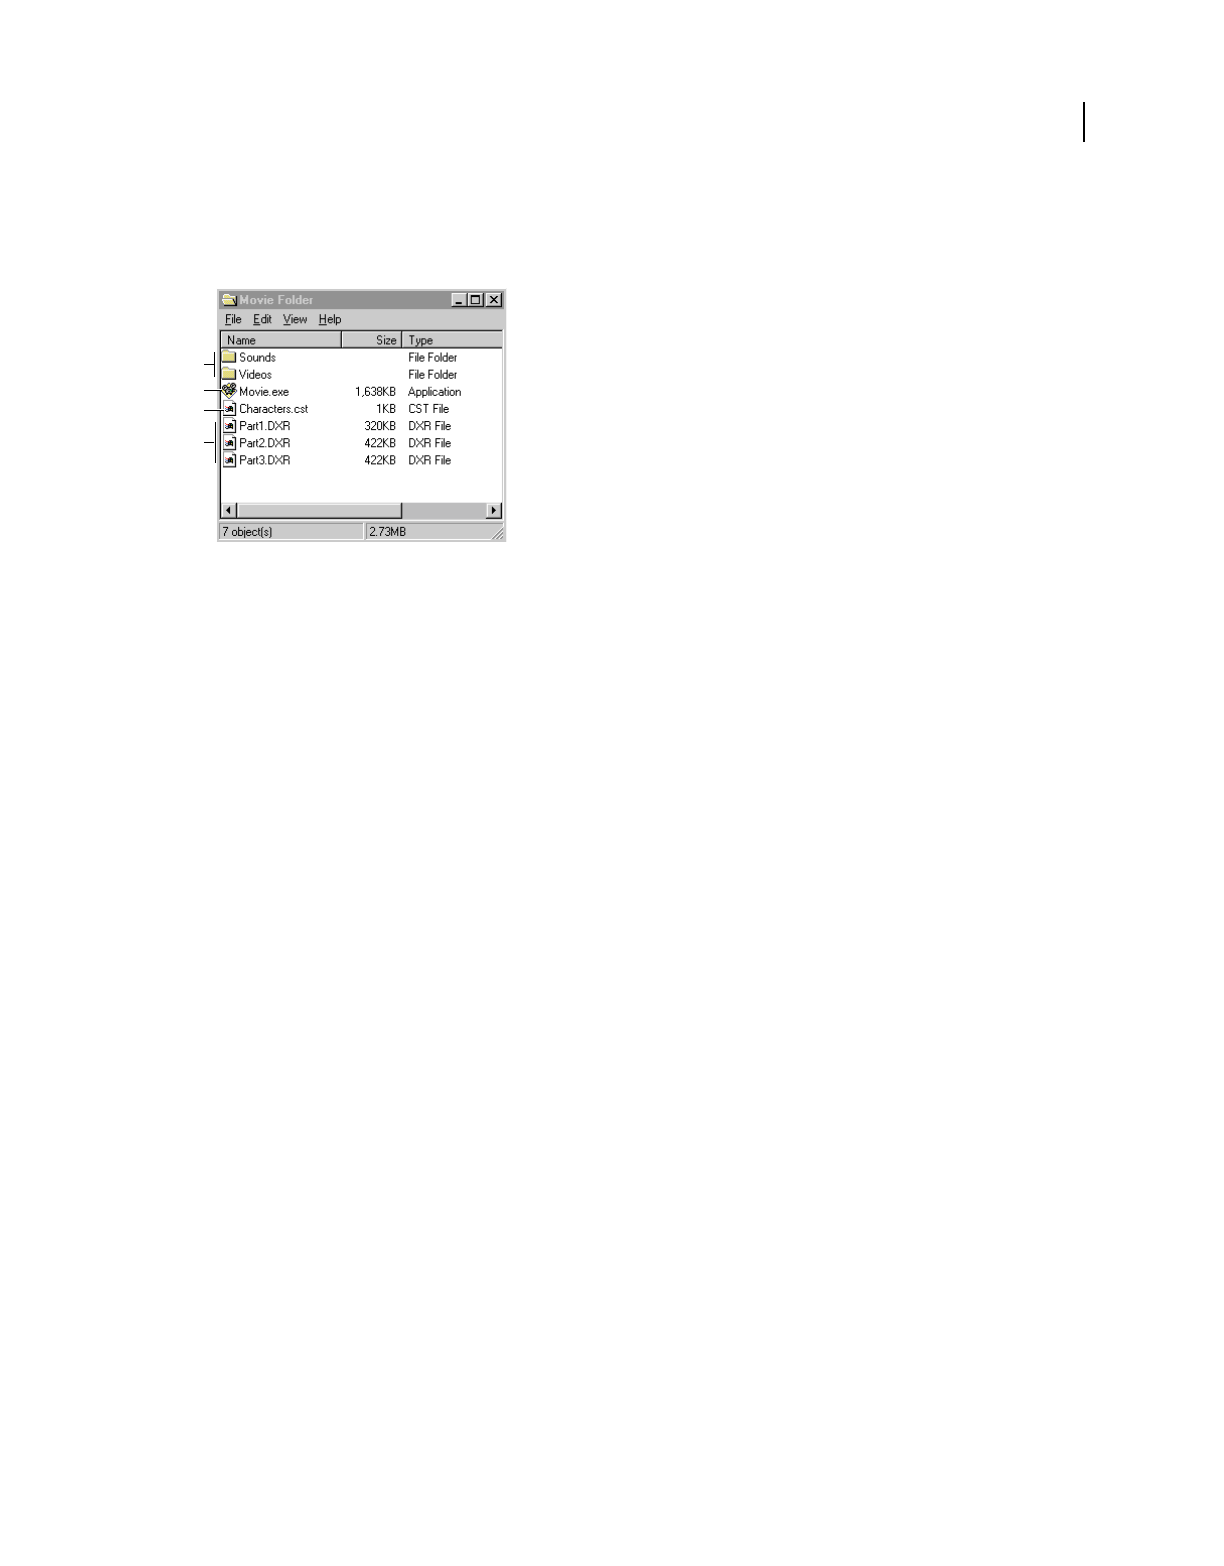
465
USING DIRECTOR 11.5
Packaging Movies for Distribution
Last updated 9/28/2011
The best way to organize a large production is to create a small projector file that starts the movie and then branches
to Shockwave content or protected content. This saves you the trouble of re-creating the projector every time you
change one part of a movie.
A typical file organization for a distributed movie
A. Folders for linked media B. Projector C. External cast D. Protected movies
This approach also makes sense for movies on the Internet, but for different reasons. If the first movie is small, users
don’t have to wait as long for something to happen. Branching to a series of smaller movies also enables users to avoid
downloading time for parts of the movie they do not use.
The size of your movie may be less of an issue if you use streaming Shockwave content. For more information, see
“Setting movie playback options” on page 467.
A
B
C
D

466
Last updated 9/28/2011
Chapter 25: Using Shockwave Player
About Shockwave Player
Adobe® Director® movies can use the Internet in various ways: hosting multiuser sessions such as chats and games,
streaming movies and sounds, retrieving data from the network, and interacting with a browser. Whether it is
distributed on disk or downloaded from the Internet, a movie can use an active network connection to retrieve linked
files, send information, open web pages, and perform many other network activities.
To make a movie appear in a user’s browser, you can save it as Shockwave® content and embed it in an HTML
document. The movie can play from a local disk or an Internet server. When the user opens the HTML document
stored on an Internet server, the movie often begins streaming to the user’s system, and begins playing when either a
specified number of frames has been downloaded, or waits until all of the movie is downloaded to the local disk. (The
movie begins streaming if you have set the Shockwave streaming playback option to on. If the default streaming option
is left at off, the movie begins playing after the entire movie has been downloaded to the local drive. For more
information, see “Setting movie playback options” on page 467.)
You can also distribute a movie over the Internet as a projector (a packaged movie that the user downloads and
executes). A projector plays as a stand-alone application, not in a browser. For more information, see “About
Distribution formats” on page 445.
When you author a movie, consider how the movie is to be distributed and played on users’ systems. If the movie
streams from an Internet source, you might need to modify the movie for the best streaming performance and use the
behaviors that are built into Director to make the movie wait while certain cast members download. Controls and
script methods offer ways to send and retrieve media and other information, to interact with a browser, and to monitor
downloading.
Streaming movies
When you distribute a movie on the Internet, streaming provides an immediate and satisfying experience for your
users. If you don’t enable streaming, users must wait for the entire movie to download before it begins to play. A
streaming movie begins playing as soon as a specified amount of content reaches the user’s system. As the movie plays,
the remaining content downloads in the background and appears when it is needed. Streaming can dramatically
decrease the perceived downloading time.
When Director streams a movie over the Internet, it first downloads the Score data and other nonmedia information
such as scripts and the size of each cast member’s bounding rectangle. This data is usually quite small compared with
the size of the movie’s media—usually only a few kilobytes. Before starting the movie, Director then downloads the
internal and linked cast members that are required for the first frame of the movie (or more frames if you have
increased the number in the Movie Playback dialog box). After the movie starts, Director continues to download cast
members (along with any associated linked media) in the background, in the order that the cast members appear in
the Score.
If the movie jumps ahead in the Score or uses cast members that are referenced only by scripts, the required cast
member might not be available when necessary. If cast members are unavailable, the movie either ignores them or
displays a placeholder, depending on how you set the streaming options in the Movie Playback Properties dialog box.
In addition, if cast members are not fully downloaded and present in memory, you might get script errors, especially
if you are working with 3D.

467
USING DIRECTOR 11.5
Using Shockwave Player
Last updated 9/28/2011
A challenge of authoring for Internet streaming is ensuring that all cast members have been downloaded by the time
the movie needs them. To avoid missing cast members, make sure that all the cast members required for a particular
scene have been downloaded before beginning the scene. Use the Director behaviors to wait for media in certain
frames or for particular cast members. For more information, see “About streaming with the Score and behaviors” on
page 469. You can also write custom scripts to do this. See “Checking whether media elements are loaded with Lingo
or Java Script syntax” on page 470.
Director movies stream automatically if the Streaming playback option is set to on (its default setting is off). In
addition to turning streaming off and on, you can specify that the media elements for a certain number of frames must
finish downloading before the movie starts playing.
Control streaming movies by arranging sprites in the Score and controlling the movement of the playhead, either with
the Director behaviors or with Lingo or JavaScript™ syntax. You can also use these scripting methods to specify when
externally linked files are downloaded.
About network operations
Director lets a network operation begin even if a previous network operation is not complete. This capability, often
referred to as background loading, lets Director perform multiple operations while loading files. Because something
else is happening while files are loading, the user does not perceive the wait.
Note: Loading data from a network is different from loading cast members in Director. Loading from a network loads
data to the local disk. Loading cast members in Director means loading cast members into memory.
It’s a good idea to author Shockwave content so that it performs other tasks while data is loading in the background.
Because Internet operations require background loading, Lingo or JavaScript intended to execute on the Internet
behaves differently than script methods that run within one movie. For more information, see “Using Lingo or
JavaScript syntax in different Internet environments” on page 473.
Setting movie playback options
To change basic streaming settings for a movie, use the Movie Playback Properties dialog box. You can turn streaming
on and off, specify a number of frames to download before playing the movie, and make Director display placeholders
if cast members are not downloaded yet. The Movie Playback Properties dialog box also includes options for locking
the current tempo.
Leaving streaming off (the default setting) makes sense for some types of movies. For example, a game that requires all
cast members to be available at once might not be suitable for streaming. Other movies work best if the media for a
certain number of frames downloads before the movie begins playing. This option is especially useful for streaming
movies that were not originally designed for streaming.
Placeholders are rectangles that appear in place of media elements for cast members that have not yet been
downloaded. Placeholders are useful when testing to indicate places where media is missing.
You can specify streaming options any time before saving a movie as Shockwave content.
Note: If you want to test how a movie streams from a server before you save the movie as a Shockwave movie, use File >
Save and Compact to make sure the data in the movie is correctly ordered and that redundant data is removed.
1Select Modify > Movie > Playback to define streaming options.
2To let the movie stream automatically, select Play While Downloading Movie.

468
USING DIRECTOR 11.5
Using Shockwave Player
Last updated 9/28/2011
3To make the movie wait for all media elements (internal and linked) for a specified range of frames, enter the
number of frames in Download __ Frames Before Playing.
By default, movies download the first frame only. Adjust this setting to the number of frames that is best for your
movie.
4To make the movie display placeholders for media elements that have not been downloaded, select Show
Placeholders.
The placeholders appear as rectangles when the movie plays.
5To lock the movie to its current tempo settings, select Lock Frame Durations. For more information, see “Locking
frame durations” on page 172.
To set Shockwave playback options, see “Setting Shockwave playback options” on page 468.
Setting Shockwave playback options
To view Shockwave content, your users must have the Shockwave® Player, which comes preinstalled on many
computer systems. The player is also available for free downloading from the Adobe website at
www.adobe.com/shockwave/download/.
The Shockwave Player includes a volume control and a standard context menu that appears when a user right-clicks
(Windows®) or Control-clicks (Mac®) a movie. You can select specific playback options to include for your users when
you save your movie as Shockwave content.
Shockwave content loops by default. To cause Shockwave content to play only once, add the Hold on Current Frame
behavior to the last frame of the movie.
1Select File > Publish Settings.
2If not already selected, select Shockwave File (DCR) on the Formats tab.
3Select the Shockwave tab and then select the options you want to provide for your users, as described in the
following list:
Image Compression Optimizes your content for download over the Internet by letting you manage the file size
(versus the image quality) of a file. The default is set to JPEG, with a quality setting of 80. To further optimize the
size of your images, adjust the Image Compression setting of each individual bitmap.
•Standard Select Standard to apply the compression techniques used by Director. This setting is suitable for
simple graphics that contain few colors or non-photographic type images.
•JPEG Select JPEG and specify the image-quality setting by moving the slider to a value between 0 and 100
percent. A lower percentage results in increased compression, but produces a lower-quality image.
Audio Compression •Compression Enabled Lets you compress the sound in your movie. Select this option and
select the level of compression from the kBits/second menu. For more information about sound compression, see
“Compressing internal sounds with Shockwave Audio” on page 248.
•Convert Stereo to Mono Lets you convert stereo audio to monaural. This option is available only if Shockwave
Audio Compression is enabled.
Include Cast Member Comments Lets you include comments you might have entered in the Comments text box of
the Property inspector for your cast members. You can then use Lingo or JavaScript syntax to access the comments
in the DCR file.
Enabled context menu items •Volume Control Lets users adjust the volume of the movie’s soundtrack.

469
USING DIRECTOR 11.5
Using Shockwave Player
Last updated 9/28/2011
•Transport Control Provides controls for rewinding, stopping, and stepping through the movie.
About creating multiuser applications
If you want to create multiuser movies or applications with Director, you must use Flash® Media Server in your
Director movie. This can be a Flash movie that has already been authored to communicate with the Flash Media Server
or a simple Flash movie that can serve as a container for Flash script objects that you create with Lingo or JavaScript
syntax. You can create applications that use the Flash Media Server entirely in Director by using Lingo or JavaScript
to create Flash script objects.
For more information about using Flash Communication Server in Director, see “Using Flash, Flash Components, and
Other Interactive Media Types” on page 194.
About streaming with the Score and behaviors
The easiest way to create a movie that streams well is to arrange the Score properly and use behaviors to control the
playhead. Director downloads cast members in the order in which they appear in the Score. Try to arrange the Score
so that events don’t make the playhead jump far ahead in the Score, where cast members have not yet been
downloaded. For example, if you place a menu in the first frame of a movie and a user selects an option that sends the
playhead to frame 400, the cast members for frame 400 might not be immediately available.
To avoid this problem, begin a movie with a simple introductory scene that contains a few small cast members,
preferably vector shapes. You can use a streaming behavior from the Library palette to make the introduction loop
until the cast members that are required for the next scene have been downloaded in the background.
While media elements are downloading, several behaviors included with Director control the playhead or a progress
bar. While media elements are downloading. These behaviors make it easy to allow enough time for downloading to
catch up with action in the Score.
Looping behaviors
Looping behaviors make the playhead return (loop) to a frame or stay on the current frame until specified media
elements have been downloaded and then continue to the next frame. Attach a looping behavior to a frame in the script
channel, not to a sprite. The following looping behaviors are accessible by selecting Internet > Streaming from the
Library List menu in the Library palette:
Loop Until Next Frame Is Available Loops the playhead to a specified frame until all the media elements that are
required for the next frame have been downloaded.
Loop Until Member Is Available Loops the playhead to a specified frame until a certain cast member has been
downloaded.
Loop Until Media In Marker Is Available Loops the playhead to a specified frame until all the media elements for the
frame at the specified marker have been downloaded.
Loop Until Media In Frame Is Available Loops the playhead to a specified frame until all the media elements that are
required for a certain frame have been downloaded.

470
USING DIRECTOR 11.5
Using Shockwave Player
Last updated 9/28/2011
Jumping behaviors
Jumping behaviors make the playhead skip to a specified frame or marker after certain media elements have been
downloaded. Attach a jumping behavior to a frame in the script channel, not to a sprite.
Jump When Member Is Available Moves the playhead to the specified frame after a certain cast member has been
downloaded.
Jump When Media In Frame Is Available Moves the playhead to the specified frame after the media elements for a
particular frame have been downloaded.
Jump When Media In Marker Is Available Moves the playhead to the specified frame after the media elements for the
frame at a particular marker have been downloaded.
Checking whether media elements are loaded with
Lingo or Java Script syntax
Director has several options that let an initial portion of a movie start playing as soon as the required data and cast
members are available. Use Lingo or Java Script syntax to check whether media elements have been downloaded from
a network by testing the following:
•Whether a specific cast member is loaded before the movie proceeds
•Whether the cast members used in a specific frame are loaded before the frame plays
Checking whether a cast member or sprite is loaded
To determine whether a specified cast member is available locally, use the mediaReady() cast member or sprite
property. You can check for a specific cast member or the cast member that is assigned to a specific sprite. When
mediaReady() returns TRUE, the cast member is present on the local drive and ready for loading into memory. For
more information, see the Scripting Reference topics in the Director Help Panel.
This property always returns TRUE for local files. It is useful only for movies that stream from a remote server. Because
playback can begin before the entire movie has been downloaded, make sure that necessary media elements have been
downloaded as the movie plays.
Checking whether a frame’s contents are loaded
Use the frameReady() method to determine whether all the media elements that the specified frame requires are
available locally. For more information about this method, see the Scripting Reference topics in the Director Help
Panel.
Downloading files from the Internet with Lingo or
JavaScript syntax
Lingo or JavaScript syntax uses the Internet’s resources by obtaining files from the Internet. The data is copied to the
local disk or cache. After data is available on the local computer, use these scripts to retrieve the data for the movie. For
more information, see “Retrieving network operation results with Lingo or JavaScript syntax” on page 473.

471
USING DIRECTOR 11.5
Using Shockwave Player
Last updated 9/28/2011
For a movie or projector that plays outside a browser, background loading is not required. However, preloading is a
good idea because it improves playback performance.
All network Lingo or JavaScript syntax operations that obtain data from the network begin downloading the data and
return a network ID. The data is not immediately available.
An unlimited number of network Lingo or JavaScript syntax operations can take place at once. However, depending
on the browser chosen and the preferences set, there can be limitations on the number of network operations taking
place. When multiple network Lingo or JavaScript syntax operations run simultaneously, rely on the network ID that
the method returns to distinguish which operation is complete. Be aware that running more than four operations at
the same time usually adversely impacts performance.
When using network Lingo or JavaScript syntax, the current handler must finish before an operation’s result can
return. For best results, place script that initiates a network operation and script that uses the operation’s result in
different handlers. An on exitFrame handler is a good location for checking whether an operation is complete.
Note: You should typically use frame events rather than repeat loops for this process.
Execute a network script operation
1Start the operation.
For example, the following statement initiates a text-downloading operation and assigns the network ID returned
by the getNetText() operation to the variable theNetID:
theNetID = getNetText("http://www.thenews.com")
2Make sure that the operation finishes.
To check an operation’s status regularly until the method indicates that the operation is complete, use the
netDone() method. For more information about this method, see the Scripting Reference topics in the Director
Help Panel.
For example, the following statement loops in the current frame until the download operation is complete:
if not(netDone(theNetID)) then _movie.go(_movie.frame)
3Check whether the operation was successful by using the netError() method. For more information about this
method, see the Scripting Reference topics in the Director Help Panel.
4Obtain the results if the operation is complete.
Note: You can also use getStreamStatus() to determine the status of a network operation. You can use netDone() to
check whether an operation is “done” or “not done”. By using getStreamStatus(), you can check on an operation’s
progress, because it displays how many of the total number of bytes have downloaded.
Cancel a network operation in progress
❖Use the netAbort() method to cancel a network operation without waiting for a result. This frees up capacity for
Internet access, which lets other network operations finish faster. For more information about this method, see the
Scripting Reference topics in the Director Help Panel.
Retrieve a file as text
1Use the getNetText() method or the postNetText method to start retrieving text. For more information about
this method, see the Scripting Reference topics in the Director Help Panel.

472
USING DIRECTOR 11.5
Using Shockwave Player
Last updated 9/28/2011
2Use the netTextResult() method to return the text you retrieved with getNetText or postNetText. For more
information about this method, see the Scripting Reference topics in the Director Help Panel.
Retrieve and play a new Shockwave movie from the network
❖Use the gotoNetMovie() method. For more information about this method, see the Scripting Reference topics in
the Director Help Panel.
The current movie continues to run until the new movie is ready to play. After the new movie is ready, the player
quits the current movie and plays the new movie in the same display area as the calling movie.
Open a URL in the user’s browser
❖Use the gotoNetPage() method. This method works whether the URL refers to Shockwave content, HTML, or
another MIME type. For more information about this method, see the Scripting Reference topics in the Director
Help Panel.
You can specify that this method replaces a page’s content or opens a new page. If the browser is not open, the
method launches the browser. If the gotoNetPage method replaces the page in which the movie is playing, the
movie continues to play until the browser replaces the page.
The gotoNetPage method is similar to the Director open method. It does not return a value.
Preload a file from the server into the browser’s cache
❖Use the preloadNetThing() method. For more information about this method, see the Scripting Reference topics
in the Director Help Panel.
The preloadNetThing() method initiates downloading a linked movie asset into the cache, where it is available
for later use. Director can later preload the asset into memory without a download delay.
The current movie continues to play while preloading occurs.
Test whether getNetText(), preloadNetThing, or gotoNetMovie operations
are complete
•Use the netDone() method.
•Use the getStreamStatus() method.
For more information about these methods, see the Scripting Reference topics in the Director Help Panel.
Post information using HTTP post/get abilities to a server and retrieve a
response
❖Use the getNetText() or postNetText() methods. You can use either method to post data to a server, but HTTP
"get" commands can post only a limited amount of information compared with HTTP "post" operations. If you
are posting a great deal of information, the postNetText() method is recommended.
For more information about these methods, see the Scripting Reference topics in the Director Help Panel.

473
USING DIRECTOR 11.5
Using Shockwave Player
Last updated 9/28/2011
Retrieving network operation results with Lingo or
JavaScript syntax
Lingo or JavaScript syntax can retrieve network operation results, such as a text result, a unique identifier for a network
operation, a file’s MIME type, and the date an HTTP item was last modified.
Retrieve the text result of a network operation
❖Use the netTextResult() method. For more information about this method, see the Scripting Reference topics in
the Director Help Panel.
Retrieve the “date last modified” string from the HTTP header for a specific
item
❖Use the netLastModDate() method. For more information about this method, see the Scripting Reference topics
in the Director Help Panel.
Obtain the MIME type of the HTTP item
❖Use the netMIME() method. For more information about this method, see the Scripting Reference topics in the
Director Help Panel.
The results of the netTextResult(), netDone(), netError(), netMIME(), and netLastModDate() methods are
retained until normal memory clean-up is needed.
Determine the state of a network operation that retrieves data
❖Use the Lingo on streamStatus event handler or the JavaScript streamStatus function. For more
information, see the Scripting Reference topics in the Director Help Panel.
Using Lingo or JavaScript syntax in different Internet
environments
Some Lingo or JavaScript syntax features behave differently, depending on whether the movie is playing back in a
browser, as a projector, or within the authoring environment.
Using Lingo or JavaScript syntax with Internet security restrictions
Because of Internet security issues for movies that play back in browsers, the following Lingo or JavaScript syntax
features are unsupported for Shockwave movies playing in a browser:
•Setting colorDepth() for the user’s monitor
•Saving a movie by using the saveMovie() method
•Printing by using the printFrom() method
•Opening an application by using the open() method
•Stopping an application or the user’s computer by using the quit(), restart(), or shutDown() method

474
USING DIRECTOR 11.5
Using Shockwave Player
Last updated 9/28/2011
•Opening a local file that is not in the dswmedia folder or a subfolder of the dswmedia folder
•Pasting content from the Clipboard by using the pasteClipBoardInto() or the copyToClipboard method yields
a security prompt
•Searching for files on a user’s system with getNthFileNameInFolder(), searchCurrentFolder(), or
searchPath()
•Permanently downloading files from a URL to the user’s local drive using downloadNetThing() is disabled in
Shockwave. (This function works in authoring and projector.)
Using URLs with Lingo or JavaScript syntax
In addition to the Lingo or JavaScript syntax that is explicitly intended for use with network operations, some script
elements can use URLs as references to external files.
The following Lingo or JavaScript syntax elements can use URLs as file references in all circumstances:
•moviePath
•pathName
•unloadMovie
Note: You can also set the fileName of cast members to URLs and link to external media assets.
The following Lingo or JavaScript syntax supports URLs as references to external files. If you use this script in
projectors or during authoring, you can avoid pauses while the file is being downloaded by first using
preloadNetThing() to download the file. After the file has been downloaded, you can use these Lingo or
JavaScript syntax elements with the file’s URL without a delay.
When the following Lingo or JavaScript syntax is used in a browser, you must first download the file by using the
preloadNetThing method. If you don’t, the script fails.
•Using a gotoMovie statement
•Using an importFileInto() method
•Using a preLoadMovie() method
•Using a playMovie() method
•Using an openWindow method() (disabled in browsers).
The following Lingo or JavaScript syntax elements can use URLs to Shockwave Audio (SWA) sound files as file
references:
•streamName
•URL cast member property
The following elements don’t work in Shockwave content because Shockwave does not support movies in windows
(MIAWs):
•open window
•forget window
•close window

475
USING DIRECTOR 11.5
Using Shockwave Player
Last updated 9/28/2011
Differences in scripting for browsers
•For a movie playing in a browser, it’s best to use preloadNetThing to first load into the browser’s cache the media
elements, external casts, or other movies you might navigate to. If the media elements are not preloaded using
preloadNetThing, linked media elements might not be present when they are needed.
•Avoid using long repeat loops in browsers. Such repeat loops can make the computer appear unresponsive. As an
alternative, you can split long operations into sections and execute them over a series of frames, or check for user
actions in an on exitFrame handler. Remember that the status of any active network operation does not update
while long repeat loops are running.
•Don’t use a repeatwhile loop to check whether a network operation is complete.
Lingo or JavaScript syntax that is unsupported in browsers
The following Lingo or JavaScript syntax features are unsupported for movies that play back in browsers:
•Creating and managing a MIAW
•Installing and managing custom menus
Interacting with browsers
Use setPref() or getPref() to read or write simple text preference files to the Prefs folder found in the Shockwave
Player folder.
Write to a preferences file on a local disk
❖Use the setPref method. For more information about this method, see the Scripting Reference topics in the
Director Help Panel.
After the method runs, a folder named Prefs is created inside the Shockwave Player folder (in the same location as
the Xtras folder). The setPref method can write only to that folder. The default folder locations for Windows and
Mac are described in the following list:
Windows The \Adobe\Shockwave 8 subfolder of the system folder; the system folder is typically c:\winnt\system32
or c:\windows\system
Mac The OS 9 path is the System Folder:Extensions:Adobe:Shockwave 8 folder. The OS X path is /my
Volume/Users/<me>/Library/Application Support/Adobe/Shockwave/prefs.
The setPref method cannot write to a file that is on a CD.
Return the content of a file that was written by a previous setPref method
❖Use the getPref() method. If no setPref method has already written such a file, the getPref() method returns
VOID if called from Lingo or null if called from JavaScript syntax. For more information about this method, see the
Scripting Reference topics in the Director Help Panel.
Specify text in a browser’s status area
❖Use the netStatus method. For more information about this method, see the Scripting Reference topics in the
Director Help Panel.
Note: Some browsers do not support this method.

476
USING DIRECTOR 11.5
Using Shockwave Player
Last updated 9/28/2011
Testing your movie
Regardless of how you create your movie, test it thoroughly before releasing it to the public. Make sure you test on
systems with all common types of Internet connections, especially on slow modems and at busy times of day. See the
following list of items to check, and remember that each movie has its own special needs:
•Compare a streaming version of the movie to a nonstreaming version to see if the performance is different. Some
smaller movies might work better without streaming playback.
•Verify that all linked media elements appear correctly. To see if the movie correctly handles an error, try forcing
the linked media elements to fail.
•Run the movie on all systems your users are likely to have. For the general public, these include Windows 2000, XP,
and Vista. For Mac®-Intel® users, these include OS X 10.4 for Mac®s with Intel® processors. Browsers include
Microsoft® Internet Explorer® 6 or later; Firefox® 2.0 and 3.0, and a color monitor.
•(Critical) Test your movie on a machine that was not used to develop the content.
•Run the movie on slow and fast connections. Problems can arise both.
•Check for display problems on systems set to 8-, 16-, 24-, and 32-bit color. Test as many types of monitors and
display adapters as you can.
•Check for font mapping problems in your movie. If your movie uses nonstandard fonts, use embedded fonts. For
more information, see “Embedding fonts in movies” on page 175.
•Check for sound problems, particularly if you stream sounds with SWA.
Cross-domain policy
The Shockwave Player uses the cross- domain policy file to allow or deny requests from Shockwave movies to load files
from external servers. When the request is made to the server, the Shockwave Player does not invoke the Security
dialog box. The request succeeds if the cross-domain policy file in the Server allows access to the domain.
For more information, see loadPolicyFile() in the Scripting Dictionary.
In Adobe Director, cross-domain checking happens based on policy files, placed on the servers. This means that even
the URLs accessed by the SWFs were being checked by the Shockwave player against the policy file. However, Adobe
Flash player does cross-domain checking through policy files or through other security mechanisms
(security.allowDomain). The checks which were done through the latter mechanism inside Flash player are not
supported in Shockwave and because of this, the content which were accessed by this mechanism will fail to load in
Shockwave player.
Shockwave movie properties
_movie.enableSecurityDialog
Usage
_movie.enableSecurityDialog
Access: Get/Set
Type: Boolean

477
USING DIRECTOR 11.5
Using Shockwave Player
Last updated 9/28/2011
Default value: false
Description
If this property is set to false, then the movie will fail to load. If this property is set to true, then the security dialogs will
appear in the Shockwave movie while trying to access the content and the option of displaying the content is left to the
discretion of the user.
Example
--Lingo Syntax
_movie.enableSecurityDialog = true
//Javascript syntax
_movie.enableSecurityDialog = 1;
See also
cdpCheckMode
cdpCheckMode
Usage
member(whichFlashMember).cdpCheckMode
Access: Get/Set
Default value: useSwPolicy
Description
A Flash cast member property cdpCheckMode, which can be set to either #useMediaPolicy (to use the Flash player’s
cross-domain checks) or #useSWPolicy (to use Shockwave’s cross-domain checks).
When the #useSWPolicy property is set and if the policy file doesn’t have the necessary entry then the content
developer has two options:
•If the movie property enableSecurityDialog is set to true, then the security dialogs will appear in the Shockwave
movie while trying to access the content and the option of displaying the content is left to the discretion of the user.
•If the enableSecurityDialog property is not set to true, then the movie will fail to load.
Example
--Lingo Syntax
-- The following code sets the cdpCheckMode property to
-- #useMediaPolicy, which will enable Flash player's
-- cross-domain checks.
on beginSprite me
member(2).cdpCheckMode = #useMediaPolicy
end
//Javascript syntax
function beginSprite(me){
member(2).cdpCheckMode = symbol("useMediaPolicy");
}
See also
_movie.enableSecurityDialog

478
USING DIRECTOR 11.5
Using Shockwave Player
Last updated 9/28/2011
About downloading speed
Developers distributing multimedia over the Internet usually limit file size, primarily because most users connect at
relatively slow speeds. At 28,800 bps, it takes 30 seconds to 1 minute to download a 60KB file. Using streaming
playback can help you avoid some of the delays caused by downloading large files.
Movies and streaming SWA sounds always compete for control of the network, which can cause a noticeable problem
on slower connections.
The following chart shows theoretical throughput times for various types of network access technology. The rates
calculated for this chart are based on the average throughput rate shown. Actual download times vary and are highly
dependent on the network conditions that exist at the time of download.
Content 28.8 Kbps 56K modem DSL T1
Small graphics and animation, 30KB 15 sec 7 sec 1 sec or less 1 sec or less
Small complete movie, 100KB 45 sec 21 sec 3 sec 1 sec or less
500KB movie 220 sec 107 sec 15 sec 4 sec
1 MB movie -- 213 sec 30 sec 8 sec

479
Last updated 9/28/2011
Index
Numerics
3D behaviors
about 326
action 328
applying 330
groups 330
library 327
triggers 327
types 326
3D Extruder tab (Property inspector) 323
3D Model tab, Property inspector 307
3D models 377
3D properties 21
3D text 322
3D vectors 383
3D window, Shockwave 306
3D world
boxes 328
collision properties and commands 381
defined 312
event handling 380
objects 315
3D Xtra 305
A
accelerating sprites 92
accessibility
captioning 429
features 425
keyboard navigation 425
scripting 430
text-to-speech 428
action behaviors
defined 326
independent 329
local 328
public 329
viewing 328
ActionScript instructions 203
activate a mixer 243
ActiveX 216
Add Inks command 88
Adjust Color filter 141
Airbrush tool, Paint window 108, 111
Align window 76
alternate image options 454
ancestor scripts 292
angularDamping (world) property 476, 477
Animate In Background projector
option 458
animated GIFs 105
animation
Auto Filter bitmap effects 149
Cast To Time command 98
complex model 313
cursor colors 300
defined 90
film loops 99
frame-by-frame 96
modifiers 361
motions 315, 361
onion skinning 127
Paste Relative command 102
playing 329
real-time recording 102
Root Lock button 307
scripting with Lingo or JavaScript 103
Space To Time command 98
step recording 101
transitions 172
anti-aliasing
3D cast members 310
Flash movies 213
setting with Lingo or JavaScript 188
text 181
toon modifier 330
appearance properties, MIAWs (movie in a
window) 397
Apply
Filter 136
arranging sprites 67
ASCII values, keys 300
attaching behaviors 279
attributes, XML 407
audio cast member 241
audio filters 242
audio mixer 241
audio. See sound
Auto Distort command 115
Auto Filter command 149
automatically adjusting line spacing 180
AVI files 462
axis
Camera Rotate tool 306, 307
colors 330
model movement 344
B
background color 83
background operations 467
Background Transparent ink 87
backward compatibility 455
Beep action 284
Behavior channel 14
behaviors
accessibility 425
actions 283
attaching 279
defined 279
descriptions, creating 288
example 288
handlers 285
inheritance 292
jumping 470
library 305
looping 469
navigation controls 293
order, changing 281
parameters, changing 281
parameters, customizing 285
properties, setting 286
sending messages to sprites 290
streaming 469
viewing descriptions 281
writing with Lingo or JavaScript 285
behaviors, 3D
about 326
action 328
applying 330
groups 330
library 327
triggers 327
types 326
behaviors, definition of 23
Bevel filter 139
bevel, 3D text 323

480USING DIRECTOR 11.5
Index
Last updated 9/28/2011
binary operations, vectors 384
bitmaps
animated GIFs 105
Auto Filter command 149
cast member properties 129
color depth 118
color effects 115
compression 131
controlling with script 118
creating 104
cursor colors, animating 300
defined 104
distorting 115
exporting frames as 462
filters 135
flipping 114
fonts 175
gradients 121
image options 45
importing 104
inks 125
moving selected areas 114
onion skinning 127
Paint window 106
PICT files, importing 44
registration points 116
resizing 104, 117
resolution 105
rotating 114
text, converting 184, 187
texture 324
tiling 124
Transform command 117
troubleshooting colors 168
tweenable filters 149
Blend ink 87
blending sprites 84, 198
Blur Filter 138
bold text 178
Bones player
events 364
methods 361
modifiers 361
motions 368
properties 362
boxes
creating 328
properties 333
boxes, text 189
brightness, changing 167
browsers
cache, preloading 472
color palettes 168
HTML file options 452
Lingo and JavaScript support 475
preferences 475
previewing movies 442
Shockwave content support 441
Shockwave support 442
status area 475
tips for 475
URLs, opening 472
Brush tool, Paint window 108, 112
Bucket tool, Paint window 107
Button component, Flash movies 218
buttons 294
C
cache, preloading files 472
callbacks, Flash objects 206, 208
cameras
commands 321
defined 313, 315, 331
group properties 353
manipulating 306, 307, 328, 329
methods 375, 382
model interactions 316
models, moving 343
overview 369
properties 372
resetting 329
canvas, definition of 14
captioning 429
Cast
definition of 11
metaphor explained 10
Cast List view 53
cast members
3D 315
3D worlds 312
ActiveX 216
anti-aliasing 310
bitmap properties 129
button properties 294
compared to sprites 19
copying 49
creating 19, 37
cursors, animated 301
defined 35
digital video 258
downloading, for streaming movies 466
editing 21
editing in Fireworks 134
editing text 178
editors, launching 41, 56
exchanging 95
fields 182, 185
film loop properties 100
finding 41
Flash 195, 197
formatting text 180, 188
frame-by-frame animation 96
importing 19, 42
importing text 177
libraries 59
loading, checking status 470
memory, removing from 46, 434, 435
model resource commands 338
moving 49
naming 48, 53
optimizing 135
Paint window 106
palette properties 168
PICT properties 130
properties, setting with Lingo or
JavaScript 59
properties, setting with Property
inspector 39
properties, viewing 53
renderer services object 388
rendering commands 393
rendering properties 391
scripts, editing 53
scripts, showing in Cast window 48
selecting 49
shapes 157, 158
Show Data Tips 34
sorting 50
sounds, properties 244
sprites, assigning 88
sprites, reusing 79
text, creating 176
thumbnail view 55
thumbnails, custom 56
transition properties 174
types of 18
Xtra properties 60
Cast panels and panel groups
Options menu 51
tabs 52

481USING DIRECTOR 11.5
Index
Last updated 9/28/2011
Cast Thumbnail view 55
Cast To Time command 98
Cast window
controls 52
list view 53
moving members 49
old movies, opening 52
organizing 50
preferences 47
viewing 47
Cast window, definition of 18
casts
creating 36
defined 35
external 36, 57
internal, defined 36
opening in new window 53
preferences 55
properties 39
Change Cast Member action 284
Change Cursor action 284
Change Ink action 284
Change Location action 284
Change Palette action 284
Change Tempo action 284
Changes Only sprite label option 71
channels
behavior 280
behaviors 470
definition of 14
film loops 99
layering sprites 67
number of 16
selecting all sprites 64
showing and hiding 16
sound 244, 247
Space To Time command 98
sprite, naming 66
tempo 170
transitions 172
turning on and off 16
character formatting 178
character sets, XML 409
check boxes 294
child models 339
child nodes, 3D cast members 316
circles, drawing 152
Classic Tool palette 32
clicks, detecting 296
closing MIAWs (movie in a window) 396
closing panels and panel groups 27
collision modifier 359, 381
color
axis 330
brightness 167
cast member properties 168
changing palette 167
controls 160
cursor, animating 300
Darken and Lighten inks 86
effects, bitmaps 115
Favorites, editing 163
Flash movies 198
guides 75
hue 167
importing images 45
inks, Paint window 125
inks, sprite 85, 87
Lingo and JavaScript controls 167
mask effects 85
menu 161
modes 160
Paint window inks 109
palettes, changing during movies 163
RGB and index 160
saturation 167
selecting in Paint window 107
shader properties 344
sprites 83
text 324
troubleshooting 168
color depth
bitmaps 118
changing for movies 161
importing bitmaps 104
movie settings 161
Paint window tools 110
Reset Monitor option 458
troubleshooting 168
Color menu 161
color palette 21
Color Palettes window 164
color, selecting RGB or index 21
comments, cast members 36
components, Flash 218
compression
bitmaps 131
JPEG 105
projector players 445
Shockwave 451
Shockwave Audio 248
Shockwave movies 468
Concavity (dynamic concave rigid
bodies) 421
contactTolerance (world) property 477
context menu, Authorware Player 212
Continuous At Endpoints tweening
option 94
Control panel
definition of 17
displaying and hiding 17
using 18
Control toolbar, displaying and hiding 17
Convert To Bitmap command 184
Convolution Matrix filter 145
coordinates, sprites 73
Copy ink 87
copying
cast members 49
frames 35
keyframes 94
Paste Relative command 102
sprites 77
copyright date, setting 22
corner points in vector shapes 152
Create
Filter 136
creating
3D text 322
bitmaps 104
cast members 19, 37
casts 36
custom cast member thumbnails 56
custom tiles 124
editable text 183
external casts 57
fields 182
film loops 100
guides 75
hypertext links 182
libraries 59
MIAWs (movie in a window) 395
new markers 15
particle systems 328
projectors 458
sprites 61
text cast members 176
vector shapes 150
vectors 383
cropping videos 265

482USING DIRECTOR 11.5
Index
Last updated 9/28/2011
cross-platform font mapping 184
cross-platform keyboards 299
cross-platform projectors 460
cue points, synchronizing 251
cursors
animated color cursors 300
behaviors 283
finding location 299
Flash movies 199
rollovers 329
trigger behaviors 327
Curvature tweening control 94
curves
creating 152
defined 150
joining and splitting 154
reshaping 154
smoothness 330
custom cast member thumbnails,
creating 56
custom tiles, creating 124
customizing your workspace 24
cylinders 333
D
Darken button, Paint window 115
Darken ink 86
Darkest ink 87
data, obtaining from a network 470
DCR files
creating 446
distributing 445
previewing in browsers 442
settings 446
debugging movies 23
decelerating sprites 92
decreasing view of Stage 13
Default Tool palette 32
default workspace, settings of 11
deleting
Cast panels from groups 51
frames 35
guides 75
deleting panel sets 27
deploying movies. See distributing movies
Depth (dynamic concave rigid bodies) 421
detecting mouse clicks 296
digital video
AVI files, importing 43
cast member properties 258
controlling in the Score 256
controlling QuickTime with Lingo 259
controlling with Lingo 256
cropping 265
Direct To Stage 255
Direct To Stage option 308
exporting 462
exporting QuickTime 463
importing 253
preloading 436
synchronizing with cue points 251, 267
turning tracks on and off with Lingo 257
using on the Internet 266
Video window 255
Direct To Stage option 255, 308
Director, features 304
disks, distributing movies 446
Displacement Map filter 146
Display Template tab on Property
inspector 33
Display Template, MIAWs (movie in a
window) 400
displaying windows 12
dissolve transition 172
distorting images 115
distributing movies
accessibility 432
disks 446
formats 445
local networks 446
methods 441
project management tips 437
protected formats 445
Publish command 446
testing 476
URLs 446
Xtra extensions 443, 444
dithering 118
dockable MIAWs (movie in a window) 399
docking channels 24
docking panels and panel groups 26
docking Tool palette 32
document windows, definition of 12
dolly camera 329
downloading
alternate image options 454
cast members 466
looping behaviors 469
speed 478
status, checking 470
streaming movies, options 468
using Lingo or JavaScript 470
Xtra extensions 443
dragging camera 328
drawing tools 32
drawRect property 396
Drop Shadow filter 144
Dropper tool, Paint window 107
dswmedia folder 254, 454, 474
duration of sprites 78
DXR files 445
dynamic concave rigid bodies 421
E
Ease-In And Ease-Out tweening option 92,
95
editable text 183
editing
3D text 323
bitmaps 104
cast member scripts 53
cast members in Fireworks 134
Favorite color 163
fields 182
film loops 100
Flash cast members 197
frames 34
gradients, bitmap 121
image objects 119
movies 21
palettes 165, 167
patterns 123
protected movies 445
sprite frames 95
sprites and cast members 21
text 178
vector shapes 154
editors, cast members 41, 56
effects
filters 135
Paint window buttons 114
effects channels
definition of 14
showing and hiding 16
Ellipse tool 152
ellipses, drawing 152
embedded fonts 175
end points
adding 154
creating 152

483USING DIRECTOR 11.5
Index
Last updated 9/28/2011
engraver shader 351
Enter Frame event 284
Eraser tool, Paint window 107
event handlers 380
events
ActiveX 217
behaviors 283
Flash components 220
MIAWs (movie in a window) 400
Every Frame sprite label option 71
Exchange Cast Members command 95
Exit Frame event 284
expander arrow in Property inspector 20
exporting
movies as digital video 462
QuickTime options 463
Extended Display option 34
extending sprites 78
extensions. See Xtra extensions
external casts
creating 57
defined 36
external sounds 240
Extreme tweening option 94
extruder model resource 338
Eyedropper tool, Paint window 107
F
F4V 253
Fade To Black/White 164
fading sprites 84
Favorite colors, editing 163
field text 175
fields
creating 182
properties 185
string checking 190
user click detection 298
files
compression 105
downloading with Lingo or
JavaScript 470
downloading, speed 478
importing 42
linking to 45
preloading 472
project management 437
projectors, options 449
types supported 44
URL references 474
Fill color, Paint window 115
fill settings for vector shapes 153
film loops 100
Filter
Apply 136
Create 136
Install 136
Modify 137
filters, bitmaps 135
finding
cast members 41
sprites 66
text 181
Fireworks
bitmap compression settings 131
editing cast members 134
importing files into Director 132
First Frame sprite label option 71
Flash asset commonPlayer 195
Flash component Tool palette 32
Flash Media Server 210
Flash movies
ActionScript instructions 203
Button component 218
components 218
context menu 212
controlling with Lingo or JavaScript
syntax 198
creating cast members 195
editing 197
events 220
importing 194
local connection object 207
performance tips 213
playback 200
playback settings 195
Settings panel 212
Stage, placing on 200
streaming 200
tips for using 196
variables, testing 201
XML data, sending to Director 205
Flash objects 205
Flip button, Paint window 114
flipping
Flash movies with Lingo 198
sprites 83
FLV 253
font maps 22
fonts
3D text 322
character sets, XML 409
embedding in a movie 175
mapping across platforms 184
Foreground and Background color 83
formatting
fields 182
paragraphs 179
text 178
text inspector 180
frame-by-frame animation 90, 96
frames
adding 35
behaviors, attaching 280
definition of 15
duration, setting 78
editing in Score 34
events 284
exporting as bitmaps 462
jumping to 295
loading status, checking 470
Lock Frame Durations 172
looping 295, 469
moving sprites 77
moving sprites in 77
navigating 16, 18
Paste Relative command 102
Preload options 39
printing 439
returning to 295
selecting within a sprite 64
sound controls 244
tempo 170
transitions 172
functions, Flash movies 201
G
getURL 203
Ghost ink 87
GIFs, animated 105
Glow Filter 138
Go To Frame action 284
Go To Marker action 284
Go To Movie action 284
Go To Net Page action 284
Google SketchUp 377
gotoNetMovie command 295
gotoNetPage command 295
Gradient bevel filter 142

484USING DIRECTOR 11.5
Index
Last updated 9/28/2011
Gradient Glow filter 141
gradients
bitmaps 121
vector shapes 156
graphical view mode in Property
inspector 20
grid
configuring 76
positioning sprites 75
properties, setting 33
grouping Cast panels 51
groups
commands 322
defined 313, 315
methods 354
parameters 330
properties 353
guides
color 75
positioning sprites 75
properties, setting 33
Guides tab on Property inspector 33
H
Hand tool, Paint window 107
handlers
anti-aliasing, turning on and off 311
behaviors 285
callback 208
events 380
Lingo or JavaScript events 380
MIAWs (movie in a window) 400
on getPropertyDescriptionList 287
scripts 380
handles 150
handwriting, simulating 102
hiding
effects channels 16
information in Property inspector 20
windows 12
HTML files
browser options 452
previewing in browsers 442
settings 446
HTML, compared to XML 403
HTTP servers 473
hue, changing 167
hypertext links, creating 182
I
icons, Cast Thumbnail view 55
image objects
creating with script 119
editing 119
Image Options dialog box 45
image options, Shockwave 454
Import Pict File As PICT option 44
importing cast members 19
importing media
ActiveX 216
animated GIFs 105
bitmaps 104
cast members 42
color palette requirements 168
digital video 253
Director movies 214
file types supported 44
Fireworks files 132
Flash movies 194
image options 45
JPEG files 105
linking to files 45
managing projects 437
sound 240
text 177
Include Original Data For Editing option 44
increasing view of Stage 13
independent actions 329
independent behaviors 326
index color 21
mode settings 160
inheritance, behaviors 292
inker modifier 358
inks, Paint window 110, 125
inks, sprite
Darken and Lighten 86
Mask 85
settings 85
types of 87
Insert Blank Frames To Make Room
option 35
Install
Filter 136
interactive features 293
internal casts, defined 36
internal sounds
compressing 248
importing 240
Internet
color palettes 168
digital video and 266
distributing movies 446
downloading files with Lingo or
JavaScript 470
linked media 45
sound, streaming 240
speed 478
streaming movies 466
introduction to Director 10
introduction to workspace 11
Invert colors, Paint window 115
italic text 178
J
JavaScript syntax
3D text methods and properties 324
animating sprites 103
assigning cast members to sprites 88
behaviors, writing 285
bitmap controls 118
browser support 475
cast member properties, changing 59
cursor location detection 299
downloading files 470
editable sprites 297
Flash movies 198
handlers 380
importing files 44
introduction to 22
jumping 294
keyboard detection 299
MIAWs (movie in a window)
properties 397
mouse click detection 296
naming cast members 49
naming sprites 66
network operation results 473
positioning sprites 76
rollovers 298
security limitations 473
sound controls 246
sprite properties 72
streaming Flash movies 200
streaming media controls 470
streaming sound 250
strings, checking 190
synchronizing sound 252
tempo controls 172

485USING DIRECTOR 11.5
Index
Last updated 9/28/2011
text, formatting 187
text, importing 177
text, user click detection 298
text-to-speech scripting 430
transitions 174
URL references 474
vector shape attributes 153
vector shape controls 156
joining
curves, vector shapes 154
sprites 79
JPEG files, importing 105
jumping 294, 470
jumping to markers 15
K
kerning 179, 181, 186
Key Down event 284
Key Up event 284
keyboards
accessibility navigation 425
cross-platform equivalents 299
press detection 299
trigger behaviors 327
keyframe animation
events 367
methods 365
modifiers 361
motions 368
properties 365
keyframes
duplicating 94
properties 90
selecting 64
showing path 91
L
labels, sprite 71
LANs, distributing movies on 446
Lasso tool, Paint window 106, 110
launching cast member editors 41, 56
layering
MIAWs (movie in a window) 400
sprites 67
level of detail (LOD) modifiers 329, 356
libraries, creating new 59
Library palette, behaviors
3D 327
attaching behaviors 279
viewing descriptions 281
Lighten button, Paint window 115
Lighten ink 86
Lightest ink 87
lights
commands 320
defined 313, 315, 331
group properties 353
methods 371
model interactions 316
overview 369
properties 369
Property inspector 308
text 324
line settings for vector shapes 153
line spacing, adjusting automatically 180
Linear tweening option 94
lines, Paint window tools 109
Lingo syntax
3D text methods and properties 324
animating sprites 103
assigning cast members to sprites 88
behaviors, writing 285
bitmap controls 118
browser support 475
cast member properties, changing 59
cursor location detection 299
downloading files 470
editable sprites 297
Flash movies 198
handlers 380
importing files 44
jumping 294
keyboard detection 299
MIAWs (movie in a window)
properties 397
mouse click detection 296
naming cast members 49
naming sprites 66
network operation results 473
positioning sprites 76
rollovers 298
security limitations 473
sound controls 246
sprite properties 72
streaming Flash movies 200
streaming media controls 470
streaming sound 250
strings, checking 190
synchronizing sound 252
tempo controls 172
text, formatting 187
text, importing 177
text, user click detection 298
text-to-speech scripts 430
transitions 174
URL references 474
vector shape attributes 153
vector shape controls 156
Lingo, introduction to 22
Link To External File option 43
linking
Director movies 214
external casts 57
file structure 437
media files 45
sounds 240
testing 455
links, hypertext 182
list view mode in Property inspector 20
loading cast members 46, 434, 435
loading, checking status 470
local actions 328
local behaviors 326
local connection object 207
local folders 454
local networks, distributing movies on 446
location of Stage 22
Lock Frame Durations option 172
locking sprites 72
looping
behaviors 469
browser support 475
frames 295
sounds 245
loops, film 100
M
Macintosh
browsers supported 441, 442
font mapping 184
keyboards 299
projectors 460
Magnifying Glass tool, Paint window 107
Maintain Outdated Ink Mode Limitations
option 455
managing projects 437, 464
mapping fonts 22, 184
markers 15
Markers channel 14
markers, playhead 329

486USING DIRECTOR 11.5
Index
Last updated 9/28/2011
Marquee tool, Paint window 107, 111
Mask ink 85
masks, for QuickTime 259
math, vector 383
Matte ink 87
media
importing 42
linking 45
project management 437
media Xtra extensions 29
memory
MIAWs (movie in a window) 396
sounds, importing 240
textures 351
unloading cast members 46, 434, 435
Xtra extensions 443
Memory inspector 434
memory, preloading content into 14
Merge Volume (dynamic concave rigid
bodies) 421
mesh deform modifier 368
mesh generator 334, 336
Message window 23
messages, sending to sprites 290
methods
ActiveX 217
Bones player 361
cameras 375, 382
collision 381
downloading files 471
event handling 380
keyframe animation 365
lights 371
models 341
rendering 393
sprites 393
textures 353
transforms 386
vectors 383
MIAWs (movie in a window)
appearance properties 397
browsers, not supported 475
closing 396
creating 395
dockable 399
events 400
interaction, controlling 401
layering 400
listing current 401
naming 395
objects 394
opening 395
setting size and location 396
mixer 241
mixer asset reference 243
model resources
about 331
boxes 333
cast members 338
commands 316
cylinders 333
defined 312, 316, 331
extruder 338
mesh generator 334
particle systems 336
planes 334
primitives 332
properties 331
spheres 332
models
3D Xtra 305
automatic rotation 329
cast members 338
commands 317
defined 312, 315
group properties 353
interaction with cameras and lights 316
methods 341
moving 328, 343
parent-child hierarchy 339
properties 340
selecting 382
transforms 384
modes, color 160
modes, Tool palette 32
modifier keys 327
modifiers
animation 361
collision 359, 381
defined 313, 356
inker 358
level of detail (LOD) 329, 356
mesh deform 368
renderer services object 388
subdivision surfaces (SDS) 330, 358
toon 330, 357
Modify
Filter 137
Modify Filter
Script 138
motions
commands 320
defined 315
interaction with models 316
keyframe and bones 361
methods 369
properties 368
mouse
clicks, detecting 296
cursor colors, animating 300
Flash movies 199
pointer location detection 299
rollovers 298, 329
trigger behaviors 327
Mouse Down event 283
Mouse Enter event 284
Mouse Leave event 284
Mouse Up event 283
Mouse Within event 284
movie in a window. See MIAWs (movie in a
window)
Movie tab 21
Movie tab, Property inspector 161
movies
accessibility 425
adding copyright date to 22
browsers, playing in 475
browsers, previewing in 442
captioning 429
changing color depth of 161
changing sound volume of 18
color modes 160
color palettes, changing 163
cursors, animated color 302
disks 446
distribution formats 445
exporting as digital video 462
exporting QuickTime 463
external casts 57
Flash 194
fonts, embedding 175
importing Director within Director 214
linked media 45
linked, properties 215
local connection object 207
local network distribution 446
old versions, opening 52
older versions, converting 455
organizing 464
pausing 295

487USING DIRECTOR 11.5
Index
Last updated 9/28/2011
printing 439
properties of 20
protected 445
Publish command 446
rendering properties 390
safe mode 454
saving as Shockwave content 446
selecting colors for 21
setting properties of 21
starting, stopping, and rewinding 18
streaming 466
tempo 170
testing 438, 455, 476
Update command 461
windows. See MIAWs (movie in a
window)
Xtra extensions 443, 444
Xtra extensions in 30
moving
accelerating and decelerating sprites 92
cast members 53
cast members in window 49
frames 35
guides 75
keyframes 94
models 328, 343
selected bitmap areas 114
sprites 74, 77
moving around on Stage 13
MP3 audio
controlling with Lingo or JavaScript 250
streaming 249
MP4Media formats 253
MP4Media member 254
multiple undo 9
N
naming
cast members 48, 53
Cast panel groups 52
MIAWs (movie in a window) 395
sprite channels 66
sprites 65
navigating to markers 15
navigation
accessibility 425
behaviors 293
interactive features 293
jumping to different locations 294
returning to original frame 295
NetConnection object 210
NetStream object 210
network operations
background loading 467
downloading files 470
results, retrieving 473
security 473
speed 478
networks, local 446
new
cast members 37
casts 36
film loops 100
guides 75
sprites 61
tiles, custom 124
New Action 284
newsprint shader 351
nodes
3D cast members 316
models 340
XML 405, 408
Not Copy ink 87
Not Ghost ink 87
Not Reverse ink 87
Not Transparent ink 87
O
object-relative model movement 344
objects
3D 315
Flash 205
local connection 207
MIAWs (movie in a window) 394
renderer services 388
scripts 380
vector 383
offscreen graphics buffer 308
offstage canvas 14
old versions
converting movies 455
opening movies 52
Update Movies command 461
on getPropertyDescriptionList handler 287
onion skinning 127
onstage canvas 14
opening
casts in new windows 53
MIAWs (movie in a window) 395
old movies 52
opening panel sets 27
opening panels and panel groups 27
optimizing cast members 135
Options menu, Cast panel 51
Options menu, location of 24
organizing
files 437
movies 464
outlining edges of bitmaps 114
Overwrite Existing Sprites option 35
P
Paint Brush tool 108, 112
Paint window
Effects toolbar 114
inks 125
opening 106
preferences 130
registration points 116
rulers 113
tools 106
zooming 113
painter shader properties 350
palette 21
Palette channel 14
palettes
transitions 164
palettes, color
changing colors in 167
changing during movies 163
editing 165
importing 168
Lingo and JavaScript controls 167
modes 160
properties 168
remapping 118
troubleshooting 168
window 164
pan camera 329
panel groups
adding new tabs to 25
closing, opening, and collapsing 27
custom versus default 25
customizing 24
definition of 24
docking 26
rearranging tabs in 26
renaming 26

488USING DIRECTOR 11.5
Index
Last updated 9/28/2011
panel sets
definition of 24
saving, opening, and removing 27
panels
closing, opening, and collapsing 27
definition of 24
docking 26
moving between panel groups 25
panning QuickTime VR 260
paragraph formatting 179, 188
parameters, behaviors 279, 285, 330
parent models 339
parent nodes, 3D cast members 316
parent scripts 292
parent-relative model movement 344
parser objects, XML 404, 408
Parser, XML
about 403
character sets 409
objects 404
white space, ignoring 408
particle systems
creating 328
primitives 331
properties 336
Paste As Pict command 129
Paste Relative command 102
pasting
frames 35
keyframes 94
sprites 102
paths, tweening sprites 91
patterns, Paint window tools 109, 123
pausing a movie 295
Pen tool
adding points 154
creating shapes 151
Pencil tool, Paint window 108
Perform Transition action 284
Perspective button, Paint window 114
picking models 382
PICT files
importing 44
Paste As command 129
properties 130
planes 334
platforms
font mapping 184
keyboards 299
projectors 460
Play Cast Member action 284
play done method 295
Play Every Frame digital video property 255
Play External File action 284
play method 295
Playback options, Shockwave 468
playhead
behaviors 469
jumping behaviors 470
location of 15
markers 329
moving 16
sprites, extending 78
playing Flash movies 200
PNG images, importing 132
pointers, mouse
behaviors 283
click detection 296
cursor colors, animating 300
Flash movies 199
location detection 299
rollovers 298, 329
trigger behaviors 327
points
adding 154
creating 152
positioning sprites 73
preferences
browsers 475
Cast window 47
for windows 12
number of sprite channels 16
Paint window 130
Score 34
sprites 62
preloading
cast members 39
files into browser cache 472
preloading digital video 436
Prepare Frame event 284
pre-rendered text, Save Bitmap
command 187
Preview In Browser command 442
previous versions
opening movies 52, 455
Update Movies command 461
primitives 331, 332
printing movies 439
projectors
about 458
creating 458
cross-platform 460
defined 441, 445
options 449
organizing 464
Xtra extensions 443, 444
Xtra extensions, excluding 460
projects, managing 437, 464
properties
ActiveX 216
animated GIFs 106
behaviors 286
bitmaps 129
Bones player 362
boxes 333
buttons 294
cameras 372
cast member 39
collision modifier 359, 381
Director movies 215
fields 185
film loops 100
groups 353
inker modifier 358
keyframe animation 365
keyframes 90
lights 369
mesh generator 334
MIAWs (movie in a window) 397
model resources 331
models 340
modifiers 356
motions 368
painter shader 350
palette 168
planes 334
renderer services object 389
rendering 390
shaders 344
sound 244
spheres 332
sprites 67
textures 351
toon modifier 357
transforms 385
transitions 174
tweening 90, 93, 94
vector shapes 157

489USING DIRECTOR 11.5
Index
Last updated 9/28/2011
vectors 383
Xtra cast members 60
Property inspector
3D Extruder tab 323
3D Model tab 307
changing view of 20
definition of 11, 20
editing cast members and sprites 21
Guides tab 75
Guides tab, Stage 33
information not appearing in 20
Member tab 36, 39
MIAWs (movie in a window) 400
Movie tab 161
new features 305
setting 3D properties 21
setting movie properties 21
sprites 68
Stage 33
Text tab 322
protected movies 445
public actions 329
public behaviors 326
Publish settings
changing 447
default 446
Files tab 449
HTML 452
Image tab 454
Projector tab 449
Shockwave tab 451
purgePriority 434
push buttons 294
Q
QuickTime
controlling with Lingo 259
exporting options 463
importing files 43
masks 259
QuickTime VR
inserting 260
panning 260
R
radio buttons 294
radius properties 333
real-time recording 102
rect property 396
Rectangle tool 152
rectangles, drawing 152
redraw mode 329
Registration Point tool, Paint window 107
registration points 116
registration points, sprites 74
remapping colors in bitmaps 118
removing panel sets 27
renderer services object 388
rendering
methods 309, 393
properties 390
reset a mixer 243
Reset Monitor option 458
resizing
bitmaps 104, 117
Flash movies 199
HTML pages 452
rotated or skewed sprites 82
sprites 80
vector shapes 104, 155
resolution for screen images 105
Restore Cursor action 284
returning to original frames 295
Reverse ink 87
rewinding movies 18
RGB color 21
Darken and Lighten inks 86
mode settings 160
sprites, changing 83
Right Mouse Down event 284
Right Mouse Up event 283
rollovers 298, 329
Rotate button, Paint window 114
rotating
cameras 306, 307
models 329, 343
sprites 81, 198
RTF files, importing 44
rulers
Paint window 113
S
safe mode 454
saturation, color 167
Save All command 58
Save As Shockwave Movie command 446
Save Bitmap command 187
saving panel sets 27
scaling
bitmaps 104, 117
Flash movies 199
HTML pages 452
rotated or skewed sprites 82
sprites 80
vector shapes 104, 155
Score
Cast To Time command 98
compared to Stage 14
definition of 11, 14
digital video in 256
editing frames 34
film loops 99
frames in 15
metaphor explained 10
navigating 16, 18
number of sprite channels in 16
playhead in 15
preferences 34
sound controls 244
Space To Time command 98
sprite display settings 34
sprite labels 71
sprites, viewing by name 65
streaming movies, behavior 469
tempo 170
turning channels on and off 16
windows, using multiple 34
zooming 17
screen resolution for graphics 105
Script window, creating cast members in 38
Script window, definition of 22
scripting
ActionScript instructions 203
editing 53
handlers 380
Preview option 34
showing in Cast window 48
Xtra extensions 29
scripts, behavior inheritance 292
scripts, testing and debugging scripts 23
scroll bar, displaying on Stage 185
scrolling text 189
searching for
cast members 41
sprites 66
text 181

490USING DIRECTOR 11.5
Index
Last updated 9/28/2011
security
Lingo and JavaScript limitations 473
Shockwave linked media 254
selecting
cast members 49
Flash components 218
keyframes 64
models 382
Paint window tools 106, 110
sprites 62
text 178
vertex 152
sending messages to sprites 290
Set Volume action 284
setting properties
movies 21
sprites and cast members 21
Settings panel, Flash movies 212
shaders
commands 318
defined 315
engraver 351
interactions with models 316
newsprint 351
painter 350
properties 344
Property inspector 308
text 324
shape cast members 157
shape drawing tools, Paint window 108
Sharp Changes tweening option 92, 94
shocked fonts 175
Shockwave
alternate image options 454
backward compatibility 455
browsers supported 441, 442
context menu, disabling 212
linking to local media 254
MIAWs, not supported 394
options 451
playback options 468
Preview in Browser command 442
Publish command 446
safe mode 454
testing movies 476
Xtra extensions 443, 444
Shockwave 3D window 306
Shockwave Audio
compressing internal sounds 248
controlling with Lingo or JavaScript 250
description of 248
Shockwave content
distribution formats 441, 445
saving movies 446
Show Data Tips 34
Show Paths command 91
showing effects channels 16
showing more or less of Property
inspector 20
silhouettes 358
size of Stage 21
Skew button, Paint window 114
skewing sprites 81, 198
Smooth button, Paint window 115
Smooth Changes tweening option 92, 95
smoothness
anti-aliasing 310
curves 330
text 323
Snap To Grid 33, 75
Snap To Guides 33, 75
sorting
Cast List 54
cast members 50
sound
AVI files 462
cast member properties 244
channel 244
channels 247
compressing internal 248
controlling with Lingo or JavaScript 250
importing 240
Lingo and JavaScript controls 246
looping 245
playing external 250
Shockwave Audio 248
streaming Shockwave Audio 249
streaming, formats supported 240
synchronizing with cue points 251, 267
transitions, playing during 173
Windows issues 246
WMA files 247
Sound channels 14
sound object 241
sounds, changing volume of 18
sourceRect property 396
Space To Time command 98
spacing, lines 180
Speech Xtra 432
speech, converting text to 428, 430
speed
downloading 478
Lock Frame Durations 172
network operations 467
particles 338
tempo 170
tweening 92
spheres 328, 332
splash screens 195
splitting
sprites 79
vector curves 154
sprite channels
definition of 14
setting the number of 16
Sprite Overlay 69
Sprite toolbar 69
sprites
3D behaviors, attaching 330
Align window 76
anti-aliasing 310
assigning cast members 88
behaviors, attaching 280
blending 84
cast members, exchanging 95
cast members, reusing 79
Cast To Time command 98
changing frames 77
channels, naming 66
color settings 83, 161
compared to cast members 19
coordinates 73
copying 77
creating 61
Darken and Lighten inks 86
defined 61
Direct To Stage option 308
draggable 297
duration, changing 78
editable 297
editing 21
editing frames 34, 95
finding 66
flipping 83
frame-by-frame animation 96
inks 85
introduction to 10

491USING DIRECTOR 11.5
Index
Last updated 9/28/2011
joining 79
labels 71
layering 67
locking and unlocking 72
Mask ink 85
moving to different frames 77
naming 65
Overlay 69
Paste Relative command 102
paths, tweening 91
positioning 73
preferences 62
properties 67, 72
rendering commands 393
rendering properties 393
resizing 80
resizing rotated or skewed 82
rollovers 298
rotating and skewing 81
Score display, settings 34
selecting 62
sending messages to 290
Snap features 75
Snap To Grid 33
Snap To Guides 33
Space To Time command 98
speed, settings 92
splitting 79
step recording 101
toolbar 69
Trails option 68, 102
transitions 172
Tweak window 74
tweening 90
tweening properties 93
tweening settings 94
Width and Height settings 69
Stage
cast members, creating in 38
color 161
compared to Score 14
definition of 11, 13
Direct To Stage option 308
Flash movies, placing 200
guides and grid 33
location of 22
metaphor explained 10
moving around on 13
moving sprites 77
offstage canvas 14
positioning sprites 74
Property inspector 33
rendering methods 309
size of 21
Sprite Overlay 69
sprites, viewing by name 65
zooming 13
Standard Import option 43
standard mode in Message window 24
starting movies 18
step recording 101
stepping through movies 18
stopping movies 18
Storyboard Format 440
streaming
controlling with Lingo or JavaScript 470
Flash movies 200
loading status, checking 470
movies 466
playback options 468
score-based 469
Shockwave Audio 248, 249
sound, formats supported 240
WMA files 247
streaming member 241
strings, checking 190
stroke settings for vector shapes 153
subdivision surfaces (SDS) 330, 358
Subtract ink 88
Switch Colors button, Paint window 115
Sync To Soundtrack digital video
property 255
synchronizing
cue points with Lingo 252
events 170
sound 251
T
tabbing, text 189
tabs in panel groups, rearranging 26
tabs, Cast panel
rearranging 52
saving 52
tempo
channel 170
comparing actual 171
controlling from Lingo or JavaScript 172
Lock Frame Durations 172
settings 170
Tempo channel 14
testing movies 23, 438, 455, 476
text
3D 322
anti-aliased 181
character formatting 178
converting to bitmap 184, 187
creating 176
editable 183
editing 178
embedding in a movie 175
features 175
field 175
field properties 185
finding and replacing 181
font mapping, cross-platform 184
formatting cast members 180
formatting from Lingo or JavaScript 187
hypertext links 182
importing 177
inspector, formatting with 180
kerning 181
line spacing 180
Paint window tool 108
paragraph formatting 179
printing 439
scrolling 189
selecting 178
user click detection 298
wrapping and tabbing 189
text boxes, formatting with Lingo or
JavaScript 189
text files, importing 44
text-to-speech scripting 428, 430
textures
commands 319
defined 315, 351
interactions with models 316
mesh generator 335
methods 353
properties 351
text 324
thumbnails, cast members
custom, creating 56
preferences 48
viewing icons 55
tiles, custom 124
Tool palette 32
tool windows, definition of 12
toon modifier 330, 357
Trace Edges button, Paint window 114

492USING DIRECTOR 11.5
Index
Last updated 9/28/2011
trace mode in Message window 24
Trails option
redraw mode 329
sprites 68, 102
Transform Bitmap command 117
transforms 384
Transition channel 14
transition Xtra extensions 30
transitions 164, 172
transparency effects, sprites 85
Transparent ink 87
trigger behaviors
defined 326
groups 330
parameters 330
viewing 327
troubleshooting
color palettes 168
resources 440
testing movies 438
Truncate Sprites Being Pasted option 35
tunnel depth 323
turning channels on and off 16
Tweak window 74
tweening
bitmap filters 149
defined 90
paths 91
properties 90
settings, changing 94
speed 92
sprite properties 93
sprites 90
tips 93
U
undo actions 9
undocking panels and panel groups 26
unlinking external casts 57
unloading cast members 46, 434, 435
unlocking sprites 72
Update Movies command 461
updating movies from older versions 455
URLs
distributing movies 446
getURL action 203
jumping to 295
maximum length 45
opening in browsers 472
references in Lingo or JavaScript 474
third-party extensions 443
user interaction 293
V
variables, Flash movies 201
vector objects 383
Vector Shape window
defined 150
editing shapes 154
zooming 151
vector shapes
cast members 157, 158
color settings 161
controlling with Lingo or JavaScript 157
corner points 152
creating 150
curve points 152
defined 104
editing 154
fill and line settings 153
gradients 156
Pen tool 151
properties 157
resizing 104
scaling 155
setting attributes with Lingo or
JavaScript 153
Verisign Xtra downloading 444
versions, previous
opening movies 52, 455
Update Movies command 461
vertex
colors 150
defined 150
selecting 152
Video window 255
video. See digital video
View Port 26
Volume Control 468
volume, changing 18
W
Wait For Cue Point tempo option 171
Wait For Mouse Click tempo option 171
Wait For Time Duration action 284
Wait On Current Frame action 284
Wait Until Click action 284
Wait Until Key Press action 284
Warp button, Paint window 114
Web216 color palette 164, 168
Window menu 12
Windows
ActiveX 216
browsers supported 441, 442
font mapping 184
keyboards 299
projectors 460
sound issues 246
windows
changing preferences 12
displaying and hiding 12
moving between panel groups 25
types of 12
Windows Media Audio (WMA) 247
windows, movies in. See MIAWs (movie in a
window)
windows, using multiple Score 34
WMA (Windows Media Audio) 247
workspace
customizing 12, 24
default settings of 11
world-relative model movement 344
wrapping, text 189
X
XML
about 403
attributes 407
character sets 409
data, sending from Flash to Director 205
nodes 405, 408
parser objects 404, 408
websites, resources 403
white space, ignoring 408
Xtra extensions
3D 305
Auto Filter command 149
bitmap filters 135
cast member properties 60
cursor animation support 300
definition of 28
distributing movies 443, 444
excluding from projectors 460
included 443
linked media 45
media 29
packaging movies with 30
scripting 29
Speech 432

