Corel CorelDRAW® Graphics Suite 12 User Guide Draw CDraw UG EN
User Manual: corel Corel Draw Graphics Suite - 12 - User Guide Free User Guide for Corel Draw Software, Manual
Open the PDF directly: View PDF ![]() .
.
Page Count: 574 [warning: Documents this large are best viewed by clicking the View PDF Link!]
- Book contents
- Table of contents
- CorelDRAW Graphics Suite 12 User Guide
- Welcome
- CorelDRAW Graphics Suite 12 applications
- What’s new in CorelDRAW Graphics Suite 12
- Installing and uninstalling applications
- Changing the language of the user interface and Help
- Registering Corel products
- Updating Corel products
- Corel Support Services
- Documentation conventions
- Getting help
- Using CorelTUTOR
- VBA Programming Guide
- Customer feedback
- Other resources
- About Corel Corporation
- CorelDRAW
- Workspace tour
- Getting started in CorelDRAW
- Starting and opening drawings
- Finding and inserting drawing content
- Exploring the basic features of CorelDRAW
- Working with templates
- Undoing, redoing, and repeating actions
- Accessing drawing information
- Zooming and panning
- Previewing a drawing
- Backing up and recovering files
- Saving drawings
- Closing drawings and quitting CorelDRAW
- Working with lines, outlines, and brush strokes
- Drawing shapes
- Working with objects
- Selecting objects
- Copying, duplicating, and deleting objects
- Copying object properties, transformations, and effects
- Positioning objects
- Aligning and distributing objects
- Snapping objects
- Using dynamic guides
- Changing the order of objects
- Sizing and scaling objects
- Rotating and mirroring objects
- Grouping objects
- Combining objects
- Shaping objects
- Working with curve objects
- Skewing and stretching objects
- Smudging objects
- Roughening objects
- Applying distortion effects
- Shaping objects using envelopes
- Splitting and erasing portions of objects
- Trimming objects
- Welding and intersecting objects
- Blending objects
- To blend objects
- To copy or clone a blend
- To set the distance for intermediate objects in a blend fitted to a path
- To set the color progression for intermediate objects in a blend
- To map the nodes of a blend
- To work with the start or end objects in a blend
- To change the blend path
- To split a blend
- To remove a blend
- Creating PowerClip objects
- Working with symbols
- Filling objects
- Working with color
- Managing color for display, input, and output
- Adding three-dimensional effects to objects
- Changing the transparency of objects
- Using lenses with objects
- Working with pages and layout tools
- Working with layers
- Adding and formatting text
- Adding and selecting text
- Encoding text
- Changing the appearance of text
- Finding, editing, and converting text
- Aligning and spacing text
- Shifting and rotating text
- Moving text
- Fitting text to a path
- Formatting paragraph text
- Combining and linking paragraph text frames
- Wrapping paragraph text around objects and text
- Embedding graphics and adding special characters
- Managing fonts
- Working with bitmaps
- Changing color modes in bitmaps
- Creating Web-enabled objects
- Publishing to the Web
- Managing projects
- Printing
- Commercial printing
- Publishing to PDF
- Importing and exporting files
- Working with graphic, text, and color styles
- From Adobe Illustrator to CorelDRAW
- Corel R.A.V.E.
- Workspace tour
- Getting started in Corel R.A.V.E.
- Animating objects
- Editing and previewing animation
- Animating text
- Corel PHOTO-PAINT
- Corel PHOTO-PAINT workspace tour
- Viewing images and obtaining image information
- Working with color
- Changing color modes
- Bringing images into Corel PHOTO-PAINT
- Cropping and changing orientation
- Adjusting color and tone
- Changing image dimensions, resolution, and paper size
- Retouching
- Working with lenses
- Masking
- Applying special effects
- Painting
- Filling images
- Working with objects
- Modifying objects
- Creating images for the Web
- Saving and closing
- Managing color for display, input, and output
- Printing
- Glossary
- CorelDRAW Index
- Corel R.A.V.E. Index
- Corel PHOTO-PAINT Index
CorelDRAW® Graphics Suite 12 User Guide
The contents of this user guide and the associated CorelDRAW, Corel R.A.V.E., and
Corel PHOTO-PAINT software are the property of Corel Corporation and its
respective licensors, and are protected by copyright. For more complete copyright
information about CorelDRAW, Corel R.A.V.E., or Corel PHOTO-PAINT, please refer
to the About section in the Help menu of the software.
Copyright 2000 – 2003 Corel Corporation. All rights reserved.
Corel, the Corel logo, CorelDRAW, Corel R.A.V.E., Corel PHOTO-PAINT,
CorelTUTOR, Perfect Shapes, PowerClip, Quattro Pro, Scrapbook, and WordPerfect
are trademarks or registered trademarks of Corel Corporation and/or its subsidiaries in
Canada, the U.S. and/or other countries.
Adobe, Acrobat, Illustrator, Photoshop, PostScript, and Reader are registered
trademarks of Adobe Systems Incorporated in the United States and/or other countries.
AutoCAD is a registered trademark of Autodesk, Inc. Bitstream, Font Navigator, and
TrueDoc are registered trademarks of Bitstream Inc. Digimarc is a registered trademark
of Digimarc Corporation. Hewlett-Packard is a registered trademark of Hewlett
Packard. InstallShield is a registered trademark of InstallShield Software Corporation in
the United States and/or other countries. Java is a trademark of Sun Microsystems, Inc.
JavaScript is a registered trademark of Sun Microsystems, Inc. in the U.S. and other
countries. Kodak is a registered trademark of Eastman Kodak Company. Mac,
Macintosh, and TrueType are registered trademarks of Apple Computer, Inc., registered
in the United States and other countries. Macromedia Flash is a trademark of
Macromedia, Inc. Microsoft, Visual Basic, Windows, and Windows NT are registered
trademarks of Microsoft Corporation in the United States and/or other countries.
MyFonts.com is a trademark of MyFonts.com. PANTONE® and other Pantone, Inc.
trademarks are the property of Pantone, Inc. TRUMATCH is a registered trademark of
Trumatch, Inc. Other product, font, and company names and logos may be trademarks
or registered trademarks of their respective companies.
Book contents
Table of contents . . . . . . . . . . . . . . . . . . . . . . . . . . . . . . . . . . . . . i
Welcome to CorelDRAW Graphics Suite 12 . . . . . . . . . . . . . . . . . . 3
CorelDRAW . . . . . . . . . . . . . . . . . . . . . . . . . . . . . . . . . . . . . . . . . 17
Corel R.A.V.E. . . . . . . . . . . . . . . . . . . . . . . . . . . . . . . . . . . . . . . 319
Corel PHOTO-PAINT . . . . . . . . . . . . . . . . . . . . . . . . . . . . . . . . . . 351
CorelDRAW Index . . . . . . . . . . . . . . . . . . . . . . . . . . . . . . . . . . . 523
Corel R.A.V.E. Index. . . . . . . . . . . . . . . . . . . . . . . . . . . . . . . . . . 543
Corel PHOTO-PAINT Index . . . . . . . . . . . . . . . . . . . . . . . . . . . . . 547

Table of contents i
Table of contents
Section I: Welcome to CorelDRAW Graphics Suite 12
Welcome . . . . . . . . . . . . . . . . . . . . . . . . . . . . . . . . . . . . . . . . . . . . . . . . . . .3
CorelDRAW Graphics Suite 12 applications . . . . . . . . . . . . . . . . . . . . . . . . . . . 3
What’s new in CorelDRAW Graphics Suite 12 . . . . . . . . . . . . . . . . . . . . . . . . . . 4
Installing and uninstalling applications . . . . . . . . . . . . . . . . . . . . . . . . . . . . . . . . 6
Changing the language of the user interface and Help . . . . . . . . . . . . . . . . . . . . . 7
Registering Corel products . . . . . . . . . . . . . . . . . . . . . . . . . . . . . . . . . . . . . . . . . 8
Updating Corel products . . . . . . . . . . . . . . . . . . . . . . . . . . . . . . . . . . . . . . . . . . . 8
Corel Support Services . . . . . . . . . . . . . . . . . . . . . . . . . . . . . . . . . . . . . . . . . . . . . 8
Documentation conventions . . . . . . . . . . . . . . . . . . . . . . . . . . . . . . . . . . . . . . . . 9
Getting help . . . . . . . . . . . . . . . . . . . . . . . . . . . . . . . . . . . . . . . . . . . . . . . . . . . 10
Using CorelTUTOR . . . . . . . . . . . . . . . . . . . . . . . . . . . . . . . . . . . . . . . . . . . . . 11
VBA Programming Guide. . . . . . . . . . . . . . . . . . . . . . . . . . . . . . . . . . . . . . . . . 11
Customer feedback . . . . . . . . . . . . . . . . . . . . . . . . . . . . . . . . . . . . . . . . . . . . . . 11
Other resources . . . . . . . . . . . . . . . . . . . . . . . . . . . . . . . . . . . . . . . . . . . . . . . . . 11
About Corel Corporation. . . . . . . . . . . . . . . . . . . . . . . . . . . . . . . . . . . . . . . . . . 12
Section II: CorelDRAW
Workspace tour . . . . . . . . . . . . . . . . . . . . . . . . . . . . . . . . . . . . . . . . . . . . .17
CorelDRAW terminology and concepts. . . . . . . . . . . . . . . . . . . . . . . . . . . . . . . 17
CorelDRAW application window . . . . . . . . . . . . . . . . . . . . . . . . . . . . . . . . . . . 18
CorelDRAW workspace tools . . . . . . . . . . . . . . . . . . . . . . . . . . . . . . . . . . . . . . 20
Getting started in CorelDRAW . . . . . . . . . . . . . . . . . . . . . . . . . . . . . . . . .29
Starting and opening drawings . . . . . . . . . . . . . . . . . . . . . . . . . . . . . . . . . . . . . 29
Finding and inserting drawing content . . . . . . . . . . . . . . . . . . . . . . . . . . . . . . . 31
Exploring the basic features of CorelDRAW . . . . . . . . . . . . . . . . . . . . . . . . . . . 32
Working with templates . . . . . . . . . . . . . . . . . . . . . . . . . . . . . . . . . . . . . . . . . . 33
Undoing, redoing, and repeating actions . . . . . . . . . . . . . . . . . . . . . . . . . . . . . . 35
Accessing drawing information . . . . . . . . . . . . . . . . . . . . . . . . . . . . . . . . . . . . . 36
Zooming and panning . . . . . . . . . . . . . . . . . . . . . . . . . . . . . . . . . . . . . . . . . . . . 36

ii Table of contents
Previewing a drawing. . . . . . . . . . . . . . . . . . . . . . . . . . . . . . . . . . . . . . . . . . . . . 38
Backing up and recovering files . . . . . . . . . . . . . . . . . . . . . . . . . . . . . . . . . . . . . 39
Saving drawings. . . . . . . . . . . . . . . . . . . . . . . . . . . . . . . . . . . . . . . . . . . . . . . . . 41
Closing drawings and quitting CorelDRAW . . . . . . . . . . . . . . . . . . . . . . . . . . . 42
Working with lines, outlines, and brush strokes . . . . . . . . . . . . . . . . . . .45
Drawing lines . . . . . . . . . . . . . . . . . . . . . . . . . . . . . . . . . . . . . . . . . . . . . . . . . . 45
Formatting lines and outlines. . . . . . . . . . . . . . . . . . . . . . . . . . . . . . . . . . . . . . . 52
Closing multiple line segments. . . . . . . . . . . . . . . . . . . . . . . . . . . . . . . . . . . . . . 54
Applying brush strokes . . . . . . . . . . . . . . . . . . . . . . . . . . . . . . . . . . . . . . . . . . . 55
Spraying objects along a line . . . . . . . . . . . . . . . . . . . . . . . . . . . . . . . . . . . . . . . 57
Drawing flow and dimension lines . . . . . . . . . . . . . . . . . . . . . . . . . . . . . . . . . . . 59
Drawing shapes. . . . . . . . . . . . . . . . . . . . . . . . . . . . . . . . . . . . . . . . . . . . .63
Drawing rectangles and squares . . . . . . . . . . . . . . . . . . . . . . . . . . . . . . . . . . . . . 63
Drawing ellipses, circles, arcs, and wedges . . . . . . . . . . . . . . . . . . . . . . . . . . . . . 64
Drawing polygons and stars . . . . . . . . . . . . . . . . . . . . . . . . . . . . . . . . . . . . . . . . 67
Drawing spirals . . . . . . . . . . . . . . . . . . . . . . . . . . . . . . . . . . . . . . . . . . . . . . . . . 68
Drawing grids . . . . . . . . . . . . . . . . . . . . . . . . . . . . . . . . . . . . . . . . . . . . . . . . . . 69
Drawing predefined shapes . . . . . . . . . . . . . . . . . . . . . . . . . . . . . . . . . . . . . . . . 70
Drawing using shape recognition . . . . . . . . . . . . . . . . . . . . . . . . . . . . . . . . . . . . 71
Working with objects . . . . . . . . . . . . . . . . . . . . . . . . . . . . . . . . . . . . . . . .75
Selecting objects. . . . . . . . . . . . . . . . . . . . . . . . . . . . . . . . . . . . . . . . . . . . . . . . . 75
Copying, duplicating, and deleting objects. . . . . . . . . . . . . . . . . . . . . . . . . . . . . 78
Copying object properties, transformations, and effects . . . . . . . . . . . . . . . . . . . 79
Positioning objects . . . . . . . . . . . . . . . . . . . . . . . . . . . . . . . . . . . . . . . . . . . . . . . 80
Aligning and distributing objects . . . . . . . . . . . . . . . . . . . . . . . . . . . . . . . . . . . . 82
Snapping objects . . . . . . . . . . . . . . . . . . . . . . . . . . . . . . . . . . . . . . . . . . . . . . . . 84
Using dynamic guides . . . . . . . . . . . . . . . . . . . . . . . . . . . . . . . . . . . . . . . . . . . . 87
Changing the order of objects . . . . . . . . . . . . . . . . . . . . . . . . . . . . . . . . . . . . . . 92
Sizing and scaling objects . . . . . . . . . . . . . . . . . . . . . . . . . . . . . . . . . . . . . . . . . . 93
Rotating and mirroring objects . . . . . . . . . . . . . . . . . . . . . . . . . . . . . . . . . . . . . 94
Grouping objects . . . . . . . . . . . . . . . . . . . . . . . . . . . . . . . . . . . . . . . . . . . . . . . . 96
Combining objects . . . . . . . . . . . . . . . . . . . . . . . . . . . . . . . . . . . . . . . . . . . . . . . 98

Table of contents iii
Shaping objects. . . . . . . . . . . . . . . . . . . . . . . . . . . . . . . . . . . . . . . . . . . .101
Working with curve objects . . . . . . . . . . . . . . . . . . . . . . . . . . . . . . . . . . . . . . 101
Skewing and stretching objects . . . . . . . . . . . . . . . . . . . . . . . . . . . . . . . . . . . . 106
Smudging objects . . . . . . . . . . . . . . . . . . . . . . . . . . . . . . . . . . . . . . . . . . . . . . 108
Roughening objects . . . . . . . . . . . . . . . . . . . . . . . . . . . . . . . . . . . . . . . . . . . . . 110
Applying distortion effects. . . . . . . . . . . . . . . . . . . . . . . . . . . . . . . . . . . . . . . . 113
Shaping objects using envelopes . . . . . . . . . . . . . . . . . . . . . . . . . . . . . . . . . . . 115
Splitting and erasing portions of objects . . . . . . . . . . . . . . . . . . . . . . . . . . . . . 117
Trimming objects . . . . . . . . . . . . . . . . . . . . . . . . . . . . . . . . . . . . . . . . . . . . . . 120
Welding and intersecting objects. . . . . . . . . . . . . . . . . . . . . . . . . . . . . . . . . . . 123
Blending objects . . . . . . . . . . . . . . . . . . . . . . . . . . . . . . . . . . . . . . . . . . . . . . . 124
Creating PowerClip objects . . . . . . . . . . . . . . . . . . . . . . . . . . . . . . . . . . . . . . . 130
Working with symbols . . . . . . . . . . . . . . . . . . . . . . . . . . . . . . . . . . . . . .133
Creating, editing, and deleting symbols. . . . . . . . . . . . . . . . . . . . . . . . . . . . . . 133
Using symbols in drawings . . . . . . . . . . . . . . . . . . . . . . . . . . . . . . . . . . . . . . . 136
Managing collections and libraries . . . . . . . . . . . . . . . . . . . . . . . . . . . . . . . . . . 138
Sharing symbols between drawings . . . . . . . . . . . . . . . . . . . . . . . . . . . . . . . . . 139
Filling objects . . . . . . . . . . . . . . . . . . . . . . . . . . . . . . . . . . . . . . . . . . . . .141
Applying uniform fills . . . . . . . . . . . . . . . . . . . . . . . . . . . . . . . . . . . . . . . . . . . 141
Applying fountain fills. . . . . . . . . . . . . . . . . . . . . . . . . . . . . . . . . . . . . . . . . . . 142
Applying pattern fills . . . . . . . . . . . . . . . . . . . . . . . . . . . . . . . . . . . . . . . . . . . 144
Applying texture fills. . . . . . . . . . . . . . . . . . . . . . . . . . . . . . . . . . . . . . . . . . . . 146
Applying mesh fills . . . . . . . . . . . . . . . . . . . . . . . . . . . . . . . . . . . . . . . . . . . . . 147
Working with fills . . . . . . . . . . . . . . . . . . . . . . . . . . . . . . . . . . . . . . . . . . . . . . 149
Working with color . . . . . . . . . . . . . . . . . . . . . . . . . . . . . . . . . . . . . . . . .153
Choosing colors . . . . . . . . . . . . . . . . . . . . . . . . . . . . . . . . . . . . . . . . . . . . . . . . 153
Creating custom color palettes. . . . . . . . . . . . . . . . . . . . . . . . . . . . . . . . . . . . . 158
Managing color for display, input, and output . . . . . . . . . . . . . . . . . . .159
Understanding the Color management dialog box. . . . . . . . . . . . . . . . . . . . . . 159
Working with color profiles. . . . . . . . . . . . . . . . . . . . . . . . . . . . . . . . . . . . . . . 161
Choosing advanced color management settings . . . . . . . . . . . . . . . . . . . . . . . . 164
Correcting colors for display . . . . . . . . . . . . . . . . . . . . . . . . . . . . . . . . . . . . . . 167

iv Table of contents
Adding three-dimensional effects to objects . . . . . . . . . . . . . . . . . . . . .169
Contouring objects. . . . . . . . . . . . . . . . . . . . . . . . . . . . . . . . . . . . . . . . . . . . . . 169
Applying perspective to objects . . . . . . . . . . . . . . . . . . . . . . . . . . . . . . . . . . . . 172
Creating vector extrusions . . . . . . . . . . . . . . . . . . . . . . . . . . . . . . . . . . . . . . . . 174
Creating drop shadows. . . . . . . . . . . . . . . . . . . . . . . . . . . . . . . . . . . . . . . . . . . 180
Changing the transparency of objects . . . . . . . . . . . . . . . . . . . . . . . . . .183
Applying transparencies. . . . . . . . . . . . . . . . . . . . . . . . . . . . . . . . . . . . . . . . . . 183
Applying merge modes . . . . . . . . . . . . . . . . . . . . . . . . . . . . . . . . . . . . . . . . . . 186
Using lenses with objects . . . . . . . . . . . . . . . . . . . . . . . . . . . . . . . . . . . .189
Applying lenses . . . . . . . . . . . . . . . . . . . . . . . . . . . . . . . . . . . . . . . . . . . . . . . . 189
Editing lenses. . . . . . . . . . . . . . . . . . . . . . . . . . . . . . . . . . . . . . . . . . . . . . . . . . 192
Working with pages and layout tools. . . . . . . . . . . . . . . . . . . . . . . . . . .193
Specifying the page layout . . . . . . . . . . . . . . . . . . . . . . . . . . . . . . . . . . . . . . . . 193
Choosing a page background . . . . . . . . . . . . . . . . . . . . . . . . . . . . . . . . . . . . . . 195
Adding, renaming, and deleting pages . . . . . . . . . . . . . . . . . . . . . . . . . . . . . . . 196
Using the rulers . . . . . . . . . . . . . . . . . . . . . . . . . . . . . . . . . . . . . . . . . . . . . . . . 198
Calibrating the rulers . . . . . . . . . . . . . . . . . . . . . . . . . . . . . . . . . . . . . . . . . . . . 199
Setting up the grid. . . . . . . . . . . . . . . . . . . . . . . . . . . . . . . . . . . . . . . . . . . . . . 200
Setting up guidelines . . . . . . . . . . . . . . . . . . . . . . . . . . . . . . . . . . . . . . . . . . . . 201
Setting the drawing scale . . . . . . . . . . . . . . . . . . . . . . . . . . . . . . . . . . . . . . . . . 203
Working with layers . . . . . . . . . . . . . . . . . . . . . . . . . . . . . . . . . . . . . . . .205
Creating layers. . . . . . . . . . . . . . . . . . . . . . . . . . . . . . . . . . . . . . . . . . . . . . . . . 205
Changing layer properties and stacking order. . . . . . . . . . . . . . . . . . . . . . . . . . 208
Moving and copying objects between layers . . . . . . . . . . . . . . . . . . . . . . . . . . . 209
Printing layers . . . . . . . . . . . . . . . . . . . . . . . . . . . . . . . . . . . . . . . . . . . . . . . . . 210
Adding and formatting text . . . . . . . . . . . . . . . . . . . . . . . . . . . . . . . . . .211
Adding and selecting text . . . . . . . . . . . . . . . . . . . . . . . . . . . . . . . . . . . . . . . . 211
Encoding text . . . . . . . . . . . . . . . . . . . . . . . . . . . . . . . . . . . . . . . . . . . . . . . . . 214
Changing the appearance of text . . . . . . . . . . . . . . . . . . . . . . . . . . . . . . . . . . . 215
Finding, editing, and converting text . . . . . . . . . . . . . . . . . . . . . . . . . . . . . . . . 217
Aligning and spacing text . . . . . . . . . . . . . . . . . . . . . . . . . . . . . . . . . . . . . . . . 219
Shifting and rotating text. . . . . . . . . . . . . . . . . . . . . . . . . . . . . . . . . . . . . . . . . 223

Table of contents v
Moving text . . . . . . . . . . . . . . . . . . . . . . . . . . . . . . . . . . . . . . . . . . . . . . . . . . 224
Fitting text to a path . . . . . . . . . . . . . . . . . . . . . . . . . . . . . . . . . . . . . . . . . . . . 224
Formatting paragraph text . . . . . . . . . . . . . . . . . . . . . . . . . . . . . . . . . . . . . . . 226
Combining and linking paragraph text frames. . . . . . . . . . . . . . . . . . . . . . . . . 228
Wrapping paragraph text around objects and text. . . . . . . . . . . . . . . . . . . . . . 231
Embedding graphics and adding special characters . . . . . . . . . . . . . . . . . . . . . 232
Managing fonts. . . . . . . . . . . . . . . . . . . . . . . . . . . . . . . . . . . . . . . . . . . .235
Substituting unavailable fonts . . . . . . . . . . . . . . . . . . . . . . . . . . . . . . . . . . . . . 235
Embedding fonts . . . . . . . . . . . . . . . . . . . . . . . . . . . . . . . . . . . . . . . . . . . . . . . 237
Using Bitstream Font Navigator . . . . . . . . . . . . . . . . . . . . . . . . . . . . . . . . . . . 237
Working with bitmaps . . . . . . . . . . . . . . . . . . . . . . . . . . . . . . . . . . . . . .239
Converting vector graphics to bitmaps . . . . . . . . . . . . . . . . . . . . . . . . . . . . . . 239
Adding bitmaps . . . . . . . . . . . . . . . . . . . . . . . . . . . . . . . . . . . . . . . . . . . . . . . 240
Cropping and editing bitmaps . . . . . . . . . . . . . . . . . . . . . . . . . . . . . . . . . . . . . 241
Applying special effects to bitmaps. . . . . . . . . . . . . . . . . . . . . . . . . . . . . . . . . 243
Applying color and tone effects . . . . . . . . . . . . . . . . . . . . . . . . . . . . . . . . . . . . 246
Removing dust and scratch marks from bitmaps . . . . . . . . . . . . . . . . . . . . . . . 248
Changing color modes in bitmaps . . . . . . . . . . . . . . . . . . . . . . . . . . . . .249
Changing the color mode of bitmaps . . . . . . . . . . . . . . . . . . . . . . . . . . . . . . . . 249
Changing bitmaps to black-and-white images . . . . . . . . . . . . . . . . . . . . . . . . . 250
Creating Web-enabled objects . . . . . . . . . . . . . . . . . . . . . . . . . . . . . . . .253
Using preset Internet objects . . . . . . . . . . . . . . . . . . . . . . . . . . . . . . . . . . . . . . 253
Optimizing bitmaps for the World Wide Web . . . . . . . . . . . . . . . . . . . . . . . . 254
Creating rollovers . . . . . . . . . . . . . . . . . . . . . . . . . . . . . . . . . . . . . . . . . . . . . . 256
Creating Web-compatible text . . . . . . . . . . . . . . . . . . . . . . . . . . . . . . . . . . . . 258
Working with bookmarks and hyperlinks . . . . . . . . . . . . . . . . . . . . . . . . . . . . 259
Publishing to the Web. . . . . . . . . . . . . . . . . . . . . . . . . . . . . . . . . . . . . . .263
Preparing files and objects for Web publishing . . . . . . . . . . . . . . . . . . . . . . . . 263
Publishing to HTML. . . . . . . . . . . . . . . . . . . . . . . . . . . . . . . . . . . . . . . . . . . . 266
Managing projects . . . . . . . . . . . . . . . . . . . . . . . . . . . . . . . . . . . . . . . . .267
Setting up the project database . . . . . . . . . . . . . . . . . . . . . . . . . . . . . . . . . . . . 267

vi Table of contents
Assigning and copying object data . . . . . . . . . . . . . . . . . . . . . . . . . . . . . . . . . . 269
Viewing an object data summary . . . . . . . . . . . . . . . . . . . . . . . . . . . . . . . . . . . 270
Printing . . . . . . . . . . . . . . . . . . . . . . . . . . . . . . . . . . . . . . . . . . . . . . . . . .271
Printing your work . . . . . . . . . . . . . . . . . . . . . . . . . . . . . . . . . . . . . . . . . . . . . 271
Laying out print jobs . . . . . . . . . . . . . . . . . . . . . . . . . . . . . . . . . . . . . . . . . . . . 273
Previewing print jobs . . . . . . . . . . . . . . . . . . . . . . . . . . . . . . . . . . . . . . . . . . . . 274
Commercial printing . . . . . . . . . . . . . . . . . . . . . . . . . . . . . . . . . . . . . . . .277
Preparing a print job for a service bureau . . . . . . . . . . . . . . . . . . . . . . . . . . . . . 277
Working with imposition layouts. . . . . . . . . . . . . . . . . . . . . . . . . . . . . . . . . . . 279
Printing printer's marks . . . . . . . . . . . . . . . . . . . . . . . . . . . . . . . . . . . . . . . . . . 282
Printing color separations. . . . . . . . . . . . . . . . . . . . . . . . . . . . . . . . . . . . . . . . . 285
Specifying In-RIP trapping settings . . . . . . . . . . . . . . . . . . . . . . . . . . . . . . . . . 287
Printing to film . . . . . . . . . . . . . . . . . . . . . . . . . . . . . . . . . . . . . . . . . . . . . . . . 290
Publishing to PDF . . . . . . . . . . . . . . . . . . . . . . . . . . . . . . . . . . . . . . . . . .291
Saving documents as PDF files. . . . . . . . . . . . . . . . . . . . . . . . . . . . . . . . . . . . . 291
Reducing PDF file size . . . . . . . . . . . . . . . . . . . . . . . . . . . . . . . . . . . . . . . . . . . 293
Preparing PDF files for a service bureau . . . . . . . . . . . . . . . . . . . . . . . . . . . . . . 295
Optimizing PDF files . . . . . . . . . . . . . . . . . . . . . . . . . . . . . . . . . . . . . . . . . . . . 296
Importing and exporting files . . . . . . . . . . . . . . . . . . . . . . . . . . . . . . . . .299
Importing files . . . . . . . . . . . . . . . . . . . . . . . . . . . . . . . . . . . . . . . . . . . . . . . . . 299
Exporting files . . . . . . . . . . . . . . . . . . . . . . . . . . . . . . . . . . . . . . . . . . . . . . . . . 302
Working with graphic, text, and color styles . . . . . . . . . . . . . . . . . . . . .307
Creating, applying, and editing graphic or text styles. . . . . . . . . . . . . . . . . . . . 307
Creating and applying color styles . . . . . . . . . . . . . . . . . . . . . . . . . . . . . . . . . . 309
From Adobe Illustrator to CorelDRAW . . . . . . . . . . . . . . . . . . . . . . . . . .313
Comparing terminology . . . . . . . . . . . . . . . . . . . . . . . . . . . . . . . . . . . . . . . . . . 313
Comparing tools . . . . . . . . . . . . . . . . . . . . . . . . . . . . . . . . . . . . . . . . . . . . . . . 314
Section III: Corel R.A.V.E.
Workspace tour . . . . . . . . . . . . . . . . . . . . . . . . . . . . . . . . . . . . . . . . . . . .319
Corel R.A.V.E. terminology and concepts . . . . . . . . . . . . . . . . . . . . . . . . . . . . 319

Table of contents vii
Corel R.A.V.E. application window . . . . . . . . . . . . . . . . . . . . . . . . . . . . . . . . . 320
Corel R.A.V.E. toolbox . . . . . . . . . . . . . . . . . . . . . . . . . . . . . . . . . . . . . . . . . . 322
Getting started in Corel R.A.V.E. . . . . . . . . . . . . . . . . . . . . . . . . . . . . . . .325
How Corel R.A.V.E. works . . . . . . . . . . . . . . . . . . . . . . . . . . . . . . . . . . . . . . . 325
Setting the properties of movies. . . . . . . . . . . . . . . . . . . . . . . . . . . . . . . . . . . . 326
Animating objects . . . . . . . . . . . . . . . . . . . . . . . . . . . . . . . . . . . . . . . . . .329
Understanding animation methods and terms . . . . . . . . . . . . . . . . . . . . . . . . . 329
Increasing the life span of objects. . . . . . . . . . . . . . . . . . . . . . . . . . . . . . . . . . . 330
Tweening objects. . . . . . . . . . . . . . . . . . . . . . . . . . . . . . . . . . . . . . . . . . . . . . . 331
Editing and previewing animation . . . . . . . . . . . . . . . . . . . . . . . . . . . . .339
Working with timelines . . . . . . . . . . . . . . . . . . . . . . . . . . . . . . . . . . . . . . . . . 339
Working with tweens . . . . . . . . . . . . . . . . . . . . . . . . . . . . . . . . . . . . . . . . . . . 341
Previewing animation . . . . . . . . . . . . . . . . . . . . . . . . . . . . . . . . . . . . . . . . . . . 343
Animating text . . . . . . . . . . . . . . . . . . . . . . . . . . . . . . . . . . . . . . . . . . . .345
Tweening text . . . . . . . . . . . . . . . . . . . . . . . . . . . . . . . . . . . . . . . . . . . . . . . . . 345
Creating animated text effects . . . . . . . . . . . . . . . . . . . . . . . . . . . . . . . . . . . . . 346
Section IV: Corel PHOTO-PAINT
Corel PHOTO-PAINT workspace tour . . . . . . . . . . . . . . . . . . . . . . . . . . . .351
Corel PHOTO-PAINT terms . . . . . . . . . . . . . . . . . . . . . . . . . . . . . . . . . . . . . 351
Exploring the application window . . . . . . . . . . . . . . . . . . . . . . . . . . . . . . . . . . 352
Toolbars . . . . . . . . . . . . . . . . . . . . . . . . . . . . . . . . . . . . . . . . . . . . . . . . . . . . . 354
Toolbox. . . . . . . . . . . . . . . . . . . . . . . . . . . . . . . . . . . . . . . . . . . . . . . . . . . . . . 356
Property bar . . . . . . . . . . . . . . . . . . . . . . . . . . . . . . . . . . . . . . . . . . . . . . . . . . 360
Dockers. . . . . . . . . . . . . . . . . . . . . . . . . . . . . . . . . . . . . . . . . . . . . . . . . . . . . . 361
Status bar . . . . . . . . . . . . . . . . . . . . . . . . . . . . . . . . . . . . . . . . . . . . . . . . . . . . 362
Viewing images and obtaining image information . . . . . . . . . . . . . . . .363
Viewing images . . . . . . . . . . . . . . . . . . . . . . . . . . . . . . . . . . . . . . . . . . . . . . . . 363
Zooming . . . . . . . . . . . . . . . . . . . . . . . . . . . . . . . . . . . . . . . . . . . . . . . . . . . . . 365
Obtaining image information . . . . . . . . . . . . . . . . . . . . . . . . . . . . . . . . . . . . . 365
Working with color . . . . . . . . . . . . . . . . . . . . . . . . . . . . . . . . . . . . . . . . .367

viii Table of contents
Choosing colors . . . . . . . . . . . . . . . . . . . . . . . . . . . . . . . . . . . . . . . . . . . . . . . . 367
Creating custom color palettes . . . . . . . . . . . . . . . . . . . . . . . . . . . . . . . . . . . . . 371
Changing color modes . . . . . . . . . . . . . . . . . . . . . . . . . . . . . . . . . . . . . .373
Changing the color mode of images . . . . . . . . . . . . . . . . . . . . . . . . . . . . . . . . . 373
Changing images to the paletted color mode . . . . . . . . . . . . . . . . . . . . . . . . . . 374
Bringing images into Corel PHOTO-PAINT. . . . . . . . . . . . . . . . . . . . . . . .377
Opening images. . . . . . . . . . . . . . . . . . . . . . . . . . . . . . . . . . . . . . . . . . . . . . . . 377
Importing files . . . . . . . . . . . . . . . . . . . . . . . . . . . . . . . . . . . . . . . . . . . . . . . . . 377
Loading photos from a digital camera. . . . . . . . . . . . . . . . . . . . . . . . . . . . . . . . 378
Working with vector graphics . . . . . . . . . . . . . . . . . . . . . . . . . . . . . . . . . . . . . 379
Cropping and changing orientation . . . . . . . . . . . . . . . . . . . . . . . . . . . .381
Cropping images . . . . . . . . . . . . . . . . . . . . . . . . . . . . . . . . . . . . . . . . . . . . . . . 381
Stitching images together . . . . . . . . . . . . . . . . . . . . . . . . . . . . . . . . . . . . . . . . 383
Changing image orientation. . . . . . . . . . . . . . . . . . . . . . . . . . . . . . . . . . . . . . . 385
Adjusting color and tone . . . . . . . . . . . . . . . . . . . . . . . . . . . . . . . . . . . .387
Adjusting image color and tone . . . . . . . . . . . . . . . . . . . . . . . . . . . . . . . . . . . . 387
Working with color channels . . . . . . . . . . . . . . . . . . . . . . . . . . . . . . . . . . . . . . 390
Changing image dimensions, resolution, and paper size. . . . . . . . . . . .393
Changing image dimensions. . . . . . . . . . . . . . . . . . . . . . . . . . . . . . . . . . . . . . . 393
Changing image resolution . . . . . . . . . . . . . . . . . . . . . . . . . . . . . . . . . . . . . . . 394
Changing the paper size . . . . . . . . . . . . . . . . . . . . . . . . . . . . . . . . . . . . . . . . . . 395
Retouching . . . . . . . . . . . . . . . . . . . . . . . . . . . . . . . . . . . . . . . . . . . . . . .397
Improving scanned images. . . . . . . . . . . . . . . . . . . . . . . . . . . . . . . . . . . . . . . . 397
Removing red-eye . . . . . . . . . . . . . . . . . . . . . . . . . . . . . . . . . . . . . . . . . . . . . . 398
Removing dust and scratch marks . . . . . . . . . . . . . . . . . . . . . . . . . . . . . . . . . . 399
Cloning image areas. . . . . . . . . . . . . . . . . . . . . . . . . . . . . . . . . . . . . . . . . . . . . 402
Sharpening images . . . . . . . . . . . . . . . . . . . . . . . . . . . . . . . . . . . . . . . . . . . . . . 403
Erasing image areas . . . . . . . . . . . . . . . . . . . . . . . . . . . . . . . . . . . . . . . . . . . . . 405
Smearing, smudging, and blending colors . . . . . . . . . . . . . . . . . . . . . . . . . . . . 407
Working with lenses . . . . . . . . . . . . . . . . . . . . . . . . . . . . . . . . . . . . . . . .409
Creating lenses. . . . . . . . . . . . . . . . . . . . . . . . . . . . . . . . . . . . . . . . . . . . . . . . . 409

Table of contents ix
Editing lenses . . . . . . . . . . . . . . . . . . . . . . . . . . . . . . . . . . . . . . . . . . . . . . . . . 411
Combining lenses with the image background. . . . . . . . . . . . . . . . . . . . . . . . . 412
Masking . . . . . . . . . . . . . . . . . . . . . . . . . . . . . . . . . . . . . . . . . . . . . . . . . .413
Distinguishing protected and editable areas. . . . . . . . . . . . . . . . . . . . . . . . . . . 413
Defining editable areas . . . . . . . . . . . . . . . . . . . . . . . . . . . . . . . . . . . . . . . . . . 414
Defining editable areas using color information . . . . . . . . . . . . . . . . . . . . . . . . 416
Inverting and removing masks . . . . . . . . . . . . . . . . . . . . . . . . . . . . . . . . . . . . 420
Cutting out image areas . . . . . . . . . . . . . . . . . . . . . . . . . . . . . . . . . . . . . . . . . 420
Applying special effects . . . . . . . . . . . . . . . . . . . . . . . . . . . . . . . . . . . . .423
Working with special effects . . . . . . . . . . . . . . . . . . . . . . . . . . . . . . . . . . . . . . 423
Applying preset styles . . . . . . . . . . . . . . . . . . . . . . . . . . . . . . . . . . . . . . . . . . . 425
Applying color and tone effects . . . . . . . . . . . . . . . . . . . . . . . . . . . . . . . . . . . . 426
Managing plug-ins . . . . . . . . . . . . . . . . . . . . . . . . . . . . . . . . . . . . . . . . . . . . . 427
Painting . . . . . . . . . . . . . . . . . . . . . . . . . . . . . . . . . . . . . . . . . . . . . . . . . .429
Drawing shapes and lines . . . . . . . . . . . . . . . . . . . . . . . . . . . . . . . . . . . . . . . . 429
Applying brush strokes . . . . . . . . . . . . . . . . . . . . . . . . . . . . . . . . . . . . . . . . . . 431
Spraying images . . . . . . . . . . . . . . . . . . . . . . . . . . . . . . . . . . . . . . . . . . . . . . . 434
Repeating brush strokes . . . . . . . . . . . . . . . . . . . . . . . . . . . . . . . . . . . . . . . . . 436
Using a pressure-sensitive pen . . . . . . . . . . . . . . . . . . . . . . . . . . . . . . . . . . . . . 437
Filling images . . . . . . . . . . . . . . . . . . . . . . . . . . . . . . . . . . . . . . . . . . . . .439
Applying uniform fills . . . . . . . . . . . . . . . . . . . . . . . . . . . . . . . . . . . . . . . . . . . 439
Applying fountain fills. . . . . . . . . . . . . . . . . . . . . . . . . . . . . . . . . . . . . . . . . . . 440
Applying bitmap fills. . . . . . . . . . . . . . . . . . . . . . . . . . . . . . . . . . . . . . . . . . . . 442
Applying texture fills. . . . . . . . . . . . . . . . . . . . . . . . . . . . . . . . . . . . . . . . . . . . 444
Applying gradient fills. . . . . . . . . . . . . . . . . . . . . . . . . . . . . . . . . . . . . . . . . . . 445
Working with objects . . . . . . . . . . . . . . . . . . . . . . . . . . . . . . . . . . . . . . .447
Creating objects . . . . . . . . . . . . . . . . . . . . . . . . . . . . . . . . . . . . . . . . . . . . . . . 447
Grouping and combining objects. . . . . . . . . . . . . . . . . . . . . . . . . . . . . . . . . . . 450
Modifying objects . . . . . . . . . . . . . . . . . . . . . . . . . . . . . . . . . . . . . . . . . .453
Transforming objects. . . . . . . . . . . . . . . . . . . . . . . . . . . . . . . . . . . . . . . . . . . . 453
Changing the edges of objects . . . . . . . . . . . . . . . . . . . . . . . . . . . . . . . . . . . . . 457

x Table of contents
Adding drop shadows to objects. . . . . . . . . . . . . . . . . . . . . . . . . . . . . . . . . . . . 460
Creating images for the Web . . . . . . . . . . . . . . . . . . . . . . . . . . . . . . . . .463
Exporting and optimizing images for the Web. . . . . . . . . . . . . . . . . . . . . . . . . 463
Creating and editing rollovers . . . . . . . . . . . . . . . . . . . . . . . . . . . . . . . . . . . . . 465
Saving and closing . . . . . . . . . . . . . . . . . . . . . . . . . . . . . . . . . . . . . . . . .471
Saving images . . . . . . . . . . . . . . . . . . . . . . . . . . . . . . . . . . . . . . . . . . . . . . . . . 471
Exporting images to other file formats . . . . . . . . . . . . . . . . . . . . . . . . . . . . . . . 472
Closing images. . . . . . . . . . . . . . . . . . . . . . . . . . . . . . . . . . . . . . . . . . . . . . . . . 474
Managing color for display, input, and output . . . . . . . . . . . . . . . . . . .475
Working with color profiles . . . . . . . . . . . . . . . . . . . . . . . . . . . . . . . . . . . . . . . 475
Choosing advanced color management settings . . . . . . . . . . . . . . . . . . . . . . . . 477
Correcting colors for display. . . . . . . . . . . . . . . . . . . . . . . . . . . . . . . . . . . . . . . 478
Printing . . . . . . . . . . . . . . . . . . . . . . . . . . . . . . . . . . . . . . . . . . . . . . . . . .479
Printing your work . . . . . . . . . . . . . . . . . . . . . . . . . . . . . . . . . . . . . . . . . . . . . 479
Laying out print jobs . . . . . . . . . . . . . . . . . . . . . . . . . . . . . . . . . . . . . . . . . . . . 480
Previewing print jobs . . . . . . . . . . . . . . . . . . . . . . . . . . . . . . . . . . . . . . . . . . . . 481
Section V: Glossary
Glossary . . . . . . . . . . . . . . . . . . . . . . . . . . . . . . . . . . . . . . . . . . . . . . . . . .485

Section I: Welcome to
CorelDRAW Graphics Suite 12

CorelDRAW Graphics Suite 12: Welcome 3
Welcome
CorelDRAW® Graphics Suite 12 delivers powerful software for graphic design, page
layout, photo editing, and vector animation.
In this section, you’ll learn about
• CorelDRAW Graphics Suite 12 applications
• what’s new in CorelDRAW Graphics Suite 12
• what’s new in Corel PHOTO-PAINT
• installing and uninstalling applications
• changing the language of the user interface and Help
• registering Corel products
• updating Corel products
• Corel® Support Services
• documentation conventions
• getting Help
• using CorelTUTOR™
• customer feedback
•other resources
• about Corel Corporation
CorelDRAW Graphics Suite 12 applications
This section describes the major applications included in CorelDRAW Graphics Suite
12.
CorelDRAW
CorelDRAW is an intuitive graphics design application that gives designers a more
enjoyable work experience. CorelDRAW is built and designed to meet the demands of
today’s working designer to create ads or collateral for print or for the Web.

4CorelDRAWGraphicsSuite12UserGuide
Corel PHOTO-PAINT
Corel PHOTO-PAINT® is a complete image-editing application that lets you retouch
and enhance photos. Whether you’re correcting red-eye or exposure problems, cutting
out image areas, or creating and publishing images for the Web, Corel PHOTO-PAINT
gives you powerful tools that are fast and easy to use.
Corel R.A.V.E.
Corel R.A.V.E.™ makes it easy to create a wide range of animated graphics — from
animated logos and navigation controls to interactive animated graphics for the Web.
The Corel R.A.V.E. application combines the familiar graphics capabilities and user
interface of CorelDRAW with a powerful yet easy-to-use set of animation features.
What’s new in CorelDRAW Graphics Suite 12
The following section outlines what’s new in CorelDRAW Graphics Suite 12.
What’s new in CorelDRAW and Corel R.A.V.E.
CorelDRAW and Corel R.A.V.E. include new features and enhancements that will make
your work easier.
Feature Description
Enhanced support for SVG files Allows you to choose a variety of new
options when exporting a drawing to the
SVG file format. You can also embed
information in an SVG file or store
information in externally linked files.
Export for Office (CorelDRAW only) Lets you optimize drawings for export to
Microsoft® Office or WordPerfect® Office
Unicode Allows users to exchange files effortlessly,
regardless of the language or operating
system in which the file was created,
ensuring that text displays correctly
Text encoding Allows users to correct the display of text
created in a language that differs from that
of their operating system

CorelDRAW Graphics Suite 12: Welcome 5
Dynamic guides Helps you precisely position, align, and draw
objects relative to other objects using snap
points in objects
Smart drawing tool Lets you draw freehand strokes that are
recognized and converted to basic shapes
using the Smart drawing tool
Enhanced snapping Allows you to snap an object to a number of
snap points in a target object
Enhanced text alignment Allows you to align text objects to other
objects using the first text baseline, last text
baseline, or the bounding box
Enhanced Eyedropper and Paintbucket
tools
Allows you to copy color, object properties,
effects, and transformations from one object
to another
Virtual segment delete tool Lets you delete portions of objects, called
virtual line segments, that are between
intersections
Improved file format compatibility Gives you improved compatibility with
many industry-standard file formats, such as
Hewlett-Packard® Plotter (PLT),
AutoCAD® Drawing Interchange Format
(DXF), AutoCAD Drawing Database
(DWG), Computer Graphics Metafile
(CGM), Microsoft® Word Document
(DOC), and many more
Improved symbols The Symbol manager docker allows you to
identify, create, and edit symbols easily. You
can easily import and export symbols using
Corel Symbol Libraries (CSL).
Enhanced sprites (Corel R.A.V.E. only) The Symbol manager docker allows you to
identify, create, and edit sprites easily.
Feature Description

6CorelDRAWGraphicsSuite12UserGuide
What’s new in Corel PHOTO-PAINT
Corel PHOTO-PAINT includes new features and enhancements that will make your
work easier.
Installing and uninstalling applications
The application’s Installer makes it easy to install Corel applications and components.
It lets you
• install any Corel applications included in your software package
• add components to a currently installed application
• refresh files and configurations of currently installed applications
To install an application
1Close all applications.
2Insert Disc 1 in the CD drive.
If the installation wizard does not start automatically, click Start on the Windows
taskbar, and click Run. Type D:\Setup, where D is the letter that corresponds to
the CD drive.
3Follow the instructions in the installation wizard and enable one of the following
options:
• Ty p i c a l — to install the default applications and components
Feature Description
Export for Office Lets you optimize drawings for export to
Microsoft Office or WordPerfect Office
Multiple language support Allows users to exchange files effortlessly,
regardless of the language or operating
system in which the file was created,
ensuring that text displays correctly
Touch-up brush tool Lets you remove imperfections, such as tears,
scratch marks, and wrinkles, from an image
by blending its textures and colors
Export menu command Provides you with another method for
exporting images to a variety of file formats

CorelDRAW Graphics Suite 12: Welcome 7
• Compact — to install the minimum components for the application to operate
• Custom — to choose applications and writing tool components
4Follow the instructions for installing and registering the application.
To uninstall applications
1On the Windows taskbar, click Start ` Control Panel.
If your operating system is Windows 2000 or earlier, click Start ` Settings `
Control Panel.
2Double-click Add/Remove programs.
3Choose a Corel application from the list, click Change/Remove, and enable the
Remove all option in the dialog box.
If you want to remove all files, including user files, click Change, and enable the
Remove user files checkbox.
If your operating system is Windows 2000 or earlier, click the Remove button.
4Follow the InstallShield® wizard instructions.
You can choose whether the uninstalling process will remove user files such as
preference, presets, user-created fills, customized files, and so on.
Changing the language of the user interface and Help
If you chose to install an application in more than one language, you can change the
language of the user interface and Help at any time.
To change the language of the user interface and Help
1Click To o l s ` Options.
2In the list of categories, click Global.
3Choose a language from the Select the language for the user interface list box.
If you want to change the language of the user interface and Help as you start the
application, enable the Ask me the next time the software starts check box.
4Restart the application.

8CorelDRAWGraphicsSuite12UserGuide
Registering Corel products
Registering Corel products is important. Registration provides you with timely access
to the latest product updates, valuable information about product releases, and access
to free downloads, articles, tips and tricks, and special offers.
You can register when you install the application or at a later date.
You can register using the following methods:
•online — You can launch online registration if you are connected to the Internet
when you install the Corel graphics application. If no Internet connection is
detected, a list of options displays in a dialog box.
•FTP — You can complete the registration form, and it will be sent automatically
when an Internet connection is detected.
•by phone — You can call the Corel Customer Service Center nearest you.
For more information about registering a Corel product, visit www.corel.com/support/
register.
Updating Corel products
Corel® Update is an automatic feature that notifies you of updates to Corel products,
downloads the updates, and installs them. Corel Update operates via the Web, so it
requires an Internet connection.
You can set how often Corel Update checks for updates through the Start menu. It’s
recommended that you set Corel Update to check for updates every 30 days or on
starting the application. If you prefer, you can disable Corel Update altogether by
choosing to never check for updates.
Corel Support Services
Corel Support Services can provide you with prompt and accurate information about
product features, specifications, pricing, availability, services, and technical support. For
the most current information on support services available for your Corel product,
please visit www.corel.com/support.

CorelDRAW Graphics Suite 12: Welcome 9
Documentation conventions
The following table describes important conventions used in the user guide and Help.
Convention Description Examples
Menu ` Menu command Click the menu item
followed by the menu
command.
Click File ` Open.
list box A list of options that drops
down when a user clicks the
down arrow button.
Choose a value from the
Force field list box on the
property bar.
docker A window containing
available commands and
settings relevant to a specific
tool or task.
Double-click the name of the
group in the Timeline
docker.
Enter Enter key Type a value in the Eraser
thickness box on the
property bar, and press
Enter.
A note contains information
that is important to the
preceding steps. It can
describe conditions under
which the procedure can be
performed.
You can’t copy or clone a
compound blend. If you click
the Equal margins button,
you must specify values in
the To p / l e f t m a r g i n boxes.
A tip contains suggestions
for performing the preceding
steps. It can present
alternatives to the steps, and
other benefits and uses of the
procedure. You can also
create a hyperlink using the
Internet toolbar.
Trimming an object can
reduce the drawing file size.

10 CorelDRAW Graphics Suite 12 User Guide
Getting help
You can get help from the accompanying user guide or directly from the user interface.
You can find topics from the Help by using the table of contents and search tool. You
can also print a Help topic and display Help topics relevant to the task you are
performing.
Help is available through the following tools:
•User guide — provides commonly used procedures and information. Chapters
ending with From here tables contain keywords that direct you to additional topics
in the Help.
•Help — lets you access Help directly from the user interface and find topics using
the contents topic, index, and word/phrase search tool
•To o l Ti p s — let you access tips for using the application’s icons and buttons. To
view a ToolTip, position the cursor over an icon, button, or other application
control.
To use Help
1Click Help ` Help topics.
2Click one of the following tabs:
• Contents — lets you browse through topics in the Help
• Index — lets you use the index to find a topic
• Search — lets you search the full text of the Help for a particular word. For
example, if you are looking for information about RGB color mode, you can type
“RGB” to display a list of relevant topics.
You can also launch Help by pressing F1.
You can also
View Help for a dialog box Click the Help button.
Print a specific Help topic Open a Help topic, click the frame you want
to print, and click Print.

CorelDRAW Graphics Suite 12: Welcome 11
Using CorelTUTOR
CorelTUTOR provides a series of project-based tutorials that introduce you to basic and
advanced features of the applications of CorelDRAW Graphics Suite 12.
To access CorelTUTOR
•Click Help ` CorelTUTOR.
VBA Programming Guide
The new VBA Programming Guide for CorelDRAW Graphics Suite 12 will help you
automate tasks and create custom solutions using Microsoft® Visual Basic® for
Applications (VBA) in CorelDRAW and Corel PHOTO-PAINT. If you installed
CorelDRAW or Corel PHOTO-PAINT using the Typical install, or a Custom install
that included VBA, then the guide is accessible from a link in the VBA Help for
CorelDRAW or the VBA Help for Corel PHOTO-PAINT.
Customer feedback
If you have any comments or suggestions about the user guides, Help, and tutorials,
you can send them by email to drawdoc@corel.com. You can check the product Web
site for the latest news, tips and tricks, and product upgrade information. Go to
www.corel.com and follow the links to the product site.
Other resources
Corel has training partnerships with other firms and provides professional services for
its software products. The Corel Designer Web site contains a wealth of graphics
resources.
Training
Corel Training Events
• Maximize your skills and attend a Corel® Training Camp — special intensive
Training Events held throughout North America on various Corel products. All
Training Camps are delivered by a Corel Training Specialist, with hands-on

12 CorelDRAW Graphics Suite 12 User Guide
instruction, exercises and practical real-world projects. To look at the training
schedule or to register for a course, please visit www.corel.com/trainingschedule.
Corel Customized Training
• Once you have Corel applications running on your computers, our team of expert
Corel Training Specialists can help you make the most of them with customized
training, tailored to the specific needs of your work environment. We will help you
develop a custom curriculum which is practical and relevant to the needs of your
organization. For more information about Corel Customized Training, please visit
www.corel.com/customizedtraining.
Corel Training Partners (CTP)
• A Corel® Training Partner is an independent, officially accredited local
organization that provides training on Corel products and is located worldwide for
your convenience.
Corel Corporate Services
Corel is committed to getting you up and running quickly with time and money-saving
workflow solutions. To simplify the process of deploying Corel applications across your
organization, our Corporate Services department offers a comprehensive range of cost-
effective services to meet your technology needs. This group brings together highly
skilled experts from across the company who are dedicated to providing top-notch
solutions. Our knowledgeable team is ready to offer assistance through all stages of your
project, from application development and support to software systems integration and
training.
For more information on Corel Corporate Services, please contact
proservices@corel.com.
World Wide Web resources
The following sites include product information, articles, tips, and additional tutorials,
as well as graphics resources such as photos, clipart, and font subscriptions:
• www.corel.com
About Corel Corporation
Founded in 1985, Corel Corporation (www.corel.com) is a leading technology company
specializing in content creation tools, business process management and XML-enabled
enterprise solutions. The company’s goal is to give consumers and enterprise customers

CorelDRAW Graphics Suite 12: Welcome 13
the ability to create, exchange and instantly interact with visual content that is always
relevant, accurate and available. Corel Corporation has its headquarters in Ottawa,
Canada.

Section II:
CorelDRAW

CorelDRAW: Workspace tour 17
Workspace tour
Becoming familiar with the terminology and workspace of CorelDRAW will help you
easily follow this user guide’s concepts and procedures.
In this section, you’ll learn about
• CorelDRAW terminology and concepts
• CorelDRAW application window
• CorelDRAW workspace tools
CorelDRAW terminology and concepts
Before you get started with CorelDRAW, you should be familiar with the following
terms.
Term Description
object An element in a drawing such as an image,
shape, line, text, curve, symbol, or layer.
drawing The work you create in CorelDRAW: for
example, custom artwork, logos, posters,
and newsletters
vector graphic An image generated from mathematical
descriptions that determine the position,
length, and direction in which lines are
drawn.
bitmap An image composed of grids of pixels or dots
docker A window containing available commands
and settings relevant to a specific tool or task
flyout A button that opens a group of related tools
or menu items
18 CorelDRAW Graphics Suite 12 User Guide
CorelDRAW application window
When you launch CorelDRAW, the application window opens containing a drawing
window. The rectangle in the center of the drawing window is the drawing page where
you create your drawing. Although more than one drawing window can be opened, you
can apply commands to the active drawing window only.
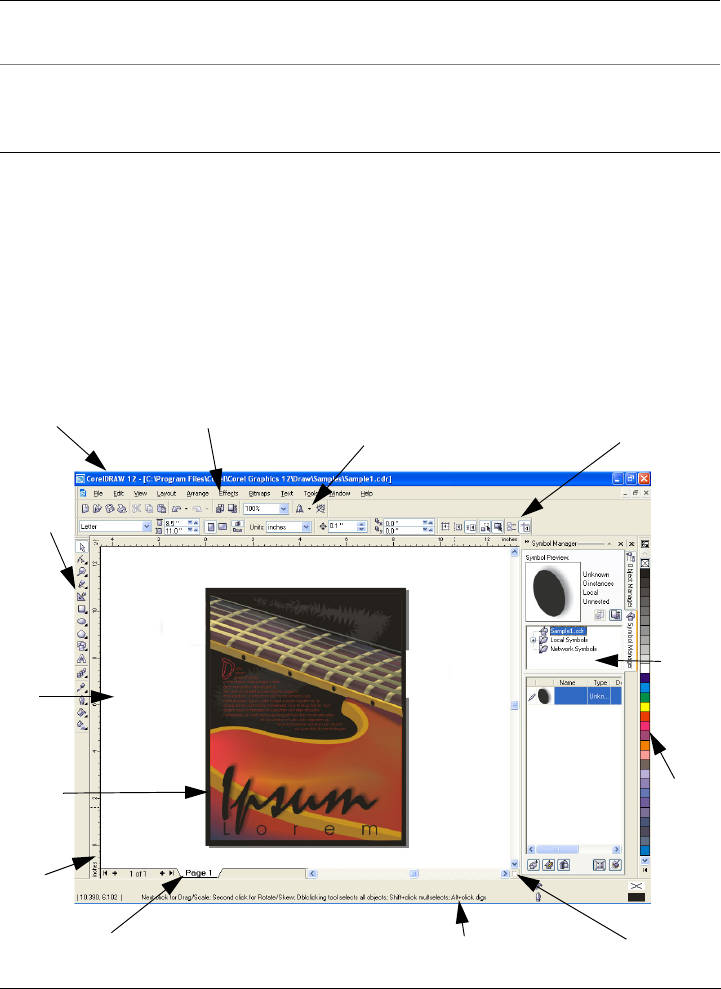
The CorelDRAW application window appears below. A description of its parts follows.
artistic text A type of text to which you can apply special
effects, such as shadows
paragraph text A type of text to which you can apply
formatting options, and which can be edited
in large blocks
Term Description
Title bar
Toolbox
Navigator
Color
palette
Docker
Toolbar
(standard)
Property
bar
Menu bar
Document
navigator Status bar
Drawing
window
Drawing
page
Ruler

CorelDRAW: Workspace tour 19
Part Description
Menu bar The area containing pull-down menu
options
Property bar A detachable bar with commands that relate
to the active tool or object. For example,
when the text tool is active, the text property
bar displays commands that create and edit
text.
Toolbar A detachable bar that contains shortcuts to
menu and other commands
Title bar The area displaying the title of the currently
open drawing
Rulers Horizontal and vertical borders that are used
to determine the size and position of objects
in a drawing
Toolbox A floating bar with tools for creating, filling,
and modifying objects in the drawing
Drawing window The area outside the drawing page bordered
by the scroll bars and application controls
Drawing page The rectangular area inside the drawing
window. It is the printable area of your work
area.
Color palette A dockable bar that contains color swatches
Docker A window containing available commands
and settings relevant to a specific tool or task
Status bar An area at the bottom of the application
window that contains information about
object properties such as type, size, color, fill,
and resolution. The status bar also shows the
current mouse position.
Document navigator The area at the bottom left of the application
window that contains controls for moving
between pages and adding pages
20 CorelDRAW Graphics Suite 12 User Guide
To toggle between displaying and hiding the status bar, click Window `
To o l b a r s ` Status bar.
CorelDRAW workspace tools
Application commands are accessible through the menu bar, toolbars, toolbox, property
bar, and dockers. The property bar and dockers provide access to commands that relate
to the active tool or current task. The property bar, dockers, toolbars, and toolbox can
be opened, closed, and moved around your screen at any time.
You can customize many of these workspace tools to suit your needs. For more
information, see “Customizing your application” in the Help.
Standard toolbar
The standard toolbar, which displays by default, contains buttons that are shortcuts to
many of the menu commands.
For information about customizing the position, contents, and appearance of toolbars,
see “Customizing toolbars” in the Help.
Navigator A button at the bottom-right corner that
opens a smaller display to help you move
around a drawing
Click this button To
Start a new drawing
Open a drawing
Save a drawing
Print a drawing
Part Description
CorelDRAW: Workspace tour 21
More about toolbars
In addition to the standard toolbar, CorelDRAW has toolbars for specific kinds of tasks.
For example, the Te x t toolbar contains commands relevant to using the Te x t tool. If
you use a toolbar frequently, you can display it in the workspace at all times.
The following table describes toolbars other than the standard toolbar.
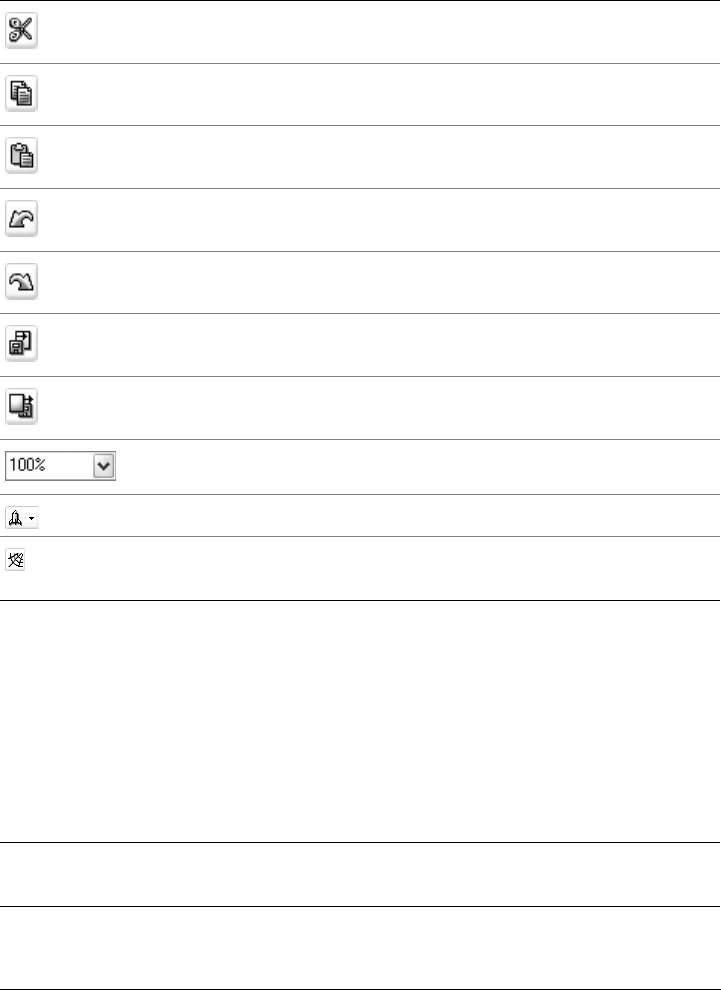
Cut selected objects to the Clipboard
Copy selected objects to the Clipboard
Paste the Clipboard contents into a drawing
Undo an action
Restore an action that was undone
Import a drawing
Export a drawing
Set a zoom level
Start Corel applications
Launch to Corel Graphics Community Web
site
Toolbar Description
Text Contains commands for formatting and
aligning text
Click this button To

22 CorelDRAW Graphics Suite 12 User Guide
Exploring the toolbox
Flyouts open to display a set of related CorelDRAW tools. A small arrow in the bottom,
right corner of a toolbox button indicates a flyout: for example, the Shape edit flyout
. Clicking a flyout arrow opens a set of related tools. Clicking and dragging the grab
handles at the end of the flyout sets the flyout in its expanded form.
The following table provides descriptions of the flyouts and tools in the CorelDRAW
toolbox.
Flyouts
Zoom Contains commands for zooming in and out
of a drawing page by specifying percentage
of original view, clicking the Zoom tool, and
selecting a page view
Internet Contains commands for Web-related tools
for creating rollovers and publishing to the
Internet
Print merge Contains commands for print merge items
that combine text with a drawing such as
creating and loading data files, creating data
fields for variable text, and inserting print
merge fields
Transform Contains commands for skewing, rotating,
and mirroring objects
Visual Basic for Applications Contains commands for editing, testing, and
running VBA commands
Flyout Description
Shape edit Lets you access the Shape, Knife, Eraser,
Smudge brush, Roughen brush, Free
transform, and Virtual segment delete
tools
Zoom Lets you access the Zoom and Hand tools
Toolbar Description

CorelDRAW: Workspace tour 23
Curve Lets you access the Freehand, Bézier,
Artistic media, Polyline, Pen, 3 point
curve, Dimension, and Interactive
connector tools
Rectangle Lets you access the Rectangle and 3 point
rectangle tools
Ellipse Lets you access the Ellipse and 3 point
ellipse tools
Object Lets you access the Graph paper, Polygon,
and Spiral tools
Perfect Shapes™ Lets you access the Basic shapes, Arrow
shapes, Flowchart shapes, Star shapes,
and Callout shapes tools
Interactive tools Lets you access the Interactive blend,
Interactive contour, Interactive
distortion, Interactive envelope,
Interactive extrude, Interactive drop
shadow, and Interactive transparency
tools
Eyedropper Lets you access the Eyedropper and
Paintbucket tools
Outline Lets you access the Color docker, Outline
pen and the Outline color dialog boxes,
and a selection of outlines of various widths
Fill Lets you access the Color docker, Fill color,
Fountain fill, Pattern fill, Texture fill, and
PostScript® fill dialog boxes
Interactive fill Lets you access Interactive fill and
Interactive mesh fill tools
Flyout Description
24 CorelDRAW Graphics Suite 12 User Guide
Tools
Tool Description
The Pick tool lets you select and size, skew,
and rotate objects.
The Shape tool lets you edit the shape of
objects.
The Knife tool lets you cut through objects.
The Eraser tool lets you remove areas of
your drawing.
The Smudge brush tool lets you distort a
vector object by dragging along its outline.
The Roughen brush tool lets you distort
the outline of a vector object by dragging
along the outline.
The Free transform tool lets you transform
an object by using the Free rotation, Angle
rotation, Scale, and Skew tools.
The Virtual segment delete tool lets you
delete portions of objects that are between
intersections.
The Zoom tool lets you change the
magnification level in the drawing window.
The Hand tool lets you control which part of
the drawing is visible in the drawing
window.
The Pen tool lets you draw curves one
segment at a time.
The Polyline tool lets you draw lines and
curves in preview mode.
The Freehand tool lets you draw single line
segments and curves.
CorelDRAW: Workspace tour 25
The Bézier tool lets you draw curves one
segment at a time.
The 3 point curve tool lets you draw a curve
by defining the start, end, and center points.
The Artistic media tool provides access to
the Brush, Sprayer, Calligraphic, and
Pressure tools.
The Dimension tool lets you draw vertical,
horizontal, slanted, or angular dimension
lines.
The Interactive connector tool lets you
join two objects with a line.
The Smart drawing tool converts the
freehand strokes that you draw to basic
shapes and smoothed curves.
The Rectangle tool lets you draw rectangles
and squares.
The 3 point rectangle tool lets you draw a
rectangle by dragging to create the rectangle
baseline and clicking to define its height.
The Ellipse tool lets you draw ellipses and
circles.
The 3 point ellipse tool lets you draw an
ellipse by dragging to create the center line
of the ellipse and clicking to define its
height.
The Polygon tool lets you draw symmetrical
polygons and stars.
The Spiral tool lets you draw symmetrical
and logarithmic spirals.
Tool Description
26 CorelDRAW Graphics Suite 12 User Guide
The Graph paper tool lets you draw a grid
of lines similar to that on graph paper.
The Basic shapes tool lets you choose from
a full set of shapes, including hexagram, a
smiley face, and a right-angle triangle.
The Arrow shapes tool lets you draw arrows
of various shape, direction, and number of
heads.
The Flowchart shapes tool lets you draw
flowchart symbols.
The Star shapes tool lets you draw ribbon
objects and explosion shapes.
The Callout shapes tool lets you draw
callouts and labels.
The Te x t tool lets you type words directly on
the screen as artistic or paragraph text.
The Interactive blend tool lets you blend
two objects.
The Interactive contour tool lets you apply
a contour to an object.
The Interactive distortion tool lets you
apply a Push or Pull distortion, a Zipper
distortion, or a Twister distortion to an
object.
The Interactive envelope tool lets you
distort an object by dragging the nodes of
the envelope.
The Interactive extrude tool lets you apply
the illusion of depth to objects.
The Interactive drop shadow tool lets you
apply a drop shadow to an object.
Tool Description
CorelDRAW: Workspace tour 27
Property bar
The property bar displays the most commonly used functions that are relevant to the
active tool or to the task you’re performing. Although it looks like a toolbar, the
property bar content changes depending on the tool or task.
For example, when you click the Te x t tool in the Toolbox, the property bar displays only
text-related commands. In the example below, the property bar displays text,
formatting, alignment, and editing tools.
You can customize the contents and position of the property bar to suit your needs. For
more information, see “Customizing the property bar” in the Help.
The Interactive transparency tool lets you
apply transparencies to objects.
The Eyedropper tool lets you select object
properties, such as fill, line thickness, size,
and effects, from an object on the drawing
window.
The Paintbucket tool lets you apply object
properties, such as fill, line thickness, size
and effects, to an object on the drawing
window after selecting these properties using
the Eyedropper tool.
The Interactive fill tool lets you apply
various fills.
The Interactive mesh tool lets you apply a
mesh grid to an object.
The Fill tool lets you set the fill properties.
Tool Description
28 CorelDRAW Graphics Suite 12 User Guide
Dockers
Dockers display the same type of controls as a dialog box, such as command buttons,
options, and list boxes. Unlike most dialog boxes, you can keep dockers open while
working on a document, so you can readily access the commands to experiment with
different effects.
Dockers can be either docked or floating. Docking a docker attaches it to the edge of
the application window. Undocking a docker detaches it from other parts of the
workspace, so it can be easily moved around. You can also collapse dockers to save screen
space.
Status bar
The status bar displays information about selected objects (such as color, fill type, and
outline, cursor position, and relevant commands).
See “Customizing the status bar” in the Help for information about customizing the
contents and appearance of the status bar.
An example is the
Object properties
docker. When this
docker is open, you can
click an object in the
drawing window and
view formatting,
dimensions, and other
properties of the object.

CorelDRAW: Getting started in CorelDRAW 29
Getting started in CorelDRAW
Drawings are the work that you create and edit in CorelDRAW.
In this section, you’ll learn about
• starting and opening drawings
• finding and inserting drawing content
• exploring the basic features of CorelDRAW
• working with templates
• undoing, redoing, and repeating actions
• accessing drawing information
• zooming and panning
• previewing a drawing
• backing up and recovering files
• saving drawings
• closing drawings and quitting CorelDRAW
Starting and opening drawings
CorelDRAW lets you start a new drawing from a blank page, from a template, or from
an existing drawing.
A blank page gives you the freedom to specify every aspect of a drawing.
A template provides you with a starting point and leaves the amount of customization
up to you. The templates included with CorelDRAW are available under the following
categories:
• Full page
•Label
•Envelope
•Side-fold
•Web
30 CorelDRAW Graphics Suite 12 User Guide
For more information about creating and using templates, see “Working with
templates” on page 33.
Basing a new drawing on an existing drawing lets you reuse objects and page settings.
CorelDRAW lets you open existing drawings saved to a variety of file formats. For
information about the file formats you can open in CorelDRAW, see “File formats” in
the Help.
If the drawing you are opening is from an earlier version of CorelDRAW and contains
text in a language different from the language of your operating system, you can choose
code page settings to ensure that text is converted into Unicode characters properly.
Code page settings help you correctly display text outside the drawing window, such as
keywords, file names, and text entries in the Object manager and Object data
manager dockers. To correctly display text in the drawing window, you need to use
encoding settings. For more information, see “Encoding text” on page 214.
To start CorelDRAW
•Click Start ` All programs ` CorelDRAW Graphics Suite 12 ` CorelDRAW
12.
To start a drawing
When you start a drawing from a blank page, the drawing is based on the
default CorelDRAW template (CorelDRAW.cdt).
You can specify a layout style (template) by clicking Layout ` Page setup,
clicking Layout in the list of categories, and choosing a layout style from the
Layout list box.
To Do the following
Start a drawing from a blank page Click File ` New.
Start a drawing from a template Click File ` New from template, click the
tab that corresponds to the template
category you want, and choose a template.
CorelDRAW: Getting started in CorelDRAW 31
To open a drawing
1Click File ` Open.
2Locate the folder where the drawing is stored.
3Click a filename.
If the drawing is from an earlier version of CorelDRAW and contains text in a
language different from the language of your operating system, choose the
corresponding option from the Code page list box to ensure text is converted into
Unicode characters properly.
4Click Open.
You can also open a drawing by clicking the Open button on the toolbar.
If you want to view a thumbnail of the drawing, click the Preview check box.
Finding and inserting drawing content
You can use clipart, photo images, and sounds stored on the Corel content CDs or that
are available online. The digital content manual contains pictures of the graphics
available on the CD and their folder locations.
You can also access online images directly from Corel on the Web through the
Scrapbook™ docker.
To browse for clipart, photos, and sound files
1Click Window ` Dockers ` Scrapbook.
2Insert a Corel content CD into the CD drive.
3Double-click an icon in the CD list and navigate to a folder.
To browse for images online, you must be connected to the Internet.
You can also
Browse for files on your computer or
network
Double-click the Desktop icon, and
navigate to a folder.
Browse for images online Click the Content on the Web button.

32 CorelDRAW Graphics Suite 12 User Guide
To change your browsing view in the Scrapbook docker, click the flyout
arrow, click View, and choose a view type.
To search for clipart, photos, and sound files
1Click Window ` Dockers ` Scrapbook ` Search.
2Insert a Corel contents CD into the CD drive.
3Type a keyword in the Search for text box.
To insert a graphic or sound file
• Drag the graphic or sound file from the Scrapbook docker to the drawing window.
Exploring the basic features of CorelDRAW
CorelDRAW has a virtually unlimited number of tools and capabilities to help you
create drawings. The following table provides you with the basic features of
CorelDRAW so that you can get started.
For information about See
Drawing lines “Working with lines, outlines, and brush
strokes” on page 45
Drawing shapes “Drawing shapes” on page 63
Creating and manipulating objects “Working with objects” on page 75
Adding color to objects “Filling objects” on page 141
Adding text to a drawing “Adding and selecting text” on page 211
Creating drawings for use on the World
Wide Web
“Publishing to the Web” on page 263
Printing drawings “Printing” on page 271
CorelDRAW: Getting started in CorelDRAW 33
Working with templates
A template is a set of styles and page layout settings that govern the layout and
appearance of a drawing. You can use the default template (CorelDRAW.cdt) or choose
one from a wide variety of preset templates available in the application. For information
on starting a drawing from a template, see “Starting and opening drawings” on
page 29. If none of the preset templates meets your requirements, you can create a
template based on styles you create or styles taken from other templates. For example,
if you regularly put together a newsletter, you can save the newsletter’s page layout
settings and styles to a template.
When you create a new drawing using a template, CorelDRAW formats the page using
the template’s page layout settings and loads the template’s styles in the new file.
You can edit a template by making changes to the styles, page layout settings, or
objects. For example, if you like a template but want to make it more versatile, you can
add styles that you’ve created or that you’ve taken from another template. For
information about setting page layout options, see “Specifying the page layout” on
page 193. After you have started a drawing with a template, you can load a different
template. When you load a template, you can choose to load just the styles or to load
styles, page layout settings, and objects.
Use a template for drawing designs that you want to reuse.
To create a template
1Click File ` Save as.
2Ty p e a n a m e i n t h e File name list box.

34 CorelDRAW Graphics Suite 12 User Guide
3Choose CDT - CorelDRAW template from the Save as type list box.
4Locate the folder where you want to save the template.
5Click Save.
To edit a template
1Click File ` Open.
2Choose CDT - CorelDRAW template from the Files of type list box.
3Locate the folder where the template is stored.
4Double-click a template filename.
5In the Open dialog box, enable the Open for editing check box.
To preview the contents of a template, enable the Preview check box.
To create a new file based on a saved template
1Click File ` Open.
2Choose CDT - CorelDRAW template from the Files of type list box.
3Locate the folder where the template is stored.
4Double-click a template filename.
5Enable the New from template check box in the Open dialog box.
If, in addition to loading the template’s styles, you also want to load page settings
and objects, enable the With contents check box.
To load styles from another template
1Click To o l s ` Graphic and text styles.
2In the Graphic and text styles docker, click the flyout button , and click
Te m p l a t e ` Load.
3Locate the folder where the template is stored.
4Click a template whose styles you want to load.
5Click Open.

CorelDRAW: Getting started in CorelDRAW 35
When you use the Load command, only the styles are loaded. CorelDRAW
does not use the template’s page layout settings and does not add objects saved
with the template to the page. The attributes of existing objects are
maintained.
Undoing, redoing, and repeating actions
You can undo the actions you perform in a drawing, starting with the most recent
action. If you don’t like the result of undoing an action, you can redo it. Reverting to
the last saved version of a drawing also lets you remove one or more actions. Certain
actions applied to objects, such as stretching, filling, moving and rotating, can be
repeated to create a stronger visual effect.
Customizing the undo settings lets you increase or decrease the number of actions that
you can undo or redo.
To undo, redo, and repeat actions
When you undo a series of actions, all actions listed below the action you
choose are undone.
When you redo a series of actions, the action you choose and all actions listed
between it and the last undone action are redone.
To Do the following
Undo an action Click Edit ` Undo.
Redo an action Click Edit ` Redo.
Undo or redo a series of actions Click To o l s ` Undo Docker. Choose the
action that precedes all the actions you want
to undo, or choose the last action you want
to redo.
Revert to the last saved version of a drawing Click File ` Revert.
Repeat an action Click Edit ` Repeat.

36 CorelDRAW Graphics Suite 12 User Guide
You can repeat an action on another object or group of objects by selecting the
object or objects and clicking Edit ` Repeat.
You can also undo or redo actions by clicking the Undo button or Redo
button on the Standard toolbar.
Accessing drawing information
As you work, you can access drawing information such as the number of pages, fonts,
text statistics, color models used, and the types of objects the drawing contains. You can
also save and print this information.
To access drawing information
1Click File ` Document info.
2Enable the check box beside each type of information you want to display.
Zooming and panning
You can change the view of a drawing by zooming in to get a closer look or by zooming
out to see more of the drawing. You can experiment with a variety of zoom options to
determine the amount of detail you want. Another way in which you can view specific
areas of a drawing is by panning. When you work at high magnification levels or with
large drawings, you may not be able to see the whole drawing. Panning lets you view
areas that aren’t displayed by moving the page around in the drawing window.
You can also
Save drawing information Click Save as, specify a folder and filename,
and click Save.
Print drawing information Click Print.
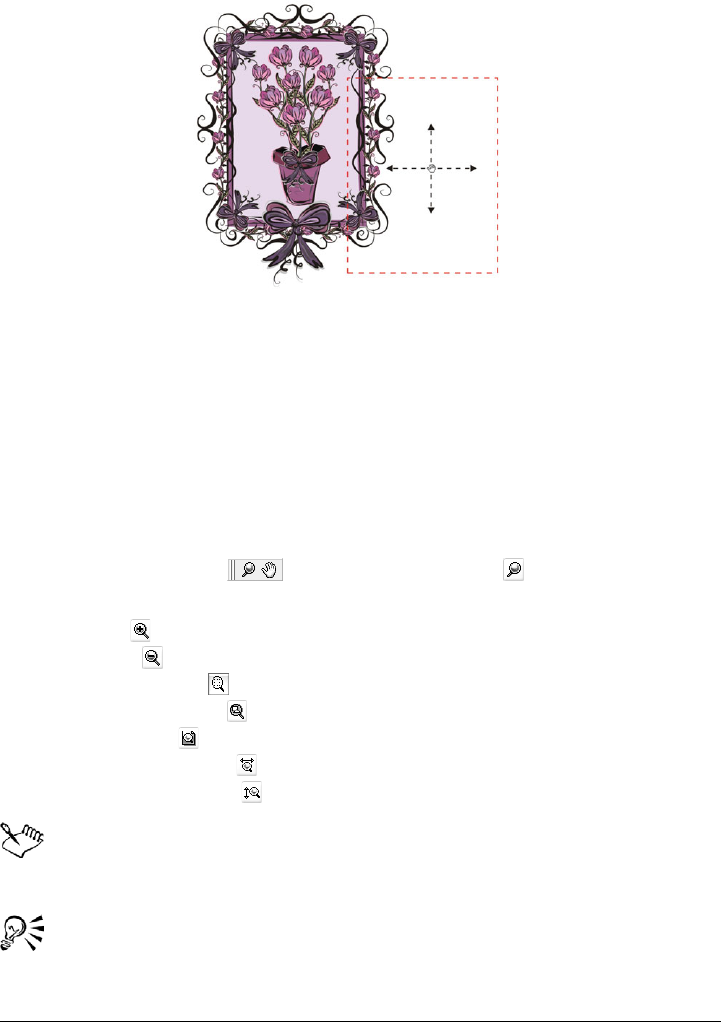
CorelDRAW: Getting started in CorelDRAW 37
You can use the Hand tool to pan around a large image and view particular
areas.
While you are panning, you can zoom in and out. While you are zooming, you can pan.
This saves you from having to alternate between the two tools.
You can specify zooming and panning settings to zoom in quickly to detailed parts of a
drawing and zoom out to the larger context.
To zoom
1Open the Zoom flyout , and click the Zoom tool .
2On the property bar, click one of the following buttons:
• Zoom in
• Zoom out
• Zoom to selected
• Zoom to all objects
• Zoom to page
• Zoom to page width
• Zoom to page height
The Zoom to selected button is available only when you select one or more
objects before you open the Zoom flyout.
When you are not editing text, you can also access the Zoom tool by pressing
the Z key.

38 CorelDRAW Graphics Suite 12 User Guide
You can also zoom in by double-clicking or dragging anywhere in the drawing
window using the Hand tool . To zoom out, right-click in the drawing
window.
To pan in the drawing window
1Open the Zoom flyout , and click the Hand tool .
2Drag in the drawing window until the area you want to view displays.
When you are not editing text, you can also access the Hand tool by pressing
the H key.
If you want to pan in the drawing window while zoomed in on the drawing,
click the Navigator button in the bottom-right corner of the drawing
window or the N key. Drag the cross-haired pointer around in the Navigator
pop-up window.
Previewing a drawing
You can preview a drawing to see how it will look when you print and export. When
you preview a drawing, only the objects on the drawing page and in the immediate area
of the drawing window are displayed, and you can see all layers that are set to print in
the Object Manager. If you want to get a closer look at specific objects in a drawing,
you can select and preview them, too. When you preview selected objects, the rest of
the drawing is hidden.
Before you preview a drawing, you can specify the preview mode. The preview mode
affects the speed at which your preview displays and the amount of detail that is
displayed in the drawing window.
You can also display consecutive pages on the screen at the same time and create objects
that span two pages.
To preview a drawing
•Click View ` Full screen preview.
Click anywhere on the screen, or press any key, to return to the application window.

CorelDRAW: Getting started in CorelDRAW 39
You can press Page up and Page down to preview pages in a multiple-page
drawing.
To preview selected objects
1Select the objects.
2Click View ` Preview selected only.
3Click View ` Full screen preview.
Click anywhere on the screen, or press any key, to return to the application window.
If Preview selected only mode is enabled and no objects are selected, Full
screen preview displays a blank screen.
You can disable Preview selected only mode after you return to the
application window by clicking View ` Preview selected only.
To view facing pages
1Click Layout ` Page setup.
2In the Document, Page list of categories, click Layout.
3Enable the Facing pages check box.
4Choose one of the following settings from the Start on list box:
• Left side — starts the document on a left-facing page
• Right side — starts the document on a right-facing page
You will be unable to view facing pages if the document uses a Tent card or
Top fold card layout style, or if it contains multiple page orientations. The Left
side option is only available for the Full page and Book layout styles.
Backing up and recovering files
CorelDRAW can automatically save backup copies of drawings and prompt you to
recover them when you restart the program in the event of a system error.
40 CorelDRAW Graphics Suite 12 User Guide
The auto backup feature saves drawings that you have open and modified. During any
working session with CorelDRAW, you can set the time interval for automatically
backing up files and specify where you want the files to be saved: by default in your
temporary folder or to a specified folder.
You can recover backed-up files from the temporary or specified folder when you restart
CorelDRAW. Backup files are stored in either the temporary or the user-specified folder.
You can choose not to recover a file; however, that file is automatically erased when you
shut down the program normally.
To specify auto backup settings
1Click To o l s ` Options.
2In the Wo rk s pa ce list of categories, click Save.
3Enable the Auto-backup every check box, and choose a value from the Minutes
list box.
4In the Always back-up to area, enable one of the following options:
• Te m p o r a r y f o l d e r — lets you save an auto backup file in the temporary folder
• Specific folder — lets you specify the folder for an auto backup file
Auto backup files are named auto_backup_of_filename and can be saved in
any folder you specify. Backup files created when you save a drawing are named
backup_of_filename and are always stored in the same folder as the original
drawing.
All open or modified files other than CorelDRAW file format (.cdr) will be
backed up as .cdr files.
You can cancel the creation of an auto backup file by pressing Esc while saving
is in progress.
You can also
Create a backup file every time you save Enable the Make backup on save check
box.
Disable auto backup Choose Never from the Minutes list box.

CorelDRAW: Getting started in CorelDRAW 41
To recover a backup file
1Restart CorelDRAW.
2Click OK in the File recovery dialog box.
3Save and rename the file in the specified folder.
Recovered files are named GraphicsX.cdr, where X is the numbered
increment.
If you click Cancel, CorelDRAW ignores the backup file and deletes it when
you exit the program normally.
Saving drawings
CorelDRAW lets you save a drawing as you work. The application also offers advanced
options that let you assign notes, keywords, and thumbnails to drawings so that you can
find them more easily.
By default, drawings are saved to the CorelDRAW file format (.cdr); however, advanced
save options let you choose other file formats as well. If you are saving a drawing to use
in another application, you must save it to a file format that is supported by that
application. You can also save a drawing to a previous version of CorelDRAW. For
information about file formats supported by CorelDRAW, see “File formats” in the
Help. For information about saving files to other formats, see “Exporting files” on
page 302.
A drawing can also be saved as a template, allowing you to create other drawings with
the same properties. You can also save selected objects in a drawing. If you are working
on a large drawing, saving only the selected objects reduces the file size, which can
decrease the time it takes to load the drawing. For information about saving a drawing
as a template, see “Working with templates” on page 33.
To save a drawing
1Click File ` Save as.
2Locate the folder where you want to save the file.
• If you want to save notes or keywords with the file, type them in the
corresponding box.
• If you want to specify advanced settings, click Advanced, and specify the
settings you want in the Options dialog box.

42 CorelDRAW Graphics Suite 12 User Guide
3Type a filename in the File name list box.
4Click Save.
If you want to save changes made to a previously saved drawing, click File `
Save.
To save only selected objects
1Select the objects.
2Click File ` Save as.
3Enable the Selected only check box.
4Locate the folder where you want to save the file.
5Type a filename in the File name list box.
6Click Save.
Closing drawings and quitting CorelDRAW
You can close one or all open drawings at any time before quitting CorelDRAW.
To close drawings
To quit CorelDRAW
•Click File ` Exit.
You can also quit CorelDRAW by pressing Alt + F4.
To close Do the following
One drawing Click File ` Close.
All open drawings Click Window ` Close all.

CorelDRAW: Getting started in CorelDRAW 43
From here
For more information about In the Help index, see
Customizing undo settings undoing, customizing settings
Choosing default settings for zooming and
panning
zooming, defaults
Working with views views

CorelDRAW: Working with lines, outlines, and brush strokes 45
Working with lines,
outlines, and brush strokes
CorelDRAW lets you add lines and brush strokes using a variety of techniques and
tools. After you draw lines or apply brush strokes to lines, you can format them. You
can also format the outlines that surround objects.
CorelDRAW provides preset objects that you can spray along a line. You can also create
flow and dimension lines in drawings.
You can draw lines using shape recognition. For more information, see “Drawing using
shape recognition” on page 71.
In this section, you’ll learn about
• drawing lines
• formatting lines and outlines
• closing multiple line segments
• applying brush strokes
• spraying objects along a line
• drawing flow and dimension lines
Drawing lines
CorelDRAW lets you draw all kinds of different lines, from curved or straight lines to
calligraphic lines. You can create a line that is drawn as you drag the mouse. You can
create segments that are straight and curved in the same line. You can draw straight or
curved segments and then add one node at a time. You can also draw a curve by
specifying width and height.
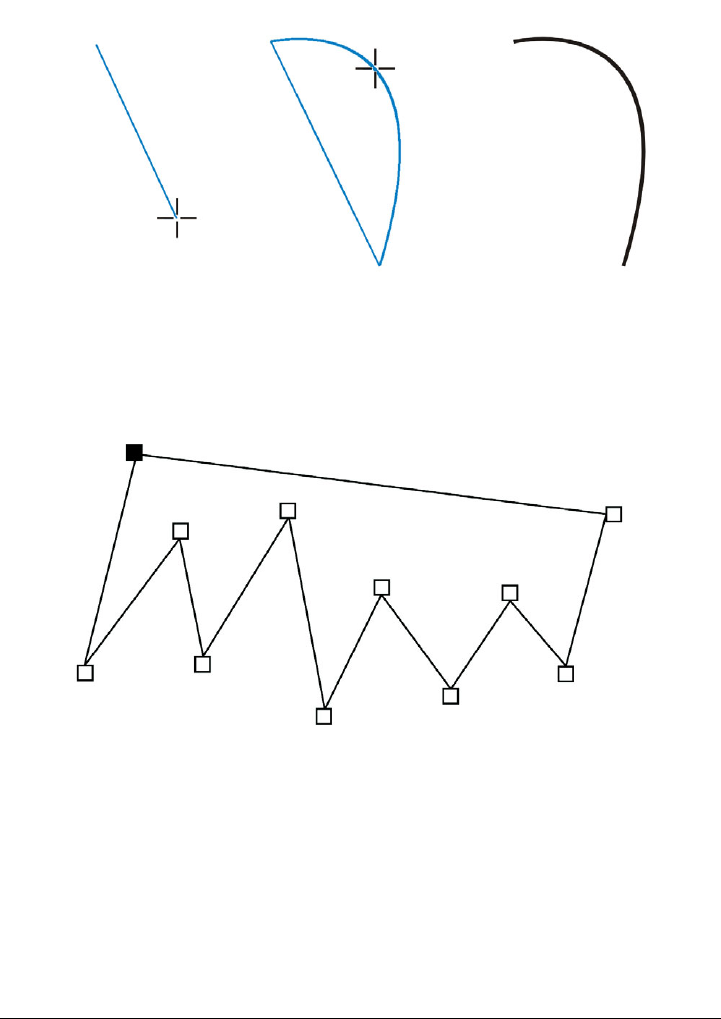
46 CorelDRAW Graphics Suite 12 User Guide
You can draw a curved line by specifying its width (left), specifying its height
(center), and clicking the page (right).
Some lines have nodes and control points that you can manipulate to shape lines as you
draw. For information about node types, see “Working with curve objects” on page 101.
You can draw multi-segment lines using the Bézier tool, by clicking each time
you want the line to change direction.
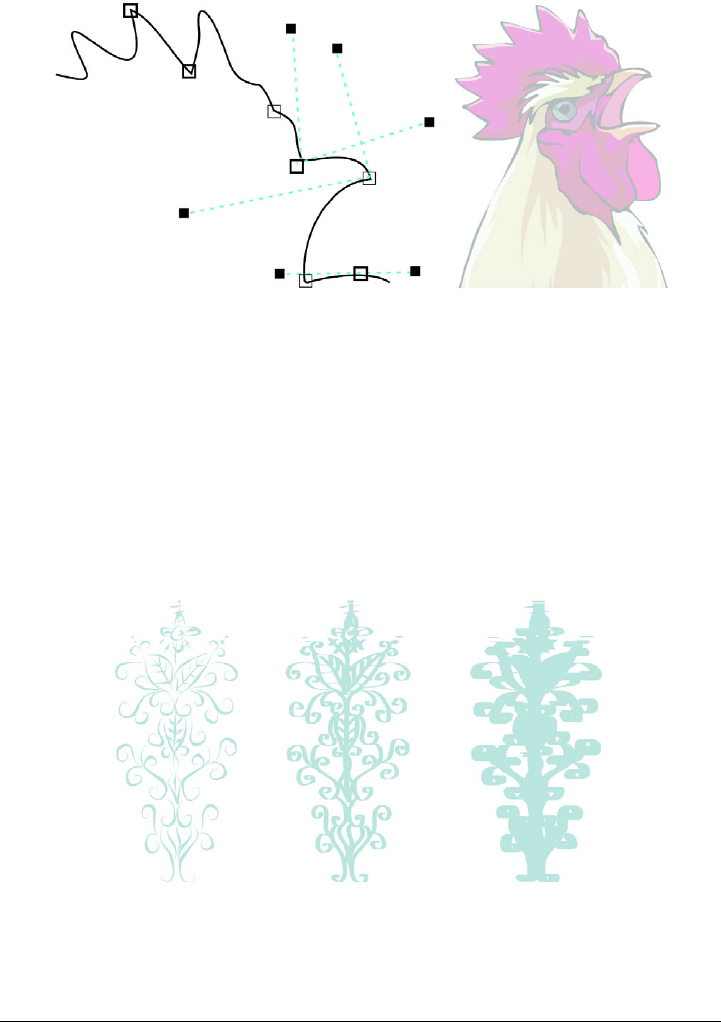
CorelDRAW: Working with lines, outlines, and brush strokes 47
You can draw curves using the Bézier tool, by dragging the control points at
the ends of the Bézier curve.
CorelDRAW also lets you simulate the effect of a calligraphic pen when you draw lines.
Calligraphic lines vary in thickness according to the direction of the line and the angle
of the pen nib. By default, calligraphic lines display as closed shapes drawn with a
pencil. You can control the thickness of a calligraphic line by changing the angle of the
line you draw in relation to the calligraphic angle you choose. For example, when the
line you draw is perpendicular to the calligraphic angle, the line is at the maximum
thickness specified by the pen width. Lines drawn at the calligraphic angle, however,
have little or no thickness.
A calligraphic pen allows you to draw lines of various thicknesses.
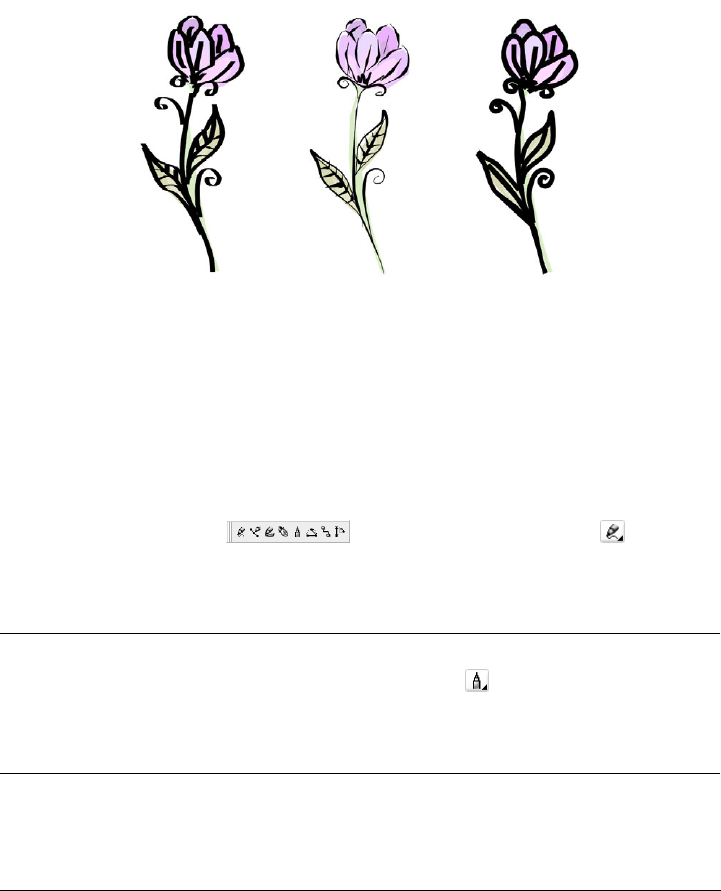
48 CorelDRAW Graphics Suite 12 User Guide
CorelDRAW lets you create pressure-sensitive lines which vary in thickness. You can
create this effect using the mouse or a pressure-sensitive pen and graphics tablet. Both
methods result in lines with curved edges and varying widths along a path. For
information about using a pressure-sensitive pen on a graphics tablet, see the
manufacturer’s instructions.
A flower drawn by using three different artistic media lines: calligraphic lines
(left), pressure-sensitive lines (center), and the lineflat preset line (right).
CorelDRAW provides preset lines that let you create thick strokes in a variety of shapes.
After you draw a calligraphic or preset line, you can apply a fill to it as you would to any
other object. For information about applying fills, see “Filling objects” on page 141.
To draw a straight line
1Open the Curve flyout , and click the Freehand tool .
2Click where you want to start the line, and click where you want to end it.
You can also
Draw a straight line using the Polyline tool Open the Curve flyout, and click the
Polyline tool . Click where you want to
start the line segment, and click where you
want to end the line segment. Double-click
to end the line.

CorelDRAW: Working with lines, outlines, and brush strokes 49
You can constrain a line created with the Freehand tool to a straight vertical
or horizontal line by holding down Ctrl while you drag. You can change the
angle of this line by clicking To o l s ` Options, clicking Edit in the Wor ks pac e
list of categories and changing the value in the Constrain Angle box.
To draw a curved line
1Open the Curve flyout , and click the Freehand tool .
Draw a straight line using the Bézier tool Open the Curve flyout, and click the Bézier
tool . Double-click where you want to
start the line. Click where you want to end
the line. If you want to create a multi-
segment line, double-click where you want
the new line segment to end. Continue this
process until the line has as many segments
as you want. Double-click to finish the line.
Draw a straight line using the Pen tool Open the Curve flyout, and click the Pen
tool . Double-click where you want to
start the line. Click where you want to end
the line. If you want to create a jagged line,
double-click where you want the new line
segment to end. Continue this process until
the line has as many segments as you want.
Double-click to finish the line.
Preview a line using the Pen tool Click the Preview mode button in the
property bar. Click on the drawing page, and
release the mouse button. Move the mouse,
and click to finish the line.
Add line segments to an existing line Using the Freehand tool , click the end
node of a selected line, and click where you
want the new segment to end.
Create a closed shape from two or more
connected lines
Using the Freehand tool , click the end
node of a line with two segments. Click the
first node.
You can also
50 CorelDRAW Graphics Suite 12 User Guide
2Click where you want to start the curve, and drag to draw the line.
You can erase a portion of a curved freehand line by holding down Shift and
dragging backward over the line before releasing the mouse button.
You can close an object with the Shape tool by opening the Shape flyout
, and selecting a shape. Click on the Auto-close curve button .
You can also
Draw a curved line using the Polyline tool Open the Curve flyout, and click the
Polyline tool . Click where you want to
start the curve, and drag across the drawing
page. Double-click to finish the curve.
Draw a curved line using the Bézier tool Open the Curve flyout and click the Bézier
tool . Click where you want to place the
first node, and drag the control point in the
direction you want the curve to bend.
Release the mouse button. Position the
cursor where you want to place the next
node, and drag the control point to create
the curve you want. Double-click to finish
the curve.
Draw a curved line using the Pen tool Open the Curve flyout and click the Pen
tool . Click where you want to place the
first node, and drag the control point in the
direction you want the curve to bend.
Release the mouse button. Position the
cursor where you want to place the next
node, and drag the control point to create
the curve you want. Double-click to finish
the curve.
Preview a line using the Pen tool Click the Preview mode button in the
property bar. Click on the drawing page, and
release the mouse button. Move the mouse
and click to finish the curve.
CorelDRAW: Working with lines, outlines, and brush strokes 51
To draw a curve by specifying width and height
1Open the Curve flyout , and click the 3 point curve tool .
2Click where you want to start the curve, and drag to where you want the curve to
end.
3Release the mouse button, and click where you want the center of the curve to be.
To draw a calligraphic line
1Open the Curve flyout , and click the Artistic media tool .
2Click the Calligraphic button on the property bar.
3Type a value in the Calligraphic angle box on the property bar.
If you want to smooth the edges of the line, type a value in the Freehand
smoothing box on the property bar.
4Drag until the line is the shape you want.
If you want to set the width of the line, type a value in the Artistic media tool
width box on the property bar.
The width you set is the maximum line width. The angle of the line you draw
in relation to the calligraphic angle determines the line’s actual width.
You can also access calligraphic lines by clicking Effects ` Artistic media, and
specifying the settings you want in the Artistic media docker.
To draw a pressure-sensitive line
1Open the Curve flyout , and click the Artistic media tool .
2Click the Pressure button on the property bar.
If you want to smooth the edges of the line, type a value in the Freehand
smoothing box on the property bar.
3Drag until the line is the shape you want.
If you want to change the width of the line, type a value in the Artistic media tool
width box on the property bar.

52 CorelDRAW Graphics Suite 12 User Guide
The width you set represents the line’s maximum width. The amount of
pressure you apply determines the line’s actual width.
If you are using the mouse, press the Up arrow or Down arrow to simulate
the pen pressure, and, therefore, the width of the line.
You can also access pressure-sensitive lines by clicking Effects ` Artistic
media.
To draw a preset line
1Open the Curve flyout , and click the Artistic media tool .
2Click the Preset button on the property bar.
3Choose a preset line shape from the Preset stroke list list box.
If you want to smooth the edges of the line, type a value in the Freehand
smoothing box on the property bar.
4Drag until the line is the shape you want.
If you want to set the width of the line, type a value in the Artistic media tool
width box on the property bar.
Formatting lines and outlines
You can change the appearance of both lines and outlines. For example, you can specify
their color, width, style, corner shape, and cap style. You can also remove a line or
outline, and you can create your own line or outline style by adjusting the distance
between segments in the line.
CorelDRAW also lets you copy the color of an outline to other objects, convert outlines
to objects so that you can apply a fill to them, and create calligraphic outlines. For more
information about filling objects, see “Filling objects” on page 141.
You can also add arrowheads to lines and curves. In addition, you can create new
arrowheads and edit current or new ones.
Setting the miter limit for outlines lets you specify at what angle a sharp corner is either
mitered (pointed) or beveled (squared-off).
CorelDRAW: Working with lines, outlines, and brush strokes 53
To specify line and outline settings
1Select an object.
2Open the Outline tool flyout , and click the Outline pen
dialog button .
3Specify the settings you want.
You can change the outline color of a selected object by choosing a color from
the color picker in the Outline pen dialog box.
To copy outline color to another object
1Open the Eyedropper flyout , and click the Eyedropper tool .
2Choose Object attributes from the list box on the property bar.
3Click the Properties flyout on the property bar, and enable the Outline check box.
4Click the edge of the object whose outline you want to copy.
5Open the Eyedropper flyout , and click the Paintbucket tool .
6Click the edge of the object to which you want to copy the outline.
To convert an outline to an object
1Select an object.
2Click Arrange ` Convert outline to object.
You can also
Create a line style Click Edit style, and move the slider in the
Edit line style dialog box. By clicking the
boxes to the left of the slider, you can specify
the placement and frequency of the dots in
the new line style you create.
Edit a line style Choose a line style from the Style list box,
and click Edit style. Create a line style in the
Edit line style dialog box, and click
Replace.
54 CorelDRAW Graphics Suite 12 User Guide
To create a calligraphic outline
1Select an object.
2Open the Outline tool flyout , and click the Outline pen
dialog button .
3In the Corners area, enable a corner style option.
4Type a value in the Stretch box.
5Type a value in the Angle box.
To remove an object’s outline
1Select an object.
2Open the Outline tool flyout , and click the No outline
button .
You can also remove an object’s outline by selecting the object and right-
clicking No Color on the color palette.
To add an arrowhead
1Select a line or curve.
2Open the Outline tool flyout , and click the Outline pen
dialog button .
3In the Arrows area, open the Start arrowhead picker, and click a line-ending
shape.
4Open the End arrowhead picker, and click a line-ending shape.
Closing multiple line segments
You can quickly create a closed object from line segments by selecting which lines you
want to connect and the shape of the connecting line.
You can connect lines using the closest nodes between lines. The connecting line can be
either straight or curved. You can also connect lines using the start to end nodes of the
lines. The end node of the first selected line connects directly with the starting node of
the closest selected line. The connected lines will take on the properties of the first line
selected.

CorelDRAW: Working with lines, outlines, and brush strokes 55
Closing multiple line segments can be the starting point for more complex
drawings.
To close multiple line segments
1Hold down Shift, and select each object using the Pick tool .
2Click Arrange ` Close path, and click one of the following:
• Closest nodes with straight lines
• Closest nodes with curvy lines
• Start to end with straight lines
• Start to end with curvy lines
Text and blends fitted to a path will be detached from their paths when the
paths are closed.
You can also connect the subpaths in a group of objects.
You can also select lines by marquee selecting. If the lines are marquee selected,
the properties from the top object on a layer are used. To see which object is
the top one, open the Object manager docker by clicking Window `
Dockers ` Object manager.
Applying brush strokes
CorelDRAW lets you apply a variety of preset brush strokes, ranging from strokes with
arrowheads to ones that are filled with rainbow patterns. When you draw a preset brush
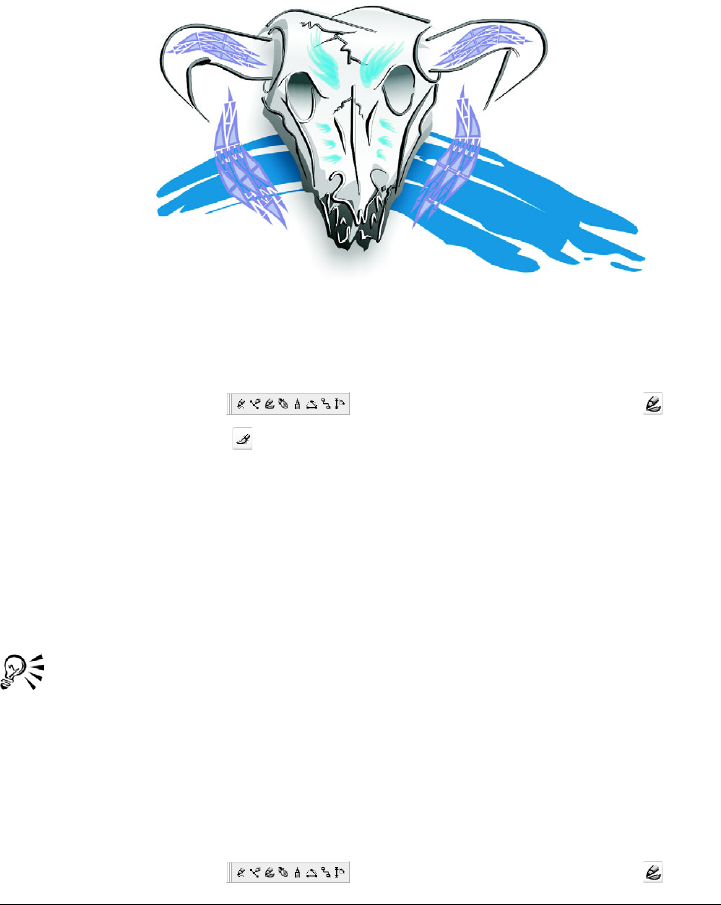
56 CorelDRAW Graphics Suite 12 User Guide
stroke, you can specify some of its attributes. For example, you can change the width of
a brush stroke and specify its smoothness.
You can also create custom brush strokes using an object or a group of vector objects.
When you create a custom brush stroke, you can save it as a preset.
The above image was created using different kinds of brush strokes and widths.
To apply a preset brush stroke
1Open the Curve flyout , and click the Artistic media tool .
2Click the Brush button on the property bar.
3Choose a brush stroke from the Brush stroke list box.
If you want to smooth the edges of the brush stroke, type a value in the Freehand
smoothing box on the property bar.
4Drag until the stroke is the shape you want.
If you want to set the width of the stroke, type a value in the Artistic media tool
width box on the property bar.
If you have access to a brush stroke that isn’t listed in the Brush stroke list
box, you can apply it by clicking the Browse button on the property bar, and
locating the brush stroke file.
To create a custom brush stroke
1Select an object or a set of grouped objects.
2Open the Curve flyout , and click the Artistic media tool .

CorelDRAW: Working with lines, outlines, and brush strokes 57
3Click the Brush button on the property bar.
4Click the object or grouped objects.
5Click the Save artistic media stroke button on the property bar.
6Ty p e a f i l e n a m e f o r t h e b r u s h s t r o k e .
7Click Save.
You can create custom brush strokes by clicking Effects ` Artistic media, and
specifying the settings you want in the Artistic media docker.
Spraying objects along a line
CorelDRAW lets you spray a series of objects in a line. Besides graphic and text objects,
you can import bitmaps and symbols to spray along a line.
You can control how a sprayed line appears by adjusting the spacing between objects,
so they are closer or farther apart from each other. You can also vary the order of objects
in the line. For example, if you are spraying a series of objects that includes a star, a
triangle, and a square, you can change the spray order so that the square appears first,
followed by the triangle and then the star. CorelDRAW also lets you shift the position
of objects in a sprayed line by rotating them along the path or offsetting them in one of
four different directions: alternating, left, random, or right. For example, you can
choose a left offset direction to align the objects you spray to the left of the path.
You can also create a new spraylist with objects of your own.
Objects sprayed along a curved line. The objects and line can be edited after the
objects have been sprayed.
58 CorelDRAW Graphics Suite 12 User Guide
To spray a line
1Open the Curve flyout , and click the Artistic media tool .
2Click the Sprayer button on the property bar.
3Choose a spraylist from the Spraylist file list box on the property bar.
If the spraylist you want is not listed, click the Browse button on the property bar
to select the folder in which the file is located.
4Drag to draw the line.
Increasing the value for the size of spray objects along the line causes objects to
become larger as they are distributed along the path.
Spraylists that have more complex objects use more system resources.
CorelDRAW takes longer to produce lines using complex objects, and these
objects will increase the file size. Using symbols for each group in the list can
help reduce file size and demands on your system. For more information about
creating symbols, see “Working with symbols” on page 133.
You can also
Adjust the number of objects sprayed at each
spacing point
Type a number in the top box of the Dabs/
spacing of objects to be sprayed
box on the property bar.
Adjust the spacing between dabs Type a number in the bottom box of the
Dabs/spacing of objects to be sprayed
box on the property bar.
Set the spray order Choose a spray order from the Choice of
spray order list box on the property bar.
Adjust the size of spray objects Type a number in the top box of the Size of
objects to be sprayed box on the property
bar.
Increase or decrease the size of the spray
objects as they progress along the line
Type a number in the bottom box of the Size
of objects to be sprayed box on the
property bar.
Reset a spraylist to its saved settings Click the Reset values button on the
property bar.

CorelDRAW: Working with lines, outlines, and brush strokes 59
To rotate the lines that you spray
1Select the spraylist that you want to adjust.
2Click the Rotation button on the property bar.
3Type a value between zero and 360 in the Angle box on the property bar.
If you want each object in the spray to rotate incrementally, enable the Use
Increment check box and type a value in the Increment box.
4Enable one of the following options:
• Path based — rotates objects in relation to the line
• Page based — rotates objects in relation to the page
5Press Enter.
To offset the lines that you spray
1Select a spraylist.
2Click the Offset button on the property bar.
3Enable the Use offset check box to offset objects from the path of the line sprayed.
If you want to adjust the offset distance, type a new value in the Offset box.
4Choose an offset direction from the Offset direction list box.
If you want to alternate between the left and right of the line, choose Alternating.
To create a new spray list
1Click Effects ` Artistic media.
2Select an object, a set of grouped objects, or a symbol.
3Click the Save button on the Artistic media docker.
4Enable Object sprayer.
5Click OK.
6Type a filename in the Filename box.
7Click Save.
Drawing flow and dimension lines
You can draw flow lines in flowcharts and organizational charts to connect chart shapes.
Objects stay connected by these lines even when you move one or both objects. For
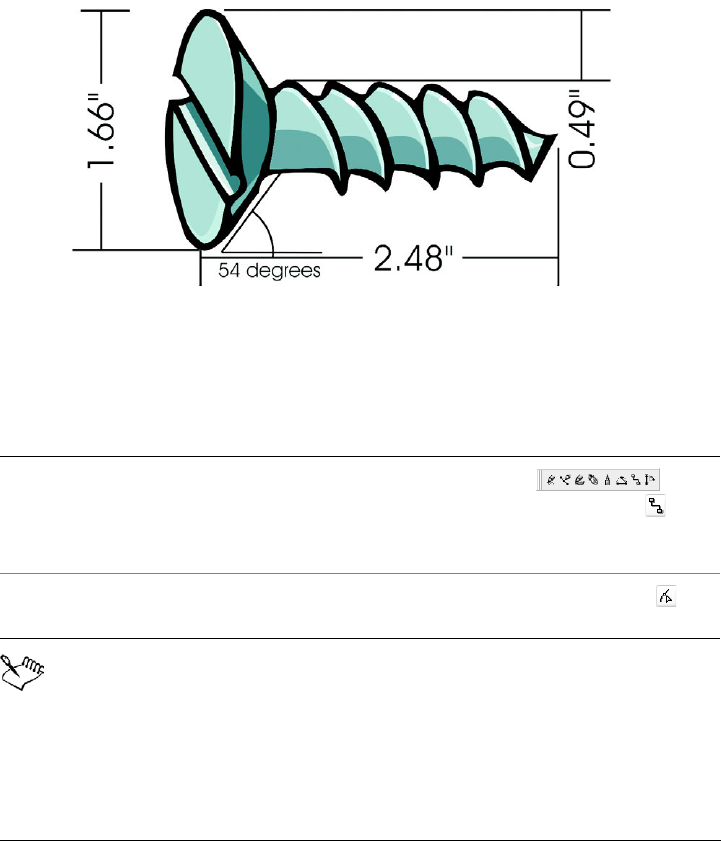
60 CorelDRAW Graphics Suite 12 User Guide
information about drawing flowchart shapes, see “Drawing predefined shapes” on
page 70.
You can draw callout lines that label and draw attention to objects.
You can also draw dimension lines to indicate the distance between two points in a
drawing or the size of objects. Dimension lines and the measurements shown on the
lines change with an object. You can also set how dimension lines are displayed.
Dimension lines can show the sizes of parts of an object.
To draw a flow line between two or more objects
You can draw a flow line horizontally or vertically, but not both. All angles in
a flow line, therefore, are right angles.
To Do the following
Draw a flow line Open the Curve flyout , and
click the Interactive connector tool .
Drag from a node on one object to a node on
another object.
Move a flow line Select a flow line using the Shape tool ,
and drag the node you want to move.
CorelDRAW: Working with lines, outlines, and brush strokes 61
To draw a callout
1Open the Curve flyout , and click the Dimension tool .
2Click the Callout tool on the property bar.
3Click where you want the first callout segment to start.
4Click where you want the second segment to start.
5Type the callout text.
When you draw a callout line, a text cursor displays at the end of line, showing
where to type a label for the object.
To draw a dimension line
1Open the Curve flyout , and click the Dimension tool .
2On the property bar, click one of the following buttons:
• Vertical dimension tool
• Horizontal dimension tool
• Slanted dimension tool
3Click the start and end points of the dimension line.
4Click where you want to place the dimension text.
To set how the dimension units are displayed
1Select a dimension line.
2Click the Show units for dimension button on the property bar.
3On the property bar, choose options from the following list boxes:
You can also
Draw an angular dimension line Open the Curve flyout , and
click the Dimension tool. Click the
Angular dimension tool button on the
property bar. Click where you want the two
lines that measure the angle to intersect.
Click where you want the first line to end,
and click where you want the second line to
end. Click where you want the angle’s label
to appear.

62 CorelDRAW Graphics Suite 12 User Guide
• Dimension style
• Dimension precision
• Dimension units
From here
You can also
Specify the position of the dimension units Click the Text position drop down button
on the property bar, and click a text
position.
Change the point size and font of the
dimension units
Select a dimension line. Click Te x t ` Format
text. Choose a font style from the Font list
box, and type a value in the Size box.
For more information about In the Help index, see
drawing using shape recognition drawing, using shape recognition
Setting the miter limit miter limit
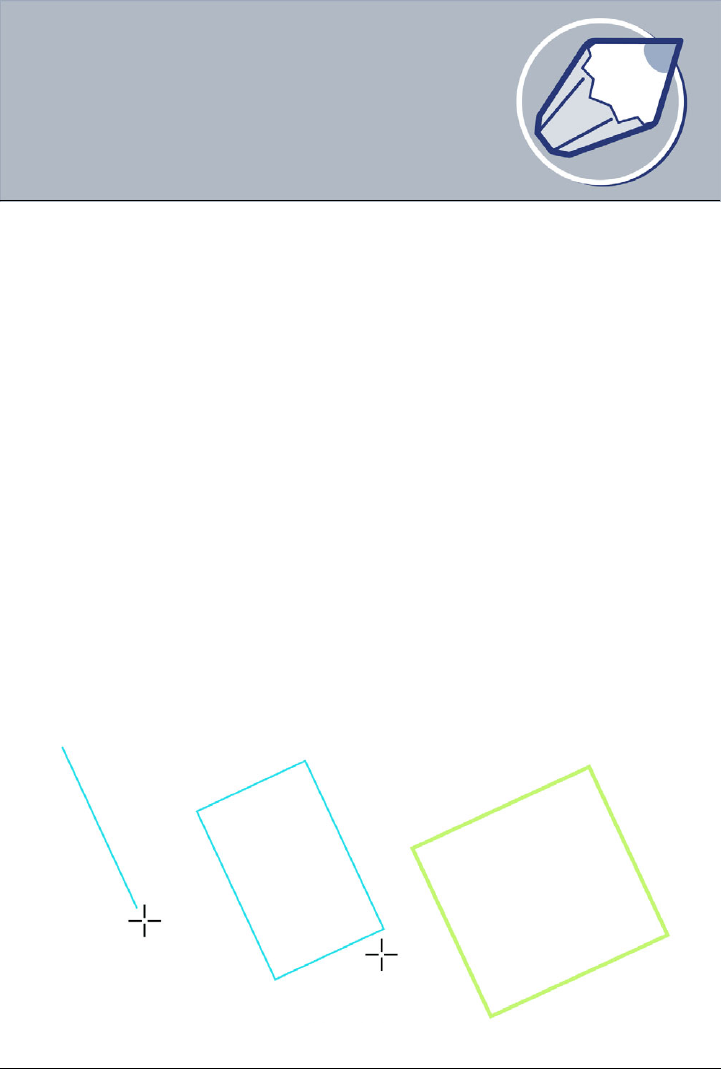
CorelDRAW: Drawing shapes 63
Drawing shapes
CorelDRAW lets you draw basic shapes, which you can modify using special effects
and reshaping tools.
In this section, you’ll learn about
• drawing rectangles and squares
• drawing ellipses, circles, arcs, and wedges
• drawing polygons and stars
• drawing spirals
• drawing grids
• drawing predefined shapes
• drawing using shape recognition
Drawing rectangles and squares
CorelDRAW lets you draw rectangles and squares. You can draw a rectangle or square
by dragging diagonally or draw a rectangle by specifying the width and height. After
you draw a rectangle or square, you can reshape it by rounding one or more of its
corners.
You can create a rectangle by drawing its baseline first and then its height.

64 CorelDRAW Graphics Suite 12 User Guide
To draw a rectangle or a square by dragging diagonally
You can draw a rectangle from its center outward by holding down Shift as
you drag. You can also draw a square from its center outward by holding down
Shift + Ctrl as you drag.
You can draw a rectangle that covers the drawing page by double-clicking the
Rectangle tool.
To round the corners of a rectangle or a square
1Click a rectangle or a square.
2Type values in the Corner roundness areas on the property bar.
To apply the same roundness to all corners click the Round corners together
button on the property bar.
To set default corner roundness click To o l s ` Options, double-click To o l b o x
in the list of categories, click Rectangle tool, and move the slider or enter a
number.
Drawing ellipses, circles, arcs, and wedges
You can draw an ellipse or circle by dragging diagonally or you can draw an ellipse by
specifying its width and height. You can draw an ellipse or circle and change the shape
into an arc or wedge.
To draw Do the following
A rectangle Open the Rectangle flyout , and
click the Rectangle tool . Drag in the
drawing window until the rectangle is the
size you want.
A square Open the Rectangle flyout , and
click the Rectangle tool . Hold down
Ctrl, and drag in the drawing window until
the square is the size you want.
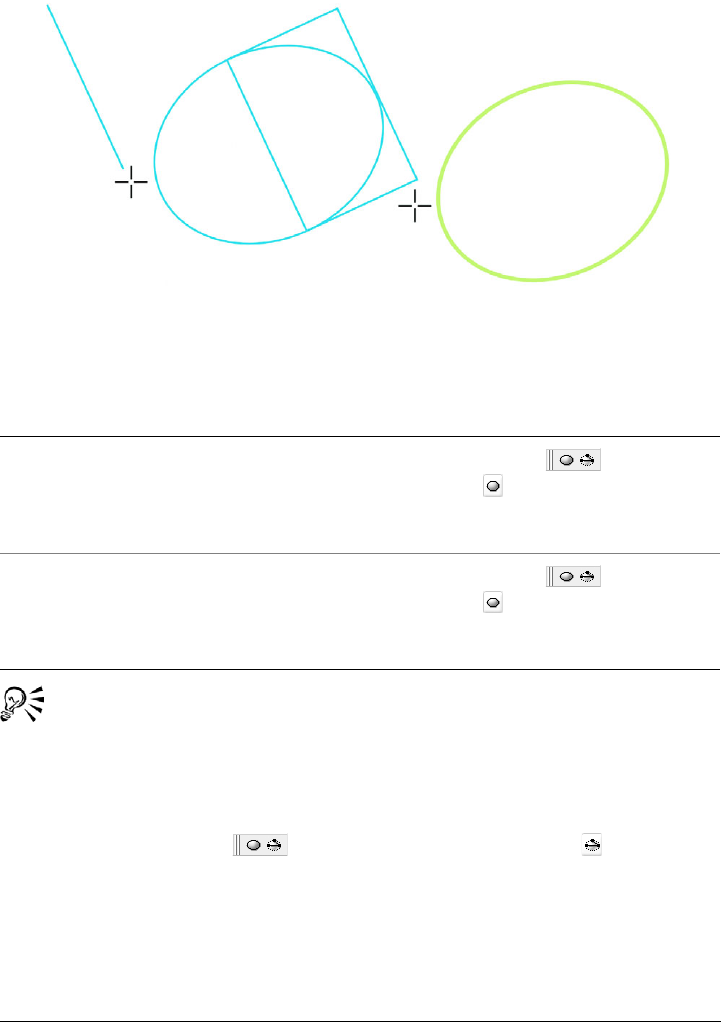
CorelDRAW: Drawing shapes 65
You can draw an ellipse by drawing first its centerline and then its height.
To draw an ellipse or a circle by dragging diagonally
You can draw an ellipse or a circle from its center outward by holding down
Shift as you drag.
To draw an ellipse by specifying width and height
1Open the Ellipse flyout , and click the 3 point ellipse tool .
2In the drawing window, drag to draw the centerline of the ellipse, and release the
mouse button.
The centerline runs through the center of the ellipse and determines its width.
3Move the pointer to define the height of the ellipse, and click.
To draw Do the following
An ellipse Open the Ellipse flyout , and click
the Ellipse tool . Drag in the drawing
window until the ellipse is the shape you
want.
A circle Open the Ellipse flyout , and click
the Ellipse tool . Hold down Ctrl, and
drag in the drawing window until the circle
is the size you want.

66 CorelDRAW Graphics Suite 12 User Guide
To draw an arc or a wedge
To draw an arc, the ellipse or circle must have an outline.
You can change the direction of a selected arc or a wedge by clicking the
Clockwise/counterclockwise arcs or pies button on the property bar.
You can constrain the movement of the node to 15-degree increments by
holding down Ctrl as you drag.
To create a wedge, drag the node of the ellipse (left) to the inside of the ellipse
(center). To create an arc, drag the node to the outside of the ellipse (right).
To draw Do the following
An arc Open the Ellipse flyout , and click
the Ellipse tool. Click the Arc button on the
property bar. Drag in the drawing window
until the arc is the shape you want.
A wedge Open the Ellipse flyout , and click
the Ellipse tool. Click the Wedge button on
the property bar. Drag in the drawing
window until the wedge is the shape you
want.
CorelDRAW: Drawing shapes 67
Drawing polygons and stars
CorelDRAW lets you draw polygons and stars and then reshape them. For example, you
can convert polygons to stars and stars to polygons, change the number of sides on a
polygon or the number of points on a star, and sharpen the points of a star.
You can also draw a predefined star shape. For more information, see “To draw a
predefined shape” on page 70.
To draw a polygon or a star
You can draw a polygon or a star from its center by holding down Shift as you
drag.
You can draw a symmetrical polygon or a star by holding down Ctrl as you
drag.
To reshape a polygon or a star
To draw Do the following
A polygon Open the Object flyout , click the
Polygon tool , and drag in the drawing
window until the polygon is the size you
want.
A star Open the Object flyout , click the
Polygon tool, drag in the drawing window
until the polygon is the size you want, and
click the Star button on the property bar.
To Do the following
Change a polygon to a star or a star to a
polygon
Select a polygon or a star, and click the
Polygon button or the Star button on
the property bar.
Reshape a polygon or a star Click the Shape tool ,and click a node on
the object. Drag the node to change the
object’s shape.

68 CorelDRAW Graphics Suite 12 User Guide
The Sharpness of polygon slider displays only if the star you select has at least
seven points. The sensitivity of the slider increases with the number of points.
You can change a polygon to a star by selecting the polygon, clicking a node
on one of the sides, and dragging toward the center of the polygon.
Drawing spirals
You can draw two types of spirals: symmetrical and logarithmic. Symmetrical spirals
expand evenly so that the distance between each revolution is equal. Logarithmic spirals
expand with increasingly larger distances between revolutions. You can set the rate by
which a logarithmic spiral expands outward.
A symmetrical spiral (left) and a logarithmic spiral (right)
Change the number of sides of a polygon or
number of points on a star
Select a polygon or star, type a value in the
Number of points on polygon box on the
property bar, and press Enter.
Sharpen a star’s points Select a star, and move the Sharpness of
polygon slider on the property bar.
To Do the following

CorelDRAW: Drawing shapes 69
To draw a spiral
1Open the Object flyout , and click the Spiral tool .
2Type a value in the Spiral revolutions box on the property bar.
3On the property bar, click one of the following buttons:
• Symmetrical spiral
• Logarithmic spiral
If you want to change the amount by which the spiral expands as it moves
outward, move the Spiral expansion slider.
4Drag diagonally in the drawing window until the spiral is the required size.
You can draw a spiral from its center outward by holding down Shift as you
drag.
You can also draw a spiral with even horizontal and vertical dimensions by
holding down Ctrl as you drag.
Drawing grids
You can draw a grid and set the number of rows and columns. A grid is a grouped set
of rectangles, which you can break apart.
To draw a grid
1Open the Object flyout, and click the Graph paper tool .
2Type values in the top and bottom portions of the Graph paper columns and
rows box on the property bar.
The value you type in the top portion specifies the number of columns; the value in
the bottom portion specifies the number of rows.
3Point to where you want the grid to display.
4Drag diagonally to draw the grid.
If you want to draw the grid from its center point outward, hold down Shift as
you drag; if you want to draw a grid with square cells, hold down Ctrl as you
drag.
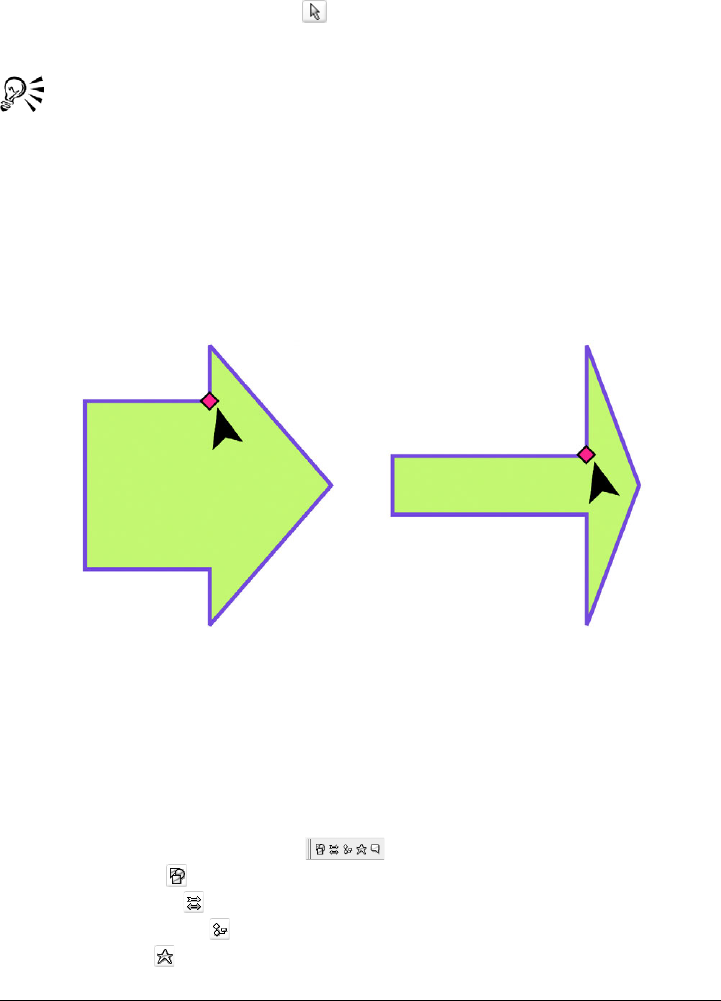
70 CorelDRAW Graphics Suite 12 User Guide
To ungroup a grid
1Select a grid using the Pick tool .
2Click Arrange ` Ungroup.
You can also break apart a grid by clicking the Ungroup button on the
property bar.
Drawing predefined shapes
Using the Perfect Shapes collection, you can draw predefined shapes, such as basic
shapes, arrows, stars, and callouts. Basic shapes, arrows shapes, star shapes, and callout
shapes have glyphs which let you modify their appearance.
You can drag a glyph to alter a shape.
You can add text to the inside or outside of the shape. For example, you might want to
put a label inside a flowchart symbol or a callout.
To draw a predefined shape
1Open the Perfect Shapes flyout , and click one of the following tools:
• Basic shapes
• Arrows shapes
• Flowchart shapes
• Star shapes

CorelDRAW: Drawing shapes 71
• Callout shapes
2Open Perfect Shapes picker on the property bar, and click a shape.
3Drag in the drawing window until the shape is the size you want.
Perfect Shapes can be modified like any other shapes.
To modify a predefined shape
1Select a shape with a glyph.
2Drag a glyph until the shape is the form you want.
The right-angle, heart, lightning bolt, explosion, and flowchart shapes do not
have glyphs.
To add text to a predefined shape
1Click the Te x t tool .
2Position the cursor inside the shape’s outline until it changes to a text cursor .
3Type and format the font inside the shape.
Drawing using shape recognition
You can use the Smart drawing tool to draw freehand strokes that can be recognized
and converted to basic shapes. Rectangles and ellipses are translated to native
CorelDRAW objects; trapezoids and parallelograms are translated to Perfect Shapes
objects; lines, triangles, squares, diamonds, circles, and arrows are translated to curve
objects. If an object is not converted to a shape, it can be beautified. Objects and curves
drawn with shape recognition are editable. You can set the level at which CorelDRAW
recognizes shapes, converts them to objects, and the amount of smoothing applied to
curves.
You can set the amount of time to elapse between making a pen stroke and the
implementation of shape recognition. For example, if the timer is set to one second and
you draw a circle, shape recognition takes effect one second after you draw the circle.
You can make corrections as you draw. You can also change the thickness and line style
of a shape drawn using shape recognition.
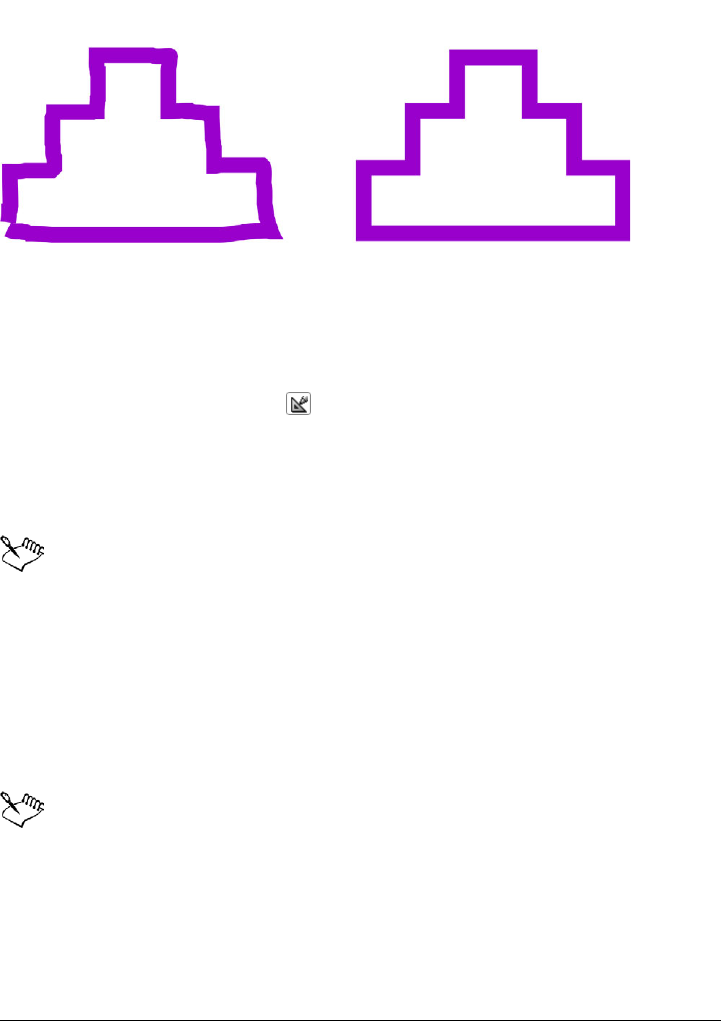
72 CorelDRAW Graphics Suite 12 User Guide
Shapes created with the Smart drawing tool are recognized and smoothed.
To draw a shape using shape recognition
1Click the Smart drawing tool .
2Choose a recognition level from the Recognition level list box on the property bar.
3Choose a smoothing level from the Smoothing level list box on the property bar.
4Draw a shape in the drawing window.
The Smart drawing tool property bar is only displayed when the Smart
drawing tool is selected.
To set shape recognition delay
1Click To o l s ` Customization.
2In the To o l b o x list of categories, click Smart drawing tool.
3Move the Drawing assistance delay slider.
The minimum delay is ten milliseconds; the maximum is two seconds.
To make a correction while using shape recognition
• Before the delay recognition period has elapsed, hold down Shift, and drag over the
area you want to correct.
You must start erasing the shape from the last point drawn.
CorelDRAW: Drawing shapes 73
If you are drawing a freehand shape consisting of several curves, pressing Esc
deletes the last curve drawn.
To change the outline thickness of a shape drawn with shape recognition
1Click the Smart drawing tool .
2Click the shape.
3Choose an outline thickness from the Outline width list box on the property bar.
The Smart drawing tool property bar is displayed only when the Smart
drawing tool is selected.
When you overlap lines drawn with the Smart drawing tool, the outline
thickness is determined by the average.
You can change the line style of a shape drawn with shape recognition. For
more information, see “To specify line and outline settings” on page 53.
From here
For more information about In the Help index, see
Specifying the height and width of
rectangles
three-point tools, rectangle

CorelDRAW: Working with objects 75
Working with objects
Working with objects is an essential part of creating drawings.
In this section, you’ll learn about
• selecting objects
• copying, duplicating, and deleting objects
• copying object properties, transformations, and effects
• positioning objects
• aligning and distributing objects
• snapping objects
• using dynamic guides
• changing the order of objects
• sizing and scaling objects
• rotating and mirroring objects
•grouping objects
•combining objects
Selecting objects
Before you can change an object, you must select it. You can select visible objects,
hidden objects, and a single object in a group or a nested group. You can select objects
in the order in which they were created. You can also select all objects at once and
deselect objects.
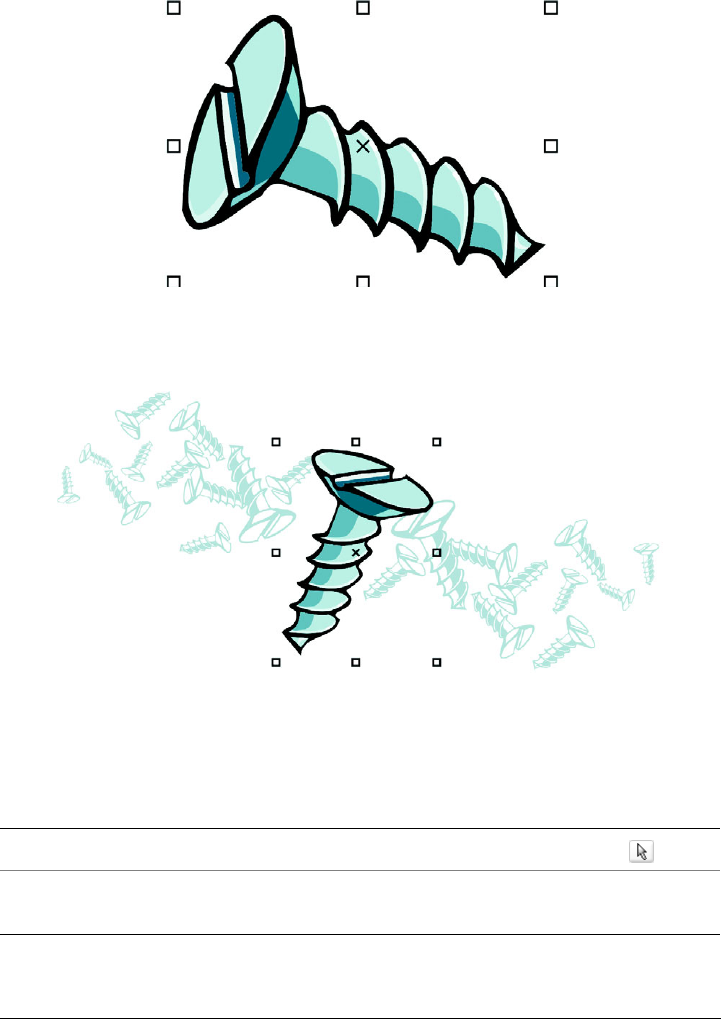
76 CorelDRAW Graphics Suite 12 User Guide
A bounding box displays around a selected object, and an “X” appears at its
center.
You can select a single object from a group.
To select objects
To select Do the following
An object Click an object using the Pick tool .
Multiple objects Hold down Shift, and click each object you
want to select.

CorelDRAW: Working with objects 77
The status bar displays a description of each hidden object as you select it.
You can also select one or more objects by dragging around the object or
objects using the Pick tool .
An object, starting with the first object
created and moving toward the last object
created
Press Shift + Ta b until a selection box
displays around the object you want to
select.
An object, starting with the last object
created and moving toward the first object
created
Press Ta b until a selection box displays
around the object you want to select.
All objects Click Edit ` Select all ` Objects.
An object in a group Hold down Ctrl, and click an object in a
group using the Pick tool.
An object in a nested group Hold down Ctrl, and using the Pick tool,
click an object you want to select until a
selection box displays around it.
A hidden object Hold down Alt, and using the Pick tool,
click the topmost object until a selection box
displays around the hidden object you want
to select.
Multiple hidden objects Hold down Shift + Alt and using the Pick
tool, click the topmost object until a
selection box displays around the hidden
objects you want to select.
A hidden object in a group Hold down Ctrl + Alt and using the Pick
tool, click the topmost object until a
selection box displays around the hidden
object you want to select.
To select Do the following

78 CorelDRAW Graphics Suite 12 User Guide
To deselect objects
Copying, duplicating, and deleting objects
CorelDRAW gives you two ways to copy objects. You can cut or copy an object to place
it on the Clipboard and paste it into a drawing, or you can duplicate an object. Cutting
an object to the Clipboard removes it from the drawing; copying an object to the
Clipboard leaves the original in the drawing; and duplicating an object places a copy
directly in the drawing window, not the Clipboard. Duplicating is faster than copying
and pasting.
When you no longer need an object, you can delete it.
To cut or copy an object
1Select an object.
2Click Edit, and click one of the following:
• Cut
• Copy
You can also cut or copy an object by right-clicking the object, and clicking
Cut or Copy.
To paste an object into a drawing
•Click Edit ` Paste.
To duplicate an object
1Select an object.
2Click Edit ` Duplicate.
To deselect Do the following
All objects Click the Pick tool , and click a blank
space in the drawing window.
A single object in multiple selected objects Hold down Shift, and click the object using
the Pick tool .
CorelDRAW: Working with objects 79
To delete an object
1Select an object.
2Click Edit ` Delete.
You can also delete an object by clicking the object and pressing Delete.
Copying object properties, transformations, and effects
CorelDRAW lets you copy one object’s attributes to another. You can copy object
properties such as outline, fill, and text properties. You can copy object transformations
such as sizing, rotating, and positioning. You can also copy effects applied to an object.
To copy an object’s fill, outline, or text properties to another object
1Click the Eyedropper flyout , and click the Eyedropper tool .
2Choose Object attributes from the list box on the property bar.
3Click the Properties flyout on the property bar, and enable any of the following
check boxes:
• Outline
• Fill
• Te x t
4Click the edge of the object whose properties you want to copy.
5Click the Eyedropper flyout , and click the Paintbucket tool .
6Click the edge of the object to which you want to copy the properties.
You can copy fill or outline properties or both by right-clicking an object,
dragging over another object, and choosing Copy fill here, Copy outline
here, or Copy all properties.
To copy an object’s size, position, or rotation to another object
1Click the Eyedropper flyout , and click the Eyedropper tool .
2Choose Object attributes from the list box on the property bar.
3Click the Tr a n s f o r m a t i o n s flyout on the property bar.
4Enable any of the following check boxes:

80 CorelDRAW Graphics Suite 12 User Guide
• Size
• Rotation
• Position
5Click the edge of the object whose transformations you want to copy.
6Click the Eyedropper flyout , and click the Paintbucket tool .
7Click the edge of the object to which you want to copy the transformations.
To copy effects from one object to another object
1Click the Eyedropper flyout , and click the Eyedropper tool .
2Choose Object attributes from the list box on the property bar.
3Click the Effects flyout on the property bar, and enable any of the following check
boxes:
• Perspective
• Envelope
• Blend
• Extrude
• Contour
• Lens
• PowerClip™
• Drop shadow
• Distortion
4Click the edge of the object whose effects you want to copy.
5Click the Eyedropper flyout , and click the Paintbucket tool .
6Click the edge of the object to which you want to copy the effects.
Positioning objects
You can position objects by dragging them to a new location, by nudging, or by
specifying their horizontal and vertical position.
The values you set in super nudging, and micro nudging allow you to move objects by
increments. By default, you can nudge objects in 0.1-inch increments, but you can
change the nudge values to suit your needs.
When you specify the position of an object, you can set horizontal and vertical
coordinates that are relative to the object’s center anchor point or to another anchor

CorelDRAW: Working with objects 81
point. You can also position objects by placing them at specific horizontal and vertical
coordinates in the drawing window according to the object’s anchor point.
To move an object
• Drag an object to a new position in the drawing.
You can move an object to another page by dragging the object over a page
number tab and then dragging over the page.
To move an object to another page
1Drag the object over a page number tab of the page you want to move the object
to.
2Drag the object over the page.
To nudge an object
To set nudge distances
1Click To o l s ` Options.
2In the Document list of categories, click Rulers.
3Type a value in the Nudge box.
4Type a value in one of the following boxes:
• Super nudge
• Micro nudge
To Do the following
Nudge a selected object by the nudge
distance
Press an Arrow key.
Nudge a selected object by a fraction of the
nudge distance
Hold down Ctrl, and press an Arrow key.
Nudge a selected object by a multiple of the
nudge distance
Hold down Shift, and press an Arrow key.

82 CorelDRAW Graphics Suite 12 User Guide
You can also set the nudge distance by deselecting all objects and typing a
value in the Nudge offset box on the property bar.
To use the nudge distances you set in new drawings, click To o l s ` Save
settings as default.
To position an object by x and y coordinates
1Select an object.
2On the property bar, type values in the following boxes:
• x — lets you position the object on the x axis
• y — lets you position the object on the y axis
3Press Enter.
Aligning and distributing objects
CorelDRAW lets you precisely align and distribute objects in a drawing. You can align
objects to each other and to parts of the drawing page such as the center, edges, and
grid. When you align objects to objects, you can line them up by their centers or by
their edges.
CorelDRAW lets you align multiple objects to the center of the drawing page
horizontally or vertically. Single or multiple objects can also be arranged along the edge
of the page and to the nearest point on a grid.
You can distribute objects at equal intervals in a specified area.
The scattered objects (left) with vertical alignment applied to them (right).

CorelDRAW: Working with objects 83
To align an object to an object
1Select the objects.
2Click Arrange ` Align and distribute ` Align and distribute.
3Click the Align tab.
4Enable the check boxes that correspond to the horizontal and vertical alignment
you want.
If you want to align objects vertically, enable the Left, Center, or Right option.
If you want to align objects horizontally, enable the To p , Center, or Bottom
option.
5From the Align objects to list box, choose Active objects.
If you are aligning text objects, choose one of the following from the For text
source objects use list box:
• First line baseline
• Last line baseline
• Bounding box
The object used to align the left, right, top, or bottom edge is determined by
the order of creation or order of selection. If you marquee select the objects
before you align them, the last object created will be used. If you select the
objects one at a time the last object selected will be the reference point for
aligning the others.
You can also align objects by selecting them and clicking the Align and
distribute button on the property bar.
To align an object to the page center
1Select an object.
If you want to align multiple objects, marquee select the objects.
2Click Arrange ` Align and distribute, and click one of the following:
• Center to page — aligns all objects to the page center
• Center to page vertically — aligns objects to the page center along a vertical
axis
• Center to page horizontally — aligns objects to the page center along a
horizontal axis

84 CorelDRAW Graphics Suite 12 User Guide
To align an object to the page edge
1Select an object.
If you want to align an object group, select the group.
2Click Arrange ` Align and distribute ` Align and distribute.
3Click the Align tab.
4Enable the check boxes that correspond to the horizontal and vertical alignment
you want.
If you want to align objects vertically, enable the Left, Center, or Right option.
If you want to align objects horizontally, enable the To p , Center, or Bottom
option.
5Choose Edge of page from the Align to object list box.
You can also align objects by selecting them and clicking the Align and
distribute button on the property bar.
You can align an object to the grid by choosing Grid from the Align objects
to list box.
To distribute objects
1Select the objects.
2Click Arrange ` Align and distribute ` Align and distribute.
3Click the Distribute tab.
4Enable the check boxes that correspond to the distribution you want.
5In the Distribute to area, enable an option that corresponds to the distribution
area.
Snapping objects
While you move or draw an object, you can snap it to another object in a drawing. You
can snap an object to a number of snap points in the target object. When the pointer is
close to a snap point, the snap point is highlighted, indicating it as the target that the
pointer will snap to.
To snap an object to another object with greater precision, you first snap the pointer to
a snap point in the object, and then snap the object to a snap point in the target object.
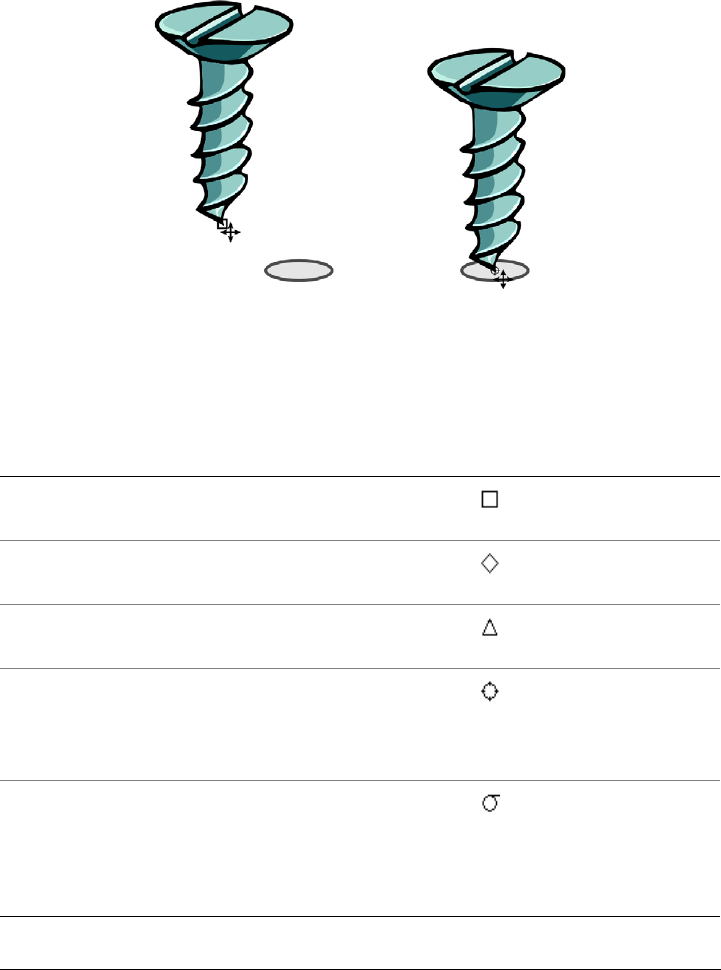
CorelDRAW: Working with objects 85
For example, you can snap the pointer to a rectangle’s center, and then drag the
rectangle by its center and snap it to the center of another rectangle.
The pointer was snapped to an end node of the screw (left), and then the screw
was dragged to snap to the center of an ellipse (right).
Snapping modes determine what snap points in an object you can use. The table below
includes descriptions of all available snapping modes.
Snapping mode Description Snapping mode indicator
Node Lets you snap to an object’s
node
Intersection Lets you snap to a geometric
intersection of objects
Midpoint Lets you snap to a line
segment midpoint
Quadrant Lets you snap to points that
are at 0°, 90°, 130°, and
270° on a circle, ellipse, or
arc
Tangent Lets you snap to a point on
the outside edge of an arc,
circle, or ellipse where a line
will touch but not intersect
the object
86 CorelDRAW Graphics Suite 12 User Guide
You can choose a number of snapping options. For example, you can disable some or all
snapping modes to make the application run faster. You can also choose the distance
from the pointer at which a snap point will become active by setting the snapping
threshold.
To turn snapping on or off
•Click View ` Snap to objects.
A check mark beside the Snap to objects command indicates that snapping is
turned on.
You can also press Alt+ Z to toggle snapping on and off.
To snap objects
1Select the object you want to snap to the target object.
2Move the pointer over the object until the snap point you want becomes
highlighted.
3Drag the object close to the target object, and when the snap point you want
becomes highlighted, release the mouse button.
Perpendicular Lets you snap to a point on
the outside edge of a
segment where a line will be
perpendicular to the object
Edge Lets you snap to a point that
touches the edge of an object
Center Lets you snap to the center
of the closest object (arc,
regular polygon, or curve
centroid)
Text baseline Lets you snap to a point in
the baseline of artistic or
paragraph text
Snapping mode Description Snapping mode indicator

CorelDRAW: Working with objects 87
To snap an object as you draw it, drag in the drawing window and release the
mouse button when the snap point in the target object becomes highlighted.
To set snapping options
1Click View ` Snap to objects setup.
2In the Snapping modes area, enable one or more of the mode check boxes.
If you want to enable all snapping modes, click Select all.
If you want to disable all snapping modes, but without turning off snapping, click
Deselect all.
3Choose one of the following snapping options from the Snapping threshold list
box:
• Low — activates a snap point when it is four screen pixels away from the pointer
• Medium — activates a snap point when it is eight screen pixels away from the
pointer
• High — activates a snap point when it is sixteen screen pixels away from the
pointer
Using dynamic guides
You can display dynamic guides to help you precisely move, align, and draw objects
relative to other objects. Dynamic guides are temporary guidelines that you can pull
from the following snap points in objects — center, node, quadrant, and text baseline.
For more information about snap points and snapping modes, see “Snapping objects”
on page 84.
As you drag an object along a dynamic guide, you can view the object’s distance from
the snap point used to create the dynamic guide, and place the object precisely. You can
use dynamic guides to place objects in relation to other objects as you draw them. You
can also display intersecting dynamic guides and then place an object at the intersection
point.
You can also
Display or hide snapping mode indicators Enable or disable the Show snap location
marks check box.
Display or hide screen tips Enable or disable the Screen tip check box.
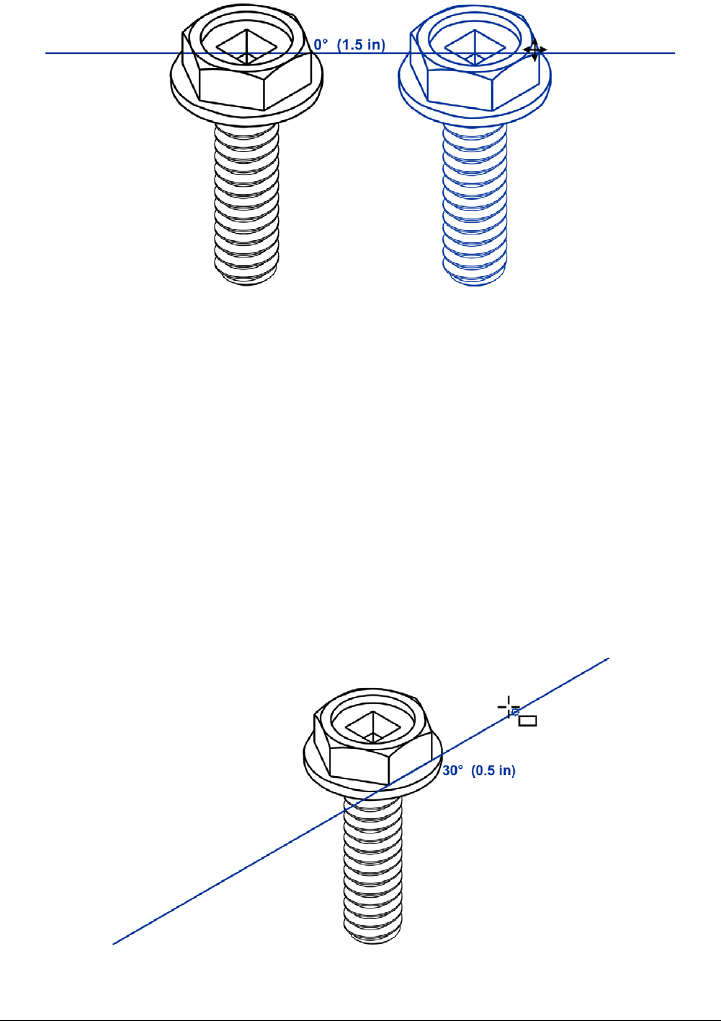
88 CorelDRAW Graphics Suite 12 User Guide
A dynamic guide was pulled from a node in the bolt on the left. The screen tip
beside the node displays the angle of the dynamic guide(0º)and the distance
between the node and the pointer (1.5”). The bolt on the right was dragged
along the dynamic guide and positioned precisely 1.5 inches away from the
node used to generate the dynamic guide.
Dynamic guides contain invisible divisions called ticks to which your pointer gravitates.
Ticks let you move objects with precision along a dynamic guide. You can adjust tick
spacing to suit your needs, and you can disable snapping to ticks. You can set other
options for dynamic guides. For example, you can choose to display dynamic guides at
one or more preset angles, or at custom angles you specify. A preview of the angle
settings you choose is available. When you no longer need a dynamic guideline at a
certain angle, you can delete the angle settings. You can also display dynamic guides
that are extensions of line segments.
An example of a dynamic guide that is an extension of a line segment

CorelDRAW: Working with objects 89
You can turn off dynamic guides at any time.
To enable or disable dynamic guides
•Click View ` Dynamic guides.
A check mark beside the Dynamic guides command indicates that dynamic
guides are enabled.
You can toggle dynamic guides on and off by clicking the Dynamic guides
button on the property bar or by pressing Shift+Alt+D.
To display dynamic guides
1With dynamic guides enabled, click a drawing tool.
2Move the pointer over and then off an eligible snap point of an object.
3Repeat step 2 with other objects to display other dynamic guides.
The snap points you point to are registered in a queue and are used to create
dynamic guides.
The eligible snap points — node, center, quadrant, and text baseline snap
points — display only when the corresponding snapping modes are activated.
For more information about snap points and snapping modes, see “Snapping
objects” on page 84.
To avoid displaying too many dynamic guides, you can clear the queue of
points at any time by clicking in the drawing window or pressing Esc.
You can use the snap points you registered to display intersecting dynamic
guides. To do this, you first display a dynamic guide and then move the pointer
along the dynamic guide to where an intersecting dynamic guide would display
from a registered snap point.
To place an object in relation to another object
1With dynamic guides enabled, select an object.

90 CorelDRAW Graphics Suite 12 User Guide
If you want to move the object by a specific snap point, move the pointer over the
snap point until the snap point becomes highlighted.
2Drag the object to an eligible snap point of the target object.
3When the snap point of the target object becomes highlighted, drag the object
along the dynamic guide to position it.
To draw an object in relation to another object
1With dynamic guides enabled, click a drawing tool.
2Move the pointer over an eligible snap point of an object.
3When the snap point becomes highlighted, move the pointer to display a dynamic
guide.
4Move the pointer along the dynamic guide to where you want, and drag to draw an
object.
To place an object at the intersection of dynamic guides
1With dynamic guides enabled, select an object.
If you want to move the object by a specific snap point, move the pointer over the
snap point until the snap point becomes highlighted.
2Drag the object to an eligible snap point of another object, and drag to display a
dynamic guide. Don’t release the mouse button.
3Drag the object to another eligible snap point, and when the snap point becomes
highlighted, drag to display another dynamic guide to where the two dynamic
guides would intersect.
4When the intersection point displays, release the mouse button.
Below is an example of using intersecting dynamic guidelines to position a washer
in relation to two other objects — another washer and a bolt.
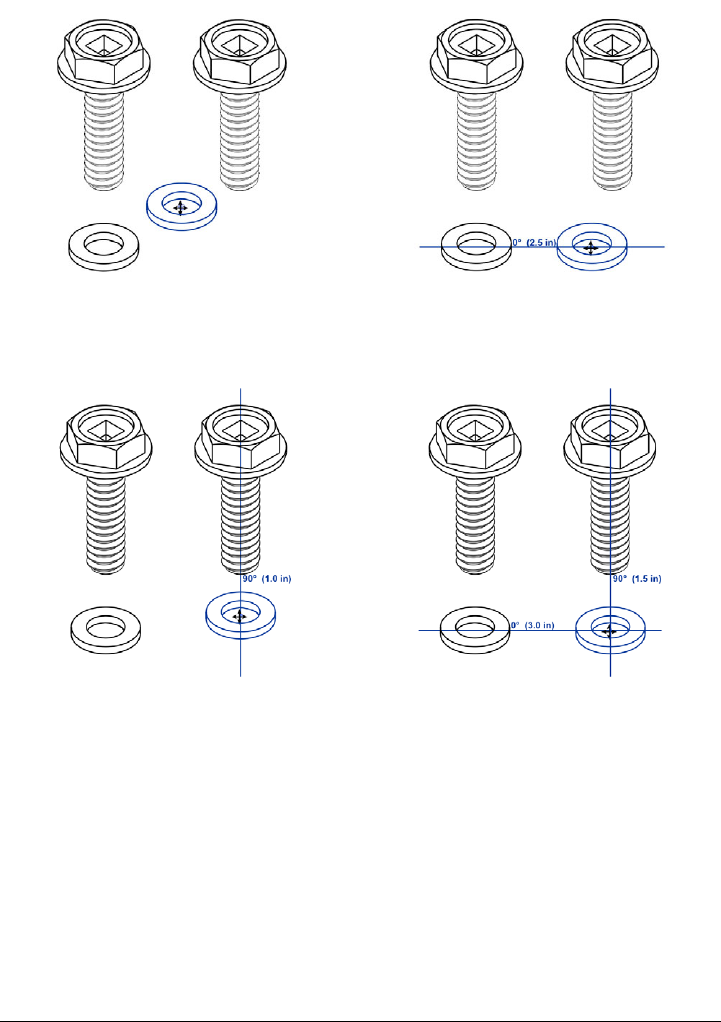
CorelDRAW: Working with objects 91
First, the washer was dragged by its center snap point (top left) to the other
washer’s edge, and then to the right to display a dynamic guide (top right).
Next, the washer was dragged to the edge of the bolt, and then down to display
another dynamic guide (top left). Last, the washer was positioned at the
intersection point of the dynamic guides (top right).
To set dynamic guide options
1Click View ` Dynamic guides setup.
2Enable any of the following check boxes:
• Angle screen tip — lets you display or hide the angle of dynamic guides
• Distance — lets you display or hide the distance from the snap point, used to
create the dynamic guide

92 CorelDRAW Graphics Suite 12 User Guide
3Type a value in the Tick spacing box to change the distance between the invisible
divisions on the dynamic guides.
4In the Guides area, enable or disable the angle check boxes to choose the angles at
which to create the dynamic guides.
When you enable an angle check box, a preview of the dynamic guide displays in
the Guides preview window.
5Enable the Extend along segment check box to create dynamic guides that are
extension of line segments.
Changing the order of objects
You can change the stacking order of objects on a layer by sending objects to the front
or back, or behind or in front of other objects. You can also position objects precisely in
the stacking order, as well as reverse the stacking order of multiple objects.
To change the order of an object
1Select an object.
2Click Arrange ` Order, and click one of the following:
• To f r o n t — moves the selected object to the front of all other objects
• To b a c k — moves the selected object behind all other objects
• Forward one — moves the selected object forward one position
• Back one — moves the selected object behind one position
• In front of — moves the selected object in front of a specific object
• Behind — moves the selected object behind a specific object
You can also Do the following
Disable snapping to ticks Disable the Snap to ticks check box.
Display a custom dynamic guide by
specifying its angle
In the Guides area, type a value in the
Degrees box, and click Add.
Delete angle settings Click an angle check box in the list box, and
click Delete.
Display dynamic guides at all available
angles
Click Select all.
CorelDRAW: Working with objects 93
To reverse the order of multiple objects
1Select the objects.
2Click Arrange ` Order ` Reverse order.
Sizing and scaling objects
CorelDRAW lets you size and scale objects. In both cases, you change the dimensions
of an object proportionally by preserving its aspect ratio. You can size an object’s
dimensions by specifying values or changing the object directly. Scaling changes an
object’s dimensions by a specified percentage.
You can change an object’s anchor point from its center to any of its eight selection
handles.
To size an object
You can also set a precise size for the object by typing values in the Object size
boxes on the property bar.
To scale an object
1Select an object.
2Click Window ` Dockers ` Tr a n s f o r m a t i o n s ` Scale.
3In the Tr a n s f o r m a t i o n s docker, type values in the following boxes:
• H — lets you specify a percentage by which you want to scale the object
horizontally
To Do the following
Size a selected object Drag any of the corner selection handles.
Size a selected object from its center Hold down Shift, and drag one of the
selection handles.
Size a selected object to a multiple of its
original size
Hold down Ctrl, and drag one of the
selection handles.
Stretch a selected object as you size it Hold down Alt, and drag one of the
selection handles.
94 CorelDRAW Graphics Suite 12 User Guide
• V — lets you specify a percentage by which you want to scale the object
vertically
If you want to change the object’s anchor point, enable the check box that
corresponds to the anchor point you want to set.
If you want to maintain the aspect ratio, disable the Non-proportional check box.
You can also scale an object by dragging a selection handle.
Rotating and mirroring objects
CorelDRAW lets you rotate and create mirror images of objects.You can rotate an object
by specifying horizontal and vertical coordinates. You can move the center of rotation
to a specific ruler coordinate or to a point that is relative to the current position of the
object.
Rotating objects around a single point
Mirroring an object flips it from left to right or top to bottom. By default, the mirror
anchor point is in the center of the object.

CorelDRAW: Working with objects 95
Mirroring an object from top to bottom
To rotate an object
1Select an object.
2Click Window ` Dockers ` Tr a n s f o r m a t i o n s ` Rotate.
3Disable the Relative center check box in the Tr a n s f o r m a t i o n s docker.
To rotate an object around a point relative to its current position, enable the
Relative center check box.
4Type a value in the Angle box.
You can also rotate a selected object by dragging a rotation handle clockwise
or counterclockwise.
To rotate an object around a ruler coordinate
1Select an object.
2Open the Shape edit flyout , and click the Free transform tool .
3Disable the Relative to object button on the property bar.
You can also
Specify the point around which you want to
rotate the object
Type values in the H and V boxes to specify
the horizontal and vertical positions. Click
Apply.

96 CorelDRAW Graphics Suite 12 User Guide
4Type values in any of the following Center of rotation position boxes:
• x — lets you specify the point on the horizontal ruler around which the object
will rotate
• y — lets you specify the point on the vertical ruler around which the object will
rotate
5Type a value in the Angle of rotation box on the property bar.
6Press Enter.
To mirror an object
1Select an object.
2Click Window ` Dockers ` Tr a n s f o r m a t i o n s ` Scale.
3In the Tr a n s f o r m a t i o n s docker, click one of the following:
• Horizontal mirror — lets you flip the object left to right
• Vertical mirror — lets you flip the object top to bottom
If you want to flip the object on a specific anchor point, enable the check box that
corresponds to the anchor point you want to set.
4Click Apply.
You can also mirror a selected object by holding down Ctrl and dragging a
selection handle to the opposite side of the object.
You can open the Transformations docker by clicking Arrange `
Tr a n s f o r m a t i o n s and selecting an option from the flyout.
Grouping objects
When you group two or more objects, they are treated as a single unit. This lets you
apply the same formatting, properties, and other changes to all the objects within the
group at the same time. CorelDRAW also lets you group other groups to create nested
groups.
You can also add and remove objects to and from a group and delete objects that are
members of a group. If you want to edit a single object in a group, you can ungroup the
objects.

CorelDRAW: Working with objects 97
Single objects retain their attributes when they are grouped.
To group objects
1Select the objects.
2Click Arrange ` Group.
You can select objects from different layers and group them; however, once
grouped, the objects will reside on the same layer.
You can create a nested group, by selecting two or more groups of objects and
clicking Arrange ` Group.
You can also group objects by clicking Window ` Dockers ` Object
manager, and dragging an object’s name in the Object manager docker over
the name of another object.
To add an object to a group
1Click Window ` Dockers ` Object manager.
2In the Object manager docker, drag the name of the object to the name of the
group you want to add it to.
To remove an object from a group
1Click Window ` Dockers ` Object manager.
98 CorelDRAW Graphics Suite 12 User Guide
2Double-click the name of the group in the Object manager docker.
3Drag an object from the group to a position outside the group.
If you’re removing an object from a group, click the object in the object list, and
drag it out of the group.
If you want to delete an object that’s in a group, select the object in the object list
and click Edit ` Delete.
To ungroup objects
1Select one or more groups.
2Click Arrange ` Ungroup.
You can also ungroup all the nested groups in an object by clicking the
Ungroup all button.
Combining objects
Combining two or more objects creates a single object with common fill and outline
attributes. You can combine rectangles, ellipses, polygons, stars, spirals, graphs, or text.
CorelDRAW converts these objects to a single curve object. If you need to modify the
attributes of an object that is combined, you can break the combined object apart. You
can extract a subpath from a combined object to create two separate objects. You can
also weld two or more objects to create a single object. For information about welding
objects, see “Welding and intersecting objects” on page 123.
The two objects (left) are combined to create a single object (right). The new
object has the properties of the last object selected before combining.
CorelDRAW: Working with objects 99
To combine objects
1Select the objects.
2Click Arrange ` Combine.
Combined text objects become larger blocks of text.
You can also combine selected objects by clicking the Combine button on
the property bar.
You can close open lines in a combined object by clicking Arrange ` Close
path, and clicking a command.
To break apart a combined object
1Select a combined object.
2Click Arrange ` Break curve apart.
If you break apart a combined object that contains artistic text, the text breaks
apart into lines first, then into words. Paragraph text breaks into separate
paragraphs.
To extract a subpath from a combined object
1Select a segment, node, or group of nodes on a combined object using the Shape
tool .
2Click the Extract subpath button on the property bar.
After you have extracted the subpath, the path’s fill and outline properties are
removed from the combined object.
From here
For more information about In the Help index, see
Positioning an object using a different
anchor point
positioning, using anchor points

CorelDRAW: Shaping objects 101
Shaping objects
CorelDRAW lets you shape objects in various ways.
In this section, you’ll learn about
• working with curve objects
• skewing and stretching objects
• smudging objects
•roughening objects
•applying distortion effects
• shaping objects using envelopes
• splitting and erasing portions of objects
• trimming objects
• welding and intersecting objects
•blending objects
• creating PowerClip objects
Working with curve objects
CorelDRAW lets you shape objects by manipulating their nodes and segments. An
object’s nodes are the tiny squares that display along the object’s outline. The line
between two nodes is called a segment. Moving an object’s segments lets you make
coarse adjustments to the object’s shape, while changing the position of its nodes lets
you fine-tune the shape of the object.
Most objects that are added to a drawing are not curve objects, with the exception of
spirals and freehand and Bézier lines. Therefore, if you want to customize the shape of
an object, it is recommended that you convert that object to a curve object. By
converting objects to curves, you can shape them by adding, removing, positioning, as
well as aligning and transforming their nodes.
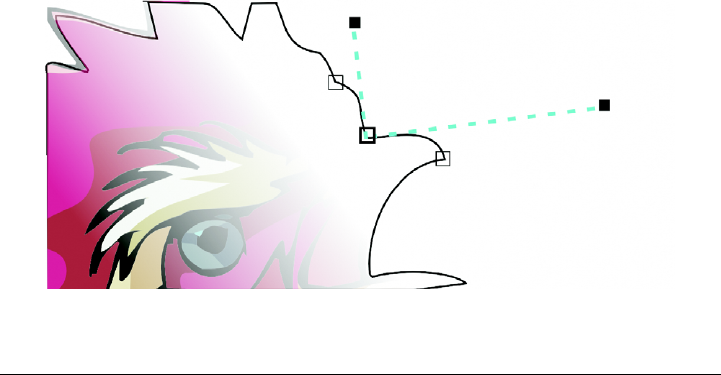
102 CorelDRAW Graphics Suite 12 User Guide
Before you can manipulate an object’s nodes, you must select them. When working
with curve objects you can select individual, multiple, or all of the object’s nodes.
Selecting multiple nodes lets you shape different parts of an object simultaneously.
When you add nodes, you increase the number of segments, and therefore the amount
of control you have over the shape of the object. You can also remove nodes to simplify
an object’s shape.
When you create an object, it is made up of one or multiple paths. If you are working
on an open object, such as a freehand line, you can join its start and end nodes. When
you join the start and end nodes, the two nodes are pulled together to create a closed
object. You can add color to the inside of closed paths that you create. For information
on applying fills, see “Filling objects” on page 141. If the paths consist of multiple
subpaths, you can break paths apart to extract subpaths. For information on breaking
paths apart see “Splitting and erasing portions of objects” on page 117.
After you create a curve object, you can align its nodes horizontally or vertically.
You can change the nodes on a curve object to one of four types: cusp, smooth,
symmetrical, or line. Cusp nodes make the node’s intersecting line take on the shape of
a corner or point when you adjust the position of the node’s control points. Smooth
nodes make the node’s intersecting line take on the shape of a curve. Each control point
can be shortened or lengthened independently, giving you smaller or larger angles to
work with. Symmetrical nodes make the node’s intersecting line take on the shape of a
curve as well as intersect the node at exactly the same angle. Line nodes let you shape
objects by changing the shape of their segments. You can make a curve segment straight
or a straight segment curved.
The components of a curve
CorelDRAW: Shaping objects 103
You can also change the direction of a segment by reversing the position of its start and
end nodes. The effect is transparent only when the ends of a segment are different.
You can also shape objects by stretching, scaling, rotating, and skewing their nodes. For
example, you can scale the corner nodes of a curve object to enlarge the curve object
proportionally. Stretching, on the other hand, elongates a curve object so that its shape
is distorted. All or parts of a curve object can be rotated in a counterclockwise or
clockwise direction. You can also skew nodes to shape a curve object.
To convert objects to curve objects
1 Select the object.
2Click Arrange ` Convert to curves.
You can convert artistic text to curves so that you can shape individual
characters.
You can also convert an object to a curve object by selecting the object and
clicking the Convert to curves button on the property bar.
To select a node
1Open the Shape edit flyout , and click the Shape tool .
2Select a curve object.
3Click a node.
When a curve is selected by using the Shape tool, you can select the first node
in a curve object by pressing Home, or the last node by pressing End.
You can also
Select multiple nodes Press Shift, and click each node.
Select all nodes on a selected curved Click Edit ` Select all ` Nodes.
Deselect a node Press Shift, and click a selected node.
Deselect multiple nodes Press Shift, and click each selected node.
Deselect all nodes Click a blank space in the drawing window.
104 CorelDRAW Graphics Suite 12 User Guide
To add or remove a node
You can also add a node on a selected line by opening the Curve flyout
, clicking the Pen tool , and clicking a point between any two
nodes.
To join the end nodes of a single subpath
1Open the Shape edit flyout , and click the Shape tool .
2Click a subpath.
3Click the Auto-close curve button on the property bar.
You can close multiple subpaths by clicking Arrange ` Close path. For more
information, see “Closing multiple line segments” on page 54.
To join the nodes of multiple subpaths
1Open the Shape edit flyout , and click the Shape tool .
2Press Shift, and click a node from each subpath.
3Click the Extend curve to close button on the property bar.
If you want to join nodes from separate curve objects, you must first combine
them into a single curve object, and then join the end nodes of the new
subpaths. For information about combining objects, see “Combining objects”
on page 98.
To Do the following
Add a node Open the Shape edit flyout
, click the Shape tool ,
select a curve object, and double-click where
you want to add a node.
Delete a node Open the Shape edit flyout, click the Shape
tool, select a curve object, and double-click a
node.
CorelDRAW: Shaping objects 105
To align nodes
1Open the Shape edit flyout , and click the Shape tool .
2Select a curve object.
3Press Shift, and select the nodes you want to align.
4Click the Align nodes button on the property bar.
To make a curve cusp, smooth, or symmetrical
1Open the Shape edit flyout , and click the Shape tool .
2Click a node.
3On the property bar, click one of the following buttons:
• Make node a cusp
• Make node smooth
• Make node symmetrical
You can also change an existing node from one type to another using shortcut
keys. To change a smooth node to a cusp node or a cusp node to a smooth node,
click the node using the Shape tool and press C. To change a symmetrical node
to a smooth node or a smooth node to a symmetrical node, click the node using
the Shape tool and press S.
To manipulate a curve object’s segments
1Open the Shape edit flyout , and click the Shape tool .
2Select a curve object.
3Drag a segment until it’s the shape you want.
You can also
Straighten a curve segment Click a curve segment, and click the
Convert curve to line button on the
property bar.
Curve a straight segment Click a straight segment, and click the
Convert line to curve button on the
property bar.
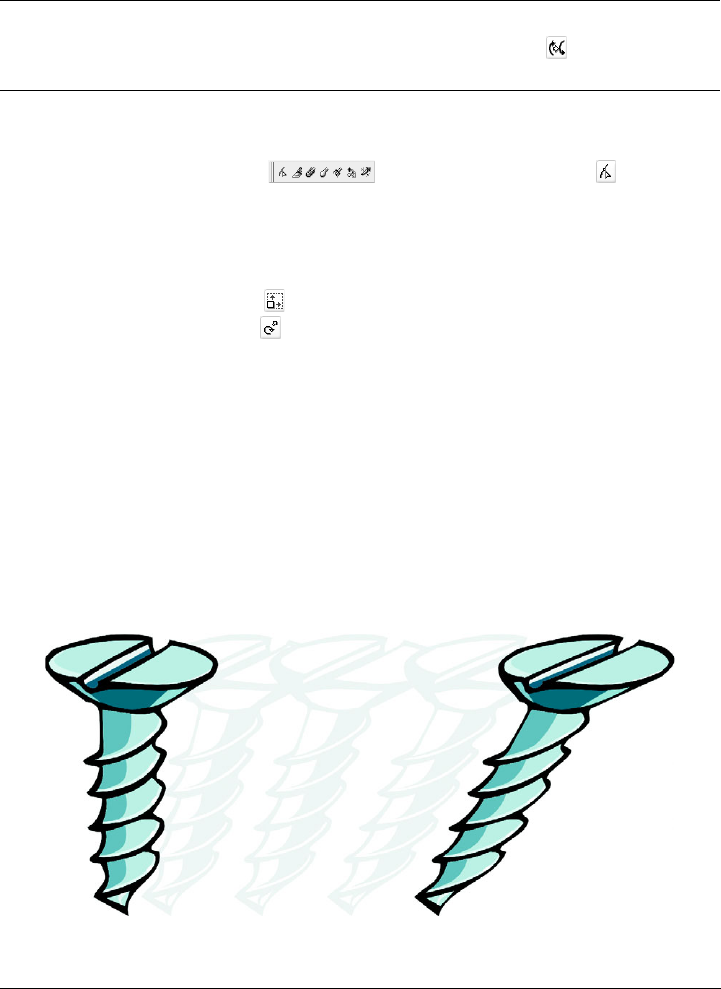
106 CorelDRAW Graphics Suite 12 User Guide
To stretch, scale, rotate, or skew nodes
1Open the Shape edit flyout , and click the Shape tool .
2Select a curve object.
3Select the nodes along the curve you want to transform.
4On the property bar, click one of the following buttons:
• Stretch and scale nodes
• Rotate and skew nodes
5Drag a set of handles to transform the nodes.
Skewing and stretching objects
You can skew and stretch objects in CorelDRAW. When you skew an object, you specify
the degree by which you want to slant the object. Stretching changes an object’s vertical
and horizontal dimensions non proportionally.
CorelDRAW also lets you change the skew and sizing anchor point of an object from its
default center position.
Skewing an object horizontally
Change the direction of the curve Click a segment, and click the Reverse
curve direction button on the property
bar.
You can also

CorelDRAW: Shaping objects 107
Stretching an object horizontally
To skew an object
1Select an object.
2Click Arrange ` Transformations ` Skew.
3In the Tr a n s f o r m a t i o n s docker type a value in any of the following boxes:
• H — lets you specify the number of degrees by which you want to skew the
object horizontally
• V — lets you specify the number of degrees by which you want to skew the
object vertically
If you want to change the object’s anchor point, enable the Use anchor point
check box, and enable the check box that corresponds to the anchor point you want
to set.
4Click Apply.
If you move the skew anchor point, you can reset it to the center again.
You can also skew an object interactively by dragging one of its skew handles.
To stretch an object
1Select an object.
2Click Arrange ` Transformations ` Size.

108 CorelDRAW Graphics Suite 12 User Guide
3Enable the Non-proportional check box.
4In the Tr a n s f o r m a t i o n s docker, type a value in the following boxes:
• H — lets you specify the width of a selected object
• V — lets you specify the height of a selected object
5Click Apply.
The new values that you enter to stretch an object are the basis for a new ratio
of the horizontal and vertical dimensions of the object. When you disable the
Non-proportional check box, any resizing of the object is based on this new
ratio. To revert the object to its original one-to-one proportions before
transforming it again, you must disable the Non-proportional check box and
then retype the original values.
You can stretch the sides of an object proportionally by disabling the Non-
proportional check box, typing a value in either the H or V box, and pressing
Enter.
You can also stretch an object from its center by pressing Shift and dragging
a corner selection handle.
You can also stretch an object in increments of 100% by pressing Ctrl, and
dragging a corner selection handle.
Smudging objects
Smudging lets you distort an object by dragging the outline of an object or a group of
objects. When applying smudging to an object, you can control the extent and shape
of the distortion whether you activate the controls for the graphics tablet stylus or use
the settings that apply to a mouse.
The smudging effect responds to both the angle of rotation — or bearing — and the
tilt angle of a graphics tablet stylus. Rotating the stylus changes the angle of the
smudging effect and tilting the stylus flattens the brush tip and changes the shape of
the smudging. If you are using a mouse, you can simulate the bearing and tilt of the
stylus by specifying values. Increasing the bearing angle from 0 - 359° changes the
angle of the brush stroke. As you decrease the tilt angle from 90° - 1°, you change the
smudging shape by flattening the brush tip.

CorelDRAW: Shaping objects 109
Smudging can respond to the pressure of a stylus on a tablet where the smudging
widens with more pressure and narrows with less. If you are using a mouse or want to
override stylus pressure, you can enter real values to simulate the pressure of a stylus on
a graphics tablet. Negative values to -10 create a narrowing distortion, 0 maintains an
even stroke width, and positive values to 10 create an expanding distortion.
Objects placed in the foreground and background have been shaped by outside
smudging (sun’s rays and blades of grass) and inside smudging (clouds).
Whether you are using a stylus or a mouse, you must specify the nib size. The nib size
determines the width of the smudging applied to an object.
You can apply the smudging effect to the inside and outside of an object.
To smudge an object
1Select an object using the Pick tool .
2Open the Shape edit flyout , and click the Smudge brush tool .
3Drag around the outline to distort it.
You can also
Change the size of the brush nib Type a value in the Size of the nib box
on the property bar.
Change the size of the brush nib when using
the graphics stylus
Click the Use stylus pressure button on
the property bar and apply pressure to the
stylus.
110 CorelDRAW Graphics Suite 12 User Guide
You cannot apply smudging to Internet or embedded objects, linked images,
grids, masks, mesh-filled objects, or objects with blend and contour effects.
To get the minimum and maximum values for the smudging controls, right-
click the control on the property bar and click Settings.
Roughening objects
The roughening effect lets you apply a jagged or spiked edge to objects, including lines,
curves, and text. You can control the size, angle, direction, and number of the
indentations whether you activate the graphics tablet stylus or apply settings to a
mouse.
The roughening effect is determined either by movements of a graphics tablet stylus,
by fixed settings, or by automatically applying perpendicular spikes to the line. Tilting
Widen or narrow the smudging Type a value between -10 and 10 in the Add
dry out to the effect box on the
property bar.
Specify the shape of the smudging Type a value between 1 and 90 in the Enter
a fixed value for tilt settings box
on the property bar.
Change the shape of the smudging when
using the graphics stylus
Click the Use stylus tilt button on the
property bar.
Specify the angle of the nib shape for
smudging
Type a value between 0 and 359 in the Enter
a fixed value for bearing settings box
on the property bar.
Change the angle of the nib shape for
smudging when using the graphics stylus
Click the Use stylus bearing button on
the property bar.
Smudge the inside of an object Click the outside of an object and drag
inwards.
Smudge the outside of an object Click the inside of an object an drag
outwards.
You can also
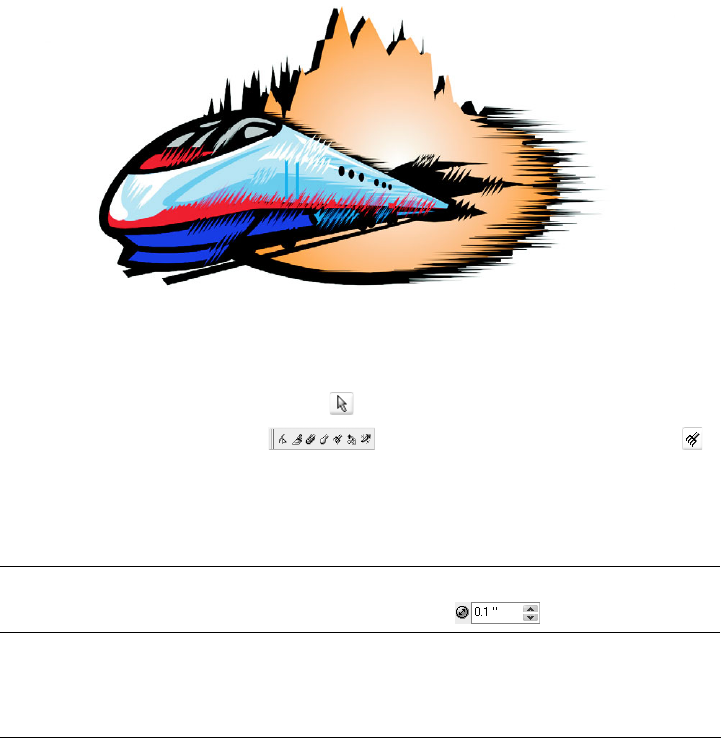
CorelDRAW: Shaping objects 111
the stylus toward and away from the tablet’s surface increases and decreases the size of
the spikes. If you are using a mouse, you can specify the tilt angle from 1 - 90°. You can
determine the direction of the spikes by changing the angle of rotation (or bearing) of
the stylus as you apply the roughening effect to an object. When you are using a mouse,
you can set the bearing angle from 0 - 359°. You can also increase or decrease the
number of spikes that are applied as you drag.
The roughening effect also responds to the pressure of the stylus on the tablet. The more
pressure you apply, the more spikes are created in the roughened area. If you are using
a mouse, you can specify values to simulate the stylus pressure.
You can also change the brush nib size.
Roughening allows you to apply jags or spikes to part of an outline or path.
To roughen an object
1Select an object using the Pick tool .
2Open the Shape edit flyout , and click the Roughen brush tool .
3Point to the area on the outline you want to roughen, and drag the outline to
distort it.
You can also
Specify the size of the roughening spikes Type a value from .01" to 2" in the Size of
the nib box on the property bar.
112 CorelDRAW Graphics Suite 12 User Guide
Objects with distortions, envelopes, and perspective applied to them are
converted to curve objects before the roughening effect is applied.
To make the tilt angle and bearing angle responsive to the graphics tablet
stylus, right-click the roughened object, and select a command from the
submenu.
To get the minimum and maximum values for the roughening controls, right-
click the control on the property bar, and click Settings.
Change the number of spikes in a roughened
area
Type a value between 1 and 10 in the Enter
a value for frequency of spikes box
on the property bar.
Change the number of spikes in a roughened
area when using a graphics stylus
Click the Use stylus pressure button on
the property bar.
Specify the height of the roughening spikes Type a value between 1 and 90 in the Enter
a fixed value for tilt settings box
on the property bar.
Increase the number of roughening spikes as
you drag
Type a value between -10 and 10 in the Add
dry out to the effect box on the
property bar.
Change the height of the roughening spikes
when using a graphics stylus
Click the Use stylus tilt button on the
property bar.
Specify the direction of the roughening
spikes
Choose Fixed direction from the Spike
direction list box. Type a value between 0
and 359 in the Enter a fixed value for
bearing settings box on the
property bar.
Change the direction of the roughening
spikes when using a graphics stylus
Choose Stylus setting from the Spike
direction list box on the property bar.
Create roughening spikes perpendicular to
the path or outline
Choose Auto from the Spike direction list
box on the property bar.
You can also
CorelDRAW: Shaping objects 113
Applying distortion effects
You can apply three types of distortion effects to shape objects.
After you distort an object, you can change the effect by altering the center of
distortion. This point is identified by a diamond-shaped handle, around which a
distortion appears. It is similar to a mathematical compass, where the pencil moves
around a stationary point. You can place the center of distortion anywhere in the
drawing window, or choose to center it in the middle of an object so that the distortion
is distributed evenly and the shape of the object changes in relation to its center.
You can create an even more dramatic effect by applying a new distortion to an already
distorted object. You don’t lose the effect of the original distortion if, for example, you
apply a zipper distortion on top of a twister distortion. The CorelDRAW application
also lets you remove and copy distortion effects.
To distort an object
1Open the Interactive tool flyout , and click the Interactive
distortion tool .
2On the property bar, click one of the following buttons, and specify the settings
you want:
• Push and pull distortion
• Zipper distortion
• Twister distortion
3Point to where you want to place the center of distortion, and drag until the object
is the shape you want.
Distortion effect Description
Push and pull Lets you push the edges of an object in or
pull the edges of an object out
Zipper Lets you apply a saw tooth effect to the
edges of the object. You can adjust the
amplitude and frequency of the effect.
Twister Lets you rotate an object to create a swirl
effect. You can choose the direction of the
swirl, as well as the origin, degree, and
amount of rotation.
114 CorelDRAW Graphics Suite 12 User Guide
You can reapply the effects to distorted objects.
You can center a distortion by clicking the Center distortion button on the
property bar.
To remove a distortion
1Select a distorted object.
2Click Effects ` Clear distortion.
Removing a distortion this way clears the most recent distortion you’ve
applied.
You can also remove a distortion from a selected object by clicking the Clear
distortion button on the property bar.
To copy a distortion
1Select the object to which you want to copy a distortion.
2Click Effects ` Copy effect ` Distortion from.
3Click a distorted object.
You can also use the Eyedropper tool to copy the effect. For more
information, see “To copy effects from one object to another object” on
page 80.
You can also
Change the center of distortion Drag the diamond-shaped position handle to
a new location.
Adjust the number of points on a zipper
distortion
Move the slider on the center of the
distortion handle.
Apply more than one distortion to an object Click another distortion type on the property
bar, click an object, and drag.
CorelDRAW: Shaping objects 115
Shaping objects using envelopes
CorelDRAW lets you shape objects, including lines, artistic text, and paragraph text
frames by applying envelopes to them. Envelopes are made of multiple nodes that you
can move to shape the envelope and, as a result, change the shape of the object. You can
apply a basic envelope that conforms to the shape of an object, or you can also apply a
preset envelope. After you apply an envelope, you can edit it or add a new envelope to
continue changing the object’s shape. CorelDRAW also lets you copy and remove
envelopes.
You can edit an envelope by adding and positioning its nodes. Adding nodes gives you
more control over the shape of the object contained in the envelope. CorelDRAW also
lets you delete nodes, move multiple nodes simultaneously, change nodes from one type
to another, and change a segment of an envelope to a line or curve. For more
information about the different types of nodes, see “Working with curve objects” on
page 101.
You can also change the mapping mode of an envelope to specify how the object fits to
the envelope. For example, you can stretch an object to fit the basic dimensions of the
envelope, and then apply the horizontal mapping mode to compress it horizontally so
that it fits the shape of the envelope.
To apply an envelope
1Select an object.
2Open the Interactive tools flyout , and click the Interactive
envelope tool .
3On the property bar, click one of the following buttons:
• Envelope straight line mode — creates envelopes based on straight lines,
adding perspective to objects
• Envelope single arc mode — creates envelopes with an arc shape on one
side, giving objects a concave or convex appearance
• Envelope double arc mode — creates envelopes with an S shape on one or
more sides
• Envelope unconstrained mode — creates freeform envelopes, that let you
change the properties of the nodes, and add and delete the nodes
4Click the object.
5Drag the nodes to shape the envelope.
If you want to reset the envelope, press Esc before releasing the mouse.
116 CorelDRAW Graphics Suite 12 User Guide
You can prevent the object’s straight lines from being converted to curves by
enabling the Keep lines button on the property bar.
To copy an envelope
1Select an object to which you want to copy an envelope.
2Click Effects ` Copy effect ` Envelope from.
3Select the object from which you want to copy the envelope.
You can also copy an envelope by selecting an object, clicking the Copy
envelope properties button on the property bar, and selecting an object with
the envelope you want to copy.
You can also use the Eyedropper tool to copy an envelope. For more
information, see “To copy effects from one object to another object” on
page 80.
To edit an envelope’s nodes and segments
1Open the Interactive tools flyout , and click the Interactive
envelope tool .
2Select an object with an envelope.
3Double-click the envelope to add a node or double-click a node to delete it.
You can also
Apply a preset envelope Click the Add preset button on the
property bar, and click an envelope shape.
Apply an envelope to an object with an
envelope
Click the Add new envelope button on
the property bar, and drag the nodes to
change the shape of the envelope.
Remove an envelope Click Effects ` Clear envelope.

CorelDRAW: Shaping objects 117
Splitting and erasing portions of objects
You can split a bitmap or vector object in two and reshape it by redrawing its path. You
can split a closed object along a straight or jagged line. CorelDRAW lets you choose
between splitting an object into two objects, or leaving it as one object composed of two
or more subpaths. You can specify whether you want to close paths automatically or
keep them open.
CorelDRAW lets you erase unwanted portions of bitmaps and vector objects. Erasing
automatically closes any affected paths and converts the object to curves. If you erase
connecting lines, CorelDRAW creates subpaths rather than individual objects. You can
also delete portions of objects, called virtual line segments, that are between
intersections.
You can also
Move several envelope nodes at once Click the Envelope unconstrained mode
button on the property bar, marquee
select the nodes you want to move, and drag
any node to a new position.
Move opposing nodes an equal distance in
the same direction
Press Shift, select two opposing nodes, and
drag them to a new position.
Move opposing nodes an equal distance in
the opposite direction
Click the Envelope single arc mode or
Envelope double arc mode button on
the property bar so that it appears raised,
press Shift, and drag one of the nodes to a
new position.
Change an envelope node type Click the Envelope unconstrained mode
button on the property bar so that it appears
pressed, and click either the Make node a
cusp , the Make node smooth , or the
Make node symmetrical button.
Change an envelope segment to a straight
line or curve
Click the Envelope unconstrained mode
button on the property bar so that it appears
pressed, click a line segment, and click the
Convert curve to line button or the
Convert line to curve button.
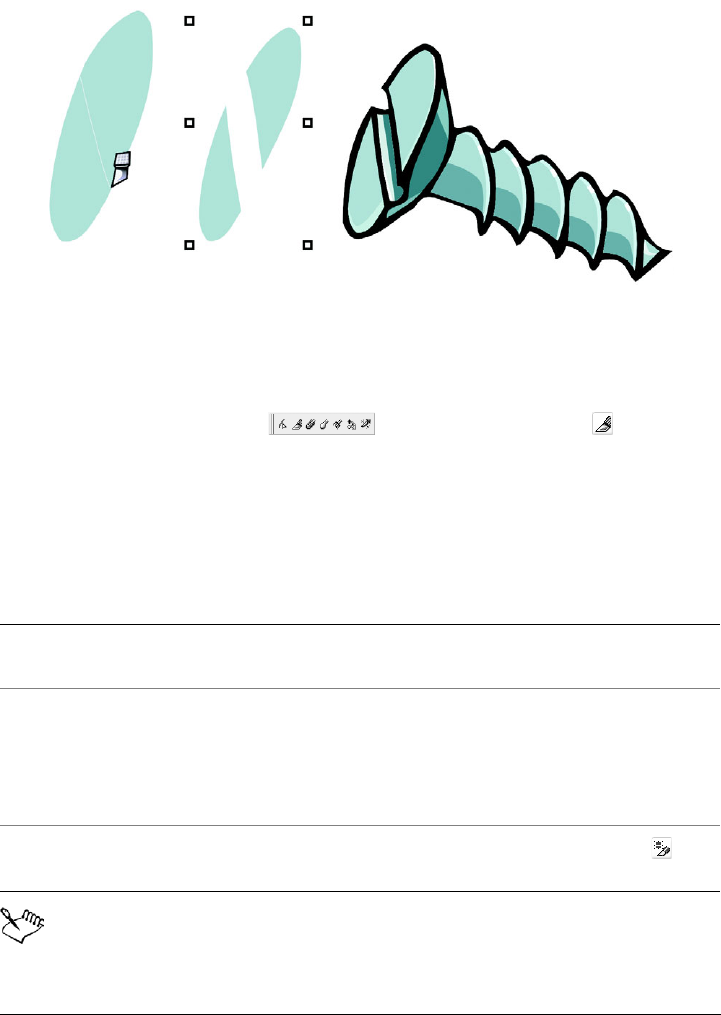
118 CorelDRAW Graphics Suite 12 User Guide
The Knife tool creates two separate objects by cutting the ellipse in half (left).
The two objects are separated and used to form the top of the screw (right).
To split an object
1Open the Shape edit flyout , and click the Knife tool .
2Position the Knife tool over the object’s outline where you want to start cutting.
The Knife tool snaps upright when positioned properly.
3Click the outline to start cutting.
4Position the Knife tool where you want to stop cutting, and click again.
By default, objects are split into two objects and paths are automatically closed.
You can also
Split an object along a freehand line Point to where you want to start the cut, and
drag to where you want it to end.
Split an object along a Bézier line Press Shift, click where you want to start
cutting an object, and click each time you
want to change the direction of the line. If
you want to constrain the line by 15-degree
increments, press Shift + Ctrl.
Split an object into two subpaths Click the Leave as one object button on
the property bar.
CorelDRAW: Shaping objects 119
When you use the Knife tool on a selected object, the object becomes a curve
object.
To break a path
To erase portions of an object
1Select an object.
2Open the Shape edit flyout , and click the Eraser tool .
3Drag over the object.
When you erase portions of objects, any affected paths are automatically
closed.
To Do the following
Break a path Open the Shape edit flyout
, and click the Shape tool .
Select a node on the path, and click the
Break curve button on the property bar.
Extract a broken path from an object Open the Shape edit flyout, and click the
Shape tool. Right-click a path, and click
Break apart. Select a segment, node, or
group of nodes that represents the portion of
the path you want to extract, and click the
Extract subpath button on the property
bar.
You can also
Change the size of the eraser nib Type a value in the Eraser thickness box on
the property bar, and press Enter.
Change the shape of the eraser nib Click the Circle/square button on the
property bar.
Maintain all the nodes of the area being
erased
Disable the Auto-reduce on erase button
on the property bar.

120 CorelDRAW Graphics Suite 12 User Guide
You can erase straight lines by clicking where you want to start erasing, and
then clicking where you want to finish erasing. Press Ctrl if you want to
constrain the line’s angle.
You can also erase an area of a selected object by double-clicking the area with
the Eraser tool.
To delete a virtual line segment
1Open the Shape edit flyout , and click the Virtual segment delete
tool .
2Move the pointer to the line segment you want to delete.
The Virtual segment delete tool snaps upright when positioned properly.
3Click the line segment.
If you want to delete multiple line segments at one time, click the pointer to drag a
marquee around all line segments you want to delete.
The Virtual segment delete tool does not work on linked groups such as drop
shadows, text, or images.
Trimming objects
Trimming creates irregularly shaped objects by removing object areas that overlap. You
can trim almost any object, including clones, objects on different layers, and single
objects with intersecting lines. However, you cannot trim paragraph text, dimension
lines, or masters of clones.
Before you trim objects, you must decide which object you want to trim (the target
object) and which object you want to use to perform the trimming (the source object).
For example, if you want to create a star-shaped cut out of a square object, the star is
the source object because you are using it to trim the square. The square is the target
object because it’s the object you want to trim. The source object trims the part of the
target object it overlaps.
The target object retains its fill and outline attributes. For example, if you trim a
rectangle that is overlapped by a circle, the area of the rectangle that was covered by the
circle is removed, creating an irregular shape.
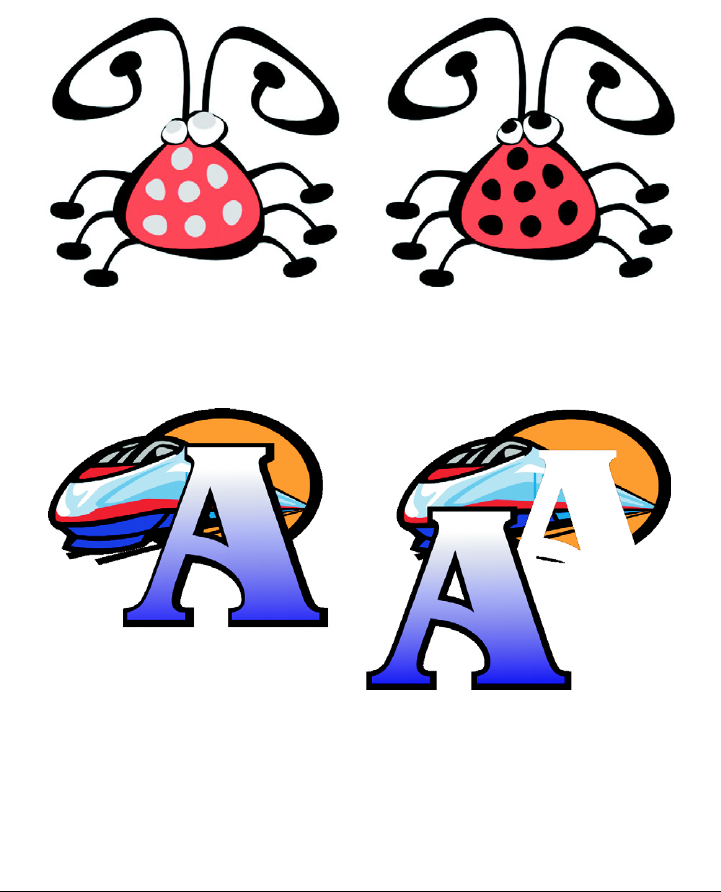
CorelDRAW: Shaping objects 121
CorelDRAW lets you trim objects in different ways. You can use a front object as the
source object to trim an object behind it, as well as use the back object to trim a front
object. You can also remove hidden areas of overlapping objects, so that only the visible
areas remain in the drawing. Removing the hidden areas can reduce file size when you
convert vector graphics to bitmaps.
Trimming can be used to reduce the number of objects in a drawing. Instead of
adding eyes and spots to the bug, areas (shown on the left in gray) are trimmed
to reveal the black background (right).
The letter “A” is the front object used to trim the back object. A partial
silhouette of the letter is created in the logo (right).
To trim an object
1Select the source objects.

122 CorelDRAW Graphics Suite 12 User Guide
2Hold down Shift and click the target object.
3Click Arrange ` Shaping ` Tr i m .
If you marquee select the objects, CorelDRAW trims the bottom-most selected
object. If you select multiple objects individually, the last object selected is
trimmed.
You can also trim objects by marquee selecting the source and target objects
and clicking the Tr i m button on the property bar.
To trim front and back objects
1Marquee select the source and target objects.
2Click Arrange ` Shaping, and click one of the following:
• Back minus front — removes the front object from the back one
• Front minus back — removes the back object from the front one
You can trim the control object of a PowerClip object so that the object inside
the PowerClip object will assume the new shape of the PowerClip container.
For information about PowerClip objects, see “Creating PowerClip objects” on
page 130.
Linked objects such as drop shadows, text on a path, artistic media, blends,
contours, and extrusions are converted to curve objects before they are
trimmed.
To trim overlapping areas among objects
1Marquee select the objects you want to trim.
2Click Arrange ` Shaping ` Simplify.
You can trim the control object of a PowerClip object, so that the object inside
the PowerClip object assumes the new shape.
Linked objects, such as drop shadows, text on a path, artistic media, blends,
contours, and extrusions, are converted to curve objects before they are
trimmed.

CorelDRAW: Shaping objects 123
Welding and intersecting objects
You can create irregular shapes by welding and intersecting objects. You can weld or
intersect almost any object, including clones, objects on different layers, and single
objects with intersecting lines. However, you cannot weld or intersect paragraph text,
dimension lines, or masters of clones.
You can weld objects to create one object with a single outline. The new object uses the
welded objects’ perimeter as its outline and adopts the fill and outline properties of the
target object. All intersecting lines disappear.
You can weld objects regardless of whether they overlap each other. If you weld objects
that do not overlap, they form a weld group that acts as a single object. In both cases,
the welded object takes on the fill and outline attributes of the target object.
You can weld single objects with intersecting lines so that the object breaks into several
subpaths, but its appearance remains the same.
Welding the leaves to the apple creates a single object outline.
Intersecting creates an object from the area where two or more objects overlap. The
shape of this new object can be simple or complex, depending on the shapes you
intersect. The new object’s fill and outline attributes depend on the object you define as
the target object.
To weld an object
1Select the source object or objects.
2Hold down Shift, and click the target object.

124 CorelDRAW Graphics Suite 12 User Guide
3Click Arrange ` Shaping ` We ld.
You can also weld objects by marquee-selecting the source and target objects
and clicking the Wel d button on the property bar.
To intersect objects
1Select the source object.
2Hold down Shift, and select the target object.
3Click Arrange ` Shaping ` Intersect.
You can also intersect objects by selecting the source and target objects and
clicking the Intersect button on the property bar.
To intersect multiple objects
1Marquee select the source object or objects.
2Hold down Shift, and click each target object.
3Click Arrange ` Shaping ` Intersect.
You can also intersect objects by marquee-selecting the source and target
objects and clicking the Intersect button on the property bar.
Blending objects
CorelDRAW lets you create blends, such as straight-line blends, blends along a path,
and compound blends.
A straight-line blend shows a progression in shape and size from one object to another.
The outline and fill colors of the intermediate objects progress along a straight-line path
across the color spectrum. The outlines of intermediate objects show a gradual
progression in thickness and shape.
After you create a blend, you can copy or clone its settings to other objects. When you
copy a blend, the object takes on all the blend-related settings, except for their outline
and fill attributes. When you clone a blend, changes you make to the original blend
(also called the master) are applied to the clone.
CorelDRAW: Shaping objects 125
Straight-line blends can be used to create graphics with a glass-like
appearance. The rollover button (left) contains a blend of tightly overlapped
blended objects.
You can fit objects along part or all of a path’s shape, and you can add one or more
objects to a blend to create a compound blend.
The straight-line blend (top) is fitted to a curved path (bottom).
You can change the appearance of a blend by adjusting the number and spacing of its
intermediate objects, the blend’s color progression, the nodes the blends map to, the
blend’s path, and the start and end objects. You can fuse the components of a split or
compound blend to create a single object.
126 CorelDRAW Graphics Suite 12 User Guide
This compound blend consists of three blends.
You can also split and remove a blend.
By mapping nodes, you can control the appearance of a blend. Four nodes on
the arrow are mapped to the four corners of a square, showing a more gradual
transition (bottom).
CorelDRAW: Shaping objects 127
To blend objects
To copy or clone a blend
1Select the two objects you want to blend.
2Click Effects, and click one of the following:
• Copy effect ` Blend from
• Clone effect ` Blend from
3Select the blend whose attributes you want to copy or clone.
You can’t copy or clone a compound blend.
To Do the following
Blend along a straight line Open the Interactive tools flyout
, and click the Interactive
blend tool . Select the first object, and
drag over the second object. If you want to
reset the blend, press Esc as you drag.
Blend an object along a freehand path Open the Interactive tools flyout, and click
the Interactive blend tool. Select the first
object. Hold down Alt and drag to draw a
line to the second object.
Fit a blend to a path Open the Interactive tools flyout, and click
the Interactive blend tool. Click the blend.
Click the Path properties button on the
property bar. Click New path. Using the
curved arrow, click the path to which you
want to fit the blend.
Stretch the blend over an entire path Select a blend that is already fitted on a path.
Click the Miscellaneous blend options
button on the property bar, and enable
the Blend along full path check box.
Create a compound blend Using the Interactive blend tool, drag from
an object to the start or end object of
another blend.
128 CorelDRAW Graphics Suite 12 User Guide
You can also use the Eyedropper tool to copy a blend. For more
information, see “To copy effects from one object to another object” on
page 80.
To set the distance for intermediate objects in a blend fitted to a path
1Select a blend.
2Click the Use steps or fixed spacing for blend button on the property bar.
3Ty p e a v a l u e i n t h e Number of steps or offset between blend shapes box on the
property bar.
4Press Enter.
You can set object and color acceleration rates by clicking the Object and
color acceleration button on the property bar and moving the
corresponding slider.
To set the color progression for intermediate objects in a blend
1Select a blend.
2On the property bar, click one of the following:
• Direct blend
• Clockwise blend
• Counterclockwise blend
You can’t create color progressions using blended objects filled with bitmaps,
texture, pattern, or PostScript fills.
You can set how fast the object’s colors transform from the first to the last
object by clicking the Object and color acceleration button on the
property bar and moving the corresponding sliders.
To map the nodes of a blend
1Select a blend.
2Click the Miscellaneous blend options button on the property bar.
CorelDRAW: Shaping objects 129
3Click the Map nodes button on the property bar.
4Click a node on the start object and on the end object.
To work with the start or end objects in a blend
You can reverse the direction of the blend by clicking Arrange ` Order `
Reverse order.
To change the blend path
1Select a blend.
2Click the Path properties button on the property bar, and click New path.
3Click the path you want to use for the blend.
To Do the following
Select the start or end object Select a blend, click the Start and end
object properties button on the
property bar, and click Show start, or Show
end.
Change the start or end object of a blend Select a blend, click the Start and end
object properties button on the property
bar, and click New start, or New end. Click
an object outside the blend that you want to
use as the start or end of the blend.
Fuse the start or end object in a split or
compound blend
Hold down Ctrl, click a middle object in a
blend, and then click a start or end object.
Click the Miscellaneous options button
on the property bar. If you have selected the
start object, click the Fuse start button .
If you have selected the end object, click the
Fuse end button .
You can also
Detach a blend from a path Click the Path properties button on the
property bar, and click Detach from path.
130 CorelDRAW Graphics Suite 12 User Guide
To select the blend path, click the Path properties button and click Show
path.
To split a blend
1Select a blend.
2Click the Miscellaneous options button on the property bar.
3Click the Split button .
4Click the intermediate object at the point at where you want to split the blend.
You can’t split a blend at the intermediate object that is immediately adjacent
to the start or end object.
To remove a blend
1Select a blend.
2Click Effects ` Clear blend.
You can also remove a selected blend by clicking the Clear blend button
on the property bar.
Creating PowerClip objects
CorelDRAW lets you place vector objects and bitmaps, such as photos, inside other
objects, or containers. A container can be any object, for example artistic text or a
rectangle. When you place an object into a container that is larger than the container,
the object, called the content, is cropped to fit the form of the container. This creates a
PowerClip object.
Change the path of a selected freehand blend Click the blend path with the Shape tool ,
and drag a path’s node.
You can also
CorelDRAW: Shaping objects 131
Objects before becoming a PowerClip object: artistic text and a bitmap
You can create more complex PowerClip objects by placing one PowerClip object inside
another PowerClip object to produce a nested PowerClip object. You can also copy the
contents of one PowerClip object to another PowerClip object.
In the PowerClip object, the artistic text is the container, and the bitmap forms
the contents. The bitmap is shaped to the letters of the artistic text.
After you create a PowerClip object you can modify the content and the container. For
example, you can lock the content, so that when you move the container, the content
moves with it. CorelDRAW also lets you extract the content from a PowerClip object,
so that you can delete the content or modify it without affecting the container.

132 CorelDRAW Graphics Suite 12 User Guide
To create a PowerClip object
1Select an object.
2Click Effects ` PowerClip ` Place inside container.
3Click the object you want to use as the container.
If you want to create a nested PowerClip object, hold down the right mouse
button, drag the PowerClip object inside a container, and click PowerClip inside.
To copy the content of a PowerClip object
1Select an object.
2Click Effects ` Copy effect ` PowerClip from.
3Click a PowerClip object.
To edit the content of a PowerClip object
1Select a PowerClip object.
2Click Effects ` PowerClip ` Edit contents.
3Edit the contents of the PowerClip object.
4Click Effects ` PowerClip ` Finish editing this level.
While you edit, the container displays in Wireframe mode and cannot be
selected.
To lock or unlock the content of a PowerClip object
• Right-click a PowerClip object, and click Lock contents to PowerClip.
From here
For more information about In the Help index, see
Changing the mapping mode of an envelope envelopes, changing mapping modes
Extracting the content of a PowerClip object PowerClip objects, extracting contents

CorelDRAW: Working with symbols 133
Working with symbols
The CorelDRAW application lets you create objects and save them as symbols.
Symbols are defined once and can be referenced many times in a drawing. Each time
you insert a symbol into a drawing, you create an instance of the symbol. Symbol
definitions, as well as information about instances, are stored in a symbol manager,
which is part of the CorelDRAW (CDR) file. Using symbols for objects that appear
many times in a drawing helps to reduce file size.
In this section, you’ll learn about
• creating, editing, and deleting symbols
• using symbols in drawings
• managing collections and libraries
• sharing symbols between drawings
For information about modifying symbol instances and about unsupported object types,
see “Reference: Working with symbols” in the Help.
The term “symbol,” as it was used in earlier versions of CorelDRAW, has been replaced
by “special character” in CorelDRAW 12. For more information about working with
special characters, see “Embedding graphics and adding special characters” on
page 232.
Creating, editing, and deleting symbols
Symbols are objects that are defined once and can be referenced many times in a
drawing. You can have multiple instances of a symbol in a drawing with little impact
on file size. Symbols make editing a drawing quicker and easier, as changes made to a
symbol are automatically inherited by all instances.
Symbols are created from objects. When you convert an object to a symbol, the new
symbol is added to the Symbol manager, and the selected object becomes an instance.
You can also create a symbol from multiple objects. You can edit a symbol; any changes
you make affect all instances in a drawing. The selection handles for symbols differ from
134 CorelDRAW Graphics Suite 12 User Guide
those for objects. Selection handles for symbols are blue; selection handles for objects
are black. You can also delete a symbol instance and purge unused symbol definitions.
Purging removes all symbol definitions that are not instanced in a drawing.
Using symbols for objects that appear many times helps to reduce file size.
To convert an object to a symbol
1Select an object or multiple objects.
2Click Edit ` Symbol ` New symbol.
Symbols cannot span layers. If you convert objects on different layers to a
symbol, the objects are combined on the topmost object’s layer. For more
information about layers, see “Working with layers” on page 205.
You can also convert an existing object or objects to a symbol by dragging the
object or objects to the Symbol manager docker.
To make a linked symbol internal
1Select a symbol.
2Click Edit ` Symbol ` Break link.
If other instances of the symbol are in the drawing, you are given the choice to
break links to all instances. If you do, the internal symbol will then apply to all the
instances.
CorelDRAW: Working with symbols 135
You can also make a linked symbol internal by right-clicking a symbol and
choosing Break link.
To edit a symbol
1In the Symbol manager docker, choose a symbol from the Symbols list.
If you want to name or rename the symbol, double-click the symbol’s name box,
and type a name.
2Click the Edit symbol button .
3Modify the objects on the drawing page.
4Click the Finish editing object tab in the bottom-left corner of the drawing
window.
Changes made to a symbol are automatically made to all instances in the active
drawing.
While working in symbol edit mode, you cannot add layers or save a drawing.
You can also edit a symbol by selecting an instance in the drawing window,
and clicking the Edit symbol button on the property bar or holding down
Ctrl and clicking a symbol.
While editing a symbol, you can insert an instance of another symbol, which
creates a nested symbol. You cannot, however, insert an instance of the same
symbol.
To edit a linked symbol
1Click File ` Open.
2Choose the drive and folder where the library is stored.
3Click a library filename.
Library files have a .csl filename extension.
4Click Open.
5In the Symbol manager docker, click the active document, and choose a symbol
from the Symbols list.
If you want to rename the symbol, click the name again, and type a new name.
136 CorelDRAW Graphics Suite 12 User Guide
6Click the Edit symbol button .
7Modify the objects on the drawing page.
8Click the Finish editing object tab in the bottom-left corner of the drawing
window.
9Click File ` Save.
You may need permission to change files on the network.
To delete a symbol
1In the Symbol manager docker, choose a symbol from the Symbols list.
2Click the Delete symbol button .
When you delete a symbol, it is removed from the Symbol manager, and all
instances of the symbol are removed from the drawing.
Using symbols in drawings
You can insert a symbol into a drawing, which creates a symbol instance. You can
modify certain properties of a symbol instance, such as size and position, without
affecting the symbol definition stored in the library. You can revert a symbol instance to
an object or objects while preserving its properties. You can also delete a symbol
instance.
To insert a symbol instance
1Open the Symbol manager docker by clicking Window ` Dockers ` Symbol
manager.
If you want the symbol scaled automatically to match the current drawing scale,
ensure that the Scale to world units button is enabled.
2Choose a symbol from the Symbols list.
3Click the Insert symbol button .
The term “symbol,” as it was used in earlier versions of CorelDRAW, has been
replaced by “special character” in CorelDRAW 12. For more information

CorelDRAW: Working with symbols 137
about working with special characters, see “Embedding graphics and adding
special characters” on page 232.
You can also insert a symbol instance by dragging a symbol from the Symbol
manager docker to the drawing window.
To purge unused symbol definitions
1In the Symbol manager docker, click the active document.
2Click the Purge unused definitions button .
To modify a symbol instance
1Select a symbol instance.
2Make any changes.
If a symbol contains multiple objects, all objects in the symbol instance are
treated as if they were a group. You cannot modify individual objects in a
symbol instance.
Not all properties of a symbol instance can be modified. For a list of properties
that can be modified, see “Modifying symbol instances” on page 152.
When a symbol instance is selected, you can modify many object properties on
the property bar.
To revert a symbol instance to an object or objects
1Select a symbol instance.
2Click Edit ` Symbol ` Revert to objects.
The symbol remains in the Symbol manager.
You can also revert a symbol instance to an object by right-clicking the symbol
instance and clicking Revert to objects.

138 CorelDRAW Graphics Suite 12 User Guide
To delete a symbol instance
1Select a symbol instance.
2Press Delete.
The symbol remains in the Symbol manager.
Managing collections and libraries
Most of the symbols you will use have already been created and are stored in library files
that are grouped into collections.
The Symbol manager docker always displays libraries and collections that are in your
local Symbols folder. You can add collections and libraries to your Symbols folder from
elsewhere on the network. When you insert a local or external symbol into a drawing,
a copy of the symbol definition is added to the document, but it remains linked to the
source symbol.
To add a collection or library
1Click Window ` Dockers ` Symbol manager.
2In the tree, click Local Symbols or Network Symbols.
3Click the Add library button .
4Locate and choose a collection or library.
5Click OK.
By default, library files are referenced from their original location. If you want
to copy a library to your User Symbols folder, enable the Copy libraries
locally checkbox.
If you are adding a collection, you can enable the Recursive check box to
include subfolders.
To delete a collection or library
1In the Symbol manager docker, click a collection or library.
2Press Delete.

CorelDRAW: Working with symbols 139
The collection or library is removed from the tree in the Symbol manager
docker, but files are not deleted.
Sharing symbols between drawings
In CorelDRAW, each drawing has its own library of symbols, which is part of the
CorelDRAW (CDR) file. You can share symbols between drawings by copying and
pasting. Copying symbols to the Clipboard leaves the originals in the library.
You can also copy and paste instances of a symbol to and from the Clipboard. Pasting a
symbol instance places the symbol in the library and also places an instance of the
symbol in the drawing. Subsequent pasting will place another instance of the symbol in
the drawing without adding to the library. If a modified symbol instance is pasted into
a drawing, the new instance maintains the properties of the original instance, and the
new symbol definition in the library maintains the properties of the original symbol.
Symbol instances are copied and pasted in the same way other objects are. For more
information, see “Copying, duplicating, and deleting objects” on page 78.
To copy or paste symbols
If a pasted symbol has the same name as an existing symbol, the new name is
appended with an increment number. For example, a pasted symbol named
“logo” would be renamed “logo1.”
To export a symbol library
1In the Symbol manager docker, click the active document.
2Click the Export library button .
To Do the following
Copy symbols to the Clipboard In the Symbol manager docker, choose the
symbol or symbols from the Symbols list,
right-click, and click Copy.
Paste symbols from the Clipboard In the Symbol manager docker, right-click,
and click Paste.

140 CorelDRAW Graphics Suite 12 User Guide
3Choose the drive and folder where you want to save the library file.
4Type a filename in the File name box.
5Click Save.
To create a new library
1Click File ` Save.
2Choose the drive and folder where you want to store the library.
3Type a filename in the File name box.
4Choose CSL - Corel Symbol Library from the Save as type list box.
5Click Save.
To add a symbol to an existing library
1Click File ` Open.
2Choose the drive and folder where the library is stored.
3Choose CSL - Corel Symbol Library from the Files of type list box.
4Choose the library file where you want to add a symbol.
5Paste a symbol to the document.
6Save the library file.

CorelDRAW: Filling objects 141
Filling objects
You can add colored, patterned, textured, and other fills to the inside of objects. You
can customize a fill and set it as a default, so that each object you draw has the same
fill.
In this section, you’ll learn about
• applying uniform fills
• applying fountain fills
• applying pattern fills
• applying texture fills
•applying mesh fills
• working with fills
Applying uniform fills
You can apply a uniform fill to objects. Uniform fills are solid colors you can choose or
create using color models and color palettes. For information about creating colors, see
“Working with color” on page 153.
To apply a uniform fill
1Select an object.
2Open the Interactive fill flyout , and click the Interactive fill tool .
3Choose Uniform fill from the Fill type list box on the property bar.
4Specify the settings you want on the property bar, and press Enter.
You can also fill a selected object by clicking a color on the color palette.
You can mix colors in a uniform fill by selecting a filled object, pressing Ctrl,
and clicking another color on the color palette.
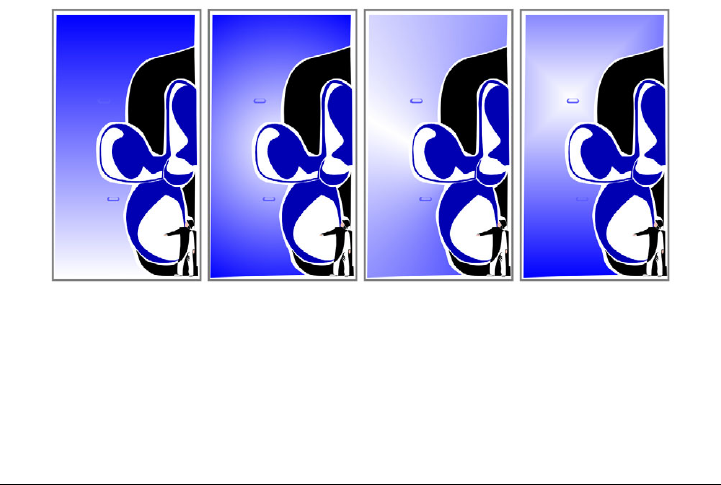
142 CorelDRAW Graphics Suite 12 User Guide
Applying fountain fills
A fountain fill is a smooth progression of two or more colors that adds depth to an
object. There are four types of fountain fills: linear, radial, conical, and square. A linear
fountain fill flows in a straight line across the object, a conical fountain fill creates the
illusion of light hitting a cone, a radial fountain fill radiates from the center of the object,
and a square fountain fill is dispersed in concentric squares from the center of the object.
You can apply preset fountain fills, two-color fountain fills, and custom fountain fills to
objects. Custom fountain fills can contain two or more colors, which you can position
anywhere in the fill’s progression. After you create a custom fountain fill, you can save
it as a preset.
When you apply a fountain fill, you can specify attributes for the fill type you choose;
for example, the direction of a fill’s color blend, the fill’s angle, center point, midpoint,
and edge pad. You can also adjust the print and display quality of the fountain fill by
specifying the number of fountain steps. By default, the fountain step setting is locked
so that the print quality of the fountain fill is determined by the value specified in the
print settings and the display quality is determined by the default value you set.
However, you can unlock the fountain steps setting when you apply a fountain fill and
specify a value that applies to both the print and view quality of the fill. For information
about setting fountain fill steps for printing, see “Fine-tuning print jobs” in the Help.
There are four types of fountain fills: (left to right) linear, radial, conical, and
square.
To apply a preset fountain fill
1Select an object.
CorelDRAW: Filling objects 143
2Open the Fill flyout , and click the Fountain fill dialog button .
3Choose a fill from the Presets list box.
4Specify the settings you want.
To apply a two-color fountain fill
1Select an object.
2Open the Interactive fill flyout , and click the Interactive fill tool .
3Choose a fountain fill from the Fill type list box on the property bar.
4Open the Fill dropdown picker on the property bar, and click a color.
5Open the Last fill picker on the property bar, and click a color.
6Specify the settings you want.
You can mix colors in a two-color fountain fill by selecting one of the
interactive vector handles, pressing Ctrl, and clicking a color on the color
palette.
You can add a color to a fountain fill by dragging a color from the color palette
to an object’s interactive vector handle.
To apply a custom fountain fill
1Select an object.
2Open the Fill flyout , and click the Fountain fill dialog button .
3Choose a fountain fill from the Ty p e list box on the property bar.
4Enable the Custom option.
5Click the box at one end of the area just above the color band, and click a color on
the color palette.
6Click the box at the opposite end of the area just above the color band, and click a
color.
7Specify the attributes you want.

144 CorelDRAW Graphics Suite 12 User Guide
You can also create a custom fountain fill by dragging colors from the color
palette in the drawing window onto the object’s interactive vector handles.
Applying pattern fills
You can fill objects with two-color, full-color, or bitmap pattern fills.
Examples of bitmap pattern fills
A two-color pattern fill is composed of only the two colors that you choose. A full-color
pattern fill is a more complex vector graphic that can be composed of lines and fills. A
You can also
Add an intermediate color Double-click between the two ends of the
area just above the color band, and click a
color on the color palette.
Change a color Click the vector just above the color band,
and click a color on the color palette.
Delete a color Double-click the vector just above the color
you want to delete.
Change the position of a color Drag the vector just above the color to a new
location.
Save the fill as a preset Type a name in the Presets box, and click
the Add preset button .
CorelDRAW: Filling objects 145
bitmap pattern fill is a bitmap image whose complexity is determined by its size, image
resolution, and bit depth.
CorelDRAW provides preset pattern fills that you can apply to objects; however, you
can also create your own pattern fills. For example, you can create pattern fills from
objects that you draw or images that you import.
You can change the tile size of pattern fills. You can also specify exactly where these fills
begin by setting the tile origin. CorelDRAW also lets you offset tiles in a fill. Adjusting
the horizontal or vertical position of the first pattern, relative to the top of the object,
affects the rest of the fill.
You can choose how the pattern fill appears by specifying whether to mirror the fill so
that alternating tiles are the reflections of one another. If you want a pattern fill to
change according to actions you perform on the filled object, you can specify that you
want it to transform with the object. For example, if you enlarge an object filled with a
pattern that transforms, the pattern becomes larger while the number of tiles is not
increased.
To apply a two-color pattern fill
1Select an object.
2Open the Interactive fill flyout , and click the Interactive fill tool .
3Choose Two color pattern from the Fill type list box on the property bar.
4Open the Fill dropdown picker, and click a pattern.
5Open the Front color picker, and click a color.
6Open the Back color picker, and click a color.
You can also mix colors in a two-color pattern fill by pressing Ctrl and clicking
a color on the color palette.
You can mix a color with only one of the colors in the fill by pressing Ctrl and
dragging a color to the interactive handle.
To apply a full-color or bitmap pattern fill
1Select an object.
2Open the Interactive fill flyout , and click the Interactive fill tool .
3Choose one of the following from the Fill type list box on the property bar:

146 CorelDRAW Graphics Suite 12 User Guide
• Full-color pattern
• Bitmap pattern
4Open the Fill dropdown picker, and click a pattern.
Applying texture fills
A texture fill is a randomly generated fill that you can use to give your objects a natural
appearance. CorelDRAW provides preset textures, and each texture has a set of options
that you can change. You can use colors from any color model or palette to customize
texture fills. Texture fills can hold only RGB colors; however, other color models and
palettes can be used as a reference to select colors. For information about color models,
see “Understanding color models” on page 164.
You can change the tile size of texture fills. Increasing the resolution of a texture tile
increases the accuracy of the fill. You can also specify exactly where these fills begin by
setting the tile origin. CorelDRAW also lets you offset tiles in a fill. Adjusting the
horizontal or vertical position of the first tile, relative to the top of the object, affects the
rest of the fill.
You can rotate, skew, adjust the tile size, and change the center of the texture to create
a custom fill.
If you want a texture fill to change according to the actions you perform on the filled
object, you can specify that you want the fill to transform with the object. For example,
if you enlarge an object filled with a texture that transforms, the texture becomes larger
instead of increasing the number of tiles.
Texture fills are powerful features that can enhance a drawing. However, they also
increase the size of a file and the time it takes to print, so you may want to use them in
moderation.
To apply a texture fill
1Select an object.
2Open the Fill flyout , and click the Texture fill dialog button .
3Choose a texture library from the Texture library list box.
4Choose a texture from the Texture list.

CorelDRAW: Filling objects 147
You can modify the texture you choose from the texture library and save it to
another library, but you cannot save textures to or overwrite textures in the
texture library.
You can save a custom texture fill by clicking the plus sign (+) in the Texture
fill dialog box and typing a name in the Texture name box.
Applying mesh fills
When you fill an object with a mesh fill, you can create unique effects. For example, you
can create smooth color transitions in any direction without having to create blends or
contours. When you apply a mesh fill, you specify the number of columns and rows in
the grid, and you specify the grid’s intersecting points. After you have created a mesh
object, you can edit the mesh fill grid by adding and removing nodes or intersections.
You can also remove the mesh.
You can also
Create a custom texture fill Specify the settings you want in the Style
name area.
Change the size of texture tiles Click Tiling, and type values in the Width
and Height boxes.
Set the tile origin of a texture fill Click Tiling, and type values in the X and Y
boxes in the Origin area.
Offset the tile origin of a texture fill Click Tiling, and enable the Row or
Column option. Type an amount of offset in
the % of tile size box.
Rotate a texture fill Click Tiling, and type a value in the Rotate
box.
Skew a texture fill Click Tiling, and type a value in the Skew
box.
Mirror a texture fill Click Tiling, and enable the Mirror fill
check box.
148 CorelDRAW Graphics Suite 12 User Guide
A mesh fill can be applied only to closed objects or a single path. If you want to apply
a mesh fill to a complex object, you must first create a mesh-filled object and combine
it with the complex object to form a PowerClip object. For more information about
working with PowerClip objects, see “Creating PowerClip objects” on page 130.
You can add color to a patch of a mesh fill and to the individual intersection nodes. You
can also choose to mix colors for a more blended appearance.
To apply a mesh fill to an object
1Select an object.
2Open the Interactive fill flyout , and click the Interactive mesh fill tool
.
3Type the number of columns in the top portion of the Grid size box on the
property bar.
4Type the number of rows in the bottom portion of the Grid size box on the
property bar, and press Enter.
5Adjust the grid nodes on the object.
If the mesh object contains color, adjusting the intersection nodes of the mesh
affects how the colors blend together.
You can also marquee select or freehand marquee select nodes to shape an
entire area of the mesh.
You can also
Add an intersection Click once within a grid, and click the Add
intersection button on the property bar.
Add a node Hold down Shift, and double-click where
you want to add the node.
Remove a node or an intersection Click a node, and click the Delete node(s)
button on the property bar.
Shape the mesh fill Drag a node to a new location.
Remove the mesh fill Click the Clear mesh button on the
property bar.
CorelDRAW: Filling objects 149
You can add an intersection by double-clicking in a space, or you can add a
single line by double-clicking a line.
To add color to a patch in a mesh fill
1Select a mesh-filled object.
2Open the Interactive fill flyout , and click the Interactive mesh fill tool
.
3Drag a color from the color palette to a patch in the object.
You can also drag a color from the color palette to an intersection node.
You can also freehand marquee select nodes to apply a color to an entire area
of the mesh.
Working with fills
There are a number of tasks that are common to all types of fills. You can choose a
default fill color so that every object you add to a drawing has the same fill. You can also
remove any fill, copy it to another object, or use it to fill an area surrounded by an open
curve.
To choose a default fill color
1Click a blank area on the drawing page to deselect all objects.
2Open the Fill flyout , and click the Fill color dialog.
3In the Uniform fill dialog box, enable any of the following check boxes:
• Graphic — applies the default fill color to shapes you draw
• Artistic text — applies the default fill color to artistic text you add
• Paragraph text — applies the default fill color to paragraph text you add
You can also
Color an intersection node in a mesh fill Click an intersection node, and click a color
on the color palette.
Mix a color in a mesh fill Select part of the mesh, press Ctrl, and click
a color on the color palette.
150 CorelDRAW Graphics Suite 12 User Guide
4Specify any fill settings.
To remove a fill
1Select an object.
2Open the Fill flyout , and click the No fill button .
To copy a fill to another object
1Open the Eyedropper flyout , and click the Eyedropper tool .
2Choose Sample color from the list box on the property bar.
3Click the Sample size flyout on the property bar, and enable one of the following
options:
• 1X1 — lets you choose the average color in a 1X1 pixel area of the object
• 3X3 — lets you choose the average color in a 3X3 pixel area of the object
• 5X5 — lets you choose the average color in a 5X5 pixel area of the object
4Click the object whose fill you want to copy.
5Open the Eyedropper flyout , and click the Paintbucket tool .
6Click the object to which you want to apply the fill.
Fills you copy may not match the original fill. The closest equivalent RGB color
is applied.
If you want to sample a color from your desktop, click the Eyedropper tool,
choose Sample color from the list box on the property bar, and click Select
from desktop. Click anywhere on your desktop to sample a color.
From here
For more information about In the Help index, see...
Changing fountain fill quality fountain fills, print quality
Setting the display quality for fountain fills fountain fills, display quality
Creating pattern fills pattern fills
Applying PostScript texture fills PostScript

CorelDRAW: Filling objects 151
Showing fills in open curves curves, filling open
For more information about In the Help index, see...

CorelDRAW: Working with color 153
Working with color
Your application lets you choose and create colors using a wide variety of industry-
standard palettes, color mixers, and color models. You can create and edit custom color
palettes to store frequently used colors for future use.
You can also customize how color palettes display on your screen by changing the size
of swatches, the number of rows in palettes, and other properties.
In this section, you’ll learn about
• choosing colors
• creating custom color palettes
Choosing colors
You can choose fill and outline colors using fixed or custom color palettes, color viewers,
color harmonies, or color blends.
For information about applying the colors you choose, see “Applying uniform fills” on
page 141 and “Formatting lines and outlines” on page 52.
When you want to use a color that already exists in an object or document, you can
sample the color to achieve an exact match. For more information, see “To copy a fill to
another object” on page 150.
Choosing a color using the default color palette
A color palette is a collection of color swatches. You can choose fill and outline colors
using the default color palette, which contains 99 colors from the CMYK color model.
The selected fill and outline colors display in the color swatches on the status bar.
Choosing a color using fixed or custom color palettes
Fixed color palettes are provided by third-party manufacturers. Some examples of these
are PANTONE®, HKS Colors, and TRUMATCH®. It may be useful to have on hand

154 CorelDRAW Graphics Suite 12 User Guide
a manufacturer’s swatch book, which is a collection of color samples that shows exactly
what each color looks like when printed.
Some fixed color palettes — PANTONE, HKS Colors, TOYO, DIC, Focoltone, and
SpectraMaster — are collections of spot colors. If you create color separations when you
print, each color from these color palettes requires a separate printing plate. This can
significantly affect the cost of your print job. If you want to use these colors, but you
don’t want to use spot colors, convert the spot colors to process colors when printing.
For more information, see “Printing color separations” on page 285.
Custom color palettes can include colors from any color model or fixed color palette.
You can save a custom color palette for future use. For more information about working
with custom color palettes, see “Creating custom color palettes” on page 158 and
“Opening and editing custom color palettes” in the Help.
Choosing a color using color viewers
Color viewers give a representation of a range of colors using either one-dimensional or
three-dimensional shapes. The default color viewer is based on the HSB color model,
but you can use this viewer to choose CMYK, CMY, or RGB colors. For information
about color models, see “Understanding color models” in the Help.
Choosing a color using color harmonies
Color harmonies work by superimposing a shape, such as a rectangle or a triangle, over
a color wheel. Each vertical row in the color grid begins with the color located at one of
the points on the superimposed shape.
The colors at each corner of the shape are always complementary, contrasting, or
harmonious, depending on the shape you choose. The color harmonies allow you to
choose the color model you prefer to use, and are most useful when you’re choosing
several colors for a project.
Choosing a color using color blends
When you choose a color using color blends, you combine base colors to get the color
you want. The color blender displays a grid of colors that it creates from the four base
colors you choose.
CorelDRAW: Working with color 155
To choose a color using the default color palette
You can display color names by pointing to a swatch.
To choose a color using a fixed or custom color palette
1Select an object.
2Open one of the following flyouts:
• the Fill flyout, and click the Fill color dialog tool .
• the Outline flyout, and click the Outline color dialog tool .
3Click the Palettes tab.
4Choose a fixed or custom palette from the Palette list box.
5Move the color slider to set the range of colors displayed in the color selection area.
6Click a color in the color selection area.
Each color swatch on a fixed color palette is marked with a small white square.
You should use the same color model for all colors in a drawing; the colors will
be consistent and you will be able to predict the colors of the final output more
accurately. It is preferable to use the same color model that you are using for
the final output. For more information about reproducing colors accurately, see
“Managing color for display, input, and output” on page 159.
You can display or hide the names of fixed or custom colors by clicking
Options ` Show color names.
To Do the following
Choose a fill color for a selected object Click a color swatch.
Choose an outline color for a selected object Right-click a color swatch.
Choose from different shades of a color Click and hold a color swatch to display a
pop-up color picker, and click a color.
View more colors in the default color palette Click the scroll arrows at the top and bottom
of the color palette.
156 CorelDRAW Graphics Suite 12 User Guide
You can swap the Old color (of the selected object) and the New color (which
has been chosen in the color selection area) by clicking Options ` Swap
colors.
To choose a color using a color viewer
1Select an object.
2Open one of the following flyouts:
• the Fill flyout, and click the Fill color dialog tool .
• the Outline flyout, and click the Outline color dialog tool .
3Click the Models tab.
4Choose a color model from the Model list box.
5Click Options ` Color viewers, and click a color viewer.
6Move the color slider.
7Click a color in the color selection area.
If you choose a color that is out of the printer’s gamut, CorelDRAW displays
the closest in-gamut color. This color is displayed in the Reference area, in the
small swatch beside the New color. You can either choose this closest in-gamut
color or you can correct the out-of-gamut color. For information about color
correction, see “Managing color for display, input, and output” on page 159.
You should use the same color model for all colors in a drawing; the colors will
be consistent and you will be able to predict the colors of the final output more
accurately. It is preferable to use the same color model that you are using for
the final output.
You can swap the Old color (of the selected object) and the New color (which
has been chosen in the color selection area) by clicking Options ` Swap
colors.
To choose a color using color harmonies
1Select an object.
2Open one of the following flyouts:
• the Fill flyout, and click the Fill color dialog tool .
• the Outline flyout, and click the Outline color dialog tool .
CorelDRAW: Working with color 157
3Click the Mixers tab.
4Click Options ` Mixers ` Color harmonies.
5Choose a shape from the Hues list box.
6Choose an option from the Variation list box.
7Drag the black dot on the color wheel.
8Click a color swatch on the color palette below the color wheel.
If you choose a color that is out of the printer’s gamut, CorelDRAW displays
the closest in-gamut color. This color is displayed in the Reference area, in the
small swatch beside the New color. You can either choose this closest in-gamut
color, or you can correct the out-of-gamut color. For information about color
correction, see “Managing color for display, input, and output” on page 159.
You can change the number of swatches in the color grid by dragging the Size
slider.
To choose a color using color blends
1Select an object.
2Open one of the following flyouts:
• the Fill flyout, and click the Fill color dialog tool .
• the Outline flyout, and click the Outline color dialog tool .
3Click the Mixers tab.
4Click Options ` Mixers ` Color blend.
5Open each color picker, and click a color.
6Click a color in the color selection area.
You can only blend colors that are in the default color palette. If you want to
blend other colors, change the default color palette.
You can change the cell size of the color grid by moving the Size slider.
You can swap the Old color (of the selected object) and the New color (which
has been chosen in the color selection area) by clicking Options ` Swap
colors.

158 CorelDRAW Graphics Suite 12 User Guide
Creating custom color palettes
Custom color palettes are collections of colors that you save. A number of preset custom
color palettes are available; however, you can create color palettes from scratch. Custom
color palettes are useful when you frequently choose the same colors, or when you want
to work with a set of colors that look good together.
You can create a custom color palette by choosing each color manually, or by using
colors in an object or an entire area.
To create a custom color palette
1Click Window ` Color palettes ` Palette editor.
2Click New palette .
3Ty p e a f i l e n a m e .
4Click Save.
To create a color palette from an object
1Select an object.
2Click Window ` Color palettes ` Create palette from selection.
3Ty p e a f i l e n a m e .
4Click Save.
To create a color palette from a document
1Click Window ` Color palettes ` Create palette from document.
2Ty p e a f i l e n a m e .
3Click Save.
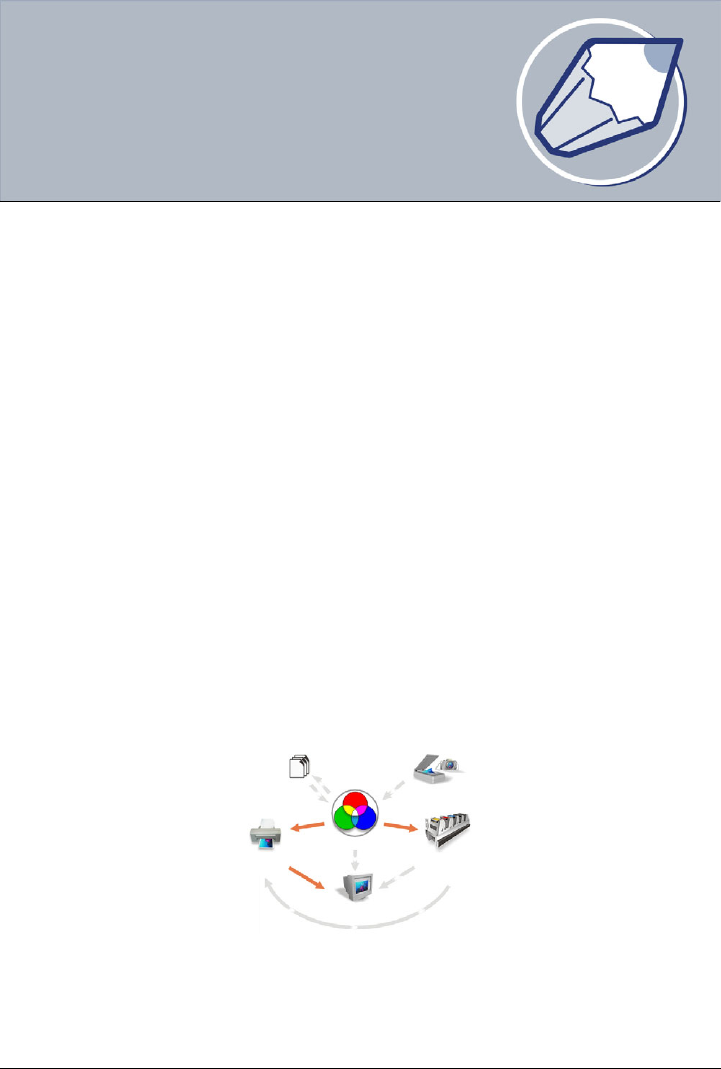
CorelDRAW: Managing color for display, input, and output 159
Managing color for
display, input, and output
You may find that the colors displayed on your monitor don’t match the colors of a
scanned image or of a printer’s output. Color management lets you reproduce colors
accurately by using color profiles and by correcting colors for display.
In this section, you’ll learn about
• understanding the Color management dialog box
• working with color profiles
• choosing advanced color management settings
• correcting colors for display
Understanding the Color management dialog box
Color management is the process of matching colors between devices, such as scanners,
digital cameras, printers, and monitors. Your application features color management
controls designed to help you achieve the best possible color matches.
The Color management dialog box, with its default settings, looks like this:
The Color management dialog box

160 CorelDRAW Graphics Suite 12 User Guide
You can activate the following visual elements:
•Scanner/digital camera icon
•Separations printer icon
•Monitor icon
•Composite printer icon
•Import/export icon
•Internal RGB icon
•Arrows
You can click the Monitor icon, the Import/export icon, the Internal RGB icon, and
the Arrows to choose color management options and advanced settings.
You can click the caption text under the icons to choose color profiles for each device.
You can also get other color profiles from the application CD or online. For more
information, see “Working with color profiles” on page 161. To help you choose the
appropriate profile, check the manufacturer’s documentation for a device.
In addition, you can click the arrows between device icons to turn the color profiles on
or off. The arrows appear orange when on, and grayed and broken when off. You can
use the arrows to correct colors between devices, and control how colors are displayed.
The following table contains descriptions of what happens when an arrow is on or off.
When a device is corrected for color, at least two profiles are used — one for each device.
For example, if the printer colors are being corrected using Internal RGB, both the
Internal RGB and printer profiles are used. If you use simulation to display colors on
your monitor as they are printed, three profiles are used: the Internal RGB, printer, and
monitor profiles.
Convention Description Examples
From the Scanner/digital
camera to Internal RGB
The scanner/digital camera
profile and the Internal RGB
profiles are used for color
correction.
The profiles are not used.
From Internal RGB to the
Monitor
Colors are calibrated for
display using the Internal
RGB and monitor color
profiles.
The profile is not used.

CorelDRAW: Managing color for display, input, and output 161
Working with color profiles
A color management system helps you achieve accurate colors across a variety of devices
consistently. The first stage in setting up your color management system is to choose
color profiles for your monitor and each of the devices you use, such as scanners, digital
cameras, and printers.
Understanding color management
Each device has a range of colors, or color space, that it uses. For example, a monitor
displays a different set of colors than a printer reproduces. So, you may see some colors
on the screen that cannot be printed.
From Internal RGB to the
Composite printer
The printer and Internal
RGB profile are used for
color correction.
The profile is not used.
From the Composite
printer to the Monitor
The monitor simulates a
composite printer output.
The monitor does not
simulate a composite printer
output.
From Internal RGB to the
Separations printer
The separations printer and
RGB profiles are used for
color correction.
The profile is not used. You
can override this setting in
the Print dialog box.
From the Separations
printer to the Monitor
The monitor simulates color
separations printer output.
The monitor does not
simulate color separations
printer output.
From the Separations
printer to the Composite
printer
The composite printer
simulates separations printer
display.
The composite printer does
not simulate separations
printer display.
From Internal RGB to
Import/Export
Internal RGB profiles are
embedded.
ICC profiles are not
embedded.
From Import/Export to
Internal RGB
Embedded ICC profiles are
used.
ICC profiles are ignored.
Convention Description Examples

162 CorelDRAW Graphics Suite 12 User Guide
You can use a color management system to translate colors from one device to another.
Color profiles define the color space for your monitor and for the input and output
devices you use.
For more information about using color management in your application, see
“Understanding the Color management dialog box” on page 159.
Choosing color profiles
Different brands and models of monitors, scanners, digital cameras, and printers have
different color spaces, and thus require different color profiles. Some widely used profiles
are installed with your application.
Standard ICC (International Color Consortium) color profiles are used in your
application. You can choose color profiles for a:
•monitor
• scanner/digital camera
• composite printer
• separations printer
• internal RGB color space
Obtaining additional color profiles
If you need additional profiles or updates, you can get them from the application CD,
or you can download them.
To choose a color profile
1Click To o l s ` Color management.
2Click a profile name under one of the following icons:
• Scanner/digital camera
• Separations printer
• Monitor
• Composite printer
• Internal RGB
3Choose a profile from the list box.
By default, color profiles are stored in the application’s Color folder.

CorelDRAW: Managing color for display, input, and output 163
You can access other color profiles.
To copy a color profile from the CD
1Click To o l s ` Color management.
2Below a device icon, click a color profile list box, and choose Get profile from
disk.
3Insert the application CD.
4In the Browse for folder dialog box, choose the folder where the profiles are
located.
If you want to load color profiles that you have stored in a different location, such
as on a network or on your hard disk, you can choose the folder where the profiles
are located.
5In the Install from disk dialog box, choose the color profile you want to copy.
6Click Choose.
To download a color profile
1Click To o l s ` Color management.
2Below a device icon, click a color profile list box, and choose Download profiles.
3In the dialog box, enable the check box for each profile you want to download.
4Click Download.
5In the Save as dialog box, choose a destination for the color profile.
6If you want to store the new color profile with the existing profiles, download it to
the application’s Color folder.
You can also
Choose a different profile type Click the Profile type list box, and choose a
type.
Specify your connection speed Click the Connection speed list box, and
choose a speed. The faster your connection
speed, the shorter the download time.
Update the profiles list Click Refresh.
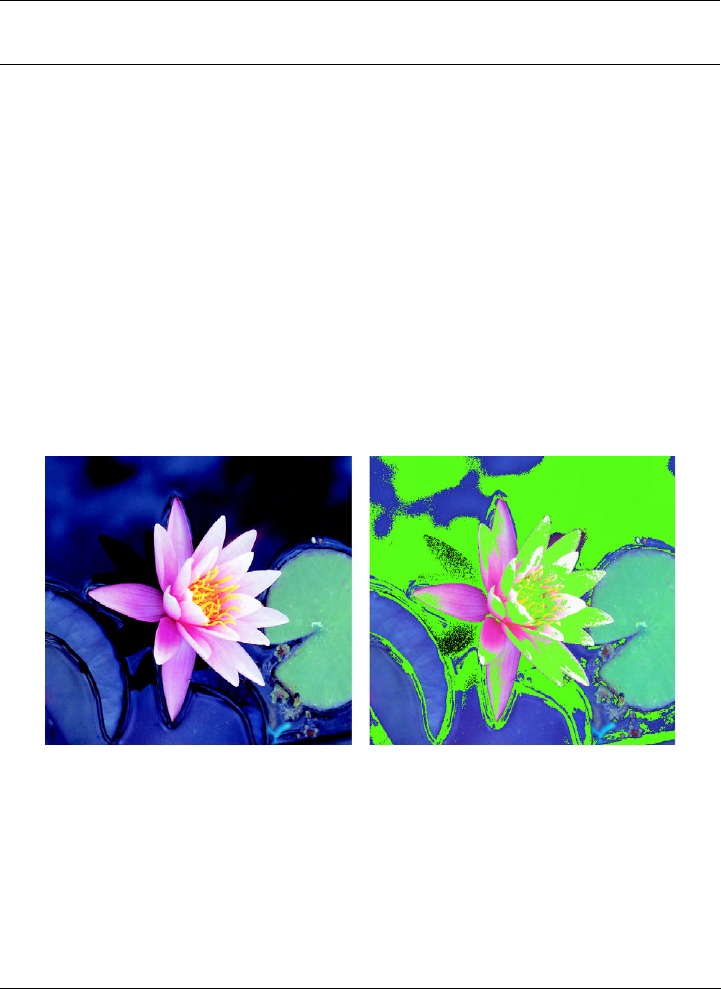
164 CorelDRAW Graphics Suite 12 User Guide
Choosing advanced color management settings
Once you choose color profiles, the color management system uses a Color Matching
Module (CMM) to match colors between devices as closely as possible. Your application
uses the Kodak® Color Management System by default. You can also choose different
rendering intents, which control how the color management system converts colors
between different color spaces.
When you import or export graphics, you can embed, or attach, color profiles. By
embedding a color profile, you can ensure color integrity; anyone viewing or printing
your work will use the same colors that you used.
By enabling the gamut alarm, you can preview which on-screen colors cannot be
printed. The colors that cannot be reproduced are highlighted.
The gamut alarm highlights colors that a printer cannot reproduce
There are advanced settings for separations and composite printers; you can link a color
profile to a specific printer.
Using color styles, you can choose to turn color management off or to optimize the color
display.
Return to the main Color management
dialog box
Click Cancel.
You can also
CorelDRAW: Managing color for display, input, and output 165
To choose a color engine and rendering intent
1Click To o l s ` Color management.
2Click on the Internal RGB .
3In the Advanced settings dialog box, from the Rendering intent list box, choose
one of the following:
• Absolute colorimetric — preserves the white point throughout conversion
• Automatic — default setting, which uses saturation for vector graphics and
perceptual for bitmaps
• Perceptual — good for a variety of images, especially bitmaps and photographic
images
• Relative colorimetric — good for producing proofs on inkjet printers
• Saturation — good for vector graphics (lines, text, and solid colored objects)
4Choose an option from the Color engine list box.
The Microsoft ICM 2.0 Color Matching Module (CMM) is not available for
Windows NT® 4.0.
To embed color profiles
1Click To o l s ` Color management.
2Click the Import/export icon .
3In the Import area, enable one of the following options:
• Use embedded ICC profile
• Always convert using
• Ignore embedded ICC profile
4In the Export area, enable one of the following options:
• Embed internal RGB profile
• Always embed using
• Do not embed ICC profiles
When you enable the Always convert using import options, as well as the
Always embed using export option, you can choose a profile from the list box.
When you enable the Embed internal RGB profile or the Always embed
using export options, certain file formats are exported with an embedded ICC
profile. These file formats are: TIFF, encapsulated PostScript (EPS), Corel

166 CorelDRAW Graphics Suite 12 User Guide
PHOTO-PAINT (CPT), CorelDRAW (CDR), JPEG, Portable Document
Format (PDF), and Adobe® Photoshop® (PSD).
To enable the gamut alarm
1Click To o l s ` Color management.
2Click the Monitor icon .
3Enable the Highlight display colors out of printer gamut check box.
If you want to show CMYK in percentages, enable the Show CMYK in
percentages check box.
You can map spot colors into CMYK gamut by enabling the Map spot colors
into CMYK gamut check box.
You can change the warning color of the gamut alarm by opening the
Warning color picker and choosing a color.
To choose advanced printer settings
1Click To o l s ` Color management.
2Click one of the following icons:
• Composite printer
• Separations printer
3Choose a setting from the list box.
If you choose an advanced setting, that setting overrides the profile that
displays under the printer icon in the Color management dialog box.
To use color management styles
1Click To o l s ` Color management.
2Choose one of the following from the Style list box:
• Color management off
• Default settings
• Optimized for desktop printing
• Optimized for professional output
• Optimized for the Web
CorelDRAW: Managing color for display, input, and output 167
Some color management settings, such as Default, Optimized for desktop
printing, and Optimized for professional output, can result in on-screen
colors appearing dull. This is due to an on-screen printer simulation of the
output.
You can add or delete a color management style by clicking the Add preset
or Remove preset buttons.
Correcting colors for display
You can correct colors so that they display as accurately as possible on screen. If you
correct only the display colors, the colors are shown according to the internal RGB, and
monitor color profiles.
If you display colors as they will print, on-screen colors simulate output using the
Internal RGB, monitor, and printer color profiles. Simulating printer output may cause
on-screen colors to appear dull.
To correct colors for display
•Click To o l s ` Color management.
To Do the following
Correct display colors Click the arrow from the Internal RGB
icon to the Monitor icon .
Display simulation of a composite printer
output
Click the arrow from the Composite
printer icon to the Monitor icon .
Display simulation of a color separations
printer output
Click the arrow from the Separations
printer icon to the Monitor icon .
Display simulation of a separations printer
on a composite printer
Click the arrow from the Separations
printer icon to the Composite printer
icon .

168 CorelDRAW Graphics Suite 12 User Guide
Arrows appear orange when they are turned on, and grayed and broken when
they are turned off. For more information about using the arrows for color
correction, see “Understanding the Color management dialog box” on
page 159.
The display simulation of a separations printer on a composite printer does not
affect output.

CorelDRAW: Adding three-dimensional effects to objects 169
Adding three-dimensional
effects to objects
You can create the illusion of three-dimensional depth in CorelDRAW objects by
adding contour, perspective, extrusion, or drop shadow effects.
In this section, you’ll learn about
• contouring objects
• applying perspective to objects
• creating vector extrusions
• creating drop shadows
Contouring objects
You can contour an object to create a series of concentric lines that progress to the inside
or outside of the object. CorelDRAW also lets you set the number and distance of the
contour lines.
After contouring an object, you can copy or clone its contour settings to another object.
You can also change the colors of the fill between the contour lines and the contour
outlines themselves. You can set a color progression in the contour effect, where one
color blends into another. The color progression can follow a straight, clockwise, or
counterclockwise path through the color range of your choice.

170 CorelDRAW Graphics Suite 12 User Guide
A center contour has been applied to the above object. The number of contour
lines, as well as the distance between lines, can be changed.
An outside contour has been applied to the above object. Note that an outside
contour projects from the outside edge of the object.
To contour an object
1Open the Interactive tools flyout , and click the Interactive contour
tool .
2Click an object or a set of grouped objects, and drag the start handle toward the
center to create an inside contour.
3Move the object slider to change the number of contour steps.
CorelDRAW: Adding three-dimensional effects to objects 171
You can create an outside contour by dragging the start handle away from the
center.
To copy or clone a contour
1Select the object you want to contour.
2Click Effects and click one of the following:
• Copy effect ` Contour from
• Clone effect ` Contour from
3Click a contour object.
You can also use the Eyedropper tool to copy a contour. For more
information, see “To copy effects from one object to another object” on
page 80.
To set the fill color for a contour object
1Open the Interactive tools flyout , and click the Interactive contour
tool .
2Select a contour object.
3Open the Fill color picker on the property bar, and click a color.
If the original object has a fountain fill, a second color picker displays.
You can also
Specify the number of contour lines Click the Inside button on the property
bar, and type a value in the Contour steps
box on the property bar.
Specify the distance between contour lines Type a value in the Contour offset box on
the property bar.
Accelerate contour line progression Click the Object and color acceleration
button on the property bar, and move the
object slider.
172 CorelDRAW Graphics Suite 12 User Guide
You can accelerate the fill color progression by clicking the Object and color
acceleration button on the property bar.
You can change the contour center’s color by dragging a color from the color
palette to the end fill handle.
To specify an outline color for the contour object
1Open the Interactive tools flyout , and click the Interactive contour
tool .
2Select a contour object.
3Open the Outline color picker on the property bar, and click a color.
To set the fill progression
1Open the Interactive tools flyout , and click the Interactive contour
tool .
2Select a contour object.
3Click one of the following buttons on the property bar:
• Linear contour colors
• Clockwise contour colors
• Counterclockwise contour colors
Applying perspective to objects
You can create a perspective effect by shortening one or two sides of an object. This
effect gives an object the appearance of receding in one or two directions, thereby
creating a one-point perspective or a two-point perspective.
Perspective effects can be added to objects or grouped objects. You can also add a
perspective effect to linked groups, such as contours, blends, extrusions, and objects
created with the Artistic media tool. You can’t add perspective effects to paragraph text,
bitmaps, or symbols.
CorelDRAW: Adding three-dimensional effects to objects 173
The original graphic (left) with one-point (middle) and two-point (right)
perspectives applied to it.
After you apply a perspective effect, you can copy it to other objects in a drawing, adjust
it, or remove it from the object.
To apply a perspective
Pressing Ctrl constrains the node’s movement to the horizontal or vertical axis
to create a one-point perspective effect.
You can move opposing nodes the same distance in opposite directions by
pressing Ctrl + Shift as you drag.
To
Apply a one-point perspective Click Effects ` Add perspective. Press
Ctrl, and drag a node.
Apply a one-point perspective Click Effects ` Add perspective. Press
Ctrl, and drag a node.
Apply a two-point perspective Click Effects ` Add perspective. Drag the
nodes on the outside of the grid to apply the
effect you want.
174 CorelDRAW Graphics Suite 12 User Guide
To copy an object’s perspective effect
1Select an object to which you want to apply a perspective effect.
2Click Effects ` Copy effect ` Perspective from.
3Select an object whose perspective effect you want to copy.
You can also use the Eyedropper tool to copy a perspective effect. For more
information, see “To copy effects from one object to another object” on
page 80.
To adjust the perspective
1Open the Shape edit flyout , and click the Shape tool .
2Select an object that has a perspective effect.
3Drag a node to a new position.
You can also adjust the perspective by dragging one or both of the vanishing
points.
You can move opposing nodes the same distance in opposite directions by
pressing Ctrl + Shift while dragging the node.
To remove an object’s perspective effect
1Select an object that has a perspective effect.
2Click Effects ` Clear perspective.
Creating vector extrusions
You can make objects appear three-dimensional by creating vector extrusions. You can
create vector extrusions by projecting points from an object and joining them to create
an illusion of three dimensions. CorelDRAW also lets you apply a vector extrusion to an
object in a group.
After you create an extrusion, you can copy or clone its attributes to a selected object.
Cloning and copying transfer the extrusion attributes of an extruded object to another.
However, the cloned extrusion settings cannot be edited independently from the
master.
CorelDRAW: Adding three-dimensional effects to objects 175
You can change an extruded form by rotating it and rounding its corners.
CorelDRAW also lets you remove a vector extrusion.
Bevels
Another way in which you can give an object a three-dimensional appearance is by
applying a beveled edge to an extrusion. A bevel creates the illusion that an object’s
extruded edges are cut on an angle. You can specify the angle and depth values of the
bevel to control the effect.
Extruded fills
You can apply fills to an entire vector extrusion or to the extruded surfaces of a vector
extrusion. You can cover each surface individually with the fill, or you can drape the fill
so that it blankets the entire object with no breaks to the pattern or texture.
Extruded fills:(left to right) solid color, solid color with lighting, draped two-
color pattern, undraped two-color pattern, draped bitmap
Lighting
You can enhance vector extrusions by applying light sources. You can add up to three
light sources to project toward the extruded object with varying intensity. When you
no longer need light sources, you can remove them.
Vanishing points
You can create a vector extrusion in which the lines of the extrusion converge at a
vanishing point. The vanishing point of a vector extrusion can be copied to another
object so that both objects appear to recede toward the same point.
176 CorelDRAW Graphics Suite 12 User Guide
Vector extrusions with the same vanishing point
You can also give two vector extrusions different vanishing points.
Vector extrusions with different vanishing points
To create a vector extrusion
1Open the Interactive tools flyout , and click the Interactive extrude
tool .
2Choose an extrusion type from the Extrusion type list box on the property bar.
3Select an object.
4Drag the object’s selection handles to set the direction and depth of the extrusion.
CorelDRAW: Adding three-dimensional effects to objects 177
If you want to reset the extrusion, press Esc before releasing the mouse button.
To copy or clone a vector extrusion
1Select the object you want to extrude.
2Click Effects and click one of the following:
• Copy effect ` Extrude from
• Clone effect ` Extrude from
3Click an extruded object.
You can also use the Eyedropper tool to copy a vector extrusion. For more
information, see “To copy effects from one object to another object” on
page 80.
To change a vector extrusion’s form
To remove a vector extrusion
1Select an extruded object.
2Click Effects ` Clear extrude.
You can also
Apply preset settings to a vector extrusion Select an extrude object, click Interactive
extrude tool, and choose a preset setting
from the Preset list box on the property bar.
To Do the following
Rotate an extrusion Select an extruded object. Click the Extrude
rotation button on the property bar.
Drag the extrusion in the direction you
want.
Round the corners of an extruded rectangle
or square
Open the Shape edit flyout
, and click the Shape tool .
Drag a corner node along the outline of the
rectangle or square.
178 CorelDRAW Graphics Suite 12 User Guide
You can also remove a vector extrusion by clicking the Clear extrude button
on the property bar.
To apply a fill to a vector extrusion
1Select an extruded object with the Interactive extrude tool .
2Click the Color button on the property bar.
3Click one of the following buttons:
• Use object fill — applies the object’s fill to the extrusion.
• Use solid color — applies a solid color to the extrusion
• Use color shading — applies a gradient fill to the extrusion
You can apply an unbroken pattern or texture fill to an object by enabling the
Drape fills check box before you click the Use object fill button.
To apply beveled edges to a vector extrusion
1Open the Interactive tools flyout , and click the Interactive extrude
tool .
2Select an extruded object.
3Click the Bevels button on the property bar.
4Enable the Use bevel check box.
5Type a value in the Bevel depth box.
6Type a value in the Bevel angle box.
You can also set the bevel depth and angle by using the Interactive display
box in the bevel list box.
You can show only the bevel and hide the extrusion by enabling the Show
bevel only check box.
To add light to a vector extrusion
1Select an extruded object.
2Click the Lighting button on the property bar.

CorelDRAW: Adding three-dimensional effects to objects 179
3 Click any of the three Light buttons .
The lights appear as numbered circles in the preview window.
4Drag the numbered circles in the Light intensity preview window to position the
lights.
If you want to create more realistic shading, enable the Use full color range check
box.
To change the vanishing point of a vector extrusion
You can also
Adjust the intensity of a light source Select a light in the Light intensity preview
window and move the Intensity slider.
Remove a light source Click an active Light button.
To Do the following
Lock a vanishing point Double-click an extruded object. Choose VP
locked to object or VP locked to page
from the Vanishing point properties list
box on the property bar.
Copy a vanishing point Double-click an extruded object whose
vanishing point you want to change. Choose
Copy VP from the Vanishing point
properties list box on the property bar.
Select the extruded object that has the
vanishing point you want to copy.
Set one vanishing point for two extrusions Double-click an extruded object. Choose
Shared vanishing point from the
Vanishing point properties list box on the
property bar. Select the extruded object that
has the vanishing point you want to share.
180 CorelDRAW Graphics Suite 12 User Guide
Creating drop shadows
Drop shadows simulate light falling on an object from one of five particular
perspectives: flat, right, left, bottom, and top. You can add drop shadows to most
objects or groups of objects, including artistic text, paragraph text, and bitmaps.
When you add a drop shadow, you can change its perspective, and you can adjust
attributes such as color, opacity, fade level, angle, and feathering.
A drop shadow applied to an object
After you create a drop shadow, you can copy it or clone it to a selected object. When
you copy a drop shadow, the original and copy have no connection and can be edited
independently. With cloning, the master object’s drop shadow attributes are
automatically applied to its clone.
The feathered effect softens the edges of a drop shadow.

CorelDRAW: Adding three-dimensional effects to objects 181
By separating a drop shadow from its object, you can gain more control over the drop
shadow itself. Drop shadows are bitmaps, so any feature or effect that can be used to
modify a bitmap can be applied to a drop shadow. You can also set the rendering
resolution of a drop shadow.
You can also remove a drop shadow.
To add a drop shadow
1Open the Interactive tools flyout , and click the Interactive drop
shadow tool .
2Click an object.
3Drag from the center or side of the object until the drop shadow is the size you
want.
4Specify any attributes on the property bar.
You can’t add drop shadows to linked groups, such as blended objects,
contoured objects, beveled objects, extruded objects, objects created with the
Artistic media tool , or other drop shadows.
To copy or clone a drop shadow
1Select the object to which you want to copy or clone a drop shadow.
2Click Effects and click one of the following:
• Copy effect ` Drop shadow from
• Clone effect ` Drop shadow from
3Click the drop shadow of an object.
You can also use the Eyedropper tool to copy a drop shadow. For more
information, see “To copy effects from one object to another object” on
page 80.
To separate a drop shadow from an object
1Select an object’s drop shadow.
2Click Arrange ` Break drop shadow group apart.
3Drag the shadow.

182 CorelDRAW Graphics Suite 12 User Guide
To adjust the resolution of a drop shadow
1Click To o l s ` Options.
2In the Wo rk s pa ce list of categories, click General.
3Type a value in the Resolution box.
To remove a drop shadow
1Select an object’s drop shadow.
2Click Effects ` Clear drop shadow.
You can also remove a drop shadow from an object by clicking the Clear drop
shadow button on the property bar.
From here
For more information about In the Help index, see...
copying three-dimensional effects effects, copying
Filling objects fills

CorelDRAW: Changing the transparency of objects 183
Changing the
transparency of objects
You can apply a transparency to an object so that all objects behind it show
through. The CorelDRAW application also lets you specify how the color of the
transparent object combines with the color of the object beneath it.
In this section, you’ll learn about
• applying transparencies
•applying merge modes
Applying transparencies
When you apply a transparency to an object, you make the objects beneath it partially
visible. You can apply transparencies using the same kind of fills you apply to objects;
that is, uniform, fountain, texture, and pattern. For more information about these fills,
see “Filling objects” on page 141.
By default, CorelDRAW applies all transparencies to the object’s fill and outline;
however, you can specify whether you want the transparency to apply only to the
object’s outline or fill.
You can also copy a transparency from one object to another.
When you position a transparency over an object, you can freeze it, making the view of
the object move with the transparency.
To apply a uniform transparency
1Select an object.
2Open the Interactive tools flyout , and click the Interactive
transparency tool .
3On the property bar, choose Uniform from the Transparency type list box.
4Click a color on the color palette.
184 CorelDRAW Graphics Suite 12 User Guide
5Type a value in the Starting transparency box on the property bar, and press
Enter.
To apply a fountain transparency
1Select an object.
2Open the Interactive tools flyout , and click the Interactive
transparency tool .
3On the property bar, choose one of the following fountain transparencies from the
Transparency type list box:
• Linear
• Radial
• Conical
• Square
4Reposition the interactive vector handles that display, or point to where you want
the transparency to start on the object, and drag to where you want the
transparency to end.
If you want to reset the transparency, press Esc before releasing the mouse button.
5Type a value in the Transparency midpoint box on the property bar, and press
Enter.
You can create a custom fountain transparency by dragging colors, whose
shades convert to grayscale, from the color palette onto the object’s interactive
vector handles .
To apply a textured transparency
1Select an object.
2Open the Interactive tools flyout , and click the Interactive
transparency tool .
3Choose Texture from the Tr a n s p a r e n c y t y p e list box on the property bar.
4Choose a sample from the Texture library list box on the property bar.
5Open the First transparency picker on the property bar and click a texture.
6On the property bar, type values in the following boxes:
• Starting transparency — lets you change the opacity of the starting color
• Ending transparency — lets you change the opacity of the ending color
CorelDRAW: Changing the transparency of objects 185
To apply a pattern transparency
1Select an object.
2Open the Interactive tools flyout , and click the Interactive
transparency tool .
3From the Tr a n s p a r e n c y t y p e list box on the property bar, choose one of the
following:
• Two-color pattern — a simple picture composed of “on” and “off ” pixels. The
only shades included in the picture are the two that you assign.
• Full-color pattern — a picture composed of lines and fills, instead of dots of
color like bitmaps. These vector graphics are smoother and more complex than
bitmap images and are easier to manipulate.
• Bitmap pattern — a color picture composed of patterns of light and dark or
differently colored pixels in a rectangular array.
4Open the First transparency picker on the property bar, and click a pattern.
5On the property bar, type values in the following boxes:
• Starting transparency
• Ending transparency
To specify the extent of a transparency
1Open the Interactive tools flyout , and click the Interactive
transparency tool .
2Select an object to which a transparency has been applied.
3From the Tr a n s p a r e n c y t a r g e t list box on the property bar, choose one of the
following:
• Fill
• Outline
• All
To copy a transparency to another object
1Select an object to which you want to apply a transparency.
2Click Effects ` Copy effect ` Lens from.
3Using the horizontal cursor, select the object with the transparency you want to
copy.

186 CorelDRAW Graphics Suite 12 User Guide
To freeze the contents of a transparency
1Open the Interactive tools flyout , and click the Interactive
transparency tool .
2Select an object to which a transparency has been applied.
3Click the Freeze button on the property bar.
The view of the object beneath the transparency moves with it; however, the
actual object remains unchanged.
Applying merge modes
You can apply a merge mode to a transparency to specify how the color of a transparency
is combined with the color of the object behind it.
Merge mode Description
Normal Applies the transparency color on top of the
base color
Add Adds the values of the transparency color
and the base color
Subtract Adds the values of the transparency color
and the base color together, and then
subtracts 255
Difference Subtracts the transparency color from the
base color and multiplies by 255. If the
transparency color value is 0, the result will
always be 255.
Multiply Multiplies the base color by the transparency
color, and then divides by 255. This has a
darkening effect, unless you are applying
color to white. Multiplying black with any
color results in black. Multiplying white
with any color leaves the color unchanged.

CorelDRAW: Changing the transparency of objects 187
Divide Divides the base color by the transparency
color, or conversely, divides the transparency
color by the base color, depending on which
color has the higher value
If lighter Replaces any base color pixels that are a
darker color with the transparency color.
Base color pixels that are lighter than the
transparency color are not affected.
If darker Replaces any base color pixels that are a
lighter color with the transparency color.
Base color pixels that are darker than the
transparency color are not affected.
Texturize Converts the transparency color to grayscale,
and then multiplies the grayscale value by
the base color
Hue Uses the hue of the transparency color, as
well as the saturation and lightness of the
base color. If you are adding color to a
grayscale image, there will be no change
because the colors are desaturated.
Saturation Uses the lightness and hue of the base color
and the saturation of the transparency color
Lightness Uses the hue and saturation of the base color
and the lightness of the transparency color
Invert Uses the transparency color’s
complementary color. If a transparency color
value is 127, there will be no change because
the color value falls in the center of the color
wheel.
Logical AND Converts the transparency and base colors to
binary values, and then applies the Boolean
algebraic formula AND to these values
Merge mode Description
188 CorelDRAW Graphics Suite 12 User Guide
To apply a merge mode
1Open the Interactive tools flyout , and click the Interactive
transparency tool .
2Select an object with a transparency.
3Choose a merge mode from the Transparency operation list box on the property
bar.
From here
Logical OR Converts the transparency and base colors to
binary values, and then applies the Boolean
algebraic formula OR to these values
Logical XOR Converts the transparency and base colors to
binary values, and then applies the Boolean
algebraic formula XOR to these values
Red Applies the transparency color to the red
channel of RGB objects
Green Applies the transparency color to the green
channel of RGB objects
Blue Applies the transparency color to the blue
channel of RGB objects
For more information about In the Help index, see...
Filling objects fills
Merge mode Description
CorelDRAW: Using lenses with objects 189
Using lenses with objects
Lenses contain creative effects that let you change the appearance of an object without
actually changing the object.
In this section, you’ll learn about
• applying lenses
• editing lenses
Applying lenses
Lenses change how the object area beneath the lens appears, not the actual properties
and attributes of the objects. You can apply lenses to any vector object, such as a
rectangle, ellipse, closed path, or polygon. You can also change the appearance of artistic
text and bitmaps. When you apply a lens over a vector object, the lens itself becomes a
vector image. Likewise, if the lens is placed over a bitmap, the lens also becomes a
bitmap.
After you apply a lens, you can copy it and use it with another object.
The lens types applied to the original (far left): (left to right) Heat map,
Magnify, and a Custom color map

190 CorelDRAW Graphics Suite 12 User Guide
The following are the types of lenses you can apply to objects.
Lens Description
Brighten Lets you brighten and darken object areas
and set the rate of the brightness and
darkness
Color add Lets you simulate an additive light model.
The colors of the objects beneath the lens are
added to the color of the lens as if you were
mixing colors of light. You can choose the
color and the amount of color you want to
add.
Color limit Lets you view an object area with only black
and the lens color showing through. For
example, if you place a green color limit lens
over a bitmap, all colors except green and
black are filtered out in the lens area.
Custom color map Lets you change all the colors of the object
area beneath the lens to a color ranging
between two colors you specify. You can
choose the range’s start and end colors and
the progression between the two colors. The
progression can follow a direct, forward, or
reverse route through the color spectrum.
Fish eye Lets you distort, magnify, or shrink the
objects beneath the lens, according to the
percentage value you specify
Heat map Lets you create the effect of an infrared
image by mimicking the heat levels of colors
in object areas beneath the lens
Invert Lets you change the colors beneath the lens
to their complementary CMYK colors.
Complementary colors are colors that are
opposite one another on the color wheel.

CorelDRAW: Using lenses with objects 191
To apply a lens
1Select an object.
2Click Effects ` Lens.
3Choose a lens type from the list box in the Lens docker.
4Specify the settings you want.
You cannot apply the lens effect directly to linked groups such as contoured
objects, beveled objects, extruded objects, drop shadows, paragraph text or
objects created with the Artistic media tool .
You can preview the different types of lenses in real-time before auto-applying
one to a drawing by clicking the Lock button and then choosing a lens and
settings to preview. When you find the lens you want to use, click the Lock
button again, and click Apply.
Magnify Lets you magnify an area on an object by an
amount that you specify. The magnify lens
overrides the original object’s fill, making
the object look transparent.
Tinted grayscale Lets you change the colors of object areas
beneath the lens to their grayscale
equivalents. Tinted grayscale lenses are
particularly effective for creating sepia-tone
effects.
Transparency Lets you make an object look like a piece of
tinted film or colored glass
Wireframe Lets you display the object area beneath the
lens with the outline or fill color you choose.
For example, if you set red for the outline
and blue for the fill, all areas beneath the
lens appear to have red outlines and blue
fills.
Lens Description

192 CorelDRAW Graphics Suite 12 User Guide
To copy a lens
1Select an object.
2Click Effects ` Copy effect ` Lens from.
3Click the object whose lens you want to copy.
Editing lenses
You can edit a lens to change how it affects the area beneath it. For example, you can
change the viewpoint of a lens, indicated by an X in the drawing window, to display any
part of a drawing. The viewpoint represents the center point of what is being viewed
through the lens. You can position the lens anywhere in the drawing window, but it
always shows the area around its viewpoint marker. For example, you can use the
viewpoint marker on the Magnify lens to enlarge part of a map.
You can also display a lens only where it overlaps other objects or the background. As a
result, the lens effect is not seen where the lens covers blank space (white space) in the
drawing window.
Freezing the current view of a lens lets you move the lens without changing what’s
displayed through it. In addition, changes you make to the areas beneath the lens have
no effect on the view.
To edit a lens
1Select an object.
2Click Effects ` Lens.
3Enable the Viewpoint check box on the Lens docker.
If you want to display a lens only where it covers other objects, enable the Remove
face check box.
4Click Edit to display the viewpoint marker.
5Drag the viewpoint marker in the drawing window to a new location.
6Click End.
If you want to freeze the current view of a lens, enable the Frozen check box.
7Click Apply.

CorelDRAW: Working with pages and layout tools 193
Working with pages and
layout tools
The CorelDRAW application allows you to specify the size, orientation, unit of scale,
and background of the drawing page. You can customize and display page grids and
guidelines to help you organize objects and place them exactly where you want. For
example, if you are designing a newsletter, you can set the dimensions of the pages and
create guidelines for positioning columns and heading text. When you are laying out
an advertisement, you can align graphics and advertisement copy along guidelines and
arrange graphic elements within a grid. Rulers can help you position grids, guidelines,
and objects along a scale using units of your choosing. Also, you can add and delete
pages.
Page layout settings and tools are fully customizable and can be used as defaults for
other drawings.
In this section, you’ll learn about
• specifying the page layout
• choosing a page background
• adding, renaming, and deleting pages
• using the rulers
• calibrating the rulers
• setting up the grid
• setting up guidelines
• setting the drawing scale
Specifying the page layout
You can begin working on a drawing by specifying settings for the size, orientation, and
layout style of the page.
There are two options for specifying a page size: choosing a preset page size or creating
your own. You can choose from many preset page sizes ranging from legal-size paper

194 CorelDRAW Graphics Suite 12 User Guide
and envelopes to posters and Web pages. If a preset page size does not meet your needs,
you can create a custom page size by specifying a drawing’s dimensions.
The orientation of the page can be landscape or portrait. With landscape orientation the
drawing’s width is greater than its height, and with portrait orientation the drawing’s
height is greater than its width. Any pages you add to a drawing project assume the
current orientation; however, you can give single pages in a drawing project a different
orientation. The options you choose when specifying the page layout can be used as a
default for all new drawings you create. You can also adjust the page size and orientation
settings to match the standard paper settings for printing.
To set the page size and orientation
To apply page size and orientation settings to all pages in a drawing, select the
top half of the Set default or current page size and orientation button, and
disable the Resize current page only check box in the Size dialog box.
You can also specify the page size and orientation for individual pages by
clicking View ` Page sorter view, selecting the bottom half on the Set
default or current page size and orientation button, clicking a page, and
specifying your options using the buttons on the property bar.
To set the default page layout
1Click Tools ` Options.
To Do the following
Choose a preset page size Click Layout ` Page setup, and choose a
paper type from the Paper list box.
Specify a custom page size Click Layout ` Page setup, and choose
Custom from the Paper list box, and type
values in the Width and Height boxes.
Set the page orientation Click Layout ` Page setup, and enable the
Landscape or the Portrait option.
Set the page orientation for an individual
page in a multi-page document
Go to the page. Click the bottom half of the
Set default or current page size and
orientation button on the property bar, and
click the Landscape or Portrait button.

CorelDRAW: Working with pages and layout tools 195
2In the list of categories, click Document.
3Enable the Save options as defaults for new documents check box.
4Enable the Page options check box.
The next new document is created with the page size and orientation options
that were last specified with the Resize current page only check box disabled.
Choosing a page background
You can choose the color and type of background for a drawing. For example, you can
use a solid color if you want a uniform background. If you want a more intricate or
dynamic background, you can use a bitmap. Some examples of bitmaps include
textured designs, photographs, and clipart.
When you choose a bitmap as the background, it is embedded in the drawing by
default. This is the recommended option. However, you can also link the bitmap to the
drawing so that if you later edit the source image, the change is automatically reflected
in the drawing. If you send a drawing with a linked image to someone else, you must
also send the linked image.
You can make a background bitmap printable and exportable, or you can save computer
resources by exporting and printing a drawing without the background bitmap.
If you no longer need a background, you can remove it.
To use a solid color as the background
1Click Layout ` Page background.
2Enable the Solid option.
3Open the Color picker, and click a color.
To use a bitmap as the background
1Click Layout ` Page background.
2Enable the Bitmap option.
3Click Browse.
4Choose a file format from the Files of type list box.
5Locate the folder where the file is stored.

196 CorelDRAW Graphics Suite 12 User Guide
6Double-click the filename.
7Enable one of the following options:
• Linked — links the bitmap to the drawing so that changes made to the source
file are reflected in the bitmap background
• Embedded — embeds the bitmap in the drawing so that changes made to the
source file are not reflected in the bitmap background
If you want the background to be printed and exported with the drawing, enable
the Print and export background check box.
8Enable one of the following options:
• Default size — lets you use the bitmap’s current size
• Custom size — lets you specify the dimensions of the bitmap. Type values in the
H and V boxes.
If you want to specify non proportional height and width values, disable the
Maintain aspect ratio check box.
If the bitmap is smaller than the drawing page, it is tiled across the drawing
page. If it is larger than the drawing page, it is cropped to fit the drawing page.
A background bitmap is not an object and cannot be edited.
To remove a background
1Click Layout ` Page background.
2Enable the No background option.
Adding, renaming, and deleting pages
CorelDRAW lets you add a page to a drawing, rename it any time, and delete a single
page or an entire range of pages.
You can change the order of pages after you have created a multi-page drawing. You can
also move objects from one page to another.
To add a page
1Click Layout ` Insert page.
2Type the number of pages you want to add in the Insert pages box.
3Enable one of the following options:

CorelDRAW: Working with pages and layout tools 197
• Before
• After
If you want to insert before or after a page other than the current page, type the
page number in the Page box.
You can also add pages by clicking the Add page button on the Document
window, if you’re on the first or last page.
You can also choose where to add a page by right-clicking a page tab in the
Document window, and clicking Insert page after or Insert page before.
To rename a page
1Click Layout ` Rename page.
2Type the name of the page in the Page name box.
To delete a page
1Click Layout ` Delete page.
2In the Delete page dialog box, type the number of the page you want to delete.
You can delete a range of pages by enabling the Through to page check box
and typing the number of the last page to delete in the Through to page box.
To change the order of pages
1Click View ` Page sorter view.
2Drag a page to its new location.
You can also change the order of pages by dragging the page tabs on the
Document Navigator at the bottom of the drawing window.
You can also
Copy a page Right-click, drag the page to its new
location, and choose Copy here from the list
box.
Return to normal view Double-click a page.

198 CorelDRAW Graphics Suite 12 User Guide
To move an object to another page
• Drag the object over the page number tab of the page you want to move the object
to, and without letting go of the mouse button, drag the object to position it on the
page.
Using the rulers
You can display rulers in the drawing window to help you draw, size, and align objects
precisely. You can hide the rulers or move them to another position in the drawing
window. You can also customize the ruler settings to suit your needs. For example, you
can set the ruler origin, choose a unit of measure, and specify how many marks or ticks
display between each full unit mark.
By default, CorelDRAW applies the same units used for the rulers to the duplicate and
nudge distances. You can change the default so that you can specify different units for
these and other settings. For information about nudging, see “Positioning objects” on
page 80.
To hide or display the rulers
•Click View ` Rulers.
A check mark beside the Rulers command indicates the rulers are displayed.
To move a ruler
• Hold down Shift, and drag a ruler to a new position in the drawing window.
To customize ruler settings
1Click View ` Grid and ruler setup.
2In the Document list of categories, click Rulers.
3In the Units area, choose a unit of measure from the Horizontal list box.
If you want to use a different unit of measure for the vertical ruler, disable the
Same units for horizontal and vertical rulers check box, and choose a unit of
measure from the Vertical list box.
4In the Origin area, type values in the following boxes:
• Horizontal
• Vertical

CorelDRAW: Working with pages and layout tools 199
5Type a value in the Tick divisions box.
If you change the unit of measure for rulers, the unit of measure for nudge
distances automatically changes as well, unless you first disable the Same units
for duplicate distance, nudge and rulers check box in the Nudge area.
You can access ruler settings directly by double-clicking a ruler.
You can specify nudge settings by typing values in the Nudge, Super nudge,
and Micro nudge boxes in the Nudge area.
Calibrating the rulers
You can have one inch on your screen equal one inch of “real” distance. This lets you
work using real-world distances as opposed to relative distances that depend on screen
resolution. This tool is particularly useful when working with signs, or when drawing
in 1:1 zoom mode.
Before you can perform this procedure, you must have a clear plastic ruler for comparing
real-world and on-screen distances. This ruler should use the same unit of measurement
you set for the CorelDRAW rulers. For information about ruler settings, see “Using the
rulers” on page 198.
To calibrate the rulers to match real-world distance
1Click To o l s ` Options.
2In the To o l b o x list of categories, double-click To o l b o x , and click Zoom, hand
tool.
3Click Calibrate rulers.
4Place a clear plastic ruler under the on-screen horizontal ruler.
5Click the Up or Down Arrow on the Horizontal box to match one unit of
measurement on the on-screen ruler with one unit of measurement on the actual
ruler.
6Place the ruler beside the on-screen vertical ruler.
7Click the Up or Down Arrow button on the Vertical box to match one unit of
measurement on the on-screen ruler with one unit of measurement on the actual
ruler.

200 CorelDRAW Graphics Suite 12 User Guide
Setting up the grid
The grid is a series of intersecting dashed lines or dots that you can use to precisely align
and position objects in the drawing window. You can set the distance between the grid
lines or dots by specifying the frequency or spacing. Frequency refers to the number of
lines or dots that display between each horizontal and vertical unit. Spacing refers to the
exact distance between each line or dot. High frequency values or low spacing values
can help you align and position objects more precisely.
You can have objects snap to the grid so that when you move the objects, they jump
between grid lines.
To display or hide the grid
•Click View ` Grid.
A check mark beside the Grid command indicates that the grid is displayed.
To set the distance between the grid lines
1Click View ` Grid and ruler setup.
2Enable one of the following options:
• Frequency — specifies grid spacing as the number of lines per unit of measure
• Spacing — specifies grid spacing as the distance between each grid line
3Type values in the following boxes:
• Horizontal
• Vertical
The unit of measure used for grid spacing is the same as that used for rulers.
For information about ruler settings, see “To customize ruler settings” on
page 198.
To have objects snap to the grid
1Click View ` Snap to grid.
2Move the objects using the Pick tool .
CorelDRAW: Working with pages and layout tools 201
Setting up guidelines
Guidelines are lines that can be placed anywhere in the drawing window to aid in object
placement. There are three types of guidelines: horizontal, vertical, and slanted. By
default, the application displays guidelines you can add to the drawing window, but you
can hide them at any time.
You can add a guideline wherever you need one; however, you can also choose to add
preset guidelines. There are two types of preset guidelines: Corel presets and user
defined presets. Examples of Corel presets include guidelines that display at one-inch
margins, and guidelines that display at newsletter column borders. User defined presets
are guidelines whose location you specify. For example, you can add preset guidelines
that display margins at a distance you specify or that define a column layout or grid.
After you add a guideline, you can select it, move it, rotate it, lock it in place, or delete
it.
You can have objects snap to the guidelines so that when an object is moved near a
guideline, it can only be centered on the guideline or lined up on either side of the
guideline.
Guidelines always use the unit of measure specified for rulers. For information about
ruler settings, see “To customize ruler settings” on page 198.
Guidelines can be placed in the drawing window to aid in object placement.
To display or hide the guidelines
•Click View ` Guidelines.
202 CorelDRAW Graphics Suite 12 User Guide
A check mark beside the Guidelines command indicates that the guidelines
are displayed.
To add a horizontal or vertical guideline
1Click View ` Guidelines setup.
2In the list of categories, click one of the following:
• Horizontal
• Vertical
3Specify the guideline settings you want.
4Click Add.
You can also add a guideline by dragging from the horizontal or vertical ruler
in the drawing window.
To modify guidelines
To Do the following
Select a single guideline Click the guideline using the Pick tool .
Select all guidelines Click Edit ` Select all ` Guidelines.
Move a guideline Drag a guideline to a new position in the
drawing window.
Rotate a guideline Click a guideline twice using the Pick tool
, and rotate it when skewing handles
display.
Lock a guideline Click a guideline using the Pick tool ,
and click Arrange ` Lock object.
Unlock a guideline Click a guideline using the Pick tool ,
and click Arrange ` Unlock object.
Delete a guideline Click a guideline using the Pick tool ,
and press Delete.

CorelDRAW: Working with pages and layout tools 203
You can also lock or unlock a guideline by right-clicking the guideline, and
then clicking Lock object or Unlock object.
You can access the guidelines setup directly by right-clicking a ruler, and then
clicking Guidelines setup.
To have objects snap to the guidelines
1Click View ` Snap to guidelines.
2Drag the object to the guideline.
If you want to snap the center of an object to a guideline, select the object and
move it over the guideline until its center of rotation snaps to the guideline.
Setting the drawing scale
You can choose a preset or custom drawing scale to relate distances in a drawing to real-
world distances. For example, you can specify that one inch in the drawing corresponds
to one meter in reality. A preset drawing scale lets you set a typical scale, such as 1:2 or
1:10, while a custom drawing scale lets you set any distance on the page equal to a real-
world distance. For example, you can set a more accurate, precise scale that includes
decimal numbers, such as 4.5 to 10.6.
Drawing scales are particularly useful if you are creating a technical or architectural
drawing with dimension lines. For information about dimension lines, see “Drawing
flow and dimension lines” on page 59.
Delete a preset guideline Click View ` Guidelines setup, and click
Presets in the list of categories. Disable the
check box beside the preset guideline you
want to delete.
To Do the following
204 CorelDRAW Graphics Suite 12 User Guide
The checkered effect in this graphic was created using a grid.
To choose a preset drawing scale
1Click View ` Grid and ruler setup.
2In the Document list of categories, click Rulers.
3Click Edit scale.
4Choose a drawing scale from the Ty p i c a l s c a l e s list box.
From here
For more information about In the Help index, see...
Adding guidelines guidelines, adding
Creating custom drawing scales scale

CorelDRAW: Working with layers 205
Working with layers
You can work with layers to help you organize and arrange objects in complex
illustrations.
In this section, you’ll learn about
•creating layers
• changing layer properties and stacking order
• moving and copying objects between layers
•printing layers
Creating layers
All CorelDRAW drawings consist of stacked objects. The vertical order of these objects
— the stacking order — contributes to the appearance of the drawing. You can organize
these objects using invisible planes called layers.
Layering gives you added flexibility when organizing and editing the objects in complex
drawings. You can divide a drawing into multiple layers, each containing a portion of
the drawing’s contents. For example, using layers can help you organize an architectural
plan for a building. You can organize the building’s various components (for example,
plumbing, electrical, structural) by placing them on separate layers. You can display
pages only and layers only.
You can also display selected objects. Hiding a layer lets you identify and edit the objects
on other layers. You also reduce the time CorelDRAW needs to refresh your drawing
when you edit it.
206 CorelDRAW Graphics Suite 12 User Guide
Drawings can be assembled by placing objects on various levels or layers.
Layering lets you change foregrounds and backgrounds independently.
Each new file has one Master Page that contains and controls three default layers: the
Grid, Guides, and Desktop layers. The Grid, Guides, and Desktop layers contain the
grid, guidelines, and objects outside the borders of the drawing page. The Desktop layer
lets you create drawings you might want to use later. You can specify settings for the
grid and guidelines on the Master Page. You can specify settings, for example color, for
each layer on the Master Page.
You can add one or more master layers to a Master Page. This layer contains information
that you want to display on every page of a multipage document. For example, you can
use a master layer to place a header, footer, or static background on every page.
To create a layer
To use a layer in the drawing, you must first make the layer active. In the
Object manager docker the active layer is highlighted in red. When you start
a drawing, the default layer (Layer 1) is the active layer.
To Do the following
Create a layer Click To o l s ` Object manager. Click the
flyout button , and click New layer.
Create a master layer Click To o l s ` Object manager. Click the
flyout button, and click New master layer.

CorelDRAW: Working with layers 207
When you create a master layer, it moves to the Master Page.
You can also add a layer by clicking the New layer button in the Object
manager docker.
You can make any layer a master layer by right-clicking the layer name, and
clicking Master.
To display or hide a layer
1Click To o l s ` Object manager.
2Click the Eye icon beside the layer name.
The layer is hidden when the Eye icon is grayed.
You can also display or hide a layer by right-clicking the layer in the Object
manager docker and clicking Visible.
To display pages, layers, and objects
To delete a layer
1Click To o l s ` Object manager.
2Click the name of a layer.
3Click the flyout button , and click Delete layer.
To
Display pages Click Window ` Dockers ` Object
manager. Click the flyout button , and
then click Show pages.
Display layers Click Window ` Dockers ` Object
manager. Click the Layer manager view
button .
Display objects Click Window ` Dockers ` Object
manager. Click the flyout button , and
then click Expand to show selection.

208 CorelDRAW Graphics Suite 12 User Guide
When you delete a layer, you also delete all the objects on it. To keep an object
on the layer you’re deleting, move it to a different layer first.
You can delete any unlocked layer except the three default layers of the Master
Page (Grid, Guides, or Desktop).
To specify settings for a layer on the Master Page
1Click To o l s ` Object manager.
2Right-click the layer, and click Properties.
3Change the settings and click OK.
Changing layer properties and stacking order
By default, each new layer has its editing, printing, and display properties enabled and
its master layer property disabled; however, you can change these properties.
You can set a layer’s editing properties to make a layer active, and allow the editing of
all layers or the active layer only. When you are making changes to a drawing, you can
lock a layer to prevent accidental changes to its objects. When you lock a layer, you
cannot select or edit it.
Renaming layers can be used to indicate their contents, position in the stacking order,
and relationship with other layers.
You can change a layer’s place in the stacking order.
To set a layer’s editing properties
•Click To o l s ` Object manager.
To Do the following
Make a layer active Click the name of a layer.
Allow editing of all layers Click the flyout button , and click Edit
across layers.
Allow editing of the active layer only Click the flyout button , and disable Edit
across layers.

CorelDRAW: Working with layers 209
If you disable the Edit across layers button , you can work on the active
layer and the Desktop layer only. You can’t select or edit objects on inactive
layers.
You can’t “lock” or “unlock” the Grid layer.
You can also allow editing of the active or of all layers by enabling or disabling
the Edit across layers button in the Object manager docker. Editing across
layers is enabled when the button appears pressed.
You can also lock or unlock a layer by right-clicking the layer in the Object
manager docker and clicking Editable.
To rename a layer
1Click To o l s ` Object manager.
2Right-click the layer name, and click Rename.
You can also rename a layer by clicking the layer name and typing a new name.
To change the position of a layer in the stacking order
1Click To o l s ` Object manager.
2In the Layers list, drag a layer name tag to the new position.
Moving and copying objects between layers
You can move or copy selected objects to new layers, including layers on the Master
Page to another page and back.
Moving or copying an object to a layer below its current layer causes the object to
become the top object on its new layer. Similarly, moving or copying an object to a layer
above its current layer causes the object to become the bottom object.
Lock or unlock a layer Click the Pencil icon beside the layer
name.
To Do the following

210 CorelDRAW Graphics Suite 12 User Guide
To move or copy an object to another layer
1Click To o l s ` Object manager.
2Click an object in the Object manager.
3Click the flyout button , and click one of the following:
• Move to layer
• Copy to layer
4Point to the layer to which you want to move or copy the object, and click.
When moving objects to or from a layer, the layers must be unlocked.
You can move and copy an object to another layer by dragging an object to a
new layer in the Object manager docker.
Printing layers
Enabling the print setting of a layer lets you print the layer and its contents. If you
disable a layer’s print setting, the layer and its contents won’t appear when you print
the drawing.
To enable or disable printing for a specific layer
1Click To o l s ` Object manager.
2Click the Printer icon beside the layer name.
Disabling the printing of a layer prevents its contents from displaying in full-
screen previews. For information about full-screen previews, see “Previewing a
drawing” on page 38.
You can also enable or disable the printing of a layer by right-clicking the layer
in the Object manager docker and clicking Printable.

CorelDRAW: Adding and formatting text 211
Adding and formatting text
The CorelDRAW application lets you use text to create documents or annotate
drawings.
In this section, you’ll learn about
• adding and selecting text
•encoding text
• changing the appearance of text
• finding, editing, and converting text
• aligning and spacing text
• shifting and rotating text
•moving text
• fitting text to a path
• formatting paragraph text
• combining and linking paragraph text frames
• wrapping paragraph text around objects and text
• embedding graphics and adding special characters
• displaying nonprinting characters
Adding and selecting text
There are two types of text you can add to drawings — artistic text and paragraph text.
Artistic text can be used to add short lines of text to which you can apply a wide range
of effects, such as drop shadows. Paragraph text can be used for larger bodies of text that
have greater formatting requirements. You can add both paragraph and artistic text
directly in the drawing window.
You can add artistic text along an open or closed path. You can also fit existing artistic
and paragraph text to a path. For more information, see “Fitting text to a path” on
page 224.
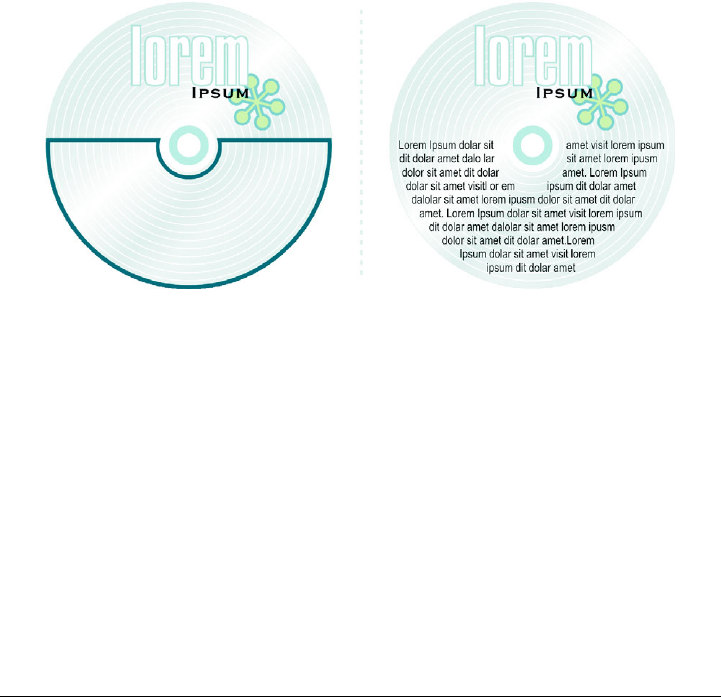
212 CorelDRAW Graphics Suite 12 User Guide
When adding paragraph text, you must first create a text frame. By default, paragraph
text frames remain the same size regardless of how much text they contain. Any text
that continues past the bottom-right border of the text frame is hidden until you either
enlarge the text frame or link it to another text frame. You can fit text to a frame, which
automatically adjusts the point size of text so that the text fits perfectly in the frame.
For information about fitting text to a frame, see “To fit text to a paragraph text frame”
on page 227. You can also have paragraph text frames automatically expand and shrink
as you type, so that the text fits perfectly in the frame.
You can insert a paragraph text frame inside a graphic object. This lets you use objects
as containers for text so that you can use different shapes for text frames. You can also
separate text from an object. When you do, the text retains its shape, and you can move
or modify the text and the object independently.
Paragraph text placed inside an object. The object is made invisible by
removing its outline.
When you import or paste text, you have the option of maintaining formatting,
maintaining fonts and formatting, or discarding fonts and formatting. Maintaining
fonts ensures that imported and pasted text retains its original font type. Maintaining
formatting ensures that formatting information such as bullets, columns, and bold or
italic formatting is preserved. If you choose to discard fonts and formatting, the
imported or pasted text takes on the properties of the selected text object, or if none is
selected, the default font and formatting properties. For more information about
importing files, see “Importing files” on page 299. For more information about pasting,
see “To paste an object into a drawing” on page 78.
To modify text, you must first select it. You can select entire text objects or specific
characters.
CorelDRAW: Adding and formatting text 213
To add artistic text
• Click anywhere in the drawing window using the Te x t tool , and type.
To add paragraph text
Enabling the Expand and shrink paragraph text frames to fit text check
box on the Paragraph page of the Options dialog box affects only new text
frames. Existing paragraph text frames remain fixed in size.
You can adjust the size of a paragraph text frame by clicking the text frame
using the Pick tool, and dragging any selection handle.
To set options for importing and pasting text
1Import or paste the text.
2In the Importing / pasting text dialog box, enable one of the following options:
• Maintain fonts and formatting
• Maintain formatting only
To Do the following
Add paragraph text Click the Te x t tool . Drag in the drawing
window to size the paragraph text frame,
and type.
Add paragraph text inside an object Click the Te x t tool. Move the pointer over
the object’s outline, and click the object
when the pointer changes to an Insert in
object pointer. Type inside the frame.
Separate a paragraph text frame from an
object
Select the object using the Pick tool , and
click Arrange ` Break paragraph text
inside a path apart.
Have paragraph text frames automatically
adjust to fit text
Click To o l s ` Options. In the list of
categories, double-click Te x t , and click
Paragraph. Enable the Expand and shrink
paragraph text frames to fit text check
box.
214 CorelDRAW Graphics Suite 12 User Guide
• Discard fonts and formatting
If you want to use the same formatting options whenever you import or paste text,
enable the Don’t show this warning again check box.
Clicking Cancel will cancel the import or paste operation.
If you choose to maintain fonts and a required font is not installed on your
computer, the PANOSE font matching system substitutes the font for you. For
more information, see “Substituting unavailable fonts” on page 235.
You can re-enable the Importing / pasting text dialog box by clicking To o l s
` Options, clicking Warni ngs in the Wor ks pac e list of categories, and
enabling the Pasting and importing text check box.
To select text
You can select multiple text objects by holding down Shift and clicking each
text object using the Pick tool.
Encoding text
After opening or importing a drawing that contains text in a language different from
the language of your operating system, you may find that text does not display correctly.
To correctly display text, you can change the encoding. Encoding determines the
character set of text.
Encoding settings do not help display correctly text outside the drawing window, such
as keywords, file names, and text entries in the Object manager and Object data
manager dockers. You have to use code page settings in the Open or Import dialog
boxes to set the proper characters for such text.
To select Do the following
An entire text object Click the text object using the Pick tool .
Specific characters Drag across the text using the Te x t tool .

CorelDRAW: Adding and formatting text 215
To correctly display text in any language
1Click Te x t ` Encode.
2In the Te x t e n c o d i n g dialog box, choose the Other encoding option.
3From the Other encoding list box, choose an encoding setting that makes the text
readable.
The preview window displays the text with the current encoding setting.
Changing the appearance of text
You can change the default text style, so that all new artistic or paragraph text you
create has the same properties. You can enhance artistic text and paragraph text by
modifying their character properties. For example, you can change the font type and size
or make the text bold or italic. You can also change the position of text to subscript or
superscript, which is useful if a drawing contains scientific notation. You can add
underlines, strikethrough lines, and overlines to text. You can change the thickness of
these lines, as well as the distance between the lines and the text. You can also change
the color of text.
You can change the case of text to lowercase or uppercase without deleting or replacing
letters. You can increase or decrease font size by a specified increment amount. By
default, the unit of measure is points. You can change this setting for the active drawing
and all subsequent drawings you create.
Greeking text lets you increase the redraw speed by representing text under a certain
size with lines. This is useful when showing prototypes of documents or drawings. You
can make text readable again by reducing the greeking value or by zooming in on the
text.
To change the default text style
1Click a blank space in the drawing window using the Pick tool .
2Click Te x t ` Format text.
3Click the Character tab.
4Specify the properties you want.
Following each property change you make, by default you must specify whether
the changes are applied to artistic text, paragraph text, or both. You can override
this default by disabling the Auto apply button next to Apply.
216 CorelDRAW Graphics Suite 12 User Guide
To have changes to the default text style apply to future documents, click
To o l s ` Save settings as default.
You can make the style of an existing text frame or object the default style by
clicking Tools ` Graphic and text styles, and dragging the text frame or
object over either the Default artistic text or the Default paragraph text
icon on the Graphic and text docker.
To change character properties
1Select the text.
2Click Te x t ` Format text.
3Click the Character tab.
4Specify the character attributes you want.
You can also make selected text bold, italic, or underlined by clicking the Bold
button ,
Italic button , or Underline button on the property bar.
To change the color of text
1Select the text using the Te x t tool .
2Click a color on the color palette.
You can change the color of an entire text object by selecting it with the Pick
tool and dragging a color swatch from the color palette to the text object.
To change text case
1Select the text.
2Click Te x t ` Change case.
3Enable one of the following options:
• Sentence case — capitalizes the initial letter of the first word in each sentence
• Lowercase — makes all text lowercase
• Uppercase — makes all text uppercase
• Title case — capitalizes the initial letter of each word
• Toggle case — reverses the case; all uppercase letters become lowercase and all
lowercase letters become uppercase
CorelDRAW: Adding and formatting text 217
To resize text
You must be in Num lock mode to increase or decrease the size of text.
To greek text
1Click To o l s ` Options.
2In the list of categories, click Te x t .
3Type a value in the Greek text below box.
Finding, editing, and converting text
You can find text in a drawing and replace it automatically. You can edit text directly in
the drawing window or in a dialog box.
CorelDRAW lets you convert artistic text to paragraph text if you require more
formatting options, and paragraph text to artistic text if you’d like to apply special
effects.
You can also convert both paragraph and artistic text to curves. This transforms
characters into single line and curve objects, letting you add, delete, or move the nodes
of individual characters to alter their shape. For more information, see “Working with
curve objects” on page 101. When you convert text to curves, the appearance of the text
is preserved, including font, style, character position and rotation, spacing, and any
To Do the following
Increase the size of text Select the text using the Te x t tool , hold
down Ctrl, and press 8 on the number pad.
Decrease the size of text Select the text using the Te x t tool, hold
down Ctrl, and press 2 on the number pad.
Specify the amount by which to resize text Click To o l s ` Options. Click Tools `
Options. In the list of categories, click Te x t ,
and type a value in the Keyboard text
increment box.
If you want to change the default unit of
measure, choose a unit from the Default
text units list box.

218 CorelDRAW Graphics Suite 12 User Guide
other text settings and effects. Any linked text objects are also converted to curves. If
you convert paragraph text in a fixed-sized frame to curves, any text that overflows the
frame is deleted. For information about fitting text to a frame, see “Formatting
paragraph text” on page 226.
To find text
1Click Edit ` Find and replace ` Find text.
2Type the text you want to find in the Find what box.
If you want to find the exact case of the text you specified, enable the Match case
check box.
3Click Find next.
To find and replace text
1Click Edit ` Find and replace ` Replace text.
2Type the text you want to find in the Find what box.
If you want to find the exact case of the text you specified, enable the Match case
check box.
3Type the replacement text in the Replace with box.
4Click one of the following buttons:
• Find next — finds the next occurrence of the text specified in the Find what
box
• Replace — replaces the selected occurrence of the text specified in the Find
what box. If no occurrence is selected, Replace finds the next occurrence.
• Replace all — replaces every occurrence of the text specified in the Find what
box
To edit text
1Select the text.
2Click Te x t ` Edit text.
3Make changes to the text in the Edit text dialog box.
You can also
Edit text in the drawing window Select the text using the Te x t tool , and
edit it.
CorelDRAW: Adding and formatting text 219
You cannot edit text that has been converted to curves.
To convert text
You cannot convert paragraph text to artistic text when the paragraph text is
linked to another frame, has special effects applied to it, or overflows its frame.
You can also convert text to curves by right-clicking the text using the Pick
tool and clicking Convert to curves.
Aligning and spacing text
You can align both paragraph and artistic text horizontally. Aligning paragraph text
lines up text relative to the paragraph text frame. You can horizontally align all
paragraphs or only selected paragraphs in a paragraph text frame. You can vertically
align all paragraphs in a paragraph text frame. You can also align text to another object.
To convert Do the following
Paragraph text to artistic text Select the text using the Pick tool , and
click Te x t ` Convert to artistic text.
Artistic text to paragraph text Select the text using the Pick tool, and click
Te x t ` Convert to paragraph text.
Artistic or paragraph text to curves Select the text using the Pick tool, and click
Arrange ` Convert to curves.
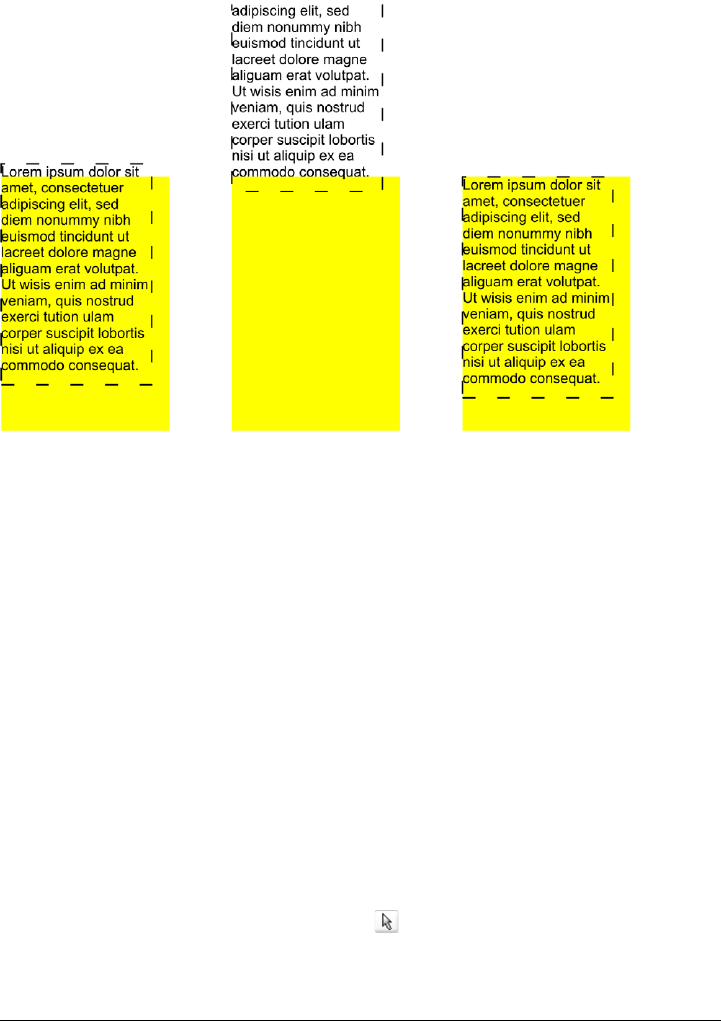
220 CorelDRAW Graphics Suite 12 User Guide
You can align a text object to other objects using the first line baseline, last line
baseline, or the edge of the text bounding box.
Artistic text can be aligned horizontally, but not vertically. When you align artistic text,
it is aligned with the entire text object. If characters have not been shifted horizontally,
applying no alignment produces the same result as applying left alignment.
You can change character and word spacing in selected paragraphs, or in an entire
paragraph text frame or artistic text object. Changing character spacing between
selected or specific text is also referred to as tracking; changing character spacing in an
entire block of text is also called kerning. You can change the line spacing of text, which
is also referred to as leading. Changing the leading for artistic text applies the spacing
to lines of text separated by a carriage return. For paragraph text, leading applies only
to lines of text within the same paragraph. You can also change the spacing before and
after paragraphs in paragraph text, and you can kern selected characters. Kerning
balances the optical space between letters.
To align text horizontally
1Select the text object using the Pick tool .
2Click Te x t ` Format text.
3Click the Paragraph tab.

CorelDRAW: Adding and formatting text 221
4Choose an item from the Alignment list box.
To align selected paragraphs in a paragraph text frame, select them using the
Te x t tool .
To align paragraph text vertically in a text frame
1Select the paragraph text.
2Click Te x t ` Format text.
3Click the Columns tab.
4Choose an alignment option from the Vertical justification list box.
To align text to an object
1Hold down Shift, select the text, and then select the object.
2Click Arrange ` Align and distribute ` Align and distribute.
3Choose one of the following from the For text source objects use list box:
• First line baseline — aligns the text using the baseline of the first line of text
• Last line baseline — aligns the text using the baseline of the last line of text
• Bounding box — aligns the text using its bounding box
4Enable one of the following horizontal alignment check boxes:
• Left
• Right
• Center
5Enable one of the following vertical alignment check boxes:
• To p
• Bottom
• Center
6Click Apply.
The object used to align the left, right, top, or bottom edges is determined by
the order of creation or order of selection. If you marquee select the objects
before you align them, the last object created will be used. If you select the
objects one at a time the last object selected will be the reference point for
aligning the others. If you’ve applied a linear transformation, such as rotation,
222 CorelDRAW Graphics Suite 12 User Guide
to the text and are aligning with a baseline, the objects align using the baseline
point of the starting edge of the text object.
If you are aligning text objects to each other and have elected to align with the
first line baseline or last line baseline, the vertical and horizontal alignment
check boxes are grayed. The baseline points of the text objects are aligned to
each other.
You can also align objects by selecting them and clicking the Align and
distribute button on the property bar.
To change the spacing of text
1Select the text.
2Click Te x t ` Format text.
3Click the Paragraph tab.
4In the Spacing area, type values in any of the boxes.
Character and word spacing can only be applied to entire paragraphs, or to an
entire paragraph text frame or artistic text object.
Values represent a percentage of the space character. The Character values
range from -100 to 2000 percent. All other values range from 0 to 2000
percent.
You can also change the spacing between words and characters proportionately
by selecting the text object using the Shape tool and dragging the
Interactive horizontal spacing arrow in the bottom-right corner of the text
object. Drag the Interactive vertical spacing arrow in the bottom-left corner
of the text object to change the line spacing proportionately.
To apply range kerning to selected characters
1Select two or more characters using the Te x t tool .
2Click Te x t ` Format text.
3Click the Character tab.
4Type a value in the Range kerning box.
CorelDRAW: Adding and formatting text 223
Shifting and rotating text
Shifting artistic and paragraph text vertically and horizontally can create an interesting
effect. You can also rotate characters. Straightening text pulls the text into its original
position. You can return vertically shifted characters to the baseline without affecting
their rotation angle.
Rotated characters
To shift or rotate a character
1Select the character or characters using the Te x t tool .
2Click Te x t ` Format text.
3Click the Character tab.
4In the Shift area, type a value in one of the following boxes:
• Horizontal — a positive number moves characters to the right, and a
negative number moves characters to the left
• Vertical — a positive number moves characters up, and a negative number
moves characters down
• Rotate — a positive number rotates characters counter-clockwise, and a
negative number rotates characters clockwise
You can also shift or rotate characters whose nodes you select using the Shape
tool by typing values in the Horizontal shift box, Vertical shift box, or
Angle of rotation box on the property bar.

224 CorelDRAW Graphics Suite 12 User Guide
To straighten a shifted or rotated character
1Select the text.
2Click Te x t ` Straighten text.
To return a vertically shifted character to the baseline
1Open the Shape edit flyout , and click the Shape tool .
2Select the text object, and select the node to the left of the character.
3Click Te x t ` Align to baseline.
Moving text
CorelDRAW lets you move paragraph text between frames, and artistic text between
artistic text objects. You can also move paragraph text to an artistic text object, and
artistic text to a paragraph text frame.
To move text
1Select the text using the Te x t tool .
2Drag the text to another paragraph text frame or artistic text object.
Fitting text to a path
You can add artistic text along the path of an open object (for example, a line) or a closed
object (for example, a square). You can also fit existing text to a path. Artistic text can
be fitted to an open or closed path. Paragraph text can be fitted to open paths only.
After you fit text to a path, you can adjust the text’s position relative to that path. For
example, you can place the text on the opposite side of the path, or you can adjust the
distance between the text and the path.
You can also
Move text within the same frame or object Select the text, and drag it to a new position.
Move or copy selected text to a new text
object
Right-click and drag the text to a new
position, and click Copy here or Move here.

CorelDRAW: Adding and formatting text 225
CorelDRAW treats text fitted to a path as one object; however, you can separate the
text from the object if you no longer want it to be part of the path. When you separate
text from a curved or closed path, the text retains the shape of the object to which it was
fitted. Straightening the text reverts it to its original appearance.
To add text along a path
1Select a path using the Pick tool .
2Click Te x t ` Fit text to path.
3Point to the path, and click when the pointer changes to the Fit to path pointer
.
4Type along the path.
If the text is fitted to a closed path, the text is centered along the path. If the
text is fitted to an open path, the text flows from the point of insertion.
You can’t fit text to the path of another text object.
You can also fit text to a path by clicking the Te x t tool and pointing to a
path. When the pointer changes to a Fit to path pointer, click where you want
the text to begin, and type.
To fit text to a path
1Select a text object using the Pick tool .
2Click Te x t ` Fit text to path.
The pointer changes to a thick, black arrow.
3Click a path.
To adjust the position of text fitted to a path
1Using the Pick tool , select the text fitted to a path.
2Choose a setting from any of the following list boxes on the property bar:
• Te x t o r i e n t a t i o n — the angle at which the text sits on the path
• Vertical placement — the vertical alignment of the text relative to the path
• Distance from path — the distance between the text and the path to which it is
fit

226 CorelDRAW Graphics Suite 12 User Guide
• Text placement — the side of the path on which the text is fitted
• Horizontal offset — the horizontal position of the text along the path
You can also change the horizontal position of fitted text by selecting it with
the Shape tool and dragging the character nodes you want to reposition.
Using the Pick tool, you can move text along the path by dragging the small
red node that displays beside the text.
To separate text from a path
1Select the fitted text using the Pick tool .
2Click Arrange ` Break text apart.
To straighten text
1Select the fitted text using the Pick tool .
2Click Arrange ` Break text apart.
3Click Te x t ` Straighten text.
Formatting paragraph text
CorelDRAW offers various formatting options for paragraph text. For example, you can
fit text to a paragraph text frame. Fitting text to a frame increases or decreases the point
size of text so that it fits the text frame exactly. You can also use columns to lay out text-
intensive projects such as newsletters, magazines, and newspapers. You can create
columns of equal or varying widths and gutters.
Applying drop caps to paragraphs enlarges the initial letter and insets it into the body
of text. You can customize a drop cap by changing its settings. For example, you can
change the distance between the drop cap and the body of text, or specify the number
of lines of text you want to appear beside the drop cap. You can remove the drop cap at
any point, without deleting the letter.
You can use bulleted lists to format information. You can have text wrap around bullets,
or you can offset a bullet from text to create a hanging indent. CorelDRAW lets you
customize bullets by changing their size, position, and distance from text. After you
add a bullet, you can remove it without deleting the text.

CorelDRAW: Adding and formatting text 227
You can add tabs to indent paragraph text. You can also remove tabs and change tab
alignment. Setting trailing leader tabs automatically creates dots that precede the tab.
Indenting changes the space between a paragraph text frame and the text that it
contains. You can indent an entire paragraph, the first line of a paragraph, all but the
first line of a paragraph (a hanging indent), or from the right side of the frame. You can
also remove an indent without deleting or retyping text.
Hyphenating splits words between lines when the whole word does not fit on one line.
You can have CorelDRAW hyphenate automatically. You can specify hyphenation
settings such as the minimum number of letters before and after a hyphen, and the hot
zone.
Paragraph text frame formatting can be applied to selected frames only, selected frames
and frames they are currently linked to, or to all selected and subsequently linked
frames. For information about setting these options, see “To choose paragraph text
frame formatting options” in the Help.
To fit text to a paragraph text frame
1Select a paragraph text frame.
2Click Te x t ` Fit text to frame.
If you fit text to linked paragraph text frames, the application adjusts the size
of text in all of the linked text frames. For more information about linking
frames, see “Combining and linking paragraph text frames” on page 228.
To add columns to paragraph text frames
1Select a paragraph text frame.
2Click Te x t ` Format text.
3Click the Columns tab.
4Type a value in the Number of columns box.
5Specify the settings and options you want.
You can change the size of columns and gutters by dragging a side selection
handle in the drawing window with the Te x t tool .
228 CorelDRAW Graphics Suite 12 User Guide
To add a drop cap
1Select the paragraph text.
2Click Te x t ` Format text.
3Click the Effects tab.
4Choose Drop cap from the Effect type list box.
5Click one of the following icons:
• Dropped — wraps text around the drop cap
• Hanging indent — offsets the drop cap from the body of text
You can add a drop cap (left) or a hanging indent drop cap(right).
Combining and linking paragraph text frames
You can combine paragraph text frames. You can also break paragraph text frames apart
into subcomponents — columns, paragraphs, bullets, lines, words, and characters.
You can also
Specify the number of lines beside a drop cap Type a value in the Dropped lines box.
Specify the distance between the drop cap
and the body of text
Type a value in the Distance from text box.
Remove drop caps Choose None from the Effect type list box.
CorelDRAW: Adding and formatting text 229
Every time you break apart a text frame, the subcomponents are placed into separate
paragraph text frames.
Linking paragraph text frames directs the flow of text from one text frame to another if
the amount of text exceeds the size of the first text frame. If you shrink or enlarge a
linked paragraph text frame, or change the size of the text, the amount of text in the
next text frame is automatically adjusted. You can link paragraph text frames before or
after you type text.
You cannot link artistic text. However, you can link a paragraph text frame to an open
or closed object. When you link a paragraph text frame to an open object (for example,
a line), the text flows along the path of the line. Linking a text frame to a closed object
(for example, a rectangle) inserts a paragraph text frame and directs the flow of text
inside the object. If text exceeds the open or closed path, you can link the text to another
text frame or object. You can also link to paragraph text frames and objects across pages.
After linking paragraph text frames, you can redirect the flow from one object or text
frame to another. When you select the text frame or object, a blue arrow indicates the
direction of the text flow. You can hide or display these arrows.
You can make text flow between frames and objects by linking the text.
You can remove links between multiple paragraph text frames, and between paragraph
text frames and objects. When you have only two linked paragraph text frames and you
remove the link, the text flows into the remaining paragraph text frame. Removing a
link between paragraph text frames with a series of links redirects the flow of text into
the next paragraph text frame or object.
By default, CorelDRAW applies paragraph formatting such as columns, drop caps, and
bullets to only the selected paragraph text frames; however, you can change your
230 CorelDRAW Graphics Suite 12 User Guide
settings so that formatting is applied to all linked frames, or all selected and
subsequently linked frames. For example, if you apply columns to the text in one text
frame, you can choose whether you want all of the linked frames to also be formatted
in columns. For information about paragraph formatting, see “Formatting paragraph
text” on page 226.
To combine or break apart paragraph text frames
1Select a text frame.
If you are combining text frames, hold down Shift and select subsequent text
frames using the Pick tool .
2Click Arrange, and click one of the following:
• Combine
• Break paragraph text apart
Text frames with envelopes, text fitted to a path, and linked frames cannot be
combined.
If you select a text frame with columns first, the combined text frame will have
columns.
To link paragraph text frames and objects
1Select the starting text frame using the Te x t tool .
2Click the Te x t f l o w tab at the bottom of the text frame or object.
If the frame cannot hold all the text, the tab contains an arrow .
3When the pointer changes to a Link to pointer , click the frame or object into
which you want to continue the text flow.
If the frame or object is on a different page, first click the corresponding Page tab
on the Document Navigator.
If a text frame is linked, the Te x t f l o w tab changes , and a blue arrow
indicates the direction of text flow. If the linked text is on another page, the
page number and a dashed blue line are displayed. To hide or display these
indicators, see “To choose paragraph text frame formatting options” on
page 36.
CorelDRAW: Adding and formatting text 231
To link paragraph text frames successfully, the text frames cannot be
automatically sized. For information, see “Adding and selecting text” on
page 211.
To change text flow to a different text frame or object
1Using the Pick tool , click the Te x t f l o w tab at the bottom of the text frame
or object from which you want to change the link.
2Select the new text frame or object into which you want the text flow to continue.
Wrapping paragraph text around objects and text
You can change the shape of text by wrapping paragraph text around an object, artistic
text, or a paragraph text frame. You can wrap text using contour or square wrapping
styles. The contour wrapping styles follow the curve of the object. The square wrapping
styles follow the bounding box of the object. You can also adjust the amount of space
between paragraph text and the object or text, as well as remove any wrapping style
you apply.
Wrapping text around an object using the contour wrapping style (left) and
the square wrapping style (right)
To wrap paragraph text around an object or text
1Select the object or text around which you want to wrap text.
2Click Window ` Dockers ` Properties.
3In the Object properties docker, click the General tab.

232 CorelDRAW Graphics Suite 12 User Guide
4Choose a wrapping style from the Wrap paragraph text list box.
If you want to change the amount of space between wrapped text and the object or
text, type a value in the Text wrap offset box.
5Click the Te x t tool , and drag to create a paragraph text frame over the object or
text.
6Type text in the paragraph text frame.
You can wrap existing paragraph text around a selected object by applying a
wrapping style to the object and dragging the paragraph text frame over the
object.
To remove a wrapping style
1Select the wrapped text or the object it wraps.
2Click Window ` Dockers ` Properties.
3 In the Object properties docker, click the General tab.
4Choose None from the Wrap paragraph text list box.
Embedding graphics and adding special characters
You can embed a graphic object or bitmap in text. The graphic object or bitmap is
treated as a text character. As a result, you can apply formatting options according to
the type of text in which you embed the graphic object. You can also remove an
embedded object from text, after which the object returns to its original state.
You can add special characters to text as text objects or as graphic objects. When you
add special characters as text, you can format the characters as you do the text. When
you add special characters as graphic objects, the characters are curves. Consequently,
you can edit them as you would other graphic objects.
You can also change objects, such as company logos or modified letters, into special
characters, and then add them to a character set. This lets you add an object to text as
a text or graphic object. The object is automatically resized to match the proportions of
other characters in the set.
You can create patterns with special characters by tiling them across the page. Each
character in the pattern is a separate object to which you can apply effects. You can
change the spacing between the rows and columns in which the characters are arranged.

CorelDRAW: Adding and formatting text 233
To embed a graphic object in text
1Select a graphic object.
2Click Edit, and click one of the following:
• Cut
• Copy
3Using the Te x t tool , click where you want to embed the graphic object.
4Click Edit ` Paste.
To remove an embedded object from text
1Select an embedded object using the Te x t tool .
2Click Edit ` Cut.
3Click the Pick tool , and click outside the text object.
4Click Edit ` Paste.
From here
For more information about In the Help index, see
Adding bullets to paragraph text bullets, adding to text
Adding tabs to paragraph text tabs, adding to text
Indenting paragraph text indenting, paragraph text
Hyphenating paragraph text hyphenating, paragraph text
Removing and changing text links linking, paragraph text
Choosing paragraph text frame formatting
options
text frames, formatting options
Adding special characters to text special characters, adding to text
Displaying nonprinting characters nonprinting characters

CorelDRAW: Managing fonts 235
Managing fonts
CorelDRAW has several features that allow you to manage fonts.
In this section, you’ll learn about
• substituting unavailable fonts
• embedding fonts
• using Bitstream® Font Navigator®
Substituting unavailable fonts
You can use PANOSE font matching to access a list of fonts that can be used as
substitutes for fonts used in a drawing but not installed on your computer.
You can set font matching options. You can use font matching in text only, in both text
and text styles, or you can turn off font matching. With font matching, you can accept
the default substitute font, or you can choose another font to substitute for the missing
font. You can apply the substitution temporarily or permanently to the active drawing.
You can build a list of exceptions to font substitutions. Exceptions override default font
substitutions. You can also specify font equivalents. This is useful when sharing
drawings across the two platforms because sometimes the same font has a different
spelling for its name on each platform.
To set font matching options
1Click To o l s ` Options.
2In the list of categories, double-click Te x t , and click Fonts.
3Click PANOSE font matching.
4In the PANOSE font matching preferences dialog box, enable one of the
following options:
• Never use font matching — applies default font substitutions for both text in
the document and text styles

236 CorelDRAW Graphics Suite 12 User Guide
• Use font matching for text — lets you select font substitutions for text in the
document and applies default font substitutions for text styles
• Use font matching for text and styles — lets you select font substitutions for
both text in the document and text styles
To substitute a missing font
1Open a drawing.
2Enable one of the following options:
• Show fonts in the same code page — displays only missing fonts that support
the code page of the active drawing
• Show all fonts — displays all missing fonts
3In the Font matching results dialog box, choose a missing font.
If you want to override the default substitution, choose a font from the bottom list
box.
4Enable one of the following options:
• Te m p o r a r y — replaces the missing font with the substitution, but only in the
current session of the drawing
• Permanent — permanently makes the font substitution in the document. When
you save the file and reopen it, the new font automatically displays.
In order for the Font matching results dialog box to display, the drawing that
you open must contain fonts that aren’t installed on your computer.
To build a list of exceptions to font substitutions
1Click To o l s ` Options.
2In the list of categories, double-click Te x t , and click Fonts.
3Click PANOSE font matching.
4In the PANOSE font matching preferences dialog box, click Exceptions.
5In the PANOSE font matching exceptions dialog box, click Add.
6In the Add matching exception dialog box, type the name of the font you want to
replace in the Missing font box.
7Choose a font that is installed on your computer from the Substituted font list.

CorelDRAW: Managing fonts 237
To match more Windows and Macintosh fonts
1Click To o l s ` Options.
2In the list of categories, double-click Te x t , and click Fonts.
3Click PANOSE font matching.
4In the PANOSE font matching preferences dialog box, click Spellings.
5Click Add.
6Choose a Windows font name from the Windows name list box.
7Type the Macintosh® spelling for the font in the Macintosh name list box.
Embedding fonts
You can choose to embed fonts in a drawing. Embedding fonts ensures that all fonts
used in a drawing are available when the drawing is opened on another computer. When
fonts are embedded, font substitution is not required, and a drawing displays and prints
the same way on all computers. For more information about font substitution, see
“Substituting unavailable fonts” on page 235.
To embed fonts in a file
1Click File ` Save as.
2Click Options.
3Enable the Embed fonts using TrueDoc® check box.
4Click Save.
Only characters used in the drawing are embedded in the file.
Using Bitstream Font Navigator
Bitstream Font Navigator is a font management system included with your application.
Font Navigator lets you store up to 2000 fonts in a database (or “catalog”). You can
access fonts quickly, organize them, and preview them before using them. See the Font
Navigator documentation for information about installing and using Font Navigator.

CorelDRAW: Working with bitmaps 239
Working with bitmaps
You can convert a vector graphic to a bitmap. Also, you can import and crop bitmaps
in the CorelDRAW application.
You can also add color masks, watermarks, special effects, and change the color and tone
of the images.
In this section, you’ll learn about
• converting vector graphics to bitmaps
•adding bitmaps
• cropping and editing bitmaps
•using Digimarc® watermarks to identify bitmaps
• applying special effects to bitmaps
• applying color and tone effects
• transforming color and tone effects
• removing dust and scratch marks from bitmaps
Converting vector graphics to bitmaps
When you convert a vector graphic to a bitmap, you can apply special effects in the
CorelDRAW application that are unavailable to vector graphic or objects. As you
convert the vector, you can select the color mode of the bitmap. A color mode
determines the number and kind of colors that make up the bitmap, so that file size is
also affected.
You can also determine settings such as the aliasing, background transparency, and color
profile, as you convert it a vector graphic to a bitmap.
To convert a vector graphic to a bitmap
1Select an object.
2Click Bitmaps ` Convert to bitmap.

240 CorelDRAW Graphics Suite 12 User Guide
3Choose a color mode from the Color list box.
4Choose a resolution from the Resolution list box.
5Enable any of the following check boxes:
• Anti-aliasing — smooths the edges of the bitmap
• Tr a n s p a r e n t b a c k g r o u n d — makes the background of the bitmap transparent
• Apply ICC profile — applies the International Color Consortium profiles to
standardize colors across devices and color spaces
Making the background of a bitmap transparent lets you see images or a
background otherwise obscured by the bitmap background.
Adding bitmaps
You can import a bitmap into a drawing either directly or by linking it to an external
file. When you link to an external file, edits to the original file are automatically
updated in the imported file.
To import a bitmap
1Click File ` Import.
2Choose the folder where the bitmap is stored.
3Select the file.
If you want to link the image to the drawing, enable the Link bitmap externally
check box.
4Click Import.
5Click where you want to place the bitmap.
If you want to center the image on the drawing page, press Enter.
Ensure that All file formats is chosen from the Files of type list box when you
import an image.
The status bar provides information about the bitmap, including color mode,
size, and resolution after it has been placed on the page.
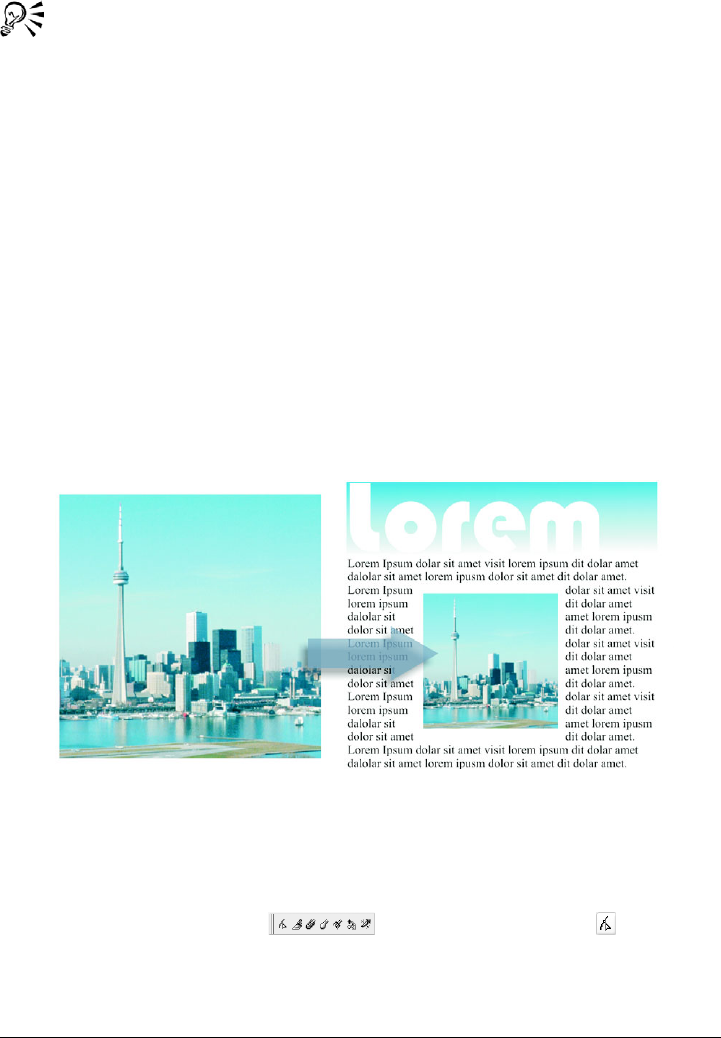
CorelDRAW: Working with bitmaps 241
You can import a bitmap in its original size by pressing Spacebar when you
click the Import button.
Linking to a bitmap results in a smaller file size than importing the bitmap
directly.
Cropping and editing bitmaps
After you add a bitmap to a drawing, you can crop, resample, and resize the bitmap.
Cropping removes unwanted areas of a bitmap. When you resample a bitmap, you can
change the image size, the resolution, or both by adding or removing pixels. For
example, if you make an image larger without resampling, you can lose details because
the image’s pixels are spread over a greater area. By resampling, you can add pixels to
preserve more detail from the original image. Resizing an image maintains the same
number of pixels in a smaller or larger area. For example, you can lose details when you
make an image larger without resampling because the image’s pixels are spread over a
greater area. Upsampling adds pixels to maintain some of the original’s details.
With resampling, you can either increase the resolution of an image by adding
pixels (upsampling) or decrease the resolution by subtracting pixels
(downsampling).
To crop a bitmap
1Open the Shape edit flyout , and click the Shape tool .
2Select a bitmap.
3Drag the bitmap’s corner nodes to the shape you want.
242 CorelDRAW Graphics Suite 12 User Guide
If you want to add a node, double-click the node boundary by using the Shape tool
where you want the node to display.
4Click Bitmaps ` Crop bitmap.
You cannot crop a bitmap comprised of more than one object.
You can also crop a selected bitmap after you drag the bitmap’s corner nodes
by clicking the Crop bitmap button on the property bar.
To resample a bitmap
1Select a bitmap.
2Click Bitmaps ` Resample.
3In the Resolution area, type values in any of the following boxes:
• Horizontal
• Vertical
If you want to maintain the proportions of the bitmap, enable the Maintain aspect
ratio check box.
If you want to maintain the file size, enable the Maintain original size check box.
You can also resample a selected bitmap by clicking the Resample button
on the property bar.
Enable the Anti-alias check box to minimize the jagged appearance of curves.
To resize a bitmap
1Select a bitmap.
2Click Bitmaps ` Resample.
3Choose a unit of measure from the list box beside the Width and Height boxes.
4Type values in any of the following boxes:
• Width
• Height
If you want to minimize the jagged appearance of curves, enable the Anti-alias
check box.

CorelDRAW: Working with bitmaps 243
You can maintain the proportions of the bitmap by enabling the Maintain
aspect ratio check box and typing a value in either the Width or Height box.
You can also resample the bitmap as a percentage of its original size by typing
values in the % boxes.
Applying special effects to bitmaps
You can apply a wide range of special effects to bitmaps, such as three-dimensional and
artistic effects.
Adding plug-in filters to CorelDRAW provides additional features and effects that you
can use to edit images. You can add plug-in filters and you can remove them when you
no longer need them.
Special effect type Description
3-D Lets you create the illusion of three-
dimensional depth. The 3-D effects include
embossing, page curl, and perspective.
Art strokes Lets you apply hand-painted techniques.
The art stroke media and styles include
crayon, impressionist, pastels, watercolor,
and pen and ink.
Blur Lets you blur an image to simulate gradual
change, movement, or speckling. The blur
effects include Gaussian blur, motion blur,
and zoom.
Camera Lets you simulate the effect produced by
diffusion filters of a diffusion lens.
Color transform Lets you create photographic illusions by
using color reduction and replacements. The
color transform effects include half-tones,
psychedelic, and solarizing.
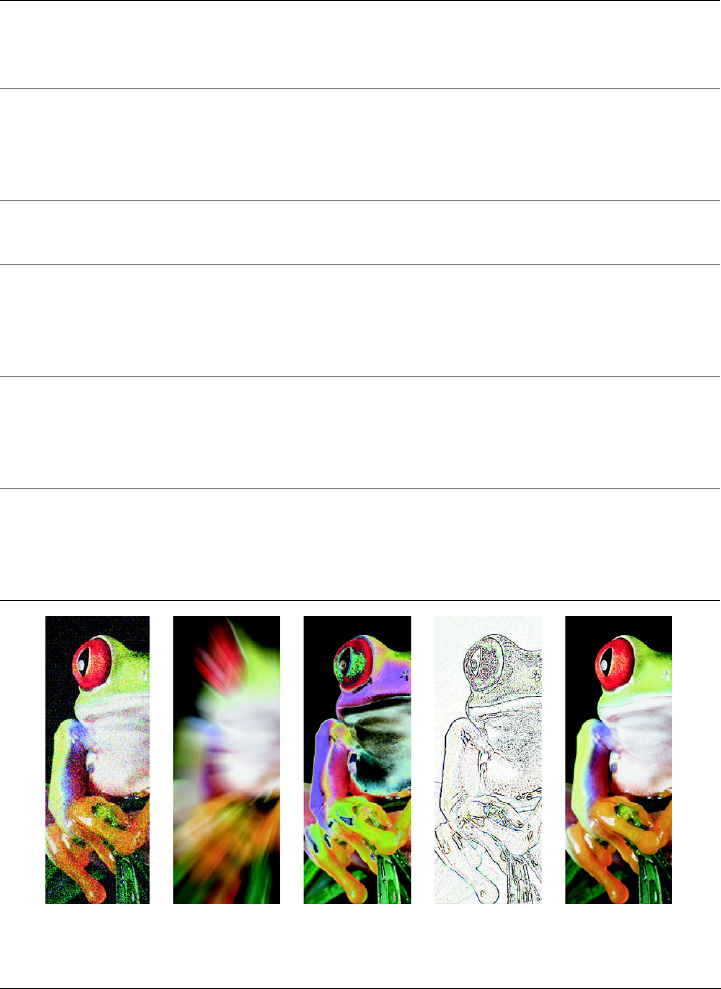
244 CorelDRAW Graphics Suite 12 User Guide
Left to right: Add noise effect, Zoom blur effect, Solarize color transform effect,
Edge detect contour effect, Sharpen effect
Contour Lets you highlight and enhance the edges of
an image. The contour effects include edge
tracing and highlighting.
Creative Lets you apply a variety of textures and
shapes to an image. The creative effects
include fabric, glass block, crystal fragments,
vortex, and stained glass.
Distort Lets you distort image surfaces. The distort
effects include ripples, blocks, swirl, and tile.
Noise Lets you modify the graininess of an image.
The noise effects include adding noise,
applying dust and scratch, and diffusing to
change an image’s granularity.
Sharpen Lets you create a sharpening effect to focus
and enhance edges. The sharpen effects
include accentuating edge detail and
sharpening smooth areas.
Plug-ins Lets you apply effects from a third-party
filter to bitmaps in CorelDRAW. An
installed plug-in appears at the bottom of
the Bitmaps menu.
Special effect type Description
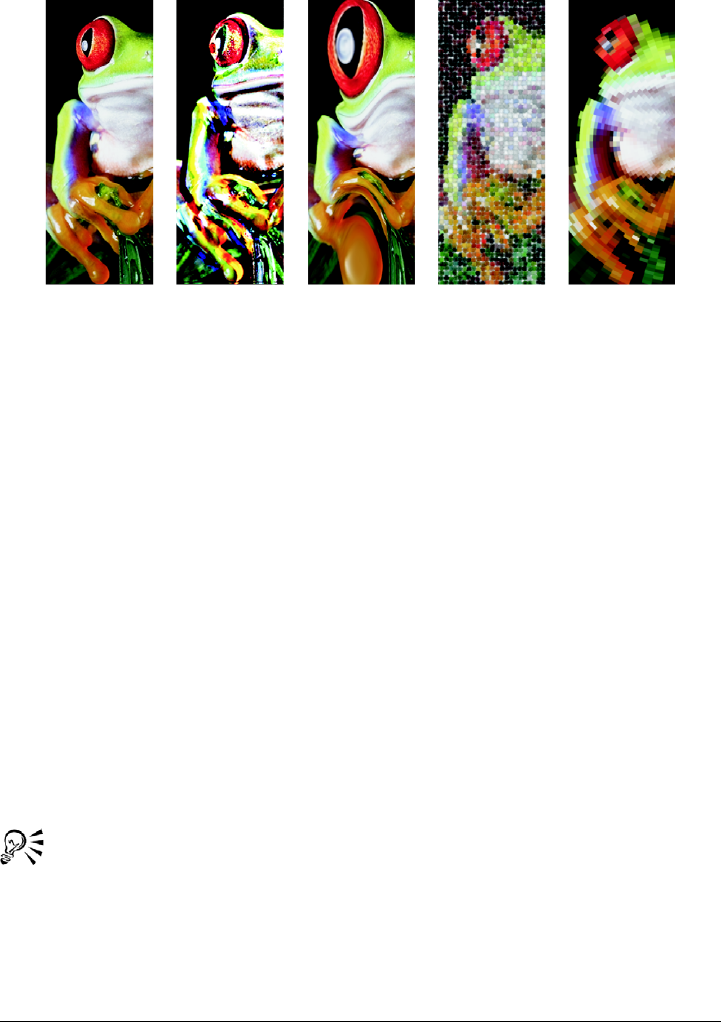
CorelDRAW: Working with bitmaps 245
Left to right: Original image, Emboss effect, Cubist artistic effect, Mosaic
creative effect, Distort pixelate effect
CorelDRAW automatically inflates a bitmap to make a special effect cover the entire
image. You can disable the automatic inflate and manually specify how much you want
to inflate the bitmap.
To apply a special effect
1Select a bitmap.
2Click Bitmaps, choose a special effect type, and click an effect.
3Adjust any special effect settings.
To add a plug-in filter
1Click To o l s ` Options.
2In the list of categories, double-click Wo r ks pac e, and click Plug-ins.
3Click Add.
4Choose a folder containing a plug-in.
To remove a plug-in filter, click a plug-in folder from the Plug-in folders list,
and click Remove.

246 CorelDRAW Graphics Suite 12 User Guide
Applying color and tone effects
CorelDRAW lets you apply color and tone to a bitmap. For example, you can replace
colors, shift them between different color modes and adjust the brightness, lightness,
and darkness of colors.
By applying color and tone effects, you can restore detail lost in shadows or highlights,
remove color casts, correct underexposure or overexposure, and generally improve the
quality of the bitmaps.
You can apply the following color and tone effects.
Effect Description
Contrast enhancement Lets you adjust the tone, color, and contrast
of a bitmap while preserving shadow and
highlight detail. An interactive histogram
lets you shift or compress brightness values
to printable limits. The histogram can also
be adjusted by sampling values from the
bitmap.
Local equalization Lets you enhance contrast near edges to
reveal detail in both light and dark regions.
You can set the height and width around the
region to accentuate contrast.
Sample/Target balance Lets you adjust color values in a bitmap with
sample colors taken from the image. You can
choose sample colors from the dark,
midtone, and light ranges of an image and
apply target colors to each of the sample
colors.
Tone curve Lets you perform color corrections precisely
by controlling individual pixel values. By
changing pixel brightness values, you can
make changes to shadows, midtones, and
highlights.
Brightness-contrast-intensity Lets you adjust the brightness of all colors
and the difference between light and dark
areas.

CorelDRAW: Working with bitmaps 247
Color balance Lets you add cyan or red, magenta or green,
and yellow or blue to selected tones in a
bitmap.
Gamma Lets you accentuate detail in low contrast
areas without affecting shadows or
highlights.
Hue-Saturation-Lightness Lets you adjust the color channels in a
bitmap and change the position of colors in
the spectrum. This effect allows you to
change colors and their richness, as well as
the percentage of white in an image.
Selective color Lets you change color by changing the
percentage of spectrum CMY process colors
from the red, yellow, green, cyan, blue, and
magenta color spectrums in a bitmap. For
example, decreasing the percentage of
magenta in the reds spectrum results in a
color shift toward yellow.
Replace colors Lets you replace one bitmap color with
another color. A color mask is created to
define the color to be replaced. Depending
on the range you set, you can replace one
color or shift an entire bitmap from one color
range to another. You can set the hue,
saturation, and lightness for the new color.
Desaturate Lets you reduce the saturation of each color
in a bitmap to zero, remove the hue
component, and convert each color to its
grayscale equivalent. This creates a grayscale
image without changing the color mode.
Channel mixer Lets you mix color channels to balance the
colors of a bitmap. For example, if a bitmap
has too much red, you can adjust the red
channel in an RGB bitmap to improve image
quality.
Effect Description

248 CorelDRAW Graphics Suite 12 User Guide
To apply a color or tone effect
1Select a bitmap.
2Click Effects ` Adjust, and click a color or tone effect.
3Specify any settings.
Removing dust and scratch marks from bitmaps
You can quickly improve the appearance of a bitmap by removing dust and scratch
marks. The dust and scratch filter works by eliminating the contrast between pixels that
exceed the contrast threshold you set. You can set a radius to determine how many
pixels are affected by the changes. The settings you choose depend on the size of the
blemish and the area surrounding it. For example, if you have a white scratch that is 1
or 2 pixels wide on a dark background, you can set a radius of 2 or 3 pixels and set the
contrast threshold higher than if the same scratch was on a light background.
To remove dust and scratch marks from a bitmap
1Click Effects ` Correction ` Dust and scratch.
2Move the following sliders:
• Radius — lets you set the range of pixels used to produce the effect. Set the
radius as low as possible to retain image detail.
• Threshold — lets you set the amount of noise reduction. Set the threshold as
high as possible to retain image detail.
From here
For more information about In the Help index, see
Inflating bitmaps manually bitmaps, inflating
Using Digimarc watermarks to identify
bitmaps
watermarks
Working with colors in bitmaps colors, bitmaps
Transforming color and tone effects tone, effects in bitmaps

CorelDRAW: Changing color modes in bitmaps 249
Changing color modes in bitmaps
Changing an image to another color mode, such as RGB, CMYK or Grayscale,
changes a bitmap’s color structure.
In this section, you’ll learn about
• changing the color mode of bitmaps
• changing bitmaps to black-and-white images
Changing the color mode of bitmaps
The colors of the images that you work with in CorelDRAW are based on color modes.
Color modes define the color characteristics of images and are described by their
component colors. The CMYK color mode is composed of cyan, magenta, yellow, and
black values and the RGB color mode is composed of red, green, and blue values.
Although you may not be able to see the difference between an image in the CMYK
color mode and an image in the RGB color mode on screen, the images are quite
different. For the same image dimensions, an RGB image has a smaller file size than a
CMYK image and the RGB color space, or gamut, can display more colors. Therefore,
images intended for the Web or desktop printers, which require accurate color fidelity,
are generally in RGB mode. Where accurate print reproduction is needed, such as on a
commercial printing press, images are generally created in CMYK mode. Paletted color
images attempt to preserve color fidelity while reducing the small file size, making them
ideal for on-screen uses.
Each time you convert an image, you may lose color information. For this reason, you
should save an edited image before you change it to a different color mode. For more
information about color modes, see “Working with color” on page 153.
CorelDRAW supports the following color modes:
Color
Black-and-White (1-bit) Grayscale (8-bit)

250 CorelDRAW Graphics Suite 12 User Guide
To change the color mode of a bitmap
1Click a bitmap.
2Click Bitmaps ` Mode, and click one of the following:
• Black and White (1-bit)
• Grayscale (8-bit)
• Duotone (8-bit)
• Paletted (8-bit)
• RGB color (24-bit)
• Lab color (24-bit)
• CMYK color (32-bit)
The mode which the selected bitmap is in will not be available in the menu.
Changing bitmaps to black-and-white images
You can change any image to a black-and-white image. In addition to conversion
settings such as threshold, screen type, and intensity, there are seven conversion options
that affect how the converted images will look.
Duotone (8-bit) Paletted (8-bit)
RGB Color (24-bit) Lab Color (24-bit)
CMYK Color (32-bit)
Conversion
Line art Produces a high-contrast, black-and-white
image. Colors with a grayscale value lower
than the threshold value that you set change
to black, while colors with a grayscale value
higher than the threshold value change to
white.
Color

CorelDRAW: Changing color modes in bitmaps 251
To change a bitmap to a black-and-white image
1Click a bitmap.
2Click Bitmaps ` Mode ` Black-and-white (1-bit).
3Choose an option from the Conversion list box.
4Move the Intensity slider.
If you want to view different parts of the image, you can drag the image in the
Preview window.
The Intensity slider is not available for the Halftone conversion option.
Ordered Organizes the gray levels into repeating
geometric patterns of black and white pixels.
Solid colors are emphasized and image edges
are hard. This option is best suited for
uniform colors.
Halftone Creates different shades of gray by varying
the pattern of black and white pixels in an
image. You can choose the screen type, angle
for the halftone, lines per unit, and the unit
of measure.
Cardinality-Distribution Creates a textured look by applying a
calculation and distributing the result to the
screen.
Jarvis Applies the Jarvis algorithm to the screen.
This form of error diffusion is suitable for
photographic images.
Stucki Applies the Stucki algorithm to the screen.
This form of error diffusion is suitable for
photographic images.
Floyd-Steinberg Applies the Floyd-Steinberg algorithm to
the screen. This form of error diffusion is
suitable for photographic images.
Conversion

252 CorelDRAW Graphics Suite 12 User Guide
From here
For more information about In the Help index, see...
Changing bitmaps to the paletted color
mode
paletted color mode
Changing bitmaps to duotones duotone color mode

CorelDRAW: Creating Web-enabled objects 253
Creating Web-enabled objects
CorelDRAW lets you create Web-enabled objects for optimum viewing in browsers.
You can convert text to a Web-compatible format so that it can be edited in a browser,
add Web form objects such as options and check boxes, and create interactive rollovers
from CorelDRAW objects.
In this section, you’ll learn about
• using preset Internet objects
• optimizing bitmaps for the World Wide Web
• creating rollovers
• creating Web-compatible text
• working with bookmarks and hyperlinks
Using preset Internet objects
CorelDRAW provides you with a set of Internet objects, such as options, Java™ applets,
text edit boxes, and check boxes that you can use when designing an HTML page. You
can customize Internet objects by adjusting their parameters.
If a document contains form-related Internet objects such as check boxes, you need a
CGI script address to enable these Internet objects to work once the document is
published to the World Wide Web as an HTML file.
After you create a preset Internet object, you can save it as an HTML page. For
information about optimizing, see “Optimizing bitmaps for the World Wide Web” on
page 254.
254 CorelDRAW Graphics Suite 12 User Guide
To add or customize an Internet object
All Internet objects, except for Java applets and embedded files, require a CGI
script address to function properly after you publish a drawing to the World
Wide Web.
To save objects to a Web-compatible format
1Click File ` Publish to the Web ` HTML.
2Choose the HTML layout from the HTML layout method list box.
3Choose a destination folder.
4Choose an image subfolder.
5Choose an export range.
You can check to see whether there are any issues by clicking the Issues tab.
Optimizing bitmaps for the World Wide Web
You can save objects and optimize them for the World Wide Web. When you optimize
an image for the Web, you can export to a GIF, JPEG, JPEG 2000, PNG 8-bit, and
To Do the following
Add an Internet object Click Edit ` Insert Internet object, and
click the object you want. Click where you
want to place the Internet object.
Customize an Internet object Right-click an Internet object, and click
Properties. In the Object properties
docker, click the Internet tab, and specify
the attributes you want to add.
Add a CGI Script address to an Internet
object
Deselect any objects, right-click, and click
Properties. Click the Form tab, and type
the CGI script address in the URL of CGI
script box. Choose an HTML equivalent
method from the Method list box and a
frame type from the Ta r g e t list box.
CorelDRAW: Creating Web-enabled objects 255
PNG 24-bit file type, choose a Web preset, and compare the previewed results. The
Web presets are optimized for color, dithering, compression, and smoothing, depending
on the file type you choose. You can compare up to four file types by viewing their
download speed, image quality, file size, color range, and compression size as well as by
panning and zooming in the image. You can also add and delete Web presets of your
own.
To save and optimize a bitmap to Web-compatible format
1Click File ` Publish to the Web ` Web image optimizer.
2Choose a speed from the Connection speed list box.
3Choose one of the following pane display options:
• Single pane
• Double-vertical panes
• Double-horizontal panes
• Four panes
4Keep one pane as the original image. In one or more of the other panes, choose
from the following list boxes below the preview window:
• File type
• Web preset
If no objects are selected, all of the active page’s content is exported.
You can also
Edit preset settings for a single preview area Click Advanced. In the Export dialog box,
customize the preset options. If you select
GIF or PNG8 file formats, you can modify
the color palette and settings in the Convert
to paletted dialog box.
Save the current configuration of settings for
a preview area
Click the Save settings button for each
area where you want to save the settings.
Save a custom preset Click Add .
Delete a preset Click Delete .
Display file information below each preview
window
Click Preview.
256 CorelDRAW Graphics Suite 12 User Guide
Some browsers require a plug-in to display JPEG 2000 files.
You can compare file types with the original image by choosing Original from
the File type list box in one of the panes.
Creating rollovers
Rollovers are interactive objects that change in appearance when you click or point to
them. You can create rollovers using objects.
To create a rollover, you add the following rollover states:
•Normal — the default state of a button when no mouse activity is associated with
the button
•Over — the state of a button when the pointer passes over it
•Down — the state of a clicked button
To edit the rollover states, you can view the rollover states and their properties.
Rollovers showing Normal (left), Over (center), and Down (right) states
Pan to another section of the image Drag in the preview window of the original
image.
Zoom in the preview window Choose a magnification from the Zoom
level list box.
You can also

CorelDRAW: Creating Web-enabled objects 257
To publish a rollover to the Internet, you must save the rollover to a Web-compatible
file format by publishing to HTML or to the Macromedia Flash™ (SWF) format. For
information on publishing to the Web, see “Publishing to the Web” on page 263. For
more information about creating and editing objects such as rollovers, see “Working
with objects” on page 75.
To create a rollover object
1Select an object.
2Click Effects ` Rollover ` Create rollover.
You cannot create a rollover from a clone.
To edit a rollover object
1Select an object.
2Click Effects ` Rollover ` Edit rollover.
3Specify the attributes of each state.
4Click Effects ` Rollover ` Finish editing rollover.
You cannot close a drawing in which you are editing a rollover. You must finish
editing first.
You can also edit a rollover object by clicking the Edit rollover button on the
Internet toolbar.
To view the rollover states
1Click Window ` To o l b a r s ` Internet.
If the Internet command is not available, click To o l s ` Options, click Command
bars in the Wor ksp ac e, Customization list of categories, and ensure the Internet
check box is enabled.
2On the Internet toolbar, choose between the Normal, Over, and Down states
from the Active rollover state list box.

258 CorelDRAW Graphics Suite 12 User Guide
You can preview a rollover object’s states in the drawing page by clicking View
` Enable rollover. To quit previewing the rollover so that you can edit it, click
View ` Enable rollover. You cannot undo while previewing a rollover.
To view rollover properties
1Click Window ` Dockers ` Object manager.
2Click the page and layer where the rollover resides.
3Click the rollover name, and expand the Normal, Over, and Down states.
Creating Web-compatible text
When you convert paragraph text to Web-compatible text, you can edit the text of the
published document in an HTML editor. If you are publishing a drawing to the Web as
HTML, you can change text font characteristics, including the font type, size, and style.
The Web-compatible text sizes, numbered 1 through 7, correspond to particular point
sizes between the 10-point and 48-point range. For more information about formatting
text, see “Formatting paragraph text” on page 226.
The default Web font style is used automatically, unless you override it with another
font. If you choose to override it, the default font is used when visitors to your Web site
don’t have the same font installed on their computers. The bold, italic, and underline
text styles are also available. You can apply uniform fills, but not outlines, to Web-
compatible text.
Any non-Web-compatible text in your drawing is converted to bitmaps when you
publish your drawing to the World Wide Web as HTML.
To make text Web-compatible
To Do the following
Change paragraph text to Web-compatible
text
Select the paragraph text. Click Te x t `
Make text Web compatible.

CorelDRAW: Creating Web-enabled objects 259
Ensure that the Web-compatible text does not intersect or overlap other
objects or extend beyond the boundaries of the drawing page; otherwise the
text will be converted to a bitmap, and it will lose its Internet properties.
Artistic text cannot be converted to Web-compatible text and is always treated
as a bitmap. However, you can convert it to paragraph text and then make it
Web compatible. For information on converting text, see “Finding, editing,
and converting text” on page 217.
Working with bookmarks and hyperlinks
CorelDRAW lets you create bookmarks and hyperlinks in your Web document. You can
apply these to rollovers, bitmaps, and other objects.
Bookmarks
To create an internal link in an HTML file, you can assign a bookmark to text or to an
object. You can then assign a Uniform Resource Locator (URL) to an object that links
to the bookmark. The object containing a URL has a hotspot, an area that activates a
hyperlink when clicked in a browser.
Hyperlinks
Within a document, hyperlinks connect to any object that has been assigned a
bookmark, or the hyperlink can connect to any document on the World Wide Web by
using that document’s URL. You can also set a hotspot that follows the outline of the
object, or fills the object’s bounding box.
CorelDRAW applies a crosshatch pattern to an object containing a hyperlink. You can
change the color of the crosshatch pattern as well as its background fill.
After you create hyperlinks, you can display and verify them.
Make new text Web-compatible Click To o l s ` Options. In the list of
categories, double-click Works p ace , Te x t ,
and click Paragraph. Enable the Make all
new paragraph text frames Web
compatible check box.
To Do the following
260 CorelDRAW Graphics Suite 12 User Guide
To assign a bookmark
1Right-click an object, and click Properties.
2Click the Internet tab .
3Choose Bookmark from the Behavior list box.
4Type the name of the bookmark.
To assign a hyperlink to a bookmark or external Web site
1Right-click an object, and click Properties.
2Click the Internet tab .
3Choose URL from the Behavior list box.
4Type a URL address.
URLs to external Web sites must contain the http:// prefix. Other supported
protocols include mailto:, ftp:, and file:.
You can rename a bookmark and create a hyperlinked bookmarked object from
a document object by using the Internet bookmark manager docker.
To assign crosshatch and background hotspot colors
1Click Window ` Dockers ` Properties.
2Click the Internet tab .
3Open the Cross-hatch color picker , and click a color.
4Open the Background color picker , and click a color.
You can also
Specify what frame will display when the
rollover is clicked
Choose a target frame from the Ta r g e t
list box.
Add a description of the object for text-only
browsers
Type the text in the Alt comments text box.
Define the hotspot area Choose Object shape or Object’s
bounding box from the Define hotspot
using list box.

CorelDRAW: Creating Web-enabled objects 261
If you choose a hyperlinked object first and then change the crosshatch and
background hotspot colors, the change applies to the selected object only. If
you change the hotspot colors with no object selected, the default colors are
changed for this drawing and for future sessions of CorelDRAW.
To display hyperlinked objects
1Click Window ` To o l b a r s ` Internet.
If the Internet command is not available, click To o l s ` Options, click Command
bars in the Wor ksp ac e, Customization list of categories, and ensure the Internet
check box is enabled.
2On the Internet toolbar, enable the Show hotspots button .
All objects to which you’ve assigned URLs display in the crosshatch and
background hotspot colors.
To verify links in a Web document
1Click Window ` Dockers ` Link manager.
2In the list, verify that all URL links display a green check mark.
3Click the Refresh button to verify any broken links.
You can also verify a single link in the Link manager by right-clicking it and
clicking Verify link.
If you want to test a link by opening a URL in a Web browser, right-click the
object, and click Jump to hyperlink in browser.

CorelDRAW: Publishing to the Web 263
Publishing to the Web
You can ensure that your CorelDRAW files and objects publish to HTML successfully
by setting document elements to be Web-compatible, selecting the settings you want,
and checking Preflight issues. You can then publish to HTML. The resulting HTML
code and images can be used in HTML authoring software for creating a Web site or
page.
In this section, you’ll learn about
• preparing files and objects for Web publishing
• publishing to HTML
Preparing files and objects for Web publishing
You can prepare your files and objects for the Web by setting preferences and verifying
the objects before you export them.
The CorelDRAW application provides options for publishing your document to the
World Wide Web. You can determine layout options, set link colors, and select HTML
text preferences. Among the text export options, you can export Web-compatible text
as plain text so that users can copy and reuse the text, or you can export all text as
images so that the text will always display as you designed it.
You can export your graphics to preset JPEG, GIF, or PNG formats. You can also
publish your document as a single image, from which the application creates an image
map. An image map is a hypergraphic whose hotspots link to different URLs —
including pages, locations, and images — when you view the HTML document with a
browser. Note that large image maps might cause slow downloads for those with a slow
Internet connection.
You can check the download times of your Web page objects through a browser preview.
To change text export preferences
1Click To o l s ` Options.

264 CorelDRAW Graphics Suite 12 User Guide
2In the list of categories, double-click Document, Publish to Web, and click Te x t .
3Enable one of the following options:
• Export HTML compatible text as text — exports the Web-compatible text as
text
• Export all text as images — exports the text as images and ensures
compatibility for all browsers
• Export HTML compatible text as text using TrueDoc font technology —
exports the text using TrueDoc
Exporting all text as images can increase download times because of the larger
file sizes.
To change link export preferences
1Click To o l s ` Options.
2In the list of categories, double-click Document, Publish to the Web, and click
Links.
3Enable the Underline check box.
4Enable the following check boxes, and select a color for each:
• Normal link
• Active link
• Visited link
The link colors set in the Options dialog box are exported with the file,
eliminating any conflict between link color and your document’s page
background color.
To change image export preferences
1Click To o l s ` Options.
2In the list of categories, double-click Document, Publish to the Web, and click
Image.
3In the Export image using area, enable one of the following image format options:
• JPEG
• GIF
• PNG

CorelDRAW: Publishing to the Web 265
4Set any bitmap options.
To change HTML layout export preferences
1Click To o l s ` Options.
2In the list of categories, double-click Document, and click Publish to the Web.
3Type values in the following boxes:
• Position tolerance — lets you specify the number of pixels text can be
automatically nudged to avoid introducing rows or columns that are only a few
pixels in size
• Image white space — lets you specify the number of pixels that can occur in an
empty cell before it’s merged with an adjacent cell. This lets you avoid splitting a
single graphic that spans adjacent cells. Cells or tables are used to position
Internet objects in your Web document when you choose the HTML Tables
layout method
• Position white space — lets you specify the amount of white space allowed in
an image
To preview a Web page
1Click File ` Publish to the Web ` HTML.
2Click the General tab.
3Click Browser preview.
To set Web preflight options
1Click File ` Publish to the Web ` HTML.
2Click the Issues tab.
3Click Settings.
4In the Issues to check for list, expand the Publishing to Web tree.
You can also
Apply anti-aliasing Enable the Anti-alias check box.
Create a Client-side image map Enable the Client check box.
Create a Server-side image map Enable the Server check box, and choose a
format.

266 CorelDRAW Graphics Suite 12 User Guide
5Deselect the issues you do not want to check.
Publishing to HTML
When publishing a document or selection to the World Wide Web, you can choose
several options, such as image format, HTML layout, export range, and file transfer
protocol (FTP) site parameters.
To publish to the Web
1Click File ` Publish to the Web ` HTML.
2Set the following options in the Publish to the Web dialog box:
• General — contains options for HTML layout, folders for HTML file and
images, and FTP site and export range. You can also select, add, and remove
presets.
• Details — contains details of HTML files produced, and allows you to change
the page name and file name
• Images — lists all images for the current HTML export. You can set individual
objects to JPEG, GIF, and PNG formats. Click Options to select presets for each
image type.
• Advanced — provides options for generating JavaScript® for rollovers and
cascading style sheets, maintaining links to external files, and embedding fonts
• Summary — shows statistics for files according to various download speeds
• Issues — displays a list of potential issues, including explanations, suggestions,
and tips
CorelDRAW assigns the extension .htm to documents you publish in the
HTML format. By default, HTML files share the same name as the
CorelDRAW (CDR) source file and are saved in the last folder you used to store
exported Web documents.
From here
For more information about In the Help index, see...
File formats file formats
Creating rollovers rollovers, creating

CorelDRAW: Managing projects 267
Managing projects
The Object Data Manager is an advanced feature that is particularly useful as a project
management tool when you create or supervise a large project. Using the Object Data
Manager is like having a small spreadsheet program, like Quattro Pro® or Microsoft®
Excel, within your graphics program. It lets you track expenses, deadlines,
assignments, progress, or anything else you need to organize. You can enter many
types of project data about individual objects or groups of objects.
In this section, you’ll learn about
• setting up the project database
• assigning and copying object data
• viewing an object data summary
Setting up the project database
Before you assign project data to objects in a drawing, you need to know what
information you want to display. By default, CorelDRAW creates four data fields:
Name, Cost, Comments, and CDRStaticID. The first three fields can be edited or
deleted as required. The CDRStaticID field is hidden; it is used by CorelDRAW to
identify objects, and it can’t be edited or deleted.
You can create and assign as many data fields as you want, as long as they use permitted
format variables. For more information about assigning data fields, see “Assigning and
copying object data” on page 269.
At any time, you can change the setting, such as the name or format, of a data field. If
you require custom fields, you can define their formats using four basic field formats:
General, Date/time, Linear/angular, and Numeric. Each of these formats provides a
series of common settings. If the preset formats in CorelDRAW don’t provide the
information you want in your data summary, you can create your own custom formats
using the variables available for the format type you’re using. The field format you select
is used for all objects in the active drawing.

268 CorelDRAW Graphics Suite 12 User Guide
You can reorder fields to display them in a logical order on the data summary. You can
also delete any data field except CDRStaticID. When you delete a field, you also delete
all data entered for that field in the active document.
To add a data field
1Click To o l s ` Object Data Manager.
2In the Object data docker, click the Open Field Editor button .
3In the Object data field editor dialog box, click Create new field.
4To change the name of the field you created, double-click the field, type a new
name, and press Enter.
5In the Add field to area, enable one or both of the following check boxes:
• Application defaults — stores the new field in the application
• Document defaults — stores the new field in the current document
You can also use this procedure to change the settings of an existing data field.
You can also
Change the format of a data field Select the data field, and click Change in the
Format area. In the Format definition
dialog box, enable the option beside the
format type you want to use, and choose a
format from the Format type list.
Create a custom format for a data field Select the data field, and click Change in the
Format area. In the Format definition
dialog box, enable the option beside the
format type you want to create. Type the
format in the Create box, and press Enter.
Delete a data field Choose the name of the data field from the
list. To choose multiple fields, hold down
Ctrl, and click the names in the list. Click
Delete field(s).
CorelDRAW: Managing projects 269
Assigning and copying object data
After creating all the data fields you want for a drawing, you can create a database. The
Object data docker and the Object Data Manager provide all the commands and
features you need to add and edit object information.
The Object data docker is best for entering data for single objects. It lets you add, edit,
and delete object data.The Object Data Manager, in contrast, is best for entering and
editing data for multiple objects. It provides many of the editing features available in
popular spreadsheet applications.
You can use one object’s data entries to update another object’s data entries. This
function does not replace an object’s data entries; rather, it appends fields and data
where appropriate.
To add or edit data for an object
1Select the object using the Pick tool .
2Click To o l s ` Object Data Manager.
3Select a data field. Type text in the Value column for the field, and press Enter.
4Repeat step 3 to add data to other fields.
To add or edit data for multiple objects
1Select the objects using the Pick tool .
2Click To o l s ` Object Data Manager.
3In the Object data docker, click the Open spreadsheet button .
4In the Object Data Manager window, click a cell, and type the appropriate data.
Press Enter to assign the entry to the cell, the fields, and the objects.
To copy data from one object to another
1Using the Pick tool , select the object to which you want to copy data.
2Click To o l s ` Object Data Manager.
You can also
Clear one field Click the Clear field button .
Clear all fields Click the Clear all fields button .

270 CorelDRAW Graphics Suite 12 User Guide
3In the Object data docker, click the Copy data from button .
4Click the object from which you want to copy data.
Viewing an object data summary
The Object Data Manager provides the commands and functions you need to view your
object data summary. It summarizes the information you’ve assigned to the objects in a
drawing. While the Object Data Manager can be used to view and edit data associated
with a single object, its main purpose is to help you view and manage large amounts of
data associated with multiple objects contained in various groups in a drawing.
You can change how object data displays:
• You can display individual group subtotals for fields shared by multiple groups. Use
this command when more than one group of objects is displayed in a datasheet.
This command applies only to fields with numeric formats.
• To create a visible distinction between groups in a column, you can place a two-
space indent before data relating to objects in groups.
• You can have the Object Data Manager automatically total the values in the
selected column. The total is displayed at the bottom of the column.
To view an object data summary
1Select the object or objects using the Pick tool .
If you want to view an object data summary for the entire document, click Edit `
Select all ` Objects.
2Click To o l s ` Object Data Manager.
3In the Object data docker, click the Open spreadsheet button .
From here
For more information about In the Help index, see...
customizing and printing object data
summaries
object data summaries, viewing

CorelDRAW: Printing 271
Printing
CorelDRAW provides extensive options for printing your work.
In this section, you'll learn about
• printing your work
• laying out print jobs
• previewing print jobs
Printing your work
In the CorelDRAW application, you can print one or more copies of the same drawing.
You can specify what to print, as well as which parts of a drawing to print; for example,
you can print selected vectors, bitmaps, text, or layers.
Before printing a drawing, you can specify printer properties, including paper size and
device options.
To set printer properties
1Click File ` Print.
2Click the General tab.
3Click Properties.
4Set any properties in the dialog box.
To print your work
1Click File ` Print.
2Click the General tab.
3Choose a printer from the Name list box.
4Type a value in the Number of copies box.
If you want the copies collated, enable the Collate check box.

272 CorelDRAW Graphics Suite 12 User Guide
5Enable one of the following options:
• Current document — prints the active drawing
• Current page — prints the active page
• Pages — prints the pages that you specify
• Documents — prints the documents that you specify
• Selection — prints the objects that you have selected
You must select objects before printing a selection.
The Collate check box is available only for documents with more than one
page.
To print selected vectors, bitmaps, or text
1Click File ` Print.
2Click the Misc tab.
3In the Proofing options area, enable any of the following check boxes:
• Print vectors
• Print bitmaps
• Print text
You can print graphics in full color, monochrome, or grayscale, by enabling the
corresponding check boxes in the Bitmap downsampling area.
You can print all text in black by enabling the Print all text in black check
box.
To print selected layers
1Click To o l s ` Object manager.
2Click the printer icon that corresponds to a layer.
If the icon appears grayed, the layer will not print.
3Click File ` Print.

CorelDRAW: Printing 273
Laying out print jobs
You can lay out a print job by specifying the size, position, and scale. Tiling a print job
prints portions of each page on separate sheets of paper that you can assemble into one
sheet. You would, for example, tile a print job that is larger than your printer paper.
If the orientation of a print job differs from the orientation specified in the printer
properties, a message prompts you to adjust the paper orientation of the printing
device. You can disable this prompt, so that the printer adjusts paper orientation
automatically.
To specify the size and position of a print job
1Click File ` Print.
2Click the Layout tab.
3Enable one of the following options:
• As in document — maintains the image size, as it is in the document
• Fit to page — sizes and positions the print job to fit to a printed page
• Reposition images to — lets you reposition the print job by choosing a position
from the list box
Enabling the Reposition images to option lets you specify size, position, and
scale in the corresponding boxes.
To tile a print job
1Click File ` Print.
2Click the Layout tab.
3Enable the Print tiled pages check box.
4Type values in the following boxes:
• Tile overlap — lets you specify the number of inches by which to overlap tiles
• % of page width — lets you specify the percentage of the page width the tiles
will occupy
Enable the Tiling marks check box to include tiling alignment marks.

274 CorelDRAW Graphics Suite 12 User Guide
To change the page orientation prompt
1Click To o l s ` Options.
2In the list of categories, double-click Global, and click Printing.
3Choose Page orientation prompt from the Option list.
4Choose one of the following from the Setting list box:
• Off — always match orientation
• On — ask if orientations differ
• Off — don't change orientation
Previewing print jobs
You can preview your work to show how the position and size of the print job will appear
on paper. For a detailed view, you can zoom in on an area. You can view how the
individual color separations will appear when printed. You can also increase the speed
of a print preview by hiding the graphics.
Before printing your work, you can view a summary of issues for a print job to find
potential printing problems. For example, you can check the current print job for print
errors, possible print problems, and suggestions for resolving issues.
To preview a print job
•Click File ` Print preview.
You can quickly preview a print job in the Print dialog box by clicking File `
Print, and clicking the Mini preview button .
To magnify the preview page
1Click File ` Print preview.
2Click View ` Zoom.
3Enable the Percent option, and type a value in the box.
You can also magnify the preview page by choosing a preset zoom level.
You can also zoom in on a portion of the print preview by clicking the Zoom
tool in the toolbox and marquee selecting an area.

CorelDRAW: Printing 275
To preview color separations
1Click File ` Print preview.
2On the property bar, click the Enable color separations button .
You can preview the composite by clicking View ` Preview separations `
Composite.
You can view individual color separations by clicking the tabs at the bottom of
the application window.
To hide or display graphics
1Click File ` Print preview.
2Click View ` Show image.
A check mark beside the menu command name indicates that graphics are
displayed.
When the Show image menu command is disabled, the print job is
represented by a bounding box that you can use to position and size the job.
To view a summary of issues for a print job
1Click File ` Print.
2Click the Issues tab.
If you don't want Preflight to check for certain issues, click Settings, double-click
Printing, and disable any check boxes that correspond to issues you want
overlooked.
You can save settings by clicking the Add preflight settings button and
typing a name in the Save preflight style box.

276 CorelDRAW Graphics Suite 12 User Guide
From here
For more information about In the Help index, see...
Applying print styles print styles
Fine-tuning print jobs printing, fine-tuning
Printing colors accurately printing, colors accurately
Printing to a PostScript printer printing, PostScript

CorelDRAW: Commercial printing 277
Commercial printing
With CorelDRAW, you can prepare a print job for commercial printing.
In this section, you'll learn about
• preparing a print job for a service bureau
• working with imposition layouts
• printing printer's marks
• maintaining OPI links
• printing color separations
• working with color trapping
• specifying In-RIP trapping settings
•printing to film
Preparing a print job for a service bureau
You can use the Prepare for service bureau wizard to guide you through the process of
sending a file to a service bureau. The wizard simplifies processes such as creating
PostScript and PDF files; gathering different pieces required for outputting an image;
and copying the original image, embedded image files, and fonts to a user-defined
location.
You can print a drawing to a file, which lets the service bureau send the file directly to
an output device. If you are unsure about which settings to choose, consult the service
bureau.
You can include a job information sheet with all the pre-press settings that you have
specified.
For more information about commercial printing, see “Understanding commercial
printing” in the Help.

278 CorelDRAW Graphics Suite 12 User Guide
To use the Prepare for Service Bureau wizard
1Click File ` Prepare for service bureau.
2Enable one of the following options:
• Gather all files associated with this document
• Choose a profile provided by your service bureau
The PDF file settings for the service bureau and the PDF for prepress settings
are identical. For information about the PDF for prepress style settings, see
“Saving documents as PDF files” on page 291.
To create a service bureau profile, you need the Service Bureau Profiler utility,
which you can custom install with CorelDRAW.
To print to a file
1Click File ` Print.
2Click the General tab.
3Enable the Print to file check box.
4Click the flyout arrow, and click one of the following commands:
• For Mac® — saves the drawing to be readable on a Macintosh computer
• Single file — prints pages to a single file
• Pages to separate files — prints pages to separate files
• Plates to separate files — prints plates to separate files
5Click Print.
6Choose one of the following from the Save as type list box:
• Print file — saves the file as a PRN file
• PostScript file — saves the file as a PS file
7Choose the folder where you want to save the file.
8Type a filename in the File name box.
If you prefer not to prepare PostScript files, service bureaus equipped with the
application in which you created your work can take the original files (for
example, CorelDRAW files) and apply the required prepress settings.

CorelDRAW: Commercial printing 279
To include a job information sheet with the print job
1Click File ` Print.
2Click the Misc tab.
3Enable the Print job information sheet check box.
4Click Info settings.
5In the Information area, disable any of the options.
6In the Destination area, enable one of the following:
• Send to text file
• Send to printer
Working with imposition layouts
Working with imposition layouts lets you print more than one page of a document on
each sheet of paper. You can choose a preset imposition layout to create documents such
as magazines and books to print on a commercial printing press; produce documents
that involve cutting or folding, such as mailing labels, business cards, pamphlets, or
greeting cards; or print multiple thumbnails of a document on one page. You can also
edit a preset imposition layout to create your own layout.
You can select a binding method by choosing from three preset binding methods, or you
can customize a binding method. When you choose a preset binding method, all but
the first signature are automatically arranged.
You can arrange pages on a signature manually or automatically. When you arrange the
pages automatically, you can choose the angle of the image. If you have more than one
page across or down, you can specify the size of gutters between pages; for example, you
can choose the automatic gutter spacing option, which sizes gutters so that the
document's pages fill the entire available space in the layout.
When printing on a desktop printer, you can adjust the margins to accommodate the
non-printable area of a page. If the margin is smaller than the non-printable area, the
edges of some pages or some printer's marks may be clipped by your printer.
To choose a preset imposition layout
1Click File ` Print.
2Click the Layout tab.
3Choose an imposition layout from the Imposition layout list box.
280 CorelDRAW Graphics Suite 12 User Guide
The layout you choose does not affect the original document, only the way it is
printed.
To edit an imposition layout
1Click File ` Print.
2Click the Layout tab.
3Choose an imposition layout from the Imposition layout list box.
4Click Edit.
5Edit any imposition layout settings.
6Click Save layout on the property bar.
7Type a name for the imposition layout in the Save as box.
When editing an imposition layout, you should save it with a new name;
otherwise the settings for a preset imposition layout will be overwritten.
To select a binding method
1Click File ` Print preview.
2Click the Imposition layout tool .
3Choose Edit basic settings from the What to edit list box on the property bar.
4Type values in the Pages across/down boxes.
If you want the page to be double-sided, click the Single/double sided button .
5Choose one of the following binding methods from the Binding mode list box:
• Perfect binding
• Saddle stitch
• Collate and cut
• Custom binding
If you choose either Perfect binding or Custom binding, type a value in the
corresponding box.
When you click the Single/double sided button for double-sided printing,
and you are printing on a non-duplex printing device, a wizard automatically
CorelDRAW: Commercial printing 281
provides instructions on how to insert the paper into the printer, so that you
can print on both sides of the page.
To arrange pages
1Click File ` Print preview.
2Click the Imposition layout tool .
3Choose Edit page placements from the What to edit list box on the property bar.
4Click one of the following buttons:
• Intelligent auto-ordering
• Sequential auto-ordering
• Cloned auto-ordering
If you want to arrange the page numbering manually, click on the page and specify
the page number in the Page sequence number box.
5Choose an angle from the Page rotation list box.
To edit gutters
1Click File ` Print preview.
2Click the Imposition layout tool .
3Choose Edit gutters and finishing from the What to edit list box on the property
bar.
4Click one of the following buttons:
• Auto gutter spacing
• Equal gutters
5Click one of the following buttons:
• Cut location
• Fold location
If you click the Equal gutters button, you must specify a value in the Gutter
size box.
You can edit the gutters only if you've selected an imposition layout with two
or more pages across and down.

282 CorelDRAW Graphics Suite 12 User Guide
To adjust margins
1Click File ` Print preview.
2Click the Imposition layout tool .
3Choose Edit margins from the What to edit list box on the property bar.
4Click one of the following buttons:
• Auto margins
• Equal margins
If you click the Equal margins button, you must specify values in the To p / l e f t
margin boxes.
When preparing a job for a commercial press, the service bureau may request
minimum margin sizes, such as for page grippers and printer's marks.
Printing printer's marks
Printing printer's marks lets you display information on a page about how a work
should be printed. You can specify the position of the printer's marks on the page.
The available printer's marks are as follows:
•Crop/fold marks — represent the size of the paper and print at the corners of the
page. You can print crop/fold marks to use as guides to trim the paper. If you print
multiple pages per sheet (for example, two rows by two columns), you can choose
to print the crop/fold marks on the outside edge of the page so that all crop/fold
marks are removed after the cropping process, or you can choose to add crop marks
around each row and column. Crop/fold marks ensure that marks appear on each
plate of a separated CMYK file.
•Bleed limit — determines how far an image can extend beyond the crop marks.
When you use a bleed to extend the print job to the edge of the page, you must set
a bleed limit. A bleed requires that the paper you are printing on is larger than the
size of paper you ultimately want, and the print job must extend beyond the edge
of the final paper size.
•Registration marks — are required to line up film for proofing or printing plates
on a color press. They print on each sheet of a color separation.
•Color calibration bars — are color scales that print on each sheet of a color
separation and ensure accurate color reproduction. To see calibration bars, the page
size of the print job must be larger than the page size of the work you are printing.

CorelDRAW: Commercial printing 283
•Densitometer scale — is a series of gray boxes ranging from light to dark. These
boxes are required to test the density of halftone images. You can position the
densitometer scale anywhere on the page. You can also customize the levels of gray
that appear in each of the seven squares on the densitometer scale.
•Page numbers — helps you collate pages of an image that do not include any
page numbers or do not contain page numbers that correspond to the actual
number of pages.
•File information — prints file information, such as, the color profile; halftone
settings; name, date, and time the image was created; plate number; and job name.
To print crop and fold marks
1Click File ` Print.
2Click the Prepress tab.
3Enable the Crop/fold marks check box.
If you want to print only the exterior crop/fold marks, enable the Exterior only
check box.
To print crop and fold marks, the paper on which you print must be 0.5 inches
larger on all sides than the page size of the image that you are printing.
To set crop and fold marks, see “To edit gutters” on page 281.
To print composite crop/fold marks
1Click To o l s ` Options.
2In the list of categories, double-click Global, and click Printing.
3Choose Composite crop marks from the Option list.
4Choose Output in CMYK from the Setting list box.
To set a bleed limit
1Click File ` Print.
2Click the Layout tab.
3Enable the Bleed limit check box.
4Type a value in the Bleed limit box.

284 CorelDRAW Graphics Suite 12 User Guide
Usually, a bleed limit of .125 to .25 inches is sufficient. Any object extending
beyond that uses memory needlessly and may cause problems when you print
multiple pages with bleeds on a single sheet of paper.
To print registration marks
1Click File ` Print.
2Click the Prepress tab.
3Enable the Print registration marks check box.
4Choose a registration mark style from the Style list box.
To print registration marks, the paper on which you print must be 0.5 inches
larger on all sides than the page size of the image that you are printing.
To print color calibration bars and densitometer scales
1Click File ` Print.
2Click the Prepress tab.
3In the Calibration bars area, enable any of the following check boxes:
• Color calibration bar
• Densitometer scales
If you want to customize the levels of gray in one of the densitometer scale squares,
choose a number from the Densities list (lower values represent lighter squares)
and type a new density for that square.
To print page numbers
1Click File ` Print.
2Click the Prepress tab.
3Enable the Print page numbers check box.
If you want to position the page number inside the page, enable the Position
within page check box.
To print file information
1Click File ` Print.

CorelDRAW: Commercial printing 285
2Click the Prepress tab.
3Enable the Print file information check box.
4Type a job name in the Job name/slug line box.
If you want to position the file information inside the page, enable the Position
within page check box.
To position printer's marks
1Click File ` Print preview.
2Click the Marks placement tool .
3Click the Auto-position marks rectangle button on the property bar.
4Type values in the Marks alignment rectangle boxes.
You can also change the position of printer's marks by clicking on a printer's
mark icon in the print preview window and dragging the bounding box.
If you want to affix printer's marks to the object's bounding box instead of to
the page bounding box, click the Prepress tab in the Print dialog box, and
enable the Marks to objects check box.
Printing color separations
When you send color work to a service bureau or printing shop, either you or the service
bureau must create color separations. Color separations are necessary because a typical
printing press applies only one color of ink at a time to a sheet of paper. You can specify
the color separations to print, including the order in which they print.
Printing presses produce color using either process color or spot color, or both. You can
convert the spot colors to process colors at printing time. For more information on spot
and process colors, see “Choosing colors” on page 153.
Corel also supports PANTONE® Hexachrome®, a type of printing process that
increases the range of printable colors. Talk to the service bureau about whether you
should use PANTONE Hexachrome color.
When setting halftone screens to print color separations, we recommend that you use
default settings; otherwise, screens can be improperly set and result in undesirable
moiré patterns and poor color reproduction. However, if you are using an imagesetter,
the screen technology should be set to match the type of imagesetter the service bureau

286 CorelDRAW Graphics Suite 12 User Guide
uses. Before customizing a halftone screen, consult the service bureau to determine the
correct setting.
To print color separations
1Click File ` Print.
2Click the Separations tab.
3Enable the Print separations check box.
If you want to print specific color separations, enable the corresponding check box
in the list of color separations.
Although not recommended, you can print separations in color by enabling the
Print separations in color check box in the Options area.
You can change the order in which color separations print, by enabling the Use
advanced settings check box, clicking Advanced, and choosing an order from
the Order list box.
To convert spot colors to process colors
1Click File ` Print.
2Click the Separations tab.
3Enable the Print separations check box.
4Enable the Convert spot colors to process check box in the Options area.
Changing the spot colors to process colors when you print does not affect the
document, only the way it is printed.
To use PANTONE Hexachrome process color
1Click File ` Print.
2Click the Separations tab.
3Enable the Print separations check box.
4Enable the Hexachrome plates check box in the Options area.

CorelDRAW: Commercial printing 287
To customize a halftone screen
1Click File ` Print.
2Click the Separations tab.
3Enable the Print separations check box.
4Enable the Use advanced settings check box.
5Click Advanced.
6Change any of the following settings:
• Screening technology
• Resolution
• Basic screen
• Halftone type
You can set the screen frequency, screen angle, and overprint options for spot
colors as well as process colors. For example, if you have a fountain fill made up
of two spot colors, you can set one to print at 45 degrees and the other at 90
degrees.
Specifying In-RIP trapping settings
In-RIP trapping allows you to specify advanced trapping settings. Before selecting In-
RIP trapping, ensure that your PostScript 3 printer supports In-RIP trapping options.
You can select a trap width — the amount that one color spreads into another. You can
also specify image trap placement, which determines where the trap occurs. You can, for
example, specify whether the trap is a choke or a spread, depending upon the neutral
densities of adjacent colors. Neutral density indicates the lightness or darkness of a color
and helps determine how adjacent colors spread into one another.
You can specify a threshold at which a trap will be created by specifying a step trap limit.
If trap colors are of similar neutral densities, the trap placement will be adjusted
accordingly. The step trap limit specifies a threshold at which a trap will adjust.
Before trapping, you can set the inks; for example, you can set an ink to opaque, as in
the case of a metallic ink, so that nothing shows through it. To reduce the visibility of a
trap, you can decrease the amount of ink color in a trap. This is especially helpful in the
case of pastel colors, contrasting colors, and colors with similar neutral densities.

288 CorelDRAW Graphics Suite 12 User Guide
To select a trap width
1Click File ` Print.
2Click the Separations tab.
3Enable the In-RIP trapping check box.
4Click Settings.
5Type a value in the Tr a p w i d t h box.
If you are trapping to black, type a value in the Black trap width box.
To select In-RIP trapping options, you must have selected PostScript 3 from
the Compatibility list box under the PostScript tab of the Print dialog box.
To specify image trap placement
1Click File ` Print.
2Click the Separations tab.
3Enable the In-RIP trapping check box.
4Click Settings.
5From the Image trap placement list box, choose one of the following placements:
• Neutral density — used to determine the lighter object and thus, the direction
and placement of the trap
• Choke — used to trap a dark foreground object to a light background image
• Spread — used to trap a light foreground object to a dark background image
• Centerline — used when adjacent images and objects have similar neutral
densities or when image density changes along an object's edge
If you want to trap an object to an image, enable the Trap objects to images
option.
To select In-RIP trapping options, you must have selected PostScript 3 from
the Compatibility list box under the PostScript tab of the Print dialog box.
To specify a threshold
1Click File ` Print.
2Click the Separations tab.
3Enable the In-RIP trapping check box.

CorelDRAW: Commercial printing 289
4Click Settings.
5Type a value in one or any of the following boxes:
• Step limit — specifies a threshold between color variations. The lower the
threshold value, the more likely it is that a trap will be created.
• Black limit — specifies the threshold at which process black is considered pure
black
• Black density limit — specifies a neutral density value for the black ink
• Sliding trap limit — specifies the difference between the neutral densities of
adjacent colors at which a trap adjusts (slides) from the darker side of a color edge
toward the centerline. The lower the sliding trap limit, the more gradual the
transition.
To select In-RIP trapping options, you must have selected PostScript 3 from
the Compatibility list box under the PostScript tab in the Print dialog box.
To set inks for trapping
1Click File ` Print.
2Click the Separations tab.
3Enable the In-RIP trapping check box.
4Click Settings.
5Click Ty p e , and for each color separation, select one of the following:
• Tr a n s p a r e n t — the selected ink doesn't get trapped, but anything beneath it
does
• Neutral density — the neutral density of the selected ink determines how it is
treated
• Opaque — the selected ink is treated as opaque
• Opaque ignore — the selected ink doesn't get trapped nor does anything
beneath it
To select In-RIP trapping options, you must have selected PostScript 3 from
the Compatibility list box under the PostScript tab in the Print dialog box.
To select a trap color reduction
1Click File ` Print.
2Click the Separations tab.

290 CorelDRAW Graphics Suite 12 User Guide
3Enable the In-RIP trapping check box.
4Click Settings.
5Type a value in the Trap color reduction box.
A reduction value of 100% indicates no reduction, while a lower value reduces
the neutral density.
To select In-RIP trapping options, you must have selected PostScript 3 from
the Compatibility list box under the PostScript tab in the Print dialog box.
Printing to film
You can set up a print job to produce negative images. An image-setter produces images
on film that may need to be produced as negatives depending on which printing device
you are using. Consult the service bureau or printing shop to determine whether you
can produce images on film.
You can specify to print with the emulsion down. Printing with the emulsion down
produces a backward image on desktop printers.
To print a negative
1Click File ` Print.
2Click the Prepress tab.
3Enable the Invert check box.
Do not choose negative film if you are printing to a desktop printer.
From here
For more information about In the Help index, see...
Working with color trapping color trapping
Printing with the emulsion down printing, to film
Understanding commercial printing commercial printing

CorelDRAW: Publishing to PDF 291
Publishing to PDF
PDF is a file format designed to preserve fonts, images, graphics, and formatting of an
original application file.
In this section, you'll learn about
• saving documents as PDF files
• reducing PDF file size
• preparing PDF files for a service bureau
• optimizing PDF files
Saving documents as PDF files
You can save a document as a PDF file. A PDF file can be viewed, shared, and printed
on any platform provided that users have Adobe® Acrobat®, Adobe® Acrobat®
Reader®, or a PDF-compatible reader installed on their computers. A PDF file can also
be uploaded to an intranet or the World Wide Web. You can also export an individual
selection or an entire document to a PDF file.
When you save a document as a PDF file, you can choose from several preset PDF
styles, which apply settings that are specific to that particular PDF style. For example,
with the PDF for the Web style, the resolution of the images in the PDF file will be
optimized for the World Wide Web. You can also create a new PDF style or edit any
preset style.
If you have used symbols in a document, they will be supported in the PDF file. For
more information on symbols, see “Working with symbols” on page 133.
To save a document as a PDF file
1Click File ` Publish to PDF.
2From the PDF style list box, choose one of the following:

292 CorelDRAW Graphics Suite 12 User Guide
• PDF for document distribution — enables JPEG bitmap image compression,
and is best used for general document delivery. These documents can include
bookmarks and hyperlinks and can be printed on a laser or desktop printer.
• PDF for prepress — enables ZIP bitmap image compression, embeds fonts,
and preserves spot color options best designed for high-end quality printing.
Consult the service bureau for their preferred settings.
• PDF for the Web — enables JPEG bitmap image compression, compresses text,
and includes hyperlinks for publishing the document to the World Wide Web.
• PDF for editing — enables LZW compression, embeds fonts, and includes
hyperlinks, bookmarks, and thumbnails. It displays the PDF file with all the
fonts, with all of the images at full resolution, and with hyperlinks, so that you
can edit the file at a later date.
• PDF/X-1— enables ZIP bitmap image compression, converts all objects to
CMYK, and preserves spot color options. This style contains the basic settings for
prepress and is the standard format used for ad distribution.
• PDF/X-1a — This style is a subset of PDF/X-1. It enables ZIP bitmap
compression and converts objects to CMYK, but does not allow encryption or use
of OPI references.
• PDF/X-3 — This style is a superset of PDF/X-1a. It allows both CMYK and
non-CMYK data (such as Lab or Grayscale) in the PDF file.
3Locate the folder where you want to save the file.
4Type a filename in the File name box.
To save multiple documents as a single PDF file
1Click File ` Publish to PDF.
2Click Settings.
3Click the General tab.
4Enable the Documents option.
5Enable the check box for each document you want to save.
To create a PDF style
1Click File ` Publish to PDF.
2Click Settings.
3In the Publish to PDF dialog box, specify any settings.
4Click the General tab.
CorelDRAW: Publishing to PDF 293
5Click the Add PDF style button beside the PDF style list box.
6Type a name for the style in the Save PDF style as list box.
If you want to delete a PDF style, select the style and click the Delete PDF
style button beside the PDF style list box.
To edit a PDF style
1Click File ` Publish to PDF.
2Click Settings.
3In the Publish to PDF dialog box, specify any settings.
4Click the General tab.
5Click the Add PDF style button beside the PDF style list box.
6Choose a style from the Save PDF style as list box.
If you save changes you make to preset style settings, the original settings will
be overwritten. To avoid this, save any changes to preset style settings with a
new name.
Reducing PDF file size
You can compress bitmap images, text, and line art to reduce the size of a PDF file.
Bitmap image compression options include JPEG, LZW, or ZIP. Bitmap images using
JPEG compression have a quality scale ranging from 2 (high) to 255 (low). The higher
the image quality, the larger the file size.
You can also reduce the size of a PDF file by downsampling color, grayscale, or
monochrome bitmap images or converting complex fills to bitmaps.
To set the bitmap compression in a PDF file
1Click File ` Publish to PDF.
2Click Settings.
3Click the Objects tab.
4Choose one of the following from the Compression type list box:
• None

294 CorelDRAW Graphics Suite 12 User Guide
• LZW
• JPEG
• ZIP
To compress text and line art in a PDF file
1Click File ` Publish to PDF.
2Click Settings.
3Click the Objects tab.
4Enable the Compress text and line art check box.
To downsample bitmap images in a PDF file
1Click File ` Publish to PDF.
2Click Settings.
3Click the Objects tab.
4Enable any of the following check boxes, and type a value in the corresponding
box:
• Color
• Grayscale
• Monochrome
Downsampling color, grayscale, or monochrome bitmap images is effective
only when the resolution of the bitmap image is higher than the resolution
specified in the Bitmap downsampling area.
To render complex fills as bitmaps
1Click File ` Publish to PDF.
2Click Settings.
3Click the Advanced tab.
4Enable the Render complex fills as bitmaps check box.

CorelDRAW: Publishing to PDF 295
Preparing PDF files for a service bureau
Open Prepress Interface (OPI) lets you use low-resolution images as placeholders for the
high-resolution images that appear in your final work. When a service bureau receives
your file, the OPI server substitutes the low-resolution images for the high-resolution
images.
Document settings can be preserved to maintain how a PDF file looks. You can preserve
document overprints, halftone screen information, and spot colors.
Printer's marks provide information to the service bureau about how the work should
be printed. You can specify which printer's marks to include on the page. The available
printer's marks are as follows:
•Crop marks—represent the size of the paper and appear at the corners of the page.
You can add crop marks to use as guides to trim the paper. If you output multiple
pages per sheet (for example, two rows by two columns), you can add the crop
marks on the outside edge of the page so that all crop marks are removed after the
cropping process, or you can choose to add crop marks around each row and
column. A bleed determines how far an image can extend beyond the crop marks.
A bleed requires that the paper you are printing on is larger than the size of paper
you ultimately want, and the image area must extend beyond the edge of the final
paper size.
•Registration marks — are required to line up the film, analog proofs, or print
plates on a color press. Registration marks print on each sheet of a color separation.
•Densitometer scale — is a series of gray boxes ranging from light to dark. These
boxes are required to test the density of halftone images. You can position the
densitometer scale anywhere on the page. You can also customize the levels of gray
that appear in each of the seven squares on the densitometer scale.
•File information — can be printed, including the color profile; name, date, and
time the image was created; and page number.
To preserve document settings in a PDF file
1Choose File ` Publish to PDF.
2Click Settings.
3Click the Advanced tab.
4Enable any of the following check boxes:
• Preserve document overprints — retains the overprint settings of objects in a
document

296 CorelDRAW Graphics Suite 12 User Guide
• Preserve halftone screen information—useful for color separation screening
• Preserve spot colors—instead of converting to RGB, CMYK, or grayscale
To include printer's marks in a PDF file
1Click File ` Publish to PDF.
2Click Settings.
3Click the Prepress tab.
4Enable any of the following check boxes:
• Crop marks
• File information
• Registration marks
• Densitometer scales
If you want to include a bleed, enable the Include bleed check box, and type a
bleed amount in the corresponding box.
The bleed option is only available for Acrobat 4.0, Acrobat 5.0, PDF/X-1,
PDF/X-1a, and PDF/X-3. A third party plug-in is required to view printer's
marks in Adobe Acrobat.
Usually, a bleed amount of .125 to .25 inches is sufficient. Any object
extending beyond that uses memory needlessly and may cause problems when
you print multiple pages with bleeds on a single sheet of paper.
Optimizing PDF files
You can optimize PDF files for different versions of Adobe Acrobat or Acrobat Reader.
You can select a compatibility depending upon what kind of viewer the recipients have.
In CorelDRAW, you can select one of six compatibilities: Acrobat 3.0, Acrobat 4.0,
Acrobat 5.0, PDF/X-1, PDF/X-1a, or PDF/X-3. Different compatibilities have
different options; for example, the bleed option is not available for Acrobat 3.0.
To select a compatibility
1Click File ` Publish to PDF.
2Click Settings.
3Click the General tab.

CorelDRAW: Publishing to PDF 297
4From the Compatibility list box, choose one of the following:
• Acrobat 3.0
• Acrobat 4.0
• Acrobat 5.0
• PDF/X-1
• PDF/X-1a
• PDF/X-3
From here
For more information about In the Help index, see
Including hyperlinks in PDF files PDF, hyperlinks
Including bookmarks in PDF files PDF, bookmarks
Including thumbnails in PDF files PDF, thumbnails
Working with fonts in PDF files PDF, fonts
Specifying the encoding format for PDF files PDF, encoding format
Setting the number of fountain steps in PDF
files
fountain steps, PDF
Choosing an EPS file format PDF, choosing EPS file format
Viewing Preflight summaries for PDF files PDF, preflight

CorelDRAW: Importing and exporting files 299
Importing and exporting files
Your application provides filters that convert files from one format to another when
you import or export files.
In this section, you will learn about
•importing files
•exporting files
Importing files
Your application lets you import files created in other applications. For example, you can
import a Portable Document Format (PDF), JPEG, or Adobe® Illustrator® (AI) file.
You can import a file and place it in the active application window as an object. You can
also resize and center a file as you import it. The imported file becomes part of the active
file. While importing a bitmap, you can resample it to reduce the file size or crop it to
eliminate unused areas of the photo. You can also crop a bitmap to select only the exact
area and size of the image you want to import.
To import a file into an active drawing
1Click File ` Import.
2Choose the folder where the file is stored.
3Choose a file format from the Files of type list box.
4Click the filename.
If the file contains text in a language different from the language of your operating
system, choose the corresponding option from the Code page list box to ensure all
text displays correctly.
5Click Options, and enable any of the following active check boxes:
• Combine multi-layer bitmap — automatically merges the layers within a
bitmap

300 CorelDRAW Graphics Suite 12 User Guide
• Extract embedded ICC profile — lets you save the embedded International
Color Consortium (ICC) profile to the color folder where the application is
installed
• Check for watermark — lets you check the image for a watermark and any
information it contains, such as copyright
• Do not show filter dialog — lets you use the filter's default settings without
opening its dialog box
• Maintain layers and pages — lets you maintain layers and pages when
importing files; if you disable the check box, all layers are combined in a single
layer
6Click Import, and do one of the following:
• Click the drawing page — maintains original file and positions top-left corner
where you click
• Click and drag on the drawing page — resizes the file. The import cursor
displays the dimensions of the resized file as you drag on the drawing page.
• Press Enter — centers the file on the drawing page
Active snapping options are applied to the imported file.
Not all importing options are available for all file formats.
Multi-layered bitmaps can be imported by default.
You can import multiple files. Hold down Shift + click to select consecutive
files in a list. Hold down Ctrl + click to select non-consecutive files.
To resample a bitmap while importing
1Click File ` Import.
2Choose the folder where the image is stored.
3Choose a file format from the Files of type list box.
4Click the filename.
5Click Options, and enable any of the following check boxes:
• Link bitmap externally — lets you link a bitmap externally instead of
embedding it in a file
• Combine multi-layer bitmap — automatically merges the layers within a
bitmap
CorelDRAW: Importing and exporting files 301
• Extract embedded ICC profile — lets you save the embedded International
Color Consortium (ICC) profile to the color folder where the application is
installed
• Check for watermark — lets you check the image for a watermark and any
information it contains such as copyright
• Do not show filter dialog — lets you use the filter's default settings without
opening its dialog box
• Maintain layers and pages — lets you maintain layers and pages when
importing files; if you disable the check box, all layers are combined in a single
layer
6Choose Resample from the list box, and click Import.
7In the Resample image dialog box, type values in any of the following boxes:
• Width — specifies the width of the graphic in a chosen unit of measurement or
as a percentage of its original width
• Height — specifies the height of the graphic in a chosen unit of measurement or
as a percentage of its original height
8In the Resolution area, type values in the following boxes:
• Horizontal — lets you specify the horizontal resolution of the graphic in pixels
or dots per inch (dpi)
• Vertical — lets you specify the vertical resolution of the graphic in pixels or dots
per inch (dpi)
9Click the drawing page.
If a dialog box for the import format opens, specify the options you want. For
detailed information about file formats, see “File formats” in the CorelDRAW
Help.
Not all importing options are available for all file formats.
You can also Do the following
Maintain the width-to-height ratio of the
image
Enable the Maintain aspect ratio check
box.
Change the units of measurement Choose a unit type from the Units list box.
Maintain equal horizontal and vertical
resolution values automatically
Enable the Identical values check box.

302 CorelDRAW Graphics Suite 12 User Guide
To crop a bitmap while importing
1Click File ` Import.
2Choose the folder where the image is stored.
3Choose a file format from the Files of type list box.
4Click the filename.
5Click Options, and enable any of the following active check boxes:
• Link bitmap externally — lets you link a bitmap externally instead of
embedding it in a file
• Combine multi-layer bitmap — automatically merges the layers within a
bitmap
• Extract embedded ICC profile — lets you save the embedded International
Color Consortium (ICC) profile to the color folder where the application is
installed
• Check for watermark — lets you check the image for a watermark and any
information it contains such as copyright
• Do not show filter dialog — lets you use the filter's default settings without
opening its dialog box
• Maintain layers and pages — lets you maintain layers and pages when
importing files; if you disable the check box, all layers are combined in a single
layer
6Choose Crop from the list box, and click Import.
7In the Crop image dialog box, type values in any of the following boxes:
• To p — specifies the area to remove from the top of the graphic
• Left — specifies the area to remove from the left edge of the graphic
• Width — specifies the width of the graphic you want to keep
• Height — specifies the height of the graphic you want to keep
8Click the drawing page.
You can also resize a graphic by dragging the selection handles in the preview
window.
Exporting files
You can export and save images to a variety of file formats that can be used in other
applications. For example, you can export a file to the Adobe Illustrator (AI) or GIF

CorelDRAW: Importing and exporting files 303
format. You can also export a file so that it is optimized for use with a suite of office
productivity applications, such as Microsoft Word.
You can export a file to a selected file format. You can also export a file by saving the
open file under a different name or to a different file format while leaving the open file
in its existing format.
To export a file
1Click File ` Export.
2Choose the folder where you want to save the file.
3Choose a file format from the Save as type list box.
4Type a filename in the File name list box.
5Click Options, and enable any of the following active check boxes:
• Selected only — saves only the objects selected in the active drawing
• Web _s afe _fil enam es — replaces the white space in a filename with an
underscore. Special characters are replaced by characters suitable for Web-based
filenames.
• Do not show filter dialog — suppresses dialog boxes that provide other options
when exporting
6Click Export.
If a dialog box for the export format opens, specify the options you want. For
detailed information about file formats, see “File formats” in the CorelDRAW
Help.
To export to Microsoft Office or WordPerfect Office
1Click File ` Export for Office.
2From the Export to list box, choose one of the following:
You can also Do the following
Compress a file on export Choose a compression type from the
Compression type list box.
Specify information about a file Type any comments you want in the Notes
box.

304 CorelDRAW Graphics Suite 12 User Guide
• Microsoft Office
• Corel WordPerfect Office
3From the Graphic should be best suited for list box, choose one of the following:
• Compatibility
• Editing
4From the Optimized for list box, choose one of the following options:
• Presentation
• Desktop printing
• Commercial printing
5Click OK.
6Locate the folder where you want to save the file.
7Type a filename in the Filename list box.
8From the Save as type list box, choose one of the following file formats:
• PNG - Portable Network Graphics
• BMP - Windows bitmap
Drawings are exported at 96 DPI with color management settings unchanged.
Layers in a drawing are flattened when exported to Microsoft Office or Corel
WordPerfect Office.
To save a file to a different format
1Click File ` Save as.
2Choose the folder where you want to save the file.
3Choose a file format from the Save as type list box.
4Type a filename in the File name list box.
5Click Options, and enable any of the following active check boxes:
• Selected only — saves only the objects selected in the active drawing
• Web _s afe _fil enam es — replaces the white space in a filename with an
underscore. Special characters are replaced by characters suitable for Web-based
filenames.
• Embed fonts using TrueDoc — lets you save fonts to the file using TrueDoc
• Save with embedded VBA project — lets you save, with the file, macros you
have created in the VBA editor
6Click Save.

CorelDRAW: Importing and exporting files 305
Not all of the options or the compression types in the Save drawing dialog box
are available for all file formats.

CorelDRAW: Working with graphic, text, and color styles 307
Working with graphic, text,
and color styles
The CorelDRAW application has three types of styles you can create and apply in
drawings: graphic, text, and color. After you create a style, you can edit it and apply it
to any number of graphic and text objects. When you edit a style, all the unlocked
objects using that style are automatically updated, letting you make design changes to
many objects in one step.
You can save all styles in the active drawing and use them for all new drawings you
create. For more information, see “Saving defaults” in the Help.
In this section, you’ll learn about
• creating, applying, and editing graphic or text styles
• customizing the Graphic and text styles docker
• creating and applying color styles
• editing and sorting color styles
• moving and copying color styles
Creating, applying, and editing graphic or text styles
A style is a set of formatting attributes. When you apply a style to an object, all the
attributes of the style are applied to that object in one step. Styles can save you
considerable time if you must apply the same formatting to several objects.
There are graphic styles and text styles. A graphic style consists of fill and outline
settings that you can apply to graphic objects such as rectangles, ellipses, and curves.
For example, if you have a group of objects in a drawing that use one graphic style, you
can simultaneously change their fill by editing the graphic style. For more information
on applying fills, see “Filling objects” on page 141. For more information about
changing the appearance of outlines, see “Formatting lines and outlines” on page 52.
A text style is a set of text settings such as font type and size. Text styles can also include
fill and outline attributes. For example, you can create a style that applies a 72 point
AvantGarde font with a texture fill. There are two types of text styles: artistic and

308 CorelDRAW Graphics Suite 12 User Guide
paragraph. You can also change the properties of default artistic and paragraph text. For
example, you can change the properties of default artistic text, so that every artistic text
object you create has the same formatting. For information about default text, see
“Changing the appearance of text” on page 215.
You can create a graphic or text style from the properties of an existing object or from
scratch, at which time the style is saved. When you apply a style to an object,
CorelDRAW overrides the existing text or graphic properties with the properties of the
current style. To use the style in another drawing, you can copy the style to the new
drawing or save the style in a template. For more information about templates, see
“Working with templates” on page 33. If you copy or import a style with the same
name as an existing style, CorelDRAW renames the style by adding a number to the
style name. At any point, you can rename a style, unless it is a default style. You can
also change the properties of an object back to its previous style if you made a mistake
or decide that the previous style was better suited to that object.
After you create a style, you can edit its properties and find any object using a given
style. For example, you can find all objects that use the default graphic style. Finding
objects assigned a specific style makes editing that style even more efficient.
To create a graphic or text style from an object
1Right-click an object whose style properties you want to save.
2Click Styles ` Save style properties.
3Enable one or more of the following check boxes:
• Te x t
• Fill
• Outline
4Type a name for the style in the Name box.
When you create a style from an existing object, CorelDRAW does not
automatically apply the style to an object. If you want an object to use the style,
you must apply the style. For information about applying a style, see “To apply
a graphic or text style” on page 309.
You can also create a graphic or text style from an object by dragging the
object to the Graphic and text styles docker.
CorelDRAW: Working with graphic, text, and color styles 309
To create or edit a graphic or text style
1Click To o l s ` Graphic and text styles.
2In the Graphic and text styles docker, click the flyout button .
3Click New, and click one of the following style types:
• Graphic style
• Artistic text style
• Paragraph text style
4Choose a style from the list.
5Click the flyout button, and click Properties.
6Click Edit beside a property.
7Modify any text, fill, or outline properties.
To apply a graphic or text style
1Select an object.
2Click To o l s ` Graphic and text styles.
3In the Graphic and text styles docker, double-click a style.
Creating and applying color styles
A color style is a color you save and apply to objects in a drawing. Since an infinite
number of colors are available in CorelDRAW, color styles can make it easier to apply
the exact color you want.
You can also
Copy object properties Choose a style, click the flyout button ,
click Copy properties from, and click the
object.
Delete a style Right-click a style, and click Delete.
Rename a style Right-click a style, click Rename, type a
new name, and press Enter.
Revert to an object’s style Right-click an object using the Pick tool ,
and click Styles ` Revert to style.

310 CorelDRAW Graphics Suite 12 User Guide
When you create a color style, the new style is saved to the active drawing. After you
create a color style, you can apply it to objects in the drawing. You can also delete color
styles if you no longer require them.
One powerful feature of color styles is that you can create a shade or series of shades
based on a color style. The original color style is referred to as the “parent” color, and
the shades are referred to as “child” colors. For most of the available color models and
palettes, child colors share the same hue as the parent color but have different saturation
and brightness levels. With the PANTONE MATCHING SYSTEM®, PANTONE
Hexachrome, and Custom spot color palettes, child and parents are linked to one
another but have different tint levels.
CorelDRAW has an Auto-create feature for creating color styles from selected objects.
For example, you can import a drawing and Auto-create color styles from an object in
the drawing. When you create color styles from an object, the color style is
automatically applied to that object so that if you decide to change a color style, the
object’s related color will also be updated. For more information on importing files, see
“Importing files” on page 299.
When you use the Auto-create feature, you can choose to create few or many parent
color styles. After you have converted all colors to color styles, you can, for example, use
one parent color to control all red objects, or many parents, one for each shade of red in
the drawing.
When creating child colors, colors added from a color-matching system are converted
to the parent color’s color model so that they can be grouped into appropriate parent-
child groups automatically.
To create a color style
1Click To o l s ` Color styles.
2In the Color styles docker, click the New color style button .
3Select a color from the New color style dialog box.
You can also
Apply a color style Select an object, and double-click the name
of the style you want to apply in the Color
styles docker.
Delete a color style Right-click the color style in the Color
styles docker, and click Delete.

CorelDRAW: Working with graphic, text, and color styles 311
You can also create a color style from an object or the color palette by dragging
a color to the Color styles docker.
You can also apply a color style to an object by dragging a color from the Color
styles docker.
From here
For more information about In the Help index, see
Finding objects assigned a specific graphic or
text style
styles, finding objects with
Customizing the Graphic and text styles
docker/palette
styles, displaying
Creating a child color child colors, creating
Creating a series of child colors child colors, creating
Creating parent colors from an object parent colors, creating from objects
Creating child colors from an object child colors, creating from objects
Editing color styles color styles, editing
Sorting color styles color styles, sorting
Moving color styles color styles, moving
Copying color styles color styles, copying

CorelDRAW: From Adobe Illustrator to CorelDRAW 313
From Adobe Illustrator to
CorelDRAW
Adobe Illustrator and CorelDRAW have many similarities, which makes it easy to move
from one graphics application to the other. Although they share the most basic drawing
and design capabilities, Adobe Illustrator and CorelDRAW are distinguished by some
differences in both terminology and tools. Understanding these differences lets you
make a quick transition to CorelDRAW.
In this section you’ll learn about
• comparing terminology
• comparing tools
Comparing terminology
The terms and concepts in Adobe Illustrator and CorelDRAW differ for some features.
Many terms have similar meanings but are referred to by different names. Adobe
Illustrator terms are listed below with their CorelDRAW equivalents.
Adobe Illustrator term CorelDRAW term
Anchor points Nodes
Artwork Drawing
Compound object Curve object
Gradient fill Fountain fill
Mask PowerClip
Outline view Wireframe view
Path Curve
Placing images Inserting images
Rasterizing Converting to a bitmap
314 CorelDRAW Graphics Suite 12 User Guide
Comparing tools
The following table lists Adobe Illustrator tools and the corresponding CorelDRAW
tools. Many of the tools create the same result but operate slightly differently.
Stroke Outline
Swatches palette Color palette
Unite Weld
Adobe Illustrator tool CorelDRAW tool
Add anchor point tool Shape tool , see “To add or remove a
node” on page 104.
Area type tool Te x t tool , see “To add paragraph text” on
page 213.
Blend tool Interactive blend tool , see “To blend
objects” on page 127.
Convert anchor point tool Shape tool , see “To make a curve cusp,
smooth, or symmetrical” on page 105.
Delete anchor point tool Shape tool , see “To add or remove a
node” on page 104.
Direct selection tool Shape tool , see “To select a node” on
page 103.
Drop shadow tool Interactive drop shadow tool , see “To
add a drop shadow” on page 181.
Gradient tool Interactive fill tool , see “Applying
fountain fills” on page 142.
Line segment tool Freehand tool , see “To draw a straight
line” on page 48 or Polyline tool , see
“Drawing lines” on page 45.
Adobe Illustrator term CorelDRAW term
CorelDRAW: From Adobe Illustrator to CorelDRAW 315
Measure tool Dimension tool , see “Drawing flow and
dimension lines” on page 59.
Mesh tool Interactive mesh fill tool , see “To apply
a mesh fill to an object” on page 148.
Paint bucket tool Interactive fill tool , see “To apply a
uniform fill” on page 141.
Paintbrush tool Artistic media tool , see “To draw a
calligraphic line” on page 51 or Brush tool
, see “Applying brush strokes” on page 55.
Path type tool Te x t tool , see “To fit text to a path” on
page 225.
Pencil tool Freehand tool , see “To draw a curved
line” on page 49.
Pucker tool Interactive envelope tool , see “To apply
an envelope” on page 115.
Rectangular grid tool Graph paper tool , see “To draw a grid”
on page 69.
Reflect tool Mirror buttons, see “To mirror an object” on
page 96.
Reshape tool Shape tool , see “To stretch, scale, rotate,
or skew nodes” on page 106.
Rotate tool Pick tool , see “To rotate an object” on
page 95.
Rounded rectangle tool Rectangle tool , see “To round the corners
of a rectangle or a square” on page 64.
Scissors tool Knife tool , see “To split an object” on
page 118.
Selection tool Pick tool , see “To select objects” on
page 76.
Adobe Illustrator tool CorelDRAW tool
316 CorelDRAW Graphics Suite 12 User Guide
Size tool Pick tool , see “To size an object” on
page 93.
Skew tool Pick tool , see “Skewing and stretching
objects” on page 106.
Star tool Polygon tool , see “To reshape a polygon
or a star” on page 67 or Star shapes , see
“To draw a predefined shape” on page 70.
Symbol sprayer tool Sprayer tool , see “To spray a line” on
page 58.
Tw i r l t o o l Interactive twister distortion tool , see
“To distort an object” on page 113.
Twist tool Interactive twister distortion tool , see
“To distort an object” on page 113.
Type tool Te x t tool , see “To add paragraph text” on
page 213.
Wa r p t o o l Smudge brush tool , see “To smudge an
object” on page 109 or Envelope tool, see
“Shaping objects using envelopes” on
page 115.
Wrinkle tool Roughen brush tool , see “To roughen an
object” on page 111.
Adobe Illustrator tool CorelDRAW tool

Section III: Corel R.A.V.E.

Corel R.A.V.E.: Workspace tour 319
Workspace tour
Becoming familiar with the terminology and workspace of Corel R.A.V.E. will help
you easily follow this user guide’s concepts and procedures.
In this section, you’ll learn about
• Corel R.A.V.E. terminology and concepts
• Corel R.A.V.E. application window
•Corel R.A.V.E. toolbox
Corel R.A.V.E. terminology and concepts
Before you get started with Corel R.A.V.E., you should be familiar with the following
terms.
Term Description
object An element in a drawing such as an image,
shape, line, curve, symbol, text, or layer
movie An animation project you create in
Corel R.A.V.E. A movie consists of a
succession of frames.
frame One image in a series of images that make
up a movie. A movie frame can contain one
or more objects.
stage The area in which you add objects to a
movie, compose the contents of individual
frames, and preview animation
docker A window containing available commands
and settings relevant to a specific tool or task
flyout A button that opens a group of related tools
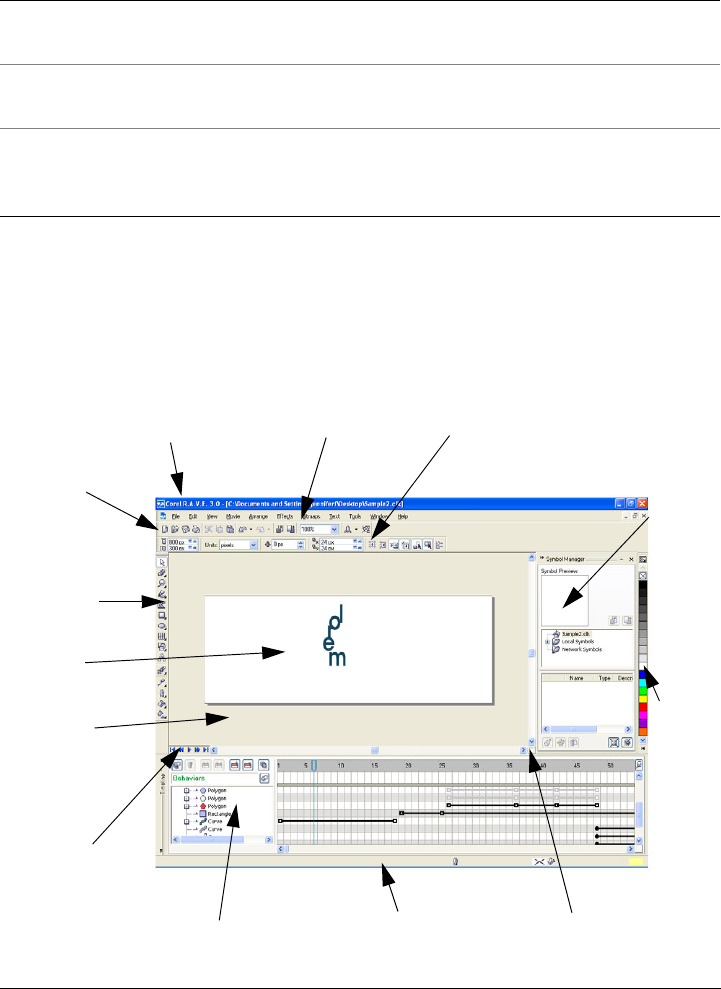
320 CorelDRAW Graphics Suite 12 User Guide
Corel R.A.V.E. application window
When you launch Corel R.A.V.E., the application window opens containing a drawing
window. The rectangle in the center of the drawing window is the stage where you
create your movie. Although more than one drawing window can be opened, you can
apply commands to the active drawing window only.
thumbnail A small, low-resolution representation of an
image
artistic text A type of text to which you can apply special
effects, such as shadows
paragraph text A type of text to which you can apply
formatting options, and which can be edited
in large blocks
Term Description
Status bar Navigator
Timeline docker
Docker
Color
palette
Menu bar
Movie
playback
controls
Drawing
window
Stage
Toolbox
Property bar
Title bar
Toolbar

Corel R.A.V.E.: Workspace tour 321
The application window contains the following main parts:
Part Description
Menu bar The area containing pull-down menu
options
Property bar A detachable bar that changes depending on
the tool or task. For example, when the text
tool is active, the property bar displays
commands that create and edit text.
Toolbar A detachable bar that contains shortcuts to
menu and other commands
Title bar The area displaying the title of the currently
open movie
Rulers Horizontal and vertical borders that are used
to determine the size and position of objects
in a movie
Toolbox A dockable bar with tools for creating,
filling, and modifying objects in the movie
Drawing window The area outside the stage bordered by the
scroll bars and application controls
Stage The rectangular area inside the drawing
window in which you add objects to a movie,
compose the contents of individual frames,
and preview animation
Color palette A dockable bar that contains color swatches
Docker A window containing available commands
and settings relevant to a specific tool or task
Status bar An area at the bottom of the application
window that contains information about
object properties such as type, size, color, fill,
and resolution. The status bar also shows the
current mouse position.
322 CorelDRAW Graphics Suite 12 User Guide
By default, the rulers are not displayed. To toggle between displaying and
hiding the rulers, see “To display or hide the rulers” on page 1.
By default, the status bar is not displayed. To toggle between displaying and
hiding the status bar, click Window ` To o l b a r s ` Status bar.
Corel R.A.V.E. toolbox
Many application commands are accessible through the toolbox. You can also access
application commands from the menu bar, toolbars, property bar, and dockers. The
toolbox can be opened, closed, and moved around your screen at any time. For
information about the menu bar, toolbars, property bar, and dockers, see
“Corel R.A.V.E. workspace tools” in the Help.
You can customize many of these workspace tools to suit your needs. For more
information, see “Customizing your application” in the Help.
Flyouts open to display a set of related Corel R.A.V.E. tools. A small arrow in the
bottom right corner of a toolbox button indicates a flyout: for example, the Shape edit
flyout . Clicking a flyout arrow opens a set of related tools. Clicking the grab handles
at the left end of the flyout and dragging the flyout away from the toolbox sets the
flyout in its expanded form.
The following table provides descriptions of the flyouts and tools in the Corel R.A.V.E.
toolbox.
Navigator The small, square button at the bottom-
right corner that opens a smaller display to
help you move around in the drawing
window
Movie playback controls The area at the bottom left of the drawing
window that contains controls for playing
movies
Timeline docker The window displaying the timeline of all
objects in a movie. This is where you
animate, organize, and coordinate objects in
a movie.
Part Description
Corel R.A.V.E.: Workspace tour 323
Flyouts
Flyout Description
Zoom Lets you access the Zoom and Hand tools
Curve Lets you access the Freehand, Bézier, Artistic
media, 3-point curve, Polyline, and Pen tools
Rectangle Lets you access the Rectangle and 3-point
rectangle tools
Ellipse Lets you access the Ellipse and 3-point ellipse
tools
Shape edit Lets you access the Shape, Knife, Eraser,
Smudge brush, Roughen brush, and Virtual
segment delete tools
Object Lets you access the Polygon, Spiral, and
Graph paper tools
Perfect Shapes Lets you access the Basic shapes, Arrow
shapes, Flowchart shapes, Star shapes, and
Callout shapes tools
Interactive tools Lets you access the Interactive blend,
Interactive contour, Interactive distortion,
Interactive envelope, Interactive extrude,
Interactive drop shadow, and Interactive
transparency tools
Interactive fill Lets you access the Interactive fill and
Interactive mesh fill tools
Eyedropper Lets you access the Eyedropper and
Paintbucket tools
Outline Lets you access the Outline pen and the
Outline color dialog boxes, the Color docker,
and a selection of outlines of various widths
Fill Lets you access the Color docker, the Fill
color, Fountain fill, Pattern fill, and Te x t u r e
fill dialog boxes, and the No fill button.

324 CorelDRAW Graphics Suite 12 User Guide
An example is the Object properties docker. When it is open, you can click an object
and view formatting, dimensions, and other properties of the object.
From here
For more information about In the Help index, see...
Movie playback controls workspace, movie playback controls
Property bar workspace, property bar
Status bar workspace, status bar
Timeline docker workspace, Timeline docker
Toolbars workspace, toolbars
Tools workspace, tools

Corel R.A.V.E.: Getting started in Corel R.A.V.E. 325
Getting started in Corel R.A.V.E.
In this section, you’ll learn about
• how Corel R.A.V.E. works
• setting the properties of movies
How Corel R.A.V.E. works
The Corel R.A.V.E. application lets you create movies by following these steps:
1 Start a movie project — See “Starting Corel R.A.V.E. and opening movies” in the
Help for information about starting a movie project, either from scratch or by
opening a graphic. See “Setting the properties of movies” on page 326 for
information about setting movie properties such as stage size, frame rate, and
background.
2 Create the movie contents — Use the drawing and effects tools to create and
modify lines, shapes, and text, or to import artwork created in other applications.
For information about drawing lines and shapes, shaping and working with objects,
filling and coloring objects, adding special effects, and working with bitmaps, see
the Help. For information about working with text, see “Adding and formatting
text” in the Help.
3 Animate, preview, and edit the movie contents — Use a timeline to extend the
life of objects in a movie and change them over time. You can preview the movie,
coordinate animated objects, and modify the way they change over time. For
information about animating, see “Animating objects” on page 329 and
“Animating text” on page 345. For information about editing and previewing
movies, see “Editing and previewing animation” on page 339.
4 Add sound and repetition — Add sound to further enliven a movie, or repeat an
animated object or group of objects for the duration of a movie. For information
about working with sound, see “Using sound in movies” in the Help. For
information about repeating an animation within a movie, see “Repeating
animated objects” on page 338.

326 CorelDRAW Graphics Suite 12 User Guide
5 Add interactivity — Add interactive objects, or rollovers, that move or change
when pointed to or clicked. Use behaviors to create more complex, interactive
movies. For information about creating interactive movie elements, see “Creating
interactive objects’ in the Help. For information about using behaviors in movies,
see “Using behaviors” in the Help.
6Export a movie — When you complete a movie, prepare to share it with the
world by exporting it to a standard animation format. For information about
exporting movies, see “Exporting and publishing movies” in the Help.
Setting the properties of movies
When you create a movie, you should begin by setting the stage size and frame rate and
choosing a background. In Corel R.A.V.E., the length of a movie is determined by the
life span of objects within the movie. You cannot set the length of a Corel R.A.V.E.
movie in advance, because it changes as you extend the life of objects within it. For more
information about setting the life span of objects, see “Working with timelines” in the
Help.
Setting the stage size and frame rate of a movie
A movie consists of a succession of frames that are displayed on the stage (500 x 500
pixels by default). You can customize the stage size of a movie by specifying its width
and height.
The frame rate of a movie refers to the number of frames that are played per second.
The frame rate affects the smoothness of the animation and the file size of a movie.
Usually, higher frame rates result in smoother animation and larger files, while lower
frame rates result in choppier animation and smaller files. The default frame rate in
Corel R.A.V.E. is 12 frames per second, the optimal rate for the Web. The typical frame
rate of motion pictures is 24 frames per second.
Choosing a background
By default, all movies have a solid white background. You can choose another color, or
you can use a bitmap, such as a textured design or photograph, to create a more intricate
or dynamic background. You can also remove a background.
When you choose a bitmap as the background, it is embedded in the Corel R.A.V.E.
movie by default. This is the recommended option. However, you can also link the
bitmap to the movie so that if you later edit the source image, the change is
Corel R.A.V.E.: Getting started in Corel R.A.V.E. 327
automatically reflected in the movie. If you send a movie containing a linked image to
someone else, you must also send the linked image.
If the bitmap is larger than the stage, it is cropped. If the bitmap is smaller than the
stage, it is tiled across the stage. You can change the size of the background bitmap to
create smaller or larger tiles.
You can enhance a movie by adding a background. Clockwise from top-left:
solid color background, bitmap background, tiled bitmap background, cropped
bitmap background.
To set the stage size and frame rate of a movie
1Click Movie ` Movie setup.
2Choose a unit of measurement from the list box.
3Type values in the following boxes:
• Width
• Height
• Frame rate
From here
For more information about In the Help index, see...
Resampling bitmaps while importing resampling bitmaps
Cropping bitmaps while importing cropping bitmaps
Customizing undo settings undoing commands, specifying levels

328 CorelDRAW Graphics Suite 12 User Guide
Starting Corel R.A.V.E. and opening movies movies, opening
Importing files files, importing
Saving movies movies, saving
For more information about In the Help index, see...

Corel R.A.V.E.: Animating objects 329
Animating objects
The Corel R.A.V.E. application lets you create animation by extending the life of
objects in a movie and changing them over time.
In this section, you’ll learn about
• understanding animation methods and terms
• increasing the life span of objects
• tweening objects
Understanding animation methods and terms
Corel R.A.V.E. lets you animate vector objects and bitmaps by editing object properties
and interactive effects applied to objects over time. For example, you can make an object
roll across the stage, fade out, or change size, color, and shape.
Animation methods
Corel R.A.V.E. offers three animation methods: tweening objects, creating animation
sequences from existing objects, and animating objects frame-by-frame.
Tweening lets you define changes in an object at specific frames during its life span, and
then automatically applies the changes between these frames.
You can create an animation sequence from a blend, a group, or text. For information
about creating animation sequences from blends, see “Animating blends” in the Help.
For information about creating animation sequences from groups, see “Creating
animation sequences from groups” in the Help. For information about creating
animation sequences from text, see “To create a typing effect” on page 348.
Animating objects frame-by-frame lets you edit an object in each frame of its life span,
giving you complete control over the way it changes over time.

330 CorelDRAW Graphics Suite 12 User Guide
Animation terms
Before you start animating objects in a movie, you should be familiar with the following
animation terms.
Increasing the life span of objects
When you add an object to the stage, it has a life span of one frame and therefore its
timeline consists of a single black dot. Before you can animate an object, you must
increase its life span. You can increase the life span of a single object or a group of
objects. For information about increasing the life span of a group of objects, see “To
increase the life span of a new group of objects” in the Help.
Term Description
Frame One image in a series of images that make
up a movie. A movie frame can contain one
or more objects.
Current frame The frame that is displayed on the stage
Keyframe A frame in which you define change in an
object. When tweening, Corel R.A.V.E. fills
in the frames between keyframes so that
objects change gradually over time.
Object’s life span The frames in which an object exists in a
movie
Object’s timeline A graphical representation of an object’s life
span in a movie
Static object An object that does not change during its life
span in a movie
Animated object An object in a movie that changes over time
Symbol An object or group of objects that is defined
once and can be referenced many times in a
movie
Sprite An animated symbol

Corel R.A.V.E.: Animating objects 331
Increasing the life span of a new object does not animate the object. It only produces a
static object that exists in a number of successive frames. To animate a static object, you
must tween it or animate it frame-by-frame. For more information about animating
frame-by-frame, see “Animating objects frame-by-frame” in the Help.
To increase the life span of a new object
1Select a new object.
2In the Timeline docker, drag the black dot associated with the object to the frame
you want.
Tweening objects
Tweening lets you animate objects in a movie. You change their position and
appearance at specific frames in their life spans, and Corel R.A.V.E. creates the frames
in between.
Before you can tween an object, you must increase its life span so that it exists for more
than one frame. For more information, see “Increasing the life span of objects” on
page 330.
How tweening works
To tween a static object, you can turn the end frame of the object’s timeline into a
keyframe. The start frame of the object’s timeline automatically becomes another
keyframe that stores information about the object’s original state. Modifying the object
at the end keyframe produces an animated object that changes gradually from its
original state to its modified state. The rate of change is determined by the number of
intermediate frames, and by the frame rate of the movie. For more information about
frame rate, see “Setting the properties of movies” on page 326.
You can also tween a static object by turning any intermediate frame in its timeline into
a keyframe, and then modifying the object at that keyframe. The start and end frames
automatically become keyframes with the object in its original state. This produces an
animated object that changes from its original state to its modified state and then back
to its original state.
332 CorelDRAW Graphics Suite 12 User Guide
Frames with an interior border indicate keyframes. Turning the end frame in
an object’s timeline into a keyframe and modifying the object at that keyframe
produces an animated object that changes over time (top). Turning an
intermediate frame in an object’s timeline into a keyframe and modifying the
object at that keyframe produces an animated object that changes over time and
returns to its original state (bottom).
What can be tweened
Corel R.A.V.E. lets you tween object properties such as size, position, rotation angle,
and outline, as well as interactive effects you’ve applied, such as contour, transparency,
fill, envelope, distortion, and drop shadow. You can tween several object properties and
effects at the same time.
You can tween the size, position, and rotation angle of an object simultaneously
to make it roll across the stage as it recedes. Frames with an interior border
indicate keyframes.
Corel R.A.V.E.: Animating objects 333
Changing the fill of a silhouette and its background at an end keyframe
produces an image that gradually changes color. In this movie, the sun is also
tweened to move along a path.
Tweening a distortion effect applied to an object produces an animated object
that changes its shape. Frames with an interior border indicate keyframes.

334 CorelDRAW Graphics Suite 12 User Guide
Tweening the drop shadow of this object produces the effect of a light moving
over it. Frames with an interior border indicate keyframes.
Not all attributes of object properties and interactive effects can be tweened. For more
information, see, “Tweening limitations” in the Help.
Creating motion
Corel R.A.V.E. lets you create interesting motion effects by tweening the position, size,
skew, and rotation angle of an object.
Tweening the position of an object makes an object move across the stage. You can make
an object move in a straight line or make it follow a path. For information about
creating paths, see “Drawing lines” in the Help.
When you tween the size, or scale, of an object, the object appears to be moving closer
or receding. When you tween the skew of an object, you add depth to the object over
time, and the object appears to rotate. You can rotate an object or an extruded object
over time by tweening the rotation angle. Tweening the rotation angle of an object
makes the object move around its center of rotation. When you tween the rotation
angle of an extruded object, you can rotate the object around its x, y, or z axis. For both
objects and extruded objects, you can set the rotation direction and number of rotations.
For information about changing these object properties, see “Working with objects” in
the Help.
To tween an object
1Select an object.
Corel R.A.V.E.: Animating objects 335
If the object appears in one frame only, drag the black dot associated with the
object to increase its life span.
2In the Timeline docker, click the end frame or an intermediate frame in the
object’s timeline.
3Click Movie ` Insert keyframe.
4Modify the object on the stage by editing any of its properties or by applying
interactive effects.
You can only tween objects that have a life span greater than one frame. For
information about increasing the life span of objects, see “Increasing the life
span of objects” on page 330.
You can also change a frame to a keyframe by double-clicking it.
You can modify how quickly or slowly a tweened object changes by adjusting
object and color acceleration. For more information, see “To adjust object and
color acceleration” on page 341.
To move an object in a straight line
1Select an object.
2In the Timeline docker, click a frame other than the start frame in the object’s
timeline.
3Click Movie ` Insert keyframe.
To Tw e e n t h e
Fade an object in and out Transparency
Change an object’s color and pattern Color and fill
Change an object’s shape Envelope effects, distortion effects, and
extrusion
Move a light over an object Drop shadow, transparency, and extrusion
lighting
Make an object glow Fill and drop shadow
Add a third dimension to an object Extrusion

336 CorelDRAW Graphics Suite 12 User Guide
4Drag the object to a new position on the stage.
You can move an object in a perfectly horizontal or vertical line by holding
down Ctrl and dragging the object.
To move an object along a path
1Select an object.
2In the Timeline docker, click a frame other than the start frame in the object’s
timeline.
3Click Movie ` Insert keyframe.
4Drag the object to a new position on the stage.
5Draw a path.
6In the Timeline docker, drag the black dot associated with the path to the start
frame of the object’s timeline.
7Click the Pick tool, and select the object on the stage.
8Click Movie ` Tw e e n ` Attach to path.
The pointer changes to a curved arrow.
9Click the path.
You can also attach an object to a path by clicking the Attach to path button
on the property bar.
You can attach more than one object to the same path.
You can also
Have an object move along the entire path Click an intermediate frame in the object’s
timeline to display tween controls on the
property bar, and click the Sets the tween
to occur along full path button .
Have an object rotate along a path Click an intermediate frame in the object’s
timeline to display tween controls on the
property bar, and click the Rotate all
objects relative to the path button .
Corel R.A.V.E.: Animating objects 337
Tweening the object’s position (top) and attaching the object to a path produces
an animated object that moves along a specified path (bottom). Frames with
an interior border indicate keyframes.
To scale an object over time
1Select an object.
2In the Timeline docker, click a frame other than the start frame in the object’s
timeline.
3Click Movie ` Insert keyframe.
4Type values in the Scale factor boxes on the property bar.
You can also scale an object by dragging any corner selection handle.
From here
For more information about In the Help index, see...
Repeating animated objects animation, repeating
Animating blends blends, animating
Creating animation sequences from groups animation, creating from groups

Corel R.A.V.E.: Editing and previewing animation 339
Editing and previewing animation
The Corel R.A.V.E. application lets you make changes to movies and preview them.
In this section, you’ll learn about
• working with timelines
• working with tweens
• previewing animation
Working with timelines
You can modify the way an animated object changes over time by making changes to
its timeline. You can insert and delete frames. You can also add, delete, and move
keyframes. Adding keyframes gives you more control over the way an object changes
between its start and end frames; deleting keyframes lets you remove unwanted changes
to the object over time; and moving keyframes lets you control how quickly changes
take place.
You can also edit an animated object by changing its life span or shifting its timeline.
You change an object’s life span by moving the start frame, end frame, or both. Shifting
an object’s timeline lets you move the object to a different series of frames without
affecting its life span. For example, you can shift the timeline of an object that appears
in frames 5 to 20 so that it appears in frames 10 to 25. For more information about
shifting an object’s timeline, see “To shift an object’s timeline” in the Help.
To insert a frame
1In the Timeline docker, click a frame.
2Click the Insert frame button .
3In the Insert frame dialog box, type a value in the Number of frames box.
4Enable one of the following options:
• After current frame
• Before current frame
340 CorelDRAW Graphics Suite 12 User Guide
If the current frame is not part of at least one object’s timeline, inserting frames
has no effect.
To delete a frame
1In the Timeline docker, click a frame.
2Click the Delete frame button .
3In the Delete frame dialog box, type a value in the Number of frames box.
4Enable one of the following options:
• After current frame
• Before current frame
If the current frame is not part of at least one object’s timeline, deleting frames
has no effect.
To add, delete, and move keyframes
You cannot move a keyframe beyond another keyframe in an object’s timeline.
You can also add a keyframe by double-clicking a frame in the object’s
timeline.
You can also delete a keyframe by double-clicking it.
To change the life span of an object
1Select an object.
To Do the following
Add a keyframe Click a frame in an object’s timeline, and
click Movie ` Insert keyframe.
Delete a keyframe Click a keyframe in an object’s timeline, and
click Movie ` Delete keyframe.
Move a keyframe Click a keyframe in an object’s timeline, and
drag it to another frame.

Corel R.A.V.E.: Editing and previewing animation 341
2In the Timeline docker, drag from the start frame in the object’s timeline to the
frame you want.
3Drag from the end frame in the object’s timeline to the frame you want.
For a compound tween, changing the life span affects only the first or last
timeline section.
You can change the life span of a group of objects by holding down Ctrl and
dragging the start and end frames.
Working with tweens
A tween is the animation created by tweening. For more information about tweening,
see “Tweening objects” on page 331.
You can modify how quickly or slowly a tweened object changes by adjusting object and
color acceleration. For example, you can make a ball rolling down a hill speed up as it
approaches the bottom of the hill.
Corel R.A.V.E. lets you copy tween properties from one tween to another. Tween
properties include object and color acceleration, rotation controls, color controls, and if
applicable, path properties. You can also reverse a tween. For example, a tweened object
that moves from left to right while changing from red to blue can be reversed so that it
moves from right to left while changing from blue to red. When you reverse a tween,
you reverse the entire timeline.
You can also remove a tween. When you do, Corel R.A.V.E. deletes all keyframes, and
the object maintains the properties it had at the first keyframe.
To adjust object and color acceleration
1In the Timeline docker, click an intermediate frame in the timeline of a tween.
2On the property bar, click the Object and color acceleration button .
If you want to set different acceleration rates for color and object properties, click
the Lock button.
3Move the Object and Color sliders.

342 CorelDRAW Graphics Suite 12 User Guide
Moving the Object slider to the left accelerates object changes at the end of the
tween, while moving the Object slider to the right accelerates object changes
at the beginning of the tween. Moving the Color slider to the left accelerates
color change at the beginning of the tween, while moving the Color slider to
the right accelerates color change at the end of the tween.
You can adjust a section of a compound tween by holding down Ctrl, and
clicking an intermediate frame in the timeline section.
To copy tween properties
1In the Timeline docker, click an intermediate frame in the timeline of the tween to
which you want to copy properties.
2Click Effects ` Copy effect ` Tw e e n f r o m .
The pointer changes to a thick, black arrow.
3Click an intermediate frame in the timeline of the tween whose properties you want
to copy.
Copying tween properties does not attach a tween to a path; however, if both
tweens are attached to a path, the path properties are copied.
To reverse a tween
1In the Timeline docker, click an intermediate frame in the timeline of a tween.
2Click Movie ` Tw e e n ` Reverse tween.
You can also reverse a tween by right-clicking a frame, and clicking Reverse
tween.
To remove a tween
1In the Timeline docker, click an intermediate frame in the timeline of a tween.
2Click Movie ` Tw e e n ` Remove tween.

Corel R.A.V.E.: Editing and previewing animation 343
You can also remove a tween by right-clicking a frame, and clicking Remove
tween.
Previewing animation
You can preview animation in Corel R.A.V.E., or you can use the Macromedia Flash
preview to view movies in your Web browser. If a movie contains Stop, Play, or Go to
behaviors applied to frames, these will affect the flow of the movie when previewed in
Corel R.A.V.E. For movies containing other behaviors, you must use the Macromedia
Flash preview. For more information about behaviors, see “Using behaviors” in the
Help. Complex animations, such as tweened sprites, should also be viewed with the
Macromedia Flash preview.
When you play a movie in Corel R.A.V.E., it plays in a continuous loop, automatically
restarting from the first frame after reaching the last frame, unless a Stop behavior has
been applied to a frame. You can stop a movie at any time and view specific frames.
When you scrub through a movie, you can control the speed and stop at any frame.
To preview animation
To Do the following
Play a movie Click Movie ` Control ` Play movie.
Stop a movie Click Movie ` Control ` Stop movie.
Rewind to the beginning of a movie Click Movie ` Control ` Rewind to
beginning.
Fast forward to the end of a movie Click Movie ` Control ` Fast forward to
end.
Move to the previous frame Click Movie ` Control ` Step back one
frame.
Move to the next frame Click Movie ` Control ` Step forward one
frame.
Scrub through a movie In the Timeline docker, drag the playhead
back and forth along the timeline.

344 CorelDRAW Graphics Suite 12 User Guide
You can also control the playback of a movie using the playback controls
located in the bottom left corner of the drawing window. For more
information, see “Movie playback controls” in the Help.
You can also use keyboard shortcuts to preview a movie. In Num lock mode,
on the number pad, press 4 to rewind, press 6 to fast forward, press 1 to step
back one frame, and press 3 to step forward one frame. Press Enter to play or
stop a movie.
To preview a movie in Macromedia Flash
•Click File ` Flash preview in browser.
You must have the Macromedia Flash Player plug-in installed in your default
Web browser.
Corel R.A.V.E.: Animating text 345
Animating text
The Corel R.A.V.E. application lets you animate text in a movie by changing its
position and appearance at specific frames in its life span.
In this section, you’ll learn about
• tweening text
• creating animated text effects
Tweening text
Corel R.A.V.E. lets you animate text by tweening it along a path. You can also tween
the text’s properties, such as vertical placement and distance from a path.
You can only tween text that has a life span greater than one frame. For information
about increasing the life span of objects, see “To increase the life span of a new object”
on page 331.
When you move text along a path, you can tween the text’s properties.
346 CorelDRAW Graphics Suite 12 User Guide
Corel R.A.V.E. also lets you animate text without tweening it to a path, by treating the
text as an object. For information about tweening objects, see “Tweening objects” on
page 331.
To move text along a path
1Draw a path.
2Click the Te x t tool , and move the pointer over the path. When the pointer
changes to a Fit to path pointer , click the object and type.
3In the Timeline docker, drag the black dot associated with the path to increase the
life span of the path.
4Click the end frame in the text’s timeline.
5Click Movie ` Insert keyframe.
6Drag the glyph to change the position of the text on the path.
You can also change a frame to a keyframe by double-clicking the frame.
Creating animated text effects
Corel R.A.V.E. lets you create a typing effect and animated text effects.
You can blend artistic text, and then create an animated sequence from the blend.
You can also
Have text move along the entire path Click the text’s name in the Timeline
docker, and click the Sets the tween to
occur along full path button on the
property bar.
Have text rotate along a path Click the text’s name in the Timeline
docker, and click the Rotate all objects
relative to the path button on the
property bar.
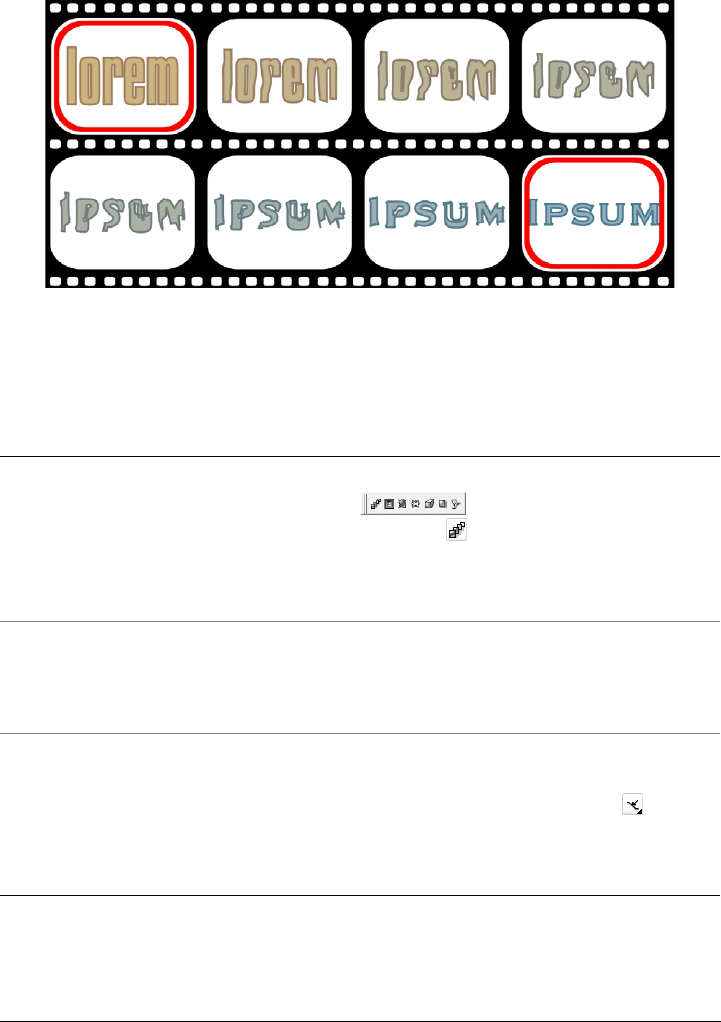
Corel R.A.V.E.: Animating text 347
You can blend two instances of text along a path.
To blend artistic text
To Do the following
Blend text along a straight line Open the Interactive tools flyout
, and click the Interactive
blend tool . Select the first text instance,
and drag over the second text instance. If
you want to reset the blend, press Esc as you
drag.
Blend text along a freehand path Open the Interactive tools flyout, and click
the Interactive blend tool. Select the first
text instance. Hold down Alt, and drag to
draw a line to the second text instance.
Fit a blend to a path Open the Interactive tools flyout, and click
the Interactive blend tool. Click the blend.
Click the Path properties button on the
property bar. Click New path. Using the
curved arrow, click the path to which you
want to fit the blend.
348 CorelDRAW Graphics Suite 12 User Guide
You can also blend text with an object. For more information about blending
objects, see “Blending objects” in the Help.
To create a typing effect
1Type the text in the frame where you want the animation to begin.
2Select the text, and click Movie ` Create sequence from text.
3Select the group of objects, and click Edit ` Copy.
4In the Timeline docker, expand the group of objects, and drag the timeline dot for
each character to the end of the group’s timeline.
5In the Timeline docker, click the third frame in the group’s timeline, and click
Edit ` Paste.
6Select the group of objects with the earlier timeline, and choose the Interactive
transparency tool from the Interactive tools flyout .
7Select Uniform from the Tr a n s p a r e n c y t y p e list box in the property bar, and type
50 in the Starting transparency box.
8Click the Play button on the Control panel to play the movie.
9Click the Stop button to stop the movie and make adjustments.
Stretch the blend over an entire path Select a blend that is already fitted on a path.
Click the Miscellaneous blend options
button on the property bar, and enable
the Blend along full path check box.
Create a compound blend Using the Interactive blend tool, drag from
an object to the start or end text instance of
another blend.
Create a sequence from a blend Select a blend, and click Movie ` Create
sequence from blend.
To Do the following

Section IV: Corel PHOTO-
PAINT

Corel PHOTO-PAINT: Corel PHOTO-PAINT workspace tour 351
Corel PHOTO-PAINT workspace
tour
Becoming familiar with the terminology and workspace of Corel PHOTO-PAINT
helps you follow the concepts and procedures found in the user guide and in the Help
that is available through the application window.
In this section, you’ll learn about
• Corel PHOTO-PAINT terms
• application window
•toolbars
• toolbox
•property bar
•dockers
• status bar
Corel PHOTO-PAINT terms
Before you get started in Corel PHOTO-PAINT, you should be familiar with the
following terms.
Term Description
Channel An 8-bit grayscale image that stores color or
mask information for an image.
Editable area An editable area of a mask allows paint and
effects to be applied to a selected area of an
image.
Image A file you open or create in Corel PHOTO-
PAINT.

352 CorelDRAW Graphics Suite 12 User Guide
For more terms and definitions, see the glossary in the Help.
Exploring the application window
The Corel PHOTO-PAINT application window contains elements that help you access
the tools and commands you need to view and edit images. Application commands are
accessible through the menu bar, toolbox, property bar, toolbars, or dockers.
You can customize many of the elements in the application window to suit your
workflow. For information about customizing Corel PHOTO-PAINT, see “Customizing
your application” in the Help.
The application window contains the following main parts:
Lens An object layer that protects part or all of an
image when you perform color and tonal
corrections.
Mask A mask can be applied to an image during
image editing to define protected areas and
editable areas.
Object An independent bitmap that is layered above
the background image.
Path A series of line and curve segments
connected by adjustable endpoints called
nodes.
Thumbnails A miniature, low-resolution version of an
image.
Part Description
Menu bar The area containing drop-down menus with
commands grouped by category
Property bar A detachable bar containing commands that
change according to the active tool
Term Description
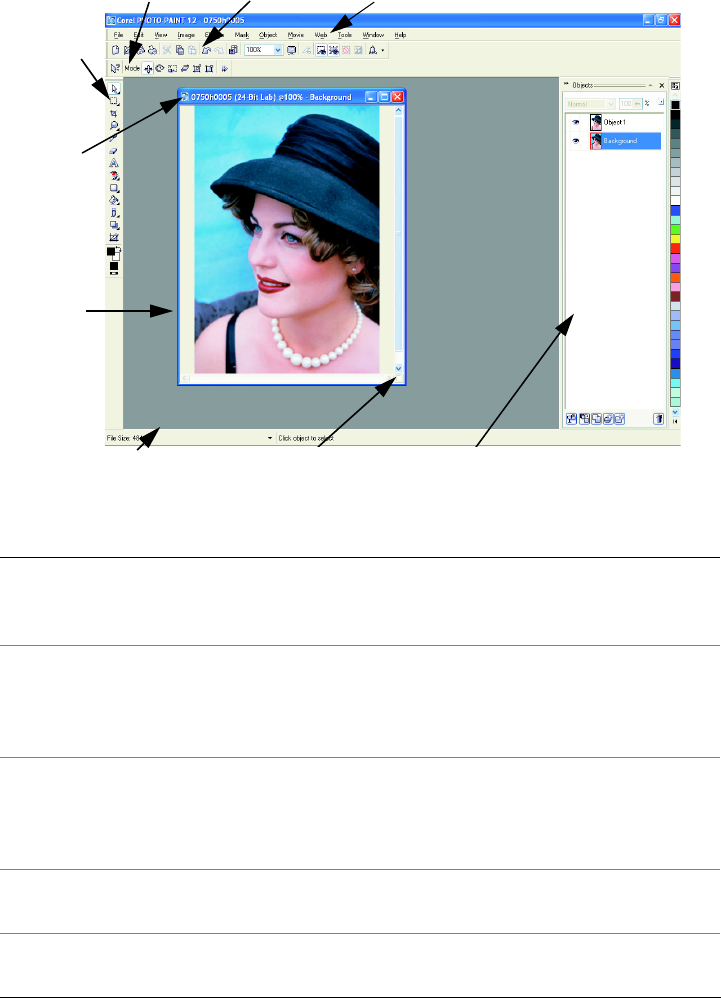
Corel PHOTO-PAINT: Corel PHOTO-PAINT workspace tour 353
Toolbar (standard) A bar that contains shortcuts to some menus
and other basic commands, such as opening,
saving, and printing
Toolbox A bar that contains tools for editing,
creating, and viewing images. The toolbox
also contains the color control area which
lets you select colors and fills.
Image window The area in which the image displays.
Although more than one image window can
be open at the same time, you can apply
commands to the active image window only.
Title bar The area on the image window displaying
the title of the image
Part Description
Property bar Toolbar Menu bar
Status bar Navigator Docker
Toolbox
Title bar
Image
window
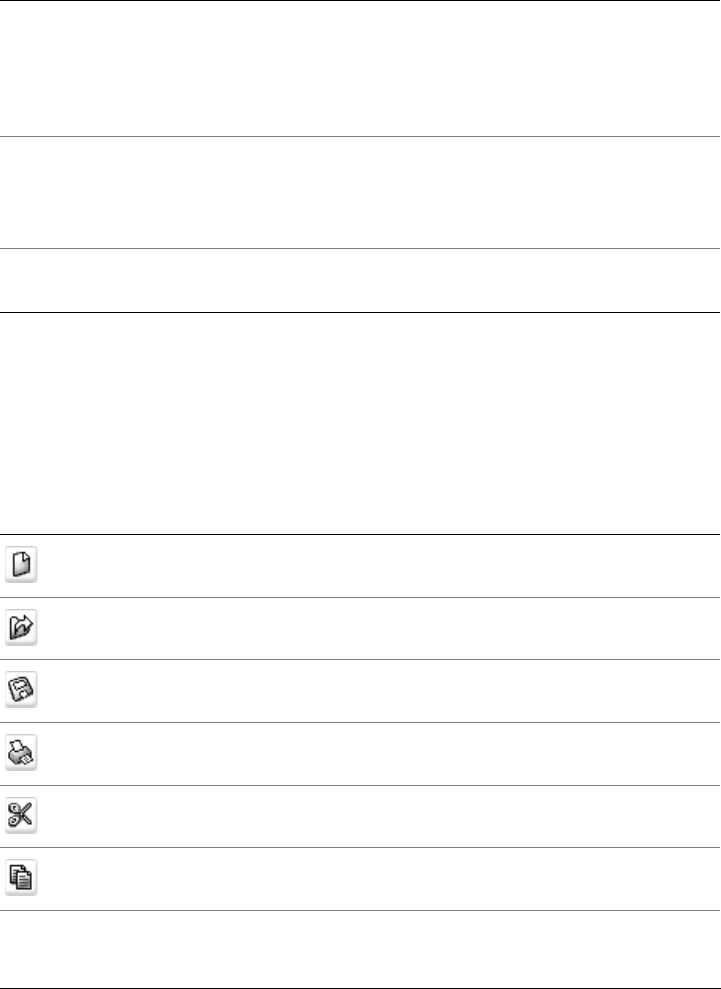
354 CorelDRAW Graphics Suite 12 User Guide
Toolbars
Toolbars consist of buttons that are shortcuts to menu commands. The standard toolbar
consists of commonly used commands. The table below outlines the buttons on the
standard toolbar.
Navigator A button that lets you view a thumbnail of
the entire image so you can focus the image
window on a specific area. The Navigator is
only available if you have areas that exceed
the image window.
Docker A window that provides access to additional
commands and image information. Some
dockers provide a visual display area. The
Object docker is displayed by default.
Status bar An area that displays image information,
system information, and tips
Press this button To
Start a new image
Open an image
Save an image
Print an image
Cut selected objects to the Clipboard
Copy selected objects to the Clipboard
Part Description
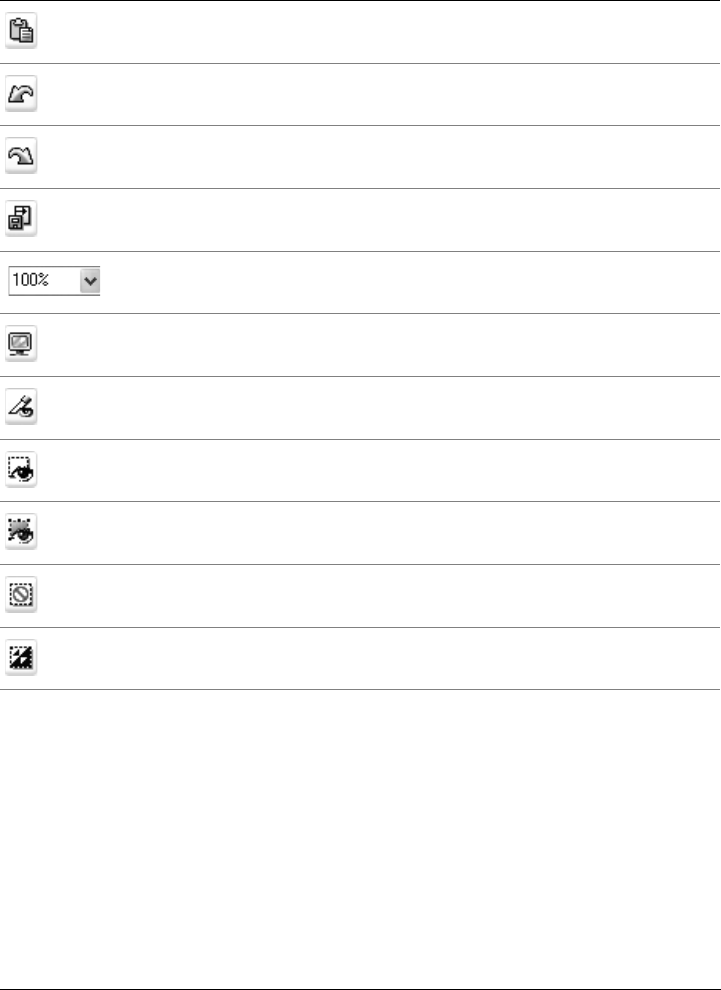
Corel PHOTO-PAINT: Corel PHOTO-PAINT workspace tour 355
In addition to the standard toolbar, Corel PHOTO-PAINT has toolbars for specific
kinds of tasks. For example, if you frequently work with masks, you can display the
Mask/object toolbar. Unlike the property bar, the contents of a toolbar remain the
same.
For information about moving and re-sizing toolbars, and changing which toolbars
display by default, see “To customize toolbar position and display” in the Help. You can
also create a custom toolbar to include the tools and commands you use most often. For
information about creating custom toolbars, see “Customizing toolbars” in the Help.
Paste the Clipboard contents into an image
Undo the last action
Redo the last action
Import an image
Change the zoom level
Display a full-screen preview
Show or hide the image slicing grid
Show or hide the mask marquee
Show or hide the object marquee
Clear a mask
Invert a mask
Press this button To
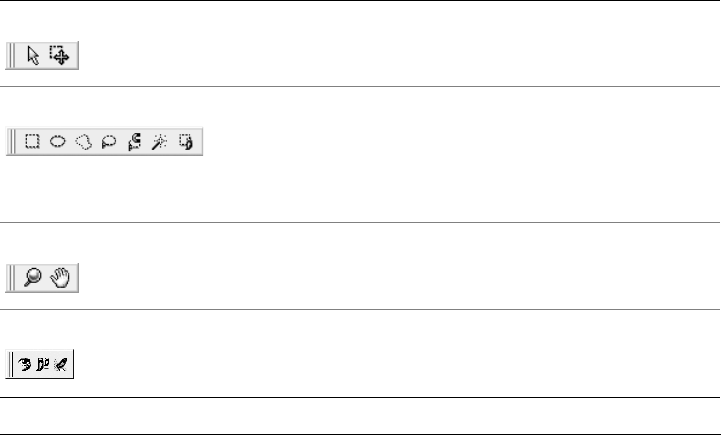
356 CorelDRAW Graphics Suite 12 User Guide
To hide or display a toolbar
•Click Window ` To o l b ar s , and click a toolbar.
A check mark next to a toolbar name indicates that the toolbar is displayed in the
image window.
Toolbox
The toolbox contains tools for editing, creating, and viewing images. Some of the tools
are visible by default, while others are grouped in flyouts. Flyouts open to display a set
of related tools. A small arrow in the bottom-right corner of a toolbox button indicates
a flyout. The last tool used in a flyout displays in the toolbox. For example, in the Brush
flyout, the Paint tool displays by default, but if you use another tool in the flyout, such
as the Image Sprayer tool, the Image Sprayer tool displays in the toolbox with the
flyout arrow. Flyouts function like toolbars when you drag them away from the toolbox.
This lets you view all the related tools while you work.
In addition to the tools, the color control area displays in the toolbox. The color control
area lets you choose colors and fills.
The following tables provide descriptions of the flyouts, tools, and the color control area
in the Corel PHOTO-PAINT toolbox:
Flyout Description
Pick flyout
Lets you access the Object pick tool and the
Mask transform tool
Mask flyout
Lets you access the Rectangular mask tool,
the Ellipse mask tool, the Freehand mask
tool, the Lasso mask tool, the Magnetic
mask tool, the Magic wand mask tool, and
the Brush mask tool
Zoom flyout
Lets you access the Zoom tool and the Pan
tool
Touch-up flyout
Lets you access the Red-eye removal tool,
the Clone tool, and the Touch-up brush
tool
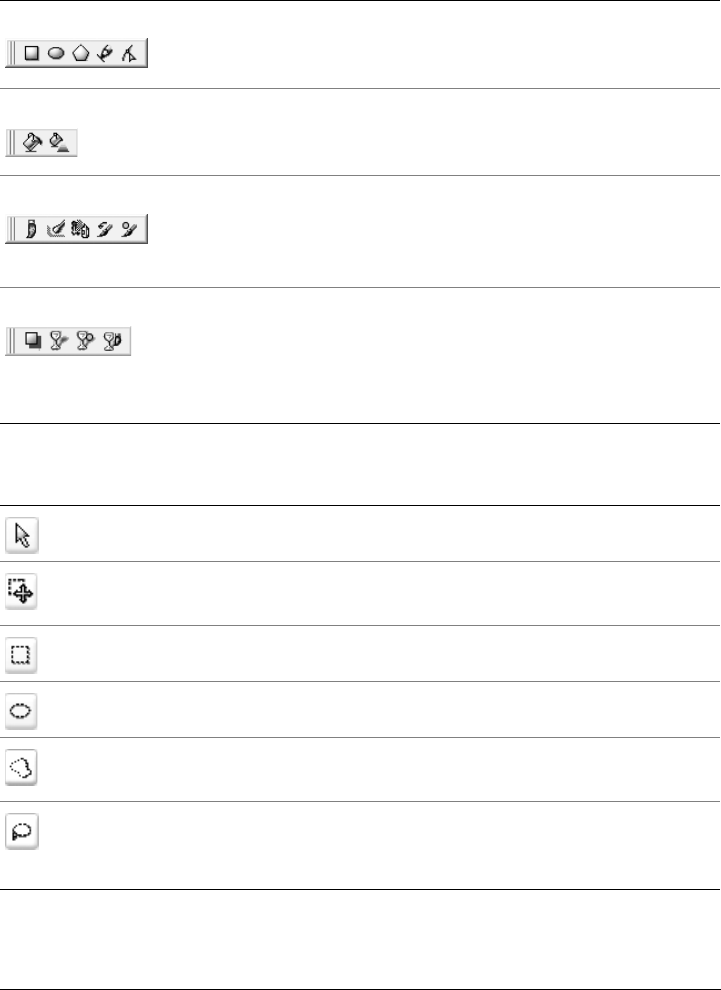
Corel PHOTO-PAINT: Corel PHOTO-PAINT workspace tour 357
Shape flyout
Lets you access the Rectangle tool, the
Ellipse tool, the Polygon tool, the Line
tool, and the Path tool
Fill flyout
Lets you access the Fill tool and the
Interactive fill tool
Brush flyout
Lets you access the Paint tool, the Effect
tool, the Image sprayer tool, the Undo
brush tool, and the Replace color brush
tool
Interactive/Transparency flyout
Lets you access the Interactive
dropshadow tool, the Interactive object
transparency tool, the Color transparency
tool, and the Object transparency brush
tool
Tool Description
Object pick Lets you select an object
Mask transform Lets you change the appearance of editable
areas
Rectangle mask Lets you define rectangular editable areas
Ellipse mask Lets you define elliptical editable areas
Freehand mask Lets you define irregularly shaped or
polygonal editable areas
Lasso mask Lets you define editable areas that are
irregular in shape and surrounded by pixels
of similar colors
Flyout Description
358 CorelDRAW Graphics Suite 12 User Guide
Magnetic mask Lets you detect edges of elements in your
image, that is, the outline of areas that are in
contrasting color to their surroundings, and
place the mask marquee along that edge
Magic wand mask Lets you define irregularly shaped editable
areas that include all adjacent pixels that are
similar in color to the pixel you first select
Brush mask Lets you define an editable area by brushing
an area as if you were painting
Crop Lets you remove unwanted areas and
straighten crooked images
Zoom Lets you change the magnification level in
the image window
Pan Lets you drag areas of an image into view
when the image is larger than its window
Eyedropper Lets you choose colors from an image
Eraser Lets you erase image areas or object areas to
reveal the object or background underneath
Te x t Lets you add text to your image and edit
existing text
Red-eye removal Lets you remove the red-eye effect from the
eyes of subjects in photos.
Clone Lets you duplicate part of an image and
apply it to another part of the same image or
to another image
To u c h - u p Lets you remove imperfections, such as tears,
scratch marks, and wrinkles, from an image
by blending its textures and colors.
Rectangle Lets you draw square or rectangular shapes
Tool Description
Corel PHOTO-PAINT: Corel PHOTO-PAINT workspace tour 359
Ellipse Lets you draw circular or elliptical shapes
Polygon Lets you draw polygons
Line Lets you draw single or joined straight line
segments using the foreground color
Path Lets you create and edit paths
Fill Lets you fill areas with one of four fill types:
uniform, fountain, bitmap, and texture
Interactive fill Lets you apply a gradient fill to the entire
image, object, or selection
Paint Lets you paint on an image using the
foreground color
Effect Lets you perform local color and tonal
corrections on the image
Image sprayer Lets you load one or more images and paint
them on your image
Undo brush Lets you restore image areas to how they
looked before your last brush stroke
Replace color brush Lets you replace the foreground color in your
image with the background color
Interactive dropshadow Lets you add shadows to objects
Interactive object transparency Lets you make the colors of an object fade
gradually towards the image background
color
Color transparency Lets you make pixels with a specific color
value in an object transparent
Object transparency brush Lets you brush areas on an object to make
them more transparent
Tool Description
360 CorelDRAW Graphics Suite 12 User Guide
Property bar
The property bar displays commonly used commands that are relevant to the active
tool. Unlike toolbars, the contents of the property bar change depending on which tool
is active. For example, when you use the Te x t tool, the contents of the property bar
change to display text-related settings such as font type, font size, and alignment.
More advanced options for the active tool can be accessed on the extended property bar.
A button with a double arrow at the end of the property bar lets you open or close the
extended property bar.
To open or close the extended property bar
Image slicing Lets you cut a large image into smaller
sections that can be modified for the Web
Color control area
Lets you choose colors and fills. Consists of
three swatches: a Foreground color swatch,
a Background color swatch, and a Fill
color swatch. The arrow lets you swap the
foreground color and background color, and
the Reset color icon lets you return to the
default colors.
To Do the following
Open the extended property bar Click the Open advanced options
button .
Close the extended property bar Click the Close advanced options
button .
Tool Description

Corel PHOTO-PAINT: Corel PHOTO-PAINT workspace tour 361
Dockers
Dockers display controls, such as command buttons, options, and list boxes. Some
dockers also include additional visual information about the tools or image elements.
You can keep dockers open while you work on an image.
You can attach, or dock, dockers to either side of the application window, or you can
float, or undock, them so you can move them as you work in the application window.
You can also minimize dockers to save valuable screen space. If you open more than one
docker at a time, the windows stack on top of each other and tabs display so you can
quickly access the docker you want.
An example of a docker is the Objects docker. The Objects docker displays thumbnails
of the image background and each object layer, as well as command buttons and options
related to objects.
To open a docker
•Click Window ` Dockers, and click a docker.
To move a docker
• Drag the title bar of the docker to a new location.
Dragging a docker away from the side undocks it, whereas dragging a floating
docker toward the side docks it.
As you drag, an outline of the docker displays. The outline changes shape as
you drag to the side of the application window to indicate that the docker is
docked.
To minimize a docker
To minimize Do the following
A floating docker Click the roll-down arrow on the title bar of
the docker.
A docked docker Click the double-arrow on the title bar of the
docker. A tab displays along the right side of
the application window.

362 CorelDRAW Graphics Suite 12 User Guide
Status bar
The status bar displays information about the image, system memory, and the active
tool. You can change the type of information that displays to help you with your current
task. For example, if you are working with images that have different dimensions, you
can display the dimension of the current image.
You can also customize the status bar by adding command buttons. For information
about customizing the status bar, see “Customizing the status bar” in the Help.
To change the type of information displayed on the status bar
• Click the arrow on the status bar, and click one of the following:
• File size
• Current tool
• Document dimension
• Color mode
• Memory
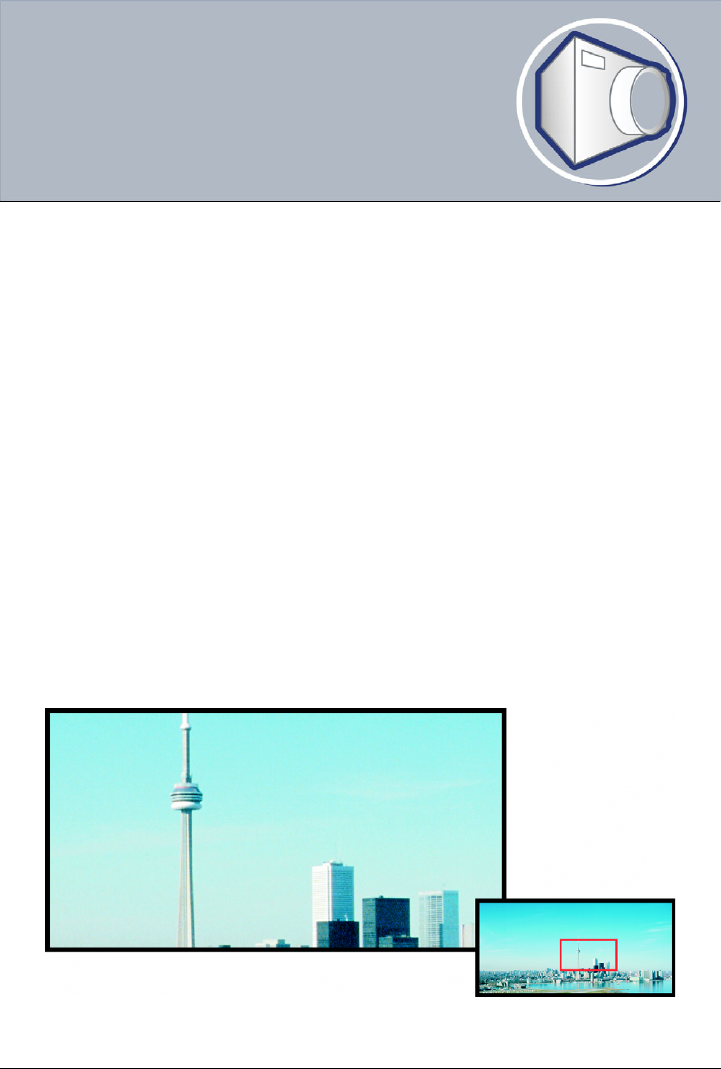
Corel PHOTO-PAINT: Viewing images and obtaining image information 363
Viewing images and
obtaining image information
You can change the appearance of windows and the magnification level of an image.
Changing the magnification level allows you to view specific image areas and makes
image editing easier.
In this section, you’ll learn about
• viewing images
• zooming
• obtaining image information
Viewing images
Images can be viewed in a number of different ways. You can hide windows, the toolbox
and the toolbars, leaving only the menu bar and the image windows visible. You can
view a large representation of an image in a full-screen preview.
You can view image areas that fall outside the image window. For example, when you
are working at a high magnification level or with large images, you can pan or jump to
a different image area without having to adjust the magnification level.
You can select the image area to be displayed in the image window using the
Navigator pop-up.
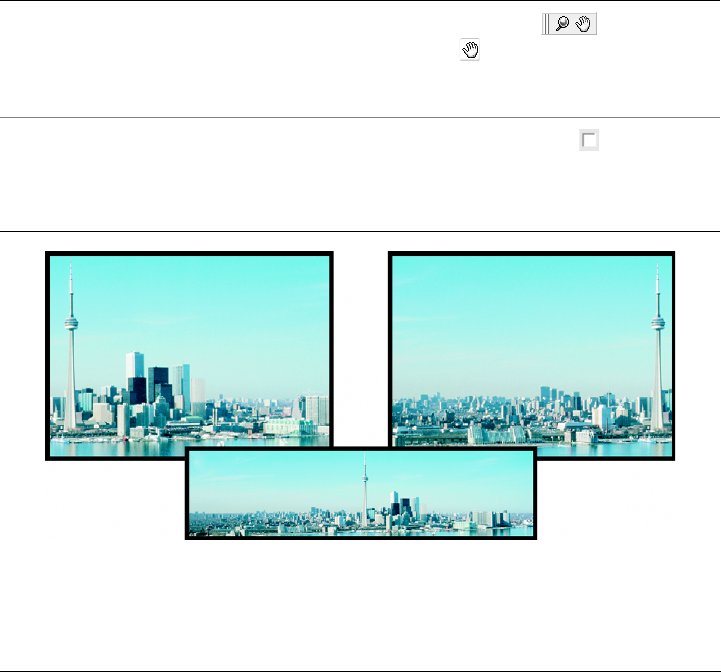
364 CorelDRAW Graphics Suite 12 User Guide
To hide windows, the toolbox, and toolbars
•Click Window ` Hide windows.
If you want to return to normal view, right-click in the workspace, and click Show
windows.
To view a full-screen preview of an image
•Click View ` Full-screen preview.
If you want to return to normal view, press any key or click the screen.
To view an image area that falls outside the image window
Image areas that fall outside the image window can be dragged into view using
the Pan tool. This photo has been dragged from its original position in the first
image toward the right in the second image. The inset below shows the entire
image.
To Do the following
Pan to another area of the image Open the Zoom flyout , and click
the Pan tool . Drag the image until the
area you want to view displays in the image
window.
Jump to another area of the image Click the Navigator pop-up at the lower-
right corner of the image window. Drag the
rectangle to the area of the image you want
to view.
Corel PHOTO-PAINT: Viewing images and obtaining image information 365
Zooming
By default, images are displayed at 100% magnification; however, you can zoom in to
get a closer look at image detail or zoom out to view a larger portion of the image. You
can also specify the magnification level at which images open.
To zoom
•Open the Zoom flyout , and click the Zoom tool .
Obtaining image information
You can view image properties, such as name, file format, and file size.
You can view information about image areas, such as pointer coordinates, as you work.
You can view the changes in the x-coordinate (X) or the y-coordinate (Y) as you move
the pointer in the image window. You can also make note of the angle (A) and distance
(D) that the pointer moves in the image window as you draw a shape or define an
editable area. In addition, you can obtain statistics related to the x- and y-coordinates
of the center position (C) and the radius (R) when you create or select a circular editable
area or shape.
You can also view color information for an image area that corresponds to the pointer
position. By default, the RGB, Hex, and CMYK values are displayed. You can choose
to display color information in two color models at once. For example, you can view
both the grayscale and RGB values of a particular image area.
To Do the following
Zoom in Click the image where you want to magnify
it.
Zoom in to a specific area Drag across the area you want to magnify.
Zoom out Right-click in the image window.
Switch between the current and previous
zoom levels
Click the Zoom to previous button on
the extended property bar .
Zoom in or out by a preset level Choose a magnification level from the Zoom
level list box on the property bar.
366 CorelDRAW Graphics Suite 12 User Guide
To view image information
•Click File ` Document properties.
To view information about image areas
•Click Window ` Dockers ` Info.
By default, the Image info palette lists the RGB, Hex, and CMYK values from
top to bottom.
You can also view color mode information by clicking the Eyedropper tool ,
and pointing to an image area.
From here
You can also
Choose a new color model Click the top flyout arrow , choose a color
level, and click a color model.
Change the units of measure used to display
image information
Click the bottom flyout arrow, and click a
unit of measure.
For more information about In the Help index, see...
Setting the magnification level at which
images are opened
magnification level, customizing
Zooming to display image areas at different
magnification levels
zooming, changing magnification level
Maximizing or restoring the work area viewing, maximizing or restoring work area

Corel PHOTO-PAINT: Working with color 367
Working with color
Your application lets you choose and create colors using a wide variety of industry-
standard palettes, color mixers, and color models. You can create and edit custom color
palettes to store frequently used colors for future use.
In this section, you’ll learn about
• choosing colors
• creating custom color palettes
Choosing colors
You can choose background, foreground, and fill colors using the color control area,
color palettes, sampling, color viewers, color harmonies, or color blends.
Choosing a color using the color control area
In the color control area, you can view the selected foreground, background, and fill
colors, and you can choose new colors.
Choosing a color using the default color palette
A color palette is a collection of color swatches. You can choose foreground,
background, and fill colors using the default color palette, which contains 99 colors
from the RGB color model.
Choosing a color using fixed or custom color palettes
Fixed color palettes are provided by third-party manufacturers. Some examples of these
are HKS Colors, Focoltone, PANTONE, and TRUMATCH. It may be useful to have
on hand a manufacturer’s swatch book, which is a collection of color samples that shows
exactly what each color looks like when printed.
Custom color palettes can include colors from any color model or fixed color palette.
You can save a custom color palette for future use. For more information about working

368 CorelDRAW Graphics Suite 12 User Guide
with custom color palettes, see “Creating custom color palettes” on page 371 and
“Opening and editing custom color palettes” in the Help.
Sampling colors
When you want to use a color that already exists in an object or image, you can sample
the color to achieve an exact match. By default, you sample a single pixel from the
image window.
When you sample a color from a photo, what looks to be a solid-colored area may
actually be subtly shaded or dithered. In this case, it is useful to average the colors of
pixels in a larger sample area. You can set the sample area to 3 x 3 pixels, or to 5 x 5
pixels for high-resolution images. You can also sample pixels in a selected area.
Choosing a color using color viewers
Color viewers give a representation of a range of colors using either one-dimensional or
three-dimensional shapes. The default color viewer is based on the HSB color model,
but you can use this viewer to choose CMY or RGB colors. For information about color
models, see “Understanding color models” in the Help.
Choosing a color using color harmonies
Color harmonies work by superimposing a shape, such as a rectangle or a triangle, over
a color wheel. Each vertical row in the color grid begins with the color located at one of
the points on the superimposed shape.
The colors at each corner of the shape are always complementary, contrasting, or
harmonious, depending on the shape you choose.
Choosing a color using color blends
When you choose a color using color blends, you combine base colors to get the color
you want. The color blender displays a grid of colors that it creates from the four base
colors you choose.
To choose a color using the color control area
1In the color control area of the toolbox, double-click one of the following:
• Foreground color swatch
• Background color swatch
2Move the color slider to set the range of colors displayed in the color selection area.
3Click in the color selection area to choose a color.
Corel PHOTO-PAINT: Working with color 369
To choose a color using the default color palette
To choose a color using a fixed or custom color palette
1In the color control area of the toolbox, double-click one of the following:
• Foreground color swatch
• Background color swatch
2Click the Palettes tab.
3Choose a fixed or custom palette from the Palette list box.
4Move the color slider to set the range of colors displayed in the color selection area.
5Click a color in the color selection area.
You should use the same color model for all colors in an image; the colors will
be consistent, and you will be able to predict the colors of the final output more
accurately. It is preferable to use the same color model that you are using for
the final output.
To sample a color
1Click the Eyedropper tool .
2Click the image to choose a foreground color.
The default sample size is 1 pixel.
To Do the following
Choose a foreground color Click a color swatch.
Choose a background color Hold down Ctrl, and click a color swatch.
Choose a fill color Right-click a color swatch.
You can also
Increase the sample size Click the Eyedropper 3 x 3 button on
the extended property bar.
Increase the sample size for a high-resolution
image
Click the Eyedropper 5 x 5 button on
the extended property bar.
370 CorelDRAW Graphics Suite 12 User Guide
To choose a color using a color viewer
1In the color control area of the toolbox, double-click one of the following:
• Foreground color swatch
• Background color swatch
2Click the Models tab.
3Choose a color model from the Model list box.
4Click Options ` Color viewers, and click a color viewer.
5Move the color slider.
6Click a color in the color selection area.
If you choose a color that is out of the printer’s gamut, Corel PHOTO-PAINT
displays the closest in-gamut color. This color is displayed in the Reference
area, in the small swatch beside the New color. You can either choose this
closest in-gamut color or you can correct the out-of-gamut color.
To choose a color using color harmonies
1In the color control area of the toolbox, double-click one of the following:
• Foreground color swatch
• Background color swatch
Sample from a selected area Click the Eyedropper selection button
on the extended property bar.
You can also
Choose a fill color Double-click the Fill color swatch in the
color control area, click the Uniform fill
button in the Select fill dialog box, and
click Edit.
Swap colors Click Options ` Swap colors. This swaps
the Old color (the current foreground or
background color) and the New color (which
has been chosen in the color selection area).
You can also
Corel PHOTO-PAINT: Working with color 371
2Click the Mixers tab.
3Click Options ` Mixers ` Color harmonies.
4Choose a shape from the Hues list box.
5Choose an option from the Variation list box.
6Drag the black dot on the color wheel.
7Click a color swatch on the color palette below the color wheel.
If you choose a color that is out of the printer’s gamut, Corel PHOTO-PAINT
displays the closest in-gamut color. This color is displayed in the Reference
area, in the small swatch beside the New color. You can either choose this
closest in-gamut color or you can correct the out-of-gamut color.
To choose a color using color blends
1In the color control area of the toolbox, double-click one of the following:
• Foreground color swatch
• Background color swatch
2Click the Mixers tab.
3Click Options ` Mixers ` Color blend.
4Open each color picker, and click a color.
5Click a color in the color selection area.
You can only blend colors that are in the default color palette. If you want to
blend other colors, change the default color palette. For information, see “To
open a custom color palette” in the Help.
Creating custom color palettes
Custom color palettes are collections of colors that you save. A number of preset custom
color palettes are available; however, you can create color palettes from scratch. Custom
color palettes are useful when you frequently choose the same colors, or when you want
to work with a set of colors that look good together.
You can create a custom color palette by choosing each color manually, or by using
colors in an object, an editable area, or an entire document.
372 CorelDRAW Graphics Suite 12 User Guide
To create a custom color palette
1Click Window ` Color palettes ` Palette editor.
2Click New palette .
3Ty p e a f i l e n a m e .
4Click Save.
To create a color palette from an object
1Select an object.
2Click Window ` Color palettes ` Create palette from selection.
3Ty p e a f i l e n a m e .
4Click Save.
To create a color palette from an editable area
1Define an editable area.
2Click Window ` Color palettes ` Create palette from visible.
3Click Save palette as .
4Ty p e a f i l e n a m e .
5Click Save.
For information about defining editable areas, see “Defining editable areas” on
page 414.
To create a color palette from an image
1Click Window ` Color palettes ` Create palette from document.
2Ty p e a f i l e n a m e .
3Click Save.

Corel PHOTO-PAINT: Changing color modes 373
Changing color modes
Changing an image to another color mode, such as RGB, CMYK, or grayscale,
changes the image’s color structure and size and can affect how the image displays and
prints.
In this section, you’ll learn about
• changing the color mode of images
• changing images to the paletted color mode
Changing the color mode of images
In Corel PHOTO-PAINT, the colors of images are defined by color modes. Computer
monitors display images in the RGB color mode; by default, images in Corel PHOTO-
PAINT are created in the RGB color mode.
Color modes are described by their component colors and bit depth. For example, the
RGB (24-bit) color mode is composed of red, green, and blue channels and has a bit
depth of 24 bits. Similarly, the CMYK (32-bit) color mode is composed of cyan,
magenta, yellow, and black channels and has a bit depth of 32 bits. Each channel has a
bit depth of 8 bits.
Although on the screen you may not be able to see the difference between an image in
the CMYK color mode and an image in the RGB color mode, the images are quite
different. Colors from the RGB color space can cover a greater range of the visual
spectrum (they have a larger gamut) than those from the CMYK color space. For the
same image dimensions, a CMYK image has a larger file size than an RGB image, but
it contains the channels necessary to print standard inks.
Each time you convert an image, you may lose color information. For this reason, you
should finish editing and then save an image before you convert it to a new color mode.
Corel PHOTO-PAINT supports the following color modes:
• Black-and-white (1-bit) • Grayscale (8-bit)

374 CorelDRAW Graphics Suite 12 User Guide
To change the color mode of an image
•Click Image ` Color mode, and click one of the following:
• Grayscale (8-bit)
• RGB color (24-bit)
• Lab color (24-bit)
• CMYK color (32-bit)
• Multichannel
• Grayscale (16-bit)
• RGB color (48-bit)
• NTSC RGB
• PAL RGB
Changing images to the paletted color mode
The paletted color mode, also called indexed color mode, is frequently used for GIF
images on the World Wide Web. When you convert a complex image to the paletted
color mode, a fixed color value is assigned to each pixel. These values are stored in a
compact color table, or palette. As a result, the paletted image contains less data than
the original, and it has a smaller file size. Paletted color mode is an 8-bit mode that
stores and displays images using up to 256 colors.
Choosing, editing, and saving a color palette
When you change an image to the paletted color mode, you use a predefined or a
custom color palette and then edit the palette by replacing individual colors. If you
choose the Optimized color palette, you can also edit the palette by specifying a range
sensitivity color. The color palette you use to convert the image is called the processed
color palette, and it can be saved for use with other images.
• Duotone (8-bit) • Paletted (8-bit)
• RGB color (24-bit) • Lab color (24-bit)
• CMYK color (32-bit) • Multichannel
• Grayscale (16-bit) • RGB color (48-bit)
• NTSC RGB (video) • PAL RGB (video)

Corel PHOTO-PAINT: Changing color modes 375
Dithering
Paletted images can only contain up to 256 different colors. If the original image
contains many colors, you can use dithering to create the illusion of seeing more than
256 colors. Dithering creates additional colors and shades from an existing palette by
interspersing pixels of different colors. The relationship of one colored pixel to another
creates an optical mix, so you perceive additional colors.
Dithering can be done by distributing colors either regularly or randomly. Ordered
dithering approximates color blends using regular dot patterns; as a result, solid colors
are emphasized and edges appear harder. Error diffusion scatters pixels randomly,
making edges and colors softer. Jarvis, Stucki and Floyd-Steinberg are methods of error
diffusion.
If your image contains only a few colors and simple shapes, you do not need to use
dithering.
To change an image to the paletted color mode
1Click Image ` Color mode ` Paletted (8-bit).
2Click the Options tab.
3Choose one of the following color palette types from the Palette list box:
• Uniform — provides a range of 256 colors with equal parts of red, green, and
blue
• Standard VGA — provides the Standard VGA 16-color palette
• Adaptive — provides colors original to the image, and preserves the individual
colors (the entire color spectrum) in the image
• Optimized — creates a color palette based on the highest percentage of colors in
the image. You can also select a range sensitivity color for the color palette.
• Black Body — contains colors that are based on temperature. For example,
black may represent cold temperatures, while red, orange, yellow, and white may
represent hot temperatures.
• Grayscale — provides 256 shades of gray, ranging from black (0) to white (255)
• System — provides a palette of Websafe and grayscale colors
• Web safe — provides a palette of 216 colors that are common to Web browsers
4Choose a dithering option from the Dithering list box.
5Move the Dither intensity slider to adjust the amount of dithering.
376 CorelDRAW Graphics Suite 12 User Guide
The Ordered dithering option applies more quickly than do the error
diffusion options Jarvis, Stucki, and Floyd-Steinberg; however, it is less
accurate.
You can choose a custom color palette by clicking the Options tab, clicking
Open, locating the color palette file you want, and double-clicking the
filename.
From here
You can also
Save the conversion options as a preset Click Add preset , and type a name in the
Save preset box.
Edit the processed color palette Click the Processed palette tab, and click
Edit. In the Color table dialog box, edit the
color palette.
Save the processed color palette Click the Processed palette tab, and click
Save. Choose the folder where you want to
save the processed color palette, and type a
filename.
For more information about In the Help index, see...
Changing images to the black-and-white
color mode
black-and-white color mode
Changing images to the duotone color mode duotone
Setting the color range for a custom color
palette
color palette, color range
Changing multiple files to the paletted color
mode
paletted color mode, converting files to

Corel PHOTO-PAINT: Bringing images into Corel PHOTO-PAINT 377
Bringing images into
Corel PHOTO-PAINT
You can bring images into Corel PHOTO-PAINT in a variety of ways.
In this section, you’ll learn about
• opening images
•importing files
• loading photos from a digital camera
• working with vector graphics
Opening images
You can open most bitmaps in Corel PHOTO-PAINT. Each image you open displays
in its own image window.
To open an image
1Click File ` Open.
2Choose the folder where the file is stored.
3Double-click the filename.
Importing files
Corel PHOTO-PAINT provides filters that convert files from one format to another
when you import them. You can import a file and place it in the active application
window as an object. The imported file becomes part of the active image.
To import a file into an active image
1Click File ` Import.
2Choose the folder where the file is stored.

378 CorelDRAW Graphics Suite 12 User Guide
3Choose a file format from the Files of type list box.
4Click the filename.
5Enable any of the following active check boxes:
• Do not show filter dialog — lets you use the filter’s default settings without
opening the dialog box
• Check for watermark — lets you check the image for a watermark and any
information it contains such as copyright
• Extract embedded ICC profile — lets you save the embedded International
Color Consortium (ICC) profile to the color folder where the application is
installed
6Click Import.
7Click the image window.
Loading photos from a digital camera
You can load photos from a digital camera into Corel PHOTO-PAINT. Corel PHOTO-
PAINT supports digital cameras that use Microsoft Windows Image Acquisition
(WIA), which provides a standard interface for loading photos. The WIA interface is
available only for the Windows Me and Windows XP operating systems.
If your digital camera does not support WIA, you can use the digital camera’s software
and TWAIN driver for loading photos. The software interfaces and options for loading
photos vary. For information about using your digital camera’s software, see the
manufacturer’s documentation.
To load photos from a digital camera
1Connect a digital camera to your computer.
2Click File ` Acquire image ` Select source.
3Choose a digital camera from the Sources box.
4Click File ` Acquire image ` Acquire.
5In the Get pictures dialog box, choose the images you want to copy.
If your digital camera does not support WIA, you are presented with the digital
camera’s interface for loading photos. Options will vary.
6Click Get pictures.
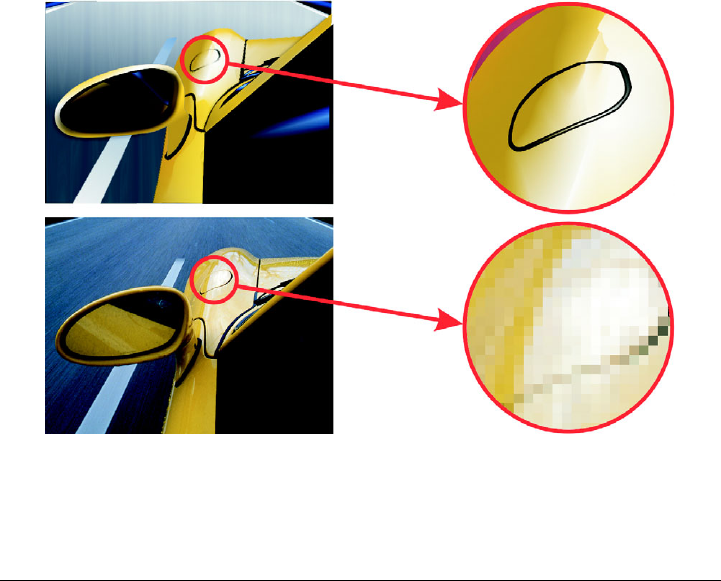
Corel PHOTO-PAINT: Bringing images into Corel PHOTO-PAINT 379
To open digital camera photos automatically in Corel PHOTO-PAINT
1Connect a digital camera to your computer.
2In the dialog box, choose Corel PHOTO-PAINT in the Select the program to
launch for this action area.
3Enable the Always use this program for this action check box.
Double-clicking a thumbnail in the digital camera directory will bring the image
into Corel PHOTO-PAINT.
Working with vector graphics
Vector graphics are made up of lines, curves, objects, and fills that are all calculated
mathematically. Although you cannot work with vector graphics in Corel PHOTO-
PAINT, you can convert vector graphics to bitmaps as you open or import them. This
conversion process is called rasterization. You can also copy vector graphics from
CorelDRAW and paste them into Corel PHOTO-PAINT.
The top illustration is a vector graphic consisting of lines, objects and fills. The
bottom version is a bitmap made up of pixels.

380 CorelDRAW Graphics Suite 12 User Guide
To open a vector graphic
1Click File ` Open.
2Choose the folder where the file is stored.
3From the Files of type list box, choose the vector file format of the file you want to
import.
4Click the filename.
5Click Open.
6In the Convert to bitmap dialog box, specify the settings you want.
To import a vector graphic
1Click File ` Import.
2Choose the folder where the file is stored.
3From the Files of type list box, choose the vector file format of the file you want to
import.
4Click the filename.
5Click Open.
6Click in the image window.
7In the Convert to bitmap dialog box, specify the settings you want.
From here
For more information about In the Help index, see...
Resampling a graphic while importing importing, resampling
Cropping a graphic while importing importing, cropping
Browsing for clipart, photos, and sound files clipart, finding
Inserting files into active images inserting, files
Viewing EXIF information for digital camera
photos
photos, EXIF data
Importing files files, importing
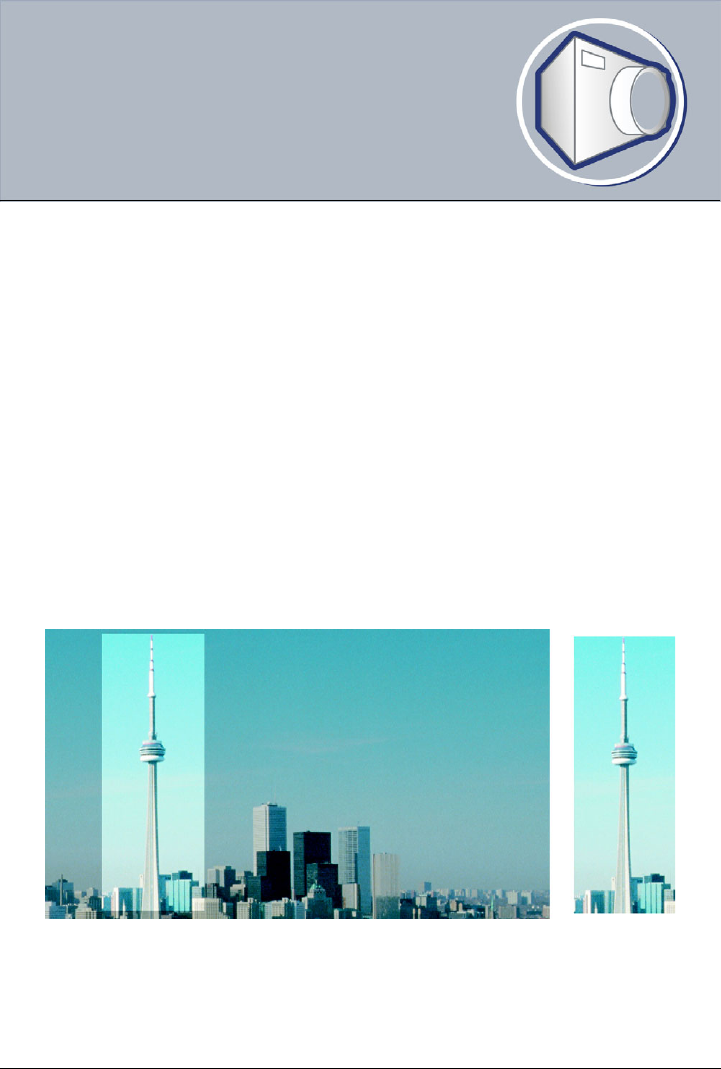
Corel PHOTO-PAINT: Cropping and changing orientation 381
Cropping and changing orientation
You can crop an image to remove unwanted areas or combine multiple images to
create a single, large image. You can also change the orientation of an image by
flipping it or rotating it.
In this section, you’ll learn about
• cropping images
• stitching images together
• changing image orientation
Cropping images
You can crop an image to remove unwanted areas and improve its composition.
Cropping allows you to select a rectangular area that you want to keep and discard the
rest. As a result, you reduce the file size of an image without affecting its resolution.
Cropping lets you remove unwanted image areas.
You can also easily crop a single-color border surrounding an image, such as a white
edge surrounding an old photograph.

382 CorelDRAW Graphics Suite 12 User Guide
Corel PHOTO-PAINT also lets you crop around the editable area of a mask; however,
the resulting image is always rectangular. For information about masks, see “Masking”
on page 413.
To crop an image
1Click the Crop tool .
2Drag to select an area on the image.
3Double-click inside the cropping area.
You can hide the crop overlay to view the image you are cropping more clearly.
Click Image ` Crop ` Crop overlay.
You can also crop an image area by clicking the Crop tool and typing values
in the Size and Position boxes on the property bar.
To crop a border color from an image
1Click Image ` Crop ` Crop border color.
2Enable one of the following options:
• Background — crops the color specified in the Background color swatch in
the color control area of the toolbox
• Foreground — crops the color specified in the Foreground color swatch in
the color control area of the toolbox
• Other — crops the color you choose using the color picker or the Eyedropper
tool
You can also
Enlarge or reduce the cropping area Drag the cropping handles.
Move the cropping area Click and drag inside the cropping area to
reposition it.
Rotate the cropping area to straighten it Click inside the cropping area to display the
rotation handles . Drag the rotation
handles to align the cropping area with the
image area you want to crop.
Expand the cropping area outside the
original image
Click Image ` Crop ` Expand, and drag a
cropping handle outside the image.
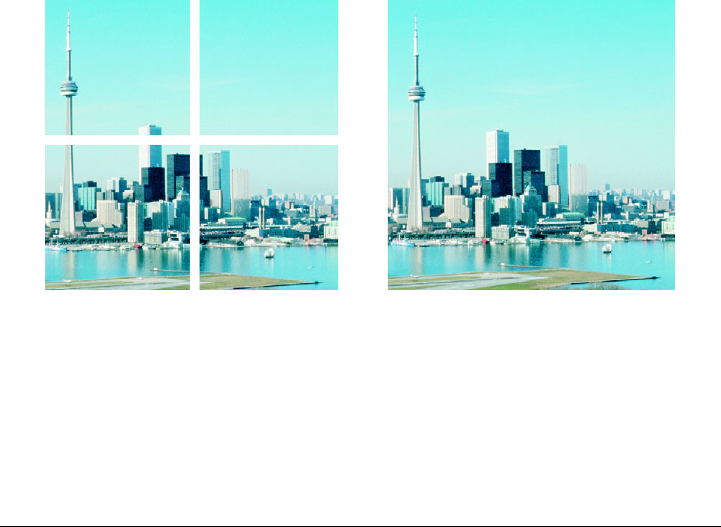
Corel PHOTO-PAINT: Cropping and changing orientation 383
3In the To l e r a n c e area, enable one of the following options:
• Normal — determines the color tolerance based on the similarity of hue values
between adjacent pixels
• HSB mode — determines the color tolerance based on the similarity of hue,
saturation, and brightness levels between adjacent pixels
4Move the Tolerance slider to set the tolerance for the color that you want to crop.
You may need to experiment with different To l e r a n c e slider positions to
successfully remove the border color.
To crop to an editable area of a mask
1Define an editable area on an image.
2Click Image ` Crop ` Crop to mask.
Stitching images together
Image stitching allows you to seamlessly join 2D images. For instance, you can scan a
large image in smaller, overlapping pieces and reassemble them.
You can stitch images together to create a single, large image. This image has
been scanned in four sections and stitched.
To stitch images together
1Open the images you want to stitch together.
2Click Image ` Stitch.
3Choose a filename from the Source files list, and click Add.
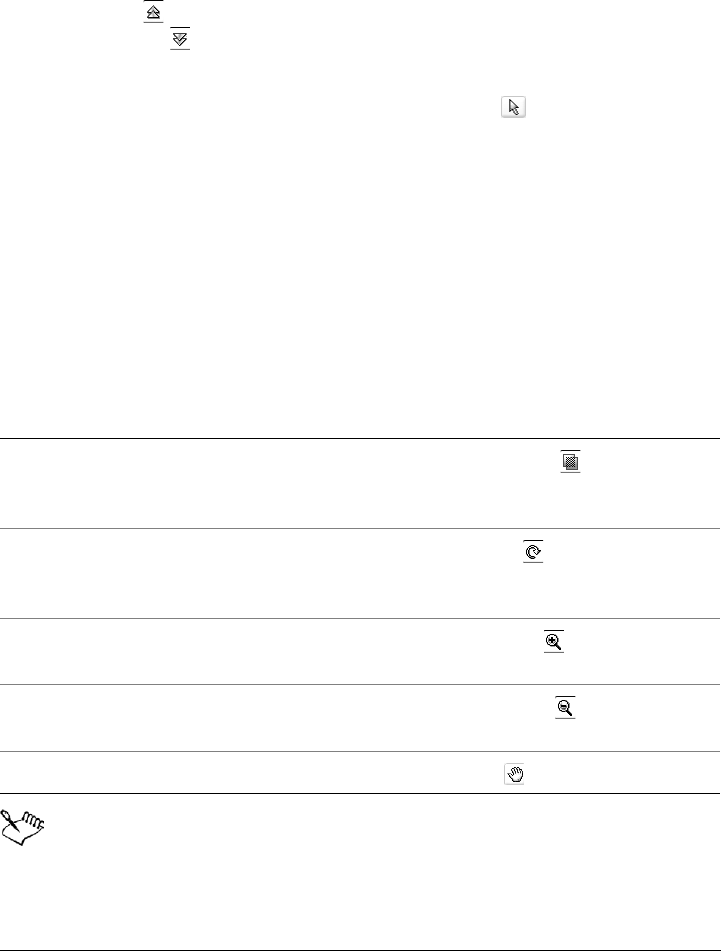
384 CorelDRAW Graphics Suite 12 User Guide
If you want to select all open images, click Add all.
4To change the position of an image in the Selected files list, click a filename, and
click one of the following buttons:
• Up button
• Down button
5Click OK.
6In the Image stitch dialog box, click the Selection tool .
7In the image stitch window, drag an image to align it with another image.
Repeat to align all images.
8Type a value in the Blend images list box to define the number of overlapping
pixels used to blend images together.
9Enable one of the following options:
• Combine to background — creates a single, flattened image
• Create objects from images — creates a stitched image in which each source
image becomes a separate object. You can later adjust the brightness and contrast
of each object so they match.
Stitched images that are flattened have a smaller file size than stitched images
containing separate objects.
You can also
View image alignment Click the Difference tool . Overlapping
image areas are highlighted; correctly
aligned image edges display as black.
Rotate one or more selected images Click the Rotate tool , and drag an image.
If you want to rotate an image by a precise
angle, type a value in the Rotate image box.
Zoom in to inspect an area where images
join
Click the Zoom in tool , and click where
you want a close-up view.
Zoom out Click the Zoom out tool , and click the
image.
View areas outside the image stitch window Click the Pan tool , and drag an image.
Corel PHOTO-PAINT: Cropping and changing orientation 385
Use the Arrow keys with the Selection tool, the Rotate tool, and the Pan tool
to move, rotate and view images precisely in the image stitch window.
Changing image orientation
You can change the orientation of an image by flipping or rotating it in the image
window. You can flip an image horizontally or vertically to reposition a scanned image
or to create unique effects.
You can mirror an image by flipping it.
When you rotate an image, you can specify the angle and direction of rotation, as well
as the paper color that is visible after the image is rotated.
To flip an image
•Click Image ` Flip, and click one of the following:
• Flip horizontally
• Flip vertically
To rotate an image
1Click Image ` Rotate ` Rotate custom.
2Type a value in the Angle box.
3Enable one of the following options:
• Clockwise
386 CorelDRAW Graphics Suite 12 User Guide
• Counterclockwise
4Enable any of the following check boxes:
• Maintain original image size — maintains the size of the original image
• Anti-aliasing — smooths the edges in the image
5Open the Background color picker, and click a color.
You can rotate an image by clicking Image ` Rotate, and clicking 90°
Clockwise, 90° Counterclockwise, or 180°.
You can rotate an image to change its orientation.
From here
For more information about In the Help index, see...
Cropping editable areas cropping, editable areas
Defining editable areas editable areas, defining
Wo r k i n g w i t h m a s k s m a s k s

Corel PHOTO-PAINT: Adjusting color and tone 387
Adjusting color and tone
You can improve the quality of images by adjusting the color and tone to correct color
casts and exposure problems or to alter specific colors.
In this section, you’ll learn about
• adjusting image color and tone
• working with color channels
Adjusting image color and tone
Corel PHOTO-PAINT provides you with filters and tools to make adjustments to the
color and tone of images. When you adjust the color and tone, you adjust elements such
as hue, saturation, brightness, contrast, or intensity. If you want to adjust the color and
tone of the entire image, you can apply an adjustment filter directly to the image or
apply a lens which exists on a separate object layer and can be edited without changing
the original image. For information about lenses, see “Working with lenses” on
page 409.
You can adjust part of an image by editing the size and shape of a lens or by creating an
editable area before applying an adjustment filter. For information about editable areas,
see “Masking” on page 413.
Choosing color and tone filters
Some filters adjust the image automatically, while others give you varying degrees of
control. For example, the Auto equalize filter adjusts the tonal range automatically,
while the To n e c u r ve filter lets you pinpoint and adjust tone, or color, using separate
color channels. More advanced filters, such as the To n e c u r v e filter and the Contrast
enhancement filter, are precise and can correct a variety of problems, but require
practice. If you are new to color and tone correction, consider the following options:
• Automatic adjustments: apply the Auto equalize filter. This filter improves the
tone of most images instantly. If the filter doesn’t correct the problem, you can
undo the change and try another filter.

388 CorelDRAW Graphics Suite 12 User Guide
• Quick tone adjustments: apply the Color tone filter to brighten or darken an
image, or improve contrast using thumbnail buttons. You can also try the
Brightness/Contrast/Intensity filter. After you adjust the brightness, you must
adjust the contrast and intensity to retain image detail.
• Quick color adjustments: apply the Color hue filter to adjust the color using
thumbnail buttons, or apply the Color balance filter which lets you increase or
decrease specific color values. For example, if an image has a green cast, you can
remove some green or add a contrasting color (magenta) to neutralize the green
cast.
Adjusting tone interactively
You can view the tonal range of an image using a histogram to evaluate and adjust the
color and tone of an image. For example, a histogram can help you determine if there is
hidden detail in an underexposed photo. A histogram has a horizontal bar chart that
plots the brightness values of the pixels in your image on a scale from 0 (dark) to 255
(light). The left part of the histogram represents the shadows of an image, the middle
part represents the midtones, and the right part represents the highlights. The height
of the spikes indicates how many pixels are at each brightness level. For example, a large
number of pixels in the shadows (the left side of the histogram) indicates the presence
of image detail in the dark areas of the image.
A histogram is available with the following filters:
• Contrast enhancement
• Histogram equalization
• Sample/Target balance
Adjusting the color and tone using brush strokes
You can adjust the brightness, contrast, hue or saturation in part of an image by
applying brush strokes. You can use preset brushes or create a custom brush. For more
information, see “Creating custom brushes” in the Help.
To adjust image color and tone
1Click Image ` Adjust, and click an adjustment filter.
2In the filter’s dialog box, specify the settings you want.
To adjust image tone interactively
1Click Image ` Adjust ` Contrast enhancement.
Corel PHOTO-PAINT: Adjusting color and tone 389
2Move the Input value clipping arrows to adjust shadows and highlights.
The arrow on the left lets you darken shadow areas. Drag the arrow until it points
to the area where the histogram starts to spike.
The arrow on the right lets you lighten highlight areas. Drag the arrow until it
points to the area where the histogram stops spiking.
3Move the Gamma slider to adjust the midtones.
4Move the Output range compression arrows to fine-tune the contrast:
The arrow on the left lets you lighten darker areas as you drag the arrow to the
right.
The arrow on the right lets you darken light areas as you drag the arrow to the left.
To adjust image color and tone using brush strokes
1Select an object or the background image.
2Open the Brush flyout , and click the Effect tool .
3On the property bar, open the Effect tool picker, and click one of the following:
• Brightness tool — brightens or darkens the image
• Contrast tool — increases or decreases the contrast
• Hue tool — shifts all hues along the color wheel by the number of degrees
that you specify in the Amount box
• Hue replacer tool — retains the brightness and saturation of the original
colors, but replaces all hues with the current paint color
• Sponge tool — saturates or desaturates the colors
• Dodge/Burn tool — brightens (overexposes) or darkens (underexposes) the
image
• Tint tool — tints the image using the current paint color
You can also
Automatically redistribute pixels across the
tonal range
Enable the Auto-adjust check box.
Set input and output values by sampling
pixels in the image
Enable the Set input values or Set output
values option from the Eyedropper
sampling area. Click the Shadow
eyedropper button to sample shadow
areas, or click the Highlight eyedropper
button to sample highlight areas.
390 CorelDRAW Graphics Suite 12 User Guide
4Choose a preset brush from the Brush type list box on the property bar.
If you want to customize the brush, specify the settings you want on the property
bar.
5Drag in the image window.
Working with color channels
You can adjust the color and tone of an image by making changes directly to the image's
color channels. The number of color channels in an image depends on the number of
components in the color mode associated with the image. For example, black-and-
white, grayscale, duotone, and paletted images have only one color channel; RGB and
Lab images have three channels; and CMYK images have four color channels. For more
information about these color models, see “Understanding color models” in the Help.
Displaying, mixing and editing color channels
Although color channels represent the colored components of an image, they are
displayed by default as grayscale images in the image window. However, you can display
these channels in their respective colors so that the red channel is tinted red, the blue
channel is tinted blue, and so on.
You can mix color channels to balance the colors of an image. For example, if an image
has too much red, you can adjust the red channel in an RGB image to improve image
quality.
You can also
Increase the effect of the brush across an area
without clicking over the area multiple times
Click the Cumulative button on the
Stroke attributes bar that displays in the
Brush settings docker. This option is
available only for some of the Effect tools. If
the Brush settings docker is not open, click
Window ` Dockers ` Brush settings.
Apply the effect to an object and the
background simultaneously
Click the Merge source button on the
Dab attributes bar that displays in the
Brush settings docker. This option is only
available when the Cumulative button is
disabled.

Corel PHOTO-PAINT: Adjusting color and tone 391
You can edit color channels the same way that you edit other grayscale images. For
example, you can select areas, apply paints and fills, add special effects or filters, and cut
and paste objects in the image channel.
Splitting and combining images using color channels
You can split an image into a series of 8-bit grayscale image files — one for each color
channel of the color mode. Splitting an image into separate channel files lets you edit
one channel without affecting the others, save channel information before you convert
the image to another mode, or associate channels from one mode with another mode for
editing purposes. For example, if you have an oversaturated RGB image, you can reduce
the saturation by splitting the image into the HSB mode and reducing the saturation
(S) channel. When you finish editing the images, you can combine them into one image.
The images are combined automatically using equal values.
You can split an image into the following color channels.
To display color channels
•Click Window ` Dockers ` Channels.
You can display color channels using their respective colors by clicking To o l s
` Customization. In the Wo rk s pa ce list of categories, click Display, and
enable the Tint screen color channels check box.
Splitting mode Color channels created
RGB Red (R), green (G), blue (B)
CMYK Cyan (C), magenta (M), yellow (Y), black
(K)
HSB Hue (H), saturation (S), brightness (B)
HLS Hue (H), lightness (L), saturation (S)
YIQ Luminance (Y), two chromaticity values (
I, Q)
Lab Luminosity (L), green/magenta (a), blue/
yellow (b)

392 CorelDRAW Graphics Suite 12 User Guide
To mix color channels
1Click Image ` Adjust ` Channel mixer.
2Choose a color mode from the Color model list box.
3Choose an output channel from the Output channel list box.
4Move the sliders in the Input channels area.
To edit a color channel
1In the Channels docker, click the channel that you want to edit.
If the Channels docker is not open, click Window ` Dockers ` Channels.
2Edit the image.
To split an image using color channels
•Click Image ` Split channels to, and click a color mode.
Images in the CMYK and Lab color modes must be split into their original
component channels.
To combine images using color channels
1Click Image ` Combine channels.
2In the Mode area, choose a color mode option.
3In the Channel area, choose a channel option and click a filename from the Images
list to associate the channel with a file.
4Repeat step 3 until all the channels in the Channel area have been associated with
an image from the Images list.
From here
For more information about In the Help index, see...
Adjustment filters adjustment filters
Working with color channels color channels

Corel PHOTO-PAINT: Changing image dimensions, resolution, and paper size 393
Changing image dimensions,
resolution, and paper size
You can change the dimensions and resolution of an image. You can also change the
size of the paper border that surrounds an image.
In this section, you’ll learn about
• changing image dimensions
• changing image resolution
•changing the paper size
Changing image dimensions
You can change the physical dimensions of images by increasing or decreasing their
height and width. When you increase image dimensions, the application inserts new
pixels between existing pixels, and their colors are based on the colors of adjacent pixels.
If you increase image dimensions significantly, images may appear stretched and
pixelated.
You can change the height and width of an image without changing the
resolution. The center image is the original, the first image has smaller
dimensions, and the third image has larger dimensions. Notice the pixelation
of the larger image.

394 CorelDRAW Graphics Suite 12 User Guide
To change the dimensions of an image
1Click Image ` Resample.
2Enable any of the following check boxes:
• Anti-alias — smooths the edges in the image
• Maintain aspect ratio — avoids distortion by maintaining the width-to-height
ratio of the image
3In the Image size area, type values in one of the following pairs of boxes:
• Width and Height — let you specify the image dimensions
• Width % and Height % — let you resize the image to a percentage of its
original size
When you change the dimensions of an image, you produce better results using
width and height values that are factors of the original values. For example,
reducing an image by 50 per cent produces a better-looking image than by
reducing the size by 77 per cent. When reducing an image by 50 per cent, the
application removes every other pixel; to reduce an image by 77 per cent, the
application must remove pixels irregularly.
Changing image resolution
You can change the resolution of an image increase or decrease its file size. Resolution is
measured by the number of dots per inch (dpi) when the image is printed. The
resolution you choose depends on how the image is output. Typically, images created
only for display on computer monitors are 96 or 72 dpi and images created for the
World Wide Web are 72 dpi. Images created for printing on desktop printers are
generally 150 dpi, while professionally printed images are usually 300 dpi, or higher.
Increasing resolution
Higher resolution images contain smaller and more densely packed pixels than lower
resolution images. Upsampling increases the resolution of an image by adding more
pixels per unit of measure. Image quality may be reduced because the new pixels are
interpolated based on the colors of neighboring pixels; the original pixel information is
simply spread out. You cannot use upsampling to create detail and subtle color
gradations where none existed in the original image. When you increase image
resolution, the image size increases on your screen; by default the image maintains its
original size when printed.
Corel PHOTO-PAINT: Changing image dimensions, resolution, and paper size 395
Decreasing resolution
Downsampling decreases the resolution of an image by removing a specific number of
pixels per unit of measure. This produces better results than upsampling. Best results
are usually achieved when downsampling is done after correcting an image’s color and
tone but before sharpening. For more information about correcting and sharpening
images, see “Adjusting color and tone” on page 387 and “Retouching” on page 397.
You can change the resolution and size of an image at the same time. The center
image is the original, the first image is downsampled, and the third image is
upsampled.
To change the resolution of an image
1Click Image ` Resample.
2Enable any of the following check boxes:
• Identical values — sets the same value in the Horizontal and Vertical boxes
• Anti-alias — smooths the edges in the image
• Maintain original size — maintains the size of the file on your hard disk when
you change the resolution of the image
3In the Resolution area, type values in the following boxes:
• Horizontal
• Vertical
Changing the paper size
Changing the paper size lets you modify the dimensions of the printable area, which
contains both the image and the paper. When you resize the paper, you increase or
396 CorelDRAW Graphics Suite 12 User Guide
decrease the paper-colored border, but not the dimensions of the original image.
However, if you reduce the paper size so that its height and width are smaller than the
dimensions of the original image, the original image will be cropped.
You can change the paper size surrounding the original image.
To change the paper size
1Click Image ` Paper size.
2Choose a unit of measure from the list box beside the Width box.
3Type values in the following boxes:
• Width
• Height
If you want to lock the paper size ratio, click Lock .
From here
For more information about In the Help index, see...
Resampling images resampling, images
Changing the size of an image by cropping cropping, images
Cropping the editable area of a mask cropping, editable areas

Corel PHOTO-PAINT: Retouching 397
Retouching
Corel PHOTO-PAINT lets you retouch images to improve their quality or modify
their contents.
In this section, you’ll learn about
• improving scanned images
•removing red-eye
• removing dust and scratch marks
• cloning image areas
•sharpening images
• erasing image areas
• smearing, smudging, and blending colors
Improving scanned images
You can remove lines from scanned or interlaced video images. These lines can be filled
with copies of adjacent lines of pixels, or with colors derived from surrounding pixels.
You can also remove moiré or noise. Moiré is the wave pattern produced when halftone
screens of two different frequencies are superimposed on the same image. Noise is the
speckled effect produced by scanning or video-capturing.
398 CorelDRAW Graphics Suite 12 User Guide
You can remove lines from a scanned image using the Deinterlace filter.
To improve scanned images
Removing red-eye
You can remove the red-eye effect from the eyes of subjects in photos. Red-eye occurs
when light from a flash reflects off the back of a person’s eye.
To remove red-eye
1Open the Touch-up flyout , and click the Red-eye removal tool .
2Type a value in the Size box to match the brush size to the eye.
3Click the eye to remove the red pixels.
To Do the following
Remove moiré Click Effects ` Noise ` Remove moiré,
and specify the settings you want.
Remove noise Click Effects ` Noise ` Remove noise, and
specify the settings you want.
Remove lines Click Image ` Tr a n s f o r m ` Deinterlace.

Corel PHOTO-PAINT: Retouching 399
Removing dust and scratch marks
Corel PHOTO-PAINT provides several different ways to improve the appearance of an
image that has small dust and scratch marks. You can apply a filter to the entire image,
or if an image has one or more scratches in a specific area, you can create a mask around
the scratches and apply the filter to the editable areas.
The filter works by eliminating the contrast between pixels that exceed the contrast
threshold you set. You can set a radius to determine how many pixels are affected by the
changes. The settings you choose depend on the size of the blemish and the area
surrounding it. For example, if you have a white scratch that is 1 or 2 pixels wide on a
dark background, you can set a radius of 2 or 3 pixels and set the contrast threshold
higher than if the same scratch was on a light background.
You can also remove imperfections, such as tears, scratch marks, and wrinkles, from an
image by blending its textures and colors. Similar to using a filter, you choose the range
of pixels necessary to retouch the image, depending on the size of the correction and the
area surrounding it.
If the scratch or blemish is fairly large or in an area of the image that has a varied color
and texture, such as leaves on a tree, you can achieve better results by cloning image
areas. For information about cloning, see “Cloning image areas” on page 402.
To remove small dust and scratch marks throughout an image
1Click Image ` Correction ` Dust and scratch.
2Move the following sliders:
• Radius — lets you set the range of pixels used to produce the effect. Set the
radius as low as possible to retain image detail.
• Threshold — lets you set the amount of noise reduction. Set the threshold as
high as possible to retain image detail.
400 CorelDRAW Graphics Suite 12 User Guide
You can remove small dust and scratch marks from an image by applying the
Dust and scratch filter.
To remove scratch marks from part of an image
1Define an editable area that includes the scratch marks.
2Click Image ` Correction ` Dust and scratch.
3Move the following sliders:
• Radius — lets you set the range of pixels used to produce the effect. Set the
radius as low as possible to retain image detail.
• Threshold — lets you set the amount of noise reduction. Set the threshold as
high as possible to retain image detail.
You can remove scratches from specific areas by creating a mask around the
scratches before applying the Dust and scratch filter. A dashed line or red-
tinted overlay indicates the presence of a mask.
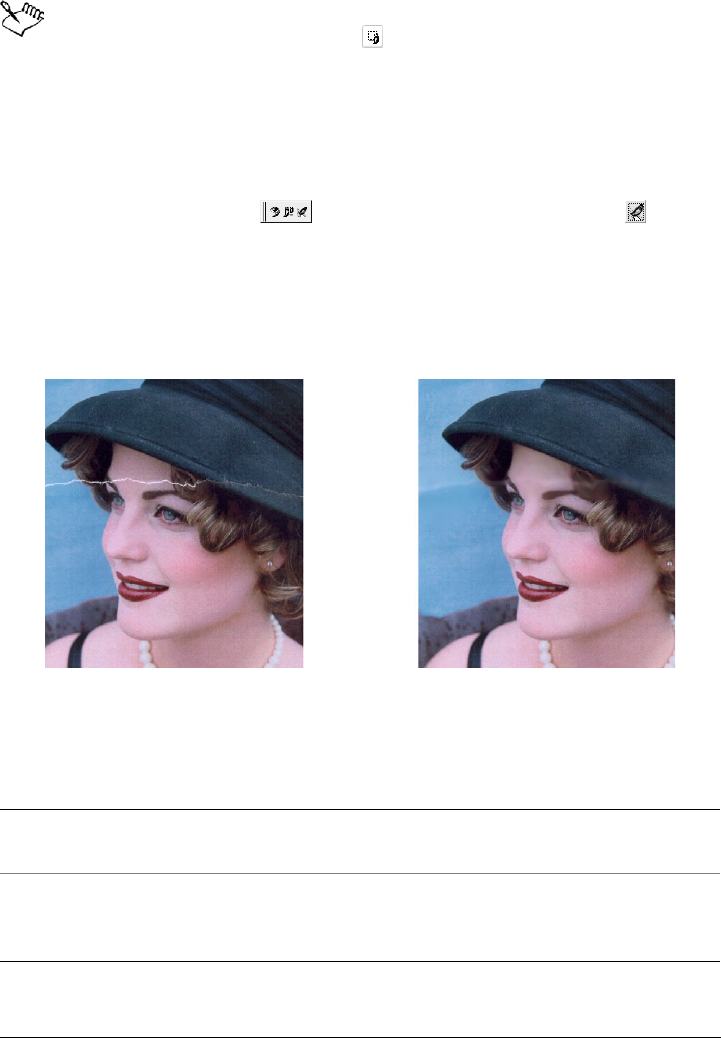
Corel PHOTO-PAINT: Retouching 401
You can use the Brush mask tool to define an editable area that includes
the scratch mark. Choose a nib size that is wider than the scratch mark so you
can brush over the scratch easily. For information about the Brush mask tool,
see “To define an editable area by freehand” on page 415.
To remove imperfections from an image by blending textures and colors
1Open the Touch-up flyout , and click the Touch-up brush tool .
2Choose a nib from the Shape picker.
3Type a value in the Size box to specify the nib size.
4Choose a value from the Strength box to set the intensity of the effect.
5Dab the brush in the image window to apply the effect.
You can remove imperfections from an image by blending textures and colors
using the Touch-up brush tool.
You can also
Apply the effect to the object and the
background simultaneously
Click the Enable or disable merged source
button.
Change the brush size Hold down Shift while dragging in the
image window. Release the key when the nib
is the size you want.
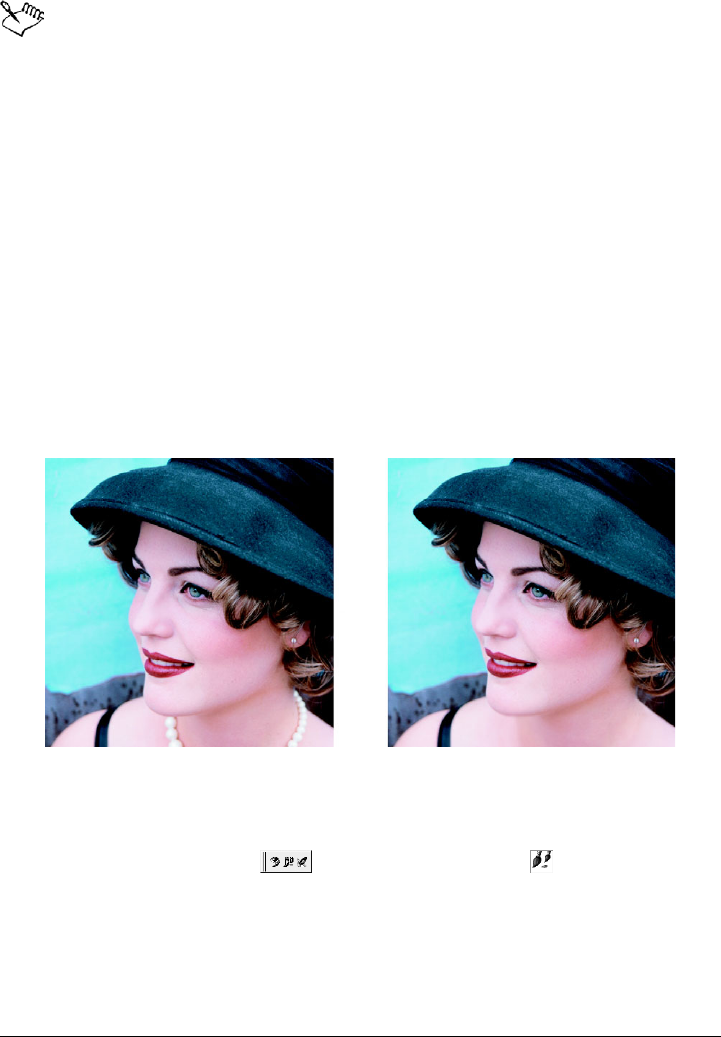
402 CorelDRAW Graphics Suite 12 User Guide
You can use the Touch-up brush tool on images in the grayscale, duotone,
Lab, RGB, and CMYK color modes.
Cloning image areas
You can copy pixels from one image area to another in order to cover damaged or
unwanted elements in an image. For example, you can fix a tear or remove a person from
an image by applying cloned pixels over the area you want to remove. You can also clone
image elements you like and apply them to another image area or a second image. If
you clone an object, the newly cloned areas are added to the active object. You can also
create abstract images, based on pixels sampled from the original image.
When you clone, two brushes display in the image window: a source point brush and a
clone brush that applies the copied pixels from the source point. A cross-hair displays in
the source point brush to distinguish it from the clone brush. The source point brush
moves relative to the clone brush as you drag across the image.
The Clone tool was used to remove the woman’s necklace.
To clone an image area or object
1Open the Touch-up flyout , and click the Clone tool .
2On the property bar, open the Clone picker, and click Clone.
3Choose a brush from the Brush type list box.
4Click the image to set a source point for the clone.
If you want to reset the source point, right-click the area you want to clone.
Corel PHOTO-PAINT: Retouching 403
5Drag the clone brush in the image window to apply the pixels from the source
point.
Sharpening images
You can sharpen images to increase contrast, enhance image edges, or reduce shading.
To sharpen an image, or an editable area of an image, you can use filters or brush
strokes. Filters can also be applied using a lens. For more information about lenses, see
“Working with lenses” on page 409. Sharpening is usually done after adjusting the color
and tone of an image and after resampling or resizing.
You can also
Create abstract image areas based on pixels
sampled from the source point
Click Impressionism clone or
Pointillism clone on the Clone picker
before dragging in the image window.
Create multiple clones of an object Click the Cumulative button on the
Stroke attributes bar that displays in the
Brush settings docker. This option is
available only for some of the Effect tools
and the Clone tool. If the Brush settings
docker is not open, click Window `
Dockers ` Brush settings.
Clone an object and the background
simultaneously
Click the Merge source button on the
Dab attributes bar that displays in the
Brush settings docker. This option is only
available when the Cumulative button is
disabled.

404 CorelDRAW Graphics Suite 12 User Guide
You can reveal more image detail by sharpening an image.
To sharpen an image by applying a filter
1Click Image ` Correction ` Tu n e s h a r p e n .
2Move the Percentage slider to set the amount of sharpening that is applied each
time you click a thumbnail button.
3Click any of the following thumbnail buttons:
• Unsharp mask — lets you accentuate edge detail and focus blurred areas in the
image without removing low-frequency areas.
• Adaptive unsharp — lets you accentuate edge detail by analyzing the values of
neighboring pixels. This filter preserves most image detail, but its effect is most
apparent in high-resolution images.
• Sharpen — lets you accentuate the edges of the image by focusing blurred areas
and increasing the contrast between neighboring pixels. Move the Background
slider to set the threshold for the effect. Lower values increase the number of
pixels changed by the sharpening effect.
• Directional sharpen — lets you enhance the edges of an image without
creating a grainy effect.
Corel PHOTO-PAINT: Retouching 405
The Unsharp mask filter provides best results for most photographs.
Most sharpen filters support all color modes except 48-bit RGB, 16-bit
grayscale, paletted, and black-and-white. The Sharpen filter supports all color
modes except paletted and black-and-white.
You can access each of the sharpen filters individually by clicking Effects `
Sharpen, and clicking a filter.
You can use this procedure to sharpen an editable area of an image.
To sharpen selected areas by applying brush strokes
1Open the Brush flyout , and click the Effect tool .
2On the property bar, open the Effect tool picker, and click the Sharpen tool .
3Choose a brush from the Brush type list box.
4Choose a nib from the Shape picker.
5Type a value in the Size box to specify the nib size.
6Drag across an image area.
Erasing image areas
You can edit images and objects by erasing areas. For example, you can erase part of an
object to change its shape or reveal more of the layer below. You can also erase areas of
the image to reveal the background color, or erase part of the last action applied to the
image.
The tools used to erase have many of the same settings as brushes, which means you can
control the size, shape and transparency to create unique effects. For example, you can
You can also
Remove shading Click Effects ` Sharpen ` High pass. The
High pass filter removes image detail and
shading to give an image a glowing quality
by emphasizing its highlights and luminous
areas. However, it can also affect the color
and tone of the image.
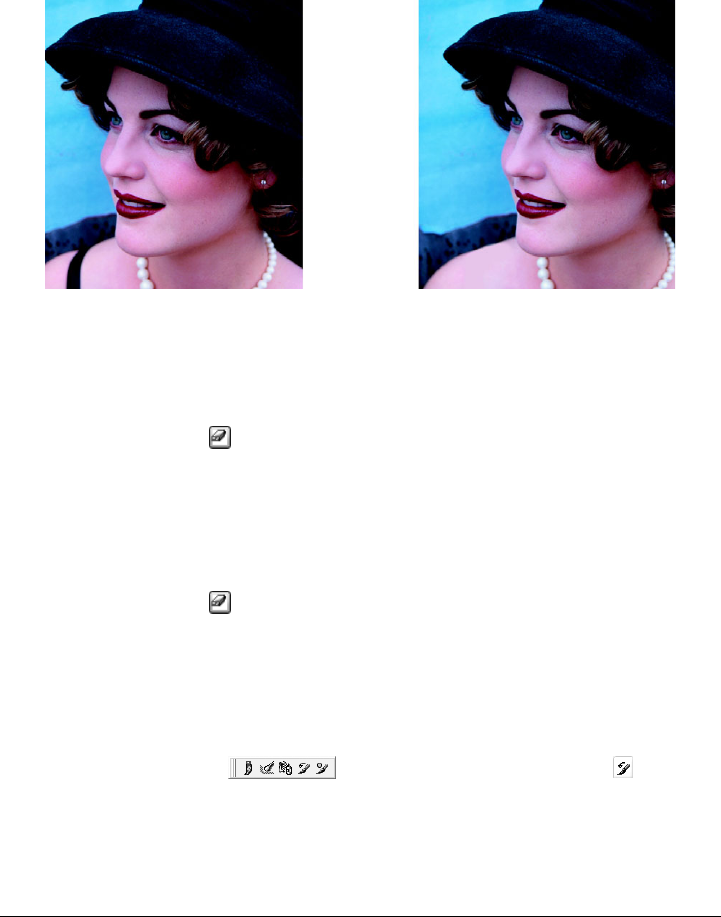
406 CorelDRAW Graphics Suite 12 User Guide
apply a bitmap fill to the entire image, increase the transparency value of the eraser tool,
and create a superimposed effect by partially erasing the fill (the last action performed).
You can also erase image areas based on color. The background color replaces the
foreground color you erase.
The Eraser tool was used to remove the strap from the woman’s dress.
To erase part of an object
1 Select an object.
2Click the Eraser tool .
3Specify the settings you want on the property bar.
4Drag across the area you want to erase.
To erase image areas and reveal the background color
1Click the Eraser tool .
2Specify the settings you want on the property bar.
3Drag across the image area you want to erase.
To erase the last action applied to an image
1Open the Brush flyout , and click the Undo brush tool .
2Specify the settings you want on the property bar.
3Drag across the area you want to erase.
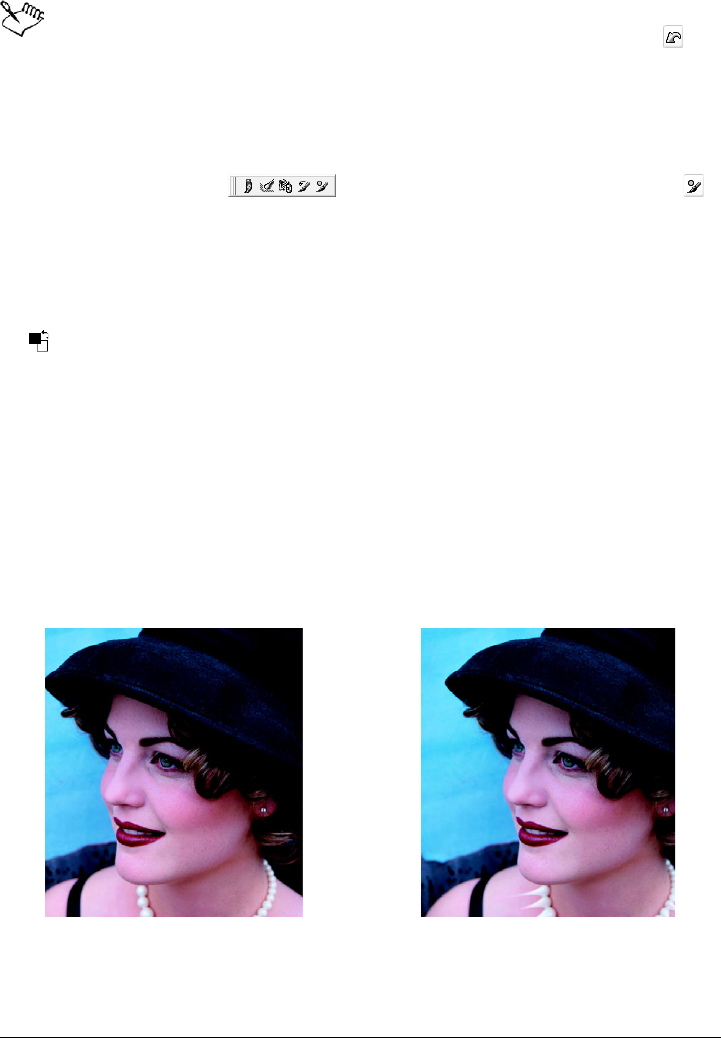
Corel PHOTO-PAINT: Retouching 407
If you want to erase the last action completely, click the Undo button on
the standard toolbar. For more information about undoing, see “Undoing,
redoing, repeating, and fading” in the Help.
To replace a foreground color with the background color
1Open the Brush flyout , and click the Replace color brush tool .
2On the property bar, choose a nib shape from the Shape picker.
3Type a value in the To l e r a n c e box to specify the the color tolerance based on color
similarity.
4In the color control area of the toolbox, double-click the Foreground color swatch
, and choose a color.
5Drag in the image window.
Smearing, smudging, and blending colors
You can smear, smudge, or blend the paint in an image. Smearing produces a similar
effect to dragging across wet paint. Smudging has the same effect as rubbing across a
pastel drawing. Blending softens the transition between colors or hard edges. You can
smear, smudge, or blend the colors in an entire image or in an editable area you define.
For more information about defining an editable area, see “Masking” on page 413.
The Smear tool was used to alter the woman’s necklace.
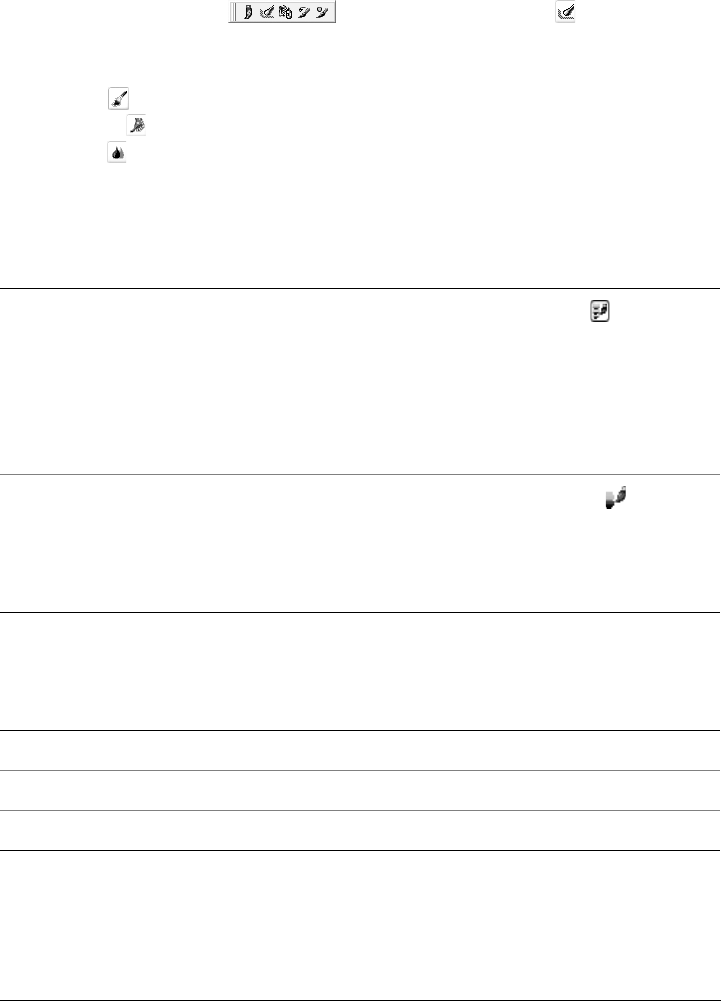
408 CorelDRAW Graphics Suite 12 User Guide
To smear, smudge, or blend colors in an image
1Open the Brush flyout , and click the Effect tool .
2On the property bar, open the Effect tools picker, and click one of the following
tools:
• Smear
• Smudge
• Blend
3Choose a brush from the Brush type list box on the property bar.
4Drag in the image window.
From here
You can also
Increase the effect of the brush across an area
without clicking over the area multiple times
Click the Cumulative button on the
Stroke attributes bar that displays in the
Brush settings docker. This option is
available only for some of the Effect tools
and the Clone tool. If the Brush settings
docker is not open, click Window `
Dockers ` Brush settings.
Apply the effect to an object and the
background simultaneously
Click the Merge source button on the
Dab attributes bar that displays in the
Brush settings docker. This option is only
available when the Cumulative button is
disabled.
For more information about In the Help index, see...
Working with scanned images scanning, images
Feathering objects to soften repaired areas feathering
Color modes color modes

Corel PHOTO-PAINT: Working with lenses 409
Working with lenses
Lenses let you view special effects, corrections, or adjustments, on a separate object
layer before you apply the changes to the image.
In this section, you’ll learn about
•creating lenses
• editing lenses
• combining lenses with the image background
Creating lenses
Lenses let you view adjustments and special effects that you want to apply to an image.
When you create a lens, the changes you make are not applied to the image pixels;
instead, they are displayed on the screen through the lens. The lens is created as a
separate object on a layer above the image background so you can edit the lens and the
background image separately.
You can create a lens to cover the entire image, or you can create a lens from the editable
area of a mask. When you create a lens, you must choose a lens type based on the change
that you want to apply. However, the types of lenses are determined by the image’s color
mode. For example, you cannot use a color lens on a grayscale image because there are
no colors to modify. If you want to correct or adjust image color and tone, choose a lens
type that corresponds to the adjustment and transform filters. For more information
about using filters, see “Adjusting color and tone” on page 387. If you want to apply a
special effect to improve image quality or dramatically transform an image, choose a
special effects filter. For more information about special effects, see “Applying special
effects” on page 423.

410 CorelDRAW Graphics Suite 12 User Guide
The picture of the man is an image object cut out from a darker image. A lens
was applied to brighten the image object without permanently changing the
image object or background.
To create a lens
1Click Object ` Create ` New lens.
2Choose a lens from the Lens type list.
3Ty p e a n a m e i n t h e Lens name box.
4Click OK.
If a dialog box displays, specify the lens properties.
To create a lens from an editable area
1Define an editable area.
2Click Object ` Create ` New lens.
3Enable the Create lens from mask check box.
4Choose a lens from the Lens type list.
5Ty p e a n a m e i n t h e Lens name box.
6Click OK.
7In the dialog box, specify the lens properties.
Corel PHOTO-PAINT: Working with lenses 411
Editing lenses
After you create a lens, you can edit it. For example, you can add areas to it and remove
areas from it.
Lenses can be selected and transformed in the same way that you select and transform
objects. For information about selecting and transforming objects, see “Working with
objects” on page 447 and “Modifying objects” on page 453. You can also change the
shape of a lens using a special effects filter. For more information about special effects,
see “Applying special effects” on page 423.
To add an area to a lens
1Click the Object pick tool .
2Select a lens.
3Click one of the following:
• Paint tool
• Rectangle tool
• Ellipse tool
• Polygon tool
• Line tool
4On the property bar, specify the tool’s attributes.
Ensure the New object button on the extended property bar is disabled.
5Drag across the areas that you want to add to the lens.
When adding areas to a lens, the grayscale value of the foreground color or fill
color affects the lens opacity. White adds areas to the lens, while black makes
lens areas transparent. For more information, see “Working with object
transparency” in the Help.
To remove an area from a lens
1Click the Object pick tool .
2Select a lens.
3Click the Eraser tool .
4On the property bar, specify the Eraser tool’s attributes.
5Drag across the areas that you want to remove from the lens.

412 CorelDRAW Graphics Suite 12 User Guide
To change the shape of a lens using a special effects filter
1Click the Object pick tool .
2Select a lens.
3Click Effects, and click a special effect.
4Specify the settings of the special effects filter.
Combining lenses with the image background
To apply a lens’s adjustment and special effects to the pixels of an image, you combine
the lens with the image background. Combining a lens with the image background
reduces the file size of the image and lets you save the image to a non-native file format.
Once a lens is combined with the image background, the lens cannot be selected or
modified.
To combine a lens with the image background
1Click the Object pick tool .
2Select a lens.
3In the Objects docker, choose a merge mode from the Merge mode list box.
If the Objects docker is not open, click Window ` Dockers ` Objects.
4Click Object ` Combine, and click one of the following:
• Combine objects with background — combines the selected lens with the
image background
• Combine all objects with background — combines the selected lens and all
other objects with the image background
From here
For more information about In the Help index, see...
Changing the properties of a lense lenses, properties
Adjusting the transparency of a lens lenses, transparency
Using special effects filters filters

Corel PHOTO-PAINT: Masking 413
Masking
In Corel PHOTO-PAINT, you can isolate areas in an image that you want to edit,
while protecting the remaining areas from change using masks. Masks, with their
combination of editable and protected areas, let you modify images with precision.
In this section you’ll learn about
• distinguishing protected and editable areas
• defining editable areas
• defining editable areas using color information
• inverting and removing masks
• cutting out image areas
For information about clip masks, see “Using clip masks to change object transparency”
in the Help.
Distinguishing protected and editable areas
You can use masks for advanced image editing. Masks function like a stencil placed over
an image: protected areas prevent paint and effects from affecting the underlying
image, whereas editable areas let paint and effects reach the image. When you define
an editable area for an image, you also define a corresponding mask, or protected area,
for the same image.
Mask overlay
By default, a mask overlay displays only over protected areas to make it easy to
differentiate between protected and editable areas. The mask overlay is a red-tinted,
transparent sheet. If you adjust the transparency of a mask in certain areas, the degree
of red displayed by the mask overlay in those areas will vary accordingly.
You can hide the mask overlay.

414 CorelDRAW Graphics Suite 12 User Guide
Mask marquee
The border separating an editable area and its corresponding protected area is indicated
by a dashed outline, called the mask marquee. You can display the mask marquee only
after hiding the mask overlay. You can change the color of the mask marquee so that it
can be seen clearly against an image’s colors.
To display or hide the mask overlay
•Click Mask ` Mask overlay.
A check mark beside the menu command indicates that the mask overlay is visible.
To display or hide the mask marquee
•Click Mask ` Marquee visible.
A check mark beside the menu command indicates that the marquee is visible.
The mask marquee does not display when you use a mask overlay or when you
are adjusting the transparency of a mask.
Defining editable areas
There are a number of ways to define an editable area in an image without using color
information from the image.
Defining an editable area using an object, text, or the Clipboard contents
You can define an editable area using objects. When you create an editable area that has
the shape of one or more objects, you have to move the objects away from the editable
area before editing it.
You can define an editable area using text. The editable area created when you type has
the font and style characteristics you specify. You can also create an editable area from
existing text.
You can define an editable area using the Clipboard contents by pasting the information
from the Clipboard into the image window as an editable area. The area you create is a
floating editable area, which you can edit and move without changing the underlying
image pixels.
Corel PHOTO-PAINT: Masking 415
Defining an editable area by freehand
You can define an editable area by outlining the image area as you would using a pencil
and paper, or by clicking at different points on the image to anchor straight line
segments.
Defining a border-shaped editable area
You can define a border-shaped editable area from the edges of an existing editable area
to frame parts of an image with a color, a texture, or a special effect. A new mask
marquee is placed on either side of an existing mask marquee to define a border-shaped
editable area.
Defining the entire image as an editable area
You can also define the entire image as an editable area. This feature is very useful when
you want to apply a special effect requiring a mask to the entire image. For information
about special effects, see “Applying special effects” on page 423.
To define an editable area using text, objects, or the Clipboard contents
To define an editable area by freehand
1Open the Mask flyout , and click the Freehand mask tool .
2Click the Normal button on the property bar.
3Click where you want to start and end each line segment in the image window.
4Double-click to finish.
To define an area using Do the following
Te x t Click the Te x t tool , and specify the text
attributes on the property bar. Click the
Create text mask button on the
extended property bar, type the text, and
click anywhere in the toolbox to apply the
changes.
One or more objects Select one or more objects, and click Mask `
Create ` Mask from object(s).
The Clipboard contents Click Edit ` Paste ` Paste as new
selection.
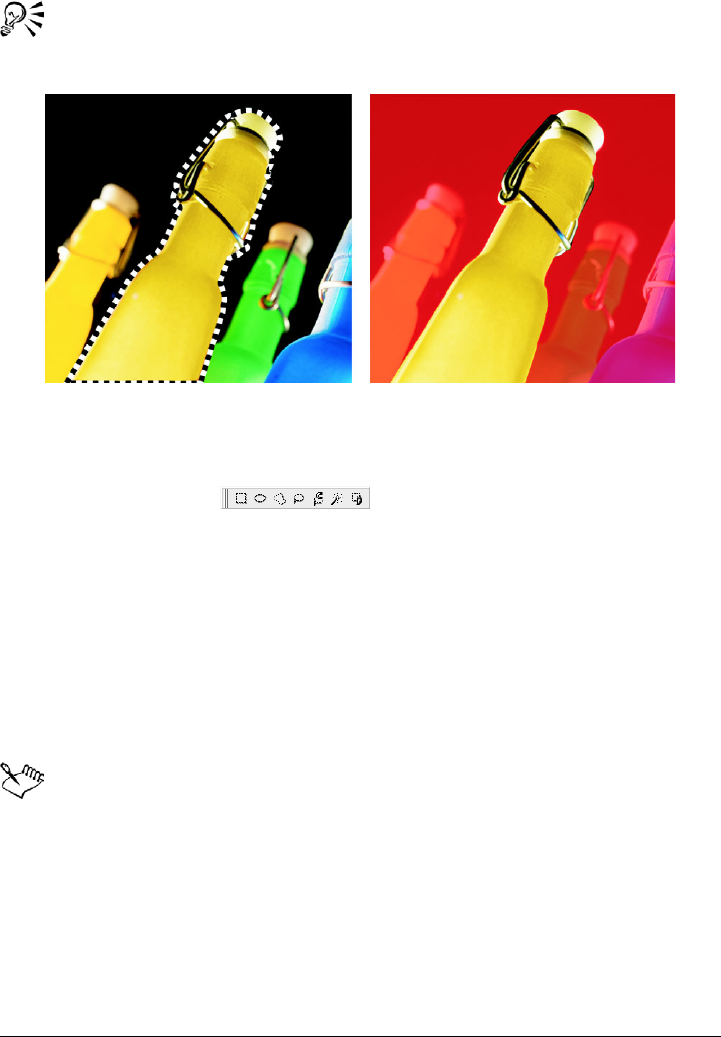
416 CorelDRAW Graphics Suite 12 User Guide
You can also define an editable area by dragging the Freehand mask tool in
the image window and double-clicking to complete the outline.
An editable area created with the Freehand mask tool
To define a border-shaped editable area
1Open the Mask flyout , and click a mask tool.
2Define an editable area.
3Click Mask ` Mask outline ` Border.
4Type a value in the Width box.
5Choose an edge type from the Edges list box.
To define the entire image as an editable area
•Click Mask ` Select all.
If the mask overlay is enabled, you cannot see the mask marquee.
Defining editable areas using color information
You can define the editable and protected areas of a mask using the color information
in an image. When you use color information, you must specify seed colors and a color
tolerance value. A seed color is the base color you use to define either protected or
editable areas. The color tolerance value defines the percentage of color variation from
Corel PHOTO-PAINT: Masking 417
the seed color that is allowed in the mask; a greater tolerance value adds more colors to
the protected or editable areas. Color tolerance is based on color similarity.
Defining editable areas using uniform colors
You can define an editable area of uniform color or an editable area surrounded by
uniform colors. When the area is surrounded by uniform colors, you can either make a
rough outline that contracts to fit the area you want to edit, or you can define an
editable area based on the boundary between uniform colors.
Defining editable areas throughout an image
You can define editable areas throughout an image using a color mask. A color mask
lets you select seed colors throughout the image instead of in a specific area.
The color threshold lets you further refine the range of colors that are included in the
editable area. The threshold value evaluates the brightness of each seed color and
determines which pixels are included in the editable area. Adjusting the color threshold
lets you soften or sharpen the pixels at the edge of the editable area. To adjust the
threshold levels of a color mask, you can use a grayscale preview of your image to display
masked areas in black, and editable areas in white.
Defining editable areas in a specific color channel
You can define an editable area in specific color channels. Every color image has a
number of color channels, each representing one component of the image’s color model.
For example, an RGB image is composed of a red channel, a green channel, and a blue
channel. When an image is displayed in its individual color channels, only part of its
color information is displayed. Displaying only certain color channels lets you define an
editable area with greater precision.
To define an editable area of uniform color
1Open the Mask flyout , and click the Magic wand mask tool .
2Click the Normal button on the property bar.
3Type a tolerance value in the Tolerance box.
4Click a color in the image.
To edit an intricate image shape set against a plain background, you can define
the background as an editable area of uniform color, and then invert the mask
418 CorelDRAW Graphics Suite 12 User Guide
to make the shape editable. For more information about inverting masks, see
“Inverting and removing masks” on page 420.
The color of the first pixel that you click establishes the seed color; all adjacent
pixels with colors within the specified color tolerance range are included in the
editable area. The editable area expands until it reaches pixels with colors that
exceed the specified color tolerance.
To define an editable area surrounded by uniform color
1Open the Mask flyout , and choose one of the following:
• Lasso mask tool — lets you roughly outline an image area and then contract
the mask marquee around a specified range of colors within that area; uses an
initial seed color
• Magnetic mask tool — lets you establish a mask marquee along a boundary
between colors in an image; uses multiple seed colors
2Click the Normal button on the property bar.
3Type a tolerance value in the Tolerance box.
4In the image window, click a color you want to protect from changes, and click at
different points to outline the editable area.
5Double-click to complete the outline.
You can choose whether only the color of the first pixel or the color of every
pixel you click establishes a seed color. The color tolerance range indicates the
range of colors protected from changes. When the first pixel that you click
establishes the seed color, the protected area expands until the specified color
tolerance is reached. When using the Lasso mask tool, the completed outline
of the editable area contracts from your original outline to fit the irregular
shape produced by excluding all the pixels from the original outline which fall
within the specified color tolerance range. When using the Magnetic mask
tool, every pixel that you click establishes a seed color, so that each time you
click, the protected area expands until the specified color tolerance is reached.
The color tolerance is measured in relation to the current seed color and within
a specific area around the pointer.
To define editable areas throughout an image
1Click Mask ` Color mask.

Corel PHOTO-PAINT: Masking 419
2Click the Normal mode button .
3Choose Sampled colors from the top pop-up menu.
4Click the Eyedropper tool , and click each seed color in the image window.
5Click the Preview button .
6From the list box beside the Preview button, choose one of the following:
• Overlay — displays protected areas covered by a red-tinted transparent sheet
• Grayscale — displays protected areas in black and the editable areas in white
• Black matte — displays protected areas covered by a black-tinted transparent
sheet
• White matte — displays protected areas covered by a white-tinted transparent
sheet
• Marquee — displays a dotted line around the editable area
7Click More, and enable one of the following options:
• Normal — determines the color tolerance based on color similarity between
pixels
• HSB mode — determines the color tolerance based on similarity between hue,
saturation, and brightness levels of pixels
8In the box beside each seed color, specify the percentage of color variation
permitted between pixels of that color and the remaining pixels.
9In the Threshold area, move the Threshold slider and enable one of the following
options:
• To b l a c k — all pixels with a brightness value above the threshold value are
added to the protected area
• To w h i t e — all pixels with a brightness value above the threshold value are
added to the editable area
If colors from a previous session display in the Color mask dialog box, click
Reset before you create a new color mask.
The Marquee display style is unavailable if you disable the Marquee visible
command on the Mask menu.
To define editable areas in specific color channels
1In the Channels docker, click the Eye icon beside a color channel.
If the Channels docker is not open, click Window ` Dockers ` Channels.

420 CorelDRAW Graphics Suite 12 User Guide
2Open the Mask flyout , and click one of the following:
• Lasso mask tool
• Magic wand mask tool
3Define an area in the image.
Inverting and removing masks
You can invert a mask so that the protected area becomes editable and the editable area
becomes protected. Inverting a mask when defining the image area that you want to
protect is easier than defining the area that you want to edit. For example, if you want
to edit an intricate shape in an image that is set against a plain background, it is easier
to select the background, and then invert the mask.
You can remove a mask from an image when you no longer need it.
To invert a mask
•Click Mask ` Invert.
To remove a mask
•Click Mask ` Remove.
If the editable area on your image was floating before you removed the mask,
it is automatically merged with the background.
Cutting out image areas
You can cut out image areas by removing the surrounding background. This feature lets
you isolate even the most detailed image areas while preserving edge detail, such as hair
or blurred edges. The cut-out image area becomes an object that you can place against
any background image.
To cut out an image area, you begin by drawing a highlight over its edges. Then, you
apply a fill to define the inside of the area. You can preview the cut-out image with the
background removed, and you can switch between the cut-out and original views of the
image to evaluate the results. If necessary, you can erase and redo sections of the
highlighted area.
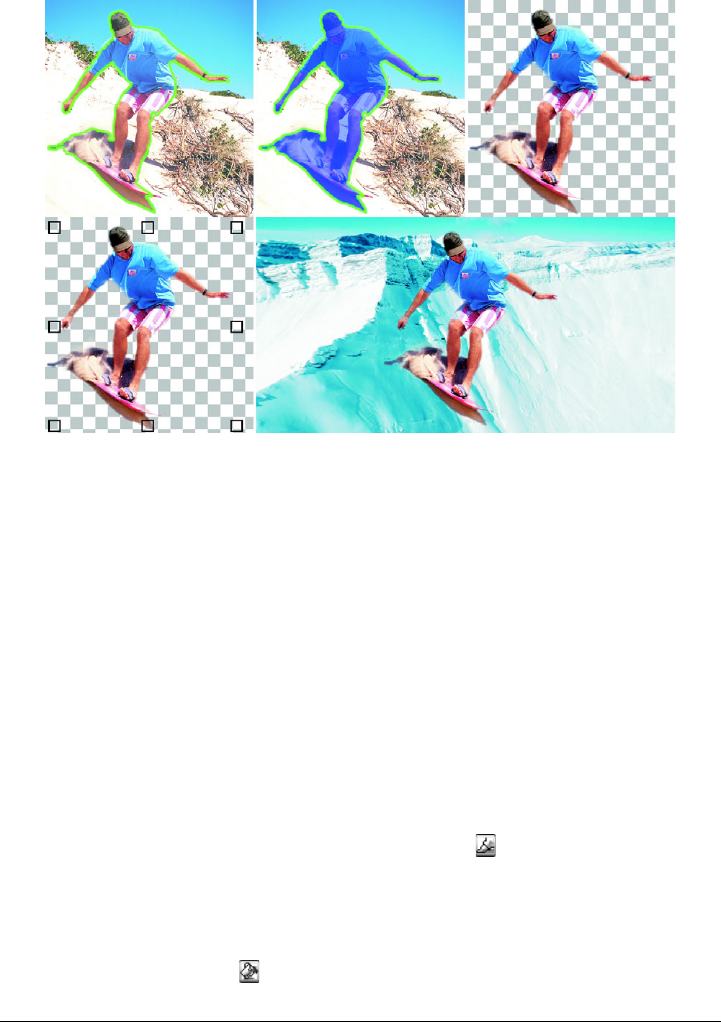
Corel PHOTO-PAINT: Masking 421
Highlight the edges of the image area (1); add a fill to the inside (2); preview
the cut-out image (3); bring the cut-out image into the image window (4);
place the cut-out image against a background image (5).
You can customize the thickness of the highlighted and erased lines for best results. For
example, if an image area has hard edges, you can use a thinner line to define its edges
more precisely. Conversely, if an image area has blurred or wispy edges that are hard to
define, you can use a thicker line.
To make it easier to work, you can change the highlight and fill color. You can also zoom
in to get a closer look at image detail or zoom out to view a larger area of the image.
You can pan to view image areas that fall outside the preview window.
To cut out an image area
1Click Image ` Cutout.
2In the Cutout dialog box, click the Highlighter tool .
3In the preview window, draw a line along the edges of the image area you want to
cut out.
The line should slightly overlap the surrounding background.
4Click the Inside fill tool , and click inside the image area.
123
45
422 CorelDRAW Graphics Suite 12 User Guide
5Click Preview.
If you want to switch between the original and cut-out view of an image, choose a
view from the View list box.
The Cutout command supports RGB, CMYK, grayscale, paletted, and Lab
images. When brought into the Cutout dialog box, grayscale, paletted, and
Lab images are automatically converted to RGB or CMYK images, which may
result in a slight color shift. The original image colors are restored after
applying or canceling the Cutout command.
From here
You can also Do the following
Erase highlighted sections Click the Eraser tool , and draw over
highlighted sections you want to remove.
Set the nib size of the Highlighter and Eraser
tools
Choose a nib size from the Nib size list box.
Change the highlight color Choose a highlight color from the Highlight
color list box.
Change the fill color Choose a fill color from the Fill color list
box.
Zoom in and out Using the Zoom in or Zoom out tool
, click in the preview window.
Pan to another area of an image Using the Pan tool , drag the image until
the area you want to see is visible.
For more information about In the Help index, see...
Positioning the mask marquee mask marquee, aligning
Moving and aligning editable areas editable areas, moving
Transforming editable areas editable areas, transforming
Managing multiple masks with alpha
channels
alpha channels

Corel PHOTO-PAINT: Applying special effects 423
Applying special effects
Corel PHOTO-PAINT provides special effects filters that let you apply a wide range of
transformations to images. For example, you can transform images to simulate
drawings, paintings, etchings, or abstract art.
In this section, you’ll learn about
• working with special effects
• applying preset styles
• applying color and tone effects
• managing plug-ins
Working with special effects
Corel PHOTO-PAINT special effects let you change the appearance of an image. You
can apply a special effect to the entire image, or you can use a mask or a lens to
transform only part of an image.
Applying special effects
The following are all the categories of special effects available, each of which includes
several different effects:
When you apply a special effect, you can adjust its settings to control how the effect
transforms an image. For example, when you use a vignette effect to frame an image,
you can increase the offset value and decrease the fade value to decrease the size and
•3-D effects •Color transform •Distort
•Art strokes •Contour •Noise
•Blur •Creative •Texture
•Camera •Custom

424 CorelDRAW Graphics Suite 12 User Guide
opacity of the frame. With a watercolor effect, you can decrease the size of the brush to
show more image detail or increase the size of the brush for an abstract effect.
Applying special effects to part of an image
You can apply special effects to part of an image by defining an editable area. For
information about editable areas, see “Masking” on page 413.
You can also use a lens to apply a special effect to part of an image. The following special
effects are also preset lens types:
When you use a lens, changes are not applied to the image; instead, they are seen on
the screen through the lens. For information about lenses, see “Working with lenses” on
page 409.
Repeating and fading special effects
You can repeat a special effect to intensify its result. You can also fade an effect to
diminish its intensity, and you can define how the effect is merged with the image. For
information about repeating and fading a special effect that you’ve applied, see
“Undoing, redoing, repeating, and fading” in the Help. For information about merge
modes, see “Understanding merge modes” in the Help.
To apply a special effect
1Click Effects, choose a special effect category, and click an effect.
2Adjust the settings of the special effect filter.
If the image contains one or more objects, the special effect is applied only to
the background or the selected object.
When you preview the special effect in the image window, you can press and
hold F2 to hide the special effect dialog box.
•Jaggy despeckle •Scatter •Invert
•Smooth •Pixelate •Posterize
•Soften •Add noise •Threshold
•Psychedelic •Remove noise •Solarize
•Sharpen

Corel PHOTO-PAINT: Applying special effects 425
Some special effects can affect the shape of the object they are applied to. You
can retain an outline of the object’s original shape by enabling the Lock object
transparency button on the Objects docker. The areas which remain
between the outline of the original shape and the new shape of the object are
filled with black. If the Objects docker is not open, click Window ` Dockers
` Objects.
To apply a special effect to an editable area
1Define an editable area.
2Click Effects, choose a special effect category, and click an effect.
3Adjust the settings in the dialog box.
To repeat a special effect
•Click Effects ` Repeat, and click one of the following:
• Repeat [last effect] — repeats the last applied effect
• [Last effect] to all visible — repeats the last applied effect to all visible
elements in an image
• [Last effect] to all selected — repeats the last applied effect to all selected
objects in an image
Applying preset styles
Some special effects include preset styles. You can apply different preset styles and
modify their settings to get the effect you want. When you are satisfied with an effect,
you can save the customized settings as a preset style to apply it to other images. When
you no longer need a preset style, you can delete it.
The following special effects include preset styles:
•The Boss
•Glass
•Mesh warp
•Lens flare
•Frame
• Whirlpool
• Lighting effects
•Alchemy
426 CorelDRAW Graphics Suite 12 User Guide
• Bevel effects
•Spot filter
•Bump map
To apply a preset style
1Click Effects, choose a special effect category, and click an effect that includes
preset styles.
2Choose a preset style from the Style or Presets list box.
To create a custom preset style
1Click Effects, choose a special effect category, and click an effect that includes
preset styles.
If you want to base the custom preset style on an existing preset style, choose a
preset style from the Style or Presets list box.
2Adjust the settings of the special effect.
3Click the Add preset button .
4Type a name in the dialog box.
To delete a custom preset style
1Click Effects, choose a special effect category, and click an effect that includes
preset styles.
2Choose a preset style from the Style or Presets list box.
3Click the Delete preset button .
You cannot delete the default or the last-used preset style.
Applying color and tone effects
You can transform the color and tone of an image to produce a special effect. For
example, you can create an image that looks like a photographic negative or flatten the
appearance of an image.

Corel PHOTO-PAINT: Applying special effects 427
To apply color and tone effects
•Click Image ` Tr a n s f o r m , and click one of the following effects:
• Invert — lets you reverse the colors of an image. Inverting an image creates the
appearance of a photographic negative.
• Posterize — lets you reduce the number of tonal values in an image to remove
gradations and create larger areas of flat color
• Threshold — lets you specify a brightness value as a threshold. Pixels with a
brightness value higher or lower than the threshold will display in white or black,
depending on the threshold option you specify.
If a dialog box displays, adjust the effect settings.
Managing plug-ins
Plug-ins provide additional features and effects for image editing in Corel PHOTO-
PAINT. Special effect plug-in filters process image information and alter an image
according to preset specifications.
At start-up, Corel PHOTO-PAINT automatically detects and loads plug-ins placed in
the plug-ins folder. For example, the Digimarc plug-in is loaded automatically, and
added to the Effects menu. You can add more plug-ins to the plug-ins folder or you can
add plug-ins installed in other locations, but third-party plug-ins must be installed in a
folder for which you have read and write access.
You can disable plug-ins you are not using.
To install a plug-in from another location
1Click To o l s ` Options.
2In the Wo rk s pa ce list of categories, click Plug-ins.
3Click Add.
4Choose the folder where the plug-in is stored.
To disable a plug-in
1Click To o l s ` Options.
2In the Wo rk s pa ce list of categories, click Plug-ins.
3Disable the checkbox next to the plug-in you want to disable.

428 CorelDRAW Graphics Suite 12 User Guide
If your plug-ins are installed in the Corel PHOTO-PAINT plug-ins folder, you
must add individual plug-ins to the list on the Plug-ins page, and disable the
first checkbox in the list (the Corel PHOTO-PAINT plug-in folder) before you
can disable individual plug-ins. To add individual plug-ins to the list, see “To
install a plug-in from another location” on page 427.
You can also disable a plug-in and remove it from the plug-in list by clicking
a plug-in to highlight it, and clicking the Remove button.
From here
For more information In the Help index, see...
Managing plug-ins plug-ins
Special effect categories special effects, categories
Bevel effects Bevel effects filter
Lens flare effect Lens flare effect filter
Lighting effects Lighting effects filter

Corel PHOTO-PAINT: Painting 429
Painting
Corel PHOTO-PAINT lets you create images or modify existing ones using a variety
of shape and paint tools.
In this section, you’ll learn about
• drawing shapes and lines
• applying brush strokes
• spraying images
• repeating brush strokes
• using a pressure-sensitive pen
Drawing shapes and lines
You can add shapes, such as squares, rectangles, circles, ellipses, and polygons, to
images. By default, shapes are added to an image as new objects. Shapes can be
outlined, filled, or rendered as separate, editable objects. For more information about
objects, see “Creating objects” on page 447.
You can also add lines to images. When you add lines, you can specify the width and
transparency, as well as the way line segments join together. The current foreground
color determines the color of a line.
To draw a rectangle or an ellipse
1Open the Shape flyout , and click one of the following tools:
• Rectangle tool
• Ellipse tool
2On the property bar, choose one of the following options in the Fill list box:
• Uniform fill
• Fountain fill
• Bitmap fill
• Texture fill
430 CorelDRAW Graphics Suite 12 User Guide
If you want to edit the fill, click the Edit button on the property bar.
3Drag in the image window until the rectangle or ellipse is the size you want.
To draw a polygon
1Open the Shape flyout , and click the Polygon tool .
2On the property bar, choose one of the following options in the Fill list box:
• Uniform fill
• Fountain fill
• Bitmap fill
• Texture fill
If you want to edit the fill, click the Edit button on the property bar.
3Click where you want to set the anchor points of the polygon, and double-click to
set the last anchor point.
You can also
Disable the fill Click the Disable button on the property
bar.
Apply an outline Type a value in the Border box on the
property bar to specify the border width in
pixels.
Round the corners of a rectangle Type a value in the Radius box on the
property bar.
Change the transparency Type a value in the Tr a n s p a r e n c y box in the
extended property bar.
You can also
Disable the fill Click the Disable button on the property
bar.
Apply an outline to the polygon Type a value in the Border box on the
property bar to specify the border width in
pixels.
Change the way outline segments join Choose a join type from the Shape joints list
box on the extended property bar.
Corel PHOTO-PAINT: Painting 431
To draw a line
1Open the Shape flyout , and click the Line tool .
2Type a value in the Width box on the property bar.
3Click the Color button on the property bar, and choose a color.
4On the property bar, open the Line joint list box, and click one of the following:
• Butt — joins the segments; if you specify a higher width value, a gap appears
between the joined segments
• Filled — fills the gaps between joined segments
• Round — rounds the corners between joined segments
• Point — makes points on the corners of joined segments
5Drag in the image window to draw a single line segment.
You can specify how lines join: Butt, Fitted, Round, or Point.
Applying brush strokes
Paint tools let you imitate a variety of painting and drawing media. For example, you
can apply brush strokes that imitate watercolors, pastels, felt markers and pens. By
You can also
Draw a line with multiple segments In the image window, click where you want
to start and end each segment, and double-
click to end the line.
Change the transparency Type a value in the Transparency box on the
extended property bar.
432 CorelDRAW Graphics Suite 12 User Guide
default, brush strokes are added to the active object or background. Brush strokes can
also be rendered as separate objects. For information about objects, see “Creating
objects” on page 447.
The paint tool and brush type you choose determines the appearance of the brush stroke
on the image. When you paint with a preset brush, the brush attributes of the paint tool
are predetermined.
The color of the brush stroke is determined by the current foreground color, which is
displayed in the color control area. You can also choose a foreground color by taking a
color sample from an image. For more information about choosing colors, see “Working
with color” on page 153.
In addition to painting with color, you can apply images and textures by painting with
a fill. You can also apply a brush stoke to a path. For more information, see “Applying
brush strokes to paths” in the Help.
Preset brush type Painting an image
Airbrush The Airbrush is used for shading.
Spray can Colors are splattered to add texture.
Corel PHOTO-PAINT: Painting 433
To paint with a preset brush
1Open the Brush flyout , and click the Paint tool .
2Open the Paint tool picker on the property bar, and click a paint tool.
3Choose a preset brush type from the Ty p e list box on the property bar.
4In the color control area of the toolbox, double-click the Foreground color swatch
, and choose a color.
5Drag in the image window.
If you want to constrain the brush to a straight horizontal or vertical line, hold
down Ctrl while you drag and press Shift to change direction.
To paint with a color sampled from an image
1Click the Eyedropper tool .
2Click a color in the image window.
3Open the Brush flyout , and click the Paint tool .
4Open the Paint tool picker on the property bar, and click a paint tool.
Brush A decorative effect is added using a
Camel hair brush.
You can also
Change the brush shape Choose a brush shape from the Shape picker
on the property bar.
Change the brush size Type a value in the Size box on the property
bar.
Change the transparency Type a value in the Transparency box on the
extended property bar.
434 CorelDRAW Graphics Suite 12 User Guide
5Choose a preset brush type from the Ty p e list box on the property bar.
6Drag in the image window.
To paint with a fill
1Open the Fill flyout , and click the Fill tool .
2On the property bar, choose a fill type.
3Open the Touch-up flyout , and click the Clone tool .
4On the property bar, open the Clone tool picker, and click the Clone from fill tool
.
5Drag in the image window.
Spraying images
You can paint with small-scale, full-color bitmaps, instead of a brush. For example, you
can enhance landscapes by spraying clouds across the sky or foliage across the ground.
Corel PHOTO-PAINT includes a variety of images, which are used to create spraylists.
You can load a preset spraylist, edit a preset, or create a spraylist by saving images in an
image list. You can edit the source images at any time.
You can enhance a photo by spraying it with images or create an image from
scratch using presets. This image features presets, such as Planets, Fire, Clouds,
and Stardust.
Corel PHOTO-PAINT: Painting 435
To spray images
1Open the Brush flyout , and click the Image sprayer tool .
2Choose a preset image list from the Ty p e list box on the property bar.
3Type a value in the Size box on the property bar.
4Drag in the image window.
To load an image list
1Open the Brush flyout , and click the Image sprayer tool .
2Click the Load image sprayer list button on the extended property bar .
3Choose the folder where the image list is stored.
4Click a filename.
If you want to view a thumbnail of the image list, enable the Preview check box.
5Click Open.
To create a spraylist
1Open the Brush flyout , and click the Image sprayer tool .
2Choose a preset image list from the Ty p e list box on the property bar.
3Click the Create spraylist button on the extended property bar.
You can also
Change the transparency of the spraylist
images
Type a value in the Transparency box on the
extended property bar.
Specify the number of images sprayed in
each dab of the brush
Type a value in the Number of dabs box on
the extended property bar.
Specify the distance between dabs along the
length of a stroke
Type a value in the Spacing box on the
extended property bar.
Specify the distance between dabs along the
width of a brush stroke
Type a value in the Spread box on the
extended property bar.
Change the rate at which paint fades in a
brush stroke
Type a value in the Fade out box on the
extended property bar. Negative numbers
fade in while positive numbers fade out.

436 CorelDRAW Graphics Suite 12 User Guide
4In the Create spraylist dialog box, specify the contents of the spraylist.
Repeating brush strokes
You can save a brush stroke and then reapply it to the same image or other images. You
can also repeat a brush stroke along the border of a path or mask. For information about
applying a brush stroke to a path, see “Applying brush strokes to paths” in the Help.
You can edit a saved brush stroke to create new effects by adjusting attributes such as
the size, number, angle, and color of the brush stroke.
To save a brush stroke
1Open the Brush tool flyout , and click the Paint tool .
2On the property bar, open the Brush tool picker, and click a tool.
3Apply a brush stroke.
4Click Edit ` Repeat brush stroke.
5In the Repeat stroke dialog box, click the Stroke flyout arrow, and click Add last
tool stroke.
6Choose the folder where you want to save the brush stroke.
7Type a filename in the Filename box.
To apply a saved brush stroke
1Open the Brush tool flyout , and click the Paint tool .
2On the property bar, open the Brush tool picker, and click a tool.
3Click Edit ` Repeat brush stroke.
If there are two menu items called Repeat brush stroke, click the second one.
4Choose a brush stroke from the Stroke list box.
5Click in the image window to apply the brush stroke.
If you want to apply more than one brush stroke, continue clicking.
To edit a saved brush stroke
1Open the Brush tool flyout , and click the Paint tool .
2On the property bar, open the Brush tool picker, and click a tool.
Corel PHOTO-PAINT: Painting 437
3Click Edit ` Repeat brush stroke.
If there are two menu items called Repeat brush stroke, click the second one.
4In the Repeat stroke dialog box, choose a saved brush stroke from the Stroke list
box.
5In the Repeat stroke dialog box, modify any attributes.
6Click in the image window to apply the brush stroke.
Using a pressure-sensitive pen
Corel PHOTO-PAINT provides settings to control brush strokes applied using a
pressure-sensitive pen, or stylus. The pressure applied with the pen on a pen tablet
determines the size, opacity, and other attributes of the brush stroke.
The pressure-sensitive pen attributes can be saved for future use when you save a
custom brush. For more information about custom brushes, see “Creating custom
brushes” in the Help.
To configure a pen tablet
1Click To o l s ` Options.
2In the Wo rk s pa ce list of categories, click General.
3In the Pen tablet area, click the Configuration button.
4Apply five strokes using a full range of pressure.
Corel PHOTO-PAINT automatically configures many pressure-sensitive
pens. If your pressure-sensitive pen has been configured automatically, the Pen
tablet configuration button appears grayed.
To set the attributes of a pressure-sensitive pen
1Open the Brush flyout , and click the Paint tool .
2On the property bar, open the Paint tool picker, and click a paint tool.
3In the Brush settings docker, click the flyout arrow on the Pen settings bar.
If the Brush settings docker is not open, click Window ` Dockers ` Brush
settings.
4Type values in any of the following boxes:

438 CorelDRAW Graphics Suite 12 User Guide
• Size — lets you specify the size of the brush tool. Use a value from -999 to 999.
• Opacity — lets you adjust the transparency of the brush stroke. Positive or
negative values have no impact if the transparency of the tool is set to 0 or is
already set to the maximum. Use a value from -99 to 100.
• Soft edge — lets you specify the width of the transparent edge along a brush
stroke. Use a value from -99 to 100.
• Hue — lets you shift the hue of the paint color around the Color Wheel up to
the specified degree
• Saturation — represents the maximum variation in the saturation of the paint
color. Use a value from -100 to 100.
• Lightness — represents the maximum variation of lightness of the paint color.
Use a value from -100 to 100.
• Texture — lets you specify the amount of texture visible for the current paint
tool. Use a value from -100 to 100.
• Bleed — lets you specify how quickly a brush stroke runs out of paint. Use a
value from -100 to 100.
• Sustain color — works in conjunction with the bleed value to adjust the traces
of paint that remain throughout the brush stroke. Use a value from -100 to 100.
• Elongation — represents the amount of tilt and rotation of the pen. Use a value
from 0 to 999.
5Drag the pen, varying the amount of pressure you apply to the tablet, to test the
attributes.
From here
For more information about In the Help index, see...
Repeating brush strokes brush strokes, repeating
Creating custom brushes brushes, creating custom brushes
Creating an image list spraying images, creating image lists
Editing a source image spraying images, editing source images
Painting symmetrical patterns and orbits painting, symmetrical patterns; painting,
orbits
Understanding merge modes merge modes

Corel PHOTO-PAINT: Filling images 439
Filling images
In Corel PHOTO-PAINT, you can fill objects, editable areas, and images with colors,
patterns, and textures. You can choose from a wide variety of fills and create your own
fills.
In this section, you’ll learn about
• applying uniform fills
• applying fountain fills
•applying bitmap fills
• applying texture fills
• applying gradient fills
Applying uniform fills
Uniform fills are the simplest fill type. They are solid colors that you can apply to
images.
To apply a uniform fill
1Open the Fill flyout , and click the Fill tool .
If you want to fill an object, you must select it using the Object pick tool
before applying the fill.
2Click the Uniform fill button on the property bar.
3Click the Edit button on the property bar.
4In the Uniform fill dialog box, choose a color model from the Model list box.
5Click a color in the visual selection area.
6Click OK.
7Click where you want to apply the fill in the image.
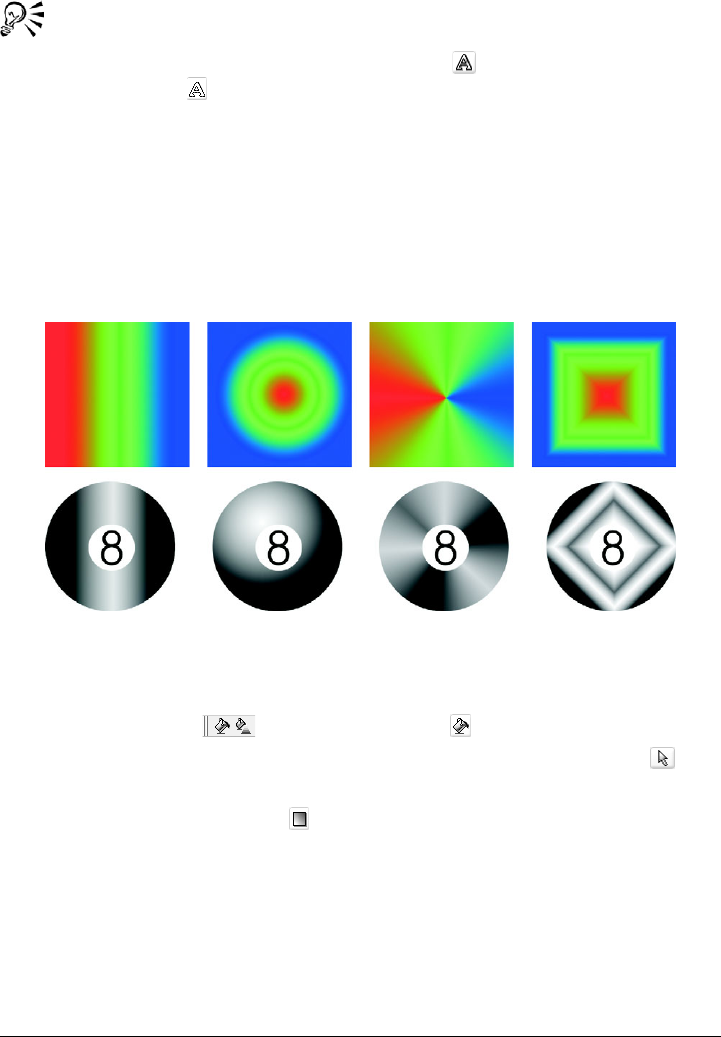
440 CorelDRAW Graphics Suite 12 User Guide
To apply a fill to a text object, you can first render the text as an editable area
by selecting the text object with the Te x t tool and clicking the Create text
mask button on the extended property bar. This produces a text-shaped
editable area to which you can apply fills.
Applying fountain fills
Fountain fills gradually change from one color to the next, along a linear, radial, conical,
square, or rectangular path. You can use fountain fills to create the illusion of depth. You
can choose a preset fill, or you can create a two-color or a custom fountain fill.
Linear, radial, conical, and rectangular fountain fills
To apply a preset fountain fill
1Open the Fill flyout , and click the Fill tool .
If you want to fill an object, you must select it using the Object pick tool
before applying the fill.
2Click the Fountain fill button on the property bar.
3Click the Edit button on the property bar.
4In the Fountain fill dialog box, choose a preset fountain fill from the Presets list
box.
5Click OK.
6Click where you want to apply the fill in the image.
Corel PHOTO-PAINT: Filling images 441
To create a two-color fountain fill
1Open the Fill flyout , and click the Fill tool .
2Click the Fountain fill button on the property bar.
3Click the Edit button on the property bar.
4In the Fountain fill dialog box, choose a fountain fill from the Presets list box.
5Choose a fountain fill type from the Ty p e list box.
6Enable the Tw o c o l o r option in the Color blend area.
7Open the following color pickers, and click a color:
• From — determines the start color for the progression
• To — determines the end color for the progression
8Move the Mid-point slider to set the midpoint between the two colors.
9Click one of the following:
• Direct color path — blends the colors along a straight line, beginning at the
start color and continuing across the color wheel to the end color
• Counterclockwise color path — blends the colors along a counterclockwise
path around the color wheel
• Clockwise color path — blends the colors along a clockwise path around the
color wheel
To create a custom fountain fill
1Open the Fill flyout , and click the Fill tool .
2Click the Fountain fill button on the property bar.
3Click the Edit button on the property bar.
4In the Fountain fill dialog box, choose a fountain fill from the Presets list box.
5Choose a fountain fill type from the Ty p e list box.
6Enable the Custom option in the Color blend area.
7Double-click the area above the Color band to add a color marker, and click a
color on the color palette.
If you want to change the location of a color marker, drag it to a new position.

442 CorelDRAW Graphics Suite 12 User Guide
Applying bitmap fills
Bitmap fills are bitmaps that you can use to fill an object or image. You can fill an area
with a single bitmap. You can also tile, or repeat, a smaller bitmap across an area to
create a seamless pattern.
You can fill images with preset bitmap fills, or you can create custom bitmap fills from
saved images or editable areas. For more information about defining editable areas, see
“Defining editable areas” on page 414.
It is best to use less complex bitmaps for fills, because complex bitmaps are memory-
intensive and slow to display. The complexity of a bitmap is determined by its size,
resolution, and bit depth.
Bitmap fills can be used to create interesting backgrounds and textures.
To apply a bitmap fill
1Open the Fill flyout , and click the Fill tool .
If you want to fill an object, you must select it using the Object pick tool
before applying the fill.
2Click the Bitmap fill button on the property bar.
3Click the Edit button on the property bar.
4In the Bitmap fill dialog box, open the Bitmap fill picker, and click a fill.
5Specify the attributes you want.
6Click OK.
7Click where you want to apply the fill in the image.
Corel PHOTO-PAINT: Filling images 443
Merge modes control the way the foreground or fill color blends with the base
color of the image. You can change the merge mode setting from the default
(Normal) for specific blending purposes. For more information about merge
modes, see “Understanding merge modes” in the Help.
To tile a bitmap fill
1Open the Fill flyout , and click the Fill tool .
2Click the Bitmap fill button on the property bar.
3Click the Edit button on the property bar.
4In the Bitmap fill dialog box, open the Bitmap fill picker, and click a fill.
5In the Size area, disable the Use original size and Scale bitmap to fit check
boxes.
6Type values in the Width and Height boxes to specify the size of bitmap tiles.
To fill an image with a single, large bitmap, enable the Scale bitmap to fit
check box in the Size area.
To create a bitmap fill from an editable area
1Define an editable area.
2Click Edit ` Create fill from selection.
3Choose the folder where you want to save the file.
4Type a filename in the File name box.
The bitmap fill you create is added to the Bitmap fill picker.
To import a bitmap fill
1Open the Fill flyout , and click the Fill tool .
2Click the Bitmap fill button on the property bar.
3Click the Edit button on the property bar.
4In the Bitmap fill dialog box, click the Load button.
5In the Load bitmap fill dialog box, choose the folder, disk, or CD where the file is
stored.
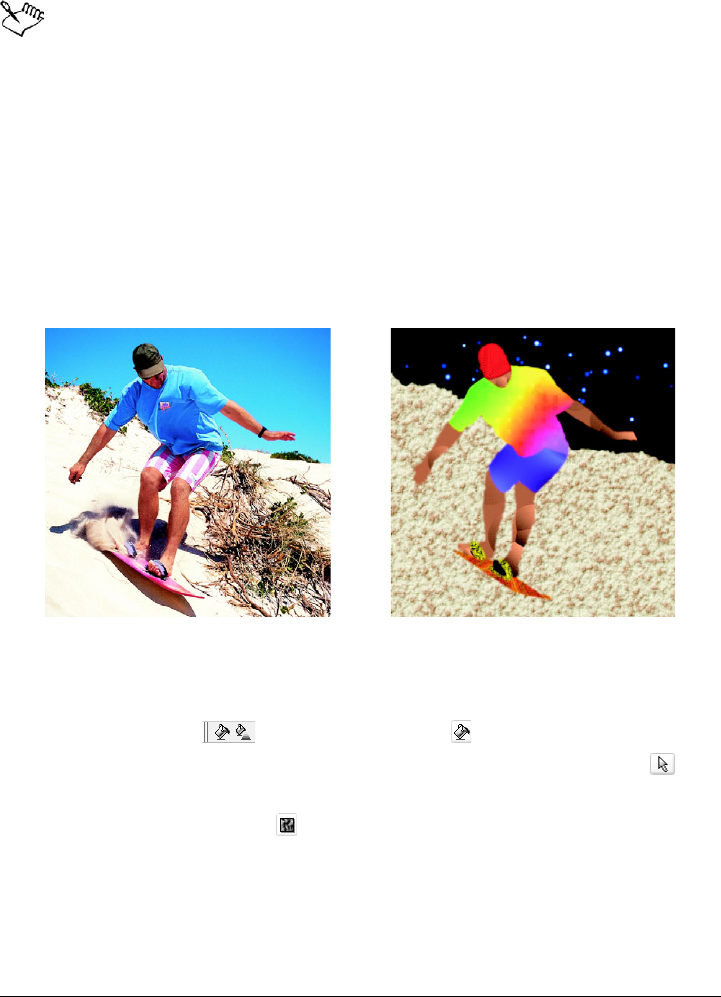
444 CorelDRAW Graphics Suite 12 User Guide
6Double-click the filename.
Thumbnail images of the bitmap files you import are added to the Bitmap fill
picker.
Applying texture fills
Texture fills are three-dimensional patterns. You can use preset texture fills, such as
water, minerals, and clouds, or you can edit a preset to create a custom texture fill. You
cannot import files to use as texture fills.
When you edit a texture fill, you can modify parameters, such as the softness, density,
brightness, and colors. Parameters vary for each texture.
You can modify the attributes of a texture fill to change its appearance.
To apply a texture fill
1Open the Fill flyout , and click the Fill tool .
If you want to fill an object, you must select it using the Object pick tool
before applying the fill.
2Click the Texture fill button on the property bar.
3Click the Edit button on the property bar.
4In the Texture fill dialog box, choose a texture library from the Texture library
list box.
5Choose a texture from the Texture list.
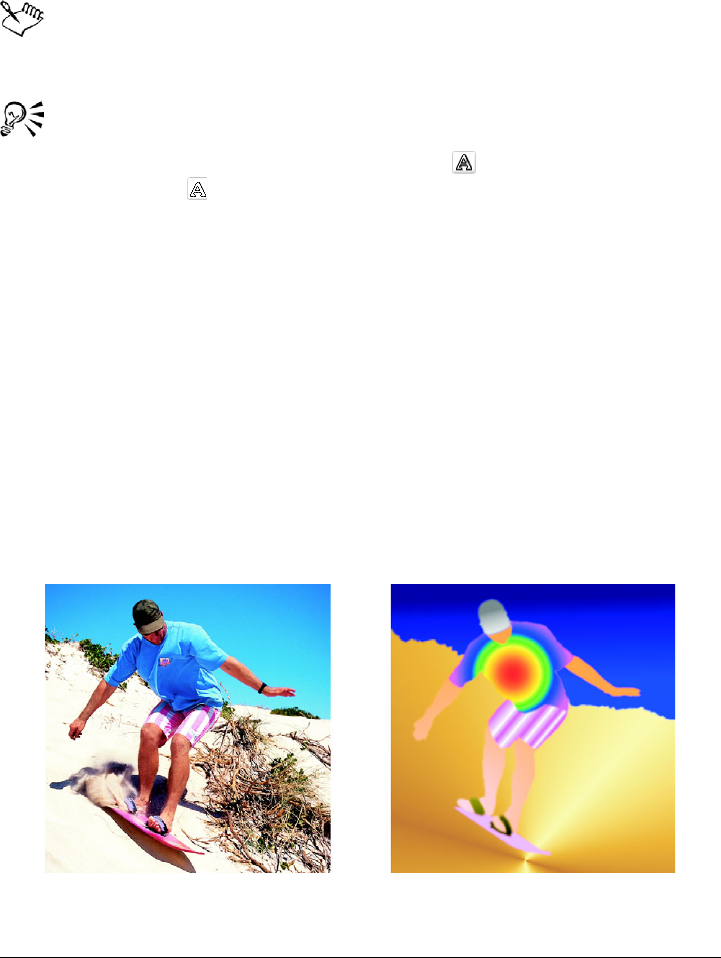
Corel PHOTO-PAINT: Filling images 445
6Click OK.
7Click where you want to apply the fill in the image.
Texture fills are scaled to the image or image area to which you apply them.
You cannot tile texture fills.
To apply a fill to a text object, you can first render the text as an editable area
by selecting the text object with the Te x t tool and clicking the Create text
mask button on the extended property bar. This produces a text-shaped
editable area to which you can apply fills.
Applying gradient fills
Gradient fills let you create a gradual blend between colors in an area. They are similar
to fountain fills, but they can be adjusted directly in the image window. Gradient fills
can be flat, linear, elliptical, radial, rectangular, square, or conical. They can also be
made up of bitmaps or texture patterns.
When you apply a gradient fill to an image, a gradient arrow, which marks the
transition from one color to another, displays in the image window. Each color in the
gradient fill is represented by a square node on the gradient arrow. You can change and
add colors or adjust the transparency of individual colors. You can also adjust the size of
the gradient fill.
Gradient fills can be used to enhance an image. You can adjust gradient fills
in the image window.

446 CorelDRAW Graphics Suite 12 User Guide
To apply a gradient fill
1Open the Fill flyout , and click the Interactive fill tool .
If you want to fill an object, you must select it using the Object pick tool
before applying the fill.
2Choose a gradient type from the Fill type list box on the property bar.
3Choose Custom from the Interactive fill style list box on the property bar.
4Drag in the image window to set the gradient arrow.
5Drag a color swatch from the color palette to a color node on the gradient arrow. A
black arrow displays to indicate that the color swatch is in position.
If a color palette is not displayed, click Window ` Color palettes, and choose a
color palette.
If you are adding a gradient fill to an object, you must click the Lock object
transparency button in the Objects docker before you select and apply the
fill. When the Lock object transparency button is enabled, the object’s shape
and transparency are protected.
When you choose a flat, bitmap, or texture fill type from the Fill type list box,
color nodes do not display in the image window; the current foreground color
determines the color of the flat fill, and the last settings for the bitmap fill or
texture fill are applied.
From here
For more information about In the Help index, see...
Applying a transparency pattern to fills fills, transparency patterns
Rendering text as an editable area editable areas
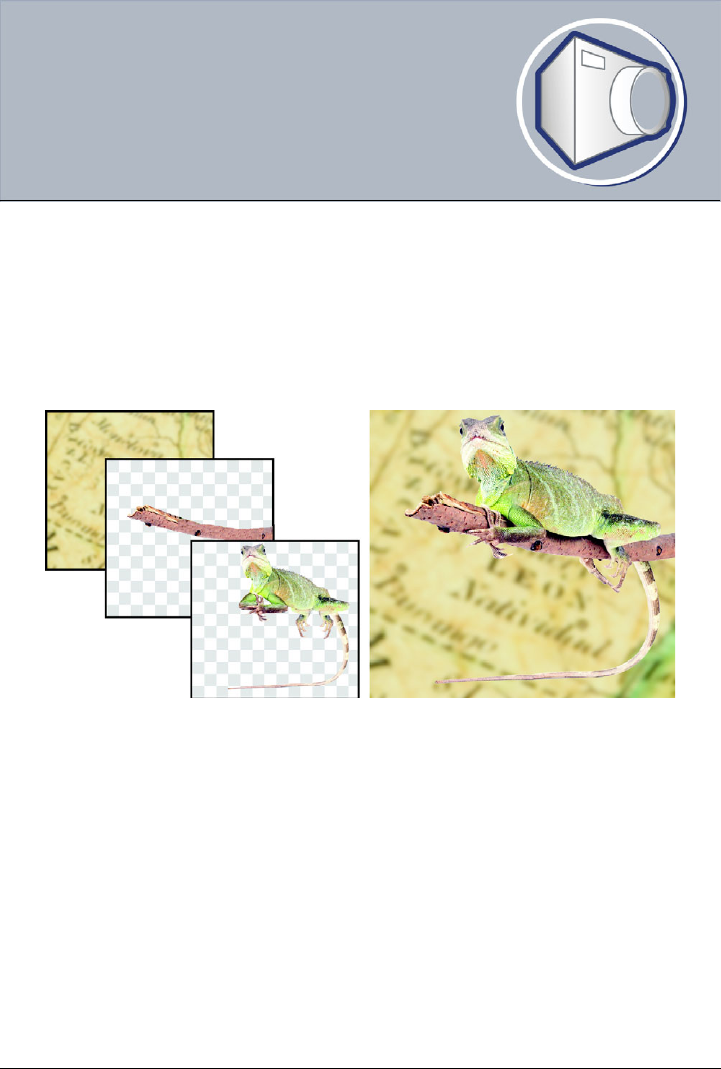
Corel PHOTO-PAINT: Working with objects 447
Working with objects
You can increase your image-editing capabilities using objects, which are independent
image elements that float above the background. Objects are transparent layers that
stack on top of one another. The background forms the bottom layer, and when you
create new objects, they are added to the top of the stack. For example, when you open
a photo, it becomes the background. You can then add shapes, brush strokes, sprayed
images, and other objects on top of the photo.
Objects are like layers that you can stack on top of one another. This image
consists of the background and two photo objects.
In this section you’ll learn about
• creating objects
• grouping and combining objects
Creating objects
In Corel PHOTO-PAINT, you can create objects from:
• brush strokes
•shapes
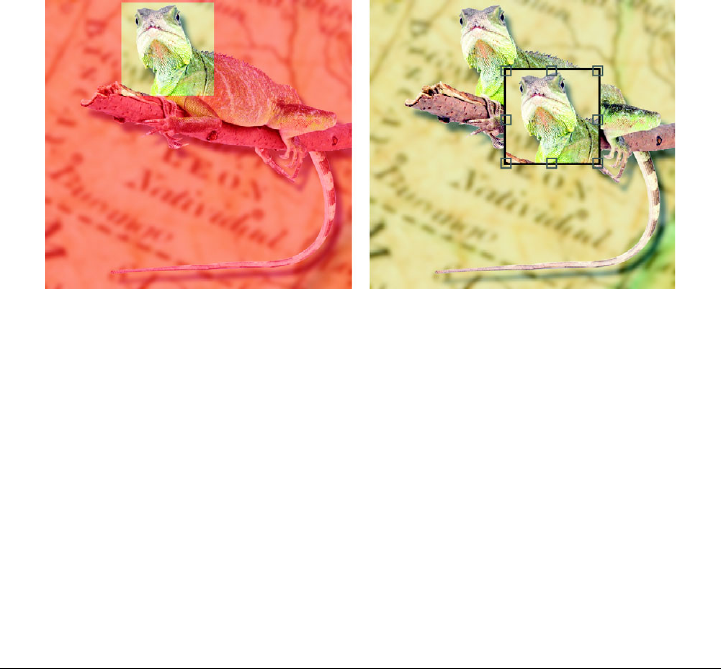
448 CorelDRAW Graphics Suite 12 User Guide
• the background
• editable areas
You can create objects from scratch by applying brush strokes or creating shapes, or you
can add brush strokes and shapes to an existing object. For more information about
applying brush strokes and creating shapes, see “Painting” on page 429.
You can also create an object using an entire image background. The background
cannot be edited or moved in the stacking order unless it is converted to an object.
Another way you can create an object is to define an editable area on an image
background or another object. When you create an object from an editable area, you
can include only the visible elements in that area. If an object is obscured by other
objects, and you cannot see it, then it will not be included in the editable area. For
information about defining editable areas, see “Masking” on page 413.
You can create an object using part of an image background. Here, an editable
area is defined and then the selection is copied and moved.
All objects in an image have the same resolution and color mode. As you add objects to
a file, the file size and memory requirements increase. To decrease file size, you can
flatten an image by combining objects. For more information on combining objects, see
“Grouping and combining objects” on page 450.
To retain objects when you save an image, you must save the image in the native Corel
PHOTO-PAINT (CPT) file format. For more information on saving images, see
“Saving and closing” on page 471.
Corel PHOTO-PAINT: Working with objects 449
To create an object using a brush tool
1Click Object ` Create ` New object.
2Open the Brush flyout , and click the Paint tool .
3Set the attributes on the property bar.
4Drag in the image window to create a brush stroke.
When the Marquee visible command in the Object menu is enabled, a dashed
outline, called a marquee, surrounds the new object.
All brush strokes and sprayed images are added to the active object by default.
You can also create an object by clicking the New object button in the
Objects docker. If the Objects docker is not open, click Window ` Dockers
` Objects.
To create an object using a shape tool
1Open the Shape flyout , and click a shape tool.
2Set the attributes on the property bar.
3Drag in the image window to create a shape.
When the Marquee visible command in the Object menu is enabled, a dashed
outline, called a marquee, surrounds the new object.
If you want to add a shape to the active object, instead of creating a new object,
disable the New object button on the extended property bar .
To create an object using the entire image background
•Click Object ` Create ` From background.
To create an object using an editable area
1In the Objects docker, click the thumbnail of the background, or of an object.
If the Objects docker is not open, click Window ` Dockers ` Objects.
2Define an editable area.
3Click Object ` Create ` Object: copy selection.

450 CorelDRAW Graphics Suite 12 User Guide
If you want to remove the editable area of an image as you create an object,
click Object ` Create ` Object: cut selection.
To create an object using all visible elements in an editable area
1Define an editable area.
2Click Edit ` Copy visible.
3Click Edit ` Paste ` Paste as new object.
Grouping and combining objects
You can group objects so they behave as one unit. Grouped objects can be moved,
deleted, or transformed as a single entity. You can add objects to an existing group, and
ungroup the objects when you want to edit them individually.
Another way to group objects is to create a clipping group. Clipping groups let you
combine the characteristics of objects by placing the image elements from one or more
objects into the shape of another; the characteristics of child objects are inserted into the
shape of the parent object. For example, if the parent object is a picture of a flower, and
the child object is a picture of the sky, the result will be a flower shape with the color
and texture of the sky. An object is the parent to objects above it in the stacking order;
a child object cannot be below the parent object. If you want to create a clipping group
using the background image, you must first turn the background into an object. You
can undo a clipping group at any time.
Combining objects lets you group them permanently. You can combine multiple objects
into one object, or combine objects with the background. When you combine objects,
you lose the ability to edit the objects independently. You can also decrease the file size
of an image by combining objects.
To group objects
1In the image window, select the objects.
2Click Object ` Arrange ` Group.
To add an object to a group of objects
1In the image window, select an object in a group.

Corel PHOTO-PAINT: Working with objects 451
2Hold down Shift, and click the object you want to add.
3Click Object ` Arrange ` Group.
To ungroup objects
1In the image window, click an object in a group.
2Click Object ` Arrange ` Ungroup.
To create a clipping group
1In the Objects docker, click the column to the left of the object thumbnail to make
it a child object. A Paper clip icon displays.
If the Objects docker is not open, click Window ` Dockers ` Objects.
2In the image window, select the child object and drag it over the parent object.
Only areas of the child object that fall within the boundaries of the parent
object are visible. Otherwise, only the object marquee of the child object is
visible.
A child object must be above a parent object in the Objects docker stacking
order.
To undo a clipping group
•In the Objects docker, click the Paper clip icon next to each child object.
If the Objects docker is not open, click Window ` Dockers ` Objects.
To combine objects
To c o m b i n e
Multiple objects into one object Select the objects, and click Object `
Combine ` Combine objects together.
One or more objects with the background Select an object or objects, and click Object
` Combine ` Combine objects with
background.
All objects with the background Click Object ` Combine ` Combine all
objects with background.

452 CorelDRAW Graphics Suite 12 User Guide
When objects are combined with the background, they become part of the
background layer and can no longer be edited as individual objects.
You can specify a merge mode and transparency level before you combine
objects by modifying the settings in the Merge mode list box and Opacity box
in the Objects docker. If the Objects docker is not open, click Window `
Dockers ` Objects.
From here
For more information about In the Help index, see...
Changing object properties objects, changing properties
Displaying and arranging objects objects, arranging
Changing the properties of an object objects, changing properties
Selecting objects objects, selecting
Moving objects to another location objects, moving
Copying objects objects, copying
Displaying and hiding objects objects, displaying

Corel PHOTO-PAINT: Modifying objects 453
Modifying objects
Objects are independent image elements that can be layered on top of one another.
You can transform objects, change their edges, add drop shadows, and adjust their
transparency. Objects can be changed without affecting the other objects, or the
background, in an image.
In this section you’ll learn about
• transforming objects
• changing the edges of objects
• adding drop shadows to objects
Transforming objects
You can change the appearance of objects using the following transformations.
Transformation Description
Sizing Lets you change the width and height of an
object
Scaling Lets you size an object to a percentage of its
original size
Rotating Lets you turn an object around its center of
rotation
Flipping Lets you create a horizontal or vertical mirror
image of an object
Skewing Lets you slant an object to one side
Distorting Lets you stretch an object disproportionately
Applying perspective Lets you give an object the appearance of
depth
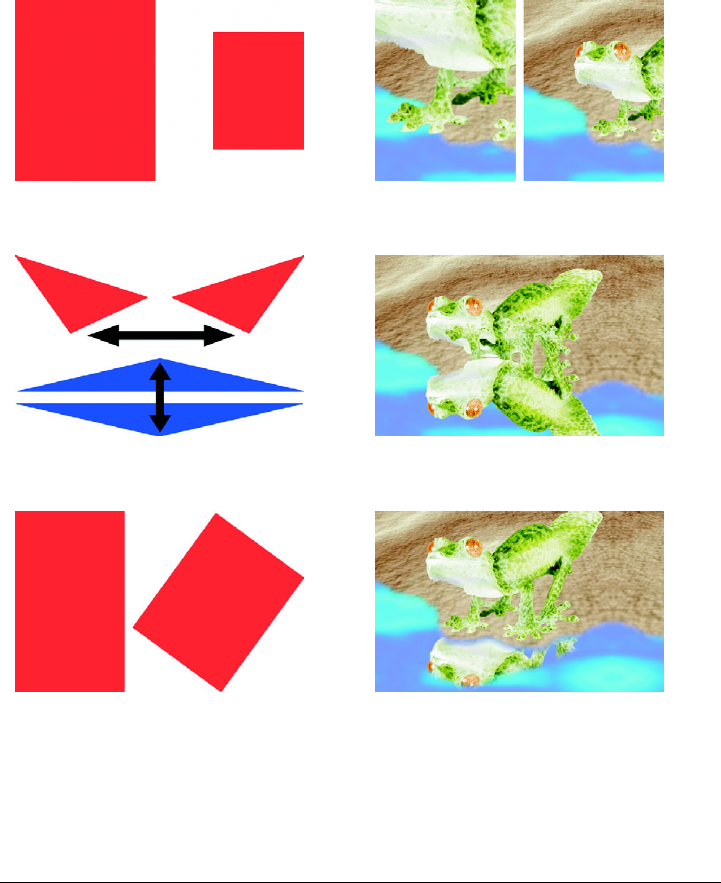
454 CorelDRAW Graphics Suite 12 User Guide
You can apply freeform transformations in the image window or manually adjust
settings for more precise results.
You can apply transformations to a single object or multiple objects simultaneously.
Transformation Applied to objects in an image
Sizing and scaling The photo object is scaled down to fit
onto the background image.
Flipping The object is flipped to create a
reflection.
Rotating The reflection is rotated.
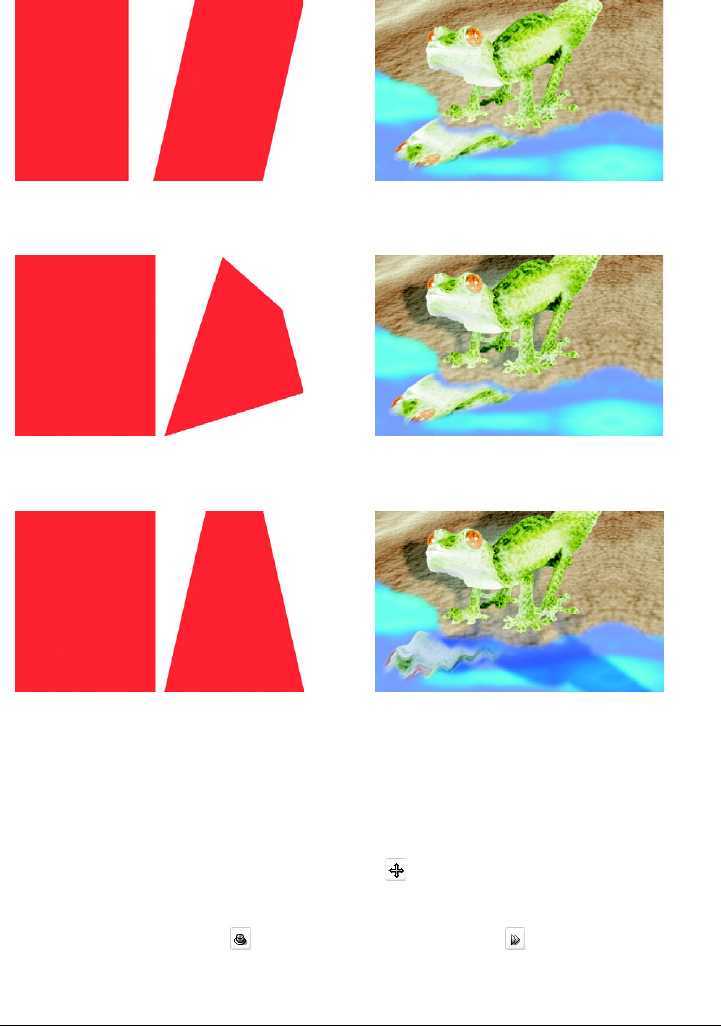
Corel PHOTO-PAINT: Modifying objects 455
To size an object
1Select an object.
2Click the Position and size mode button on the property bar.
3Drag any of the handles on the highlighting box.
4Click the Apply button on the extended property bar .
If you want to cancel the transformation, double-click outside the object.
Skewing The reflection is skewed to create a
realistic angle.
Distorting The shadow is distorted to indicate the
direction of a light source.
Perspective A second shadow is added and
modified.

456 CorelDRAW Graphics Suite 12 User Guide
To scale an object
1Select an object.
2Click the Scale mode button on the property bar.
3Drag a corner handle on the highlighting box.
4Click the Apply button on the extended property bar .
If you want to cancel the transformation, double-click outside the object.
To rotate an object
1Select an object.
2Click the Rotate mode button on the property bar.
3Drag a rotation handle on the highlighting box.
4Click the Apply button on the extended property bar .
If you want to cancel the transformation, double-click outside the object.
To flip an object
1Select an object.
2Hold down Ctrl, and drag a middle handle on the highlighting box across the
object, past the middle handle on the opposite side.
3Click the Apply button on the extended property bar .
If you want to cancel the transformation, double-click outside the object.
To skew an object
1Select an object.
2Click the Skew mode button on the property bar.
3Drag a skewing handle on the highlighting box.
4Click the Apply button on the extended property bar .
If you want to cancel the transformation, double-click outside the object.
To distort an object
1Select an object.
2Click the Distort mode button on the property bar.
Corel PHOTO-PAINT: Modifying objects 457
3Drag a distortion handle on the highlighting box.
4Click the Apply button on the extended property bar .
If you want to cancel the transformation, double-click outside the object.
To apply perspective to an object
1Select an object.
2Click the Perspective mode button on the property bar.
3Drag a perspective handle on the highlighting box.
4Click the Apply button on the extended property bar .
If you want to cancel the transformation, double-click outside the object.
Changing the edges of objects
You can adjust the appearance of an object by changing the characteristics of its edges.
You can blend the edges of an object with the background by feathering, defringing,
and removing black and white edges. To emphasize a certain object in an image, you
can define its edges by sharpening them.
Feathering
Feathering softens the edges of an object by gradually increasing the transparency of the
edge pixels. You can specify the width of the feathered section of the object and the
transparency gradient you want to use.
The object on the right has been feathered to soften its edges.
458 CorelDRAW Graphics Suite 12 User Guide
Defringing
An object created from an editable area sometimes includes stray pixels along its edges.
This is apparent when the editable area is surrounded by pixels of a different brightness
or color. Defringing replaces the color of the stray pixels with a color from the object so
that the object blends with the background.
Removing black or white object edges
You can remove black or white edges from a feathered object by making pixels along
the edges more transparent or more opaque.
Sharpening
Sharpening defines the edges of an object by making the edges crisp. The edges become
sharper as the pixels below the threshold become transparent and the pixels within the
threshold become opaque.
The object on the right has been sharpened to define its edges and make them
more crisp.
Changing the appearance of the object marquee
You can customize the appearance of the object marquee by changing its color and
threshold value. Changing the marquee threshold value modifies the location of the
visual boundary of the active object. You can also change the color of the object marquee
to make it more visible against the image background.
To feather the edges of an object
1Select an object.

Corel PHOTO-PAINT: Modifying objects 459
2Click Object ` Feather.
3Type a value in the Width box.
4From the Edges list box, choose one of the following:
• Linear — changes the edge transparency in even increments from the beginning
to the end of the feathered section
• Curved — results in small transparency increments at the beginning of the
feathered edge, larger transparency increments in the middle, and small
transparency increments at the end
If you want to view the effect in the image window, click Preview .
To defringe an object
1Select an object.
2Click Object ` Matting ` Defringe.
3Type a value in the Width box.
Higher values create a more gradual transition between the edges of the object and
the background.
To remove black or white edges from an object
1Select an object.
2Click Object ` Matting, and click one of the following:
• Remove black matte — makes edge pixels more transparent
• Remove white matte — makes edge pixels more opaque
To sharpen the edges of an object
1Select an object.
2Click Object ` Matting ` Threshold.
3Ty p e a v a l u e f r o m 1 to 255 in the Level box.
Higher values include fewer semitransparent pixels.
To change the object marquee
1Click To o l s ` Options.
2In the Wo rk s pa ce list of categories, click Display.
3Type a value from 1 to 255 in the Object threshold box.
460 CorelDRAW Graphics Suite 12 User Guide
Lower values enclose more of the object's pixels.
4Open the Object marquee color picker, and click a color.
When you change the threshold value of the object marquee, the area enclosed
by the marquee changes, but the object itself does not change. Pixels that are
not completely opaque can lie outside the marquee even though they are still
part of the object.
Adding drop shadows to objects
There are three types of drop shadows: glow, flat, and perspective. Glow drop shadows
silhouette objects and are centered horizontally and vertically; they simulate a light
source shining straight onto an object. Flat drop shadows simulate the effect of
directional light, so shadows are offset. Perspective drop shadows create three-
dimensional depth. You can add a drop shadow to any object, including text.
The object on the left has a flat drop shadow, while the object on the right has
a perspective drop shadow.
You can create and adjust drop shadows interactively in the image window. You can also
change the color, position, direction, and transparency of a drop shadow directly in the
image window.
You can also apply preset drop shadows. When you apply a preset, you can modify it to
create a custom drop shadow. For example, you can change its direction and distance
from an object, its color, and its opacity. By default, the edges of drop shadows feature
squared feathering. You can choose another feathering type, such as a Gaussian blur

Corel PHOTO-PAINT: Modifying objects 461
which creates a realistic-looking drop shadow. You can also copy a custom drop shadow
or save it as a preset.
When you change the shape or transparency of an object that has a drop shadow, the
drop shadow automatically also changes.
To add an interactive drop shadow
1Open the Interactive/Transparency flyout , and click the Interactive
dropshadow tool .
2Select an object.
If you want to create a flat drop shadow, drag from the center of the object
If you want to create a perspective drop shadow, drag from the edge of an object.
To add a preset or custom drop shadow
1Open the Interactive/Transparency flyout , and click the Interactive
dropshadow tool .
2Select an object.
3Choose a preset from the Preset list box on the property bar.
You can also
Change the color of the drop shadow Drag a color swatch from the color palette to
the end node on the drop shadow arrow.
Move the drop shadow Drag the start node on the drop shadow
arrow.
Change the direction of the drop shadow Drag the drop shadow arrow head.
Adjust the drop shadow’s opacity Drag the triangular Tr a n s p a r e n c y handle
on the drop shadow arrow.
Adjust the edge feathering Drag the triangular Feather handle on the
drop shadow arrow. By default, squared
feathering is used, but you can choose
another type from the Shadow feather
edge picker on the extended property bar
. For example, the Gaussian blur creates a
realistic drop shadow.
462 CorelDRAW Graphics Suite 12 User Guide
4Open the Shadow color picker on the property bar, and click a color.
5On the extended property bar , type values in any of the following boxes:
• Shadow direction — lets you specify the angle of the shadow in relation to the
object
• Shadow offset — lets you specify the distance of the shadow from the object’s
point of origin
• Shadow fade — lets you specify the percentage by which a perspective drop
shadow fades as it moves away from the object
• Shadow stretch — lets you specify the length of a perspective shadow
• Shadow transparency — lets you specify the transparency of the shadow
• Shadow feather — lets you specify the number of pixels on the edge of the
shadow that are feathered to create a soft edge. By default, squared feathering is
used, but you can choose another type from the Shadow feather edge picker
on the extended property bar. For example, if you want to create a realistic drop
shadow, choose the Gaussian blur. You can also specify a direction for the
feathered pixels from the Shadow feather direction picker .
To copy a drop shadow
1Select the object to which you want to apply a drop shadow.
2Open the Interactive/Transparency flyout , and click the Interactive
dropshadow tool .
3Click the Copy shadow properties button on the extended property bar .
4Click the object that has the drop shadow properties you want to copy.
From here
For more information about In the Help index, see...
Removing black or white edges from an
object
objects, changing edges
Changing the object marquee object marquee, customizing
Using clip masks to change object
transparency
transparency, using clip masks

Corel PHOTO-PAINT: Creating images for the Web 463
Creating images for the Web
Corel PHOTO-PAINT gives you the tools you need to create images for the World
Wide Web.
In this section, you’ll learn about
• exporting and optimizing images for the Web
• creating and editing rollovers
Exporting and optimizing images for the Web
In Corel PHOTO-PAINT, you can export and optimize images for the Web.
Exporting images
Before you use an image on the Web, you must export it to a Web-compatible file
format, such as the GIF or JPEG format. The GIF file format is best for line drawings,
text, and images with sharp edges or few colors, while the JPEG file format is suitable
for photos. For information about these file formats and alternatives, see “Choosing a
Web-compatible file format” in the Help.
Optimizing images
You can also optimize an image for the Web before you export it to adjust its display
quality and file size. In Corel PHOTO-PAINT, you can preview an image with up to
four different configurations of settings. You can compare file formats, preset settings,
download speeds, compression, file size, image quality, and color range. You can also
examine previews by zooming and panning within the preview windows.
Corel PHOTO-PAINT provides preset settings, but you can edit these presets, and add
and delete custom presets. Once you specify the settings you want for all of the preview
areas, you can save the settings for the entire optimization dialog box.

464 CorelDRAW Graphics Suite 12 User Guide
The Web image optimizer lets you preview an image in different Web-
compatible file formats.
To export an image for the Web
1Click File ` Export for Web.
2Choose the folder where you want to save the file.
3Type a filename in the Filename box.
4Disable the Slices check box.
5Choose a file format from the Save as type list box.
6Enable the Images only option.
7Click Save.
8In the export dialog box for the chosen file format, specify the settings you want.
To optimize and export an image for the Web
1Click File ` Web image optimizer.
2Below the image preview windows, choose from the following list boxes:
• File type
• Web preset
If you want the image previews, download speeds, compression percentages, file
sizes, and color palettes to update automatically, ensure that Preview is enabled.
3Choose an option from each of the list boxes below an image preview window to
select the file format to which you want to save.
A red border indicates the selected format.
Corel PHOTO-PAINT: Creating images for the Web 465
4Click OK.
5In the Save Web image to disk dialog box, type a filename in the Filename box.
6Choose the folder where you want to save the image.
7Click Save.
You can compare file types with the original image by selecting Original file
type in one of the preview panes.
Creating and editing rollovers
A rollover is an interactive image that changes in appearance when you click or point
to it. For example, you can make a button change color when it is clicked, or display
text when you point to it. Rollovers are frequently used on Web pages as navigation
buttons.
You can also
Increase the number of preview areas In the top right corner, click one of the
preview area display buttons.
Pan to another section of the image Drag in the first preview window.
Zoom in Choose a magnification level from the Zoom
level list box.
Edit preset settings for a single preview area Click Advanced in one of the preview areas.
In the Export dialog box, customize the
preset options. If you select GIF or PNG8
file formats, you can modify the color palette
and settings in the Convert to paletted
dialog box.
Save the current configuration of settings for
a preview area
Click the Save settings button for each
area where you want to save the settings.
Save a custom preset Click Add .
Delete a custom preset Click Delete .
Preview the file download time for a
particular connection speed
Choose a speed from the Connection speed
list box.
466 CorelDRAW Graphics Suite 12 User Guide
Creating rollovers
Rollover are made using objects, such as shapes, brush strokes and text. You can use a
single object or a group of objects, such as an ellipse with text on it. Rollovers consist of
the following states:
•Normal — displays the default state
•Over — is triggered when you point to it
•Down — is triggered when you click it
Each state consists of an object or multiple objects.
The three states of a rollover: normal, over, and down
You can assign properties to a rollover, such as a Web address that opens when you click
a rollover, and alternate text that displays when you point to it. You can specify a target
for the down state which determines how a Web page opens in a browser window. You
can also add sound to the over and down rollover states, which will play when these
rollover states are activated.
Editing rollover objects
You can edit rollover states by adding, modifying and removing objects in each state.
When you create a rollover, the original objects are copied to the normal, over, and
down states. Adding an object to a rollover state adds the object to all states. However,
any changes you make to an object are applied only to the current state. For example,
you can use different text for the over state by replacing the original text in that state.
If you want to create a rollover using an editable area or the background, they must first
be converted to objects. For more information about defining editable areas, see
“Masking” on page 413.

Corel PHOTO-PAINT: Creating images for the Web 467
When you create a rollover, the image is sliced, and the rollover becomes a slice. For
more information on working with image slices, and exporting and optimizing sliced
images, see “Slicing images” in the Help.
To create a rollover
1Select one or more objects.
When you create a rollover, the original objects are destroyed. If you want to retain
the original objects, save them before you create a rollover.
2Click We b ` Create rollover from object.
3In the Rollover docker, set any of the following properties for the rollover:
• URL — specifies an address, or URL, for a Web page.
• ALT — specifies the alternate text that displays when you point to a rollover.
4Choose one of the following rollover states from the States list box:
• Normal
• Over
• Down
5Edit the selected rollover state by adding, removing, and modifying objects.
6Click the Finish editing button .
Each state retains its component objects, so you can continue to edit the rollover.
You can also
Add sound to a rollover state In the Sound box, type a filename of the
sound you want to play when the selected
state is triggered. You can also click the
Browse button to locate and choose the
sound file.
Specify the target frame or browser window
for the URL
Click a target type in the Ta r g e t list box:
_self opens the URL in the current frame,
_blank opens the URL in a new browser
window, _top opens the URL in the root
frame of the browser, _parent opens the
URL in the highest level frame.
Preview a rollover in a browser In the Rollover docker, click the Preview in
browser button .
468 CorelDRAW Graphics Suite 12 User Guide
In the Objects docker, rollover objects are highlighted, grouped, and have a
Rollover object icon to the right of the object name. The Te x t r o l l o v e r
object icon indicates that the rollover object is text.
In the Objects docker, the Rollover object icon turns red when a rollover
overlaps another rollover. Overlapping rollovers cannot be exported. You must
move the rollover so it no longer overlaps with another rollover object.
To edit a rollover
1In the Objects docker, select a rollover.
Rollovers have Rollover object icons to the right of their object names.
If the Objects docker is not open, click Window ` Dockers ` Objects.
2Click We b ` Edit rollover.
3In the Rollover docker, choose one of the following rollover states from the States
list box:
• Normal
• Over
• Down
4Edit the rollover state by adding, removing, and modifying objects.
5Click the Finish editing button .
When you extract a rollover to simple objects, the component objects are
named automatically.
Create a new rollover Click the Create rollover from object
button .
You can also
Return a state to the current Normal state,
so you can start over again
Click Reset.
Return all states in a rollover to simple
objects
Click Web ` Extract rollover.
You can also
Corel PHOTO-PAINT: Creating images for the Web 469
It is not possible to edit two rollovers at the same time.
You can edit a rollover by double-clicking it in the image window.
You can also edit a rollover by clicking the Edit rollover button in the
Rollover docker.
To add an object to a rollover
1In the Rollover docker, choose one of the following rollover states from the States
list box:
• Normal
• Over
• Down
2Open the Shape flyout , and click a shape tool.
3Drag in the image window to create a shape.
The object is added to all rollover states.
For more information about adding shapes and brush strokes, see “Working
with objects” on page 447. For more information about adding text, see
“Working with text” in the Help.
All brush strokes are added to the active object by default. You can also create
an object by clicking the New object button in the Objects docker. If the
Objects docker is not open, click Window ` Dockers ` Objects.
To modify an object in the current rollover state
1In the Rollover docker, choose one of the following rollover states from the States
list box:
You can also
Add brush strokes Open the Brush flyout , click
the Paint tool , and drag in the image
window to create a brush stroke.
Add text Click the Te x t tool , click in the image
window, and type the text.

470 CorelDRAW Graphics Suite 12 User Guide
• Normal
• Over
• Down
2In the Objects docker, select the object you want to modify.
If the Objects docker is not open, click Window ` Dockers ` Objects.
3Modify the object.
The changes apply only to the object in the current state.
A rollover can display different text in each of the normal, over and down
states. To edit text in a rollover, click the Te x t tool , point to the text until
the pointer becomes a cursor, and select the text. Type new text to replace the
current text.
To remove an object from the current rollover state
1In the Rollover docker, choose one of the following rollover states from the States
list box:
• Normal
• Over
• Down
2In the Objects docker, select the object you want to remove.
3Double-click the Eraser tool .
The object is removed only from the current state.
From here
For more information about In the Help index, see...
E-mailing images e-mail, sending images
Choosing a Web-compatible file format file formats, Web-compatible
Slicing images slicing, images for the Web
E-mailing images e-mail, sending images
Choosing a Web-compatible file format file formats, Web-compatible

Corel PHOTO-PAINT: Saving and closing 471
Saving and closing
In Corel PHOTO-PAINT, you can save your work as you create and edit an image and
before you close it. You can also save images to many different file formats.
In this section, you’ll learn about
•saving images
• exporting images to other file formats
•closing images
Saving images
You can save an image to preserve it. You can also save images automatically at regular
intervals and save backup copies of the file.
When you save an image, you can specify a file format, a filename, and a folder where
you want to save the file. Images are automatically saved using the currently selected
file format, name, and location. The default format is the native Corel PHOTO-PAINT
(CPT) file format. Saving to the Corel PHOTO-PAINT (CPT) file format retains all
image properties — objects, the most recently created mask, alpha channels, grids,
guidelines, and color information — so you can edit them later.
To save an image
1Click File ` Save as.
2Choose the folder where you want to save the file.
3Choose a file format from the Save as type list box.
4Type a filename in the Filename list box.
The file extension for the file format you choose is appended to the filename
automatically, but can be removed.
5Click Options.
6Enable any of the following active check boxes:
472 CorelDRAW Graphics Suite 12 User Guide
• Selected only — saves only the editable areas defined in your image, when there
are no active and selected objects. If there are no editable areas, this option saves
only the active and selected objects.
• Web _s afe _f il enam es — replaces the white space in a filename with an
underscore. Special characters are replaced by characters suitable for Web-based
filenames.
• Do not show filter dialog — suppresses dialog boxes that provide other options
when exporting
7Click Save.
When you save an image containing objects to a file format that does not
support objects, you can continue working on the original file (which still
contains the objects) in the image window. The image and its objects can still
be saved to the Corel PHOTO-PAINT (CPT) format.
You can also save an image by clicking the Save button on the standard
toolbar.
You can add notes to an image when you save it by typing text in the Notes
box. You can view notes in the Notes box in the Open dialog box when you
open an image, or in the Import dialog box when you import an image. Some
file formats do not let you save annotations with an image.
Exporting images to other file formats
You can export Corel PHOTO-PAINT images to a variety of file formats. The file
format you choose depends on how you want to use the image in the future. However,
when you export an image to another file format, you may lose some image properties;
You can also
Compress a file Choose a compression type from the
Compression type list box.
Save a file in a new folder Click New, type a name in the Name of
new folder box, and click Create.
Specify information about a file Type any comments you want in the Notes
box.

Corel PHOTO-PAINT: Saving and closing 473
each file format has its own idiosyncrasies and appropriate use. For example, if you want
to work on an image in another image editing application, you can export it to the
Adobe Photoshop (PSD) file format. You retain many image properties, such as objects
and masks, so you can continue to edit the image. If you want to share an image, the
Tagged Image File Format (TIFF) or the Windows bitmap (BMP) file format are
suitable because they are standard formats; images in these formats can be opened in
most image viewers and most image editing and desktop publishing applications.
You can also export a file so that it is optimized for use with a suite of office productivity
applications, such as Microsoft Office or WordPerfect Office.
For information about the image properties supported by file formats, consult the
technical notes for each file format in “File formats” in the Help.
To export an image to another file format
1Click File ` Export.
2Choose the folder where you want to save the file.
3Choose a file format from the Files of type list box.
4Type a filename in the File name list box.
The file extension for the file format you choose is appended to the filename
automatically, but can be removed.
5Click Options.
6Enable any of the following active check boxes:
• Selected only — saves only the editable areas defined on your image, when
there are no active and selected objects. If there are no editable areas, this option
saves only the active and selected objects.
• Web _s afe _f il enam es — replaces the white space in a filename with an
underscore. Special characters are replaced by characters suitable for Web-based
filenames.
• Do not show filter dialog — suppresses dialog boxes that provide other options
when exporting
7Click Save.
To compress an image while exporting, choose a compression type from the
Compression type list box.

474 CorelDRAW Graphics Suite 12 User Guide
To export an image to Microsoft Office or WordPerfect Office
1Click File ` Export for Office.
2From the Export to list box, choose one of the following:
• Microsoft Office
• WordPerfect Office
3Click OK.
4Locate the folder where you want to save the file.
5Type a filename in the File name list box.
6Click Save.
Images are exported at 96 DPI with color management settings unchanged.
Layers in an image are flattened when exported to Microsoft Office or
WordPerfect Office.
Closing images
You can close an image or all images at any time. If you close images without saving
them, your work is lost.
To close an image
To close Do the following
An image Click File ` Close.
All images Click Window ` Close all.

Corel PHOTO-PAINT: Managing color for display, input, and output 475
Managing color for
display, input, and output
You may find that the colors displayed on your monitor don’t match the colors of a
scanned image or of a printer’s output. Color management lets you reproduce colors
accurately by using color profiles and by correcting colors for display.
In this section, you’ll learn about
• working with color profiles
• choosing advanced color management settings
• correcting colors for display
Working with color profiles
A color management system helps you achieve accurate colors across a variety of devices
consistently. The first stage in setting up your color management system is to choose
color profiles for your monitor and each of the devices you use, such as scanners, digital
cameras, and printers.
Understanding color management
Each device has a range of colors, or color space, that it uses. For example, a monitor
displays a different set of colors than a printer reproduces. So, you may see some colors
on the screen that cannot be printed.
You can use a color management system to translate colors from one device to another.
Color profiles define the color space for your monitor and for the input and output
devices you use.
Choosing color profiles
Different brands and models of monitors, scanners, digital cameras, and printers have
different color spaces, and thus require different color profiles. Some widely used profiles
are installed with your application.
476 CorelDRAW Graphics Suite 12 User Guide
Standard ICC (International Color Consortium) color profiles are used in your
application. You can choose color profiles for a:
•monitor
• scanner/digital camera
• composite printer
• separations printer
• internal RGB color space
Obtaining additional color profiles
If you need additional profiles or updates, you can get them from the application CD,
or you can download them. You can access other color profiles.
To choose a color profile
1Click To o l s ` Color management.
2Click a profile name under one of the following icons:
• Scanner/digital camera
• Separations printer
• Monitor
• Composite printer
• Internal RGB
3Choose a profile from the list box.
By default, color profiles are stored in the application’s Color folder.
To copy a color profile from the CD
1Click To o l s ` Color management.
2Below a device icon, click a color profile list box, and choose Get profile from
disk.
3Insert the application CD.
4In the Browse for folder dialog box, choose the folder where the profiles are
located.

Corel PHOTO-PAINT: Managing color for display, input, and output 477
If you want to load color profiles that you have stored in a different location, such
as on a network or on your hard disk, you can choose the folder where the profiles
are located.
5In the Install from disk dialog box, choose the color profile you want to copy.
6Click Choose.
To download a color profile
1Click To o l s ` Color management.
2Below a device icon, click a color profile list box, and choose Download profiles.
3In the dialog box, enable the check box for each profile you want to download.
4Click Download.
5In the Save as dialog box, choose a destination for the color profile.
6If you want to store the new color profile with the existing profiles, download it to
the application’s Color folder.
Choosing advanced color management settings
Once you choose color profiles, the color management system uses a Color Matching
Module (CMM) to match colors between devices as closely as possible. Your application
uses the Kodak Color Management System by default. You can also choose different
rendering intents, which control how the color management system converts colors
between different color spaces.
You can also
Choose a different profile type Click the Profile type list box, and choose a
type.
Specify your connection speed Click the Connection speed list box, and
choose a speed. The faster your connection
speed, the shorter the download time.
Update the profiles list Click Refresh.
Return to the main Color management
dialog box
Click Cancel.

478 CorelDRAW Graphics Suite 12 User Guide
To choose a color engine and rendering intent
1Click To o l s ` Color management.
2Click on the Internal RGB .
3In the Advanced settings dialog box, from the Rendering intent list box, choose
one of the following:
• Absolute colorimetric — preserves the white point throughout conversion
• Automatic — default setting, which uses saturation for vector graphics and
perceptual for bitmaps
• Perceptual — good for a variety of images, especially bitmaps and photographic
images
• Relative colorimetric — good for producing proofs on inkjet printers
• Saturation — good for vector graphics (lines, text, and solid colored objects)
4Choose an option from the Color engine list box.
Correcting colors for display
You can correct colors so that they display as accurately as possible on screen. If you
correct only the display colors, the colors are shown according to the internal RGB, and
monitor color profiles.
If you display colors as they will print, on-screen colors simulate output using the
Internal RGB, monitor, and printer color profiles. Simulating printer output may cause
on-screen colors to appear dull.
To correct colors for display
•Click To o l s ` Color management.
Arrows appear orange when they are turned on, and grayed and broken when
they are turned off.
The display simulation of a separations printer on a composite printer does not
affect output.

Corel PHOTO-PAINT: Printing 479
Printing
Corel PHOTO-PAINT provides extensive options for printing your work.
In this section, you'll learn about
• printing your work
• laying out print jobs
• previewing print jobs
Printing your work
In the Corel PHOTO-PAINT application, you can print one or more copies of the same
image. You can specify whether to print the current image or specific images. Before
printing an image, you can specify printer properties, including paper size and device
options.
To set printer properties
1Click File ` Print.
2Click the General tab.
3Click Properties.
4Set any properties in the dialog box.
To print your work
1Click File ` Print.
2Click the General tab.
3Choose a printer from the Name list box.
4Type a value in the Number of copies box.
If you want the copies collated, enable the Collate check box.
5Enable one of the following options:

480 CorelDRAW Graphics Suite 12 User Guide
• Current document — prints the active drawing
• Current page — prints the active page
• Pages — prints the pages that you specify
• Documents — prints the documents that you specify
The Collate check box is available only for documents with more than one
page.
Laying out print jobs
You can lay out a print job by specifying the size, position, and scale. Tiling a print job
prints portions of each page on separate sheets of paper that you can assemble into one
sheet. You would, for example, tile a print job that is larger than your printer paper.
If the orientation of a print job differs from the orientation specified in the printer
properties, a message prompts you to adjust the paper orientation of the printing
device. You can disable this prompt, so that the printer adjusts paper orientation
automatically.
To specify the size and position of a print job
1Click File ` Print.
2Click the Layout tab.
3Enable one of the following options:
• As in document — maintains the image size, as it is in the document
• Fit to page — sizes and positions the print job to fit to a printed page
• Reposition images to — lets you reposition the print job by choosing a position
from the list box
Enabling the Reposition images to option lets you specify size, position, and
scale in the corresponding boxes.
To tile a print job
1Click File ` Print.
2Click the Layout tab.
3Enable the Print tiled pages check box.

Corel PHOTO-PAINT: Printing 481
4Type values in the following boxes:
• Tile overlap — lets you specify the number of inches by which to overlap tiles
• % of page width — lets you specify the percentage of the page width the tiles
will occupy
Enable the Tiling marks check box to include tiling alignment marks.
To change the page orientation prompt
1Click To o l s ` Options.
2In the list of categories, double-click Global, and click Printing.
3Choose Page orientation prompt from the Option list.
4Choose one of the following from the Setting list box:
• Off — always match orientation
• On — ask if orientations differ
• Off — don't change orientation
Previewing print jobs
You can preview your work to show how the position and size of the print job will appear
on paper. For a detailed view, you can zoom in on an area. You can view how the
individual color separations will appear when printed. You can also increase the speed
of a print preview by hiding the graphics.
Before printing your work, you can view a summary of issues for a print job to find
potential printing problems. For example, you can check the current print job for print
errors, possible print problems, and suggestions for resolving issues.
To preview a print job
•Click File ` Print preview.
You can quickly preview a print job in the Print dialog box by clicking File `
Print, and clicking the Mini preview button .
To magnify the preview page
1Click File ` Print preview.

482 CorelDRAW Graphics Suite 12 User Guide
2Click View ` Zoom.
3Enable the Percent option, and type a value in the box.
You can also magnify the preview page by choosing a preset zoom level.
You can also zoom in on a portion of the print preview by clicking the Zoom
tool in the toolbox and marquee selecting an area.
To preview color separations
1Click File ` Print preview.
2On the property bar, click the Enable color separations button .
You can preview the composite by clicking View ` Preview separations `
Composite.
To hide or display graphics
1Click File ` Print preview.
2Click View ` Show image.
A check mark beside the menu command name indicates that graphics are
displayed.
When the Show image menu command is disabled, the print job is
represented by a bounding box that you can use to position and size the job.
To view a summary of issues for a print job
1Click File ` Print.
2Click the Issues tab.
If you don't want Preflight to check for certain issues, click Settings, double-click
Printing, and disable any check boxes that correspond to issues you want
overlooked.
You can save settings by clicking the Add preflight settings button and
typing a name in the Save preflight style box.

Section I: Welcome to
CorelDRAW Graphics Suite 12

CorelDRAW Graphics Suite 12: Glossary 485
Glossary
A B C D E F G H I J K L M N O P Q R S T U V W Z
A
accelerator table
A file that contains a list of shortcut keys. Different tables are active depending on the
task that you are performing.
active object
An object that has a red border around its thumbnail in the Objects docker.
add-in
A separate module that extends the functionality of an application.
alpha channel
A temporary storage area for masks. When you save a mask to an alpha channel, you
can access and reuse it in the image as many times as you want. You can save an alpha
channel to a file or load a previously saved channel in the active image.
ambient lighting
The lighting in a room, including natural and artificial light sources.
anchor point
The point that remains stationary when you stretch, scale, mirror, or skew an object.
Anchor points correspond to the eight handles that display when an object is selected,
as well as the center of a selection box marked by an X.
animation
An animated object or objects. An animation consists of a succession of frames and can
be an entire Corel R.A.V.E. movie or part of a movie.
animation file

486 CorelDRAW Graphics Suite 12 User Guide
A file that supports moving images; for example, animated GIF and QuickTime
(MOV).
anti-aliasing
A method of smoothing curved and diagonal edges in images. Intermediate pixels along
edges are filled to smooth the transition between the edges and the surrounding area.
arrow keys
Direction keys that move or "nudge" selected objects in small increments. You can also
use arrow keys to position the cursor when you type or edit text onscreen or in a dialog
box.
artistic text
A type of text created with the Text tool. Use artistic text to add short lines of text, such
as titles, or to apply graphic effects, such as fitting text to a path, creating extrusions
and blends, and creating all other special effects. An artistic text object can contain up
to 32,000 characters.
aspect ratio
The ratio of the width of an image to its height (expressed mathematically as x:y). For
example, the aspect ratio of an image that is 640 x 480 pixels is 4:3.
audio object
A sound file imported into a movie project.
B
base color
The color of the object that appears under a transparency. The base color and the color
of the transparency combine in various ways depending on the merge mode you apply
to the transparency.
behavior
A command that is executed either when a movie reaches a certain point (for a behavior
applied to a frame), or when the user interacts with an object (for a behavior applied to
a rollover state). Behaviors let you create more complex and interactive movies. For
example, you can start and stop movies, jump to other parts of a movie, load additional
movies, and control sound.
Bézier line

CorelDRAW Graphics Suite 12: Glossary 487
A straight or curved line made up of segments connected by nodes. Each node has
control points that allow the shape of the line to be modified.
bit depth
The number of binary bits that define the shade or color of each pixel in a bitmap. For
example, a pixel in a black-and-white image has a depth of 1 bit, because it can only be
black or white. The number of color values that a given bit depth can produce is equal
to 2 to the power of the bit depth.
bitmap
An image composed of grids of pixels or dots.
See also vector graphic.
bitmap fill
A fill created from any bitmap.
black-and-white color mode
A 1-bit color mode that stores images as two solid colors - black and white - with no
gradations. This color mode is useful for line art and simple graphics.
bleed
The part of the printed image that extends beyond the edge of the page. The bleed
ensures that the final image goes right to the edge of the paper after binding and
trimming.
blend
An effect created by transforming one object into another through a progression of
shapes and colors.
bookmark
An indicator for marking an address on the Internet.
bounding box
The invisible box indicated by the eight selection handles surrounding a selected object.
button
An interactive object or group of objects that changes its appearance or executes a
behavior when you click or point to it.
See also rollover.

488 CorelDRAW Graphics Suite 12 User Guide
brightness
The amount of light that is transmitted or reflected from a given pixel. In the HSB color
mode, brightness is a measure of how much white a color contains. For example, a
brightness value of 0 produces black, and a brightness value of 255 produces white.
C
calligraphic angle
The angle that controls the orientation of a pen to the drawing surface, like the slant of
the nib on a calligraphy pen. A line drawn at the calligraphic angle has little or no
thickness, but widens as its angle gets farther from the calligraphic angle.
cascading style sheet (CSS)
An extension to HTML that allows styles such as color, font, and size to be specified for
parts of a hypertext document. Style information can be shared by multiple HTML files.
See also HTML.
center of rotation
The point around which an object rotates.
CERN
CERN (Conseil Europeén pour la Recherche Nucléaire) is the scientific laboratory in
which the World Wide Web was developed. CERN is also one of the World Wide Web
server systems. Contact your server administrator to find out which system your server
uses.
CGI script
An external application that is executed by an HTTP server in response to an action you
perform in a Web browser, such as clicking a link, image, or another interactive element
of a Web page
channel
An 8-bit grayscale image that stores color or mask information for another image.
There are two types of channels: color and mask. Images have one color channel for each
component of the color model on which they are based. Each channel contains the color
information for that component. Mask (alpha) channels store masks that you create for
your images and can be saved with images in formats that support mask information,
for example, Corel PHOTO-PAINT (CPT).

CorelDRAW Graphics Suite 12: Glossary 489
character
A letter, number, punctuation mark, or other symbol.
child color
A color style created as a shade of another color style. For most of the available color
models and palettes, child colors share the same hue as the parent, but have different
saturation and brightness levels.
See also parent color.
child object
An object whose image elements are inserted into the shape of another object, called a
parent object. The child object and parent object are called a clipping group. The child
object must be on a layer above the parent object.
choke
In commercial printing, a form of trapping created by extending the background object
into the foreground object.
client/server image map
A rarely used image map type that includes code for both client-side and server-side
image maps. This type of image map automatically defaults to the user's Web browser
for image map processing. If the browser does not support image maps, the server uses
the external map file to process information. Currently, most Web browsers support
image maps, so client-side image maps are more common.
client-side image map
This common image map type does not depend on the server to process the map
information.
clipart
Ready-made images that can be imported into Corel applications and edited if required.
Clipboard
An area that is used to temporarily store cut or copied information. The information is
stored until new information is cut or copied to the Clipboard, replacing the old.
clip mask

490 CorelDRAW Graphics Suite 12 User Guide
A mask that lets you edit an object's transparency levels without affecting the pixels in
the object. You can change the transparency levels directly on the object and then add
the clip mask, or add the clip mask before making the changes.
clipping range
The percentage of the range of values that is not displayed in the upper part of the
histogram's vertical axis.
clone
A copy of an object or an area of an image that is linked to a master object or image
area. Most changes made to the master are automatically applied to its clones.
See also symbol.
closed object
An object defined by a path whose start point and end point are connected.
closed path
A path whose start point and end point are connected.
CMY
A color mode made up of cyan (C), magenta (M), and yellow (Y). This mode is used in
the three-color printing process.
CMYK
A color mode made up of cyan (C), magenta (M), yellow (Y), and black (K). CMYK
printing produces true blacks and a wide tonal range. In the CMYK color mode, color
values are expressed as percentages; therefore, a value of 100 for an ink means that the
ink is applied at full saturation.
code page
A code page is a table in the DOS or Windows operating system that defines which
ASCII or ANSI character set is used for displaying text. Different character sets are used
for different languages.
color channel
An 8-bit grayscale version of an image. Each channel represents one level of color in the
image; for example, RGB has three color channels, while CMYK has four. When all the
channels are printed together, they produce the entire range of colors in the image.
See also RGB and CMYK.

CorelDRAW Graphics Suite 12: Glossary 491
color gamut
The range of colors that can be reproduced or perceived by any device. For example, a
monitor displays a different color gamut than a printer, making it necessary to manage
colors from original images to final output.
color mode
A system that defines the number and kind of colors that make up an image. Black-
and-white, grayscale, RGB, CMYK, and paletted are examples of color modes.
color model
A simple color chart that defines the range of colors displayed in a color mode. RGB
(red, green, blue), CMY (cyan, magenta, yellow), CMYK (cyan, magenta, yellow,
black), HSB (hue, saturation, brightness), HLS (hue, lightness, saturation), and CIE
L*a*b (Lab) are examples of color models.
color palette
A collection of solid colors from which you can choose colors for fills and outlines.
color profile
A description of the color-handling capabilities and characteristics of a device.
color separation
In commercial printing, the process of splitting colors in a composite image to produce
a number of separate grayscale images, one for each primary color in the original image.
In the case of a CMYK image, four separations (one for cyan, magenta, yellow, and
black) must be made.
color space
In electronic color management, a virtual representation of a device or the color gamut
of a color model. The boundaries and contours of a device's color space are mapped by
color management software.
See also color gamut.
color swatch
A solid-colored patch in a color palette.
color tolerance
The value that determines the color range or sensitivity of the Lasso mask tool, Magic
wand mask tool, and Fill tool. Tolerance is also used in the Color mask dialog box to

492 CorelDRAW Graphics Suite 12 User Guide
determine which pixels are protected when you create a color mask. A pixel is included
in the specified color range if its grayscale value falls within the defined tolerance.
color value
A set of numbers that define a color in a color mode. For example, in the RGB color
mode, color values of 255 for red (R) and zero for both green (G) and blue (B) result in
the color red.
combined object
An object created by combining two or more objects and converting them into a single
curve object. A combined object takes on the fill and outline attributes of the last
selected object. Sections where an even number of objects overlapped have no fill.
Sections where an odd number of objects overlapped are filled. The outlines of the
original objects remain visible.
compound blend
A blend created by blending the start or end object of one blend with another object.
compound tween
A tween consisting of three or more keyframes. The timeline of a compound tween
consists of two or more timeline sections.
concave
Hollowed or rounded inward like the inside of a bowl.
content
The object or objects that appear inside a container object when you apply PowerClip
effects.
contour
An effect created by adding evenly spaced concentric shapes inside or outside the
borders of an object.
contrast
The difference in tone between the dark and light areas of an image. Higher contrast
values indicate greater differences and fewer gradations between dark and light.
control object

CorelDRAW Graphics Suite 12: Glossary 493
The original object used to create effects such as envelopes, extrusions, drop shadows,
contours, and objects created with the Artistic media tool. Changes made to the control
object control the appearance of the effect.
control points
The points that extend from a node along a curve that is being edited with the Shape
tool. Control points determine the angle at which the curve passes through the node.
convex
Curved or rounded outwards like the exterior of a sphere or circle.
crop
To cut unwanted areas of an image without affecting the resolution of the part that
remains.
cubist
An abstract style of art that stresses several aspects of the same object simultaneously,
generally in the form of squares or cubes.
curve object
An object that has nodes and control points, which you can manipulate to change the
object's shape. A curve object can be any shape, including a straight or curved line.
D
desktop
The area in a drawing where you can experiment and create objects for future use. This
area is outside the borders of the drawing page. You can drag objects from the desktop
area to the drawing page when you decide to use them.
diacritical mark
An accent mark above, below, or through a written character; for example, the acute
(é) and cedilla (ç) accents.
dimension line
A line that displays the size of objects or the distance or angle between objects.
distortion handles
The outward-facing, double-headed arrows located at each corner of the highlighting
box.

494 CorelDRAW Graphics Suite 12 User Guide
dithering
A process used to simulate a greater number of colors when only a limited number of
colors is available.
document navigator
The area at the bottom-left of the application window that contains controls for moving
between pages and adding pages. The document navigator also displays the page
number of the active page and the total number of pages in a drawing.
dpi (dots per inch)
A measure of a printer's resolution in dots per inch. Typical desktop laser printers print
at 600 dpi. Image setters print at 1270 or 2540 dpi. Printers with higher dpi capabilities
produce smoother and cleaner output. The term dpi is also used to measure scanning
resolution and to indicate bitmap resolution.
drawing
A document you create in CorelDRAW.
drawing page
The portion of a drawing window enclosed by a rectangle with a shadow effect.
drawing window
The portion of the application window on which you can create, add, and edit objects.
drop shadow
A three-dimensional shadow effect that gives objects a realistic appearance.
duotone
An 8-bit color mode that displays images using 256 shades of up to four tones. An
image in the duotone color mode is simply a grayscale image that has been enhanced
with one to four additional colors.
dynamic guides
Temporary guidelines that appear from the following snap points in objects — center,
node, quadrant, and text baseline.
E
editable area

CorelDRAW Graphics Suite 12: Glossary 495
An editable area (selection) allows paint and effects to be applied to the underlying
pixels.
See also protected area and mask.
embedding
The process of placing an object created in one application into a document created in a
different application. Embedded objects are included entirely in the current document;
they are not linked to their source files.
encoding
Determines the character set of text, letting you correctly display text in the appropriate
language.
envelope
A closed shape that can be placed around an object to change the object's shape. An
envelope consists of segments connected by nodes. Once an envelope has been placed
around an object, the nodes can be moved to change the shape of the object.
Exchangeable Image File (EXIF)
A file format that embeds digital camera information, such as the time and date a photo
is taken, shutter speed, focus, and flash conditions, into TIFF and JPEG images.
extrusion
A feature that lets you apply a three-dimensional perspective by projecting lines from
an object to create the illusion of depth.
F
feathering
The level of sharpness along a drop shadow's edges.
fill
A color, bitmap, fountain, or pattern applied to an area of an image.
filter
An application that translates digital information from one form to another.
flattened image

496 CorelDRAW Graphics Suite 12 User Guide
An image in which objects and masks are combined with the background and can no
longer be edited.
floating editable area
An editable area that hovers or floats above an image and can be moved and modified
without affecting the underlying pixels.
floating object
A bitmap with no background. Floating objects are also referred to as photo objects or
cutout images.
font
A set of characters with a single style (such as italic), weight (such as bold), and size
(such as 10 point) for a typeface such as Times New Roman.
fountain fill
A smooth progression of two or more colors applied to an area of an image that follow
a linear, radial, conical, or square path. Two-color fountain fills have a direct progression
from one color to another, while custom fills may have a progression of many colors.
fountain steps
The shades of color that make up the appearance of a fountain fill. The more steps in a
fill, the smoother the transition from the beginning color to the end color.
fractal
An irregular shape generated by a repeating pattern. Fractals can be used to
mathematically generate an irregular and complex image by following a pattern,
without having to define all of the individual components in the image.
freehand marquee select
To marquee select objects or nodes by holding down the Option key while dragging the
Shape tool and controlling the shape of the marquee box enclosure as if you were
drawing a freehand line.
See also marquee select.
FTP (File Transfer Protocol)
A method of moving files between two computers. Many Internet sites have established
repositories of material that can be obtained using FTP.

CorelDRAW Graphics Suite 12: Glossary 497
G
Gaussian
A type of pixel distribution that spreads the pixel information outward using bell-
shaped curves rather than straight lines.
GIF
A graphic file format designed to use a minimum of disk space and be easily exchanged
between computers. This format is commonly used to publish images of 256 or fewer
colors to the Internet.
glyph
Diamond-shaped handles that can be dragged to alter the form of a shape.
grab area
The area of a command bar that can be dragged. Dragging the grab area moves the bar,
while dragging any other area of the bar has no effect. The location of the grab area
depends on the operating system you are using, the orientation of the bar, and whether
the bar is docked or undocked. Command bars with grab areas include toolbars, the
toolbox, and the property bar.
gradient node
A square point that represents each color on the gradient arrow of a gradient fill, which
is used to change the fill's start and end points, colors, and transparency values.
grayscale
A color mode that displays images using 256 shades of gray. Each color is defined as a
value between 0 and 255, where 0 is darkest (black) and 255 is lightest (white).
grayscale image
An image that uses the grayscale color mode, which can display up to 256 shades of gray
ranging from white to black. Grayscale images, especially photographs, are commonly
referred to as "black and white."
greeking
A method of representing text using either words that have no meaning or a series of
straight lines.
grid

498 CorelDRAW Graphics Suite 12 User Guide
A series of evenly spaced horizontal and vertical dots that are used to help draw and
arrange objects.
group
A set of objects that behaves as one unit. Operations you perform on a group apply
equally to each of its objects.
guideline
A horizontal, vertical, or slanted line that can be placed anywhere in the drawing
window to aid in object placement.
gutter
The space between columns of text, also called the alley. In printing, the white space
formed by the inside margins of two facing pages.
H
halftone
An image that has been converted from a continuous tone image to a series of dots of
various sizes to represent different tones.
handles
A set of eight black squares that appear at the corners and sides of an object when the
object is selected. By dragging individual handles, you can scale, resize or mirror the
object. If you click a selected object, the shape of the handles changes to arrows so that
you can rotate and skew the object.
highlighting box
A rectangle with eight handles that encloses a selection in an image.
hotspot
The area of an object that you can click to jump to the address specified by a URL.
hotspotting
The process of adding data to objects or groups of objects, so that they respond to
events, such as pointing or clicking. For example, you can assign a URL to an object,
making it a hyperlink to an external Web site.
hot zone
The distance from the right margin at which hyphenation begins.

CorelDRAW Graphics Suite 12: Glossary 499
HSB (hue, saturation, brightness)
A color model that defines three components: hue, saturation, and brightness. Hue
determines color (yellow, orange, red, and so on); brightness determines perceived
intensity (lighter or darker color); and saturation determines color depth (from dull to
intense).
HTML
The World Wide Web authoring standard comprised of markup tags that define the
structure and components of a document. The tags are used to tag text and integrate
resources (such as images, sound, video, and animation) when you create a Web page.
hue
The property of a color that allows it to be classified by its name. For example, blue,
green, and red are all hues.
hyperlink
An electronic link that provides access directly from one place in a document to another
place in that document or to another document.
I
icon
A pictorial representation of a tool, object, file, or other application item.
image map
A graphic in an HTML document that contains clickable areas that link to locations on
the World Wide Web, to other HTML documents, or to graphics.
image resolution
The number of pixels per inch in a bitmap measured in ppi (pixels per inch) or dpi (dots
per inch). Low resolutions can result in a grainy appearance to the bitmap; high
resolutions can produce smoother images but result in larger file sizes.
imagesetter
A high-resolution device that creates film or film-based paper output used in the
production of plates for printing presses.
insert
To import and place a photo image, clipart object, or sound file into a drawing.

500 CorelDRAW Graphics Suite 12 User Guide
intensity
Intensity is a measure of the brightness of the light pixels in a bitmap compared with
the darker mid-tones and dark pixels. An increase in intensity increases the vividness of
whites while maintaining true darks.
interlaced video image
Interlaced video images take two passes to fill a screen, painting every other line in each
pass. This can produce a flicker.
interlacing
In GIF images, a method that lets you display a Web-based image on the screen at a
low, blocky resolution. As the image data loads, the image quality improves.
intersection
The point at which one line crosses another.
J
JavaScript
A scripting language used on the World Wide Web to add interactive functions to
HTML pages.
JPEG
A format for photographic images that offers compression with some loss of image
quality. Because of their compression (up to 20 to 1) and small file size, JPEG images
are widely used in Internet publishing.
JPEG 2000
An improved version of the JPEG file format that features better compression and
allows you to attach image information and assign a different compression rate to an
image area.
justify
To modify the spacing between characters and words so that the edges on the left, right,
or both margins of a block of text are even.
K
kerning

CorelDRAW Graphics Suite 12: Glossary 501
The space between characters, and the adjustment of that space. Often, kerning is used
to place two characters closer together than usual, for example WA, AW, TA, or VA.
Kerning increases readability and makes letters appear balanced and proportional,
especially at larger font sizes.
keyframe
A movie frame which defines change to an object or a group of objects. When tweening,
Corel R.A.V.E. fills in the frames between keyframes so that objects change gradually
over time.
L
Lab
A color model that contains a luminance (or lightness) component (L) and two
chromatic components: "a" (green to red) and "b" (blue to yellow).
label
A name that can be attached to a frame. A label lets you reference frames easily when
working with sprites and using behaviors.
leader tabs
A row of characters placed between text objects to help the reader follow a line across
white space. Leader tabs are often used in place of tab stops, especially before text that
is flush right such as in a list or table of contents.
leading
The spacing between lines of text. Leading is important for both readability and
appearance.
lens
An object that protects part or all of an image when you perform color and tonal
corrections. You can view the effect of a correction through a lens without affecting the
underlying pixels. If you move a lens, the correction is applied to the pixels at the new
location.
linking
The process of placing an object created in one application into a document created in
a different application. A linked object remains connected with its source file. If you
want to change a linked object in a file, you have to modify the source file.

502 CorelDRAW Graphics Suite 12 User Guide
library (CorelDRAW)
A collection of symbol definitions that are included in a CorelDRAW (CDR) file. To
share a library between drawings, you can export it to the Corel Symbol Library (CSL)
file format.
library (Corel R.A.V.E.)
A collection of symbol and sprite definitions included in a Corel R.A.V.E. (CLK) file.
To share a library between movies, you can export it to the Corel Symbol Library (CSL)
file format.
life span
The series of frames in which an object exists in a movie.
ligature
A character consisting of two or more letters joined together.
lightness
The level of brightness that is shared between a transparency and the object to which it
is applied. For example, if a transparency is applied to an object whose color appears
bright, the transparency color will take on a comparable brightness. The same holds
true for a transparency that is applied to an object whose color appears dark—the
transparency will take on a comparable darkness.
lossless
A kind of file compression that maintains the quality of an image that has been
compressed and decompressed.
lossy
A kind of file compression that results in noticeable degradation of image quality.
low-frequency areas
Smooth areas in an image where gradual changes take place. That is, areas where there
are no edges or noise.
LZW
A lossless file compression technique that results in smaller file size and faster processing
time. LZW compression is commonly used on GIF and TIFF files.

CorelDRAW Graphics Suite 12: Glossary 503
M
marquee
A dashed outline that surrounds an editable area or an object in an image. By default,
object marquees are blue and mask marquees are black.
marquee select
To select objects or nodes by dragging the Pick tool or Shape tool diagonally and
enclosing objects in a marquee box with a dotted outline.
mask
A mask is applied to an image during image editing to define protected areas and
editable areas.
master object
An object that has been cloned. Most changes you make to the master object are
automatically applied to the clone.
mask modes
Mask tool operation modes that you must choose before you create or fine-tune a mask
and its editable area. There are four mask modes: Normal, Additive, Subtractive, and
XOR. The Normal mode (default) lets you select an area in an image. The Additive
mode lets you expand the editable regions by selecting multiple areas in an image. The
Subtractive mode lets you reduce the editable regions by removing areas from a
selection. The XOR mode lets you select multiple areas in an image. If areas overlap,
the overlapping regions are excluded from the editable area and added to the protected
area.
master layer
A layer on a master page whose objects appear on every page of a multipage drawing.
A master page can have more than one master layer.
master page
A page that controls the master settings for the Grid, Guideline, and Desktop layers
plus one initial active layer.
merge mode
An editing state that determines how the selected paint, object, or fill color combines
with other colors in the image.

504 CorelDRAW Graphics Suite 12 User Guide
mesh fill
A type of fill that lets you add patches of color to the inside of a selected object.
metadata
Information about objects. Examples of metadata are names, comments, and cost
assigned to objects.
micro nudge
To move an object in small increments.
See also nudge and super nudge.
midpoint
The point of a Bézier line that divides it into two parts of equal length.
miter limit
A value that determines when two lines that meet at a sharp angle switch from a
pointed (mitered) joint to a squared-off (beveled) joint.
moiré pattern
The visual effect of radiating curves created by superimposing two regular patterns. For
example, a moiré pattern can result by overlapping two halftone screens of different
angles, dot spacing, and dot size. Moiré patterns are the undesirable result of
rescreening an image with a different halftone screen or with the same halftone screen
on an angle different from the original.
mosaic
The decorative artwork made by arranging small pieces of variously colored material to
form pictures or patterns.
movie frame
One image in a series of images that make up a movie. A movie frame can contain one
or more objects.
multichannel
A color mode that displays images using multiple color channels, each comprised of 256
shades of gray. When you convert an RGB color image to the multichannel color mode,
the individual color channels (red (R), green (G), and blue (B)) are converted to
grayscale information that reflects the color values of the pixels in each channel.

CorelDRAW Graphics Suite 12: Glossary 505
multiple select
To select multiple objects using the Pick tool or multiple nodes using the Shape tool.
N
NCSA (National Center for Supercomputing Applications)
NCSA is a server system. If you are creating an image map to be displayed on the World
Wide Web, you need to know the system your server uses, because different codes are
used in the map files. Contact your server administrator to find out which system your
server uses.
nested group
A group of two or more groups that behaves as one object.
nested PowerClip objects
Containers that hold other containers to form complex PowerClip objects.
nodes
The square points at each end of a line or curve segment. You can change the shape of
a line or curve by dragging one or more of its nodes.
noise
In bitmap editing, random pixels on the surface of a bitmap, resembling static on a
television screen.
nonprinting characters
Items that appear on the screen but do not print. They include the rulers, guidelines,
table gridlines, hidden text, and formatting symbols, such as spaces, hard returns, tabs,
and indents.
NTSC (National Television Standards Committee)
A video color filter that is commonly used to define the gamut of colors supported by
television monitors in North America.
nudge
To move an object in increments.
See also micro nudge and super nudge.

506 CorelDRAW Graphics Suite 12 User Guide
O
object (CorelDRAW)
A generic term for any item you create or place in a drawing. Objects include lines,
shapes, graphics, and text.
object (Corel R.A.V.E.)
An independent bitmap that is layered above the background image. Changes applied
to objects do not affect the underlying image.
one-point perspective
An effect created by lengthening or shortening one side of an object to create the
impression that the object is receding from view in one direction.
onion skinning
Displaying multiple frames on the stage at once. Objects in the current frame appear in
full color while objects in other frames display in wireframe view.
opacity
The quality of an object that makes it difficult to see through. If an object is 100%
opaque, you cannot see through it. Opacity levels under 100% increase the ability to
see through objects.
See also transparency.
open object
An object defined by a path whose start point and end point are not connected.
origin
The point in the drawing window at which the rulers intersect.
output resolution
The number of dots per inch (dpi) that an output device, such as an imagesetter or laser
printer, produces.
outline
The line that defines the shape of an object.
overexposure
Excessive light in an image that gives it a washed-out appearance.

CorelDRAW Graphics Suite 12: Glossary 507
overlay
A red-tinted, transparent sheet that you can superimpose on the protected areas in an
image. The mask overlay makes it easy to distinguish between the editable and the
masked (protected) regions in an image. When the overlay is applied, the masked areas
are displayed in varying degrees of red (according to their transparency). The deeper the
saturation of the red tint, the greater the degree of protection.
See also editable area and protected area.
P
PAL
A video color filter that is commonly used to define the gamut of colors supported by
television monitors in Europe and Asia.
paletted color mode
An 8-bit color mode that displays images using up to 256 colors. You can convert a
complex image to the paletted color mode to reduce file size and to control the colors
used throughout the conversion process more precisely.
pan (CorelDRAW)
To move the drawing page around in the drawing window. Panning changes the page
view in the same way that scrolling moves the drawing up, down, to the left, or to the
right in the drawing window. When working at high magnification levels where not all
of the drawing is displayed, you can quickly pan to see parts of the drawing that were
previously hidden.
pan (Corel R.A.V.E.)
To move the stage around in the drawing window. Panning changes the stage view in
the same way that scrolling moves the stage up, down, to the left, or to the right in the
drawing window. When working at high magnification levels where not all of the stage
is displayed, you can quickly pan to see parts of the stage that were previously hidden.
pan (Corel PHOTO-PAINT)
To move the image around in the image window, usually when the image is larger than
its window. Panning changes the image view in the same way that scrolling moves the
image up, down, to the left, or to the right in the image window. When working at high
magnification levels where not all of the image is displayed, you can quickly pan to see
parts of the image that were previously hidden.

508 CorelDRAW Graphics Suite 12 User Guide
PANOSE font matching
A feature that lets you choose a substitute font if you open a file that contains a font not
installed on your computer. You can make a substitution for the current working
session only, or you can permanently make a substitution so that when you save and
reopen the file, the new font automatically displays.
PANTONE process colors
The colors that are available through the PANTONE Process Color System, which is
based on the CMYK color model.
paragraph text
A text type that allows you to apply formatting options and directly edit large blocks
of text.
parent color
An original color style that you can save and apply to objects in a drawing. You can
create child colors from the parent color.
See also child color.
parent object
An object whose shape is combined with the image elements of another object, called a
child object. The child object and parent object are called a clipping group. The parent
object must be on an object layer below the child object.
path (CorelDRAW)
The basic component from which objects are constructed. A path can be open (for
example, a line) or closed (for example, a circle), and it can be made up of a single line
or curve segment or many joined segments.
path (Corel PHOTO-PAINT)
A series of line or curve segments connected by square endpoints called nodes.
pattern fill
A fill consisting of a series of repeating vector objects or images.
Perfect Shapes
Predefined shapes, such as basic shapes, arrows, stars, and callouts. Perfect Shapes often
have glyphs, which let you modify their appearance.

CorelDRAW Graphics Suite 12: Glossary 509
perpendicular line
A line that intersects another line at a right angle.
perspective handles
The hollow circles in the corners of the highlighting box.
pixel
A colored dot that is the smallest part of a bitmap.
See also resolution.
pixelation
A type of image distortion in which individual pixels are discernible to the naked eye,
or groups of pixels display as blocks of colors. Pixelation is caused by incorrect
resolution, by incorrect image dimensions, or it can be created intentionally for a special
effect.
PNG (Portable Network Graphics)
A graphic file format designed for use in online viewing. This format can import 24-bit
color graphics.
playhead
The indicator in the Timeline docker that shows which frame in a movie is displayed on
the stage and lets you navigate through frames.
point
A unit of measure used primarily in typesetting to define type sizes. There are
approximately 72 points to an inch and 12 points to a pica.
PostScript fill
A type of texture fill designed using the PostScript language
PowerClip effect
A way of arranging objects that lets you contain one object inside another
PowerClip object
An object created by placing objects (contents objects) inside other objects (container
objects). If the contents object is larger than the container object, the contents object is
automatically cropped. Only the contents that fit inside the container object are visible.

510 CorelDRAW Graphics Suite 12 User Guide
pressure-sensitive pen
A stylus that you can use to access commands and draw your images. To use with Corel
PHOTO-PAINT, you must install the pressure-sensitive pen, along with a pressure-
sensitive tablet and its corresponding drivers.
process color
In commercial printing, colors that are produced from a blend of cyan, magenta, yellow,
and black. This is different from a spot color, which is a solid ink color printed
individually (one printing plate is required for each spot color).
progressive
In JPEG images, a method of having the image appear on screen in its entirety, at a low,
blocky resolution. As the image data loads, the image quality progressively improves.
protected area
An area that prevents paint and effects from being applied to the underlying pixels.
See also mask and editable area.
Q
QuickCorrect
A feature that automatically displays the fully worded form for abbreviations or the
correct form for errors as you type. You can use QuickCorrect to capitalize words or to
correct common spelling and typographic errors automatically; for example,
QuickCorrect can replace "asap" with "as soon as possible" and "hte" with "the."
R
radius
As applied to orbits, sets the distance between the center of the brush stroke and the
nibs that travel around the center of the brush stroke when you paint with orbits.
Increasing this value increases the size of the brush stroke.
As applied to the Dust & Scratch filter, sets the number of pixels surrounding the
damaged area that are used to apply the filter.
range sensitivity
A paletted color mode option that lets you specify a focus color for the paletted
conversion. You can adjust the color and specify its importance to guide converting.

CorelDRAW Graphics Suite 12: Glossary 511
rasterized image
An image that has been rendered into pixels. When you convert vector graphics files to
bitmap files, you create rasterized images.
render
To capture a two-dimensional image from a three-dimensional model.
resample
To change the resolution and dimensions of a bitmap. Upsampling increases the size of
the image; downsampling decreases the size of the image. Resampling with fixed
resolution lets you maintain the resolution of the image by adding or subtracting pixels
while varying the image size. Resampling with variable resolution keeps the number of
pixels unchanged while changing the image size, resulting in lower or higher resolution
than that of the original image.
resolution
The amount of detail that an image file contains, or that an input, output, or display
device is capable of producing. Resolution is measured in dpi (dots per inch) or ppi
(pixels per inch). Low resolutions can result in a grainy appearance; high resolutions can
produce higher quality images but result in larger file sizes.
RGB
A color mode in which the three colors of light (red, green, and blue) are combined in
varying intensities to produce all other colors. A value between 0 and 255 is assigned to
each channel of red, green and blue. Monitors, scanners, and the human eye use RGB
to produce or detect color.
rollover
An interactive object or group of objects that changes its appearance when you click or
point to it.
rollover
An interactive object or group of objects that changes its appearance or executes a
behavior when you click or point to it.
rollover state
One of the following three conditions of a rollover:
Normal—default state when there is no mouse activity associated with the rollover

512 CorelDRAW Graphics Suite 12 User Guide
Over—triggered when the pointer is over the rollover
Down—triggered when the rollover is clicked
rotate
To reposition and reorient an object by turning it around its center of rotation.
rotation handles
The curved, double arrows in the corners of the highlighting box.
ruler
A horizontal or vertical bar marked off in units that is used to determine the size and
position of objects. By default, the rulers display on the left side and along the top of
the application window, but they can be hidden or moved.
S
saturation
The purity or vividness of a color, expressed as the absence of white. A color that has
100% saturation contains no white. A color with 0% saturation is a shade of gray.
scale
To change an object's horizontal and vertical dimensions proportionally by a specified
percentage. For example, a rectangle with a height of 1" and a width of 2" that is scaled
by 150% results in a height of 1.5" and a width of 3". The aspect ratio of 1:2 (height to
width) is maintained.
scanner
A device that converts images on paper, transparency, or film to digital form. Scanners
produce bitmaps or rasterized images.
seed color
The color of the first pixel that you click when you define an editable area and mask
using the Lasso and Magic wand mask tools. This color is used by the tolerance value
to set the sensitivity of the color detection in color masks.
segment
The line or curve between nodes in a curve object.
segment (path)

CorelDRAW Graphics Suite 12: Glossary 513
The section of a path located between two consecutive nodes. A path is a series of
segments.
selection
An area of an image, also called editable area, that is not protected by a mask and that
is, therefore, available for editing. The selection can be modified by painting and editing
tools, special effects, and image commands.
selection box
An invisible rectangle with eight visible handles that appears around any object you
select using the Pick tool.
server-side image map
A rarely used image map type that relies on a server to process image map information.
It requires a separate map (*.map) file for the Web server. Currently, most Web
browsers can process image maps, so client-side image maps are more common.
shape cursor
Uses the shape and size of the nib of the current tool as a cursor.
shape recognition
The ability to recognize and convert hand-drawn shapes into perfect forms. To take
advantage of shape recognition, you must use the Smart drawing tool. For example, you
can draw four pen strokes to sketch a rectangle, and the application will convert your
hand-drawn lines into a perfect rectangle.
simple wireframe view
An outline view of a drawing that hides fills, extrusions, contours, and intermediate
blend shapes. Bitmaps are displayed in monochrome.
See also wireframe view.
size
To change an object's horizontal and vertical dimensions proportionally by changing
one of the dimension's values. For example, a rectangle with a height of 1" and a width
of 2" can be sized by changing the value of the height to 1.5". A width of 3"
automatically results from the new height value. The aspect ratio of 1:2 (height to
width) is maintained.
skew

514 CorelDRAW Graphics Suite 12 User Guide
To slant an object vertically, horizontally, or both.
skewing handles
The straight, double-headed arrows located in the center of each side of the highlighting
box.
snap
To force an object that is being drawn or moved to align automatically to a point on the
grid, a guideline, or another object.
source object
The object you use to perform a shaping action on another object, such as welding,
trimming, or intersecting. The source object receives the fill and outline attributes of
the target object.
See also target object.
splash screen
The screen that appears when CorelDRAW starts. It monitors the progress of the
startup process and provides information about copyright and registration.
split blend
A single blend that is broken into two or more components to create a compound blend.
The object where the blend is split becomes the end object for one component of the
blend and start object for the other.
spot color
In commercial printing, a solid ink color that prints individually, one plate per spot
color.
spread
In commercial printing, a type of trap that is created by extending the foreground
object into the background object.
sprite
A reusable animation. A sprite is an animated symbol that is defined once and can be
referenced many times in a movie.
sprite instance

CorelDRAW Graphics Suite 12: Glossary 515
An occurrence of a sprite in a movie. A sprite instance automatically inherits any
changes made to the sprite. You can also apply unique properties to the objects in each
instance, including size, position, and uniform transparency.
stacking order
The sequence in which objects are created in the image window. This order determines
the relationship between objects and, therefore, the appearance of your image. The first
object you create appears on the bottom; the last object appears on the top.
stage
The portion of the drawing window in which you add objects to a movie, compose the
contents of individual frames, and test animation results.
style
A set of attributes that controls the appearance of a specific type of object. There are
three style types: graphic styles, text styles (artistic and paragraph), and color styles.
stylus
A pen device, used in conjunction with a pen tablet, that allows you to draw paint
strokes. A pressure-sensitive stylus allows you to vary your strokes with subtle changes
in pressure.
subpaths
Paths that are part of one object.
subpath
A segment which is not joined to the main path.
subscript
Text characters that are positioned below the baseline of the other characters in a line
of text.
subtractive color model
A color model, such as CMYK, that creates color by subtracting wavelengths of light
reflected from an object. For example, a colored ink appears blue if it absorbs all colors
except blue.
super nudge

516 CorelDRAW Graphics Suite 12 User Guide
To move an object in large increments by pressing Shift and an Arrow key. The super
nudge value is multiplied by the nudge value to obtain the distance by which the object
is moved.
See also nudge and micro nudge.
superscript
Text characters that are positioned above the baseline of the other characters in a line
of text.
swap disk
Hard drive space used by applications to artificially increase the amount of memory
available in your computer.
swatch
One of a series of solid-colored patches used as a sample when selecting color. A printed
booklet of swatches is called a swatchbook. Swatch also refers to the colors contained in
the color palette.
symbol (CorelDRAW)
A reusable object or group of objects. A symbol is defined once and can be referenced
many times in a drawing.
symbol (Corel PHOTO-PAINT)
A reusable object or group of objects. A symbol is defined once and can be referenced
many times in an image.
symbol (Corel R.A.V.E.)
A reusable object or group of objects. A symbol is defined once and can be referenced
many times in a movie.
symbol instance
An occurrence of a symbol in a drawing. A symbol instance automatically inherits any
changes made to the symbol. You can also apply unique properties to each instance,
including size, position, and uniform transparency.
symbol instance
An occurrence of a symbol in a movie. A symbol instance automatically inherits any
changes made to the symbol. You can also apply unique properties to each instance,
including size, position, and uniform transparency.

CorelDRAW Graphics Suite 12: Glossary 517
T
tangent
A straight line that touches a curve or an ellipse at a point, but does not cross the curve
or ellipse at that point.
target
The frame or Web browser window in which a new Web page displays.
target object
The object you perform a shaping action on, such as welding, trimming, or intersecting
with another object. The target object retains its fill and outline attributes while
copying these attributes to the source objects used to perform the action.
See also source object.
template
A predefined set of information that sets the page size, orientation, ruler position, and
grid and guideline information. A template may also include graphics and text that can
be modified.
text baseline
The imaginary horizontal line that text characters appear to be placed on.
text frame
The rectangle that appears as a series of dashed lines around a block of paragraph text
created using the Text tool.
text style
A set of attributes that controls the appearance of text. There are two text style types:
artistic text styles and paragraph text styles.
texture fill
A fractally generated fill that, by default, fills an object or image area with one image
instead of with a series of repeating images.
threshold
A level of tolerance for tonal variation in a bitmap.
threshold (path)

518 CorelDRAW Graphics Suite 12 User Guide
A control available when you create a path from a mask. Threshold values range from
1 to 10 and determine the size of the angle required between two sections of a mask for
a node to be created there. A low value produces more cusps, and therefore more nodes
on the resulting path.
thumbnail
A miniature, low-resolution version of an image or illustration.
tightness (path)
A control available when you create a path from a mask marquee. Tightness values
range from 1 to 10 and determine how close the path's shape will be to that of the
marquee. The higher the value, the more the new path resembles the marquee; it will
have more nodes than a path with a lower tightness value.
tiling
The technique of repeating a small image across a large surface. Tiling is often used to
create a patterned background for World Wide Web pages.
timeline
The graphical representation of an object's life span in a movie.
timeline section
A portion of an object's timeline consisting of two keyframes and all the frames in
between.
tint
A semitransparent color applied over an image. Also called a color cast.
tint
The lighter shade of a spot color.
tone
The variations in a color or the range of grays between black and white.
transparency
The quality of an object that makes it easy to see through. Setting lower levels of
transparency causes higher levels of opacity and less visibility of the underlying items or
image.
See also opacity.

CorelDRAW Graphics Suite 12: Glossary 519
TrueType fonts
A font specification developed by Apple. TrueType fonts print the way they appear on
the screen and can be resized to any height.
true color
A term that refers to digital RGB color that is composed of 24-bits, or 16.7 million
colors.
TWAIN
By using the TWAIN driver supplied by the manufacturer of the imaging hardware,
Corel graphics applications can acquire images directly from a digital camera or scanner.
tween
To animate an object by modifying some of the frames in its timeline and letting Corel
R.A.V.E. create the frames in between, so that objects change gradually over time.
Also, the animation created by tweening.
two-point perspective
An effect created by lengthening or shortening two sides of an object to create the
impression that the object is receding from view in two directions.
U
underexposure
The lack of light in an image that makes it too dark.
uniform fill
A type of fill used to apply one solid color to your image.
See also fill.
Unicode
A character encoding standard that defines character sets for all written languages in
the world by using a 16-bit code set and more than 65, 000 characters. Unicode lets
you handle text effectively regardless of the language of the text, your operating system,
or the application you are using.
URL (Uniform Resource Locator)
A unique address that defines where a Web page is located on the Internet.

520 CorelDRAW Graphics Suite 12 User Guide
V
vanishing point
A marker that appears when you select an extrusion or an object to which perspective
has been added. With an extrusion, the vanishing point marker indicates the depth
(parallel extrusion) or the point at which the extruded surfaces would meet if extended
(perspective extrusion). In both cases, the vanishing point is indicated by an X.
vector graphic
An image generated from mathematical descriptions that determine the position,
length, and direction in which lines are drawn. Vector graphics are created as collections
of lines rather than as patterns of individual dots or pixels.
See also bitmap.
vector object
A specific object within a drawing that is created as a collection of lines rather than as
patterns of individual dots or pixels. Vector objects are generated from mathematical
descriptions that determine the position, length, and direction in which lines are drawn.
W
watermark
A small amount of random noise added to the luminance component of the image pixels
which carries information about the image. This information survives normal editing,
printing, and scanning.
weld
To combine two objects into a single curve object with a single outline. A source object
is welded to a target object to create a new object that takes on the fill and outline
attributes of the target object.
white point
The measurement of white on a color monitor that influences how highlights and
contrast display.
Microsoft Windows Image Acquisition (WIA)
A standard interface and driver for loading images from peripheral devices, such as
scanners and digital cameras.
wireframe view

CorelDRAW Graphics Suite 12: Glossary 521
An outline view of a drawing that hides fills but displays extrusions, contour lines, and
intermediate blend shapes. Bitmaps are displayed in monochrome.
See also simple wireframe view.
workspace
A configuration of settings that specifies how the various command bars, commands,
and buttons are arranged when you open the application.
Z
zoom
To reduce or magnify the view of a drawing. You can zoom in to see details or zoom out
for a broader view.
ZIP
A lossless file compression technique that results in smaller file size and faster processing
time.

Index 523
CorelDRAW Index
Numerics
3D effects . . . . . . . . . . . . . . . . . . . . . . . . . . 169
A
actions
repeating . . . . . . . . . . . . . . . . . . . . . . . . 35
undoing and redoing . . . . . . . . . . . . . . 35
Add anchor point tool . . . . . . . . . . . . . . . . 314
aligning
objects . . . . . . . . . . . . . . . . . . . . . 82, 83, 84
text . . . . . . . . . . . . . . . . . . . . 219, 220, 221
using dynamic guides . . . . . . . . . . . . . . 87
anchor points . . . . . . . . . . . . . . . . . . . . . . . 313
arcs . . . . . . . . . . . . . . . . . . . . . . . . . . . . . . 64, 66
Area type tool . . . . . . . . . . . . . . . . . . . . . . 314
arrows
drawing . . . . . . . . . . . . . . . . . . . . . . . . . 70
artistic text . . . . . . . . . . . . . . . . . . . . . . . . . 211
adding . . . . . . . . . . . . . . . . . . . . . . . . . 213
aligning . . . . . . . . . . . . . . . . . . . . 219, 220
converting to curves . . . . . . . . . . . . . . 103
converting to paragraph text . . . 217, 219
fitting to a path . . . . . . . . . . . . . . . . . . 224
artwork . . . . . . . . . . . . . . . . . . . . . . . . . . . . 313
assigning
object data . . . . . . . . . . . . . . . . . . . . . . 269
B
background . . . . . . . . . . . . . . . . . . . . . . . . . 195
creating . . . . . . . . . . . . . . . . . . . . . . . . . 195
exporting . . . . . . . . . . . . . . . . . . . . . . . 195
from bitmaps . . . . . . . . . . . . . . . . . . . . 195
removing . . . . . . . . . . . . . . . . . . . . . . . 196
solid color . . . . . . . . . . . . . . . . . . . . . . . 195
backup files . . . . . . . . . . . . . . . . . . . . 39, 40, 41
bevels
applying . . . . . . . . . . . . . . . . . . . . . . . .175
Bézier lines
curved . . . . . . . . . . . . . . . . . . . . . . . . . . .50
straight . . . . . . . . . . . . . . . . . . . . . . . . . .49
bitmaps . . . . . . . . . . . . . . . . . . . . . . . . . . . . .239
adding . . . . . . . . . . . . . . . . . . . . . . . . . .240
applying a PowerClip . . . . . . . . . . . . .130
applying lenses . . . . . . . . . . . . . . . . . . .189
as background . . . . . . . . . . . . . . . . . . .195
changing to black and white . . . .250, 251
checking for watermarks . . . . . . . . . . .299
color and tone . . . . . . . . . . . . . . . . . . .248
color effects . . . . . . . . . . . . . . . . . . . . . .246
color modes . . . . . . . . . . . . . . . . .249, 250
color structure . . . . . . . . . . . . . . . . . . .249
combining multi-layer bitmaps . . . . .299
compression in PDF . . . . . . . . . . . . . .293
converting from vector graphics . . . . .239
cropping . . . . . . . . . . . . . . . . . . . . . . . .241
cropping while importing . . . . . . . . . .302
downsampling in PDF . . . . . . . . . . . .294
editing . . . . . . . . . . . . . . . . . . . . . . . . . .241
embedding in text . . . . . . . . . . . . . . . .232
extracting embedded color profiles . .299
importing . . . . . . . . . . . . . . . . . . .240, 299
linking externally . . . . . . . . . . . . . . . . .299
maintaining proportions . . . . . . . . . . .242
optimizing for the Web . . . . . . . .254, 255
printing . . . . . . . . . . . . . . . . . . . . . . . . .272
removing dust and scratches . . . . . . .248
resampling . . . . . . . . . . . . . . . . . . . . . .242
resampling while importing . . . . . . . .300
resizing . . . . . . . . . . . . . . . . . . . . . . . . .242
special effects . . . . . . . . . . . . . . . .243, 245
splitting . . . . . . . . . . . . . . . . . . . . . . . . .117

524 Index
CorelDRAW
tone . . . . . . . . . . . . . . . . . . . . . . . . . . . .246
tone effects . . . . . . . . . . . . . . . . . . . . . .246
using as fills . . . . . . . . . . . . . . . . . . . . .145
black-and-white color mode . . . . . . 250, 251
bleed limit
setting . . . . . . . . . . . . . . . . . . . . . . 282, 283
Blend tool . . . . . . . . . . . . . . . . . . . . . . . . . .314
blends . . . . . . . . . . . . . . . . . . . . . . . . . . . . . .124
changing path . . . . . . . . . . . . . . . . . . .129
cloning . . . . . . . . . . . . . . . . . . . . . . . . .127
copying . . . . . . . . . . . . . . . . . . . . . . . . .127
creating . . . . . . . . . . . . . . . . . . . . . . . . .127
creating colors . . . . . . . . . . . . . . .157, 371
end objects . . . . . . . . . . . . . . . . . . . . . .129
mapping nodes . . . . . . . . . . . . . . . . . .128
mesh fills . . . . . . . . . . . . . . . . . . . . . . .147
removing . . . . . . . . . . . . . . . . . . . . . . .130
setting distances between objects . . . .128
setting the color progression . . . . . . . .128
splitting . . . . . . . . . . . . . . . . . . . . . . . . .130
start objects . . . . . . . . . . . . . . . . . . . . . .129
bookmarks . . . . . . . . . . . . . . . . . . . . . . . . .259
assigning . . . . . . . . . . . . . . . . . . . . . . . .260
assigning hyperlinks to . . . . . . . . . . . .260
brush strokes . . . . . . . . . . . . . . . . . . . . . . . .45
applying . . . . . . . . . . . . . . . . . . . . . . 55, 56
custom . . . . . . . . . . . . . . . . . . . . . . . . . .56
buttons
creating for Web . . . . . . . . . . . . .256, 257
C
calibrating rulers . . . . . . . . . . . . . . . . . . . . .199
calligraphic lines . . . . . . . . . . . . . . . . . . . . . .51
as outlines . . . . . . . . . . . . . . . . . . . . . . . .54
callouts . . . . . . . . . . . . . . . . . . . . . . . . . . . . . .70
characters
returning to baseline . . . . . . . . . . . . . 223
rotating . . . . . . . . . . . . . . . . . . . . . . . . 223
shifting . . . . . . . . . . . . . . . . . . . . . . . . 223
straightening . . . . . . . . . . . . . . . . . . . 223
check boxes
creating for Web . . . . . . . . . . . . .253, 254
circles
drawing . . . . . . . . . . . . . . . . . . . . . . .64, 65
clipart . . . . . . . . . . . . . . . . . . . . . . . . . . . .31, 32
cloning . . . . . . . . . . . . . . . . . . . . . . . . . . . . .171
blends . . . . . . . . . . . . . . . . . . . . . . . . . 127
contours . . . . . . . . . . . . . . . . . . . . . . . 171
drop shadows . . . . . . . . . . . . . . . . . . . 181
vector extrusions . . . . . . . . . . . . . . . . 174
closed shapes . . . . . . . . . . . . . . . . . . . . . . . .54
creating from lines . . . . . . . . . . . . . .48, 54
drawing freehand . . . . . . . . . . . . . . . . . 49
closing
CorelDRAW . . . . . . . . . . . . . . . . . . . . . 42
drawings . . . . . . . . . . . . . . . . . . . . . . . . 42
color
effects in bitmaps . . . . . . . . . . . . . . . . 248
color calibration bars
printing . . . . . . . . . . . . . . . . . . . . .282, 284
color management . . . . . . . . . . . . . . . . . . .159
choosing an engine . . . . . . . . . . .165, 478
choosing styles . . . . . . . . . . .164, 166, 477
correcting colors for display . . . .167, 478
embedding color profiles . . .164, 165, 477
enabling gamut alarm . . . . .164, 166, 477
setting advanced options . . . . . . .164, 477
settings . . . . . . . . . . . . . . . . . . . . . . . . 159
using color profiles . . . . . . . . . . . . . . 161
color modes . . . . . . . . . . . . . . . . . . . . . . . .249
bitmaps . . . . . . . . . . . . . . . . . . . . . . . . 250
black-and-white . . . . . . . . . . . . . . . . . 249
changing . . . . . . . . . . . . . . . . . . . . . . . 249

Index 525
CorelDRAW
CMYK . . . . . . . . . . . . . . . . . . . . . . . . . 249
definition . . . . . . . . . . . . . . . . . . . . . . . 249
duotone . . . . . . . . . . . . . . . . . . . . . . . . 249
grayscale . . . . . . . . . . . . . . . . . . . . . . . . 249
lab . . . . . . . . . . . . . . . . . . . . . . . . . . . . . 249
paletted . . . . . . . . . . . . . . . . . . . . . . . . . 249
RGB . . . . . . . . . . . . . . . . . . . . . . . . . . . 249
color palettes . . . . . . . . . . . . . . . . . . . 153, 367
creating . . . . . . . . . . . . . . . . . . . . . 158, 372
creating custom palettes . . . 158, 371, 372
docking or undocking . . . . . . . . . . . . . 158
fixed or custom . . . . . . . . . . . . . . 155, 369
color profiles . . . . . . . . . . . . . . . . . . . . . . . . 161
choosing . . . . . . . . . . . . . . . . . . . . . . . . 162
copying from CD . . . . . . . . . . . . . . . . 163
downloading . . . . . . . . . . . . . . . . . . . . 163
embedding . . . . . . . . . . . . . . 164, 165, 477
color separations
previewing . . . . . . . . . . . . . . . . . . . . . . 275
printing . . . . . . . . . . . . . . . . . . . . 285, 286
color styles . . . . . . . . . . . . . . . . . . . . . . . . . 307
applying . . . . . . . . . . . . . . . . . . . . 307, 310
creating and deleting . . . . . . . . . 307, 310
parent colors and . . . . . . . . . . . . . . . . . 307
color viewers
choosing colors . . . . . . . . . . . . . . 156, 370
colors . . . . . . . . . . . . . . . . . . . . . . . . . . 153, 367
choosing . . . . 153, 155, 156, 367, 369, 370
contour fills . . . . . . . . . . . . . . . . . . . . . 171
contour outline . . . . . . . . . . . . . . . . . . 172
copying outline . . . . . . . . . . . . . . . . 52, 53
correcting between devices . . . . . 161, 167
creating blends . . . . . . . . . . . . . . . 157, 371
custom palettes . . . . . . . . . . . . . . 158, 371
default for fills . . . . . . . . . . . . . . . . . . . 149
mesh fills . . . . . . . . . . . . . . . . . . . . . . . 149
mixing . . . . . . . . . . . . . . . . . . . . . 157, 371
parent and child . . . . . . . . . . . . . . . . . 309
reproducing accurately . . . . . . . . . . . .159
sampling from desktop . . . . . . . . . . . .150
setting for hotspots . . . . . . . . . . . . . . .260
setting for hypergraphics . . . . . . . . . . .260
setting progression in blends . . . . . . .128
using color harmonies . . . . . . . . . . . . .156
using color palettes . . . . . . . . . . .155, 369
vector extrusions . . . . . . . . . . . . . . . . .178
colors styles
child colors and . . . . . . . . . . . . . . . . . .307
columns
adding to text . . . . . . . . . . . . . . . . . . . .227
combined objects . . . . . . . . . . . . . . . . . . . . .98
breaking apart . . . . . . . . . . . . . . . . . . . .99
creating . . . . . . . . . . . . . . . . . . . . . . .98, 99
extracting subpaths . . . . . . . . . . . . . . . .99
combining paragraph text frames . . . . . .228
commands
redoing . . . . . . . . . . . . . . . . . . . . . . . . . .35
undoing . . . . . . . . . . . . . . . . . . . . . . . . .35
commercial printing . . . . . . . . . . . . . .277, 278
compatibility
PDF . . . . . . . . . . . . . . . . . . . . . . . . . . .296
compound object . . . . . . . . . . . . . . . . . . . .313
compression
bitmaps in PDF . . . . . . . . . . . . . . . . . .293
connector lines . . . . . . . . . . . . . . . . . . . .59, 60
contours . . . . . . . . . . . . . . . . . . . . . . . . . . . .169
applying to groups . . . . . . . . . . . . . . . .170
color settings . . . . . . . . . . . . . . . . . . . .171
conventions for documentation . . . . . . . . .9
Convert anchor point tool . . . . . . . . . . . .314
converting artistic and paragraph text . .217
copying
blends . . . . . . . . . . . . . . . . . . . . . . . . . .127

526 Index
CorelDRAW
envelopes . . . . . . . . . . . . . . . . . . . . . . .116
fills . . . . . . . . . . . . . . . . . . . . . . . . . . . .150
lenses . . . . . . . . . . . . . . . . . . . . . . . . . .192
object data . . . . . . . . . . . . . . . . . . . . . .269
object properties . . . . . . . . . . . . . . . . . .79
objects . . . . . . . . . . . . . . . . . . . . . . . . . . .78
transparencies . . . . . . . . . . . . . . . . . . .185
Corel Corporation
contact . . . . . . . . . . . . . . . . . . . . . . . . . .11
training . . . . . . . . . . . . . . . . . . . . . . . . . .11
CorelTUTOR . . . . . . . . . . . . . . . . . . . . . . . .11
corners
rounding . . . . . . . . . . . . . . . . . . . . . . . . .64
crop/fold marks
printing . . . . . . . . . . . . . . . . . . . . . 282, 283
cropping
while importing bitmaps . . . . . . . . . .302
cropping bitmaps . . . . . . . . . . . . . . . . . . . .241
curve objects
adding nodes . . . . . . . . . . . . . . . . . . . .104
converting . . . . . . . . . . . . . . . . . . . . . . .103
modifying . . . . . . . . . . . . . . . . . . . . . . .106
nodes . . . . . . . . . . . . . . . . . . . . . . . . . . .103
removing nodes . . . . . . . . . . . . . . . . . .104
segments . . . . . . . . . . . . . . . . . . . . . . . .105
curved lines
drawing . . . . . . . . . . . . . . . . . . . . . . . . .50
curves
converting text to . . . . . . . . . . . . . 217, 219
previewing . . . . . . . . . . . . . . . . . . . . . . .50
D
data fields . . . . . . . . . . . . . . . . . . . . . . . . . . .267
adding . . . . . . . . . . . . . . . . . . . . . .267, 268
changing formats . . . . . . . . . . . . . . . . .267
deleting . . . . . . . . . . . . . . . . . . . . . . . . .267
renaming . . . . . . . . . . . . . . . . . . . . . . .267
reordering . . . . . . . . . . . . . . . . . . . . . . 267
database
setting up . . . . . . . . . . . . . . . . . . . . . . 267
defaults
text style . . . . . . . . . . . . . . . . . . . . . . . 215
Delete anchor point tool . . . . . . . . . . . . .314
densitometer scales
printing . . . . . . . . . . . . . . . . . . . . .282, 284
digital cameras
color management settings . . . . . . . . 159
dimension lines . . . . . . . . . . . . . . . . . . . . . . .59
changing display . . . . . . . . . . . . . . . . . 61
drawing . . . . . . . . . . . . . . . . . . . . . . . . . 61
Direct selection tool . . . . . . . . . . . . . . . . .314
displaying
dynamic guides . . . . . . . . . . . . . . . . . . 89
grid . . . . . . . . . . . . . . . . . . . . . . . . . . . 200
distance between grid lines . . . . . . . . . . .200
distortion effects . . . . . . . . . . . . . . . . . . . . .113
applying . . . . . . . . . . . . . . . . . . . . . . . 113
copying . . . . . . . . . . . . . . . . . . . . . . . . 114
removing . . . . . . . . . . . . . . . . . . . . . . . 114
dockers . . . . . . . . . . . . . . . . . . . . . . . . . . . . . .28
documentation conventions . . . . . . . . . . . . .9
documents
backing up and recovering . . . .39, 40, 41
creating . . . . . . . . . . . . . . . . . . . . . . . . . 30
facing . . . . . . . . . . . . . . . . . . . . . . . . . . 39
opening . . . . . . . . . . . . . . . . . . . . . . . . . 31
starting . . . . . . . . . . . . . . . . . . . . . . . . . 29
starting from a template . . . . . . . . . . . 34
thumbnails . . . . . . . . . . . . . . . . . . . . . . 41
downsampling
bitmaps in PDF . . . . . . . . . . . . . . . . . 294
drawing

Index 527
CorelDRAW
shape recognition delay . . . . . . . . . . . . 72
shapes . . . . . . . . . . . . . . . . . . . . . . . . . . . 63
using dynamic guides . . . . . . . . . . . . . . 87
using shape recognition . . . . . . . . . 71, 72
drawing information
accessing . . . . . . . . . . . . . . . . . . . . . . . . . 36
drawing scale
custom preset . . . . . . . . . . . . . . . . . . . . 204
drawings
backing up and recovering . . . . 39, 40, 41
closing . . . . . . . . . . . . . . . . . . . . . . . . . . 42
creating . . . . . . . . . . . . . . . . . . . . . . . . . . 30
creating from a template . . . . . . . . . . . . 30
facing pages . . . . . . . . . . . . . . . . . . . . . . 39
information about . . . . . . . . . . . . . . . . . 30
inserting content . . . . . . . . . . . . . . . . . . 31
moving . . . . . . . . . . . . . . . . . . . . . . . . . . 38
opening . . . . . . . . . . . . . . . . . . . . . . 31, 38
panning in . . . . . . . . . . . . . . . . . . . . 36, 38
previewing . . . . . . . . . . . . . . . . . . . . . . . 38
reverting to saved . . . . . . . . . . . . . . . . . . 35
saving . . . . . . . . . . . . . . . . . . . . . . . . . . . 41
using templates with . . . . . . . . . . . . . . . 33
drop caps
adding to text . . . . . . . . . . . . . . . . 228, 232
Drop shadow tool . . . . . . . . . . . . . . . . . . . 314
drop shadows . . . . . . . . . . . . . . . . . . . . . . . 180
adding . . . . . . . . . . . . . . . . . . . . . . . . . 181
adjusting resolution . . . . . . . . . . . . . . 182
copying and cloning . . . . . . . . . . . . . . 181
creating . . . . . . . . . . . . . . . . . . . . . . . . . 180
removing . . . . . . . . . . . . . . . . . . . . . . . 182
separating from objects . . . . . . . . . . . . 181
duotone color mode
changing images to . . . . . . . . . . . . . . . 251
duplicates
creating . . . . . . . . . . . . . . . . . . . . . . . . . . 78
dust and scratches
correcting bitmaps . . . . . . . . . . . . . . . .248
dynamic guides . . . . . . . . . . . . . . . . . . . . . . .87
displaying . . . . . . . . . . . . . . . . . . . . . . . .89
drawing objects . . . . . . . . . . . . . . . . . . .90
enabling or disabling . . . . . . . . . . . . . . .89
placing objects at intersection . . . . . . .90
positioning objects . . . . . . . . . . . . . . . . .89
settings . . . . . . . . . . . . . . . . . . . . . . . . . .91
E
editing
object data . . . . . . . . . . . . . . . . . . . . . .269
text . . . . . . . . . . . . . . . . . . . . . . . . . . . .218
effects
copying . . . . . . . . . . . . . . . . . . . . . . . . . .80
lenses . . . . . . . . . . . . . . . . . . . . . . . . . .191
ellipses . . . . . . . . . . . . . . . . . . . . . . . . . . . . . .64
3-point . . . . . . . . . . . . . . . . . . . . . . . . . .65
drawing . . . . . . . . . . . . . . . . . . . . . . . . . .65
embedding
fonts . . . . . . . . . . . . . . . . . . . . . . . . . . .237
objects in text . . . . . . . . . . . . . . . . . . . .233
embedding (definition) . . . . . . . . . . . . . . .495
encoding (definition) . . . . . . . . . . . . . . . . .495
encoding text . . . . . . . . . . . . . . . . . . . . . . .214
envelopes . . . . . . . . . . . . . . . . . . . . . . . . . . .115
adding . . . . . . . . . . . . . . . . . . . . . . . . . .116
applying . . . . . . . . . . . . . . . . . . . . . . . .115
changing segments to curves . . . . . . .117
copying . . . . . . . . . . . . . . . . . . . . . . . . .116
editing . . . . . . . . . . . . . . . . . . . . . . . . . .116
preset . . . . . . . . . . . . . . . . . . . . . . . . . . .115
removing . . . . . . . . . . . . . . . . . . . . . . .115
resetting . . . . . . . . . . . . . . . . . . . . . . . .115
shaping . . . . . . . . . . . . . . . . . . . . . . . . .117

528 Index
CorelDRAW
erasers
using to create holes . . . . . . . . . . . . . .119
erasing . . . . . . . . . . . . . . . . . . . . . . . . . . . . .117
connecting lines . . . . . . . . . . . . . . . . . .117
in straight lines . . . . . . . . . . . . . . 117, 119
maintaining nodes . . . . . . . . . . . . . . . .119
portions of objects . . . . . . . . . . . . . . . .117
exporting
embedding color profiles . . 164, 165, 477
files . . . . . . . . . . . . . . . . . . . . . . . . . . . .302
extracting paths from objects . . . . . . . . .119
extrusions . . . . . . . . . . . . . . . . . . . . . . . . . .174
creating vector . . . . . . . . . . . . . . . . . . .176
F
features
main . . . . . . . . . . . . . . . . . . . . . . . . . . . .32
file formats . . . . . . . . . . . . . . . . . . . . . . . . . .41
file information
printing . . . . . . . . . . . . . . . . . . . . . 282, 284
file size
reducing for PDF . . . . . . . . . . . . . . . .293
files
backing up and recovering . . . . 39, 40, 41
creating from a template . . . . . . . . . . . .33
exporting . . . . . . . . . . . . . . . . . . . 299, 303
exporting to Microsoft Office . . . . . . .303
exporting to WordPerfect Office . . . .303
importing . . . . . . . . . . . . . . . . . . . . . . .299
saving to different formats . . . . . . . . .304
Web publishing . . . . . . . . . . . . . . . . . .263
fills . . . . . . . . . . . . . . . . . . . . . . . . . . . . . 141, 149
applying to vector extrusions . . . . . . .178
applying uniform . . . . . . . . . . . . . . . . .141
copying . . . . . . . . . . . . . . . . . . . . . .79, 150
default color . . . . . . . . . . . . . . . . . . . . .149
fountain . . . . . . . . . . . . . . . . . . . . . . . 142
mesh . . . . . . . . . . . . . . . . . . . . . . . . . . 147
removing . . . . . . . . . . . . . . . . . . . . . . . 150
rendering as bitmaps . . . . . . . . . . . . . 294
setting contour colors . . . . . . . . . . . . 171
setting progression . . . . . . . . . . . . . . . 172
two-color fountain . . . . . . . . . . . . . . . 143
uniform . . . . . . . . . . . . . . . . . . . . . . . . 141
film
printing to . . . . . . . . . . . . . . . . . . . . . . 290
finding text . . . . . . . . . . . . . . . . . . . . . . . . . .218
flow lines . . . . . . . . . . . . . . . . . . . . . . . . . . . .59
drawing . . . . . . . . . . . . . . . . . . . . . . . . . 60
moving . . . . . . . . . . . . . . . . . . . . . . . . . 60
font matching
exceptions . . . . . . . . . . . . . . . . . . . . . . 236
setting options . . . . . . . . . . . . . . . . . . 235
Font Navigator . . . . . . . . . . . . . . . . . . . . . .237
fonts
embedding . . . . . . . . . . . . . . . . . . . . . 237
managing . . . . . . . . . . . . . . . . . . . . . . 237
missing . . . . . . . . . . . . . . . . . . . . .235, 236
PANOSE system . . . . . . . . . . . . . . . . 235
specifying attributes . . . . . . . . . . . . . . 216
substituting . . . . . . . . . . . . . . . . . .235, 236
using Font Navigator to manage . . . 237
Windows and Macintosh equivalents 237
fountain fills . . . . . . . . . . . . . . . . . . . . . . . . .142
applying . . . . . . . . . . . . . . . . . . . . . . . 142
attributes . . . . . . . . . . . . . . . . . . . . . . . 142
custom . . . . . . . . . . . . . . . . . . . . . . . . 143
display quality . . . . . . . . . . . . . . . . . . 142
preset . . . . . . . . . . . . . . . . . . . . . . . . . . 142
print quality . . . . . . . . . . . . . . . . . . . . 142
steps . . . . . . . . . . . . . . . . . . . . . . . . . . . 142
two-color . . . . . . . . . . . . . . . . . . . . . . . 143
freehand . . . . . . . . . . . . . . . . . . . . . . . . . . . . .45

Index 529
CorelDRAW
freehand lines . . . . . . . . . . . . . . . . . . . . . . . . 58
formatting . . . . . . . . . . . . . . . . . . . . . . . 52
G
gamut alarm
enabling . . . . . . . . . . . . . . . . . . . . . . . . 166
gradient fills . . . . . . . . . . . . . . . . . . . . . 178, 313
Gradient tool . . . . . . . . . . . . . . . . . . . . . . . 314
graphic styles . . . . . . . . . . . . . . . . . . . . . . . 307
creating and applying . . . . . . . . . . . . . 307
editing . . . . . . . . . . . . . . . . . . . . . . . . . 309
finding objects with . . . . . . . . . . . . . . . 309
graphics
embedding in text . . . . . . . . . . . . . . . . 232
hiding for print preview . . . . . . . . . . . 275
greeking text . . . . . . . . . . . . . . . . . . . . . . . . 215
grid . . . . . . . . . . . . . . . . . . . . . . . . . . . . . . . . 200
displaying . . . . . . . . . . . . . . . . . . . . . . . 200
grids . . . . . . . . . . . . . . . . . . . . . . . . . . . . . . . . 69
distance between lines . . . . . . . . . . . . 200
drawing . . . . . . . . . . . . . . . . . . . . . . . . . 69
snapping objects to . . . . . . . . . . . . . . . 200
ungrouping . . . . . . . . . . . . . . . . . . . . . . 70
groups . . . . . . . . . . . . . . . . . . . . . . . . . . . . . . 96
adding objects to . . . . . . . . . . . . . . . . . . 97
creating . . . . . . . . . . . . . . . . . . . . . . . 96, 97
removing objects from . . . . . . . . . . . . . 97
guidelines . . . . . . . . . . . . . . . . . . . . . . . . . . . 205
adding . . . . . . . . . . . . . . . . . . . . . . . . . 202
deleting . . . . . . . . . . . . . . . . . . . . . . . . . 202
hiding . . . . . . . . . . . . . . . . . . . . . . . . . . 201
hiding and displaying . . . . . . . . . . . . . 201
locking . . . . . . . . . . . . . . . . . . . . . . . . . 202
modifying . . . . . . . . . . . . . . . . . . . 201, 202
setting . . . . . . . . . . . . . . . . . . . . . . . . . . 201
snapping objects to . . . . . . . . . . . . . . . 203
unlocking . . . . . . . . . . . . . . . . . . . . . . .202
gutters . . . . . . . . . . . . . . . . . . . . . . . . . . . . .281
H
halftone screens
customizing . . . . . . . . . . . . . . . . . . . . .287
Help . . . . . . . . . . . . . . . . . . . . . . . . . . . . . . . .10
changing the language . . . . . . . . . . . . . .7
printing . . . . . . . . . . . . . . . . . . . . . . . . . .10
tutorials . . . . . . . . . . . . . . . . . . . . . . . . . .11
using . . . . . . . . . . . . . . . . . . . . . . . . . . . .10
VBA . . . . . . . . . . . . . . . . . . . . . . . . . . . .11
hotspots . . . . . . . . . . . . . . . . . . . . . . . . . . . .259
changing colors . . . . . . . . . . . . . .259, 260
displaying . . . . . . . . . . . . . . . . . . . . . . .261
hotspotting (definition) . . . . . . . . . . . . . . .498
HTML . . . . . . . . . . . . . . . . . . . . . . . . . . . . . .266
export options . . . . . . . . . . . 263, 264, 265
preparing files and objects for . . . . . .263
publishing to . . . . . . . . . . . . . . . .263, 266
setting Preflight options . . . . . . .263, 265
hyperlinks . . . . . . . . . . . . . . . . . . . . . . . . . .259
assigning to bookmarks . . . . . . . . . . . .260
assigning to external Web sites . . . . . .260
assigning to rollovers . . . . . . . . . . . . . .256
verifying in a Web document . . . . . . .261
I
ICC profiles
choosing options . . . . . . . . . . . . .165, 478
embedding profiles . . . . . . . . . . . . . . .165
images . . . . . . . . . . . . . . . . . . . . . . . . . . . . . .31
browsing . . . . . . . . . . . . . . . . . . . . . . . . .31
inserting . . . . . . . . . . . . . . . . . . . . . . . . .32
searching . . . . . . . . . . . . . . . . . . . . . . . .32
setting Web options . . . . . . . . . . .264, 266

530 Index
CorelDRAW
importing
bitmaps . . . . . . . . . . . . . . . . . . . . . . . . .240
embedding color profiles . . 164, 165, 477
files . . . . . . . . . . . . . . . . . . . . . . . . . . . .299
text . . . . . . . . . . . . . . . . . . . . . . . . . . . .211
imposition layouts . . . . . . . 279, 280, 281, 282
information about a drawing . . . . . . . . . . .36
In-RIP trapping . . . . . . . . . . . . . . . . . . . . . .287
color reduction . . . . . . . . . . . . . . . . . . .289
inks . . . . . . . . . . . . . . . . . . . . . . . . . . . .289
placement . . . . . . . . . . . . . . . . . . . . . . .288
threshold . . . . . . . . . . . . . . . . . . . . . . .288
trap width . . . . . . . . . . . . . . . . . . . . . . .288
installing
applications . . . . . . . . . . . . . . . . . . . . . . .6
Internet . . . . . . . . . . . . . . . . . . . . . . . . . . . .263
bitmaps . . . . . . . . . . . . . . . . . . . . . 254, 255
export options . . . . . . . . . . . 263, 264, 265
objects . . . . . . . . . . . . . . . . . . 253, 256, 259
preparing files and objects for . . . . . .263
publishing to . . . . . . . . . . . . . . . . 263, 266
setting Preflight options . . . . . . .263, 266
text . . . . . . . . . . . . . . . . . . . . . . . . . . . .258
intersecting . . . . . . . . . . . . . . . . . . . . . . . . .123
multiple objects . . . . . . . . . . . . . . . . . .124
objects . . . . . . . . . . . . . . . . . . . . . . . . . .124
issues
viewing for print jobs . . . . . . . . . . . . .275
J
Java applets . . . . . . . . . . . . . . . . . . . . . 253, 254
K
kerning . . . . . . . . . . . . . . . . . . . . . . . . . . . . .219
L
language
Help . . . . . . . . . . . . . . . . . . . . . . . . . . . . 7
text display . . . . . . . . . . . . . . . . . . . . . 215
user interface . . . . . . . . . . . . . . . . . . . . . 7
layers . . . . . . . . . . . . . . . . . . . . . . . . . . . . . . .205
activating . . . . . . . . . . . . . . . . . . . . . . 208
copying objects between . . . . . . . . . . 209
creating . . . . . . . . . . . . . . . . . . . . .205, 206
creating master . . . . . . . . . . . . . . . . . . 206
deleting . . . . . . . . . . . . . . . . . . . . . . . . 207
displaying . . . . . . . . . . . . . . . . . . . . . . 207
editing . . . . . . . . . . . . . . . . . . . . . . . . . 208
editing objects on . . . . . . . . . . . . . . . . 208
hiding and displaying . . . . . . . . . . . . 207
locking . . . . . . . . . . . . . . . . . . . . . . . . 208
master page settings . . . . . . . . . . . . . . 208
master pages . . . . . . . . . . . . . . . . . . . . 205
moving . . . . . . . . . . . . . . . . . . . . . . . . 209
objects on . . . . . . . . . . . . . . . . . . . . . . 210
printing . . . . . . . . . . . . . . . . . . . . .210, 272
properties . . . . . . . . . . . . . . . . . . . . . . 208
renaming . . . . . . . . . . . . . . . . . . . . . . 209
stacking order . . . . . . . . . . . . . . . .208, 209
to organize objects . . . . . . . . . . . . . . . 205
layout
for printing . . . . . . . . . . . . . . . . . . . . . 273
gutters . . . . . . . . . . . . . . . . . . . . . . . . . 281
margins . . . . . . . . . . . . . . . . . . . . . . . . 282
page . . . . . . . . . . . . . . . . . . . . . . . . . . . 194
pages . . . . . . . . . . . . . . . . . . . . . . . . . . 193
leading . . . . . . . . . . . . . . . . . . . . . . . . . . . . .219
lenses
applying . . . . . . . . . . . . . . . . . . . .189, 191
copying . . . . . . . . . . . . . . . . . . . . .189, 192
creating . . . . . . . . . . . . . . . . . . . . . . . . 189
displaying . . . . . . . . . . . . . . . . . . . . . . 192
editing . . . . . . . . . . . . . . . . . . . . . .189, 192

Index 531
CorelDRAW
magnifying . . . . . . . . . . . . . . . . . . . . . . 189
special effects . . . . . . . . . . . . . . . . . . . . 191
library . . . . . . . . . . . . . . . . . . . . . . . . . . . . . . 139
symbols . . . . . . . . . . . . . . . . . . . . . . . . . 139
lighting
applying to vector extrusions . . . . . . . 178
removing from vector extrusions . . . . 178
Line segment tool . . . . . . . . . . . . . . . . . . . 314
lines . . . . . . . . . . . . . . . . . . . . . . . . . . . . . . . . . 45
adding end shapes . . . . . . . . . . . . . . . . . 54
adding shapes to ends . . . . . . . . . . . . . . 52
calligraphic . . . . . . . . . . . . . . . . . . . 51, 54
callout . . . . . . . . . . . . . . . . . . . . . . . . . . . 61
closing . . . . . . . . . . . . . . . . . . . . . . . 48, 54
curved . . . . . . . . . . . . . . . . . . . . . . . . . . . 49
deleting segments . . . . . . . . . . . . . . . . 120
dimension . . . . . . . . . . . . . . . . . . . . . . . 61
flow . . . . . . . . . . . . . . . . . . . . . . . . . . . . . 59
formatting . . . . . . . . . . . . . . . . . . . . . . . 52
preset . . . . . . . . . . . . . . . . . . . . . . . . . . . 52
pressure-sensitive . . . . . . . . . . . . . . . . . 51
previewing . . . . . . . . . . . . . . . . . . . . 48, 50
specifying settings for . . . . . . . . . . . . . . 53
spraying . . . . . . . . . . . . . . . . . . . . . . . . . 58
straight . . . . . . . . . . . . . . . . . . . . . . . . . . 48
linking
bitmaps . . . . . . . . . . . . . . . . . . . . . . . . . 240
bitmaps externally . . . . . . . . . . . . . . . . 299
paragraph text . . . . . . . . . . . . . . . . . . . 230
linking (definition) . . . . . . . . . . . . . . . . . . . 501
links
setting Web options . . . . . . . . . . . . . . 264
locking
layers . . . . . . . . . . . . . . . . . . . . . . . . . . . 209
PowerClip objects . . . . . . . . . . . . . . . . 132
M
magnifying
drawings . . . . . . . . . . . . . . . . . . . . . . . . .36
lenses . . . . . . . . . . . . . . . . . . . . . . . . . .189
print preview . . . . . . . . . . . . . . . . . . . .274
managing projects . . . . . . . . . . . . . . . . . . .267
mask . . . . . . . . . . . . . . . . . . . . . . . . . . . . . . .313
master layers
creating . . . . . . . . . . . . . . . . . . . . . . . . .206
master page . . . . . . . . . . . . . . . . . . . . . . . . .206
displaying objects . . . . . . . . . . . . . . . .207
settings . . . . . . . . . . . . . . . . . . . . . . . . .208
Measure tool . . . . . . . . . . . . . . . . . . . . . . . .314
merge modes . . . . . . . . . . . . . . . . . . . . . . .186
applying to transparencies . . . . . . . . .188
mesh fills . . . . . . . . . . . . . . . . . . . . . . . . . . .147
applying to objects . . . . . . . . . . . . . . . .148
Mesh tool . . . . . . . . . . . . . . . . . . . . . . . . . . .314
Microsoft Office
export files to . . . . . . . . . . . . . . . . . . . .303
mirroring
objects . . . . . . . . . . . . . . . . . . . . . . . . . . .96
modifying
object data . . . . . . . . . . . . . . . . . . . . . .269
modifying object data . . . . . . . . . . . . . . . .269
monitors
color management settings . . . . . . . . .159
nonprinting color alert . . . . 164, 166, 477
moving
objects . . . . . . . . . . . . . . . . . . . . . . . .80, 81
setting nudge distances . . . . . . . . . . . . .81
N
nodes . . . . . . . . . . . . . . . . . . . . . . . . . . . . . .101
adding . . . . . . . . . . . . . . . . . . . . . . . . . .104

532 Index
CorelDRAW
aligning . . . . . . . . . . . . . . . . . . . . . . . .105
deleting from envelopes . . . . . . . . . . .116
deselecting . . . . . . . . . . . . . . . . . . . . . .103
editing . . . . . . . . . . . . . . . . . . . . . . . . . .101
editing envelopes . . . . . . . . . . . . . . . . .116
joining . . . . . . . . . . . . . . . . . . . . . . . . . .48
mapping in blends . . . . . . . . . . . . . . . .128
removing . . . . . . . . . . . . . . . . . . . . . . .104
rotating . . . . . . . . . . . . . . . . . . . . . . . . .106
scaling . . . . . . . . . . . . . . . . . . . . . . . . . .106
selecting . . . . . . . . . . . . . . . . . . . . 101, 103
skewing . . . . . . . . . . . . . . . . . . . . . . . . .106
stretching . . . . . . . . . . . . . . . . . . . . . . .106
types . . . . . . . . . . . . . . . . . . . . . . . . . . .105
O
object data . . . . . . . . . . . . . . . . . . . . . . . . . .267
adding . . . . . . . . . . . . . . . . . . . . . . . . . .269
assigning . . . . . . . . . . . . . . . . . . . . . . . .269
changing the display . . . . . . . . . . . . . .270
copying . . . . . . . . . . . . . . . . . . . . . . . . .269
editing . . . . . . . . . . . . . . . . . . . . . . . . . .269
setting up a database . . . . . . . . . . . . . .267
object data fields
adding . . . . . . . . . . . . . . . . . . . . . .267, 268
changing formats . . . . . . . . . . . . . . . . .267
deleting . . . . . . . . . . . . . . . . . . . . . . . . .267
renaming . . . . . . . . . . . . . . . . . . . . . . .267
reordering . . . . . . . . . . . . . . . . . . . . . . .267
Object Data Manager . . . . . . . . . . . . . . . .267
object data summaries
changing the display . . . . . . . . . . . . . .270
printing . . . . . . . . . . . . . . . . . . . . . . . . .270
viewing . . . . . . . . . . . . . . . . . . . . . . . . .270
object sprayer . . . . . . . . . . . . . . . . . . . . . . . .57
objects
adding to PowerClip containers . . . .130
aligning . . . . . . . . . . . . . . . . . . . . . .83, 84
applying distortion effects to . . . . . . . 113
applying lenses . . . . . . . . . . . . . . . . . . 189
applying uniform fills to . . . . . . . . . . 141
assigning data to . . . . . . . . . . . . . . . . 269
at intersection of dynamic guides . . . . 90
blending . . . . . . . . . . . . . . . . . . . . . . . 124
combined . . . . . . . . . . . . . . . . . . . . . . . 98
combining . . . . . . . . . . . . . . . . . . . . . . 99
converting from outlines . . . . . . . . . . . 53
copying . . . . . . . . . . . . . . . . . . . . . . . . . 78
copying data . . . . . . . . . . . . . . . . . . . . 269
copying effects . . . . . . . . . . . . . . . . . . . 80
copying fills to . . . . . . . . . . . . . . . . . . 150
copying outline color . . . . . . . . . . . . . . 53
copying properties . . . . . . . . . . . . . . . . 79
copying size, position, or rotation . . . 79
creating closed . . . . . . . . . . . . . . . . . . . 55
creating Web-enabled . . . . . . . . . . . . 253
curve . . . . . . . . . . . . . . . . . . . . . . . . . . 101
cutting . . . . . . . . . . . . . . . . . . . . . . . . . . 78
deleting . . . . . . . . . . . . . . . . . . . . . . .78, 79
deleting portions . . . . . . . . . . . . . . . . 120
deselecting . . . . . . . . . . . . . . . . . . . . . . 78
displaying . . . . . . . . . . . . . . . . . . . . . . 207
distributing . . . . . . . . . . . . . . . . . . . . . . 84
drawing relative to other objects . . . . . 90
duplicating . . . . . . . . . . . . . . . . . . . . . . 78
embedding in text . . . . . . . . . . . . . . . 233
erasing . . . . . . . . . . . . . . . . . . . . . . . . . 117
fills . . . . . . . . . . . . . . . . . . . . . . . . . . . . 141
grouping . . . . . . . . . . . . . . . . . . . . . . . . 97
groups . . . . . . . . . . . . . . . . . . . . . . . . . . 96
intersecting . . . . . . . . . . . . . . . . . . . . . 123
mesh fills . . . . . . . . . . . . . . . . . . . . . . . 148
mirroring . . . . . . . . . . . . . . . . . . . . . . . 94
moving . . . . . . . . . . . . . . . . . . .80, 81, 198
order . . . . . . . . . . . . . . . . . . . . . . . . .92, 93
pasting . . . . . . . . . . . . . . . . . . . . . . . . . 78
positioning . . . . . . . . . . . . . . . . . . . .80, 81

Index 533
CorelDRAW
positioning from other objects . . . . . . . 89
previewing selected . . . . . . . . . . . . . . . . 39
removing outlines . . . . . . . . . . . . . . . . . 54
rotating . . . . . . . . . . . . . . . . . . . . . . . 94, 95
roughening outlines . . . . . . . . . . 110, 111
saving selected . . . . . . . . . . . . . . . . . . . . 42
scaling . . . . . . . . . . . . . . . . . . . . . . . . . . 93
selecting . . . . . . . . . . . . . . . . . . . . . . 75, 76
setting nudge distances . . . . . . . . . . . . . 81
size . . . . . . . . . . . . . . . . . . . . . . . . . . . . . 93
sizing . . . . . . . . . . . . . . . . . . . . . . . . . . . 93
skewing . . . . . . . . . . . . . . . . . . . . . . . . 107
smudging . . . . . . . . . . . . . . . . . . . . . . . 108
snapping . . . . . . . . . . . . . . . . . . . . . . 84, 86
splitting . . . . . . . . . . . . . . . . . . . . . . . . 117
spraying . . . . . . . . . . . . . . . . . . . . . . . . . 57
stretching . . . . . . . . . . . . . . . . . . . . . . . 107
trimming . . . . . . . . . . . . . . . . . . . 120, 121
ungrouping . . . . . . . . . . . . . . . . . . . . . . 98
Web publishing . . . . . . . . . . . . . . . . . . 263
welding . . . . . . . . . . . . . . . . . . . . . . . . . 123
wrapping text around . . . . . . . . . . . . . 231
offsetting . . . . . . . . . . . . . . . . . . . . . . . . . . . . 57
offsetting sprayed lines . . . . . . . . . . . . . . . . 59
opacity . . . . . . . . . . . . . . . . . . . . . . . . . 183, 184
adjusting for transparencies . . . . 184, 185
transparencies . . . . . . . . . . . . . . . 183, 184
optimizing
bitmaps . . . . . . . . . . . . . . . . . . . . . 254, 255
colors . . . . . . . . . . . . . . . . . . . . . . . . . . 159
PDF files . . . . . . . . . . . . . . . . . . . . . . . 296
option buttons
creating for Web . . . . . . . . . . . . . . . . . 254
order of objects . . . . . . . . . . . . . . . . . . . . . . 92
changing . . . . . . . . . . . . . . . . . . . . . 92, 93
orientation . . . . . . . . . . . . . . . . . . . . . . . . . . 193
page . . . . . . . . . . . . . . . . . . . . . . . . . . . 194
printing . . . . . . . . . . . . . . . . . . . . . . . . .274
outline view . . . . . . . . . . . . . . . . . . . . . . . . .313
outlines . . . . . . . . . . . . . . . . . . . . . . . 45, 52, 111
calligraphic . . . . . . . . . . . . . . . . . . . . . . .54
converting to objects . . . . . . . . . . . . . . .53
copying . . . . . . . . . . . . . . . . . . . . . . . . . .79
copying color . . . . . . . . . . . . . . . . . . . . .53
removing from objects . . . . . . . . . . . . . .54
roughening . . . . . . . . . . . . . . . . . . . . . .111
specifying settings . . . . . . . . . . . . . . . . .53
P
page numbers
printing . . . . . . . . . . . . . . . . . . . . .282, 284
pages
adding . . . . . . . . . . . . . . . . . . . . . . . . . .196
adding and deleting . . . . . . . . . . . . . . .196
background . . . . . . . . . . . . . . . . . . . . .195
copying . . . . . . . . . . . . . . . . . . . . . . . . .197
deleting . . . . . . . . . . . . . . . . . . . . . . . . .197
displaying . . . . . . . . . . . . . . . . . . . . . . .207
layout . . . . . . . . . . . . . . . . . . . . . .193, 194
moving objects . . . . . . . . . . . . . . . . . . .198
naming . . . . . . . . . . . . . . . . . . . . .196, 197
order . . . . . . . . . . . . . . . . . . . . . . . . . . .197
orientation . . . . . . . . . . . . . . . . . . . . . .193
orientation for printing . . . . . . . . . . . .274
settings . . . . . . . . . . . . . . . . . . . . . . . . .193
size . . . . . . . . . . . . . . . . . . . . . . . . . . . .193
viewing facing . . . . . . . . . . . . . . . . . . . .39
Paint bucket tool . . . . . . . . . . . . . . . . . . . .314
Paintbrush tool . . . . . . . . . . . . . . . . . . . . . .314
palettes
color . . . . . . . . . . . . . . . 153, 155, 367, 369
creating color palettes . . . . . 158, 371, 372
panning . . . . . . . . . . . . . . . . . . . . . . . . . . . . . .36
drawings . . . . . . . . . . . . . . . . . . . . . . . . .38

534 Index
CorelDRAW
PANOSE font matching . . . . . . . . . . . . . .235
preferences . . . . . . . . . . . . . . . . . . . . . .235
substitute font lists . . . . . . . . . . . . . . . .236
paragraph text . . . . . . . . . . . . . . . . . . . . . .211
adding . . . . . . . . . . . . . . . . . . . . . . . . . .213
adjusting frames automatically . . . . .213
aligning . . . . . . . . . . . . . . . . 219, 220, 221
converting to artistic text . . . . . . .217, 219
fitting to frame . . . . . . . . . . . . . . . . . . .227
formatting . . . . . . . . . . . . . . . . . . . . . .226
making Web-compatible . . . . . .258, 263
placing inside an object . . . . . . . . . . . .213
separating from an object . . . . . . . . . .213
styles . . . . . . . . . . . . . . . . . . . . . . . . . . .307
wrapping . . . . . . . . . . . . . . . . . . . . . . .231
path . . . . . . . . . . . . . . . . . . . . . . . . . . . . . . . .313
Path type tool . . . . . . . . . . . . . . . . . . . . . . .314
paths
breaking . . . . . . . . . . . . . . . . . . . . . . . .119
changing in blends . . . . . . . . . . . . . . .129
closing automatically . . . . . . . . . . . . .117
detaching from blends . . . . . . . . . . . .129
extracting from objects . . . . . . . . . . . .119
keeping open . . . . . . . . . . . . . . . . . . . .117
roughening . . . . . . . . . . . . . . . . . . . . . .111
pattern fills . . . . . . . . . . . . . . . . . . . . . . . . . .144
applying . . . . . . . . . . . . . . . . . . . . . . . .145
bitmap . . . . . . . . . . . . . . . . . . . . .144, 145
tile size . . . . . . . . . . . . . . . . . . . . . . . . .144
PDF
bitmap compression . . . . . . . . . . . . . .293
compatibility . . . . . . . . . . . . . . . . . . . .296
compressing text and line art . . . . . . .294
creating and editing . . . . . . . . . . . . . . .291
downsampling bitmaps . . . . . . . . . . . .294
editing styles . . . . . . . . . . . . . . . . . . . . .291
optimizing files . . . . . . . . . . . . . . . . . .296
prepress settings . . . . . . . . . . . . . . . . . .295
preserving document settings . . . . . . 295
printer’s marks . . . . . . . . . . . . . . .295, 296
publishing to . . . . . . . . . . . . . . . . . . . 291
reducing file size . . . . . . . . . . . . . . . . 293
rendering fills as bitmaps . . . . . . . . . 294
saving files . . . . . . . . . . . . . . . . . . . . . 291
styles . . . . . . . . . . . . . . . . . . . . . . . . . . 293
Pencil tool . . . . . . . . . . . . . . . . . . . . . . . . . .314
perfect shapes (definition) . . . . . . . . . . . .508
perspective
adjusting . . . . . . . . . . . . . . . . . . . . . . . 174
applying . . . . . . . . . . . . . . . . . . . . . . . 173
copying . . . . . . . . . . . . . . . . . . . . . . . . 174
removing . . . . . . . . . . . . . . . . . . . . . . . 174
perspectives
applying . . . . . . . . . . . . . . . . . . . . . . . 172
photos . . . . . . . . . . . . . . . . . . . . . . . . . . . . . . .31
browsing . . . . . . . . . . . . . . . . . . . . . . . . 31
inserting . . . . . . . . . . . . . . . . . . . . . . . . 32
searching . . . . . . . . . . . . . . . . . . . . . . . . 32
pie shapes . . . . . . . . . . . . . . . . . . . . . . . . . . .66
placing images . . . . . . . . . . . . . . . . . . . . . . .313
plug-in filters
adding and removing . . . . . . . . . . . . 245
polygons . . . . . . . . . . . . . . . . . . . . . . . . . . . . .67
converting to stars . . . . . . . . . . . . . . . . 67
drawing . . . . . . . . . . . . . . . . . . . . . . . . . 67
reshaping . . . . . . . . . . . . . . . . . . . . . . . 67
pop-up menus
creating for Web . . . . . . . . . . . . . . . . 254
position
copying to objects . . . . . . . . . . . . . . . . . 79
positioning
objects . . . . . . . . . . . . . . . . . . . . . . . .80, 81
using anchor points . . . . . . . . . . . . . . . 82
using xy coordinates . . . . . . . . . . . . . . 82

Index 535
CorelDRAW
PowerClip objects . . . . . . . . . . . . . . . . . . . 130
copying . . . . . . . . . . . . . . . . . . . . . . . . . 132
creating . . . . . . . . . . . . . . . . . . . . . 130, 132
editing contents . . . . . . . . . . . . . . . . . . 132
locking . . . . . . . . . . . . . . . . . . . . . . . . . 132
nested objects . . . . . . . . . . . . . . . . . . . . 130
nesting . . . . . . . . . . . . . . . . . . . . . . . . . 132
prepress settings . . . . . . . . . . . . . . . . . . . . 295
preset lines
drawing . . . . . . . . . . . . . . . . . . . . . . . . . 52
pressure-sensitive lines . . . . . . . . . . . . . . . . 51
previewing . . . . . . . . . . . . . . . . . . . . . . . . . . . 38
color separations . . . . . . . . . . . . . . . . . 275
drawings . . . . . . . . . . . . . . . . . . . . . . . . . 38
full-screen specifications . . . . . . . . . . . 39
hiding graphics . . . . . . . . . . . . . . . . . . 275
increasing speed . . . . . . . . . . . . . . . . . 275
print jobs . . . . . . . . . . . . . . . . . . . 274, 275
selected objects . . . . . . . . . . . . . . . . . . . 39
Web pages . . . . . . . . . . . . . . . . . . 263, 265
printer’s marks . . . . . . . . . . . . . . . . . . . . . . 295
in PDF . . . . . . . . . . . . . . . . . . . . . . . . . 296
positioning . . . . . . . . . . . . . . . . . . . . . . 285
printing . . . . . . . . . . . . . . . . . . . . . . . . 282
printers
color management settings .164, 166, 477
printing . . . . . . . . . . . . . . . . . . . . . . . . . . . . . 271
arranging pages . . . . . . . . . . . . . . . . . . 281
binding method . . . . . . . . . . . . . . . . . . 280
bitmaps . . . . . . . . . . . . . . . . . . . . . . . . . 272
bleed limit . . . . . . . . . . . . . . . . . . 282, 283
color calibration bars . . . . . . . . . . 282, 284
color separations . . . . . . . . . . . . . 285, 286
commercial printing . . . . . . . . . . 277, 278
crop/fold marks . . . . . . . . . . . . . . 282, 283
densitometer scale . . . . . . . . . . . . . . . . 282
densitometer scales . . . . . . . . . . . . . . . 284
drawing information . . . . . . . . . . . . . . .36
file information . . . . . . . . . . . . . .282, 284
gutters . . . . . . . . . . . . . . . . . . . . . . . . . .281
halftone screens . . . . . . . . . . . . . . . . . .287
hiding graphics in preview . . . . . . . . .275
imposition layouts . . . . 279, 280, 281, 282
In-RIP trapping . . . . . . . . . . 287, 288, 289
job information sheets . . . . . . . . . . . . .279
layers . . . . . . . . . . . . . . . . . . . . . . .210, 272
layout . . . . . . . . . . . . . . . . . . . . . . . . . .273
margins . . . . . . . . . . . . . . . . . . . . . . . . .282
object data summaries . . . . . . . . . . . . .270
page numbers . . . . . . . . . . . . . . . .282, 284
page orientation . . . . . . . . . . . . . . . . . .274
preview . . . . . . . . . . . . . . . . . . . . .274, 275
printer’s marks . . . . . . . . . . . . . . .282, 285
registration marks . . . . . . . . . . . .282, 284
service bureau jobs . . . . . . . . . . .277, 278
spot colors to process colors . . . . . . . .286
text . . . . . . . . . . . . . . . . . . . . . . . . . . . .272
tiling jobs . . . . . . . . . . . . . . . . . . . . . . .273
to a file . . . . . . . . . . . . . . . . . . . . . . . . .278
to film . . . . . . . . . . . . . . . . . . . . . . . . . .290
vectors . . . . . . . . . . . . . . . . . . . . . . . . . .272
viewing issues . . . . . . . . . . . . . . . . . . .275
process colors
converting from spot colors . . . . . . . .286
PANTONE Hexachrome . . . . . . . . .286
product updates . . . . . . . . . . . . . . . . . . . . . . .8
projects
managing . . . . . . . . . . . . . . . . . . . . . . .267
property bar . . . . . . . . . . . . . . . . . . . . . . . . .27
publishing
to PDF . . . . . . . . . . . . . . . . . . . . . . . . .291
to the Web . . . . . . . . . . . . . . . . . .263, 266
Pucker tool . . . . . . . . . . . . . . . . . . . . . . . . .314

536 Index
CorelDRAW
Q
quitting CorelDRAW . . . . . . . . . . . . . . . . . .42
R
radio buttons
creating for Web . . . . . . . . . . . . .253, 254
rasterizing . . . . . . . . . . . . . . . . . . . . . . . . . .313
rectangles . . . . . . . . . . . . . . . . . . . . . . . . . . .63
drawing . . . . . . . . . . . . . . . . . . . . . . . . .64
rounding corners . . . . . . . . . . . . . . . . . .64
Rectangular grid tool . . . . . . . . . . . . . . . . .314
redoing actions . . . . . . . . . . . . . . . . . . . . . . .35
Reflect tool . . . . . . . . . . . . . . . . . . . . . . . . .314
registering Corel products . . . . . . . . . . . . . .8
registration marks
printing . . . . . . . . . . . . . . . . . . . . . 282, 284
removing background . . . . . . . . . . . . . . . .196
repeating actions . . . . . . . . . . . . . . . . . . . . .35
replacing
text . . . . . . . . . . . . . . . . . . . . . . . . . . . .218
resampling
bitmaps . . . . . . . . . . . . . . . . . . . . . 241, 242
while importing bitmaps . . . . . . . . . .300
Reshape tool . . . . . . . . . . . . . . . . . . . . . . . .314
resizing
bitmaps . . . . . . . . . . . . . . . . . . . . . . . . .242
text . . . . . . . . . . . . . . . . . . . . . . . . . . . .217
resolution
adjusting in drop shadows . . . . . . . . .182
changing in bitmaps . . . . . . . . . . 241, 242
RGB . . . . . . . . . . . . . . . . . . . . . . . . . . . . . . .249
rollovers . . . . . . . . . . . . . . . . . . . . . . . . . . . .256
assigning bookmarks . . . . . . . . . . . . . .259
assigning hyperlinks . . . . . . . . . . . . . .259
creating . . . . . . . . . . . . . . . . . . . . .256, 257
editing . . . . . . . . . . . . . . . . . . . . . . . . . 257
properties . . . . . . . . . . . . . . . . . . . . . . 258
viewing states . . . . . . . . . . . . . . . . . . . 257
Rotate tool . . . . . . . . . . . . . . . . . . . . . . . . . .314
rotating . . . . . . . . . . . . . . . . . . . . . . . . . . . . . .94
characters . . . . . . . . . . . . . . . . . . . . . . 223
objects . . . . . . . . . . . . . . . . . . . . . . . . . . 95
sprayed lines . . . . . . . . . . . . . . . . . . . . . 59
text . . . . . . . . . . . . . . . . . . . . . . . . . . . . 223
using ruler coordinates . . . . . . . . . . . . 95
rotation
copying to objects . . . . . . . . . . . . . . . . . 79
roughening
applying . . . . . . . . . . . . . . . . . . . . . . . 111
objects . . . . . . . . . . . . . . . . . . . . . . . . . 110
options . . . . . . . . . . . . . . . . . . . . . . . . 111
Rounded rectangle tool . . . . . . . . . . . . . . .314
rulers . . . . . . . . . . . . . . . . . . . . . . . . . . . . . . .198
calibrating . . . . . . . . . . . . . . . . . . . . . . 199
customizing . . . . . . . . . . . . . . . . . . . . 198
displaying . . . . . . . . . . . . . . . . . . . . . . 198
moving . . . . . . . . . . . . . . . . . . . . . . . . 198
origin . . . . . . . . . . . . . . . . . . . . . . . . . . 198
S
saving . . . . . . . . . . . . . . . . . . . . . . . . . . .41, 291
drawings . . . . . . . . . . . . . . . . . . . . . . . . 41
PDF files . . . . . . . . . . . . . . . . . . . . . . . 291
selected objects . . . . . . . . . . . . . . . . . . . 42
to different formats . . . . . . . . . . . . . . 304
scale . . . . . . . . . . . . . . . . . . . . . . . . . . . . . . .203
choosing . . . . . . . . . . . . . . . . . . . .203, 204
custom preset . . . . . . . . . . . . . . . .203, 204
drawing . . . . . . . . . . . . . . . . . . . . . . . . 203
setting drawing . . . . . . . . . . . . . . .203, 204
scaling . . . . . . . . . . . . . . . . . . . . . . . . . . .93, 106

Index 537
CorelDRAW
nodes . . . . . . . . . . . . . . . . . . . . . . . . . . 106
objects . . . . . . . . . . . . . . . . . . . . . . . . . . . 93
scanners
color management settings . . . . . . . . . 159
Scissors tool . . . . . . . . . . . . . . . . . . . . . . . . 314
scratches
correcting bitmaps . . . . . . . . . . . . . . . . 248
segments . . . . . . . . . . . . . . . . . . . . . . . . . . . 101
deleting . . . . . . . . . . . . . . . . . . . . . . . . . 120
editing . . . . . . . . . . . . . . . . . . . . . 101, 105
selecting
objects . . . . . . . . . . . . . . . . . . . . . . . . 75, 76
Selection tool . . . . . . . . . . . . . . . . . . . . . . . 314
setting up object databases . . . . . . . . . . . 267
settings
advanced . . . . . . . . . . . . . . . . . . . . . . . . 41
drawing scale . . . . . . . . . . . . . . . . 203, 204
dynamic guides . . . . . . . . . . . . . . . . . . . 91
page layout . . . . . . . . . . . . . . . . . . . . . . 194
rulers . . . . . . . . . . . . . . . . . . . . . . . . . . . 198
shape recognition (definition) . . . . . . . . . 513
shapes . . . . . . . . . . . . . . . . . . . . . . . . 54, 63, 70
adding text to . . . . . . . . . . . . . . . . . . . . . 71
adding to line ends . . . . . . . . . . . . . . . . 54
changing outline thickness . . . . . . . . . . 73
correcting . . . . . . . . . . . . . . . . . . . . . . . . 72
creating from lines . . . . . . . . . . 48, 49, 54
drawing predefined . . . . . . . . . . . . . . . . 70
modifying . . . . . . . . . . . . . . . . . . . . . . . . 71
setting recognition delay . . . . . . . . . . . . 72
shape recognition . . . . . . . . . . . . . . . . . 72
shaping text . . . . . . . . . . . . . . . . . . . . . . . . . 211
size
copying to objects . . . . . . . . . . . . . . . . . 79
Size tool . . . . . . . . . . . . . . . . . . . . . . . . . . . . 314
sizing . . . . . . . . . . . . . . . . . . . . . . . . . . . . . . . . 93
objects . . . . . . . . . . . . . . . . . . . . . . . . . . .93
Skew tool . . . . . . . . . . . . . . . . . . . . . . . . . . .314
skewing . . . . . . . . . . . . . . . . . . . . . . . . . . . .106
nodes . . . . . . . . . . . . . . . . . . . . . . . . . . .106
objects . . . . . . . . . . . . . . . . . . . . . .106, 107
smudging . . . . . . . . . . . . . . . . . . . . . . . . . . .108
applying . . . . . . . . . . . . . . . . . . . . . . . .109
snapping . . . . . . . . . . . . . . . . . . . . . . . . . . . . .82
and dynamic guides . . . . . . . . . . . . . . .87
objects . . . . . . . . . . . . . . . . . . . . .82, 84, 86
settings . . . . . . . . . . . . . . . . . . . . . . . . . .87
to grid . . . . . . . . . . . . . . . . . . . . . . . . . .200
to guidelines . . . . . . . . . . . . . . . . . . . . .203
turning on or off . . . . . . . . . . . . . . . . . .86
sound files . . . . . . . . . . . . . . . . . . . . . . . . . . .31
browsing . . . . . . . . . . . . . . . . . . . . . . . . .31
inserting . . . . . . . . . . . . . . . . . . . . . . . . .32
searching . . . . . . . . . . . . . . . . . . . . . . . .32
spacing text . . . . . . . . . . . . . . . . . . . . . . . . .222
special characters . . . . . . . . . . . . . . . . . . . .232
adding to text . . . . . . . . . . . . . . . .232, 233
special effects . . . . . . . . . . . . . . . . . . . . . . .243
applying to bitmaps . . . . . . . . . . . . . . .245
bitmaps . . . . . . . . . . . . . . . . . . . . . . . . .239
lenses . . . . . . . . . . . . . . . . . . . . . . . . . .191
plug-in filters . . . . . . . . . . . . . . . . . . . .245
spirals . . . . . . . . . . . . . . . . . . . . . . . . . . . . 68, 69
splitting . . . . . . . . . . . . . . . . . . . . . . . . . . . . .117
bitmaps . . . . . . . . . . . . . . . . . . . . . . . . .118
objects . . . . . . . . . . . . . . . . . . . . . . . . . .118
spot colors
converting to process colors . . . . . . . .286
spraying . . . . . . . . . . . . . . . . . . . . . . . . . . . . .57
lines . . . . . . . . . . . . . . . . . . . . . . . . . . . . .45
objects . . . . . . . . . . . . . . . . . . . . . . . . . . .57
offsetting lines . . . . . . . . . . . . . . . . . . . .59

538 Index
CorelDRAW
rotating lines . . . . . . . . . . . . . . . . . . . . .59
spraylist . . . . . . . . . . . . . . . . . . . . . . . . . . . . .57
creating . . . . . . . . . . . . . . . . . . . . . . . . . .59
reset to saved settings . . . . . . . . . . . . . .58
size of objects . . . . . . . . . . . . . . . . . . . . .58
spacing of objects . . . . . . . . . . . . . . . . . .58
spray order . . . . . . . . . . . . . . . . . . . . . . .58
squares . . . . . . . . . . . . . . . . . . . . . . . . . . . . . .63
drawing . . . . . . . . . . . . . . . . . . . . . . . . .64
rounding corners . . . . . . . . . . . . . . . . . .64
stacking order of layers . . . . . . . . . . . . . . .209
Star tool . . . . . . . . . . . . . . . . . . . . . . . . . . . .314
stars . . . . . . . . . . . . . . . . . . . . . . . . . . . . . 67, 70
converting to polygons . . . . . . . . . . . . .67
drawing . . . . . . . . . . . . . . . . . . . . . .67, 70
reshaping . . . . . . . . . . . . . . . . . . . . . . . .67
starting
CorelDRAW . . . . . . . . . . . . . . . . . . . . .30
drawings . . . . . . . . . . . . . . . . . . . . . . . . .30
status bar
description . . . . . . . . . . . . . . . . . . . . . . .28
straight lines . . . . . . . . . . . . . . . . . . . . . . 45, 48
straightening text . . . . . . . . . . . . . . . . 224, 226
stretching . . . . . . . . . . . . . . . . . . . . . . . . . . .106
nodes . . . . . . . . . . . . . . . . . . . . . . .101, 106
objects . . . . . . . . . . . . . . . . . . . . . . 106, 107
stroke . . . . . . . . . . . . . . . . . . . . . . . . . . . . . .313
styles . . . . . . . . . . . . . . . . . . . . . . . . . . . . . . .307
applying . . . . . . . . . . . . . . . . . . . . . . . .309
color . . . . . . . . . . . . . . . . . . . . . . . . . . .307
copying . . . . . . . . . . . . . . . . . . . . . . . . .307
creating and applying . . . . . . . . .307, 308
deleting . . . . . . . . . . . . . . . . . 307, 309, 310
editing . . . . . . . . . . . . . . . . . . . . . . . . . .309
editing PDF . . . . . . . . . . . . . . . . . . . . .293
finding objects with . . . . . . . . . . . . . . .309
graphic . . . . . . . . . . . . . . . . . . . . . . . . 307
importing . . . . . . . . . . . . . . . . . . . . . . 307
loading from another template . . . . . . 34
renaming . . . . . . . . . . . . . . . . . . . . . . 307
text . . . . . . . . . . . . . . . . . . . . . . . . . . . . 307
subpaths
closing . . . . . . . . . . . . . . . . . . . . . . . . . 104
joining . . . . . . . . . . . . . . . . . . . . . . . . . 104
substitute fonts . . . . . . . . . . . . . . . . . .235, 236
support
customer feedback . . . . . . . . . . . . . . . . 11
registration . . . . . . . . . . . . . . . . . . . . . . . 8
Swatches palette . . . . . . . . . . . . . . . . . . . . .313
symbol instances . . . . . . . . . . . . . . . . . . . . .136
inserting . . . . . . . . . . . . . . . . . . . . . . . 136
Symbol sprayer tool . . . . . . . . . . . . . . . . . .314
symbols . . . . . . . . . . . . . . . . . . . . . . . . . . . .133
adding to an object spraylist . . . . . . . . 58
copying and pasting . . . . . . . . . . . . . . 139
inserting instances . . . . . . . . . . . . . . . 136
library . . . . . . . . . . . . . . . . . . . . . . . . . 139
sharing between drawings . . . . . . . . 139
spraylists . . . . . . . . . . . . . . . . . . . . . . . . 57
using in drawings . . . . . . . . . . . . . . . 136
T
tabs
adding to text . . . . . . . . . . . . . . . . . . . 226
templates . . . . . . . . . . . . . . . . . . . . . . . . . . . .33
creating . . . . . . . . . . . . . . . . . . . . . . . . . 33
editing . . . . . . . . . . . . . . . . . . . . . . . . . . 34
loading . . . . . . . . . . . . . . . . . . . . . . . . . 34
loading styles from . . . . . . . . . . . . . . . . 34
previewing contents . . . . . . . . . . . . . . . 33
saving . . . . . . . . . . . . . . . . . . . . . . . . . . 33
using . . . . . . . . . . . . . . . . . . . . . . . . . . . 33
terminology . . . . . . . . . . . . . . . . . . . . . . . .9, 17

Index 539
CorelDRAW
application window . . . . . . . . . . . . . . . . 18
workspace tools . . . . . . . . . . . . . . . . . . . 20
text . . . . . . . . . . . . . . . . . . . . . . . . . . . . . . . . 211
adding . . . . . . . . . . . . . . . . . . . . . . . . . 211
adding special characters . . . . . . . . . . 232
adding to a path . . . . . . . . . . . . . . . . . . 225
adding to predefined shapes . . . . . . . . . 71
adjusting position on a path . . . . . . . . 225
aligning . . . . . . . . . . . . . . . . 219, 220, 221
aligning to an object . . . . . . . . . . . . . . 221
breaking apart . . . . . . . . . . . . . . . . . . . 230
changing case . . . . . . . . . . . . . . . 215, 216
changing color . . . . . . . . . . . . . . . . . . . 216
changing flow . . . . . . . . . . . . . . . . . . . 231
character properties . . . . . . . . . . . . . . . 216
combining text frames . . . . . . . . . . . . 228
converting . . . . . . . . . . . . . . . . . . . . . . 219
converting to artistic or paragraph . . . 217
converting to curves . . . . . . . . . . . . . . 217
copying . . . . . . . . . . . . . . . . . . . . . . . . . 224
copying properties . . . . . . . . . . . . . . . . . 79
creating for Web . . . . . . . . . . . . . . . . . 258
default style . . . . . . . . . . . . . . . . . . . . . 215
editing . . . . . . . . . . . . . . . . . . . . . 217, 218
embedding graphics . . . . . . . . . . . . . . 232
embedding objects . . . . . . . . . . . . . . . . 233
encoding . . . . . . . . . . . . . . . . . . . . . . . . 214
finding . . . . . . . . . . . . . . . . . . . . . 217, 218
finding and replacing . . . . . . . . . . . . . 218
fitting to a path . . . . . . . . . . . . . . 224, 225
formatting . . . . . . . . . . . . . . . . . . . . . . 226
frames . . . . . . . . . . . . . . . . . . . . . . . . . . 211
greeking . . . . . . . . . . . . . . . . . . . . . . . . 217
importing . . . . . . . . . . . . . . . . . . . . . . . 211
importing and pasting options . . . . . . 213
kerning . . . . . . . . . . . . . . . . . . . . . . . . . 222
language display . . . . . . . . . . . . . . . . . 215
leading . . . . . . . . . . . . . . . . . . . . . . . . . 222
linking . . . . . . . . . . . . . . . . . . . . . . . . . 228
marker . . . . . . . . . . . . . . . . . . . . . . . . .211
modifying . . . . . . . . . . . . . . . . . . . . . . .215
moving . . . . . . . . . . . . . . . . . . . . . . . . .224
placing inside objects . . . . . . . . . . . . .213
printing . . . . . . . . . . . . . . . . . . . . . . . . .272
resizing . . . . . . . . . . . . . . . . . . . . .216, 217
returning to baseline . . . . . . . . . . . . . .224
rotating characters . . . . . . . . . . . . . . . .223
selecting . . . . . . . . . . . . . . . . . . . . . . . .214
separating from a path . . . . . . . .224, 226
setting font attributes . . . . . . . . . . . . .216
shaping . . . . . . . . . . . . . . . . . . . . . . . . .211
shifting . . . . . . . . . . . . . . . . . . . . . . . . .223
shifting characters . . . . . . . . . . . . . . . .223
spacing . . . . . . . . . . . . . . . . . . . . . . . . .222
straightening . . . . . . . . . . . . 223, 224, 226
underlining . . . . . . . . . . . . . . . . . . . . .216
wrapping . . . . . . . . . . . . . . . . . . .231, 232
text baseline (definition) . . . . . . . . . . . . . .517
text edit boxes
creating for Web . . . . . . . . . . . . .253, 254
text frames
automatically-sized . . . . . . . . . . . . . . .211
breaking apart . . . . . . . . . . . . . . . . . . .228
combining . . . . . . . . . . . . . . . . . . . . . .228
fitting text to . . . . . . . . . . . . . . . . . . . . .228
fixed size . . . . . . . . . . . . . . . . . . . .211, 228
formatting options . . . . . . . . . . . . . . . .228
linking . . . . . . . . . . . . . . . . . . . . . . . . .228
text styles . . . . . . . . . . . . . . . . . . . . . . . . . . .307
creating and applying . . . . . . . . . . . . .307
finding objects with . . . . . . . . . . . . . . .309
texture fills
applying . . . . . . . . . . . . . . . . . . . . . . . .146
tile origin . . . . . . . . . . . . . . . . . . . . . . .147
transforming with objects . . . . . . . . . .146
three-dimensional effects . . . . . . . . . . . . .169
applying . . . . . . . . . . . . . . . . . . . . . . . .170

540 Index
CorelDRAW
applying perspective . . . . . . . . . . . . . .173
contouring . . . . . . . . . . . . . . . . . . . . . .170
drop shadows . . . . . . . . . . . . . . . . . . . .180
perspective . . . . . . . . . . . . . . . . . . . . . .172
vector extrusions . . . . . . . . . . . . . . . . .174
three-point tools
curve . . . . . . . . . . . . . . . . . . . . . . . . . . . .51
ellipse . . . . . . . . . . . . . . . . . . . . . . . . . . .65
tiling . . . . . . . . . . . . . . . . . . . . . . . . . . . . . . .144
tiling print jobs . . . . . . . . . . . . . . . . . . . . . .273
tone
effects in bitmaps . . . . . . . . . . . . . 246, 248
tone curves
adjusting . . . . . . . . . . . . . . . . . . . . . . . .251
toolbox
exploring . . . . . . . . . . . . . . . . . . . . . . . .22
tour . . . . . . . . . . . . . . . . . . . . . . . . . . . . .22
tools . . . . . . . . . . . . . . . . . . . . . . . . . . . . . . . .20
transparencies . . . . . . . . . . . . . . . . . . . . . . .183
applying . . . . . . . . . . . . . . . . . . . . . . . .183
applying merge modes to . . . . . .186, 188
applying to an outline . . . . . . . . . . . . .185
copying . . . . . . . . . . . . . . . . . . . . . 183, 185
editing the colors of . . . . . . . . . . .185, 186
fountain . . . . . . . . . . . . . . . . . . . . . . . .184
freezing . . . . . . . . . . . . . . . . . . . . . . . . .186
opacity . . . . . . . . . . . . . . . . . 183, 184, 185
patterned . . . . . . . . . . . . . . . . . . . . . . .185
textured . . . . . . . . . . . . . . . . . . . . . . . . .184
types of . . . . . . . . . . . . . . . . . . . . . . . . .183
uniform . . . . . . . . . . . . . . . . . . . . . . . .183
trimming . . . . . . . . . . . . . . . . . . . . . . . . . . .120
front and back objects . . . . . . . . . . . . .122
objects . . . . . . . . . . . . . . . . . . . . . . 120, 121
overlapping areas . . . . . . . . . . . . . . . . .122
tutorials . . . . . . . . . . . . . . . . . . . . . . . . . . . . .11
accessing . . . . . . . . . . . . . . . . . . . . . . . . .11
Twirl tool . . . . . . . . . . . . . . . . . . . . . . . . . . .314
Twist tool . . . . . . . . . . . . . . . . . . . . . . . . . . .314
Type tool . . . . . . . . . . . . . . . . . . . . . . . . . . .314
U
undoing
actions . . . . . . . . . . . . . . . . . . . . . . . . . . 35
specifying levels . . . . . . . . . . . . . . . . . . 35
ungrouping
grids . . . . . . . . . . . . . . . . . . . . . . . . . . . . 70
objects . . . . . . . . . . . . . . . . . . . . . . . . . . 98
uniform fills . . . . . . . . . . . . . . . . . . . . . . . . .141
uninstalling
applications . . . . . . . . . . . . . . . . . . . . .6, 7
unite . . . . . . . . . . . . . . . . . . . . . . . . . . . . . . .313
unlocking
layers . . . . . . . . . . . . . . . . . . . . . . . . . . 209
PowerClip objects . . . . . . . . . . . . . . . 132
updating Corel products . . . . . . . . . . . . . . . .8
user interface
changing the language . . . . . . . . . . . . . 7
V
VBA
help . . . . . . . . . . . . . . . . . . . . . . . . . . . . 11
vector extrusions . . . . . . . . . . . . . . . . . . . .174
beveled edges . . . . . . . . . . . . . . . . . . . 178
cloning . . . . . . . . . . . . . . . . . . . . .174, 177
copying . . . . . . . . . . . . . . . . . . . . .174, 177
creating . . . . . . . . . . . . . . . . . . . . . . . . 176
filling . . . . . . . . . . . . . . . . . . . . . . . . . . 178
light sources . . . . . . . . . . . . . . . . . . . . 178
removing . . . . . . . . . . . . . . . . . . . . . . . 177
rotating . . . . . . . . . . . . . . . . . . . . . . . . 177
rounding corners . . . . . . . . . . . . . . . . 177
vanishing points . . . . . . . . . . . . . . . . . 179

Index 541
CorelDRAW
vector graphics
printing . . . . . . . . . . . . . . . . . . . . . . . . 272
to bitmaps . . . . . . . . . . . . . . . . . . . . . . 239
views
changing . . . . . . . . . . . . . . . . . . . . . . . . 39
W
Warp tool . . . . . . . . . . . . . . . . . . . . . . . . . . 314
watermarks
checking while importing . . . . . . . . . . 299
Web . . . . . . . . . . . . . . . . . . . . . . . . . . . . . . . 263
export options . . . . . . . . . . . 263, 264, 265
Preflight options . . . . . . . . . . . . . 263, 265
preparing files and objects for . . . . . . 263
publishing . . . . . . . . . . . . . . . . . . 263, 266
Web objects . . . . . . . . . . . . . . . . . . . . . . . . 253
adding to HTML documents . . 253, 254
bitmaps . . . . . . . . . . . . . . . . . . . . . 254, 255
check boxes . . . . . . . . . . . . . . . . . . . . . 253
creating text . . . . . . . . . . . . . . . . . . . . . 258
customizing . . . . . . . . . . . . . . . . . 253, 254
forms . . . . . . . . . . . . . . . . . . . . . . . . . . . 253
importing to HTML documents . . . .253
Java applets . . . . . . . . . . . . . . . . . . . . . 253
pop-up menus . . . . . . . . . . . . . . . . . . . 253
preset objects . . . . . . . . . . . . . . . . . . . . 253
radio buttons . . . . . . . . . . . . . . . . . . . . 253
saving . . . . . . . . . . . . . . . . . . . . . . . . . . 254
text edit boxes . . . . . . . . . . . . . . . . . . . 253
user interface controls . . . . . . . . . . . . . 253
using . . . . . . . . . . . . . . . . . . . . . . . . . . . 253
verifying links . . . . . . . . . . . . . . . . . . . 261
Web pages
previewing . . . . . . . . . . . . . . . . . . 263, 265
wedges . . . . . . . . . . . . . . . . . . . . . . . . . . . 64, 66
welding objects . . . . . . . . . . . . . . . . . . . . . 123
workspace . . . . . . . . . . . . . . . . . . . . . . . . . . 521
application window . . . . . . . . . . . . . . . .18
dockers . . . . . . . . . . . . . . . . . . . . . . . . . .28
property bar . . . . . . . . . . . . . . . . . . . . . .27
standard toolbar . . . . . . . . . . . . . . . . . . .20
status bar . . . . . . . . . . . . . . . . . . . . . . . .28
terminology . . . . . . . . . . . . . . . . . . . . . .17
toolbars . . . . . . . . . . . . . . . . . . . . . . .20, 21
toolbox . . . . . . . . . . . . . . . . . . . . . . . . . .22
tools . . . . . . . . . . . . . . . . . . . . . . . . . . . . .20
workspace (definition) . . . . . . . . . . . . . . .521
wrapping text . . . . . . . . . . . . . . . . . . .231, 232
styles . . . . . . . . . . . . . . . . . . . . . . . . . . .231
Wrinkle tool . . . . . . . . . . . . . . . . . . . . . . . .314
Z
zooming . . . . . . . . . . . . . . . . . . . . . . . . . .36, 37
drawings . . . . . . . . . . . . . . . . . . . . . .37, 38

Index 543
Corel R.A.V.E. Index
A
acceleration
adjusting in tweens . . . . . . . . . . . . . . . 341
anchor point (definition) . . . . . . . . . . . . . . 485
animating
artistic text blends . . . . . . . . . . . . 346, 347
text . . . . . . . . . . . . . . . . . . . . . . . . . . . . 345
text effects . . . . . . . . . . . . . . . . . . . 347, 348
animation . . . . . . . . . . . . . . . . . . . . . . . . . . . 329
before you start . . . . . . . . . . . . . . . . . . 330
creating . . . . . . . . . . . . . . . . . . . . . . . . . 329
creating by tweening . . 331, 334, 335, 336
methods . . . . . . . . . . . . . . . . . . . . . . . . 329
terms . . . . . . . . . . . . . . . . . . . . . . . . . . . 329
artistic text
animating blends . . . . . . . . . . . . . 346, 347
blending . . . . . . . . . . . . . . . . . . . . 346, 347
B
backgrounds
choosing . . . . . . . . . . . . . . . . . . . . . . . . 326
bitmaps
embedding and linking . . . . . . . . . . . 326
in movie backgrounds . . . . . . . . . . . . . 326
blending
artistic text . . . . . . . . . . . . . . . . . . 346, 347
C
color
acceleration in tweens . . . . . . . . . . . . . 341
tweening . . . . . . . . . . . . . . . . . . . . . . . . 334
color, acceleration in tweens . . . . . . . . . 341
colors
sampling from desktop . . . . . . . . . . . . 150
setting acceleration rates . . . . . . . . . . .341
conventions for documentation . . . . . . . . .9
copying
tween properties . . . . . . . . . . . . . . . . .342
Corel Corporation
contact . . . . . . . . . . . . . . . . . . . . . . . . . .11
training . . . . . . . . . . . . . . . . . . . . . . . . . .11
CorelTUTOR . . . . . . . . . . . . . . . . . . . . . . . .11
creating
typing effect . . . . . . . . . . . . . . . . .346, 348
D
documentation conventions . . . . . . . . . . . . .9
E
encoding (definition) . . . . . . . . . . . . . . . . .495
F
fading . . . . . . . . . . . . . . . . . . . . . . . . . . . . . .334
fill
tweening . . . . . . . . . . . . . . . . . . . . . . . .334
Flash
using to preview movies in browser . .344
frame rate
setting . . . . . . . . . . . . . . . . . . . . . .326, 327
frames
adding and deleting . . . . . . . . . . .339, 340
labeling . . . . . . . . . . . . . . . . . . . . . . . . .339
G
glowing . . . . . . . . . . . . . . . . . . . . . . . . . . . . .334

544 Index
Corel R.A.V.E.
H
Help . . . . . . . . . . . . . . . . . . . . . . . . . . . . . . . .10
changing the language . . . . . . . . . . . . . .7
tutorials . . . . . . . . . . . . . . . . . . . . . . . . .11
using . . . . . . . . . . . . . . . . . . . . . . . . . . . .10
I
installing
applications . . . . . . . . . . . . . . . . . . . . . . .6
K
keyframes . . . . . . . . . . . . . . . . . . . . . . 329, 331
adding . . . . . . . . . . . . . . . . . . . . . . . . . .334
adding and deleting . . . . . . . . . . . 339, 340
moving . . . . . . . . . . . . . . . . . . . . .339, 340
L
labels
adding to frames . . . . . . . . . . . . . . . . .339
language
Help . . . . . . . . . . . . . . . . . . . . . . . . . . . . .7
user interface . . . . . . . . . . . . . . . . . . . . . .7
life span . . . . . . . . . . . . . . . . . . . . . . . . . . . .330
changing . . . . . . . . . . . . . . . . 330, 331, 340
light
tweening . . . . . . . . . . . . . . . . . . . . . . . .334
M
movies
adding sound . . . . . . . . . . . . . . . . . . . .325
backgrounds . . . . . . . . . . . . . . . . . . . . .326
closing . . . . . . . . . . . . . . . . . . . . . . . . . .327
creating . . . . . . . . . . . . . . . . . . . . . . . . .325
moving
text along a path . . . . . . . . . . . . .345, 346
O
objects
animating . . . . . . . . . . . . . . . . . . . . . . 329
changing life span . . . . . . . . . . . . . . . 340
increasing life span of . . . . . . . . .330, 331
moving along a path . . . . . . . . . . . . . 336
tween properties . . . . . . . . . . . . . .341, 342
tweening . . . . . . . . 331, 334, 335, 336, 337
objects, tween properties . . . . . . . . . . . .341
P
paths
moving objects along . . . . . . . . . . . . . 336
perfect shapes (definition) . . . . . . . . . . . .508
playing movies . . . . . . . . . . . . . . . . . . .343, 344
position
tweening . . . . . . . . . . . . . . . . . . . .335, 336
positioning
using xy coordinates . . . . . . . . . . . . . . 82
previewing movies . . . . . . . . . . . . . . . . . . .343
Corel R.A.V.E. playback . . . . . . . . . . 343
Flash preview in browser . . . . . .343, 344
product updates . . . . . . . . . . . . . . . . . . . . . . .8
Q
quitting
Corel R.A.V.E. . . . . . . . . . . . . . . . . . . 327
R
registering Corel products . . . . . . . . . . . . . .8
reversing animation . . . . . . . . . . . . . . . . . .342
S
scale
tweening . . . . . . . . . . . . . . . . . . . . . . . 337

Index 545
Corel R.A.V.E.
scrubbing . . . . . . . . . . . . . . . . . . . . . . . . . . . 343
shape
tweening . . . . . . . . . . . . . . . . . . . . . . . . 334
shape recognition (definition) . . . . . . . . . 513
size
tweening . . . . . . . . . . . . . . . . . . . . . . . . 337
sound
adding . . . . . . . . . . . . . . . . . . . . . . . . . 325
stage size
setting . . . . . . . . . . . . . . . . . . . . . . 326, 327
stopping movies . . . . . . . . . . . . . . . . . . . . . 343
support
customer feedback . . . . . . . . . . . . . . . . . 11
registration . . . . . . . . . . . . . . . . . . . . . . . . 8
T
terminology . . . . . . . . . . . . . . . . . . . . . . . 9, 319
animation . . . . . . . . . . . . . . . . . . . . . . . 329
application window . . . . . . . . . . . . . . . 320
text
animating . . . . . . . . . . . . . . . . . . . . . . . 345
animating effects . . . . . . . . . . . . . 347, 348
blending artistic . . . . . . . . . . . . . . 346, 347
creating a typing effect . . . . . . . . 346, 348
moving along a path . . . . . . . . . . 345, 346
tweening . . . . . . . . . . . . . . . . . . . . . . . . 345
tweening properties . . . . . . . . . . . . . . . 345
text baseline (definition) . . . . . . . . . . . . . . 517
timelines
modifying . . . . . . . . . . . . . . . . . . . 339, 340
tutorials . . . . . . . . . . . . . . . . . . . . . . . . . . . . . 11
accessing . . . . . . . . . . . . . . . . . . . . . . . . . 11
tweening . . . . . . . . . . . . . . . . . . . . . . . . . . . 331
objects . . . . . . . . . . . . . . . . . . . . . . 331, 334
position . . . . . . . . . . . . . . . . . . . . . 335, 336
size . . . . . . . . . . . . . . . . . . . . . . . . . . . . 337
text . . . . . . . . . . . . . . . . . . . . . . . . . . . .345
text properties . . . . . . . . . . . . . . . . . . .345
tweens
copying properties of . . . . . . . . . .341, 342
modifying acceleration in . . . . . . . . . .341
removing . . . . . . . . . . . . . . . . . . .341, 342
reversing . . . . . . . . . . . . . . . . . . . .341, 342
tweens, modifying properties of . . . . . . .341
typing effect
creating . . . . . . . . . . . . . . . . . . . . .346, 348
U
uninstalling
applications . . . . . . . . . . . . . . . . . . . . .6, 7
Updating . . . . . . . . . . . . . . . . . . . . . . . . . . . . .8
updating Corel products . . . . . . . . . . . . . . . .8
user interface
changing the language . . . . . . . . . . . . . .7
W
workspace
application window . . . . . . . . . . . . . . .320
workspace (definition) . . . . . . . . . . . . . . .521

Index 547
Corel PHOTO-PAINT Index
Numerics
256 colors . . . . . . . . . . . . . . . . . . . . . . . . . . 374
A
Adaptive unsharp filter . . . . . . . . . . . . . . . 404
adjustment filters . . . . . . . . . . . . . . . . . . . . 387
using . . . . . . . . . . . . . . . . . . . . . . . . . . . 388
adjustment layers . . . . . . . . . . . . . . . . . . . . 409
application window . . . . . . . . . . . . . . . . . . 352
B
background
creating object from . . . . . . . . . . . . . . 449
removing . . . . . . . . . . . . . . . . . . . . . . . 420
background color
choosing . . . . . . . . . . . . . . . . . . . . . . . . 368
bitmap fills . . . . . . . . . . . . . . . . . . . . . . . . . . 442
applying . . . . . . . . . . . . . . . . . . . . . . . . 442
creating . . . . . . . . . . . . . . . . . . . . . . . . . 443
importing . . . . . . . . . . . . . . . . . . . . . . . 443
loading . . . . . . . . . . . . . . . . . . . . . . . . . 443
tiling images . . . . . . . . . . . . . . . . . . . . 443
blending colors . . . . . . . . . . . . . . . . . . 407, 408
blends
creating colors . . . . . . . . . . . . . . . . . . . 371
border
cropping . . . . . . . . . . . . . . . . . . . . 381, 382
resizing . . . . . . . . . . . . . . . . . . . . . . . . . 395
border-shaped editable areas . . . . . . . . . 416
brush strokes
adjusting color . . . . . . . . . . . . . . . . . . . 388
adjusting tone . . . . . . . . . . . . . . . . . . . 388
applying . . . . . . . . . . . . . . . . 431, 433, 436
editing . . . . . . . . . . . . . . . . . . . . . . . . . 436
painting with images . . . . . . . . . . . . . .434
painting with orbits . . . . . . . . . . . . . . .436
painting with symmetrical patterns . .436
rendering as objects . . . . . . . . . . . . . . .449
repeating . . . . . . . . . . . . . . . . . . . . . . . .436
saving . . . . . . . . . . . . . . . . . . . . . . . . . .436
brushes
painting with preset brushes . . . . . . .433
C
channels
color . . . . . . . . . . . . . . . . . . . . . . . . . . .390
Choosing . . . . . . . . . . . . . . . . . . . . . . . . . . .477
clip art
finding . . . . . . . . . . . . . . . . . . . . . . . . .377
clipart
Web resources . . . . . . . . . . . . . . . . . . . .12
clipping groups . . . . . . . . . . . . . . . . . . . . . .450
creating . . . . . . . . . . . . . . . . . . . . . . . . .451
undoing . . . . . . . . . . . . . . . . . . . . . . . .451
Clone tool . . . . . . . . . . . . . . . . . . . . . .402, 434
cloning . . . . . . . . . . . . . . . . . . . . . . . . . . . . .402
image areas . . . . . . . . . . . . . . . . . . . . . .402
objects . . . . . . . . . . . . . . . . . . . . . . . . . .402
closing images . . . . . . . . . . . . . . . . . . . 471, 474
color
adjusting . . . . . . . . . . . . . . . . . . . . . . . .388
correcting . . . . . . . . . . . 387, 388, 389, 409
dithering . . . . . . . . . . . . . . . . . . . . . . . .375
filters . . . . . . . . . . . . . . . . . . . . . . . . . . .387
color channels . . . . . . . . . . . . . . . . . . . . . . .390
color modes . . . . . . . . . . . . . . . . . . . . .390
combining images . . . . . . . . . . . . . . . .392
creating masks . . . . . . . . . . . . . . .416, 419
displaying . . . . . . . . . . . . . . . . . . . . . . .391

548 Index
Corel PHOTO-PAINT
editing . . . . . . . . . . . . . . . . . . . . . . . . . .392
mixing . . . . . . . . . . . . . . . . . . . . . . . . . .392
splitting images into channels . . . . . .392
color control area
choosing colors . . . . . . . . . . . . . . . . . .368
color depth
changing . . . . . . . . . . . . . . . . . . . . . . . .374
color modes . . . . . . . . . . . . . . . . . . . . .373
color management . . . . . . . . . . . . . . . . . . .475
choosing styles . . . . . . . . . . . . . . . . . . .477
embedding color profiles . . . . . .477, 478
enabling gamut alarm . . . . . . . . . . . . .477
setting advanced options . . . . . . . . . . .477
using color profiles . . . . . . . . . . . . . . .475
color masks . . . . . . . . . . . . . . . . . . . . . . . . .416
creating . . . . . . . . . . . . . . . . . . . . . . . . .418
color models
changing . . . . . . . . . . . . . . . . . . . . . . . .366
color modes
changing . . . . . . . . . . . . . . . . 366, 373, 374
channels . . . . . . . . . . . . . . . . . . . . . . . .390
converting to paletted . . . . . . . . . 374, 375
viewing image information . . . . . . . .363
color palettes . . . . . . . . . . . . . . . . . . . 367, 374
choosing . . . . . . . . . . . . . . . . . . . . . . . .374
creating . . . . . . . . . . . . . . . . . . . . . . . . .372
creating custom palettes . . . . . . . 371, 372
editing . . . . . . . . . . . . . . . . . . . . . . . . . .374
fixed or custom . . . . . . . . . . . . . . . . . .369
in paletted color mode . . . . . . . . . . . .375
saving . . . . . . . . . . . . . . . . . . . . . . . . . .374
color profiles . . . . . . . . . . . . . . . . . . . . . . . .475
choosing . . . . . . . . . . . . . . . . . . . . . . . .476
copying from CD . . . . . . . . . . . . . . . . .476
downloading . . . . . . . . . . . . . . . . . . . .477
embedding . . . . . . . . . . . . . . . . . . . . . .477
color separations
previewing . . . . . . . . . . . . . . . . . . . . . 482
color viewers
choosing colors . . . . . . . . . . . . . . . . . . 370
colors . . . . . . . . . . . . . . . . . . . . . . . . . . . . . .367
blending . . . . . . . . . . . . . . . . . . . . . . . 408
choosing . . . . . . . . . . . . 367, 368, 369, 370
correcting between devices . . . . .475, 478
creating blends . . . . . . . . . . . . . . . . . . 371
current selections . . . . . . . . . . . . . . . . 368
custom palettes . . . . . . . . . . . . . . . . . . 371
erasing . . . . . . . . . . . . . . . . . . . . . . . . . 407
mixing . . . . . . . . . . . . . . . . . . . . . . . . . 371
replacing . . . . . . . . . . . . . . . . . . . . . . . 407
reproducing accurately . . . . . . . . . . . 475
sampling from images . . . . . . . . . . . . 369
smearing . . . . . . . . . . . . . . . . . . . . . . . 408
smudging . . . . . . . . . . . . . . . . . . . . . . 408
using color harmonies . . . . . . . . . . . . 370
using color palettes . . . . . . . . . . .367, 369
viewing image information . . . . . . . . 365
combining . . . . . . . . . . . . . . . . . . . . . . . . . .450
objects . . . . . . . . . . . . . . . . . . . . . . . . . 451
objects with background . . . . . . . . . . 451
compression
optimizing images for the Web . . . . 463
configuring a pen tablet . . . . . . . . . . . . . . .437
contrast . . . . . . . . . . . . . . . . . . . . . . . . . . . .403
contrast enhancement filter . . . . . . . . . . .388
conventions for documentation . . . . . . . . .9
copying
objects . . . . . . . . . . . . . . . . . . . . . . . . . 450
copying image areas . . . . . . . . . . . . . . . . . .402
Corel Corporation
contact . . . . . . . . . . . . . . . . . . . . . . . . . . 11
training . . . . . . . . . . . . . . . . . . . . . . . . . 11
CorelTUTOR . . . . . . . . . . . . . . . . . . . . . . . .11

Index 549
Corel PHOTO-PAINT
correcting color and tone . . . . 387, 388, 389
Crop tool . . . . . . . . . . . . . . . . . . . . . . . . . . . 381
cropping
border . . . . . . . . . . . . . . . . . . . . . . 381, 382
editable areas . . . . . . . . . . . . . . . . . . . . 381
expanding cropping area . . . . . . . . . . 382
images . . . . . . . . . . . . . . . . . . . . . 381, 382
to editable areas . . . . . . . . . . . . . . . . . . 383
Cutout command . . . . . . . . . . . . . . . . . . . 421
cutting out images . . . . . . . . . . . . . . . . . . . 420
D
defringing . . . . . . . . . . . . . . . . . . . . . . . . . . . 457
edges of objects . . . . . . . . . . . . . . . . . . 459
deinterlacing . . . . . . . . . . . . . . . . . . . . . . . . 398
deselecting
objects . . . . . . . . . . . . . . . . . . . . . . . . . . 450
digital cameras . . . . . . . . . . . . . . . . . . . . . . 377
color management settings . . . . . . . . . 475
photos . . . . . . . . . . . . . . . . . . . . . . 378, 379
dimensions of images . . . . . . . . . . . . 393, 394
Directional sharpen filter . . . . . . . . . . . . . 404
distorting . . . . . . . . . . . . . . . . . . . . . . . . . . . 453
objects . . . . . . . . . . . . . . . . . . . . . . . . . . 456
distributing objects . . . . . . . . . . . . . . . . . . 450
dithering
color . . . . . . . . . . . . . . . . . . . . . . . . . . . 375
paletted color mode . . . . . . . . . . . . . . . 374
dockers
minimizing . . . . . . . . . . . . . . . . . . . . . 361
moving . . . . . . . . . . . . . . . . . . . . . . . . . 361
opening . . . . . . . . . . . . . . . . . . . . . . . . 361
documentation conventions . . . . . . . . . . . . 9
downsampling images . . . . . . . . . . . . 394, 395
drawing . . . . . . . . . . . . . . . . . . . . . . . . . . . . 429
adding outlines to shapes . . . . . .429, 430
lines . . . . . . . . . . . . . . . . . . . . . . . . . . . .431
rectangles and ellipses . . . . . . . . . . . . .429
rounding rectangle corners . . . . . . . . .429
triangles and polygons . . . . . . . . . . . .430
drop shadows . . . . . . . . . . . . . . . . . . . . . . .460
adding . . . . . . . . . . . . . . . . . . . . . . . . . .461
copying . . . . . . . . . . . . . . . . . . . . . . . . .462
duplicating
image areas . . . . . . . . . . . . . . . . . . . . . .402
objects . . . . . . . . . . . . . . . . . . . . . . . . . .450
E
edges
changing on objects . . . . . . . . . . . . . . .457
editable areas . . . . . . . . . . . . . . . . . . . . . . .413
applying special effects . . . . . . . . . . . .425
creating border-shaped areas . . . . . . .416
creating lenses from . . . . . . . . . . . . . . .410
cropping to . . . . . . . . . . . . . . . . . . . . . .383
defining . . . . . . . . . . . . . . . . 414, 415, 416
defining in color channels . . . . . . . . .419
deleting . . . . . . . . . . . . . . . . . . . . . . . . .420
expanding . . . . . . . . . . . . . . . . . . . . . . .416
inverting . . . . . . . . . . . . . . . . . . . . . . . .413
removing . . . . . . . . . . . . . . . . . . . . . . .413
rendering as objects . . . . . . . . . . .449, 450
viewing image information . . . . . . . .365
effect filters
lenses . . . . . . . . . . . . . . . . . . . . . . . . . .409
Effect tool . . . . . . . . . . . . . . . . . . . . . . . . . .405
effects . . . . . . . . . . . . . . . . . . . . . . . . . . . . . .423
Ellipse tool . . . . . . . . . . . . . . . . . . . . . . . . . .429
ellipses . . . . . . . . . . . . . . . . . . . . . . . . . . . . .429
drawing . . . . . . . . . . . . . . . . . . . . . . . . .429
encoding (definition) . . . . . . . . . . . . . . . . .495

550 Index
Corel PHOTO-PAINT
Eraser tool . . . . . . . . . . . . . . . . . . . . . . . . . .406
erasing . . . . . . . . . . . . . . . . . . . . . . . . . . . . .405
colors . . . . . . . . . . . . . . . . . . . . . . . . . . .407
image areas . . . . . . . . . . . . . . . . . . . . . .406
object areas . . . . . . . . . . . . . . . . . . . . . .406
exporting . . . . . . . . . . . . . . . . . . . . . . . . . . .471
embedding color profiles . . . . . . . . . .477
for Web . . . . . . . . . . . . . . . . . . . . .463, 464
images . . . . . . . . . . . . . . . . . . . . . . . . . .473
lenses . . . . . . . . . . . . . . . . . . . . . . . . . .412
to different file formats . . . . . . . . . . . .472
extended property bar . . . . . . . . . . . . . . .360
opening or closing . . . . . . . . . . . . . . . .360
Eyedropper tool . . . . . . . . . . . . . . . . . . . . .433
F
feathering . . . . . . . . . . . . . . . . . . . . . . . . . . .457
edges of objects . . . . . . . . . . . . . . . . . .458
file formats
viewing image information . . . . . . . .365
Web-compatible . . . . . . . . . . . . . . . . .463
file size
viewing image information . . . . . . . .365
files
exporting to Microsoft Office . . . . . . .474
exporting to WordPerfect Office . . . .474
importing . . . . . . . . . . . . . . . . . . . . . . .377
Fill tool . . . . . . . . . . . . . . . . . . . . . . . . . . . . .439
fills . . . . . . . . . . . . . . . . . . . . . . . . . . . . . . . . .439
3-D patterns . . . . . . . . . . . . . . . . . . . . .444
bitmap . . . . . . . . . . . . . . . . . . . . . . . . .442
choosing colors . . . . . . . . . . . . . . . . . .368
fountain . . . . . . . . . . . . . . . . . . . . 440, 441
gradient . . . . . . . . . . . . . . . . . . . . 445, 446
painting . . . . . . . . . . . . . . . . . . . . . . . .434
texture . . . . . . . . . . . . . . . . . . . . . . . . . .444
uniform . . . . . . . . . . . . . . . . . . . . . . . . 439
filters . . . . . . . . . . . . . . . . . . . . . . . . . . . . . . .423
applying with lenses . . . . . . . . . . . . . 409
color . . . . . . . . . . . . . . . . . . . . . . . . . . 387
correcting color and tone . . . . . .387, 388
tone . . . . . . . . . . . . . . . . . . . . . . . . . . . 387
finding
clip art . . . . . . . . . . . . . . . . . . . . . . . . . 377
images . . . . . . . . . . . . . . . . . . . . . . . . . 377
sound files . . . . . . . . . . . . . . . . . . . . . . 377
flattening objects . . . . . . . . . . . . . . . . . . . .451
flipping . . . . . . . . . . . . . . . . . . . . . . . . . . . . .453
images . . . . . . . . . . . . . . . . . . . . . . . . . 385
objects . . . . . . . . . . . . . . . . . . . . . . . . . 456
flyouts . . . . . . . . . . . . . . . . . . . . . . . . . . . . . .356
focusing
image detail . . . . . . . . . . . . . . . . . . . . 403
fonts
Web resources . . . . . . . . . . . . . . . . . . . 12
foreground color
choosing . . . . . . . . . . . . . . . . . . . . . . . 368
foreground objects
cutting out . . . . . . . . . . . . . . . . . . . . . 420
fountain fills . . . . . . . . . . . . . . . . . . . . . . . . .440
applying . . . . . . . . . . . . . . . . . . . .440, 441
creating depth . . . . . . . . . . . . . . . . . . 440
custom . . . . . . . . . . . . . . . . . . . . . . . . 440
customizing . . . . . . . . . . . . . . . . . . . . 441
editing presets . . . . . . . . . . . . . . . . . . 441
freehand mask . . . . . . . . . . . . . . . . . . . . . . .415
Freehand mask tool . . . . . . . . . . . . . . . . . .415
full-screen preview . . . . . . . . . . . . . . . . . .363
changing view . . . . . . . . . . . . . . . . . . 364

Index 551
Corel PHOTO-PAINT
G
GIF
optimizing and exporting . . . . . . . . . . 463
gradient fills . . . . . . . . . . . . . . . . . . . . . . . . . 445
applying . . . . . . . . . . . . . . . . . . . . . . . . 446
graphics
hiding for print preview . . . . . . . . . . . 482
vector . . . . . . . . . . . . . . . . . . . . . . 379, 380
H
Help . . . . . . . . . . . . . . . . . . . . . . . . . . . . . . . . 10
changing the language . . . . . . . . . . . . . . 7
printing . . . . . . . . . . . . . . . . . . . . . . . . . 10
tutorials . . . . . . . . . . . . . . . . . . . . . . . . . 11
using . . . . . . . . . . . . . . . . . . . . . . . . . . . . 10
VBA . . . . . . . . . . . . . . . . . . . . . . . . . . . . 11
Web . . . . . . . . . . . . . . . . . . . . . . . . . . . . 12
hiding
windows, toolbox, and toolbars . . . . . 364
High pass filter . . . . . . . . . . . . . . . . . . . . . . 404
histogram . . . . . . . . . . . . . . . . . . . . . . . 387, 388
I
ICC profiles
choosing options . . . . . . . . . . . . . . . . . 478
image
flipping . . . . . . . . . . . . . . . . . . . . . . . . . 385
mirroring . . . . . . . . . . . . . . . . . . . . . . . 385
orientation . . . . . . . . . . . . . . . . . . . . . . 385
image lists . . . . . . . . . . . . . . . . . . . . . . . . . . 434
loading . . . . . . . . . . . . . . . . . . . . . . . . . 435
Image sprayer tool . . . . . . . . . . . . . . . . . . . 434
images
closing . . . . . . . . . . . . . . . . . . . . . . . . . 474
correcting . . . . . . . . . . . . . . . . . . . . . . . 401
cropping . . . . . . . . . . . . . . . . . . . . . . . . 382
dimensions . . . . . . . . . . . . . . . . . . . . . .393
exporting . . . . . . . . . . . . . . . . . . . . . . .473
finding . . . . . . . . . . . . . . . . . . . . . . . . .377
joining . . . . . . . . . . . . . . . . . . . . . . . . .383
opening . . . . . . . . . . . . . . . . . . . . . . . . .377
resampling . . . . . . . . . . 377, 393, 394, 395
resizing . . . . . . . . . . . . . . . . . . . . .393, 394
resolution . . . . . . . . . . . . . . . . . . .393, 394
rotating . . . . . . . . . . . . . . . . . . . . . . . . .385
saving . . . . . . . . . . . . . . . . . . . . . . . . . .471
stitching . . . . . . . . . . . . . . . . . . . . . . . .383
importing . . . . . . . . . . . . . . . . . . . . . . . . . . .377
bitmap fills . . . . . . . . . . . . . . . . . . . . . .443
embedding color profiles . . . . . . . . . .477
files . . . . . . . . . . . . . . . . . . . . . . . . . . . .377
images . . . . . . . . . . . . . . . . . . . . . . . . . .377
vector graphics . . . . . . . . . . . . . . . . . . .380
Impressionism clone . . . . . . . . . . . . . . . . .402
indexed color mode . . . . . . . . . . . . . . . . .374
installing applications . . . . . . . . . . . . . . . . . . .6
Interactive drop shadow tool . . . . . . . . .460
Interactive fill tool . . . . . . . . . . . . . . . . . . .445
Internet
exporting for Web . . . . . . . . . . . . . . . .463
optimizing for Web . . . . . . . . . . . . . . .463
rollovers . . . . . . . . . . . . . . . . . . . . . . . .465
Invert effect filter . . . . . . . . . . . . . . . . . . . .427
inverting masks . . . . . . . . . . . . . . . . . . . . . .420
J
joining
images . . . . . . . . . . . . . . . . . . . . . . . . . .383
JPEG
optimizing and exporting . . . . . . . . . .463

552 Index
Corel PHOTO-PAINT
L
language
Help . . . . . . . . . . . . . . . . . . . . . . . . . . . . .7
user interface . . . . . . . . . . . . . . . . . . . . . .7
Lasso mask tool . . . . . . . . . . . . . . . . . . . . .418
using in color channels . . . . . . . . . . . .419
layers . . . . . . . . . . . . . . . . . . . . . . . . . . . . . .409
objects . . . . . . . . . . . . . . . . . . . . . . . . . .447
layout
for printing . . . . . . . . . . . . . . . . . . . . . .480
lenses . . . . . . . . . . . . . . . . . . . . . . . . . . . . . .409
combining with background . . . . . . .412
creating . . . . . . . . . . . . . . . . . . . . . 409, 410
editing . . . . . . . . . . . . . . . . . . . . . . 411, 412
exporting . . . . . . . . . . . . . . . . . . . . . . .412
Line tool . . . . . . . . . . . . . . . . . . . . . . . . . . . .431
lines . . . . . . . . . . . . . . . . . . . . . . . . . . . . . . . .429
drawing . . . . . . . . . . . . . . . . . . . . . . . .431
joining . . . . . . . . . . . . . . . . . . . . . . . . .431
linking (definition) . . . . . . . . . . . . . . . . . . .501
loading
bitmap fills . . . . . . . . . . . . . . . . . . . . . .443
loading photos . . . . . . . . . . . . . . . . . . 378, 379
M
Magic wand mask tool . . . . . . . . . . . . . . .417
using in color channels . . . . . . . . . . . .419
Magnetic mask tool . . . . . . . . . . . . . . . . . .418
magnification level . . . . . . . . . . . . . . . . . . .365
magnifying
print preview . . . . . . . . . . . . . . . . . . . .274
marquee
customizing . . . . . . . . . . . . . . . . . . . . .459
mask marquee . . . . . . . . . . . . . . . . . . . . . .413
hiding and displaying . . . . . . . . . . . . .414
mask overlay . . . . . . . . . . . . . . . . . . . . . . . .413
hiding and displaying . . . . . . . . . . . . 414
masks . . . . . . . . . . . . . . . . . . . . . . . . . . . . . .413
auto-sensing edges . . . . . . . . . . . . . . . 418
border-shaped masks . . . . . . . . . . . . . 416
color . . . . . . . . . . . . . . . . . . . . . . . . . . 416
color channels . . . . . . . . . . . . . . . . . . 419
color masks . . . . . . . . . . . . . . . . . . . . . 418
creating . . . . . . . . . . . . . . . . . . . . .414, 415
creating lenses from . . . . . . . . . . . . . . 410
expanding . . . . . . . . . . . . . . . . . . . . . . 416
freehand . . . . . . . . . . . . . . . . . . . . . . . 415
inverting . . . . . . . . . . . . . . . . . . . . . . . 420
outlining . . . . . . . . . . . . . . . . . . . . . . . 415
removing . . . . . . . . . . . . . . . . . . . . . . . 420
uniform color masks . . . . . . . . . . . . . 417
using color channels . . . . . . . . . . . . . 416
measurements
changing units of measure . . . . . . . . 366
menus
hiding menu bar . . . . . . . . . . . . . . . . 364
Microsoft Office
export files to . . . . . . . . . . . . . . . . . . . 474
mirroring images . . . . . . . . . . . . . . . . . . . .385
moire
removing . . . . . . . . . . . . . . . . . . . . . . . 398
monitors
alerting to nonprinting colors . . . . . . 477
color management settings . . . . . . . . 475
N
Navigator pop-up . . . . . . . . . . . . . . . . . . . .364
viewing areas outside image window 364
noise
removing . . . . . . . . . . . . . . . .397, 398, 399

Index 553
Corel PHOTO-PAINT
O
object marquee
customizing . . . . . . . . . . . . . . . . . . . . . 459
objects . . . . . . . . . . . . . . . . . . . . . . . . . . . . . 453
applying perspective . . . . . . . . . . . . . . 457
blending into the background . . . . . . 459
changing edges . . . . . . . . . . 457, 458, 459
changing properties . . . . . . . . . . . . . . . 450
clipping groups . . . . . . . . . . . . . . . . . . 450
cloning . . . . . . . . . . . . . . . . . . . . . . . . . 402
combining . . . . . . . . . . . . . . . . . . 450, 451
combining with background . . . . . . . 451
copying . . . . . . . . . . . . . . . . . . . . . . . . . 450
creating . . . . . . . . . . . . . . . . . . . . . . . . . 447
distorting . . . . . . . . . . . . . . . . . . . . . . . 456
distributing . . . . . . . . . . . . . . . . . . . . . 450
drop shadows . . . . . . . . . . . . . . . . . . . . 460
flipping . . . . . . . . . . . . . . . . . . . . . . . . . 456
grouping . . . . . . . . . . . . . . . . . . . . 450, 451
lenses . . . . . . . . . . . . . . . . . . . . . . . . . . 409
painting . . . . . . . . . . . . . . . . . . . . . . . . 431
renaming . . . . . . . . . . . . . . . . . . . . . . . 450
resizing and scaling . . . . . . . . . . . 455, 456
rotating . . . . . . . . . . . . . . . . . . . . . . . . . 456
selecting . . . . . . . . . . . . . . . . . . . . . . . . 450
skewing . . . . . . . . . . . . . . . . . . . . . . . . 456
transforming . . . . . . . . . . . . . . . . . . . . 453
ungrouping . . . . . . . . . . . . . . . . . . . . . 451
opening . . . . . . . . . . . . . . . . . . . . . . . . . . . . 377
images . . . . . . . . . . . . . . . . . . . . . . . . . 377
vector graphics . . . . . . . . . . . . . . . . . . . 380
optimizing
colors . . . . . . . . . . . . . . . . . . . . . . . . . . 475
optimizing images for the Web . . . . 463, 464
orbits . . . . . . . . . . . . . . . . . . . . . . . . . . . . . . 436
orientation
changing . . . . . . . . . . . . . . . . . . . . . . . 385
images . . . . . . . . . . . . . . . . . . . . . .381, 385
printing . . . . . . . . . . . . . . . . . . . . . . . . .481
outlining . . . . . . . . . . . . . . . . . . . . . . . . . . . .429
rectangles and ellipses . . . . . . . . . . . . .429
triangles and polygons . . . . . . . . . . . .430
output resolution . . . . . . . . . . . . . . . .394, 395
P
pages
orientation for printing . . . . . . . . . . . .481
Paint tool . . . . . . . . . . . . . . . . . . . . . . .431, 436
painting
applying brush strokes . . . . . . . . . . . .431
orbits . . . . . . . . . . . . . . . . . . . . . . . . . . .436
sampling image colors . . . . . . . . . . . .433
spirals . . . . . . . . . . . . . . . . . . . . . . . . . .436
symmetrical patterns . . . . . . . . . . . . . .436
using fills . . . . . . . . . . . . . . . . . . . . . . .434
using preset brushes . . . . . . . . . . . . . .433
using pressure-sensitive pens . . . . . . .437
using sprayed images . . . . . . . . . . . . .435
paletted color mode
dithering . . . . . . . . . . . . . . . . . . . . . . . .374
saving conversion options . . . . . . . . . .375
palettes
color . . . . . . . . . . . . . . . . . . . . . . . . . . .369
creating color palettes . . . . . . . . .371, 372
hiding . . . . . . . . . . . . . . . . . . . . . . . . . .364
moving . . . . . . . . . . . . . . . . . . . . . . . . .361
opening . . . . . . . . . . . . . . . . . . . . . . . . .361
Pan tool . . . . . . . . . . . . . . . . . . . . . . . . . . . .364
panning . . . . . . . . . . . . . . . . . . . . . . . . .363, 364
panoramas . . . . . . . . . . . . . . . . . . . . . . . . . .383
paper size
changing . . . . . . . . . . . . . . . . . . . . . . . .396
paper border . . . . . . . . . . . . . . . . . . . . .395

554 Index
Corel PHOTO-PAINT
pen tablet
configuring . . . . . . . . . . . . . . . . . . . . . .437
perspective . . . . . . . . . . . . . . . . . . . . . . . . .453
applying to objects . . . . . . . . . . . . . . . .457
photos . . . . . . . . . . . . . . . . . . . . . . . . . . . . .377
digital cameras . . . . . . . . . . . . . . .378, 379
importing . . . . . . . . . . . . . . . . . . . . . . .377
opening . . . . . . . . . . . . . . . . . . . . . . . . .377
retouching . . . . . . . . . . . . . . . . . . . . . .397
plug-ins . . . . . . . . . . . . . . . . . . . . . . . . . . . . .427
installing . . . . . . . . . . . . . . . . . . . . . . . .427
removing . . . . . . . . . . . . . . . . . . . . . . .427
Pointillism clone . . . . . . . . . . . . . . . . . . . . .402
Polygon tool . . . . . . . . . . . . . . . . . . . . . . . .430
polygons . . . . . . . . . . . . . . . . . . . . . . . . . . . .429
drawing . . . . . . . . . . . . . . . . . . . . . . . .430
Posterize effect filter . . . . . . . . . . . . . . . . .427
pressure-sensitive pens . . . . . . . . . . . . . . .437
setting attributes . . . . . . . . . . . . . . . . .437
previewing
color separations . . . . . . . . . . . . . . . . .482
hiding graphics . . . . . . . . . . . . . . . . . .482
increasing speed . . . . . . . . . . . . . . 481, 482
print jobs . . . . . . . . . . . . . . . 274, 481, 482
previews . . . . . . . . . . . . . . . . . . . . . . . . . . .363
changing image views . . . . . . . . . . . . .364
printers
color management settings . . . . . . . . .477
printing . . . . . . . . . . . . . . . . . . . . . . . . . . . . .479
changing resolution . . . . . . . . . . . . . . .394
hiding graphics in preview . . . . . . . . .482
layout . . . . . . . . . . . . . . . . . . . . . . . . . .480
page orientation . . . . . . . . . . . . . . . . . .481
preview . . . . . . . . . . . . . . . . . 274, 481, 482
tiling jobs . . . . . . . . . . . . . . . . . . . . . . .480
product updates . . . . . . . . . . . . . . . . . . . . . . .8
property bar . . . . . . . . . . . . . . . . . . . . . . . .360
extended . . . . . . . . . . . . . . . . . . . . . . . 360
protected areas . . . . . . . . . . . . . . . . . . . . . .413
distinguishing . . . . . . . . . . . . . . . . . . 413
R
Rectangle tool . . . . . . . . . . . . . . . . . . . . . . .429
rectangles . . . . . . . . . . . . . . . . . . . . . . . . . . .429
drawing . . . . . . . . . . . . . . . . . . . . . . . . 429
red-eye . . . . . . . . . . . . . . . . . . . . . . . . . . . . .398
removing . . . . . . . . . . . . . . . . . . . . . . . 398
registering Corel products . . . . . . . . . . . . . .8
removing masks . . . . . . . . . . . . . . . . . . . . .420
repairing images . . . . . . . . . . . . . . . . . . . . .397
Replace color brush tool . . . . . . . . . . . . . .407
resampling
images . . . . . . . . . . . . . . . . . . . . . . . . . 377
resampling images . . . . . . . . . . . . . . .394, 395
resizing
images . . . . . . . . . . . . . . . . . . . . . .393, 394
objects . . . . . . . . . . . . . . . . . . . . . . . . . 455
paper border . . . . . . . . . . . . . . . . . . . . 395
resolution
changing . . . . . . . . . . . . . . . . . . . . . . . 395
images . . . . . . . . . . . . . . . . . . . . . .393, 394
restoring photos . . . . . . . . . . . . . . . . . . . . .397
retouching . . . . . . . . . . . . . . . . . . . . . . . . . .397
rollovers . . . . . . . . . . . . . . . . . . . . . . . . . . . .465
creating . . . . . . . . . . . . . . . . . . . . . . . . 467
editing . . . . . . . . . . . . . . . . . . . . . .468, 469
images for the Web . . . . . . . . . . . . . . 465
removing objects . . . . . . . . . . . . . . . . 470
rotating . . . . . . . . . . . . . . . . . . . . . . . . . . . . .453
images . . . . . . . . . . . . . . . . . . . . . . . . . 385
objects . . . . . . . . . . . . . . . . . . . . . . . . . 456

Index 555
Corel PHOTO-PAINT
S
sampling
painting with image colors . . . . . . . . . 433
sampling colors . . . . . . . . . . . . . . . . . . . . . . 369
saving . . . . . . . . . . . . . . . . . . . . . . . . . . . . . . 471
auto-save settings . . . . . . . . . . . . . . . . 471
backup settings . . . . . . . . . . . . . . . . . . 471
for Web . . . . . . . . . . . . . . . . . . . . . . . . . 464
images . . . . . . . . . . . . . . . . . . . . . . . . . 471
preserving image properties . . . . . . . . 471
to different file formats . . . . . . . . 471, 472
to different locations . . . . . . . . . . . . . . 472
using different filenames . . . . . . . . . . 472
scaling objects . . . . . . . . . . . . . . . . . . . 453, 456
scanned images . . . . . . . . . . . . . . . . . . . . . 397
improving . . . . . . . . . . . . . . . . . . . 397, 398
scanners
color management settings . . . . . . . . . 475
scanning . . . . . . . . . . . . . . . . . . . . . . . . . . . . 377
images . . . . . . . . . . . . . . . . . . . . . . . . . 377
scratches . . . . . . . . . . . . . . . . . . . . . . . . . . . 399
removing . . . . . . . . . . . . . . . 399, 400, 401
seed color . . . . . . . . . . . . . . . . . . . . . . . . . . 416
selecting
objects . . . . . . . . . . . . . . . . . . . . . . . . . . 450
selections . . . . . . . . . . . . . . . . . . . . . . . . . . . 413
shadows . . . . . . . . . . . . . . . . . . . . . . . . . . . . 460
adding to objects . . . . . . . . . . . . . . . . . 461
shapes . . . . . . . . . . . . . . . . . . . . . . . . . . . . . 429
drawing rectangles and ellipses . . . . . 429
drawing triangles and polygons . . . . . 430
outlining . . . . . . . . . . . . . . . . . . . . 429, 430
rendering as objects . . . . . . . . . . . . . . . 449
shaping lenses . . . . . . . . . . . . . . . . . . . . . . . 412
Sharpen filter . . . . . . . . . . . . . . . . . . . . . . . 404
sharpening . . . . . . . . . . . . . . . . . . . . . .403, 457
edges of objects . . . . . . . . . . . . . . . . . .459
filters . . . . . . . . . . . . . . . . . . . . . . . . . . .404
image areas . . . . . . . . . . . . . . . . . . . . . .405
images . . . . . . . . . . . . . . . . . . . . . . . . . .404
size
changing image dimensions . . . . . . . .394
displaying image . . . . . . . . . . . . . . . . .393
paper border . . . . . . . . . . . . . . . . . . . . .395
skewing objects . . . . . . . . . . . . . . . . .453, 456
smearing colors . . . . . . . . . . . . . . . . .407, 408
smudging colors . . . . . . . . . . . . . . . . .407, 408
sound files
finding . . . . . . . . . . . . . . . . . . . . . . . . .377
spacing
objects . . . . . . . . . . . . . . . . . . . . . . . . . .450
special effects . . . . . . . . . . . . . . . . . . . . . . .423
applying . . . . . . . . . . . . . . . . . . . .424, 427
applying to editable areas . . . . . . . . . .425
categories . . . . . . . . . . . . . . . . . . . . . . .423
color and tone . . . . . . . . . . . . . . . . . . .426
creating preset styles . . . . . . . . . . . . . .426
deleting preset styles . . . . . . . . . . . . . .426
preset styles . . . . . . . . . . . . . . . . .425, 426
repeating . . . . . . . . . . . . . . . . . . . . . . . .425
types . . . . . . . . . . . . . . . . . . . . . . . . . . .423
spraying images . . . . . . . . . . . . . . . . . . . . . .434
choosing images . . . . . . . . . . . . . . . . .435
creating spraylists . . . . . . . . . . . . . . . .435
loading image lists . . . . . . . . . . . . . . . .435
status bar . . . . . . . . . . . . . . . . . . . . . . . . . . .362
changing information . . . . . . . . . . . . .362
stitching images . . . . . . . . . . . . . . . . . . . . .383
stylus . . . . . . . . . . . . . . . . . . . . . . . . . . . . . . .437
setting attributes . . . . . . . . . . . . . . . . .437
support

556 Index
Corel PHOTO-PAINT
Corel on the Web . . . . . . . . . . . . . . . . .12
customer feedback . . . . . . . . . . . . . . . . .11
registration . . . . . . . . . . . . . . . . . . . . . . . .8
symmetrical patterns . . . . . . . . . . . . . . . . .436
T
tablets . . . . . . . . . . . . . . . . . . . . . . . . . . . . . .437
terminology . . . . . . . . . . . . . . . . . . . . . . . 9, 351
texture fills . . . . . . . . . . . . . . . . . . . . . . . . . .444
applying . . . . . . . . . . . . . . . . . . . . . . . .444
Threshold effect filter . . . . . . . . . . . . . . . .427
tiling
bitmaps . . . . . . . . . . . . . . . . . . . . . . . . .443
tiling print jobs . . . . . . . . . . . . . . . . . . . . . .480
tone
adjusting . . . . . . . . . . . . . . . . . . . . . . . .388
correcting . . . . . . . . . . . 387, 388, 389, 409
filters . . . . . . . . . . . . . . . . . . . . . . . . . . .387
toolbars . . . . . . . . . . . . . . . . . . . . . . . . . . . .354
hiding . . . . . . . . . . . . . . . . . . . . . . . . . .364
hiding and displaying . . . . . . . . . . . . .356
standard . . . . . . . . . . . . . . . . . . . . . . . .354
toolbox . . . . . . . . . . . . . . . . . . . . . . . . . . . . .356
hiding . . . . . . . . . . . . . . . . . . . . . . . . . .364
tools and flyouts . . . . . . . . . . . . . . . . . .356
tools . . . . . . . . . . . . . . . . . . . . . . . . . . . . . . .356
Transform filters . . . . . . . . . . . . . . . . . . . .427
transformations
applying to objects . . . . . . . . . . . . . . . .453
triangles
drawing . . . . . . . . . . . . . . . . . . . . . . . .430
tutorials . . . . . . . . . . . . . . . . . . . . . . . . . . . . .11
accessing . . . . . . . . . . . . . . . . . . . . . . . . .11
U
Undo brush tool . . . . . . . . . . . . . . . . . . . . .406
undoing . . . . . . . . . . . . . . . . . . . . . . . . . . . . .405
part of an action . . . . . . . . . . . . . . . . . 406
uniform fills . . . . . . . . . . . . . . . . . . . . . . . . .439
uninstalling applications . . . . . . . . . . . . . . .6, 7
Unsharp mask filter . . . . . . . . . . . . . . . . . .404
updating Corel products . . . . . . . . . . . . . . . .8
upsampling images . . . . . . . . . . . . . . .394, 395
user interface
changing the language . . . . . . . . . . . . . 7
V
VBA
help . . . . . . . . . . . . . . . . . . . . . . . . . . . . 11
vector graphics . . . . . . . . . . . . . . . . . . . . . .379
importing . . . . . . . . . . . . . . . . . . . . . . 380
opening . . . . . . . . . . . . . . . . . . . . . . . . 380
video images . . . . . . . . . . . . . . . . . . . . . . . .397
improving . . . . . . . . . . . . . . . . . . .397, 398
viewing . . . . . . . . . . . . . . . . . . . . . . . . . . . . .363
areas outside image window . . . . . . . 364
changing image view . . . . . . . . . . . . . 363
cursor coordinates . . . . . . . . . . . . . . . 365
full-screen . . . . . . . . . . . . . . . . . . . . . . 364
hiding windows . . . . . . . . . . . . . . . . . 364
image information . . . . . . . . . . . .365, 366
panning . . . . . . . . . . . . . . . . . . . . . . . . 363
W
Web
exporting images . . . . . . . . . . . . .463, 464
image resolution . . . . . . . . . . . . . . . . 394
optimizing images . . . . . . . . . . . .463, 464
rollovers . . . . . . . . . . . . . . . . . . . . . . . 465

Index 557
Corel PHOTO-PAINT
support . . . . . . . . . . . . . . . . . . . . . . . . . . 12
windows
hiding . . . . . . . . . . . . . . . . . . . . . . . . . . 364
work area
changing view . . . . . . . . . . . . . . . . . . . 363
Z
Zoom tool . . . . . . . . . . . . . . . . . . . . . . . . . . 365
zooming . . . . . . . . . . . . . . . . . . . . . . . . 363, 365
changing magnification level . . . . . . . 365
returning to previous zoom level . . . . 365
viewing areas outside image window 364
