Corel Painter 2015 User Guide Instruction Manual Ug En
User Manual: corel Painter - 2015 - Instruction Manual Free User Guide for Corel Painter Software, Manual
Open the PDF directly: View PDF ![]() .
.
Page Count: 968 [warning: Documents this large are best viewed by clicking the View PDF Link!]
- Contents
- Welcome to Corel Painter
- What’s new in Corel Painter 2015
- Workspace tour
- Corel Painter terms
- Exploring the Document window
- Choosing a workspace layout
- Exploring the toolbox
- Displaying the toolbox
- Displaying the Media Selector bar
- Displaying the property bar
- Exploring the Navigator panel
- Displaying the Brush Selector bar and the Brush library panel
- Displaying the command bar
- Exploring panels and palettes
- Rearranging panels and palettes
- Creating and modifying custom palettes
- Managing custom palettes
- Working with libraries
- Creating, importing, exporting, and deleting workspaces
- Restoring the default Corel Painter settings
- A short tour of Corel Painter for users of Adobe Photoshop
- Creating, navigating, and manipulating documents
- Creating documents
- Understanding resolution
- Opening and placing files
- Creating and opening templates
- Switching document views
- Navigating images and viewing image information
- Zooming images
- Rotating images and the canvas
- Flipping images
- Repositioning images
- Cropping images
- Resizing images and the canvas
- Saving and backing up files
- Choosing a file format
- Emailing documents
- Closing documents and quitting the application
- Using two monitors
- Support for tablets and other devices
- Multi-touch support
- Wacom Intuos support
- Drag-and-drop features
- Keyboard shortcuts
- Customizing keys
- Toolbox commands
- Panel commands
- Corel Painter menu commands
- File menu commands
- Edit menu commands
- Canvas menu commands
- Layers menu commands
- Select menu commands
- Shapes menu commands
- Effects menu commands
- Window menu commands
- Screen navigation
- Panel navigation
- Panel menu commands
- Brush tools
- Selection tools
- Adjuster tools
- Shape tools
- Animation
- Lighting
- Layer selection tools
- Mosaics
- Other commands
- Painting
- Choosing a painting workflow
- Brush tracking and calibration
- Exploring painting media
- Working with the canvas and layers
- Displaying reference images
- Clearing the canvas
- Setting up the drawing cursor
- Using a stylus vs. a mouse
- Applying freehand and straight brushstrokes
- Constraining, fading, and undoing strokes
- Erasing image areas
- Aligning brushstrokes to paths and shapes
- Letting media pool
- Making 360° strokes
- Painting with airbrushes
- Adjusting spread
- Recording and playing back brushstrokes
- Reference: Troubleshooting
- Working with paper texture and grain
- Auto-painting photos
- Image cloning and sampling
- Cloning images
- Using Quick Clone
- Setting cloning preferences
- Working with multiple clone sources
- Editing, updating, saving, and exporting clone source images
- Painting in the clone
- Using brush loading
- Performing offset sampling
- Applying transformations when sampling
- Using selections and transformations when sampling
- Filling an area with a sampled image
- Working with composition tools, symmetry tools, rulers, and guides
- Color
- Choosing colors from the Color panel
- Resizing the Color panel
- Showing or hiding Color panel components
- Using the temporal colors palette
- Changing the paper color
- Sampling colors from images
- Cloning color
- Creating two-color brushstrokes
- Exploring the Mixer panel and mixing controls
- Displaying and resizing the Mixer panel
- Mixing, sampling, and applying colors from the Mixer pad
- Opening images in the Mixer panel
- Changing and saving the Mixer color swatches
- Saving Mixer panel colors to a color set
- Clearing and resetting Mixer panel colors
- Saving the Mixer pad
- Loading color swatches and Mixer pad files
- Working with color sets
- Customizing the layouts of color sets
- Creating and exporting color sets
- Editing color sets
- Setting color variability
- Setting Color Expression
- Loading multiple colors
- Working with color fills
- Applying a color as a fill
- Limiting and preventing leakage
- Color management
- Understanding color management
- Specifying the default RGB color profile
- Embedding color profiles when saving files
- Specifying the default CMYK color profile for converting CMYK images to RGB
- Previewing and soft-proofing color profiles
- Assigning or removing color profiles
- Converting color profiles
- Working with color profile policies
- Working with presets
- Correcting and adjusting colors
- Correcting colors using curves
- Adjusting brightness and contrast
- Using the curve to correct colors
- Drawing freehand curves to adjust colors
- Specifying the curve values to adjust colors
- Adjusting hue, saturation, and value
- Adjusting selected colors
- Equalizing images
- Matching color and brightness across images
- Inverting colors
- Posterizing an image
- Applying video legal colors
- Dodging and burning
- Libraries
- Selecting, managing, and creating brushes
- Understanding brushes
- Exploring brush categories
- Searching and selecting brushes
- Setting basic brush attributes
- Displaying advanced brush controls dynamically
- Organizing and displaying brushes in the Brush library panel
- Copying and moving brush variants
- Renaming brush categories and variants
- Saving and deleting brush variants
- Restoring default brush variants
- Creating and deleting brush categories
- Creating and deleting brush libraries
- Importing and exporting brush libraries, categories, and variants
- Saving a brush look
- Creating brush dabs
- Adjusting brushes with brush controls
- Exploring Brush Controls
- Expression settings
- Previewing brushstrokes and brush dabs
- Calibrating brush variants
- General controls
- General controls: Dab types
- General controls: Stroke types
- General controls: Methods and subcategories
- General controls: Source
- General controls: Multicore
- Opacity controls
- Grain controls
- Stroke Attribute controls
- Size controls
- Angle controls
- Spacing controls
- Changing dab profiles
- Real Watercolor controls
- Real Wet Oil controls
- Computed Circular controls
- Hard Media controls
- Bristle controls
- RealBristle controls
- Static Bristle controls
- Airbrush controls
- Artists’ Oils controls
- Impasto controls
- Digital Watercolor controls
- Water controls
- Liquid Ink controls
- Stroke Jitter controls
- Well controls
- Mouse controls
- Smoothing controls
- Image Hose controls
- Rake controls
- Multi controls
- Cloning controls
- Color Variability controls
- Color Expression controls
- Jitter brushes
- Watercolor
- Particle brushes
- Applying and adjusting flow maps
- Hard Media
- Markers
- Image hose
- Using the Image hose
- Adjusting Image hose opacity and grain
- Adjusting the size and spacing of image hose elements
- Indexing nozzle files
- Understanding nozzles, ranks, and indexing
- Creating a 1-Rank nozzle
- Creating a 2-Rank nozzle
- Creating a 3-Rank nozzle
- Loading and managing nozzle files
- Creating a nozzle from a movie
- RealBristle brushes
- Liquid Ink
- Impasto
- Layers
- Getting started with layers
- Displaying the Layers panel
- Creating and deleting layers
- Converting selections into layers or floating objects
- Naming and adding notes to layers
- Selecting layers
- Copying and duplicating layers
- Moving layers
- Transforming layers
- Aligning layers
- Locking layers
- Showing or hiding layers
- Changing layer order
- Viewing layer position
- Grouping layers
- Dropping layers with the canvas
- Painting on layers
- Preserving layer transparency
- Adjusting layer opacity
- Adding drop shadows to layers
- Blending layers by using composite methods
- Creating and deleting layer masks
- Applying layer masks
- Loading layer masks to selections
- Selecting and viewing layer masks
- Enabling and disabling layers masks
- Copying layer masks
- Inverting layer masks
- Editing layer masks
- Importing and exporting layers
- Working with reference layers
- Storing layers as images in the Image Portfolio
- Alpha Channels
- Selections and transformations
- Getting started with selections
- Creating path-based selections
- Creating pixel-based selections
- Creating selections from layers
- Choosing the protected area of a selection
- Saving selections as alpha channels
- Working with the Selection Portfolio
- Viewing selections
- Inverting selections
- Softening the edges of selections
- Stroking selections
- Modifying the borders of selections
- Expanding or contracting selections
- Adding to or subtracting from selections
- Preparing selections for transformations
- Moving selections
- Transforming a duplicate selection
- Scaling and rotating path-based selections
- Skewing and distorting path-based selections
- Canceling transformations
- Common options for effects
- Using focus and esoterica effects
- Applying Smart Blur
- Applying Camera Motion Blur
- Applying Depth of Field
- Applying Glass Distortion
- Applying Motion Blur
- Sharpening focus
- Softening focus
- Applying Zoom Blur
- Applying Marbling
- Automatically cloning an image
- Applying the Auto Van Gogh effect
- Applying Blobs
- Creating custom tiles
- Applying Grid Paper
- Applying Growth effects
- Applying Highpass
- Applying the Maze effect
- Placing elements
- Applying the Pop Art Fill effect
- Using lighting and surface texture effects
- Applying preset lighting effects
- Adding, deleting, and repositioning lights
- Adjusting light properties
- Using paper to create texture
- Using 3D brushstrokes to create texture
- Using image luminance to create texture
- Using clone source or pattern luminance to create texture
- Creating embossed effects
- Using channels and layer masks to create texture
- Creating reflection maps
- Adjusting texture lighting
- Apply Surface Texture controls
- Applying the Apply Screen effect
- Applying the Color Overlay effect
- Applying the Dye Concentration effect
- Applying the Express Texture effect
- Applying a warp effect
- Applying the Woodcut effect
- Applying the Distress effect
- Applying the Serigraphy effect
- Applying the Sketch effect
- Dynamic Plug-ins
- Getting started with dynamic plug-ins
- Modifying and deleting dynamic layers
- Committing dynamic layers to default layers
- Applying the Brightness and Contrast dynamic plug-in
- Applying the Burn dynamic plug-in
- Applying the Tear dynamic plug-in
- Applying the Bevel World dynamic plug-in
- Applying the Equalize dynamic plug-in
- Applying the Glass Distortion dynamic plug-in
- Applying the Kaleidoscope dynamic plug-in
- Applying the Liquid Lens dynamic plug-in
- Applying the Liquid Metal dynamic plug-in
- Applying the Posterize dynamic plug-in
- Patterns
- Gradients
- Mosaics and tessellations
- Weaves
- Shapes
- Getting started with shapes
- Drawing shapes
- Drawing lines and curves
- Setting preferences for drawing shapes
- Selecting a shape
- Modifying shape outlines and fills
- Adding, deleting, and moving anchor points
- Adjusting curvature
- Cutting and joining shape segments
- Converting shapes to image layers
- Converting selections to shapes
- Resizing, rotating, skewing, and flipping shapes
- Duplicating shapes
- Combining shapes
- Blending shapes
- Saving a shape outline as a selection
- Exporting Adobe Illustrator shapes
- Adding text
- Working with animation and digital videos
- Choosing an animation workflow
- Creating frame-by-frame animation
- Opening a Corel Painter movie
- Importing QuickTime and AVI files
- Selecting movie frames
- Editing frame content
- Applying effects to a single frame
- Previewing animations
- Using onion skinning
- Animating with layers
- Adding, deleting, and erasing frames
- Repeating frames
- Inserting movies
- Rotoscoping
- Applying scripts to movies
- Exporting movies as QuickTime
- Exporting movies as AVI
- Importing and exporting numbered files
- Exporting animated GIFs
- Using scripts to automate tasks
- Getting started with scripts
- Displaying the Scripts panel
- Recording and playing scripts
- Enabling and playing background scripts
- Creating resolution-independent scripts
- Editing, renaming, and deleting scripts
- Converting scripts to movies
- Importing and exporting scripts
- Importing and exporting script libraries
- Creating and deleting script libraries
- Printing images
- Notes for users of Adobe Photoshop
- Setting preferences
- Web
- Index
Copyright 2014 Corel Corporation. All rights reserved.
Corel® Painter® 2015 User Guide
The contents of this user guide and the associated Corel Painter software are the property of Corel
Corporation and its respective licensors, and are protected by copyright. For more complete copyright
information about Corel Painter, please refer to the About Corel Painter section in the Help menu of the
software.
Product specifications, pricing, packaging, technical support and information (“specifications”) refer to the
retail English version only. The specifications for all other versions (including other language versions) may
vary.
Information is provided by Corel on an “as is” basis, without any other warranties or conditions, express
or implied, including, but not limited to, warranties of merchantable quality, satisfactory quality,
merchantability or fitness for a particular purpose, or those arising by law, statute, usage of trade, course
of dealing or otherwise. The entire risk as to the results of the information provided or its use is assumed
by you. Corel shall have no liability to you or any other person or entity for any indirect, incidental, special,
or consequential damages whatsoever, including, but not limited to, loss of revenue or profit, lost or
damaged data or other commercial or economic loss, even if Corel has been advised of the possibility of
such damages, or they are foreseeable. Corel is also not liable for any claims made by any third party. Corel's
maximum aggregate liability to you shall not exceed the costs paid by you to purchase the materials. Some
states/countries do not allow exclusions or limitations of liability for consequential or incidental damages, so
the above limitations may not apply to you.
Corel, the Corel balloon logo, the Corel logo and balloon logo combination, Painter, Cinco, CorelDRAW,
Natural-Media, PaintShop, RealBristle, VideoStudio and WordPerfect are trademarks or registered
trademarks of Corel Corporation and/or its subsidiaries in Canada, the U.S., and/or other countries.
Other product, font, and company names and logos may be trademarks or registered trademarks of their
respective companies. Patents: www.corel.com/patent
Sample artwork is provided by third parties not affiliated with Corel and used by permission.
110064
Contents | 1
Contents
Welcome to Corel Painter..................................................................................................................... 1
Using the documentation.....................................................................................................................1
Adjusting the Help window text size....................................................................................................4
Additional resources............................................................................................................................. 5
Registration.......................................................................................................................................... 5
Corel Cinco for Painter......................................................................................................................... 6
Feedback.............................................................................................................................................. 7
About Corel Corporation...................................................................................................................... 7
What’s new in Corel Painter 2015........................................................................................................9
Revolutionary digital brushes................................................................................................................ 9
Enhanced speed and performance..................................................................................................... 11
A fully responsive experience.............................................................................................................. 12
Mobile art that moves you.................................................................................................................13
What was new in earlier versions of Corel Painter.............................................................................. 13
Workspace tour...................................................................................................................................23
Corel Painter terms.............................................................................................................................24
Exploring the Document window....................................................................................................... 26
Choosing a workspace layout.............................................................................................................29
Exploring the toolbox......................................................................................................................... 31
Displaying the toolbox........................................................................................................................37
Displaying the Media Selector bar...................................................................................................... 38
2 | Corel Painter 2015 User Guide
Displaying the property bar................................................................................................................ 39
Exploring the Navigator panel............................................................................................................ 40
Displaying the Brush Selector bar and the Brush library panel.............................................................41
Displaying the command bar............................................................................................................. 43
Exploring panels and palettes.............................................................................................................43
Rearranging panels and palettes.........................................................................................................49
Creating and modifying custom palettes............................................................................................ 53
Managing custom palettes................................................................................................................. 55
Working with libraries........................................................................................................................ 56
Creating, importing, exporting, and deleting workspaces................................................................... 57
Restoring the default Corel Painter settings........................................................................................ 58
A short tour of Corel Painter for users of Adobe Photoshop..............................................................61
Creating, navigating, and manipulating documents...........................................................................67
Creating documents........................................................................................................................... 68
Understanding resolution................................................................................................................... 70
Opening and placing files.................................................................................................................. 71
Creating and opening templates........................................................................................................ 74
Switching document views................................................................................................................. 74
Navigating images and viewing image information............................................................................ 75
Zooming images.................................................................................................................................77
Rotating images and the canvas.........................................................................................................80
Flipping images.................................................................................................................................. 82
Repositioning images..........................................................................................................................84
Contents | 3
Cropping images................................................................................................................................ 85
Resizing images and the canvas......................................................................................................... 86
Saving and backing up files............................................................................................................... 88
Choosing a file format....................................................................................................................... 89
Emailing documents........................................................................................................................... 91
Closing documents and quitting the application................................................................................ 92
Using two monitors........................................................................................................................... 93
Support for tablets and other devices................................................................................................ 93
Multi-touch support........................................................................................................................... 93
Wacom Intuos support.......................................................................................................................96
Drag-and-drop features...................................................................................................................... 97
Keyboard shortcuts............................................................................................................................. 99
Customizing keys..............................................................................................................................101
Toolbox commands.......................................................................................................................... 104
Panel commands.............................................................................................................................. 107
Corel Painter menu commands.........................................................................................................107
File menu commands....................................................................................................................... 108
Edit menu commands...................................................................................................................... 108
Canvas menu commands................................................................................................................. 109
Layers menu commands................................................................................................................... 110
Select menu commands................................................................................................................... 110
Shapes menu commands................................................................................................................. 111
Effects menu commands.................................................................................................................. 111
4 | Corel Painter 2015 User Guide
Window menu commands............................................................................................................... 111
Screen navigation............................................................................................................................. 112
Panel navigation............................................................................................................................... 112
Panel menu commands.................................................................................................................... 113
Brush tools....................................................................................................................................... 114
Selection tools.................................................................................................................................. 116
Adjuster tools................................................................................................................................... 116
Shape tools...................................................................................................................................... 118
Animation........................................................................................................................................ 120
Lighting............................................................................................................................................ 120
Layer selection tools......................................................................................................................... 121
Mosaics............................................................................................................................................ 121
Other commands............................................................................................................................. 121
Painting............................................................................................................................................. 123
Choosing a painting workflow......................................................................................................... 124
Brush tracking and calibration..........................................................................................................126
Exploring painting media..................................................................................................................131
Working with the canvas and layers.................................................................................................132
Displaying reference images............................................................................................................. 133
Clearing the canvas.......................................................................................................................... 134
Setting up the drawing cursor......................................................................................................... 134
Using a stylus vs. a mouse............................................................................................................... 136
Applying freehand and straight brushstrokes....................................................................................138
Constraining, fading, and undoing strokes....................................................................................... 140
Contents | 5
Erasing image areas......................................................................................................................... 141
Aligning brushstrokes to paths and shapes...................................................................................... 142
Letting media pool...........................................................................................................................143
Making 360° strokes........................................................................................................................ 144
Painting with airbrushes................................................................................................................... 144
Adjusting spread.............................................................................................................................. 145
Recording and playing back brushstrokes......................................................................................... 147
Reference: Troubleshooting...............................................................................................................149
Working with paper texture and grain............................................................................................. 151
Applying paper texture.....................................................................................................................152
Creating and deleting paper textures................................................................................................153
Opening and managing the Paper Textures library............................................................................155
Inverting and scaling paper grain..................................................................................................... 155
Controlling brightness and contrast of paper grain.......................................................................... 157
Adjusting grain direction and behavior.............................................................................................157
Auto-painting photos........................................................................................................................159
Creating underpaintings................................................................................................................... 160
Auto-painting photos....................................................................................................................... 162
Restoring detail to paintings.............................................................................................................165
Image cloning and sampling............................................................................................................ 167
Cloning images................................................................................................................................ 167
Using Quick Clone............................................................................................................................171
6 | Corel Painter 2015 User Guide
Setting cloning preferences.............................................................................................................. 172
Working with multiple clone sources................................................................................................173
Editing, updating, saving, and exporting clone source images.......................................................... 174
Painting in the clone........................................................................................................................ 176
Using brush loading.........................................................................................................................179
Performing offset sampling.............................................................................................................. 179
Applying transformations when sampling.........................................................................................182
Using selections and transformations when sampling.......................................................................191
Filling an area with a sampled image...............................................................................................193
Working with composition tools, symmetry tools, rulers, and guides.............................................. 195
Using the Layout Grid...................................................................................................................... 196
Using the Mirror Painting mode....................................................................................................... 198
Using the Kaleidoscope Painting mode.............................................................................................201
Using Perspective Guides.................................................................................................................. 203
Using the Divine Proportion tool...................................................................................................... 208
Using rulers......................................................................................................................................211
Using guides.................................................................................................................................... 212
Using Snap to Guides...................................................................................................................... 213
Using the grid.................................................................................................................................. 214
Using Snap to Grid.......................................................................................................................... 215
Color................................................................................................................................................. 217
Choosing colors from the Color panel.............................................................................................. 218
Resizing the Color panel...................................................................................................................221
Contents | 7
Showing or hiding Color panel components.....................................................................................221
Using the temporal colors palette.................................................................................................... 222
Changing the paper color................................................................................................................ 223
Sampling colors from images........................................................................................................... 223
Cloning color....................................................................................................................................224
Creating two-color brushstrokes....................................................................................................... 224
Exploring the Mixer panel and mixing controls................................................................................. 226
Displaying and resizing the Mixer panel........................................................................................... 228
Mixing, sampling, and applying colors from the Mixer pad.............................................................. 229
Opening images in the Mixer panel................................................................................................. 231
Changing and saving the Mixer color swatches................................................................................ 232
Saving Mixer panel colors to a color set...........................................................................................232
Clearing and resetting Mixer panel colors.........................................................................................233
Saving the Mixer pad....................................................................................................................... 234
Loading color swatches and Mixer pad files..................................................................................... 234
Working with color sets................................................................................................................... 235
Customizing the layouts of color sets...............................................................................................236
Creating and exporting color sets.....................................................................................................237
Editing color sets..............................................................................................................................238
Setting color variability.....................................................................................................................240
Setting Color Expression................................................................................................................... 240
Loading multiple colors.................................................................................................................... 240
Working with color fills.................................................................................................................... 241
8 | Corel Painter 2015 User Guide
Applying a color as a fill.................................................................................................................. 242
Limiting and preventing leakage.......................................................................................................244
Color management........................................................................................................................... 247
Understanding color management................................................................................................... 247
Specifying the default RGB color profile........................................................................................... 251
Embedding color profiles when saving files...................................................................................... 252
Specifying the default CMYK color profile for converting CMYK images to RGB.................................253
Previewing and soft-proofing color profiles...................................................................................... 253
Assigning or removing color profiles................................................................................................ 254
Converting color profiles.................................................................................................................. 255
Working with color profile policies................................................................................................... 256
Working with presets....................................................................................................................... 257
Correcting and adjusting colors........................................................................................................259
Correcting colors using curves.......................................................................................................... 260
Adjusting brightness and contrast.................................................................................................... 261
Using the curve to correct colors......................................................................................................264
Drawing freehand curves to adjust colors.........................................................................................266
Specifying the curve values to adjust colors......................................................................................267
Adjusting hue, saturation, and value................................................................................................268
Adjusting selected colors.................................................................................................................. 271
Equalizing images.............................................................................................................................274
Matching color and brightness across images.................................................................................. 276
Inverting colors.................................................................................................................................277
Contents | 9
Posterizing an image........................................................................................................................ 278
Applying video legal colors...............................................................................................................279
Dodging and burning.......................................................................................................................279
Libraries.............................................................................................................................................281
Importing and exporting libraries..................................................................................................... 281
Creating and removing libraries........................................................................................................282
Modifying the display of library panels.............................................................................................283
Moving, renaming, and deleting library resources............................................................................ 285
Restoring default libraries................................................................................................................. 285
Selecting, managing, and creating brushes...................................................................................... 287
Understanding brushes.....................................................................................................................288
Exploring brush categories............................................................................................................... 288
Searching and selecting brushes.......................................................................................................304
Setting basic brush attributes........................................................................................................... 306
Displaying advanced brush controls dynamically...............................................................................310
Organizing and displaying brushes in the Brush library panel........................................................... 310
Copying and moving brush variants................................................................................................. 312
Renaming brush categories and variants.......................................................................................... 312
Saving and deleting brush variants...................................................................................................313
Restoring default brush variants....................................................................................................... 315
Creating and deleting brush categories............................................................................................ 315
Creating and deleting brush libraries................................................................................................ 316
10 | Corel Painter 2015 User Guide
Importing and exporting brush libraries, categories, and variants..................................................... 317
Saving a brush look......................................................................................................................... 321
Creating brush dabs......................................................................................................................... 321
Adjusting brushes with brush controls............................................................................................. 325
Exploring Brush Controls.................................................................................................................. 326
Expression settings........................................................................................................................... 327
Previewing brushstrokes and brush dabs.......................................................................................... 329
Calibrating brush variants.................................................................................................................330
General controls............................................................................................................................... 332
General controls: Dab types............................................................................................................. 332
General controls: Stroke types.......................................................................................................... 337
General controls: Methods and subcategories.................................................................................. 339
General controls: Source.................................................................................................................. 342
General controls: Multicore.............................................................................................................. 343
Opacity controls............................................................................................................................... 343
Grain controls...................................................................................................................................345
Stroke Attribute controls.................................................................................................................. 347
Size controls.....................................................................................................................................349
Angle controls.................................................................................................................................. 353
Spacing controls...............................................................................................................................357
Changing dab profiles...................................................................................................................... 359
Real Watercolor controls.................................................................................................................. 362
Real Wet Oil controls....................................................................................................................... 367
Computed Circular controls.............................................................................................................. 373
Contents | 11
Hard Media controls.........................................................................................................................373
Bristle controls..................................................................................................................................374
RealBristle controls........................................................................................................................... 375
Static Bristle controls........................................................................................................................ 375
Airbrush controls.............................................................................................................................. 378
Artists’ Oils controls......................................................................................................................... 381
Impasto controls.............................................................................................................................. 385
Digital Watercolor controls...............................................................................................................385
Water controls..................................................................................................................................385
Liquid Ink controls............................................................................................................................390
Stroke Jitter controls.........................................................................................................................397
Well controls.................................................................................................................................... 398
Mouse controls................................................................................................................................ 401
Smoothing controls.......................................................................................................................... 402
Image Hose controls........................................................................................................................ 403
Rake controls....................................................................................................................................403
Multi controls...................................................................................................................................407
Cloning controls............................................................................................................................... 407
Color Variability controls...................................................................................................................415
Color Expression controls..................................................................................................................417
Jitter brushes.....................................................................................................................................419
Choosing a Jitter brush variant.........................................................................................................419
Controlling the behavior of Jitter variants.........................................................................................422
12 | Corel Painter 2015 User Guide
Watercolor.........................................................................................................................................423
Working with the Watercolor layer...................................................................................................424
Watercolor brushes and paper texture interaction............................................................................ 425
Working with Real Watercolor brushes.............................................................................................426
Working with Watercolor brushes.................................................................................................... 427
Working with Digital Watercolor brushes......................................................................................... 428
Particle brushes................................................................................................................................. 431
The New Brushes workspace layout..................................................................................................432
Gravity Particle brushes.....................................................................................................................432
Flow Particle brushes........................................................................................................................ 435
Spring Particle brushes..................................................................................................................... 438
General Particle brush controls......................................................................................................... 442
Info palettes..................................................................................................................................... 447
Applying and adjusting flow maps...................................................................................................449
Getting started with flow maps....................................................................................................... 449
Choosing flow maps and compatible brush variants.........................................................................450
Enabling flow maps and controlling flow resistance......................................................................... 452
Customizing flow maps....................................................................................................................453
Hard Media....................................................................................................................................... 457
Choosing a Hard Media variant........................................................................................................457
Modifying Hard Media profiles.........................................................................................................460
Controlling the behavior of Hard Media variants.............................................................................. 462
Contents | 13
Previewing Hard Media dabs............................................................................................................ 463
Markers............................................................................................................................................. 465
Getting started with markers............................................................................................................465
Customizing markers........................................................................................................................ 467
Image hose....................................................................................................................................... 469
Using the Image hose...................................................................................................................... 470
Adjusting Image hose opacity and grain.......................................................................................... 471
Adjusting the size and spacing of image hose elements................................................................... 473
Indexing nozzle files.........................................................................................................................474
Understanding nozzles, ranks, and indexing.....................................................................................476
Creating a 1-Rank nozzle................................................................................................................. 479
Creating a 2-Rank nozzle................................................................................................................. 481
Creating a 3-Rank nozzle................................................................................................................. 483
Loading and managing nozzle files.................................................................................................. 485
Creating a nozzle from a movie....................................................................................................... 487
RealBristle brushes............................................................................................................................ 491
Getting started with RealBristle brushes........................................................................................... 492
Modifying RealBristle settings........................................................................................................... 492
Liquid Ink.......................................................................................................................................... 497
Working with Liquid Ink brushes......................................................................................................497
Adjusting attributes of the Liquid Ink layer.......................................................................................498
14 | Corel Painter 2015 User Guide
Using Liquid Ink controls..................................................................................................................498
Impasto............................................................................................................................................. 501
Applying, displaying, and clearing impasto.......................................................................................501
Adjusting and creating Impasto brushes...........................................................................................503
Adjusting Impasto lighting and depth.............................................................................................. 507
Blending impasto with other layers.................................................................................................. 510
Layers................................................................................................................................................ 513
Getting started with layers............................................................................................................... 514
Displaying the Layers panel.............................................................................................................. 517
Creating and deleting layers............................................................................................................. 520
Converting selections into layers or floating objects..........................................................................521
Naming and adding notes to layers................................................................................................. 523
Selecting layers.................................................................................................................................524
Copying and duplicating layers.........................................................................................................526
Moving layers................................................................................................................................... 528
Transforming layers...........................................................................................................................530
Aligning layers..................................................................................................................................532
Locking layers................................................................................................................................... 533
Showing or hiding layers..................................................................................................................533
Changing layer order........................................................................................................................534
Viewing layer position...................................................................................................................... 536
Grouping layers................................................................................................................................ 536
Dropping layers with the canvas...................................................................................................... 539
Contents | 15
Painting on layers.............................................................................................................................539
Preserving layer transparency............................................................................................................541
Adjusting layer opacity..................................................................................................................... 542
Adding drop shadows to layers........................................................................................................543
Blending layers by using composite methods................................................................................... 543
Creating and deleting layer masks....................................................................................................552
Applying layer masks........................................................................................................................554
Loading layer masks to selections.....................................................................................................555
Selecting and viewing layer masks....................................................................................................555
Enabling and disabling layers masks.................................................................................................556
Copying layer masks.........................................................................................................................557
Inverting layer masks........................................................................................................................557
Editing layer masks...........................................................................................................................558
Importing and exporting layers.........................................................................................................558
Working with reference layers.......................................................................................................... 559
Storing layers as images in the Image Portfolio................................................................................ 561
Alpha Channels................................................................................................................................. 563
Creating and copying channels.........................................................................................................564
Generating channels automatically................................................................................................... 565
Importing and exporting alpha channels.......................................................................................... 567
Selecting and viewing channels........................................................................................................ 567
Setting channel attributes................................................................................................................ 570
Deleting and clearing channels.........................................................................................................571
16 | Corel Painter 2015 User Guide
Editing channels............................................................................................................................... 571
Selections and transformations.........................................................................................................577
Getting started with selections......................................................................................................... 578
Creating path-based selections......................................................................................................... 580
Creating pixel-based selections......................................................................................................... 583
Creating selections from layers......................................................................................................... 586
Choosing the protected area of a selection...................................................................................... 588
Saving selections as alpha channels..................................................................................................588
Working with the Selection Portfolio................................................................................................ 592
Viewing selections............................................................................................................................ 593
Inverting selections........................................................................................................................... 594
Softening the edges of selections.....................................................................................................594
Stroking selections............................................................................................................................595
Modifying the borders of selections................................................................................................. 596
Expanding or contracting selections................................................................................................. 597
Adding to or subtracting from selections......................................................................................... 598
Preparing selections for transformations...........................................................................................600
Moving selections.............................................................................................................................600
Transforming a duplicate selection................................................................................................... 602
Scaling and rotating path-based selections.......................................................................................602
Skewing and distorting path-based selections.................................................................................. 604
Canceling transformations................................................................................................................ 606
Contents | 17
Common options for effects.............................................................................................................609
Fading effects...................................................................................................................................609
Applying recently used effects.......................................................................................................... 610
Changing effects with open panels.................................................................................................. 611
Applying effects using source luminance..........................................................................................611
Using focus and esoterica effects..................................................................................................... 613
Applying Smart Blur......................................................................................................................... 614
Applying Camera Motion Blur.......................................................................................................... 614
Applying Depth of Field................................................................................................................... 615
Applying Glass Distortion................................................................................................................. 618
Applying Motion Blur....................................................................................................................... 622
Sharpening focus..............................................................................................................................623
Softening focus................................................................................................................................ 624
Applying Zoom Blur......................................................................................................................... 625
Applying Marbling............................................................................................................................626
Automatically cloning an image....................................................................................................... 628
Applying the Auto Van Gogh effect................................................................................................. 629
Applying Blobs................................................................................................................................. 630
Creating custom tiles........................................................................................................................632
Applying Grid Paper......................................................................................................................... 636
Applying Growth effects...................................................................................................................636
Applying Highpass............................................................................................................................638
18 | Corel Painter 2015 User Guide
Applying the Maze effect................................................................................................................. 639
Placing elements...............................................................................................................................640
Applying the Pop Art Fill effect........................................................................................................ 642
Using lighting and surface texture effects........................................................................................645
Applying preset lighting effects........................................................................................................ 646
Adding, deleting, and repositioning lights........................................................................................647
Adjusting light properties................................................................................................................. 648
Using paper to create texture...........................................................................................................649
Using 3D brushstrokes to create texture...........................................................................................650
Using image luminance to create texture......................................................................................... 651
Using clone source or pattern luminance to create texture............................................................... 652
Creating embossed effects................................................................................................................653
Using channels and layer masks tocreate texture.............................................................................654
Creating reflection maps.................................................................................................................. 655
Adjusting texture lighting................................................................................................................. 657
Apply Surface Texture controls..........................................................................................................659
Applying the Apply Screen effect..................................................................................................... 660
Applying the Color Overlay effect.....................................................................................................660
Applying the Dye Concentration effect............................................................................................. 663
Applying the Express Texture effect.................................................................................................. 666
Applying a warp effect.....................................................................................................................668
Applying the Woodcut effect........................................................................................................... 670
Applying the Distress effect.............................................................................................................. 672
Applying the Serigraphy effect......................................................................................................... 674
Contents | 19
Applying the Sketch effect............................................................................................................... 676
Dynamic Plug-ins...............................................................................................................................679
Getting started with dynamic plug-ins..............................................................................................680
Modifying and deleting dynamic layers............................................................................................ 681
Committing dynamic layers to default layers.................................................................................... 681
Applying the Brightness and Contrast dynamic plug-in.....................................................................682
Applying the Burn dynamic plug-in.................................................................................................. 683
Applying the Tear dynamic plug-in................................................................................................... 684
Applying the Bevel World dynamic plug-in.......................................................................................686
Applying the Equalize dynamic plug-in.............................................................................................688
Applying the Glass Distortion dynamic plug-in................................................................................. 690
Applying the Kaleidoscope dynamic plug-in..................................................................................... 691
Applying the Liquid Lens dynamic plug-in........................................................................................ 693
Applying the Liquid Metal dynamic plug-in...................................................................................... 698
Applying the Posterize dynamic plug-in............................................................................................706
Patterns............................................................................................................................................. 709
Applying pattern fills........................................................................................................................ 709
Painting with patterns...................................................................................................................... 711
Creating and editing patterns...........................................................................................................714
Creating seamless patterns............................................................................................................... 717
Creating fractal patterns...................................................................................................................719
20 | Corel Painter 2015 User Guide
Gradients...........................................................................................................................................723
Applying gradients........................................................................................................................... 723
Replacing image colors with gradient colors.....................................................................................726
Adjusting gradients.......................................................................................................................... 727
Creating and editing gradients......................................................................................................... 729
Saving gradients............................................................................................................................... 733
Mosaics and tessellations..................................................................................................................735
Creating a mosaic............................................................................................................................ 736
Selecting and removing tiles.............................................................................................................739
Specifying tile and grout color......................................................................................................... 741
Adjusting mosaic tile dimensions and randomness........................................................................... 742
Filling an area with tiles................................................................................................................... 746
Creating 3D tiles.............................................................................................................................. 747
Re-rendering mosaic tiles..................................................................................................................748
Stroking and filling a selection with mosaic tiles.............................................................................. 749
Adding mosaic effects to an image..................................................................................................750
Creating tessellations........................................................................................................................ 750
Weaves.............................................................................................................................................. 757
Applying weaves...............................................................................................................................757
Editing and saving weaves............................................................................................................... 759
Creating weave patterns...................................................................................................................760
Using the Edit Weave dialog box..................................................................................................... 761
Defining warp and weft expressions.................................................................................................763
Contents | 21
Defining warp and weft color expressions........................................................................................ 765
Designing the tie-up.........................................................................................................................766
Reference: Expression operators........................................................................................................768
Shapes...............................................................................................................................................781
Getting started with shapes............................................................................................................. 782
Drawing shapes................................................................................................................................783
Drawing lines and curves................................................................................................................. 785
Setting preferences for drawing shapes............................................................................................789
Selecting a shape............................................................................................................................. 791
Modifying shape outlines and fills.................................................................................................... 792
Adding, deleting, and moving anchor points................................................................................... 794
Adjusting curvature.......................................................................................................................... 796
Cutting and joining shape segments................................................................................................ 798
Converting shapes to image layers................................................................................................... 800
Converting selections to shapes........................................................................................................801
Resizing, rotating, skewing, and flipping shapes...............................................................................802
Duplicating shapes........................................................................................................................... 804
Combining shapes............................................................................................................................ 805
Blending shapes............................................................................................................................... 806
Saving a shape outline as a selection............................................................................................... 808
Exporting Adobe Illustrator shapes................................................................................................... 809
22 | Corel Painter 2015 User Guide
Adding text....................................................................................................................................... 811
Adding text to images......................................................................................................................811
Formatting text.................................................................................................................................812
Aligning text.....................................................................................................................................813
Adjusting text kerning and leading...................................................................................................813
Stretching, rotating, and skewing text..............................................................................................814
Adding drop shadows to text...........................................................................................................815
Applying effects to text.................................................................................................................... 816
Applying curves to text.................................................................................................................... 817
Converting text layers.......................................................................................................................819
Dropping text................................................................................................................................... 820
Working with animation and digital videos......................................................................................821
Choosing an animation workflow.....................................................................................................822
Creating frame-by-frame animation..................................................................................................823
Opening a Corel Painter movie.........................................................................................................825
Importing QuickTime and AVI files................................................................................................... 826
Selecting movie frames.....................................................................................................................827
Editing frame content...................................................................................................................... 827
Applying effects to a single frame....................................................................................................827
Previewing animations......................................................................................................................828
Using onion skinning....................................................................................................................... 829
Animating with layers...................................................................................................................... 830
Adding, deleting, and erasing frames...............................................................................................831
Contents | 23
Repeating frames............................................................................................................................. 831
Inserting movies............................................................................................................................... 832
Rotoscoping..................................................................................................................................... 833
Applying scripts to movies................................................................................................................833
Exporting movies as QuickTime........................................................................................................ 835
Exporting movies as AVI...................................................................................................................837
Importing and exporting numbered files.......................................................................................... 838
Exporting animated GIFs.................................................................................................................. 839
Using scripts to automate tasks....................................................................................................... 843
Getting started with scripts.............................................................................................................. 843
Displaying the Scripts panel..............................................................................................................844
Recording and playing scripts...........................................................................................................845
Enabling and playing background scripts......................................................................................... 847
Creating resolution-independent scripts............................................................................................848
Editing, renaming, and deleting scripts............................................................................................ 849
Converting scripts to movies............................................................................................................ 850
Importing and exporting scripts....................................................................................................... 851
Importing and exporting script libraries............................................................................................852
Creating and deleting script libraries................................................................................................ 853
Printing images................................................................................................................................. 855
Specifying the page layout and image size.......................................................................................855
Printing your work........................................................................................................................... 856
24 | Corel Painter 2015 User Guide
Saving files in EPS format for printing..............................................................................................858
General notes on printing................................................................................................................ 859
Notes for users of Adobe Photoshop............................................................................................... 861
Comparing terminology in Corel Painter and Adobe Photoshop........................................................861
Comparing tools in Corel Painter and Adobe Photoshop.................................................................. 862
Frequently asked questions from users of Adobe Photoshop.............................................................864
Setting preferences........................................................................................................................... 867
General preferences..........................................................................................................................867
Interface preferences........................................................................................................................ 869
Performance preferences.................................................................................................................. 871
Shapes preferences...........................................................................................................................873
Cloning preferences..........................................................................................................................874
Tablet preferences.............................................................................................................................875
Connections preferences...................................................................................................................875
Web...................................................................................................................................................877
Choosing web-safe colors.................................................................................................................877
Posterizing using color sets.............................................................................................................. 878
Choosing web-friendly brushes.........................................................................................................879
Creating transparent GIFs................................................................................................................. 880
Reducing the number of colors in GIF files.......................................................................................882
Creating image maps....................................................................................................................... 883
Creating server-side image maps...................................................................................................... 885
Creating web page backgrounds......................................................................................................886
Contents | 25
Creating web buttons.......................................................................................................................889
Index................................................................................................................................................. 891
26 | Corel Painter 2015 User Guide

Welcome to Corel Painter | 1
Welcome to Corel Painter
Corel® Painter® 2015 is the ultimate digital art studio. Its inventive drawing tools, realistic brushes, cloning
capabilities, and customizable features let you expand your creative output in exciting new ways. When
you use the pressure-sensitive brushes of Corel Painter, they become fluid extensions of your hand, so the
resulting brushstrokes are unrivaled in texture and precision. What’s more, features such as the ability
to build your own Natural-Media® brushes and customize how brushes interact with the canvas give
you countless ways to develop your artistic ideas. Corel Painter takes you far beyond what’s possible in a
traditional art environment.
This section contains the following topics:
•“Using the documentation” (page 1)
•“Adjusting the Help window text size” (page 4)
•“Additional resources” (page 5)
•“Registration” (page 5)
•“Corel Cinco for Painter” (page 6)
•“Feedback” (page 7)
•“About Corel Corporation” (page 7)
Using the documentation
The server-based Help gives you access to a full range of up-to-date topics in a searchable format. You need
to have an active internet connection to access the server-based help. However, if you are working offline,
you can access the local help file that is installed with Corel Painter.
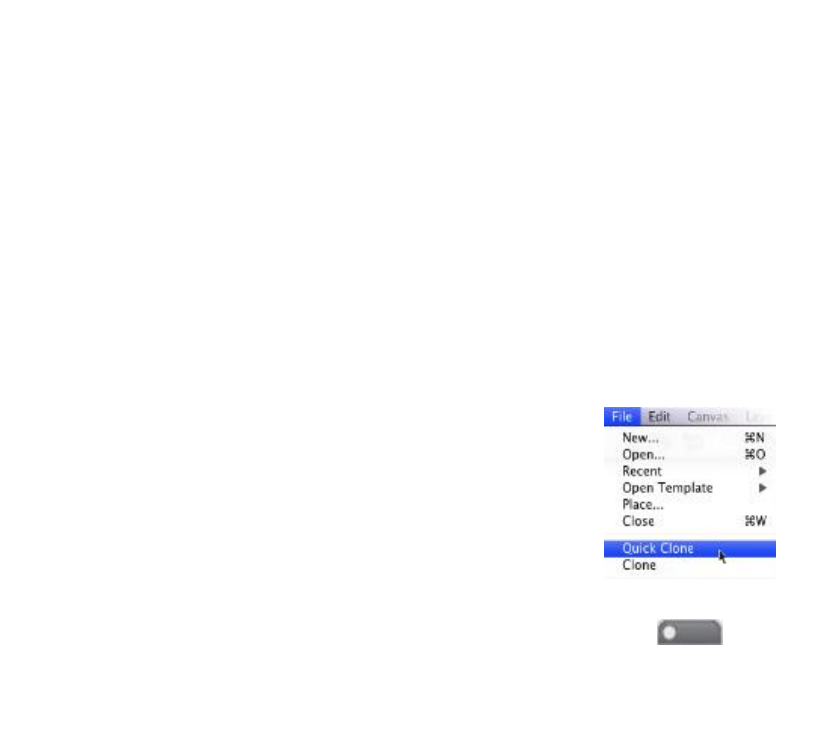
2 | Corel Painter 2015 User Guide
The Help is also provided as a PDF file, which is available online. In addition, you can refer to the Corel
Painter 2015 Getting Started Guide, which provides general overviews about Corel Painter features and
presents the most commonly used procedures.
Documentation conventions
The following table describes the conventions used in the Help.
Convention Description Example
MacOS and Windows
commands
Commands for MacOS and
Windows sometimes appear
within the same procedural
step, with the operating systems
specified in parentheses.
Hold down Command (MacOS)
or Ctrl (Windows).
Modifier keys (Command,
Option, Ctrl, Alt)
Names of modifier keys
for MacOS and Windows
sometimes appear within the
same procedural step, with the
operating systems specified in
parentheses.
Command+I (MacOS) or
Ctrl+I (Windows)
(For the MacOS, press
Command+I; for Windows,
press Ctrl+I.)
Menu commands (Choose X
menu menu item)
You choose a menu name by
clicking it, and then you click to
choose a menu item from the
list.
Choose File QuickClone.
Header bar A header bar is located at the
top or side of some workspace
components, such as the
toolbox, property bar, and
panels.

Welcome to Corel Painter | 3
Convention Description Example
Panel tab The panel tab appears at the top
of a panel. You can click a panel
tab to expand that panel.
Panel options menu Clicking the panel options menu
button displays a pop-up menu
with additional commands.
Flyout Flyouts are containers shared by
certain tools in the toolbox. You
can open a flyout by clicking and
holding down the tool on the
flyout that is displayed.
By clicking and holding down
the Layer Adjuster tool in the
toolbox, you can display a flyout
that includes the Transform tool.
A note contains information
that is important to the steps
that precede it. Often, a note
describes conditions under which
the procedure can be performed.
This command is available only if
you have turned off a selection.
A tip contains suggestions
related to the procedure. Some
tips present alternative methods
of performing the steps, or
information about other benefits
and uses of the procedure.
You can choose a brush
category and variant in the main
application or in the Brush library
panel.
To access the Help
•Choose Help Corel Painter 2015 Help (Mac OS) or Help Topics (Windows).

4 | Corel Painter 2015 User Guide
To use the Help
1Choose Help Corel Painter 2015Help (Mac OS) or Help topics (Windows).
2Perform a task from the following table.
To Do the following
Browse through Help topics Click the Contents tab, and click a topic in the left
pane.
Use the index Click the Index tab, and scroll through the entries
to find a topic.
Search the full text of the Help (Mac OS) Type a word or phrase in the Search box
in the upper-right corner of the Help window, and
press Return.
(Windows) Click the Search tab, type a word or
phrase in the box, and click Go. Note that the
search feature does not support quotation marks.
If you enclose the word or expression in quotation
marks, the search will not produce any results.
To access a PDF version of the Help
• Click the following link.
Corel Painter 2015 User Guide
Adjusting the Help window text size
You can adjust the size of the text that displays in the Help window by adjusting the zoom level in your
browser. Adjusting the zoom level quickly increases the size of all web page elements, including text and
images. You can adjust zoom levels in Internet Explorer, Chrome, Firefox, and Apple Help. Some browsers
may offer additional controls for customizing the font size of the display text. For more information, see the
Help for your browser.
To adjust the size of text in Firefox and Chrome
• In the browser, do one of the following:

Welcome to Corel Painter | 5
• To increase the zoom level, press Ctrl and + (Windows), or Command and + (Mac).
• To decrease the zoom level, press Ctrl and - or Command and - (Mac).
To adjust the size of text in Internet Explorer
• In the Internet Explorer browser, do one of the following:
• To increase the zoom level, press Ctrl and +.
• To decrease the zoom level, press Ctrl and -.
To adjust the size of text in Apple Help
• In the Apple Help viewer, do one of the following:
• To increase the zoom level, press Command and +.
• To decrease the zoom level, press Command and -.
Additional resources
You can access additional Corel Painter resources online to learn more about the product and connect with
the Corel Painter community.
Resources To access
Corel Painter website http://www.painterartist.com
Corel Painter Tutorials http://www.youtube.com/user/PainterTutorials
Corel Painter on Twitter http://www.twitter.com/corelpainter
Corel Painter on Facebook http://www.facebook.com/corelpainter
Registration
Registering Corel products is important. Registration provides you with timely access to the latest product
updates, valuable information about product releases and access to free downloads.
If you skipped the registration process when installing Corel Painter 2015, you can register at
www.corel.com/support/register.
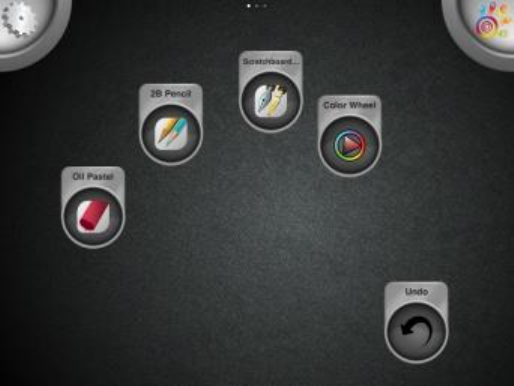
6 | Corel Painter 2015 User Guide
Corel Cinco for Painter
Corel® Cinco™ for Painter® is a companion app that lets you control Painter remotely from your iPad by
opening and using any custom palettes that you created in Corel Painter. You can download Corel Cinco for
Painter from the Apple App Store.
Corel Cinco for Painter lets you display only one custom palette at a time, but you can quickly switch
between palettes. Corel Cinco for Painter displays five palette controls per screen. If your custom palette
includes more than five controls, you can swipe the screen to display the additional controls.
The icons of the controls are conveniently positioned to match the
shape of your hand so that each finger can quickly tap a control.
Working with Corel Cinco for Painter allows you to extend your workspace and reduce onscreen clutter. It
can also replace traditional shortcut keys.
To allow Corel Cinco for Painter to connect with Corel Painter, you need to enable the option in the Painter
Preferences dialog box.
To allow Corel Cinco for Painter to connect with Corel Painter
1Do one of the following:
•(Mac OS) Choose Corel Painter 2015 menu Preferences Connections.
•(Windows) Choose Edit Preferences Connections.

Welcome to Corel Painter | 7
2Enable the Allow companion application to connect to Painter check box.
3Type a name in the Service Name box to give your copy of Corel Painter a unique name.
We recommended that you do not enable the Allow companion applications to connect to
Painter check box before the companion application is available.
To use Corel Cinco for Painter with Corel Painter, you must have iTunes or Bonjour (Windows only)
installed.
You can also specify an Authentication Code to ensure that only a legitimate user can access your
copy of Corel Painter from a remote application.
Feedback
We value any feedback that you may have about the product or the Help content. To provide feedback
about a specific Help topic, scroll to the bottom of any Help topic and click the “Was this page helpful?”
link.
About Corel Corporation
Corel is one of the world’s top software companies, boasting some of the industry's best-known graphics,
productivity and digital media products. We've built a reputation for giving customers more choice, and
delivering solutions that are easy to learn and use. Our mission is simple: help people achieve new levels of
creativity and productivity.
Corel’s product lines include CorelDRAW® Graphics Suite, Corel® Painter®, Corel® PaintShop® Pro,
Corel® VideoStudio® and Corel® WordPerfect® Office. For more information on Corel, please visit
www.corel.com.
8 | Corel Painter 2015 User Guide

What’s new in Corel Painter 2015 | 9
What’s new in Corel Painter 2015
Corel Painter takes you far beyond what’s possible in a traditional art environment. This section contains the
following topics about what’s new in Corel Painter 2015:
•“Revolutionary digital brushes” (page 9)
•“Enhanced speed and performance” (page 11)
•“A fully responsive experience” (page 12)
•“Mobile art that moves you” (page 13)
•“What was new in earlier versions of Corel Painter” (page 13)
Revolutionary digital brushes
With the addition of Particle brushes and Jitter Smoothing, Corel Painter 2015 continues to push the
envelope of digital art.
Particle Brushes
These new physics-inspired brushes produce rich, chaotic strokes by emitting particles from a central point
that create lines and patterns as they move across the canvas. This revolutionary brush category allows a
wide variety of artists to push their creative visions further, whether in photo art, illustration, concept art,
traditional art, and more.
There are three types of Particle brushes — Gravity, Flow and Springs — and each have their own set of
behaviors. You can control a Particle brush variant by linking its behavior to a variety of real-time input
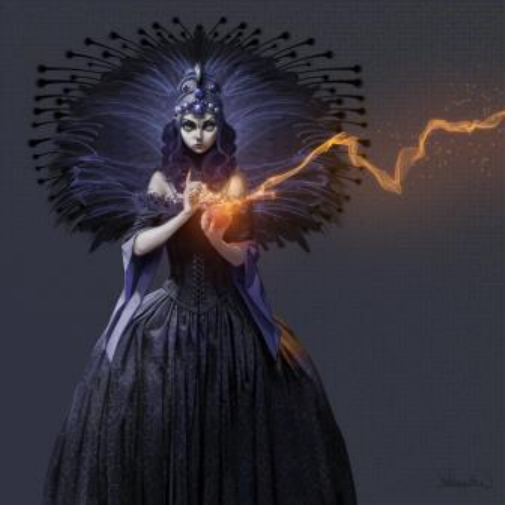
10 | Corel Painter 2015 User Guide
factors, such as pressure, bearing, tilt or velocity. Or you can let them run free, with beautiful, unpredictable
results.
You can quickly get to work with Particle brushes by choosing the New Brushes user interface arrangement,
which displays all palettes and controls related to the Particle brushes.
For more information, see “Particle brushes” on page 431.
Particle brushes were used to create the sparks and wisps of smoke in this image.
Artwork by Don Seegmiller
Jitter Smoothing
Corel Painter X3 saw the introduction of Universal Jitter, which allows you to add randomness to your
brushstrokes by integrating the Jitter expression in a range of brush controls. The addition of Jitter
Smoothing in Corel Painter 2015 helps you give your brushstrokes an even more natural, organic look.
What’s new in Corel Painter 2015 | 11
Angle Jitter applied to a brushstroke without Jitter
Smoothing (top) and with Jitter Smoothing (bottom).
Opacity Jitter applied to a brushstroke without Jitter Smoothing (top) and with Jitter Smoothing
(bottom)
Enhanced speed and performance
Speed and performance enhancements let you focus on your art and forget about technology.
Native 64-bit application for Mac
Users on the Mac OS will notice extended processing power right away, especially during operations that
require big data transfers, such as opening files, switching clone sources, working with multiple layers,
using large documents and more.
Enhanced cross-platform performance
Whether you're working on a Mac or a PC, you'll notice increased speed in Painter 2015. With the latest
round of CPU performance optimizations, brushes perform faster, so you can concentrate on your art and
forget about technology.
Enhanced real-time effect preview
Corel Painter 2015 takes the guesswork out of applying effects. You can now preview effects in real-time on
the canvas so you instantly get an idea how the whole painting will look.
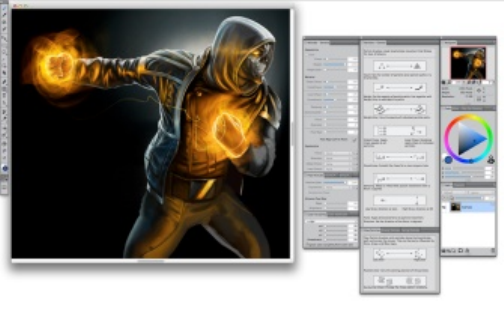
12 | Corel Painter 2015 User Guide
Enhanced brush tracking
Because each artist uses a different strength or pressure level in a stroke, the enhanced Brush Tracking
utility helps calculate the appropriate settings for pressure and velocity. The new visual power curve helps
you control universal application pressure-sensitive memory and instantly apply the settings to the current
brush variant. There are default pressure curves to choose from, or you can tweak the curve and save it as
a preset. You can also make practice strokes with a variant on the canvas while you’re calibrating the brush
tracking so you can draw from with the most realistic, accurate brushstroke information possible. For more
information, see “Brush tracking and calibration” on page 126.
A fully responsive experience
Based on user feedback, Corel Painter 2015 offers you new streamlined ways to work as well as updated
content.
Custom user-interface palette arrangements
Inspired by Painter artists, this collection of new pre-defined user-interface arrangements is designed to
kick-start a variety of digital-art workflows by displaying only the relevant palettes and tools. There’s one for
illustrating, creating photo art, and getting started with the revolutionary new Particle brushes. There’s even
one that displays only minimal UI, freeing up space for tablet users. For more information, see “Choosing a
workspace layout” on page 29.
The New Brushes arrangement displays everything you need to use the Particle Brushes.
Artwork by Mike Thompson
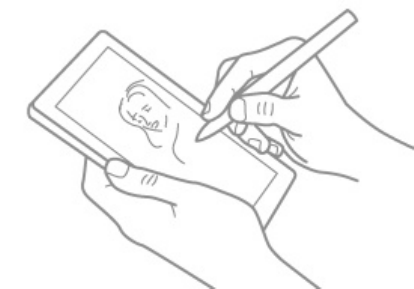
What’s new in Corel Painter 2015 | 13
Fresh new content
You can add an extra special touch to your artwork with new, freshly inspirational papers, nozzles, images,
patterns, weaves, gradients and more. Some of the updates are designed specifically for different types of
digital artists, so whether you're an illustrator or photo artist, you can be sure to find compelling content to
work with.
Mobile art that moves you
Corel Painter 2015 lets you paint on the go, so you can create anytime, anywhere.
Real-Time Stylus and Windows Tablet PC support
You can combine your Tablet PC with Windows Real-Time Stylus support to capture whatever inspires you
on the fly. Support for the Windows Real-Time Stylus delivers truly responsive pressure-sensitivity, and
depending on the device, tilt. What’s more, there’s no stylus driver to install, so you can use Corel Painter
2015 right away. For more information, see “Support for tablets and other devices” on page 93.
Real-Time Stylus and Windows Tablet PC support let you create art on the go.
Painter Mobile for Android
The Painter Mobile for Android app gives you the ability to paint anywhere, anytime. When it's time to
finalize your work, you can import it directly into Painter 2015 to add professional finishing touches.
What was new in earlier versions of Corel Painter
This topic describes what was new in earlier versions of Corel Painter.

14 | Corel Painter 2015 User Guide
What was new in Corel Painter X3?
If you are migrating to Corel Painter 2015 from Update 2 of Corel Painter 12, you may not be aware of the
features and enhancements that were added in Corel Painter X3. These features and enhancements are also
available in Corel Painter 2015.
A platform for inspiration, creativity, and reflection
Brush search Helps you find the perfect brush by performing
a search. Simply type in the name of the brush
variant or a combination of brush properties, such
as jitter or bristle, to narrow down the search.
To find all of the new brush variants that were
added in Corel Painter 2015, type in “14,” “X4,” or
“2015” in the Search bar.
For more information, see “Searching and selecting
brushes” on page 304.
Reference Image panel Lets you display an inspirational image in an easy
to use, dockable panel. You can zoom, pan, and
sample colors from the reference image while
maintaining focus on your digital painting.
For more information, see “Displaying reference
images” on page 133.
Enhanced stroke preview Offers a more detailed preview of the brushstroke
that will appear on the canvas in real-time. The
preview now visually represents brush parameters
such as mixing, erasing, blending, and jitter. The
brush preview displays in the Brush library panel,
Brush search results panel, and the Stroke Preview
brush control panel.
For more information, “Previewing brushstrokes
and brush dabs” on page 329.

What’s new in Corel Painter 2015 | 15
Inspirational Mixer Pads Lets you choose colors from a collection of original
mixer pads that were created for you by expert
Corel Painter artists.
For more information, see “Displaying and resizing
the Mixer panel” on page 228.
The innovator in digital art
Jitter brushes Produces more realistic brushstrokes by introducing
an increased amount of randomness. The Jitter
brush variants are found under various brush
categories.
For more information, see “Jitter brushes” on page
419.
Universal Jitter Allows you to control the randomness of various
brush features, such as size, angle, and opacity.
You can now use Jitter in conjunction with a
different expression.
For more information, see “Controlling the
behavior of Jitter variants” on page 422.
Minimum controls Allows you to introduce a range of variation to a
selected expression. You can apply minimum values
for brush controls such as Size and Opacity.
For more information, “Expression settings” on
page 327.
Additional Flow Maps, Patterns, and Papers Includes a greater variety of Flow Maps, Patterns,
Papers that you can use in your paintings.
Easier to learn and use

16 | Corel Painter 2015 User Guide
Smart Brush Settings with added media panel
(Advanced Brush Controls)
Provides you with a more intuitive way of
modifying the advanced brush controls of a
selected brush.
For more information, see “Displaying advanced
brush controls dynamically” on page 310.
Perspective Guides Allows you to accurately draw in one, two or
three-point perspective by using preset guides. The
Perspective-Guided Strokes constrain your strokes
to direct them towards the vanishing points. This
feature replaces the Perspective Grid feature.
For more information, “Using Perspective Guides”
on page 203.
Enhanced Cloning Reintroduces the traditional side-by-side cloning
workflow and lets you view the crosshair cursor on
your source image to increase painting accuracy.
In addition, you now have the ability to edit the
source image. For example, you can apply various
effects to the source image.
For more information, see “Cloning images” on
page 167. and “Editing, updating, saving, and
exporting clone source images” on page 174.
Transform across layers Allows you to apply transformations to multiple
layers and layer groups simultaneously.
For more information, “Transforming layers” on
page 530.
Set maximum colors for color sets Lets you specify a maximum number of colors
when creating new color sets.
For more information, see “Creating and exporting
color sets” on page 237.
Show Onion Skin layers Allows you to display underlying frames when
working with movies.
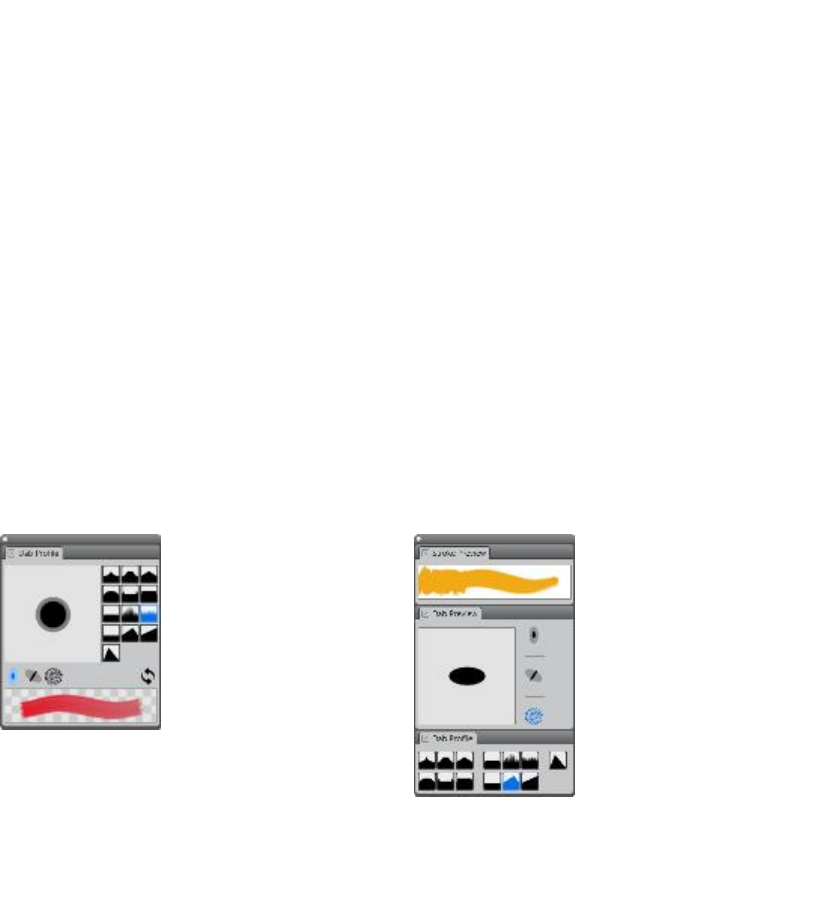
What’s new in Corel Painter 2015 | 17
For more information, see “Using onion skinning”
on page 829.
Performance
Memory Extender Lets you take advantage of more of your Mac
systems’s available RAM by letting you control how
much RAM you want to designate to Painter. This
features was introduced in Painter 12.2.1.
For more information, see “Performance
preferences” on page 871.
Changes to the brush control panels
In Corel Painter X3, a number of brush controls panels were more logically organized to better reflect the
structure of the Corel Painter brush engine. The following table maps the Corel Painter 12 brush control
panels to the Corel Painter X3 brush control panels.
For more information about the brush control panels that include the new Jitter controls, see “Controlling
the behavior of Jitter variants” on page 422.
Corel Painter 12 brush control panels Corel Painter X3 brush control panels
Dab Profile panel
Stroke Preview panel (New)
Dab Preview panel (New)
Dab Profile panel (Modified)
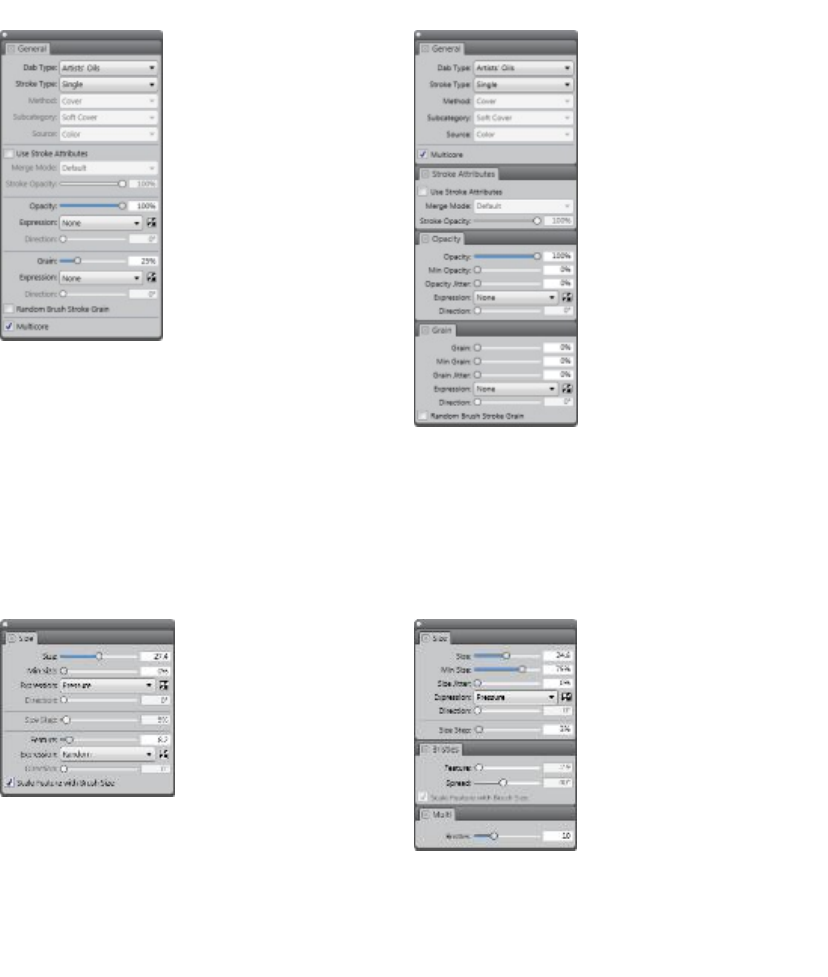
18 | Corel Painter 2015 User Guide
Corel Painter 12 brush control panels Corel Painter X3 brush control panels
General panel
General panel (Modified)
Stroke Attributes panel (New)
Opacity panel (New)
Grain panel (New)
Size panel
Size panel (Modified)
Bristles panel (New)
Multi panel (New)
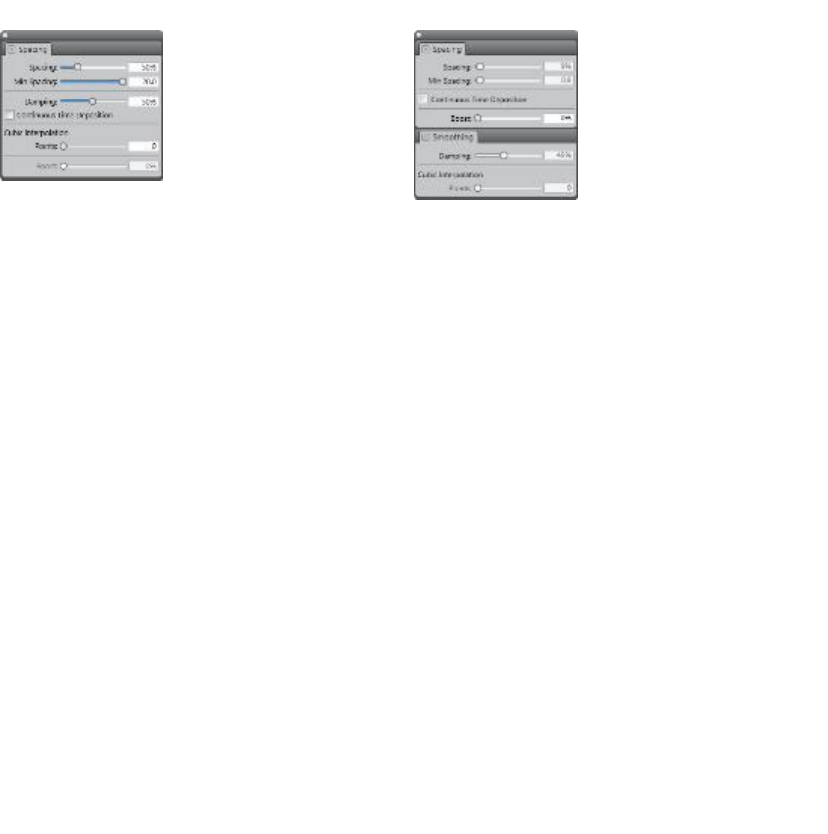
What’s new in Corel Painter 2015 | 19
Corel Painter 12 brush control panels Corel Painter X3 brush control panels
Spacing panel
Spacing panel (Modified)
Smoothing panel (New)
What was new in Corel Painter 12 Updates 1 and 2
If you are migrating to Corel Painter 2015 from Corel Painter 12, you may not be aware of the features and
enhancements that were added to Corel Painter 12 Updates 1 and 2. These features and enhancements are
also available in Corel Painter 2015.
Corel Painter 12 Update 1 Features
Ability to import and export brush libraries,
categories, and variants
Allows you to import and export brush libraries,
categories, and variants so you can better manage
brush resources.
For more information, “Importing and exporting
brush libraries, categories, and variants” on page
317.
Creating and removing brush libraries Allows you to more easily create and delete custom
brush libraries.
For more information, “Creating and deleting
brush libraries” on page 316.
Creating and removing brush categories Allows you to store brush variants in custom brush
categories. You can also remove custom brush
libraries when you no longer need them.

20 | Corel Painter 2015 User Guide
For more information, “Creating and deleting
brush categories” on page 315.
Saving brush variants Allows you to quickly save the custom brush
variants that you create.
For more information, “Saving and deleting brush
variants” on page 313.
Moving brush variants Allows you to easily drag variants between
categories.
For more information, “Copying and moving brush
variants” on page 312.
Deleting Workspaces Allows you to delete custom Workspaces from
within the application.
For more information, see “Creating, importing,
exporting, and deleting workspaces” on page
57.
Color mixing enhancements Allows you to open images as mixer pads and save
mixer pads to the PNG file format.
For more information, see “Opening images in the
Mixer panel” on page 231 and “Saving the Mixer
pad” on page 234.
Panel resizing Lets you vertically resize most panels within a
palette.
For more information, see “Rearranging panels and
palettes” on page 49.
Navigator panel enhancements Lets you hide the image information area or the
controls of the Navigator panel.
For more information, see “Navigating images and
viewing image information” on page 75.

What’s new in Corel Painter 2015 | 21
Corel Painter 12 Update 2 Features
Flow Maps Introduces an additional textured surface for
working with Real Watercolor and Real Wet Oil
brushes that help you direct the flow of paint.
For more information, see “Applying and adjusting
flow maps” on page 449.
Vertical docking of panels Allows you to vertically dock panels in the
document window.
For more information, see “Rearranging panels and
palettes” on page 49.
Support for Corel Cinco for Painter Allows Corel Painter to connect to Corel Cinco
for Painter, which is a companion iPad app that
integrates seamlessly into your current workflow to
enhance productivity.
For more information, see “Corel Cinco for Painter”
on page 6.
Wacom Multi-Touch support Enables enhanced multi-touch support for
Wacom Intuos 5 touch tablets. You can now
simultaneously pan, rotate, and zoom the canvas.
For more information, see “Wacom Intuos
support” on page 96.
22 | Corel Painter 2015 User Guide

Workspace tour | 23
Workspace tour
The Corel Painter workspace has been designed to give you easy access to tools, effects, commands, and
features. The workspace is organized by using a series of menus, selectors, panels, and interactive palettes.
This section contains the following topics:
•“Corel Painter terms” (page 24)
•“Exploring the Document window” (page 26)
•“Choosing a workspace layout” (page 29)
•“Exploring the toolbox” (page 31)
•“Displaying the toolbox” (page 37)
•“Displaying the Media Selector bar” (page 38)
•“Displaying the property bar” (page 39)
•“Exploring the Navigator panel” (page 40)
•“Displaying the Brush Selector bar and the Brush library panel” (page 41)
•“Displaying the command bar” (page 43)
•“Exploring panels and palettes” (page 43)
•“Rearranging panels and palettes” (page 49)
•“Creating and modifying custom palettes” (page 53)
•“Managing custom palettes” (page 55)
•“Working with libraries” (page 56)
•“Creating, importing, exporting, and deleting workspaces” (page 57)
•“Restoring the default Corel Painter settings” (page 58)

24 | Corel Painter 2015 User Guide
Corel Painter terms
Before you get started with Corel Painter, you should be familiar with the following terms.
Term Description
Canvas The canvas is the rectangular work area inside the
document window. In addition, the canvas serves
as the background layer of the image. However,
unlike other layers, it is always locked. The size of
the canvas also determines the size of the image
that you create.
Pixels-per-inch (ppi) The default unit of measurement for resolution in
Corel Painter. Pixels-per-inch (ppi) is equivalent to
dots per inch (dpi).
Layer Layers are independent image elements that
stack on top of the canvas. You can manipulate
the content of a layer without altering the
canvas. Layers let you experiment with different
compositions and effects without risking an
unwanted, permanent edit.
Brush category Brush categories are groups of similar brushes and
media.
Brush variant Brush variants are specific brushes and brush
settings within a brush category.
Dab types The dab type controls the way a brush applies
color to the painting surface. In Corel Painter, there
are numerous dab types that fall under two dab
type groups: rendered and dab-based, also known
as pixel-based.

Workspace tour | 25
Term Description
Rendered dab type The rendered dab type produces continuous,
smooth-edged strokes. For example, Camel Hair
and Airbrush use the rendered dab type.
Dab-based dab type The dab-based dab types produce brushstrokes
that are made up of tiny dabs of color that are
closely spaced together so they appear smooth.
Panel A panel is a single tabbed container that displays
commands, controls, and settings for a specific
feature. Panels reside in a palette. For example, the
Color panel contains controls that allow you to
choose colors.
Palette A palette is a container for one or multiple panels.
Paper Paper allows you to control both the color and
texture of the canvas.
Clone source The clone source determines the image, or image
area, that you want to reproduce through cloning.
A document can include multiple clone sources.
Clone document The clone document is created by copying the
original clone source image which allows you to
reproduce a painterly version of the source image.
A copy of the clone source is embedded in the
clone document. In addition, you can add multiple
clone sources to a clone document.
Image sampling Image sampling lets you copy part of one image
and reuse it elsewhere in the image or in another
image. You can sample an image by using the
Rubber Stamp tool, a Cloner brush that supports
offset sampling, or a Cloner brush that supports
multi-point sampling. Sampling is similar to

26 | Corel Painter 2015 User Guide
Term Description
cloning, but, unlike cloning, it does not create a
separate document that stores clone sources.
Composite method A composite method, which is similar to blend
modes in Adobe Photoshop, lets you change how
a layer blends with an underlying image.
Exploring the Document window
The document window is the area outside the canvas that is bordered by scroll bars and application
controls.
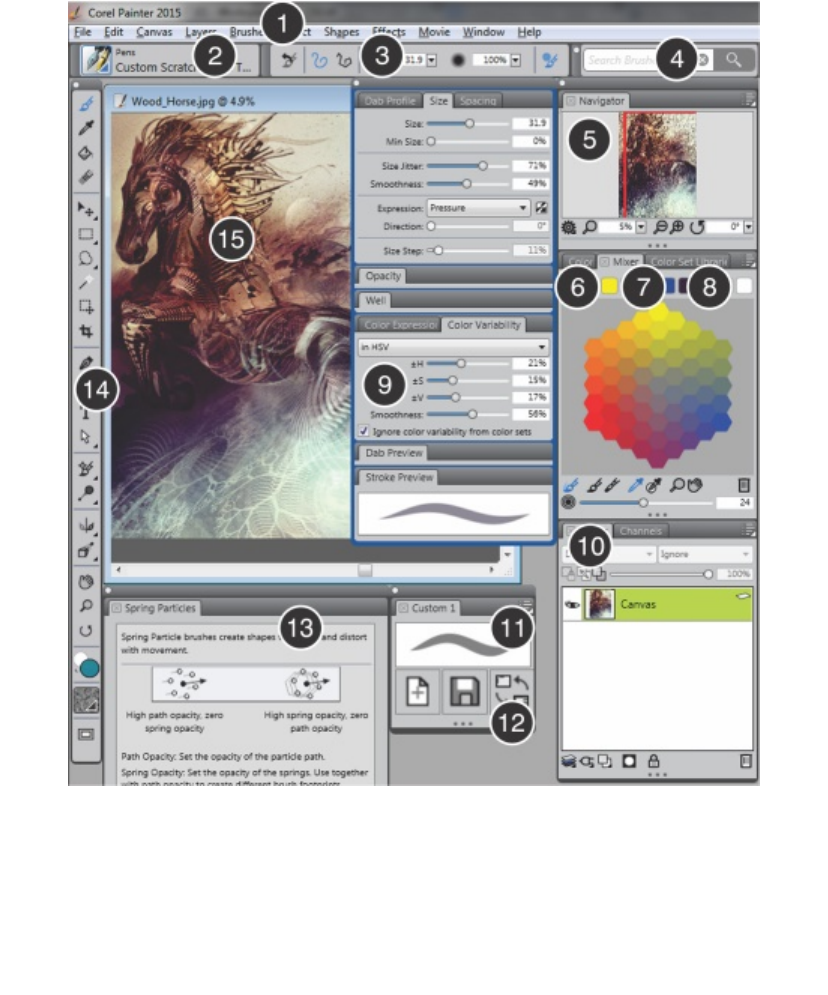
Workspace tour | 27
Circled numbers correspond to the numbers in the following table, which describes
the main components of the application window. (Artwork by Android Jones)
Part Description
1. Menu bar Lets you access tools and features using pull-down
menu options

28 | Corel Painter 2015 User Guide
Part Description
2. Brush Selector bar Lets you open the Brush library panel to choose a
brush category and variant. It also allows you to
open and manage brush libraries.
3. Property bar Displays commands that relate to the active tool
or object. For example, when the Fill tool is active,
the fill property bar displays commands for filling
selected areas.
4. Brush Search bar Lets you quickly search the content of the currently
selected brush library to find brushes that match a
specific description.
5. Navigator panel Lets you navigate in the document window,
change the magnification level, and access various
document viewing options, such as Tracing Paper
and Drawing Modes
6. Color panel Lets you choose main and additional colors for
painting in Corel Painter documents.
7. Mixer panel Lets you blend colors together to create new
colors. You can also open inspirational mixer
pads designed by expert Corel Painter artists. (The
inspirational mixer pad in the image was created
by artist John Malcolm.)
8. Color Set Libraries panel Displays the colors in the current color set so you
can organize groups of colors.
9. Advanced Brush Controls Lets you quickly access the advanced brush
controls for any default brush variant. It also
displays an enhanced stroke preview of the
currently selected brush variant. The image shows
the Color Variability panel, which includes the
new Jitter Smoothness control.

Workspace tour | 29
Part Description
10. Layers panel Lets you manage the hierarchy of layers and
includes controls for creating, selecting, hiding,
locking, deleting, naming, and grouping layers
11. A custom brush button This custom brush button shows the brush as a
stroke instead of a brush category, helping you
recognize the brush variant.
12. A custom palette Custom palettes give you easy access to controls
that you use often. This custom palette includes
a control (Quick Switch) that lets you switch
between your favorite workspace layouts.
13. Info palette Explains key features of the new Particle brushes.
14. Toolbox Lets you access tools for creating, filling, and
modifying an image
15. Canvas The canvas is the rectangular work area inside the
document window whose size determines the size
of the image you create. The canvas acts as the
image background and, unlike a layer, it is always
locked.
Choosing a workspace layout
Corel Painter 2015 offers preset workspace layouts that you can choose from. A workspace layout (also
known as “palette arrangement”) displays, hides, and positions workspace elements such as palettes and
panels to suit a specific workflow. The following table describes the available workspace layouts.
Workspace layout Description
New Brushes Displays the palettes of the new Particle brushes for
quick and easy access

30 | Corel Painter 2015 User Guide
Workspace layout Description
Simple Displays minimal user interface that includes the
toolbox, the menu bar, and a command bar that
contains shortcuts to commonly used commands.
This layout is ideal for small screens.
Photo Art Displays palettes commonly used by photo artists,
providing optimal setup for cloning photos,
textures, and paintings
Illustration Displays palettes commonly used for creating
illustrations
Default The default workspace layout that works well
for most computers. For more information, see
“Exploring the Document window” on page
26.
The Quick Switch feature lets you choose two workspace layouts that you use most often and quickly
switch between them to suit the current task or the display mode of your device. This feature is especially
useful on multi- or dual-mode devices. For example, you can select Default as Layout 1 and Simple as
Layout 2. When you flip the display panel from Notebook to Tablet mode, the Simple workspace layout is
automatically displayed, letting you work in an un-cluttered minimalistic user interface.
To choose a workspace layout
•Choose Window Arrange Palettes, and choose a layout.
You can also choose a layout from the Welcome screen by clicking the Create tab and selecting a
layout in the Arrange Your Workspace area.
To switch between workspace layouts
1Choose Window Arrange Palettes Quick Switch Layout 1, and choose a layout.
2Choose Window Arrange Palettes Quick Switch Layout 2, and choose a layout.
3To switch between Layout 1 and Layout 2, do one of the following:

Workspace tour | 31
• Reposition the display panel of your dual- or multi-mode device (for example, from Notebook mode
to Tablet mode).
•Choose Window Arrange Palettes Quick Switch Toggle Layout.
You can switch between factory workspace layouts or custom workspace layouts that you created.
For information about creating and saving custom workspace layouts, see “Rearranging panels
and palettes” on page 49.
Exploring the toolbox
You can use the tools in the toolbox to paint, draw lines and shapes, fill shapes with color, view and
navigate documents, and make selections. Under the toolbox is a color selector, plus six content selectors
that let you choose papers, gradients, patterns, looks, and nozzles.
The following table provides descriptions of the tools in the Corel Painter toolbox.
Tool Description
Color tools
The Brush tool lets you paint and draw on
the canvas or a layer. Brush categories include
pencils, pens, chalk, airbrushes, oil paints,
watercolors, and more. When the Brush tool is
selected, you can choose specific brushes from
the Brushlibrarypanel. For more information, see
“Selecting, managing, and creating brushes” on
page 287.
The Dropper tool lets you pick up a color from
an existing image. The property bar shows the
values of the color. When you select a color with
the Dropper tool, that color becomes the current
color in the Color panel. For more information, see
“Sampling colors from images” on page 223.
The Paint Bucket tool lets you fill an area with
media, such as a color, gradient, pattern, weave,
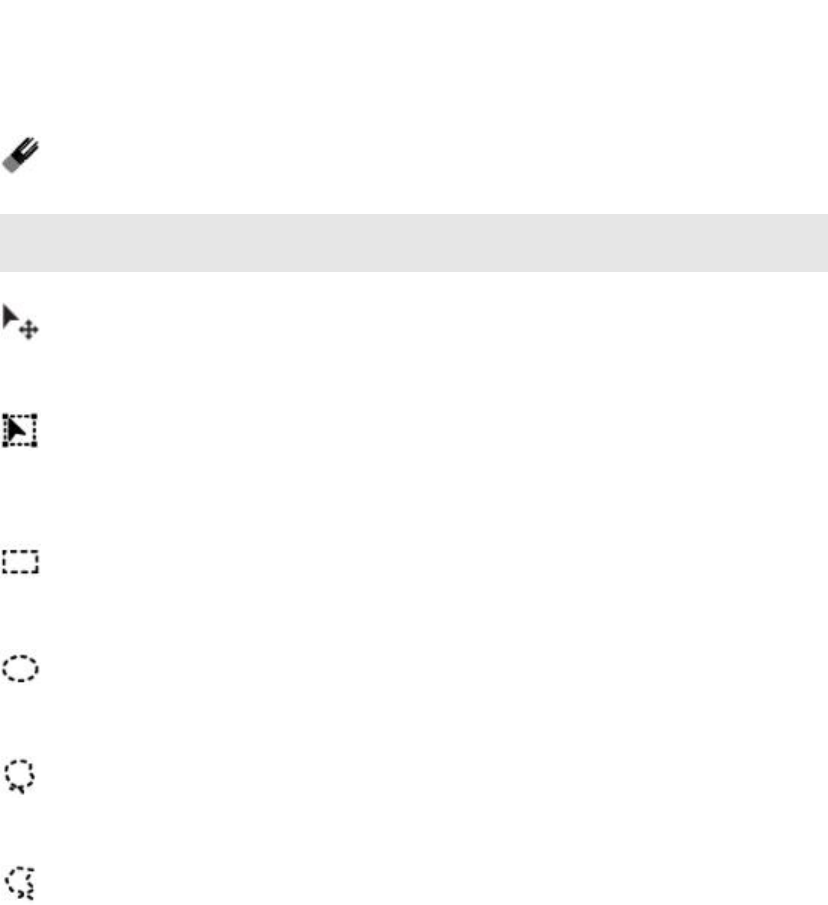
32 | Corel Painter 2015 User Guide
Tool Description
or clone. The property bar shows options for the
areas that you can fill and the media that you can
use. For more information, see “Working with
color fills” on page 241.
The Eraser tool lets you remove unwanted areas
from an image. For more information, see “Erasing
image areas” on page 141.
Selection tools
The Layer Adjuster tool is used to select, move,
and manipulate layers. For more information, see
“Displaying the Layers panel” on page 517.
The Transform tool lets you modify selected areas
of an image by using different transformation
modes. For more information, see “Preparing
selections for transformations” on page 600.
The Rectangular Selection tool lets you create
rectangular selections. For more information, see
“Getting started with selections” on page 578.
The Oval Selection tool lets you create oval
selections. For more information, see “Getting
started with selections” on page 578.
The Lasso tool lets you draw a freehand selection.
For more information, see “Getting started with
selections” on page 578.
The Polygonal Selection tool lets you select an
area by clicking different points on the image
to anchor straight line segments. For more

Workspace tour | 33
Tool Description
information, see “Creating path-based selections”
on page 580.
The Magic Wand tool lets you select an area of
similar color by clicking or dragging in an image.
For more information, see “Creating pixel-based
selections” on page 583.
The Selection Adjuster tool lets you select,
move, and manipulate selections created with
the Rectangular, Oval, and Lasso selection
tools and selections converted from shapes. For
more information, see “Preparing selections for
transformations” on page 600.
The Crop tool lets you remove unwanted edges
from an image. For more information, see
“Cropping images” on page 85.
Shape tools
The Pen tool lets you create straight lines and
curves in objects. For more information, see
“Drawing lines and curves” on page 785.
The Quick Curve tool lets you create shape paths
by drawing freehand curves. For more information,
see “Adjusting curvature” on page 796.
The Rectangular Shape tool lets you create
rectangles and squares. For more information, see
“Drawing shapes” on page 783.
The Oval Shape tool lets you create circles and
ovals. For more information, see “Drawing shapes”
on page 783.
34 | Corel Painter 2015 User Guide
Tool Description
The Text tool creates text shapes. Use the Text
panel to set the font, point size, and tracking.
For more information, see “Adding text” on page
811.
The Shape Selection tool is for editing Bézier
curves. You use the Shape Selection tool to select
and move anchor points and adjust their control
handles. For more information, see “Selecting a
shape” on page 791.
The Scissors tool lets you cut an open or closed
segment. If the segment is closed, after you click
on a line or point, the shape path becomes open.
For more information, see “Cutting and joining
shape segments” on page 798.
The Add Point tool lets you create a new anchor
point on a shape path. For more information, see
“Adding, deleting, and moving anchor points” on
page 794.
The Remove Point tool lets you remove an anchor
point from a shape path. For more information,
see “Adding, deleting, and moving anchor points”
on page 794.
The Convert Point tool is used to convert between
smooth and corner anchor points. For more
information, see “Adjusting curvature” on page
796.
Photo tools
The Cloner tool gives you quick access to the
last Cloner brush variant you used. For more
Workspace tour | 35
Tool Description
information, see “Painting in the clone” on page
176.
The Rubber Stamp tool gives you quick access
to the Straight Cloner brush variant, and lets
you to sample areas within an image or between
images. For more information, see “Performing
offset sampling” on page 179.
The Dodge tool lets you lighten the highlights,
midtones, and shadows in an image. For more
information, see “Dodging and burning” on page
279.
The Burn tool lets you darken the highlights,
midtones, and shadows in an image. For more
information, see “Dodging and burning” on page
279.
Symmetry tools
The Mirror Painting mode lets you create
a perfectly symmetrical painting. For more
information, see “Using the Mirror Painting mode”
on page 198.
The Kaleidoscope mode lets you transform
basic brushstrokes into colorful and symmetrical
kaleidoscope images. For more information, see
“Using the Kaleidoscope Painting mode” on page
201.
Composition tools
The Divine Proportion tool lets you plan
compositions by using guides based on a classical
36 | Corel Painter 2015 User Guide
Tool Description
composition method. For more information, see
“Using the Divine Proportion tool” on page 208.
The Layout Grid tool lets you divide your canvas so
that you can plan your composition. For example,
you can divide your canvas into thirds vertically and
horizontally to use the compositional rule of thirds.
For more information, see “Using the Layout Grid”
on page 196.
The Perspective Guides tool lets you display
guides using one, two or three-point perspective.
For more information, see “Using Perspective
Guides” on page 203.
Navigation tools
The Grabber tool lets you scroll through an image
quickly. For more information, see “Repositioning
images” on page 84.
The Magnifier tool lets you magnify areas of an
image when you are performing detailed work, or
reduce areas to get an overall view of an image.
For more information, see “Zooming images” on
page 77.
The Rotate Page tool lets you rotate an image
window to accommodate the way you naturally
draw. For more information, see “Rotating images
and the canvas” on page 80.
Selectors
The Color selector lets you choose main and
additional colors. The front swatch displays
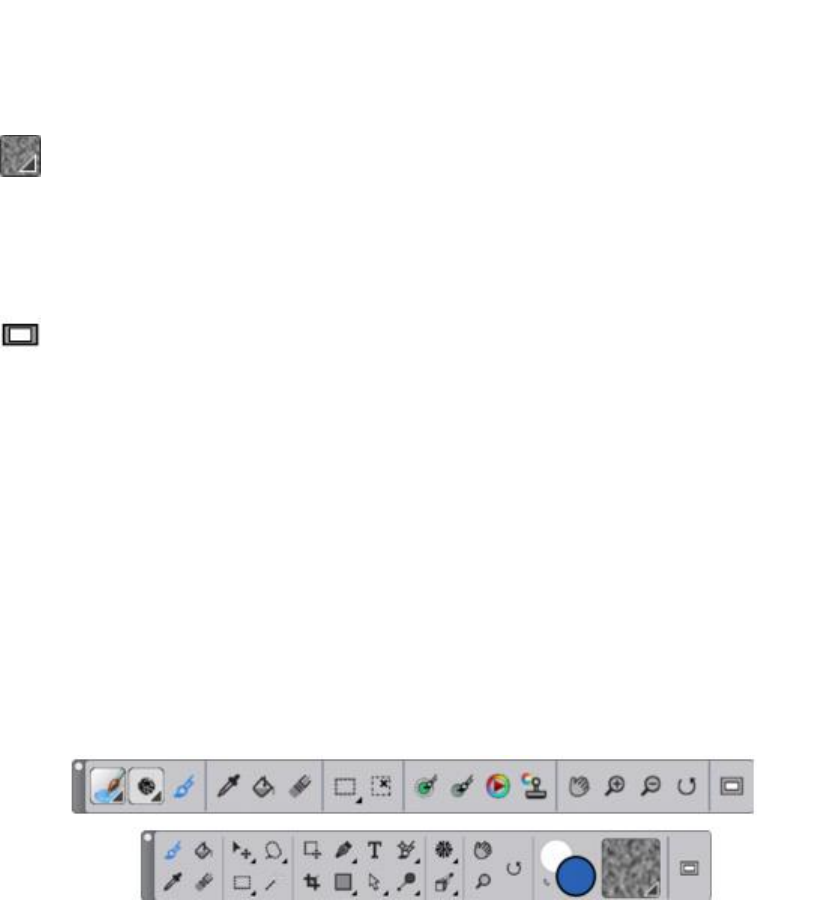
Workspace tour | 37
Tool Description
the main color, and the back swatch displays
the additional color. For more information, see
“Choosing colors from the Color panel” on page
218.
The Paper Selector opens the Papers panel.
From the Papers panel, you can choose a paper
texture to alter the canvas surface and achieve
more realistic results when applying brushstrokes.
For more information, see “Working with paper
texture and grain” on page 151.
The View Mode selector allows you to switch
between Full Screen and Windowed. For more
information, see “Switching document views” on
page 74.
Displaying the toolbox
The toolbox is open by default, but you can close it. In addition, to minimize the space required to display
the toolbox, tools of similar function are grouped together and they are accessible from flyout menus. The
button for only one of these tools is displayed at a given time on the toolbox. A flyout menu is indicated by
a triangle in the lower-right corner of the button. You can open a flyout to access all of its tools.
You can also reposition the toolbox by moving it in the application window. In addition, you can change
the toolbox display. For example, you can arrange the tools in two columns instead of one, or you change
the toolbox orientation from vertical to horizontal. If you are working with a tablet or low-resolution
display, or you prefer to work in an uncluttered workspace; you can also display a simpler version of the
toolbox that includes fewer tools.
Top: A simpler version of the toolbox. Bottom: A two-row toolbox.

38 | Corel Painter 2015 User Guide
To open or close the toolbox
•Choose Window Toolbox.
You can also close the toolbox by clicking the close button on the toolbox header bar.
To access tools grouped in flyouts
1In the toolbox, click and hold the tool icon whose flyout you want to open.
A flyout menu of the entire group of related tools appears.
2Click the tool that you want to use.
The tool you’ve chosen appears in the toolbox.
To move the toolbox
• Drag the toolbox header bar to a new location in the application window.
To change the toolbox display
1Do one of the following:
•(Mac OS) Choose Corel Painter 2015 Preferences Interface.
•(Windows) Choose Edit Preferences Interface.
2Choose an option from the Toolbox Layout list box.
Displaying the Media Selector bar
The Media Selector bar gives you quick access to the libraries for the following Corel Painter media:
patterns, gradients, nozzles, weaves, and looks. The Media Selector bar is open by default, but you can
close it at any time.
The Media Selector bar (displayed horizontally). From left to right:
PatternSelector, GradientSelector, NozzleSelector, WeaveSelector, LookSelector.
You can also reposition the Media Selector bar by moving it in the application window. In addition, you can
change the Media Selector bar display. For example, you can change the Media Selector bar orientation or
increase the size of the buttons.
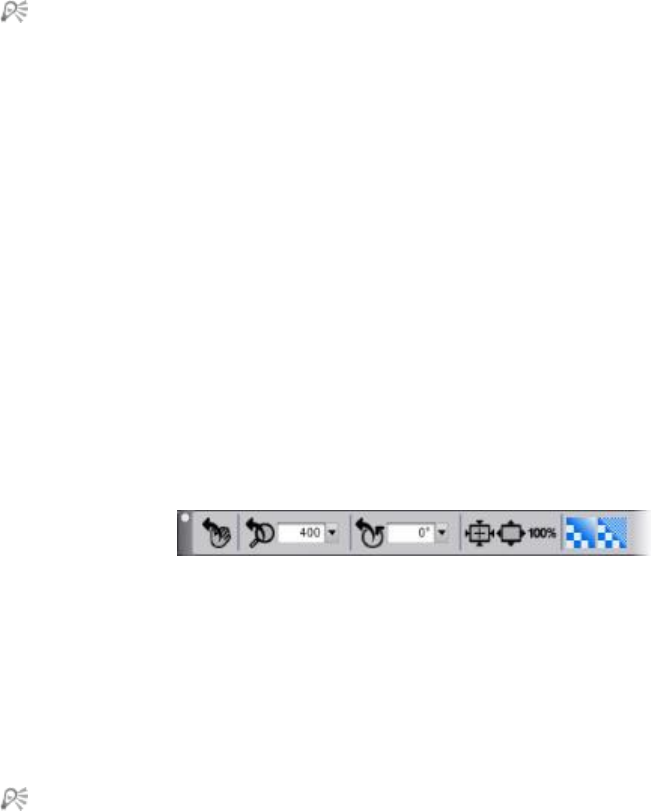
Workspace tour | 39
To open or close the Media Selector bar
•Choose Window Media Selector.
You can also close the Media Selector bar by clicking the close button on the header bar.
To move the Media Selector bar
• Drag the Media Selector bar header to a new location in the application window.
To change the Media Selector bar display
1Do one of the following:
•(Mac OS) Choose Corel Painter 2015 Preferences Interface.
•(Windows) Choose Edit Preferences Interface.
2Choose an option from the Media Layout list box.
Displaying the property bar
In Corel Painter, the property bar displays options for the currently selected tool. By default, the property bar
displays in the application window docked below the menu bar, but you can close it. You can also move the
property bar or dock it to the application window or to other panels.
The property bar for the Grabber tool.
From the property bar you can access and change tool options and settings. Tool settings are retained when
you switch from one tool to another. You can also use the property bar to restore the default settings of the
selected tool.
To open or close the property bar
•Choose Window Property Bar.
You can also close the property bar by clicking the close button on the header bar.
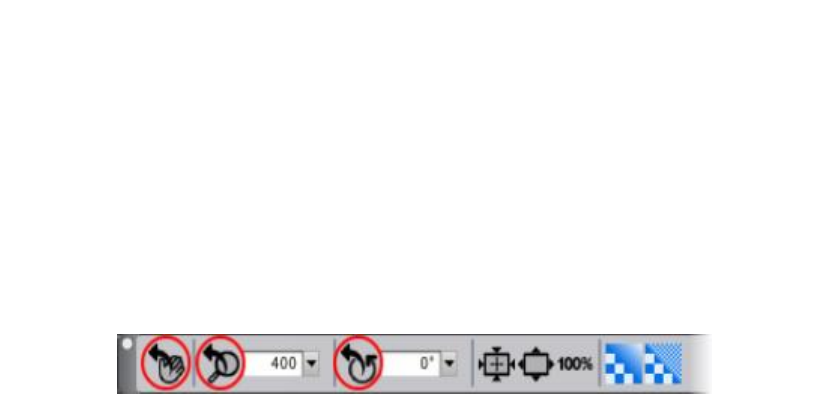
40 | Corel Painter 2015 User Guide
To move or dock the property bar
• Perform a task from the following table.
To Do the following
Move the property bar Drag the property bar’s header bar to a new
location.
Dock the property bar Drag the header area of the property bar, and
place it under the menu bar. The property bar
snaps into place.
To reset the default tool settings
• Click the Reset Tool button on the property bar.
The Reset Tool button on the property bar has the same icon as the selected tool in the toolbox.
Various Reset Tool buttons for the Grabber property bar.
Exploring the Navigator panel
The Navigator panel is a convenient tool for managing many aspects of a document.
You can use the Navigator panel to better orient yourself in the document window and modify the
document window display. For example, when you’re working at a high zoom level, or with a large image,
you can use the Navigator panel’s small canvas preview to display the entire image without having to zoom
out. You can also move to a different image area without having to adjust the zoom level. In addition, you
can change the zoom level or rotate the canvas from the Navigator panel.
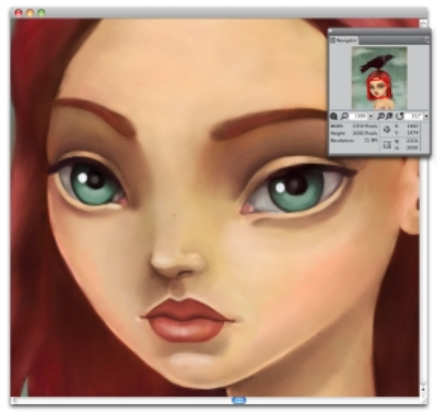
Workspace tour | 41
The Navigator’s canvas preview allows you to view
the entire image even when you’re zoomed in.
The Navigator lets you enable various tools such as the drawing modes, Impasto information, tracing
paper, grids, and color management.
The Navigator panel also displays document information such as the X and Y coordinates and the cursor
position to help you navigate the image. You can also view document width, height, and resolution. For
more information, see “Navigating images and viewing image information” on page 75.
Displaying the Brush Selector bar and the Brush library panel
The Brush library panel lets you choose a brush from the currently selected brush library. It also allows you
to organize and display brushes in various ways. For example, you can create a new brush library, open a
previously stored brush library, and view the most recently used brushes. The Brush library panel displays the
content of only one brush library at a time.
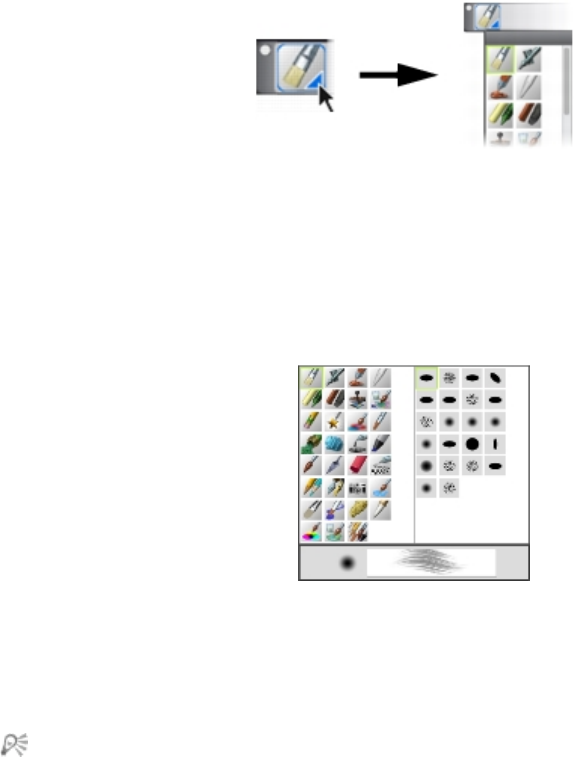
42 | Corel Painter 2015 User Guide
You can access the Brush library panel by clicking
the Brush Selector on the Brush Selector bar.
In the Brush library panel, brushes are organized into categories, which contain brush variants. Brush
categories are groups of similar brushes and media. Brush variants are specific brushes and brush settings
within a brush category. For example, in the Pastels category, there are pencil, chalk, soft, and hard pastel
brush variants. You can change the display of the categories and variants. For more information, see
“Organizing and displaying brushes in the Brush library panel” on page 310.
The Brush library panel allows you to browse all of the brush
categories and variants for the currently open brush library.
To hide or show the Brush Selector bar
•Choose Window Brush Selector.
You can also close the Brush Selector bar by clicking the close button on the header bar.
To move the Brush Selector bar
• Perform a task from the following table.
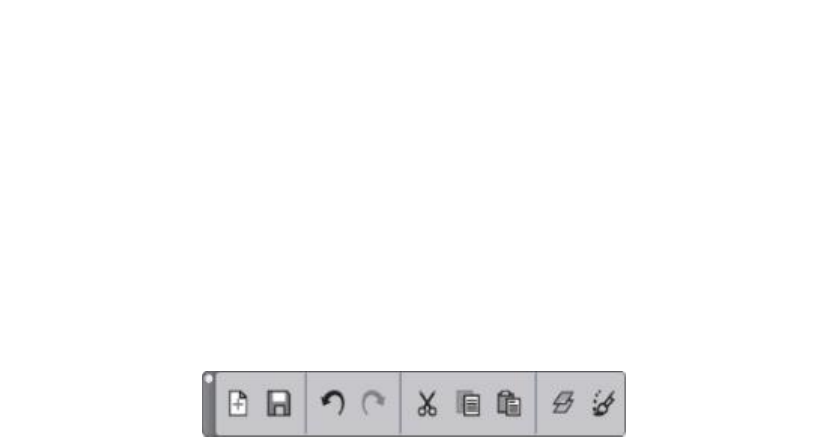
Workspace tour | 43
To Do the following
Move the Brush Selector bar Drag the Brush Selector header bar to a new
location in the application window.
Dock the Brush Selector bar Drag the Brush Selector header bar to the edge of
the application window or a panel. The bar snaps
into place.
Displaying the command bar
The command bar gives you quick access to commonly used commands such as starting and saving
documents, undoing and redoing actions, cutting and pasting, and accessing brush tracking options.
Displaying the command bar is especially useful for tablets and other small-screen devices.
The command bar.
You can change the orientation of the command bar.
To display the command bar
•Choose Window Command Bar.
To change the orientation of the command bar
1Do one of the following:
•(Mac OS) Choose Corel Painter 2015 Preferences Interface.
•(Windows) Choose Edit Preferences Interface.
2From the Command Bar Layout list box, choose an option.
Exploring panels and palettes
The interactive panels in Corel Painter are single tabbed containers that let you access content libraries,
commands, controls, and settings. Panels are stored in palettes. You can store one or multiple panels in a
palette. For example, you can reconfigure the panels that you most often use in one palette. You can also
arrange panels and palettes in the application window to quickly access the tools and controls that you use
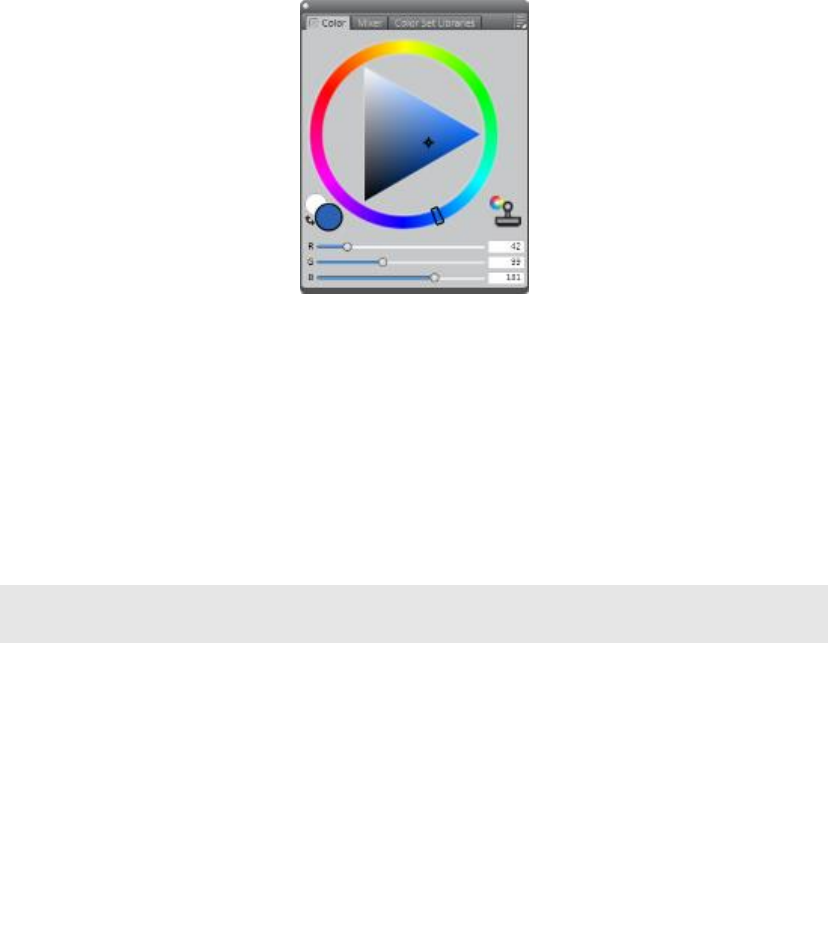
44 | Corel Painter 2015 User Guide
most often or to maximize screen space. For example, you can display all color-specific panels in one color
palette, or display panels individually.
This palette includes three color-related panels: Color, Mixer, and Color
Set Libraries. You can access a panel’s content by clicking its tabs.
Corel Painter also includes the Brush controls palette, which is a preset palette that groups all panels that
contain brush-related settings. You can copy an individual brush control panel to the workspace, but you
can’t remove any of the brush control panels from the palette.
Exploring panels
Corel Painter includes several panels that you can group together to create a custom palette.
Panel Description
Brush Control panels
The brush control panels are included in the Brush
Controls palette. They include the following panels:
General, Stroke Attributes, Opacity, Grain,
Dab Profile, Size, Bristles, Spacing, Smoothing,
Angle, Static Bristle, Computed Circular, Well,
Rake, Multi, Mouse, Cloning, Impasto, Image
Hose, Airbrush, Water, Liquid Ink, Digital
Watercolor, Artists’ Oils, Real Watercolor,
Real Wet Oil, Stroke Jitter, RealBristle™Hard
Media, Color Variability, Color Expression, Brush
Calibration, Dab Preview, and Stroke Preview.
Allows you to customize brush variants. For more
information, see “Adjusting brushes with brush
controls” on page 325.

Workspace tour | 45
Panel Description
Advanced Brush Controls panel Generates a grouping of brush control panels that
are relevant to the currently selected brush. For
more information, see “Displaying advanced brush
controls dynamically” on page 310.
Color panels
Color Lets you choose main and additional colors for
painting in Corel Painter documents. For more
information, see “Choosing colors from the Color
panel” on page 218.
Mixer Lets you mix and blend colors as you would on
an artist’s palette. For more information, see
“Exploring the Mixer panel and mixing controls” on
page 226.
Color Set Libraries Displays the colors in the current color set so
you can organize groups of colors. For more
information, refer to “Working with color sets” on
page 235.
Paper panels
Papers Lets you apply and edit paper textures
Paper Libraries Lets you open and manage paper libraries. You can
also choose a paper texture.
Media library panels
Patterns, Gradients, Nozzles, Looks, and Weaves
library panels
Let you open and manage media libraries. You can
also choose media.

46 | Corel Painter 2015 User Guide
Panel Description
Image Portfolio and Selection Portfolio Contain all images or selections in the current
library. You can view the items as thumbnails or in
a list as well as preview the current item. For more
information, see “Storing layers as images in the
Image Portfolio” on page 561 and “Working
with the Selection Portfolio” on page 592.
Media control panels
Patterns, Gradients, and Weaves control panels Lets you apply and edit patterns, gradients, and
weaves
Flow Map panels
Flow Map panel Lets you apply and manipulate flow maps. For
more information, see “Applying and adjusting
flow maps” on page 449.
Flow Map Libraries panel Lets you open, manage, and navigate flow map
libraries. For more information, see “Choosing flow
maps and compatible brush variants” on page
450.
Navigator, Clone Source, and Reference Image
panels
Navigator panel Lets you navigate the document window. You can
also view document information, such as width
and height; X and Y coordinates and the cursor
position; context-sensitive information based on a
selected tool; and unit information, such as pixels,
inches, and resolution. For more information, see
“Exploring the Navigator panel” on page 40.
Clone Source panel Lets you open and manage clone sources. For more
information, see “Cloning images” on page 167.

Workspace tour | 47
Panel Description
Reference Image panel Lets you display an inspirational image in the
document window while maintaining focus on
the canvas. For more information, see “Displaying
reference images” on page 133.
Layers and Channels panels
Layers Lets you preview and arrange all layers in a Corel
Painter document. You can use Dynamic Plug-ins,
add new layers (including Watercolor and Liquid
Ink layers), create layer masks, and delete layers.
In addition, you can set the composite method
and depth, adjust the opacity, and lock and unlock
layers. For more information, see “Layers” on page
513.
Channels Lets you preview thumbnails of all the channels
in a Corel Painter document, including RGB
composite channels, layer masks, and alpha
channels. From the panel, you can also load,
save, and invert existing channels, and create
new channels. For more information, see “Alpha
Channels” on page 563.
Auto-Painting panels
Underpainting Lets you adjust tone, color, and detail in a photo
in preparation for auto-painting. This panel is used
in the first step of the photo-painting process. For
more information, see “Creating underpaintings”
on page 160.
Auto-Painting Lets you specify a range of settings that control
how brushstrokes are applied. This panel is used in
the second step of the photo-painting process. For

48 | Corel Painter 2015 User Guide
Panel Description
more information, see “Auto-painting photos” on
page 162.
Restoration Lets you fine-tune a painting by providing brushes
that help you restore detail. This panel is used
in the third step of the photo-painting process.
For more information, see “Restoring detail to
paintings” on page 165.
Composition panels
Divine Proportion Lets you customize the Divine Proportion guide —
a tool that helps you plan a layout according to a
classic composition method. For more information,
see “Using the Divine Proportion tool” on page
208.
Layout Grid Lets you customize the Layout Grid — a tool that
helps you divide your canvas so that you can plan
your composition. For more information, see
“Using the Layout Grid” on page 196.
Text and Scripts panels
Text Lets you perform all text-related tasks, such as
choosing fonts, adjusting opacity, and applying
drop shadows. For more information, refer to
“Adding text” on page 811.
Scripts Lets you access all commands and settings related
to scripts. For example, you can open, close, play,
and record scripts from the Scripts panel. For more
information, see “Using scripts to automate tasks”
on page 843.
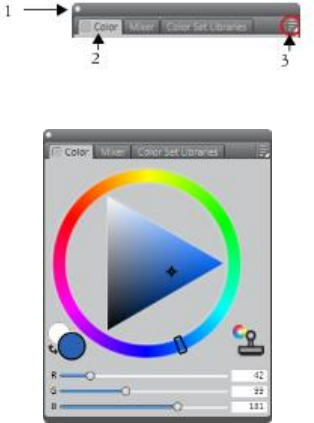
Workspace tour | 49
Rearranging panels and palettes
You can rearrange the display of panels to better match your workflow. For example, you can group task-
related panels together in one palette. At any time, you can further customize these palettes by adding or
removing a panel, repositioning a panel, or moving a panel to another palette.
You can easily display a panel when you need it, and you can quickly close a panel when you’re done. If you
want to save screen space, but keep the panels and palettes displayed (in the application window), you can
collapse or resize them.
Palettes and panels float in the workspace. Docking attaches the panel or palette to the vertical edge of the
application window. Undocking detaches them from other parts of the workspace, so you can move them.
To perform docking, you need to grab a panel’s tab or a palette’s header bar.
Most panels in Corel Painter contain option menus from which you can access a series of related
commands. For example, you can use the options menu in the Paper controls panel to capture, make, and
invert paper textures.
A typical palette features a header bar (1), panel tabs (2), and a Paneloptions button (3).
By default, the Color panel is open and is grouped in a
palette with the Mixer and Color Set Libraries panels.
You can save the arrangement of palettes as a custom workspace layout for later use, and you can delete
this custom workspace layout when you no longer need it.

50 | Corel Painter 2015 User Guide
To group panels into palettes
• Perform a task from the following table.
To Do the following
Group panels into a palette Drag a panel by its tab to another open panel to
create a group.
Add a panel to a palette Drag the panel tab to the palette.
Remove a panel from a palette Drag the panel tab out of the palette.
Reposition a panel in a palette Drag the panel tab to a new location in the
palette.
To hide or show a panel or palette
• Perform an action from the following table.
To Do the following
Hide or show a panel from a menu Choose Window [Panel name].
Hide an open panel Click the Close button on the panel tab.
Hide an open palette Click the Close button on the header bar.
When you choose Window Show Panels, only the panels that were open when you chose Hide
Panels are displayed.
You can restore a previously hidden palette by choosing Window, and choosing the name of a
panel that is contained in the palette.

Workspace tour | 51
To expand or collapse a panel
• Double-click the panel tab.
To resize a panel or palette
• Perform a task from the following table.
To Do the following
Resize a panel or palette proportionally Point to the lower-right corner of the panel or
palette. When the cursor changes to a double-
sided arrow, drag the panel or palette to resize it.
Resize a panel or palette vertically Point to the lower edge of the panel or palette.
When the cursor changes to a double-sided arrow,
drag the edge of the panel or palette to resize it.
Resize a panel or palette horizontally Point to the right edge of a panel or palette
header. When the cursor changes to a double-
sided arrow, drag the edge of the panel or palette
to resize it.
To dock or undock a palette
• Perform a task from the following table.
To Do the following
Dock a palette Drag the palette header bar, or the blank space to
the right of the tabs, to the vertical edge of the
application window. The palette snaps into place
when it lines up with the edge.
Undock a palette Drag the blank area to the right of the panel tabs
away from the edge of the application window.

52 | Corel Painter 2015 User Guide
To Do the following
Dock a panel Drag the panel tab to the vertical edge of the
application window. The panel snaps into place
when it lines up with the edge.
Undock a panel Drag the panel tab away from the application
window.
If there’s not enough space along the vertical edge of the application window (for example, if you
have a lot of expanded palettes), you may not be able to dock a panel or a palette. Collapse one or
multiple panels to create sufficient space for docking.
You cannot dock panels or palettes with toolbars.
To access additional panel options
•In the panel, click the Panel options button , and choose an option.
To save an arrangement of palettes as a workspace layout
1Choose Window Arrange Palettes Save Layout.
2In the Palette Layout Name dialog box, type a name in the New Layout list box.
The workspace layout appears as a menu item under Window Arrange Palettes.
You can display a saved arrangement of palettes by choosing Window Arrange Palettes [Name
of Layout].
You can restore the default palette arrangement at any time by choosing Window Arrange
Palettes Default.
To delete a workspace layout
1Choose Window Arrange Palettes Delete Layout.
2In the DeletePalette Layout dialog box, choose a layout from the Palette Layout list box.

Workspace tour | 53
Creating and modifying custom palettes
Corel Painter lets you create custom palettes that contain only the features that you want so you can quickly
access them. For example, you can place items from the Brush library panel or any of the Media library
panels in a custom palette. You can also add commands from the main menus or panel options to custom
palettes.
Items that appear on a custom palette are references (aliases or shortcuts) to the original. This means that
if you change the original — for example, by modifying and saving a brush variant — the custom panel
button loads the newest version. However, if you delete the original, Corel Painter won’t be able to find the
item again to load in the custom palette.
You can change how items on a custom palette are displayed. For example, you can display them as text,
icons, or wide icons.
Custom palettes behave like the standard panels. For more information about working with panels, see
“Rearranging panels and palettes” on page 49.
To create a custom palette
1Choose Window Custom Palette Add Command.
2Choose New from the Custom Palette list box.
3With the Create Palette/Add Command dialog box open, do one of the following:
• Choose a menu item from a default Corel Painter menu.
• Choose a menu item from the Other menu to add additional controls to a custom palette.
• Choose a menu item from the Panel Menus menu to add a panel, or any of the items included in a
panel’s options flyout menu, to a custom palette.
• Choose a menu item from the Tools menu to add a toolbox tool to a custom palette.
• Choose an item from an open palette.
4In the Create Palette/Add Command dialog box, click Add, and then click OK.
If the item that you want is represented on a panel with an icon, you can create a custom palette
by holding down Shift and dragging the icon out of a panel to the application window. This
method works for brush variants, paper textures, media, such as gradients and patterns, and
nozzles, looks, and scripts.
You can add brush variants that are stored in different brush libraries to the same custom palette.
When you choose a brush variant from the custom palette, the brush library in which the brush
variant is stored is automatically loaded in the Brush library panel. This allows you to quickly switch
between brush libraries.

54 | Corel Painter 2015 User Guide
To open or close a custom palette
• Perform a task from the following table.
To Do the following
Open a custom palette Choose Window Custom Palette [Custom Panel
Name].
Close a custom palette On the custom panel header bar, click the Close
button.
To add items to a custom panel
• Perform a task from the following table.
To Do the following
Add a button from a panel Hold down Shift and drag a button from one
panel to the custom panel.
Add a menu item Choose Window Custom Palette Add
Command. Choose the custom panel from the
SelectCustom Palette list box, and with the Create
Palette/Add Command dialog box open, choose a
menu item, and click OK.
Add a tool Choose Window Custom Palette Add
Command. Choose the custom panel from the
Select Custom Palette list box, and with the
Create Palette/Add Command dialog box open,
choose a menu item from the Tools menu.
To change the appearance of items on a custom palette
1Do one of the following:
• (Mac OS) Holding down Control, click an item.
• (Windows) Right-click an item.

Workspace tour | 55
2Perform a task from the following table.
To Do the following
Use a custom icon Choose Set Custom Icon, and locate the image
you want.
Display a text label for each item Choose Text View.
Display an icon for each item Choose Icon View or Wide Icon View.
To change the size of the icons, click the Options button in the custom palette, and choose Small
Icons or Large Icons.
Managing custom palettes
You can manage your custom palettes in the Custom Palette Organizer. Corel Painter names custom
palettes “Custom 1”, “Custom 2,” and so on. For ease of use, you can rename them.
Corel Painter keeps your custom palettes from one session to the next. You can also save a custom palette
to a file. If you save it to a file, you can remove it from Corel Painter, and then load it again later. You can
delete obsolete custom palettes or those you don’t use very often.
To rename a custom palette
1Choose Window Custom Palette Organizer.
2Choose a palette from the Custom Palette list.
3Click Rename.
4In the Palette Name dialog box, type a name in the New Palette text box.
To save a custom palette
1Choose Window Custom Palette Organizer.
2Choose a palette from the Custom Palette list.
3Click Export.
4In the New Palette File dialog box, type a name in the File Name text box.

56 | Corel Painter 2015 User Guide
5Choose the drive and folder where you want to save the file.
It’s a good idea to store all saved palettes in the same folder.
To import a custom palette
1Choose Window Custom Palette Organizer.
2In the Custom Palette Organizer, choose a palette from the Custom Palette list.
3Click Import.
4In the Open Palette File dialog box, choose the file where the custom palette is saved.
5Click Open.
Only custom palette files created with version 8.1 or later are supported by Corel Painter. Custom
palettes created with version 7 or earlier cannot be loaded.
To delete a custom palette
1Choose Window Custom Palette Organizer.
2Choose a palette from the Custom Palette list.
3Click Delete.
Working with libraries
A library is a storage place that helps you organize and manage a collection of similar items, such as
brushes or paper textures. For example, the default paper textures are contained in the Paper Textures
library, which is loaded by default when you open Corel Painter. As you customize paper textures and other
resources, you can save them to your own libraries. Libraries are available for brushes, gradients, layers,
lighting, looks, nozzles, paper textures, patterns, selections, scripts, and weaves. For more information, see
“Libraries” on page 281 and “Importing and exporting brush libraries, categories, and variants” on page
317.
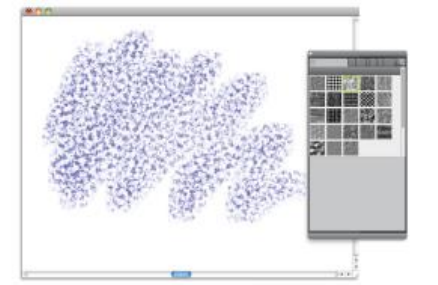
Workspace tour | 57
The Paper Libraries panel lets you choose, organize, and apply paper textures.
Creating, importing, exporting, and deleting workspaces
Corel Painter lets you completely customize your workspace to suit your workflow needs. You can customize
Brush libraries, Paper libraries, and Portfolios and save these changes to use later. In addition, you can
easily create multiple workspaces, each with different libraries and portfolios. You can even share these
customized workspaces with others by importing or exporting them. However, if you are importing a
workspace that was created in an older version of Corel Painter, only libraries and custom palettes are
preserved in Corel Painter 2015.
You can also delete any obsolete workspaces.
To create a new workspace
1Choose Window Workspace New Workspace.
2Type a name in the Workspace Name text box.
3From the Based On list box, choose the workspace on which you want to base the new workspace.
4Click Save.
The application switches to the new workspace.
To switch to a different workspace
•Choose Window Workspace [Workspace Name].
To import a workspace
1Choose Window Workspace Import Workspace.

58 | Corel Painter 2015 User Guide
2Choose the workspace file that you want to import.
3Click Open.
To export a workspace
1Choose Window Workspace Export Workspace.
2Choose the workspace that you want to export.
3Click Save.
To revert to the default workspace
•Choose Window Workspace Default.
Corel Painter lets you modify the default workspace, so this workspace may eventually differ
from the factory default workspace. If you restore the factory default workspace, you will lose all
customizations unless you save the workspace. For more information, see “Restoring the default
Corel Painter settings” on page 58.
To delete a workspace
1Choose Window Workspace Delete Workspace.
2From the Workspace list box, choose the workspace that you want to delete.
3Click Delete.
If you are trying to remove the active workspace, you may be prompted to choose a new active
workspace.
Restoring the default Corel Painter settings
You can restore the Corel Painter workspace to its default factory settings. The restoring process removes all
modifications and customizations that you made to the application — including the following:
• All libraries (Brushes, Papers, Scripts, Nozzles, etc)
• Custom palettes
• Palette Layout(s)
• Color Sets
• All preferences (Preferences dialog box)
• Customized keyboard shortcuts
• Brush tracking and calibration settings
• Recent brushes

Workspace tour | 59
• Color Management presets
• Perspective Guides, Layout, and Divine Proportion presets
Before restoring the Corel Painter default workspace, we recommend that you export any libraries that you
want to preserve. For example, if you created custom brushes, you can export the brush library. For more
information, see “Importing and exporting libraries” on page 281.
To restore CorelPainter to its default factory settings
1Hold down Shift and start Corel Painter.
A warning appears, asking you to confirm that you want to erase all of the modifications that you have
made to Corel Painter. Restoring the default factory settings copies the original workspace settings from
the installation to the user folder.
2Choose whether you want to restore the current workspace or all workspaces.
When you choose to restore all workspaces, all custom workspaces are deleted. Only the default
workspace is preserved and restored to the factory settings.
60 | Corel Painter 2015 User Guide
A short tour of Corel Painter for users of Adobe Photoshop | 61
A short tour of Corel Painter for users of Adobe
Photoshop
by Cher Threinen-Pendarvis
Corel Painter is known for its responsive, realistic brushes, multitude of rich textures, and fabulous special
effects, which cannot be found in any other program. The biggest difference that you will notice between
Adobe Photoshop and Corel Painter is the warmth and texture of the Natural-Media brushes and paper
textures of Corel Painter. You’ll find brushes with realistic bristles that lay down oily paint and dry-media
brushes, such as variants in the Chalk and Pastels categories, that are sensitive to textures on the canvas.
Now, let’s get started!
Before we begin the tour, you need to make sure that you are displaying the default panels and palettes. To
display the default settings, choose the Window menu, and choose Arrange Palettes Default.
Property bar
At the very top of the screen, you’ll see the property bar, which is similar to the Options bar in Photoshop.
The property bar changes contextually, depending on the tool that you choose from the toolbox.
The property bar with the Grabber tool selected from the toolbox.
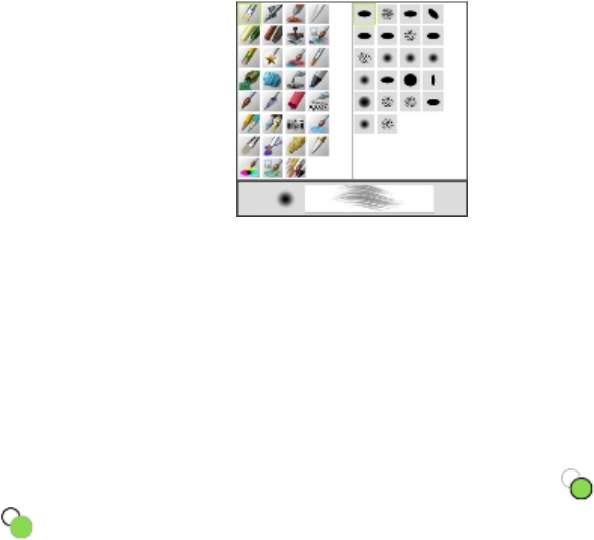
62 | Corel Painter 2015 User Guide
Brush Selector bar
On the far left of the property bar is the Brush Selector bar, which lets you open the Brush library panel. The
Brush library panel contains the amazing brush categories and brush variants of Corel Painter, such as the
Real Watercolor Brushes category and its variants.
The Brush Selector bar (left) lets you choose a brush category and a brush variant (right).
Color panel
On the upper right corner of your screen you’ll see the large, beautiful Color panel, which lets you choose
colors. You can choose colors by using the Hue Ring and the Saturation/Value Triangle. However, if you
prefer to mix color by using numbers, you can adjust the three sliders that are located under the Hue Ring.
By clicking the panel options button on the right side of the Color panel, you can set the sliders to display
either Red, Green, and Blue, or Hue, Saturation, and Value.
Also located on the Color panel is the Clone Color button, a useful control that lets you paint with color
from a source image. On the left of the Color panel are the Main Color swatch or Additional Color
swatch . The color swatches in Corel Painter operate differently than the Foreground and Background
Color squares in Photoshop. To change the color, you can double-click either the Main Color swatch or the
Additional Color swatch and then choose a new color on the Hue Ring. Or you can click in the Saturation/
Value Triangle to choose a new tint or shade. You can use the additional color to create gradients or to use
brushes that paint more than one color. Unlike the Background Color in Photoshop, the additional color
does not affect the canvas.
Before moving on with the tour, click the Main Color swatch to select it.
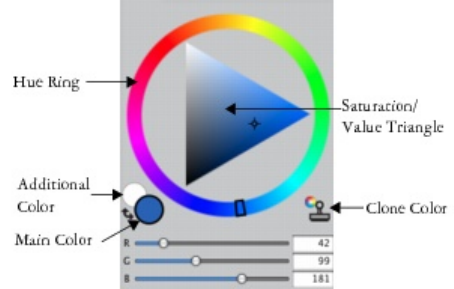
A short tour of Corel Painter for users of Adobe Photoshop | 63
Color panel
In Corel Painter, you can resize the Color panel by dragging the handle in the lower-right corner of the
panel to resize it. Resizing the Color panel lets you select colors more accurately.
Textures
A basic paper texture is automatically loaded when you start Corel Painter. You can access additional rich
paper textures by clicking the Paper Selector from the toolbox, or from the Paper Libraries panel (Window
menu Paper Panels Paper Libraries).
Layers and mask channels
In Corel Painter, you can open Photoshop files that contain pixel-based layers and layer masks. You can
access and edit the layers and layer masks by using the Layers panel, much like in Photoshop. The files you
open in Corel Painter have multiple channels intact.
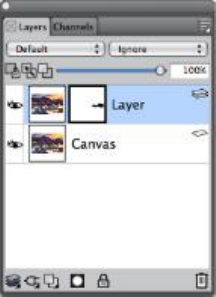
64 | Corel Painter 2015 User Guide
Layers panel
Photoshop Layer Styles
If you are using native Photoshop layer styles, such as the Drop Shadow layer style, make sure that you
preserve the original Photoshop file in your archive before you convert the layer style information. That is,
save the file with the live layer styles in the Photoshop (PSD) file format, and then save a new copy of this
file. In the new file, convert the layer style information into pixel-based layers before importing the file into
Corel Painter.
To convert a layer that has a Drop Shadow layer style, select the layer, and then choose Layers Layers
Style Create Layer. A word of caution: Some aspects of the effects cannot be reproduced with standard
layers.
File formats
Corel Painter gives you the flexibility of opening Photoshop (PSD) files that are saved in RGB, CMYK, and
grayscale modes while preserving pixel-based layers and mask channels (also referred to as alpha channels).
You can also open TIFF files in Corel Painter, but only one mask channel is preserved. Layered TIFF (TIF) files
that you create in Photoshop are flattened when you open them in Corel Painter. When you work exclusively
with RIFF (RIF), which is the native file format for Corel Painter, you retain Corel Painter specific elements
when saving files. For instance, special paint media layers, such as Watercolor layers, require the RIFF format
to retain the live “wet” capabilities. However, if you open a Photoshop file in Corel Painter but plan on
reopening the file in Photoshop, you should continue to save the file to the Photoshop format.
Now roll up your sleeves, grab your stylus, and continue to explore Corel Painter.
About the author
An award-winning artist and author, Cher Threinen-Pendarvis is a pioneer in digital art. She has been
widely recognized for her mastery of Corel Painter, Adobe Photoshop, and the Wacom pressure-sensitive
A short tour of Corel Painter for users of Adobe Photoshop | 65
tablet and has used these electronic tools since they were first released. Her artwork has been exhibited
worldwide, her articles and art have been published in many books and periodicals, and she is a member of
the San Diego Museum of Art Artist Guild. She has taught Corel Painter and Adobe Photoshop workshops
around the world and is the principal of the consulting firm Cher Threinen Design. Cher is the author
of The Photoshop and Painter Artist Tablet Book, Creative Techniques in Digital Painting, Beyond Digital
Photography, and all nine editions of The Painter Wow! book. Visit Cher's web site at: www.pendarvis-
studios.com.
66 | Corel Painter 2015 User Guide

Creating, navigating, and manipulating documents | 67
Creating, navigating, and manipulating
documents
The Corel Painter application provides a digital workspace in which you can create new images, or alter
existing images, by using the Natural-Media tools and effects. Your working image, known as a document,
is displayed in a document window. This document window includes navigation and productivity features
to help you work efficiently.
As you create an image, you can save your document in various file formats, such as RIFF (the native Corel
Painter format), JPEG, TIFF, and PSD (Adobe Photoshop). Corel Painter also lets you open or import images
saved in many other file formats.
This section contains the following topics:
•“Creating documents” (page 68)
•“Understanding resolution” (page 70)
•“Opening and placing files” (page 71)
•“Creating and opening templates” (page 74)
•“Switching document views” (page 74)
•“Navigating images and viewing image information” (page 75)
•“Zooming images” (page 77)
•“Rotating images and the canvas” (page 80)
•“Flipping images” (page 82)
•“Repositioning images” (page 84)
•“Cropping images” (page 85)
•“Resizing images and the canvas” (page 86)
•“Saving and backing up files” (page 88)
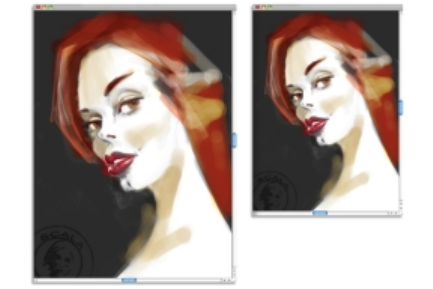
68 | Corel Painter 2015 User Guide
•“Choosing a file format” (page 89)
•“Emailing documents” (page 91)
•“Closing documents and quitting the application” (page 92)
•“Using two monitors” (page 93)
•“Support for tablets and other devices” (page 93)
•“Multi-touch support” (page 93)
•“Wacom Intuos support” (page 96)
•“Drag-and-drop features” (page 97)
Creating documents
To start an image from a blank canvas, you must create a new document. This allows you to specify the
canvas settings, such as width, height, and resolution. You can also specify the canvas color and texture.
The size of the canvas determines the size of the image when it is printed. To quickly get started, you can
choose from a list of preset canvas settings. However, you can also specify custom settings, which you can
save as a preset for future use.
You can resize the canvas (left) to prepare an image for printing (right).
Canvas size and resolution
When setting the canvas size and resolution, you can choose options that correspond to the image’s
destination, however, you may want to choose a larger image size to preserve more image details. For
example, you can set the resolution of a new image at 300 pixels-per-inch (ppi), the width to 16 inches, and
the height to 20 inches. This large size makes it easier to maintain image quality when you need to produce
a smaller version of the image. For more information, see “Understanding resolution” on page 70 and
“Resizing images and the canvas” on page 86.

Creating, navigating, and manipulating documents | 69
Pixels-per-inch (ppi) is equivalent to dots per inch (dpi).
To create a new document
1Choose File New.
2Type a filename in the Image Name text box.
3From the Canvas Preset list box, choose a preset to automatically determine the size, resolution, color
of the canvas, and the paper texture.
You can also
Change the unit of measurement for the document Choose a unit of measurement from the list box
located to the right of the Width and Height
boxes.
Change the document size Type values in the Width and Height boxes.
Change the number of pixels-per-inch (ppi) or
pixels per centimeter that make up an image
Type a value in the Resolution box.
Change the resolution type Choose a resolution type from the list box located
to the right of the Resolution box.
Change the color of the canvas Click the Color chip, and choose a paper color
from the Color dialog box.
Change the texture of the canvas Click the Paper chip, and choose a paper texture
from the Paper Textures panel.
In the New Image dialog box, setting the document’s pixels-per-inch is equivalent to setting its
dots per inch (dpi). For more information, see “Understanding resolution” on page 70.
To create a custom canvas preset
1Choose File New.
70 | Corel Painter 2015 User Guide
2Choose the settings that you want to save as a canvas preset.
3Click the Add button .
4In the Add Preset dialog box, type a name in the Preset Name text box.
A custom canvas preset is not a template. Unlike a template, it does not allow you to store any
content. A custom canvas preset allows you to store only canvas dimensions, resolution, color, and
texture.
You can delete a canvas preset by choosing the preset name from the Canvas Preset list box and
clicking the Delete button .
Understanding resolution
When you work with images in a digital workspace, it is helpful to understand the concept and applications
of resolution. Resolution refers to how Corel Painter measures, displays, saves, and prints images —
whether as small squares of color called “pixels” or as mathematical objects called “vectors.”
A document’s resolution affects both its appearance on your computer screen and its print quality. You can
specify a document’s resolution when you create a new document, save, or export a file.
Resolution and screen appearance
Most monitors have a resolution of 72 pixels-per-inch (ppi). The Corel Painter display default is 72 ppi,
which means that each pixel in the Corel Painter image occupies one pixel on your monitor. The display
resolution does not affect the document’s actual number of pixels-per-inch — it affects only how the image
is displayed on the monitor.
For example, a 300-ppi image is displayed on-screen at approximately four times its actual size. Because
each pixel in the Corel Painter image occupies one pixel on your monitor, and the monitor’s pixels are
approximately four times the size of the image’s pixels (72 ppi versus 330 ppi), the image must appear four
times larger on-screen in order to display all of the pixels. In other words, your 300-ppi document will be
printed at approximately one-quarter of its on-screen size. To view the image at its actual size, you can set
the zoom level to 25%.
If you set the dimensions in pixels and then change the number of pixels-per-inch (resolution), this change
will affect the size of the printed image. If you set your document size in inches, centimeters, points, or
picas and then change the resolution, the dimensions of the printed image will not be affected.

Creating, navigating, and manipulating documents | 71
Pixels-per-inch (ppi) is equivalent to dots per inch (dpi).
Resolution and print quality
The resolution of output devices (printers) is measured in dots per inch, and in the case of halftones, lines
per inch (lpi). Output device resolutions vary, depending on the type of press and paper used. In general,
a photograph is output at a crisp 150 lpi if printed on glossy magazine stock, and at 85lpi if printed on
newspaper stock.
If you are using a personal laser or inkjet printer, set your document size in inches, centimeters, points,
or picas at the dots-per-inch setting specific to your printer. Most printers produce excellent output from
images set at 300 ppi. Increasing the file’s pixels-per-inch setting does not necessarily improve the output
and may create a large, unwieldy file.
If you are using a commercial printer or a more sophisticated output device, the dimensions of the image
should always be set to the actual size that you want the image to appear in the printed piece. A good
rule of thumb is to set the number of pixels-per-inch to twice the desired lines per inch. So, at 150lpi, the
setting should be twice that, or 300 ppi; at 85lpi, the setting should be 170 ppi. If you have questions
about the resolution of specific output devices, it’s a good idea to check with the print service provider.
Opening and placing files
You can open files that were created in Corel Painter or in other applications. For example, you can open a
file from another graphics application and use Corel Painter to add brushstrokes, tints, or paper textures.
You can also place a file in an existing Corel Painter document. The placed image becomes a new reference
layer in the document — you can transform (resize, rotate, or slant) it on-screen by dragging its handles. A
placed file maintains its link to the source file until you commit it to the standard layer format.
You can scale a file before placing it in a document.

72 | Corel Painter 2015 User Guide
For more information, see “Working with reference layers” on page 559.
Supported file formats
Corel Painter lets you open the following file formats:
• RIFF (RIF) — native Corel Painter format
• TIFF (TIF)
• PNG
• CMYK TIF (TIF) — Because Corel Painter works with RGB colors, the CMYK TIF files that you open or
import in the application are converted to an RGB color profile.
• Adobe Photoshop formats (PSD) — Corel Painter preserves layers, layer masks, alpha channels, and
composite methods. Layer effects and adjustment layers are not supported and should be merged or
flattened in Adobe Photoshop.
• Windows Bitmap (BMP)
• PC Paintbrush (PCX)
• TARGA (TGA)
• GIF — Corel Painter does not convert GIF animations to frame stacks.
• JPEG (JPG)
Windows only
• Frame stacks (FRM) — Corel Painter animation files
• QuickTime (MOV), Video for Windows (AVI), and numbered files. For more information, see “Opening a
Corel Painter movie” on page 825 or “Importing and exporting numbered files” on page 838.
Corel Painter does not support LZW compressed TIFF file format. Only uncompressed TIFF files can
be opened in Corel Painter.
To open a document
1Choose File Open.
Corel Painter displays the folder of the last file you opened.
2In the Open dialog box, locate the file that you want to open.
For each image, Corel Painter lists the dimensions (in pixels), file size, and file format. Files saved in Corel
Painter include thumbnails for browsing.
3Click Open.
The File menu also offers you a shortcut to previously opened documents. You can find your file in
the recently opened files list by choosing File Recent, and clicking the filename to open the file.

Creating, navigating, and manipulating documents | 73
To browse for a document (Mac OS)
1Choose File Open.
2Click Browse.
The Browse dialog box shows thumbnails for all the RIFF files in a folder.
3Double-click the filename, or select a file, and click Open.
To place a file
1Choose File Place.
2Select an image file, and click Open.
The Place dialog box appears.
3Perform a task from the following table.
To Do the following
Place the image in a specific location in the
document window
Click the area in the document window where you
want to place the image.
Place the image in the center of the document
window
Click Ok.
Scale the image before placing In the Scaling area, type a value in both the
Horizontal and Vertical boxes.
Maintain the image proportions when scaling In the Scaling area, enable the Constrain Aspect
Ratio check box.
Retain the image mask Enable the Retain Alpha check box. The image
mask becomes a layer mask.
If the placed image contains a mask and you do not enable the Retain Alpha check box when
placing, the image mask is discarded.

74 | Corel Painter 2015 User Guide
Creating and opening templates
If you regularly work with documents that contain similar dimensions, formatting, and resolution, you can
create document templates so that you don’t have to start each document from scratch. When creating a
template, you can add content to the canvas and save it as part of the template.
To save a document as a template
1Create a file with the sizing, formatting, and resolution attributes you want.
2Choose File Save As.
3In the Save (Mac OS) or Save Image As (Windows) dialog box, save the file to one of the following
folders in your user folder:
• (Mac OS) Corel Painter 2015\Support Files\Templates
• (Windows) AppData\Roaming\Corel\Painter 2015\Default\Templates
If you want the template to display under File Open Template, you need to close and then reopen
Corel Painter.
In a multiuser environment, only users with Administrator status can add files to the Templates
folder.
In Windows, you need to ensure that all hidden files are displayed in order to access the AppData
folder.
To open a document template
•Choose File Open Template {template name}.
You can also open a template by choosing Help Welcome, and then choosing a template from
the Open an Image Template list box.
Switching document views
Corel Painter offers two document viewing modes: Windowed and Full-Screen.
Windowed mode is the default viewing mode for documents, which displays all standard tools in the
workspace. For example, the property bar, Brush selector bar, toolbox, and a few additional panels are
readily accessible.

Creating, navigating, and manipulating documents | 75
Full-Screen mode lets you hide your computer’s desktop and view the document window without scroll
bars. When Full-Screen mode is enabled, the document window is centered over a solid background. All of
the Corel Painter features work when you use Full-Screen mode.
You can also change the default document view mode for the application. For more information, see
“Interface preferences” on page 869.
To switch viewing modes
•From the toolbox, click the View Mode button to toggle between Full Screen Mode and
Windowed Mode.
You can also
Toggle the viewing modes Press Command+M(MacOS) or
Ctrl+M(Windows).
Reposition the canvas anywhere on the screen Hold down the Spacebar and drag.
You can also switch viewing modes from the Navigator panel.
Navigating images and viewing image information
You can use the Navigator panel to better orient yourself in the document window. For example, when
you’re working at a high zoom level or with a large image, you can use the Navigator panel’s small canvas
preview to display the entire image without having to zoom out. You can also move to a different image
area without adjusting the zoom level. In addition, you can highlight which area is currently displayed in
the document window.
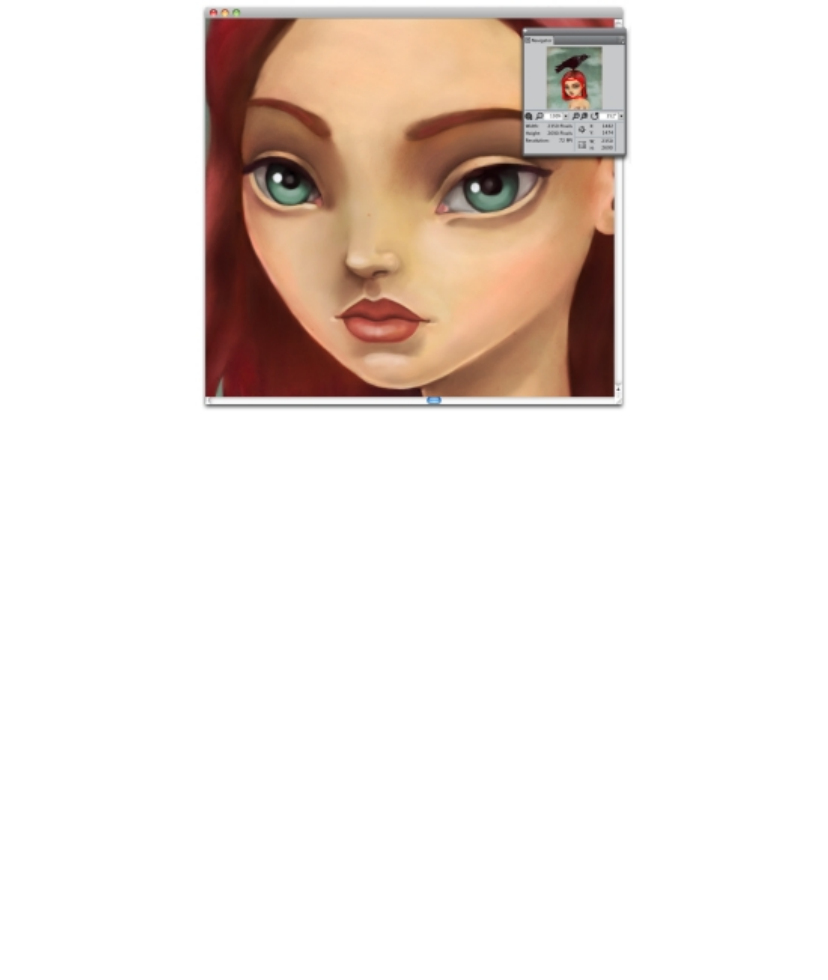
76 | Corel Painter 2015 User Guide
The Navigator’s canvas preview allows you to view
the entire image even when you’re zoomed in.
The Navigator also lets you view the X and Y coordinates and cursor position to help you navigate the
image. In addition, you can view document information, such as width and height; and unit information,
such as pixels, inches, and resolution.
You can customize the appearance of the Navigator panel by hiding the image information area or the
controls.
To display the Navigator panel
1Choose Window Navigator.
2Perform a task from the following table.
To Do the following
Move to a different area of the image without
adjusting the zoom level
In the Navigator panel, click a different area of the
canvas preview.
Zoom to a specific magnification level in the
document window
Open the Zoom Canvas list box, and adjust the
zoom level slider.

Creating, navigating, and manipulating documents | 77
To Do the following
Rotate the image in the document window Open the Rotate Canvas list box, and adjust the
rotation slider.
From the Navigator panel, you can also enable various tools by clicking the Open Navigator
Settings button , and choosing an option. The available tools include the drawing modes,
Impasto, tracing paper, grids, and color management.
To hide or show the information area or controls of the Navigator panel
•In the Navigator panel, click the Navigator options button , and disable one of the following
options:
•Navigator Frame — In the Navigator canvas preview window, hides the frame that shows the area
that is currently displayed in the document window
•View Controls — Hides the Navigator controls, such as canvas preview so that you can view the
entire image without having to zoom out. You can also move to a different image area without
adjusting the zoom level.
•Info — Hides the X and Y coordinates, cursor position, and document information, such as width
and height, and unit information, such as pixels, inches, and resolution
Zooming images
You can change the level of magnification by zooming. You can zoom in and out by using the Magnifier
tool, resetting magnification, or zooming to fit the screen. You can even zoom in and out while working
with other tools.

78 | Corel Painter 2015 User Guide
The Magnifier tool lets you zoom in and out by clicking in the document window.
To zoom in
1In the toolbox, click the Magnifier tool .
The Magnifier cursor shows a plus sign (+), which indicates that you are increasing the magnification
(zooming in).
2Click or drag in the document window.
Each click increases the magnification to the next level, as defined in the Scale box at the bottom of the
image window.
When you drag, Corel Painter chooses the magnification level that most closely conforms to the selected
area and centers the screen view on that area.
You can also zoom in using the following keyboard shortcuts:
• (Mac OS) Hold down Command, and press + (plus sign).
• (Windows) Hold down Ctrl, and press + (plus sign).
To zoom out
1In the toolbox, click the Magnifier tool , and hold down Option (Mac OS) or Alt (Windows).
A minus sign (–) appears on the Magnifier cursor, which indicates that you are decreasing the
magnification (zooming out).
Creating, navigating, and manipulating documents | 79
2Click in the document window.
Each click reduces the magnification to the next level, as defined in the Scale box at the bottom of the
image window.
You can also zoom out using the following keyboard shortcuts:
• (Mac OS) Hold down Command, and press – (minus sign).
• (Windows) Hold down Ctrl, and press – (minus sign).
To zoom to a specific magnification level
•Choose Window Navigator, and type a value in the Zoom canvas box.
If you prefer, open the Zoom Canvas slider, and adjust the zoom level.
To reset magnification to 100%
•Double-click the Magnifier tool in the toolbox.
You can also reset magnification to 100% by clicking the Reset tool on the property bar or
the Reset Zoom to 100% button in the Navigator panel.
To zoom to fit the screen
•Choose Window Zoom to Fit.
Corel Painter generates a view of the entire document to fit your document window.
You can also zoom to fit the screen by clicking the Fit Screen button on the property bar.
To set zooming performance preferences
1Click the Magnifier tool in the toolbox.
2Click one of the following buttons on the property bar:
•High Quality Display — smooths objects when zooming
•Area-averaging — increases screen drawing speed when zoomed out
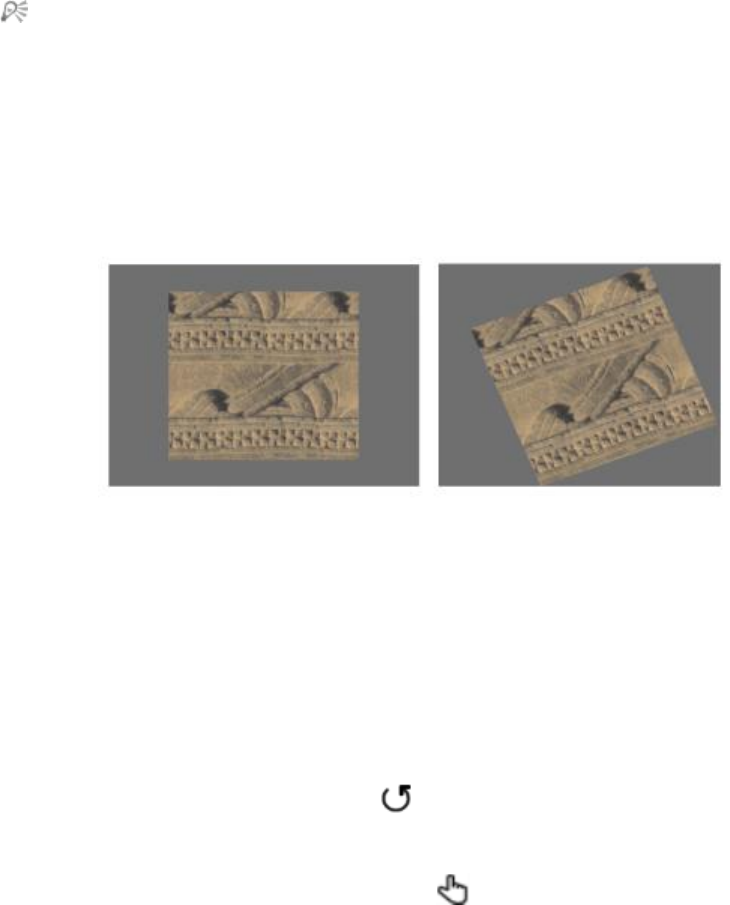
80 | Corel Painter 2015 User Guide
You can also specify zooming preferences by clicking Edit Preferences Performance, and
enabling options in the View Options area.
Rotating images and the canvas
You can rotate an image on the screen to accommodate the way you draw naturally. You can also rotate
the canvas to change the image orientation.
Rotate an image to accommodate the way you naturally draw.
Rotating an image onscreen is meant for drawing purposes only; whereas rotating the canvas modifies the
appearance of the image. For example, if you print an image that you rotated onscreen, the rotation is not
reflected in the printed image. However, if you rotate the canvas of the image, the rotation is reflected in
the printed image.
You can rotate an image or the canvas by a predefined amount, or you can choose the amount of rotation.
You can also reset the original orientation of an image.
To rotate an image
1From the toolbox, click the Rotate Page tool .
If you prefer using a keyboard shortcut, hold down Option + Spacebar (Mac OS) or Spacebar + Alt
(Windows).
The cursor changes to a hand with a pointing finger .
2Drag in the document window to rotate the image.
The new rotation angle appears on the property bar.
Creating, navigating, and manipulating documents | 81
You can also
Constrain rotation to 90° increments Hold down Shift while rotating.
Rotate an image by specifying a rotation angle Type a rotation angle in the Rotation Angle box on
the property bar or in the Navigator panel.
You can also rotate an image from the Navigator panel by typing a value in the Rotate canvas
box or by opening the Rotate Canvas slider and adjusting the rotation.
To reset the original orientation of an image
1In the toolbox, click the Rotate Page tool .
2Do one of the following:
• Click once in the document window.
•Double-click the Rotate Page tool .
•On the property bar, click the Reset Tool button .
You can also reset image rotation from the Navigator panel by clicking the Reset Rotation button
.
To rotate the canvas
1Choose Canvas Rotate Canvas.
2Perform a task from the following table.
You can also
Rotate the Canvas layer 180 degrees Choose Canvas Rotate Canvas 180.
Rotate the Canvas layer 90 degrees clockwise Choose Canvas Rotate Canvas 90 CW.
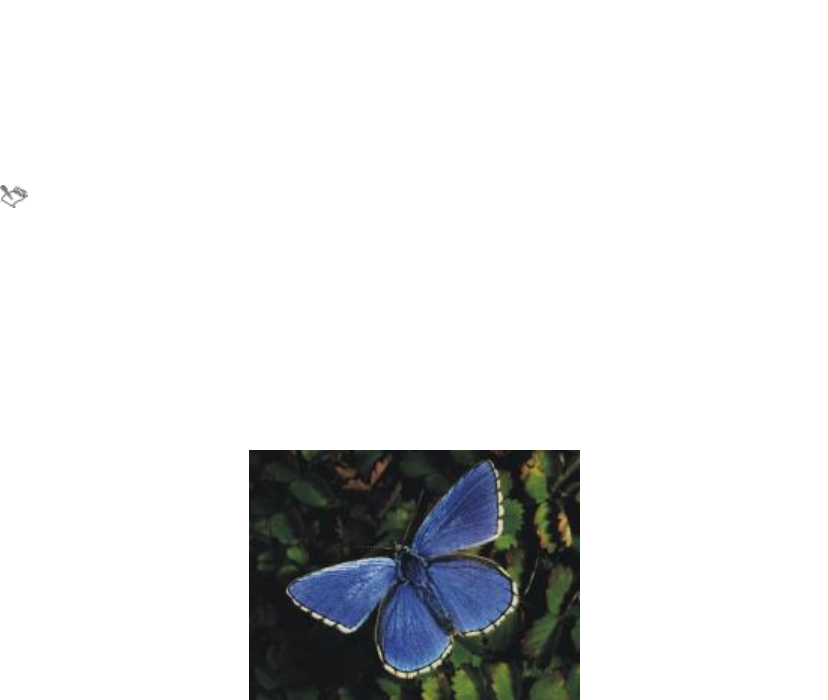
82 | Corel Painter 2015 User Guide
You can also
Rotate the Canvas layer 90 degrees
counterclockwise
Choose Canvas Rotate Canvas 90 CCW.
Rotate the Canvas layer by a user-defined amount Choose Canvas Rotate Canvas Arbitrary, and
type a value in the Angle box.
If your document has layers of different types, you are prompted to commit all of them to default,
pixel-based layers.
Flipping images
You can flip the canvas and all of its associated layers together, or you can flip a layer, selection, or the
canvas individually. You can flip all or parts of an image horizontally (from left to right) or vertically (from
top to bottom).
Original image.
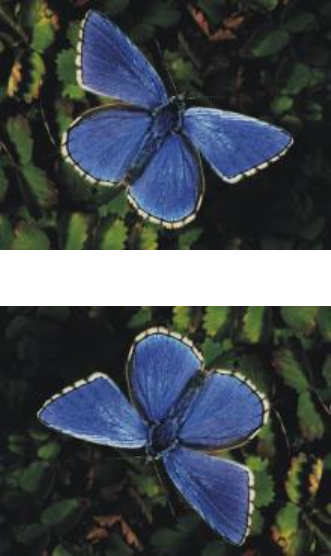
Creating, navigating, and manipulating documents | 83
Image flipped horizontally.
Image flipped vertically.
To flip the canvas and layers together
1Choose Canvas Rotate Canvas.
2Choose one of the following:
•Flip Canvas Horizontal
•Flip Canvas Vertical
If your document has layers of different types, you are prompted to commit all of them to a default,
pixel-based layer.
To flip the canvas, a layer, or a selection individually
1Perform a task from the following table.

84 | Corel Painter 2015 User Guide
To flip Do the following
The canvas Click the Canvas in the Layers panel.
A layer Click one or multiple layers in the Layers panel.
A selection Click a selection tool from the toolbox, and drag in
the document window to select an area.
2Choose Edit, and choose one of the following:
•Flip Horizontal
•Flip Vertical
Repositioning images
You can reposition an image in the Corel Painter workspace in order to view, or work on, a different area of
an image. You can also view a different area of an image when you’re zoomed in.
To reposition a document
1In the toolbox, click the Grabber tool .
The cursor changes to the Grabber tool.
2Perform a task from the following table.
To Do the following
Scroll through the image Drag in the document window.
Center the image Click once in the document window.
You can also activate the Grabber tool by holding down the spacebar.
To reposition a document while zoomed in
1Choose Window Navigator.
Creating, navigating, and manipulating documents | 85
2In the Navigator panel, click a different area of the preview area.
If the Navigator frame is displayed, you can drag the frame to a different area of the canvas preview.
Cropping images
You can remove unwanted edges from the image with the Crop tool . You can adjust the aspect ratio
of the cropped image and choose to maintain the aspect ratio. You can also remove unwanted areas of an
image by resizing the canvas area. For more information, see “Resizing images and the canvas” on page
86.
To crop an image
1In the toolbox, click the Crop tool .
2Drag inside the image to define the rectangular area that you want to keep.
You can adjust the rectangle by dragging a corner or any of its edges.
3When you’re ready to execute the crop, click the Commit Crop button on the property bar.
To cancel the crop, click the Cancel Crop button on the property bar.
You can also execute the crop by double-clicking inside the rectangle.
To constrain cropping to a square
1In the toolbox, click the Crop tool .
2Hold down Shift, and drag to define the area for cropping.
3Double-click inside the square.
To adjust the aspect ratio of the cropped image
1In the toolbox, click the Crop tool .
2On the property bar, type values in the Crop Ratio Width and Crop Ratio Height boxes.
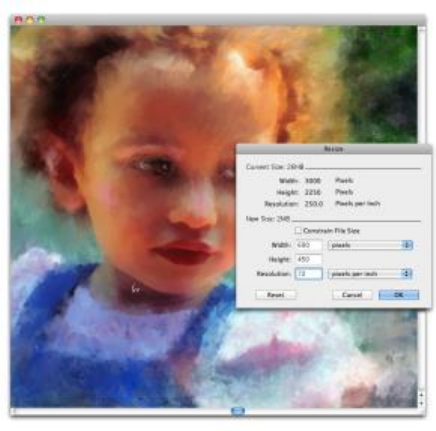
86 | Corel Painter 2015 User Guide
Resizing images and the canvas
You can change the physical dimensions of an image by resizing the canvas and the image together, or
by resizing the canvas area only. It is important to understand the distinction between the two resizing
techniques.
When you resize the canvas and image together, the image dimensions and resolution change, but the
image appearance doesn’t change. For example, if you resize a 300 ppi image to 150 ppi, the image size is
smaller, but it looks the same.
The image was resized by modifying the resolution.
Alternatively, when you resize only the canvas area, both the image dimensions and appearance change. For
example, if you increase the size of the canvas, a border appears around the image. If you decrease the size
of the canvas, the edge of the canvas is trimmed. In addition, the image resolution is affected.
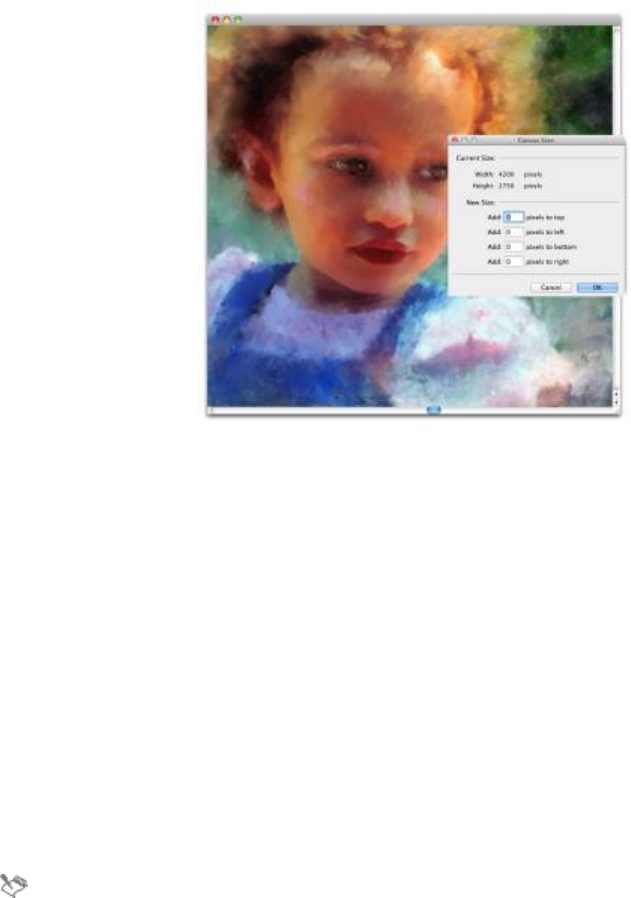
Creating, navigating, and manipulating documents | 87
The canvas area is resized in order to apply an empty border around the edge of an image.
It is also important to note that the size of the onscreen image is affected by the pixel height and width of
the image, the zoom level, and the monitor settings. As a result, an image may be displayed as a different
size onscreen than when it is printed. For more information, see “Understanding resolution” on page 70
and “Creating documents” on page 68.
To resize the canvas and image content together
1Choose Canvas Resize.
To keep the file size of the image in megabytes (MB) the same, enable the Constrain File Size check
box.
2In the New Size area, type values in the Width and Height boxes.
If you enable the Constrain File Size check box, you need to type a value only in one of the boxes; the
other values are adjusted automatically.
If you choose pixels or percent as the unit and enter a value, the Constrain File Size check box is
automatically disabled.
Increasing the image dimensions significantly may cause the image to appear stretched and
pixelated.

88 | Corel Painter 2015 User Guide
To resize the canvas area
1Choose Canvas Canvas Size.
2In the Canvas Size dialog box, specify the number of pixels you want to add to any side of the canvas.
To reduce, or trim, the canvas size, specify negative values.
Saving and backing up files
You can save a file in its current format or in a different format. You can also track the changes that you
make to a file by saving multiple versions of the file, also known as iterations. In addition, you have the
option of creating backup files every time you save a document.
When you save an iteration of a file, an updated version of the file is saved with a version number added to
the filename. For example, if you saved the original file as Image. RIF and then save an iteration of the file,
the latest version of the file is saved as Image_001.RIF. For each subsequent iterative save that you perform,
the number added to the filename increases by1, for example, Image_002.RIF and Image_003.RIF. Iterative
saving is useful if you need to revert to an older version of a file, or simply to track your progress over time.
To save a file in its current format
•Choose File Save.
To save a file with a different name or in a different format
1Choose File Save As.
2In the Save (Mac OS) or Save Image As (Windows) dialog box, use the controls to specify a location,
file name, and format.
To perform an iterative save
•Choose File Iterative Save.
The location of the last file saved is stored and used for iterative saves unless you specify a new location.
You can also perform an iterative save by pressing Command+Option+S (Mac OS) or
Ctrl+Alt+S (Windows).
To create a backup file when saving
1Do one of the following:
Creating, navigating, and manipulating documents | 89
•(Mac OS) Choose Corel Painter 2015 menu Preferences.
•(Windows) Choose Edit Preferences.
2In the Preferences list of categories, click General.
3Enable the Create backup on Save check box.
Choosing a file format
When you save a file, you must choose a file format. The following section contains information about
some of the supported file formats.
Saving RIFF files
RIFF is the Corel Painter file format, which retains special information about your document. For example, a
RIFF file maintains all layers.
RIFF files are best used as “work-in-progress” files. It is recommended that you always save files in RIFF
format, and then save to GIF, JPEG, TIF, or another file format when a file is ready for production.
Corel Painter lets you compress files and save disk space with a lossless compression method. When saving
in RIFF format, you can minimize the file size on your hard disk by ensuring that the Uncompressed option
is disabled by default.
Saving JPEG files
Corel Painter supports the JPEG file format. Unlike GIF, the JPEG file format displays a full range of colors.
The JPEG file format lets you compress your file on a scale of Fair to Excellent, where quality is directly
proportional to file size. These quality settings will let you achieve compression ratios ranging from less
than 10:1 to greater than 100:1. JPEG is a “lossy” file format, meaning that a compressed JPEG file will not
be identical, pixel-for-pixel, to the original. However, because the JPEG algorithm takes into account the
sensitivity of the eye to different colors, the higher-quality settings should achieve visually satisfying results.
You can assign a URL to layers and placed images and then save the file in GIF or JPEG format to produce
an image map. For more information, see “Creating image maps” on page 883.
When you save a file in JPEG format, Corel Painter displays the JPEG Encoding Quality dialog box, with the
following options:
• The Quality options — Excellent, High, Good, and Fair — let you set the degree of file compression.
The Excellent option compresses the least, but retains the most data. Fair compresses the most, but
loses the most data.
You can also use the Quality slider to adjust file compression.
• The Smoothness slider applies smoothing to the entire image. This is useful when using the Fair option
to blur the edges of JPEG artifacts. The default is 0. Keep in mind that using a high smoothness setting
can cause blurring.
90 | Corel Painter 2015 User Guide
• The Progressive JPEG check box creates a progressive JPEG file. The progressive format is useful for files
designed for the Web. As the name implies, the progressive format displays an image in stages — as
a series of scans — while the file downloads. The first scan is a low-quality image; the following scans
improve in quality. This allows the user to see the whole image quickly.
• The HTML Map Options — NCSA Map File, CERN Map File, and Client Side Map File — let you
generate an image map. (NCSA refers to the National Center for Supercomputing Applications, and
CERN refers to the Conseil Europeén pour la Recherche Nucléaire.) Use the NCSA Map File or CERN
Map File option to generate a server-side image map. Use the Client Side Map File option to generate a
client-side image map.
For more information, see “Creating image maps” on page 883.
It is best not to decompress and recompress a file multiple times. Although JPEG can compress and discard
data that is not visible or obvious, the degradation of the data can affect the condition of your file.
When a file has lost a significant amount of data, block patterns may appear in areas of the image. If you
try to use the Apply Surface Texture feature on a JPEG file, you may find that the block patterns become
more prominent.
Saving GIF files
Corel Painter lets you save documents as GIF files. GIF, a file format using 8 or fewer bits, is commonly used
to display graphics on the Web. When you save a GIF file, you can choose settings from 4 Colors to 256
Colors. You can choose how your colors will be displayed and what part of your image will be transparent.
You can enable the Color Set option to force all colors in the color table of the GIF file to match the colors
in the current color set. This option can be useful when you are doing Web work, especially if you want to
constrain colors to a specific color set or control the number of colors on a Web page, thus controlling the
image file size.
The Imaging Method setting determines how a 24-bit Corel Painter document will be converted to the
limited number of colors that GIF uses. If you choose Quantize to Nearest Color, Corel Painter may replace
some colors with colors that are located next to each pixel. If you choose Dither Colors, Corel Painter
applies a pattern to the chosen colors to generate a more accurate, less banded result.
Corel Painter can also save a frame stack as a GIF animation file. For more information, see “Exporting
animated GIFs” on page 839.
If you want your image to have transparency, enable the Output Transparency check box. Most programs
that display GIF files support transparency, but for those that don’t, you should specify the color of the
“transparent” area. If your image will be displayed on the Web, enable the Background is WWW Gray
option. You can also choose to use the background color of your Web page by enabling the Background is
BG Color option.
For programs that support transparency, your selection will determine which areas are transparent. The
Threshold slider determines which selection (loaded mask) value becomes transparent. You can see how
the Threshold slider affects the transparency of your image in the Preview window of the dialog box.
Creating, navigating, and manipulating documents | 91
Transparency is displayed in the Preview window by a rectangular lattice. You can toggle between the
Preview window and your Save As GIF options to the results you want. Enable the Interlaced check box if
your image will be displayed on a Web page.
For more information, see “Selections and transformations” on page 577.
Saving RGB TIF files
The TIF format facilitates exchange between applications and computer platforms. It is a widely supported
bitmap image format that lets you save RGB color profile information.
Saving Adobe Photoshop (PSD) files
Corel Painter can save files in Adobe Photoshop (PSD) format. For optimum compatibility, shapes and text
are rasterized, and masks are placed in channels.
When you save a file in PSD format, you can embed the RGB color profile, as you do when saving in TIF
format.
Saving Encapsulated PostScript (EPS) files
The encapsulated PostScript (EPS) files in Corel Painter conform to the Desktop Color Separation (DCS) 2.0
format (EPS-DCS 5 file format). Although Corel Painter saves files in EPS-DCS, it can’t read EPS-DCS. If you
plan to save an image in EPS-DCS, it’s a good idea to save it in another format first, so that you’ll have a
copy of it that you can reopen in Corel Painter.
When you save an image as an EPS-DCS file with Preview Options turned on, Corel Painter uses the loaded
International Color Consortium (ICC) profile to prepare the separation files. For more information, see
“Printing images” on page 855.
Although you can save your images as CMYK EPS separations, Corel Painter can’t open or edit CMYK files.
When you save a file in EPS-DCS, Corel Painter opens the EPS Save Options dialog box, with these options:
•Hex (ASCII) Picture Data provides another way of storing PostScript information. Some page design
programs require that this option be checked. The file sizes will be approximately twice as large when
saved with this option.
•Preview options — No Preview, Black and White Preview, and Color Preview — specify whether to save
preview data and in what format. The resulting preview file is a low-resolution (72-ppi) file.
If you have an older laser printer, you must use the black and white preview to print these files.
Although the preview or display is black and white, the color information remains intact.
Emailing documents
Corel Painter lets you email documents by using the default email application installed on your computer.

92 | Corel Painter 2015 User Guide
To email a document
1Choose File Email Image.
2Type the image name in the Image Name text box.
3In the Select Image Format area, enable one of the following options:
•JPEG
•PNG
•TIFF
Closing documents and quitting the application
You can close documents or quit Corel Painter by using menu commands, keyboard shortcuts, or the Close
button of the current window.
To close a document
•Choose File Close.
You can also
Close the current window Click the Close button.
Close the current document by using a keyboard
shortcut
Press Command + W (Mac OS) or Ctrl + W
(Windows).
To quit Corel Painter
• Do one of the following:
•(Mac OS) Choose Corel Painter 2015 menu Quit Corel Painter 2015.
•(Windows) Choose File Exit.
You can also quit Corel Painter by pressing Command + Q (Mac OS) or Ctrl + Q (Windows).
Creating, navigating, and manipulating documents | 93
Using two monitors
The Corel Painter user interface can be displayed across two or more monitors. You can drag any of the
Corel Painter panels, palettes, the property bar, and the toolbox to any monitor; however, each panel or
palette must be displayed entirely on one monitor at a time. If a panel or palette straddles two monitors, it
automatically snaps to the nearest vertical edge of the monitor displaying the large portion of the panel or
palette. If the panel or palette is displayed equally on both monitors, it snaps to the vertical edge of the left
monitor.
For best performance, make sure that both monitors are set to the same resolution. In Windows, you must
stretch the application window to straddle both monitors, then redesign your workspace. For information
about configuring your system so that Corel Painter is displayed across two or more monitors, refer to the
documentation of your operating system.
Support for tablets and other devices
Corel Painter supports Wacom-compatible tablets and devices as well as devices that support the Real-Time
Stylus (RTS) feature of the Windows operating system. Both groups have multi-touch capabilities.
Wacom-compatible devices are supported on both Mac OS and Windows. For more information, see
“Wacom Intuos support” on page 96. RTS-compatible devices include tablet PCs and graphics tablets
and are supported only on Windows.
By default, Corel Painter uses tablet options that are suitable for Wacom-compatible devices. To take full
advantage of your RTS-compatible graphics tablet or other device with Corel Painter, you must configure
it first. Otherwise, you cannot use stylus information such as pressure and tilt to adjust and control
brushstrokes.
To configure your RTS-compatible device (Windows)
1Choose Edit Preferences Tablet.
2In the Tablet Options area, enable the RTS-compatible devices (Real-Time Stylus) option.
3Restart Corel Painter.
Multi-touch support
Corel Painter supports two ways of working with gestures: with multi-touch mode enabled (default) or
disabled. In addition, two multi-touch options are available: Corel Painter multi-touch and Windows
multi-touch.
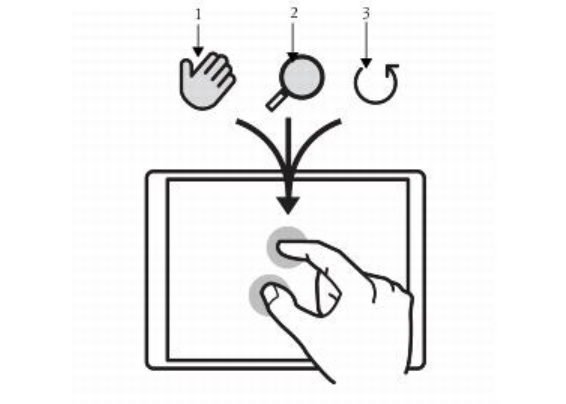
94 | Corel Painter 2015 User Guide
Corel Painter multi-touch
This option, available both on Mac OS and Windows, provides enhanced support for Wacom Intuos 5
tablets and other Wacom-compatible devices. You can simultaneously pan, rotate, and zoom the canvas.
This provides a seamless and responsive way of positioning and navigating the canvas. For example,
you can rotate and move the canvas at the same time by moving two fingers in a circular motion while
simultaneously swiping them across the tablet. You can also rotate and zoom by moving two fingers in a
circular motion while simultaneously pinching the fingers together, or pulling them apart. In addition, you
can quickly restore the canvas position, rotation, and zoom level.
You can simultaneously perform panning (1), zooming (2), and rotating (3).
You can also change the reference point, around which rotating and zooming takes place. If you’re not
using a multi-touch tablet, by default the reference point is located at the center of the image. However,
when using a multi-touch tablet, the reference point changes depending on the finger positions. Corel
Painter sets the reference point at the center of the space that’s between your two fingers.

Creating, navigating, and manipulating documents | 95
Changing the finger positions from the center of the
image (1) allows you to move the reference point (2).
Windows multi-touch
With this option, your gestures on the tablet or device behave the same way in Corel Painter as in other
applications. However, you cannot use the advanced features of your Wacom-compatible device.
Multi-touch disabled
When the multi-touch mode is disabled, you cannot simultaneously pan, rotate, and zoom the canvas.
Disabling multi-touch is useful if you find that the canvas moves unexpectedly or that brushstrokes do not
apply paint as expected.
To restore the canvas position, rotation, and zoom level
• Double-tap two fingers simultaneously on the tablet.
To enable or disable multi-touch support (Mac OS)
1Choose Corel Painter 2015 Preferences Tablet.
2Enable or disable the Corel Painter Multi-touch option.
To enable or disable multi-touch support (Windows)
1Choose Edit Preferences Tablet.
2In the Multi-touch options area, enable or disable the Enable multi-touch check box.
If multi-touch support is enabled, choose one of the following options:
•Corel Painter Multi-touch
•Windows Multi-touch
96 | Corel Painter 2015 User Guide
Wacom Intuos support
Corel Painter supports the use of Wacom® Intuos® tablet, pen, and airbrush technology.
Painting with an Intuos tablet and pen
The Intuos tablet provides increased pressure sensitivity to help you create smooth curves, gradual
transitions, and precise brushstrokes. When using an Intuos tablet with Corel Painter, you can take
advantage of tilt and bearing input in exciting ways.
Customizing brush tracking
Every artist uses different pressure when drawing on an Intuos tablet. The Corel Painter brush tracking
preferences help you customize your Intuos tablet to meet your pressure sensitivity needs. For more
information, see “Brush tracking and calibration” on page 126.
Linking stylus features to Expression settings
The settings that you adjust Expression in the brush control panels let you tie brush features like Opacity,
Grain, Angle, Size, Jitter, Resaturation, Bleed, Flow, and Depth to stylus data, such as Velocity, Direction,
Pressure, Wheel, Tilt, and Bearing. For more information, see “Expression settings” on page 327.
Using the Min Size setting
In Corel Painter, the Min Size setting lets you take full advantage of stylus input data. When Size is set in
the Expression panel of the Brush Controls palette to respond to stylus pressure, and the Min Size setting is
set to a small percentage of the brush size, the strokes you make with the stylus create amazingly realistic
results.
Using the Intuos airbrush wheel
The Intuos Airbrush — the first true computer airbrush — provides fingertip media flow control. Corel
Painter airbrushes respond to angle (tilt), bearing (direction), and flow (wheel setting) data from the Intuos
stylus, allowing for a truly realistic brushstroke. For example, as you tilt your stylus, specks of media land on
the paper in a way that reflects that tilt. Corel Painter airbrushes create conic sections that mirror your stylus
movements.
Corel Painter airbrushes take advantage of the Intuos Airbrush stylus wheel control. Like the needle control
on a real airbrush, the Intuos wheel control adjusts airbrush flow, or how much medium is applied. For
more information, see “Painting with airbrushes” on page 144.
Creating, navigating, and manipulating documents | 97
Using multiple Intuos pens
All Intuos pens — both standard and airbrush — feature Tool ID, which lets you configure and work with
multiple pens during a Corel Painter session. For example, let’s assume you have two Intuos pens: Pen 1 and
Pen 2. Pen 1 is set to an Oil brush variant; Pen 2 is set to an Artists variant.
Every time you bring Pen 1 into the tablet’s proximity, Corel Painter automatically changes the active brush
to the Oil brush. Every time you bring Pen 2 into the tablet’s proximity, Corel Painter switches to the Artists
brush. If you’ve adjusted the tool assigned to a pen’s size or other settings, Corel Painter remembers those
changes for the next time you use that pen.
Drag-and-drop features
Corel Painter supports drag-and-drop copying of documents and layers from one window to another.
Dragging layers between documents
You can copy layers between Corel Painter documents by dragging from one window to the other. When
you drag a layer to a new document, the layer keeps its original properties. For more information, see
“Moving layers” on page 528.
Dragging between programs
Corel Painter supports drag-and-drop functionality between applications. This can be a quick, convenient
way to acquire images. For example, you can drag files from Adobe Photoshop directly into Corel Painter.
98 | Corel Painter 2015 User Guide
Keyboard shortcuts | 99
Keyboard shortcuts
Many features in Corel Painter have keyboard shortcuts which allow you to access a variety of tools quickly
and easily using the keyboard, rather than selecting them from a menu or panel.
The four modifier keys on a Mac-compatible keyboard
are Command, Option, Shift, and the Spacebar.
100 | Corel Painter 2015 User Guide
The four modifier keys on the Windows keyboard are Ctrl, Alt, Shift, and the Spacebar.
The keyboard shortcuts rely on four modifier keys on Mac-compatible and Windows keyboards: Command,
Option, Shift, and the Spacebar on the Mac OS; and Ctrl, Alt, Shift, and the Spacebar on Windows.
Some of the same key combinations are reused to provide different actions depending on which tool is
currently selected. For example, holding down the Shift key while using the Rectangle shape tool constrains
the shape to a square; whereas holding down the Shift key while using a Cloning brush sets the clone
destination.
This section contains the following topics:
•“Customizing keys” (page 101)
•“Toolbox commands” (page 104)
•“Panel commands” (page 107)
•“Corel Painter menu commands” (page 107)
•“File menu commands” (page 108)
•“Edit menu commands” (page 108)
•“Canvas menu commands” (page 109)
•“Layers menu commands” (page 110)
•“Select menu commands” (page 110)
•“Shapes menu commands” (page 111)
•“Effects menu commands” (page 111)
•“Window menu commands” (page 111)
•“Screen navigation” (page 112)
•“Panel navigation” (page 112)
•“Panel menu commands” (page 113)
•“Brush tools” (page 114)
•“Selection tools” (page 116)
•“Adjuster tools” (page 116)
Keyboard shortcuts | 101
•“Shape tools” (page 118)
•“Animation” (page 120)
•“Lighting” (page 120)
•“Layer selection tools” (page 121)
•“Mosaics” (page 121)
•“Other commands” (page 121)
Customizing keys
Corel Painter lets you assign commands to keys on your keyboard. This saves you time by giving you
immediate keyboard access to your favorite commands. Along with character, numeric, function, and
modifier keys, you can also use Tab, Backspace (Windows), Delete, Insert, Home, End, Page Up, Page Down,
Up Arrow, Down Arrow, Left Arrow, Right Arrow, and Spacebar. You can use keys already used for other
shortcuts.
You can also create a collection of keyboard shortcuts, or key sets, based on changes to the default key set.
For easy reference, you can generate an HTML summary of a key set.
To assign commands to keys
1Do one of the following:
•(Mac OS) Choose Corel Painter 2015 menu Preferences Customize Keys.
•(Windows) Choose Edit Preferences Customize Keys.
If you want to modify keyboard shortcuts that you previously stored in a key set, choose the key set
from the Key Set list box.
2Choose one of the following options from the Shortcuts list box:
•Application Menus — lets you create or modify menu bar command shortcuts
•Panel Menus — lets you create or modify panel menu command shortcuts
•Tools — lets you create or modify tools shortcuts
•Other — lets you create or modify command shortcuts for items that are not menus, panels, or tools
3Choose a command from the Application Commands list.
4In the Shortcut column next to the command, type the shortcut keys you want to assign.
If you typed a unique shortcut key, you can click OK to exit the Preferences dialog box.
If the shortcut you assigned is already in use, a message appears below the Application Commands
list. To proceed, you need to perform a task from the following table:

102 | Corel Painter 2015 User Guide
To Do the following
Assign the shortcut to the selected command
while deleting the shortcut key from the conflicting
command
Click Accept.
Assign the shortcut to the new command and then
assign another keyboard shortcut to the conflicting
command
Click Accept and Go To Conflict.
To revert keyboard shortcuts
To Do the following
Revert the last keyboard shortcut you created or
modified
Click Undo.
Revert to all keyboard shortcuts you created or
modified since you opened the Preferences dialog
box
Click Reset. In the warning dialog box, click Yes.
Revert all keyboard shortcuts to their default
settings
Click Defaults. In the warning dialog box, click Yes.
To manage key sets (Mac OS)
To Do the following
Open an existing key set Click Open. In the Open Key Set dialog box, select
a key set, and click Open.
Create a new key set from the existing key set Click New. In the Save New Key Set dialog box,
type a name for the key set in the Save As box,
and click Save.

Keyboard shortcuts | 103
To Do the following
Save the active key set Click Save. In the Save Key Set dialog box, type a
name for the key set in the Save As box, and click
Save.
Create an HTML summary of the active key set Click Export to HTML. In the Save Summary
dialog box, type a name in the Save As box, and
click Save.
Delete the active key set Click Delete.
Key set files created on the Mac OS cannot be imported into Corel Painter on Windows. Likewise,
key set files created on Windows cannot be imported into Corel Painter on the Mac OS.
To manage key sets (Windows)
To Do the following
Open an existing key set Click the Open button . In the Open Key Set
dialog box, select a key set, and click Open.
Create a new key set from the existing key set Click the New From Existing button . In the
Save New Key Set dialog box, type a name for the
key set in the Filename box, and click Save.
Save the active key set Click the Save Active Set button . In the Save
Key Set dialog box, type a name for the key set in
the Filename box, and click Save.
Create an HTML summary of the active key set Click the Create HTML Summary button . In
the Save Summary dialog box, type a name in the
Filename box, and click Save.

104 | Corel Painter 2015 User Guide
To Do the following
Delete the active key set Click the Delete button .
Key set files created on the Mac OS cannot be imported into Corel Painter on Windows. Likewise,
key set files created on Windows cannot be imported into Corel Painter on the Mac OS.
Toolbox commands
Tool name Shortcut key
Navigation and Utility tools
Magnifier M
Grabber G
Rotate Page E
Divine Proportion ,
Layout Grid /
Perspective Guides (opens property bar) .
Crop C
Drawing and painting tools
Brush (Freehand line) B
Brush (Straight line) V
Paint Bucket K
Keyboard shortcuts | 105
Tool name Shortcut key
Dropper D
Dodge ‘
Burn =
Selection tools
Rectangular selection R
Oval selection O
Lasso L
Polygonal selection Shift + L
Magic wand W
Adjuster tools
Layer adjuster F
Selection adjuster S
Shape selection H
Shape design tools
Pen P
Quick curve Q
106 | Corel Painter 2015 User Guide
Tool name Shortcut key
Text T
Shape object tools
Rectangular shape I
Oval shape J
Shape edit tools
Scissors Z
Add point A
Convert point Y
Remove point X
Transform tool
Transform tool Option + Command + T (Mac OS)
Alt + Ctrl + T (Windows)
Symmetry tools
Mirror tool ‘
Kaleidoscope tool Command + K (Mac OS)
Ctrl + K (Windows)
Keyboard shortcuts | 107
Panel commands
Command Mac OS Windows
Brush controls panel
(General or All)
Command + B Ctrl + B
Colors Command + 1 Ctrl + 1
Mixer Command + 2 Ctrl + 2
Color sets Command + 3 Ctrl + 3
Layers Command + 4 Ctrl + 4
Channels Command + 5 Ctrl + 5
Clone source Command + 6 Ctrl + 6
Navigator Command + 7 Ctrl + 7
Gradients Command + 8 Ctrl + 8
Patterns Command + 9 Ctrl + 9
Corel Painter menu commands
Command Mac OS Windows
Preferences General Command + , Ctrl + ,
Hide Corel Painter
2015
Command + H
Hide others Command + Option + H
108 | Corel Painter 2015 User Guide
Command Mac OS Windows
Quit Command + Q Ctrl + Q
File menu commands
Command Mac OS Windows
New Command + N Ctrl + N
Open Command + O Ctrl + O
Close Command + W Ctrl + W
Save Command + S Ctrl + S
Save as Shift + Command + S Shift + Ctrl + S
Export Source Image Shift + Command + S Shift + Ctrl + S
Iterative save Command + Option + S Ctrl + Alt + S
E-mail image Option + Command + E Alt + Ctrl + E
Page setup Shift + Command + P Shift + Ctrl + P
Print Command + P Ctrl + P
Exit (Windows) Ctrl + Q
Edit menu commands
Command Mac OS Windows
Undo Command + Z Ctrl + Z
Redo Command + Y Ctrl + Y
Keyboard shortcuts | 109
Command Mac OS Windows
Fade Command + Shift + F Ctrl + Shift + F
Cut Command + X Ctrl + X
Copy Command + C Ctrl + C
Copy merged Shift + Command + C Shift + Ctrl + C
Paste Shift + Command + V Shift + Ctrl + V
Paste in place Command + V Ctrl + V
Fill Command + F Ctrl + F
Free transform Option + Command + T Alt + Ctrl + T
Preferences General Command + K Ctrl + K
Preferences Brush
tracking
Shift + Command + K Shift + Ctrl + K
Canvas menu commands
Command Mac OS Windows
Resize Shift + Command + R Shift + Ctrl + R
Tracing paper Command + T Ctrl + T
Show/Hide rulers Command + R Ctrl + R
Show/Hide guides Command + ; Ctrl + ;
Snap to guides Shift + Command + ; Shift + Ctrl + ;
Show/Hide grid Command + ‘ Ctrl + ‘
110 | Corel Painter 2015 User Guide
Command Mac OS Windows
Color management
settings
Option + Command + K Alt + Ctrl + K
Layers menu commands
Command Mac OS Windows
New layer Command + Shift + N Ctrl + Shift + N
Select all layers Command + Shift + 1 Ctrl + Shift + 1
Group Command + G Ctrl + G
Ungroup Command + U Ctrl + U
Collapse Command + E Ctrl + E
Dry digital watercolor Command + Shift + L Ctrl + Shift + L
Select menu commands
Command Mac OS Windows
All Command + A Ctrl + A
None Command + D Ctrl + D
Invert Command + I Ctrl + I
Reselect Shift + Command +D Shift + Ctrl +D
Hide marquee Shift + Command + H Shift + Ctrl + H
Load selection Shift + Command + G Shift + Ctrl + G
Keyboard shortcuts | 111
Shapes menu commands
Command Mac OS Windows
Join endpoints Shift + J Shift + J
Duplicate Command + ] Ctrl + ]
Set shape attributes Command + [ Ctrl + [
Effects menu commands
Command Mac OS Windows
Last effect Command + / Ctrl + /
Auto clone Command + Shift + Z Ctrl + Shift + Z
Tonal control
Correct colors Shift + Command + Kn/a
Adjust colors Shift + Command + A Ctrl +Shift + A
Brightness/Contrast Shift + Command + B Ctrl +Shift + B
Equalize Shift + Command + E Ctrl + Shift + E
Negative Shift + Command + I Ctrl + Shift +I
Window menu commands
Command Mac OS Windows
Panels Tab Tab
112 | Corel Painter 2015 User Guide
Command Mac OS Windows
Zoom in Command + Plus sign Ctrl + Plus sign
Zoom out Command + Minus sign Ctrl + Minus sign
Zoom to fit Command + 0 Ctrl + 0
Screen toggle mode Command + M Ctrl + M
Actual size Command + Option + 0 Ctrl + Alt + 0
Screen navigation
Command Mac OS Windows
Scroll image with grabber Spacebar Spacebar
Center image Spacebar + click Spacebar + click
Zoom in Spacebar + Command +
click
Spacebar + Ctrl + click
Zoom out Spacebar + Command +
Option + click
Spacebar + Ctrl + Alt +
click
Rotate image Spacebar + Option +
drag
Spacebar + Alt + drag
Constrain rotate to 90
degrees
Shift + Option +
Spacebar + drag
Spacebar + Alt + Shift +
drag
Orient screen to default
view
Shift + Option + click Shift + Alt + click
Panel navigation
Keyboard shortcuts | 113
Command Mac OS Windows
Scroll contents of panel Option + click + drag Alt + click + drag
Expand/Collapse all panels Shift + click on
Open/Close triangle
Shift + click on
Open/Close triangle
Panel menu commands
Command Mac OS Windows
Layers panel
Select all layers Command + Shift + 1 Ctrl + Shift + 1
Delete layer Command + Delete Ctrl + Backspace
Colors panel
Toggle between main and
additional colors
Shift + S Shift + S
Standard colors Shift + O Shift + O
Use clone color U U
Mixer panel
When apply color tool or
mix color tool active
Pan tool Spacebar Spacebar
Zoom tool (zoom-in) Command+ Spacebar Ctrl + Spacebar
Zoom tool (zoom-out) Command+ Spacebar +
Option
Ctrl + Spacebar + Alt
Channels panel
114 | Corel Painter 2015 User Guide
Command Mac OS Windows
New from Command + Shift + M Ctrl + Shift + M
Clear Command + Shift + U Ctrl + Shift + U
Gradients panel
Edit gradient Command + Shift + E Ctrl + Shift + E
Brush tools
Command Mac OS Windows
Brush controls
Dropper Option Alt
Layer adjuster Command Ctrl
Resize brush Option + Command Alt + Ctrl
Increase current brush size
incrementally
] ]
Decrease current brush
size incrementally
[ [
Constrain to 45 degrees Shift Shift
Adjust opacity in 10%
increments
1 to 0 keys 1 to 0 keys
Unconstrained draw Shift + 1 Shift + 1
Draw outside Shift + 2 Shift + 2
Draw inside Shift + 3 Shift + 3
Keyboard shortcuts | 115
Command Mac OS Windows
Load nozzle Command + L Ctrl + L
Cloners
Set clone source Option Alt
Set clone destination Option + Shift Alt + Shift
Re-link clone source Command + Option +
Clone
Ctrl + Alt + Clone
Colors
Correct colors Command + Shift + K Ctrl + Shift + K
Toggle between main and
additional colors
Shift + X Shift + X
Gradations
Adjust spiral Command + Angle
Adjuster
Ctrl + Angle Adjuster
Paint bucket
Limit fill extent Drag Drag
Dropper Option Alt
116 | Corel Painter 2015 User Guide
Selection tools
Command Mac OS Windows
Rectangle, Oval, and
Lasso selection tools
Constrain to square or
circle
Hold down Shift after you
start to drag.
Hold down Shift after you
start to drag.
Add to selection Shift Shift
Subtract from selection Option Alt
Magic wand
Add color to selection Shift + click Shift + click
Add range of colors to
selection
Shift + drag Shift + drag
Remove color from
selection
Option + click Alt + click
Remove range of colors
from selection
Option + drag Alt + drag
Adjuster tools
Command Mac OS Windows
Layer adjuster Command (except
when either the screen
Ctrl (except when either
the screen navigation or
Shape tools are selected)
Keyboard shortcuts | 117
Command Mac OS Windows
navigation or Shape tools
are selected)
Selection adjuster Command (when
Selection tools are
selected)
Ctrl (when Selection tools
are selected)
Shape selection tool Command (when Shape
tools are selected)
Ctrl (when Shape tools are
selected)
Layer adjuster
Duplicate Option + drag Alt + drag
Delete layer Command + Shift + D Ctrl + Shift + D
Move layer by one screen
pixel
Arrow keys Arrow keys
Hide/Display marquee Command + Shift + H Ctrl + Shift + H
Attribute dialog box for
current layer
Enter Enter
Adjust opacity in 10%
increments
1 to 0 keys 1 to 0 keys
Select all layers Command + Shift +
Option + A
none
Deselect layers Command + Shift +
Option + D
none
Select/Deselect mode Command + Shift Ctrl + Shift
118 | Corel Painter 2015 User Guide
Command Mac OS Windows
Selection adjuster
Reposition Click inside active
selection, and drag
Click inside active
selection, and drag
Duplicate Option + drag Alt + drag
Move selection by one
screen pixel
Arrow keys, on canvas Arrow keys, on canvas
Delete current selection Delete Backspace
Select/Deselect mode Shift Shift
Free transform
Distort Option + corner handles Alt + corner handles
Perspective distort Command + Option +
corner handles
Ctrl + Alt + corner
handles
Resize Corner handles Corner handles
Resize/Preserve aspect Shift + corner handles Shift + corner handles
Resize/One dimension Side handles Side handles
Rotate Command + corner
handles
Ctrl + corner handles
Skew Command + side handles Ctrl + side handles
Shape tools
Keyboard shortcuts | 119
Command Mac OS Windows
Shape selection tool
toggle
Command Ctrl
Shape design tools
Command Mac OS Windows
Pen
Add to current point Click last point Click last point
Quick curve
Add to current endpoint Click and draw from
endpoint
Click and draw from
endpoint
Shape objects tools
Command Mac OS Windows
Rectangle
Constrain to square Shift + click Shift + click
Circle
Constrain to circle Shift + click Shift + click
Shape selection tool
Command Mac OS Windows
Direct selection
Select start point of shape Home Home
120 | Corel Painter 2015 User Guide
Command Mac OS Windows
Select endpoint of shape End End
Select previous point in
shape
Page up Page up
Select next point in shape Page down Page down
Move path by one screen
pixel
Arrow keys Arrow keys
Delete selected (closed)
shape
Delete Backspace
Animation
Command Mac OS Windows
First frame of stack Home Home
Last frame of stack End End
Next frame Page up Page up
Previous frame Page down Page down
Stop at current frame Option + Stop Alt + Stop
Stop and return to current
starting frame
Command + . Ctrl + .
Lighting
Command Mac OS Windows
Lighting mover Shift + Command + L Shift + Ctrl + L
Keyboard shortcuts | 121
Layer selection tools
Command Mac OS Windows
Group Command + G Ctrl + G
Ungroup Command + U Ctrl + U
Mosaics
Command Mac OS Windows
Get tile color Option + click tile Alt + click tile
Get tile shape Command + click tile Ctrl + click tile
Delete tile Shift + click tile Shift + click tile
Select all tiles A A
Deselect all tiles D D
Change selected tiles to
current color
C C
Tint selected tiles with
current color
T T
Vary color of selected tiles V V
Other commands
Command Mac OS Windows
Add current color to color
set
Command + Shift + T Ctrl + Shift + T
122 | Corel Painter 2015 User Guide
Command Mac OS Windows
Swap colors Shift + S Shift + S
Nudge 1 pixel Arrow key Arrow key
Nudge 4 pixels Shift + Arrow key Shift + Arrow key
Memory info Shift + I Shift + I
Zoom to actual pixels Command + Option + 0 Ctrl + Alt + 0
Insert script delay - -
Close all windows Command + Shift + W Ctrl + Shift + W
Perspective Guides —
Reposition one vanishing
point and the associated
primary lines together
when
Hold down Shift and drag
the vanishing point to a
new position.
Hold down Shift and drag
the vanishing point to a
new position.
Perspective Guides —
Reposition all vanishing
points and primary lines
together
Hold down Command
+ Shift (Mac) or Ctrl +
Shift (Win), and drag the
vanishing point to a new
position.
Hold down Command
+ Shift (Mac) or Ctrl +
Shift (Win), and drag the
vanishing point to a new
position.

Painting | 123
Painting
The Corel Painter application lets you draw and paint as you might with real artists’ tools and media. In
your studio, you use brushes, pens, pencils, chalk, airbrushes, and palette knives to make marks on a canvas
or piece of paper. With Corel Painter, an infinite variety of marks are possible.
This section contains the following topics:
•“Choosing a painting workflow” (page 124)
•“Brush tracking and calibration” (page 126)
•“Exploring painting media” (page 131)
•“Working with the canvas and layers” (page 132)
•“Displaying reference images” (page 133)
•“Clearing the canvas” (page 134)
•“Setting up the drawing cursor” (page 134)
•“Using a stylus vs. a mouse” (page 136)
•“Applying freehand and straight brushstrokes” (page 138)
•“Constraining, fading, and undoing strokes” (page 140)
•“Erasing image areas” (page 141)
•“Aligning brushstrokes to paths and shapes” (page 142)
•“Letting media pool” (page 143)
•“Making 360° strokes” (page 144)
•“Painting with airbrushes” (page 144)
•“Adjusting spread” (page 145)
•“Recording and playing back brushstrokes” (page 147)
124 | Corel Painter 2015 User Guide
•“Reference: Troubleshooting” (page 149)
Choosing a painting workflow
Corel Painter includes a wide array of tools and features that allow you to create original artwork. The
purpose of this topic is to introduce you to the two most-common Corel Painter workflows and refer you to
Help topics that provide more information about each of these workflows.
Workflow 1: Start with a photo
Using Corel Painter’s powerful cloning tools, you can quickly transform a digital photo into a painting.
The photo (left) was cloned (right) to begin the painting process.
Workflow step Help topic
1. Open a photo for painting “Opening and placing files” on page 71
2. Prepare a photo for cloning “Using Quick Clone” on page 171
3. Paint the clone “Painting in the clone” on page 176
4. Save the photo painting “Saving and backing up files” on page 88
You can also create a photo-painting by using the Auto-painting feature. For more information,
see “Auto-painting photos” on page 162.
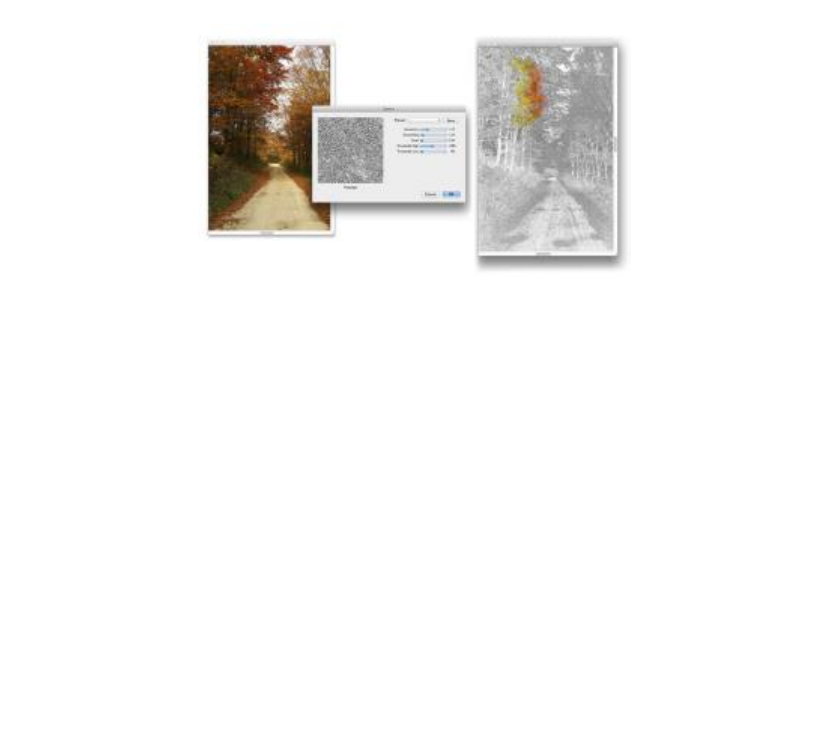
Painting | 125
Workflow 2: Start with a sketch
In Corel Painter, you can quickly create a sketch of a photo so you can use it as a guide for applying color.
To maintain the integrity of the sketch, you should apply color to layers, and not directly to the sketch. In
addition, depending on the desired effect, using layers gives you the option of incorporating the sketch
markings in the final image. If you don’t want the sketch to be visible in the final image, you can delete the
sketch by clearing the canvas. When you’re done, you can drop the layers to the canvas.
The photo (left) was transformed into a sketch (right) to begin the painting process.
Workflow Help topic
1. Choose a photo “Opening and placing files” on page 71
2. Convert a photo into a sketch “Applying the Sketch effect” on page 676
3. Create a layer “Creating and deleting layers” on page 520
4. Apply a brushstroke to the layer “Painting on layers” on page 539
5. Clear the canvas “Clearing the canvas” on page 134
6. Drop layers to the canvas “Dropping layers with the canvas” on page 539
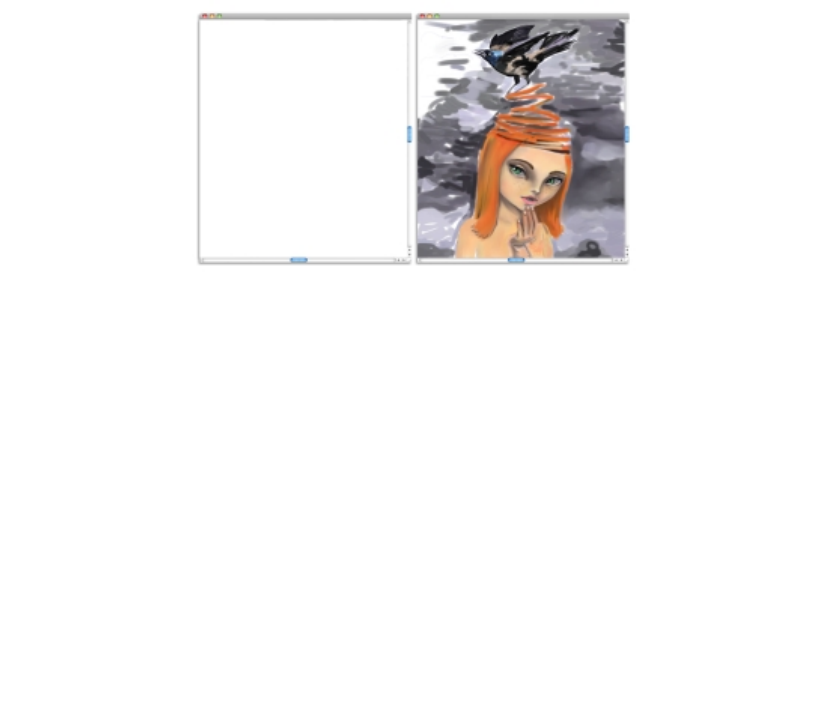
126 | Corel Painter 2015 User Guide
Workflow 3: Start with a blank canvas
You can also start a project from scratch by choosing a paper texture and a brush, and applying color to the
canvas.
You can start with a blank canvas (left) and use your
imagination, and the Corel Painter tools, to create a work of art.
Workflow Help topic
1. Choose a paper texture “Applying paper texture” on page 152
2. Choose a brush “Selecting, managing, and creating brushes” on
page 287
3. Choose a color “Choosing colors from the Color panel” on page
218
4. Apply a brushstroke to the canvas “Applying freehand and straight brushstrokes” on
page 138
Brush tracking and calibration
When you draw with traditional media, the amount of pressure that you use with a tool determines the
density and width of your strokes. Using a pressure-sensitive stylus with Corel Painter gives you the same
kind of control. Because each artist uses a different strength or pressure level in a stroke, you can adjust

Painting | 127
Corel Painter to match your stroke strength for all brushes by using the Brush Tracking preferences, or for a
specific brush, by using the Brush Calibration controls.
Brush Tracking for all brush variants
Brush Tracking is particularly useful for artists with a light touch. If a light stroke leaves no color on the
canvas, you can use Brush Tracking to increase sensitivity for all brushes. Corel Painter saves Brush Tracking
between sessions, so whatever tracking sensitivity you set will be the default the next time you open the
application.
Abrupt changes in the width or density of your strokes shows that you need to adjust your Brush Tracking
preferences.
Top: A brushstroke with abrupt changes in width. Bottom:
A similar brushstroke with adjusted brush tracking.
The most common way of adjusting brush tracking is to apply a typical brushstroke, such as a wavy stroke,
to the scratch pad. Corel Painter then uses your stroke to calculate the appropriate pressure and velocity
settings for all brush variants. However, you can also specify pressure and velocity values.
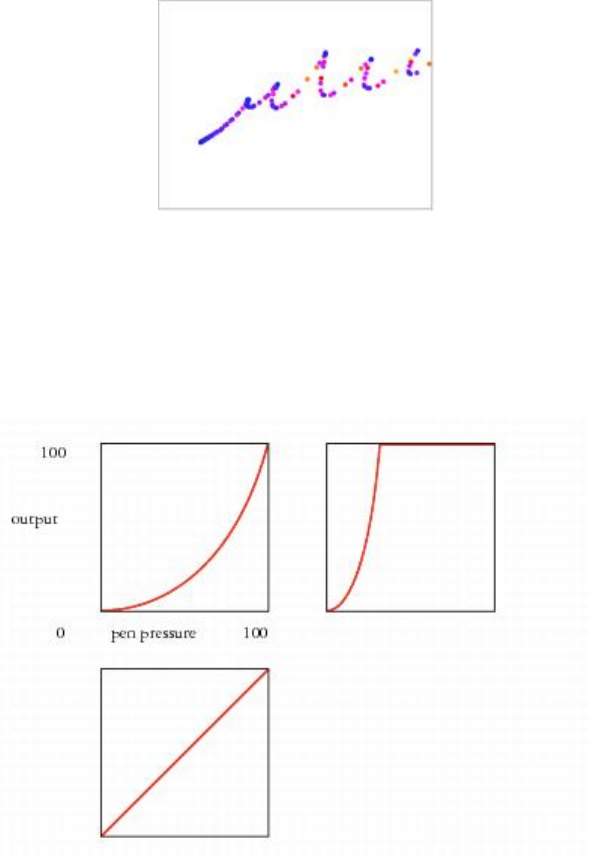
128 | Corel Painter 2015 User Guide
Use the scratch pad in the Brush Tracking dialog box to customize
how Corel Painter responds to your stroke pressure and speed.
In addition, Corel Painter includes the following brush tracking presets that you can choose from: Default,
Legacy, and Linear.
The graph in the Brush Tracking dialog box shows how increasing the pen pressure affects brushstrokes,
which are referred to as “output” in the graph.
The graphs for the Default preset (upper left), Legacy
preset (upper right), and the Linear preset (lower left).
By default, brush tracking settings apply to all brush variants, but you can also limit them to only the
current brush variant.

Painting | 129
Brush Calibration for individual brush variants
The Brush Calibration controls are very useful for adjusting individual brush variants. You can modify the
pressure of your stroke on the scratch pad to achieve different results. For example, you could use a light
touch when sketching with a pencil brush variant, but set more pressure when using an oil paint brush
variant. Corel Painter saves Brush Calibration control settings with the brush variant, so whatever sensitivity
you set will be the default the next time you choose the brush variant. If you set Brush Calibration for a
specific brush in addition to general Brush Tracking preferences, the Brush Calibration settings override
the Brush Tracking preferences.
Manually adjusting pressure and velocity
When you use the scratch pad to set brush tracking and calibration, Corel Painter calculates the pressure
and velocity settings for you. However, you can manually adjust these settings. For example, you can adjust
the stroke pressure to achieve a full pressure range with a softer or harder touch by using the Scale and
Power sliders for pressure. You can also adjust the stroke velocity to achieve a full velocity range with a
slower or faster stroke by using the Scale and Power sliders for velocity.
To ensure that a brush control is using the pressure or velocity settings, you need to set the brush control
Expression setting to Pressure or Velocity. For more information, see “Expression settings” on page 327.
To set brush tracking
1Do one of the following:
•(Mac OS) Choose Corel Painter 2015 menu Preferences Brush Tracking.
•(Windows) Choose Edit Preferences Brush Tracking.
2Drag in the scratch pad by using a “normal” stroke.
Use the pressure and speed you prefer when drawing or painting. This allows the Brush Tracker to
calculate the appropriate speed and pressure settings for the brush.
If you are using a Wacom-compatible tablet, you can also apply brushstrokes in the document to
preview the results and make adjustments as needed.
To adjust the settings manually, perform a task from the following table:
To Do the following
Achieve a full pressure range with a softer or
harder touch
In the Pressure area, move the Scale and Power
sliders.
Achieve a full velocity range with a slower or faster
motion
In the Velocity area, move the Scale and Power
sliders.
130 | Corel Painter 2015 User Guide
To Do the following
Limit brush tracking to the current brush variant Enable the Apply to current brush variant check
box.
To choose a brush tracking preset
1Do one of the following:
•(Mac OS) Choose Corel Painter 2015 Preferences Brush Tracking.
•(Windows) Choose Edit Preferences Brush Tracking.
2Choose one of the following presets from the Preset list box:
•Default — suitable for most artists. The preset also provides a good starting point for brush tracking
adjustments.
•Legacy — default brush tracking in Corel Painter X3 and earlier versions
•Linear — pressure changes impact the brushstroke in a linear fashion. Each small variation in pen
pressure changes the brushstroke.
You can also
Save brush tracking settings as a custom preset Adjust any settings you want in the Brush Tracking
dialog box. Click the Add button . In the Add
Preset dialog box, type a name in the Preset Name
text box.
Delete a custom brush tracking preset Choose the preset from the Preset list box, and
click the Deletebutton .
To set brush calibration
1In the toolbox, click the Brush tool .
2Click the Brush Selector on the Brush Selector bar.
3In the Brush library panel, click a brush category, and click a brush variant.
4Choose Window Brush Control Panels Brush Calibration.
5Enable the Enable Brush Calibration check box.

Painting | 131
6Click the Set brush calibration settings button .
7Drag in the scratch pad by using a “normal” stroke.
Use the pressure and speed you prefer when drawing or painting. This allows the Brush Tracker to
calculate the appropriate speed and pressure settings for the brush.
To adjust the settings manually, perform a task from the following table:
To Do the following
Achieve a full pressure range with a softer or
harder touch
Adjust the PressureScale and Pressure Power
sliders.
Achieve a full velocity range with a slower or faster
motion
Adjust the Velocity Scale and Velocity Power
sliders.
Exploring painting media
Corel Painter lets you apply a wide variety of media to the canvas. For example, you can use a brush to
apply colors directly from a color panel or apply a color that you mixed on the Mixer Pad. You can also paint
by using a gradient, pattern, or clone.
The following table lists the media that you can apply to the canvas or layer and references to the related
topic in the Help.
Media For information
Color “Choosing colors from the Color panel” on page
218
Mixer pad “Exploring the Mixer panel and mixing controls” on
page 226
Two-color “Creating two-color brushstrokes” on page 224
Gradients “Applying gradients” on page 723

132 | Corel Painter 2015 User Guide
Media For information
Patterns “Painting with patterns” on page 711
Cloners “Painting in the clone” on page 176
Working with the canvas and layers
In Corel Painter, you have the option of painting directly on the canvas by applying brushstrokes or by
creating a layer and applying brushstrokes on it. Working with layers allows you to protect the canvas from
any unwanted changes. When you select a layer in the Layers panel, that layer becomes the target for your
brushstrokes. For more information, see “Getting started with layers” on page 514.
The result of any brushstroke you make depends on the following:
• The brush category (or drawing tool) you choose
• The brush variant you select within the brush category
• The brush controls you set, such as brush size, opacity, and the amount of color penetrating paper
texture
• The paper texture
• The color, gradient, or pattern you use as media
• The brush method
If you are using a Watercolor brush, you can paint only on a Watercolor layer. If you are using a Liquid
Ink brush, you can paint only on a Liquid Ink layer. For more information, refer to “Working with the
Watercolor layer” on page 424 and “Working with Liquid Ink brushes” on page 497.
If you try to paint on a shape, dynamic layer, or reference layer, you must commit it to a standard layer so
that your brushstrokes are accepted.
You can also select a channel or a layer mask as the target for your brushstrokes. For more information, see
“Creating and copying channels” on page 564 or “Creating and deleting layer masks” on page 552.
When you have an active selection, painting is confined to the selection by default. For more information,
see “Selections and transformations” on page 577.
When you use complex brush variants, you see a dotted line on the canvas before the mark appears. For
example, the Gloopy variant of the Impasto brush is complex, and it delays the appearance of the stroke
onscreen. When you experience a delay, you can continue applying strokes, without losing any stroke data,
while waiting for the stroke to appear on the screen.
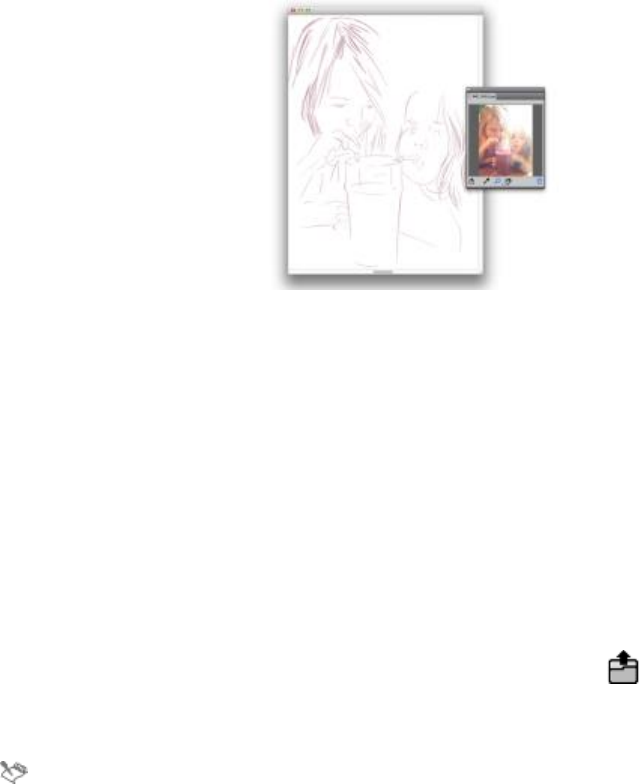
Painting | 133
Displaying reference images
In Corel Painter, you can open an inspirational photo or image that you want to reference in a painting by
using the Reference Image panel.
An example of displaying an image in the Reference
Image panel and using it as an inspiration for a painting
You can reposition or magnify the reference image while maintaining focus on your painting. In addition,
you can sample a color directly from the reference image and apply it to your painting. If you plan on using
reference images strictly for color sampling, you may prefer opening images directly in the Mixer panel
instead. This technique allows you to sample and mix the image colors. For more information, see “Opening
images in the Mixer panel” on page 231.
We recommend using reference images that are a maximum of 1600 X 1600 pixels. You can open reference
images that are saved as the following file formats: JPG, PNG, RIFF, and PSD.
To display a reference image
1Choose Window Reference Image.
2In the Reference Image panel, click the Open a Reference Image button .
3In the Open Reference Image dialog box, locate the file that you want to open.
4Click Open.
When you open RIFF, TIFF, and PSD files that contains layers in the Reference Image panel, all
layers are flattened.

134 | Corel Painter 2015 User Guide
To move a reference image
1In the Reference Image panel, click the Grabber tool .
2Drag the image to a new position in the Reference Image window.
To zoom in and out of a reference image
1In the Reference Image panel, click the Magnifier tool .
2Do one of the following:
• To zoom in, click in the Reference Image window.
• To zoom out, hold down Command (Mac) or Ctrl (Windows), and click in the Reference Image
window.
To sample a color in a reference image
1In the Reference Image panel, click the Dropper tool .
2Move the cursor to the color that you want to sample, and click it.
The color swatch is updated to display the color you’ve selected.
Clearing the canvas
You can erase the canvas by clearing its contents. Clearing the canvas does not delete the canvas, it only
removes its content. In Corel Painter, you cannot delete the canvas.
To clear the canvas
1Choose Window Layers.
2In the Layers panel, click the Canvas to select it.
3Choose Select All.
4Choose Edit Clear.
Setting up the drawing cursor
You can choose the icon and orientation of the drawing cursor. You can also set the drawing cursor to
show a brush ghost — a representation of the brush variant you choose from the Brush Selector bar.
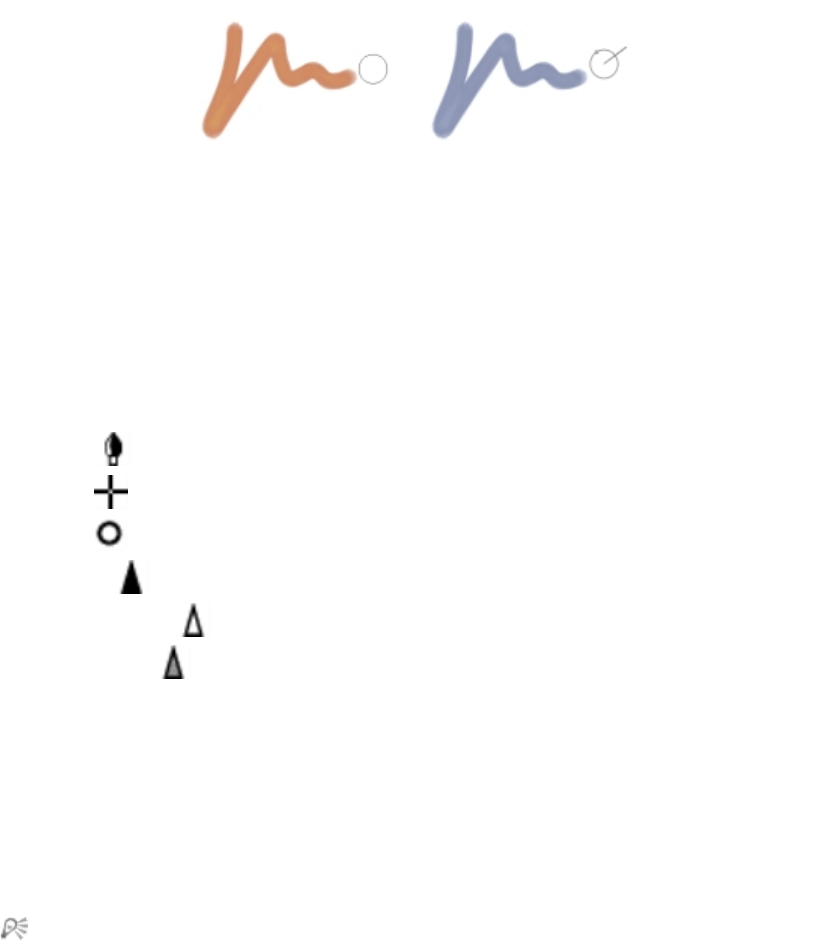
Painting | 135
The Brush ghost (left) gives you information about the size of
your brush variant. The Enhanced brush ghost (right) gives you
information about the tilt, bearing, and rotation of your pen.
To choose a drawing cursor icon
1Do one of the following:
•(Mac OS) Choose Corel Painter 2015 menu Preferences Interface.
•(Windows) Choose Edit Preferences Interface.
2In the Cursor Type area, enable the Iconic option.
3Choose an icon from the Iconic list box:
•Brush
•Cross
•Torus
•Triangle
•Hollow Triangle
•Gray Triangle
You can also
Change the cursor color Click the Main Color button, and click a color in
the Color dialog box.
Change the cursor orientation Drag the Angle slider.
If you want the drawing cursor icon to be a single pixel, enable the Single pixel option in the
Cursor Type area.
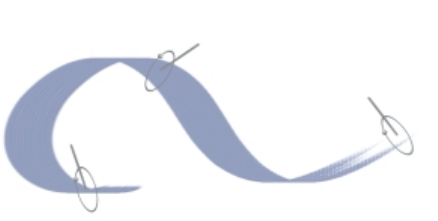
136 | Corel Painter 2015 User Guide
To set brush ghost options
1Do one of the following:
•(Mac OS) Choose Corel Painter 2015 Preferences Interface.
•(Windows) Choose Edit Preferences Interface.
2In the Cursor Type area, enable one of the following options:
•Brush ghost — gives you immediate visual feedback on the cursor, showing you the shape and size
of the selected brush
•Enhanced brush ghost — gives you visual feedback about the brush size as well as the tilt, bearing,
and rotation of the pen. The outer ring indicates the brush size, and the line indicates the tilt and
bearing of the pen. If you have a flat-tip pen that supports 360-degree rotation, a dot appears along
the outer ring to indicate the pen rotation.
The Enhanced brush ghost gives more visual
feedback about your pen in relation to the tablet.
Using a stylus vs. a mouse
With Corel Painter, you can produce realistic brushstrokes that fade in and out; change width, tilt, and
angle; and penetrate based on the stylus or mouse input. Overall, the stylus provides more control and
interactivity because it gives you the most responsive digital painting experience by allowing your hand and
brush to work fluidly as one. However, if you don’t have a stylus, you can adjust the mouse so it simulates
stylus pressure, tilt, bearing, and fingerwheel settings. For more information, see “Mouse controls” on page
401.
Edges
When you reach for a wide, flat brush, the stroke you make is affected by how you hold the brush. A stroke
made with the face of the brush comes out wide. A stroke made with the edge is narrow.
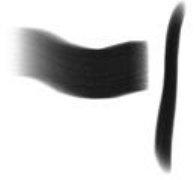
Painting | 137
Paint with the face of a flat brush for a wide stroke; use the edge for a narrow stroke.
Tilt
Some brush variants, such as the Smeary Flat variant in the Oils category, react to stylus tilt (how close to
vertical the stylus is held) and bearing (the compass direction in which the stylus is pointing).
Tilt can significantly affect brushstrokes. If you get unexpected results, especially with bristle-type brushes
or airbrushes, you can try reducing the tilt of your stylus. Extreme tilt angles are usually undesirable. For
information about adjusting tilt, see “Expression settings” on page 327.
Pressure
Many Corel Painter brushes respond to stylus pressure (how hard you press with the stylus). Depending
on the variant settings, greater stylus pressure can increase the width of a brushstroke, the penetration of
color, or the degree of other effects. The Corel Painter airbrushes also respond to the fingerwheel on the
Wacom Intuos airbrush, simulating a needle control that adjusts how much ink is sprayed.
You can link brush settings (such as size, opacity, and angle) to stylus input data (such as velocity, direction,
pressure, airbrush fingerwheel, tilt, and bearing). Refer to “Expression settings” on page 327 for more
information about linking brush settings to stylus input controls.
In theory, a mouse has no pressure information because a mouse button is either “on” (button down) or
“off” (button up). However, with Corel Painter you can simulate stylus pressure.
If you are using a mouse with Corel Painter, you can compensate for the lack of pressure information by
adjusting size, opacity, and grain on the property bar. For example, reducing opacity or grain can produce
the same results as pressing more lightly with a stylus.
To adjust pressure, tilt, and bearing when using a mouse
1Choose Window Brush Control Panels Mouse.
2Move the Pressure slider.
A 100% setting uses maximum pressure.
3Move the Tilt slider.
A 90° setting simulates a stylus that is perpendicular to the tablet.
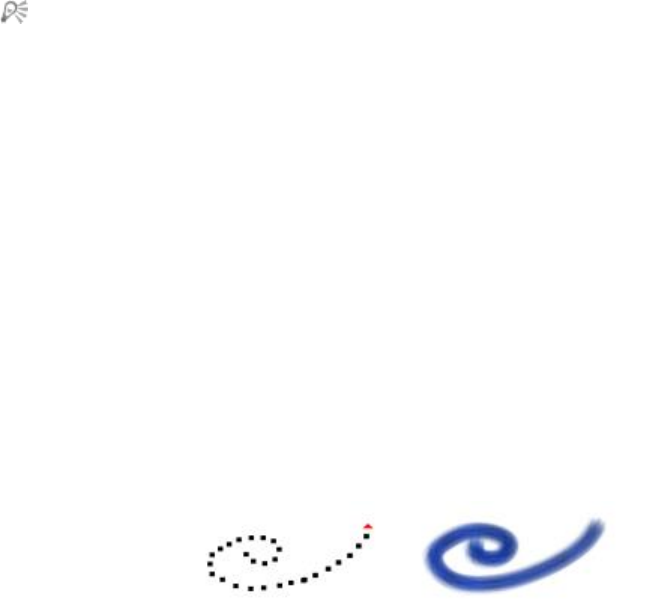
138 | Corel Painter 2015 User Guide
4Move the Bearing slider.
A setting of zero indicates that if a stylus were in use, it would be pointing left.
5Move the Rotation slider.
A 360° setting simulates a stylus that complete a 360°-barrel rotation.
To see the effect of the tilt setting, apply a stroke to the drawing window using the Fine Spray
variant of the Airbrush category.
To adjust fingerwheel settings when using a mouse
1Choose Window Brush Control Panels General.
2Choose Wheel from the Expression list box.
3Choose Window Brush Control Panels Mouse.
4Move the Wheel slider.
A 90% setting indicates that if a stylus were in use, it would be perpendicular to the tablet.
Applying freehand and straight brushstrokes
You can draw unconstrained lines by using the freehand drawing style, or you can draw straight lines.
When you draw a freehand stroke, you can drag with any motion or in any direction. The stroke follows
your path.
Dragging to create freehand strokes.
When you draw a straight line stroke, Corel Painter connects points with a straight line.
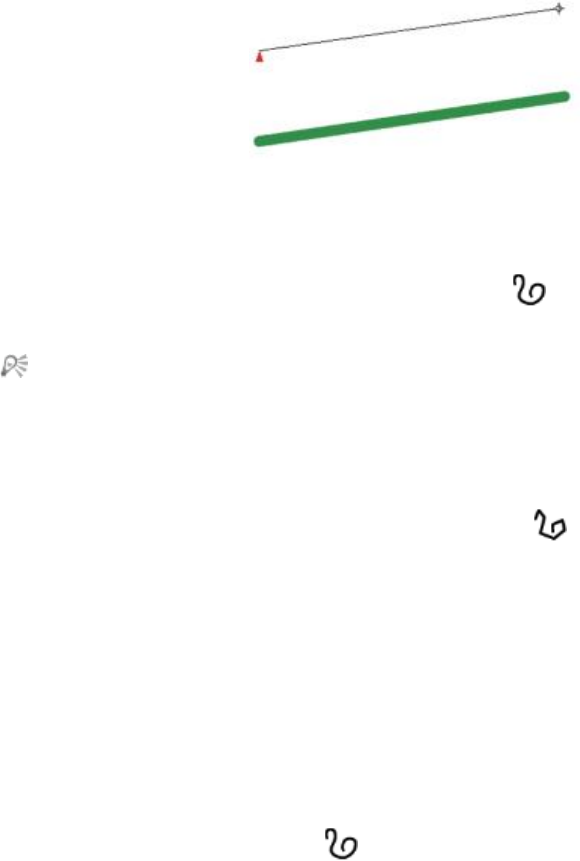
Painting | 139
To create a straight line stroke, you click to add the
first point and then click or drag to create the stroke.
To draw freehand lines
1On the Brush property bar, click the Freehand Strokes button .
2Drag on the canvas.
You can use shortcut keys to toggle between the freehand and straight line drawing styles. Press B
to choose the freehand style, or V to choose the straight-line style.
To draw straight lines
1On the Brush property bar, click the Straight line strokes button .
2Click a point on the canvas where you want to start your line.
3Do one of the following:
• Click the point where you want to end the line.
• Drag to place the end point exactly where you want it.
Corel Painter connects the first and second points with a straight line.
4To continue drawing from the second point, click or drag to create additional points on the canvas.
Corel Painter connects each point with a straight line.
5To end a line, do one of the following:
• Press Return (Mac OS) or Enter (Windows) to close the polygon. The final point is connected to the
origin with a straight line.
•Click the Freehand Strokes button to return to the freehand drawing style without closing the
polygon.
6Press V to end the current polygon without closing it, so that you can begin a new one.
7Drag on the canvas.
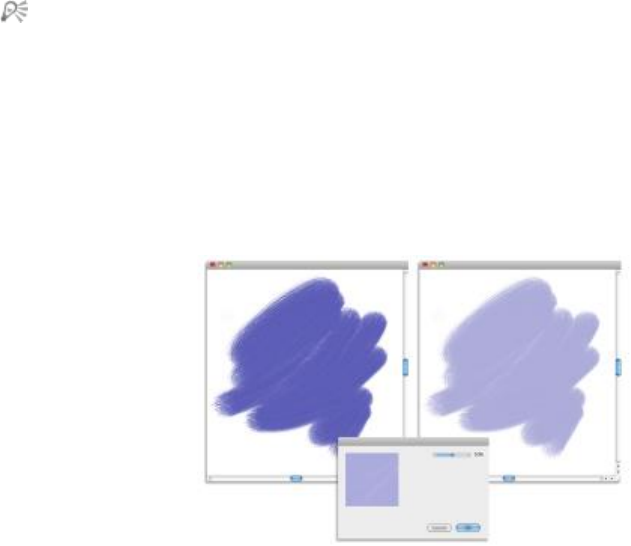
140 | Corel Painter 2015 User Guide
You can also paint in a straight line by holding down Shift as you drag on the canvas.
Constraining, fading, and undoing strokes
Using the freehand stroke drawing style, you can constrain your strokes to a straight line. The angle you
draw depends on the orientation of the stroke.
You can also make a stroke less opaque, or more translucent, by fading the stroke.
In this example, a brushstroke was applied to the canvas (left) and then fade
was applied to the brushstroke (right) by using the Fade dialog box (center).
In addition, you can undo a stroke. You can also control how many individual strokes can be undone, see
“Performance preferences” on page 871.
To constrain freehand strokes
• Hold down Shift as you drag.
To fade a stroke
1Choose Edit Fade.
2Drag the Undo Amount slider.
The Preview window displays the results of your selection.
To undo a stroke
•Choose Edit Undo Brush Stroke.
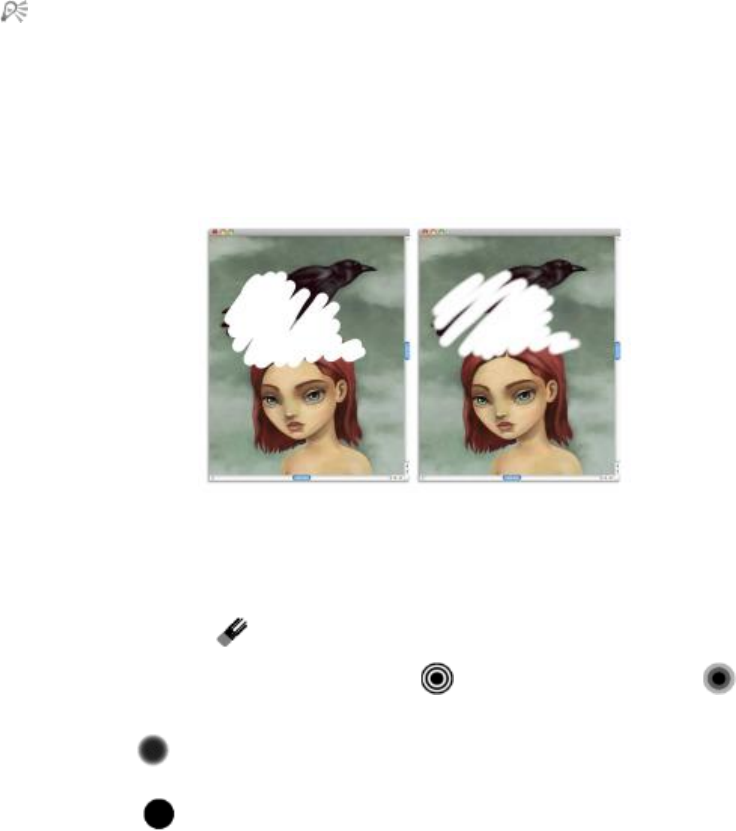
Painting | 141
You can also undo a stroke by pressing Command + Z (Mac OS) or Ctrl + Z (Windows).
Erasing image areas
You can erase any part of your image and control the opacity of erased areas. You can also link the opacity
to stylus pressure or specify a fixed opacity value.
You can set the Eraser opacity to Hard (left) or Soft (right).
To erase an image area
1In the Layers panel, choose the layer on which you want to erase.
2Choose the Eraser tool in the toolbox.
3On the property bar, adjust the Size pop-up slider and the Opacity pop-up slider .
4Click one of the following buttons:
•Soft Mode — sets opacity based on stylus pressure. The more pressure you apply, the higher the
opacity. The initial opacity level is determined by the Opacity pop-up slider.
•Hard Mode — sets opacity based on the value specified by the Opacity pop-up slider
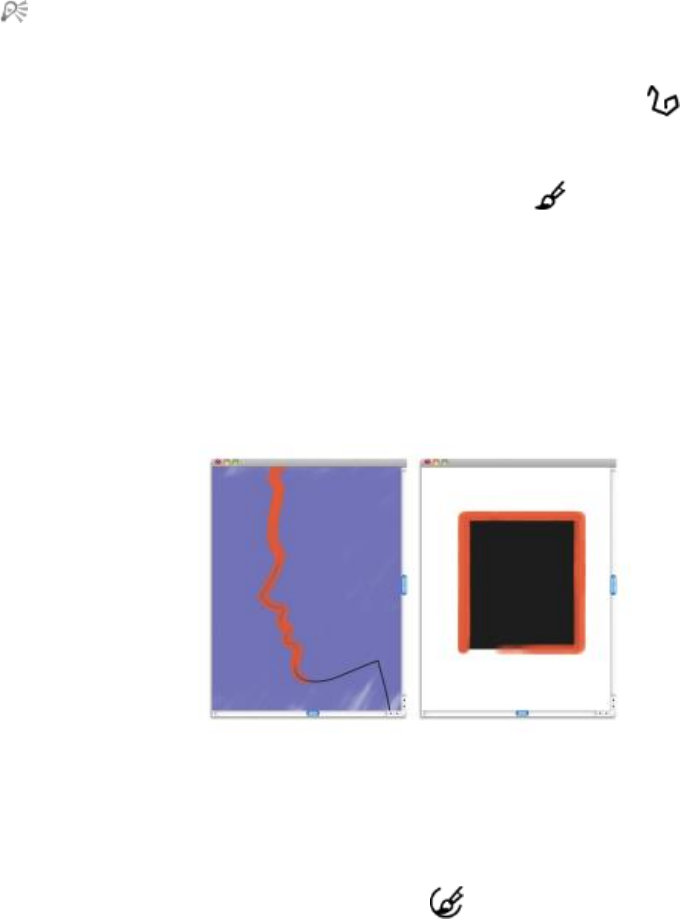
142 | Corel Painter 2015 User Guide
You can toggle between Soft Mode and Hard Mode by holding down Option (Mac OS) or Alt
(Windows) as you drag in the image window.
You can erase in straight lines by clicking the Straight line strokes button on the property
bar, clicking a point on the canvas where you want to start your line, and clicking where you want
to end the line.
You can also erase image areas by choosing the Brush tool in the toolbox and choosing
Erasers from the Brush Category selector on the Brush Selector bar.
Aligning brushstrokes to paths and shapes
You can automatically align a brushstroke to a path or the edge of a shape. You do this by determining the
tolerance area, that is, how close the brushstroke must be to the path or shape for automatic alignment
to occur. If the brushstroke is within the tolerance area, the brushstroke snaps to the path or shape; if the
brushstroke is outside of the tolerance area, no brushstroke is applied.
You can align brushstrokes to paths (left) and to shapes (right).
To align a brushstroke to a path or shape
1Click the Brush Selector on the Brush Selector bar.
2In the Brush library panel, click a brush category and a brush variant.
3On the property bar, click the Align to Path button .
Brushstrokes within the tolerance area of a path or shape are automatically aligned.
Painting | 143
If there are multiple shapes within the tolerance area, the brushstroke is aligned to the shape on
the selected layer.
To set the tolerance area for brushstroke alignment
1Choose one of the following:
•(Mac OS) Corel Painter 2015 menu Preferences
•(Windows) Edit Preferences
2In the Preferences list of categories, click General.
3Type a number in the Align Brush to Path tolerance box.
The tolerance area is measured in pixels and must be between 1 and 999.
Letting media pool
Corel Painter computed brushes allow media to build up or “pool” when you move a brush slowly. Pooling
creates very realistic strokes, especially with airbrushes. You can also cause media to pool by simply touching
and pausing with the selected brush.
With an airbrush, paint pools when you pause in a stroke
for 1second (left), 4seconds (middle), and 7seconds (right).
To enable media pooling
1Choose Window Brush Control Panels Spacing.
2Enable the Continuous Time Deposition check box.
When the Continuous Time Deposition check box is disabled, you must move the brush (even
just slightly) to cause media to be deposited.
144 | Corel Painter 2015 User Guide
Making 360° strokes
Because there are no restrictions on bearing (stylus direction) in Corel Painter, you can create full 360°
strokes with noncomputed brushes by completing an arc without interruption. Computed brushes use
bearing, with the exception of those that use the Rendered dab type, so you cannot use them to create
360° strokes.
Painting with airbrushes
The Corel Painter computed airbrushes are so realistic, you feel as though you’re using a real airbrush. For
more about computed brushes, refer to “General controls: Dab types” on page 332.
The best way to get used to the Corel Painter airbrushes is to play with them. Select each variant and spray
paint onto the canvas without worrying about running out of compressed air. With computed airbrushes,
you can paint with color, patterns, or variants. One variant blows hairlike strokes; another variant just blows
existing paint around on the canvas, like a hose without an airbrush attached.
Try using the Fine Spray variant in the Airbrushes category for an example of how Bearing and Flow
settings combine to give realistic airbrush results.
For information about the Airbrush controls, see “Airbrush controls” on page 378.
Conic sections
Previous versions of digital airbrushes projected a thin mist of dots (or paint dabs) onto the canvas. The
Digital Airbrush variant (named Fat Stroke in previous versions of Corel Painter) is included in the default
brush library. With a digital airbrush, dots are laid down, or sprayed, within a circular area, resembling
the circle thrown by a flashlight that is perfectly perpendicular to a piece of paper. The area of application
remains circular, regardless of tilt, bearing, or stylus pressure. Density, or flow, adjustments can be mimicked
with adjustments to the Opacity setting.
Painting | 145
Previous versions of airbrushes sprayed a thin layer of dots within an area that was always
circular, like a circle of light from a flashlight that is perpendicular to a piece of paper.
Now, airbrushes respond to angle (tilt), bearing (direction), and flow (fingerwheel setting) data from a
stylus, allowing for a truly realistic brushstroke. For example, as you tilt your stylus, specks of media land
on the paper in a way that reflects that tilt. Imagine, again, the circle of light thrown by a flashlight. The
moment the flashlight is no longer perpendicular to the paper, the shape of the cone of light changes,
creating a conic section. In the same manner, Corel Painter airbrushes create conic sections that mirror your
stylus movements.
Angle and tilt determine the shape and size of the conic section
created by Corel Painter airbrushes, which resembles a circle of
light from a flashlight that is no longer perpendicular to the paper.
Extreme-tilt angles affect large areas of the canvas. This can slow the brush down as it tries to squirt paint
too far from the stylus.
Adjusting spread
You can adjust airbrush spread, which affects how paint spreads out as it is applied. In other words, it sets
the size of area where the paint will be applied.
146 | Corel Painter 2015 User Guide
A good range for the Spread setting is 30° to 40°. Narrow settings for Spread and Angle can cause
problems. Combined with a very tilted stylus, a narrow setting for Spread can cause paint to be deposited
away from the cursor.
Varying edges
You can vary the edges of the paint sprayed from an airbrush to achieve desired softness by selecting a
brush tip profile. Each profile gives you a different edge to the paint you spray. For more information, refer
to “Changing dab profiles” on page 359.
Airbrush edges created with the Watercolor profile (left) and the Medium profile (right).
Adjusting flow
Although you can still adjust Opacity to apply fainter or darker dots of media, some Corel Painter
airbrushes, for example, the Fine Wheel Airbrush variant, take advantage of stylus fingerwheel controls.
Like the needle control on real airbrushes, the fingerwheel control adjusts airbrush flow — that is, how
much media is applied.
With the fingerwheel control, you can adjust airbrush flow on many airbrush styluses.
Controlling droplet size
You can control the size of the airbrush droplets. This is not the same as adjusting the size of the brush (the
larger the brush, the more droplets are sprayed).

Painting | 147
To change the size of airbrush droplets
1Choose Window Brush Control Panels General.
2Choose Airbrush from the Dab Type list box.
3In the Brush palette, click the Size tab to open the Size panel.
4In the Size panel, move the Size slider.
5Move the Feature slider to the left for smaller droplets, or to the right for larger droplets.
Very large droplets may produce unexpected results.
The Feature setting is not available for variants that use the Pixel Airbrush or Line Airbrush dab
types.
To increase or decrease media flow from an airbrush
• Move the stylus fingerwheel toward the tip (or forward), to decrease flow. Move it away from the tip (or
backward), to increase flow.
You can also control media flow from an airbrush by adjusting the Flow and Min Flow sliders in
the Airbrush panel in the Brush Controls palette. Flow sets the maximum flow. Min Flow sets the
minimum amount of flow as a percentage of Flow.
Depending on the Airbrush variant, you can reverse the effect of moving the airbrush fingerwheel
by enabling the Invert button in the Color Expression panel, or by clicking the Invert Flow
Expression button in the Airbrush panel in the Brush Controls palette.
In the Airbrush panel in the Brush Controls palette, you can also determine flow based on stylus
information, such as velocity or pressure, by choosing an expression from the Flow Expression list
box.
Recording and playing back brushstrokes
Corel Painter plays back any stroke you record, wherever you click in the document window. In this way, you
can easily create a series of identical strokes — for example, when you create hatching effects.
148 | Corel Painter 2015 User Guide
A brushstroke (top) is recorded and played back within a triangular selection.
Another way to use a recorded stroke is with Auto Playback, which lets you repeat the recorded stroke at
random positions on the page.
You can also save recorded strokes for later use. You can play back saved strokes, and you can paint with
the data from a saved stroke. This way of working can be particularly useful if you work sometimes with a
stylus and sometimes with a mouse: you can record the brushstrokes you make with a stylus, save them for
later use, and then use a mouse to obtain the data from that stroke, allowing stylus-quality results.
Corel Painter has a number of brushstroke scripts that can be played back on their own or used in
conjunction with an original brushstroke. When you use a brushstroke script, your freehand brushstrokes
adhere to the stroke data in the script. This allows you to emulate features of a tablet and stylus while using
a mouse.
To record a stroke
•Choose Brushes Record Stroke.
The next brushstroke you make is saved in memory.
To play back a stroke
1Choose Brushes Playback Stroke.
2Click where you want to repeat the stroke.
Corel Painter centers the stroke on the point on which you click. You can repeat the stroke as many
times as you want.
3Choose Brushes Playback Stroke to turn off playback.
To play back strokes randomly
•Choose Brushes Auto Playback.
Corel Painter repeats the stroke at random positions until you click.
Painting | 149
To save a stroke
1Choose Brushes Save Stroke.
2In the Save Stroke dialog box, type a name.
Corel Painter adds the stroke to the list of saved strokes.
To select a saved stroke
•Choose Brushes Strokes, and choose a saved stroke.
The selected stroke is used when you play back strokes or use stroke data.
To use stroke data
1Choose Brushes Strokes, and choose one of the following:
•Pressure Modulate — varies the stylus pressure in a brushstroke
•360° Bearing Rotate — rotates the stylus bearing by 360°
•Size/Bearing Modulate — varies the size of the brush tip and stylus bearing in a brushstroke
•Size/Tilt Modulate — varies the size of the brush tip and tilt of the stylus in a brushstroke
•Fade In/Out — the start point and endpoint of a brushstroke
•Short Stroke — decreases the length of a brushstroke
•Bearing Rotate — rotates stylus bearing in a brushstroke
You can also base stroke data on brushstrokes that you’ve already saved.
2Choose Brushes Use Stroke Data.
3Draw brushstrokes.
Reference: Troubleshooting
This topic describes some of the reasons why a brushstroke may not appear:
• Main color — In the Color panel, what color is the Main Color (front) swatch? Is it a color that will
show up when applied to your image? If not, click the Main Color swatch, and then set a different
color.
• Opacity — Check the Opacity setting on the property bar and, if necessary, adjust the pop-up slider to
increase opacity.
• Brush method — The brush method determines the basic nature of a brush. To check the brush
method, choose Window Brush Control Panels General. If you’re drawing with a light color on a
dark background, the method must be set to Cover in order to show the lighter color.
• Drawing mode — When you make a selection, the drawing mode determines what part of the selection
is protected. For more information, see “Choosing the protected area of a selection” on page 588.
150 | Corel Painter 2015 User Guide

Working with paper texture and grain | 151
Working with paper texture and grain
With traditional art media, the results from using a marking tool depend on the texture of the surface to
which it is applied. Corel Painter allows you to control the texture of the canvas to achieve the results you
would expect from using traditional media on a given surface — pencil on watercolor paper, felt pens on
cotton paper, chalk on the sidewalk, and so on. You can also create your own paper textures and adjust the
grain of paper textures.
You can use paper textures in many ways. Brushes interact with paper “grain,” just as traditional tools
react with the texture of the surfaces beneath them. Working with paper grains is useful when you use the
Apply Surface Texture command or other effects, such as Glass Distortion. You can select different paper
textures, modify them, organize them in libraries, and even create your own custom textures.
In Corel Painter, brushes that react with paper texture have a “grainy” method. For more information about
brush methods, see “General controls: Methods and subcategories” on page 339.
This section contains the following topics:
•“Applying paper texture” (page 152)
•“Creating and deleting paper textures” (page 153)
•“Opening and managing the Paper Textures library” (page 155)
•“Inverting and scaling paper grain” (page 155)
•“Controlling brightness and contrast of paper grain” (page 157)
•“Adjusting grain direction and behavior” (page 157)

152 | Corel Painter 2015 User Guide
The terms “paper grain” and “paper texture” are used synonymously.
Applying paper texture
Corel Painter allows you to apply paper texture to the canvas. In general, you can define texture as the
roughness or coarseness of a surface, which you can both see and feel. In Corel Painter, however, texture
modifies only the appearance of the image, to give you the illusion of surface roughness. It also interacts by
subtly or dramatically altering the appearance of brushstrokes.
In addition, certain brushes include a “grainy” method subcategory that is specifically designed to react
with the paper texture and grain. Some brushes also let you determine the amount of grain that is revealed
by each brushstroke. For more information about brush methods, see “General controls: Methods and
subcategories” on page 339.
One brushstroke applied to three different paper textures.
It is important to note that some brushes, such as those in the Airbrushes category, don’t reveal paper
texture in their brushstrokes. This behavior corresponds with that of a traditional airbrush.
Corel Painter includes several default paper textures that are stored in the Papers library. For more
information about working with libraries, see “Working with libraries” on page 56. Additional paper
textures are also provided on the Corel Painter DVD and on the Corel website.
To apply a paper texture
1Click the Paper selector button in the toolbox.
2In the Paper Textures library panel, click a paper texture swatch.
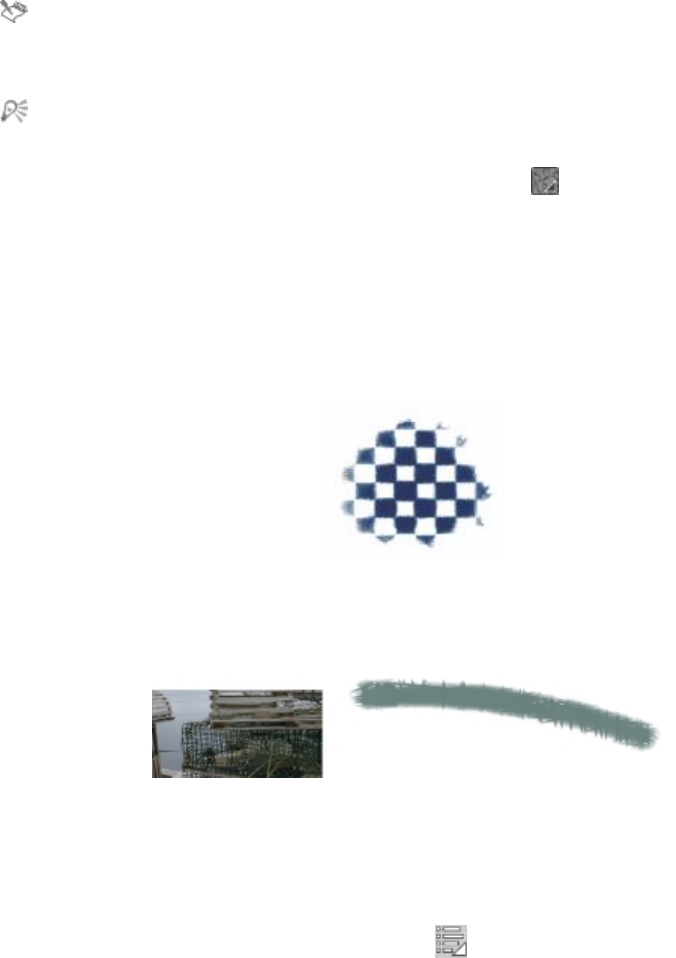
Working with paper texture and grain | 153
The currently selected paper is saved with the document. This includes custom paper textures that
may not be saved in a paper texture library.
You can also choose a paper texture from the Papers panel by choosing Window Paper
Panels Papers, clicking the Paper Textures library button , and clicking a paper texture
swatch in the Paper Textures library panel.
Creating and deleting paper textures
You can create your own paper texture by choosing a pattern and then modifying the spacing of the
pattern elements. You can also modify the angle of the pattern elements to alter the direction of the
texture.
You can create a paper texture from a selected pattern.
You can also create a paper texture by selecting an area of an image and converting it into a paper texture.
A paper texture was generated by selecting an area of the image (left). An example
of applying a brushstroke to the canvas using the new paper texture (right).
To create a paper texture
1Choose Window Paper Panels Papers.
2In the Papers panel, click the Papers options button , and choose Make Paper.
3In the Make Paper dialog box, choose a pattern from the Pattern list box.
154 | Corel Painter 2015 User Guide
4Adjust the Spacing slider.
Moving the Spacing slider to the right opens up the space between rows and columns in the selected
pattern. It also increases the size of the pattern.
5Adjust the Angle slider.
Moving the Angle slider changes the direction of the texture rows.
6Type a name in the Save As box.
The paper texture appears as the last selection in the Papers panel.
You can also make a paper texture from the Paper Libraries panel by clicking the Make Paper
button .
To capture paper texture
1Open or create an image.
2Choose the Rectangular Selection tool from the toolbox.
3Drag in the document window to select the area of the image that you want to capture as a paper
texture.
4In the Papers panel, click the Papers options button , and choose Capture Paper.
If you want to blend the distinction between tile borders, in the Capture Paper dialog box drag the
Crossfade slider to the right.
5Type a name in the Save As box.
The paper texture is added to the currently selected library.
The Make Fractal Pattern feature and certain weaves also produce excellent paper textures. For
more information, see “Creating fractal patterns” on page 719.
You can also capture a paper texture from the Paper Libraries panel by clicking the Capture Paper
button .
Working with paper texture and grain | 155
Opening and managing the Paper Textures library
You can organize and manage paper textures from the Paper Textures library panel. The Paper Textures
library panel displays the default Papers library, the custom libraries that you create, and any custom
libraries that you import.
To open the Paper Textures library panel
•Choose Window Paper Panels Paper Libraries.
You can also open the Paper Libraries panel by clicking the Paper selector button in the
toolbox.
To delete a paper texture
1Choose Window Paper Panels Paper Libraries.
2Click a paper texture swatch.
3Click the Delete Paper button .
To rename a paper texture
1Choose Window Paper Panels Papers.
2Click the Paper Textures library button .
3Click a paper texture swatch from the Paper Textures library panel.
4Click the Paper options button , and choose Rename Paper.
5Type a name in the New Name box.
Inverting and scaling paper grain
Paper texture can be visualized as a three-dimensional landscape made up of grains. The size, shape, and
spacing of the grains determine the pattern and direction of the paper texture. When applying media to the
canvas, brushes react to paper texture by coloring the grain peaks and ignoring the valleys. However, Corel
Painter allows you to invert this effect to make color fill the grain valleys instead of the peaks. You can also
resize the paper grain by adjusting the scale.
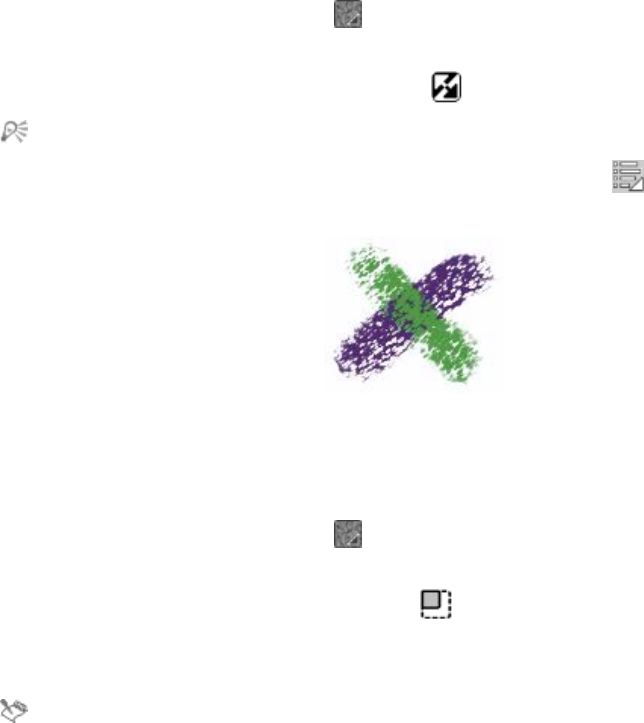
156 | Corel Painter 2015 User Guide
To invert paper grain
1Choose Window Paper Panels Papers.
2Click the Paper Textures library button .
3Click a paper texture swatch from the Paper Textures library panel.
4In the Papers panel, click the Invert Toggle button .
You can also invert paper texture by clicking the Paper options button in the Papers panel,
and choosing Invert Paper.
The green brushstroke was painted with the paper grain inverted.
To scale paper grain
1Choose Window Paper Panels Papers.
2Click the Paper Textures library button .
3Click a paper texture swatch from the Paper Textures library panel.
4In the Papers panel, adjust the Paper Scale slider to resize the paper grain.
As you move the slider, the Paper Preview window updates to display the new grain size. You can scale
texture down to 25% or up to 400%.
Scaling large textures can use a great deal of Random Access Memory (RAM). Most textures in
Corel Painter range from 50 to 400 pixels square at 100% scaling.
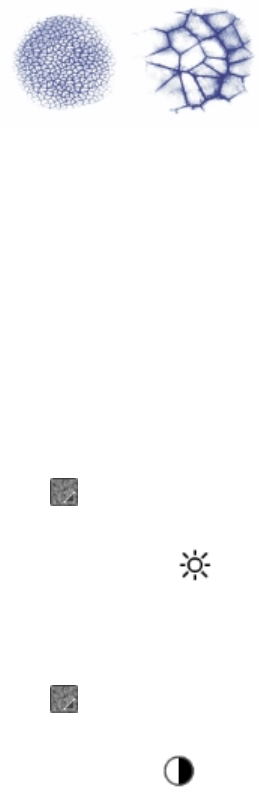
Working with paper texture and grain | 157
Brushstrokes on paper grains with different scale values.
Controlling brightness and contrast of paper grain
Brightness can be thought of as controlling the depth of the paper grain. The effect of lowering the paper’s
brightness is similar to that of using a more shallow grain.
Contrast can be thought of as controlling the steepness of the paper grain. The grain in higher-contrast
paper changes from high to low more quickly and with fewer intermediate levels than the grain in lower-
contrast paper.
To change paper grain brightness
1Choose Window Paper Panels Papers.
2Click the Paper Textures library button .
3Click a paper texture swatch from the Paper Textures library panel.
4In the Papers panel, adjust the Paper Brightness slider .
To change paper grain contrast
1Choose Window Paper Panels Papers.
2Click the Paper Textures library button .
3Click a paper texture swatch from the Paper Textures library panel.
4In the Papers panel, adjust the Paper Contrast slider .
Adjusting grain direction and behavior
When you use a brush that interacts with paper grain, the results appear with each stroke. If you have a
stylus and tablet, you can adjust paper grain by changing the stroke of the stylus on a pressure-sensitive
tablet. In most cases, a light stroke colors only the peaks and ridges of the grain. A heavy stroke fills color
deep into the pockets and valleys. You can also affect the brush interaction with paper grain by changing
the brush grain settings.
158 | Corel Painter 2015 User Guide
If you want a uniform paper grain across an image, create your artwork first, and then apply the grain as
a surface texture. If you apply paper texture before you create an image, the texture is erasable, and you
cannot erase the paper texture without erasing brushstrokes at the same time. For this reason, it is usually
best to add paper texture as a last step in developing your image.
By default, paper grain is fixed, which means that the texture is in the same position each time you apply a
brushstroke. You can change this setting if you want grain to be applied randomly.
You can also change the look of brushstrokes by having the paper grain interact with stroke direction. This
option works best when you paint with a stylus and use certain papers and brushes.
When you find a brush and paper combination that you really like, you can save it as a new look in the
Look Selector. For more information about saving looks, see “Saving a brush look” on page 321.
To randomize paper grain
1Choose Window Brush Control Panels Grain.
2Enable the Random Brush Stroke Grain check box.
The Random Brush Stroke Grain check box is not available for all brushes.
To enable directional paper grain
1Choose Window Paper Panels Papers.
2Click the Paper Textures library button .
3Click a paper texture swatch from the Paper Textures library panel.
4In the Papers panel, click the Direction Toggle button .
Factors such as stylus pressure, paper, and brush variant affect the appearance of brushstrokes
when the Direction Toggle button is enabled. Papers with pronounced grain, such as Wood
Grain and Gessoed Canvas, produce the best results.
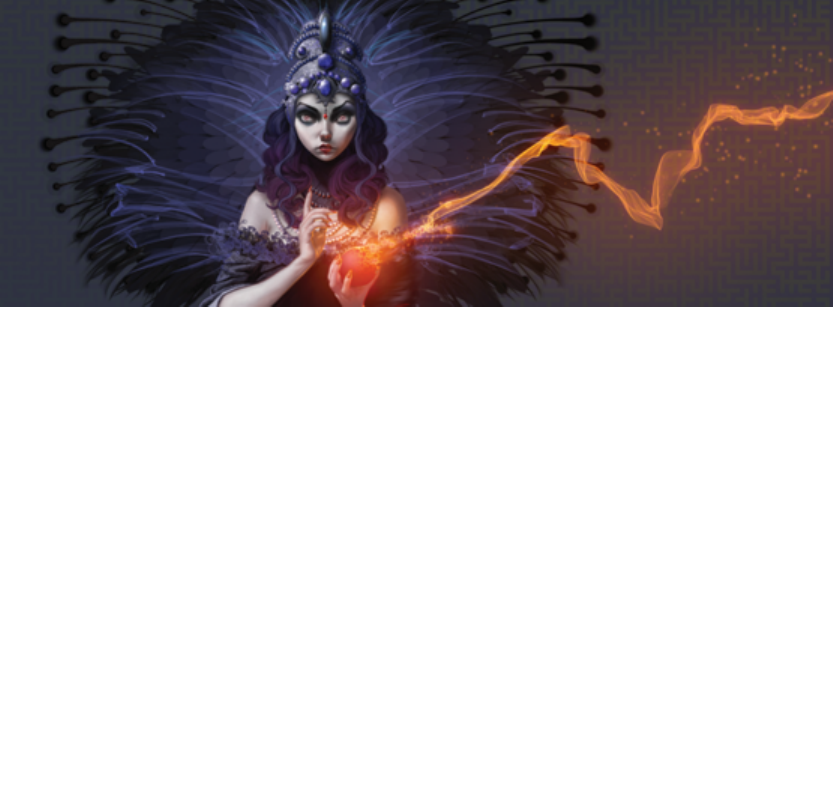
Auto-painting photos | 159
Auto-painting photos
Corel Painter’s auto-painting tools streamline the process of creating a painting that is based on a digital
image or scanned photo. Previous experience with digital art is not required to use these tools.
The auto-painting process involves three basic steps:
Step Description
1. Underpainting Prepare and clone a photo for painting
2. Auto-painting Apply brushstrokes to the canvas
3. Fine-tuning Fine-tune your artwork by restoring some detail to
the image
This section contains the following topics:
•“Creating underpaintings” (page 160)
•“Auto-painting photos” (page 162)
•“Restoring detail to paintings” (page 165)
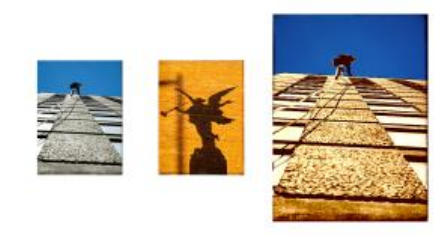
160 | Corel Painter 2015 User Guide
Creating underpaintings
An underpainting is a version of the photo in which you adjust the photo’s colors, tones, and sharpness.
The purpose of the underpainting is to prepare it for auto-painting. For example, you can darken colors to
simulate the colors used in an 18th-century painting, or you can soften colors to simulate the colors found
in watercolor paintings.
After adjusting these elements, you must clone the underpainting to preserve it and to prepare for auto-
painting. Creating a clone allows Corel Painter to borrow colors from the photo in order to recreate it as a
painting on a blank canvas.
Choosing an underpainting method
Depending on the effect you want to achieve, you can choose one of the following methods for creating an
underpainting:
• Quickly simulate the color and tone used in some popular art styles, such as watercolor paintings or
chalk drawings, by using a Color Scheme preset.
• Match the color and tone of your underpainting to an existing image, such as a photo, scanned image,
or digital artwork.
• Quickly lighten, darken, or shift the color or contrast of your photo by using a Photo Enhance preset.
• Adjust individual settings in the Photo Enhance area, and save the settings as a custom preset.
One method you can use to prepare a photo for painting (left) is to choose a source
image (center) that contains the colors and tones you want to use. The color and tone
of the source image can be applied to your photo to create an underpainting (right).
To create an underpainting
1Open the image that you want to auto-paint.
2Choose Window Auto-Painting Panels Underpainting.
3In the Underpainting panel, choose a preset from the Color Scheme list box.
4Choose a preset from the Photo Enhance list box.
Auto-painting photos | 161
5In the Photo Enhance area, move any of the following sliders:
•Brightness — lets you brighten or darken the photo
•Contrast — lets you increase or decrease the difference in tone between the dark and light areas of
the photo
•Hue — lets you shift the color balance of the photo. For example, you can correct a color cast or
apply a cast to create a special effect.
•Saturation — lets you adjust the vividness of colors
•Value — lets you brighten or darken the photo by using the HSV color space values
•Smart Blur — lets you adjust the level of detail in the photo. More detail is maintained in high-
contrast areas than in low-contrast areas.
A preview of the change is shown in the photo, but the change is not applied until you click the Apply
Underpainting button .
6Click the Apply Underpainting button .
Before clicking the Apply Underpainting button , you can return the photo to its original
state by clicking the Reset Underpainting button .
You can add an edge effect to simulate the unpainted edge of a canvas or to create a frame effect
by choosing an edge from the Edge Effect list box and moving the Amount slider.
To save Photo Enhance settings as a preset
1In the Underpainting panel, adjust the Photo Enhance sliders to achieve the style you want.
2Click the Add Preset button .
3In the Save Preset dialog box, type a name for your preset.
The preset appears in the Photo Enhance list box.
You can delete a preset by choosing it in the Photo Enhance list box and clicking the Delete
Preset button .
To create an underpainting by matching the color and tone of another image
1Open the image that you want to use as a source for color matching.
2Open the image that you want to use as an underpainting.
This image is now the active document.
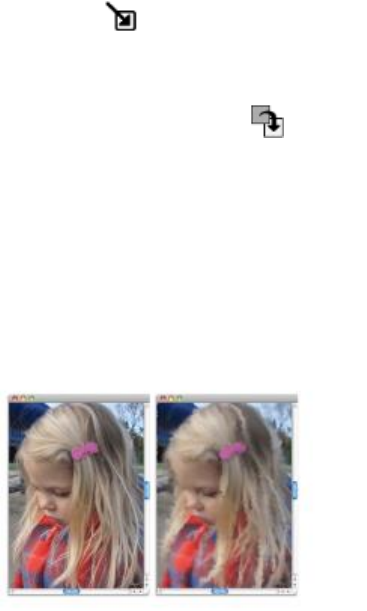
162 | Corel Painter 2015 User Guide
3In the Underpainting panel, choose the filename for the source image from the Color Scheme list box.
The underpainting is automatically updated with the color scheme from the source image.
If you want to fine-tune the underpainting, you can adjust the Photo Enhance settings.
4Click the Apply Underpainting button .
To clone an underpainting
•In the Underpainting panel, click the Auto Clone button .
Auto-painting photos
After the underpainting is created and cloned, you can start the auto-painting process. You can choose a
Smart Stroke brush variant and let the Smart Stroke painting and Smart settings do the work. Although the
Smart Stroke brush variants are optimized for auto-painting, you can also use any Cloner brush variant. If
you want more control over how the brushstrokes interact with the canvas, you can set individual stroke
settings.
Auto-painting applies brushstrokes to the canvas.
Using the Auto-Painting panel
The Auto-Painting panel lets you specify how paint strokes are applied to a photo. You can choose from
the following options:
•Smart Stroke Painting — automatically applies paint strokes that follow forms in the photo
•Smart Settings — changes the size, length, and pressure of brushstrokes in areas of greater detail. This
option can be used with Smart Stroke painting to preserve detail from the source photo.
•Stroke — lets you choose a brushstroke. You can also add custom brushstrokes to the list.
•Randomness — introduces an “accidental” quality in color and stroke. Randomness contributes to the
appealing, unique look of artwork created with Corel Painter. You can control the randomness of the
following settings:

Auto-painting photos | 163
•Pressure — lets you set a value from 0 to 100 to specify the amount of pressure with which
brushstrokes are applied. This setting represents the percentage of the preset pressure for the Stroke
option.
•Length — lets you set a value from 0 to 100 to specify the length of the brushstrokes. This setting
represents the percentage of the preset length for the Stroke option.
•Rotation — lets you set a value from 0 to 360 degrees to specify the rotation of the brushstrokes.
•Brush Size — lets you set the brush size
You can control the speed of auto-painting so that you can see how and where individual strokes are
applied. You can also stop the auto-painting process at any time.
To auto-paint a photo by using Smart Stroke painting
1In the document window, select the clone that you created from the underpainting.
2Choose Window Auto-Painting Panels Auto-Painting.
3In the Auto-Painting panel, enable the Smart Stroke Painting check box.
4Click the Play button .
Brushstrokes are applied automatically.
5Click the Stop button when you are satisfied with the results.
If you do not click the Stop button, auto-painting stops at the end of the brushstroke cycle.
You can also
Enable paint strokes to adjust automatically in size,
length, and pressure to areas of greater detail
Enable the Smart Settings check box.
Control the speed at which brushstrokes are
applied
Move the Speed slider.
Turn off tracing paper to view the auto-painting
progression more easily
Press Command + T (Mac OS) or Ctrl + T
(Windows).
To auto-paint a photo by using stroke settings
1In the document window, select the image that you want to auto-paint.
2In the Auto-Painting panel, choose a stroke from the Stroke list box.

164 | Corel Painter 2015 User Guide
3Click the Play button .
Brushstrokes are applied automatically.
4Click the Stop button when you are satisfied with the results.
If you do not click the Stop button, auto-painting stops at the end of the brushstroke cycle.
You can also
Control the speed at which brushstrokes are
applied
Move the Speed slider.
Change the size of the brushstrokes Move the Brush Size slider.
Randomize the brushstrokes Move the Randomness slider. The settings in the
slider determine the range of randomness for
Pressure, Length, and Rotation. For example,
if the Randomness for pressure slider is set to
32% and the Randomness slider is set to 64%, the
pressure for each stroke is between 0% and 32%
with a variation of 64%.
Randomize the pressure of the brushstrokes Click the Randomness for pressure button,
and then move the slider.
Randomize the length of the brushstrokes Click the Randomness for length button, and
then move the slider.
Randomize the rotation of the brushstrokes Click the Randomness for rotation button,
and then move the slider.
You can use a custom stroke by clicking the Recording Options button and choosing Record
Stroke. Paint a stroke on the canvas, and choose Save Stroke from the same menu. Your
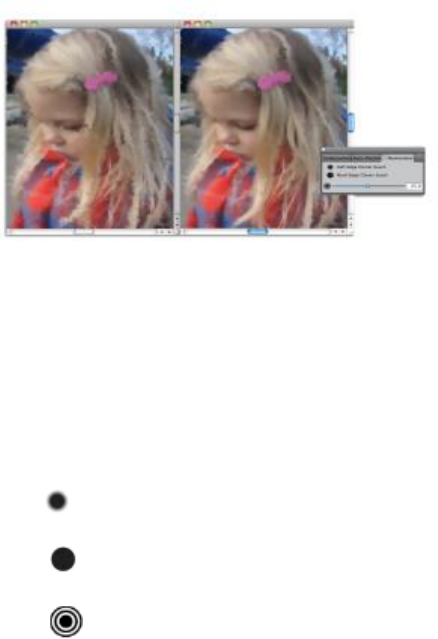
Auto-painting photos | 165
stroke is added to the Stroke list box. For more information, see “Recording and playing back
brushstrokes” on page 147.
Restoring detail to paintings
After using the Auto-Painting panel to create the painting, you can use the Restoration panel to recover
detail from the original photo, if necessary. For example, the Restoration panel is ideal for restoring some
detail in the area of a subject’s eyes in a portrait.
You can restore detail from the original photo by using brushes in the Restoration panel.
The Restoration panel gives you access to two cloner brushes, which you can use in specific areas of your
photo to restore detail. You can adjust the settings for these brushes on the property bar.
To restore photo detail
1Choose Window Auto-Painting Panels Restoration.
2In the Restoration panel, click one of the following buttons:
•Soft Edge Cloner Brush — activates the Soft Edge Cloner brush variant, which restores detail
gradually
•Hard Edge Cloner Brush — activates the Straight Cloner brush variant, which restores detail
quickly with a few brushstrokes
3Move the Brush Size slider .
4Paint over the area in which you want to restore detail.
166 | Corel Painter 2015 User Guide

Image cloning and sampling | 167
Image cloning and sampling
Corel Painter includes powerful image cloning tools to help you transform an existing image, such as a
photograph, into a work of art. You can also use image sampling tools and techniques to sample a portion
of an image so you can use it elsewhere.
This section contains the following topics:
•“Cloning images” (page 167)
•“Using Quick Clone” (page 171)
•“Setting cloning preferences” (page 172)
•“Working with multiple clone sources” (page 173)
•“Editing, updating, saving, and exporting clone source images” (page 174)
•“Painting in the clone” (page 176)
•“Using brush loading” (page 179)
•“Performing offset sampling” (page 179)
•“Applying transformations when sampling” (page 182)
•“Using selections and transformations when sampling” (page 191)
•“Filling an area with a sampled image” (page 193)
Cloning images
Corel Painter lets you clone an image to create a work of art. In other words, you can use cloning
techniques to give your digital photographs a second life.
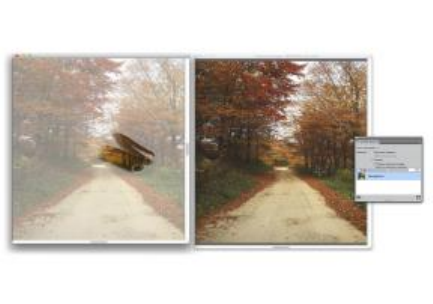
168 | Corel Painter 2015 User Guide
This section explains the manual process of cloning an image. The manual process involves choosing
the image you want to clone (source image), creating the clone, and then setting up the workspace to
start painting in the clone. However, if you prefer, you can choose a source image and let Corel Painter
automatically set up the workspace for painting in the clone. For information, see “Using Quick Clone” on
page 171.
Setting up the clone
To begin the cloning process, you need to select the source image that you want to clone. Corel Painter
then duplicates this source image and embeds the image as a clone source in the clone document. The
clone document appears in a new document window, and the clone source is displayed in the Clone
Source panel. You can also open the source image in a separate window, which allows you to paint on the
canvas with the source image displayed by its side. A crosshair cursor appears in the Source Image window
to identify which area of the source image you are painting.
The area that is painted in the clone document window (left) is
identified by a crosshair cursor in the Source Image window (right).
Working with the source image
The clone source image is best described as a snapshot of a selected image at a given time. Once the clone
is created and the clone source image is embedded, the relationship with the original document is broken.
However, you can edit the embedded clone source image to change its appearance. For more information,
see “Editing, updating, saving, and exporting clone source images” on page 174.
Once the initial clone is created, you can add additional source images to the clone document, which
allows you to clone colors from different sources. For more information, see “Working with multiple clone
sources” on page 173.

Image cloning and sampling | 169
When the clone document opens in the document window, you need to clear the canvas to begin painting
in the clone by using the painterly technique of your choice. For more information, see “Painting in the
clone” on page 176.
Cloning with tracing paper
Before you begin painting in the clone, you can also enable tracing paper. Tracing paper displays a faded-
out version of the source image beneath the clone document, which lets you precisely apply clone colors to
the canvas.
Unlike traditional tracing paper, the Corel Painter tracing paper is a viewing mode that you can use as a
reference for painting or tracing images. It’s not a real object, such as a layer or a document. This viewing
mode provides a faded-out version of the source image in the document window, as if it were displayed on
top of a light box. When you apply media to the image with tracing paper enabled, the media is applied to
the clone document, not the tracing paper.
The clone with the tracing paper turned on (right) allows you
to see a faded-out image of the clone source image (left).
When the tracing paper is turned on, not all image details are clearly visible. To keep track of the changes,
you may want to toggle between enabling and disabling the tracing paper. You can also control the opacity
of the tracing paper.
Outlining with tracing paper
In addition to painting in a clone, you can use a clone with tracing paper enabled to outline an image. You
can then use the outline as a starting point for a painting.
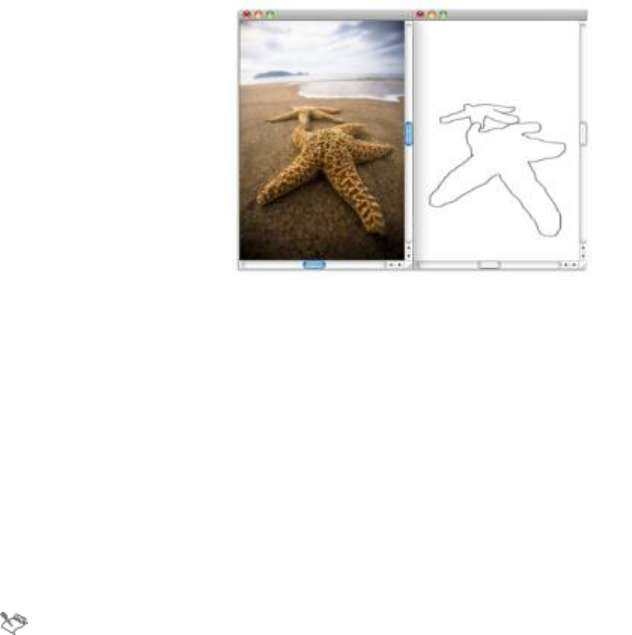
170 | Corel Painter 2015 User Guide
Use the tracing paper feature to view the source image for outlining
(left). When you turn tracing paper off, you can see the outline (right).
To clone an image
1Open the image that you want to clone.
2Choose File Clone.
The clone is displayed in its own document window.
If you want to paint in the clone colors on a blank canvas, you can clear the clone document by
choosing Select All, and then choosing Edit Clear.
3Apply brushstrokes to the canvas by using a cloner brush, or choose any brush and set it to clone color.
If you want to open the Clone Source panel, choose Window Clone Source.
When you create a clone, a copy of the source image is automatically embedded in the clone
document. Consequently, if you make changes to the original image, the changes are not reflected
in the clone. If you want to use the most up-to-date version of the image, you need to add it
as a new clone source and then delete the older version. For more information, see “To update
changes to a clone source image” on page 175.
If a source image has layers, cloning creates a fully composited copy — that is, all layers in the
image are dropped automatically. This aspect of cloning lets you flatten an image for faster
printing.
If you select a Cloner brush and switch to offset sampling while cloning an image, the Offset
Sampling check box is automatically enabled in the Clone Source panel. It is also important to
note the sampling reference point is not treated as a clone source and does not display in the
Clone Source panel. For more information, see “Performing offset sampling” on page 179.

Image cloning and sampling | 171
To display the Source Image window and crosshair cursor
1Choose Window Clone Source.
2In the Clone Source panel, enable the Show Source Image (with crosshair cursor) check box.
To enable tracing paper
1Choose Window Clone Source.
2In the Clone Source panel, click the Toggle Tracing Paper button .
To use a keyboard shortcut, press Command + T (Mac OS) or Ctrl+ T (Windows).
A faint rendering of the source image is displayed through the tracing paper.
3Do one of the following:
• Apply brushstrokes to the canvas by using a clone tool or brush variant set to clone color.
• Outline the image using, for example, a Pencil brush variant.
You can also
Change the opacity of tracing paper In the Clone Source panel, adjust the Set Tracing
Paper Opacity slider.
To disable the tracing paper In the Clone Source panel, click the Toggle
Tracing Paper button.
You can also enable tracing paper from the Navigator panel by clicking the Open Navigator
Settings button and choosing Tracing Paper.
Using Quick Clone
You can use Quick Clone to automatically set up everything you need to clone an image. When you use
Quick Clone, it automatically:
• creates the clone document
• embeds the clone source
• closes the source image
• clears the canvas

172 | Corel Painter 2015 User Guide
• enables tracing paper
• selects a cloner brush
You can also change the Quick Clone preferences. For more information, see “Setting cloning preferences”
on page 172.
To clone an image using Quick Clone
1Open the image that you want to clone.
2Choose File Quick Clone.
3In the Clone Source panel, enable the Show Source Image (with crosshair cursor) check box.
4Apply brushstrokes to the canvas by using the selected cloner brush.
If you enabled the Switch to Cloner Brushes check box in the Preferences dialog box, the last Cloner
brush that you used is automatically selected.
Setting cloning preferences
You can set various preferences for cloning and for Quick Clone. For example, you can choose to always
use the last selected cloner brush variant or enable Tracing Paper.
To customize cloning behavior
1Do one of the following:
•(Mac OS) Choose Corel Painter 2015 menu Preferences Cloning.
•(Windows) Choose Edit Preferences Cloning.
2Perform a task from the following table.
To Do the following
Close the image that was used as the clone source Enable the Close Source Image check box.
Open the Clone Source panel automatically Enable the Open Clone Sourcepanel check box.
Start painting in the clone colors on a clear canvas Enable the Clear Canvas check box.
Activate tracing paper Enable the Turn On Tracing Paper check box.

Image cloning and sampling | 173
To Do the following
Activate the last Cloner brush variant Enable the Switch To Cloner Brushes check box.
Use the current brush variant to clone the
underlying color
Enable the Clone Color check box.
To enable the CloneColor check box, you must
disable the Switch to Cloner Brushes check box.
Display a dialog box every time you switch to the
Source Image window from the clone document
window. The dialog box warns you that any
source image editing needs to be updated, saved,
discarded, or exported.
Enable the Show Edit Source Image Dialog Box
check box.
Working with multiple clone sources
Corel Painter lets you add multiple clone sources to a clone document, which lets you borrow elements
from multiple images and combine them in the clone. You can use any open document as a clone source
if you add it as a clone source using the Clone Source panel. In addition, the Clone Source panel lets you
quickly switch between clone sources.
The girl (1) and background (2) images were set as clone sources. They were then merged
into the clone image (3). Both clone sources display in the Clone Source panel (4).
To add a clone source to a clone document
1Open the clone image to which you want to add a clone source.
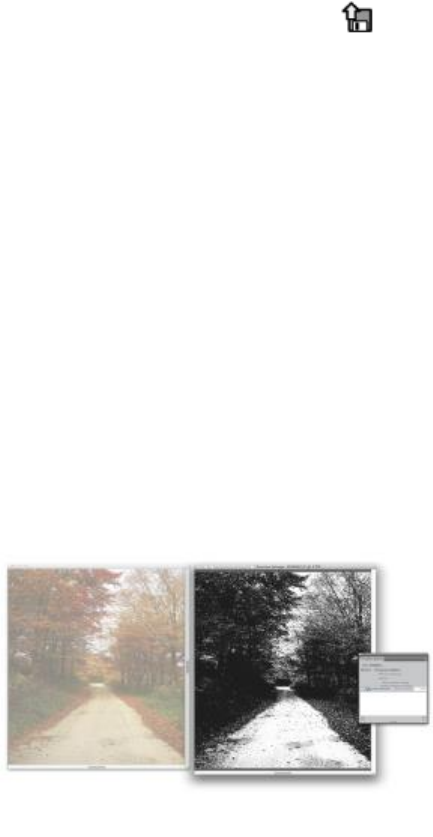
174 | Corel Painter 2015 User Guide
2Choose Window Clone Source.
3In the Clone Source panel, click the Open Source Image button , and choose Open Source.
4Locate the image that you want to add as a clone source.
5Click Open.
The clone source is added to the Clone Source panel, and it’s also embedded in the document.
If you want to add additional clone sources, repeat steps 3 to 5.
To work with multiple clone sources
1Choose Window Clone Source.
2In the Clone Source panel, choose a clone source from the clone source list.
3Apply brushstrokes to the canvas.
To work with a different clone source, choose the clone source from the clone source list.
Editing, updating, saving, and exporting clone source images
You can edit an embedded clone source image to change its appearance. For example, you can add layers
or apply effects to the source image. When the source image modifications are complete, you have various
options for working with the edited source image.
A black and white effect was applied to the Source Image (right). However,
the edit is not yet reflected in the embedded clone source image (left).
You can save the changes to the source image by updating the currently selected source image, or by
creating a new source image from the edited source. It’s important to note that performing either of these
Image cloning and sampling | 175
actions flattens all layers and deletes all undo levels from the image. If you want to retain the layers, you
can export the source image as a new document and then update the embedded source image to continue
cloning. Once the source image is exported as a new document, the relationship with the embedded source
image is broken.
You can also discard any changes that you make to embedded source image.
To edit a clone source image
1Choose Window Clone Source.
2In the Clone Source panel, enable the Show Source Image check box.
3Click in the Source Image window.
4The Edit Source Image dialog box opens to provide instructions on how to proceed after editing a
source image. Click OK.
5In Source Image window, edit the source image.
To update changes to a clone source image
1With the edited clone source image open in the Source Image window, switch to the clone document
window.
The Clone Source Image dialog box appears.
2In the Clone Source Image dialog box, enable the Update option.
3Click OK.
To create a new source image from an edited source
1With the edited clone source image open in the Source Image window, switch to the clone document
window.
The Clone Source Image dialog box appears.
2In the Clone Source Image dialog box, enable the Create New option.
3Click OK.
The new source image reference displays in the Clone Source panel.
To export an edited source image
1With the edited clone source image open in the Source Image window, choose File ExportSource
Image.
2In the Export Source Image As dialog box, choose the drive and folder where you want to save the file.
3Type a filename in the Save As (Mac) or File Name (Windows) text box.
4Click Save.
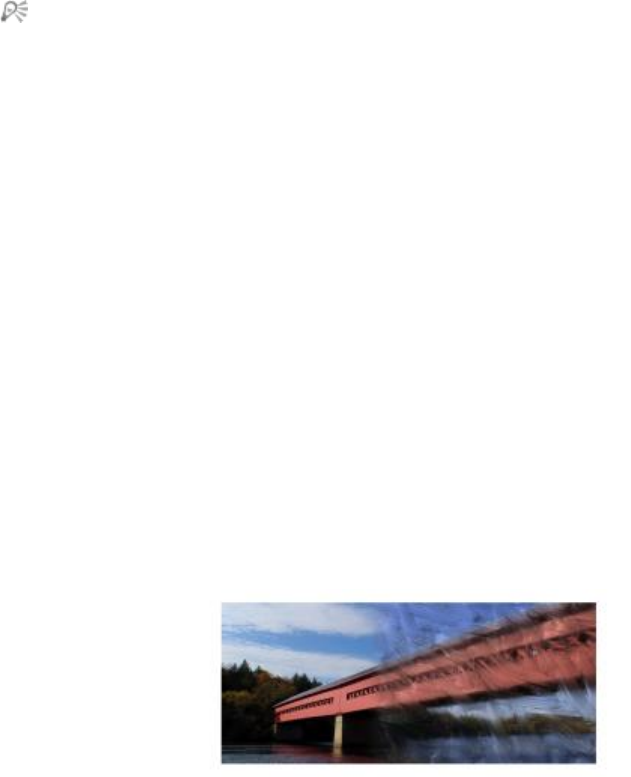
176 | Corel Painter 2015 User Guide
You can also export a clone source image by pressing Command + Shift + S (Mac) or Ctrl +
Shift + S (Windows).
To discard the changes made to the source image
1With the edited clone source image open in the Source Image window, switch to the clone document
window.
The Clone Source Image dialog box appears.
2In the Clone Source Image dialog box, enable the Discard option.
3Click OK.
Painting in the clone
After creating a clone, you can choose which brush you want to use to apply cloned colors to the canvas.
Cloners
Painting with a cloner brush is a great way to obtain an artistic rendering from photographic source
material. You can choose the Cloner tool, which automatically enables the brush variants in the Cloners
brush category. Some cloner brush variants, such as the Straight Cloner, reproduce a source image directly,
but most variants let you reproduce a source image with media effects, such as paper grain and specialized
dabs.
The Oil Brush Cloner is just one of many cloner brush variants.
Cloning method brush variants
You can also expand Corel Painter’s cloning capabilities by turning almost any brush variant into a cloner.
Using a cloning-method brush variant is the most common way to develop an image in a clone destination.
The variant re-creates the source image while it effectively “filters” it, which allows you to reproduce an
artistic rendering of the image in the clone document.
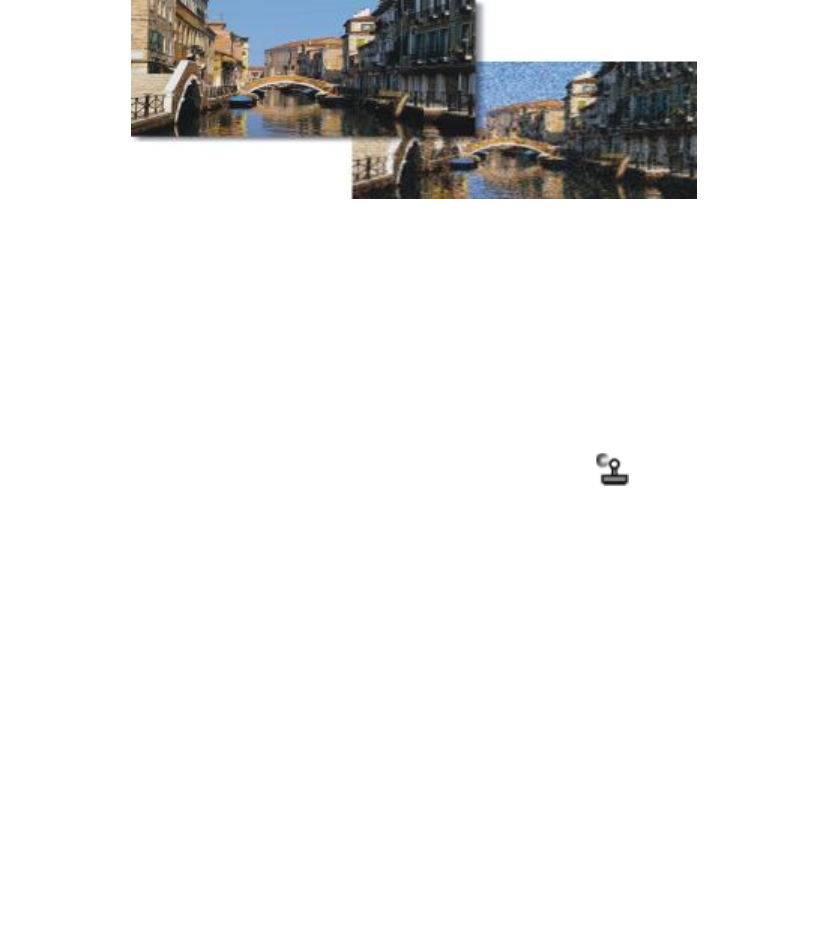
Image cloning and sampling | 177
Cloning allows you to “filter” source images to create an artistic rendering of the image.
You can create new cloner brushes or refine existing cloner brush variants by using the brush controls. For
more information, see “Adjusting brushes with brush controls” on page 325.
Brushes that use buildup methods, like pencils and felt pens, build toward black. If you clone with one
of these brushes in a dark area of your image, you may not achieve the desired results. You can use the
Opacity slider on the property bar to control how rapidly these brushes build up to black. You can also
choose chalk or one of the other tools that cover underlying colors.
Because the cloning methods use a full set of pixels from the original document for each brush dab, you get
a truer copy of the original than you might by using the Clone Color button . Unlike the Clone Color
option, the cloning methods preserve the original image texture in the clone. Cloning methods are good to
use when you want to precisely re-create portions of a source image.
Auto cloning
Using a cloner brush can take a long time if you’re working on a large area. To work more quickly, you
can have Corel Painter make brushstrokes for you, using the Auto Clone feature. For more information,
see “Automatically cloning an image” on page 628. You can also have Corel Painter place directional
brushstrokes to produce a Van Gogh–like rendition of a cloned image. For more information, see “Applying
the Auto Van Gogh effect” on page 629.
Additional clone painting techniques
The following table describes different techniques for painting a clone:
To For information, see
Create a mosaic or tessellation by using a source
image
“Creating a mosaic” on page 736
178 | Corel Painter 2015 User Guide
To For information, see
Add three-dimensional effects by applying surface
texture
“Using 3D brushstrokes to create texture” on page
650
Create a selection or channel “Selections and transformations” on page 577
and “Alpha Channels” on page 563
To choose a cloner brush
1With a clone source selected, click the Cloner tool in the toolbox.
The Cloners brush category and a cloners brush variant are automatically selected.
If you want to change the brush variant, click the Brush Selector, and then click a different Cloners
brush variant in the Brush library panel.
2On the property bar, adjust any of the brush properties, such as size, opacity, and resat.
3Apply brushstrokes to the canvas.
For increased color accuracy, you can enable the Brush Loading option. For more information, see
“Using brush loading” on page 179.
To transform a brush variant into a cloner brush
1With a clone source selected, click the Brush tool in the toolbox.
2Click the Brush Selector on the Brush Selector bar.
3In the Brush library panel, click a brush category and brush variant.
4Click the Clone Color button in the Color panel.
Enabling the Clone Color option disables the Color panel. This is a reminder that the color information
is pulled from the clone source.
5Choose Window Brush Control Panels General.
6In the General panel, choose Cloning from the Method list box.
7From the Subcategory list box, choose one of the following options:
•Hard Cover Cloning — results in partially anti-aliased brushstrokes that hide underlying strokes
•Soft Cover Cloning — produces anti-aliased brushstrokes that cover layered ones
•Grainy Hard Cover Cloning — works like Hard Cover Cloning, but brushstrokes also interact with
paper grain

Image cloning and sampling | 179
•Grainy Soft Cover Cloning — works like Soft Cover Cloning, but brushstrokes also interact with
paper grain
•Drip Cloning — pushes color around as if it were wet, cloning the original with distortions based on
your stroke
8Choose Window Brush Control Panels Cloning.
9In the Cloning panel, choose Normal from the Clone Type list box.
The additional cloning types allow you to apply transformation to the clone. For more information, see
“Applying transformations when sampling” on page 182.
10 Apply brushstrokes to the canvas.
If you change brushes while cloning images, you must click the Clone Color button again.
If you change the brush or variant, the clone color is automatically disabled. To continue working
with the clone color, re-enable the clone color.
For more information about methods and subcategories, see “General controls: Methods and
subcategories” on page 339.
Using brush loading
For greater color accuracy while cloning, you can use the brush loading option. This causes the brush to
pick up individual colors in different regions of the brush dab.
Without brush loading, the Clone Color option uses a single, averaged color from the source for each
brush dab. This results in an approximation of the original. You can use the Clone Color button
without brush loading to create an artistic impression of the source.
To enable the Brush Loading option
1Choose Window Brush Control Panels Well.
2In the Well panel, enable the Brush Loading check box.
Performing offset sampling
Offset sampling, also known as “point-to-point cloning,” lets you sample an area of an image and then
reuse it elsewhere within the document, or in separate document. Sampling is a useful technique for
retouching photographs.
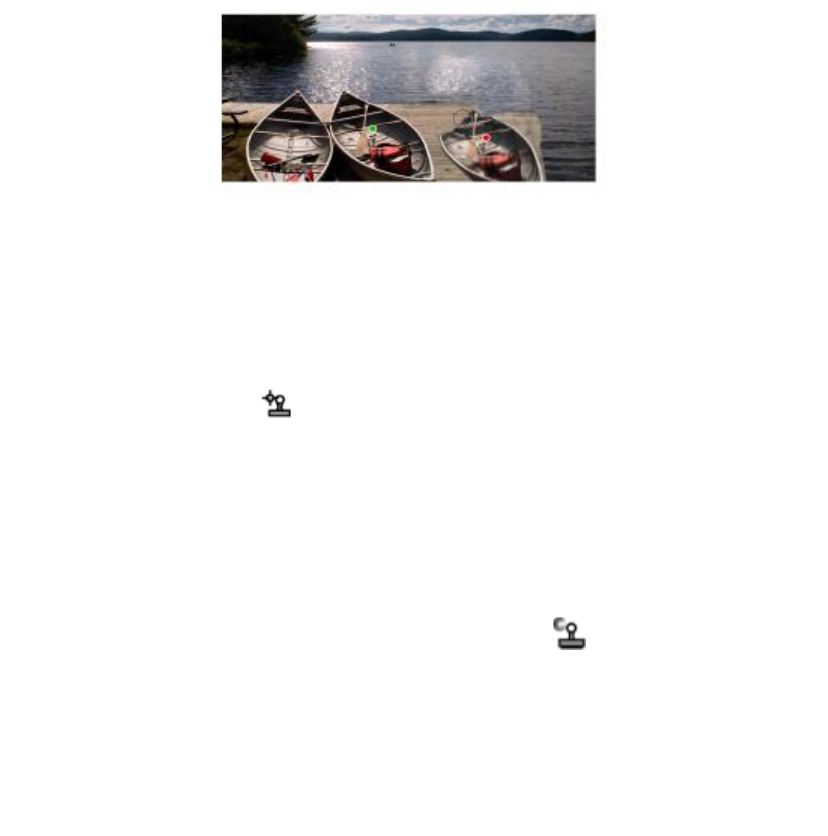
180 | Corel Painter 2015 User Guide
To perform offset sampling, you must set a sampling reference point and then set destination reference
points. Sampling reference points specify the area of the document that you want to reuse, or clone.
Destination reference points determine the area where you want the sampled image to appear. To identify
which area of the source document you are sampling, a crosshair cursor appears.
The green dot (left) represents the sampling reference
point. The red dot (right) represents the destination point.
It is important to note that the sampling reference point, also known as the source, is not treated as a clone
source. The sampled area does not display in the Clone Source panel.
To perform offset sampling within a document
1Click the Rubber Stamp tool in the toolbox.
If you want to adjust the size of the sampled area, type a value in the Size box, or adjust the slider on
the property bar.
2Hold down Option (Mac OS) or Alt (Windows), and click to set the source reference point.
A green marker appears on the image, indicating the reference point for the source image.
3Hold down Option + Shift (Mac OS) or Alt + Shift (Windows), and click to set the destination
reference point.
4Apply brushstrokes to the destination area to reveal the sampled area.
You can disable offset sampling by clicking the Clone Color button in the Color panel or by
clicking the Brush Selector on the Brush Selector bar, and choosing a non-Cloner brush variant.
You can also
Adjust the clone color opacity On the property bar, type a percentage in the
Opacity box, or adjust the slider.
Image cloning and sampling | 181
You can also
Adjust the randomized jitter of the brushstroke On the property bar, type a value in the Stroke
Jitter box, or adjust the slider.
You can also enable offset sampling by clicking the Cloner tool in the toolbox.
You can set the destination area before painting by clicking while holding down Option + Shift
(Mac OS) or Alt + Shift (Windows). A red marker indicates the destination area.
To perform offset sampling between documents
1Open both the image that you want to use as the sampling source and the image that you want to use
as the destination.
If you want to view both images at once, you may want to arrange the images side-by-side.
2With the source image selected, click the Cloner tool in the toolbox.
If you want to change the brush variant, click the Brush Selector, and click a Cloners brush variant in the
Brush library panel.
3Hold down Option (Mac OS) or Alt (Windows), and click the source document to set the sample source
area reference point.
A green numbered marker appears on the image to indicate the reference point for the source area.
4Hold down Option + Shift (Mac OS) or Alt + Shift (Windows), and click the destination document to
set the destination reference point.
5In destination document, apply brushstrokes to the canvas.
You can disable offset sampling by clicking the Clone Color button in the Color panel or by
clicking the Brush Selector on the Brush Selector bar, and choosing a non-Cloner brush variant.
You can also
Adjust the size of the brushstroke Type a value in the Size box, or adjust the slider on
the property bar.
Adjust the clone color opacity On the property bar, type a percentage in the
Opacity box, or adjust the slider.

182 | Corel Painter 2015 User Guide
You can also
Control the amount of color that is replenished in
a stroke
On the property bar, type a percentage in the
Resat box, or adjust the slider.
Control how much the brush colors smear
underlying colors, including the paper color
On the property bar, type a percentage in the
Bleed box, or adjust the slider.
Adjust bristle separation On the property bar, type a value in the Feature
box, or adjust the slider. The higher the setting, the
farther apart the bristle hairs will appear.
Scale the brushstroke proportionally with the brush
size
Click the Scale Feature With Brush Size button
on the property bar.
Applying transformations when sampling
Corel Painter allows you to sample part of an image and apply a transformation to the sample when you
reuse it elsewhere. This technique is also referred to as multi-point cloning. You can apply transformations
such as, scaling, rotating, shearing (also referred to as skewing), or you can apply perspective.
Multi-point sampling brush variants
To apply transformations when sampling, you can select a multi-point cloning brush variant from the
Cloners brush category or you can use any brush variant that supports the cloning method. For more
information, see “To transform a brush variant into a cloner brush” on page 178.
The following table describes the available multi-point sampling brush variants.
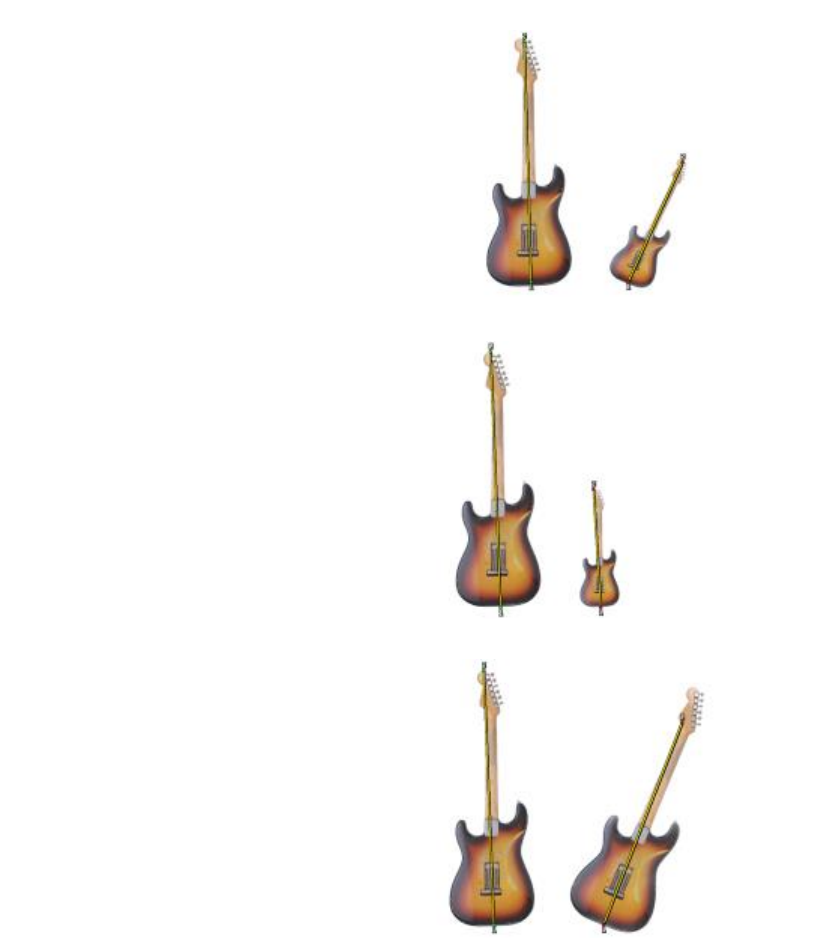
Image cloning and sampling | 183
Multi-point Cloners brush variant Example
Rotate, Scale 2P lets you turn the sampled area
around its center of rotation and size it to a
percentage of its original size. Rotate, Scale 2P
uses two reference points.
Scale 2P lets you size the sampled area to a
percentage of its original size. Scale 2P uses two
reference points.
Rotate 2P lets you turn the sampled area around
its center of rotation. Rotate 2P uses two reference
points.

184 | Corel Painter 2015 User Guide
Multi-point Cloners brush variant Example
Rotate, Mirror 2P lets you turn the sampled area
around its center of rotation while creating a
horizontal or vertical mirror image of the clone
source. Rotate, Mirror 2P uses two reference
points.
Rotate, Scale, Shear 3P lets you turn the sampled
area around its center of rotation, while sizing it
to a percentage of its original size, and skewing
its appearance. Rotate, Scale, Shear 3P uses three
reference points.
Bilinear 4P lets you stretch, or warp, the sampled
area disproportionately. You can also tile the clone
source. Bilinear 4P uses four reference points.
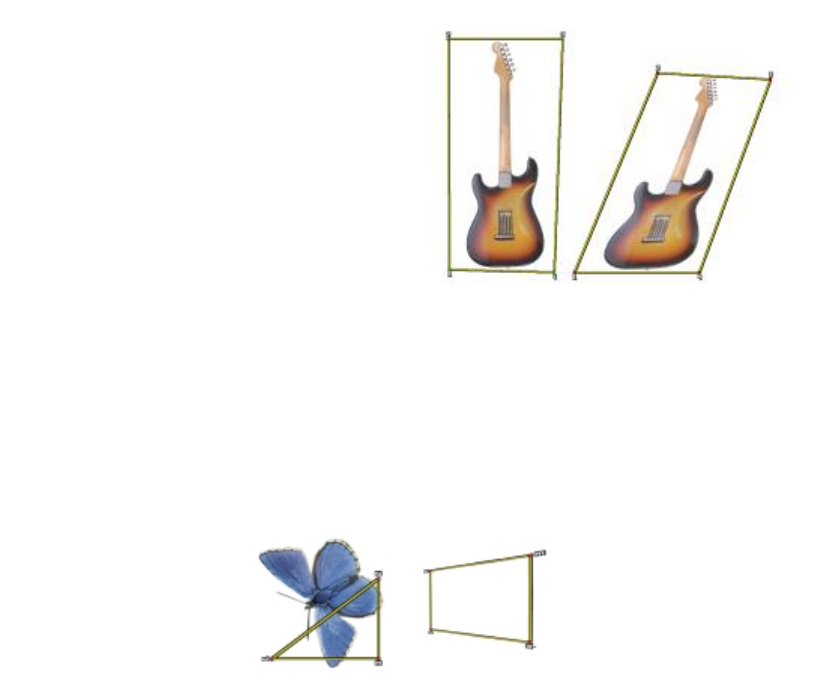
Image cloning and sampling | 185
Multi-point Cloners brush variant Example
Perspective 4P lets you give the sampled area the
appearance of depth. Perspective Tiling 4P also
lets you tile the sampled area. Perspective 4P uses
four reference points.
Reference points
After selecting a brush variant, you need to set the sample and destination reference points in the image.
The number of reference points depends on the type of transformation that you choose. The reference
points allow you to identify the sample area, position the destination, and control the transformation.
After the points are set, you can then apply brushstrokes to the destination area to gradually reveal the
transformed sample. You can insert source points in one document and destination points in another, or
you can insert both sets of points in the same document.
Sample source (left) and destination (right) reference points are set for Perspective cloning.
Tiling
Tiling allows you to fill a space by repeating a small sampled image. The 4-Point Tiling option is available
for Bilinear or Perspective cloning only.
The four sample reference points define the sampled area, which is temporarily converted into a pattern
tile. In the clone destination, the tile is warped according to the relative positions of the source and
destination reference points and repeated as necessary to cover the area. If you want to save the sampled
area for future use, you can capture it as a pattern. For more information, see “Creating and editing
patterns” on page 714.
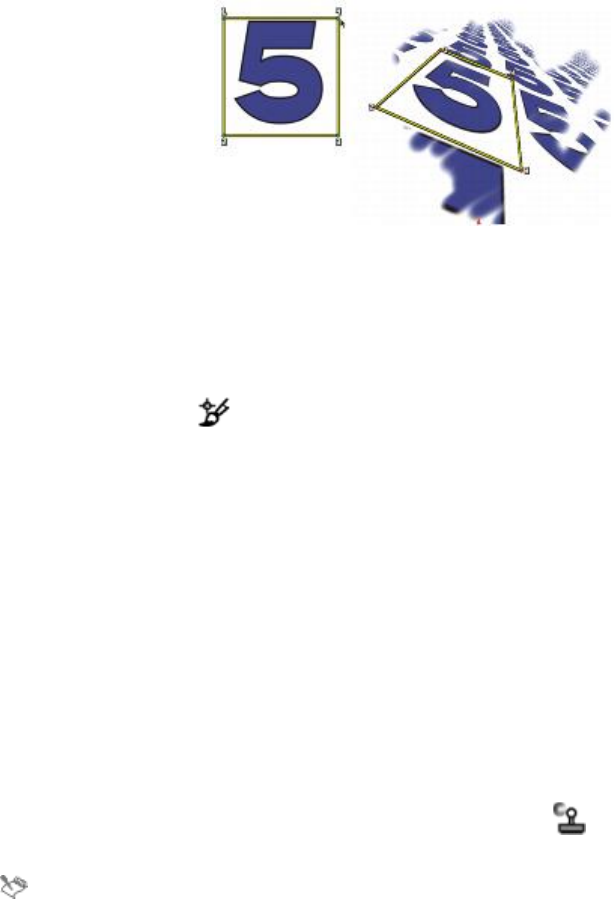
186 | Corel Painter 2015 User Guide
With 4-Point Tiling, the source image is repeated.
Tiling is particularly useful when you want to fill an area with the sample source. For more information, see
“Filling an area with a sampled image” on page 193.
To scale the sample source
1Click the Cloner tool in the toolbox.
2Click the Brush Selector on the Brush Selector bar.
3In the Brush library panel, click the XScale 2P brush variant.
When you choose the XScale 2P brush variant, the Scale (2) clone type is automatically selected in the
Cloning brush control panel.
4Hold down Option (Mac OS) or Alt (Windows), click in the image to set the two sample reference
points.
5Hold down Option + Shift (Mac OS) or Alt + Shift (Windows), and click to set the two destination
reference points.
The relative distance between the two destination points and the two source points determines the
amount of scaling that is applied to the sample. For example, if the line length between the two
destination points is longer than the line length between the two source points, the sample is scaled up.
Conversely, if the line length between the two destination points is shorter than the line length between
the two source points, the sample is scaled down.
6Apply brushstrokes to the destination area.
You can disable offset sampling by clicking the Clone Color button in the Color panel or by
clicking the Brush Selector on the Brush Selector bar, and choosing a non-Cloner brush variant.
To achieve the best scaling results, set the sample reference points at the outer edges of the object
that you want to sample to better delineate its size. This ensures that the object will be scaled
proportionally.

Image cloning and sampling | 187
To rotate the sample source
1Click the Cloner tool in the toolbox.
2Click the Brush Selector on the Brush Selector bar.
3In the Brush library panel, click the XRotate 2P brush variant.
When you choose the XRotate 2P brush variant, the Rotate (2) clone type is automatically selected in
the Cloning brush control panel.
4Hold down Option (Mac OS) or Alt (Windows), and set the two sample reference points.
5Hold down Option + Shift (Mac OS) or Alt + Shift (Windows), and click in the image to set the two
destination reference points.
The relative difference between the angle of the line of the two destination points and the two sample
reference points determines the angle of rotation of the sample. If the line angle does not change, the
position of the destination points relative to the sample points also affects the rotation. For example, if
you set the sample points vertically from bottom to top, but then set the destination points at the same
vertical angle but from top to bottom, the sampled image will be flipped 180 degrees.
6Apply brushstrokes to the destination area.
You can disable offset sampling by clicking the Clone Color button in the Color panel or by
clicking the Brush Selector on the Brush Selector bar, and choosing a non-Cloner brush variant.
The line length does not affect the rotation.
To rotate and mirror the sample source
1Click the Cloner tool in the toolbox.
2Click the Brush Selector on the Brush Selector bar.
3In the Brush library panel, click the XRotate, Mirror 2P brush variant.
When you choose the XRotate, Mirror 2P, the XRotate & Mirror (2) clone type is automatically
selected in the Cloning brush control panel.
4Hold down Option (Mac OS) or Alt (Windows), and click in the image to set the two sample reference
points.
5Hold down Option + Shift (Mac OS) or Alt + Shift (Windows), and click to set the two destination
reference points.
The relative difference between the angle of the line of the two destination points and the two sample
points determines the angle of rotation of the mirrored clone image.
If the line angle does not change, the position of the destination points relative to the sample points
also affects the rotation. For example, if you set the sample points vertically from bottom to top, but

188 | Corel Painter 2015 User Guide
then set the destination points at the same vertical angle but from top to bottom, the sampled image
will be flipped 180 degrees.
If you want to mirror the sample, without any rotation, set both the sample and destination points in
the same position.
6Apply brushstrokes to the destination area.
You can disable offset sampling by clicking the Clone Color button in the Color panel or by
clicking the Brush Selector on the Brush Selector bar, and choosing a non-Cloner brush variant.
To rotate and scale the sample source
1Click the Cloner tool in the toolbox.
2Click the Brush Selector on the Brush Selector bar.
3In the Brush library panel, click the XRotate, Scale 2P brush variant.
When you choose the XRotate, Scale 2P brush variant, the XRotate & Scale (2) clone type is
automatically selected in the Cloning brush control panel.
4Hold down Option (Mac OS) or Alt (Windows), and set the sample reference points.
5Hold down Option + Shift (Mac OS) or Alt + Shift (Windows), and set the two destination reference
points.
The relative distance between the two destination points and the two sample points determines the
amount of scaling that is applied to the sample. In addition, the relative difference between of the angle
of the line of the two destination points and the two sample reference points determines the angle of
rotation of the mirrored sample image. In cases where the line angle does not change, the position of
the destination points relative to the sample points also affects the rotation.
Two destination reference points are set in preparation for Rotate & Scale sampling.
6Apply brushstrokes to the destination area.
You can disable offset sampling by clicking the Clone Color button in the Color panel or by
clicking the Brush Selector on the Brush Selector bar, and choosing a non-Cloner brush variant.
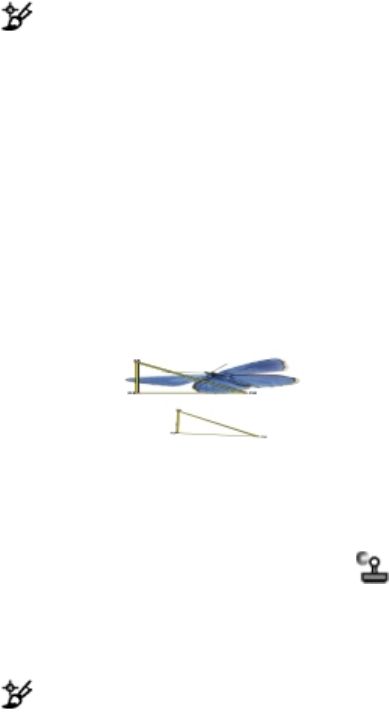
Image cloning and sampling | 189
To rotate, scale, and shear the sample source
1Click the Cloner tool in the toolbox.
2Click the Brush Selector on the Brush Selector bar.
3In the Brush library panel, click the XRotate, Scale, Shear 3P brush variant.
When you choose the XRotate, Scale, Shear 3P brush variant, the XRotate, Scale, Shear (3) clone type
is automatically selected in the Cloning brush control panel.
4Hold down Option (Mac OS) or Alt (Windows), and click in the image to set the three sample reference
points.
5Hold down Option + Shift (Mac OS) or Alt + Shift (Windows), and click in the image to set the three
destination reference points.
When all three points are inserted, a triangle is created. The length of the line segments controls the
scaling of the sample, the angling of the line segments controls the rotation, and the degree of slanting
controls the shearing, also referred to as skewing.
Sample source–destination reference points are set for Rotate, Scale, & Shear.
6Apply brushstrokes to the destination area.
You can disable offset sampling by clicking the Clone Color button in the Color panel or by
clicking the Brush Selector on the Brush Selector bar, and choosing a non-Cloner brush variant.
To warp the sample source
1Click the Cloner tool in the toolbox.
2Click the Brush Selector on the Brush Selector bar.
3In the Brush library panel, click the XBilinear 4P brush variant.
When you choose the XBilinear 4P brush variant, the XBilinear 4P clone type is automatically selected
in the Cloning brush control panel.
4Hold down Option (Mac OS) or Alt (Windows), and click to set the four sample reference points.
5Hold down Option + Shift (Mac OS) or Alt + Shift (Windows), and click to set the four destination
reference points.
6The relative positions of all four sample and destination points affects the warping of the sample.
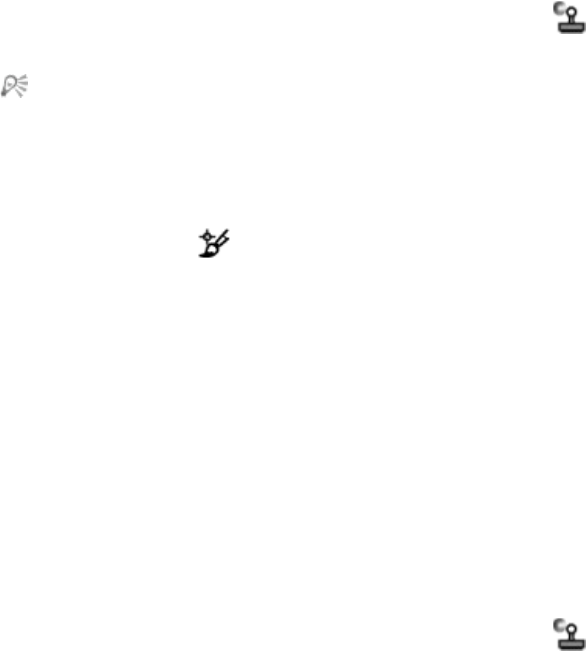
190 | Corel Painter 2015 User Guide
7Apply brushstrokes to the destination area.
You can disable offset sampling by clicking the Clone Color button in the Color panel or by
clicking the Brush Selector on the Brush Selector bar, and choosing a non-Cloner brush variant.
You can tile the sample by enabling the 4-Point Tiling check box in the Cloning brush control
panel.
To add perspective to the clone source
1Click the Cloner tool in the toolbox.
2Click the Brush Selector on the Brush Selector bar.
3In the Brush library panel, click the XPerspective 4P brush variant.
If you want the clone to produce a tiling effect, click the XPerspective Tiling 4P brush variant.
When you choose the XPerspective 4P brush variant, the XPerspective 4P clone type is automatically
selected in the Cloning brush control panel.
4Hold down Option (Mac OS) or Alt (Windows), and click in the image to set the four sample reference
points.
5Hold down Option + Shift (Mac OS) or Alt + Shift (Windows), and click to set the four destination
reference points.
The relative position of the four sample and destination points controls the perspective transformation.
To achieve a simple perspective transformation, set the four sample points to form a rectangle, and then
set the four destination points to form a trapeze.
6Apply brushstrokes to the destination area.
You can disable offset sampling by clicking the Clone Color button in the Color panel or by
clicking the Brush Selector on the Brush Selector bar, and choosing a non-Cloner brush variant.
To move previously set reference points
1Do one of the following:
Hold down Option (Mac OS) or Alt (Windows) to display the sample points.
Hold down Option + Shift (Mac OS) or Alt + Shift (Windows) to display the destination points.
2With the reference points displayed, drag a point to a new location.

Image cloning and sampling | 191
Using selections and transformations when sampling
You can use a selection when sampling an image area in two ways: by making brushstrokes in the
destination image obey the selection in the sample source image, or by copying the active selection in the
sample source region. These two options can be used individually or together.
These selection options require a Cloning method. They do not work for brushes of other methods that use
the Clone Color button on the Color panel.
Use Obey Source Selection to paint in the area that corresponds to the source selection.
Use Copy Source Selection to sample both the selection and the color.
To sample an area of an image by using a source selection
1Choose a selection tool from the toolbox, and select the area of the image that you want to sample.

192 | Corel Painter 2015 User Guide
If you want to closely outline the sample source area, choose the Lasso tool . For information
about setting up a selection, see “Creating path-based selections” on page 580.
2Click the Cloner tool in the toolbox.
3Click the Brush Selector on the Brush Selector bar.
4In the Brush library panel, click the Cloners category, and click a brush variant.
5Choose Window Brush Control Panels Cloning.
6In the Cloning panel, enable the Clone Color check box.
7Enable any of the following options:
•Obey Source Selection — respects the content of the active sample source selection. When you paint
in the destination, the brushstrokes are constrained to a region that corresponds to the sample source
selection. For sampling types that apply a transformation, the selection is transformed.
•Copy Source Selection — copies the active selection in the source region. When you paint in the
destination, your brushstrokes sample the selection’s pixels as well as the RGB pixels. For sampling
types that apply a transformation, the copied selection is transformed. Copy Source Selection is
often used together with Obey Source Selection.
8Hold down Option (Mac OS) or Alt (Windows), and click to set the sample source reference points.
9Hold down Option + Shift (Mac OS) or Alt + Shift (Windows), and click to set the destination
reference points.
The number of points depends on the brush variant that you chose.
10 Apply brushstrokes to the destination area.
You can disable offset sampling by clicking the Clone Color button in the Color panel or by
clicking the Brush Selector on the Brush Selector bar, and choosing a non-Cloner brush variant.
This image uses Rotate & Scale sampling with both Obey
Source Selection and Copy Source Selection enabled.

Image cloning and sampling | 193
Filling an area with a sampled image
You can apply a transformed sample by filling, instead of using a brush. Filling allows you to cover a large
area evenly, without much effort. Filling is supported only when you use perspective or bilinear sampling,
with or without tiling.
To apply a transformed sample as a fill, you need to set both sample source and destination reference
points, as you would when applying a sample with a brush. For information, see “Applying transformations
when sampling” on page 182.
If you want to save the sample source reference area as a pattern for future use, you can capture the
pattern. For more information, see “Creating and editing patterns” on page 714.
To fill with a transformed source image
1Click the Brush Selector on the Brush Selector bar.
2In the Brush library panel, click the Cloners category, and click a brush variant that allows you to select
four sample source and destination points:
•XPerspective 4P
•XPerspective Tiling 4P
•XBilinear 4P
3Choose Window Brush Control Panels Cloning.
4In the Cloning panel, enable the Clone Color check box.
5Do one of the following:
• If you chose the XPerspective 4P or XPerspective Tiling 4P variant, choose Perspective from the
Clone Type list box.
• If you chose the XBilinear 4P variant, choose Bilinear from the Clone Type list box.
6Hold down Option (Mac OS) or Alt (Windows), and click to set the four sample source reference points.
7Hold down Option + Shift (Mac OS) or Alt + Shift (Windows), and click to set the four destination
reference points.
8Click the Paint Bucket tool from the toolbox.
9Choose Source Image from the Fill list box on the property bar.
10 Click in the destination area to apply the fill.
You can disable offset sampling by clicking the Clone Color button in the Color panel or by
clicking the Brush Selector on the Brush Selector bar, and choosing a non-Cloner brush variant.
194 | Corel Painter 2015 User Guide
The destination points determine where the transformation occurs.
By using transformed clone information, the brick pattern becomes a steep wall.

Working with composition tools, symmetry tools, rulers, and guides | 195
Working with composition tools, symmetry
tools, rulers, and guides
The placement of objects in a painting can dramatically affect the overall appearance of the finished work.
Corel Painter includes many tools and features to help you compose, size, and position images and image
elements. For example, you can display the rulers or the grid to help you position image elements with
precision. You can also use symmetry tools, such as the Mirror Painting tool, to achieve visual balance.
This section contains the following topics:
•“Using the Layout Grid” (page 196)
•“Using the Mirror Painting mode” (page 198)
•“Using the Kaleidoscope Painting mode” (page 201)
•“Using Perspective Guides” (page 203)
•“Using the Divine Proportion tool” (page 208)
•“Using rulers” (page 211)
•“Using guides” (page 212)
•“Using Snap to Guides” (page 213)
•“Using the grid” (page 214)
•“Using Snap to Grid” (page 215)
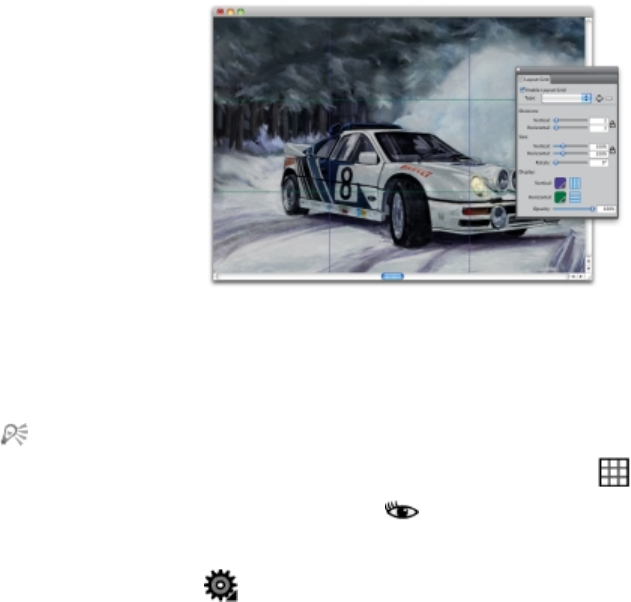
196 | Corel Painter 2015 User Guide
Using the Layout Grid
The Layout Grid provides an easy way to divide your canvas so that you can plan your composition. For
example, you can divide your canvas into thirds vertically and horizontally to use the compositional rule
of thirds. From the Layout Grid panel, you can access grid settings, such as the number of divisions, size,
angle, color, and opacity of the grid. You can adjust these settings while you work and save them as a
preset for future drawings and paintings. You can also move the grid to a new position.
The Layout Grid also lets you divide the canvas into compositional sections based on the proportions of
the canvas. This nonprinting grid is used primarily for composing artwork before you begin drawing or
painting.
The Layout Grid helps you compose images.
To show or hide the Layout Grid
•Choose Canvas Compositions, and choose either Show Layout Grid or Hide Layout Grid.
You can also show or hide the grid by clicking the Layout Grid tool in the toolbox and
clicking the Enable Layout Grid button on the property bar.
You can also show or hide the grid from the Navigator panel by clicking the Open Navigator
Settings button in the toolbox, and choosing Show Grids.
To set Layout Grid options
1Choose Window Composition Panels Layout Grid.

Working with composition tools, symmetry tools, rulers, and guides | 197
In the Layout Grid panel, ensure that the Enable Layout Grid check box is enabled.
2Perform a task from the following table.
To Do the following
Set the number of vertical and horizontal divisions In the Divisions area, type values in the Vertical
box and the Horizontal box.
If you want to link the Vertical and Horizontal
values, click the Synchronize Divisions button
.
Resize the grid In the Size area, move the Vertical slider to set the
height, and move the Horizontal slider to set the
width.
If you want to resize the grid proportionally, enable
the Synchronize Sizes button .
Change the angle of the grid Type a value in the Rotate box to set the degree of
the angle.
Change the color of the vertical or horizontal
gridlines
In the Display area, click the Horizontal or Vertical
color picker, and choose a color.
Change the opacity of the grid Move the Opacity slider to the left to increase
transparency. Move the slider to the right to
increase opacity.
You can also set some Layout Grid options by clicking the Layout Grid tool in the toolbox,
and modifying the settings you want on the property bar.
To save Layout Grid settings as a preset
1In the Layout Grid panel, modify the settings you want, and click the Add Preset button .
2In the Add Preset dialog box, type a name for your preset in the Preset Name box.
198 | Corel Painter 2015 User Guide
3Click Save.
The preset appears in the Type list box.
You can also save a preset by clicking the Layout Grid tool in the toolbox and clicking the
Add Preset button on the property bar.
To delete a Layout Grid preset
1In the Layout Grid panel, choose the preset you want to delete from the Type list box.
2Click the Delete Preset button .
You can also delete a preset by clicking the Layout Grid tool in the toolbox, selecting a
preset from the Presets list box on the property bar, and clicking the Delete Preset button .
To choose a Layout Grid preset
• In the Layout Grid panel, choose a preset from the Type list box.
To move a Layout Grid
1In the toolbox, click the Layout Grid tool .
The cursor changes to a hand icon .
2Drag the grid to a new position.
Using the Mirror Painting mode
In Corel Painter, you can create a symmetrical painting by using the Mirror Painting mode. When you
enable the Mirror Painting mode, a plane appears in the drawing window that lets you paint one half of
an object while Corel Painter automatically replicates a mirror image of the opposing side of the object by
reproducing the brushstrokes. For example, if you want to paint a symmetrical face, simply paint one half of
the face and Corel Painter automatically completes the other half.
When using the Mirror Painting mode, the brushstrokes that you apply on one side of the plane may
occasionally look different in the opposite plane. For example, if you start the Mirror Painting on a canvas
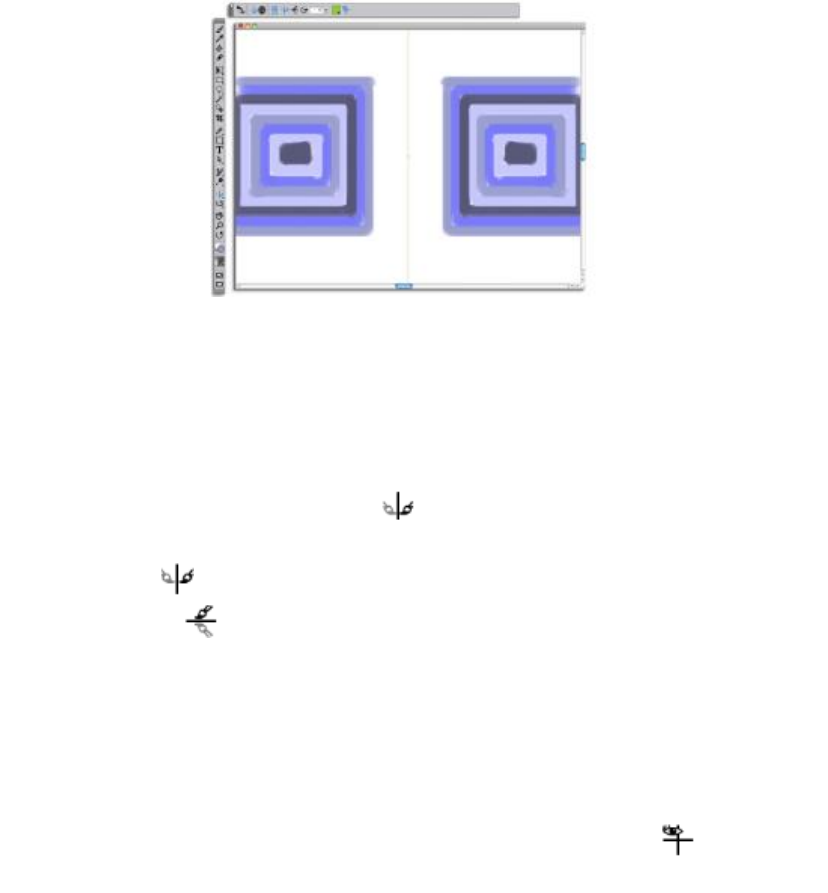
Working with composition tools, symmetry tools, rulers, and guides | 199
that contains previously applied brushstrokes, the mirrored brushstrokes blend with the colors that are
already on the canvas. In addition, if you’re applying randomized brushstrokes, such as a nozzle, the
mirrored brushstrokes are also randomly applied.
The green line that displays in the middle of the
document window represents the mirror plane.
You can display the mirror plane vertically, horizontally, or display both at the same time. You can also
control the placement of the mirror plane in the drawing window by moving or by rotating the plane.
To create a mirror painting
1In the toolbox, click the Mirror Painting tool .
2On the property bar, click any of the following buttons:
•Vertical Plane — positions the mirror plane vertically in the drawing window
•Horizontal Plane — positions the mirror plane horizontally in the drawing window
3Click the Brush Selector on the Brush Selector bar.
4In the Brush library panel, click a brush category, and click a brush variant.
5Apply a brushstroke on either side of the mirror plane.
To Do the following
Hide the mirror plane while painting Click the Toggle Planes button on the
property bar.
200 | Corel Painter 2015 User Guide
To Do the following
Disable mirror painting mode Click the Toggle Mirror Painting button on
the property bar.
The Brush tool is the only tool that you can use to create mirror and kaleidoscope paintings. Other
tools, such as the Shape tool, are not supported.
To control the display of the mirror plane
1In the toolbox, click the Mirror Painting tool .
2Perform a task from the following table.
To Do the following
Specify an angle of rotation On the property bar, type a value in the Rotation
Angle box.
Rotate the plane in the drawing window Point to a plane until the cursor changes into a
rotation angle cursor , and then drag to rotate
the plane.
Change the plane position Hover over the center point of the plane until the
cursor changes into a four-headed arrow ,
and then drag the plane to a new location in the
drawing window.
Change the color of the plane Click the Symmetry Plane Color button, and click
a color swatch.
Reset the mirror plane to the default position Click the Reset Mirror Painting button on
the property bar.
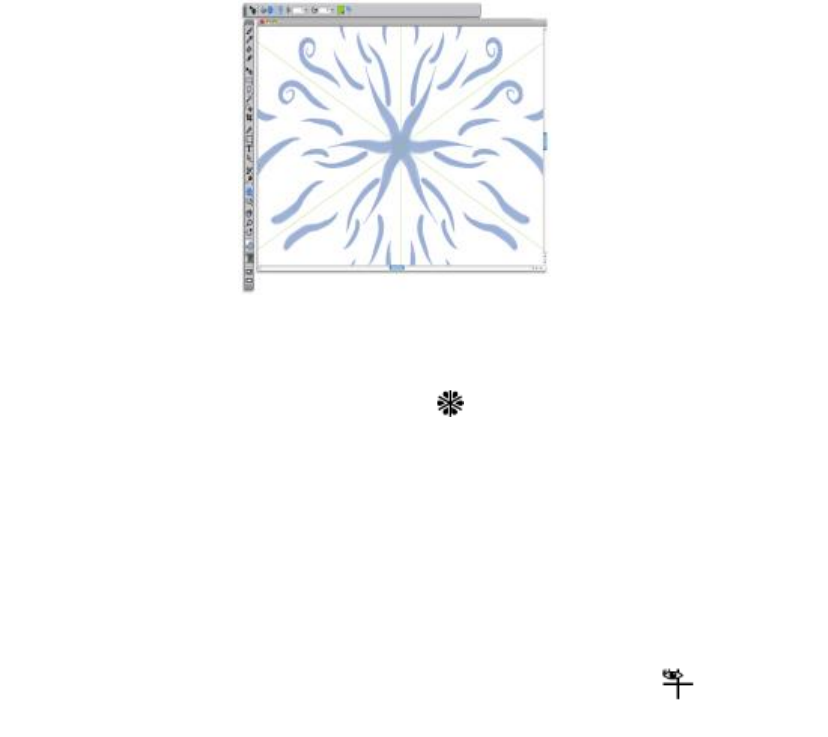
Working with composition tools, symmetry tools, rulers, and guides | 201
Using the Kaleidoscope Painting mode
Corel Painter lets you to transform basic brushstrokes into a colorful and symmetrical kaleidoscope image.
When you paint a brushstroke in one kaleidoscope segment, multiple reflections of the brushstroke appear
in the other segments. You can apply between 3 to 12 mirror planes to a kaleidoscope. You can also rotate
or reposition the mirror planes to expose different colors and patterns.
The green lines that display in the document window delineate the symmetrical planes.
To create a kaleidoscope painting
1In the toolbox, click the Kaleidoscope Painting tool .
2In the Segment Number box on the property bar, type the number of planes that you want to display.
3Click the Brush Selector on the Brush Selector bar.
4In the Brush library panel, click a brush category, and click a brush variant.
5Apply brushstrokes in any of the kaleidoscope segments.
If you want to achieve a spiralling effect, apply brushstrokes across multiple segments.
To Do the following
Hide the kaleidoscope planes while painting Click the Toggle Planes button on the
property bar.
202 | Corel Painter 2015 User Guide
To Do the following
Disable the Kaleidoscope Painting mode Click the Toggle Kaleidoscope Painting button
on the property bar.
The Brush tool is the only tool that you can use to create mirror and kaleidoscope paintings. Other
tools, such as the Shape tool, are not supported.
To control the display of the kaleidoscope planes
1In the toolbox, click the Kaleidoscope Painting tool .
2Perform a task from the following table:
To Do the following
Specify an angle of rotation On the property bar, type a value in the Rotation
Angle box.
Rotate the plane in the drawing window Point to a plane until the cursor changes to a
rotation angle cursor , and then drag to rotate
the plane.
Change the plane position Point to the center point of the planes until the
cursor changes into a four-headed arrow ,
and then drag it to a new location in the drawing
window.
Change the color of the plane Click the Symmetry Plane Color button, and click
a color swatch.
Reset the mirror plane to the default position Click the Reset Kaleidoscope Painting button
on the property bar.
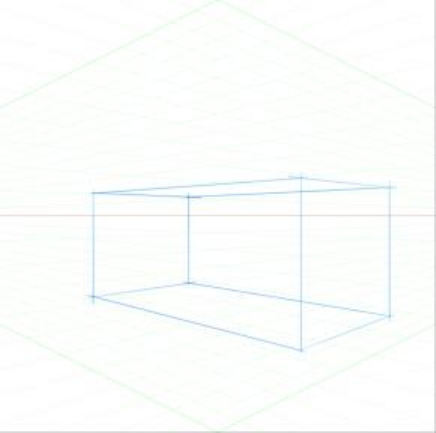
Working with composition tools, symmetry tools, rulers, and guides | 203
Using Perspective Guides
You can display non-printing Perspective Guides to create objects that give the impression that they are
receding, or vanishing, from view. You can hide the Perspective Guides when you no longer need them.
You can choose from a selection of Perspective Guide presets, which include different configurations of the
Perspective Guides. You can also modify a preset to best suit your needs. However, you can restore presets
to their default state. You can also save a modified preset and delete presets that were previously saved.
The Perspective Guide presets include one, two, or three vanishing points that help set the direction of the
perspective. You can also enable Perspective-Guided Strokes. The Perspective-Guided Strokes straighten the
appearance of brushstrokes while constraining their position to direct them towards the closest vanishing
point.
An example of painting a box by using Perspective Guides.

204 | Corel Painter 2015 User Guide
The Perspective-Guided Strokes are constrained to
direct them towards the closest vanishing point.
You can also modify the appearance of Perspective Guides by repositioning the vanishing point, the horizon
line, and the primary lines. You can also rotate the primary lines to best suit your needs.
In addition, you can change the color and opacity of all lines. You can also increase or decrease the density
of the intermediate lines.
To show Perspective Guides
1In the toolbox, click the Perspective Guides tool .
If you prefer, you can enable the Perspective Guides tool by pressing the keyboard shortcut.
2Click the Enable Perspective Guides button on the property bar.
3On the property bar, click the Perspective Guide Presets button, and choose a preset from the list.
To better display the guides, make sure you are in Full Screen mode. This allows you to reposition
the guides to best suit your needs.
You can also show the Perspective Guides by choosing Canvas Perspective Guides Enable
Perspective Guides. However, this option does not allow you to modify the Perspective Guides.
Working with composition tools, symmetry tools, rulers, and guides | 205
To show or hide Perspective Guides
1In the toolbox, click the Perspective Guides tool .
2Click the Enable Perspective Guides button on the property bar.
To enable perspective-guided strokes
1In the toolbox, click the Perspective Guides tool .
2Click the Perspective-Guided Strokes button on the property bar.
To reposition lines and the vanishing point
1In the toolbox, click the Perspective Guides tool .
2Perform a task from the following table.
To Do the following
Reposition the vanishing point Drag the vanishing point to a new position.
Reposition the horizon line Drag the horizon line up or down.
Reposition a primary line Drag the primary line’s position handle to a new
position.
Rotate a primary line Drag a rotation handle to change the line angle.
Reposition one vanishing point and the associated
primary lines together
Hold down Shift and drag the vanishing point to a
new position.
Reposition all vanishing points and primary lines as
a group
Hold down Command + Shift (Mac) or Ctrl +
Shift (Win), and drag the vanishing point to a new
position.
Move the primary line position handle Drag the position handle along the primary line.
206 | Corel Painter 2015 User Guide
To control the display of the primary lines
1In the toolbox, click the Perspective Guides tool .
2Perform a task from the following table.
To Do the following
Show or hide the primary lines On the toolbar, click the Show/Hide Primary Lines
button .
Change the color of the primary lines On the toolbar, click the color picker that is to the
right of the Show/Hide Primary Lines button, and
choose a color.
Change the opacity of the primary lines On the toolbar, move the Primary Lines Opacity
slider to adjust the line opacity.
To control the display of the horizon line
1In the toolbox, click the Perspective Guides tool .
2Perform a task from the following table.
To Do the following
Show or hide the horizon line On the toolbar, click the Show/Hide Horizon Line
button .
Change the color of the horizon line On the toolbar, click the color picker that is to the
right of the Show/Hide Horizon Line button, and
choose a color.
Change the opacity of the horizon line On the toolbar, move the Horizon Line Opacity
slider to adjust the line opacity.
Working with composition tools, symmetry tools, rulers, and guides | 207
To control the display of the intermediate lines
1In the toolbox, click the Perspective Guides tool .
2Perform a task from the following table.
To Do the following
Show or hide the intermediate lines On the toolbar, click the Show/Hide Intermediate
Lines button .
Change the color of the intermediate lines On the toolbar, click the color picker that is to
the right of the Show/Hide Intermediate Lines
button, and choose a color.
Change the opacity of the intermediate lines On the toolbar, move the Intermediate Lines
Opacity slider to adjust the line opacity.
Change the line density On the toolbar, move the Intermediate Lines
Density slider to adjust the line density.
To reset the perspective guides
1In the toolbox, click the Perspective Guides tool .
2Click the Reset Tool button on the property bar.
To save perspective guide settings as a preset
1In the toolbox, click the Perspective Guides tool .
2Click the Enable Perspective Guides button on the property bar.
3Click the Perspective Guide Presets button on the property bar, and then choose Add from the list.
4In the Add Preset dialog box, type a name for your preset in the Preset Name box.
5Click Save.
The preset appears in the presets list.
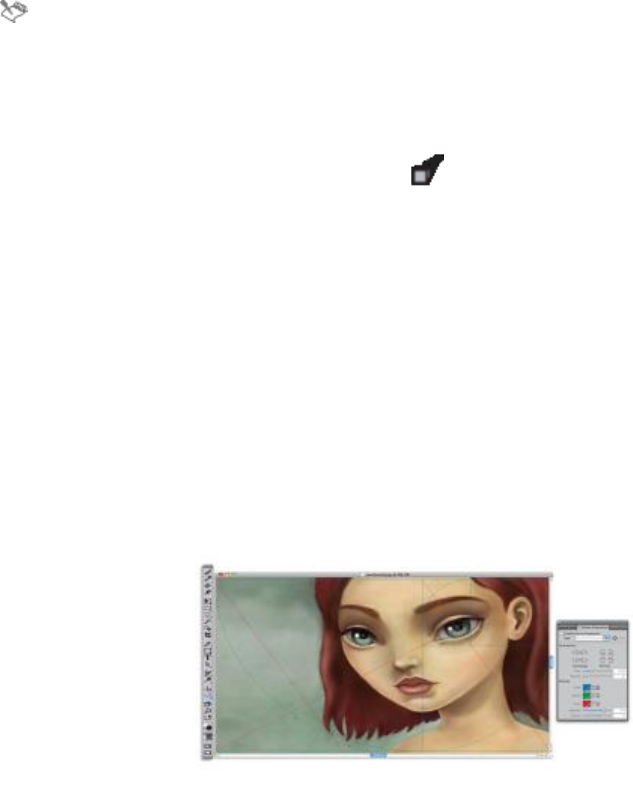
208 | Corel Painter 2015 User Guide
If you export your workspace, any Perspective Guides presets that you created are saved with the
workspace.
To delete a perspective guide preset
1In the toolbox, click the Perspective Guides tool .
2With perspective guides enabled, click the Perspective Guide Presets button on the property bar, and
then choose Delete from the list.
3Choose a preset from the Preset Name list box.
4Click Yes.
Using the Divine Proportion tool
The Divine Proportion tool lets you use guides based on a classical composition method of the same name.
When planning your artwork, you can use the guides to create a sense of proportion, which helps maintain
interest as the eye of the viewer travels across a drawing or painting.
Divine Proportion — helps identify where to place focal areas in artwork by using classical composition. This
nonprinting layout is primarily used for composing artwork before you begin drawing or painting.
The Divine Proportion tool can help you establish focal areas.
The Divine Proportion panel lets you change the orientation, size, angle, color, and opacity of the Divine
Proportion guide that appears on the canvas. You can also adjust the number of levels to determine how
many times a section divides within itself, creating a spiral. You can adjust these settings while you work,
and you can save them as a preset. You can also move the Divine Proportion guide to a new position.

Working with composition tools, symmetry tools, rulers, and guides | 209
To show or hide the Divine Proportion guide
•Choose Canvas Compositions, and then choose either Show Divine Proportion or Hide Divine
Proportion.
You can also show or hide the Divine Proportion guide by clicking the Divine Proportion tool
in the toolbox and clicking the EnableDivine Proportion button on the property bar.
To set Divine Proportion options
1Choose Window Composition Panels Divine Proportion.
The Divine Proportion panel appears.
2In the Divine Proportion panel, enable the Enable Divine Proportion check box, and perform a task
from the following table.
To Do the following
Set orientation In the Orientation area, click one of the
Landscape or Portrait buttons.
Resize the guide Move the Size slider to the right to increase the
size. Move the slider to the left to decrease the
size.
Size is measured as a percentage of the width or
height of the canvas, depending on whether the
orientation is Landscape or Portrait.
Change the angle Type a value in the Rotate box to set the degree of
the angle.
Change the color of the grid, spiral, or axis In the Display area, click the Grid, Spiral, or Axis
color picker, and choose a color.
Change the opacity Move the Opacity slider to the left to increase
transparency. Move the slider to the right to
increase opacity.
210 | Corel Painter 2015 User Guide
To Do the following
Change the numbers of levels Move the Levels slider to the right to increase the
number of levels. Move the slider to the left to
decrease the number of levels.
You can also set some Divine Proportion options by clicking the Divine Proportion tool in the
toolbox and modifying the settings that you want on the property bar.
To save Divine Proportion settings as a preset
1In the Divine Proportion panel, modify the settings you want, and click the Add Preset button .
2In the Add Preset dialog box, type a name for your preset in the Preset Name box.
3Click Save.
The preset appears in the Type list box.
You can also save a preset by clicking the Divine Proportion tool in the toolbox and clicking
the Add Preset button on the property bar.
To delete a Divine Proportion preset
1In the Divine Proportion panel, choose the preset you want to delete from the Type list box.
2Click the Delete Preset button .
You can also delete a preset by clicking the Divine Proportion tool in the toolbox, selecting a
preset from the Presets list box on the property bar, and clicking the Delete Preset button .
To choose a Divine Proportion preset
• In the Divine Proportion panel, choose a preset from the Type list box.

Working with composition tools, symmetry tools, rulers, and guides | 211
To move the Divine Proportion guide
1In the toolbox, click the Divine Proportion tool .
The cursor changes to a hand icon .
2Drag the Divine Proportion guide to a new position.
Using rulers
Corel Painter lets you show or hide rulers along the top and left sides of the document window. Each mark
on a ruler is known as a tick and represents the selected unit of measurement. You can set the unit of
measurement to pixels, inches, centimeters, points, or picas.
As you rotate an image in the document window, the rulers scroll to show the position of the canvas in
the document window. The origin of the document is the intersection of the zero (0) ticks on each ruler. By
default, the origin is the upper left corner of the canvas. Changing the origin resets the location of the zero
ticks on the rulers.
To show or hide rulers
•Choose Canvas Rulers, and choose either Show Rulers or Hide Rulers.
To set the ruler units
1Choose Canvas Rulers Ruler Options.
2In the Ruler Options dialog box, choose a unit of measurement from the Ruler Units list box.
You can also open the Ruler Options dialog box by holding down Option (Mac OS) or Alt
(Windows) and clicking the ruler.
To change the document origin
1Click the box at the intersection of the rulers (upper-left corner of the document window).
2Drag diagonally into the document window.
Crosshairs mark the new origin point.
3Drag the crosshairs to the desired position.
The ruler numbers update to show the new origin as 0,0.
212 | Corel Painter 2015 User Guide
To restore the origin
• Double-click the box at the intersection of the rulers (upper-left corner of the document window).
Using guides
Guides are nonprinting lines that appear over the image in the document window. They are very helpful
in aligning image elements. You can place guides at any position in the document window and easily
reposition and remove them. If you enable the Snap to Ruler Ticks option, the guides you create will land
precisely on the tick marks. Each guide also has options that let you change its color and lock it so that it
can’t be dragged.
To show or hide guides
•Choose Canvas Guides Show Guides or Hide Guides.
To create a guide
1Show the rulers and the guides.
2Click in a ruler at the position where you want to place the guide.
A guide appears in the document window and a triangular marker appears in the ruler.
A black triangle marks the guide’s position in the ruler.
To reposition a guide
• Drag the guide’s marker to any point of the ruler.
Working with composition tools, symmetry tools, rulers, and guides | 213
You can also double-click the guide’s marker to display the Guide Options dialog box, and enter a
value in the Guide Position box.
To enable the Snap to Ruler Ticks option
•Choose Canvas Rulers Snap to Ruler Ticks.
To set a guide’s color
1Double-click the guide’s marker.
2In the Guide Options dialog box, click the Guide Color chip, and choose a color.
To change the color of all guides, enable the Same Color for All Guides check box.
To lock or unlock a guide
1Double-click the guide’s marker to display the Guide Options dialog box.
2Enable or disable the Lock Guide check box.
To remove a guide
• Drag the guide’s marker off the edge of the document window.
To remove all guides
1Double-click the guide’s marker to display the Guide Options dialog box.
2Click Delete All Guides.
Using Snap to Guides
The Snap to Guides option enables selections and tool operations to “snap” to a guide within 6 pixels of
the cursor (or edge).
The following operations respect Snap to Guides:
•Dragging with the Rectangular Selection and Oval Selection tools
•Dragging with the Crop tool
•Drawing straight lines with the Brush tool
•Clicks made with the Pen tool
214 | Corel Painter 2015 User Guide
•Clicking with the Text tool to create a text entry point
•Clicking and dragging with the Paint Bucket tool and Magnifier tool
• Dragging shapes and selections. The edges of the content and the selection rectangle for the shapes
and selections snap to the guides. The cursor — wherever it might be in the object — also snaps to the
guide.
• Dragging the handles of reference layers, shapes, and selections to transform them
•Dragging with the Selection Adjuster tool or Layer Adjuster tool
To enable Snap to Guides
•Choose Canvas Guides Snap to Guides.
The option is enabled when the menu item has a check mark beside it.
Using the grid
Corel Painter provides a grid to help you in laying down brushstrokes or creating shapes. You can align and
snap image elements to a basic grid. You can set the types, size, line thickness, and color of the grid. You
can also print gridlines.
To activate the grid
•Choose Canvas Grid Show Grid.
A non-printing grid appears.
You can also activate the grid from the Navigator panel by clicking the Open Navigator Settings
button and choosing Show Grid.
To set grid options
1Choose Canvas Grid Grid Options.
2In the Grid Options dialog box, choose a grid type from the Grid Type list box.
3Type values in any of the following boxes:
•Horizontal Spacing
•Vertical Spacing
The unit of measure can be in pixels, inches, centimeters, points, picas, columns (2 in. wide), or percent.
Working with composition tools, symmetry tools, rulers, and guides | 215
4Click the Grid Color chip to set the color of the gridlines.
5Click the Background chip to set the grid’s background color.
To print gridlines
•Choose Effects Esoterica Grid Paper.
Using Snap to Grid
The Snap to Grid option enables certain tool operations to “snap” to a grid within 6 pixels of the cursor.
The following tools respect Snap to Grid:
•Pen tool
•Shape Selection tool
•Convert Point tool
•Text tool
To enable Snap to Grid
•Choose Canvas Grid Snap to Grid.
The option is enabled when the menu item has a check mark beside it.
216 | Corel Painter 2015 User Guide

Color | 217
Color
Corel Painter offers many ways to select color and apply it to your image. For example, you can change the
paper color, choose colors for your brushstrokes, or apply a color fill to an entire image or selection.
You can select colors in several ways. You can use
• the color swatches in the Color panel
• the temporal color palette
• the Dropper tool, which samples color from the image
• the Use Clone Color setting, which pulls color from a source
• the Mixer panel
• the Color Sets panel
This section contains the following topics:
•“Choosing colors from the Color panel” (page 218)
•“Resizing the Color panel” (page 221)
•“Showing or hiding Color panel components” (page 221)
•“Using the temporal colors palette” (page 222)
•“Changing the paper color” (page 223)
•“Sampling colors from images” (page 223)
•“Cloning color” (page 224)
•“Creating two-color brushstrokes” (page 224)
•“Exploring the Mixer panel and mixing controls” (page 226)
•“Displaying and resizing the Mixer panel” (page 228)
•“Mixing, sampling, and applying colors from the Mixer pad” (page 229)

218 | Corel Painter 2015 User Guide
•“Opening images in the Mixer panel” (page 231)
•“Changing and saving the Mixer color swatches” (page 232)
•“Saving Mixer panel colors to a color set” (page 232)
•“Clearing and resetting Mixer panel colors” (page 233)
•“Saving the Mixer pad” (page 234)
•“Loading color swatches and Mixer pad files” (page 234)
•“Working with color sets” (page 235)
•“Customizing the layouts of color sets” (page 236)
•“Creating and exporting color sets” (page 237)
•“Editing color sets” (page 238)
•“Setting color variability” (page 240)
•“Setting Color Expression” (page 240)
•“Loading multiple colors” (page 240)
•“Working with color fills” (page 241)
•“Applying a color as a fill” (page 242)
•“Limiting and preventing leakage” (page 244)
Choosing colors from the Color panel
You can use the Color panel to select a color and view information about the selected color.
Color panel
In the Color panel, you can choose a color from the Hue Ring and adjust the color from the Saturation/
Value Triangle. The following information can help you adjust colors by using the Saturation/Value Triangle.
• Color values span the Saturation/Value Triangle from top to bottom. The top of the triangle represents
the highest value (white), and the bottom of the triangle represents the lowest value (black).
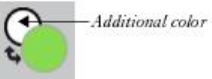
Color | 219
• Saturation levels increase from left to right. Dragging to the right, or clicking on the right, produces
purer colors within the predominant hue. Dragging to the left, or clicking on the left, reduces the color
saturation and produces “muddier” or grayer colors.
You can also set the Hue, Saturation, Value (HSV) and standard Red, Green, Blue (RGB) values for the
selected color.
You can also enable the Clone Color option from the Color panel. For more information, see “Cloning
color” on page 224.
The Main and Additional Color swatches display in the Color panel, temporal color panel, and the toolbox.
They include two overlapping swatches: the front swatch displays the selected Main Color and the back
swatch displays the selected Additional Color.
The Additional Color is used when applying more than one color, as in two-color brushstrokes, two-point
gradients, and Image Hose effects. It is not what other graphics applications refer to as the “background
color.” In Corel Painter, the background color is the paper color.
The Main Color and Additional Color overlapping swatches.
To display the Color panel
•Choose Window Color Panels Color.
To choose a hue and color from the Color panel
1Choose Window Color Panels Color.
2Drag the handle on the Hue Ring to select the predominant hue.
The Saturation/Value Triangle displays all available colors within that selected hue.
3Select a color on the Saturation/Value Triangle by dragging the circle or by clicking the color you want.
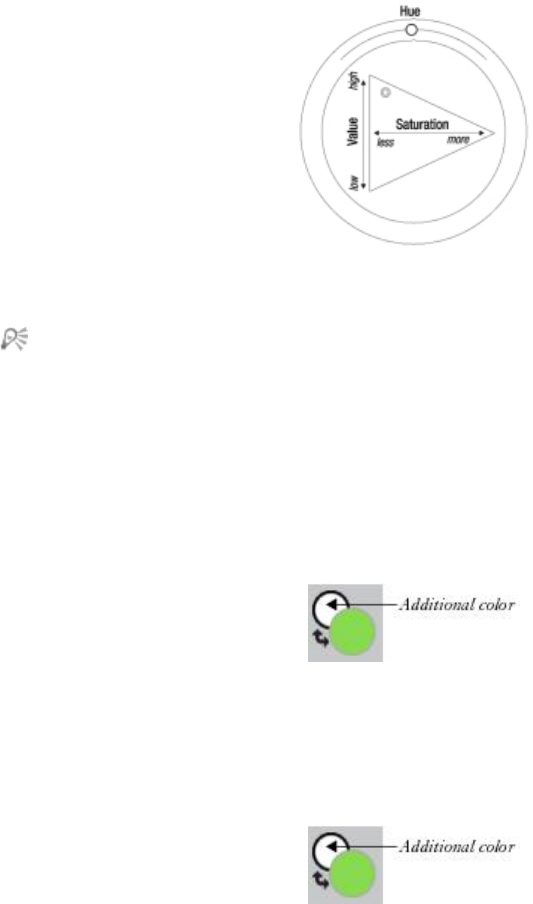
220 | Corel Painter 2015 User Guide
Drag in the Hue Ring to select a hue. Drag in the
Saturation/Value Triangle to pick the saturation.
You can also select a hue by clicking anywhere on the Hue Ring (in the Standard Colors view) or
on the hue indicator (in the Small Colors view).
To choose the Main Color
1Choose Window Color Panels Color.
2Double-click the front swatch in the Color Selector.
3Choose a color from the Color dialog box.
Click the front swatch to set the Main Color.
To choose the Additional Color
1In the Color panel, double-click the back swatch.
2Choose a color from the Color dialog box.
Click the back swatch to set the Additional Color.
To work with the Main Color, click the front swatch to reselect it.
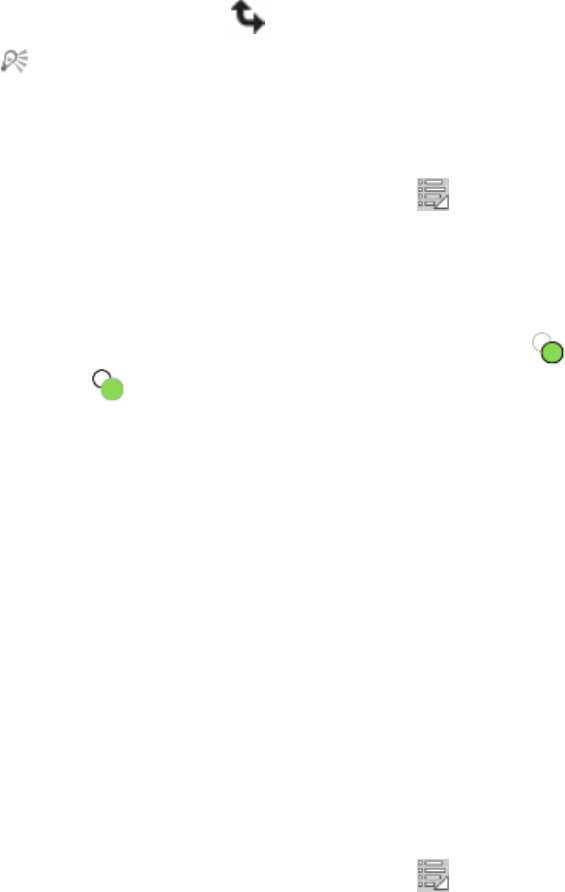
Color | 221
To swap the Main and Additional Colors
•Click the Color Swap icon in the lower-left corner of the Color Selector.
You can also swap the Main Color with the Additional Color by pressing Shift + S or Shift + X.
To switch between RGB or HSV values
1In the Color panel, click the Color options button , and choose the available option:
•Display as RGB
or
•Display as HSV
2Move the sliders to adjust the values, or type new values in the boxes.
You can preview the new color in the Main Color (front) swatch and the Additional Color (back)
swatch .
Resizing the Color panel
You can customize the Color panel by resizing it. For instance, you can increase the panel size in order to
select colors more accurately, and then decrease the panel size in order to focus on the canvas.
To resize the Color panel
• Drag the lower-right corner of the Color panel.
Showing or hiding Color panel components
By default, the Color panel displays the color wheel and color information for a selected color, but you can
hide these elements. You can also choose to show or hide color tooltips, which appear by default when you
point to a color in the Color panel. Tooltips provide information about individual colors.
To show or hide the color wheel
•In the Color panel, click the Color options button , and choose Color Wheel.
A check mark indicates that it is displayed.

222 | Corel Painter 2015 User Guide
To show or hide the color information
•In the Color panel, click the Color options button , and choose Color Info.
A check mark indicates that it is displayed.
To show or hide the color tooltips
•In the Color panel, click the Color options button , and choose one of the following:
•Show Color Tooltip
•Hide Color Tooltip
Using the temporal colors palette
The temporal colors palette is a floating color palette that displays in the document window that allows you
to view and choose colors within the context of the image. The temporal colors palette, which is similar to
the Color panel, consists of two components that help you choose a color and its intensity: the Hue Ring
and the Saturation/Value Triangle.
Hue Ring
The Hue Ring lets you choose a color.
Saturation/Value Triangle
The Saturation/Value Triangle lets you choose the intensity of the color as well as, black, white, or shades of
gray.
Saturation levels can be set from left to right. Dragging or clicking to the right increases the saturation and
produces purer colors within the predominant hue. Dragging or clicking to the left reduces the level of color
saturation, producing “muddier” or grayer colors.
Values can be set from top to bottom. The top of the triangle is the highest value (white), and the bottom
is the lowest value (black).
The current color is displayed in a round swatch to the left of the Saturation/Value Triangle.
To display the temporal colors palette
• Press Command + Option + 1 (Mac OS) or Ctrl + Alt +1 (Windows).
You can also customize the temporal color palette keyboard shortcut by choosing Corel Painter
2015 menu Preferences (Mac OS) or Edit Preferences (Windows), and choosing Customize
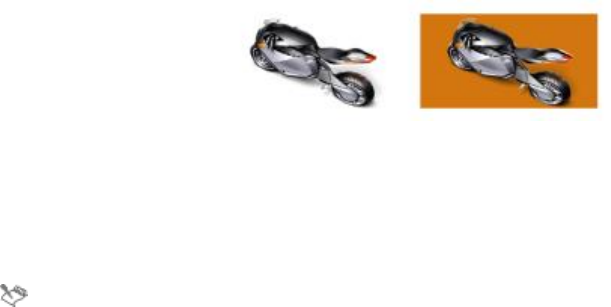
Color | 223
Keys. In the Customize Keys dialog box, choose Other from the Shortcuts list box, and click
Toggle Temporal Color Palette from the Application Commands list. You can then type a new
shortcut key in the Shortcut column and click OK.
If you are using a Wacom tablet, you can also assign a shortcut to the stylus button.
To choose a color on the temporal colors palette
1In the Color panel, click a color on the Hue Ring.
2Inside the Hue Ring, click the Saturation/Value Triangle to set the exact shade that you want.
The color is displayed as the current color.
Changing the paper color
You can change a document’s paper color — the color of the background canvas — at any time.
Example of changing the paper color.
To change the existing paper color
1Choose a Main Color from the Color panel.
2Choose Canvas Set Paper Color.
Do not use a bleach variant to expose the new paper color unless the paper color is white. Bleach
variants erase to white, regardless of the paper color.
Sampling colors from images
You can select, or sample, a color from an existing image so that you can apply it to other areas in an
image.
To paint with a color already in an image
1On the Color Selector in the toolbox, click the Main Color or Additional Color.
224 | Corel Painter 2015 User Guide
2Click the Dropper tool in the toolbox.
3Move the cursor to the color that you want to sample, and click.
The color swatch is updated to display the color you’ve selected.
The Dropper tool picks up visible color only; it cannot be used to select a hidden color.
The Dropper tool works with the Brush, Crop, Pen, Rectangular Shape, Oval Shape, Text, Shape
Selection, Scissors, Add Point, Remove Point, Convert Point, and Paint Bucket tools.
You can quickly access the Dropper tool from the toolbox by clicking the Brush tool in the
toolbox, and then pressing Option (Mac OS) or Alt (Windows) or by pressing D on the keyboard.
Cloning color
Cloning a color lets you pick up dabs of color from an original (source) image and apply the same color
to a clone (destination). Brushes that use dab-based dab types produce a color based on samples of color
from the clone source, which results in an approximation of the original color. Brushes that use rendered
dab types sample several colors and load each color onto individual bristles, which allows startlingly realistic
results. For more information, see “Painting in the clone” on page 176.
Creating two-color brushstrokes
Selected brush categories include variants that support two-color brushstrokes. For example, the Acrylics,
Calligraphy, and Chalk categories include variants that allow you to produce two-color brushstrokes.
They are also known as noncomputed dab types, which are dab-based, as opposed to rendered. For more
information, see “General controls: Dab types” on page 332.
You can choose the two colors used by the brushstroke by specifying both a Main and an Additional Color.
If you have only a Main Color selected, you produce a solid-color brushstroke. You can then use the Color
Expression panel to determine when Corel Painter uses one color or the other. For more information, see
“Setting Color Expression” on page 240.
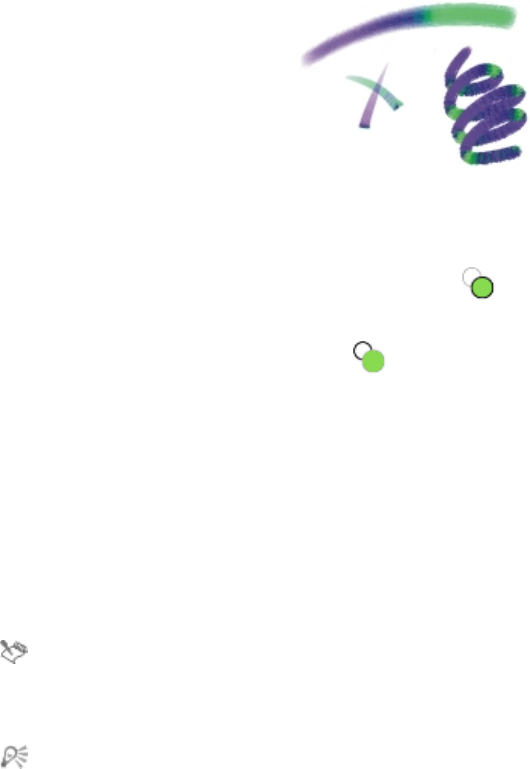
Color | 225
You can use two colors at once in a brushstroke.
To set up a two-color brushstroke
1In the Color panel, click the Main Color (front) swatch .
2Click a color on the Saturation/Value Triangle.
3Click the Additional Color (back) swatch .
4Click a color on the Saturation/Value Triangle.
5Choose Window Brush Control Panels Color Expression.
Displaying the Color Expression panel helps you determine which brush variants support two-color
brushstrokes.
6Click the Brush Selector on the Brush Selector bar.
7In the Brush library panel, click a brush category and a brush variant.
If the Expression list box is grayed out in the Color Expression panel, the brush variant does not
support two-color brushstrokes.
8In the Color Expression panel, choose Direction from the Expression list box.
For information about using the Color Sets panel, see “Working with color sets” on page 235.
For information about using Color Expressions, see “Setting Color Expression” on page 240.
For different results, try different Expression settings. For example, choose Pressure to create color
transitions based on the pressure you apply with your stylus.
You can also choose a color from a color set. For more information, see “Working with color sets”
on page 235.
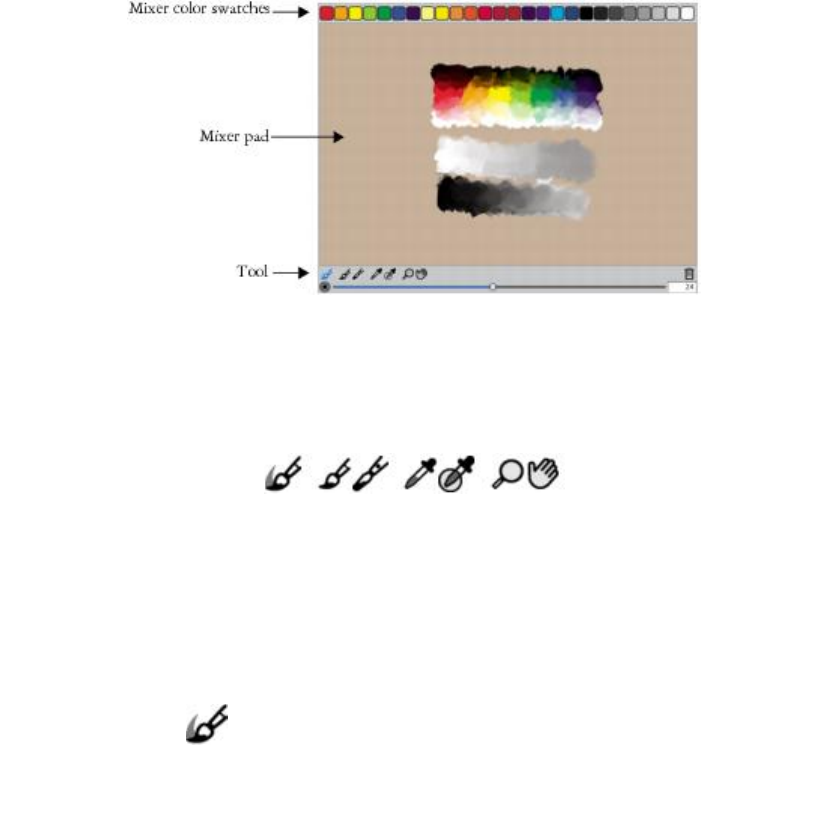
226 | Corel Painter 2015 User Guide
Exploring the Mixer panel and mixing controls
The Mixer panel lets you mimic the experience of mixing colors on a traditional artist’s palette. In the Mixer
panel, you can access color swatches and various tools that let you mix colors. You can then apply two
or more colors to the Mixer pad, the mixing area at the center of the Mixer panel, and then blend them
together to create a new color.
You can save, load, and reset colors in the Mixer panel. In addition, you can save colors as Mixer swatches
and save colors to color sets.
Understanding the Mixer panel controls
The controls in the Mixer panel are used to apply, mix, sample, and clear color on the Mixer pad.
Mixer panel tools
The following table describes all of the Mixer panel tools.
Mixer panel tool Description
Dirty Brush Mode tool Lets you apply colors that were mixed in the
Mixer panel to the canvas. The Dirty Brush Mode
tool is active by default and can be used with
brush variants that support mixing. For more
information, see “Mixing, sampling, and applying
colors from the Mixer pad” on page 229.
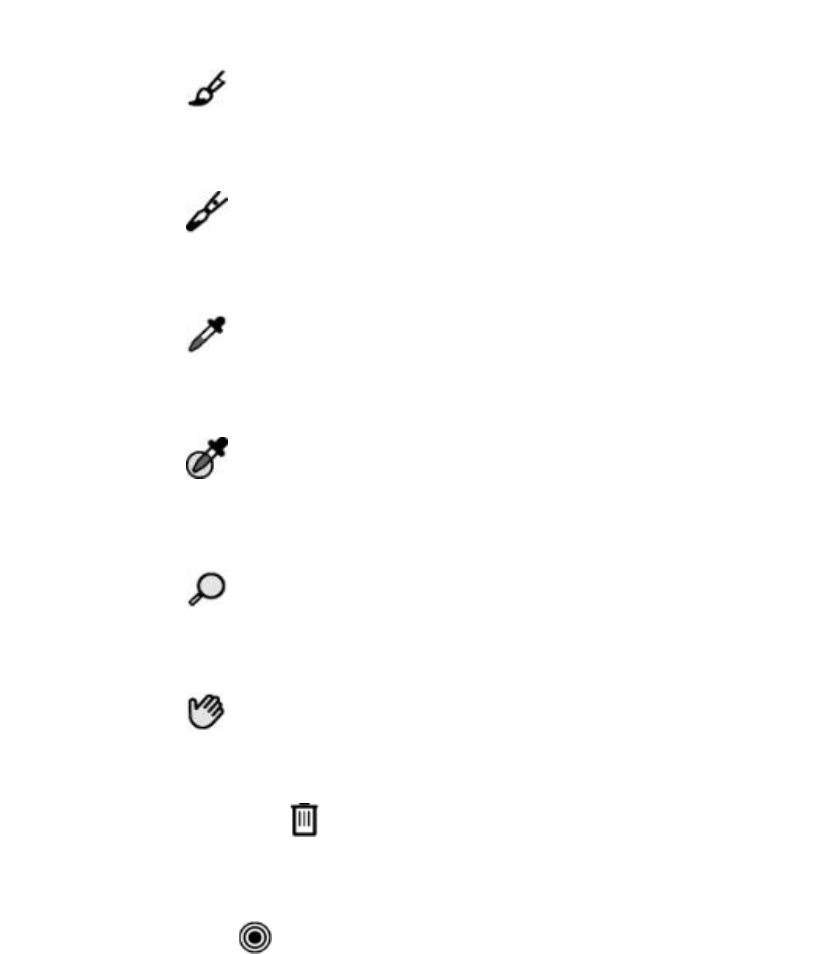
Color | 227
Mixer panel tool Description
Apply Color tool Acts as a loaded paint source; applies color to the
Mixer pad. Color loaded on the Apply Color tool
blends with color already in the Mixer pad.
Mix Color tool Mixes colors already in the Mixer pad; does not
add new colors to the Mixer pad.
Sample Color tool Samples color in the Mixer pad for use on the
canvas. The sampled color becomes the Main
Color in the Color panel.
Sample Multiple Colors tool Samples multiple colors in the Mixer pad. The size
of the sample area is determined by the Change
Brush Size slider. You can use the sampled color
on the canvas.
Zoom tool Lets you zoom in and out of areas in the Mixer
pad.
Pan tool Lets you scroll through the Mixer pad.
Using the Clear and Reset Canvas button
The Clear and Reset Canvas button erases the contents of the Mixer pad and resets the zoom level to
100%. It does not, however, reset the brush size.
Using the Change Brush Size slider
The Change Brush Size slider lets you increase or decrease the size of the Apply Color tool and the
Mix Color tool. The Change Brush Size slider also lets you set the size of the sample area in the Mixer pad
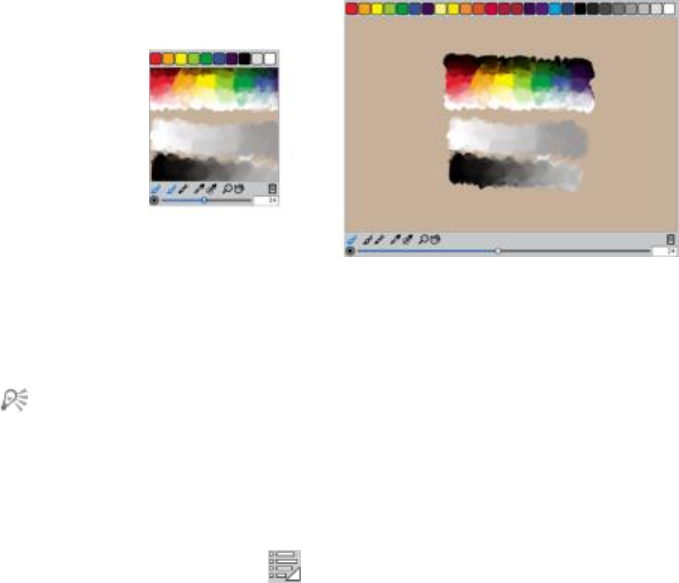
228 | Corel Painter 2015 User Guide
when sampling with the Sample Multiple Colors tool. If you adjust the Change Brush Size slider, the new
value is retained when you reopen the application.
Displaying and resizing the Mixer panel
To display the Mixer panel, you can use the Window menu, or you can use a keyboard shortcut. You can
start mixing colors using the default Mixer Pad or you can load one of the inspirational Mixer Pads that were
designed for you by various expert Corel Painter artists.
If you need more space to mix your colors, you can undock the Mixer panel and resize it. Increasing the size
of the Mixer panel also gives you access to additional Mixer swatches. For more information, see “Changing
and saving the Mixer color swatches” on page 232.
You can also change the background of the Mixer pad, the surface on which you mix color.
Mixer panel before (left) and after (right) resizing.
To display the Mixer panel
•Choose Window Color Panels Mixer.
You can also display the Mixer panel by pressing Command + 2 (Mac OS) or Ctrl + 2 (Windows).
To choose a Mixer Pad
1Choose Window Color Panels Mixer.
2Click the Mixer options button , and choose one of the following:
•Restore Jeremy Sutton’s Mixer Pad
•Restore John Malcom’s Mixer Pad
•Restore Karen Bonaker’s Mixer Pad
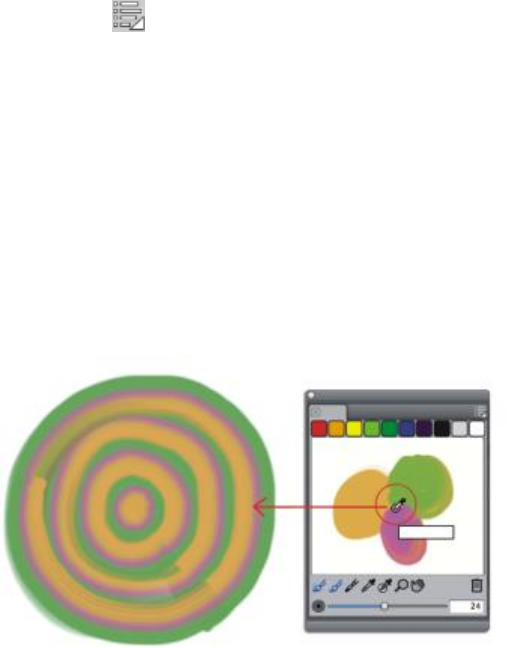
Color | 229
•Restore Skip Allen’s Mixer Pad
•Restore Default Mixer
To resize the Mixer panel
• With the Mixer panel undocked, drag the resize handle at the lower-right corner of the main window of
the panel.
To change the Mixer pad background
1Choose Window Color Panels Mixer.
2Click the Mixer options button , and choose Change Mixer Background.
3In the Color dialog box, choose a background color.
Mixing, sampling, and applying colors from the Mixer pad
You can create a color in the Mixer panel and then sample it to apply it to the canvas.
In addition, some brush variants that support mixing allow you to mix colors in the Mixer panel and apply
them directly to the canvas without sampling, which mimics the traditional experience of mixing color on
an artist’s palette. The brush variants that support mixing use the following dab types: Camel Hair, Flat,
Bristle Spray, Watercolor Camel Hair, Watercolor Flat, and Watercolor Bristle Spray. The dab type for a
brush variant appears in the General panel of the Brush Controls palette. These brush variants also allow
you to sample multiple colors simultaneously to produce multi-colored brushstrokes.
You can sample multiple colors in the Mixer panel and paint directly on the canvas.
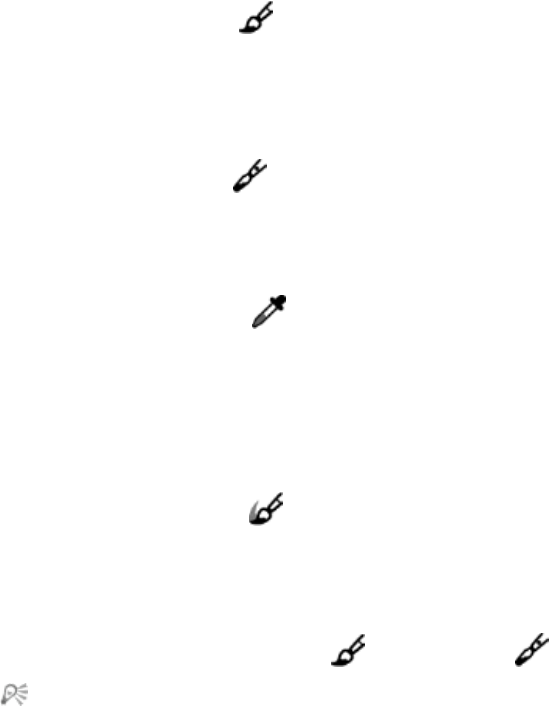
230 | Corel Painter 2015 User Guide
When you have finished mixing and sampling colors, you can clear the mixer pad, or save it as a mixer pad
(MXS) file that you can open and use later. For more information, see “Saving the Mixer pad” on page
234.
To mix colors
1Choose Window Color Panels Mixer.
2Click the Apply Color tool in the Mixer panel.
3Choose a color from a Mixer swatch, and paint on the Mixer pad.
4Choose a second color from the Mixer swatch, and paint on the Mixer pad.
5Do one of the following:
• Use the Apply Color tool to add to and blend the colors.
•Use the Mix Color tool to blend the colors.
To sample a color from the Mixer pad
1Choose Window Color Panels Mixer.
2Click the Sample Color tool .
3On the Mixer pad, click the color you want to sample.
The sampled color becomes the Main Color in the image.
To paint from the Mixer panel
1Mix the color you want in the Mixer panel.
The Dirty Brush Mode tool is active by default. If it is not active, click the Dirty Brush Mode tool.
2Click the Brush Selector on the Brush Selector bar.
3In the Brush library panel, choose a brush category and variant that supports mixing.
4Paint in the document window.
The last color on the Apply Color tool or Mix Color tool is used in the brushstroke.
You can verify if a brush variant supports mixing by clicking Window Brush Control
Panels General, and ensuring that one of the following dab types is selected: Camel Hair, Flat,
Bristle Spray, Watercolor Camel Hair, Watercolor Flat, and Watercolor Bristle Spray.
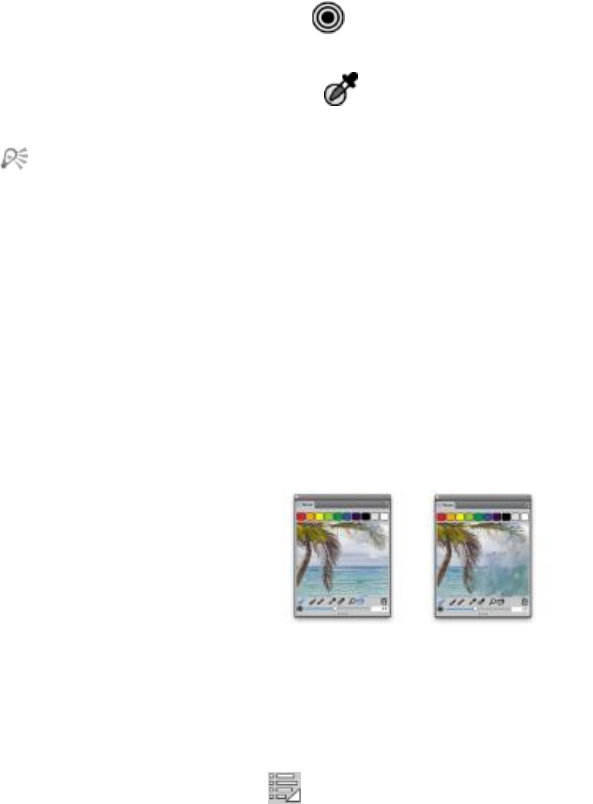
Color | 231
To sample multiple colors
1In the Brush library panel, choose a brush category and variant that supports mixing.
2Mix the color you want in the Mixer panel.
3Move the Change Brush Size slider to set the size of the sample area.
The size of the sample area is displayed to the right of the slider and is measured in pixels.
4Click the Sample Multiple Color tool , and click the area of the Mixer pad that you want to
sample.
You can verify if a brush variant supports mixing by clicking Window Brush Control
Panels General, and ensuring that one of the following dab types is selected: Camel Hair, Flat,
Bristle Spray, Watercolor Camel Hair, Watercolor Flat, and Watercolor Bristle Spray.
Opening images in the Mixer panel
You can now load an external image file in the Mixer panel so that you can sample and mix the image
colors. For example, you can open a photo and then blend its colors directly in the Mixer pad to create new
colors. You can open PNG, RIFF, TIFF, JPEG, and PSD files in the Mixer panel.
An example of importing a photo in the Mixer
panel (left) to transform the photo into a Mixer Pad
To open an image in the Mixer panel
1Click the Mixer options button , and choose Open Mixer Pad.
2In the Open Mixer Pad dialog box, choose the image file format from the list box.

232 | Corel Painter 2015 User Guide
3Browse to the folder where the image file is stored.
4Choose the image, and click Open.
Changing and saving the Mixer color swatches
You can store commonly used colors in Mixer color swatches at the top of the Mixer panel and then use
these colors on the Mixer pad. A series of colors appears by default; however, this color series can be
changed to suit the individual preferences of the artist. You can save the Mixer color swatches that you
create.
To change a Mixer swatch color
1Choose Window Color Panels Mixer.
2In the Mixer panel, click the Sample Color tool , and choose a color for the swatch.
3Press Command (Mac OS) or Ctrl (Windows) and then click the Mixer swatch that you want to change.
The new color appears in the Mixer swatch.
To save colors in the Mixer panel
1Choose Window Color Panels Mixer.
2Click the Mixer options button , and choose Save Mixer Colors.
3In the Save Mixer Colors dialog box, type a name for the Mixer colors and choose where you want to
save the Mixer swatches (MSW) file.
4Click Save.
Saving Mixer panel colors to a color set
You can add individual colors that you saved as color swatches to the currently selected color set. For
example, if you mixed colors that you are particularly happy with, you can save them to a color set. You
can also create a color set from the colors on the Mixer pad. You can also choose the maximum number of
colors that you want to retain from the Mixer pad. For more information, see “Working with color sets” on
page 235.
To add a Mixer color swatch to a color set
1In the Mixer panel, click the Sample Color tool , and choose the Mixer swatch that you want to
save to a color set.
Color | 233
2Click the Mixer options button , and choose Add Swatch to Color Set.
The selected color is added to the current color set.
To create a color set from the Mixer Pad
1In the Mixer panel, click the Mixer options button , and choose New Color Set from Mixer Pad.
2In the New Colorset dialog box, type a name in the Name text box.
3Adjust the Max Colors slider to set the maximum number of colors that you want to add to the color
set.
4Click OK.
5To access the new colors, choose Window Color Panels Color Sets.
Clearing and resetting Mixer panel colors
There are various options for clearing and restoring both the Mixer pad and Mixer color swatches. You can
clear all colors from the Mixer pad to start mixing colors from scratch. You can also restore the Mixer pad to
the default colors.
In addition, you can reset the Mixer color swatches to the factory default colors.
You can revert to the factory default color swatch colors.
To clear the Mixer pad
1Choose Window Color Panels Mixer.
2Do one of the following:
•Click the Mixer options button , and choose Clear Mixer Pad.
•In the Mixer panel, click the Clear and Reset Canvas button .
To restore the default Mixer pad
•Click the Mixer options button , and choose Restore Default Mixer.
To reset Mixer color swatches
•Click the Mixer options button , and choose Reset Mixer Colors.

234 | Corel Painter 2015 User Guide
Saving the Mixer pad
When you have finished mixing and sampling colors, you can save the Mixer pad contents as a Mixer pad
(MXS) file that you can open and use later. In addition, you can also save a Mixer pad as a PNG file.
To save a new version of the Mixer pad
1Choose Window Color Panels Mixer.
2Click the Mixer options button , and choose Save Mixer Pad.
3In the Save Mixer Pad dialog box, type a name for the Mixer colors, and choose where you want to
save the Mixer pad (MXS) file.
4Click Save.
To save a Mixer pad as a PNG file
1Choose Window Color Panels Mixer.
2Click the Mixer options button , and choose Save Mixer Pad.
3In the Save Mixer Pad dialog box, type a name in the File Name box.
4Choose choose PNG from the Save As Type list box.
5Click Save.
Loading color swatches and Mixer pad files
You can load previously saved Mixer color swatches or Mixer pad files (MXS) in the Mixer panel.
To load colors in the Mixer panel
1Choose Window Color Panels Mixer.
2Click the Mixer options button , and choose Load Mixer Colors.
3In the Load Mixer Colors dialog box, choose the Mixer swatch (MSW) file that you want to load.
4Click Open.
You can also load a color set in the Mixer panel by clicking the Mixer options button ,
choosing Load Mixer Colors. In the Load Mixer Colors dialog box, go to Corel\Painter
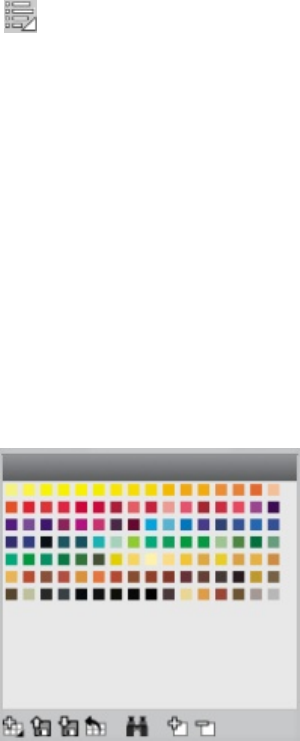
Color | 235
2015\Support Files\Color Sets\[Color Set Name], type *.* in the File name box, and press Enter.
A list of hidden user files appears. Double-click a color set.
To load a saved version of the Mixer pad
1Choose Window Color Panels Mixer.
2Click the Mixer options button , and choose Open Mixer Pad.
3In the Open Mixer Pad dialog box, choose the Mixer pad (MXS) file that you want to open.
4Click Open.
Working with color sets
Corel Painter uses color sets to organize groups of colors. Some color sets are organized by both name and
color relationship. Corel Painter provides several color sets — Painter Colors, Mac OS and Windows system
palettes, and the PANTONE MATCHING SYSTEM are a few. You can open any of the available color sets,
choose a color from the color set, and then apply it to a brushstroke. You can open multiple color sets at a
time.
In addition, you can import a color set to access Additional Colors. For example, you can import a color set
that you created in a previous version of Corel Painter.
If you need to find a specific color in a color set, you can search for the color by name or have Corel Painter
find the color that comes closest to matching the current color.
Color Sets panel
To display the Color Sets panel
•Choose Window Color Panels Color Sets.

236 | Corel Painter 2015 User Guide
To open a color set
•In the Color Set Libraries panel, click the Color Set Libraries options button , and choose Color Set
Libraries, and choose a color set from the list.
To choose a color from a color set
• In the Color Set Libraries panel, click a color.
To import a color set
1In the Color Set Libraries panel, click the Import Color Set button .
2In the Select Color Set dialog box, click the Color Sets folder, choose a color set, and click Open.
To find a color in a color set
1In the Color Set Libraries panel, click the Search for Color button .
2In the Find Color dialog box, do one of the following:
• Enable the By name option, and type a name in the box.
• Enable Closest to current color.
3Click Begin.
4Click OK when the desired color is found.
If the color set is visible, Corel Painter surrounds the found color with a selection frame.
If you search for a color by name, but a color with that name is not found, the OK button is not
available (it is grayed out).
Customizing the layouts of color sets
You can arrange colors in a color set in various ways. You can sort by hue, luminance, and saturation;
determine the size of color swatches; decide whether to have grid lines; and display the colors in a list in
order to view the color names.
To change how colors are sorted
1Choose Window Color Panels Color Sets.
2In the Color Set Libraries panel, click the Color Set options button and choose Sort Order.
3Choose one of the following options:

Color | 237
•Saved — sorts colors in the order in which they were originally entered.
•HLS — sorts colors by hue, luminance, and saturation.
•LHS — sorts colors by luminance, hue, and saturation.
•SHL — sorts colors by saturation, hue, and luminance.
To adjust the size of the color swatches
•In the Color Set Libraries panel, click the Color Set options button , choose Color Set Library
View, and choose one of the following options:
•Small
•Medium
•Large
To display the color swatches as a list
•In the Color Set Libraries panel, click the Color Set options button , choose Color Set Library
View, and choose List.
Creating and exporting color sets
You can create color sets to control the colors in particular projects or to create groups of favorite painting
colors. Creating clearly named color sets can be very useful. For example, you could name a color set Shades
of Purple, Hero Image, My Crayons, or Rollover Buttons — all offering you easy access to recognizable color
sets.
You can create color sets from
• an image
• a selection on an image
• a layer
• the Mixer panel
Once a color set is created, you can add additional colors to the color set. You can also export the color set.
To create a color set
1Choose Window Color Panels Color Sets.
2In the Color Set Libraries panel, click the New Color Set button , and choose one of the following
options:
•New Color Set from Image — Includes all image colors in the color set. This option is available only
if an image is open.

238 | Corel Painter 2015 User Guide
•New Color Set from Layer — Includes all colors that are found in the active layer in the color set.
This option is available only if an active layer is selected in the image.
•New Color Set from Selection — Includes all colors in the selected area of the image in the color set.
This option is available only if the image has an active selection.
•New Color Set from Mixer Pad — Includes all colors that are used in the Mixer panel in the color
set.
3In the New Color Set dialog box, type a name in the Name text box.
4Adjust the Max Colors slider to set the maximum number of colors that you want to add to the color
set.
For information about adding colors to a color set, see “Editing color sets” on page 238.
For more information about selecting colors, see “Choosing colors from the Color panel” on page
218.
To export a color set
1In the Color Set Libraries panel, click the Export Color Set button .
2Choose the name of the color set that you want to export from the Library list box.
3Click OK.
4Choose the drive and folder where you want to save the file.
If you want to rename the color set, type a name for the color set in the File name box.
5Click Save.
Editing color sets
You can customize color sets by adding, deleting, or replacing colors. You can also append colors to a color
set. This is useful if you want to use colors from multiple color sets. In addition, you can name or rename
individual colors in a color set.
Naming colors in a color set can be useful. You can then search for a color by name, or annotate the colors
you use, right in the document window. For more information, see “To find a color in a color set” on page
236.
To add a color to a color set
1In the Color panel, choose a color.
2In the Color Set Libraries panel, choose the color set where you want to add the selected color.
3Click the Add Color to Color Set button .
Color | 239
You can also
Add a sampled color to a color set Click the Dropper tool in the toolbox, click
a color in the image, then click the Add Color to
Color Set button .
Add a color from another color set Drag a color swatch from one color set to another.
To delete a color
1In the Color Set Libraries panel, choose a color and click the Delete Color from Color Set button .
2In the warning dialog box, click Yes.
Corel Painter deletes the chosen color from the color set.
To replace a color
1Choose the color you want to add from the Color panel, a color set, or an existing image.
2Hold down Command (Mac OS) or Ctrl (Windows), and click the color you want to replace.
The new color replaces the old one in the color set.
To show or hide a color
• Perform a task from the following table.
To Do the following
Hide a color Right-click a color swatch in the Color Set
Libraries panel, and choose Hide Color.
Show all hidden colors In the Color Set Libraries panel, click the Color
Set options button , choose Color Set Library
View, and choose Show All Hidden Items.

240 | Corel Painter 2015 User Guide
To name or rename a color
1Right-click a color swatch in the Color Set Libraries panel, and choose Rename Color.
2Type a color name in the New name box.
Color names can contain up to 31 characters.
To restore the default color set
•In the Color Set Libraries panel, click the Color Set options button , choose Restore a Default
Color Set.
Setting color variability
Color variability allows you to create brushstrokes of more than one color. Variability can be used to
enhance the Natural-Media appearance of your work. For more information, see “Color Variability controls”
on page 415.
Setting Color Expression
Color expression determines where Corel Painter should use the Main or Additional Color in an image. For
more information, see “Color Expression controls” on page 417.
Loading multiple colors
Imagine the ability to load color at a bristle level, picking up different colors with each “hair” of a brush
— as though filling tiny ink wells. Imagine also the ability to move multiple colors along with a palette
knife, dragging them across your canvas or paper. The Brush Loading feature affects how paint comes off a
brush and what happens to the pixels underneath.
When Brush Loading is not active, brushes interact with previously applied colors by sampling underlying
pixels and then loading the brush with one new color — the average of those that were sampled. With
Brush Loading active, brushes can literally “pick up” existing colors, hair by hair. This capability offers truer
color interaction, astounding color variations, and better cloning results.
To paint with multiple colors
1Click the Brush Selector on the Brush Selector bar.
2In the Brush library panel, click a brush category and a brush variant.

Color | 241
3Choose Window Brush Control Panels General.
4Choose Static Bristle from the Dab Type list box.
5Choose Multi from the Stroke Type list box.
6Choose Window Brush Control Panels Well.
7In the Well panel, enable the Brush Loading check box.
This step activates the brush’s ability to pick up underlying colors.
8Adjust the Resaturation and Bleed sliders.
The Bleed setting determines how much underlying paint is affected by the brushstroke. A higher
Bleed setting, combined with a low Resaturation setting, can enhance the Brush Loading feature. A
resaturation value of 0, combined with different levels of bleed, will cause your brush to smear image
color, rather than deposit it. In this case, the lower the bleed, the longer the smear.
9Choose Window Brush Control Panels Spacing.
10 In the Spacing panel, adjust the Spacing and Min Spacing sliders to create fewer “echo” artifacts in
your smeared stroke.
11 Drag a brushstroke through existing paint to see how the paint is “picked up” from the underlying
pixels and moved across the canvas.
It is easier to see the Brush Loading feature if the canvas is not white. To fill the canvas with
another color, see “Applying a color as a fill” on page 242.
You can tie brush controls like Bleed to the Controller setting in the Color Expression panel. For
example, if you choose Pressure, each stroke bleeds more or less, depending on how hard you
press the stylus. For more information, see “Expression settings” on page 327.
Working with color fills
Corel Painter gives you many options for filling images with color. You can apply a color fill to only part of
an image, to a layer of an image, to an alpha channel, or to an entire image. You can also fill image areas
based on pixel color.
In addition, you can apply gradients, patterns, and weaves as fills. The following table lists the various ways
to apply fills to an image and where to find more information.
Fill type For more information see
Color “Applying a color as a fill” on page 242

242 | Corel Painter 2015 User Guide
Fill type For more information see
Gradient “Applying gradients” on page 723
Pattern “Applying pattern fills” on page 709
Weaves “Applying weaves” on page 757
Applying a color as a fill
Corel Painter gives you different options for applying a color as a fill. You can quickly apply a fill to a
selected area of an image or you can apply a fill to the entire image based on a selected pixel color. When
filling an image with a selected pixel color, you can apply the fill directly to the canvas or to a channel. Corel
Painter fills areas of the image based on color boundaries, as well as the specified tolerance and feather
settings.
Tolerance allows you to set the amount of variance allowed from the color of the selected pixel. With a low
tolerance setting, Corel Painter fills only contiguous pixels that are very close to the selected pixel color. With
a high tolerance setting, Corel Painter fills a greater range of colors.
Feathering softens the edges of the fill by controlling the fill opacity for pixels with colors outside the
tolerance range. For example, if feather is set to zero (the default), only pixels in the tolerance range are
filled. With a low feather setting, pixels with colors just outside the Tolerance range receive partial fill.
Increasing the feather setting increases the range of colors that receive partial fill. Pixels with colors farther
from the tolerance range receive a more transparent fill. Typically, when feather is set high, tolerance is set
low.
You can also fill the interior of an area that is bound by lines. This is especially useful for producing solid fills
of regions bounded by anti-aliased lines. If you want to fill regions completely, without affecting the lines,
you can first copy the lines to a selection. Then, when you fill the cells, the lines are protected.
To apply a color fill
1In the Color panel, double-click the Main Color (front) swatch in the Color Selector.
2Choose a color from the Color dialog box.
3To apply a gradient to:
• The canvas — Click the Canvas in the Layers panel.
• A selection — Click a selection tool from the toolbox, and drag in the document window to select an
area.
Color | 243
• A layer — Click a layer in the Layers panel.
• A channel — Click a channel in the Channels panel.
4Choose Edit Fill.
If you prefer, press Command + F (Mac OS) or Ctrl + F (Windows).
5In the Fill dialog box, choose Current Color from the Fill with list box.
6Adjust the Opacity slider.
To apply a pixel-based color fill
1Choose Window Color Panels Color Sets.
2In the Color Sets panel, click the Color Sets options button , and choose New Color Set from
Image.
3In the New Colorset dialog box, type a name in the Name text box.
4Choose the Paint Bucket tool from the toolbox.
5On the property bar, click one of the following buttons:
•Fill Image
•Fill Cell
6Choose the Current Color option from the Fill list box.
7Open the Select Fill panel, and choose a color.
The image color set displays in the Select Fill palette.
8Click the image in the drawing window.
If the result is not what you want, undo the fill, change the settings, and try again.
You can also
Specify the range of colors to be filled On the property bar, type a value in the Tolerance
box or adjust the slider.
Specify the fill opacity for pixels outside of the
tolerance range
On the property bar, type a value in the Feather
box or adjust the slider.
Soften the edges of the fill On the property bar, click the Anti-Alias button
.

244 | Corel Painter 2015 User Guide
You can also
Anti-aliasing is desirable when the Feather setting
is set to zero or extremely low.
You can constrain the fill to a rectangular area by dragging with the Paint Bucket tool.
Limiting and preventing leakage
In complex drawings, lines don’t always meet, which can cause the fill to leak into areas that you don’t
want filled — sometimes through the whole image. You can’t always tell if there’s a leak just by looking at
your image. If you click a small area and see the prompt, Now Looking for Extent of Fill, there’s probably a
leak, and Corel Painter is preparing to fill a bigger area than you had in mind. In this case, you can abort the
fill.
You can limit leakage to a specific rectangular area. In typical cartoon line work, unbounded areas — for
example, hair, tail feathers, and brush bristles — sometimes must be filled. By limiting leakage to a specific
area, you can close off these items. You can also close leaks by copying the lines to a selection, saving the
selection to a channel, editing the channel, and then reloading it to the selection. For more information
about editing channels, refer to “Editing channels” on page 571.
To undo a fill
• To undo a fill, do one of the following:
•Choose Edit Undo Paint Bucket Fill.
• Press Command + Z (Mac OS), or Ctrl + Z (Windows).
To limit leakage
1Choose the Paint Bucket tool from the toolbox.
2On the property bar, click the Fill Cell button or the Fill Image button .
3Drag to create a rectangle that just covers the area you want to fill.
If there is no leak, only the area within the lines is filled. If there is a leak, the fill goes outside the area,
but not beyond the constraints of your rectangle.
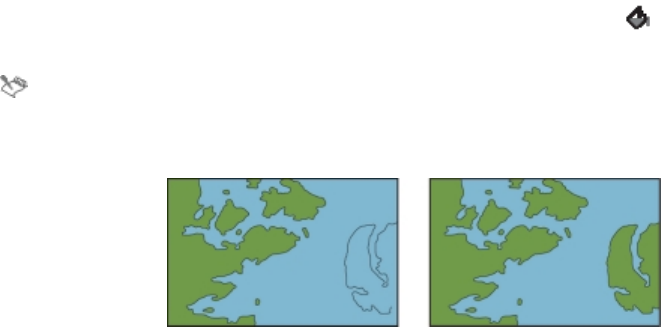
Color | 245
To close a leak
1Copy the lines to a selection.
2Choose Select Save Selection.
3In the Save Selection dialog box, choose New from the Save to list box.
4Click OK.
A new channel is displayed in the Channels panel.
5In the Channels panel, display and select the channel.
6Click the Brush Selector on the Brush Selector bar.
7In the Brush library panel, choose the same brush you used to create the lines.
8In the Color panel, set black as the current Main Color.
9Paint in the channel to close the gaps.
10 Choose Select Load Selection.
11 In the Load Selection dialog box, choose the modified channel from the Load From list box.
12 Enable the Replace Selection option to replace the original with the edited version.
If you want to adjust the mask threshold, double-click the Paint Bucket tool in the toolbox, and
move the slider.
The channel does not have to be selected to contain the fill. If you deselect the channel in the
Channels panel, the loaded selection is still in effect.
Edit the channel to close leaks. Remember to load
the channel back into the selection after editing.
246 | Corel Painter 2015 User Guide

Color management | 247
Color management
Corel Painter lets you manage colors when you create or open images, or place images in a document. The
color management controls help ensure that colors are consistent when you work with images from various
sources, such as Adobe Photoshop or a digital camera. In addition, you can store color information in a
document by embedding a color profile in the file when you save it.
This section contains the following topics:
•“Understanding color management” (page 247)
•“Specifying the default RGB color profile” (page 251)
•“Embedding color profiles when saving files” (page 252)
•“Specifying the default CMYK color profile for converting CMYK images to RGB” (page 253)
•“Previewing and soft-proofing color profiles” (page 253)
•“Assigning or removing color profiles” (page 254)
•“Converting color profiles” (page 255)
•“Working with color profile policies” (page 256)
•“Working with presets” (page 257)
Understanding color management
This section provides answers to some commonly asked questions about color management.
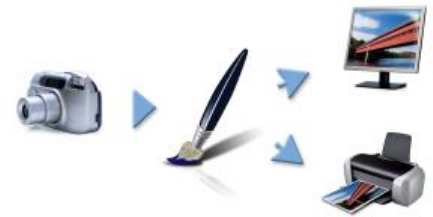
248 | Corel Painter 2015 User Guide
What is color management?
Color management is a process that lets you predict and control color reproduction, regardless of the
source or destination of the image. For example, a monitor displays a different set of colors than a
printer reproduces, so you may see colors on-screen that cannot be printed. If you want to reduce color
discrepancies, you can use color management to ensure a more accurate color representation when an
image is viewed, modified, or printed.
During the digital imaging process, different tools are used to capture, modify, and print images. In a
typical workflow, you capture an image by using a digital camera, upload the image to a computer, modify
the image in a photo-editing application, and print the image. Each of these tools has a different way of
interpreting color. In addition, each has its own range of available colors, called a color space, which is a
set of numbers that define how each color is represented. A color space is a subset of a color model (for
example, CMYK or RGB). In other words, each tool speaks a unique language when it comes to color. One
number in the color space of a digital camera may represent an entirely different color in the color space of
a monitor. As a result, when an image moves through the workflow, the colors get lost in the translation
and are not accurately reproduced. A color management system is designed to improve the communication
of color in the workflow.
This is an example of a typical digital imaging workflow.
A color management system, also known as a color engine, uses color profiles to translate the color values
from the source, which ensures a more accurate color reproduction at the destination. A color profile
contains the data that the color management system requires to translate colors. Many standard color
profiles are available. In addition, color profiles exist for different brands of monitors, scanners, digital
cameras, and printers.
Why do I need color management?
If your document requires accurate color representation, you should consider using color management. The
complexity of your workflow and the ultimate destination of the images are also important considerations.
If your documents are destined only for online viewing, color management may not be as important.
However, if you plan to open images in another application, such as Adobe Photoshop, or if you are
creating images for print or multiple types of output, the use of color management is essential.
Color management | 249
Color management lets you do the following:
• reproduce colors consistently across your digital imaging workflow, especially when opening documents
that were created in other applications
• reproduce colors consistently when sharing files with others
• preview, or “soft-proof”, colors before they are printed
• reduce the need to adjust and correct images when sending images to different destinations
A color management system does not offer identical color matching (this is not technically possible), but it
greatly improves the color representation.
Is my monitor displaying the right colors?
How you perceive the color that your monitor displays is another important factor in managing color
consistency. Your perception is influenced by the environment in which you are viewing the images. Here
are some ways to neutralize your viewing environment.
• Ensure that your room has a consistent flow of light. For example, if the room is filled with sunlight, use
a shade, or if possible, work in a room without windows.
• To ensure accuracy in perceiving colors, some graphics professionals work in windowless rooms with
gray or neutral walls and ceilings. If these conditions do not match the room you work in, you can
invest in a monitor hood, or you can create one by using black cardboard and tape.
• Don’t wear bright clothing that can clash with the display of colors on the monitor. For example,
wearing a white shirt reflects on the monitor and alters your perception of color.
• Set the monitor background to a neutral color, such as gray, or apply a grayscale image. Avoid using
colorful wallpapers and screensavers.
Calibration and profiling of the monitor, also known as characterization, are also important steps for
ensuring color accuracy. Calibration helps ensure consistency in the colors that are displayed on the
monitor. After calibration, you can create a color profile of the monitor, which contains the details of how
the monitor interprets colors. The profile is then shared with other devices. Calibration and profiling work
together to achieve color accuracy: If a monitor is incorrectly calibrated, its color profile is not useful.
However, calibration and profiling are complex and usually require a special calibration device and
specialized software. Furthermore, improper calibration may do more harm than good. You can find
additional information about monitor calibration and custom color profiles by researching color-
management techniques and products. You can also refer to the documentation that was provided with
your operating system or monitor.
Should I assign or convert color profiles?
In deciding whether to assign or convert a color profile, you should first consider the results that each
action produces. When you assign a color profile in Corel Painter, the color values, or numbers, in the
document do not change. Instead, the application simply uses the color profile to interpret the colors in
an image. However, when you convert a color profile, the color values in the document change. Instead
of assigning a color profile, the application translates one color profile to another. Converting a color
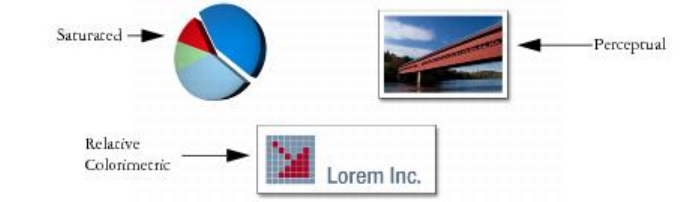
250 | Corel Painter 2015 User Guide
profile does more than affect the display of colors — it produces irreversible changes to the colors in the
document.
The best practice is to choose a working color space, such as sRGB, when you create an image and to use
the same color profile throughout your workflow. You should avoid assigning and converting color profiles.
However, you may encounter scenarios that require you to switch to a different color profile.
For example, if you receive a file from someone, and no color profile is embedded in the file, you should
assign a color profile to the file. In this way, you can retain the file’s original color values.
You should choose the conversion option only if you are preparing the file for a specific output, such as a
printer. After the data has been changed to accommodate the destination profile, conversion back to the
original color profile is often not suitable.
What is a rendering intent?
A color management system can perform effective translation of colors from the source to multiple outputs.
However, when matching colors from one color space to another, a color management system may be
unable to match certain colors. These “out-of-gamut” colors can dramatically change the look of the image,
depending on how they are interpreted by the color management system. Fortunately, you can choose a
rendering intent to instruct the color management system how to interpret the out-of-gamut colors. The
rendering intent that you choose depends on the graphical content of the image.
This is an example of three types of images and their corresponding rendering intents.
•Perceptual — Choose this rendering intent for photographs and bitmaps that contain many out-of-
gamut colors. The overall color appearance is preserved by changing all colors, including in-gamut
colors, to fit within the destinations range of colors at the destination. This rendering intent maintains
the relationships between colors to produce the best results.
•Saturated — Choose this rendering intent to produce more concentrated solid colors in business
graphics, such as charts and graphs. Colors may be less accurate than those produced by other
rendering intents.
•Relative Colorimetric — Choose this rendering intent for logos or other graphics to preserve original
colors. If a match is not found for the source colors, then the closest possible match is found. This
rendering intent causes the white point to shift. In other words, if you are printing on white paper, the

Color management | 251
white areas of an image use the white of the paper to reproduce the color. Therefore, this rendering
intent is a good option for printing images.
•Absolute Colorimetric — Choose this rendering intent for logos, or other graphics, that require very
precise colors. If no match is found for the source colors, then the closest possible match is used.
The Absolute Colorimetric and Relative Colorimetric rendering intents are similar, but the Absolute
Colorimetric rendering intent preserves the white point through the conversion and does not adjust for
the whiteness of the paper. This option is used mainly for proofing.
What is “soft-proofing”?
Soft-proofing lets you generate an on-screen preview of what the image will look like when it’s reproduced.
This technique simulates the “hard-proofing” stage in a traditional printing workflow. However, unlike hard-
proofing, soft-proofing lets you look at the final result without committing ink to paper. For example, you
can preview what the printed image will look like when a specific brand of printer is used. You can also
preview what the image will look like on another type of monitor.
Soft-proofing also lets you verify whether the document’s color profile is suitable for a specific printer or
monitor and can help you prevent unwanted results. For more information, see “Previewing and soft-
proofing color profiles” on page 253.
Specifying the default RGB color profile
To use color management in Corel Painter, you can start by specifying the default RGB color profile that
you want to assign to all new documents. When you create images in another application, such as Adobe
Photoshop, you should use the same default color profile that you will use when opening the file in Corel
Painter. In addition, you should always embed the color profile when saving a document in Corel Painter
or Adobe Photoshop, so that the document retains the color information. For more information, see
“Embedding color profiles when saving files” on page 252.
To change the default RGB color profile
1Choose Canvas Color Management Settings.
2Choose a color profile from the Default RGB Profile list box.
The factory default color profile for Corel Painter is sRGB, which is the default color profile for
many monitors, digital cameras, and even some printers.

252 | Corel Painter 2015 User Guide
You can also access the Color Management Settings dialog box from the Navigator panel by
clicking the Open Navigator Settings button , clicking Color Management, and choosing
Color Management Settings.
Embedding color profiles when saving files
You can embed an assigned color profile in a file. However, if you did not assign a color profile to the file,
the default color profile is embedded.
The following file formats support color profile embedding:
• RIFF (RIF)
• TIFF (TIF)
• Photoshop (PSD)
• JPEG
• Portable Network Graphics (PNG)
To embed a color profile when saving a file
1Choose File Save As.
2In the Save Image As dialog box, use the controls to specify a location and filename.
3From the Format list box (Mac) or the Save As Type list box (Windows), choose one of the following file
formats:
•RIFF Files (*.RIF; *.RIFF)
•TIF Files (*.TIF; *.TIFF)
•Photoshop Files (*.PSD)
•JPEG Files (*.JPG; *.JPEG)
•PNG Files (*.PNG)
4Enable the Embed Profile check box.
If you do not want to embed the color profile, you need to disable the Embed Profile check box.

Color management | 253
Specifying the default CMYK color profile for converting CMYK images to
RGB
Because Corel Painter works with RGB colors, all CMYK images that you open or import in the application
are converted to an RGB color profile. You can specify the default CMYK profile that Corel Painter uses to
convert the CMYK images to RGB. The following file formats are supported for CMYK images:
• RIFF (RIF)
• TIFF (TIF)
• Photoshop (PSD)
• JPEG
• Portable Network Graphic (PNG)
To specify the default CMYK color profile for converting CMYK images to RGB
1Choose Canvas Color Management Settings.
2Choose a color profile from the Default CMYK Conversion Profile list box.
You can also access the Color Management Settings dialog box from the Navigator panel by
clicking the Open Navigator Settings button , clicking Color Management, and choosing
Color Management Settings.
Previewing and soft-proofing color profiles
After an RGB profile is selected for the document, you can preview the image with the default color profile
applied. You can also “soft-proof” images, which means to preview on-screen what the image will look like
when it is printed with a specific printer, or when it is displayed on another type of monitor. You can also
soft-proof by using a specific rendering intent. For more information, see “What is a rendering intent?” on
page 250. After soft-proofing an image, you can turn off the soft-proofing feature.
To preview a color profile
1Choose Window Navigator.
2Click the Open Navigator Settings button , click Color Management Settings, and choose the
name of the color profile that you want to preview.

254 | Corel Painter 2015 User Guide
To soft-proof an image
1Choose Canvas Color Proofing Settings.
2Choose a profile from the Simulate Device list box.
3Choose a rendering intent from the Rendering Intent list box.
4Enable the Turn On Color Proofing Mode check box.
To turn off soft-proofing
•Choose Canvas Color Proofing Mode.
Assigning or removing color profiles
You can change the appearance of a document by assigning a new color profile. A color profile contains
the data that the color management system requires to translate colors from one color space to another.
The default color profile for Corel Painter is sRGB IEC61966-2-1 noBPC, but you can choose from a list of
Standard ICC color profiles.
When you assign a new profile, the color values, or numbers, in the document do not change. When you
enable color management and display a document, the colors in the document represent an interpretation
of the assigned color profile. For more information, see “Should I assign or convert color profiles?” on page
249.
You can also remove an assigned color profile from a document. In other words, color management is no
longer applied to the document. The color values are retained, however.
To assign or remove a color profile
1Choose Canvas Assign Profile.
2Enable one of the following color profile options:
•Use Default RGB Profile — applies the default RGB profile to the document
•Use Profile — applies a color profile to the document but does not convert the original colors. If you
enable this option, you must choose a color profile.
•Do Not Color Manage — retains the color values without associating them with a color profile
If you have color profiles installed on your computer, Corel Painter includes them in the list of
available color profiles.

Color management | 255
You can also assign a color profile from the Navigator panel by clicking the Open Navigator
Settings button , clicking Color Management, and choosing Assign Profile.
Converting color profiles
Corel Painter lets you convert the color profile of a document to another color profile. Converting a color
profile differs from assigning a color profile, which involves only the translation of one color profile to
another and affects only the display of color. When you convert one color profile to another, the color
values in the document are irreversibly changed. For more information, see “Should I assign or convert color
profiles?” on page 249.
Corel Painter also lets you choose the color management engine that is used for converting color profiles.
The color management engine, also known as a color management module (CMM), uses the information
in the color profiles to translate the color values. The resulting translation of the color values may differ,
depending on the color management engine.
In addition, you can flatten images when converting color profiles. Flattening images drops all the layers
onto the background canvas.
To convert a color profile
1Choose Canvas Convert To Profile.
2Choose a new color profile from the New Color Profile list box.
You can also
Choose a color engine Choose a color engine from the Color Engine list
box.
Choose a rendering intent Choose a rendering intent from the Rendering
Intent list box.
Flatten all layers in the image Enable the Flatten Image option.

256 | Corel Painter 2015 User Guide
You can also convert the color profile from the Navigator panel by clicking the Open Navigator
Settings button , clicking Color Management, and choosing Convert To Profile.
Working with color profile policies
Corel Painter lets you create color profile policies for opening and placing both RGB and CMYK images. The
options that you choose for the Color Profile Policy determine how colors are managed in images that you
open and work with in the application.
When creating a color profile policy for opening and placing images, you can specify the following:
• RGB color profile to apply to images
• CMYK color profile for converting images to RGB
• color engine
• rendering intent (depends on image content)
For more information, see “What is a rendering intent?” on page 250.
The color profile policy lets you display warning messages when a document has a mismatched or missing
color profile. In the case of a mismatched color profile, you can choose a new color profile. If the document
does not have a color profile associated with it, you can apply a new color profile or choose not to use color
management with the document.
To create a color profile policy
1Choose Canvas Color Management Settings.
2Choose one of the following options from the RGB Images list box:
•Use embedded profile — applies the embedded RGB color profile to RGB images that you open or
import
•Use default RGB profile — converts the image by using the default RGB color profile that you specify
in the color management settings
3Choose one of the following options from the Convert CMYK Images list box:
•Use default CMYK profile — converts to RGB by using the default CMYK color profile that you
specify in the color management settings
•Use embedded profile — converts to RGB by using the embedded CMYK color profile
4Choose a color engine from the Color Engine list box.
5From the Rendering Intent list box, choose one of the following options:
•Perceptual — is recommended for a variety of images, especially bitmaps and photographs
•Saturation — is best for vector graphics (lines, text, and solid-colored objects, such as charts)

Color management | 257
•Relative Colorimetric — is ideal for producing proofs on inkjet printers
•Absolute Colorimetric — preserves the white point and can be used to proof images
If you want to display a warning message when you open a document that has a mismatched color
profile, enable the Profile Mismatch check box.
For more complete descriptions of rendering intents, see “What is a rendering intent?” on page
250.
You can also access the Color Management Settings dialog box from the Navigator panel by
clicking the Open Navigator Settings button , clicking Color Management, and choosing
Color Management Settings.
Working with presets
Corel Painter provides color management presets, which are default settings that you can apply to a
document. They are useful if you do not feel comfortable changing the settings in the Color Management
Settings dialog box. You can also create your own presets, which allows you to retain all of your selections
in the Color Management Settings dialog box and reuse them in other documents. If you no longer need a
preset, you can delete it.
To choose a preset
1Choose Canvas Color Management Settings.
2Choose a preset from the Preset list box.
You can also access the Color Management Settings dialog box from the Navigator panel by
clicking the Open Navigator Settings button , clicking Color Management, and choosing
Color Management Settings.
To add a preset
1Choose Canvas Color Management Settings.
2In the Color Management Settings dialog box, use the controls to specify color management settings.
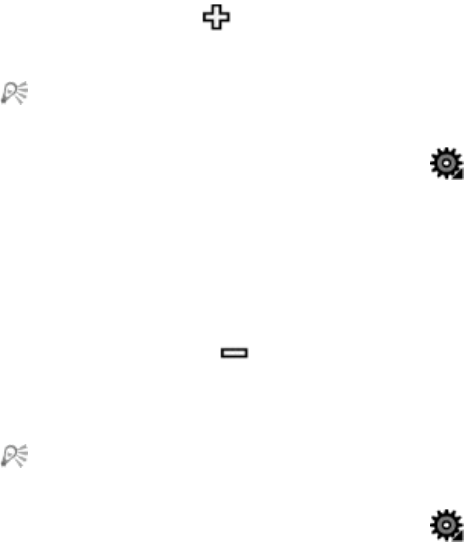
258 | Corel Painter 2015 User Guide
3Click the Add button next to the Preset list box.
4Type a name for the preset in the Preset Name box.
You can also access the Color Management Settings dialog box from the Navigator panel by
clicking the Open Navigator Settings button , clicking Color Management, and choosing
Color Management Settings.
To delete a preset
1Choose Canvas Color Management Settings.
2Choose a preset from the Preset list box.
3Click the Delete button next to the Preset list box.
A warning box appears and asks you if you want to delete the preset.
4Click Yes.
You can also access the Color Management Settings dialog box from the Navigator panel by
clicking the Open Navigator Settings button , clicking Color Management, and choosing
Color Management Settings.

Correcting and adjusting colors | 259
Correcting and adjusting colors
Corel Painter includes a variety of effects and tools that let you correct and adjust image colors. For
example, you can use the effects to fix a color-casted or washed-out photo. You can also use the effects to
creatively alter image colors using techniques such as posterizing or inverting.
This section contains the following topics:
•“Correcting colors using curves” (page 260)
•“Adjusting brightness and contrast” (page 261)
•“Using the curve to correct colors” (page 264)
•“Drawing freehand curves to adjust colors” (page 266)
•“Specifying the curve values to adjust colors” (page 267)
•“Adjusting hue, saturation, and value” (page 268)
•“Adjusting selected colors” (page 271)
•“Equalizing images” (page 274)
•“Matching color and brightness across images” (page 276)
•“Inverting colors” (page 277)
•“Posterizing an image” (page 278)
•“Applying video legal colors” (page 279)
•“Dodging and burning” (page 279)
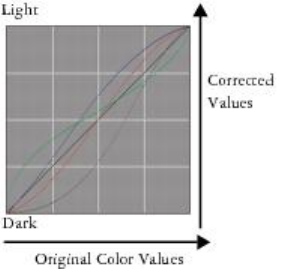
260 | Corel Painter 2015 User Guide
Correcting colors using curves
Corel Painter lets you correct colors by using curves to adjust the relative amounts of the color components
in an image. You can adjust the curves for red, green, blue, or all three color components at once.
Modifying a curve individually is useful for correcting an unwanted color cast. The curves describe how the
input color values are adjusted to create the output (corrected) color values.
A visual representation of the curve.
The horizontal axis represents the input (original color) values. The vertical axis represents the output
(corrected) values. Before you adjust a curve, it appears perfectly diagonally (45°), which indicates that all
input and output values are equal. Corel Painter maps light values at the top of the graph and darker values
at the bottom. When you edit RGB curves, the current color is indicated by a colored point on the curve. For
example, if you’re editing the color blue, dragging the curve below the diagonal line subtracts blue from
the image and adds its complimentary color yellow. Alternatively, dragging above the line intensifies the
color blue.
You can use any of the following curve methods to correct colors:
•Curve
•Freehand
•Advanced
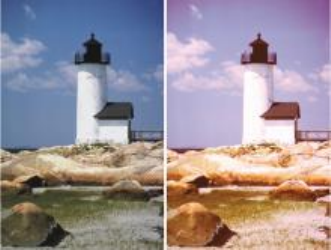
Correcting and adjusting colors | 261
Use the Color Correction dialog box to correct colors.
You can use a single curve method, or a combination of curve methods, to adjust the image.
You can apply color correction to a selection, a layer, or the entire image.
• If there is no selection, the correction is applied to the entire image.
• To correct the color of only a section of the canvas, select the area by using a selection tool before
applying the color correction. For more information about these tools, refer to “Getting started with
selections” on page 578.
• To correct the color of a layer, select the layer before applying the color correction. For more information
about selecting a layer, refer to “Selecting layers” on page 524.
• To apply color correction to a shape, dynamic layer, text layer, or reference layer, you must first commit
the layer to an image layer.
Adjusting brightness and contrast
Corel Painter offers two different methods for adjusting image brightness and contrast. You can adjust
brightness and contrast more quickly by using the Brightness/Contrast effect, or more precisely by using
the curve in the Color Correction dialog box.
When using the Brightness/Contrast effect, you can adjust all image colors at once.
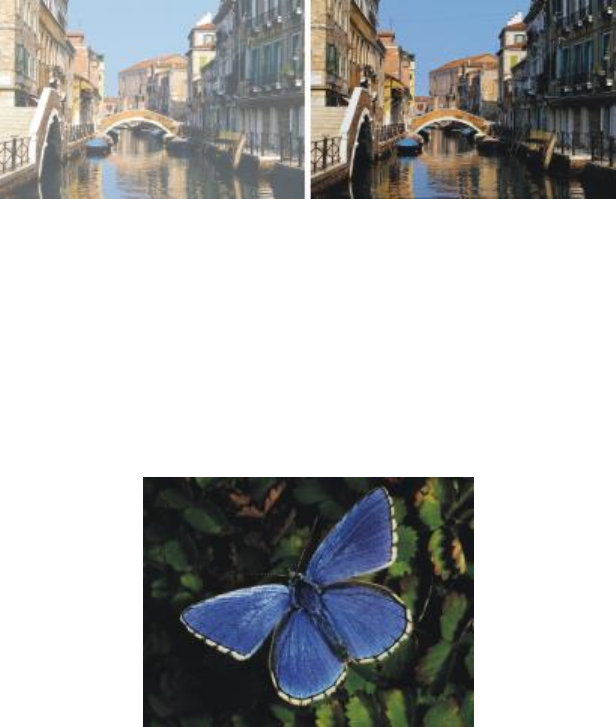
262 | Corel Painter 2015 User Guide
Before (left) and after (right) applying the Brightness/Contrast effect.
When using the curve, you can adjust the contrast or brightness of colors while maintaining the tonal
transitions in the original image. You can adjust all colors at once, or adjust R, G, and B individually. As
you adjust the Contrast or Brightness sliders, the endpoints of the curves remain fixed. Because the effect
maintains the levels from the original image, there are always 256 distinct levels, regardless of how much
you adjust the sliders.
Contrast adjusts the difference between light and dark values. As you increase the contrast, the curve takes
on an “S” shape, indicating that light colors are becoming lighter and dark colors darker. If you decrease
the contrast, the curve takes on an inverted “S” shape and tones down the contrast of all midtone colors.
An image before adjusting brightness and contrast by using the curve.
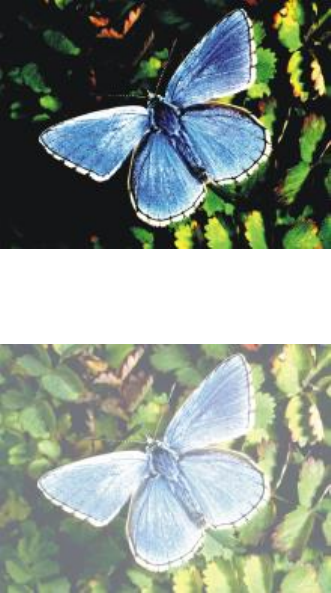
Correcting and adjusting colors | 263
An example of increasing the contrast by using the curve.
Brightness moves all values on a curve to a brighter tone or darker tone.
An example of increasing brightness by using the curve.
To quickly adjust brightness and contrast
1To apply the effect to:
• The canvas — Click the Canvas in the Layers panel.
• A selection — Click a selection tool from the toolbox, and drag in the document window to select an
area.
• A layer — Click a layer in the Layers panel.
2Choose Effects Tonal Control Brightness/Contrast.
3Move the Brightness slider to adjust image brightness.
4Move the Contrast slider to adjust image contrast.

264 | Corel Painter 2015 User Guide
You can reset the sliders to the default settings by clicking Reset.
You can compare the adjusted image with the original image by enabling and disabling the
Preview check box.
To adjust brightness and contrast by using the curve
1Choose Effects Tonal Control Correct Colors.
2In the Color Correction dialog box, choose Curve from the Method list box.
3Click one of the following Channel buttons:
•Red — allows you to adjust only the red curve
•Green — allows you to adjust only the green curve
•Blue — allows you to adjust only the blue curve
•Master — allows you to adjust all color curves at once
4Move any of the following sliders:
•Brightness — lets you brighten or darken the selected color(s). This control can correct exposure
problems caused by too much light (overexposure) or too little light (underexposure).
•Contrast — increases or decreases the difference in tone between the dark and light areas of an
image
Channel icons in the Color Correction dialog box.
You can clear all corrections so that you can start again by clicking Reset.
You can compare the adjusted image with the original image by enabling and disabling the
Preview check box.
Using the curve to correct colors
You can use the Curve method to drag the color curves to reshape them. This method lets you create very
specific changes in color values.
You can control the overall effect by using the Effect slider. The slider controls how much of the curve
moves in response to dragging. When the slider is all the way to the right, the entire curve moves. As the
value is reduced, a smaller portion of the curve moves.
The Curve method lets you perform color and tonal corrections by adjusting either individual color channels
(R, G, or B) or the master channel (all channels combined).
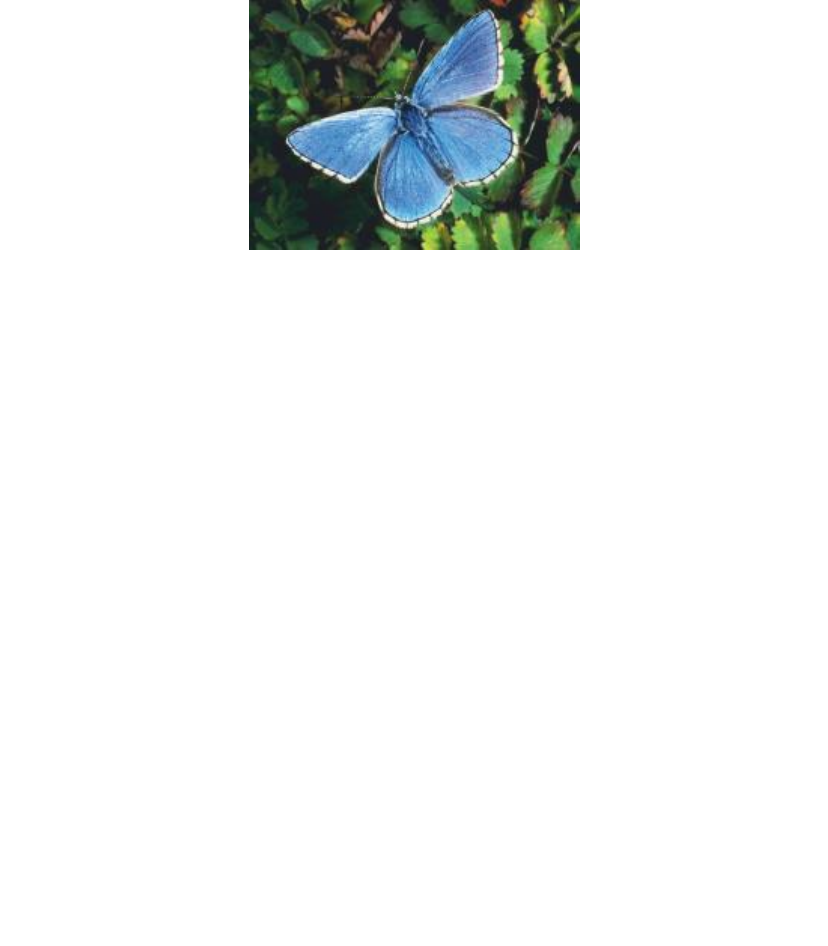
Correcting and adjusting colors | 265
Curve method of color correction.
To quickly adjust colors, you can use the automatic correction controls.
To correct colors using the curve
1Choose Effects Tonal Control Correct Colors.
2In the Color Correction dialog box, choose Curve from the Method list box.
3Click one of the following Channel buttons:
•Red — allows you to adjust only the red curve
•Green — allows you to adjust only the green curve
•Blue — allows you to adjust only the blue curve
•Master — allows you to adjust all color curves at once
4Drag the Effect slider to the right to increase the range of the curve that’s affected when you drag it, or
drag it to the left to decrease range.
5Position the crosshair cursor over the diagonal line, and drag the curve.
Dragging the curve down increases shadows and dragging it up increases highlights.
You can also
Automatically correct the contrast and color in an
image
Choose Auto-set from the CurvePreset list box.
Automatically adjust the contrast in an image
according to the white point
Choose White Point from the CurvePreset list box.
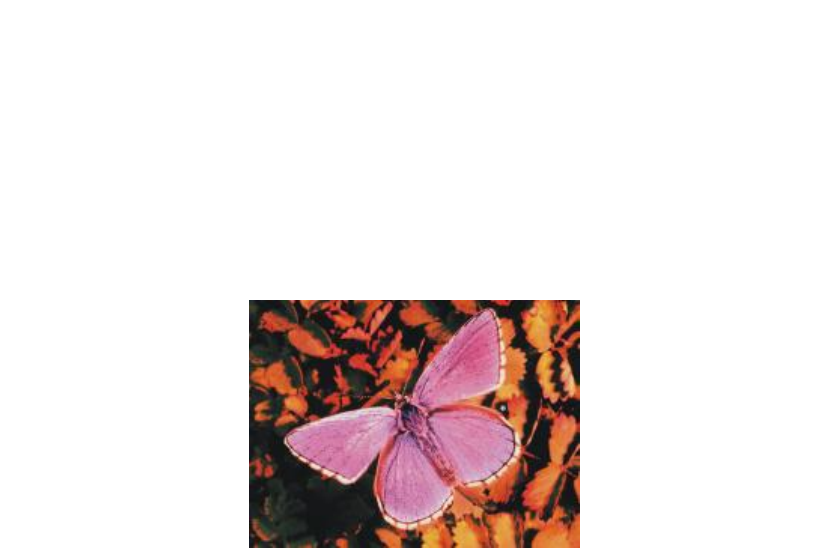
266 | Corel Painter 2015 User Guide
You can also
Automatically adjust the contrast in an image
according to the black point
Choose Black Point from the CurvePreset list box.
Clear all corrections Click Reset.
Drawing freehand curves to adjust colors
You can use the Freehand method to adjust colors. This method lets you draw a curve to produce dramatic
results. It’s particularly useful for creating posterized or solarized effects.
Freehand method of color correction.
To adjust colors by using the Freehand method
1Choose Effects Tonal Control Correct Colors.
2In the Color Correction dialog box, choose Freehand from the Method list box.
3Click one of the following Channel buttons:
•Red — allows you to adjust only the red curve
•Green — allows you to adjust only the green curve
•Blue — allows you to adjust only the blue curve
•Master — allows you to adjust all color curves at once
4Drag the pointer over the graph to draw a new curve. Drawing a curve below the middle line increases
shadows and drawing a curve above the middle line increases highlights.
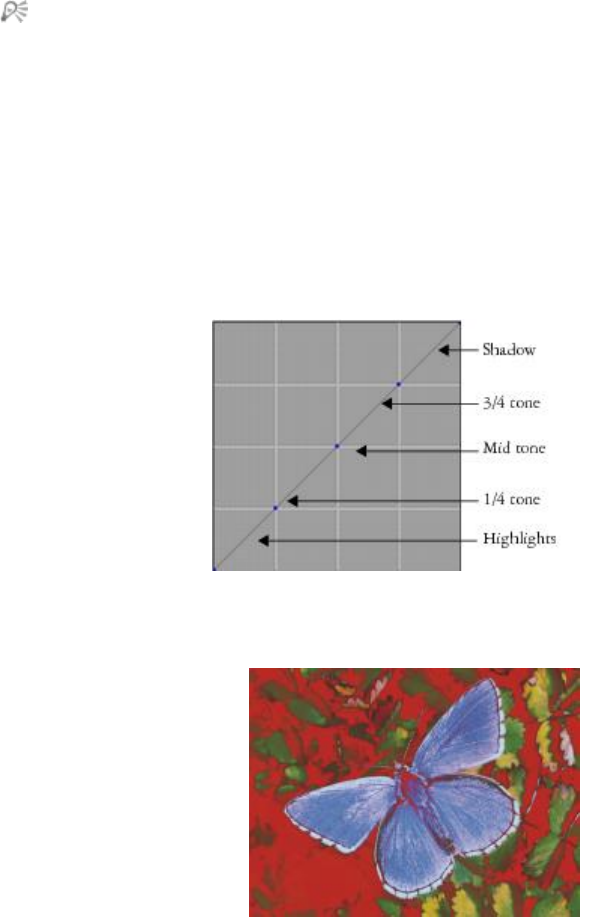
Correcting and adjusting colors | 267
You can clear all corrections so that you can start again by clicking Reset.
You can compare the adjusted image with the original image by enabling and disabling the
Preview check box.
Specifying the curve values to adjust colors
You can use the Advanced method to more accurately adjust colors using the curve. You can adjust the 1/4
Tone, Midtone, and 3/4 Tone ranges by manually dragging the curves of red, green, and blue. You can also
adjust color by setting the percentage of red, green, and blue at five specific points in the curve: Highlight,
1/4 Tone, Midtone, 3/4 Tone, and Shadow.
Each section of the curve controls the balance between the shadows, midtones, and
highlights of an image. Setting values in the upper portion of the grid lightens the
image; whereas setting values in the lower portion of the grid darkens the image.
Various tone curves were modified to achieve this look.
268 | Corel Painter 2015 User Guide
You can compare the adjusted image with the original image by enabling and disabling the Preview check
box.
To adjust 1/4 tone, midtone, and 3/4 tone by dragging color curves
1Choose Effects Tonal Control Correct Colors.
2In the Color Correction dialog box, choose Advanced from the list box.
3Click one of the following Channel buttons:
•Red — allows you to adjust only the red curve
•Green — allows you to adjust only the green curve
•Blue — allows you to adjust only the blue curve
4Drag a node on the diagonal line. Dragging the curve down darkens the image and dragging it up
lightens the image.
To adjust colors by specifying curve values
1Choose Effects Tonal Control Correct Colors.
2In the Color Correction dialog box, choose Advanced from the Method list box.
3Type percentage values for Red, Green, or Blue in the following columns:
•Highlight — adjusts the image highlights (lower portion of the graph)
•1/4 Tone — adjusts the image contrast
•Midtone — adjusts the image contrast
•3/4 Tone — adjusts the image contrast
•Shadow — adjusts the image shadows (upper portion of the graph)
Typing positive percentages, such as 89%, sets values in the upper portion of the graph, which lightens
the image. Typing negative percentages, such as -89%, sets values in the lower portion of the graph and
darkens the image. Typing the same percentage value for each color applies the change equally.
Adjusting hue, saturation, and value
The Adjust Colors effect lets you control the hue, saturation, and value of an image in much the same
way as you would adjust your television. It also lets you adjust the image colors equally or by using the
luminosity of an external source.
When using luminosity to adjust colors, pixels with higher luminance undergo greater color adjustments.
You can choose any of the following adjustment methods:
•Uniform Color — adjusts all pixels equally
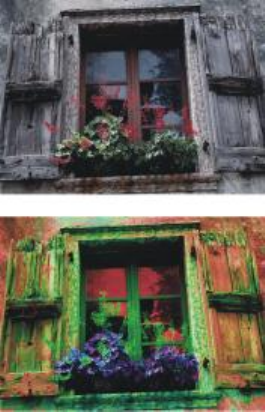
Correcting and adjusting colors | 269
•Paper — uses the selected paper grain to control the color adjustment
•Image Luminance — uses the luminance of the image as the model for color adjustment. Areas of
greater luminance are adjusted more.
•Original Luminance — uses the luminance of the clone source as the model for color adjustment. If
you have not set up a clone source, the current pattern is used.
•[Alpha channel] or [Layer mask] — sets the selected alpha channel or layer mask as the model for
controlling color adjustment. For example, a black-to-white gradation in the channel or mask lets you
adjust the color progressively across the image. In black areas of the channel or mask, colors are not
changed. In white areas of the channel or mask, the adjustment applies fully. Transitional areas receive
proportional color adjustments.
Use the Adjust Color dialog box to change the hue, saturation, and value of an image.
To adjust colors equally
1To apply the effect to:
• The canvas — Click the Canvas in the Layers panel.
• A selection — Click a selection tool from the toolbox, and drag in the document window to select an
area.
• A layer — Click a layer in the Layers panel.
2Choose Effects Tonal Control Adjust Colors.
3Choose Uniform Color from the Using list box.
4Adjust any of the Adjust Colors controls. For information, see “Adjust Colors controls” on page 271.

270 | Corel Painter 2015 User Guide
To adjust colors by using paper luminance
1Choose Window Paper Panels Papers.
2Choose a paper swatch from the Papers library panel.
3To apply the effect to:
• The canvas — Click the Canvas in the Layers panel.
• A selection — Click a selection tool from the toolbox, and drag in the document window to select an
area.
• A layer — Click a layer in the Layers panel.
4Choose Effects Tonal Control Adjust Colors.
5Choose Paper from the Using list box.
6Adjust any of the Adjust Colors controls. For information, see “Adjust Colors controls” on page 271.
To adjust colors by using image luminance
1To apply the effect to:
• The canvas — Click the Canvas in the Layers panel.
• A selection — Click a selection tool from the toolbox, and drag in the document window to select an
area.
• A layer — Click a layer in the Layers panel.
2Choose Effects Tonal Control Adjust Colors.
3Choose Image Luminance from the Using list box.
4Adjust any of the Adjust Colors controls. For information, see “Adjust Colors controls” on page 271.
To adjust colors by using clone or pattern luminance
1Do one of the following:
•To use a clone source, choose Window Clone Source. In the Clone Source panel, click the Open
Image button , and Open Source to choose a clone source.
•To use a pattern, choose Window Media Library Panels Patterns, and click a pattern swatch from
the Pattern library panel.
2To apply the effect to:
• The canvas — Click the Canvas in the Layers panel.
• A selection — Click a selection tool from the toolbox, and drag in the document window to select an
area.
• A layer — Click a layer in the Layers panel.
3Choose Effects Tonal Control Adjust Colors.
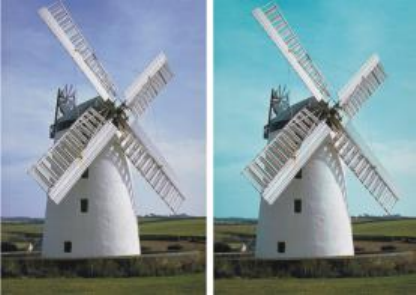
Correcting and adjusting colors | 271
4Choose Original Luminance from the Using list box.
5Adjust any of the Adjust Colors controls. For information, see “Adjust Colors controls” on page 271.
Adjust Colors controls
•Hue Shift — adjusts the hue of pixels
•Saturation — adjusts the amount of pure hue in the color
•Value — adjusts color brightness. Moving the slider to the left darkens colors.
•Reset — resets the sliders to their default settings
Adjusting selected colors
The Adjust Selected Colors effect is similar to the Adjust Colors effect, but it works only on a specified
range of colors within an image. You choose a color in an image and adjust colors within a range of that
color. You could, for example, change yellow peppers to red peppers. You can adjust colors that are exactly
the same as the color you select, or you can choose colors within a range, based on proximity (on the color
wheel or the color space) to the selected color.
Selective color adjustments change only certain colors in the image.
The Range sliders determine the extent of the HSV color space around the selected center color.
By combining these settings, you can set up a very specific range of colors to adjust. For example, you can
limit changes to a precise shade of red.
The Feather sliders affect the softness at the edge of the selected colors. These sliders can help you create
smoother transitions between the replaced color and the original.
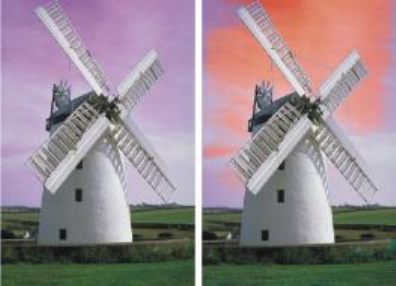
272 | Corel Painter 2015 User Guide
A replaced color with and without feathering.
You can choose from any of the following adjustment methods:
•Uniform Color — adjusts all pixels equally
•Paper — uses the selected paper grain to control the color adjustment
•Image Luminance — uses the luminance of the image as the model for color adjustment. Areas of
greater luminance are adjusted more.
•Original Luminance — uses the luminance of the clone source as the model for color adjustment. If
you have not set up a clone source, the current pattern is used.
To adjust a selected color
1Choose Effects Tonal Control Adjust Selected Colors.
The Adjust Selected Colors dialog box appears.
2Move the cursor over the image in the document window (the cursor becomes a dropper), and click the
color you want to adjust.
The Color panel displays the selected color as the main color.
3Choose Uniform Color from the Using list box.
4Adjust any of the Adjust Selected Colors controls. For information, see “Adjust Selected Colors
controls” on page 274.
To adjust selected colors by using paper luminance
1Choose Window Paper Panels Papers.
2Choose a paper swatch from the Papers library panel.
3To apply the effect to:
• The canvas — Click the Canvas in the Layers panel.

Correcting and adjusting colors | 273
• A selection — Click a selection tool from the toolbox, and drag in the document window to select an
area.
• A layer — Click a layer in the Layers panel.
4Choose Effects Tonal Control Adjust Selected Colors.
5Choose Paper from the Using list box.
6Adjust any of the Adjust Selected Colors controls. For information, see “Adjust Selected Colors
controls” on page 274.
To adjust colors by using image luminance
1To apply the effect to:
• The canvas — Click the Canvas in the Layers panel.
• A selection — Click a selection tool from the toolbox, and drag in the document window to select an
area.
• A layer — Click a layer in the Layers panel.
2Choose Effects Tonal Control Adjust Selected Colors.
3Choose Image Luminance from the Using list box.
4Adjust any of the Adjust Selected Colors controls. For information, see “Adjust Selected Colors
controls” on page 274.
To adjust colors by using clone or pattern luminance
1Do one of the following:
•To use a clone source, choose Window Clone Source. In the Clone Source panel, click the Open
Image button , and Open Source to choose a clone source.
•To use a pattern, choose Window Media Library Panels Patterns, and click a pattern swatch from
the Pattern library panel.
2To apply the effect to:
• The canvas — Click the Canvas in the Layers panel.
• A selection — Click a selection tool from the toolbox, and drag in the document window to select an
area.
• A layer — Click a layer in the Layers panel.
3Choose Effects Tonal Control Adjust Selected Colors.
4Choose Paper from the Using list box.
5Adjust any of the Adjust Selected Colors controls. For information, see “Adjust Selected Colors
controls” on page 274.
274 | Corel Painter 2015 User Guide
Adjust Selected Colors controls
The following controls in the Select area let you refine the color selection.
Hue controls
•Range — controls the number of hues adjusted. Only hues within the specified percentage of hues on
the color wheel are adjusted.
•Feather — controls the softness at the edge of the selected hues
Saturation controls
•Range — controls the range of saturation adjusted. Only saturations within this range are adjusted.
•Feather — controls the softness at the edge of the range of saturated colors
Value controls
•Range — controls the range of values adjusted
•Feather — controls the softness at the edge of the selected values
Moving the Range sliders to the right increases the amount of color space affected and creates
smoother transitions between the replaced color and the original.
The following controls in the Replace area let you refine the adjusted colors.
•Hue — adjusts the colors of the pixels by changing their hue. Moving the slider to the right increases
the hue.
•Saturation — adjusts the amount of pure hue in the color. Moving the slider all the way to the left
creates a grayscale image.
•Value — adjusts color brightness. Moving the slider to the left darkens colors.
The following controls can help you preview and reset adjustments.
•Preview — enable this check box to preview the adjustments in the document window
•Reset — resets the sliders to their default settings
Equalizing images
Corel Painter includes various options for equalizing images. Equalizing involves increasing the contrast by
resetting the darkest and lightest points and then evenly distributing the values across those two points.
You can produce an equalizing effect by automatically or manually adjusting the black and white points in
an image.
You can also equalize an image by using the Equalize effect. This effect allows you to adjust contrast,
adjust black and white points, and distribute the brightness levels throughout the entire range of available
levels. In addition, you can equalize an image by creating a histogram showing the number of pixels
for each brightness level value and then adjusting those values. The Equalize effect also allows gamma
adjustment, which lightens or darkens an image without changing highlights or shadows.
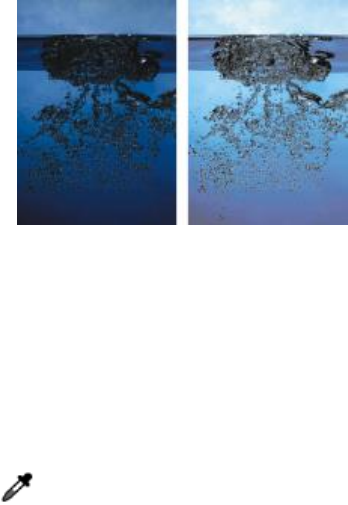
Correcting and adjusting colors | 275
Before (left) and after (right) applying the Equalize effect.
To automatically set black and white points
1Choose Effects Tonal Control Correct Colors.
2In the Color Correction dialog box, choose Curve from the Method list box.
3From the Curve Preset list box, choose Auto Set.
To manually set black or white points
1Choose the Dropper tool from the toolbox.
2In the document window, click the color you want to assign as the darkest or lightest point.
3Choose Effects Tonal Control Correct Colors.
4In the Color Correction dialog box, choose Curve from the list box.
5From the Curve Preset list box, choose one of the following:
•Black Point — assigns all colors equal to or darker than the current main color to black
•White Point — assigns all colors equal to or lighter than the current main color to white
To equalize colors
1To apply the effect to:
• The canvas — Click the Canvas in the Layers panel.
• A selection — Click a selection tool from the toolbox, and drag in the document window to select an
area.
• A layer — Click a layer in the Layers panel.
2From the menu bar, choose Effects Tonal Control Equalize.
Corel Painter automatically adjusts the image or selection so that the lightest color is white and the
darkest color is black.
276 | Corel Painter 2015 User Guide
3In the Equalize dialog box, adjust contrast by dragging the black and white markers under the
histogram, or type values in the Black box and White box.
Any values in the image located to the right of the white marker become white; any values to the left of
the black marker become black.
4Move the Gamma slider.
Moving the slider to the right darkens the image; moving the slider to the left lightens the image.
Changing the gamma adjusts only the midtones of an image and leaves the black and white areas
untouched.
5Click OK to apply changes.
A preview of the changes is applied to the original image, but the changes are not final until you click
OK. If you want to revert to the original image, click Cancel.
Matching color and brightness across images
The Match Palette effect lets you apply the color and brightness of a source image to a destination image.
For example, you can match the colors in a photo to the colors in a favorite painting. You can then clone
and paint your photo in the same style as your favorite painting. You can also use the Match Palette effect
to ensure that the color and brightness in a group of photos is consistent.
You can apply the color and brightness from a source image
(center) to your working image (left) to create a new effect (right).
To match colors across images
1Open both the source image and the destination image.
2Select the destination image.
3Choose Effects Tonal Control Match Palette.
4From the Source list box, select the source image.
The filenames for all open images appear in the list box.
5Adjust any of the following sliders:
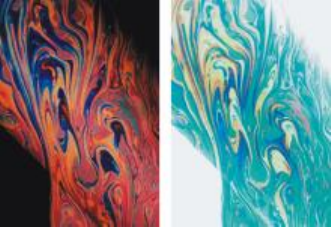
Correcting and adjusting colors | 277
•Color — lets you determine how the colors from the source image blend with the colors in the
destination image. At higher settings, more source color is applied.
•Variance (Color) — lets you adjust the range of the source colors. Higher settings increase the
number of shades used from the source image.
•Brightness — lets you determine how the luminance from the source image blends with the
luminance in the destination image. Higher settings pull more highlights and shadows from the
source image into the destination image.
•Variance (Brightness) — lets you adjust the range of highlights and shadows. Higher settings
increase the contrast between the highlights and shadows.
6Move the Amount slider to specify the overall intensity of the other settings.
Start at 100%, and decrease the amount until you are satisfied with the results.
Inverting colors
The Negative effect inverts all the colors in an image, or in the selected layer.
Positive (left) and negative (right) versions of an image.
To invert colors
1To apply the effect to:
• The canvas — Click the Canvas in the Layers panel.
• A selection — Click a selection tool from the toolbox, and drag in the document window to select an
area.
• A layer — Click a layer in the Layers panel.
2Choose Effects Tonal Control Negative.

278 | Corel Painter 2015 User Guide
Posterizing an image
Corel Painter offers two different options for posterizing images. You can use the Posterize effect to reduce
the number of color levels contained in an image.
You can also posterize an image by specifying a color set. This effect lets you replace image colors
with those of a specified colors set. This is useful for multimedia work, as well as applications such as
silkscreening. You can use this effect to reduce the number of colors in an image.
To posterize an image
1To apply the effect to:
• The canvas — Click the Canvas in the Layers panel.
• A selection — Click a selection tool from the toolbox, and drag in the document window to select an
area.
• A layer — Click a layer in the Layers panel.
2Choose Effects Tonal Control Posterize.
3In the Posterize dialog box, specify a number of levels.
The fewer levels you specify, the more dramatic the effect.
To posterize an image combined with a paper grain, refer to “Applying the Apply Screen effect” on
page 660.
To posterize to two levels and also adjust the brightness, refer to “Equalizing images” on page
274.
To posterize an image by using a color set
1To apply the effect to:
• The canvas — Click the Canvas in the Layers panel.
• A selection — Click a selection tool from the toolbox, and drag in the document window to select an
area.
• A layer — Click a layer in the Layers panel.
2Choose Window Color Panels Color Sets.
3Click the Color set libraries options button , choose Color Set Libraries, and choose a color set
from the list.
Correcting and adjusting colors | 279
4Choose Effects Tonal Control Posterize Using Color Set.
The image is replaced with the colors in the current color set.
Applying video legal colors
You can apply an effect that adjusts the colors in an image so they are compatible with video. Colors that
aren’t possible in video are converted to video legal colors.
Only bright yellows and cyans are not video legal. Corel Painter supports both the National Television
System Committee (NTSC) for video systems in the U.S. and Phase Alternation by Line (PAL) for video
systems in Europe.
To apply video legal colors
1To apply the effect to:
• The canvas — Click the Canvas in the Layers panel.
• A selection — Click a selection tool from the toolbox, and drag in the document window to select an
area.
• A layer — Click a layer in the Layers panel.
2Choose Effects Tonal Control Video Legal Colors.
3In the Video Legal Colors dialog box, choose NTSC or PAL from the System list box.
Dodging and burning
The Dodge and Burn tools let you adjust the highlights, midtones, and shadows in an image. The Dodge
tool lightens the tone; the Burn tool darkens it. You can dodge and burn anywhere in a photo, affecting an
area as large or as small as you like.
To lighten the tone
1Choose the Dodge tool from the toolbox.
2On the property bar, move the Size slider , or type a value in the Size box.
3Move the Opacity slider , or type a value in the Opacity box.
4Drag the brush in the image to apply the effect.
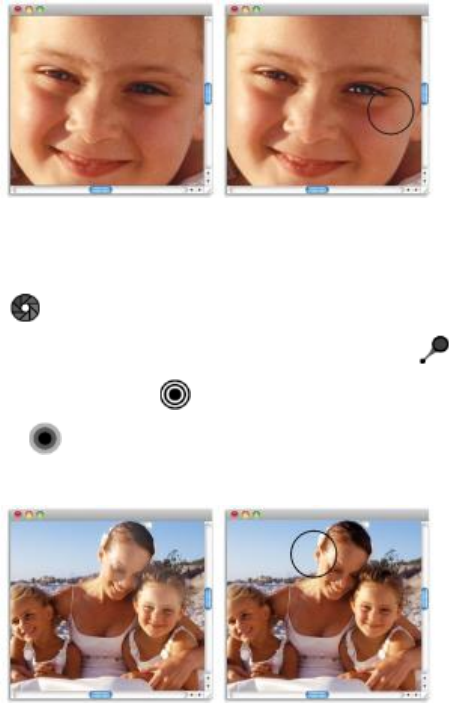
280 | Corel Painter 2015 User Guide
The Dodge tool was used to lighten the girl’s eye.
To darken the tone
1Choose the Burn tool from the toolbox.
If the Burn tool is not displayed in the toolbox, hold down the Dodge tool to open the tool flyout.
2On the property bar, move the Size slider , or type a value in the Size box.
3Move the Opacity slider , or type a value in the Opacity box.
4Drag the brush in the image to apply the effect.
The Burn tool was used to reduce the strong highlights on the faces.

Libraries | 281
Libraries
A library is a storage place for a collection of tools or media. In Corel Painter, default libraries are available
for the following resources: brushes, paper, color sets, gradients, looks, nozzles, textures, patterns,
selections, scripts, images, weaves, and flow maps. The default libraries contain a vast array of resources
that are ready for you to use. In addition, you can create your own libraries to better organize resources, or
to store customized resources.
This section contains the following topics:
•“Importing and exporting libraries” (page 281)
•“Creating and removing libraries” (page 282)
•“Modifying the display of library panels” (page 283)
•“Moving, renaming, and deleting library resources” (page 285)
•“Restoring default libraries” (page 285)
Importing and exporting libraries
Corel Painter lets you import and export libraries. For example, you can open a library that was created in
a previous version of Corel Painter. You can also open multiple libraries at once, except in the Brush library
panel. For more information, see “Creating and deleting brush libraries” on page 316.
All of the Corel Painter tools and media that are included in the application are stored in default libraries.
For example, the default papers that are included in Corel Painter are contained in the Papers libraries.
When you first open a library panel, the content of the default library for that given tool or media is
displayed in the panel.
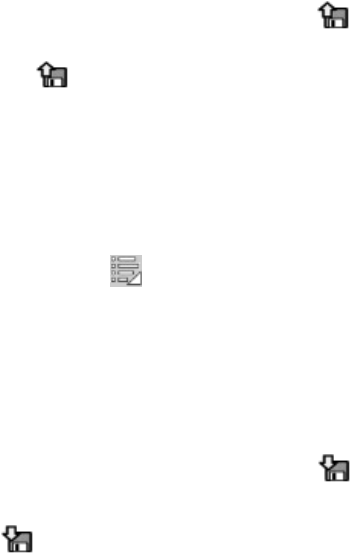
282 | Corel Painter 2015 User Guide
To import a library
1In a library panel, click the Import[Resource type] Library button .
For example, if you want to open a paper textures library from the Paper Libraries panel, click the
Import Paper Library button .
2Choose the drive and folder where the library is stored.
3Click Open.
The imported library displays at the bottom of the panel window.
To import a library created in a previous version of Corel Painter
1Click the Library panel’s options button , choose Import Legacy [Resource type] Library.
2Choose the drive and folder where the library is stored.
3Click Open.
The imported library displays at the bottom of the panel window.
To export a library
1In a library panel, click the Export [Resource type] Library button .
For example, if you want to open a gradient library from the Gradient Libraries panel, click the Export
Gradient Library button .
2In the Choose Library dialog box, choose the library that you want to export from the Library list box.
3Choose the drive and folder where you want to store the library.
4Click Save.
Creating and removing libraries
Libraries allow you to store and organize tools and media to make it easier for you to locate and access
them. When you create a new resource, such as a gradient, it is automatically saved to the current library.
However, you can create a custom library and move the resource to that library. In addition, you can copy
any of the default resources to a custom library. If you no longer need a library, you can remove it.
The method for creating a library is the same for most tools and media, except for brush libraries. For more
information, see “Creating and deleting brush libraries” on page 316.

Libraries | 283
To create a library
1In a library panel, click the New [Resource type] Library button .
For example, if you want to open a pattern library from the Pattern Libraries panel, click the New
Pattern Library button .
2In the New Library dialog box, type a name in the Save As box.
A header bar for the new library appears at the bottom of the library panel and its title appears in the
list of available libraries. The new library also contains one swatch by default.
When you save an item, Corel Painter stores it in the currently selected library. If this is not where
you want it, be sure to select the correct library before saving the item. You can move items
between libraries later, but switching libraries before saving the resource will spare you that extra
step.
To add an existing resource to a library
• From the library panel, drag a resource from one library to the library where you want to add the
resource.
When you create a new resource, such as a brush variant, paper, or weave, it is automatically
saved to the currently selected library. For more information about creating resources, please refer
to the Help chapter that pertains to the resource.
Over time, with additions and deletions, library file sizes are compounded. In some cases, you may
lose items if you restore a default library. For best results, save new resources to new libraries, and
limit the number of resources in each library.
To remove a library
1Click the library panel’s options button , choose Remove [Resource type] Library.
2Choose the library that you want to remove from the Library list box.
Modifying the display of library panels
You can modify the appearance of the library panels by changing the way they are organized and displayed.
You can resize a library panel to control the space that it takes in the application window. You can also
change the display size of the resource icons. If you do not need to use some of the resource swatches, you
can hide them. In addition, if you create a new resource, you can create a custom icon for the resource.

284 | Corel Painter 2015 User Guide
To modify the display of a library panel
1Open a library panel.
2Perform a task from the following table.
To Do the following
Resize the library panel Point to the edge of the panel. When the cursor
changes to a double-sided arrow, drag the edge of
the panel to resize it.
Resize the library swatches Click the library panel’s options button ,
choose [Resource type] Library View, and choose
one of the following options:
•Small
•Medium
•Large
Display the library swatches as a list Click the library panel’s options button ,
choose [Resource type] Library View, and choose
List.
Hide a library swatch Right-click a library resource swatch, and choose
Hide [Resource type].
Unhide all swatches Click the library panel’s options button ,
choose [Resource type] Library View, and choose
Show All Hidden Items.
Customize a swatch icon Right-click a resource swatch, and choose Set
Custom Icon. Choose the drive and folder where
the image is stored. Click the image file and click
Open.

Libraries | 285
Moving, renaming, and deleting library resources
You can move a library resource to a new position within a library, or drag it to a different library. You can
also rename resources, such as renaming a paper or gradient, to give them more descriptive names. You
can also delete an item from a library, including a default library. You can also restore the default library to
the factory settings. For information, see “Restoring default libraries” on page 285.
To move a library resource
• In a library panel, do one of the following:
• Drag a resource swatch to another position within the library.
• Drag a resource swatch to another library.
If you’re dragging a swatch to a different library, you cannot position the swatch at the end of the
library. You must place the swatch in between, or before, an existing swatch.
To rename a library resource
1In a library panel, right-click the resource that you want to rename, and choose Rename [Resource].
(e.g. Rename Paper)
2In the Rename dialog box, type the new name in the Rename [Resource] text box.
To delete a library resource
1In a library panel, click the resource that you want to delete.
2Click the Delete [Resource] button .
Do not delete default resource files or folders.
Restoring default libraries
You can restore a default library at any time. When you restore the default libraries, all custom resources are
removed for all libraries.
To restore a default library
•In a library panel, click the library options button , choose Restore Default [Resource] Library.
286 | Corel Painter 2015 User Guide

Selecting, managing, and creating brushes | 287
Selecting, managing, and creating brushes
Corel Painter offers an impressive array of realistic and responsive brushes that you can use to apply media
to the canvas. For example, you can choose a brush with realistic bristles that apply oil, watercolor, or acrylic
paint. You can also choose a dry media brush, such as chalk or charcoal.
This section contains the following topics:
•“Understanding brushes” (page 288)
•“Exploring brush categories” (page 288)
•“Searching and selecting brushes” (page 304)
•“Setting basic brush attributes” (page 306)
•“Displaying advanced brush controls dynamically” (page 310)
•“Organizing and displaying brushes in the Brush library panel” (page 310)
•“Copying and moving brush variants” (page 312)
•“Renaming brush categories and variants” (page 312)
•“Saving and deleting brush variants” (page 313)
•“Restoring default brush variants” (page 315)
•“Creating and deleting brush categories” (page 315)
•“Creating and deleting brush libraries” (page 316)
•“Importing and exporting brush libraries, categories, and variants” (page 317)
•“Saving a brush look” (page 321)
•“Creating brush dabs” (page 321)
288 | Corel Painter 2015 User Guide
Understanding brushes
Corel Painter offers users a wide range of preset brushes that are designed with the real media in mind, so
you can predict how a brush will behave.
In an art store, if the brushes in one aisle don’t produce the results you want, you can try a different aisle.
Similarly, with Corel Painter, individual brushes, known as brush variants, are stored in the Brush library
panel in different brush categories. You can use the brush variants as they are, or you can adjust them to
suit your purposes. Many artists use brush variants with only minor adjustments — to size, opacity, or grain
(how brushstrokes interact with paper texture).
To modify a brush variant extensively, or to create a new brush variant, you can adjust the brush controls.
For more information, see “Adjusting brushes with brush controls” on page 325 or “Saving and deleting
brush variants” on page 313.
Most Corel Painter brushes apply media, such as a color, gradient, or pattern, to an image. However, some
brushes make changes to media already in the image. For example, the Just Add Water brush variant (in
the Blenders brush category) smudges and dilutes existing colors in the image with smooth, anti-aliased
brushstrokes. Using one of these brushes on a blank area of the canvas has no effect.
Corel Painter includes a batch of Natural-Media brushes that use a media application method called
“rendered dab types” to produce wonderfully realistic, continuous, smooth-edged brushstrokes. They are
fast and more consistent because the brushstrokes appear as you draw, and are not created by applying
dabs of color. In fact, you can’t draw fast enough to leave dabs or dots of color in a brushstroke. These
brushes allow for rich features that are not possible with the application of dab-based media. You can take
better advantage of tilt and angle, and you can paint with patterns or gradients. For more information, see
“General controls: Dab types” on page 332.
Exploring brush categories
In the following section, descriptions of the brush categories are presented in alphabetical order. The
section includes a description of each category and highlights some of the brush variants that you can find
in Corel Painter.
Acrylics Airbrushes Artists Blenders
Chalk & Crayons Charcoal & Conte Cloners Digital Watercolor
Erasers F/X Gel Gouache

Selecting, managing, and creating brushes | 289
Acrylics Airbrushes Artists Blenders
Image Hose Impasto Liquid Ink Markers
Oils Palette Knives Pastels Pattern Pens
Pencils Pens Photo Real Watercolor
Real Wet Oil Smart Stroke Sponges Sumi-e
Tinting Watercolor “Particle
brushes” (page
298)
Acrylics
The Acrylic brush variants, much like their real-world counterparts, are versatile brushes that let you apply
quick-drying paints to the canvas. Most of the brushes allow you to cover underlying brushstrokes and
many are capable of multicolored brushstrokes. In addition, a few Acrylic brush variants interact with
underlying pixels to create realistic effects.
Captured Bristle Thick Acrylic Flat Wet Acrylic
Airbrushes
Airbrushes apply fine sprays of color, which carefully mirror the feel of a real airbrush in action. However,
some variants have a different way of building up color. Most airbrushes support color buildup on a single
brushstroke. However, some of the digital airbrushes do not. To achieve color buildup with the digital
airbrushes, you need to overlay multiple brushstrokes.
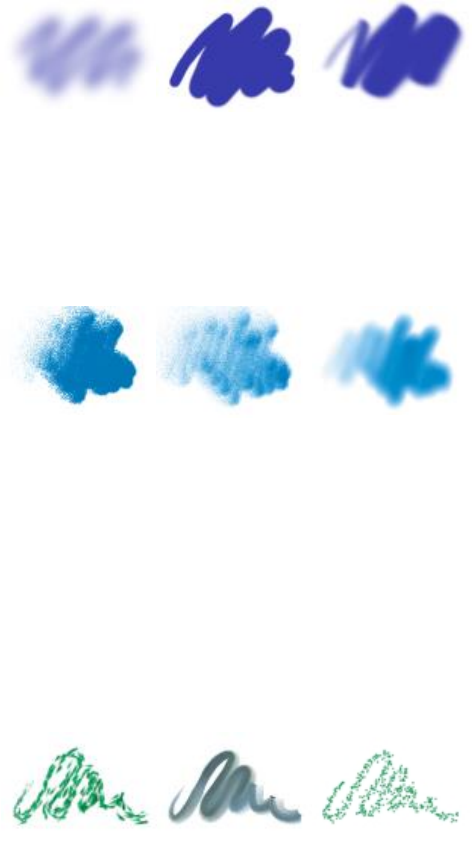
290 | Corel Painter 2015 User Guide
Digital soft flow
airbrush
Digital hard edge
airbrush
Digital soft flat
airbrush
The Wacom airbrush styluses are fully compatible with the variants in the Airbrushes category. For more
information, see “Airbrush controls” on page 378.
Coarse Spray Fine Spray Digital Airbrush
Artists
The Artist brush variants help you paint in the styles of master artists. For example, you can paint in the
style of Vincent Van Gogh, with multishaded brushstrokes, or in the style of Georges Seurat, with multiple
dots combining to form an image.
When you use any of the Artist brush variants, dragging quickly produces wider brushstrokes. You can use
the Color Variability settings to adjust how the Artist brushstrokes are colored.
Impressionist Sargent Brush Seurat
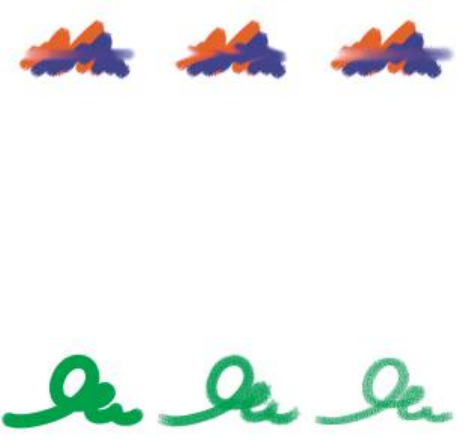
Selecting, managing, and creating brushes | 291
Blenders
Blenders brushes affect underlying pixels by moving and mixing them. The variants can reproduce the
effects of blending paint by applying water or oil. You can also smooth drawing lines and create shading
just as you would on a pencil sketch or charcoal drawing.
Just Add Water Smear Smudge
Chalk & Crayons
Chalk brush variants produce the thick, rich texture of natural chalk sticks, and have strokes that interact
with the paper grain. The opacity is linked to stylus pressure.
Blunt Chalk Square Chalk Variable Chalk
Crayons offer a range of styles. From soft and dull, to waxy and grainy, they produce textured strokes
that interact with the paper grain. As with other dry media brush variants, the opacity is linked to stylus
pressure.
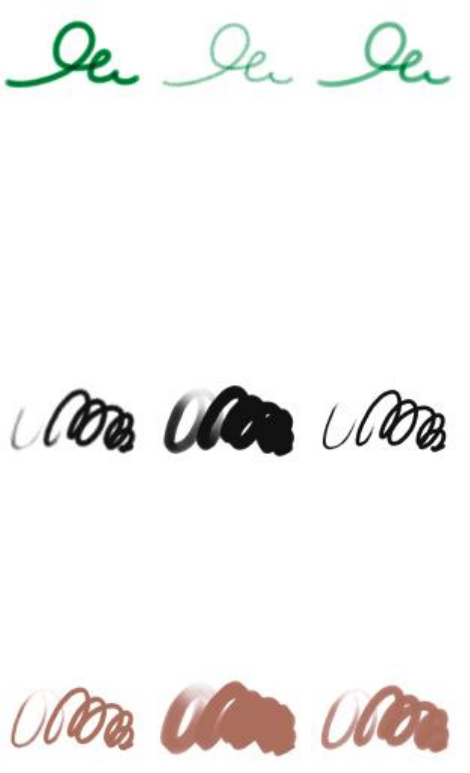
292 | Corel Painter 2015 User Guide
Basic Crayon Grainy Hard Crayon Waxy Crayon
Charcoal & Conte
Charcoal brush variants range from pencils to hard or soft charcoal sticks. As with other dry media brush
variants, the opacity is linked to stylus pressure. Blender brush variants can be used to soften and blend the
charcoal strokes. For a smooth workflow, keep your favorite Charcoal and Blender brush variants together
in a custom palette.
Charcoal Soft Vine Charcoal Hard Charcoal Pencil
Similar to Chalk, Conte brush variants produce textured strokes that interact with the paper grain. As with
other dry media brush variants, the opacity is linked to stylus pressure.
Dull Conte Square Conte Tapered Conte
Cloners
The Cloner brush variants behave like other brush variants, except that they take color from a cloned or
sampled source. These variants recreate the source imagery while effectively filtering it, reproducing the
image in an artistic style, such as pastel chalk or watercolor. For more information, see “Cloning controls”
on page 407 and “Image cloning and sampling” on page 167.
Selecting, managing, and creating brushes | 293
Original photo Soft Cloner Impressionist Cloner
Digital Watercolor
Digital Watercolor brush variants produce watercolor effects that react with the canvas texture. Unlike
Watercolor brush variants, which work with the Watercolor Layer, Digital Watercolor brushstrokes can
be applied directly to any standard pixel-based layers, including the canvas. For example, if you’re applying
watercolor effects to a photo, Digital Watercolor brushstrokes can be applied directly to the image. If
you’re creating a realistic watercolor from scratch, the Real Watercolor or Watercolor brush variants allow
colors to flow, mix, and absorb more realistically. For more information, see “Real Watercolor controls” on
page 362 and “Digital Watercolor controls” on page 385.
The width of Digital Watercolor brushstrokes is affected by stylus pressure, with the exception of the Wet
Eraser brush variant.
Simple Water Diffuse Water Dry Brush
Erasers
There are three types of Eraser brush variants: Eraser, Bleach, and Darkener. Eraser brush variants erase
down to the paper color. Bleach brush variants erase to white, gradually lightening by removing color.
Darkener brush variants are the inverse of Bleach variants. Darkener brush variants gradually increase color
density, building colors toward black. With all Eraser brush variants, pressure determines how much you
erase.
294 | Corel Painter 2015 User Guide
Bleach Eraser Flat Eraser
F/X
F/X brush variants can give you an array of creative results. Some add color; others affect underlying pixels.
The best way to appreciate the F/X brush variants is to experiment with them on an image and a blank
canvas.
Fairy Dust Glow The Fire brush
(works with
underlying colors)
Some variants, such as Grainy Distorto or Grainy Mover, produce blending effects. Other variants, such as
Hurricane, Turbulence, and Water Bubble, produce more dramatic effects.
Bulge Confusion Hurricane
Gel
Gel brushes allow you to tint an image’s underlying colors with the brushstroke color. For example, a yellow
brushstroke gives the underlying color a yellow cast. The Gel brushes use the Merge Modes brush control
to produce the effect. For more information, see “Stroke Attribute controls” on page 347. The Gel effect
Selecting, managing, and creating brushes | 295
is similar to blending layers by using the Gel composite method; however, you do not require any layers to
achieve the same results.
Gel coarse Gel broad Gel captured
Gouache
Gouache brush variants let you paint with the fluidity of watercolors and the opacity of acrylics. These
variants range from fine, detail brushes, to flat or thick brushes. Brushstrokes created with Gouache brush
variants cover underlying brushstrokes.
Detail Opaque Thick Gouache Flat Wet Gouache Round
Image Hose
The Image Hose is a special brush that applies images instead of color. The images it “paints” with come
from special image files called nozzles. Each nozzle file contains multiple images that are organized by
characteristics such as size, color, and angle. Each characteristic (parameter) can be linked to a stylus
attribute (animator), such as Velocity, Pressure, and Direction. For more information, see “Image Hose
controls” on page 403 and “Image hose” on page 469.
The name of each Image Hose variant tells you which parameter and animator are in effect. For example,
the Linear-Size-P Angle-R brush variant links size to stylus pressure (P) and sets the angle randomly (R).
296 | Corel Painter 2015 User Guide
Linear-Angle-B
(Bearing)
Linear-Size-P
(Pressure)
Spray-Size-P
(Pressure) controls
size and spread
Impasto
Impasto brush variants use the classic technique of applying thick paint on a canvas to create depth.
The depth information for the brushstroke is stored with the layer, but you need to display the Impasto
information to view it. For information, see “Impasto controls” on page 385 and “Impasto” on page
501.
Some variants, such as Acid Etch, Clear Varnish, Depth Rake, and Texturizer-Clear, apply depth effects to
underlying pixels. Other variants apply three-dimensional brushstrokes with the current paint color.
Opaque Flat Smeary Round Loaded Palette Knife
Liquid Ink
Liquid Ink brush variants combine ink and paint to create a thick, liquid paint effect. There are three main
types of Liquid Ink brush variants: ones that apply ink, ones that remove ink to create a resist effect, and
ones that soften edges. A new layer is created automatically when you first apply a brushstroke. You can
also create 3D effects with Liquid Ink. For information, see “Liquid Ink controls” on page 390 and “Liquid
Ink” on page 497.

Selecting, managing, and creating brushes | 297
Clumpy Ink Coarse Bristle Smooth Flat
Markers
The brush variants in the Marker category replicate conventional, real-world markers. The brush variants
range from fine point to blunt and have a variety of nib shapes and opacity levels.
The strokes that you make with some of the Marker variants closely reflect those of traditional, high-quality
markers, mainly because of the way the Marker variants interact with the canvas. For example, the Flat
Rendering Marker allows color buildup and pooling. For more information, see “Hard Media” on page
457.
Round Tip Marker Leaky Marker Flat Rendering
Marker
Art Marker Dirty Marker Felt Marker
Oils
Oils brush variants let you create effects you’d expect from oil paints. Some variants are semitransparent
and can be used to produce a glazed effect. Other variants are opaque and cover underlying brushstrokes.
298 | Corel Painter 2015 User Guide
Fine Camel Opaque Flat Smeary Round
Some Oil brush variants let you mix media as though you were working with traditional oil paints. You can
use colors mixed on the Mixer pad and apply them directly to the canvas. The colors can then be blended
with the oils already on the canvas. In addition, you can load multiple colors from the Mixer pad. Some Oil
brush variants load the brush with a finite amount of oil, which is then transferred to the image. As you
apply a brushstroke to the canvas, the brush loses oil, and the brushstroke becomes fainter. Because layers
don’t have the oily properties of the canvas, brushstrokes applied to a layer don’t fade as rapidly.
Some Oil brush variants are palette knives that let you mix paint directly on the canvas. There are six brush
tip profiles designed specifically for Oil brushes. For more information, see “Artists’ Oils controls” on page
381 and “Artists’ Oils brush tip profiles” on page 360.
Palette Knives
You can use Palette Knives brush variants to scrape, push, or pick up and drag colors in your image. Only
one Palette Knives brush variant, the Loaded Palette Knife, applies the current paint color. The Palette
Knives dabs are always parallel to the shaft of the stylus.
Loaded Palette Knife Palette Knife Smeary Palette Knife
Particle brushes
Particle brushes are physics-inspired brushes that give a unique look and feel to your artwork. They emit
particles from a central point, and in turn the particles draw a pattern of lines (paths) as they move across
the canvas. For more information, see “Particle brushes” on page 431.
Selecting, managing, and creating brushes | 299
Flow Aurora Gravity Deco
Streamline
Spring Concept
Creature
Pastels
Pastels, which include oil pastels, range from hard pastel styles that reveal the paper grain to extra soft
pastels that glide on to completely cover existing strokes. Opacity is linked to stylus pressure.
Artist Pastel Chalk Soft Pastel Square Soft Pastel
The oil pastel brush variants produce the thick, rich texture of natural pastel sticks. Most oil pastel brush
variants cover existing strokes with the current paint color. However, the Variable Oil Pastel brush variant
blends the underlying color into the stroke. As with other dry media brush variants, opacity is linked to
stylus pressure.
Oil Pastel Chunky Oil Pastel Variable Oil Pastel
Pattern Pens
Pattern Pens brush variants let you use a brush to apply a pattern to an image. You can vary features
such as the size of the pattern and the transparency. For example, Pattern Pen Micro decreases the size

300 | Corel Painter 2015 User Guide
of the pattern, and Pattern Pen Transparent applies a semitransparent version of the pattern. For more
information, see “Painting with patterns” on page 711.
Pattern Pen Pattern Pen Masked Pattern Pen Marker
(based on the
current color)
Pencils
Pencil brush variants are great for any artwork that would traditionally require pencils, from rough sketches
to fine-line drawings. Like their natural counterparts, Pencil brush variants interact with canvas texture. All
variants build to black and link opacity to stylus pressure. The width of Pencil strokes varies according to the
speed of the stroke, so dragging quickly produces a thinner line and dragging slowly leaves a thicker line.
2B Pencil Cover Pencil Greasy Pencil
Colored Pencil Hard Colored Pencil Oily Colored Pencil
Selecting, managing, and creating brushes | 301
Pens
Pens brush variants, like the Scratchboard Rake and Bamboo Pen, create realistic effects without the
drawbacks of traditional pens, which can clog, spatter, or run dry.
Croquil Pen Scratchboard Tool Thick and Thin Pen
Whether you want to reproduce the look of calligraphy pen strokes on a grainy texture, or the smooth
strokes of a calligraphy brush, the Calligraphy brush variants offer you a range of creative options.
Calligraphy Calligraphy Brush Dry Ink
Photo
Photo brush variants let you modify digital images or existing artwork. For example, you can clean up
photos by adjusting color or removing scratches, add a blur effect, or sharpen an image. You can also add
color to a grayscale image.
Blur Dodge Burn
302 | Corel Painter 2015 User Guide
Real Watercolor
The brushstrokes of the Real Watercolor brush variants flow and apply pigments in a very natural way,
helping you create realistic watercolor paintings. In addition, the brushstrokes interact with the paper
texture and grain to produce results you would expect from real-world watercolors. You can modify the
Real Watercolor brush controls to achieve different effects. For more information, see “Real Watercolor
controls” on page 362.
Light fringe Wet on wet paper Dry on dry paper
Real Wet Oil
The Real Wet Oil brush variants help you achieve realistic oil brushstrokes. The Real Wet Oil brush variants
let you control paint viscosity and color concentration, similar to mixing oil paint and a medium. You can
also modify the Real Wet Oil brush controls to achieve different effects. For more information, see “Real
Wet Oil controls” on page 367.
Turp grainy Liquid oil Wet oil
Smart Strokes
Smart Strokes brush variants are based on popular brush variants from other brush categories, but they are
optimized to work with the Photo Painting System. For more information about the Photo Painting System,
see “Auto-painting photos” on page 162.
Sponges
Sponges let you create a variety of textures by applying the current paint color to cover or blend existing
colors. Some Sponge brush variants apply dabs of paint at random angles with each click of a stylus. Wet
sponge brush variants, such as Grainy Wet Sponge, apply sponge dabs as you drag across the canvas. The
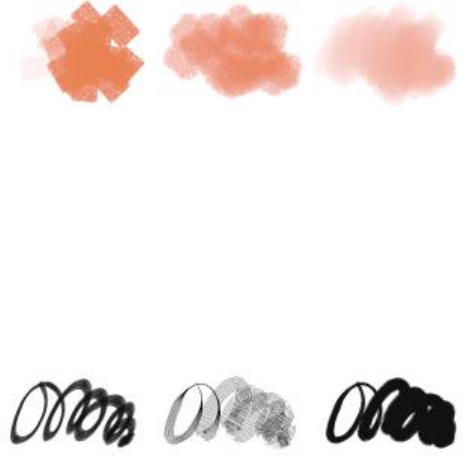
Selecting, managing, and creating brushes | 303
Smeary Wet Sponge variant lets you blend the current paint color with existing colors as you drag across
the canvas.
Dense Sponge Grainy Wet Sponge Smeary Wet Sponge
Sumi-e
Sumi-e brush variants let you create flowing sumi-e-style brushstrokes. In addition, various brush sizes and
shapes are available to help you recreate traditional sumi-e brushstrokes.
Sumi-e Brush Detail Sumi-e Coarse Bristle Sumi-e
Tinting
Tinting brush variants let you apply effects to photos or existing artwork. For example, you can apply
translucent color to areas of a black-and-white photo by using the Basic Round brush variant. Applying
each color to a separate Gel or Colorize layer lets you adjust the opacity of each color layer independently
for a more subtle or dramatic effect. Some of the Tinting brushes are based on the Merge Modes brush
control. For more information, see “Stroke Attribute controls” on page 347.
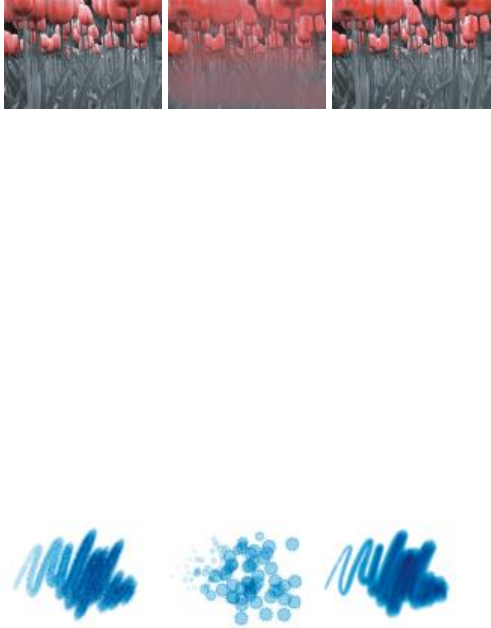
304 | Corel Painter 2015 User Guide
Basic Round Blender Soft Grainy Round
Watercolor
Watercolor brush variants paint onto a watercolor layer, which enables the colors to flow, mix, and absorb
into the paper. The watercolor layer is created automatically when you first apply a brushstroke with
a Watercolor brush variant. The layer lets you control the wetness and evaporation rate of the paper
to effectively simulate conventional watercolor media. Most Watercolor brush variants interact with
the canvas texture. You can use Watercolor brush variants to apply a watercolor effect to a photo by
lifting the canvas to the watercolor layer. For more information, see “Water controls” on page 385 and
“Watercolor” on page 423.
For more information about additional watercolor brush variants, see “Real Watercolor” on page 302.
To paint directly on the canvas, use a Digital Watercolor brush variant.
Diffuse Flat Splatter Water Wet Camel
Searching and selecting brushes
In Corel Painter, you can find brush variants by searching or browsing the currently selected brush library.
You can quickly search the content of the currently selected brush library to find brushes that match
a specific description. You can perform a search by entering one attribute, or a combination of brush
attributes. For example, typing the search terms “pencil real” generates a list of all “Real Pencil” brush
variants.
You can also look for brush variants by browsing the brush categories in the Brush library panel. If you
hover over a brush variant’s name, you can preview the variant’s brush dab and brush stroke at the bottom
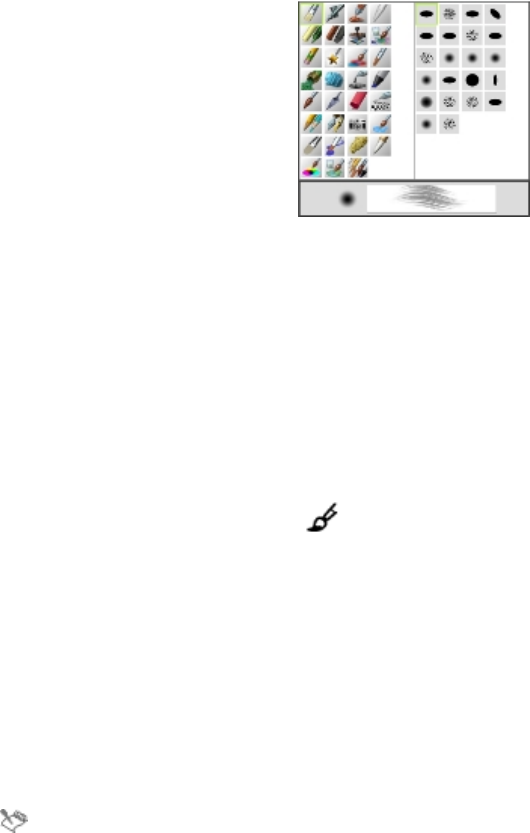
Selecting, managing, and creating brushes | 305
of the panel. The Brush library panel also displays the most recently used brushes at the top of the panel so
you can quickly access the last brushes that you used.
The Brush library panel lets you choose a brush category (left) and a brush variant (right).
The default Corel Painter brush variants are displayed in the Brush library panel until you open or import a
different brush library. In addition, the Brush library panel displays only one brush library at a time. For more
information, see “Importing and exporting brush libraries, categories, and variants” on page 317.
If you’re looking for a brush from a previous version of Corel Painter, you can reload the old version’s brush
library. For more information, see “Importing and exporting brush libraries, categories, and variants” on
page 317.
To select a brush category and variant
1In the toolbox, click the Brush tool .
2Click the Brush Selector on the Brush Selector bar.
3In the Brush library panel, click a brush category, and click a brush variant.
To search for brush variants
1In the Search bar, type one attribute or a combination of brush attributes in the Search text box.
The Search bar is located to the right of the property bar, in the upper-right corner of the document
window.
2Hover over a brush variant in the list to display a preview of the brushstroke.
3Choose a brush variant from the list.
You can search for brushes that are new in Corel Painter 2015 by typing 2015, X4, or 14 in the
Search text box.

306 | Corel Painter 2015 User Guide
If you previously hid the Search bar, you can show it by clicking Window Search.
Setting basic brush attributes
To quickly get started in Corel Painter, you specify basic brush attributes, such as brush size, opacity, and
grain, on the property bar. Size determines the dimension of a single brush dab. You can also use the
ghost brush to determine if a change in size is required. For more information, see “Setting up the drawing
cursor” on page 134.
The ghost brush, the circle displayed to the right of the brushstroke, appears when a brush
is selected and positioned over the canvas. It mirrors the size and shape of the brush dab.
Opacity controls the degree to which a stroke covers or builds up on the underlying pixels.
80% opacity (top) and 20% opacity (bottom).
Grain controls the interaction of color with the paper texture.
You can also set brush attributes, such as angle and squeeze, dynamically onscreen. A circle appears
onscreen in the document window that lets you size and shape the brush within the context of the image.
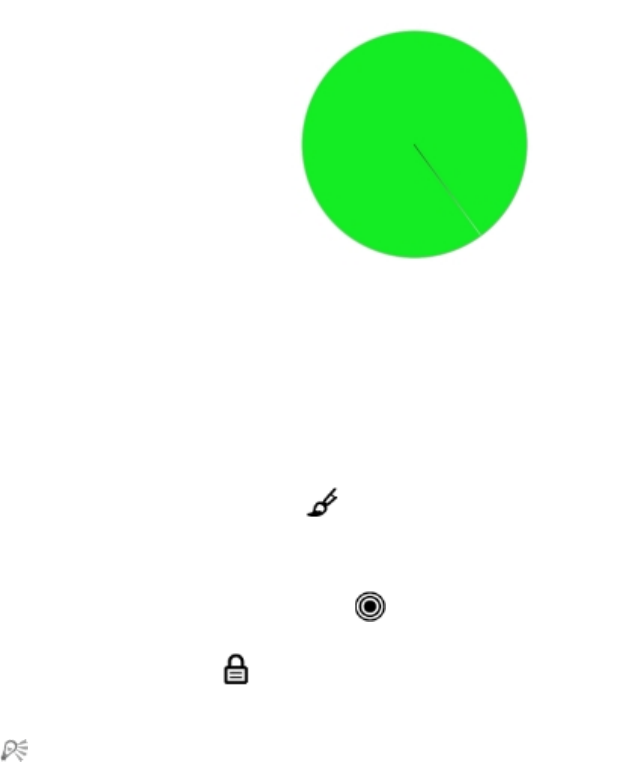
Selecting, managing, and creating brushes | 307
The circle provides a visual representation of the brush size onscreen.
You can also access additional brush controls to further customize brushes. For example, you can set a
minimum brushstroke size to control the tapering and widening of brushstrokes as stylus pressure or
direction is varied. For more information, see “Adjusting brushes with brush controls” on page 325.
To set brush size
1In the toolbox, click the Brush tool .
2Click the Brush Selector on the Brush Selector bar.
3In the Brush library panel, click a brush category, and click a brush variant.
4On the property bar, move the Size slider , or type a value in the Size box.
If you want to scale the brushstroke feature proportionally with the brush size, click the Scale Feature
with Brush Size button on the property bar, which is available for some brushes.
Corel Painter may need to rebuild the brush after you resize it; therefore, you can expect a short delay.
You can also increase brush size incrementally by pressing the right square bracket ( ] ) key or
decrease brush size by pressing the left square bracket ( [ ) key.
You can specify the default brush size increment value in pixels by choosing Corel Painter
2015 Preferences General (Mac OS) or Edit Preferences General (Windows) and typing a
pixel value in the Brush size increment box.
You can also disable the scaling option in all areas by choosing Corel Painter
2015 Preferences General (Mac OS) or Edit Preferences General (Windows) and enabling the
Disable feature scaling when resizing brush.

308 | Corel Painter 2015 User Guide
To set opacity
1In the toolbox, click the Brush tool .
2Click the Brush Selector on the Brush Selector bar.
3In the Brush library panel, click a brush category, and click a brush variant.
4On the property bar, move the Opacity slider , or type a percentage in the Opacity box.
When the Opacity setting is low, the applied color is thin, so you can see through to the underlying
colors. When the setting is high, the applied color covers underlying pixels more completely.
Some methods and dab types do not allow you to adjust opacity.
When the Brush tool is active, you can set opacity by pressing a number key. Each number key is
mapped to a fixed percentage. For example, 1 equals 10% opacity, 5 equals 50% opacity, and 0
equals 100% opacity.
To set grain
1In the toolbox, click the Brush tool .
2Click the Brush Selector on the Brush Selector bar.
3In the Brush library panel, click a brush category, and click a brush variant.
4On the property bar, move the Grain slider, or type a percentage in the Grain box.
Move the slider to the left to reduce penetration and reveal more texture. Move it to the right to
increase penetration and reveal less grain.
For liquid media brushes, Grain controls the amount of “pull.” For Image Hose brushes, Grain
controls the mixture with the additional color. For other brushes, such as airbrushes, the Grain
slider is not available.
To set brush attributes onscreen
• Perform a task from the following table.

Selecting, managing, and creating brushes | 309
To Do the following
Change the brush size Hold down Command + Option (Mac OS) or Ctrl
+ Alt (Windows), and drag the crosshair cursor to
display the Radius circle in the document window.
Keep dragging until the circle is set to the size that
you want, and then release the stylus or mouse
button.
Change the brush opacity Hold down Command + Option (Mac OS) or Ctrl
+ Alt (Windows), and click the crosshair cursor to
display the Radius circle in the document window.
While pressing the stylus, or holding down the
left mouse button, release the keys, and press
Command (Mac OS) or Ctrl (Windows) once. Drag
the Opacity circle in the image window until the
circle is set to the opacity that you want, and then
release the stylus or mouse button.
Change the brush squeeze setting Hold down Command + Option (Mac OS) or Ctrl
+ Alt (Windows), and click the crosshair cursor to
display the Radius circle in the document window.
While pressing the stylus, or holding down the
left mouse button, release the keys, and press
Command (Mac OS) or Ctrl (Windows) twice.
Drag the Squeeze circle in the document window
until the circle is set to the brush squeeze that you
want, and then release the stylus or mouse button.
Change the brush angle Hold down Command + Option (Mac OS) or
Ctrl + Alt (Windows), and click the crosshair
cursor to display the Radius circle in the document
window. While pressing the stylus, or holding
down the left mouse button, release the keys,
and press Command (Mac OS) or Ctrl (Windows)
three times. Drag the Angle circle in the document
window until the circle is set to the angle that you
want, and then release the stylus or mouse button.

310 | Corel Painter 2015 User Guide
You can also revert to an onscreen brush sizing control that has the look and feel of
the brush sizing control in earlier versions of Corel Painter by choosing Corel Painter
2015 Preferences General (Mac OS) or Edit Preferences General (Windows) and enabling the
Simplified (Legacy-style) check box.
Displaying advanced brush controls dynamically
You can quickly access the advanced brush controls for any default brush variant from the property bar. This
option dynamically generates a grouping of brush control panels that are relevant to the currently selected
brush. It also displays any media options, such as papers or flow maps, that are relevant for the selected
brush. This feature simplifies the process of finding the relevant brush controls and media for any given
default brush. For more information about modifying the individual controls, see “Selecting, managing, and
creating brushes” on page 287.
To display relevant brush controls dynamically
•With a brush variant selected in the brush library, press the Advanced Brush Controls button on
the property bar.
Organizing and displaying brushes in the Brush library panel
You can modify the appearance of the Brush library panel by changing the way brushes are organized and
displayed. This allows you to set up the Brush library panel to best suit your needs. For example, you can
hide the recently used brushes to give you more space or hide brush categories and variants to expose the
brushes that you use most.
To modify the Brush library panel
1Click the Brush Selector on the Brush Selector bar.
2In the Brush library panel, perform a task from the following table.
To Do the following
Resize the Brush library panel Point to the edge of the panel. When the cursor
changes to a double-sided arrow, drag the edge of
the panel to resize it.

Selecting, managing, and creating brushes | 311
To Do the following
Hide the recently used brushes In the Brush library panel, click the Brush library
options button , and choose Recent Brushes.
Hide the dab and stroke preview window In the Brush library panel, click the Brush library
options button , and choose Dab and Stroke
Preview.
To modify the display of brush categories and variants
1Click the Brush Selector on the Brush Selector bar.
2In the Brush library panel, perform a task from the following table.
To Do the following
Modify the display of brush categories In the Brush library panel, click the Brush library
options button , choose Category Display,
and choose one of the following:
•Categories as Icons
•Categories as List
Modify the display of brush variants In the Brush library panel, click the Brush library
options button , choose Variant Display, and
choose one of the following:
•Variants as Icons
•Variants as List
Hide a brush category Right-click a brush category, and choose Hide
Category.
Hide a brush variant Right-click a brush variant, and choose Hide
Variant.
312 | Corel Painter 2015 User Guide
Unhide all brush categories In the Brush library panel, click the Brush library
options button , choose Category Display,
and choose Show All Categories.
Unhide all brush variants In the Brush library panel, click the Brush library
options button , choose Variant Display, and
choose Show All Variants.
Customize a brush category or brush variant icon Right-click a brush category or variant, and choose
Set Custom Icon. Choose the drive and folder
where the image is stored. Click the image file and
click Open.
Copying and moving brush variants
You can reorganize brush variants by copying or dragging them to a different category.
To copy a brush variant
1In the Brush library panel, choose a brush variant.
2Choose Brushes Copy Variant.
3Choose the destination brush category from the Copy Variant To list box.
You can also copy a variant by clicking the Brush library options button , and choosing Copy
Variant.
To move a brush variant
• In the Brush library panel, drag a brush variant from one brush category to another.
Renaming brush categories and variants
You can rename brush categories and variants.

Selecting, managing, and creating brushes | 313
To rename brush categories and variants
1Click the Brush Selector on the Brush Selector bar.
2In the Brush library panel, perform a task from the following table.
To Do the following
Rename a brush category Right-click a brush category, choose Rename
Category, and type a name for the category.
Rename a brush variant Right-click a brush variant, choose Rename
Variant, and type a name for the variant.
Saving and deleting brush variants
You can save a customized brush variant for future use. When saving a brush variant, you have the option
of saving to the currently selected brush category, or saving to a new brush category that you create. The
new brush variant is always saved to the currently selected brush library. You can also delete the brush
variants that you create.
In addition, you can save the variant as a look. Variant settings are included when you save a look, but looks
can also include paper texture, pattern, gradient, and nozzle data. For more information, see “Saving a
brush look” on page 321.
To save a brush variant
1In the Brush library panel, click the brush variant that you want to save.
2Choose Brushes Save Variant.
3In the Save Variant dialog box, type a name for the new variant.
4Choose the category in which you want to save the variant from the Brush Category list box.
If you want the current main and additional colors to be saved with the variant, enable the Save
Current Color check box. You do not need to enable the option if the variant uses the Clone Color
option.
5Click Save.
The new variant appears on the variant menu, in the currently selected brush category.
314 | Corel Painter 2015 User Guide
You can also
Copy the variant to another category With a variant selected, click the Brush library
options button , and choose Copy Variant.
Choose the destination brush category from the
Copy Variant To list box. (Remember to delete the
variant in the category from which it was copied.)
When you create a new variant, the variant files are saved in the operating system’s Users folder.
The variant is stored in the brush category folder that was selected when the variant was saved.
You can also create a new brush category by clicking the Add New Brush Category button
in the Save Variant dialog box and typing a name in the New Category Name text box.
You can also save a brush variant from the Brush library panel by clicking the Brush library options
button and choosing Save Variant.
You can also copy brush variants at the root of the category folder by copying the brush variant
files (XML, NIB, STK, and, in some instances, a JPEG file) to the desired category. This is a useful
method when you need to copy multiple variant files to a new category.
To delete a brush variant
1Click the Brush Selector on the Brush Selector bar.
2In the Brush library panel, click a brush category, and then click the brush variant that you want to
delete.
3Choose Brushes Remove Variant.
4Click Yes to delete the variant.
The variant’s related files (XML, NIB, STK, and, in some instances, a JPEG file) are deleted from the
operating system’s Users folder.
You cannot delete any of the default brush variants.
Selecting, managing, and creating brushes | 315
You can also delete a brush variant from the Brush library panel by clicking the Brush library
options button and choosing Remove Variant.
Restoring default brush variants
You can restore any modified brush variant to its default settings. For information about restoring all factory
default settings, see “Restoring the default Corel Painter settings” on page 58.
To restore a default brush variant
1Click the Brush Selector on the Brush Selector bar.
2In the Brush library panel, click a brush category, and then click the brush variant that you want to
restore.
3In the Brush library panel, click the Brush library options button , and choose Restore Default
Variant.
If you want to restore all brush variants to their default settings, click the Brush library options button
, and choose Restore All Default Variants.
You can also restore a default brush variant by clicking the Reset Tool button on the property
bar.
Creating and deleting brush categories
You can create a brush category to store new brush variants or to organize existing variants for a specific
workflow or project. You can also delete a brush category.
To create a new brush category
1Choose Brushes New Brush Category.
2Type a name in the New Category Name text box.
The new brush category appears in the Brush Category list of the Brush library panel and contains the
currently selected brush variant, because a brush category must contain at least one brush variant.
316 | Corel Painter 2015 User Guide
You can also change the brush category icon by right-clicking a category in the Brush library panel,
choosing Set Custom Icon, and choosing the image that you want to display as the category
icon.
You can also create a new brush category from the Brush library panel by clicking the Brush library
options button and choosing New Brush Category.
To remove a brush category
1Choose Brushes Remove Brush Category.
2In the Choose Brush Category dialog box, choose a category from the Category list box.
3Click OK.
A warning message about deleting the brush category appears.
4Click OK.
You cannot remove any of the default Painter brush categories.
You can also remove a brush category from the Brush library panel by clicking the Brush library
options button and choosing Remove Brush Category.
Creating and deleting brush libraries
You can create a brush library by modifying the contents of an existing brush library and then exporting
it. You cannot create a brush library from scratch. To modify an existing brush library for export, you can
add new brush categories and variants. You can also exclude brush categories and variants from export by
hiding them in the brush library panel. After you’ve exported the modified library, you can import it as a
new brush library. In addition, you can delete a brush library from within Corel Painter.
To create a brush library
1In the Brush library panel, display the brush library that you want to copy.
To exclude brush categories and variants from the exported brush library, you can hide them by doing
the following:
• Right-click a brush category, and choose Hide Category.
• Right-click a brush variant, and choose Hide Variant.
2Click Brushes Export Brush Library.

Selecting, managing, and creating brushes | 317
3In the Choose Brush Library dialog box, choose the brush library that you want to export from the
Library list box.
4Click OK.
5In the Export Brush Library dialog box, type a name for the new library in the File Name text box.
6Click Save.
7Click Brushes Import Brush Library.
8In the Import Brush Library dialog box, choose the exported library, and click Open.
This is the recommended method for creating a new brush library in Corel Painter 12 Update 1
and later. In previous versions of Corel Painter, the only method for creating a new library was by
manipulating brush files in the operating system file browser.
Currently, there is no method for creating blank brush libraries.
To delete a brush library
1In the Brush library panel, click the Brush library options button , and choose Remove Brush
Library.
2Choose a brush library from the list box.
If you are trying to remove the active library, which is the library currently open in the Brush library
panel, you are prompted to choose a new active library.
You cannot delete any of the default Painter brush libraries.
Importing and exporting brush libraries, categories, and variants
You can import and export brush libraries, categories, and variants. This allows you to work with brush
resources that were created by others, or share them with others. You can only import brush libraries,
categories, and variants that were previously exported by you or someone else from Corel Painter 12 Update
1 or later.
You can share exported brush resources (brush libraries, categories, and variants) only with users who have
Corel Painter 12 Update 1 or later installed. The brush source files of Corel Painter 12 Update 1 or later are
not supported in older versions of Corel Painter, including Corel Painter 12 and Service Pack 1.
It is important to note that you can display only one library at a time in the Brush library panel.

318 | Corel Painter 2015 User Guide
Corel Painter 11 (or earlier) brush libraries
You can open brush libraries that were created in an older version of Corel Painter. In Corel Painter 11 and
earlier versions, brush variants are individual XML files organized in brush category folders within brush
libraries. To use older brush libraries, you must first copy them to Corel\Painter 2015\Brushes. After you
copy the files, you can access them through the Brush library panel or the Brushes menu.
Brush libraries that are not in the Brushes folder are not recognized or visible within Corel Painter. The
folder structure of brush libraries must match that of the default Painter Brushes library folder (Corel
\Painter 2015\Brushes\[library folder]\[category folder]\[variantFile.xml]). If you want to copy only a few
brush variants, you must still add them to a brush library while following the correct folder structure.
When you open the older library, you can export it. This converts the brush library to the new brush library
format.
To import a brush library
1Click Brushes Import Brush Library.
2In the Import Brush Library dialog box, browse to the folder where the brush library is stored.
3Choose the brush library, and click Open.
The imported brush library is displayed in the Brush library panel.
You can also import a brush library from the Brush library panel by clicking the Brush library
options button , choosing Import, and choosing Brush Library.
You can also import a brush library from the file browser of your operating system by double-
clicking a brush library file.
To import a legacy Corel Painter brush library
1In the file browser of your operating system, browse to the location where the legacy brush library
folder is stored.
2Copy the files.
3Paste the library folder in the Corel\Painter 2015\Brushes folder.
4Ensure that the library folder is writable by doing the following:
• (Mac OS) While pressing Control, click the brush library folder, and click Get Info. In the Info dialog
box, disable the Locked check box. Repeat for subfolders and files.
• (Windows) Right-click the brush library folder, and choose Properties. On the General page, disable
the Read-only check box, and click Apply. In the Confirm Attribute Changes dialog box, enable the
Apply Changes to This Folder, Subfolders and Files option.
5In Corel Painter, click the Brush Selector on the Brush Selector bar.
Selecting, managing, and creating brushes | 319
6In the Brush library panel, click the Brush library options button , and choose Brush Library Painter
Brushes.
To export a brush library
1Click Brushes Export Brush Library.
2In the Choose Brush Library dialog box, choose the brush library that you want to export from the
Library list box.
3In the Export Brush Library dialog box, browse to the folder where you want to store the library.
To rename the brush library, type a name in the File Name box.
4Click Save.
You can also export a brush library from the Brush library panel by clicking the Brush library
options button , choosing Export, and choosing Brush Library.
To import a brush category
1Click Brushes Import Category.
2In the Import Brush Category dialog box, browse to the folder where the brush category is stored.
3Choose the brush category, and click Open.
You can also import a brush category from the Brush library panel by clicking the Brush library
options button , choosing Import, and choosing Category.
You can also import a brush category from the file browser of your operating system by double-
clicking a brush category file. The brush category automatically appears in the Brush library panel.
To export a brush category
1Click Brushes Export Category.
2In the Choose Brush Category dialog box, choose a brush category from the Category list box.
3Click OK.
4In the Export Brush Category dialog box, click Save.
To rename the brush category, type a name in the File Name box.

320 | Corel Painter 2015 User Guide
You can also export a brush category from the Brush library panel by clicking the Brush library
options button , choosing Export, and choosing Category.
To import a brush variant
1Click Brushes Import Brush.
2In the Import Brush Variant dialog box, browse to the folder where the brush variant is stored.
3Choose the brush variant file, and click Open.
4In the Save Variant dialog box, choose the brush category where you want to store the variant from the
Brush Category list box.
To rename the brush variant, type a name in the Save Variant As text box.
5Click Save.
You can also create a new brush category while in the Save Variant dialog box by clicking the Add
New Brush Category button and typing a name in the New Category Name text box.
You can also import a brush variant from the Brush library panel by clicking the Brush library
options button , choosing Import, and choosing Brush.
You can also import a brush variant from the file browser of your operating system by double-
clicking a brush variant file. The brush variant automatically appears in the Brush library panel.
To export a brush variant
1In the Brush library panel, click the brush variant that you want to export.
2Click Brushes Export Brush.
3In the Export Brush dialog box, click Save.
To rename the brush variant, type a name in the File Name box.
You can also export a brush variant from the Brush library panel by clicking the Brush library
options button , choosing Export, and choosing Brush.

Selecting, managing, and creating brushes | 321
Saving a brush look
A look retains all brush variant settings, plus the paper, pattern, gradient, or nozzle settings. For example,
if you customize a brush variant and paper texture to achieve a specific effect that you want to use in the
future, you can save these settings as a look. When you save a look, it is added to the Look Libraries panel.
A brush variant is not itself associated with information about underlying texture or other elements. The
look, on the other hand, is associated with additional information about a particular variant. Regardless of a
document’s current libraries, when you select a look, you use the elements that are part of that look.
To save a look
1Choose Window Media Library Panels Looks.
2Create a look by choosing a brush variant and any additional settings that you want to save with the
look.
3Apply a brushstroke to the canvas.
4Click the Rectangular Selection tool , press Shift, and drag to select a square portion of the image
or brushstroke, so you can use it as an icon for the look.
5In the toolbox, click the Brush tool .
6Click the Look Libraries options button , and choose Save Look.
7In the New Look dialog box, type a name for the look in the Save As box.
The new look appears as the last item in the Brush Looks panel.
To apply a saved look
1From the Media Selector bar, click the Look Selector button.
2Choose a look from the Brush Looks panel.
Corel Painter loads the correct variant and materials for the saved look.
3Paint in the document window.
Creating brush dabs
You can create your own brush dab shapes by creating a shape, selecting it, and then capturing it as a dab.

322 | Corel Painter 2015 User Guide
This musical note was captured as a brush dab.
To create a brush dab shape
1On a white background, draw a shape in black.
Use shades of gray to define the transparent areas of the dab.
To follow stroke direction, a captured brush set must face toward the right side.
2Choose the Rectangular Selection tool from the toolbox.
3Hold down Shift and drag across your brush shape to create a square selection.
Corel Painter uses the selected area to set the brush size. When the brush is created, the selected area is
sampled to compute each brush dab.
If the original area requires scaling to the size of the brush dab, sampling can appear aliased. The
greater the scaling, the more aliasing is apparent. To prevent too much aliasing from appearing, create
a shape with soft (grayscale) edges that is close to the size you’ll be using.
4Click the Brush Selector on the Brush Selector bar.
5In the Brush library panel, choose the brush category in which you want to save the variant for the
captured dab shape.
6Click the Brush library options button , and choose Capture Dab.
7If necessary, choose Window Brush Control Panels Size, and change the settings.
8Draw with the brush on the canvas.
If you like the results you’ve captured, you can save the brush as a new variant. For information about
how to save customized brushes for later use, see “Saving and deleting brush variants” on page 313.
Selecting, managing, and creating brushes | 323
You can paint with a captured brush just as you would with other brushes.
324 | Corel Painter 2015 User Guide

Adjusting brushes with brush controls | 325
Adjusting brushes with brush controls
Like a fully stocked art store, Corel Painter supplies you with many different brushes and drawing tools,
each with modifiable characteristics. This chapter provides descriptions and procedures for customizing and
saving the many parameters of any brush type.
This section contains the following topics:
•“Exploring Brush Controls” (page 326)
•“Expression settings” (page 327)
•“Previewing brushstrokes and brush dabs” (page 329)
•“Calibrating brush variants” (page 330)
•“General controls” (page 332)
•“General controls: Dab types” (page 332)
•“General controls: Stroke types” (page 337)
•“General controls: Methods and subcategories” (page 339)
•“General controls: Source” (page 342)
•“General controls: Multicore” (page 343)
•“Opacity controls” (page 343)
•“Grain controls” (page 345)
•“Stroke Attribute controls” (page 347)
•“Size controls” (page 349)
•“Angle controls” (page 353)
•“Spacing controls” (page 357)
•“Changing dab profiles” (page 359)
326 | Corel Painter 2015 User Guide
•“Real Watercolor controls” (page 362)
•“Real Wet Oil controls” (page 367)
•“Computed Circular controls” (page 373)
•“Hard Media controls” (page 373)
•“Bristle controls” (page 374)
•“RealBristle controls” (page 375)
•“Static Bristle controls” (page 375)
•“Airbrush controls” (page 378)
•“Artists’ Oils controls” (page 381)
•“Impasto controls” (page 385)
•“Digital Watercolor controls” (page 385)
•“Water controls” (page 385)
•“Liquid Ink controls” (page 390)
•“Stroke Jitter controls” (page 397)
•“Well controls” (page 398)
•“Mouse controls” (page 401)
•“Smoothing controls” (page 402)
•“Image Hose controls” (page 403)
•“Rake controls” (page 403)
•“Multi controls” (page 407)
•“Cloning controls” (page 407)
•“Color Variability controls” (page 415)
•“Color Expression controls” (page 417)
Exploring Brush Controls
You can apply media to the canvas by using a ready-to-use default brush variant from the impressive Corel
Painter brush library. You can also modify a brush variant to meet a particular need. The brush controls are
divided into multiple brush control panels that allow you to adjust a brush variant while you work, or alter
an existing variant to create a new variant.
You can use the brush controls to adjust the Corel Painter brushes in many different ways, such as change
their size, shape, angle, flow, and much more. In fact, the Corel Painter default brush variants are built by
adjusting the same set of brush controls in order to emulate a real-life painting or drawing tool.
Changes that you make to brush variants, including basic controls, including changes to Size and Opacity,
are retained until you restore the brush variant. You can also save custom brushes as the default, as new
variants, or as looks. For more information, see “Saving and deleting brush variants” on page 313 and
“Saving a brush look” on page 321.

Adjusting brushes with brush controls | 327
Modifying Brush Variants
When you modify a brush variant using the brush controls, the modified brush variant information is stored
in the variant’s XML, NIB, STK, and in some instances, JPEG files that are found in the operating system’s
User folder:
Users\(user name)\AppData\Roaming\Corel\Painter 2015\Default\Brushes\Painter Brushes folder (Windows)
When you start Corel Painter, the application applies the modified settings to the brush variant, instead of
the default settings. However, the default settings are not lost, they remain stored in the application folder.
If you decide to reset a brush variant’s default settings, the modified brush variant files are automatically
deleted from the Users folder.
To open a brush control panel
•Choose Window Brush Control Panels, and choose a brush control panel from the list.
To open all brush controls panels at once
•Choose Window Brush Control Panels General.
You can also open all brush control panels at once by pressing Command + B (Mac) or Ctrl +
B (Windows). To close all brush control panels at once, the General brush control panel must be
docked with the other brush control panels.
To close a brush control panel
• Click the Close button on the brush control panel title bar.
Expression settings
Corel Painter lets you control brush effects along the stroke based on a number of real-time input factors.
For example, many brushes vary their opacity or size in response to changes in stylus pressure. These
responses reflect their default settings. You can use the Expression settings to vary these effects in response
to other factors, such as stroke direction or velocity.
Expression settings are linked to the following controls: Opacity, Grain, Size, Angle, Airbrush (Feature
and Flow), Impasto, Liquid Ink, Stroke Jitter, Well (Saturation and Bleed), and Color Expression. In
addition, for some of the brush controls that use Expression, you can adjust the Min setting to specify the
range of variation that you want the expression to apply. The Min setting represents a percentage of the
specific setting, such as Opacity, and it must be linked to an expression to have an effect. For example, if

328 | Corel Painter 2015 User Guide
you choose the Pressure expression on the Opacity panel, set the Opacity slider to 50%, and then set the
Min Opacity slider to 20%, the more stylus pressure you apply, the more opaque the brushstroke will be.
Direction adjusts the angle value of the direction controller. When the expression is set to Direction, it
specifies the angle at which a brushstroke narrows or widens, which is particularly useful for calligraphic
effects.
To choose an Expression setting
1Open any of the following brush control panels: Opacity, Grain, Size, Angle, Airbrush (Feature and
Flow), Impasto, Liquid Ink, Stroke Jitter, Well (Saturation and Bleed), and Color Expression.
2Perform a task from the following table.
To Do the following
Disable the expression setting Choose None from the Expression list box.
Adjust the brushstroke based on the dragging
speed
Choose Velocity from the Expression list box.
Dragging quickly minimizes the setting; dragging
slowly increases it.
Adjust the selected brushstroke based on the
direction of the stroke
Choose Direction from the Expression list box,
and move the Direction slider.
Adjust the brushstroke based on stylus pressure Choose Pressure from the Expression list box.
Greater pressure increases the setting for that
brush feature.
Adjust the brushstroke based on the wheel setting
on an airbrush stylus, specifically the Intuos
Airbrush stylus
Choose Wheel from the Expression list box. The
maximum value is set when the wheel is pushed
all the way forward. The minimum is set when the
wheel is pushed all the way back.
Adjust the brushstroke based on the angle of the
stylus from the tablet
Choose Tilt from the Expression list box. For
example, when the stylus is perpendicular to the
tablet, Tilt is set at zero.
Adjust the brushstroke according to the direction
in which the stylus points
Choose Bearing from the Expression list box.
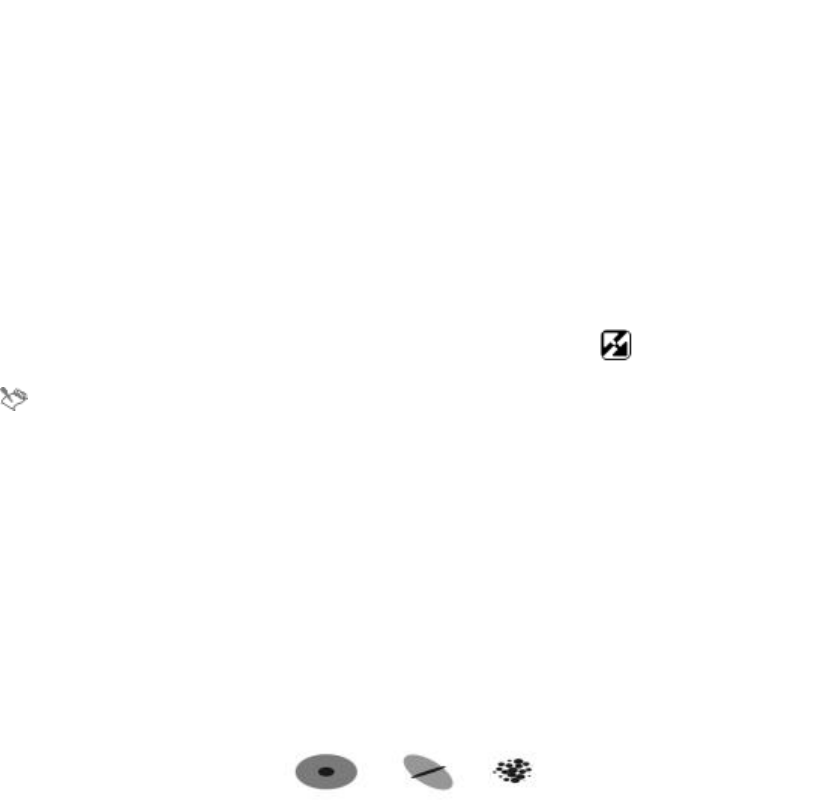
Adjusting brushes with brush controls | 329
To Do the following
Adjust the brushstroke as you turn a flat-tip
Intuos Art Pen that supports 360-degrees of barrel
rotation sensitivity
Choose Rotation from the Expression list box.
Adjust the brushstroke according to the luminance
of the clone source
Choose Source from the Expression list box.
Higher luminance (closer to white) increases the
setting for that component, producing a wider
stroke.
Adjust the brushstroke on a random basis Choose Random from the Expression list box.
Reverse the effect of an Expression setting Click the Invert button .
Not all stylus models convey tilt or bearing information.
Previewing brushstrokes and brush dabs
The Stroke Preview and Dab Preview panels include preview windows that show how brush control
changes affect the appearance of the currently selected variant’s brushstrokes and brush dabs. Both preview
panels display changes in real-time. In addition, the Stroke Preview panel reflects how brushstrokes blend
with colors and textures. For example, if you change the brush size (Size panel) or dab type (General panel),
you can preview the impact of the changes on both the dab and stroke.
The Dab Preview window lets you choose different viewing modes, to reveal different aspects of the brush
dabs.
The Dab Preview window lets you toggle between
Size and Shape, Hard Media, and Brush Dab views.
In the Size and Shape view, concentric circles show the minimum and maximum sizes of a brush. The
inner (black) circle shows the minimum dab width. The outer (gray) circle shows the maximum dab width.
330 | Corel Painter 2015 User Guide
Remember that some brushes vary the line width based on pressure or stroke speed. The difference
between the diameter of the two circles shows the range in which the stroke width can vary.
In the Hard Media view, you can preview what a Hard Media, such as a Pencil variant, will look like at
various angles. This is useful when modifying the settings in the Hard Media brush control panel. The dab
appears in the Dab Preview window at the corresponding angle.
In the Dab Preview, shading shows the density distribution of the brush tip. The density distribution
describes how much of the medium is conveyed by a given point on the brush dab. For example, an
individual dab made by an airbrush produces a soft-edged circular mark with minimum density at the outer
edge of the dab. Density increases inward to a maximum value at the exact center of the dab. The Dab
Preview cannot be used for the Image Hose or rendered dab types.
To preview brushstrokes
•Choose Window Brush Control Panels Stroke Preview.
To preview brush dabs
1Choose Window Brush Control Panels Dab Preview.
2In the Dab Profile panel, click one of the following buttons:
•Preview Size and Shape
•Preview Hard Media
•Preview Brush Dab
The Dab Preview window supports only views of dab based brushes.
You can switch between the different preview modes by clicking in the preview window.
Calibrating brush variants
When you draw with traditional media, the amount of pressure that you use with a tool determines the
density and width of your strokes. Using a pressure-sensitive stylus with Corel Painter gives you this same
kind of control. Because each artist uses a different strength or pressure level in a stroke, you can calibrate
individual brush variants to match your stroke strength.

Adjusting brushes with brush controls | 331
The most common way of adjusting brush calibration is to apply a typical brush stroke, such as a wavy
stroke, to the scratch pad. Corel Painter then uses your stroke to calculate the appropriate pressure and
velocity settings for the brush variant.
For example, you can set less pressure when sketching with a pencil brush variant, but set more pressure
when using an oil paint brush variant. Corel Painter saves Brush Calibration control settings with the brush
variant, so whatever sensitivity you set will be the default the next time you choose the brush variant. If
you set Brush Calibration for a specific brush in addition to general Brush Tracking preferences, the Brush
Calibration settings override the Brush Tracking preferences. For more information, see “Brush tracking
and calibration” on page 126.
When you use the scratch pad to set brush calibration, Corel Painter calculates the pressure and velocity
settings for you. However, you can manually adjust these settings. For example, you can adjust the stroke
pressure to achieve a full pressure range (Pressure Scale slider) using a softer or harder touch (Pressure
Power slider). You can also adjust the stroke velocity to achieve a full velocity range (Velocity Scale slider)
with a slower or faster stroke (Velocity Power slider).
To ensure that a brush control is using the pressure or velocity settings, you need to set the brush control
Expression setting to Pressure or Velocity. For more information, see “Expression settings” on page 327.
To calibrate a brush variant
1With a brush variant selected, choose Window Brush Control Panels Brush Calibration.
2Enable the Enable Brush Calibration check box.
3Click the Set brush calibration settings button .
The Brush Tracker appears.
4Drag in the Scratch Pad using a “normal” stroke.
Use the pressure and speed you prefer when drawing or painting. This allows the Brush Tracker to
calculate the appropriate speed and pressure settings for the brush.
If you want to adjust the settings manually, perform a task from the following table.
To Do the following
Achieve a full pressure range with a softer or
harder touch
Adjust the Pressure Scale and Pressure Power
sliders.
Achieve the full velocity range with a slower or
faster motion
Adjust the Velocity Scale and Velocity Power
sliders.

332 | Corel Painter 2015 User Guide
General controls
Corel Painter provides extensive control over brush properties and dab types. You can also choose how
brushstrokes interact with existing color in the image.
To learn about the controls included in the General panel, see the following topics:
•“General controls: Dab types” (page 332)
•“General controls: Stroke types” (page 337)
•“General controls: Methods and subcategories” (page 339)
•“General controls: Source” (page 342)
•“General controls: Multicore” (page 343)
General controls: Dab types
When you choose a dab type, you’re choosing a method for applying media to the canvas. Corel Painter
uses rendered dab types that are computed during the stroke.
Earlier versions of Corel Painter used “dab-based” media application, in which brushes applied small dots
of media to create brushstrokes. With the spacing between dabs set small, strokes appear smooth. If you
zoom in enough, you can probably tell that the brushstroke is made up of tiny dabs of color. If you make a
rapid brushstroke or set large spacing between dabs, strokes can become trails of dots.
Rendered dab types create continuous, smooth-edged strokes. They’re fast and less prone to artifacts than
dab-based media application. In fact, you can’t draw fast enough to leave dabs or dots of color showing in
a stroke, because they’re just not there. Rendered dab types allow rich new features that were not possible
with dab-based media application.
The Scratchboard Tool variant of the Pen brush category illustrates the
smooth stroke that can be accomplished with the rendered dab types.
Corel Painter brushes use dab-based or rendered dab types:

Adjusting brushes with brush controls | 333
Dab-based dab type Description
Circular Dabs are controlled by the sliders in the Size and
Angle brush control panels.
Single-Pixel Consists of one pixel only. You can’t change its
size. You use single-pixel brushes when you zoom
in for editing at the pixel level.
Static Bristle Controlled by the sliders in the Size brush control
panel. When the Static Bristle dab type is selected,
the preview grid displays a bristly profile.
Captured Shapes that you create and capture. For more
information, see “Creating brush dabs” on page
321.
Eraser Dabs that let you erase parts of images
Computed Circular Controlled by the sliders in the Computed Circular
brush control panel. This dab type allows you to
customize the brush dab profile.
For more information, see “Computed Circular
controls” on page 373.
A captured dab lets you paint with specific shapes and designs that you create.

334 | Corel Painter 2015 User Guide
Rendered dab type Description
Camel Hair Creates bristle brushes with circular arrays of
bristles. Individual brush hairs can have their own
color, and they can also pick up underlying colors
independently of the Brush Loading option. By
increasing color variability in Corel Painter, you
can make each hair a separate color. For more
information, see “Setting color variability” on page
240.
The Feature slider in the Bristles panel separates
bristles. The higher the setting, the farther apart
the hairs will appear. Using a low setting makes
the strokes more solid. For more information about
the Size controls, see “Size controls” on page
349.
Flat Creates flat brushes such as those used to apply
paint to houses or walls. Brushes that use Flat dabs
respond to bearing and allow for flat or narrow
strokes, depending on how the stylus is held. Flat
dabs are always perpendicular to the shaft of the
stylus.
The Feature setting in the Bristles panel separates
bristles.
Palette Knife Creates brushes that are the opposite of Flat dab
brushes. With resaturation set low, you can use
these brushes to scrape, push, pick up, or rapidly
drag colors along. Palette Knife dabs are always
parallel to the shaft of the stylus.
The Feature setting in the Bristles panel separates
bristles.
Bristle Spray Creates brushes that can use airbrush controls.
These brushes recognize tilt, which separates
bristles on the opposite side of the tilt.

Adjusting brushes with brush controls | 335
Rendered dab type Description
By adjusting the Feature slider in the Bristles
panel, you can separate bristles.
Airbrush Creates brushes that act like airbrushes. Bearing
(direction) and angle (tilt) affect the eccentricity
of the resulting conic section. The Feature slider
in the Airbrush panel controls the size of the
individual droplets of media. Setting the Feature
slider too high might produce undesirable artifacts.
You can reverse the spray direction when you paint
by enabling the Continuous Time Deposition
check box in the Spacing panel, and by holding
down Option + Shift (Mac OS) or Alt + Shift
(Windows).
Pixel Airbrush Creates brushes that work like airbrushes. Brushes
that use Pixel Airbrush dabs cannot use the
Feature slider to control the size of individual
droplets of media.
You can reverse the spray direction when you paint
by enabling the Continuous Time Deposition
check box in the Spacing panel, and by holding
down Option + Shift (Mac OS) or Alt + Shift
(Windows).
Line Airbrush Creates brushes that work like airbrushes. Brushes
that use Line Airbrush dabs spray lines instead of
droplets of media.
You can reverse the spray direction when you paint
by enabling the Continuous Time Deposition
check box in the Spacing panel, and by holding
down Option + Shift (Mac OS) or Alt + Shift
(Windows).
Projected Creates brushes that act like airbrushes. Brushes
created with Projected dabs work similarly to the

336 | Corel Painter 2015 User Guide
Rendered dab type Description
airbrush from previous versions of the application,
but react to bearing and angle data. They create
conic sections with an overall softness.
You can reverse the spray direction when you paint
by enabling the Continuous Time Deposition
check box in the Spacing panel, and by holding
down Option + Shift (Mac OS) or Alt + Shift
(Windows).
Rendered Creates brushes that conform the source to a
stroke. Use the Source list box to control what is
mapped into the computed brushstrokes. For more
information, see “General controls: Source” on
page 342.
The effects of Feature on the stroke.
Corel Painter also includes additional dab types that do not fall under the dab-based or rendered dab types.
Additional dab types
Liquid Ink Liquid Ink dabs create liquid paint effects that
simulate traditional ink-based media. You can give
a Liquid Ink brushstroke the appearance of height
by applying lighting effects. There are five types
of Liquid Ink dab types: Liquid Ink Camel Hair,
Liquid Ink Flat, Liquid Ink Palette Knife, Liquid
Ink Bristle Spray, and Liquid Ink Airbrush.
Watercolor dabs Watercolor dabs create brushes that work like
watercolor brushes. The colors flow and mix
and absorb into the paper. You can control the

Adjusting brushes with brush controls | 337
Additional dab types
wetness and evaporation rate of the paper.
There are five types of Watercolor dab types:
WatercolorCamel Hair, Watercolor Flat,
Watercolor Palette Knife, Watercolor Bristle
Spray, and WatercolorAirbrush.
Artists’ Oil dabs Artists’ Oil dabs produce brushes that work like
real-world, high quality oil brushes.
To choose a dab type
1Choose Window Brush Control Panels General.
2Choose a dab type from the Dab Type list box.
General controls: Stroke types
The StrokeType determines how a brushstroke applies media. Corel Painter brushes use one of the
following stroke types.
• The Single stroke type draws one dab path that corresponds exactly to your brushstroke.
• You can use Static Bristle, Captured, or one of the bristly rendered dab types (such as Camel Hair)
with the Single stroke type to create the effect of multiple bristles.
The Single stroke type has one dab path.
• The Multi stroke type draws a set of randomly distributed dab paths, positioned around the
brushstroke you make. These dabs leave dab paths that are not parallel and might overlap. The Multi
stroke type may produce different results each time you use it. For more information, see “Multi
controls” on page 407.
• Increasing the Stroke Jitter value in the Stroke Jitter panel spreads out the strokes in a multi-stroke
brush.
• Increasing the amount of bristles can increase the density of the brushstroke. For more information,
see “Multi controls” on page 407.
•Multi-stroke brushes are computed before you apply them, therefore, the computing process can
delay their appearance on the canvas. Because of this delay, multi-stroke brushes work best when you
apply short, controlled strokes.
338 | Corel Painter 2015 User Guide
The Multi stroke type draws a set of randomly distributed dab paths.
• The Rake stroke type draws a set of evenly distributed dab paths. The several dab paths in a rake
brushstroke are parallel. You can control all other aspects of the stroke by using settings in the Rake
brush control panel.
• Each bristle in a Rake brush can have a different color. Increasing Color Variability in Corel Painter
causes bristles to be colored differently.
A Rake stroke is composed of evenly distributed dab paths.
• The Hose stroke type applies only to the Image Hose. It’s a single stroke composed of the current
Image Hose Nozzle file. For more information about the Image Hose and Nozzle files, see “Image hose”
on page 469.
The Hose stroke type uses the current Nozzle file as media.
To choose a stroke type
1Choose Window Brush Control Panels General.
2Choose a stroke type from the Stroke Type list box.
If a stroke type is not available (appears greyed out), it’s not supported by the currently selected brush
variant and dab type.
Adjusting brushes with brush controls | 339
General controls: Methods and subcategories
The brush method defines the most basic level of brush behavior and is the foundation on which all
other brush variables are built. The method and method subcategory represent attributes of the stroke’s
appearance.
Because the method sets a brush variant’s most basic behavior, you can alter a variant’s behavior by
changing its method. For example, suppose you want a stroke that looks like charcoal, but instead of hiding
underlying strokes, you want the brushstrokes to build to black. You can get this effect by changing the
method to Buildup. Perhaps you want a variant of the Pens brush category to smear underlying colors. You
can change its method from Cover to Drip. Some brush effects are less easily affected by other methods,
and results may differ.
Each method can have several variations, called method subcategories. These subcategories further refine
the brush behavior. The following terms are used in describing most method subcategories:
• Soft methods produce strokes with feathered edges.
• Flat methods produce hard, aliased strokes with pixelated edges.
• Hard methods produce smooth strokes.
• Grainy methods produce brushstrokes that react to paper texture.
• The words “edge” and “variable” are sometimes used to describe a method subcategory. Edge strokes
are thick and sticky-looking. Variable strokes are affected by tilt and direction.
Combining a method with a method subcategory results in a specific brush style that you can assign
to a given brush. For example, Grainy Hard Cover brushstrokes interact with paper grain and are semi
anti-aliased so that they hide underlying pixels. Grainy Hard Cover is the default method for Chalk and
Charcoal.
Grainy Hard Buildup was used to create the brushstroke on top.
Soft Variable Buildup was used to create the stroke on the bottom.
Corel Painter supplies the following methods:
•Buildup
•Cover
•Eraser
340 | Corel Painter 2015 User Guide
•Drip
•Mask (Cover)
•Cloning
•Wet
•Digital Wet
•Marker
•Plug-in
The Buildup methods allow you to produce brushstrokes that build towards black as they are overlaid. A
real-world example of buildup is the felt pen: scribble on the page with blue, then scribble on top of that
with green, and then red. The scribbled area keeps getting darker, approaching black. Even if you were to
apply a bright color like yellow, you couldn’t lighten the scribble — it would stay dark. Crayons and Felt
Pens are buildup brushes.
An example of the Buildup method.
The Cover methods produce brushstrokes that cover underlying strokes, as oil paint does in traditional
painting. No matter what colors you use, you can always apply a layer of paint that completely hides what’s
underneath. Even with a black background, a thick layer of yellow remains pure yellow. Some Chalk and
Pen variants are examples of brushes that use the Cover method.
An example of the Cover method.
The Eraser methods erase, lighten, darken, or smear the underlying colors.
An example of the Eraser method.
The Drip methods interact with the underlying colors to distort the image.
Adjusting brushes with brush controls | 341
An example of the Drip method.
The Mask method is provided only for compatibility with earlier versions of the application. You do not
need to use the Mask method because the masking capabilities of Corel Painter are provided by the Cover
method.
The Cloning methods take images from a clone source and re-create them in another location, often
rendering them in a Natural-Media style. For more information about painting a clone, see “Painting in the
clone” on page 176.
The image on the left was created with a brush that
used the image on the right as the clone source.
The Wet method applies brushstrokes to a Watercolor layer. For more information, see “Working with the
Watercolor layer” on page 424.
The Digital Wet method applies digital watercolor brushstrokes to the canvas or a regular layer. For more
information, see “Working with Digital Watercolor brushes” on page 428.
The Marker method lets you simulate the use of professional markers for drawing and creating renderings.
For more information, see “Markers” on page 465.
Plug-in is a special category of method subcategories. It defines no specific brush behavior, but is an open
door to a wide range of subcategories.
It’s well worth your time to browse through the Plug-in method subcategories. There, you’ll find methods
such as Left Twirl, which simulates the dab and brushstroke of an Impressionist performing left-handed
twirls.
342 | Corel Painter 2015 User Guide
You can give any built-in brush the power of a
plug-in by changing its method and subcategory.
To choose a method and subcategory
1Choose Window Brush Control Panels General.
2Choose a method from the Method list box.
3Choose a subcategory from the Subcategory list box.
The Method and Subcategory options are available only with circular, single-pixel, static bristle,
captured, and eraser dab types.
General controls: Source
The Source setting lets you specify the media that is applied by the brush variant. Source applies only to
some dab types, such as Line Airbrush,Projected, and Rendered. For more information about setting a
media source, see “Exploring painting media” on page 131.
Corel Painter brushes use one of the following source types:
• Color applies primary or secondary color.
• Gradient applies the current gradient across the length of the stroke. For more information, see
“Applying gradients” on page 723.
• Gradient Repeat applies the current gradient repeatedly along the stroke. For more information, see
“Applying gradients” on page 723.
• Pattern paints with a pattern containing no mask information. For more information, see “Painting with
patterns” on page 711.
• Pattern With Mask paints with a pattern limited by the pattern’s mask. For more information, see
“Painting with patterns” on page 711.
• Pattern As Opacity paints a pattern in which the luminance of the pattern becomes the opacity of the
stroke. For more information, see “Painting with patterns” on page 711.
To choose a media source
1Choose Window Brush Control Panels General.
2Choose a source from the Source list box.

Adjusting brushes with brush controls | 343
General controls: Multicore
Corel Painter helps you maximize brush performance when working on a multicore computer.
To enable brush multicore support
1Choose Window Brush Control Panels General.
2Enable the Multicore check box.
Not all brush variants support the Multicore option.
Opacity controls
Opacity lets you control how Corel Painter varies the density of the media that you apply to the canvas. The
Opacity controls let you set opacity levels for the currently selected brush.
You can also use the Expression settings to link opacity to various stylus or mouse movements. For example,
you can link the opacity of an Airbrush variant to stylus pressure. Heavier pressure produces more opaque
strokes. For more information, see “Expression settings” on page 327.
You can also adjust the Min setting to specify the range of variability that you want the expression to
apply. The Min Opacity setting represents a percentage of the Opacity setting and it must be linked to an
expression to have an effect. For example, if you choose the Pressure expression on the Opacity panel, set
the Opacity slider to 20%, and then set the Min Opacity slider to 50%, the opacity will vary from 10% to
20% every time you apply pressure during a brushstroke.
You can increase the variation of the opacity effect by adjusting Opacity Jitter, which enhances the natural
appearance of brushstrokes. You can also use the Smoothness slider to smooth the opacity variation in a
brushstroke for a more organic look.
344 | Corel Painter 2015 User Guide
Digital Airbrush brushstrokes without Opacity Jitter (left) and with Opacity Jitter (right)
Opacity Jitter applied to a brushstroke without jitter
smoothing (top) and with jitter smoothing (bottom)
To set brush opacity
1Choose Window Brush Control Panels Opacity.
2Move the Opacity slider to the left to reduce opacity, or to the right to increase opacity.
You can also
Link the opacity settings to a specific stylus or
mouse movement
Choose an option from the Expression list box.
Set the percentage of variability that you want the
expression to apply
Move the Min Opacity slider.
Adjust the angle of the Direction expression Move the Direction slider.
Adjust the amount of variation that is applied to
Opacity
Move the Opacity Jitter slider.

Adjusting brushes with brush controls | 345
You can also
Smooth the opacity variation Move the Smoothness slider.
When adjusting Opacity Jitter, make sure the Min Opacity slider is not set to 100%. Setting the
Min Opacity to 100% stops Opacity Jitter from occurring.
You can also set brush opacity dynamically onscreen. For more information, see “To set brush
attributes onscreen” on page 308.
Grain controls
Grain lets you control the amount of paper texture that brushstrokes reveal. You can set the level of grain
that you want to reveal (Grain slider). You can also use the Expression settings to link grain to various
stylus or mouse movements. For more information, see “Expression settings” on page 327. For example,
you can link grain to pressure. Increasing pressure causes the pencil to “dig into” the paper and produce a
grainier brushstroke.
You can also adjust the Min setting to specify the range of variability that you want the expression to apply.
The Min Grain setting represents a percentage of the Grain setting and it must be linked to an expression
to have an effect. For example, if you choose the Pressure expression on the Grain panel, set the Grain
slider to 100% and set the Min Grain slider to 10%, the amount of grain revealed will vary from 10% to
100% every time you apply pressure during a brushstroke.
Normally, when you make a brushstroke, the paper grain is fixed. Strokes repeated over an area bring
out the same grain, but you can specify to randomly move the paper grain for each dab of each stroke
(Random Brush Stroke Grain and Grain Jitter). You can also use the Smoothness slider to smooth the
grain jitter in a brushstroke for a more organic look.
346 | Corel Painter 2015 User Guide
Brushstrokes with Random Brush Stroke Grain disabled (top) and enabled (bottom)
In addition, you can use the paper’s brightness and contrast settings to control brush–grain interaction. For
more information, see “Working with paper texture and grain” on page 151 and “Expression settings” on
page 327.
To set grain
1Choose Window Brush Control Panels Grain.
2Move the Grain slider to adjust the penetration into the grain.
You can also
Link the grain settings to a specific stylus or mouse
movement
Choose an option from the Expression list box.
Set the percentage of variability that you want the
expression to apply
Move the Min Grain slider.
Adjust the angle of the Direction expression Move the Direction slider.
Adjust the amount of variation that is applied to
Grain
Move the Grain Jitter slider.

Adjusting brushes with brush controls | 347
You can also
Smooth the grain variation Move the Smoothness slider.
Randomize the brushstroke grain interaction Enable the Random Brushstroke Grain check box.
When adjusting Grain Jitter, make sure the Min Grain slider is not set to 100%. Setting the Min
Grain to 100% stops Grain Jitter from occurring.
Stroke Attribute controls
You can apply a merge mode to a brush variant to control how brushstrokes interact with the underlying
colors within the currently selected layer or the canvas. This technique allows you to produce similar results
to applying composite method to layers. In addition, it allows you to control where the effect is applied. For
more information about composite methods, see “Blending layers by using composite methods” on page
543.
To apply a merge mode
1Choose Window Brush Control Panels Stroke Attributes.
2Enable the Use Stroke Attributes check box.
3Move the Stroke Opacity slider.
4From the Merge Mode list box, choose one of the following merge modes:
Merge Mode Description
Color Creates a new color by combining the luminance
of the underlying color with the hue and
saturation of the brushstroke color. This method is
the opposite of Luminosity.
Colorize Replaces the hue and saturation of the underlying
color with the hue and saturation of the
brushstroke color. You can use this mode to apply
color to a grayscale image.

348 | Corel Painter 2015 User Guide
Merge Mode Description
Darken Darkens the underlying color with the brushstroke
color — whichever is darker
Default Covers and hides the underlying brushstrokes
Difference Subtracts one color from the other, depending on
which color has a greater brightness value
Dissolve Combines the underlying color with the
brushstroke color, based on opacity
Gel Tints the underlying color with the brushstroke
color. For example, a yellow brushstroke gives the
underlying color a yellow cast.
GelCover Uses a combination of the Default method and
the Gel method
Hard Light Multiplies, or screens colors, depending on the
luminance of the underlying color
Hue Creates a color by combining the luminance and
saturation of the underlying color with the hue of
the brushstroke color
Lighten Colors with the underlying color or the brushstroke
color — whichever is lighter
Luminosity Creates a new color from the hue and saturation
of the underlying color and the luminance of the
brushstroke color. This method is the opposite of
Color.

Adjusting brushes with brush controls | 349
Merge Mode Description
Magic Combine Combines the brushstroke color with the
underlying color based on luminance. The parts
of the brushstroke that are lighter than the
underlying color are visible. The parts that are
darker are replaced by the lighter area of the
underlying color.
Multiply Combines colors to create a darker color
Normal Works like the Default method; the brushstroke
covers the underlying color.
Overlay Combines colors while preserving the highlights
and shadows of the underlying color
Pseudocolor Translates the brushstroke’s luminance into hue
Reverse-Out Inverts the colors beneath it
Saturation Creates a color by combining the luminance and
hue of the image color with the saturation of the
layer color
Screen Combines colors to create a lighter color
Shadow Map Blocks light and combines colors while preserving
the shadows of the underlying color
Soft Light Darkens or lightens colors depending on the
luminance of the underlying color
Size controls
The Size brush controls determine how Corel Painter varies the width of the brushstroke.

350 | Corel Painter 2015 User Guide
Size lets you control the width of the brush and the brushstroke. As size changes, you may need to adjust
the spacing controls for brushes that use nonrendered or dab-based dab types to prevent gaps from
appearing in the stroke.
Size controls the width of the brush.
You can choose an Expression setting to create a brush that responds to subtle hand movements. For more
information, see “Expression settings” on page 327. You can also adjust the Min setting to specify the
range of variability that you want the expression to apply. The Min Size setting represents a percentage of
the Size setting and it must be linked to an expression to have an effect. For example, if you choose the
Pressure expression on the Size panel, set the Size slider to 40 and set the Min Size slider to 50%, the
stroke sizes will vary from 20% to 40% every time you apply pressure. The Min Size control allows you to
create a brushstroke that is amazingly realistic. As stylus pressure eases, brushstrokes taper. As pressure
increases, brushstrokes widen, just as they would with a real brush.
The minimum and maximum sizes of a stroke can be linked to Expression
settings, such as pressure or velocity. The small black circle shows the
minimum stroke size, and the gray circle shows the maximum stroke size.
The Size Jitter control lets you introduce more variation to the size of the brushstroke, which enhances
the responsiveness and natural appearance of the brushstrokes. You can also use the Smoothness slider to
smooth the size variation for a more organic look.
Adjusting brushes with brush controls | 351
Oils Real Round brushstrokes without Size Jitter (left) and with Size Jitter (right)
Size Jitter applied to a brushstroke without jitter
smoothing (top) and with jitter smoothing (bottom)
Size Step controls the transition between narrow and wide sections of a stroke.
Brushstrokes with Size Step set to 1% (top) and 100% (bottom)
To set brush size
1Choose Window Brush Control Panels Size.
2Move the Size slider to the right to make the brush larger, which makes the transition appear more
abrupt. Move the slider to the left to make the brush smaller, which produces a smoother transition.

352 | Corel Painter 2015 User Guide
You can also
Adjust the amount of variation that is applied to
Size
Move the Size Jitter slider.
Smooth the size variation Move the Smoothness slider.
Link the size settings to a specific stylus or mouse
movement
Choose an option from the Expression list box.
Set the percentage of variability that you want the
expression to apply
Move the Min Size slider.
Adjust the angle of the Direction expression Move the Direction slider.
You can also set the brush size dynamically onscreen. For more information, see “To set brush
attributes onscreen” on page 308.
When adjusting Size Jitter, make sure the Min Size slider is not set to 100%. Setting the Min Size
to 100% stops Size Jitter from occurring.
You can also change the brush size from the property bar by adjusting the Size slider or
typing a value in the Size box.
To set stroke transition
1Choose Window Brush Control Panels Size.
2Move the Size Step slider to the right to increase the transition between brush sizes. Move it to the left
to make the transitions smaller.
To switch the brush size preview mode
1Choose Window Brush Control Panels Dab Preview.
2Click the Preview Size and Shape button .

Adjusting brushes with brush controls | 353
Angle controls
The Angle controls let you change the shape of a brush. Some Angle controls work in conjunction with
Expression settings. For more information, see “Expression settings” on page 327.
The Squeeze setting lets you control the shape of the brush dab. Squeezing a brush changes it from round
to elliptical. You use the Squeeze controls with Circular and Captured dab types.
Brushstrokes with Squeeze set to 100% (left) and 25% (right)
This brushstroke created with Pen brush uses the
Squeeze control to produce a calligraphy effect.
The Angle slider controls the angle of an elliptical brush dab and the length of the ellipse. It is significant
only for dabs with Squeeze settings under 100%. You can use Angle controls with Circular and Captured
dab types.
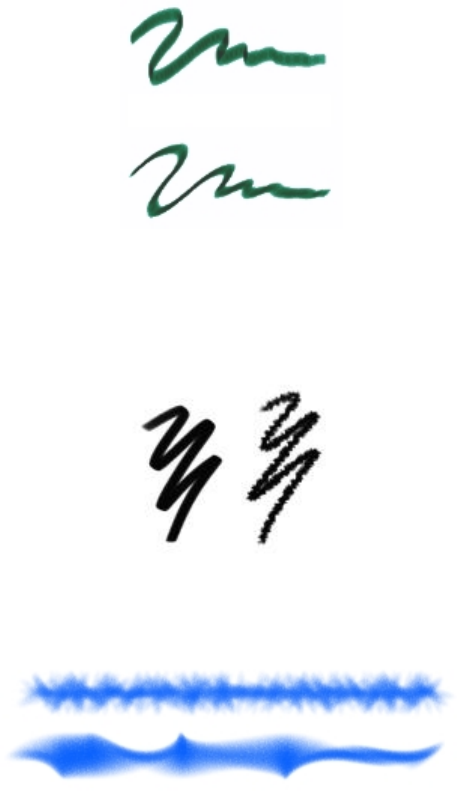
354 | Corel Painter 2015 User Guide
Brushstrokes with Angle set to 90° (top) and 45° (bottom)
The Angle Jitter control lets you introduce variation to the angle of the brushstrokes, which enhances their
responsiveness and natural appearance. You can use the Smoothness slider to smooth the angle variation
in a brushstroke for a more organic look.
Felt Marker brushstrokes without Angle Jitter (left) and with Angle Jitter (right)
Angle Jitter applied to a brushstroke without jitter
smoothing (top) and with jitter smoothing (bottom)
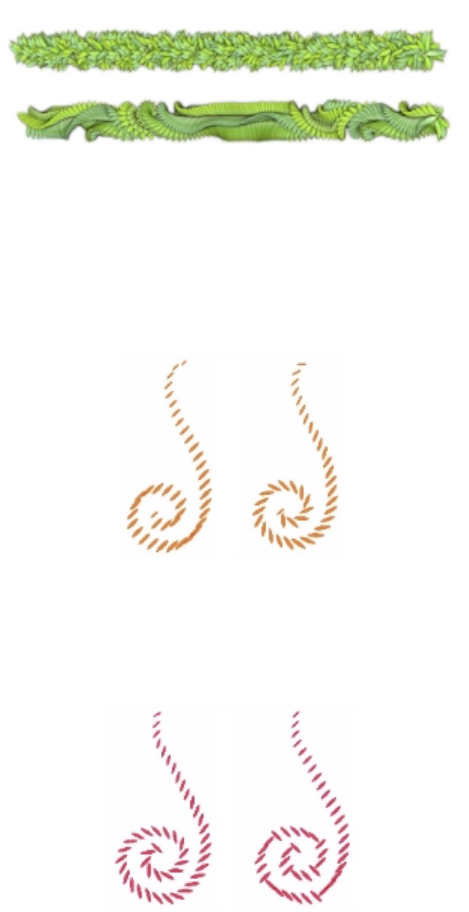
Adjusting brushes with brush controls | 355
Angle Jitter applied to an Image Hose brushstroke without
jitter smoothing (top) and with jitter smoothing (bottom)
For dab-based brushes, the Ang Range setting lets you specify a range of dab angles that may appear in a
brushstroke. To take advantage of this feature, you must use the Expression settings to base the angle on
some factor, such as stroke direction or bearing. For more information, see “Expression settings” on page
327.
Brushstrokes with Ang Range set to 0° (left) and 180° (right)
For dab-based brushes, the Ang Step slider controls the increment of change for brushes with an Ang
Range setting greater than 0°. For example, setting the Ang Step to 5° produces a brush dab every 5°
within the current Ang Range setting.
Brushstrokes with Ang Step set to 0° (left) and 90° (right)

356 | Corel Painter 2015 User Guide
To set brush shape
1Choose Window Brush Control Panels Angle.
2Move the Squeeze slider to the left to make the brush dab more elliptical. Move it to the right to make
it rounder.
You can also change the brush shape dynamically onscreen. For more information, see “To set
brush attributes onscreen” on page 308.
To apply an expression to the brush angle
1Choose Window Brush Control Panels Angle.
2Choose an option from the Expression list box.
If you want to switch the main and additional colors, click the Invert button .
If you chose Direction from the Expression list box, move the Direction slider until the desired angle is
achieved.
To set elliptical brush dab angle
1Choose Window Brush Control Panels Angle.
2Move the Angle slider to the right to rotate the dab counterclockwise. Move the slider to the left to
rotate the brush clockwise.
To set brush dab angle range
1Choose Window Brush Control Panels Angle.
2Move the Ang Range slider to the right to increase the range of angles that can appear in a dab. Move
the slider to the left to reduce the range of angles that can appear in a stroke.
Setting this slider to 360° allows for any angle in your stroke.
To set angle variation using jitter
1Choose Window Brush Control Panels Angle.
2Move the Angle Jitter slider.
To smooth the angle variation, move the Smoothness slider.
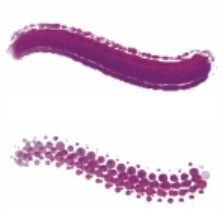
Adjusting brushes with brush controls | 357
To set brush angle increment
1Choose Window Brush Control Panels Angle.
2Move the Ang Step slider to the right to produce fewer angles between dabs. Move it to the left to
create more angles between dabs.
Spacing controls
When a brushstroke uses a dab-based dab type, Corel Painter creates the stroke with a series of dabs. By
adjusting the spacing between those dabs, you can control the continuity of the brushstroke.
The Spacing control allow you to set the distance between brush dabs in a stroke. The Min Spacing slider
specifies the minimum number of pixels between dabs. If you don’t want a continuous stroke, you can
adjust the Min Spacing to create a dotted or dashed line. Each dot or dash represents one brush dab.
Brushstrokes with Min Spacing set to 2.0 (top) and 10.5 (bottom)
Continuous Time Deposition controls whether you must move a brush before a medium is applied. With
Continuous Time Deposition enabled, the medium begins flowing at the first touch.
Brushes that use rendered dab types take full advantage of this setting, which causes the medium to pool
realistically when the stroke is slowed or paused. Brushes that use dab-based dab types require a full pause
in the stroke before the medium begins to pool. You use Continuous Time Deposition mostly with airbrush
tools.
With Continuous Time Deposition disabled, you must move a brush before the medium flows.
Boost allows you to optimize the performance of brushstrokes. However, a high-boost level may produce
a less accurate brushstroke that appears a bit jagged. This setting applies only to specific brush dab types,
such as Flat and Camel hair.

358 | Corel Painter 2015 User Guide
To set spacing between brush dabs
1Choose Window Brush Control Panels Spacing.
2Perform a task from the following table.
To Do the following
Increase the distance between dabs Move the Spacing slider to the right.
Decrease the distance between dabs Move the Spacing slider to the left until the dabs
begin to overlap. Overlapping increases the density
of the stroke and makes it look more continuous.
Set the size of the dab to equal the spacing Move the Spacing slider to the right to 100%. For
example, a dab that is 10 pixels across is repeated
every 10 pixels.
To set minimum dab spacing
1Choose Window Brush Control Panels Spacing.
2Move the Min Spacing slider to the right to increase the minimum spacing between dabs. Move it to
the left to decrease the minimum spacing between dabs.
To set continuous time deposition
1Choose Window Brush Control Panels Spacing.
2Enable the Continuous Time Deposition check box.
To boost brushstrokes
1Choose Window Brush Control Panels Spacing.
2Move the Boost slider to the right to increase brush performance. Move it to the left to decrease brush
performance.

Adjusting brushes with brush controls | 359
Changing dab profiles
The Dab Profile panel displays a selection of dab profiles that you can apply to your brushes. Each brush
tip profile shows a cross-section of density distribution across the diameter of the dab. You can think of a
brush tip profile as a bell-curve graph representing the density spread across the brush dab.
Different media have different density distributions. Changes in the density distribution produce different
marking qualities in a brushstroke. For rendered airbrush dab types, the brush tip profile controls the
concentration of the spray.
Each Corel Painter brush uses one of the following brush tip profiles.
Profile Description
Pointed Profile Provides maximum density at the center, with rapid
falloff to the edge.
Medium Profile
Has a wide area of greater density at the center,
with rapid falloff to the edge.
Linear Profile
Provides maximum density at the center, with even
falloff to the edge.
Dull Profile
Provides maximum density at the center, with high
density weighting to the edge.
Watercolor Profile
Provides maximum density at the outer edge in a
ringlike fashion, with medium internal density. This
tip may be used with the rendered dab types to
yield a hollow dab or a spray concentration.

360 | Corel Painter 2015 User Guide
Profile Description
1-Pixel Edge
Provides maximum density throughout, with rapid
falloff at the edge, producing a 1-pixel, anti-aliased
edge.
Artists’ Oils brush tip profiles
There are six brush tips designed specifically for Artists’ Oils brushes. You can also use any brush tip, listed
in the table above, with Artists’ Oils brushes.
Artists’ Oils profile Description
Soft Round Provides maximum density throughout, with rapid
falloff at the edge.
Pointed Rake Provides a range of bristle lengths, with bristles
longer in the center and tapering in length toward
the edge.
Flat Rake Provides a range of bristle lengths and maximum
density throughout, producing pronounced, even
bristling.
Flat Designed for Artists’ Oils palette knives, it provides
maximum density throughout, with rapid falloff at
the edge.
Chisel Designed for Artists’ Oils palette knives, its
maximum density is off-center, with uneven falloff.
Wedge Designed for Artists’ Oils palette knives, it provides
maximum density at one edge, with consistent
falloff to the other edge.

Adjusting brushes with brush controls | 361
Hard Media Profiles
There are six tip profiles designed specifically for the Hard Media variants.
Hard Media profile Description
Pencil Profile Provides a sharper tip when perpendicular to the
tablet and a wider, softer tip when at an angle.
Medium Profile
Has a wide area of greater density at the center,
with rapid falloff toward the edge.
Linear Profile
Provides maximum density at the center, with even
falloff toward the edge.
Pointed Profile Provides maximum density at the center, with rapid
falloff toward the edge.
Dull Profile
Provides maximum density at the center, with high-
density weighting toward the edge.
1-Pixel Edge
Provides maximum density throughout, with rapid
falloff toward the edge, producing a 1-pixel, anti-
aliased edge.
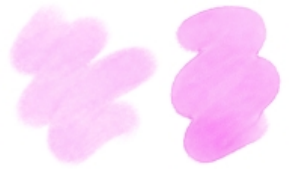
362 | Corel Painter 2015 User Guide
To choose a brush tip profile
1Choose Window Brush Control Panels Dab Profile.
2In the Dab Profile panel, click a brush tip profile icon.
Real Watercolor controls
The Corel Painter Real Watercolor brush controls help you achieve very realistic watercolor brushstrokes.
The controls simulate working with a watercolor brush, watercolor paper, pigments, and a glass of water.
You can adjust pigment levels and water consistency to achieve natural flow and pigment settling effects.
The following section describes the Real Watercolor brush controls in more detail.
Brush controls
The Real Watercolor brush-related controls let you set the amount of water and pigment that the brush
deposits on the paper.
Brushstrokes set at a lower Wetness setting (left) and higher Wetness setting (right)
Water controls
The Real Watercolor water-related controls let you adjust the water viscosity, or thickness, in order to
control the way it flows and spreads on the surface of the paper. For example, if the water viscosity is high,
it will produce a runny effect and the water will flow and spread easily. If the water viscosity is low and
thick, it will have a tendency to pool, instead of flow. You can also adjust the speed at which the water
dries, which influences how and where the pigment settles on the paper.
Adjusting brushes with brush controls | 363
Brushstrokes set at a lower Viscosity setting (left) and higher Viscosity setting (right)
Flow controls
The Flow controls let you enable and choose flow maps, so you can introduce an additional surface texture
that promotes greater water displacement. For more information, see “Getting started with flow maps”
on page 449. You can also adjust the Flow Resistance to control the effect the paper grain or flow map
texture has on the direction of the water flow.
Brushstrokes set at a lower Flow Resistance setting
(left) and higher Flow Resistance setting (right)
Pigment controls
The Pigment controls let you adjust how much pigment is deposited on the paper after the water
evaporates and how quickly the pigment settles on the paper. You can also specify the degree to which
water is able to lift dry pigment from the paper.
Brushstrokes set at a higher Settling Rate (left) and a lower Settling Rate (right)
364 | Corel Painter 2015 User Guide
Paper controls
With the Paper controls, you can adjust how the Real Watercolor brushes interact with paper texture and
grain. You can adjust the paper roughness, which affects all other paper settings.
Brushstrokes set at a lower Roughness setting (left) and higher Roughness setting (right)
In addition, you can set the rate at which the paper grain can absorb water and control the amount of
pigment that settles into the valleys of the paper grain when it dries.
Wind controls
The Wind controls let you control the angle at which water flows on the paper. You can also specify the
amount of wind force exerted on the water.
Brushstrokes set at a lower Angle and Force settings
(left) and higher Angle and Force settings (right)
Diffusion controls
The diffusion controls allow you to manage how and when the pigment is diffused on the paper. You can
specify that diffusion be precisely applied to ensure accurate water flow. You can also delay diffusion so the
effect is applied only after you complete a brushstroke. In addition, you can choose to suspend diffusion
temporarily. This lets you apply multiple brushstrokes to the paper before applying the diffusion, to apply
the effect to all brushstrokes at once. You can also specify the number of flow steps to be completed during
animation. This controls the rate at which the visual flow of the pigment refreshes onscreen. For example,
you can specify a lower number of steps for smaller brushes and a higher number of steps for bigger
brushes.

Adjusting brushes with brush controls | 365
To adjust the Real Watercolor controls
1Choose Window Brush Control Panels Real Watercolor.
2Perform an action from the following table.
To Do the following
Set the amount of water the brush deposits on the
paper
In the Brush area, move the Wetness slider to
adjust the amount of water.
Set the amount of pigment the brush deposits on
the paper
In the Brush area, move the Concentration slider
to adjust the amount of pigment.
Adjust the water thickness to control the way it
flows and spreads on the surface of the paper
In the Water area, move the Viscosity slider to
adjust the thickness.
Adjust the speed at which the water dries In the Water area, move the Evaporation Rate
slider to adjust the effect.
Adjust the degree to which the flow map surface,
or the paper texture, affects the direction of the
water flow
In the Flow area, move the Flow Resistance slider
to adjust the effect.
Adjust the amount of pigment deposited on the
paper after the water evaporates
In the Pigment area, move the Settling Rate slider
to adjust the amount of pigment.
Control how quickly the pigment settles on the
paper
In the Pigment area, move the Weight slider to
the left to achieve a lighter pigment or to the right
to achieve a heavier pigment. A lighter weight
pigment flows with the water longer, whereas a
heavier pigment settles onto the paper very quickly.
Specify the degree to which water is able to lift dry
pigment from the paper
In the Pigment area, move the Pickup slider to
adjust the amount of pigment pickup.

366 | Corel Painter 2015 User Guide
To Do the following
Adjust the paper roughness In the Paper area, move the Roughness slider to
the left to decrease the paper roughness or to the
right to increase the paper roughness. This impacts
flow resistance, dry rate, and pigment granulation.
Adjust the rate at which the paper grain can
absorb water
In the Paper area, move the Dry Rate slider to the
left to decrease the speed of absorption or to the
right to increase the speed of absorption.
Control the amount of pigment that settles into
the valleys of the paper grain when it dries
In the Paper area, move the Granulation slider to
adjust the effect.
Control the angle at which water flows on the
paper
In the Wind area, move the Angle slider to adjust
the angle.
Specify the amount of wind force exerted on
water, which affects the way it flows on the paper
In the Wind area, move the Force slider to adjust
the force.
You can optimize the performance of Real Watercolor and Real Wet Oil brushes by temporarily
disabling High Quality Display. Click the Magnifier tool in the toolbox, and click the High
Quality Display button on the property bar.
To apply a flow map when using a Real Watercolor brush
1In the Brush library panel, choose a Real Watercolor brush variant.
2Choose Window Brush Control Panels Real Watercolor.
3In the Flow area, enable the Flow Map option to set the Source.
To maximize the effect of flow maps, you need to ensure that the Wetness control is set high and
the Evaporation Rate control is set low.

Adjusting brushes with brush controls | 367
To control Real Watercolor diffusion
1Choose Window Brush Control Panels Real Watercolor.
2Perform an action from the following table.
To Do the following
Apply diffusion precisely to ensure accurate water
flow
Enable the Accurate Diffusion check box.
Delay diffusion until the brushstroke is complete Enable the Delay Diffusion check box.
Suspend diffusion temporarily Enable the Pause Diffusion check box or click the
Pause Diffusion button on the property bar
to suspend the diffusion. You need to disable the
check box to perform the diffusion.
Specify the speed at which the pigment is revealed
onscreen
Move the Animation Step slider to the left to
lower the speed of the animation or to the right to
increase the speed.
Specifying a lower Animation Step, such as 0,
produces a smoother effect.
Real Wet Oil controls
The Real Wet Oil brush variants help you achieve realistic oil brushstrokes. For example, you can control
paint viscosity and color concentration, similar to mixing oil paint and a medium. The following section
describes the Real Wet Oil brush controls in more detail.
Brush controls
The Real Wet Oil brush-specific controls let you set the amount of liquid and paint that the brush deposits
on the canvas.
368 | Corel Painter 2015 User Guide
Brushstrokes set at a lower Wetness setting (left) and higher Wetness setting (right)
Liquid Flow controls
The Liquid Flow controls let you adjust the liquid viscosity, or thickness, in order to control the way it’s
applied to the canvas. For example, if the liquid viscosity is high, the paint spreads easily and looks smooth.
If the liquid viscosity is low and thick, the paint does not spread as easily and creates the illusion of texture.
Brushstrokes set at a lower Viscosity setting (left) and higher Viscosity setting (right)
You can also adjust the speed at which the liquid evaporates, which influences how the paint dries on the
canvas.
Brushstrokes set at a lower Evaporation Rate (left) and higher Evaporation Rate (right)
Flow controls
The Flow controls let you enable and choose flow maps, so you can introduce an additional surface texture
to promote greater liquid displacement. For more information, see “Getting started with flow maps” on
page 449. You can also adjust the flow resistance to control how paint spreads on the canvas or flow
map.
Adjusting brushes with brush controls | 369
Brushstrokes set at a lower Flow Resistance setting
(left) and higher Flow Resistance setting (right)
Paint controls
The Paint controls let you modify the look and feel of paint on the canvas. For example, you can adjust the
opacity of the paint deposited on the canvas after the oil dries. You can also specify how easily the paint
blends and the degree to which oil is able to lift dry paint from the canvas.
Brushstrokes set at a lower Settling Rate (left) and higher Settling Rate (right)
Canvas controls
With the canvas controls, you can adjust how the Real Wet Oil brushes interact with canvas texture and
grain. For example, you can adjust the canvas roughness, which affects all other canvas settings.
Brushstrokes set at a lower Roughness setting (left) and higher Roughness setting (right)
In addition, you can set the rate at which the paper grain can absorb liquid and control the amount of
paint that settles into the valleys of the canvas grain when it dries.
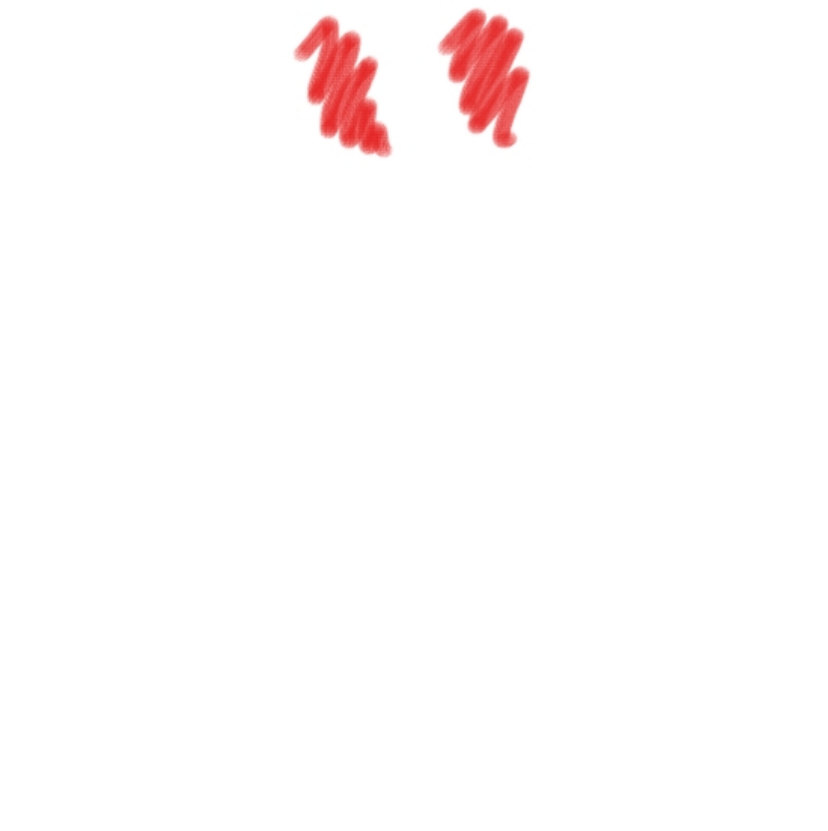
370 | Corel Painter 2015 User Guide
Wind controls
The Wind controls let you to set the angle at which the paint spreads on the canvas. You can also specify
the amount of wind force exerted on the paint.
Brushstrokes set at a lower Angle and Force settings
(left) and higher Angle and Force settings (right)
Diffusion controls
The Diffusion controls allow you to manage how and when the paint is diffused on the canvas. You
can specify that diffusion be precisely applied to ensure accurate paint dispersion. You can also delay
diffusion so the effect is applied only after you complete a brushstroke. In addition, you can choose to
suspend diffusion temporarily. This lets you apply multiple brushstrokes to the canvas before applying the
diffusion, to apply the effect to all brushstrokes at once. You can also specify the number of flow steps
to be completed during animation. This controls the rate at which the visual flow of the paint refreshes
onscreen. For example, you can specify a lower number of steps for smaller brushes and a higher number of
steps for bigger brushes.
To adjust the Real Wet Oil controls
1Choose Window Brush Control Panels Real Wet Oil.
2Perform an action from the following table.
To Do the following
Set the amount of oil the brush deposits on the
canvas
In the Brush area, move the Wetness slider to
adjust the amount of liquid.
Set the concentration of paint the brush deposits
on the canvas
In the Brush area, move the Concentration slider
to adjust the amount of pigment.

Adjusting brushes with brush controls | 371
To Do the following
Adjust the oil thickness to control the way it
spreads on the surface of the canvas
In the Liquid Flow area, move the Viscosity slider
to adjust the viscosity effect.
Adjust the speed at which the paint dries In the Liquid Flow area, move the Evaporation
Rate slider to adjust the effect.
Adjust the degree to which the flow map surface,
or the paper texture, affects the direction of the
water flow
In the Flow area, move the Flow Resistance slider
to adjust the effect.
Adjust the opacity of the paint deposited on the
canvas after the oil dries
In the Paint area, move the Settling Rate slider
to the left to decrease the amount of paint (more
opacity) or to the right to increase the amount of
paint (less opacity).
Control how easily the paint colors mix on the
canvas
In the Paint area, move the Blend Rate slider to
the left to decrease the blending capacity or to the
right to increase the blending capacity.
Specify the degree to which oil is able to lift dry
paint from the canvas
In the Paint area, move the Pickup slider to adjust
the amount of paint pickup.
Adjust the canvas roughness In the Canvas area, move the Roughness slider
to the left to decrease the canvas roughness or
to the right to increase the canvas roughness.
(This impacts flow resistance, dry rate, and paint
granulation.)
Control the effect canvas grain has on the direction
of the paint flow
In the Canvas area, move the Flow Resistance
slider to adjust the flow resistance.
Adjust the rate at which the canvas grain can
absorb paint
In the Canvas area, move the Dry Rate slider to
adjust the speed of absorption.

372 | Corel Painter 2015 User Guide
To Do the following
Control the degree to which paint settles into the
valleys of the canvas grain when it dries
In the Canvas area, move the Granulation slider to
adjust the effect.
Control the angle at which paint spreads on the
canvas
In the Wind area, move the Angle slider to adjust
the angle.
Specify the amount of wind force exerted on paint,
which affects the way it spreads on the canvas
In the Wind area, move the Force slider to adjust
the force.
You can improve the appearance of the visual flow of paint onscreen by clicking the Magnifier
tool in the toolbox, and disabling the High Quality Display button on the property bar.
To apply a flow map when using a Real Wet Oil brush
1In the Brush library panel, choose a Real Wet Oil brush variant.
2Choose Window Brush Control Panels Real Wet Oil.
3In the Flow area, enable the Flow Map option to set the Source.
To maximize the effect of flow maps, you need to ensure that the Wetness control is set high and
the Evaporation Rate control is set low.
To control Real Wet Oil diffusion
1Choose Window Brush Control Panels Real Wet Oil.
2Perform an action from the following table.
To Do the following
Apply diffusion precisely to ensure accurate water
flow
Enable the Accurate Diffusion check box.
Delay diffusion until the brushstroke is complete Enable the Delay Diffusion check box.

Adjusting brushes with brush controls | 373
Suspend diffusion temporarily Enable the Pause Diffusion check box to suspend
the diffusion. You need to disable the check box to
perform the diffusion.
Specify the speed at which the paint is revealed
onscreen
Move the Animation Step slider to the left to
lower the speed of the animation or to the right to
increase the speed.
Specifying a lower Animation Step, such as 0,
produces a smoother effect.
Computed Circular controls
The Computed Circular controls allow you to specify the tip profile of brushes using the Computed
Circular dab type. For example, you can customize the dab opacity and hardness, which controls the color
density at the outer edge of the dab.
To customize a Computed Circular dab profile
1Choose Window Brush Control Panels Computed Circular.
2Perform a task from the following table.
To Do the following
Modify dab opacity Move the Dab Opacity slider to the left to reduce
the opacity. Move it to the right to increase the
opacity.
Control the color density at the edge of the dab Move the Dab Hardness slider to the left to reduce
the color density and create a soft dab. Move it to
the right to increase the color density and create a
hard dab.
Hard Media controls
The Hard Media controls let you customize drawing and sketching tools with more precision. You can
adjust several Hard Media variants, which include blenders, pencils, chalks, Conté, crayons, pastels, markers,

374 | Corel Painter 2015 User Guide
and erasers. The Hard Media controls can be used only with the Circular, Captured, and Eraser dab types.
For more information, see “Hard Media” on page 457.
Bristle controls
The Bristle controls allow you to adjust the appearance of bristle brushes, such as Camel Hair, Flat, Palette
Knife, and Bristle Spray. You can specify the number of bristles, or bristle density (Feature). You can also
control how far the bristles spray out, or fan out, when applying brushstrokes (Spread). This control is
linked to the Tilt expression. For example, the more you tilt the stylus, the greater the bristles will fan out.
You can also specify that bristles scale relative to the size of the brush. This ensures that the feature is
distributed proportionally to match the size of the brush.
To adjust bristle controls
1Choose Window Brush Control Panels Bristles.
2Perform an action from the following table:
To Do the following
Specify the number of bristles Move the Feature slider. The higher the setting, the
denser the brush bristles.
Adjust the fanning of the bristles Move the Spread slider. This control is linked to the
Tilt expression.
To scale bristles with the brush size
1Choose Window Brush Control Panels Bristles.
2Enable the Scale Feature with Brush Size check box.
You can also scale a brushstroke’s features with the brush size by clicking the Scale Feature with
Brush Size button on the Brush property bar.
You can also disable the scaling option in all areas by choosing Corel Painter 2015 menu
Preferences General (Mac OS) or Edit Preferences General (Windows), and enable the
Disable feature scaling when resizing brush.
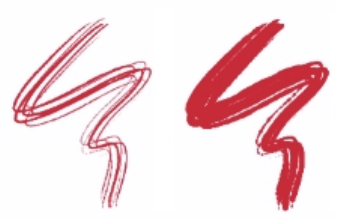
Adjusting brushes with brush controls | 375
RealBristle controls
RealBristle controls let you choose a brush tip profile, adjust the brush, and determine how the brush
interacts with the surface of the canvas. For more information about RealBristle controls, see “Modifying
RealBristle settings” on page 492.
Static Bristle controls
The Static Bristle controls help you create the look of a real brushstroke, complete with the striations that
hairs on a real brush make. Use the Static Bristle controls to design the individual bristles in a single brush
dab.
You can also preview a “soft” view of the dab to display how the bristle dabs change. For more
information, see “To switch the brush size preview mode” on page 352.
If you choose Rake as the stroke type, you can adjust brush scale and contact angle. For more information,
see “Rake controls” on page 403.
The Thickness slider controls the diameter of separate bristles.
Brushstrokes with Thickness set to 17% (left) and 87% (right)
Clumpiness lets you control how bristles adhere to each other by applying a random variance to the
thickness of each bristle, which makes some of the bristles look like they are clumping together. Clumpiness
is proportional to Thickness.

376 | Corel Painter 2015 User Guide
Brushstrokes with Clumpiness set to 0% (left) and 100% (right)
The Hair Scale lets you control the density of bristles in the brush dab and, therefore, the number of bristles
in the dab.
Brushstrokes with Hair Scale set to 410% (top) and 990% (bottom)
Scale/Size lets you control the degree of size variation applied to the bristles of a brush. At 0%, there is
no size change applied to the bristles. Setting this slider to a value greater than 0% creates a set of scaled
iterations of the dab.
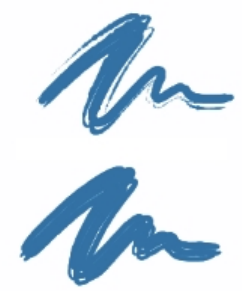
Adjusting brushes with brush controls | 377
Brushstrokes with Scale/Size set to 0% (top) and 100% (bottom)
At a Scale/Size setting of 100%, when the brush size changes, the bristles scale in proportion to the size. At
a Scale/Size setting of 8%, when the brush size changes, the bristles remain a constant absolute size. The
Scale/Size control is invalid if a size range is not specified (that is, if Min Size is set to 100%).
To set bristle thickness
1Choose Window Brush Control Panels Static Bristle.
2Move the Thickness slider to the left to reduce the density of the medium left by the stroke. Move it to
the right to increase brush density.
When the slider is moved fully to the left, the brush leaves a faint stroke — even if Opacity is set to
100%.
To set clumping of bristles
1Choose Window Brush Control Panels Static Bristle.
2Move the Clumpiness slider to the left to reduce bristle clumping. Move it to the right to increase bristle
clumping.
To set bristle density
1Choose Window Brush Control Panels Static Bristle.
2Move the Hair Scale slider to the left to reduce the amount of bristle density and create a fine-hair
brush. Move it to the right to increase density.
378 | Corel Painter 2015 User Guide
To scale bristles according to brush size
1Choose Window Brush Control Panels Static Bristle.
2Move the Scale/Size slider to the left to reduce the degree of size variation. Move it to the right to
increase size variation.
Airbrush controls
The Airbrush controls allow you to adjust the amount and the displacement of the media that is applied by
an airbrush.
Feature lets you set the spacing in between individual paint droplets.
Flow controls how much media is applied by an airbrush stroke. The Flow control acts like the needle
control on a real airbrush. Because the airbrush dab types deposit many small dabs to create their spray-
paint look, you might need to cut down on the flow to speed up the airbrush.
You can also link an Expression setting to both the Flow and Feature controls. This lets you link the
controls to a stylus or mouse movement. You can choose different Expression settings for each. For
example, you can link Flow to the Pressure expression and link Feature to the Tilt expression.
You can also adjust the Min setting to specify the range of variability that you want the expression to apply.
The Min Flow and Min Feature settings represent a percentage of the Flow and Feature settings and they
must be linked to an expression to have an effect. For example, if you link the Pressure expression to the
Flow control, set the Flow slider to 40% and set the Min Flow slider to 50%, the amount of flow will vary
from 20% to 40% every time you apply pressure with the stylus.
Spread controls how paint spreads out as it is applied. In other words, it sets the size of the cone of spread
from the tip of the airbrush or spray can. A good range for the Spread setting is 30% to 40%. Narrow
settings for Spread and Angle can cause problems. Narrow settings for Spread and Tilt can cause paint to
be deposited away from the cursor.
Flow Jitter and Feature Jitter let you adjust the amount of variation that you want these controls to apply
when using the airbrush, which produces more realistic results. You can use the Smoothness sliders to
smooth the jitter for a more organic look.
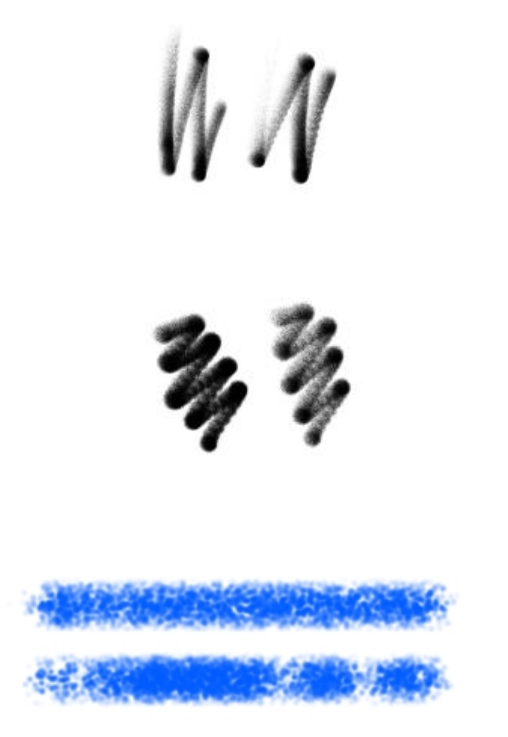
Adjusting brushes with brush controls | 379
Broad Wheel Airbrush brushstrokes without Flow Jitter (left) and with Flow Jitter (right)
Finer Spray Airbrush brushstrokes without Feature Jitter (left) and with Feature Jitter (right)
Flow Jitter applied to a brushstroke without jitter
smoothing (top) and with jitter smoothing (bottom)

380 | Corel Painter 2015 User Guide
Feature Jitter applied to a brushstroke without jitter
smoothing (top) and with jitter smoothing (bottom)
To adjust the Airbrush feature spacing
1Choose Window Brush Control Panels Airbrush.
2Move the Feature slider to adjust the paint droplet spacing. The higher the setting, the farther apart the
paint droplets will appear.
You can also
Adjust the amount of variation that is applied to
Feature
Move the Feature Jitter slider.
Smooth the variation in the paint spacing Move the Smoothness slider.
Link the features settings to a specific stylus or
mouse movement
Choose an option from the Expression list box.
Set the percentage of variability that you want the
expression to apply
Move the Min Feature slider.
Adjust the angle of the Direction expression Move the Direction slider.
When adjusting Feature Jitter, make sure the Min Feature slider is not set to 100%. Setting the
Min Feature to 100% stops Feature Jitter from occurring.

Adjusting brushes with brush controls | 381
To set paint spread
1Choose Window Brush Control Panels Airbrush.
2Move the Spread slider to the left to reduce the amount of spread, or to the right to increase the
amount of spread.
To set ink flow
1Choose Window Brush Control Panels Airbrush.
2Move the Flow slider to the left to reduce the smallest amount of media applied with a stroke, or to the
right to increase it.
You can also
Adjust the amount of variation that is applied to
Flow
Move the Flow Jitter slider.
Smooth the variation in the ink flow Move the Smoothness slider.
Link the flow settings to a specific stylus or mouse
movement
Choose an option from the Expression list box.
Set the percentage of variability that you want the
expression to apply
Move the Min Flow slider.
Adjust the angle of the Direction expression Move the Direction slider.
When adjusting Flow Jitter, make sure the Min Flow slider is not set to 100%. Setting the Min
Flow to 100% stops Flow Jitter from occurring.
Artists’ Oils controls
The Artists’ Oils controls are divided into three critical components: Paint, Brush, and Canvas. You can
control Artists’ Oils brush size and opacity with a tablet expression. For more information, see “Expression
settings” on page 327.

382 | Corel Painter 2015 User Guide
The Grain slider on the General panel affects the look of Artists’ Oils by controlling the level at which
paper absorbs paint. When the Grain slider is set to 0%, the paper absorbs a very limited amount of paint;
no paper grain is visible in the stroke and the paint color appears lighter. When Grain is set to 100%, the
paper completely absorbs the paint; no paper grain is visible, and the paint color appears darker. Grain
is visible with Artists’ Oils when Grain is set between 1% and 99%. As an Artists’ Oils brush runs out of
paint, paper grain becomes more visible, so Amount also affects how much grain appears.
Artists’ Oil brushes hold a finite amount of paint.
As the paint runs out, the stroke becomes fainter.
Paint
Amount determines how much paint is loaded before each new brushstroke. The more paint you load, the
longer the brushstroke lasts.
Viscosity controls the rate of paint transfer to the canvas. The higher the viscosity, the faster the brush runs
out of paint, creating shorter brushstrokes.
Blend controls how the paint color mixes with paint already on the canvas. High blend levels allow paint on
the brush to blend easily with existing paint.
Brush
Bristling controls the amount of bristling at the tail and tip of a brushstroke. For example, you can adjust
bristling to increase the irregularity of the brush bristles.
Clumpiness controls brush bristle fineness. For example, you can increase the amount of brush hair
variation, or clumpiness.
Adjusting brushes with brush controls | 383
Trail-off determines the length of a brushstroke tail when the brush is running out of paint. This doesn’t
change the length of the brushstroke, just the look of the end of the stroke. For example, you can adjust
the trail-off to produce a longer trail-off effect of the brushstroke tail.
Canvas
Wetness determines the wetness of the paint on the canvas. This affects how paint from a brushstroke
interacts with paint already on the canvas.
Painting in Dirty Mode
Painting in Dirty Mode allows you to further replicate the experience of using artists’ oil paints in the
real world. In this mode, any paint remaining on the brush upon completion of a brushstroke is left to
interact with paint loaded for the next brushstroke. When you select another color, the brush is cleared of
remaining paint.
To set the amount of Artists’ Oils paint loaded
1With an Artists’ Oils brush selected, choose Window Brush Control Panels Artists’ Oils.
If the controls on the Artists’ Oils panel are not available (appear gray), the selected Oils brush variant
is not supported by the Artists’ Oils controls. For example, any Oils brush variant name that begins with
Real are supported brush variants.
2Move the Amount slider to the right to increase the amount of paint loaded for each brushstroke.
To set the viscosity of Artists’ Oils paint
1With an Artists’ Oils brush selected, choose Window Brush Control Panels Artists’ Oils.
If the controls on the Artists’ Oils panel are not available (appear gray), the selected Oils brush variant
is not supported by the Artists’ Oils controls. For example, any Oils brush variant name that begins with
Real are supported brush variants.
2Move the Viscosity slider to the right to increase the rate at which paint is transferred to the canvas.
It is important to note that higher viscosity settings make for a shorter brushstroke.
To set Artists’ Oils paint blending
1With an Artists’ Oils brush selected, choose Window Brush Control Panels Artists’ Oils.
If the controls on the Artists’ Oils panel are not available (appear gray), the selected Oils brush variant
is not supported by the Artists’ Oils controls. For example, any Oils brush variant name that begins with
Real are supported brush variants.
2Move the Blend slider to the right to increase the blending of brushstroke paint and existing paint.

384 | Corel Painter 2015 User Guide
You can also set how Artists’ Oils paint blend on the Blend slider on the Artists’ Oils property bar.
To set Artists’ Oils brush bristling
1With an Artists’ Oils brush selected, choose Window Brush Control Panels Artists’ Oils.
If the controls on the Artists’ Oils panel are not available (appear gray), the selected Oils brush variant
is not supported by the Artists’ Oils controls. For example, any Oils brush variant name that begins with
Real are supported brush variants.
2Move the Bristling slider to the right to increase the length of the bristling and the tip and tail of the
brushstroke.
To set Artists’ Oils brushstroke trail-off
1With an Artists’ Oils brush selected, choose Window Brush Control Panels Artists’ Oils.
If the controls on the Artists’ Oils panel are not available (appear gray), the selected Oils brush variant
is not supported by the Artists’ Oils controls. For example, any Oils brush variant name that begins with
Real are supported brush variants.
2Move the Trail-off slider to the right to increase the length of brushstroke trail-off.
To set canvas wetness for Artists’ Oils
1With an Artists’ Oils brush selected, choose Window Brush Control Panels Artists’ Oils.
If the controls on the Artists’ Oils panel are not available (appear gray), the selected Oils brush variant
is not supported by the Artists’ Oils controls. For example, any Oils brush variant name that begins with
Real are supported brush variants.
2Move the Wetness slider to the right to increase the mixing of brushstroke color and existing color.
You can also set how Artists’ Oils paints blend on the Blend slider on the Artists’ Oils property bar.
To paint in Dirty Mode
1With an Artists’ Oils brush selected, choose Window Brush Control Panels Artists’ Oils.
If the controls on the Artists’ Oils panel are not available (appear gray), the selected Oils brush variant
is not supported by the Artists’ Oils controls. For example, any Oils brush variant name that begins with
Real are supported brush variants.
2Enable the Dirty Mode check box.

Adjusting brushes with brush controls | 385
Impasto controls
The Impasto brush controls let you modify and create brush variants that give the illusion of depth. The
controls allow you to choose different methods for applying and controlling the appearance of depth. For
more information, see “Impasto” on page 501 and “Adjusting and creating Impasto brushes” on page
503.
Some Impasto controls work in conjunction with Expression settings. For more information, see
“Expression settings” on page 327.
Digital Watercolor controls
Digital Watercolor controls let you create effects similar to those of watercolor brushes without requiring a
separate layer.
You can use Diffusion to create soft, feathery edges on the brushstrokes.
Wet Fringe controls the amount of pooling of water and paint at the edges of Digital Watercolor
brushstrokes. For more information about wet fringe, see “Working with Digital Watercolor brushes” on
page 428.
Water controls
Water controls work with Watercolor layers. A Watercolor layer is automatically created when you apply a
stroke with a Watercolor brush. The layer can be edited from the Layers panel.
Wetness controls the dilution and the spread of paint. As Wetness is increased, the resulting stroke
expands over a larger area, eliminating the appearance of brush hairs.
Brushstrokes with Wetness set to 0 (top) and 40 (bottom)
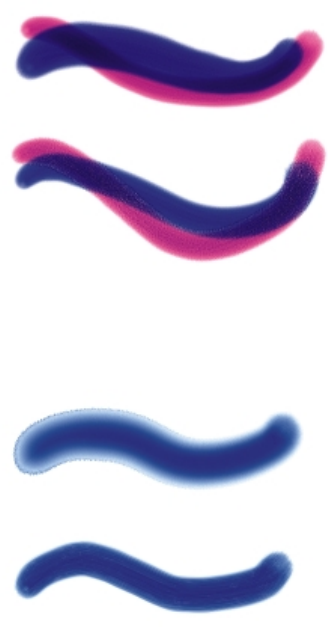
386 | Corel Painter 2015 User Guide
Pickup controls how much dry paint gets picked up during diffusion. Lower values mean that there is no
mixing or leaching of paints. Higher values produce more leaching.
Brushstrokes with Pickup set to 0% (top) and 100% (bottom)
Dry Rate controls the rate at which water dries during diffusion. Lower values cause greater spread; higher
values reduce the amount of spread.
Brushstrokes with Dry Rate set to 1% (top) and 50% (bottom)
The evaporation threshold (Evap Thresh slider) controls the minimum amount of water that can still diffuse.
Lower values cause greater spread; higher values reduce the amount of spread.
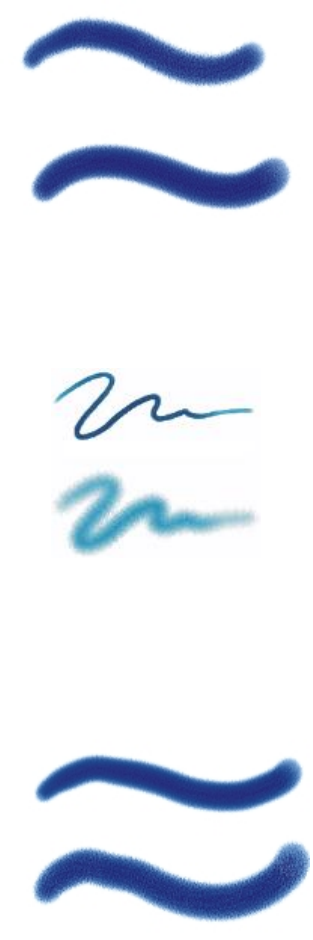
Adjusting brushes with brush controls | 387
Brushstrokes with Evap Thresh set to 1% (top) and 50% (bottom)
The diffusion setting (Diffuse Amt slider) controls the amount of paint diffused. Using high diffusion
creates soft edges that feather into the grain, as though you were painting on wet absorbent paper. Using
low diffusion is similar to painting on dry paper.
Brushstrokes with Diffuse Amt set to 0% (top) and 8% (bottom)
The capillary factor (Cap Factor slider) controls the grain’s effect on diffusion. Lower values result in a
smoother edge.
The grain soak-in (Grn Soak-In slider) controls the amount of paint that soaks into the grain when paint is
drying. You can lower both capillary factor and grain soak-in values to reduce grain effects.
Brushstrokes with Grn Soak-In set to 0% (top) and 100% (bottom)
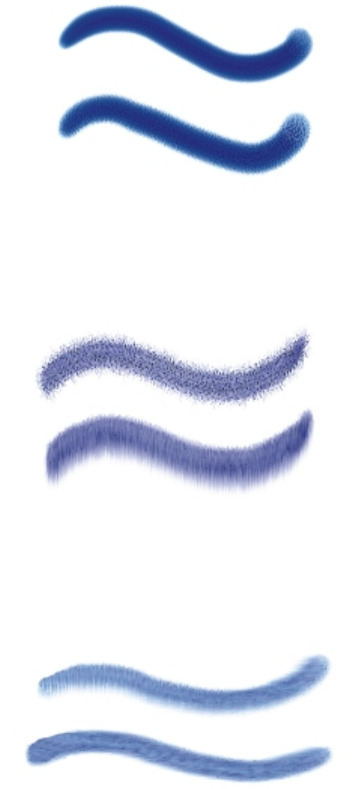
388 | Corel Painter 2015 User Guide
Enable the Accurate Diffusion check box to use a smaller diffusion window. Disabling Accurate Diffusion
results in a larger, less accurate window being used.
Brushstrokes with Accurate Diffusion enabled (top) and disabled (bottom)
You can specify the amount of wind force exerted on the diffusing particles. Set the Wind Force to zero to
turn off directional diffusion.
Brushstrokes with Wind Force set to 0% (top) and 25% (bottom)
You can specify wind direction, which controls the direction in which the particles diffuse. This can be used
to simulate tilting of a wet watercolor image to introduce the paint migration effects of gravity.
Brushstrokes with Wind Angle set to 270° (top) and 180° (bottom)
To adjust watercolor controls
1Choose Window Brush Control Panels Water.
2Perform an action from the following table.

Adjusting brushes with brush controls | 389
To Do the following
Adjust wetness Move the Wetness slider to the left to create a
more uniform brushstroke, or to the right to have
the water flow more in the direction of the wind.
Set paint pickup Move the Pickup slider to the right to increase the
amount of leaching, or to the left to reduce it.
Set the dry rate Move the Dry Rate slider to the right to reduce the
amount of spread, or to the left to increase it.
Set the evaporation threshold Move the Evap Threshold slider to the right to
reduce the amount of spread, or to the left to
increase it.
Set the diffusion amount Move the Diffuse Amt slider right to create soft
edges that feather into the grain, or to the left to
emulate painting on dry paper.
Set the effect of grain on diffusion Move the Cap Factor slider to the right to create
rougher edges, or to the left to create smoother,
more continuous results.
Set grain soak-in Move the Grn Soak-In slider to the right to create
rougher surfaces, or to the left to create smoother,
more continuous results.
Set accurate diffusion Enable the Accurate Diffusion check box.
Set wind force Move the Wind Force slider to the right to increase
wind force, or to the left to decrease it.
Set wind direction Move the Wind Angle slider to the right to
increase angle.

390 | Corel Painter 2015 User Guide
To Do the following
Delay diffusion Enable the Delay Diffusion check box. Diffusion
begins when you finish the brushstroke.
When you enable the Delay Diffusion check box, you increase the speed of Watercolor brush
variants.
Liquid Ink controls
Liquid Ink controls work with Liquid Ink layers. You can use the Liquid Ink controls to specify qualities such
as type, smoothness, and volume of a brushstroke. You can adjust the Liquid Ink controls when you select
a Liquid Ink brush.
Liquid Ink is divided into two basic properties: Ink and Color. The Ink component provides the form of the
brushstroke, while the Color component applies color to the Ink form. The Ink and Color components can
be used together or controlled separately.
The following describes the available Ink types.
Example Description
Ink Plus Color applies the currently selected color
to the Ink form.
Ink Only applies only the ink component.

Adjusting brushes with brush controls | 391
Example Description
Color Only applies only the color component.
Soften Ink Plus Color applies color to an ink form,
causing inks and colors to blend into one another.
Soften Ink Only applies only the ink component.
Soften Color Only applies only the color
component.
Resist repels ink.

392 | Corel Painter 2015 User Guide
Example Description
Erase deletes ink and color.
Presoftened Ink Plus Color is applied in
conjunction with surface depth effects.
Smoothness controls the “tack” of the brushstrokes. Lower values result in coarser brushstrokes. Higher
values cause brushstrokes to appear smoother.
Brushstrokes with Smoothness set to 0% (top) and 100% (bottom)
Volume controls the height of the brushstroke, or the amount of medium applied to the image. Higher
values result in thicker strokes.

Adjusting brushes with brush controls | 393
Brushstrokes with Volume set to 100% (top) and 500% (bottom)
You can also use the Expression settings to link Volume to various stylus or mouse movements. For
example, you can link Volume to the Wheel expression to control the amount of spray from the Liquid Ink
airbrush by adjusting the wheel on the airbrush stylus. The wheel on the stylus acts like a needle control on
a real airbrush.
In addition, you can adjust the Min Volume setting to specify the range of variability that you want the
expression to apply. The Min Volume setting represents a percentage of the Volume setting and it must be
linked to an expression to have an effect. For example, if you choose the Wheel expression on the Liquid
Ink panel, set the Volume slider to 40%, and then set the Min Volume slider to 50%, the volume will vary
from 20% to 40% every time you use the stylus wheel to apply spray.
You can use the Depth controls to give Liquid Ink brushstrokes the appearance of height. For more
information about Depth controls, see “Impasto controls” on page 385.
Rand Vol controls the randomness in volume within the brushstroke. A value of zero results in a perfectly
smooth brushstroke.
Brushstrokes with Rand Vol set to 0% (top) and 100% (bottom)
Rand Size controls the randomness in size within a brushstroke. A value of zero results in a perfectly
smooth brushstroke.

394 | Corel Painter 2015 User Guide
Brushstrokes with Rand Size set to 0% (top) and 100% (bottom)
The bristle fraction (Bristle Frac slider) controls the thickness of the bristles. Higher values cause the bristles
to stick together and result in a smoother brushstroke. Lower values cause the individual brushstrokes to
become visible.
Brushstrokes with Bristle Frac set to 3% (top) and 20% (bottom)
Rand Br Vol controls the variation in bristle height. A value of zero signifies that all the bristles are of equal
height.
Brushstrokes with Rand Br Vol set to 0% (top) and 75% (bottom)
Rand Br Size controls the variation in bristle width. A value of zero signifies that all the bristles are of equal
width.

Adjusting brushes with brush controls | 395
Brushstrokes with Rand Br Size set to 0% (top) and 100% (bottom)
To choose an ink type
1Choose Window Brush Control Panels Liquid Ink.
2Choose a liquid ink type from the Ink Type list box.
To set smoothness
1Choose Window Brush Control Panels Liquid Ink.
2Adjust the Smoothness slider.
Lower values result in coarse brushstrokes. Higher values cause brushstrokes to blend into one another
and appear smoother.
To set ink volume
1Choose Window Brush Control Panels Liquid Ink.
2Adjust the Volume slider.
Higher values result in thicker strokes.
To apply an expression to ink volume
1Choose Window Brush Control Panels Liquid Ink.
2Choose an option from the Expression list box.
You can also
Set the percentage of variability that you want the
expression to apply
Move the Min Volume slider.

396 | Corel Painter 2015 User Guide
You can also
Adjust the angle of the Direction expression Move the Direction slider until the desired angle is
achieved.
Reverse the effect of an Expression setting Click the Invert button .
To set random volume
1Choose Window Brush Control Panels Liquid Ink.
2Adjust the Rand Vol slider.
Lower values result in more uniform brushstrokes.
To set random size
1Choose Window Brush Control Panels Liquid Ink.
2Adjust the Rand Size slider.
Lower values result in more uniformly sized brushstrokes.
To set bristle fraction
1Choose Window Brush Control Panels Liquid Ink.
2Adjust the Bristle Frac slider.
Higher values result in strokes in which individual bristles are less visible.
To set random bristle volume
1Choose Window Brush Control Panels Liquid Ink.
2Adjust the Rand Br Vol slider.
Higher values result in a greater variation in the length of brush bristles.
To set random bristle size
1Choose Window Brush Control Panels Liquid Ink.
2Adjust the Rand Br Size slider.
Higher values result in a greater variation in the length of brush bristles.

Adjusting brushes with brush controls | 397
Stroke Jitter controls
The Stroke Jitter controls introduces a randomized jitter to the brushstroke. Instead of appearing directly
along the stroke, dabs appear randomly outside the brushstroke path. You can also set an Expression
setting to further control the Stroke Jitter effect. For more information, see “Expression settings” on page
327.
Brushstrokes with Stroke Jitter set to 0 (top) and 3.13 (bottom)
You can also find feature-specific jitter controls on the following brush control panels: Opacity, Grain, Size,
Angle, Airbrush, Impasto, and Color Expression.
To set stroke jitter
1Choose Window Brush Control Panels Stroke Jitter.
2Move the Stroke Jitter slider to the left to decrease deviation from the stroke path, or to the right to
increase the deviation.
You can also
Adjust the angle of the Direction expression Move the Direction slider until the desired angle is
achieved.
Reverse the effect of an Expression setting Click the Invert button .
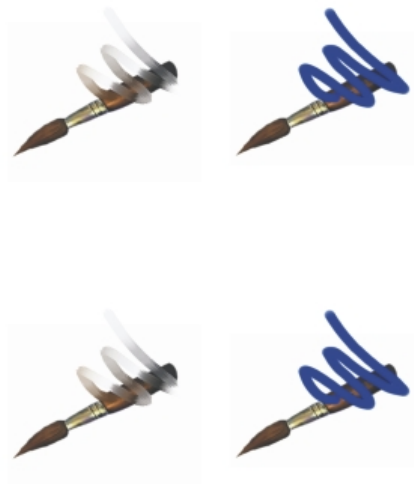
398 | Corel Painter 2015 User Guide
Well controls
The Well controls determine how a brush conveys its medium (color) to the paper. The Resaturation, Bleed,
and Dryout controls work together to determine how much color a brush has at the start and finish of a
stroke.
Resaturation lets you control the amount of color that is replenished in a stroke. If it is set at zero, the
brush does not produce any color. When Resaturation is less than 10% (and Bleed is less), a brushstroke
fades in gently. When the Resaturation slider is set at zero and Bleed is set high, an airbrush can move
underlying colors, as when just the airbrush hose is used to blow paint around on the canvas.
Brushstrokes with Resaturation set to 25% (top) and 100% (bottom)
Bleed lets you control how much the brush colors smear underlying colors, including the paper color. When
Bleed is higher than resaturation, more color bleeds than covers, so the stroke never reaches full opacity.
Brushstrokes with Bleed set to 55% (left) and 1% (right)
You can also apply an Expression setting to the Resat and Bleed controls to link them to a stylus or mouse
movement. You can choose different Expression settings for each. For example, you can link Resat to the
Pressure expression and link Bleed to the Velocity expression.
You can also adjust the Min setting to specify the range of variability that you want each expression to
apply. The Min Resat and Min Bleed settings represent a percentage of the Resat and Bleed settings and
they must be linked to an expression to have an effect. For example, if you link the Pressure expression

Adjusting brushes with brush controls | 399
to the Resat control, set the Resat slider to 40% and set the Min Resat slider to 50%, the amount of
resaturation will vary from 20% to 40% every time you apply pressure with the stylus.
Brush Loading affects how dab-based brushes interact with underlying pixels and works in conjunction
with Resat and Bleed. When Brush Loading is active, brushes can pick up existing colors, hair by hair. This
capability offers truer color interaction, astounding color-variations, smearing, and better cloning results.
For more information about dab-based brushes, see “General controls: Dab types” on page 332.
When Brush Loading is not active, brushes interact with previously applied colors by sampling underlying
pixels and then loading the brush with one new color — the average of those colors that were sampled.
When you use Brush Loading, it’s best to use a very low setting for spacing. For more information, see
“Spacing controls” on page 357.
The Dryout control determines how quickly a brush runs out of medium. Dryout is measured in
pixels. Moving the slider to the left causes a brush’s reservoir to empty more quickly. This can produce
brushstrokes that fade out gently. If Dryout is set high, the brush never runs out of color.
Dryout works in conjunction with Bleed, so Bleed must be set above zero if you want to take advantage of
Dryout. You can modulate the Dryout effect by changing the Bleed setting.
Brushstrokes with Dryout set to 724 (left) and 22026 (right)
To set resaturation
1Choose Window Brush Control Panels Well.
2Move the Resaturation slider to the left to reduce the amount of color replenished in a stroke. Move it
to the right to increase the amount of color.
You can also
Link the size settings to a specific stylus or mouse
movement
Choose an option from the Expression list box.

400 | Corel Painter 2015 User Guide
You can also
Set the percentage of variability that you want the
expression to apply
Move the Min Resat slider.
Adjust the angle of the Direction expression Move the Direction slider.
To set color bleed
1Choose Window Brush Control Panels Well.
2Move the Bleed slider to the left to reduce the amount of interaction with underlying pixels. Move it to
the right to increase the interaction.
You can also
Link the size settings to a specific stylus or mouse
movement
Choose an option from the Expression list box.
Set the percentage of variability that you want the
expression to apply
Move the Min Resat slider.
Adjust the angle of the Direction expression Move the Direction slider.
To set brush dryout
1Choose Window Brush Control Panels Well.
2Move the Dryout slider to the left to shorten the distance the brush can move before it dries out. Move
it to the right to lengthen the distance.
To enable brush loading
1Choose Window Brush Control Panels Well.
2Enable the Brush Loading check box.
Adjusting brushes with brush controls | 401
Mouse controls
In theory, a mouse has no pressure information. A mouse button is either on (button down), or off (button
up). However, the Corel Painter Mouse controls let you simulate the following stylus settings:
•Pressure (how hard you would be pressing with a stylus)
•Tilt (how close to vertical the stylus is held)
•Bearing (the compass direction in which the stylus is pointing)
•Rotation (to simulate using a flat-tip stylus that supports 360-degree rotation)
•Wheel (how much ink is sprayed).
For more information, see “Using a stylus vs. a mouse” on page 136.
You can record and save brushstrokes created with a stylus and then have Corel Painter use the saved
settings for the stroke when you switch to a mouse. For more information about using saved brushstrokes
to further enhance mouse functionality, see “Recording and playing back brushstrokes” on page 147.
To set pressure for the mouse
1Choose Window Brush Control Panels Mouse.
2Move the Pressure slider.
A 100% setting uses maximum pressure.
To set tilt for the mouse
1Choose Window Brush Control Panels Mouse.
2Move the Tilt slider.
A 90º setting indicates that if a stylus were in use, it would be perpendicular to the tablet.
To set bearing for the mouse
1Choose Window Brush Control Panels Mouse.
2Move the Bearing slider.
A setting of 0º indicates that if a stylus were in use, it would be pointing left.
To set rotation for the mouse
1Choose Window Brush Control Panels Mouse.

402 | Corel Painter 2015 User Guide
2Move the Rotation slider.
A 360° setting simulates a stylus that completes a 360° barrel rotation.
Rotation is supported only when you are using a brush with the Expression setting set to
Rotation. For more information, see “Expression settings” on page 327.
To set ink flow for the mouse
1Choose Window Brush Control Panels Mouse.
2Move the Wheel slider.
A setting of 100% indicates that maximum flow is in effect.
Smoothing controls
The Smoothing controls allow you to soften the appearance of brushstrokes.
Damping smooths otherwise jagged brushstrokes for brushes that use rendered dab types. Higher values
make the stroke smoother. (Damping suspends a stroke in an area by using calculations to even out edges
and reduce jaggedness.)
High values of Damping round out corners of a stroke. A value of 50% works best. Higher values might be
necessary for jittery input devices such as a mouse.
Cubic Interpolation smooths jagged brushstrokes by adding points to dab paths, primarily for brushes that
use dab-based dab types. Unlike Damping, which uses mathematical calculations to smooth jagged edges,
Cubic Interpolation inserts additional points into dab paths, which are used to replot brushstrokes.
Cubic Interpolation is best for dab-based dab types, while Damping is best for rendered dab types.
To set smooth rendered dab strokes
1Choose Window Brush Control Panels Smoothing.
2Move the Damping slider to the right to even out jagged strokes. Move it to the left to allow for more
ragged transitions between points on the stroke.
To set smooth strokes by adding path points
1Choose Window Brush Control Panels Smoothing.
2In the Cubic Interpolation area, move the Points slider to the right to add points and even out jagged
strokes. Move it to the left to decrease the number of additional points.

Adjusting brushes with brush controls | 403
Image Hose controls
The Image Hose controls let you design nozzles designated Rank 1, 2, and 3. For more information, see
“Image hose” on page 469.
The settings for each rank consist of the Expression settings plus the Sequential setting. For more
information, see “Expression settings” on page 327.
Rank 1
The Rank 1 control lets you assign an input to locate Rank 1 imagery within an Image Hose nozzle.
Rank 2
The Rank 2 control lets you assign an input to locate Rank 2 imagery within an Image Hose nozzle.
Rank 3
The Rank 3 control lets you assign an input to locate Rank 3 imagery within an Image Hosee nozzle.
To choose expression settings for ranks
1Choose Window Brush Control Panels Image Hose.
2Choose a setting from each of the Rank list boxes.
To pick out nozzles from the index in order, you can choose Sequential from any of the Rank list boxes.
For more information, see “Expression settings” on page 327.
Rake controls
The Rake controls let you control the sophisticated features of a Rake stroke, which maintains the angle of
the brush head as the stroke changes direction. As the brush turns, bristles come in and out of contact with
the painting surface.
The Contact Ang slider adjusts how much of the brush touches the painting surface — in other words, the
number of rake “tines” that touch the canvas at any one time.
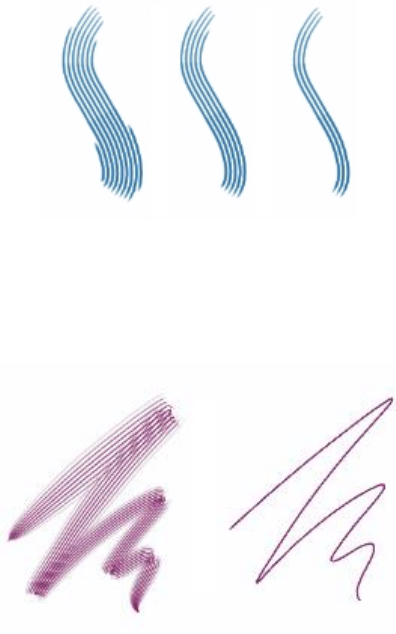
404 | Corel Painter 2015 User Guide
Brushstrokes with Contact Ang set to 180° (left), 125° (middle),
and right 0° (right), with a Brush Scale setting of 450%
Brush Scale controls the spacing between individual bristles that compose the Rake. The size of each dab is
determined in the Size brush control panel. For more information, see “Spacing controls” on page 357.
Brushstrokes with Brush Scale set to 2500% (left) and 0% (right)
When you turn a real brush to paint a curve, bristles at the edges move in and out of contact with the
painting surface, depending on the brush’s location on the curve (inside or outside). Turn Amount
simulates this bristle displacement by controlling the displacement of inside and outside bristles.
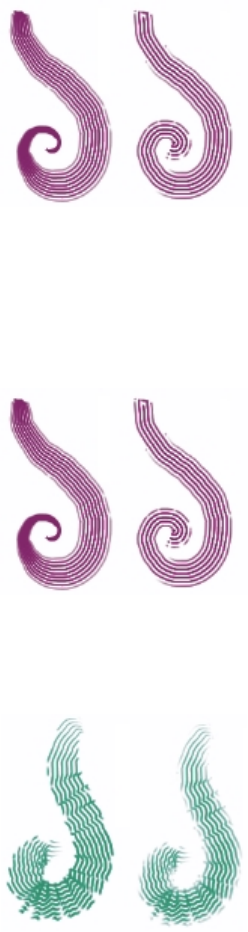
Adjusting brushes with brush controls | 405
Brushstrokes with Turn Amount set to 0% (left) and 150% (right)
The Bristle controls set the number of bristles or dabs used for Rake stroke types.
The Spread Bristles control dynamically adjusts brush scale on the basis of stylus pressure. The harder you
press, the more the brush fans out. If you want to maintain the spread, regardless of pressure, disable the
option.
Brushstrokes with Spread Bristles enabled (left) and disabled (right)
Soften Bristle Edge makes a brush’s outer dabs semitransparent. This option is particularly effective when
used with Turn Amount.
Brushstrokes with Soften Bristle Edge disabled (left) and enabled (right)

406 | Corel Painter 2015 User Guide
To set brush contact angle
1Choose Window Brush Control Panels Rake.
2Move the Contact Ang slider to the left to create a low contact angle (few of the dabs are in contact
with the paper). Move the slider all the way to the right to create a high contact angle (all the dabs are
in contact with the paper).
To set brush scale
1Choose Window Brush Control Panels Rake.
2Perform a task from the following table.
To Do the following
Bring the scale closer to equaling the dab width Move the Brush Scale slider to the right. When
the scale is 100%, the stroke width equals the dab
width multiplied by the number of dabs.
Cause dabs to overlap Move the Brush Scale slider to the left. When
the scale is less than 100%, the dabs overlap.
Overlapping dabs create a natural, subtle stroke
when used with Turn Amount and Soften Bristle
Edge.
To set bristle displacement
1Choose Window Brush Control Panels Rake.
2Perform a task from the following table.
To Do the following
Increase the degree to which the displacement
changes are based on the direction of the brush
Move the Turn Amount slider to the right.
Decrease the degree to which the displacement
changes are based on the direction of the brush
Move the Turn Amount slider to the left.
Adjusting brushes with brush controls | 407
To adjust the number of Rake brush bristles
1Choose Window Brush Control Panels Rake.
2Move the Bristle slider to adjust the number of bristles.
To set bristle spacing
1Choose Window Brush Control Panels Rake.
2Enable the Spread Bristles check box.
To soften bristle edge
1Choose Window Brush Control Panels Rake.
2Enable the Soften Bristle Edge check box.
Multi controls
You can set the number of bristles used for brushes set to the Multi stroke type. For more information, see
“General controls: Stroke types” on page 337.
To adjust the number of Multi brush bristles
1Choose Window Brush Control Panels Multi.
2Move the Bristles slider to adjust the number of bristles.
Cloning controls
The Cloning controls are specific to brushes that use the cloning method and affect other brushes only
when the Clone Color option is enabled.
The Clone Color control directs a brush to pick up color from a source image. Clone Color takes averaged
samples of color from the clone source, resulting in an approximation of the original. The Clone Color
option is also available on the Color panel. For information about using different clone types, see “Cloning
color” on page 224.
The Clone Type control lets you choose between several cloning variations. These variations are arranged
according to the number of reference points used. With two or more reference points, you can apply a
transformation (rotate, skew, scale mirror, and perspective) during cloning. For complete information on
using the different clone types, refer to “Image cloning and sampling” on page 167.

408 | Corel Painter 2015 User Guide
The Obey Source Selection option uses any selection in the clone source region to constrain painting in
the destination. If a transform Clone Type is used, the selection is appropriately transformed. This option is
available only with the Cloning method.
When Copy Source Selection is enabled, the Cloner brush reproduces the source selection information in
the destination selection. This option is available only with the Cloning method.
With the 4-Point Tiling check box enabled, your clone source is tiled in a repeating pattern.
•Normal (0), or zero-point, cloning references the upper-left corners of the source and destination
documents and patterns. This means that the pixels of the destination document correspond directly to
the pixels of the source document. This type of cloning, in which no transformations occur, is valid only
between documents. This type of cloning is the basic type of cloning between documents.
•Offset (1) cloning offsets the image from the source. The source and destination areas can be at
different locations in the same or different documents. Offset cloning is basic point-to-point cloning
and is useful for retouching photographs. For more information, see “Performing offset sampling” on
page 179.
•Rotate & Scale (2) cloning rotates and scales the source image using two reference points.
Rotate & Scale cloning. Note that the source and destination
reference points are numbered and connected by a line.
•Scale (2) cloning scales the source image using two reference points. The distance between the two
destination points, in relation to the distance between the two source points, determines the scaling
transformation.
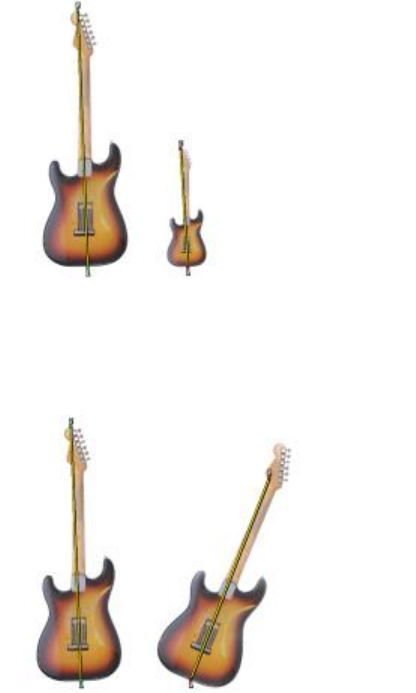
Adjusting brushes with brush controls | 409
Scale cloning.
•Rotate (2) cloning rotates the source image using two reference points. The line between the two
destination points in relation to the line between the two source points determines the rotation
transformation.
Rotate cloning.
•Rotate & Mirror (2) cloning rotates and mirrors (flips) the source image using two reference points.
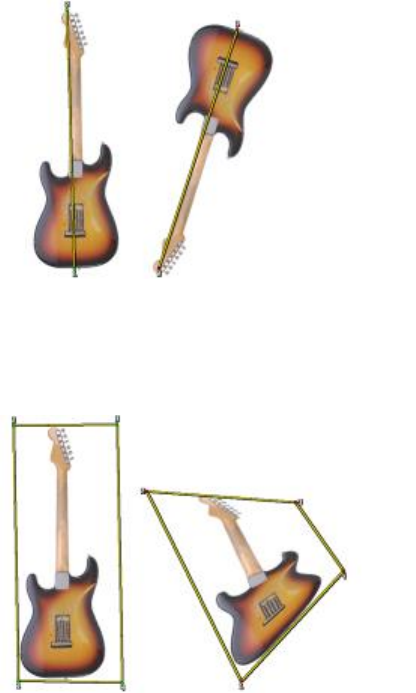
410 | Corel Painter 2015 User Guide
Rotate & Mirror cloning.
•Rotate, Scale, & Shear (3) cloning rotates, scales, and shears (slants) the source image using three
reference points. The relative positions of the three source and destination reference points determine
the transformation effect.
Rotate, Scale, Shear cloning.
•Bilinear (4) cloning applies a bilinear warp to the source image using four reference points. The relative
positions of the four source and destination points describe the bilinear transformation.
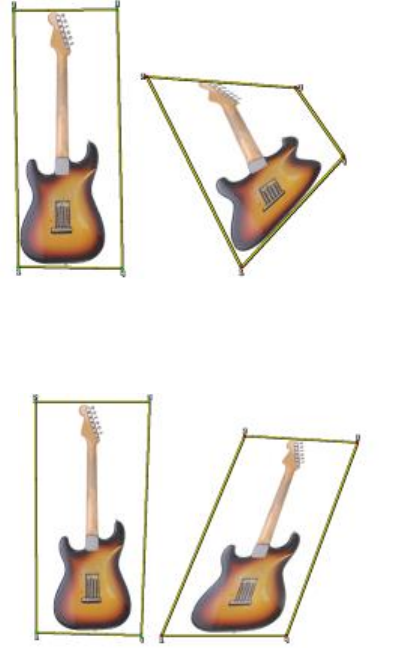
Adjusting brushes with brush controls | 411
Bilinear cloning.
•Perspective (4) cloning applies perspective to the source image using four reference points. The relative
positions of the four source and destination points describe the perspective transformation.
Perspective cloning.
When you work with brushes using the Cloning method, you can modify the Variability to control the
offset of the clone based on the location of the source image. When Variability is set at zero, the pixels of
the source and destination images correspond precisely. Using a cover brush at full Opacity (and no Grain)
simply re-creates the source image.

412 | Corel Painter 2015 User Guide
Brushstrokes with Variability set to 0 (top) and 12 (bottom)
Introducing a degree of randomness disturbs the pixel-to-pixel correspondence. The resultant variations
in the image distance the clone from its photographic source, which can contribute to a Natural-Media
appearance.
The How Often controls allow you to set the period between random offsets.
Brushstrokes with How Often set to 0 (top) and 15 (bottom)
Random Clone Source randomly samples the source document and then places strokes on the clone
destination. There is no correspondence between the samples taken from the source and where they are
placed on the clone. The result is a random pattern of the predominant colors and edges of the source. The
brush and stroke determine the nature of the pattern.
You might use Random Clone Source with a faint stipple brush to add “noise” to an image. In this case,
the clone source image merely contains the noise colors that you wish to add.
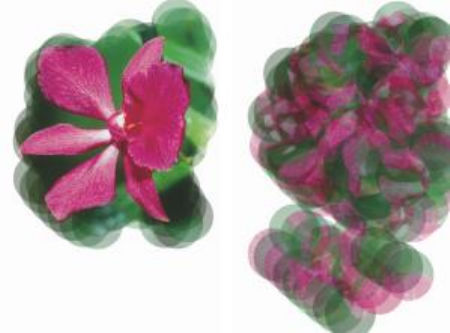
Adjusting brushes with brush controls | 413
Brushstrokes with Random Clone Source disabled (left) and enabled (right)
To set clone color
1Choose Window Brush Control Panels Cloning.
2Enable the Clone Color check box.
To set clone type
1Choose Window Brush Control Panels Cloning.
2Choose a type from the Clone Type list box.
To constrain painting in the destination
1Choose Window Brush Control Panels Cloning.
2Enable the Obey Source Selection check box.
To reproduce the source selection information in the destination selection
1Choose Window Brush Control Panels Cloning.
2Click the Copy Source Selection check box to enable or disable the option.
To tile clone source
1Choose Window Brush Control Panels Cloning.
2Enable the 4-Point Tiling check box.

414 | Corel Painter 2015 User Guide
To set clone location variability
1Choose Window Brush Control Panels Cloning.
2Perform a task from the following table.
To Do the following
Increase the range (distance) that the sample can
be offset
In the Clone Location area, move the Variability
slider to the right.
Limit offset so that source and destination images
correspond more precisely
In the Clone Location area, move the Variability
slider to the left.
Clone location sliders have no effect when Clone Color is enabled in the Color panel. They have
an effect only when a Clone method is used.
To set the period between random offsets
1Choose Window Brush Control Panels Cloning.
2Perform a task from the following table.
To Do the following
Offset a greater number of samples and give the
clone image a rough, distorted look
In the Clone Location area, move the How Often
slider to the left.
Offset samples less frequently and keep the clone
image more coherent
In the Clone Location area, move the How Often
slider to the right.
To choose the Random Clone Source option
1Choose Window Brush Control Panels Cloning.
2Enable the Random Clone Source check box.
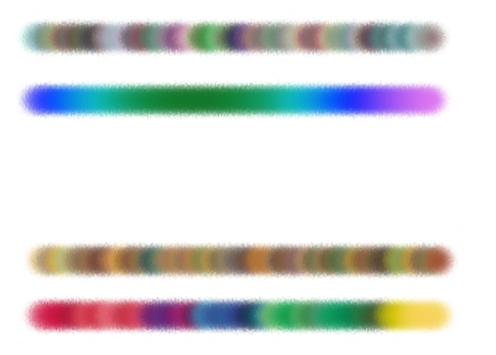
Adjusting brushes with brush controls | 415
Color Variability controls
Color variability allows you to create brushstrokes of more than one color. Color variability can be set for
HSV or RGB mode, and it can be based on the current gradient or color set.
You can also use the Smoothness slider to smooth the color variability in a brushstroke for a more organic
look.
Color Variability applied to a brushstroke without
smoothing (top) and with smoothing (bottom)
Color Variability based on a color set applied without
smoothing (top) and with smoothing (bottom)
To display the Color Variability panel
•Choose Window Brush Control Panels Color Variability.
To set color variability in HSV mode
1In the Color panel, choose a main color.
2Choose Window Brush Control Panels Color Variability.
3Choose in HSV from the list box.
4Adjust the HueVariability, Saturation Variability, and Value Variability sliders to control hue,
saturation, and value ranges for color variability:
• Moving the ±H slider to the right increases the number of hues in the resulting brushstroke. These
colors are the ones adjacent to the selected color on the color wheel.
• Moving the ±S slider to the right increases variability in the color intensity of the brushstroke.
• Moving the ±V slider to the right increases variability in the brightness of the brushstroke.

416 | Corel Painter 2015 User Guide
You can try different hue, saturation, and variability settings with any of the brushes to produce
interesting results.
To smooth the color variability in the brushstroke, move the Smoothness slider.
When you save a brush variant, the current color variability setting is also saved.
When working with brushes like the Van Gogh and Seurat variants of the Artists brush category,
you can add a natural, almost 3D appearance to your webpage images by increasing the hue,
saturation, and value settings.
To set color variability in RGB mode
1In the Color panel, choose a main color.
2Choose Window Brush Control Panels Color Variability.
3Choose in RGB from the list box.
4Move the ±R, ±G, and ±B sliders to control color variability of red, green, and blue values.
To smooth the color variability in the brushstroke, move the Smoothness slider.
To set color variability based on the current gradient
1In the Color panel, choose a main color.
2Choose Window Brush Control Panels Color Variability.
3Choose from Gradient from the list box.
Color variability is now based on random colors from the current gradient.
To smooth the color variability in the brushstroke, move the Smoothness slider.
To set color variability based on the current color set
1In the Color panel, choose a main color.
2Choose Window Brush Control Panels Color Variability.
3Choose from Color Set from the list box.
Color variability is now based on random colors from the current color set.
To smooth the color variability in the brushstroke, move the Smoothness slider.
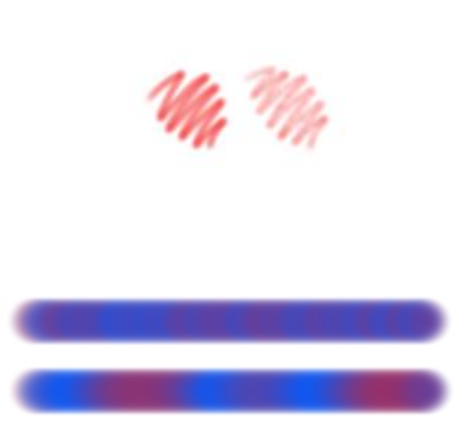
Adjusting brushes with brush controls | 417
To ignore color set variability
1Choose Window Brush Control Panels Color Variability.
2Enable the Ignore color variability from color sets check box.
Color Expression controls
Color Expression determines whether Corel Painter should use the main or additional color in an image.
Using Color Expression, you can introduce input (such as direction) which controls output when you apply
two-color brushstrokes. You can adjust the amount of variation applied to Color Expression by adjusting
Color Jitter. You can also use the Smoothness slider to smooth the color variation for a more organic look.
Digital Airbrush brushstrokes without Color Jitter (left) and with Color Jitter (right)
Color Jitter applied to a brushstroke without jitter
smoothing (top) and with jitter smoothing (bottom)
To set Color Expression controls
1Choose Window Brush Control Panels Color Expression.
2In the Color Expression panel, choose one of the following options from the Expression list box:
•None — applies no adjustment to the color expression
•Velocity — adjusts the color expression based on the dragging speed

418 | Corel Painter 2015 User Guide
•Direction — adjusts the color expression based on the direction of the stroke, and according to the
value you set with the slider or in the box
•Pressure — adjusts the color expression based on stylus pressure
•Wheel — adjusts the color expression based on the wheel settings on an airbrush stylus, specifically
the Wacom Intuos Airbrush stylus
•Tilt — adjusts the color expression based on the angle of the stylus from the tablet
•Bearing — adjusts the color expression based on the direction in which the stylus points
•Rotation — adjusts the color expression based on the rotation of the stylus
•Source — adjusts the color expression based on the luminance of the clone source
•Random — adjusts the color expression at random
If you want to switch the main and additional colors, click the Invert button .
If you chose Direction from the Expression list box, move the Direction slider until the desired angle is
achieved.
To set color variation using jitter
1Choose Window Brush Control Panels Color Expression.
2Move the Color Jitter slider.
To smooth the color variation, move the Smoothness slider.

Jitter brushes | 419
Jitter brushes
Corel Painter includes a collection of Jitter brushes that let you introduce a range of random behaviors to
brushstrokes to produce more realistic results. You can use the preset Jitter brush variants and adjust them
as needed. You can also save these customized brushes as new Jitter brush variants.
This section contains the following topics:
•“Choosing a Jitter brush variant” (page 419)
•“Controlling the behavior of Jitter variants” (page 422)
Choosing a Jitter brush variant
Corel Painter includes several preset Jitter brush variants. You can use the variants as they are or customize
them by using the Jitter controls to build your own Jitter brushes.
420 | Corel Painter 2015 User Guide
An example of the Artist Impressionist brush variant (no Jitter) (left) and the Artist
Impressionist Blender Jitter brush variant (right) that has Opacity Jitter and Color Jitter
The Jitter brush variants are found in many different brush categories. The following table lists the Jitter
brush variants found in each of these brush categories.
Brush category Jitter brush variant
Airbrushes Coarse Spray Jitter
Artists Coarse Sargent Brush Jitter
Impressionist Blender Jitter
Sargent Super Jitter
Blenders Coarse Smear Blender Jitter
Grainy Blender Impasto Jitter
Chalk and Crayons Real Chalk Jitter
Cloners Impasto Cloner Jitter Etch
F-X Fog Jitter
Furry Airbrush Jitter
Gel Gel Fractal Jitter

Jitter brushes | 421
Brush category Jitter brush variant
Gouache Gouache Rake Jitter
Image Hose Color Hose Jitter
Impasto Captured Impasto Blender Jitter
Coarse Impasto Jitter
Heavy Impasto Stamp Jitter
Markers Worn Marker Jitter
Oils Dense Impasto Block Jitter
Palette Knives Pointed Palette Knife Brush Jitter
Pointed Palette Knife Plow Jitter
Pattern Pens Pattern Chalk Jitter
Squiggly Pattern Chalk Jitter
Real Watercolor Light Fringe Jitter
Real Wet Jitter Sponge
Sponges Grainy Jitter Sponge
To choose a Jitter variant
1Click the Brush Selector on the Brush Selector bar.
2In the Brush library panel, click one of the categories that are listed in the above table.
3Click a Jitter brush variant.
You can also quickly find all Jitter brush variants by typing jitter in the Search bar, and pressing
Enter.

422 | Corel Painter 2015 User Guide
Controlling the behavior of Jitter variants
You can control the amount of Jitter a brush produces. The Jitter controls that you can modify are
determined by the Jitter brush variant that you choose. For example, if you choose the Coarse Spray Jitter
brush variant from the Airbrushes category, you can adjust the following Jitter controls: Size Jitter (Size
brush control panel), Feature Jitter and Flow Jitter (Airbrush brush control panel), Opacity Jitter (Opacity
brush control panel), and Stroke Jitter (Stroke Jitter brush control panel).
To quickly find the Jitter brush controls for a selected brush, you can let Corel Painter generate a group of all
the relevant brush controls panels for your selected brush variant. This narrows down your search for Jitter
controls by limiting the number of brush control panels that are available for your selected brush. For more
information, see “Displaying advanced brush controls dynamically” on page 310.
The following table lists all of the brush control panels that include Jitter controls and where you can find
more detailed information about these brush controls in the Help.
Brush control panel with Jitter controls For more information, see
Opacity “Opacity controls” on page 343
Grain “Grain controls” on page 345
Size “Size controls” on page 349
Angle “Angle controls” on page 353
Airbrush “Airbrush controls” on page 378
Impasto “Impasto controls” on page 385
Color Expression “Color Expression controls” on page 417
Stroke Jitter “Stroke Jitter controls” on page 397
Watercolor | 423
Watercolor
Corel Painter features different tools and controls that allow you to produce natural-looking watercolor
effects. The tools include watercolor brushes that are stored in the following brush categories.
Brush category Description
Real Watercolor The Real Watercolor brushes allow you to apply
pigment to the paper in a very realistic way. They
include brush control options that allow you to
precisely control water and paper interactions.
The Real Watercolor brushes are applied to the
Watercolor layer.
Watercolor The Watercolor brushes are designed to produce
natural-looking effects. They include brush control
options that allow you to control color diffusion
and some water and paper interactions. The
Watercolor brushes are applied to the Watercolor
layer.
Digital Watercolor The Digital Watercolor brushes let you apply
watercolor effects directly to the canvas or a
default layer, without the need for a Watercolor
424 | Corel Painter 2015 User Guide
Brush category Description
Layer. However, the brush control options for
Digital Watercolor are limited.
You can also alter the appearance of watercolor by changing the paper texture and modifying the brush
controls.
This section contains the following topics:
•“Working with the Watercolor layer” (page 424)
•“Watercolor brushes and paper texture interaction” (page 425)
•“Working with Real Watercolor brushes” (page 426)
•“Working with Watercolor brushes” (page 427)
•“Working with Digital Watercolor brushes” (page 428)
Working with the Watercolor layer
Both the Real Watercolor and Watercolor brushes paint into a watercolor layer, which enables the colors to
flow and mix and absorb into the paper. In Corel Painter, you can edit the Watercolor layer as you would
any other layer without changing anything in the image layer. For example, you can draw pencil outlines in
the image layer and then overlay watercolor shading without smudging the pencil lines.
You can sketch on one layer and paint with watercolors on a separate Watercolor layer.
You can transfer, or lift, information from the canvas to the Watercolor layer. This is useful if you want to
apply Watercolor effects to a photograph. You can also wet the Watercolor layer, which activates a diffusion
process.
Watercolor | 425
To create a new Watercolor layer
1Choose Window Layers.
2In the Layers panel, click the Layer options button , and choose New Watercolor Layer.
If you select a Real Watercolor or Watercolor brush variant from the Brush library, a Watercolor
layer is automatically created when you apply a brushstroke to the document window.
To transfer the canvas to a Watercolor layer
1Open the image that you want to convert to a watercolor in the document window.
2Choose Window Layers.
If the image contains multiple layers, you can drop all of the layers onto the canvas by clicking the Layer
options button in the Layers panel, and choosing Drop All.
3In the Layers panel, click the Layer options button , and choose Lift Canvas to Watercolor Layer.
Once the layer content is lifted from the canvas, the canvas is blank.
To wet the Watercolor layer
1Choose Window Layers.
2In the Layers panel, click the Layer options button , and choose Wet Entire Watercolor Layer.
To work with a dry surface, click the Layer options button in the Layers panel, and choose
Dry Watercolor Layer.
Watercolor brushes and paper texture interaction
The watercolor brushes interact with paper texture and grain — the colors flow, mix, and are absorbed into
the paper. The luminance information of the paper grain is used to determine how the paint diffuses into
the paper. It also affects how the pigment settles onto the paper when it dries.
You can experiment by adjusting the sliders in the Papers panel to see their effect on the watercolor
brushes. The Paper Scale slider controls the size of the grain. The Paper Contrast slider, as it applies to the
Watercolor layer, controls the height of the grain surface. Adjusting the Paper Contrast slider to the right
426 | Corel Painter 2015 User Guide
increases the height of the grain and adds more texture as a result. For more information, see “Controlling
brightness and contrast of paper grain” on page 157.
The Scale slider controls the size of the paper grain. The image on
the left is set to 50% and the image on the right is set to 200%.
In addition, the Real Watercolor brushes include controls that allow you to further control the paper
interaction. For more information, see “Working with Real Watercolor brushes” on page 426.
Working with Real Watercolor brushes
The Real Watercolor brush variants let you produce very realistic watercolor brushstrokes because they
replicate real world watercolor media. Corel Painter simulates the look and feel of blending pigments with
water so they interact with paper in a very natural way. When working with Real Watercolor brushes, the
brushstrokes are applied to the Watercolor layer.
Using Real Watercolor brush variants
You can get started quickly with the Real Watercolor brushes by choosing one of the available brush
variants. However, you can also customize a brush variant by using the Real Watercolor brush controls. For
more information, see “Real Watercolor controls” on page 362.
To choose a Real Watercolor brush variant
1In the toolbox, click the Brush tool .
2Click the Brush Selector on the Brush Selector bar.
3In the Brush library panel, click the Real Watercolor brush category, and click a brush variant.
To customize a Real Watercolor brush variant
•Choose Window Brush Control Panels Real Watercolor.
For more information about each of the Real Watercolor controls, see “Real Watercolor controls” on
page 362.
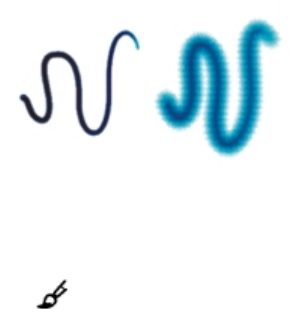
Watercolor | 427
Working with Watercolor brushes
The Watercolor brush variants produce natural-looking watercolor effects. When working with Watercolor
brushes, the brushstrokes are applied to the Watercolor layer. All Watercolor brush variants, except Wet
Eraser, interact with the canvas texture.
Stylus pressure affects the width of the brushstroke for all Watercolor brush variants except Wet Eraser.
Increased pressure widens a brushstroke; less pressure narrows a stroke.
If too many strokes are made within a short period, particularly with slow-drying brushes, the application
can become slower. In this situation, it is best to wait for the drying process to finish before continuing.
Watercolor Dab Types
For more information about Watercolor Dab Types, see “General controls: Dab types” on page 332.
Water Controls
When you select a Watercolor brush, you can adjust the Water controls which allow you to specify
various settings for the Watercolor brushes. For example, you can adjust brush size, control diffusion, and
determine how the paper texture will interact with the brushstrokes. For more information, see “Water
controls” on page 385.
A watercolor stroke before (left) and after (right) diffusion.
To choose a Watercolor brush variant
1In the toolbox, click the Brush tool .
2Click the Brush Selector on the Brush Selector bar.
3In the Brush library panel, click the Watercolor brush category, and click a brush variant.

428 | Corel Painter 2015 User Guide
To customize a Watercolor brush variant
•Choose Window Brush Control Panels Water.
For more information about each of the Watercolor controls, see “Water controls” on page 385.
Working with Digital Watercolor brushes
The Digital Watercolor brushes paint directly on both the Canvas layer or a default layer so you can create
effects similar to those of Watercolor brushes without using a separate layer.
You can use Digital Watercolor brushes to create effects similar to those produced
with Watercolor brushes, without having to create a separate layer. Settings
such as Diffusion, Opacity, and Wet Fringe control the appearance of the stroke.
Digital Watercolor Diffusion
Digital Watercolor brushes also use diffusion to create soft, feathery edges on the brushstrokes. You can
adjust the amount of diffusion by using the controls on the property bar.
Wet Fringe
The Wet Fringe slider controls the amount of water pooling and paint at the edges of Digital Watercolor
brushstrokes. You can dynamically adjust the wet fringe on any Digital Watercolor brushstroke before you
dry it. Dynamically adjusting the Wet Fringe affects every wet Digital Watercolor brushstroke, which remains
wet until you dry it.
When you’re satisfied with the wet fringe, it’s a good idea to dry Digital Watercolor brushstrokes. This
allows you to dynamically adjust the Wet Fringe on future Digital Watercolor brushstrokes without
affecting existing brushstrokes that you’re satisfied with.
To choose a Digital Watercolor brush variant
1In the toolbox, click the Brush tool .

Watercolor | 429
2Click the Brush Selector on the Brush Selector bar.
3In the Brush library panel, click the Digital Watercolor brush category, and click a brush variant.
To adjust diffusion
1With a Digital Watercolor brush variant selected, adjust the Diffusion slider on the property bar.
Drag the slider to the right to increase diffusion, or to the left to decrease diffusion.
2Apply one or more strokes with a Digital Watercolor variant.
If you would like to restrict the diffusion to a region, make a selection with any selection tool. The
diffusion effect will apply only within the selection.
The Diffusion slider is also accessible from the Digital Watercolor panel. You can open the panel
by choosing Window Brush Control Panels Digital Watercolor.
To adjust wet fringe
1Apply one or more strokes with a Digital Watercolor variant.
If you would like to restrict the diffusion to a region, make a selection with any selection tool. The
pooling effect will apply only within the selection.
2On the property bar, adjust the Wet Fringe slider on the property bar.
Drag the slider to the right to increase pooling, or to the left to decrease pooling.
You can also adjust wet fringe before applying brushstrokes by adjusting the Wet Fringe slider.
The Wet Fringe slider is also accessible from the Digital Watercolor panel in the Brush Controls
palette. You can open the panel by choosing Window Brush Control Panels Digital Watercolor.
To dry Digital Watercolor brushstrokes
•Choose Layer Dry Digital Watercolor.
After you dry a Digital Watercolor brushstroke, you can no longer adjust its wet fringe.
430 | Corel Painter 2015 User Guide

Particle brushes | 431
Particle brushes
Particle brushes are physics-inspired brushes that give a unique look and feel to your artwork. They emit
particles from a central point, and in turn the particles draw a pattern of lines (paths) as they move across
the canvas.
You can control the particle paths with precision or introduce randomness in the brushstroke movement by
using the Particle brush controls. Particle brushes are capable of wide-ranging creative variation when you
adjust the parameters of each brush variant.
In addition, you can streamline your workflow by choosing the New Brushes workspace layout, which
displays the palettes of the Particle brushes.
Depending on the movement of the particles around the central point, there are three types of Particle
brushes: Gravity, Flow, and Spring brushes. A dark background is ideal for most of these brushes.
You can also display Info palettes, which contain information about the brush controls for each type.
This section contains the following topics:
•“The New Brushes workspace layout” (page 432)
•“Gravity Particle brushes” (page 432)
•“Flow Particle brushes” (page 435)
•“Spring Particle brushes” (page 438)
•“General Particle brush controls” (page 442)
•“Info palettes” (page 447)
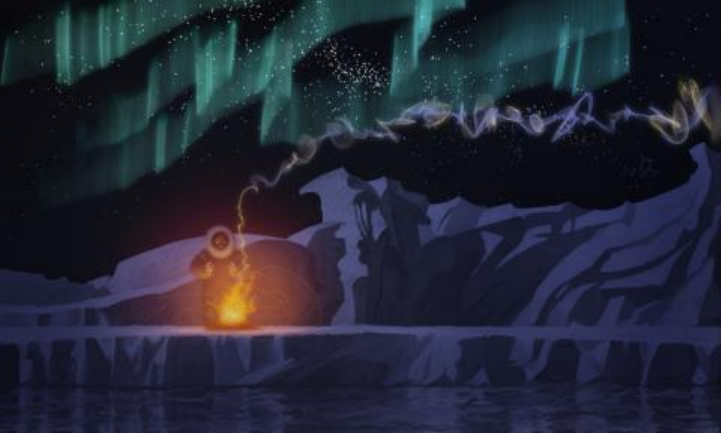
432 | Corel Painter 2015 User Guide
Gravity, Flow, and Spring Particle brushes were used to create smoke and Aurora
Borealis effects in this artwork, as well as to enhance the water reflections.
The New Brushes workspace layout
You can display all palettes and controls related to the Particle brushes in the New Brushes workspace
layout.
For more information about workspace layouts, see “Choosing a workspace layout” on page 29.
To display the New Brushes layout
•Choose Window Arrange Palettes New Brushes.
Gravity Particle brushes
Gravity Particle brushes create sweeping marks that dramatically shrink and grow with movement. The
movement of the particles in a Gravity brush resembles planetary movement, as the particle paths are
greatly influenced by velocity, acceleration, and other forces. Depending on the speed of the stroke, the
particles can stay tight within the brushstroke, or they can be pulled apart by forces.
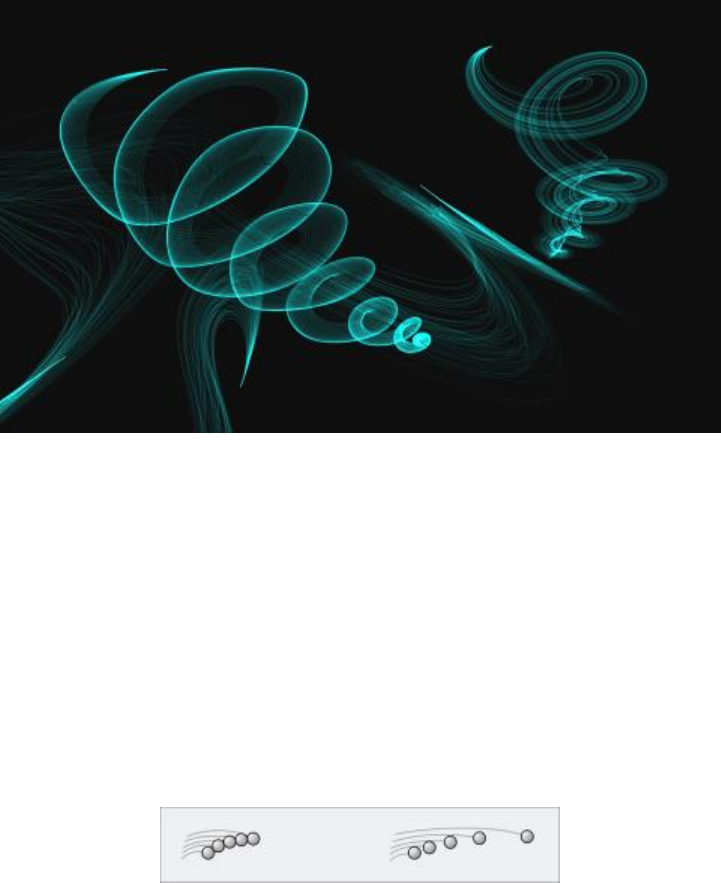
Particle brushes | 433
Gravity Particle brushstrokes
Gravity brushes include the following variants:
• Gravity Bristle
• Gravity Jagged Light Pen
• Gravity Lazy Sketch
Gravity Particle brush controls
You can customize Gravity Particle brushes by using the Gravity Particles control panel, which includes the
Velocity, Acceleration, and Spin Rate controls.
The Velocity slider sets the base speed of all particles. Use it together with the Acceleration slider to control
the forward movement of the particles.
The Acceleration slider sets the distance between particle paths.
Left: Low velocity and acceleration. Right: High velocity and acceleration
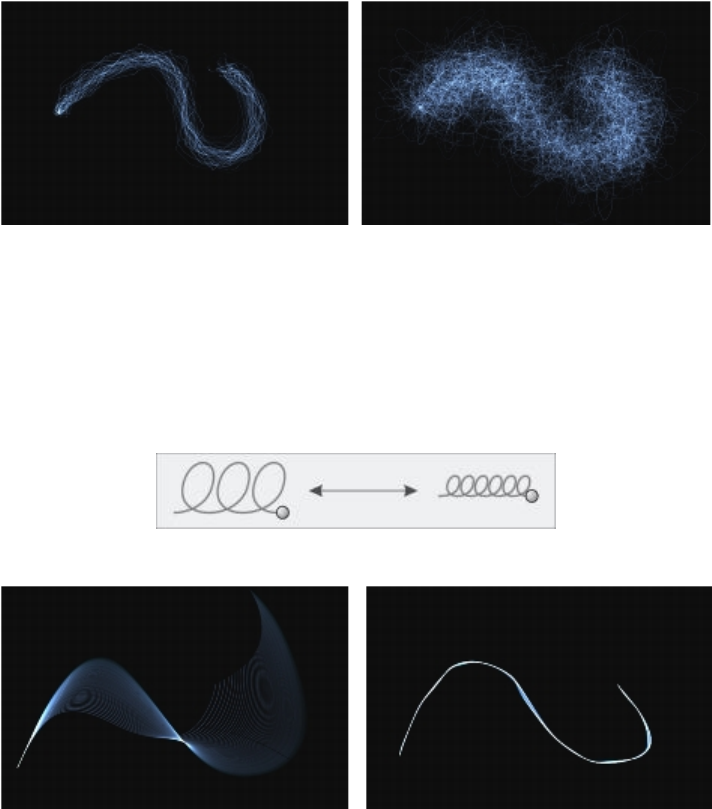
434 | Corel Painter 2015 User Guide
A brushstroke with low velocity and acceleration
(left) and high velocity and acceleration (right)
The Spin Rate slider sets the speed at which the particles spin around the cursor. Slower spin rates allow the
particles to track the cursor closely, while higher spin rates allow the particles to travel further away from
the cursor.
You can also associate the spin rate with an expression by choosing an option from the Expression list box.
For more information about Expression controls, see “Expression settings” on page 327.
Low spin rate (left) and high spin rate (right)
A brushstroke with low spin rate (left) and high spin rate (right)
For information about general Particle brush settings, see “General Particle brush controls” on page 442.
For information about other brush settings, see “Adjusting brushes with brush controls” on page 325.

Particle brushes | 435
To choose a Gravity Particle brush variant
1In the toolbox, click the Brush tool .
2Click the Brush Selector on the Brush Selector bar.
3In the Brush library panel, click the Particles brush category, and click a Gravity Particle brush variant.
To customize a Gravity Particle brush variant
1Choose Window Brush Control Panels Gravity Particles.
2Adjust any of the settings in the Gravity Particles panel.
3Choose Window Brush Control Panels Particles - General.
4Adjust any of the settings in the Particles - General panel.
For more information see “General Particle brush controls” on page 442.
Flow Particle brushes
Flow Particle brushes emit short-lived particles that flow out from the center of the brushstroke across
the canvas and gradually fade. Their movement resembles that of fireworks. As they flow, they encounter
forces that change their path, resulting in a chaotic or controlled movement. The Flow brushes are easily
influenced by force, chaos, and flow maps. For more information about flow maps, see “Applying and
adjusting flow maps” on page 449.
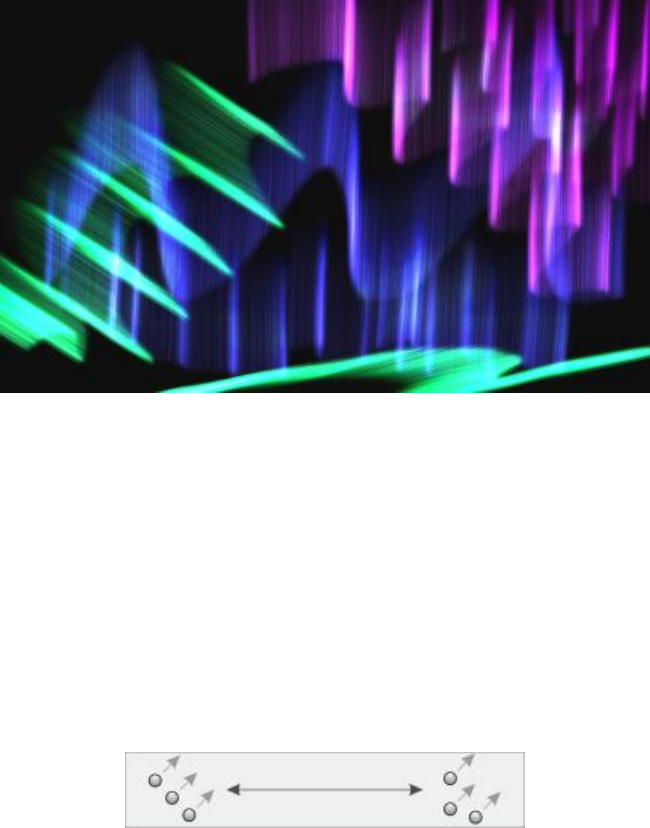
436 | Corel Painter 2015 User Guide
Flow Particle brushstrokes
Flow brushes include the following variants:
• Flow Organic Texture
• Flow Flare
• Flow Sparkler Glow
Flow Particle brush controls
You can customize Flow Particle brushes by using the Flow Particles control panel, which includes the
Position Jitter, Randomize Chaos, and Enhance Flow Map controls.
The Position Jitter slider lets you vary the starting position of the particles. You can also associate the
position jitter with an expression by choosing an option from the Expression list box. For more information
about Expression controls, see “Expression settings” on page 327.
Low position jitter (left) and high position jitter (right)
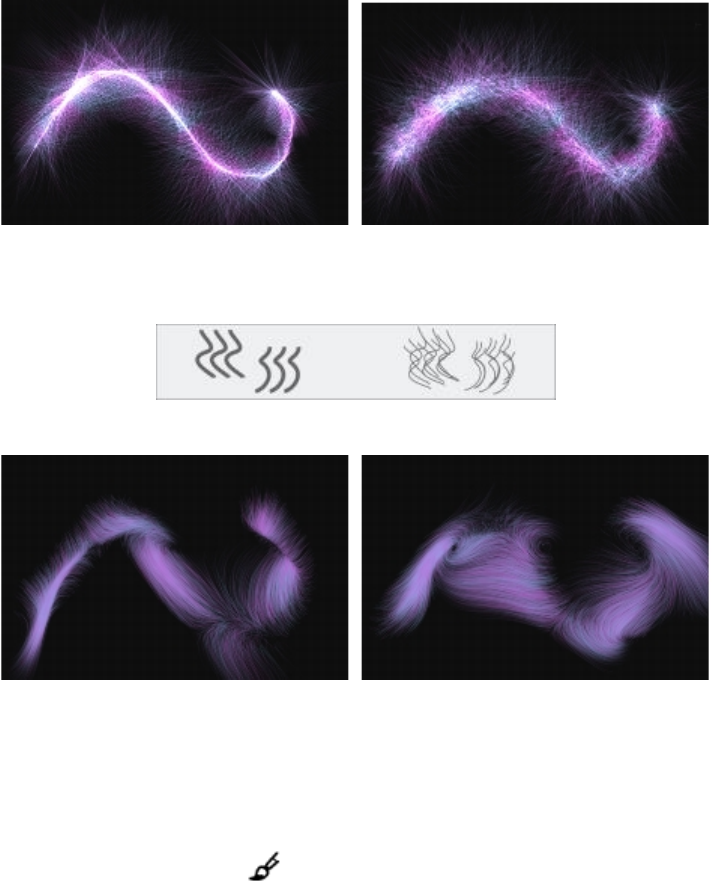
Particle brushes | 437
A brushstroke with low position jitter (left) and high position jitter (right)
The Randomize Chaos check box lets you change the chaos pattern randomly for a more organic look.
Particle paths before and after applying randomized chaos
A brushstroke with randomized chaos off (left) and on (right)
The Enhance Flow Map controls include the Edge slider and the Brightness slider, which modify the
brushstroke based on the edge and brightness of the flow map.
To choose a Flow Particle brush variant
1In the toolbox, click the Brush tool .
2Click the Brush Selector on the Brush Selector bar.
3In the Brush library panel, click the Particles brush category, and click a Flow Particle brush variant.

438 | Corel Painter 2015 User Guide
To customize a Flow Particle brush variant
1Choose Window Brush Control Panels Flow Particles.
2Adjust any of the settings in the Flow Particles panel.
3Choose Window Brush Control Panels Particles - General.
4Adjust any of the settings in the Particles - General panel.
For more information see “General Particle brush controls” on page 442.
Spring Particle brushes
Spring Particle brushes consist of a net of particles held together by elastic springs. Since the particles are
connected to each other, they don’t spread out across the canvas but bounce back toward the center of the
brushstroke. The brushstroke mark is determined by the individual paths of the particles and the flexibility of
the springs between them.
Spring Particle brushstrokes
Spring brushes include the following variants:
• Spring Feather Sketch
• Spring Chunky
• Spring Mesh Concept
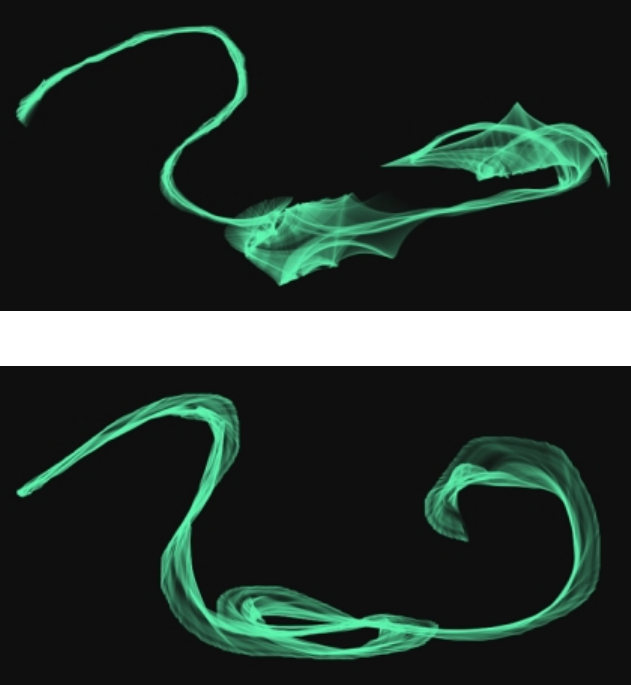
Particle brushes | 439
Spring Particle brush controls
You can customize Spring Particle brushes by using the Spring Particles control panel, which includes
the Appearance, Path Opacity, Spring Opacity, Stiffness, Stiffness Jitter, Length Jitter, and Minimum
Length controls.
The Appearance controls let you choose a Nucleus, Chain, or Geometric appearance for the particle
pattern.
•Nucleus — Particles spring outward from the brush path.
•Chain — A chain of particles whips around the brush path.
•Geometric — Particles form a geometric shape around the brush path.
A brushstroke with Appearance set to Nucleus
A brushstroke with Appearance set to Chain
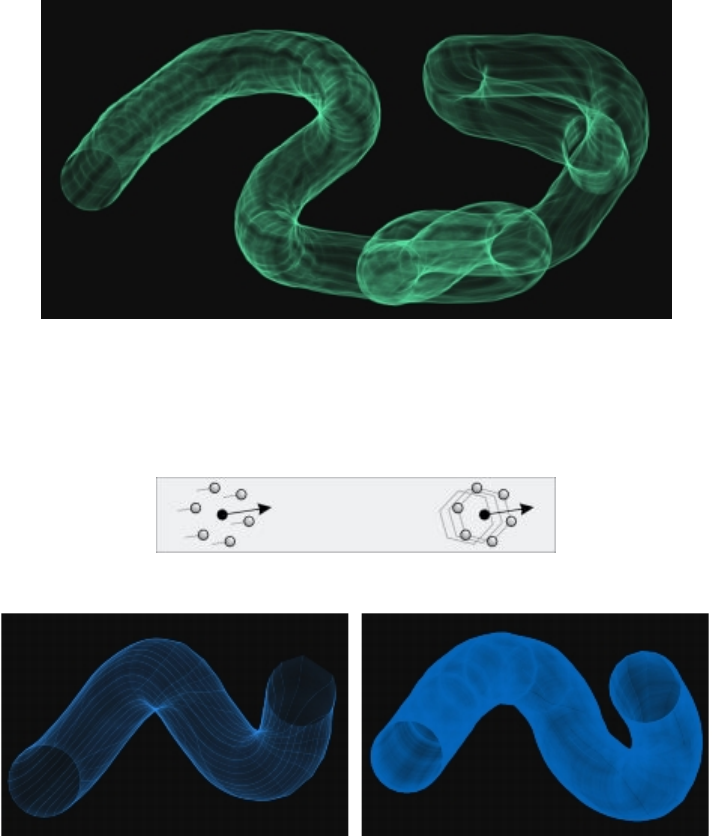
440 | Corel Painter 2015 User Guide
A brushstroke with Appearance set to Geometric
The Path Opacity slider sets the opacity of the particle path (the mark that each particle makes on the
canvas).
The Spring Opacity slider sets the opacity of the springs (the links between the particles).
Left: High path opacity, zero spring opacity. Right: High spring opacity, zero path opacity.
A brushstroke with high path opacity, low spring opacity
(left) and low path opacity, high spring opacity (right)
The Stiffness slider controls the strength of the springs. Low values produce more relaxed springs, which
allows the particles to move more freely in relation to each other. You can also associate the stiffness with
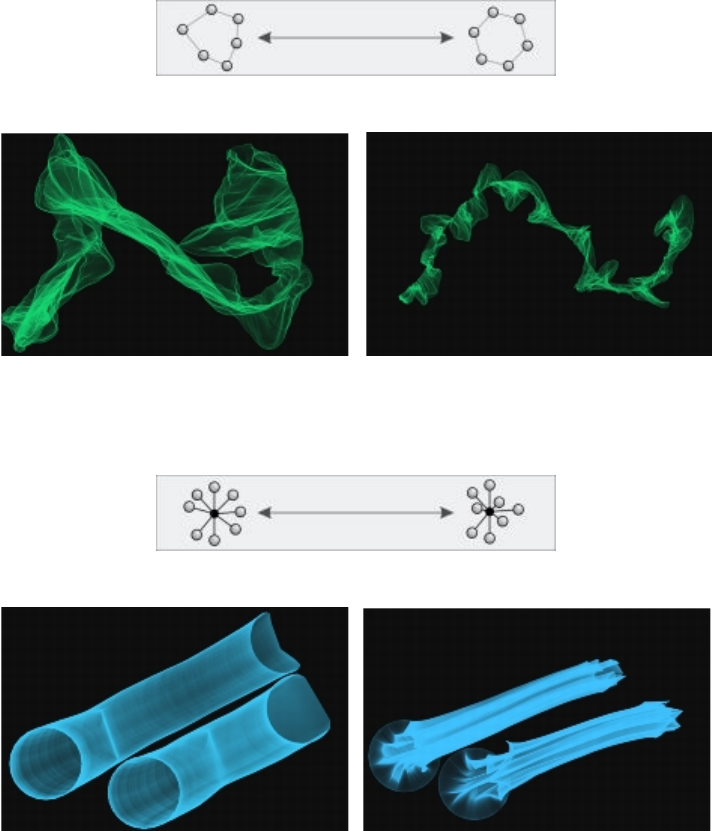
Particle brushes | 441
an expression by choosing an option from the Expression list box. The Stiffness Jitter slider randomly varies
the strength of individual springs.
Low stiffness (left) and high stiffness (right)
A brushstroke with low stiffness (left) and high stiffness (right)
The Length Jitter slider randomly varies the length of individual springs. Once adjusted, the lengths remain
constant during the brushstroke.
Low length jitter (left) and high length jitter (right)
A brushstroke with low length jitter (left) and high length jitter (right)
The Minimum Length slider sets the initial length of the springs. Low values allow springs to stretch more.
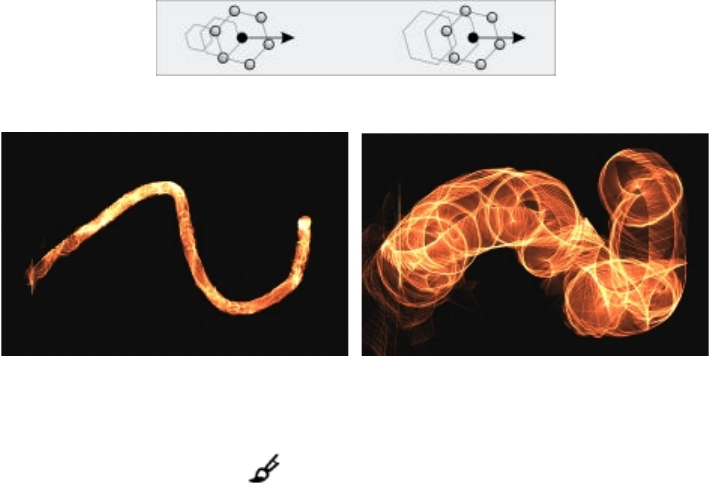
442 | Corel Painter 2015 User Guide
Low minimum length (left) and high minimum length (right)
A brushstroke with low minimum length (left) and high minimum length (right)
To choose a Spring Particle brush variant
1In the toolbox, click the Brush tool .
2Click the Brush Selector on the Brush Selector bar.
3In the Brush library panel, click the Particles brush category, and click a Spring Particle brush variant.
To customize a Spring Particle brush variant
1Choose Window Brush Control Panels Spring Particles.
2Adjust any of the settings in the Spring Particles panel.
3Choose Window Brush Control Panels Particles - General.
4Adjust any of the settings in the Particles - General panel.
For more information see “General Particle brush controls” on page 442.
General Particle brush controls
Brush controls common to all Particle brushes are accessible through the Particles - General control panel.
The Glow check box makes particles shine, with colors building up to white. A dark background is required.
The Count slider sets the number of particles in a brushstroke, and in turn the number of paths rendered
during the stroke.
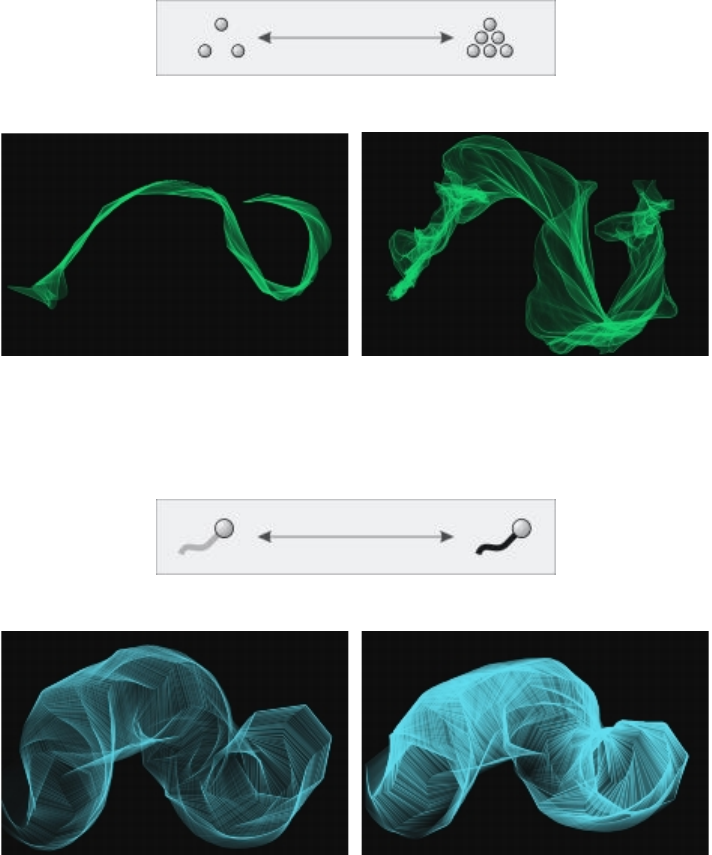
Particle brushes | 443
Low count (left) and high count (right)
A brushstroke with low count (left) and high count (right)
The Weight slider sets the opacity of particle paths. Use it together with Weight Jitter to add depth and
dimension to rendered paths. The Weight Jitter slider randomly varies the opacity of individual particle
paths.
Weight applied to a particle path
A brushstroke with low weight (left) and high weight (right)
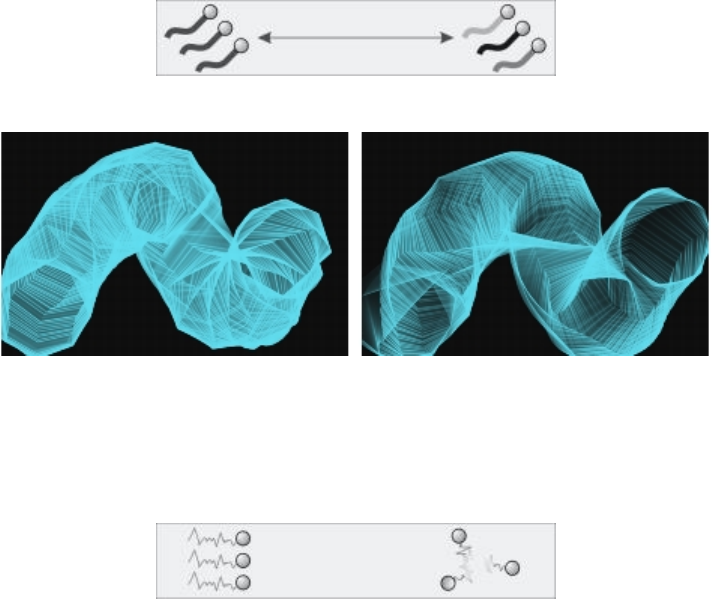
444 | Corel Painter 2015 User Guide
Weight jitter applied to individual paths
A brushstroke with low weight jitter (left) and high weight jitter (right)
The Global Chaos slider applies chaos to all particles equally, so that they move chaotically but in unison.
The Local Chaos slider randomly applies chaos to individual particles in the brush. The Smoothness
slider smooths the chaos for a more organic look. You can also associate global and local chaos with an
expression.
Global chaos (left) and local chaos (right)
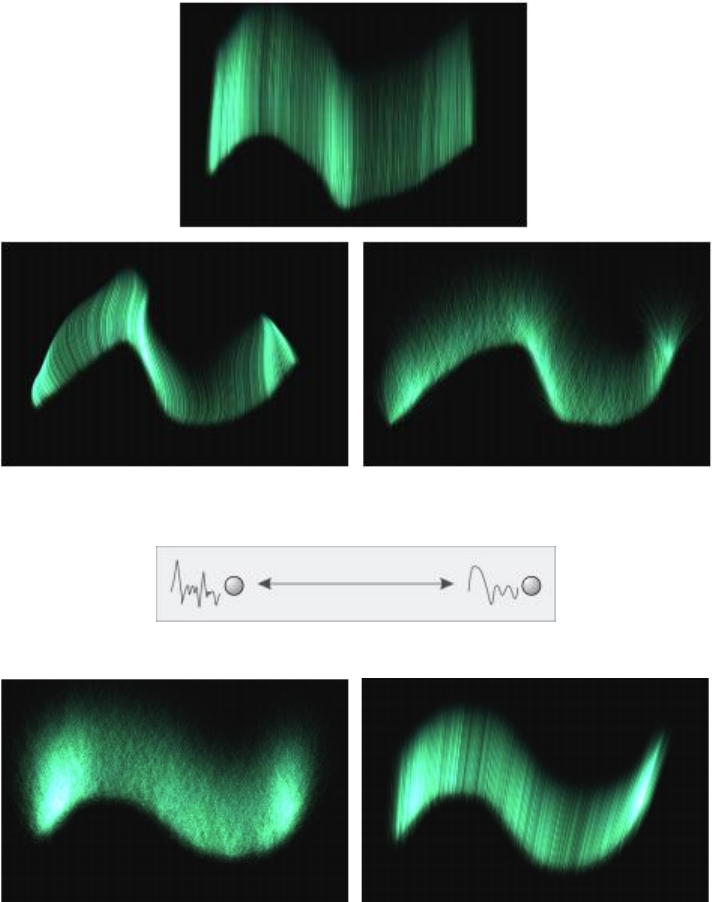
Particle brushes | 445
A brushstroke with low chaos (top), high global
chaos (lower-left) and high local chaos (lower-right)
Smoothness applied to chaos
A brushstroke with high chaos, low smoothness
(left) and high chaos, high smoothness (right)
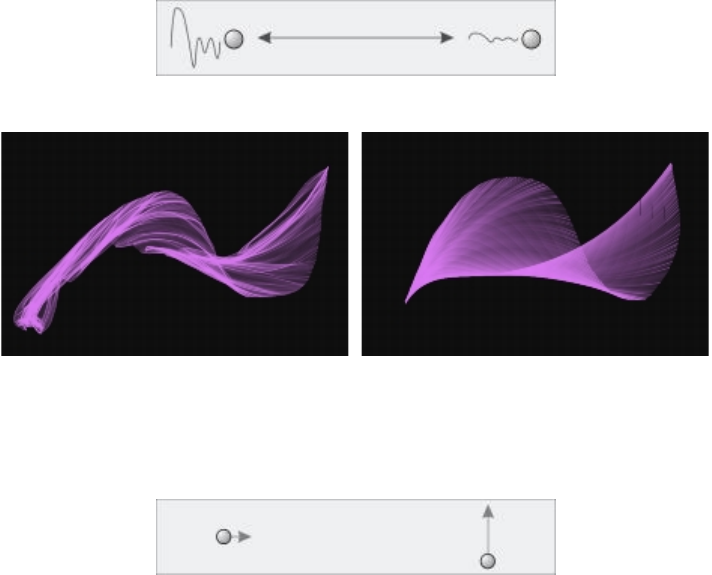
446 | Corel Painter 2015 User Guide
The Damping slider allows or inhibits particle movement. Low damping allows particles to move faster
and be more responsive to any forces affecting their movement. High damping reduces all forces affecting
particle movement, and the movement itself becomes slow and heavy. The Damping Jitter slider applies
damping at random to individual particles.
Damping applied to particle movement
A brushstroke with low damping (left) and high damping (right)
The Force slider applies global directional force to all particle movement. The effect is similar to the effect
of wind on watercolor. The Direction slider sets the direction of the global force in degrees. You can also
associate force and direction with an expression.
Left: Low force, direction at 0. Right: High force, direction at 90.
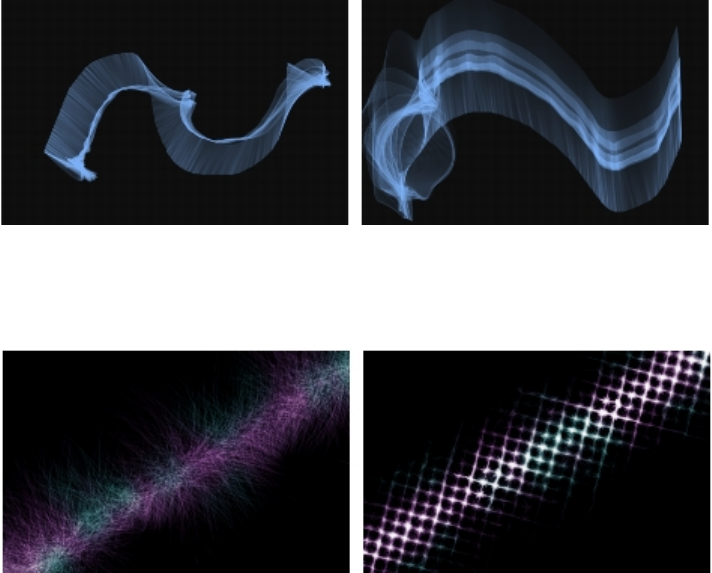
Particle brushes | 447
A brushstroke with low force, direction 0 (left) and high force, direction 90 (right)
The Flow Map slider sets the degree to which particle movement is affected by the flow map. For more
information about flow maps, see “Applying and adjusting flow maps” on page 449.
A brushstroke without (left) and with (right) a flow map applied
To access the General Particle brush controls
1Choose Window Brush Control Panels Particles - General.
2Adjust any of the settings in the Particles - General panel.
Info palettes
You can display Info palettes for Particle brushes to view information about the brush controls.
To display an Info palette
•Choose Window Info Palettes, and choose a palette.
448 | Corel Painter 2015 User Guide

Applying and adjusting flow maps | 449
Applying and adjusting flow maps
Flow maps are designed to maximize the creative potential of the Real Watercolor brushes and the Particle
brushes by adding a textured surface that helps direct the flow of paint.
This section contains the following topics:
•“Getting started with flow maps” (page 449)
•“Choosing flow maps and compatible brush variants” (page 450)
•“Enabling flow maps and controlling flow resistance” (page 452)
•“Customizing flow maps” (page 453)
Getting started with flow maps
You can use flow maps when working with Real Watercolor and Particle brushes to create textured surfaces
that help direct the flow of paint. Flow maps are similar to paper textures; however, the surfaces that they
create have higher peeks and deeper valleys that allow for greater water displacement. The flow map
relief encourages the paint to flow and settle in unique and irregular patterns. You can use flow maps in
combination with paper texture to retain the paper grain.
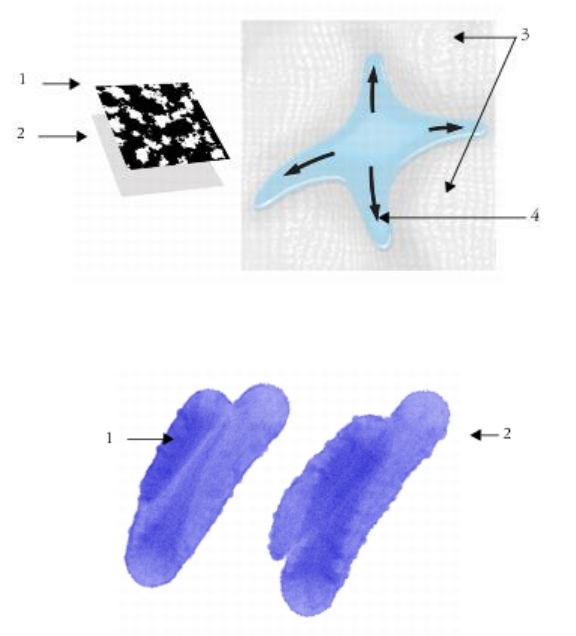
450 | Corel Painter 2015 User Guide
A flow map (1) works with paper texture (2) to add relief to the image and encourage water
displacement. The elevated areas (3) in the flow map help direct the flow of water (4).
The Wet Flowmap Fringe brush variant is used with paper texture (1). The same
brushstroke is used in combination with paper texture and the Gravel flow map (2).
Although flow maps are intended for Real Watercolor brushes, you can also use them with Real Wet Oil
brushes.
Choosing flow maps and compatible brush variants
To quickly get started with flow maps, you can choose one of the flow map brush variants. They are
available under the Real Watercolor brush category. These brush variants enable flow maps by default. You
can experiment and choose a different flow map to produce the effect you like.
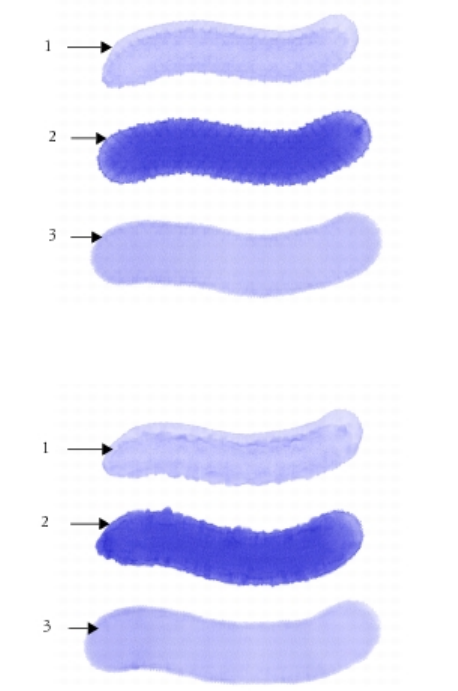
Applying and adjusting flow maps | 451
Brushstrokes using the Melted Flowmap (1), Noisy Flowmap Fringe (2), and
Wet Flowmap Fringe (3) brush variants with the Fine Dots flow map selected.
Brushstrokes using the Melted Flowmap (1), Noisy Flowmap Fringe (2), and
Wet Flowmap Fringe (3) brush variants with the Gravel flow map selected.
To choose a flow map brush variant
1From the Brush library panel, choose the Real Watercolor brush category.
2Choose one of the following brush variants:
•Melted Flowmap
•Noisy Flowmap Fringe
•Wet Flowmap Fringe
•Real Wet Flowmap Wash
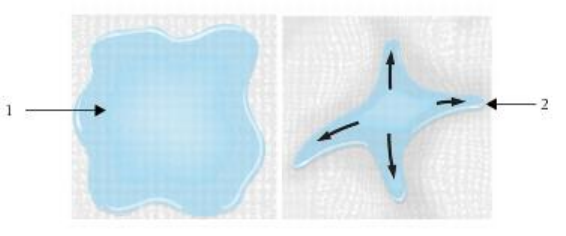
452 | Corel Painter 2015 User Guide
To choose a flow map
1Choose Window Flow Map Panels Flow Map Libraries.
2Click a flow map swatch.
Enabling flow maps and controlling flow resistance
You can choose an existing Real Watercolor brush variant and then manually enable flow maps. You can
also adjust the flow resistance of a brush to enhance the flow map interaction. Flow resistance lets you
control the degree to which the flow map surface, or the paper texture, affects the direction of the water
flow.
When the flow resistance is set low, the water flows freely across the
canvas (1), when the resistance is set high, the flow is obstructed (2).
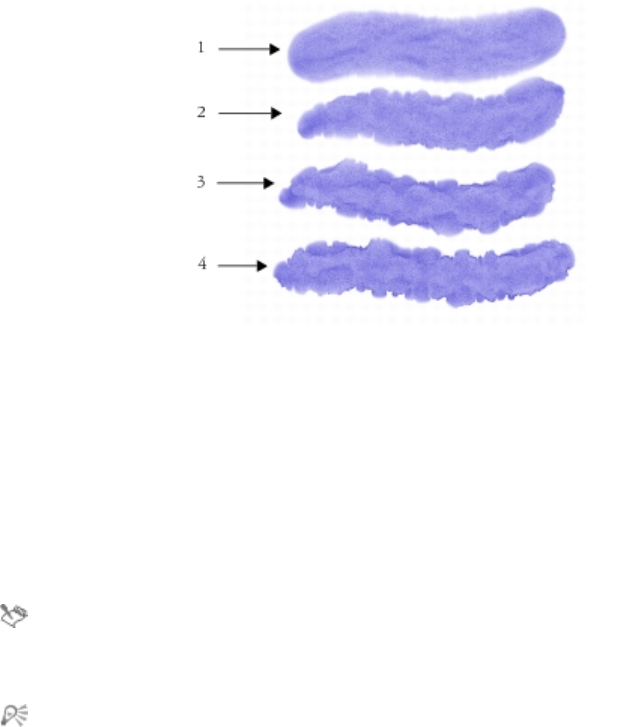
Applying and adjusting flow maps | 453
Brushstrokes using the Noisy Flowmap Fringe brush variant set at a flow resistance
of 0 (1), 33 (2), 66 (3), and 100% (4) with the Clouds flow map selected.
To enable flow maps and control flow resistance
1In the Brush library panel, choose a Real Watercolor brush variant.
2Choose Window Brush Control Panels Real Watercolor.
3In the Flow area, enable the Flow Map option to set the Source.
4Move the Flow Resistance slider to adjust the resistance.
Moving the slider to the right increases the effect.
To maximize the effect of flow maps, you need to ensure that the Wetness control is set high and
the Evaporation Rate control is set low.
You can also adjust the flow resistance of the Real Wet Oil brush variants by choosing
Window Brush Control Panels Real Wet Oil.
Customizing flow maps
You can create a custom flow map from scratch or modify an existing flow map. You can create a flow map
by using an existing paper texture or by capturing an area of an image. You can modify the scale, contrast,
and several other settings of a flow map the same way that you would paper texture. For more information,
see “Working with paper texture and grain” on page 151. It is important to note that flow maps benefit
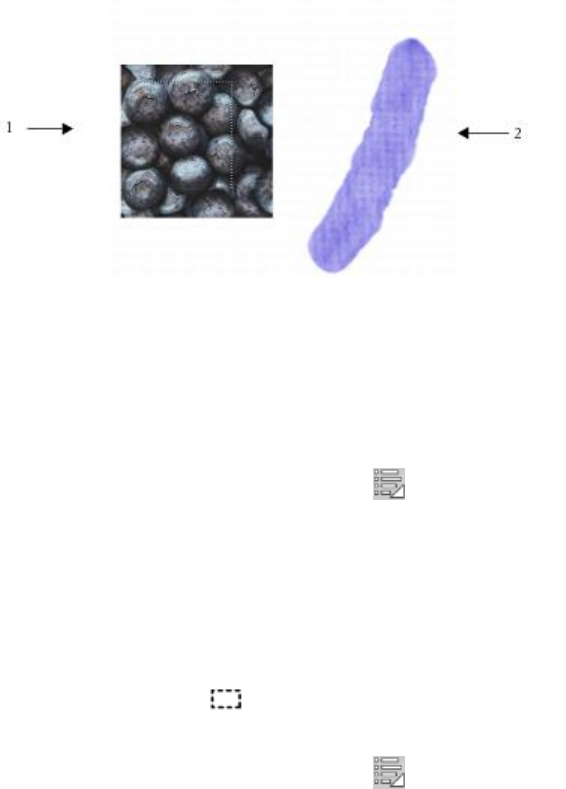
454 | Corel Painter 2015 User Guide
from increased scale and contrast; therefore, if you create a flow map from a paper texture or image, you
should increase the scale and contrast.
An area of an image was selected (1) to create a flow map (2).
To create a flow map from a paper texture
1Choose Window Paper Panels Paper Libraries.
2Click a paper texture swatch.
3Choose Window Flow Map Panels Flow Maps.
4In the Flow Maps panel, click the Flow Maps options button , and choose Create From Current
Paper.
If you want to rename the flow map, right-click the swatch in the Flow Map Libraries panel, and
choose Rename Flow Map.
To capture a flow map from an image
1Open or create an image.
2Choose the Rectangular Selection tool from the toolbox.
3Drag in the document window to select the area of the image.
4In the Flow Maps panel, click the Flow Maps options button , and choose Capture Flow Map.
If you want to blend the distinction between tile borders, drag the Crossfade slider to the right in the
Capture Flow Map dialog box.
5Type a name in the Save As text box.
The flow map is added to the currently selected library.
Applying and adjusting flow maps | 455
You can also capture a flow map from the Flow Map Libraries panel by clicking the Capture Flow
Map button .
To customize a flow map
1Choose Window Flow Map Panels Flow Maps.
2In the Flow Maps panel, perform one or more actions from the following table.
To Do the following
Invert the flow map effect Click the Invert Toggle button .
Resize the flow map pattern Move the Flow Map Scale slider .
Control the contrast of the flow map Move the Flow Map Contrast slider . A
higher setting alternates the flow map pattern
from high to low more quickly and with fewer
intermediate levels than a lower setting.
Control the brightness of the flow map Move the Flow Map Brightness slider .
456 | Corel Painter 2015 User Guide

Hard Media | 457
Hard Media
Corel Painter lets you simulate many different types of traditional hard media, such as pencils, pens,
and markers. The hard media brush controls and variants give you a wide range of options for creating
drawings, sketches, and renderings. You can use the preset variants or create your own collection of
customized Hard Media brush variants.
This section contains the following topics:
•“Choosing a Hard Media variant” (page 457)
•“Modifying Hard Media profiles” (page 460)
•“Controlling the behavior of Hard Media variants” (page 462)
•“Previewing Hard Media dabs” (page 463)
Choosing a Hard Media variant
Corel Painter includes a vast array of preset Hard Media brush variants. You can use the variants as they
are or customize them by using the Hard Media controls to build your own Hard Media toolkit. For
information, see “Controlling the behavior of Hard Media variants” on page 462 and “Modifying Hard
Media profiles” on page 460.
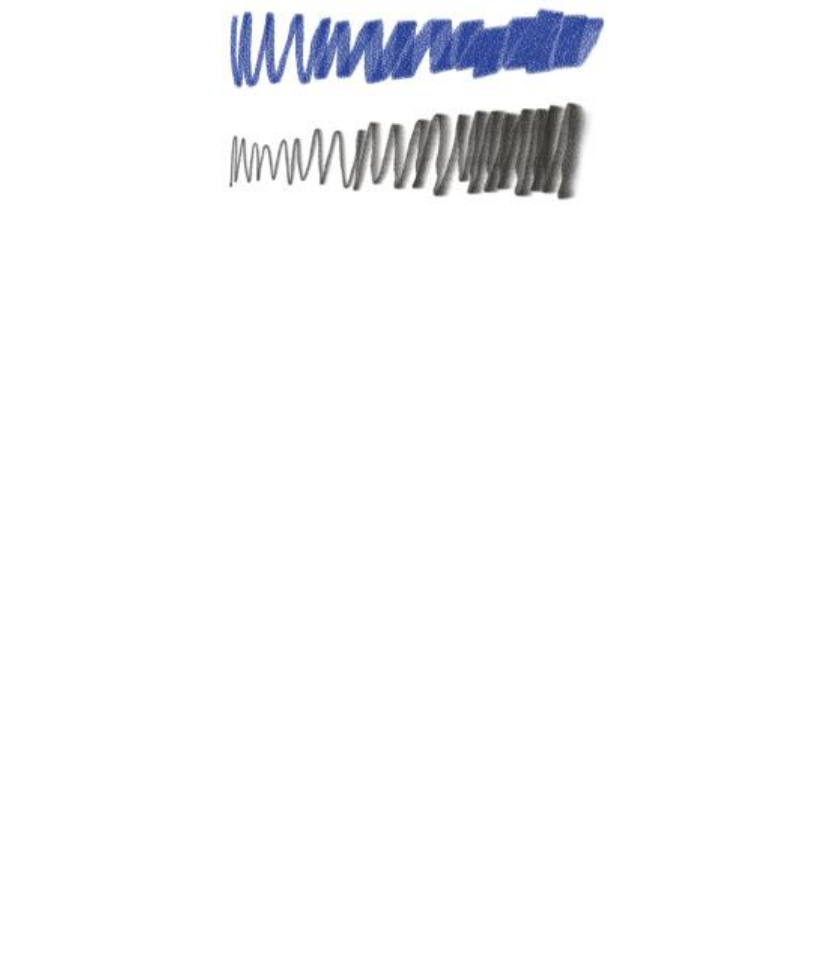
458 | Corel Painter 2015 User Guide
You can modify select chalk (top) and pencil
(bottom) variants using the Hard Media controls.
The Hard Media brush variants are found in many different brush categories. The following table lists the
Hard Media brush variants found in each of these brush categories.
Brush category Hard Media brush variant
Pencils Real 2B Pencil
Real 6B Soft Pencil
Real 2H Drafting Pencil
Real 4H Hard Pencil
Real Soft Colored Pencil
Real Sharp Colored Pencil
Erasers Real Pointy Eraser
Real Soft Eraser
Real Hard Eraser
Pens Real Fine-Point Pen
Real Variable-Width Pen
Real Drippy Pen
Real Variable-Tip Pen

Hard Media | 459
Brush category Hard Media brush variant
Chalk and Crayons Real Soft Chalk
Real Fat Chalk
Real Hard Chalk
Charcoal and Conté Real Hard Conté
Real Soft Conté
Pastels Real Soft Pastel
Real Hard Pastel
Blenders Real Pointy Blender
Real Stubby Blender
Sumi-e Real Sumi-e Wet Brush
Real Sumi-e Dry Brush
Markers Most of the Marker variants
To choose a Hard Media variant
1Click the Brush Selector on the Brush Selector bar.
2In the Brush library panel, click one of the following brush categories:
•Pencils
•Erasers
•Pens
•Chalk and Crayons
•Charcoal and Conté
•Pastels
•Blenders
•Sumi-e

460 | Corel Painter 2015 User Guide
•Markers
3Click a Hard Media brush variant.
Modifying Hard Media profiles
You can modify Hard Media profiles to change the shape and size of the dabs that you apply to the canvas.
By changing the profile, you can simulate the real-world hard media that have different shapes, sharpness,
or thickness. Using the Hard Media controls, you can change the size, and choose one of six profiles to
modify the shape.
Hard Media profile Description
Pencil Profile Provides a sharper tip when perpendicular to the
tablet, and provides a wider, softer tip when at an
angle.
Medium Profile
Has a wide area of greater density at the center,
with rapid falloff toward the edge.
Linear Profile
Provides maximum density at the center, with even
falloff toward the edge.
Pointed Profile Provides maximum density at the center, with rapid
falloff toward the edge.
Dull Profile
Provides maximum density at the center, with high-
density weighting toward the edge.

Hard Media | 461
Hard Media profile Description
1-Pixel Edge
Provides maximum density throughout, with rapid
falloff toward the edge, producing a 1-pixel, anti-
aliased edge.
When changing the shape, you can use the Squeeze controls to specify the vertical and horizontal ranges
of the dab. For example, tilting the tool while drawing can change the dab shape from round to elliptical.
You can also change the size of the tip.
The Hard Media controls are usable only with the Circular, Captured, and Eraser dab types. For more
information about dab types, see “General controls” on page 332.
You can also save your customized Hard Media variant. For more information, see “Adjusting brushes with
brush controls” on page 325.
To choose a Hard Media tip profile
1With a Hard Media variant selected, choose Window Brush Control Panels Hard Media.
2Click the Hard Media tip profile that you want to use.
To set the Hard Media tip size
1With a Hard Media variant selected, choose Window Brush Control Panels Size.
2Move the Size slider to the right to increase the size of the tip, or move the slider to the left to decrease
the size of the tip.
To set the Hard Media tip shape
1With a Hard Media variant active, choose Window Brush Control Panels Hard Media.
2In the Squeeze area, adjust any of the following sliders:
•V Min — sets the amount of squeeze applied to the dab on the vertical axis. This setting represents
the dab at its smallest.
•V Max — sets the amount of squeeze applied to the dab on the vertical axis. This setting represents
the dab at its maximum size.
•H Min — sets the amount of squeeze applied to the dab on the horizontal axis. This setting
represents the dab at its smallest.
•H Max — sets the amount of squeeze applied to the dab on the horizontal axis. This setting
represents the dab at its maximum size.
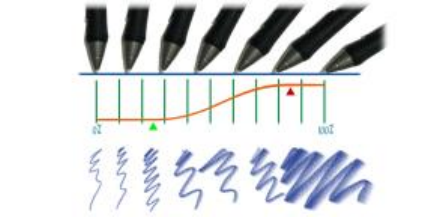
462 | Corel Painter 2015 User Guide
Controlling the behavior of Hard Media variants
Corel Painter lets you control how a Hard Media variant behaves when you apply strokes to the canvas. The
Stepping slider controls the transition between narrow and wide sections of a stroke. Moving the slider to
the right makes the transition appear more abrupt, and moving it to the left makes the transition smoother.
The Transition Range sliders lets you determine the angle at which you transition from a fine point to a
wider stroke when tilting your stylus. This control lets you simulate the look and feel of hard media such as
pencils or markers. A real-world example of this would be holding a sharp pencil perpendicular to a piece
of paper. When you draw at a 90° angle, you produce a very narrow or hard line. If you tilt your pencil to a
60° angle, you produce a wider or softer line.
At the top of the image, a stylus is shown tilting at different angles and
the stoke that corresponds with the angle is displayed at the bottom
of the image. The graph in the middle of the image identifies the
start (green arrow) and the Finish (red arrow) of the Transition Range.
The Hard Media controls are usable only with the Circular, Captured, and Eraser dab types. For more
information, see “General controls” on page 332.
To set the Hard Media size step
1With a Hard Media variant active, choose Window Brush Control Panels Hard Media.
2Move the Size Step slider to the right to produce fewer angles between dabs, or move it to the left to
create more angles between dabs.
To set the Hard Media transition range
1With a Hard Media variant active, choose Window Brush Control Panels Hard Media.
2Move the Start slider to set the angle at which the transition will start.
Moving the slider to the right increases the angle; moving the slider to the left decreases the angle.
Hard Media | 463
3Move the Finish slider to set the angle at which the transition will finish.
Moving the slider to the right increases the angle; moving the slider to the left decreases the angle.
Previewing Hard Media dabs
As you modify the Hard Media variants, you can preview your changes to see how they affect the dab
shape and size in the Dab Profile panel. You can toggle between different views of the dab, including the
Hard Media view. For more information about these views, see “Changing dab profiles” on page 359.
To choose a brush dab preview option
1Choose Window Brush Control Panels Dab Profile.
2In the Dab Profile panel, click the Brush Dab Preview Window until the desired preview appears.
464 | Corel Painter 2015 User Guide
Markers | 465
Markers
Corel Painter includes a Markers brush category to simulate the professional markers that are used by
illustrators, graphic designers, industrial designers, and architects for drawing and creating renderings.
This section contains the following topics:
•“Getting started with markers” (page 465)
•“Customizing markers” (page 467)
Getting started with markers
The brush variants in the Markers category replicate traditional markers used for drawing and creating
renderings.
You can choose any of the following rendering marker variants from the Markers brush category:
Art Marker Blunt Tip
Chisel Tip Marker Design Marker
Dirty Marker Dry Chisel Tip Marker
466 | Corel Painter 2015 User Guide
Felt Art Marker Felt Marker
Fine Point Marker Fine Tip Marker
Fine Tip Flat Rendering Marker
Leaky Marker Medium Tip Felt Pens
Pointy Rendering Markers Round Tip Marker
Scratchy Dry Tip Marker Sharp Marker
Thick n Thin Marker Variable Chisel Tip Marker
Worn Marker Jitter
The strokes that you make with the Marker variants closely reflect those of traditional, high-quality markers,
mainly because of the way the Marker variants interact with the canvas. For example, the Flat Rendering
Marker in Corel Painter allow color buildup and pooling. One continuous brushstroke at a constant speed
lays down one consistent color. However, if you lift the stylus, or release the mouse button, the color builds
up, as it would with conventional markers. The Marker variants also let you overlay strokes, and because the
applied color is somewhat transparent, the underlying colors show through.
The color builds up only when you either lift your stylus up from the tablet or let go of the left mouse
button. Slowing down or stopping does not cause build up.
With a marker, you can build up or pool color.
To choose a marker variant
1Click the Brush selector on the Brush Selector bar.
2In the Brush library panel, click the Markers brush category, and click a marker brush variant.
Markers | 467
Customizing markers
You can customize a preset Marker variant by using various brush controls, such as General controls or
Size controls. In addition, you can change the look of Markers more precisely by using the Hard Media
controls that are specifically designed for modifying drawing media, such as markers and pencils. For more
information about the Hard Media options, see “Hard Media” on page 457. For more information about
customizing brushes, see “Adjusting brushes with brush controls” on page 325.
You can also save your customized Marker variant. For more information, see “Saving and deleting brush
variants” on page 313.
468 | Corel Painter 2015 User Guide

Image hose | 469
Image hose
The Image hose lets you paint with images instead of painting with color. The images flowing from the
hose change as you make a brushstroke. You can modify the appearance of the default Image hose
elements or create your own set of images so you can paint with a unique image series.
The Image hose allows you to paint with images.
This section contains the following topics:
•“Using the Image hose” (page 470)
•“Adjusting Image hose opacity and grain” (page 471)
•“Adjusting the size and spacing of image hose elements” (page 473)
•“Indexing nozzle files” (page 474)
•“Understanding nozzles, ranks, and indexing” (page 476)
470 | Corel Painter 2015 User Guide
•“Creating a 1-Rank nozzle” (page 479)
•“Creating a 2-Rank nozzle” (page 481)
•“Creating a 3-Rank nozzle” (page 483)
•“Loading and managing nozzle files” (page 485)
•“Creating a nozzle from a movie” (page 487)
Using the Image hose
To start painting with the Image hose, you need to choose the Image Hose category from the Brush library,
select an Image hose variant, and then choose the imagery that you want to apply. The imagery is stored in
a nozzle file. For example, you can load images of any description — leaves, bark, grass, stones, people, or
whatever you want. When you paint with these image elements, you can build them into coherent shapes,
such as a tree, hill, cobblestone street, or crowd of people.
As with other Corel Painter brushes, the Image hose has several variants. These built-in variants combine
nozzle control factors (indexing rules) with brush settings to create different hose effects.
The Nozzle Libraries panel.
Variants are divided into two types — Spray and Linear — according to the placement of images in relation
to the stroke. Spray variants scatter images. Linear variants place images directly on the stroke path.
Variants also differ in the way they link the size and angle of images to factors such as stylus tilt, pressure,
and position.
A variant’s name contains important information. For example, the variant’s name Linear-Size-P Angle-D
indicates that this is a Linear variant that links the size of images you paint to the stylus pressure (P) and
places them at an angle based on the direction (D) of the stroke. The letters R, W, and B in variants’ names
signify Random, Wheel, and Bearing. For more information, see “Color Expression controls” on page 417
and “Understanding nozzles, ranks, and indexing” on page 476.
You can use these variants as a starting point and then adjust the brush and nozzle controls to deliver the
images just as you want them. For more information, see “Adjusting Image hose opacity and grain” on
page 471 and “Adjusting the size and spacing of image hose elements” on page 473.

Image hose | 471
You can also control the image output by increasing stylus pressure, so you can paint larger or more
colorful images, or by changing the direction of the stroke, so you can change the angle of the images.
To use the Image hose
1Choose the Brush tool from the toolbox.
2Click the Brush Selector on the Brush Selector bar.
3In the Brush library panel, click the Image Hose brush category, and click a brush variant.
4Choose Window Media Library Panels Nozzles.
5In the Nozzle Libraries panel, choose a nozzle from the list box.
6Make a brushstroke on the canvas.
The Image hose deposits 24-bit images with an 8-bit mask. The mask enables you to layer the
images gently, without aliased edges or artifacts.
Adjusting Image hose opacity and grain
You can change the appearance of the image hose elements by adjusting the opacity or grain. For example,
you can adjust the opacity to add transparency to the nozzle images and allow the background colors to
show through.
You can change the opacity of Image hose strokes. Settings
shown are 100% opacity (left) and 20% opacity (right).
You can also adjust the grain, which lets you mix the additional color with the nozzle images. If the Grain
slider is set to 100%, the nozzle images remain unaffected. As you move the slider to the left, more of the
additional color appears in the elements. This is a handy way to adjust the shading of image elements.
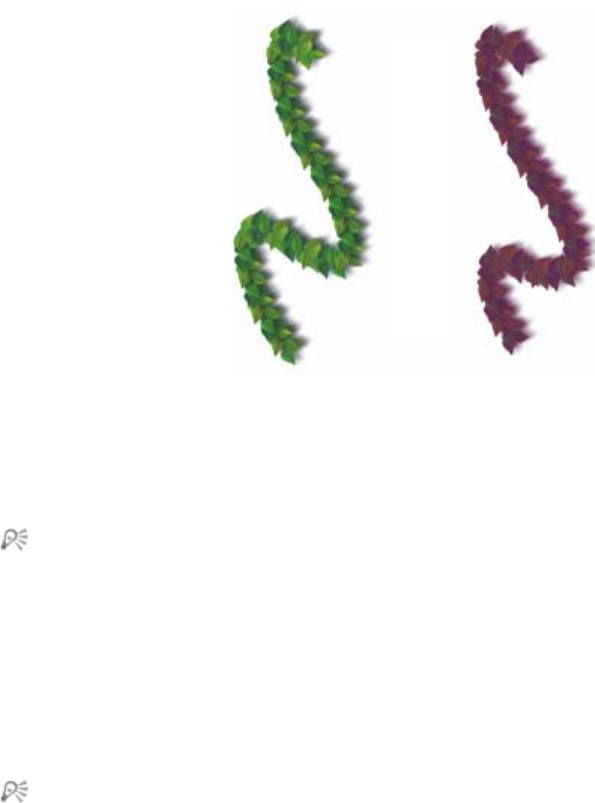
472 | Corel Painter 2015 User Guide
You can turn down the Grain to mix in the additional color.
Settings shown are 100% grain (left) and 39% grain (right).
To adjust the opacity of image hose elements
• On the property bar, move the Opacity slider.
You can also randomize the effect by choosing Window Brush Control Panels Opacity. In the
Opacity panel, choose Random from the Expression list box.
To adjust the grain of the image hose elements
1In the Color panel, double-click the Additional Color swatch.
2Choose a color from the Color dialog box.
3On the property bar, move the Grain slider.
You can also randomize the effect by choosing Window Brush Control Panels Grain. In the
Grain panel, choose Random from the Expression list box.
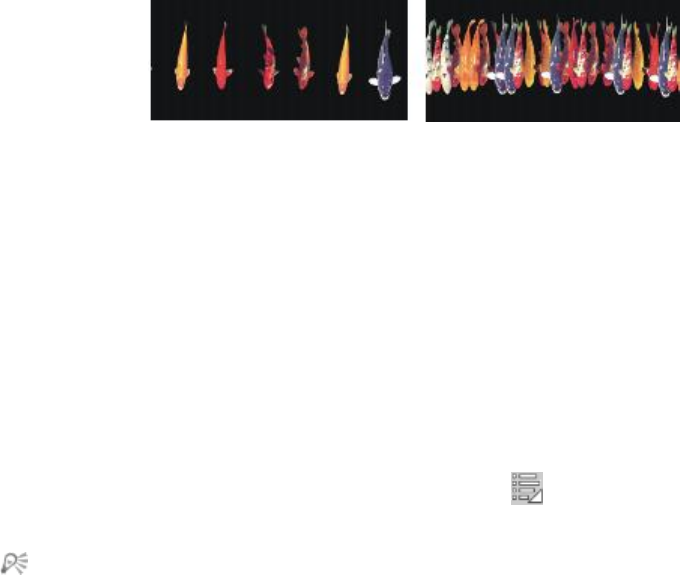
Image hose | 473
Adjusting the size and spacing of image hose elements
You can scale the size of image elements that are applied by the Image hose. At 100%, the images are the
same size as they are in the nozzle file.
You can also control the space between images.
The Spacing slider controls the spacing of the images.
Settings shown are 85% (left) and 20% (right).
Because spacing is based on the diameter of the brush, the Size settings also affect image spacing. For
example, increasing the brush size adds space between the images applied with the hose.
The Min Size slider also affects the size of images applied by the Image hose. When set to stylus pressure or
direction, the Min Size setting determines the range within which the images you apply will vary in size. For
more information, see “Spacing controls” on page 357 and “Size controls” on page 349.
You can also randomize the proximity of images to the stroke path by increasing jitter.
To adjust the scale of the image hose elements
1Choose Window Media Library Panels Nozzles.
2In the Nozzle Libraries panel, click the Nozzle options button , and choose Set Nozzle Scale.
3Type a value in the New Scale box.
You can also change the scale of the elements by moving the Size slider on the property bar, just
as you would with other brushes.
To adjust the spacing between Image hose elements
1Choose Window Brush Control Panels Spacing.
2Move the Spacing slider.
3Move the Min Spacing slider.
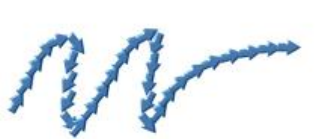
474 | Corel Painter 2015 User Guide
To randomize the spacing between Image hose elements
• On the property bar, move the Stroke Jitter slider to the right.
Indexing nozzle files
A nozzle file can contain any number of images. Usually, the images are similar and form a logical series —
that is, the images progress along some order. For example, the images might increase in size or advance
in angle. It is not necessary for images to progress in a logical series, but the Image hose is more effective
when they do.
“Indexing” refers to the method used to select particular images from the many images in a nozzle file.
You can apply indexing rules to control the sequencing of nozzle images. For example, you can set up the
nozzle so that by pressing harder with a pressure-sensitive stylus, you paint with larger images.
Ranks and indexing rules
Image nozzle files can be created with one, two, or three image progressions known as “ranks.” Corel
Painter offers these three rankings, so each nozzle file can be identified as a 1-Rank, 2-Rank, or 3-Rank
nozzle. For more information, see “Creating a 1-Rank nozzle” on page 479.
The following indexing rules are available for each rank in Corel Painter:
•None returns one element only — the last in the rank.
•Velocity indexes images from the rank based on the speed of the stroke. A faster stroke delivers
elements from later in the rank. Velocity is often used with a mouse to mimic pressure. Velocity can be
difficult to control. For this reason, you might want to use it in a rank with few elements.
•Direction indexes images from the rank based on the direction of the stroke. The first item in the
rank corresponds to a left-to-right stroke (toward 3 o’clock). As the stroke direction progresses
counterclockwise, the Image hose delivers subsequent images from the rank. The number of elements in
the rank determines the directional change required to index a different element. For example, a nozzle
file that contains 72 images at progressive angles delivers a different item at every 5° of stroke direction
(360° divided by 72 equals 5°).
This Arrow nozzle is an example of indexing based on Direction.
•Pressure indexes images based on stylus pressure. Greater pressure selects images from later in the rank.
Pressure works only with pressure-sensitive tablets. Pressure is a great control for requesting images
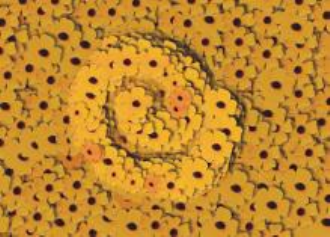
Image hose | 475
from a nozzle. For example, if you set up your nozzle file to progress from small to large images, heavier
strokes deliver larger images.
•Wheel indexes images based on the wheel setting on an airbrush stylus.
•Tilt indexes images based on the tilt of the stylus. Not all stylus models convey this information. This
control does not work with a mouse.
•Bearing indexes images based on the position of the stylus. Not all stylus models convey this
information. This control does not work with a mouse.
•Rotation indexes images based on the rotation of a flat-tip stylus that supports 360-degree rotation.
•Source delivers images based on the luminance of pixels in the clone source (or current pattern if you
have not set a clone source). The pixels of the working document have a direct correspondence with
the pixels of the clone source image. As the luminance increases, Source delivers images from later in
the rank. For best results, the clone source should have the same dimensions as the document in which
you’re working. For more information, see “Painting in the clone” on page 176. Depending on the
nozzle you’re using, Source can be quite useful. For example, if the source image is black on the left
and progresses through gradations to white on the right, the Image hose delivers images from the start
of the rank at the left of the document, in the dark area. As the brush moves to the right into the lighter
area, the Image hose delivers images from later in the rank. To take advantage of this feature, you may
want to create a special source image for the single purpose of controlling the Image hose. The clone
source image or pattern for controlling the Image hose may be grayscale. Remember, Corel Painter uses
only the luminance values.
Indexing based on Source.
•Random selects images from the rank at random. Randomness can add irregularity of color and texture
to the areas you paint with the Image hose. This contributes to the aesthetics of the painting, because
minor irregularities occur in natural structures.
•Sequential indexes images in the order they appear in the rank — moving left to right, and top to
bottom.
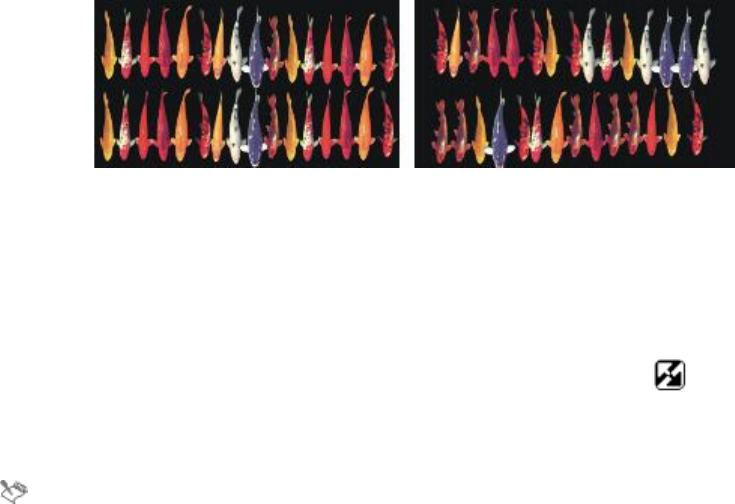
476 | Corel Painter 2015 User Guide
Left: sequential indexing. Right: random indexing.
To change the indexing rule
1Choose Window Brush Control Panels Image Hose.
2For each rank in the nozzle, choose an indexing rule from the list box.
If you choose Direction, adjust the Direction slider.
If you want to invert the effect of the indexing rule, click the Invert Rank button . For example, if
you choose Pressure for an indexing rule, greater stylus pressure selects images from later in the rank.
Inverting the rank produces the opposite result — greater stylus pressure delivers images from earlier in
the rank.
The indexing rules for Rank 2 and Rank 3 have no effect on a 1-Rank nozzle.
Understanding nozzles, ranks, and indexing
You can create custom nozzles for the Image hose by choosing a series of images and then applying ranks
and indexing rules. After saving a custom nozzle, you can load it so you can use it in an image. For more
information, see “Loading and managing nozzle files” on page 485.
You can create a simple nozzle (1-Rank) or, as your Image hose requirements become more exacting, you
can create complex nozzles (2-Rank or 3-Rank) that involve two or three progressions — for example,
images getting larger and changing angle. In this case, you’ll use one input factor to determine image size
and use another factor to determine image angle.
Introducing the rank indexing system
A 1-Rank indexing system is simply a numbered sequence. You can locate any element in the sequence by
specifying its number — for example, “Item 3.”
A 2-Rank indexing system uses two perpendicular indexes. The first rank extends horizontally and the
second extends vertically. Again, you’ll vary input to locate an item for either rank. You can think of indexing
in the two ranks as “selecting a column” and “selecting a row.” The Image hose delivers the image that
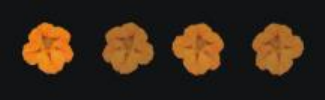
Image hose | 477
is located where the selected column and row intersect. For this to work properly, you must use different
indexing rules (input factors) for selecting in each rank.
A 3-Rank indexing system extends the 2-Rank model. The third rank is created by repeating the 2-Rank
“set.” Within the selected set, the 1-Rank and 2-Rank indexing (described above) is used. You must use
different indexing rules for selecting in each rank.
A 3-Rank indexing system can be used with calendar dates. Any day — past, present, or future — can be
located by specifying the month, day, and year. For example, “February 25, 1962 (2/25/1962).”
Designing nozzles: 1, 2, or 3 ranks
A nozzle file contains a series of images arranged in a regular grid. Usually, the images are progressive in
terms of size, shape, angle, or color. Progression is not necessary, but it increases the sophistication of the
Image hose. For example, a nozzle file with images progressing in size can be set up so that greater stylus
pressure paints incrementally larger images.
A 1-Rank nozzle progresses in one dimension.
In this example, changing angle is the first rank.
If you want a two-dimensional progression, such as having image elements increasing in size and changing
angle, you need to set up your images as a 2-Rank nozzle file. Painting with a 2-Rank nozzle, you can
control where your image comes from in terms of both progressions. In this case, you use a different input
factor to control the location of the image elements in each rank.
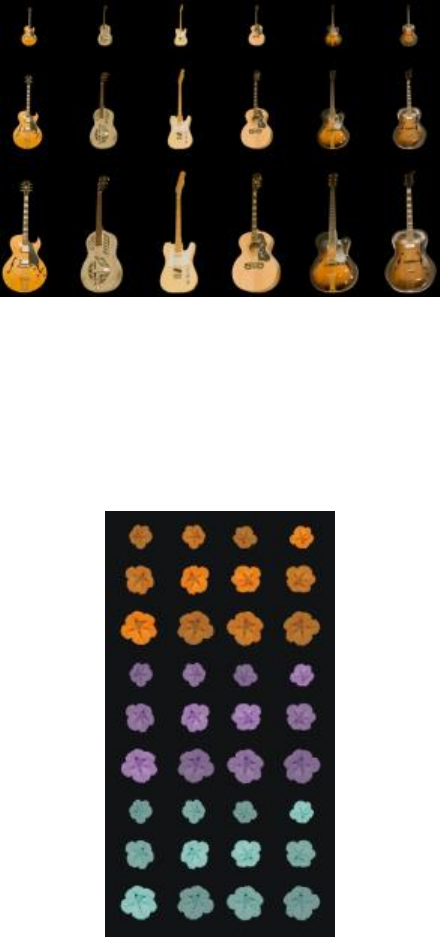
478 | Corel Painter 2015 User Guide
A 2-Rank nozzle progresses in two dimensions. In this example,
changing angle is the first rank, and changing size is the second rank.
You can extend the nozzle to a third progression, creating a 3-Rank nozzle. Again, you use a separate
indexing rule (input factor) to control the location in each rank. If you use one indexing rule to control two
ranks, some image elements become unavailable. In the following image, Rank 3 is a progression in color.
You might control this final rank with randomness, velocity, or source — depending on your plans for the
image.
Color is the third rank in this 3-Rank nozzle.
Image hose | 479
It is recommended that you consider how you will control each rank before you build a nozzle. The way you
lay out the images can limit the ways you can control the indexing. Before you begin building a nozzle, you
must decide which rank level you need as well as how many elements you want in each progression. For
more information, see “To change the indexing rule” on page 476.
Preparing images
Regardless of the rank level of the nozzle you are making or the method you use to build it, the following
tips will help you develop the individual images.
Each element in an Image hose nozzle must be selected. The selection allows you to paint with images of
irregular shape. Only what is inside the selection will flow from the Image hose.
You might want to work by creating a silhouette of the image shape as a selection, and then fill in the
color information later. With soft edges to the selection, you can create images that are anti-aliased
automatically. This improves the continuity across an area of hosed images.
You can create Image hose nozzles from layers. As you create image elements, turn them into layers. If the
layer looks good when dropped on different backgrounds, the image will look good as a nozzle element.
Building a nozzle from layers offers advantages in convenience as well.
Another technique is to float the image on a black background and add a drop shadow. This will enhance
the appearance of three dimensions, as image elements build up in layers. When all elements have
the shadow in the same position, the light source appears the same across the painted area. For more
information, see “Layers” on page 513.
Creating a 1-Rank nozzle
To create a 1-Rank nozzle, first you create the images that you want to include in the nozzle. Each image
must be created on a separate layer. You can then select and group the individual layers and save the
nozzle file in the RIFF format. To use the new 1-Rank nozzle, you load it in the nozzle library. For more
information, see “Loading and managing nozzle files” on page 485.
In a 1-Rank nozzle, the images do not need to be in one line. Corel Painter wraps images onto several lines
to create a document of reasonable shape. Corel Painter follows a mathematical rule in reconstructing the
rank of images. This rule is contained in the nozzle definition. For more information, see “To build a 2-Rank
nozzle” on page 482.

480 | Corel Painter 2015 User Guide
Nozzles are most useful when they deliver similar images
with some irregularity — for example, butterflies on flowers.
To create a 1-Rank nozzle from layers
1Choose Window Layers.
2Click the New Layer button .
3Create an image element to be used as a nozzle.
The alignment of layers in the document doesn’t affect the nozzle-building process.
4Repeat steps 2 and 3 to create additional image elements.
Rearrange the layer hierarchy to create the progression you want in the nozzle. The top layer on the list
will be the first element in the nozzle sequence. Moving down the list advances through the element
progression.
5Hold down the Shift key, and select the layers that you want to add to the nozzle.
6Click the Layer Commands button , and choose Group Layers.
All items are now part of the same group.
7Choose Window Media Library Panels Nozzles.
8In the Nozzle Libraries panel, click the Nozzle options button , and choose Make Nozzle From
Group.
Corel Painter creates a new, untitled image. This is your nozzle file.
9From the menu bar, choose File Save.
Save the file to the RIFF format.
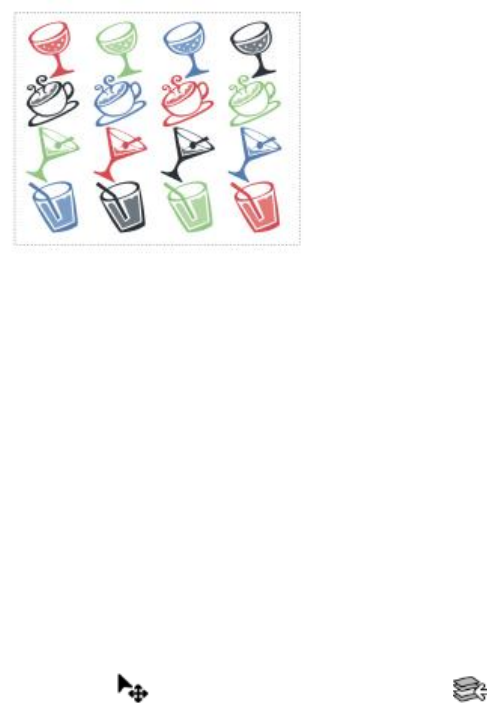
Image hose | 481
Creating a nozzle from layers.
Creating a 2-Rank nozzle
If you want to create a 2-Rank nozzle, such as a nozzle with a two-dimensional progression, you need to
set up the nozzle images accordingly. Unlike 1-Rank nozzles, nozzles of two and three ranks cannot be
created from a layer group. You must build these nozzles manually. The indexing system requires the nozzle
images to fit in a grid. You can create a nozzle file by setting up a grid and placing an image element at the
center of each cell.
The cell size is based on the smallest rectangle that will hold the largest image element (including its
selection). To make sure that your images fit in the grid, copy your largest image element to a layer. After
you have set up the nozzle images in the grid, you can build your nozzle. For more information, see
“Creating and deleting layers” on page 520.
To determine the grid cell size and nozzle dimensions
1In the toolbox, click the Layer Adjuster tool , enable the Auto Select Layer button on the
property bar, and in the document window click the layer with the largest image element that you want
to include in the nozzle.
Corel Painter displays the pixel width and height of the layer’s content in the Navigator panel. To display
the Navigator panel, choose Window Navigator.
You might want to use slightly larger values for the grid cell size.
Determine the number of elements that you want in each rank.
2Multiply the number of items in Rank-1 by the cell width.
This value is the nozzle’s width.
3Multiply the number of items in Rank-2 by the cell height.
This value is the nozzle’s height.

482 | Corel Painter 2015 User Guide
To create the grid
1From the menu bar, choose File New, and enter the nozzle’s width and height in the Width and
Height boxes.
You must enter the nozzle’s width and height that you calculated in steps 3 and 4 of “To determine the
grid cell size and nozzle dimensions” on page 481.
2From the menu bar, choose Canvas Virtual Grid Virtual Grid Options.
3In the Grid Options dialog box, set the Horizontal spacing and Vertical spacing to the values of the
cell width and height, and click OK.
You need to enter the cell width and height from step 1 of “To determine the grid cell size and nozzle
dimensions” on page 481.
4Show the grid by choosing Canvas Virtual Grid Show Virtual Grid.
The grid should describe the number of elements you want in each rank — Rank 1 horizontally and
Rank 2 vertically.
To build a 2-Rank nozzle
1Place one image element in the center of each grid cell.
Follow an appropriate progression based on your intentions for controlling this nozzle.
The easiest way to do this is with layers. When you bring image elements into the grid as layers, they
bring their layer masks with them. If the image elements are layers in different files, it is easier to open
the files one at a time.
2From the menu bar, choose Window Layers.
3In the Layers panel, select all layers.
4Click the Layer options button , and choose Drop and Select.
5From the menu bar, choose File Save As, and save the file in RIFF format.

Image hose | 483
In this finished 2-Rank nozzle, variety is the first rank, and size is the second rank.
To paint with your new nozzle file, you’ll need to load it first. For more information, see “To load a
1-Rank nozzle file” on page 486.
Creating a 3-Rank nozzle
You can create a 3-Rank nozzle using the grid method.
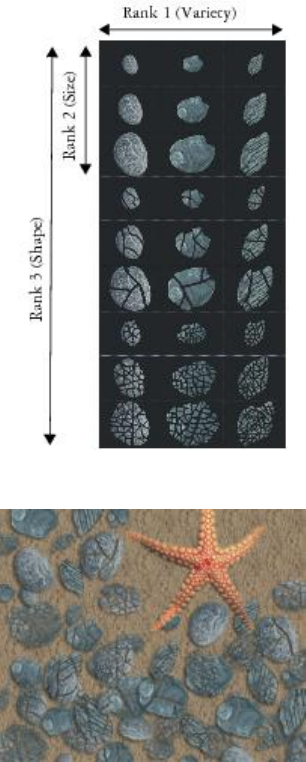
484 | Corel Painter 2015 User Guide
This nozzle file has three items in Rank 1, three items in Rank 2, and three items in Rank 3.
Painting with the 3-Rank nozzle “Broken Shells.”
To create a 3-Rank nozzle
1Build or open a 2-Rank file.
2Determine the number of elements you want in the third rank.
3Choose Window Navigator to display the Navigator panel, and check the height of the current
nozzle file.
4Multiply the number of items in the third rank by the height of the file.

Image hose | 485
The result will be the height of your 3-Rank nozzle file.
5Choose Select Reselect.
6Choose Select Float.
7Choose Edit Copy.
Now you must extend this file vertically to accommodate the items in the third rank.
8In the Layers panel, select the canvas.
9From the menu bar, choose Canvas Canvas Size.
10 To set the canvas to the height of your 3-Rank nozzle, add the correct number of pixels in the Add:
pixels to bottom box.
The value you need is the difference between the height of the 3-Rank nozzle calculated in step 4 and
the height of the open 2-Rank nozzle.
Now you can develop images for each item (set) in the third rank.
11 Choose Edit Paste, and position the pasted layer in the area you added.
The images should be centered in the grid cells.
If necessary, modify the images in this layer.
12 Select both layers in the Layers panel.
13 Click the Layer options button , and choose Drop and Select.
14 Choose File Save, and save the file in RIFF format.
If you previously defined this file as a nozzle, you must edit the definition to describe the three ranks
you created.
15 Choose File Get Info, and edit the nozzle definition in the File Information dialog box.
For example, the nozzle definition “Image hose 3 by 3” describes a 2-Rank nozzle with three image
elements (items) in Rank 1 and three image elements in Rank 2. Suppose the new nozzle has three
image elements in Rank 3. To paint with images from all three ranks, you need to change the nozzle
definition to “Image hose 3 by 3 by 3”.
To paint with your new nozzle file, you first need to load it. For more information, see “To load a
1-Rank nozzle file” on page 486.
Loading and managing nozzle files
To paint with a custom nozzle file, one that isn’t available in a nozzle library, you need to load it in the
application. You can also store custom nozzle files by adding them to a nozzle library.

486 | Corel Painter 2015 User Guide
To load a 1-Rank nozzle file
1Choose Window Media Library Panels Nozzles.
2In the Nozzle Libraries panel, click the Nozzle options button , and choose Load Nozzle.
3Choose a nozzle from the Open dialog box, and click Open.
4You can now paint with the nozzle.
To load a 2-Rank or 3-Rank nozzle file
1Choose Window Media Library Panels Nozzles.
2In the Nozzle Libraries panel, click the Nozzle options button , and choose Load Nozzle.
3Choose a nozzle from the Open dialog box, and click Open.
4In the Item Width and Item Height boxes in the Nozzle Definition dialog box, enter the values you set
in the nozzle file. These values describe the grid cell size.
If you are not sure about these values, first open the nozzle file, and choose File Get Info. The File
Information dialog displays all the information you need. For example, “Image hose 3 by 2 items
(height 100, width 100)” indicates that this is a 2-Rank nozzle, with three image elements in Rank
1 (horizontal progression) and two image elements in Rank 2 (vertical progression). Item width and
height are 100 pixels each (grid cell size of 100 by 100 pixels).
5In the Index Rank box, enter 2 for a 2-Rank nozzle and 3 for 3-Rank nozzle.
6In the Rank columns, enter the number of image elements used in each rank of the nozzle file.
If this is a 2-Rank nozzle file, enter 1 in the Rank 3 column.
If the values you enter do not describe the file, Corel Painter won’t accept them. In other words, the
“number of items” in Rank 1 (horizontal progression) multiplied by the “item width” must equal the
width of the nozzle file; the “number of items” in Rank 2 (vertical progression) multiplied by the “item
height” must equal the height of the nozzle file.
Remember, you still need to describe the indexing rule for each rank.
Corel Painter needs the information you enter in the Nozzle Definition dialog box to index images
correctly.
To add a nozzle to the library
1Choose Window Media Library Panels Nozzles.
2In the Nozzle Libraries panel, click the Nozzle options button , and choose Load Nozzle.
3Locate your nozzle file in the dialog box, and click Open.

Image hose | 487
If necessary, enter the values to define the number of elements, their size, and rank.
4In the Nozzle Libraries panel, click the Nozzle options button , and choose Add Nozzle to Library.
5In the Save Nozzle dialog box, name the nozzle.
To retrieve and edit a nozzle
1Choose Window Media Library Panels Nozzles.
2In the Nozzle Libraries panel, click the Nozzle options button , and choose Check Out Nozzle.
3In the Check Out Nozzle dialog box, type a value in the Scale box.
Corel Painter opens the nozzle file in an image window.
4Choose Select Reselect.
5If necessary, edit the file.
Make sure to keep the selections.
6Choose File Save As, and save the file to the folder you want.
If you want to protect your original nozzle, save the file under a different name.
7Choose Window Media Library Panels Nozzles.
8In the Nozzle Libraries panel, click the Nozzle options button , and choose Load Nozzle, and select
the nozzle you just saved.
9To put the nozzle back in the library, click the Nozzle options button , and choose Add Nozzle to
Library.
Creating a nozzle from a movie
(Windows only)
On the Windows operating system, Corel Painter lets you create an Image hose nozzle from a movie. This
allows you to transform each frame of a Corel Painter movie into Image hose imagery. The frame size
describes the item size. If you’re creating a movie just to turn it into a nozzle, set the frame size just large
enough to hold your largest image element. You can use the selection in each frame to control the shape of
the images.
The Make Nozzle From Movie command automatically creates a 1-Rank nozzle. If you want, you can use
this technique to create a 2-Rank nozzle.
To make a nozzle file from a movie
1Open the movie that you want to turn into a nozzle file.

488 | Corel Painter 2015 User Guide
2Choose Window Media Library Panels Nozzles.
3In the Nozzle Libraries panel, click the Nozzle options button , and choose Make Nozzle From
Movie.
An untitled image file appears containing each movie frame.
4If you didn’t create selections in a frame of the frame stack, you can create the selections now.
Remember, each image element must be included in the selection.
5Save the file in RIFF format.
You can now load and use this file as you would any 1-Rank nozzle file.
To make a 2-Rank nozzle from a movie
1Choose Movie New Movie, and start a movie.
The frame size (canvas width and height) should be just large enough to hold your largest image
element.
The total number of frames must equal the number of elements in Rank 1 multiplied by the number
of elements in Rank 2. For example, for a 2-rank nozzle with three items in Rank 1 and three items in
Rank 2, the movie needs to contain nine frames.
2Add an image element to the first frame. You can add image elements by using selections or layers.
3In the Layers panel, click the Layer options button , and choose Drop and Select.
4Move to the second frame, and add an image element. Edit the image element if necessary, and repeat
step 3 before moving to the next frame.
5Continue adding image elements to the remaining frames. Make sure to apply the Drop and Select
command before moving to a new frame.
You need to arrange image elements in sets according to the second rank. In the following example,
the second rank progression for the new nozzle is changing color. The movie is organized in three color
sets. Frames 1 to 3 form the red set; frames 4 to 6, the green set, and frames 7 to 9, the yellow set.
Each set is the first rank progression (changing angle) for the new nozzle and contains images that are
the same color but are placed at a different angle.
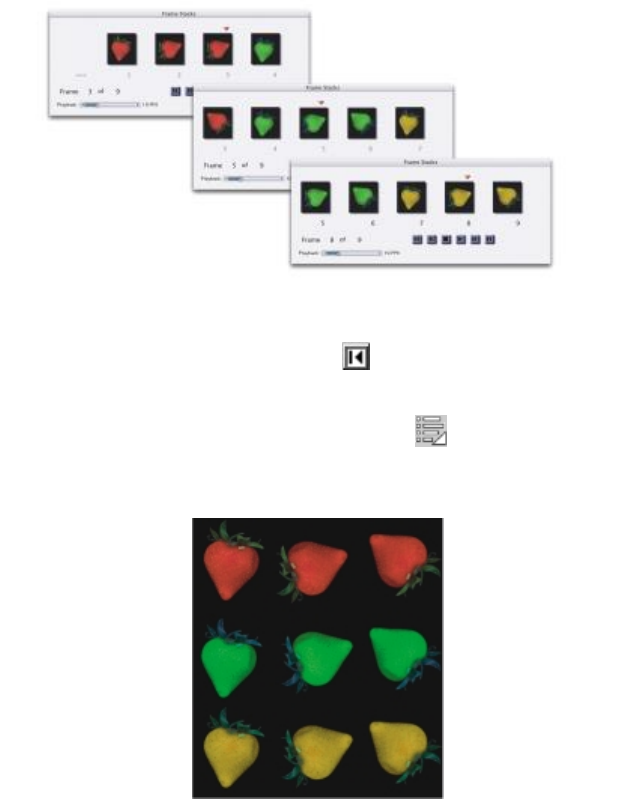
Image hose | 489
The image elements in this movie are arranged in color sets according to the second rank.
6In the Frame Stacks panel, click the Rewind button to return to the first frame of the movie.
7Choose Window Media Library Panels Nozzles.
8In the Nozzle Libraries panel, click the Nozzle options button , and choose Make Nozzle From
Movie.
A new file appears.
The resulting nozzle file from the movie in the previous example.
9From the menu bar, choose File Get Info.
The File Information dialog box holds the information Corel Painter uses to index in this file.
10 Edit the statement to describe the nozzle index you created.

490 | Corel Painter 2015 User Guide
For example, the statement “Image hose 9 items” describes a 1-Rank nozzle with nine image elements.
To describe a 2-Rank nozzle with three items in Rank 1 and three items in Rank 2, you need to change
the statement to “Image hose 3 by 3 items.”
11 Save the file.
To paint with the new nozzle file, you need to load it first. For more information, see “To load a 2-Rank
or 3-Rank nozzle file” on page 486.
Do not allow empty frames at the end of the movie.
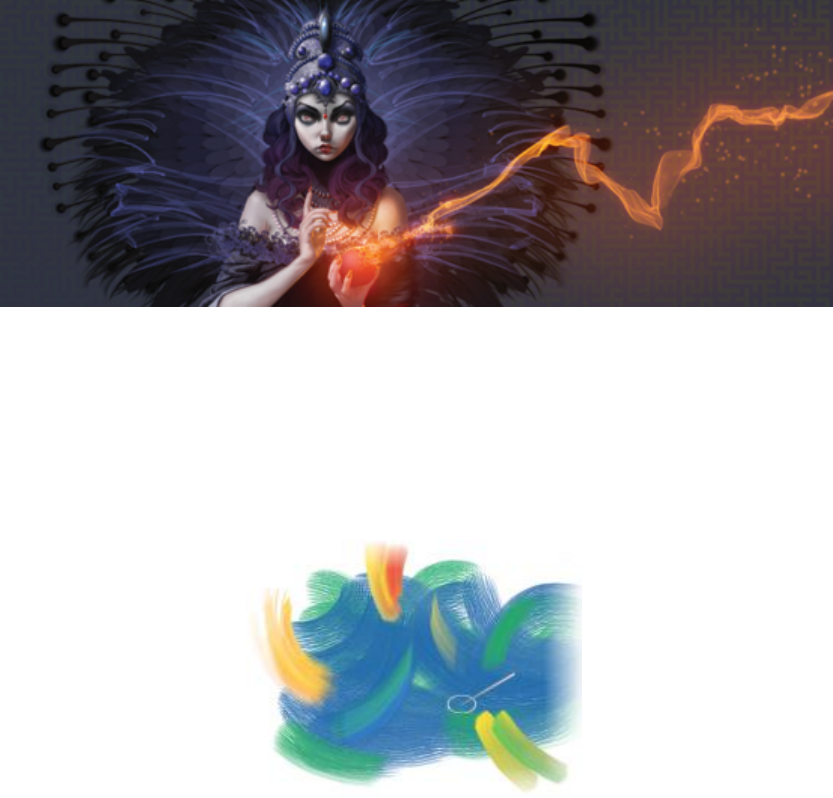
RealBristle brushes | 491
RealBristle brushes
RealBristle brushes bring a new level of realism to the digital painting experience by simulating the natural
movement of an artist’s brush. The resulting brushstrokes and their interaction with the canvas more closely
reflect the look and feel of working with a traditional art brush.
RealBristle Painting System.
Artwork by Cher Threinen-Pendarvis.
RealBristle brush variants are based on brush variants from different brush categories, such as Acrylics, Oils,
and Watercolor.
When you work with RealBristle brushes, enabling the Enhanced Brush Ghost option gives you more visual
feedback about your brush. For more information, see “Setting up the drawing cursor” on page 134.
This section contains the following topics:
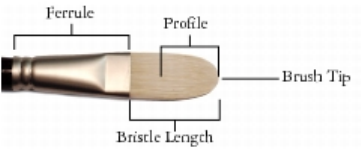
492 | Corel Painter 2015 User Guide
•“Getting started with RealBristle brushes” (page 492)
•“Modifying RealBristle settings” (page 492)
Getting started with RealBristle brushes
RealBristle brush variants are stored in various brush categories. They consist of a broad range of bristle-
based brushes that let you apply brushstrokes to the canvas or a layer.
To choose a RealBristle brush variant
1Click the Brush Selector on the Brush Selector bar.
2In the Brush library panel, click a brush category that contains a RealBristle variant, and click a
RealBristle brush variant.
You can find RealBristle brush variants in brush categories such as Acrylics, Oils, and Watercolor. Their
names begin with the word “Real.”
Modifying RealBristle settings
You can work with a preset RealBristle brush variant or customize a preset brush and save it as a new brush
variant. The RealBristle panel gives you easy access to settings that let you modify a brush variant.
The following diagram outlines some key terminology used to describe RealBristle brushes and their
settings.
The RealBristle panel
The RealBristle panel contains the following settings:
Roundness — lets you control the rounding along the width of the brush and overall shape of the brush.
With a round brush, lower values flatten the brush to create an elliptical shape (can be flattened to a
minimum thickness of 10% of the diameter). With a flat brush, lower values create a brush with more
angular corners (90 degree edges as opposed to rounded edges).
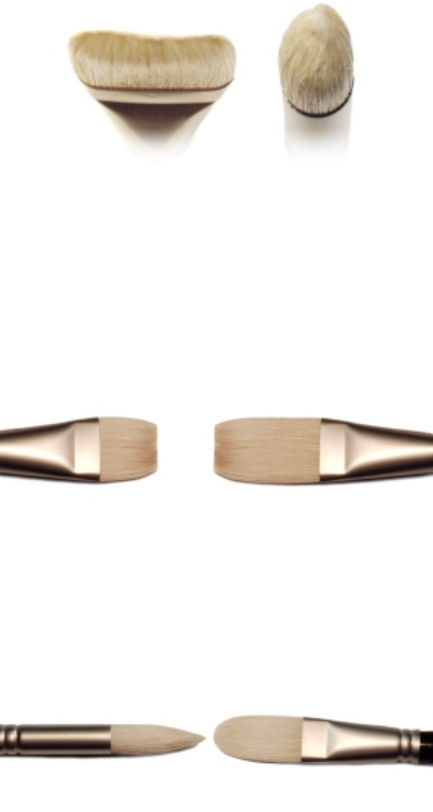
RealBristle brushes | 493
The brush on the left approximates the rounded edges created by
a flat brush with a Roundness setting of 100%; the brush on the
right approximates a round brush with a Roundness setting of 100%.
Bristle length — lets you control the length of the bristles, from the end of the ferrule to the tip of the
brush. The bristle length is calculated by multiplying the brush size value by the bristle length value you
choose. For example, if your Brush size setting is 20, and your Bristle length setting is 2, the length of the
bristles is 40.
The brush on the left approximates a brush with a Bristle length setting
of 1; the brush on the right approximates a brush with a setting of 2.
Profile length — lets you control the length of the profile as a percentage of the overall length of the
bristles.
Although quite different in shape, both brushes have a Profile length of approximately 50%.
Bristle rigidity — lets you control the flexibility of the bristles. Lower values create a more flexible brush,
similar to a sable hair brush; higher values create a more rigid brush, similar to a hog hair brush.
494 | Corel Painter 2015 User Guide
The brush on the left approximates a Bristle rigidity setting of approximately
90%; the brush on the right approximates a setting of approximately 30%.
Fanning — lets you control how the bristles spread out from the ferrule. Lower values keep the bristles
closer together, creating a more pointed tip; higher values spread the bristles out.
The brush on the left represents a Fanning setting of
100%; the brush on the right represents a setting of 0%.
Friction — lets you control how smoothly the bristles move across the canvas. This setting works in
conjunction with the Rigidity setting. Lower values produce smoother strokes; higher values produce more
textured, splayed brushstrokes.
Height — lets you control the minimum distance between the ferrule and the canvas. Higher values let you
paint with the tip of the brush only; lower values let you compress the bristles against the canvas, causing
the bristles to splay in different directions.
The brush on the left represents a Height setting of 100%;
the brush on the right represents a height setting of 50%.

RealBristle brushes | 495
To open the RealBristle panel
•Choose Window Brush Control Panels RealBristle.
To customize a RealBristle brush variant
1Click the Brush Selector on the Brush Selector bar.
2In the Brush library panel, click a brush category that contains a RealBristle variant, such as Acrylics,
Oils, and Watercolor, then click a RealBristle brush variant.
3Choose Window Brush Control Panels RealBristle.
If the selected brush variant is a true RealBristle brush, the controls in the RealBristle panel are
available.
4In the RealBristle panel, enable the Enable RealBristle check box.
5Choose Window Brush Control Panels Dab Profile.
6In the Dab Profile panel, click the brush tip profile that you want to use.
7In the RealBristle panel, adjust any of the Brush sliders.
8In the RealBristle panel, adjust any of the Surface sliders.
By enabling the Enable RealBristle check box, you can create RealBristle brushes from any brush
variant that uses the following Dab types: CamelHair, Flat, Palette Knife, or Bristle Spray.
496 | Corel Painter 2015 User Guide
Liquid Ink | 497
Liquid Ink
Liquid Ink brushes in Corel Painter create liquid paint effects that simulate traditional ink-based media.
This section contains the following topics:
•“Working with Liquid Ink brushes” (page 497)
•“Adjusting attributes of the Liquid Ink layer” (page 498)
•“Using Liquid Ink controls” (page 498)
Working with Liquid Ink brushes
To work with Liquid Ink brushes, you need to create a Liquid Ink layer. Liquid Ink layers are displayed in the
Layers panel.
To create a new Liquid Ink layer
1Choose Window Layers to display the Layers panel.
If the Layers panel is not expanded, double-click the Layers panel tab.
2In the Layers panel, click the Layers options button , and choose New Liquid Ink Layer.
When you apply a brushstroke to the document window using a Liquid Ink brush, a Liquid Ink
layer is automatically created.
498 | Corel Painter 2015 User Guide
To choose a Liquid Ink brush variant
1In the toolbox, click the Brush tool .
2Click the Brush Selector on the Brush Selector bar.
3In the Brush library panel, click the Liquid Ink brush category and click a brush variant.
Adjusting attributes of the Liquid Ink layer
You can experiment with the Liquid Ink layer settings to control the appearance of depth and adjust the
threshold of the edges of the ink.
To adjust Liquid Ink layer attributes
1In the Layers panel, double-click the Liquid Ink layer you want to modify.
2Click the Layers options button , and choose Layer Options.
3In the Liquid Ink Layer Attributes dialog box, perform a task from the following table.
To Do the following
Name the layer Type a name in the Name box.
Adjust the position of the layer Type values in the Top and Left boxes.
Add layer notes Type layer information in the Notes box.
Increase or decrease the width of the brushstroke Adjust the Threshold slider.
Increase or decrease the height, or three-
dimensional appearance, of the brushstroke
Adjust the Amount slider.
Using Liquid Ink controls
You can adjust the Liquid Ink controls. For example, you can select Liquid Ink brush type, size, smoothness,
and stroke volume. For more information, see “Liquid Ink controls” on page 390.
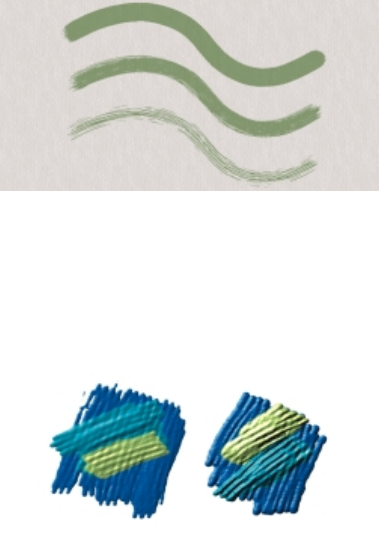
Liquid Ink | 499
Size
The Feature slider lets you determine the space between bristles. You can experiment with the Feature
slider and its effect on different Liquid Ink brushes; the higher the setting, the farther apart the bristles
appear. Lower settings produce more solid strokes. With Liquid Ink brushes, the adhesion of the bristles
minimizes the appearance of individual bristles.
The Feature slider and its effect on Liquid Ink brushstrokes.
Expression
You can use the Expression settings to vary Liquid Ink effects. For example, you can vary the stroke volume
by adjusting controllers such as Direction or Velocity. You can also use the Pressure controller to create
layered Liquid Ink strokes. For more information, see “Expression settings” on page 327.
Light pressure is used to apply overlapping strokes (left).
Increased pressure produces a heavier layering effect (right).
Lighting effects
You can use the Surface Lighting controls to add light sources and change lighting angles to give the
appearance of height to a Liquid Ink brushstroke. For more information, see “Applying preset lighting
effects” on page 646.
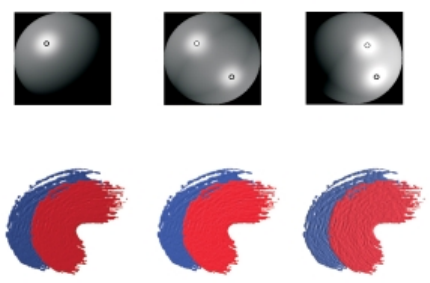
500 | Corel Painter 2015 User Guide
By adjusting lighting angles and adding multiple light
sources, you can add height to Liquid Ink brushstrokes.
To customize a Liquid Ink brush variant
•Choose Window Brush Control Panels Liquid Ink.
For more information about each of the Liquid Ink controls, see “Liquid Ink controls” on page 390.

Impasto | 501
Impasto
Impasto is a painting technique that involves using a brush or palette knife to apply thick paint on a
canvas and retain visible brush or knife marks. This painting method is used to add texture, dimension, and
movement to a painting. In Corel Painter, the Impasto brushes allow you to simulate the appearance and
texture of traditional impasto. You can also control the impasto effect by manipulating the surface lighting
to increase or decrease the perceived depth of the brushstrokes.
This section contains the following topics:
•“Applying, displaying, and clearing impasto” (page 501)
•“Adjusting and creating Impasto brushes” (page 503)
•“Adjusting Impasto lighting and depth” (page 507)
•“Blending impasto with other layers” (page 510)
Applying, displaying, and clearing impasto
Before applying Impasto brushstrokes, you need to set the canvas to display the impasto depth and lighting
information. The canvas stores the impasto information for the entire image, which includes the Impasto
brushstrokes that you apply to individual layers. If the impasto information is hidden, the brushstrokes
appear smooth and flat.
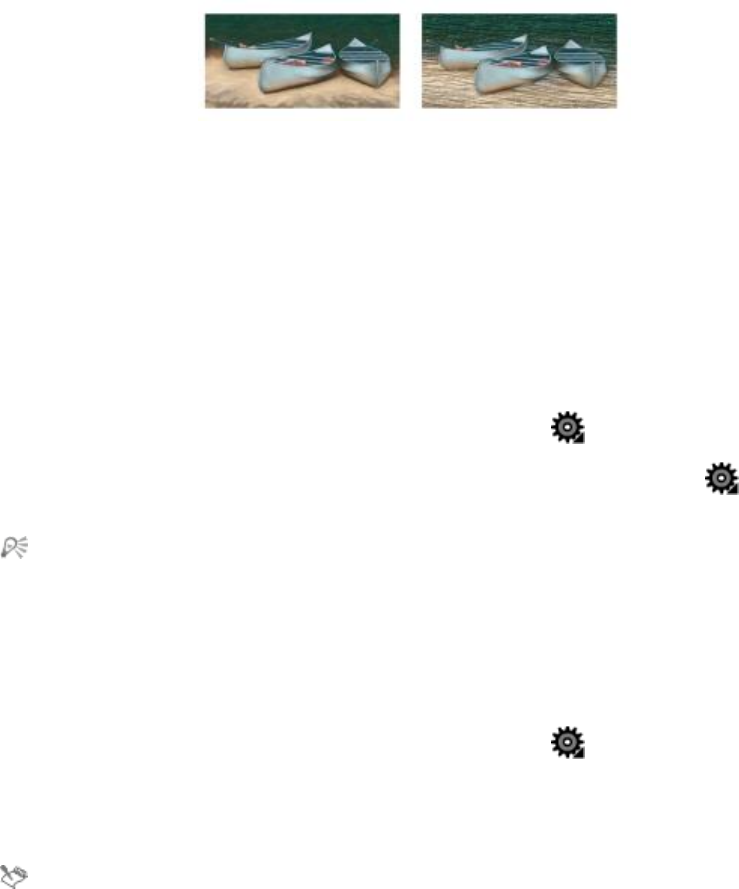
502 | Corel Painter 2015 User Guide
An image with impasto information hidden (left) and displayed (right).
You can choose one of the available Impasto brush variants from the Impasto brush category. You can also
transform other brush variants into Impasto brushes. For more information, see “Adjusting and creating
Impasto brushes” on page 503.
You can clear the impasto information from the canvas at any time. You can also hide the impasto
information before clearing it in order to preview the end result.
To display or hide impasto information
1Choose Window Navigator.
2In the Navigator panel, click the Open Navigator Settings button , and choose Show Impasto.
If you want to deactivate the Impasto view, click the Open Navigator Settings button in the
Navigator panel, and choose Hide Impasto.
You can also activate the impasto view by choosing Canvas Surface Lighting, and enabling the
Enable Impasto check box.
To quickly apply an Impasto brushstroke
1Choose Window Navigator.
2In the Navigator panel, click the Open Navigator Settings button , and choose Show Impasto.
3Click the Brush Selector on the Brush Selector bar.
4In the Brush library panel, click the Impasto brush category, and click an Impasto brush variant.
5Paint on the canvas or layer.
If you save a file that contains Impasto brushstrokes on multiple layers to the Adobe Photoshop
(PSD) format, do not drop the layers to the canvas before saving. If you drop the layers before
saving, you may lose some of the impasto information.

Impasto | 503
To clear the impasto information
•Choose Canvas Clear Impasto.
Adjusting and creating Impasto brushes
The Impasto brush controls let you modify Impasto brush variants, or transform other brush variants into
Impasto brushes. The controls let you set drawing and depth methods, set the amount of depth applied,
and the modify brush interaction. The impasto settings act identically to other brush settings, in that
they’re saved as part of a brush variant or applied to any active brush. For more information, see “Adjusting
brushes with brush controls” on page 325.
Setting an impasto drawing method
The impasto drawing methods control the amount of color and depth that the brush applies to the canvas.
When you change the drawing method, it affects the next brushstroke that you apply to the canvas.
Setting an impasto depth method
The impasto Depth Method lets you choose a control medium for applying depth. Corel Painter uses the
luminance (brightness) information in the control medium to determine how much depth is applied within
a stroke. Light areas of the medium receive more depth; dark areas receive less. Black areas appear flat.
For example, when you use Paper as the Depth Method, the bright and dark areas of the paper grain
determine where grooves and bumps appear in the brushstroke.
This Impasto brushstroke is produced when Paper is used as the Depth Method.
The impasto depth method option is not supported by all brush types.
Controlling the depth interaction of a medium
If the brush variant that you chose allows you to select a Depth Method, you can also adjust various
settings that alter the way the brushstrokes interact the canvas and other brushstrokes.
You can invert the depth method to apply the negative of the source in a brushstroke. For example, if you
invert the depth using Weaving Luminance, light areas of the weave become dark and vice versa.
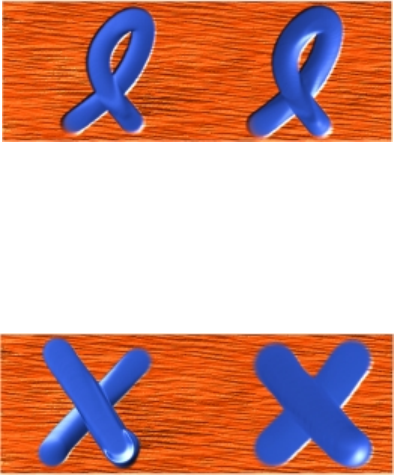
504 | Corel Painter 2015 User Guide
You can also apply negative depth, which allows you to use a brushstroke to excavate, or dig into the paint.
The Negative depth option forces impasto to excavate
(left). Normally, impasto raises ridges and bumps (right).
In addition, you can specify how Impasto interacts with previously applied brushstrokes. For example, you
can adjust the Plow setting so when a brushstroke with a high Plow value encounters another Impasto
brushstroke, it displaces the depth of the existing brushstroke. In essence, the brushstroke “plows” through
existing brushstrokes. This technique produces realistic effects.
The effects of high (left) and low (right) Plow settings.
You can apply one of the nine depth Expression settings to control the flow of depth based on stylus
pressure, velocity, or bearing. You can also invert the depth Expression setting to create a different effect.
For example, if you set depth Expression to Pressure and the Invert option is enabled, less depth is applied
as you press harder, just as it would if you were using a real brush. For more information, see “Expression
settings” on page 327.
You can also adjust the Min setting to specify the range of variability that you want the expression to apply.
The Min Depth setting represents a percentage of the Depth setting and it must be linked to an expression
to have an effect. For example, if you choose the Pressure expression on the Impasto panel, set the Depth
slider to 20%, and then set the Min Depth slider to 50%, the depth will vary from 10% to 20% every time
you apply pressure to the stylus.
You can increase the variation of depth that is applied by adjusting the Depth Jitter. You can also use the
Smoothness slider to smooth the depth jitter in a brushstroke for a more organic look.
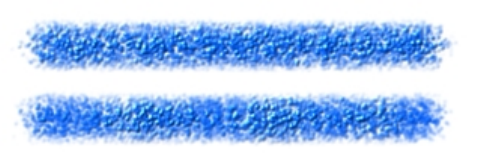
Impasto | 505
Depth Jitter applied to a brushstroke without jitter
smoothing (top) and with jitter smoothing (bottom)
To choose an impasto drawing method
1Choose Window Brush Control Panels Impasto.
2From the Draw to list box, choose one of the following options:
•Color and Depth — applies brushstrokes with color and depth
•Color — applies brushstrokes with color only, depth is disabled
•Depth — applies grayscale brushstrokes to represent the highlights and shadows created by depth,
color is disabled
To control the appearance of depth
1Choose Window Brush Control Panels Impasto.
2From the Depth Method list box, choose one of the following:
•Uniform — applies brushstokes with even depth and little texture
•Erase — removes depth while applying color, which allows you to remove unwanted Impasto
brushstrokes. To erase depth, you must select the Color and Depth option from the Draw To list box.
The amount of depth removed depends on the Depth value that is set. If you want to remove all
depth, set the Depth slider to 0.
•Paper — uses the selected paper grain to control the appearance of depth
•Original Luminance — uses the clone source luminance to control depth. For more information, see
“Using clone source or pattern luminance to create texture” on page 652.
•Weaving Luminance — uses the selected weave pattern to control the appearance of depth
3Drag the Depth slider to the right to increase depth, or to the left to decrease it.
If you set a high value, you produce brushstrokes that have deeper grooves.

506 | Corel Painter 2015 User Guide
The impasto depth method option is not supported by all brush types.
You can create Impasto brush variants using only dab-based dab types, such as Circular, Static
Bristle, and Computed Circular.
When a brushstroke with a high Plow value encounters another Impasto brushstroke, it displaces
the depth of the existing brushstroke. In essence, your brushstroke “plows” through existing
brushstrokes.
For a realistic effect, try varying Depth inversely with Pressure. Set the Expression list box to
Pressure, and enable the Invert option. This lets you apply paint more thickly when you press
lightly, but more thinly when you press firmly, just as if you were using real paint.
To control the depth interaction
1Choose Window Brush Control Panels Impasto.
2Perform an action from the following table:
You can also
Invert the appearance of impasto depth Enable the Invert check box.
Change the direction of impasto depth so you can
dig into the paint
Enable the Negative Depth check box.
Link the depth settings to a specific stylus, or
mouse, movement
Choose an option from the Expression list box.
Set the percentage of variability that you want the
expression to apply
Move the Min Depth slider.
Invert the appearance of the depth expression Click the Invert Depth Expression button.
Adjust the amount of variation that is applied to
Depth
Move the Depth Jitter slider.

Impasto | 507
You can also
Smooth the depth variation Move the Smoothness slider.
Specify the transitions in the brushstroke texture Move the Smoothing slider to the right to increase
the effect, or to the left to decrease it. A high
smoothing value produces brushstrokes with less
texture.
Control how much depth a brushstroke displaces
when it intersects with other brushstrokes
Move the Plow slider to the right to increase the
effect, or to the left to decrease it.
When a brushstroke with a high Plow value encounters another Impasto brushstroke, it displaces
the depth of the existing brushstroke. In essence, your brushstroke “plows” through existing
brushstrokes.
For a realistic effect, try varying Depth inversely with Pressure. Set the Expression list box to
Pressure, and enable the Invert option. This lets you apply paint more thickly when you press
lightly, but more thinly when you press firmly, just as if you were using real paint.
When adjusting Depth Jitter, make sure the Min Depth slider is not set to 100%. Setting the Min
Depth to 100% stops Depth Jitter from occurring.
Adjusting Impasto lighting and depth
Corel Painter offers surface lighting controls that let you manipulate the overall depth effect that impasto
creates. The changes that you make to the surface lighting can increase or decrease the depth, or perceived
thickness, of the brushstroke. These controls are global — they affect all the Impasto brushstrokes on all
layers.
You can modify the impasto effect by increasing the appearance of depth.
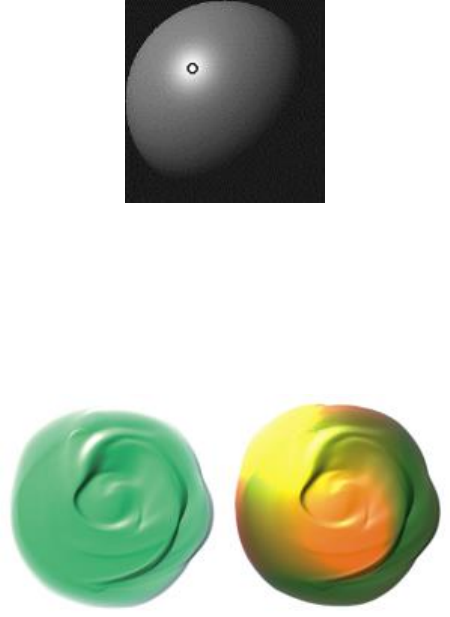
508 | Corel Painter 2015 User Guide
Setting light position and color
You can adjust surface lighting by using preset (simple) lighting or custom lighting. With simple lighting,
you can choose one of eight preset lights. With custom lighting, you can add more light sources, and you
can move and delete light sources. The lighting sphere shows all possible surface angles and how the lights
illuminate them. The light indicators on the sphere show the position of all light sources.
When you disable the Simple lighting option, the lighting sphere appears with a
single light indicator. You can then add more light sources and change their position.
In addition, you can change the color of a light source. For example, you can have multiple colored lights
interact with the depth to produce different textural effects. You should keep in mind that each light
interacts with all the Impasto brushstrokes, so be careful not to set up colored lights that clash with the
colors in your composition or light sources that create unwanted shadows.
The image above uses two different colored light sources.
Setting light properties
You can adjust the appearance of depth, in addition to the intensity and brightness of a light source. The
adjustments that you make to surface lighting affect all Impasto brushstrokes. To change the depth of
individual brushstrokes, you can vary stylus settings or build up media. For more information, see “Blending
impasto with other layers” on page 510. Just as the right lighting can bring out the deep-textured look of
a brushstroke, the wrong lighting can wash out the effect altogether.

Impasto | 509
To add, remove, or modify a light source
1Choose Canvas Surface Lighting.
2Enable the Enable Impasto check box.
3In the Light Controls area, perform an action from the following table.
To Do the following
Add a preset light source In the Light Controls area, enable the Simple
lighting check box, and click a light indicator on
the lighting sphere.
Add a custom light source In the Light Controls area, disable the Simple
lighting check box, and click on the lighting
sphere where you want to add a new light source.
A new light indicator (small circle) appears where
you click.
Delete a custom light source Click on a light indicator and press Delete.
Add custom lights along a circular path In the Light Controls area, disable the Simple
lighting check box, and move the Lights slider.
Change the position of a custom light source Drag a light indicator to a new position on the
sphere.
Change the light color Click a lighting indicator, click the Light Color chip,
and then choose a color.
To modify surface lighting to adjust depth
1Choose Canvas Surface Lighting.
2In the Appearance of Depth area, adjust any of the following sliders:
•Amount — increases or decreases the visibility of brush striations in brushstrokes. The highest value
displays more striations to create the illusion of more texture and increased depth, whereas the
lowest value displays less striations to creates the illusion of a smooth texture and no depth.
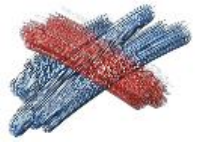
510 | Corel Painter 2015 User Guide
•Picture — controls how much color appears in the image. At its lowest value, all color is washed out,
leaving only the highlights.
•Shine — controls how much highlight appears on the surface of brushstrokes. Higher Shine values
make the brushstroke look metallic.
•Reflection — maps a clone source image or pattern onto the texture at a variable percentage. For
more information, see “Creating reflection maps” on page 655.
To adjust the intensity and brightness of a light source
1Choose Canvas Surface Lighting.
2In the Light Controls area, adjust any of the following sliders:
•Brightness — controls how much light the light source contributes to the overall lighting color
•Concentration — adjusts the spread of the light over the surface
•Exposure — adjusts the overall lighting amount from darkest to brightest
Blending impasto with other layers
You can control how Impasto brushstrokes blend with images on other layers by selecting a Composite
Depth method in the Layers panel.
The Composite Depth menu provides the following methods for combining Impasto brushstrokes:
• The Add method, which is the default Composite Depth method, combines depth information
between layers. Brushstrokes on different layers build up where they overlap. If the composite depth
method is set to Add and you paint with an Impasto brush variant on a layer, the composite depth
setting does not change.
An example of the Add composite depth method.
• The Subtract method removes depth information between layers. Impasto brushstrokes on top layers
create grooves in the image data beneath them. If the composite depth method is set to Subtract and
you paint with an Impasto brush variant on a layer, the composite depth method does not change.
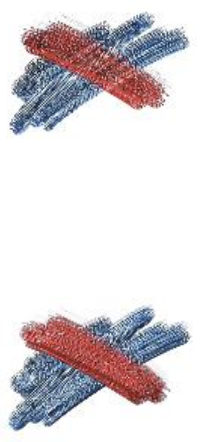
Impasto | 511
An example of the Subtract composite depth method.
• The Replace method uses layer masks to replace the depth information from lower layers with
information from top layers. Wherever brushstrokes overlap, only the top brushstrokes are visible; the
lower brushstrokes are completely covered. If the composite depth method is set to Replace and you
paint with an Impasto brush variant on a layer, the composite depth method does not change.
An example of the Replace composite depth method.
• The Ignore method prevents Impasto brushstrokes from interacting with image data on different layers.
With the Ignore method active, the display of depth for the layer is turned off. This makes it possible to
disable display of depth for individual layers. If the composite depth method is set to Ignore and you
paint with an Impasto brush variant on a layer, the method changes back to Add.
You can set a different composite depth method for every layer in a document. For more information, see
“Blending layers by using composite methods” on page 543.
512 | Corel Painter 2015 User Guide

Layers | 513
Layers
Layers provide one of the great advantages of creating images in a digital workspace — the freedom to
experiment with different compositions and effects without risking an unwanted, permanent edit. The Corel
Painter file format preserves layers when you save a document, so you can easily make changes at a later
time.
This section contains the following topics:
Creating layers
•“Getting started with layers” (page 514)
•“Displaying the Layers panel” (page 517)
•“Creating and deleting layers” (page 520)
•“Converting selections into layers or floating objects” (page 521)
•“Naming and adding notes to layers” (page 523)
Selecting, transforming, and manipulating layers
•“Selecting layers” (page 524)
•“Copying and duplicating layers” (page 526)
•“Moving layers” (page 528)
•“Transforming layers” (page 530)
•“Aligning layers” (page 532)
•“Locking layers” (page 533)
•“Showing or hiding layers” (page 533)
•“Changing layer order” (page 534)
514 | Corel Painter 2015 User Guide
•“Viewing layer position” (page 536)
•“Grouping layers” (page 536)
•“Dropping layers with the canvas” (page 539)
Working with layer content
•“Painting on layers” (page 539)
•“Preserving layer transparency” (page 541)
•“Adjusting layer opacity” (page 542)
•“Adding drop shadows to layers” (page 543)
•“Blending layers by using composite methods” (page 543)
Working with layers masks
•“Creating and deleting layer masks” (page 552)
•“Applying layer masks” (page 554)
•“Loading layer masks to selections” (page 555)
•“Selecting and viewing layer masks” (page 555)
•“Enabling and disabling layers masks” (page 556)
•“Copying layer masks” (page 557)
•“Inverting layer masks” (page 557)
•“Editing layer masks” (page 558)
Saving, storing, and sharing layers
•“Importing and exporting layers” (page 558)
•“Working with reference layers” (page 559)
•“Storing layers as images in the Image Portfolio” (page 561)
Getting started with layers
A layer is an object that serves as a container for image data. You can use layers to build an image one
element at a time. This allows you to modify and manipulate the content of a layer independently of other
layers and the canvas. Likewise, you can work on the canvas without interfering with any of the other
layers. For example, if you introduced an element to an image by using a layer and you don’t like the result,
you don’t have to clear the entire canvas — just modify or remove the affected layer.
When you add content, such as brushstrokes to a layer, the areas of the layer that have no content are
transparent. This allows you to see the content of layers below and the canvas. In Corel Painter, you can
control the behavior of layer transparency. For more information, see “Preserving layer transparency” on
page 541.

Layers | 515
Think of layers as sheets of clear material, such as acetate. Painting on a layer obscures
the image below it. Areas of a layer that don’t contain images remain transparent.
Understanding layers and the canvas
To better understand the role of layers in Corel Painter, it’s important to understand the role of the canvas.
When creating a new image in Corel Painter, a blank canvas displays in the document window, which serves
as the foundation, or background layer, of the image. Although the canvas displays in the Layers panel, you
cannot modify the canvas like other layers. For example, you cannot delete, reorder, unlock, transform, or
group the canvas. In addition, unlike layers, the canvas is not transparent because it stores the paper color.
Therefore, if you convert the canvas to a layer, even areas that appear transparent retain the paper color. For
more information, see “To convert the canvas to a layer” on page 522.
Layer categories and types
Corel Painter includes different layer types that are pixel-based, media-based or vector-based. It also
includes dynamic and reference layers. The type is determined by the data the layer contains.
The Corel Painter default layer is pixel-based. You can use most brush variants on pixel-based layers, with
the following exceptions: Watercolor and Liquid Ink brushes. These brush variants require media-based
layers. Pixel-based layers also play a role in more specialized functions, such as building an image hose
nozzle, embedding a URL in an image, or creating an animation.
Vector-based layers contain shapes or text. When you create a shape with one of the shape tools (Pen,
Quick Curve, Rectangular Shape, or Oval Shape) or text using the Text tool, Corel Painter automatically
adds a new layer to the document. Each new shape or text block becomes a separate layer; you can group
multiple shapes together or merge them into a single shape.
Some features in Corel Painter can be applied only to default, pixel-based layers. If you want to use these
features on shapes, Watercolor layers, Liquid Ink layers, dynamic layers, and so on, you must convert them
to default layers.
The following table describes each of the layer types.

516 | Corel Painter 2015 User Guide
Layer type Description
Default Stores the paint applied by most brush variants.
You can also apply effects to pixel-based default
layers.
Floating object Stores layer selections so you can edit layer
content. For more information, see “Converting
selections into layers or floating objects” on page
521.
Watercolor Stores the paint applied with the Watercolor and
Real Watercolor brushes and enables them to mix
and flow together. When you apply a Watercolor
brush to the canvas, or to a standard layer, a new
Watercolor layer is automatically created. For more
information, see “Working with the Watercolor
layer” on page 424.
Liquid Ink Stores the brushstrokes of Liquid Ink brushes.
When you apply one of the Liquid Ink brushes
to the canvas or to an image layer, a new Liquid
Ink layer is automatically created. For more
information, see “Working with Liquid Ink brushes”
on page 497.
Reference Stores low-resolution representations of other
layers, which lets you manipulate standard layers
more easily. For more information, see “Working
with reference layers” on page 559.
Dynamic Lets you apply effects to the underlying image.
Some dynamic layers, such as Glass Distortion and
Equalize, interact with the underlying images in
a specific area to produce effects. Other dynamic
layers, such as Liquid Metal, interact with the
underlying images as you apply brushstrokes. For
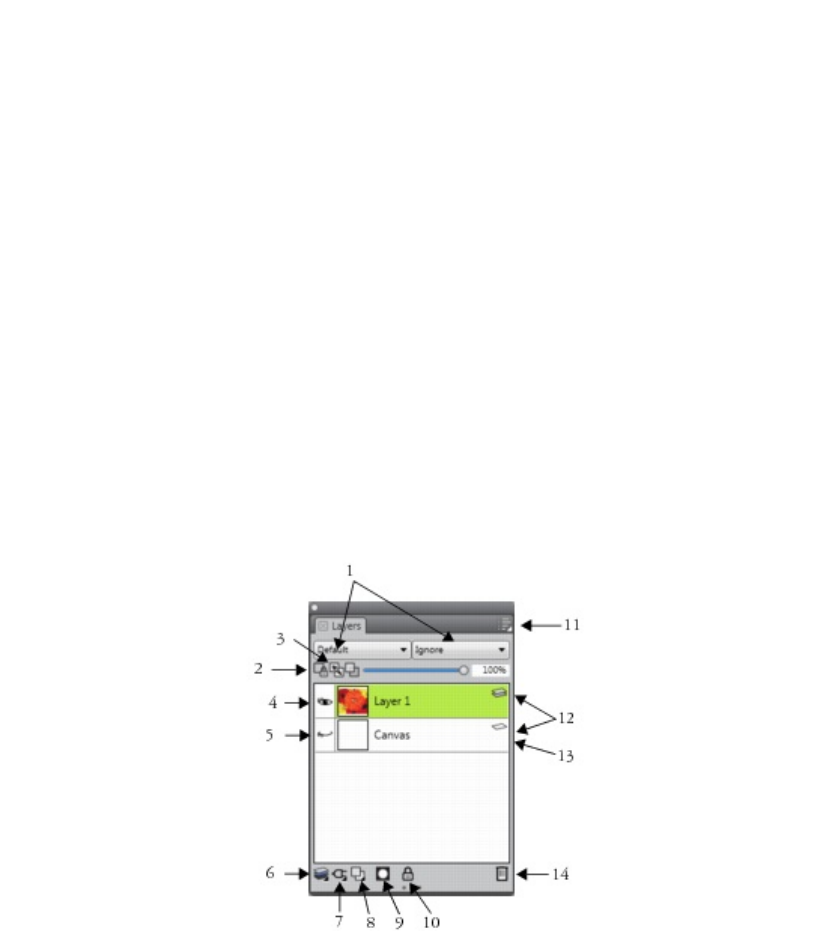
Layers | 517
Layer type Description
more information, see “Dynamic Plug-ins” on page
679.
Shape Stores any shapes that you create using one of
the shape tools. When you create a shape, a new
vector-based shape layer is automatically created.
For more information, see “Getting started with
shapes” on page 782.
Text Stores single blocks of text that were inserted
with the Text tool. When you add text, a vector-
based text layer is automatically created. For more
information, see “Aligning text” on page 813.
Displaying the Layers panel
All layers in a document are listed in the Layers panel. The Layers panel allows you to display manage the
order of layers. It also includes commands and controls for selecting, hiding, locking, deleting, naming,
and grouping layers. You can access the various layer commends and controls by using the buttons at the
bottom of the panel.

518 | Corel Painter 2015 User Guide
Layer panel components
1. Composite Method list box 8. New Layer button
2. Preserve Transparency button 9. New Layer Mask button
3. Pick Up Underlying Color button 10. Lock Layer button
4. Show Layer icon 11. Layer options button
5. Hide Layer icon 12. Layer list
6. Layer Commands 13. Canvas
7. Dynamic Plugins 14. Delete Layer button
The Layers panel displays icons that identify layer types and characteristics. The following table lists the
icons that appear in the Layers panel.
Icon Description
Canvas
Pixel-based layer
Shape layer
Floating object
Layers | 519
Icon Description
Reference layer
Dynamic layer
Watercolor layer
Liquid Ink layer
Text layer
Layer group
Expanded group
Visible layer
Hidden layer
Locked layer
In the Layers panel, you can also set layer opacity and choose a composite method. For information, see
“Adjusting layer opacity” on page 542 and “Blending layers by using composite methods” on page
543.
520 | Corel Painter 2015 User Guide
The Navigator panel displays information about the dimensions and position of layer content. For more
information, see “Navigating images and viewing image information” on page 75.
To display the Layers panel
•Choose Window Layers.
If the panel is not expanded, double-click the Layers panel tab.
To convert to a default layer
1In the Layers panel, select the layer that you want to convert.
You can convert Shape, Watercolor, Liquid Ink, and dynamic layers into default layers.
2Click the Layer options button , and choose Convert To Default Layer.
Creating and deleting layers
You can add a default layer to an image at any time. When you apply a brush stroke by using a Watercolor
and Liquid Ink brush, the appropriate layer is automatically generated. You can also add additional
Watercolor or Liquid Ink layers when required. You can delete layers, but you cannot delete the canvas.
When you create a layer, the new layer is placed directly above the selected layer in the Layers panel. If
the selected layer belongs to a group, the new layer is added to the group. If a layer group is selected, the
layer is placed above the group. You can also change the order in which layers are displayed. For more
information, see “Changing layer order” on page 534 and “Grouping layers” on page 536.
To create a new layer
• Perform a task from the following table.
To Do the following
Create a layer In the Layers panel, click the New Layer button
.
Create a watercolor layer In the Layers panel, click the Layer options button
, and choose New Watercolor Layer.

Layers | 521
To Do the following
Create a Liquid Ink layer In the Layers panel, click the Layer options button
, and choose New Liquid Ink Layer.
If you choose a Watercolor, Real Watercolor, or Liquid Ink brush, a new layer for that brush type is
automatically created when you apply a brushstroke to the document window.
To delete a layer
1In the Layers panel, select one layer or multiple layers.
2Do one of the following:
•Click the Delete Layer button at the bottom of the Layers panel.
•Click the Layer options button , and choose Delete Layer.
• Right-click a layer, and choose Delete Layer.
You can also delete shape layers by selecting the shape and pressing Delete (Mac OS) or
Backspace (Windows).
You cannot delete the canvas layer.
Converting selections into layers or floating objects
In Corel Painter, you can convert a selection that was made on the canvas into a layer. You can also convert
a selection that was made on a layer into a floating object. You can convert selections that were made with
the Rectangular Selection, Oval Selection, Lasso, or Magic Wand tool. You can also duplicate a selection
to convert it to layer or floating object.
Converting a selection to a layer is also a useful way to convert the entire canvas to a layer. For example, you
can convert a photo into a layer and then apply effects to it.
Layer-based selections function in the same way as selections on the canvas — you can use them to
constrain brushstrokes, to isolate an area of the layer for applying an effect, or to choose an area of the
layer to cut or copy. For more information, see “Selections and transformations” on page 577.
When you convert a canvas-based selection to a layer, a new layer appears in the Layers panel. However,
when you convert a layer-based selection, a Layer Floating Object appears as an item below the parent
layer in the Layers panel.

522 | Corel Painter 2015 User Guide
You can move floating objects around a layer to create new compositions. Each layer in a document can
have only one floating object at a time. You can drop a floating object to merge it with the layer, but many
operations automatically drop (or merge) the floating object back to its parent layer.
Floating objects are created by making a selection on a pixel-based layer. Shapes cannot be floating
objects because they are vector-based. However, you can turn a shape into a pixel-based layer. For more
information, see “To convert a shape to a pixel-based layer for painting” on page 800.
When you save a document to RIFF format, Corel Painter preserves all floating objects. However, saving a
document in a non-RIFF format automatically drops floating objects onto their parent layers.
To convert a selection to a layer or floating object
1Create a selection on the canvas or a layer with a selection tool.
2Perform an action from the following table.
To Do the following
Convert the selection to a layer or floating object Choose Select Float or click the selection with the
Layer Adjuster tool .
Duplicate the selection as a layer or floating object Hold down Option (Mac OS) or Alt (Windows),
and click the selection with the Layer Adjuster tool
.
When you rotate, scale, distort, or flip a selection using the Transform tool , the selection
is automatically committed to a layer. For more information, see “Preparing selections for
transformations” on page 600.
To convert the canvas to a layer
1In the Layers panel, select the canvas.
2Choose Select All.
3Choose Select Float.
Layers | 523
To reposition or drop a floating object
1In the Layers panel, select the floating object.
2Perform an action from the following table.
To Do the following
Reposition a floating object In the document window, drag the floating object
to the new location with the Layer Adjuster tool
. Then, press the arrow keys to move the
floating object one pixel at a time.
Drop a floating object Click the Layer Commands button , and
choose Drop.
Naming and adding notes to layers
As you add more layers and groups to a document, it can become difficult to remember which image data
each layer contains. By assigning descriptive names to layers and groups, you can keep track of the separate
pieces of an image. You can also assign more descriptive information to a layer by adding notes to it.
Corel Painter assigns each layer or group a default name when you create it. This name references the
object’s type and creation order. For example, pixel-based layers are titled Layer 1, Layer 2, and so on. A
shape’s title is based on the tool you use to create it — Rect for the Rectangular Shape tool, Oval for
the Oval Shape tool, and Shape for the Pen and Quick Curve tools.
To name a layer or group
1In the Layers panel, double-click a layer or group.
2Type a new name in the text box.
You can also rename a layer by clicking the Layer options button , choosing Layer Attributes,
and typing a name in the Name box.
You cannot rename the Canvas layer.

524 | Corel Painter 2015 User Guide
To add a layer description
1Select a layer or group.
2Do one of the following:
•Choose Layers Layer Attributes.
•Click the Layer options button in the Layers panel, and choose Layer Attributes.
3Type in the Note box.
You cannot add notes to a layer if you enable the WWW Map Clickable Region check box for
image mapping.
You can also add notes for pixel-based layers and reference layers, by double-clicking the item in
the Layers panel, or selecting an item and pressing Return (Mac OS) or Enter (Windows).
Selecting layers
In Corel Painter, you have different options for selecting individual and multiple layers. You must select
layers to make changes such as moving, aligning, and painting. If no layers are selected when making
changes, you may make unwanted changes to the canvas.
Layer Adjuster tool and Auto Select Layer option
You can select layers with the Layer Adjuster tool if the Auto Select Layer option is enabled.
When you choose the Layer Adjuster tool from the toolbox, the property bar displays layer-related options
including the Auto Select Layer button . This option lets you select layers automatically with the Layer
Adjuster tool by clicking an area of layer content in the document window.
By default, the Auto Select Layer option is disabled. This means that the layer selection is “locked in” —
the Layer Adjuster tool affects only the selected layer or layers. In other words, without enabling the Auto-
Select Layer option, you cannot select a layer by clicking it in the document window; you must select a
layer by clicking it in the Layers panel.
Layers panel
You can select a layer, multiple layers, or a layer group from the Layers panel. Because the Layers panel lists
all image layers, it’s a useful tool for browsing and selecting layers. For more information, see “Displaying
the Layers panel” on page 517.
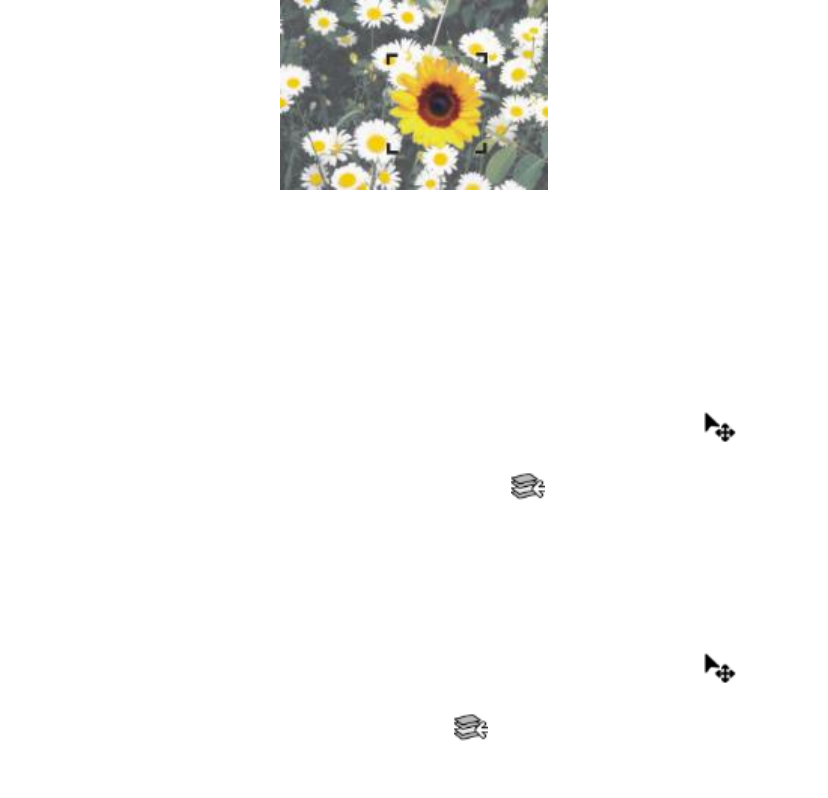
Layers | 525
Displaying layer indicators
You can also display layer indicators, which are handles that display at the corners of a selected layer’s
content. The layer indicators provide a visual representation of the layer’s bounding box. For more
information, see “Moving layers” on page 528.
Show the layer indicators to mark the corners of a selected layer.
To select a layer
To Do the following
Select a single layer Do one of the following:
•Click a layer in the Layers panel.
•Choose the Layer Adjuster tool from
the toolbox, enable the Auto Select Layer
button on the property bar, and then click
anywhere in a layer’s content.
Select multiple layers Do one of the following:
•In the Layers panel, hold down Command +
Shift (Mac OS) or Ctrl + Shift (Windows), and
click each layer you want to select.
•Choose the Layer Adjuster tool from the
toolbox, enable the Auto Select Layer button
on the property bar, and then drag over
the layers you want to select in the document
window.
Select all layers in a document Do one of the following:
526 | Corel Painter 2015 User Guide
To Do the following
•In the Layers panel, click the Layer options
button , and choose Select All Layers.
•Press Ctrl + Shift + 1.
You can also press the F key to activate the Layer Adjuster tool.
If you are working with a shape, you can switch to the Shape Selection tool by double-
clicking a shape with the Layer Adjuster tool.
To deselect layers
• In the Layers panel, click the Canvas.
You can also deselect a single layer by clicking the Layer options button in the Layers panel,
and choosing Deselect Layer.
To show layer indicators
1In the Layers panel, select a layer.
2Click the Layer options button , and choose Show Layer Indicators.
To hide the layer indicators, click the Layer options button , and choose Hide Layer
Indicators.
Copying and duplicating layers
You can copy individual layers in the same image or between images. You can also duplicate layers in order
to quickly replicate image elements. In addition, you can simultaneously copy the contents of multiple layers
by using a selection.
To copy and paste a layer
1Choose the Layer Adjuster tool from the toolbox.
Layers | 527
2Click the Auto Select Layer button on the property bar.
3In the document window, click the layer that you want to copy.
4Choose Edit Copy.
5Choose Edit Paste.
To duplicate a layer
1In the Layers panel, choose a layer.
2Choose Layer Duplicate Layer.
A duplicate layer is created on top of the original layer. Drag the new layer to reveal the original layer in
the document window.
You can also duplicate a layer by choosing the Layer Adjuster tool from the toolbox, clicking
the Auto Select Layer button on the property bar, holding down Option (Mac OS) or Alt
(Windows), and clicking the layer.
To copy a layer to a new document
1Choose the Layer Adjuster tool from the toolbox.
2Click the Auto Select Layer button on the property bar.
3In the document window, click the layer that you want to copy.
4Choose Edit Copy.
5Choose Edit Paste In New Image.
You can also copy a layer by opening the document where you want to copy the layer, clicking
the Auto Select Layer button on the property bar, and dragging the layer to the other
document.
To copy a selection from multiple layers
1Make a selection.
The selection must include elements from multiple layers.
2Choose Edit Copy Merged.
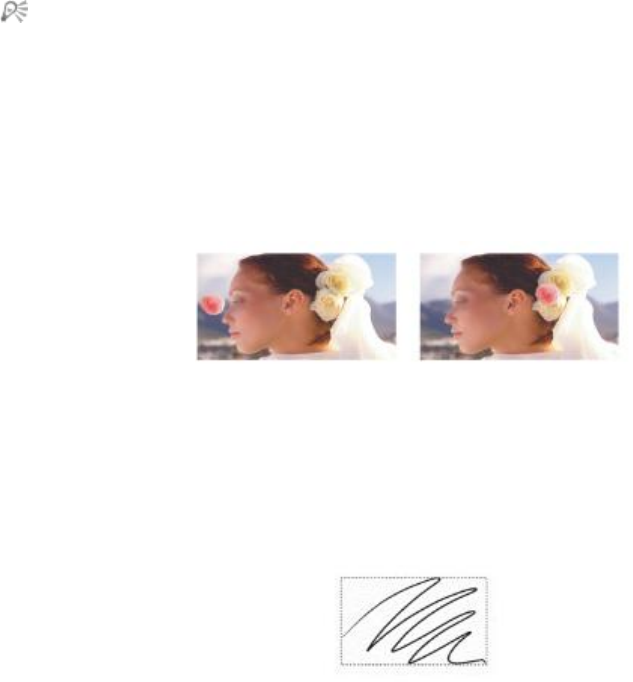
528 | Corel Painter 2015 User Guide
You can also copy from multiple layers by pressing Command + Option+C (Mac OS) or Ctrl +
Alt + C (Windows).
Moving layers
When a layer is selected, you can move its content anywhere in the document to create a new image
layout.
The pink rose was added to an individual layer. The rose
layer (left) was repositioned on top of the white roses (right).
Think of a layer’s content as being contained by an invisible bounding box. This bounding box is a rectangle
that marks the left, right, top, and bottom edges of the layer’s content. When you move or align a layer,
you work with the dimensions and position of this bounding box, not with the entire area of the layer. This
allows you to easily position the contents of a layer in relation to the canvas.
This layer contains a brushstroke. The content area is defined by an
invisible bounding box (indicated by a dashed outline in the image).
The layer indicators provide a visual representation of the bounding box. For more information, see
“Selecting layers” on page 524.
To move or nudge a layer
1In the Layers panel, select the layer or group you want to move.
2Perform an action from the following table.
Layers | 529
To Do the following
Move a layer Click the Layer Adjuster tool in the toolbox,
and drag the selected layer in the document
window.
Move a layer one pixel at a time Click the Layer Adjuster tool in the toolbox,
click the layer in the document window, and press
the Arrow keys to move the selected layer one
pixel at a time.
Move a layer to a new document window With two or more documents open in the
application window, click the Layer Adjuster tool
in the toolbox, and drag the selected layer to
another document window.
To move a layer to a specific location
1In the Layers panel, select a layer or group.
2Click the Layer options button , and choose Layer Attributes.
3In the Position area, type values in the following boxes:
•Top — defines the distance in pixels from the top edge of the canvas to the top edge of the layer’s
content. Increase to move the layer down, or decrease to move the layer up.
•Left — defines the distance in pixels from the left edge of the canvas to the left edge of the layer’s
content. Increase to move the layer to the right, or decrease to move the layer to the left.
If you use negative values, or values larger than the canvas dimensions, the layer is placed partially
or wholly outside the canvas.
You can also open the Layer Attributes dialog box for pixel-based and reference layers by double-
clicking the item in the Layers panel, or by selecting an item and pressing Return (Mac OS) or
Enter (Windows).
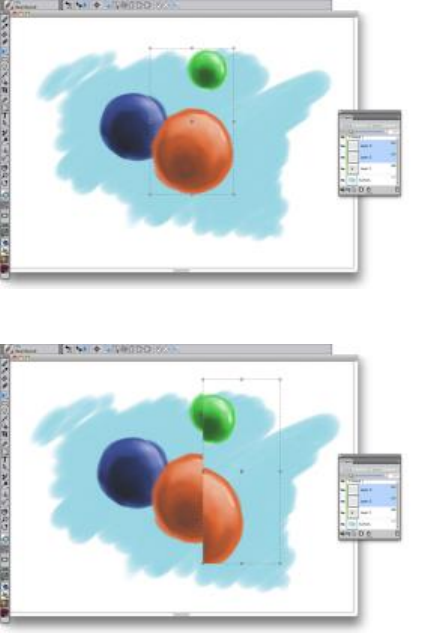
530 | Corel Painter 2015 User Guide
Transforming layers
You can apply transformations to layers individually or multiple layers simultaneously, which also includes
transforming layer groups. For more information about the various methods of transformation, see
“Selections and transformations” on page 577.
An example of selecting multiple layers for performing a transformation.
An example of applying a transformation across multiple selected layers.
To speed up the process of applying transformations to multiple layers or a layer group, you can enable
the Fast Preview Mode. During the transformation, only a grayscale rendering of the layers displays in the
document window, instead of full-color details. You can turn off the Fast Preview Mode to reveal the full-
color results. For example, you may want see the transformed layers in full-color before committing the
transformation.
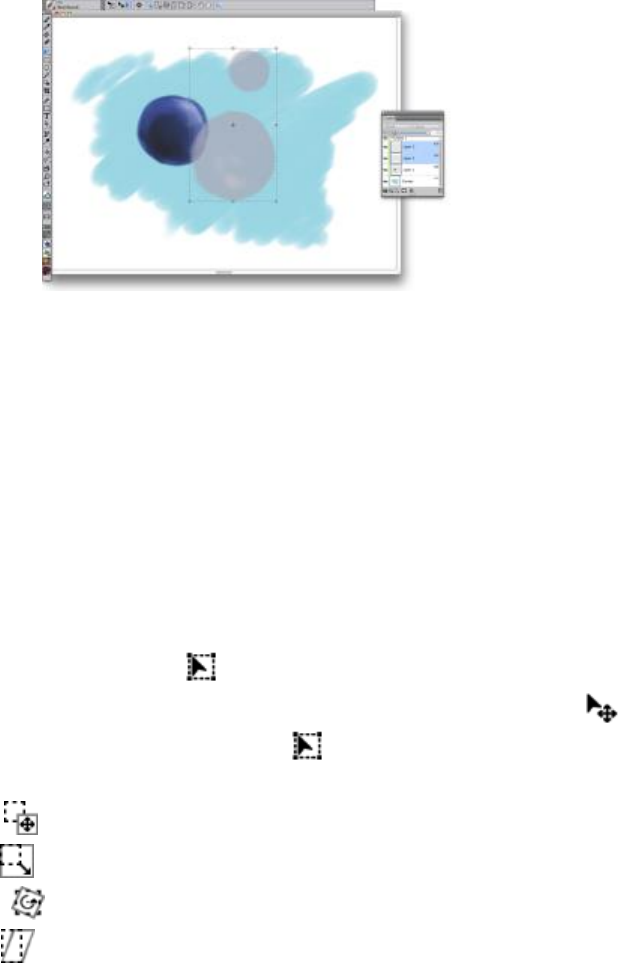
Layers | 531
Fast Preview Mode displays the selected layers in
grayscale to perform the transformation more quickly.
In addition, you can apply a transformation to a selection across multiple layers. For more information, see
“Creating path-based selections” on page 580.
To transform one or multiple layers
1Choose Window Layers.
2In the Layers panel, do one of the following:
• Click a layer.
• Click a layer group.
• Hold down Command + Shift (Mac OS) or Ctrl + Shift (Windows), and click each layer you want to
select.
3In the toolbox, click the Transform tool .
If the Transform tool is not displayed in the toolbox, click and hold the Layer Adjuster tool to
open the flyout, and then choose the Transform tool .
4On the property bar, click one of the following:
•Move button
•Scale button
•Rotate button
•Skew button
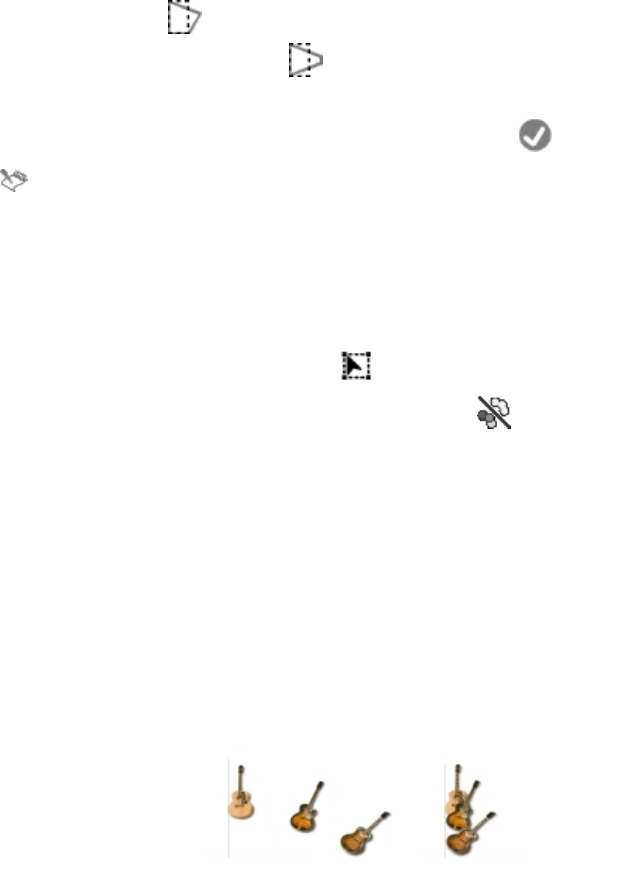
532 | Corel Painter 2015 User Guide
•Distort button
•Perspective Distortion button
5Perform the transformation.
6On the property bar, click the Commit Transformation button .
When applying a transformation to a layer group, the transformation is applied to all layers within
a layer group, including hidden layers or layers that do not appear to be selected.
Transformations are not applied to locked layers.
To enable or disable Fast Preview of transformations
1In the toolbox, click the Transform tool .
2On the property bar, click the Fast Preview Mode button .
Aligning layers
You can align layers horizontally or vertically. When aligning layers, Corel Painter calculates the “destination”
point for alignment. For example, if you align layers to the left, the destination is the leftmost point of all
selected layers. If you align horizontally to the center, the destination is the midpoint between the leftmost
edge and the rightmost edge of the selected layers.
Next, Corel Painter aligns the corresponding edge of each selected layer’s bounding box with the
destination point. For example, if you align layers to the left, each layer is moved so that the left edge of its
bounding box lines up with the destination point. If you align horizontally to the center, each layer is moved
so that the horizontal midpoint of its bounding box lines up with the destination point.
The left edge of the image is the leftmost point of all the layers (left). The layers are
aligned horizontally to the left so that all the layers line up with the leftmost point (right).
To align layers
1Select the layers or groups that you want to align.
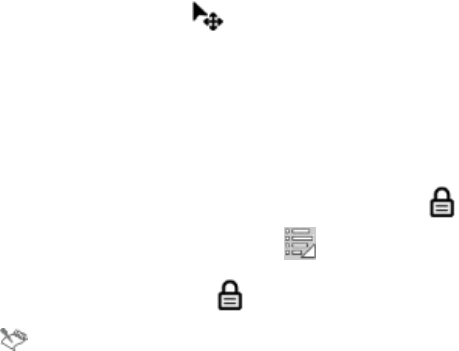
Layers | 533
2Choose Layers Align, and choose any of the following commands:
•Left Edges — aligns the left edges of the layers’ content
•Horizontal Centers — aligns the midpoints of the layers’ content horizontally
•Right Edges — aligns the right edges of the layers’ content
•Top Edges — aligns the top edges of the layers’ content
•Vertical Centers — aligns the midpoints of the layers’ content vertically
•Bottom Edges — aligns the bottom edges of the layers’ content
Locking layers
You can lock layers to avoid accidentally changing them. When a layer is locked, you cannot select it with
the Layer Adjuster tool in the document window. You can, however, move a locked layer or shape by
nudging it.
To lock or unlock a layer
1Select the layer in the Layers panel.
2Do one of the following:
•In the Layers panel, click the Lock Layer button .
•Click the Layer options button , and choose Lock or Unlock.
The Locked Layer icon appears next to a locked layer in the Layers panel.
The canvas is always in a locked state, therefore, it cannot be unlocked.
Showing or hiding layers
You can control the view of an image in the document window by changing the layer visibility settings. This
is helpful in both compositing an image and applying effects. For example, you can hide one layer to gain
better visibility of the layer below it.
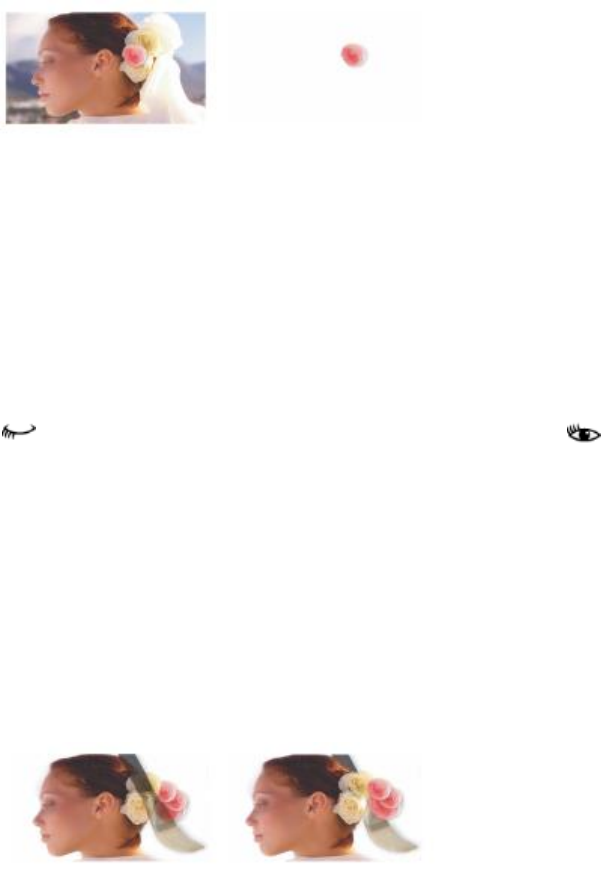
534 | Corel Painter 2015 User Guide
In the example on the right, the layer containing the background is hidden;
in the example on the left, the layer containing the background is visible.
Layer visibility settings stay active when you print or save documents to certain file formats. In other words,
the content of hidden layers does not print and is not saved. However, saving a document in RIFF or
PSD format preserves hidden layers as part of the document. For more information, see “Importing and
exporting layers” on page 558.
To show or hide a layer or the canvas
• In the Layers panel, click the eye icon next to the layer name or the canvas.
When the eye is shut , the layer is hidden in the document window. When the eye is open ,
the layer is visible in the document window.
Changing layer order
The layer order determines how the layers in a document interact. When you create a new pixel-based
layer, it appears on top of the existing layers (when the canvas is selected) or on top of the selected layer.
New Watercolor, Liquid Ink, and dynamic layers are always created on top of existing layers. Depending on
its transparency, masking, and compositing characteristics, the layer will obscure or otherwise affect the
underlying layers.
A document’s layer order is reflected in the Layers panel. The bottom layer is always the canvas.
In this example, the picture of the brush is contained in a layer. The brush
layer is displayed in the top position (left) and in the bottom position (right).
Layers | 535
To change the order of layers
1Choose the Layer Adjuster tool from the toolbox.
2In the Layers panel, select the layer you want to reposition.
3Perform an action from the following table.
To Do one of the following
Move a layer to the bottom •From the menu bar, choose Layers Move to
Bottom.
•On the property bar, click the Move to Bottom
button .
Move a layer to the top •From the menu bar, choose Layers Move to
Top.
•On the property bar, click the Move to Top
button .
Move a layer down one •From the menu bar, choose Layers Move Down
One Layer.
•On the property bar, click the Move Down One
Layer button .
Move a layer up one •From the menu bar, choose Layers Move Up
One Layer.
•On the property bar, click the Move Up One
Layer button .
When you have nonoverlapping layers in a document, the Move Up One Layer and Move
Down One Layer commands may move the selected layer past multiple layers. This is because
nonoverlapping layers are considered to be at the same level. The Move Up One Layer and Move
Down One Layer commands move the selected layer (or layers) above or below the next level. To
move a layer to a position between nonoverlapping layers, drag it in the Layers panel.

536 | Corel Painter 2015 User Guide
Viewing layer position
You can display information about the size of a layer’s content and its position on the canvas in the
Navigator panel. Think of the area of a layer that contains images as being marked by a bounding box. For
more information, see “Selecting layers” on page 524. The Navigator panel displays the dimensions and
position of the bounding box, not the entire area of the layer. This makes it easy to determine the exact size
and location of a layer’s content in the document.
The following table describes the information displayed in the Navigator panel.
Position indicator (measured in pixels) Description
XX-coordinate of the pointer on the canvas
YY-coordinate of the pointer on the canvas
WWidth of the layer’s content
HHeight of the layer’s content
In the document window, you can also view indicators that mark the corners of the selected layer’s content.
For more information, see “To show layer indicators” on page 526.
To displaying layer position information
•Choose Window Navigator.
If the panel is not expanded, double-click the Navigator panel tab.
Grouping layers
Grouping layers enables you to control layers as a unit. A group can contain any combination of layers:
pixel-based layers, Watercolor layers, Liquid Ink layers, vector-based shapes, and dynamic layers.
You can move, rename, hide, show, lock, and set options for a group just as you do for a single layer.
However, you cannot paint across layers in a group or change the composite method for a group; you must
collapse the group into a single layer if you want to paint on it.
Layers | 537
To work with individual layers in a group, you must open the group. To regain control of the group as a
unit, you must close the group. Collapsing a group reduces its contents to a single layer.
If you select a layer within a group in the Layers panel and then proceed to create a new layer, the new
layer is added to the group. If the group is selected, the layer is placed above the group.
To create a group
1In the Layers panel, select the layers you want to group.
For more information, see “Selecting layers” on page 524.
2Do one of the following:
•Click the Layer Commands button , and choose Group Layers.
•Click the Layer options button , and choose Group Layers.
The layers are collected under a group item in the Layers panel.
If you select nonsequential layers (layers not next to each other in the list), Corel Painter creates
the group at the position of the topmost layer. To select nonsequential layers, in the Layers panel,
hold down Shift and click each layer you want to select.
To open or close a group
• In the Layers panel, click the arrow to the left of the group.
When the arrow points down and you can see the group items, the group is open. When the
arrow points to the right and the names of the group members are hidden, the group is closed.
To add or remove a layer in a group
1In the Layers panel, open the destination group.
2Perform an action from the following table.
To Do the following
Add a layer to a group Drag a layer to the group.
Remove a layer from a group Drag the layer out of the group.
538 | Corel Painter 2015 User Guide
You can create a nested group by dragging a closed group to the open destination group.
To ungroup layers
1In the Layers panel, select the group.
If the group is open, close the group.
2Do one of the following:
•Click the Layer Commands button , and choose Ungroup Layers.
•Click the Layer options button , and choose Ungroup Layers.
To collapse a group
1In the Layers panel, select the group.
2Click the Layer Commands button , and choose Collapse Layers.
If the group contains shapes, Liquid Ink layers, or dynamic layers, the Commit dialog box is displayed.
Click Commit All to convert the items to pixel-based layers before collapsing the entire group.
If you want to collapse a group containing a Watercolor layer, you must first convert the
Watercolor layer to a default layer and change its composite method to Default. For more
information, see “Blending layers by using composite methods” on page 543.
You can also collapse layers by clicking the Layer options button , and choosing Collapse
Layers.
If you have enabled the Commit and don’t ask again check box in the Commit dialog box,
you can reinstate the display of the Commit dialog box when collapsing layers by choosing
Corel Painter 2015 menu Preferences (Mac OS) or Edit Preferences (Windows), then clicking
General from the Preferences list of categories, and enabling the Show Commit dialog when
converting to layer check box.

Layers | 539
Dropping layers with the canvas
You can drop a layer or layer group to merge its contents with the canvas. Dropping a layer is a permanent
change. Once layers are dropped, you can no longer access the layers’ content separately from the canvas.
You can drop specific layers or you can drop all layers at once, this also known as flattening an image.
When you drop a layer, you can choose to create a selection based on the layer contents. If the layer has a
layer mask, the mask is used to make the selection. For more information, see “Creating and deleting layer
masks” on page 552 and “Selections and transformations” on page 577.
To drop a layer
To Do the following
Drop specific layers In the Layers panel, select the layers (or groups)
that you want to drop, and do one of the
following:
•Click the Layer Commands button , and
choose Drop.
•Click the Layer options button , and choose
Drop.
Drop all layers In the Layers panel, click the Layer options button
, and choose Drop All.
Make a selection by dropping a layer In the Layers panel, click the Layer options button
, and choose Drop and Select.
Painting on layers
Painting on layers, instead of painting directly on the canvas, allows you build an image gradually and
with more control. For example, if you add a series of brushstrokes to a layer and you’re not satisfied with
the result, you can delete the layer and start over. You can paint on layers using any of the Corel Painter
brushes. The purpose of this section is to provide you with tips and techniques for painting on layers.
540 | Corel Painter 2015 User Guide
Pick up colors from underlying layers
When painting using brush variants that push paint, rather than apply paint, you can choose to pick up
colors from underlying layers. For example, if you have red paint on the top layer, and blue paint on the
bottom layer, you can use the Subtle Palette Knife brush variant to blend the red and blue paint. In most
cases, brush variants that allow you to blend colors within an individual layer will also support the picking
up of colors on underlying layers.
Brush methods and painting on layers
The Natural-Media environment allows brushstrokes on different layers to interact with each other.
However, mixing brushstrokes that use the Cover and Buildup methods on the same layer can produce
unexpected results. This is caused by a conflict between the brush method and the layer’s composite
method.
• Brushes that use the Buildup method — such as those in the Felt Pens or Pencils category — work best
on layers that use the Gel composite method. In fact, when you use the Buildup method to paint on a
blank layer, Corel Painter automatically sets the layer’s composite method to Gel.
• Brushes that use the Cover method work best on layers that are set to the Default composite method.
For more information, see “Blending layers by using composite methods” on page 543 and “General
controls: Methods and subcategories” on page 339.
General tips for painting on layers
The following are tips for painting on layers:
• You can use Watercolor brushes only on Watercolor layers.
• You can use Liquid Ink brushes only on Liquid Ink layers.
• You must collapse a layer group before painting, because you cannot paint on grouped layers. For more
information, see “Grouping layers” on page 536.
• You must commit a shape to a pixel-based layer before painting. Corel Painter prompts you to commit
a shape if you attempt to paint on it. After you commit the shape, you cannot re-access the shape’s
vector controls. For more information, see “Converting shapes to image layers” on page 800.
• You can protect areas of a layer from painting by creating a selection or preserving transparency.
For more information, see “Selections and transformations” on page 577 and “Preserving layer
transparency” on page 541.
• You can control what parts of a layer are visible and hidden by creating a layer mask. For more
information, see “Creating and deleting layer masks” on page 552.
To paint on a layer
1In the Layers panel, select a layer.
2Click the Brush selector on the Brush selector bar.
3In the Brush library panel, click a brush category and brush variant.
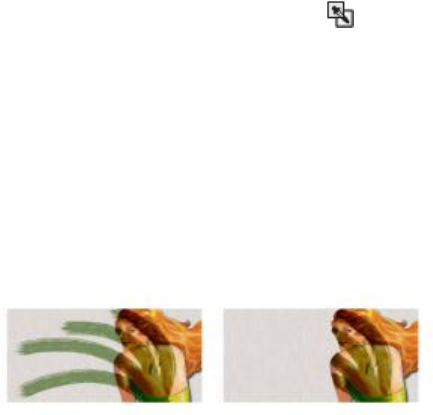
Layers | 541
4Paint on the layer in the document window.
The Preserve Transparency button in the Layers panel affects what areas of a layer you can paint on.
For more information, see “Preserving layer transparency” on page 541.
To pick up color from underlying layers
•In the Layers panel, click the Pick Up Underlying Color button .
Preserving layer transparency
Areas of a layer that don’t contain images are transparent. In Corel Painter, you can preserve these
transparent areas of a layer. When you preserve layer transparency, it affects which areas of a layer you can
create images on. It also affects the results of erasing or deleting images on a layer.
By default, the Preserve Transparency setting is disabled, which lets you paint anywhere on the layer. When
the setting is enabled, the transparent areas are preserved, and you are confined to painting on areas of the
layer that already contain images.
The results of painting on a layer with Preserve
Transparency disabled (left) and enabled (right).
If you want to paint on a shape, you must first commit the shape to a pixel-based layer. For more
information, see “Converting shapes to image layers” on page 800.
A good way to think about preserving transparency is in terms of a layer mask. As described in “Creating
and deleting layer masks” on page 552, a layer mask defines the visible areas of a layer.
Preserving transparency provides a powerful selective editing capability to create interesting effects by
altering the strokes you’ve already applied. For example, you can enable the setting to fill a set of hand-
drawn letters with a pattern, a color gradient, or other brushstrokes.
Preserving transparency also affects the results of cutting or erasing on a layer.
• When Preserve Transparency is disabled, erasing or deleting images restores transparency to the area
and reveals the underlying image.
• When Preserve Transparency is enabled, erasing or deleting images reveals the document’s paper color.
In effect, erasing or deleting with Preserve Transparency enabled is the same as painting or filling with
the document’s paper color.

542 | Corel Painter 2015 User Guide
Erasing part of a layer (the woman’s hair) with Preserve Transparency disabled restores
transparency (left). When the option is enabled, erasing reveals the paper color (right).
You can create a layer mask based on the layer’s transparency. A layer mask defines which areas of a layer
are visible in the document window. For more information, see “Creating and deleting layer masks” on
page 552.
To preserve layer transparency
•In the Layers panel, click the Preserve Transparency button .
You can also load a layer’s transparency to a selection. In the Layers panel, hold down Control
and click the layer (Mac OS), or right-click the layer (Windows), and choose Select Layer Content.
You can also click the Layer options button in the Layers panel, and choose Create Layer
Mask From Transparency. For more information, see “Selections and transformations” on page
577.
Adjusting layer opacity
You can adjust a layer’s opacity to create different levels of transparency. The Opacity slider covers a range
of 0% (completely transparent) to 100% (completely opaque).
To change a layer’s opacity
1Select the layer you want to change.
2In the Layers panel, do one of the following:
•Move the Opacity slider .
• Type a percentage in the Opacity box, and press Return (Mac OS) or Enter (Windows).
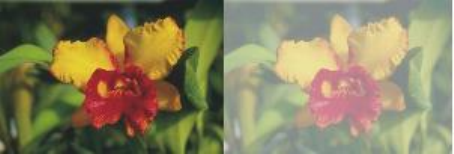
Layers | 543
The example on the left shows the background layers at 100%
opacity. The example on the right shows them at 50% opacity.
Adding drop shadows to layers
You can add a drop shadow to a single layer or to a group to enhance the appearance of an image. Drop
shadows are also helpful for developing Image Hose nozzles.
When you add a drop shadow, Corel Painter creates a new layer for the shadow and groups it with the
original. This enables you to select and modify the drop shadow layer independently from the original layer.
To add a drop shadow
1Select a layer or group.
2Choose Effects Objects Create Drop Shadow.
3In the Drop Shadow dialog box, type values in the following boxes:
•X-Offset and Y-Offset — specifies the distance, in pixels, from the center of the layer image to the
shadow
•Opacity — specifies the degree to which the shadow covers underlying images. Setting Opacity to
100% obscures underlying images; lower values create a more transparent shadow.
•Radius — specifies the amount of blur at the edge of the shadow. The radius is half the distance
across the blurred region. If you set Radius to zero, you create a sharp-edged shadow.
•Angle — specifies the direction of the blur.
•Thinness — specifies the amount of blur applied perpendicular to the Angle. If a blur shows streaks,
increase Thinness to soften it.
If you want to merge the drop shadow layer with the image layer, enable the Collapse to one layer
check box.
Blending layers by using composite methods
Composite methods control how layers interact with the underlying image. You can change composite
methods to create special effects without changing the actual images that make up a document.

544 | Corel Painter 2015 User Guide
Corel Painter provides two types of composite settings:
•Composite Method sets the standard composite method.
•Composite Depth controls how a layer’s image data interacts with depth information on the canvas
and other layers.
For example, if the canvas contains Impasto brushstrokes, the Composite Depth setting determines what
happens when these brushstrokes intersect with brushstrokes on the layer. For more information, see
“Blending impasto with other layers” on page 510.
You can set a different composite method for every layer in a document. Keep in mind the role of the
underlying image in creating an effect — you might achieve an unexpected result if the underlying image is
solid black or white.
The best way to understand the different composite methods is by seeing them in action. Quickly
cycle through a layer’s composite methods to create new and interesting versions of your image. For a
comparison of Corel Painter composite methods and Adobe Photoshop blend modes, see “Importing and
exporting layers” on page 558.
The available composite methods are described in the following table:
Composite method Example
Default
Allows the layer to cover and hide the underlying
image
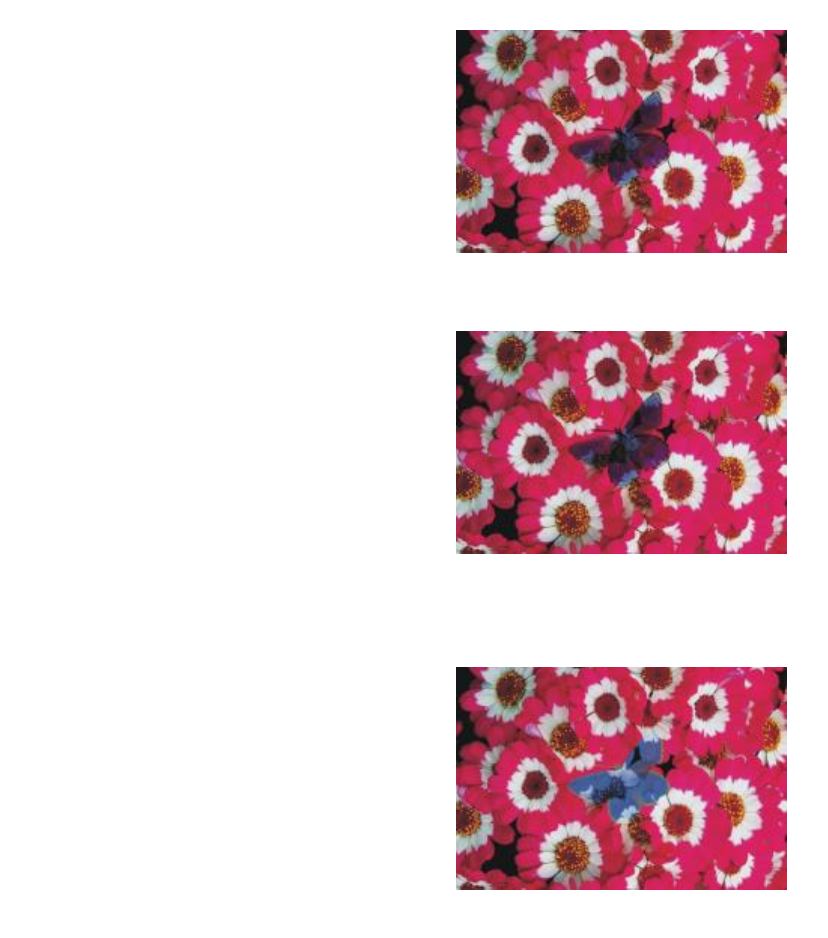
Layers | 545
Composite method Example
Gel
Tints the underlying image with the layer’s color.
For example, a yellow layer gives the underlying
image a yellow cast.
Corel Painter automatically sets a layer’s composite
method to Gel if you paint on it with a brush that
uses the Buildup method.
GelCover
Uses a combination of the Default method and
the Gel method. The edges of the layer’s content
tint the underlying image with their color (the
Gel method). The rest of the layer covers the
underlying image (Default method).
If you save a file that uses a GelCover composite
method layer to the PSD file format, the GelCover
information will be lost.
Colorize
Replaces the hue and saturation of the canvas
pixels with the hue and saturation of the layer
pixels.
You can use this feature to convert a color image
to grayscale, or a grayscale image to color. A
black layer turns the underlying color image into a
grayscale image. A colored layer adds color to an
underlying grayscale image.
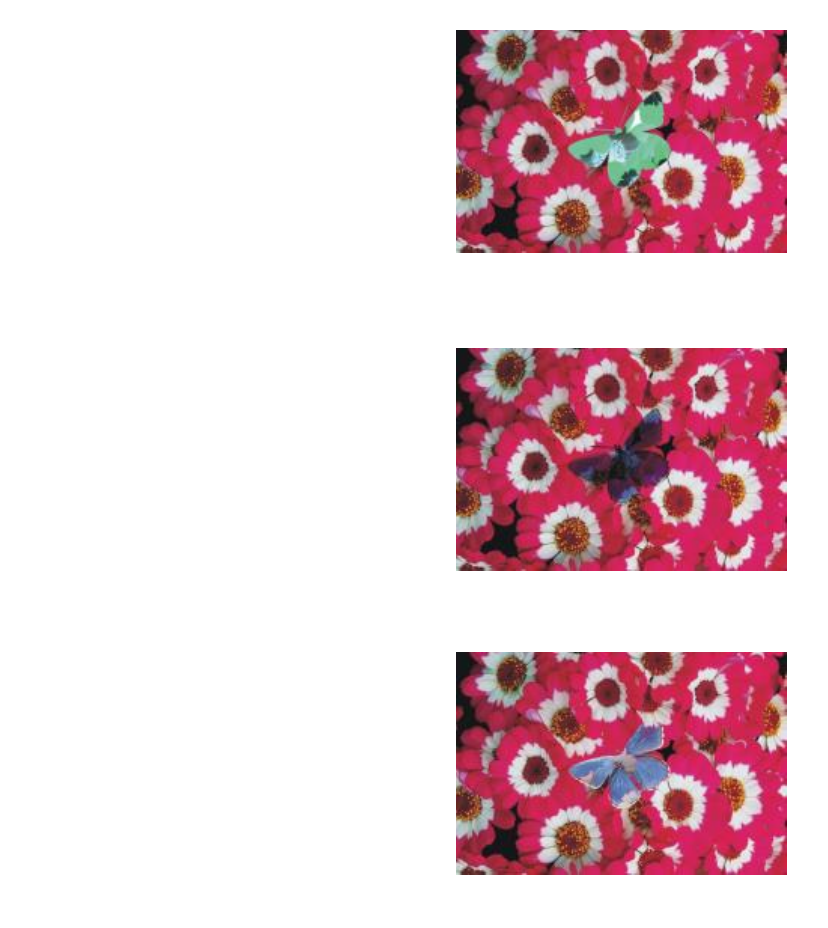
546 | Corel Painter 2015 User Guide
Composite method Example
Reverse-Out
Allows the layer to invert the colors beneath it. This
method is a great way to remove text. Place a layer
over black text to turn it white.
A color’s inverse, also known as its complementary
color, is the color on the opposite side of the color
wheel.
With Reverse-Out, the colors in the layer are
ignored; the layer content becomes transparent
and reveals the inverse of the colors beneath it.
Shadow Map
Blocks light, letting you create shadows without
changing the image
Magic Combine
Combines the layer with the underlying image
based on luminance. The parts of the layer that
are lighter than the underlying image are visible.
The parts that are darker are replaced by the lighter
area of the underlying image.
One way to use this method is to fill text. With a
photograph as the top layer and black text as the
underlying image, choosing Magic Combine fills
the text with the image.
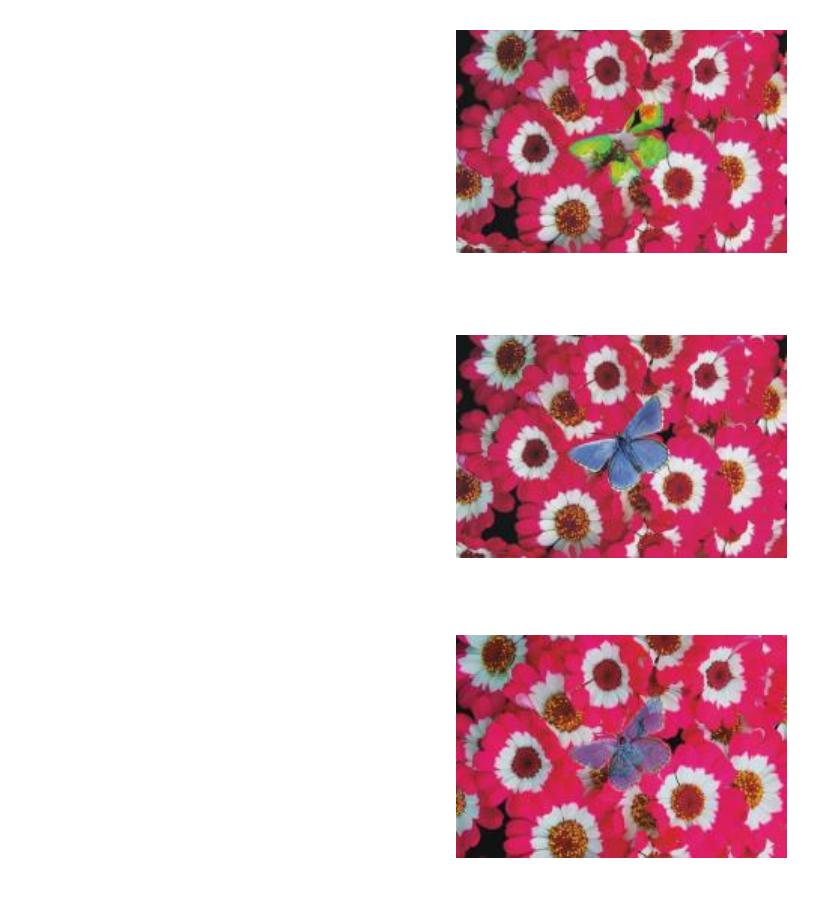
Layers | 547
Composite method Example
Pseudocolor
Translates the layer’s luminance into hue. You can
use this method to turn a grayscale layer into a
spectrum of color.
Normal
Works like the Default method; the layer covers
the underlying image. The Normal method is the
default mode in Photoshop.
Dissolve
Combines the image color with the layer color
based on opacity
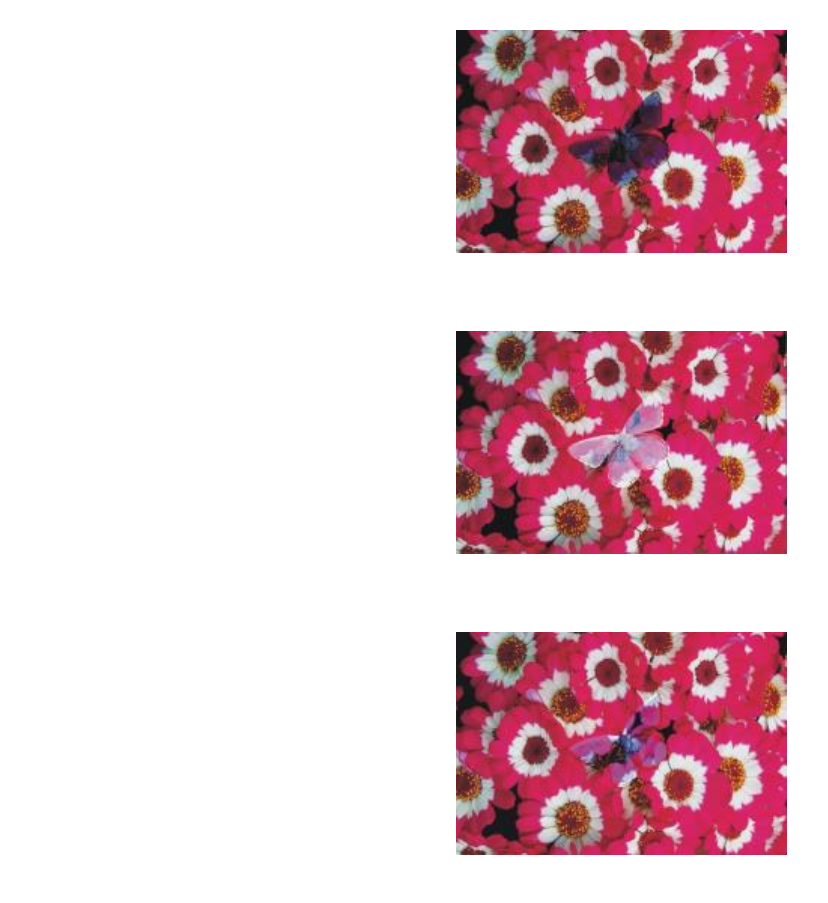
548 | Corel Painter 2015 User Guide
Composite method Example
Multiply
Combines colors to create a darker color
Screen
Combines colors to create a lighter color
Overlay
Combines colors while preserving the highlights
and shadows of the image color
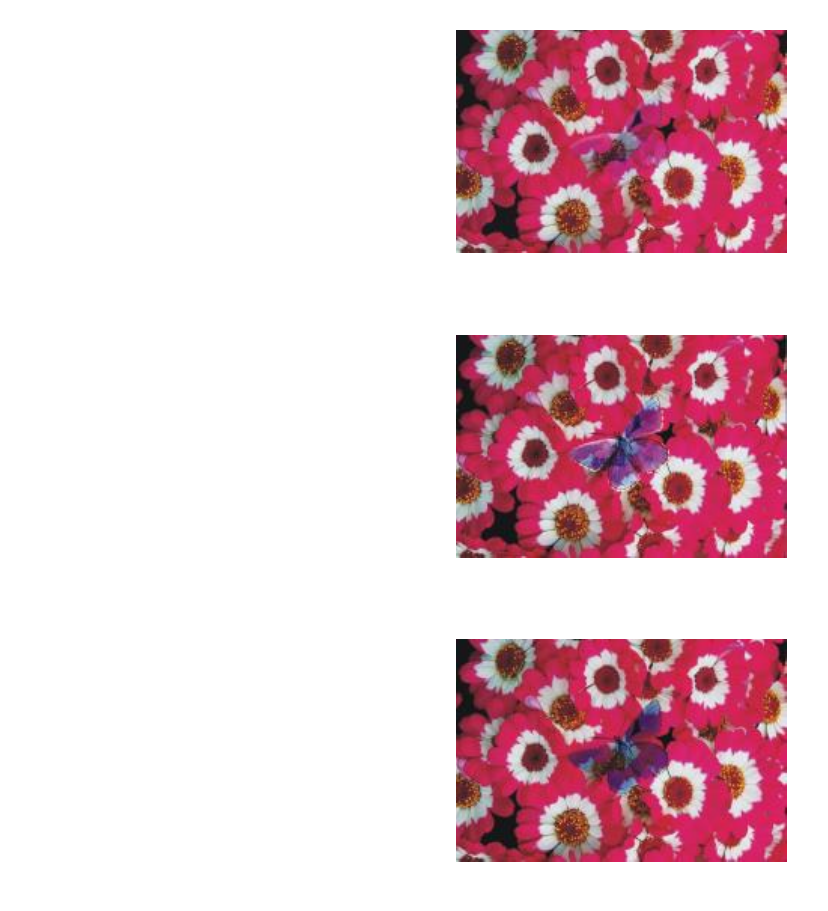
Layers | 549
Composite method Example
Soft Light
Darkens or lightens colors depending on the
luminance of the layer color
Hard Light
Multiplies or screens colors, depending on the
luminance of the layer color
Darken
Colors with the image color or the layer color —
whichever is darker
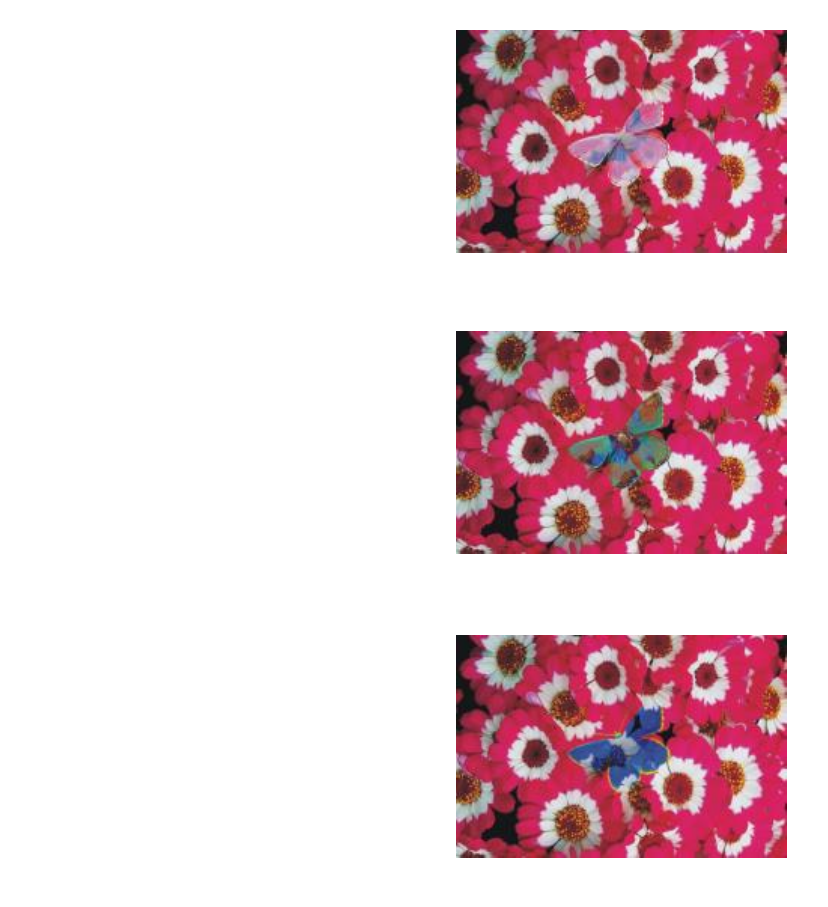
550 | Corel Painter 2015 User Guide
Composite method Example
Lighten
Colors with the image color or the layer color —
whichever is lighter
Difference
Subtracts one color from the other, depending on
which color has a greater brightness value
Hue
Creates a color by combining the luminance and
saturation of the image color with the hue of the
layer color

Layers | 551
Composite method Example
Saturation
Creates a color by combining the luminance and
hue of the image color with the saturation of the
layer color
Color
Creates a new color by combining the luminance
of the image color with the hue and saturation
of the layer color. This method is the opposite of
Luminosity.
Luminosity
Creates a new color from the hue and saturation
of the image color and the luminance of the layer
color. This method is the opposite of Color.

552 | Corel Painter 2015 User Guide
To change a layer’s composite method
1Select a layer.
2In the Layers panel, choose a composite method from the Composite Method list box.
You can also choose a composite depth method from the Composite Depth list box. For more
information, see “Blending impasto with other layers” on page 510.
Creating and deleting layer masks
You can create a new, blank layer mask, or you can create a layer mask based on the layer’s transparency.
A layer mask based on transparency is white wherever the layer has content, and black in other areas.
Intermediate levels of gray are partially transparent. For more information, see “Preserving layer
transparency” on page 541.
You can delete layer masks you no longer need. You can also clear a layer mask without deleting it, leaving
you with a blank mask.
Layer masks let you define what areas of a layer are visible in the document window. Masking originated
as a technique for creating color separations, where sheets of masking material were hand-cut to define
the color regions in an image. In the Corel Painter digital workspace, the layer mask is a powerful tool for
controlling image composition and effects.
Layer masks vs. channels
A layer mask is similar to an alpha channel. Both are grayscale images that you can create and edit.
Although the Channels panel provides access to both channels and layer masks, their characteristics and
functions are different:
• A layer mask is attached to a layer, but an alpha channel is independent.
• The canvas can have up to 32 alpha channels; each layer can have only one layer mask.
• Channels don’t influence the visibility of the canvas image; a layer mask defines what areas of a layer’s
image are visible.
• An alpha channel, when loaded, protects designated areas of an image; a layer mask does not provide
protection.
• A channel is enabled by loading it to a selection. A layer mask can be enabled and disabled at any time,
and it can also be loaded to a selection.
For more information, see “Creating and copying channels” on page 564.
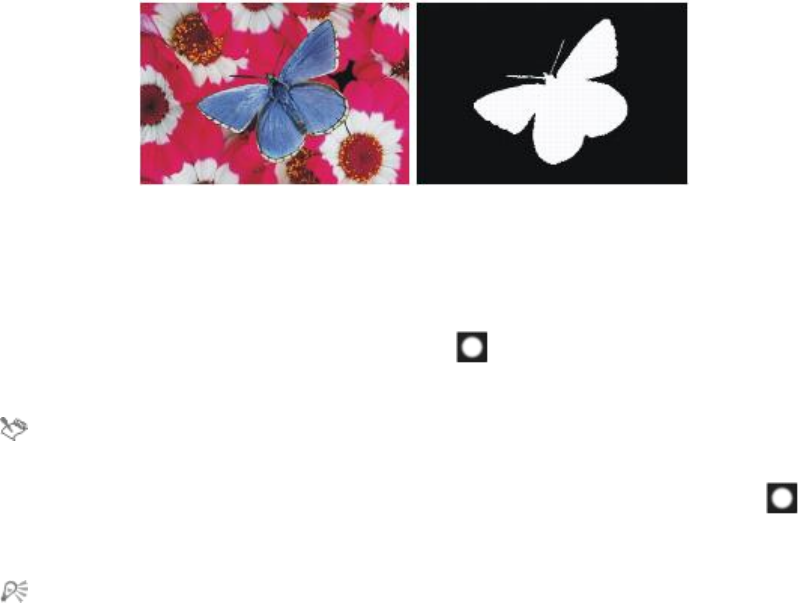
Layers | 553
A layer mask for the butterfly layer is created based on its transparency.
Black areas are transparent; white areas reveal the image.
To create a blank layer mask
1Select a layer.
2In the Layers panel, click the New Layer Mask button .
The blank layer mask icon displays next to the layer name in the Layers panel.
The layer mask icon varies in appearance depending on how you’re viewing the layers. If you are
displaying layers as No Thumbnails, the icon is the same as the New Layer Mask button . If
you’re viewing layers as any size of thumbnail, a small-scale representation of the mask displays as
the icon.
You can also create a layer mask by choosing Layers Create Layer Mask.
To create a layer mask based on transparency
1Select a layer.
2Choose Layers Create Layer Mask From Transparency.
The layer mask icon displays next to the layer name in the Layers panel.
554 | Corel Painter 2015 User Guide
You can create layer masks based on transparency for pixel-based layers only. Other layers must
first be converted to default layers by clicking the Layer options button in the Layers panel,
and choosing Convert To Default Layer.
Earlier versions of Corel Painter used layer visibility masks. If you have a file with a modified
visibility mask that was created with an earlier version of Corel Painter, use this procedure to load
the visibility mask to a layer mask.
To delete or clear a layer mask
• Perform an action from the following table.
To Do the following
Delete a layer mask Do one of the following:
•Choose Layers Delete Layer Mask.
•In the Layers panel, select the layer mask and
click the Delete button .
•In the Layers panel, select the layer mask, click
the Channel options button , and choose
Delete Layer Mask.
•In the Channels panel, click the Channel options
button , and choose Delete.
•Click the Delete button at the bottom of
the Channels panel.
Clear a layer mask In the Channels panel, click the Channel options
button , and choose Clear.
Applying layer masks
If you like the result of a layer mask, you can apply it. This permanently removes the hidden parts of the
layer and deletes the layer mask.
Layers | 555
To apply a layer mask
1Select a layer mask.
2Choose Layers Apply Layer Mask.
Loading layer masks to selections
Although a layer mask does not protect areas of a layer from being edited, you can load a layer mask to
a selection. The selection provides protection to the hidden parts of the layer. For more information, see
“Selections and transformations” on page 577.
To load a layer mask to a selection
1In the Layers panel, select a layer that has a layer mask.
2Control + click the layer mask icon (Mac OS), or right-click the layer mask icon (Windows), and choose
Load Layer Mask To Selection.
Selecting and viewing layer masks
Before you work with a layer mask, you must select it. You can also view a layer mask as a grayscale image.
Selecting a layer mask and viewing it are distinct operations — you can select a layer mask without viewing
it. You can also hide a layer mask.
To select a layer mask
1In the Layers panel, choose a layer that has a layer mask.
The layer mask is displayed in the Channels panel.
2Do one of the following:
• In the Channels panel, click the layer mask.
• In the Layers panel, click the layer mask icon next to the layer name.
To select a transparency mask from the Layers Panel
• In the Layers panel, perform an action from the following table:
556 | Corel Painter 2015 User Guide
To Do the following
Select the transparency mask for a layer Press Command (Mac) or CTRL (Windows), and
click the title or preview icon of a layer or layer
group.
Add the transparency mask for a layer to another
layer
Press Shift + Command (Mac) or Shift + CTRL
(Windows), and click the title or preview icon of a
layer or layer group.
To view a layer mask
1Select a layer with a layer mask.
2In the Channels panel, click the layer mask.
In this mode, the RGB image is hidden.
To hide a layer mask
•In the Channels panel, click the eye icon next to the layer mask item, so that the icon changes to a
closed eye .
Enabling and disabling layers masks
You can disable a layer mask to you view the entire layer, but you can re-enable it at any time.
To enable or disable a layer mask
• Select a layer mask.
To Do the following
Enable a layer mask Choose Layers Enable Layer Mask.
Disable a layer mask Choose Layers Disable Layer Mask. A red ‘X’ is
displayed over the layer mask icon.
Layers | 557
Copying layer masks
You can copy a layer mask to an alpha channel or copy a channel to a layer mask. The name of a layer mask
in the Channels panel reflects the name of the layer ([Layer Name] [Layer Mask]). Although you cannot
change the name of a layer mask, it automatically updates if you change the layer name.
To copy a layer mask to a channel
1Select a layer mask.
2In the Channels panel, click the Channel options button , and choose Duplicate.
3In the Duplicate Channel dialog box, enable the New Alpha Channel option.
You can also copy a channel to an existing channel, so that the existing channel is replaced. To do
this, enable the Replace Existing Alpha Channel option, and choose the existing channel from
the list box.
To copy a channel to a layer mask
1Select a layer in the Layers panel.
2Click the New Layer Mask button .
A blank layer mask is created.
3In the Channels panel, select the channel you want to copy.
4Click the Channel options button , and choose Duplicate.
5In the Duplicate Channel dialog box, enable the Replace Existing Alpha Channel option.
Corel Painter copies to the layer mask the portion of the channel that coincides with the layer content.
Inverting layer masks
You can invert a layer mask to make dark pixels light, and light pixels dark.
To invert a layer mask
1Select a layer mask.
2In the Channels panel, click the Channel options button , and choose Invert.

558 | Corel Painter 2015 User Guide
Editing layer masks
When you select a layer mask, you can edit it as you would edit a channel. You can paint in a layer mask;
apply effects to it; fill it with a color, pattern, gradient, or weave; and feather it. You do not have to view
a layer mask to edit it; you can select the layer mask, make changes to it, and view the resulting image
immediately.
A layer mask before (left) and after (right) feathering.
When you edit a layer mask, you are making modifications to the mask, not to the layer’s image. You can
use shades of gray only; no colors are available. This is because the layer mask is a grayscale image that is
separate from the RGB image.
The paint and effects you apply to a layer mask are reflected as follows:
• Applying white removes areas from the mask and reveals more of the layer.
• Applying black adds to the mask, which conceals more of the layer.
• Applying an intermediate gray value makes the mask semitransparent.
Importing and exporting layers
You can save your Corel Painter document in the RIFF format with “live” layers — the layers continue to
function when you reopen the file. RIFF is the only format that preserves layers in their original state.
If you export a Corel Painter document in PSD (Photoshop) format, all layers convert to standard Photoshop
transparent layers. Photoshop does not preserve groups; each layer in a group becomes its own Photoshop
layer. For more information, see “Grouping layers” on page 536.
The following table describes how Corel Painter layer composite methods are covered to blend modes in
Photoshop:

Layers | 559
Corel Painter
Composite Method
Photoshop Blend
Mode
Corel Painter
Composite Method
Photoshop Blend
Mode
Gel Darken Overlay Overlay
GelCover not converted Soft Light Soft Light
Colorize Color Hard Light Hard Light
Reverse-Out Normal Darken Darken
Shadow Map Multiply Lighten Lighten
Magic Combine Lighten Difference Difference
Pseudocolor Normal Hue Hue
Normal Normal Saturation Saturation
Dissolve Dissolve Color Color
Multiply Multiply Luminosity Luminosity
Screen Screen
For more information, see “Blending layers by using composite methods” on page 543.
If you save a file to a file format other than RIFF or PSD, the layers drop (or merge) into a single background
image.
Working with reference layers
Reference layers get their image content from an external source — either a pixel-based layer in the current
document or a separate file. They provide a low-resolution representation of the original image that you
can quickly manipulate in ways that would otherwise require more time. Working with a reference layer
allows you to resize, rotate, or slant a layer onscreen by dragging its handles. The changes are immediately
displayed in the document window. When you finish making changes, you can commit the reference layer
back to a standard layer. Corel Painter examines the source image to restore the original resolution.
You cannot edit the image data in a reference layer. If you try to paint on or apply effects to a reference
layer, Corel Painter prompts you to commit it back to a pixel-based layer.
560 | Corel Painter 2015 User Guide
You can create a reference layer by basing it on an existing layer or by placing an image. For more
information, see “Opening and placing files” on page 71.
To create a reference layer
1Select a layer.
2Choose Layers Convert To Reference Layer.
The layer’s icon in the Layers panel changes to an eight-handled shape , and an eight-handled box
marks the boundary of the layer’s contents in the document window.
To modify a reference layer
• Select a reference layer.
To Do the following
Resize a reference layer in one direction Drag a side handle.
Resize a reference layer in more than one direction
at once
Drag a corner handle. If you want to maintain the
layer proportions, hold down Shift as you drag.
The pointer changes when you position it over a
corner handle .
Rotate a reference layer Hold down Command (Mac OS) or Ctrl
(Windows), and drag a corner handle. The pointer
changes when you position it over a corner handle
.
Skew a reference layer Hold down Command (Mac OS) or Ctrl
(Windows), and drag a side handle. The pointer
changes when you position it over a side handle
.

Layers | 561
To commit a reference layer
• In the Layers panel, right-click a reference layer, and click Convert To Default Layer.
The conversion process might take a few seconds, depending on the size and quality of the layer.
Storing layers as images in the Image Portfolio
The Image Portfolio is a convenient place to store layers as images so you can use them again.
You can create your own Image Portfolio libraries to organize images by category. When you’re creating a
library, keep in mind that the smaller the library, the easier it will be to see its contents at a glance.
You can also move items between Image Portfolio libraries. For more information, see “Working with
libraries” on page 56.
To display the Image Portfolio panel
•Choose Window Media Library Panels Images.
If the Image Portfolio panel is not expanded, double-click the Image Portfolio panel tab.
To add a layer to the Image Portfolio
1Select a layer.
2In the toolbox, click the Layer Adjuster tool .
3In the Image Portfolio panel, click the Image Portfolio options button , and choose Add Image To
Portfolio.
The layer is cut from the current document.
4In the Save Image dialog box, type a name in the Save As box.
The Image Portfolio holds only pixel-based layers. If you want to add a shape, Watercolor, Liquid
Ink, or dynamic layer to the Image Portfolio, you must first convert it to a default layer. In the
Layers panel, click the Layer options button , and choose Convert To Default Layer.
To use an image from the Image Portfolio
1Choose Window Media Library Panels Images.
2Double-click an item in the Image Portfolio panel to add it to the document window.

562 | Corel Painter 2015 User Guide
Corel Painter places the Image Portfolio item on a new layer.

Alpha Channels | 563
Alpha Channels
Alpha channels, also referred to simply as channels, let you store and edit path-based and pixel-based
selections in an active document. Corel Painter stores only the current selection by default, therefore, when
you make a new selection, your previous selection is automatically lost. However, by saving the selection as
an alpha channel, you can retain the selection information and load it in the image whenever you need it.
The alpha channel is a grayscale image that stores 8 bits of information per pixel, which means that
each pixel can be assigned one of 256 levels of gray — from 0 (black) to 255 (white). White areas of the
channel are selected, and black areas of the channel are protected. Intermediate levels of gray are partially
protected. For example, areas that are 50% gray will allow 50% of the brushstroke or effect to get through
the channel to the image.
This section contains the following topics:
•“Creating and copying channels” (page 564)
•“Generating channels automatically” (page 565)
•“Importing and exporting alpha channels” (page 567)
•“Selecting and viewing channels” (page 567)
•“Setting channel attributes” (page 570)
•“Deleting and clearing channels” (page 571)
•“Editing channels” (page 571)
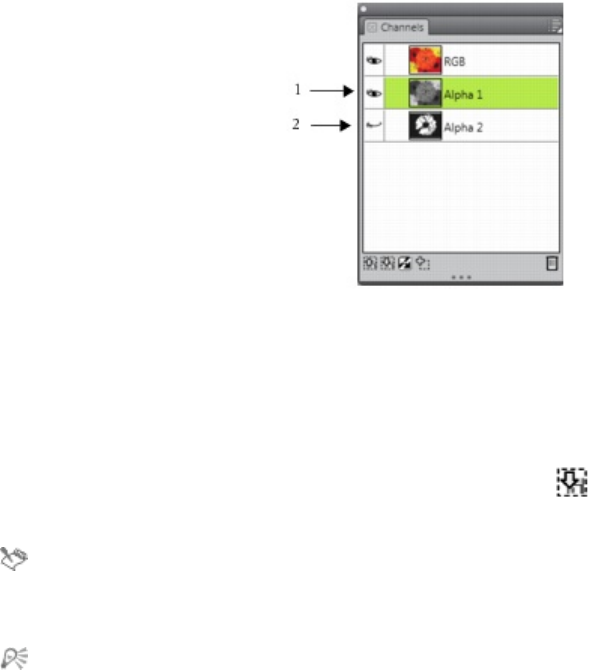
564 | Corel Painter 2015 User Guide
Creating and copying channels
You can create a channel from a selection, create a blank channel, or create a new channel by copying
an existing channel. The channels are saved with the image and remain part of the file. Channels remain
inactive (for canvas control) until you load them as selections in the image. For more information, see “To
load a selection from an alpha channel” on page 592.
Corel Painter lets you create up to 32 alpha channels. The channels are listed in the Channels panel and are
available for selecting, displaying, and modifying.
The Channels panel displays all of the alpha
channels that are stored in the current document.
To create a channel from a selection
1Click a selection tool in the toolbox and make a selection.
2Choose Window Channels.
3In the Channels panel, click the Save Selection as Channel button .
4Type a name in the Name box.
To apply an alpha channel as a selection, you must load it as a selection in the document window.
For more information, see “To load a selection from an alpha channel” on page 592.
You can also open the Channels panel by pressing Command + 5 (Mac) or Ctrl + 5 (Windows).
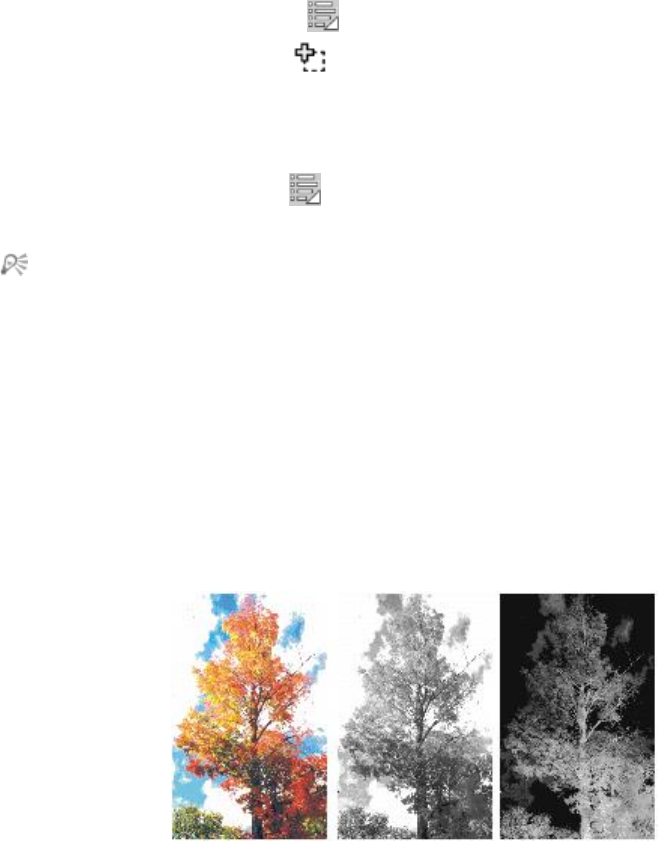
Alpha Channels | 565
To create a blank channel
• In the Channels panel, do one of the following:
•Click the Channel options button , and choose New.
•Click the New Channel button .
To copy a channel
1In the Channels panel, choose a channel from the list.
2Click the Channel options button , and choose Duplicate.
3In the Duplicate Channel dialog box, enable the New Alpha Channel option.
You can also copy a channel to an existing channel, so that the existing channel is replaced. To do
this, enable the Replace Existing Alpha Channel option, and choose the existing channel from
the list box.
Generating channels automatically
Corel Painter can automatically generate a channel based on the light and dark areas of a number of
sources, including paper, pattern, and clone source. For example, you can create a channel based on the
luminance values of a clone. You can also create a channel based on a range of colors. These methods are
similar to automatically generating pixel-based selections. For more information, see “Creating pixel-based
selections” on page 583.
An image (left), the channels created using image
luminance (middle), and inverted image luminance (right).

566 | Corel Painter 2015 User Guide
To generate a channel based on luminance
1In the Channels panel, do one of the following:
• To generate a new channel, choose the RGB channel from the list.
• To replace a channel, choose it from the list.
2Click the Channel options button , and choose New From.
3In the New From dialog box, choose one of the following options from the list box:
•Paper — uses the current paper texture to create the channel
•3D Brush Strokes — creates a channel based on the difference between the current image and the
clone source. If no clone source is selected, Corel Painter uses the current pattern.
•Original Selection — works only when performing offset sampling between documents. It allows
you to create a channel in the sampling destination document that is based on a selection made
in the sampling source document. For best results, the dimensions of the source and destination
documents should match. You must establish a link between an offset sampling source and
destination document for this option to be available. For more information, see “Performing offset
sampling” on page 179.
•Image Luminance — creates a channel based on the current image’s light and dark areas. For Image
Luminance to be effective, the image must have high contrast. Images with low contrast produce a
semisolid channel, without clear delineation between the selected and protected areas.
•Original Luminance — produces a channel based on the clone source’s light and dark areas. This
option lets you import an image to the channel. If no clone source is selected, Corel Painter uses the
current pattern.
•Current Color — creates a channel based on pixels of the current main color. Areas of the current
color are protected; the rest of the image is selected. You might want to use the Dropper tool to pick
a color from the image before using the Current Color option.
If you want to invert the channel, enable the Invert check box.
Like a grayscale image, a channel can have 256 values in it. Inverting a channel is equivalent to
creating the negative of a grayscale image. For example, a pixel with 80% luminance will have
20% luminance when inverted. A pixel with 30% luminance will have 70% luminance when
inverted.
To generate a color-based channel
1In the Channels panel, do one of the following:
• To generate a new channel, choose the RGB channel from the list.
• To replace a channel, choose it from the list.
2Click the Channel options button , and choose New From Color Range.

Alpha Channels | 567
3With the New Channel from Color Range dialog box open, click in the document window to pick a
color.
4The color you select is the middle of the range of colors used to create the channel.
5In the New Channel from Color Range dialog box, adjust the Range slider in the Hue, Saturation, and
Value areas.
These sliders control the selected range. You can drag the limits of the range in either direction.
6In the New Channel from Color Range dialog box, adjust the Feather slider in the Hue, Saturation,
and Value areas.
This helps soften the edges of the channel.
If you want to invert the channel, enable the Inverted check box.
The channel displays as a red overlay on the image in the Preview window of the New Channel
from Color Range dialog box. You can drag in the Preview window to display other parts of the
image.
Importing and exporting alpha channels
When you save a file to the Corel Painter file format (RIFF), the alpha channels that are stored in the file are
retained. They are also retained when exporting Corel Painter files in the Adobe Photoshop (PSD) format.
In addition, if you import an Adobe Photoshop file that contains alpha channels in Corel Painter, the alpha
channels are supported.
It is important to note that when you open RGB-based Adobe Photoshop files in Corel Painter, anything in
the alpha channels (4 and above) appear as a channel in Corel Painter. Conversely, when you export your
Corel Painter file in the Photoshop format, all channels are placed into channels 4 and above.
Selecting and viewing channels
You can select and view all alpha channels that are stored in the active document from the Channels panel.
Selecting and viewing a channel are distinct operations — you can view a channel without selecting it, and
you can select a channel without viewing it. If you want to edit a particular channel, you must select it.
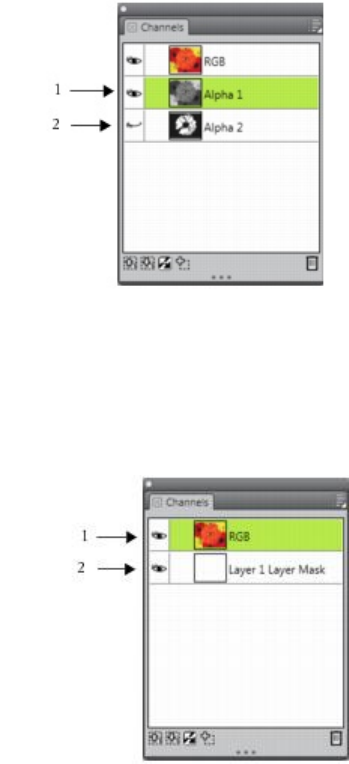
568 | Corel Painter 2015 User Guide
You can view or hide a channel by clicking the eye icon next to the channel’s
thumbnail in the Channels panel. When the eye is open (1), the channel displays
in the document window. When the eye is closed (2), the channel is hidden.
The Channels panel also lists the RGB color image. In addition, if a layer is selected, and the layer has a layer
mask, the Channels panel also lists the layer mask. For more information, see “Creating and deleting layer
masks” on page 552.
The Channels panel displays the RGB color image
(1) and the Layer Masks of selected layers (2).
You can view the RGB image and more than one channel, but your editing applies only to the one item
selected in the Channels panel — either the RGB image or a channel.
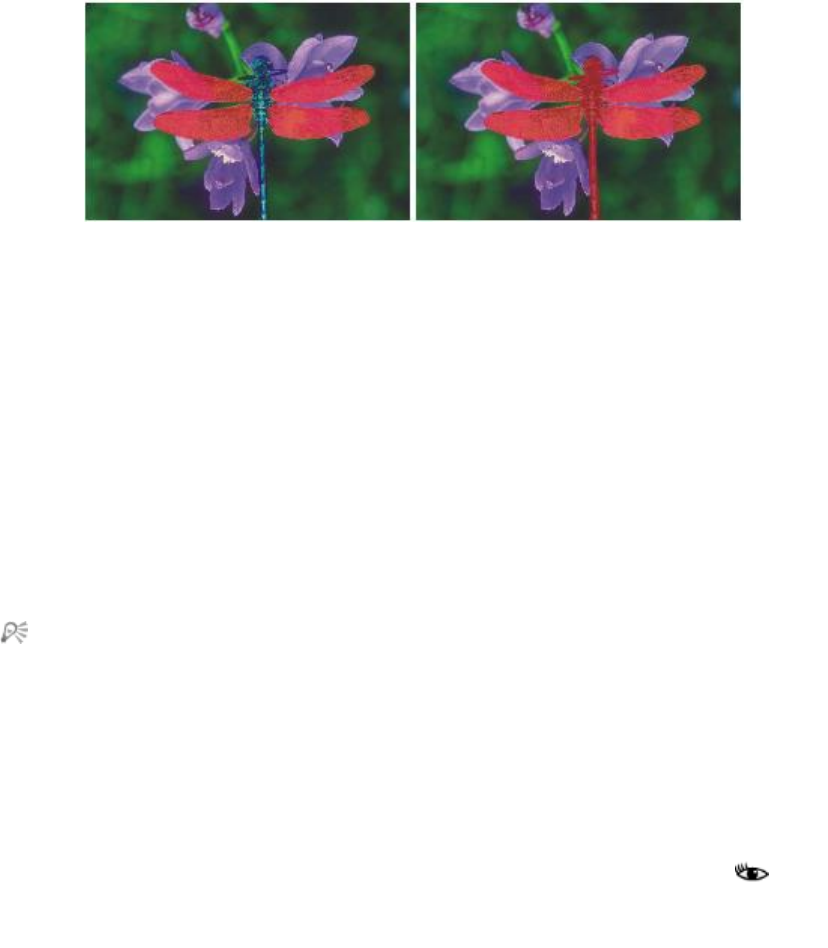
Alpha Channels | 569
Left: The “wings” channel and the RGB image are displayed. Right:
The “wings” and “body” channels are displayed as red overlays on the
RGB image. The eye icons for both channels and for RGB are open.
Corel Painter offers two ways to view a channel — as a colored overlay on the image or in grayscale.
Colored overlays are red by default, but you can change the color. For more information, see “To set
channel attributes” on page 570.
To display the channels panel
•Choose Window Channels.
If the panel is not expanded, double-click the panel tab.
To select a channel
• In the Channels panel, choose a channel from the list.
When you want to work on the image again, choose RGB from the list.
To view or hide a channel
To Do the following
View a channel as a colored overlay In the Channels panel, click the eye icon next
to the channel’s thumbnail. In this mode, the RGB
image is always displayed.

570 | Corel Painter 2015 User Guide
To Do the following
View a channel as a grayscale image In the Channels panel, make sure the channel is
hidden (eye closed ) and not selected, and
click the channel name. In this mode, the RGB
image is hidden.
Hide a channel Click the eye icon next to the channel item to
close the eye .
A channel protecting the wings and body is
displayed in grayscale. The RGB image is hidden.
Setting channel attributes
You can change the appearance of channels by modifying their display attributes, which helps to distinguish
one channel from another. These attributes do not affect the function of the channel; they affect only how
the channel displays in the document window.
Corel Painter names new channels incrementally: Alpha 1, Alpha 2, and so on. Renaming a channel makes
it easier to find a specific channel, especially if you have several in the document.
To set channel attributes
1In the Channels panel, choose a channel from the list.
2Click the Channel options button , and choose Channel Attributes.
3In the Channel Attributes dialog box, move the Opacity slider to set the channel display strength.
4Click the Color chip, and choose a display color in the Color dialog box.
If you want to see the color overlay in grayscale, choose black.
Alpha Channels | 571
A channel is easiest to use as an overlay when its color contrasts strongly with the predominant hue of
the RGB image. You might want to use a different color for each channel.
5Click OK.
6Enable one of the following options to specify where the color overlay displays:
•Masked Areas
•Selected Areas
If you want to rename the channel, type a name in the Name box.
If you want the channel displayed at its full intensity, move the Opacity slider to 100%. Choose a
lower value to display the channel more transparently so you can follow the underlying RGB image
as you edit the channel.
Deleting and clearing channels
If you’ve finished working with a particular channel you can delete it. You can also clear a channel without
deleting it, leaving you with a blank channel.
To delete a channel
1In the Channels panel, choose a channel from the list.
2Click the Delete button at the bottom of the Channels panel.
You can also delete a channel by clicking the Channel options button , and choosing Delete.
To clear a channel
1In the Channels panel, choose a channel from the list.
2Click the Channel options button , and choose Clear.
Editing channels
You can edit a channel by modifying the size, shape, or opacity of its protected area, which ultimately
becomes the protected area of the selection. The changes that you make to the channel do not directly
affect the image until you load it as a selection. For more information, see “To load a selection from an
alpha channel” on page 592.
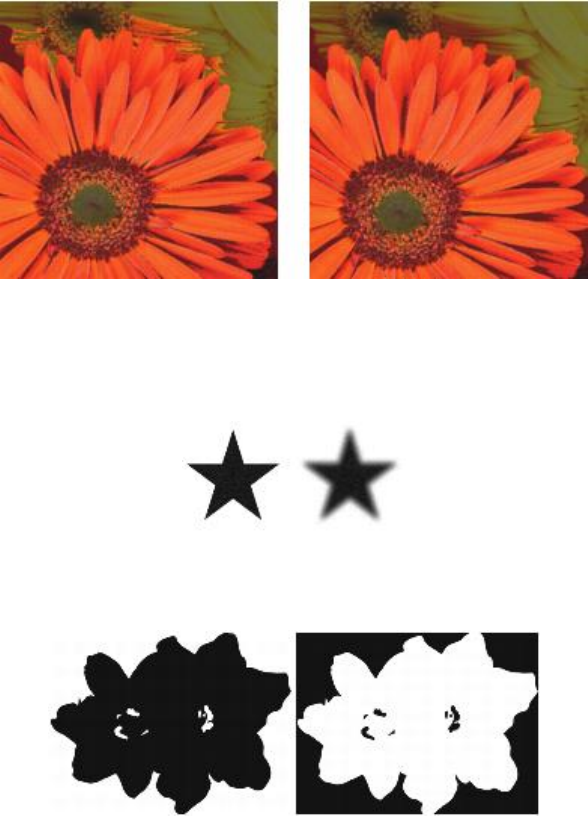
572 | Corel Painter 2015 User Guide
Because the alpha channel is a grayscale image, you edit the channel by applying only white (to remove
protected areas), black (to add protected areas), and shades of gray (to create semi-protected areas); no
colors are available.
You can apply changes by selecting a brush and painting the changes in the channel.
In this example, the channel has a few stray areas that are unprotected (left). The stray
areas were transformed into protected areas by applying black brushstroke (right).
In addition, you can apply effects, such as feathering to soften the transitions between light and dark areas.
This introduces a bit of opacity to the channel.
A channel — before and after feathering.
You can also invert a channel to convert a protected area into an unprotected area.
A channel — before and after inversion.
Alpha Channels | 573
In addition, you can introduce interesting effects by filling a channel with a pattern, gradient, or weave. For
more information, see “Working with color fills” on page 241.
To paint in a channel
1In the Channels panel, display and select the channel you want to work with.
If you want to paint only on a specific area of the channel, make a selection.
2Choose the Brush tool from the toolbox.
3Click the Brush Selector on the Brush Selector bar.
4In the Brush library panel, click a brush category, and brush variant.
The Pen and Airbrush brush categories make good choices.
5In the Color panel, choose one of the following:
•Black — adds to the protected area
•White — removes from the protected area
•Grey — applies a semi-protected area
When you paint in the channel, hue is irrelevant. The channel carries 8 bits of information and you need
only set a level in that range. The value scale is between black and white.
6Paint in the document window.
7In the Channels panel, click the eye icon next to the RGB channel’s thumbnail to display the
channel in grayscale.
You can also
Control the brush opacity Adjust the Opacity slider on the property bar.
Change the brush size Type a value in the Size box, or adjust the slider.
To apply an effect to a channel
1In the Channels panel, display and select the channel you want to work with.
If you want to apply the effect to a specific area of the channel, make a selection.
2Choose an effect from the Effects menu.
To feather a channel
1In the Channels panel, display and select the channel you want to work with.
574 | Corel Painter 2015 User Guide
2Click the Channel options button , and choose Feather.
3In the Feather dialog box, type a number of pixels.
To invert a channel
1In the Channels panel, choose a channel from the list.
2Click the Invert Channel button .
To fill a channel with a pattern
1In the Channels panel, display and select the channel you want to work with.
If you want to fill only a specific area of the channel, make a selection.
2Click Window Media Library Panels Patterns.
3In the Patterns panel, click a pattern swatch.
4Choose Edit Fill.
5In the Fill dialog box, choose Original Luminance from the Fill with list box.
If you want to change the opacity, adjust the Opacity slider.
To fill a channel
1In the Channels panel, display and select the channel you want to work with.
2Choose the Paint Bucket tool from the toolbox.
3On the property bar, click the Fill Image button .
4From the Fill list box on the property bar, choose one of the following:
•Current Color — fills with the current color (a shade of gray). For information, see “Working with
color fills” on page 241.
•Gradient — fills with the selected gradient. For information, see “Applying gradients” on page 723.
•Source Image — fills using the current clone source image. If you haven’t defined a clone source,
Corel Painter fills with the current pattern. For information, see “Filling an area with a sampled
image” on page 193.
•Weave — fills with the selected weave. For information, see “Applying weaves” on page 757.
5Open the Fill selector on the property bar, and click a swatch from the media library panel.
6Click the area of the channel you want to fill.
If the result is not what you want, undo the fill, change the settings, and try again.
Alpha Channels | 575
You can also
Specify the range of grey to be filled On the property bar, type a value in the Tolerance
box, or adjust the slider.
Specify the fill opacity for pixels outside the
tolerance range
On the property bar, type a value in the Feather
box, or adjust the slider.
Soften the edge of the fill Enable the Anti-Alias button on the property
bar. Anti-aliasing is desirable when Feather is zero
or extremely low.
The Paint Bucket tool applies a fill only to a visible channel. Make sure the channel’s eye icon
is open before using the Paint Bucket tool.
You can return to the default Paint Bucket tool settings by clicking the Reset Paint Bucket Tool
button on the property bar.
576 | Corel Painter 2015 User Guide

Selections and transformations | 577
Selections and transformations
Corel Painter includes various tools for selecting an area of the canvas to mark it for special treatment. You
can make selections to change an area, to protect an area from change, or to apply a transformation.
This section contains the following topics:
Creating and saving selections
•“Getting started with selections” (page 578)
•“Creating path-based selections” (page 580)
•“Creating pixel-based selections” (page 583)
•“Creating selections from layers” (page 586)
•“Choosing the protected area of a selection” (page 588)
•“Saving selections as alpha channels” (page 588)
Viewing and modifying selections
•“Working with the Selection Portfolio” (page 592)
•“Viewing selections” (page 593)
•“Inverting selections” (page 594)
•“Softening the edges of selections” (page 594)
•“Stroking selections” (page 595)
•“Modifying the borders of selections” (page 596)
•“Expanding or contracting selections” (page 597)
•“Adding to or subtracting from selections” (page 598)

578 | Corel Painter 2015 User Guide
Transforming selections
•“Preparing selections for transformations” (page 600)
•“Moving selections” (page 600)
•“Transforming a duplicate selection” (page 602)
•“Scaling and rotating path-based selections” (page 602)
•“Skewing and distorting path-based selections” (page 604)
•“Canceling transformations” (page 606)
Getting started with selections
You can use selections to isolate an area of the canvas to apply effects or transformations, while protecting
the unselected areas from the changes.
Selection types
Corel Painter supports two types of selections: path-based and pixel-based. The method that you use to
create a selection determines its type.
• Path-based selections are defined by a closed path, for example a circle or a square. You can make
path-based selections by using the Rectangular Selection, Oval Selection, Lasso tool, or by converting
a shape. Path-based selections support many transformations that pixel-based selections do not. In
addition, it’s the only type of selection that you can store in the Selection Portfolio.
• Pixel-based selections are defined at the pixel level. You can create a pixel-based selection by using the
Magic Wand tool. Corel Painter also includes options for auto-generating selections based on various
image or clone characteristics.
You can covert a pixel-based selection to a path-based selection. For more information, see “To convert a
pixel-based selection to a path-based selection” on page 583.
Selection methods
The following table describes the various methods for using selections.
To Description
Constrain brushstrokes Protects the area inside or outside the selection
from painting
Transform Moves, scales, rotates, skews, or distorts an area
Selections and transformations | 579
To Description
Apply an image effect Applies an effect to only an isolated area. You
can also set different levels of protection within a
selection to create partial intensity of the effect.
Cut or copy Removes, moves, or duplicates an area
Copy to a new layer Copies or moves an area to a new layer
Stroke the selection Applies a brushstroke along a selection’s border
Create a channel Saves a selection to a channel
Selection tools
The following table describes all of the available selections tools.
Tool Description
Rectangular Selection Creates rectangular and square
selections (path-based)
Oval Selection Creates oval selections (path-
based)
Lasso tool Creates freehand selections
(path-based)
Polygonal Selection tool Selects an area based on
different points set in an image
which are anchored by straight
line segments (path-based)

580 | Corel Painter 2015 User Guide
Magic Wand tool Selects pixels of similar color by
clicking or dragging in an image
(pixel-based)
Transform tool Modifies path-based selections
by using different transformation
modes
Selection Adjuster tool Selects, moves, and manipulates
path-based selections
Selection storage
In Corel Painter, each new selection automatically replaces the current selection, therefore, you need to
store a selection in order to reuse it. Corel Painter includes two options for storing the selections that you
want to reuse.
Option Description
Alpha channels Stores both path-based and pixel-based selections
for the current document. You can modify alpha
channels by combining them with the current
selection.
Selection Portfolio Stores path-based selections in a library to make
them accessible from any document
Creating path-based selections
You can create path-based selections that are rectangular or oval. If you need more flexibility, you can create
freehand selections by using the Lasso or the Polygonal Selection tools. The Lasso tool creates selections
based on freehand segments. The Polygonal Selection tool selects an area with more precision by setting
different points on the image and anchoring them using straight-line segments.
You can apply transformations only to path-based selections. However, you can convert any pixel-based
selections to path-based selections in order to perform transformations. It’s important to note that when
converting a pixel-based selection, the modified selection is reduced to only two levels of protection: the

Selections and transformations | 581
inside or the outside of the selection is protected. For more information, see “Choosing the protected area
of a selection” on page 588.
In addition, if you select multiple layers prior to performing a transformation on a path-based selection, the
transformation applies to the selected area across any layers that are currently selected. For example, if you
select a layer group, the selection and transformation is applied to all layers within that group. Therefore,
make sure to select only the desired layers before performing a transformation.
You can also select the entire canvas or create path-based selections by converting shapes or pixel-based
selections. Converting a shape to create a path-based selection is useful for selecting an area that is
identical to an existing shape or text.
To make an oval or a circular selection
1Choose Window Layers.
2In the Layers panel, do one of the following:
• Click a layer.
• Click a layer group.
• Hold down Command + Shift (Mac OS) or Ctrl + Shift (Windows), and click each layer you want to
select.
3Perform a task from the following table.
To select Do the following
An oval area Choose the Oval Selection tool from the
toolbox. Drag in the document window to select
an area.
A circular area Choose the Oval Selection tool from the
toolbox. While dragging the selection in the
document window, hold down the Shift key.
Whenever you create a selection, Corel Painter deactivates the previous selection.
To make a rectangular or square selection
1Choose Window Layers.
2In the Layers panel, do one of the following:

582 | Corel Painter 2015 User Guide
• Click a layer.
• Click a layer group.
• Hold down Command + Shift (Mac OS) or Ctrl + Shift (Windows), and click each layer you want to
select.
3Perform a task from the following table.
To select Do the following
A rectangular area Choose the Rectangular Selection tool from
the toolbox. Drag in the document window to
select an area.
A square area Choose the Rectangular Selection tool from
the toolbox. While dragging the selection in the
document window, hold down the Shift key.
To make a freehand selection
1Choose Window Layers.
2In the Layers panel, do one of the following:
• Click a layer.
• Click a layer group.
• Hold down Command + Shift (Mac OS) or Ctrl + Shift (Windows), and click each layer you want to
select.
3Perform a task from the following table.
To Do the following
Make a freehand selection Choose the Lasso tool from the toolbox.
Draw a freehand border around the area that you
want to select in the document window.
Make a freehand selection with straight-edged
segments Choose the Polygonal Selection tool from
the toolbox. Click where you want to set the
Selections and transformations | 583
anchor points of the polygon selection, and
double-click to set the last anchor point.
If you draw an open path with the Lasso tool , the endpoints are connected automatically
with a straight line before the selection is created.
When using the Lasso tool or Polygonal Selection tool , you can switch from one tool
to another by pressing Option (Mac OS) or Alt (Windows).
To select the entire canvas
•Choose Select All.
To convert a shape to a selection
1Select the shape that you want to convert.
The shape must be closed.
2Choose Shapes Convert To Selection.
The outline of the shape creates the selection path. Everything within the outline is fully selected.
You can also convert the current selection to a shape. For more information, see “To convert a
selection to a shape” on page 801.
To convert a pixel-based selection to a path-based selection
1Create a pixel-based selection.
For more information, see “Creating pixel-based selections” on page 583.
2Choose Select Transform Selection.
Corel Painter generates paths from the outlines of the pixel-based selection. You can now use the
Transform tool for transformations.
Creating pixel-based selections
Corel Painter offers various methods for making pixel-based selections. The Magic Wand tool selects
groups of pixels according to color. You can adjust the settings to control the range of colors, and you can
also choose to include only adjacent colors (contiguous) or only nonadjacent colors (noncontiguous).
584 | Corel Painter 2015 User Guide
In addition, there are ways to auto-generate pixel-based selections by using various image, clone, and color
characteristics. For example, you can create a selection based on the luminance values of a clone.
Pixel-based selections provide 256 levels of protection to the canvas. Each pixel in the selection sets a level
of protection for its corresponding color pixel in the RGB image. Opaque areas of the selection provide
100% protection and prevent brushstrokes and effects from marking the canvas. Clear areas of the selection
provide no protection and allow brushstrokes and effects to mark the canvas. Brushstrokes and effects are
partially applied to areas where the selection is shaded or semitransparent. As a result, you can paint and
apply effects with varying levels of intensity within a selection.
You can move pixel-based selections, but you cannot resize or rotate them. To apply transformations to
pixel-based selections, convert any pixel-based selections into path-based selections. For more information,
see “To convert a pixel-based selection to a path-based selection” on page 583.
To select an area by using the Magic Wand tool
1In the toolbox, click the Magic Wand tool .
2On the property bar, adjust the Tolerance slider to control the amount of variance allowed from the
selected color with higher values creating a larger range of colors.
3In the document window, do one of the following:
• Click to select the color in the middle of the range of colors that you want to use for the selection.
• Click and drag over an area to define the range of colors that you want to use for the selection.
It may take a moment for the selection to be calculated and loaded.
You can also
Create a selection with contiguous pixels On the property bar, click the Contiguous button.
Create a new selection On the property bar, click the New Selection
button and click in the document window.
Add to the current selection On the property bar, click the Add To Selection
button and click the areas you want to add.
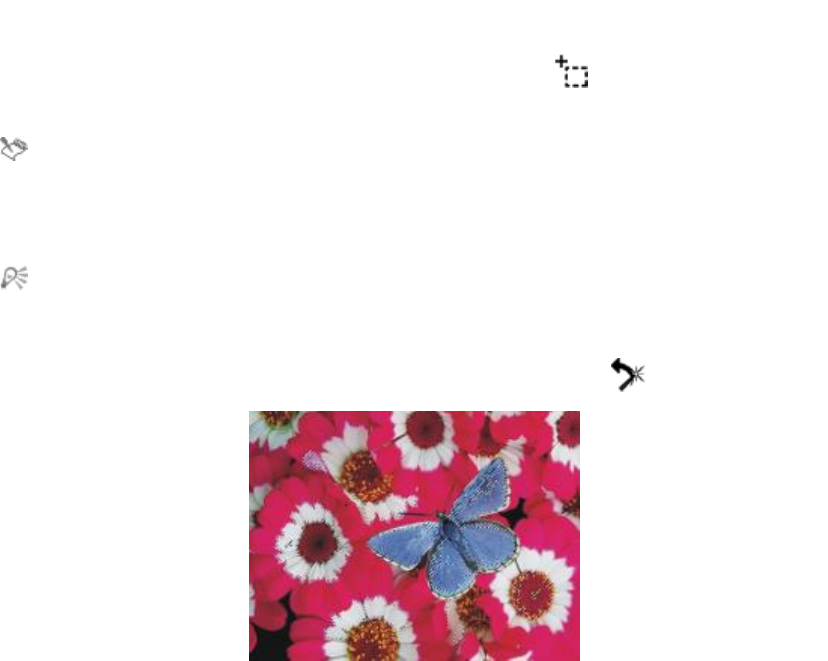
Selections and transformations | 585
You can also
Remove an area from the current selection On the property bar, click the Subtract From
Selection button and click the areas you
want to add.
The default tolerance for selections is 32. This can be adjusted from 1 to 255.
If you add to the current selection, you add to the range of values that the Magic Wand tool
selects rather than create an additional selection with a unique seed color.
You can restrict a selection to a rectangular area by pressing Option + Shift (Mac OS) or Alt +
Shift (Windows), and dragging a bounding rectangle in your image.
You can restore the default settings by clicking the Reset Tool button on the property bar.
Adding to a selection by using the Magic Wand tool.
To auto-generate a selection based on image characteristics
1Choose Select Auto Select.
2From the Using list box, choose one of the following options:
•Paper — creates a selection by using the current paper texture
•Image Luminance — creates a selection based on the light and dark areas of the current image

586 | Corel Painter 2015 User Guide
•Current Color — creates a selection of pixels based on the current main color. Before using this
option, you can pick a color from the image by using the Dropper tool .
If you want to invert the selection, enable the Invert check box.
To auto-generate a selection based on clone characteristics
1Choose Window Clone Source.
2In the Clone Source panel, click the Open Source Image button , and choose the image that you
want to set as the clone source.
3Choose Select Auto Select.
4From the Using list box, choose one of the following:
•3D Brush Strokes — creates a selection that is based on the difference between the current image
and the clone source. If no clone source is selected, the current pattern is used.
•Original Luminance — produces a selection in the current document based on the light and dark
areas of the clone source. If no clone source is selected, the current pattern is used.
If you want to invert the selection, enable the Invert check box.
To auto-generate a color-based selection
1Choose Select Color Select.
2Click in the document window to pick a color.
3In the Color Select dialog box, move the Range sliders in the Hue, Saturation, and Value areas.
These sliders control the selected range of colors.
4Move the Feather sliders in the Hue, Saturation, and Value areas.
Feathering helps soften the selection edge.
5The Preview window shows the selected area as a red overlay on the image. Drag in the Preview
window to see other parts of the document.
Creating selections from layers
You can create a selection from a layer, multiple layers, or layer group. You can also add the transparency
mask of a layer, or layer group, to a previous selection. To modify a layer-based selection, you can subtract
or intersect the transparency mask of a layer, or layer group, with a previous selection. Intersecting includes
only those parts that are common to all selected layers. For more information, see “Getting started with
layers” on page 514.

Selections and transformations | 587
To create a selection from a layer
• With the Layers panel open, perform an action from the following table:
To Do the following
Select the content of a layer Choose Select Select Layer Content.
You can also select the content of a layer from the
Layers panel, by holding down Command (Mac)
or Ctrl (Windows), and clicking the title of the layer
that you want to select.
Select the content of a group of layers Choose Select Select Group Content.
You can also select the content of a layer group
from the Layers panel, by clicking the group,
and then holding down Command (Mac) or Ctrl
(Windows), and clicking the title of the layer group
that you want to select.
Add the transparency mask of the layer or layer
group to the previous selection
In the Layers panel, hold down Shift + Command
(Mac) or Shift + Ctrl (Windows), and click the
titles of the layers that you want to add.
Subtract the transparency mask of the layer or
layer group from the previous selection
In the Layers panel, hold down Option +
Command (Mac) or Alt + Ctrl (Windows), and
click the title of the layer that you want to subtract.
Intersect the transparency mask of a layer or layer
group with the previous selection
In the Layers panel, hold down Shift + Option +
Command (Mac) or Shift +Alt + Ctrl (Windows),
and click the title of the layer that you want to
intersect.
Create a selection from a Dynamic, Shape, or Text
layer
In the Layers panel, click the Layer options button
, and choose Convert To Default Layer.
Choose Select Load Selection. In the Load
Selection dialog box, choose the transparency of

588 | Corel Painter 2015 User Guide
To Do the following
the selected layer from the Load From list box, and
enable the Replace Selection option.
You can also create a selection from a layer by choosing Load Selection from the Select menu. In
the Load Selection dialog box, choose the transparency of the selected layer from the Load From
list box, and enable the Replace Selection option.
Choosing the protected area of a selection
The drawing mode determines whether the inside or the outside of a selection is protected when you paint.
To specify the protected area of a selection
1Choose Window Navigator.
2Click the Open Navigator Settings button , choose Drawing Mode, and then choose one of the
following options:
•Draw Anywhere — disables protection by the selection. Brushstrokes are allowed anywhere on the
canvas. The selection is active only for applying effects and using the Cut or Copy command.
•Draw Outside — protects the area inside the selection
•Draw Inside — protects the area outside selection. This drawing mode is similar to using a stencil in
that only the selected region accepts brushstrokes.
Saving selections as alpha channels
You can create alpha channels to store multiple selections in a document. An alpha channel is a temporary
storage area for both path-based and pixel-based selections. To reuse a selection in other documents, you
can store the selection in the Selection Portfolio. It is important to note that the Selection Portfolio stores
only path-based selections. For more information see, “Working with the Selection Portfolio” on page
592.
You can create an alpha channel from the current selection to copy its editable and protected areas. You
can also combine a new selection with one that was previously stored in an alpha channel. To reactivate
a selection that was previously saved as an alpha channel, simply load it in the image. Loading a selection
reactivates it on the canvas, where it controls painting and image effects.
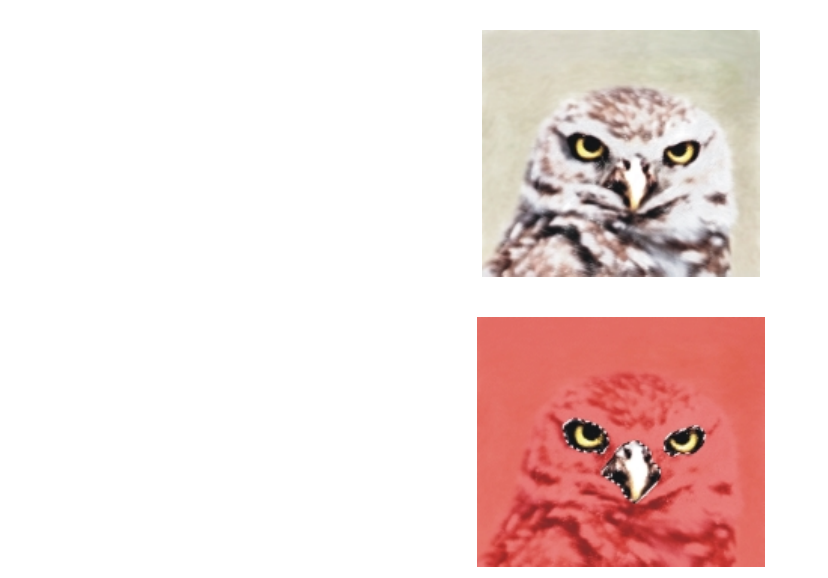
Selections and transformations | 589
Combining selections when saving or loading alpha channels
When you save or load alpha channels, you can combine the current selection with an existing alpha
channel by adding, subtracting, or intersecting with the selection. Adding to a selection combines it
with the existing channel. Subtracting a selection cuts it out of the existing channel. When intersecting a
selection, you include only those parts that are common to the selection and the existing channel.
In the following set of owl images, the artist created and saved selections for each area that she wanted to
work with separately — the eyes, the beak, and the outline. To show the selections clearly in these images,
the selections were saved to channels, reloaded, and displayed as red overlays. For more information, see
“To view or hide a channel” on page 569.
The following images show the step-by-step creation of a precise “face” selection that excludes the beak
and eyes. The purpose of the precise selection of the face is to control the brushstrokes and constrain
effects.
The image
The eye and beak channels (saved selections) are
loaded and added. The combined selection is saved
to the “eyebeak” channel.
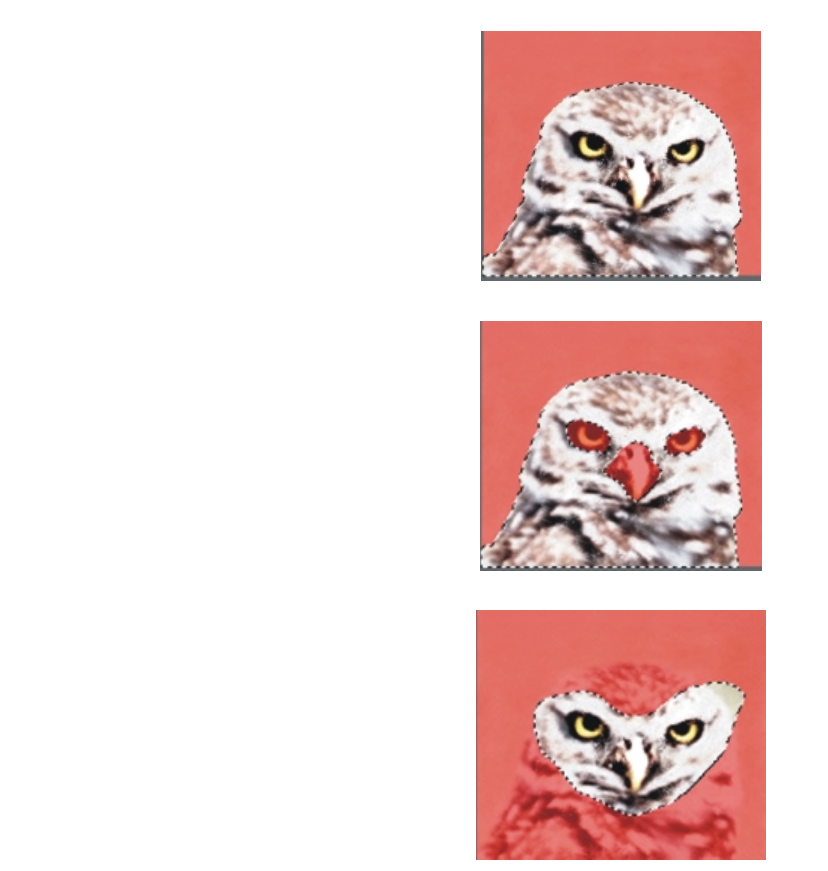
590 | Corel Painter 2015 User Guide
The “outline” channel is loaded.
The “eyebeak” channel is loaded and subtracted
from the “outline” channel. The resulting selection
is saved to the “head” channel.
A “face” selection is drawn roughly by using the
Lasso tool. The eyes, the beak, and a portion of
the background are included.
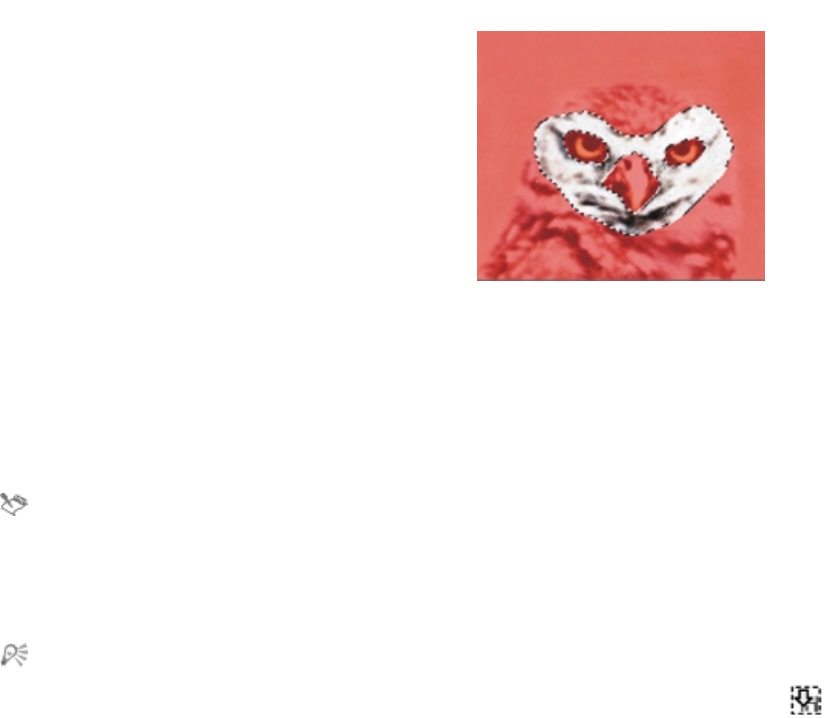
Selections and transformations | 591
The “head” channel (the outline with eyes and
beak subtracted) is loaded and intersected with
the rough “face” selection. This step removes the
eyes, beak, and background portion. The resulting
selection is saved to the “face” channel.
To save a selection to a new alpha channel
1Create a selection.
2Choose Select Save Selection.
3Choose New from the Save To list box.
If you want to specify a name, type a name in the Name box.
Alpha channels are pixel based, therefore, any path-based selections are saved as pixel-based
selections.
If you do not specify a name, the new channel is named incrementally with the previous channel:
Alpha1, Alpha2, and so on.
You can also save a selection to a channel by clicking the Save Selection As Channel button
in the Channels panel.
To combine a selection with an existing alpha channel
1Create a selection.
2Choose Select Save Selection.
3Choose a channel from the Save To list box.
4In the Operation area, enable one of the following options:
•Replace Mask — replaces the channel with the current selection
•Add to Mask — combines the current selection with the chosen channel
592 | Corel Painter 2015 User Guide
•Subtract From Mask — subtracts the current selection from the chosen channel
•Intersect With Mask — determines the intersection of the selection and the chosen channel, and
saves the intersection to the channel
You can also save a selection to a channel by clicking the Save Selection As Channel button
in the Channels panel.
To load a selection from an alpha channel
1Choose Select Load Selection.
2Choose a channel from the Load From list box.
3In the Operation area, enable one of the following options:
•Replace Selection — replaces the current selection with the chosen channel
•Add To Selection — adds the channel to the current selection
•Subtract From Selection — subtracts the channel from the current selection. In other words, the
channel is “cut away” from the selection.
•Intersect With Selection — determines the intersection of the channel and the current selection. This
intersection becomes the new selection.
You can also load a selection from an alpha channel by clicking the Load Channel As Selection
button in the Channels panel.
Working with the Selection Portfolio
You can store any of the path-based selections that you want to reuse in the Selection Portfolio, which is
a library for storing selections. You can add your selections to the default library, or create your own library.
For more information, see “Working with libraries” on page 56. You can also browse and use any of the
available sample selections in the Selection Portfolio.
To store a selection in the portfolio
1Create the path-based selection you want to store.
2Choose Window Media Library Panels Selections.
3In the toolbox, click the Selection Adjuster tool .
Selections and transformations | 593
4In the Selection Portfolio panel, click the Selection Portfolio options button , and choose Add
Selection To Portfolio.
5In the Save Selection dialog box, type a name for the selection.
To use a selection from the portfolio
• Double-click a selection in the Selection Portfolio panel.
The selection replaces the previous selection and appears in its original position on the canvas, provided
that the document dimensions are the same.
Viewing selections
You can turn a selection off and reactivate it later. In addition, options are available for controlling the
display of the selection marquee, which is the visible border of the selection.
To turn off a selection
•Choose Select None.
You can also turn off a selection by clicking outside it with the Oval Selection tool , the
Rectangular Selection tool , or the Lasso tool .
To reactivate a selection
•Choose Select Reselect.
This command is available only if you have previously turned off a selection.
To hide or show the selection marquee
• From the menu bar, choose one of the following:
•Select Hide Marquee.
•Select Show Marquee.
The drawing mode remains in effect even when the marquee is hidden. For more information, see
“Choosing the protected area of a selection” on page 588.
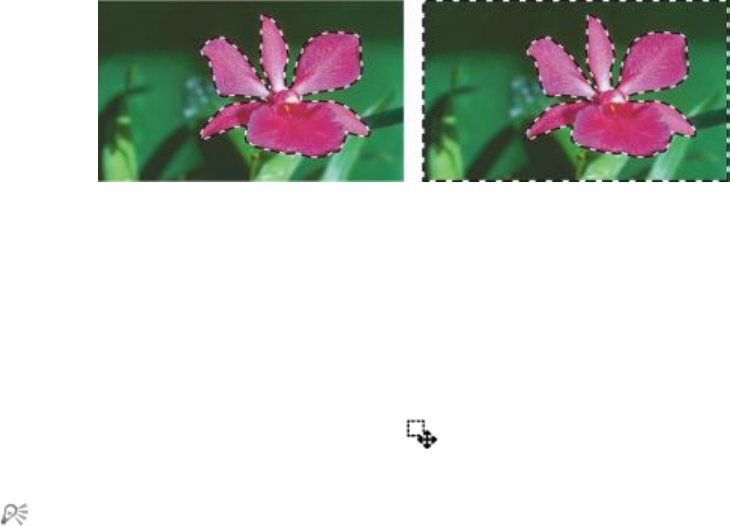
594 | Corel Painter 2015 User Guide
Inverting selections
You can invert a selection, which deselects the previously selected area and selects the previously unselected
area.
The marquee indicates that the flower is selected (left). After inverting
the selection, the marquees, that surround both the canvas and the
flower, indicate that everything but the flower is selected (right).
A pixel-based selection can include 256 values, like a grayscale image. An inverted pixel-based selection is
equivalent to the negative of a grayscale image. For example, a pixel that has 80% luminance will have 20%
luminance when inverted.
To invert a selection
1In the toolbox, click the Selection Adjuster tool , and then click a selection.
2From the menu bar, choose Select Invert Selection.
To produce a unique effect, you can nudge the selection by a few pixels by using the Selection
Adjuster tool, clicking the selection, and then pressing an arrow key on your keyboard a few
times. This technique works only when the selection is directly on the canvas, it does not work if
the selection is on a layer.
Softening the edges of selections
You can soften the edges of a path-based selection by anti-aliasing or feathering. Anti-aliasing smooths the
edges of a selection by modifying the color transition between the pixels. Feathering, on the other hand,
softens the edges by gradually increasing the transparency of the pixels along the edge of the selection.

Selections and transformations | 595
To apply anti-aliasing to a selection
1Create a selection by using one of the selection tools.
2On the property bar, click the Anti-alias button .
To feather the edge of a selection
1In the toolbox, click the Selection Adjuster tool , and then click a selection.
2From the menu bar, choose Select Feather.
3In the Feather Selection dialog box, specify the number of pixels that you want to feather.
When the selection marquee is shown, feathering may be difficult to see. It is easier to see
the effect of feathering if you save the selection to a channel and view the channel. For more
information, see “To view or hide a channel” on page 569.
Stroking selections
You can apply a brushstroke to a path-based selection. Corel Painter uses the current brush variant, brush
size, color, and paper texture to apply a stroke along the border of a selection. Stroking selections is an
excellent way to make brushstrokes follow specific contours.
Setting the drawing mode controls whether brushstrokes are placed inside, outside, or on both sides of the
selection border. For more information, see “Choosing the protected area of a selection” on page 588.
To stroke a selection
1Create a path-based selection.
2In the toolbox, click the Brush tool .
3Click the Brush Selector on the Brush Selector bar.
4In the Brush library panel, click a brush category, and click a brush variant.
5Click a color in the Color panel.
6On the property bar, type a value in the Size box, or adjust the pop-up slider.
7In the Navigator panel, click the Open Navigator Settings button , choose Drawing Mode, and
then choose a drawing mode option.
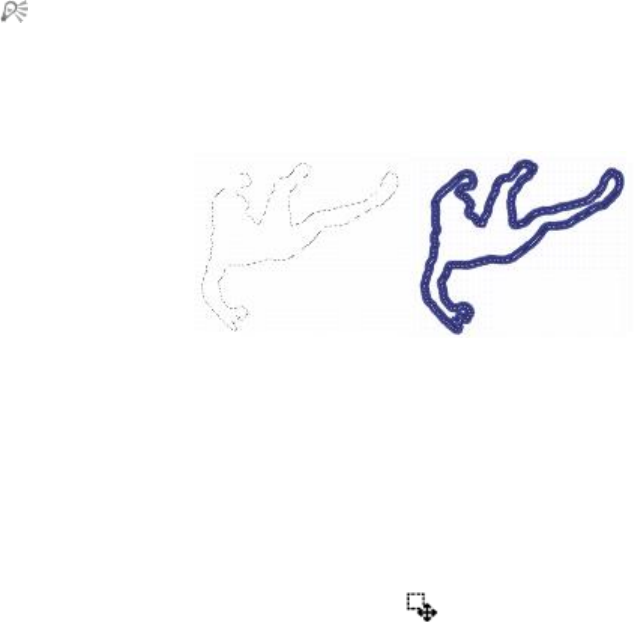
596 | Corel Painter 2015 User Guide
8From the menu bar, choose Select Stroke Selection, and repeat the command to build strokes.
You can use different brushes while building strokes.
To produce a unique effect, you can nudge the selection by a few pixels by using the Selection
Adjuster tool, clicking the selection, and then pressing an arrow key on your keyboard a few
times. This technique works only when the selection is directly on the canvas, it does not work if
the selection is on a layer.
Stroking a selection while using the Draw Anywhere drawing
mode lets you apply strokes to both sides of the selection border.
Modifying the borders of selections
You can modify the border width of path-based selections. You can also smooth a selection border by
removing sharp edges, rounding corners, and straightening the outline path.
To modify the border of a selection
1In the toolbox, click the Selection Adjuster tool , and then click a selection.
2From the menu bar, choose Select Modify Border.
3In the Border Selection dialog box, specify the number of pixels for the width of the border.
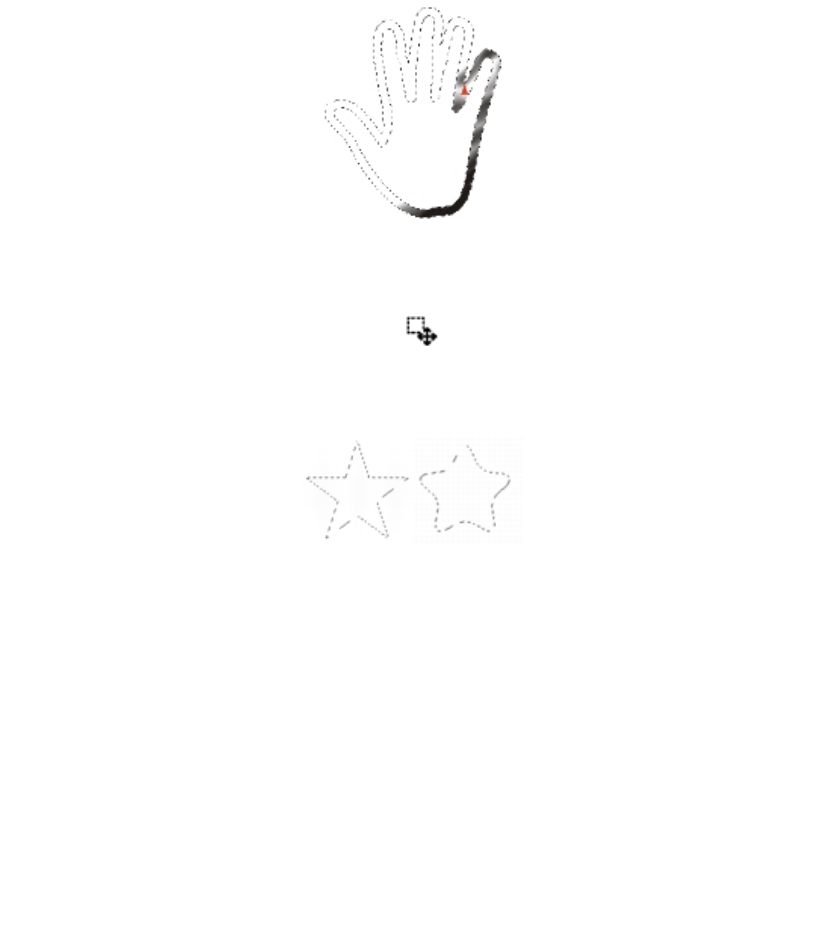
Selections and transformations | 597
Border selection with airbrush strokes applied.
To smooth a selection
1In the toolbox, click the Selection Adjuster tool , and then click a selection.
2From the menu bar, choose Select Modify Smooth.
3Repeat the command from the previous step until the path is sufficiently smooth.
Selection before (left) and after (right) smoothing.
Expanding or contracting selections
You can expand or contract a selection by a set number of pixels.
To expand or contract a selection
• Perform an action from the following table.
To Do the following
Expand a selection Choose Select Modify Widen. In the Widen
Selection dialog box, specify the number of pixels.

598 | Corel Painter 2015 User Guide
To Do the following
Contract a selection Choose Select Modify Contract. In the Contract
Selection dialog box, specify the number of pixels.
Adding to or subtracting from selections
You can adjust the size and shape of a selection by adding or subtracting selection areas.
To add to a selection
1Create a selection by using one of the selection tools.
2On the property bar, click the Add To Selection button .
3Select the area that you want to add.
If you are using the Oval Selection tool or the Rectangular Selection tool , you can select a
circular or square area by holding down Shift while dragging.
You can also add to a selection by holding down Shift and selecting the area that you want to
add. If you are using the Oval Selection tool or the Rectangular Selection tool and
you want to select a circular or square area, you need to release Shift for a moment and then hold
down Shift again while dragging.
When making selections, you can use any combination of selection tools, including the Magic
Wand tool . If you combine pixel- and path-based selections, the result is a pixel-based
selection. For more information about creating pixel-based selections with the Magic Wand tool,
see “To select an area by using the Magic Wand tool” on page 584.
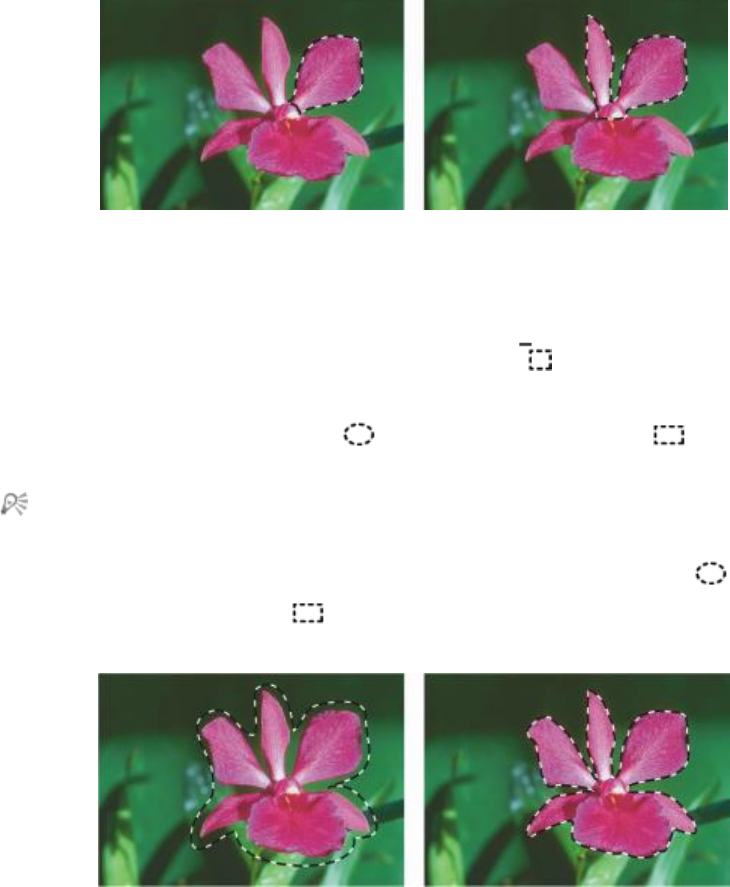
Selections and transformations | 599
Adding to a path-based selection.
To subtract from a selection
1Create a selection by using one of the selection tools.
2On the property bar, click the Subtract From Selection button .
3Select the area that you want to subtract.
If you are using the Oval Selection tool or the Rectangular Selection tool , you can select a
circular or square selection by holding down Shift while dragging.
You can also subtract from a selection by holding down Option (Mac OS) or Alt (Windows) and
selecting the area you want to subtract. If you are using the Oval Selection tool or the
Rectangular Selection tool and you want to select a circular or square area, you need to
hold down Option + Shift (Mac OS) or Alt + Shift (Windows) while dragging.
Subtracting from a path-based selection.
You can also load selections from the Selection Portfolio, a library of ready-to-use selections. In addition,
you can use Boolean operations to combine existing selections with alpha channels.
600 | Corel Painter 2015 User Guide
Preparing selections for transformations
Before attempting to transform a selection, it’s important to determine if it’s path-based or pixel-based
because the selection type determines which transformations you can perform. For example, path-based
selections support many transformations that pixel-based selections do not. However, you can convert a
pixel-based selection to a path-based selection to apply transformations to it. For more information, see “To
convert a pixel-based selection to a path-based selection” on page 583.
To prepare a selection for a transformation, you can set the reference point around which the
transformation is performed. The reference point is located at the center of the selection by default.
You can also apply transformation simultaneously across multiple layers. For more information, see
“Transforming layers” on page 530.
To determine the selection type
•In the toolbox, click the Selection Adjuster tool , and then click a selection.
• If the selection displays handles, the selection is path-based.
• If the selection does not have handles, it is pixel-based.
To set the reference point for a transformation
1For a selection made by using the Selection Adjuster tool , choose the Transform tool from
the toolbox.
If the Transform tool is not displayed in the toolbox, click and hold the Layer Adjuster tool to
open the flyout, and then choose the Transform tool .
2Point to the center of the selection’s bounding box.
3Drag the Reference Point to new location on the canvas.
You can place the Reference Point outside the selection.
You can reset the Reference Point to its default location by clicking the Reset Reference Point
button on the property bar or choosing the Edit Transform Reset Reference Point.
Moving selections
You can move both path-based and pixel-based selections to a new location on the canvas.
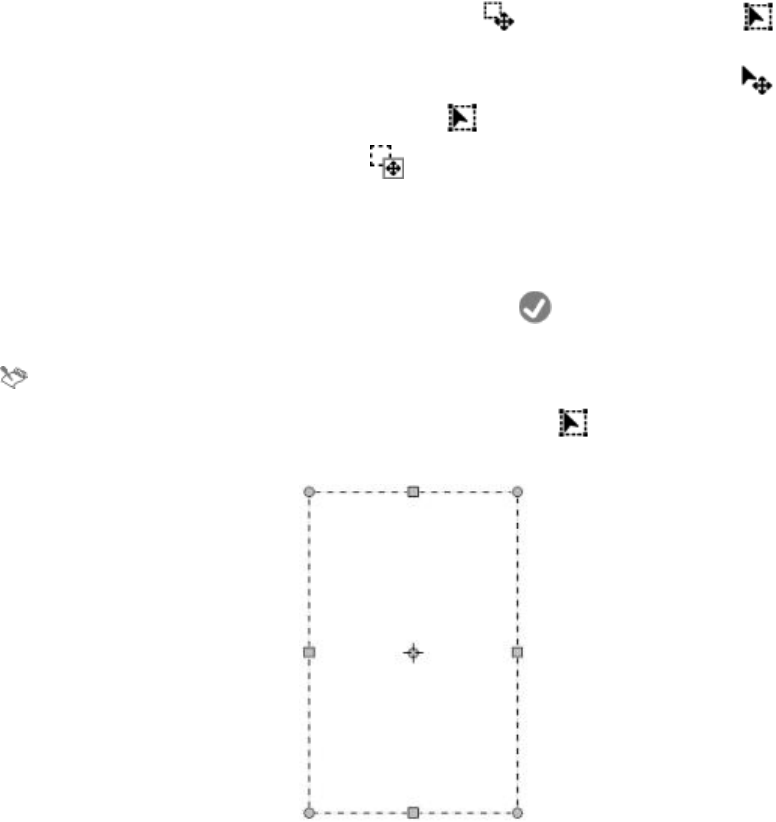
Selections and transformations | 601
To move a selection
1For a selection made by using the Selection Adjuster tool , choose the Transform tool from
the toolbox.
If the Transform tool is not displayed in the toolbox, click and hold the Layer Adjuster tool to
open the flyout, and then choose the Transform tool .
2On the property bar, click the Move button .
3While staying within the bounding box, click the selection, and then drag it to a new position on the
canvas.
To display the layers in full-color before committing the transformation, click the Fast Preview button
on the property bar.
4On the property bar, click the Commit Transformation button .
If you prefer, you can apply the transformation by pressing Enter.
You can move a pixel-based selection with the Transform tool ; however, if a portion of the
selection moves off the canvas, it is subtracted from the selection.
To reposition a selection, use the Move tool, and drag the selection to a new
position. A rectangular marquee appears while you are dragging the selection.
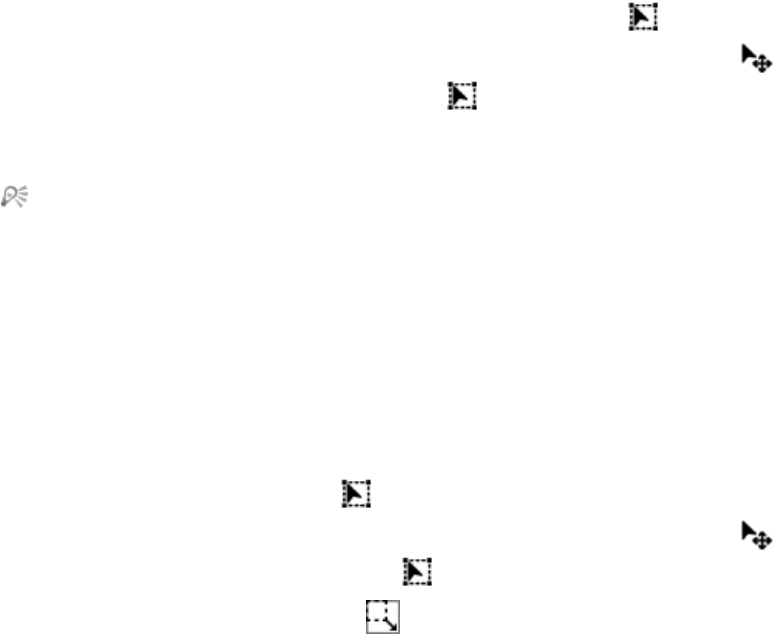
602 | Corel Painter 2015 User Guide
Transforming a duplicate selection
You can transform a copy of a selection or the contents of an active layer.
To transform a duplicate
1Hold down Option (Mac) or Alt (Windows), and choose the Transform tool from the toolbox.
If the Transform tool is not displayed in the toolbox, click and hold the Layer Adjuster tool to
open the flyout, and then choose the Transform tool .
2On the property bar, click a transformation mode.
The transformation is applied to copied content.
You can also transform a duplicate by clicking Command + Shift + Option + T (Mac) or CTRL +
Shift + Alt + T (Windows).
Scaling and rotating path-based selections
You can scale or rotate path-based selections. Scaling lets you change the dimensions of a selection. You
can also scale an object proportionally by preserving its aspect ratio.
To scale a selection
1In the toolbox, click the Transform tool .
If the Transform tool is not displayed in the toolbox, click and hold the Layer Adjuster tool to
open the flyout, then select the Transform tool .
2On the property bar, click the Scale button .
3Perform a task from the following table.
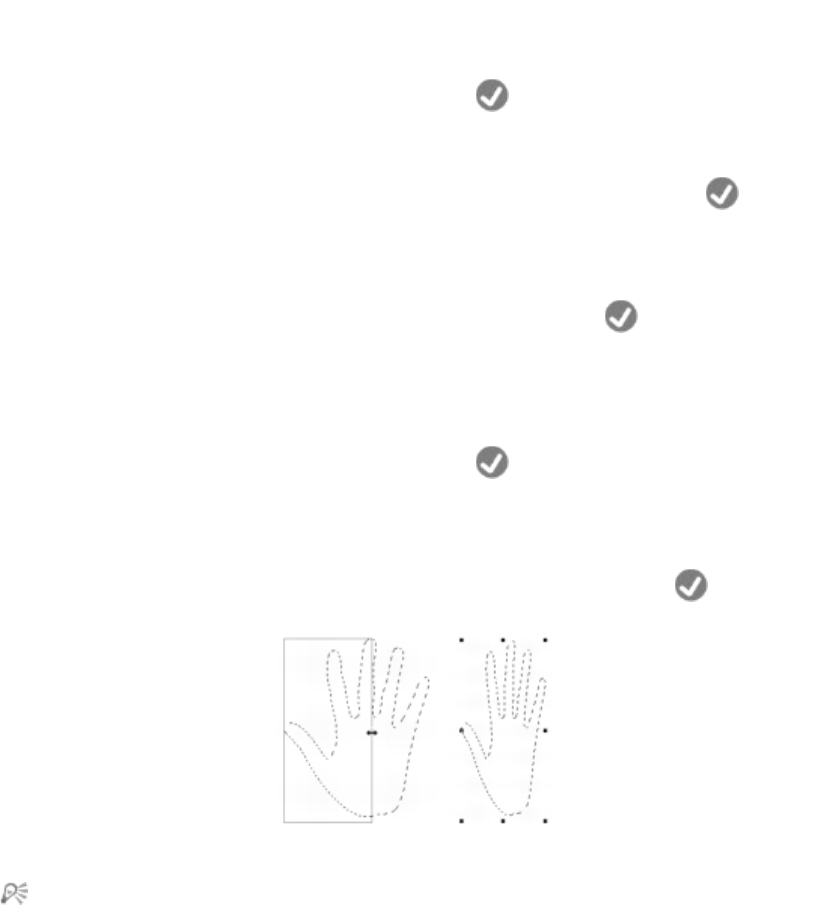
Selections and transformations | 603
To Do the following
Scale a selection in one dimension Drag a side, top, or bottom handle. On the
property bar, click the Commit Transformation
button .
Scale a selection in two dimensions Drag a corner handle. On the property bar, click
the Commit Transformation button .
Scale while maintaining the selection’s shape, or
“aspect ratio”
Hold down Shift while you drag a corner
handle. On the property bar, click the Commit
Transformation button .
Scale around the reference point while maintaining
the selection’s shape, or “aspect ratio”
Hold down Alt + Shift (Windows) or Option +
Shift (Mac), and drag a corner handle. On the
property bar, click the Commit Transformation
button .
Scale around the reference point Hold down Alt (Windows) or Option (Mac), and
drag a corner handle. On the property bar, click the
Commit Transformation button .
Drag a side handle to scale horizontally.
You can also scale a selection by choosing Edit Transform Scale, and specifying the horizontal
and vertical scale percentages in the dialog box.
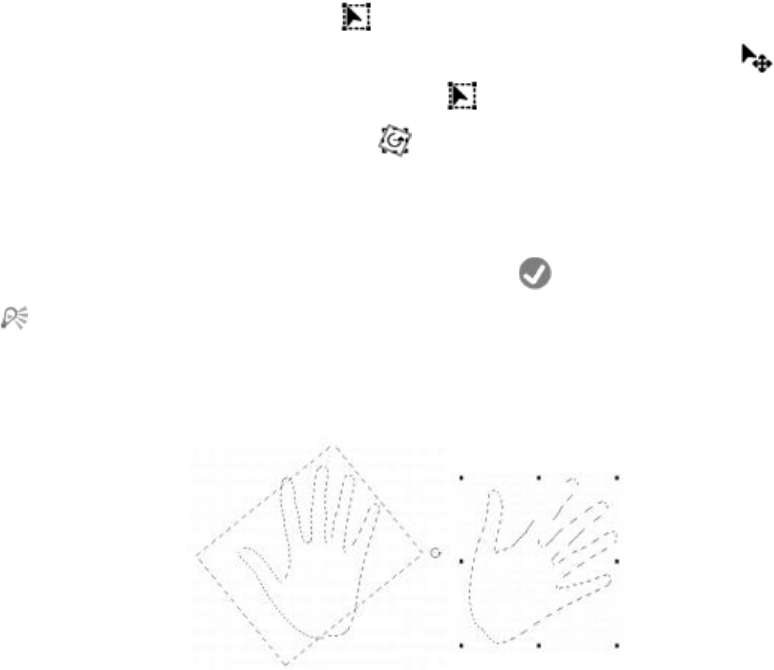
604 | Corel Painter 2015 User Guide
To rotate a selection
1In the toolbox, click the Transform tool .
If the Transform tool is not displayed in the toolbox, click and hold the Layer Adjuster tool to
open the flyout, and then choose the Transform tool .
2On the property bar, click the Rotate button .
3Move the pointer outside the border of the selection’s bounding box.
4Drag a corner handle.
If you want to constrain the rotation by 15-degree increments, hold down Shift while dragging.
5On the property bar, click the Commit Transformation button .
You can also Rotate a selection by choosing Edit Transform Rotate, and specifying the rotation
angle in degrees in the dialog box. A positive number rotates clockwise; a negative number rotates
counterclockwise.
Rotating a selection.
Skewing and distorting path-based selections
You can skew and distort path-based selections. Skewing slants the vertical and horizontal dimensions of
a selection non-proportionally. Distorting a selection lets you move the sides or corners of a selection in
different directions. For example, you can crush or stretch the selection. In addition, you can use perspective
distortion to give an object the appearance of depth. Skewing distortion allows you to achieve a 3D look.
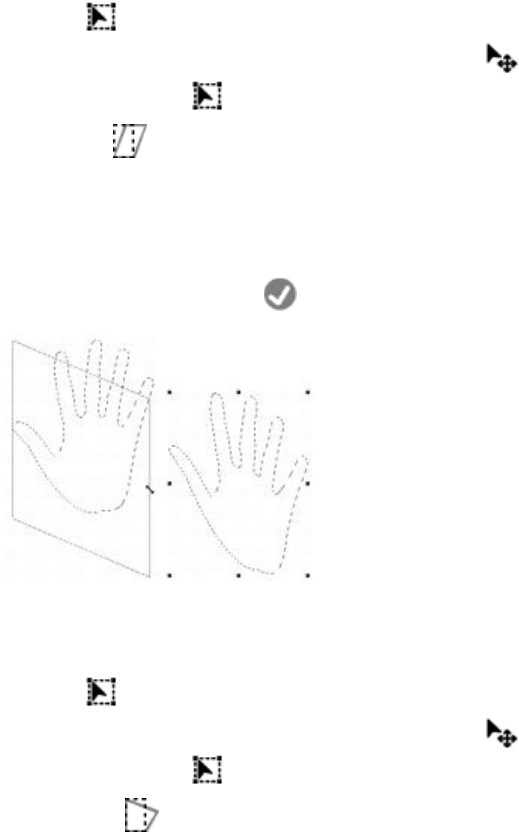
Selections and transformations | 605
To skew a selection
1In the toolbox, click the Transform tool .
If the Transform tool is not displayed in the toolbox, click and hold the Layer Adjuster tool to
open the flyout, and then choose the Transform tool .
2On the property bar, click the Skew button .
3Move the pointer outside the border of the selection’s bounding box.
4Drag a side handle.
If you want to skew only the selected side, hold down Alt (Windows) or Option (Mac) while dragging
the side handle.
5On the property bar, click the Commit Transformation button .
Skewing a selection.
To distort a selection
1In the toolbox, click the Transform tool .
If the Transform tool is not displayed in the toolbox, click and hold the Layer Adjuster tool to
open the flyout, and then choose the Transform tool .
2On the property bar, click the Distort button .
3Drag a corner handle.
If you want to constrain the distortion to the horizontal or vertical axis, hold down Shift while dragging
a corner handle.
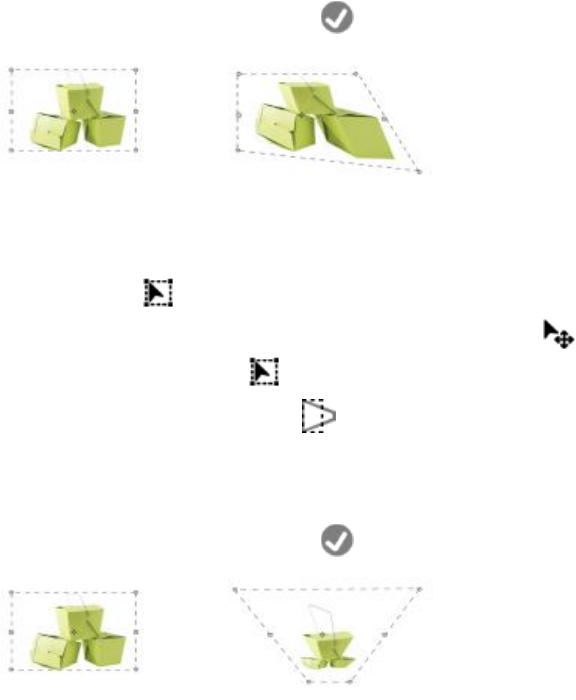
606 | Corel Painter 2015 User Guide
If you want to distort the selection relative to the Reference Point, hold down Alt (Windows) or Option
(Mac) while dragging a corner handle.
4On the property bar, click the Commit Transformation button .
A selection before (left) and after (right) distorting.
To distort perspective in a selection
1In the toolbox, click the Transform tool .
If the Transform tool is not displayed in the toolbox, click and hold the Layer Adjuster tool to
open the flyout, and then choose the Transform tool .
2On the property bar, click the Perspective Distortion button .
3Drag a corner handle.
If you want to constrain the distortion to the horizontal or vertical axis, hold down Shift while dragging
a corner handle.
4On the property bar, click the Commit Transformation button .
A selection before (left) and after (right) perspective distorting.
Canceling transformations
If you are not satisfied with the transformation, you can cancel it and return the selection to its previous
state.

Selections and transformations | 607
To cancel a transformation
•Click the Cancel Transformation button on the property bar, or press Esc.
608 | Corel Painter 2015 User Guide

Common options for effects | 609
Common options for effects
Corel Painter includes a wide array of effects that you can use to alter images. The effects are organized in
four main categories:
•Tonal control
•Surface control
•Focus
•Esoterica
To control each of the effects, you need to modify their individual settings. However, the effects do have
some options in common.
This section contains the following topics:
•“Fading effects” (page 609)
•“Applying recently used effects” (page 610)
•“Changing effects with open panels” (page 611)
•“Applying effects using source luminance” (page 611)
Fading effects
You use the Fade control to undo a percentage of the last effect applied to the image. You can use this
feature to control the intensity of an effect.

610 | Corel Painter 2015 User Guide
Fade was applied to the image (right) to undo a percentage of the last effect (left).
To fade an effect
1Choose Edit Fade.
To apply Fade, you must have previously applied an effect to the image.
2In the Fade dialog box, move the slider.
If you change your mind, choose Edit Undo.
Applying recently used effects
At the top of the Effects menu, Corel Painter displays the last two effects you applied. This lets you quickly
reapply frequently used effects. You can also use keyboard shortcuts to apply the last two effects.
To reapply a recently used effect
• Do one of the following:
• Choose Effects, then choose one of the options at the top of the menu.
• Press Command + / (Mac OS) or Ctrl + / (Windows).
You can also apply a shortcut key to the 2nd Last Effect command by clicking
Edit Preferences Customize Keys. Clicking the Effects category in the Application Commands
list, clicking the 2nd Last Effect command to select it, and typing a shortcut key in the Shortcut
column.
Common options for effects | 611
Changing effects with open panels
To experiment with an effect, you must display all required panels before choosing an effect. For example,
the Color Overlay effect combines the selected paper texture and main color to define the overlay. If the
Papers and Color panels are open when you choose the effect, you can change paper grains and colors to
create different overlays before applying the effect to your image. Any changes in the paper or color appear
in the Preview window in the ColorOverlay dialog box. You can move an effect’s dialog box around on
your screen, if necessary, for full access to other panels.
Applying effects using source luminance
With Corel Painter, you can apply some effects to an image by using the luminance values of a specified
source, which can include an external source or the luminance of the image itself. The intensity of the
effect on the image is based on the light and dark values of the source. A larger degree of change to the
light areas of the source, and a smaller degree of change is applied to dark areas. For example, when you
choose Paper as a source, the effect is applied according to the light and dark areas of the paper selected
in the Paper Libraries panel. You can also choose a pattern or external image (clone source) as a luminance
source.
The luminance source options are listed in the Using list box and they vary between effects. The luminance
options can include:
•Paper
•Image luminance
•Original luminance (pattern or clone source)
•3D Brushstrokes
•Alpha channel or layer mask (Note: This option is available only if your document has a channel or a
layer with a layer mask.)
These options are explained in greater detail in the Help for each of the effects. The best way to see how
these options affect your images is to try them.
612 | Corel Painter 2015 User Guide

Using focus and esoterica effects | 613
Using focus and esoterica effects
Corel Painter includes Focus effects for sharpening, softening, motion blurring, and distorting image. It also
includes a collection of Esoterica effects, which let you transform images in various ways.
This section contains the following topics:
Focus effects
•“Applying Smart Blur” (page 614)
•“Applying Camera Motion Blur” (page 614)
•“Applying Depth of Field” (page 615)
•“Applying Glass Distortion” (page 618)
•“Applying Motion Blur” (page 622)
•“Sharpening focus” (page 623)
•“Softening focus” (page 624)
•“Applying Zoom Blur” (page 625)
Esoterica effects
•“Applying Marbling” (page 626)
•“Automatically cloning an image” (page 628)
•“Applying the Auto Van Gogh effect” (page 629)
•“Applying Blobs” (page 630)
•“Creating custom tiles” (page 632)
•“Applying Grid Paper” (page 636)
•“Applying Growth effects” (page 636)
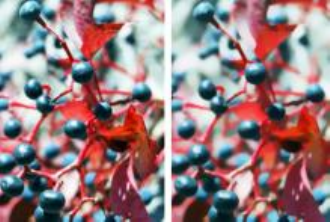
614 | Corel Painter 2015 User Guide
•“Applying Highpass” (page 638)
•“Applying the Maze effect” (page 639)
•“Placing elements” (page 640)
•“Applying the Pop Art Fill effect” (page 642)
Applying Smart Blur
The Smart Blur effect softens the appearance of an image by smoothing out the colors and sharp details.
The effect produces a result that is similar to applying soft brushstrokes. You can use Smart Blur to quickly
apply a painterly effect to an image.
Before (left) and after (right) using Smart Blur.
To apply Smart Blur
1To apply the effect to:
• The canvas — Click the Canvas in the Layers panel.
• A selection — Click a selection tool from the toolbox, and drag in the document window to select an
area.
• A layer — Click a layer in the Layers panel.
2Choose Effects Focus Smart Blur.
3In the Smart Blur dialog box, adjust the Amount slider.
Applying Camera Motion Blur
The Camera Motion Blur effect creates a blur similar to what you’d get in a photograph by jostling
the camera during a long exposure. It’s particularly effective with an image showing lights on a dark
background.
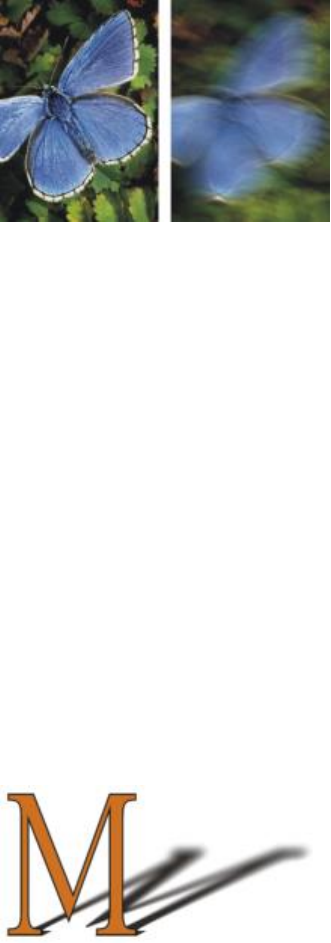
Using focus and esoterica effects | 615
Before (left) and after (right) using Camera Motion Blur.
To apply Camera Motion Blur
1To apply the effect to:
• The canvas — Click the Canvas in the Layers panel.
• A selection — Click a selection tool from the toolbox, and drag in the document window to select an
area.
• A layer — Click a layer in the Layers panel.
2Choose Effects Focus Camera Motion Blur.
3In the document window, drag to create the blur motion.
The direction and intensity of the blur is determined by your cursor movement. For example, fast
movement produces a different blur than slow. A longer drag path increases the amount of blur.
Straight, curved, and zigzag movements also produce different effects.
4In the Camera Motion Blur dialog box, adjust the Bias slider to move the origin of motion along the
drag path.
Applying Depth of Field
This effect creates a blur similar to the distance from the plane of camera focus in photography. You can
specify the radius of the blurring effect in the image.
The “M” is a floating shape. The blur on the shadow was created by using Depth of Field.
616 | Corel Painter 2015 User Guide
There are five different methods for applying Depth of Field:
•Uniform Color — applies the effect uniformly to the image
•Paper — applies the effect by using the paper texture luminance (brightness) as a mapping model.
More of the effect is applied to the dark areas in the paper grain; less of the effect is applied to the light
areas. If you want to experiment with the effect, keep the Papers panel open while you apply the effect.
This way you can switch to different papers and modify the paper controls.
•Image Luminance — uses the image’s luminance as the model for the effect. More of the effect is
applied to dark areas in the original image; less color is applied to light areas.
•Original Luminance — uses the luminance of the clone source (or a pattern) as the model for the
effect. More of the effect is applied to dark areas in the clone source (or pattern); less color is applied to
light areas.
•Alpha Channel or Layer Mask — sets the values in the channel or layer mask as the model for the
effect. More of the effect is applied to dark areas in the layer mask or channel; less color is applied to
light areas. You can use this method only if you have a saved alpha channel or a layer mask in your
image.
To apply Depth of Field uniformly
1To apply the effect to:
• The canvas — Click the Canvas in the Layers panel.
• A selection — Click a selection tool from the toolbox, and drag in the document window to select an
area.
• A layer — Click a layer in the Layers panel.
2Choose Effects Focus Depth of Field.
3Choose Uniform Color from the Using list box.
4Adjust any of the Depth of Field controls. For information, see “Depth of Field controls” on page
618.
To apply Depth of Field by using paper luminance
1Choose Window Paper Panels Papers.
2Choose a paper swatch from the Papers library panel.
3To apply the effect to:
• The canvas — Click the Canvas in the Layers panel.
• A selection — Click a selection tool from the toolbox, and drag in the document window to select an
area.
• A layer — Click a layer in the Layers panel.
4Choose Effects Focus Depth of Field.
5Choose Paper from the Using list box.

Using focus and esoterica effects | 617
Darker regions of the source receive greater blur.
6Adjust any of the Depth of Field controls. For information, see “Depth of Field controls” on page
618.
To apply Depth of Field by using image luminance
1To apply the effect to:
• The canvas — Click the Canvas in the Layers panel.
• A selection — Click a selection tool from the toolbox, and drag in the document window to select an
area.
• A layer — Click a layer in the Layers panel.
2Choose Effects Focus Depth of Field.
3Choose Image Luminance from the Using list box.
Darker regions of the source receive greater blur.
4Adjust any of the Depth of Field controls. For information, see “Depth of Field controls” on page
618.
To apply Depth of Field by using clone or pattern luminance
1Do one of the following:
•To use a clone source, choose Window Clone Source. In the Clone Source panel, click the Open
Source Image button , and Open Source to choose a clone source.
•To use a pattern, choose Window Media Library Panels Patterns, and click a pattern swatch from
the Pattern library panel.
2To apply the effect to:
• The canvas — Click the Canvas in the Layers panel.
• A selection — Click a selection tool from the toolbox, and drag in the document window to select an
area.
• A layer — Click a layer in the Layers panel.
3Choose Effects Focus Depth of Field.
4Adjust any of the Depth of Field controls. For information, see “Depth of Field controls” on page
618.
To apply Depth of Field by using layer mask or channel luminance
1Do one of the following:
•To use a layer mask, choose Window Layers, and click the layer that contains a layer mask in the
Layers panel.
618 | Corel Painter 2015 User Guide
•To use an alpha channel, choose Window Channels, and click the alpha channel in the Channels
panel.
2To apply the effect to:
• The canvas — Click the Canvas in the Layers panel.
• A selection — Click a selection tool from the toolbox, and drag in the document window to select an
area.
• A layer — Click a layer in the Layers panel.
3Choose Effects Focus Depth of Field.
4Choose Original Luminance from the Using list box.
Darker regions of the source receive greater blur.
5Adjust any of the Depth of Field controls. For information, see “Depth of Field controls” on page
618.
Depth of Field controls
•Min Size — sets the minimum radius of the blur regions
•Max Size — sets the maximum radius of the blur regions
The maximum size must be greater than the minimum size.
Applying Glass Distortion
The Glass Distortion effect creates the kind of distortions you would see if you were looking at your image
through a sheet of glass. You can make your image appear as if it is behind the pebble glass of a shower
door, or you can distort your image beyond recognition.
Glass Distortion works by relocating the pixels of the image based on a displacement map. The map is
created by combining displacement information from a source with a preset map type.
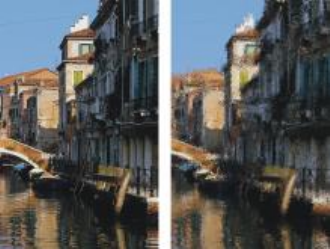
Using focus and esoterica effects | 619
Before (left) and after (right) applying Glass Distortion.
There are five sources of displacement information:
•Paper uses the information in a paper texture to displace pixels. More displacement is applied to light
areas of the texture, and less to dark areas. Paper texture is good for creating the pebbled glass effect.
Unless you want frosted glass, you’ll probably want to increase the scale of the paper.
•3D Brushstrokes uses the difference in luminance between the brushstrokes applied to the clone and
the current document
•Image Luminance uses the light and dark areas in the current document to determine the intensity of
distortions
•Original Luminance uses the clone source’s luminance. Use a tessellation as the clone source to
produce a bumpy glass effect.
•[Alpha channel] or [Layer mask] uses the luminance of a channel or layer mask. More distortion
appears in the light areas of the channel. You must have a saved alpha channel or layer mask to use this
source.
To create a controlled distortion map, choose an alpha channel or a layer mask as a source. For example,
gradations in the channel lead to a progressive distortion effect. Shapes in the channel produce
distortions with distinct outlines.
To apply glass distortion by using paper luminance
1Choose Window Paper Panels Papers.
2Choose a paper swatch from the Papers library panel.
3To apply the effect to:
• The canvas — Click the Canvas in the Layers panel.
• A selection — Click a selection tool from the toolbox, and drag in the document window to select an
area.
• A layer — Click a layer in the Layers panel.
4Choose Effects Focus Glass Distortion.

620 | Corel Painter 2015 User Guide
5Choose Paper from the Using list box.
6Adjust any of the Glass Distortion controls. For information, see “Glass Distortion controls” on page
621.
To apply glass distortion by using 3D brushstrokes
1Open an image.
2Choose File Clone.
3Apply brushstrokes to the clone.
4To apply the effect to:
• The canvas — Click the Canvas in the Layers panel.
• A selection — Click a selection tool from the toolbox, and drag in the document window to select an
area.
• A layer — Click a layer in the Layers panel.
5Choose Effects Focus Glass Distortion.
6Choose 3D Brush strokes from the Using list box.
7Adjust any of the Glass Distortion controls. For information, see “Glass Distortion controls” on page
621.
To apply glass distortion by using image luminance
1To apply the effect to:
• The canvas — Click the Canvas in the Layers panel.
• A selection — Click a selection tool from the toolbox, and drag in the document window to select an
area.
• A layer — Click a layer in the Layers panel.
2Choose Effects Focus Glass Distortion.
3Choose Image Luminance from the Using list box.
4Adjust any of the Glass Distortion controls. For information, see “Glass Distortion controls” on page
621.
To apply glass distortion by using clone or pattern luminance
1Do one of the following:
•To use a clone source, choose Window Clone Source. In the Clone Source panel, click the Open
Source Image button , and Open Source to choose a clone source.
•To use a pattern, choose Window Media Library Panels Patterns, and click a pattern swatch from
the Pattern library panel.
Using focus and esoterica effects | 621
2To apply the effect to:
• The canvas — Click the Canvas in the Layers panel.
• A selection — Click a selection tool from the toolbox, and drag in the document window to select an
area.
• A layer — Click a layer in the Layers panel.
3Choose Effects Focus Glass Distortion.
4Choose Original Luminance from the Using list box.
5Adjust any of the Glass Distortion controls. For information, see “Glass Distortion controls” on page
621.
To apply glass distortion by using layer mask or channel luminance
1Do one of the following:
•To use a layer mask, choose Window Layers, and click the layer that contains a layer mask in the
Layers panel.
•To use an alpha channel, choose Window Channels, and click the alpha channel in the Channels
panel.
2To apply the effect to:
• The canvas — Click the Canvas in the Layers panel.
• A selection — Click a selection tool from the toolbox, and drag in the document window to select an
area.
• A layer — Click a layer in the Layers panel.
3Choose Effects Focus Glass Distortion.
4Choose Original Luminance from the Using list box.
5Adjust any of the Glass Distortion controls. For information, see “Glass Distortion controls” on page
621.
Glass Distortion controls
•Softness — controls the transitions between displaced colors
Increasing the Softness setting creates more intermediate steps, which produces a smoother distortion.
If you experience aliasing in a glass distortion, try increasing the Softness setting.
•Refraction (Map type) — displaces pixels in the same way that an optical lens bends light. This is the
best map type for creating distortions that you’d expect from looking through glass.
•Vector Displacement (Map type) — moves pixels in a specific direction
•Angle Displacement (Map type) — moves pixels in different directions. Increasing the Softness value
by a small amount (from 0 to 0.1) with this map type produces dramatic changes in the glass distortion.
•Amount — controls the degree of displacement. Moving the slider to the right increases the distortion.
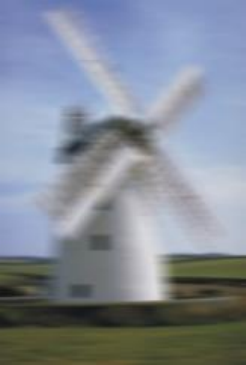
622 | Corel Painter 2015 User Guide
•Variance — creates multiple variations in the neighborhood of the displacement. The result of
increasing variance depends on the type of image and other settings.
•Direction — controls the direction of displacement. The 3 o’clock position corresponds to 0°. The
Refraction map type is not dependent on direction.
•Inverted — inverts the selected source
•Quality — changes the quality of the distortion
Applying Motion Blur
This effect makes an image appear as if it has been blurred by movement. You can control the angle, radius,
and direction of the blurring effect.
The Motion Blur effect.
To apply a Motion Blur effect
1To apply the effect to:
• The canvas — Click the Canvas in the Layers panel.
• A selection — Click a selection tool from the toolbox, and drag in the document window to select an
area.
• A layer — Click a layer in the Layers panel.
2Choose Effects Focus Motion Blur.
In the Motion Blur dialog box, adjust the following sliders:
•Radius — sets the amount of blur. Moving the slider to the right makes the image look as though it’s
moving faster.
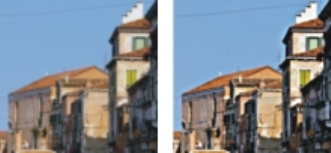
Using focus and esoterica effects | 623
•Angle — sets the direction in which the image appears to travel. A setting of 0° blurs in the direction
of 3 o’clock.
•Thinness — blurs the image in a direction perpendicular to the angle you choose with the Angle
slider.
Sharpening focus
The Sharpen effect heightens contrast by intensifying highlights and shadows. You can create sharper
images by using either the Gaussian or Circular aperture options. Gaussian aperture sharpens the red,
green, and blue components of color; Circular aperture sharpens an image based on luminance.
Before (left) and after (right) applying Sharpen.
To sharpen focus
1To apply the effect to:
• The canvas — Click the Canvas in the Layers panel.
• A selection — Click a selection tool from the toolbox, and drag in the document window to select an
area.
• A layer — Click a layer in the Layers panel.
2Choose Effects Focus Sharpen.
3In the Sharpen dialog box, enable an aperture option.
4Use the following guidelines to adjust the sliders:
•Amount — determines how much of the edge of an element is affected
•Highlight — determines the intensity of the bright areas. Move the slider to the right to brighten the
highlights.
•Shadow — determines the depth of the shadows. The higher the percentage, the darker the
shadows.
If you chose the Gaussian aperture option and you want to sharpen only selected colors, enable any
combination of the Red, Green, or Blue check boxes.
624 | Corel Painter 2015 User Guide
Softening focus
The Soften and Super Soften effects increase the transition from one part of an image to another by
enhancing the anti-aliasing of the brushstrokes. You can apply the Soften effect to images by using either
the Gaussian or Circular aperture options. The Gaussian aperture is useful for creating smooth, optical
blurs or defocusing; the Circular aperture is useful for creating shadow maps cast by a circular light source
like the sun.
The Super Soften effect lets you soften images by specifying the radius of pixels that you want to soften.
To soften focus
1To apply the effect to:
• The canvas — Click the Canvas in the Layers panel.
• A selection — Click a selection tool from the toolbox, and drag in the document window to select an
area.
• A layer — Click a layer in the Layers panel.
2Choose Effects Focus Soften.
3In the Aperture area, enable one of the following options:
•Gaussian
•Circular
4Adjust the Amount slider.
The farther the slider is to the right, the more steps there are between image elements, which creates
more blurring.
To soften by specifying pixel values
1To apply the effect to:
• The canvas — Click the Canvas in the Layers panel.
• A selection — Click a selection tool from the toolbox, and drag in the document window to select an
area.
• A layer — Click a layer in the Layers panel.
2Choose Effects Focus Super Soften.
3Type a pixel value in the Soften box.
This value determines the radius of pixels that are softened. The lower the value, the more subtle the
effect.
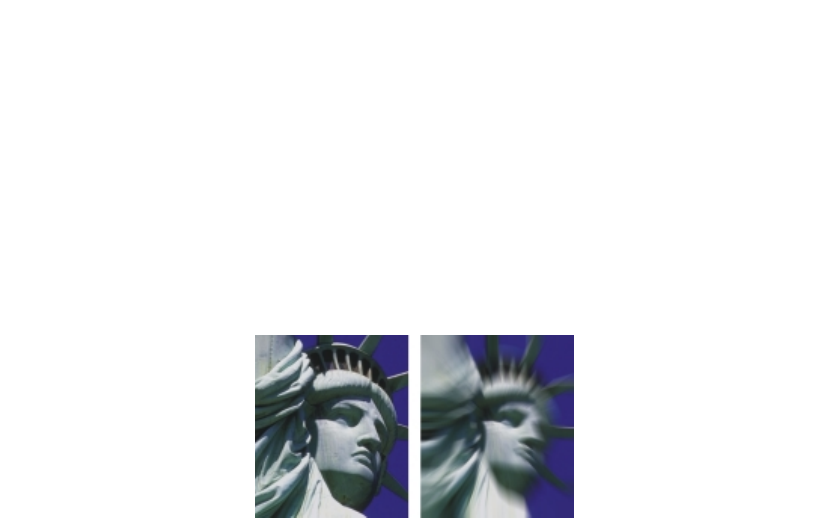
Using focus and esoterica effects | 625
You can also
Wrap around the effect Enable the Wrap Around check box.
Preview the effect Enable the Preview check box.
Clear the effect Click Reset.
Applying Zoom Blur
This effect creates a blur by zooming in on, or out from, an area. The greater the distance from the zoom
point, the more the image is blurred. This effect lets you call attention to a particular area of the image.
Before (left) and after (right) applying the Zoom Blur.
To apply Zoom Blur
1To apply the effect to:
• The canvas — Click the Canvas in the Layers panel.
• A selection — Click a selection tool from the toolbox, and drag in the document window to select an
area.
• A layer — Click a layer in the Layers panel.
2Choose Effects Focus Zoom Blur.
3In the document window, click the image to specify the zoom point.
4Adjust the Amount slider to determine the amount of blur.
If you want to create the blur by zooming in, enable the Zoom In check box. If you want to create the
blur by zooming out, disable the Zoom In check box.
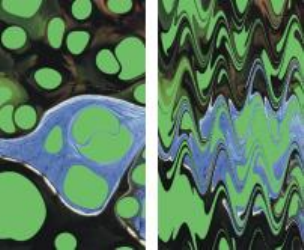
626 | Corel Painter 2015 User Guide
Applying Marbling
The Marbling effect creates intricate distortions of an image, following a technique that dates back to the
12th century. Marbling is created by dragging a fork, or rake, across an image, which produces an effect
similar to a fork dragging through a mix of chocolate syrup and melted ice cream.
Before (left) and after (right) applying the Marbling effect.
Each time you drag a rake across an image, you create a step. You can create marbling “recipes” that
include several steps — each one using a different rake, direction, and waviness. You can save marbling
recipes and reuse them.
Marbling works best with patterns or textures. Using the Blobs effect is an excellent way of creating the raw
materials for marbling; filling with a pattern is another. For more information, see “Applying Blobs” on page
630.
To create a marbling recipe
1To apply the effect to:
• The canvas — Click the Canvas in the Layers panel.
• A selection — Click a selection tool from the toolbox, and drag in the document window to select an
area.
• A layer — Click a layer in the Layers panel.
2Choose Effects Esoterica Apply Marbling.
3Move any of the following sliders:
•Spacing — adjusts the distance between rake teeth, which controls the number of teeth in the rake.
When the slider is all the way to the right, the rake has one tooth.
•Offset — moves the rake in a perpendicular direction to the path direction, which adjusts the
position of the rake lines

Using focus and esoterica effects | 627
•Waviness — changes the amplitude (height) of the waves. When this slider is set to zero, the path is
straight.
•Wavelength — determines the distance between wave peaks
•Phase — moves the wave in the rake direction. This lets you set where in the curve (peak, downslope,
valley, or upslope) the rake begins in the image.
•Pull — controls how much the rake distorts the image. Lower values produce thin, short distortions.
Higher values create stronger distortions.
•Quality — lets you control the smoothness in the marbled image. Low settings produce an aliased
effect. The marbling looks rough with scattered pixels. Increasing the Quality setting adds anti-
aliasing, making color distortions appear smoother and more fluid.
As you move the sliders, the dotted lines in the preview window show the rake path.
4In the Direction area, enable an option for the rake stroke.
5Click the Add Step button .
6Repeat steps 3 to 5 for each rake step you want to create.
The Apply Marbling dialog box displays the current step number and the total number of steps in the
recipe. You can move between steps by clicking the forward and backward arrow buttons.
Selections can help you control the marbling when you have a particular effect in mind. For
example, the rake path normally begins from the edge of the image. If you want the rake path to
begin in the center of a blob, select an area that begins at the blob’s center.
Steps are applied in order, so subsequent steps are based on the result of each previous one.
The final look of the marble largely depends on whether you start horizontally or vertically, and
whether you work with a fine comb or a coarse rake.
Each step you add increases the time it takes to apply the recipe.
To save or load a recipe
• Perform an action from the following table:
To Do the following
Clear a recipe In the Apply Marbling dialog box, click Reset. The
current recipe is deleted.
Save a recipe In the Apply Marbling dialog box, click Save All
Steps. In the Save Marbling dialog box, specify a
name.
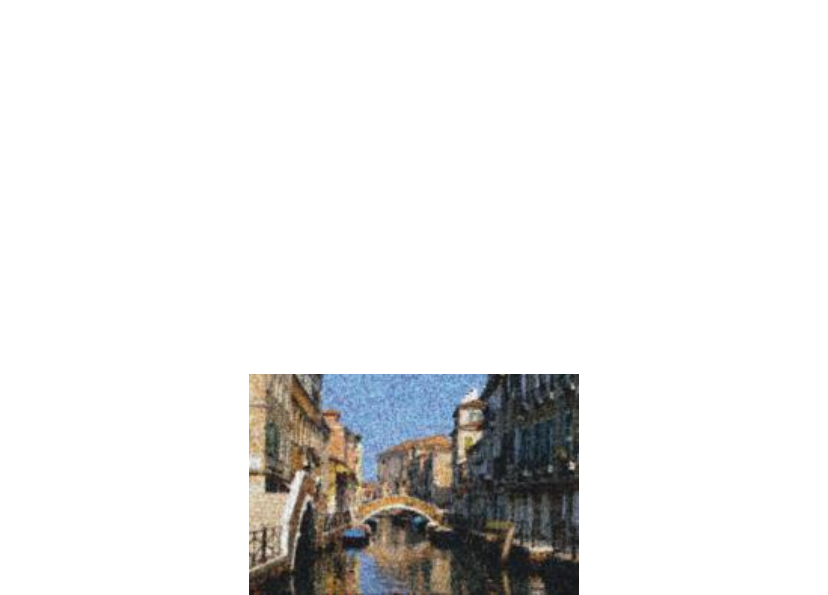
628 | Corel Painter 2015 User Guide
To Do the following
Load a recipe In the Apply Marbling dialog box, click Load
Marbling Steps. In the Marbling Recipes dialog
box, choose a recipe.
Automatically cloning an image
You can use the Auto Clone effect to automatically apply brush dabs to your image. The types of dabs
depend on which brush you select. The color is picked up from the clone source. Unlike most other effects,
Auto Clone has no dialog box, using the current brush settings and the clone color instead.
The best way to produce a Natural-Media version of an image is to first clone it and then choose a brush
that produces artistic dabs. The Driving Rain variant of the Cloner brush category works well for generating
a hand-drawn look. The Seurat variant of the Artists brush category also works well.
In this example, the Seurat variant was used with the Auto Clone effect.
If you apply Auto Clone to a large area, the paint may fill smaller rectangular tiles one at a time. If you click
to stop Auto Clone, it won’t automatically finish the final tile of the overall selected area. To fill in non-
rectangular areas, you can use Auto Clone with a selection. For more information, see “Getting started
with selections” on page 578.
When you use Auto Clone with the Felt Pen Cloner variant, or other tools that turn black as you repeat
strokes, areas darken rapidly. You can slow down the color buildup when using Auto Clone by dimming the
original image.
Another way to automate cloning is by recording and playing back individual brushstrokes, which is
especially useful for filling in backgrounds. For more information, see “Recording and playing back
brushstrokes” on page 147 and “Image cloning and sampling” on page 167.

Using focus and esoterica effects | 629
To automatically fill an area with cloned brushstrokes
1Open an image file to use as a clone source.
2Choose File Clone.
If you want to apply the effect to only a portion of your image, choose a Selection tool from the
toolbox and make a selection.
3Click the Brush Selector on the Brush Selector bar.
4In the Brush library panel, click the Cloners brush category, and then choose a brush variant such as
Driving Rain Cloner or Impressionist cloner.
Not all Cloners are compatible with Auto Clone. If you choose an incompatible variant, the Auto Clone
effect is disabled.
5Choose Effects Esoterica Auto Clone.
Dabs of paint are automatically applied to the selected area.
6Click anywhere in the image to turn off Auto Clone.
If you apply Auto Clone to a large area, the paint may fill areas sparsely. When you click to
stop Auto Clone, it stops at that point. It won’t continue to fill the selected area. To fill an area
completely, you must let the Auto Clone continue.
You can transform a variant into a cloner, so you can use it with Auto Clone, by clicking the Clone
Color button in the Color panel.
You can generate more color variety in the dabs by setting the ±H, ±S, and ±V sliders in the
Color Variability panel to 15% each. You can open the Color Variability panel by choosing
Window Brush Control Panels Color Variability.
Applying the Auto Van Gogh effect
You can use the Auto Van Gogh effect to create a Van Gogh–like rendition of an image. To apply Auto Van
Gogh, you must first clone the image and then choose the Auto Van Gogh variant from the Artists brush
category.
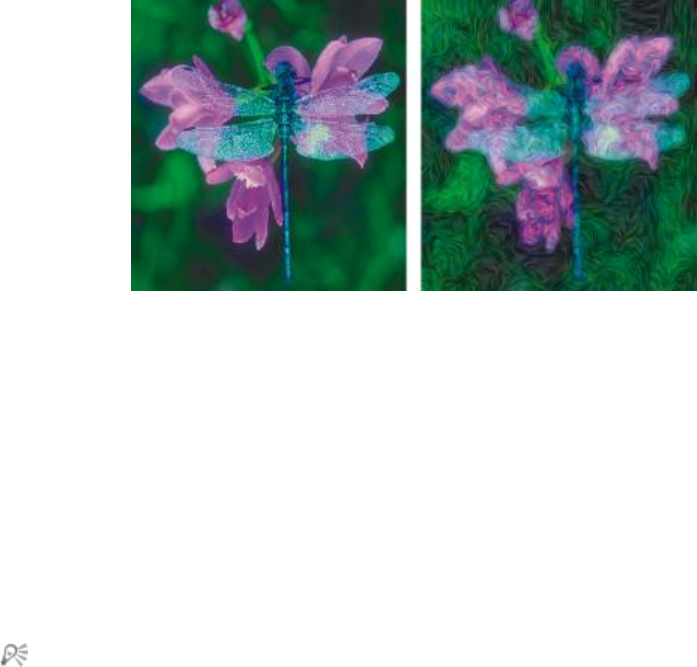
630 | Corel Painter 2015 User Guide
The Auto Van Gogh effect.
The effect requires two passes. The first pass determines the angles of the brush dabs. The second pass
applies the dabs. The image is then rendered in a set of directional brushstrokes.
To apply Auto Van Gogh to an image
1Select the image you want to clone.
2Choose File Quick Clone.
3Click the Brush Selector on the Brush Selector bar.
4In the Brush library panel, click the Artists brush category, and then click the Auto Van Gogh brush
variant.
5Choose Effects Esoterica Auto Van Gogh.
You can generate more color variety in the dabs by setting the ±H, ±S, and ±V sliders in the
Color Variability panel to 15% each. You can open the Color Variability panel by choosing
Window Brush Control Panels Color Variability.
Applying Blobs
The Blobs effect creates a pattern similar to oil floating on water. The effect distorts underlying image as if
it were liquid and places blobs that are based on color, clipboard content, or a pattern, on the image.
You can use one of three sources to fill in the blobs. You can produce blobs that look like bubbles by
creating a circular selection that’s shaded like a sphere, and then copying it to the Clipboard.
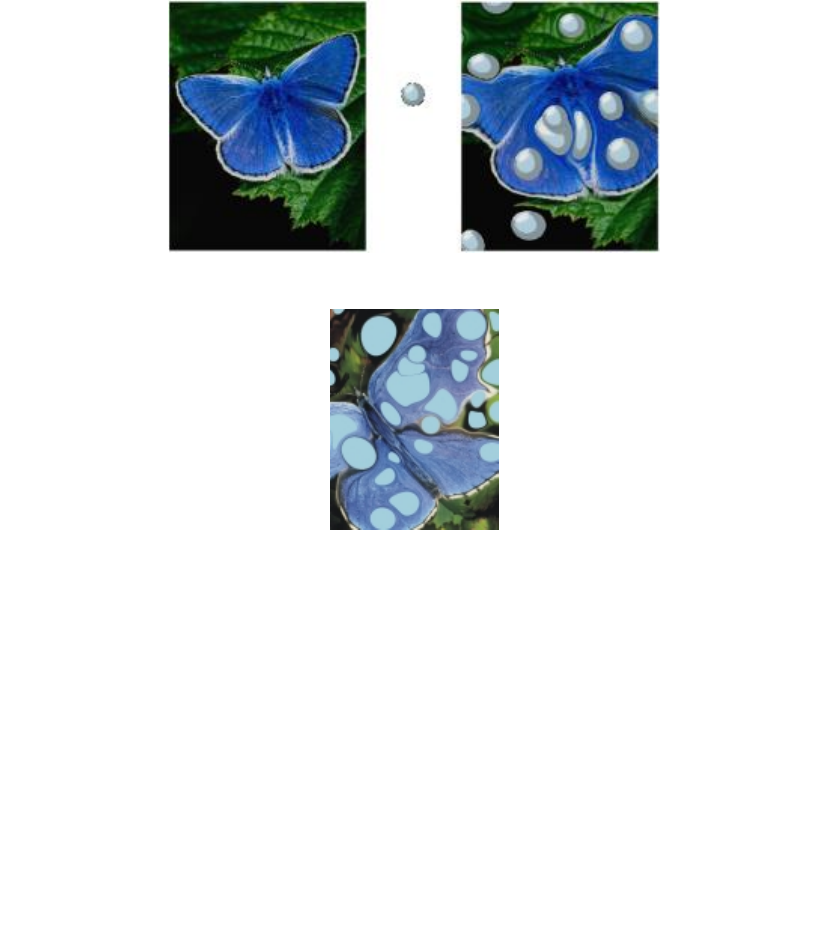
Using focus and esoterica effects | 631
Before (left) and after (right) applying a Blob effect created from Clipboard contents.
A Blob effect created from the current color source.
Blobs create a nice basis for the Apply Marbling effect because they create interesting color patterns. You
may want to apply this effect to your original image before Apply Marbling. For more information, see
“Applying Marbling” on page 626.
To apply a blob effect
1Perform an action from the following table:
To Do the following
Fill blobs with Clipboard contents Copy an image to the Clipboard. You can copy
images outside of Corel Painter.
Fill blobs with the current color Choose a color in the Color panel.

632 | Corel Painter 2015 User Guide
To Do the following
Fill blobs with a pattern Choose a pattern in the Patterns panel.
2Open the image.
3To apply the effect to:
• The canvas — Click the Canvas in the Layers panel.
• A selection — Click a selection tool from the toolbox, and drag in the document window to select an
area.
• A layer — Click a layer in the Layers panel.
4Choose Effects Esoterica Blobs.
5Choose one of the following options from the Using list box:
•Paste Buffer — fills blobs with the current contents of the Clipboard
•Current Color — fills blobs with the color currently selected in the Color panel
•Pattern — fills blobs with the pattern currently selected in the Patterns panel
Each time you apply the effect, a different seed number is generated in the Seed box.
6Type a value in the Number of Blobs box.
7Specify the minimum and maximum sizes of the blobs.
You can also
Set the number of anti-aliasing steps Type a value in the Subsample box.
Create repeating patterns Disable the Random Seed check box, and type a
value in the Seed box.
Change the random pattern of the blobs With the Random Seed check box enabled, click
the Refresh button next to the Seed box.
Creating custom tiles
Corel Painter transforms images into tiles based on a preset pattern, like bricks or hexagons, or from a
paper pattern, clone source, or channel. If you use a preset pattern, the tiles are uniform in size and cover
the entire image evenly.
The color of each tile is determined by applying the average color of the image pixels it covers.
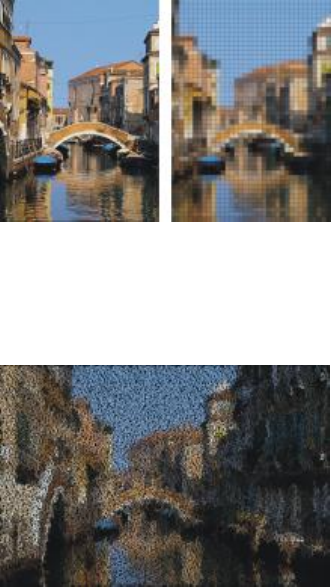
Using focus and esoterica effects | 633
Before (left) and after (right) applying tiles generated from a preset pattern.
When you generate tiles from either a paper pattern, clone source, or channel, tiles are based on light and
dark concentrations in the selected source. In this case, the shape of the tiles is varied and may not cover an
image evenly.
Tiles generated from a paper pattern.
The Custom Tile effect functions differently from the Make Mosaic and Make Tessellation effects. For
more information, see “Creating a mosaic” on page 736.
To apply custom tiles
1To apply the effect to:
• The canvas — Click the Canvas in the Layers panel.
• A selection — Click a selection tool from the toolbox, and drag in the document window to select an
area.
• A layer — Click a layer in the Layers panel.
2Choose Effects Esoterica Custom Tile.
3Choose one of the following patterns from the Using list box:
•Brick
•Hex
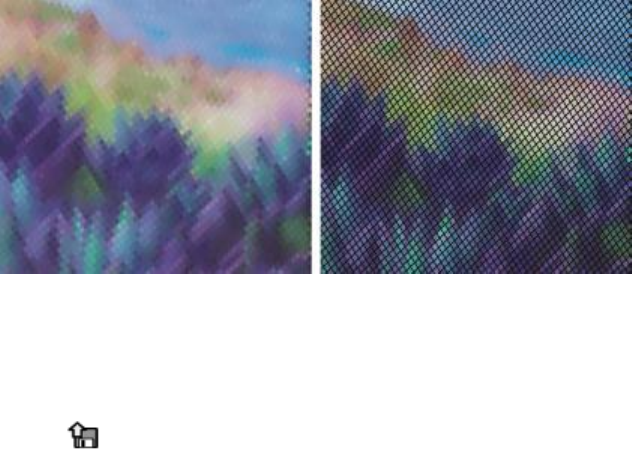
634 | Corel Painter 2015 User Guide
•Square
•Triangle
•Cross
•12-6-4
•12-6-4 V2
4Adjust any of the Custom Tile controls. For information, see “Custom tile controls” on page 635.
The original grout appearance (left) is changed by blurring (right).
To apply custom tiles by using clone or pattern luminance
1Do one of the following:
•To use a clone source, choose Window Clone Source. In the Clone Source panel, click the Open
Image button , and Open Source to choose a clone source.
•To use a pattern, choose Window Media Library Panels Patterns, and click a pattern swatch from
the Pattern library panel.
2To apply the effect to:
• The canvas — Click the Canvas in the Layers panel.
• A selection — Click a selection tool from the toolbox, and drag in the document window to select an
area.
• A layer — Click a layer in the Layers panel.
3Choose Effects Esoterica Custom Tile.
4Choose Original Luminance from the Using list box.
5Adjust any of the Custom Tile controls. For information, see “Custom tile controls” on page 635.
Using focus and esoterica effects | 635
To apply custom tiles by using paper luminance
1Choose Window Paper Panels Papers.
2Choose a paper swatch from the Papers library panel.
3To apply the effect to:
• The canvas — Click the Canvas in the Layers panel.
• A selection — Click a selection tool from the toolbox, and drag in the document window to select an
area.
• A layer — Click a layer in the Layers panel.
4Choose Effects Esoterica Custom Tile.
5Choose Paper from the Using list box.
6Adjust any of the Custom Tile controls. For information, see “Custom tile controls” on page 635.
To apply custom tiles by using layer mask or channel luminance
1Do one of the following:
•To use a layer mask, choose Window Layers, and click the layer that contains a layer mask in the
Layers panel.
•To use an alpha channel, choose Window Channels, and click the alpha channel in the Channels
panel.
2To apply the effect to:
• The canvas — Click the Canvas in the Layers panel.
• A selection — Click a selection tool from the toolbox, and drag in the document window to select an
area.
• A layer — Click a layer in the Layers panel.
3Choose Effects Esoterica Custom Tile.
4Choose the channel or layer mask from the Using list box.
5Adjust any of the Custom Tile controls. For information, see “Custom tile controls” on page 635.
Custom tile controls
•Brick Width and Brick Height — adjusts the size of bricks
•Angle and Scale — adjusts the tile orientation and size of built-in tile shapes
•Blur Radius — sets the sampling radius for blurring the crack or grout color. Increasing the Blur Radius
adds more neighboring colors to the crack pixels in each pass.
•Blur Passes — sets the number of times the crack pixels are blurred. More passes mix more tile color
into the cracks. Blurring occurs only when Blur Passes is greater than zero.
•Threshold — draws the line between light and dark. Everything above the Threshold value becomes
tiles, and everything below becomes grout.
636 | Corel Painter 2015 User Guide
•Use grout — adds grout between the tiles
•Grout Color — sets the grout color
•Grout Thickness — controls the width of the cracks between tiles or the grout lines (if grout is enabled)
Applying Grid Paper
The Grid Paper effect adds a grid of horizontal lines, vertical lines, rectangles, or dots to an image.
Unlike the grid overlay, which is a transparent layer that floats as a reference above an image, Grid Paper
becomes part of an image. It is best to apply Grid Paper to a blank canvas and then apply color to the
canvas or layers.
To apply Grid paper
1Choose Effects Esoterica Grid Paper.
2Choose an option from the Grid Type list box.
3Set the grid dimensions by entering values in the following boxes:
•Horizontal Spacing — determines the amount of space between horizontal lines
•Vertical Spacing — determines the amount of space between vertical lines
•Line Thickness — sets the width of grid lines
4Click the Grid Color chip, and choose a color from the Color dialog box to set the grid color.
5Click the Background chip, and choose a color from the Color dialog box to set the background color.
Applying Growth effects
The Growth Effect generates branchlike designs from a central point and adds them to your image. The
designs resemble architectural renderings of trees.

Using focus and esoterica effects | 637
Examples of Growth patterns.
Growth patterns are created from the current main color. You have access to the Color panel while the
Growth dialog box is open, so you can change the main color at any time.
To create growth patterns
1In the Color panel, choose a color.
2Choose Effects Esoterica Growth.
3Enable any of the following check boxes:
•Hard edges — creates growth patterns with hard edges; disable to create growth patterns with soft,
feathery edges
•Fractal — creates open-ended (fractal) patterns; disable to create nonfractal patterns, which are
closed on the outside by a ring
4Adjust any of the following sliders:
•Flatness — reshapes the growth pattern like a lens effect. Move the slider to the left for a concave
lens effect. Move the slider to the right for a “fish-eye” lens effect.
•Thinout — affects how the size of the growth pattern is distributed from the center to the outside
edges. At settings over 100%, the outside edges become thicker. At settings under 100%, the edges
become finer and more delicate.
•Random — affects how symmetrical the growth patterns appear. Lower values generate straight-line,
geometrical designs. Higher values generate distorted, crooked designs.
•Thickness — uniformly adjusts the weight of the lines within the design. Move the slider to the left
for thinner lines, and to the right for thicker lines. The growth pattern cannot be made thinner than
one pixel.
•Branch — determines how many branches come from the center to the outside edge. The range is 1
through 20.
•Max Level — determines the number of levels or sublevels that appear in the tree. Specifically, Max
Level determines how the branches split to the outside edge.
•Fork — adjusts the overall intricacy of the outermost branches

638 | Corel Painter 2015 User Guide
•Fork Ratio — is similar to Fork, but it affects only the tips of the outermost branches
5Without closing the Growth dialog box, drag in the document window to create a growth pattern.
6Do one of the following:
• To apply the current growth pattern, click OK.
• To discard all patterns, click Cancel.
The sliders in the Growth dialog box affect both fractal and nonfractal growth patterns in a similar
way, with the exception of Fork and Fork Ratio, which affect only fractal growth patterns.
Applying Highpass
The Highpass effect suppresses low-frequency areas containing gradual or smooth transitions of brightness
levels. This leaves high-frequency areas, or just the edges of an image, containing stark shifts between
brightness levels.
Highpass uses either the Gaussian or Circular aperture options. Gaussian aperture affects the red, green,
and blue components of color; Circular aperture uses image luminance. You can make the highpass more
pronounced by using the Equalize effect.
The Highpass effect introduces stark shifts between brightness levels.
To apply a Highpass effect
1To apply the effect to:
• The canvas — Click the Canvas in the Layers panel.
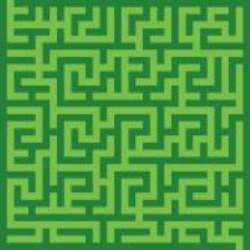
Using focus and esoterica effects | 639
• A selection — Click a selection tool from the toolbox, and drag in the document window to select an
area.
• A layer — Click a layer in the Layers panel.
2Choose Effects Esoterica Highpass.
3In the Highpass dialog box, choose an aperture option.
4Move the Amount slider to determine how much to suppress the low-frequency areas.
This value defines a radius, in pixels, around each pixel in the selected image area. Moving the slider
to the left suppresses larger amounts of low-frequency information. Moving the slider to the right
suppresses smaller amounts of low-frequency information.
Applying the Maze effect
The Maze effect generates an image of a maze. Typically, you’ll create a maze in a new, blank image. Each
maze has one “solution” — that is, an open path from the entrance to the exit.
The Maze effect produces interesting designs.
You can capture a portion of the maze as a pattern or paper texture, or use the maze as a source for other
effects. Mazes must be rectangular and cannot be applied to non-rectangular selections.
To apply a Maze effect
1Choose Effects Esoterica Maze.
2Click the Maze Color chip, and choose a maze color.
3Click the Background chip, and choose a background color.
4Enable any of the following check boxes:
•Patterned — constrains barriers to the horizontal
•Display solution — displays the path from the entrance to the exit
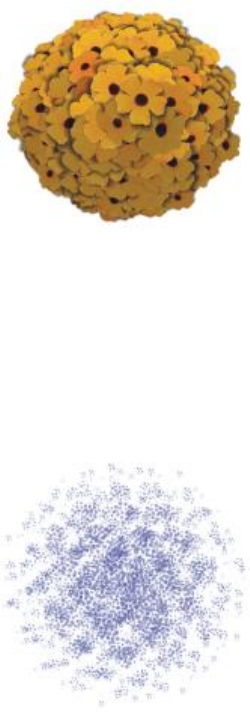
640 | Corel Painter 2015 User Guide
5Type a value in the Seed box to generate a random maze pattern.
6Type a value in the Thickness box to set the width of barriers and paths.
Placing elements
Place Elements is an effect designed to automate the application of brush dabs. It’s particularly useful
when applying it with an Image hose brush variant. For more information, see “Using the Image hose” on
page 470.
An example of the Place Elements effect used with the Image hose.
The Place Elements effect creates a virtual sphere within the confines of a selection rectangle. When the
selection is square, the sphere is perfectly round; when the selection is rectangular, the sphere is elongated
or flattened.
A number of points are created at random locations on the sphere. The points are then distanced from
each other, and a brush dab is placed at each point. Each dab’s appearance is adjusted according to its
location on the sphere.
An example of the Place Elements effect used with a brush.

Using focus and esoterica effects | 641
To place elements
1Do one of the following:
• To use an Image hose, choose an Image hose brush variant from the Brush library, and then choose a
nozzle from the Nozzle selector on the Media Selector bar.
• To apply paint dabs, select a brush from the Brush library. Not all brush variants are supported by
Place Elements.
2Choose Window Color Panels Color.
3In the Color panel, do one of the following:
• If using an Image hose brush variant, set the additional color to black.
• If using another brush variant, set the main color.
If using the Image hose, the effect automatically controls mixing of the additional color with nozzle
elements to produce depth shading. Shadows tend toward black, so black is a good color to use.
4Choose the Rectangular Selection tool from the toolbox.
5Drag to create a selection.
This selection determines the location and size of the effect.
6Choose Effects Esoterica Place Elements.
7Adjust any of the following sliders:
•Iterations — controls the spacing of iterations. In each iteration, the points distance themselves from
each other on the surface of the virtual sphere. The points start at random locations, so if you set zero
as the number of iterations, the placement of the points is completely random. Higher numbers of
iterations increase the regularity of the spacing.
•Points — sets the number of points to create on the virtual sphere. Each point correlates to an image
element placed.
•Radius Fraction — determines the size of the virtual spheres created at the second and third levels.
The first-level radius is multiplied by the fraction amount to determine the radius of the second-level
spheres.
The fraction is used again between the second and third levels. Higher values (above 1.0) increase
overlapping of the spheres. Lower values (below 1.0) preclude overlapping (when sufficient iterations
are used to distribute the points).
•Oversizing — controls the diameter of the first-level virtual sphere in relation to the selection
marquee. At a setting of 2.5, the sphere fits within the selection. Higher settings shrink the sphere.
Lower settings stretch it beyond the selection.
•Ambient Amount — controls the use of the additional color in elements that appear on the virtual
sphere away from the light source. This is how the clump of placed elements exhibits coherent three-
dimensional shading when black is used as the additional color. The default setting is 0.7, which
produces good shading results. Increasing the value brings in more of the additional color. Decreasing
it reduces additional color mixing.
8In the Levels area, enable one of the following options:
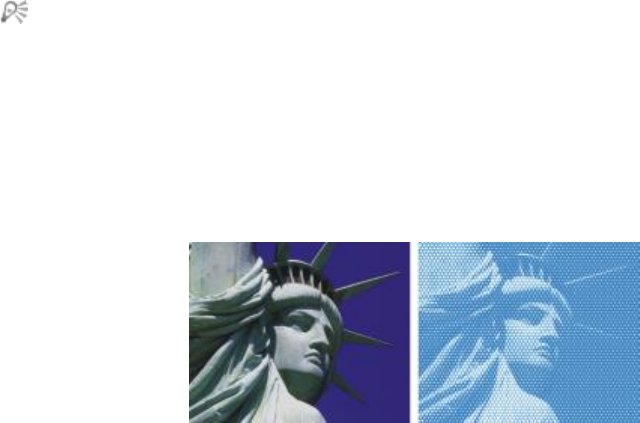
642 | Corel Painter 2015 User Guide
•1 — specifies that each point receives only one element
•2 — specifies that each point receives an element and then is used as the center for another virtual
sphere on which point iteration and element placement repeats
•3 — extends sphere creation and element placement once more
The number of elements increases rapidly with more than one level. For example, if you choose 12
points and three levels, you’ll create 12 + (12 × 12) + (12 × 12 × 12) = 1,884 elements. Of course,
many of these elements will probably be covered by later placements.
If you choose two or three levels, you can prevent overlapping elements by enabling the Cull
Interiors check box. This removes points that occur inside other spheres, before elements are
placed. This option increases processing time for the effect.
Applying the Pop Art Fill effect
This effect lets you cover an image with pseudo-halftone dots so you can create a Pop Art image.
Before (left) and after (right) applying the Pop Art Fill effect.
To apply a Pop Art Fill
1To apply the effect to:
• The canvas — Click the Canvas in the Layers panel.
• A selection — Click a selection tool from the toolbox, and drag in the document window to select an
area.
• A layer — Click a layer in the Layers panel.
2Choose Effects Esoterica Pop Art Fill.
3Choose Image Luminance from the Using list box.
If you want to work with an inverted version of the source, enable the Invert colors check box.
4Adjust the Scale slider to set the dot size.
Using focus and esoterica effects | 643
5Adjust the Contrast slider to mix in the luminance of the control medium.
6Click the Dab Color chip, and choose a dot color.
7Click the Background chip, and choose a background color.
644 | Corel Painter 2015 User Guide

Using lighting and surface texture effects | 645
Using lighting and surface texture effects
Corel Painter includes a collection of effects that let you control image lighting and surface texture.
For general information about using effects, see “Common options for effects” on page 609.
This section contains the following topics:
Lighting effects
•“Applying preset lighting effects” (page 646)
•“Adding, deleting, and repositioning lights” (page 647)
•“Adjusting light properties” (page 648)
Surface texture effects
•“Using paper to create texture” (page 649)
•“Using 3D brushstrokes to create texture” (page 650)
•“Using image luminance to create texture” (page 651)
•“Using clone source or pattern luminance to create texture” (page 652)
•“Creating embossed effects” (page 653)
•“Using channels and layer masks tocreate texture” (page 654)
Adjusting surface texture using lighting effects
•“Creating reflection maps” (page 655)
•“Adjusting texture lighting” (page 657)
Other surface effects
•“Applying the Apply Screen effect” (page 660)
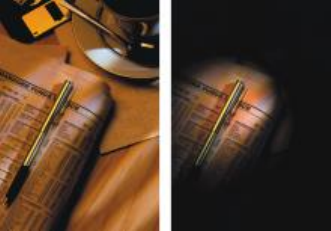
646 | Corel Painter 2015 User Guide
•“Applying the Color Overlay effect” (page 660)
•“Applying the Dye Concentration effect” (page 663)
•“Applying the Express Texture effect” (page 666)
•“Applying a warp effect” (page 668)
•“Applying the Woodcut effect” (page 670)
•“Applying the Distress effect” (page 672)
•“Applying the Serigraphy effect” (page 674)
•“Applying the Sketch effect” (page 676)
Applying preset lighting effects
Corel Painter includes a series of preset lighting effects that you can apply to your images. The lighting
effects allow you to quickly change the intensity or direction of the image lighting. You can apply a preset
lighting environment without making any changes, or you can use it as a starting point for customized
lighting. For more information, see “Adding, deleting, and repositioning lights” on page 647 or
“Adjusting light properties” on page 648.
Before (left) and after (right) applying a preset lighting effect.
To apply preset lighting effects
1To apply the effect to:
• The canvas — Click the Canvas in the Layers panel.
• A selection — Click a selection tool from the toolbox, and drag in the document window to select an
area.
• A layer — Click a layer in the Layers panel.
2Choose Effects Surface Control Apply Lighting.
3In the Apply Lighting dialog box, choose a preset from the Preset list box.
The lighting effect displays in the preview window.
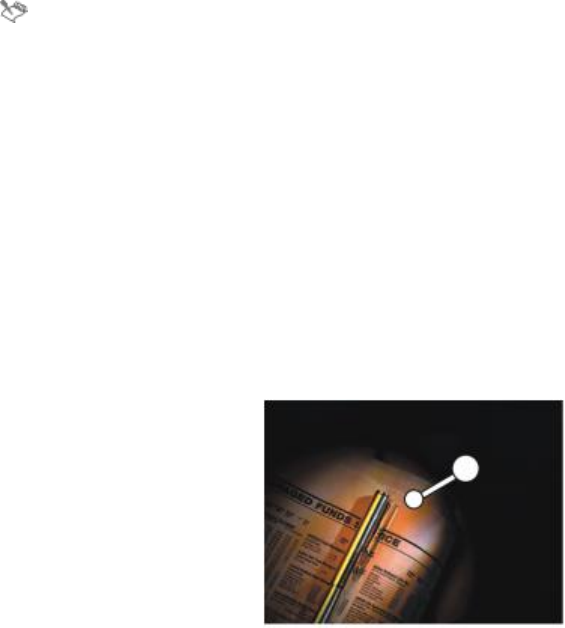
Using lighting and surface texture effects | 647
If you apply an effect to a shape, dynamic layer, text layer, or reference layer, you must first commit
the layer to an image layer.
Adding, deleting, and repositioning lights
You can add one or more light sources to an image to create unique lighting effects. Adding a light source
is similar to hanging your artwork in a gallery and adjusting spotlights to illuminate it. You can also delete
and reposition lights.
When you add a light, a new indicator appears in the preview window of the Apply Lighting dialog box.
The preview window displays the current position of each light and the angle of its projection. You can use
the light indicators to move and direct lights. The large part of the light indicator controls the light source
(the point from which the light is shining). The small part of the indicator controls the light direction (the
point toward which the light is shining).
The small circle (left) controls the light direction.
The large circle (right) controls the light source.
In addition, you can change the light properties, such as intensity and spread. For more information, see
“Adjusting light properties” on page 648.
To add, delete, and reposition a light
1To apply the effect to:
• The canvas — Click the Canvas in the Layers panel.
• A selection — Click a selection tool from the toolbox, and drag in the document window to select an
area.
• A layer — Click a layer in the Layers panel.

648 | Corel Painter 2015 User Guide
2Choose Effects Surface Control Apply Lighting.
3Perform a task from the following table.
To Do the following
Add a light Click anywhere in the preview window.
Delete a light Click an indicator, and press Delete (Mac OS) or
Backspace (Windows).
Move a light Drag the large end of the indicator to the point
where you want the light to originate.
Change the direction of a light Drag the small end of the light indicator until the
light is pointing in the desired direction.
Adjusting light properties
You can adjust light properties such as brightness, distance, elevation, and color. Light properties have a
cumulative effect. For example, if you turn up a light’s brightness, you might need to adjust exposure.
To adjust the light properties
1To apply the effect to:
• The canvas — Click the Canvas in the Layers panel.
• A selection — Click a selection tool from the toolbox, and drag in the document window to select an
area.
• A layer — Click a layer in the Layers panel.
2Choose Effects Surface Control Apply Lighting.
3In the preview window, click an indicator to select it.
4In the Directional Lighting area, move any of the following sliders:
•Brightness — controls the light intensity
•Distance — controls how far the light is from the image. If you move the light source closer, you can
compensate for the increased light by adjusting the Exposure slider.
•Elevation — sets the light’s angle in relation to the canvas. At 90°, the light is shining straight down,
and at 1°, it’s nearly horizontal.
•Spread — sets the angle of the light cone
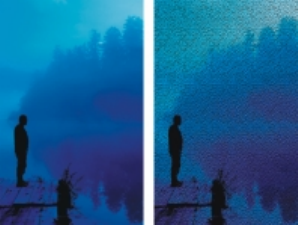
Using lighting and surface texture effects | 649
To change the light color, click the Color chip, and choose a color.
5In the Ambient Lighting area, move any of the following sliders:
•Exposure — controls the image’s brightness, as in photography. Moving the slider to the left
decreases exposure and darkens the image; moving it to the right increases exposure and lightens the
image.
•Ambient — controls the surrounding light in an image. If you have no light indicators in the preview
window, the ambient lighting controls the overall lightness of the image. Moving the slider to the left
darkens the overall lighting; moving it to the right increases the light.
To change the color of the ambient light, click the Color chip, and choose a color.
Using paper to create texture
You can add texture to an image by incorporating paper texture. This allows you to give the appearance of
depth to brushstrokes. Corel Painter uses the paper surface and grain to produce the effect. You can choose
a specific paper texture, or Corel Painter applies the currently selected paper texture to the image by default.
If you want open to experiment with the effect, keep the Papers panel open while you apply the effect. This
way you can switch to different papers and modify the paper controls.
Before (left) and after (right) creating texture by using paper grain.
To create surface texture by using paper
1Choose Window Paper Panels Papers.
2Choose a paper swatch from the Papers library panel.
3To apply the effect to:
• The canvas — Click the Canvas in the Layers panel.
• A selection — Click a selection tool from the toolbox, and drag in the document window to select an
area.
• A layer — Click a layer in the Layers panel.
4Choose Effects Surface Control Apply Surface Texture.
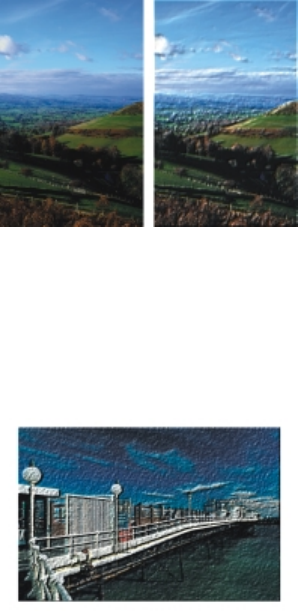
650 | Corel Painter 2015 User Guide
5Choose Paper from the Using list box.
If you want to apply an inverted paper texture, enable the Inverted check box.
6Adjust any of the Apply Surface Texture controls. For more information, see “Apply Surface Texture
controls” on page 659.
Using 3D brushstrokes to create texture
You can create the illusion of textured brushstrokes by applying the 3D Brushstrokes effect to an image. To
use this effect, you need to clone the image, apply brushstrokes to the clone using cloners, and then apply
the effect to the image. Corel Painter then uses the difference in luminance between the clone source and
the image to produce the texture.
An example of an image before (left) the 3D
Brushstrokes method is applied to the image (right).
If you use this method, the look of the brushstrokes on the clone determines how realistic the final 3D
brushstrokes appear. So, you may want to set up a more complex brush before painting. For example, you
can apply a paper texture to the stroke. Many of the brush variants reveal the paper texture automatically in
their brushstrokes.
An example of 3D Brushstrokes with paper texture.
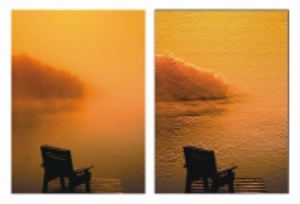
Using lighting and surface texture effects | 651
You can apply a paper texture when you first create an image, and then paint or draw over it to make
a textured canvas for your brushstrokes. However, the texture is erasable, so you might not end up with
the same texture across the document surface. As a rule, you add the paper texture as the last step in
producing artwork.
You can also use advanced brush settings to make realistic brushstrokes. For example, you can use the
Brush Loading option to move underlying colors as you make brushstrokes. For more information, see
“Using brush loading” on page 179. You can also apply other settings, like Bleed, or adjust brush size to
create complex brushstrokes. For more information, see “Adjusting brushes with brush controls” on page
325.
An example of 3D Brushstrokes with Brush Loading (left) and bleed (right) settings applied.
To apply 3D brushstrokes to an image
1Open an image.
2Choose File Quick Clone.
3Apply brushstrokes to the clone.
4Choose Effects Surface Control Apply Surface Texture.
5Choose 3D Brushstrokes from the Using list box.
6Adjust any of the Apply Surface Texture controls. For more information, see “Apply Surface Texture
controls” on page 659.
Using image luminance to create texture
You can use the currently selected image’s luminance, or lightness, to produce surface texture. Light parts
of the image create dents; whereas darker parts create raised areas. The overall effect gives an embossed
look to the image.
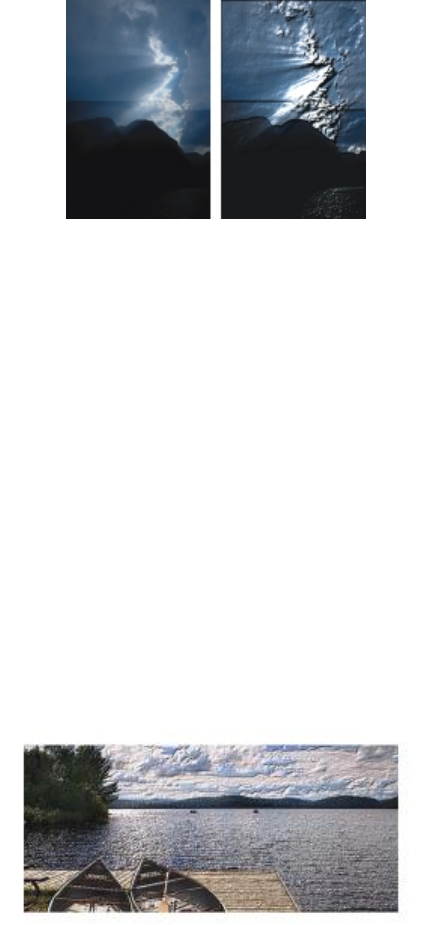
652 | Corel Painter 2015 User Guide
Before (left) and after (right) adding texture based on image luminance.
To create surface texture by using image luminance
1To apply the effect to:
• The canvas — Click the Canvas in the Layers panel.
• A selection — Click a selection tool from the toolbox, and drag in the document window to select an
area.
• A layer — Click a layer in the Layers panel.
2Choose Effects Surface Control Apply Surface Texture.
3Choose Image Luminance from the Using list box.
4Adjust any of the Apply Surface Texture controls. For more information, see “Apply Surface Texture
controls” on page 659.
Using clone source or pattern luminance to create texture
You can add texture to an image by using the luminance of a clone source or a pattern. The method uses
the light and dark areas in the clone source or pattern to produce the illusion of dents and bumps. To
experiment with different looks, you can change the clone source or pattern.
The clone source luminance helps produce a textured effect.

Using lighting and surface texture effects | 653
Any image effects or brushstrokes that you apply to the clone source result in different textures. For
example, you can create raised areas in the clone by darkening the area in the source image.
To create surface texture based on clone source or pattern luminance
1Open an image.
2Do one of the following:
•To use a clone source, choose Window Clone Source. In the Clone Source panel, click the Open
Image button , and Open Source to choose a clone source.
•To use a pattern, choose Window Media Library Panels Patterns, and click a pattern swatch from
the Pattern library panel.
3To apply the effect to:
• The canvas — Click the Canvas in the Layers panel.
• A selection — Click a selection tool from the toolbox, and drag in the document window to select an
area.
• A layer — Click a layer in the Layers panel.
4Choose Effects Surface Control Apply Surface Texture.
5Choose Original Luminance from the Using list box.
6Adjust any of the Apply Surface Texture controls. For more information, see “Apply Surface Texture
controls” on page 659.
Creating embossed effects
You can generate an image that appears embossed by cloning the image and then using the luminance of
the clone source to produce the effect. You can control the height of the texture, as well as the lighting,
color, and material properties of the embossing.
Before (left) and after (right) applying the embossed effect.
654 | Corel Painter 2015 User Guide
To create an embossed effect
1Open an image.
2Choose File Clone.
3Choose a color other than black from the Colors or Color Sets panel.
If you want the embossed image to be white, select all, and then press Delete (Mac OS) or Backspace
(Windows).
4Choose Edit Fill.
5In the Fill dialog box, choose Current Color from the Fill with list box.
6Adjust the Opacity slider to set the opacity of the fill.
7Click OK to fill the clone file with color.
8Choose Effects Surface Control Apply Surface Texture.
9Choose Original Luminance from the Using list box.
The preview window shows how the embossed image will look.
10 In the Light Controls area, adjust any of the following sliders:
•Brightness — controls the light intensity
•Concentration— adjusts the spread of the light’s shine over the surface
•Exposure — adjusts the overall lighting amount from darkest to brightest
11 Enable the Simple lighting check box, and click a light indicator on the sphere to change the location
of highlights and shadows.
If you want to change the light color, click the Light Color chip, and choose a color from the Color
dialog box.
Using channels and layer masks tocreate texture
Corel Painter lets you produce surface texture based on an alpha channel or a layer mask. You can use this
method only if you added an alpha channel, or a layer that contains a layer mask, to the image.
When you apply the texture to a channel, the area that surrounds the edges of the channel appears raised.
When you apply texture to a layer mask, the layer mask acts as a boundary for the texture and the texture
appears around the edges. For more information, see “Creating and deleting layer masks” on page 552.
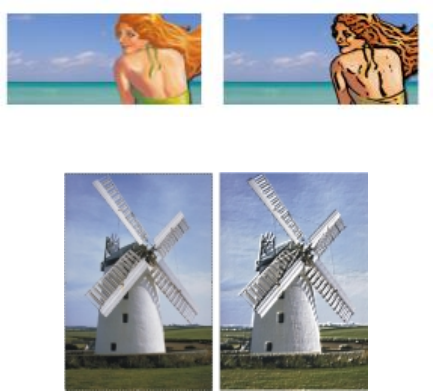
Using lighting and surface texture effects | 655
Before (left) and after (right) adding texture based on a saved alpha channel.
Before (left) and after (right) adding texture based on a layer mask.
To create surface texture based on a channel or layer mask
1In the Layers panel, select a layer or the canvas.
If you want to use a layer mask, you must select the layer to which the layer mask is attached. Make
sure that the layer mask is not blank.
2Choose Effects Surface Control Apply Surface Texture.
3Choose the channel or layer mask from the Using list box.
4Adjust any of the Apply Surface Texture controls. For more information, see “Apply Surface Texture
controls” on page 659.
Creating reflection maps
A reflection map is an image that is mapped onto a texture to produce the illusion that it’s reflecting light
from the surrounding environment. You can use either a pattern or a clone source image as a reflection
map. Choosing a pattern allows you to quickly apply a realistic reflection. Reflection maps are useful to
create the appearance of chrome or polished metal.
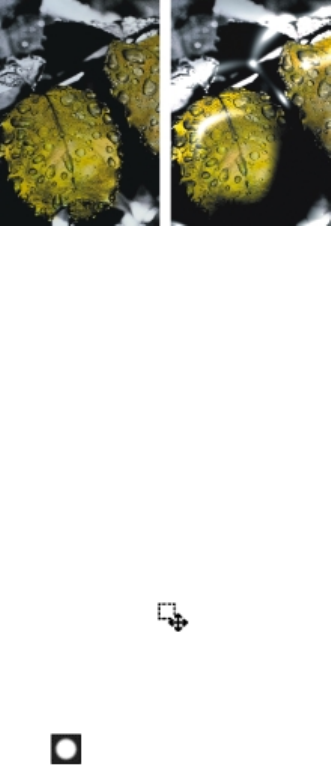
656 | Corel Painter 2015 User Guide
Before (left) and after (right) applying a typical reflection map.
You can control how much of the image appears in the texture. If you add a reflection map to a clone, the
clone source is mapped onto the texture. Otherwise, Corel Painter uses the current pattern as the reflection
map.
You can use the Image Warp effect to approximate the reflection from a curved surface. For more
information, see “Applying a warp effect” on page 668.
To create a reflection map from a clone source
1Open an image or create a new image to use as the reflection.
If you want to approximate the reflection from a curved surface, apply the Image Warp effect.
2Choose File Clone.
3Click a selection tool from the toolbox, and select the area that you want to be reflective.
4In the toolbox, click the Selection Adjuster tool .
5Right-click the selection and choose Layer ViaCopy.
A new layer is created.
6In the Layers panel, click the Canvas, and then select the layer you just created.
7Click the New Layer Mask button .
Using a layer mask simplifies the process because the layer mask exactly matches the shape of the
reflection area. For more information, see “Creating and deleting layer masks” on page 552.
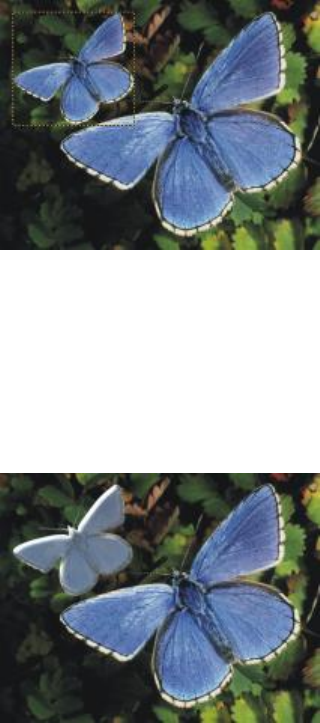
Using lighting and surface texture effects | 657
A selected image area, ready to become reflective.
8Choose Effects Surface Control Apply Surface Texture.
9Choose the layer mask from the Using list box.
10 Move the Reflection slider to adjust the amount of reflection you want.
11 Move the Softness slider to adjust the mapping from the edges of the layer’s image.
Increasing softness gives a rounder, more 3D look to the surface.
The resulting chrome-plated butterfly.
Adjusting texture lighting
Lighting determines a large part of the final look of a texture. Bad lighting can obscure details in a pattern
or surface. Good lighting, however, can add interesting highlights and enhance reflections.
You can use preset (simple) lighting or custom lighting. With simple lighting, you can choose one of eight
preset lights. With custom lighting, you can add more lights, and you can move and delete light sources.
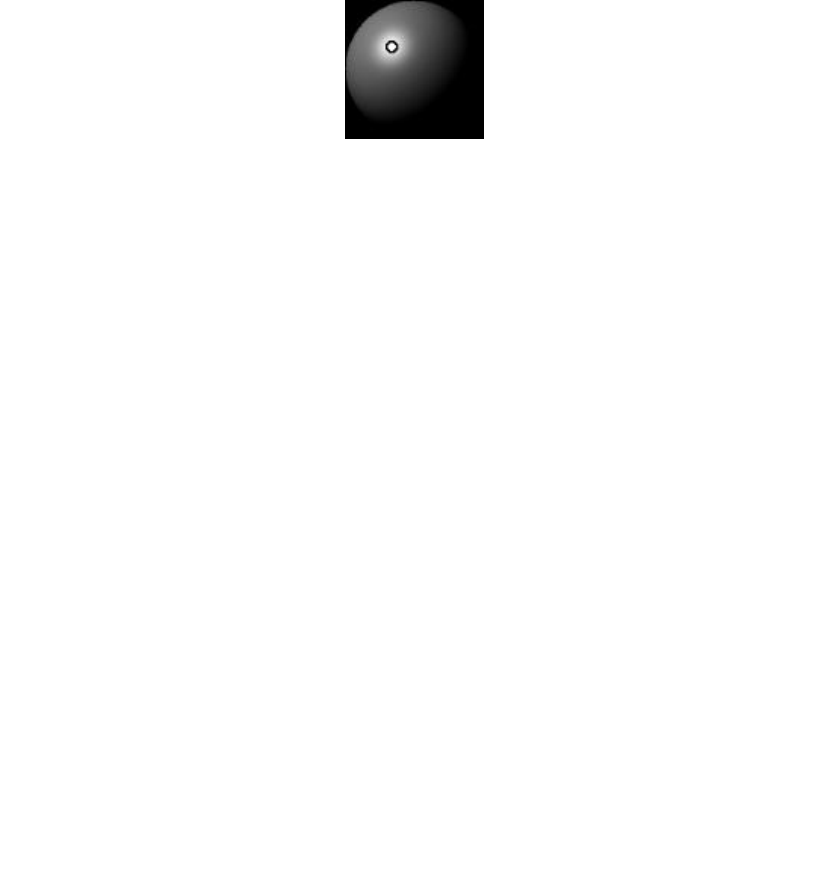
658 | Corel Painter 2015 User Guide
The lighting sphere shows all possible surface angles and how the lights illuminate them. The light
indicators on the sphere show the position of all light sources.
The lighting sphere with a light indicator.
You can also change the following light properties: brightness, concentration, and exposure. In addition,
you can change a light’s color.
To adjust texture lighting
1To apply the effect to:
• The canvas — Click the Canvas in the Layers panel.
• A selection — Click a selection tool from the toolbox, and drag in the document window to select an
area.
• A layer — Click a layer in the Layers panel.
2Choose Effects Surface Control Apply Surface Texture.
3Do one of the following
• For preset lighting, enable the Simple lighting check box, and click a light indicator on the lighting
sphere.
• For custom lighting, disable the Simple lighting check box, and perform an action from the following
table.
To Do the following
Add a custom light Click on the lighting sphere where you want to add
a new light source.
A new light indicator (small circle) appears where
you click.
Delete a custom light Click a light indicator, and press Delete (Mac OS),
or Backspace (Windows).

Using lighting and surface texture effects | 659
To Do the following
Add custom lights along a circular path Move the Lights slider.
Move a custom light Drag a light indicator to a new position on the
sphere.
Change the light color Click a lighting indicator, click the Light Color chip,
and then choose a color.
4Adjust any of the Apply Surface Texture controls. For information, see “Apply Surface Texture controls”
on page 659.
Apply Surface Texture controls
•Using — lets you choose a method for applying the surface texture. The following methods are
available: Paper, 3D Brushstrokes, Image Luminance, and Original Luminance.
•Softness — lets you adjust the amount of distortion created by the texture. Increasing softness creates
more intermediate steps, which produces a smoother distortion.
•Inverted — lets you apply an inverted texture
Appearance of Depth
•Amount — controls how much surface texture is applied to the image. Moving the slider all the way to
the right applies the maximum amount.
•Picture — controls how much of the color from the original image is applied to the texture. At 100%,
the full color of the picture shines through. Moving the slider to the left displays more black, leaving
only the shine.
•Shine — controls how much highlight appears on the surface of the texture. Higher Shine values make
the texture look metallic.
•Reflection — maps a clone source image or pattern onto the texture at a variable percentage
Light Controls
•Brightness — controls the light intensity
•Concentration — adjusts the spread of the light’s shine over the surface
•Exposure — adjusts the overall lighting amount from darkest to brightest
•Light Color — lets you change the light color
•Simple lighting — lets you choose one from eight preset lights
•Lighting sphere — lets you add, move, and delete custom lights when the Simple lighting check box is
disabled.
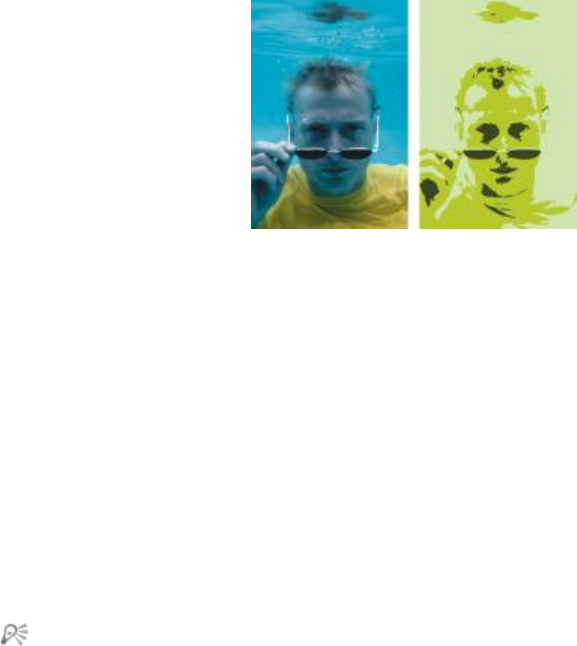
660 | Corel Painter 2015 User Guide
Applying the Apply Screen effect
You can simulate the appearance of a silk-screened print by using the Apply Screen effect. This effect lets
you combine image luminance and the three selected colors, to produce a multi-color rendition of the
image. When you use this effect, anti-aliasing is automatically applied to the image.
Before (left) and after (right) using Apply Screen using the image luminance.
To apply a screen
1Open an image.
2Choose Effects Surface Control Apply Screen.
3Choose Image Luminance from the Using list box.
4Choose three colors by clicking each color chip and choosing a color from the Color dialog box.
5Adjust any of the following sliders:
•Threshold 1 — determines how much of the two colors below the slider display in the image
Moving the slider increases the amount of one color and decreases the amount of the other color.
•Threshold 2 — determines how much of the color below the slider displays in the image
Moving the slider to the left decreases the color amount. Moving it to the rightincreases the color
amount.
You can also apply a screen that is based on paper texture by choosing Paper from the Using list
box, and then clicking the Paper Textures chip, and choosing a texture.
Applying the Color Overlay effect
You can simultaneously add color and texture to an image by using the Color Overlay effect. This effect
allows you to coat an image with color. You can control the opacity and intensity of the color. To use the
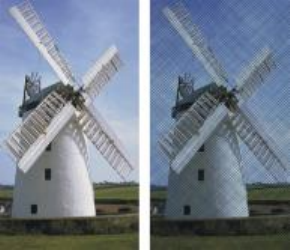
Using lighting and surface texture effects | 661
Color Overlay effect, you need to choose a color that you want to apply and then choose the method for
applying the effect.
There are five different methods for applying color:
•Uniform Color — adds a flat tint to the image
•Paper — overlays a color using the paper texture as a mapping model. More color is applied to light
areas in the paper grain; less color is applied to dark areas. If you want open to experiment with the
effect, keep the Papers panel open while you apply the effect. This way you can switch to different
papers and modify the paper controls.
•Image Luminance — uses the image’s brightness as the model for the color overlay. More of the effect
is applied to light areas in the original image; less color is applied to dark areas.
•Original Luminance — uses the luminance of the clone source (or a pattern) as the model for the color
overlay. Light areas in the clone source produce more color in the image.
•Alpha Channel or Layer Mask — sets the values in the channel or layer mask as the model for the color
overlay. More color is applied to the light areas of the channel or mask; less color is applied to dark
areas. You can use this method only if you have a saved alpha channel or a layer mask in your image.
Before (left) and after (right) applying the Color Overlay effect using the Paper method.
To apply a uniform tint to an image
1To apply the effect to:
• The canvas — Click the Canvas in the Layers panel.
• A selection — Click a selection tool from the toolbox, and drag in the document window to select an
area.
• A layer — Click a layer in the Layers panel.
2Choose Effects Surface Control Color Overlay.
3Choose a color from the Use Color chip.
4Choose Uniform Color from the Using list box.
5Adjust any of the Color Overlay controls. For information, see “Color Overlay controls” on page 663.

662 | Corel Painter 2015 User Guide
To use image luminance to apply a color overlay
1To apply the effect to:
• The canvas — Click the Canvas in the Layers panel.
• A selection — Click a selection tool from the toolbox, and drag in the document window to select an
area.
• A layer — Click a layer in the Layers panel.
2Choose Effects Surface Control Color Overlay.
3Choose a color from the Use Color chip.
4Choose Image Luminance from the Using list box.
5Adjust any of the Color Overlay controls. For information, see “Color Overlay controls” on page 663.
To use paper texture to apply a color overlay
1Choose Window Paper Panels Papers.
2Choose a paper swatch from the Papers library panel.
3To apply the effect to:
• The canvas — Click the Canvas in the Layers panel.
• A selection — Click a selection tool from the toolbox, and drag in the document window to select an
area.
• A layer — Click a layer in the Layers panel.
4Choose Effects Surface Control Color Overlay.
5Click the Use Color chip, and choose a color.
6Choose Paper from the Using list box.
7Adjust any of the Color Overlay controls. For information, see “Color Overlay controls” on page 663.
To use clone source or pattern luminance to apply a color overlay
1Open an image.
2Do one of the following:
•To use a clone source, choose Window Clone Source. In the Clone Source panel, click the Open
Image button , and Open Source to choose a clone source.
•To use a pattern, choose Window Media Library Panels Patterns, and click a pattern swatch from
the Pattern library panel.
3Choose Effects Surface Control Color Overlay.
4Choose a color from the Use Color chip.
Using lighting and surface texture effects | 663
5Choose Original Luminance from the Using list box.
6See “Color Overlay controls” on page 663.
To use a layer mask or channel to apply a color overlay
1Do one of the following:
•To use a layer mask, choose Window Layers, and click the layer that contains a layer mask in the
Layers panel.
•To use an alpha channel, choose Window Channels, and click the alpha channel in the Channels
panel.
2Choose Window Color Panels Color.
3Choose a color from the Color panel.
4Choose Effects Surface Control Color Overlay.
5Choose the layer mask or alpha channel from the Using list box.
6Adjust any of the Color Overlay controls. For information, see “Color Overlay controls” on page 663.
Color Overlay controls
•Use Color — lets you choose the overlay color
•Opacity — controls how transparent the effect is
•Dye Concentration— allows the paper to absorb the color
•Hiding Power — allows the color to cover what lies beneath it
Applying the Dye Concentration effect
You can adjust the dye concentration in an image to control color intensity and play with surface texture.
For example, use this effect to lighten an underexposed photo or to darken an overexposed one. You need
to choose a method for applying the effect. Some methods, such as Paper, generate more texture than
other methods, such as Uniform Color. There are five different methods for applying dye concentration:
•Uniform Color — allows you to adjust only color density
•Paper — adjusts color by using the paper texture as a mapping model. If you want open to experiment
with the effect, keep the Papers panel open while you apply the effect. This way you can switch to
different papers and modify the paper controls.
•Image Luminance — uses the image’s brightness as the model for the color adjustment
•Original Luminance — uses the luminance of the selected pattern or clone source as the model for the
adjustment
•Alpha Channel or Layer Mask — sets the values in the alpha channel or layer mask as the model for
the dye concentration adjustment. You can use this method only if you have a saved channel or a layer
mask in your image.
664 | Corel Painter 2015 User Guide
To uniformly adjust dye concentration
1To apply the effect to:
• The canvas — Click the Canvas in the Layers panel.
• A selection — Click a selection tool from the toolbox, and drag in the document window to select an
area.
• A layer — Click a layer in the Layers panel.
2Choose Effects Surface Control Dye Concentration.
3Choose Uniform Color from the Using list box.
4Adjust any of the Dye Concentration controls. For information, see “Dye Concentration controls” on
page 665.
To adjust dye concentration using image luminance
1To apply the effect to:
• The canvas — Click the Canvas in the Layers panel.
• A selection — Click a selection tool from the toolbox, and drag in the document window to select an
area.
• A layer — Click a layer in the Layers panel.
2Choose Effects Surface Control Dye Concentration.
3Choose Image Luminance from the Using list box.
4Adjust any of the Dye Concentration controls. For information, see “Dye Concentration controls” on
page 665.
To adjust dye concentration using paper luminance
1Choose Window Paper Panels Papers.
2Choose a paper swatch from the Papers library panel.
3To apply the effect to:
• The canvas — Click the Canvas in the Layers panel.
• A selection — Click a selection tool from the toolbox, and drag in the document window to select an
area.
• A layer — Click a layer in the Layers panel.
4Choose Effects Surface Control Dye Concentration.
5Choose Paper from the Using list box.
6Adjust any of the Dye Concentration controls. For information, see “Dye Concentration controls” on
page 665.

Using lighting and surface texture effects | 665
To adjust dye concentration using clone source or pattern luminance
1Open an image.
2Do one of the following:
•To use a clone source, choose Window Clone Source. In the Clone Source panel, click the Open
Image button , and Open Source to choose a clone source.
•To use a pattern, choose Window Media Library Panels Patterns, and click a pattern swatch from
the Pattern library panel.
3Choose Effects Surface Control Dye Concentration.
4Choose Original Luminance from the Using list box.
5Adjust any of the Dye Concentration controls. For information, see “Dye Concentration controls” on
page 665.
To adjust dye concentration using a layer mask or alpha channel
1Do one of the following:
•To use a layer mask, choose Window Layers, and click the layer that contains a layer mask in the
Layers panel.
•To use an alpha channel, choose Window Channels, and click the alpha channel in the Channels
panel.
2Choose Effects Surface Control Dye Concentration.
3Choose the Layer mask or alpha channel from the Using list box.
4Adjust any of the Dye Concentration controls. For information, see “Dye Concentration controls” on
page 665.
Dye Concentration controls
•Presets — the controls in this area let you choose a preset effect, save the current settings as a preset,
and delete a preset
•Maximum — controls the amount of dye on the peaks of the texture
If you think of texture as peaks and valleys, the Maximum slider controls the amount of dye on the
peaks, and the Minimum slider controls the amount of dye in the valleys.
•Minimum — controls the depth of the texture. The lower the values, the higher the contrast between
the peaks and valleys. The higher the values, the flatter the image appears.
•Preview — enable this check box to preview the effect in the document window
•Reset — resets the sliders to their default settings
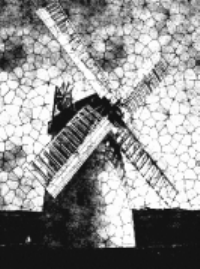
666 | Corel Painter 2015 User Guide
Applying the Express Texture effect
You can apply the Express Texture to generate a high-contrast version of an image in grayscale, which
creates a visual effect similar to a custom halftone screen, like a mezzotint or line screen. When you use this
effect, anti-aliasing is automatically applied to the image.
You need to choose a method for applying the effect. There are five different methods for applying Express
Texture:
•Paper — adjusts light intensity by using the paper texture as a mapping model. If you want open to
experiment with the effect, keep the Papers panel open while you apply the effect. This way you can
switch to different papers and modify the paper controls.
•Image Luminance — uses the image’s brightness as the model for the adjustments
•Original Luminance — uses the luminance of the clone source as the model for the adjustment
•Alpha Channel or Layer Mask — sets the values in the alpha channel or layer mask as the model for
the adjustments. You can use this method only if you have a saved channel or a layer mask in your
image.
An image with the Express Texture effect applied.
To apply Express Texture using image luminance
1To apply the effect to:
• The canvas — Click the Canvas in the Layers panel.
• A selection — Click a selection tool from the toolbox, and drag in the document window to select an
area.
• A layer — Click a layer in the Layers panel.
2Choose Effects Surface Control Express Texture.

Using lighting and surface texture effects | 667
3Choose Image Luminance from the Using list box.
4Adjust any of the Express Texture controls. For information, see “Express Texture controls” on page
668.
To apply Express Texture using paper texture
1Choose Window Paper Panels Papers.
2Choose a paper swatch from the Papers library panel.
3To apply the effect to:
• The canvas — Click the Canvas in the Layers panel.
• A selection — Click a selection tool from the toolbox, and drag in the document window to select an
area.
• A layer — Click a layer in the Layers panel.
4Choose Effects Surface Control Express Texture.
5Choose Paper from the Using list box.
6Adjust any of the Express Texture controls. For information, see “Express Texture controls” on page
668.
To apply Express Texture using clone source or pattern luminance
1Open an image.
2Do one of the following:
•To use a clone source, choose Window Clone Source. In the Clone Source panel, click the Open
Image button , and Open Source to choose a clone source.
•To use a pattern, choose Window Media Library Panels Patterns, and click a pattern swatch from
the Pattern library panel.
3Choose Effects Surface Control Express Texture.
4Choose Original Luminance from the Using list box.
5Adjust any of the Express Texture controls. For information, see “Express Texture controls” on page
668.
To apply Express Texture using a layer mask or alpha channel
1Do one of the following:
•To use a layer mask, choose Window Layers, and click the layer that contains a layer mask in the
Layers panel.
•To use an alpha channel, choose Window Channels, and click the alpha channel in the Channels
panel.
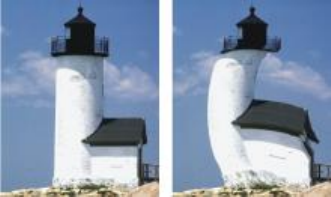
668 | Corel Painter 2015 User Guide
2Choose Effects Surface Control Express Texture.
3Choose the layer mask or alpha channel from the Using list box.
4Adjust any of the Express Texture controls. For information, see “Express Texture controls” on page
668.
Express Texture controls
•Gray Threshold — determines where the threshold is, between pure black and pure white
•Grain — determines how deeply the texture penetrates the surface
•Contrast — determines the number of levels of black and white. For example, low contrast generates
pure gray, medium contrast produces levels of grayscale, and high contrast produces a black and white
screen.
Applying a warp effect
Corel Painter offers different options for warping images. The Image Warp effect lets you distort the
surface of an image as if it were a sheet of pliable film. You can make images look as though they’re
reflected in a fun house mirror.
Before (left) and after (right) applying the Image Warp effect.
You can also use the Quick Warp effect to create some basic distortions, like stretch or bulge. These
distortions are useful for preparing images for reflection maps when applying surface texture. For more
information, see “Creating reflection maps” on page 655.
Quick Warp lets you create five types of distortions:
•Sphere — warps the image spherically, like a reflection on a polished silver ball
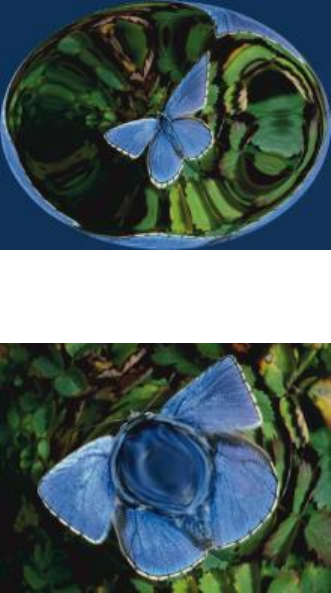
Using lighting and surface texture effects | 669
An example of the Quick Warp effect using Sphere distortion.
•Bump — warps the center of the image toward you, making it appear convex
An example of the Quick Warp effect using Bump distortion.
•Valley — warps the center of the image away from you, making it appear concave
•Swirl — distorts the image in a spiral
•Ripple — distorts the image in concentric rings, like the rings created when you drop a stone into a
pool of water
You can apply Image Warp and Quick Warp to the canvas, selections, and layers. However, Image Warp
allows you to better target areas for warping, which is useful if you need to warp only a small portion of an
image.
To warp an image using Image Warp
1To apply the effect to:
• The canvas — Click the Canvas in the Layers panel.
• A selection — Click a selection tool from the toolbox, and drag in the document window to select an
area.
670 | Corel Painter 2015 User Guide
• A layer — Click a layer in the Layers panel.
2Choose Effects Surface Control Image Warp.
3In the Image Warp dialog box, enable one of the following options:
•Linear — pulls the selected area as if you were pulling from the top of a cone
•Cubic — pulls a flat surface outward
•Sphere — pulls a surface as if it were a lens
4Adjust the Size slider.
This slider controls the size of the area affected by dragging the cursor. The higher the number, the
smaller the affected area.
5In the document window, drag to distort the image.
A circle displays as you drag, which indicates the area affected.
To warp an image using Quick Warp
1To apply the effect to:
• The canvas — Click the Canvas in the Layers panel.
• A selection — Click a selection tool from the toolbox, and drag in the document window to select an
area.
• A layer — Click a layer in the Layers panel.
2Choose Effects Surface Control Quick Warp.
3In the Quick Warp dialog box, enable one of the following options:
•Sphere — warps the image spherically, like a reflection on a polished silver ball
•Bump — warps the center of the image toward you, making it appear convex
•Valley — warps the center of the image away from you, making it appear concave
•Swirl — distorts the image in a spiral
•Ripple — distorts the image in concentric rings, like the rings created when you drop a stone into a
pool of water
4Adjust any of the following sliders:
•Power — controls the intensity of the Sphere and Ripple effects
•Angle Factor — controls the appearance of twisting and swirling in all effects
Applying the Woodcut effect
You can apply the Woodcut effect to create an image that appears like a woodcut or linoleum block print.
You can specify either black and white or colored Woodcut effects. You can also save preset Woodcut
effects to apply to other images.
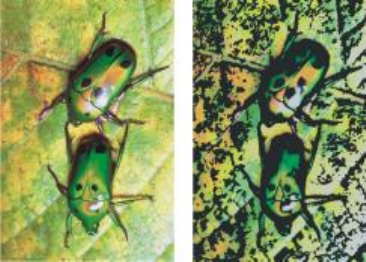
Using lighting and surface texture effects | 671
Before (left) and after (right) applying the Woodcut effect.
To apply a black and white Woodcut effect
1To apply the effect to:
• The canvas — Click the Canvas in the Layers panel.
• A selection — Click a selection tool from the toolbox, and drag in the document window to select an
area.
• A layer — Click a layer in the Layers panel.
2Choose Effects Surface Control Woodcut.
3Enable the Output Black check box to use the black part of the effect in the final image.
4Disable the Output Color check box if you want to use black and white only in the final image.
5Adjust any of the following sliders:
•Black Edge — determines the detail of the black edge. Larger values produce thick, black edges
around objects. Smaller values produce more intricate edges.
•Erosion Time — determines the number of erosion iterations performed on the black edge. The
higher the erosion, the simpler the edge.
•Erosion Edge — controls the amount of smoothing on the black edge. Larger values produce a
rounded appearance of the black edge.
•Heaviness — determines the amount of black in the final image
To apply a colored Woodcut effect
1To apply the effect to:
• The canvas — Click the Canvas in the Layers panel.
• A selection — Click a selection tool from the toolbox, and drag in the document window to select an
area.
• A layer — Click a layer in the Layers panel.
2Choose Effects Surface Control Woodcut.

672 | Corel Painter 2015 User Guide
3Enable the Output Color check box to use the color part of the effect in the final image.
4Disable the Output Black check box if you want to use color only in the final image.
5Enable one of the following options:
•Auto Color — computes the color set from the original image’s colors automatically
•Use Current Color Set — uses a predefined color set. Next, choose a color from the Color Set box.
6Adjust any of the following sliders:
•Number of Colors — determines the number of colors used in the effect, ranging from 2 to 256.
This control is available only with the Auto Color option.
•Color Edge — determines the thickness of a colored edge applied to the image boundaries. Moving
the slider to the right increases edge thickness, which is measured in pixels. The edge color is selected
by choosing a color swatch below the preview window.
You can change the colors in a color set by clicking a color and then clicking a new color in the
Change Color chip.
To save a Woodcut effect as a preset
1Choose Effects Surface Control Woodcut.
2In the Woodcut dialog box, modify any of the settings.
3Click the Add button .
4In the Add Preset dialog box, type a name in the Preset Name box.
You can choose the saved preset from the Preset list box.
Color options cannot be saved with a preset.
Applying the Distress effect
You can apply the Distress effect to generate a high-contrast, black and white rendering of an image. You
can control the edges, smoothness, variability, and threshold of the effect. The effect interacts with either
the currently selected paper grain, pattern, clone source, layer mask, or channel.
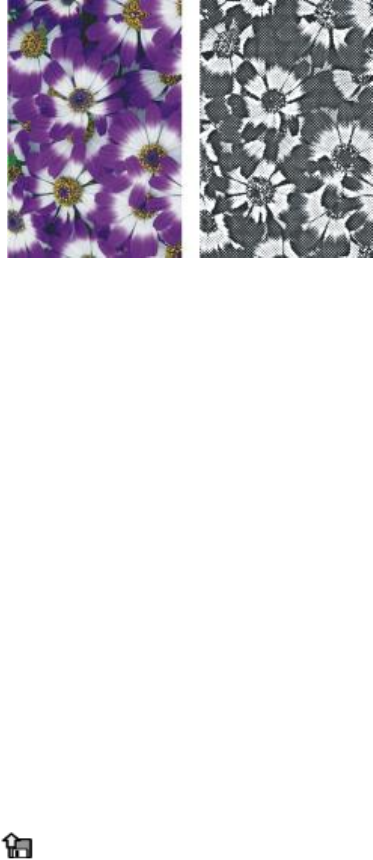
Using lighting and surface texture effects | 673
Before (left) and after (right) applying the Distress effect.
To apply the Distress effect using paper luminance
1Choose Window Paper Panels Papers.
2Choose a paper swatch from the Papers library panel.
If you want open to experiment with the effect, keep the Papers panel open while you apply the effect.
This way you can switch to different papers and modify the paper controls.
3To apply the effect to:
• The canvas — Click the Canvas in the Layers panel.
• A selection — Click a selection tool from the toolbox, and drag in the document window to select an
area.
• A layer — Click a layer in the Layers panel.
4Choose Effects Surface Control Distress.
5Choose Paper from the Using list box.
6Adjust any of the Distress controls. For information, see “Distress controls” on page 674.
To apply the Distress effect using clone source or pattern luminance
1Open an image.
2Do one of the following:
•To use a clone source, choose Window Clone Source. In the Clone Source panel, click the Open
Source Image button , and Open Source to choose a clone source.
•To use a pattern, choose Window Media Library Panels Patterns, and click a pattern swatch from
the Pattern library panel.
3To apply the effect to:
• The canvas — Click the Canvas in the Layers panel.
674 | Corel Painter 2015 User Guide
• A selection — Click a selection tool from the toolbox, and drag in the document window to select an
area.
• A layer — Click a layer in the Layers panel.
4Choose Effects Surface Control Distress.
5Choose Original Luminance from the Using list box.
6Adjust any of the Distress controls. For information, see “Distress controls” on page 674.
To apply the Distress effect using a layer mask or alpha channel luminance
1Do one of the following:
•To use a layer mask, choose Window Layers, and click the layer that contains a layer mask in the
Layers panel.
•To use an alpha channel, choose Window Channels, and click the alpha channel in the Channels
panel.
2To apply the effect to:
• The canvas — Click the Canvas in the Layers panel.
• A selection — Click a selection tool from the toolbox, and drag in the document window to select an
area.
• A layer — Click a layer in the Layers panel.
3Choose Effects Surface Control Distress.
4Choose the layer mask or channel from the Using list box.
5Adjust any of the Distress controls. For information, see “Distress controls” on page 674.
Distress controls
•Edge Size — determines the size of the edge enhancement
•Edge Amount — determines the amount of edge enhancement
•Smoothing — determines the roundness of the edge between black and white
•Variance — determines the amount of grain added to the edge
•Threshold — determines how much black is in the image
•Preview — enable this check box to preview the effect in the document window
Applying the Serigraphy effect
With the Serigraphy effect, you can use photographs to generate images that appear silk-screened or look
like woodblock cuts. When applying the effect, Corel Painter saves each color reduction as a separate layer,
so you can edit each layer individually.

Using lighting and surface texture effects | 675
Before (left) and after (right) applying the Serigraphy effect.
To apply Serigraphy effects
1To apply the effect to:
• The canvas — Click the Canvas in the Layers panel.
• A selection — Click a selection tool from the toolbox, and drag in the document window to select an
area.
• A layer — Click a layer in the Layers panel.
2Choose Effects Surface Control Serigraphy.
3Click the Match to color chip, and choose a color from the Color dialog box.
This is the center color — the color on which the effect will be based.
4Click the Fill with color chip, and choose a color from the Color dialog box.
This color is used on the new layer.
5In the Serigraphy color dialog box, adjust any of the following sliders:
•Smoothing — determines the smoothness of the black edge
•Threshold — determines the total amount of color difference from the center color
•Distance Weighting — determines the amount of color distance from the center color
•Hue Weighting — determines how much hue contributes to the effect
•Sat Weighting — determines how much saturation contributes to the effect
•Lum Weighting — determines how much luminance contributes to the effect
6Click Create Serigraphy Layer.
7Click OK.
You can also specify Match and Fill colors by clicking a color in the image.
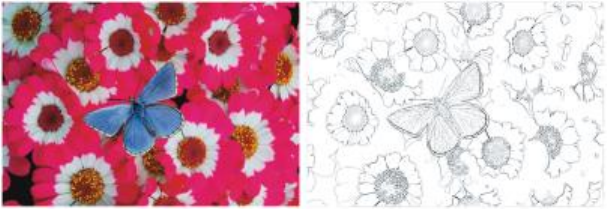
676 | Corel Painter 2015 User Guide
Applying the Sketch effect
You can use the Sketch effect to generate a black and white pencil outline of a photograph. You can then
use the outline as a guide for applying color, which is a useful technique for starting a painting. For more
information, see “Choosing a painting workflow” on page 124.
To store the settings for the effect, you can create a preset. This allows you to quickly apply the settings to
another image.
Before (left) and after (right) applying the Sketch effect.
To apply the Sketch effect
1To apply the effect to:
• The canvas — Click the Canvas in the Layers panel.
• A selection — Click a selection tool from the toolbox, and drag in the document window to select an
area.
• A layer — Click a layer in the Layers panel.
2Choose Effects Surface Control Sketch.
3In the Sketch dialog box, adjust any of the following sliders:
•Sensitivity — determines sensitivity to detail. Low values detect only the main edges. High values
detect the main edges as well as thin lines, such as the lines around a person’s eyes.
•Smoothing — determines how much noise is filtered out. Higher values result in wider, lighter, and
blurrier lines.
•Grain — determines how much of the paper grain is revealed in the sketch marks. Move this slider to
the right to show more of the paper grain.
•Threshold High and Threshold Low — removes noise after edge detection. Threshold High is used
to flag light pixels which may be just noise in the image. Threshold Low is used to test surrounding
pixels.

Using lighting and surface texture effects | 677
You can also apply a preset sketch effect by choosing a preset from the Preset list box.
To save a sketch effect as a preset
1Choose Effects Surface Control Sketch.
2In the Sketch dialog box, modify any of the settings.
3Click the Add button .
4In the Add Preset dialog box, type a name in the Preset Name box.
You can delete a preset sketch effect by choosing it from the Preset list box and clicking the
Delete button.
678 | Corel Painter 2015 User Guide

Dynamic Plug-ins | 679
Dynamic Plug-ins
Dynamic plug-ins are a category of floating layers that give you the ability to manipulate, transform, and
adjust underlying images non-destructively. In other words, you can apply and modify the dynamic plug-
effects any number of times without altering the source image.
The Liquid Metal dynamic plug-in lets you introduce
metallic droplets to an image by using a dynamic layer.
This section contains the following topics:

680 | Corel Painter 2015 User Guide
•“Getting started with dynamic plug-ins” (page 680)
•“Modifying and deleting dynamic layers” (page 681)
•“Committing dynamic layers to default layers” (page 681)
•“Applying the Brightness and Contrast dynamic plug-in” (page 682)
•“Applying the Burn dynamic plug-in” (page 683)
•“Applying the Tear dynamic plug-in” (page 684)
•“Applying the Bevel World dynamic plug-in” (page 686)
•“Applying the Equalize dynamic plug-in” (page 688)
•“Applying the Glass Distortion dynamic plug-in” (page 690)
•“Applying the Kaleidoscope dynamic plug-in” (page 691)
•“Applying the Liquid Lens dynamic plug-in” (page 693)
•“Applying the Liquid Metal dynamic plug-in” (page 698)
•“Applying the Posterize dynamic plug-in” (page 706)
Getting started with dynamic plug-ins
Dynamic plug-ins allow you to apply effects to images without altering the original image. For example, you
can add a burnt effect to the edge of an image or increase the image brightness. The Dynamic plug-ins are
accessible from the Layers panel.
When you apply an effect using a dynamic plug-in, a dynamic layer is automatically generated in the
document. Like all floating objects, dynamic layers appear in the layer list in the Layers panel, where they
are identified by the plug icon . You can select, move, group, hide, show, and lock dynamic layers,
as well as change their display order, opacity, and composite method, as you would with other layers. For
more information, see “Layers” on page 513.
The steps for applying dynamic plug-ins vary slightly depending on which dynamic plug-in you choose. For
most dynamic plug-ins, you can apply the effect to:
• a constrained area by making a selection in the document window
• a selected layer
• to the content of the entire canvas
If you apply the effect to a selection, the dynamic layer conforms to the dimensions and location of the
selection. If you apply the effect to the canvas, the dynamic layer is the same size as the canvas. For a few
dynamic plug-ins, such as Kaleidoscope, you can specify the size of the new layer before you create it. For
more information, see “Applying the Kaleidoscope dynamic plug-in” on page 691.
When you save the file in RIFF format, the dynamic layer retains its dynamic nature. Therefore, if you plan
on modifying the dynamic layer in the future, you should save the file to RIFF.

Dynamic Plug-ins | 681
To access the dynamic plug-ins
1Choose Window Layers.
2In the Layers panel, click the Dynamic Plug-ins button to display a list of dynamic plug-ins.
Modifying and deleting dynamic layers
After creating a dynamic layer, you can change its settings. You can also delete a dynamic layer at any time.
To change a dynamic layer’s settings
1Select the dynamic layer in the document window or in the Layers panel.
2Double-click the dynamic layer in the Layers panel.
3In the dialog box, change any settings.
To delete a dynamic layer
•In the Layers panel, select the dynamic layer, and click the Delete button .
You can also delete a dynamic layering by choosing Edit Undo.
Committing dynamic layers to default layers
At some point, you may want to finalize the effect and commit the result to a default layer. This allows you
to work with the image in ways not possible when the effect is held in a dynamic layer.
Committing a dynamic layer captures its current appearance to a pixel-based layer. After a dynamic layer is
committed, you can no longer adjust the effect. The following operations automatically generate a prompt
to commit a dynamic layer:
• painting on a dynamic layer
• applying an additional effect or dynamic plug-in
• dropping a dynamic layer
• collapsing a group that contains a dynamic layer
• saving to a non-RIFF format
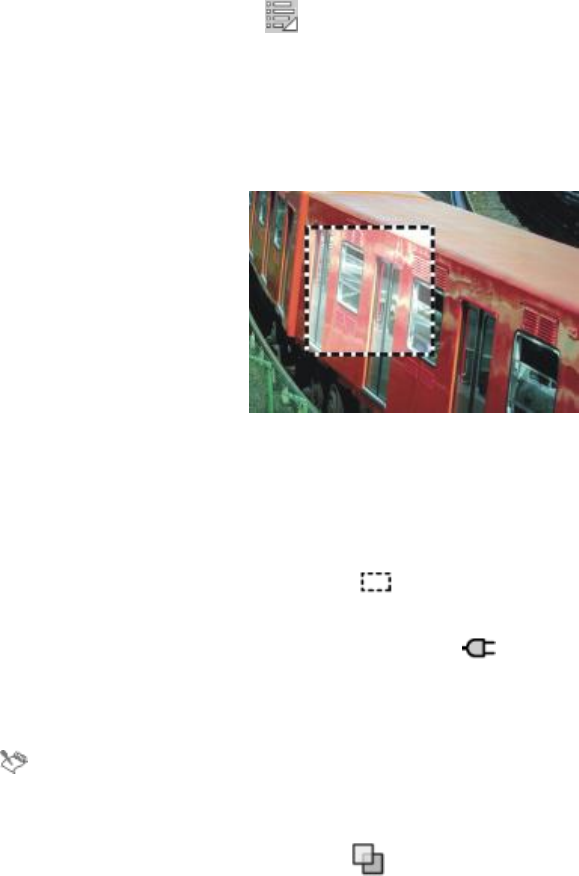
682 | Corel Painter 2015 User Guide
To commit a dynamic layer to a default layer
1In the Layers panel, choose a dynamic layer.
2Click the Layer options button , and choose Convert To Default Layer.
Applying the Brightness and Contrast dynamic plug-in
The Brightness and Contrast dynamic plug-in creates a layer that lets you adjust the brightness and
contrast of the image beneath it.
The Brightness and Contrast dynamic layer affects all images beneath it.
To create a Brightness and Contrast dynamic layer
1Do one of the following:
• In the Layers panel, choose the Canvas.
•Choose the Rectangular Selection tool from the toolbox, and then drag in the document
window to select an area.
2In the Layers panel, click the Dynamic Plug-ins button , and choose Brightness and Contrast.
3In the Brightness/Contrast dialog box, drag the sliders to adjust the image contrast and brightness.
Corel Painter automatically creates a new layer when you apply the dynamic plug-in.
If you don’t like the results, you can click Cancel or you can click Reset to restore the default
settings.
You can also use the Opacity slider in the Layers panel to adjust the effect.
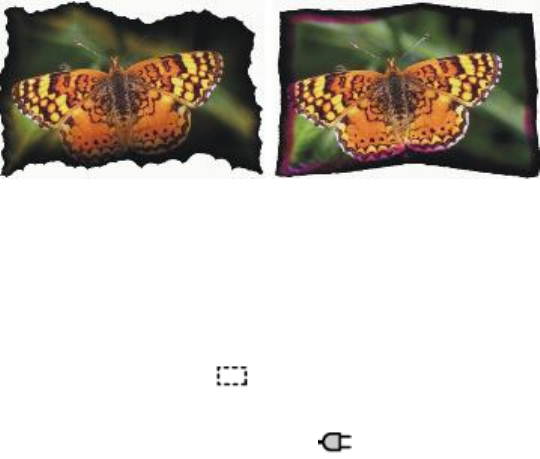
Dynamic Plug-ins | 683
Applying the Burn dynamic plug-in
The Burn dynamic plug-in lets you add a burn effect to the edges of a selection or layer. You can adjust the
amount and character of the burn.
Different Burn settings produce different results.
To burn a layer or selection
1Do one of the following:
•In the Layers panel, choose the Canvas, and choose Select All.
• In the Layers panel, choose a layer.
•Choose the Rectangular Selection tool from the toolbox, and then drag in the document
window to select an area.
2In the Layers panel, click the Dynamic Plug-ins button , and choose Burn.
3In the Burn Options dialog box, adjust any of the following sliders and controls:
•Burn Margin — specifies the width of the burn effect in relation to the layer’s size
•Flame Breadth — specifies the width of the scorched region. The burn color appears in the scorch.
•Flame Strength — specifies how much of the layer is consumed by the burn. Increasing Flame
Strength shrinks the layer.
•Wind Direction — changes the burn amount for different sides of the layer
•Wind Strength — determines how much change the Wind Direction control imparts
•Jaggedness — specifies the amount of irregularity in the burnt edges
If you apply the effect a selection, Corel Painter 2015 automatically creates a new layer when you apply
the dynamic plug-in.
If you apply the effect to an existing layer, Corel Painter converts the layer to a dynamic layer.

684 | Corel Painter 2015 User Guide
You can also
Use the current paper to vary the dye
concentration in the scorch region
Enable the Use paper texture check box.
Burn the interior edges as well as the exterior
edges of the selection
Enable the Burn Interior Edges check box. Disable
this check box to protect the interior edges.
Change the scorch color Click the Color chip, and choose a color in the
Color dialog box.
Restore the default settings Click the Reset button.
You can view only the dynamic layer by hiding the canvas in the Layers panel.
You can apply a Burn to a specific area of the canvas by selecting the area, right-clicking the
selection and choosing Layer via Copy, then applying the effect to the new layer.
You can use the Revert to Original command in the Layers panel menu to restore a source image
to its original condition. For more information, see “Modifying and deleting dynamic layers” on
page 681.
Applying the Tear dynamic plug-in
The Tear dynamic plug-in lets you apply a torn-paper effect to the edge of a selection or layer. You can also
control the amount of tearing that the effect produces.
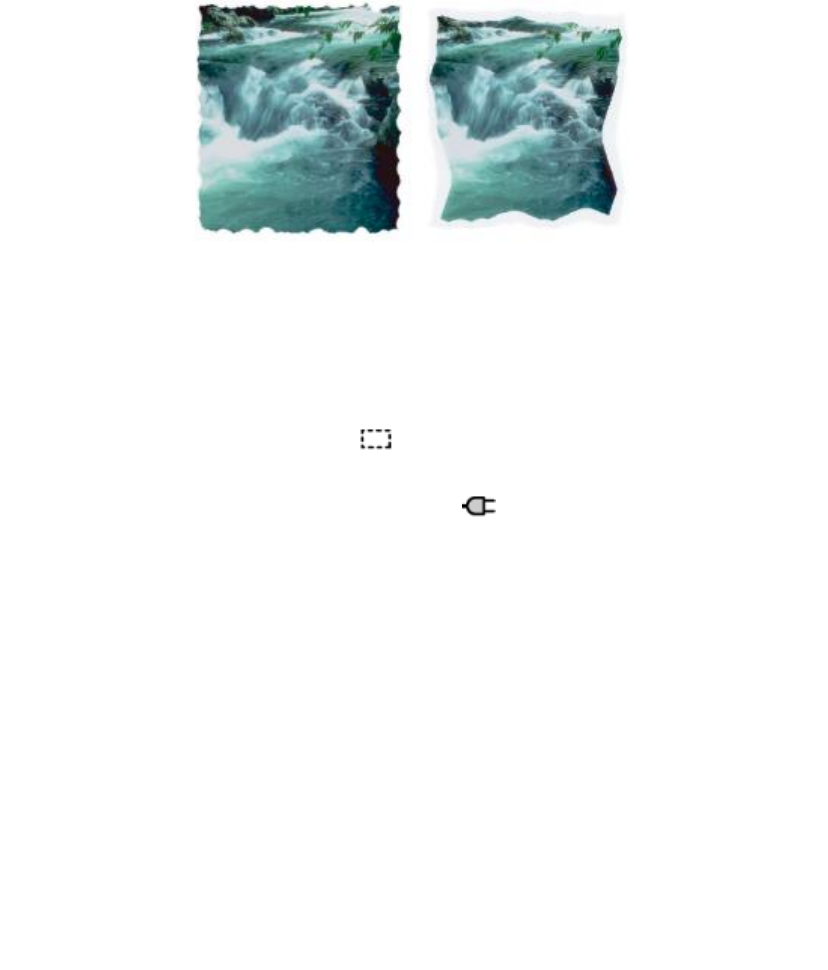
Dynamic Plug-ins | 685
You can tear a little (left) or a lot (right).
To apply the Tear dynamic plug-in
1Do one of the following:
•In the Layers panel, choose the Canvas, and choose Select All.
• In the Layers panel, choose a layer.
•Choose the Rectangular Selection tool from the toolbox, and then drag in the document
window to select an area.
2In the Layers panel, click the Dynamic Plug-ins button , and choose Tear.
3In the Tear Options dialog box, set the following sliders and controls to adjust the tear effect:
•Margin — specifies the width of the tear effect from the edge of the layer
•Strength — specifies how much of the layer is torn away
•Jaggedness — specifies the amount of irregularity in torn edges
If you apply the effect a selection, Corel Painter automatically creates a new layer when you apply the
dynamic plug-in.
If you apply the effect to an existing layer, Corel Painter converts the layer to a dynamic layer.
You can also
Tear the interior edges as well as the exterior edges Enable the Tear interior edges check box. Disable
this check box to protect interior edges.
Change the tear color Click the Color chip, and choose a color in the
Color dialog box.
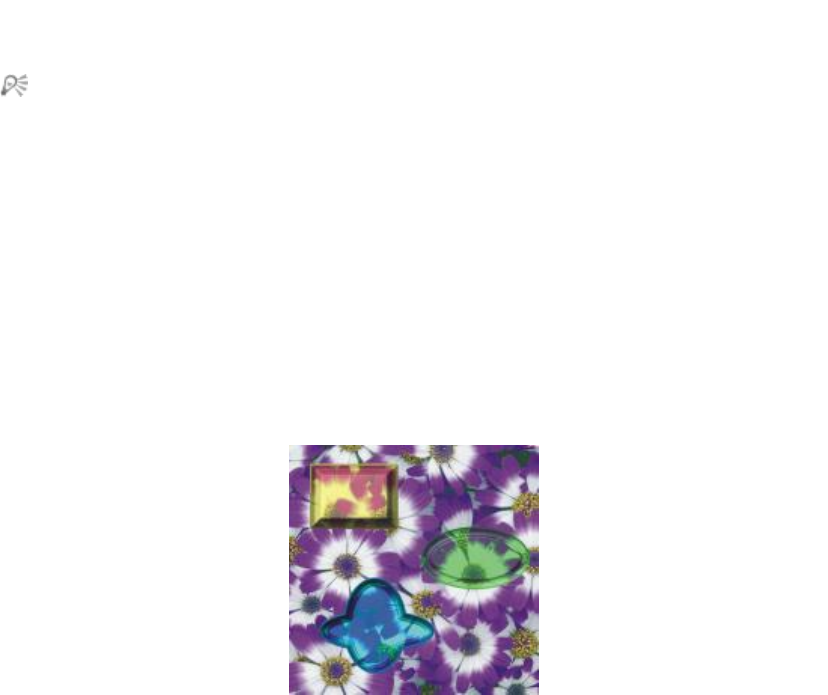
686 | Corel Painter 2015 User Guide
You can also
Restore the default settings Click the Reset button.
You can view only the dynamic layer by hiding the canvas in the Layers panel.
Use a rough paper texture to create a better tear by clicking the Paperselector in the toolbox and
choosing a paper texture from the list.
You can use the Revert to Original command in the Layers panel menu to restore a source image
to its original condition. For more information, see “Modifying and deleting dynamic layers” on
page 681.
Applying the Bevel World dynamic plug-in
The Bevel World dynamic plug-in lets you create three-dimensional (3D) objects by adding bevel effects,
or angled edges, to selections or layers. You can control both bevel shape and lighting to create unique
effects.
Examples of various bevel profiles.
For example, you can even use Bevel World to create a 3D button with text on it. First, create the
background button, and then add text to float over the button. You can then group the text and button
together and collapse the layer group.
You can also change the 3D appearance of the bevel by adjusting the lighting.
To apply a bevel effect
1Do one of the following:

Dynamic Plug-ins | 687
• In the Layers panel, choose a layer.
•Choose a selection tool from the toolbox, and then drag in the document window to select an
area.
2In the Layers panel, click the Dynamic Plug-ins button , and choose Bevel World.
3In the Bevel area, adjust any of the following sliders:
•Bevel Width — specifies the width of the bevel in relation to the layer diameter
•Outside Portion — controls the portion of the bevel that appears outside the layer
•Rim Slope — specifies the angle of the rim (innermost portion) of the bevel
•Cliff Portion — specifies the horizontal distance between the base and the rim
•Cliff Height — specifies the vertical distance between the base level and rim level
•Cliff Slope — specifies the angle of the cliff (middle portion) of the bevel
•Base Slope — specifies the angle of the base (outermost portion) of the bevel
•Smoothing — controls the roundness of the transitions between base, cliff, and rim as well as the
sharpness of the resulting ridges
4In the Light area, adjust any of the following sliders:
•Light Direction — specifies the angle of the light source
•Light Height — specifies the light’s angle in relation to the canvas. At 90°, the light is shining straight
down, and at 1°, it’s nearly horizontal. With Light Height set to 90%, the Light Direction setting has
no effect. When set to 90% or less, the light rotates around the center.
•Brightness — controls the light’s intensity
•Scatter — adjusts the spread of the light’s shine over the surface
•Shine — controls the prevalence of highlights
•Reflection — controls how much of the source image is visible in the bevel. If you are working with a
clone, the clone source is mapped onto the surface at a variable percentage.
You can also
Add beveling on the interior edges of the bevel
area
Enable the Bevel Interior Edges check box.
Change the color of the outside portion Click the Outside Color chip, and choose a color
in the Color dialog box. This control applies only
when Outside Portion is greater than zero.

688 | Corel Painter 2015 User Guide
You can also
Change the light color Click the Light Color chip, and choose a color in
the Color dialog box.
Add a preset light source In the Light area, enable the Simple lighting check
box, and click a light indicator on the lighting
sphere.
Add a custom light source In the Light area, disable the Simple lighting
check box, and click on the lighting sphere where
you want to add a new light source.
A new light indicator (small circle) appears where
you click.
Delete a custom light source Click on a light indicator and press Delete.
Restore the default settings Click the Reset button.
You can use the Revert to Original command in the Layers panel menu to restore a source image
to its original condition. For more information, see “Modifying and deleting dynamic layers” on
page 681.
Applying the Equalize dynamic plug-in
The Equalize dynamic plug-in creates a layer that lets you adjust the contrast in underlying images. It does
this by adjusting black and white points and distributing the brightness levels throughout the entire range
of available levels.
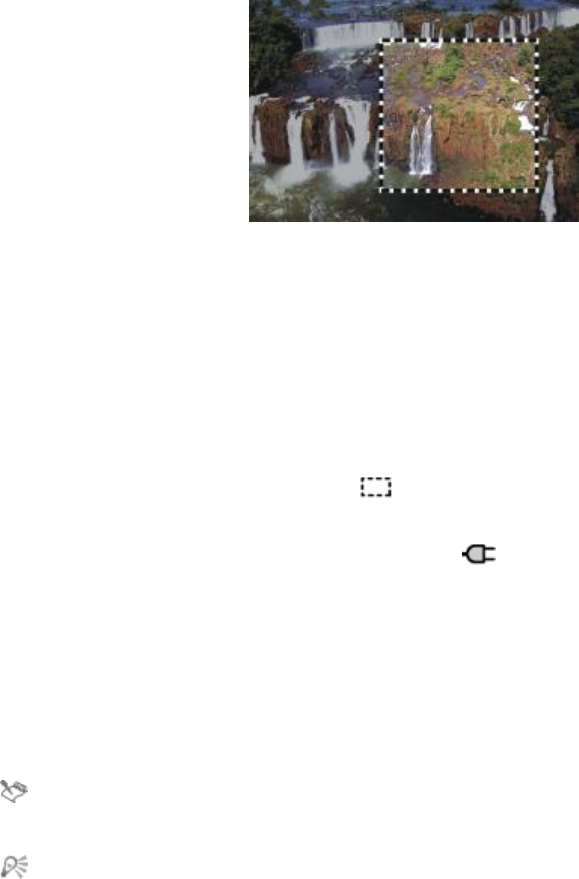
Dynamic Plug-ins | 689
The Equalize dynamic layer is applied to a rectangular selection.
The Equalize dynamic plug-in creates a histogram showing the number of pixels for each brightness
level value. Equalize allows gamma adjustment, which lightens or darkens an image without changing
highlights or shadows.
To create an Equalize dynamic layer
1Do one of the following:
• In the Layers panel, choose the Canvas.
•Choose the Rectangular Selection tool from the toolbox, and then drag in the document
window to select an area.
2In the Layers panel, click the Dynamic Plug-ins button , and choose Equalize.
3In the Equalize dialog box, adjust the contrast by dragging the small black and white markers under the
histogram.
Any values in the image located to the right of the white marker become black; any values to the left of
the black marker become white.
4Drag the Gamma slider to adjust only the midtones of an image and leave the white and black areas
untouched.
Corel Painter automatically creates a new layer when you apply the dynamic plug-in.
If you don’t like the results, click Reset to restore the default settings.
You can also use the Opacity slider in the Layers panel to adjust the effect.
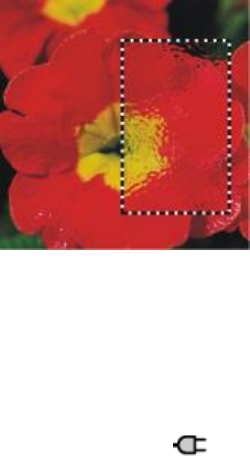
690 | Corel Painter 2015 User Guide
Applying the Glass Distortion dynamic plug-in
The Glass Distortion dynamic plug-in creates a layer that simulates the appearance of viewing the image
through textured glass. You can move the layer in the document to view the distortion over different parts
of an image.
A section of an image with Glass Distortion applied.
To create a Glass Distortion dynamic layer
1Do one of the following:
• In the Layers panel, choose the Canvas.
• Choose a selection tool from the toolbox, and then drag in the document window to select an area.
2In the Layers panel, click the Dynamic Plug-ins button , and choose Glass Distortion.
3In the Glass Distortion Options dialog box, choose one of the following displacement sources from the
Using list box:
•Paper — uses the selected paper texture. Paper texture is good for creating the pebbled glass effect.
Unless you want frosted glass, you’ll probably want to increase the scale of the paper.
•Current Selection — uses the currently selected area in the document window
•Image Luminance — uses the current document’s luminance
•Original Luminance — uses the clone source’s luminance
Image pixels are displaced, based on the light and dark areas of the source.
4To modify the distortion effect, adjust any of the following sliders:
•Softness — controls the transitions between displaced colors. Increasing softness creates more
intermediate steps and produces a smoother distortion. If you experience aliasing in a glass distortion,
try increasing the softness.
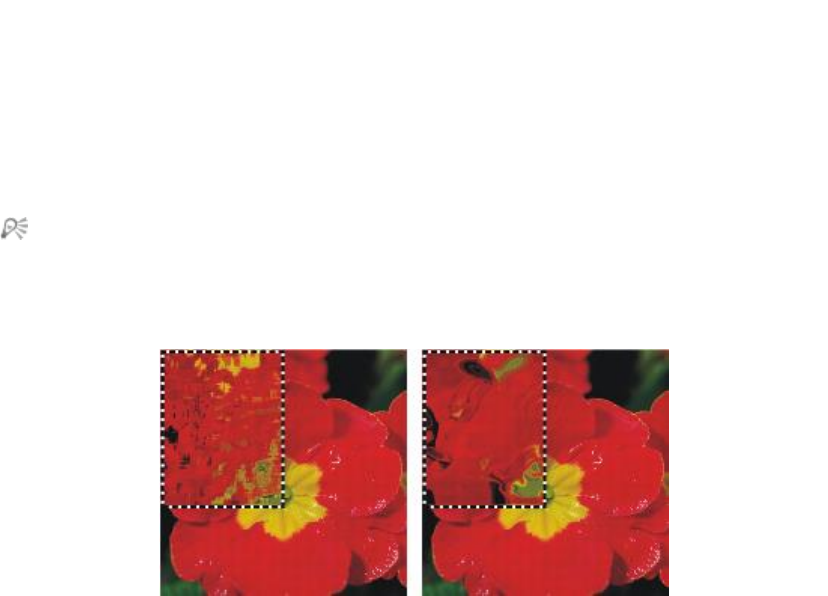
Dynamic Plug-ins | 691
•Amount — controls the degree of displacement. A higher amount leads to more distortion.
•Variance — creates multiple variations in the neighborhood of the displacement. The result of
increasing variance depends on the type of image and other settings.
Corel Painter automatically creates a new layer when you apply the dynamic plug-in.
You can also
Inverts the selected source Enable the Inverted check box.
Display changes before applying them to the
image
Enable the Preview check box.
Restore the default settings Click the Reset button.
You can also use the Opacity slider in the Layers panel to adjust the effect.
You can drag the Glass Distortion layer or selection in the document window to distort other
areas of the image.
The Glass Distortion dynamic layer using Paper (left)
and Image Luminance (right) displacement sources.
Applying the Kaleidoscope dynamic plug-in
The Kaleidoscope dynamic plug-in creates a square layer that produces kaleidoscopic effects from
underlying images. The traditional kaleidoscope is a hollow tube with a set of mirrors and colored chips at
one end. You peer into the other end and enjoy the highly symmetrical patterns that the mirrors create from
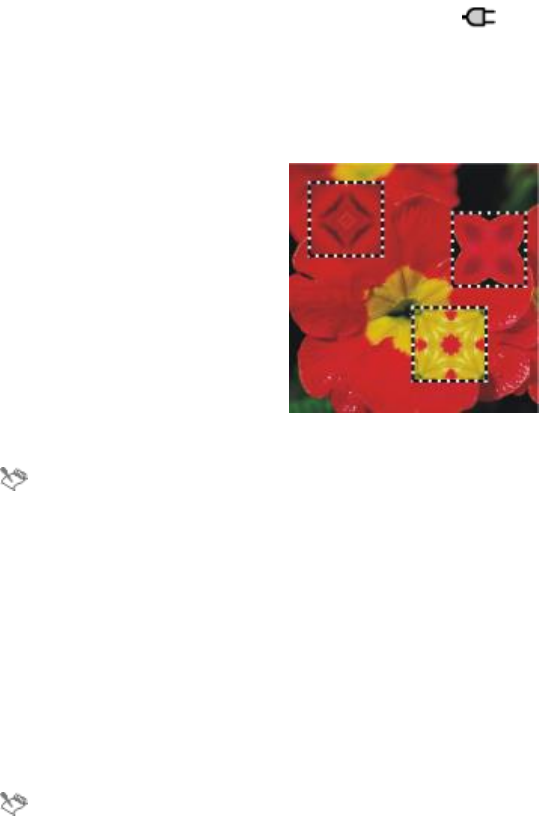
692 | Corel Painter 2015 User Guide
the colored chips. When you add a Kaleidoscope dynamic layer, you first specify its size. You can move the
layer over different parts of an image to produce different effects.
To create a Kaleidoscope dynamic layer
1In the Layers panel, click the Dynamic Plug-ins button , and choose Kaleidoscope.
2In the Kaleidoscope dialog box, specify the size of the dynamic layer.
Kaleidoscopes must be square, and no bigger than the shorter dimension of the document (width or
height).
3Drag the Kaleidoscope layer to different areas of the image to alter the effect.
Move the Kaleidoscope layer to produce different effects.
To preserve the Kaleidoscope layer, you need to save the image in RIFF format.
To create and capture a Kaleidoscope pattern
1Drag the Kaleidoscope layer on the canvas until it displays an image that you like.
2In the Layers panel, select the Kaleidoscope layer.
3Click the Layers panel menu arrow, and choose Drop and Select to commit the layer.
4Choose Window Media Library Panels Patterns.
5In the Patterns Libraries panel, click the Capture Pattern button.
For more information, see “Patterns” on page 709.
When you create a pattern from a Kaleidoscope layer, the selection is dropped to the canvas and
cut out. If you want to preserve the original image and the Kaleidoscope layer so that you can
continue working with the effect, save the image in RIFF format before you choose Drop and
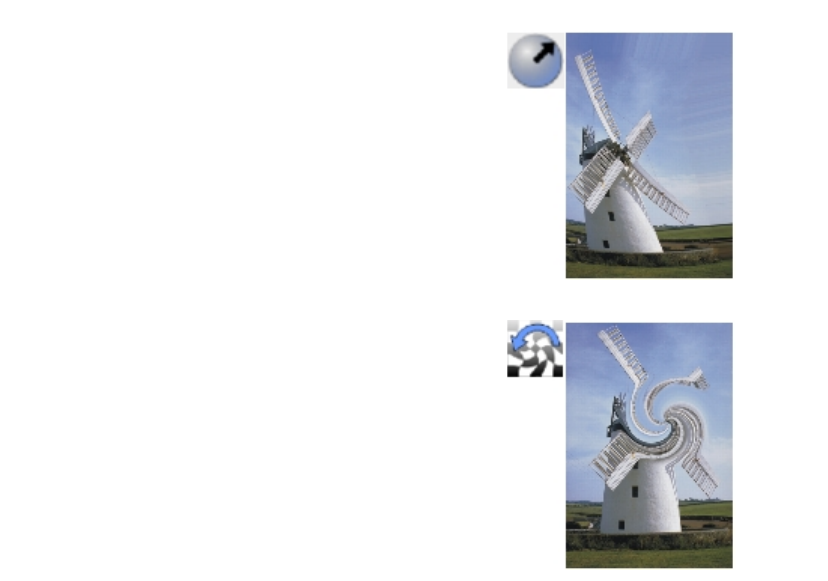
Dynamic Plug-ins | 693
Select. As an alternative, you can set the number of Undo levels high enough so that you can
back out of the steps to restore the original image.
Applying the Liquid Lens dynamic plug-in
Liquid Lens creates a dynamic layer that lets you distort and smear the underlying image. You can create
“fun house” mirror effects, melting images, and more. You can also erase any of the changes that you
make.
Liquid Lens tools
You can apply different distortion effects by using any of the following tools:
Liquid Lens tool Example
The Circular Distortion tool creates circular rings
of distortion. Drag in the direction you want the
distortion to move. Size and Spacing have no
effect on the Circular Distortion tool.
The Left Twirl tool distorts in counterclockwise
spirals.
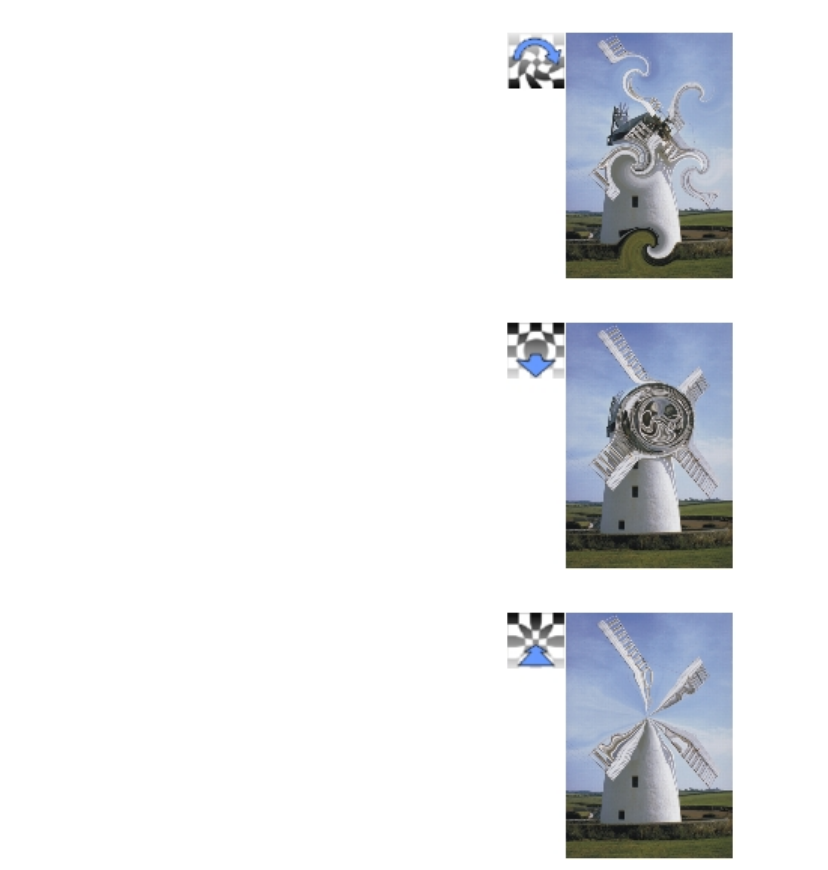
694 | Corel Painter 2015 User Guide
Liquid Lens tool Example
The Right Twirl tool distorts in clockwise spirals.
The Bulge tool distorts outward, pushing images
out.
The Pinch tool distorts inward, drawing images
closer.
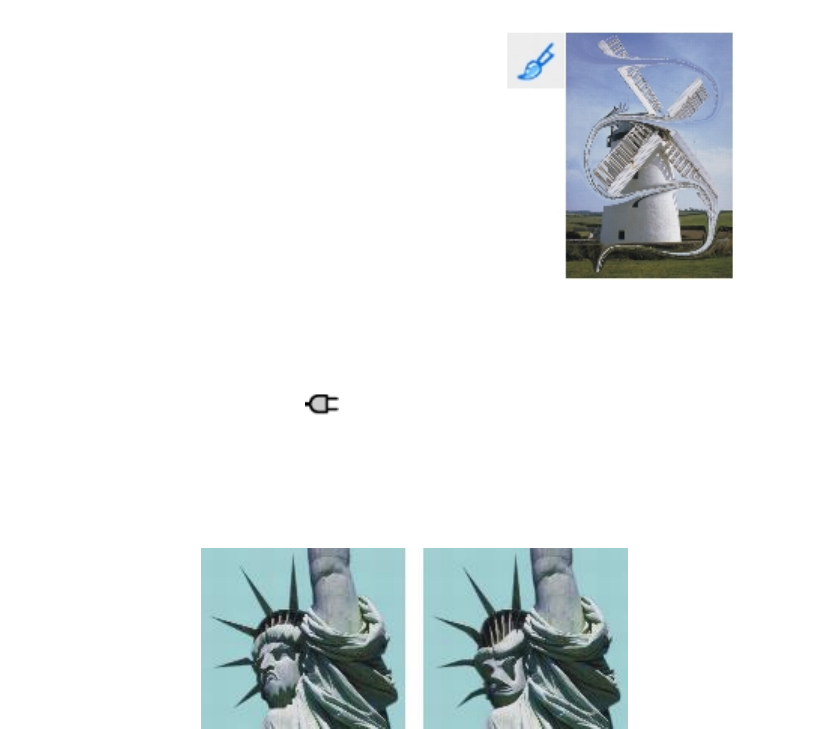
Dynamic Plug-ins | 695
Liquid Lens tool Example
The Brush tool distorts in the direction you drag.
To create a Liquid Lens dynamic layer
1In the Layers panel, choose the Canvas.
2Click the Dynamic Plug-ins button , and choose Liquid Lens.
3In the Liquid Lens dialog box, choose a Liquid lens tool.
4Adjust any of the following sliders:
•Size — changes the diameter of the distortion tool and the size of rain, which scatters distortion
droplets in the layer
Examples of how the Size slider affects distortion.
•Spacing — changes the distance between distortion dabs
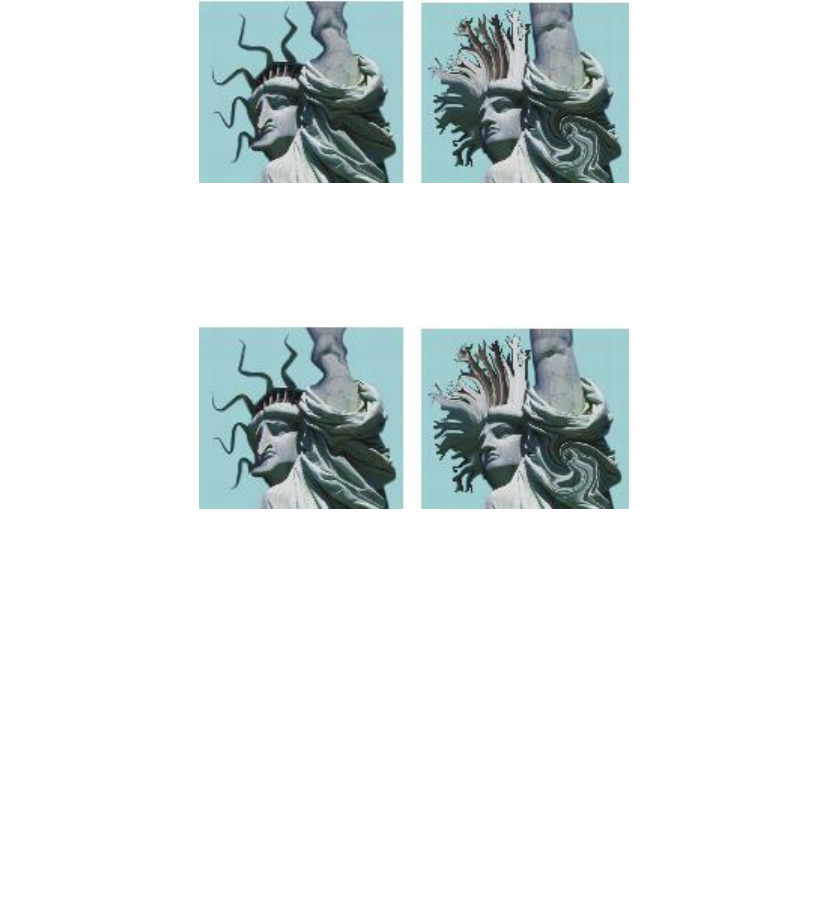
696 | Corel Painter 2015 User Guide
Low spacing makes a smooth, continuous stroke (left);
high spacing lets the dabs appear individually (right).
•Amount — controls the degree of distortion applied
•Smooth — changes the blending between the distortion stroke and the unaffected images
Higher values create a smooth, continuous distortion (right).
Lower values create individual dabs of distortion (left).
5Drag in the document window to create distortion.
If you don’t like the distortion, click Clear.
You can also
Simulate a melting image by scattering distortion
droplets downwards in the layer
In the Liquid Lens dialog box, click Rain, then click
anywhere in the image to stop the rain.
If Smooth and Size settings are very high, the rain
might continue for a moment after you click.
Restore the default settings Click the Reset button.
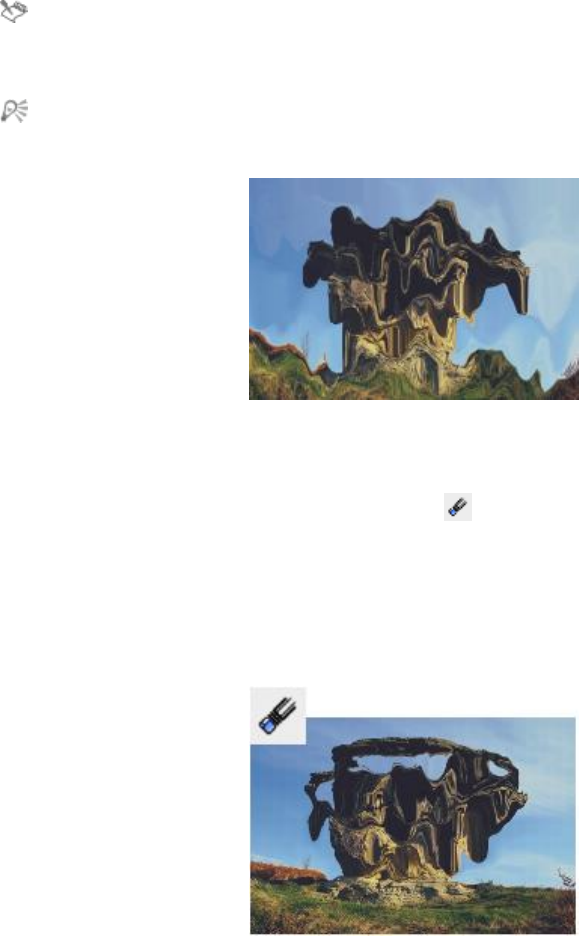
Dynamic Plug-ins | 697
You cannot use Undo to restore the image to its previous state, however, you can use the Eraser
tool in the Liquid Lens dialog box.
You can move the Liquid Lens layer to different regions of the document to distort other images.
Rain melts the image.
To erase Liquid Lens distortion
1In the Liquid Lens dialog box, choose the Eraser tool .
2Adjust the Size, Spacing, and Smooth sliders to modify the Eraser tool settings.
Higher settings on the Smooth slider create softer transitions from the erased area to the remaining
distortion.
3Drag in the document window.
The original underlying image returns.
Remove distortion by using the Eraser tool.

698 | Corel Painter 2015 User Guide
Applying the Liquid Metal dynamic plug-in
The Liquid Metal dynamic plug-in lets you paint on a layer with liquid and metal. This text uses the term
“metal” to refer to the media applied — even if the settings create an effect more like water.
You can apply droplets of liquid that distort the underlying image through refraction. You can also create
globs of shiny metal that flow together and move like mercury. The Refraction slider sets the difference
between water and metal, which lets you achieve intermediate effects. Negative metal can be used to
create holes in metal.
The Liquid Metal dynamic plug-in creates either liquid metal or translucent, refractive liquid.
A stroke of metal is made up of a series of discrete droplets. You can select one or several droplets and
move them or change their properties.
The “handles” show the droplet’s circle and center point. Showing the handles on the droplets isn’t
necessary for selecting them, but it can make your work easier. The droplets applied in the last stroke are
automatically selected. Each new stroke deselects the droplets of the previous one.
The Undo feature is not available when working with metal; however, you can remove selected metal, the
last metal applied, or all metal on the layer.
Metal is highly reflective. You can customize the look by using a clone source or a pattern as a reflection
map. For more information, see “Image cloning and sampling” on page 167 and “Patterns” on page
709.
Liquid metal tools
You can apply metal with the Brush tool, the Circular Drop tool, or the Rain feature. You can adjust the size
of your brush or rain droplets. The Brush is the default applicator. You can use the Brush tool to paint with
metal. You can use the Circular Drop tool to create circles of metal. The Rain feature lets you scatter metallic
droplets on the layer.
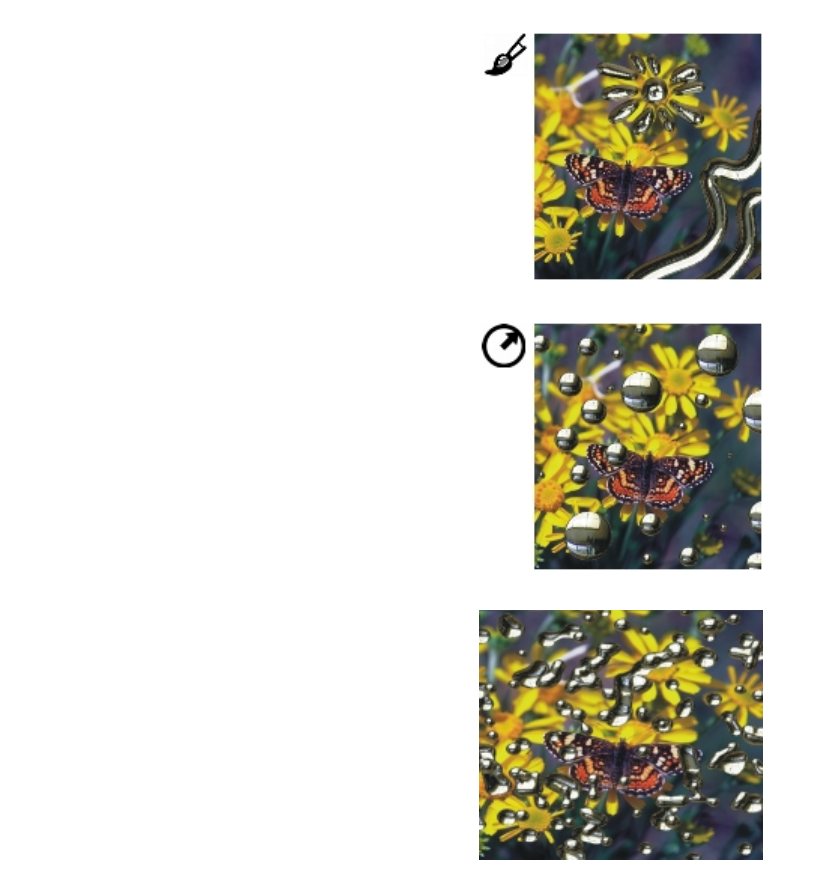
Dynamic Plug-ins | 699
Liquid Metal tool Example
You can create strokes of metal by using the Brush
tool.
You can create circles of metal by using the Circular
Drop tool.
You can create randomly falling metal raindrops by
applying the Rain feature.
To create a Liquid Metal dynamic layer
1In the Layers panel, choose the Canvas.
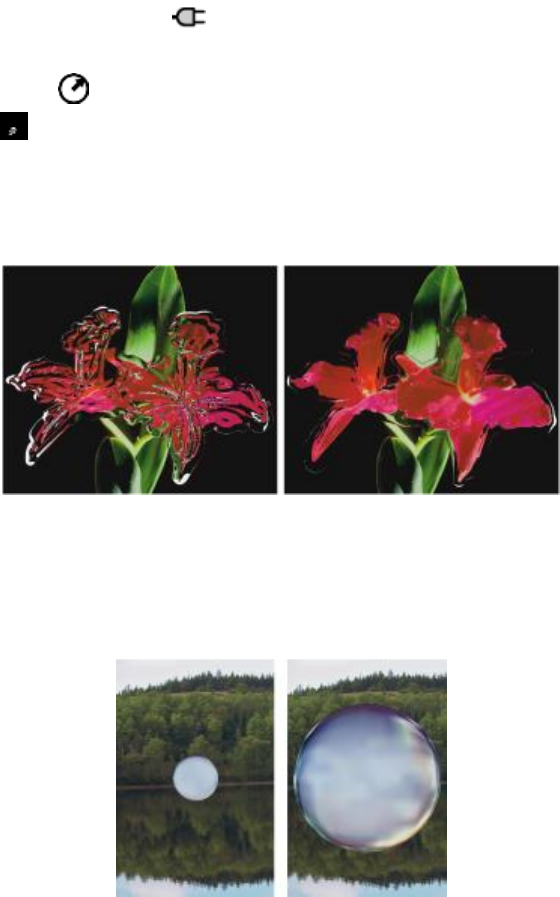
700 | Corel Painter 2015 User Guide
2Click the Dynamic Plug-ins button , and choose Liquid Metal.
3In the Liquid Metal dialog box, choose one of the following tools:
•Circular Drop tool
•Brush tool
4In the Settings area, move any of the following sliders:
•Size — changes the diameter of the selected droplets that you apply by using the Brush tool or Rain.
It does not affect the Circular Drop tool.
•Spacing — adjusts the spacing between droplets in strokes created with the Brush tool
A stroke with low spacing (left): the droplets flow together.
A stroke with high spacing (right): each droplet is distinct.
•Volume — adjusts visibility along the perimeter
Decreasing volume below 100% shrinks the visible portion of the
droplet, “drying it up” (left). Increasing volume beyond 100% extends
visibility beyond the droplet circle into the perimeter range (right).

Dynamic Plug-ins | 701
•Smooth — changes the perimeter range, which determines the droplet’s tendency to “join” its
neighbors
Low settings on the Smooth slider keep droplets distinct
(left); higher settings make the droplets flow together (right).
5In the Rendering area, choose one of the following metal types from the Map list box:
•Standard Metal
•Chrome 1
•Chrome 2
•Interior
•Clone Source
6Move any of the following sliders:
•Amount — controls the emphasis of the metal effect from the Refraction slider and applies to all
droplets in the layer. To create water effects, you can set the Amount to –0.5 so the droplets magnify
the underlying images.
Reflection and Refraction invert when you move the Amount slider to either extreme.
•Refraction — controls droplet appearance. The slider represents a scale between reflection and
refraction.
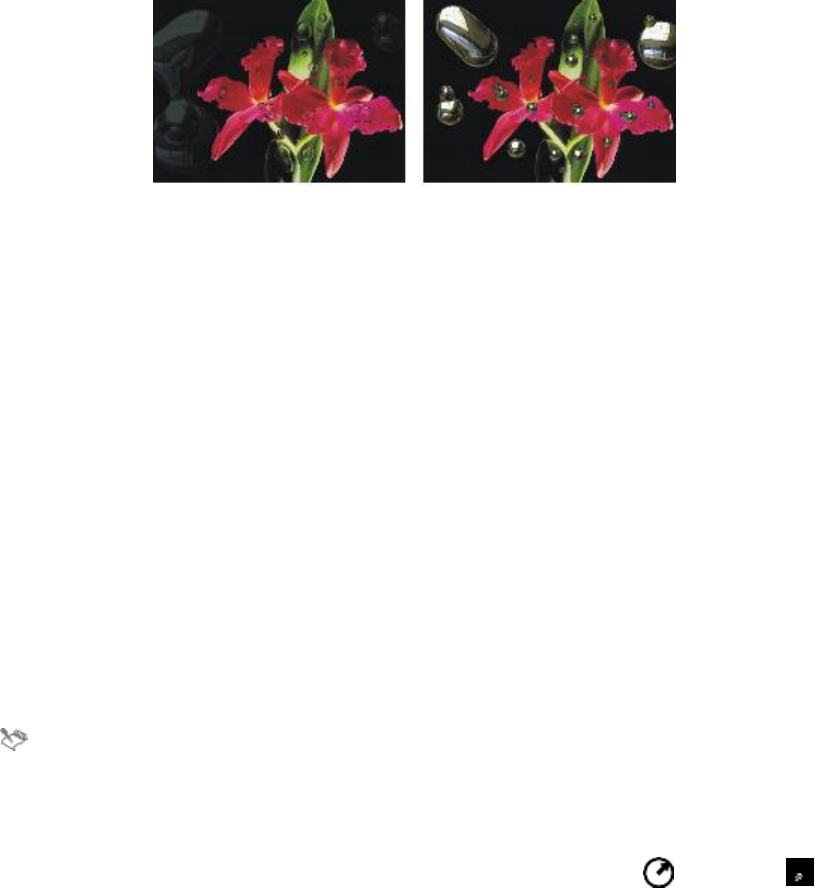
702 | Corel Painter 2015 User Guide
Low refraction means high reflection (left). High refraction creates
translucent, refractive liquid. As Refraction nears 100%, the metal becomes
transparent. The droplets look like a simple liquid — oil or water (right).
7Drag in the document window to apply the metal.
If you want to clear the effect and start again, click Clear.
You can also
Makes the droplets appear more round and three-
dimensional
Enable the Surface tension check box.
Scatter metal droplets in the layer In the Liquid Metal dialog box, click Rain, then
click anywhere in the image to stop the rain.
If Smooth and Size settings are very high, the rain
might continue for a moment after you click.
Restore the default settings Click the Reset button.
The Map type that you choose applies to the entire layer. You can change the type at any time.
To create negative metal
•Press Option (Mac OS) or Alt (Windows), and drag with the Circular Drop tool or Brush tool
over existing metal droplets.
You will create holes in your metal. As you drag through positive pools, the negative metal will divide
and separate the existing metal.

Dynamic Plug-ins | 703
To remove metal
To Do the following
Remove the last metal applied Press Delete (Mac OS) or Backspace (Windows).
Remove the selected metal droplets In the Liquid Metal dialog box, click the Select
Drops tool , select the metal, and press
Delete (Mac OS) or Backspace (Windows).
Remove all metal on the layer In the Liquid Metal dialog box, click Clear.
To show metal droplet handles
• In the Liquid Metal dialog box, enable the Display handles check box.
When you enable the Display Handles check box (right),
you can see the droplet circles and center points.
To select metal droplets
1In the Liquid Metal dialog box, choose the Select Drops tool .
2Perform an action from the following table.
To Do the following
Select a single droplet If the Display Handles check box is enabled, click
the center point handle of a droplet. If handles are
not displayed, click anywhere on a droplet.
Select a group of droplets Drag across the droplets you want to select.
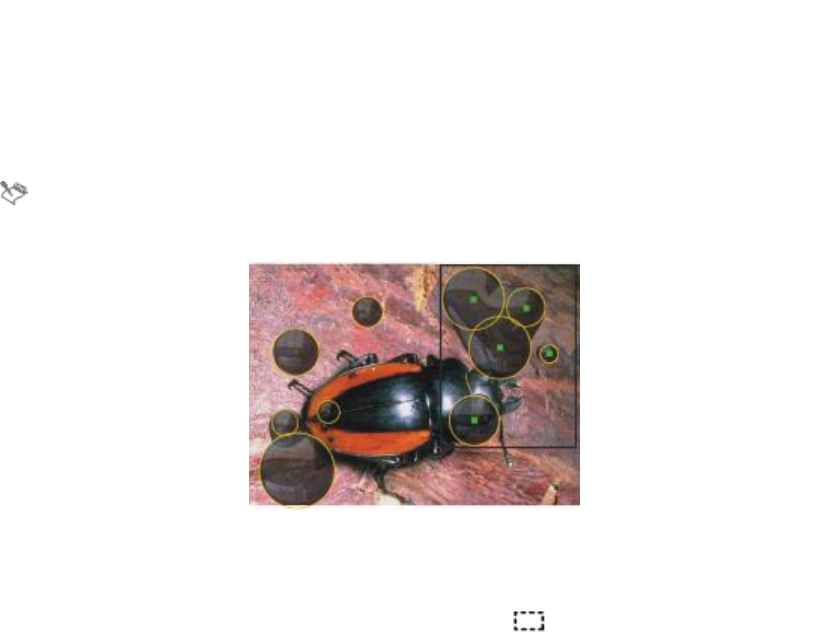
704 | Corel Painter 2015 User Guide
To Do the following
Add droplets to a selection Hold down Shift, and click additional droplets to
add to the selection.
Subtract droplets from a selection Hold down Shift, and click droplets to subtract
from the selection.
When a droplet is selected, the center point handle is displayed as a solid.
Drag over the droplets you want to select.
To move metal droplets
1In the Liquid Metal dialog box, choose the Select Drops tool , and select the droplets that you
want to move.
2Choose the Move Drop tool, and drag the droplets to a new position.
Notice how the droplets seek to join other droplets they encounter. You can control this tendency by
adjusting the Smooth slider.
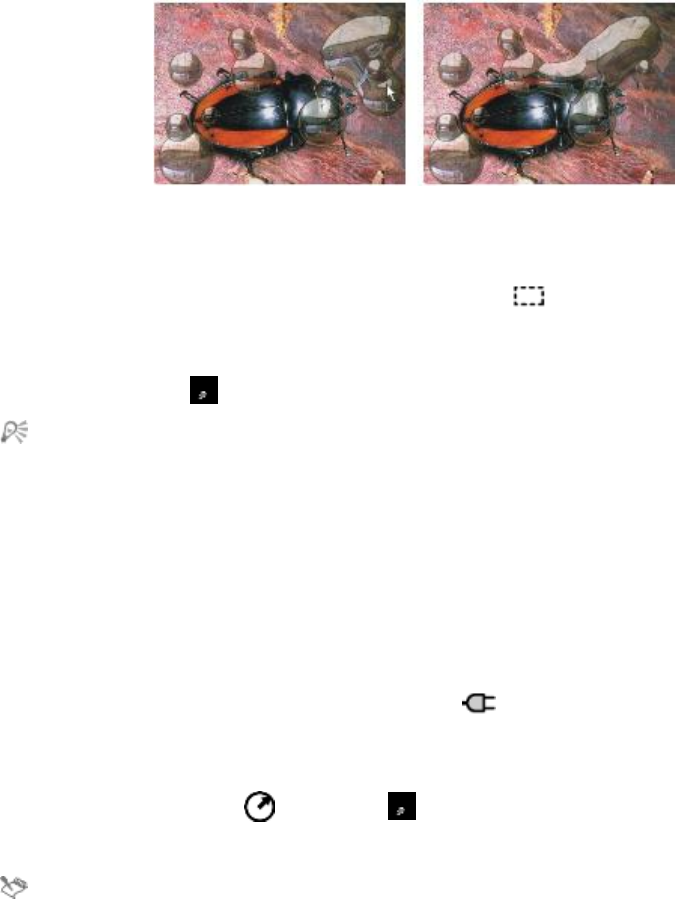
Dynamic Plug-ins | 705
You can drag the center of one of the droplets to move the selected group.
To adjust the size of the Liquid Metal brush
1In the Liquid Metal dialog box, choose the Select Drops tool , and click outside the droplets to
deselect all.
2Move the Size slider to the desired value.
3Click the Brush tool and paint, or click Rain.
You can also adjust the size of existing metal by selecting the droplets and moving the Size slider.
To apply a clone source or pattern to the Liquid Metal reflection
1Do one of the following:
• Choose a pattern by clicking the Pattern selector from the Media Selector bar, and clicking a pattern
from the list.
• Set a clone source.
2In the Layers panel, choose the Canvas.
3In the Layers panel, click the Dynamic Plug-ins button , and choose Liquid Metal.
4In the Liquid Metal dialog box, choose Clone Source from the Map list box.
5Adjust any settings.
6With the Circular Drop tool or Brush tool , drag in the document window to apply the metal.
If you want to clear the effect and start again, click Clear.
If no clone source has been specified, Corel Painter uses the current pattern as the reflection map.
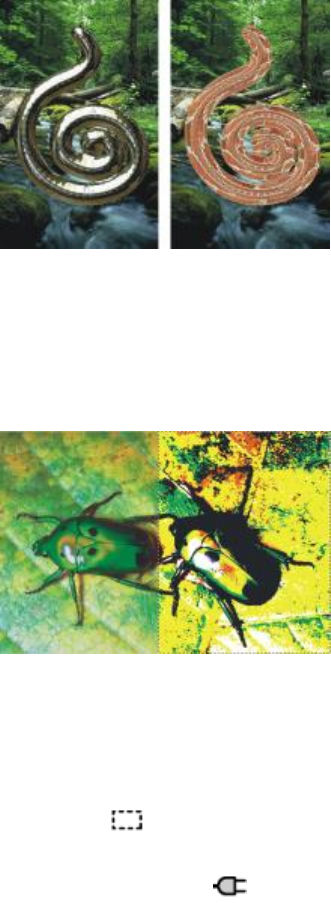
706 | Corel Painter 2015 User Guide
The same piece of metal changes appearance when a pattern is used as the reflection map.
Applying the Posterize dynamic plug-in
The Posterize dynamic plug-in creates a layer that reduces the number of color levels in the images it floats
over.
A Posterize dynamic layer modifies the right half of this image.
To create a Posterize dynamic layer
1Do one of the following:
• In the Layers panel, choose the Canvas.
•Choose the Rectangular Selection tool from the toolbox, and then drag in the document
window to select an area.
2In the Layers panel, click the Dynamic Plug-ins button , and choose Posterize.
3In the Posterize dialog box, specify the number of color levels you want.
Dynamic Plug-ins | 707
The maximum number of color levels is 128. The value applies to each color channel — red, green, and
blue.
Corel Painter automatically creates a new layer when you apply the dynamic plug-in.
708 | Corel Painter 2015 User Guide

Patterns | 709
Patterns
With Corel Painter, you can apply patterns to an image by filling or painting. In addition, you can customize
patterns by modifying sample patterns or by creating them from scratch.
All patterns, including both the sample and custom patterns, reside in libraries. You’ll find more libraries,
with additional materials, on the Corel website. For more information, see “Working with libraries” on page
56.
This section contains the following topics:
•“Applying pattern fills” (page 709)
•“Painting with patterns” (page 711)
•“Creating and editing patterns” (page 714)
•“Creating seamless patterns” (page 717)
•“Creating fractal patterns” (page 719)
Applying pattern fills
Corel Painter lets you apply preset pattern fills to images. A pattern is a repeating design, and the smallest
unit of a pattern is known as a “tile.” When you fill an area with a pattern, the tile, which is rectangular, is
repeated across the selected area.
You can adjust the appearance of a pattern in various ways. For example, you can change the tile size, also
known as the scale, and offset tiles in a fill. When you offset the tiles, you adjust the horizontal or vertical
position of the first tile, relative to the top of the object, which affects the rest of the pattern fill.
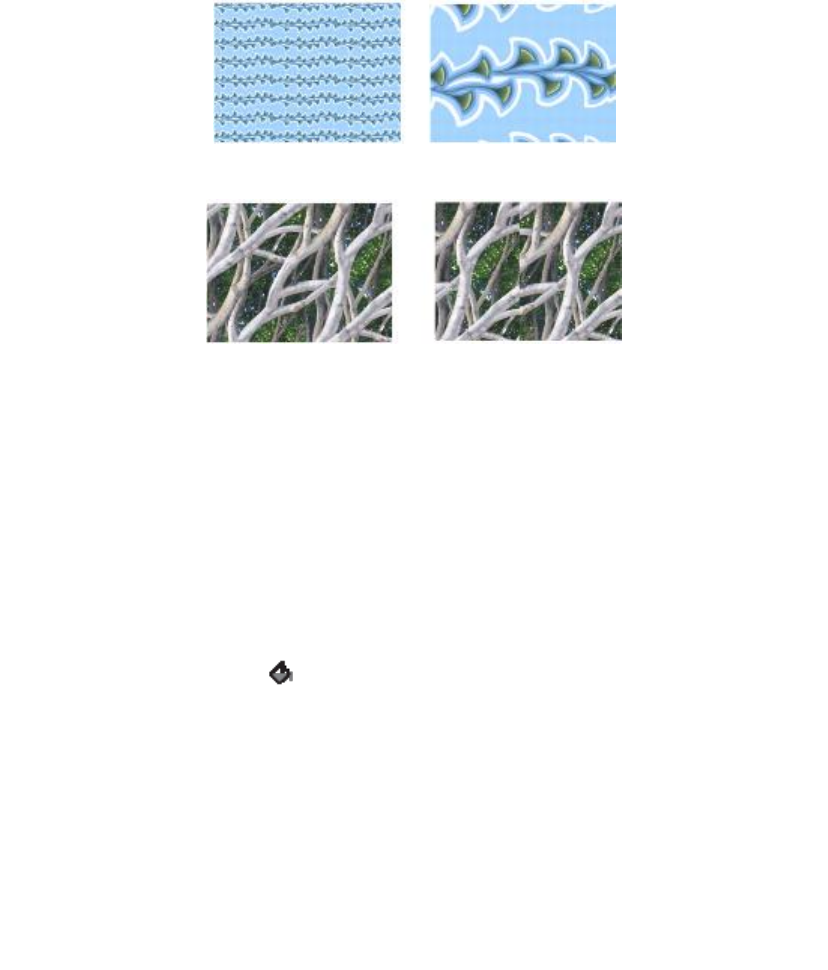
710 | Corel Painter 2015 User Guide
Left: A pattern scaled at 20%. Right: The same pattern scaled at 100%.
Left: The pattern offset set to 50% produces a seamless pattern. Right: The pattern
offset set to 100% increases the pattern tile visibility. The tiles also appear misaligned.
To apply a pattern as a fill
1Choose Window Media Control Panels Patterns.
2Click the Pattern selector, and click a pattern in the Patterns library panel.
3To apply a pattern to:
• The canvas — Click Canvas in the Layers panel.
• A selection — Click a selection tool from the toolbox, and drag in the document window to select an
area.
• A layer — Click a layer in the Layers panel.
4Choose the Paint Bucket tool from the toolbox.
5In the document window, click the canvas, selection, or layer.
You can also
Specify the range of colors to be filled On the property bar, type a value in the Tolerance
box or move the slider.
Specify the pattern opacity for pixels outside the
tolerance range
On the property bar, type a value in the Feather
box or move the slider.
Patterns | 711
You can also
Soften the edges of the pattern On the property bar, click the Anti-Alias button
.
Anti-aliasing is desirable when the Feather setting
is extremely low or set to zero.
The image must be larger than the tile in order for the tiling to be visible in an image.
You can also choose a pattern from the Pattern Selector in the toolbox or by choosing Edit Fill.
In the Fill dialog box, choose Original Luminance from the Fill With list box, and click the Pattern
selector. Note that the Pattern selector appears only if Current Pattern is selected in the Clone
Source panel.
To adjust the appearance of a pattern
1Choose Window Media Control Panels Patterns.
2Click the Pattern selector, and click a pattern in the Patterns library panel.
3Click one of the following buttons:
•Rectangular Pattern Type — places the tiles in a rectangular grid for fills. This option disables
the Pattern Offset slider.
•Horizontal Pattern Type — offsets the tiles in subsequent rows
•Vertical Pattern Type — offsets the tiles in subsequent columns
If applicable, move the Pattern Offset slider to control the amount of offset.
4Move the Pattern Scale slider to control the size of each tile in the pattern.
After you set these options, the pattern is ready to use.
Painting with patterns
Corel Painter lets you paint patterns directly onto an image using a brush that uses the rendered dab type.
When painting with a pattern, you can apply the pattern as is, or you can modify its appearance. For

712 | Corel Painter 2015 User Guide
example, you can paint a pattern with a mask, which generates a pattern with a transparent background.
You can also paint subtle patterns by adjusting the opacity, which produces a translucent effect.
Painted pattern type Example
Pattern
Pattern with mask
Pattern with opacity
To paint with a pattern
1Choose Window Media Control Panels Patterns.
2Click the Pattern selector, and click a pattern in the Patterns library panel.
3Choose Window Brush Control Panels General.
4Click the Brush Selector on the Brush Selector bar.
5In the Brush library panel, click a brush category and a brush variant.
If the Source list box in the General controls panel is not available (appears gray), the selected brush
category does not support patterns. For example, the Pattern Pens brush category supports patterns.
6From the General controls panel, choose a dab type from the Dab Type list box.
If the Source list box in the General controls panel is not available (appears gray), the dab type does not
support patterns. For example, the Projected and Rendered dab types support patterns.
7From the Source list box in the General controls panel, choose one of the following options:
•Pattern — paints with a pattern containing no mask information
•Pattern with Mask — paints using the mask data contained in the pattern (not all patterns contain
mask data)
If you want to change the size of the painted pattern, you should resize the brush instead of scaling the
pattern. To achieve the best results, set the Pattern Scale in the Patterns panel to 100%.
8Paint in the image.

Patterns | 713
You can also paint with a pattern by choosing a brush variant from the Pattern Pens category.
If you have not set a clone source, Corel Painter uses the current pattern in any operation related
to clone source colors or luminance. This means you can paint with a pattern by using a Cloner
brush.
When painting with a pattern, keep in mind that direction matters. Corel Painter flips the pattern
you’re painting when you change directions, so apply strokes in the same direction to achieve a
uniform effect.
To paint with pattern opacity
1Choose Window Media Control Panels Patterns.
2Click the Pattern selector, and click a pattern in the Patterns library panel.
If you want to resize the pattern tile, move the Pattern Scale slider.
3Choose Window Brush Controls General.
4Click the Brush Selector on the Brush Selector bar.
5In the Brush library panel, click a brush category and a brush variant.
If the Source list box in the General controls panel is not available (appears gray), the selected brush
category does not support patterns. For example, the Pattern Pens brush category supports patterns.
6From the General controls panel, choose a dab type from the Dab Type list box.
If the Source list box in the General controls panel is not available (appears gray), the dab type does not
support patterns. For example, the Rendered dab types support patterns with opacity.
7In the General controls panel, choose Pattern As Opacity from the Source list box.
Pattern As Opacity is the only computed dab type that responds to methods (Cover and Buildup),
allowing it to respond to Graininess.
8Apply a brushstroke to the image.
You can also paint with a pattern by choosing a brush variant from the Pattern Pens category.
Corel Painter applies the current color, using luminance in the pattern to control opacity. Light
colors in the pattern are rendered as transparent (or as having very low opacity). Dark colors in the
pattern are rendered as very dark (or as having high opacity).
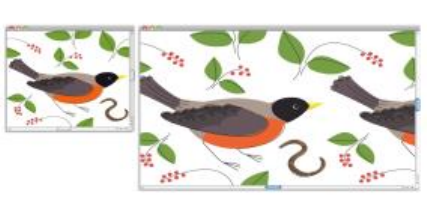
714 | Corel Painter 2015 User Guide
Creating and editing patterns
You can create a pattern from scratch or from an existing image. When creating a pattern from an existing
image, you can base the pattern on the entire image or a selected area. You can also create a pattern from
a mask, which produces a pattern with a transparent background. The image or selection that you choose
is converted into a tile that, when repeated, generates a pattern.
A pattern tile was created by applying brushstrokes to the canvas.
If you want to edit an existing pattern, or if a pattern preview isn’t detailed enough, you can open the
pattern tile in its own window so that you can view the pattern closely to modify it. For example, you can
manipulate a pattern to be a half-drop design, traditionally used in wallpaper designs.
After creating a pattern tile, you may want to refine it so that it tiles seamlessly. For more information, see
“Creating seamless patterns” on page 717.
Images that you turn into patterns are saved in the RIFF format, and they maintain their pattern
characteristics even after you save and reopen them. You can switch libraries whenever you want to use a
different set of patterns. For more information, see “Working with libraries” on page 56.
Creating patterns on layers
You can use the same techniques to create patterns on layers as you do to create them on the canvas.
However, a pattern’s wrap-around features do not apply to layers. This is because the canvas has edges,
but layers do not — they are unlimited in size. If you shift a pattern on a layer, the pattern does not wrap
around.
To create a pattern from scratch
1Choose File New.
2Type values in the Width and Height boxes.
If you want to create a pattern, you should set a small canvas size, such as 400 pixels by 300 pixels at
300 ppi.
Patterns | 715
3Choose Window Media Control Panels Patterns.
4In the Patterns panel, click the Pattern options button , and choose Define Pattern.
5Apply brushstrokes to the canvas.
If you apply a brushstroke to the edge of the canvas, wrap-around colors are enabled so that you can
drag a brushstroke off one edge of an image, while simultaneously applying the brushstroke to the
other side of the image.
6Click the Pattern options button , and choose Add Image to Library.
7In the Save Image dialog box, type a name for the pattern.
You can also create a pattern by choosing an existing pattern, modifying it, and then choosing
Define Pattern.
To create a pattern from an image
1Open the image file that you want to use in creating a pattern.
2Choose Window Media Control Panels Patterns.
3In the Patterns panel, click the Pattern options button , and choose Define Pattern.
4Click the Pattern options button , and choose Add Image to Library.
5In the Save Image dialog box, type a name for the pattern.
To create a pattern from a selection
1Open the image file that you want to use in creating a pattern.
2Choose Window Media Control Panels Patterns.
3Choose the Rectangular Selection tool from the toolbox.
4Drag in the document window to select the area that you want to save as a pattern tile.
5In the Pattern panel, click the Pattern options button , and choose Capture Pattern.
6In the Capture Pattern dialog box, enable one of the following options:
•Rectangular Tile — places the tile in a rectangular grid for fills. This option disables the Bias slider.
•Horizontal Shift — offsets the tiles in subsequent rows
•Vertical Shift — offsets the tiles in subsequent columns
If applicable, move the Bias slider to adjust the amount of offset.
716 | Corel Painter 2015 User Guide
7Type a name in the Name text box.
8Click OK to save the pattern tile to the current library.
You can also create a pattern that is based on a 4-point clone source, such as perspective or
bilinear. For more information, see “Applying transformations when sampling” on page 182.
To create a masked pattern
1Open the image file that you want to use in creating a pattern.
2Choose Window Media Control Panels Patterns.
3Choose the Lasso tool from the toolbox.
4In the document window, draw a freehand border around the area that you want to convert to a
masked pattern.
5In the Patterns panel, click the Pattern options button , and choose Capture Pattern.
6In the Capture Pattern dialog box, enable one of the following options:
•Rectangular Tile — places the tile in a rectangular grid for fills. This option disables the Bias slider.
•Horizontal Shift — offsets the tiles in subsequent rows
•Vertical Shift — offsets the tiles in subsequent columns
If applicable, move the Bias slider to adjust the amount of offset.
7Type a name in the Name text box.
8Click OK to save the masked pattern to the current library.
To quickly apply a pattern mask, click the Brush Selector. In the Brush library panel, choose the
Pattern Pens category, and then choose the Pattern Pen Masked variant.
You can apply pattern masks by using any brush variant that supports them. For more
information, see “Painting with patterns” on page 711.
To edit a pattern
1Choose Window Media Control Panels Patterns.
2Click the Pattern selector, and click a pattern in the Patterns library panel.
3Click the Pattern options button , and choose Check Out Pattern.
The pattern tile appears in a separate document window.
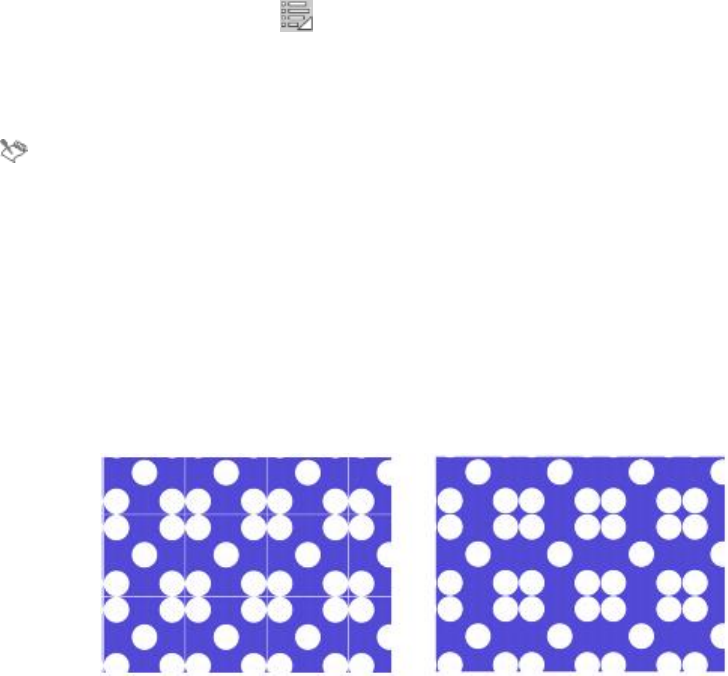
Patterns | 717
4On the canvas, modify the pattern tile image.
5Click the Pattern options button , and choose Add Image to Library.
6In the Save Image dialog box, click OK to save the pattern to the library.
If you want to rename the pattern, type a new name in the Save As text box. For example, you may
want to modify a default pattern, but keep a copy of the default pattern intact.
The Check Out Pattern mode supports wrap-around colors. When you drag a brushstroke off one
edge of an image, the brushstroke is simultaneously applied to the other side of the image. This
allows you to quickly modify the edges of an individual pattern tile.
Creating seamless patterns
Patterns are created by repeating a rectangular image tile across an area. Ideally, the pattern tiles should
seamlessly blend into one another so that the eye doesn’t distinguish the tile edges. Corel Painter allows
you to generate seamless patterns by modifying the edges of a pattern tile before applying the pattern.
However, you can also fix a pattern’s seams by directly modifying the pattern fill.
Left: The pattern tile includes a visible white edge, which delimits each tile. Right:
The white edge was filled with the background color to produce a seamless pattern.
To achieve seamless tiling, Corel Painter gives documents defined as pattern tiles two special characteristics:
wrap-around colors and wrap-around seams.
• The wrap-around colors feature lets you drag a brushstroke off one edge of an image, while
simultaneously applying the stroke to the other side of the image. This allows you to quickly modify the
edges of an individual pattern tile.
• The wrap-around seams feature lets you shift the edges of pattern tiles to the center of the image,
where their tonal differences are more apparent and easier to correct. This allows you to modify a
pattern after applying it as a fill.
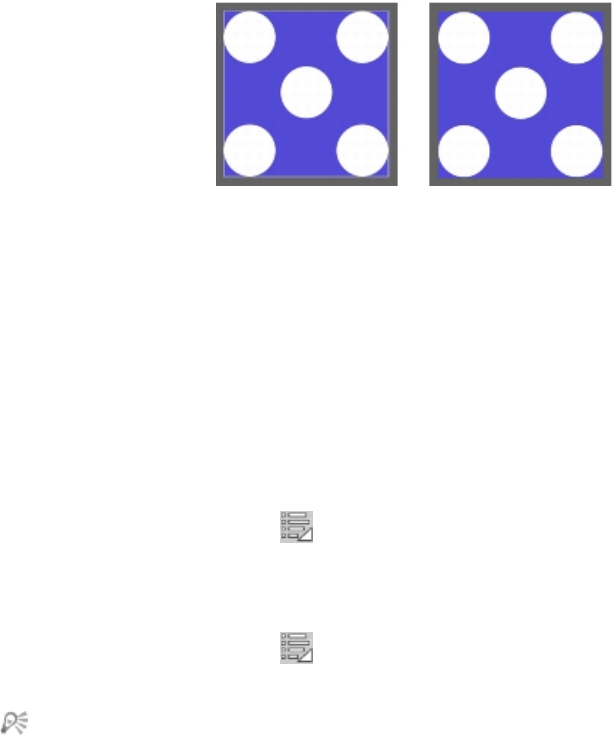
718 | Corel Painter 2015 User Guide
Left: The pattern tile before the edges were modified. Right: The same pattern tile after the
edges were painted by using the Straight Cloner brush and the wrap-around colors feature.
To ensure a seamless pattern, you can also apply an effect, such as the Glass Distortion effect, the Super
Soften effect (with the Wrap Around check box enabled), and most of the Tonal Control effects. Some
effects, such as Apply Surface Texture, can result in a noticeable seam. For information, see “Applying Glass
Distortion” on page 618.
To create a seamless pattern from a pattern tile
1Choose Window Media Control Panels Patterns.
2Click the Pattern selector, and click the pattern whose tile you want to fix from the Patterns library
panel.
3Click the Pattern options button , and choose Check Out Pattern.
The pattern tile appears in a separate document window.
4Use any color brush to paint out the edge lines, or use a brush with a Water or Drip method to smear
across the lines.
5Click the Pattern options button , and choose Capture Pattern.
6In the Capture Pattern dialog box, type a name in the Name box.
To preserve detailed images, set the Straight Cloner brush to clone from somewhere inside the
image. For more information, see “Painting in the clone” on page 176.
You can also copy a selection to a layer and move it over the edge. To produce clean transitions,
feather the layer, and reduce opacity. Drop the layer when you’re satisfied with the result. For
more information, see “Layers” on page 513.
To create a seamless pattern from a pattern fill
1Open a new blank document.
2Choose Window Media Control Panels Patterns.
Patterns | 719
3In the Patterns panel, click the Pattern selector, and click the pattern whose seams you want to modify
in the Patterns library panel.
4Click Canvas in the Layers panel.
5Choose the Paint Bucket tool from the toolbox, and click the canvas in the document window.
6In the Patterns panel, click the Pattern options button , and choose Define Pattern.
7In the toolbox, click the Grabber tool .
8Hold down the Shift key and drag the image to display the area where the tile’s horizontal and vertical
edges meet.
9Do any of the following:
• Use any color brush to paint out the edge lines, or use a brush with a Water or Drip method to
smear across the lines.
• Use the Straight Cloner brush to paint out the edge lines to preserve image details. For more
information, see “Painting in the clone” on page 176.
You can also copy a selection to a layer and move it over the edge. To produce clean transitions,
feather the layer, and reduce opacity. Drop the layer when you’re satisfied with the result. For
more information, see “Layers” on page 513.
The changes that you make to a pattern fill are not reflected in the original pattern tile.
Creating fractal patterns
You can create interesting landscapes by using fractal patterns. You can also convert a fractal pattern into a
paper texture and save it to the Paper library. For more information, see “Working with paper texture and
grain” on page 151.
Using Fractal Pattern controls
When you create fractal patterns, the following controls allow you to fine-tune your creation:
•Power controls the intricacy of the pattern’s definition, as if you were “zooming” in and out on a
textured surface with a microscope.
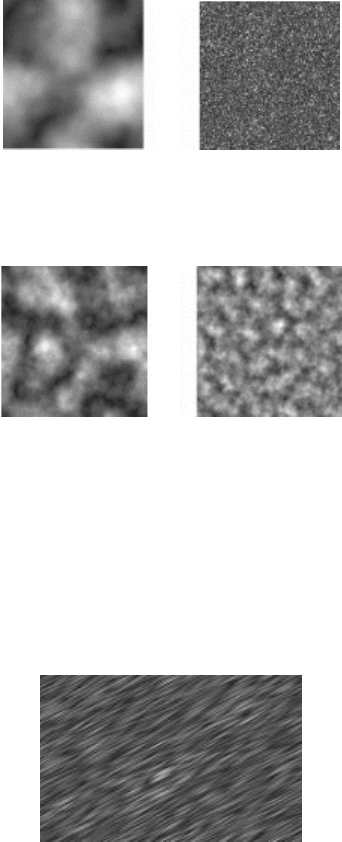
720 | Corel Painter 2015 User Guide
The Power slider determines the degree ofdetail. The image on
the left is set to -200% and the image on the right is set to 0%.
•Feature Size defines the number of prominent features within the tile.
The Feature Size slider determines the number of repetitions per tile. The
image on the left is set to 90% and the image on the right is set to 20%.
•Softness adjusts the edge softness of the pattern.
•Angle changes the direction from which you view the fractal.
•Thinness emphasizes the direction suggested by the lines of the fractal pattern. Thinner lines produce a
more linear look.
•Size determines the size of the tile you are creating. If your computer has a lot of memory, you can
make a large file with a high resolution. If you do not have a lot of available memory on your computer,
some of the size options may not be available.
Low Thinness settings display the fractal as streaks. Use
the Angle slider to change the direction of streaking.
Corel Painter uses four channels to store graphic information: Red, Green, Blue, and Alpha. When creating
fractal patterns, you can place information other than color values in these channels, which allows you to
visualize this information in different ways.

Patterns | 721
To create fractal patterns
1Choose Window Media Control Panels Patterns.
2In the Patterns panel, click the Pattern options button , and choose Make Fractal Pattern.
3In the Make Fractal Pattern dialog box, perform a task from the following table.
To Do the following
Control the intricacy of the pattern Move the Power slider to the right to zoom out
and see many small features, or move it to the left
to zoom in and see a few large features.
Modify the number of prominent features within
the tile
Move the Feature Size slider to the right to
decrease the repetitions per tile, or move it to the
left to increase the number of repetitions per tile.
Adjust the edge softness of the pattern Move the Softness slider to the left to decrease
the softness, or move it to the right to increase the
softness.
Change the direction from which you view the
fractal
Move the Angle slider to the left to decrease the
angle, or move it to the right to increase the angle.
Create a more linear pattern by emphasizing the
direction suggested by the lines of the fractal
pattern
Move the Thinness slider to the left to increase
the appearance of lines, or move it to the right to
decrease the appearance of lines.
4In the Size area, enable the option that corresponds to the size of the tile that you want to create.
5From the Channel list box, choose one of the following options:
•Height as Luminance — displays pseudo-height information as luminance. White areas are
represented as peaks, and dark areas become depressions. Images generated with this option can be
used with the Apply Surface Texture effect.
•Gradient Bearing — uses the Red channel to display the bearing of the down angle of a height field.
•Surface Normal — uses the Green and Blue channels to represent the X and Y components of the
surface normal (angle perpendicular to the surface at a given point) of the height field (Green=X,
Blue=Y).
6Click OK.
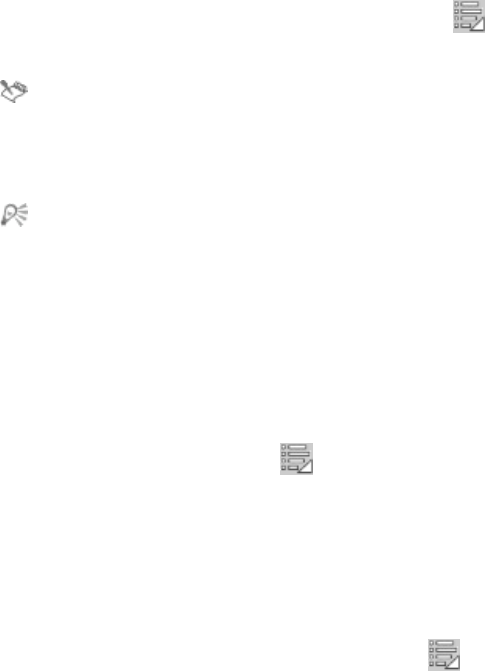
722 | Corel Painter 2015 User Guide
Creating the new pattern may take some time. When the pattern file is ready, it appears in a new
document window.
7In the Patterns panel, click the Pattern options button , and choose Capture Pattern.
8In the Capture Pattern dialog box, type a name in the Name box.
The Gradient Bearing and Surface Normal options for viewing a fractal texture are offered for
purely aesthetic reasons. One way to take advantage of them is to create color variations of the
texture with the Adjust Colors feature.
To colorize a fractal pattern, you can replace the grayscale tones with colors from a gradient fill by
using the Express in Image feature. For information, see “To replace image colors with gradient
colors” on page 727.
To convert a fractal pattern into a paper texture
1Choose Window Media Control Panels Patterns.
2In the Patterns panel, click the Pattern selector, and click a pattern in the Patterns library panel.
3Click the Pattern options button , and choose Check Out Pattern.
The fractal pattern is displayed in a new image window.
4Choose Effects Tonal Control, and adjust image elements such as brightness, contrast, and luminance.
For more information, see “Equalizing images” on page 274.
5Choose Select All.
6Choose Window Paper Panels Papers.
7In the Papers panel, click the Paper options button , and choose Capture Paper.
8In the Capture Paper dialog box, set the crossfade to 0.
9Type a name in the Save As box.

Gradients | 723
Gradients
A gradient is a type of fill that displays a smooth progression of two or more colors and adds the illusion
of depth to an image. Gradient fills are also known as blends or fountain fills. Corel Painter offers a wide
selection of preset gradients, but you can also create gradients.
This section contains the following topics:
•“Applying gradients” (page 723)
•“Replacing image colors with gradient colors” (page 726)
•“Adjusting gradients” (page 727)
•“Creating and editing gradients” (page 729)
•“Saving gradients” (page 733)
Applying gradients
Corel Painter allows you to apply a gradient to an image by filling an area, such as the canvas, a selection,
layer, or channel. For more information, see “Selections and transformations” on page 577, “Layers” on
page 513, and “Alpha Channels” on page 563.
When applying a gradient as a fill, you can apply one of four gradient types: linear, radial, circular, and
spiral.
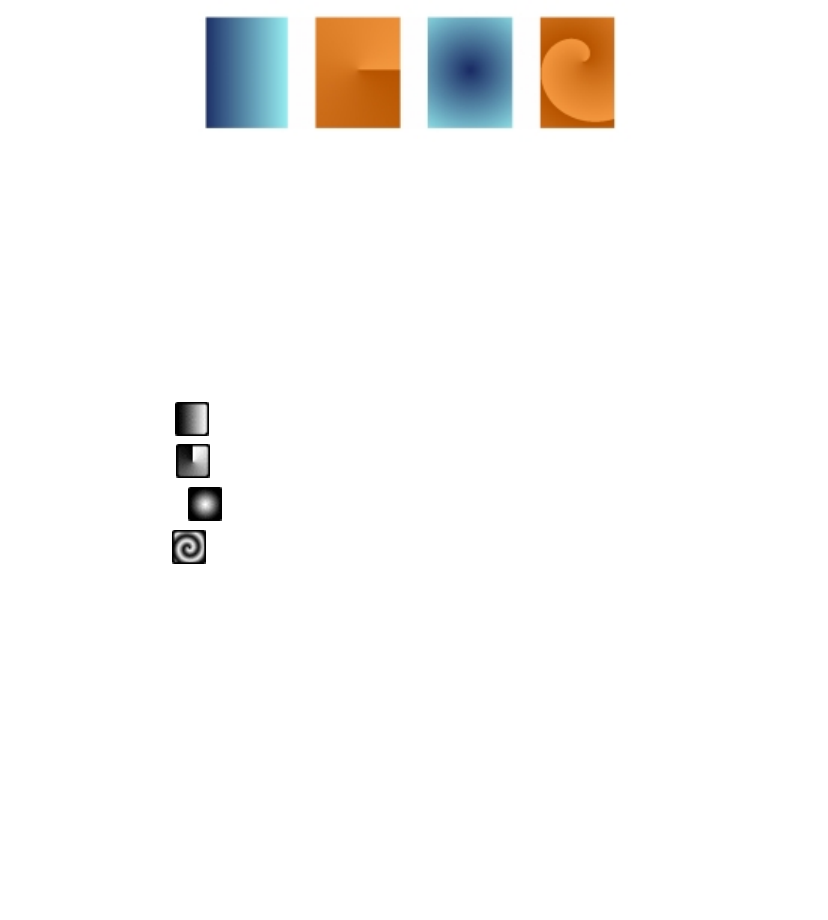
724 | Corel Painter 2015 User Guide
Left to right: Linear, radial, circular, and spiral gradients.
You can also apply a gradient in a fluid way by painting it onto an image with a brush and dab type that
support gradient painting. For more information, see “General controls: Dab types” on page 332.
To apply a gradient as a fill
1Choose Window Media Control Panels Gradients.
2Click the Gradient selector, and click a gradient from the Painter Gradients library panel.
3Click one of the following gradient types:
•Linear Gradient
•Radial Gradient
•Circular Gradient
•Spiral Gradient
4Perform a step from the following table.
To apply a gradient to Do the following
The canvas Click the Canvas in the Layers panel.
A selection Click a selection tool from the toolbox, and drag in
the document window to select an area.
A layer Click a layer in the Layers panel.
A channel Click a channel in the Channels panel.
Gradients | 725
5Click the Paint Bucket tool from the toolbox.
6In the document window, click the selected area, layer, or channel.
You can also
Specify the range of colors to be filled On the property bar, type a value in the Tolerance
box, or adjust the slider.
Specify the gradient fill opacity for pixels outside of
the tolerance range
On the property bar, type a value in the Feather
box, or adjust the slider.
Soften the edges of the gradient fill On the property bar, click the Anti-Alias button
.
Anti-aliasing is desirable when the Feather setting
is set to zero or extremely low.
You can also apply a Gradient by choosing the Paint Bucket tool from the toolbox, choosing
Gradient from the Fill list box on the property bar, then clicking the selected area, layer, or
channel.
You can also modify the gradient fill opacity by choosing Edit Fill, and moving the Opacity slider
in the Fill dialog box. Decreasing the gradient opacity increases the transparency of the gradient
fill.
To paint a gradient
1Choose Window Media Control Panels Gradients.
2In the Gradients panel, click the Gradient Selector.
3Click a gradient in the Painter Gradients library panel.
4Choose Window Brush Control Panels General.
5Click the Brush Selector on the Brush Selector bar.
6In the Brush library panel, click a brush category, and a brush variant.
If the Source pop-up menu in the General controls panel is not available (appears gray), the selected
brush category or variant does not support gradients. For example, the Pattern Pens brush category
supports gradients.
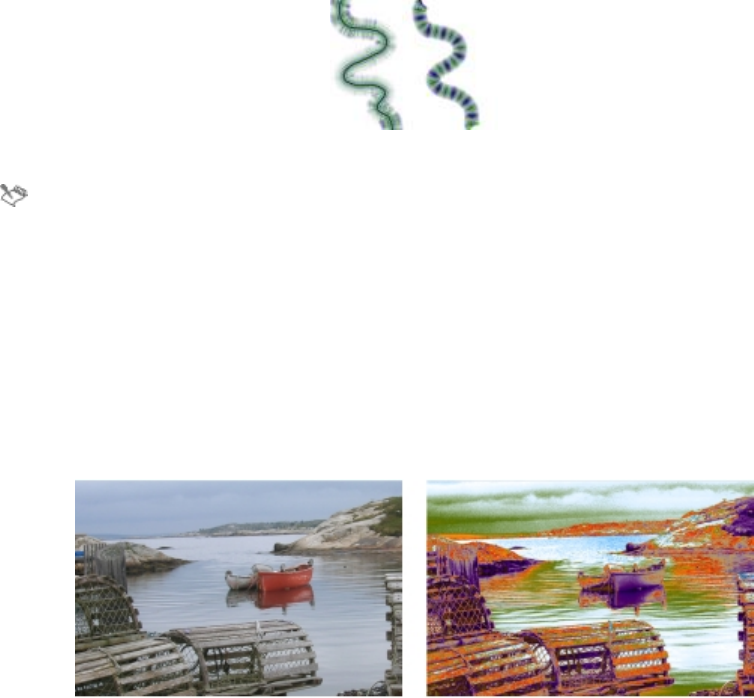
726 | Corel Painter 2015 User Guide
7From the General controls panel, choose a dab type from the Dab Type pop-up menu.
If the Source pop-up menu in the General controls panel is not available (appears gray), the selected
dab type does not support gradients. For example, the Line Airbrush, Projected, and Rendered dab
types support gradients.
8From the Source pop-up menu in the General controls panel, choose one of the following options:
•Gradient — applies the current gradient across the width of the stroke
•Gradient Repeat — repeats the current gradient along the length of the stroke
9Paint in the document window.
Painting with a gradient by using Gradient (left) and Gradient Repeat (right).
When painting with a gradient, only the Linear gradient type is supported.
Direction matters when you paint with a gradient. Corel Painter flips the gradient when you
change direction. To achieve a uniform effect, apply strokes in the same direction.
Replacing image colors with gradient colors
You can replace an image’s colors with those of a gradient. This effect applies gradient colors to the pixels
of the image, based on their luminance values. For more information, see “Using image luminance to create
texture” on page 651.
You can choose an image (left) and replace its
colors with the colors of a selected gradient (right).
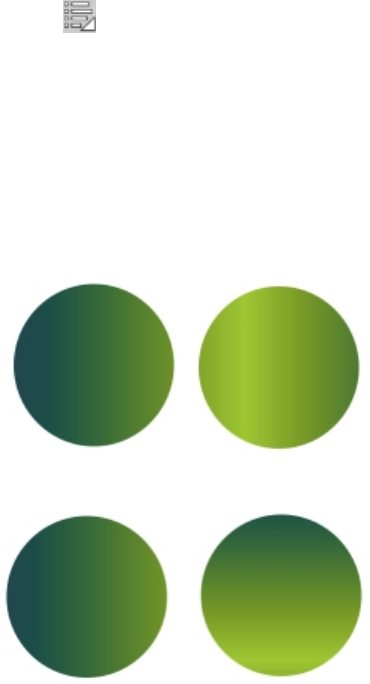
Gradients | 727
To replace image colors with gradient colors
1Open the image that you want to use.
Select part of the image, or use the entire image.
2Choose Window Media Control Panels Gradients.
3Click the Gradient selector, and click a gradient from the PainterGradients library panel.
4Click the Gradient options button , and choose Express In Image.
5In the Express in Image dialog box, adjust the Bias slider to define how the gradient is mapped.
Corel Painter replaces the colors in the image with the colors in the gradient, based on matching
luminance.
Adjusting gradients
You can adjust gradients to control the display of the gradient colors. For example, you can change the
order of the colors and the angle of the gradient.
The gradient order set to display from Left to Right (left) and Right to Left (right).
The gradient angle set to display at a vertical angle (left) and at a horizontal angle (right).
You can also modify the spirality of the gradient. For example, a higher amount of spirality produces a
tighter spiral effect.
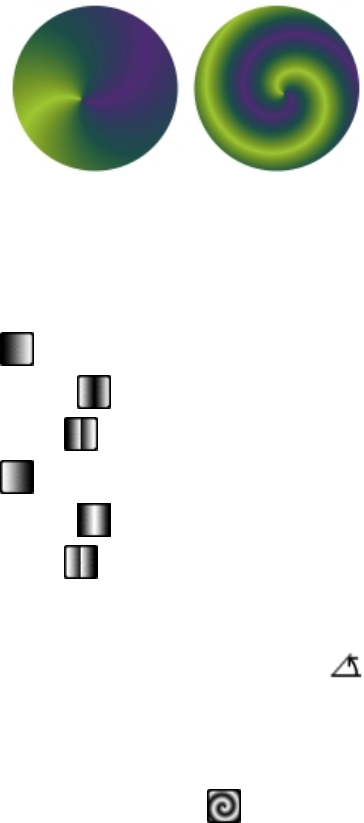
728 | Corel Painter 2015 User Guide
The gradient with low spiral tension (left) and high spiral tension (right).
To gradient direction
1Choose Window Media Control Panels Gradients.
2In the Gradients panel, click one of the gradient order buttons:
•Left to Right Gradient
•Mirrored Right to Left Gradient
•Double Left to Right Gradient
•Right to Left Gradient
•Mirrored Left to Right Gradient
•Double Right to Left Gradient
To change a gradient angle
•In the Gradients panel, drag the Set the Angle of the Ramp slider to adjust the gradient.
If you prefer, type an angle in the corresponding numeric value box.
To modify the spiral gradient appearance
1From the Gradients panel, click the Spiral Gradient button.
2Perform a task from the following table.
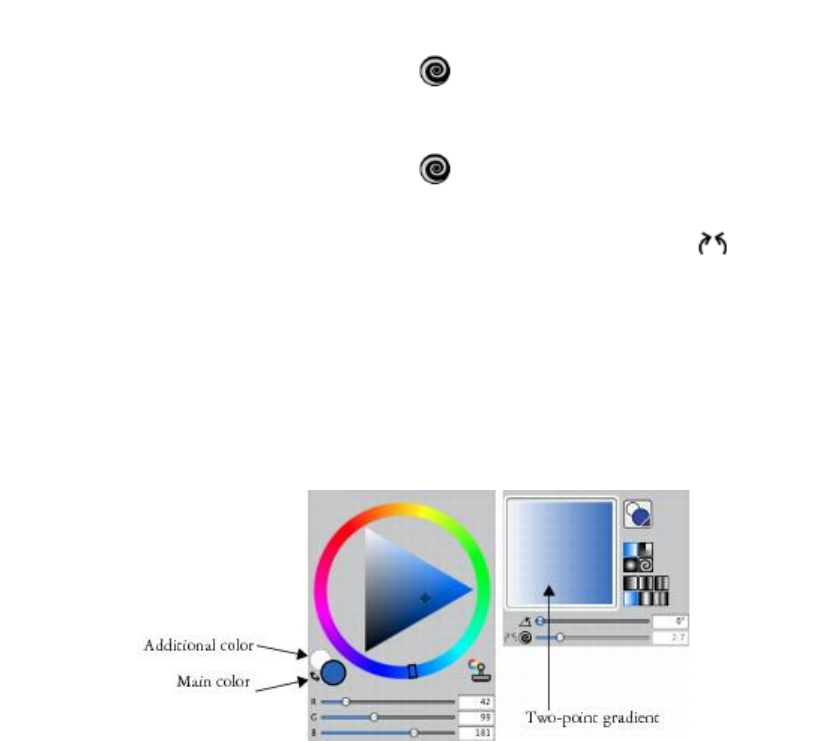
Gradients | 729
To Do the following
Increase the spiral tension Drag the Scale the Spiral Rate of the Ramp slider
to the right.
Decrease the spiral tension Drag the Scale the Spiral Rate of the Ramp slider
to the left.
Change the direction of the spiraling effect Click the Spirality Direction button .
Creating and editing gradients
Although Corel Painter comes with libraries full of gradients, you can create custom gradients or edit
existing gradients.
You can create very simple to very complex gradients. For a simple two-point gradient, you choose a main
and an additional color, and then Corel Painter generates the gradient colors between them.
A two-point gradient (right) generated from the main and additional colors (left).
You can also create a new gradient by editing an existing gradient. For example, you can modify the
gradient color blend or add additional colors to a gradient, which are also known as color control points.
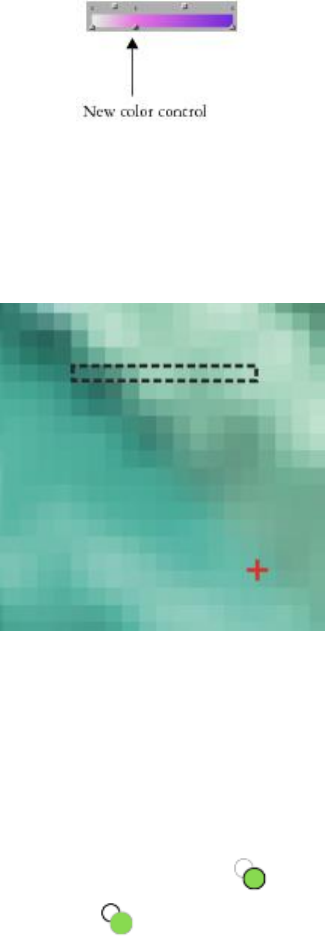
730 | Corel Painter 2015 User Guide
A new color was added to the gradient by adding
a color control point to the color ramp bar.
In addition, you can modify the gradient hue to change the appearance of a particular gradation of color.
You can use any existing image as a source for creating new gradients. For example, you can capture the
colors in a photo of a sunset, or paint your own range of colors as the content of a gradient.
To create a perfect blend between a series of colors, it is better to
work with a row of single pixels than a large piece of an image.
You can save all of your new and modified gradients in the Gradient Library so you can use them in future
projects. For more information, see “Working with libraries” on page 56.
To create a two-point gradient
1Choose Window Color Panels Color.
2From the Color panel, click the Main Color (front) swatch , and choose a main color.
3Click the Additional Color (back) swatch , and choose an additional color.
4Choose Window Media Control Panels Gradients.
5Choose Two-Point from the Gradient Selector.
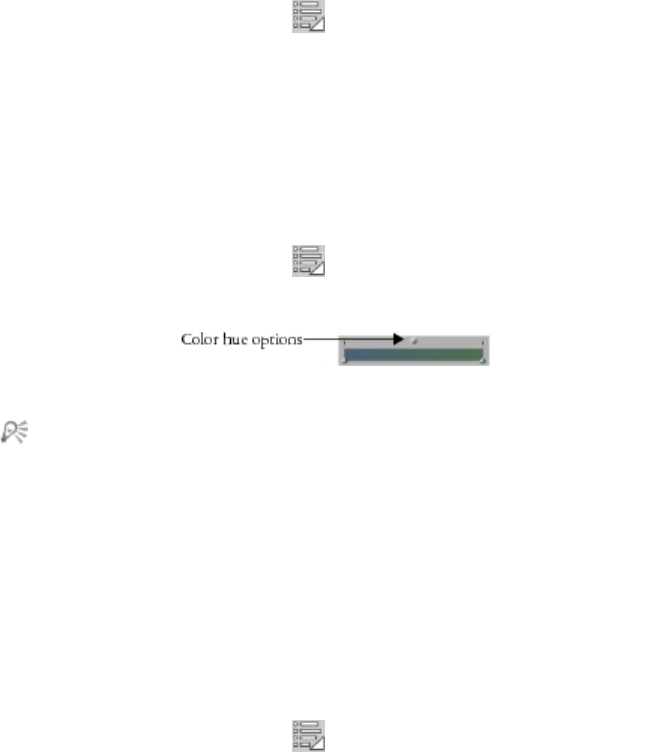
Gradients | 731
6Click the Gradient options button , and choose Save Gradient.
7In the Save Gradient dialog box, type a name for the gradient in the Save as box.
To edit a gradient
1Choose Window Media Control Panels Gradients.
2Click the Gradient selector, and click a gradient from the Painter Gradients library panel.
You can modify only default gradients. You cannot edit the customized gradients that you saved to the
Painter Gradients library.
3Click the Gradient options button , and choose Edit Gradient.
4In the Edit Gradient dialog box, drag a color control point to modify the color transition.
Drag a color control point to adjust the color transition at a specific point in the gradient.
To modify a two-point gradient, you can add additional color control points by clicking in the
color ramp bar where you want to set the control points.
You can blend the gradient color ramp by disabling the Linear check box and dragging the Color
Spread slider to control the color smoothness at each color control point.
To add color to a gradient
1Choose Window Color panels Color.
2Choose Window Media Control Panels Gradients.
3Click the Gradient selector, and click a gradient from the Painter Gradients library panel.
4Click the Gradient options button , and choose Edit Gradient.
5In the Edit Gradient dialog box, click in the color ramp bar where you want to set the control point.
The control point is added, without affecting the color.
6Click the new color control point to select it.
7In the Color panel, choose the color you want to add to the gradient.
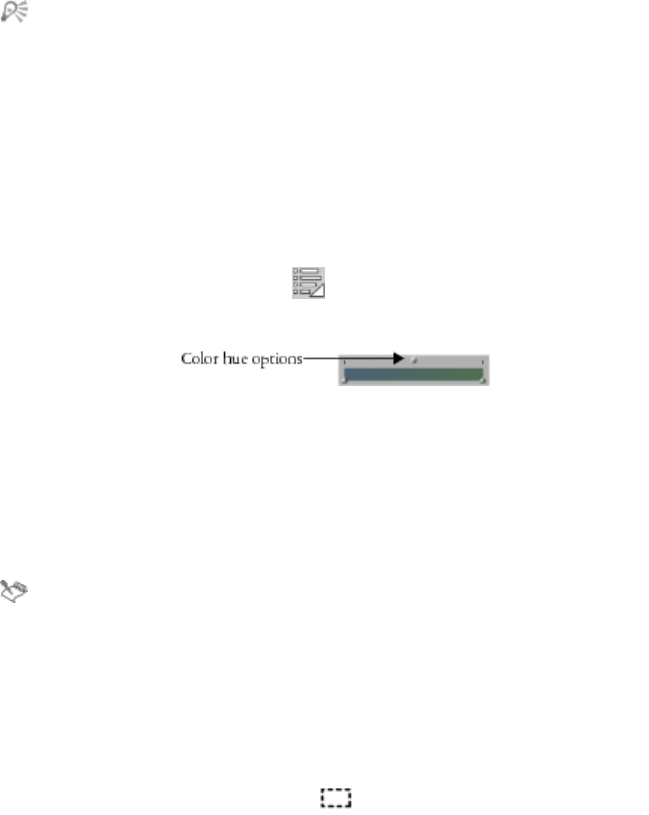
732 | Corel Painter 2015 User Guide
You can press Option + click (Mac OS) or Alt + click (Windows) in the color ramp bar to create a
control point that is set to the current color.
You can delete a control point by clicking a control point and pressing Delete (Mac OS) or
Backspace (Windows).
To change the gradient hue
1Choose Window Media Control Panels Gradients.
2Click the Gradient selector, and click a gradient from the Painter Gradients library panel.
3Click the Gradient options button , and choose Edit Gradient.
4In the Edit Gradient dialog box, click a square box above the color ramp bar.
The Color hue options allow you to change the hue of the blend within that segment.
5Select an option from the Color list box:
•RGB — blends the red, green, and blue components of the two colors
•Hue Clockwise — blends the endpoint colors by rotating around the color wheel clockwise
•Hue Counterclockwise — blends the endpoint colors by rotating around the color wheel
counterclockwise
To understand this concept better, refer to the standard display of the Color panel (Hue Ring and
Saturation/Value Triangle), and note the order of the colors on the Hue Ring. Notice that as you
change parameters within the Edit Gradient dialog box, gradient previews are updated in the
Gradients panel.
To create a gradient from an image
1Click the Rectangular Selection tool from the toolbox.
2Drag in the document window to select a horizontal or vertical area, making the selection as narrow as
possible.
If the selection is horizontal, Corel Painter creates the gradient from the first row of pixels starting at the
upper left.
If the selection is vertical, Corel Painter creates the gradient from the first column of pixels, starting at
the upper left.
3Choose Window Media Control Panels Gradients.
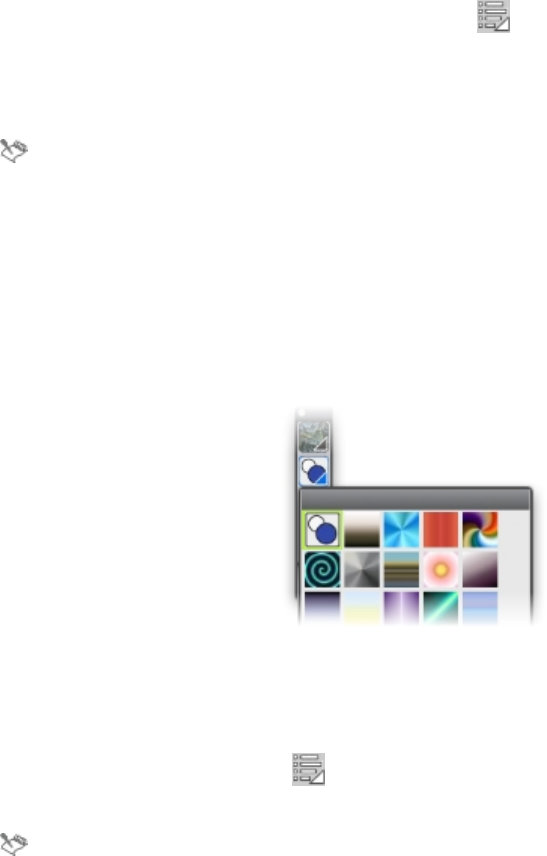
Gradients | 733
4In the Gradients panel, click the Gradient options button , and choose Capture Gradient.
5In the Save Gradient dialog box, type a name for the gradient in the Save as box.
The new gradient is saved in the current library. In the future, you can choose it by name from the
Painter Gradients library panel.
After a gradient is captured, it can no longer be edited. To change a captured gradient, change
the artwork from which it was captured, and then recapture the gradient.
Saving gradients
You can save the gradients that you create for future use. When you save a gradient, it is stored in a library.
You can load alternate libraries of gradients to increase your choices. For more information about working
with libraries, see “Working with libraries” on page 56.
All gradients are stored in the Painter Gradients library.
To save a gradient
1Choose Window Media Control Panels Gradients.
2Click the Gradient options button , and choose Save Gradient.
3In the Save Gradient dialog box, enter a name for the gradient.
Once you save a gradient, it can no longer be edited. To change a captured gradient, change the
artwork from which it was captured, and then recapture the gradient.
734 | Corel Painter 2015 User Guide
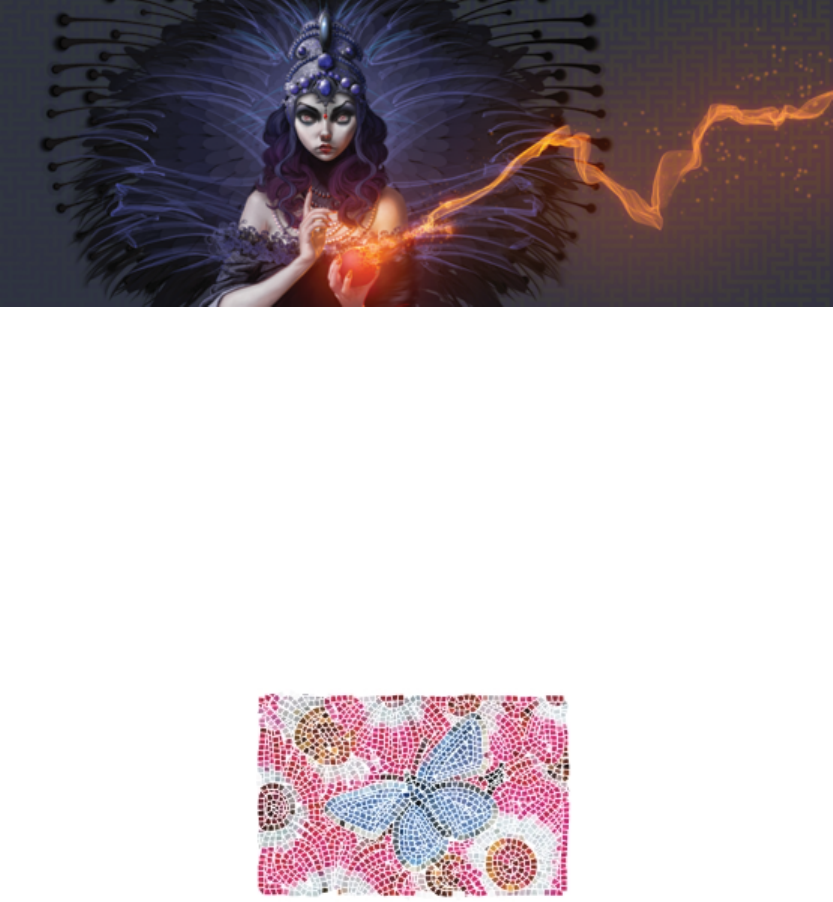
Mosaics and tessellations | 735
Mosaics and tessellations
Mosaic is a decorative art technique that involves creating images by assembling colored tiles and setting
them on a surface by using grout. A tessellation is also a form of mosaic that involves repeating a geometric
shape, without overlaps, to create an image. In Corel Painter, you create images by using mosaic or
tessellation effects.
When you create a mosaic in Corel Painter, it’s similar to applying color by using brushstrokes, however,
instead of applying paint to the canvas, you’re laying down tiles. You can create a mosaic from scratch or
from an existing photo by using a clone source. You can also integrate mosaic effects in an existing image.
You can erase and/or reshape tiles to create the perfect mosaic design.
You can apply tiles to the canvas to create a mosaic.
You can use the tessellation technique to generate a mosaic that resembles stained glass. Tessellating
divides your image into polygonal shapes and then converts the shapes into tiles.
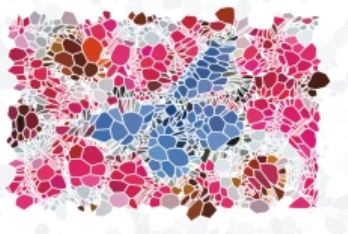
736 | Corel Painter 2015 User Guide
You can use the tessellation technique to create a stained-glass effect.
You can alter the appearance of mosaics and tessellations in many ways. For example, you can give a three-
dimensional (3D) appearance to mosaics or add points to tessellations to increase the number of shapes.
This section contains the following topics:
•“Creating a mosaic” (page 736)
•“Selecting and removing tiles” (page 739)
•“Specifying tile and grout color” (page 741)
•“Adjusting mosaic tile dimensions and randomness” (page 742)
•“Filling an area with tiles” (page 746)
•“Creating 3D tiles” (page 747)
•“Re-rendering mosaic tiles” (page 748)
•“Stroking and filling a selection with mosaic tiles” (page 749)
•“Adding mosaic effects to an image” (page 750)
•“Creating tessellations” (page 750)
Creating a mosaic
You can create a mosaic from scratch or from a clone source. When you create a mosaic, it is applied
directly to the canvas. You cannot apply mosaic tiles inside a layer.
After you exit the Mosaic and Tessellation dialog box, you can treat this rendered image just like any
photograph or painting. You can paint it, apply effects to it, select portions of it, or increase the canvas size.
You can also integrate mosaic effects into an existing image. For information, see “Adding mosaic effects to
an image” on page 750.
After you apply tiles to a mosaic, you can select, deselect, or remove tiles to change their color or apply
effects to them. For information, see “Selecting and removing tiles” on page 739 and “Specifying tile and
grout color” on page 741.
When creating mosaics from scratch, you can follow these helpful guidelines:
Mosaics and tessellations | 737
• Use your first few courses of mosaic tiles to delineate the most important contours of your subject
— just as if you were drawing with a pencil. Describe the most important lines of your scene first.
Additional courses of tiles should follow the initial contours.
Tiles applied to the outline of an image.
• Use larger tiles in areas of flat color and smaller tiles in regions where you must add more detail. In flat-
color areas, you may want to introduce some color variability for a more realistic effect. Tiles used in
traditional mosaics rarely have uniform color.
• Each mosaic tile is stored as a resolution-independent object within the Corel Painter image database.
This means that if you resize an image composed of mosaic tiles, your image can be displayed at the
same quality as if it had been created at a higher resolution originally.
• If you’re working with a clone, tracing paper is enabled by default to help you follow the source image.
738 | Corel Painter 2015 User Guide
You can create a mosaic from a clone with tracing
paper turned off to hide the clone source image.
• If you want to continue working on the mosaic at a later date, you need to save mosaic in the RIFF
format. RIFF is the only file format that saves resolution-independent mosaic tile objects. Saving in any
other format prohibits you from resuming working on the mosaic. All file formats will save the rendered
image of the mosaic tiles on the canvas. For more information, see “Saving and backing up files” on
page 88.
To create a mosaic from scratch
1Start a new document by choosing File New.
2Choose Effects Esoterica Make Mosaic and Tessellation.
3Click the Grout color chip, and choose a color.
4Click the Tile color chip, and choose a color
5Drag in the document window to apply tiles.
6If you want to continue working on the mosaic, keep the Mosaic and Tessellation dialog box open.
For more information about changing the grout and tile color, see “Specifying tile and grout
color” on page 741.

Mosaics and tessellations | 739
You can also change tile dimensions and shape. For more information, see “Adjusting mosaic tile
dimensions and randomness” on page 742.
You can also specify that Corel Painter automatically fill an area with tiles by choosing Stroke/
Fill Selection from the Action list box in the Mosaic and Tessellation dialog box. For more
information, see “Stroking and filling a selection with mosaic tiles” on page 749.
To create a mosaic from a clone source
1Choose File Open, and locate the file that you want to clone.
2Choose File Quick Clone.
3Choose Effects Esoterica Make Mosaic and Tessellation.
4In the Mosaic and Tessellation dialog box, choose Apply Tiles from the Action list box.
If you don’t want to work with tracing paper, disable the Use tracing paper check box.
5Enable the Clone color check box.
6Drag in the document window to apply tiles.
If you want to continue working on the mosaic, keep the Mosaic and Tessellation dialog box open.
You can monitor the progress of the clone-based mosaic by viewing the image with the Use
tracing paper check box enabled. This lets you see a faded out version of the clone source.
Selecting and removing tiles
You can select and deselect tiles so you can add or modify them. You can also remove individual tiles, a
selection of tiles, or remove all tiles from the document at once. If you remove all tiles from the document,
Corel Painter clears the canvas, leaving only the grout color.
Similar to working with real ceramic tiles, you cannot merge or overlap Corel Painter mosaic tiles. You can
place them close to each other, but you can’t make them occupy the same space. Corel Painter adjusts the
shape of the tiles to fit them close to one another while maintaining the grout line spacing. So, when you
want to re-lay the tiles in an area, you must remove the existing tiles.
To select tiles
1In the Mosaic and Tessellation dialog box, choose Select Tiles from the Action list box.
2Perform a task from the following table.

740 | Corel Painter 2015 User Guide
To Do the following
Select tiles Drag across the tiles you want to select. Red
borders appear on selected tiles.
Select contiguous tiles of the same color (no
variability allowed)
Press Command + Control (Mac OS), or Ctrl
(Windows), and drag across part of a line of tiles,
so that the whole line of tiles is selected. A magic
wand appears as you select the tiles.
Select all tiles Click Select All Tiles, or press the A key.
To deselect tiles
1In the Mosaic and Tessellation dialog box, choose Select Tiles from the Action list box.
2Perform a task from the following table.
To Do the following
Deselect an individual tile Click on a tile that is already selected to deselect it.
Deselect all tiles Click Deselect All Tiles, or press the D key.
To remove tiles
To Do the following
Remove specific tiles In the Mosaic and Tessellation dialog box, choose
Remove Tiles from the Action list box. Click or
drag across the tiles you want to remove.
Remove all tiles In the Mosaic and Tessellation dialog box, click
Clear.
Mosaics and tessellations | 741
Specifying tile and grout color
When creating a mosaic from scratch, you can adjust the tile color by adjusting the value, hue, or
randomize color variability to build visual interest. You can adjust the color for individual tiles or for larger
areas across the mosaic. The tile color is determined by the main color selected in the Colors panel.
If you’re creating a mosaic from a clone source, the tiles are based on the clone source colors. For more
information, see “To create a mosaic from a clone source” on page 739.
Normally, each tile is given a single color. If you want more options for coloring tiles, render the tiles to a
channel. You can then convert the channel to a selection to paint directly on the tiles, apply effects, or fill
them with a pattern, weave, gradient, or image. For more information, see “Creating 3D tiles” on page
747.
In a mosaic, any area that is not covered by tiles is considered grout. A default grout color is assigned to the
mosaic background when you begin working, but you can change the color.
To change the color of selected tiles
1Choose Effects Esoterica Make Mosaic and Tessellation.
2In the Mosaic and Tessellation dialog box, choose Select Tiles from the Action list box.
3Click or drag across the tiles you want to select.
4Red borders appear on selected tiles.
5Choose a color from the Color panel.
6Press one of the following keys to apply the described color change to the selected tiles:
•C (Color) — changes the tiles to the current main color
•T (Tint) — applies a small amount (10%) of the current main color. Repeat to accentuate.
•V (Vary) — adds color variability, based the settings in Brush Controls Panels Color Variability
To change tile color individually
1In the Mosaic and Tessellation dialog box, choose Change Tile Color from the Action list box.
2Enable one of the following color adjustment options:
•Color — changes the tiles to the current main color. You can click the Color chip and choose another
color.
•Darken — applies a small amount of black
•Lighten — applies a small amount of white
•Tint — applies a small amount (10%) of the current main color

742 | Corel Painter 2015 User Guide
•Vary — adds color variability based on the settings in Brush Controls Panels Color Variability.
3Click individual tiles that you want to change or drag across a group of tiles.
To apply color variability to tiles
1In the Mosaic and Tessellation dialog box, choose Change Tile Color from the Action list box.
2In the Color Adjustments area, enable the V (Vary) option.
3Click Color Variability to display the Color Variability panel.
4In the Color Variability panel, move the sliders or type values in the boxes to adjust the color variability
settings.
To change the grout color
1In the Mosaic and Tessellation dialog box, choose Apply Tiles from the Action list box.
2Click the Grout Color chip.
3Choose a color on the Color panel or the Painter Colors panel that appear.
Changing the grout color automatically re-renders the mosaic, which erases any part of the image
that is not a tile or grout.
Adjusting mosaic tile dimensions and randomness
You can change the shape of mosaic tiles by adjusting the tile dimensions and spacing. You can also
control the variability of tile shapes by setting the degree of randomness. Increasing randomness makes the
shapes more erratic, each different from the last. For example, if the length dimension is 10 pixels, a length
randomness of 25% creates tiles that are randomly given a length in the range of 7.5 to 12.5 pixels.
To adjust tile dimensions
1Choose Effects Esoterica Make Mosaic and Tessellation.
2Choose the Dimensions option from Settings list box.
3Adjust any of the following dimension sliders:
Dimension control Description
Width
Sets the width of the tiles in pixels.

Mosaics and tessellations | 743
Dimension control Description
In this example, the width is set to 3.5 pixels (top)
and 30.4 pixels (bottom).
Length Sets the length of the tiles in pixels.
In this example, the length is set to 4.1pixels (top)
and 24.2 pixels (bottom).
Pressure Determines how tile dimensions are affected by
stylus pressure, which allows you to control the
width variance under differently weighted strokes.
With the Pressure slider set to zero, a light stroke
produces narrow tiles, and a heavier stroke creates
wider tiles.
Increasing the Pressure slider also increases the
effect of pressure on the width of the tiles and
prevents the creation of narrow tiles in response
to a light stroke. Setting Pressure to 100% creates
uniformly wide tiles, regardless of the pressure.
In this example, the Pressure slider is set to 0%
(top) and 100% (bottom).
744 | Corel Painter 2015 User Guide
Dimension control Description
Grout Sets the spacing between tiles in pixels.
In this example, the spacing between tiles is 0%
(top) and 15% (bottom).
To adjust tile variability
1Choose Effects Esoterica Make Mosaic and Tessellation.
2Choose the Randomness option from Settings list box.
3Adjust any of the following dimension controls:
Randomness control Description
Width Allows the tile width to vary by a set percentage.
The lowest setting, 0%, produces no variability
and the highest setting, 100%, produces the most
variability.
In this example, Width randomness is set to92%.
Mosaics and tessellations | 745
Randomness control Description
Length Allows the length of a tile to vary by a set
percentage.
The lowest setting, 0%, produces no variability
and the highest setting, 100%, produces the most
variability.
In this example, the Length slider is set to98%.
Pressure Cut Controls the variability of the angle of the tile ends.
The lowest setting, 0%, produces no variability
and the highest setting, 100%, produces the most
variability.
In this example, the Cut slider is set to 90°.
Grout Controls the variability of the length of space
found between tiles.
746 | Corel Painter 2015 User Guide
Randomness control Description
The lowest setting, 0%, produces no variability
and the highest setting, 100%, produces the most
variability.
In this example, the Grout randomness is set to
100%.
Filling an area with tiles
You can use different modes to fill an area of a mosaic with tiles. You can use the Start with triangle mode
to fill a wedge-shaped area by applying a brushstroke that starts with a triangular shaped tile.
The Start with triangle mode creates a perfect wedge in the “V.”
You can use the Respect edge of image mode to automatically insert a space at the perimeter of the image
so that the tiles you insert at the edge of the image do not pass the edge.
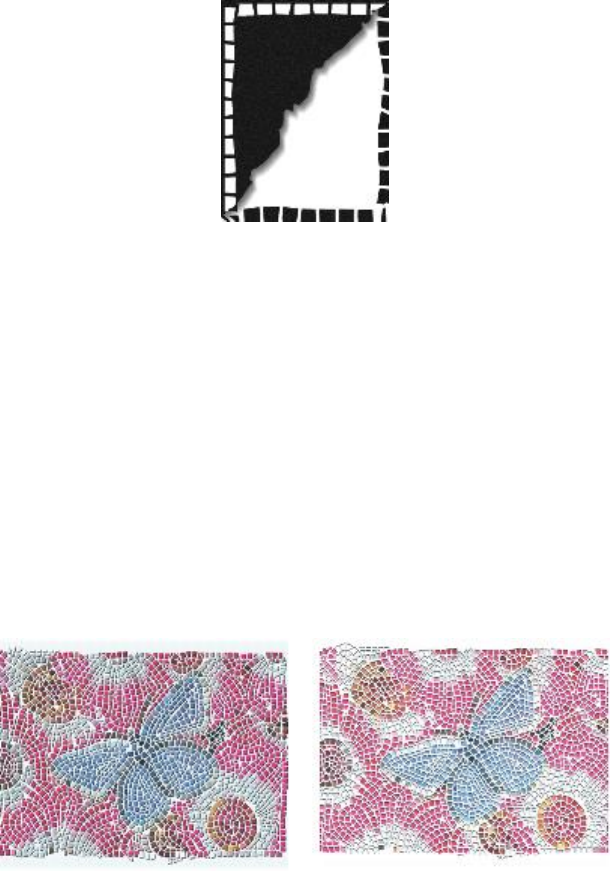
Mosaics and tessellations | 747
The white tiles that surround the image respect the edge, while the black tiles do not.
To choose a method for filling an area with tiles
1Choose Effects Esoterica Make Mosaic and Tessellation.
2In the Options area, enable one or both of the following check boxes:
•Start with triangle
•Respect edge of image
3Drag in the document window to apply tiles.
Creating 3D tiles
You can create mosaics with a 3D appearance by rendering tiles into a mask. This technique places the tile
shapes in a new channel named Mosaic Mask (in the Channels panel), which allows you to add depth to
the tiles by using surface texture to create a 3D appearance.
You can render tiles to a mask to create a look of 3Dtiles.
With the tiles in a channel, you can also load the mosaic pattern as a selection or you can invert the channel
to use the grout as a selection. The result can be particularly interesting when you work with a tessellated
mosaic.
748 | Corel Painter 2015 User Guide
To give mosaic tiles a 3D look
1Choose Effects Esoterica Make Mosaic and Tessellation.
2Drag in the document window to apply tiles.
When the mosaic is complete, you can proceed to step 3.
3Choose Render To Mask from the Action list box.
4Click Render To Mask, and then click OK.
This action uses tile data to create a new channel in the Channels panel (Window Channels).
5Choose Effects Surface Control Apply Surface Texture.
6In the Apply Surface Texture dialog box, choose Mosaic Mask from the Using list box.
7Adjust the Amount or Softness sliders to achieve the level of relief that you want.
In most cases, the best results are obtained with the Picture slider set at 100%. For more information,
see “Using 3D brushstrokes to create texture” on page 650.
Because Corel Painter uses the tile shapes from the channel, the resulting surface texture gives the tiles a
realistic 3D appearance.
Re-rendering mosaic tiles
If you increase the dimensions of a document that contains a mosaic, you need to re-render the mosaic
to ensure the mosaic resolution matches that of the document. This command re-creates the mosaic from
the grout color and the tile object information. Re-rendering fills the image with the grout color and then
re-renders the mosaic tiles at the resolution of the document. It is important to note that the re-rendering
process erases any image that is not a tile or grout.
To re-render tiles
1Open an image that is the size you want.
2Choose Effects Esoterica Make Mosaic and Tessellation.
3Create a mosaic, and click OK.
4Choose Canvas Resize.
5In the Resize dialog box, disable the Constrain File Size check box, and type a higher value in the
Width or Height box.
When Corel Painter finishes resizing, you’ll notice that the tiles have blurred. You can correct this
problem by re-rendering the mosaic.
6Choose Effects Esoterica Make Mosaic and Tessellation.
7Click Rebuild.
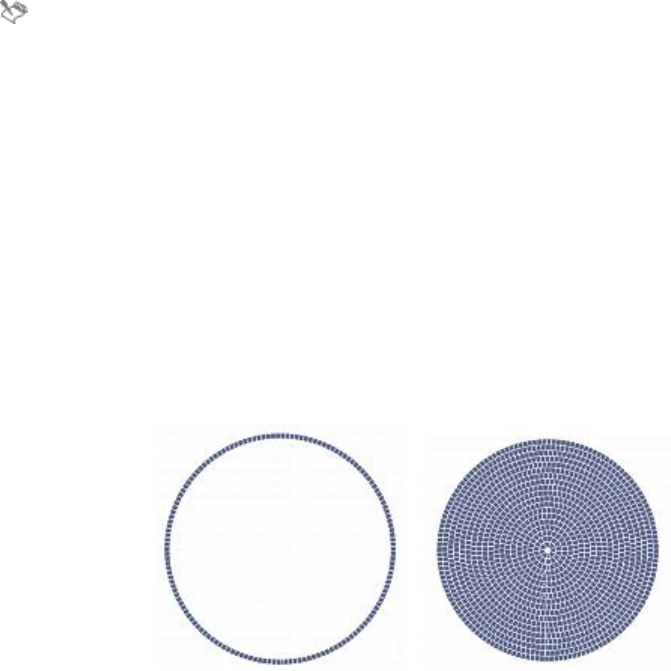
Mosaics and tessellations | 749
8Click OK.
Corel Painter replaces the resized, blurry tiles with tiles rendered at the higher resolution.
After you click Rebuild, Corel Painter erases any part of the image that is not a tile or grout.
Stroking and filling a selection with mosaic tiles
You can stroke or fill path-based selections that were created with the Rectangular Selection, Oval
Selection, and Lasso tools with mosaic tiles. If you want to stroke or fill a channel-based selection with
mosaic tiles, you need to use the Transform Selection command to convert a channel-based selection to a
path-based selection. For more information, see “Getting started with selections” on page 578.
Stroking and filling a selection are appropriate only when you change a parameter between operations
— for example, if you change the tile color or dimensions. The Stroke Selection command applies a
single row of tiles as an outline along the selection path. To fill an entire selection with tiles, you can make
the selection using the Lasso tool. To fill an oval or rectangular selection, you must first use the Stroke
Selection command to apply tiles to the selection path, and then use the Fill Selection command to fill the
rest of the selection.
To fill an oval or rectangular selection, you must first use the Stroke
Selection command to apply tiles to the selection path (left), and then
use the Fill Selection command to fill the rest of the selection (right).
To create a mosaic in a selection
1Set up the area you want to tile as an active selection.
2Choose Effects Esoterica Make Mosaic and Tessellation.
3In the Mosaic and Tessellation dialog box, choose Dimensions or Randomness from the Settings list
box.
4Choose the color for the tile and the grout.

750 | Corel Painter 2015 User Guide
5From the Action list box, choose Stroke/Fill Selection.
6Click one of the following buttons:
•Stroke Selection — creates one row of tiles along each selection path
•Fill Selection — applies multiple rows of tiles, working in from the path until the selected area is filled
with tiles
The Fill Selection command works with selections made by using the Lasso tool . To fill an oval
selection, you must first choose the Stroke Selection command, and then choose the Fill Selection
command.
In some cases, Corel Painter might not put a tile in every space. You can fill openings by choosing
Apply Tiles from the Action list box and applying the tiles.
If you want to change the tiling of an area, you can use the Remove Tiles action to clear it. Then
you can reapply tiles.
Adding mosaic effects to an image
You can add mosaic effects to an image that already contains brushstrokes, layers, or objects. However,
because mosaics are applied directly to the canvas, you need to incorporate mosaic effects carefully or you
could lose some of the existing content.
When you create a mosaic, the entire canvas is automatically covered with the grout color. This obliterates
images that are currently on the canvas, but leaves objects that hover above the canvas, such as layers and
shapes. These objects are not deleted, but they do cover up the mosaic that you’re working on.
If you want to incorporate a mosaic with another image, you have several options:
• Using selections — You can add the mosaic effect to a portion of an image by filling a selection with a
mosaic effect. For information, see “Stroking and filling a selection with mosaic tiles” on page 749.
• Using multiple documents — You can create the mosaic in its own document. When you’re satisfied
with the result, float and copy the mosaic to the document where you want to composite it. For more
information, see “Converting selections into layers or floating objects” on page 521.
• Using layers — You cannot add a mosaic to a layer. However, you can float the non-mosaic portion of
the image using a layer. Create the mosaic on the canvas and when you’re satisfied with the mosaic,
you can drop the layers.
Creating tessellations
A tessellation is a type of mosaic that is made up of nonrectangular tiles. With Corel Painter, you can
create a tessellation from scratch or from a clone source. A tessellation that is based on a clone source is
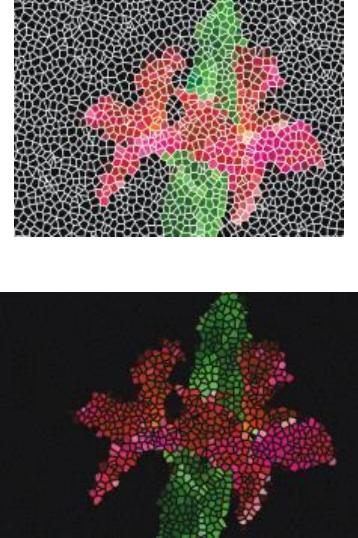
Mosaics and tessellations | 751
a powerful option. The tessellation points are distributed according to the luminance of the clone source.
Lighter regions receive a greater density of points, so the shapes are smaller.
You can create a tessellation from a clone source.
A finished tessellation resembles stained glass.
When creating a tessellation, Corel Painter divides the canvas into shapes, such as triangles, cracks,
or pieces, which become the mosaic tiles. The shapes themselves are sets of points, connected by line
segments. You can control the type of shape, the number of points, and their distribution.
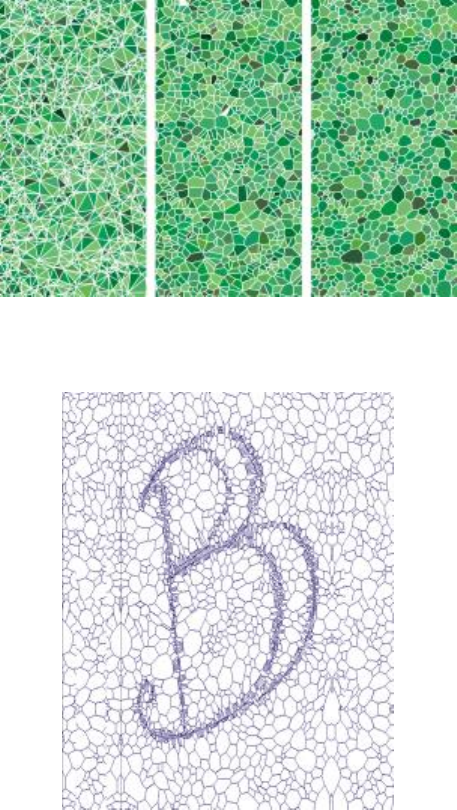
752 | Corel Painter 2015 User Guide
You can base your Tessellation on Triangles, Cracks or Pieces.
You can also add points to a specified area to create a different effect.
Adding points in the shape of a letter. The letters appear as a swath of smaller polygons.
After creating a tessellation, the shapes appear as mosaic tiles that are given the main color and are
surrounded by grout lines. You can change the color of the tiles.
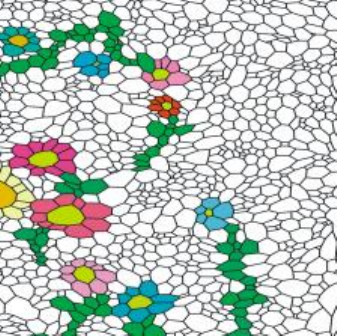
Mosaics and tessellations | 753
You can set the tile color to white, the grout color
to black, and then fill in the tessellation with color.
To create a tessellation
1Choose Effects Esoterica Make Mosaic and Tessellation.
2Choose Dimensions from the Settings list box.
3Move the Grout slider to set the grout line thickness.
4Click the Grout Color chip, and select a color.
5Choose Make Tessellation from the Action list box.
6Choose one of the following tile shapes from the Tile Shape list box.
•Triangles
•Cracks
•Pieces
7Choose one of the following from the Spacing list box:
•Even — generates a tessellation by using evenly-spaced points
•Random — generates a tessellation by using random points
Corel Painter forms polygons by connecting the points according to the spacing type.
8Do one of the following:
• Click Add 500 Points, and repeat if necessary.
• Click or drag in the image.
9Click Apply.
If you want to modify the tessellation, choose an action from the Action list box.

754 | Corel Painter 2015 User Guide
If you want to clear all tessellation points, click Clear.
To create a tessellation from a clone source
1Choose File Open, and locate the file that you want to clone.
2Choose File Quick Clone.
3Click the Clone Color button in the Color panel.
Enabling the Clone Color option disables the Color panel. This is a reminder that the color information
is pulled from the clone source.
4Choose Effects Esoterica Make Mosaic and Tessellation.
5Choose Make Tessellation from the Action list box.
6Choose one of the following tile shapes from the Tile Shape list box.
•Triangles
•Cracks
•Pieces
7Choose one of the following from the Spacing list box:
•Clone — generates a tessellation by using the clone source. Darker image areas produce a greater
density of points.
•Inverted Clone — generates a tessellation by using the clone source. Lighter image areas produce a
greater density of points.
8Do one of the following:
• Click Add 500 Points, and repeat if necessary. The points accumulate and the total number of points
appears below the Action list box.
• Click or drag in the image. You can add higher concentrations of polygons in very specific areas to
create specific patterns or shapes.
If you want to specify the grout thickness, you must do so before creating the tessellation. First,
choose Apply Tiles from the Action list box, and move the Grout slider.
It is possible to create a huge number of points. More points mean more polygons, which increase
the time it takes to convert to a mosaic. Keep this in mind to avoid overwhelming your system.

Mosaics and tessellations | 755
To color tessellations
1In the Mosaic and Tessellation dialog box, choose Change Tile Color from the Action list box.
2In the Color Adjustments area, enable the Color option.
3Click the color chip, and choose a bright main color.
4Drag to create a stroke in the document, or click individual tiles.
Colored, tessellated tiles appear beneath your stroke.
You can also base the color on the color in a clone source if you enable Clone Color in the Colors
panel.
756 | Corel Painter 2015 User Guide

Weaves | 757
Weaves
Corel Painter includes an assortment of weave samples that you can apply as fills. On Windows, you can
also edit a weave sample to make it your own. In addition, Corel Painter includes a powerful programing
language that allows you draft custom weave patterns from scratch.
Weaves reside in default libraries. You’ll find more libraries, with additional materials, on the Corel Painter
DVD and on the Corel Web site. For more information, see “Working with libraries” on page 56.
This section contains the following topics:
•“Applying weaves” (page 757)
•“Editing and saving weaves” (page 759)
•“Creating weave patterns” (page 760)
•“Using the Edit Weave dialog box” (page 761)
•“Defining warp and weft expressions” (page 763)
•“Defining warp and weft color expressions” (page 765)
•“Designing the tie-up” (page 766)
•“Reference: Expression operators” (page 768)
Applying weaves
You can choose a weave from the Weave panel, or from one of the Weave libraries that are included with
Corel Painter, and apply it as a fill. For more information, see “Working with libraries” on page 56.
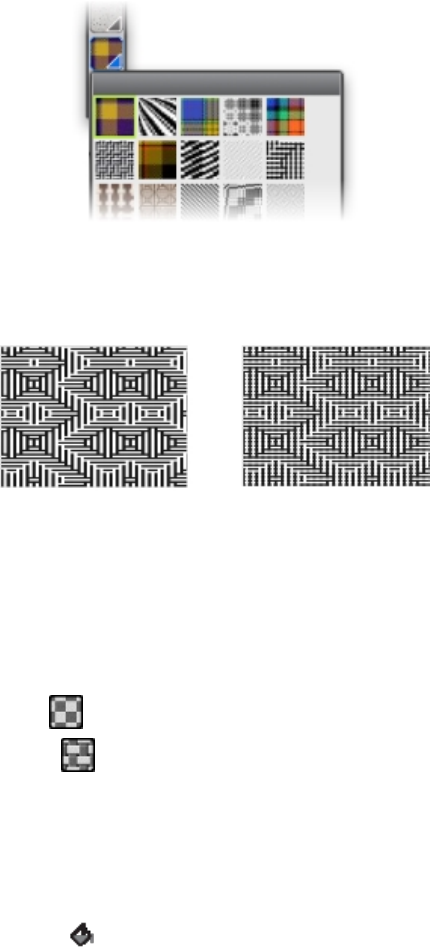
758 | Corel Painter 2015 User Guide
The Weave Library is accessible from the Media Selector bar.
You can also display a weave as two-dimensional or show the interwoven threads three-dimensionally,
complete with shadows.
Left: A weave displayed as two-dimensional. Right: The same weave
displayed as three-dimensional produces a more jagged effect.
To apply a weave as a fill
1Choose Window Media Control Panels Weaves.
2Click the Weave selector, and click a weave in the Painter Weaves library panel.
3Click one of the following buttons:
•Two-Dimensional Weave — produces a weave that looks like blocks
•Three-Dimensional Weave — produces a weave that looks like textured fabric
4To apply a weave to:
• The canvas — Click the Canvas in the Layers panel.
• A selection — Click a selection tool from the toolbox, and drag in the document window to select an
area.
• A layer — Click a layer in the Layers panel.
5Choose the Paint Bucket tool from the toolbox.
6In the document window, click the canvas, selection, or layer.
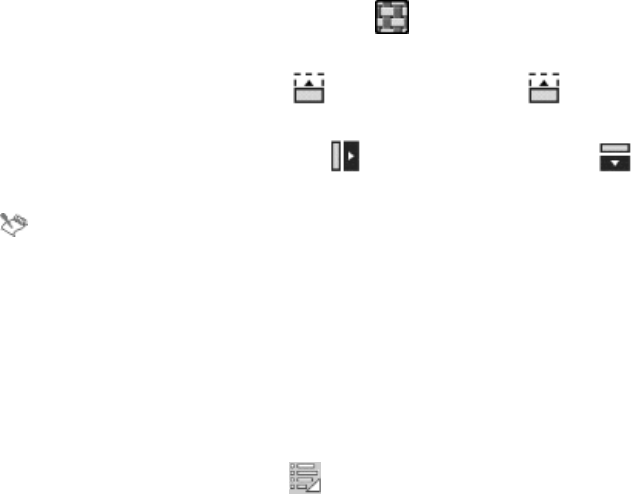
Weaves | 759
Editing and saving weaves
You can edit a sample weave from the Weaves panel to make it your own. For example, you can scale the
weave or modify the thickness of the threads.
After altering the scale, thickness, or color of a weave, you can save the changes as a new weave to the
Weaves library for future use. For more information, see “Working with libraries” on page 56.
To adjust weave scaling and thickness
1Choose Window Media Control Panels Weaves.
2Click the Weave selector, and click a weave in the Painter Weaves library panel.
The weave appears in the Weave Preview Window.
3Click the Three-Dimensional Weave button .
For most weaves, the preview does not change until you adjust the scale and thickness values.
4Move the Horizontal Scale slider and Vertical Scale slider to the right to increase the scale or
to the left to decrease the scale.
5Move the Horizontal Thickness slider and Vertical Thickness slider to the right to increase
the thickness or to the left to decrease the thickness.
Thickness sliders affect only the three-dimensional display. When you select a two-dimensional
display, the thickness sliders have no effect.
To edit weave colors
1Choose Window Color panels Color Sets.
2Choose Window Media Control Panels Weaves.
3In the Weaves panel, click the Weave selector, and click a weave on the Painter Weaves library panel.
4Click the Weave Options button , and choose Get Color Set.
The color set for the selected weave appears in the Color Set Libraries panel.
Click a color on the Color panel.
760 | Corel Painter 2015 User Guide
Hold down Command (Mac OS) or Ctrl (Windows), and then click the color swatch that you want to
replace on the Color Set Libraries panel.
5On the Weaves panel, click the Weave Options button , and choose Put Color Set.
If you fill an image with the modified weave colors, Corel Painter applies the new color set.
To save a weave
1Choose Window Media Control Panels Weaves.
2Click the Weave options button , and choose Save Weave.
3In the Save Weave dialog box, type a name for the weave.
If you want to preserve the default weave, type a new name for the modified weave. If you don’t
type a new name, Corel Painter saves the modified weave using the default weave’s name.
The new weave pattern appears in the current Painter Weaves library.
Creating weave patterns
(Windows only)
Corel Painter lets you create weave patterns to simulate fabrics, such as wallpaper, carpet, clothing, and
furniture, using the Edit Weave dialog box combined with the Corel Painter weaving language.
In this section, actual weaving terminology is used so that weavers can become familiar with these
techniques more easily.
Introduction to weaving
A weave consists of vertical threads (warp) and horizontal threads (weft) that are interlaced on a loom
to form a fabric. Each warp thread is connected to exactly one harness in the loom. The harnesses are
connected in a pattern to treadles. Pressing a treadle raises a set of harnesses, lifting the associated warp
threads. A weft thread is then passed horizontally through the loom. The particular set of harnesses that are
raised determines which warp threads are in front of the weft thread and which are behind. For the next
weft thread, a different treadle is pressed, raising a different set of harnesses and, hence, a different set of
warp threads.
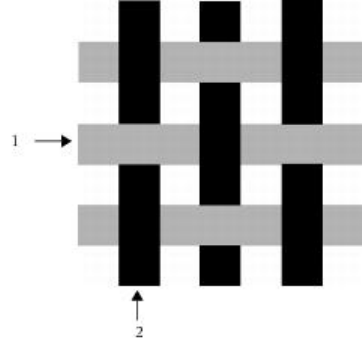
Weaves | 761
An example of a simple weave using 1) grey horizontal
weft threads and 2) black vertical warp threads.
In traditional weaving, you need to follow a draft to create a weave. A draft is a set of instructions for
setting up a loom to produce a weave. The draft contains the following details:
• warp threading definition — describes how to set up the loom for threading the vertical threads
(number of threads, sequence, and color)
• weft threading definition — describes how to set up the loom for treadling the horizontal threads
(number of threads, sequence, and color)
• tie-up — instructs the weaver which of the warp rows to use when weaving a given weft thread
In Corel Painter, the Edit Weave dialog box allows you to draft a weave pattern. For information, see “Using
the Edit Weave dialog box” on page 761.
Using the Edit Weave dialog box
(Windows only)
You can draft a weave using the Edit Weave dialog box, which is intended for an 8-harness, 8-treadle
loom.
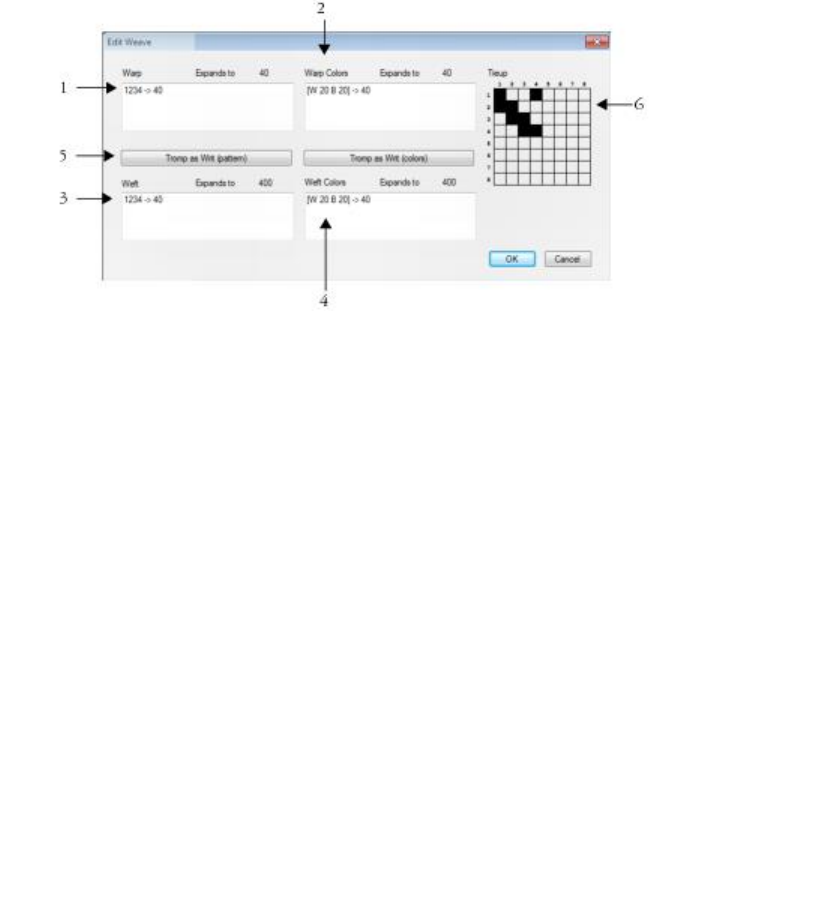
762 | Corel Painter 2015 User Guide
Edit Weave dialog box: the numbers above correspond to the numbers in
the following table, which describes the main components of the dialog box.
Component Description
1. Warp The values in the Warp area specify the threading
sequence of the vertical threads in the weave.
2. Warp Colors The values that appear in the Warp Colors area
control the color and number of vertical threads in
the weave.
3. Weft The values in the Weft area specify the treadling
sequence of the horizontal threads in the weave.
4. Weft Colors The values that appear in the Weft Colors area
control the color and number of horizontal threads
in the weave.
5. Tromp as Writ The Tromp as Writ button allows you to copy the
warp values and apply them to the weft threads.

Weaves | 763
Component Description
6. Tieup The Tieup area allows you to control the
interlacing of the threads by determining which
warp rows to use when weaving a weft thread.
To access the Edit Weave dialog box
1Choose Window Media Control Panels Weaves.
2In the Weaves panel, click the Weave options button , and choose Edit Weave.
Defining warp and weft expressions
(Windows only)
The warp and weft expressions use the information in the tie-up to extend and evolve the weave into larger,
more complex patterns. For more information, see “Designing the tie-up” on page 766.
Warp and weft expressions in traditional weaving
In traditional weaving, the warp expression represents the threading sequence, in other words, it describes
which warp threads are connected to which harnesses. The weft expression is the treadling sequence that
determines which treadle is pressed (and therefore which harnesses are raised) for each successive weft
thread.
The following table describes which warp threads are connected to which harnesses for the warp sequence
234123:
Connect warp thread To harness
1 2
2 3
3 4
4 1

764 | Corel Painter 2015 User Guide
Connect warp thread To harness
5 2
6 3
The sequence repeats for subsequent threads.
7 2
8 3
9 4
The threading sequence above, 234123, has a length of 6, which indicates that the pattern runs for 6
threads before repeating.
The following table describes which treadle is pressed (and therefore which harnesses are raised) for each
successive weft thread for the weft sequence 654:
Press treadle For weft thread
6 1
5 2
4 3
The sequence repeats for subsequent threads.
6 4
5 5
4 6

Weaves | 765
Warp and weft expressions in Corel Painter
In Corel Painter, you need to use the weave pattern expression language to generate a weave. You may
find working with the pattern expression language more logical than working with very complex expanded
sequences. For more information see, “Reference: Expression operators” on page 768.
The following table includes an example of a traditional pattern expression expressed in the Corel Painter
pattern language.
Traditional expression Pattern language expression
1223334444333221 (1-4-1)[](1-4-1)
To define a warp or weft expression
• In the Edit Weave dialog box, type an expression in the Warp box.
As you type a warp or weft sequence, the “Expands to n”message above the panel displays the length n
(number of digits) of the expression. This describes the number of threads in the sequence.
If Corel Painter cannot resolve the expression, the expansion length message displays “!” (error).
If you want to copy the Warp expression to the Weft expression, click the Tromp as Writ
(pattern) button.
Defining warp and weft color expressions
(Windows only)
You can use one color for all the warp threads and another for all the weft threads, or you can set up a
sequence of colors for each.
When defining thread color sequences using the pattern expression language, you must identify the colors
alphabetically. Therefore, you are limited to 26 colors of thread in the weaving.
Using the warp and weft color panels, you can create expressions that describe the color sequences that
you want. You can also use any letters that you like and then change the associated color later by modifying
the color set. For more information, see “To edit weave colors” on page 759.
The following table includes an example of a simple color sequence expressed in the Corel Painter pattern
language.
766 | Corel Painter 2015 User Guide
Thread color sequence Description
[B 8 D 4] Use color B for 8 threads, use color D for 4
threads.
To define a warp or weft color expression
• In the Edit Weave dialog box, type an expression in the Warp Colors box.
To display the weave color set
•In the Weaves panel, click the Weave options button , and choose Get Color Set.
The color set for the selected weave appears in the Color Set Libraries panel in its own color set library.
To display the letter associated with a color set color
1In the Weaves panel, click the Weave options button , and choose Get Color Set.
2In the Color Set Libraries panel, click the Color Sets options button , choose Color Set Library
View List.
Scroll to the newly created color set to view the letters associated with the weave colors.
Designing the tie-up
(Windows only)
The purpose of the tie-up is to describe which of the warp rows to use when weaving a given weft thread.
It works in conjunction with the warp and weft expressions to generate the weave pattern.
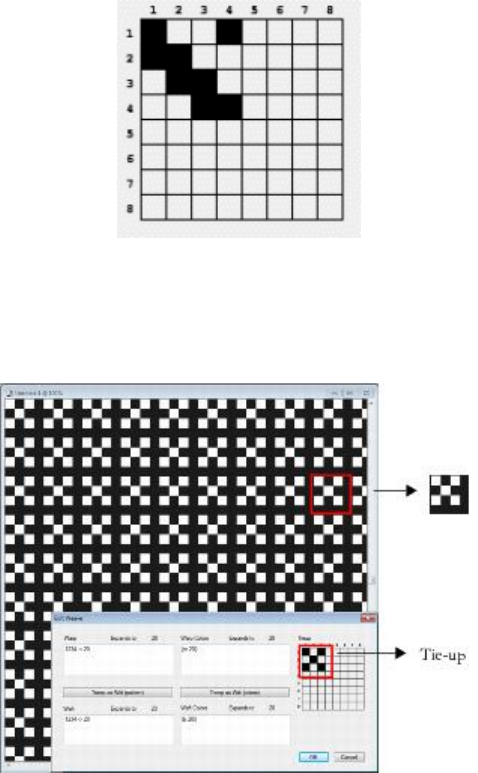
Weaves | 767
The tie-up describes which threads are in front at which point in the weaving process.
In the Edit Weave dialog box, the tie-up is a grid that measures 8 threads wide by 8 threads high. A black
cell indicates that the warp thread should be placed in front of the weft. A white cell indicates that the weft
thread should be placed in front of the warp.
In this tie-up, the white cells instruct the weft thread (black) to be placed
in front of the warp thread (white) in the weave pattern. Notice that
the white cells that are positioned in the fourth row and column cause
the weft thread (black) to be more prominent in the weave pattern.
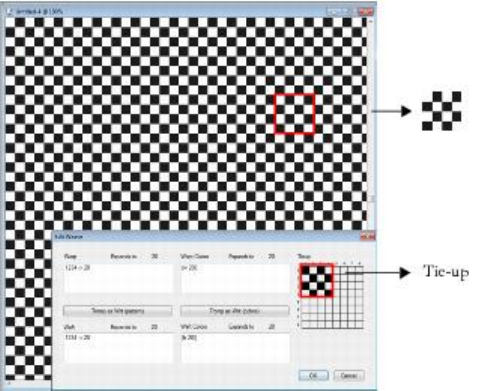
768 | Corel Painter 2015 User Guide
In this tie-up, alternate black cells that are positioned in the fourth row and column instruct
the warp thread (white) to be placed in front of the weft thread (black). Notice that the
addition of the black cells in the fourth row and column produces a checkerboard effect.
To modify the tie-up
• In the Edit Weave dialog box, click a cell in the grid.
If you click a white cell, the cell changes to black, which places the warp thread in front of the weft.
If you click a black cell, the cell changes to white, which places the weft thread in front of the warp.
Reference: Expression operators
You need to learn how to use the weaving pattern language expression operators to effectively draft a
weave pattern.
The Weaving Pattern Expression Language is designed around a group of values, called the domain of
the pattern. For the warp or weft sequences, the domain is made up of the numbers 1 through 8, which
correspond to the harnesses and treadles in the tie-up.
Patterns wrap around on their domain so the number one higher than 8 is actually 1, and the number one
lower than 1 is actually 8. This is called modular arithmetic. For example, some are found in the sequences
5678123 or 3218765.
The following table defines a few commonly used terms.

Weaves | 769
Term Definition
Operands In all examples, the operands used for the
operators are numeric sequences. However, the
operands may be other patterns created from
other operators. In this case, use parentheses to
distinguish operands.
Expansion Refers to the actual warp or weft numeric
sequence created when the expression is translated
from the shorthand pattern language.
Length Describes the number of elements in the expanded
sequence. For example, (1-4-1)[](1-4-1) expands to
1223334444333221, which has a length of 16.
BLOCK
Operator usage Short form
<pattern> block <count> []
The left operand is a sequence of any length. The right operand is a pattern of digit characters for
specifying block lengths from 0 to 9.
If either operand is shorter than the other, it is extended (via repeating) to exactly the length of the other
operand.
Then, with equal length operands, each element of the left operand is repeated individually by the value of
the corresponding digit in the right operand.
The length of the expansion is the sum of the digits in the (possibly lengthened) right operand.
Individual elements of the right operand (lengths) can be replaced by {number} for counts from 1 to 127.
Example Expansion
1234 [] 2 11223344

770 | Corel Painter 2015 User Guide
Example Expansion
34512 [] 23 334445511122
12345678 [] 87654321 111111112222222333333444445555666778
12 [] 123494321 12211122221111111112222111221
123 [] 1{12}3 1222222222222333
Block Expressions
Block expressions may be used in an interleaved format. This is particularly useful for color sequences like
those used in the Scottish tartan plaids. For example, one of the Drummond color sequences is expressed as
follows:
[G 8 R 2 G 2 R 56 G 16 B 2 G 2 B 2 G 36 R 2 G 2 R 8|].
REPEAT
Operator usage Short form
<pattern> repeat <count> rep, *
The left operand is a pattern of any length. The right operand is an integer count. The expansion is the
<pattern> repeated <count> times.
Example Expansion
1234567 repeat 3 123456712345671234567
EXTEND
Operator usage Short form
<pattern> extend <count> ext, ->
The left operand is a pattern of any length. The right operand is an integer that is interpreted as a length.
The left operand is reshaped to be the length as specified by the right operand. If the left operand is shorter

Weaves | 771
that the desired length, it is repeated out to the right length. If the left operand is shorter, it is merely
trimmed.
Example Expansion
123 -> 8 12312312
123456787654321 -> 10 1234567876
CONCAT
Operator usage Short form
<pattern> concat <pattern> ,
The left and right operands are both patterns of any length. The result is the left operand concatenated
with the right operand. Note that when a pattern is spelled out (e.g. 1234), the concat operation is implicit
between each of its members (i.e. 1234 is equivalent to 1,2,3,4). The concat operator is used only when
needed — for example, to separate parenthetical operands.
Example Expansion
(1-4|),(4-1|) 1234321
1-8,(1-8 [] 2) 123456781122334455667788
INTERLEAVE
Operator usage Short form
<pattern> interleave <pattern> int, ~
The left and right operands are both patterns of any length. If either operand is shorter than the other, it
is extended (via repeating) to exactly the length of the other operand. Then, the operands are interleaved.
Interleaving alternates the elements of the left operand with the elements of the right (like lacing your
fingers together). The expansion contains the first element of the left, the first element of the right, the
second element of the left, the second element of the right, and so on.

772 | Corel Painter 2015 User Guide
Example Expansion
123 interleave 76 172637
12345678 ~ 4321 1423324154637281
123456787654321 ~ 121221222 112231425261728272615241322211
UPTO
Operator usage Short form
<pattern> upto <pattern> <, -
The“-” may be used as an upto operator only when the last element of the left operand is strictly less than
the first element of the right operand.
The left and right operands are both patterns of any length.
The expansion is the left operand concatenated with the sequence between the last element of the left
operand and the first element of the right operand, concatenated with the rest of the right operand.
Upto wraps around on the domain. For example, 7 upto 2 expands to 7812.
The upto operator may be followed immediately (with no intervening characters) by any number of tick
marks ( ' ). A tick mark indicates to cycle through the domain before running up to the right operand. The
number of tick marks sets the number of cycles.
Example Expansion
1-8 12345678
1-''5 123456781234567812345
123-765 123456765
2<1 23456781

Weaves | 773
Example Expansion
13 upto'' 5812 13456781234567812345812
DOWNTO
Operator usage Short form
<pattern> extend <count> ext, ->
Operator usage: <pattern> downto <pattern> Short form: >, -
The “-” may be used as an downto operator only when the last element of the left operand is strictly
greater than the first element of the right operand.
The left and right operands are both patterns of any length.
The expansion is the left operand concatenated with the descending sequence between the last element
of the left operand and the first element of the right operand, concatenated with the rest of the right
operand.
Downto wraps around on the domain. For example, 2 downto 7 expands to 2187.
The downto operator may be followed immediately (with no intervening characters) by any number of tick
marks ( ' ). A tick mark indicates to cycle through the domain before running down to the right operand.
The number of tick marks sets the number of cycles.
Example Expansion
8-1 87654321
1-8-1 123456787654321
5-''1 543218765432187654321
567-321 567654321
2>1 21

774 | Corel Painter 2015 User Guide
Example Expansion
13 downto'' 5812 132187654321876543218765812
TEMPLATE
Operator usage Short form
<pattern> template <pattern> temp, :
The right and left operands are patterns of any length.
Template allows texturing (sub-articulation) of a master pattern (the left operand) with a texture pattern
(the right operand).
The first element of the template is taken as the root. All other elements in the template sequence are
considered with respect to their difference from the root. For example, if 342 is the template pattern, the
first element (3) is the root (r). The second element (4) is r+1, and the third element (2) is r-1. The template
is then r, r+1, r-1.
This template is then applied to each element in the left operand, with the element’s value replacing the
root.
Remember that the values wrap around on the domain.
Example Expansion
1-8 temp 121 121232343454565676787818
1-8 : 12121 1212123232343434545456565676767878781818
12321 temp 878 878181212181878
12321 : 3 34543
PALINDROME

Weaves | 775
Operator usage Short form
<pattern> palindrome pal, |
This operator takes only one operand, the left operand. That operand can be a pattern of any length. The
resultant expansion is the left operand concatenated with itself backwards.
However, the center element is not repeated, and the last element of the result is dropped automatically.
This is essential when the palindromed sequence is repeated and helps to remove flaws from a weaving
draft.
A palindrome word is the same, spelled backwards or forwards, like “madam.”
Example Expansion
1-8| 12345678765432
1223334444555| 122333444455555444433322
PERMUTE
Operator usage Short form
<pattern> permute <permutation> perm
The left operand is a pattern of any length. The right operand is a permutation vector.
The left operand is extended to a length that is an integer multiple of the right operand's length.
Then the left operand is permuted in chunks of the right operand's length. The organization of the
permutation pattern is used to reorganize the elements in each chunk of the pattern.
For example, a permutation of 312 puts “the third element first, the first element second and the second
element third.”
Example Expansion
123456787654321 permute 312 312645778465132
1-8 perm 1324 13245768

776 | Corel Painter 2015 User Guide
PBOX
Operator usage Short form
<pattern> pbox <permutation> none
The left operand is a pattern of any length. The right operand is a permutation vector. Its length will be
adjusted, if necessary, (by trimming or repeating) to equal the length of the left operand.
Then, the organization of the permutation pattern is used to reorganize the elements of the pattern.
Pbox maintains the length of the left operand pattern.
Example Expansion
123456787654321 pbox 21436587 214365878563412
1-'8 pbox 4-18-5 4321876543218765
UPDOWN
Operator usage Short form
<pattern> updown <pattern> <>
The left and right operands are both patterns of any length. If either operand is shorter than the other, it is
extended (via repeating) to exactly the length of the other operand.
Then, UPDOWN generates alternating ascending and descending runs. An odd number of runs is always
generated. The expansion contains the ascending run from the first element of the left operand to the first
element of the right operand, followed by the descending run from there to the second element of the first
operand, etc. The operation is complete with the ascending run from the last element of the left operand to
the last element of the right operand.
The updown operator may be followed immediately (with no intervening characters) by any number of tick
marks ( ' ). A tick mark indicates to cycle through the domain before completing the up and down runs. The
number of tick marks sets the number of cycles.

Weaves | 777
Example Expansion
1234 updown 5678 12345432345654345676545678
12 <>' 567 123456781234543218765432345678123456543218765432123456781234567
DOWNUP
Operator usage Short form
<pattern> downup <pattern> ><
The left and right operands are both patterns of any length. If either operand is shorter than the other, it is
extended (via repeating) to exactly the length of the other operand.
Then, DOWNUP generates alternating descending and ascending runs. An odd number of runs is always
generated. The expansion contains the descending run from the first element of the left operand to the first
element of the right operand, followed by the ascending run from there to the second element of the first
operand, etc. The operation is complete with the descending run from the last element of the left operand
to the last element of the right operand.
The downup operator may be followed immediately (with no intervening characters) by any number of tick
marks ( ' ). A tick mark indicates to cycle through the domain before completing the up and down runs. The
number of tick marks sets the number of cycles.
Example Expansion
1234 downup 5678 18765678121876781232187812343218
12 ><' 567 18765432187656781234567812187654321876781234567818765432187
ROTATE
Operator usage Short form
<pattern> rotate <number> rot,
The left operand is a pattern of any length. The right operand is an integer (which may be negative) that
is interpreted as a length. Rotate takes the set of elements specified by <number> from the start of the

778 | Corel Painter 2015 User Guide
pattern and moves them to the end. A negative number takes a set of elements from the end of the pattern
and moves them to the beginning.
Example Expansion
12345678 rotate 3 45678123
1-4-1 rotate -3 3211234
REVERSE
Operator usage Short form
<pattern> reverse rev, `
This operator takes only one operand, the left operand. That operand may be a pattern of any length. The
resulting expansion is the left operand written backwards.
Example Expansion
1-8 reverse 87654321
1223334444555` 5554444333221
Precedence Ordering
When several operators are used in an expression, they are evaluated in order of precedence. That is, some
operations are performed before others. The precedence levels for the pattern language are shown in the
following:
• upto, downto, concat
• downup, updown
• repeat, extend, template, interleave,
• permute, pbox
• palindrome
When two operators have the same precedence, left to right ordering is followed.

Weaves | 779
Example Interpreted as
1-4-2 ((1 upto 4) downto 2)
1234[]4321| ((1234 block 4321) palindrome)
1-4 block 4-1 ((1 upto 4) block (4 upto1))
(1-4|),(4-1|)| ((((1 upto 4) palindrome) concat ((4 upto 1)
palindrome)) palindrome)
• If precedence does the wrong thing, or if it is unclear, use parentheses to bring out the intended order
of evaluation.
780 | Corel Painter 2015 User Guide
Shapes | 781
Shapes
Shapes are vector-based objects that you can draw, modify, and fill. They can be open shapes, such as lines
and curves, or closed shapes, such as circles and squares. You can create and edit shapes with the precision
of a drawing program and integrate them with the Natural-Media environment in Corel Painter.
An image created with shapes.
This section contains the following topics:
Creating shapes
•“Getting started with shapes” (page 782)
•“Drawing shapes” (page 783)
•“Drawing lines and curves” (page 785)
•“Setting preferences for drawing shapes” (page 789)
782 | Corel Painter 2015 User Guide
Selecting and modifying shapes
•“Selecting a shape” (page 791)
•“Modifying shape outlines and fills” (page 792)
•“Adding, deleting, and moving anchor points” (page 794)
•“Adjusting curvature” (page 796)
•“Cutting and joining shape segments” (page 798)
Converting shapes
•“Converting shapes to image layers” (page 800)
•“Converting selections to shapes” (page 801)
Transforming shapes
•“Resizing, rotating, skewing, and flipping shapes” (page 802)
•“Duplicating shapes” (page 804)
•“Combining shapes” (page 805)
•“Blending shapes” (page 806)
•“Saving a shape outline as a selection” (page 808)
Sharing shapes
•“Exporting Adobe Illustrator shapes” (page 809)
Getting started with shapes
In Corel Painter, you work mainly with bitmaps, also known as raster images. Shapes, however, are vector
objects. You can work with them in Corel Painter in much the same way you work with vector objects in
drawing programs like CorelDRAW® and Adobe Illustrator. For more information, see “Exporting Adobe
Illustrator shapes” on page 809. Vector graphics are made up of lines, curves, objects, and fills that are all
calculated mathematically.
Corel Painter draws shapes in an anti-aliased fashion. This anti-aliasing gives objects a smooth edge, as
opposed to the jagged edges apparent in some drawing programs. Some clipart objects actually look like
photographic elements when they are imported into Corel Painter and displayed with anti-aliasing.
Anti-aliased shapes are typically slower to appear on the screen in Corel Painter than are aliased objects
in drawing programs, so you may want to use your drawing program for most of your object creation.
You can then import the vector artwork into Corel Painter, tweak it with the drawing tools, and add some
Natural-Media effects.
When you create a shape in Corel Painter, the shape appears on a special shape layer. To maintain all of the
editing properties of a shape, the shape must remain on the shape layer. However, you convert the shape to
a pixel-based default image layer, so you can apply effects, transformations, or use painting tools. For more
information, see “Converting shapes to image layers” on page 800.

Shapes | 783
You can also convert shapes to selections and vice versa. The tools for adjusting shapes allow precise control
over the outline path, so you may want to use shapes to create some of your selection paths. For more
information, see “Converting selections to shapes” on page 801.
When you save a file that contains a shape in the RIFF format, Corel Painter maintains shapes as vector
objects on separate layers. In other formats, shapes merge with the canvas. In the Photoshop (PSD) format,
shapes are converted to bitmaps and are assigned to appropriate layers.
Drawing shapes
You can draw shapes by using the Rectangular Shape or Oval Shape tools.
As you create shapes, Corel Painter gives them default attributes for stroke and fill. However, you can
change the default settings for shapes. For more information, see “Setting preferences for drawing shapes”
on page 789.
Shapes created with the Rectangular Shape tool and Oval Shape tool.
To draw a rectangle or square
1Choose the Rectangular Shape tool from the toolbox.
2On the property bar, click the Toggle Stroke Color button, then click the Select Stroke Color button,
and choose an outline color.
3On the property bar, click the Toggle Fill Color button, then click the Select Fill Color button, and
choose a fill color.
4Perform a task from the following table.
To draw Do the following
A rectangle Drag in the document window to draw the shape.

784 | Corel Painter 2015 User Guide
To draw Do the following
A square While dragging in the document window, hold
down the Shift key.
The property bar and the Navigator panel display information about the shape. To display the
Navigator panel, choose Window Navigator.
You can toggle between the Shape Selection tool and any of the shape design and editing tools
by holding down Command (Mac OS) or Ctrl (Windows). Toggling makes it convenient to quickly
select a wing handle or anchor point before editing it.
To draw an oval or circle
1Choose the Oval Shape tool from the toolbox.
2On the property bar, click the Toggle Stroke Color button, then click the Select Stroke Color button,
and choose an outline color.
3On the property bar, click the Toggle Fill Color button, then click the Select Fill Color button, and
choose a fill color.
4Perform a task from the following table.
To draw Do the following
An oval Drag in the document window to draw the shape.
A circle While dragging the in the document window, hold
down the Shift key.
The property bar and the Navigator panel display information about the shape. To display the
Navigator panel, choose Window Navigator.
You can toggle between the Shape Selection tool and any of the shape design and editing tools
by holding down Command (Mac OS) or Ctrl (Windows). Toggling makes it convenient to quickly
select a wing handle or anchor point before editing it.
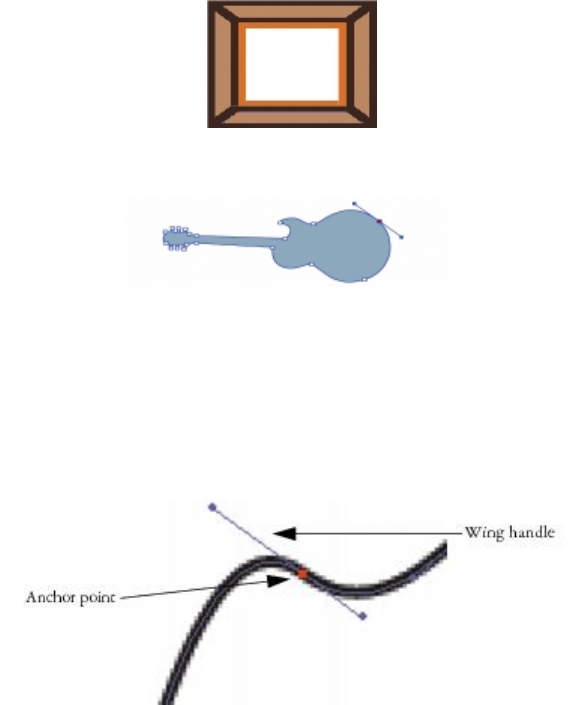
Shapes | 785
Drawing lines and curves
You can draw straight lines or smooth, flowing curves by drawing freehand. You can combine the lines and
curves to create shapes. The lines and curves that you draw are known as Bézier lines.
Shapes created with straight line segments.
Shapes created with curved line segments.
Working with Bézier lines
Bézier Lines can be straight or curved, and they consist of anchor points connected by line segments (or
paths). When the path is a curve, “wings” extend from the anchor points. The wings are represented by a
straight line and are tangent to the curve. The wings have control “handles” on them. By dragging the wing
handle, you can change the curvature of the line segment.
Paths can be modified by using anchor points and wing handles.
Shapes can be open (with endpoints) or closed (without endpoints).
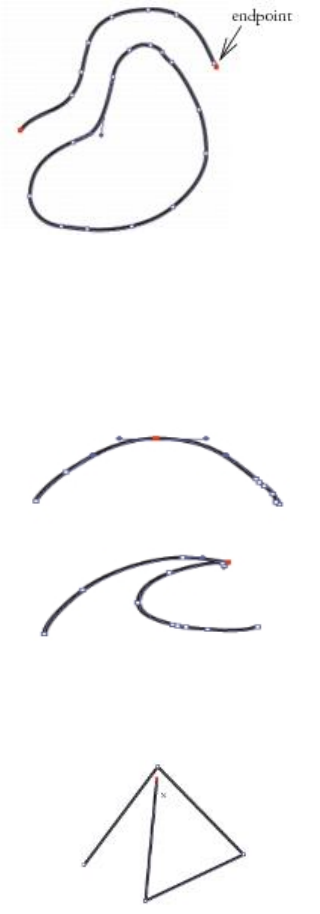
786 | Corel Painter 2015 User Guide
Open paths contain endpoints; closed paths do not.
Anchor points can be either smooth or corner points. A smooth point allows you to manipulate the
segments on both sides of an anchor point by dragging a handle. A corner point restricts the manipulation
of the segments to the one side of the anchor point that has a handle. You can also convert between
smooth and corner points. For more information, see “To convert a smooth or corner point” on page
798.
An anchor point can be a smooth point (top) or a corner point (bottom).
You can easily adjust shapes after you create them. For more information, see “Adding, deleting, and
moving anchor points” on page 794.
Clicking creates anchor points connected by straight line segments.
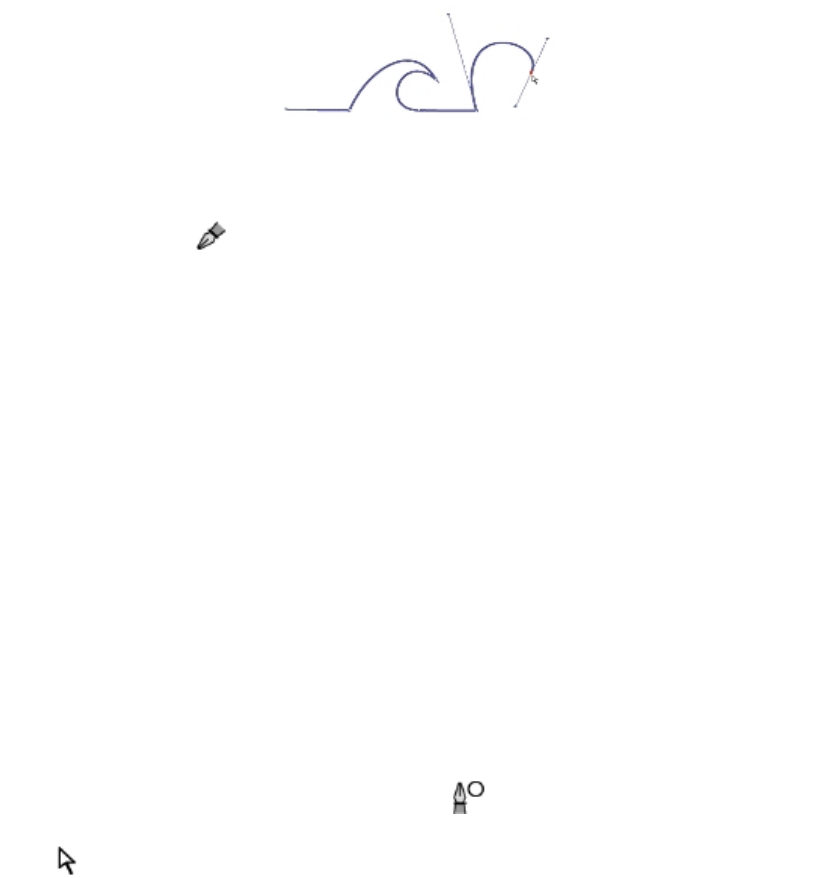
Shapes | 787
Dragging curves the segments between points.
To draw a line segment
1Choose the Pen tool in the toolbox.
2On the property bar, click the Select Stroke Color button, and choose a color.
3Perform an action from the following table:
To Do the following
Draw a straight line segment Click where you want to start the line segment,
and then click where you want to end it. Corel
Painter draws a straight line between the two
points.
Draw a curved line segment Draw a straight line segment, and then drag the
endpoint to create a curve. The angle and length
of the wing determine the curvature of the path.
The farther you drag, the longer the wing and the
deeper the curve.
4Repeat step 2 as often as necessary, combining straight and curved segments until you have the shape
you want.
5Finish the shape by doing one of the following:
• Close the shape by clicking or dragging the first anchor point.
•Close the shape by clicking the Close Shape button on the property bar.
• Hold down Command (Mac OS) or Ctrl (Windows) to temporarily access the Shape Selection tool
, and click outside the shape to deselect it.

788 | Corel Painter 2015 User Guide
You can constrain the placement of the points by snapping to the grid. For more information, see
“Using the grid” on page 214.
Each click or drag adds to the path. If you unintentionally add to the path, press Delete (Mac OS)
or Backspace (Windows) to remove the last anchor point.
To add to an open shape path
1Click an endpoint with the Pen tool .
2Click or drag where you want to add an anchor point.
You can add to a path from an endpoint only. You cannot add to a closed path, or to the middle
of an open path.
You can also select an endpoint by holding down Command (Mac OS) or Ctrl (Windows) and
clicking the endpoint or dragging a marquee over it.
To draw a freehand shape
1Choose the Quick Curve tool in the toolbox.
2On the property bar, click the Select Stroke Color button, and choose a color.
3Click where you want to start the shape or line, and drag.
As you drag, a dotted line appears. When you stop dragging, the Quick Curve shape appears.
If you want to close the shape, finish at the same point where you began or right-click the shape and
choose Close.
You can add to either endpoint of a Quick Curve shape by selecting the endpoint and dragging
out from it. To select an endpoint, hold down Command (Mac OS) or Ctrl (Windows), and click
the endpoint or drag over it.

Shapes | 789
Draw freehand shapes with the Quick Curve tool.
Setting preferences for drawing shapes
You can set the default appearance for all new shapes that you draw by modifying the shape preferences.
For example, you can set the color for the shape outline and fill. You can also modify the appearance of
Bezier handles and various elements such as outlines and wings, to make it easier for drawing.
To set preferences for drawing shape outlines
1Choose a shape tool from the toolbox.
2On the property bar, click the Open Shape Attributes Dialog button.
3In the Shape Attributes dialog box, perform an action from the following table:
To Do the following
Apply an outline to a shape Enable the Stroke check box.
Remove an outline from a shape Disable the Stroke check box.
Change the outline color In the Stroke area, double-click the color chip and
choose a color from the Color dialog box.
Adjust the outline opacity In the Stroke area, move the Opacity slider.
Adjust the outline width In the Stroke area, move the Width slider.
Modify the appearance of endpoints of open
shapes
In the Stroke area, click one of the following
Endcap buttons: Projecting , Round , or
Butt .

790 | Corel Painter 2015 User Guide
To Do the following
Modify the appearance of corners where two line
segments connect
In the Stroke area, click one of the following Miter
buttons: Miter , Round , or Bevel .
Set the miter limit to smooth out the sharpness of
lines that join at a sharp angle
Move the Miter Limit slider.
To set preferences for filling shape
1Choose a shape tool from the toolbox.
2On the property bar, click the Open Shape Attributes Dialog button.
3In the Shape Attributes dialog box, perform an action from the following table:
To Do the following
Apply a fill Enable the Fill check box.
Remove a fill Disable the Fill check box.
Change the fill color In the Fill area, double-click the color chip and
choose a color from the Color dialog box.
Fill overlapping areas of multiple shapes Click the Fill Overlaps button.
Leave overlapping areas unfilled Click the Don’t Fill Overlaps button. Multiple
overlaps alternate between filled and not filled.
Adjust the fill opacity In the Fill area, move the Opacity slider.
You can also adjust shape flatness by adjusting the Flatness slider.
To set preferences for shape tools
1Do one of the following:

Shapes | 791
•(Mac OS) Choose Corel Painter 2015 menu Preferences Shapes.
•(Windows) Choose Edit Preferences Shapes.
2Perform a task from the following table.
To Do the following
Control the size of the anchor points and the
direction of the wing handles
In the Drawing Options area, enable the Big
Handles check box. This can make them easier to
grab and drag. If you want big points, enable this
option.
Set the color of the wings, Bezier, and handles In the Colors area, click Wing/Bezier Handle, and
choose a color.
Set the color of the selected anchor points In the Colors area, click Selected Point/Anchor,
and choose a color. The unselected anchor points
appear “hollow.”
Selecting a shape
You need to select a shape before moving or modifying it. When a shape is selected, you can see
the shape’s outline path and anchor points. You can also select a shape layer to modify it. For more
information, see “Selecting layers” on page 524.
To select shapes
To Do the following
Select a shape Choose the Shape Selection tool from the
toolbox, and click a shape.
Select multiple shapes Hold down Shift, and click the shapes with the
Shape Selection tool .

792 | Corel Painter 2015 User Guide
If you are using the Layer Adjuster tool, you can switch to the Shape Selection tool by
double-clicking a shape.
Modifying shape outlines and fills
You can choose the color, opacity, and width of the path outlining the shape, which is also known as a
stroke. You can also control the way line ends are drawn and joined. In addition, you can apply a fill to a
shape by choosing the color and opacity of the fill.
Stroke and fill attributes apply to both open and closed shapes. Before filling an open shape, Corel Painter
closes the shape by connecting the endpoints with a straight line.
The Flatness slider controls how many straight lines the program uses to approximate a curve when
printing. PostScript output devices create curved lines by linking a series of short, straight lines that progress
in angle. The smaller the flatness setting, the greater the number of straight lines, and the more accurate
the curve.
You can also change the default shape attributes. For more information, see “Setting preferences for
drawing shapes” on page 789. In addition, you can paint a shape after the shape has been committed to
a pixel-based image layer. For information, see “Converting shapes to image layers” on page 800.
To modify a shape’s outline attributes
1Choose the Shape Selection tool from the toolbox, and click a shape.
You can select multiple shapes by holding down Shift while clicking the shapes.
2Right-click the shape and choose Set Shape Attributes.
3In the Shape Attributes dialog box, perform an action from the following table:
To Do the following
Apply an outline to a shape Enable the Stroke check box.
Remove an outline from a shape Disable the Stroke check box.
Change the outline color In the Stroke area, double-click the color chip and
choose a color from the Color dialog box.
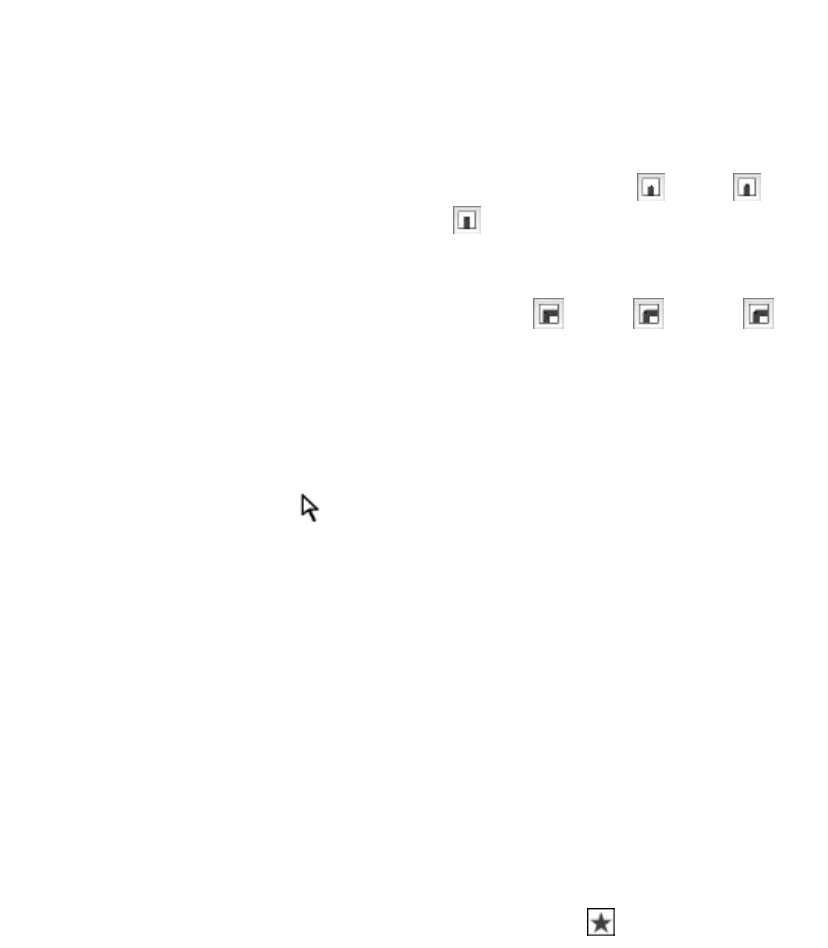
Shapes | 793
To Do the following
Adjust the outline opacity In the Stroke area, move the Opacity slider.
Adjust the outline width In the Stroke area, move the Width slider.
Modify the appearance of endpoints of open
shapes
In the Stroke area, click one of the following
Endcap buttons: Projecting , Round , or
Butt .
Modify the appearance of corners where two line
segments connect
In the Stroke area, click one of the following Miter
buttons: Miter , Round , or Bevel .
Set the miter limit to smooth out the sharpness of
lines that join at a sharp angle
Move the Miter Limit slider.
To set shape fill attributes
1Choose the Shape Selection tool from the toolbox, and click a shape.
You can select multiple shapes by holding down Shift while clicking the shapes.
2Right-click the shape and choose Set Shape Attributes.
3In the Shape Attributes dialog box, perform an action from the following table:
To Do the following
Apply a fill Enable the Fill check box.
Remove a fill Disable the Fill check box.
Change the fill color In the Fill area, double-click the color chip and
choose a color from the Color dialog box.
Fill overlapping areas of multiple shapes Click the Fill Overlaps button.
794 | Corel Painter 2015 User Guide
To Do the following
Leave overlapping areas unfilled Click the Don’t Fill Overlaps button. Multiple
overlaps alternate between filled and not filled.
Adjust the fill opacity In the Fill area, move the Opacity slider.
You can also fill a shape by choosing Edit Fill command or the Paint Bucket tool . Because
these methods apply pixel data to the region, Corel Painter first converts the shape to a pixel-
based layer. For more information, see “Applying a color as a fill” on page 242. After you commit
the shape, you cannot re-access the shape-specific controls.
To set shape flatness
1Choose the Shape Selection tool from the toolbox, and click a shape.
You can select multiple shapes by holding down Shift while clicking the shapes.
2Right-click the shape and choose Set Shape Attributes.
3In the Shape Attributes dialog box, adjust the Flatness slider.
Usually, it is not necessary to change the flatness setting. You may want to change it to adjust
for a particular high resolution printer or to avoid a PostScript limitcheck error. Check with your
output service to find out if they have a recommended flatness setting.
A change in flatness appears only in your output, not on your screen.
Adding, deleting, and moving anchor points
You can add anchor points to create new vertices or curves. You can also delete anchor points to change
the shape of the path or to smooth a contour that has unnecessary points. This might occur when you
draw with the Quick Curve tool or create a shape from a selection.
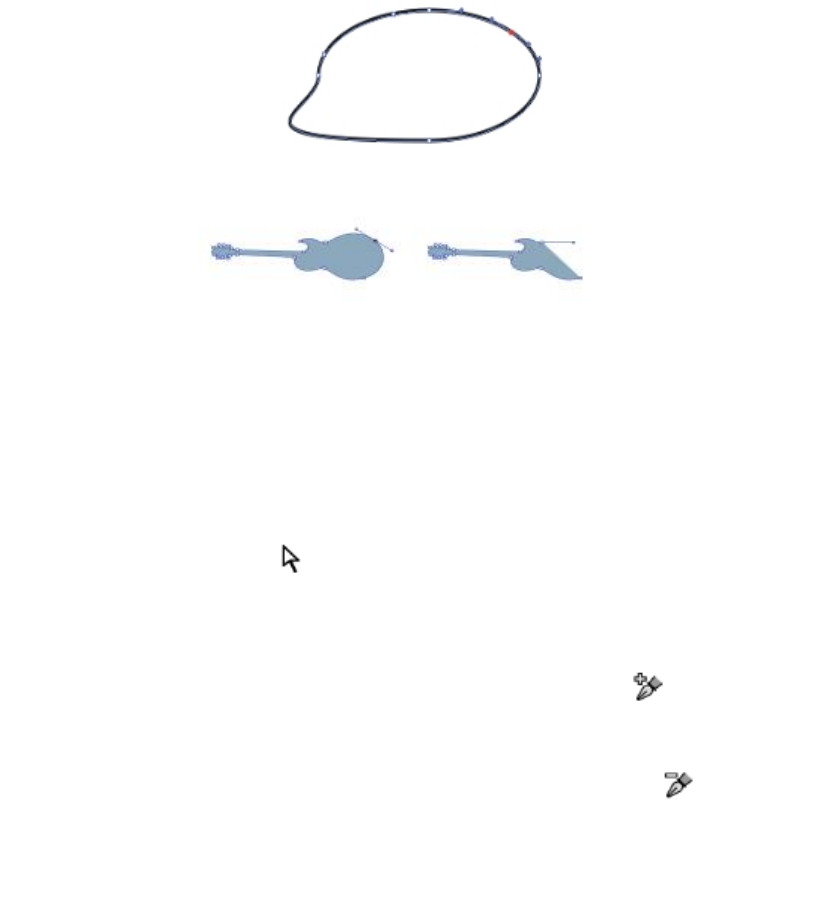
Shapes | 795
Use the Add Point tool to add anchor points to the path.
Use the Remove Point tool to delete anchor points.
You can also move one or several points by averaging, which moves two or more anchor points with
respect to each other. Averaging is useful when you need to join the endpoint of one curve to the endpoint
of another. Averaging the endpoints in both directions brings them precisely on top of each other. Now,
when you join the endpoints, Corel Painter merges them to a single point, through which the path
continues. If you don’t average points that are near each other, Corel Painter joins them with a segment.
To add or delete an anchor point
•With the Shape Selection tool , select a shape.
To Do the following
Add an anchor point Choose the Add Point tool in the toolbox,
and click where you want to add the point.
Delete an anchor point Choose the Remove Point tool in the
toolbox, and click the anchor point you want to
delete.
The anchor point is deleted, but the path remains
connected.
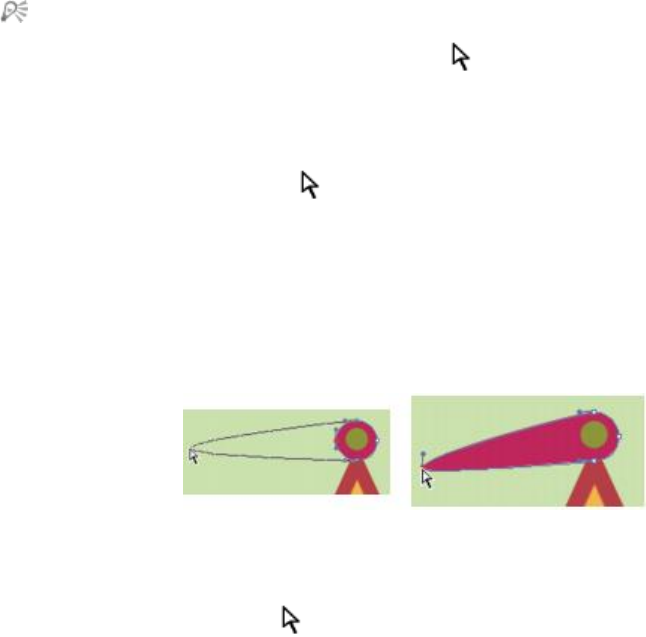
796 | Corel Painter 2015 User Guide
You can quickly switch to Shape Selection tool by holding down Command (Mac OS) or
Ctrl (Windows).
To move anchor points
1Choose the Shape Selection tool from the toolbox.
2Click an anchor point to select it, or marquee select a point by dragging over it.
If you want to select several points, marquee select them by dragging over them. All anchor points
within the marquee are selected, including those from other shapes.
If you want to add to the selection, hold down Shift and select more points.
3Drag the point to a new location.
If you have selected several points, dragging one moves them all.
Drag an anchor point to move it.
To average anchor points
1With the Shape Selection tool , select the anchor points you want to average.
It is often easiest to drag a marquee around the points you want.
2Choose Shapes Average Points.
3In the Average Points dialog box, enable an option to determine the axis for the averaging.
Adjusting curvature
The angle and length of the wing determine the curvature of the segments on either side of the anchor
point. The longer the wing, the deeper the curve.
The result of moving a wing depends on whether the anchor point is defined as a smooth point or a corner
point. Two connecting curves (or straight lines) share one anchor point, which can be a smooth or corner
point. The wings on smooth and corner points behave differently.
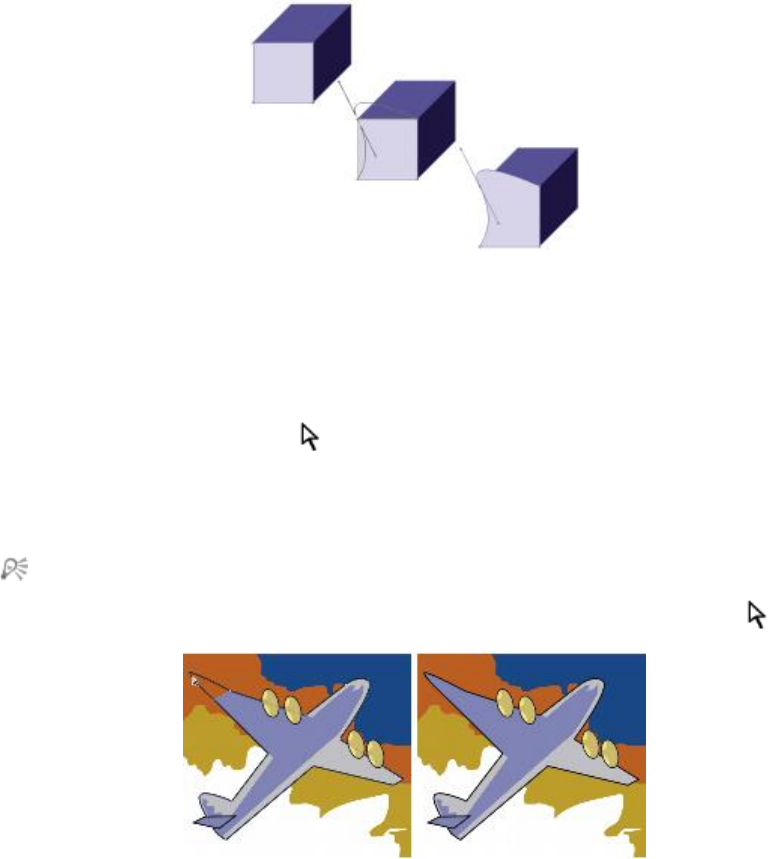
Shapes | 797
When you drag the handle on one wing of a smooth point, the curves on both sides of the point change.
With a smooth point, you adjust the angle of the wings concurrently.
A corner point is converted to a smooth point.
When you drag the handle on one wing of a corner point, only the curve on that side of the point changes.
With a corner point, you can adjust the angle of the wings independently.
To adjust a curve
1Choose the Shape Selection tool from the toolbox.
2Click a shape to select it.
If an anchor point’s wings are not displayed, drag over the anchor point to display them.
3Drag a wing handle to set the curve you want.
You can also adjust a curve by dragging a line segment with the Shape Selection tool .
Use the Shape Selection tool to drag a wing handle.
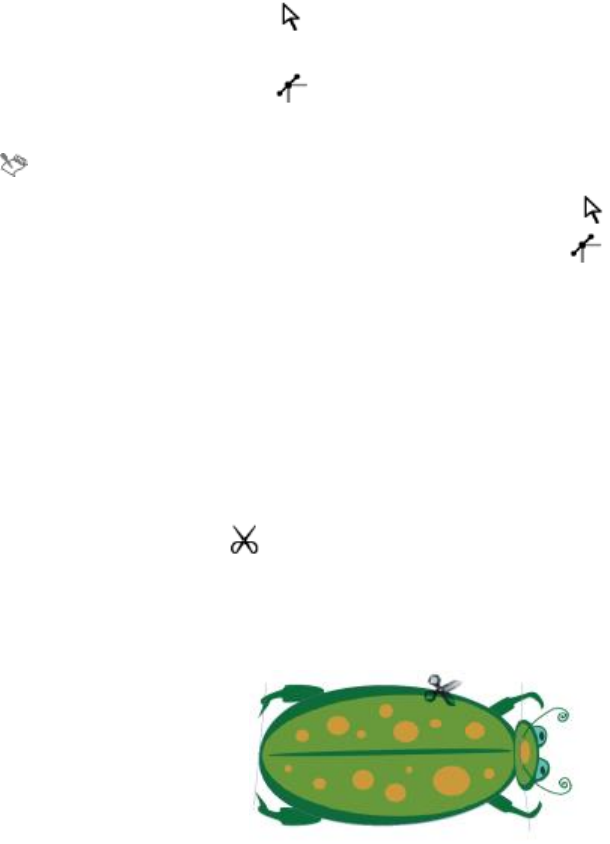
798 | Corel Painter 2015 User Guide
To convert a smooth or corner point
1With the Shape Selection tool , select an anchor point.
If the anchor point’s wings are not displayed, drag over the anchor point to display them.
2Choose the Convert Point tool from the toolbox.
3Click one of the anchor point’s wing handles.
After converting a point, you must use the Shape Selection tool for further adjustments.
If you try to adjust an anchor point with the Convert Point tool , the anchor point will be
converted again.
Cutting and joining shape segments
You may want to open a shape so that you can add new curves or connect to another open shape. You can
do this with the Scissors tool. You can also connect any two endpoints — of the same shape or of different
shapes. This lets you close an open shape or attach one shape to another.
To cut a shape
1Choose the Scissors tool from the toolbox.
2Click where you want to split the shape (you cannot click an endpoint).
The hot spot of the Scissors tool is where the blades cross. Position the cross on the line.
The scissors snap closed momentarily, and two new anchor points are created.
The Scissors tool opens and closes to cut the path.
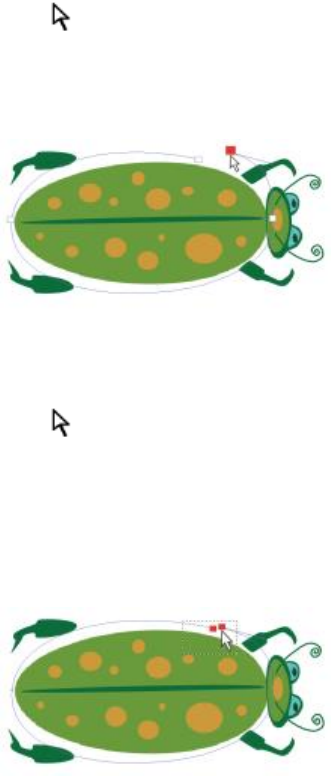
Shapes | 799
3Choose the Shape Selection tool from the toolbox, and drag the new anchor points or segments.
The new anchor points are on top of each other, and both are selected. If you try to drag one of the
new anchor points with the Shape Selection tool and both move, deselect them, then drag one point
away.
After a path is cut, it can be moved.
To join endpoints
1Choose the Shape Selection tool from the toolbox.
2Select the two anchor points you want to join.
You can do this either by marquee selecting both points, or by clicking the first point and then holding
down Shift and clicking the second point.
3Choose Shapes Join Endpoints.
A straight line is created between the two points.
Use the Shape Selection tool to select two endpoints.

800 | Corel Painter 2015 User Guide
Use the Join Endpoints command to connect two endpoints.
Converting shapes to image layers
In Corel Painter, the shapes that you create are added to shape layers. If you want to alter a shape by
painting, applying effects, or transforming, you must convert the shape to a pixel-based image layer. You
can convert an individual shape or a group of shapes to an image layer.
Shape layers vs. image layers
Some of the options and controls for working with pixel-based image layers also apply to shapes. For
example, you can move shapes in the same way you move image layers, and you can change the composite
method to control how the shape interacts with the underlying image. Shapes also follow the same layering
rules as pixel-based image layers, and you can manipulate them in many of the same ways. However,
shapes differ from pixel-based image layers by the type of data they contain. Shapes are vector objects;
pixel-based image layers are constructed of pixels. If you want to apply brushstrokes, transformations (using
the Transform tool), or effects to a shape, you must convert the shape to a pixel-based layer. Moreover, if
you attempt to perform any of these actions with a shape selected, Corel Painter automatically displays a
warning message to instruct you to commit the shape to an image layer. After you commit the shape to an
image layer, you cannot re-access the shape-specific controls.
For more information, “Layers” on page 513.
To convert a shape to a pixel-based layer for painting
1Click the shape in the Layers panel.
2Click the Layer options button , and choose Convert To Default Layer.
If you want to confine the painting to only the shape, enable the Preserve Transparency button in
the Layers panel.

Shapes | 801
You cannot paint on a shape using Watercolor brushes or Liquid Ink brushes, because they
automatically create their own special layers.
In some cases, Corel Painter will prompt you to convert a shape. For example, if you attempt to
apply an effect to a shape, Corel Painter asks if you want to commit the shape to an image layer.
You can also convert a shape to an image layers by choosing Shapes Convert To Layer.
Converting selections to shapes
You can convert a selection to a shape to edit its contour. When you are satisfied with the contour, you can
convert the shape outline back to a selection. For more information, see “To convert a shape to a selection”
on page 583.
If you are scaling, rotating, or skewing a selection path, use the Selection Adjuster tool. If you must edit
the profile of the curve, convert the selection to a shape.
Working from a selection path also lets you create shapes based on regions of the image. For example, if
you used the Magic Wand tool to select a region of common color, you could convert the Magic Wand
selection path to a shape. When the selection is pixel-based, Corel Painter may create multiple shapes.
You can convert a selection to a shape.
To convert a selection to a shape
1Choose a selection tool from the toolbox and create a selection in the image.
2Choose Select Convert To Shape.
Corel Painter converts the selection to a shape, giving it the default shape attributes. The new shape
appears in the Layers panel.
For best results, the selection should be path-based. If the selection is pixel-based, from the menu
bar choose Select Transform Selection to convert it to a path-based selection.
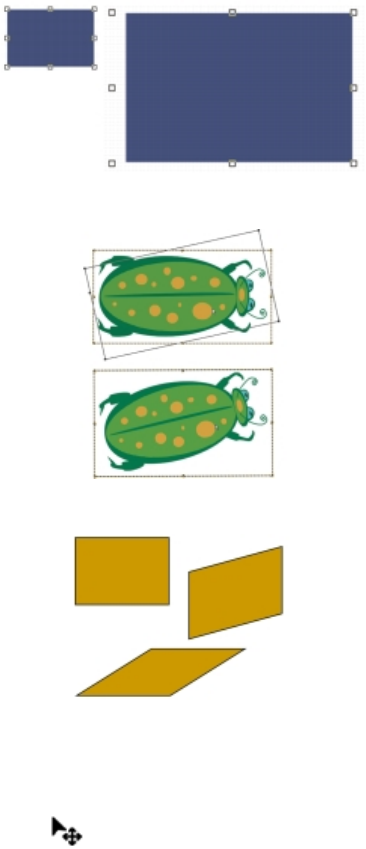
802 | Corel Painter 2015 User Guide
Resizing, rotating, skewing, and flipping shapes
Corel Painter lets you resize, rotate, flip, or skew an individual shape, or a group of shapes. Before you can
work with a shape, you must select it.
Resizing a shape
Rotating a group of shapes.
A rectangle (upper left) is skewed by dragging a side middle handle
(upper right) and by dragging the top middle handle (bottom).
To resize a shape
1Choose the Layer Adjuster tool from the toolbox.
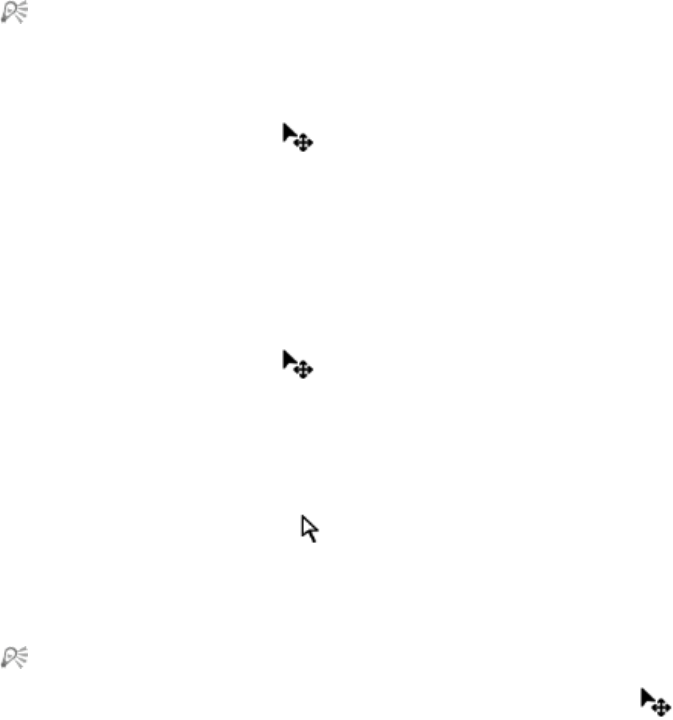
Shapes | 803
2Select the shape or group you want to resize.
A selection rectangle appears around the shapes. The rectangle has a handle on each corner and side.
3Drag one of the handles to resize the selected shape.
To resize in one dimension, drag one of the side handles. To resize in both dimensions, drag one of the
corner handles.
You can maintain the proportions by holding down Shift as you drag.
To rotate a shape
1Choose the Layer Adjuster tool from the toolbox.
2Select the shape or group you want to rotate.
A selection rectangle appears around the shapes. The rectangle has a handle on each corner and side.
3Hold down Command (Mac OS) or Ctrl (Windows) and drag a corner handle.
This command works for both shapes and pixel-based layers.
To skew a shape
1Choose the Layer Adjuster tool from the toolbox.
2Select the shape or group you want to skew.
3Hold down Command (Mac OS) or Ctrl (Windows), and drag a middle handle.
To flip a shape
1Choose the Shape Selection tool from the toolbox, and click a shape.
2From the Edit menu, choose one of the following options:
•Flip Horizontal
•Flip Vertical
You can also flip a shape by first selecting it with the Layer Adjuster tool . Then, to flip
horizontally, drag a top or bottom handle past the opposite handle. To flip vertically, drag a side
handle past the opposite handle.

804 | Corel Painter 2015 User Guide
Duplicating shapes
Duplicating creates an identical copy of the selected shape. Corel Painter also lets you duplicate shapes by
using compound transformations. Transformed duplicates are created according to the options you set.
To duplicate a shape
1Choose the Shape Selection tool from the toolbox, and click a shape.
2Choose Shapes Duplicate.
To change duplication settings
1Choose Shapes Set Duplicate Transform.
2In the Set Duplicate Transform dialog box, specify any of the following settings:
•Translation — controls where Corel Painter creates duplicate shapes in relation to the original. The
offset values are in pixels. When H. Offset and V. Offset are both zero, the duplicate is created
precisely on top of the original. If both values are 100, the duplicate appears 100 pixels lower and
100 pixels to the right. Negative values offset the duplicate up and to the left, respectively.
•Scaling — controls the size of duplicates in relation to the original. The scale values are percentages.
•Constrain Aspect Ratio — maintains the aspect ratio of the shape. If you want to create distorted
duplicates, disable this option and specify different percentages for horizontal and vertical scaling.
•Rotation — lets you specify a number of degrees to rotate duplicates. Positive values rotate
counterclockwise, and negative values rotate clockwise.
•Slant — controls the degree of slant applied to duplicates. Positive values slant duplicates to the
right. Negative values slant them to the left. Slant accepts values between –90° and 90°. However, as
values approach the extremes, the duplicate shape becomes a streak.
To create a transformed duplicate
1Select the shape you want to transform.
2Choose Shapes Duplicate.
Corel Painter creates a duplicate shape according to the specifications you’ve set.
This duplicate is now the selected shape. You can choose the Duplicate command again, or press
Command + ] (Mac OS) or Ctrl + ] (Windows), to repeat the transformation on the new shape.
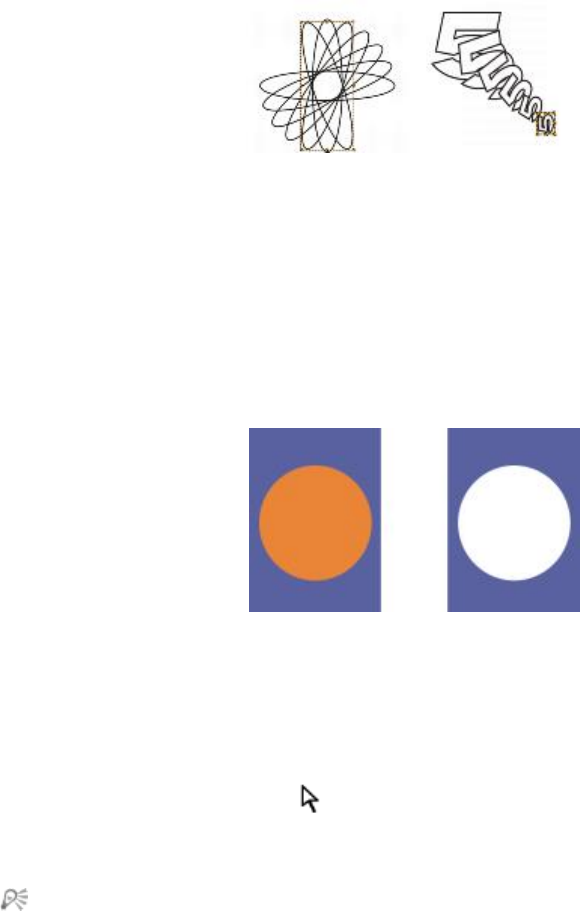
Shapes | 805
The oval shape was duplicated by using rotation only (left). The number
5 shape was duplicated by using translation, scaling, and rotation (right).
Combining shapes
You can combine shapes in various ways to achieve particular results. You can compound two or more
shapes to create a single shape. The resulting shape takes on the attributes of the shape on the topmost
layer. If the shape is filled, any overlapping areas are not filled. Compound shapes can be used to cut a
void in one shape using another shape. You can release a compound shape, which reverts it to the original
shapes.
The rectangle and the oval are combined to create a compound shape.
You can also compound shapes to create a shape group, which allows you to manipulate multiple shapes
as a single unit.
To create a compound shape
1Choose the Shape Selection tool , hold down Shift and select both shapes, or drag over the
shapes to marquee select them.
2Choose Shapes Make Compound.
You can combine a shape with a compound shape to create a nested compound shape.
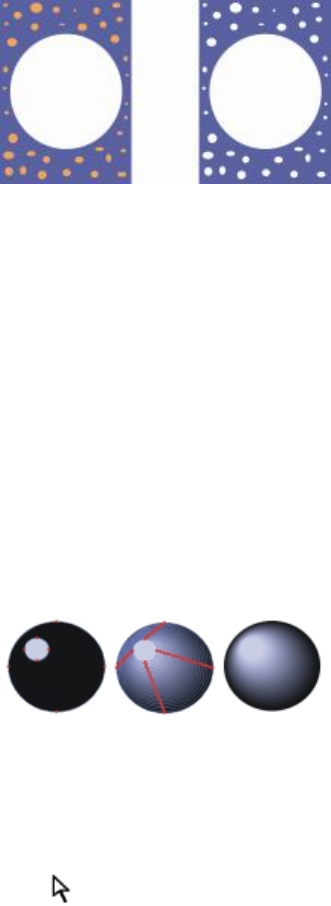
806 | Corel Painter 2015 User Guide
The resulting compound shape can itself be used again to create another compound shape.
To release a compound shape
1Select a compound shape.
2Choose Shapes Release Compound.
Blending shapes
You can blend single shapes, or groups of shapes, so that they appear to be one shape morphing into
another. Blending creates intermediate shapes between two or more selected shapes. It is also used to
simulate shading on irregular shapes. Blending applies to stroke and fill attributes as well as to the shape
size.
You can blend a shape group with another group, but you can’t blend a single shape with a group.
Blending groups with other groups offers interesting effects, especially if the groups are blends themselves.
The small circle is blended with the large circle to create a shading effect.
To blend shapes
1Position the shapes you want to blend.
You can arrange the shape layers in the Layers panel. Blends will progress from lower to higher layers.
2Choose the Shape Selection tool from the toolbox.
3Hold down Shift, and select the shapes you want to blend.
4Choose Shapes Blend.
Shapes | 807
5In the Blend dialog box, type a value in the Number of Steps box to control how many intermediate
shapes are created.
6In the Spacing area, enable one of the following options:
•Equal — blends shapes with equal spacing
•Decrease toward end — starts blending with wide spacing and decreases toward the end of the
blend
•Increase toward end — starts blending with small spacing and increases toward the end of the
blend
•Increase toward/from middle — widens spacing in the middle and decreases toward both ends
7In the Color area, choose one of the following options:
•RGB — progresses color directly over the course of the blend
•Hue CW — progresses color clockwise in the color wheel to reach the destination color
•Hue CCW — progresses color counterclockwise in the color wheel to reach the destination color
8Type a value between 0.01 and 100 in the Perspective Factor box to control the spacing of
intermediate shapes.
With a Perspective Factor of 1.0, the shapes are spaced evenly. With a Perspective Factor of less than
1.0, shapes are closer at the beginning of the blend and farther apart at the end of the blend. With a
Perspective Factor greater than 1.0, shapes are farther apart at the beginning of the blend and closer
at the end of the blend.
9Enable any of the following check boxes:
•Arc Length Matching — blends shapes containing a different number of anchor points
•Align Shape Start Points — bases the orientation of intermediate shapes on the orientation of the
start and end shapes. When disabled, Corel Painter bases the orientation of intermediate shapes
on the starting point (first anchor point) of the start and end shapes. This can create a “tumbling”
appearance in the intermediate shapes.
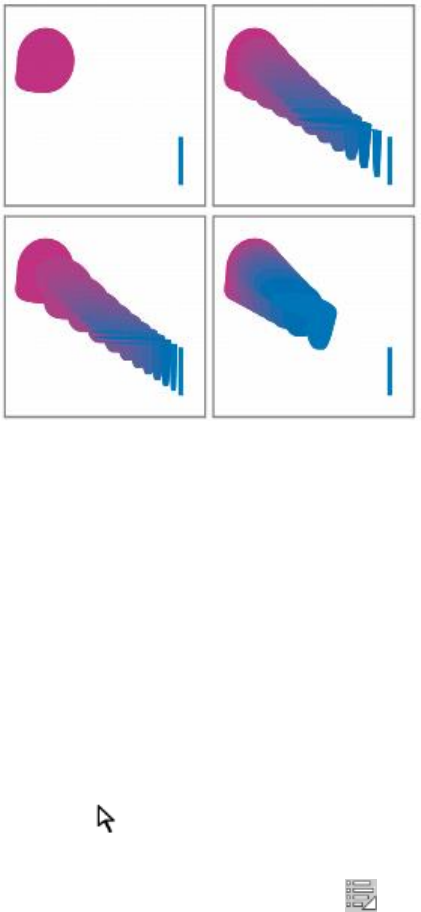
808 | Corel Painter 2015 User Guide
Clockwise from the top left picture: Two shapes with no blending;
blending with a perspective factor of 1.0; blending with a perspective
factor of 4.0; and blending with a perspective factor of 0.1.
Saving a shape outline as a selection
You can save the outline of a shape as a selection. Corel Painter doesn’t have a shapes library. However,
because of the close relationship between shape outlines and selection paths, you can save shape outlines
as selections in the Selection Portfolio. Then, you can easily convert the saved selection to a shape. For more
information, see “Working with the Selection Portfolio” on page 592. For information about converting
selections to shapes, see “To convert a selection to a shape” on page 801.
To save a shape outline as a selection
1Choose Window Media Library Panels Selections.
2Choose the Shape Selection tool from the toolbox, and click a shape.
3Choose Shapes Convert To Selection.
4In the Selection Portfolio panel, click the Selection options button , and choose Add Selection to
Portfolio.
5In the Save Selection dialog box, type a name in the Save As box.
Shapes | 809
Exporting Adobe Illustrator shapes
Corel Painter lets you export shape data to the Adobe Illustrator (AI) format. Exporting to the AI format
saves only the shapes, not the canvas or any other layers in the document. Transparency and compositing
methods are lost when shape data is exported to the AI format.
If both Corel Painter and Adobe Illustrator are running on your computer, you can copy content from
Adobe Illustrator and paste it in Corel Painter.
To export shapes to Adobe Illustrator
1Choose File Export Adobe Illustrator File.
2In the Export as Illustrator File dialog box, specify a location and filename, and click Save.
810 | Corel Painter 2015 User Guide
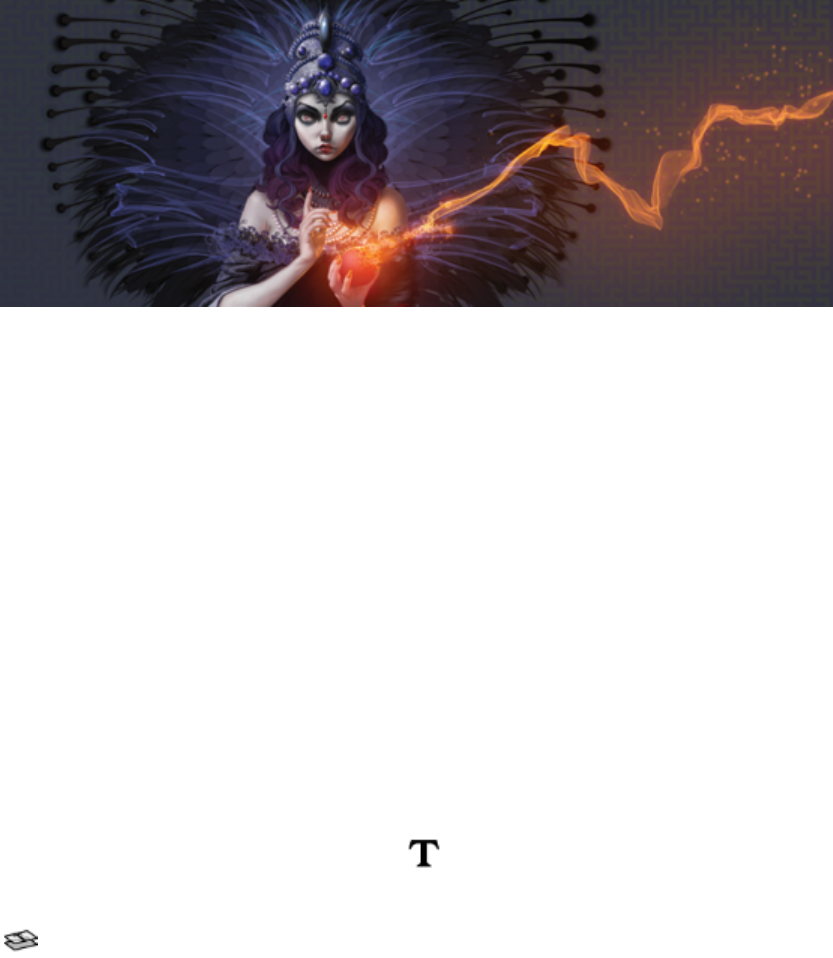
Adding text | 811
Adding text
Corel Painter lets you position and manipulate editable text on your image.
This section contains the following topics:
•“Adding text to images” (page 811)
•“Aligning text” (page 813)
•“Adjusting text kerning and leading” (page 813)
•“Stretching, rotating, and skewing text” (page 814)
•“Adding drop shadows to text” (page 815)
•“Applying effects to text” (page 816)
•“Applying curves to text” (page 817)
•“Converting text layers” (page 819)
•“Dropping text” (page 820)
Adding text to images
You can add text to an image by using the Text tool . The text that you add is then stored in a text
layer, which is automatically created for you as soon as you place the text cursor on the canvas. Each text
layer holds a single text block. The text layer is visible in the Layers panel, and is represented by a T icon
.
812 | Corel Painter 2015 User Guide
The text layer lets you work with your image without changing any text attributes. However, you can select
the text layer and edit it at any time. The text remains fully editable until you drop it onto the canvas. For
more information, see “Dropping text” on page 820.
To add text to an image
1Choose the Text tool from the toolbox.
2Click anywhere in the document window, and type.
You can also format text by choosing options from the property bar.
You can also format text by choosing Window Text, and choosing options from the Text panel.
Formatting text
You can format text by changing the font, point size, and color. You can also perform these tasks from the
property bar or from the Text panel, where you’ll find additional text controls. The changes that you make
are applied to all of the text in the text layer.
To change the font, point size, and color of text
1Choose the Text tool from the toolbox.
2In the Layers panel, select a text layer.
To Do the following
Choose a font On the property bar, choose a font from the Font
list box.
Choose a point size On the property bar, choose or type a point size in
the Point Size box .
Choose a color On the property bar, click the Color picker, and
choose a color.
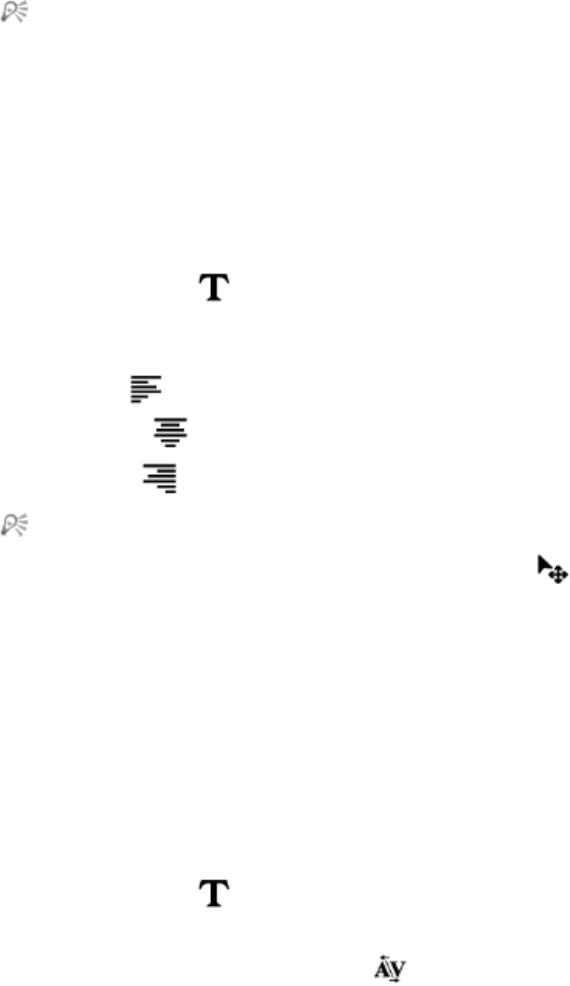
Adding text | 813
You can also format text by choosing Window Text, and choosing options from the Text panel.
Aligning text
You can align a text block to the left, right, or center. The text baseline origin is used as the reference point
for the text alignment.
To align text
1Choose the Text tool from the toolbox.
2In the Layers panel, select a text layer.
3On the property bar, enable one of the following buttons:
•Align Left
•Align Center
•Align Right
You can also align text by choosing the Layer Adjuster tool from the toolbox, clicking the
text on the canvas, and clicking one of the alignment buttons in the Text panel.
Adjusting text kerning and leading
You can fine-tune the spacing between letters by adjusting the kerning. You can also adjust the amount of
space between lines of text by adjusting the leading. You may want to change the leading from the default
setting which is set at 100%.
To kern text
1Choose Window Text.
2Choose the Text tool from the toolbox.
3In the Layers panel, select a text layer.
4In the Text panel, adjust the Tracking slider .

814 | Corel Painter 2015 User Guide
To adjust leading
1Choose Window Text.
2Choose the Text tool from the toolbox.
3In the Layers panel, select a text layer.
4In the Text panel, adjust the Leading slider .
Stretching, rotating, and skewing text
You can change the appearance of text by stretching, rotating, or skewing the text. Stretching text affects
both the horizontal and vertical size. As you stretch vertically, the text appears thinner and taller. As you
stretch horizontally, the text appears flatter and shorter.
Rotating pivots the text from the end point of the text block. Depending on the alignment of the text, it
pivots from the lower-left corner, lower-right corner, or center. You can also skew the text by slanting the
text to the right or left.
Rotated text (right).
To stretch, rotate, or skew text
1Select text using the Layer Adjuster tool .
2Choose a task from the following table:
To Do the following
Stretch text Drag a handle in the direction you want to stretch
the text.
Rotate text Hold down Command (Mac OS) or Ctrl
(Windows), and drag one of the corner handles.
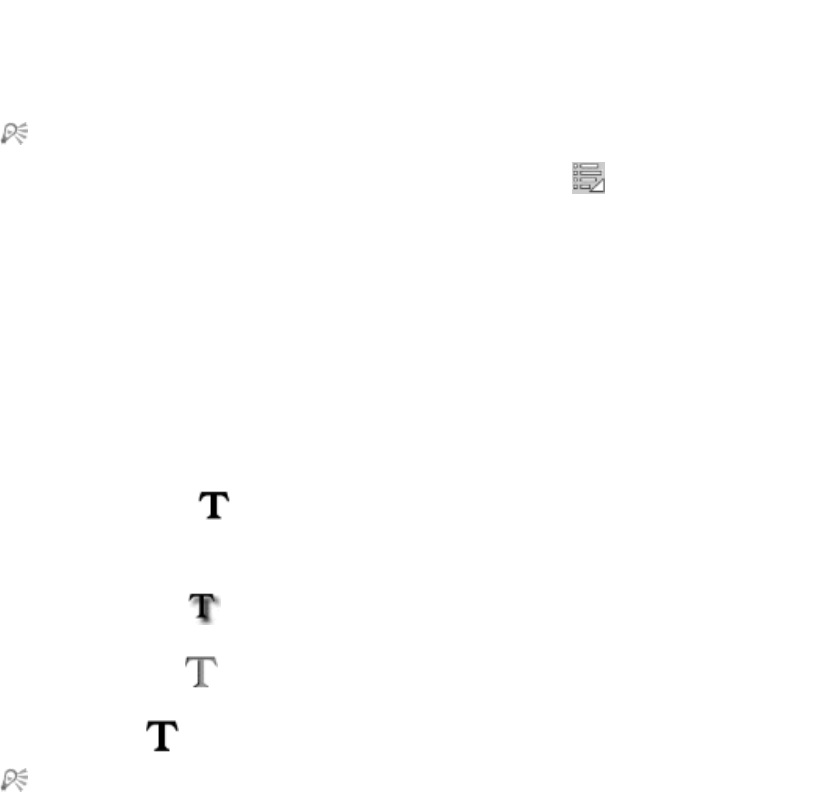
Adding text | 815
To Do the following
Skew text Hold down Command (Mac OS) or Ctrl
(Windows), and drag one of the center handles on
either side of the text.
If the bounding box is not shown, click the Layer options button and choose Show Layer
Indicators.
Adding drop shadows to text
You can apply a drop shadow to text. You can choose between two drop shadow styles: external, which
places the shadow behind the text, or internal, which places the shadow inside the text.
You can also change the composite method for text or the drop shadow of text. For more information, see
“Blending layers by using composite methods” on page 543.
To add a drop shadow to text
1Choose the Text tool from the toolbox.
2In the Layers panel, select a text layer.
3On the property bar, enable one of the following buttons:
•External Shadow — makes your letters look as though they’re casting a shadow onto a sheet of
paper held beneath them
•Internal Shadow — makes your letters look like cutouts held above a sheet of paper that is the
same color as the text
•No Shadow — removes a shadow
You can also add a shadow by choosing one of the shadow buttons in the Text panel.
816 | Corel Painter 2015 User Guide
Applying effects to text
You can alter the appearance of text or text drop shadows by applying different effects. You can apply a
composite method to text, as you would with other types of layers, to control how the text interacts with
the underlying image.
You can also adjust opacity, which controls the transparency of text or shadows. Your text’s shadow should
be semitransparent. You can also use opacity to fade the color of text.
In addition, you can add either a focus blur or a directional blur to text and shadows. Focus blurs make
text fuzzy. You can use the focus blur to soften the edges of text characters. With directional blurs, you can
specify the direction in which the blur occurs.
To apply a composite method to text
1Choose Window Text.
2Choose the Text tool from the toolbox.
3In the Layers panel, select a text layer.
4In the Text panel, click on the following buttons:
•Text Attributes
•Shadow Attributes
5Choose an option from the Composite Method list box.
To adjust text opacity
1In the Text panel, click on the following buttons:
•Text Attributes
•Shadow Attributes
2In the Text panel, move the Opacity slider to the left to increase transparency or to the right to
increase opacity.
To blur text
1In the Layers panel, select the Text layer or the Shadow layer.
2In the Text panel, click on the following buttons:
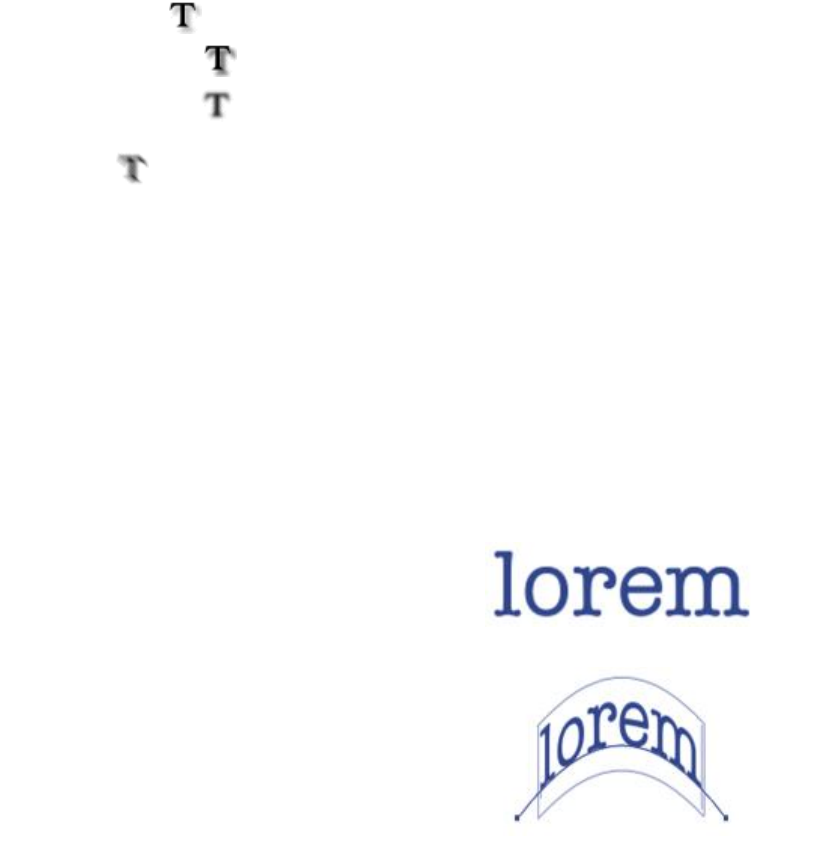
Adding text | 817
•Text Attributes
•Shadow Attributes
3Adjust the Blur slider .
If you want to apply a directional blur, enable the Directional check box, and adjust the Directional
Blur slider .
The first half of the slider adds a left-to-right blur on the text; the second half adds an up-and-down
blur.
Applying curves to text
You can apply a curve style and modify the path (baseline) along which your text will flow. The baseline
created by a curve style is a Bézier curve, meaning that the shape can be controlled by using control handles
and anchor points. For more information, see “Drawing lines and curves” on page 785.
There are four curve styles to choose from:
Curve Style Example
The Curve Flat style flows along a straight line.
The Curve Ribbon style flows the text along a
curve and keeps the letters in an upright position.
When you apply the Curve Ribbon style, you can
use the Shift key and the Rotate tool to control
how the text moves around the baseline.
818 | Corel Painter 2015 User Guide
Curve Style Example
The Curve Perpendicular style places the text
along the curve, with each letter perpendicular to
the curve.
The Curve Stretch style actually changes the shape
of the letters to fill in the space that would be left
when the curve bends. For example, if text is set on
a circular path, Corel Painter makes the tops of the
letters heavier and thicker to fill in space.
You can control how the text is centered on the baseline. You can also move the center point by dragging
on the slider or by changing the alignment. Dragging the Centering slider also changes where the text
starts and stops on a line. The Centering slider has no effect on the Curve Flat style. After you apply a curve
style, you can change the curve of the path.
To set a curve style and change centering
1Choose the Text tool from the toolbox.
2In the Layers panel, select a text layer.
3In the Text panel, click a curve style icon:
•Curve Flat
•Curve Ribbon
•Curve Perpendicular
•Curve Stretch

Adding text | 819
4Drag the Centering slider to the right or left.
The text moves along the curve.
You can also change the alignment of text on a path by clicking a text layer in the Layers panel
and clicking an alignment button in the Text panel. For more information, see “To align text” on
page 813.
To change the text path
1Choose Window Layers.
2In the Layers panel, select a text layer.
3Choose the Shape Selection tool from the toolbox.
4Click an end point on the path.
Drag the handles to change the shape of the path.
Converting text layers
You can convert a text layer into a standard layer so that you can apply effects such as gradations, blends,
or surface textures. For example, you can also apply surface control textures to give the text a three-
dimensional appearance. For more information, see “Adjusting light properties” on page 648.
You can also convert a text layer to shapes, which allows you to move and edit individual characters. For
more information, see “Shapes” on page 781.
To convert a text layer to a standard layer
1In the Layers panel, choose a text layer.
2Click the Layer options button , and choose Convert To Default Layer.
If the text has an outside or an inside shadow, then two layers — one for the text and one for the
shadow — are created within a group.
To convert a text layer to shapes
1In the Layers panel, choose a text layer.

820 | Corel Painter 2015 User Guide
2Click the Layer options button , and choose Convert Text To Shapes.
The text layer is replaced by a group of shape layers.
Text shadows and blurring effects are not converted when you use this command.
Dropping text
While you are working with text, it resides on a layer and is not yet a part of the image. When a text layer is
dropped, it integrates with the canvas and can no longer be edited.
To drop a text layer onto the canvas
1In the Layers panel, select a text layer.
If you want to select more than one text layer, highlight several layers and group them.
2Click the Layer Commands button at the bottom of the Layers panel, and choose Drop.

Working with animation and digital videos | 821
Working with animation and digital videos
Corel Painter lets you create animations frame-by-frame from scratch, as well as open existing digital videos
(QuickTime or AVI) for editing frames on Windows. Whichever workflow you choose, you can use Corel
Painter’s Natural Media brushes and effects to create or modify animation frames. You can also use features
such as onion skinning or cloning in the creation of animations.
This section contains the following topics:
•“Choosing an animation workflow” (page 822)
•“Creating frame-by-frame animation” (page 823)
•“Opening a Corel Painter movie” (page 825)
•“Importing QuickTime and AVI files” (page 826)
•“Selecting movie frames” (page 827)
•“Editing frame content” (page 827)
•“Applying effects to a single frame” (page 827)
•“Previewing animations” (page 828)
•“Using onion skinning” (page 829)
•“Animating with layers” (page 830)
•“Adding, deleting, and erasing frames” (page 831)
•“Repeating frames” (page 831)
•“Inserting movies” (page 832)
•“Rotoscoping” (page 833)
•“Applying scripts to movies” (page 833)
•“Exporting movies as QuickTime” (page 835)
•“Exporting movies as AVI” (page 837)
822 | Corel Painter 2015 User Guide
•“Importing and exporting numbered files” (page 838)
•“Exporting animated GIFs” (page 839)
Choosing an animation workflow
Corel Painter offers different animation workflows:
• Create animation frames from scratch
• Edit digital video frames
• Create animations by cloning
• Create animations by tracing
• Create animations from layers
Customizing an animation-specific color set
You can customize a color set for the animation to better control the use of color. For example, using a
particular color set prevents the colors of your characters from shifting between frames. You might want to
set up an image of each character with annotations to specify which colors to use in which areas.
Not all colors are suitable for video.
You can’t display different sections of a movie at different rates. What you can do is create sections
separately at different rates and then modulate them to the same rate before joining them. This is the kind
of work you’ll do in your video-editing application.
For more information, see “To set the preview rate” on page 829.
Frame Stacks panel
In Corel Painter, digital video and animation files are known as movies or frame stacks. Whether you’re
working with an imported digital video or building an animation from scratch, you can select and navigate
frames from the Frame Stacks panel.
The Frame Stacks panel appears whenever you open or create a movie file and it must stay open while you
work with a movie.
The number of frames displayed in the Frame Stacks panel is determined by the
number of onion skin layers. A red triangle appears above the current frame.
You work in one frame at a time — the one appearing in the document window. The Frame Stacks panel
helps you navigate the frames in the stack and choose which frame to modify.

Working with animation and digital videos | 823
Each frame in a frame stack can have one layer. For example, if you add an item from the image portfolio
onto a frame, Corel Painter places the image on a layer. You can move the image around the layer. However,
when you move between frames or close the file, Corel Painter drops all layers — the layer is deleted, and
the layer’s content is flattened onto the background canvas. For more information about working with
layers, see “Layers” on page 513.
The Frame Stacks panel displays thumbnails of several frames. The frame numbers appear under the
thumbnails. The current frame is shown with a red triangle over it.
The number of thumbnails is determined by the layers of onion skin you’ve chosen. By default, QuickTime
and AVI files are opened with two layers of onion skin. For more information about onion skinning, see
“Using onion skinning” on page 829.
Setting movie file sizes
Keep in mind that video and animation can produce huge files. When planning a project, be careful not to
overestimate your available disk space. For an idea of disk requirements, consider this example: Each 640 by
480-pixel, 24-bit color frame is 1.2 MB. At this size, a 12-fps, 30-second animation would consume more
than 400 MB of disk space.
To calculate the disk space required for a frame stack
1Using pixels as the unit of measurement for width and height, calculate the number of bytes required to
save the frame stack with the following formula:
(Frame Width) × (Frame Height) × (Bytes per Pixel) × (Number of Frames)
2Divide the product of the formula in step 1 by 1,024 to convert to kilobytes.
Bytes per pixel are determined by the storage type. For example, 24-bit color with an 8-bit alpha
channel uses 4 bytes per pixel. For more information about storage types, see “Creating frame-by-
frame animation” on page 823.
When you save a movie as QuickTime or AVI, the file size can be reduced by compression. For
more information about compression, see “Exporting movies as QuickTime” on page 835 and
“Exporting movies as AVI” on page 837.
Creating frame-by-frame animation
In Corel Painter, you can build animations one frame at a time. Then, when you complete a series of frames,
also known as a frame stack, you can preview them as a movie.
The first step in creating a new animation is to create a movie. You can specify options such as the number
of frames and the frame size. You can also choose how many onion skin layers you want to display. Onion
skinning allows you to see multiple frames at the same time. You can view up to five frames at a time: the
824 | Corel Painter 2015 User Guide
current frame and four other frames adjacent to it. This will help you determine where the next frame of
motion should be drawn. For more information, see “Using onion skinning” on page 829.
Once you create a movie file, a blank frame appears in the document window so you can begin adding
content by using brushes and other tools. After you complete a frame, you can use the navigation tools in
the Frame Stacks panel to display the next frame in the sequence, or whichever frame you want to work
on next. You can play back the animation as you create it, to make sure that you have the correct flow of
movement. The Frame Stacks panel must stay open when you create or edit movies. For more information,
see “Editing frame content” on page 827.
In Corel Painter, movies are saved to the Painter Framestack file format (FRM), which stores a series of
images equal in size and resolution.
To create a new movie
1Choose Movie New Movie.
2Type a filename in the Movie Name text box.
3In the Canvas Settings area, type values in the Width and Height boxes.
The standard digital video frame is 640 by 480 pixels, which is a 4:3 aspect ratio. Many people work at
sizes consistent with this aspect ratio.
4Type a value in the Resolution box.
5In the Movie Settings area, type a value in the Number of Frames box.
You can also add or remove frames at a later time.
6From the Layers of Onion Skin options, choose the number of onion skin layers that you want.
The number of onion skin layers determines the number of frames displayed in the Frame Stacks panel.
For more information, see “Using onion skinning” on page 829.
7From the Storage Type list box, choose one of the following options:
•8-bit gray — displays 256 levels of gray
•8-bit System Palette — displays the system palette for 256 colors
•15-bit color with 1-bit alpha — displays 32,768 colors and a layer for a channel
•24-bit color with 8-bit alpha — displays 16.7 million colors and a layer for an anti-aliased channel
8In the Enter Movie Name dialog box, specify a location to save the file.
9Click Save.
The movie file is saved to the Painter Framestack (FRM) format.
When the movie opens, the Frame Stacks panel appears, and the document window displays the first
frame of the movie.

Working with animation and digital videos | 825
You can also
Choose a paper color Click the Color chip, and choose a color from the
Color dialog box.
Choose a paper texture Click the Paper chip, and choose a paper texture
from the Papers Textures panel.
The storage type lets you specify the color depth for saving each frame. This applies to the saved
frame stack, not to your work in the current frame. For example, choosing 256 colors as the
storage type still allows you to work with a selection and 24-bit tools in the document window
for the current frame. As soon as you change frames, however, the image is saved in the 256-
color format, and the selection is lost. If you want to maintain selections in saved frames, you
must choose the 15-bit or 24-bit storage type. These storage types allow you to take advantage of
compositing options that require a selection layer.
To create frame-by-frame animation
1With the Frame Stacks panel open in the document window, navigate to frame 1.
2In the toolbox, click the Brush tool.
3Click the Brush Selector on the Brush Selector bar.
4In the Brush library panel, click a brush category, and click a brush variant.
5Paint the animation frame in the document window.
6In the Frame Stacks panel, click the Step Forward button .
Changing frames automatically saves the frame. You cannot undo changes after the frame has been
saved.
Repeat steps 5 and 6 until you complete all frames.
You can view previous and future frames while working in the current frame with the onion skin
view. You can enable the onion skin view by clicking Movie Show Onion Skin Layers.
Opening a Corel Painter movie
You can open movies (frame stacks) that were previously created in Corel Painter so you can edit them.
826 | Corel Painter 2015 User Guide
To open a Corel Painter movie
1Choose File Open.
2In the Open dialog box, locate the FRM file, and click Open.
3In the Open Frame Stack dialog box, choose the number of onion skin layers you want to appear in the
Frame Stacks panel.
The number you choose determines the number of thumbnails visible in the Frame Stacks panel.
4Click OK.
The Frame Stacks panel appears and the document window displays the first frame in the stack.
Importing QuickTime and AVI files
You can import QuickTime or AVI digital videos so you can edit them using any of the Corel Painter brushes,
textures, and effects. When you import a QuickTime or AVI file, Corel Painter automatically converts it into a
frame stack. A frame stack is a series of images equal in size and resolution.
Corel Painter does not provide features for working with audio.
When you’re finished editing the digital video in Corel Painter, you can save it as a QuickTime, AVI, or
animated GIF file. You can then open the QuickTime or AVI file in a video-editing application to add sound
effects and other finishing touches.
For efficiency, import only the video frames that you plan to edit. For example, if you have a two-minute
video clip and you want to paint on the first 10 seconds, don’t import the entire clip in Corel Painter.
Instead, separate the first 10 seconds in a video-editing application and import only those frames. After
finishing that clip in Corel Painter, you can open the frames in the video-editing application and join them
to the other frames.
You can also import movies that are saved as a series of numbered files. For more information, see
“Importing and exporting numbered files” on page 838.
To open a QuickTime or AVI movie
1Choose File Open.
2In the Open dialog box, locate the movie, and click Open.
3In the Enter Movie Name dialog box, type a name in the File Name box, and click Save.
The Frame Stacks panel appears, and the document window displays the first frame of the movie.

Working with animation and digital videos | 827
When you open a QuickTime or AVI movie, Corel Painter makes a frame stack copy of the movie.
This ensures that the original file does not change.
Frame stacks are uncompressed, so you need an adequate amount of disk space to create them.
For example, a 1MB QuickTime or AVI movie can become a 20MB frame stack.
Selecting movie frames
You can select a frame by clicking its thumbnail in the Frame Stacks panel. You can also easily jump to any
frame in a movie.
To select a frame
• Do one of the following
• In the Frame Stacks panel, click the frame’s thumbnail.
•Choose Movie Go to Frame, and type the frame number in the Go to Frame dialog box.
Editing frame content
Frames can be added to, or deleted from, a movie. You can also erase the contents of a frame while leaving
the frame in the movie. These changes cannot be undone, so it’s best that you create your animation in
segments and combine them when you are finished.
Applying effects to a single frame
You can paint on, or apply effects to, any frame in a movie. You can do anything in a frame that you can
do in a single image: paint with a brush, add layers, or apply an effect to a selection or to the entire image.
Frames are automatically saved when you select another frame, and the changes cannot be undone.
To paint on or apply an effect to a single frame
1In the Frame Stacks panel, click the thumbnail of the frame that you want to work in, or click the Step
Forward button to advance to the frame.
The selected frame appears in the document window.
2Modify the image in the document window.
828 | Corel Painter 2015 User Guide
3When you’re ready to work on the next frame, click the Step Forward button .
Changing frames automatically saves the frame. You cannot undo changes after the frame is saved.
Previewing animations
The Frame Stacks panel provides the tools that you need to preview and navigate animations. For example,
you can navigate to various frames in the stack for editing purposes or play the animation to preview how
the frames link together. You can also set the preview frame rate to control how many frames are displayed
per second.
To preview an animation
• In the Frame Stacks panel, perform an action from the following table.
To Do the following Keyboard shortcut
Play the frame stack Click the Play button .
Stop playing the frame stack Click the Stop button . Ctrl + .
Return to the first frame in a
stack
Click the Rewind button . Home
Move back one frame Click the Step Reverse button
.
Page Down
Advance to the next frame Click the Step Forward button
.
When a frame is the last in the
stack, Corel Painter adds a new
frame to the end and advances.
Page Up
Advance to the last frame in the
stack
Click the Fast Forward button
.
End
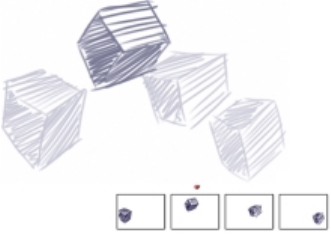
Working with animation and digital videos | 829
To set the preview rate
• In the Frame Stacks panel, move the Playback slider.
Using onion skinning
Onion skinning is a feature animators use to view previous and future frames while working in the current
frame. Traditional animators work on an onion skin paper that allows them to see a sequence of frames
through transparent layers. They then draw successive frames, using the previous frames for reference.
Seeing several images superimposed helps increment the action evenly.
Scrolling a background is another example of a cycled action. Commonly, a subject remains in one place
while the background slides by.
Onion skin view (with Show Onion Skin Layers on). Each
frame in the frame stack represents one onion skin layer.
Corel Painter lets you work with two to five onion skin layers. You can specify the number of onion skin
layers when you first open a frame stack or create a movie. To change the number of onion skin layers, you
must close the file and reopen it.
The Frame Stacks panel displays a linear view of the onion skin layers. Each thumbnail represents one onion
skin layer, and the thumbnail of the current frame has a red triangle above it.
You can change the current frame by clicking any thumbnail in the Frame Stacks panel. This lets you view a
frame in any position of the onion skin sequence. For example, if you want to display the reference frames
before the current frame, set the current frame to the far-right position in the panel. If you want to display
the frames before and after the current frame, set the current frame to the middle thumbnail in the panel.

830 | Corel Painter 2015 User Guide
To show onion skin layers
•Choose Movie Show Onion Skin Layers.
In the document window, the current frame appears darkest. Each frame moving away is progressively
fainter.
Animating with layers
One of the simplest ways to create animation in Corel Painter is to add an item from the Image Portfolio
panel across a series of frames. This is the most basic example of animating with layers. Adding multiple
layers allows you to make more complex animations.
You can also group layers and move them simultaneously, but be careful. When you leave a frame, Corel
Painter drops the layers in that frame. When a layer is dropped, its contents are merged with the canvas
and can no longer be accessed separately. For this reason, you may want to work from the background
forward; start by animating what’s farthest from your point of view. For more information, see “Dropping
layers with the canvas” on page 539.
You can also rotate a layer. Rotating a layer can degrade its on-screen image quality, but this does not affect
its printed quality.
To create motion with layers
1Choose Movie New Movie.
2Type 1 in the Number of Frames box.
3Enable one of the Layers of Onion Skin options, and click OK.
4In the Enter Movie Name dialog box, choose a location, type a name for the file, and click Save.
5Choose Window Media Library Panels Images.
6Double-click an item in the Image Portfolio panel to add it to the document window.
A new layer is created.
7Position the layer to the far left of the document window.
8Click the Step Forward button in the Frame Stacks panel.
A new frame is added and becomes the current frame. The layer in the previous frame is merged with
the canvas. In the new, current frame, the layer is active.
9On the keyboard, press the arrow keys to move the portfolio image.
10 Repeat steps 8 and 9 for as many frames as you want to add.
11 In the last frame, click the Layer options button in the Layers panel, and choose Drop.

Working with animation and digital videos | 831
12 Click the Play button in the Frame Stacks panel.
The portfolio image moves across the screen.
Adding, deleting, and erasing frames
You can add frames at the end or beginning of a movie, or in between any frames in the stack. You can also
delete frames from a movie and all subsequent frames are renumbered as necessary. In addition, you can
clear the frame contents, but retain the paper color. You cannot undo the actions of deleting and erasing
frames, so it’s best to create animations in small segments and then combine them when you are finished.
For more information, see “Inserting movies” on page 832.
To add frames
1Choose Movie Add Frames.
2In the Add Frames dialog box, type the number of frames in the Add box.
3Enable an option for frame placement.
For example, to add six blank frames before frame 10, type 6 in the Add box, enable the Before option,
and type 10 in the Frame box.
To delete frames
1Choose Movie Delete Frames.
2In the Delete Frames dialog box, enter the range of frames to delete.
To erase frames
1Choose Movie Erase Frames.
2In the Erase Frames dialog box, enter the range of frames to erase.
Repeating frames
You can repeat actions to create an animated cycle. You can also repeat the last frame at the end of the
stack.
Take, for example, a blinking eye. For this type of action, draw the cycle once, and repeat it as many times
as needed.
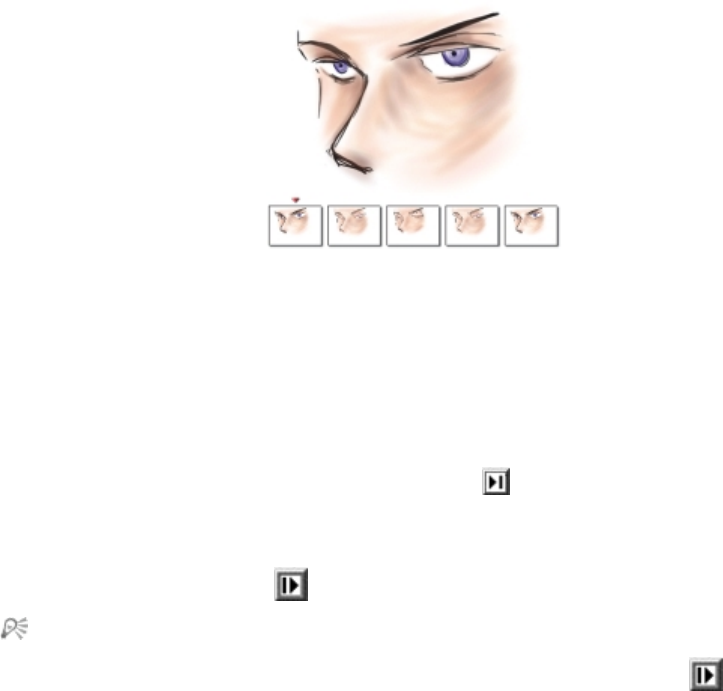
832 | Corel Painter 2015 User Guide
This example shows a blinking eye as an animated cycle.
You draw the frames once, and then repeat them.
To create a clean cycle, the beginning and ending images must be the same. For example, in an animation
of a blinking eye, the eye would be open at the beginning and at the end. That way, when the end of one
cycle is “hooked up” to the beginning of the next, the action continues smoothly.
To repeat the last frame
1In the Frame Stacks panel, click the Fast Forward button .
2Choose Movie Clear New Frames to disable this command.
The check mark beside the Clear New Frames command is removed.
3Click the Step Forward button in the Frame Stacks panel.
You can add blank frames at the end of a movie with the Step Forward button when the
Clear New Frames command is enabled.
Inserting movies
You can combine movies by inserting the frames of one movie into another. You can insert a movie before
or after a specific frame, at the start of a movie, or at the end of a movie.
You can insert only Corel Painter movie (FRM) files. You cannot insert frames from QuickTime, AVI, or
numbered files. However, if you open a QuickTime or AVI file in Corel Painter, you can save it to the FRM
format in order to insert it into another CorelPainter movie.

Working with animation and digital videos | 833
To insert a movie
1Choose Movie Insert Movie.
2Enable an option in the Insert Movie area.
3In the Select Movie dialog box, locate the movie that you want to insert.
4Click Open.
The movie you insert must have the same frame size (width and height) as the current movie. You
will also get better results if both movies use the same frame rate.
Rotoscoping
Rotoscoping is the process of painting on a movie, applying effects to a movie, or compositing a portion of
the images from one movie with the images of another. This is often done to make the action of a person
filmed in one place appear on a background filmed in another. You can also use rotoscoping to remove an
element from a video clip, as shown below in the frames from a short movie of an owl on a roost. After the
video was captured digitally, it was imported into Corel Painter, and the roost was removed frame by frame
by using the masking tools.
(1) The frame shows an owl perched on a roost. (2) The frame shows the
owl without the roost. (3) The frame shows the mask used to hide the roost.
Rotoscoping is also useful for adding a background to an animation. The process is the same whether you
work with digitized video or painted animation cells.
Applying scripts to movies
The Script feature lets you repeat the same actions for each frame in a movie. For example, you might
want to apply an effect like Glass Distortion to a video clip. You can record a script that applies the Glass
Distortion effect to a single image and then, with a single command, apply that script to the entire movie.
834 | Corel Painter 2015 User Guide
A script can contain almost any action — a single command, a series of commands, or the many steps in
creating an original drawing. You’ll devise scripts based on the needs of your project.
You cannot undo changes after applying a script to a movie. Before applying the script, you should become
familiar with scripting and experiment with a separate sample image. You might want to work with a copy
of the movie, or you might apply the script to a short sample movie to test it. For complete information on
working with scripts, see “Using scripts to automate tasks” on page 843.
Using scripts to set grain position
You can use a script to apply a surface texture (paper grain) to an entire movie. In this case, you have
several options for the position of the grain in each frame. You can put the grain in exactly the same
position, move the grain randomly, or move it linearly by a set number of pixels.
Using scripts to apply brushstrokes
You can apply a recorded brushstroke to a movie. Corel Painter divides the stroke into as many segments
as there are frames and places the segments in successive frames. This feature is most useful when used
with the Image Hose. When you apply a brushstroke to a movie using the Image Hose brush, one or more
Nozzle images are deposited on each frame. If the Nozzle file is an animated sequence — for example,
a person walking — Corel Painter can drop successive images on successive frames. Play the movie back,
and the person walks across the document window. For this to work, you must set up the Nozzle file
appropriately and have the right Image Hose brush size. For more information, see “Using the Image hose”
on page 470.
To create a script for a movie
1Choose Window Scripts.
2In the Scripts panel, click the Script options button in the upper-right corner, and choose Record
Script.
3Perform the actions you want included in the script, and click the Stop button in the Scripts panel.
4In the Script Name dialog box, type a name for the script in the Save as box.
To apply a script to a movie
1Open the movie to which you want to apply the script.
2Choose Window Scripts.
3In the Scripts panel, click the Script options button , and choose Apply Script To Movie.
Working with animation and digital videos | 835
4In the Apply Script To Movie dialog box, double-click a script.
Corel Painter applies that script to each frame in the stack. If you have a few small frames in your movie,
and the script is not a complicated one, the script can be applied quickly. If the movie has several large
frames, a complicated script could take a long time.
You can apply only scripts that do not create new images.
To set grain position with a script
1Record a script that applies surface texture or dye concentration to an entire image.
2Choose Movie Set Grain Position.
3In the Set Grain Position dialog box, enable one of the following options:
•Grain Stays Still — allows the grain to remain in the same position throughout the movie
•Grain Moves Randomly — moves the grain as the movie plays. To use this option, you must disable
the Record Initial State option when recording your script. In the Scripts panel, click the Script
options button , and choose Script Options. In the Script Options dialog box, disable the
Record Initial State check box.
•Grain Moves Linearly — increments the grain movement. Specify the number of pixels you want the
grain to move horizontally and vertically from one frame to the next.
4Click OK.
5Choose Window Scripts.
6In the Scripts panel, click the Script options button , and choose Apply Script To Movie to apply
the grain script. Each frame is textured according to your selected method.
To apply a brushstroke script
1Choose Brushes Record Stroke.
2Create a brushstroke in the document window.
3Open a movie file.
4Choose Movie Apply Brush Stroke To Movie.
Exporting movies as QuickTime
You can export a movie as a QuickTime movie on the Windows platform.
836 | Corel Painter 2015 User Guide
QuickTime supports several compression schemes. The following descriptions should help you choose one;
however, you’ll probably want to experiment with different compressors and settings to identify the best
settings for your work. You may also have additional compression methods available.
• The Animation method works well with areas of continuous tone. If you set the Quality in the
Compression Settings dialog box to Best and make every frame a key frame, this compressor is lossless.
For most Corel Painter animations, this compressor is a good choice.
• The Cinepak method produces acceptable motion and image quality at remarkably small file sizes. It is
the preferred format for CD delivery and transfer across the Internet. Cinepak can take a long time to
compress, and it can be difficult to find the best compression settings for certain image types and frame
rates.
• The Graphics method is limited to 256 colors. It compresses the file at a greater ratio than the
Animation compressor, but does not play as quickly.
• The None option uses no compression, so the images retain all of their quality. With a large frame size,
some computers might not be fast enough to play at a high frame rate.
• The Photo-JPEG method allows high compression ratios while maintaining excellent image quality.
However, it does not play at high rates. JPEG is an international standard for image compression.
• The Video method is designed for recording and playing back digitized video at high rates. Because
of the spatial compression method it uses, the Video compressor does not provide optimal results for
images with large areas of continuous tone, such as those in most animations.
The compression ratio is inversely proportional to image quality. The Quality slider allows you to set an
optimum level between the amount of compression and image quality. For most work in Corel Painter, it is
best to set the Quality slider to High.
You can specify the number of frames you want displayed per second and, with some compression
methods, the frequency of key frames. Key frames are used in temporal compression methods. Each key
frame is stored in its entirety. The next set of frames, up to the next key, are saved only as changes.
With some compression methods, you can also limit the speed of data transmission with the Limit Data
Rate option. The data rate limit overrides the Quality setting, if necessary, to keep the compressed movie
within the set limit.
To export a Corel Painter movie as a QuickTime movie
1Choose File Save As.
2In the Save Movie dialog box, enable the Save Movie As QuickTime option.
3In the Enter Movie Name dialog box, choose a location, enter a name for the file, and click Save.
4In the Compression Settings dialog box, choose a compression method from the list box.
5Specify the options you want.
Working with animation and digital videos | 837
Exporting movies as AVI
The AVI format supports several compression schemes. The following descriptions should help you choose
one; however, you’ll probably want to experiment with different compressors and settings to identify the
best settings for your work. You may also have different compression methods available.
• The Cinepak method produces acceptable motion and image quality at remarkably small file sizes. It
is the preferred format for CD delivery and transfer across the Internet. Cinepak takes a long time to
compress, and it can be difficult to find the best compression settings for certain image types and frame
rates.
• The Microsoft Video 1 method is designed for recording and playing back digitized video at high rates.
• The Full Frames (Uncompressed) method uses no compression, so the images retain all of their quality.
With a large frame size, some computers might not be fast enough to play at a high frame rate. This is
the preferred format for transferring Corel Painter movies to AVI-editing applications.
The compression ratio is inversely proportional to image quality. In the Video Compression dialog box, the
Compression Quality slider allows you to set an optimum level between the amount of compression and
image quality.
Key frames are used in temporal compression methods. Each key frame is stored in its entirety. The next set
of frames, up to the next key, are saved only as changes. With some compression methods, you can specify
the frequency of key frames with the Key Frame Every [Number] Frames option.
With some compression methods, you can also limit the speed of data transmission with the Data Rate
option. The data rate limit overrides the Quality slider setting, if necessary, to keep the compressed movie
within the set limit.
Understanding frame rate
Frame rate describes the number of image frames displayed per second (fps). The frame rate can determine
not only how big a file your animation is, but also how smooth the motion appears.
When you save a movie as an AVI file, you can specify the rate of display. This doesn’t necessarily mean
that what you specify is what you’ll experience. Factors like frame size, compression method, and computer
speed can prevent some movies from achieving their set rate. If your animations will be viewed on the
computer only, frame rates of 8, 10, and 12 fps are good choices. If your animations will be viewed
elsewhere, you should consider the following frame rates:
• The frame rate of film is 24 fps.
• The frame rate of National Television System Committee (NTSC) video is 30 fps (29.97 fps in broadcast
video). NTSC is the video standard used in the United States.
• The frame rate of Phase Alternating Line (PAL) video is 25fps.
These frame rates are sufficient to produce smooth, continuous motion with filmed or video-recorded
subjects.
838 | Corel Painter 2015 User Guide
Animation drawings contain far less detail than live-action images. The difference in the level of detail
allows animations to be produced at frame rates significantly lower than those designed for live action.
Because of the smoothness of color fills and continuity between images, animations can look quite nice at
rates between 10 and 15fps.
You must consider frame rates to know how many drawings are needed to make actions smooth, natural,
and consistent throughout the project.
The computer can display frames at any reasonable rate. The Frame Stacks panel provides control over
frame display rates. You can preview an animation at a rate of 1 to 40 fps.
To export a Corel Painter movie as an AVI movie
1Choose File Save As.
2In the Save Movie dialog box, enable the Save Movie As AVI option, and specify the number of frames
per second.
3In the Enter Movie Name dialog box, choose a location, enter a name for the file, and click Save.
4In the Video Compression dialog box, choose a compression method from the Compressor list box.
5Specify the options you want.
For some compression methods, you can click Configure to specify additional options.
Importing and exporting numbered files
Corel Painter supports importing and exporting numbered files. Numbered files are any series of files that
are the same size and resolution, and named following a specific style, which includes a number at the
beginning or end of each file name. For example, the first frame might be called “Movie01,” the second
frame “Movie02,” and so on.
When you export a movie as numbered files, you can import the numbered files into an application that
may not support other movie formats. When exporting, you specify the filename for the first file. You must
include zeros so that all numbered files have the same number of digits. For example, to create numbered
files from 1 to 24, include “01” in the filename. To create numbered files from 89 to 110, include “089” in
the filename.
Importing numbered files is an excellent method of bringing an animation from another 3D or animation
program into Corel Painter. The file format of the numbered files you are importing must be supported by
Corel Painter, and the number of digits in each filename must be the same. When you import numbered
files, you create a new frame stack, and you are prompted to choose a number of onion skin layers and a
storage type. For more information, see “Creating frame-by-frame animation” on page 823.
Working with animation and digital videos | 839
To export a movie as numbered files
1Choose File Save As.
2In the Save Movie dialog box, enable the Save Movie As Numbered Files option, and click OK.
3In the Save Numbered File As dialog box, choose a location and file format, enter a name for the first
file, and click Save.
You must begin or end the filename with a number — for example, “01Movie” or “Animation14.”
To import numbered files
1Choose File Open.
2Enable the Open Numbered Files check box in the Open dialog box.
3Select the first numbered file, and click Open. Then, select the last numbered file, and click Open.
4In the Enter Movie Name dialog box, choose a location to save the imported movie, enter a filename,
and click Save.
5In the Open Frame Stack dialog box, choose a number of onion skin layers and a storage type, and
click OK.
Corel Painter sequences the images into the frames of a new frame stack.
Exporting animated GIFs
Corel Painter lets you export a frame stack as an animated GIF file. The animated GIF format is ideal for
displaying simple animations on the web.
You can use a GIF as a link anchor or as an image map. However, you cannot use it as a background.
There are many options available when you save images to a GIF file.
You can apply transparency to the animation and choose a background option. However, you must set up a
selection for each frame. For more information, see “Getting started with selections” on page 578.
The Disposal Method options let you specify what happens to an image after it has been displayed (and
its frame delay has passed), and before the next image is displayed. The disposal method is significant only
when you use transparency that differs between frames.
The Loop option lets you play the animation repeatedly in the client browser. The animation appears in
the browser one frame at a time, at the speed at which it is downloaded. In most cases, this is significantly
slower than the intended display rate. With the Loop option enabled, the browser will loop the animation
after all frames have been downloaded, with the specified delay between frames. Because the animation
plays from the browser’s cache, it’s much faster.

840 | Corel Painter 2015 User Guide
If your movie is intended for the web, you should consider reducing its file size so the movie is small
enough to download within in a reasonable amount of time. You can minimize file size by doing any of the
following:
• Reduce the frame size. You choose the frame size when you create a new movie. If you import an
existing animation or video, you cannot resize the frames.
• Limit the number of frames because each frame increases the file size.
• Limit the number of colors. When you reduce the number colors in the image, you are also reducing the
size of the color palette, which leads to smaller files.
To export a frame stack as an animated GIF
1With the frame stack open, choose File Save As.
2In the Save Movie dialog box, enable the Save Movie As GIF Animation option.
3In the Enter Movie Name dialog box, choose a location, type a filename, and click Save.
The Save as GIF Options dialog box appears.
4Enable an option in the Number of Colors area.
5In the Imaging Method area, enable one of the following options:
•Quantize to Nearest Color — reduces the number of similar colors in the image without affecting
the overall image. This is useful for images with broad areas of a single color.
•Dither Colors — simulates a greater number of colors when only a limited number of colors are
available
6In the Animation Options area, type a value in the Frame Delay box to specify a pause (in 100ths of a
second) between frames.
7In the Disposal Method area, choose one of the following options:
•Default — uses the client browser’s default disposal method
•Background — Restores to the background color the region covered by the image
•None — leaves the image on-screen while rendering the next frame over it
•Previous — displays the imagery of the previous frame to the region covered by the image
You can now use your browser to open the file and view the animation. You can place the animation on
a web page using the same HTML image tag you’d use for a simple GIF file.
You can also
Gradually display images in the web browser as
they load
In the Misc Options area, enable the Interlaced
option.

Working with animation and digital videos | 841
You can also
Enable server-side image map In the Map Options area, enable the NCSA Map
File or CERN Map File option.
Enable client-side image maps In the Map Options area, enable the Client Side
Map File option.
Apply transparency In the Transparency area, enable the Output
Transparency option, and then enable a
background option. Move the Threshold slider
to specify the selection mask value at which the
image becomes transparent.
Repeat the animation Enable the Loop check box, and type the number
of times to repeat the animation. If you want it to
repeat indefinitely, type 0.
If you do not set a frame delay, the frames appear as quickly as the system can load and display
them. The display of each image (especially with larger frames) varies between computer systems,
so the actual animation display rate may be lower. You can use frame delay to approximate
a particular frame rate. For example, you capture some one-quarter size video at 8 frames
per second (fps). You want 8 frames to appear in one second, so you divide one second (100
hundredths of a second) by 8. The result is 100/8 = 12.5. Discard the decimal portion and enter
12 as the frame delay. Discarding the decimal is the only allowance for the time required to display
each image. For a large frame size, you might want to allow more time for display.
If the animation in the browser window stops playing, it’s probably finished the set number of
loops. In some browsers, you can get it started again by resizing the window. In all browsers, you
can get it started again by reloading the page.
842 | Corel Painter 2015 User Guide

Using scripts to automate tasks | 843
Using scripts to automate tasks
You can use scripts to speed up repetitive tasks, combine multiple or complex actions, or make an option
more easily accessible.
This section contains the following topics:
Working with scripts
•“Getting started with scripts” (page 843)
•“Displaying the Scripts panel” (page 844)
•“Recording and playing scripts” (page 845)
•“Enabling and playing background scripts” (page 847)
•“Creating resolution-independent scripts” (page 848)
•“Editing, renaming, and deleting scripts” (page 849)
•“Converting scripts to movies” (page 850)
•“Importing and exporting scripts” (page 851)
Managing script libraries
•“Importing and exporting script libraries” (page 852)
•“Creating and deleting script libraries” (page 853)
Getting started with scripts
Using a script is similar to using the speed-dialing feature on a phone. On many phones, you can set a
frequently dialed number to a speed-dial button; then, the next time you need to dial that number, you
844 | Corel Painter 2015 User Guide
can save time by pressing its speed-dial button. Similarly, a script lets you set the actions that you want to
repeat; then, the next time you need to repeat those actions, you can save time by playing the script.
You can record anything in a script — from a single edit command to an entire work session.
There are a number of ways to take advantage of scripting:
• You can record a script to replace repetitive tasks.
• You can use background scripts to back up your work, which gives you the ability to revert to any stage
in the project by playing the script and stopping it at the stage you want. This technique is similar to
using multiple levels of undo. For more information, see “Enabling and playing background scripts” on
page 847.
• You can play back a script at a different resolution. You can record at a low resolution, then
automatically produce the same results at a higher resolution. For information, see “Creating resolution-
independent scripts” on page 848.
• You can record a script that plays back using the current art materials. For example, you can record
a script of a pencil drawing, then open a new document, choose a different paper texture, color,
and brush, and play back the script. Then, you can watch Corel Painter repeat your drawing with the
selected art materials. For more information, see “Recording and playing scripts” on page 845.
• (Windows only) You can record a script to use as a tutorial so you can show someone the step-by-step
process used to create an image. It’s like looking over the artist’s shoulder. You can then convert the
script to an .avi movie to share techniques with others. Every action you take becomes a frame in the
movie. For more information, “Converting scripts to movies” on page 850.
• (Windows only) You can use scripts with movies. When you have an operation that you want to apply
to each frame in a movie, record the set of commands in a script. You can then apply the script to the
entire movie as one command. For more information, see “Applying scripts to movies” on page 833.
Displaying the Scripts panel
The Scripts panel supplies the basic tools for recording, playing, and editing scripts. It also gives you access
to the Scripts library viewer, which is used for storing and managing the scripts and script libraries that you
create.
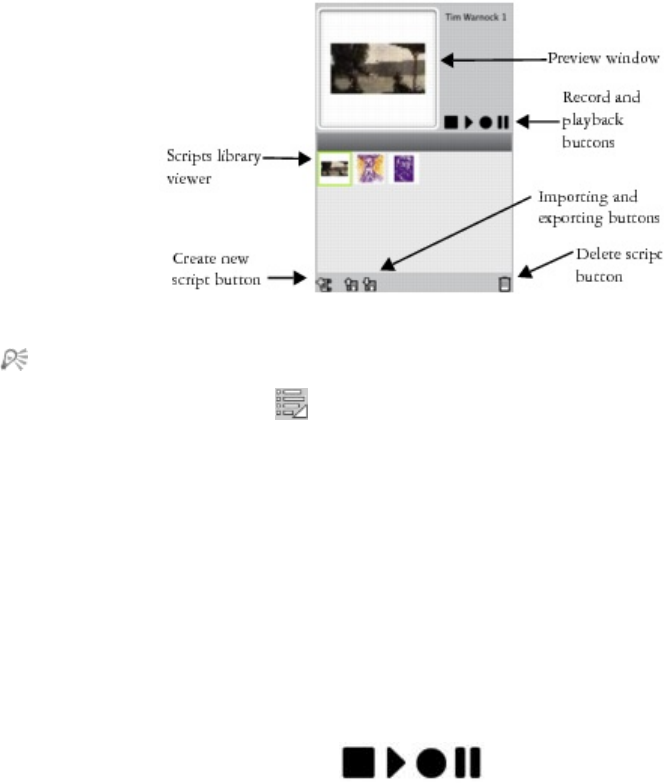
Using scripts to automate tasks | 845
The Scripts panel
The Script options button in the Scripts panel gives you several commands to choose from.
To show or hide the Scripts panel
•Choose Window Scripts.
Recording and playing scripts
Scripts allow you to record every action you make so you can repeat all actions with only one click of a
button. For example, if you need to apply color adjustments to a collection of images, you can record a
script while performing the process for the first image, and then play the script to apply the changes to the
other images in the collection. From the Scripts panel, you can access the basic functions for recording and
playing scripts.
Script buttons, from left to right: Stop, Play, Record, and Pause.
When recording scripts, you have the option of recording the initial state of the application. This includes
the tools and art materials that you use during the session, including brushes, colors, and paper textures.
Corel Painter plays the session using the materials that you recorded. If you disable this option, Corel Painter
uses the tools and art materials selected at the time you play back the script. For example, you can use a
different brush, color, and paper texture each time you play the script to produce different results.
846 | Corel Painter 2015 User Guide
To prepare for a script recording session, you may find it useful to write down the individual steps that you
want to perform so you don’t forget any steps while recording. However, you can edit or delete a script if
you’re not satisfied with the result. For more information, see “Editing, renaming, and deleting scripts” on
page 849.
To record a script
1Choose Window Scripts.
2In the Scripts panel, click the Record button .
3Perform the actions that you want to record.
4Click the Stop button .
5In the Script Name dialog box, type a name in the Save As box.
Corel Painter automatically adds an icon for the script in the Scripts library viewer.
You can record a script that enables you to change art materials on playback by clicking the Script
options button , choosing Script Options, and disabling the Record Initial State option.
When you create a new script, it is automatically saved to the currently selected library. You can
move a script from the library panel by dragging a resource from one library to another.
To play a script
1Choose Window Scripts.
2In the Scripts panel, choose a script from the Scripts library viewer.
To load another script library, click the Script options button , and choose Import Script Library.
3Click the Play button .
You can also
Stop the script Click the Stop button.
Temporarily interrupt the script Click the Pause button .

Using scripts to automate tasks | 847
You can also use Command + . (Mac OS) or Ctrl + . (Windows) to stop a script from playing.
If the script requires brushes, papers, patterns, or other materials that are stored in alternate
libraries, these libraries must be open during playback.
Enabling and playing background scripts
You can enable Corel Painter to automatically record background scripts. The background script starts
recording all of the operations that you perform from the moment you open the application until you close
the application. Background scripts are saved in the Scripts panel with a timestamp, along with the other
scripts that you create. You can specify how long Corel Painter saves background scripts before deleting
them.
You can play background scripts; however, unlike custom scripts, you cannot edit background scripts.
To enable background scripts
1Do one of the following:
•(Mac OS) Choose Corel Painter menu Preferences General.
•(Windows) Choose Edit Preferences General.
2Enable the Auto-record script check box.
3Specify the number of days for which you want Corel Painter to store background scripts in the Auto-
save scripts for box.
Because Corel Painter always saves your script data, the data can build up in your Corel Painter
Script Data file.
To play a background script
1Choose Window Scripts.
2In the Scripts panel, choose a background script from the Scripts library viewer.
Background scripts are listed by the date and time they were created.
3Click the Play button .

848 | Corel Painter 2015 User Guide
Creating resolution-independent scripts
You can create a resolution-independent script that allows you to record a script that automatically adjusts
to the resolution of the image in which you’re playing the script. When you’re creating the script, you can
get smoother, more responsive performance by working at low resolution. Then, when you play back the
script at a higher resolution, you get the benefit of a higher quality image.
The record-to-playback scaling ratio is limited. A factor of 4 is probably too much. For best results, you may
need to experiment.
To record a resolution-independent script
1Before you start recording, open a new document at the resolution in which you want to work.
2Choose Window Scripts.
3Before painting or drawing, choose Select All, or press Command + A (Mac OS) or Ctrl + A
(Windows).
This action creates a reference rectangle that is part of the recording. The rectangle must be recorded to
play a session back into a higher resolution file later.
4In the Scripts panel, click the Record button .
5Deselect the reference rectangle by doing one of the following:
•Choose Select None.
• Draw inside the selected area.
• Press Command + D (Mac OS) or Ctrl + D (Windows).
6Proceed with recording the script.
To play a script at a different resolution
1Create a new document with the resolution at which you want to play the script.
If you want the resulting image to be a higher resolution than the original, create a document with
proportionally larger dimensions. For example, if the original document is 500 X 500 pixels, make the
new document 1000 X 1000 pixels to double the size.
If the destination document has a different aspect ratio from the original, the image created by the
script will be proportionally distorted.
2In the Scripts panel, click the resolution-independent script you recorded in the Scripts library viewer.
3Before playing the script, choose Select All, or press Command + A (Mac OS) or Ctrl + A (Windows)
in the new document.
The rectangle recorded at the outset of the original script is referenced to the selected rectangle in this
document.

Using scripts to automate tasks | 849
4Click Play.
The original script replays into the new document. All brushes, paper textures, and related functions are
appropriately scaled for the new resolution.
Editing, renaming, and deleting scripts
Corel Painter lets you modify scripts in different ways. You can edit script instructions in order to change a
recorded action sequence. You can also rename and delete scripts.
You can edit a script by opening it as a series of instructions that contain parameters, most of which are
editable. You can also edit a script by exporting the script (.txt file) and then opening the file in a text editor.
For more information, see “Importing and exporting scripts” on page 851.
To edit script parameters
1Choose Window Scripts.
2In the Scripts panel, click the script that you want to edit from the Scripts library viewer.
3Click the Scripts options button , and choose Edit Script.
Corel Painter displays a list of the script’s instructions in the Edit Script dialog box.
4Double-click the instruction line that you want to edit.
5Double-click a parameter within the instruction.
6In the parameter’s dialog box, make the necessary changes.
7Close the dialog box.
8In the Edit Script dialog box, click Done to save the changes to the script.
The open script becomes the current script and is displayed in the Scripts library viewer. If you
choose another script from the Scripts library viewer, the open script does not change.
You can also edit a script by exporting the script and then opening the script file in a text editor.
You can export a script by clicking the Scripts options button in the Scripts panel, and then
choosing Export Script.
To rename a script
1Choose Window Scripts.
2In the Scripts panel, choose a script from the Scripts library viewer.

850 | Corel Painter 2015 User Guide
3Click the Script options button , and choose Script Library View Rename Script.
4Type a new name in the Save As box.
To delete a script
1Choose Window Scripts.
2In the Scripts panel, choose a script from the Scripts library viewer.
3Click the Delete button .
Converting scripts to movies
(Windows only)
You can convert a script into a Corel Painter movie, which you can save as a QuickTime or AVI file. Every
action you perform in the script becomes a frame in the movie. For more information, see “Exporting
movies as AVI” on page 837 and “Exporting movies as QuickTime” on page 835.
If the script is resolution-independent, you can replay the session into a movie using different dimensions.
For more information, see “Creating resolution-independent scripts” on page 848. However, if the script
is resolution-dependent and the new image window is larger, the script plays back in the upper-left corner
of the movie. If the new image is smaller than the script dimensions, only the upper-left portion of the
scripted session appears in the movie.
You can also apply a script to a movie. For example, you can record a script that applies the Motion Blur
effect to a single image. Then, with a single command, you can apply the script to each frame of a movie.
You can also use a script to set grain position in a movie. For more information, see “Applying scripts to
movies” on page 833.
To convert a script into a movie
1Choose Window Scripts.
2In the Scripts panel, click a script in the Scripts library viewer.
3Open a new image at the size you want the movie to be.
4In the Scripts panel, click the Script options button , and choose Script Options.
5In the Script Options dialog box, enable the Save Frames on Playback check box.
This option creates a movie on playback.
6Type the number of tenths of a second that you want between frames.
The lower the number, the more frequently a frame is created and the more fluid the movie is. More
frames, however, use more disk space.
Using scripts to automate tasks | 851
7In the Scripts panel, click Play.
8In the Enter Movie Name dialog box, type a name in the File name box, choose a destination folder,
and click Save.
9In the Open Frame Stack dialog box, enable an option in the Layers of Onion Skin area.
10 In the Storage Type area, enable an option for storing color.
Corel Painter plays the script into the Frame Stacks dialog box.
Not all actions can be converted into a movie. For example, a script that contains a File New
command will not be converted.
Importing and exporting scripts
You can import and export scripts. For example, you can import a script that was created by someone else,
or export a script to share it with others. Corel Painter scripts are exported as .txt files. In addition, you can
import or export script libraries. For more information, see “Importing and exporting script libraries” on
page 852.
To import a script
1Choose Window Scripts.
2In the Scripts panel, click the Import a script button .
3Choose the drive and folder where the script is stored.
4Click the script file.
5Click Open.
To export a script
1Choose Window Scripts.
2In the Scripts panel, click the Export the currently selected script button .
3In the Export script dialog box, choose the drive and folder where you want to store the script.
4Click Save.

852 | Corel Painter 2015 User Guide
Importing and exporting script libraries
You can import multiple scripts at once if they are stored in a script library. This includes script libraries that
were created in a previous version of Corel Painter. You can also export script libraries. In the Script library
viewer, you can open and view multiple libraries at once.
To import a script library
1Choose Window Scripts.
2In the Scripts panel, click the Script options button , and choose Import Script Library.
3Choose the drive and folder where the library is stored.
4Choose the library.
5Click Open.
The imported library is displayed at the bottom of the panel window.
To import a script created in a previous version of Corel Painter
1Choose Window Scripts.
2In the Scripts panel, click the Script options button , and choose Import Legacy Script Library.
3Choose the drive and folder where the library is stored.
4Choose the library.
5Click Open.
The imported library is displayed at the bottom of the panel window.
To export a script library
1Choose Window Scripts.
2In the Scripts panel, click the Script options button , and choose Export Script Library.
3In the Choose Library dialog box, choose the library that you want to export from the Library list box,
and click OK.
4Choose the drive and folder where you want to store the library.
5Click Save.

Using scripts to automate tasks | 853
Creating and deleting script libraries
You can store and organize scripts to make it easier to locate and access them. When you create a new
script, it is automatically saved to the currently selected script library. However, you can move a script to a
new library. If you no longer need a script library, you can delete it.
To create a script library
1Choose Window Scripts.
2In the Scripts panel, click the Script options button , and choose New Script Library.
3In the New Library dialog box, type a name in the Save As box, and click OK.
A header bar for the new library appears at the bottom of the library panel and its title appears in the
list of available libraries. The new library contains one script by default.
To delete a script library
1Choose Window Scripts.
2In the Scripts panel, click the Script options button , and choose Remove Script Library.
3In the Choose Library dialog box, choose a library from the Library list box, and click OK.
4Click Yes.
854 | Corel Painter 2015 User Guide

Printing images | 855
Printing images
You can print Corel Painter images on a wide variety of printers, including PostScript, Windows Graphics
Device Interface (GDI), and QuickDraw, and high-resolution imagesetters.
This section contains the following topics:
•“Specifying the page layout and image size” (page 855)
•“Printing your work” (page 856)
•“Saving files in EPS format for printing” (page 858)
•“General notes on printing” (page 859)
Specifying the page layout and image size
You can manually adjust the page size, orientation, and margin settings to match the standard paper
settings for printing. You can also print an image that is larger than a selected page size by automatically
resizing the image to fit the page. For example, you can automatically resize a 12-by-12-inch image to fit
on an 8.5-by-11-inch page.
To manually adjust page layout for printing
1Do one of the following:
•(Mac OS) Choose File Print, click the Show Details button, and choose Page Attributes from the
list box.
•(Windows) Choose File Page Setup.

856 | Corel Painter 2015 User Guide
2Choose a preset page size from the Paper Size list box (Mac OS) or the Size list box (Windows).
3In the Orientation area, choose one of the following options:
•Portrait — sets the page’s height to be greater than its width
•Landscape — sets the page’s width to be greater than its height
4Do one of the following:
• (Mac OS) Choose Margins and Layout from the list box, and choose any margins and layout options
you want.
• (Windows) In the Margins area, specify values in the Left, Right, Top, and Bottom boxes.
To automatically resize an image to fit the page
1Choose File Print.
2Do one of the following:
• (Mac OS) Click the Show Details button, choose Corel Painter 2015 from the list box, and enable the
Fit to page check box.
• (Windows) Click the Painter 2015 tab, and enable the Size to Fit Page check box.
You must enable this option to print images larger than the page size.
Printing your work
In Corel Painter, you can choose various preferences for printing images. The preferences that you choose
depend on several factors: the type of output device to be used, whether the printed output will be in color
or in black and white, and whether you are printing separations. You can also print an image to a file, so
you can send the file to a print service provider for printing. Some of these options are available only on the
Windows operating system.
To set printer properties
1Choose File Print.
2Do one of the following:
• (Mac OS) Click the Show Details button, and choose an option from the list box (such as Page
Attributes, Layout, Color Matching, or Paper Feed).
• (Windows) On the General page, click Preferences.
3Set any properties in the dialog box.

Printing images | 857
To print an image
1Choose File Print.
2Do one of the following:
• (Mac OS) Choose a printer from the Printer list box, choose an option from the Pages list box, and
type a value in the Copies box.
• (Windows) On the General page, choose a printer from the Select Printer area, enable an option in
the Page Range area, and type a value in the Number of copies box.
3Click Print.
You can also
Print a grayscale version of the image Do one of the following:
•(Mac OS) Click the Show Details button, choose
Corel Painter 2015 from the list box, and enable
the Print Grayscale check box.
•(Windows) Choose the Painter 2015 tab, and
enable the Print Grayscale check box.
Print to a non-PostScript printer (Windows only) Choose the Painter 2015 tab, and enable the GDI
Printing option.
Print an image to a color PostScript device
(Windows only)
Choose the Painter 2015 tab, and enable the
Color PostScript option.
Print separations (Windows only) Choose the Painter 2015 tab, and enable the
Separations option.
The output consists of four pages, one each for
cyan, magenta, yellow, and black. You can print
separations from Corel Painter with PostScript
devices, including high-resolution imagesetters.
Corel Painter places a color bar, registration marks,
and the color name on each of the four separated
plates.
Print an image to a black-and-white PostScript
laser printer (Windows only)
Choose the Painter 2015 tab, and enable the
B&WPostScriptoption.
858 | Corel Painter 2015 User Guide
To print to a file (Windows only)
1Choose File Print.
2On the General page, enable the Print to file check box.
3Click Print.
4In the Save Print Output As dialog box, type a filename in the File name box.
Saving files in EPS format for printing
You can save files in EPS-DCS format for printing. It is important to note that you cannot reopen EPS-DCS
files in Corel Painter. Therefore, you should also save a copy in another format first so that you can reopen it
in Corel Painter.
When saving to EPS-DCS, you can enable an output preview, such as color preview. Corel Painter uses the
loaded ICC profiles to control separation. If the output preview is disabled, Corel Painter uses the default
separation tables. For more information, see “Understanding color management” on page 247.
The images that you save as encapsulated PostScript (EPS) files conform to the Desktop Color Separation
(EPS-DCS) format.
To save a file in EPS format for printing
1Choose File Save As.
2In the Save Image As dialog box, choose PostScript EPSF from the Format (Mac OS) or Save as type
(Windows) list box, and click Save.
3In the EPS Save Options dialog box, enable the Hex (ASCII) picture data check box to change the data
format.
Enabling this check box allows another method of storing PostScript information, but it approximately
doubles the size of the saved file. Some programs require this option to be enabled.
4Enable one of the following output preview options:
•No preview
•Black and white preview
•Color preview
You may need to enable the Black and white preview option to print EPS files on some laser printers.
Although the preview or display is in black and white, the color information remains intact.
If you are creating a document that is destined for printing as well as online viewing (for example, a PDF
file), enable the Color preview option.

Printing images | 859
Corel Painter uses the device’s default screening information to produce high-quality color
separations. If the No preview option is enabled when you save a file in EPS format, Corel Painter
uses the Color Studio separation tables with your device’s default screening.
General notes on printing
This section includes general information about printing images.
Proofs
If you’re sending your images to a print service provider for printing, it is recommended that you first obtain
proofs. You can use proofs from a black-and-white printer to check page size and image placement. Proofs
from a color printer provide a general impression of what your final image will look like. Keep in mind that
the proof is not an accurate representation of a final print produced by an offset printing process. The final
output is affected by a combination of the print process, inks, and paper types used.
Color management is not enabled by default. If you want to use color management while working on or
printing a document, you must first set up color management for your system. For more information, see
“Color management” on page 247.
Printing shapes
In Corel Painter, you can interleave shapes with layers in the Layers panel, which can affect how your
document is printed. Shapes are vector objects, as opposed to pixel-based objects, which makes them
resolution-independent. On a PostScript printer, shapes are usually turned into PostScript paths and are
printed at the full printer resolution.
When you use PostScript Level I or II to print shapes, some effects, such as transparency and certain
composite methods, cannot be reproduced. You must rasterize the shapes on the canvas before printing.
Any object in a lower position in the Layers list “touched” by a rasterized shape must also be rasterized to
preserve the effect. For example, if you have a shape with transparency on top of a number of other shapes,
all shapes below it must be rasterized to preserve the transparency on the canvas even if the overlap area is
small. Similarly, if part of an image from a layer is placed over a shape, the shape must be rasterized to be
correctly printed.
If you want to print shapes at the full resolution of your printer, ensure that the shapes do not overlap with
raster layers, that they are not transparent, and that their composite method is set to Default.
Printing composite images
Printing a composite image that contains many layers and shapes can be time-consuming. You can print a
single-layer version of the image much more quickly.
860 | Corel Painter 2015 User Guide
Instead of flattening a composite image by dropping each layer to the canvas, you can clone the file to
produce a flattened image, which you can then print. This method lets you preserve the layers in the saved
RIFF file in case you want to change them later. For more information, see “Cloning images” on page 167.

Notes for users of Adobe Photoshop | 861
Notes for users of Adobe Photoshop
If you have previously worked with Adobe Photoshop, you may notice the differences in the tools and
terminology of Corel Painter. This section describes these differences and provides additional tips to help
you move smoothly between these applications.
This section contains the following topics:
•“Comparing terminology in Corel Painter and Adobe Photoshop” (page 861)
•“Comparing tools in Corel Painter and Adobe Photoshop” (page 862)
•“Frequently asked questions from users of Adobe Photoshop” (page 864)
Comparing terminology in Corel Painter and Adobe Photoshop
Certain terms and concepts in Corel Painter differ from those of similar features in Adobe Photoshop. The
following table lists some common terms in Photoshop with their equivalent terms in Corel Painter.
Adobe Photoshop term Corel Painter term
Action Script
Adjustment layer Layer
Animation Movie

862 | Corel Painter 2015 User Guide
Adobe Photoshop term Corel Painter term
Blending mode Composite method
Indexed color mode Web-safe color palette
Smart Object Reference layer
Layer effect Dynamic plug-ins
Layer style Composite method
Palette Panel
Selection Selection
Snapshot Clone
Comparing tools in Corel Painter and Adobe Photoshop
The following table lists Adobe Photoshop tools and the corresponding Corel Painter tools. Many of these
tools create similar results but operate slightly differently. For that reason, we also provided a link to a
corresponding help topic that describes the Corel Painter tool.
Adobe Photoshop tool Corel Painter tool For more information
Actions palette Scripts panel See “Displaying the Scripts
panel” on page 844.
Blur tool Focus effect See “Using focus and esoterica
effects” on page 613.
Burn tool Burn tool See “Dodging and burning” on
page 279.
Notes for users of Adobe Photoshop | 863
Adobe Photoshop tool Corel Painter tool For more information
Clone Stamp tool Rubber Stamp tool See “Performing offset sampling”
on page 179.
Crop tool Crop tool See “Cropping images” on page
85.
Dodge tool Dodge tool See “Dodging and burning” on
page 279.
Drop shadow Drop shadow See “Adding drop shadows to
layers” on page 543.
Elliptical Marquee tool Oval Selection tool See “Creating pixel-based
selections” on page 583.
Eyedropper tool Dropper tool See “Sampling colors from
images” on page 223.
Filter Gallery Effects menu See “Common options for
effects” on page 609.
Freeform Pen tool Quick Curve tool See “Drawing lines and curves”
on page 785.
Gradient tool Gradients panel
Gradient fill, available with the
Paint Bucket tool
See “Applying gradients” on
page 723.
Hand tool Grabber tool See “Repositioning images” on
page 84.
Lasso tool Lasso tool See “Creating path-based
selections” on page 580.
864 | Corel Painter 2015 User Guide
Adobe Photoshop tool Corel Painter tool For more information
Magic Wand tool Magic Wand tool See “Creating pixel-based
selections” on page 583.
Move tool Move mode of Transform tool See “Moving selections” on page
600.
Paint Bucket tool Paint Bucket tool See “Exploring painting media”
on page 131.
Path Selection tools Shape Selection tools See “Selecting a shape” on page
791.
Pen tool Pen tool See “Drawing lines and curves”
on page 785.
Polygon Lasso tool Polygonal Selection tool See “To make a freehand
selection” on page 582.
Rectangular Marquee tool Rectangular Selection tool See “Creating path-based
selections” on page 580.
Type tool Text tool See “Adding text to images” on
page 811.
Frequently asked questions from users of Adobe Photoshop
When I open Photoshop (PSD) files, which elements are preserved and which are lost or modified?
The following table lets you know what changes to expect when you open a PSD file in Corel Painter.
Adobe Photoshop element When the PSD file is opened in Corel Painter
Alpha channels Alpha channels are preserved.

Notes for users of Adobe Photoshop | 865
Adobe Photoshop element When the PSD file is opened in Corel Painter
Blending modes Most blending modes are preserved as composite
methods. If no equivalent composite method exists
for a particular blending mode, the blending mode
is converted to the Default composite method.
Color If the file does not use the RGB color model, you
are prompted to convert the file to the default RGB
color profile in Corel Painter. To avoid this step,
you may want to convert your files to the RGB
color model in Photoshop before opening them
in Corel Painter. For more information, see “Color
management” on page 247.
Layers Layers and layer masks are preserved.
Layer effects and adjustment layers are not
supported. To preserve the results of using these
elements, you may want to merge or flatten them
in Photoshop before opening the file in Corel
Painter.
Shape layers, layer clipping paths, and clipping
groups are not preserved.
When I save files to the PSD file format, which elements are preserved and which are lost or modified?
The following table lets you know what changes to expect when you save a file to the PSD file format.
Corel Painter element When saved to PSD file format
Color RGB options are available when you save to the
PSD file format.
Impasto Most Impasto brushstrokes are preserved if you
save the individual layers in the PSD file. If you
drop the layers before saving, you may lose some
of the Impasto information.

866 | Corel Painter 2015 User Guide
Corel Painter element When saved to PSD file format
Layers All layers are converted to standard Photoshop
transparent layers.
All Corel Painter layer composite methods are
converted to Photoshop blend modes. For
information about comparing Corel Painter
composite methods with Photoshop blending
modes, see “Importing and exporting layers” on
page 558.
Masks Layer masks are preserved in the PSD file.
Shapes Shapes are converted to bitmaps and assigned to
appropriate layers.
Text Text is converted to a bitmap and assigned to the
appropriate layer.

Setting preferences | 867
Setting preferences
Corel Painter preferences allow you to customize the program to complement your work style and to
achieve optimal performance. The purpose of this section is to describe all Corel Painter preferences and,
when applicable, provide references to more detailed information.
This section contains the following topics:
•“General preferences” (page 867)
•“Interface preferences” (page 869)
•“Performance preferences” (page 871)
•“Shapes preferences” (page 873)
•“Cloning preferences” (page 874)
•“Tablet preferences” (page 875)
•“Connections preferences” (page 875)
You can also find set preferences for setting up the drawing cursor, brush tracking and customizing
keyboard shortcuts. For more information, see “Setting up the drawing cursor” on page 134, “Brush
tracking and calibration” on page 126, and “Customizing keys” on page 101.
General preferences
The general preferences affect various aspects of Corel Painter. For example, you can specify preferences for
saving documents, controlling brushes, and saving. The following tables categorize, list, and describe all
general preferences.

868 | Corel Painter 2015 User Guide
Brush preference Description
Align constrained brushstroke to canvas Matches the brush rotation angle to the canvas
rotation angle.
Disable feature scaling when resizing brush Disables the Scale feature with brush size option
in all areas of the application.
Simplified brush resizing control (Legacy-style) Removes the green highlight from the onscreen
brush resizing control
Brush size increment Lets you set the brush size increment value in
pixels. For more information, see “Setting basic
brush attributes” on page 306.
Align Brush to Path tolerance Determines how close the brushstroke must be
to the path or shape for automatic alignment to
occur.
For more information, see “Aligning brushstrokes
to paths and shapes” on page 142.
Paint hidden shape Aligns a brushstroke with a hidden shape or path.
Layer preference Description
Show Commit dialog when converting to layer Displays a dialog box every time you need to
commit content to a layer.
Enable this check box if you previously enabled the
Commit and don’t ask again check box in the
Commit dialog box.
For more information, see Grouping Layers
Saving preference Description

Setting preferences | 869
Create backup on Save Creates a backup file every time you save a
document. For more information, see “Saving and
backing up files” on page 88.
Auto-record script Enables the automatic saving of Corel Painter
background scripts.
Auto-save scripts for Controls how long Corel Painter saves background
scripts before deleting them. For more information,
see “Enabling and playing background scripts” on
page 847.
Product update preference Description
Notify me of available product updates Notifies you automatically when a product update
is available for Corel Painter 2015.
To access the general preferences
• Do one of the following:
•(Mac OS) Choose Corel Painter 2015 menu Preferences General.
•(Windows) Choose Edit Preferences General.
Interface preferences
The following table describes the Corel Painter preferences for modifying the display of the application
interface. For example, you can modify the appearance of the drawing cursor or the interface colors.
Cursor preference Description
Cursor Type For more information, see “Setting up the drawing
cursor” on page 134.

870 | Corel Painter 2015 User Guide
Enhanced brush ghost Displays a representation of the brush variant
onscreen to give you information about the size,
tilt, bearing, and rotation of your pen.
Brush ghost Displays a representation of the brush variant
onscreen to give you information about the size.
Iconic Allows you to change the cursor icon that displays
onscreen and modify its orientation.
Single pixel Displays the drawing cursor icon as a single pixel.
Workspace Options Description
Units Lets you choose the unit of measurement used
by the application’s various sliders and other
measurement options.
Background Color Sets the window background color.
Brush Icons in Custom Palettes preference Description
Stroke (wide icons) Lets you add wide custom icons that display the
brushstrokes to a custom palette.
Category Lets you add regular-width custom icons that
display the brush category to a custom palette.
Default View Mode Description
Windowed Sets the default workspace view to display all
standard tools in the workspace.
Full Screen Sets the default workspace view to hide your
computer’s desktop and view the document
window without scroll bars.

Setting preferences | 871
Toolbox Layout Sets the orientation and layout of the toolbox in
the document window.
Media Layout Sets the orientation and layout of the Media
Selector bar in the document window.
Command Bar Layout Sets the orientation of the command bar in the
document window.
To access the interface preferences
• Do one of the following:
•(Mac OS) Choose Corel Painter 2015 menu Preferences Interface.
•(Windows) Choose Edit Preferences Interface.
Performance preferences
You can set various performance preferences to optimize Corel Painter. For example, you can change
memory options such as the amount of RAM used by the application or specify the volume name (Mac OS)
or drive (Windows) that you want to assign as a scratch disk.
To ensure the optimal performance of scratch disks, consider the following:
• Choose a drive that does not contain the files that you are currently working on.
• Choose a different drive than the one used by the operating system’s virtual memory.
• Defragment the scratch disk drive on a regular basis.
The performance preferences are described in the following table.
Performance preference Description
Memory Usage Changes the percentage of RAM memory used
by Corel Painter, which is set to 80% by default.
You can dedicate as much as 100% of the memory
to Corel Painter. The lowest percentage you can
choose is 5%.
Multicore Usage Allows you to specify the number of cores that
you want Corel Painter to use. If you use all of

872 | Corel Painter 2015 User Guide
Performance preference Description
the computer’s available cores, it may impact the
performance of any applications that you have
running in the background.
Scratch Drive Allows you to specify the volume name (MacOS)
or drive (Windows) that has free memory to allow
Corel Painter to perform an operation if your
computer runs out of RAM.
Undo Levels Allows you to undo and redo up to 256 levels of
changes.
The number of Undo levels applies across all
open documents. For example, if you set 5 undo
levels and have two open documents, undoing
three operations on the first document leaves you
with only two undo operations on the second
document.
In addition, setting multiple undo levels uses a
significant amount of disk space. If you perform
multiple operations on the entire image, the whole
image must be saved for each undo.
Smooth objects when zooming Applies smoothing to the current view to minimize
pixelation when zooming.
Increase screen drawing speed when zoomed
out
Increases the speed at which the screen is drawn
when you are viewing an image at less than 100%
magnification. Enabling this option may decrease
accuracy.
To specify performance preferences
• Do one of the following:
•(Mac OS) Choose Corel Painter 2015 menu Preferences Performance.
•(Windows) Choose Edit Preferences Performance.

Setting preferences | 873
Shapes preferences
The shapes preferences allow you to set the default fill and stroke for creating new shapes. You can also
change the appearance of the Bézier handles when drawing or the wing, point, path, outline, and anchor
colors.
Shape preference Description
On Draw - Fill with current color Fills both open and closed shapes with the
currently selected color when drawing.
On Draw - Stroke in current color Outlines both open and closed shapes with the
currently selected color when drawing.
On Close - Fill with current color Fills the shape with the currently selected color
when the shape paths are closed.
On Close - Stroke in current color Outlines the shapes with the currently selected
color when the shape paths are closed.
Big handles Controls the size of the anchor points and the
direction of the wing handles to help you grab and
drag them easily. If you want big points, enable
this option.
Colors - Wing/Bézier/Handle Sets the color of the wings, Bézier, and handles.
Colors - Outline/Path Sets the color of the shape outline paths.
Colors - Selected Point/Anchor Sets the color of the selected anchor points. The
unselected anchor points appear “hollow.”
To change shape preferences
• Do one of the following:

874 | Corel Painter 2015 User Guide
•(Mac OS) Choose Corel Painter 2015 menu Preferences Shapes.
•(Windows) Choose Edit Preferences Shapes.
If you set default preferences for the shape outline and fill color by using the Set Default Shape
Attributes dialog box, the settings in the Preferences dialog box are ignored.
Cloning preferences
The Cloning preferences let you customize the cloning and Quick Clone behavior. For example, you can
choose to always use the last selected cloner brush variant or automatically open the Clone Source panel.
For more information, see “Using Quick Clone” on page 171.
Quick Clone preferences Description
Close source image Closes the clone source image automatically when
the image is cloned. The clone source is embedded
in the clone document, but the original image is
closed.
Open Clone Source panel Displays the Clone Source panel automatically
when Quick Clone is used.
Clear Canvas Lets you start cloning with a blank canvas.
Turn on Tracing Paper Activates Tracing Paper.
Switch to cloner brushes Activates the last Cloner brush variant.
Clone color Uses the current brush variant to clone the
underlying color.
To enable the Clone Color check box, you must
disable the Switch to cloner brushes check box.
Cloning preferences Description

Setting preferences | 875
Show Edit Source Image dialog box Displays a dialog box every time you switch to the
Source Image window from the clone document
window. The dialog box warns you that any
source image editing needs to be updated, saved,
exported, or discarded.
To change Cloning preferences
• Do one of the following:
•(Mac OS) Choose Corel Painter 2015 menu Preferences Cloning.
•(Windows) Choose Edit Preferences Cloning.
Tablet preferences
The Tablet preferences let you choose a suitable option for the tablet and other devices that you use with
the application on Windows.
In addition, you can access multi-touch options for both Mac OS and Windows. For more information
about multi-touch options, see “Multi-touch support” on page 93.
Tablet preferences Description
Wacom-compatible device (Wintab) (Windows only) Allows you to use compatible
Wacom devices
RTS-compatible device (Real-Time Stylus) (Windows only) Allows you to use a tablet
or device that has the RTS feature. For more
information, see “Support for tablets and other
devices” on page 93.
Connections preferences
The Connections preferences allow you to connect Corel Painter to the Corel Cinco for Painter companion
application.
Corel Cinco for Painter is a companion app that lets you control Painter remotely from your iPad by opening
and using any custom palettes that you created in Corel Painter. For more information, see “Corel Cinco for
Painter” on page 6.

876 | Corel Painter 2015 User Guide
Connections preferences Description
Allow companion applications to connect to
Painter
Allows you to connect Corel Painter to the Corel
Cinco for Painter companion application.
Service Name Gives your copy of Corel Painter a unique name.
Authentication Code Ensures that only a legitimate user can access your
copy of Corel Painter from a remote application.
To change Connections preferences
• Do one of the following:
•(Mac OS) Choose Corel Painter 2015 menu Preferences Connections.
•(Windows) Choose Edit Preferences Connections.

Web | 877
Web
Corel Painter includes various options for creating images for the web.
This section contains the following topics:
•“Choosing web-safe colors” (page 877)
•“Posterizing using color sets” (page 878)
•“Choosing web-friendly brushes” (page 879)
•“Creating transparent GIFs” (page 880)
•“Reducing the number of colors in GIF files” (page 882)
•“Creating image maps” (page 883)
•“Creating server-side image maps” (page 885)
•“Creating web page backgrounds” (page 886)
•“Creating web buttons” (page 889)
Choosing web-safe colors
Using a web-safe color table becomes important when you expect to deliver your web page to viewers who
use monitors displaying 256 or fewer colors. On such a monitor, web browsers dither colors that aren’t
found in the web-safe palette. So, depending on your audience, making sure that some or all of your image
conforms to the web-safe palette can make good sense.

878 | Corel Painter 2015 User Guide
To select a web-safe color palette
1Click the Options button in the Color Set Libraries panel, and choose Import Color Set.
2In the Select Color Set dialog box, select the Hexadecimal folder within the Color Sets folder.
3Choose a hex file from the list, and click Open.
The selected color palette is displayed in the Color Set Libraries panel.
Posterizing using color sets
You can use the Posterize Using Color Set option to force your image to use the default color set.
Posterize Using Color Set can help make the colors in your image ready for delivery to the web — without
a lot of dithering or shifting of colors.
Posterizing means adjusting the number of color levels an image contains. Corel Painter can automatically
constrain all colors in your image to a web-safe, 216-color palette. Although the Posterize Using Color Set
option is not designed to be a highly sophisticated method of reducing color (it offers you no control over
exactly how color reduction is performed), it can be a real time-saver.
In addition, you can constrain the colors you use to the default or another Corel Painter web-safe palette,
utilize web-safe single-color brushes, and keep the number of colors in your image to a minimum.
It’s important to note that exporting to GIF format can compromise the color set values used when
Posterize Using Color Set has been performed. For best results in those cases, do the following:
• First, save your reduced-color image in a 24-bit format, such as Windows Bitmap, TIFF, or PICT. This
maintains the benefits of defining web-safe colors in Corel Painter.
• Next, open the image in a tool that supports indexed color to save the GIF — one that offers “constrain
to color set” features.
• Finally, save the image to GIF format. The web-safe colors from Corel Painter are maintained and your
image is ready to go on the web.
To posterize using a color set
1Select an area of your image you want affected or select nothing if you want the entire image affected.
2Make sure the proper color set is active.
3Choose Effects Tonal Control Posterize Using Color Set.
Web | 879
Choosing web-friendly brushes
Web artists are pulled between the desire for beautiful images and the need for small image file sizes, with
faster download times. Corel Painter includes brushes that are designed for creating images for the web,
making it easier to create smaller files without compromising image quality.
Bitmapped images can be roughly divided into two general types — images with areas of flat color and
continuous-tone images. Continuous-tone images (which most of the normal features in Corel Painter
produce) are best saved as JPEG images. Images with flat areas of color are best saved as GIF images. The
more regions of flat color there are in an image, the more compressed (smaller) the resulting GIF file is.
The strength of Corel Painter is its Natural-Media brushes; however, Corel Painter is also versatile in the
creation of flat color suitable for GIF images on the web.
One-color brushes
You can set the brush controls to create areas of flat color, while keeping all the feeling and nuance of a
Natural-Media brush. These brush edges are aliased, meaning they have jagged edges. For example, if a
brush color is black, there are no intermediate gray pixels at the brush’s edge. There is either black or the
background color. In addition to a flat color, this brush type responds to paper texture.
Magnified detail of the stroke is shown to the left of each W-stroke. In this
image, the same brushstroke is applied using a different paper texture.
To make a brush with a flat-edged appearance, change the method to Cover and the subcategory to
Grainy Edge Flat Cover. If you have created some of your own brush variants in Corel Painter, you can
convert them to web-friendly brushes, too.
Web brushes are also included with the extra content in Corel Painter, which is available online.
To change the brush method and subcategory
1Choose Window Brush Control Panels General.

880 | Corel Painter 2015 User Guide
2From the Method list box, choose Cover.
3From the Subcategory list box, choose Grainy Edge Flat Cover.
The result is the current brush with a web-friendly hard edge.
4Save your creation as a variant.
For more information, see “Saving and deleting brush variants” on page 313 and “Creating and
deleting brush categories” on page 315.
Brushes that require a particular method, such as Wet, Eraser, or Plug-in, will not work as well
with the Cover method. If you use another brush method, you will not be working with a one-
color brush.
To load Corel Painter web-friendly brushes into a library
1Click the Brush Selector.
2In the Brush library panel, click the Brush library options button , and choose Import Brush
Library.
3In the Import Brush Library dialog box, locate a web brushes library that you have downloaded or
created.
4Click Open.
Creating transparent GIFs
Corel Painter lets you create web-ready transparent GIFs. If designed correctly, GIFs with transparent areas
are very effective when displayed over background colors or tiles.
Web | 881
A GIF with a transparent background (the airplane)
is displayed over a blue background image.
In Corel Painter, the method of defining transparency during GIF export is to define the transparent areas
based on the content of the selected layers. The edges of the floating elements on the layers help define the
transparent areas. For more information, see “Layers” on page 513.
When saving to the GIF file format, you can reduce the number of colors, which translates into smaller files.
To create a transparent GIF from a layer or group of layers
1From the Layers panel, select a layer or group of layers.
To output transparency in a GIF, you need an active selection.
2Choose Select Select Layer Content.
3Choose File Save As.
4Choose GIF from the Save As Type list box.
5Specify a location and filename, and click Save.
6In the Save As GIF Options dialog box, enable the Output Transparency check box to make the
selected area the only part of the canvas displayed on your web page.
7Enable one of the following options:
•Background is WWW Gray — sets the transparent color to 75% gray
•Background is BG Color — sets the transparent color using the additional color specified in the
Color panel. Note that this setting does not refer to the background color of the HTML page.
8In the Preview window, verify that the selected area is correctly masked and that the transparent area is
correctly positioned. Transparent areas appear as a grid.
If necessary, drag in the Preview window to view all parts of the image.
9Choose one of the following imaging methods:

882 | Corel Painter 2015 User Guide
•Quantize to Nearest Color — causes Corel Painter to look at each pixel and pick the nearest color.
This is useful when the image you are saving has broad areas of a single color.
•Dither Colors — causes Corel Painter to apply a stippled effect to the chosen colors to generate a
more accurate, less banded result. Dither Colors can reduce the effectiveness of GIF file compression.
The RIFF format contains image data that is lost when saving to GIF or JPEG. To edit the file later,
save a RIFF copy before saving to the GIF or JPEG file format.
Reducing the number of colors in GIF files
Web designers are always seeking a careful balance when creating graphics for the web. Artwork and
images must be as rich and vibrant as possible while remaining small and easily downloadable.
One way of keeping the file size small is to reduce the number of colors used to create the image. Reducing
the number of colors reduces file size and, therefore, download time.
A web artist may end up saving multiple versions of the same graphic element, varying the number of
colors used. These versions must then be placed on a web page to determine if the quantity of colors used
is acceptable. This whole process can be time-consuming.
In Corel Painter, you can make this decision during the process of saving the image to GIF format, by using
the Preview window on the Save As GIF Options dialog box.
To reduce the number of colors in a GIF
1Choose File Save As and name your image file.
2Choose the GIF file format, and click Save.
Click OK to dismiss the layer warning, if displayed.
3In the Save As GIF Options dialog box, in the Number of Colors area, enable the 256 Colors option.
In the preview window, the image appears in 256 colors.
4Enable the 128 Colors option.
In the preview window, the image appears in 128 colors.
5Continue reducing the number of colors in the image until you find the minimum number of colors
necessary for adequate display on your web page.
6Choose one of the following imaging methods:
•Quantize to Nearest Color — causes Corel Painter to look at each pixel and pick the nearest color.
This is useful when the image you are saving has broad areas of a single color.
•Dither Colors — causes Corel Painter to apply a stippled effect to the chosen colors to generate a
more accurate, less banded result.
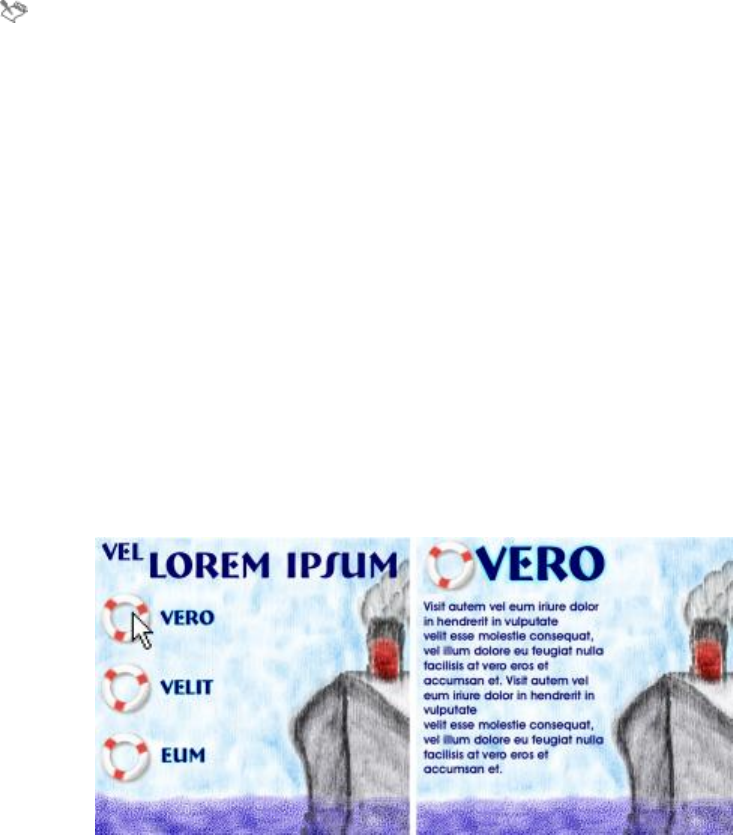
Web | 883
The RIFF format contains data about your image that is lost when you convert it to GIF. If you want
to edit the file later, save a RIFF copy before you generate a GIF version.
Creating image maps
An image map is a web feature that lets you jump to different locations by clicking specific areas within an
image.
There are two types of image maps:
• Client-side image maps store image map information right in your HTML document. URL information
appears at the bottom of the browser window when a pointer is moved over the mapped areas.
• In a server-side image map, image map information is saved in a separate file that is stored on a
server and accessed by a Common Gateway Interface (CGI) script. Coordinate information, not URL
information, is displayed at the bottom of the browser window when a pointer is moved over a mapped
area.
Client-side image maps are faster and more efficient because all the image information is present in the
HTML code for the page. A server-side image map, in contrast, requires an extra round trip of information
between the browser and the web server. However, client-side image maps are not supported by very old
browsers.
When a hotspot is clicked (left), the browser
jumps to the page referenced by that link (right).
Client-side image mapping
A client-side image map is an image that has “hotspots” directly associated with URL information. When a
hotspot is clicked, the browser jumps to the page referenced by that link.
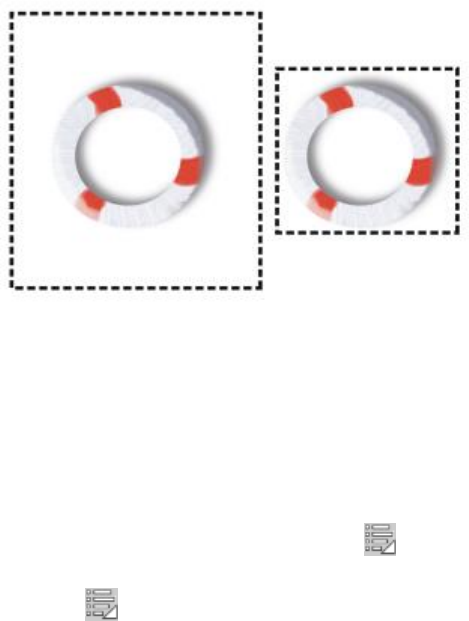
884 | Corel Painter 2015 User Guide
A client-side image map recognizes circular and rectangular “hotspots.” Therefore, Corel Painter treats a
circular area as a circle and a rectangle as a rectangle. Oval areas are exported as rectangles.
Image maps are created using layers. The size of the layer determines the clickable area. For more
information, see “Layers” on page 513.
The size of the layer determines the size of the clickable area, or hotspot.
Server-side image mapping handles circles and ovals differently. With server-side mapping, you can export
ovals. For more information on server-side image maps, see “Creating server-side image maps” on page
885.
To define a client-side image map
1Select or create a layer or shape in the exact place in your image where you want a link created.
If you can’t see the layer’s marquee, click the Layer options button in the Layers panel, and choose
Show Layer Indicators.
2Click the Layer options button , and choose Layer Attributes.
3In the Layer Attributes dialog box, specify a name for the layer.
4Enable the WWW Map Clickable Region check box.
5In the URL box, specify a URL to associate with this portion of your image (for example, http://
www.painterartist.com).
6Click OK to return to the image.
7Deselect the layer, and then define the next area of your image map.

Web | 885
If there are two or more overlapping areas in an image map, the topmost one takes priority.
8Export your image to the GIF or JPEG file format. In the Save As GIF Options or Save as JPEG Options
dialog box, enable the Client Side Map File check box to indicate that Corel Painter should export an
HTML file containing the image map definition.
The RIFF format contains data about your image that is lost when you convert it to GIF or JPEG. If
you want to edit the file later, save a RIFF copy before you generate a GIF or JPEG version.
When a client-side image map is exported, Corel Painter exports both the image and an HTML file.
You can then open the HTML file in a text or HTML editor and copy the code into another web
page.
To define a default URL for an image map
1To define a default, or base, URL to use when a user clicks outside the defined hotspot areas in an
image map, choose File Get Info when no layers, shapes, or plug-ins are selected.
2In the File Information dialog box, enable the WWW Map Default URL check box.
3Enter a URL address.
4Click OK.
If you don’t provide a default URL, clicking outside the defined hotspot areas has no effect.
Creating server-side image maps
In Corel Painter, you can define a layer as a clickable region. Corel Painter saves this image map information
within a separate text file, which you can upload to your web server. It can then be accessed by a CGI script.
Because server-side image mapping is becoming obsolete, be sure to read the previous section on client-
side image mapping support.
To create a server-side image map
1Select or create a layer or shape in the exact place in your image where you want a link created.
2In the Layers panel, select a layer.
3Click the Layer options button , and choose Layer Attributes.
4In the Layer Attributes dialog box, specify a name for the layer.
5Enable the WWW Map Clickable Region check box.
6In the URL box, specify a URL to associate with this portion of your image (for example, http://
www.painterartist.com).
7Click OK to return to the image.

886 | Corel Painter 2015 User Guide
8Deselect the layer, then select the next hotspot in your image map. Try to avoid overlapping hotspot
areas within an image map.
You can set a default URL to use if the user clicks outside of your defined hotspot areas. For more
information, see “To define a default URL for an image map” on page 885.
9Export your image to the GIF or JPEG file format. In the Save As GIF Options or Save As JPEG Options
dialog box, enable either the NCSA Map File check box or the CERN Map File check box, depending on
which format is recommended by your Internet Service Provider.
When you save the image, Corel Painter creates an additional text file that describes the clickable
regions and their associated URLs.
10 Store both files (the image file and its associated image map definition file) on your web server, as
directed in the documentation for your image mapping CGI script/program. Both files must be present
for the server-side image map to work.
The RIFF format contains data about your image that is lost when you convert it to GIF or JPEG. If
you want to edit the file later, save a RIFF copy before you generate a GIF or JPEG version.
Creating web page backgrounds
Corel Painter offers tools for creating web page backgrounds.
An effective web page background should be subtle and unobtrusive. This is particularly important if the
background is used behind text. You can lighten patterns by using the Edit Fade command, to make them
more suitable for displaying behind text.
Web | 887
Use the Fade command to lighten a pattern.
Controlling background color
Using a background color closely matched to your background image takes no additional download time
and creates a pleasing transition. For example, suppose your page loads a dark green seamless background
tile. The tile takes a little time to download. While it’s loading, the browser displays the page, using the
page background color (which, if not explicitly defined, is usually gray or white). This can cause a jarring
visual transition. Depending on the text color used, it can even make a page impossible to read until the
background image has finished loading.
Using HTML, you can specify a solid background color for a page, table, or Cascading Style Sheet (CSS)
element. Although Corel Painter can’t assist you with actually setting the background color in your HTML
code, you can use Corel Painter to determine the hexadecimal format of a color, which is used in HTML.
Using tiled backgrounds
When a background image is smaller than the boundaries of the display area for a page, table, or
Cascading Style Sheet (CSS) layer, web browsers automatically repeat the image, effectively creating a tiled
pattern. Corel Painter makes it easy to create tiling background images for use in web pages.
The CSS features in modern browsers let you apply background tiles to more elements than ever before.
In the past, you could apply them only to the page itself, or possibly to a table. Now, with CSS, layers
or block-level elements — anything you can display on its own line in traditional HTML layout — can
have a background image. Since authors are no longer limited to using tiled backgrounds for just pages,
possibilities open up for the creative use of tiles behind such elements as borders, call-out boxes, or
sidebars.
888 | Corel Painter 2015 User Guide
You can use any image or selection to define a pattern. An image designed for use as part of a pattern
is normally created so that it tiles seamlessly. That is, the eye should not be able to distinguish the edges
between tile repetitions. Corel Painter has features that can help you create seamless tiles, which you can
then use as interesting web backgrounds. For information about creating, editing, saving, and filling with
patterns, see “Patterns” on page 709.
The Glass Distortion effect, the Super Soften effect (with the Wrap Around check box enabled), and
most of the Tonal Control effects preserve the seamless quality of the pattern. Some effects, such as Apply
Surface Texture, can result in a noticeable seam, so experiment.
Example of using seamless and non-seamless tiles in a pattern
A way to partially avoid seams that occur with effects such as Apply Surface Texture is to apply the effect
several times at lower strengths (by moving the Amount slider). Shift the pattern a little (using Shift +
Spacebar) between applications. This tends to “distribute” the seams and make them less noticeable.
Tile dimensions should be as small as practical, but in most cases should not go below 20 x 20 pixels. If a
tile is too small, it takes the browser longer to render it over a large area.
When you’ve finished creating your tile, save the image in RIFF format, in case you must work with it later in
Corel Painter. Then, save it in either JPEG or GIF format for use on the web.
Web backgrounds should, ideally, be saved as GIFs, with as few colors as possible, to reduce file size. You
can also use JPEGs, but they often have larger file sizes. As a rule of thumb, any background tile over 20 KB
is probably too large. For more information about saving an image in GIF or JPEG format, see “Saving and
backing up files” on page 88.
Creating tiles with fractal patterns
Another easy way to design seamless tiles is to take advantage of the effects you can create with the Make
Fractal Pattern command. Make Fractal Pattern is a pattern generator that creates organic patterns, which
can make interesting background tiles. The patterns it generates can be filled with color and even enhanced
with a paper texture. For more information, see “Creating fractal patterns” on page 719.
Color Overlay, the Watercolor brushes, and Cloning are other options you can apply to a pattern.
Beautiful, complex effects can also be achieved by applying Glass Distortion to a pattern created with
Make Fractal Pattern.
Web | 889
Creating web buttons
Corel Painter has a wide array of features that help you create web buttons. You can apply textures and
effects to your web buttons.
Using shapes and selections
You can create web buttons using shapes or by choosing a selection from the Selection Portfolio. For more
information, see “Drawing shapes” on page 783. For information about using selections, see “To use a
selection from the portfolio” on page 593.
Using 3D techniques
You may want to use one or more of the texturing options in Corel Painter to create 3D effects. The
following sections describe several powerful ways to quickly add 3D effects to the buttons you create.
After you’ve added a desired 3D effect, try altering the light source to create a second image that
represents the button in a different state, or try using the Hue Shift slider in the Effects Tonal
Control Adjust Colors dialog box.
Adding shadows
Shadows lend a definite 3D flare to a web page. You can quickly add drop shadows to text, buttons,
shapes, and layers. When you apply a drop shadow to a shape, the shape loses its vector quality and
becomes a pixel-based layer. For more information about creating drop shadows, see “Adding drop
shadows to layers” on page 543.
Applying surface texture
Leading the array of Corel Painter web-friendly tools, the Apply Surface Texture feature could easily
become a web designer’s best friend. You can use Apply Surface Texture to apply 3D effects to web
buttons, bars, or other elements.
You can use the Reflection slider to create an effect you would expect to see in objects made of glass or
polished metal, like a chrome bumper on a classic car. The Image Luminance option in the Using list box
gives your buttons an embossed look. For more information about applying surface texture, see “Using
paper to create texture” on page 649.
Using the Impasto technique
The Impasto feature lets you create the illusion of depth by applying thick paint to the canvas. You can use
the Impasto technique to add a 3D appearance to all or discrete areas of your image. For more information,
see “Impasto” on page 501.
890 | Corel Painter 2015 User Guide
Using Bevel World
No discussion of creating web buttons would be complete without mentioning Bevel World. Bevel World is
a dynamic plug-in that can add 3D angled edges to your shapes and selections.
You can bevel any element in your painting, and then turn it into a 3D button.
Bevel World has controls that affect the 3D bevel shape being applied, as well as controls to adjust lighting.
Try experimenting with lighting controls. By changing the lighting on a bevelled surface, you can easily
create different states for your web buttons.
Altering lighting in the Bevel World dialog box is an
easy way to create images that indicate button states.
For more information about Bevel World, see “Applying the Bevel World dynamic plug-in” on page 686.
You can decide later to change the settings, as long as you have not committed the layer. To understand
more about committing a layer, see “Committing dynamic layers to default layers” on page 681.
Index | 891
Index
Numerics
1-Pixel Edge brush tip profile 360
for Hard Media 361
1-Rank nozzles
creating 479
2-Rank nozzles
building 482
creating 481
making from movies 488
360° brushstrokes 144
3D brushstrokes
simulating 650
3D techniques
applying depth of field 615
for mosaic tiles 748
for Web buttons 889
3-Rank nozzles
creating 483
A
Acrylics brushes 289
actions
automating 843
repeating in movies 831
Actions palette 862
Add Point tool 34
using 795
Add to Selection button
using 598
additional color, choosing 220
Adjust Colors effect 268
Adjust Selected Colors effect 271
adjuster tools
keyboard shortcuts for 116
adjusting
colors 259
hue 268
saturation 268
selected colors 271
value 268
Adobe Illustrator files
exporting shapes to 809
Adobe Photoshop
using layer styles 64
Adobe Photoshop files
opening, notes on 864
saving 91
saving layers as 558
saving, notes on 865
Adobe Photoshop users
Corel Painter tour for 61
FAQs from 864
notes for 861
Airbrush brush controls 378
Airbrush dab type 335
airbrushes 289
adjusting flow 146
adjusting spread 145
conic sections 144
controlling droplet size 146
controls for 378
painting with 144
stylus settings 145
varying edges 146
aligning
brush to path 868
brushstrokes 142
layers 532
text 813
892 | Corel Painter 2015 User Guide
alpha channels 563
auto-generate 566
clearing 571
combining with selection 591
deleting 571
editing 571
importing 567
loading selection from 592
selecting 567
setting attributes 570
viewing 567
alpha mask
retaining when placing 73
anchor points 794
adding 795
averaging 796
converting 798
deleting 795
joining 799
moving 796
Angle brush controls 353
animated GIFs
creating 839
exporting movies as 839
animations 821
calculating required disk space 823
considering frame rate 837
creating 822
frame delay 841
keyboard shortcuts for 120
using color sets in 822
anti-aliasing
selections 595
Apply Color tool 227
sizing 227
Apply Screen effect 660
Apply Surface Texture effect 649
using 3D brushstrokes with 650
Artist brushes 290
Artists’ Oils
brush controls 381
brush tip profiles 360
aspect ratio
setting for cropping 85
Auto Clone effect 628
Auto Select command
selecting areas with 585
selecting from a clone 586
Auto Van Gogh effect 629
auto-cloning 177
automating actions 843
background scripts, auto-saving 847
auto-painting
brush size 163
photos 162
randomness 162
restoring details 165
Smart settings 162
Smart stroke painting 162
Stroke settings 163
Stroke type 162
Auto-Painting panels 47
descriptions 47
using 162
auto-recording
scripts 869
Auto-Save Scripts preference 847
auto-saving
preferences for 868
scripts 869
AVI files
exporting 837
opening 826
B
Index | 893
background color
setting 870
vs Additional Color 62
background scripts
saving automatically 847
backgrounds
creating for Web pages 886
creating transparent 880
tiled 887
backing up files
preferences for 868
backup files
creating when saving 88
creating with scripts 843
saving preferences 869
setting preferences 88
Bevel World dynamic plug-in 686
controlling bevel 686
controlling light 686
using for Web buttons 890
beveling
layers or selections 686
Web buttons 890
Bézier lines 785
creating shapes with 787
bleed, brushstroke 398
blend modes
converting from composite methods 558
blenders 291
blending
Impasto with layers 510
layers, with composite methods 543
shapes 806
Blobs effect 630
BLOCK expression operator 769
Blur tool 862
blurring
Camera Motion Blur effect 614
Motion Blur effect 622
Smart Blur effect 614
text 816
Zoom Blur effect 625
brightness
adjusting 261
adjusting for paper grain 157
matching across images 276
Brightness and Contrast dynamic plug-in 682
Brightness/Contrast effect 261
Bristle Spray dab type 334
bristles
adjusting number 407
modifying spacing 407
RealBristle variant length 493
RealBristle variant rigidity 493
scaling with brush size 378
setting clumping 377
setting density 377
setting displacement 406
setting edge softness 407
setting thickness 377
Bristles
brush controls 374
browsing for documents (Mac OS) 73
brush calibration 129
setting 130
Brush Calibration brush controls 330
brush categories
creating 315
definition 24
exporting 317
hiding 311
importing 317, 319
list of 288
renaming 313
restoring 315
894 | Corel Painter 2015 User Guide
brush control panels
changes to 17
closing 327
descriptions 44
opening 326
shortcut for opening all 327
brush controls
Airbrush 378
Angle 353
Artists’ Oils 381
bristle controls 374
Brush Calibration 330
Cloning 407
Color Expression 417
Color Variability 415
Computed Circular 373
Dab Profile 359
Digital Watercolor 385
displaying advanced 310
exploring 326
Expression 327
for Jitter brush variants 422
General 332
Hard Media 373
Image Hose 403
Impasto 385
Liquid Ink 390
Min setting 327
Mouse 401
Multi 407
Rake 403
Real Watercolor 362
RealBristle 375
size 349
smoothing 402
Spacing 357
Static Bristle 375
stroke attributes 347
Stroke Jitter 397
water 385
Well 398
brush dabs
adjusting bristles 375
angling 353
changing tip profile 362
creating 321
previewing 329, 329
sizing 306
spacing 357
types of 332
brush ghost
displaying 870
brush libraries 56, 281
creating and deleting 316
importing 317
importing older 318
loading Web-friendly brushes into 880
Brush library panel
displaying 41
modifying 310
using 304
Brush Loading feature 399
cloning with 179
painting with multiple colors 240
brush methods 339
for painting on layers 540
for Web-friendly brushes 879
troubleshooting 149
Brush Preview panel
opening 329
Brush Selector bar 62
choosing brushes with 305
description 28
moving or docking 42
showing or hiding 41
brush size
scaling features with 868
Index | 895
brush tip profiles 359
airbrushes 146
Artists’ Oils 360
choosing 362
modifying Hard Media 460
Brush tool 31
applying Liquid Lens with 695
applying Liquid Metal with 699
erasing image areas with 142
keyboard shortcuts for 114
painting in channels with 573
stroking selections with 595
brush tracking 127
presets 130
setting 129
Wacom Intuos tablet 96
brush variants
calibrating 331
copying 313
definition 24
deleting 314
exporting 317
Hard Media 457
hiding 311
importing 317
Jitter 419
modifying 327
moving 312
renaming 313
restoring 315
restoring default settings 315
saving and deleting 313
selecting 305
brushes
adjusting grain 345
aligning to path 868
basic attributes 306
calibrating, with brush controls 330
categories, list of 288
contact angle 406
copying 313
creating categories 315
creating dab 321
custom icons for 316
customizing 325
dab profiles 359
dab types 332
deleting categories 315
displaying 310
displaying controls dynamically 310
exporting 317
grain controls 306
grain settings 342
grain, setting 308
importing 317
managing 287
media pooling 143
media source 342
methods and subcategories 339
modifying bristles 375
multicore support for 343
new in Painter X3 305
one-color 879
opacity 343
opacity, setting 306, 308
organizing 310
saving and deleting 313
saving looks 321
scale, setting 406
searching for 304
selecting 304
shape, setting 356
shaping 356, 356
size controls 349
size, setting 307
sizing using legacy controls 868
stroke attributes 347
stroke types 337
tip profiles 359
understanding 288
Web-friendly 879
896 | Corel Painter 2015 User Guide
brushstrokes
360° 144
3D 650
aligning 142
applying 138
applying straight 138
applying to selections 595
applying, mouse settings for 137
applying, to movies 835
blending Impasto 510
boosting 357
constraining 140, 868
controlling angles 353
damping 402
expression setting 327
fading 140
jitter 397
merge modes 347
optimizing 357
perspective 203
perspective-guided 205
playing back 147
previewing 329
Rake 403
randomizing grain 346
recording 147
resizing 349
saving 149
scaling 307
setting alignment tolerance 143
straight lines 139
troubleshooting 149
two-color 224
types 337
undoing 140
using data from 149
Buildup brush methods 340
Bulge tool
applying Liquid Lens with 694
Burn dynamic plug-in 683
Burn tool 35
darkening tone with 280
burning 279
layers or selections 683
C
Calligraphy brushes 301
Camel Hair dab type 334
Camera Motion Blur effect 614
canvas
applying gradients to 724
changing color 69
clearing Impasto 503
definition 24
description 29
displaying Impasto 502
dropping text layers onto 820
flipping 83
flipping with layers 83
merging layers with 539
painting 132
presets 69
protecting from selection 588
repositioning 75
resizing 86
resizing with images 87
resolution 68
rotating 80
selecting 583
size 68
texture, changing 69
transferring to Watercolor layer 425
workflow for painting 126
Canvas menu
keyboard shortcuts for commands 109
Captured dab type 333
Chalk brushes 291
Index | 897
channels 563
applying effects to 573
applying gradients to 724
copying 564, 565
copying layer masks to 557
copying to layer masks 557
creating blank 564
creating from selections 564
creating texture with 654
editing 571
feathering 573
filling 574
filling, based on color 574
generating automatically 565
generating texture with 654
hiding 570
inverting 574
loading selections from 588
painting in 573
placing mosaic tiles on 747
saving selections to 564
saving selections to new 591
selecting 567
viewing 567
vs. layer masks 552
Channels panel
description 29, 47
displaying 569
editing channels with 567
managing channels with 567
Charcoal brushes 292
Chisel brush tip profile 360
Circle tool
applying Liquid Lens with 693, 693
circles, creating 783, 784
Circular dab type 333
Circular Drop tool
applying Liquid Metal with 699
client-side image maps 883
default URL for 885
defining 884
Clone color 224
clone document (definition) 25
clone luminance
adjusting colors with 273
adjusting with 270
clone painting techniques 177
clone source
adding 173
adding perspective 190
adding perspective to 190
adding using Clone Source panel 173
creating mosaics from 739
creating reflection maps from 656
creating tessellation from 754
creating texture with 652
definition 25
editing 174
exporting 174
filling areas with 193
moving reference points 190
painting 176
rotating 187, 187
rotating and mirroring 187
rotating and scaling 188, 188
rotating, scaling, and shearing 189, 189
scaling 186
selections 191
setting 168
setting color 176
tiling 185
to create texture 652
transforming 191
updating 174
using luminance 268
warping 189, 189
working with 168
working with multiple 173, 174
Clone Stamp tool 863
898 | Corel Painter 2015 User Guide
cloner brushes 292
choosing 178
multi-point variants 182
painting with 176, 176
transforming brush variants into 178
Cloner tool 34
choosing brush for 178
performing offset sampling with 181
using 176
cloning 167
applying transformations 182
automatically 177, 628
between documents 181
brush controls 407
brush controls for 407
brush methods 341
clone color 176
color 224
displaying crosshairs cursor 171
editing source images 174
exporting clone source images 174
image sources 168
images 167
images, with Brush Loading 179
images, with Van Gogh effect 629
methods 176
perspective 185
point-to-point 179
preferences 172
preferences for 874
reference points for 185
rotating source 187
saving clone source images 174
set reference point 190
setting clone source 168
tracing paper 169
underpaintings 162
updating source images 174
using cloner brushes 176
using Quick Clone 171
with crosshair 168
with multiple clone sources 173
within documents 180
CMYK
specifying default color profile 253
Index | 899
color 217
adding to color sets 238
adding to gradients 731
adjusting 259, 268
adjusting for video 279
adjusting levels 878
adjusting selected 271, 271
applying as fills 242
changing canvas 69
changing for Impasto lights 509
changing light 648
choosing 218
choosing additional 220
choosing from Color panel 219
choosing from color sets 236
choosing main 220
choosing with temporal colors palette 223
cloning 224
controlling in Web page backgrounds 887
correcting 259, 260
creating color sets 237
creating overlays 660
deleting from color sets 239
displaying 239
filling channels based on 574
filling channels with 574
fills, using 241
finding in color sets 236
generating channels from 566
generating selections from 586
hiding 239
inverting 277
loading multiple 240
loading on Mixer panel 234
managing 247
matching across images 276
mixing 229
paper, changing 223
picking up from underlying layers 541
posterizing 278
reducing in web graphics 882
renaming in color sets 240
replacing in color sets 239
replacing with gradients 726
resetting on Mixer panel 233
sampling 223
sampling from Mixer pad 230
sampling multiple 231
saving on Mixer panel 232
setting variability 240
sorting in color sets 236
swapping main and additional 221
text 812
using in movies 822
variability controls 415
Web-safe 877
color cast
correcting 260
Color composite method 551
color correction
advanced setting 267
Freehand 266
hue, saturation, and value 268
using color curve 264
color engines, choosing 255
Color Expression brush controls 417
Color Expression panel
displaying 417
color expression, setting 240
color fills
applying 242
applying pixel-based 243
color management 247
assigning color profiles 254
color policies 256
color profiles 249
converting CMYK to RGB 253
creating presets 257
definition of 248
embedding color profiles 252
monitor calibration and profiling 249
previewing images 253
reasons for using 248
removing color profiles 254
rendering intents 250
RGB color profiles 251
soft-proofing 251
soft-proofing images 253
understanding 247
Color merge mode 347
Color Overlay effect 660
color palettes
Web-safe 877
900 | Corel Painter 2015 User Guide
Color panel 45
choosing color from 219
choosing colors 218
choosing hue from 219
creating color sets with 237
discovering 62
displaying 219
hiding color wheel 221
hiding information 221
resizing 221
setting color values with 221
Color panels
descriptions 45
color policies 256
creating 256
color profiles 249
assigning or removing 254
CMYK 253
converting 255
creating policies 256
embedding 252
previewing 253
RGB 251
soft-proofing 253
Color selector 36
color set libraries 281
adding 282
creating 282
deleting resources 285
exporting 281
importing 281
modifying display of 283
moving resources 285
removing 282
renaming resources 285
color sets
adding colors to 238
adding Mixer swatches to 232
choosing colors from 236
creating 237
customizing layout 236
deleting colors from 239
displaying color names 237
displaying, for weaves 759
editing 238
exporting 238
finding colors in 236
from Mixer pad 233
from Mixer panel 232
hiding color names 237
ignoring color variability 417
importing 236
opening 236
posterizing Web graphics with 878
posterizing with 278, 278
renaming colors in 240
replacing colors in 239
resizing swatches 237
reverting to default 240
setting color variability based on 416
sorting colors in 236
using 235
using, for movies 822
using, for warp and weave expressions 765
Color Sets panel 45
displaying 235
color swatches
Mixer pad 232
color tools 31
color variability
brush controls 415
setting 240
color wheel
hiding in Color panel 221
colored pencils 300
Colorize composite method 545
Index | 901
Colorize merge mode 347
combining
layers with canvas 539
selections 589
selections with alpha channels 591
shapes 805
commands
assigning to keys 101
committing
dynamic layers 681
reference layers 561
composite depth
Impasto 510
composite images
printing 859
composite methods
blending layers with 543
changing for layers 552
converting to blend modes 558
definition 26
compositing
mosaics with other images 750
Composition panels
description 48
composition tools 35
working with 195
compound shapes 805
creating 805
releasing 806
compression
support for LZW 72
Computed Circular brush controls 373
Computed Circular dab type 333
customizing profiles 373
CONCAT expression operator 771
connecting
to Corel Painter for Cinco 875
constraining
brushstrokes 868
fills 244
freehand brushstrokes 140
Conte brushes 292
Continuous Time Deposition control 357
contrast
adjusting 261
adjusting for paper grain 157
Convert Point tool 34
converting
CMYK to RGB 253
color profiles 255
colors to video legal colors 279
composite methods to blend modes 558
Corel Painter files to Adobe Photoshop files 865
fractal patterns to paper textures 722
layers to default layers 520
pixel-based selections to path-based 583
scripts to movies 850
selections to shapes 801
shapes to pixel-based layers 800
shapes to selections 583
smooth or corner points 798
text to default layers 819
text layers to shapes 819
copying
brushes 313
channels 565
channels, to layer masks 557
layer masks to channels 557
layers 526
selections from multiple layers 527
Corel Corporation 7
Corel Painter for Cinco
preferences for 875
Corel Painter for Cinco, enabling connection 6
902 | Corel Painter 2015 User Guide
Corel Painter interface 23
vs. Adobe Photoshop interface 61
corner points
converting 798
correcting colors 259
advanced 267
basics 260
Correct Colors effect 260
curve 264
equalizing images 274
Cover brush methods 340
crayons 291
Crop tool 33
constraining to a square 85
cropping images with 85
setting aspect ratio 85
crosshair
for cloning 168
Cubic Interpolation control 402
cursor icon
changing 870
crosshairs cloning cursor 171
preferences 869
curvature, adjusting in shapes 796
curve
correcting colors with 264
curves
adjusting in shapes 797
custom palettes
adding items to 54
closing 54
creating 53, 53
Custom Palette Organizer 55
deleting 56
importing 56
opening 54
placing menu commands on 54
renaming 55
saving 55
Custom tile controls 635
Custom Tile effect 632
customizing
brushes 325
color-set layout 236
Hard Media variants 460
Impasto brushes 503
markers 467
RealBristle brush variants 495
shortcut keys 101
tiles 632
workspaces 57
D
Dab Profile brush controls 359
dab types 332
Camel Hair 334
Captured 333
choosing 337
Circular 333
Computed Circular 333
dab-based 333
definition 24
eraser 333
rendered 334
single-pixel 333
Static Bristle 333
dab-based dab type (definition) 25
Index | 903
dabs, brush
adjusting 325
creating 321
damping brushstrokes 402
Darken composite method 549
Darken merge mode 348
darkening image tone 280
Default composite method 544
default layers
converting layers to 520
Default merge mode 348
default settings
displaying 61
restoring Painter 58
default workspace, reverting to 58
depth
adjusting for Impasto 509
adjusting for Liquid Ink layers 498
applying to mosaic tiles 748
applying to surface texture 649
applying to Web buttons 889
Impasto 503
interaction 503
using Expression setting 506
Depth of Field
controls 618
effect 615
deselecting
layers 526
selections 593
tiles 740
Difference composite method 550
Difference merge mode 348
diffusion, adjusting
Digital Watercolor 429
Real Watercolor 367
Real Wet Oil 372
watercolor 388
Digital Watercolor brushes 293
adjusting diffusion 429
adjusting wet fringe 429
choosing variants 428
controls for 385
description 423
drying brushstrokes 429
using 428
Digital Wet brush method 341
directional grain, enabling 158
Dirty Brush Mode tool 226
Dirty Mode, painting in 383
Dissolve composite method 547
Dissolve merge mode 348
distorting
images with Glass Distortion effect 618
images with Liquid Lens 693
images, with warp effects 668
perspective in selections 606
selections 605
Distress effect 672
divine proportion 208
guide, moving 211
hiding 209
presets, choosing 210
presets, creating 210
presets, deleting 210
settings 209
settings, saving as presets 210
showing 209
Divine Proportion panel 48
using 208
904 | Corel Painter 2015 User Guide
Divine Proportion tool 35
using 208
docking
Brush Selector bar 43
panels and palettes 49
property bar 40
document window 26
documentation 1, 1
conventions of 2
increasing text size 4
documents
canvas size and resolution 68
closing 92
copying layers between 527
creating 68
custom canvas presets 69
emailing 91
opening and placing 71
repositioning 84
resolution 70
saving as templates 74
switching views 74
Dodge tool 35
lightening tone with 279
dodging 279
dots per inch
vs pixels per inch 68
DOWNTO expression operator 773
DOWNUP expression operator 777
dpi vs ppi
screen appearance 70
drag-and-drop features 97
drawing
circles 783, 784
freehand lines 139
ovals 783, 784
rectangles 783, 784
shapes 783
shapes, preferences for 789
squares 783, 784
straight lines 139
drawing cursor 134
choosing icon 135
setting brush ghost options 136
drawing methods, Impasto 503
drawing modes
for selections 588
in Navigator panel 77
drawing speed
increasing 79
increasing when zoomed out 872
Drip brush methods 340
Drop Shadow tool 863
drop shadows
adding to layers 543
adding to text 815
Dropper tool 31
equalizing images with 275
sampling colors with 223
dropping
floating objects 523
layers 539
text layers onto canvas 820
drying Digital Watercolor brushstrokes 429
Dryout control 399
Dull brush tip profile 359
for Hard Media 361
Index | 905
duplicating
channels 565
layers 526
selections 602
shapes 804
shapes, settings for 804
shapes, transformed 804
Dye Concentration effect 663
dynamic brush resizing 306
dynamic layers 516
Brightness and Contrast, creating 682
changing settings 680
committing 681
creating 680
creating selections from 587
deleting 681
Equalize, creating 689
Glass Distortion, creating 690
Kaleidoscope, creating 692
Liquid Lens, creating 695
Liquid Metal, creating 699
Posterize, creating 706
dynamic plug-ins 679
accessing 680
getting started with 680
E
edges
airbrush, varying 146
brushstroke 136
selection, softening 594
underpainting 161
Edit menu
keyboard shortcuts for commands 108
Edit Weave dialog box 761
accessing 763
effects
applying recently used 610
applying, to channels 573
applying, to movie frames 827
common options 609
fading 609
grayscale 666
Impasto 507
keeping panels open 611
lighting 645
mosaic 736
surface texture 645
Tesselation 750
using luminance 611
Effects menu
keyboard shortcuts for commands 111
elements
Esoterica effect 640
placing 640
Elliptical Marquee tool 863
emailing images 91
embedding color profiles 252
embossing effects 653
endpoints, joining 799
EPS files
managing 858
printing 858
saving 91, 91
saving, for printing 858
Equalize dynamic plug-in 688
Equalize effect 274
equalizing images 274
with Correct Colors effect 274
with Equalize effect 274
Eraser brush methods 340
Eraser dab type 333
906 | Corel Painter 2015 User Guide
Eraser tool 32
erasing image areas with 141
erasing Liquid Lens with 697
erasers 293
erasing
frames from movies 831
image areas 141
Liquid Lens distortions 697
Esoterica effects 613
Auto Clone 628
Auto Van Gogh 629
Blobs 630
Custom Tile 632
Grid Paper 636
Growth 636
Highpass 638
Marbling 626
Maze 639
Mosaic 736
Place Elements 640
Pop Art Fill 642
Tesselation 750
exporting
Adobe Photoshop files, notes on 865
AVI movies 837
brush categories 317
brush variants 317
clone source images 174
color set libraries 281
color sets 238
flow map libraries 281
gradients libraries 281
image libraries 281
libraries 281
looks libraries 281
movies, as animated GIFs 839
movies, as numbered files 839
nozzles libraries 281
paper libraries 281
pattern libraries 281
QuickTime movies 835
script libraries 281, 852
selection libraries 281
shapes 808
texture libraries 281
weave libraries 281
workspaces 57, 58
Express Texture effect 666
expression brush settings 327
expression operators 768
precedence ordering of 778
expression, color 240
EXTEND expression operator 770
Eyedropper tool 863
F
F/X brushes 294
factory defaults
restoring 58
restoring brushes 315
Index | 907
fading
brushstrokes 140
effects 609
FAQs
from Adobe Photoshop users 864
fast preview
layers 530
feathering
channels 573
selection edges 595
feature jitter 378
features
drag-and-drop 97
feedback, submitting 7
file formats
choosing 89
supported 72
File menu
keyboard shortcuts for commands 108
files
backing up 88
choosing formats 89
embedding color profiles 252
numbered 838
opening 71
placing 71
printing to 856
saving and backing up 88
saving shapes 808
Fill Selection command
using with mosaics 749
filling
areas with sampled images 193
channels 574
channels, based on color 574
controlling leakage 244
with pattern tiles 710
fills
applying colors as 242
applying weaves as 758
color, working with 241
constraining 244
gradients 723
patterns 709
setting attributes for shapes 790, 793
undoing 244
Filter Gallery 863
fingerwheel
adjusting flow with 146
adjusting mouse settings for 138
Flat brush tip profile 360
Flat dab type 334
Flat Rake brush tip profile 360
flattening
images 539
layers 255
flipping
canvas with layers 83
canvas, individually 83
images 82
layers 83
selections 83
shapes 802
floating object layers 516
floating objects 521
creating 522
dropping from layers 523
duplicating 522
repositioning on layers 523
flow jitter 378
908 | Corel Painter 2015 User Guide
flow map libraries 281
adding to 282
creating 282
deleting resources 285
importing and exporting 281
modifying display of 283
moving resources 285
panel 46
removing 282
renaming resources 285
Flow map panel 46
flow maps 449
controlling flow resistance 452
creating from image 453
creating from paper 453
customizing 453
enabling 452
getting started 449
working with 450
Flow Particle brushes 435
flow, airbrush 146
flyouts 3
accessing tools in 38
focus
sharpening 623
softening 624
Focus effects 613
Camera Motion Blur 614
Depth of Field 615
Glass Distortion 618
Motion Blur 622
Sharpen 623
Smart Blur 614
Soften 624
Super Soften 624
Zoom Blur 625
fonts
choosing 812
resizing 812
foreground color vs Main Color 62
fractal patterns
converting to paper texture 722
creating 719
creating, controls for 719
in tiles 888
frame delay 841
frame rate
setting for movie previews 828
understanding 837
frame stacks
calculating disk space for 823
exporting as animated GIFs 840
opening 826
Frame Stacks panel 822
frames
adding to movies 831
applying effects to 827
deleting from movies 831
painting on 827
repeating 832
selecting 828
Freeform Pen tool 863
Freehand
color correction 266
freehand brushstrokes
applying 138
constraining 140
freehand lines, drawing 139
freehand selections 582
freehand shapes, drawing 788
Freehand Strokes button
drawing freehand lines with 139
frequently asked questions
from Adobe Photoshop users 864
G
Index | 909
gamma curves
adjusting 260
adjusting using Equalize effect 274
Gel brushes 294
Gel composite method 545
Gel merge mode 348
GelCover composite method 545
GelCover merge mode 348
General brush controls 332
dab types 332
methods and subcategories 339
multicore support 343
source, opacity, and grain 342
stroke types 337
general preferences
accessing 869
description 867
GIF files
creating 880
exporting movies 839
reducing color 882
reducing the number of colors 882
saving 90
transparent 880
Glass Distortion dynamic plug-in 690
Glass Distortion effect 618
controls 621
glossary of terms 24
Gouache brushes 295
Grabber tool 36
repositioning documents with 84
gradient libraries 56, 281
adding 282
creating 282
deleting resources 285
importing and exporting 281
modifying display of 283
moving resources 285
removing 282
renaming resources 285
Gradient Selector, accessing 38
Gradient tool 863
gradients 723
adjusting 727
angle, adjusting 728
applying 723
color, adding 731
creating 729
creating, from images 732
direction, adjusting 728
editing 729
filling channels with 574
hue, changing 732
painting with 725
replacing image colors with 726
saving 733
setting color variability based on 416
spiral, adjusting 728
two-point, creating 730
types of 723
Gradients library panel 45, 46
910 | Corel Painter 2015 User Guide
grain
adjusting for brushes 345
adjusting jitter 345
behavior, adjusting 157
brightness, adjusting 157
brush attributes 306
contrast, adjusting 157
direction, adjusting 157
Image Hose 471
inverting 155
randomizing for brushes 346
scaling 155
setting for brushes 308
setting for brushstrokes 346
setting in movies 835
working with 151
Gravity Particle brushes 432
grayscale images
printing 857
viewing channels as 570
grid 214
activating 214
creating for 2-Rank nozzles 482
printing gridlines 215
setting up for 2-Rank nozzles 481
settings 214
snapping items to 215
Grid Paper effect 636
gridlines
printing 215
grouped layers
adding layers to 537
closing 537
collapsing 538
creating 1-Rank nozzles from 479
creating transparent GIFs from 881
naming 523
opening 537
removing layers from 537
ungrouping 538
grouping
layers 536
panels into palettes 50
shapes 805
grout
color, specifying mosaic 741
size, adjusting 744
size, adjusting randomly 745
Growth effect 636
guides 212
color, setting 213
creating 212
hiding 212
locking 213
perspective 203
removing all 213
removing one 213
repositioning 212
showing 212
snapping items to 213
snapping to rulers 213
unlocking 213
H
Hand tool 863
Hard Light composite method 549
Hard Light merge mode 348
Hard Media 457
brush tip profiles 460
choosing variants 459
controlling variants 462
controls for 373
customizing variants 460
list of variants 457
modifying profiles 460
previewing dabs 463
setting size steps 462
squeezing brush tip 461
tip profiles for 361
Index | 911
Hard Media controls
using with markers 467
header bar 2
Help 1
increasing text size 4
using 1
Highpass effect 638
HSV values
setting in Color panel 221
hue
adjusting 268
choosing 219
Hue composite method 550
Hue merge mode 348
Hue Shift slider 271
I
icons
creating for brushes 316
Image Hose 295
brush controls for 403
changing indexing rules 476
creating 1-Rank nozzles 479
creating 2-Rank nozzles 481
creating 3-Rank nozzles 483
creating nozzles from movies 487
designing nozzles for 477
editing nozzles 487
getting started with 470
grain 471
indexing 476
indexing images with 474
indexing rules 474
linear variants 470
loading nozzles 485
nozzles 476
opacity 471
preparing images for 479
randomizing 473
rank types 474
ranking system for 476
ranks 476
retrieving nozzles 487
scaling 473
spacing 473
spray variants 470
working with 469
image libraries 281
adding to 282
creating 282
deleting resources 285
importing and exporting 281, 281
modifying display of 283
moving resources 285
removing 282
renaming resources 285
image luminance
adjusting colors with 270
adjusting selected colors with 273
image maps 883
client-side 883
server-side 885
912 | Corel Painter 2015 User Guide
Image Portfolio libraries
organizing layers with 561
Image Portfolio panel
adding layers to 561
displaying 561
storing images with 561
using images from 561
image sampling (definition) 25
Image Warp effect 668
images
adding text to 811
automatically painting 159, 162
blurring 613
burning 279
cloning 167
compositing mosaics with 750
correcting and adjusting colors 259
creating color sets from 237
creating gradients from 732
creating patterns from 715
cropping 85
dodging 279
emailing 91
equalizing 274
erasing areas 141
fitting to page 856
fitting to printed page 855
flattening 539
flipping 82
generating sketches from 676
indexing with Image Hose 474
magnifying 77
matching color and brightness across 276
matching to create underpaintings 161
navigating 75
opening in Mixer pad 231
opening reference 133
outlining 169
preparing for Image Hose 479
printing 855, 856
replacing colors with gradients 726
repositioning 84
resetting orientation 81
resizing 86
resolution 70
restoring detail from 165
rotating 80
sampling colors from 223
scaling with Image Hose 473
storing, with Image Portfolio panel 561
tracing 169
using stored 561
viewing information 75
warping 668
Index | 913
Impasto 501
adding and deleting lights 507
adjusting depth 509
adjusting depth interaction 503
adjusting light source 510
blending with layers 510
brush controls for 385
brushes 296
clearing 501, 503
composite depth 510
creating custom brushes 503
creating effects 507
depth appearance 505
depth methods 503
displaying 501, 502
drawing methods 503
getting started with 501
hiding 502
inverting depth 506
inverting depth methods 503
light color 507
lighting 507
negative depth 506
Plow setting 506
plowing 506
saving to PSD 502, 865
setting drawing methods 505
setting light position 507
setting light properties 508
smoothing 506
supported brush variants 506
using jitter with 503
using on Web buttons 889
importing
alpha channels 567
brush categories 317, 319
brush libraries 317
brush variants 317
color set libraries 281
color sets 236
custom palettes 56
flow map libraries 281
gradient libraries 281
image libraries 281
legacy libraries 282
libraries 281
looks libraries 281
nozzles libraries 281
numbered files 839
older brush libraries 318
paper libraries 281
pattern libraries 281
QuickTime and AVI files 826
script libraries 281, 852
selection libraries 281
texture libraries 281
weave libraries 281
workspaces 57, 57
Info palettes 447
interface preferences 869, 869
accessing 871
INTERLEAVE expression operator 771
inverting
channels 574
colors 277
Impasto depth 506
Impasto depth methods 503
layer masks 557
paper grain 156
selections 594
J
jitter
using with Impasto 503
914 | Corel Painter 2015 User Guide
Jitter brushes 419
choosing variants 421
controlling variants 422
list of variants 419
jitter controls
adjusting opacity 343
angle jitter 353
color jitter 417
feature 378
flow 378
flow and feature jitter 378
grain jitter 345
opacity jitter 343
size jitter 349
Jitter controls 422
joining endpoints 799
JPEG files
saving 89
K
Kaleidoscope dynamic plug-in 691
creating and capturing patterns 692
Kaleidoscope Painting mode 201
controlling display of planes 202
hiding planes 201
toggling 202
kaleidoscope planes
controlling display of 202
hiding 201
Kaleidoscope tool 35
using 201
kerning text 813
key sets 101
managing 102, 103
keyboard shortcuts 99
closing a document 92
creating key sets from 101
dynamic brush resizing 308
for adjuster tools 116
for animations 120
for brush tools 114
for Canvas menu commands 109
for Edit menu commands 108
for Effects menu commands 111
for File menu commands 108
for layers 121
for Layers menu commands 110
for lighting 120
for Mac OS menu commands 107
for miscellaneous commands 121
for mosaics 121
for panel navigation 112
for panels 107
for screen navigation 112
for Select menu commands 110
for selection tools 116
for shape tools 118
for Shapes menu commands 111
for toolbox commands 104
for Window menu commands 111
reverting 102
L
Lasso tool 32, 579
deactivating selections with 593
keyboard shortcuts for 116
making freehand selections with 582
layer (definition) 24
Layer Adjuster tool 32
keyboard shortcuts for 117
layer group
transforming 530
Index | 915
layer masks 552
applying 554
clearing 554
copying channels to 557
copying to channels 557
creating 552
creating texture with 654
deleting 554
disabling 556
editing 558
enabling 556
generating texture with 654
hiding 556
inverting 557
loading to selections 555
managing 557
selecting 555
viewing 555
vs. channels 552
layers 513
adding drop shadows 543
adding notes to 523
adding patterns 714
adding to groups 537
adding to Image Portfolio panel 561
aligning 532
animating with 830
applying gradients to 724
beveling 686
blending, with composite methods 543
burning 683
composite methods 558
composite methods, changing 552
converting selections to 521
converting shapes to 800
converting to default 520
copying 526
copying selections from 527
creating 520
creating 1-Rank nozzles from 479
creating color sets from 237
creating selections from 586
creating transparent GIFs from 881
deleting 520
deselecting 526
dragging between 97
dropping 539
duplicating 526
fast preview 530
flattening 255, 539
flipping 83
flipping with canvas 83
getting started with 514
grouping 536
hiding 534
information on, displaying 536
keyboard shortcuts for 121
locking and unlocking 533
masking 552
merging with canvas 539
moving 528
moving to a new document window 529
naming 523
nudging 528
opening Photoshop 63
opening Photoshop styles 64
ordering 534
organizing, with Image Portfolio libraries 561
painting on 539
painting on, methods for 540
painting on, vs. canvas 132
painting tips 540
picking up color from underlying 541
preferences 868
preserving transparency 541
removing from groups 537
saving 558
selecting 524
selections on 580
setting general preferences for 868
setting opacity 542
showing 534
showing indicators 524
tearing 685
transforming 530
transforming multiple 530, 530
types of 515
understanding 514
ungrouping 538
using luminance 268
viewing 533
viewing position 536
with mosaics 736
working with floating objects 521
916 | Corel Painter 2015 User Guide
layers libraries 56
Layers menu
keyboard shortcuts for commands 110
Layers panel
deleting layers with 521
description 29, 47
displaying 520
selecting transparency masks from 555
understanding 517
Layout Grid 196
hiding 196
moving 198
presets, choosing 198
presets, creating 197, 207
presets, deleting 198, 208
settings, adjusting 196
settings, saving as presets 197, 207
showing 196
Layout Grid panel 48
using 196
Layout Grid tool 36
layout tools 195
leading text 813
learning Corel Painter 1
Left Twirl tool
applying Liquid Lens with 693
libraries 56
adding to 283
brushes 56, 281, 281
changing display of 283
color sets 281
creating 282
creating brush 316
deleting 283
deleting resources 285
exporting 282
flow maps 281
gradients 56, 281
images 281
importing 282
importing legacy 282
layers 56
looks 56, 281
modifying display of 284
moving resources 285
nozzles 56, 281
paper textures 56
patterns 56, 281
removing 282
renaming resources 285
restoring default 285
scripts 56, 281
selections 56, 281
textures 281
weaves 56, 281
working with 281
library panels
displaying swatches 284
hiding swatches 284
modifying display 284
resizing 284
Lighten composite method 550
Lighten merge mode 348
lightening image tone 279
Index | 917
lighting
adding and deleting source 647
adjusting properties 648
ambient 648
applying presets to 646
applying to textures 657
brightness 648, 648
color for Impasto 508
controlling direction of 647
effects 645
elevation 648
exposure 648
Impasto brushstrokes 507
keyboard shortcuts for 120
position for Impasto 508
Line Airbrush dab type 335
Linear brush tip profile 359
for Hard Media 361
lines, Bézier 785
creating shapes with 787
liquid ink 497
controlling 498
Liquid Ink brushes 296
controls for 390
customizing variants 500
Expression settings 499
lighting effects 499
size settings 499
using 497
variants, choosing 498
Liquid Ink layers 516
adjusting attributes 498
creating 497, 521
Liquid Lens dynamic plug-in 693
controls for 693
tools for 693
Liquid Metal brush
adjusting size 705
Liquid Metal dynamic plug-in 698
controls for 699
tools for 698
loading
color sets on Mixer panel 234
colors on Mixer panel 234
layer masks to selections 555
marbling recipes 628
Mixer pad 234
multiple colors 240
nozzle files 485
selection from alpha channel 592
selections 588
Web-friendly brushes 880
locking
guides 213
layers 533
Look Selector, accessing 38
looks
accessing 38
reusing 321
saving 321
looks libraries 56, 281
adding to 282
creating 282
deleting resources 285
importing and exporting 281
modifying display of 283
moving resources 285
removing 282
renaming resources 285
Looks library
panel 45
luminance
adjusting colors using 268
creating texture with 651
generating channels from 566
mapping gradients to 726
using with effects 611
Luminosity composite method 551
918 | Corel Painter 2015 User Guide
Luminosity merge mode 348
M
Mac OS commands 2
keyboard shortcuts for 107
Magic Combine composite method 546
Magic Combine merge mode 349
Magic Wand tool 33, 580
keyboard shortcuts for 116
selecting areas with 584
magnification
fitting to screen 79
resetting to 100% 79
zooming to specific levels 79
Magnifier tool 36
resetting 79
zooming in with 78
zooming out with 78
main color, choosing 220
Marbling effect 626
creating recipes for 626
managing recipes for 626
margins
setting for page 855
Marker brush method 341
markers 297
brush category 465
choosing variants 466
customizing 467
getting started with 465
using Hard Media controls with 467
Mask brush method 341
mask channels
opening Photoshop 63
masked layers
converting text layers to 819
masked patterns, creating 716
masking layers 552
Match Palette effect 276
Maze effect 639
media control panels
description 46
media library panels
description 45
media pooling 143
Media Selector bar
accessing 38
orientation 871
media source, choosing 342
Medium brush tip profile 359
for Hard Media 361
memory
usage preferences 871
menu bar, description 27
menu commands 2
keyboard shortcuts for Mac OS 107
merge modes 347
merging layers with canvas 539
metal
adding droplets to selections 704
adjusting reflection 705
applying 699
creating negative 702
moving droplets 704
removing 703
selecting droplets 703
showing droplet handles 703
subtracting droplets from selections 704
Min setting
used with expression 327
Index | 919
Min Size
using with Wacom Intuos tablet 96
Mirror Painting mode 198
controlling display of planes 200
hiding planes 199
toggling 200
Mirror Painting tool 35
using 199
mirror planes
controlling display of 200
hiding 199
mirroring
clones 187
Mix Color tool 227
sizing 227
Mixer pad
changing background 229
clearing colors 233
color swatches 232
erasing contents 227
loading 234
opening images in 231
resetting zoom 227
restoring default 233
saving as MXS 234
saving as PNG 234
Mixer Pad
default 228
inspirational 228
Mixer panel 45
changing pad background 229
clearing pad 233
color swatches 232
creating color sets 232
creating color sets from 237
creating color sets from pad 233
description 28
displaying 228, 228
loading colors 234
loading pad 234
mixing colors in 230
opening images in 231
painting from 230
resetting colors 233
resizing 228
sampling pad colors 230
saving colors 232
saving Mixer pad 234
saving pad 234
tools for 226
using 226
Mixer swatches
adding to color sets 232
mixing
colors 229
paint 229
modifier keys 2
monitors
calibrating color 249
resolution 70
using two 93
Mosaic and Tessalation dialog box 736
920 | Corel Painter 2015 User Guide
mosaics 735
compositing with other images 750
creating 736
creating 3D 747
creating from a clone 739
deselecting tiles 740
filling selections 749
filling with tiles 746
keyboard shortcuts for 121
random tiles 742
removing tiles 739
rendering tiles into masks 747
re-rendering tiles 748
respecting image edges 746
selecting strokes 749
selecting tiles 739
specifying grout color 741
tessellation 750
tile color 741
tile dimensions 742
variable colors 742
Motion Blur effect 622
mouse
adjusting brushstroke bearing 137
adjusting brushstroke pressure 137
adjusting brushstroke tilt 137
brush control settings 401
brushstroke settings for 137
fingerwheel settings for 138
using, vs. stylus 136
Mouse brush controls 401
Move tool 864
movies 821
adding to movies 831
applying effects to frames 827
applying scripts to 833
calculating required disk space 823
considering frame rate 837
converting from scripts 850
creating 823
creating animated GIFs from 839
deleting frames 831
erasing frame contents 831
erasing frames 831
exporting, as numbered files 839
file formats 826
getting started with 823
importing numbered files 839
inserting 832
inserting movies within 833
modifying 827
navigating 827, 827
onion skinning 829
painting on 827
repeating actions 831
repeating frames 832
rotoscoping 833
scripts for, creating 834
setting preview frame rate 828
using color sets in 822
using in Image Hose nozzles 487
using layers 830
Multi brush controls 407
multicore support
for brushes 343
setting usage preferences 871
Multiply composite method 548
Multiply merge mode 349
multi-point sampling brush variants 182
multi-touch 93
multiuser support
templates 74
Index | 921
N
navigating
images 75
panels, with keyboard shortcuts 112
screen, with keyboard shortcuts 112
navigation tools 36
Navigator panel
description 28
displaying 40, 76
hiding info 75
repositioning documents with 84
using 75
viewing info 75
viewing layer position with 536
negative depth
Impasto 506
Negative effect 277
negative metal 702
New Brushes workspace layout 432
new features 12
Updates 1 and 2 19
new features 2015 9
enhanced brush trakcing 12
full-document, real-time preview 11
Jitter Smoothing 10
Particle Brushes 9
Real-Time Stylus support 13
UI arrangements 12
new features X3 14
brush search 304
clone source editing 174
enhanced cloning 167
enhanced stroke preview 329
inspirational mixer pads 228
Jitter (brush controls) 422
Jitter brushes 419
Memory Extender (Mac) 871
minimum brush controls 327
Perspective Guides 203
reference image 133
set max colors for color sets 237
show onion skin 829
Smart Brush Settings 310
transform across layers 530
Normal composite method 547
Normal merge mode 349
notes 3
adding to layers 523
nozzle files
choosing images from 474
loading 485
making from movies 487
nozzle libraries 281, 485
adding nozzles to 486
adding to 282
creating 282
deleting resources 285
editing nozzles in 487
importing and exporting 281
modifying display of 283
moving resources 285
removing 282
renaming resources 285
retrieving nozzles from 487
Nozzle Selector, accessing 38
922 | Corel Painter 2015 User Guide
nozzles 470
adding to libraries 486
creating 1-Rank 479
creating 2-Rank 481
creating 3-Rank 483
creating from movies 487
designing Image Hose 477
editing in libraries 487
Image Hose 476
Image Hose ranking 476
loading Image Hose 485
retrieving from libraries 487
selecting Image Hose 471
nozzles libraries 56
Nozzles library
panels 45
nudging layers 528
numbered files 838
exporting movies as 839
importing 839
O
offset sampling 179
between documents 181
within documents 180
oil pastels 299
oils 297
one-color brushes 879
onion skinning 829
onscreen brush resizing 306
opacity
adjusting brush 343
brush controls for 344
changing for tracing paper 171
for brushes 306
Image Hose 471
jitter 343
pattern painting 713
setting for brushes 308
setting for layers 542
setting for strokes 347
setting for text 816
opacity brush controls 343
operators, expression 768
Options bar, Painter equivalent 61
options buttons
accessing for panels 52
orientation
Divine Proportion guides 209
Media Selector bar 871
page 855
resetting image 81
toolbox 871
origin, ruler
changing 211
restoring 212
Oval Selection tool 32, 579
deactivating selections with 593
keyboard shortcuts for 116
selecting circular areas with 581
selecting oval areas with 581
Oval Shape tool 33
using 783
ovals, creating 783, 784
Overlay composite method 548
Overlay merge mode 349
Index | 923
overlays
channels 569
color 660
P
page
fitting images to 856
height 69
setting margins 855
setting orientation 855
setting size for print 855
setting up 855
size, changing 69
unit of measure, changing 69
width 69
Paint Bucket tool 31
filling channels with 574
paint, mixing 229
painting 123
brush settings for 136
brushstrokes 138
brushstrokes, alignment for 142
brushstrokes, recording and playback of 147
brushstrokes, settings for 140
choosing a workflow 124
clones 176
drawing cursor for 134
from Mixer panel 230
in channels 573
in Dirty Mode 383
layers 540
media for 131
movie frames 827
on canvas vs. layer 132
on layers 539
on layers, methods for 540
photos 159
shapes 800
troubleshooting 149
with 360° brushstrokes 144
with airbrushes 144
with airbrushes, spread settings for 145
with media pooling 143
with multiple colors 240
with patterns 711
with perspective 203
with stylus vs. mouse 136
with two-color brushstrokes 224
paintings, restoring detail to 165
palette (definition) 25
Palette Knife dab type 334
Palette Knives 298
924 | Corel Painter 2015 User Guide
palettes
adding panel to 50
creating from panels 50
customizing 53
docking 49, 51
exploring 43
grouping panels into 50
managing custom 55
moving panel in 50
removing panel from 50
resizing 51
showing and hiding 50
undocking 51
using 49
PALINDROME expression operator 774
Pan tool 227
panel (definition) 25
Panel Options menu button 3
panel tab 3
panels
adding to palette 50
docking 49
expanding or collapsing 51
exploring 43
grouping into palettes 50
keyboard shortcuts for 107
move in palette 50
navigating, with keyboard shortcuts 112
removing from palette 50
resizing 284
showing or hiding 50
using 49
using for effects 611
paper
changing color 223
size 855
paper (definition) 25
paper grain 151
brightness and contrast 157
direction and behavior 157
inverting and scaling 155
setting in movies 835
paper libraries 281
adding 282
creating 282
deleting resources 285
importing and exporting 281
modifying display of 283
moving resources 285
removing 282
renaming resources 285
Paper Libraries panel 45
description 29
paper luminance
adjusting colors using 270
adjusting selected colors with 272
Paper panels
description 45
Paper selector 37
paper textures 151
applying 152
capturing 154
converting to flow map 453
creating 153
creating, from fractal patterns 722
deleting from Paper Textures library 155
grain brightness 157
grain contrast 157
grain inversion 156
grain randomization 158
grain scale 156
grain, directional 158
renaming 155
revealing when painting 306
to create surface texture 649
watercolor brushes 425
Index | 925
Paper Textures library 56
deleting paper textures from 155
opening 155
using 155
Papers panel 45
description 29
Particle brushes 431
Flow 435
general controls 442
Gravity 432
Info palettes 447
Spring 438
pastels 299
path
aligning brushes to 868
Path Selection tools 864
path-based selections 578
converting from pixel-based 583
creating 580
scaling and rotating 602
skewing and distorting 604
paths
aligning brushstrokes to 142
curving text on 817
shape, adding to open 788
pattern libraries 56, 281
adding to 282
creating 282
deleting resources 285
importing and exporting 281
modifying display of 283
moving resources 285
removing 282
renaming resources 285
pattern luminance
adjusting colors with 270, 273
pattern pens 299
Pattern Selector, accessing 38
patterns 709
adding to layers 714
adjusting appearance 711
applying 709
creating 714
creating seamless 717
editing 714
filling channels with 574
fractal 719
from images 715
from scratch 714
from selections 715
growth 636
Kaleidoscope type 692
masked 716
painting with 711
setting opacity 713
to create texture 652
weave, creating 760
Patterns library panel 45, 46
PBOX expression operator 776
Pen tool 33
using 785
Pencil tip profile 361
pencils 300
pens 301
pens, pattern 299
performance preferences 871
specifying 872
PERMUTE expression operator 775
perspective
adding to clones 190
distorting in selections 606
perspective guides 203
Perspective Guides tool 36
perspective-guided strokes 205
Photo brushes 301
926 | Corel Painter 2015 User Guide
Photo Enhance settings
saving as presets 161
Photo Painting System 159
Auto-Painting panel 162
Restoration panel 165
Underpainting panel 160
photo tools 34
photos
auto-painting 162
creating underpaintings from 160
opening as reference 133
restoring detail from 165
workflow for painting 124
Photoshop, Adobe
notes for users of 861
Pinch tool
applying Liquid Lens with 694
Pixel Airbrush dab type 335
pixel-based layers 515
converting shapes to 800
pixel-based selections 578
converting to path-based 583
creating 583
pixels
selecting 583
pixels per inch 70
definition 24
vs dots per inch 68
Place Elements effect 640
placing
elements 640
files 71, 73
planes, kaleidoscope
controlling display of 202
hiding 201
planes, mirror
controlling display of 200
hiding 199
playing
brushstrokes, last used 148
brushstrokes, randomly 148
brushstrokes, saved 149
resolution-independent scripts 848
scripts 845
plowing
Impasto 506
Plug-in brush method subcategories 341
plug-ins, dynamic 679
PNG file
saving Mixer pad as 234
Pointed brush tip profile 359
for Hard Media 361
Pointed Rake brush tip profile 360
point-to-point cloning 179
Polygon Lasso tool 864
Polygonal Selection tool 32, 579
making freehand selections with 582
pooling, media 143
Pop Art Fill effect 642
Posterize dynamic plug-in 706
Posterize effect 278
posterizing
color 278
images for Web 878
with color sets 278
PostScript, printing 857
Index | 927
preferences
connection 875
enabling Corel Painter for Cinco 6
for cloning 172
general 867
interface 869, 869
multicore support 871
performance 871
Quick Clone 172
setting for Painter 867
setting undo levels 872
shapes 873
shapes, drawing 789
tablets 875
presets
brush tracking 130
presets, canvas 69
pressure, brushstroke 137
previewing
brush dabs 329
brush sizes 352
brushstrokes 329
color profiles 253
with color management 253
printing 855
composite images 859
EPS files 858
fitting to page 855
general information 859
grayscale 857
gridlines 215
images 856
images with shapes 859
PostScript 857
printer properties 856
proofs 859
resolution and quality 71
separations 857
setting page size 855
to a file 856
product updates, enabling notifications 869
profiles, dab 359
programs, dragging between 97
Projected dab type 335
proofing images 859
property bar
closing 39
description 28
displaying 39
docking 40
moving 40
opening 39
resetting tools with 40
PSD files
opening 64
opening, notes on 864
saving 91
saving Impasto brushstrokes 502
saving, notes on 865
using layer styles 64
Pseudocolor composite method 547
Pseudocolor merge mode 349
Q
Quick Clone
customizing 172
preferences for 874
using 171
Quick Curve tool 33
using 788
Quick Warp effect 668
QuickTime files
exporting 835
opening 826
quitting 92
R
928 | Corel Painter 2015 User Guide
Rain feature
applying Liquid Metal with 699
Rake brush controls 403
RAM
preferences 871
randomizing
image hose elements 473
paper grain 158
randomness
auto-painting 162
rank types for Image Hose 474
ranks
Image Hose 476
Real Watercolor
description 423
Real Watercolor brushes 302
choosing variants 426
controls for 362
customizing variants 426
flow maps 450
using 426
using variants 426
Real Wet Oil brushes 302
RealBristle brushes 491
choosing 492
choosing variant 492
choosing variants 492
controls for 375
customizing variants 495
fanning bristles 494
profile length 493
setting bristle friction 494
setting distance between ferrule and canvas 494
setting roundness 492
settings for 492
RealBristle panel 492
Bristle Length setting 493
Bristle Rigidity setting 493
Fanning setting 494
Friction setting 494
Height setting 494
opening 495
Profile Length setting 493
Roundness setting 492
recent brushes bar, description 28
recipes, marbling
clearing 627
loading 628
saving 627
recording
brushstrokes 148
notes for layers 524
resolution-independent scripts 848
scripts 845
rectangles, creating 783, 784
Rectangular Marquee tool 864
Rectangular Selection tool 32, 579
deactivating selections with 593
keyboard shortcuts for 116
selecting rectangular areas with 582, 783, 784
selecting square areas with 582, 784, 784
Rectangular Shape tool 33
using 783
reference image
displaying 133
moving 133
sampling colors from 133
zooming 133
Index | 929
reference layers 516
committing 561
creating 560
modifying 560
resizing 560
rotating 560
scaling 560
skewing 560
working with 559
reference points
for clones 185, 190
for transformations 600
reflection maps 655
creating texture with 655
registering Corel products 5
releasing compound shapes 806
Remove Point tool 34
using 795
rendered dabs
types of 334
Rendered dabs
definition 25
description 336
rendering intents
absolute colorimetric 251
choosing 255
color management 250
perceptual 250
relative colorimetric 250
saturated 250
rendering markers 465
REPEAT expression operator 770
resaturation, brushstroke 398
reselecting
selection 593
resetting
zoom level 79
reshaping color curves 264
resizing
brushes onscreen 306
canvas 86
images 86
shapes 802
resolution
document 68
image 70
images 69
of canvas 68
of images 69
vs. print quality 71
vs. screen appearance 70
resolution-independent
scripts 848
resource libraries 281
Restoration panel 48
using 165
restoring, Painter default settings 58
reusing
effects 610
selections 592
REVERSE expression operator 778
Reverse-Out composite method 546
Reverse-Out merge mode 349
RGB
converting from CMYK to 253
specifying default color profile 251
RGB values
setting color variability based on 416
setting in Color panel 221
RIFF files
saving 89
saving layers as 558
saving mosaics as 736
930 | Corel Painter 2015 User Guide
Right Twirl tool
applying Liquid Lens with 694
ROTATE expression operator 777
Rotate Page tool 36
resetting images with 81
rotating images with 80
rotating
canvas 80
clones 187, 187, 188
clones, while scaling and shearing 189
images 80
reference layers 560
selections 604
shapes 802
text 814
rotoscoping 833
Rubber Stamp tool 35
cloning with 180
rulers 211
hiding 211
origin, changing 211
origin, restoring 212
showing 211
snapping guides to 213
unit of measure, setting 211
S
Sample Color tool 227
Sample Multiple Colors tool 227
sampling 167
adding perspective to source 190
applying transformations 182
colors from reference image 133
colors, from images 223
colors, from Mixer pad 230
filling with clone source 193
multiple colors 231
offset 179
rotating and mirroring source 187
rotating and scaling source 188
rotating source 187
rotating, scaling, and shearing 189
scaling source 186
selections 191
set reference point 190
transformations 191
warping source 189
saturation
adjusting 268
Saturation composite method 551
Saturation merge mode 349
Saturation slider 271
Index | 931
saving
Adobe Photoshop files 91
Adobe Photoshop files, notes on 865
background scripts automatically 847
brush looks 321
brushstrokes 149
clone source images 174
colors on Mixer panel 232
custom palettes 55
documents as templates 74
Encapsulated PostScript files 91
EPS files 91, 858
files 88
GIF files 90
gradients 733
JPEG files 89
layers 558
marbling recipes 627
Mixer pad 234
mosaics 736
preferences for 868
PSD files 91
PSD files, notes on 865
RIFF files 89
selections 588
selections to channels 564
shapes 783, 808
TIF files 91
weaves 759
with embedded color profiles 252
scaling
brushstrokes 307
clones 186, 188
clones, while rotating and shearing 189
feature with brush size 868
features with brush size 374
images when placing 73
images with Image Hose 473
paper grain 156
reference layers 560
selections 602
Scissors tool 34
cutting shapes with 798
scratch-drive preferences 872
screen
appearance 70
navigating, with keyboard shortcuts 112
zooming to 79
Screen composite method 548
Screen merge mode 349
screens, applying texture with 660
script libraries 56, 281
adding to 282
creating 282
creating and deleting 853
deleting resources 285
exporting 852
importing 852
importing and exporting 281
modifying display of 283
moving resources 285
removing 282
renaming resources 285
scripting 843
scripts 843
adding 846
applying brushstrokes to movies with 834
applying to movies 833
auto-recording 869
auto-saving 869
auto-saving background 847
converting to movies 850
creating for movies 834
deleting 849
editing 849
getting started with 843
libraries 852
moving 846
playing 845
playing resolution-independent 848
recording 845
recording resolution-independent 848
renaming 849
resolution-independent 848
setting grain position for movies with 834
932 | Corel Painter 2015 User Guide
Scripts panel
description 48
displaying 844
showing and hiding 845
seamless patterns 717
searching
for brushes 304
Help 4
segments
cutting 798
joining 798
Select menu
keyboard shortcuts for commands 110
selecting
brushes 304
canvas 583
channels 569
frames 828
layer masks 555
layers 524
metal droplets 703
paths 580
shapes 791
tiles 739
Selection Adjuster tool 33, 580
inverting selections with 594
keyboard shortcuts for 118
modifying selection borders with 596
smoothing selections with 597
selection libraries 56
adding to 282
creating 282
deleting resources 285
importing and exporting 281
modifying display of 283
moving resources 285
removing 282
renaming resources 285
Selection Portfolio
using 592
selection tools 32, 32
keyboard shortcuts for 116
Index | 933
selections 577
adding metal droplets to 704
adding to 598
anti-aliasing 595
applying gradients to 724
beveling 686
burning 683
circular, making 581
combining 589
combining with alpha channels 591
contracting 597
converting pixel-based to path-based 583
converting shapes to 583
converting to layers 521
converting to shapes 801
copying from multiple layers 527
creating 578, 580
creating channels from 564
creating color sets from 237
creating from layers 586
creating mosaics in 749
creating patterns from 715
creating using contiguous pixels 584
creating Web buttons from 889
creating, by dropping layers 539
deactivating 593
distorting 604
drawing modes for 588
duplicating 602
expanding 597
feathering edges 595
flipping 83
freehand 582
generating automatically 585
generating color-based 586
generating from a clone 586
inverting 594
libraries 281
loading 588
loading from alpha channel 592
loading layer masks to 555
marquee 593
marquee, hiding 593
marquee, showing 593
modifying border 596
modifying contents 598
moving 600
multi-layer 580
oval, making 581
path-based 578
pixel-based 578
reactivating 593
rectangular 581
reference point for transformations 600
reusing 592
rotating 602
sampling 191
saving 588
saving, to channels 591
scaling 602
skewing 604
smoothing 596
softening edges 594
square 581
storing 592
stroking 595
subtracting from 599
subtracting metal droplets from 704
tearing 685
transforming 600
viewing 593
selectors 36
separations, printing 857
Serigraphy effect 674
server-side image maps 885
creating 885
Shadow Map composite method 546
Shadow Map merge mode 349
shadows
adding to layers 543
adding to text 815
adding to Web buttons 889
shape layers 517
creating selections from 587
Shape Selection tool 34
selecting shapes with 791
shape tools 33
keyboard shortcuts for 118
934 | Corel Painter 2015 User Guide
shapes 781
adding to open paths 788
adjusting curvature 796
aligning brushstrokes to 142
anchor points 794
Bézier lines 785
blending 806
combining 805
compound 805
converting selections to 801
converting to layers 800
converting to selections 583
converting to text layers 819
creating 783
creating for brush dabs 322
creating Web buttons from 889
cutting 798
duplicating 804
exporting 808
flipping 802
grouping 805
joining endpoints 799
painting 800
preferences for 873
printing 859
resizing 802
rotating 802
saving 783, 808
selecting 791
setting attributes 792
setting fill attributes 793
setting fill preferences 790
setting outline attributes 792
setting preferences 789
skewing 802
understanding 782
understanding layers 515
Shapes menu
keyboard shortcuts for commands 111
Sharpen effect 623
sharpening focus 623
shearing clones 189
shortcut keys 99
customizing 101
Single-Pixel dab type 333
size controls
adjusting 349
sizing
brushstrokes 349
canvas 68
Hard Media 461
page 69
Sketch effect 676
skewing
reference layers 560
selections 605
shapes 802
text 814
Smart Blur 614
Smart Brush Settings 310
Smart Settings 162
Smart Stroke brushes 302
Smart Stroke Painting option 162
using 163
smooth points
converting 798
working with 785
smoothing
brush controls 402
display of objects 872
Impasto 506
objects when zooming 79
selections 596
snapping
guides to rulers 213
items to grid 215
items to guides 213
Soft Light composite method 549
Index | 935
Soft Light merge mode 349
Soft Round brush tip profile 360
Soften effect 624
softening
focus 624
selection edges 594
soft-proofing
color management 251
color profiles 253
source, media 342
choosing for brushes 342
spacing
brush dabs in a stroke 357
images from Image Hose 473
lines of text 814
text characters 813
Spacing brush controls 357
special effects 613
Sponges 302
spread, airbrush 145
Spring Particle brushes 438
squares, creating 783, 784
Static Bristle brush controls 375
Static Bristle dab type 333
storing
images, with Image Portfolio panel 561
selections 592
Straight Line Strokes button
drawing straight lines with 139
erasing in straight lines with 142
straight lines
drawing 139
stretching text 814
Stroke Jitter brush controls 397
Stroke Selections command
using with mosaics 749
Stroke settings 162
auto-painting photos with 163
strokes
perspective 203
perspective-guided 205
previewing 329
resizing 349
stylus
setting transition range 462
using the fingerwheel 146
using with airbrushes 145
using, vs. mouse 136
Subtract from Selection button
using 599
Sumi-e brushes 303
Surface Control effects
Apply Screen 660
Color Overlay 660
Distress 672
Dye Concentration 663
Express Texture 666
Image Warp 668
Quick Warp 668
Serigraphy 674
Sketch 676
Woodcut 670
surface lighting
adjusting Impasto depth 509
adjusting intensity and brightness 510
Impasto 502, 507
936 | Corel Painter 2015 User Guide
surface texture
applying lighting 657
applying, to Web buttons 889
creating 3D brushstrokes 650
creating embossing 653
creating from paper 649
creating with paper 649
effects 645
generating from channels 654
generating from clone source 652
generating from image 651
generating from layer masks 654
generating from pattern 652
reflection maps 655
swapping main and additional colors 221
symmetry tools 35
T
tablets 875
Tear dynamic plug-in 684
tearing
layers 685
selections 685
TEMPLATE expression operator 774
templates
creating 74
multiuser support for 74
opening 74
saving documents as 74
temporal color palette
choosing color with 223
displaying 222
using 222
terminology
Painter 24
vs. that of Adobe Photoshop 861
tessellation mosaics 735, 750
changing tile color 755
coloring 750
creating 750
creating from clone 754
text 811
adding to images 811
aligning 813
blurring 816
changing path 817
choosing font 812
color 812
converting to shapes 819
curving 817
dropping 820
formatting 812
kerning 813
leading 813
opacity 816
options for 811
resizing 812
rotating 814
shadows, adding 815
size in Help window 4
skewing 814
spacing characters 813
spacing lines 813
stretching 814
text layers 517
converting 819
creating selections from 587
dropping onto canvas 820
understanding 811
Text panel
description 48
Text tool 34
texture 151
adding lighting to 657
applying, to Web buttons 889
changing canvas 69
expressing 666
Index | 937
texture libraries 281
adding to 282
creating 282
deleting resources 285
importing and exporting 281
modifying display of 283
moving resources 285
removing 282
renaming resources 285
TIF files, saving RGB 91
tiles
adjusting randomness in mosaics 742
color for mosaics 741
creating 3D 747
creating using fractal patterns 888
custom 632
deselecting in mosaics 740
dimensions 742
editing patterns 716
filling mosaic with 746
filling selections with 749
pattern fills 710
removing from mosaics 739
rendering into masks 747
re-rendering 748
selecting for mosaics 739
selecting in mosaics 739
using to create seamless patterns 717
tiling
clones 185
images 632
Tinting brushes 303
tip profiles
Hard Media 460
Tonal Control effects
Adjusting Selected Colors 271
Brightness/Contrast 261
Equalize 274
Match Palette 276
Negative 277
Posterize 278
Video Legal Colors 279
tone
darkening 280
lightening 279
toolbox
changing layout 38, 39
description 29
displaying 37
exploring 31
keyboard shortcuts for 104
moving 38
opening or closing 38
orientation 871
repositioning 39
using flyouts 38
tools
accessing from flyouts 38
changing toolbox layout 38, 39
comparing vs. Adobe Photoshop 862
Corel Painter 31
resetting default 40
resetting default settings 40
tracing
clone source 169
tracing paper
cloning images with 169
disabling 171
enabling 171
opacity, changing 171
outlining images with 169
using with movies 830
viewing images 169
Transform tool 32, 580
distorting perspective in selections with 606
distorting selections with 605
keyboard shortcuts for 118
moving selections with 601
rotating selections with 604
scaling selections with 602
setting reference point with 600
skewing selections with 605
transforming duplicates with 602
938 | Corel Painter 2015 User Guide
transformations 577
applying when sampling images 182
cancelling 606
distorting selections 604
duplicating selections 602
locked layers 532
moving selections 600
reference point, setting 600
rotating selections 602
sampling 191
scaling selections 602
skewing selections 604
when cloning 182
transforming
duplicated shapes 804
layer groups 530
layers 530
selections 600
selections across layers 580
transparency
creating layer masks from 553
preserving on layers 541
transparency masks
adding to selections 587
copying between layers 556
intersecting with selections 587
selecting, from Layers panel 555
subtracting from selections 587
transparent GIFs, creating 880
troubleshooting brushstrokes 149
two-color brushstrokes, creating 224
two-point gradients, creating 730
Type tool 864
U
Underpainting panel 47
using 160
underpaintings 160
adding edge effects 161
cloning 162
creating 160
matching color and tone 161
methods for creating 160
saving settings as presets 161
undoing
brushstrokes 140
fills 244
setting levels 872
unit of measure
changing 69
for rulers, setting 211
setting 870
unlocking
guides 213
layers 533
updating
software 869
UPDOWN expression operator 776
UPTO expression operator 772
V
value
adjusting 268
Value slider 271
variants
Hard Media 457
Jitter 419
vector shape layers 515
video 821
applying legal colors 279
importing 826
Video Legal Colors effect 279
View Mode selector 37
Index | 939
viewing
document window 74
full-screen document window 74
viewing modes 74
choosing default 870
switching 75
toggling 75
W
Wacom Intuos
fingerwheel 137
support for 96
using airbrush wheel 96
using Expression with 96
using Min Size with 96
warp expressions
color, defining 765
defining 763
warping
clones 189
images 668
Water brush controls 385
watercolor
choosing variants for flow maps 450
effects 423
flow maps 449
Watercolor
description 423
Watercolor brush tip profile 359
Watercolor brushes 304
choosing variants 427
customizing variants 428
using 427
using Water controls 427
using, with paper textures 425
Watercolor layers 516
creating 425, 520
transferring canvas to 425
using 424
wetting 425
weave libraries 56, 281
adding to 282
creating 282
deleting resources 285
importing and exporting 281
modifying display of 283
moving resources 285
removing 282
renaming resources 285
Weave Selector, accessing 38
weaves 757
applying 757
color sets, displaying 759
creating patterns from 760
editing 759
expression operators for 768
filling channels with 574
saving 759
scale, adjusting 759
thickness, adjusting 759
tie-ups 766
warp expressions, defining 763
warp expressions, defining color for 765
weft expressions, defining 763
weft expressions, defining color for 765
Weaves library panel 45, 46
Weaving Pattern Expression Language 768
Web animations 839
Web buttons
adding shadows to 889
applying 3D techniques to 889
applying surface texture to 889
creating 889
using Bevel World plug-in for 890
using Impasto feature on 889
Web features 877
940 | Corel Painter 2015 User Guide
web graphics
reducing the number of colors 882
Web graphics
GIF files 880
image maps 883
Web page backgrounds 886
controlling color in 887
creating fractal pattern tiles 888
designing 886
using tiled 887
Web-based resources 5
Web-friendly brushes 879
Web-safe colors 877
Wedge brush tip profile 360
weft expressions
color, defining 765
defining 763
Well brush controls 398
Wet brush method 341
wet fringe, adjusting 429
wetting Watercolor layers 425
What’s new 2015
features 9
Window menu
keyboard shortcuts for commands 111
Windows commands 2
Woodcut effect 670
workflows, painting
starting with a photo 124
starting with a sketch 125
starting with blank canvas 126
workspace layout
New Brushes 432
workspace tour 23
for Adobe Photoshop users 61
workspaces
components of 23
creating 57
creating and deleting 57
customizing 57
exporting 58
importing 57
importing and exporting 57
importing legacy 57
opening 57
preferences for 870
restoring Painter default 58
reverting to default 58
X
X and Y coordinates
using to navigate an image 75
viewing 41
Z
Zoom Blur effect 625
Zoom tool 227
zooming
drawing speed 79
high quality display 79
images 75, 77
in 78
out 78
to fit screen 79
to specific magnification levels 79
