eInstruction BTMP MeetingPad 300 User Manual Welcome
eInstruction Corporation MeetingPad 300 Welcome
UserManual.wiki
>
eInstruction
>
BTMP User Manual
manual
Navigation menu
Upload a User Manual
Namespaces
Wiki Guide
HTML
PDF
Info
Views
User Manual
Discussion / Help
Navigation

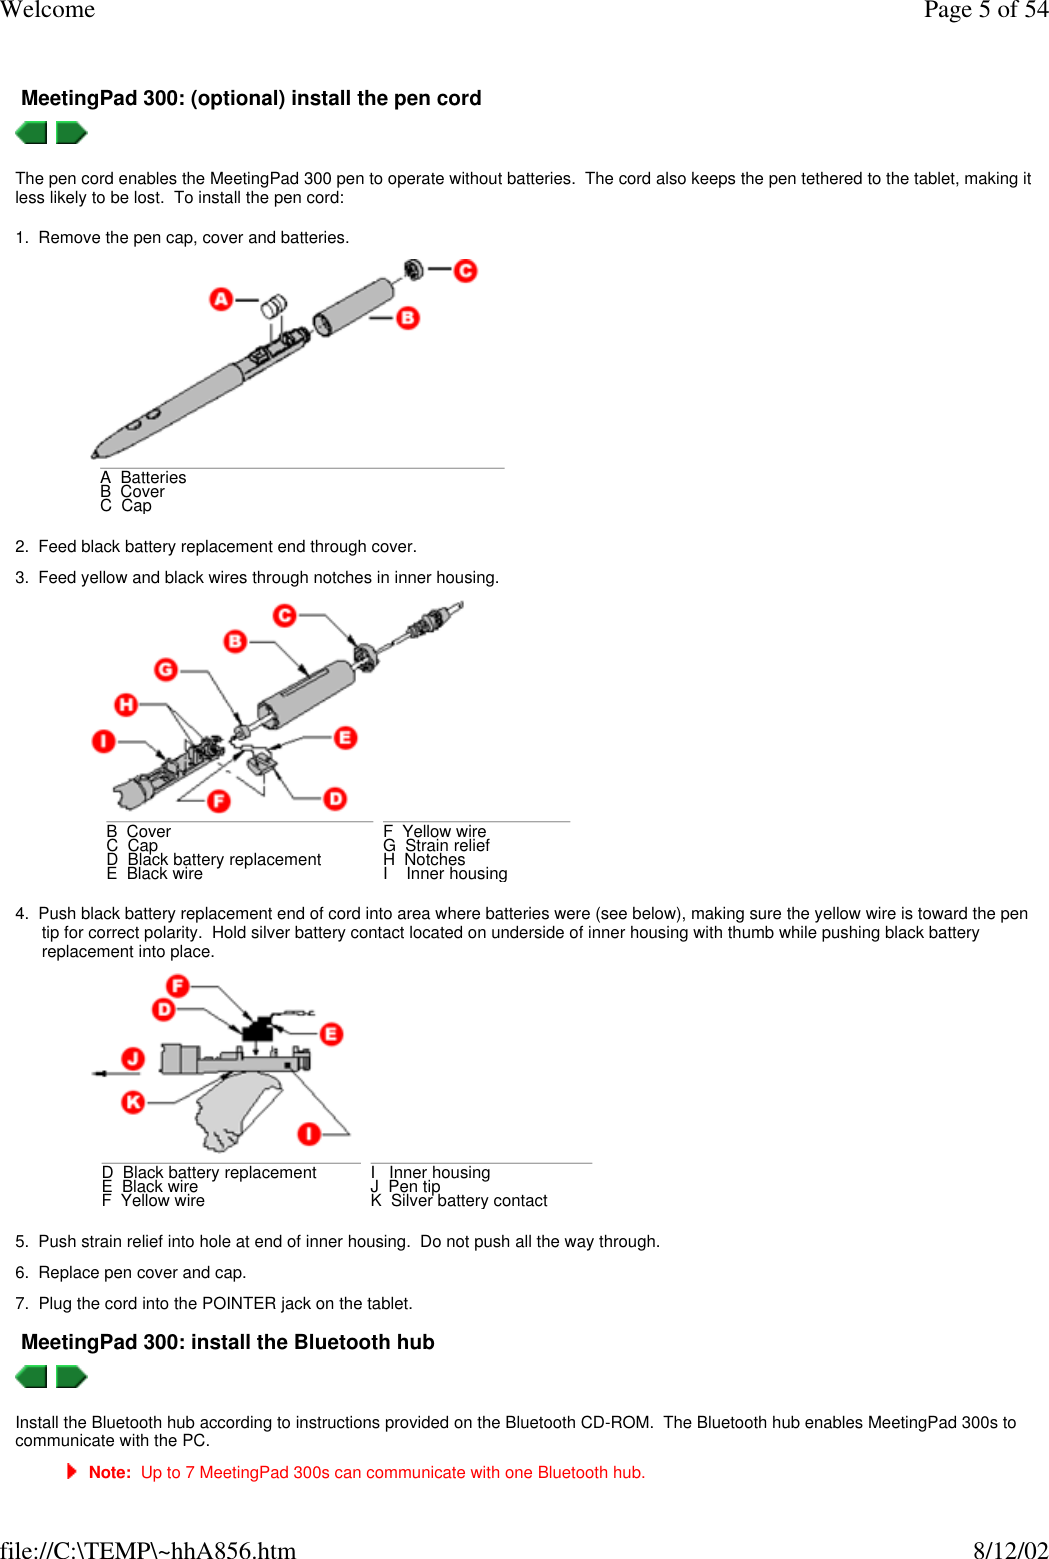
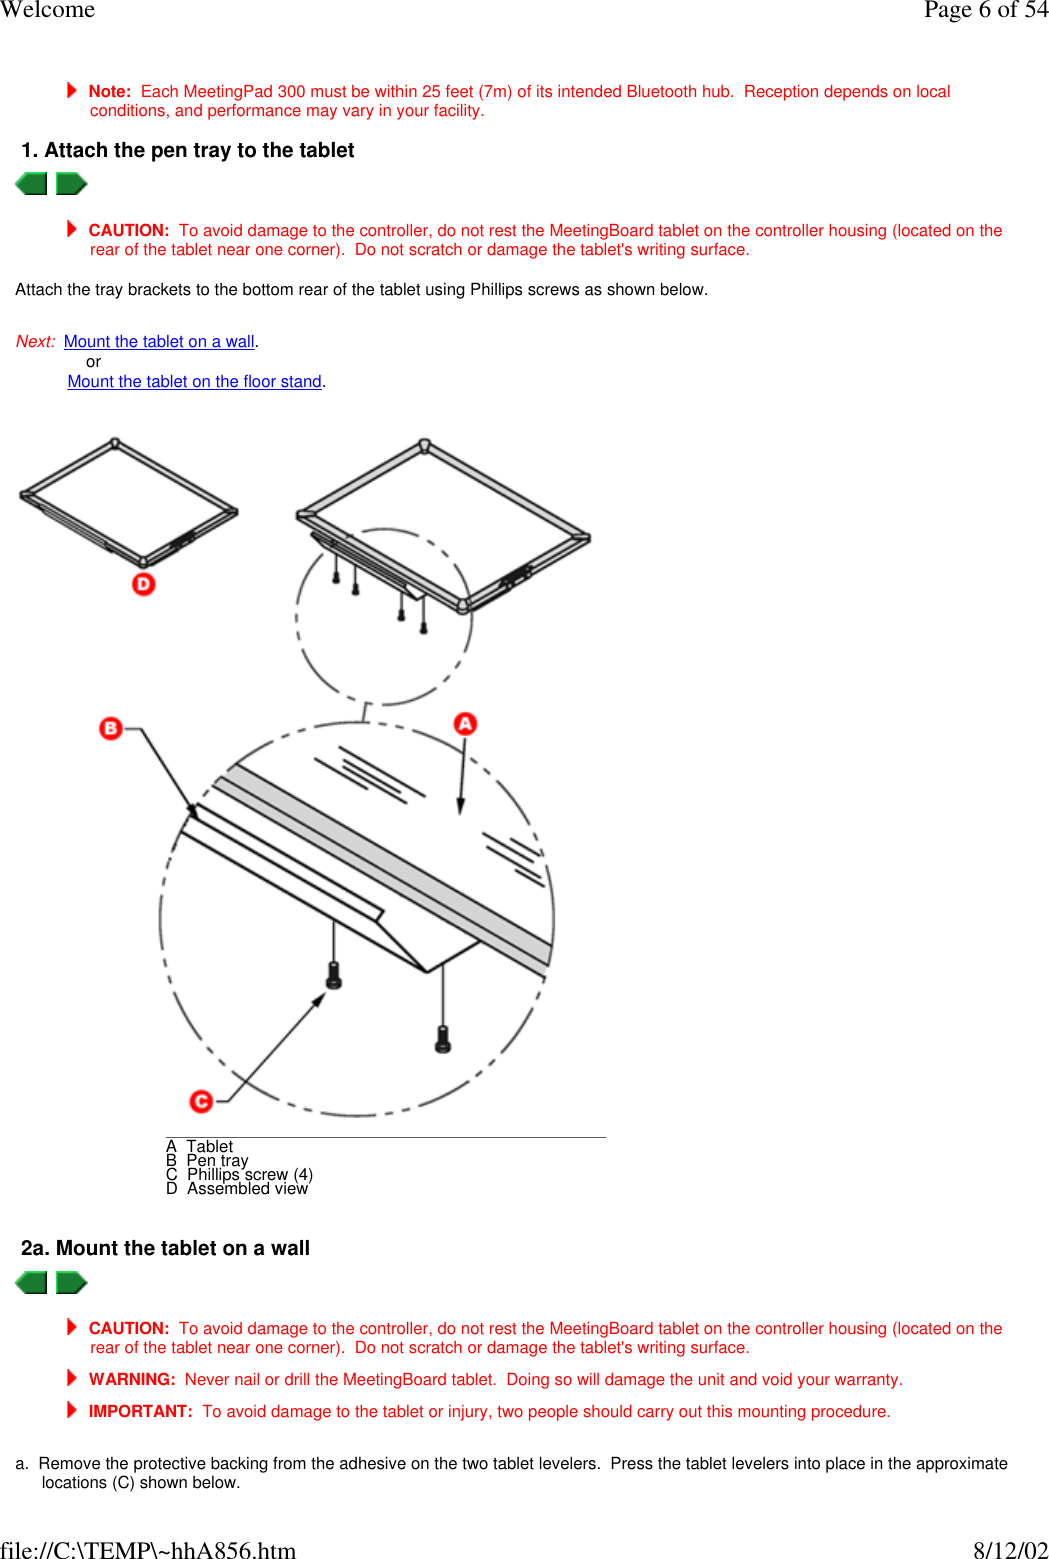
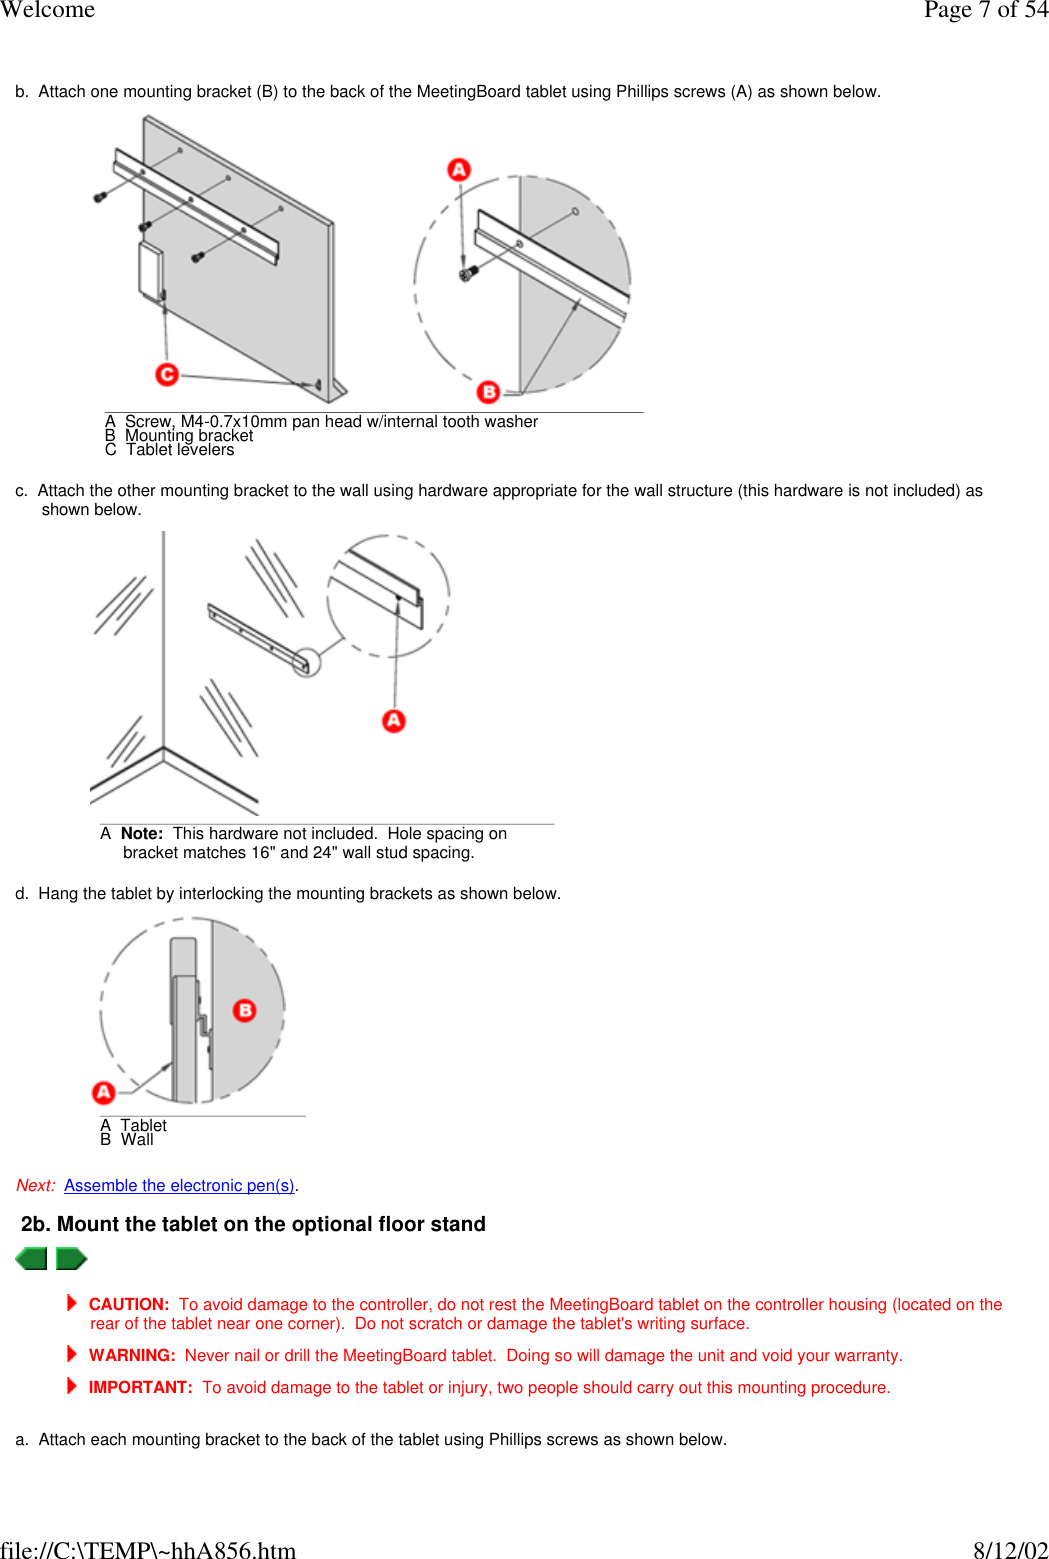
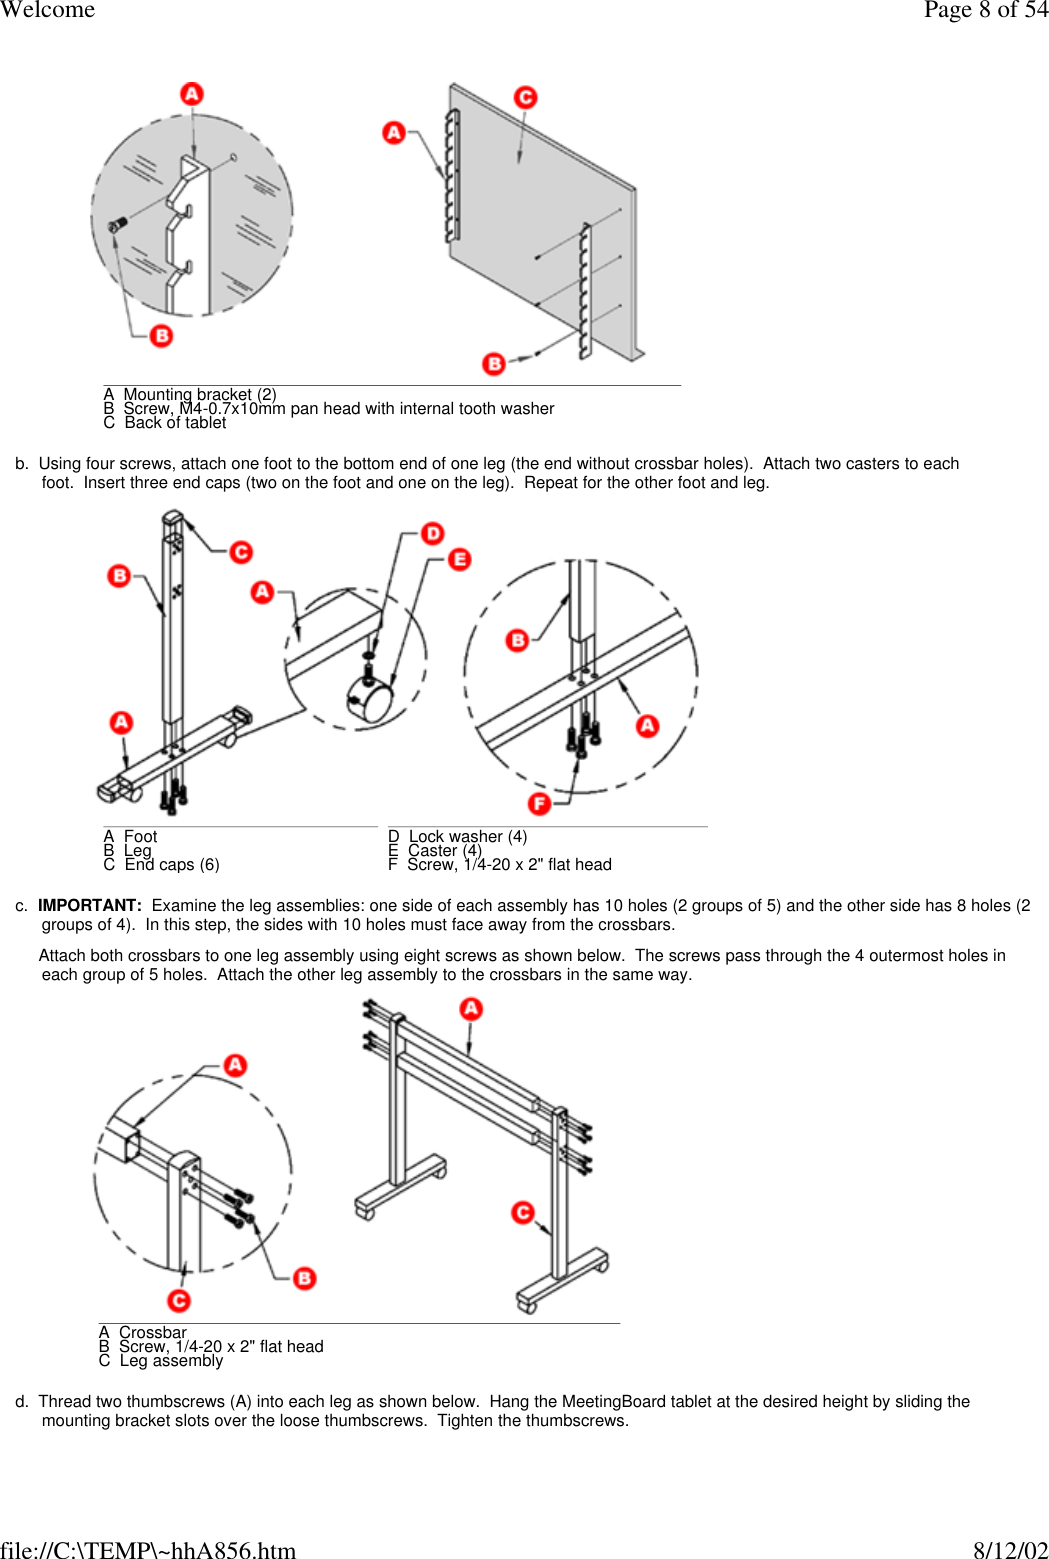
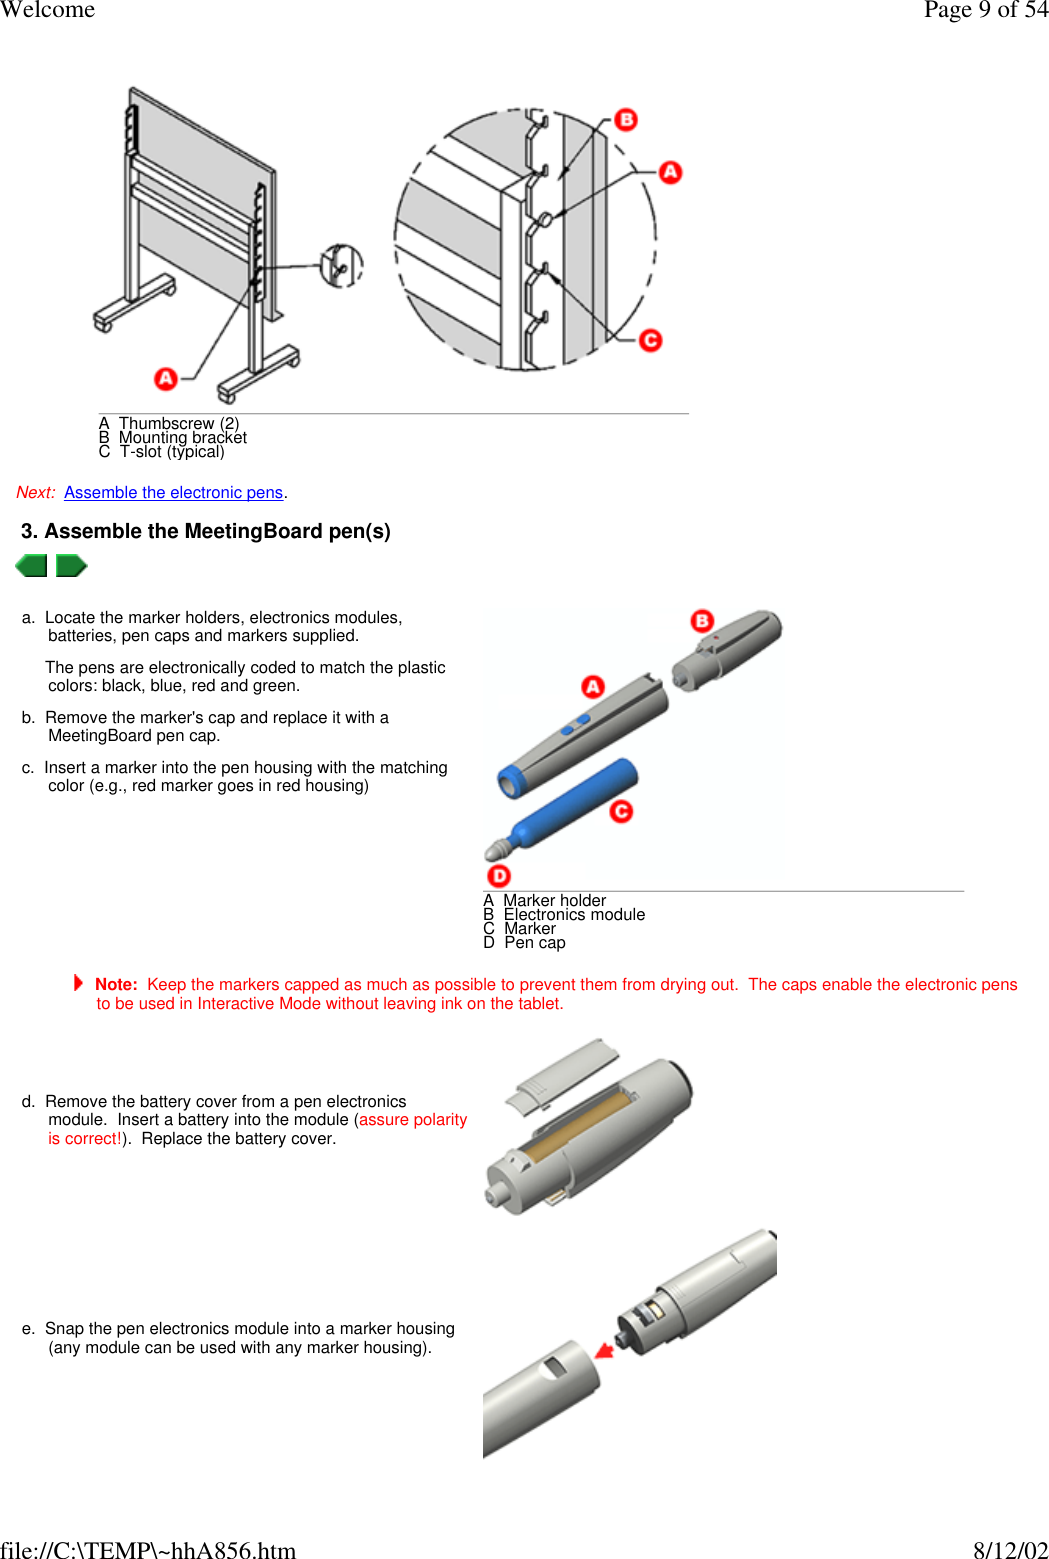
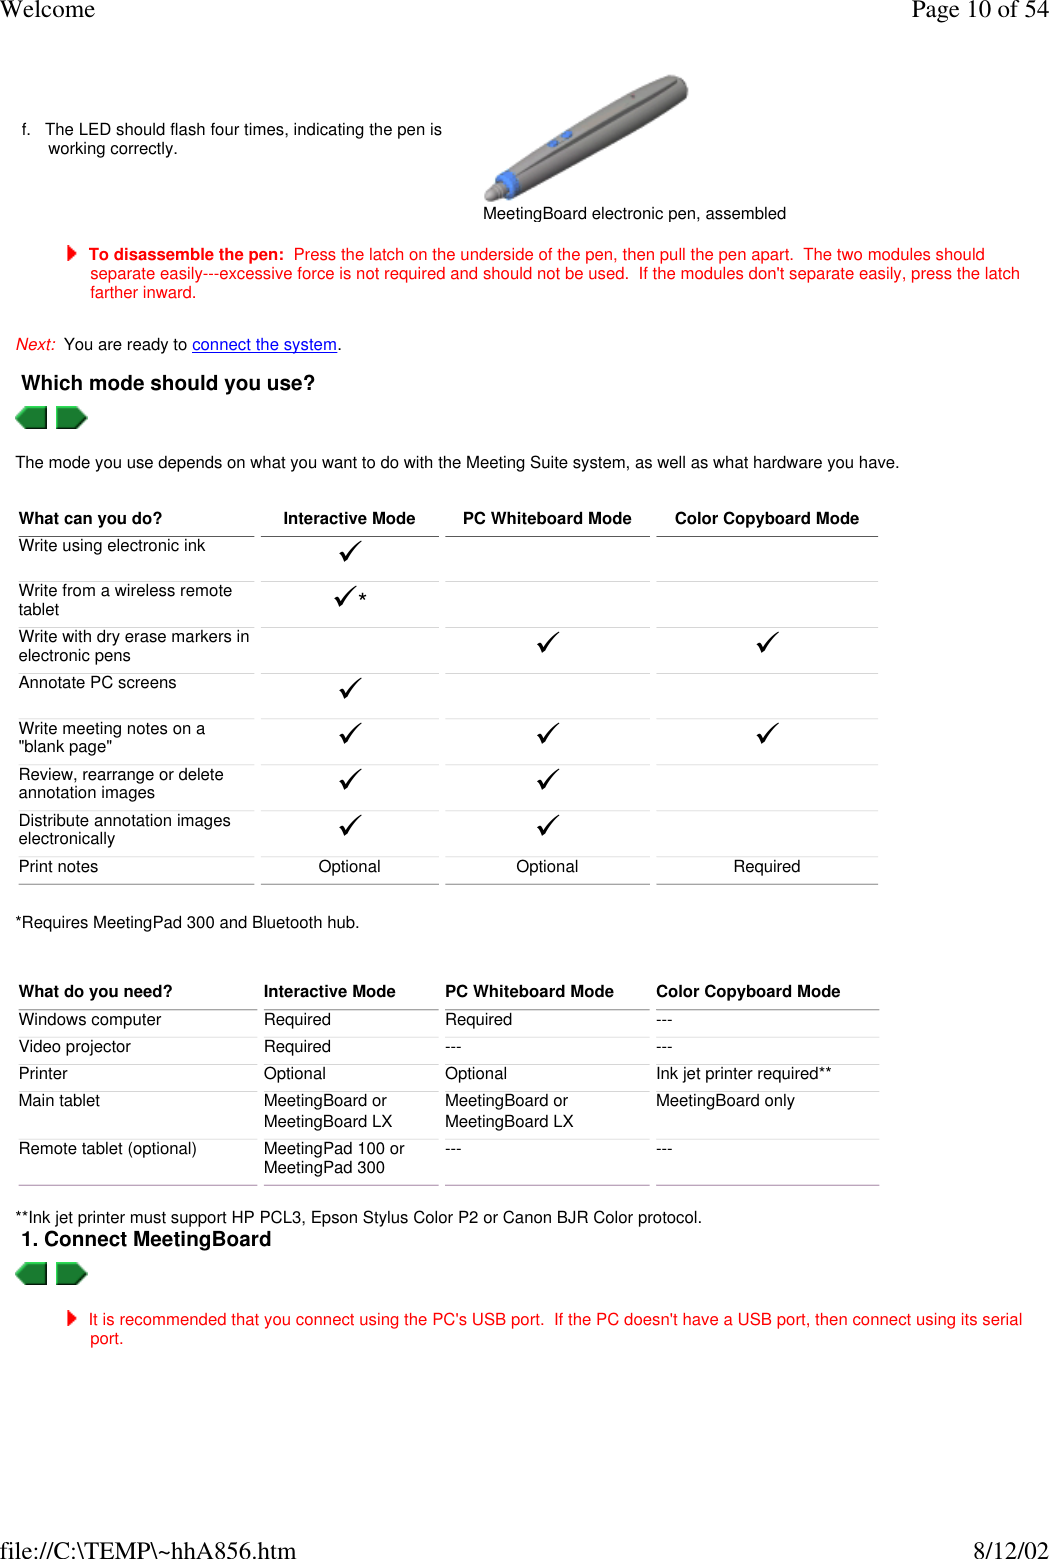
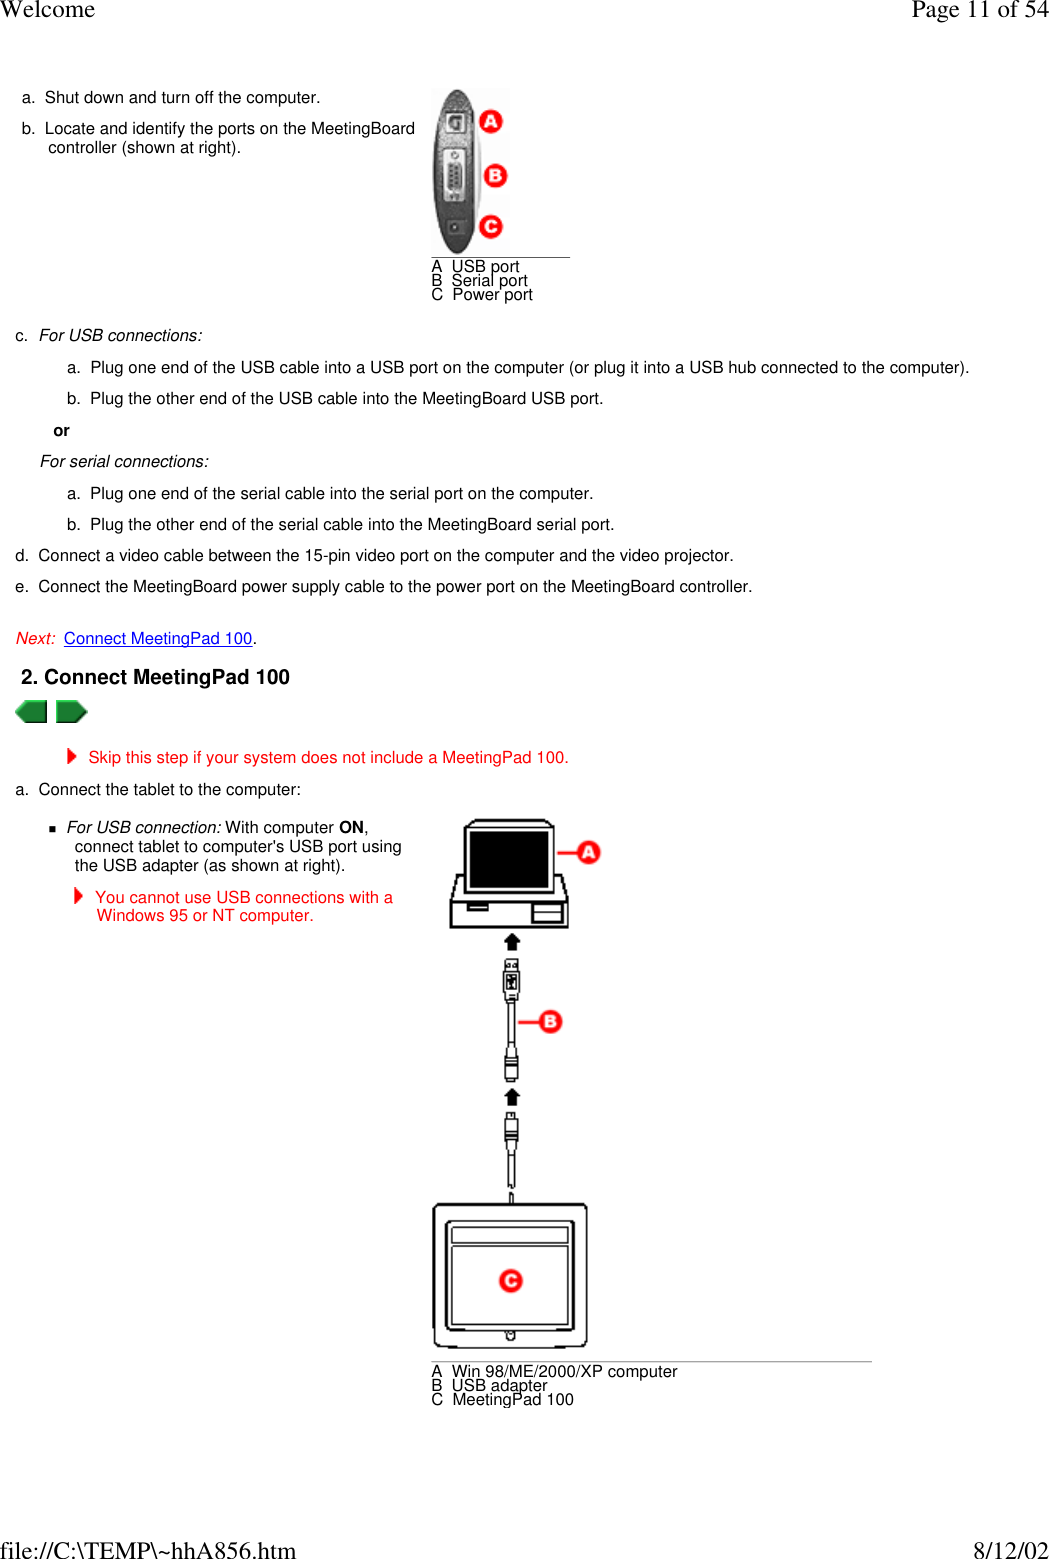
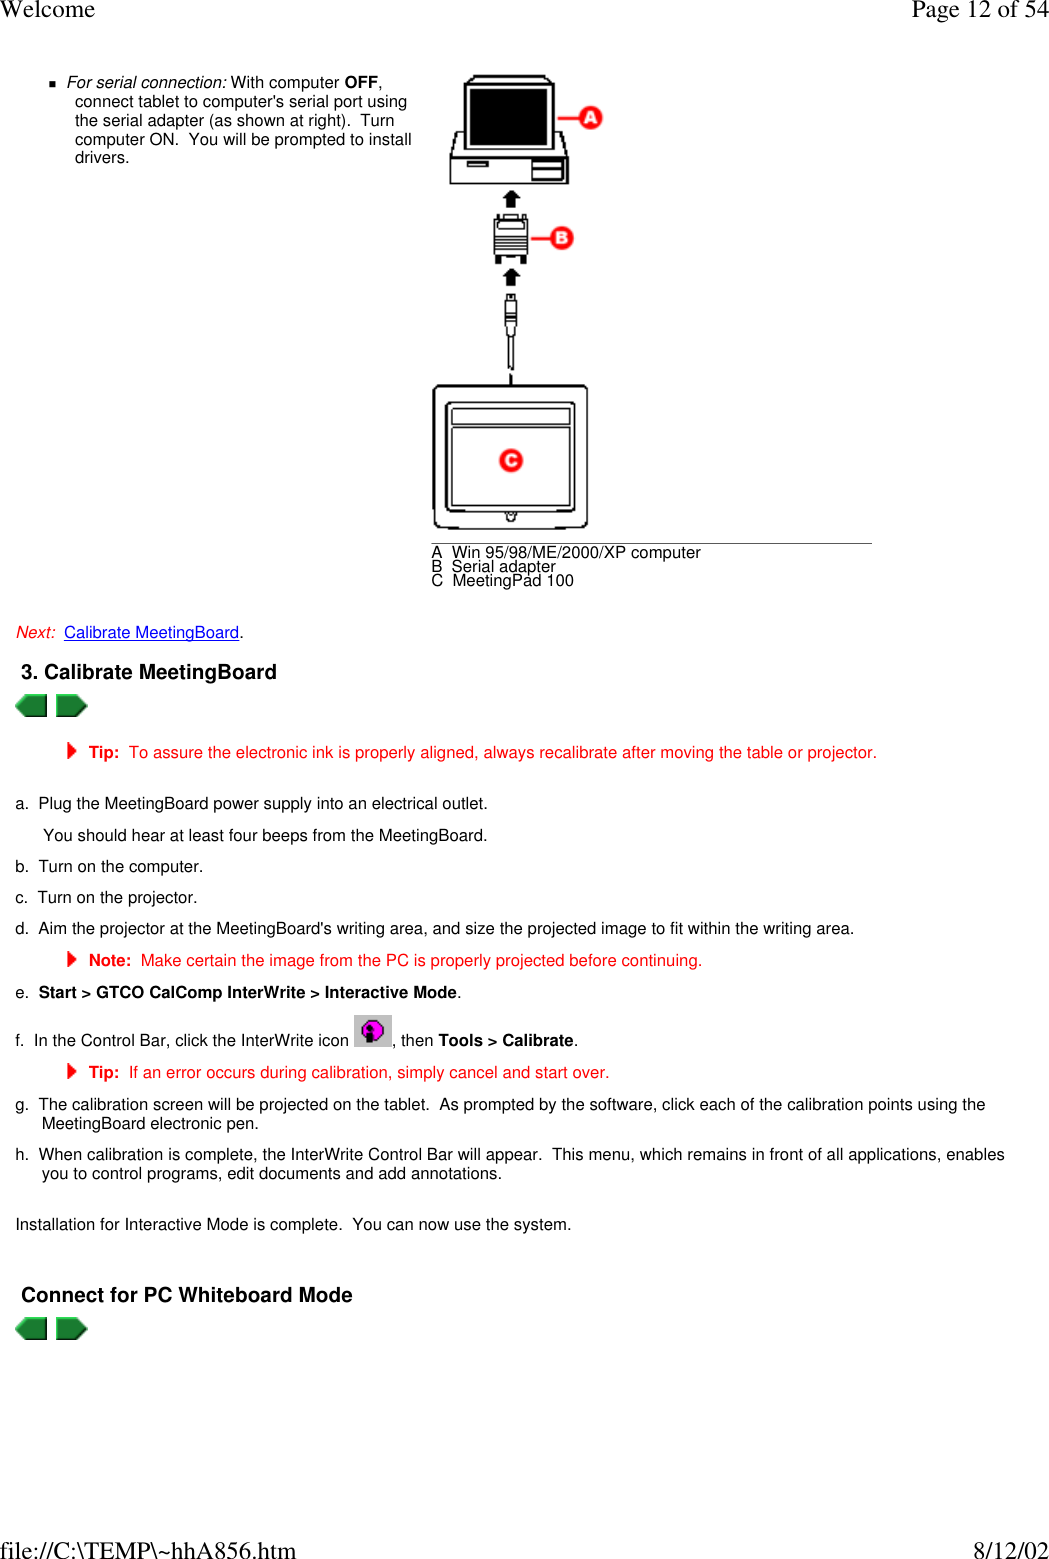
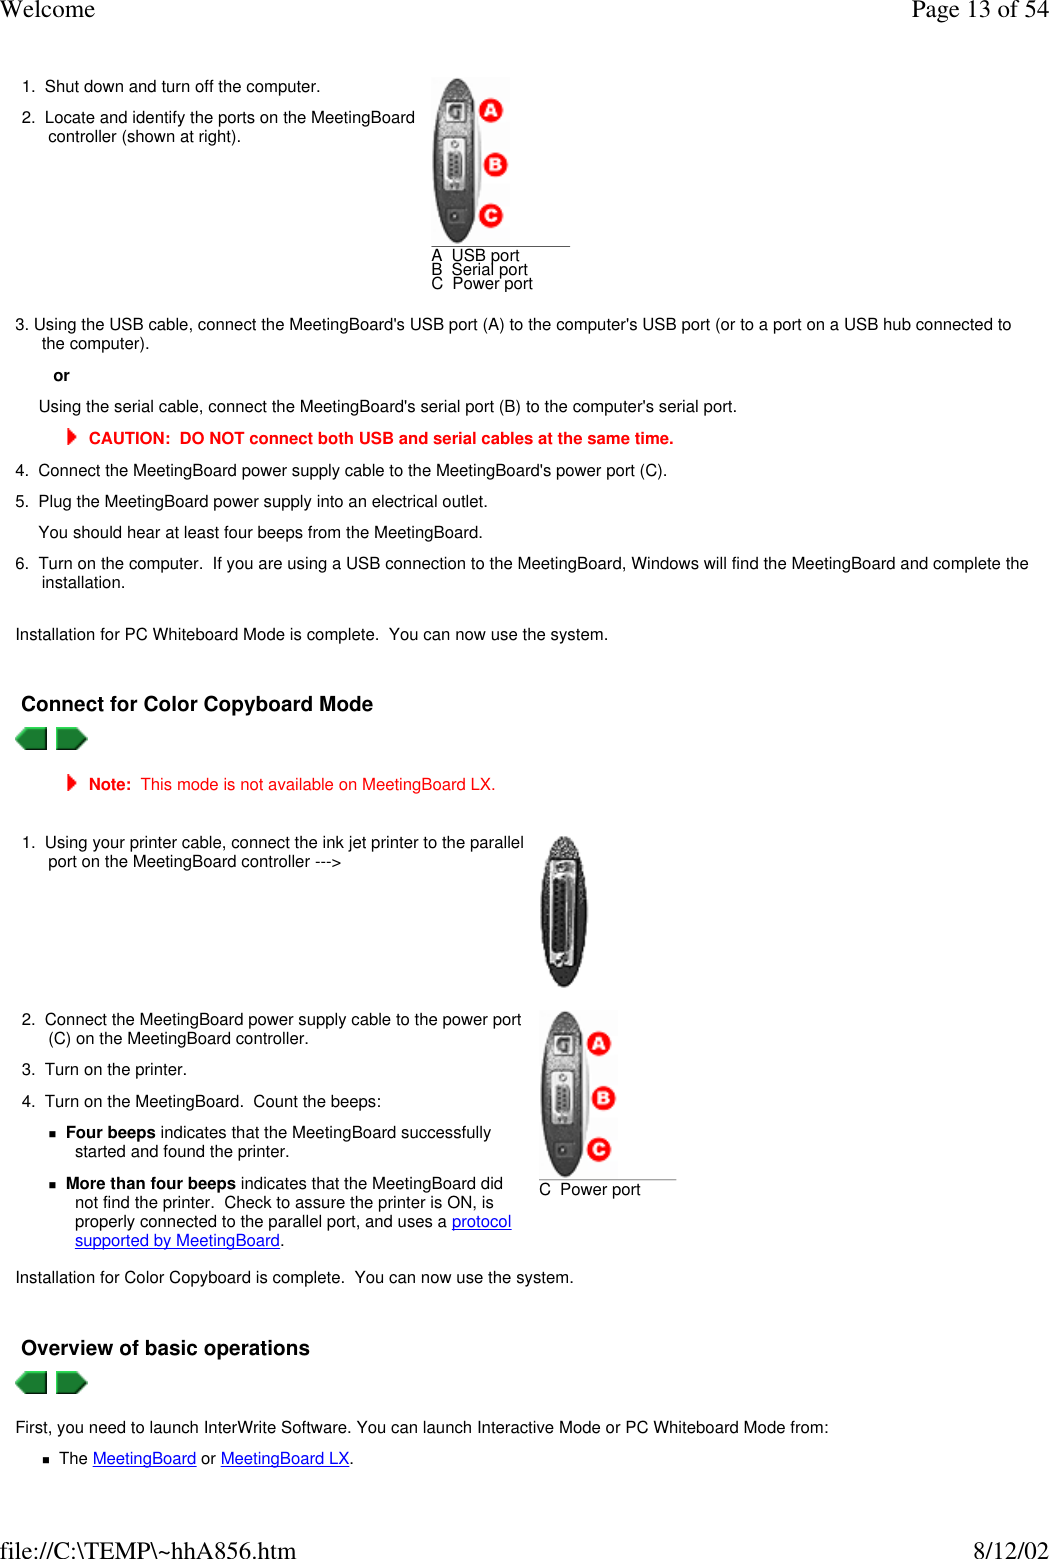
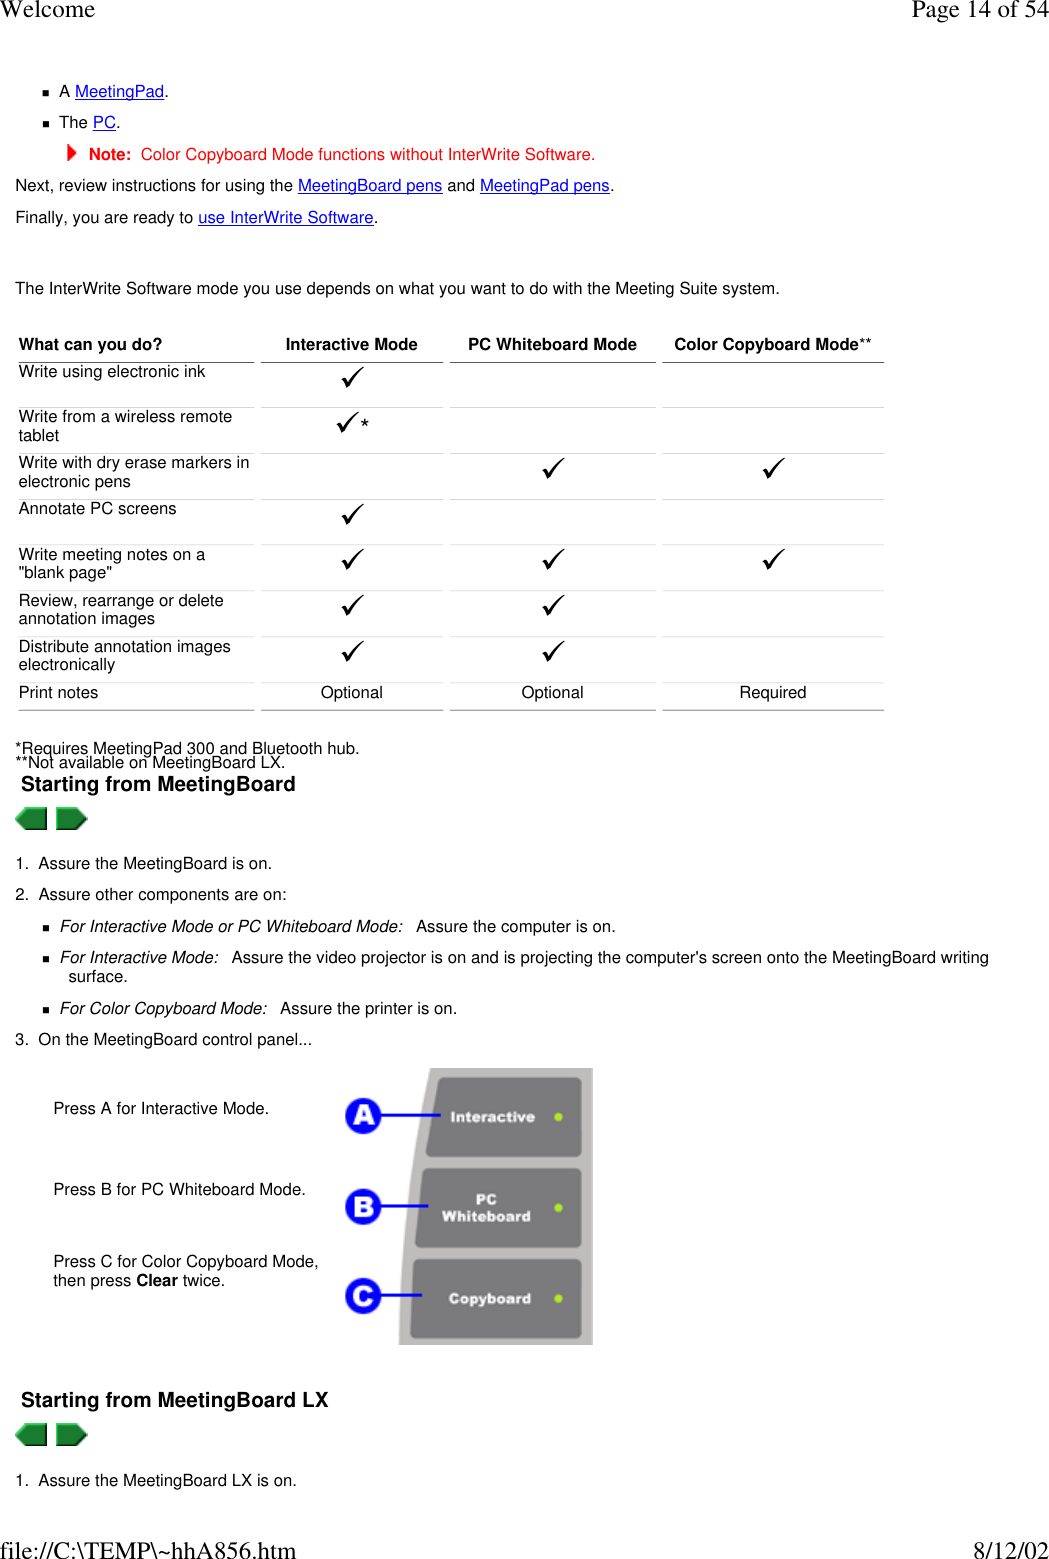
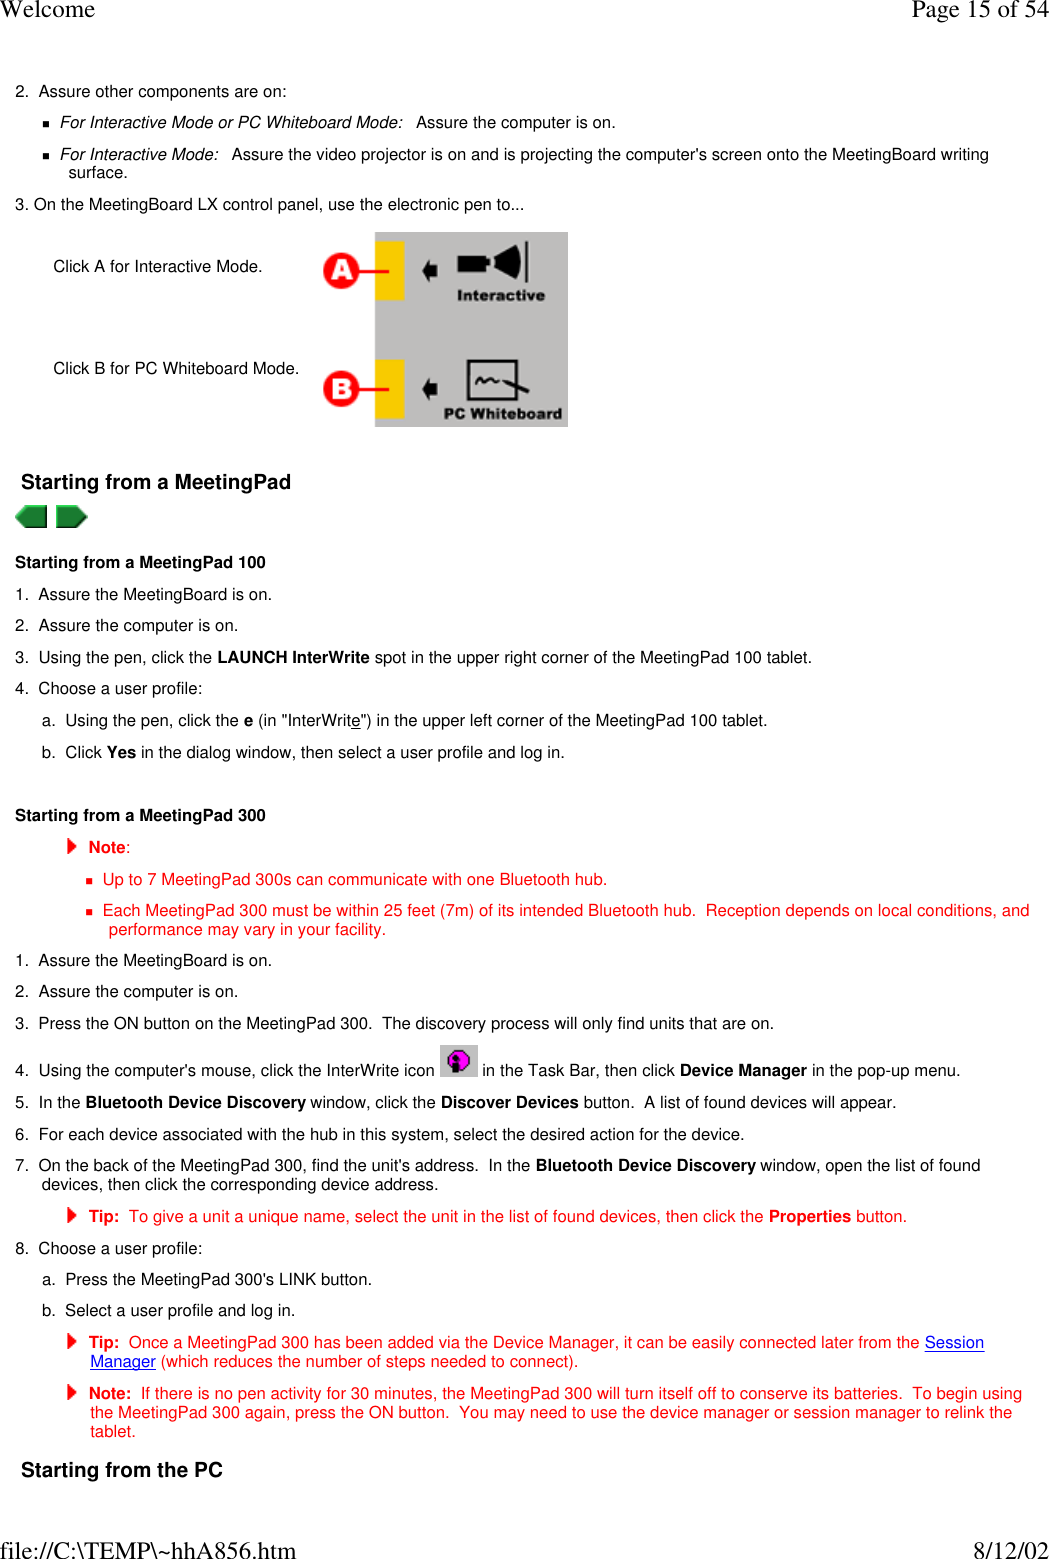
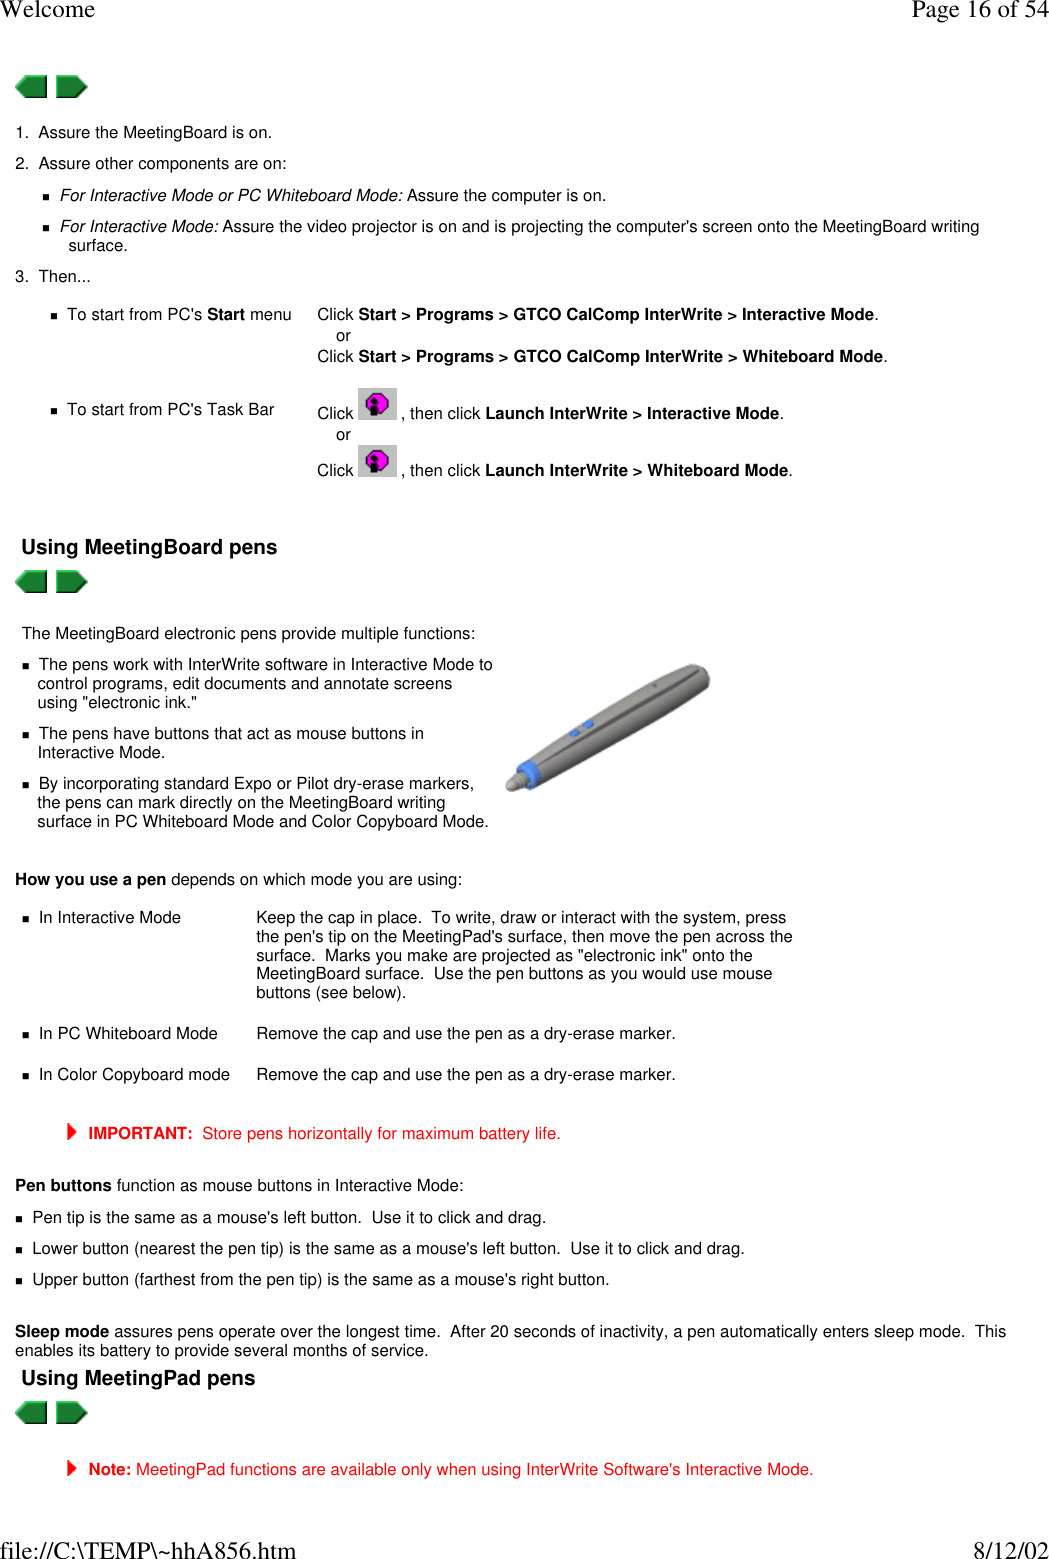
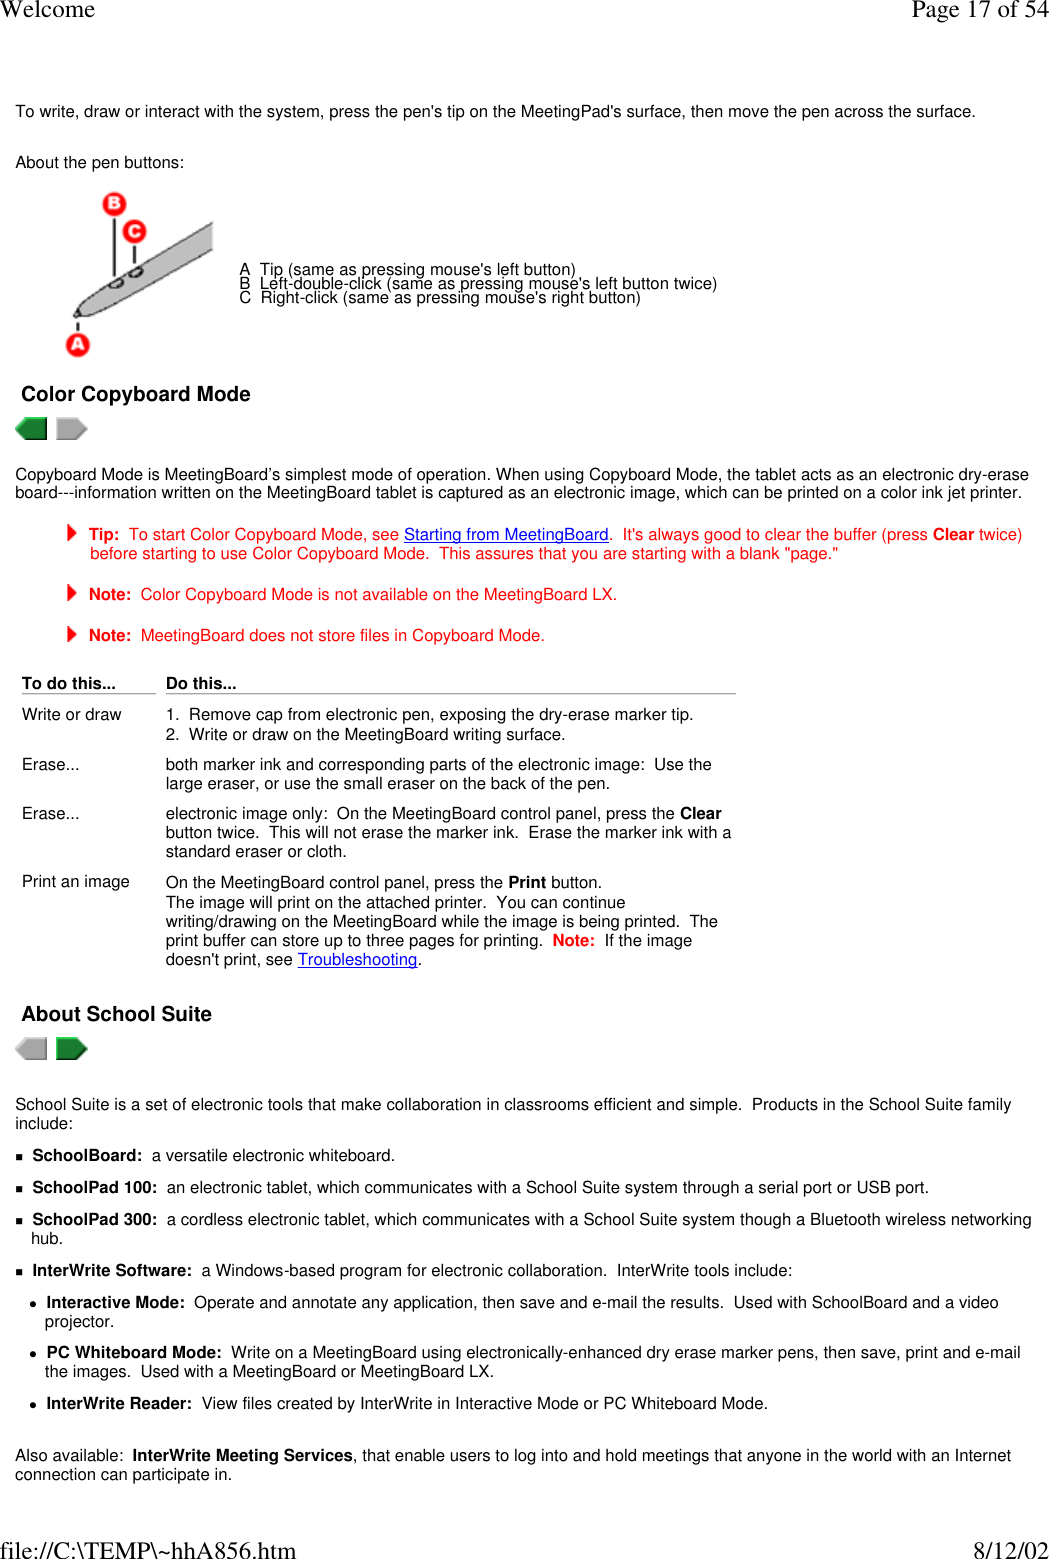
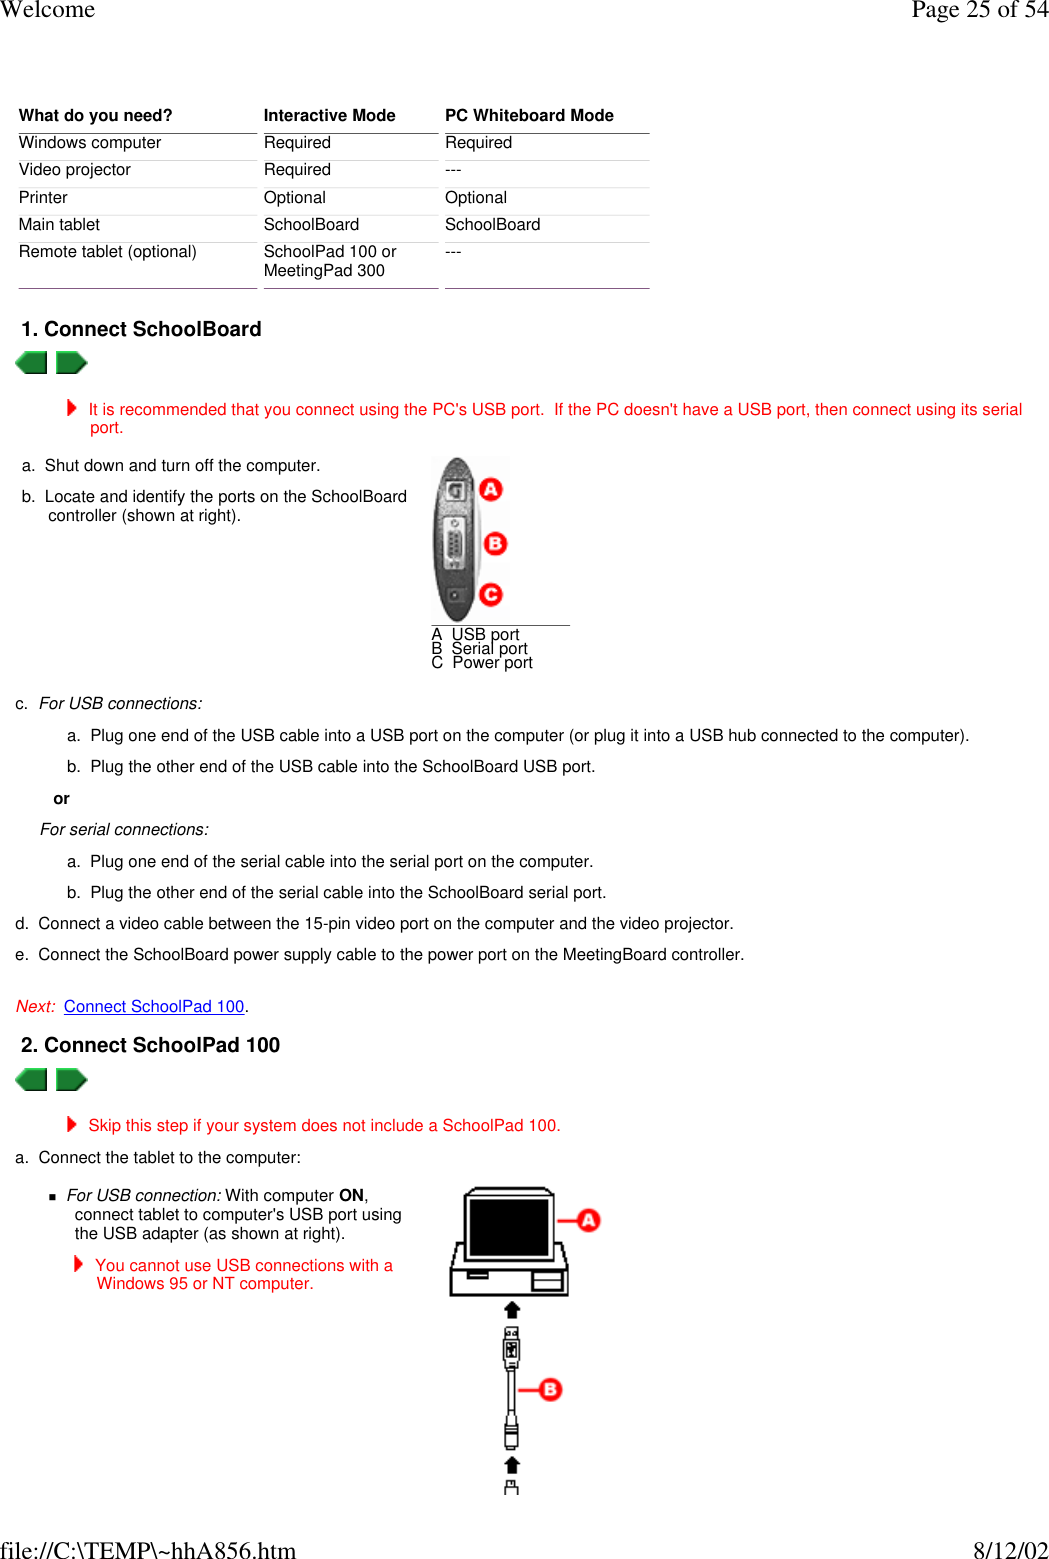
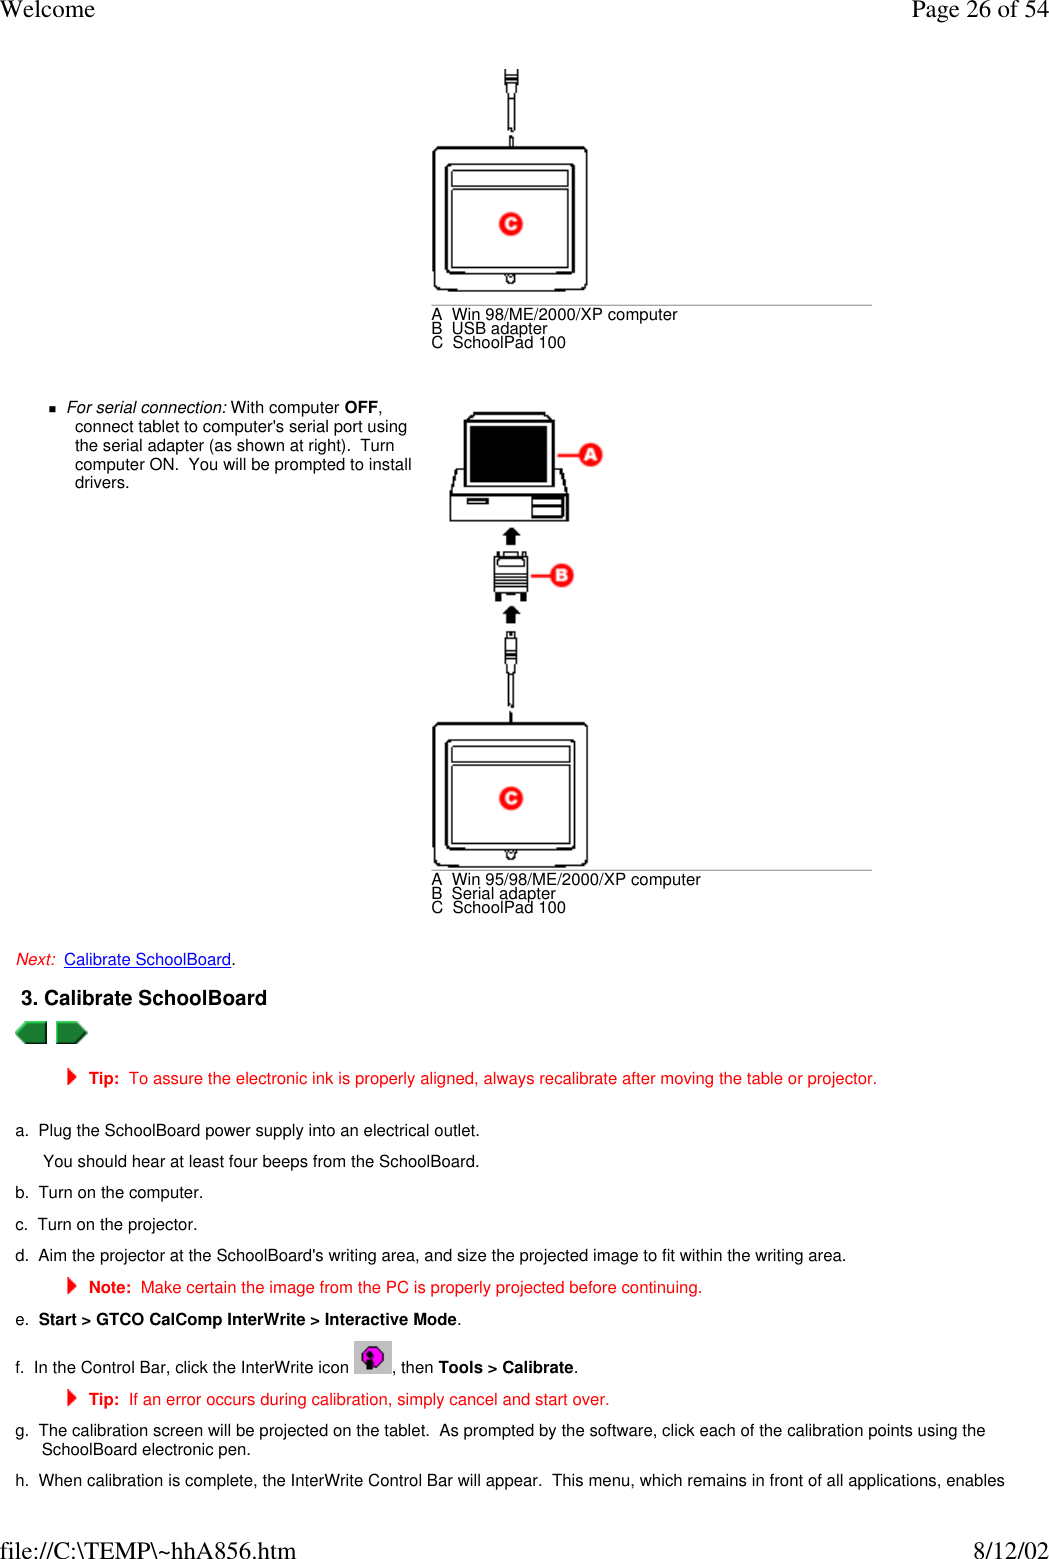
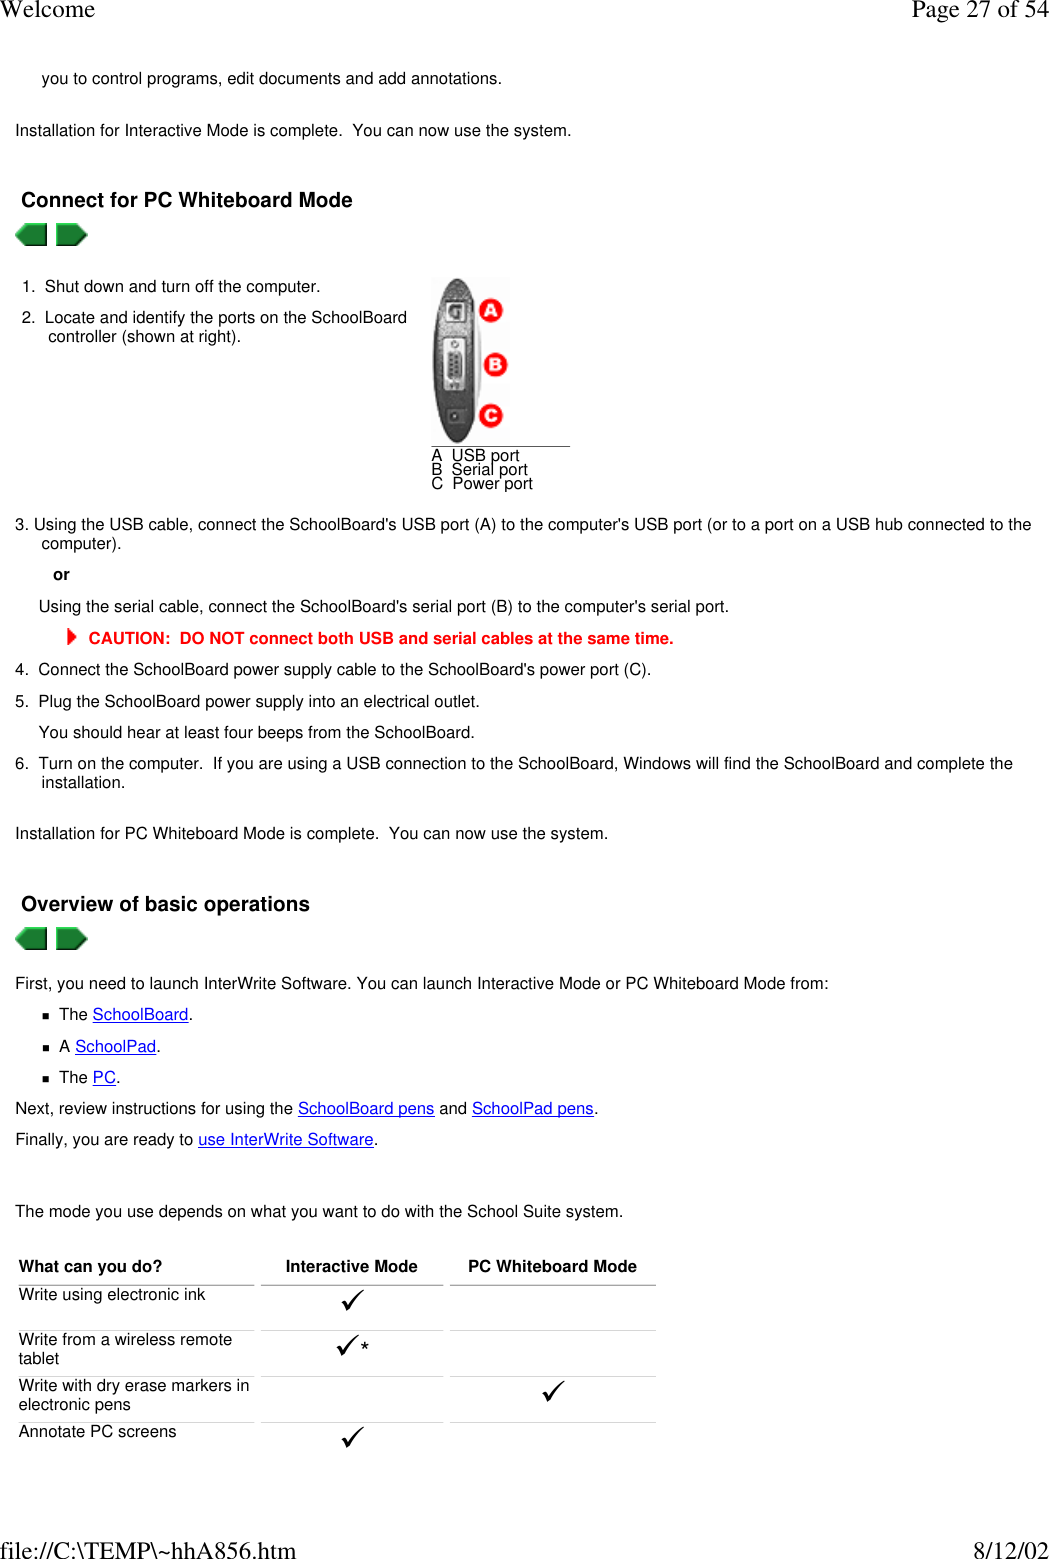
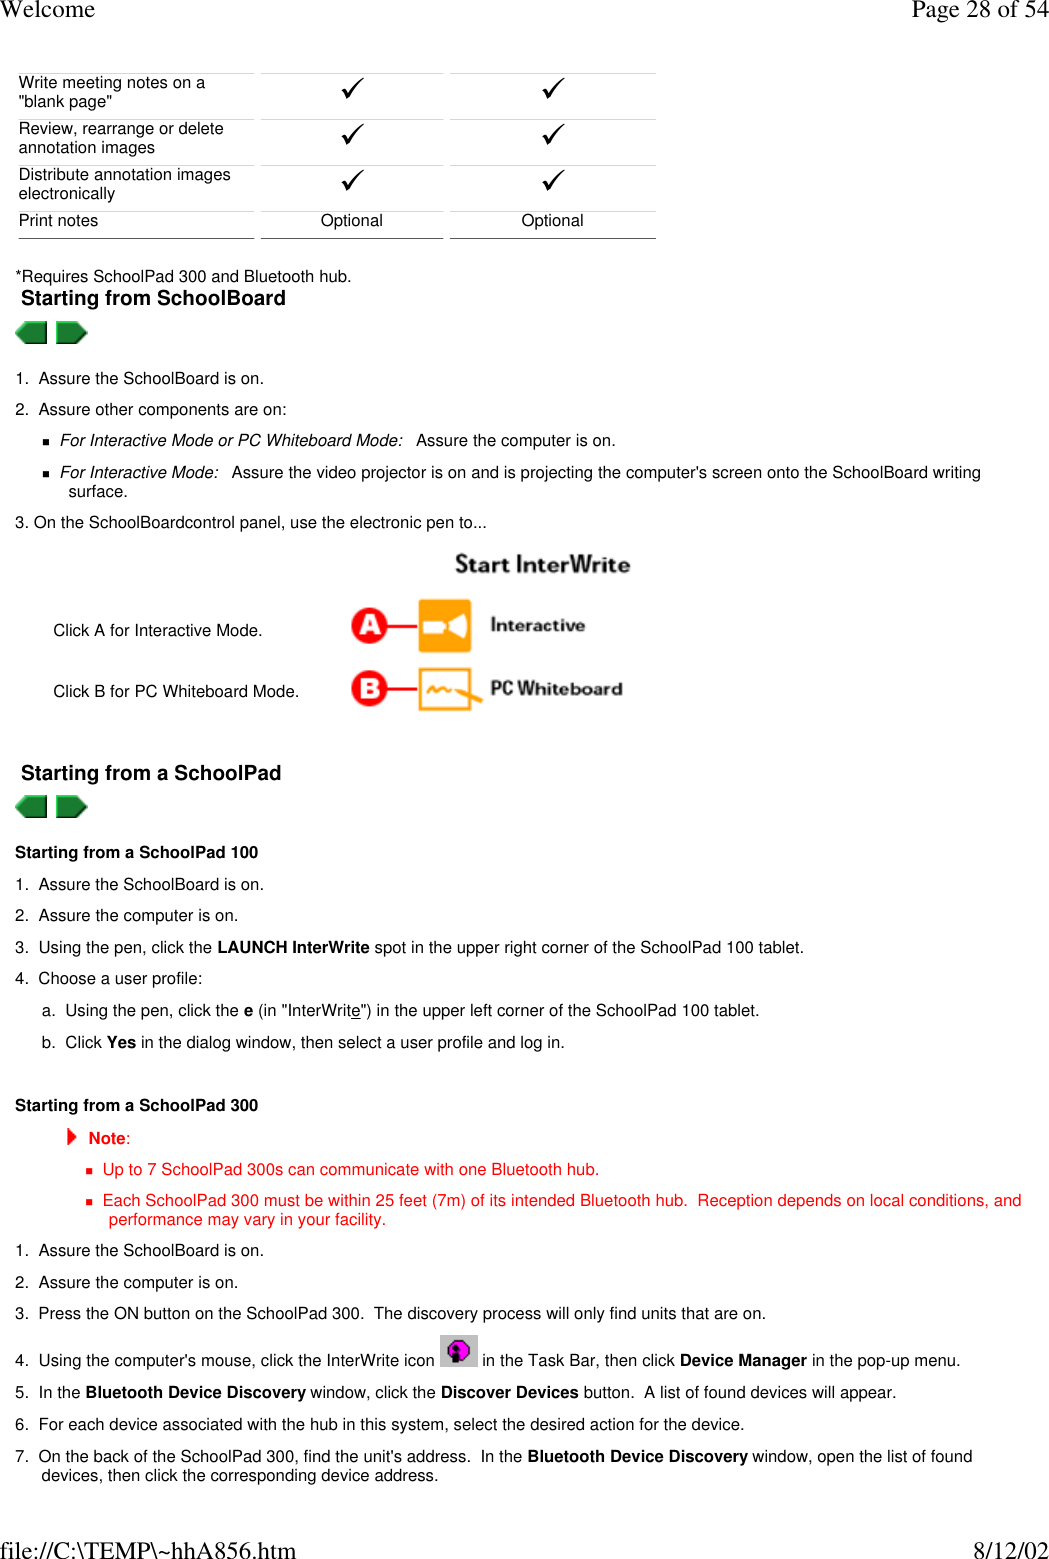
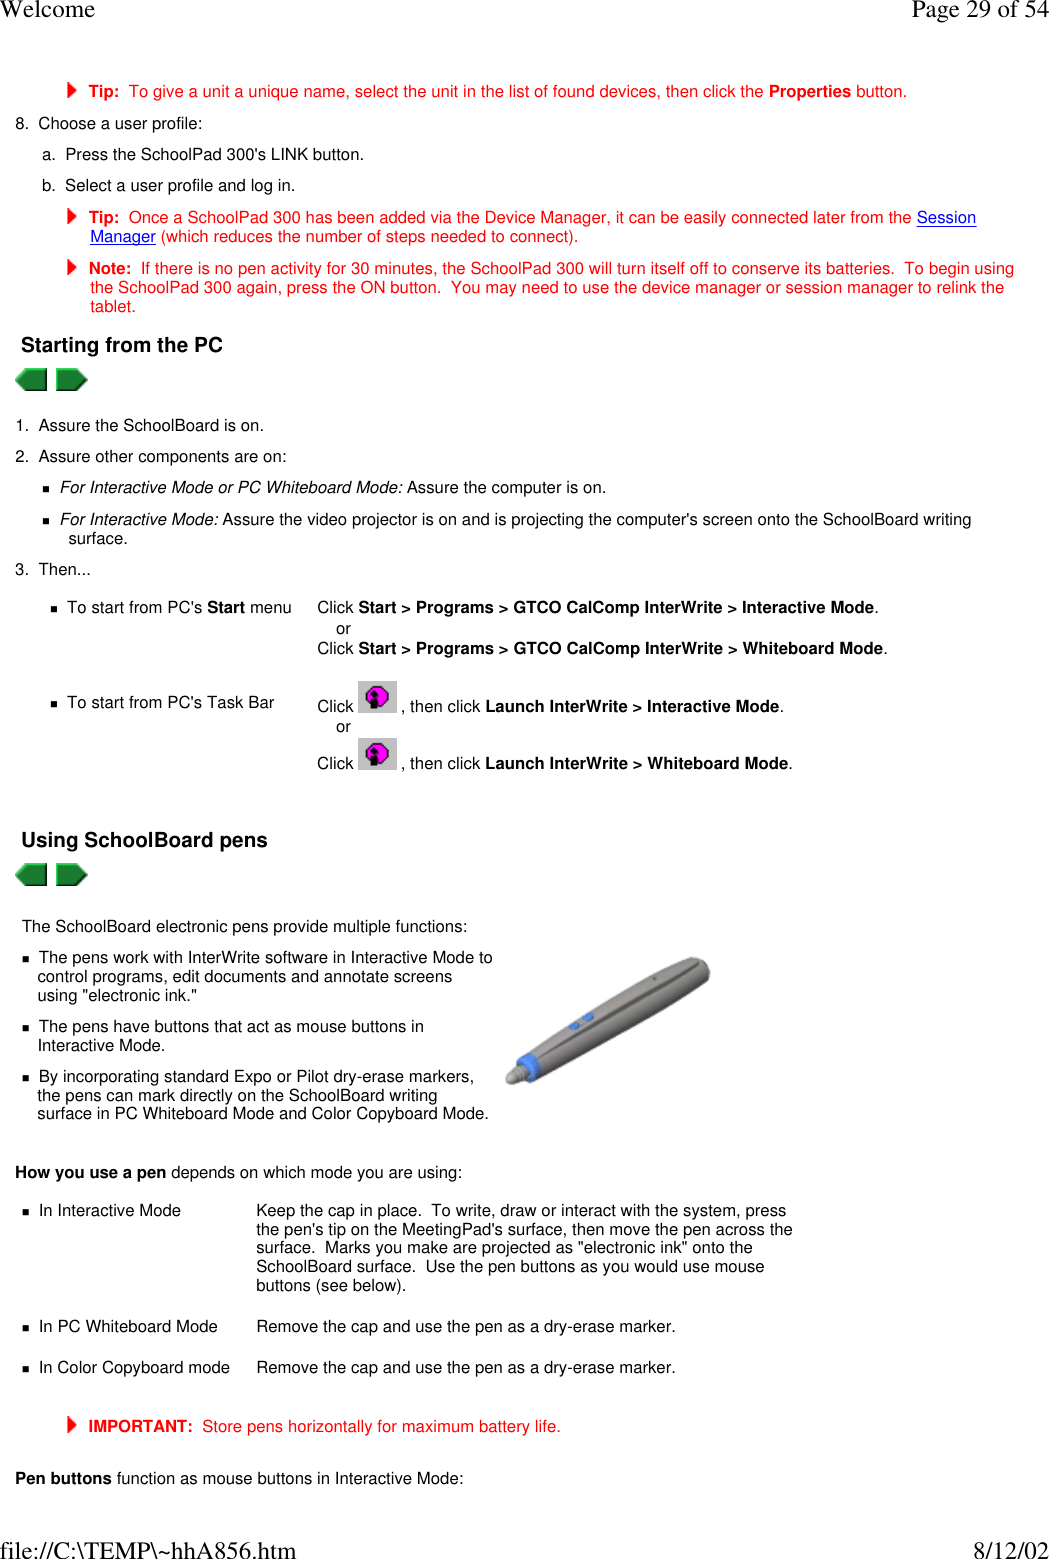

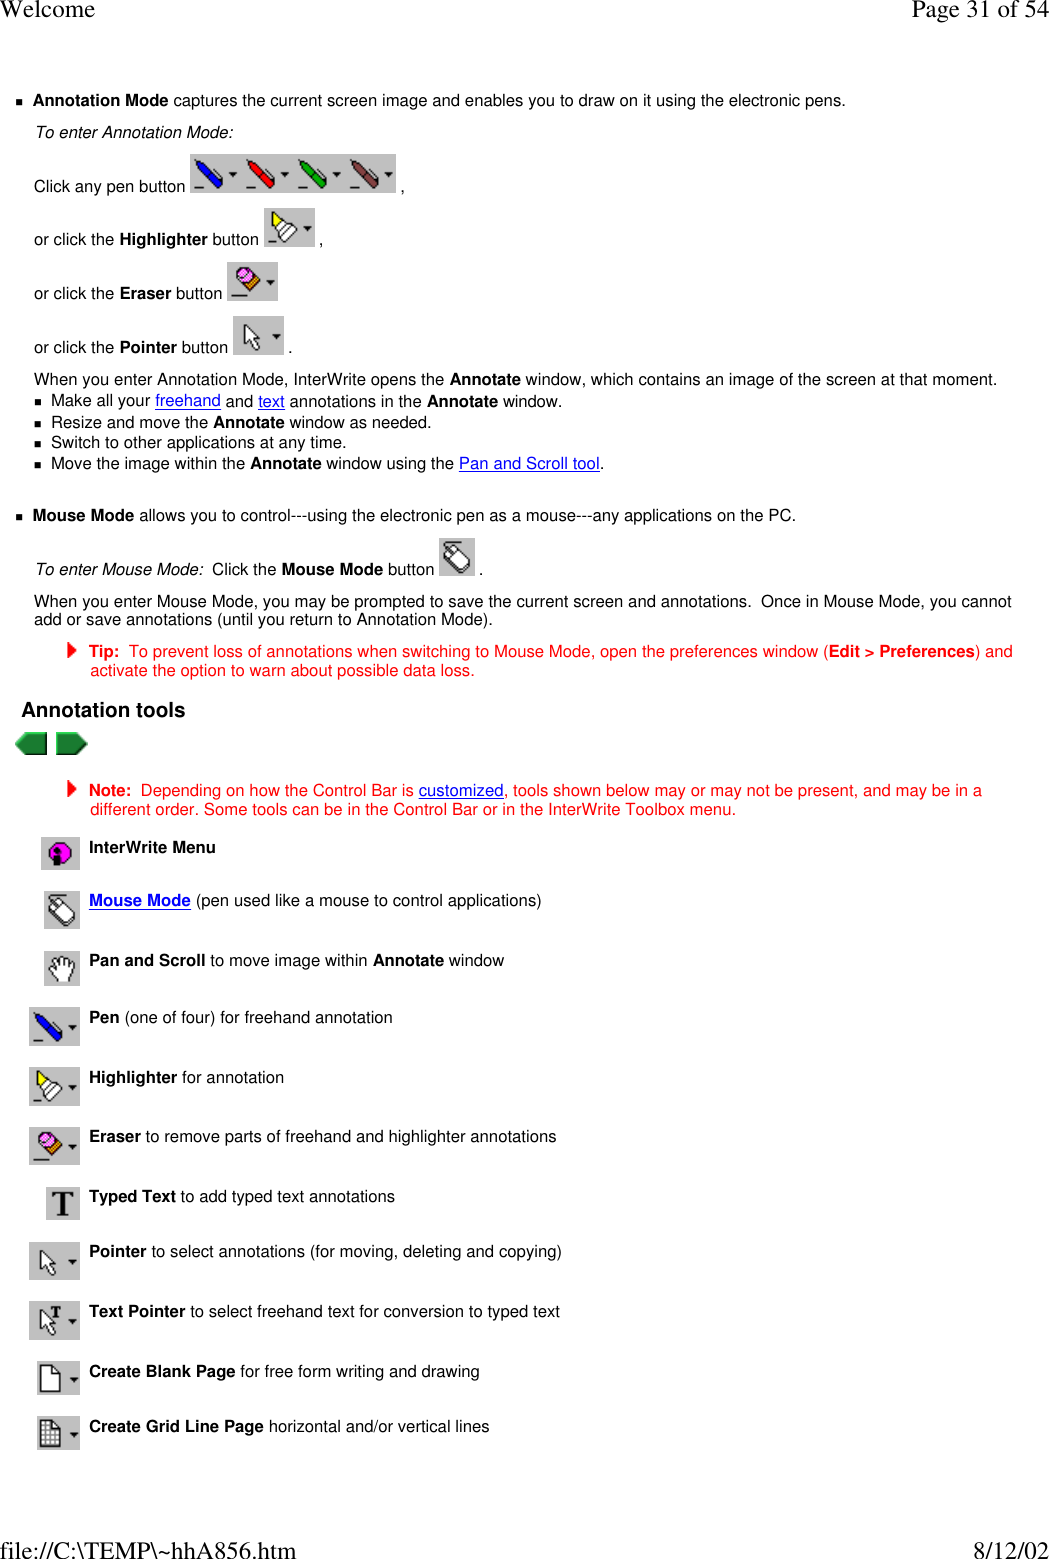
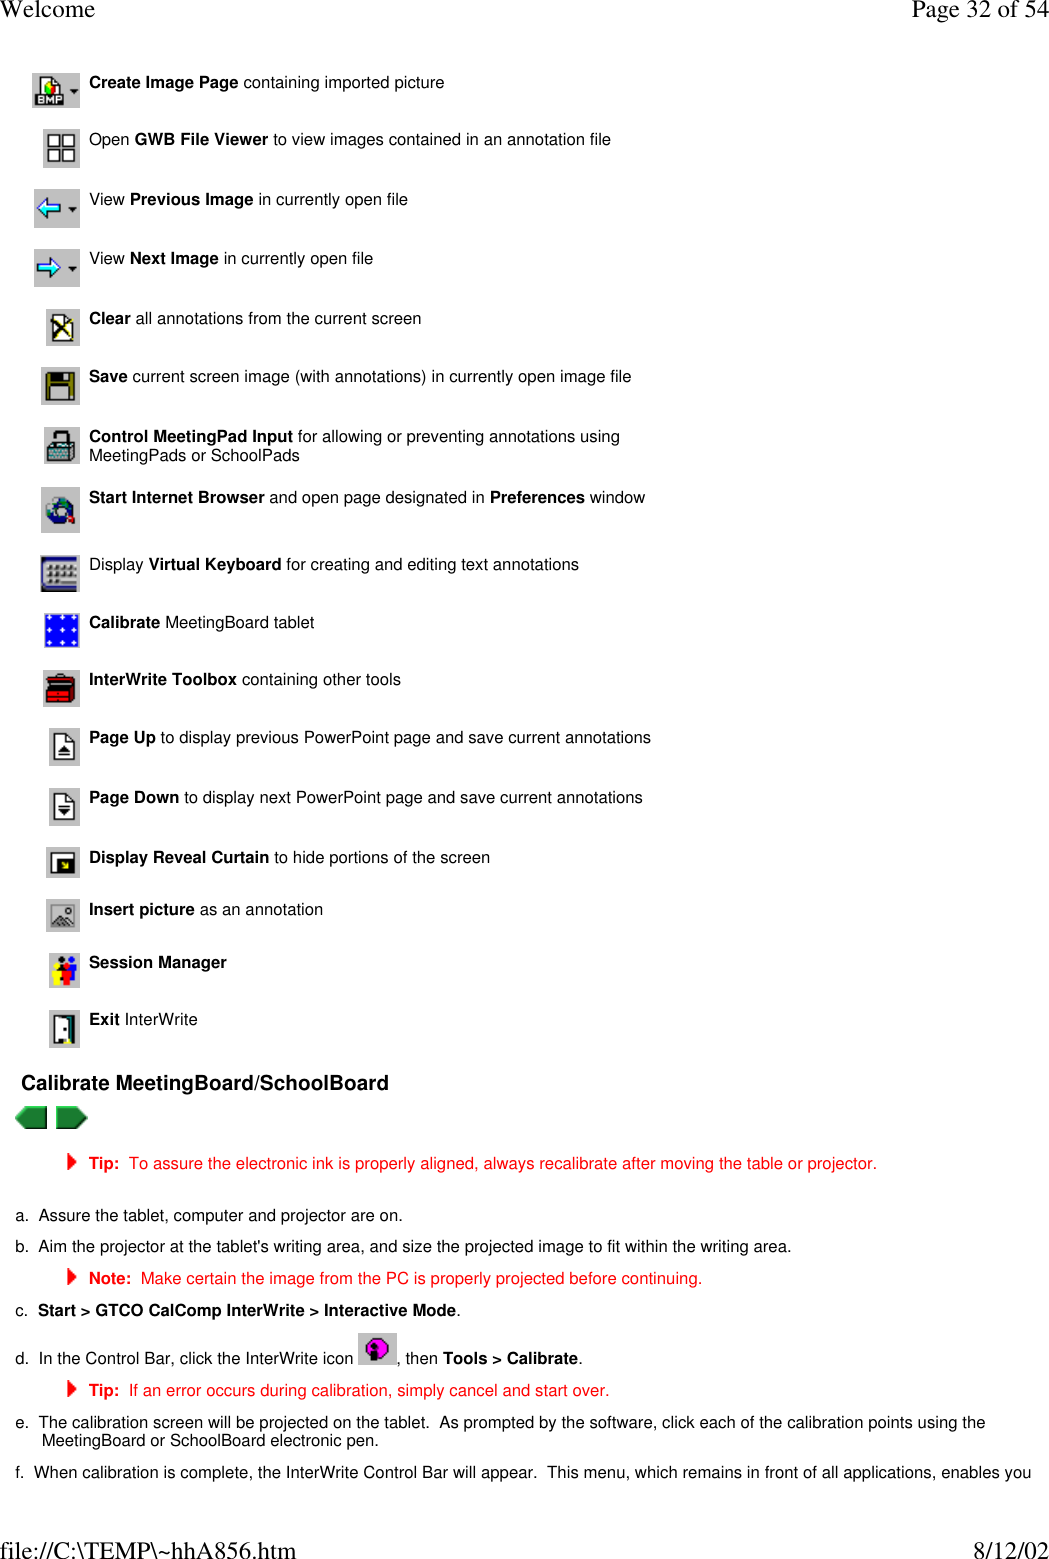

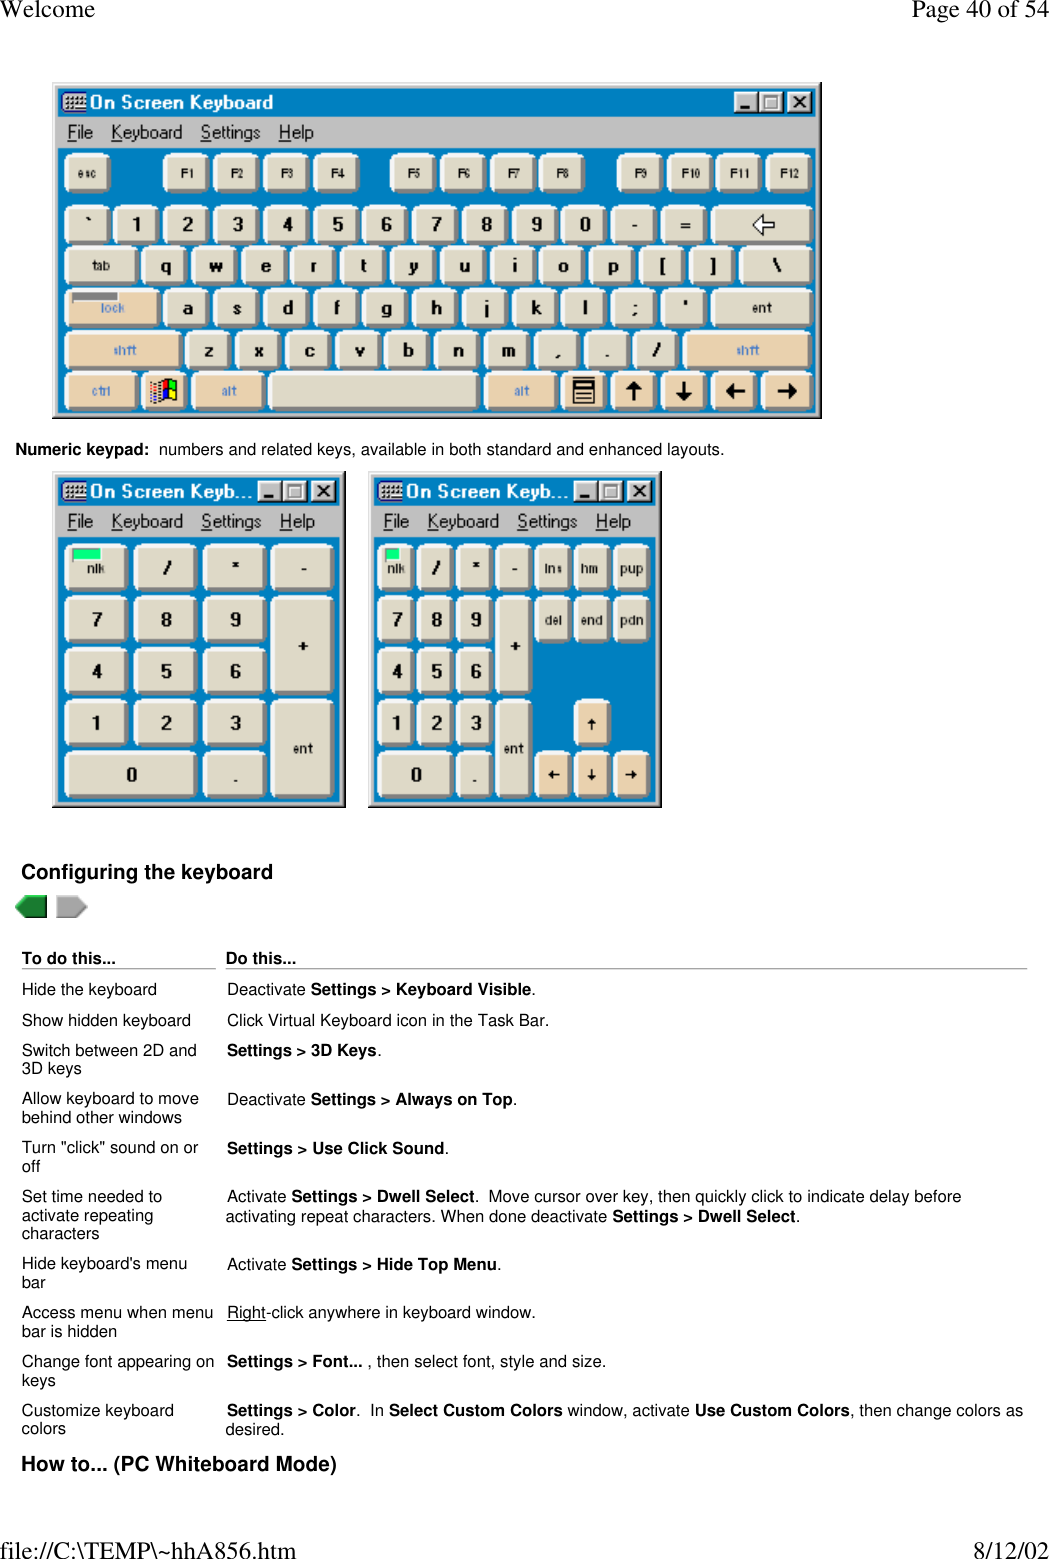
![Welcome Page 39 of 54file://C:\TEMP\~hhA856.htm 8/12/02The Virtual Keyboard is an on-screen substitute for the physical keyboard attached to the PC supporting Meeting Suite. It enables you to do anything in Interactive Mode that you can do from the physical keyboard. The Virtual Keyboard is convenient because you can "type" while keeping your focus on the MeetingBoard. Additionally, the Virtual Keyboard lets MeetingPad users "type" from anywhere in the room. Tip: The Virtual Keyboard works with any program, not just InterWrite. After opening the Virtual Keyboard, switch to another program and "type" using the Virtual Keyboard to enter text and keyboard shortcuts. To learn more, see:n Basic keyboard operations.n Selecting keyboard layout.n Configuring the keyboard. Basic Virtual Keyboard operations Selecting keyboard layout Tip: Resize the keyboard by dragging any side or corner. Enhanced keyboard: provides all the keys you would find on a physical keyboard for a desktop computer. Standard keyboard: provides fewer keys, similar to the keyboard for a laptop computer.To do this... Do this...Open the Virtual Keyboard Click Virtual Keyboard button or click Virtual Keyboard icon in system tray.Type one uppercase letter Click SHIFT button, then type letter. Type multiple uppercase letters Click LOCK button, then type letters. When done, click LOCK button again. To do this... Do this...Display standard keyboard Keyboard > Standard Keyboard.Display enhanced keyboard Keyboard > Enhanced Keyboard.Display numeric keypad Keyboard > Number Pad.Select English, European or Japanese layout Keyboard > [layout type]. (European and Japanese layouts provide additional keys needed to display extra characters. English Block simplifies layout by aligning keys in a grid. Kiosk is a minimal 85-key layout.)](https://usermanual.wiki/eInstruction/BTMP/User-Guide-263589-Page-39.png)