ePrep EPREP-01 ePrep Sample Preparation Workstation User Manual Quick start instructions
ePrep Pty Ltd ePrep Sample Preparation Workstation Quick start instructions
ePrep >
Contents
- 1. Instruction manual
- 2. Quick start instructions
- 3. Tablet installation procedure
Quick start instructions
ePrep® | Instructions
(w) www.eprep.com.au
(e) info@eprep.com.au
Quick Start Instructions
Pub No. 99-10005-01 Rev 01
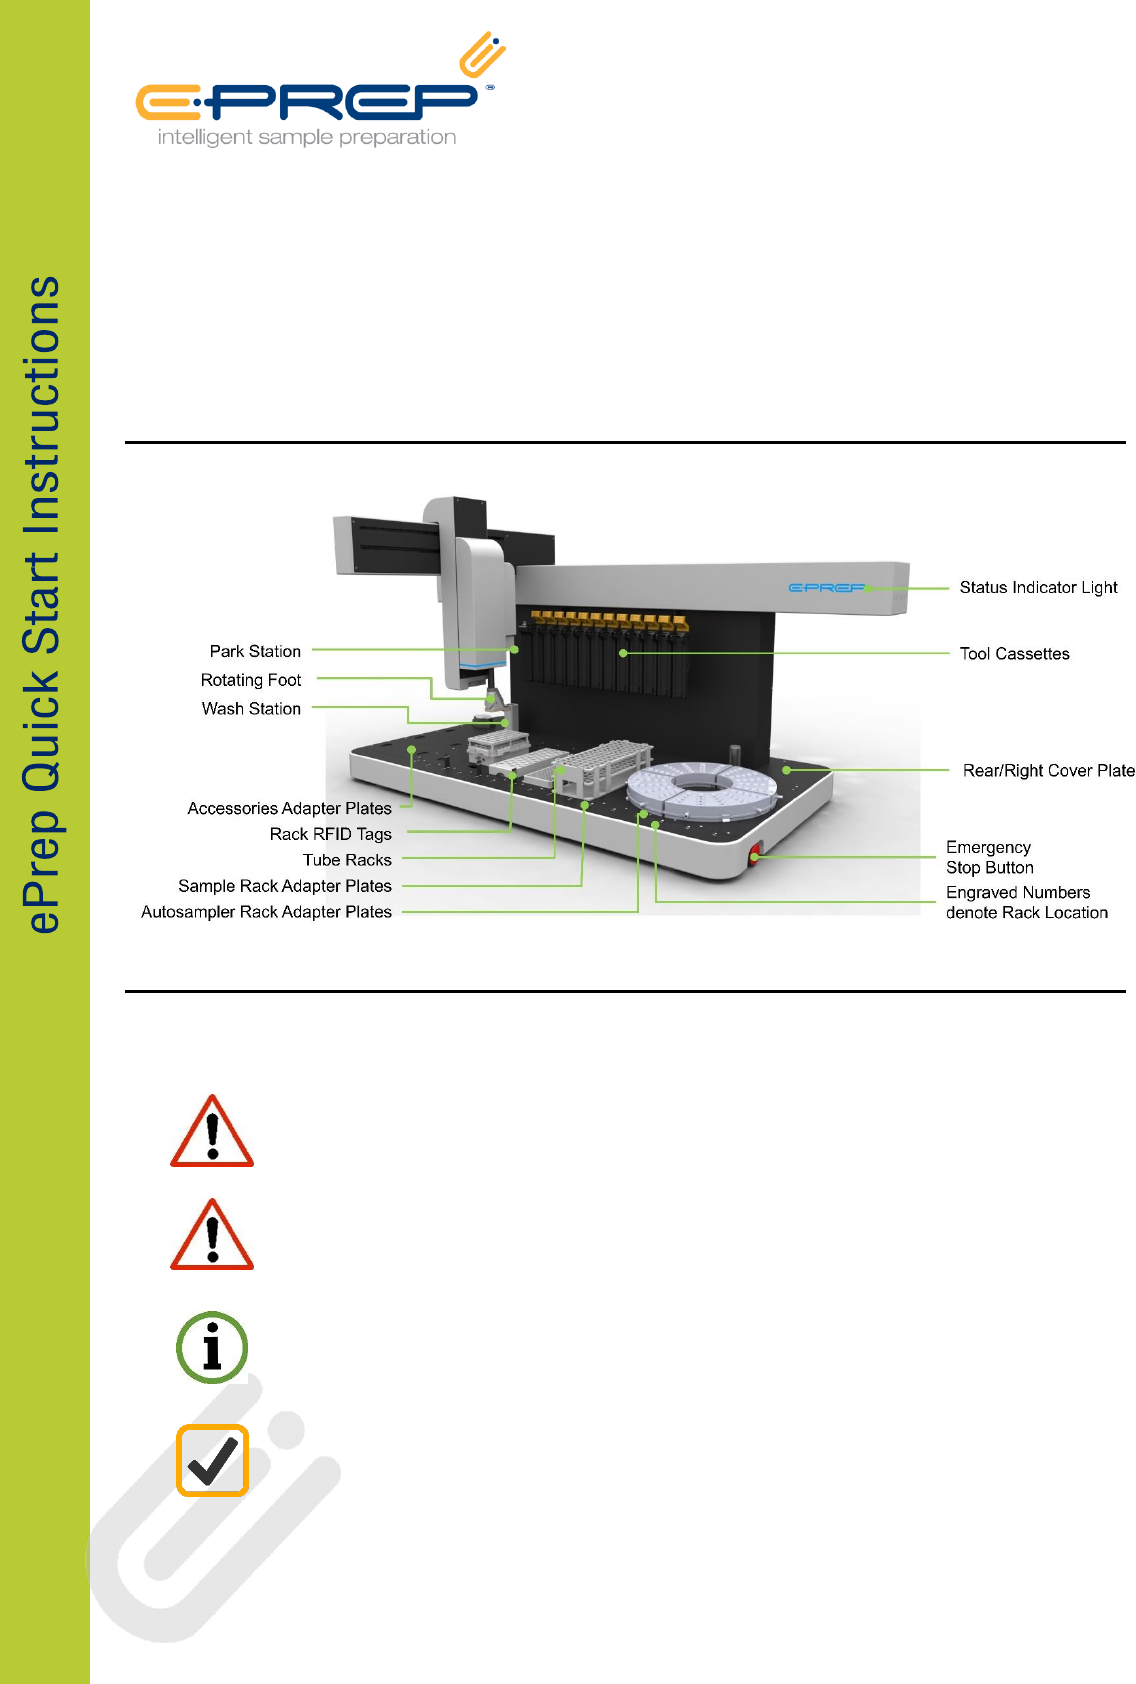
ePrep FEATURES
IMPORTANT SAFETY AND PRODUCTS WARNINGS
There are several important safety notices that you should always keep in mind when using ePrep.
Do not enter the instrument work space or place any part of your
body near moving axis during operation.
If the equipment is used in a manner not specified by the manufacturer, the protection provided
by the equipment may be impaired. Good Laboratory Practice (GLP) should be followed when
using the ePrep. Refer: 21CFR58, 21CFR58, Directive 2004/9/EC and specific product GLP
Directives.
ePrep is fitted with an Emergency Stop Button found at the front right side of the instrument.
Pressing the button will cut off all power to the instrument. To reinstate power, rotate the
emergency button 90° clockwise.
Only approved accessories and consumables can be used with the instrument. Eprep assumes no
liability for the customer’s failure to comply with these requirements.
Full instruction documentation contains information and warnings which must be followed by the user to ensure
safe operation and to maintain the instrument in a safe condition.
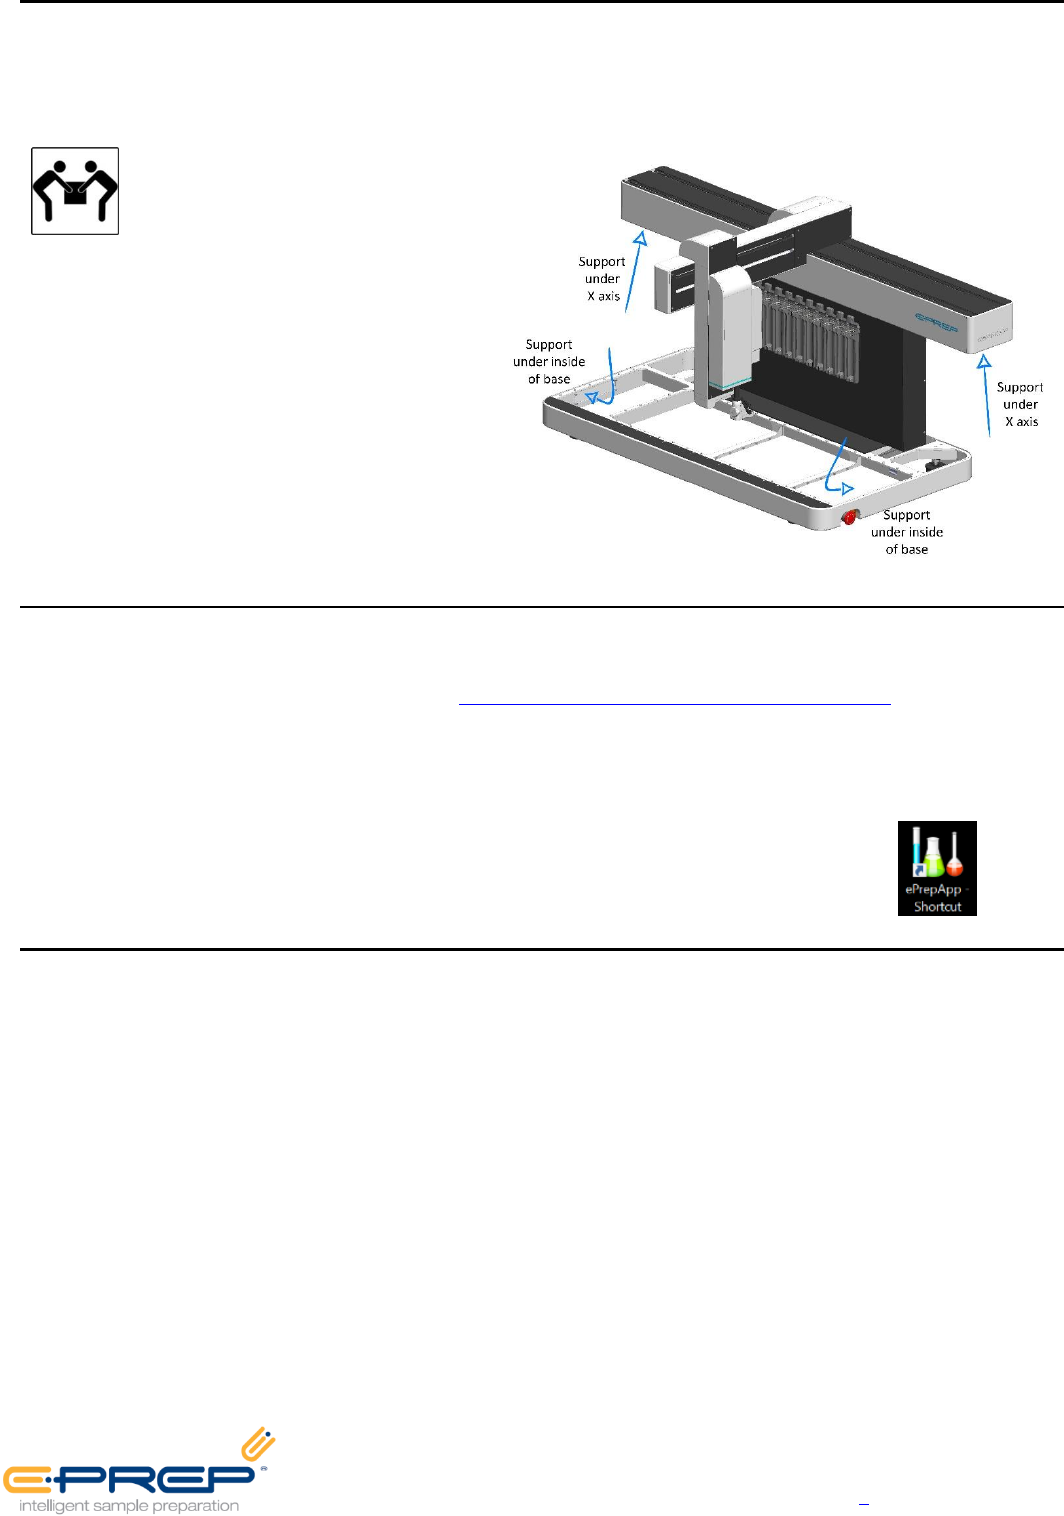
INSTRUMENT HANDLING PRECAUTIONS
Precautions must be taken when lifting and carrying the instrument.
UNPACKING
ePrep instrument is approximately
75kg. Minimum 2 person lift.
PLACING ON BENCH
EPREP instrument is heavy, approx. 75kg
Minimum 2 person lift to avoid injury
Lift by bending legs, maintain a straight back
Use a pallet trolley or other suitable wheeled
device, do not carry
Trolley instrument to installation location
Ensure bench is suitable to support instrument
weight
Lift instrument, 2 person lift, use
recommended lift points per diagram.
INSTALLATION AND COMMISSIONING
This guide provides steps for initial set up of the ePrep. Additional instructions are available on the Computer Tablet
and comprehensive instructions can be found at http://www.eprep.com.au/account/instructions. Logon using your
instrument Serial Number (Username) and Identification Code (Password).
Step #1 Locate ePrep on a clean flat surface with no obstruction to the axis movement and simple access to
connectors and emergency stop button. Adjust ePrep feet to level instrument if required.
Step #2 Power up the Computer Tablet and start ePrep Axis software via App icon.
Step #3 Following the Installation and Commissioning Instructions listed on the Tablet.
PACKING LIST
INSTRUMENT
ePrep Instrument
24volt power pack
Surface Pro Tablet with ePrep Axis
software
USB Type b cable (ePrep to Tablet
connection)
Underdeck drip tray
INSTALLATION TOOLS
3 x Screws for Rear Deck Plates
1 x Calibration Probe
ADAPTER PLATES
1 x Wash Station deck plate with
installed wash station and tubing
1 x Rear/Right deck plate
3 x Accessories Area Adapter Plates
7 x Adapter Plate for BelArt 3x7 Rack -
also used for calibration
1 x Adapter Plate & RFID Tag for
Supelco 5x10 Rack
RACKS
1 x BelArt 3x7 Rack & RFID Tag for
30mL vials
1 x Supelco 5x10 for 1.5mL vials
VIALS
100 x 1.5mL autosampler vials/caps
10 x 30mL vials/caps for with
cap/septa
SYRINGES
1 x 100µL Syringe, 80mm needle
1 x 1mL Syringe, 80mm needle
1 x 10mL Syringe, 80mm needle
SPARES
2 x Septa Piercer
2 x 100µL Needles
2 x 1mL Needles
2 x 10mL Needles
Quick Start Instructions
Wall Chart
Note: Country specific IEC C13 Power
Cable for power pack not supplied
EPREP Pty Ltd, 14/35 Dunlop Rd, Mulgrave VIC 3170, AUSTRALIA
(p) +61 (0) 3 9574 3600, (e) info@eprep.com.au, (w) www.eprep.com.au