elero Antriebstechnik RT915 Tubular Motor with Electronic Limit Switch User Manual 138186606 RolTop 915 120V 60Hz BA US CA 0513 indd
elero GmbH Antriebstechnik Tubular Motor with Electronic Limit Switch 138186606 RolTop 915 120V 60Hz BA US CA 0513 indd
Contents
- 1. RolTop 1
- 2. RolTop 2
- 3. SunTop 1
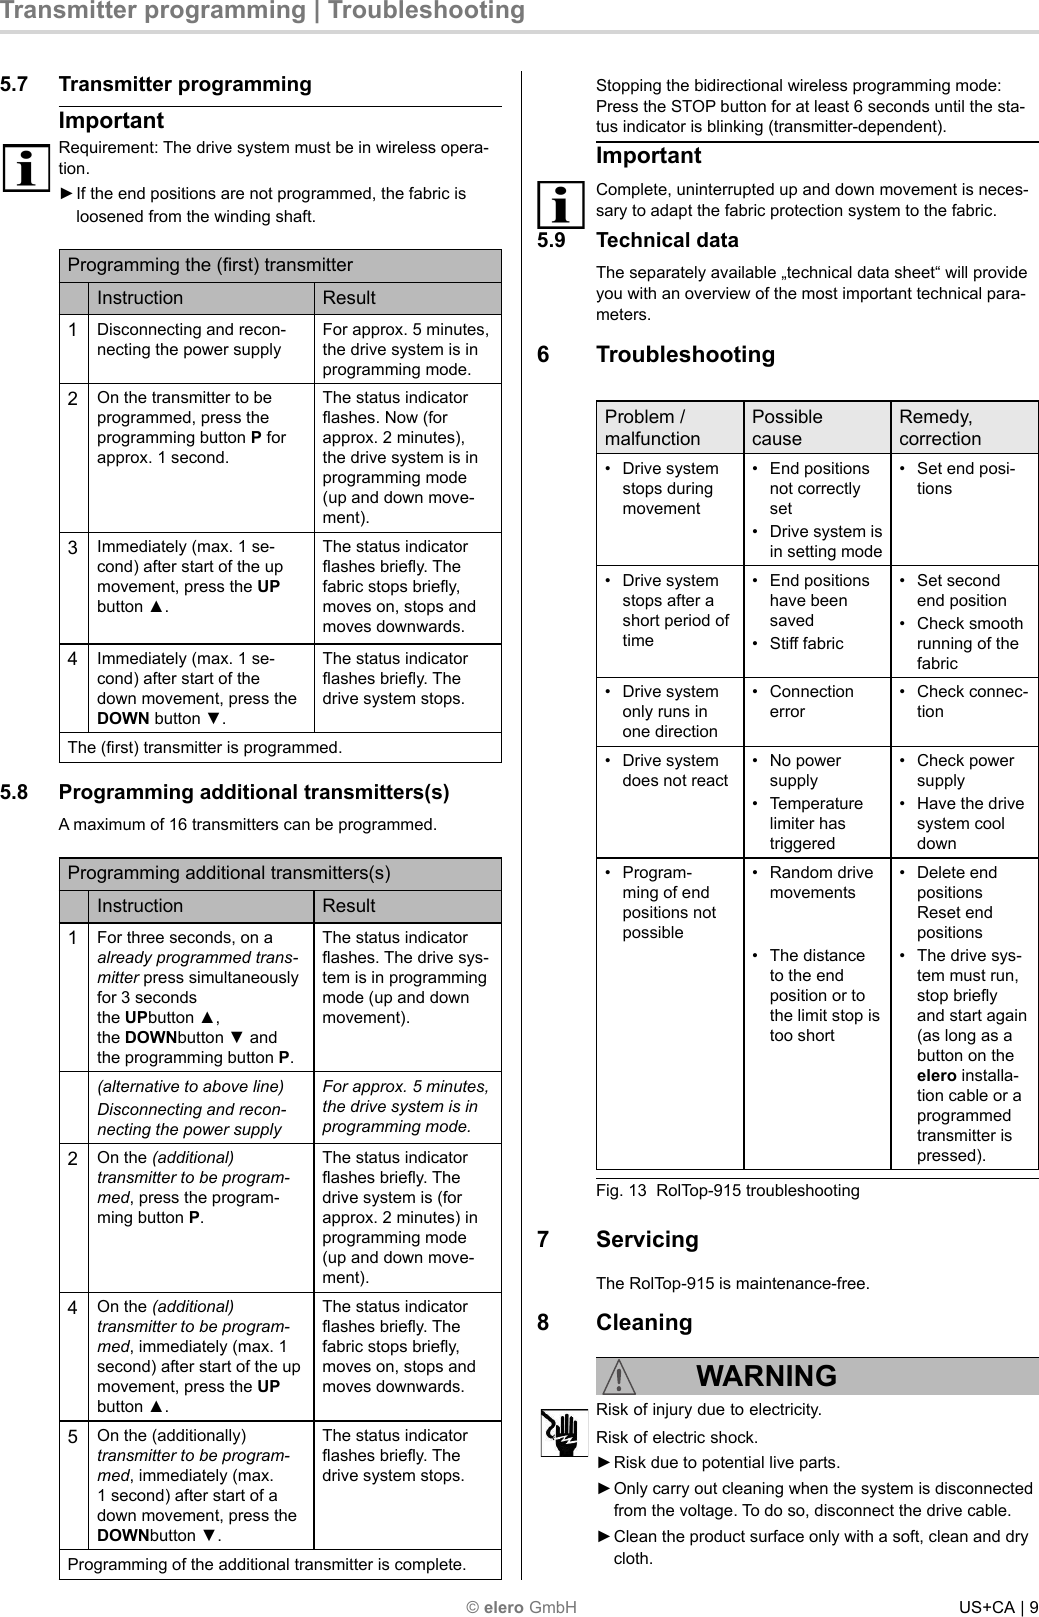
- 4. SunTop 2
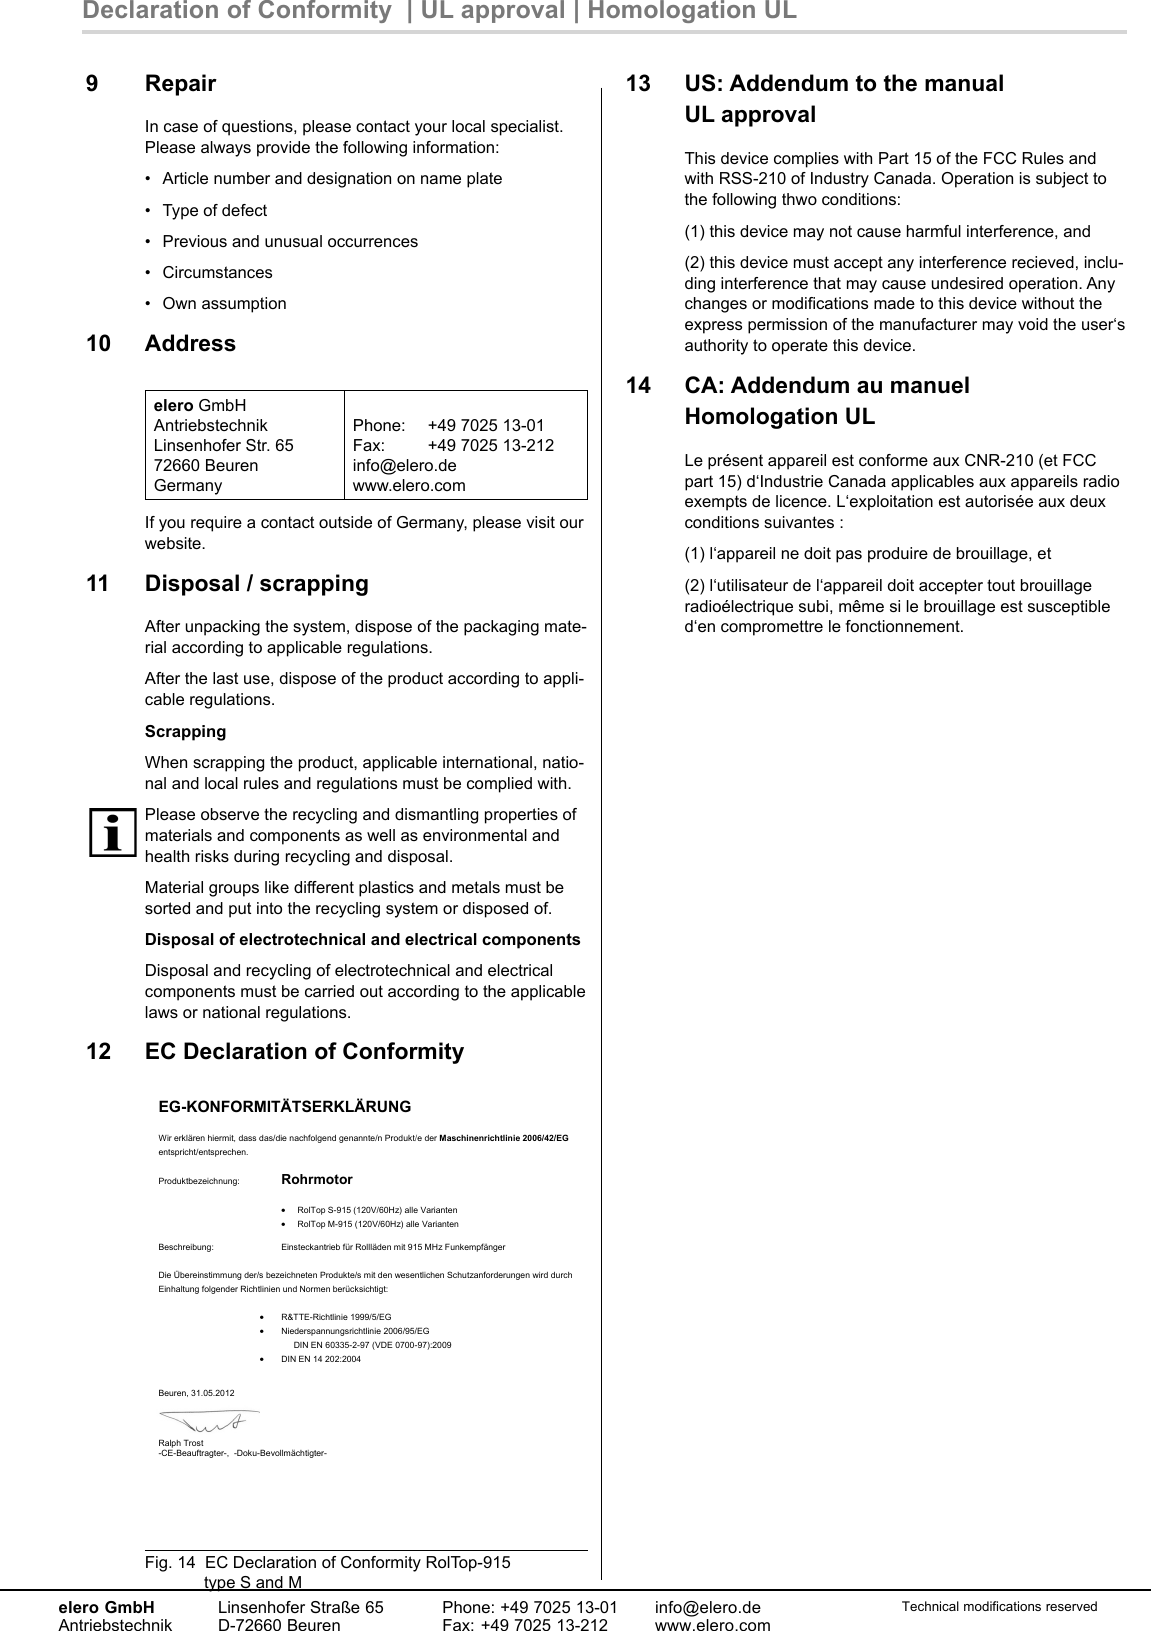
RolTop 2