iRobot 4812 iROBOT COMMAND MODULE User Manual USERS MANUAL 1 OF 2
iRobot Corporation iROBOT COMMAND MODULE USERS MANUAL 1 OF 2
UserManual.wiki
>
iRobot
>
4812 User Manual
>
USERS MANUAL 1 OF 2
Contents
1.
USERS MANUAL 1 OF 2
2.
USERS MANUAL 2 OF 2
USERS MANUAL 1 OF 2
Navigation menu
Upload a User Manual
Namespaces
Wiki Guide
HTML
PDF
Info
Views
User Manual
Discussion / Help
Navigation
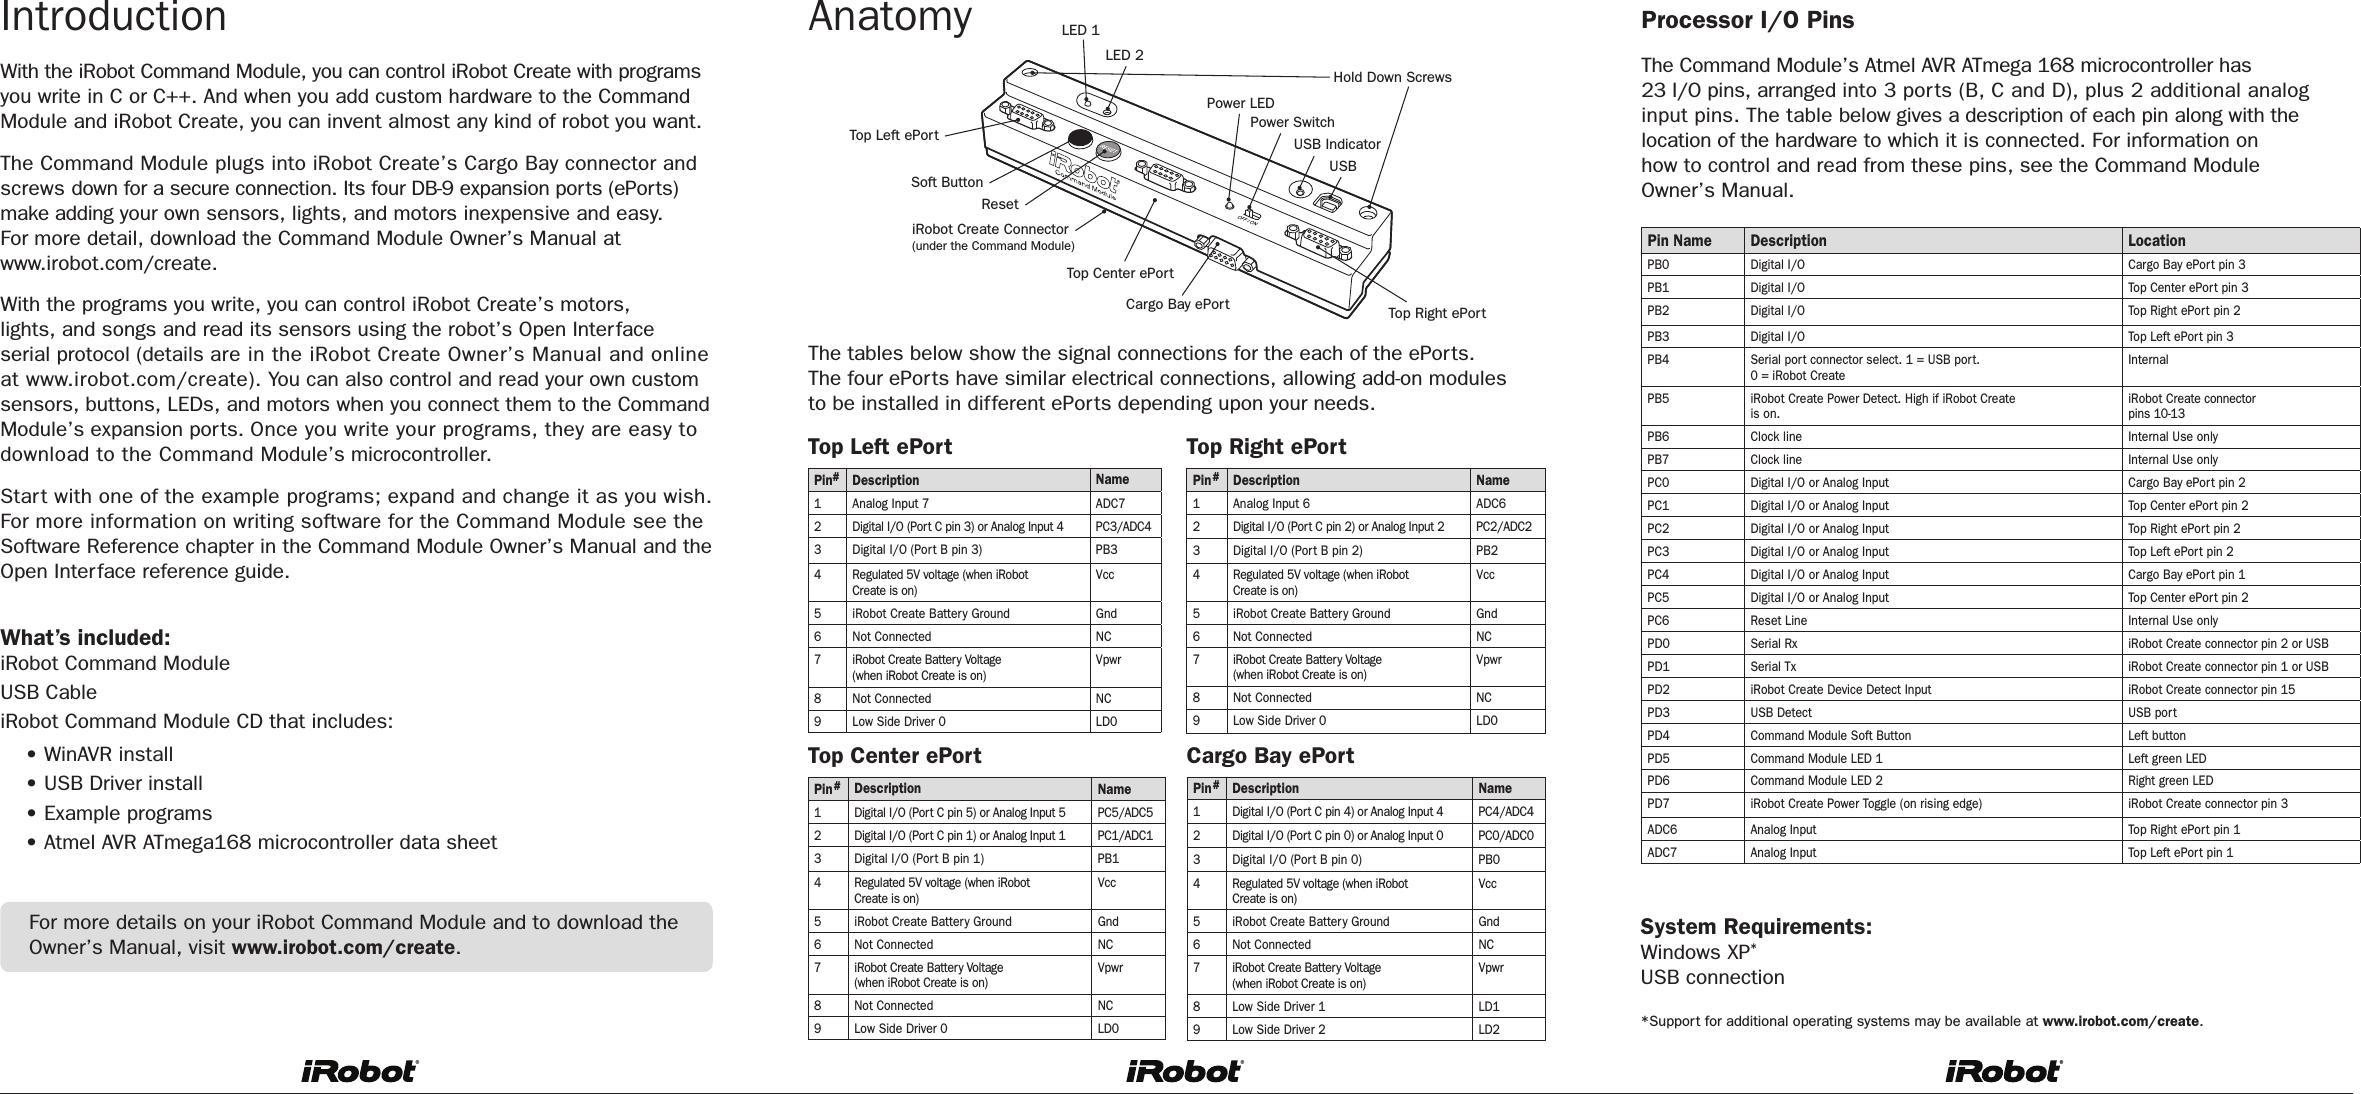
![Getting Started with a PC1 Install WinAVR from the Command Module product CD 2 Power on iRobot Create, plug the Command Module into the robot’s Cargo Bay Connector, and connect the USB cable from your PC to the Command Module.3 Install the USB drivers (there are 2 that need to be installed) using the Found New Hardware Wizard or the installation executable on the Command Module product CD4 Set the USB serial port to COM9 (open the Properties for the port from the Device Manager and change the com port using the Advanced button in the Port Settings tab)Creating and Loading a New Project1 Open WinAVR 2 Create a new project and add the source files (e.g. input.c, oi.h and makefile from the input example program on the product CD)3 Compile the project using Tools->[WinAVR] Make All4 Connect the Command Module to iRobot Create and connect the USB cable from your PC to the Command Module5 Press Reset on the Command Module6 Download the project using Tools->[WinAVR] Programwww.irobot.comiRobot® Command Module QUICK START GUIDESAVE 15%on accessories.See back for details.An easy step-by-step guide and reference card for using the iRobot Command Module with your iRobot Create.TMVirtual Wall®IR transmitter conveniently placed at robot eye-level. Can be used as an invisible wall or beaconiRobot Rechargeable BatteryRechargeable battery and charger for the iRobot CreateHome BaseTMRecharges the iRobot rechargeable battery while in iRobot Create. Also contains 3 IR transmittersStandard RemoteAllows you to control iRobot Create from a distanceiRobot® CreateTM AccessoriesRegister your iRobot® Command Module today and SAVE 15% on all accessories.*©2006 iRobot Corporation. All rights reserved. iRobot and Virtual Wall are registered trademarks of iRobot Corporation. Home Base and Create are trademarks of iRobot Corporation. U.S. Pat. Nos. 6,594,844 6,690,134, and 6,809,490. Other patents pending. For more accessories and ordering information go to www.irobot.com or call 800.727.9077. *See registration card for details. Availability subject to change. Shipping and handling not included.429.06For the full set of instructions on setting up and using your Command Module visit www.irobot.com/create to download the Command Module Owner’s Manual.](https://usermanual.wiki/iRobot/4812.USERS-MANUAL-1-OF-2/User-Guide-732914-Page-1.png)