lemega Technology FK-M3 M3+ Internet Radio User Manual M3 english 20170105
Shenzhen lemega Technology Co., Ltd M3+ Internet Radio M3 english 20170105
UserManual.wiki
>
lemega Technology
>
FK-M3 User Manual
>
User manual part 1
Contents
1.
User manual part 1
2.
User manual part 2
User manual part 1
Navigation menu
Upload a User Manual
Namespaces
Wiki Guide
HTML
PDF
Info
Views
User Manual
Discussion / Help
Navigation
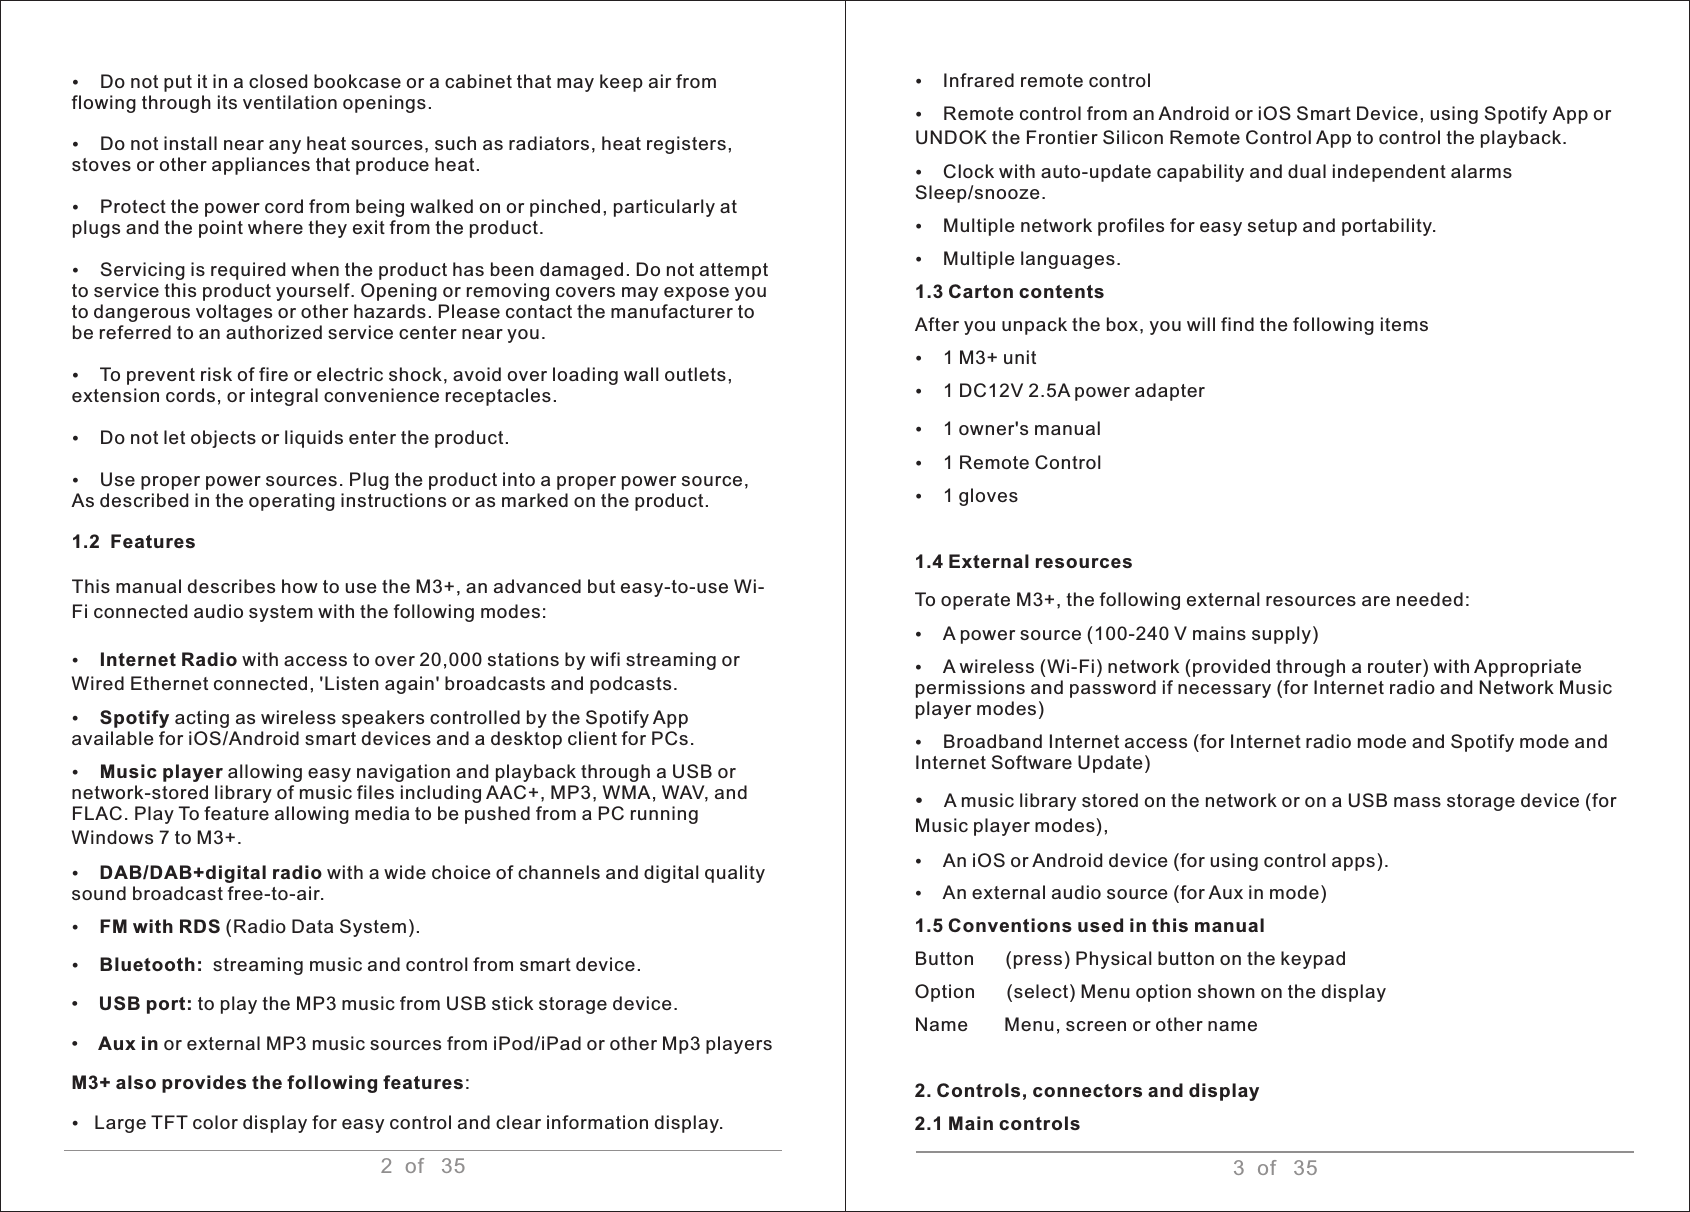
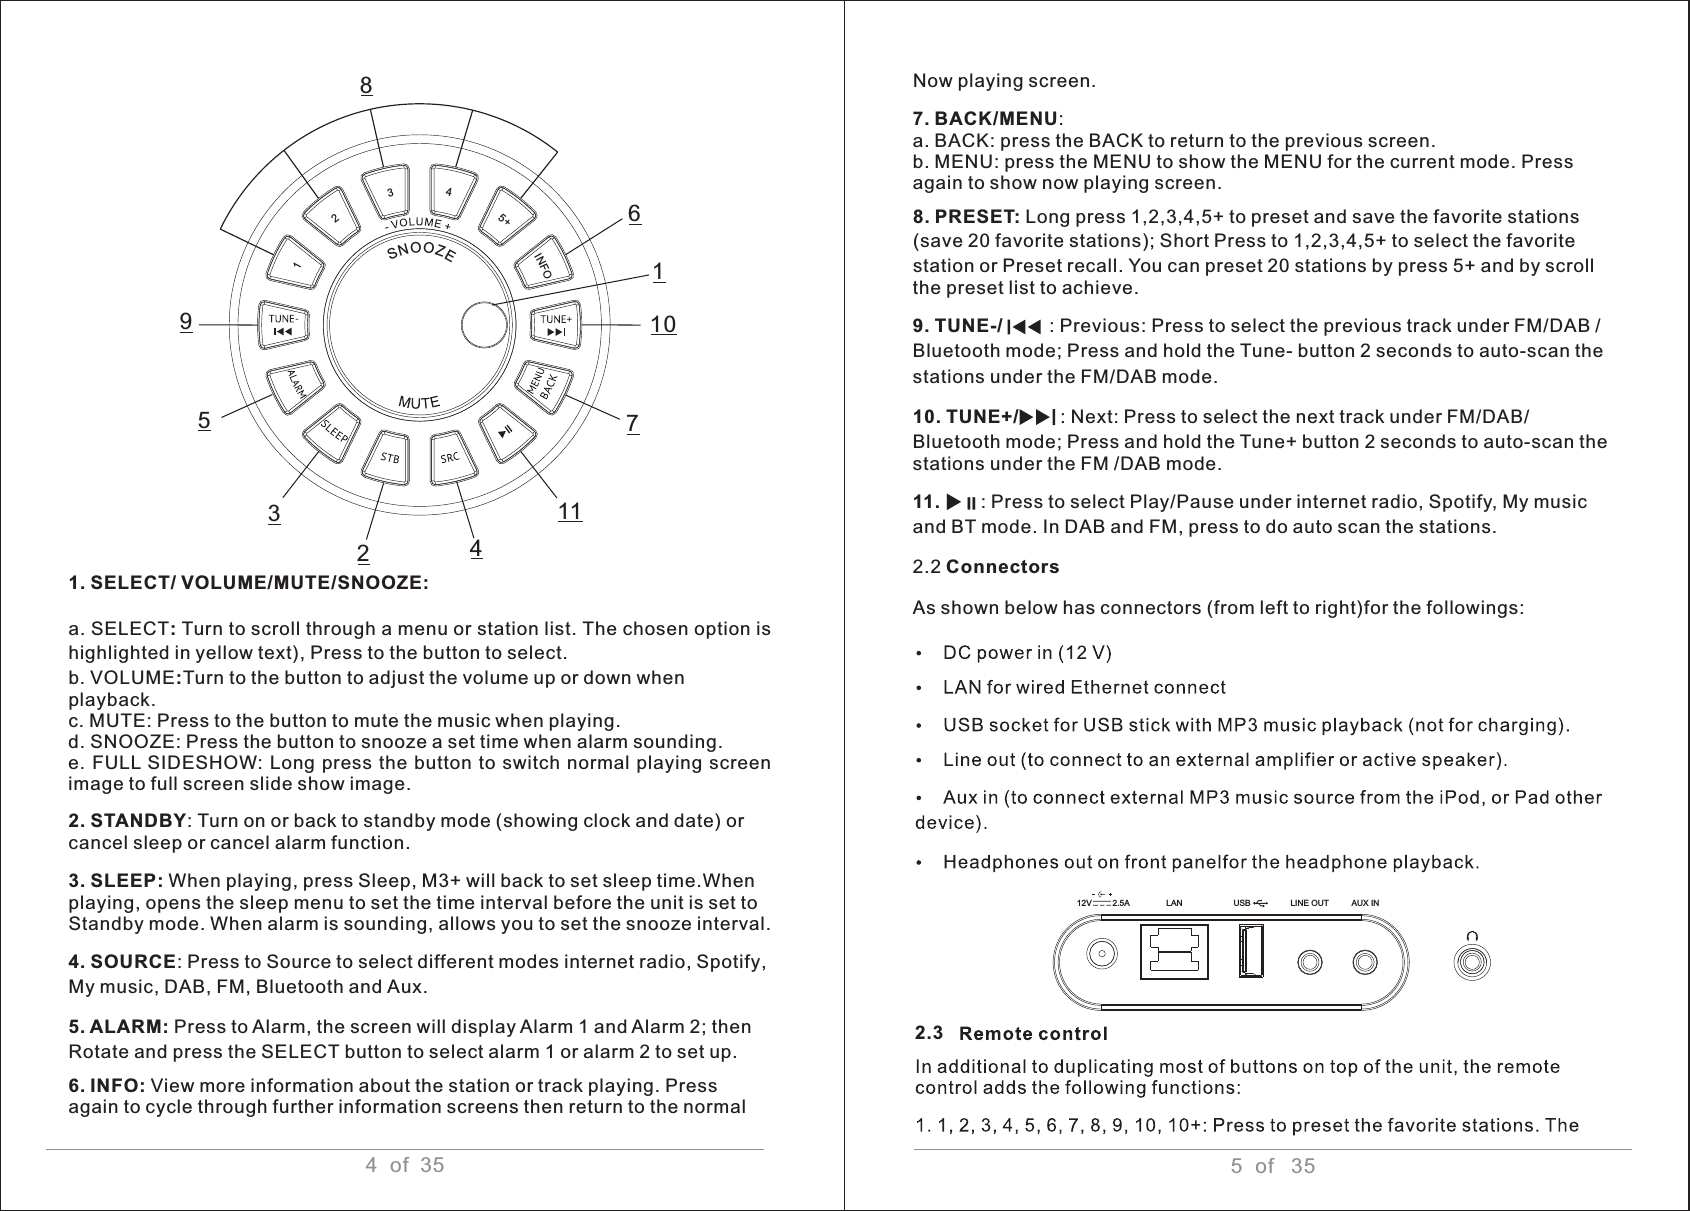
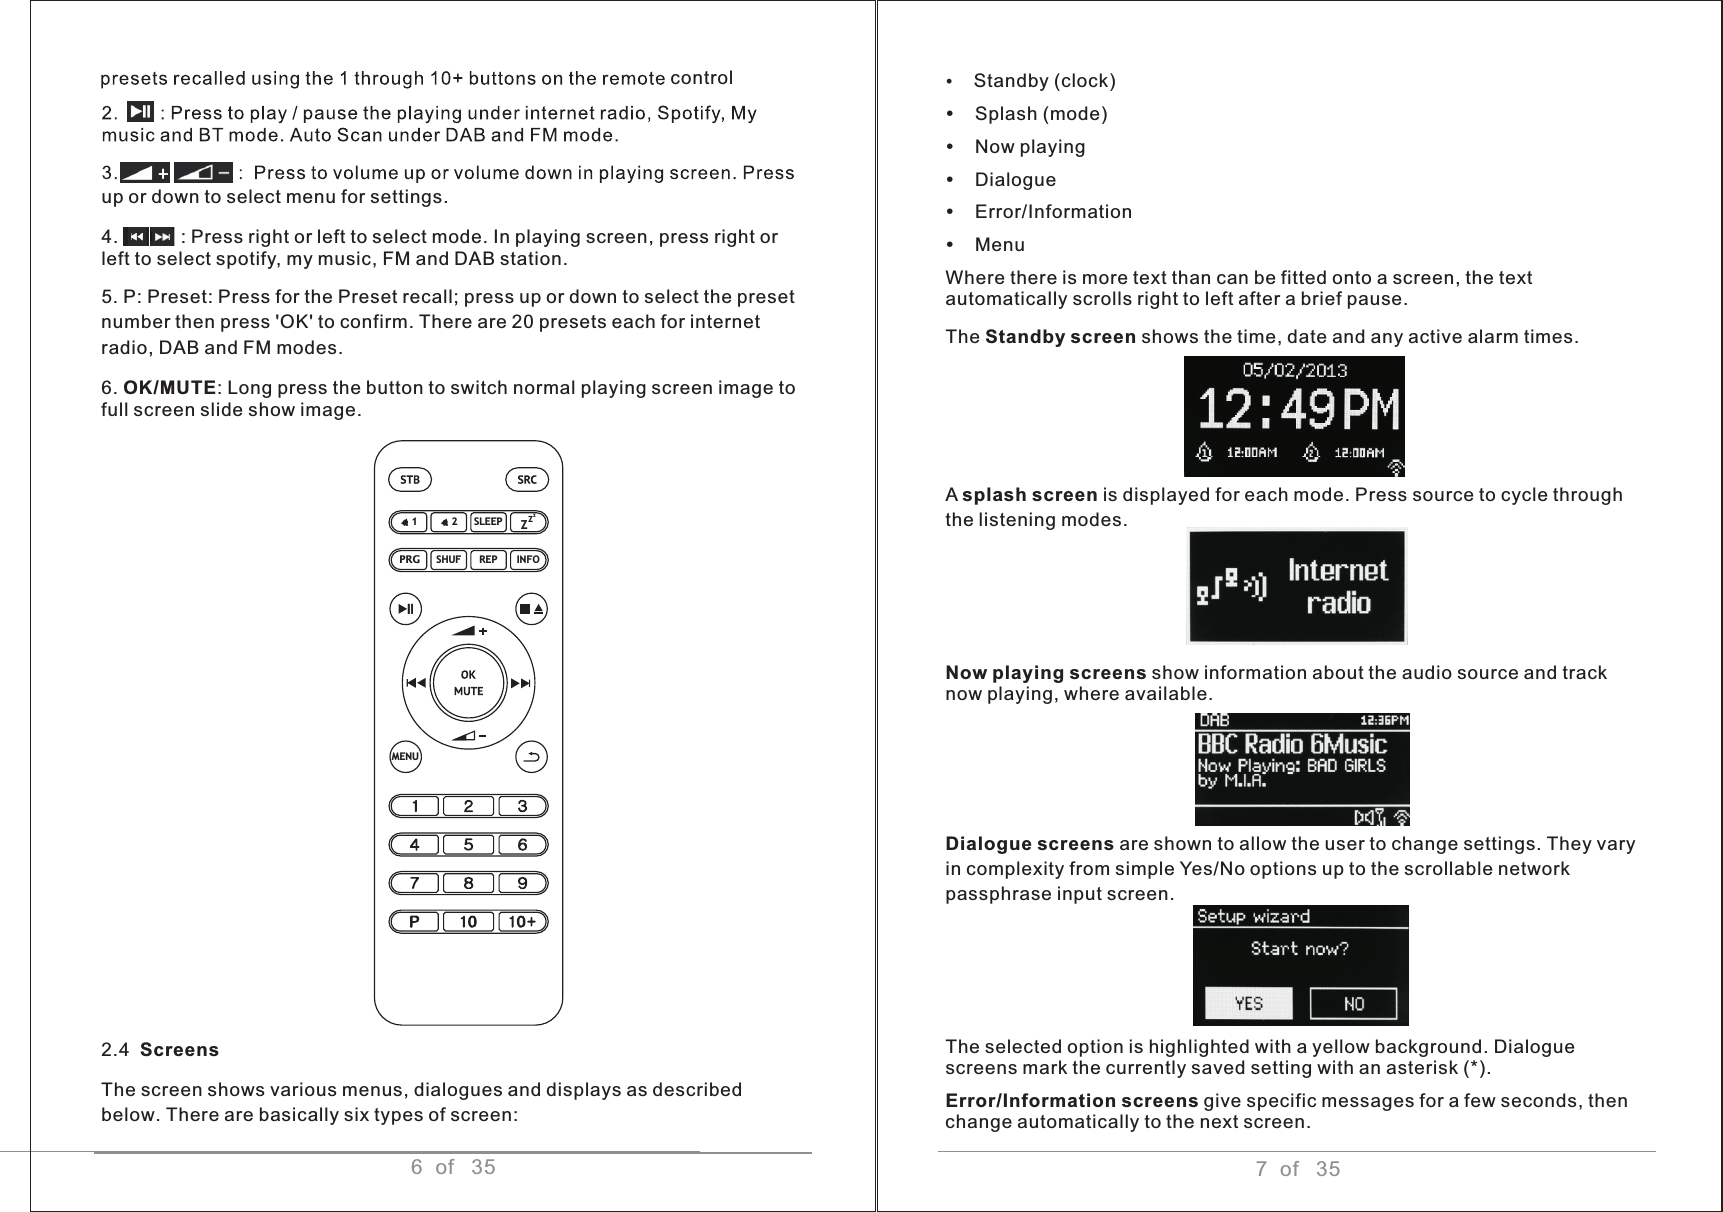
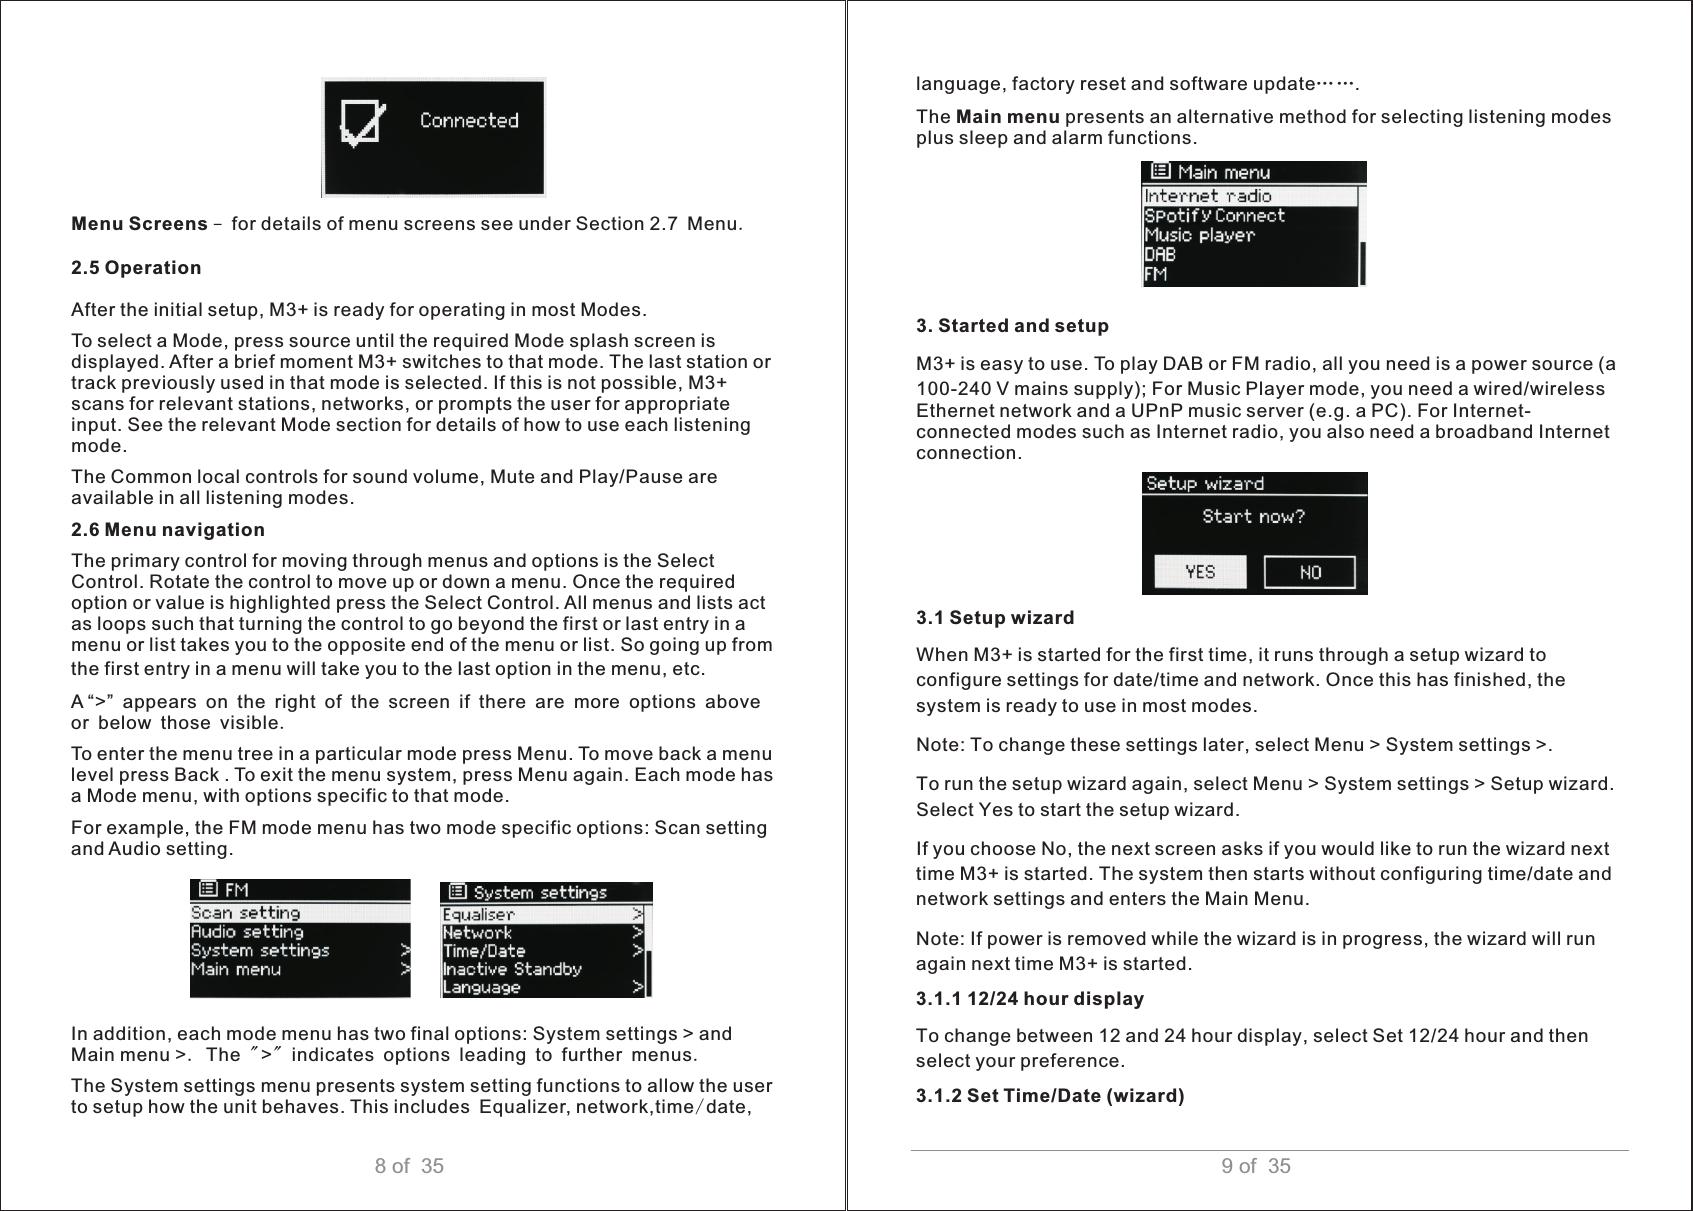
![11 of 3510 of 35The date and time are displayed as dd-mm-yyyy and hh:mm AM/PM with the first value, dd, active (flashing). Adjust each value with the Select control. As each value is set by pressing the Select control, the next value becomes active ready for adjustment.Auto-update Auto-update works with data sent over DAB, FM or the Internet. The clock is only updated when in a corresponding mode, so it is best to select a mode you use regularly. DAB and FM use time signals broadcast with radio transmissions. Network uses a time signal sent from the Internet radio portal when in anynetwork-connected mode.1.Select Update from DAB, Update from FM, Update from Network or Noupdate.2. If you are updating from the network, set your time zone.3. If your country uses daylight saving, the automatically updated time from the network may be wrong by one hour. When daylight savings are in effect (during the winter), turn on the Daylight savings option to rectify this. Note that if you are updating the time from DAB or FM, the Daylight savings option has no effect on the clock's time. M3+ will auto-update from the selected source when time information is available. Manual set If you set No update, the wizard now prompts you to set the time and date manually. The date and time are displayed as dd-mm-yyyy and hh:mm AM/PM with the first value, dd, active (flashing). Adjust each value with the Select control. As each value is set, the next value becomes active and flashes.3.1.3 Network M3+ is compatible with all common network protocols and encryption methods, including Wi-Fi Protected Setup (WPS). To connect M3+ to your network, you need a Wi-Fi wireless router, together with password key if set Select WLAN region/country >Wi-Fi network (SSID), and then select a network from the list.If the network is open (non-encrypted), M3+ connects and no further details are required; see Completion below.Standard encrypted network To enter the network’s key (password), use the Select control to highlight the next relevant character and press to select each character in turn. As each character is selected, the key is built up near the top of the display. The three options – Backspace, OK and Cancel are included in the selection loop. These can be accessed just using the Select control, or, a short cut Isavailable, pressing the Info key, which moves the selection highlight to theBack Space option. WPS setup WPS encrypted networks are identified by ‘[WPS]’ at the start of the network name, and have two methods of connection. Select one and follow the prompts. When using the network wizard an additional option to Skip WPS is available. Select one and follow the prompts:](https://usermanual.wiki/lemega-Technology/FK-M3.User-manual-part-1/User-Guide-3595590-Page-7.png)