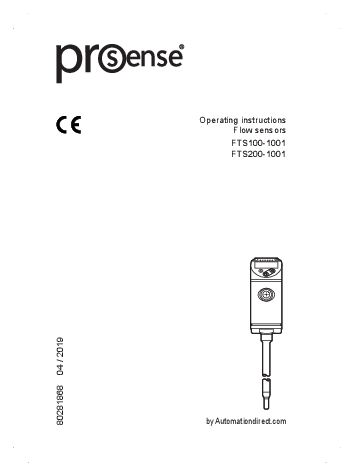
Operating instructions Flow sensors FTS100-1001 FTS200-1001 80281868 04 / 2019 by Automationdirect.com
2 Safety instructions. • The device described is a subcomponent for integration into a system. - The manufacturer of the system is responsible for the safety of the ...
Instructions > Reaction, result […] Designation of keys, buttons or indications → Cross-reference Important note Non-compliance may result in malfunction or interference. Information Supplementary note. CAUTION Warning of personal injury. Slight reversible injuries may result. 2 Safety instructions
Operating instructions Flow sensors FTS100-1001 FTS200-1001 by Automationdirect.com 80281868 04 / 2019 Contents 1 Preliminary note...................................................................................................4 2 Safety instructions ...............................................................................................4 2.1 For the scope of validity cULus: ....................................................................5 3 Functions and features ........................................................................................5 4 Function...............................................................................................................6 4.1 Operating modes (ModE) ..............................................................................6 4.2 Select the medium (MEdI) .............................................................................7 4.3 Define the internal pipe diameter (diA) ..........................................................7 4.4 Customer-specific calibration (CGA) .............................................................8 4.5 Switching function..........................................................................................9 4.6 Analog function ............................................................................................10 4.7 Frequency output.........................................................................................12 4.8 Measured value damping (dAP) ..................................................................13 4.9 Color change display (coLr).........................................................................13 5 Mounting............................................................................................................14 5.1 Installation position ......................................................................................15 5.2 Interference in the pipe system ...................................................................17 5.3 Alignment.....................................................................................................18 6 Electrical connection..........................................................................................19 7 Operating and display elements ........................................................................21 8 Menu..................................................................................................................22 8.1 Main menu...................................................................................................22 8.2 Initialisation menu (INI)................................................................................24 8.3 Extended functions (EF) Basic settings (CFG).........................................25 8.4 Min/Max memory (MEM) Display (DIS) ....................................................27 9 Set-up ................................................................................................................28 10 Parameter setting ............................................................................................29 10.1 Parameter setting in general .....................................................................29 10.1.1 Switch between the menus...............................................................30 10.1.2 Change to the process value display (RUN mode) ..........................30 10.1.3 Locking / Unlocking ..........................................................................30 10.1.4 Timeout.............................................................................................30 2 10.2 Settings for volumetric flow monitoring......................................................31 10.2.1 Define the operating mode ............................................................... 31 10.2.2 Define the internal pipe diameter......................................................31 10.2.3 Configure the limit value monitoring for flow for OUT1.....................32 10.2.4 Configure the limit value monitoring for flow for OUT2.....................32 10.2.5 Configure the frequency signal for flow for OUT1 ............................32 10.2.6 Configure the frequency signal for flow for OUT2 ............................32 10.2.7 Configure the analog output for flow for OUT2.................................33 10.3 Settings for temperature monitoring ..........................................................33 10.3.1 Configure the limit value monitoring for temperature for OUT2........33 10.3.2 Configure the frequency signal for temperature for OUT2 ...............33 10.3.3 Configure the analog output for temperature for OUT2....................33 10.4 User settings (optional)..............................................................................34 10.4.1 Configuration of the standard display ...............................................34 10.4.2 Set the standard unit of measurement for flow.................................34 10.4.3 Select the medium............................................................................34 10.4.4 Configure color change display .......................................................34 10.4.5 Setting the output logic .....................................................................34 10.4.6 Set the measured value damping.....................................................35 10.4.7 Setting the switching delays ............................................................. 35 10.4.8 Set output status in fault condition....................................................35 10.4.9 Calibration of the curve of measured values .................................... 35 10.5 Service functions .......................................................................................36 10.5.1 Read min/max values .......................................................................36 10.5.2 Reset all parameters to factory setting .............................................36 11 Operation ......................................................................................................... 36 11.1 Read the process value .............................................................................36 11.2 Read the set parameters ...........................................................................37 12 Technical data..................................................................................................37 13 Troubleshooting ..............................................................................................37 14 Servicing..........................................................................................................38 15 Factory setting .................................................................................................38 3 1 Preliminary note Technical data, approvals, accessories and further information at www.automationdirect.com. Instructions > Reaction, result [...] Designation of keys, buttons or indications Cross-reference Important note Non-compliance may result in malfunction or interference. Information Supplementary note. CAUTION Warning of personal injury. Slight reversible injuries may result. 2 Safety instructions · The device described is a subcomponent for integration into a system. - The manufacturer of the system is responsible for the safety of the system. - The system manufacturer undertakes to perform a risk assessment and to create a documentation in accordance with legal and normative requirements to be provided to the operator and user of the system. This documentation must contain all necessary information and safety instructions for the operator, the user and, if applicable, for any service personnel authorised by the manufacturer of the system. · Read this document before setting up the product and keep it during the entire service life. · The product must be suitable for the corresponding applications and environmental conditions without any restrictions. · Only use the product for its intended purpose ( Functions and features). · Only use the product for permissible media ( Technical data). · If the operating instructions or the technical data are not adhered to, personal injury and/or damage to property may occur. 4 · The manufacturer assumes no liability or warranty for any consequences caused by tampering with the product or incorrect use by the operator. · Installation, electrical connection, set-up, operation and maintenance of the unit must be carried out by qualified personnel authorised by the machine operator. · Protect units and cables against damage. 2.1 For the scope of validity cULus: The device shall be supplied from an isolating transformer having a secondary Listed fuse rated either a) max 5 amps for voltages 0~20 Vrms (0~28.3 Vp) or b) 100/Vp for voltages of 20~30 Vrms (28.3~42.4 Vp). The device shall be connected only by using any Listed (CYJV/7) or R/C (CYJV2/8) cord in respect of Condition of Acceptability, having suitable ratings. 3 Functions and features The unit monitors liquids and gases. It detects the process categories flow and medium temperature. Application area · Air · Water · Glycol solutions (reference medium: 35 % ethylene glycol solution) Selection of the medium to be monitored 10.4.3. This is a class A product. The unit may cause radio interference in domestic areas. If required, take appropriate EMC screening measures. 5 4 Function · The unit detects flow based on the calorimetric measuring principle. · The unit also detects the medium temperature. · The unit displays the current process value. It generates 2 output signals according to the parameter setting: OUT1: 2 selection options - Switching signal for flow limit values - Frequency signal for flow Parameter setting 10.2.3 10.2.5 OUT2: 6 selection options - Switching signal for flow limit values - Switching signal for temperature limit values - Analog signal for flow - Analog signal for temperature - Frequency signal for flow - Frequency signal for temperature Parameter setting 10.2.4 10.3.1 10.2.7 10.3.3 10.2.6 10.3.2 Before starting measurement inital settings must be done. 4.1 Operating modes (ModE) The unit provides two selectable operating modes for flow measurement: Operating mode LIQU Medium Liquids Display unit fps, gpm, cfm GAS Air fps, gpm, cfm On initial power up, the factory default setting for [ModE] is LIQU and is not available to be changed to GAS until any setting value for medium [MEdI] and internal pipe diameter [diA] is first entered. Then [ModE] can be selected and changed to GAS. gpm and cfm measurement is valid only for round pipes or air ducts up to 16 inches in internal diameter. For larger pipe or duct sizes and other shapes such as rectangular ducts only fps measurement will produce accurate results. In this case set the internal pipe diameter [diA] to 16 and standard unit of measurement [uni] to fps. 6 The selected operating mode has no effect on the temperature measurement, only absolute values in °F are indicated. The parameter settings are saved in the respective operating mode, i.e. when the operating mode is changed, the settings are not lost. If the operating modes LIQU or GAS are selected: Define the medium and the internal pipe diameter ( 10.2.1). If required, calibrate curve of measured values ( 10.4.9). 4.2 Select the medium (MEdI) The unit has characteristic curves for different media. Depending on the operating mode, the following media can be selected in the menu ( 10.4.3): Medium H2O GLYC AIR Operating mode LIQU GAS x x x Define the medium before setting output parameters. 4.3 Define the internal pipe diameter (diA) In the operating modes LIQU and GAS the internal pipe diameter has to be entered to define the volumetric flow ( 10.2.2). 7 4.4 Customer-specific calibration (CGA) Via the calibration factor CGA the sensor can be adjusted to a reference flow in the application. The customer-specific calibration allows changing the gradient of the curve of measured values. It influences the display and the outputs. A 140 % MEW 100 % MEW 60 % MEW V1 A = Operating value for display and output signals V0 Q = Flow V2 MEW = Final value of the measuring range V0 = Curve of measured values at factory setting MEW Q V1, = Curve of measured values after V2 calibration The change in the gradient is indicated in percentage. Factory setting: CGA = 100 %. After a change the calibration can be reset to factory setting ( 10.5.2). Depending on the set CGA factor, it may not be possible to use the complete measuring range. 8 4.5 Switching function OUTx changes its switching status if it is above or below the set switching limits (flow or temperature). Hysteresis or window function can be selected. Example of flow monitoring: Hysteresis function Window function SP FH rP FL SP = set point rP = reset point HY = hysteresis Hno = hysteresis NO (normally open) Hnc = hysteresis NC (normally closed) FH = upper limit value FL = lower limit value FE = window Fno = window NO (normally open) Fnc = window NC (normally closed) When the hysteresis function is set, the set point SP and the reset point rP are defined. The rP value must be lower than the SP value. The distance between SP and rP is at least 4 % of the final value of the measuring range (= hysteresis). If only the set point is changed, the reset point is changed automatically; the difference remains constant. When set to the window function the upper limit value FH and the lower limit value FL are defined. The distance between FH and FL is at least 4 % of the final value of the measuring range.FH and FL have a fixed hysteresis of 0.25 % of the final value of the measuring range. This keeps the switching status of the output stable if the flow rate varies slightly. 9 4.6 Analog function The unit provides an analog signal that is proportional to the flow quantity or the medium temperature. Within the measuring range the analog signal is 4...20 mA. The measuring range is scalable: · [ASP2] determines at which measured value the output signal is 4 mA. · [AEP2] determines at which measured value the output signal is 20 mA. Minimum distance between [ASP2] and [AEP2] = 20 % of the final value of the measuring range. If the measured value is outside the measuring range or in the event of an internal error, the current signals indicated in figure 1 are provided. For measured values outside the display range or in case of a fault, messages are displayed (UL, OL, Err; 13). The analog signal in case of a fault is adjustable ( 10.4.8): · [FOU] = On determines that the analog signal goes to the upper final value (22 mA) in case of an error. · [FOU] = OFF determines that the analog signal goes to the lower final value (3.5 mA) in case of an error. 10 1 [mA] FOU=On 22 21.5 3 4 20 5 4 FOU=OFF 3.5 Err Q T UL MAW ASP 0 -20 2 AEP MEW OL Err 100 120 130 [% MEW] Figure 1: Characteristics of the analog output according to the standard IEC 60947-5-7. Q: Volumetric flow T: Medium temperature MAW: Initial value of the measuring range for non-scaled measuring range MEW: Final value of the measuring range for non-scaled measuring range ASP: Analog start point with scaled measuring range AEP: Analog end point with scaled measuring range UL: Below the display range OL: Above the display range Err: The unit is in the error state 1 Analog signal 2 Measured value (flow or temperature) 3 Display range 4 Measuring range 5 Scaled measuring range 11 4.7 Frequency output The unit provides a frequency signal that is proportional to the volumetric flow and the medium temperature. Within the measuring range the frequency signal is between 0 and 100 Hz for the factory setting. The frequency signal is scalable: · [FrPx] determines the frequency signal in Hz provided when the upper measured value (MEW or FEPx) is reached. The measuring range is scalable: · [FSP2] determines the lower temperature value from which a frequency signal is provided. FSP2 is not adjustable for flow measurement. · [FEPx] determines at which measured value the frequency signal is FrPx. Minimum distance between [FSP2] and [FEP2] = 20 % MEW. If the measured value is outside the measuring range or in the event of an internal error, the frequency signals indicated in figure 2 are provided. For measured values outside the display range or in case of a fault, messages are displayed (UL, OL, Err; 13). The frequency signal in case of a fault is adjustable ( 10.4.8): · [FOU] = On determines that the frequency signal goes to the upper final value (130 % FrPx) in case of an error. · [FOU] = OFF determines that the frequency signal is 0 Hz in case of an error. 12 Flow measurement 1 FOU=On 130 % 120 % 3 4 FrP =100 % 5 Temperature monitoring 1 FOU=On 130 % 120 % 3 4 FrP =100 % 5 FOU=OFF 0 % UL MAW Err 2 FEP MEW OL Err 100% 120% FOU=OFF 0 % UL MAW FSP Err 2 FEP MEW OL Err 100% 120% Figure 2: Output curve frequency output MAW: Initial value of the measuring range for non-scaled measuring range MEW: Final value of the measuring range for non-scaled measuring range FSP: Frequency start point with scaled measuring range (only temperature) FEP: Frequency end point with scaled measuring range FrP: Frequency signal for upper measured value OL: Above the display range Err: The unit is in the error state 1 Frequency signal (FrP at factory setting = 100 Hz) 2 Measured value (flow or temperature in % MEW) 3 Display range 4 Measuring range 5 Scaled measuring range 4.8 Measured value damping (dAP) The damping time enables setting how many seconds after the output signal has reached 63 % of the final value if the flow value changes suddenly. The set damping time stabilises the outputs and the display. The signals [UL] and [OL] ( 13 Troubleshooting) are defined under consideration of the damping time. 4.9 Color change display (coLr) The color of the characters in the display can be set via the parameter [coLr] ( 10.4.4). With the set parameters rED (red) and GrEn (green), the display is 13 permanently set to one color. If the parameters rxou and Gxou are set, the color of the characters changes depending on the process value: Parameter settings OUT1 r1ou G1ou OUT2 r2ou G2ou Color change to ... red green SP1/ SP2 MAW MEW Hysteresis function: Color change if process value is above the set point FH1/ FH2 FL1/ FL2 MAW MEW Window function: Color change if process value is within the window range MAW = initial value of the measuring range, MEW = final value of the measuring range 5 Mounting CAUTION For medium temperatures above 122 °F some parts of the housing can heat up to over 149 °F. > Risk of burns. Protect the housing against contact with flammable substances and unintentional contact. 14 Ensure that the system is free of pressure during installation. Ensure that no media can leak at the mounting location during installa- tion. Accessory progressive ring mounting fittings can be ordered separately from www. automationdirect.com. Observe the instructions of the mounting accessories. When using the accessory mounting fittings use a thread sealer that is compatible with the media if required by the application. 5.1 Installation position General The sensor tip must be completely surrounded by the medium. Internal pipe diameter (diA) Minimum immersion depth < 4.7 inch 0.6 inch 4.7 inch diA Table 1: Immersion depth of the probe Observe maximum flow rates of 9.85 ft/sec for liquid and 328 ft/sec for air. 15 Recommended For horizontal pipes: mounting from the side. Conditionally possible For vertical pipes: mounting in the rising pipe. Horizontal pipe /mounting from the bottom: Horizontal pipe /mounting from the top: if if the pipe is free from build-up. the pipe is completely filled with medium. 16 Not allowed The sensor tip must not be in contact with the pipe wall. Do not mount in downpipes that are open at the bottom. Mounting in downward flow pipes in pressurized, closed loop systems is possible. 5.2 Interference in the pipe system Components integrated in the pipes, bends, valves, reductions, etc. lead to turbulence of the medium. This affects the function of the unit. Adhere to the distances between sensor and sources of interference: 5...10 x D 3...5 x D S S D = pipe diameter; S = sources of interference 17 5.3 Alignment To achieve the optimum measuring accuracy: mount the sensor in a way that the flow direction goes from the larger key surface (1) to the smaller key surface. For easier readability of the display the sensor housing can be rotated by 345° with regard to the process connection. Do not go beyond the end stop. 18 6 Electrical connection The unit must be connected by a qualified electrician. The national and international regulations for the installation of electrical equipment must be adhered to. Voltage supply according to EN 50178, SELV, PELV. Disconnect power. Connect the unit as follows: 21 34 BK: black BN: brown BU: blue WH: white Colors to DIN EN 60947-5-2 Sample circuits: 2 x positive switching 1 BN L+ 2 WH 4 BK 3 BU L 1 x positive switching / 1 x analog 1 BN L+ 2 WH 4 BK 3 BU L 1 BN 2 WH 4 BK 3 BU L+ OUT2 OUT1 L 2 x negative switching 1 BN L+ 2 WH 4 BK 3 BU L 1 x negative switching / 1 x analog 1 BN L+ 4 BK 2 WH 3 BU L 19 Pin 1 L+ Pin 3 L- Pin 4 (OUT1) · Switching signal: limit flow value · Frequency signal for flow · Switching signal: limit flow value · Switching signal: limits for temperature Pin 2 (OUT2) · Analog signal for flow · Analog signal for temperature · Frequency signal for flow · Frequency signal for temperature 20 7 Operating and display elements 1 2 3 4 6 5 1, 2, 3: Indicator LEDs · LED 1 = switching status OUT1 (lights if output 1 is switched) · LED 2 = process value in the indicated unit of measurement: fps, gpm, cfm, °F, 103 · LED 3 = switching status OUT2 (lights if output 2 is switched) 4: Alphanumeric display, 4 digits · Indication of the current process values in red or green characters 4.9. · Display of the parameters and parameter values 5: Buttons up [] and down [] · Select parameter · Change parameter value (hold button pressed) · Change of the display unit in the normal operating mode (Run mode) · Lock / Unlock (buttons pressed simultaneously > 10 seconds) 6: Button [] = Enter · Change from the RUN mode to the main menu · Change to the setting mode · Acknowledge the set parameter value 21 8 Menu 8.1 Main menu Process value display (RUN) 1_ 1 SP1 FH1 FEP1 rP1 FL1 FrP1 ASP2 SP2 FH2 FSP2 AEP2 rP2 FL2 FEP2 FrP2 EF_ &)*0(0'6 Parameters with white background are indicated in case of factory setting ( 15). Parameters with grey background are indicated depending on the operating mode [ModE] and output functions [ou1] and [ou2]. 22 Explanation main menu INI Opening of the initialization menu. EF Extended functions. Opening of the lower menu level. Switching output with hysteresis function: SP1 Set point OUT1. rP1 Reset point OUT1. SP2 Set point OUT2. rP2 Reset point OUT2. Switching output with window function: FH1 Upper limit for window OUT1. FL1 Lower limit for window OUT1. FH2 Upper limit for window OUT2. FL2 Lower limit for window OUT2. Frequency output: FEP1 End point for flow OUT1. FrP1 Frequency at the end point (FEP1) OUT1. FEP2 End point for flow or temperature OUT2. FrP2 Frequency at the end point (FEP2) OUT2. FSP2 Start point for temperature OUT2, only for SEL2 = TEMP. Analog output: ASP2 Analog start point at OUT2 = flow or temperature value at which the output signal is 4 mA. AEP2 Analog end point at OUT2 = flow or temperature value at which the output signal is 20 mA. 23 8.2 Initialisation menu (INI) Main menu ModE /48 GAS 1 0(G H2O GLYC $5 diA 0.6...16 CGA 60...140 % Parameters with white background are indicated in case of factory setting ( 15). Parameters with grey background are displayed depending on the operating mode [ModE]. Explanation initialisation menu (INI) ModE MEdI diA CGA Selection of the operating mode for flow measurement: LIQU = Display of absolute process values (liquids) GAS = Display of absolute process values (air) Medium selection Setting the internal pipe diameter in inch. Calibration of the measurement graph (pitch) 24 8.3 Extended functions (EF) Basic settings (CFG) Main menu RUN EF rES - - - - CFG_ MEM_ '6_ ou1 Hno Hnc Fno Fnc FRQ CFG ou2 Hno Hnc Fno Fnc FRQ dS1 0.0...60 s dr1 0.0...60 s dS2 0.0...60 s dr2 0.0...60 s uni fps gpm cfm P-n PnP nPn dAP 0.0...5.0 s FOU1 On OFF OU FOU2 On OFF OU SEL2 FLOW TEMP Parameters with white background are indicated in case of factory setting ( 15). Parameters with grey background are indicated depending on the operating mode [ModE] and output functions [ou1] and [ou2]. 25 Explanation extended functions (EF) rES Restore factory setting CFG Submenu basic settings MEM Submenu min/max memory DIS Submenu display settings Explanation basic settings (CFG) ou1 / ou2 Output functions OUT1 / OUT2 Hno = Hysteresis function normally open Hnc = Hysteresis function normally closed Fno = Window function normally open Fnc = Window function normally closed FRQ = Frequency output I = Analog signal 4...20 mA dS1 / dS2 dr1 / dr2 Switch-on delay on OUT1 / OUT2 Switch-off delay on OUT1 / OUT2 uni Standard unit of measurement for flow P-n Output logic: pnp / npn dAP Measured value damping (only for flow) FOU1 / FOU2 Behavior of output OUT1 / OUT2 in case of an error SEL2 Standard unit of measurement for evaluation via OUT2 26 8.4 Min/Max memory (MEM) Display (DIS) Main menu rES EF MEM Lo.F 0.0 cfm CFG_ Hi.F 0.0 cfm MEM_ Lo.T 0.0 °F '6_ Hi.T 0.0 °F coLr diS SELd rEd GrEn '6 r1ou G1ou r2ou G2ou d1 d2 d3 rd1 rd2 rd3 OFF FLOW TEMP Explanation min/max memory (MEM) Lo.F Min. value of the flow measured in the process Hi.F Max. value of the flow measured in the process Lo.T Min. value of the temperature measured in the process Hi.T Max. value of the temperature measured in the process 27 Explanation display settings (DIS) coLr diS SELd Color configuration of the display rEd = Display always red GrEn = Display always green r1ou = Display red in case of switched output OUT1 G1ou = Display green in case of switched output OUT1 r2ou = Display red in case of switched output OUT2 G2ou = Display green in case of switched output OUT2 Update rate and orientation of the display d1 = update of the measured values every 50 ms. d2 = update of the measured values every 200 ms. d3 = update of the measured values every 600 ms. rd1, rd2, rd3 = display as for d1, d2, d3; rotated by 180°. OFF = the measured value display is deactivated in the Run mode. Standard display: flow or medium temperature 9 Set-up After power on and expiry of the power-on delay time, the unit is in the normal operating mode. It carries out its measurement and evaluation functions and generates output signals according to the set parameters. During the start up delay time the outputs are switched as programmed: - ON with normally open function (Hno / Fno) - OFF with normally closed function (Hnc / Fnc) - OFF for frequency output (FRQ) - 20 mA for current output (I) 28 10 Parameter setting CAUTION For medium temperatures above 122 °F some parts of the housing can heat up to over 149 °F. > Risk of burns. Do not touch the device with your hands. Use another object (e.g. a ballpoint pen) to carry out settings on the unit. Parameters can be set before installation or during operation. If you change parameters during operation, this will influence the function of the plant. Ensure that there will be no malfunctions in your plant. During parameter setting the unit remains in the operating mode. It continues to monitor with the existing parameter until the parameter setting has been completed. 10.1 Parameter setting in general 1. Change from the RUN mode to the main menu 2. Select the requested parameter 3. Change to the setting mode 4. Change the parameter value 5. Acknowledge the set parameter value 6. Return to the RUN mode [] [] or [] [] [] or [] > 1 s [] > 30 seconds (timeout) or press [] + [] simultaneously until the RUN mode is reached. By pressing [] + [] simultaneously you exit the setting mode without saving the changed parameter. 29 10.1.1 Switch between the menus 1. Change from the RUN mode to the main menu 2. Select the parameter EF 3. Change to sub-menu EF 4. Select the parameters CFG, MEM, DIS 5. Change to the sub-menus CFG, MEM, DIS 6. Return to the next higher menu level [] [] [] [] [] Press [] + [] simultaneously 10.1.2 Change to the process value display (RUN mode) There are 3 possibilities: I. Wait for 30 seconds ( 10.1.4 Timeout). II. Press [] until the RUN mode is reached. III. Press [] + [] simultaneously until the RUN mode is reached. 10.1.3 Locking / Unlocking The unit can be locked electronically to prevent unintentional settings. On delivery: not locked. Locking Make sure that the unit is in the normal operating mode. Press [] and [] simultaneously for 10 s until [Loc] is displayed. Unlocking Make sure that the unit is in the normal operating mode. Press [] and [] simultaneously for 10 s until [uLoc] is displayed. 10.1.4 Timeout If no button is pressed for 30 s during parameter setting, the unit returns to the operating mode with unchanged values. 30 10.2 Settings for volumetric flow monitoring Select the operating mode [ModE] first before doing all the other settings ( 10.2.1). On initial power up, the factory default setting for [ModE] is LIQU and is not available to be changed to GAS until any setting value for medium [MEdI] and internal pipe diameter [diA] is first entered. Then [ModE] can be selected and changed to GAS. For the operating modes GAS and LIQU, the flow values are set in the unit defined in [uni]. If necessary, change the unit before setting the flow values. 10.2.1 Define the operating mode Select [ModE] and define the operating mode: GAS, LIQU. A medium and an internal pipe diameter must be entered for the operating modes LIQU and GAS. The unit displays [] to force these entries: Press []. > [MEdI] is displayed. Define the medium. > [diA] is displayed. Define the internal pipe diameter in inches. A change of the operating mode leads to a restart of the unit. The settings are saved in the respective operating mode, i.e. after a change of the operating mode the settings are not lost. Menu INI: [ModE] 10.2.2 Define the internal pipe diameter Select [diA] and define the internal pipe diameter: 0.6...16 inch. Menu INI: gpm and cfm measurement is valid only for round pipes or air ducts [diA] up to 16 inches in internal diameter. For larger pipe or duct sizes and other shapes such as rectangular ducts only fps measurement will produce accurate results. In this case set the internal pipe diameter [diA] to 16 and standard unit of measurement [uni] to fps. 31 10.2.3 Configure the limit value monitoring for flow for OUT1 Select [ou1] and set the switching function: Hno, Hnc, Fno or Fnc 1. When the hysteresis function is selected: Select [SP1] and set the value at which the output is set. Select [rP1] and set the value at which the output is reset. 2. When the window function is selected: Select [FH1] and set the upper limit value of the window. Select [FL1] and set the lower limit value of the window. Menu CFG: [ou1] Main menu: [SP1] [rP1] [FH1] [FL1] 10.2.4 Configure the limit value monitoring for flow for OUT2 Select [SEL2] and set FLOW. Select [ou2] and set the switching function: Hno, Hnc, Fno or Fnc 1. When the hysteresis function is selected: Select [SP2] and set the value at which the output switches. Select [rP2] and set the value at which the output is reset. 2. When the window function is selected: Select [FH2] and set the upper limit value of the window. Select [FL2] and set the lower limit value of the window. Menu CFG: [SEL2] [ou2] Main menu: [SP2] [rP2] [FH2] [FL2] 10.2.5 Configure the frequency signal for flow for OUT1 Select [ou1] and set FRQ. Select [FEP1] and set the flow value at which the frequency set in FrP1 is provided. Select [FrP1] and set the frequency: 100 Hz...1000 Hz. Menu CFG: [ou1] Main menu: [FEP1] [FrP1] 10.2.6 Configure the frequency signal for flow for OUT2 Select [SEL2] and set FLOW. Select [ou2] and set FRQ. Select [FEP2] and set the upper flow value at which the frequency set in FrP2 is provided. Select [FrP2] and set the frequency: 100 Hz...1000 Hz. Menu CFG: [SEL2] [ou2] Main menu: [FEP2] [FrP2] 32 10.2.7 Configure the analog output for flow for OUT2 Select [SEL2] and set FLOW. Menu CFG: Select [ou2] and set the function: [SEL2] I = flow-proportional current signal 4...20 mA [ou2] Select [ASP2] and set the flow value at which the output signal is 4 mA. Main menu: Select [AEP2] and set the flow value at which the output signal is 20 mA. [ASP2] [AEP2] 10.3 Settings for temperature monitoring 10.3.1 Configure the limit value monitoring for temperature for OUT2 Select [SEL2] and set TEMP. Select [ou2] and set the switching function: Hno, Hnc, Fno or Fnc 1. When the hysteresis function is selected: Select [SP2] and set the value at which the output switches. Select [rP2] and set the value at which the output is reset. 2. When the window function is selected: Select [FH2] and set the upper limit value of the window. Select [FL2] and set the lower limit value of the window. Menu CFG: [SEL2] [ou2] Main menu: [SP2] [rP2] [FH2] [FL2] 10.3.2 Configure the frequency signal for temperature for OUT2 Select [SEL2] and set TEMP. Menu CFG: Select [ou2] and set FRQ. [SEL2] Select [FSP2] and set the lower temperature value at which 0 Hz is [ou2] provided. Main menu: Select [FEP2] and set the upper temperature value at which the frequen- [FSP2] cy set in FrP2 is provided. [FEP2] Select [FrP2] and set the frequency: 100 Hz...1000 Hz. [FrP2] 10.3.3 Configure the analog output for temperature for OUT2 Select [SEL2] and set TEMP. Select [ou2] and set the function: I = temperature-proportional current signal 4...20 mA Select [ASP2] and set the temperature value at which the output signal is 4 mA. Select [AEP2] and set the temperature value at which the output signal is 20 mA. Menu CFG: [SEL2] [ou2] Main menu: [ASP2] [AEP2] 33 10.4 User settings (optional) 10.4.1 Configuration of the standard display Select [SELd] and determine the standard unit of measurement: - FLOW = the current flow in the standard measuring unit is displayed. - TEMP = the current medium temperature in °F is displayed. Select [diS] and set the update rate and orientation of the display: - d1, d2, d3: update of the measured values every 50, 200, 600 ms. - rd1, rd2, rd3: display as for d1, d2, d3; rotated by 180°. - OFF = the measured value display is deactivated in the Run mode. Menu DIS: [SELd] [diS] The LEDs remain active even if the display is deactivated. Error messages are displayed even if the display is deactivated. 10.4.2 Set the standard unit of measurement for flow Select [uni] and set the unit of measurement: cfm, gpm, fps. Menu CFG: gpm and cfm measurement is valid only for round pipes or air ducts [uni] up to 16 inches in internal diameter. For larger pipe or duct sizes and other shapes such as rectangular ducts only fps measurement will produce accurate results. In this case set the internal pipe diameter [diA] to 16 and standard unit of measurement [uni] to fps. 10.4.3 Select the medium Select [MEdI] and define the medium to be monitored: H2O, GLYC, AIR. Depending on the operating mode different media are available ( 4.2). Define the medium before setting output parameters. Menu INI: [MEdI] 10.4.4 Configure color change display Select [coLr] and define the color of the process value display: rEd, GrEn, r1ou, r2ou, G1ou, G2ou ( 4.9). 10.4.5 Setting the output logic Select [P-n] and set PnP or nPn. Menu DIS: [coLr] Menu CFG: [P-n] 34 10.4.6 Set the measured value damping Select [dAP] and set the damping constant in seconds (value 63 %): 0...5 s ( 4.8). 10.4.7 Setting the switching delays Select [dSx] and set the delay for switching OUTx in seconds: 0...60 s. Select [drx] and set the delay for resetting OUTx in seconds: 0...60 s. 10.4.8 Set output status in fault condition Select [FOU1] or [FOU2] and set the value: 1. Switching output: - On = output 1 / output 2 switches ON in case of an error. - OFF = output 1 / output 2 switches OFF in case of an error. - OU = output 1 / output 2 switches irrespective of the fault as defined with the parameters. 2. Frequency output: - On = frequency signal: 130 % of FrP1 / FrP2 ( 4.7). - OFF = frequency signal: 0 Hz ( 4.7). - OU = frequency signal output continues to run without changes. 7. Analog output: - On = the analog signal goes to the upper fault value ( 4.6). - OFF = the analog value goes to the lower fault value ( 4.6). - OU = the analog signal corresponds to the measured value. 10.4.9 Calibration of the curve of measured values Select [CGA] and set a percentage between 60 and 140 4.4. (100 % = factory calibration). Menu CFG: [dAP] Menu DIS: [dS1] [dS2] [dr1] [dr2] Menu CFG: [FOU1] [FOU2] Menu INI: [CGA] 35 10.5 Service functions 10.5.1 Read min/max values Select [Lo.x] or [Hi.x]. [Lo.F] = minimum flow value , [Hi.F] = maximum flow value [Lo.T] = minimum temperature value , [Hi.T] = maximum temperature value Delete memory: Select [Lo.x] or [Hi.x]. Keep [] or [] pressed. > [----] is displayed. Briefly press []. It is recommended to delete the memories as soon as the unit operates under normal operating conditions for the first time. Menu MEM: [Lo.F] [Hi.F] 10.5.2 Reset all parameters to factory setting Select [rES] and press []. Keep [] or [] pressed. > [----] is displayed. Briefly press []. We recommend noting down your own settings before carrying out a reset . Menu EF: [rES] 11 Operation After power on, the unit is in the RUN mode (= normal operating mode). It carries out its measurement and evaluation functions and provides output signals according to the set parameters. 11.1 Read the process value It can be preset whether flow or temperature is indicated as default ( 10.4.1 Configuration of the standard display). A standard unit of measurement can be defined for the flow measurement (gpm, cfm or fps 10.4.2). The display can be changed to another display unit in addition to the preset standard display: Press [] or []. > The display changes, the indicator LEDs indicate the current display unit. 36 > After 30 seconds the display changes to the standard display. 11.2 Read the set parameters Briefly press [] Press [] to select the parameter. Briefly press [] > The currently set value is displayed for 30 s. Then the unit returns to the pro- cess value display. 12 Technical data Technical data and scale drawing at www.automationdirect.com. 13 Troubleshooting The unit has many self-diagnostic options. It monitors itself automatically during operation. Warnings and error states are displayed, even when the display is switched off. Display Type Err Error No display Error PArA Error Loc Warning UL Warning OL Warning Description · Unit faulty / malfunction. · Supply voltage too low. · Setting [diS] = OFF. Parameter setting outside the valid range. Setting pushbuttons on the unit locked, parameter change rejected. Below the display range. Temperature value < - 20 % MEW ( 4.6). Above the display range: measured value > 120 % of MEW ( 4.6). Troubleshooting Replace the unit. Check the supply voltage. Change the setting [diS] 10.4.1. Check parameter setting. Unlock the unit 10.1.3. Check temperature range. Repeat low-flow adjustment. Check flow range / temperature range. Repeat high-flow adjustment. 37 Display SC1 SC2 SC Type Warning Warning Warning Description Troubleshooting Switching status LED for OUT1 Check switching output flashing: short circuit OUT1. OUT1 for short-circuit or excessive current. Switching status LED for OUT2 Check switching output flashing: short circuit OUT2. OUT2 for short-circuit or excessive current. Switching status LEDs for Check switching outputs OUT1 and OUT2 flashing: short OUT1 and OUT2 for short- circuit OUT1 and OUT2. circuit or excessive current. MEW = final value of the measuring range 14 Servicing From time to time check the sensor tip visually for build-up. Clean with soft cloth. Stubborn build-up, for example lime can be removed using a common vinegar cleaning agent. 15 Factory setting Parameter SP1 rP1 FH1 FL1 FEP1 FrP1 SP2 rP2 (FLOW) rP2 (TEMP) FH2 FL2 (FLOW) FL2 (TEMP) Factory setting 20 % 15 % 20 % 15 % 100 % 100 Hz 40 % 35 % 38 % 40 % 35 % 38 % User setting 38 Parameter Factory setting User setting FSP2 FEP2 FrP2 ASP2 AEP2 diA ou1 ou2 dS1 dr1 dS2 dr2 uni P-n dAP MEdI FOU1 FOU2 SEL2 CGA ModE coLr diS SELd 0 % 100 % 100 Hz 0 % 100 % ---Hno I 0 s 0 s 0 s 0 s gpm PnP 0.6 s H2O OFF OFF FLOW 100 % LIQU rEd d2 FLOW The percentage values refer to the final value of the measuring range (MEW). 39Acrobat Distiller 19.0 (Windows)