Series VA/VG20, VA/VG35 and VG80 Mobile Control Valves Service and Parts Bulletin Bulletin MSGHY14-2004-M1/US
DV20-H-6. VA/VG20 6". 3911873062. DV20-H-8. VA/VG20 8". 3911873063. DV20-H-10. VA/VG20 10". 3911873064. DV35-H-6. VA/VG35 6". 3911873065. DV35-H-8. VA/VG35 8".
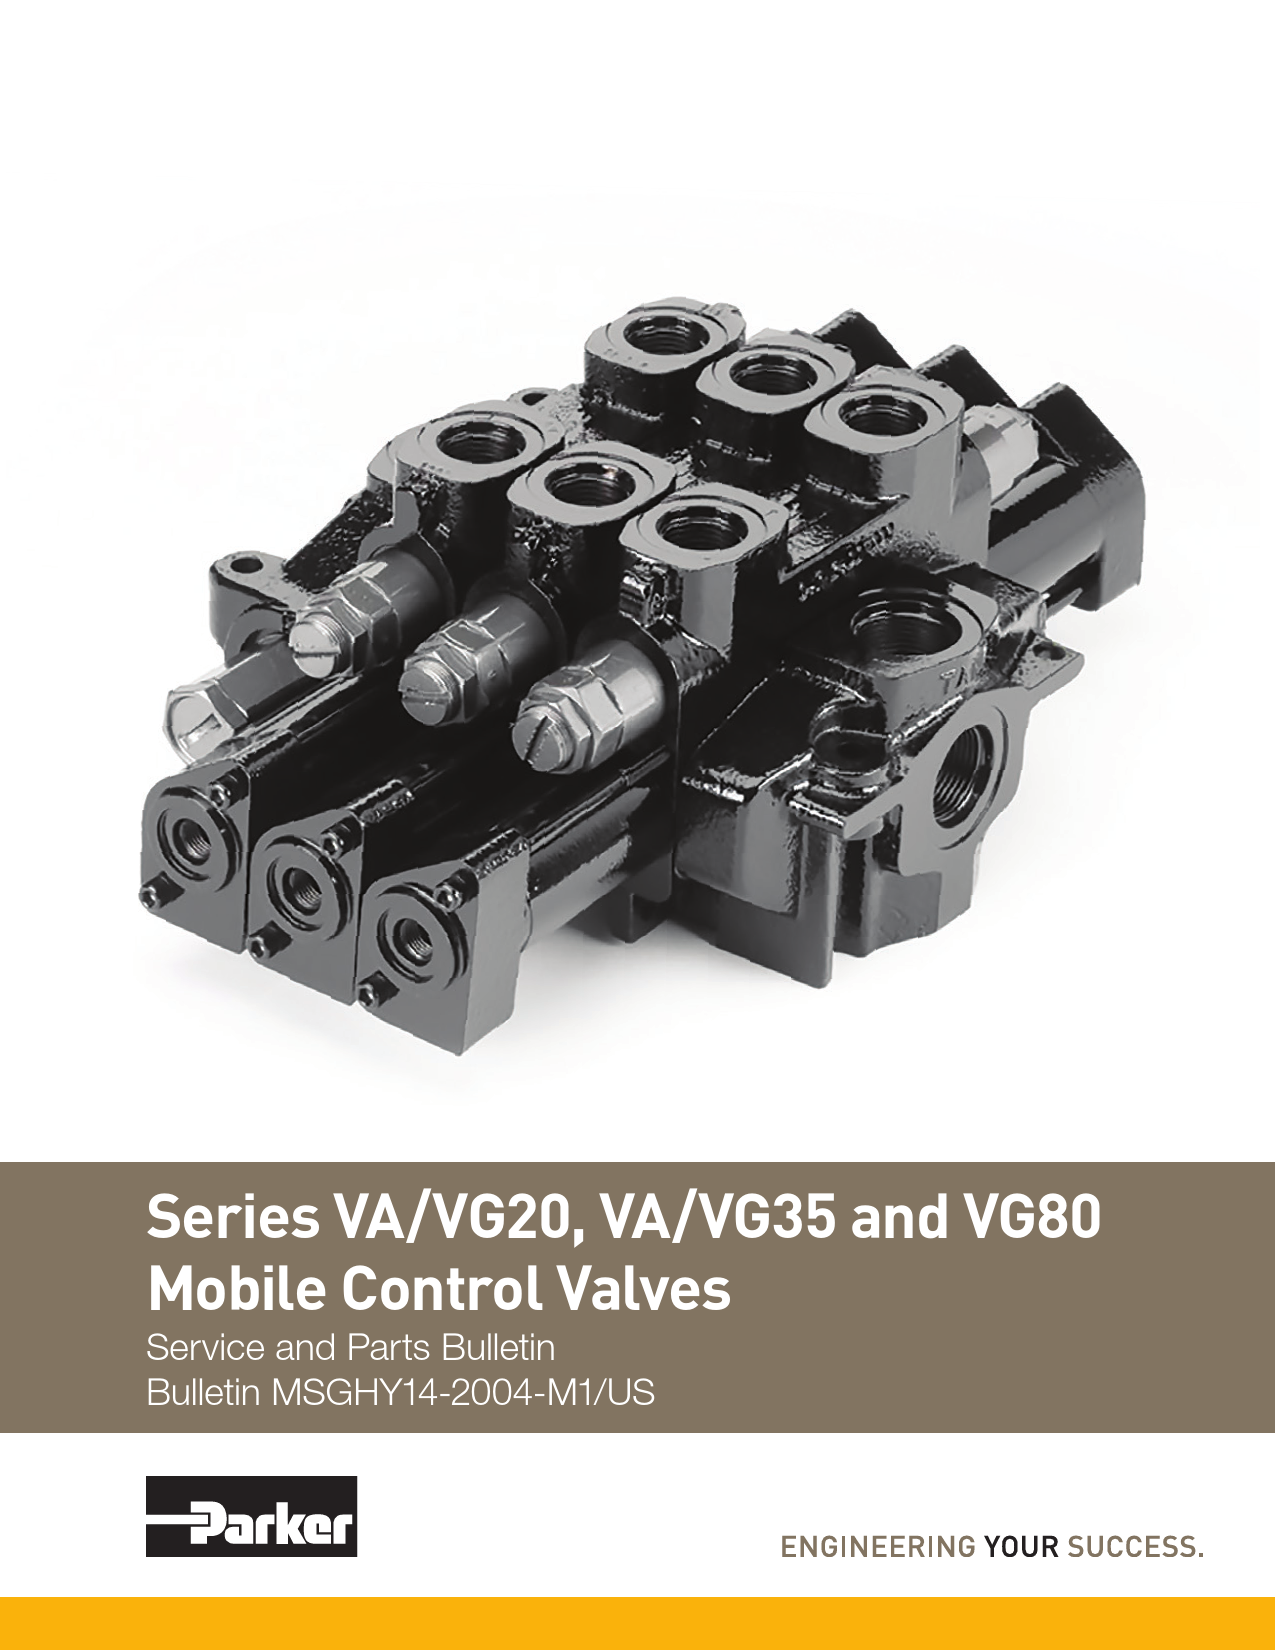
Series VA/VG20, VA/VG35 and VG80
Mobile Control Valves
Service and Parts Bulletin Bulletin MSGHY14-2004-M1/US
Bulletin MSG14-2001-M1/US
Table of Contents
Table of Contents
Introduction...................................................................... 1 General Information.......................................................... 1 Replacement Parts........................................................... 1 Maintenance..................................................................... 1 Exploded View of Work Section....................................... 2 Parts List for Work Section.............................................. 3 Valve Disassembly Instructions........................................ 4 Cleaning, Inspection, and Repair..................................... 6 Valve Assembly Instructions............................................ 7 Cutaway for VA/VG Remote Control Operators............. 11 Remote-Control Operator Disassembly......................... 12 Remote-Control Operator Assembly.............................. 14 Cutaway for Pneumatic Control Operators.................... 16 Pneumatic Section Disassembly.................................... 17 Pneumatic Section Assembly......................................... 19 Cutaways for Main Relief Valves.................................... 22 Cutaways for Port Relief Valves..................................... 23 Screw-Adjustable, Relief-Valve Pressure Ranges and Adjustments............................................... 24 DVA20 - DVG20 - VA20 - VG20 - Valve Seal Kits........... 25 DVA20 - DVG20 - VA20 - VG20 - Handle Assemblies.... 25 DVA35 - DVG35 - VA35 - VG35 - Valve Seal Kits........... 26 DVG80 - VG80 Valve Seal Kits....................................... 26 Troubleshooting.............................................................. 27 Safety Guide................................................................... 28
Service Manual
VA/VG Valve
WARNING
FAILURE OR IMPROPER SELECTION OR IMPROPER USE OF THE PRODUCTS AND/OR SYSTEMS DESCRIBED HEREIN OR RELATED ITEMS CAN CAUSE DEATH, PERSONAL INJURY AND PROPERTY DAMAGE. This document and other information from The Company, its subsidiaries and authorized distributors provide product and/or system options for further investigation by users having technical expertise. It is important that you analyze all aspects of your application and review the information concerning the product or system in the current product catalog. Due to the variety of operating conditions and applications for these products or systems, the user, through its own analysis and testing, is solely responsible for making the final selection of the products and systems and assuring that all performance, safety and warning requirements of the application are met. The products described herein, including without limitation, product features, specifications, designs, availability and pricing, are subject to change by Parker Hannifin Corporation and its subsidiaries at any time without notice.
Offer of Sale
The items described in this document are hereby offered for sale by The Company, its subsidiaries or its authorized distributors. This offer and its acceptance are governed by the provisions stated in the "Offer of Sale".
2
Parker Hannifin Corporation
Hydraulic Valve Division
Elyria, Ohio, USA
Bulletin MSG14-2001-M1/US
Introduction
Service Manual
VA/VG Valve
Introduction
This manual has been prepared to assist you in the proper maintenance of the VA20/VA35 and VG20/VG35/VG80 directional control valves. Before any work is done, we suggest that you read the assembly and disassembly instructions completely.
The first rule of good maintenance is cleanliness, which includes a clean environment. MAKE SURE YOU DISASSEMBLE AND ASSEMBLE YOUR HYDRAULIC EQUIPMENT IN A CLEAN AREA. Dirt is the natural enemy of any hydraulic system.
General Information
The VA and VG model valves are updated versions of our proven A20TM and A35TM units. The VG models are cast from compacted graphite, a high strength iron alloy, which allows the valve to be rated to 3500 psi. VA models are cast from gray iron and are rated at 2500 psi. These open-center, directional-control valves are available in parallel, tandem, and series circuitry. As needed, the sectional, stack-type construction provides flexibility for the addition of subtraction of work sections to an existing valve bank. This design also permits the combination of parallel, tandem, and series circuitry in
a single bank. The internal coring of each valve section determines its circuitry and the number of gasket seals required.
All sections with optional features, such as port relief valves, crossover relief valves, and anticavitation checks, are dimensionally larger when measured from the top of the port to the bottom of the housing. These are referred to as "hi-boy" sections. Those without work-port options can use the low-profile castings, which are called "loboy" sections.
Replacement Parts
The illustrations and instructions in this manual apply only to the VA/VG series assemblies, subassemblies, and components. All valve components, except for spools and housings, are available as replacement parts or subassemblies. Spools are hone-fitted to their individual housings, so damage to either of these components means the entire section must be replaced.
We recommend that you use only genuine VA/VG series replacement parts in your service program. Manufactured to the same exacting tolerances and quality controls as the original equipment, genuine VA/VG replacement parts may help prevent premature, component failure and costly downtime. Service parts and assemblies are available through your original equipment dealer or any authorized distributor.
Maintenance
Valves are often used in hazardous environments. Inspect them frequently for damage due to improper use, corrosion or normal wear. If needed, repairs should be made immediately.
Always refer to the machine manual for the proper procedure to remove the valve from the machine.
Remove the valve bank from the equipment, disconnecting all hoses, fittings, control handles and linkage connectors that might be attached to the valve. Plug all ports and thoroughly clean the exterior of the valve bank, then the port plugs can be removed.
1
Parker Hannifin Corporation
Hydraulic Valve Division
Elyria, Ohio, USA
Bulletin MSG14-2001-M1/US
Exploded View of Work Section
Service Manual
VA/VG Valve
Exploded View of Work Section
5 4A 4
"Lo-Boy" Work Section
6 87
4A
Spool Assembly
78 6 9
Spool
1 2 (3 not shown)
13
12
1
10 11
Figure 1
15 16
14 16
18
19
17 20
21 18
Figure 2
2
Parker Hannifin Corporation
Hydraulic Valve Division
Elyria, Ohio, USA
Bulletin MSG14-2001-M1/US
Parts List for Work Section
Service Manual
VA/VG Valve
Parts List for Work Section
Figure 1
Item
Description
Qty.
Parallel Section Seals*
1
Square Seals
3
2
Square Seal
1
Series Section Seals
1
Square Seals
2
3
Square Seal
1
Parallel and Series Section Component Parts
4
Back Cap Screws
2
4A
Lock Washers
8
5
Back Cap
1
6
Retainer Plates
3
7
Back-up Rings
2
8
Spool Seals
2
9
Retainer Plate Screws
2
Check Valve Cap
1
10
or Valve Cap (F.I.N.)
1
11
O-Ring Seal**
1
12
Check Spring**
1
13
Check Valve Poppet**
1
Figure 2
Item
Description
Qty.
Spring Centered and Detent Spool Operators
14
Stripper Bolt
1
15
Centering Spring
1
16
Spring Guides
2
17
Detent Sleeve
1
18
Detent Balls
2
19
Detent Spring
1
20
Detent Poppet Retainer
1
21
Detent Spacer
1
*Parallel Sealing Face includes inlets and mid-inlets. **Not required in Float-in-neutral Sections.
VA/VG20 Part No.
391-2881-206 391-2881-200
391-2881-206 391-2881-627
391-1433-020 341-6000-100 391-2183-001 391-2681-378 391-1985-014 391-1433-015 391-0581-044 391-2281-015 391-2881-204 391-3581-713 391-2481-069
VA/VG20 Part No.
391-1432-022 391-3581-608 391-1642-045 391-3283-015 391-0282-010 391-3581-130 391-2583-008
VA/VG35 Part No.
391-2881-200 391-2881-403
391-2881-200 391-2881-628
391-1433-009 342-6000-100 391-2183-005 391-2681-426 391-2887-212 391-1433-002 391-0581-044 391-2281-015 391-2881-204 391-3581-713 391-2481-069
VA/VG35 Part No.
391-1432-021 391-3581-633 391-1642-013 391-3283-008 391-0282-009 391-3581-015 391-2583-006
VG80 Part No.
391-2881-433 391-2881-670
(4) 391-1402-068 391-3783-039 341-0585-099 391-2183-157 391-2681-285 391-2881-096 (4) 391-1402-015 391-0585-099 391-2881-249 391-3581-778 391-2383-091
VG80 Part No.
391-1402-452 391-3581-330 391-1642-161 391-3384-310 391-0282-011 391-3581-316 391-3384-311 391-3782-208
3
Parker Hannifin Corporation
Hydraulic Valve Division
Elyria, Ohio, USA
Bulletin MSG14-2001-M1/US
Valve Disassembly Instructions
Service Manual
VA/VG Valve
Valve Disassembly Instructions
Reference exploded view and parts list on page 2 for work section detail.
Step 1 - Valve Bank
4
Valve Disassembly Instructions
Reference exploded view and parts list on
This step is the most critical in the disassemblpyagper2oacnedd3uforer .wIotrkshseoctuiolnddbeteail.
followed closely to ensure that the valve bank is properly reassembled after
repairs have been made.
Step 1 - Valve Bank
This step is the most critical in the disassembly
With a waterproof, quick-drying marker, mark ptehreoacvceadlhvuerebc. aIant ksshiostuipnlrdogbpeerwfloyllirotewahsesdeamclboslseeedlyqaftutoereenrensputareiiratshlat
number. Start by marking the inlet casting withhavtehbeeen#m1adae.nd finish by marking
the outlet with the highest number.
With a waterproof, quick-drying marker, mark each
Next, mark the port boss closest to the back Valve Disassembly cciw4naailstehtptincthgaoeswthniinitgghhewaeassittehcnqutuhhmeenbt#wie1arl.oannurdmkfibnesirs.ehSbctayrttmiboayrnkminawgrktihinteghotuhtelet Instructions
a "B" (for back cap end).
RNeexfte, rmeanrkcetheexpporltobdoessdcvloiseewst taonthde pbaacrktscalpisotnoenach
Valve Disassembly Instructions TwFwihiinttehhanllat,yhm,"eiCfac"rroek(rlfirtoeehrfsecvpplaoeolvnvriedtssibneaognrsdens)u.rcemlmobsoeevrseotdftotfhrotehmecatshspteoinvogRpS4alapwTeFttwSTpthtlehhhcaaraevighhafoeeeetnocvieelnrpeyreegachsecveeknrlepeaamds2l,wbred1svysltebmeveeuu2tno,ma1ieicpersrn-aipcsanetnfktaorgibi-.eVkobsrvmndonasIeaneoVeetntteadlnahhkrdci3kmswxddeanleet.htvi3fepiiaIoflopmpstt.nvvreohlnluooefhkplaooolreroereawrldstBtdatveodrtc"lwbiBbaepeotcacBwyonwsheaecrdoas"dniriaahfatsltorttorimnyh(vmkiceik"crflooaioklrtClwiknroehoeldrues"waenswi-(mbesneosiB(secnacessfodtocleato(rctthoverkmBritncktertreooielbccdbrCdodonsltealehsisp)foenelpsevripeoddfaeoelierrnysdafssmeaonmsdpcvrfeemttdeCiotoantatnmte)thol.saadgrweiviel)bl)niorelnh.c.rllvesiysf.luikspuanecramtalrvheovreiieboresttsdhmenhboreaanyotnfk
which they were removed. Inlet and mid-inletTrhmWeisailtrsihkteeapdfwiwsvaittaehhreplavmrcoeaosfst,inqcgruaiitncircukeam-dl brimnyeirtnhaogenrmldykia.sreaksedsre,mmwbalriyktheacah
casting number only.
prcoacsetdinugrew. iIthshaosuelqduebnetfiaolllnouwmebdecr.loSstealryt btoyemnasurkrientghathte thienvleatlvcaesbtianngkwisitphrtohpee#rl1yarnedasfsienmishblbedy mafaterrkirnegpatihres outlet
hawveithbetheen hmigahdes.t number.
Step 2 - Tie Bolts
WNitehxat,wmaatrekrptrhoeopf,oqrtubicokss-dcrlyoisnegstmtoartkherb, amcakrkcaepacohn each caRwsteoimnrkgosvweeicttthihoeanfswoeuqitruh,etaniet"ibaBol"lnt(sufmothrbabetarhc.okSldtcaartpht ebeynbdamn).kartkoignegththeer
Step 2 - Tie Bolts iwniaNTeltenahhOtcdecthTnhsa,weeEspmtoh:ianriaVrgkgrakhAtsweeetsvhicttthaethienlopvutsnhoemeerwcttbit#bieiet1oohrbn.saoassn.l"cdtsCloft"ishne(risfsetohartodbcyltiehnmvetioassprtekhonioendlg)oc.utlhetleveitosuotnlet
Remove the four, tie bolts that hold the bank NwTthoeocbaFtthheaxtraieegnknstnby,ta,cskoiemlmanmelt,yschgatarut,tr.ihreisenkikoVqftngentubtrGdhheaeiwrserlenvimiiodepnpataffhoaogplvtvnrrroahktwetaredeb"lbtatvdBoiolbseeoshsw"ossscsbelia(atcerotcft.rhlosilleootprtassnrshbeneepae(smadsaBtcctroskhtotasoovrecrretxttteahdhChespnreep)foureobfsuotnrnpasmgodcdohmt)kioo.tnhtlcgwhbecaeenhlpveuiefavcoamnlhinvsstbteiteeorheabnenrecaeyohndfk
the sections.
eawcherwe orerkmsoevcetdio. nInwleitthanad"mC"id(-fionrlectlreevlisefevnadl)v.es are marked with a casting number only.
Finally, if relief valves are removed from the valve bank
NOTE: VA valve tie bolts thread into the outlethtecy maussttibne mga.rkVedGwivthathlevceorrteiseponbdoingltnsumber of
pass through the entire bank, requiring washetwheSerrscetaersaeptminn2ogdva-endTdh. iIpeenolxreBttlaoonnclduattsmitosind-(tiBnoloertbrCee)liferffoavmaslwvtehesicanhreethedy
at both ends of the bolt.
mSartkeedpw3ith- aSceasctitniog nnumSbeear losnly.
Remove the four, tie bolts that hold the bank together
Tanhde sinepleatr,amteidth-iensleetctainodnse.ach parallel work section have
four, section seals, (Fig. 1, items 1 & 2) on the
SdVNctaeoOAswpt/TinVnEs2Ggt:r.3e-VVa5TmAGspi,vevlmiaatlaBlvfvtlieoeonwtgtliiteefmsabbciodoel.ltitsnSsletpehrtaisreseshsaawtdvhoeirrnoktthuosrgeethechtestioheonceutsietoanlnenttdisreetahles
Reobmnanothkve,erdtehoqewufniosrutirnre,gatmiwe abmsohalteisrnstghaafnat cdheoh, l(edFxtihgne.u1tbs,aitntoekmbtoes g1fea&tshtee3rn.)ed
anTadthsbeesopetahsreaectnetidotshneosfseetahclsteisobhnooslu.t.ld be removed and discarded.
NOTE: VA valve tie bolts thread into the outlet casting. VG valve tie bolts pass through the entire bank, requiring washers and hex nuts to be fastened at both ends of the bolt.
SRteEpM3I-NSDeEcRti:oAnLSLeaWlsORK MUST BE
Step 3 - Section Seals
ThPeEinRleFt,OmRid-MinlEetDanIdNeaAch CpaLraElleAl wNorAk RseEctiAon. have
four, section seals, (Fig. 1, items 1 & 2) on the
downstream, mating face. Series work sections and the
The inlet, mid-inlet and each parallel work seScVotneiAopt/hVne3Gd3ho-5waSsnpvesltciretetafilmfooownmumaStriid,negiasnflleaesctsce,ht(aFivoiegn.th1r,esieteesmeacstl1iso&n, s3e.a)ls (Fig. 1, items 1 & 2) on the downstream, matinThgTehiefnsaleects,eemcti.odn-Sinseeleatrlsaineshdsoeualwcdhbopearrrekamlleoslvweedocrakntdisoedcintsicosanrdheadv.e
and the VA/VG35 split flow mid inlets have thfroeure, sescteiocn tseiaolsn, (Fsige. 1a,listemosn1 &th2)eon the
downstream, mating face. Series work sections and the
downstream mating face, (Fig. 1, items 1 & 3.V) AT/VhGe3s5 esplsit eflocwtmioidninsletes ahalvse three section seals
should be removed and discarded.
on the downstream mating face, (Fig. 1, items 1 & 3.) These section seals should be removed and discarded.
REMINDER: ALL WORK MUST BE PERFORMED IN A CLEAN AREA.
REMINDER: ALL WORK MUST BE PERFORMED IN A CLEAN AREA.
REMINDER: ALL WORK MUST BE PERFORMED IN A CLEAN AREA.
4
Parker Hannifin Corporation Hydraulic Valve Division Elyria, Ohio, USA
Bulletin MSG14-2001-M1/US
Valve Disassembly Instructions
Service Manual
VA/VG Valve
Step 4 - Valve Back Cap
Using a large, Phillips-head screwdriver, remove the two, cap screws (Fig. 1, item 4) which fasten the back cap to the work section. Lightly tap the end of the screwdriver handle with a hammer to break adhesive. Remove the back cap (Fig. 1, item 5).
Step 5 - Control Spool and Seals
Grasp the spring end of the spool with a clean, lint-free cloth and pull the spool out of the housing using a twisting motion. Generally, the rear, retainer plate (Fig. 1, item 6) back-up ring (Fig. 1, item 7) and spool seal (Fig. 1, item 8) will come out with the spool. CAUTION: For detented spool models, be careful not to remove the detent poppet sleeve (Fig. 2, item 17) unless it is to be serviced. Using a large, Phillips-head screwdriver, remove the two, retainer-plate screws (Fig. 1, item 9) from the spool clevis end of the work section. Lightly tap the end of the screwdriver handle with a hammer to break the adhesive. Remove the two, retainer plates (Fig. 1, item 6) the back-up ring (Fig. 1, item 7) and the spool seal (Fig. 1, item 8). Tag or mark with the appropriate, work section identification number. (See Step 1.) Spool seals (Fig. 1, item 8) and back-up rings (Fig. 1, item 7) should be discarded.
Step 6 - Transition Check
The transition check is located in the bottom center of the work section housing. Carefully clamp the work section in a vise with ports down. Do not clamp on the machined surface. Remove the check-valve cap (Fig. 1, item 10) and its O-ring seal (Fig. 1, item 11). Discard the seal. Remove the check spring (Fig. 1, item 12,) and the check-valve poppet (Fig. 1, item 13). NOTE: Only cylinder work sections (ports blocked in neutral) have a transition check. Motor sections have only a cap plug.
Valve Disassembly Instruction
Step 4 - Valve
Valve
Disassembly
Instruction Using a large, Phillip two, cap screws (Fig
cap to the work secti
screwdriver handle w
RSetmeopve4th-eVbaaclkvcea
Using a large, Phillip two, cap screws (Fig cap to the work secti screwdriver handle w
Valve Disassembly InRsemtrovue tchetbiaock nca
Step 4 - Valve
Using a large, Philli
Stcwatpoe,tpocat5phes-cwrCeowroksns(etFcritgo
Gscrraeswpdthrievespr rhinangdelned cRloemthoavnedtphuelbl athcek scpa twisting motion. Gen 1, item 6 ) back-up r
(SFtige.p1,5ite-mC8o) wnitlrl o
CGrAaUspTtIhOeNsp: riFnog rendde cclaortehfaunldnpoutlltotheresmp (twFigst.in2g, miteomtion1.7G) eun Ut1(wF,siioigtn,e.grm1ea,t6ailtiaen)rmebgrae-8c,p)kPla-whuteiipllllsircp cCleAvUisTeInOdNo:f tFhoerwdoe sccarreewfdurlivneorthtaondrleemw
a6(s(b(UtcsaSGct1wFFFwcedld)el,esorrciithhiotiiiaeggvdgttehtsnee,ihswe..iit.oessgssprpim11iidennac2bvvea,,ttanrg,hnaaeei56iiirdldvttiic..eddmaeente)ekRRrpee-mmseonrog-bdupmeeruftCteha.-ilmmri88p,ftlpcoaih))ino1Pltkoonncr.eahgai7hvvd-a.nTtnenuwteeeil)Gegialedptsolnuosttgreiphhw(nbcdpr
6(F) itgh.e1b,aictekm-up8)riwngill( (CFAigU. 1T,IiOteNm: 8F).oTradg sceacrtieofnuildneonttiftiocartieomn ((FFiigg..12, ,itietmem8)1a7n)dub
SbUestidenipsgcaa6rlda-ergdT.er, aPhnilslii
Ttwhoe,trraentasiintieorn-pclhateecks tchleevwisorekndseocftitohne hwoou sseccretiwondriinvearvhisaendwleith madahcehsiinveed. sRuermfaocve.eRt
iS6te)tmtehpe10b6)aac-nkd-TuiprtsarOinn-gsrii
ttTt(s(hhhFFeheeeciieggtswci..tehoro11aeanrl,,cn.kiiiksdRttis-eeetveemminocamttlnii88vofo)c)ievnc.heapaTehntotciaohdpokguep NsbeeOctdTiiosEnc:ainrOdaendlvy.isceywlinitdh imnancehuinterdals)uhrafavcee.aRt hiteamve1o0n)lyanadciatspOp-lrui the seal. Remove the the check-valve popp
NOTE: Only cylind
iSntneeputr6al-) hTarvaenast
hTahveetroannlsyitaiocnacphpelcuk the work section hou section in a vise wit machined surface. R item 10) and its O-r the seal. Remove th the check-valve pop
NOTE: Only cylind in neutral) have a t have only a cap plu
5
Parker Hannifin Corporation
Hydraulic Valve Division
Elyria, Ohio, USA
Bulletin MSG14-2001-M1/US
Valve Disassembly Instructions
Service Manual
VA/VG Valve
Valve Disassembly Instructions cont.
Spool Disassembly
Spring Centered Spool
6
Valve Disassembly Instructions
Spool Disassembly
The spring assembly should not be removed fSrpormingthCeenstperoeodlSupnoloelss these
parts need to be replaced. Once the it must be handled carefully to avoid
Valve Disassembly spool is fTsp6rhoeeoselpurnionlegfssatsthsheemesebpwlyarsothsornukeleddsntooetbcbeetrrieeopmlnaocveehdd.ofOrounmcsettihhneeg,
damage.spPoollaiscfreeetohf tehe swporkosoecltiovnehroutiscinga, liltymuisnt bae
Instructions
soft-jawed vise, clamping on the flat, spool clehSavnpdilsoed,ocalarnDefduilslyraetosmasvoeoidmvdeabmltayhgee. Pslatcreitphepspeorol
bolt (Fig. 1, item 14) with a wrench.
vsSpeorptoircliacnllleygviinsC,aaensnodftrte-ejmraewodvedeStvhipeseos,tcroilpalpmepribnoglto(nFtihge.
flat, 1, item
1T4h)ewsiptrhinagwarsesnecmhb. ly should not be removed from the
Lightly tap the stripper bolt with a hammer anLdssppigoohaootlllyiupsntaflurepesnetshotechfeshttshreieptpwpoaerortrshkbnoseeletecldwtpitiootnhbbhaerohrueaesmpainlmagkc,eeirdtta.hmnOduensactepbuethnech
adhesive. Cautious application of heat may bethoahrneedllpeqdburceaiarrkeeftuhdlelyatdooheasvfiovrieed. dCeaamuttahigoeeu.s aPsplatpcrlieicptahtieposneporfolheat
bolt, since an anaerobic thread adhesive wasmavsunpeaaorsyetoirbecloaecbdlllirecyevqtidihuns,riuareaeansrddoditfanortd-ejgfhmareewoseivievttdehesetvhwisesaaters,sitpucrsiplspaeeepmdrebpmdroiubnlrtogbi,nlstogli(nynFictt.ishegea.as1nfsl,eaimtt,ebmly.
CAUTION: Too much heat may distort the spCso1Lp4Aiog)oUhwoltT.lliy.tIhOtaaNpw:thrTeenoscothri.mppuercbhohltewaitthmaahyamdimsteorratntdhaepunch
As the stripper-bolt threads disengage, the sp2tmAor, asiihtnyetehmlbgepe1sbrt5(rerFe)iqpaauipknigerdterh.-dsebpto2arolidtn,fhtrgheeistrgeeieuvtahieddme.seCssdtar(i1siuFpeti5pingoeg.)ura2sgb,aaeoitp,nletptm,hdlsieci1nas6cpt)ieroiwnanngiollf(Fhiega.t spring guides (Fig. 2, item 16) will release abruraenpleaaetsrleoybaibcfrrtuhoprtemlaydfraotdmhheetshievsesppwoaoosl.ousle.d during its assembly.
CAUTION: Too much heat may distort the
spool.
DAesttehensttrSipppeor-obollt threads disengage, the spring (Fig.
T2h, eitedmete1n5t)aasnsedmspbrliynsghgouuilddenso(tFbige. r2e,mitoevmed16fr)owmiltlhe
srpeoleoalsuenalbesruspthtleysefropmarttshneesepdotool.be replaced. Wrap the
Detent Spool
detent sleeve (Fig. 2, item 17) with a clean, lint-free cloth. Grip the cloth-covered sleeve and pull firmly. As
The detent assembly should not be removed ftiDthreeomestml1ee8env) etathnmSdeoptvhoeessodpbelatoecnkotwsalprrduisn,ngth(lFeeidgse.st2e,nitttehbmaell1ss9()eFwigi.ll2, parts need to be replaced. Wrap the detent slraeTsenplhdeeoeaopvsdlreeeeutvaneebln(enrtFsutasptishttgslheyeeim..rsTelb2ohlpsye,asr.sctihlstooentuhelmedsdhnotoou1tlbbd7eec)rraeepwpmtluaoricveteehtddh.efWasreormpapatrhtthsee clean, lint-free cloth. Grip the cloth-covered sldeeteenvt esleeaven(dFigp. 2u, iltlemfi1r7m) wliyth.aAclseant,hlinet-free sleeve moves backwards, the detent balls (FigNtcthh.leeoext2dsth,el.,etcGelinavrtmteieppmpotmhtophepveec1stsloprb8teohatoc)a-lckinoaiwnevarnear(rddsFesodi,gfsttt.-hljh2eeae,wedviteeetdmeadnnv2etdis0bept)au.ealllPnslnldfa(iFtcremeigmal.yon2.v,eAs
spring (Fig. 2, item 19) will release abruptly. Thuitneedmecr1si8lzo)eadtnhbdatrhstehhrdoeoutegunhtltdshpericdnegate(npFtitgbu.a2llr,beitoermteht1oe9s)eswrveiellas a
parts and prevent their loss.
wrerleenacshe.aLbirguhpttllyy.taTphtehcelodtehtesnhtopuoldppceatprteutraeintheer sweiptharats haanmd mpreervaenndt tahepiurnlcohsst.o help break the adhesive.
Cautious application of heat may be required again,
Next, clamp the spool in a soft-jawed vise andsNinercxeet,amcnlaamonapvetrehoebitscphaoedohleidnsivaeestowefat-nsjaatwlsepoduovsiepsdepiannetdhteredmeotevnet retainer (Fig. 2, item 20). Place an undersized rtubehnteaadidenrreestrietznahestdsrpeboomaprubplteyhgt.rroheutagtihnhethree(Fddiegt.een2tt, eibtaenlmltb2o0br)e.atPolllascebervaoenarsea
to serve as a wrench. Lightly tap the detent poCwhaAprmeUnpmcTheeIOr. tLaNnirg:dehaTtltoypauotnainpmchteuhtceorhdhweehtlepeinatbtthrpemoapkaaptyehhtedraiaesdtamthoienrsemtirvtwehe.eitrhsapool! and a punch to help break the adhesive. CautCiCoaLuutEisouAsaNapppIpNliclGaitcio,anItoNifohSenaPt omEafCyhbTeeIrOaeqtuNimr,edAaagNyaiDn, REPAIR be required again, since an anaerobic adhesiv1sree.intaIcniwenseparnaecaastsnstaheaemerlosbspblyoioc.oladbuhoserese,ivtdreawnsiainstioaltnshocheuescekdd sieenatttheaennddetstepnotol from 3. Wash all parts thoroughly in a cleaning solvent and
retainer assembly.
each section for deep scratches, gouges or excessive wear. If aCnAy UofTtIhOesNe:coTnodoitimonuscehxihste, aretpmlaaceytdheissteocrtitotnh.eMsipnooor,l!
blow dry before beginning reassembly. Pay special attention to the number and letters marked on the parts
CAUTION:
Too
much
heat
may
distort
the
spscoCuarroLfeaflcuE!ellyAdapmNolaiIgsNheeoGdna,twhIeaNycowSnittPrholaEsvpCeoroyTlfaIiOnnde,Ncchr,eoccAkuspNcolpoDpthet.RcaEn bPeAIR
in Step 1. If any marks mark immediately.
are
removed
during
cleaning,
re-
21. EInxsapmecint ethtehespmooacl hbionreed, tsruarnfsaictieosnocfhtehcekvsaelvaet ahnodusipnogoflofrom neaicckhssaencdtiobnurfrosrtdheaet pcosuclrdatcahuese, gleoaukgaegseobreetxwceeesnsisveecwtioenasr. If Lanigyhotlfythsteosneectohnedsietisounrsfaecxeistt,orerpemlacoevethaensyercotiuognh. sMpointso.r,
43..CWleaasnhaadlhlepsaivrtes ftrhoomrouthgrhelaydsinoaf scpleoaonli,nsgtrsipoplveernbtoalnt,d hbolouwsindgr,ycbaepfoscrerebwesgiannndinhgexrenaustsewmitbhlyL.oPcatiytesTMpecCiahlisel GatatesknetitoRnetmo othveern.umber and letters marked on the parts
Cleaning, Inspection, and Repair CscuaArrfeUafcuTelIlOydapNmo:laiAgsheseohdnaatlwhloeawycow-mnittriholllaesdvpeorroeyllifaeinnfdea,crchereoacckeusxptcoelponptdhet.scaancrboess the O-ring face of the valve housing. This should not
in Step 1. If any marks are removed during cleaning, remark immediately.
b2e. Estxoanmeindeothregmroauchnidneodfsfu! rfaces of the valve housing for
4. Clean adhesive from threads of spool, stripper bolt,
nicks and burrs that could cause leakage between sections.
housing, cap screws and hex nut with LoctiteTM Chisel
Step 1. Inspect the spool bore, transition cheLcigkhtlsy estoante tahensedsursfapceos too lrefmroovemanyeraoucghhspsotes.ction foGrasdkeet eRepmosvecr.ratches, gouges or
excessive wear. If any of these conditCioAnUTsIOeNx: iAssth,arlleopw-lmaiclleed trehlieef sareeacetxiotennd.sMacirnoossr, surface damage on the control spool and check poppet can be careftbuheelslOyto-rnpienodglofiarscghereooufdnthdaeowvfaf!lavye hwouistihnga. Tvhiesrsyhofuilnden,otcrocus cloth.
Step 2. Examine the machined surfaces of the valve housing for nicks and burrs that could cause leakage between sections. Lightly stone these surfaces to remove any rough spots.
Step 3. Wash all parts thoroughly in a cleaning solvent and blow dry before beginning reassembly. Pay special attention to the number and letters marked on the parts in Step 1. If any marks are removed during cleaning, re-mark immediately.
Step 4. Clean adhesive from threads of spool, stripper bolt, housing, cap screws and hex nut with LoctiteTM Chisel Step Gasket Remover.
CAUTION: A shallow-milled relief area extends across the O-ring face of the valve housing. This should not be stoned or ground off!
6
Parker Hannifin Corporation
Hydraulic Valve Division
Elyria, Ohio, USA
Bulletin MSG14-2001-M1/US
Valve Assembly Instructions
Service Manual
VA/VG Valve
Valve Assembly Instructions
Preparation of Parts
Spray the threads of the new stripper bolt (Fig. 2, item 14) tapped-threaded spool end, all screws and screw holes
on both ends of the housing with LOCQUIC Primer Grade NFTM and let dry.
CAUTION: Failure to follow the recommended assembly instructions can result in poor performanVcealovreprAodsuscet mbly Instruction
malfunction. Product should be thoroughly tested to ensure proper operation befoPrreeptahreatvioanlvoef Pisarptslaced back
CAUTION: Fa
into service.
Spray the threads of the new stripper bolt (Fig. 2, item 14)
recommended
Valve Assembly Instructions tapped-threaded spool end, all screws and screw holes on
both ends of the housing with LOCQUIC Primer Grade
can result in p product malfu
Spring Center Spool Assembly
NFTM and let dry.
Preparation of Parts
Spray the threads of the new stripper bolt (Fig. 2, item 14) tapped-threaded spool end, all screws and screw holes on
be thoroughly CoApUeTrIaOtiNo:nFbaeilfu rebcaocmkminetnodseedrv can result in po
Step 1 - Spool Assembly-Spring Centered
bNoFStTMhpenarndidsnolegfttdhCreyh.eounsitnegrwiSthpLoOCoQlUAICsPsriemmer Gbralyde
product malfun be thoroughly
Clamp the flat, clevis end of the control spool in a soft jawed vise. Apply Parker Super-O-LubeTM to the spool seal (Fig. 1, item 8) and slide it onto
operation befo baSctekpin1to- Sseprovoi
Centered
the end of the spool away from the clevis. Slide on the back-up ring (Fig. 1, item 7) and retainer plate (Fig. 1, item 6). Position these items onto the spool, so that they do not interfere with the spool operator mechanism during assembly. Do not allow the O-ring to come in contact with the sharp edge of the spool notches.
Spring Center Spool Assembly
Clamp the flat, clev
jawed vise. Apply P seal (Fig. 1, item 8
Stsepopol1aw-aSy pfroomolth C(eFnigt.e1r, eitdem 7) and
Position these items Clianmteprftehree fwlaitt,hctlheevissp jawasesdemvibsley..ADpoplnyoPt aa sewali(thFitgh.e1s,hiatermp e8dg) ea spool away from the c
(Fig. 1, item 7) and re Position these items o
interfere with the spo assembly. Do not allo
with the sharp edge o
Step 2 - Attach Spring Guides and Spring
Apply 2 - 3 drops of Loctite 262TM or equivalent anaerobic adhesive near the middle of the female threads in the spool. Assemble the spring guides (Fig. 2, item 16) centering spring (Fig. 2, item 15) and stripper bolt (Fig.2, item 14) onto the spool (Reverse of Step 7). Torque the stripper bolt to 175 in. lbs. +/-4 in. lbs.
CAUTION: Care must be taken to ensure that the spring retainer is not pinched under the shoulder bolt during assembly. This can result in burrs that may cause spool binding. Check for binding by compressing the spring and guides or by rotating the spring guide nearest the housing.
Lightly coat the centering spring with high- temperature grease to prevent rusting. Set the spool assembly aside and let it cure for a minimum of 1 hour. After curing, test the stripper bolt to make certain it can withstand 125 in. lbs. of breakaway torque.
CAUTION: Follow the adhesive manufacturer's instructions for proper cleaning and curing. Failure to clean and prepare parts properly may result in assembly failure!
CAUTION: Follow the adhesive manufacturer's instructions for proper cleaning and curing. Failure to clean and prepare parts properly may result in assembly failure!
CAUTION: Follow the adhesive manufacturer's instructions for proper cleaning and curing. Failure to clean and prepare parts properly may result in assembly failure!
Step 2 - Att Spring
Apply 2 - 3 drops o anaerobic adhesive threads in the spool
Stiteemp 162) ce-nteAritntgas Spborlitn(Fgig.2, item 14
Torque the stripper Apply 2 - 3 drops of L anaerobic adhesive ne threads in the spool. A itemC1A6U) cTeInOteNri:ngCsapr bolts(pFriign.2g,rietetamin1e4r, i)s Torqbuoeltthdeursitnrigppaesrsebmo
may cause spool compressing the the spring guide CAUTION: Care spring retainer is n bolt during assemb mLiagyhtclayucsoeastpthoeolcbeni cgormeapseretsosipnrgevtehnet srpu tahnedslpert iint gcugrueifdoernae test the stripper bol in. lbs. of breakawa
Lightly coat the cente grease to prevent rust and let it cure for a m test the stripper bolt t in. lbs. of breakaway
7
Parker Hannifin Corporation
Hydraulic Valve Division
Elyria, Ohio, USA
Bulletin MSG14-2001-M1/US
Valve Assembly Instructions
Service Manual
VA/VG Valve
Valve Assembly Instructions cont.
Detent Spool Assembly 8
Valve Assembly Instructions
Step 1 - Spool Assembly-Detent
Detent Spool Assembly
AonptpolythPeasrkpeoroSl.uSpleidr-eOth-LeubbaecTMkt-oupthreinsgp(oFoigl .s1e,aAS8ilpttepe(lFpymPi1gar7-.keS)1r p,Sauoinptoeedrl-mOAo-Lsn8usebe)e,mTMarnbetoVldtytah-aesDinsllepiveodtoereelnspetiaAtlla(Ftsiegs. 1e, mbly Instructions
(Fig. 1 item 6) onto the spool. Position these iirDttienemegmt(8Fe)isgan.nt1od,snSiltiedtpmoeoi7tt)oohanlnteodAtohsnseepss,proeeotoomali.nlS,eblrisldpyeolatthete(hFbiaagc.tk1-utiphtemey
Valve Assembly Instructions dalolonwotthineteOr-freirnegwtoithcothmeesipnocool notpaecrtawtoitrhmtheechs6smAS8oa)hpetotecpnhanhlpaytiarotsnPpt1tihmahserme-kyeseSddpddruoopSrugoniuonlopr.egoteiPrnialn-oosOtAgssefei-rtmLsfiotaeusbrhnbelseyetewhm.TMseDiestsbhoetompltinyhttoehoe-bmteDsaosspllepylooloootn.woneltolDontoshptetheeotaerclOas(tn-phoFroriioengog.lts,1t,o.
AtCchlpAeepaUmlnyTiindI2Ogd-Nlae3n:oddFfrocotlhulpoerswinfoegtfmh. LeFaoalaecidltutihhtreeeres2taio6vde2csTMlmeinoaarnnthauaenfnasedcpqtpouurroievelp.acnefir6smcnAirSDrttiieoooq)oo'eennCaplemtsmmuttmmeoeggtecpccAhiranhveehhlt((panly88etiUaFFaeeeeotiin))nlssnniiPtTtet1gg..tiaanhh,saphsnccI..AAnnerrmeootO-t11ddtekya,appnn,,arseaNSppssddttSnpdiirrunaallllutto:oiispyyeeccaStddrapocmmttenisiuFeeo22nnlrwwoep.otoogiio--77ttettiiipblhrP))ttlri33ooaoolihhoen-ooscaarnnOddwtAsnlsnnsttettoarrhhebip-ooddrootdmLAsteesfoiphpphttoeioouoshhssbcsseernnnsbhhleeefelse.eeooyaeaatoisss,,whffvm.rTMrradpppprreeDlrLLehieeoodstybeeeoontthoooetmaapoddsccellhliitini..ggmttaynnhttviiroeSSeerhetteebee-omeetellrrtooDiisahsmaldd22ppsffsppelyeee66pllylioattoaaovhhm22oeontttnttwhheeTMTMoeeeletuirreeoldsso((nfetdsppFFahbbpootenthloocesiiaaerreaggeootccrelOaauu..aokkllsnn(t11rf---paoFlruuetotiiriirhppttrngoee'eg.lsmm,1t,o
in assembly failure.
e6q)inuoisnvttraouletchnteti,osanpnsoafoeolr.robpPirocosaiptdiehorencstilhveeaesnneieniatgermathnsedomnctiuodrdtihlneego.sfptohoel, fseoFmtahaialeut trthheerteyoaddcoslenianontthaienntsdeprpfoeorrele.pwaritehpthaertsspporool poeprelryatmoray
mreecshualntiisnmadsuserimngblayssfeamilubrlye.. Do not allow the O-ring to
come in contact with the sharp edge of the spool
noCtcAhUesT. IAOpNpl:y F2o-ll3odwrothpse oafdLheoscitviteem26a2nTMufaocrtaunrer's
eqinuisvtraulecntti,oannsafeorrobpircoapdehrecsilveaennienagr athnedmciudrdilnego. f the
Step 2 - Spool Assembly-Detent
SfeFrmteeasaipuleultrt2heinr-teoaaSsdcsspleeimaonnbothlalyenAfsdapsipoluorselre.pem.arebplyar-tDs eprtoepnertly may
Thread the detent ball retainer (Fig. 2, item 20) into the
spCooAlUeTndI.OTNo:rqFueoltlhoewdtehtenatdbhaellsirveetaminearntuofa1c7t5urine.rl'bss.
Thread the detent ball retainer (Fig. 2, item 20+)/i-n4isntinrtu.olcbtsiot..nhsTefhoisrscpparnoopboeralccleeoanmnpdinlig.shaTendodbrcyuqurusininegg. athe detent ball retainer to 175 in. lbs.+/-4 in. lbs. TctShrFrhoeteeawsiippsusluo-lftor2ocelionba-toyasSnsocisncpleeksbmaeoerntebotiolanlynngaAftdahcsieprlcoursfuleraeopnetm.dsam,roesbftppetlheyalelri-rstcDoslhdeepvoretiosre,dpsnacenrrtbedlywhydmorliadvyienrg using a crows-foot socket on the flats of the ctTshphlroerooeulavgdehinsttdhh,e.eTdahoeornteqlenudteinbthahthleloedrbeletdataelilninnrteebrtgaa(ilFnlitergher..ta2ei,nietsermptoo2107o)5ilnintbo. ltybhse.
inserting a round, steel rod or screwdriver thr+o/-u4 ign.hlbst..hTehihs coanlebeianccotmhpelishbead blly ruesintgaainer.
ctShroetewsppso-fo2olob-t ysSoincpkseoertotionlngAtahserosfulaentmds ,osbftetlheyel-rcDoldeevotisre,snacnrtedwhdorlidvienrg
tThhrroeuagdhtthheedheotelentinbathllerbetaalilnreerta(iFniegr.. 2, item 20) into the spool end. Torque the detent ball retainer to 175 in. lbs.
+/-4 in. lbs.. This can be accomplished by using a
crows-foot socket on the flats of the clevis, and holding
the spool by inserting a round, steel rod or screwdriver
through the hole in the ball retainer.
Step 3 - Detent Balls and Spring
Next, lightly coat the detent balls (Fig. 2, item 18) detent spring (Fig. 2, item 19) and entire inside diameter of the detent sleeve (Fig. 2, item 17) with high-temperature
gSrteeaspe. 3 - Detent Balls and Spring
INnesxetr,t ltihgehtdleytecnotatspthriendgeitnetnot tbhaelltshr(oFuigg.h2h, oitleemin1t8h)edetent
Step 3 - Detent Balls and Spring
dsperteinngt b(Falilg.re2t,aitneemr. 1P9la)caentdhensttierelibnasildlseodniatmheeetenrdosfotfhe tdheetesnptrsinlege.vCeo(mFipgr.e2ss, ittheemb1a7ll)s wanitdhshpirgihn-gt,etmhepnersaltiupreon
Next, lightly coat the detent balls (Fig. 2, itemtsgShyr1etmead8mspee)te.et3ndritc-esallDet;eeoevnnete.ete(nNnsdtotpoBef:ratTihlnhelessgdleaee(tnveFnedtihgsSalse.peav2rleie,naisdg-niont iwItneistmherh1t i9tgh)hea-ntdedemteepnnettirrasetpuirnrinseigdgeirnedtaoisatemh.eettehrroouf gthhehdoeletecamsIdttscNsdgIhhnniepyshheerenneiepsssemrttaadxeeeieeammdsndtnnmmtrrsrp,egtttlaettffertbelhseettt.sbiei(hhitrrlngplFnnrael..eeeeghiogleitdTTcelg.tdds.savldhh.i)rCeeelydlteeeuii2;ttiMossteeoevcr,(oaemnnivnoFccoiinnetttnehhaitvpegetg.tsseaaoeemrpp.re(mmste(.Nhptrr2unnsFhii1ffPers,bdnnoeeee9tliisdggttrrvaotg)eehdeecemmfbq:iieaemtennn.etunTtuubhttteantedoohss12haenttntthe7lleetttbtsl,lffhhe)nssdlaasseeeltwstercctliaeieeelutrttteeneesiveehhpebetdvttlnehrr(sathhieooF.tbmnssaheehuuipsastsagioggelssilrigsed.lippmnhhshtnee21aoohv-gbhhoe,ooetdl7e,looneiellyitnrtmllaaiehcc)tee.esfmdhmllepureeii-ennonneetivvor1nmretiisatteta8ssnhhllrti)deeuwwpoosdrrhhfeoeoeenttfhennnet
Place the steel balls on spring, then slip on the
dtheeteenntdssleoefvteh.e(Nsoptrein: gTamsdtthhese.eiehpstdeeaCdsdnemrpelatertbotbieidlnpnnaemgogltdel.s.sdi)rClttpeeuiMeotoerarmivnoinnenevpgt.eotersr(se.NptussshPrsboeellsttvaeteehdceq:heeeenuTtbteetevhhantnheletetlebssdsslstetaeaieeutneseepbdvllnsale.tbssnspsastoelolrelaimstnethvgnboee,lnydntihtesfheurennotormesatnllidposroonf
symmetrical; one end of the sleeve has a leadscyh-maimnmfeectrr.ihTcahali;smocnhefaeemnrfde.roTmf tuhhseitssflaecceevhtehheaasmspaoofleleacdrle-ivnis when
must face the spool clevis when assembled.)asMsemobvleed.)tMhoevedthee tdeetnent ssleleeveetovtehetnoeutral or
the neutral or middle position to prevent the smseuipdabdrlaaetipnsogssditeuiorminngtobspulrbyesveefqnrutoetnhmtessteuspbsae.sspemabrlay ftrionmg
during subsequent steps.
8
Parker Hannifin Corporation
Hydraulic Valve Division
Elyria, Ohio, USA
Bulletin MSG14-2001-M1/US
Valve Assembly Instructions
Service Manual
VA/VG Valve
Step 1 - Spool Subassembly
Apply 2 - 3 drops of Loctite 262TM or equivalent to the fillister screw holes on both ends of the housing. Apply a light coating of clean, hydraulic oil to the valve spool. Carefully insert the spool assembly into the housing. Use caution to avoid causing burrs. Be careful not to pinch, roll or damage the seals. Make sure that the spool and housing are in the proper orientation (see Step 1, page 6 disassembly).
Step 2 - Spool Seal and Back-Up
Apply Parker Super-O-LubeTM to the spool seal (Fig. 1, item 8) and slide it onto the spool. Slide on the back-up ring (Fig. 1, item 7). Push both items into the counter-bore until they bottom out. Assemble the two, front, retainer plates (Fig. 1, item 6) using the two short, fillister screws (Fig. 1, item 9). Check retainer plates for proper alignment. Tighten to a final torque of 34 in. lbs. +/- 2 in. lbs.
Step 3 - Back Cap
Install the back cap using the two, long, fillister screws (Fig. 1, item 4). Tighten to a final torque of 34 in. lbs.+/- 2 in. lbs. CAUTION: Excessive torque will damage the back cap ears!
Valve Assembly Instructions
Step 1 - Spool
Valve Assembly InstArpuplyc2t-i3odrnopss of
fillister screw holes o
ASpteplpy a1li-ghSt cpooatoinlg
Valve
Assembly
Instructions spool. Carefully inse hAopupsliyng2. -U3sedrcoapustioofn
nfiolltistotepr isnccrhew, rohlolloers do
tSAShtpeteeppslppy1o,ao1pllaiag-gnehSdt6cphdoooiaustosaiinsnlsg
sAppopolly. C2a-r3efdurlolypsinosfe hfiolluisstienrgs. cUreswe chaoulteiosno not to pinch, roll or d
tAhpepslpyoaolliagnhdt chooautsiinng Sspteopol1. ,Cpaargeefu6lldyiisnasses
housing. Use caution
not to pinch, roll or d
the spool and housin
SStteep p1, 2pag-eS6pdoisoasls
Apply Parker Superitem 8) and slide it o ring (Fig. 1, item 7).
bSotree pun2til -thSeypbooottol
AApsspelmy bPlaerktheer Stwupo,erf-r uitseimng8t)haentdwsolisdheoirtt,o
CfrbSiionnhtrageeelc(puktFonirr2tgeqi.ltua-1teih,nSoeietyfrpe3mbpo4ola7otittn)eol..s
Apsspelmy bPlaerktheer Stwupo,erf-r uitseimng8t)haentdwsolisdheoirtt,o Crinhgec(kFirge.ta1i,nietrempla7t)e.s fbionrael utonrtqilutehoeyf 3b4otitno.
Assemble the two, fr using the two short, Check retainer plates final torque of 34 in.
Step 3 - Back c
Install the back cap u (Fig. 1, item 4). Tigh +/- 2 in. lbs.
Step 3 - Back c
I(+Fn/Cbs-igata2a.cul1kiltn,ti.choiatlenebp:mbs.Eaeca4xkr)c.sec!Tsasipgivhu
Step 3 - Back c
Install the back cap u (FCiga.u1t,ioitne:mE4x)c.eTssigivh +/b-a2ckin.calbps.ears!
Caution: Excessiv back cap ears!
9
Parker Hannifin Corporation
Hydraulic Valve Division
Elyria, Ohio, USA
Bulletin MSG14-2001-M1/US
Valve Assembly Instructions
Service Manual
VA/VG Valve
Valve Assembly Instructions cont.
10
Step 4 - Install Transition Check
Valve Assembly Instructions
Inspect transition check components for cleaSntleipne4s-sIn. sIntaslltaTrllancshietiocnkCphoepckpet
(Fig. 1, item 13) into the transition check Valve Assembly cavitII1ynnss0.ptaeAlcltclthirgeacnnksiptitoohpnpecehte(ccFkhigc.eo1mc, piktoenmsen1pt3s)rfiionnrtocgltehaenltirnaensssit.ion Instructions
(Fig. 1, item 12) square to the poppet, then cachreecfkucallvyityp. Allaigcn ethetchheeckcsphriengc(kFigc. 1a, iptem 12) (Fig. 1, item 11) over the poppet and spring. Ts(SuFqtuirgean.rpe1i,nt4oitget-hmeIbn1p1syo)ptopahveletal,rtTnthhredenap,ncoasperepinfteuitoglalynnadpgClsapcehreinetsghc.eekcTvhueercnkrinacgalpby
Valve Assembly Instructions threads. Tighten to a final torque of 75 ft. lbs.hI1na+sn0pd/e,-cet4ntgrfaatng.seiltsibeovnsecr.halecthkrecaodmsp. oTnigehnttesnfotor calefiannallinteosrsq.ue oInfs7ta5llftc.hlebcsk. +p/o-4pfpte. tlb(Fs.i.g. 1, item 13) into the transition check cavity. Align the check spring (Fig. 1, item 12) s(SFqtuigea.rpe1,t4oitet-hmeIn1p1so)ptopaveletl,rtTthhreenapncoasprepifteuitolalynndpClsapchreinetghc.ekcThuercnkincgapby hInasnpde,cetntgraangseitsieovnecrhalecthkrecaodmsp. oTnigehntesnfotor calefiannallinteosrsq.ue oInfs7ta5llftc.hlebcsk. +p/o-4pfpte. tlb(Fs.i.g. 1, item 13) into the transition check cavity. Align the check spring (Fig. 1, item 12) square to the poppet, then carefully place the check cap (Fig. 1, item 11) over the poppet and spring. Turning by hand, engage several threads. Tighten to a final torque of 75 ft. lbs. +/-4ft. lbs..
Step 5 - Relief Valves
Step 5 - Relief Valves
Return all relief valves to their proper positions and torque to 75 ft. lbs.
Install new, section seals. Place section seals (Fig. 1,
Return all relief valves to their proper positioniStsetmeasp1n5&d-2t,RooerrilqtieemufseV1a&tlov3e)7isn5theftp.rolpbersg.rooves.
MReatkuerncealrltarienliseefavlsalsvteasytiontthheeiirrpgrroopoevrepsodsuitriionngs and
Install new, section seals. Place section sealsatosrs(qeFumeibgtloy..715 ,ft.iltbes.ms 1 & 2, or
items 1 & 3) in the proper grooves. grooves during assembly.
Make
cer tIiSatnetsmitenaspll1sn5&eew-2a,,RsloeserctilitisoeenmtfasseV1yaal&sl.ivnP3e)laitscnhetsheeeciprtiroonpeser aglrso(oFviegs..1,
MReatkuerncealrltarienliseefavlsalsvteasytiontthheeiirrpgrroopoevrepsodsuitriionngs and
atosrsqeumebtloy.75 ft. lbs.
Install new, section seals. Place section seals (Fig. 1,
items 1 & 2, or items 1 & 3) in the proper grooves.
SMtaekepce6rt-aiInnsseatlas lsltaTyiien tBheoirltgsrooves during
aSslisdeemtbhley.tie bolts through the inlet casting. If cap screws
are used, place a washer on the cap screw prior to
installation. Place the valve sections on the tie bolts in
Sthhaetniedrp,perno6gpae-grIesnesqseuvteeanrlaclleTt(hsireeeeadBSsteoipnlt1ths,epoaguetle4t)..ITf uitrnisinagVbGy
sSelirdieestahsesetime bbloyl,tsasthseromubglhe tnhuetiannledtwcaassthinerg.toIfecitahperscernedws oarfethuesesdtu, dplaancde faowlloaswhearboonvethinesctraupcsticornews. Tproiroqruteo the tie binoslttaslliantiaocnr.oPslsa-cceortnheervpaalvtteersne.ctions on the tie bolts in
Step 6 - Install Tie Bolts
Sthetierppro6pe-rIsneqsuteanlcleT(sieee BSteoplt1s, page 4). Turning by
hand, engage several threads in the outlet. If it is a VG
sSelirdieestahsesetTimeiebloyBl,tsaosthlsteromTubgolherqtnhuuet ieannlVedt awcalaussthienesrg.toIfecitahperscernedws
Slide the tie bolts through the inlet casting. Ifobaincrfoeslttathauselsplieansdttiua,sodVpcnclr.AaaonPrc2sdeles0a-facwo-eowl2rltsonah9swehrfavteap.arbralovbtetnvesert.sunhei(.nec3sstc4iteora8upndcissnti,co.ornnelpbwsth.sleaTp.)rtociireoqerbutoeolttsheintie
a washer on the tie bolts
the cap screw in their proper
sperqiouretnociens(staelelaStiotethsnheaper.niiderP1s,pear,lnosasgppeVVTaecmgraGAieeesb32gels5y0qBete,uvh--aoee3s4nre4lsac42tele)mfT.tfv(thts.b.oarTeleleebrbaluqvdsnSsrsu.t.euenti((pne45aisn001tnhVd8,4eegpawiicoannlaguu.b.tsethileleloy4ebbts)r.ss.ntIh.To.f))suaietrintinohsinedangrV,ebnGyd
engage nut and
several washer
threads in the outlet. If it to either end of the stud
is a and
obVffooGltthlsleionsstwuaedVVVcrrGGAaiaone2s38dbs050s-fcoo---ola271rvlon955sewe0rffsttapf.i.ebtnal.lobtbmtlsvebsser.t.snbir((..n39u(sl401tyrc808u,0ctiinan0tiio.o.isnnlnblss.b.sslseTb.)..o)smr.q) ube ltehe
tie
Torque the tie bolts in a cross-corner pattern.
VG20 - 42 ft. lbs. (504 in. lbs.)
VTAie35B-o3l4t fTt.olbrqs.u(e40V8 ainlu. elbss.)
VVGA2305 -- 2795 fftt.. llbbss.. ((394080 iinn.. lblbss.).) VVGG8200 -- 14520ftf.t.lblbs.s(.5(01480in0.inl.blsb.)s.)
VA35 - 34 ft. lbs. (408 in. lbs.)
VG35 - 75 ft. lbs. (900 in. lbs.)
VG80 - 150 ft. lbs. (1800 in. lbs.)
Tie Bolt Torque Values
VA20 - 29 ft. lbs. (348 in. lbs.)
VG20 - 42 ft. lbs. (504 in. lbs.)
VA35 - 34 ft. lbs. (408 in. lbs.)
VG35 - 75 ft. lbs. (900 in. lbs.)
VG80 - 150 ft. lbs. (1800 in. lbs.)
10
Parker Hannifin Corporation
Hydraulic Valve Division
Elyria, Ohio, USA
Bulletin MSG14-2001-M1/US
Cutaway for VA/VG Remote-Control Operators
Service Manual
VA/VG Valve
Cutaway for VA/VG Remote-Control Operators
Read these instructions carefully. Failure to follow these procedures can result in poor performance or product malfunction. Make sure all work is done in a clean area.
Figure 3: Remote Cap Components
1. O-rings (2)
5. Return spring, outer
2. Seal retainers (2)
6. Valve caps (2)
3. Shoulder bolt
7. Spring retainers (2)
4. Return spring, inner
*Required for VG80
8. Cap screws (4) (8*)
1
9. End tubes (2) 10. O-rings (4) 11. Stop tube
2 5 49 7 8
8 6 10 9 2 10
1 10 7 3 11 10 6
Figure 3: Hydraulic Remote Control
Remote Endcap Seal Parts List
Item 13 10
Description O-Rings O-Rings
Qty. 2 4
VA/VG20 391 2881 625 391 2881 242
VA/VG35 391 2881 62 391 2881 242
VG80 391 2881 124 391 2881 106
11
Parker Hannifin Corporation
Hydraulic Valve Division
Elyria, Ohio, USA
Bulletin MSG14-2001-M1/US
Remote-Control Operator Disassembly
Service Manual
VA/VG Valve
Remote-Control Operator Disassembly
Step 1 - Remote Endcaps
12
Remote-Control Operator Disassembly
Using an allen wrench, remove cap screws (FSigte.p31i-teRmem8o)tefreonmdcbaposth ends
of
the
valve
section.
Lightly
tap
the
wrench
Remote-Control wU8i1)ts2fhinrogmaanbhoaltalhenmenwdmrseonfechtrh,ertevomalovhveeescelacpptiosncb.reLrweigsha(tFlkyigt.a3p
item the
Operator
Disassembly
the bond of the anaerobic adhesive.
wrench with a hammer to help break the bond of the
aSntaeerpob1ic-adRheesmiveo. te endcaps
Remove valve caps (Fig. 3, item 6) O-ring seaRUlessimngo(Fvaenigvaal.lven3e cw,arpietsne(cFhmi,gr.e3m1,o0itvee)mcaa6pn) Osdc-rreienwgsns(deFailgst. u(3Fibtge.em3s, (Fig. 3, item 9) from each end of the valve houi8t)esmfirno1m0g)b.aontDdh einsdcstuaobfretsdhe(Fvtiaghl.ve3e,siOetecmt-ior9ni).nfLrgoigmhstelyaectahapelsnthd.eof
twhreevnaclhvwe hitohuasihnagm. Dmiesrcatordhtehlpe Obr-erainkgthseablso.nd of the
anaerobic adhesive.
Remove valve caps (Fig. 3, item 6) O-ring seals (Fig. 3, item 10) and end tubes (Fig. 3, item 9) from each end of the valve housing. Discard the O-ring seals.
Step 2 - Spool Subassembly
Slide the seal retainer (Fig. 3, item 2) from the clevis
Step 2 - Spool Subassembly
end of the spool assembly. Grasp the spool assembly by the spring end and slide it out of the housing. Remove
Slide the seal retainer (Fig. 3, item 2) from thetShetcerlepemv2aiins-inSgepsneoadlorleotSafiunetbrhabeyssslsiedpminogbioltyolver the spool.
assembly. Grasp the spool assembly by the sNSploidwrei,ntrheegmsoeevaelnrtehdteaiOnae-rnin(dFgigses.a3ll,isdi(tFeemig.2i3t),foirtoeumtsth1oe&cfle1v0i)s the housing. Remove the remaining seal retaifetnhrnoedemsoprbfroitbnhthgeyseepnsaodlolarilnedatdasisisnneliemgdresblaiiytnt.odGuodtriavossfcepathrtrdheetthhhsoepueossoeinalsglas.ps.sReoemmobollyv.eby
the remaining seal retainer by sliding it over the spool.
Now, remove the O-ring seals (Fig. 3, items 1 & 10) from both seal retainers
and discard the seals.
Now, remove the O-ring seals (Fig. 3, items 1 & 10) from both seal retainers and discard the seals.
Step 3 - Spool Identification
The spool should now be tagged or marked with the appropriate work section identification number (see Step 1, page 4).
Step 3 - Spool Identification
The spool should now be tagged or marked with the appropriate work section identification number (see Step 1, page 4).
12
Parker Hannifin Corporation
Hydraulic Valve Division
Elyria, Ohio, USA
Bulletin MSG14-2001-M1/US
end of the spool assembly. Grasp the spool assembly by the spring end and slide it out of the housing. Remove the remaining seal retainer by sliding it over the spool.
Service Manual
Remote-Control Operator Disassembly Now, remove the O-ring seals (Fig. 3, items 1 & 10) from both seal retainers and discard the seals.
VA/VG Valve
Step 3 - Spool Identification
The spool should now be tagged or markedSwteipth3 t-hSepoaoplpIdroenptriifaictaetiwonork section
identification
number
(see
Step
1,
page
4).
The spool should now be tagged or marked with the appropriate work section identification number (see Step
1, page 4).
Step 4 - Spring Pack
The spring assembly should not be removed from the spool unless it needs to be replaced. Insert the clevis end of the spool in a soft-jawed vice. It may be necessary to apply heat to the stripper bolt to loosen the anaerobic adhesive.
Use heat carefully to avoid warping the spool.
Remote-Control Operator Disasse
Step 4 - Spring
The spring assembly spool unless it need end of the spool in a necessary to apply h anaerobic adhesive.
Use heat carefully
ALWAYS WORK IN A CLEAN ENVIRONMENT
13
Always Work In A Clean Environmen
Parker Hannifin Corporation Hydraulic Valve Division Elyria, Ohio, USA
Bulletin MSG14-2001-M1/US
Remote-Control Operator Assembly
Service Manual
VA/VG Valve
Remote-Control Operator Assembly
Step 1 - Spring Pack
14
Remote Control Operator Assembly
Step 1 - Spring Pack
If the shoulder bolt and spring assembly wereIf dtheisshaousldseer bmoltbanled sdpr,inpg laasscemebltyhweerespool in a soft-jawed vise with the tapped and threadidsaessdemeblendd, plaucpe t.heCspaoorleinfua slloyft-jcawlaedmvispe with
on the flat, spool clevis. Apply 2 - 3 drops of Ltfhlaeot,tcaspptpoieotdlecalne2dvi6tsh.2rAeTMapdpelody re2n-ed3uqdpr.uoCpiavsroeaffulLelloynccttiltaemt2op62oTMn thoer the middle of the female threads in the spool eequnivdal.enAt tso tsheemmidbdleleofdthejofeimnatlse thsrehadosuinltdhe
be allowed to cure hydraulic testing.
for
a
minimum
of
one
Remote Control hoursfh1opybr4odoarealmueflnioincdir.mteeAusstmisbnegome.fbiolnnedeghjoosiunrutsbbsehfjooeruelcdbtebeiengadllsoutwbojeedctteodctuore
Operator
Assembly
Slide a spring retainer (Fig. 3, item 7) onto theSSboltisledtehp(Faoi1gsup. -r3li,ndSigtpeermerrtian3ib)ngefoorPl(llFtoaiwgc(e.Fkd3i,bgiyte.tmh3e7,s)toopnttoubthee(Fshigo.u3ld,er
Remote Control Operator Assembly item
(Fig.
3) 3,
followed by items 4 & 5)
the stop tube (Fig. onto the shoulder
b3o, litt.ePmlittIda1thhf1ieseec4tm1ahetsseeah)ns1p.oesd1phmut)Noeol.hbddfulNeteeleahdredneexbxd,rrostpte,tbpllh,tsooa.mrlcloePistedlalaeladaatnihcenddesidpnstesetrhpphiinenrnordisegonragesulgpdmp(ianF.trasshCiiaisgennpea.simsrno3gerhgf,bfiotusiln-sutyjlpealgdymrwwienceserglrd4abemrov&elipttsae5iionnwn)teooirtthnthohetnoe
rbeytahiannedr .oTnotrhqeueenthdeosf hthoeulsdpeor obloaltntdot1h7re5aidn.tlhbShufesIeflpqsoastiotultenhe,o.isgevpslbapuhsaeyloh1netsohoodnoalu-.tirunqnclAtdSdoluleesg.edvptsrThewibreseomao.irrmnerlbAqtnlutigpeacdbeodpnhdtPld.olrjhyeoqseali2opntscfur-thisktino3hensguedhltarodfwooseuespmrledrsbmtaeoblhebfelntletLyahtcolrwlechoh1aetw7idrot.5eesdli2iennt6.o2tlhTMcbeus.roer
fdoisraassmeminbimleudm, polafcoentehehosuprooblefinorae sboefitn-jgawsuebdjevcitseedwtoith
CAUTION: Care must be taken to ensure thahtthyCedtAtrhaUpuepTliecIsdOteapNsnt:rdiniCtgnha.rgreeadmreedustetanbdienutpae.kCreanirsetofuenllnyosuctlraemtphaotnththee
pinched under the shoulder bolt during assemSfelqsblaibputod,irlevlstiynapdlog.eusonprrTltreiicnttnholagegivtinahrsieessesrt.aemcAiimsnipadenbpdrnollly(yteF.p2roiTgifen-h.tc3i3shsh,educeirftadoelnmptusrnai7eoldns)efeuotLrlhbntotrthiecounateitdtrbhsesrehu2isorsn6ruh2stolhTMduteheldraoetrr
that may cause spool binding.
bspomoltao(ylFecingad.u.3sA,eisstsepemomo3bl)lbefidonljdlooiinwngtes.dsbhyouthldebsetoaplltouwbed(Ftoigc. u3r,e
iftoerma 1m1i)n.imNuemxt,osfliodnee shporuinrgbsef(oFrieg.b3e,initgemsusb4je&cte5d)tonto
thhyedsrahuoluicldteerstbionlgt. Place the remaining spring retainer on
Sthteeepnd2of-thSeesapoloRl aentdathinreeadrsthe shoulder bolt into the
Step 2 - Seal Retainers
IhSnolsiltdeaelblaythshpeartniwndgo. ,TreOotr-aqriinunegrts(heFeaiglssh. o(3Fu, iligdte.em3r ,b7iot)eltomtnosto117t&h5ei1ns0h.)olbousnl.der buboostilhnt g(sFeaiagtlo.rr3eq,tuaiietnewmerrse3(n)Fcfihog.l.lo3w, ietedmby2)th. eAsptpolpy tPuabrek(eFr iSgu. p3e, rOite-Lmu1be1TM). Ntoetxhte, sOli-dreingspsreinalgss. (Fig. 3, items 4 & 5 ) onto the shoulder bolt. Place the remaining spring retainer on
Install the two, (Fig. 3, item 2).
O-ring seals (Fig. 3, items 1 & Apply Parker Super-O-LubeTM
thu1hsoCsCsbeiupl0onAAeerrlgt)einUbUndadytTTogoutohIIorrnfiaOOreninqtntNshNduagbee.ei::rnaTstoTCwespoOshraortreeeroq-himnsreluOcienabnmhs-nolgtr.yudhtei.snespteTtahgsiabnrhhlsleescoieashura1tdcelaelds&adtkhetnaeerua1rnrnbse0eihotdnssoioleunitumreelttltnotdhirhsile1enauseri7rrrbbs5eihuponitolrrnhtsruo.iaispzlntdbetetthseo.rh.ratBeht ee topmoastyithicoaenu.sOTe hsp-eyoroianlrbeginnodstineingat.elrsch.angeable!
CAUTION: The O-ring seals are similar in sizSeCst.peArBpiUnTeg2IrO-estNSaui:enrCeaeralritRseonmeotuitansptiisnbneecehtrreastdkeuOnntd-oerreinnthsugersehtohualtdtehre seals 1 & 10 in their proper position. They areIbnobmnsttohaaollytsletdctahualieurnrietsnwtteageosinp,areOsocrsos-ehrlm(ibFnabiginglnysd.e.3iganT,lgseiht.e(iasFmicbga2.n)l3.e,rAe!itpseupmllytsiP1na&brkue1rr0rS)suotphneart-
SO-tLeupbe3TM-toStpheoOo-lriInngssetaallsl.ation Step 2 - Seal Retainers
AcIbnaoCsppsptuotphAarssllycseUilterit2teTaohowlI-neirO.3nehtwTtNsodaelohri:erno,estTepOyOrohss-anero-r(irfbFOneionLgin-gtgrohso.icest3netae,iignlatnsiedtlstes(ee2Fmar1o6iclf2gs&2hTM.t)aha3.1ren,Aoe0ghirtpesoienepiaummqlbsytuslihienliP1eav!gaira.&rrlkiepnen1rrt0soiS)tpzouoeeptn.rheeBr-e SOl-iLdeuboenTMe steoalthreetOai-nreinr govseeraltsh.e spool, resting against the
spring retainer. Make sure the O-ring (Fig. 3, item 1) is faCciAngUtThIeOseNc:tiTonhecaOst-irnign.gAspeapllsy aarleigshimt ciolaartining soifze. Be clseuarne, htoydinrasuelritc Ooi-lrtiongthseevaalslv1e&sp1oo0li.nCthareeifrupllryoipnesrert thpeosspiotioolni.nTtohtehyeahroeunsiontgi.nUtesrechcaauntgioeanbtole!avoid causing
burrs.
Step 3 - Spool Installation
Step 3 - Spool Installation
Apply 2 - 3 drops of Loctite 262TM or equivalent to the cap screw holes on both ends of the housing.
Apply
2
-
3
drops
of
Loctite
262TM
or
equivalenSsSplttirdeintepgoorn3eettah-sieneSaelrp.rceoMtaaoainpkleeIrnssousvrceetrrathetlhelweaOst-pirohoinonogl, (lrFeeisgsti.n3go, aintgeamin1st)
the is
both ends of the housing.
fAapcpinlyg 2th-e3sedcrtoiopns ocafsLtioncgt.itAe p2p6l2yTMa loigr hetqcuoivaatilnegntotfo the
calepansc, rheywdrhaoulleisc onil btotthheenvdaslvoefstphoeohlo. uCsianrge.fully insert
Slide one seal retainer over the spool, restingtbShulaeirdrsgesp.ooanoielnisnestaotl trhetethahienoeurssionpvge.rriUtnhsegescparouoetli,tornaestiotninaegvorai.gdacinasutstihneg Make sure the O-ring (Fig. 3, item 1) is facingsptrhineg rsetaeincert.iMoankecsuarestthienOg-r.ingA(pFigp. l3y, itaem 1) is
light coating of clean, hydraulic oil to the valvfcealecaisnng,phthoyedorsaeluc.ltiicConoiaclatrsoetitnhfgeu.vAlalpylvpeliysnpaosloiegl.hrtCtcaotraehtfiunelglyoifnsert spool into the housing. Use caution to avoid cthae suposoilningto btheuhrorussi.ng. Use caution to avoid causing
burrs.
14
Parker Hannifin Corporation
Hydraulic Valve Division
Elyria, Ohio, USA
Bulletin MSG14-2001-M1/US
Remote-Control Operator Assembly
Service Manual
VA/VG Valve
Step 4 - Assemble Endcaps
Remote-Control Operator Assem
Apply a light coat of grease to the valve-cap O-rings (Fig. 3, item 10). Assemble the O-rings onto both of the cast-iron valve caps (Fig. 3, item 6). Slide the end tube (Fig. 3, item 9) over the spring end of the spool. Position the cast-iron valve cap, as shown, on the end tube and push into place. Be careful not to shear the valve-cap seal during installation. Install two, cap screws (Fig. 3, item 8) tighten evenly and torque to the final specification.
VA20/VG20 to 100 in. lbs. VA35/VG35 to 175 in. lbs. VG80 to 175 in. lbs.
Step 5 - Complete Endcap Assembly
Install seal retainer (Fig. 3, item 2) with seals on the clevis end of the spool. Install the end-cap tube (Fig. 3, item 9) the valve cap (Fig. 3, item 6) and the cap screws (Fig. 3, item 8) as previously explained.
Step 4 - Assem
Apply a light coat of
Remote-Control
Operator Assem (Fig. 3, item 10). As cast-iron valve caps
(Fig. 3, item 9) over
PtSuobtseeitpaionnd4tph-uesAchasisnts-toieropmn
vAaplpvely-caapligsheat lcdouatrionf
Ia(c(FnFnasisidggtta-..tilo33rlro,,tqnwiiutteeovemm,atlcov1a9etp0)hc)oes.avcfApreiesnrsw
VPoAs2it0ioTMn /tVheGc2a0sTMt-irtoon
VtvuaAblve3e5a-nTMcdap/pVsuGesah3l5idnTMutoritnpo
VInGst8al0lTMtwtoo, c1a7p5sicnr.elw
and torque to the fin
VA20TM/VG20TM to
Step 5 - Comp
VA35TM/VG35TM to IcVnlGesvt8aisl0lTMesnedatloorf1e7ttah5ieniesnpr.o(l item 9) the valve cap (Fig. 3, item 8) as pr
Step 5 - Comp
SIntsteapll s6ea-l rAetasisneerm(
IIvci(tnnFlaeessilmgvptva.ieesl93clc)et,aanttiphhntde.eeemoPwvtflraa8aOtlchn)ve-esaeritsitschnippoaegorpn the housing. Align th
s(SFqtuigea.rpe1,t6oitet-hmeA1ps0o)spopevemet
hInasnpde,cetntghaegterasnesviteiroan 7In5stfat.lllbasn. e+w/- O4 -frti.nlgb valve cap. Place the the housing. Align th square to the poppet
CAUTION: Failure to follow these recom(mFige.n1,dietedm a10s)soevem instructions can result in poor performah7na5cnfdet., leobnsrg.a+pg/e-ro4sedfvt.uerlbca malfunction. Product should be thoroughly tested to e proper operation before the valve is put back into serv
CAUTION: Failure to follow these recommended assem
instructions can result in poor performance or produc
Step 6 - Assemble Transition Check
malfunction. Product should be thoroughly tested to e
proper operation before the valve is put back into serv
Inspect the transition-check components for cleanliness. Install a new O-ring seal (FiUgS1E, iOteNmLY11O) oRnIGthINe AcLheVcAk-/VvaGlvTMe SERIES REPLAC
cap. Place the check poppet (Fig. 1, item 13) into the housing. Align the check spring (Fig. 1, item 12) square to the
poppet, then carefully place the check cap (Fig. 1, item 10) over the check poppet. Turning by hand, engage several
threads. Tighten to final torque of 75 ft. lbs. +/- 4 ft. lbs. USE ONLY ORIGINAL VA/VGTM SERIES REPLAC
CAUTION: Failure to follow these recommended assembly instructions can result in poor performance or product
malfunction. Product should be thoroughly tested to ensure proper operation before the valve is put back into service.
USE ONLY ORIGINAL VA/VG SERIES REPLACEMENT PARTS
15
Parker Hannifin Corporation Hydraulic Valve Division Elyria, Ohio, USA
Bulletin MSG14-2001-M1/US
Cutaway for Pneumatic Control Operators
Service Manual
VA/VG Valve
Cutaway for Pneumatic Control Operators
Figure 4 : Pneumatic Cap Components VA/VG20 AND VA/VG35
1. Retaining plate
8. Spring retainer
15. O-rings (2)
2. Spacer tube
9. Stripper bolt
16. Wiper seals (2)
3. Spacer
10. Stop tube
17. Retainer plate
4. Flange
11. Spring
18. Washers (2)
5. Pressure tube
12. Spring retainer
19. Cap screws (2)
6. Piston
13. Wiper seal
20. Spool Seals (2)
7. Seal retainer
14. Piston rod
21. Back-up rings (2)
1
23
4 56
7
9
17
20 21
8 9 10 11 12 13 14 15 16 15 17 18 19 Figure 4: Single-Ended Pneumatic Cap
Seal Parts List - Figure 4
Item 13 15 16
Description Wiper Seal O-Rings Wiper Seals
Qty. 1 2 2
VA/VG20 391 2883 165 391 2881 625 391 2883 164
VA/VG35 391 2883 165 391 2881 625 391 2883 164
16
Parker Hannifin Corporation
Hydraulic Valve Division
Elyria, Ohio, USA
Bulletin MSG14-2001-M1/US
Pneumatic Section Disassembly
Service Manual
VA/VG Valve
Pneumatic Section Disassembly
Step 1 - Pneumatic Endcap
Remove the two, hex-head cap screws (Fig. 4, item 19) and retainer plate (Fig. 4, item 17). Since LoctiteTM was used to hold fasteners, slide the Endcap and spool out of the valve body as one assembly. Remove the two, retainer screws (not shown) from the clevis end of the spool, lightly tapping the end of the screwdriver handle with a hammer to break adhesive. Remove the two, retainer plates, back-up ring and spool seal. Discard the spool seals and back-up rings from both ends of the work section.
Step 2 - Spacer Tube
Next, slide the spacer tube (Fig. 4, item 2) off of the spool to expose the spring (Fig. 4, item 11) and spring retainers (Fig. 4, items 8 and 12). Disconnect the piston rod (Fig.4, item 14) from the stripper bolt (Fig. 4, item 9). Slide the spacer (Fig. 4, item 3,) and flange (Fig. 4, item 4) off the piston rod. Remove the wiper seal (Fig. 4, item 13) and O-ring (Fig. 4, item 15) from the flange and discard.
Step 3 - Spool Identification
The spool should now be tagged or marked with the respective, work-section identification number (see Step 1, page 6).
Pneumatic Section Disassemb
Step 1 - Pneum
Pneumatic Section DRiesmaovse thse etwmo, hebx
and retainer plate (F
used to hold fastener
Pneumatic
Section
Disassemb tShetevpalv1e b-oPdynaesuonm RReemmoovvee tthhee ttwwoo,, hreetx
calnedvirseteanindeorfptlhaetes(pFo
sucsreedwtdorhivoelrd hfaasntdelneewr
RtSheetmevopavlve1ethb-eoPdtwynoae,suroenmt
seal. Discard the spo bRoetmh oevnedsthoef ttwheo,whroeetrx calnedvirseteanindeorfptlhaetes(pFo
sucsreedwtdorhivoelrd hfasntdelneewr
Rtheemvoavlveethbeodtwy oa,sroent
sbRceloeeatmvhl.ioseDvneiednscsdthaoorefdfttwtthhheoee,wssrppoeootr
screwdriver handle w
Remove the two, ret
Ssbeotatehl. peDnid2scsa-orfdStthpheeawscpoeor
Next, slide the space
spool to expose the s
retainers (Fig. 4, item
rSotde(pFig2.4,- iStempa1c4)e
9). Slide the spacer ( iNteemxt,4s)loidfef tthhee pspisatcoen 4sp, oitoelmto1e3x)paonsdeOth-erisn
arrSeonttddaei(dnpFieisrgc2s.a4(r,-Fdii.Stge.mp4a,1ic4te)em
9i4Nstp),ee.omixtSoetll,m4itsd)ole1oide3ftxehf)pettahhonseespdeapsOcptihsea-terrcoie(snn arentdaidniesrcsa(rFdi.g. 4, item rod (Fig.4, item 14)
9). Slide the spacer (
item 4) off the piston
4, item 13) and O-rin
and discard.
Step 3 - Spool
The spool should no respective, work-sec 1, page 6).
Step 3 - Spool
The spool should no respective, work-sec 1, page 6).
Step 3 - Spool
The spool should no respective, work-sec 1, page 6).
17
Parker Hannifin Corporation
Hydraulic Valve Division
Elyria, Ohio, USA
Bulletin MSG14-2001-M1/US
Pneumatic Section Disassembly
Service Manual
VA/VG Valve
Pneumatic Section Disassembly cont.
18
Step 4 - Pneumatic Endcap
Pneumatic Section Disassembly
Slide piston (Fig. 4, item exposing the two, wiper
6) and piston rod seals (Fig. 4, item
a1s6sSS1).le8tideRmeppeib4smtol-ynoP(oFvniegue.ut4t,mhoiteeafmttiw6hc)eiEapnPndpedpnrricsetseaosnpeusraoumdlsraessaaetmntubidblcyeou,St ection
Disassembly
discard. Insert a screwdriver handle into the po4f,ritetheemsps1re6us)s.ruRereemttuoubvebe, etehxepoawsniipnegdrtshdeeatliwssaoln,odwddipigsecreasredat.lhIsn(esFeirgt.a
seal retainer (Fig. 4, item 7). Remove the O-rinsSctrgeewp(dFr4iivge-r.Pha4nne,dlueitmientamottihce1pE5ren)sdsaucrneatdpubedainsdcdiaslroddg.e
t(SohFfleiitdghse.ee4app,lirsiretteeostmsnaui(nr1Fee5irtg)u(.abF4nei,dg,i.etde4xim,spciota6esri)mdna.gn7td)h. peRitsewtmoono,vrweoidtpheaerssOsee-marlibsnlg(yFoigu.t
4, item 16). Remove the wiper seals and discard. Insert a
screwdriver handle into the pressure tube and dislodge
the seal retainer (Fig. 4, item 7). Remove the O-ring
(Fig. 4, item 15) and discard.
Step 5 - Stripper Bolt
Step 5 - Stripper Bolt
The spring assembly should not be removed from the spool unless these parts are being replaced. Carefully
place the spool clevis in a soft-jawed vise. Lightly tap the
The spring assembly should not be removed sSftrrtioepppmer5bot-hltSwetirthsipapphoeamromBl eour alntndlepsunschttho beresaek the parts are being replaced. Carefully place the aTsdhhpeessopivroien.lgIfcaistlsedemovebsilsynosithnroeulealdasnseo,otcbafeuttr-ieojmuasolwvyeadepfpdrloymvhetihaste.e. Lightly tap the stripper bolt with a hammer anCsppldaaoucoetplitouhunel:nesTspcsootoohhlmecstlueeocvphiasbrhtisneraeatresmaobfkaety-injatdgwhisreetedoprlvataicstedhed.e.hLsCpeiagorshoetlfil.uyvllteyap. the
If it does not release, cautiously apply heat. stripper bolt with a hammer and punch to break the
adhesive. If it does not release, cautiously apply heat. As the stripper-bolt threads disengage, the spring (Fig. 4,
CAUTION: Too much heat may distort the spiCtoeamuot1ilo.1n):aTndoospmriungchrehtaeiantemrsa(yFidgi.s4to, ritetmhse 8spaonodl.12) will
release abruptly.
As the stripper-bolt threads disengage, the spring (Fig. 4, item 11) and spring
retainers
(Fig.
4,
items
8
and
12)
will
release
aAitbesmtrhu1e1ps)tratinplydpe.srp-rbionlgt
threads disengage, the spring (Fig. 4, retainers (Fig. 4, items 8 and 12) will
release abruptly.
18
Parker Hannifin Corporation
Hydraulic Valve Division
Elyria, Ohio, USA
Bulletin MSG14-2001-M1/US
Pneumatic Section Assembly
Service Manual
VA/VG Valve
Pneumatic Section Assembly
Step 1 - Spool Assembly
Clamp the flat, clevis end of the control spool in a soft-jawed vise. Apply Parker Super-O-LubeTM to the spool seal (Fig. 4, item 20) and slide it onto the end of the spool, away from the clevis. Slide on the Back-up ring (Fig. 4, item 21) and retainer plate (Fig. 4, item 6). Position these items onto the spool so that they do not interfere with the spool operator mechanism during assembly. Do not allow the O-ring to come in contact with the sharp edge of the spool notches.
Step 2 - Spring Assembly
Apply 2 - 3 drops of Loctite RC680TM or equivalent, anaerobic adhesive near the middle of the female threads in the spool. Place the spring retainer (Fig. 4, item 8) over the end of the spool followed by the centering spring (Fig. 4, item 11). Place the stop tube (Fig. 4, item 10) in the spring and cap with the other spring retainer (Fig. 4, item 12). Insert the stripper bolt (Fig. 4, item 9) and torque to 180 in. lbs. Apply a light coating of clean, hydraulic oil to the valve spool. Carefully insert the spool into the housing. Use caution to avoid causing burrs. Be careful not to pinch, roll or damage seals. Be certain the spool and the housing are in their original orientation.
Step 3 - Spacer Tube
Install the spacer tube (Fig. 4, item 2) over the spring with the vent hole positioned away from the section casting.
Pneumatic Section Assembly
Step 1 - Spool
Pneumatic
Section
Assembly Clamp the flat, clevis
jawed vise. Apply Pa
seal (Fig. 4, item 20)
sSpotoel,paw1ay- fSropmotohel
(Fig. 4, item 21) and
Pneumatic Section Assembl PColsaimtiopntthheefsleati,tecmlesvio injatewrefedreviwsei.thAtphpelyspPo assesaelm(bFliyg.. 4D, oitenmot 2a0ll) wspiStohtotelh,peaws1haay-rpfSreodpmgoethooe (Fig. 4, item 21) and PCoslaitmiopn tthheesfelaitt,ecmlesv injtaewrfeedreviwseit.hAthpeplsypPo assseeaml (bFliyg.. D4,oitneomt a2l0 wsipthoothl,easwhaayrpfreodmgeth (Fig. 4, item 21) an
Position these item
interfere with the s
assembly. Do not a
with the sharp edge
Step 2 - Spring
Apply 2 - 3 drops of
anaerobic adhesive n
threads in the spool. P
itSemte8p) o2ve-r Sthpe ernind go
centering spring (Fig (AFipgp. l4y, 2ite-m3 d1r0o)pisnothf sapnrianegrorbeitcaiandehr e(sFiivge. n4 (tFhirge.a4d,sitienmth9e)sapnodolt.o
AictpeSenpmttleye8rpai)nolgi2vgsehp-rtrticShnoegpate(rinFnidnigg
s(pFAoiogpl.p. 4lCy, ai2rte-mfu3l1dly0ro)inpinseotr csapaurntiianoegnrorteobtiacivnaoedirhd(ecFsaiivgue.s ro(Ftllhigroe.ra4dd,asimtienamgthe9e)sesapanlodso.t hoiutesming8)aroevienr theireno Acpepnltyerainlgigshpt rcinogati(nFg sp(Fooigl.. C4,airteefmull1y0i)nisne casputriionng troetaavinoeidr (cFaiug ro(Flliogr. 4d,amiteamge9s)eaanlsd. housing are in their o
Apply a light coatin
Stspeopol3. C-arSefpulalyciensr
Incstaaultlitohnetsopaavcoeridtucbae wirtohllthoer vdeanmtahgoelesepaol cahstoiunsgi.ng are in their
.
Step 3 - Space
Install the spacer tub
with the vent hole po
casting.
.
Step 3 - Spac
Install the spacer tu
with the vent hole p
casting.
.
19
Parker Hannifin Corporation
Hydraulic Valve Division
Elyria, Ohio, USA
Bulletin MSG14-2001-M1/US
Pneumatic Section Assembly
Service Manual
VA/VG Valve
Pneumatic Section20AssembPlnyeumcaoticnSte.ction Assembly
Step 4 - Air Piston Assembly
20
Pneumatic Section Assembly
Step 4 - Air Piston Assembly
Apply Parker Super-O-LubeTM to the wiper seaSAitelptmseplpy1(6FP4)aiarg-nkde.Arin4Sirsu,tpaPelilirts-oeOntmo-eLsnueba1Ael TM6isn)stthoeaetmhngerdbowolivypienefrassretthaaelssltl(Ffriogm. 4,
one seal in the groove farthest from the pistoAtnhpeprploiystPdoanrk(roFedriS(gFu.ipge.4r4-O,, i-itLetmuebm6eTM). T6thoe)t.hweTipwheirpeseeraswlehaialpss(aeFcirgu.p4, seal has a cup design that must be installed witdethneesdmiitpgohi1nfs6ttto)hhtneahntrpoedmidsiutno(osFsnttip.abgSle.lel4oiindn,nseiettaetcshlmeleeuad6plp)iiws.ntTiottfhhnhaee,trhcgwoerdiiopon-oepvrgneednsefftcaaiuhrlrtsphhte,aefsasintcatifonrcogutmhptehe
end of the piston. Slide the piston, rod-end fidprersessitgs,unritenhtauttbomeu(tFshtigbe.e4i,npisttreamelles5d)s.wuithrethetoupbenecup facing the
(Fig. 4, item 5).
end of the piston. Slide the piston, rod-end first, into the pressure tube (Fig. 4, item 5).
Push the piston through the pressure tube and expose the wiper seal groove closest to the rod. Install the second wiper seal with open cup facing the piston rod. Slide the piston into the pressure tube and leave the piston rod extended beyond the pressure tube.
Push the piston through the pressure tube and expose the
wiper seal groove closest to the rod. Install the second
Pwuipsherthseapliwstiothn othpreonugchupthfeacpirnegsstuhreeptiusbtoenarnodde. xSpliodsee tthhee wpiisptoenr sienatol gthroeopvreescsluorseesttubtoetahnedroleda.vIensthtaellptihsetosnecrodnd wexitpeenrdseedalbweyiothndopthene pcurepssfaucreintgubthee. piston rod. Slide the
piston into the pressure tube and leave the piston rod
extended beyond the pressure tube.
Step 5 - Piston Subassembly
SApteplpy P5ar-kePr iSsutpoern-OS-LuubbeaTMsstoetmhebwliyper seal (Fig. 4,
item 13) and O-rings (Fig. 4, item 15). Facing the open AcupppilnywPaarrdk,esrqSuuepeezre-Oth-eLwubipeeTMr steoatlhaenwd ipneserrsteiatlin(Ftoigt.h4e, iftleamng1e'3s) saenadl gOr-oroinvges((FFigig..44,,itietemm41)5. )I.nFstaacllinognethOe -orpinegn c(Fuipg.in4w, iatredm, s1q5u)eoezneththeeflwanipgeer. sCearleafnudllyinssleidrteithinetfolatnhgee folnatnogteh'es speisatlognrorodv.eP(uFlilgt.h4e, pitiesmton4)r.oIdntshtarolluognhethOe-rfilnagnge (uFnitgil. t4h,eitpeimsto1n5)botntothmesfolanntghee. fClaanregfeu.lSlylisdleidtehethsepaflcaenrge o(Fnitgo. t4h,eitpeimsto3n) roovde.rPthuell pthisetopnisrtodn.rIondsethrtrothueghentdheofltahnege upnisttiol nthreodpiisntotontbhoettsolomtsinonthtehsetrfilpanpgere.bSolitd. e the spacer (Fig. 4, item 3) over the piston rod. Insert the end of the piston rod into the slot in the stripper bolt.
20
Parker Hannifin Corporation
Hydraulic Valve Division
Elyria, Ohio, USA
Bulletin MSG14-2001-M1/US
Pneumatic Section Assembly
wiper seal with open cup facing the piston rod. Slide the piston into the pressure tube and leave the piston rod extended beyond the pressure tube.
Service Manual
VA/VG Valve
Step 5 - Piston Subassembly
Apply Parker Super-O-LubeTM to the wiper seaSlte(Fpi5g.- P4i,sittoenmSu1b3a)sasenmdbOly-rings (Fig. 4, item 15). Facing the open cup inward, squeeze the wiper seal and insert it into the flange's seal groove (Fig. 4, itAiteepmmply13P4)aar)nk.deIrOnS-usrpintegar-sOl(lF-Liogu.nb4ee,TMiteOtmo t-1h5re)iw.nFigpaecri(nsFgeatihlge(F.oipg4e. n,4,
item 15) on the flange. Carefully slide the flancgupeinownardto, sqtuheeeze ptheiswtipoenr seraol adnd.inPseurtlilt tinhtoethe piston rod through the flange until the piston f(blFainogg.te4't,soitseemmal 1sg5ro)ooovnneth(tFehigfle.a4n,gfielta.emCna4rge).feuInl.lsytSaslllildiodenetehOe-tfrlhianngege
spacer (Fig. 4, item 3) over the piston rod. Insoentrotthtehpeistoennrodd. Poulfl tthhe epistponisrotdothnrourgohdtheinflatnoge
until the piston bottoms on the flange. Slide the spacer
the slot in the stripper bolt.
(Fig. 4, item 3) over the piston rod. Insert the end of the
piston rod into the slot in the stripper bolt.
Step 6 - Endcap Assembly
Place the remaining O-ring (Fig. 4, item 15) on the seal retainer (Fig. 4, item 7). Install the retainer plate (Fig. 4, item 17) over the seal retainer (Fig. 4, item 7). Apply 2 to 3 drops of Loctite 262TM inside the tapped holes in the housing. Place the washers (Fig. 4, item 18) on the 6 1/4" cap screws (Fig. 4, item 19). Push the cap screws through the retainer plate and screw them into the valve housing. Make sure all parts are properly aligned and seated. Torque the cap screws to 25 - 30 in. lbs.
Pneumatic Section Assembly
Step 6 - Endca
Place the remaining retainer (Fig. 4, item item 17) over the se to 3 drops of Loctite the housing. Place th 1/4" cap screws (Fig through the retainer housing. Make sure seated. Torque the c
CAUTION: Failure to follow the recommended assembly i in poor performance or product malfunction. The produc thoroughly tested to ensure proper operation before the va into service.
CAUTION: FAILURE TO FOLLOW THE RECOMMENDED ASSEMBLY INSTRUCTIONS CAN RESULT IN POOR PERFORMANCE OR PRODUCT MALFUNCTION. THE PRODUCT SHOULD BE THOROUGHLY TESTED TO ENSURE PROPER OPERATION BEFORE THE VALVE IS PLACED BACK INTO SERVICE.
21
Parker Hannifin Corporation
Hydraulic Valve Division
Elyria, Ohio, USA
Bulletin MSG14-2001-M1/US
Cutaways for Main Relief Valves
Service Manual
VA/VG Valve
Cutaways for Main Relief Valves
Main System Relief Valve
The main, relief valve protects the hydraulic system agains5t overl4oa3d pressures. I2t is t1ypically located in the inlet casting and the mid-inlet sections used in the valve bank. Figure 6 illustrates the arrangement of the parts and serviceable seals for the differential-area main relief valve. Figure 7 illustrates the serviceable components found in the pilot-operated main relief. These cartridge-type relief valves are removed from the valve bank as a subassembly and replaced or serviced.
15
43
21
5 43
21
Figure 6
15
43
21
Figure 7
Service Parts List for Figure 6
Item Description Qty. VA/VG20
VA/VG35
1
O-rings
3
391-2881-332 391-2881-336
2
Back-up Ring
1
391-2681-373
3
O-ring
1
391-2881-156 391-2881-137
4
Back-up Ring
1
391-2681-163 391-2681-165
5
Gasket Washer
1
391-1583-013 391-1583-012
*All seals in the relief cartridge are not serviceable.
VA20/VG20, VA35/VG35 Main Differential Area Relief Valve Part Numbers:
· 355-9107-035
· 355-9107-061
· 355-9107-013
· 355-9001-082
· 355-9107-385
Service Parts List for Figure 7
Item Description Qty. NG80
1
O-ring
1
391-2881-342
2
Back-up Ring
1
391-2681-303
3
O-ring
1
391-2881-344
4
O-ring
1
391-2881-208
5
Gasket Washer
1
391-1581-001
*All seals in the relief cartridge are not serviceable.
VG80 Main Pilot Operated Relief Valve Part Numbers:
· 355-9001-008
· 355-9001-031
NOTE: WHEN INSTALLING RELIEF VALVE, TORQUE TO 75 FT. LBS.
22
Parker Hannifin Corporation Hydraulic Valve Division Elyria, Ohio, USA
Bulletin MSG14-2001-M1/US
Cutaways for Port Relief Valves
Service Manual
VA/VG Valve
Cutaways for Port Relief Valves
Work Port Relief Valve Options
The full-flow work port relief valve normally functions when the valve spool is in the neutral position. During over pressurization, fluid is discharged from the workport passage into the tank-return passage of the valve work section. The pressure setting is normally higher than that of the main, relief valve.
Avoid setting the main and port relief valves at the same pressure setting. If these relief-valve settings are set too close, interaction will occur causing chatter and possible instability of the load.
The pilot-operated, port relief (Fig. 8) with the anticavitation check can be used in all hi-boy work sections in the VA20/VG20, VA/VG35 and VG80 series. The differential-area, work-port, relief valve (Fig. 9) can be used in VA20/VG20, VA/VG35 hi-boy sections if the section has the appropriate machining.
Service Parts List for Figure 8-10
Item Description Qty. Part No.
1
O-ring
1
391-2881-333
2
Back-up Ring
1
391-2681-510
3
O-ring
1
391-2881-204
4
O-ring
1
391-2881-246
5
O-ring
1
391-2881-801
6
O-ring
1
391-2881-363
7
Shims
See chart below
*All seals in the relief cartridge are not serviceable.
5
63 2 1
5
63 2 1
Pilot operated with anti-cavitation Pilot ope3ra5t5e-d90w0it1h-1a1n5ti-cavitation
355-9001-115
Figure 8
12 3
4
12 3
4
Shims for Figure 10
Part No. 391-3782-103 391-3782-104 391-3782-105
Pressure 502 psi 122 psi 40 psi
Differential area - screw adjusted Different3ia5l5a-9re0a0X- -s3c0re8w adjusted
355-900X-308
Figure 9
4
7
3
21
NOTE: WHEN INSTALLING RELIEF VALVE, TORQUE TO 75 FT. LBS.
Differential area - shim adjusted 355-900X-143
Figure 10
23
Parker Hannifin Corporation
Hydraulic Valve Division
Elyria, Ohio, USA
Bulletin MSG14-2001-M1/US
Parts List
Service Manual
VA/VG Valve
Screw-Adjustable, Relief-Valve Pressure Ranges and Adjustments
R/V #
Valve Series
355-9107-035
VA / VG20
355-9001-061
VA / VG20
355-9107-013
VA / VG35
355-9107-082
VA / VG35
355-9107-385
VA / VG35
355-9001-008
VG80
355-9001-031
VG80
355-9001-115
VA/VG20, 35, 80
355-9001-308
VA/VG20, 35, 80
355-9002-308
VA/VG20, 35, 80
355-9003-308
VA/VG20, 35, 80
*Adjustment pressures are approximate.
Pressure Range - PSI 800 - 2500 2501 - 3800 800 - 2000 2001 - 2500 2501 - 3500 1000 - 2500 2500 - 3500 500 - 5000 500 - 1250 1251 - 2650 2651 - 4200
1/2 Turns Part Equals PSI* 165 160 80 121 249 196 290 446 95 138 188
Guidelines for Setting Hydraulic, Relief-Valve Pressure:
· Release hydraulic pressure before connecting or disconnecting any gauge.
· Install an accurate pressure gauge as close to the pump as possible.
· Back-out the relief-valve adjustment screw without removing it.
· Warm the hydraulic oil by idling the engine with the power take-off and hydraulic pump engaged.
· As applicable, fully engage the control valve for the circuit being tested. Allow the cylinder to reach full extension.
· Raise the engine RPM to operating speed.
· If adjustment is necessary, do not bring the pressure to a higher setting then lower it to the desired setting. Obtain each final pressure by bringing the pressure gradually up to the proper setting.
· Tighten the lock nut and apply a sealant to avoid tampering.
WARNING
Relief-valve pressures should be set according to the original, equipment manufacturer's specifications. Exceeding the specifications could cause a failure in the hydraulic system or with the mechanical structure of the equipment. These failures could cause serious personal injury or death.
24
Parker Hannifin Corporation
Hydraulic Valve Division
Elyria, Ohio, USA
Bulletin MSG14-2001-M1/US
Parts List
Service Manual
VA/VG Valve
DVA20 - DVG20 - VA20 - VG20 - Valve Seal Kits
Part Number
Kit Description
Application / Where Used
391 1873 035 391 1803 055
Section Seal Kit (Between Sections)
Inlet Sections Parallel and Tandem Worksections Midsection Inlet
391 1873 083
Section Seal Kit (Between Sections)
Series Worksections
391 1873 036 391 1803 457
Work Section Repair Kit (All Seals)
Manual, Parallel, and Tandem Worksections
391 1803 846
Spool Seal Kit
Standard Manual Worksections
391 1873 039 391 1803 469
Main-Relief Seal Kit (All Serviceable Seals)
391 1873 001, 391 1873 128 355 9107 035, 355 9001 061
391 1803 674
Main-Relief, Plug Seal Kit Convertible-Outlet, Plug Seal Kit 391 1873 002
391 1873 042 391 1803 737
Screw Adjusted, Pilot-Operated, Port Relief Valve with Anti-Cavitation Seal Kit (All Serviceable Seals)
391 1873 006, 355 9001 115
391 1823 038
Port-Accessory Seal Kit (External Seals Only)
391 1873 006, 355 9001 115 391 1873 007, 008, 009 355 900X 143 391 1873 010, 355 9001 164 391 1873 011, 391 2283 075
391 1873 037 391 1823 122
Slug-Adjusted, Relief Valve Kit (All Serviceable Seals)
391 1873 007, 008, 009 355 900x 143
391 1873 207 391 1803 387
Pneumatic, Endcap Seal Kit (New Commercial Intertech Design)
391 1873 206, 391 1803 553
391 1803 694
Pneumatic, Endcap Seal Kit (Old RMH Design)
391 1873 022, 391 1803 606 391 1803 767
Note: Part numbers in bold are distributor program items.
DVA20 - DVG20 - VA20 - VG20 - Handle Assemblies
Part Number 3911873061 3911873062 3911873063 3911873064 3911873065 3911873066
Kit Description DV20-H-6 DV20-H-8 DV20-H-10 DV35-H-6 DV35-H-8 DV35-H-10
Application / Where Used VA/VG20 6" VA/VG20 8" VA/VG20 10" VA/VG35 6" VA/VG35 8" VA/VG35 10"
25
Parker Hannifin Corporation
Hydraulic Valve Division
Elyria, Ohio, USA
Bulletin MSG14-2001-M1/US
Parts List
Service Manual
VA/VG Valve
DVA35 - DVG35 - VA35 - VG35 - Valve Seal Kits
Part Number
391 1873 040 391 1803 093
391 1803 150 391 1873 041 391 1803 722 391 1823 121 391 1823 146 391 1873 044 391 1803 272
391 1803 682 391 1873 042 391 1803 737
391 1823 038
391 1873 037 391 1823 122 391 1873 207 391 1803 387 391 1803 695 391 1823 121
Kit Description
Section Seal Kit (Between Sections)
Section Seal Kit (Between Sections)
Work Section Repair Kit (All Seals) Work Section Repair Kit (All Seals) Work Section Repair Kit (All Seals) Main Relief-Valve Seal Kit (All Serviceable Seals) Main Relief-Valve Plug Seal Kit Convertible-Outlet, Plug Seal Kit Screw Adjusted, Pilot-Operated, Port Relief Valve with Anti-Cavitation Seal Kit (All Serviceable Seals)
Port-Accessory Seal Kit (External Seals Only) 391
Slug-Adjusted, Relief Valve Kit (All Serviceable Seals) Pneumatic Endcap Seal Kit (New Commercial Intertech Design) Pneumatic Endcap Seal Kit (Old RMH Design) Work Section Repair Kit (All Seals)
Application / Where Used Inlet Sections Parallel and Tandem Work Sections Combined-Flow, Midsection Inlets Midsection Selectors Series Work Sections Split-Flow, Midsection Inlets
Manual, Parallel, and Tandem Work Sections
Manual, Series Work Sections Remote, Parallel, and Tandem Worksections 391 1873 003, 355 9107 013 391 1873 004, 355 9107 085 391 1873 137, 355 9107 385
391 1873 005
391 1873 006, 355 9001 115
391 1873 006, 355 9001 115 391 1873 007, 008, 009 355 900X 143 391 1873 010, 355 9001 164 391 1873 011, 391 2283 075 391 1873 007, 008, 009 355 900X 143
391 1873 203, 391 1803 554
391 1873 203, 391 1803 591 Series Work Sections
DVG80 - VG80 Valve Seal Kits
Part Number 391 1873 160 391 1803 484 391 1873 161 391 1803 594 391 1823 101 391 1803 041
391 1803 054
391 1803 770 391 1873 042 391 1803 737
Kit Description Section Seal Kit (Between Sections)
Work Section Repair Kit (All Seals) Main, Relief-Valve Seal Kit (All Serviceable Seals) Main, Relief-Valve Seal Kit (External Seals) Main, Relief-Valve and Plug Seal Kit (External Seals) Main, Relief-Valve Seal Kit (All Serviceable Seals) Screw-Adjusted, Pilot-Operated, Port Relief Valve with Anti-Cavitation Seal Kit (All Serviceable Seals)
391 1823 038
Port Accessory Seal Kit (External Seals Only)
391 1823 175
Work Section Repair Kit (All Seals)
Application / Where Used Inlet Sections All Work Sections
Manual Work Sections
355 9001 008, 031 355 9001 008, 031 391 1873 146, 391 1873 147 355 9001 103 391 1873 146, 355 9001 103
391 1873 006, 355 9001 115
391 1873 006, 355 9001 115 391 1873 011, 391 2283 075 391 1873 010, 355 9001 164 Hydraulic-Remote Operated
Note: Part numbers in bold are distributor program items.
26
Parker Hannifin Corporation Hydraulic Valve Division Elyria, Ohio, USA
Bulletin MSG14-2001-M1/US
Troubleshooting
Service Manual
VA/VG Valve
Trouble
Probable Cause
Pinched, blown or missing section seal
Oil leaks between sections
Stud fasteners not correctly torqued Mounting plate not level
Contamination/burrs on seal
Oil leaks at either end of spool
Over-pressurized tank core Worn or damaged spool seal
Spring - centered spools do not return to neutral
Broken centering spring Misalignment of operating linkage Foreign particles in system
Cylinder leaking or worn
Load will not hold
Port relief valve not holding
Spool or housing scored or worn excessively
Load drops when spool moved from neutral
Dirt or foreign particles lodged between check-valve poppet and seat
Scored or sticking check-valve poppet
Worn pump
Defective cylinder or motor
Low-reservoir oil level
No motion, slow, or erratic system operation
Clogged suction strainer Suction line restricted
Relief valve not properly set
Relief valve poppet or seat scored & sticking open
Valve spool not shifted to full stroke
Remedy Replace section seal Replace section seals and re-torque Loosen mounting bolts and shim as required Clean seal groove, replace section seal Correct high, back-pressure condition Replace seals and seal retainers Replace centering spring Check linkage for mechanical binding Clean valve and system Check cylinder - repair Remove and clean or replace Replace section
Disassemble, clean & reassemble
Replace poppet Check flow & pressure Repair or replace Add oil to specifications Clean or replace Check lines Check pressure setting
Replace relief valve
Check spool linkage travel
27
Parker Hannifin Corporation
Hydraulic Valve Division
Elyria, Ohio, USA
Bulletin MSG14-2001-M1/US
Safety Guide
Service Manual
VA/VG Valve
Parker Safety Guide for Selecting and Using Hydraulic Valves and Related Accessories
WARNING: Failure or improper selection or improper use of Parker Hydraulic Valve Division (HVD) Valves or related accessories ("Products") can cause death, personal injury and property damage. Possible consequences of failure or improper use of these Products include but are not limited to:
· Valves or parts thereof thrown off at high speed · High velocity fluid discharge · Explosion or burning of the conveyed fluid · Contact with suddenly moving or falling objects controlled by the Valve · Injections by high-pressure fluid discharge
· Contact with fluid that may be hot, cold, toxic or otherwise injurious · Injuries resulting from injection, inhalation or exposure to fluids · Injury from handling a heavy item (dropped, awkward lift) · Electric shock from improper handling of solenoid connections · Injury from slip or fall on spilled or leaked fluid
Before selecting or using any of these Products, it is important that you read and follow the instructions below. In general, the Products are not approved for in-flight aerospace applications. Consult the factory for the few that are FAA approved.
1.0 GENERAL INSTRUCTIONS 1.1 Scope: This safety guide provides instructions for selecting and using (including assembling, installing and maintaining) these Products. For convenience all
items in this guide are called "Valves". This safety guide is a supplement to and is to be used in conjunction with the specific Parker catalogs for the specific Valves and/or accessories being considered for use. See item 1.6 below for obtaining those catalogs. 1.2 Fail-Safe: Valves can and do fail without warning for many reasons. Design all systems and equipment in a fail-safe mode, so that failure of the Valve or Valve Assembly will not endanger persons or property. 1.3 Safety Devices: Never disconnect, override, circumvent or otherwise disable any safety lockout on any system whether powered by HVD Valves or any motion control system of any manufacturer. (e.g. Automatic shut-off on a riding lawn mower should the operator get out of the seat). 1.4 Distribution: Provide a copy of this safety guide to each person that is responsible for selecting or using HVD Valve Products. Do not select HVD Valves without thoroughly reading and understanding this safety guide as well as the specific Parker catalogs for the Products considered or selected. 1.5 User Responsibility: Due the wide variety of operating conditions and applications for Valves, HVD and its distributors do not represent or warrant that any particular Valve is suitable for any specific system. This safety guide does not analyze all technical parameters that must be considered in selecting a product. The user, through its own analysis and testing is solely responsible for: · Making the final selection of the Valve · Assuring that the user's requirements are met and that the application presents no health or safety hazards. · Providing all appropriate health and safety warnings on the equipment on which the Valves are used. · Assuring compliance with all applicable government and industry standards. 1.6 Additional Questions: Call the appropriate Parker technical service department if you have any questions or require any additional information. See the Parker publication for the product being considered or used, or call 1-800-CPARKER, or go to www.parker.com , for the telephone numbers of the appropriate technical service department. For additional copies of this or any other Parker Safety Guide go to www.parker.com and click on the safety button on the opening page. Catalogs and/or catalog numbers for the various HVD Valve Products can be obtained by calling HVD at 440-366-5100. Phone numbers and catalog information is also available on the Parker website, www.parker.com.
2.0 VALVE INSTRUCTIONS 2.1 Pressure: Valve selection must be made so that the maximum working pressure of the Valve is equal to or greater than the maximum system pressure.
Surge, impulse or peak transient pressures in the system must be below the maximum working pressure of the Valve. Surge, impulse and peak pressures can usually be determined by sensitive electrical instrumentation that measures and indicates pressures at millisecond intervals. Mechanical pressure gauges indicate only average pressure and cannot be used to determine surge, impulse or peak transient pressures. Burst pressure ratings if given or known are for manufacturing purposes only and are not an indication that the Product can be used in applications at the burst pressure or otherwise above the maximum working pressure. 2.2 Temperature: The fluid temperature must be regulated or controlled so that the operating viscosity of the fluid is maintained at a level specified for the particular Valve product. Such ranges are given in the product catalogs or can be obtained from the appropriate customer service department for the particular Valve product. 2.3 Fluid Compatibility: The fluid conveyed in Valves has direct implications on the Valve selection. The fluid must be chemically compatible with the Valve component materials. Elastomer seals, brass, cast iron, aluminum for example all are potentially affected by certain fluids. Additionally, fluid selection affects the performance of various Valves. Considerations relative to fluid selection are outlined in the specific HVD Valve product catalog. Of particular importance is that the fluid be for hydraulic use, contain the proper additives and wear inhibitors. See 1.6 "Additional Questions" above for information to obtain such HVD catalogs. 2.4 Changing Fluids: If a system requires a different fluid, it should be done with the guidance in number 2.3 above. Additionally, it may be necessary to flush the system (including the Valves) to remove any of the previous fluid. Consult the Parker Valve Division for guidance. 2.5 Size: Transmission of power by means of pressurized fluid varies with pressure and rate of flow. The size of the components must be adequate to keep pressure losses to a minimum and avoid damage due to heat generation or excessive fluid velocity. 2.6 Placement: Installation of Valves must take into account the orientation of the Valve and the proximity of the Valve to other parts of the system. This includes but is not limited to closeness to hot and cold areas, access for servicing and operation as well as orientation for proper connectors. 2.7 Ports: Connection of Valves in systems can be by threaded ports, sub-base surfaces, flanges and manifolds. In all cases, the proper fitting, surface or mounting hardware must be selected to properly seal and contain the system fluid so as to avoid the adverse conditions listed in the initial warning box above. Specifically, if using threaded ports, the designer must make sure that the mating fitting is of the compatible thread. Also, the instructions provided by the connector hardware supplier must be read and understood so as to properly assemble the connector. The Parker Safety Guide for using Hose, Tubing and Fittings and Related Accessories is but one reference to this end. 2.8 Environment: Care must be taken to insure that the Valve and Valve Assemblies are either compatible with or protected from the environment (that is, surrounding conditions) to which they are exposed. Environmental conditions including but not limited to ultraviolet radiation, sunlight, heat, ozone, moisture, water, salt water, chemicals and air pollutants can cause degradation and premature failure. 2.9 Electric Power: For Valves requiring electric power for control, it is imperative that the electricity be delivered at the proper voltage, current and wattage requirements. To obtain the proper control requirements please refer to the respective Parker product catalog for the specific Valve that is intended for use. If further guidance is required, call the appropriate technical service department identified in the respective Parker product catalog. 2.10 Specifications and Standards: When selecting Valves, government, industry and Parker specifications and recommendations must be reviewed and followed as applicable. 2.11 Accessories: All accessories used in conjunction with any Parker Valve product must be rated to the same requirements of the Valve including but not limited to pressure, flow, material compatibility, power requirements. All of these items must be examined as stated in the "VALVE INSTALLATION INSTRUCTIONS" paragraph 3.0.
(continued on next page)
28
Parker Hannifin Corporation
Hydraulic Valve Division
Elyria, Ohio, USA
Bulletin MSG14-2001-M1/US
Safety Guide
Service Manual
VA/VG Valve
3.0 VALVE INSTALLATION INSTRUCTIONS 3.1 Component Inspection: Prior to use, a careful examination of the Valve(s) must be performed. The Valve intended for use must be checked for correct style,
size, catalog number and external condition. The Valve must be examined for cleanliness, absence of external defects or gouges, cracked or otherwise deformed parts or missing items. The mounting surface or port connections must be protected and free of burrs, scratches, corrosion or other imperfections. Do NOT use any item that displays any signs of nonconformance. In addition, any accessory including but not limited to fittings, bolt kits, hoses, sub bases, manifolds, and electrical connectors must be subjected to the same examination. 3.2 Handling Valves: Many Valves whether HVD Valves or of another manufacturer can be large, bulky or otherwise difficult to handle. Care must be taken to use proper lifting techniques, tools, braces, lifting belts or other aids so as not to cause injury to the user, any other person or to property. 3.3 Filtration: Fluid cleanliness is a necessity in any hydraulic system. Fluid filters must be installed and maintained in the system to provide the required level of fluid cleanliness. Filters can be placed in the inlets, pressure lines and return lines. The level of cleanliness required is specified in the HVD product catalog for the specific Valve(s) selected or intended for use. For additional information on Filter selection contact Parker Filter Division at 800-253-1258 or 419-644-4311. 3.4 Servo Valves: Application of Servo Valves in general requires knowledge and awareness of "closed loop control theory" and the use of electronic controls for successful and safe operation. Individuals who do not have such experience or knowledge must gain training before use of such Products. Parker offers both classroom training as well as manuals to assist in gaining this knowledge. These aids can be obtained by contacting Hydraulic Valve Division at 440-366-5100, calling the general Parker help line 800-CPARKER or going to the Parker web site at www.parker.com. 3.5 Accessory Ratings: All accessories used in combination with the selected or intended Valve product must be rated and compatible with the selected Valve. Specifically, the items must be of equal or greater rating including but not limited to pressure, flow, power, size, port style, thread connectors and material. 3.6 Connection Styles: It is the responsibility of the user of the Parker product to properly select connectors and accessories that match the connections on the sub plate, Valve, flange or threaded connection or manifold. It is also the responsibility of the installer to possess adequate skill and knowledge including but not limited to thread preparation, torque technique, hose assembly and inspection, tube preparation and assembly, and fitting installation. Parker Tube Fitting Division (www.parker.com/tfd) catalog 4300 and Parker Hose Products (www.parkerhose.com) catalog 4400 describe some basic technical information relative to proper fitting assembly. 3.7 Electrical Connections: All electrical connections must be made to the applicable codes and local safety requirements. 3.8 Gauges and Sensors: The user must install sufficient gauges and sensors in the system so as to be able to determine the condition of the system. This includes but is not limited to pressure gauges, flow meters, temperature sensors and site gauges. These are of utmost importance should removal or disassembly of a Valve, portion of a Valve or portion of the system become necessary. Refer to "VALVE MAINTENANCE AND REPLACEMENT INSTRUCTIONS" for details and especially item 4.8. 3.9 System Checkout: Once installed, the Valve installation must be tested to insure proper operation and that no external leakage exists. All safety equipment must be in place including but not limited to safety glasses, helmets, ear protection, splash guards, gloves, coveralls and any shields on the equipment. All air entrapment must be eliminated and the system pressurized to the maximum system pressure (at or below the Valve maximum working pressure) and checked for proper function and freedom from leaks. Personnel must stay out of potentially hazardous areas while testing and using.
4.0 VALVE MAINTENANCE AND REPLACEMENT INSTRUCTIONS 4.1 Maintenance Program: Even with proper installation, Valves and Valve System life may be significantly reduced without a continuing maintenance program.
The severity of the application and risk potential must determine the frequency of the inspection and the replacement of the Products so that Products are replaced before any failure occurs. A maintenance program must be established and followed by the user and, at a minimum, must include instructions 4.2 through 4.10. An FMEA (Failure Mode and Effects Analysis) is recommended in determining maintenance requirements. 4.2 Visual Inspection-Valves: Any of the following conditions require immediate shut down and replacement of the Valve. · Evidence that the Valve is in partial dis-assembly. · Visible crack or suspicion of a crack in the Valve housing or bent, cracked or otherwise damaged solenoid. · Missing or partially extending drive pin on a flow control knob. · Missing, loose components, obstructions or other condition impeding the motion or function of the manual knob, lever, foot pedal or other mechanical
operator of a hydraulic Valve. · Any evidence of burning or heat induced discoloration. · Blistered, soft, degraded or loose cover of any kind. · Loose wire or electrical connector. 4.3 Visual Inspection-Other: The following conditions must be tightened, repaired, corrected or replaced as required. 1. Fluid on the ground must be cleaned immediately. Also, the source of the fluid must be determined prior to running the equipment again. 2. Leaking port or excessive external dirt build-up. 3. System fluid level is too low or air is entrapped or visible in the reservoir. 4. Equipment controlled by the Valve or Valve assembly has been losing power, speed, efficiency 4.4 Filter Maintenance: System filters must be maintained and kept in proper working order. The main service requirement is periodic replacement of the filter element or screen. Contact Parker Filter Division at 800-253-1258 or 419-644-4311 for further filter maintenance details. 4.5 Functional Test: See "System Checkout" number 3.9 above in "VALVE INSTALLATION INSTRUCTIONS". 4.6 Replacement Intervals: Valves and Valve Systems will eventually age and require replacement. Seals especially should be inspected and replaced at specific replacement intervals based on previous experience, government or industry recommendations, or when failures could result in unacceptable downtime, damage or injury risk. At a minimum seals must be replaced whenever service is rendered to a Valve product. 4.7 Adjustments, Control Knobs, and Other Manual Controls: System Pressure and Flow are typically adjusted by knobs and/or handles. A set-screw or lock-nut secures the adjustment device so as to maintain the desired setting. This set-screw or lock-nut must first be loosened prior to making any adjustments and re-tightened after adjustment on the HVD Valve. All adjustments must be made in conjunction with pressure gauges and/or flow meters (or by watching the speed of the actuator in the case of setting flow only). See paragraph "Gauges and Sensors" above in the section "VALVE INSTALLATION INSTRUCTIONS'. Under no circumstances should any control knob, adjustment stem, handle, foot pedal or other actuating device be forced beyond the mechanical stop(s) on the Valve. For example, the Parker Safety Notice Bulletin HY14-3310-B1/US for HVD Colorflow Valves specifically restricts the adjustment torque to "hand adjust" or "less than 10 ft/lbs" if it cannot be adjusted by hand. Failure to adhere to this may force the knob beyond the stop point allowing it to be ejected at high speed resulting in death, personal injury and property damage. For complete safety instructions on HVD Colorflow Valves, copies of Safety Notice Bulletin HY14-3310-B1/US can be obtained directly from the Hydraulic Valve Division at 440-366-5100 or from the Parker web site at www.parker.com by selecting the "Safety" button. Parker help line 800-CPARKER is on call 24/7 as well should there be any question about the use of a HVD Valve. Additionally, when making adjustments, always adjust the Valve with all parts of your body to the side of the Valve (that is, the knob is not pointing toward you or anyone else). 4.8 High pressure Warning: Hydraulic power is transmitted by high-pressure fluids through hoses, fittings and valves, pumps and actuators. This condition can be dangerous and potentially lethal and, therefore, extreme caution must be exercised when working with fluids under pressure. From time to time, hoses, Valves, tubes or fittings fail if they are not replaced at proper time intervals. Typically these failures are the result of some form of misapplication, abuse, wear, or failure to perform proper maintenance. When such failure occurs, generally the high pressure fluid inside escapes in a stream which may or may not be visible to the user. Under no circumstances should the user attempt to locate the leak by "feeling" with their hands or any other part of their body. Highpressure fluids can and will penetrate the skin and cause severe tissue damage and possible loss of limb or life. Even seemingly minor hydraulic fluid injection injuries must be treated immediately by a physician with knowledge of the tissue damaging properties of hydraulic fluid. If a hose, tube, fitting or Valve failure occurs, immediately shut down the equipment and leave the area until pressure has been completely released from the system. Simply shutting down the pump may or may not eliminate the pressure in the system. It may take several minutes or even hours for the pressure to be relieved so that the leak area can be examined safely. Once the pressure has been reduced to zero, the suspected leaking item can be taken off the equipment and examined. It must always be replaced if a failure has occurred. Never attempt to patch or repair a connector (especially a hose) or Valve that has failed. Consult the nearest Parker distributor or the appropriate Parker division for component replacement information. Never touch or examine a failed hydraulic component unless it is obvious that the item no longer contains fluid under pressure.
Bulletin MSG14-2001-M1/US
29
Parker Hannifin Corporation
Hydraulic Valve Division
Elyria, Ohio, USA
© 2021 Parker Hannifin Corporation. Product names are trademarks or registered trademarks of their respective companies.
Parker Hannifin Hydraulic Valve Division 520 Ternes Lane Elyria, Ohio United States 44035 Ph: (440) 366 5100 Fax: (440) 366 5253 hvdsales@parker.com www.parker.com/hydraulicvalve
4/21 VAVG Service Guide
Adobe PDF Library 15.0 Adobe InDesign 16.0 (Macintosh)