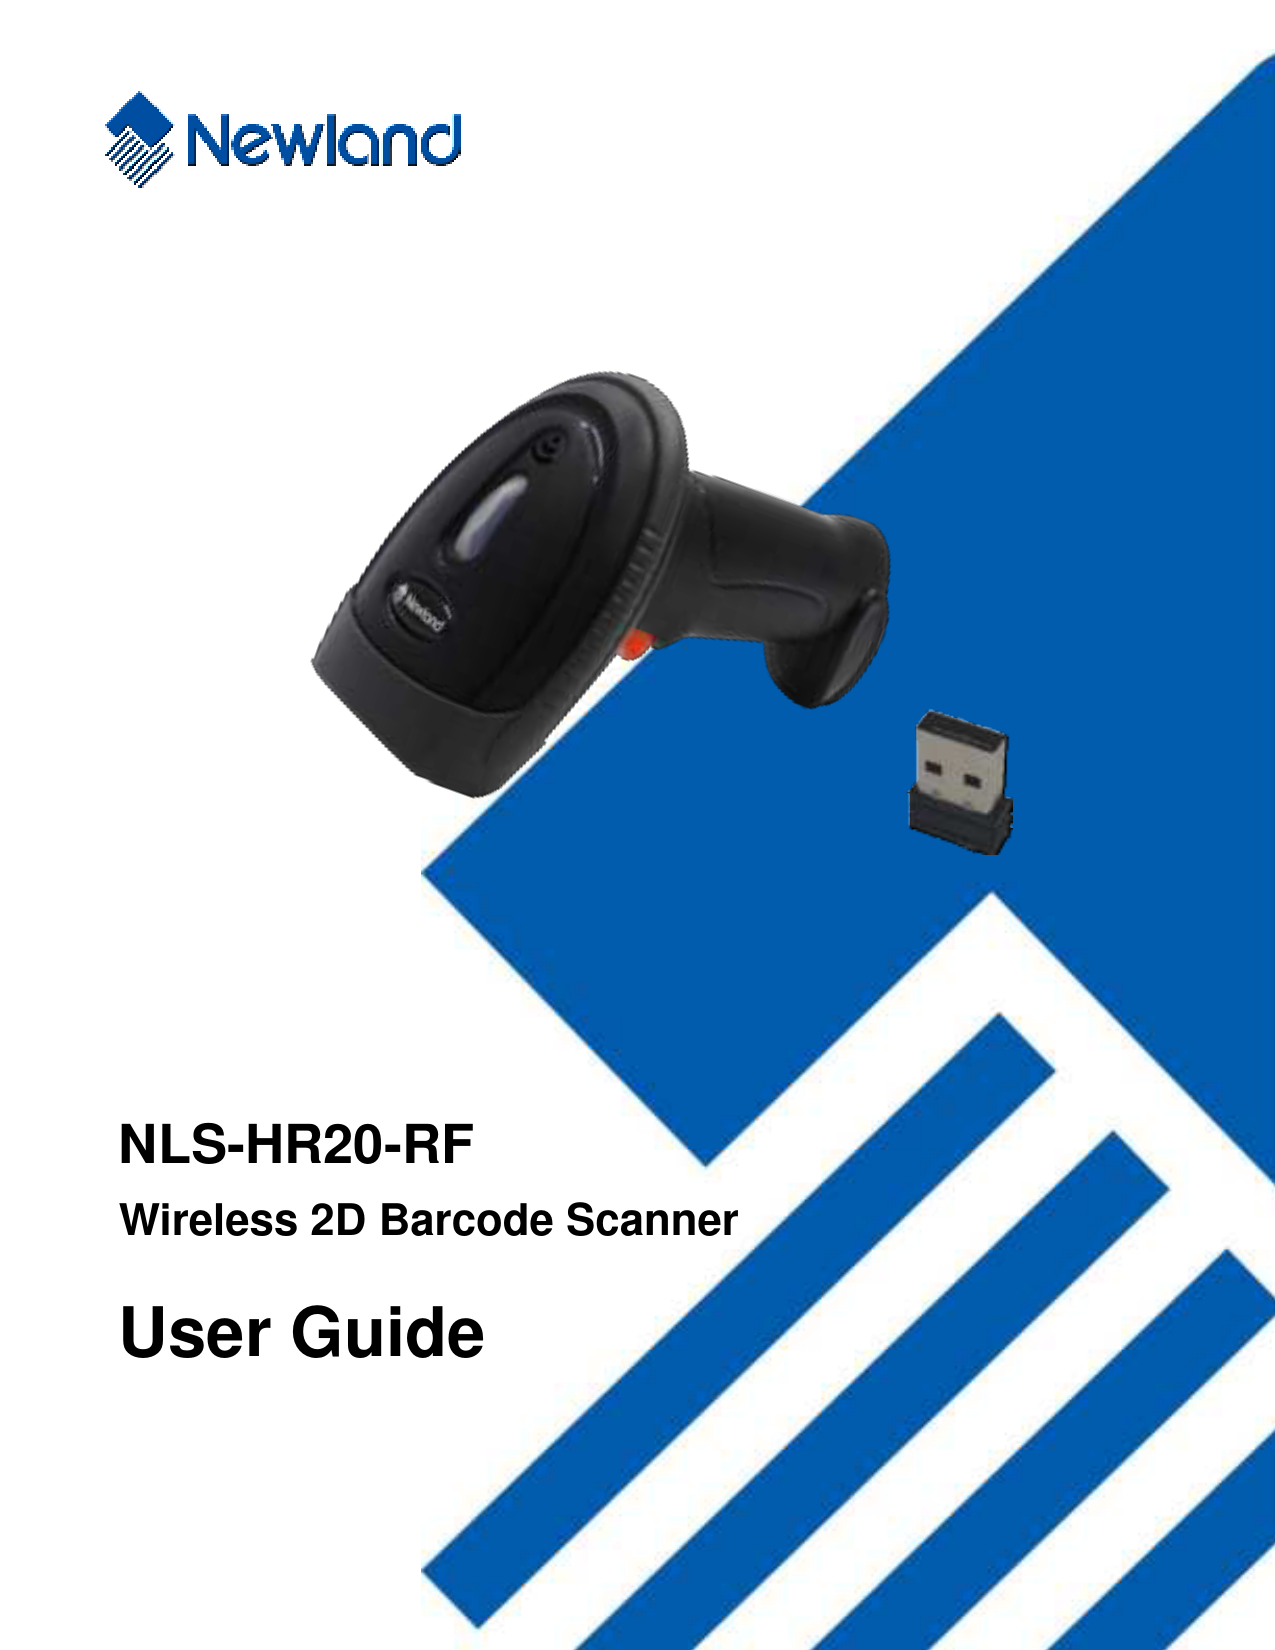
User Guide for Newland models including: Wireless 2D Barcode Scanner, NLS-HR20-RF
2019 Fujian Newland Auto-ID Tech. Co., Ltd. All rights reserved. Please read through the manual carefully before using the product and ...
NLS-HR20-RF Wireless 2D Barcode Scanner User Guide Disclaimer © 2019 Fujian Newland Auto-ID Tech. Co., Ltd. All rights reserved. Please read through the manual carefully before using the product and operate it according to the manual. It is advised that you should keep this manual for future reference. Do not disassemble the device or remove the seal label from the device, doing so will void the product warranty provided by Fujian Newland Auto-ID Tech. Co., Ltd. All pictures in this manual are for reference only and actual product may differ. Regarding to the product modification and update, Fujian Newland Auto-ID Tech. Co., Ltd. reserves the right to make changes to any software or hardware to improve reliability, function, or design at any time without notice. The information contained herein is subject to change without prior notice. The products depicted in this manual may include software copyrighted by Fujian Newland Auto-ID Tech. Co., Ltd or third party. The user, corporation or individual, shall not duplicate, in whole or in part, distribute, modify, decompile, disassemble, decode, reverse engineer, rent, transfer or sublicense such software without prior written consent from the copyright holders. This manual is copyrighted. No part of this publication may be reproduced, distributed or used in any form without written permission from Newland. Fujian Newland Auto-ID Tech. Co., Ltd. reserves the right to make final interpretation of the statement above. Fujian Newland Auto-ID Tech. Co., Ltd. 3F, Building A, No.1, Rujiang West Rd., Mawei, Fuzhou, Fujian, China 350015 http://www.newlandaidc.com Revision History Version V1.0.0 V1.0.1 V1.0.2 Description Initial release. Added the ECI Output, Set Length Range for Code 128/ UCC/EAN-128/ AIM 128/ Interleaved 2 of 5/ Matrix 2 of 5/ Industrial 25/ Standard 25/ Code 39/ Codabar/ Code 93/ Code 11/ Plessey/ MSI-Plessey, and Febraban features in Chapter 5. Note: You must have firmware version V2.06B or later to use the new features above. Updated the description of entering the sleep mode in Chapter 1. Date January 3, 2019 May 17, 2019 May 27, 2019 Table of Contents Revision History .......................................................................................................................................................................- 3 - Chapter 1 Getting Started ............................................................................................................................................................ 1 Introduction ...................................................................................................................................................................... 1 About This Guide ............................................................................................................................................................. 1 Unpacking ........................................................................................................................................................................ 1 HR20 Scanner.................................................................................................................................................................. 2 Charging the Scanner Battery .......................................................................................................................................... 2 Plug and Play ................................................................................................................................................................... 2 Power On, Sleep .............................................................................................................................................................. 3 Maintenance..................................................................................................................................................................... 3 Dimensions (unit: mm) ..................................................................................................................................................... 4 Scanning Instructions ....................................................................................................................................................... 5 Wireless Communications................................................................................................................................................ 5 Chapter 2 System Settings .......................................................................................................................................................... 6 Factory Defaults ............................................................................................................................................................... 6 Illumination ....................................................................................................................................................................... 6 Aiming .............................................................................................................................................................................. 7 Mute Mode ....................................................................................................................................................................... 7 Good Read Beep Frequency/Duration ............................................................................................................................. 8 Scan Mode ....................................................................................................................................................................... 9 Manual Mode ............................................................................................................................................................ 9 Continuous Mode ...................................................................................................................................................... 9 Query Product Serial Number ........................................................................................................................................ 11 Chapter 3 Wireless Communications ....................................................................................................................................... 12 Pairing the Scanner to a Dongle .................................................................................................................................... 12 Communication Modes .................................................................................................................................................. 12 Transmit Stored Data ..................................................................................................................................................... 13 Clear Stored Data in Flash ............................................................................................................................................. 13 Interface Selection ......................................................................................................................................................... 13 HID Keyboard Parameters ............................................................................................................................................. 14 Keyboard Types ...................................................................................................................................................... 14 Standard Keyboard .......................................................................................................................................... 18 Function Key Mapping ..................................................................................................................................... 18 Emulate ALT+Keypad ...................................................................................................................................... 19 Convert Case ................................................................................................................................................... 19 Code Page .............................................................................................................................................................. 20 Character Encoding ......................................................................................................................................... 22 Direct Character Transfer................................................................................................................................. 22 Emulate Keypad with Leading Zero ................................................................................................................. 23 Inter-Keystroke Delay.............................................................................................................................................. 23 Chapter 4 Prefix & Suffix ........................................................................................................................................................... 24 Prefix Sequence ............................................................................................................................................................. 24 Custom Prefix................................................................................................................................................................. 24 Enable/Disable Custom Prefix ................................................................................................................................ 24 Set Custom Prefix ................................................................................................................................................... 25 AIM ID Prefix .................................................................................................................................................................. 25 Code ID Prefix................................................................................................................................................................ 26 Custom Suffix................................................................................................................................................................. 27 Enable/Disable Custom Suffix................................................................................................................................. 27 Set Custom Suffix ................................................................................................................................................... 27 Terminating Character Suffix .......................................................................................................................................... 28 Chapter 5 Symbologies.............................................................................................................................................................. 29 Global Settings............................................................................................................................................................... 29 Video Reverse ........................................................................................................................................................ 29 ECI Output .............................................................................................................................................................. 30 Code 128........................................................................................................................................................................ 31 Enable/Disable Code 128 ....................................................................................................................................... 31 Set Length Range for Code 128 ............................................................................................................................. 31 UCC/EAN-128 (GS1-128) .............................................................................................................................................. 32 Enable/Disable UCC/EAN-128................................................................................................................................ 32 Set Length Range for UCC/EAN-128...................................................................................................................... 32 AIM 128.......................................................................................................................................................................... 33 Enable/Disable AIM 128.......................................................................................................................................... 33 Set Length Range for AIM 128 ................................................................................................................................ 33 EAN-8 ............................................................................................................................................................................ 34 Enable/Disable EAN-8 ............................................................................................................................................ 34 Transmit Check Character ...................................................................................................................................... 34 Add-On Code .......................................................................................................................................................... 35 EAN-8 Extension..................................................................................................................................................... 36 EAN-13 .......................................................................................................................................................................... 36 Enable/Disable EAN-13 .......................................................................................................................................... 36 Transmit Check Character ...................................................................................................................................... 36 Add-On Code .......................................................................................................................................................... 37 ISSN............................................................................................................................................................................... 38 ISBN............................................................................................................................................................................... 38 Enable/Disable ISBN............................................................................................................................................... 38 Set ISBN Format ..................................................................................................................................................... 38 UPC-E ............................................................................................................................................................................ 39 Enable/Disable UPC-E............................................................................................................................................ 39 Transmit Check Character ...................................................................................................................................... 39 Add-On Code .......................................................................................................................................................... 40 Transmit System Character..................................................................................................................................... 41 UPC-E Extension .................................................................................................................................................... 41 UPC-A ............................................................................................................................................................................ 42 Enable/Disable UPC-A............................................................................................................................................ 42 Transmit Check Character ...................................................................................................................................... 42 Add-On Code .......................................................................................................................................................... 43 Transmit Preamble Character ................................................................................................................................. 44 Interleaved 2 of 5 ........................................................................................................................................................... 45 Enable/Disable Interleaved 2 of 5 ........................................................................................................................... 45 Check Character Verification................................................................................................................................... 45 Set Length Range for Interleaved 2 of 5 ................................................................................................................. 46 Febraban........................................................................................................................................................................ 47 Disable/Enable Febraban........................................................................................................................................ 47 Expand Febraban.................................................................................................................................................... 47 Transmit Delay per Character ................................................................................................................................. 47 Transmit Delay per 12 Characters .......................................................................................................................... 48 ITF-6 .............................................................................................................................................................................. 49 ITF-14 ............................................................................................................................................................................ 49 Matrix 2 of 5 ................................................................................................................................................................... 50 Enable/Disable Matrix 2 of 5 ................................................................................................................................... 50 Check Character Verification................................................................................................................................... 50 Set Length Range for Matrix 2 of 5 ......................................................................................................................... 51 Industrial 25.................................................................................................................................................................... 52 Enable/Disable Industrial 25 ................................................................................................................................... 52 Check Character Verification................................................................................................................................... 52 Set Length Range for Industrial 25 ......................................................................................................................... 53 Standard 25.................................................................................................................................................................... 54 Enable/Disable Standard 25.................................................................................................................................... 54 Check Character Verification................................................................................................................................... 54 Set Length Range for Standard 25.......................................................................................................................... 55 Code 39 ......................................................................................................................................................................... 56 Enable/Disable Code 39 ......................................................................................................................................... 56 Transmit Start/Stop Character ................................................................................................................................. 56 Enable/Disable Code 39 Full ASCII ........................................................................................................................ 56 Check Character Verification................................................................................................................................... 57 Set Length Range for Code 39 ............................................................................................................................... 58 Codabar ......................................................................................................................................................................... 59 Enable/Disable Codabar ......................................................................................................................................... 59 Check Character Verification................................................................................................................................... 59 Transmit Start/Stop Character ................................................................................................................................. 60 Start/Stop Character Format ................................................................................................................................... 60 Set Length Range for Codabar ............................................................................................................................... 61 Code 93 ......................................................................................................................................................................... 62 Enable/Disable Code 93 ......................................................................................................................................... 62 Check Character Verification................................................................................................................................... 62 Set Length Range for Code 93 ............................................................................................................................... 63 Code 11.......................................................................................................................................................................... 64 Enable/Disable Code 11.......................................................................................................................................... 64 Check Character Verification................................................................................................................................... 64 Set Length Range for Code 11................................................................................................................................ 65 Plessey .......................................................................................................................................................................... 66 Enable/Disable Plessey .......................................................................................................................................... 66 Check Character Verification................................................................................................................................... 66 Set Length Range for Plessey ................................................................................................................................ 67 MSI-Plessey ................................................................................................................................................................... 68 Enable/Disable MSI-Plessey................................................................................................................................... 68 Check Character Verification................................................................................................................................... 68 Transmit Check Character ...................................................................................................................................... 69 Set Length Range for MSI-Plessey......................................................................................................................... 69 RSS-14 .......................................................................................................................................................................... 70 Enable/Disable RSS-14 .......................................................................................................................................... 70 Transmit Application Identifier "01" .......................................................................................................................... 70 RSS-Limited ................................................................................................................................................................... 71 Enable/Disable RSS-Limited ................................................................................................................................... 71 Transmit Application Identifier "01" .......................................................................................................................... 71 RSS-Expand .................................................................................................................................................................. 72 Enable/Disable RSS-Expand .................................................................................................................................. 72 PDF417 .......................................................................................................................................................................... 72 Enable/Disable PDF417.......................................................................................................................................... 72 Data Matrix..................................................................................................................................................................... 73 Enable/Disable Data Matrix..................................................................................................................................... 73 Rectangular Barcodes............................................................................................................................................. 73 Mirror Images .......................................................................................................................................................... 73 QR Code ........................................................................................................................................................................ 74 Enable/Disable QR Code ........................................................................................................................................ 74 Micro QR ................................................................................................................................................................. 74 Chinese Sensible Code.................................................................................................................................................. 74 Appendix ..................................................................................................................................................................................... 75 Digit Barcodes................................................................................................................................................................ 75 Factory Defaults Table.................................................................................................................................................... 78 AIM ID Table................................................................................................................................................................... 83 Code ID Table ................................................................................................................................................................ 86 ASCII Table .................................................................................................................................................................... 87 Chapter 1 Getting Started Introduction The NLS-HR20-RF wireless barcode scanner (hereinafter referred to as "HR20 scanner" or "the scanner"), armed with the world-leading Newland patented , a computerized image recognition system-on-chip, bring about a new era of 2D barcode scanner. The HR20's 2D barcode decoder chip ingeniously blends technology and advanced chip design & manufacturing, which significantly simplifies application design and delivers superior performance and solid reliability with low power consumption. The HR20 supports all mainstream 1D and standard 2D barcode symbologies (e.g., PDF417, QR Code, Data Matrix and Chinese Sensible Code) as well as GS1-DataBarTM(RSS) (Limited/Stacked/Expanded versions). It can read barcodes on virtually any medium - paper, plastic card, mobile phones and LCD displays. About This Guide This guide provides programming instructions for the HR20. Users can configure the HR20 by scanning the programming barcodes included in this manual. The HR20 has been properly configured for most applications and can be put into use without further configuration. Users may check the "Factory Defaults Table" in Appendix for reference. Throughout the manual, asterisks (**) indicate factory default values. Unpacking Open the package and take out HR20 scanner and its accessories. Check to make sure everything on the packing list is present and intact. If any contents are damaged or missing, please keep the original package and contact your dealer immediately for after-sales service. 1 HR20 Scanner Good Read/Network LED: Red LED On Charging in progress. Red LED Off Fully charged. Blue LED On - Connection established. Blue LED flashes - Data transmission in progress. Green LED flashes once - Good read in Real-time mode. Blue LED flashes once - Good read in Inventory mode. Charging the Scanner Battery To charge the scanner battery, connect the scanner to your computer with the supplied cable. You can check the charge status with the Good Read/Network LED (red) on the scanner. Plug and Play The scanner that comes with a USB dongle is already paired with it and can work out of the box through plug and play. Only one scanner can be paired to one dongle at a time. If you want to pair your scanner to another dongle, follow the instructions described in the "Pairing the Scanner to a Dongle" section in Chapter 3. 2 Power On, Sleep Power on the scanner Plug the supplied dongle into the USB port of a host device, and pull the trigger on the scanner. Then the scanner will be turned on and the connection will be automatically established. Enter the sleep mode If no operation is performed on the scanner for 5 seconds, it will automatically enter the sleep state. Maintenance The scan window should be kept clean. Do not scratch the scan window. Use soft brush to remove the stain from the scan window. Use the soft cloth to clean the window, such as eyeglass cleaning cloth. Do not spray any liquid on the scan window. Do not use any detergent to clean other parts of the device except for water. Note: The warranty DOES NOT cover damages caused by inappropriate care and maintenance. 3 Dimensions (unit: mm) 4 Scanning Instructions When the scanner is in the default scan mode, you can follow the steps below to scan a barcode: 1. Press and hold the trigger. Then the scanner will project a red aiming pattern. 2. Center the aiming pattern on the barcode, as shown in the figure below. 3. Release the trigger when the aiming beamn goes off. If the barcode is decoded successfully, the scanner will emit a good decode beep and the decoded data will be sent to the host device. Wireless Communications The scanner can communicate with a remote host by pairing with a USB dongle that supports HID Keyboard and COM Port Emulation. For wireless communication parameters and dongle pairing instructions, see Chapter 3. 5 Chapter 2 System Settings Factory Defaults Scanning the following barcode can restore the scanner to the factory defaults. You may need to reset all parameters to the factory defaults when: 1. Scanner is not properly configured so that it fails to decode barcodes; 2. you forget previous configuration and want to avoid its impact; 3. functions that are rarely used have been enabled for the time being. Restore All Factory Defaults Illumination A couple of illumination options are provided to improve the lighting conditions during every image capture: Normal (default): Illumination LED is turned on during image capture. Always On: Illumination LED keeps on after the scanner is powered on. Off: Illumination LED is off all the time. Off Always On ** Normal 6 Aiming When scanning/capturing image, the scanner projects an aiming pattern which allows positioning the target barcode within its field of view and thus makes decoding easier. Normal: The scanner projects an aiming pattern during barcode scanning/capture. Always On: Aiming pattern is constantly on after the scanner is powered on. Off: Aiming pattern is off all the time. ** Normal Off Always On Mute Mode Scanning the Enable Mute Mode can turn off all notification beeps. Enable Mute Mode ** Disable Mute Mode 7 Good Read Beep Frequency/Duration Low Frequency High Frequency ** 80ms ** Medium Frequency 40ms 120ms 8 Scan Mode Manual Mode Manual Mode (default): A trigger pull activates a decode session. The decode session continues until the barcode is decoded or the trigger is released. ** Manual Mode Continuous Mode Continuous Mode: The scanner automatically starts one decode session after another at specific intervals (i.e. timeout between decodes). The decode session continues until the barcode is decoded or the decode session timeout expires. In the Continuous mode, a trigger pull can enable the scanner to work temporarily in the Manual mode and back to the Continuous mode in 30 seconds. Continuous Mode 9 Decode Session Timeout sets the maximum time decode session continues during a scan attempt. It is programmable in 0.1s increments from 0.1s to 25.5s. The default timeout is 5.0s. To set the timeout, scan the Decode Session Timeout barcode, then the two numeric barcodes corresponding to the desired timeout in hexadecimal. Decode Session Timeout Example: Set the decode session timeout to 5.0s (50 in hex is 32) 1. Scan the Decode Session Timeout barcode. 2. Scan the numeric barcodes "3" and "2" from the "Digit Barcodes" section in Appendix. Timeout between Decodes sets the timeout between decode sessions. When a decode session ends, next session will not happen until the timeout between decodes expires. It is programmable in 0.1s increments from 0s to 25.5s. The default timeout is 1.0s. To set the timeout, scan the Timeout between Decodes barcode, then the two numeric barcodes corresponding to the desired timeout in hexadecimal. Timeout between Decodes Example: Set the timeout between decodes to 5.0s (50 in hex is 32) 1. Scan the Timeout between Decodes barcode. 2. Scan the numeric barcodes "3" and "2" from the "Digit Barcodes" section in Appendix. 10 Query Product Serial Number After scanning the barcode below, the serial number of the scanner will be sent to the host device. Query Product Serial Number 11 Chapter 3 Wireless Communications Pairing the Scanner to a Dongle The scanner that comes with a USB dongle is already paired with it and can work out of the box through plug and play. You simply plug the dongle into the USB port of your computer, pull the trigger on the scanner, and the connection will be automatically established with a beep from the scanner. If the scanner within service range fails to connect to the dongle, you may re-establish pairing by following the steps below: unplug the dongle, scan the Enter Pairing Mode barcode and the Pair barcode with the scanner, and then plug the dongle into your computer. Enter Pairing Mode Pair Communication Modes Real-time Mode: The scanner attempts to transmit every barcode you scan. When you are out of service range, the scanned data will be lost. Inventory Mode: Scanned data will be stored in the flash memory no matter whether you are in service range or not. You may send the stored data to the host by scanning the Transmit Stored Data barcode. Do not change the interface before starting data transmission operation, otherwise all data previously stored in the flash memory will be lost. ** Real-time Mode Inventory Mode 12 Transmit Stored Data You may scan the barcode below to send the stored data in the flash memory to the host. Transmit Stored Data Clear Stored Data in Flash To clear stored data in flash, you need to scan the Clear Stored Data then the Confirm Clear Operation barcodes. Clear Stored Data Confirm Clear Operation Interface Selection The scanner can communicate with a remote host via a USB dongle that supports HID Keyboard and COM Port Emulation. You may select the desired interface by scanning the appropriate barcode below. ** HID Keyboard COM Port Emulation 13 HID Keyboard Parameters Characters can be represented by key values of a keyboard or by numeric representations in a code page. The former method should only be used when scanning barcodes containing single-byte characters. Keyboard Types If you want barcode data to be represented by key values of a keyboard, you may select the keyboard type by scanning the appropriate barcode below. This feature should not be used when barcodes contain multi-byte characters. The default setting is U.S. keyboard. ** U.S. (English) Brazil Czechoslovakia Belgium Canada (French) 14 Finland (Swedish) Germany/Austria Hungary Italy 15 Denmark France Greece Israel (Hebrew) Netherlands (Dutch) Poland Romania Slovakia Latin America/South America Norway Portugal Russia 16 Sweden Turkey_F UK 17 Spain Switzerland (German) Turkey_Q Japan Standard Keyboard When Standard Keyboard is enabled, characters are sent as corresponding keys on the selected keyboard. This feature is only effective when a keyboard type is enabled. ** Standard Keyboard Function Key Mapping When Function Key Mapping is enabled, function characters (0x00 - 0x1F) are sent as ASCII sequences. This feature is only effective when a keyboard type is enabled. 1. CTRL Make 2. Press function key (Refer to the ASCII Function Key Mapping Table below) 3. CTRL Break Function Key Mapping ASCII Function Key Mapping Table ASCII Value (HEX) 00 01 02 03 04 05 06 07 08 09 0A 0B 0C 0D 0E 0F Function Key @ A B C D E F G H I J K L M N O ASCII Value (HEX) 10 11 12 13 14 15 16 17 18 19 1A 1B 1C 1D 1E 1F Function Key P Q R S T U V W X Y Z [ \ ] 6 . 18 Emulate ALT+Keypad When Emulate ALT+Keypad is enabled, any ASCII character (0x00 - 0xFF) is sent over the numeric keypad. This feature is only effective when a keyboard type is enabled. 1. ALT Make 2. Enter the number corresponding to the ASCII character on the keypad. 3. ALT Break Emulate ALT+Keypad Convert Case You may scan the appropriate barcode below to convert all barcode data to your desired case. This feature is only effective when a keyboard type is enabled. ** No Case Conversion Convert All to Upper Case Convert All to Lower Case Invert Upper and Lower Case Characters Example: When Invert Upper and Lower Case Characters is enabled, barcode data "AbC" is transmitted as "aBc". 19 Code Page If you want barcode data to be represented by numeric representations in a code page, you may select the code page by scanning the appropriate barcode below. Code Page 1252 (West European Latin) Code Page 1251 (Cyrillic) Code Page 1250 (Central and East European Latin) Code Page 1253 (Greek) Code Page 1254 (Turkish) Code Page 1255 (Hebrew) 20 Code Page 1256 (Arabic) Code Page 1257 (Baltic) Code Page 1258 (Vietnamese) Code Page 936 (Simplified Chinese, GB2312, GBK) Code Page 950 (Traditional Chinese, Big5) Code Page 874 (Thai) Code Page 932 (Japanese, Shift-JIS) 21 Character Encoding You should select the character encoding with which the barcodes were created. ** Code Page UTF-8 Direct Character Transfer When a code page is enabled, any character is sent over the numeric keypad. 1. ALT Make 2. Enter the number corresponding to the code point in selected code page on the keypad. 3. ALT Break Different host program may use different character encodings for handling incoming barcode data. For instance, Microsoft Office Word uses Unicode encoding and therefore you should enable Unicode Encoding, whereas Microsoft Office Excel or Notepad uses ANSI encoding and therefore you should enable ANSI Encoding. ** ANSI Encoding Unicode Encoding 22 Emulate Keypad with Leading Zero You may turn this feature on to send character sequences sent over the numeric keypad as ISO characters which have a leading zero. For example, ASCII A transmits as "ALT MAKE" 0065 "ALT BREAK". This feature is only applicable to Direct Character Transfer. ** On Off Inter-Keystroke Delay This parameter specifies the delay between emulated keystrokes. ** No Delay Medium Delay (20ms) Short Delay (10ms) Long Delay (30ms) 23 Chapter 4 Prefix & Suffix A 1D barcode could contain digits, letters, symbols, etc. A 2D barcode could contain more data, such as Chinese characters and other multi-byte characters. However, in real applications, they do not and should not have all information we need, such as barcode type, data acquisition time and delimiter, in order to keep the barcodes short and flexible. Preffix and suffix are how to fulfill the needs mentioned above. They can be added, removed and modified while the original barcode data remains intact. Prefix Sequence ** Code ID+ Custom +AIM ID Custom + Code ID + AIM ID Custom Prefix Enable/Disable Custom Prefix If custom prefix is enabled, you are allowed to append to the data a user-defined prefix that cannot exceed 5 characters. For example, if the custom prefix is "AB" and the barcode data is "123", the Host will receive "AB123". ** Disable Custom Prefix Enable Custom Prefix 24 Set Custom Prefix To set a custom prefix, scan the Set Custom Prefix barcode then the numeric barcodes corresponding to the hexadecimal value of a desired prefix. Note: A custom prefix cannot exceed 5 characters. Set Custom Prefix Example: Set the custom prefix to "CODE" (HEX: 0x43/0x4F/0x44/0x45): 1. Scan the Set Custom Prefix barcode. 2. Scan the numeric barcodes "4", "3", "4", "F", "4", "4", "4" and "5" from the "Digit Barcodes" section in Appendix. 3. Scan the Enable Custom Prefix barcode. AIM ID Prefix AIM (Automatic Identification Manufacturers) IDs define symbology identifiers and data carrier identifiers. For the details, see the "AIM ID Table" in Appendix. If AIM ID prefix is enabled, the scanner will add the symbology identifier before the scanned data after decoding. Enable AIM ID Prefix ** Disable AIM ID Prefix 25 Code ID Prefix Code ID can also be used to identify barcode type. For more information, refer to the "Code ID Table" in Appdendix. Enable Code ID Prefix ** Disable Code ID Prefix You can choose to transmit original Code ID or visible Code ID by scanning the appropriate barcode below. ** Original Code ID Visible Code ID 26 Custom Suffix Enable/Disable Custom Suffix If custom suffix is enabled, you are allowed to append to the data a user-defined suffix that cannot exceed 5 characters. For example, if the custom suffix is "AB" and the barcode data is "123", the Host will receive "123AB". ** Disable Custom Suffix Enable Custom Suffix Set Custom Suffix To set a custom suffix, scan the Set Custom Suffix barcode then the numeric barcodes corresponding to the hexadecimal value of a desired suffix. Note: A custom suffix cannot exceed 5 characters. Set Custom Suffix Example: Set the custom suffix to "CODE" (HEX: 0x43/0x4F/0x44/0x45): 1. Scan the Set Custom Suffix barcode. 2. Scan the numeric barcodes "4", "3", "4", "F", "4", "4", "4" and "5" from the "Digit Barcodes" section in Appendix. 3. Scan the Enable Custom Suffix barcode. 27 Terminating Character Suffix A terminating character such as carriage return (CR) or carriage return/line feed pair (CRLF) or horizontal tab (TAB) can be used to mark the end of data. ** Disable Terminating Character Suffix Append CRLF Append CR Append TAB 28 Chapter 5 Symbologies Global Settings Video Reverse The Video Reverse feature only applies to 2D barcodes. Regular barcode: Dark image on a bright background. Inverse barcode: Bright image on a dark background. The examples of egular barcode and inverse barcode are shown below. Regular Barcode Inverse Barcode Video Reverse is used to allow the scanner to read barcodes that are inverted. Video Reverse ON: Read both regular barcodes and inverse barcodes. Video Reverse OFF (default): Read regular barcodes only. The scanner shows a slight decrease in scanning speed when Video Reverse is ON. Video Reverse ON 29 ** Video Reverse OFF ECI Output ** Disable ECI Output Enable ECI Output 30 Code 128 Enable/Disable Code 128 ** Enable Code 128 Disable Code 128 Set Length Range for Code 128 The scanner can be configured to only decode Code 128 barcodes with lengths that fall between (inclusive) the minimum and maximum lengths. To accomplish it, you need to set the minimum and maximum lengths. Set the Minimum Length (Default: 1) Set the Maximum Length (Default: 80) Example: Set the scanner to decode Code 128 barcodes containing between 8 and 12 characters: 1. Scan the Set the Minimum Length barcode. 2. Scan the numeric barcodes "0" and "8" from the "Digit Barcodes" section in Appendix. 3. Scan the Set the Maximum Length barcode. 4. Scan the numeric barcodes "0" and "C" from the "Digit Barcodes" section in Appendix. 31 UCC/EAN-128 (GS1-128) Enable/Disable UCC/EAN-128 When disabled, UCC/EAN-128 is identified as Code 128. ** Enable UCC/EAN-128 Disable UCC/EAN-128 Set Length Range for UCC/EAN-128 The scanner can be configured to only decode UCC/EAN-128 barcodes with lengths that fall between (inclusive) the minimum and maximum lengths. To accomplish it, you need to set the minimum and maximum lengths. Set the Minimum Length (Default: 1) Set the Maximum Length (Default: 80) Example: Set the scanner to decode UCC/EAN-128 barcodes containing between 8 and 12 characters: 1. Scan the Set the Minimum Length barcode. 2. Scan the numeric barcodes "0" and "8" from the "Digit Barcodes" section in Appendix. 3. Scan the Set the Maximum Length barcode. 4. Scan the numeric barcodes "0" and "C" from the "Digit Barcodes" section in Appendix. 32 AIM 128 Enable/Disable AIM 128 When disabled, AIM 128 is identified as Code 128. ** Enable AIM 128 Disable AIM 128 Set Length Range for AIM 128 The scanner can be configured to only decode AIM 128 barcodes with lengths that fall between (inclusive) the minimum and maximum lengths. To accomplish it, you need to set the minimum and maximum lengths. Set the Minimum Length (Default: 1) Set the Maximum Length (Default: 80) Example: Set the scanner to decode AIM 128 barcodes containing between 8 and 12 characters: 1. Scan the Set the Minimum Length barcode. 2. Scan the numeric barcodes "0" and "8" from the "Digit Barcodes" section in Appendix. 3. Scan the Set the Maximum Length barcode. 4. Scan the numeric barcodes "0" and "C" from the "Digit Barcodes" section in Appendix. 33 EAN-8 Enable/Disable EAN-8 ** Enable EAN-8 Disable EAN-8 Transmit Check Character EAN-8 is 8 digits in length with the last one as its check character used to verify the integrity of the data. ** Transmit EAN-8 Check Character Do Not Transmit EAN-8 Check Character 34 Add-On Code An EAN-8 barcode can be augmented with a two-digit or five-digit add-on code to form a new one. In the examples below, the part surrounded by blue dotted line is an EAN-8 barcode while the part circled by red dotted line is add-on code. Enable 2-Digit Add-On Code ** Disable 2-Digit Add-On Code Enable 5-Digit Add-On Code ** Disable 5-Digit Add-On Code Enable 2-Digit Add-On Code/ Enable 5-Digit Add-On Code: The scanner decodes a mix of EAN-8 barcodes with and without 2-digit/5-digit add-on codes. Disable 2-Digit Add-On Code/ Disable 5-Digit Add-On Code: The scanner decodes EAN-8 and ignores the add-on code when presented with an EAN-8 plus add-on barcode. It can also decode EAN-8 barcodes without add-on codes. 35 EAN-8 Extension Disable EAN-8 Zero Extend: Transmit EAN-8 barcodes as is. Enable EAN-8 Zero Extend: Add five leading zeros to decoded EAN-8 barcodes to extend to13 digits. Enable EAN-8 Zero Extend EAN-13 Enable/Disable EAN-13 ** Disable EAN-8 Zero Extend ** Enable EAN-13 Disable EAN-13 Transmit Check Character EAN-13 is 13 digits in length with the last one as its check character used to verify the integrity of the data. ** Transmit EAN-13 Check Character Do Not Transmit EAN-13 Check Character 36 Add-On Code An EAN-13 barcode can be augmented with a two-digit or five-digit add-on code to form a new one. In the examples below, the part surrounded by blue dotted line is an EAN-13 barcode while the part circled by red dotted line is add-on code. Enable 2-Digit Add-On Code ** Disable 2-Digit Add-On Code Enable 5-Digit Add-On Code ** Disable 5-Digit Add-On Code Enable 2-Digit Add-On Code/ Enable 5-Digit Add-On Code: The scanner decodes a mix of EAN-13 barcodes with and without 2-digit/5-digit add-on codes. Disable 2-Digit Add-On Code/ Disable 5-Digit Add-On Code: The scanner decodes EAN-13 and ignores the add-on code when presented with an EAN-13 plus add-on barcode. It can also decode EAN-13 barcodes without add-on codes. 37 ISSN When disabled, ISSN is identified as EAN-13. Enable ISSN ISBN Enable/Disable ISBN When disabled, ISBN is identified as EAN-13. ** Enable ISBN Set ISBN Format ** ISBN-13 ** Disable ISSN Disable ISBN ISBN-10 38 UPC-E Enable/Disable UPC-E ** Enable UPC-E Disable UPC-E Transmit Check Character UPC-E is 8 digits in length with the last one as its check character used to verify the integrity of the data. ** Transmit UPC-E Check Character Do Not Transmit UPC-E Check Character 39 Add-On Code A UPC-E barcode can be augmented with a two-digit or five-digit add-on code to form a new one. In the examples below, the part surrounded by blue dotted line is a UPC-E barcode while the part circled by red dotted line is add-on code. Enable 2-Digit Add-On Code ** Disable 2-Digit Add-On Code Enable 5-Digit Add-On Code ** Disable 5-Digit Add-On Code Enable 2-Digit Add-On Code/ Enable 5-Digit Add-On Code: The scanner decodes a mix of UPC-E barcodes with and without 2-digit/5-digit add-on codes. Disable 2-Digit Add-On Code/ Disable 5-Digit Add-On Code: The scanner decodes UPC-E and ignores the add-on code when presented with a UPC-E plus add-on barcode. It can also decode UPC-E barcodes without add-on codes. 40 Transmit System Character The first character of UPC-E barcode is the system character "0". Transmit System Character "0" ** Do Not Transmit System Character "0" UPC-E Extension Disable UPC-E Extend: Transmit UPC-E barcodes as is. Enable UPC-E Extend: Extend UPC-E barcodes to make them compatible in length to UPC-A. Enable UPC-E Extend ** Disable UPC-E Extend 41 UPC-A Enable/Disable UPC-A When disabled, UPC-A is identified as EAN-13. ** Enable UPC-A Disable UPC-A Transmit Check Character UPC-A is 13 digits in length with the last one as its check character used to verify the integrity of the data. ** Transmit UPC-A Check Character Do Not Transmit UPC-A Check Character 42 Add-On Code A UPC-A barcode can be augmented with a two-digit or five-digit add-on code to form a new one. In the examples below, the part surrounded by blue dotted line is a UPC-A barcode while the part circled by red dotted line is add-on code. Enable 2-Digit Add-On Code ** Disable 2-Digit Add-On Code Enable 5-Digit Add-On Code ** Disable 5-Digit Add-On Code Enable 2-Digit Add-On Code/ Enable 5-Digit Add-On Code: The scanner decodes a mix of UPC-A barcodes with and without 2-digit/5-digit add-on codes. Disable 2-Digit Add-On Code/ Disable 5-Digit Add-On Code: The scanner decodes UPC-A and ignores the add-on code when presented with a UPC-A plus add-on barcode. It can also decode UPC-A barcodes without add-on codes. 43 Transmit Preamble Character Preamble characters (Country Code and System Character) can be transmitted as part of a UPC-A barcode. Select one of the following options for transmitting UPC-A preamble to the host device: transmit system character only or transmit system character and country code ("0" for USA). System Character & Country Code ** System Character 44 Interleaved 2 of 5 Enable/Disable Interleaved 2 of 5 ** Enable Interleaved 2 of 5 Disable Interleaved 2 of 5 Check Character Verification A check character is optional for Interleaved 2 o 5 and can be added as the last character. It is a calculated value used to verify the integrity of the data. Disable: The scanner transmits Interleaved 2 of 5 barcodes as is. Do Not Transmit Check Character After Verification: The scanner checks the integrity of all Interleaved 2 of 5 barcodes to verify that the data complies with the check character algorithm. Barcodes passing the check will be transmitted except the last digit, whereas those failing it will not be transmitted. Transmit Check Character After Verification: The scanner checks the integrity of all Interleaved 2 of 5 barcodes to verify that the data complies with the check character algorithm. Barcodes passing the check will be transmitted, whereas those failing it will not be transmitted. ** Disable Do Not Transmit Check Character After Verification Transmit Check Character After Verification 45 Set Length Range for Interleaved 2 of 5 The scanner can be configured to only decode Interleaved 2 of 5 barcodes with lengths that fall between (inclusive) the minimum and maximum lengths. To accomplish it, you need to set the minimum and maximum lengths. Set the Minimum Length (Default: 6) Set the Maximum Length (Default: 100) Example: Set the scanner to decode Interleaved 2 of 5 barcodes containing between 8 and 12 characters: 1. Scan the Set the Minimum Length barcode. 2. Scan the numeric barcodes "0" and "8" from the "Digit Barcodes" section in Appendix. 3. Scan the Set the Maximum Length barcode. 4. Scan the numeric barcodes "0" and "C" from the "Digit Barcodes" section in Appendix. 46 Febraban Disable/Enable Febraban ** Disable Febraban Expand Febraban Enable Febraban ** Do Not Expand Febraban Expand Febraban Transmit Delay per Character Transmit Delay per Character applies to both expanded and unexpanded Febraban. This feature is available only when USB HID Keyboard is enabled. The transmit delay per character is 75ms and is NOT user programmable. ** Disable Transmit Delay per Character Enable Transmit Delay per Character 47 Transmit Delay per 12 Characters Transmit Delay per 12 Characters applies to expanded Febraban only. This feature is available only when USB HID Keyboard is enabled. ** Disable Transmit Delay per 12 Characters Enable Transmit Delay per 12 Characters To set this parameter, scan the Set Transmit Delay per 12 Characters barcode below and then a numeric barcode (0-7, which represent 0ms, 300ms, 400ms, 500ms, 600ms, 700ms, 800ms and 900ms, respectively). The default value is 500ms. Set Transmit Delay per 12 Characters Example: Set the transmit delay per 12 characters to 600ms: 1. Scan the Set Transmit Delay per 12 Characters barcode. 2. Scan the numeric barcodes "0" and "4" from the "Digit Barcodes" section in Appendix. 48 ITF-6 When disabled, ITF-6 is identified as Interleaved 2 of 5. ** Disable ITF-6 Enable ITF-6 But Do Not Transmit Check Character Enable ITF-6 and Transmit Check Character ITF-14 When disabled, ITF-14 is identified as Interleaved 2 of 5. Disable ITF-14 Enable ITF-14 But Do Not Transmit Check Character ** Enable ITF-14 and Transmit Check Character 49 Matrix 2 of 5 Enable/Disable Matrix 2 of 5 ** Enable Matrix 2 of 5 Disable Matrix 2 of 5 Check Character Verification A check character is optional for Matrix 2 of 5 and can be added as the last character. It is a calculated value used to verify the integrity of the data. Disable: The scanner transmits Matrix 2 of 5 barcodes as is. Do Not Transmit Check Character After Verification: The scanner checks the integrity of all Matrix 2 of 5 barcodes to verify that the data complies with the check character algorithm. Barcodes passing the check will be transmitted except the last digit, whereas those failing it will not be transmitted. Transmit Check Character After Verification: The scanner checks the integrity of all Matrix 2 of 5 barcodes to verify that the data complies with the check character algorithm. Barcodes passing the check will be transmitted, whereas those failing it will not be transmitted. ** Disable Do Not Transmit Check Character After Verification Transmit Check Character After Verification 50 Set Length Range for Matrix 2 of 5 The scanner can be configured to only decode Matrix 2 of 5 barcodes with lengths that fall between (inclusive) the minimum and maximum lengths. To accomplish it, you need to set the minimum and maximum lengths. Set the Minimum Length (Default: 6) Set the Maximum Length (Default: 80) Example: Set the scanner to decode Matrix 2 of 5 barcodes containing between 8 and 12 characters: 1. Scan the Set the Minimum Length barcode. 2. Scan the numeric barcodes "0" and "8" from the "Digit Barcodes" section in Appendix. 3. Scan the Set the Maximum Length barcode. 4. Scan the numeric barcodes "0" and "C" from the "Digit Barcodes" section in Appendix. 51 Industrial 25 Enable/Disable Industrial 25 ** Enable Industrial 25 Disable Industrial 25 Check Character Verification A check character is optional for Industrial 25 and can be added as the last character. It is a calculated value used to verify the integrity of the data. Disable: The scanner transmits Industrial 25 barcodes as is. Do Not Transmit Check Character After Verification: The scanner checks the integrity of all Industrial 25 barcodes to verify that the data complies with the check character algorithm. Barcodes passing the check will be transmitted except the last digit, whereas those failing it will not be transmitted. Transmit Check Character After Verification: The scanner checks the integrity of all Industrial 25 barcodes to verify that the data complies with the check character algorithm. Barcodes passing the check will be transmitted, whereas those failing it will not be transmitted. ** Disable Do Not Transmit Check Character After Verification Transmit Check Character After Verification 52 Set Length Range for Industrial 25 The scanner can be configured to only decode Industrial 25 barcodes with lengths that fall between (inclusive) the minimum and maximum lengths. To accomplish it, you need to set the minimum and maximum lengths. Set the Minimum Length (Default: 6) Set the Maximum Length (Default: 80) Example: Set the scanner to decode Industrial 25 barcodes containing between 8 and 12 characters: 1. Scan the Set the Minimum Length barcode. 2. Scan the numeric barcodes "0" and "8" from the "Digit Barcodes" section in Appendix. 3. Scan the Set the Maximum Length barcode. 4. Scan the numeric barcodes "0" and "C" from the "Digit Barcodes" section in Appendix. 53 Standard 25 Enable/Disable Standard 25 ** Enable Standard 25 Disable Standard 25 Check Character Verification A check character is optional for Standard 25 and can be added as the last character. It is a calculated value used to verify the integrity of the data. Disable: The scanner transmits Standard 25 barcodes as is. Do Not Transmit Check Character After Verification: The scanner checks the integrity of all Standard 25 barcodes to verify that the data complies with the check character algorithm. Barcodes passing the check will be transmitted except the last digit, whereas those failing it will not be transmitted. Transmit Check Character After Verification: The scanner checks the integrity of all Standard 25 barcodes to verify that the data complies with the check character algorithm. Barcodes passing the check will be transmitted, whereas those failing it will not be transmitted. ** Disable Do Not Transmit Check Character After Verification Transmit Check Character After Verification 54 Set Length Range for Standard 25 The scanner can be configured to only decode Standard 25 barcodes with lengths that fall between (inclusive) the minimum and maximum lengths. To accomplish it, you need to set the minimum and maximum lengths. Set the Minimum Length (Default: 6) Set the Maximum Length (Default: 80) Example: Set the scanner to decode Standard 25 barcodes containing between 8 and 12 characters: 1. Scan the Set the Minimum Length barcode. 2. Scan the numeric barcodes "0" and "8" from the "Digit Barcodes" section in Appendix. 3. Scan the Set the Maximum Length barcode. 4. Scan the numeric barcodes "0" and "C" from the "Digit Barcodes" section in Appendix. 55 Code 39 Enable/Disable Code 39 ** Enable Code 39 Disable Code 39 Transmit Start/Stop Character Code 39 uses an asterisk (*) for both the start and the stop characters. You can choose whether or not to transmit the start/stop characters by scanning the appropriate barcode below. Transmit Start/Stop Character ** Do Not Transmit Start/Stop Character Enable/Disable Code 39 Full ASCII The scanner can be configured to identify all ASCII characters by scanning the appropriate barcode below. Enable Code 39 Full ASCII ** Disable Code 39 Full ASCII 56 Check Character Verification A check character is optional for Code 39 and can be added as the last character. It is a calculated value used to verify the integrity of the data. Disable: The scanner transmits Code 39 barcodes as is. Do Not Transmit Check Character After Verification: The scanner checks the integrity of all Code 39 barcodes to verify that the data complies with the check character algorithm. Barcodes passing the check will be transmitted except the last digit, whereas those failing it will not be transmitted. Transmit Check Character After Verification: The scanner checks the integrity of all Code 39 barcodes to verify that the data complies with the check character algorithm. Barcodes passing the check will be transmitted, whereas those failing it will not be transmitted. ** Disable Do Not Transmit Check Character After Verification Transmit Check Character After Verification 57 Set Length Range for Code 39 The scanner can be configured to only decode Code 39 barcodes with lengths that fall between (inclusive) the minimum and maximum lengths. To accomplish it, you need to set the minimum and maximum lengths. Set the Minimum Length (Default: 4) Set the Maximum Length (Default: 50) Example: Set the scanner to decode Code 39 barcodes containing between 8 and 12 characters: 1. Scan the Set the Minimum Length barcode. 2. Scan the numeric barcodes "0" and "8" from the "Digit Barcodes" section in Appendix. 3. Scan the Set the Maximum Length barcode. 4. Scan the numeric barcodes "0" and "C" from the "Digit Barcodes" section in Appendix. 58 Codabar Enable/Disable Codabar ** Enable Codabar Disable Codabar Check Character Verification A check character is optional for Codabar and can be added as the last character. It is a calculated value used to verify the integrity of the data. Disable: The scanner transmits Codabar barcodes as is. Do Not Transmit Check Character After Verification: The scanner checks the integrity of all Codabar barcodes to verify that the data complies with the check character algorithm. Barcodes passing the check will be transmitted except the last digit, whereas those failing it will not be transmitted. Transmit Check Character After Verification: The scanner checks the integrity of all Codabar barcodes to verify that the data complies with the check character algorithm. Barcodes passing the check will be transmitted, whereas those failing it will not be transmitted. ** Disable Do Not Transmit Check Character After Verification Transmit Check Character After Verification 59 Transmit Start/Stop Character ** Transmit Start/Stop Character Start/Stop Character Format ** ABCD/ABCD as the Start/Stop Character abcd/abcd as the Start/Stop Character Do Not Transmit Start/Stop Character ABCD/TN*E as the Start/Stop Character abcd/tn*e as the Start/Stop Character 60 Set Length Range for Codabar The scanner can be configured to only decode Codabar barcodes with lengths that fall between (inclusive) the minimum and maximum lengths. To accomplish it, you need to set the minimum and maximum lengths. Set the Minimum Length (Default: 4) Set the Maximum Length (Default: 60) Example: Set the scanner to decode Codabar barcodes containing between 8 and 12 characters: 1. Scan the Set the Minimum Length barcode. 2. Scan the numeric barcodes "0" and "8" from the "Digit Barcodes" section in Appendix. 3. Scan the Set the Maximum Length barcode. 4. Scan the numeric barcodes "0" and "C" from the "Digit Barcodes" section in Appendix. 61 Code 93 Enable/Disable Code 93 ** Enable Code 93 Disable Code 93 Check Character Verification Check characters are optional for Code 93 and can be added as the last two characters, which are calculated values used to verify the integrity of the data. Disable: The scanner transmits Code 93 barcodes as is. Do Not Transmit Check Character After Verification: The scanner checks the integrity of all Code 93 barcodes to verify that the data complies with the check character algorithm. Barcodes passing the checks will be transmitted except the last two digits, whereas those failing them will not be transmitted. Transmit Check Character After Verification: The scanner checks the integrity of all Code 93 barcodes to verify that the data complies with the check character algorithm. Barcodes passing the checks will be transmitted, whereas those failing them will not be transmitted. Disable ** Do Not Transmit Check Character After Verification Transmit Check Character After Verification 62 Set Length Range for Code 93 The scanner can be configured to only decode Code 93 barcodes with lengths that fall between (inclusive) the minimum and maximum lengths. To accomplish it, you need to set the minimum and maximum lengths. Set the Minimum Length (Default: 2) Set the Maximum Length (Default: 80) Example: Set the scanner to decode Code 93 barcodes containing between 8 and 12 characters: 1. Scan the Set the Minimum Length barcode. 2. Scan the numeric barcodes "0" and "8" from the "Digit Barcodes" section in Appendix. 3. Scan the Set the Maximum Length barcode. 4. Scan the numeric barcodes "0" and "C" from the "Digit Barcodes" section in Appendix. 63 Code 11 Enable/Disable Code 11 ** Enable Code 11 Disable Code 11 Check Character Verification Check characters are optional for Code 11 and can be added as the last one or two characters, which are calculated values used to verify the integrity of the data. If the Disable option is enabled, the scanner transmits Code 11 barcodes as is. Disable Two Check Characters, MOD11/MOD11 ** One Check Character, MOD11 Two Check Characters, MOD11/MOD9 64 One Check Character, MOD11 (Len <= 11) Two Check Characters, MOD11/MOD11 (Len > 11) One Check Character, MOD11 (Len <= 11) Two Check Characters, MOD11/MOD9 (Len > 11) ** Transmit Check Character Do Not Transmit Check Character Set Length Range for Code 11 The scanner can be configured to only decode Code 11 barcodes with lengths that fall between (inclusive) the minimum and maximum lengths. To accomplish it, you need to set the minimum and maximum lengths. Set the Minimum Length (Default: 4) Set the Maximum Length (Default: 80) Example: Set the scanner to decode Code 11 barcodes containing between 8 and 12 characters: 1. Scan the Set the Minimum Length barcode. 2. Scan the numeric barcodes "0" and "8" from the "Digit Barcodes" section in Appendix. 3. Scan the Set the Maximum Length barcode. 4. Scan the numeric barcodes "0" and "C" from the "Digit Barcodes" section in Appendix. 65 Plessey Enable/Disable Plessey Enable Plessey ** Disable Plessey Check Character Verification Check characters are optional for Plessey and can be added as the last two characters, which are calculated values used to verify the integrity of the data. Disable: The scanner transmits Plessey barcodes as is. Do Not Transmit Check Character After Verification: The scanner checks the integrity of all Plessey barcodes to verify that the data complies with the check character algorithm. Barcodes passing the checks will be transmitted except the last two digits, whereas those failing them will not be transmitted. Transmit Check Character After Verification: The scanner checks the integrity of all Plessey barcodes to verify that the data complies with the check character algorithm. Barcodes passing the checks will be transmitted, whereas those failing them will not be transmitted. Disable ** Do Not Transmit Check Character After Verification Transmit Check Character After Verification 66 Set Length Range for Plessey The scanner can be configured to only decode Plessey barcodes with lengths that fall between (inclusive) the minimum and maximum lengths. To accomplish it, you need to set the minimum and maximum lengths. Set the Minimum Length (Default: 4) Set the Maximum Length (Default: 60) Example: Set the scanner to decode Plessey barcodes containing between 8 and 12 characters: 1. Scan the Set the Minimum Length barcode. 2. Scan the numeric barcodes "0" and "8" from the "Digit Barcodes" section in Appendix. 3. Scan the Set the Maximum Length barcode. 4. Scan the numeric barcodes "0" and "C" from the "Digit Barcodes" section in Appendix. 67 MSI-Plessey Enable/Disable MSI-Plessey ** Enable MSI-Plessey Disable MSI-Plessey Check Character Verification Check characters are optional for MSI-Plessey and can be added as the last one or two characters, which are calculated values used to verify the integrity of the data. If the Disable option is enabled, the scanner transmits MSI-Plessey barcodes as is. Disable Two Check Characters, MOD10/MOD10 ** One Check Character, MOD10 Two Check Characters, MOD10/MOD11 68 Transmit Check Character ** Transmit Check Character Do Not Transmit Check Character Set Length Range for MSI-Plessey The scanner can be configured to only decode MSI-Plessey barcodes with lengths that fall between (inclusive) the minimum and maximum lengths. To accomplish it, you need to set the minimum and maximum lengths. Set the Minimum Length (Default: 4) Set the Maximum Length (Default: 60) Example: Set the scanner to decode MSI-Plessey barcodes containing between 8 and 12 characters: 1. Scan the Set the Minimum Length barcode. 2. Scan the numeric barcodes "0" and "8" from the "Digit Barcodes" section in Appendix. 3. Scan the Set the Maximum Length barcode. 4. Scan the numeric barcodes "0" and "C" from the "Digit Barcodes" section in Appendix. 69 RSS-14 Enable/Disable RSS-14 ** Enable RSS-14 Transmit Application Identifier "01" ** Transmit Application Identifier "01" Disable RSS-14 Do Not Transmit Application Identifier "01" 70 RSS-Limited Enable/Disable RSS-Limited ** Enable RSS-Limited Transmit Application Identifier "01" ** Transmit Application Identifier "01" Disable RSS-Limited Do Not Transmit Application Identifier "01" 71 RSS-Expand Enable/Disable RSS-Expand ** Enable RSS-Expand PDF417 Enable/Disable PDF417 ** Enable PDF417 Disable RSS-Expand Disable PDF417 72 Data Matrix Enable/Disable Data Matrix ** Enable Data Matrix Rectangular Barcodes ** Decode Rectangular Barcodes Mirror Images Decode Mirrored DM 73 Disable Data Matrix Do Not Decode Rectangular Barcodes ** Do Not Decode Mirrored DM QR Code Enable/Disable QR Code ** Enable QR Code Micro QR Enable Micro QR Chinese Sensible Code Enable Chinese Sensible Code Disable QR Code ** Disable Micro QR ** Disable Chinese Sensible Code 74 Digit Barcodes 0 - 5 Appendix 0 1 2 3 4 5 75 6 - 9 6 7 8 9 76 A - F A B C D E F 77 Factory Defaults Table Parameter System Settings Illumination Aiming Mute Mode Good Read Beep Frequency Good Read Beep Duration Scan Mode Decode Session Timeout Factory Default Normal Normal Disabled Medium 80ms Manual Mode 3.0s Timeout between Decodes 1.0s Wireless Communications Communication Mode Real-time Mode Interface Selection HID Keyboard Keyboard Type U.S. (English) Standard Keyboard Enabled Convert Case No Case Conversion Code Page Character Encoding Code Page Direct Character Transfer ANSI Encoding Emulate Keypad with Leading Zero On Inter-Keystroke Delay No Delay Prefix & Suffix Prefix Sequence Custom Prefix AIM ID Prefix Code ID Prefix Code ID Type Custom Suffix Terminating Character Suffix Symbologies Global Settings Video Reverse Code ID+ Custom +AIM ID Disabled Disabled Disabled Original Code ID Disabled Disabled Disabled Remark 0.1-25.5s 0-25.5s HID Keyboard Parameter HID Keyboard Parameter HID Keyboard Parameter HID Keyboard Parameter HID Keyboard Parameter HID Keyboard Parameter HID Keyboard Parameter Applicable to 2D symbologies. 78 ECI Output Code 128 Code 128 Maximum Length Minimum Length UCC/EAN-128 (GS1-128) UCC/EAN-128 Maximum Length Minimum Length AIM 128 AIM 128 Maximum Length Minimum Length EAN-8 EAN-8 Check Character 2-Digit Add-On Code 5-Digit Add-On Code Extend to EAN-13 EAN-13 EAN-13 Check Character 2-Digit Add-On Code 5-Digit Add-On Code ISSN ISSN ISBN ISBN Set ISBN Format UPC-E UPC-E Check Character 2-Digit Add-On Code 5-Digit Add-On Code System Character "0" Disabled Enabled 80 1 Enabled 80 1 Enabled 80 1 Enabled Transmit Disabled Disabled Disabled Enabled Transmit Disabled Disabled Disabled Enabled ISBN-13 Enabled Transmit Disabled Disabled Do not transmit 79 Extend to UPC-A UPC-A UPC-A Check Character 2-Digit Add-On Code 5-Digit Add-On Code Transmit Preamble Character Interleaved 2 of 5 Interleaved 2 of 5 Check Character Verification Maximum Length Minimum Length Febraban Febraban Expand Febraban Transmit Delay per Character Transmit Delay per 12 Characters ITF-6 ITF-6 ITF-14 ITF-14 Check Character Matrix 2 of 5 Matrix 2 of 5 Check Character Verification Maximum Length Minimum Length Industrial 25 Industrial 25 Check Character Verification Maximum Length Minimum Length Standard 25 Standard 25 Check Character Verification Disabled Enabled Transmit Disabled Disabled System Character Enabled Disabled 100 6 Disabled Do not expand Disabled, 75ms Disabled, 500ms Disabled Enabled Transmit Enabled Disabled 80 6 Enabled Disabled 80 6 Enabled Disabled No less than 1 No less than 1 No less than 1 80 Maximum Length Minimum Length Code 39 Code 39 Check Character Verification Start/Stop Character Code 39 Full ASCII Maximum Length Minimum Length Codabar Codabar Check Character Verification Start/Stop Character Maximum Length Minimum Length Code 93 Code 93 Check Character Verification Maximum Length Minimum Length Code 11 Code 11 Check Character Verification Check Character Maximum Length Minimum Length Plessey Plessey Check Character Verification Maximum Length Minimum Length MSI-Plessey MSI-Plessey Check Character Verification 80 6 No less than 1 Enabled Disabled Do not transmit Disabled 50 4 No less than 1 Enabled Disabled Transmit ABCD/ABCD 60 4 No less than 1 Enabled Do Not Transmit Check Character After Verification 80 2 No less than 1 Enabled One Check Character, MOD11 Transmit 80 4 No less than 1 Disabled Do Not Transmit Check Character After Verification 60 4 No less than 1 Enabled One Check Character, MOD10 81 Check Character Maximum Length Minimum Length RSS-14 RSS-14 AI (Application Identifier) RSS-Limited RSS-Limited AI (Application Identifier) RSS-Expand RSS-Expand PDF417 PDF417 Data Matrix Data Matrix Rectangular Barcodes Mirror Images QR Code QR Code Micro QR Chinese Sensible Code Chinese Sensible Code Transmit 60 4 Enabled Transmit Enabled Transmit Enabled Enabled Enabled Enabled Disabled Enabled Disabled Disabled No less than 1 82 AIM ID Table Symbology Code 128 UCC/EAN 128 (GS1-128) AIM 128 EAN-8 EAN-13 ISSN ISBN UPC-E UPC-A Interleaved 2 of 5 ITF-6 ITF-14 Matrix 2 of 5 Industrial 25 Standard 25 Code 39 AIM ID ]C0 ]C1 ]C2 ]E4 ]E4....]E1... ]E4....]E2... ]E0 ]E3 ]X5 ]X4 ]E0 ]E3 ]E0 ]E3 ]I0 ]I1 ]I3 ]I1 ]I3 ]I1 ]I3 ]X1 ]X2 ]X3 ]S0 ]R0 ]R8 ]R9 ]A0 Standard Code 128 Remark FNC1 is the character right after the start character FNC1 is the 2nd character after the start character Standard EAN-8 EAN-8 + 2-Digit Add-On Code EAN-8 + 5-Digit Add-On Code Standard EAN-13 EAN-13 + 2/5-Digit Add-On Code Standard ISSN Standard ISBN Standard UPC-E UPC-E + 2/5-Digit Add-On Code Standard UPC-A UPC-A + 2/5-Digit Add-On Code No check character verification Transmit check character after verification Do not transmit check character after verification Transmit check character Do not transmit check character Transmit check character Do not transmit check character No check character verification Transmit check character after verification Do not transmit check character after verification Not specified No check character verification One check character, MOD 7; do not transmit check character One check character, MOD 7; transmit check character Transmit barcodes as is; Full ASCII disabled; no check character verification 83 Symbology Codabar Code 93 Code 11 Plessey MSI Plessey RSS-14 RSS-Limited RSS-Expand PDF417 Data Matrix AIM ID ]A1 ]A3 ]A4 ]A5 ]A7 ]F0 ]F2 ]F4 ]G0 ]H0 ]H1 ]H3 ]H8 ]H9 ]P0 ]M0 ]M1 ]M7 ]M8 ]M9 ]e0 ]L0 ]d0 ]d1 ]d2 ]d3 ]d4 ]d5 ]d6 Remark One check character, MOD 43; transmit check character One check character, MOD 43; do not transmit check character Full ASCII enabled; no check character verification Full ASCII enabled; MOD43; transmit check character Full ASCII enabled; MOD43; do not transmit check character Standard Codabar Transmit check character after verification Do not transmit check character after verification Not specified One check character, MOD11; transmit check character Two check characters, MOD11/MOD11; transmit check character Do not transmit check character after verification Two check characters, MOD11/MOD9; transmit check character No check character verification Not specified One check character, MOD10; transmit check character One check character, MOD10; do not transmit check character Two check characters, MOD10 /MOD11; do not transmit check character Two check characters, MOD10 /MOD11; transmit check character No check character verification Comply with 1994 PDF417 specifications ECC 000 - 140 ECC 200 ECC 200; FNC1 is the 1st or 5th character after the start character ECC 200; FNC1 is the 2nd or 6th character after the start character ECC 200, ECI protocol supported ECC 200; FNC1 is the 1st or 5th character after the start character; ECI supported ECC 200; FNC1 is the 2nd or 6th character after the start character; ECI supported 84 Symbology QR Code Chinese Sensible Code AIM ID ]Q0 ]Q1 ]Q2 ]Q3 ]Q4 ]Q5 ]Q6 ]h0 ]h1 Remark QR1 (comply with AIM ISS 97-001 specifications) QR2 (2005 symbol), ECI protocol not supported QR2 (2005 symbol), ECI protocol supported QR2 (2005 symbol), ECI protocol not supported; FNC1 is the character right after the start character QR2 (2005 symbol), ECI protocol supported; FNC1 is the character right after the start character QR2 (2005 symbol), ECI protocol not supported; FNC1 is the 2nd character right after the start character QR2 (2005 symbol), ECI protocol supported; FNC1 is the 2nd character right after the start character ECI protocol not supported ECI protocol supported Reference: ISO/IEC 15424:2008 Information technology Automatic identification and data capture techniques Data Carrier Identifiers (including Symbology Identifiers) 85 Code ID Table Symbology Code 128 FNC3 Code 128 UCC/EAN 128 EAN-8 EAN-13 UPC-E UPC-A Interleaved 2 of 5 ITF-14 ITF-6 Code 39 Codabar Standard 25 Code 93 AIM 128 MSI Plessey ISBN Industrial 25 Matrix 2 of 5 RSS-14 RSS Limited RSS Expand Code 11 Plessey ISSN PDF417 QR Data Matrix Chinese Sensible Code Original Code ID 1 2 3 4 5 6 7 8 9 10 13 15 16 17 21 22 23 24 25 26 27 28 29 30 31 32 33 35 39 Visible Code ID A(0x41) B(0x42) C(0x43) D(0x44) E(0x45) F(0x46) G(0x47) H(0x48) I(0x49) J(0x4A) M(0x4D) O(0x4F) P(0x50) Q(0x51) U(0x55) V(0x56) W(0x57) X(0x58) Y(0x59) Z(0x5A) [(0x5B) \(0x5C) ](0x5D) ^(0x5E) _(0x5F) `(0x60) a(0x61) c(0x63) g(0x67) 86 ASCII Table Hex 00 01 02 03 04 05 06 07 08 09 0a 0b 0c 0d 0e 0f 10 11 12 13 14 15 16 17 18 19 1a 1b 1c 1d Dec Char 0 NUL (Null char.) 1 SOH (Start of Header) 2 STX (Start of Text) 3 ETX (End of Text) 4 EOT (End of Transmission) 5 ENQ (Enquiry) 6 ACK (Acknowledgment) 7 BEL (Bell) 8 BS (Backspace) 9 HT (Horizontal Tab) 10 LF (Line Feed) 11 VT (Vertical Tab) 12 FF (Form Feed) 13 CR (Carriage Return) 14 SO (Shift Out) 15 SI (Shift In) 16 DLE (Data Link Escape) 17 DC1 (XON) (Device Control 1) 18 DC2 (Device Control 2) 19 DC3 (XOFF) (Device Control 3) 20 DC4 (Device Control 4) 21 NAK (Negative Acknowledgment) 22 SYN (Synchronous Idle) 23 ETB (End of Trans. Block) 24 CAN (Cancel) 25 EM (End of Medium) 26 SUB (Substitute) 27 ESC (Escape) 28 FS (File Separator) 29 GS (Group Separator) 87 Hex Dec Char 1e 30 RS (Request to Send) 1f 31 US (Unit Separator) 20 32 SP (Space) 21 33 ! (Exclamation Mark) 22 34 " (Double Quote) 23 35 # (Number Sign) 24 36 $ (Dollar Sign) 25 37 % (Percent) 26 38 & (Ampersand) 27 39 ` (Single Quote) 28 40 ( (Left/ Opening Parenthesis) 29 41 ) (Right/ Closing Parenthesis) 2a 42 * (Asterisk) 2b 43 + (Plus) 2c 44 , (Comma) 2d 45 - (Minus/ Dash) 2e 46 . (Dot) 2f 47 / (Forward Slash) 30 48 0 31 49 1 32 50 2 33 51 3 34 52 4 35 53 5 36 54 6 37 55 7 38 56 8 39 57 9 3a 58 : (Colon) 3b 59 ; (Semi-colon) 3c 60 < (Less Than) 3d 61 = (Equal Sign) 88 Hex Dec Char 3e 62 > (Greater Than) 3f 63 ? (Question Mark) 40 64 @ (AT Symbol) 41 65 A 42 66 B 43 67 C 44 68 D 45 69 E 46 70 F 47 71 G 48 72 H 49 73 I 4a 74 J 4b 75 K 4c 76 L 4d 77 M 4e 78 N 4f 79 O 50 80 P 51 81 Q 52 82 R 53 83 S 54 84 T 55 85 U 56 86 V 57 87 W 58 88 X 59 89 Y 5a 90 Z 5b 91 [ (Left/ Opening Bracket) 5c 92 \ (Back Slash) 5d 93 ] (Right/ Closing Bracket) 89 Newland Auto-ID Tech. Co., Ltd. (Headquarters) 3F, Building A, No.1, Rujiang West Rd., Mawei, Fuzhou, Fujian, China 350015 Tel: +86 - (0) 591-83978605 Fax: +86 - (0) 591-83979216 E-mail: contact@nlscan.com Web: www.newlandaidc.com Newland Europe BV Rolweg 25, 4104 AV Culemborg, The Netherlands Tel: +31 (0) 345 87 00 33 Fax: +31 (0) 345 87 00 39 Email: info@newland-id.com Web: www.newland-id.com Tech Support: tech-support@newland-id.com Newland North America Inc. 46559 Fremont Blvd., Fremont, CA 94538, USA Tel: 510 490 3888 Fax: 510 490 3887 Email: info@newlandna.com Web: www.newlandamerica.com Newland Latin America Tel: +1 (239) 598 0068 Fax: +1 (239) 280 1238 Email: info@newlandla.com Web: www.newlandamerica.com Newland Taiwan Inc. 7F-6, No. 268, Liancheng Rd., Jhonghe Dist. 235, New Taipei City, Taiwan Tel: +886 2 7731 5388 Fax: +886 2 7731 5389 Email: info@newland-id.com.tw Web: www.newland-id.com.tw Newland Korea Biz. Center Best-one, Jang-eun Medical Plaza 6F, Bojeong-dong 1261-4, Kihung-gu, Yongin-City, Kyunggi-do, South Korea Tel: +82 10 8990 4838 Fax: +82 70 4369 0009 Email: th.sung@newland-id.com.tw Web: www.newlandaidc.com/kor/