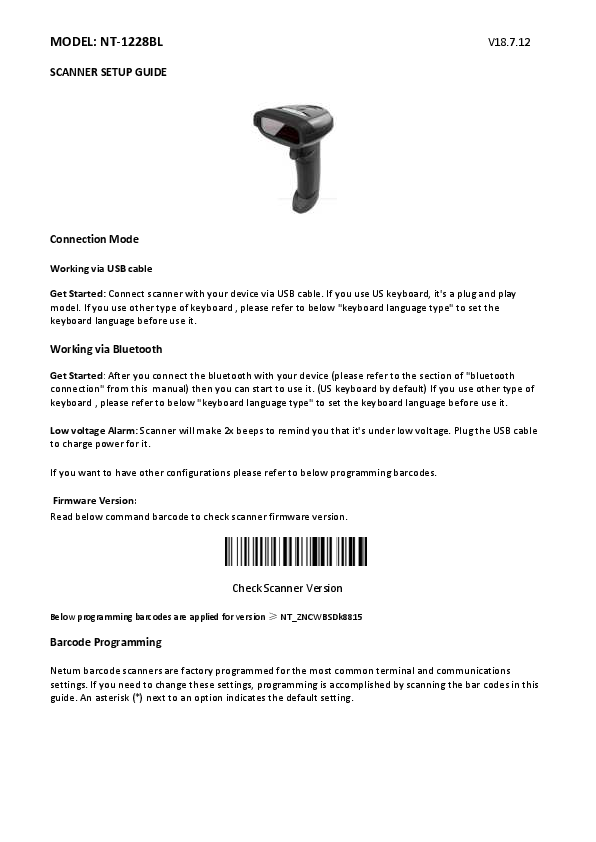
Connection Mode
Working via USB Cable
Get Started: Connect the scanner with your device via USB cable. If a US keyboard is used, it operates as a plug-and-play device. For other keyboard types, refer to the "Keyboard Language Type" section to set the correct keyboard language before use.
Working via Bluetooth
Get Started: After connecting the Bluetooth with your device (refer to the "Bluetooth Connection" section of this manual), the scanner is ready for use. It defaults to a US keyboard. If another keyboard type is used, refer to the "Keyboard Language Type" section to set the keyboard language before use.
Low Voltage Alarm: The scanner will emit two beeps to indicate low voltage. Plug in the USB cable to charge the device.
For other configurations, refer to the programming barcodes below.
Firmware Version
Scan the following command barcode to check the scanner's firmware version:
Barcode: 2050200
Description: Check Scanner Version
Programming barcodes below are applicable for versions ≥ NT_ZNCWBSDk8815.
Barcode Programming
Netum barcode scanners are factory programmed for common terminal and communications settings. To change these settings, programming is accomplished by scanning the barcodes in this guide. An asterisk (*) next to an option indicates the default setting.
Bluetooth Connection
1. Pairing with Windows XP or Windows 7/8/10
- Power on the scanner; the blue indicator will flash for a few seconds.
- Enter 'Control Panel' > 'Devices and Printers' > 'Add a device'. Select 'Bluetooth' to add the device to your computer.
- Click 'Next'. The scanner will beep to indicate successful pairing, and the light will turn solid blue.
2. Android: Connect Android Device in Basic Mode
- Power on the scanner. Ensure the scanner is discoverable (unpaired); the blue indicator will flash for a few seconds.
- Touch Home | Menu | Settings | Wireless & Networks | Bluetooth settings.
- Ensure the device has Bluetooth "On". Scan for devices.
- In the list of found devices, select "Netum Bluetooth". Tap Pair.
- The scanner will connect to the Android device.
- The scanner will beep once after connecting and is ready to scan barcodes.
Illustration: Two screenshots of an Android Bluetooth settings screen. The left shows Bluetooth turned off and a list of available devices including "NETUM Bluetooth". The right shows Bluetooth turned on, "NETUM Bluetooth" connected, and a list of paired and available devices.
3. Pairing with your iOS Device
- Power on the scanner. Ensure the scanner is discoverable (unpaired); the blue indicator will flash for a few seconds.
- Click on "Bluetooth" in the left column. Your iOS device will automatically search for any Bluetooth Devices in the area.
- Once "Netum Bluetooth" appears on the screen, tap it to automatically connect. The scanner's LED light will turn solid blue.
Illustration: Two screenshots of an iOS Bluetooth settings screen. The left shows Bluetooth turned off and a list of "MY DEVICES" and "OTHER DEVICES". The right shows Bluetooth turned on, "NETUM bluetooth" connected, and a list of other devices.
Operation Mode
A) BT HID Mode (Default)*
No software installation is needed. This mode connects to most devices via Bluetooth or USB interface. The scanner interacts with the device like a keyboard, working with applications such as Safari, Notes, and any other application that supports an active cursor.
Barcode: BT HID Mode
Note: This command barcode is only applicable for Bluetooth Wireless Mode.
Keyboard Language
To ensure the scanner uploads codes correctly, set the keyboard language before use. For example, if you use a French Keyboard, scan the "French Keyboard" barcode. The scanner will then upload barcodes according to the French keyboard layout. American Keyboard is set by default; if you use a US keyboard, you can skip this part.
Barcode: American Keyboard *
Barcode: Portugal Keyboard
Barcode: French Keyboard
Barcode: Spanish Keyboard
Barcode: Germany Keyboard
Barcode: Turkey Q Keyboard
Barcode: Italy Keyboard
Barcode: Turkey F Keyboard
B) Application Mode (SPP)
For Android or Windows only. Software installation is required. This mode is recommended if you have an application that supports mobile scanners.
Barcode: BT SPP Mode
Note: This command is only applicable for Bluetooth Wireless Mode.
Scan Mode
Trigger Mode (Default)
Scanning this barcode enables the scanner to enter manual trigger mode.
Barcode: 2050200
Continuous Mode
This mode enables the engine to scan/capture, decode, and transmit repeatedly.
Barcode: 2050204
Auto Sense Mode
Scanning this barcode enables the scanner to enter auto sense mode.
Barcode: 2050209
Working Mode
If you are moving to a working area outside the signal range, you can activate the offline mode. In this enhanced offline mode, all scanned data is stored directly into the device's buffer memory. Data entries are permanently saved in the buffer memory prior to manual upload to the working station, allowing multiple uploads as desired.
- By scanning the following barcode, offline mode will be activated:
Barcode: Offline Mode
- By scanning the following barcode, all data in the buffer memory will be deleted:
Barcode: Clear Memory
- By scanning the following barcode, all data entries in the buffer memory can be manually uploaded after reconnecting to the working station (only in offline mode):
Barcode: Uploading the Data
- By scanning the following barcode, the total quantity of uploaded data entries will be summarized (only in offline mode):
Barcode: Summarising of uploaded data entry quantity
- By scanning the following barcode, the device leaves offline mode, and instant uploading mode will be activated (By default):
Barcode: Instant uploading mode
Notes: Command barcodes from the Working mode section are only applicable for Bluetooth wireless mode.
Terminator
The scanner provides a shortcut for setting the terminating character suffix to CR or CRLF and enabling it by scanning the appropriate barcode below.
Barcode: 3030050
Setting: None
Barcode: 3030051
Setting: CR&LF *
Barcode: 3030052
Setting: CR
Barcode: 3030053
Setting: TAB
Idle Time
The scanner will stay awake for the set idle time and then enter sleep mode if unused during that period.
Barcode: 30 s
Barcode: 6 Mins
Barcode: 12 Mins
Barcode: 30 Mins
Barcode: 1Hour
Barcode: 2Hours
IOS Keyboard POP UP/HIDE
During scanning, the iOS keyboard can be hidden or popped up by scanning the command barcode below.
Barcode: IOS Keyboard POP UP/HIDE
Beeper
Enable or disable the scanner's beep to indicate a successful scan.
Barcode: BEEP ON
Barcode: BEEP OFF
Restore factory default
Scan the following barcodes one by one to restore the scanner to factory defaults (four steps included).
- Factory Restore:
Barcode: 303FFF0
- Serial Port:
Barcode: 3030010
- Baud Rate 19200:
Barcode: 2090107
- Enter+LF:
Barcode: 3030051
Transmit Code ID Character
A code ID character identifies the code type of a scanned barcode. This is useful when decoding more than one code type. The code ID character is inserted between the prefix character (if selected) and the decoded symbol.
Symbol Code ID Identifiers
| Code | Description | Code | Description |
|---|
| A | UPC-A, UPC-E, EAN-8, EAN-13 | J | MSI, MSI/Plessey |
| B | Code 39, Code 32 | K | GS1-DataBar, /UCC/EAN-128 |
| C | Codabar | L | Bookland EAN, Bookland EAN/ISBN |
| D | Code 128, ISBT 128 | M | Trioptic Code 39 |
| E | Code 93 | N | Coupon Code |
| F | Interleaved 2 of 5 | R | GS1 DataBar-14, GS1 DataBar Limited, GS1 DataBar Expanded, RSS |
| G | Discrete 2 of 5 | S | SETUP128 |
| H | CODE11 | | |
| r | PDF417 | x | Maxi Code |
| u | DataMatrix(DM) | V | Veri Code |
| q | QR | C | HanXin |
| a | Aztec Code | | |
AIM Code Identifiers
Each AIM Code Identifier contains the three-character string ]cm where:
- ] = Flag Character
- c = Code Character (see Table 4-4)
- m = Modifier Character
Table 4-4
| Code | Description | Code | Description |
|---|
| A | Code 39, Code 39 Full ASCII, Code 32 | S | Discrete 2 of 5, IATA 2 of 5 |
| C | Code 128, ISBT 128, GS1-128, Coupon (Code 128 portion), Setup128 | X | Code 39 Trioptic, Bookland EAN, Han Xin |
| E | UPC/EAN, Coupon (UPC portion) | e | GS1 DataBar |
| F | Codabar | L | PDF417 |
| G | Code 93 | d | Data Matrix(DM) |
| H | Code 11 | Q | QR |
| I | Interleaved 2 of 5 | Z | Aztec Code |
Read 1D Normal barcode/ Reversal barcode
UPC/EAN
Enable/Disable UPC-A
To enable or disable UPC-A, scan the appropriate barcode below.
Enable/Disable UPC-E
To enable or disable UPC-E, scan the appropriate barcode below.
Enable/Disable EAN-8
To enable or disable EAN-8, scan the appropriate barcode below.
Enable/Disable EAN-13
To enable or disable EAN-13, scan the appropriate barcode below.
Enable/Disable Bookland EAN(ISBN)
To enable or disable EAN Bookland, scan the appropriate barcode below.
Decode UPC/EAN Supplementals UPC/EAN
Supplementals are barcodes appended according to specific format conventions (e.g., UPC A+2, UPC E+2, EAN 13+2, EAN 13+5). The following options are available:
Barcode: 2010E00
Setting: *Ignore UPC/EAN with Supplementals
Barcode: 2010E01
Setting: Decode UPC/EAN with Supplementals
Barcode: 2010E02
Setting: Auto discriminate UPC/EAN Supplementals
Transmit UPC-A Check Digit
Scan the appropriate barcode below to transmit the symbol with or without the UPC-A check digit.
Transmit UPC-E Check Digit
Scan the appropriate barcode below to transmit the symbol with or without the UPC-E check digit.
Convert UPC-E to UPC-A
Enable this parameter to convert UPC-E (zero suppressed) decoded data to UPC-A format before transmission. After conversion, data follows UPC-A format and is affected by UPC-A programming selections.
EAN-8 Zero Extend
When enabled, this parameter adds five leading zeros to decoded EAN-8 symbols to make them compatible in format to EAN-13 symbols.
Code 128
Enable/Disable Code 128
To enable or disable Code 128, scan the appropriate barcode below.
Enable/Disable GS1-128
To enable or disable GS1-128, scan the appropriate barcode below.
Enable/Disable ISBT 128
To enable or disable ISBT 128, scan the appropriate barcode below.
Code39
Enable/Disable Code 39
To enable or disable Code 39, scan the appropriate barcode below.
Code 39 Check Digit Verification
When this feature is enabled, the scan engine checks the integrity of all Code 39 symbols to verify that the data complies with the specified check digit algorithm. Only those Code 39 symbols which include a modulo 43 check digit are decoded. Only enable this feature if your Code 39 symbols contain a module 43 check digit.
Transmit Code 39 Check Digit
Scan this symbol to transmit the check digit with the data.
Scan this symbol to transmit data without the check digit.
Enable/Disable Code 39 Full ASCII
Code 39 Full ASCII is a variant of Code 39 which pairs characters to encode the full ASCII character set.
NOTE: Trioptic Code 39 and Code 39 Full ASCII cannot be enabled simultaneously. If you get an error beep when enabling Code 39 Full ASCII, disable Trioptic Code 39 and try again.
Code 93
To enable or disable Code 93, scan the appropriate barcode below.
Set Lengths for Code 93
The length of a code refers to the number of characters (i.e., human readable characters), including check digit(s) the code contains. Lengths for Code 93 may be set for any length, one or two discrete lengths, or lengths within a specific range.
Any Length: Scan this option to decode Code 93 symbols containing any number of characters.
Barcode: F0010A0B023700011
Setting: Code 93 - Any Length
Code 11
Enable/Disable Code 11
To enable or disable Code 11, scan the appropriate barcode below.
Set Lengths for Code 11
The length of a code refers to the number of characters (i.e., human readable characters), including check digit(s) the code contains. Set lengths for Code 11 to any length, one or two discrete lengths, or lengths within a specific range.
Any Length: Scan this option to decode Code 11 symbols containing any number of characters within the scan engine capability.
Barcode: F0010C0D013700012
Setting: Code 11 - Any Length
Code 11 Check Digit Verification
This feature allows the scan engine to check the integrity of all Code 11 symbols to verify that the data complies with the specified check digit algorithm. This selects the check digit mechanism for the decoded Code 11 barcode. The options are to check for one check digit, check for two check digits, or disable the feature.
Barcode: 2051200
Setting: *Disable
Barcode: 2051201
Setting: One Check
Barcode: 2051202
Setting: Two Check Digit
Transmit Code 11 Check Digits
Interleaved 2 of 5/ITF
Enable/Disable Interleaved 2 of 5
To enable or disable Interleaved 2 of 5, scan the appropriate barcode below.
Set Lengths for Interleaved 2 of 5
Any Length: Scan this option to decode I 2 of 5 symbols containing any number of characters.
Barcode: 001080902440000
Setting: I 2 of 5 - Any Length
Convert I 2 of 5 to EAN-13
This parameter converts a 14-character I 2 of 5 code into EAN-13 and transmits it to the host as EAN-13. To accomplish this, I 2 of 5 must be enabled, one length must be set to 14, and the code must have a leading zero and a valid EAN-13 check digit.
Discrete 2 of 5/Industrial 2 of 5/IND25
Enable/Disable Discrete 2 of 5
To enable or disable Discrete 2 of 5, scan the appropriate barcode below.
Matrix 25
Enable/Disable Matrix 25
To enable or disable Matrix 25, scan the appropriate barcode below.
Standard 25/IATA 25
Enable/Disable Standard 25
To enable or disable Standard 25, scan the appropriate barcode below.
Standard 25 Check Digit Verification
Transmit Check Character
Codabar
Enable/Disable Codabar
To enable or disable Codabar, scan the appropriate barcode below.
MSI/MSI PLESSEY
Enable/Disable MSI
To enable or disable MSI, scan the appropriate barcode below.
Enable/Disable GS1 DataBar-14
To enable or disable GS1 DataBar-14, scan the appropriate barcode below.
Enable/Disable GS1 DataBar Limited
To enable or disable GS1 DataBar Limited, scan the appropriate barcode below.
Enable/Disable GS1 DataBar Expanded
To enable or disable GS1 DataBar Expanded, scan the appropriate barcode below.
PDF417
Scan normal or mirror image picture.
Enable/Disable PDF417
To enable or disable PDF417, scan the appropriate barcode below.
Read Normal Phase/ Phase Reversal
Barcode: 3030610
Setting: *Read Normal Phase
Barcode: 3030611
Setting: Read Phase Reversal
Barcode: 3030612
Setting: Read Normal Phase/ Phase Reversal
QR
Read normal phase/ phase reversal/ mirror image picture.
Enable/Disable QR
To enable or disable QR, scan the appropriate barcode below.
Data Matrix(DM)
Scan normal or mirror image picture.
Enable/Disable Data Matrix(DM)
To enable or disable Data Matrix(DM), scan the appropriate barcode below.
Read Normal Phase/ Phase Reversal
Barcode: 30306B0
Setting: *Read Normal Phase
Barcode: 30306B1
Setting: Read Phase Reversal
Barcode: 30306B2
Setting: Read Normal Phase/ Phase Reversal
Maxi Code
Enable/Disable Maxi Code
To enable or disable Maxi Code, scan the appropriate barcode below.
Aztec Code
Enable/Disable Aztec Code
To enable or disable Aztec Code, scan the appropriate barcode below.
Han Xin Code
Enable/Disable Han Xin Code
To enable or disable Han Xin Code, scan the appropriate barcode below.
Read Normal Phase/ Phase Reversal
Barcode: 3030710
Setting: *Read Normal Phase
Barcode: 3030711
Setting: Read Phase Reversal
Barcode: 3030712
Setting: Read Normal Phase/ Phase Reversal
Hide Prefix or suffix digits
The start/middle/end of barcode characters can be hidden. After scanning the hide set barcode, scan a double-digit hexadecimal number (00~FF, e.g., hide length 4, scan 0, 4) for the character length to hide.
Barcode: $SCAN#5
Setting: Hide Barcode Start Chars
Barcode: $SCAN#6
Setting: Hide Barcode Middle Char Start
Barcode: $SCAN#7
Setting: Hide Barcode Middle Chars
Barcode: $SCAN#8
Setting: Hide Barcode End Chars
To change the Scan Data Transmission Format, scan one of the eight barcodes corresponding to the desired format.
Barcode: $DATA#5
Setting: Enable Hide Barcode Start Char
Barcode: $DATA#4
Setting: Enable Hide Barcode Middle Char
Barcode: $DATA#3
Setting: Enable Hide Barcode End Char
To Hide chars of barcode Start/Middle/End: Procedures
- Scan the Hide Barcode Start / Middle Start / Middle length / End Chars symbol.
- Determine the hex value for the length to hide (e.g., hide 4 chars, scan 0,4; hide 12 chars, scan 0,C).
- Scan the 2-digit hex value from the Numeric Bar Codes.
- Scan the output format to enable or cancel the hide char function.
Custom prefix and suffix
A maximum of 20 prefixes and 20 suffixes can be added to scan data for data editing. To set these values, scan a double-digit hexadecimal number (i.e., two barcodes) that corresponds to ASCII values. Refer to Table 1 and Numeric Bar Codes in the appendix.
To Add a Prefix or Suffix:
- Scan the command barcode of "Add Prefix" or "Add Suffix".
- Check the prefix or suffix hex value from the ASCII Chart.
- Scan the 2-digit hex value from the Numeric Bar Codes.
- Repeat Steps 2 and 3 for all prefixes or suffixes to add.
- Scan the output format to enable or disable prefix/suffix output.
Barcode: $SCAN#2
Setting: Add Prefix
Barcode: $SCAN#1
Setting: Add Suffix
Barcode: $SCAN#4
Setting: Clear All Prefix
Barcode: $SCAN#3
Setting: Clear All Suffix
Numeric Bar Codes
Barcode: $NO#0
Barcode: $NO#1
Barcode: $NO#2
Barcode: $NO#3
Barcode: $NO#4
Barcode: $NO#5
Barcode: $NO#6
Barcode: $NO#7
Barcode: $NO#8
Barcode: $NO#9
Barcode: $NO#A
Barcode: $NO#B
Barcode: $NO#C
Barcode: $NO#D
Barcode: $NO#E
Barcode: $NO#F
To change the Scan Data Transmission Format, scan one of the eight barcodes corresponding to the desired format.
Barcode: $DATA#0
Setting: *Default output format
Barcode: $DATA#1
Setting: Enable Suffix output
Barcode: $DATA#2
Setting: Enable Prefix output
Example on how to add normal prefix or suffix on barcode "123456789"
Barcode: 123456789
Add "A" and "B" as prefixes and "!" as suffix
- Scan command barcode of "Add Prefix":
Barcode: $SCAN#2
- Check the prefix hex value from the ASCII Chart: A- "4","1"; B-"4" "2";
- Scan the 2-digit hex value from the Numeric Bar Codes:
Barcode: $NO#4
Barcode: $NO#1
Barcode: $NO#4
Barcode: $NO#2
- Scan the output format to enable prefix output:
Barcode: $DATA#2
Setting: Enable Prefix output
- Scan command barcode of "Add Suffix" to add "!" as suffix:
Barcode: $SCAN#1
- Check the suffix hex value from the ASCII Chart: !- "2" "1"
- Scan the 2-digit hex value from the Numeric Bar Codes:
Barcode: $NO#2
Barcode: $NO#1
- Scan the output format to enable suffix output:
Barcode: $DATA#1
Setting: Enable Suffix output
- Scan the barcode then you will get AB123456789!
Example on how to add Combination Key suffix for barcode "123456789"
Barcode: 123456789
Add "Ctrl+P" on "123456789" as suffix
- Scan command barcode of "Add Suffix" to add "Ctrl+P" as suffix:
Barcode: $SCAN#1
- Check the suffix hex value from the ASCII Chart. Ctrl+P - "9" "7" "5" "0"
- Scan the 4 digits hex value from the Numeric Bar Codes:
Barcode: $NO#9
Barcode: $NO#7
Barcode: $NO#5
Barcode: $NO#0
- Scan the output format to enable suffix output:
Barcode: $DATA#1
Setting: Enable Suffix output
- Scan "Keyboard Ctrl Combination Key"
- Scan the barcode 123456789. (test it on Excel)
ASCII Character Equivalents
Table 1. ASCII Character Equivalents
| HEX | ASCII | HEX | ASCII | HEX | ASCII | HEX | ASCII |
|---|
| 20H | Space | 30H | 0 | 40H | @ | 50H | P |
| 21H | ! | 31H | 1 | 41H | A | 51H | Q |
| 22H | " | 32H | 2 | 42H | B | 52H | R |
| 23H | # | 33H | 3 | 43H | C | 53H | S |
| 24H | $ | 34H | 4 | 44H | D | 54H | T |
| 25H | % | 35H | 5 | 45H | E | 55H | U |
| 26H | & | 36H | 6 | 46H | F | 56H | V |
| 27H | ' | 37H | 7 | 47H | G | 57H | W |
| 28H | ( | 38H | 8 | 48H | H | 58H | X |
| 29H | ) | 39H | 9 | 49H | I | 59H | Y |
| 2AH | * | 3AH | : | 4AH | J | 5AH | Z |
| 2BH | + | 3BH | ; | 4BH | K | 5BH | [ |
| 2CH | , | 3CH | < | 4CH | L | 5CH | \ |
| 2DH | - | 3DH | = | 4DH | M | 5DH | ] |
| 2EH | . | 3EH | > | 4EH | N | 5EH | ^ |
| 2FH | / | 3FH | ? | 4FH | O | 5FH | _ |
| 60H | ` | 70H | p | 80H | F1 | 90H | End |
| 61H | a | 71H | q | 81H | F2 | 91H | Page Down |
| 62H | b | 72H | r | 82H | F3 | 92H | Right Arrow |
| 63H | c | 73H | s | 83H | F4 | 93H | Left Arrow |
| 64H | d | 74H | t | 84H | F5 | 94H | Down Arrow |
| 65H | e | 75H | u | 85H | F6 | 95H | Up Arrow |
| 66H | f | 76H | v | 86H | F7 | 96H | Print Screen |
| 67H | g | 77H | w | 87H | F8 | 97H | *Ctrl |
| 68H | h | 78H | x | 88H | F9 | 98H | *Shift |
| 69H | i | 79H | y | 89H | F10 | 99H | *Left Alt |
| 6AH | j | 7AH | z | 8AH | F11 | 9AH | *Right Alt |
| 6BH | k | 7BH | { | 8BH | F12 | 08H | BS |
| 6CH | l | 7CH | | | 8CH | Insert | 09H | HT |
| 6DH | m | 7DH | } | 8DH | Home | 0AH | LF |
| 6EH | n | 7EH | ~ | 8EH | Page Up | 0DH | CR |
| 6FH | o | 7FH | DEL | 8FH | Delete | 1BH | ESC |