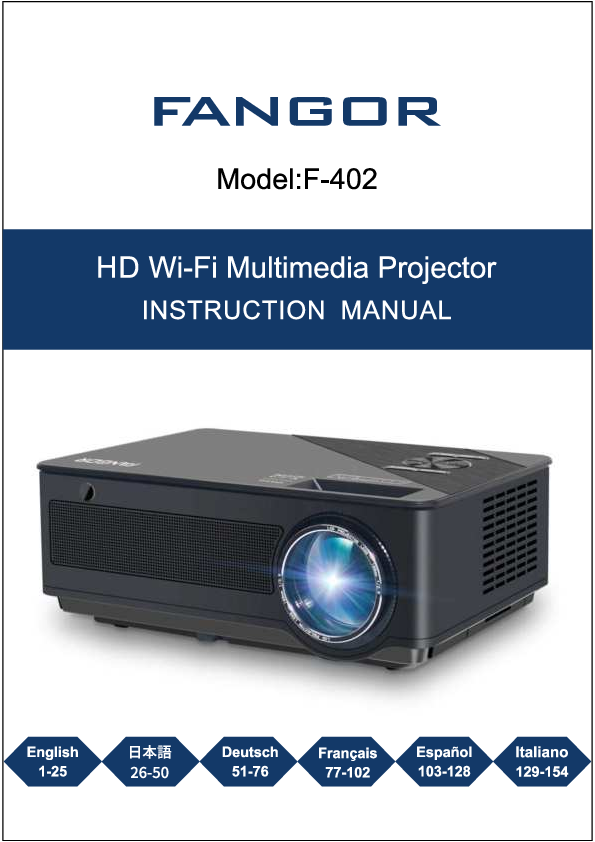
FANGOR F-402 HD Wi-Fi Multimedia Projector
Model: F-402
INSTRUCTION MANUAL
Table of Contents
Important Safety Instructions
Additional Warnings and Precautions
FCC Warning
Package Listing
Remove & Close the Lens Cover
Placing Your Projector
To Reduce Image Distortion
Distance Between the Projector and Screen
Placing Your Projector On Ceiling
Adjust the Vertical Location
Adjust the Focus and Keystone
Controls of Remote
Install & Remove Battery Of Remote
Functional Overview
Controls of Projector
Install Power Adapter
Set up the Roku® Streaming Stick® (Not included)
Connect HDMI
Using the HDMI Interface
Connect AV
Connect VGA
Connect Audio Output (Aux Out / Line Out / Earphones)
Using USB & Micro SD Card Playback
Settings of playing video on Media / HDMI / VGA / AV
Setting of playing Picture on Media / HDMI / VGA / AV
Using Bluetooth playback
WIFI Connection and IOS Cast
Miracast
Specifications
Troubleshooting
Warranty
Important Safety Instructions
- Read these Instructions.
- Keep these Instructions.
- Heed all Warnings.
- Follow all instructions.
- Do not use this apparatus near water.
- Clean only with a dry cloth.
- Do not block any ventilation openings. Install in accordance with the manufacturer's instructions.
- Do not install near any heat sources such as radiators, heat registers, stoves, or other apparatus (including amplifier) that product heat.
- Protect the power cord from being walked on or pinched particularly at plugs, convenience receptacles, and the point where they exit from the apparatus.
- Only use attachments/accessories specified by the manufacturer.
- Unplug this apparatus during lightning storms or when unused for long periods of time.
- Refer all servicing to qualified service personnel. Servicing is required when the apparatus has been damaged in any way, such as power-supply cord or plug is damaged, liquid has been spilled or objects have fallen into the apparatus, the apparatus has been exposed to rain or moisture, does not operate normally, or has been dropped.
- Use only with a cart, stand, tripod, bracket, or table specified by the manufacturer or sold with the apparatus. When a cart is used, use caution when moving the cart/ apparatus combination to avoid injury from tip-over.
Additional Warnings and Precautions
- Do not look directly into the projector light.
- Don't touch the projector lens.
- Mains adapter is used as disconnect device and it should remain readily operable during intended use. In order to disconnect the apparatus from the mains completely, the mains plug should be disconnected from the mains socket outlet completely.
- CAUTION: Use of controls or adjustments or performance of procedures other than those specified may result in hazardous radiation exposure.
- WARNING: Changes or modified to this unit not expressly approved by the party responsible for compliance could void the user's authority to operate the equipment.
- WARNING: Use of this unit near fluorescent lighting may cause interference regarding use of the remote. If the unit is displaying erratic behavior move away from any fluorescent lighting, as it may be the cause.
- WARNING: Shock hazard - Do Not Open.
- Caution and marking information is located at the rear or bottom of the apparatus.
- WARNING: To reduce the risk of fire or electric shock, do not expose this apparatus to rain, moisture, dripping, or splashing.
- Objects fill with liquids, such as vases, shall not be placed on the apparatus.
FCC Warning
This device complies with Part 15 of the FCC rules. Operation is subject to the following two conditions:
- This device may not cause harmful interference.
- This device must accept any interference received, including interference that may cause undesired operation.
NOTE: This equipment has been tested and found to comply with the limits for a Class B digital device, pursuant to Part 15 of the FCC Rules. These limits are designed to provide reasonable protection against harmful interference in a residential installation. This equipment generates, uses, and can radiate radio frequency energy and, if not installed and used in accordance with the instructions, may cause harmful interference to radio communications. However, there is no guarantee that interference will not occur in a particular installation.
If this equipment does cause harmful interference to radio or television reception, which can be determined by turning the equipment off and on, the user is encouraged to try to correct the interference by one or more of the following measures:
- Reorient or relocate the receiving antenna.
- Increase the separation between the equipment and receiver.
- Connect the equipment into an outlet on a circuit different from that to which the receiver is connected.
- Consult the dealer or an experienced radio/TV technician for help.
Warning: Changes or modifications to this unit not expressly approved by the party responsible for compliance could void the user's authority to operate the equipment.
Radiation Exposure Statement: This equipment complies with FCC radiation exposure limits set forth for an uncontrolled environment. This equipment should be installed and operated with minimum distance 20cm between the radiator and your body.
Package Listing
The package includes the following items:
- Projector
- Lens Cover
- Remote Control
- VGA Cable
- HDMI Cable
- AV Cable
- 3-in-1 Power Adapter
- User Manual
Remove & Close The Lens Cover
To remove the lens cover, slide it upwards. To close the lens cover, slide it downwards.
Placing Your Projector
Your projector can be installed in four different configurations:
- Front Table: Projector placed near the floor in front of the screen. This is the most common way for quick setup and portability.
- Front Ceiling: Projector suspended upside-down from the ceiling in front of the screen. A projector mount is required.
- Rear Table: Projector placed near the floor behind the screen. A special rear projection screen is required.
- Rear Ceiling: Projector suspended upside-down from the ceiling behind the screen. A projector mount and a special rear projection screen are required.
To Reduce Image Distortion
It is recommended to move the projector as close to the center of the screen as possible to achieve a square or rectangular image.
Distance Between The Projector and Screen
Measure the distance between the projector and where you want to position the screen. This is the projection distance. The manual provides a diagram with suggested distances for different screen sizes (e.g., 60", 50", 45", 37").
Placing Your Projector On Ceiling
When installing the projector in the ceiling, purchase a projector mount recommended by an installation professional and follow the mount's instructions. Ensure the ceiling structure can support the weight of the projector and mount. If in doubt, consult an installation professional. Projector mount and screws are not included.
Adjust the Vertical Location
Follow the provided diagrams to adjust the vertical location of the projected image. An adjustment knob (ANGLE ADJ.knob) is available to fine-tune the display angle.
Adjust the Focus and Keystone
Focus: Adjust the focus by turning the knob while observing the image pixels near the center of the screen. Optimal focus is achieved when pixels are clearly visible. Note that focus near the screen edges may be less sharp than the center.
Keystone: Keystone image is created when the projector beam is projected at an angle. Keystone correction will restore the distorted image to a rectangular or square shape using the TRAPEZOIDAL ADJ.KNOB.
Controls of Remote
The remote control has the following buttons:
- Power: Press to power ON. Press and hold to power OFF.
- Previous/Next: Press to skip between chapters or tracks.
- STOP: Press to stop playback.
- FLIP: Press to flip display image 180°.
- Play/Pause: Press to play or pause an individual chapter or track.
- Arrows/OK: Press to navigate and confirm selections in Settings and other menus.
- GoTo: Press to access projector Settings.
- Number Keypad: Press to enter specific chapter or track numbers. Use the play button to begin playing.
- MUTE: Press to mute volume.
- BACK/FWD: Press to reverse or fast forward during playing video/music.
- VOL+/VOL-: Press to adjust audio level.
- SOURCE: Press to select media source (AV, PC, HDMI, MEDIA).
- EXIT: Press to exit menus.
- ZOOM: Press to adjust the aspect ratio during playing video (Auto/16:9/4:3).
Install & Remove Battery Of Remote
To install or remove batteries, slide open the battery compartment cover on the back of the remote. Fit the correct batteries (2xAAA, not included), observing polarity markings. Replace the cover.
NOTE:
- Do not expose batteries to excessive heat.
- Ensure batteries are installed with correct polarity.
- Use only the same or equivalent type of batteries.
- Do not dispose of batteries in fire. Do not attempt to recharge batteries.
- Do not mix old and new batteries.
- Do not mix alkaline, standard (carbon-zinc), or rechargeable (Ni-Cd, Ni-MH, etc.) batteries.
Functional Overview
The projector has the following ports and controls:
- 1. LENS
- 2. FOCUS ADJ. Knob
- 3. TRAPEZOIDAL ADJ. Knob
- 4. MENU Button
- 5. RETURN Button
- 6. NAVIGATION (Arrows/OK)
- 7. POWER Indicator
- 8. POWER Button
- 9. SOURCE Button
- 10. USB Port
- 11. HDMI Port 1
- 12. HDMI Port 2
- 13. EAR PHONE Jack
- 14. AV IN Jack
- 15. Micro SD Card
- 16. VGA Port
- 17. IR Window (Front Side)
- 18. ANGEL ADJ. Knob
- 19. DC IN jack
- 20. IR Window (Rear Side)
- 21. USB Port 2 (Only for charging Roku® Streaming Stick®)
- 22. HDMI Port 3 (Roku® Streaming Stick® Input)
Controls of Projector
Return: Press to return to a previous page or setting in the on-screen menus.
Power: Press to power on the projector. Press twice to power off the unit.
Menu: Press to access on-screen menus and options.
Arrows/OK: Press to navigate on-screen menus and make selections.
Source: Press to change media source mode.
Install Power Adapter
Connect the small end of the adapter FIRST. Plug the adapter body into a mains socket.
Set up the Roku® Streaming Stick® (Not included)
Make your new Full HD Projector smart! Stream thousands of channels including movies, shows, live TV, news, sports, and more.
NOTE: The Roku® Streaming Stick® may be pre-installed in select models.
STEP 1: Install the Roku® Streaming Stick®
Plug your streaming player into HDMI port 3 on your projector.
STEP 2: Connect to power
For the best streaming experience, use the included USB power cable to connect the streaming player to the USB port on your projector. Power on the projector and select the HDMI port 3 input.
STEP 3: Pair your Roku® remote
On the back of the remote, slide open the battery cover. Insert batteries with the negative (-) ends first. The remote should pair with your streaming player automatically. For help pairing, visit go.roku.com/remotehelp.
NOTE: To operate your Roku® Streaming Stick®, you must use the included Roku® remote.
Connect HDMI
Follow the diagram to connect an HDMI cable and device.
- Turn off the unit before connecting the HDMI cable.
- After connecting, press the power button to turn on the unit. The power indicator will light green.
- In the home menu, use the direction buttons to select the corresponding HDMI signal interface. The video from the HDMI device will be displayed on the projector screen.
HDMI HD signal input: This interface can accept HD player HDMI output.
Video Player Audio: In rare cases, if the projector has no sound when playing a DVD movie via HDMI, check the player's digital audio settings and ensure it is set to "Auto" or "PCM" mode.
Using the HDMI Interface
The projector can be connected to DVD players, game boxes, HDMI players, etc., via HDMI.
Connecting to PC:
- Connect the projector and PC with an HDMI cable.
- Select the HDMI source on the home page.
Tips: Adjust the PC display resolution to approximately “1920×1080”.
The display settings on the PC should be configured as follows:
- Display: 1.MStar Demo
- Resolution: 1920 x 1080
- Orientation: Landscape
- Multiple displays: Duplicate these displays
Click “Apply” to save the settings.
Connect AV
Follow the diagram to connect an AV cable and device.
- Turn off the unit before connecting the AV cable.
- Use the AV cable to connect as shown in the figure. The video cable is YELLOW, Audio Left Channel is WHITE, and Audio Right Channel is RED.
- After connecting and turning on both units, your projector will output sound from the external device.
- After use, turn off both units.
Connect VGA
Follow the diagram to connect a VGA cable and device.
- Turn off the unit before connecting the VGA cable.
- Press the power button to turn off the projector before connection.
- After connecting, press the power button to turn on the unit. The power indicator will light green.
- Press the direction buttons to select VGA mode in the home menu. The video from the VGA device will be displayed on the projector screen.
Computer Output Signal Adjustment:
| Type | Resolution | Frequency | Field Frequency |
|---|---|---|---|
| VGA | 640x480 | 31.5 | 60 |
| 34.7 | 70 | ||
| 37.9 | 72 | ||
| 37.5 | 75 | ||
| PC | SVGA 800x600 | 31.4 | 50 |
| 35.1 | 56 | ||
| 37.9 | 60 | ||
| 46.6 | 70 | ||
| 48.1 | 72 | ||
| 46.9 | 75 | ||
| XGA | 1024x768 | 40.3 | 50 |
| 48.4 | 60 | ||
| 56.5 | 70 |
Connect Audio Output (Aux Out / Line Out / Earphones)
Follow the diagram to connect an audio cable and device.
- Press the power button to turn off the projector before connection.
- Use an audio cable to connect as shown in the figure.
- After connecting and turning on both units, your projector will output sound from the external device.
- After using, turn off both units.
Using USB & Micro SD Card Playback
- Insert the USB/Micro SD card into the USB port before turning on the device.
- Turn on the device by pressing the power button.
- Click "Media" on the home page.
- Choose the file you want to open by pressing the OK button. There are 4 sub-menus: Movie, Music, Photo, Text. Please choose the correct sub-menu before playing, or it may not be able to play.
Settings of playing video on Media / HDMI / VGA / AV
When playing videos from Media, HDMI, VGA, or AV sources, press the "Menu" button to access the setting options:
| Parameter | Option | |
|---|---|---|
| Play/Pause | Press to play or pause an individual chapter or track | |
| Rev | Reverse: X1, X2, X4, X8, X16 | |
| FF | Fast Forward: X1, X2, X4, X8, X16 | |
| FRW | Press to play previous video | |
| FFW | Press to play next video | |
| Setting | Image Mode | Standard/ Soft/ Vivid/ User |
| Aspect Ratio | Auto/16:9/4:3 | |
| Brightness | 0-100 | |
| Contrast | 0-100 | |
| Color | 0-100 | |
| Sharpness | 0-100 | |
| Digital Zoom | 60-100 | |
| Sound Mode | Standard/ Music/ News/ Theater | |
| More | Subtitle | 1/1, Off |
| Audio | 1/10 - 10/10 | |
| Repeat | Random, Sequence, Single, List |
Setting of playing Picture on Media / HDMI / VGA / AV
When playing pictures from Media, HDMI, VGA, or AV sources, press the "Menu" button to access the setting options:
| Parameter | Option | |
|---|---|---|
| Play/Pause | Press to play or pause an individual chapter or track | |
| Stop | Press to stop playback and return to the root menu | |
| PREV | Press to play previous picture | |
| NEXT | Press to play next picture | |
| Zoom In | Press to zoom in the picture | |
| Zoom Out | Press to zoom out the picture | |
| Play List | Press to open the playing list | |
| More | Repeat Mode | Random, Sequence, Single, List |
| Slide Time | 5s, 10s, 20s, 30s | |
| Rotation | Normal, 90 Degree, 180 Degree, 270 Degree |
Note: It will automatically enter "Play" mode when you open the picture. Please manually switch to "Pause" if you want to stop the automatic playback.
Using Bluetooth playback
Pairing to Bluetooth Wireless Speakers or Sound Bar
NOTE: Bluetooth is OFF by default when the projector first powers ON. Bluetooth can be turned ON or OFF from the OPTIONS Menu.
- Enable Bluetooth on the receiver (external speakers, sound bar, etc.) to which you wish to connect. Devices such as smartphones, tablets, or computers are not Bluetooth receivers and will not connect to the projector. To eliminate confusion, disable Bluetooth on all receivers to which you do not wish to connect.
- Power on the projector and ensure its Bluetooth is ON. The projector will search for nearby Bluetooth devices. Select the desired device and press the OK key to connect.
- When successfully paired, the Bluetooth receiver should indicate connection, usually with a chime or audible noise. Refer to your Bluetooth receiver's user manual for more information.
- When successfully connected, the projector will display the Bluetooth receiver's name on the top right of the Main Menu screen, and sound played from the projector will be heard through the Bluetooth receiver.
After initial pairing, the projector and Bluetooth speakers will remain paired unless unpaired manually or erased due to a device reset. If connection fails, repeat the above steps.
WIFI Connection and IOS Cast
For iOS devices, there are two operating environments:
- Without Wi-Fi environment.
- With Wi-Fi environment.
Check your wireless environment and connect your device accordingly.
A: iOS device without Wi-Fi environment (Recommended)
- Open your projector and iPhone.
- Open your iPhone's Wi-Fi function and connect to the projector in the searched Wi-Fi list (e.g., ProjectorAP-0775).
- Access the Home page of the projector via remote control and enter "iOS Cast".
- Open the control center of the iOS device and choose "Screen Mirroring".
- Choose the name of the projector device to match and enjoy screen interaction.
B: iOS device under Wi-Fi Environment:
- Turn on the projector. Choose "Setup" on the right of the interface, then find "Network".
- Find "WiFi".
- Choose "Scan". Select your wireless network from the list and enter the password.
- Confirm Wi-Fi connection.
- Return to the projector's Home page and enter "iOS Cast". Attention: Ensure your iOS device is connected to the same network as your projector before this step.
Mirror your iPhone, iPad or iPod touch:
- On your iOS device, open Control Center and tap Screen Mirroring.
- Look for devices that can be mirrored.
- Select the projector's name (e.g., ZYCast-xxxx) from the list.
Miracast
Step 1: Turn on the projector and select "Miracast" from the home page.
Step 2: Open the "Wireless Display" function of your Android Device.
Step 3: Select this projector from the searched Android devices to connect.
Step 4: Enjoy your sharing time.
Notice:
- Open the Wi-Fi function of your Android phone/pad, but do not connect to any Wi-Fi network. Otherwise, the picture may flicker if the Wi-Fi speed is not fast enough.
- Different Android devices may have different names for wireless display, such as Screen mirroring, Screen sharing, Multi-Screen, etc.
Specifications
| Specification | Details |
|---|---|
| Light Source Type | LED |
| Display Native Resolution | 1920 x 1080 |
| HDMI Input Supported Video Resolution | 1080p, 1080i, 720p, 576i, 480p, and 480i |
| Power Consumption | Operating 133W; Stand by 1.5W |
| Power Input Connect Included Adapter | DC 19V 7.0A |
| Included Adapter Connect DC input of unit | Input AC100-240V, 50/60Hz; Output DC 19V, 7.0A |
| Display Color | 7000-8000K |
| Signal Port | Video/ VGA/ HDMI |
| USB Port | Support USB device up to 64GB. Support format MPEG1, MPEG2, MPEG4, MP3, JPEG. |
| SD Card | Support SD card up to 64GB. Support format MPEG1, MPEG2, MPEG4, MP3, JPEG. |
| Weight | 2.4KG |
| Dimension | 307x226x115mm |
Ideal for dark viewing environments for optimal performance.
Troubleshooting
Before seeking maintenance service, please check the following:
| Issue | Possible Cause & Solution |
|---|---|
| No Image is Projected or a "No Signal" message is displayed |
|
| The Lamp (Bulb) switches off after a period of time |
|
| The Image is wider at the top/bottom of the screen | This is called keystone effect and is due to the projection angle not being perpendicular to the screen. Use the projector's built-in keystone function to adjust the image. |
| Spots on the screen | Use a vacuum cleaner to clean the lens. If cleaning does not resolve the issue, please contact your support provider for further assistance. |
| The image brightness has faded | This could be caused by ambient light. If not, the lamp (bulb) may need replacement. |
| Bluetooth not work | Please note that the Bluetooth function is not designed to connect with smartphones or pads. If the Bluetooth speaker or earphone cannot connect, please contact customer service for assistance. |
Warranty
Should you experience any problems not covered by the FAQ, please email:
- United States customer service: US-projector@fangor.cn
- Europe customer service: eu-projector@fangor.cn
- Japan customer service: JP-projector@fangor.cn
FANGOR will offer solutions to your issues or a direct replacement/refund without delays.
