Palm HVP-1H wireless module User Manual HS pref b w
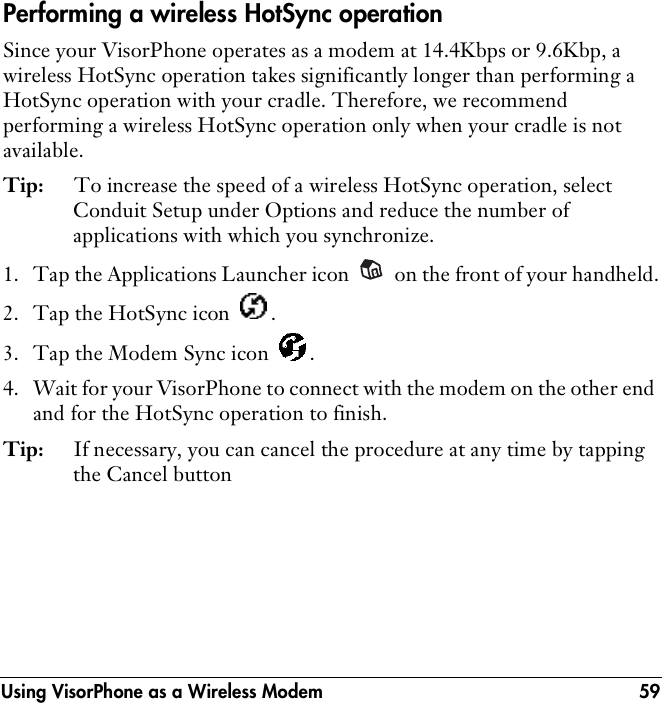
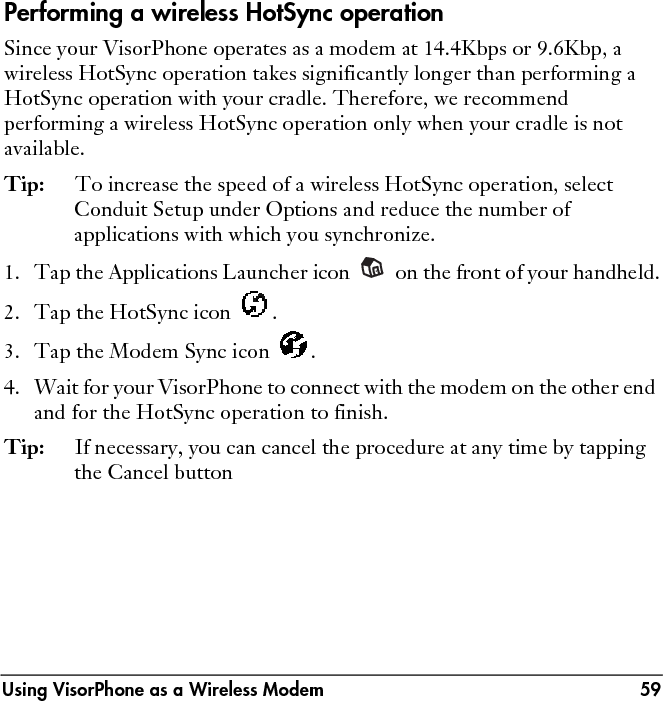
Palm Inc wireless module HS pref b w
UserManual.wiki
>
Palm
>
HVP-1H User Manual
>
Module User Manual
Contents
1.
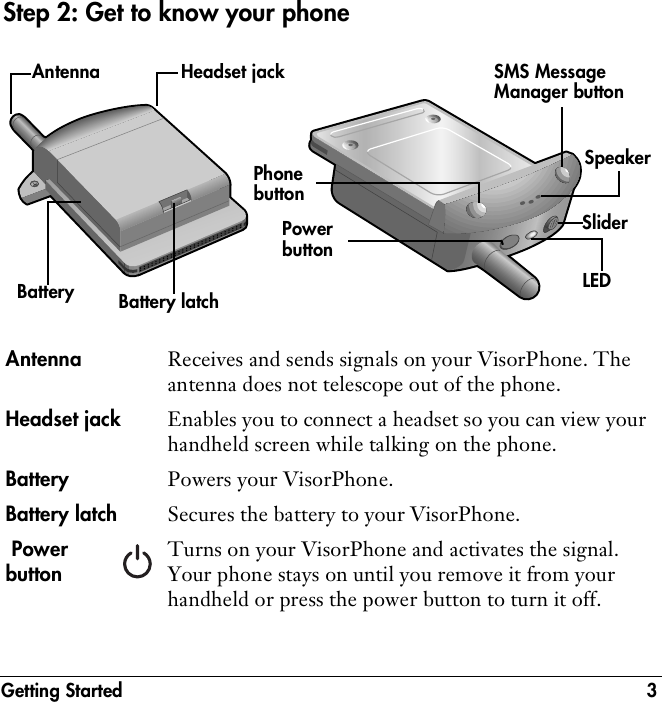
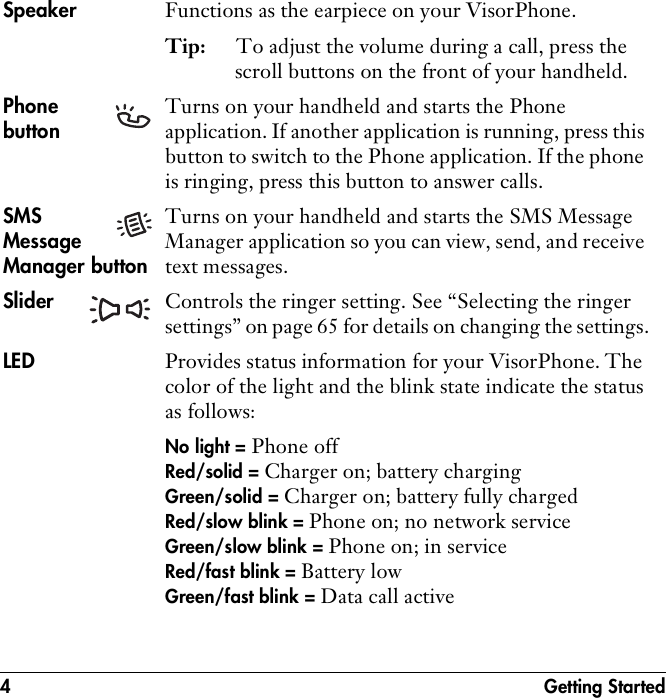
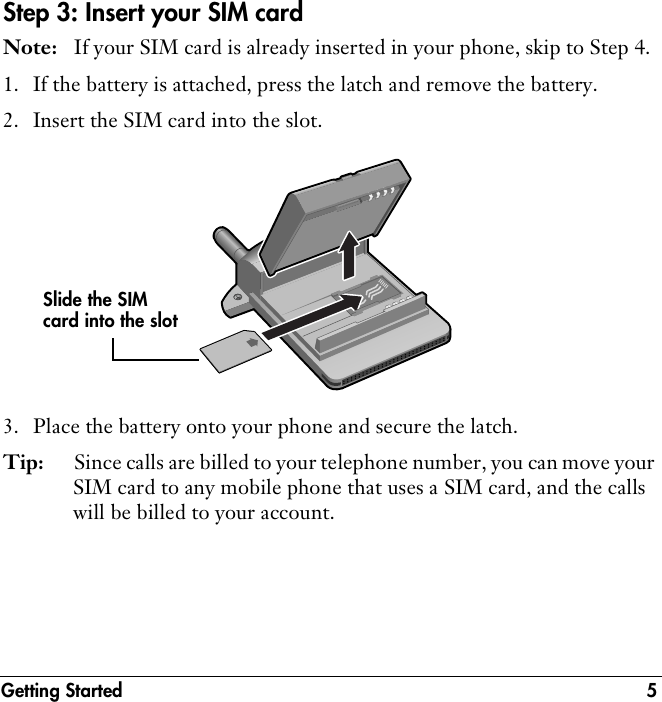
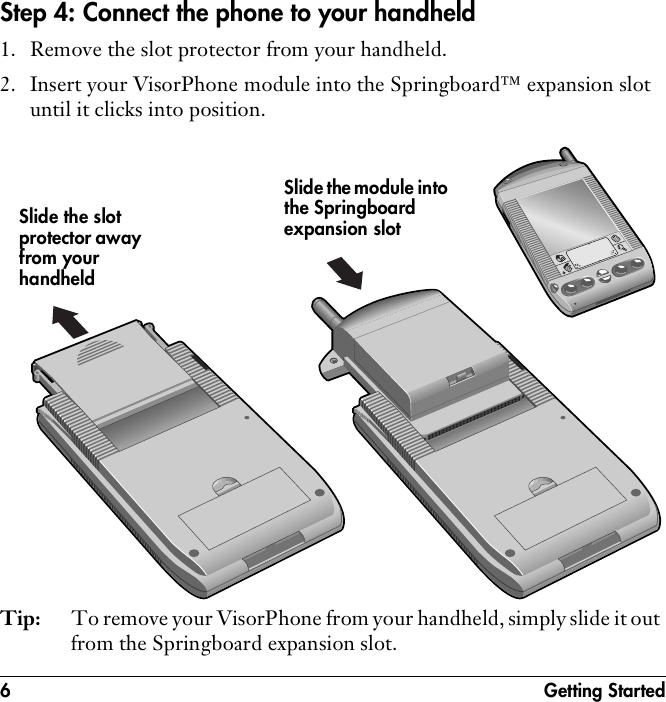
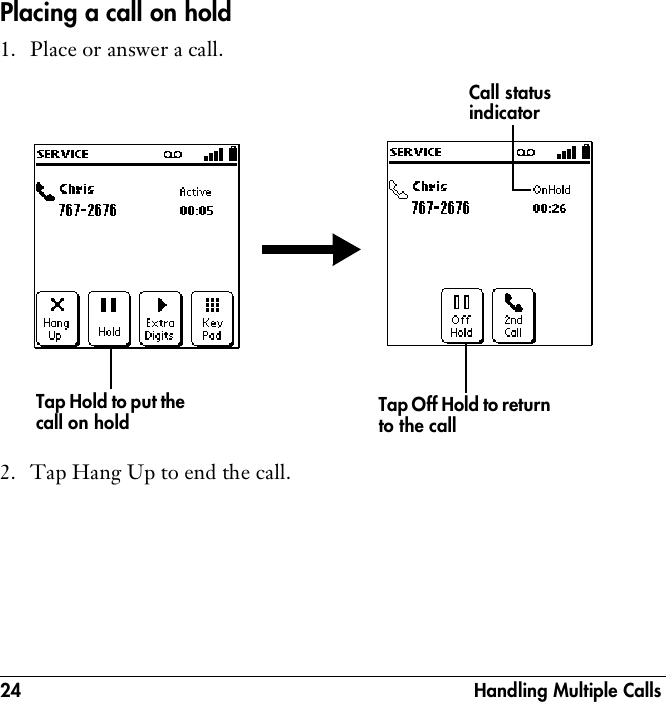
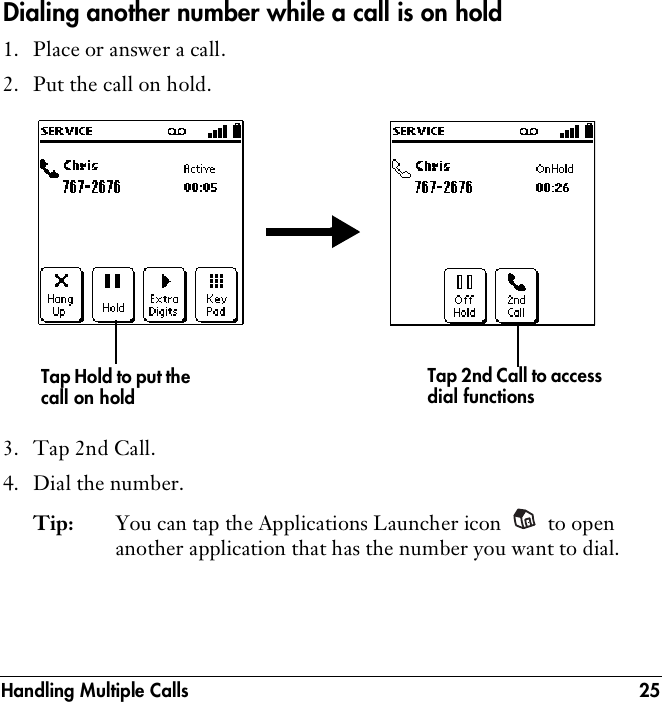
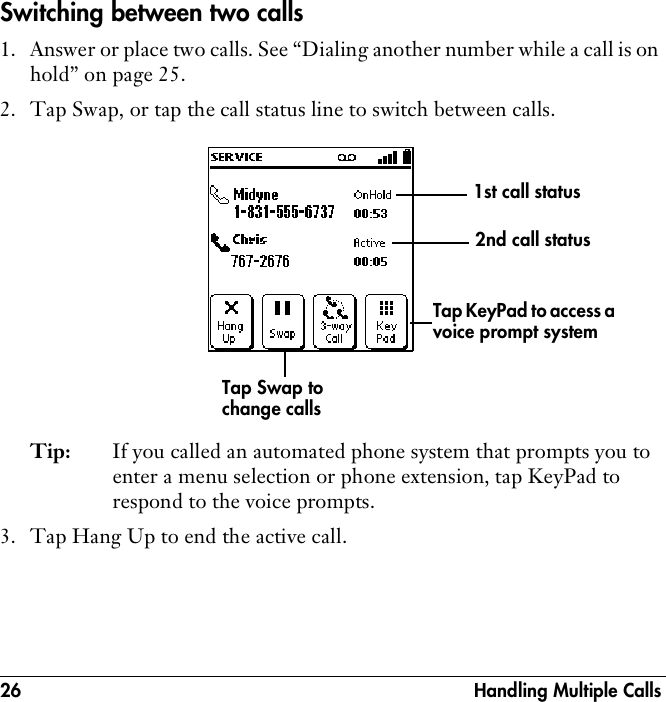
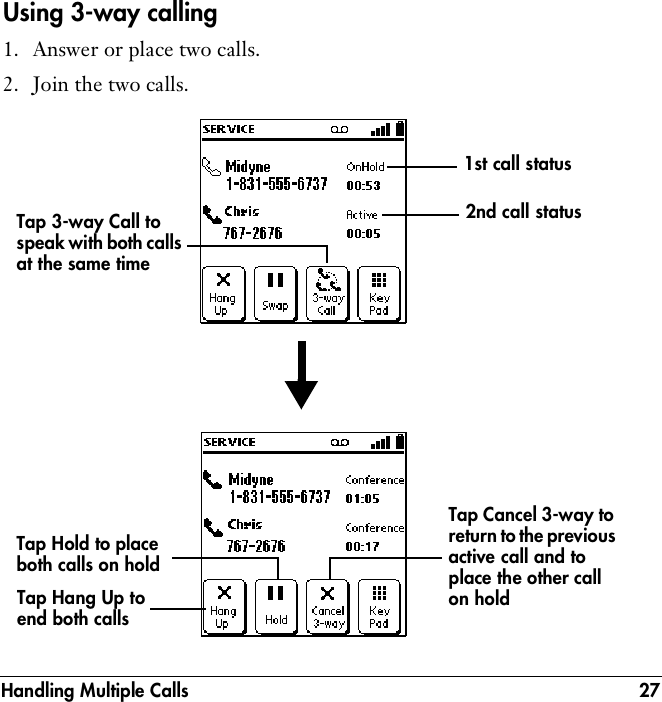
Module User Manual
2.
Visor User Manual
3.
Revised user manual statement
4.
Revised RF Exposure stmt
5.
user manual with SAR stmt at end
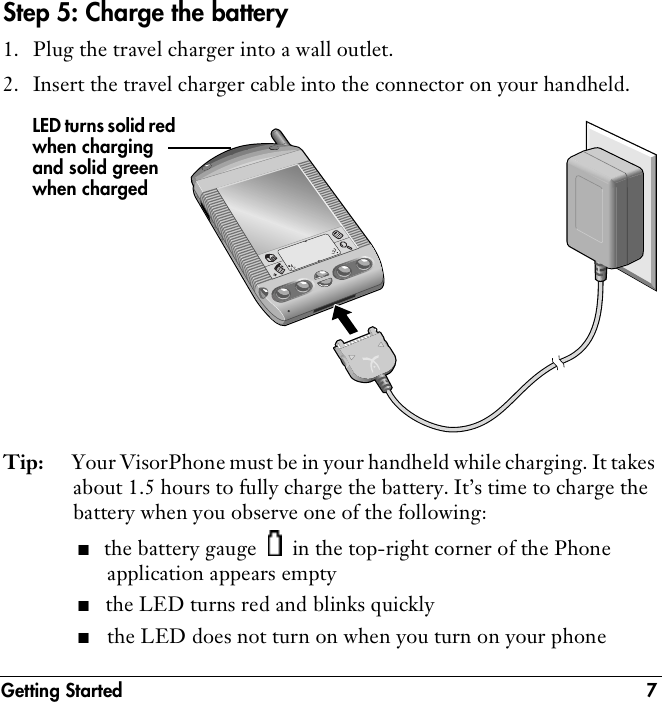
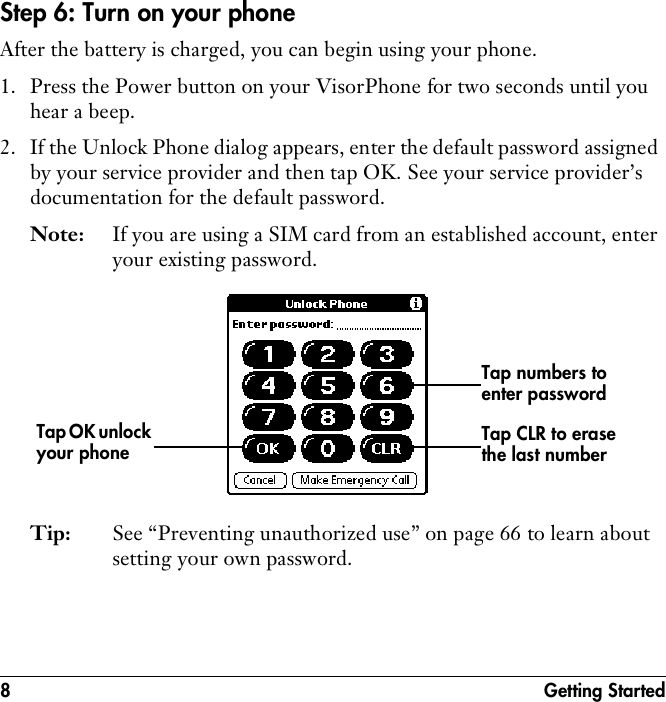
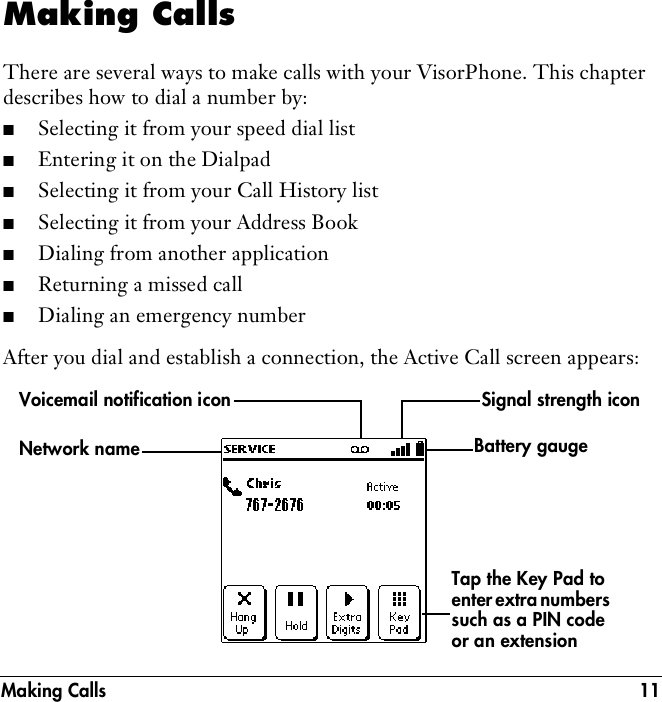
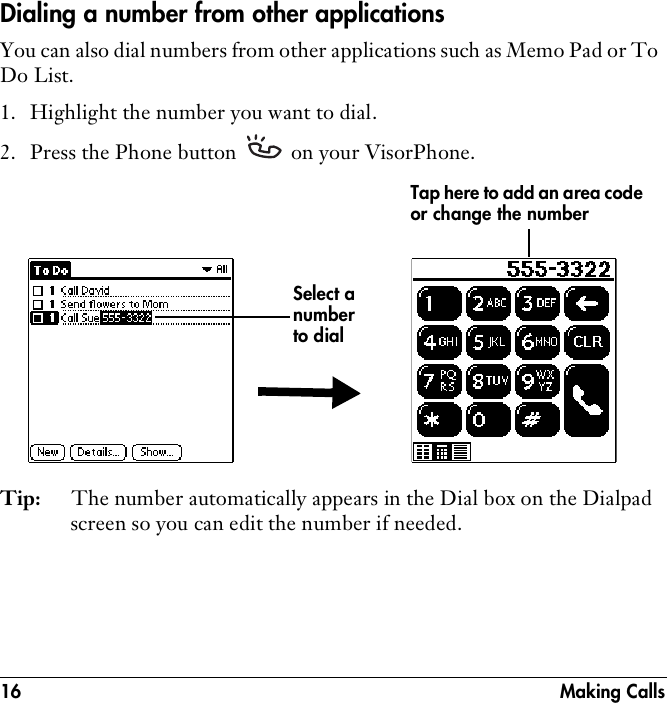
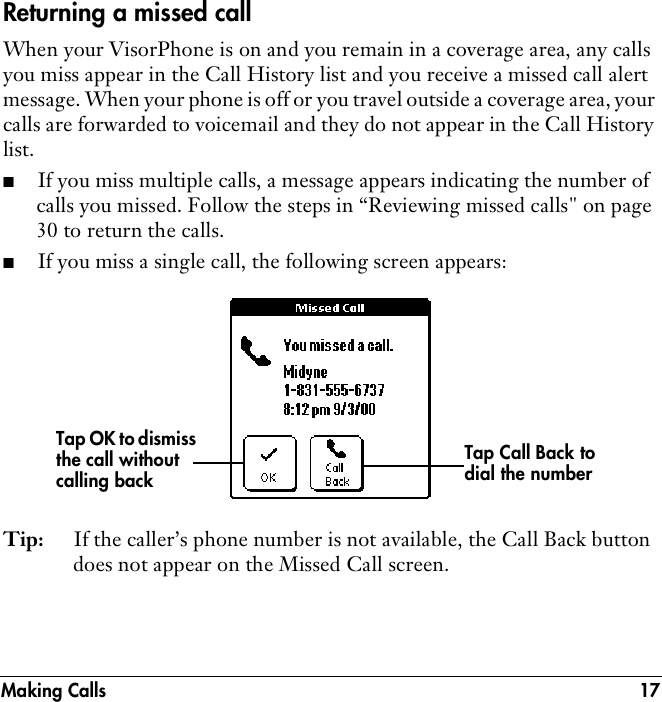
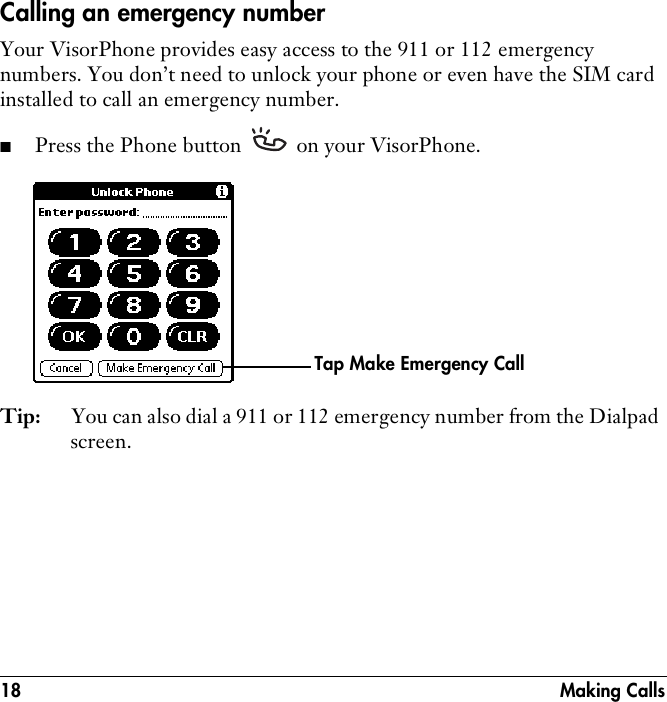
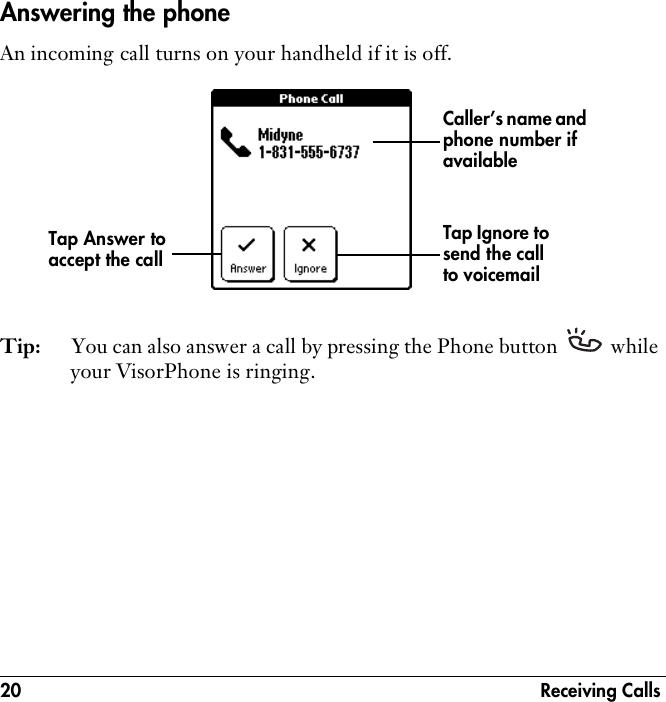
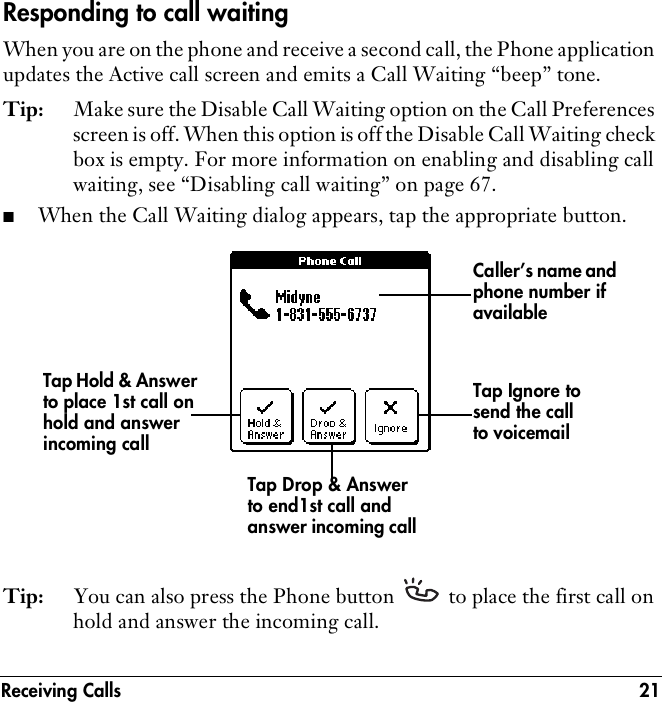
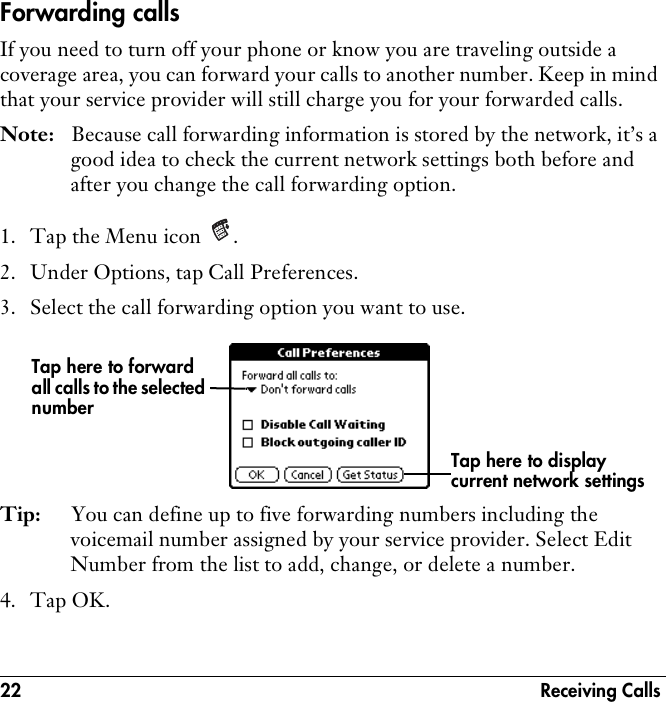
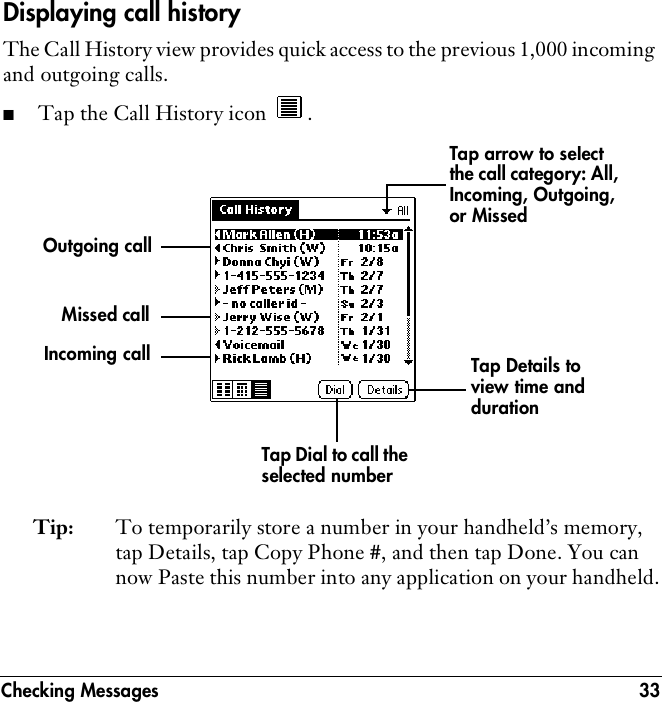
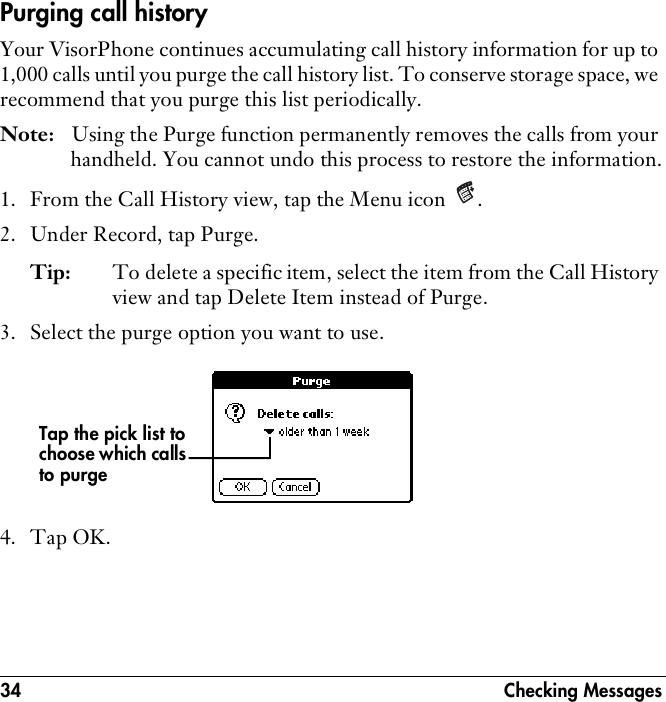
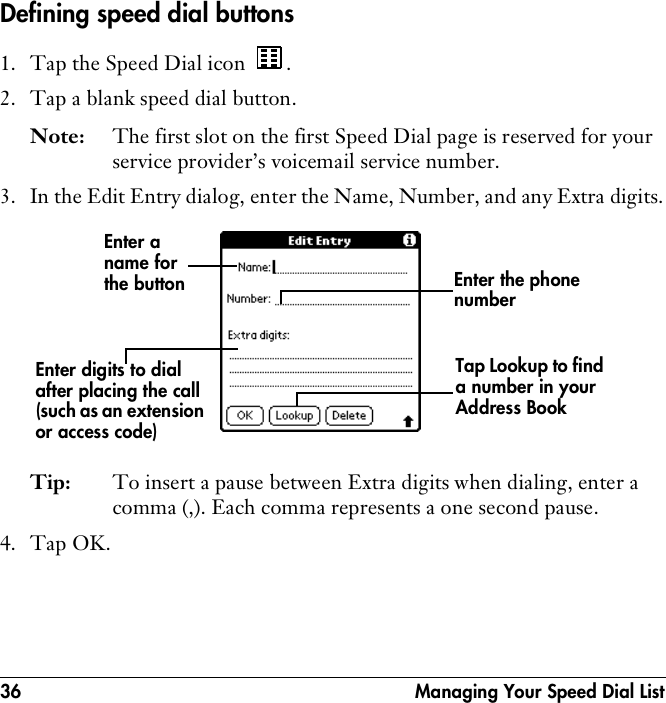
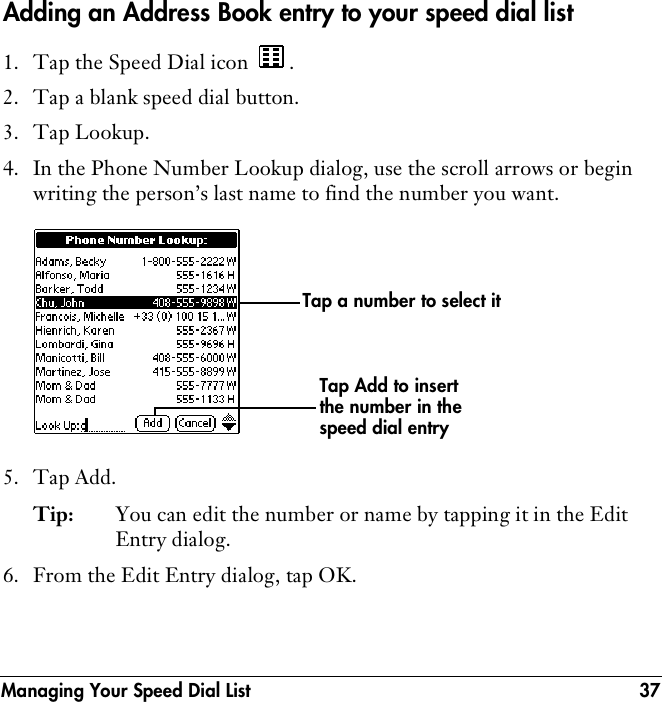
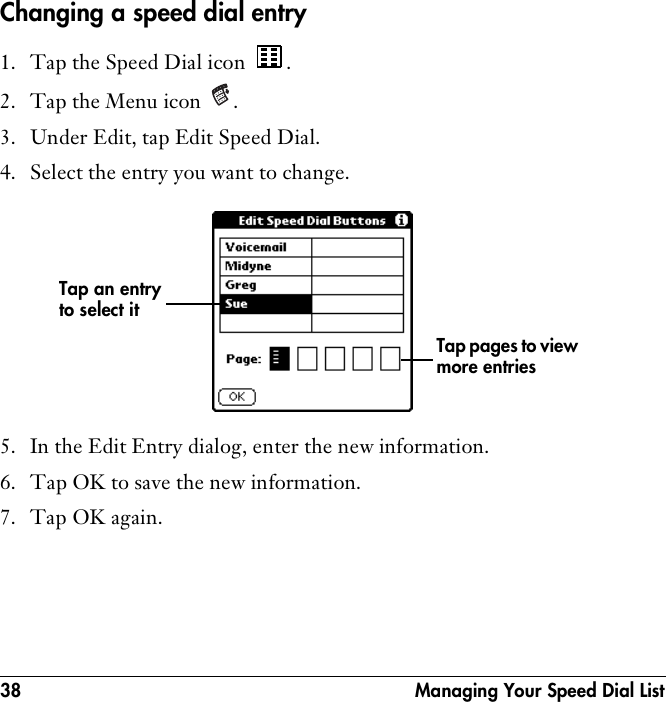
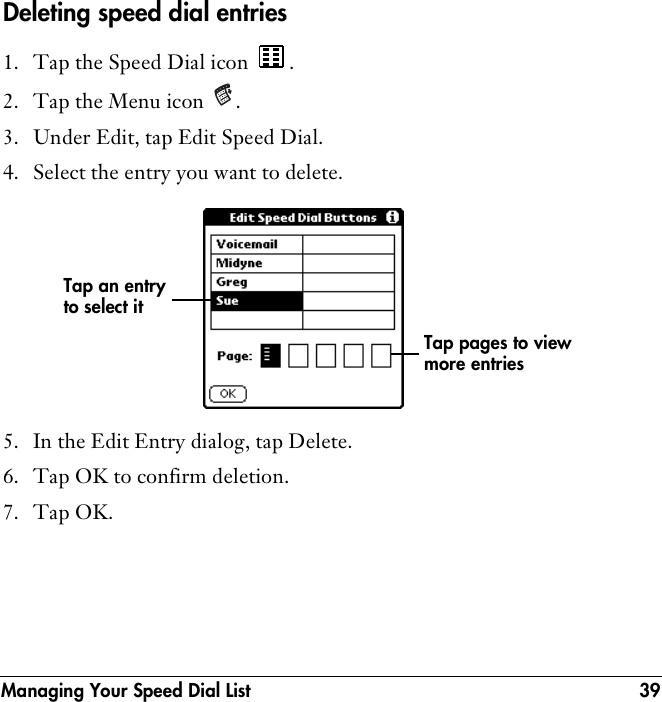
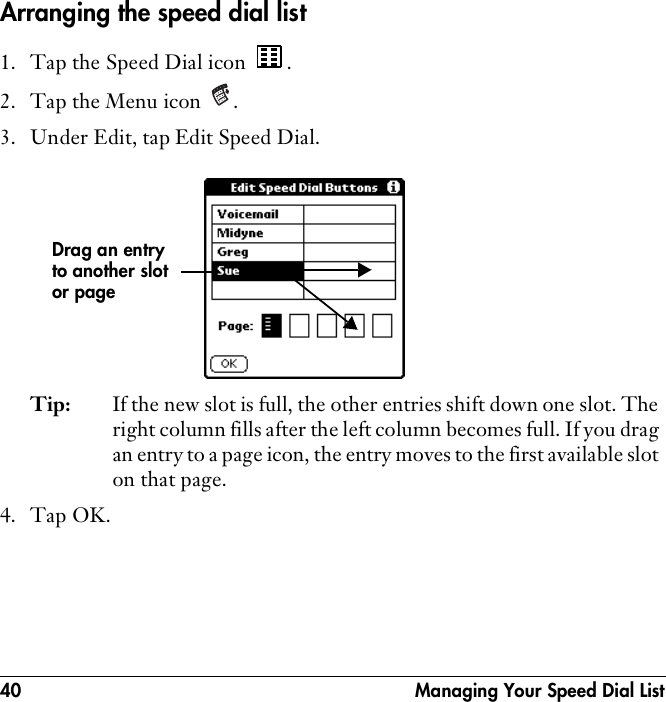
Module User Manual
Navigation menu
Upload a User Manual
Namespaces
Wiki Guide
HTML
PDF
Info
Views
User Manual
Discussion / Help
Navigation