ADC Telecommunications DIS080AB Digivance® 800 MHz Indoor Coverage Solution User Manual 75130 CV
ADC Telecommunications Inc Digivance® 800 MHz Indoor Coverage Solution 75130 CV
Contents
- 1. Users manual 1
- 2. Users manual 2
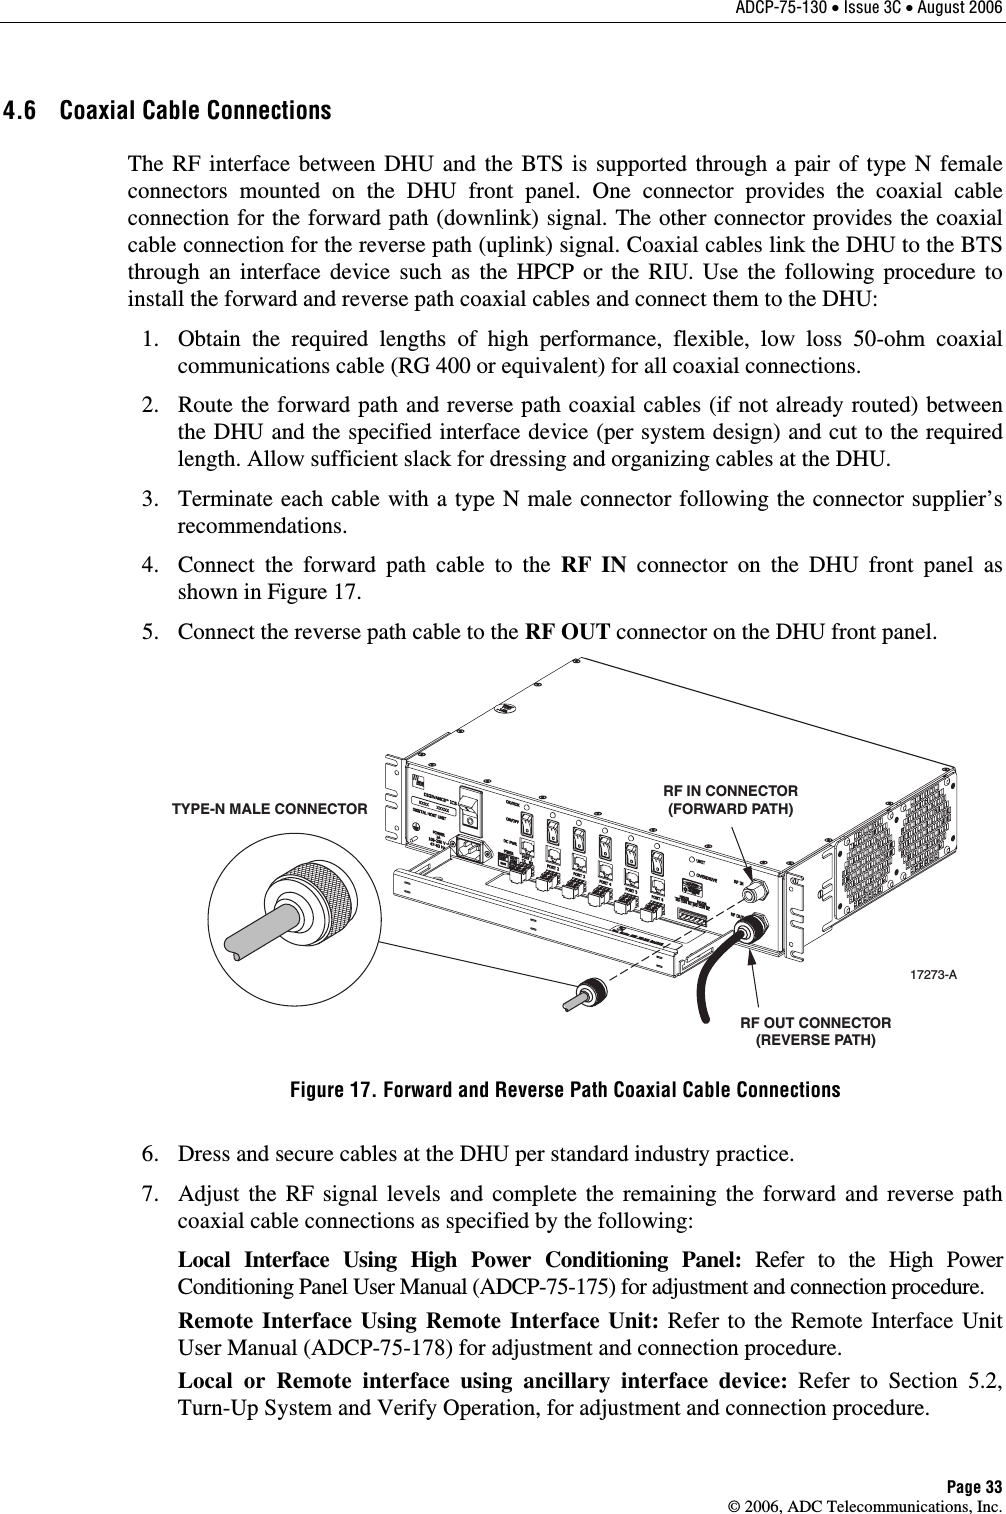
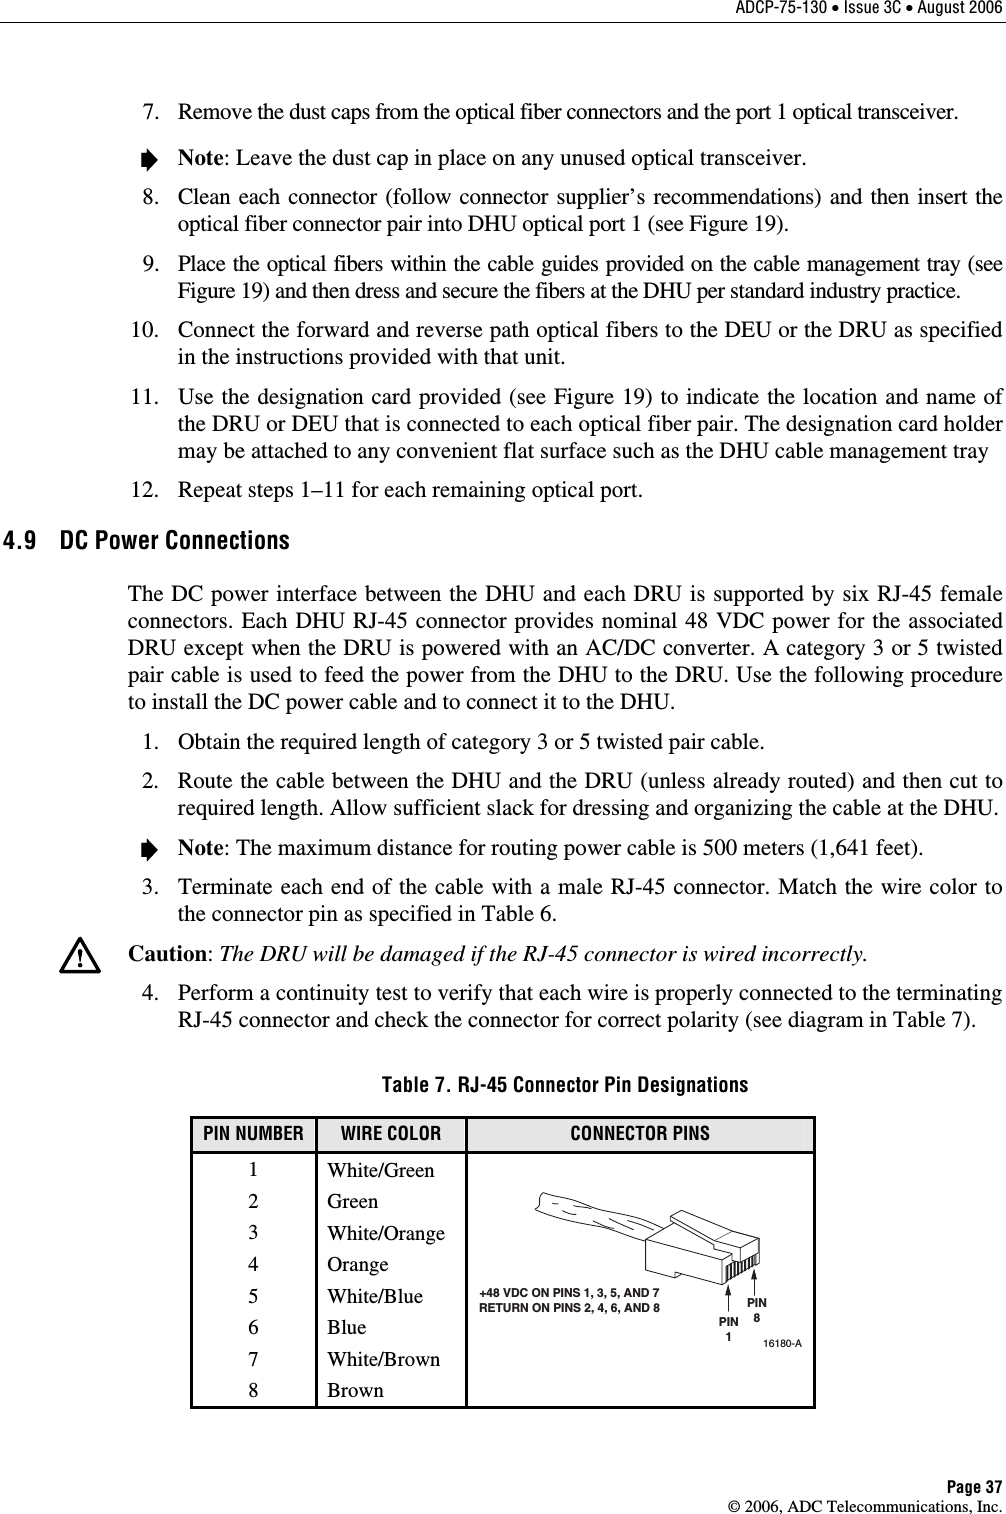
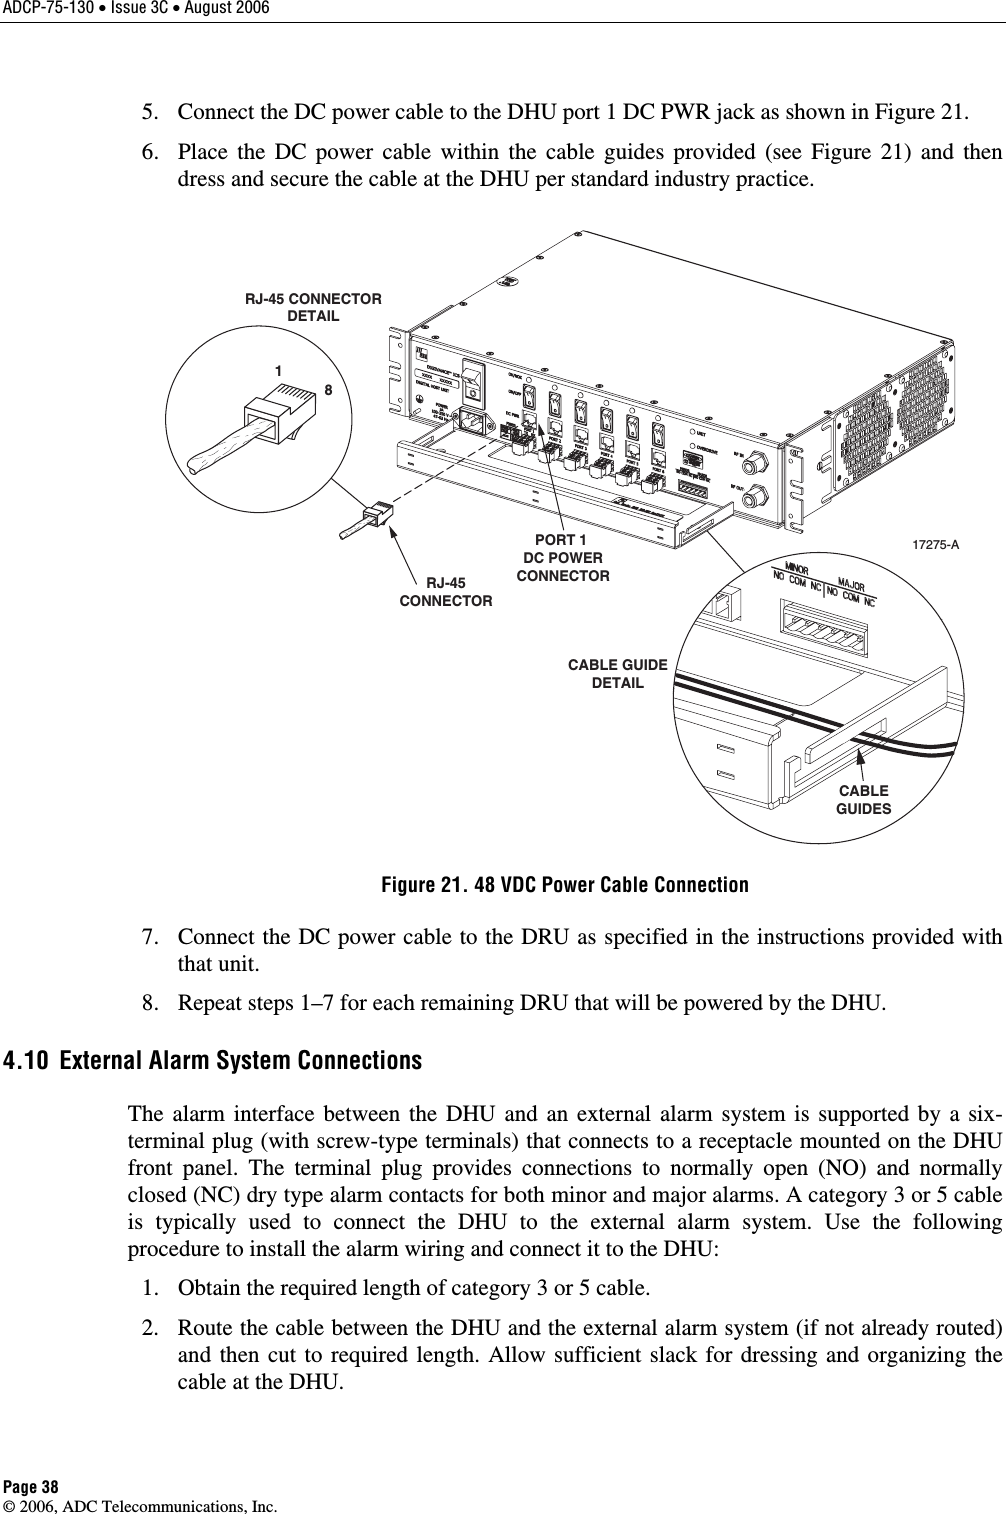
- 3. Users manual 3
Users manual 2