ASUSTeK Computer 777 PDA Phone with Bluetooth User Manual Otto UG
ASUSTeK Computer Inc PDA Phone with Bluetooth Otto UG
Contents
- 1. Manual 1
- 2. Manual 2
- 3. Manual 3
- 4. Manual 4
Manual 3
YOUR PHOTOS, VIDEOS, AND MUSIC
CAMERA 155
9
CHAPTER
record on the screen. Your smartphone
has a self-portrait mirror next to the
camera lens on the back of your
smartphone. Use the mirror when
you’re recording a video and you want
to be in the video.
6(Optional) Adjust either of the following:
Brightness: Press Menu (right
softkey) and select Brightness to
change the image brightness.
Resolution: Press Menu and
select Quality to change the video
resolution.
7Press Centre to start recording.
8When you’re finished recording, press
Stop (left softkey) or Centre
to stop recording.
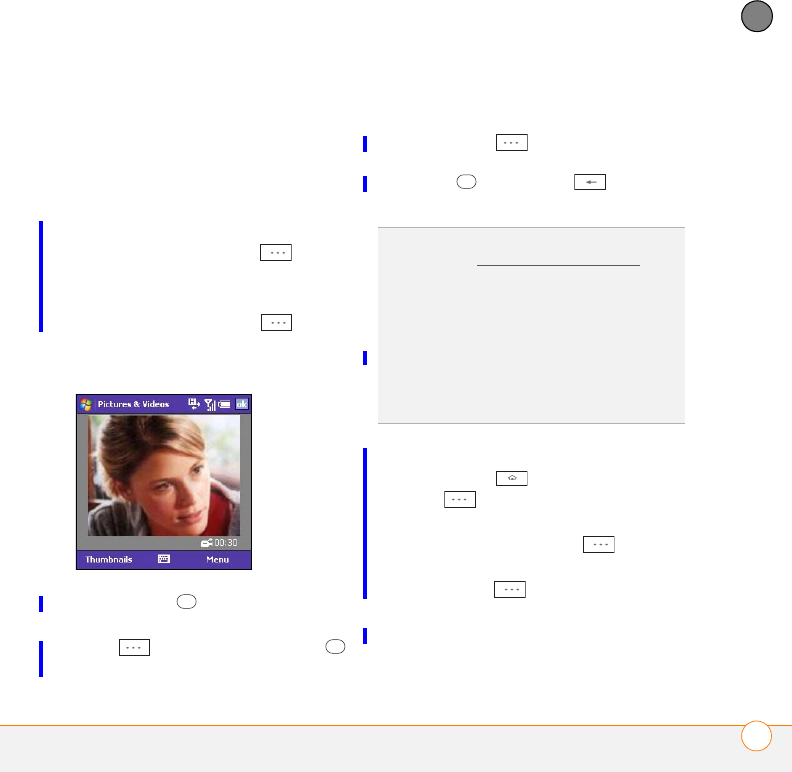
9(Optional) To review the video in
Windows Media Player Mobile, press
Thumbnails (left softkey),
highlight the video, and then press
Centre . Press Back to return
to Thumbnail View.
Customising your Camera settings
1Press Home , and then press
Start (left softkey).
2Navigate to the Recent Photos content
list and press All Photos (right
softkey).
3Press Menu (right softkey) and
select Options.
4Select General and set any of the
following options:
TIP
If you don’t like a video you recorded,
delete it. See Deleting a picture or video for
details.
DID
YOU
KNOW
?
After three minutes of
inactivity when previewing an image, the
camera goes into standby mode. Press any
key to return to the image preview. If the
camera goes to standby while the recording is
paused, the video recording is stopped and
the video is saved.
YOUR PHOTOS, VIDEOS, AND MUSIC
CAMERA
156
9
CHAPTER
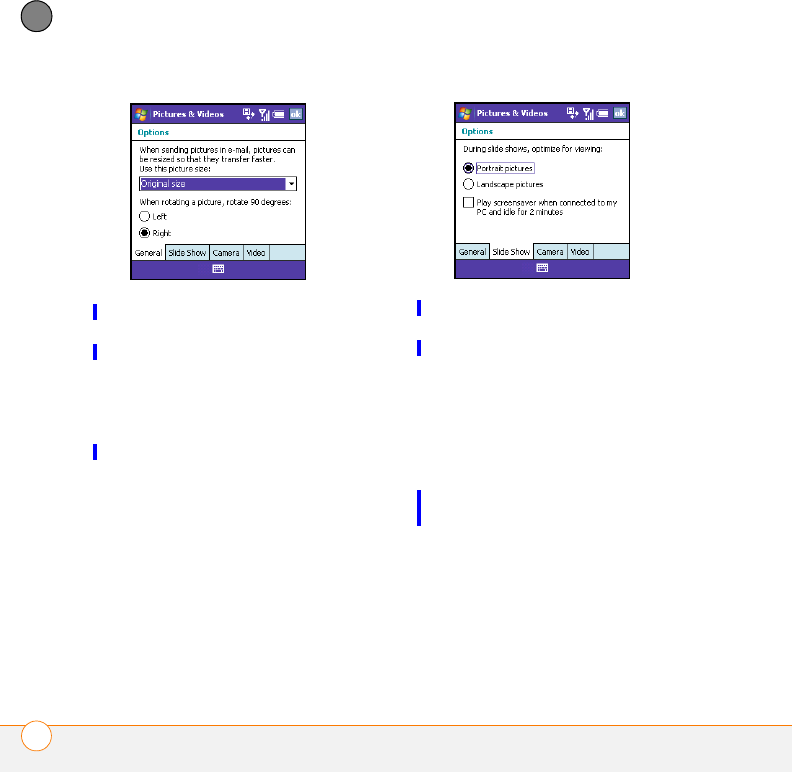
When sending pictures in email, use
this picture size: Sets the size of
pictures you send in an email message.
When rotating a picture, rotate 90
degrees: Sets the direction in which
pictures rotate.
5Select Slide Show and set any of the
following options:
During slide shows, optimise for
viewing: Sets whether pictures are
optimised for portrait or landscape
format during slide shows.
Play screensaver when connected to
my PC and idle for 2 minutes: Sets
whether the pictures in your My
Pictures folder are used as a
screensaver when your smartphone is
connected to your computer and the
desktop synchronisation software is not
running.
YOUR PHOTOS, VIDEOS, AND MUSIC
PICTURES & VIDEOS 157
9
CHAPTER
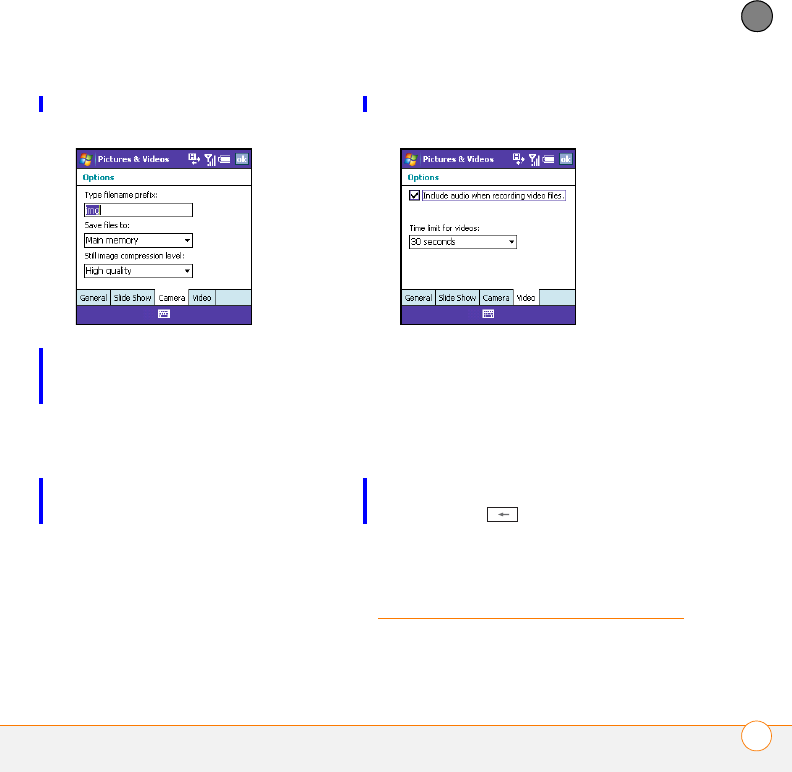
6Select Camera and set any of the
following options:
Save files to: Specifies whether
pictures and videos are stored on your
smartphone or on an expansion card.
Type filename prefix: Assigns a name
to a series of pictures to be captured,
such as Seattle001, Seattle002, and so
on.
Still image compression level:
Sets the default quality and size for
newly captured still pictures.
7Select Video and set any of the
following options:
Include audio when recording video
files: Turns the microphone on and off
so that you can record videos with or
without sound.
Time limit for videos: Limits the length
of videos you record. You can select the
No limit option.
8Press Back to return to
Thumbnail View.
Pictures & Videos
Viewing a picture
YOUR PHOTOS, VIDEOS, AND MUSIC
PICTURES & VIDEOS
158
9
CHAPTER
In addition to viewing the pictures you
capture with the built-in camera, you can
view pictures captured on many popular
digital cameras or downloaded from the
Internet. Your smartphone supports the
following picture formats:
•JPG
•PNG
•BMP
•GIF
1Press Home , and then press
Start (left softkey).
2Navigate to the Recent Photos content
list
3If the picture you want appears on the
list, select it. If the picture does not
appear, press All Photos (right
softkey) and select the picture you want
to view.
4Press Back to return to
Thumbnail View.
Viewing a video
In addition to viewing the videos you
capture with the built-in camera, you can
view videos captured on many popular
digital cameras or streamed from
websites. Your smartphone supports and
streams the following types of video files:
•MPEG-4
•3GPP2
•3GPP
•WMV, WMA, ASF
•RTSP Streaming
1Press Home , and then press
Start (left softkey).
2Navigate to the Music & Video content
list
3If the video you want appears on the
list, select it. If the video does not
appear, press All Music (right
softkey), select My Videos, select All
Video, and select the video you want to
view. For more info on viewing videos,
see Playing media files on your
smartphone.
4Press Back to return to My
Videos.
YOUR PHOTOS, VIDEOS, AND MUSIC
PICTURES & VIDEOS 159
9
CHAPTER
Viewing a slide show
1Press Home , and then press
Start (left softkey).
2Navigate to the Recent Photos content
list and press All Photos (right
softkey).
3Press Menu (right softkey) and
select Play Slide Show. The slide
show plays automatically.
4Press Back to stop the slide show
and return to Thumbnail View.
Sending a picture or video
You can send a picture or video to other
picture-enabled mobile smartphone
devices or to an email address as an
attachment.
You cannot send copyrighted pictures or
videos that appear with a lock icon in
Thumbnail View.
1Highlight the picture or video you want
to send.
2Press Menu (right softkey) and
select Send.
3Select the option you want to use to
send the picture or video: an email
account or MMS.
4When the Messaging application opens,
address and send the message
(see Creating and sending an email
message or Creating and sending a
multimedia message).
Creating new folders for storing pictures
and videos
You can create folders to organise your
pictures and videos. For example, you can
store trip items in one folder and holiday
items in another.
1Press Home , and then press
Start (left softkey).
2Navigate to the Recent Photos content
list and press All Photos (right
softkey).
TIP
You can also beam a picture or video using
the built-in Bluetooth® wireless technology on
your smartphone to another nearby Bluetooth
device. Highlight the picture or video, press
Menu (right softkey), and select Beam. Select
the receiving device and press Beam (left
softkey).
YOUR PHOTOS, VIDEOS, AND MUSIC
PICTURES & VIDEOS
160
9
CHAPTER
3Press Menu (right softkey) and
select New Folder.
Organising your pictures and videos
You can move or copy pictures and videos
to other folders or between your
smartphone and an expansion card.
1Highlight the picture or video you want
to move or copy.
2Do one of the following:
•To move the picture or video to
another location, press Menu
(right softkey) and select Edit > Cut.
•To keep the picture or video in two
locations, press Menu (right
softkey) and select Edit >Copy.
3Press Menu (right softkey), select
Folders, and then select the folder
where you want to paste the picture or
video.After you select a folder, you can
navigate to a subfolder within that
folder.
4Press Menu (right softkey) and
select Edit > Paste.
Using a picture as the Home screen
background
1Select the picture you want to use.
2Press Menu (right softkey) and
select Use as Home Screen.
3If prompted, press Up or Down to
adjust the area of the picture that
appears on the Home screen.
4Press Next (right softkey)
5Press Right or Left to select the
transparency level. Use a higher
percentage for a more transparent
picture and a lower percentage for a
more opaque picture.
6Press Finish (right softkey)
TIP
If you have an expansion card inserted into
your smartphone, select Storage Card to
paste the picture or video to the card.
TIP
You can create a new folder for storing
your pictures and videos. Press Menu (right
softkey) and select Edit > New Folders. After
you create a new folder, you can move or
rename it (see Exploring files and folders).
YOUR PHOTOS, VIDEOS, AND MUSIC
PICTURES & VIDEOS 161
9
CHAPTER
Editing a picture
For more extensive edits, just download
your picture or video to your computer and
edit it in your favourite graphics program.
Then sync the picture or video back to your
smartphone.
1Select the picture you want to edit.
2Press Menu (right softkey) and
select Edit.
3Do any of the following:
•To rotate the picture 90 degrees,
press Menu and select Rotate
(left softkey).
•To crop the picture, press Menu
(right softkey) and select Crop.
Navigate to the upper-left corner of
the area you want to crop and press
Centre . Navigate to the
lower-right corner of the area you
want to crop and press Centre to
crop the image.
•To adjust the brightness and contrast
levels of the picture, press Menu
(right softkey) and select
AutoCorrect.
•To undo an edit, press Menu
(right softkey) and select Undo.
•To cancel all unsaved edits you made
to the picture, press Menu
(right softkey) and select Cancel.
•To save the edited picture with a new
file name, press Menu (right
softkey), select Save As, enter a
name for the picture, and press Done
(left softkey).
Deleting a picture or video
1Highlight the picture or video you want
to delete.
2Press Menu (right softkey) and
select Delete.
3Select Ye s (left softkey) to
confirm the deletion.
Renaming a picture or video
1Select the picture or video you want to
delete.
2Press Menu (right softkey) and
select Properties.
3Enter a new name for the picture or
video.
4 Press Done (left softkey).

YOUR PHOTOS, VIDEOS, AND MUSIC
WINDOWS MEDIA PLAYER MOBILE
162
9
CHAPTER
Windows Media
Player Mobile
Windows Media Player Mobile can play
music, audio, and video files that are
stored on your smartphone or on an
expansion card (sold separately) in any of
the following file formats:
•WMA
•WMV
•MP3
•3GP
•AAC
•AAC+
•MPEG-4
IMPORTANT You must have QuickTime
Player version 6.5 or later installed on your
computer to play videos recorded by your
smartphone. You can download the videos
from an expansion card or you can click the
video thumbnail after synchronising the
files.
You can listen to these music, audio, and
video files through the speaker on the back
of your smartphone or through stereo
headphones.
Transferring media files to your
smartphone
Use the Sync feature in the desktop
version of Windows Media Player to
transfer digital music, audio, video, and
playlist files from your computer to an
expansion card or your smartphone. Using
the Sync feature ensures that the files are
transferred correctly.
BEFORE YOU BEGIN Do the following:
•Be sure you have Windows Media
Player 10 or later installed on your
computer. On a Windows XP computer,
Windows Media Player 10 must be
DID
YOU
KNOW
?
You can also download
animated GIF files and view them in Internet
Explorer Mobile.
TIP
For tips on using the desktop version of
Windows Media Player, go to the Help menu
in Windows Media Player on your computer.
YOUR PHOTOS, VIDEOS, AND MUSIC
WINDOWS MEDIA PLAYER MOBILE 163
9
CHAPTER
installed on your computer before you
install ActiveSync desktop software.
•To sync media files with your computer,
set the Media sync option on your
smartphone (see Changing which
applications sync).
1On your computer, open Windows
Media Player.
2(Optional) If you’re transferring media
files to an expansion card, insert a
32MB or larger expansion card into your
smartphone.
3Connect your smartphone to your
computer with the USB sync cable.
4Do one of the following:
Windows XP: When the Device Setup
Wizard opens on your computer,
click Automatic. Check the Customise
the playlists that will be
synchronised box.
Windows Vista: Select the Sync tab,
and then select Tr e o > Set Up Sync.
Check the Sync this device
automatically box.
5Select the playlists you want to sync.
On a Windows Vista computer, select
the All Photos and All Videos playlists
to synchronise pictures and videos
between your smartphone and your
computer.
6Click Finish to begin the transfer. If you
are transferring files to an expansion
card, be patient; transferring media files
to an expansion card can take several
minutes.
Playing media files on your smartphone
1Press Home , and then press
Start (left softkey).
2Navigate to the Music & Video content
list and press All Music (right
softkey).
3Press Menu (right softkey) and
select Library.
TIP
If you don’t already have Windows Media
Player 10 or later installed on your Windows
XP computer, you can download it from
www.microsoft.com. Windows Media
Player 11 is installed on Windows Vista
computers by default.
YOUR PHOTOS, VIDEOS, AND MUSIC
WINDOWS MEDIA PLAYER MOBILE
164
9
CHAPTER
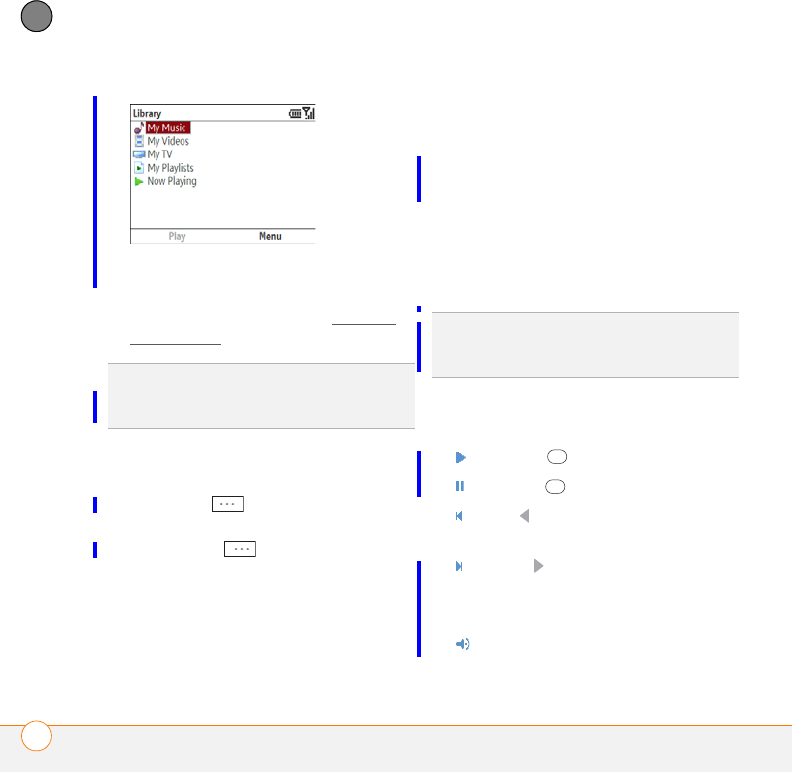
4Select the library you want to use. If you
can’t find a media file on your expansion
card, update the library (see Working
with libraries).
5Select the item you want to play (such
as a song, album, or artist name).
6Press Play (left softkey. See the
next page for playback controls.
7Press Menu (right softkey) and
select any of the following during
playback:
Library: Displays the Library screen so
you can select a different song to play.
Shuffle/Repeat > Shuffle: Plays the
Now Playing playlist in random order. A
check appears next to this command
when it is on.
Shuffle/Repeat > Repeat: Plays the
Now Playing playlist repeatedly. A check
appears next to this command when it
is on.
Stop: Ends playback.
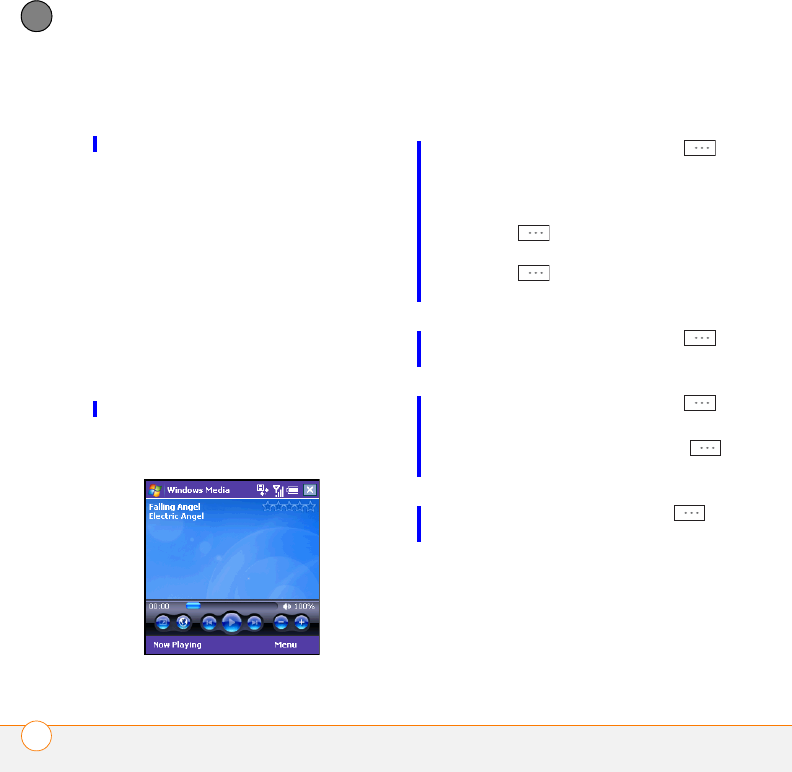
Use any of the following onscreen controls
during playback:
or Centre plays the current file.
or Centre pauses the current file.
or Left skips to the beginning of the
current file or to the previous file.
or Right skips to the next file.
Volume button increases or decreases
the volume level.
turns the sound on or off.
TIP
To play a file that is not in a library, go to
the Library screen, press Menu (right
softkey), and select Open File.
TIP
To view detailed information about the
song that is playing, press Menu (right
softkey), and select Properties.
YOUR PHOTOS, VIDEOS, AND MUSIC
WINDOWS MEDIA PLAYER MOBILE 165
9
CHAPTER
indicates the rating of the current
file.
Working with libraries
A library represents each of the storage
locations available to Windows Media
Player Mobile, so you should have two
libraries: My Device and My Storage Card.
Each library contains links to the media
files in that location. Windows Media
Player Mobile usually updates the My
Device library automatically, but you must
manually update the My Storage Card
library.
1Press Home , and then press
Start (left softkey).
2Navigate to the Music & Video content
list and press All Music (right
softkey).
3Press Menu (right softkey, and
select Library.
4Press Menu (right softkey) and
select Update Library.
5Wait for the files to be added, and then
press Done (right softkey).
Working with playlists
A playlist is a list of media files that play in
a specific order. You can use playlists to
group audio files together or video files
together for convenient playback. For
example, in the desktop Windows Media
Player, you can create a playlist of upbeat
DID
YOU
KNOW
?
You can play streaming files
from the web. To play an MMS (Microsoft
Media Streaming) file, press Menu on the
Library screen and select Open URL. Select
URL and enter the website address, or select
History and select a site you’ve visited
before.
DID
YOU
KNOW
?
If you close the Windows
Media Player Mobile window, your music
continues to play in the background.
TIP
If you don’t see a media file that you
added, manually update the library.
TIP
To delete an item from a library, highlight
the item, press Menu (right softkey), and
select Delete from Library. Press Ye s (left
softkey) to confirm the deletion.
DID
YOU
KNOW
?
If you move files between
your smartphone and an expansion card, be
sure to update your libraries, or you won’t be
able to see the files in their new location.
YOUR PHOTOS, VIDEOS, AND MUSIC
WINDOWS MEDIA PLAYER MOBILE
166
9
CHAPTER
songs for when you exercise and a playlist
of soothing songs for a long flight. When
you synchronise, your favourite playlists
are automatically copied to your
smartphone. Your playlists appear in your
libraries (in the My Playlists category).
A temporary playlist, called Now Playing,
appears on the Now Playing menu. It lists
the currently playing file, as well as any
files that are queued up to play next. You
can add to, modify, or clear the files on the
Now Playing playlist.
1Go to the Now Playing screen:
•If you are on the Library screen,
select Now Playing.
•If you are on the Playback screen,
select Now Playing.
2Do any of the following:
•To move a file up or down one slot,
highlight the file, press Menu
(right softkey), and then select Move
Up or Move Down.
•To add a file, highlight the file, press
Menu (right softkey) and select
Library. Highlight the file, press
Menu (right softkey), and then
select Queue Up.
•To delete a file from the playlist,
highlight the file, press Menu ,
and select Delete from Playlist.
•To view more info about a file,
highlight the file, press Menu ,
and select Properties.
•To save the playlist, press Menu
(right softkey) and select Save Playlist.
•To remove all items from the Now
Playing playlist, press Menu
(right softkey) and then select Clear
Now Playing.
YOUR PHOTOS, VIDEOS, AND MUSIC
WINDOWS MEDIA PLAYER MOBILE 167
9
CHAPTER
Customising Windows Media Player
Mobile
1If you are on any screen other than the
Player screen, press Back to go
to the Playback screen.
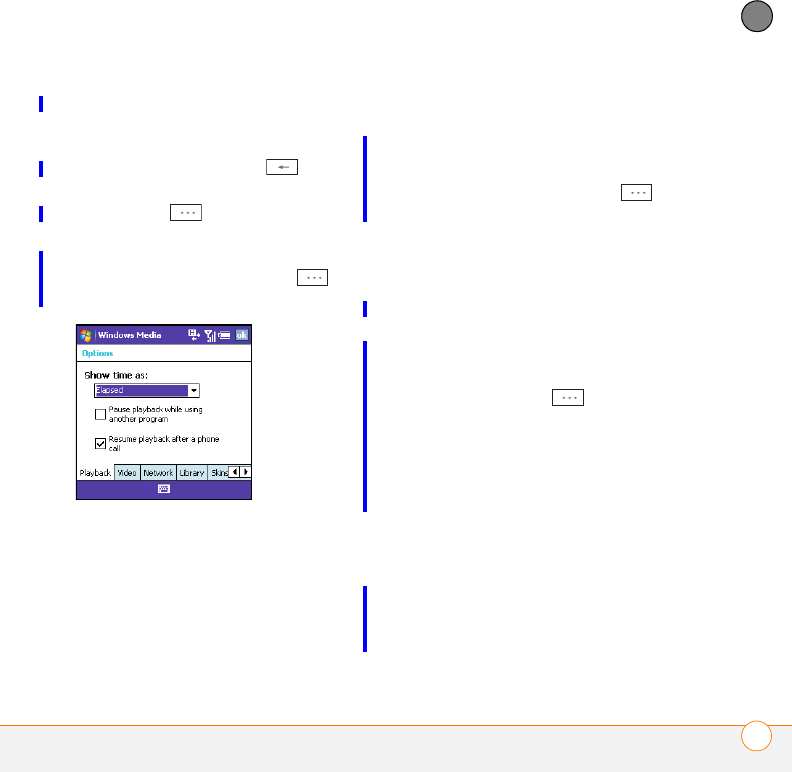
2Press Menu (right softkey) and
select Options.
3Select Playback and set any of the
following options. Press Done
(left softkey) when you have finished.
Show time as: Sets whether the time
remaining or time elapsed appears in
the Playback screen.
Pause playback while using another
program: Sets whether playback
continues if you switch to another
application.
Resume playback after a phone call:
Sets whether playback continues after
you finish a phone call.
4Select Video and set any of the
following options. Press Done
(left softkey) when you have finished.
Play video in full screen: Sets whether
videos automatically play in full screen
format.
Shrink to fit window: Sets whether
videos are automatically scaled to fit the
Playback screen.
5Select Network and set the following
options. Press Done (left softkey)
when you have finished.
Internet Connection Speed: Specifies
the speed of your network connection,
and specifies whether you want the
device to detect connection speed.
Protocol: Enables and disables the
available protocols. You must select at
least one protocol. You can also set a
UDP Port.
6Select Library and set whether you
want to see the Library or Player screen
when you open Windows Media Player

YOUR PHOTOS, VIDEOS, AND MUSIC
MOBILE TV
168
9
CHAPTER
Mobile. Press Done (left softkey)
when you have finished.
7Select Skins and press Right or Left
to set the player’s background. Press
Done (left softkey) when you
have finished.
8Select Buttons to change any of the
available button settings:
•To assign a button, highlight the item
you want to set, press Menu
(right softkey), and then select
Assign.Press the button you want to
use for that item.
•To restore an item’s factory setting,
highlight the item, press Menu
(right softkey), and then select Reset.
•To unassign an item, highlight the
item, press Menu (right
softkey), and then select None.
9Press OK (left softkey).
10 Press Done (left softkey).
Mobile TV
Mobile TV lets you watch entertainment,
sports, news, and other television
programming right on your smartphone.
BEFORE YOU BEGIN
•Be sure to subscribe to data services
from your network operator. This is
necessary for using Mobile TV.

YOUR PHOTOS, VIDEOS, AND MUSIC
MOBILE TV 169
9
CHAPTER
•You must subscribe to the Mobile TV
service; additional fees apply. Contact
your network operator.
•Make sure your phone is on and that
you’re inside a coverage area (see
“Turning your phone on” on page 22).
1Press Home , and then press
Start (left softkey).
2Navigate to the live! content list and
select Mobile TV.
3Select the channel you want to watch.
TIP
Repeat steps 1-3 to switch to a different
channel.

YOUR PHOTOS, VIDEOS, AND MUSIC
MOBILE TV
170
9
CHAPTER

CHAPTER
10
Your personal information
organiser
Say good-bye to paper calendars and throw away those
scribbled to-do lists. Your Palm® Tre o ™ 500v smartphone is all
you need to organise your personal information and keep it
with you wherever you go.
You never lose your information, even if your battery is
completely drained. All your personal information is backed up
each time you synchronise, and your information is kept private
when you use the security features available on your
smartphone. Also, you can easily share info with others
electronically.
Benefits
•Track current, future, and past
appointments
•Make to-do lists that get done
•Set reminders for appointments,
birthdays, important tasks, and
more

In this chapter
Contacts. . . . . . . . . . . . . . . . . . . . . . . . . . . . . . . . . . . . . . . . . . . . . . 173
Calendar . . . . . . . . . . . . . . . . . . . . . . . . . . . . . . . . . . . . . . . . . . . . . . 177
Tasks . . . . . . . . . . . . . . . . . . . . . . . . . . . . . . . . . . . . . . . . . . . . . . . . 183
Voice Notes . . . . . . . . . . . . . . . . . . . . . . . . . . . . . . . . . . . . . . . . . . . 186
YOUR PERSONAL INFORMATION ORGANISER
CONTACTS 173
10
CHAPTER
Contacts
Adding a contact
1Press Home , and then press
Right to open the Favourite
Contacts content list.
2Press All Contacts (right softkey).
3Press New (left softkey).
4Select the type of contact to create:
Outlook Contact: This type of contact
is stored in the Contacts application on
your smartphone and synchronises with
the Contacts application in Microsoft
Outlook on your computer.
SIM Contact: This type of contact is
stored on the SIM card in your
smartphone and does not synchronise.
If you use the SIM card with another
smartphone, you can access any
contacts on the SIM card.
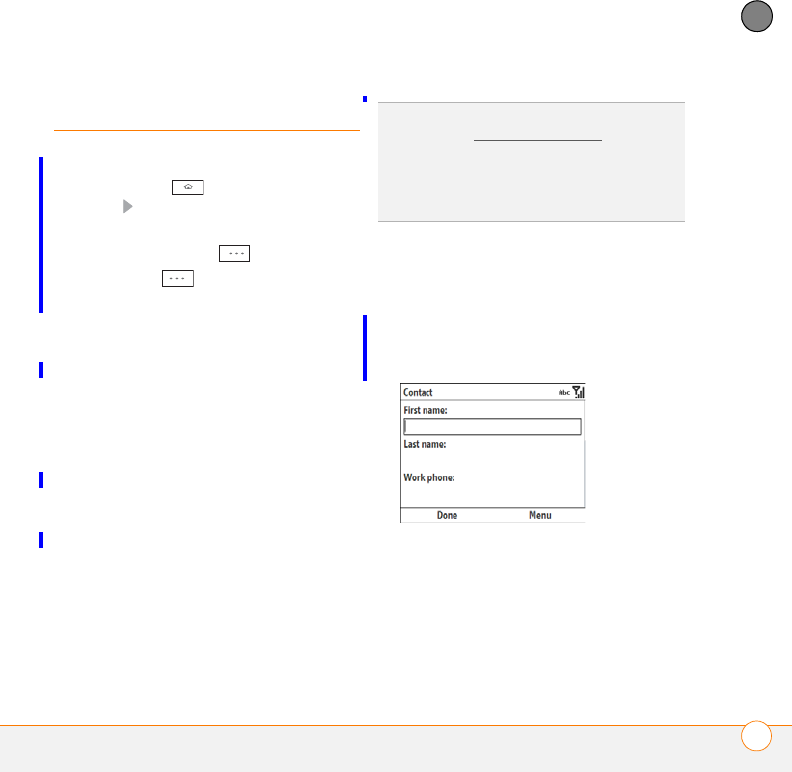
5Use the 5-way navigator to move
between fields as you enter
information.
NOTE For a SIM contact, you can enter a
name and phone number only.
TIP
If you have set up a Windows Live
account (see Using Windows Live), you can
save the contact as a Windows Live contact.
A Windows Live contact synchronises with
your Hotmail contacts list but not with
Microsoft Outlook on your computer.
YOUR PERSONAL INFORMATION ORGANISER
CONTACTS
174
10
CHAPTER
Here are some helpful tips for entering
info:
•To assign a ringtone to the entry,
select Custom ring tone and select a
tone.
•To add a caller ID picture that displays
when that person calls, select
Picture, and then select Camera and
take a picture, or select an existing
picture from Thumbnail View.
•To assign the entry to one or more
categories, select Categories and
then check the categories under
which you want this entry to appear.
•To add a note to an entry, select
Notes and enter the note text.
6After you enter all the information,
press Done (left softkey).
Viewing or changing contact information
1Press Home , and then press
Right to open the Favourite
Contacts content list.
2If the contact you want is displayed on
the list, select the contact to view the
contact’s information; to edit the
information, skip to step 5.
If the contact is not displayed, press All
Contacts (right softkey).
3In the Contacts list (viewed by name),
begin entering one of the following for
the contact you want to view or edit:
•First name
•Last name
TIP
Take some time to scroll down through all
the fields in a new contact. There are fields for
multiple addresses, phone numbers, email
addresses, and much more.
TIP
Be sure to enter mobile numbers and
email addresses in the correct fields so that
Messaging can find this info when you
address a message and Calendar can find
your contacts when you want to invite them
to meetings.
TIP
If you need to enter multiple contacts that
share information—for example, multiple
people who work at the same company—you
can copy one contact’s information and then
change only the fields you need for another
contact. In the contact list, highlight the first
contact, press Menu (right softkey), and then
select Copy Contact.
YOUR PERSONAL INFORMATION ORGANISER
CONTACTS 175
10
CHAPTER
•One or more letters of the first and
last name separated by a space
•Phone number (be sure to press
Option twice to turn on Option
Lock before entering a phone
number)
4Select the entry you want to open.
5Press Menu (right softkey) and
select Edit.
6Make changes to the entry as
necessary.
7Press Done (left softkey).
Deleting a contact
1In the Contacts list, highlight the
contact you want to delete.
TIP
You can type letters from the last name
first; for example, typing “S J” or “Smi Joh”
also finds “John Smith.”
DID
YOU
KNOW
?
The search function offers
several features that make it easy to find the
contact you want, even if you are not sure of
the exact name: 1) Search results include
name variations, such as “David” for “Dave.”
2) The search function inserts a space before
the last letter typed in if it cannot find a match.
So if entering “Davidm” returns to no results,
the search function automatically tries to
search for “David M.” 3) Search results
include soundalike entries, so entering
“Dwayne” returns results for “Duane” also.
DID
YOU
KNOW
?
When you select a contact
entry, you are presented with several options
for contacting the person, depending on what
information you have entered for the contact.
For example, you may see options for calling a
number associated with the contact, sending
an email to the contact’s email address, or
calling the last number you dialed to call the
contact.
DID
YOU
KNOW
?
You can find a contact by
company name. Press Menu (right softkey)
and select View By > Company. Select a
company name to see the contacts who work
there.
TIP
To view a particular group of contacts,
press Menu (right softkey), select Filter, and
then select the category you want to view.
YOUR PERSONAL INFORMATION ORGANISER
CONTACTS
176
10
CHAPTER
2Press Menu (right softkey) and
select Delete Contact.
3Press Ye s (left softkey) to confirm
the deletion.
Adding a contact to the Favourite
Contacts list
You can add up to 10 contacts to the
Favourite Contacts list so that you can
quickly access them.
1Press Home , and then press
Right to open the Favourite
Contacts content list.
2Select Add a Favourite.
3Select the contact you want to add and
press Centre . If the contact has
multiple phone numbers or email
addresses, select the number or
address you want to use and press
Centre .
Finding a contact in an online address
book
In addition to having contacts on your
device, you can also access contact
information from your organisation’s online
address book or Global Address List (GAL).
BEFORE YOU BEGIN Do the following:
•Make sure you are accessing Exchange
Server 2007 or Exchange Server 2003
upgraded to Service Pack 2.
•Synchronise with the Exchange server
in order for the Company Directory
option to appear.
1Press Home , and then press
Right to open the Favourite
Contacts content list.
2Press All Contacts (right softkey).
3Press Menu (right softkey), select
Company Directory, enter the name of
the contact, and then select Search.
Sending a contact
Your smartphone provides multiple options
for sending a contact’s information to
someone else.
1Press Home , and then press
Right to open the Favourite
Contacts content list.
2Press All Contacts (right softkey).
3Highlight the contact you want to send.
YOUR PERSONAL INFORMATION ORGANISER
CALENDAR 177
10
CHAPTER
4Press Menu (right softkey) and
select one of the following options:
Beam a contact to a nearby
Bluetooth device: Select Send
Contact > Beam, select the device,
and then press Beam (left
softkey).
Send a text message containing the
contact information: Select Send
Contact > Text Message. Select which
contact information you want to send
and press Done (left softkey).
Address the text message and press
Send (left softkey).
Send a multimedia message
containing the contact information:
Select Send as vCard, address the
multimedia message, and then press
Send (left softkey).
Calendar
Displaying your calendar
1Press Home , and then press
Start (left softkey).
2Navigate to the Upcoming Events
content list and press All Events
(right softkey).
3Press Menu (right softkey) and
select one of the following view
options:
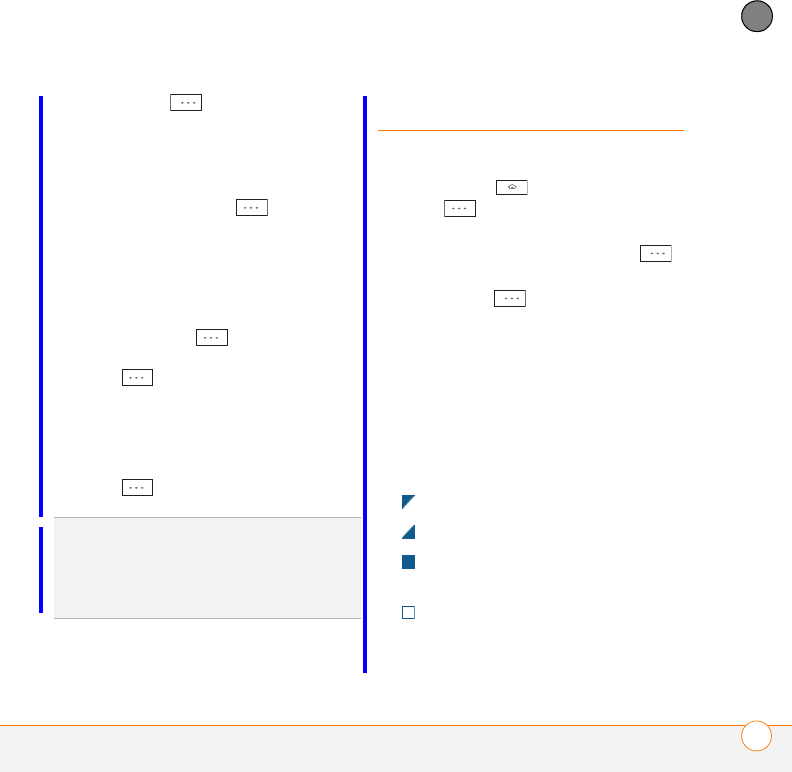
Week View: Shows your schedule for
an entire week.
Month View: Shows your schedule for
a whole month. In Month View, the
following icons appear on the date of
the appointment:
A morning appointment
An afternoon appointment
Both morning and evening
appointments
An all-day event
Go to Today: Shows your daily
schedule in list format. Upcoming
TIP
You can also quickly send a multimedia
message to a contact from within the
Contacts application. Highlight the contact
name, press Menu (right softkey), and then
select Send MMS.
YOUR PERSONAL INFORMATION ORGANISER
CALENDAR
178
10
CHAPTER
appointments are bold; past
appointments are dimmed.
Go to Date: Shows your daily schedule
in day-planner format. This view
displays a horizontal time strip at the top
to show at a glance when you have
appointments.
Creating an appointment
1Press Home , and then press
Start (left softkey).
2Navigate to the Upcoming Events
content list and press New (left
softkey).
3Use the 5-way navigator to move
among fields and enter information.
You must use the number keys to
enter date and time settings, including
AM or PM if you are using the 12-hour
time format—other keys have no
function when entering date and time
settings.
4Press Done (left softkey).
DID
YOU
KNOW
?
If your schedule contains a
conflict—two appointments that overlap—you
can see the conflict in Today View, Date View,
and Week View.
TIP
To switch views, press the left softkey.
Don’t confuse the view name displayed above
the left softkey with the current view. The
name above the left softkey is the name of
the next view you see when you press the
key.
TIP
To “pencil in” an appointment, open the
appointment, select Status, and then select
Te n t a t i v e .
TIP
You can display your appointments on
your Today screen (see Selecting your Home
screen layout).
YOUR PERSONAL INFORMATION ORGANISER
CALENDAR 179
10
CHAPTER
Adding an alarm reminder to an event
You can use the Reminder list to set an
alarm for an event when you create the
event. You can also add an alarm to an
event later, after you have created it.
1Create an event and then select it.
2Press Menu (right softkey) and
select Edit.
3Select the Reminder list and then
select the number of minutes, hours,
days, or weeks before the event you
would like to receive the alarm.
4Press Done (left softkey).
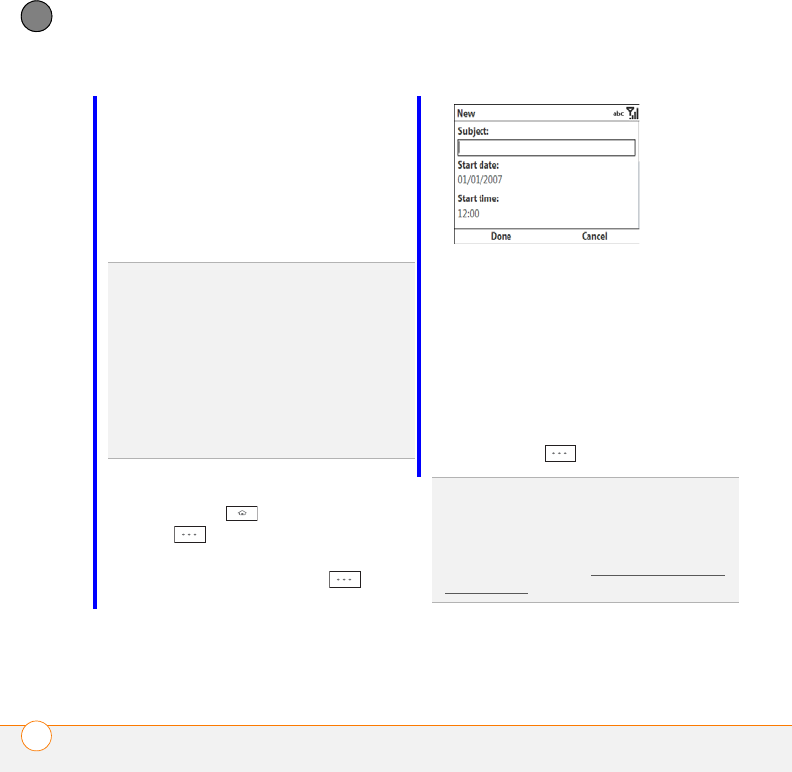
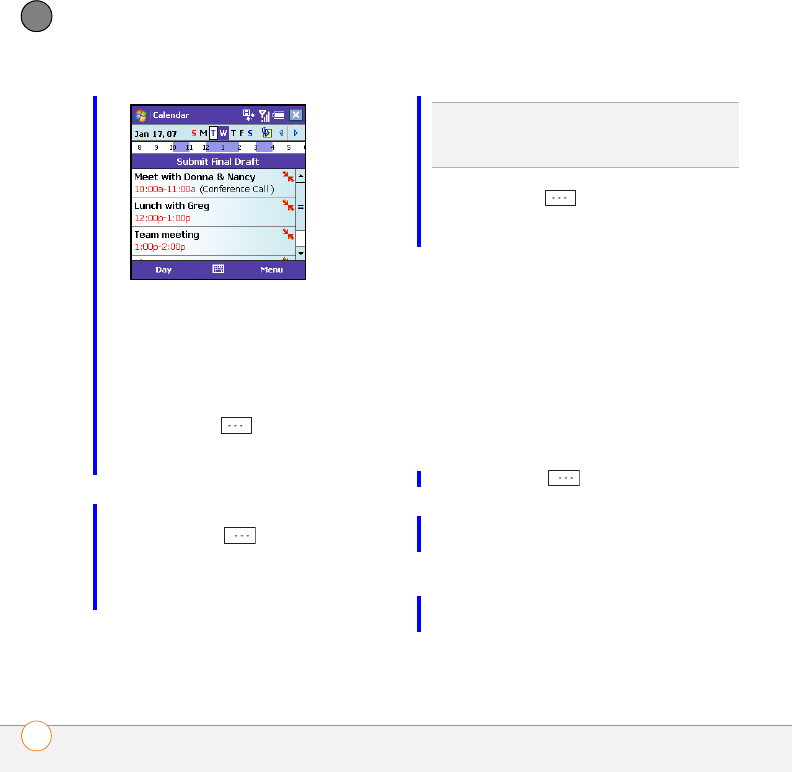
Creating an untimed event
An untimed event, such as a birthday,
anniversary, or vacation, does not occur at
a particular time of day. These events
appear as banners at the top of your
calendar; they don’t occupy blocks of time.
For example, “Submit Final Draft” in the
screenshot shown below is an untimed
event.
1Press Home , and then press
Start (left softkey).
2Navigate to the Upcoming Events
content list and press New (left
softkey).
Type of time units
Number of time units
DID
YOU
KNOW
?
An untimed event can last
longer than a day.
YOUR PERSONAL INFORMATION ORGANISER
CALENDAR
180
10
CHAPTER
3Enter a subject (description).
4Select the starting and ending dates. Do
not enter anything in the Start time or
End time field.
5Check the All day event box.
6Press Done (left softkey).
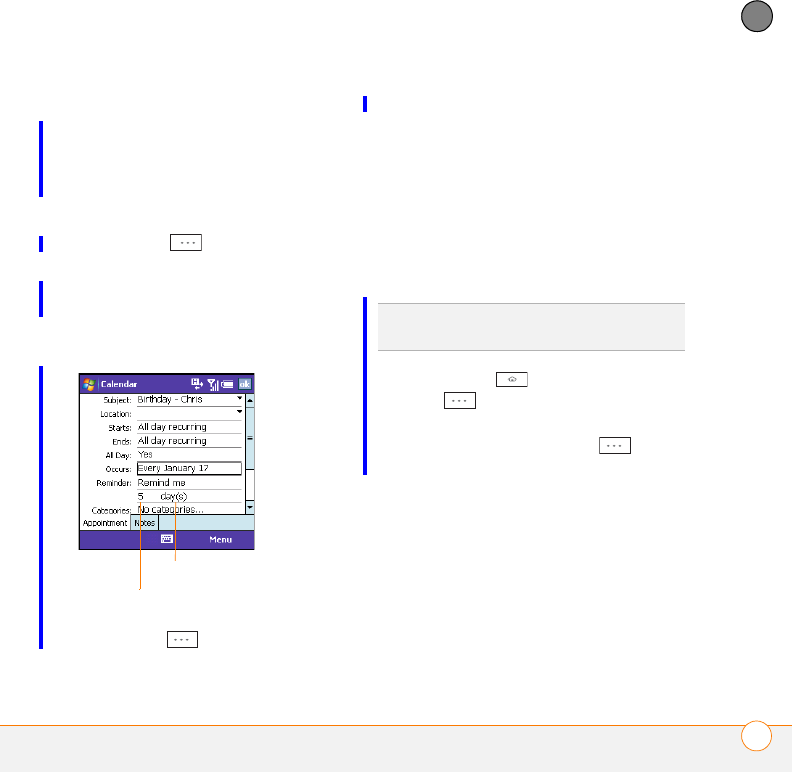
Scheduling a repeating appointment
1Create an appointment or untimed
event, and then select it.
2Press Menu (right softkey) and
select Edit.
3Select the Occurs list, and then select a
repeat pattern.
4Press Done (left softkey).
Sending a meeting request
You can email meeting invitations to
contacts who use Microsoft Office
Outlook® or Outlook Mobile.
BEFORE YOU BEGIN Create contact
entries with email addresses for the people
you want to invite to a meeting. You can’t
access contact entries without email
addresses from your calendar.
1Create an event, and then select it.
2Press Menu (right softkey) and
select Edit.
3Select the Attendees list. Select Add
Required Attendee, and then select
the name of the contact you want to
invite. To invite other attendees, select
Add Required Attendee, and then
select the name.
TIP
To enter a birthday or an anniversary,
create an untimed event that repeats every
year.
YOUR PERSONAL INFORMATION ORGANISER
CALENDAR 181
10
CHAPTER
4(Optional) To invite an optional
attendee, select Add Optional
Attendee, and then select the name.
5Press Done (left softkey).
The next time you synchronise, the
meeting request is sent to the attendees.
When attendees accept your meeting
request, the meeting is automatically
added to their schedules. When you
receive their response, your calendar is
updated as well.
Replying to a meeting request
You receive and reply to meeting requests
in the email application (see Working with
meeting invitations). If you accept or
tentatively accept an invitation, it shows up
as an appointment in your Calendar.
Marking an event as sensitive
If other people have access to your
Microsoft Office Outlook calendar on your
computer and you don’t want them to see
an appointment, you can mark that
appointment as private to hide it from
other Microsoft Office Outlook users.
1Create an event, and then select it.
2Press Menu (right softkey) and
select Edit.
3Select the Sensitivity list, and then
select one of the following:
Personal: Displays the event on your
smartphone and on your computer.
Meeting attendees or recipients see
“Please treat this as Personal” near the
top of an open appointment.
Private: Displays the event on your
smartphone and on your computer.
Meeting attendees or recipients see
“Please treat this as Private” near the
top of an open appointment. If you sync
with an Exchange server, other users
who can access your folders can’t see
your private events; they see private
events as unavailable time slots.
DID
YOU
KNOW
?
If you are using Exchange
Server 2007 or Exchange Server 2003 with
Service Pack 2, you can use your corporate
Global Address List to find contact information
for an attendee. On the contact list, select
Company Directory, and then select the
name of the contact you want to invite.
YOUR PERSONAL INFORMATION ORGANISER
CALENDAR
182
10
CHAPTER
Confidential: Displays the event on
your smartphone and on your computer.
Meeting attendees or recipients see
“Please treat this as Confidential” near
the top of an open appointment.
4Press Done (left softkey).
Deleting an event
1Highlight the event you want to delete.
2Press Menu (right softkey) and
select Delete Appointment.
3Press Ye s (left softkey) to confirm
the deletion.
Customising Calendar
1Press Menu (right softkey) and
select To o l s > Options.
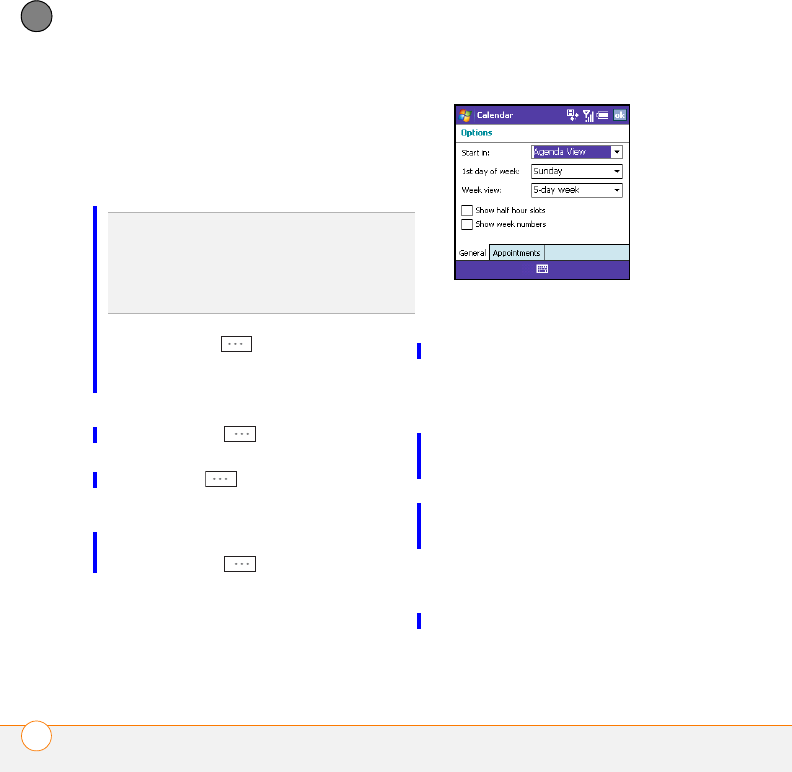
2On the General tab, set any of the
following options:
Start in: Specifies which view is
displayed when you open Calendar.
First day of week: Specifies Sunday or
Monday as the first day of the week for
all Calendar views.
Week view: Specifies whether five, six,
or seven days appear in Week View.
Month view/Show week numbers:
Specifies whether week numbers (1–
52) appear in Month View.
Set reminders: Specifies whether a
reminder is automatically added to new
events and how long before the event
the reminder appears. You can override
this setting for individual events.
TIP
If you don’t see an option on the screen,
press Down on the 5-way to scroll to other
options. For example, when editing an event,
you don’t see the Sensitivity option until you
scroll toward the bottom of the entry.
YOUR PERSONAL INFORMATION ORGANISER
TASKS 183
10
CHAPTER
Send meeting requests via: Specifies
the email account used to send meeting
requests.
3Press Done (left softkey).
Sending an appointment
1Press Home , and then press
Start (left softkey).
2Navigate to the Upcoming Events
content list and press All Events
(right softkey).
3Highlight the contact you want to send.
4and select one of the following options:
Beam an appointment to a nearby
Bluetooth device: Select the
appointment you want to send. Press
Menu (right softkey) and select
Beam Appointment. Select the
receiving device and press Beam
(left softkey).
Send a multimedia message
containing the appointment: Highlight
the appointment you want to send.
Press Menu (right softkey) and
select Send as vCalendar. Address the
multimedia message, and then press
Send (left softkey).
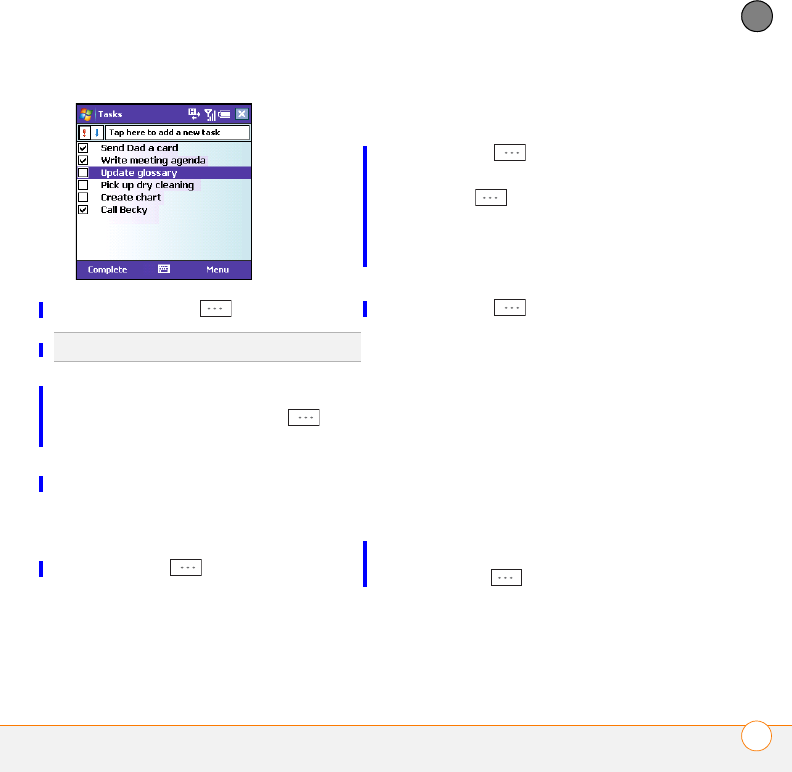
Tasks
You can use Tasks to remind you of tasks
you need to complete and to keep a record
of completed tasks.
Adding a task
1Press Home , and then press
Centre .
2Select Applications , and then
select Organiser & Tools .
3Press More (left softkey) and
select Tasks <ICON>.
4Press Menu (right softkey) and
select New Task.
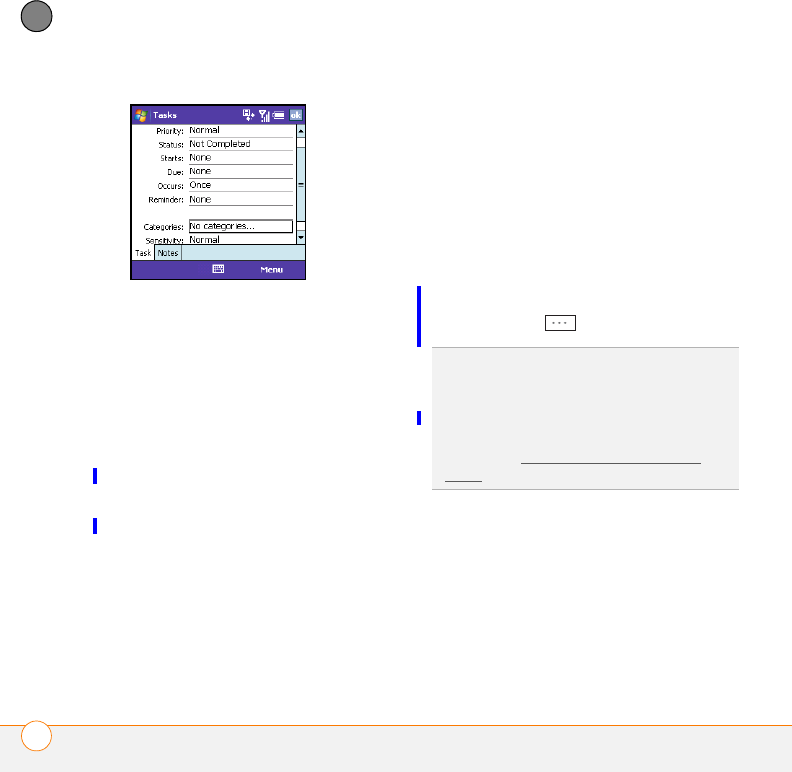
5Enter a description of the task in the
Subject field.
6Set any of the following:
YOUR PERSONAL INFORMATION ORGANISER
TASKS
184
10
CHAPTER
Priority: Specifies the priority level for
this task. Later you can arrange your
tasks based on the importance of each
task.
Status: Indicates whether the task is
now completed.
Start date: Specifies when the task
begins.
Due date: Specifies the due date for
the task.
Occurs: Indicates if the task repeats at
regular intervals and how often it
repeats.
Reminder: Sets an alarm for this task
and indicates when you want to be
reminded.
Categories: Assigns the task to one or
more categories.
Sensitivity: Marks this task as Normal,
Personal, Private, or Confidential.
Notes: Enables you to enter additional
text for the task.
7Press Done (left softkey).
Checking off a task
1Highlight the task you want to check
off.
TIP
You can also add a task by selecting the
Tasks entry bar at the top of the task list
screen, entering the task description, and
pressing Centre on the 5-way.
TIP
You can display your tasks on your Today
screen (see Selecting your Home screen
layout).
YOUR PERSONAL INFORMATION ORGANISER
TASKS 185
10
CHAPTER
2Press Complete (left softkey).
Organising your tasks
1In the Tasks list, press Menu
(right softkey) and select Filter.
2Select which tasks you want to view:
All Tasks, Recent, No Categories,
Active Tasks, Completed Tasks, or a
specific category, such as Business or
Personal.
3Press Menu (right softkey) and
select Sort By.
4Select the sort method: Status,
Priority, Subject, Start Date, or
Due Date.
Deleting a task
1Highlight the task you want to delete.
2Press Menu (right softkey) and
select Delete Task.
3Press Ye s (left softkey) to confirm
the deletion.
Customising Tasks
1Go to the Tasks list.
2Press Menu (right softkey) and
select Options.
3Set any of the following options:
Set reminders for new items:
Automatically adds a reminder to new
tasks. The default reminder is set to
8:00 on the morning the task is due.
You can override this setting for
individual tasks.
Show start and due dates: Displays
task start and due dates in the Tasks
list.
4Press Done (left softkey).
DID
YOU
KNOW
?
Overdue tasks appear in red.
YOUR PERSONAL INFORMATION ORGANISER
VOICE NOTES
186
10
CHAPTER
Voice Notes
Voice notes are a great way to capture
thoughts, questions, and meeting notes on
your smartphone.
Recording a voice note
1Press Home , and then press
Centre .
2Select Applications , and then
select Organiser & Tools .
3Press More (left softkey) and
select Voice Notes .
4Press Record (left softkey).
5Speak into the microphone on your
smartphone, or hold it close to another
sound source.
6When you have finished recording,
press Stop (left softkey).
Playing a voice note
1Highlight the voice note you want to
play.
2Press Menu (right softkey) and
select Play.
Renaming a voice note
1Highlight the voice note you want to
rename.
2Press Menu (right softkey) and
select Rename.
3Enter a new name for the note.
4Press Done (left softkey).
Deleting a voice note
1Highlight the voice note you want to
delete.
2Press Menu (right softkey) and
select Delete.
3Press Ye s (left softkey) to confirm
the deletion.
Using a voice note as your ringtone
1Highlight the voice note you want to
delete.
2Press Menu (right softkey) and
select Set As Ringtone.
3Press OK (left softkey).

CHAPTER
11
Your Microsoft Office and
other document tools
Yo u r Pa lm ® Tre o ™ 500v smartphone enables you to take your
office with you—including your Microsoft Office files. With
Microsoft Office, you can carry, view, and manage Microsoft
Word, Excel, and PowerPoint files on your smartphone. You
can keep updated copies of the files on both your smartphone
and your computer so that you can work on them in the most
convenient location at any time.
You can also use PDF Viewer to view PDF files on your
smartphone.
Benefits
•Manage Word, Excel, and
PowerPoint files on your
smartphone
•Improve productivity by taking
important docs, spreadsheets, and
presentations with you
•Work with PDF files

In this chapter
Synchronising your Microsoft Office files. . . . . . . . . . . . . . . . . . . . . 189
Word Mobile . . . . . . . . . . . . . . . . . . . . . . . . . . . . . . . . . . . . . . . . . . 191
PowerPoint Mobile . . . . . . . . . . . . . . . . . . . . . . . . . . . . . . . . . . . . . . 194
Excel Mobile. . . . . . . . . . . . . . . . . . . . . . . . . . . . . . . . . . . . . . . . . . . 197
PDF Viewer . . . . . . . . . . . . . . . . . . . . . . . . . . . . . . . . . . . . . . . . . . . 204
YOUR MICROSOFT OFFICE AND OTHER DOCUMENT TOOLS
SYNCHRONISING YOUR MICROSOFT OFFICE FILES 189
11
CHAPTER
Synchronising your
Microsoft Office files
You can create and edit Microsoft Office
files on your computer on your smartphone
and then synchronise the files so that
changes you make show up on both your
computer and your smartphone. To
synchronise Microsoft Office files, you
must first choose Files as one of your
synchronisation options on your
smartphone if you did not do so during
desktop software installation; see Setting
up wireless synchronisation and Changing
which applications sync.
The procedure for synchronising files is
different for computers running Windows
XP and computers running Windows Vista.
NOTE The Office mobile applications on
your smartphone are not compatible with
the Office 2007 desktop application.
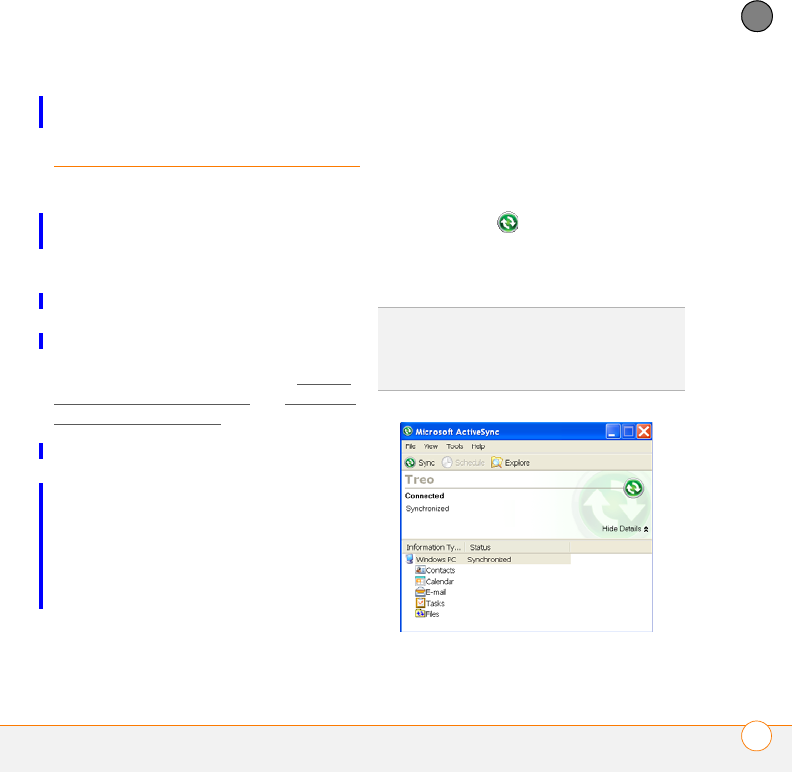
Synchronising files: Windows XP
1Connect your smartphone to your
computer with the USB sync cable.
NOTE Most ActiveSync desktop software
options are available only when your
smartphone is connected to your
computer.
2On your computer, double-click the
ActiveSync® icon in the taskbar in
the lower-right corner of your computer
screen to open the ActiveSync desktop
software window.
TIP
If the ActiveSync icon does not appear in
the taskbar, go to Start, navigate to
Programs, and then select Microsoft
ActiveSync to open the ActiveSync window.
YOUR MICROSOFT OFFICE AND OTHER DOCUMENT TOOLS
SYNCHRONISING YOUR MICROSOFT OFFICE FILES
190
11
CHAPTER
3Under Information Type, double-click
Files to view a list of all synchronised
files.
4Do any of the following:
•To delete a file from the file sync
folder on your computer and from
your smartphone, highlight the file
name and click Remove.
•To copy a file from your computer to
your smartphone, click Add, browse
to and highlight the file, and then click
Open.
NOTE If you receive an error while
synchronising files, make sure that all of
the files you’re trying to sync are closed on
both your computer and on your
smartphone.
Synchronising files: Windows Vista
1On your computer, copy or save the file
to the Documents\Documents on
username’s Smartphone folder.
2Connect your smartphone to your
computer with the USB sync cable.
Synchronisation takes place
automatically.
Where are the changes I made to my file?
Don't look for the changed file in its original
location on your computer. Only the
synchronised version contains the
changes, and that version is in the
ActiveSync file sync folder. To find this
folder, do one of the following:
Windows XP: On your computer desktop,
double-click the file sync folder icon. This is
a shortcut to the file sync folder.
Windows XP: In ActiveSync desktop
software, double-click Files. The location
of the file sync folder appears in the File
Synchronisation Settings dialog box (under
On this computer, synchronise the files in
this folder).
TIP
If Files doesn’t appear under Information
Type, open the Tools menu and select
Options. Make sure the Files box is checked.
DID
YOU
KNOW
?
The Documents on
username’s Smartphone folder is created
when you select the option to sync Files.
YOUR MICROSOFT OFFICE AND OTHER DOCUMENT TOOLS
WORD MOBILE 191
11
CHAPTER
Windows Vista: Open the Documents\
Documents on username’s Smartphone
folder.
On your smartphone, you can find the
synchronised file by doing either of the
following:
•Press Home , and then press
Centre . Select Applications ,
press More (left softkey), and
then select Office Mobile . Select
the application that opens the file: Word
Mobile , Excel Mobile , or
PowerPoint Mobile .
•Press Home , and then press
Centre . Select My Files .
Word Mobile
With Word Mobile, you can view and
change the text formatting of documents
stored on your smartphone or on an
expansion card (sold separately) inserted
into your smartphone.
Opening a document
1Press Home , and then press
Centre .
2Select Applications
3Press More (left softkey), and
then select Office Mobile .
4Select Word Mobile .
5Navigate to and select the file you want.
6To close the document, press
Menu (right softkey) and select
Close File.
DID
YOU
KNOW
?
If you have a PDF file (.pdf),
you can view the file using PDF Viewer. Press
Start, select Programs, and then select PDF
Viewer (see PDF Viewer).
TIP
If you want to create a new document,
open an existing document and save it with a
new name (see Saving a copy of a document).
Alternately, open the blank document
template located in the My Files/Templates
folder (see Exploring files and folders) and
then save it with a new name.

YOUR MICROSOFT OFFICE AND OTHER DOCUMENT TOOLS
WORD MOBILE
192
11
CHAPTER
Formatting text in a document
1Open the document whose text you
want to edit.
2Press Menu (right softkey) and
select Edit Mode.
3Highlight the text you want to format
(see Highlighting text).
4Press Menu (right softkey), select
Format, and then select the formatting
option you want: Bold, Italic,
Underline, or Highlight.
Finding or replacing text in a document
1Open the document containing the text
you want to find.
2Press Menu (right softkey) and
select Find.
3Select Find What and enter the text
you want to find.
4(Optional) Check the Match case box to
find text that matches the capitalisation
in the text you entered step 3.
5(Optional) Check the Whole words
only box to find only full words that
match the text you entered in step 3.
6Press Find (left softkey).
7Press Next (left softkey) to find
the next instance of the text, or press
Cancel (right softkey) to stop
searching.
TIP
To open a file on an expansion card, press
Menu (right softkey) and select Storage
Card.
TIP
To zoom in or out of an open document,
press View (left softkey) and select the zoom
level. To fit the document to your
smartphone’s screen, press View (left
softkey) and select Wrap to Window
TIP
To view a document’s properties,
including the size and the date created,
highlight the document name, press Menu
(right softkey), and then select Properties.
TIP
To undo the formatting change, press
Menu (right softkey) and select Undo. To
redo the last formatting change, highlight the
text you want, press Menu (right softkey) and
select Redo.
TIP
To exit Edit mode, press Menu (right
softkey) and select View Mode.
YOUR MICROSOFT OFFICE AND OTHER DOCUMENT TOOLS
WORD MOBILE 193
11
CHAPTER
Saving a copy of a document
NOTE If a document was previously saved
on a computer, any unsupported formatting
may be lost when you save the file.
1Open the document you want to copy.
2Press Menu (right softkey) and
select File > Save As.
3Select Name and enter a new name for
the file.
4Select the Location list, and then select
whether you want to store the file to
the My Files folder on your smartphone
(Main memory) or on an expansion
card (Storage Card).
5Select Save.
Changing the document list display
You can choose whether to display
documents in the documents list as icons
or in list format. You can also choose how
documents are sorted.
The options you choose apply to files
within the selected folder only. When you
select a folder, all items in that folder—
including any subfolders and other types of
files—are displayed or sorted according to
the options you select.
1Press Home , and then press
Centre .
2Select Applications
3Press More (left softkey), and
then select Office Mobile .
4Select Word Mobile .
5If the last document you were viewing
is displayed, press Menu (right
softkey) and select Close File to view
the documents list.
6Press Menu (right softkey) and
select the folder containing the
documents you want to work with: My
Device, Storage Card (if an expansion
card, sold separately, is inserted into
your smartphone), or My Files.
TIP
If you select Main memory, the document
is saved to the My Files folder on your
smartphone by default. After the file is saved,
you can move it to a different folder if you
want (see Finding information).
YOUR MICROSOFT OFFICE AND OTHER DOCUMENT TOOLS
POWERPOINT MOBILE
194
11
CHAPTER
7To change the documents list display,
press Menu (right softkey) and
select View. Select Icons or List.
8To change the sort criteria, press Menu
(right softkey) and select Sort By.
Select the sort option you want: Name,
Date, Size, or Ty p e .
The first time you select a sort option,
items are sorted in ascending (A-Z,
oldest to most recent, or smallest to
largest) order. To change to descending
(Z-A, most recent to older, or largest to
smallest) order, press Menu (right
softkey) and select the same sort
option.
PowerPoint Mobile
With PowerPoint Mobile, you can open and
view slide show presentations created on
your computer. Many presentation
elements such as slide transitions,
animations, and URL links are supported.
Playing a presentation
1Press Home , and then press
Centre .
2Select Applications
3Press More (left softkey), and
then select Office Mobile .
4Select PowerPoint Mobile .
5Navigate to and select the file you want.
6Press Right to advance to the next
slide or Left to view the previous
slide.
NOTE If a presentation is set up as a
timed slide show, the slides advance
automatically. Presentations pause during
zooming.
TIP
To sort documents in a different folder,
select My Device or My Files and navigate to
the folder you want.
TIP
To open a file on an expansion card, press
Menu (right softkey) and select Storage
Card.
TIP
To view a document’s properties,
including the size and the date created,
highlight the document name, press Menu
(right softkey), and then select Properties.
YOUR MICROSOFT OFFICE AND OTHER DOCUMENT TOOLS
POWERPOINT MOBILE 195
11
CHAPTER
7(Optional) If the softkey text labels are
hidden, press the right or left
softkey to display the labels, and
then do either of the following:
•Press Menu (right softkey),
select Go to Slide, and then select
the slide you want to view.
•Press Menu (right softkey) and
select Zoom In or Zoom Out.
8Press End (left softkey) to stop
the show.
Setting presentation playback options
1Open the presentation for which you
want to change the settings.
2Press Menu (right softkey) and
select Options.
3Select the Orientation list, and then
select the orientation you want.
4Check the Override playback options
box and set any of the following
options:
Without animation: Turns off builds
and other animations.
Without transition: Turns off transition
effects between slides.
Without media: Turns off sound or
other media files.
Use timings: Enables the timings
recorded with each slide in a
presentation. If a presentation is set up
as a timed slide show, the slides
advance automatically. Presentations
pause during zooming.
Loop continuously: Advances to the
first slide after playing the last slide in a
presentation.
5Press Done (left softkey).
TIP
To show web addresses as underlined
hyperlinks, press Menu (right softkey) and
select Show Links.
DID
YOU
KNOW
?
By default, the softkey labels
such as Menu are hidden when you open a
presentation, so you need to press the right
or left softkey once to display them, and then
press Menu (right softkey) to open the menu.

YOUR MICROSOFT OFFICE AND OTHER DOCUMENT TOOLS
POWERPOINT MOBILE
196
11
CHAPTER
Changing the presentation list display
You can choose whether to display
presentations in the presentations list as
icons or in list format. You can also choose
how presentations are sorted.
The options you choose apply to files
within the selected folder only. When you
select a folder, all items in that folder—
including any subfolders and other types of
files—are displayed or sorted according to
the options you select.
1Press Home , and then press
Centre .
2Select Applications
3Press More (left softkey), and
then select Office Mobile .
4Select PowerPoint Mobile .
5If the last presentation you were
viewing is displayed, press End
(left softkey) to close the presentation
and view the presentations list.
6Press Menu (right softkey) and
select the folder containing the
presentations you want to work with:
My Device, Storage Card (if an
expansion card, sold separately, is
inserted into your smartphone), or My
Files.
7To change the presentations list display,
press Menu (right softkey) and
select View. Select Icons or List.
8To change the sort criteria, press Menu
(right softkey) and select Sort By.
Select the sort option you want: Name,
Date, Size, or Ty p e .
The first time you select a sort option,
items are sorted in ascending (A-Z,
oldest to most recent, or smallest to
largest) order. To change to descending
(Z-A, most recent to older, or largest to
TIP
To turn the presentation into a
continuously looping slide show, check both
the Use timings and the Loop continuously
boxes.
TIP
To customize your presentation playback,
press Menu (right softkey); select Custom;
and then select the slides you want to include,
the order of slides, and so on. Custom slide
show is not available for all presentations.
TIP
To sort presentations in a different folder,
select My Device or My Files and navigate to
the folder you want.
YOUR MICROSOFT OFFICE AND OTHER DOCUMENT TOOLS
EXCEL MOBILE 197
11
CHAPTER
smallest) order, press Menu (right
softkey) and select the same sort
option.
Saving a copy of a presentation
NOTE If a presentation was previously
saved on a computer, any unsupported
formatting may be lost when you save the
file.
1Open the presentation you want to
copy.
2If the softkey text labels are hidden,
press the right or left
softkey to display the labels.
3Press Menu (right softkey) and
select File > Save As.
4Select Name and enter a new name for
the file.
5Select the Location list, and then select
whether you want to store the file to
the My Files folder on your smartphone
(Main memory) or on an expansion
card (Storage Card).
6Select Save.
Excel Mobile
With Excel Mobile you can view and edit
workbooks on your smartphone. You can
also edit workbooks that you create on
your computer. However, keep in mind
that you may lose some of the information
and formatting when you save the
workbook on your smartphone.
Viewing a workbook
1Press Home , and then press
Centre .
2Select Applications
3Press More (left softkey), and
then select Office Mobile .
4Select Excel Mobile .
5Navigate to and select the file you want.
TIP
If you select Main memory, the
presentation is saved to the My Files folder on
your smartphone by default. After the file is
saved, you can move it to a different folder if
you want (see Finding information).
YOUR MICROSOFT OFFICE AND OTHER DOCUMENT TOOLS
EXCEL MOBILE
198
11
CHAPTER
6If the softkey text labels are hidden,
press the right or left
softkey to display the labels.
7Press View (left softkey) and
select any of the following:
Full Screen: Shows as much of a
worksheet as can be displayed with a
readable text size.
Cell Text: Shows the full contents of a
highlighted cell, as well as the cell row
letter and column number. The Cell Text
option does nothing if an empty cell is
highlighted.
Overview: Shows an entire worksheet.
In Overview view, you can select an
area of the worksheet to view in Full
Screen view. Use the 5-way to
move the red selection border, and
press Centre to select the area you
want to view.
Freeze Panes: Locks rows and columns
so they remain visible while you scroll.
Highlight the cell at the point at which
you want to lock before you select this
command. To unlock the rows or
columns, select View > Unfreeze
Panes.
Zoom: Sets the magnification level so
that you can easily read the worksheet.
Sheet: Lets you switch to a different
worksheet.
Split: Divides the window into two
scrollable areas. To move the split bar,
tap and drag it. To remove the split bar,
select View > Remove Split.
To o l b a r : Indicates whether the toolbar
appears onscreen.
Status Bar: Indicates whether the
status bar appears onscreen.
TIP
To open a file on an expansion card, press
Menu (right softkey) and select Storage
Card.
DID
YOU
KNOW
?
By default, the softkey labels
such as Menu are hidden when you open a
workbook, so you need to press the right or
left softkey once to display them, and then
press Menu (right softkey) to open the menu.
TIP
To zoom in or out and set other viewing
options, press the right or left softkey, press
View (right softkey), and then select the
options you want.
YOUR MICROSOFT OFFICE AND OTHER DOCUMENT TOOLS
EXCEL MOBILE 199
11
CHAPTER
Show: Indicates whether headings and
scroll bars appear onscreen.
Entering text in a cell
1Open the workbook where you want to
enter text.
2If the softkey text labels are hidden,
press the right or left
softkey to display the labels.
3Press Menu (right softkey) and
select Edit Mode.
4Press Menu (right softkey) and
select Cell Text.
5Enter the text you want.
6Press Done (left softkey).
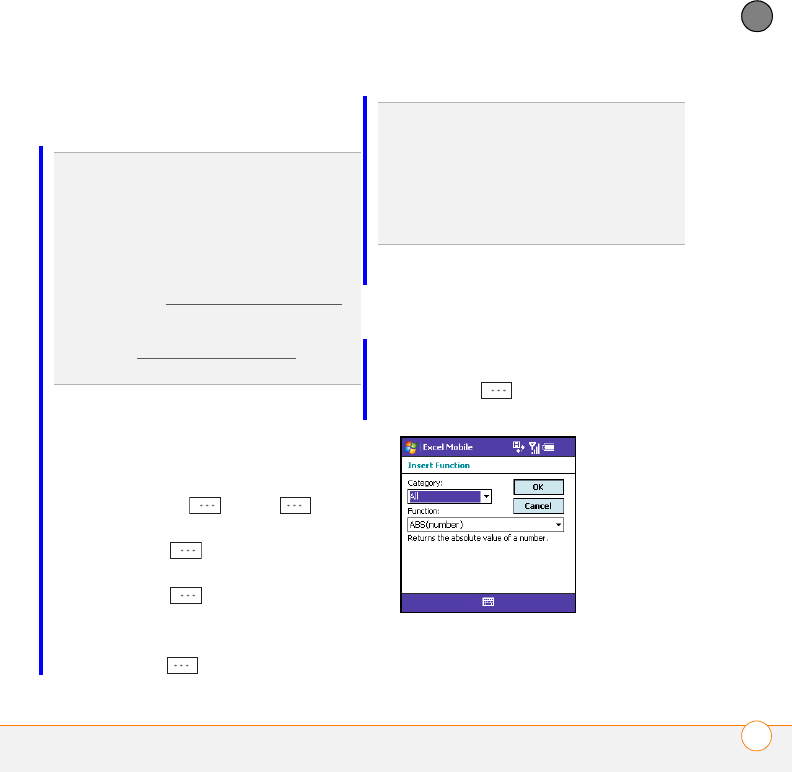
Inserting a function
1Open the workbook where you want to
insert the function.
2Select the cell where you want to insert
the function.
3Press Edit (right softkey) and
select Insert Function.
TIP
To jump to a cell or region, press Menu
(right softkey) and select Go To. (In Edit
mode, select To o l s > Go To.) Select Cell
reference or name and enter the target cell
info. Press OK (left softkey).
TIP
If you want to create a new workbook,
open an existing workbook and save it with a
new name (see Saving a copy of a workbook).
Alternately, open the blank workbook
template located in the My Files/Templates
folder (see Exploring files and folders) and
then save it with a new name.
TIP
To quickly delete cell text, in Edit mode,
press Menu (right softkey) and select Clear
Cell.
TIP
To undo or redo any edits you make in a
workbook, in Edit mode, press Menu (right
softkey) and select Undo [last action] or
Redo [last action].
YOUR MICROSOFT OFFICE AND OTHER DOCUMENT TOOLS
EXCEL MOBILE
200
11
CHAPTER
4Select the Category list, and then
select the type of function you want to
insert.
5Select the Function list, and then select
the specific function you want to insert.
6Press OK (left softkey).
7Enter any values needed in the function.
8Press Done (left softkey).
Selecting cells, rows, or columns
1Open the workbook containing the
elements you want to select.
2If the softkey text labels are hidden,
press the right or left
softkey to display the labels.
3Press Menu (right softkey) and
select Edit Mode.
4Navigate to one of the cells you want to
select so that it is highlighted.
5Press Menu (right softkey), select
Select, and then select the type of item
you want to select: Cells, Columns,
Rows, or All (all cells in the worksheet).
6If you selected Cells, Columns, or
Rows, use the 5-way to highlight
the items you want.
7Press Done (left softkey).
Adding cells, rows, or columns
1Open the workbook you want.
2If the softkey text labels are hidden,
press the right or left
softkey to display the labels.
3Press Menu (right softkey) and
select Edit Mode.
4Select the area above or to the left of
where you want to insert an element
(see Selecting cells, rows, or columns).
5Press Menu (right softkey),
select Insert > Cells, and then select
how you want to insert the elements:
Entire row: Inserts the same number
of new rows as the number of cells you
selected vertically in step 2—for
example, if you selected an area
containing two cells vertically (say A1
and A2), selecting Entire row inserts
two rows; so the original rows 1 and 2
(and their contents) are now rows 3 and
4. The rows containing the selected
area and all rows beneath it move the
same number of rows—two in this
example—down.
YOUR MICROSOFT OFFICE AND OTHER DOCUMENT TOOLS
EXCEL MOBILE 201
11
CHAPTER
Entire column: Inserts the same
number of new columns as the number
of cells you selected horizontally in step
2—for example, if you selected an area
containing two cells horizontally (say,
A1 and B1), selecting Entire column
inserts two columns; so the original
columns A and B (and their contents)
are now columns C and D. The columns
containing the selected area and all
columns on the right move the same
number of columns—two in this
example—to the right.
Shift Right: Inserts the same number
of new cells as the number of cells you
selected horizontally in step 2—for
example, if you selected an area
containing two cells horizontally (say, A1
and B1), selecting Shift cells right
inserts two horizontal cells; so the
original A1 and B1 (and their contents)
are now C1 and D1. The selected area
and all cells on the right move the same
number of columns—two in this
example—to the right.
Shift Down: Inserts the same number
of new cells as the number of cells you
selected vertically in step 2—for
example, if you selected an area
containing two cells vertically (say, A1
and A2), selecting Shift cells down
inserts two vertical cells; so the original
A1 and A2 (and their contents) are now
A3 and A4. The selected area and all
cells below it move the same number of
rows—two in this example—down.
6Press Done (left softkey).
Moving cells, rows, or columns
You can cut or copy an area of a worksheet
and paste it elsewhere on the same
worksheet or on a different worksheet.
1Open the workbook containing the
elements you want to move.
2If the softkey text labels are hidden,
press the right or left
softkey to display the labels.
3Press Menu (right softkey) and
select Edit Mode.
4Select the area you want to move (see
Selecting cells, rows, or columns).
5Press Menu (right softkey) and
select Cut or Copy,
YOUR MICROSOFT OFFICE AND OTHER DOCUMENT TOOLS
EXCEL MOBILE
202
11
CHAPTER
6Navigate to the area where you want to
insert the cells, rows, or columns.
7Press Menu (right softkey) and
select Paste,
Deleting cells, rows, or columns
1Open the workbook containing the
elements you want to delete.
2If the softkey text labels are hidden,
press the right or left
softkey to display the labels.
3Press Menu (right softkey) and
select Edit Mode.
4Select the area you want to delete (see
Selecting cells, rows, or columns).
5Press Menu (right softkey), select
Delete Cells, and then select how you
want to remove the elements:
Shift cells left: Deletes the highlighted
cells and moves all cells on their right to
the left.
Shift cells up: Deletes the highlighted
cells and moves all cells below them up.
Entire row: Deletes the entire row(s) in
which the highlighted cells are located,
and moves all rows below up.
Entire column: Deletes the entire
column(s) in which the highlighted cells
are located, and moves all columns on
their right to the left.
NOTE Excel Mobile adjusts formulas to
reflect the new cell locations. However, a
formula that refers to a deleted cell
displays the #REF! error value.
6Press Done (left softkey).
Naming a cell or range of cells
1Open the workbook containing the cells
you want to name.
2If the softkey text labels are hidden,
press the right or left
softkey to display the labels.
3Press Menu (right softkey) and
select Edit Mode.
4Press Menu (right softkey) and
select Define Name.
5Select Range Name and enter a name
for the cell or range.
6Select Refers to and enter the cell
range to be included.
7Press Done (left softkey).
YOUR MICROSOFT OFFICE AND OTHER DOCUMENT TOOLS
EXCEL MOBILE 203
11
CHAPTER
Sorting info in a worksheet
1Open the workbook containing the
elements you want to delete.
2If the softkey text labels are hidden,
press the right or left
softkey to display the labels.
3Press Menu (right softkey) and
select Edit Mode.
4Select the cells you want to sort (see
Selecting cells, rows, or columns).
5Press Menu (right softkey) and
select To o l s > Sort.
6Select the Sort by list, and then select
the primary sort column.
7Check the Ascending box to sort in
ascending order. Leave the box
unchecked to sort in descending order.
8(Optional) Select the Then by lists, and
then select second- and third-level
sorting options.
9Check or uncheck the Exclude header
row from sort box to indicate whether
you want to sort the header row.
10 Press OK (left softkey).
Finding info in a workbook
1Open the workbook containing the info
you want to find.
2If the softkey text labels are hidden,
press the right or left
softkey to display the labels.
3Press Menu (right softkey) and
select Find.If you are in Edit mode,
select To o l s > Find.
4Select Find what and enter the info you
want to find.
5(Optional) Check the Match case box to
find text that matches the capitalisation
in any text you entered in step 3.
6(Optional) Check the Match entire cells
box to find only entire cell contents that
match any text you entered in step 3.
7Select the Look in list and select
whether to look in Formulas or Values.
8Press Find (left softkey).
9Press Next (left softkey) to find
the next instance of the text, or press
Cancel (right softkey) to stop
searching.
YOUR MICROSOFT OFFICE AND OTHER DOCUMENT TOOLS
PDF VIEWER
204
11
CHAPTER
Saving a copy of a workbook
NOTE If a workbook was previously saved
on a computer, any unsupported
formatting may be lost when you save the
file.
1Open the workbook you want to copy.
2If the softkey text labels are hidden,
press the right or left
softkey to display the labels.
3Press Menu (right softkey) and
select File > Save As.
4Select Name and enter a new name for
the file.
5Select the Location list, and then select
whether you want to store the file to
the My Files folder on your smartphone
(Main memory) or on an expansion
card (Storage Card).
6Select Save.
PDF Viewer
Picsel PDF Viewer lets you view PDF files
whether they are saved to your
smartphone, attached to email messages,
stored on an expansion card (sold
separately) inserted into your
smartphone’s expansion card slot, or
downloaded from the web.
Opening a file
1Press Home , and then press
Centre .
2Select Applications , and then
select PDF Viewer .
3Press File (left softkey) and select
Open.
4Navigate to and select the file you want.
TIP
If you select Main memory, the workbook
is saved to the My Files folder on your
smartphone by default. After the file is saved,
you can move it to a different folder if you
want (see Finding information).
TIP
To open a recently viewed file, press File
(left softkey) and select Recent Files.
TIP
To open a file on an expansion card, after
you select Open, select the topmost folder
icon with two periods next to it, and then
select Storage Card.
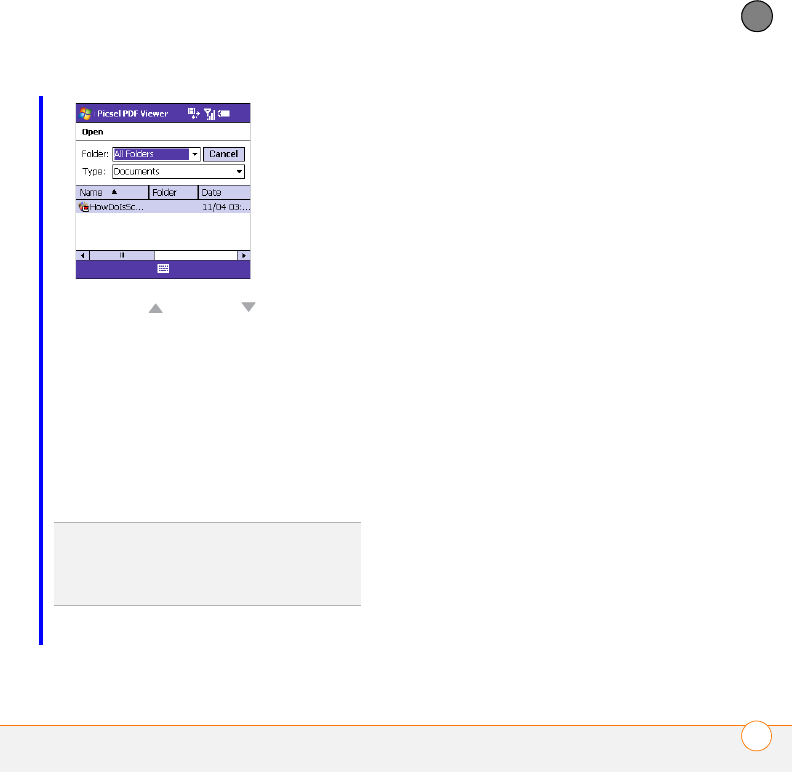
YOUR MICROSOFT OFFICE AND OTHER DOCUMENT TOOLS
PDF VIEWER 205
11
CHAPTER
5Press Up , or Down to scroll
through the file.
6(Optional) To zoom in or out, press
Zoom (right softkey) and select the
zoom level. Select Page Width to
resize the file so that the width of the
file matches the width of the screen.
7When you have finished viewing the file
press File (left softkey) and select
Close.
TIP
To view detailed information about PDF
Viewer, press File (left softkey) and select
About. For help using the application, press
File (left softkey) and select Help.

YOUR MICROSOFT OFFICE AND OTHER DOCUMENT TOOLS
PDF VIEWER
206
11
CHAPTER

CHAPTER
12
Your application and info
management tools
Yo u r Pa l m ® Tr eo ™ 500v smartphone comes equipped with a
variety of tools for managing and organising your information.
Get the most out of your smartphone: Install business,
education, or leisure-time applications available. After you use
your smartphone to create or capture important business and
personal information, use one of several options to share the
info with others. Insert expansion cards (sold separately) for a
compact and virtually limitless answer to the storage dilemma.
And because there’s one on your smartphone, you never need
to carry a separate calculator.
Benefits
•Locate info in any application
•Install applications, games, and
other software
•Keep others up-to-date with
meaningful business and personal
information
•Store, carry, and exchange info
•Always have a calculator with you

In this chapter
Finding information . . . . . . . . . . . . . . . . . . . . . . . . . . . . . . . . . . . . . 209
Installing applications . . . . . . . . . . . . . . . . . . . . . . . . . . . . . . . . . . . . 210
Removing applications . . . . . . . . . . . . . . . . . . . . . . . . . . . . . . . . . . . 213
Sharing information . . . . . . . . . . . . . . . . . . . . . . . . . . . . . . . . . . . . . 214
Beaming information . . . . . . . . . . . . . . . . . . . . . . . . . . . . . . . . . . . . 214
Using expansion cards . . . . . . . . . . . . . . . . . . . . . . . . . . . . . . . . . . . 216
Calculator . . . . . . . . . . . . . . . . . . . . . . . . . . . . . . . . . . . . . . . . . . . . . 221
YOUR APPLICATION AND INFO MANAGEMENT TOOLS
FINDING INFORMATION 209
12
CHAPTER
Finding information
Quickly find who or what you’re looking for
by using one of these search features:
•Lookup: Find and dial your contacts by
name or phone number. See Dialling by
contact name for details.
•My Files: Browse through the files and
folders on your smartphone or on an
expansion card.
•Global Address List Lookup: Look up
names in your online corporate address
list.
•Email message search: Display only
those messages whose senders,
recipients, or subjects match the text
you enter (see Finding messages).
Exploring files and folders
You can browse the contents of folders on
your smartphone or on an expansion card.
The root folder on your smartphone is
named My Device. My Device is similar to
My Computer (Windows XP) or Computer
(Windows Vista) on your computer.
Your smartphone also contains a My Files
folder where pictures you capture and
Office Mobile files you save are stored by
default. My Files is similar to My
Documents (Windows XP) or Documents
(Windows Vista) on your computer
1Press Home , and then press
Centre .
2Select My Files <ICON>.
3Navigate to and select the folder
you want to explore. Here are some
tips:
To move up one folder level: Press Up
(left softkey).
To quickly jump to the My Device
folder: Press Menu (right softkey)
and select My Device.
To quickly jump to the My Files
folder: Press Menu (right softkey)
and select My Files.
TIP
For information on opening and closing
apps, see Opening and closing applications.
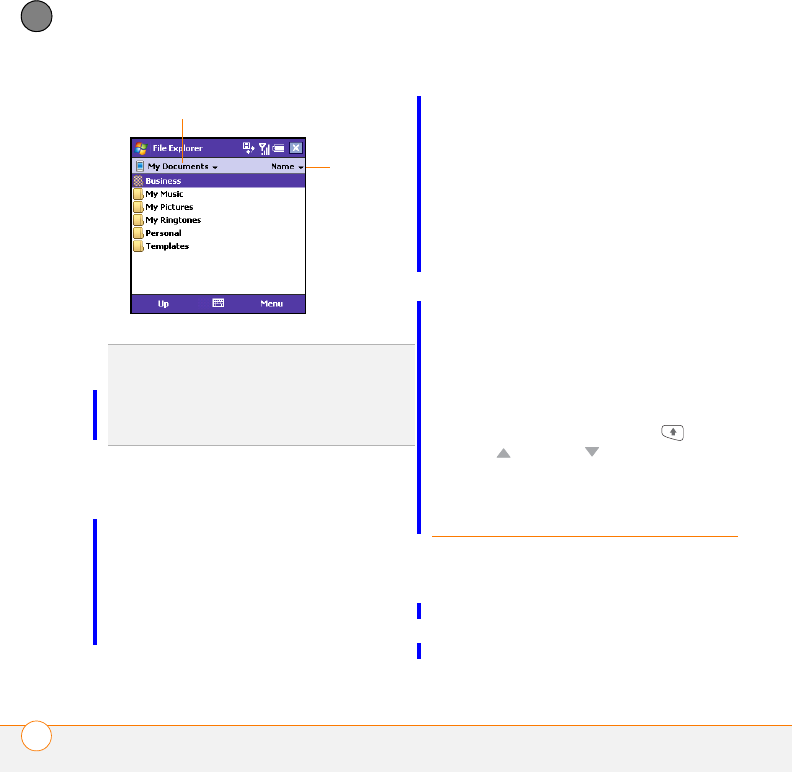
YOUR APPLICATION AND INFO MANAGEMENT TOOLS
INSTALLING APPLICATIONS
210
12
CHAPTER
4Do any of the following:
•To open an item, select it.
•To delete or rename an item, highlight
the item, press Menu (right softkey),
select Edit, and then select the
appropriate command.
IMPORTANT Do not delete any files that
you cannot identify. These files may be
required for your smartphone to function
properly.
•To send an item, highlight the item,
press Menu (right softkey) and select
Beam to send to another nearby
Bluetooth device, or select Send and
select the method you want to use
the send the item.
•To move a file to another folder,
highlight the item, press Menu (right
softkey), select Edit, and then select
Cut or Copy. Open the destination
folder, press Menu (right softkey),
select Edit, and then select Paste.
•To highlight multiple items, while
pressing and holding Shift , press
Up or Down .
Installing applications
Your smartphone comes with several
built-in and ready-to-use applications. You
can also install third-party applications that
are compatible with Microsoft Windows
Mobile® 6 Standard edition devices, such
as business software, games, and more.
DID
YOU
KNOW
?
When the items in a folder are
displayed, you can sort them by name, date,
size, or type. Press Menu (right softkey),
select Sort by, and then select the sort
method.
Show list
Sort by
list

YOUR APPLICATION AND INFO MANAGEMENT TOOLS
INSTALLING APPLICATIONS 211
12
CHAPTER
Applications you download to your
computer are likely to be in a compressed
format such as ZIP. If the file is
compressed, you need to use a
decompression utility on your computer,
such as WinZip, to decompress the file
before you install the application on your
smartphone.
These instructions tell you how to install
basic files onto your smartphone. Some
software uses an installer or wizard to
guide you through the process. For details,
consult the documentation that came with
the software.
Installing third-party applications
When installing third-party applications,
note the following:
•Install only apps that are designed for
Microsoft Windows Mobile 6 Standard.
•Apps designed for Microsoft Windows
Mobile 6 Professional or any edition of
Windows Mobile 5.x software are not
compatible with your smartphone.
•If you can try a free or trial version of
the software before purchasing it, you
can test it first to make sure it works
properly.
NOTE If you encounter a problem with a
third-party application (such as an error
message), contact the application’s vendor.
For general troubleshooting of third-party
applications, see Third-party applications.
Installing applications from the Internet
You can use Internet Explorer Mobile to
install Windows Mobile apps in the CAB
file format directly from the Internet. For
files in any other format except CAB, you
must first download the files to your
computer and then install them to your
smartphone by synchronising.
TIP
If an application does not have a Microsoft
Mobile to Market certificate, you see a
message indicating that the application is
untrusted. If this occurs, you can indicate
whether you want to continue the installation.
DID
YOU
KNOW
?
You can purchase a third-party
application that lets you run Palm OS®
applications on your smartphone.
YOUR APPLICATION AND INFO MANAGEMENT TOOLS
INSTALLING APPLICATIONS
212
12
CHAPTER
1Make sure your phone is on and that
you are in a coverage area (see Turning
your phone on).
2Download the application file you want
to install (see Downloading files and
images from a web page).
3When the download has finished, press
Home , and then press
Centre .
4Select My Files <ICON>.
5Select the file you downloaded to start
the installation program.
Installing applications from your
computer
BEFORE YOU BEGIN To install an
application from your computer to your
smartphone, you must first install the
desktop synchronisation software on
your computer (see Installing ActiveSync
desktop software: Windows XP or
Installing Windows Mobile Device Center:
Windows Vista).
1Open My Computer or Windows
Explorer on your computer.
2Double-click the icon representing your
smartphone.
3Copy the application file(s) into the
folder.
4Connect your smartphone to your
computer to synchronise and install the
application(s) on your smartphone.
Installing applications onto an expansion
card
BEFORE YOU BEGIN To install an
application from your computer to an
expansion card, you must first install the
desktop synchronisation software on
your computer (see Installing ActiveSync
TIP
You can install Java application files called
Midlets onto your smartphone, either from
your computer or from the Internet. (To install
a Midlet from your computer, first copy the
file to your smartphone using your desktop
synchronisation software.) Press Home,
press Centre, and then select Applications.
Select Organiser & Tools, and then select
Java. Press Menu (right softkey), select
Install, and then select Local (to install a file
from your computer) or Internet. After you
install the file, press Menu (right softkey) to
perform various tasks using the file.
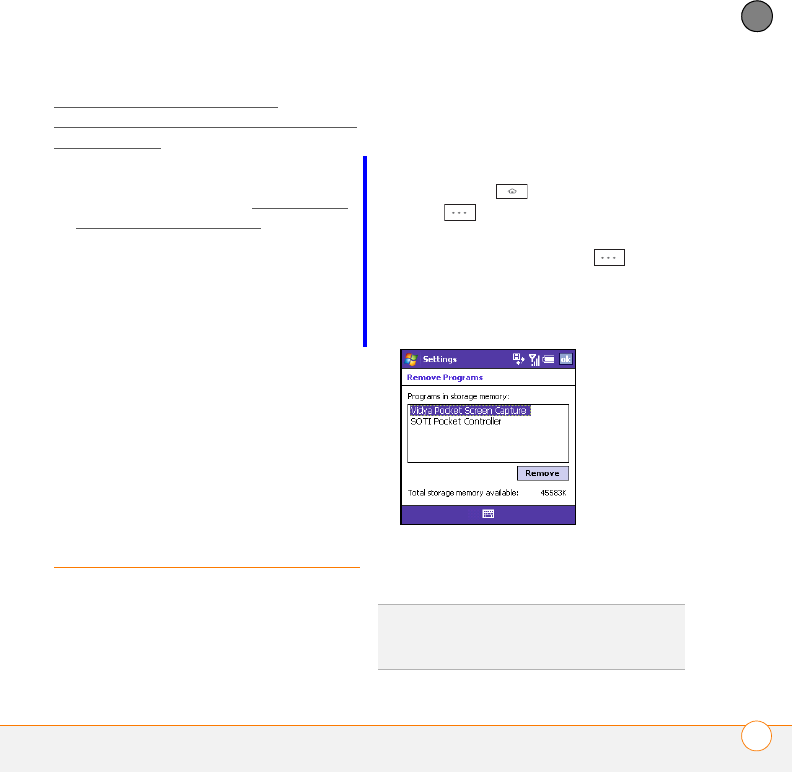
YOUR APPLICATION AND INFO MANAGEMENT TOOLS
REMOVING APPLICATIONS 213
12
CHAPTER
desktop software: Windows XP or
Installing Windows Mobile Device Center:
Windows Vista).
1Insert the expansion card into the
expansion card slot (see Inserting and
removing expansion cards).
2Connect your smartphone to your
computer using the USB sync cable.
3Open My Computer or Windows
Explorer on your computer.
4Double-click the icon representing your
smartphone.
5Navigate to the folder representing the
expansion card.
6Copy the application file(s) into the
expansion card folder.
Removing
applications
To free up memory on your smartphone,
you can remove applications that you no
longer use. You can remove only
applications, patches, and extensions that
you install; you cannot remove the built-in
applications that reside in the Read-Only
Memory (ROM) portion of your
smartphone.
1Press Home , and then press
Start (left softkey).
2Navigate to the My Settings content
list and press All Settings (right
softkey).
3Select More, and then select Remove
Programs.
4Highlight the application that you want
to remove.
DID
YOU
KNOW
?
Built-in applications that
cannot be deleted are not listed in the
Remove Programs list.
YOUR APPLICATION AND INFO MANAGEMENT TOOLS
SHARING INFORMATION
214
12
CHAPTER
5 Press Menu (right softkey) and
select Remove.
6Press Ye s (left softkey) to confirm
the deletion.
7Press Done (left softkey)
Sharing information
Your smartphone comes equipped
with a variety of options for sharing
information, so that you can choose the
quickest, most convenient way to send
your info or to receive info from another
device.
•When you have a file open such as a
picture or a Word document, you can
easily share a file by pressing Menu
(right softkey) and then selecting
the Send or Beam option. The option
name changes depending on the type of
file you are sending.
•You can insert a picture or attach a note
or other file to an email. You can also
receive pictures and attachments (see
Your email).
•You can attach a picture, video, or
sound file to a multimedia message
(see Creating and sending a multimedia
message).
•You can synchronise to share info
between your smartphone and your
computer or between your smartphone
and Microsoft Exchange Server 2003 or
2007 (see Synchronising information).
•If you are near someone, you can beam
files and applications between your
smartphone and your neighbor’s device
using the built-in Bluetooth® wireless
technology (see Beaming information).
•You can also store files on an expansion
card and share the expansion card (see
Using expansion cards).
Beaming information
Your smartphone is equipped with built-in
Bluetooth wireless technology that enables
you to beam information to another device
enabled with Bluetooth technology.
The maximum range for beaming with
Bluetooth technology is about 9 meters.