ASUSTeK Computer 777 PDA Phone with Bluetooth User Manual Otto UG
ASUSTeK Computer Inc PDA Phone with Bluetooth Otto UG
UserManual.wiki
>
ASUSTeK Computer
>
777 User Manual
>
Manual 4
Contents
1.
Manual 1
2.
Manual 2
3.
Manual 3
4.
Manual 4
Manual 4
Navigation menu
Upload a User Manual
Namespaces
Wiki Guide
HTML
PDF
Info
Views
User Manual
Discussion / Help
Navigation
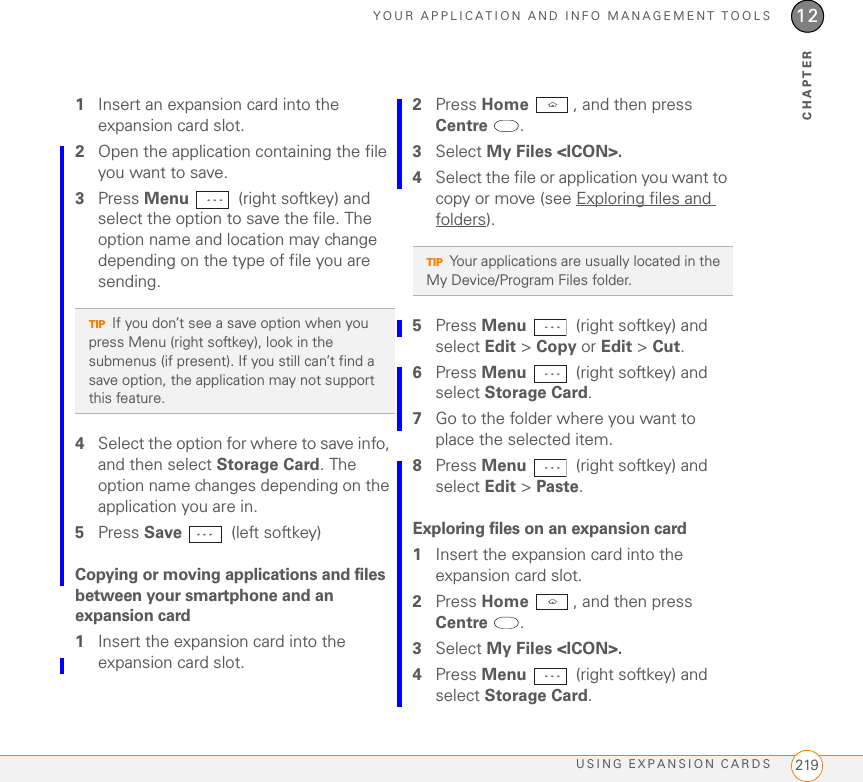
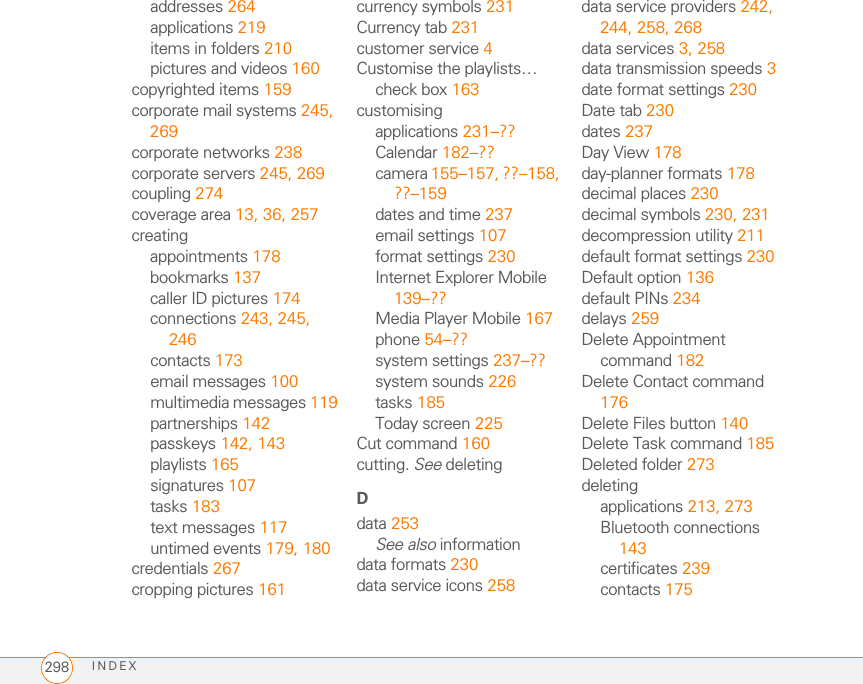
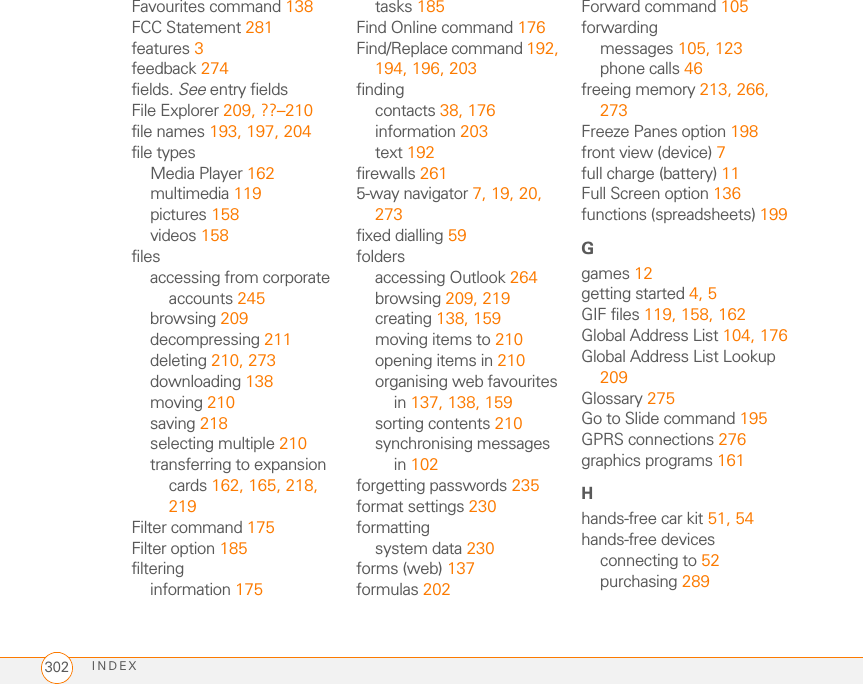
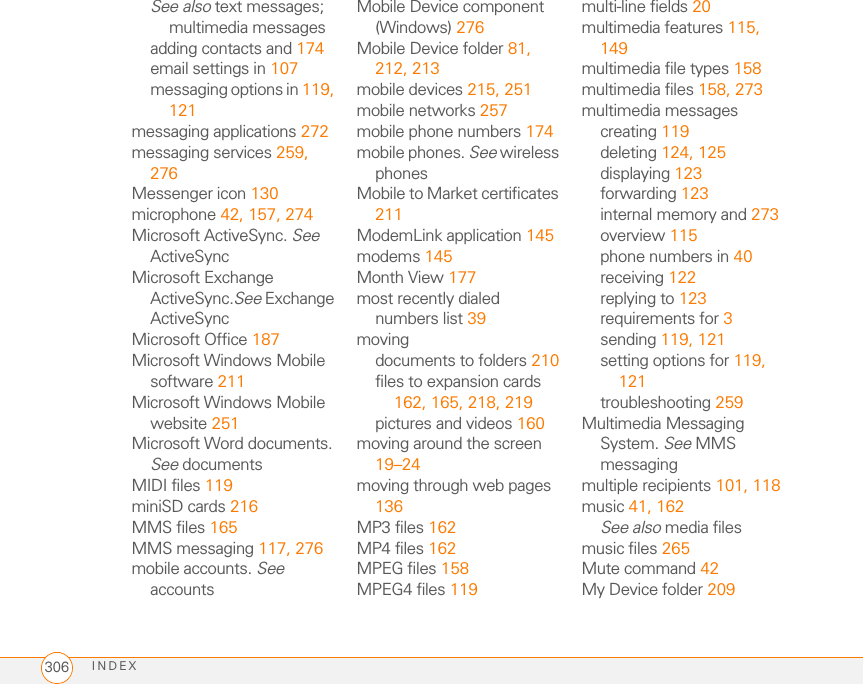
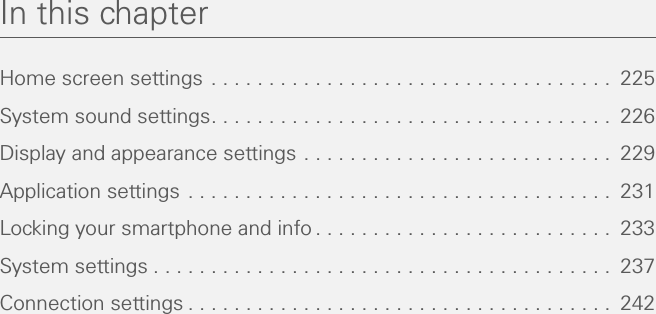
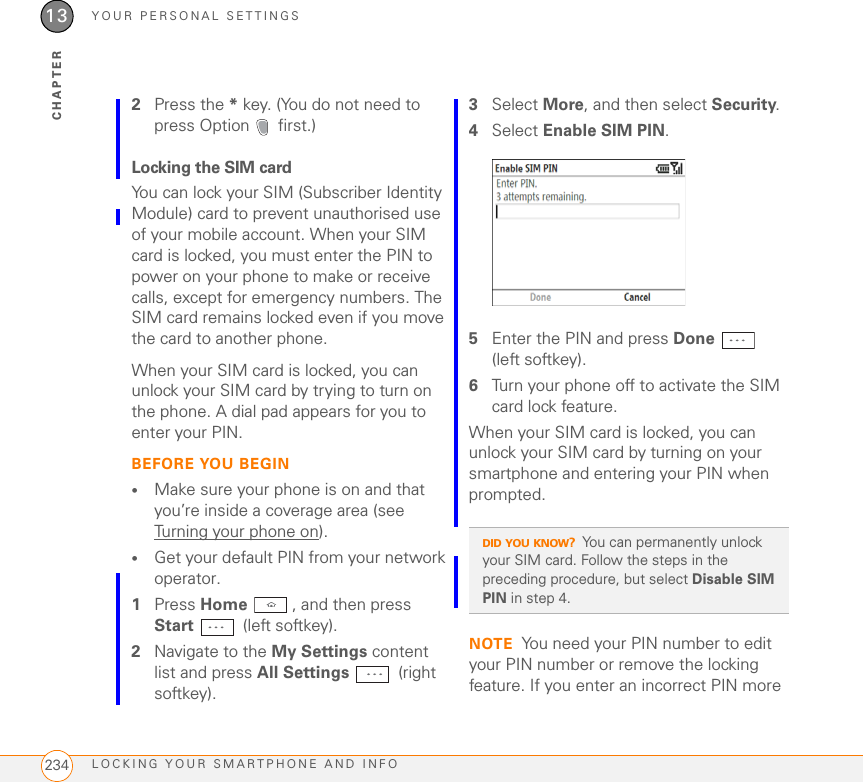
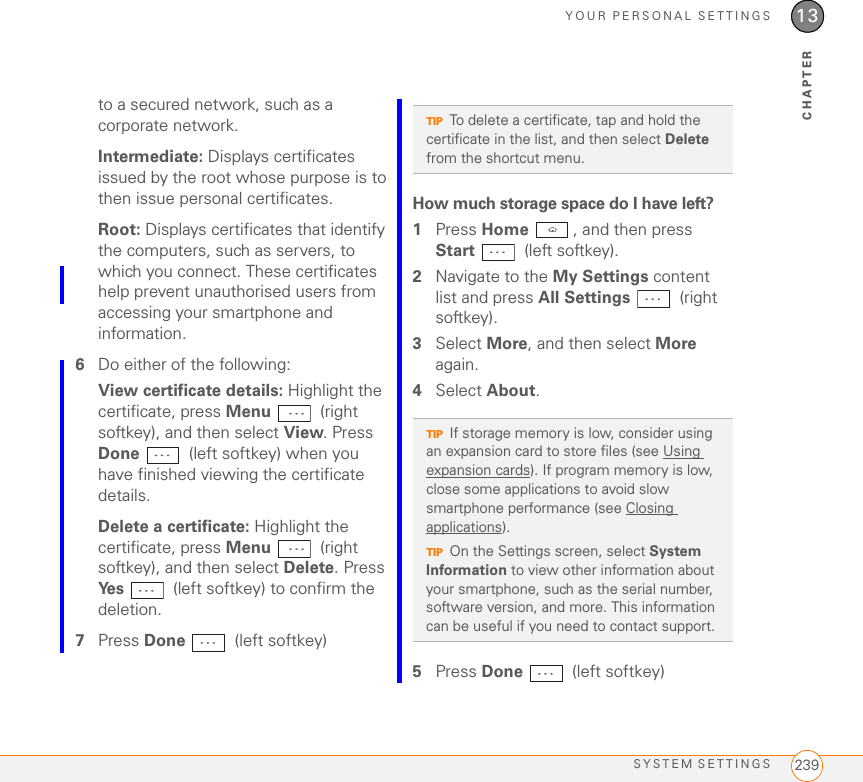
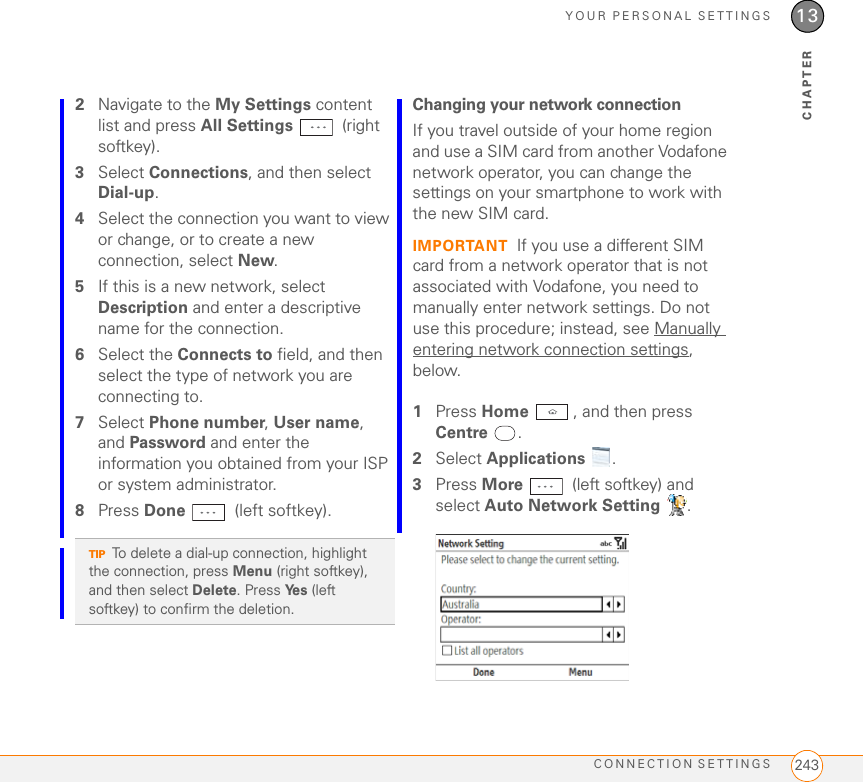
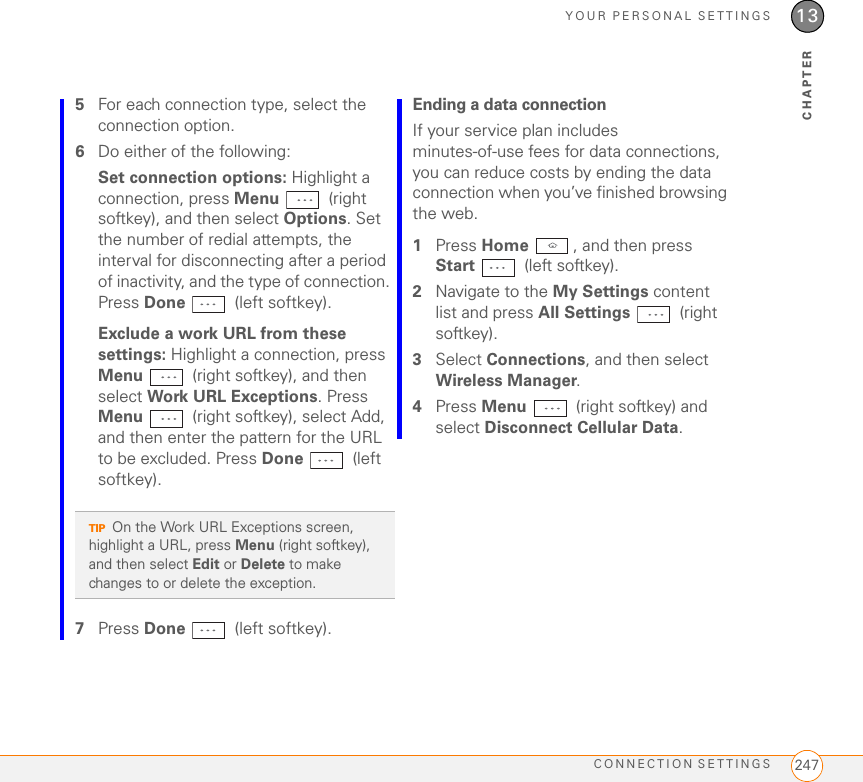
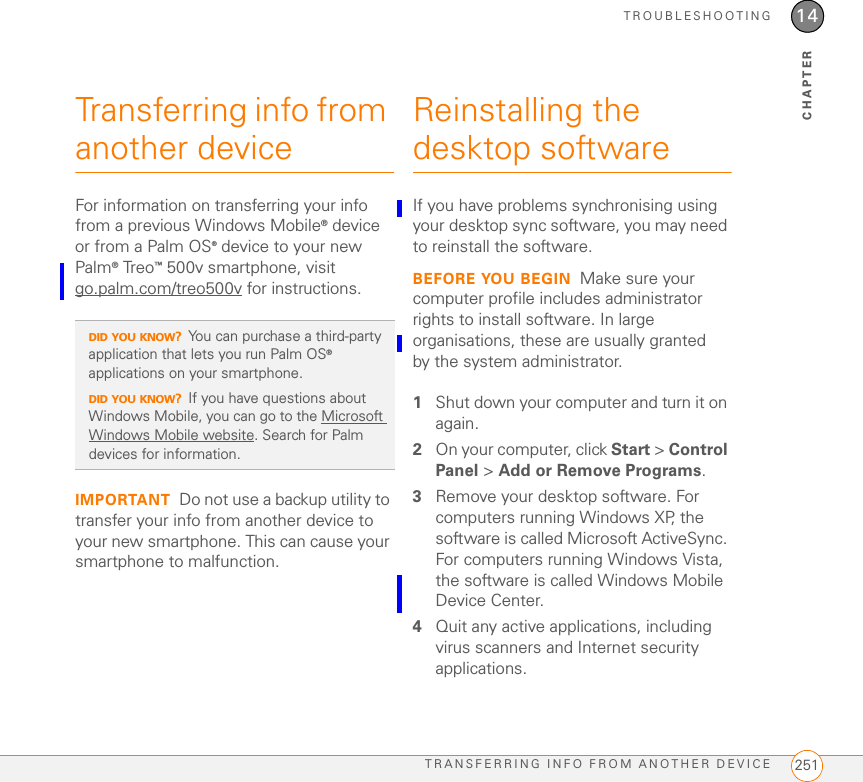
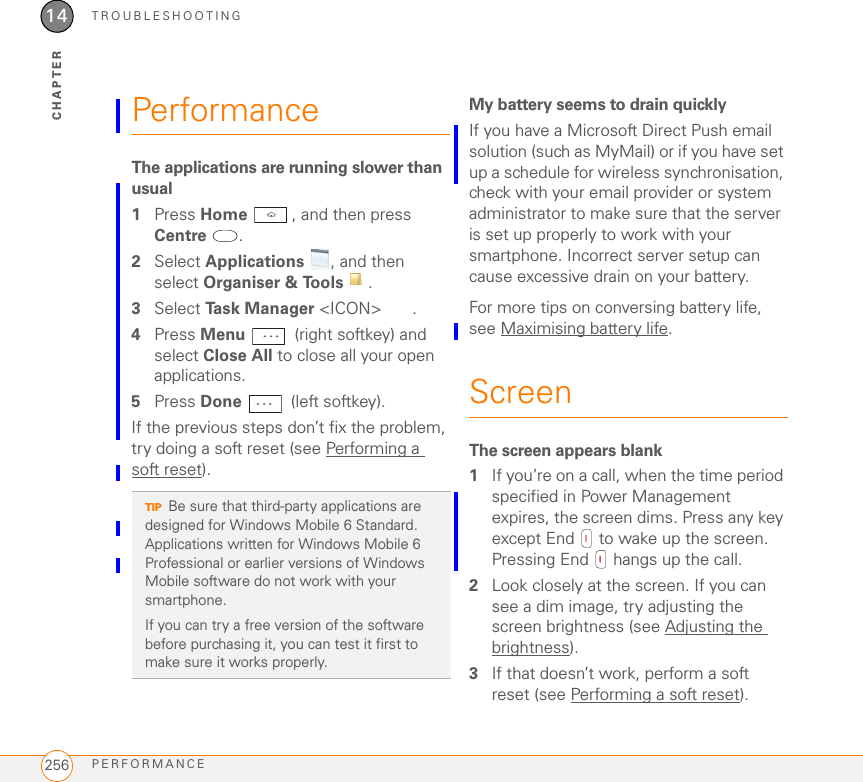
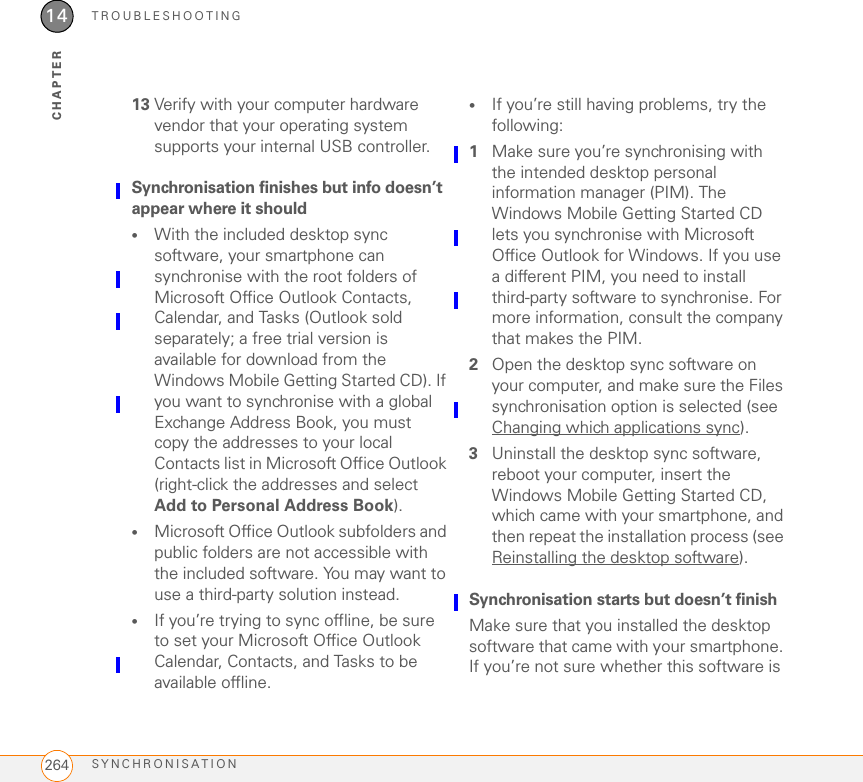
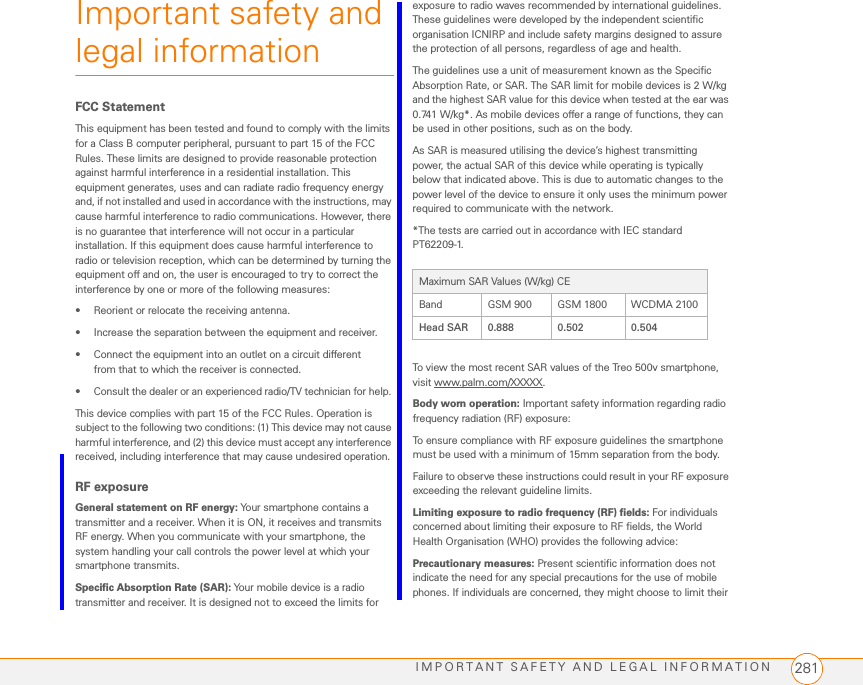
![YOUR APPLICATION AND INFO MANAGEMENT TOOLSCALCULATOR 22112CHAPTERCalculatorYou can use Calculator for basic arithmetic calculations, such as addition, subtraction, multiplication, and division.Performing calculations1Press Home , and then press Centre .2Select Applications , and then select Organiser & Tools . 3Select Calculator <ICON>.4Use the number keys to enter numbers.5To perform calculations, do any of the following:Add numbers: Press Up .Subtract numbers: Press Down .Multiply numbers: Press Left .Divide numbers: Press Right .Calculate the result: Press Centre .Enter a decimal point: Press the * key.Switch a number between positive and negative: Press the # key.Express the displayed number as a percentage: Press Menu (right softkey) and select%.Calculate the square root of the displayed number: Press Menu (right softkey) and select √.Calculate the displayed number as the fraction 1/[displayed number]: Press Menu (right softkey) and select 1/x.Clear the current calculation and displayed number: Press Clear (left softkey).TIPFor more advanced calculations, use Excel Mobile. See Excel Mobile for details.](https://usermanual.wiki/ASUSTeK-Computer/777.Manual-4/User-Guide-842620-Page-7.png)
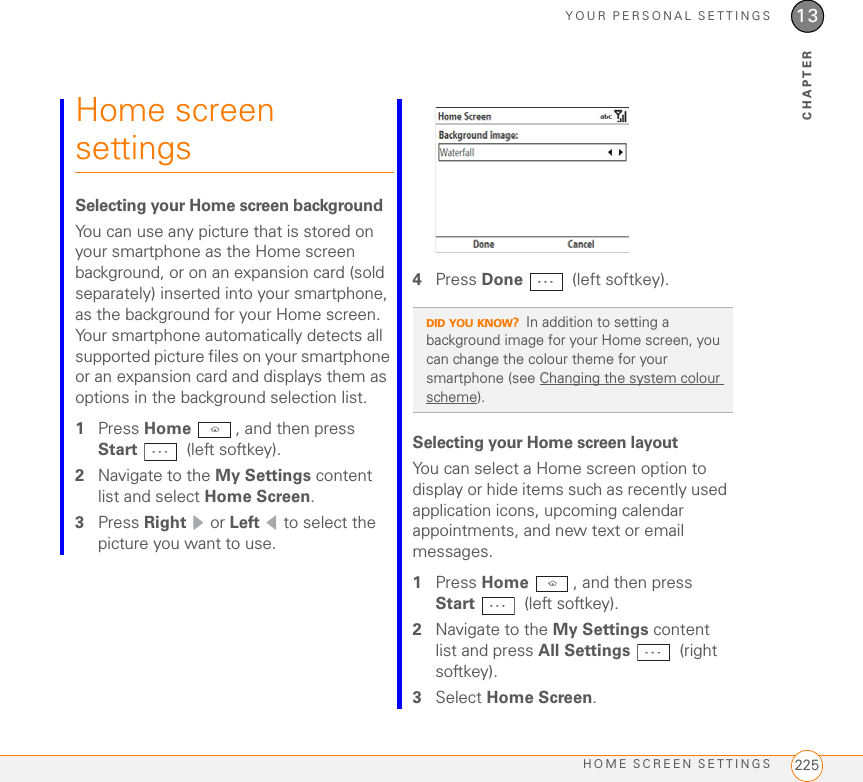


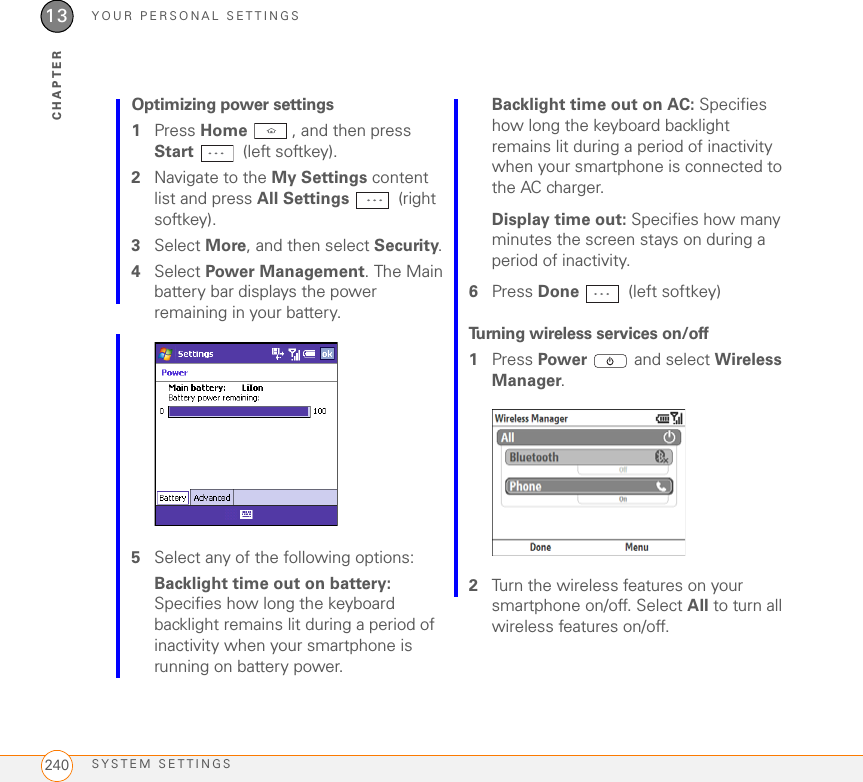
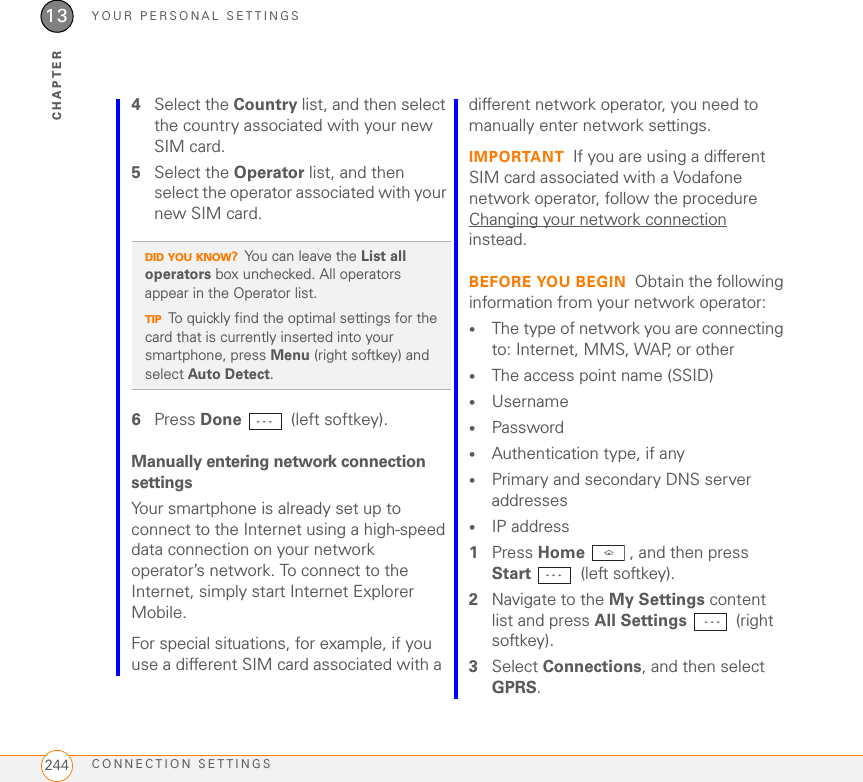
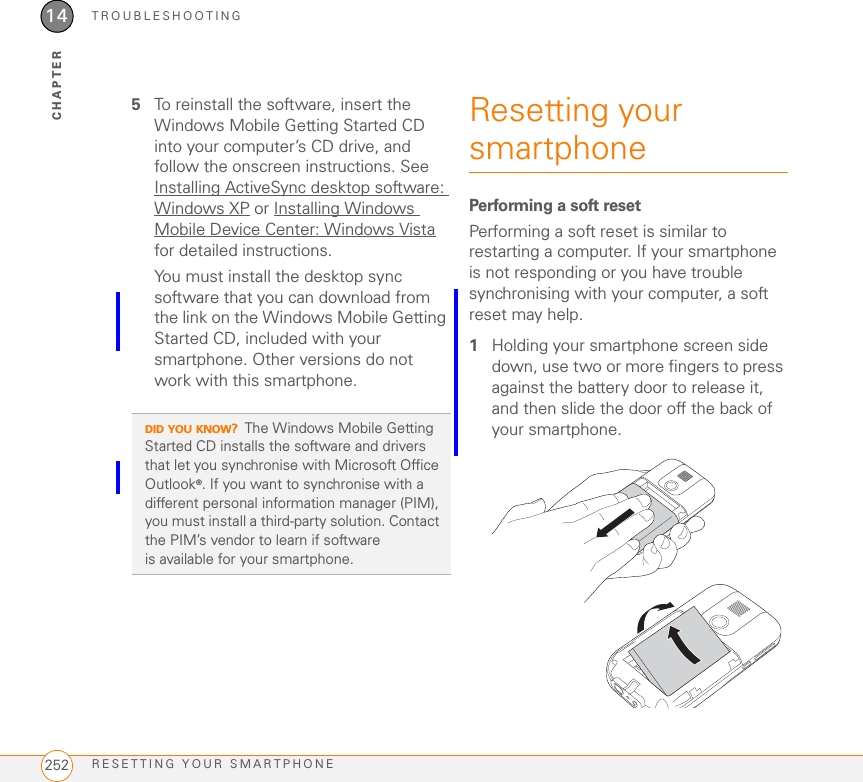

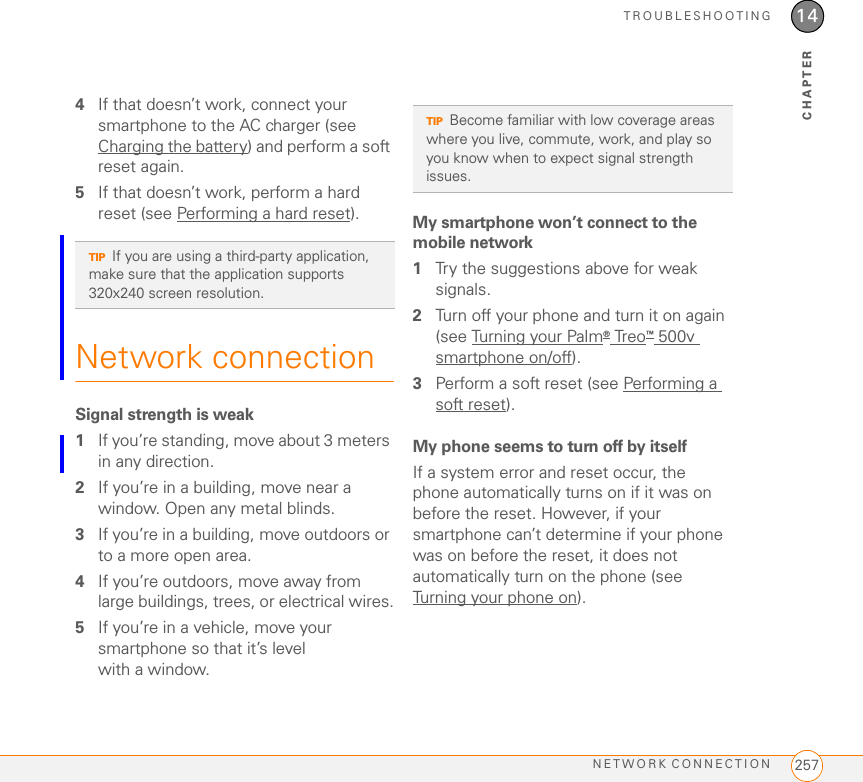
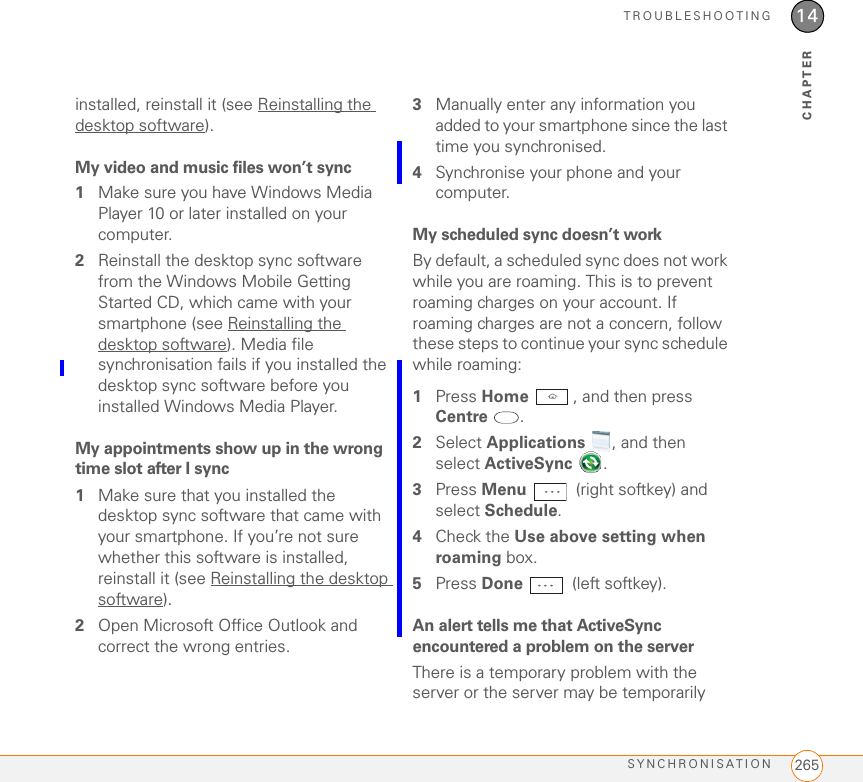
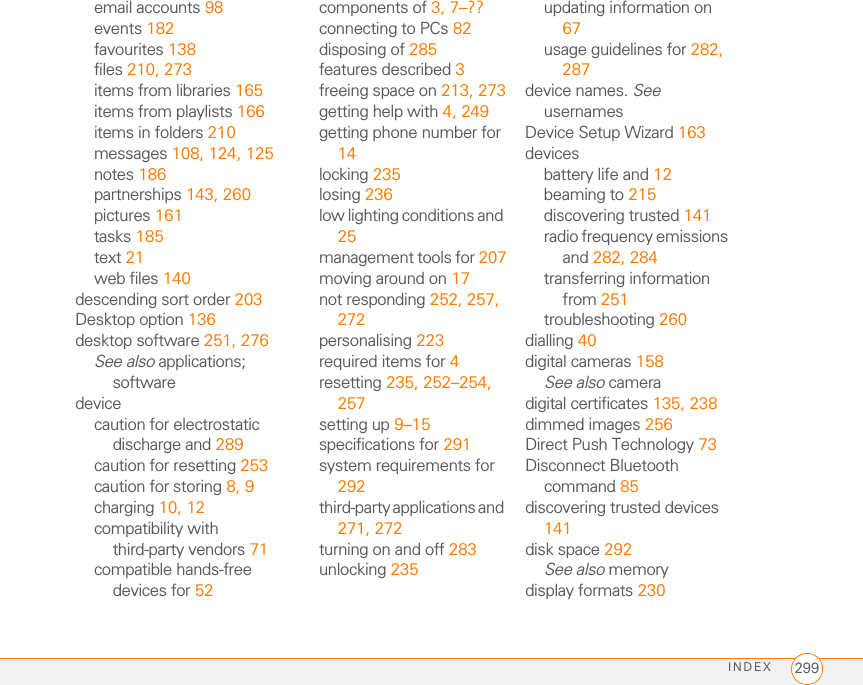
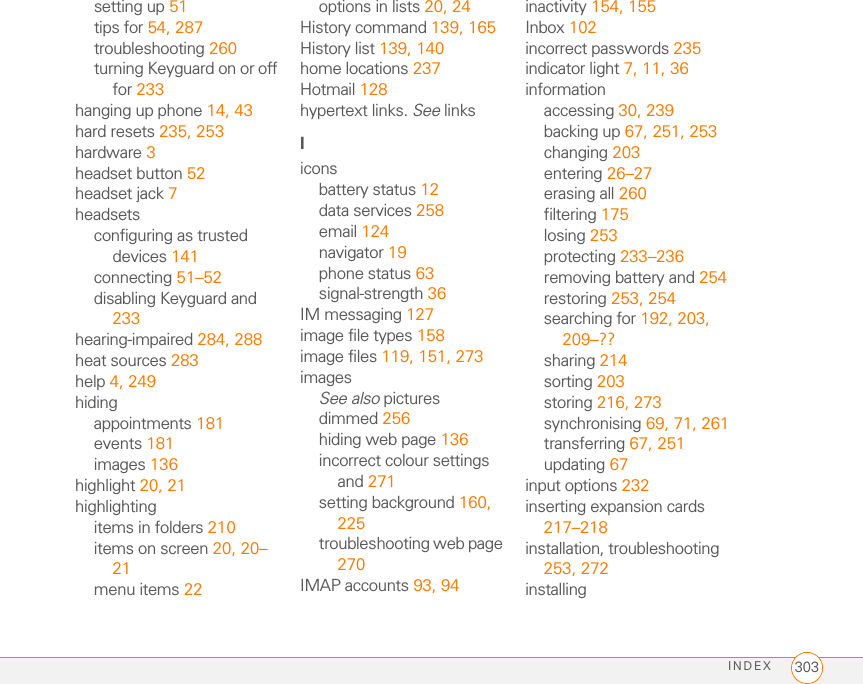
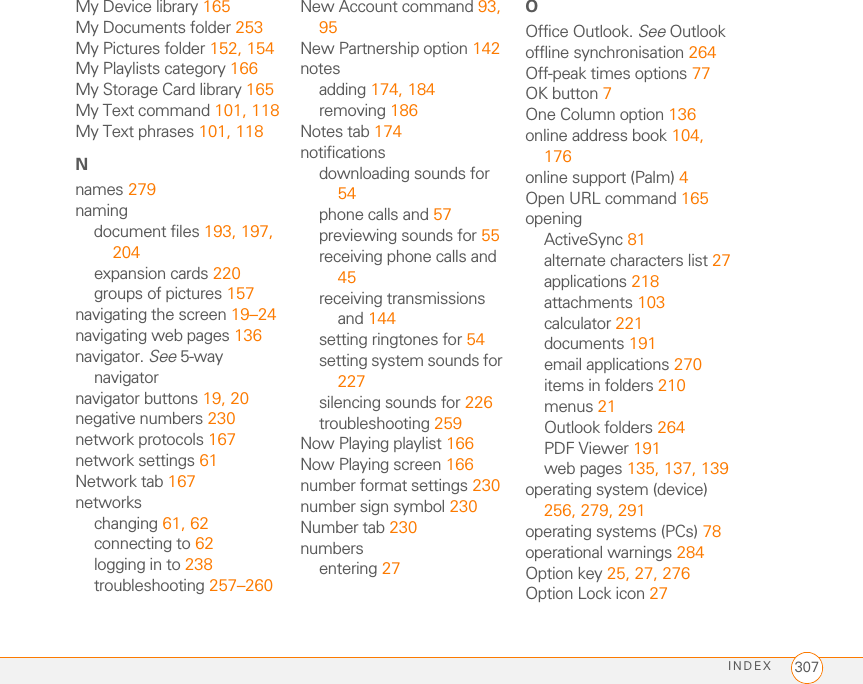
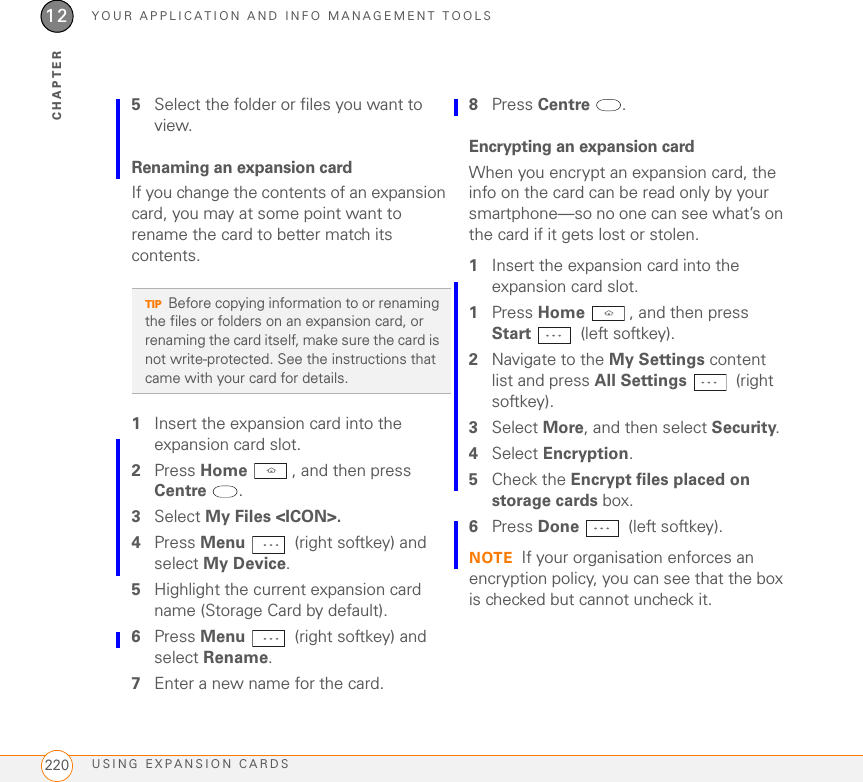
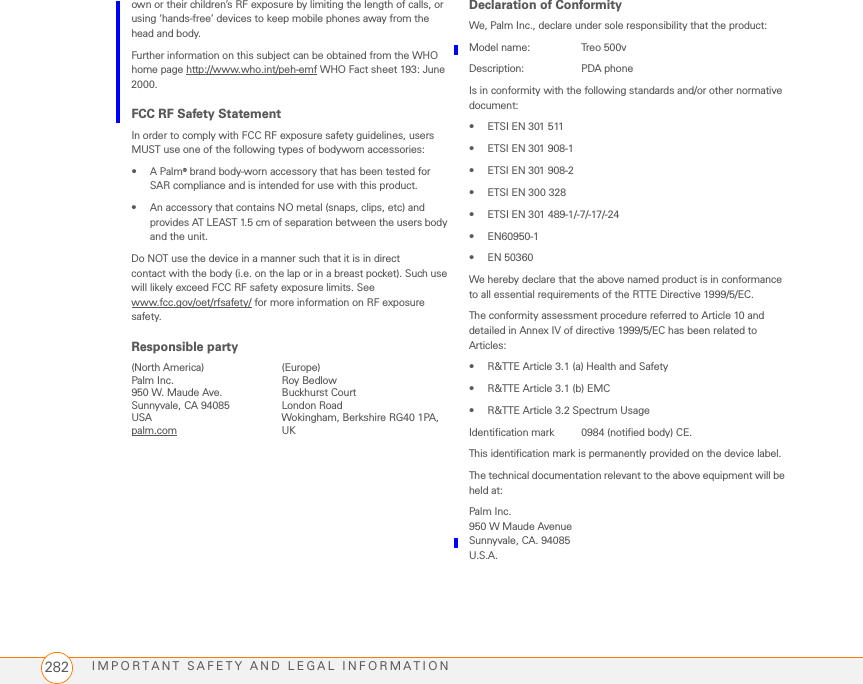
![TROUBLESHOOTINGSYNCHRONISATION26614CHAPTERoverloaded. Try again later, and if the problem persists, contact your system administrator.An alert tells me that there is not enough free memory to sync my infoThe ActiveSync application on your smartphone ran out of storage space. Try the following:1Close all running programs (see Closing applications).2If the problem persists, see Making room on your smartphone for suggestions on other ways to free up space on your smartphone.An alert tells me that ActiveSync encountered a problem with [item type] [item name]An error occurred during the sync of a single item. This error can usually be corrected only by removing the item that caused the error. If you sync again to see if the error persists, be aware that items causing this type of error are skipped and do not show up again.My Home screen settings are not restored after a hard resetSettings such as the background image are not backed up during synchronisation, so they can’t be restored after a hard reset. If you use a backup utility, you may be able to restore a backup to recover your Home screen setting and other additional info.Exchange ActiveSync (wireless synchronisation)This section covers issues with direct wireless synchronisation with an Exchange server. See Desktop sync software for help with synchronising using your desktop sync software.An alert tells me that the server could not be reachedYour smartphone had to wait too long to connect to the Exchange server. The connection may have been lost, the server TIPIf you are synchronising with an Exchange server and you’re unable to change your lock settings, check with your system administrator to find out if a systemwide locking policy is in place.](https://usermanual.wiki/ASUSTeK-Computer/777.Manual-4/User-Guide-842620-Page-52.png)
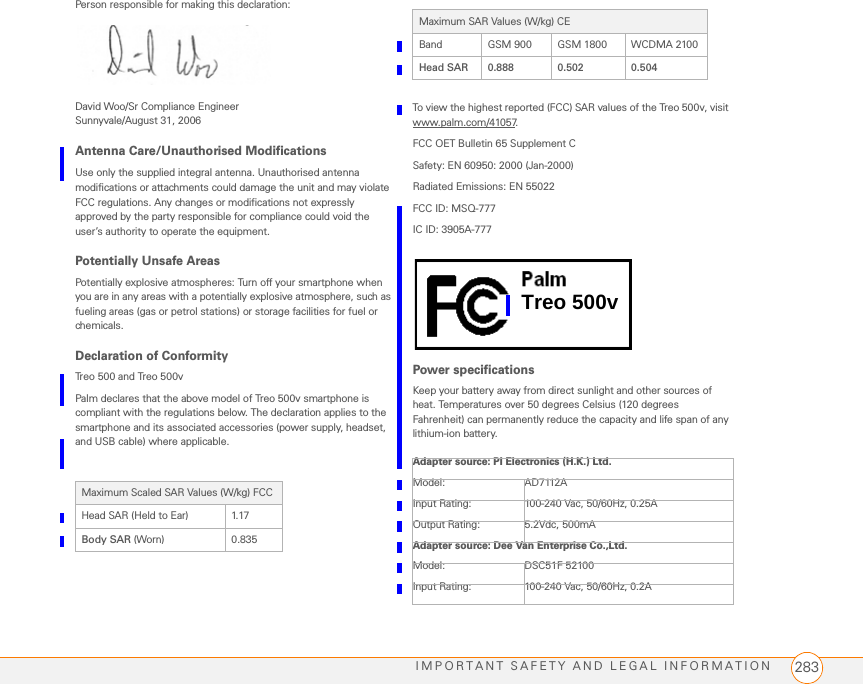
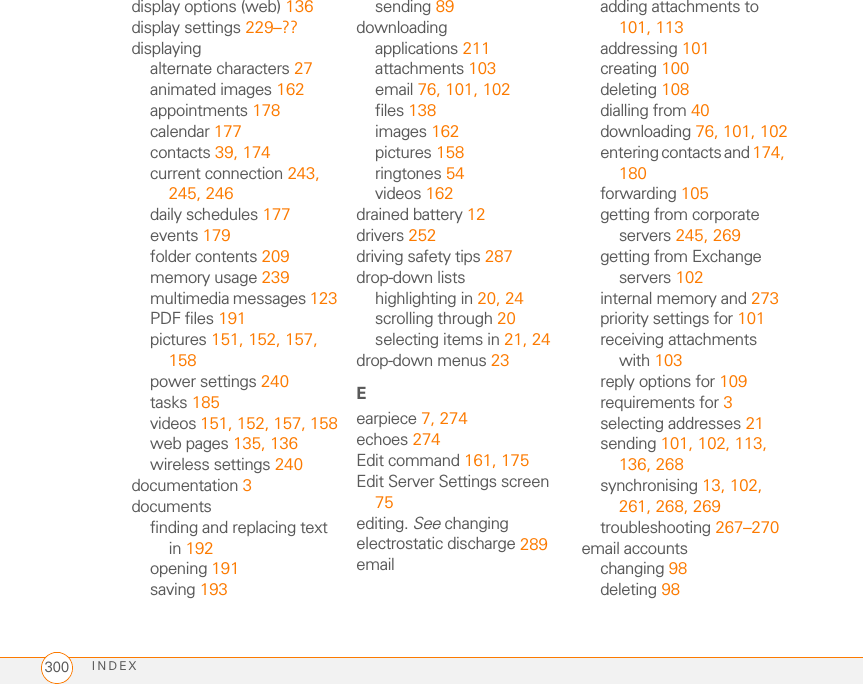
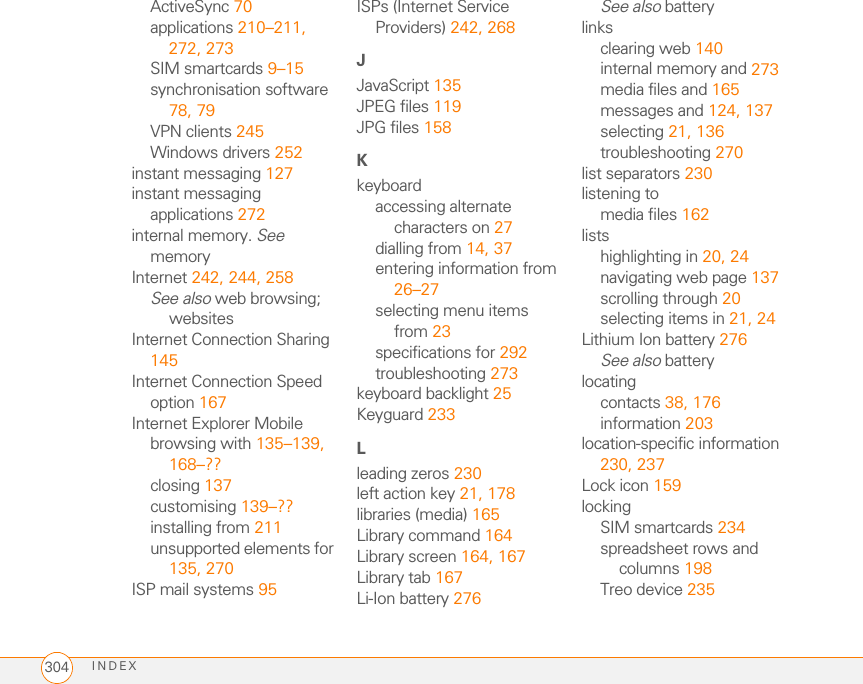
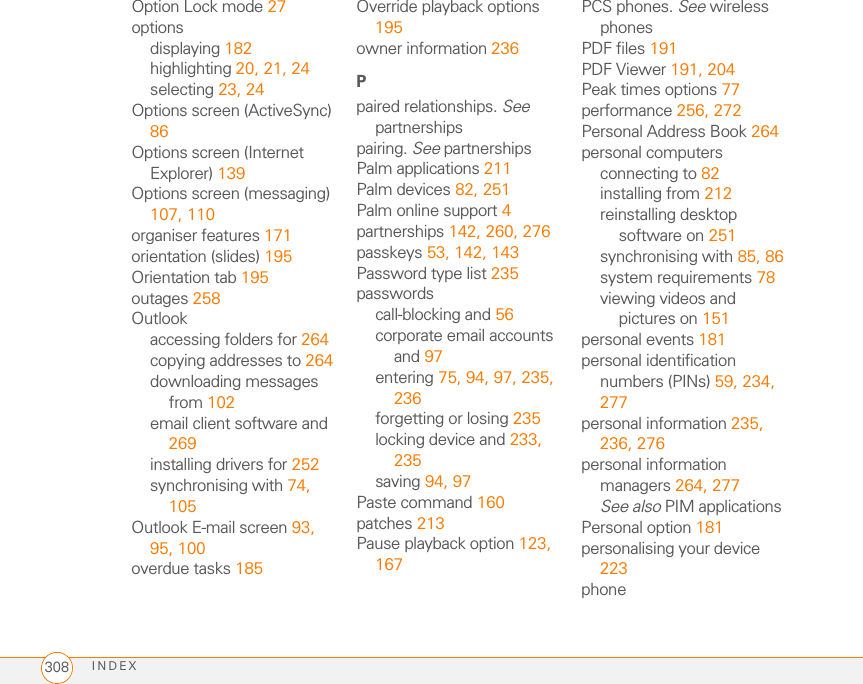
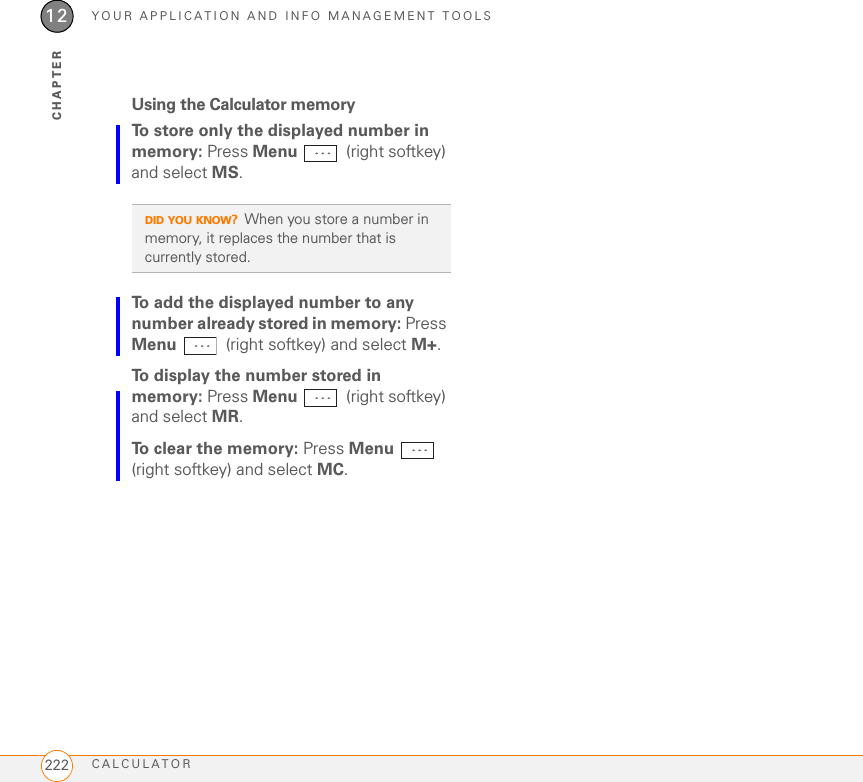
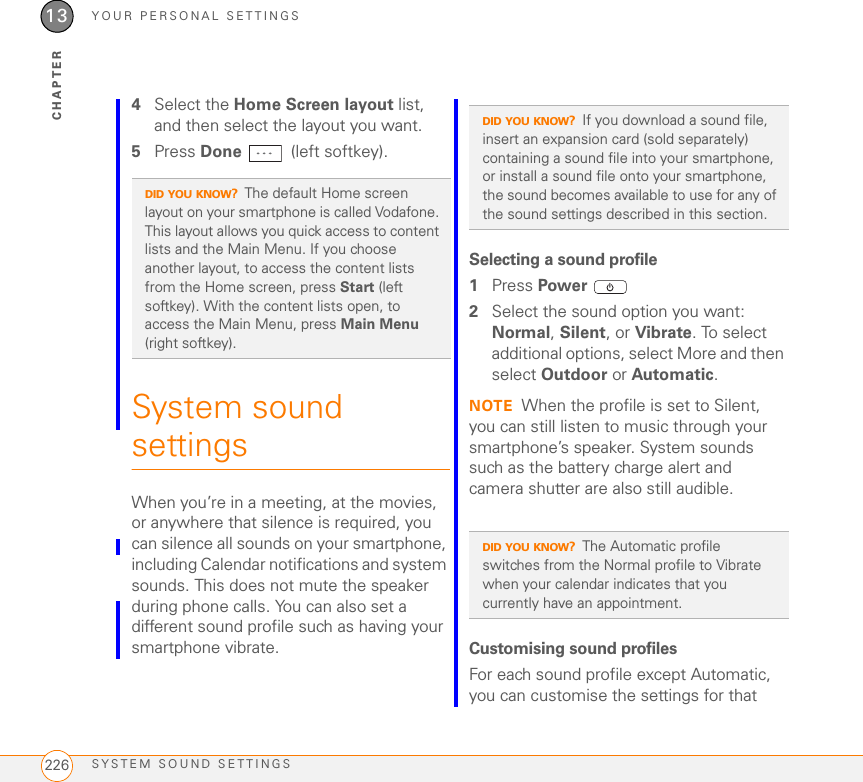
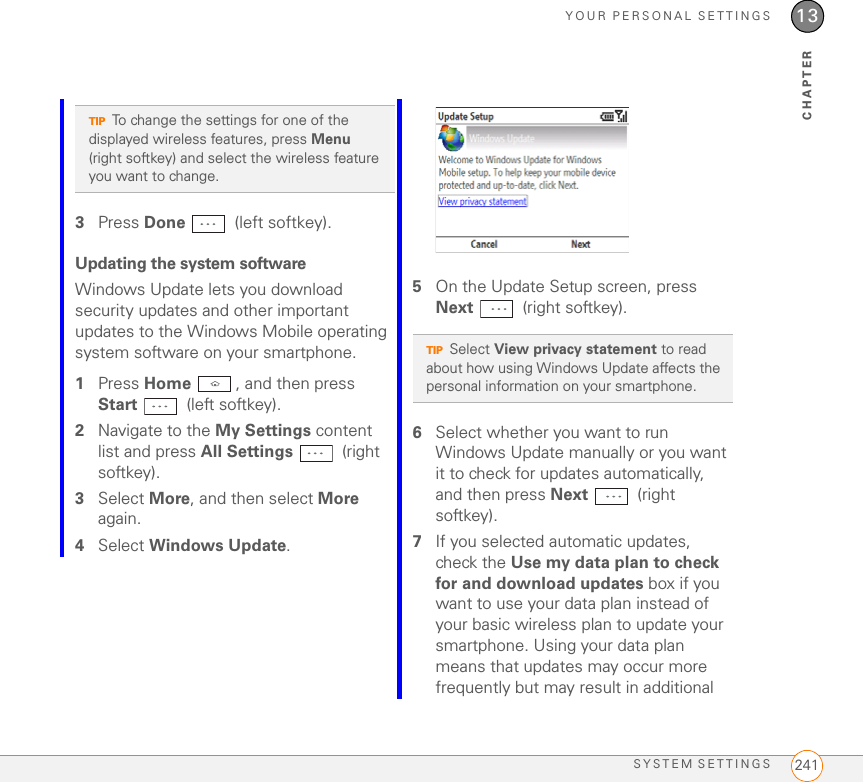
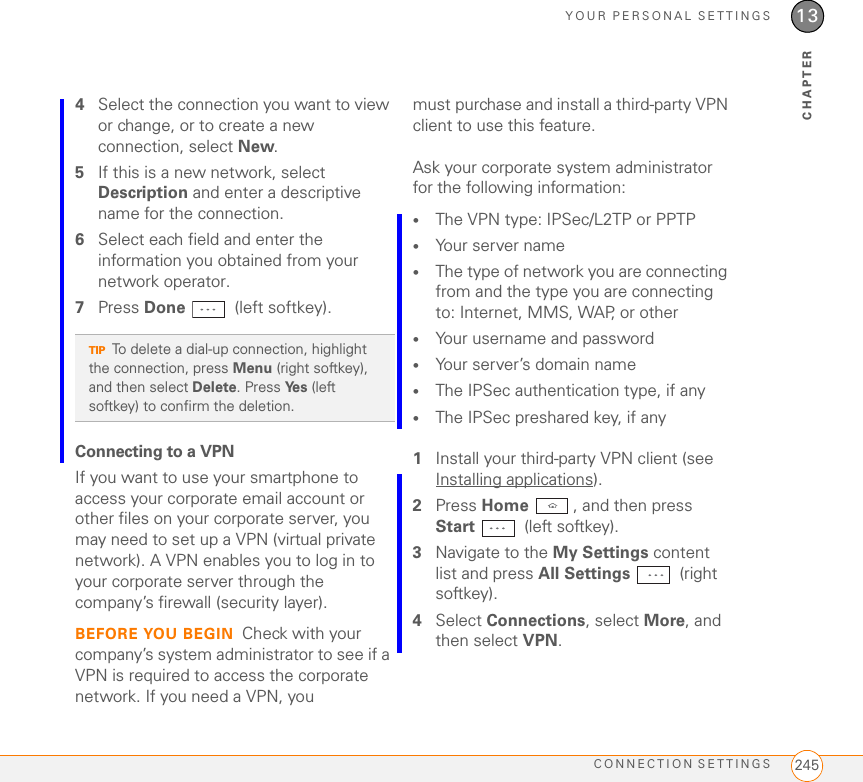
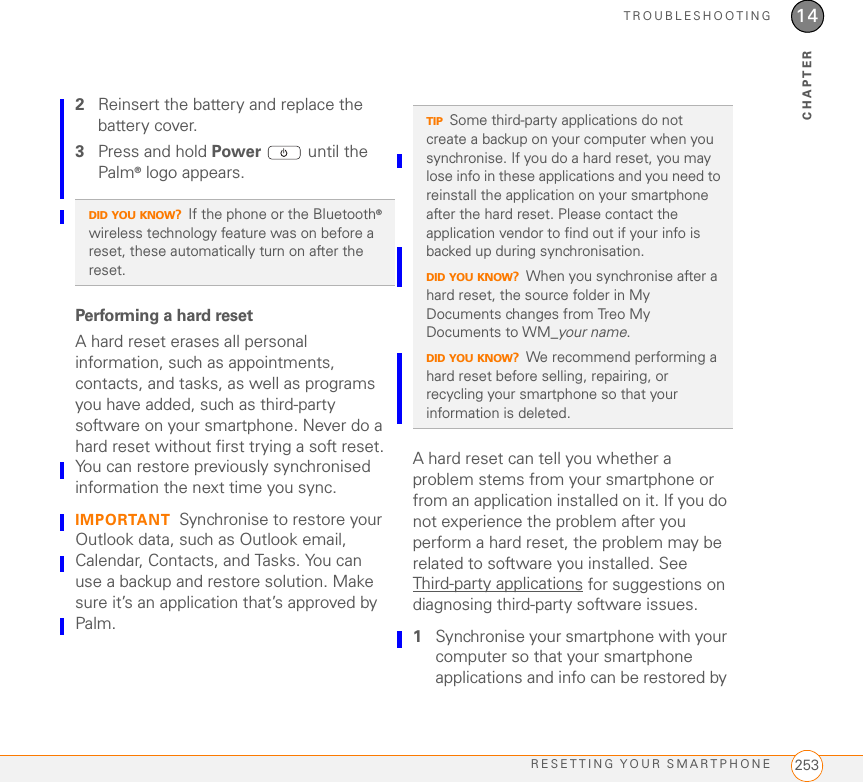
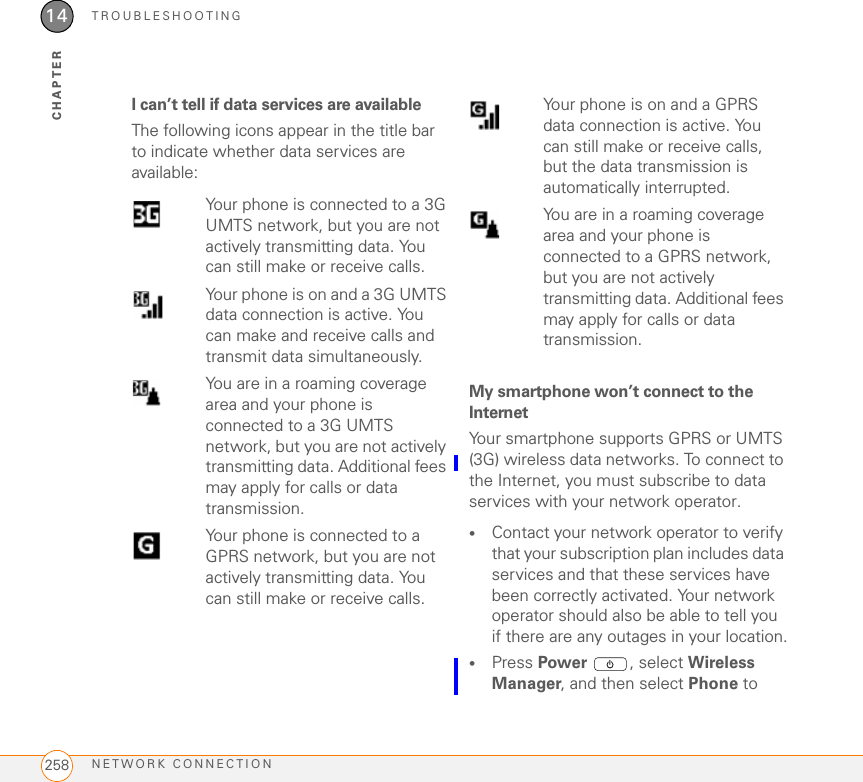
![IMPORTANT SAFETY AND LEGAL INFORMATION288otherwise stationary. But if you need to dial while driving, follow this simple tip: Dial only a few numbers, check the road and your mirrors, then continue.7 Do not engage in stressful or emotional conversations that may be distracting. Stressful or emotional conversations and driving do not mix-they are distracting and even dangerous when you are behind the wheel. Make people you are talking with aware you are driving and if necessary, suspend phone conversations which have the potential to divert your attention from the road.8 Use your smartphone to call for help. Your smartphone is one of the greatest tools you can own to protect yourself and your family in dangerous situations-with your smartphone at your side, help is only three numbers away. Dial 911 in the case of fire, traffic accident, road hazard, or medical emergencies. Remember, 911is a free call on your smartphone.9 Use your smartphone to help others in emergencies. If you see an auto accident, crime in progress, or other serious emergency where lives are in danger, call 911, as you would want others to do for you.10 Call roadside assistance or a special wireless non-emergency assistance number when necessary. Certain situations you encounter while driving may require attention, but are not urgent enough to merit a call to 911. But you can still use your smartphone to lend a hand. If you see a broken-down vehicle posing no serious hazard, a broken traffic signal, a minor traffic accident where no one appears injured, or a vehicle you know to be stolen, call roadside assistance or other special non-emergency wireless number.NOTICE FOR CONSUMERS WITH HEARING DISABILITIESDigital Wireless Phones to be Compatible with Hearing Aids On July 10, 2003, the Federal Communications Commission (FCC) modified the exemption for wireless phones under the Hearing Aid Compatibility Act of 1988. This means that wireless phone manufacturers and service providers must make digital wireless phones accessible to individuals who use hearing aids.For more information, please go to the FCC’s Consumer Alert on accessibility of digital wireless phones at http://www.fcc.gov/cgb/consumerfacts/accessiblewireless.html.Wireless telephones are hand-held phones with built-in antennas, often called cell, mobile, or PCS phones. These phones are popular with callers because they can be carried easily from place to place.Wireless telephones are two-way radios. When you talk into a wireless telephone, it picks up your voice and converts the sound to radio frequency energy (or radio waves). The radio waves travel through the air until they reach a receiver at a nearby base station. The base station then sends your call through the telephone network until it reaches the person you are calling.When you receive a call on your wireless telephone, the message travels through the telephone network until it reaches a base station close to your wireless phone. Then the base station sends out radio waves that are detected by a receiver in your telephone, where the signals are changed back into the sound of a voice.The Federal Communications Commission (FCC) and the Food and Drug Administration (FDA) each regulate wireless telephones. FCC ensures that all wireless phones sold in the United States follow safety guidelines that limit radio frequency (RF) energy. FDA monitors the health effects of wireless telephones. Each agency has the authority to take action if a wireless phone produces hazardous levels of RF energy.FDA derives its authority to regulate wireless telephones from the Radiation Control provisions of the Federal Food, Drug, and Cosmetic Act (originally enacted as the Radiation Control for Health and Safety Act of 1968). [http://www.fda.gov/cdrh/comp/eprc.html].](https://usermanual.wiki/ASUSTeK-Computer/777.Manual-4/User-Guide-842620-Page-74.png)
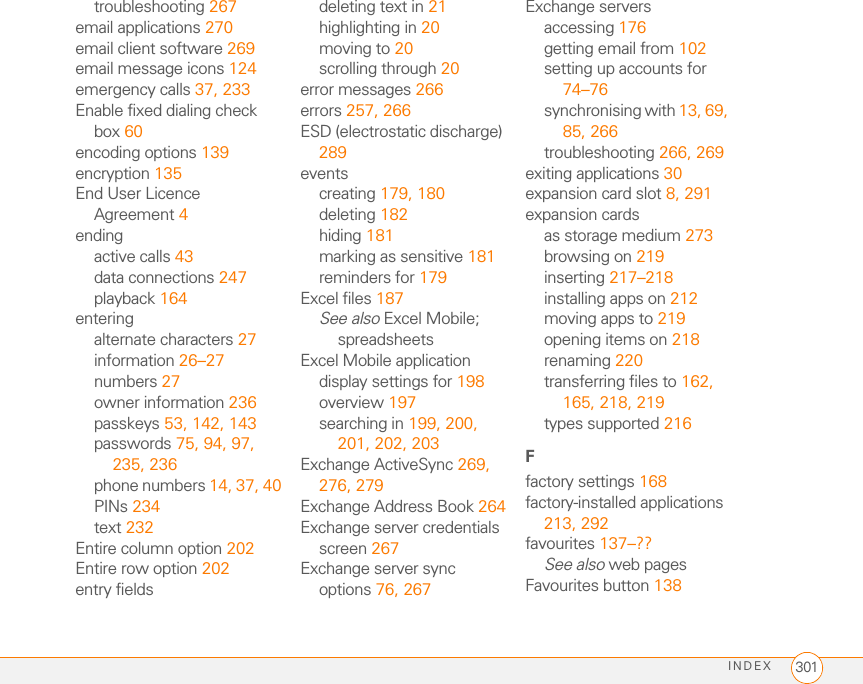
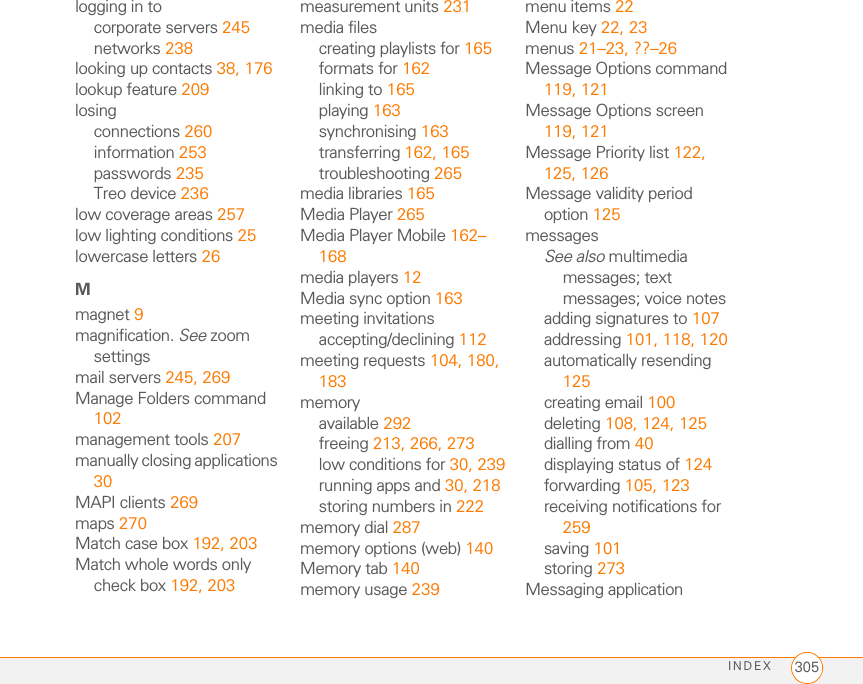
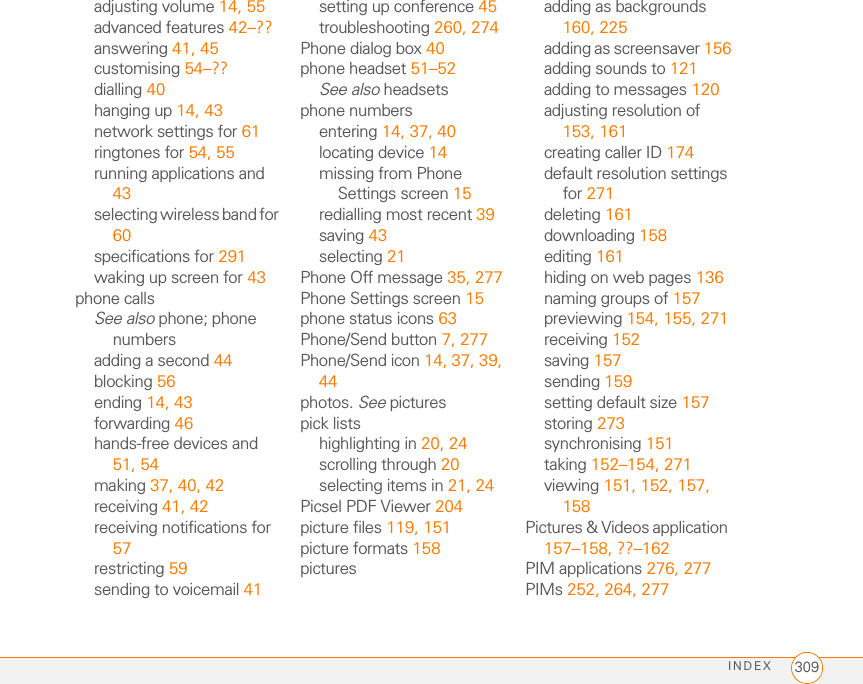
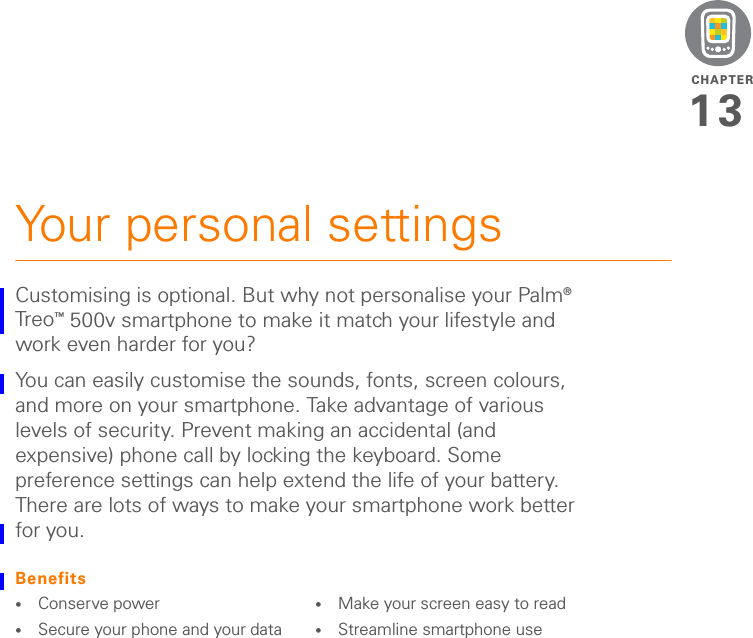
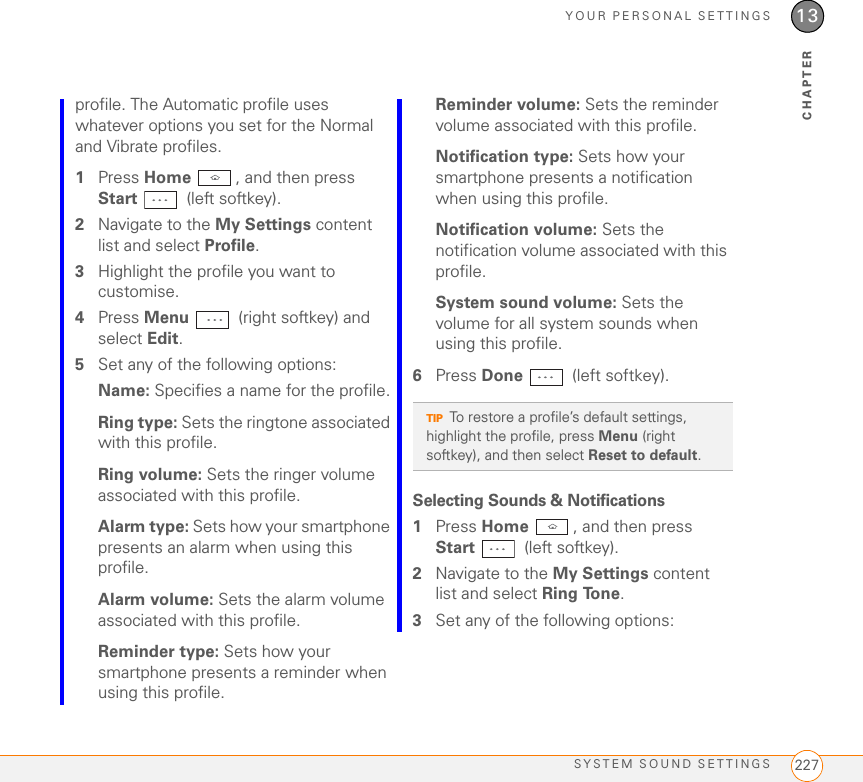
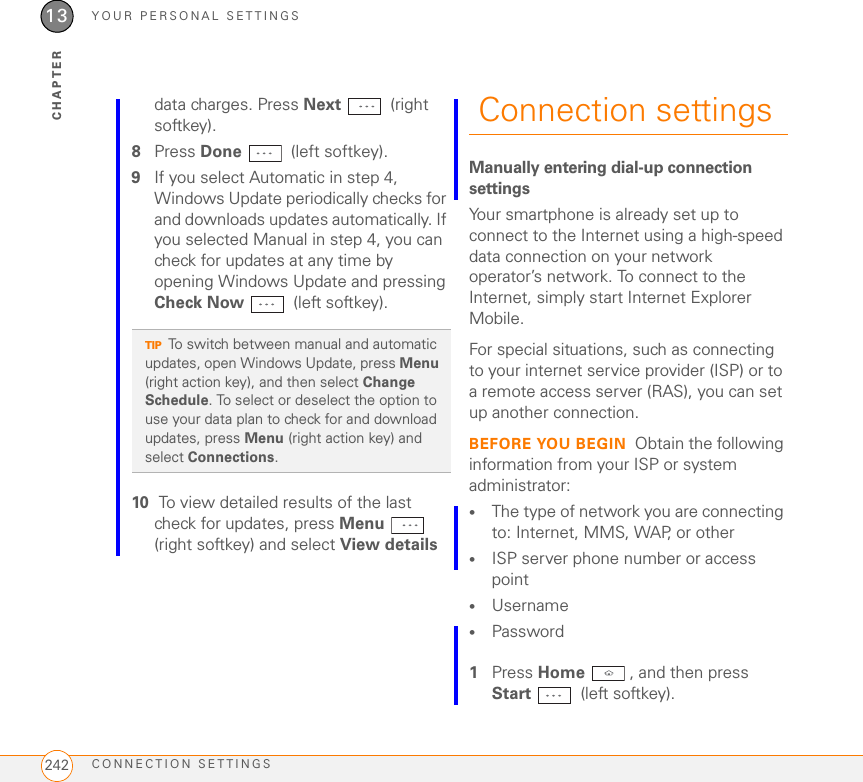
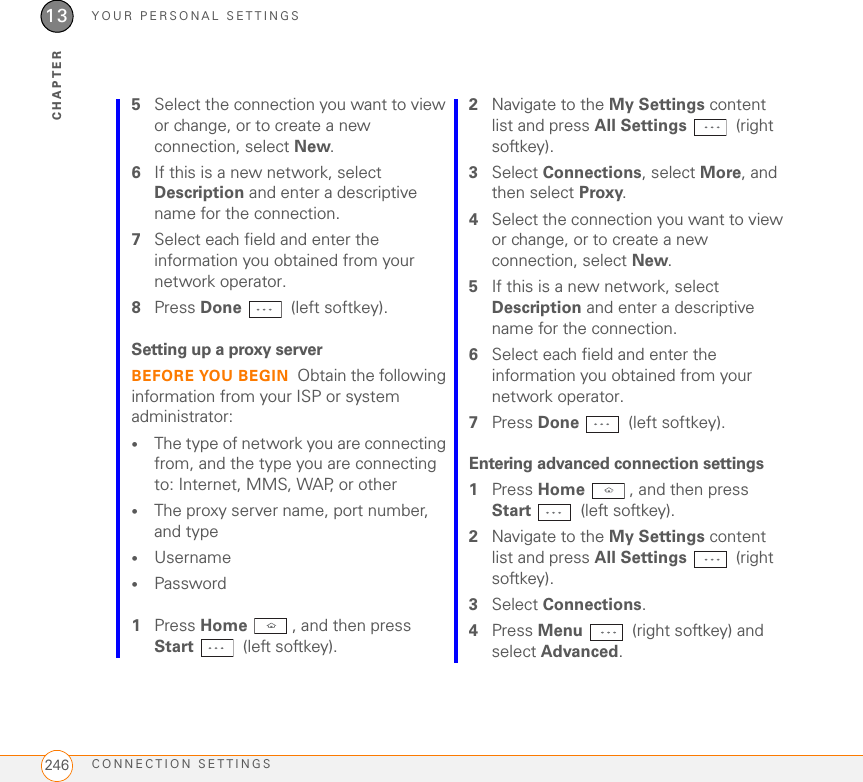
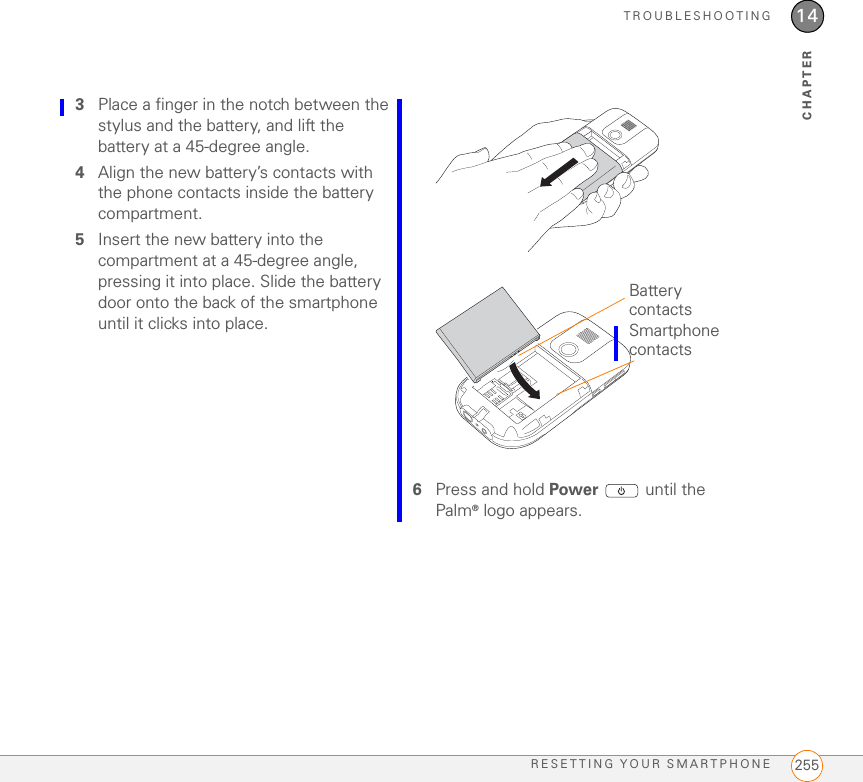
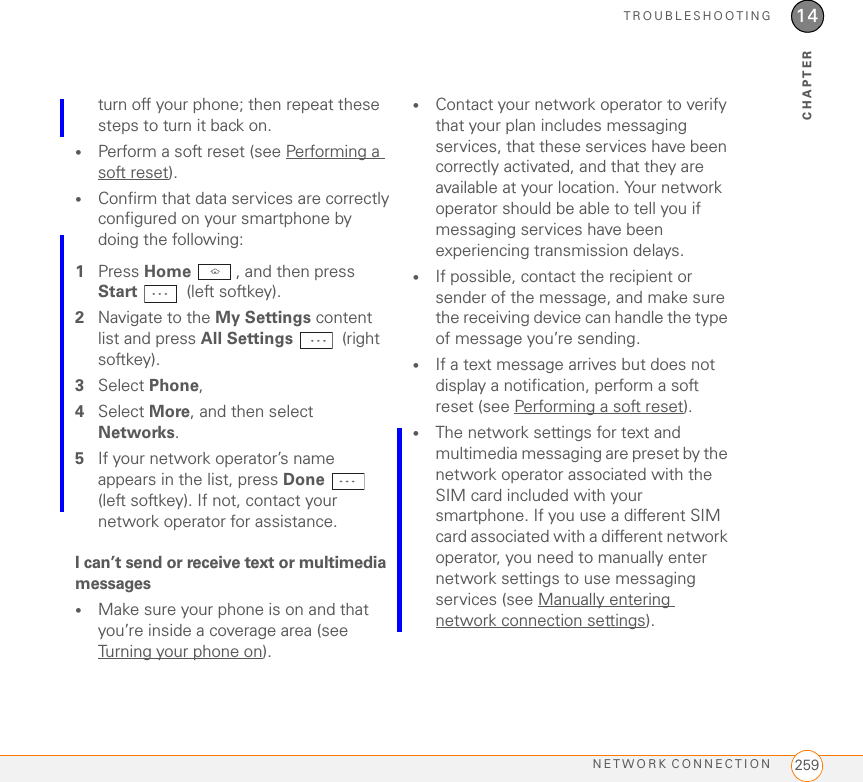
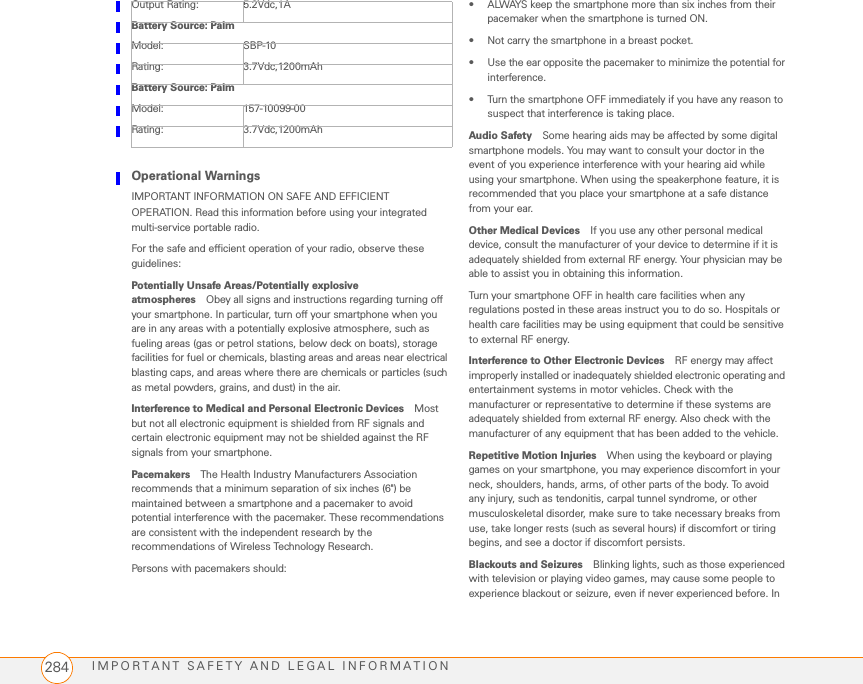
![IMPORTANT SAFETY AND LEGAL INFORMATION 289FCC derives its authority to regulate wireless telephones from the National Environmental Policy Act of 1969 (NEPA) and the Telecommunications Act of 1996 http://www.fcc.gov/telecom.html]. Updated 7/16/2003Hands-Free Capability All CTIA Certified portable products provide the consumer with a toll-free number for the purchase of a compatible hands-free device. 1-800-881-7256STATIC ELECTRICITY, ESD, AND YOUR PALM DEVICEElectrostatic discharge (ESD) can cause damage to electronic devices if discharged into the device, so you should take steps to avoid such an occurrence.Description of ESD Static electricity is an electrical charge caused by the buildup of excess electrons on the surface of a material. To most people, static electricity and ESD are nothing more than annoyances. For example, after walking over a carpet while scuffing your feet, building up electrons on your body, you may get a shock—the discharge event—when you touch a metal doorknob. This little shock discharges the built-up static electricity.ESD-susceptible equipment Even a small amount of ESD can harm circuitry, so when working with electronic devices, take measures to help protect your electronic devices, including your Palm® device, from ESD harm. While Palm has built protections against ESD into its products, ESD unfortunately exists and, unless neutralized, could build up to levels that could harm your equipment. Any electronic device that contains an external entry point for plugging in anything from cables to docking stations is susceptible to entry of ESD. Devices that you carry with you, such as your Palm device, build up ESD in a unique way because the static electricity that may have built up on your body is automatically passed to the device. Then, when the device is connected to another device such as a docking station, a discharge event can occur. Precautions against ESD Make sure to discharge any built-up static electricity from yourself and your electronic devices before touching an electronic device or connecting one device to another. The recommendation from Palm is that you take this precaution before connecting your Palm device to your computer, placing the device in a cradle, or connecting it to any other device. You can do this in many ways, including the following: • Ground yourself when you’re holding your device by simultaneously touching a metal surface that is at earth ground. For example, if your computer has a metal case and is plugged into a standard three-prong grounded outlet, touching the case should discharge the ESD on your body.• Increase the relative humidity of your environment.• Install ESD-specific prevention items, such as grounding mats.Conditions that enhance ESD occurrences Conditions that can contribute to the buildup of static electricity in the environment include the following:• Low relative humidity.• Material type (The type of material gathering the charge. For example, synthetics are more prone to static buildup than natural fibers like cotton.)• The rapidity with which you touch, connect, or disconnect electronic devices.While you should always take appropriate precautions to discharge 0ectricity, if you are in an environment where you notice ESD events, you may want to take extra precautions to protect your electronic equipment against ESD.Precaution against hearing loss Protect your hearing. Listening to this device at full volume for a long period of time can damage your hearing. A pleine puissance, l'écoute prolongée du baladeur peut endommager l'oreille de l'utilisateur. Consultez notre site web www.palm.com/fr pour plus d'informations.Waste disposal Please recycle appropriately. For appropriate recycling and disposal instructions please visit: www.palm.com/environment.](https://usermanual.wiki/ASUSTeK-Computer/777.Manual-4/User-Guide-842620-Page-75.png)