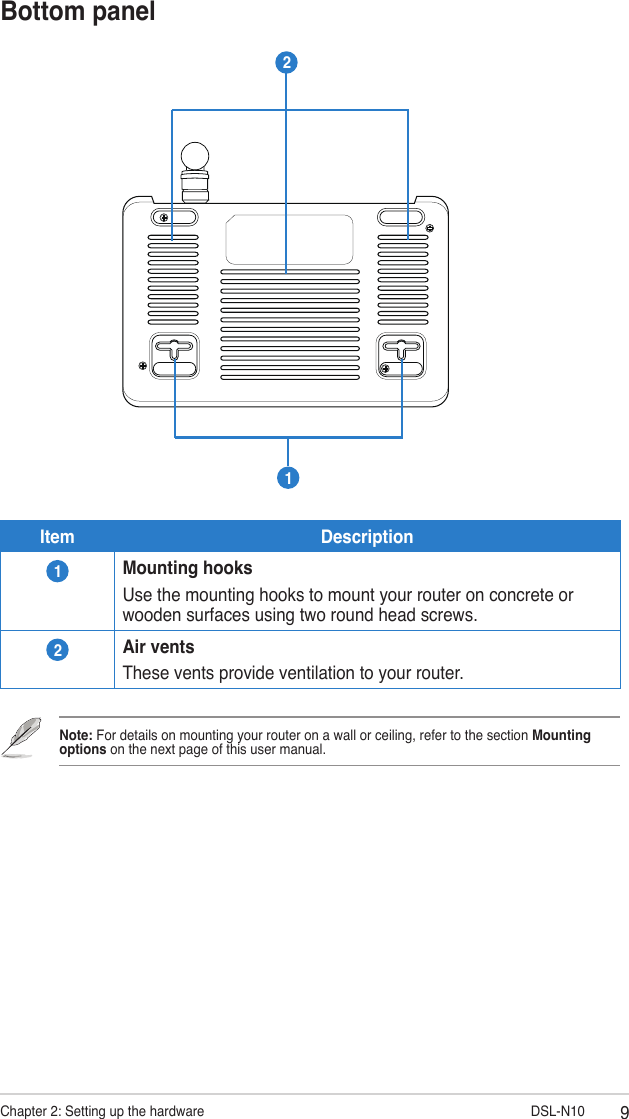
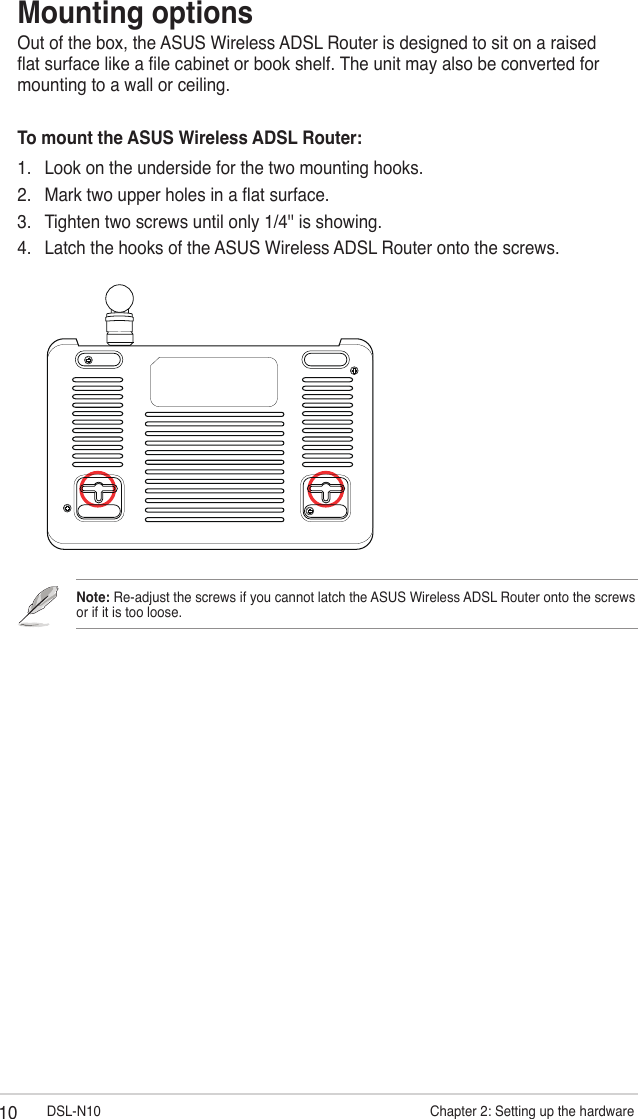
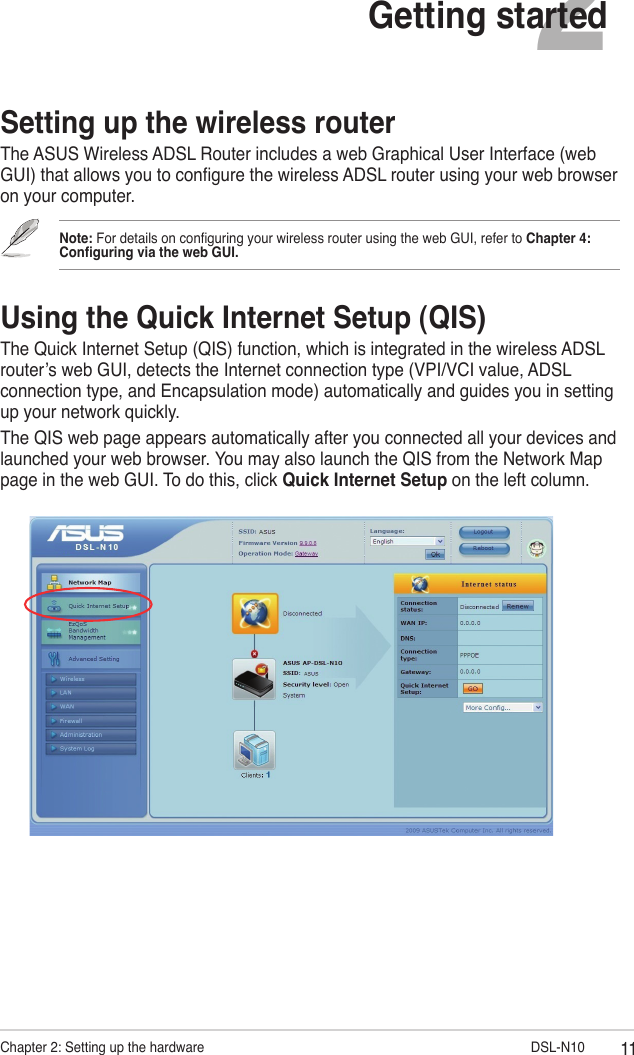
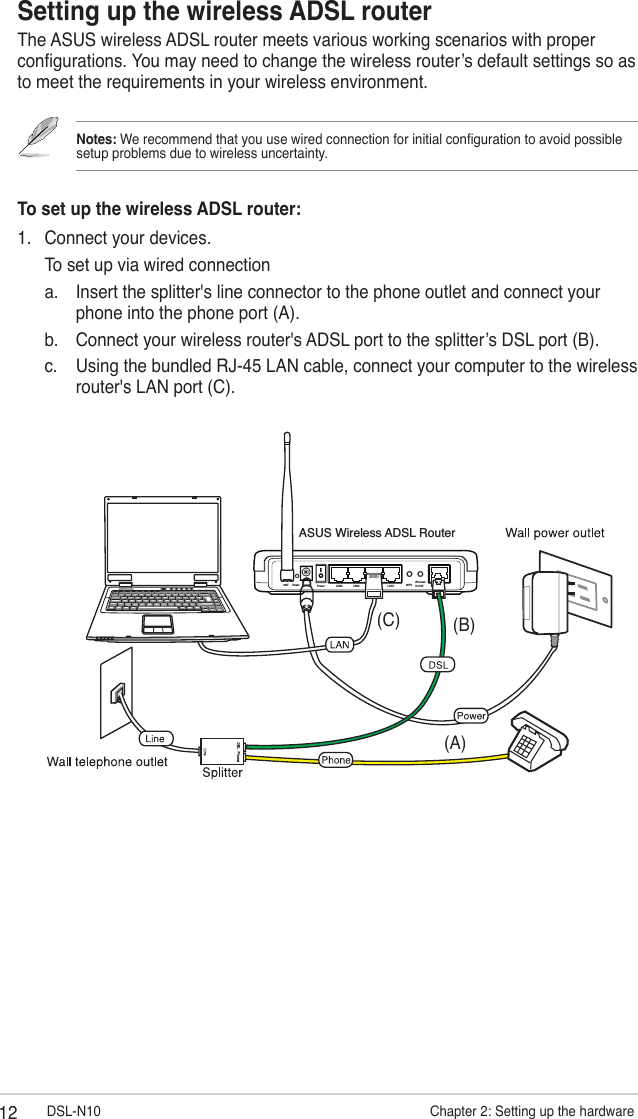
ASUSTeK Computer DSLN10 Wireless Home Gateway User Manual TempConfidential MSQDSLN10
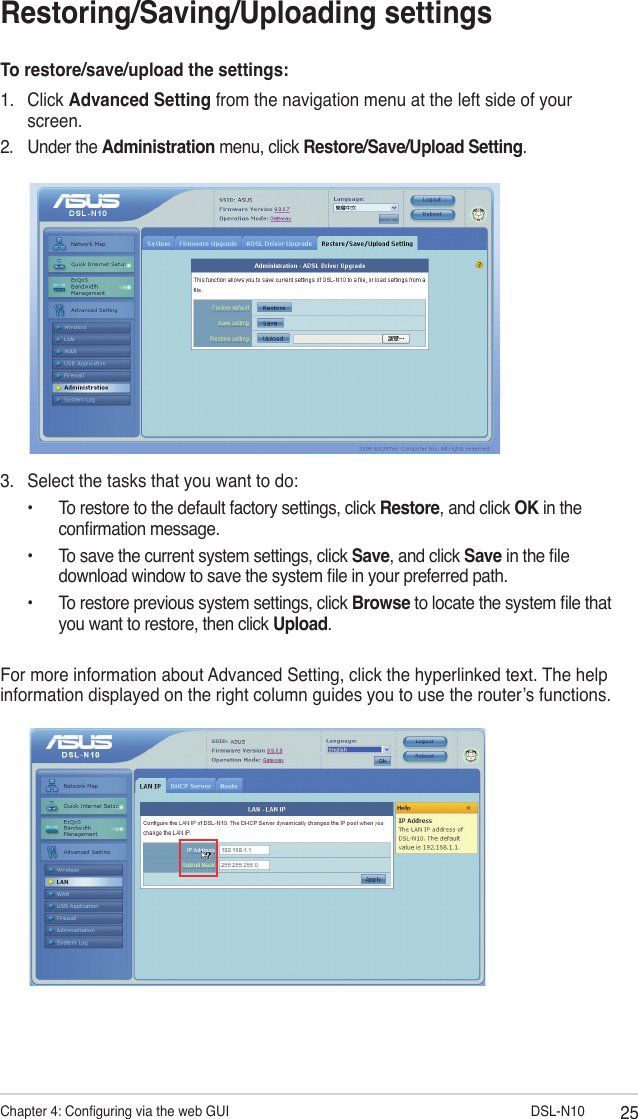
ASUSTeK Computer Inc Wireless Home Gateway TempConfidential MSQDSLN10
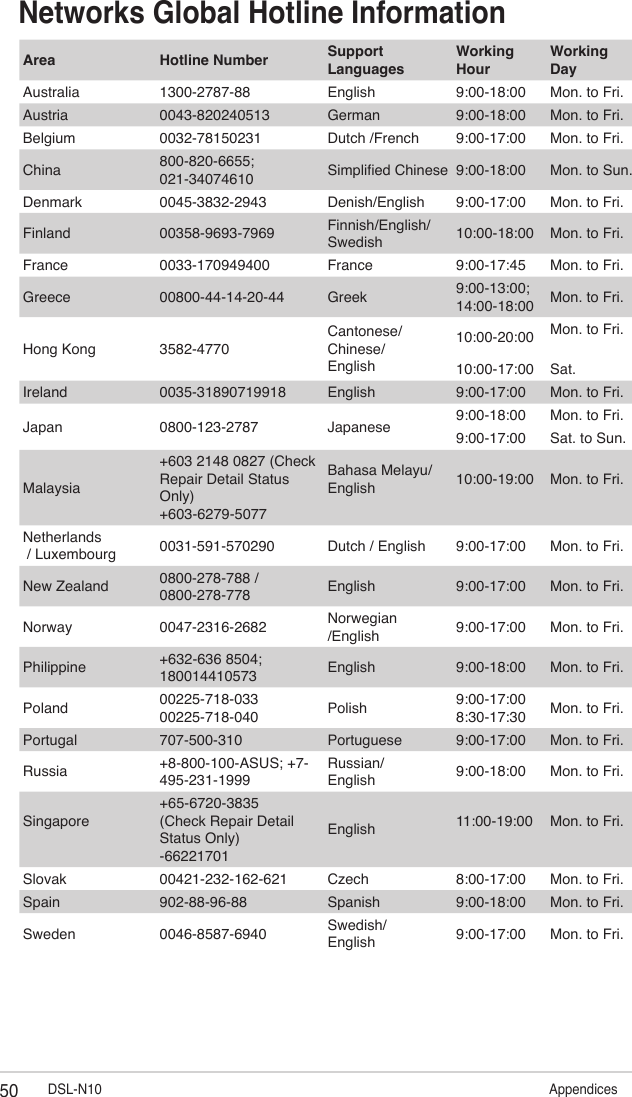
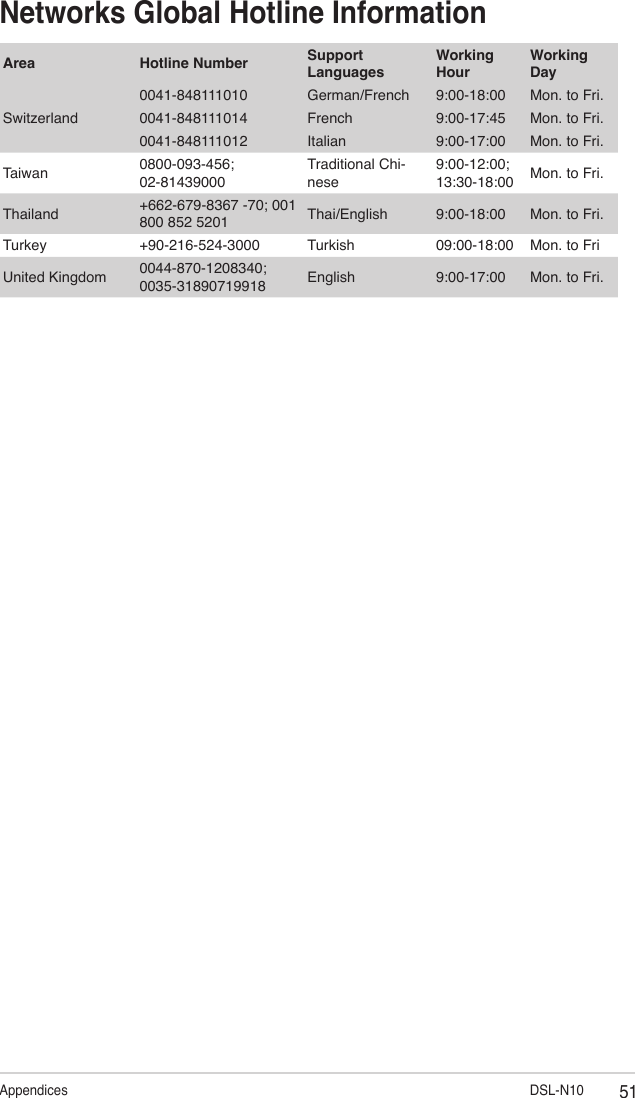
Contents
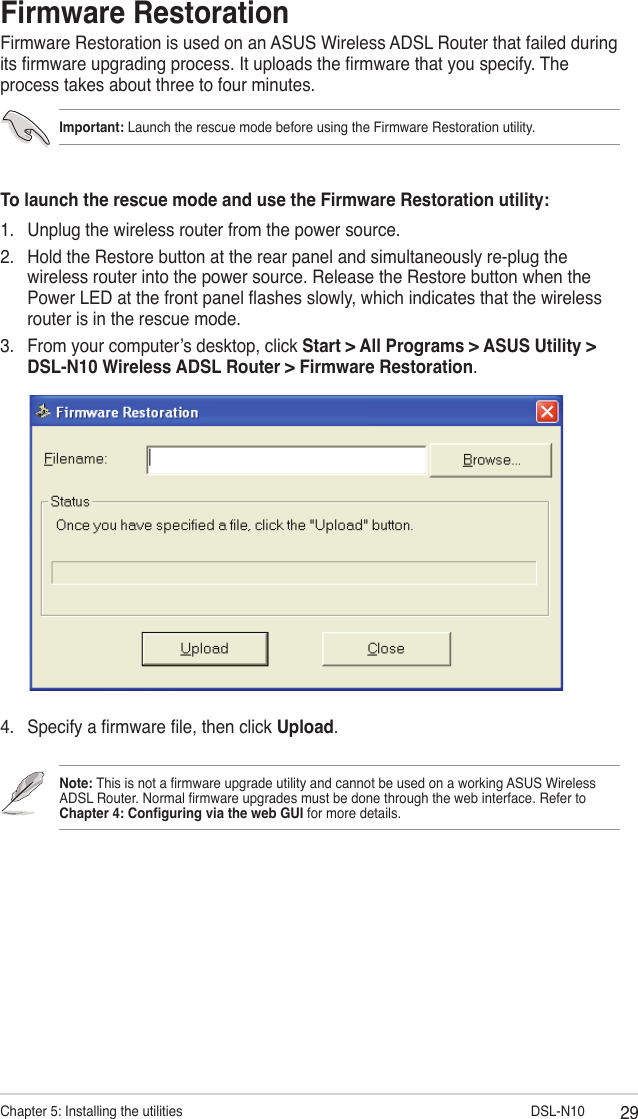
- 1. TempConfidential_MSQDSLN10-User Manual
- 2. TempConfidential_MSQDSLN10-User Guide
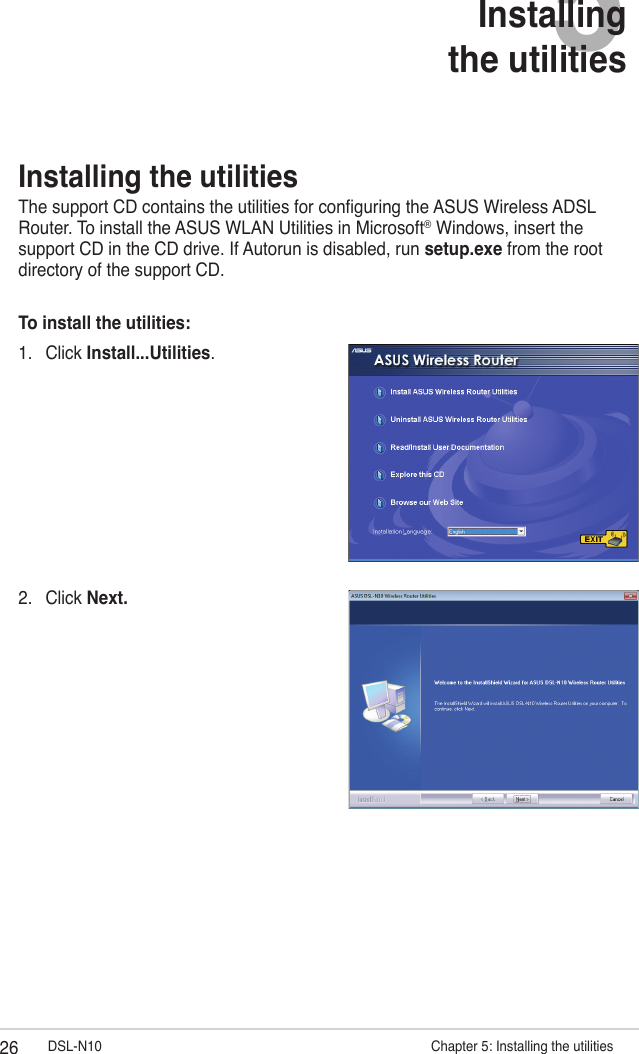
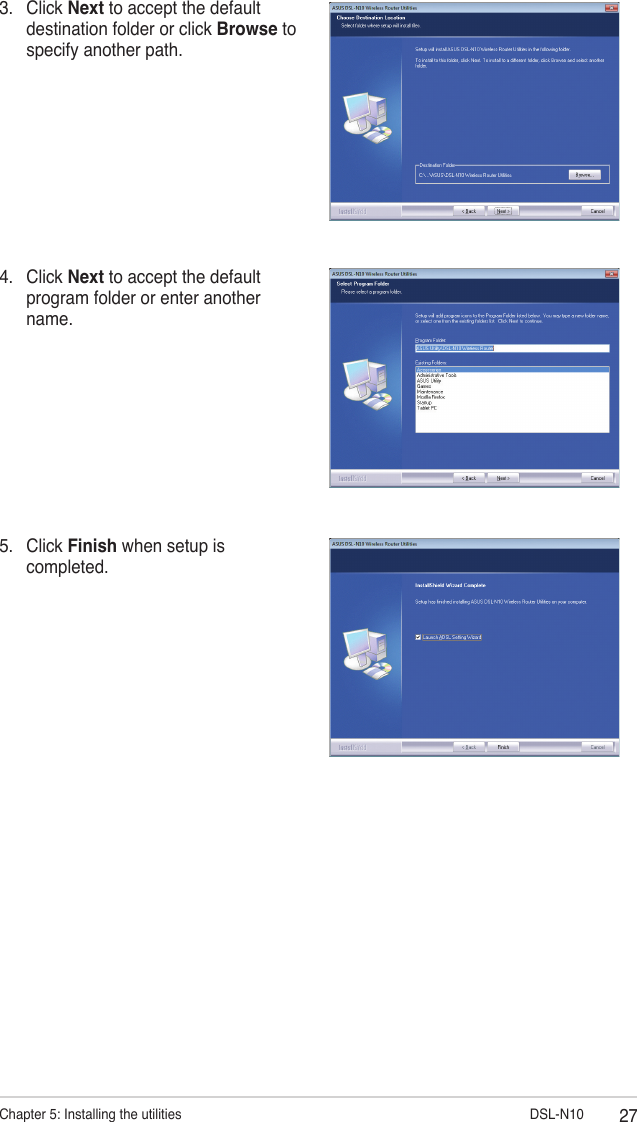
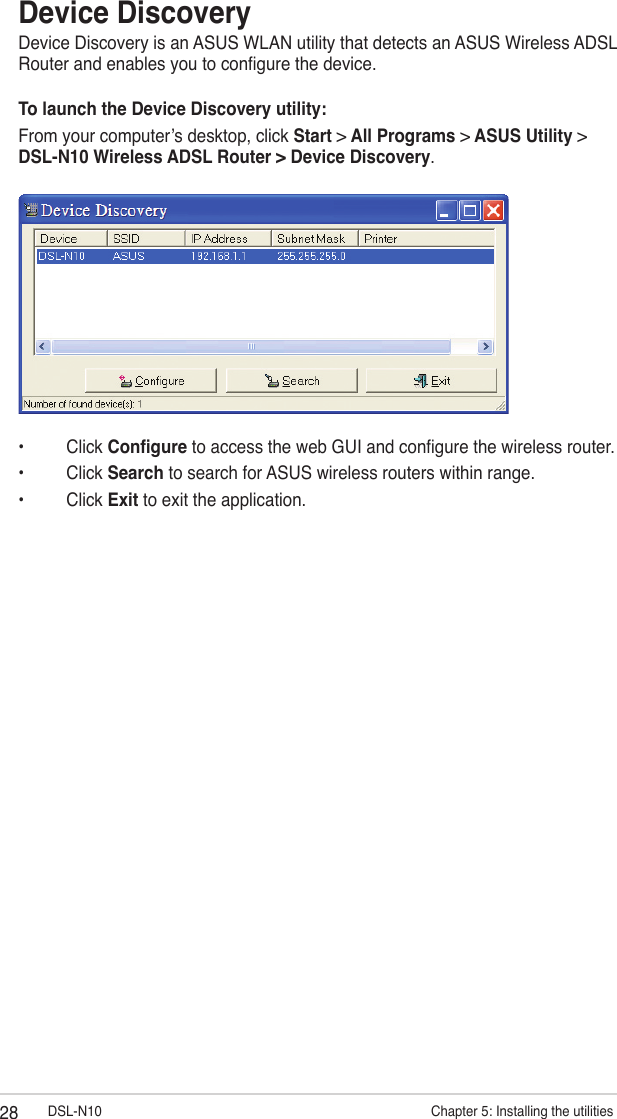
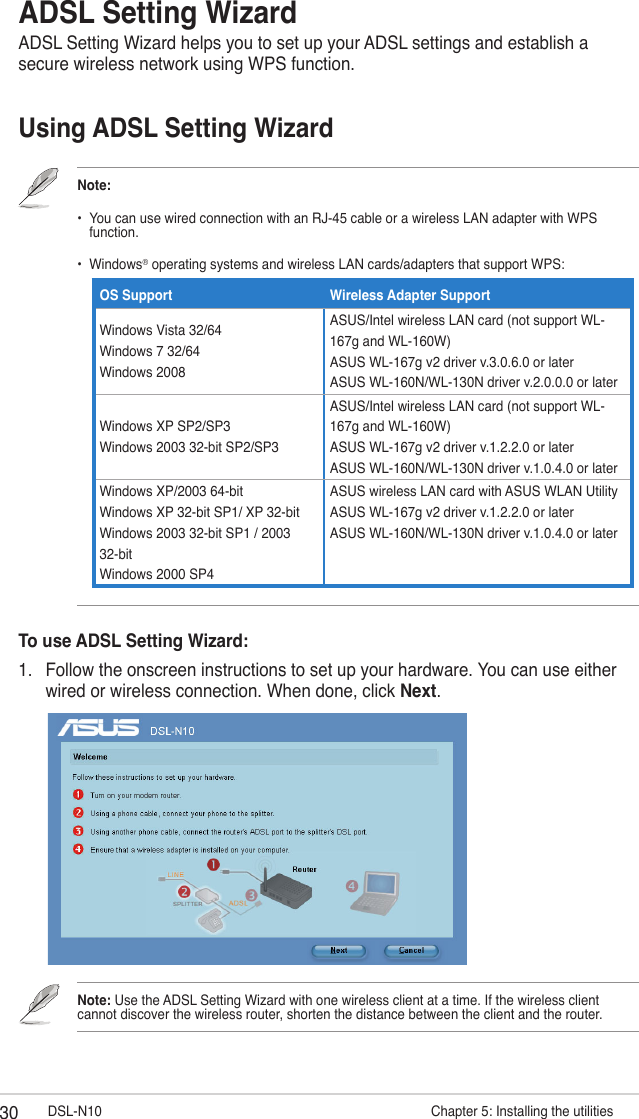
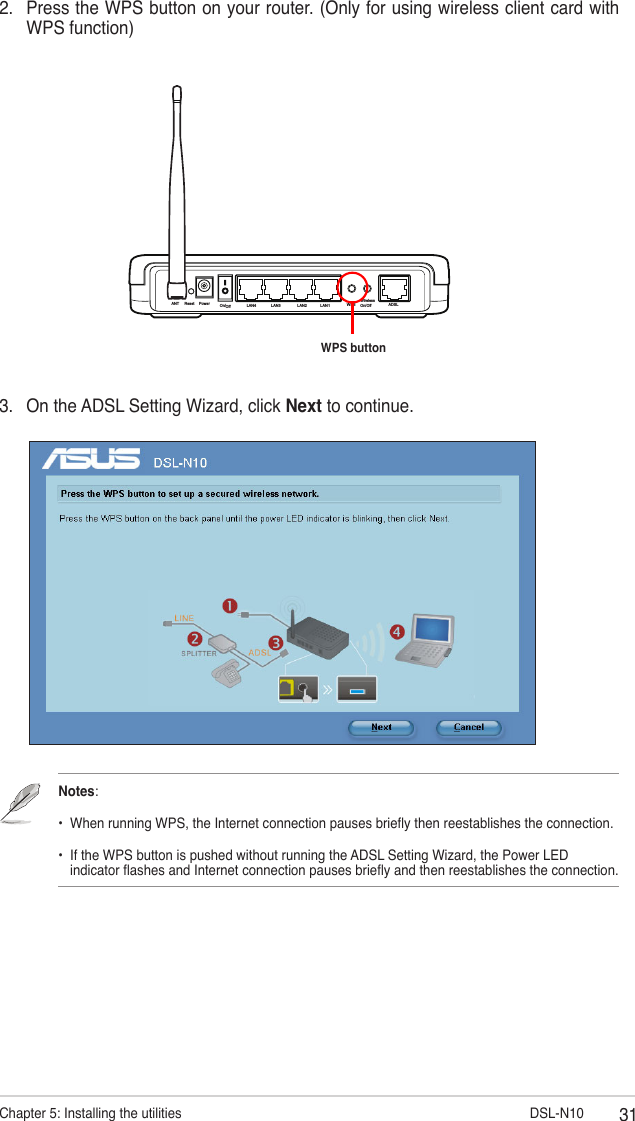
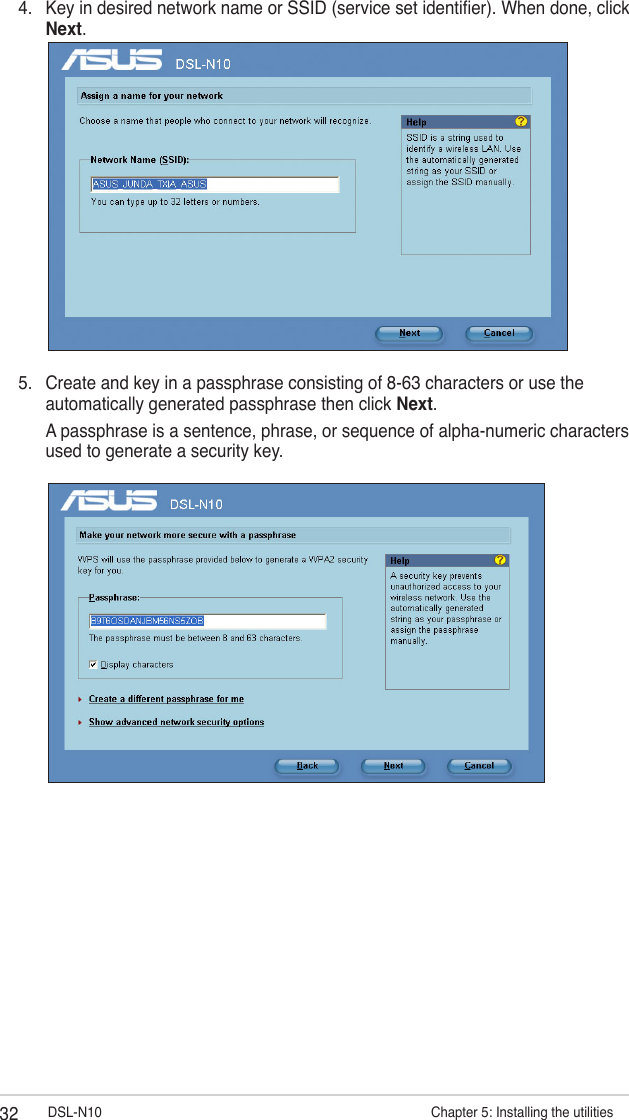
TempConfidential_MSQDSLN10-User Manual