ASUSTeK Computer P1801AH691 ASUS Tablet User Manual Confidential P1801 T OPDes Part 15C
ASUSTeK Computer Inc ASUS Tablet Confidential P1801 T OPDes Part 15C
Contents
- 1. Confidential_(P1801-T) OPDes_Part 15C
- 2. (P1801-T) UserMan
Confidential_(P1801-T) OPDes_Part 15C

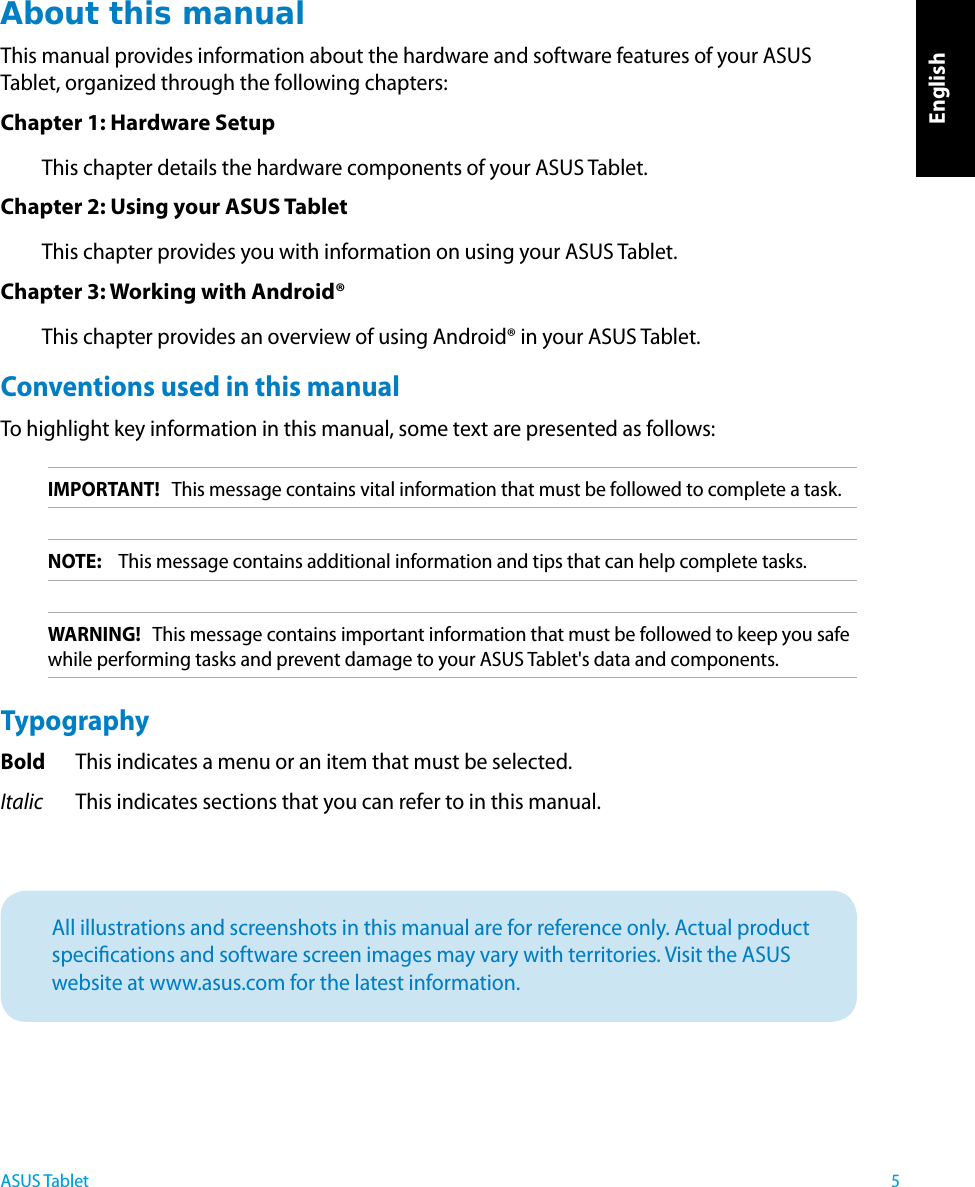


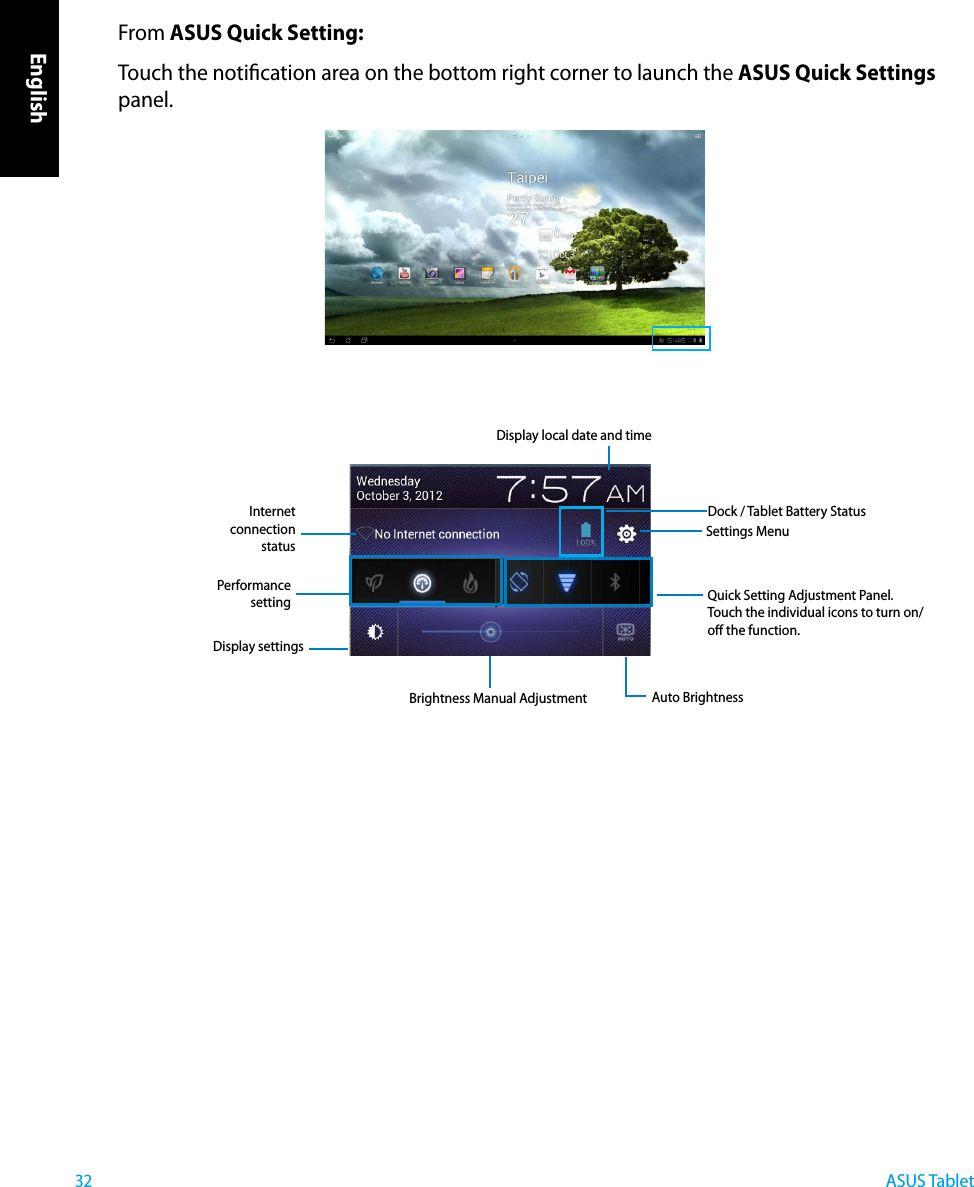
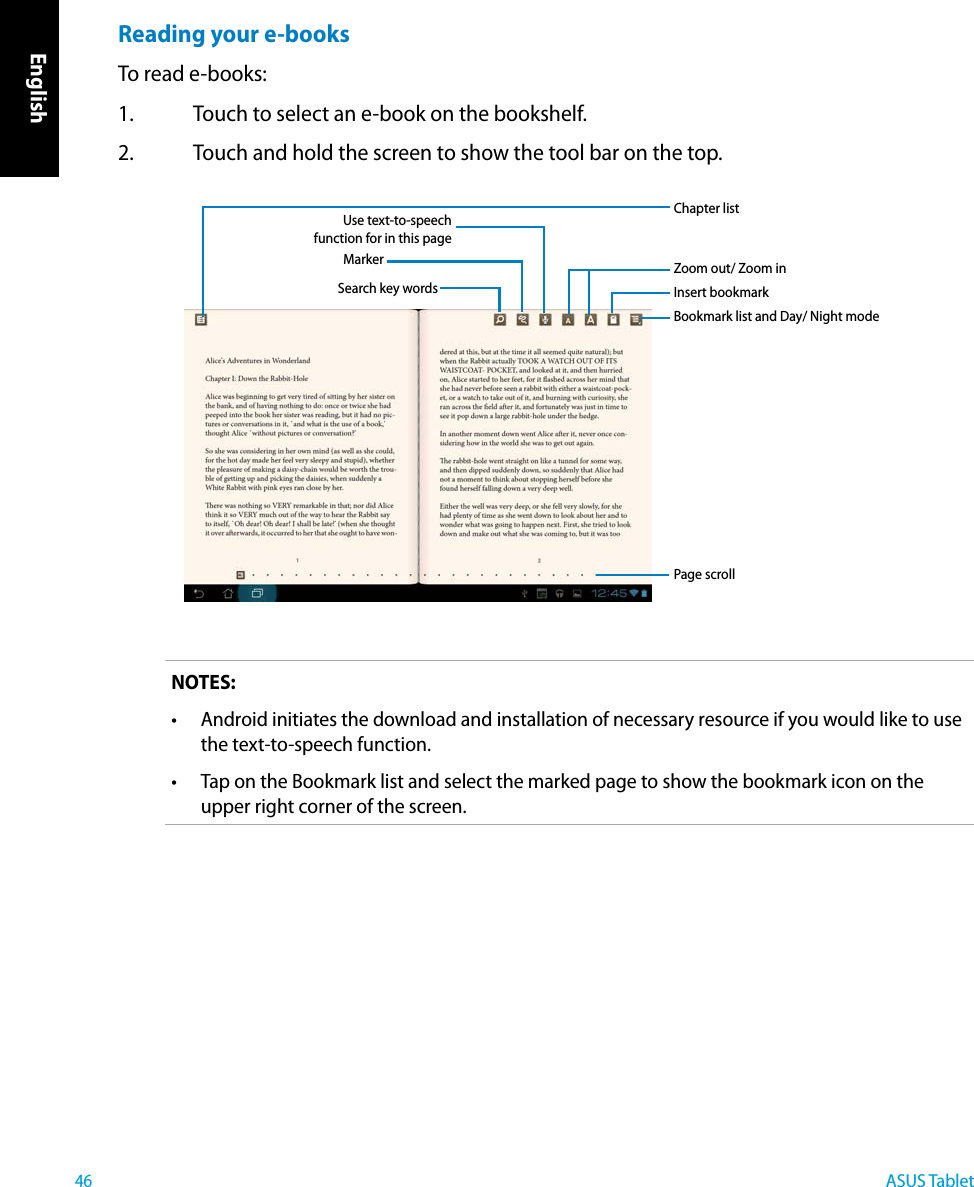
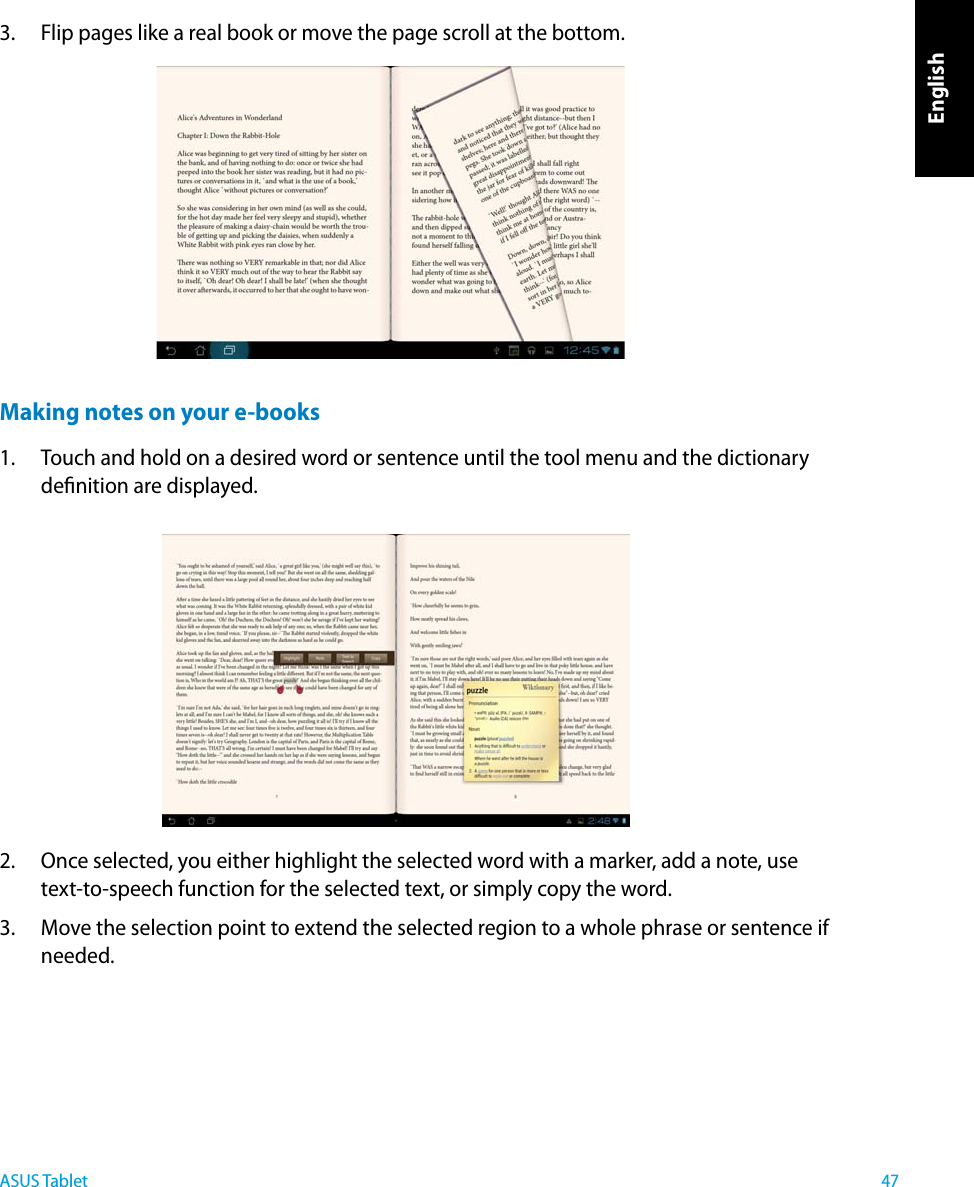
![English33ASUS TabletSilent modeASUS Quick Setting Adjustment PanelTouch any of the following icons to enable or disable its assigned function.Icon and baseline light up when enabledPerformance modeWi-FiBluetoothAuto-rotate screenAuto-SyncPower SavingBalanced modeIMPORTANT!• Balanced mode [Default mode]: Balances the system’s performance and power usage.• Performance mode: Maximizes the system’s performance but consumes more battery power.• Power saving mode: Energy saving mode Notication PanelsNotication panels will appear under the Quick Setting panel for alerts or updates in apps, incoming emails, and utillity status.IMPORTANT! Swipe a notication to the right or to the left to remove item from the list.GPS](https://usermanual.wiki/ASUSTeK-Computer/P1801AH691.Confidential-P1801-T-OPDes-Part-15C/User-Guide-1867538-Page-33.png)


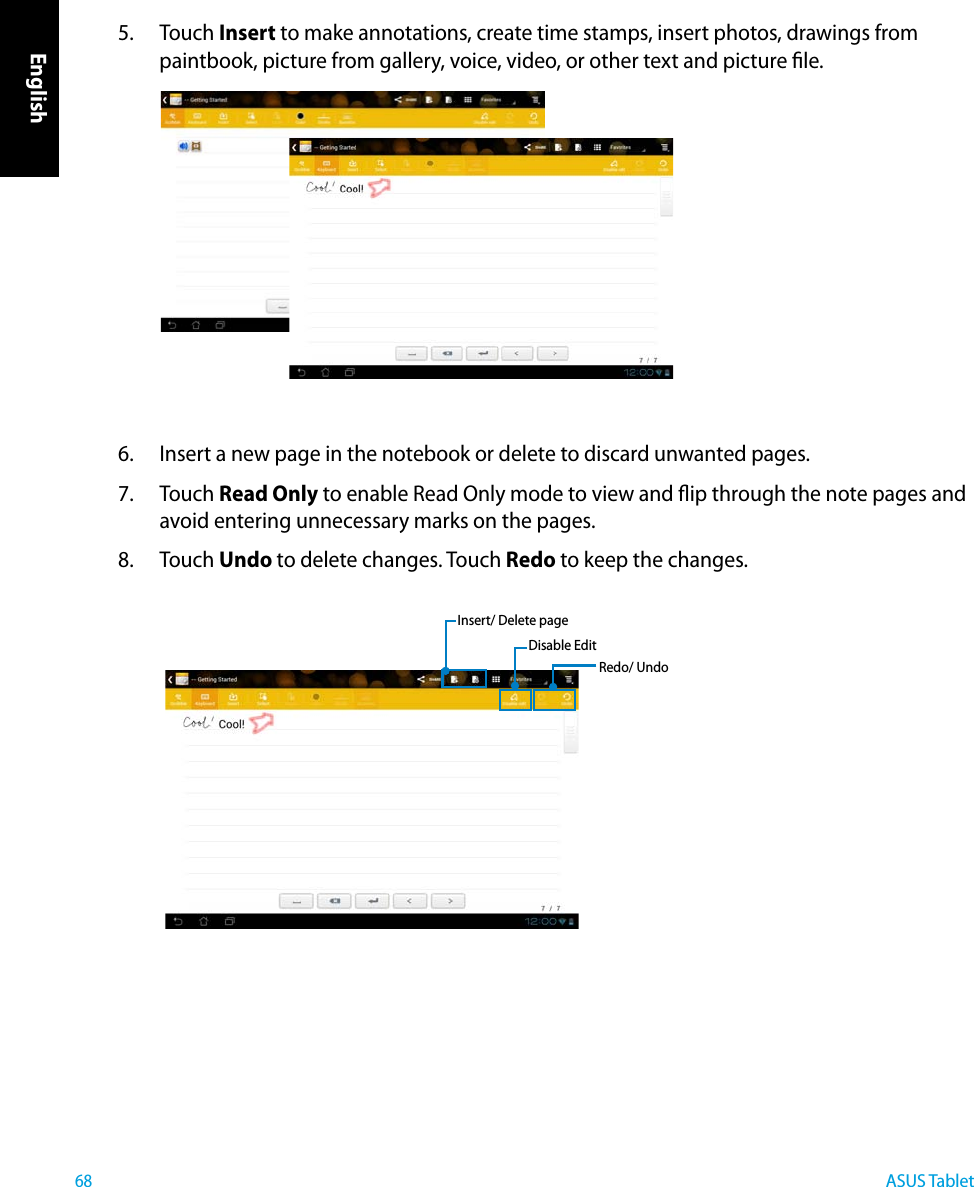

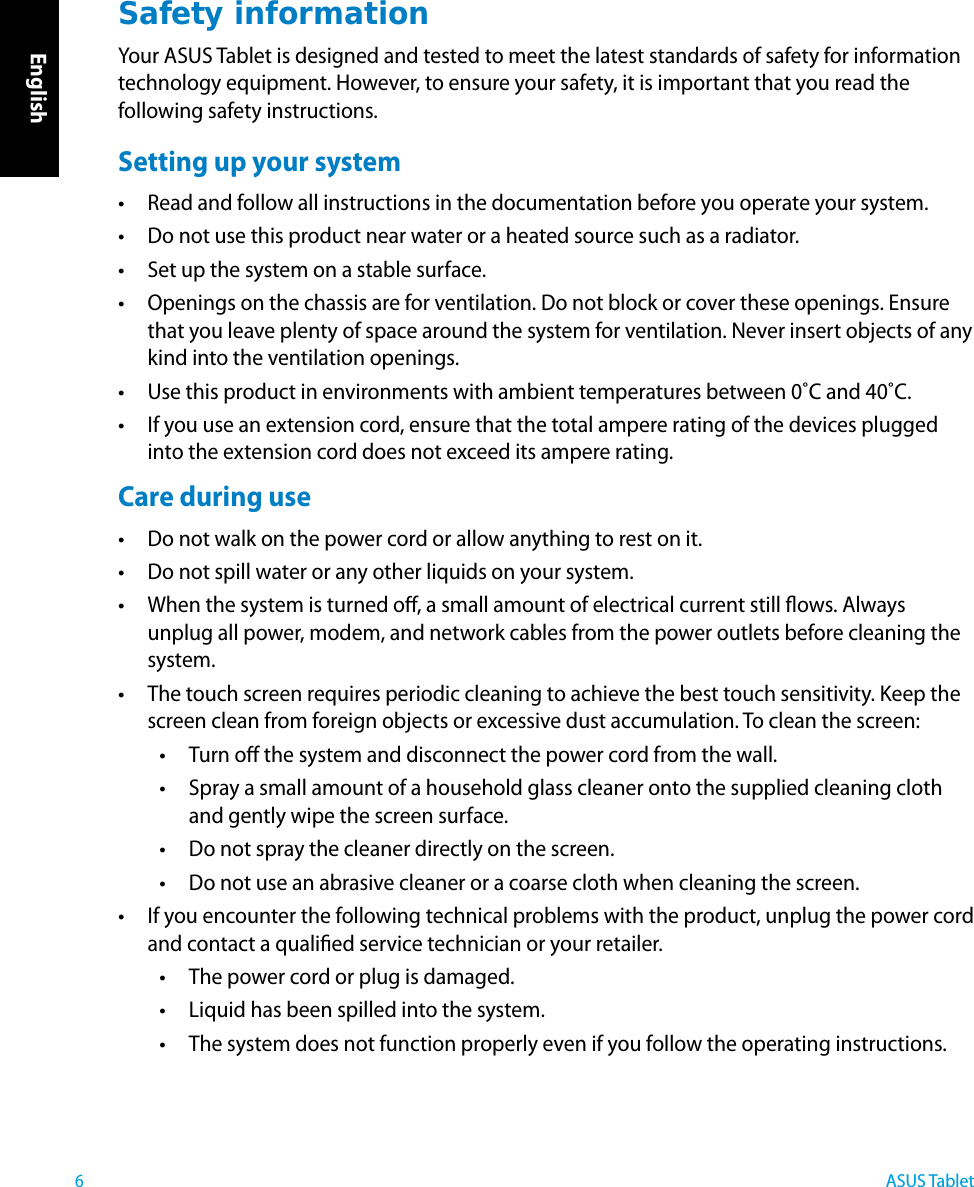
![English75ASUS TabletDeclaration of Conformity (R&TTE directive 1999/5/EC)The following items were completed and are considered relevant and sucient:Essential requirements as in [Article 3]Protection requirements for health and safety as in [Article 3.1a]Testing for electric safety according to [EN 60950]Protection requirements for electromagnetic compatibility in [Article 3.1b]Testing for electromagnetic compatibility in [EN 301 489-1] & [EN 301 489-17]Eective use of the radio spectrum as in [Article 3.2]Radio test suites according to [EN 300 328-2]CE Mark WarningThis is a Class B product, in a domestic environment, this product may cause radio interference, in which case the user may be required to take adequate measures.CE marking for devices without wireless LAN/BluetoothThe shipped version of this device complies with the requirements of the EEC directives 2004/108/EC “Electromagnetic compatibility” and 2006/95/EC “Low voltage directive”. / CE marking for devices with wireless LAN/ BluetoothThis equipment complies with the requirements of Directive 1999/5/EC of the European Parliament and Commission from 9 March, 1999 governing Radio and Telecommunications Equipment and mutual recognition of conformity. is for class II device.The highest SAR value for this device is 0.163 W/kg.Wireless Operation Channel for Dierent DomainsN. America 2.412-2.462 GHz Ch01 through CH11Japan 2.412-2.484 GHz Ch01 through Ch14Europe ETSI 2.412-2.472 GHz Ch01 through Ch13•••••••](https://usermanual.wiki/ASUSTeK-Computer/P1801AH691.Confidential-P1801-T-OPDes-Part-15C/User-Guide-1867538-Page-75.png)