ASUSTeK Computer R1F Notebook PC User Manual Contents
ASUSTeK Computer Inc Notebook PC Contents
UserManual.wiki
>
ASUSTeK Computer
>
R1F User Manual
>
User Manual WLAN 1
Contents
1.
User Manual WLAN 1
2.
User Manual WLAN 2
3.
User Manual 1
4.
User Manual 2
5.
User manual WLAN 1
6.
User manual WLAN 2
7.
User manual 1
8.
User manual 2
9.
Revised user manual part 1
10.
Revised user manual part 2
11.
user manual rev 1
12.
user manual rev 2
13.
user manual 1 rev
14.
user manual 2 rev
User Manual WLAN 1
Navigation menu
Upload a User Manual
Namespaces
Wiki Guide
HTML
PDF
Info
Views
User Manual
Discussion / Help
Navigation

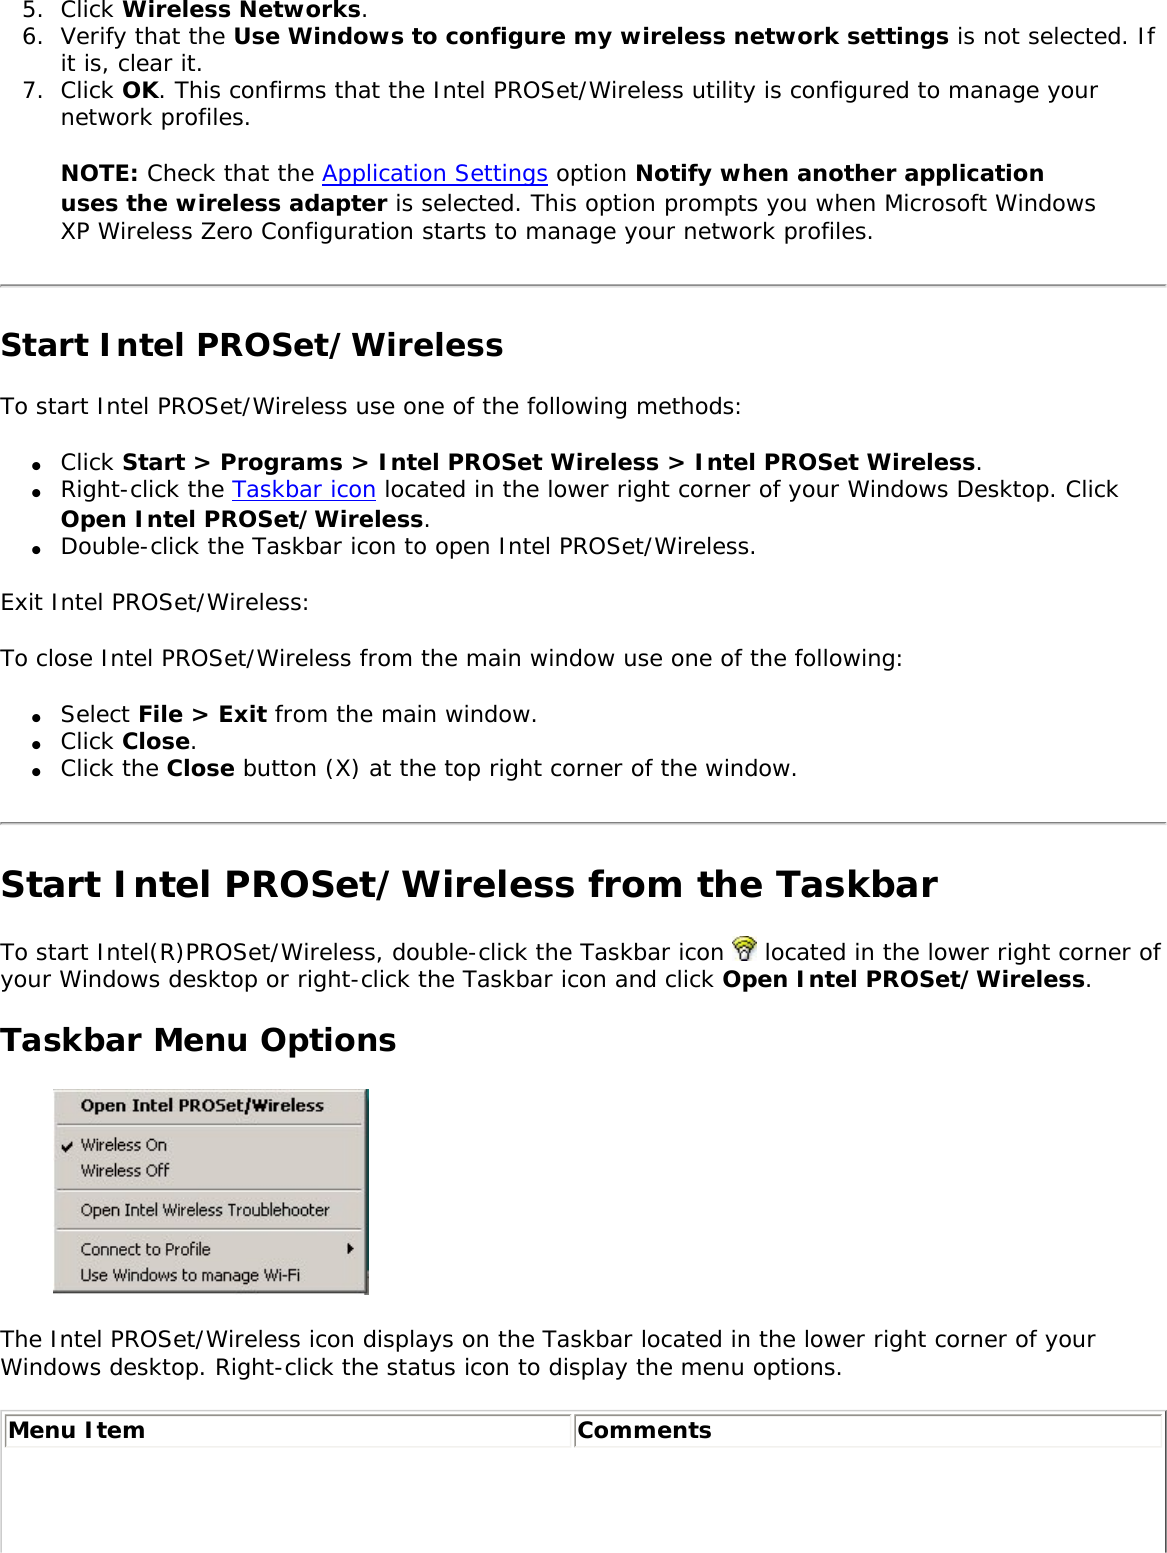
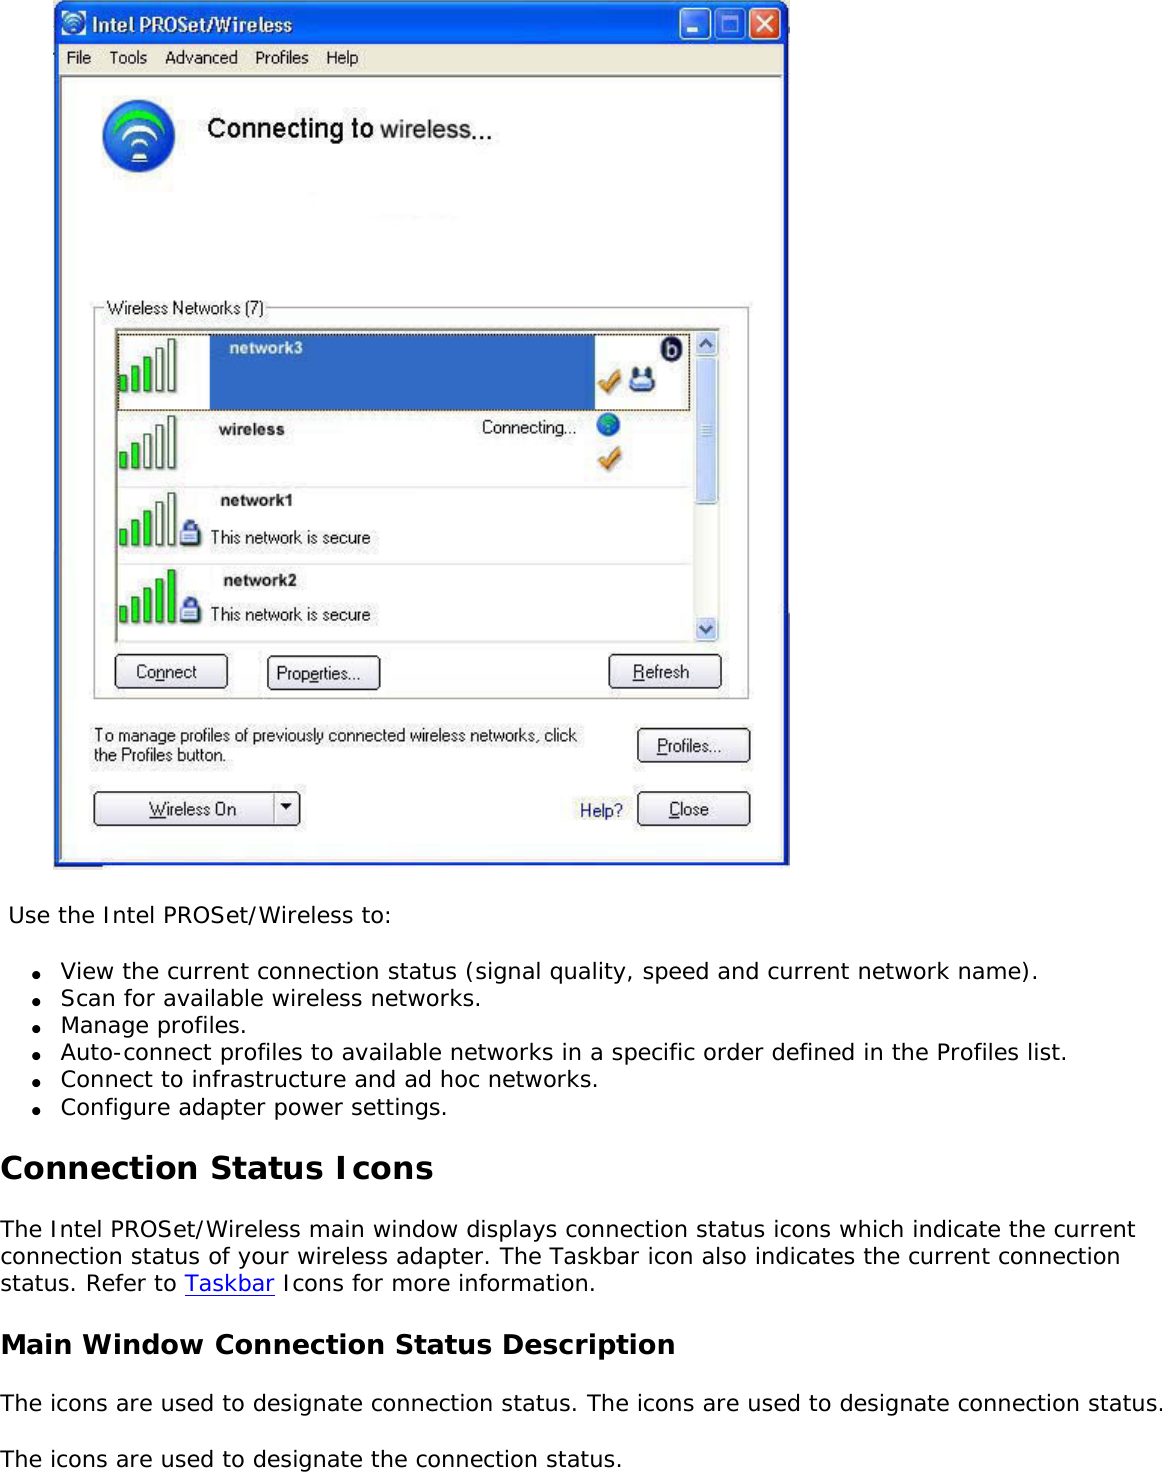
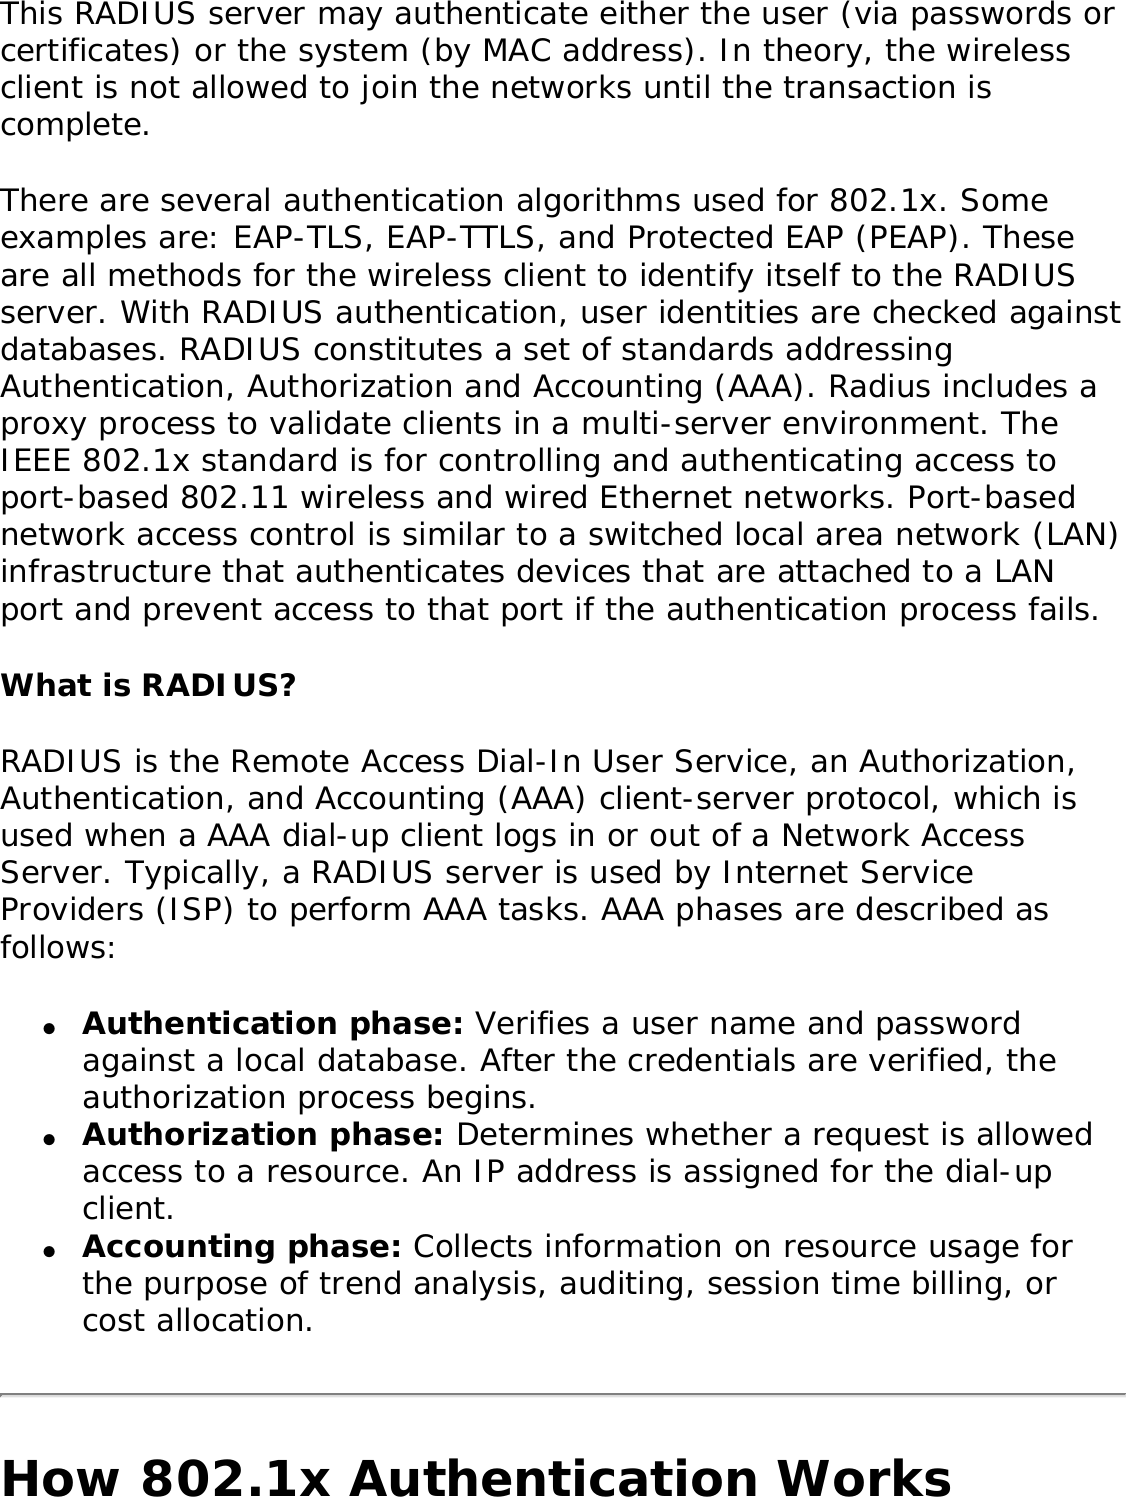
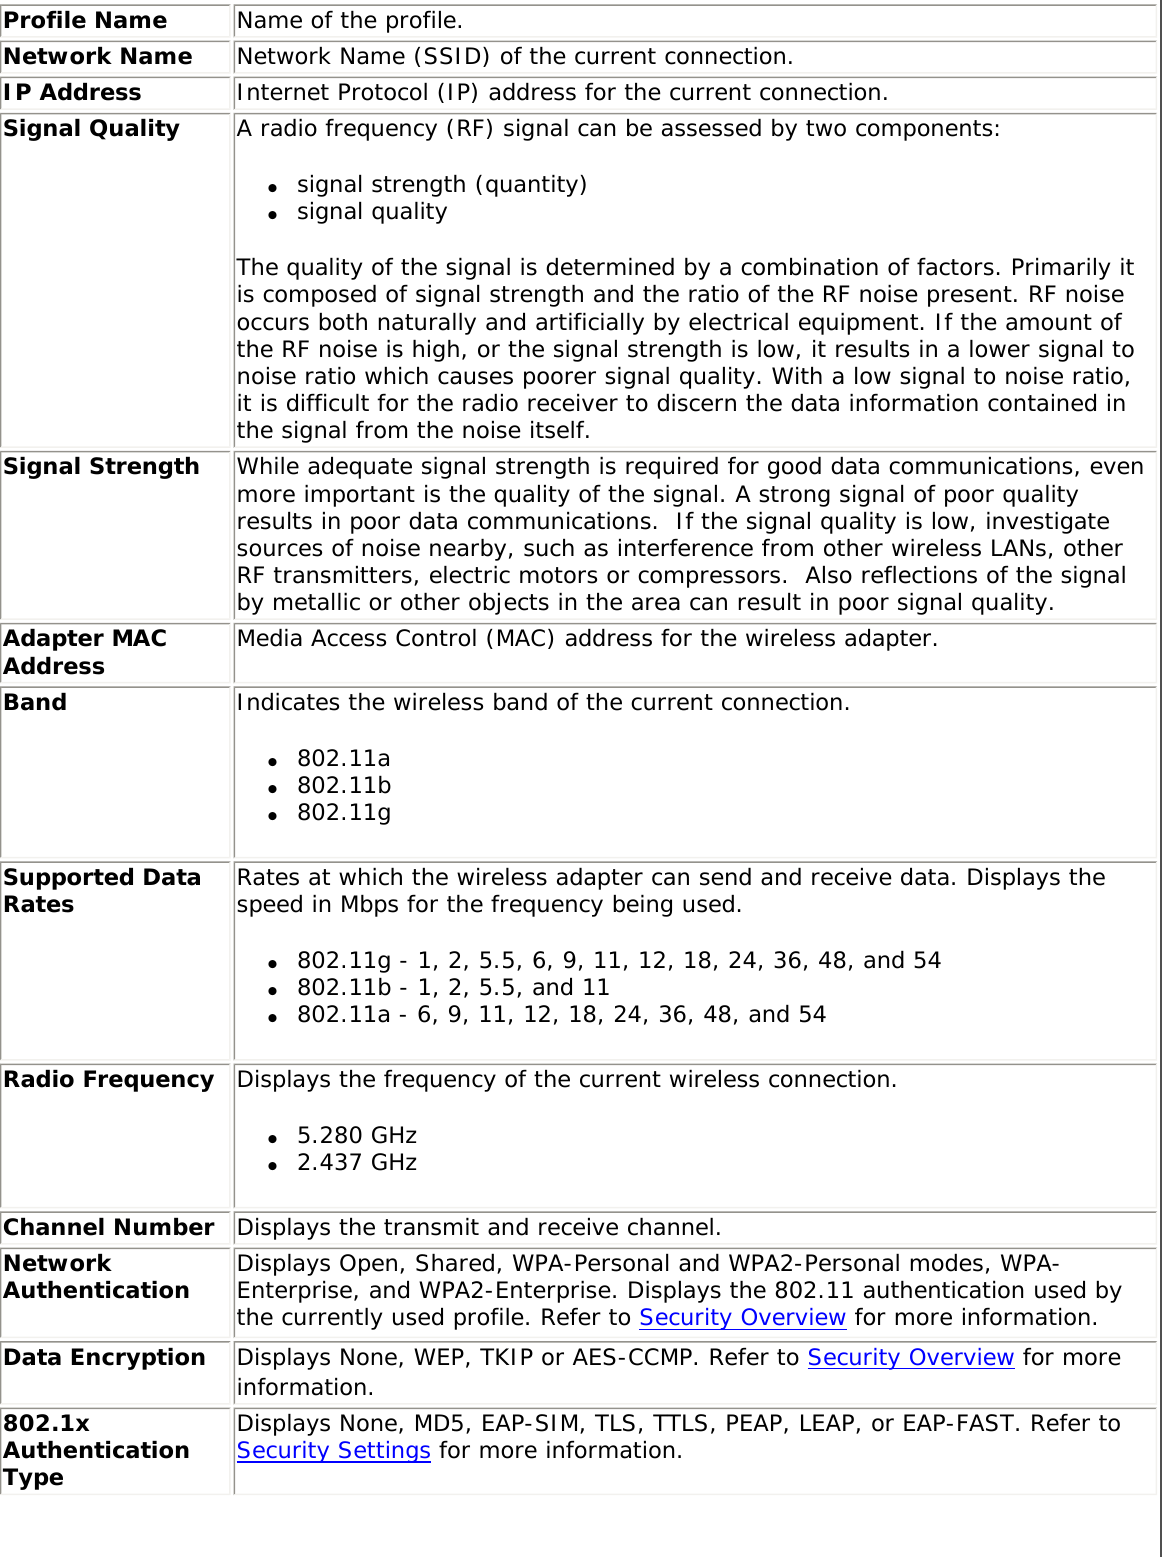
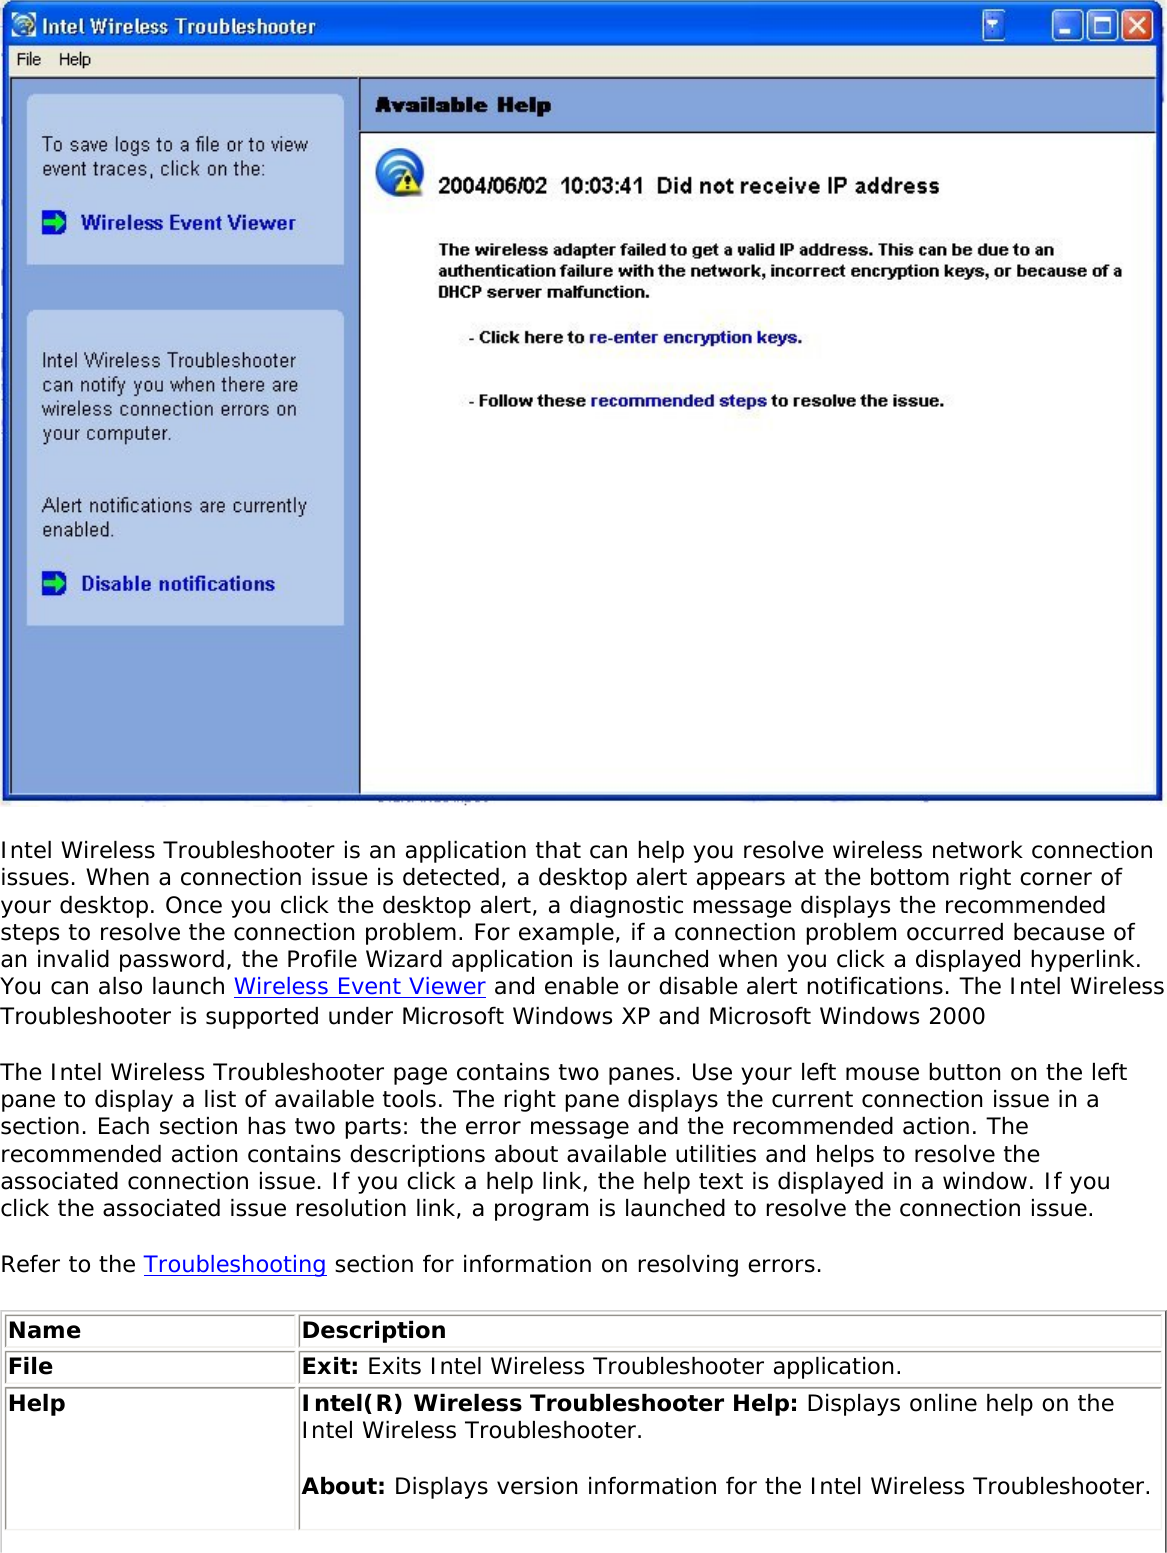
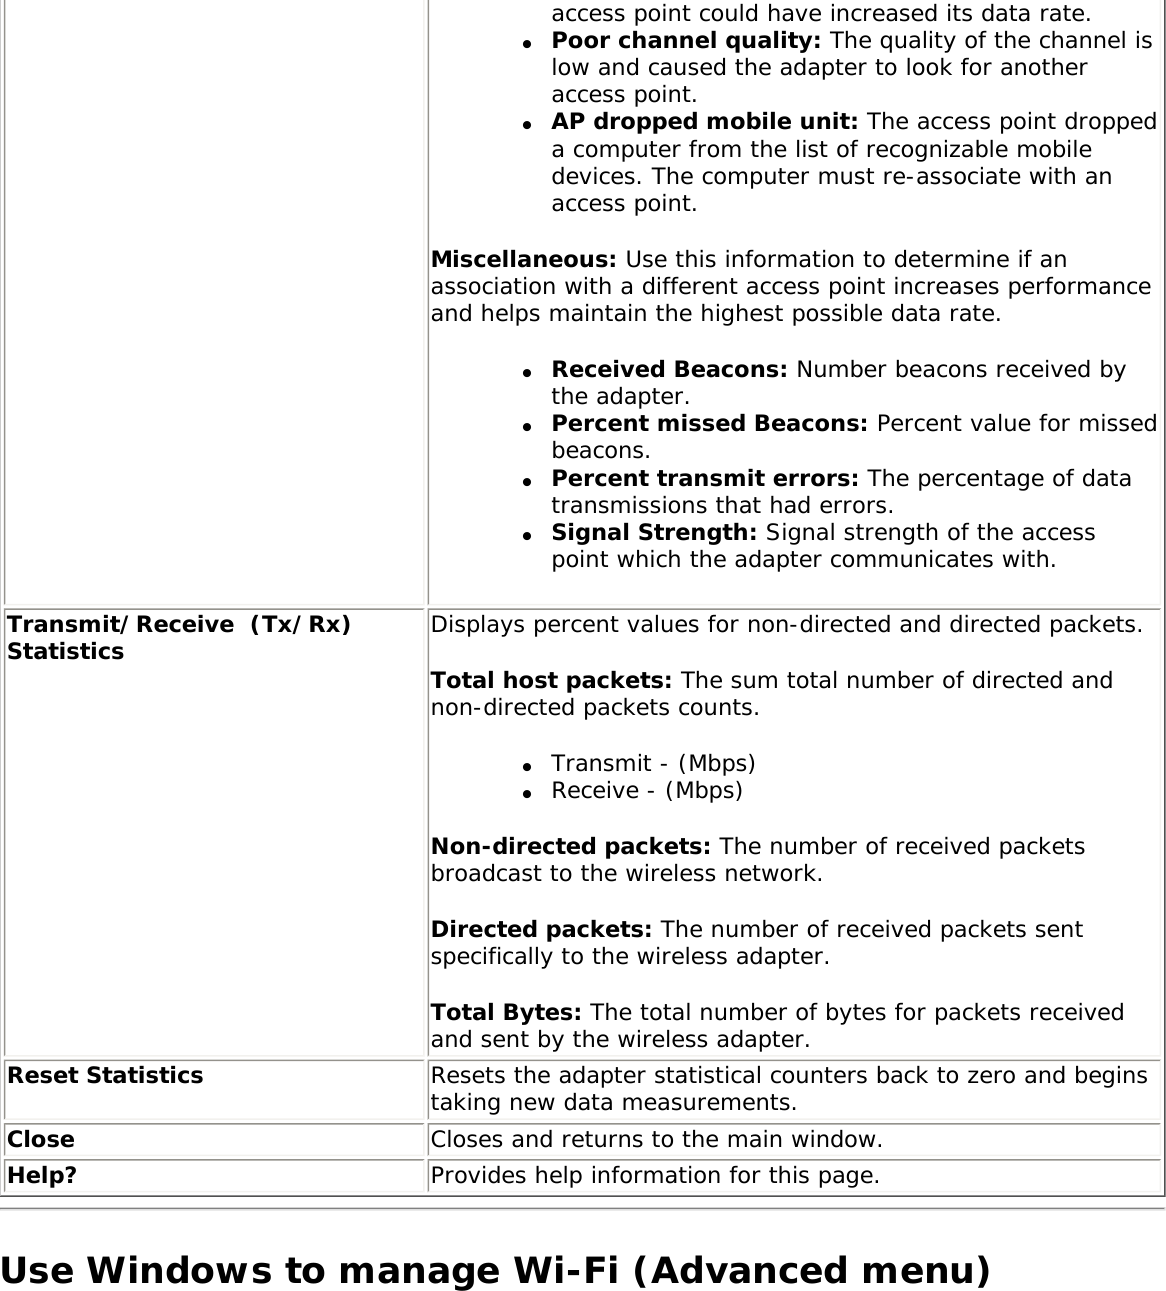
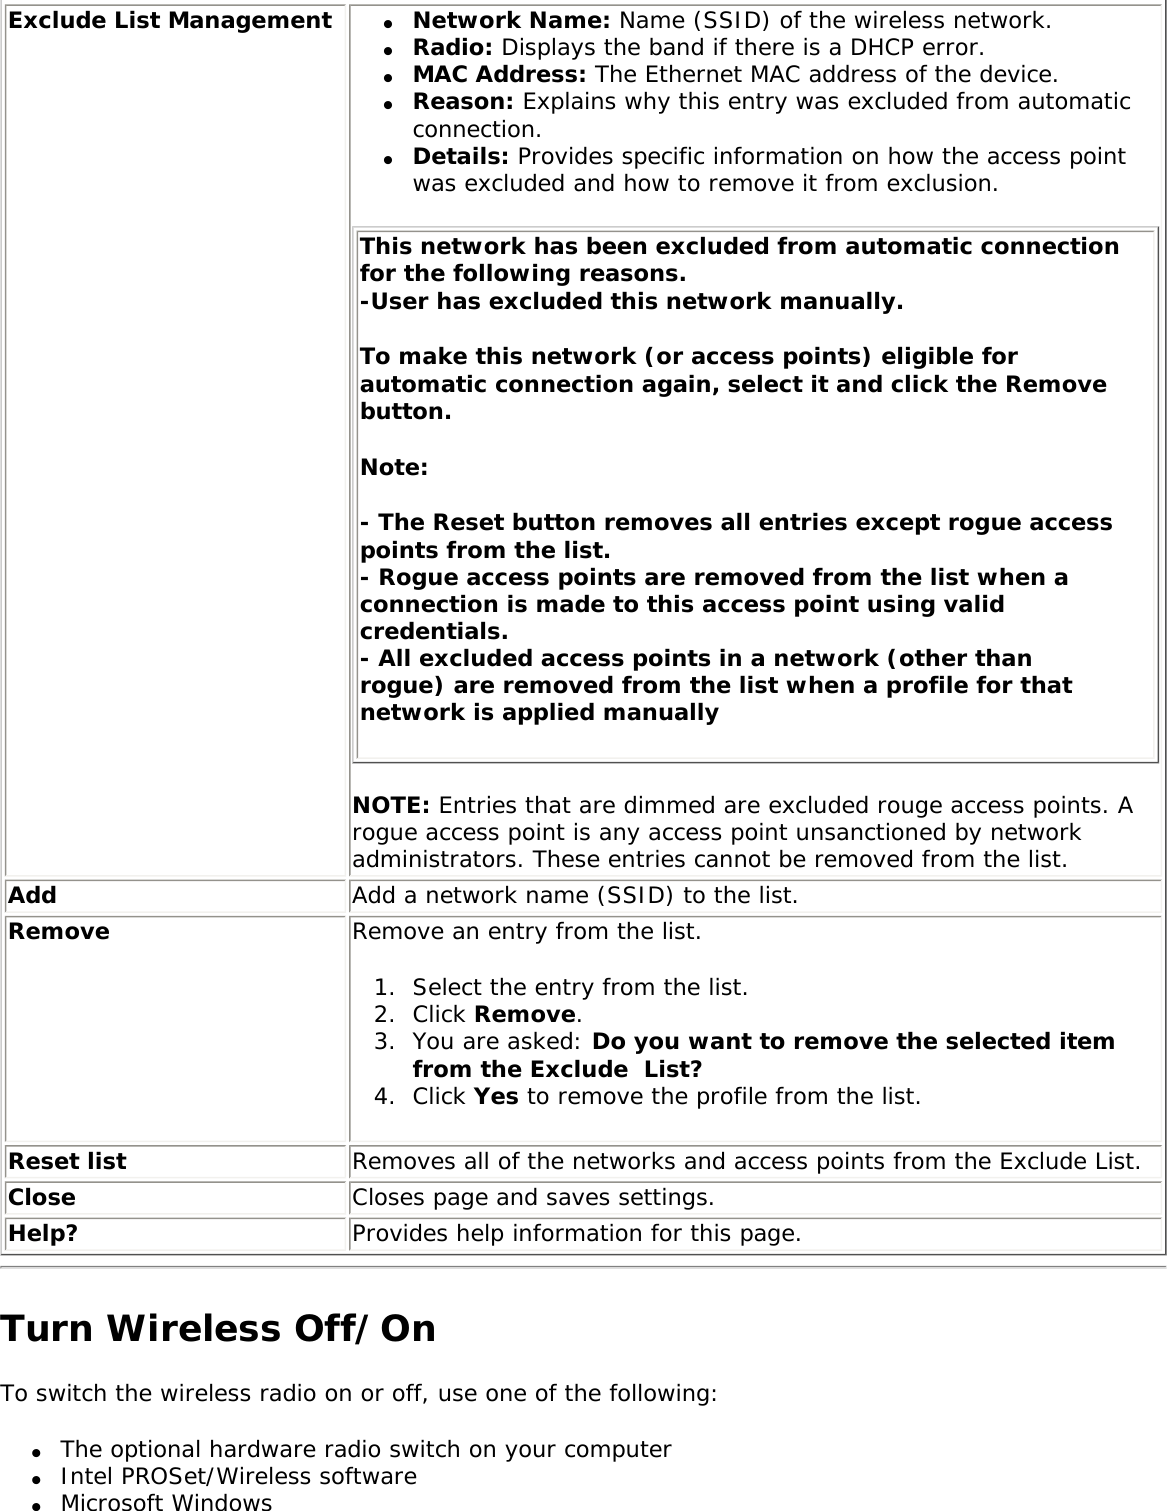
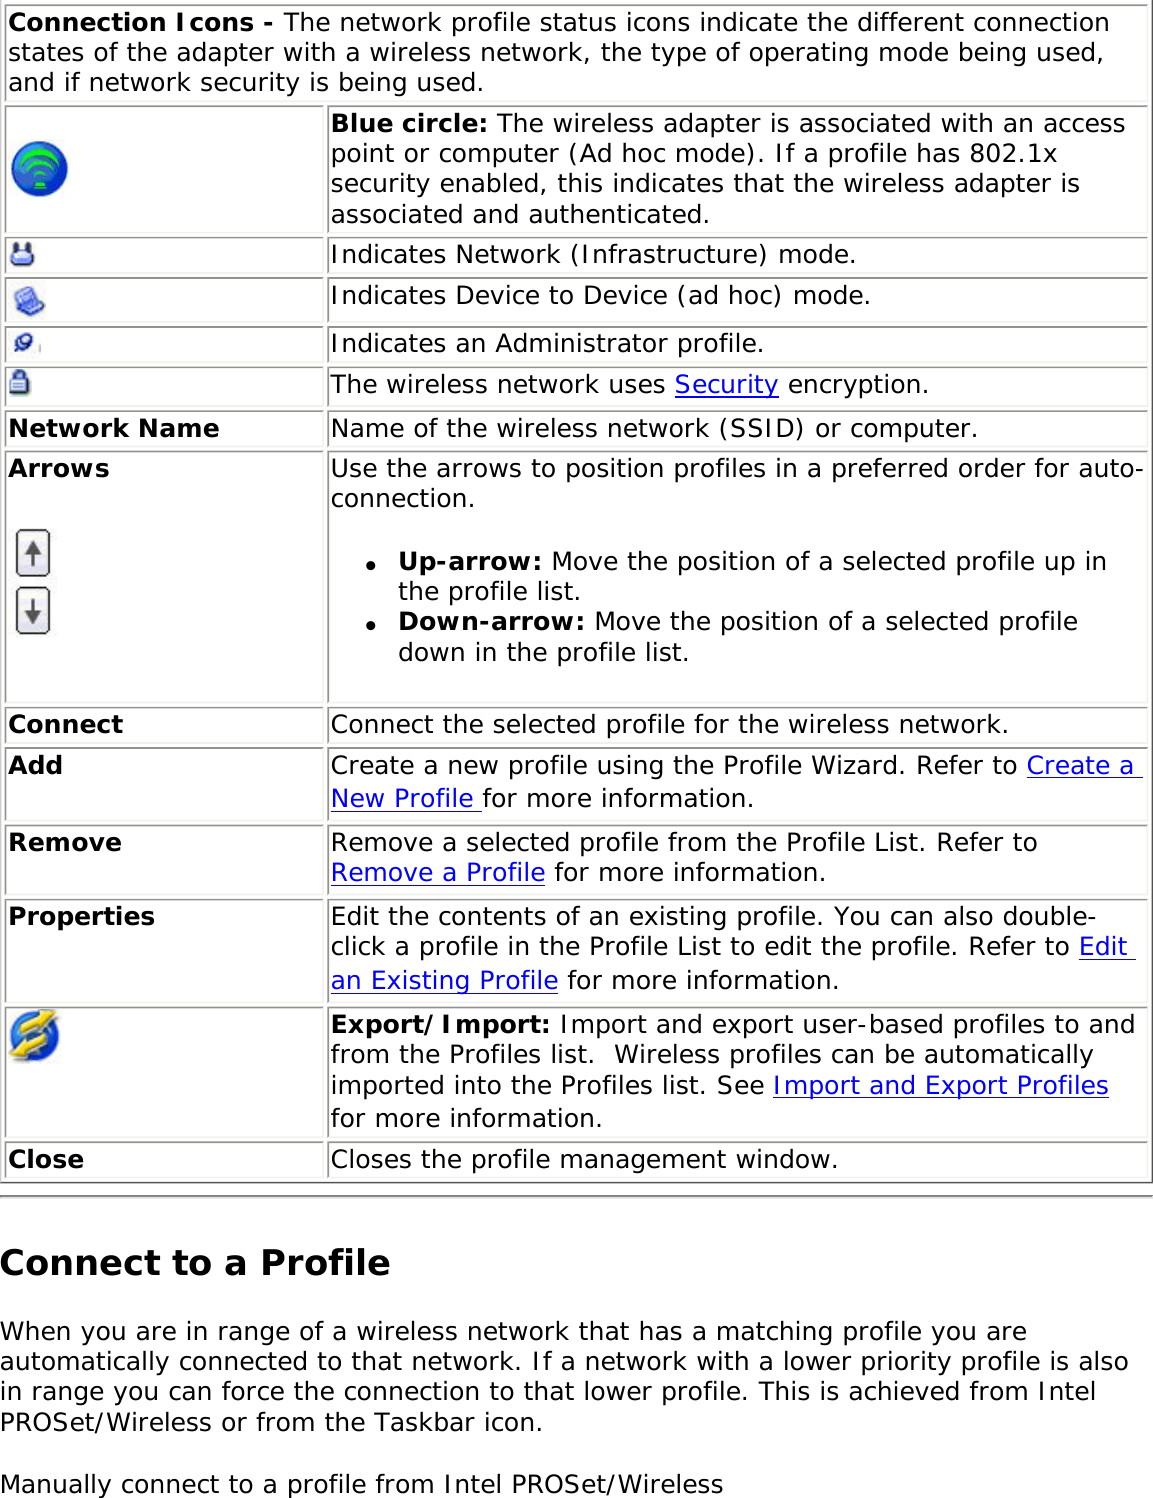
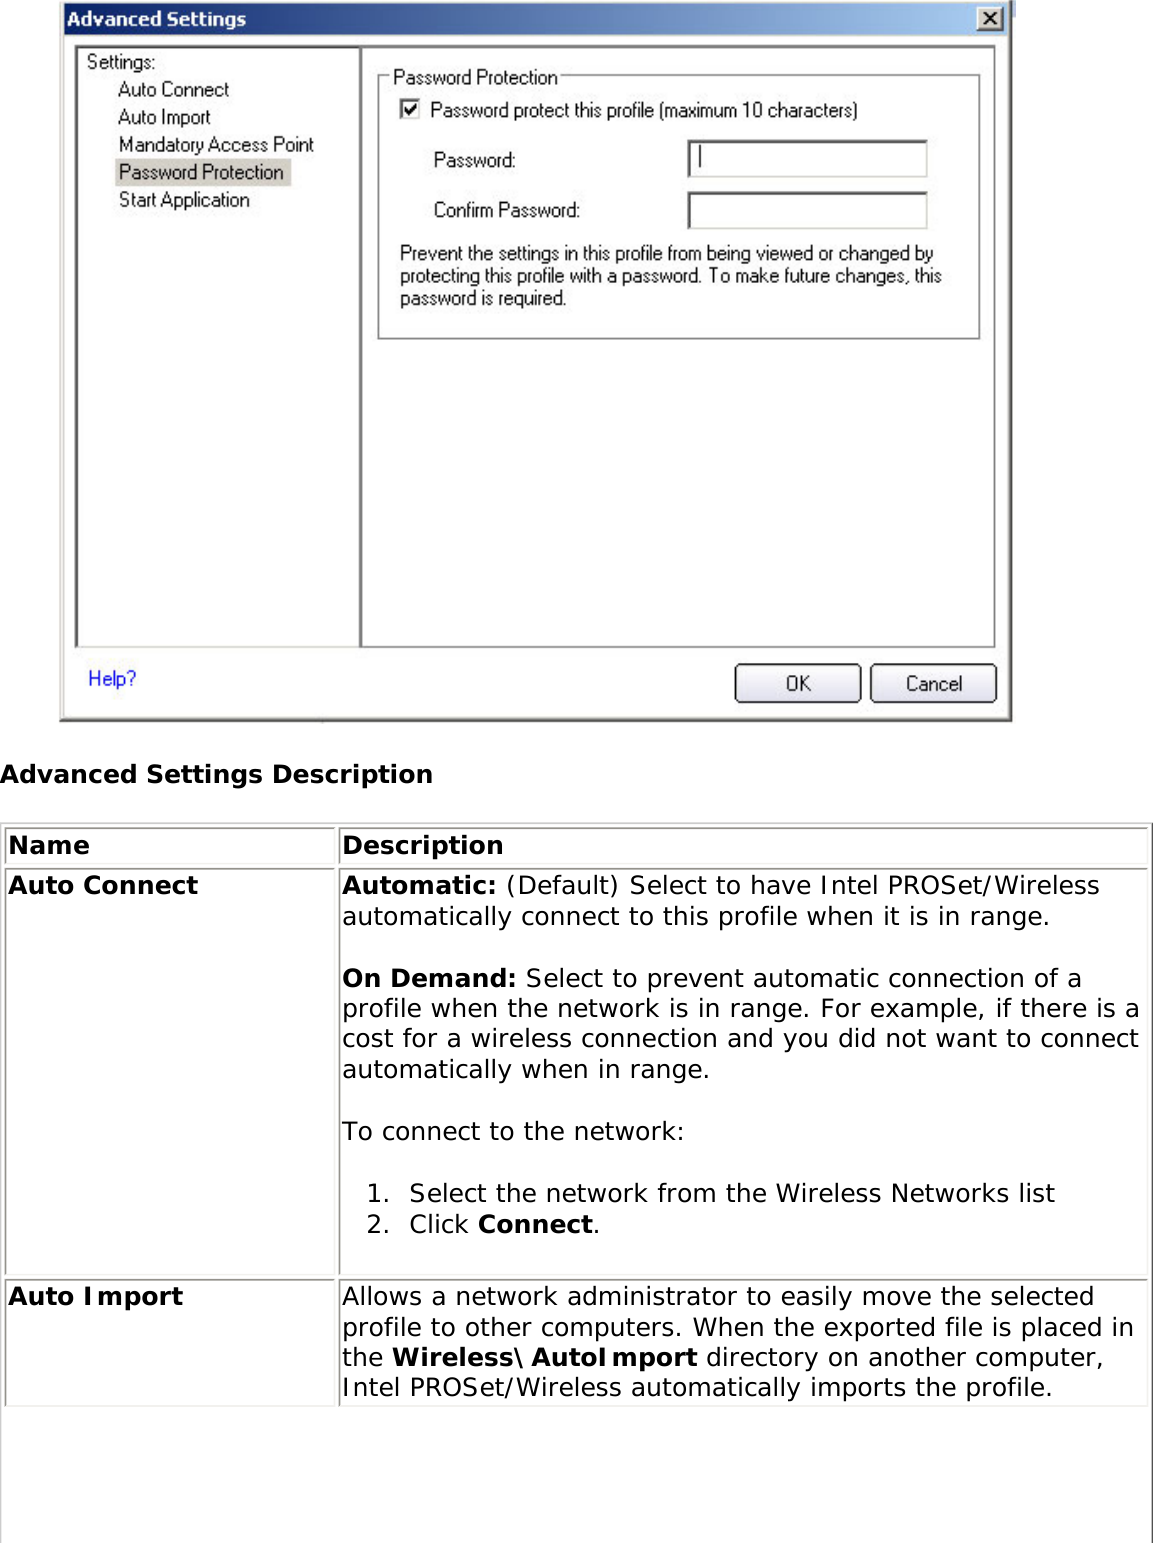
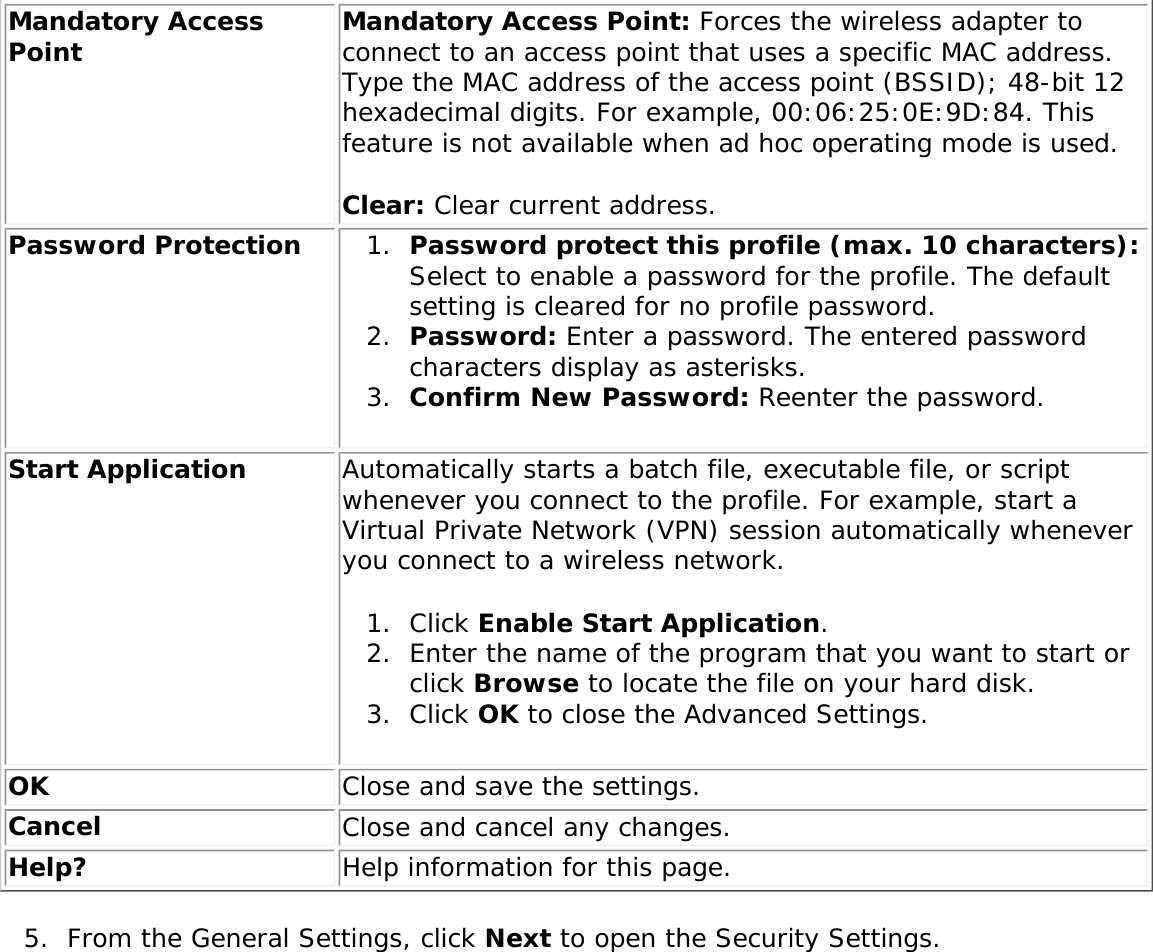
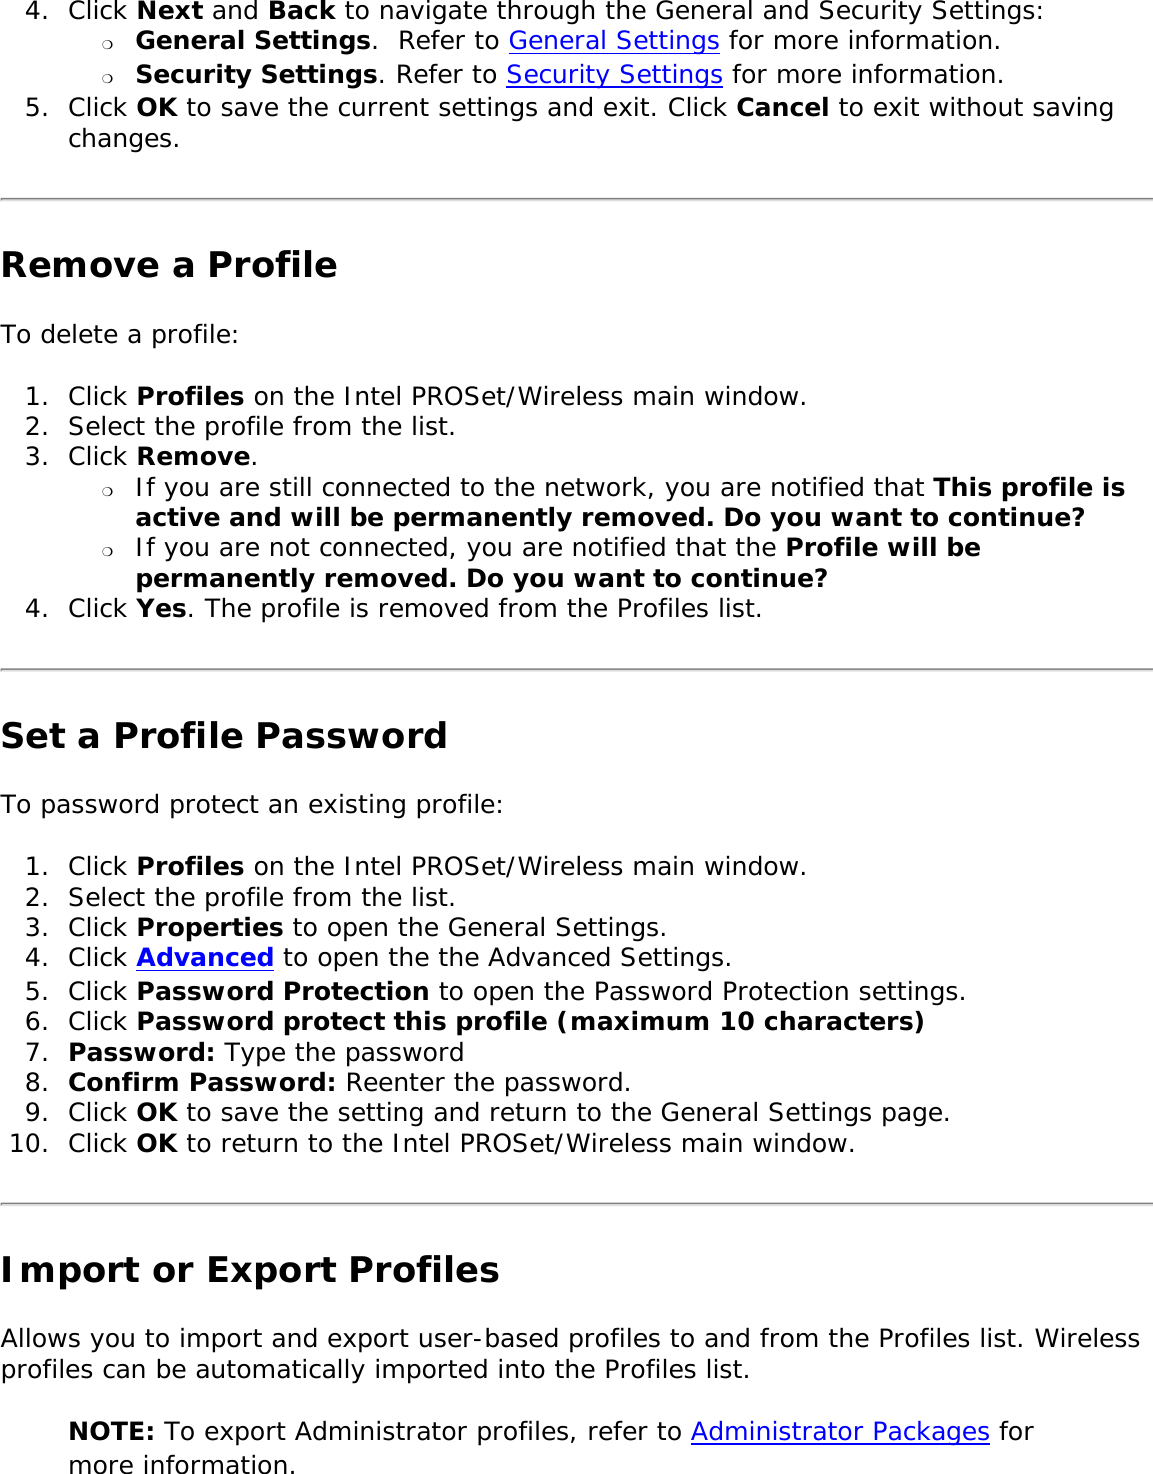
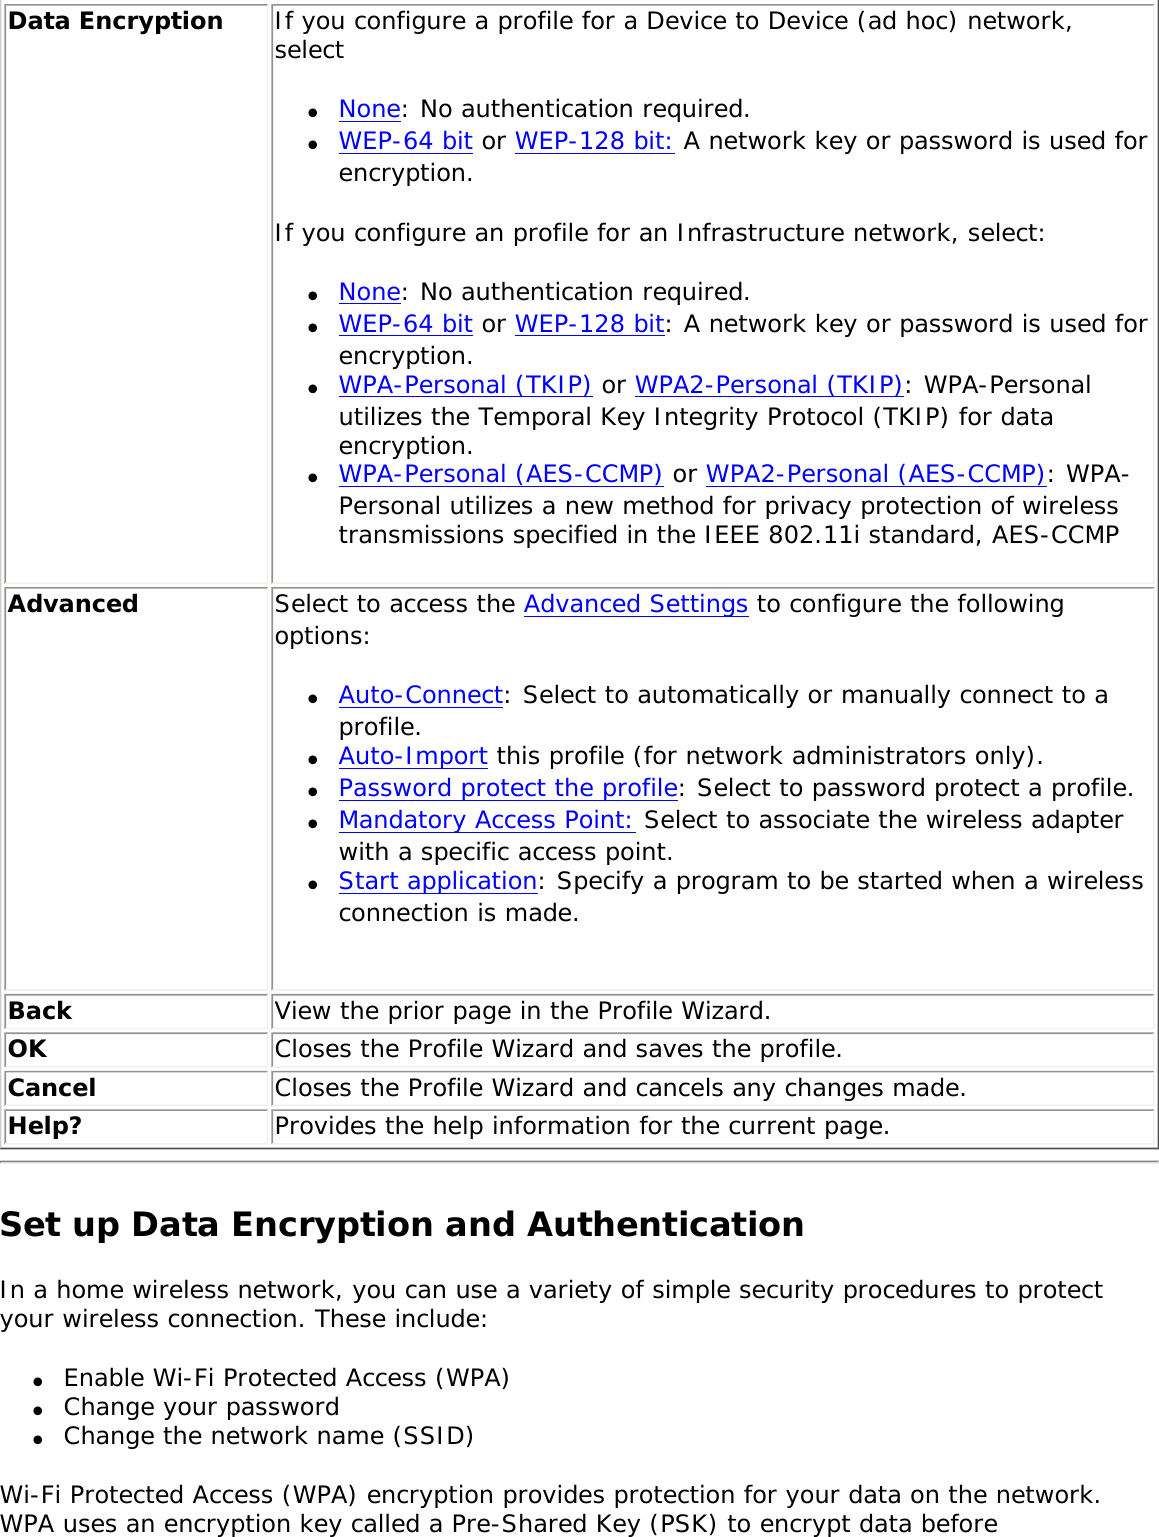
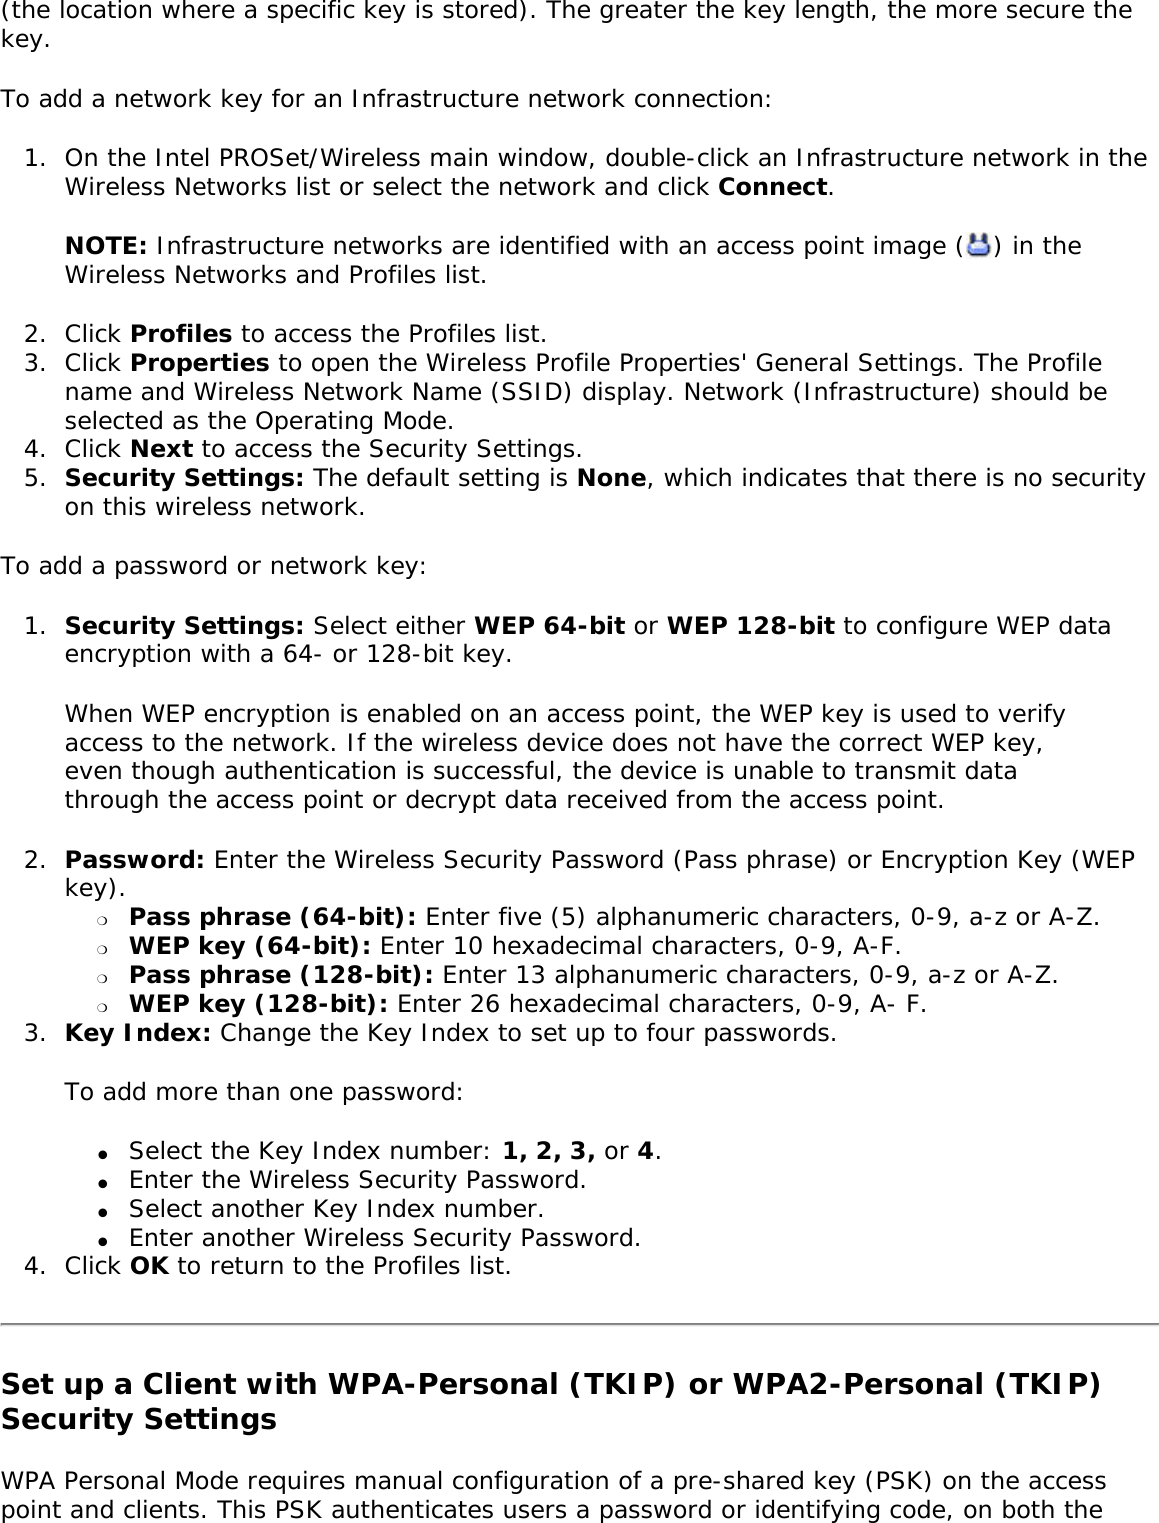
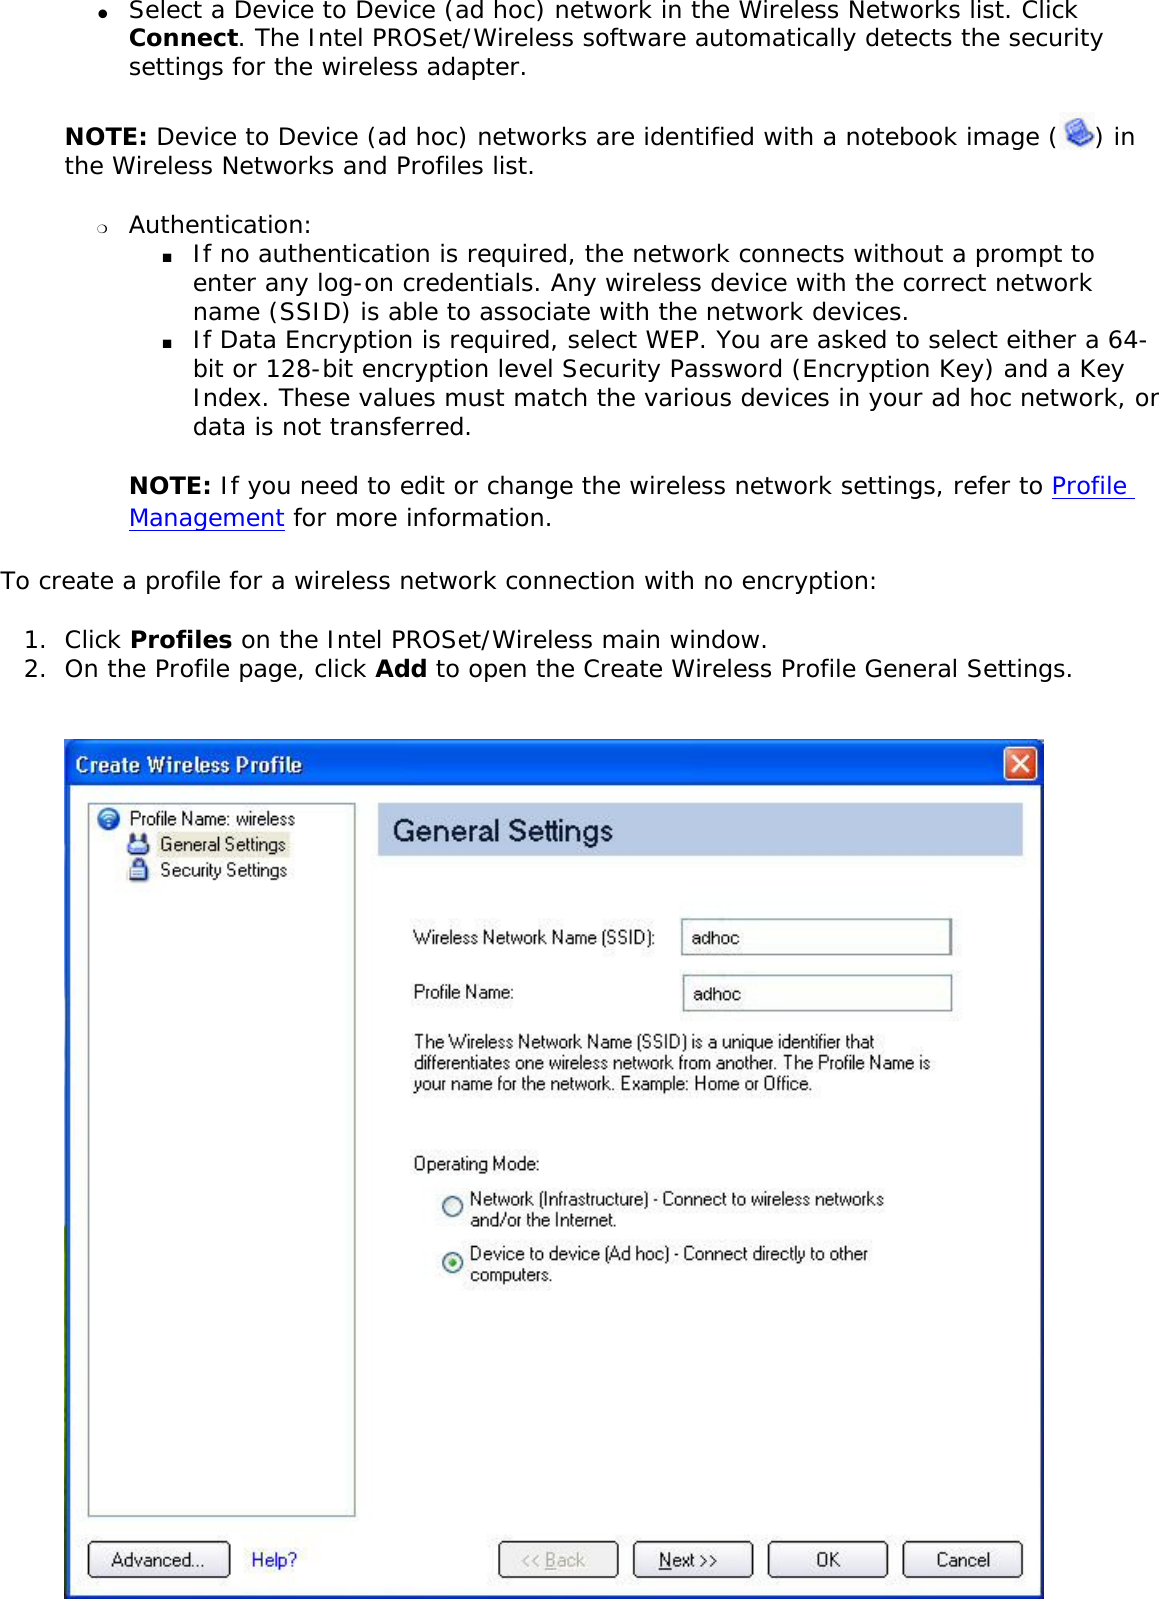
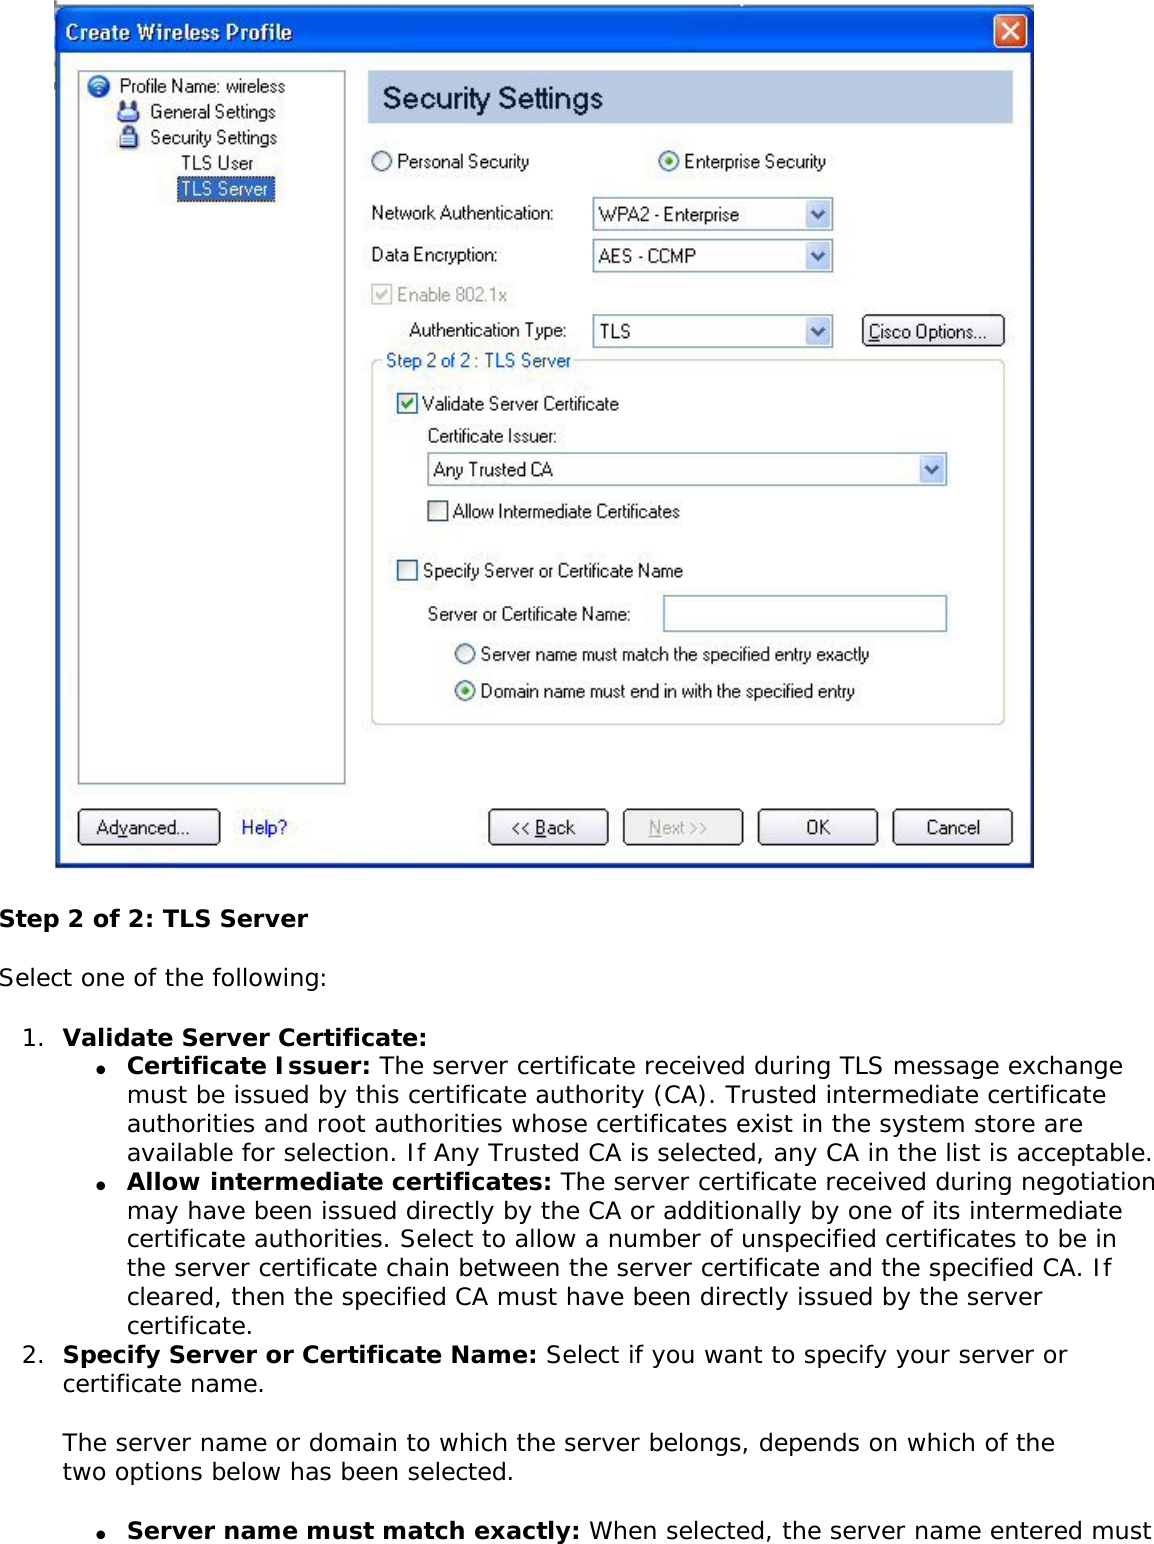
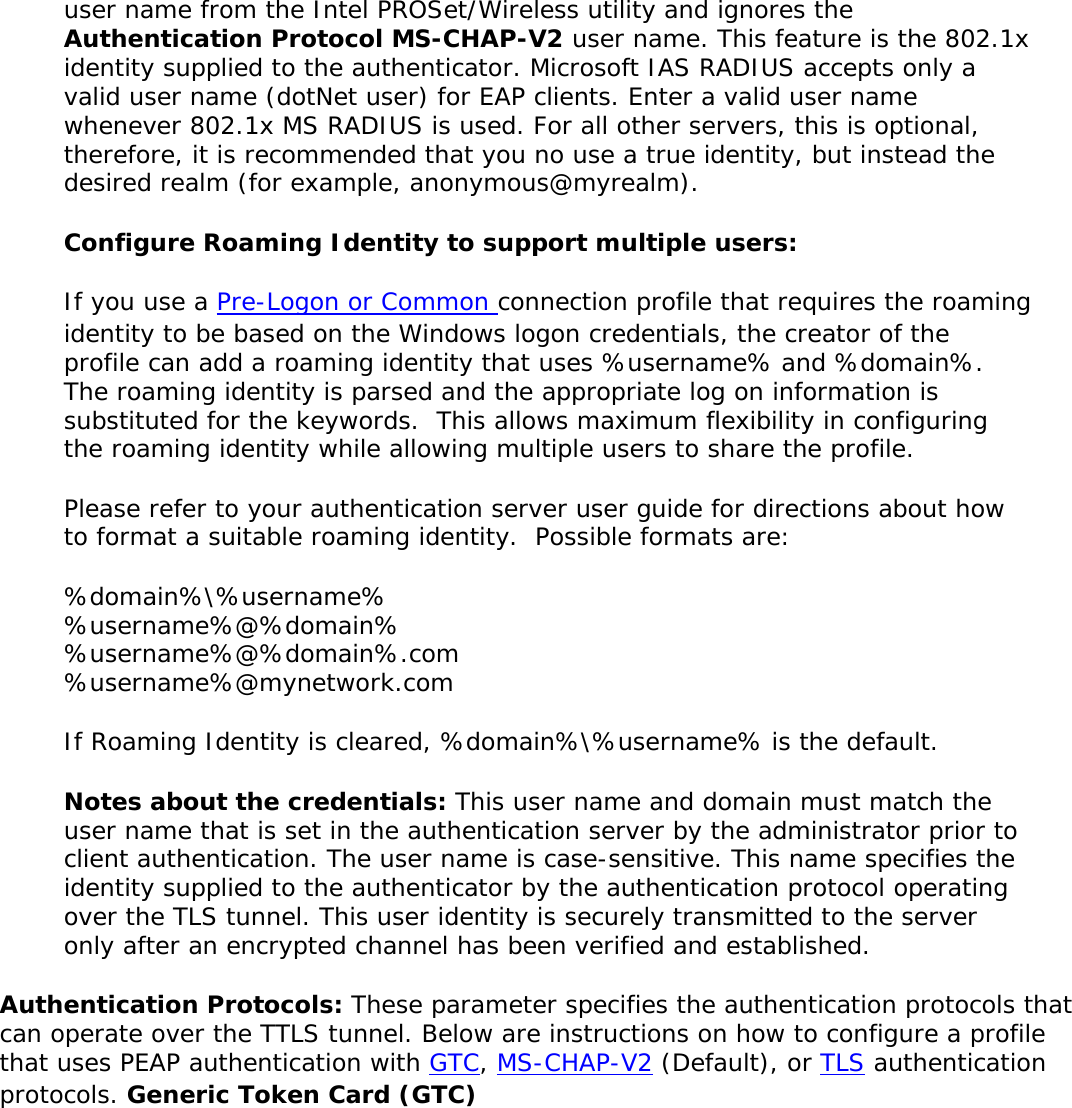
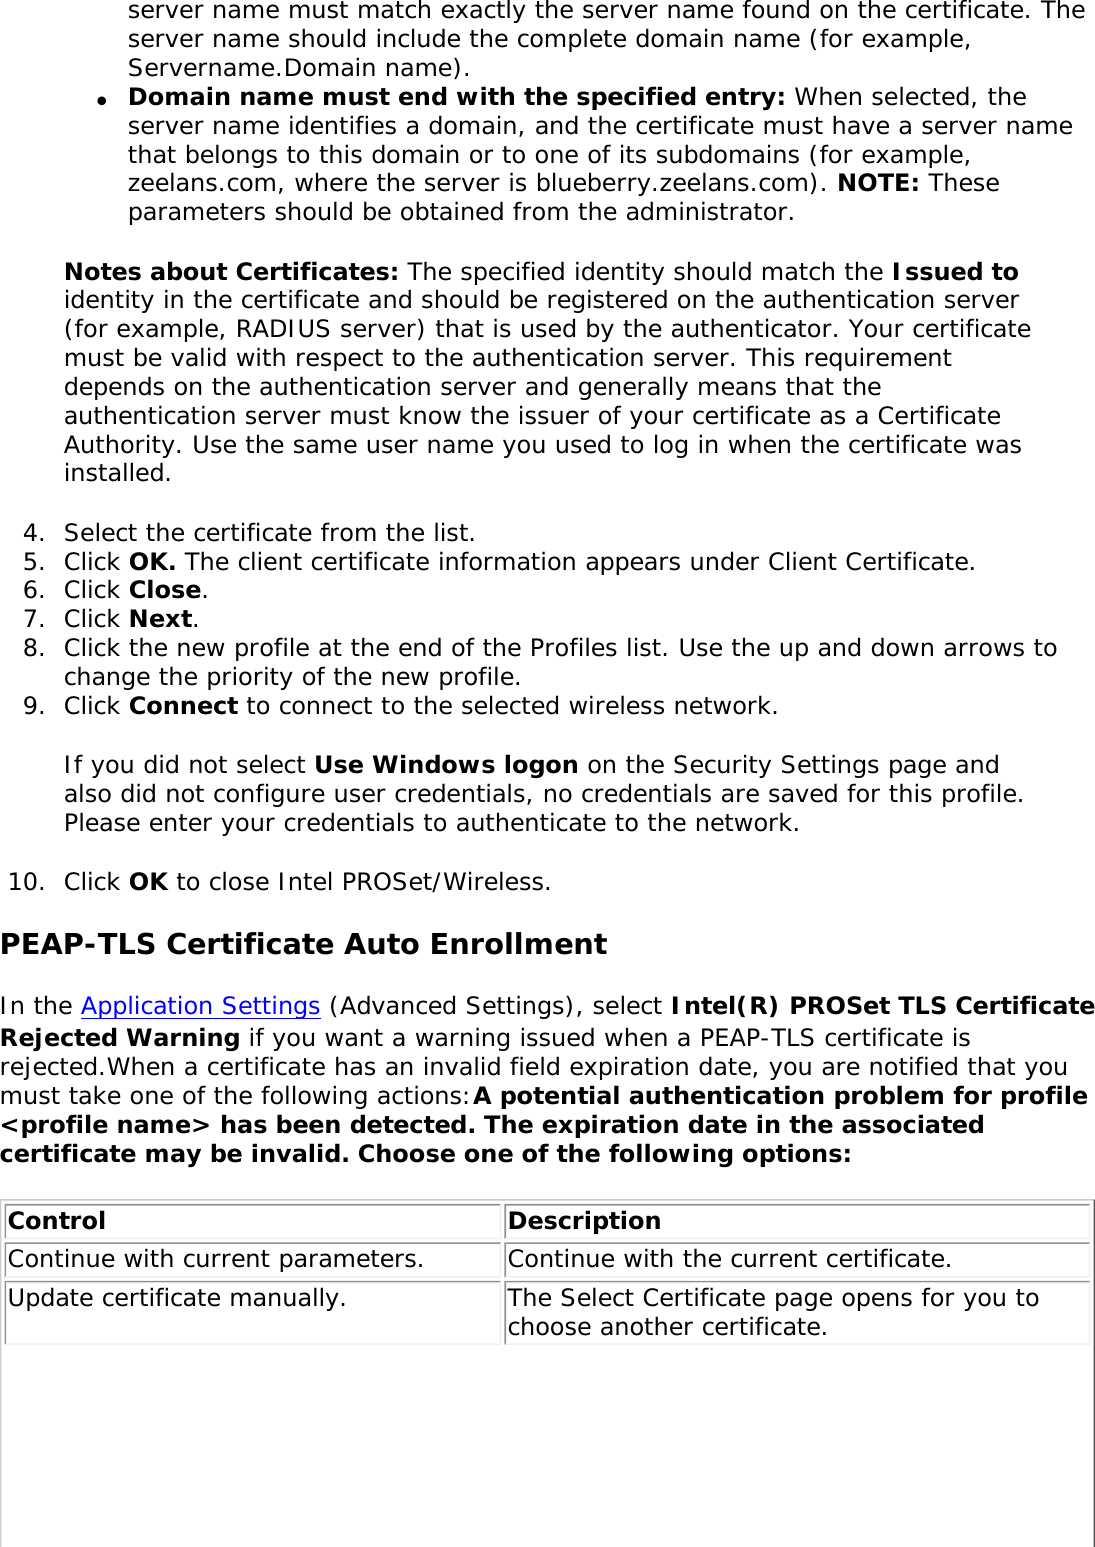
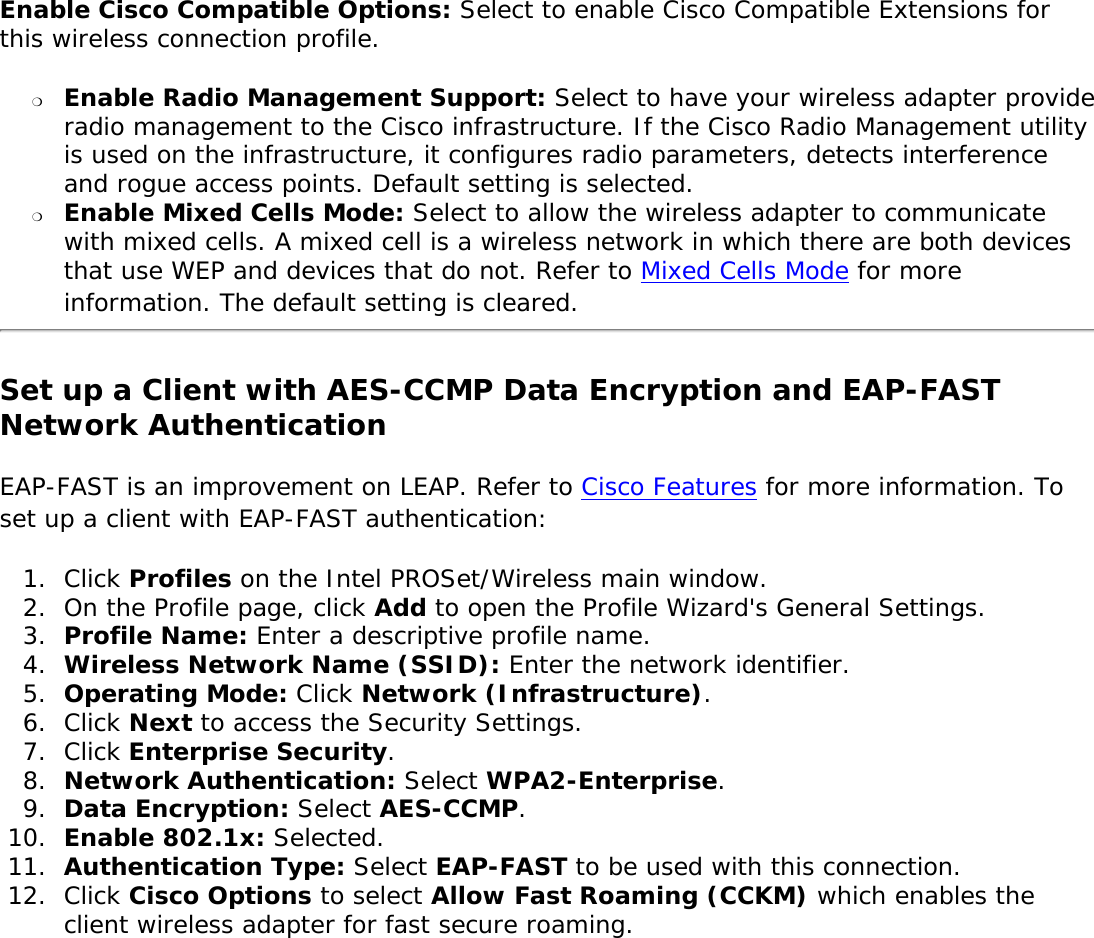
![Wireless NetworksThe Wireless Networks list displays a list of wireless networks within range of the adapter. Name Description The signal strength of the wireless network access point or computer (Device to Device [ad hoc] mode). The signal strength icon bars indicate that the wireless network or computer is available for connection but is still not is associated with an access point or computer (Device to Device [ad hoc] mode).Network Name Network Name (SSID): The name of the network that the adapter is connected to. The Network Name SSID must be the same as the SSID of the access point.Status Notification that the adapter is connecting to the wireless network. Once connected, the status is changed to Connected. Profiles: Identifies a network in the Wireless Networks list that is connected and has a profile in the profiles list. The wireless network uses Network (infrastructure) mode. The wireless network uses Device to Device (ad hoc) mode.The wireless network uses Security encryption.The band frequency being used by the wireless network (802.11a, 802.11b, 802.11g).The wireless network is on the exclusion list. Connection to a network or an access point that is on this list is not automatic. Connect (Disconnect) Click to connect to a wireless network. Once connected, the button changes to Disconnect.Properties Provides detailed information about the connected network and its access points. See Network Properties for information. Refresh Refreshes the list of available networks. If any new networks are available within the adapter range, the list is updated to show the new network name. Wireless On (Wireless Off) Switch the radio off and on. Refer to Wireless Off (On) for more information.Close Closes the Intel PROSet/Wireless main window.Help? Provides help information for this page. Network PropertiesClick the Properties button on the Intel PROSet/Wireless main window to display the security settings for the wireless adapter. You can also add profiles to be excluded from automatic connection. If network exclusion is enabled (see Application Settings) then the Network Properties also indicates if the network is excluded from automatic connection. Network Properties details Name Description](https://usermanual.wiki/ASUSTeK-Computer/R1F.User-Manual-WLAN-1/User-Guide-648377-Page-11.png)
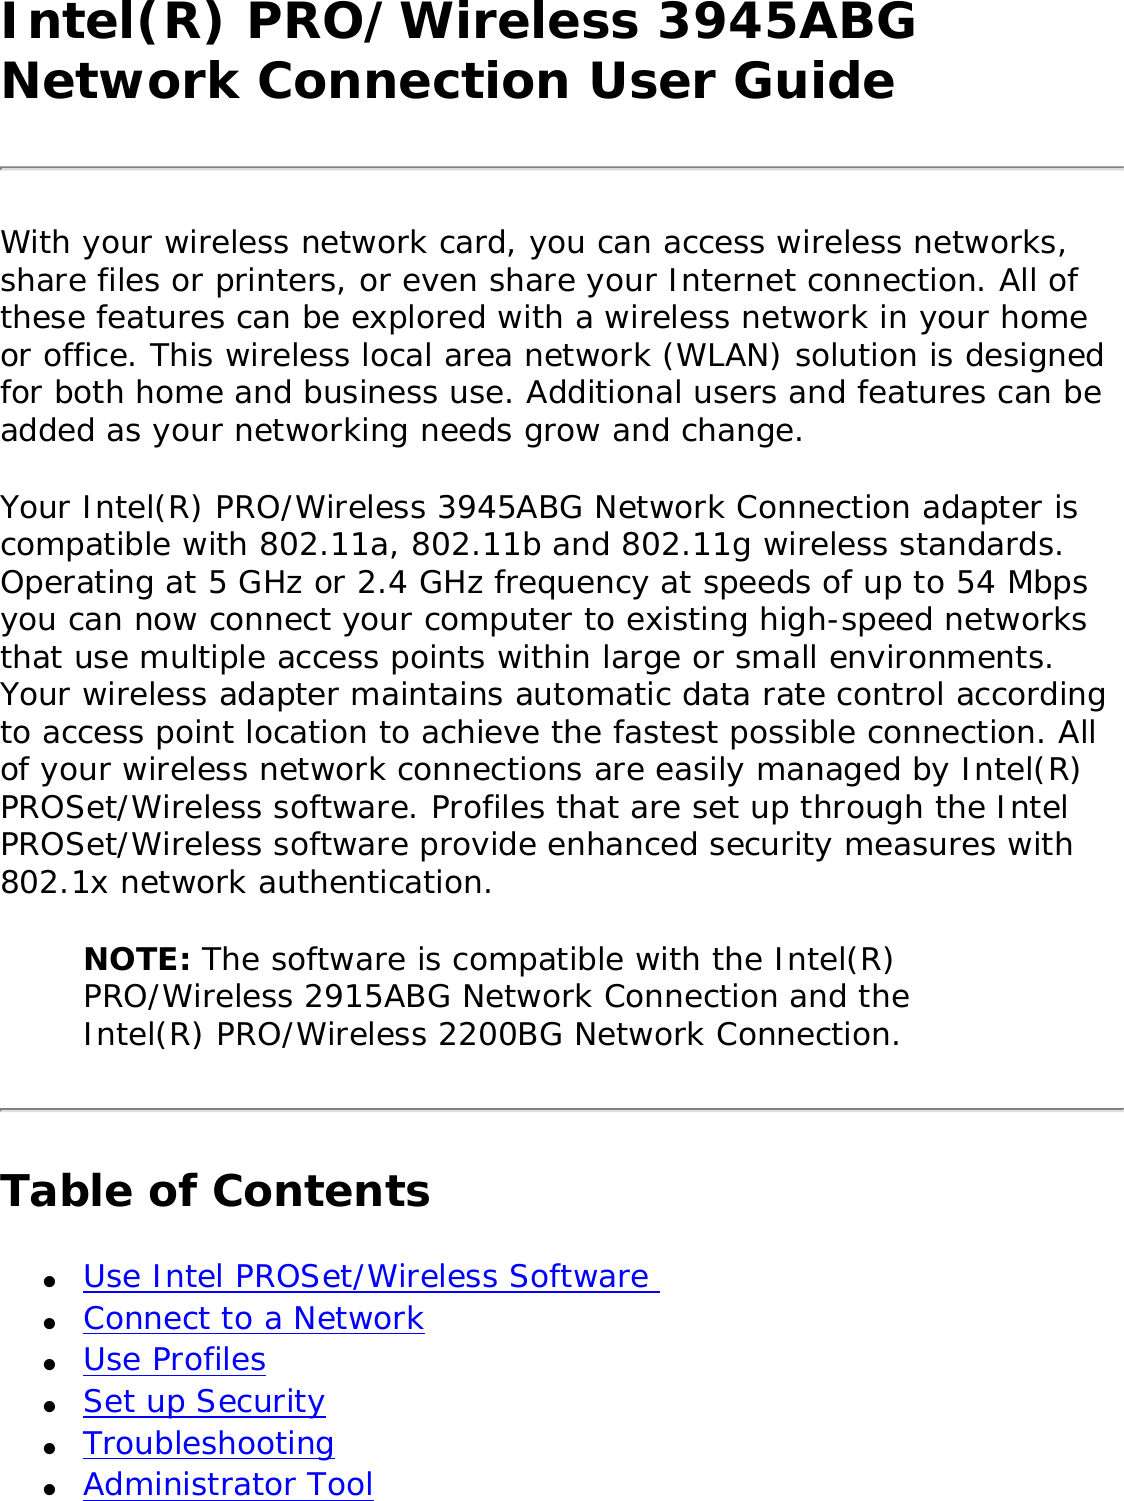
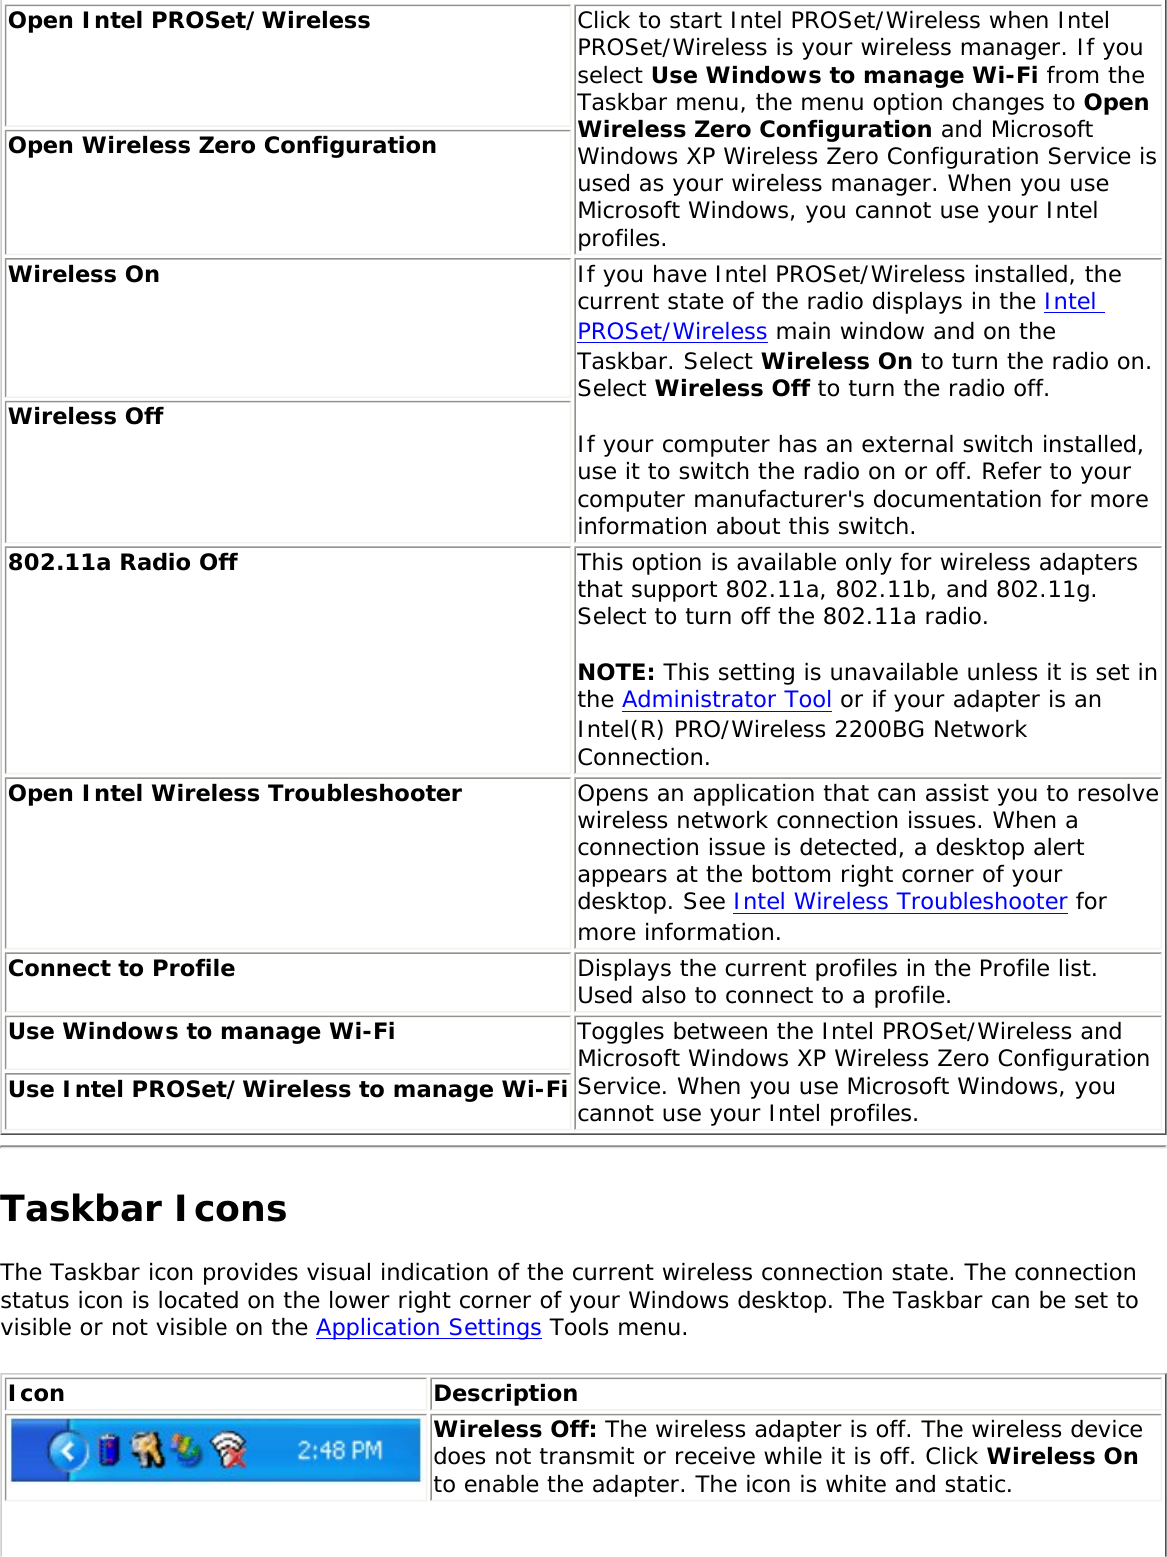
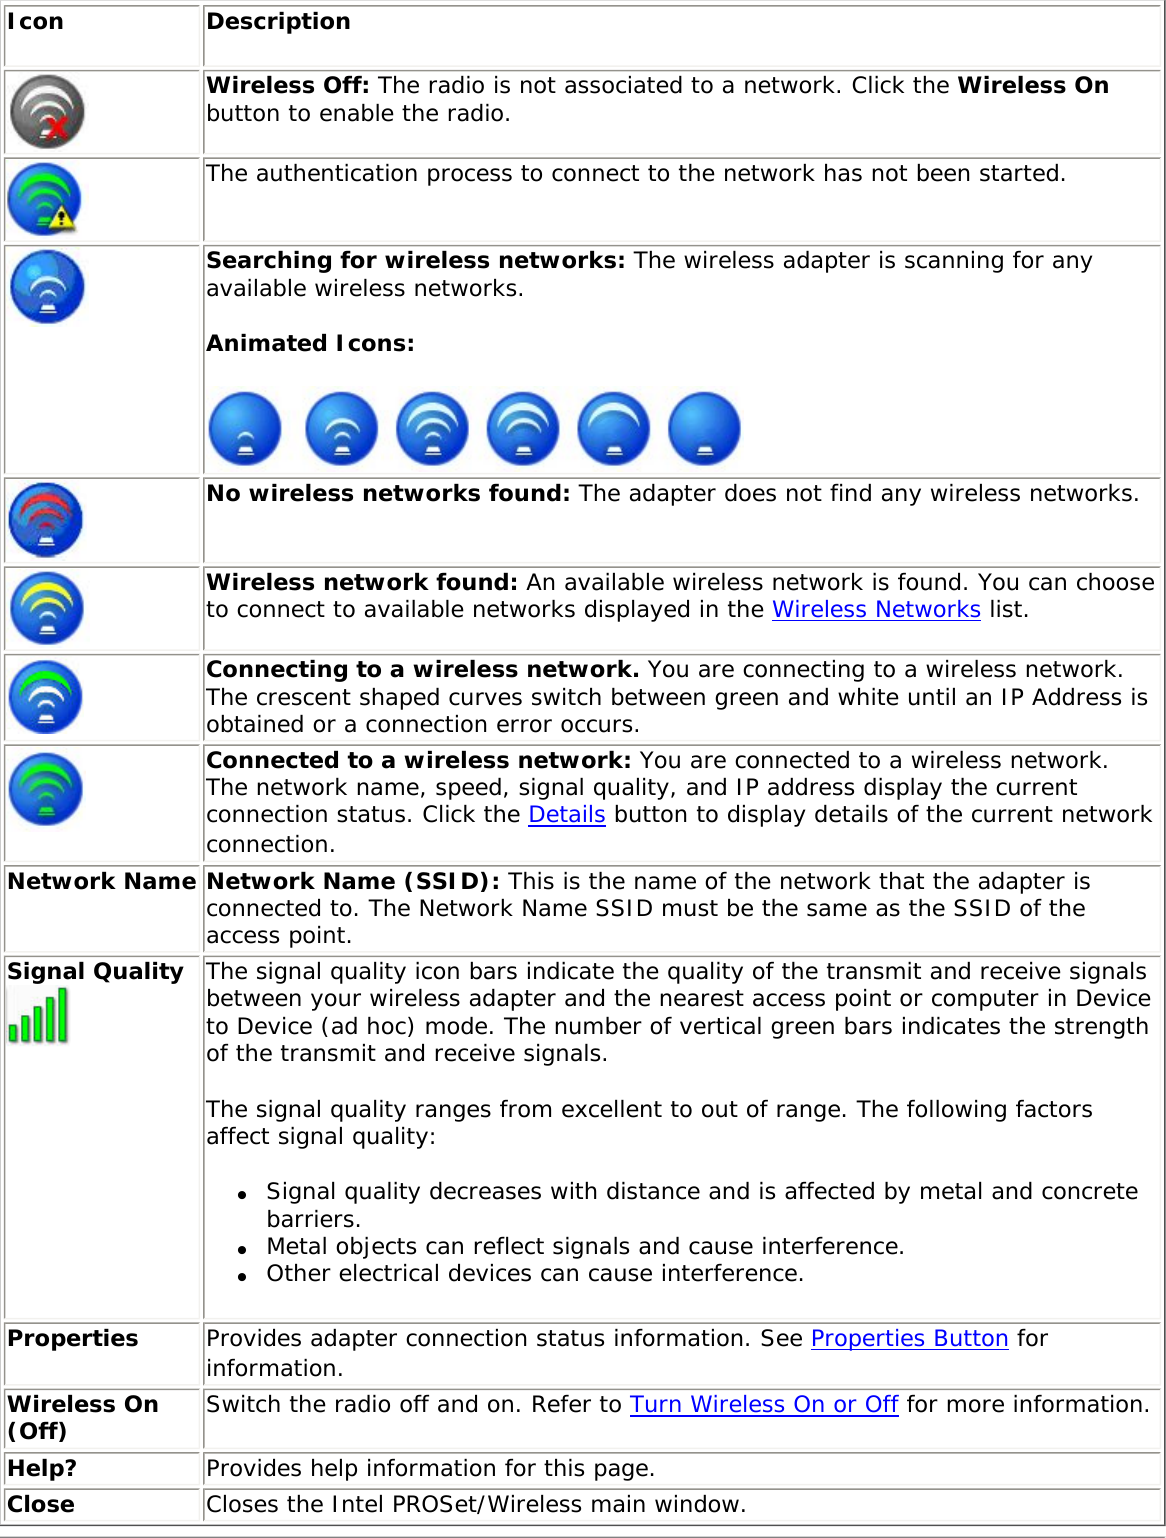
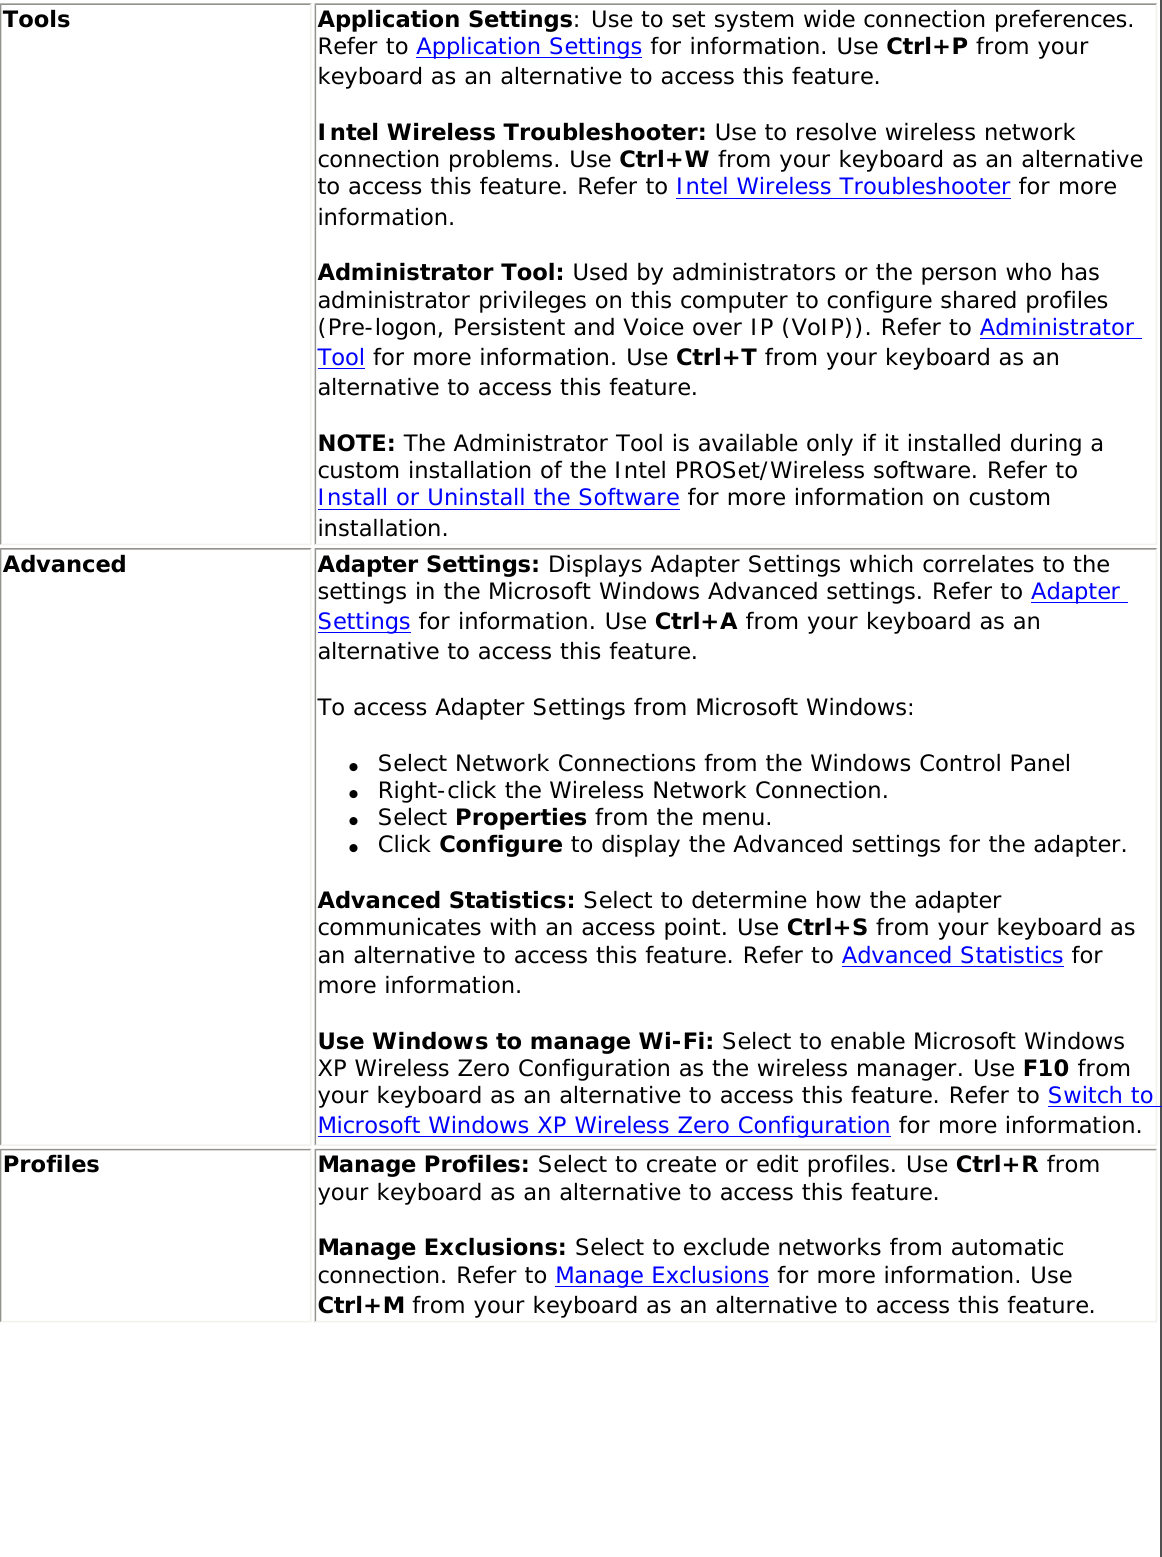
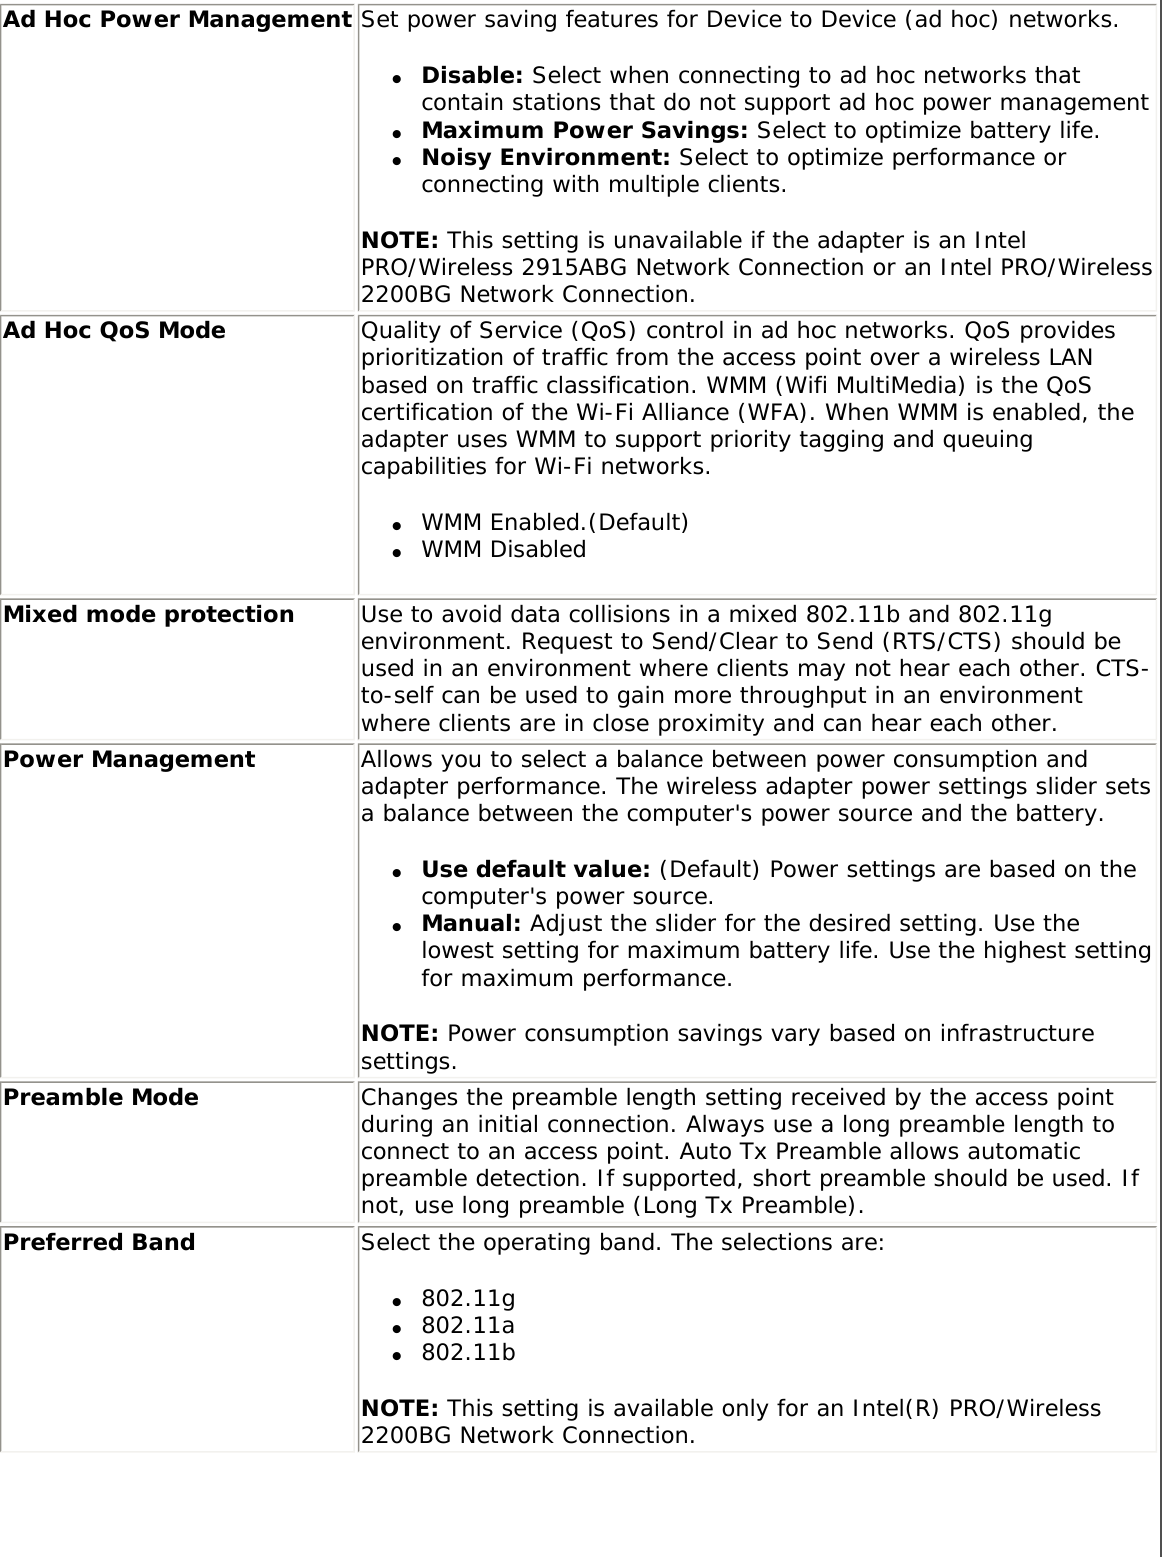
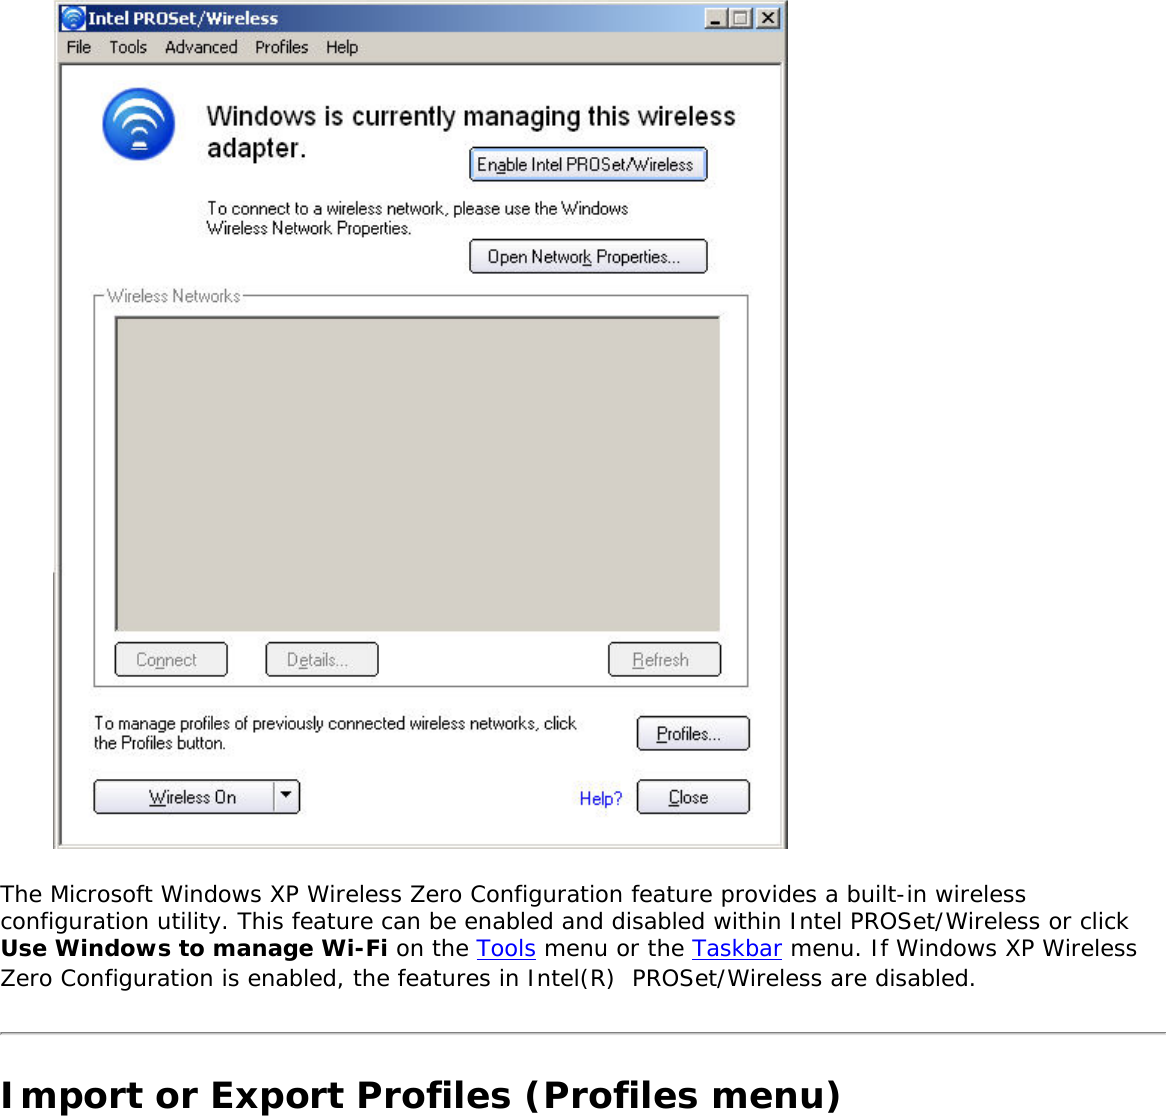
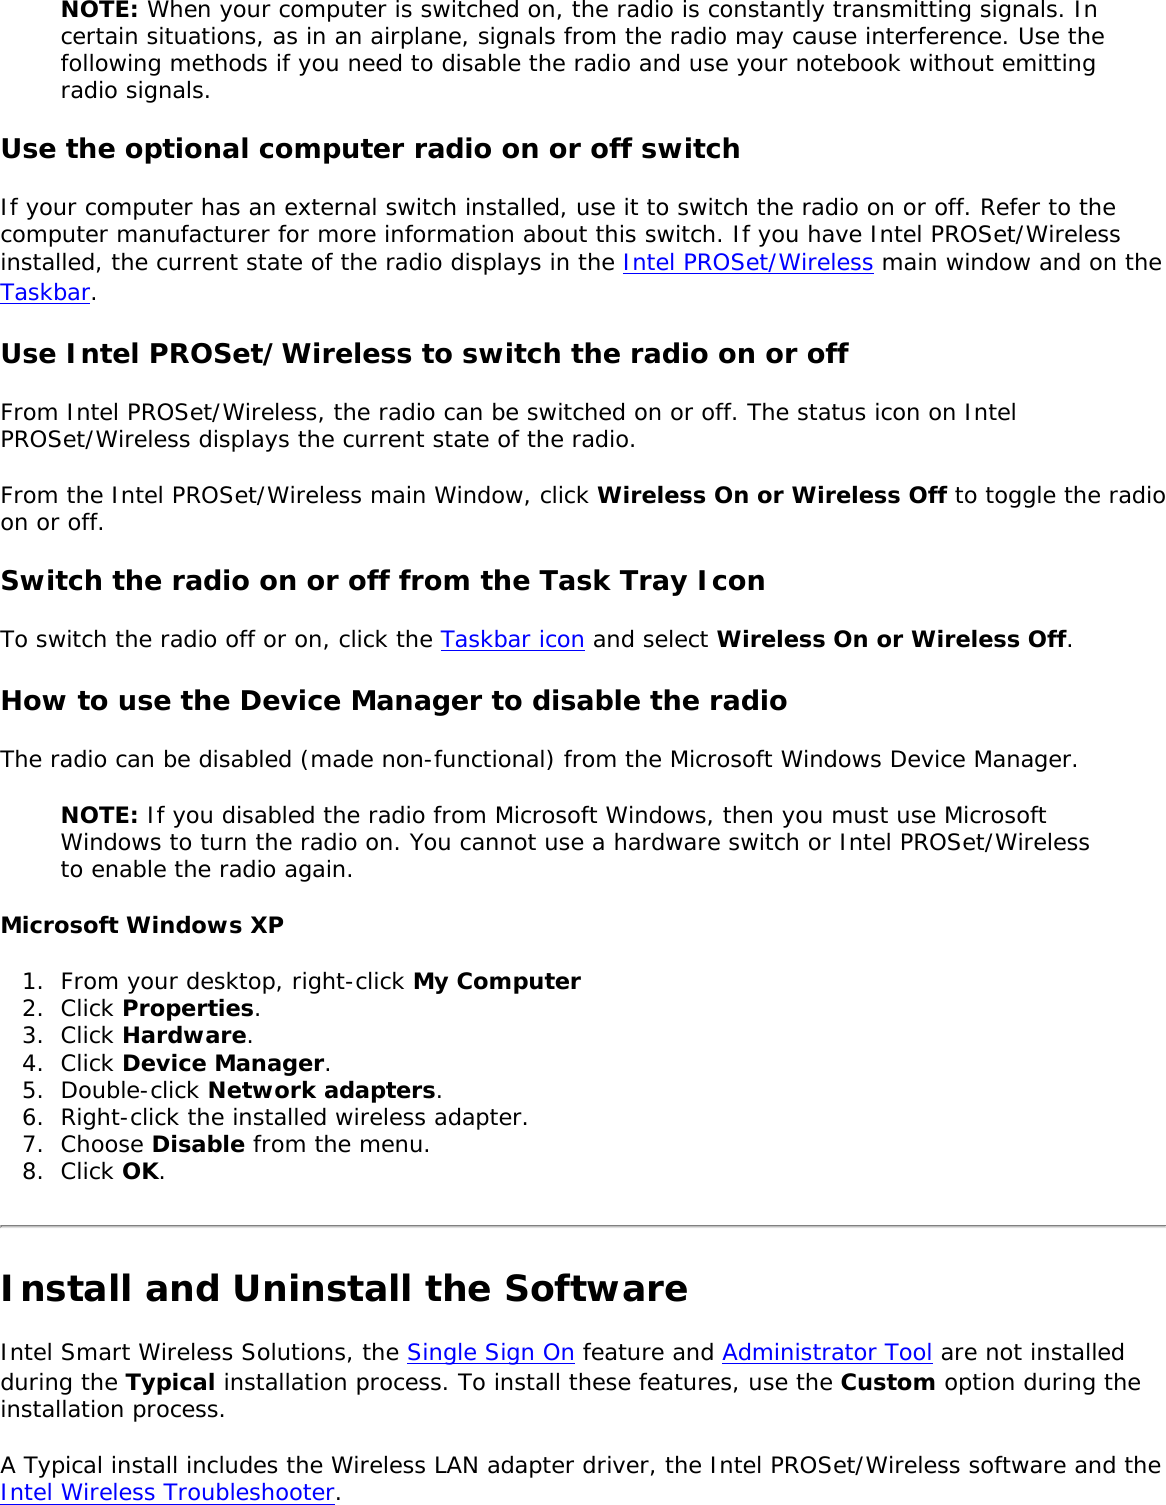
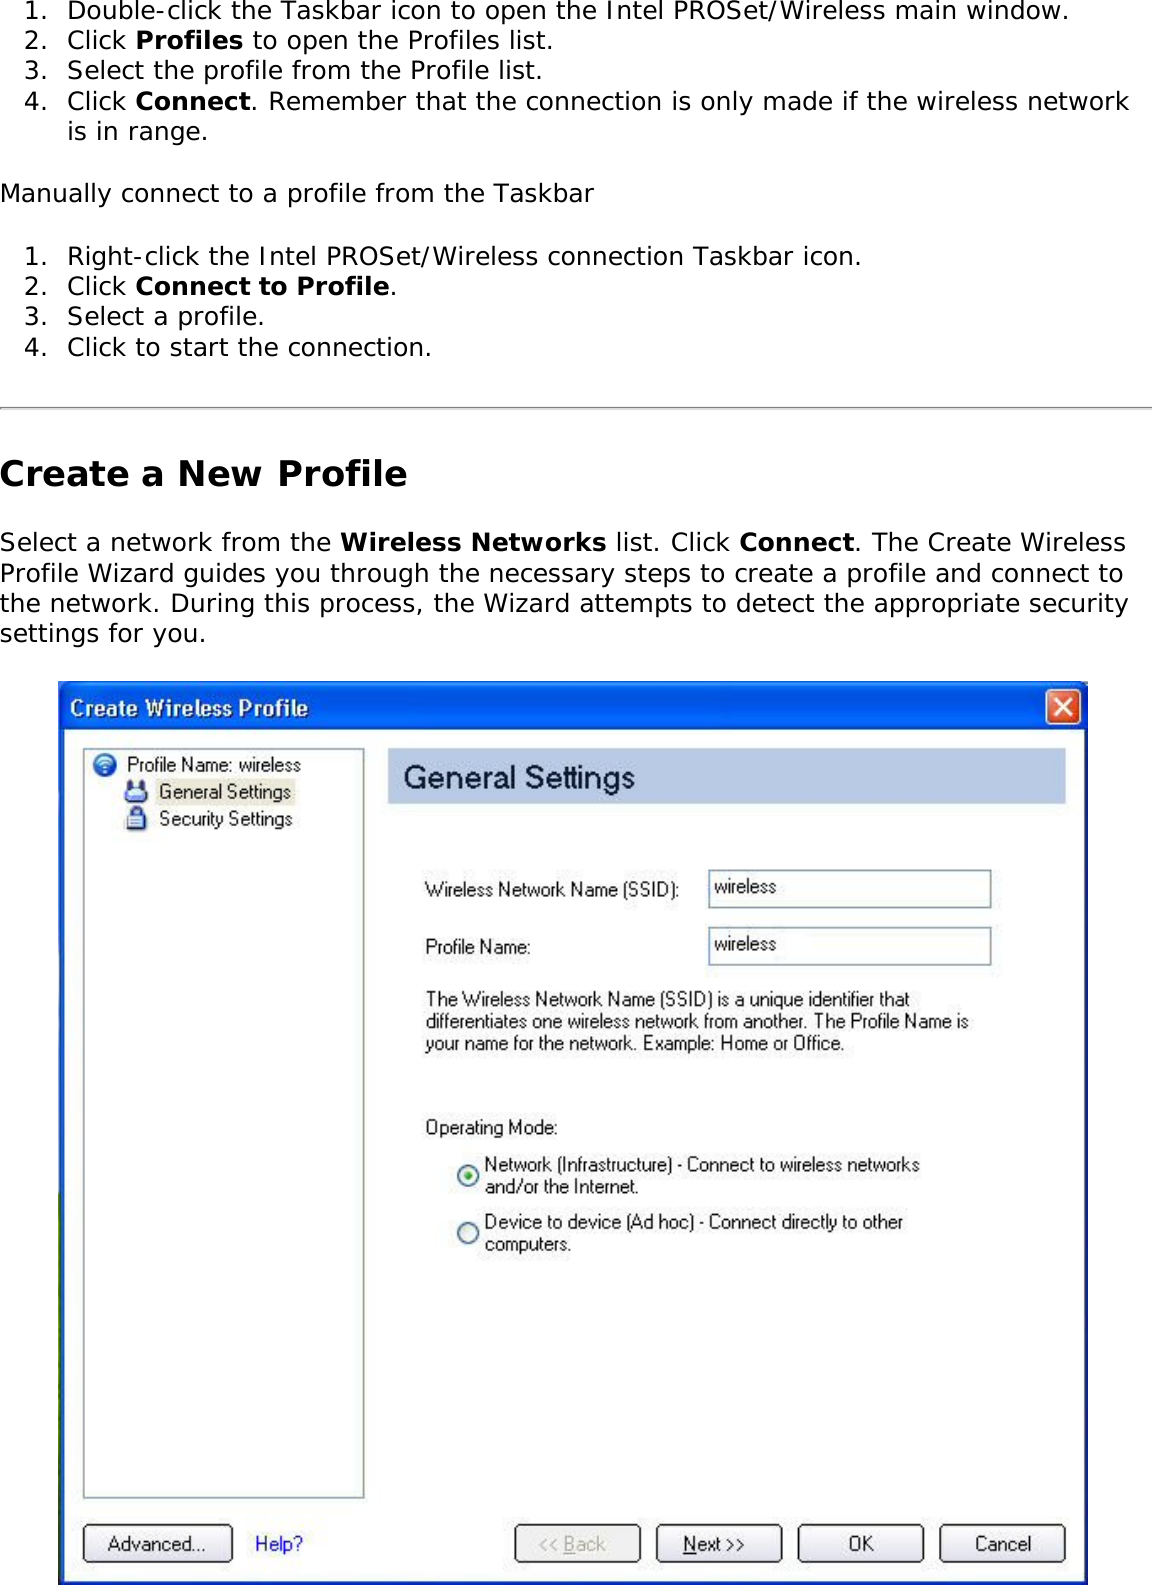
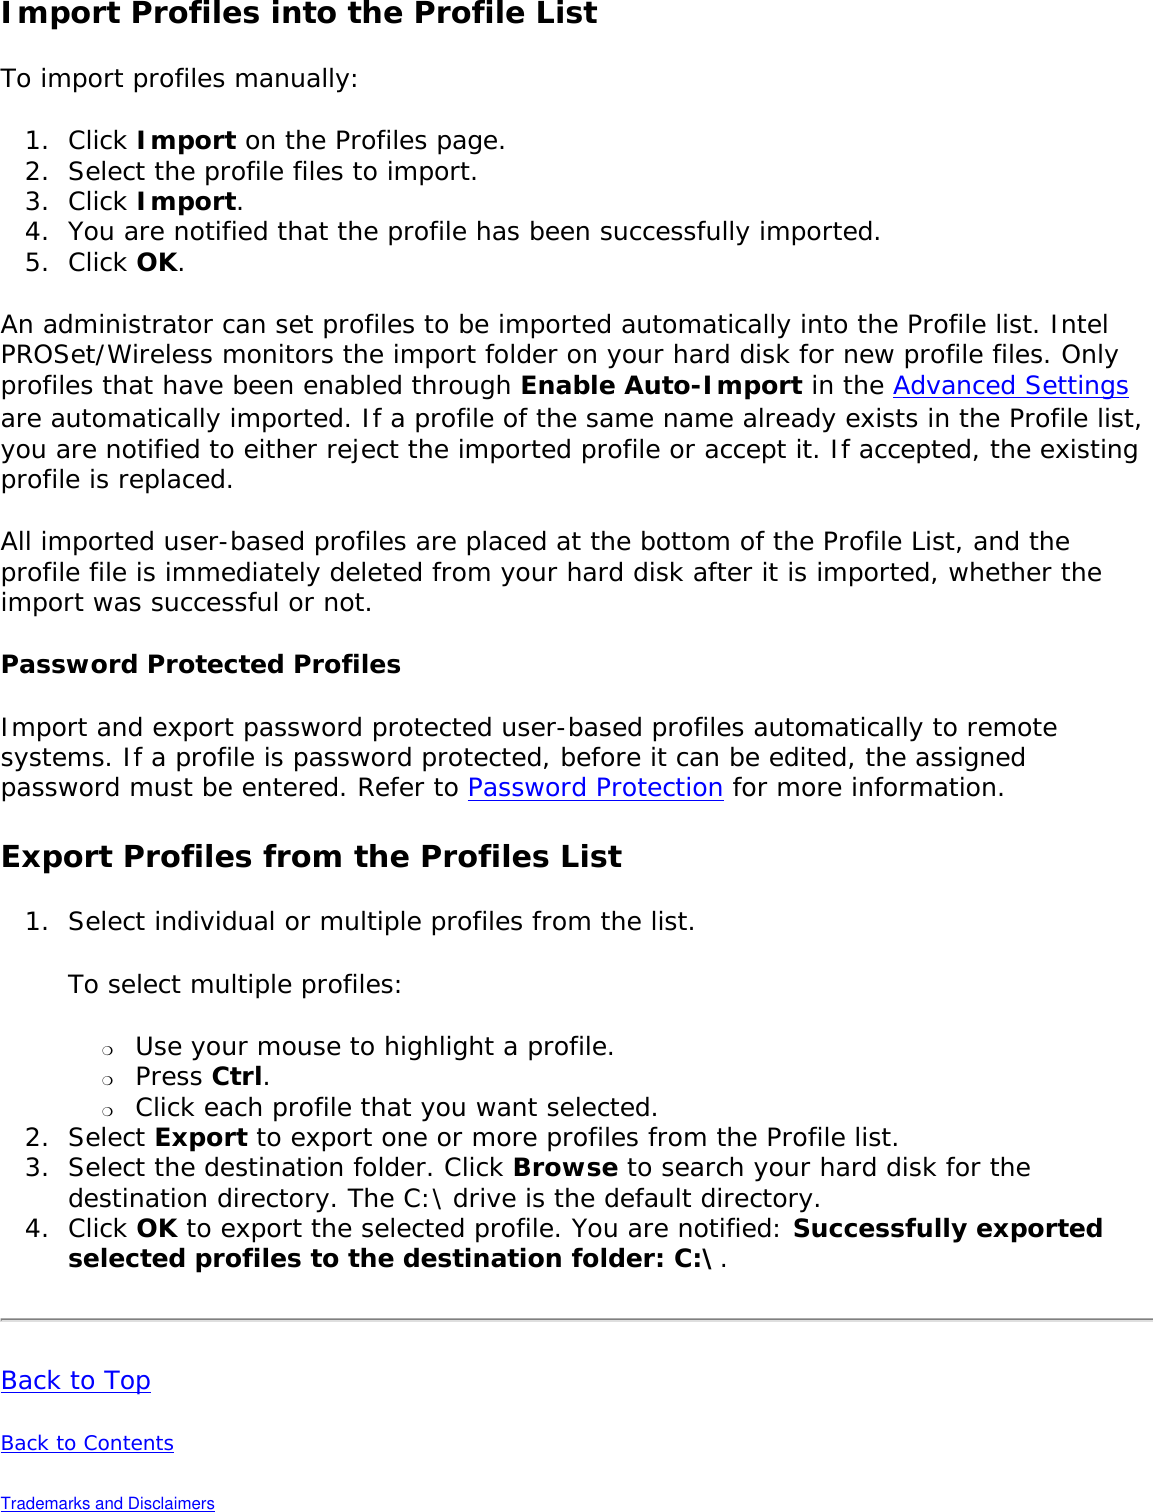
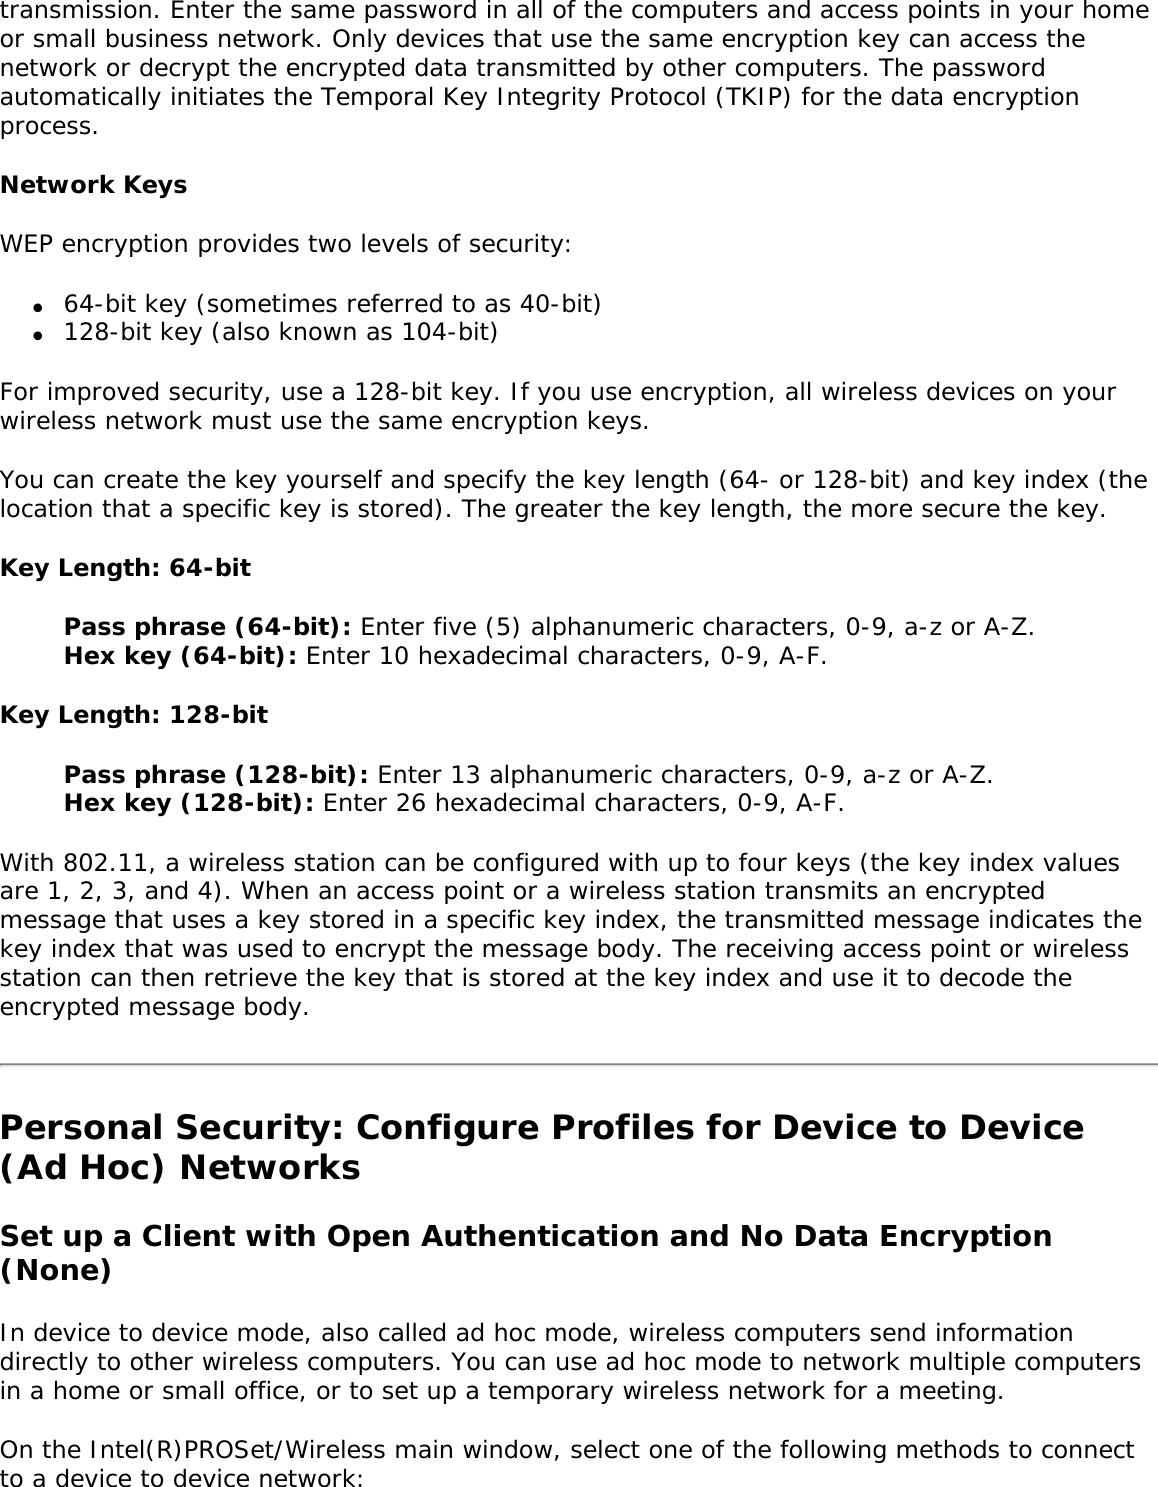
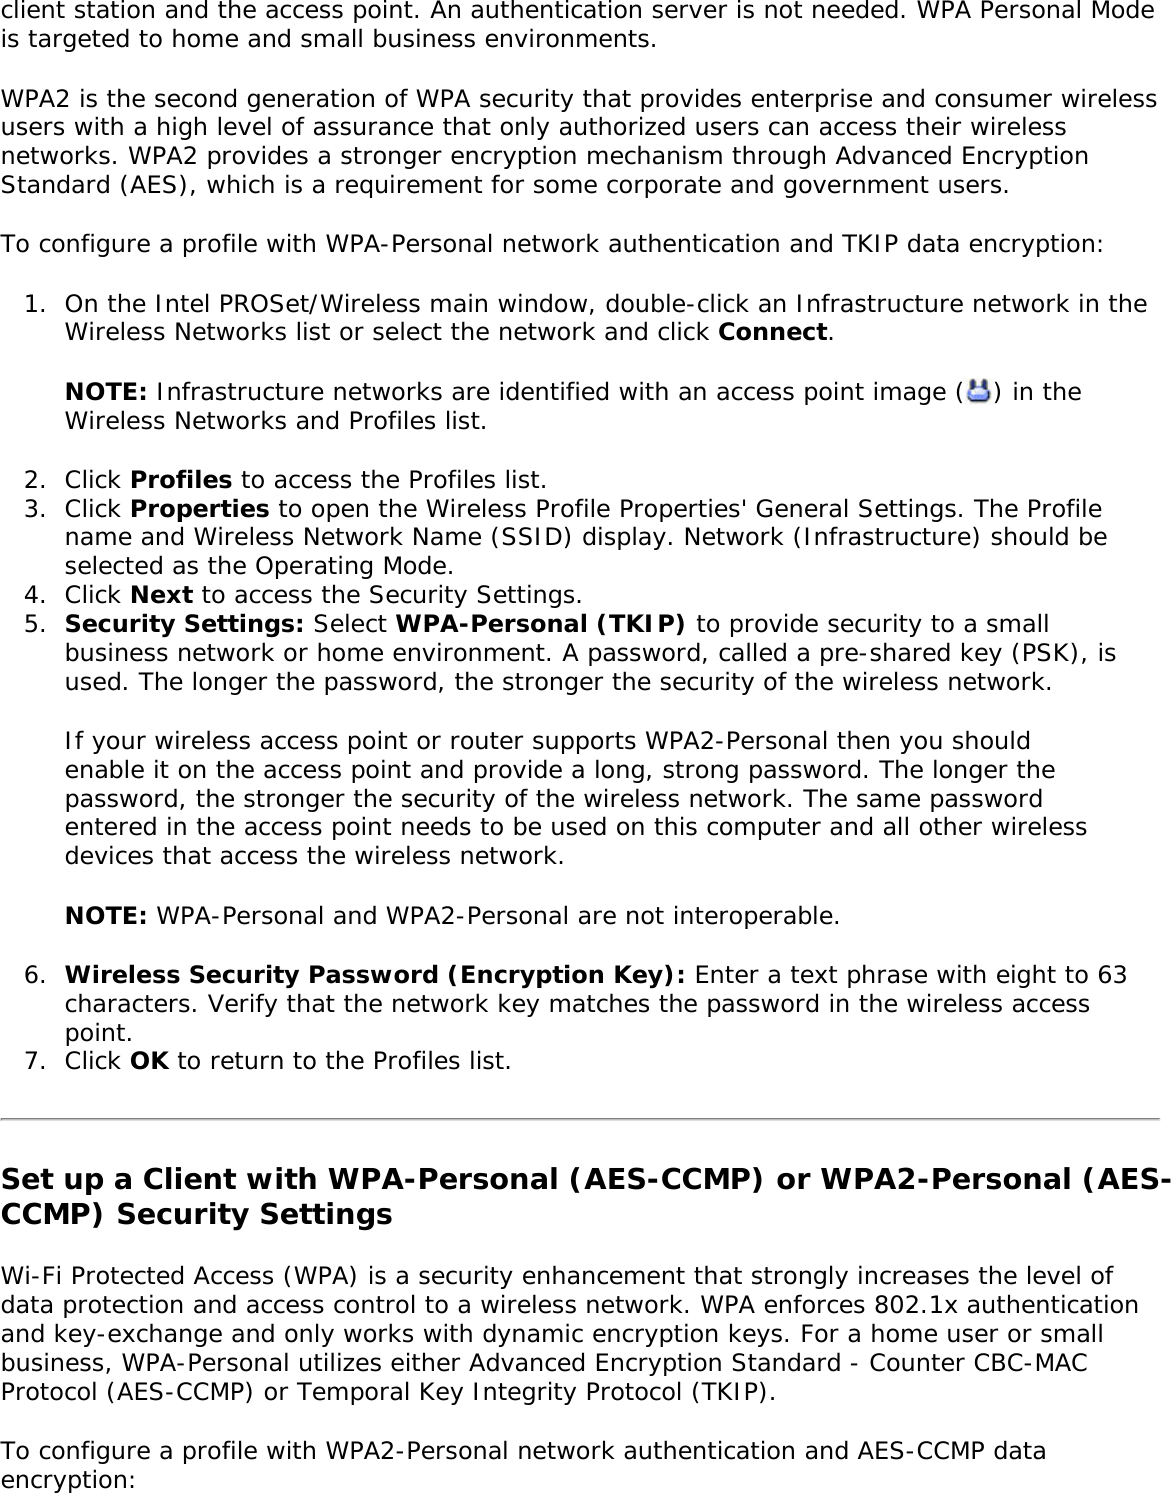
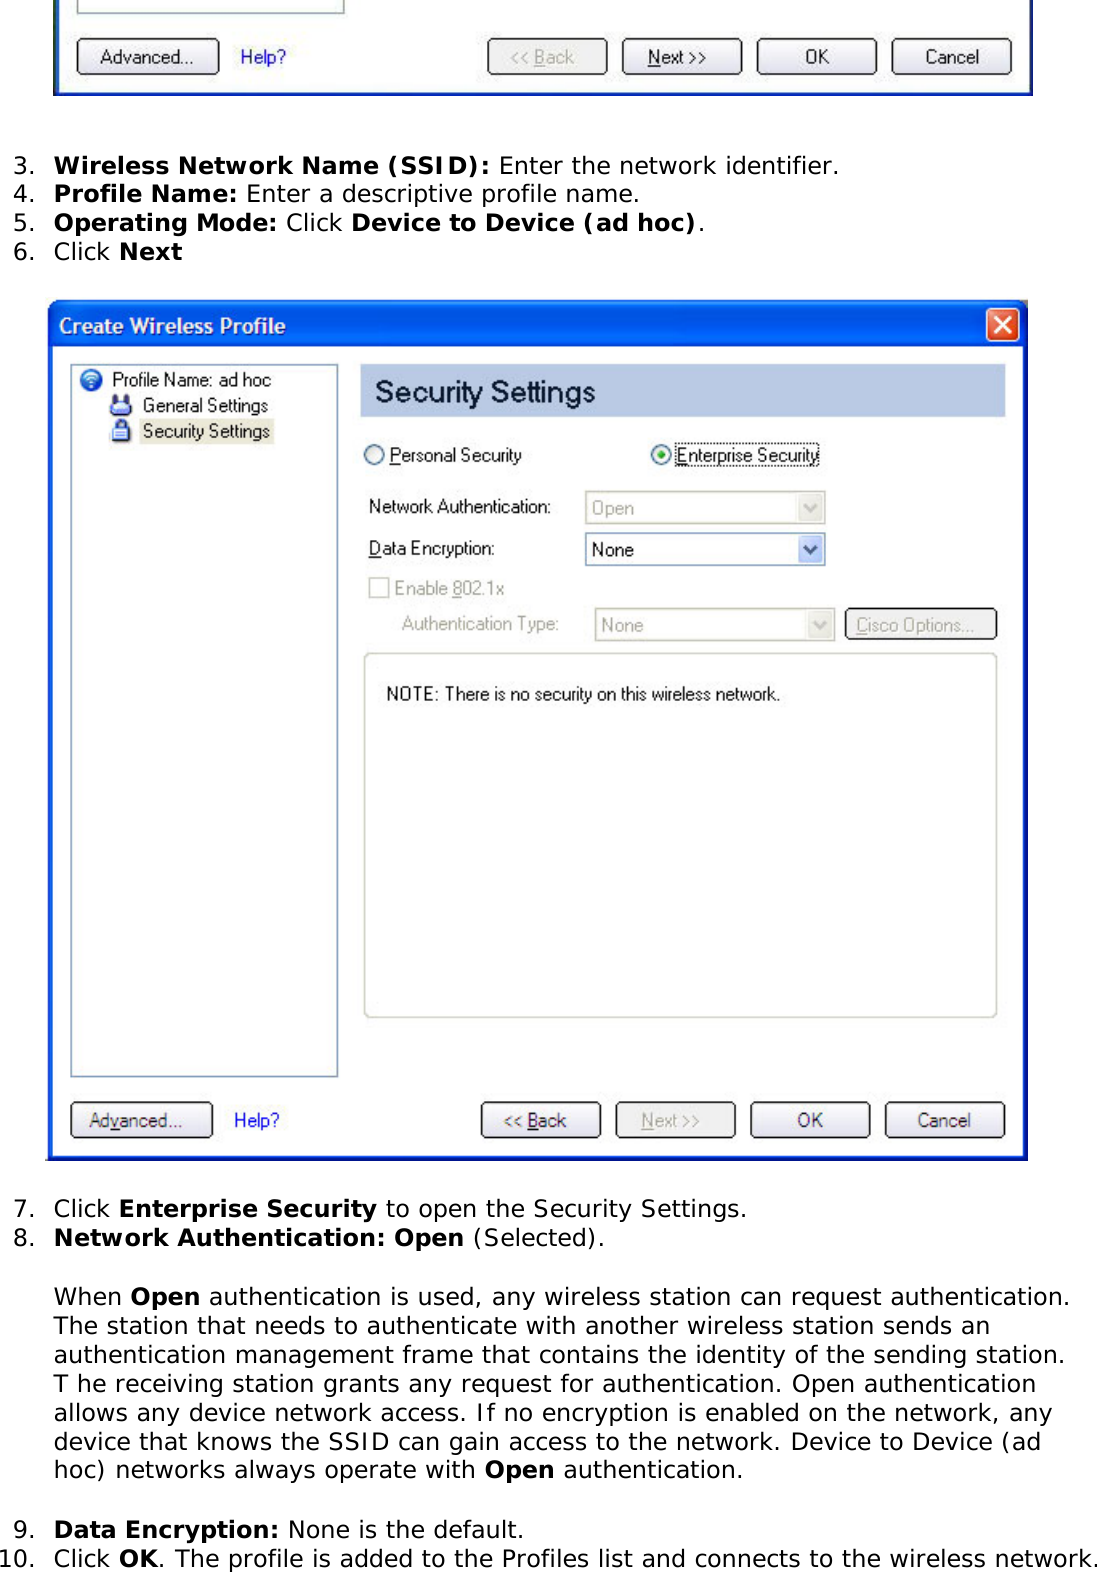
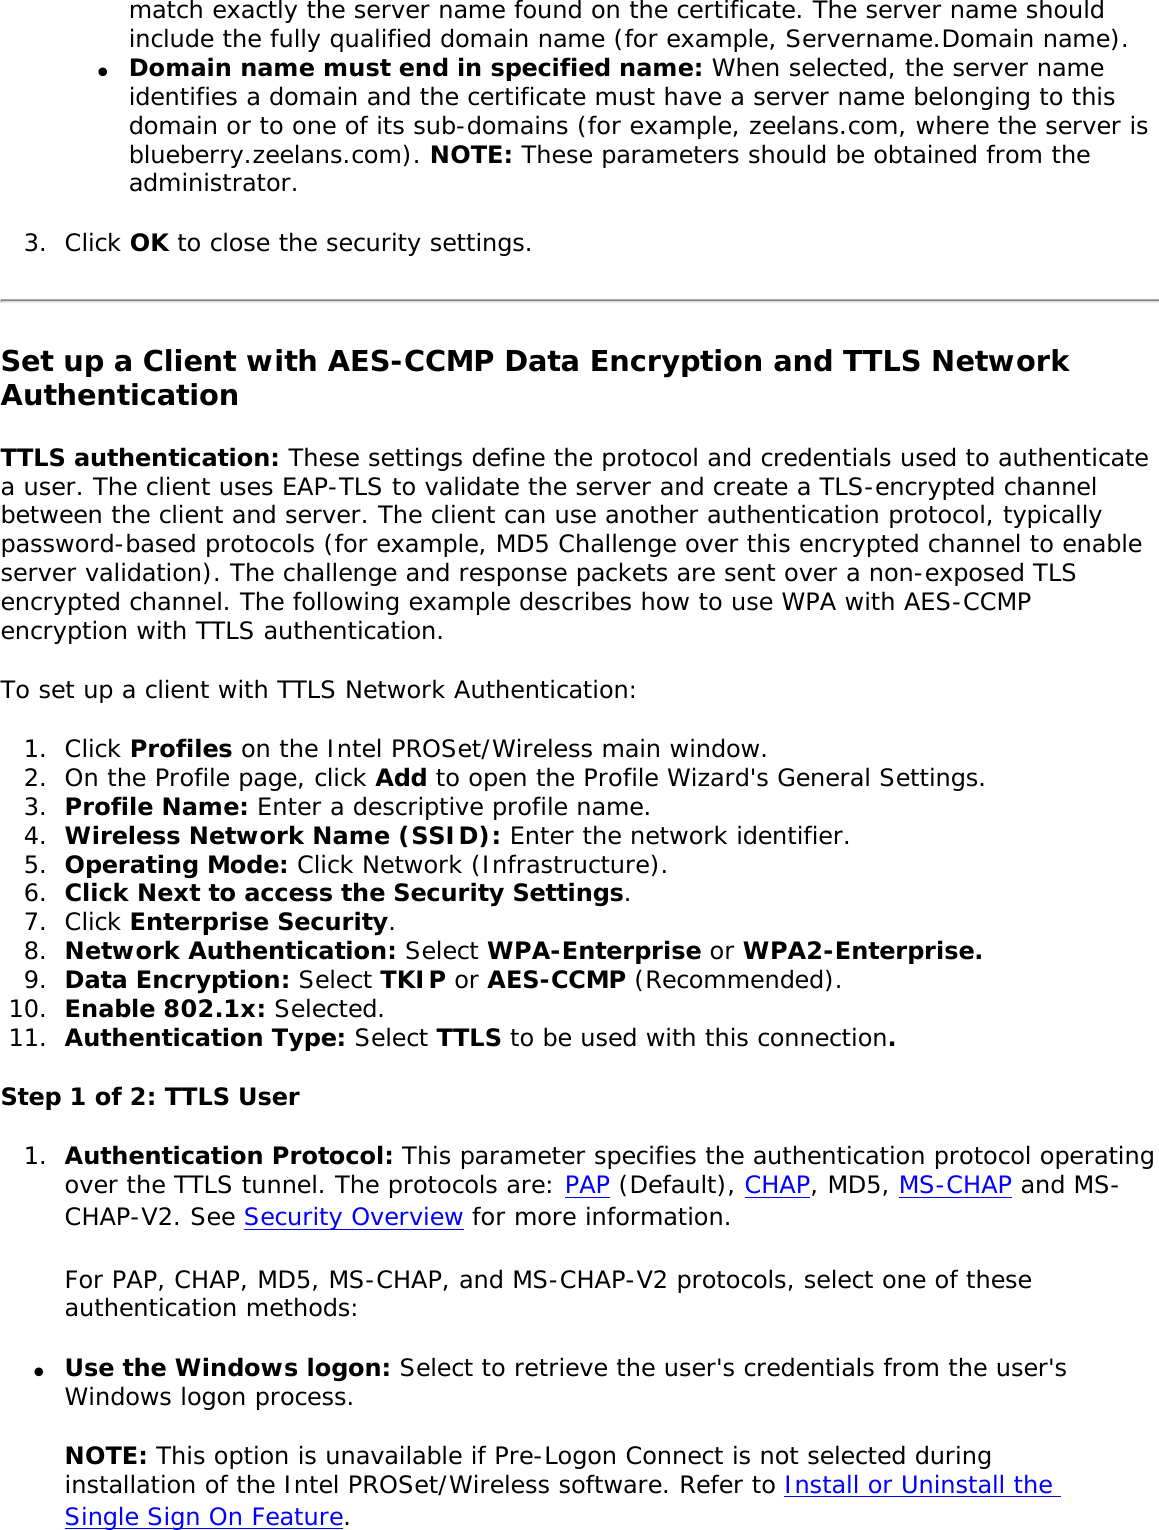
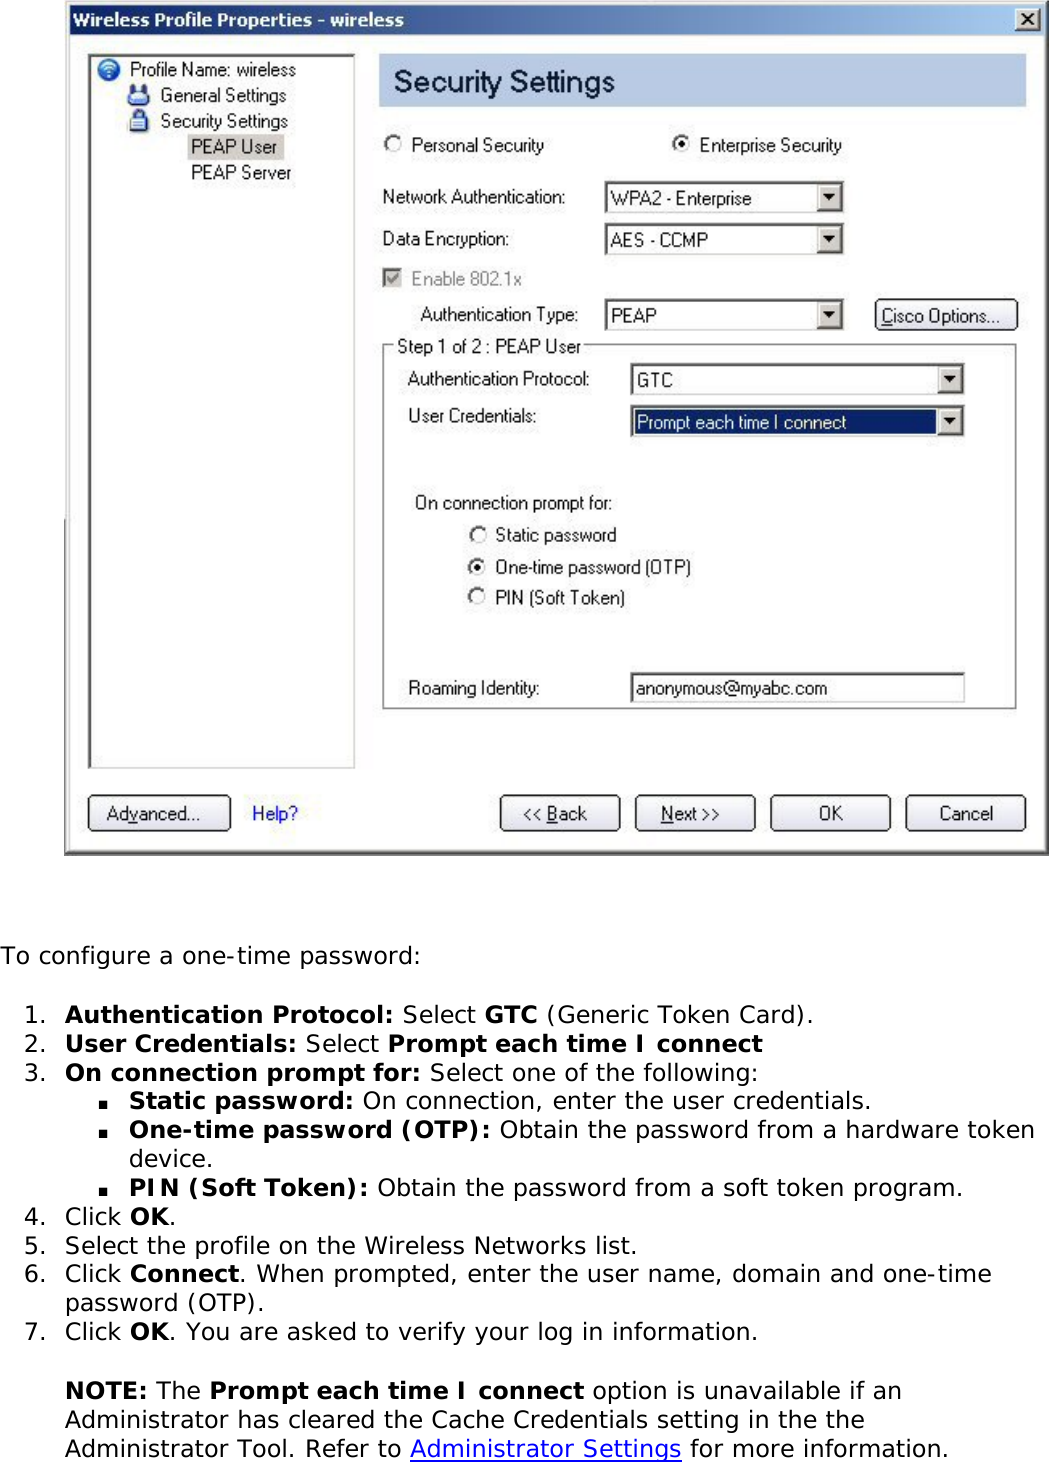
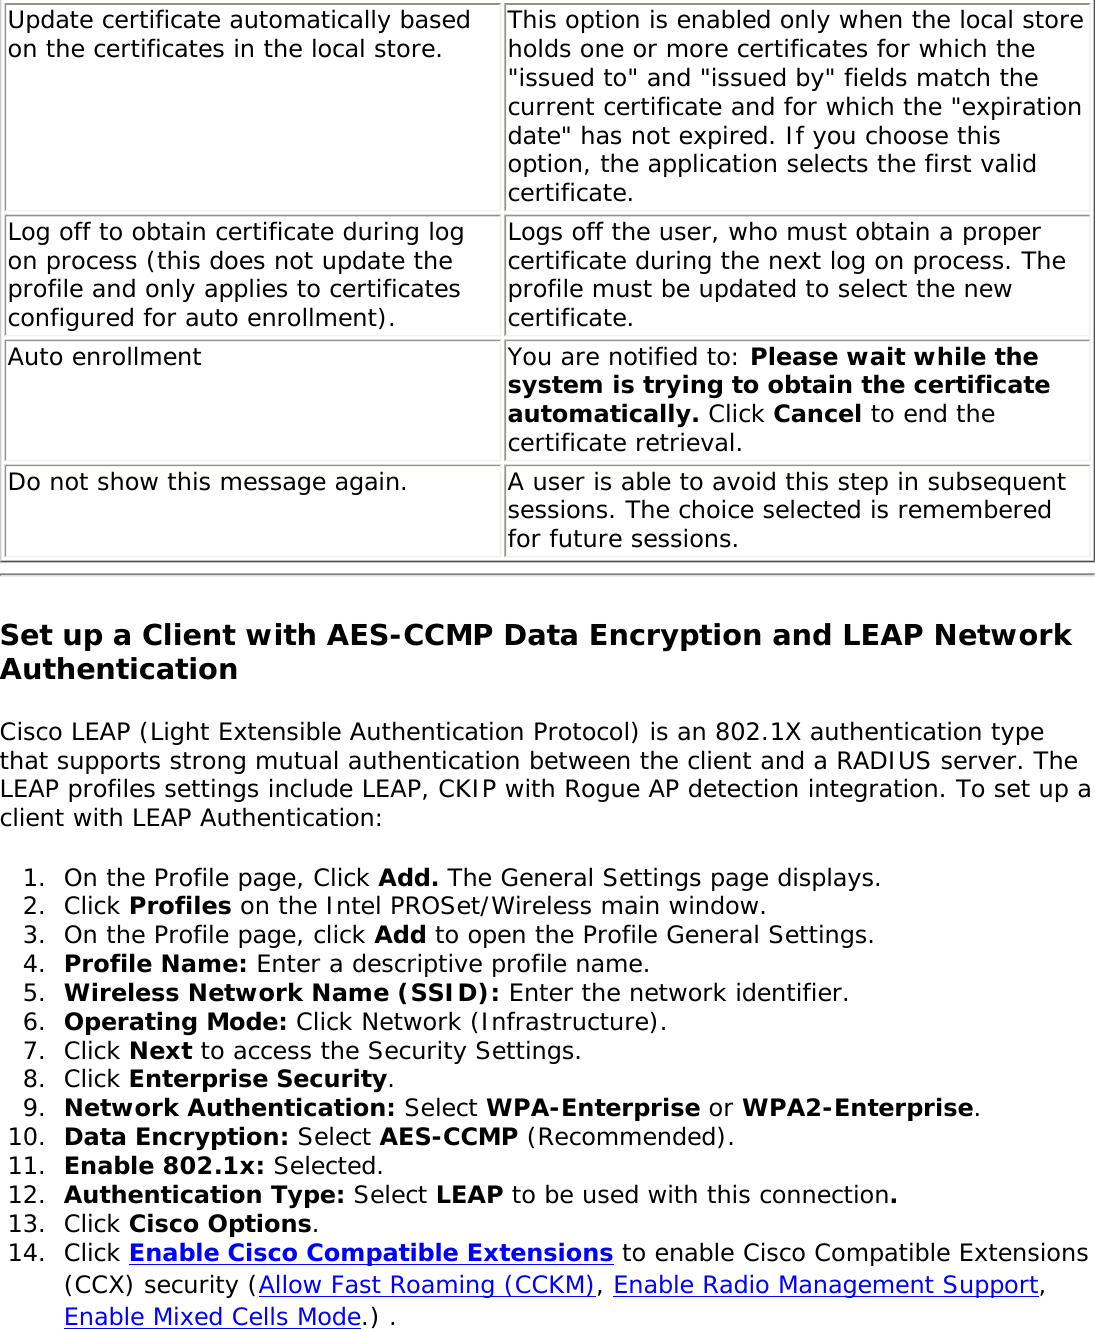
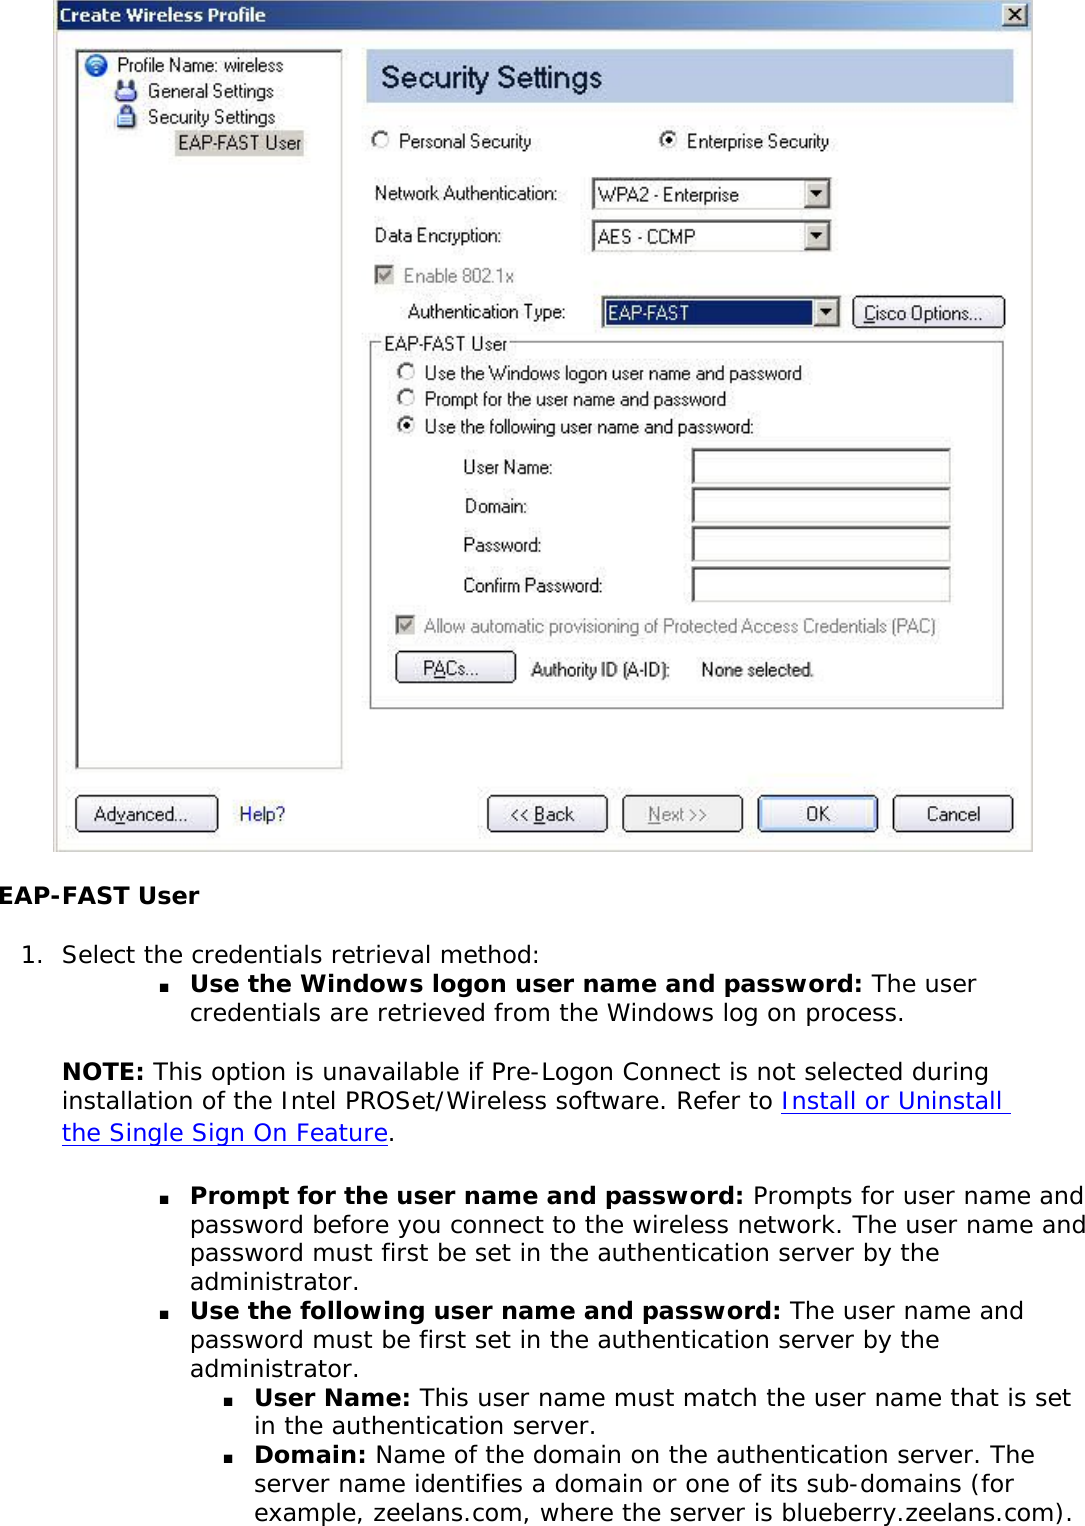
![802.1x Authentication ProtocolDisplays None, GTC, MS-CHAP-V2 or TLS. Refer to Security Settings for more information.CCX Version Version of the Cisco Compatible Extensions on this wireless connection.Current TX Power Cisco Compatible Extensions Power Levels.Supported Power Levels 1.0, 5.0, 20.0, 31.6, 50.1 mWAccess Point MAC Address The Media Access Control (MAC) address for the associated access point.Mandatory Access Point Displays None, if not enabled. If enabled, from the Mandatory Access Point setting, the access point MAC address is displayed. This option directs the wireless adapter to connect to an access point that uses a specific MAC address (48-bit 12 hexadecimal digits, for example, 00:06:25:0E:9D:84).Repair Renews the IP Address. If you have trouble accessing the network, verify if the IP address is valid. If it is 0.0.0.0 or 169.x.x.x, then it is probably not valid. If your network is setup for automatic network address assignment, then click Repair and request a new IP address.Close Closes the page.Help? Provides help information for this page.Profile Management The Profiles List displays the current user profiles in the order that they are to be applied. Use the up and down arrows to arrange profiles in a specific order to automatically connect to a wireless network. Use the Connect button to connect to a wireless network. Once connected, a profile is created in the Profiles list. You can also add, edit, and remove profiles from the Profiles 'list. Different profiles can be configured for each wireless network. Profile settings can include, the network name (SSID), operating mode, and security settings. See Profile Management for more information. Profiles list Name DescriptionProfile Name Network settings that allow your wireless adapter to connect to a network access point (infrastructure mode) or computer (Device to Device [ad hoc]) mode which does not use an access point. Refer to Set up Profiles for more information.Network Name Name of the wireless network (SSID) or computer.Connection Icons: The network profile status icons indicate the different connection states of the adapter with a wireless network, the type of operating mode being used, and whether network security is being used. Blue circle: The wireless adapter is associated with an access point or computer (Device to Device [ad hoc] mode). If a profile has 802.1x security enabled, this indicates that the wireless adapter is associated and authenticated.](https://usermanual.wiki/ASUSTeK-Computer/R1F.User-Manual-WLAN-1/User-Guide-648377-Page-15.png)


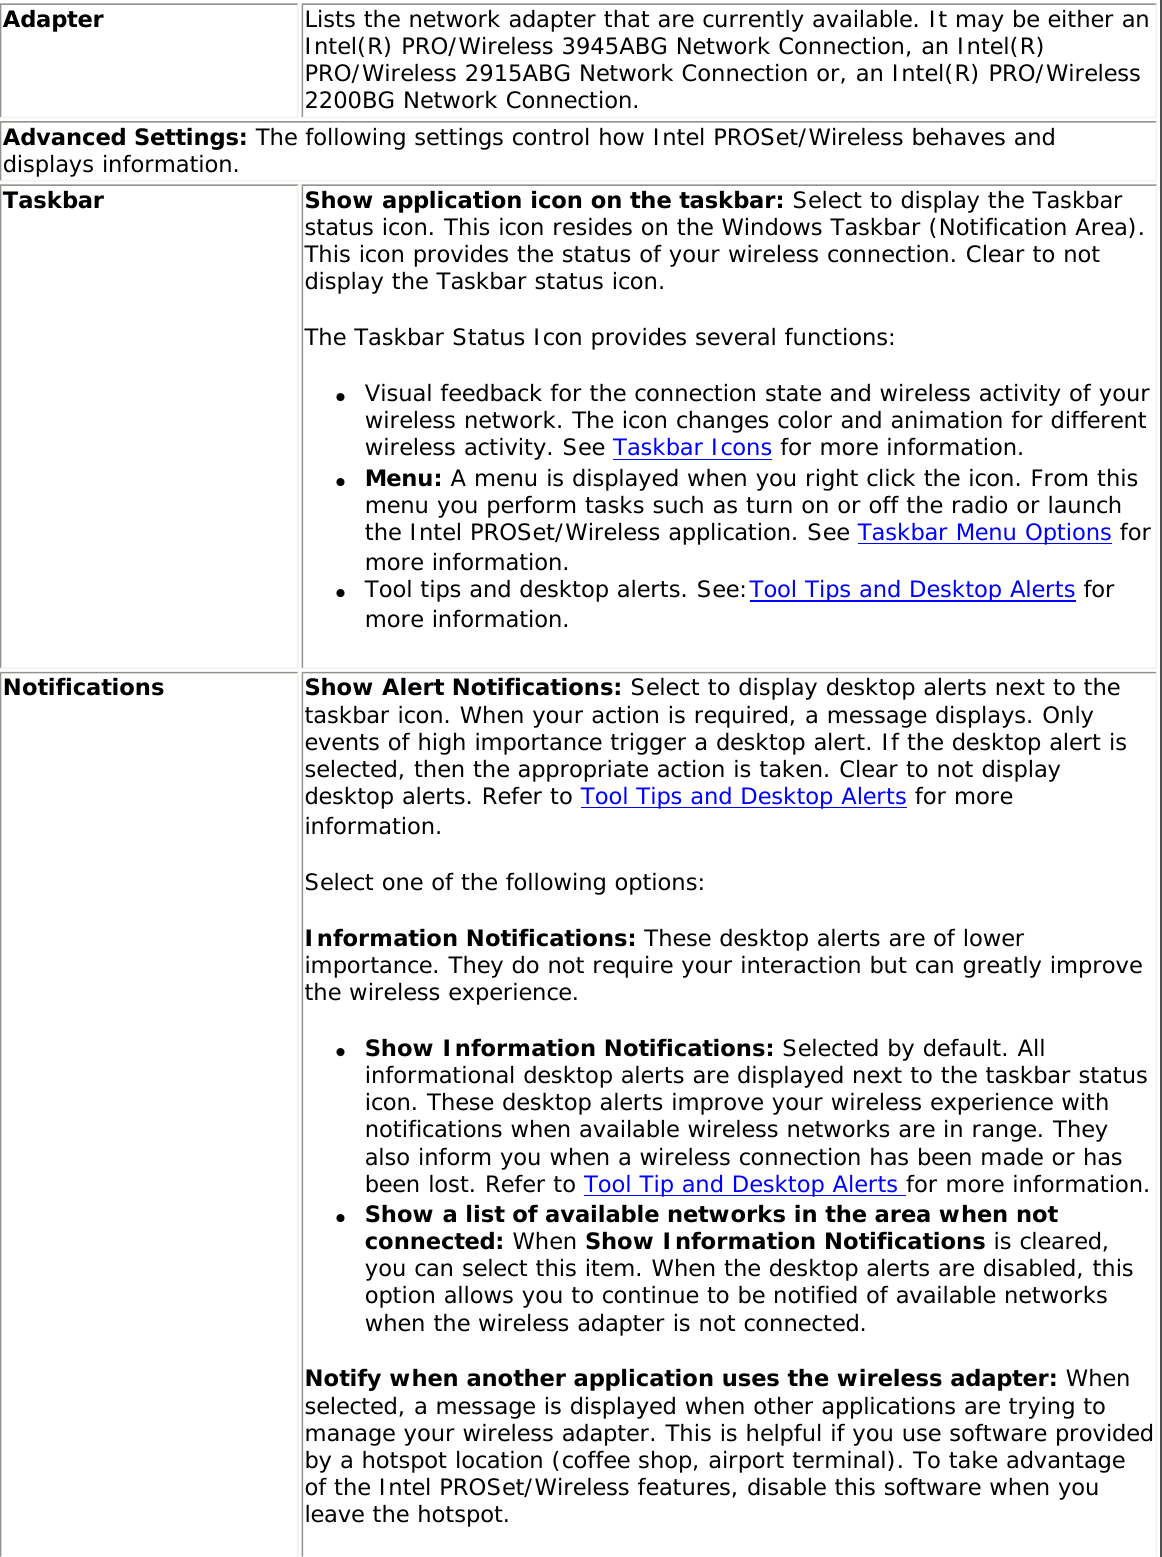


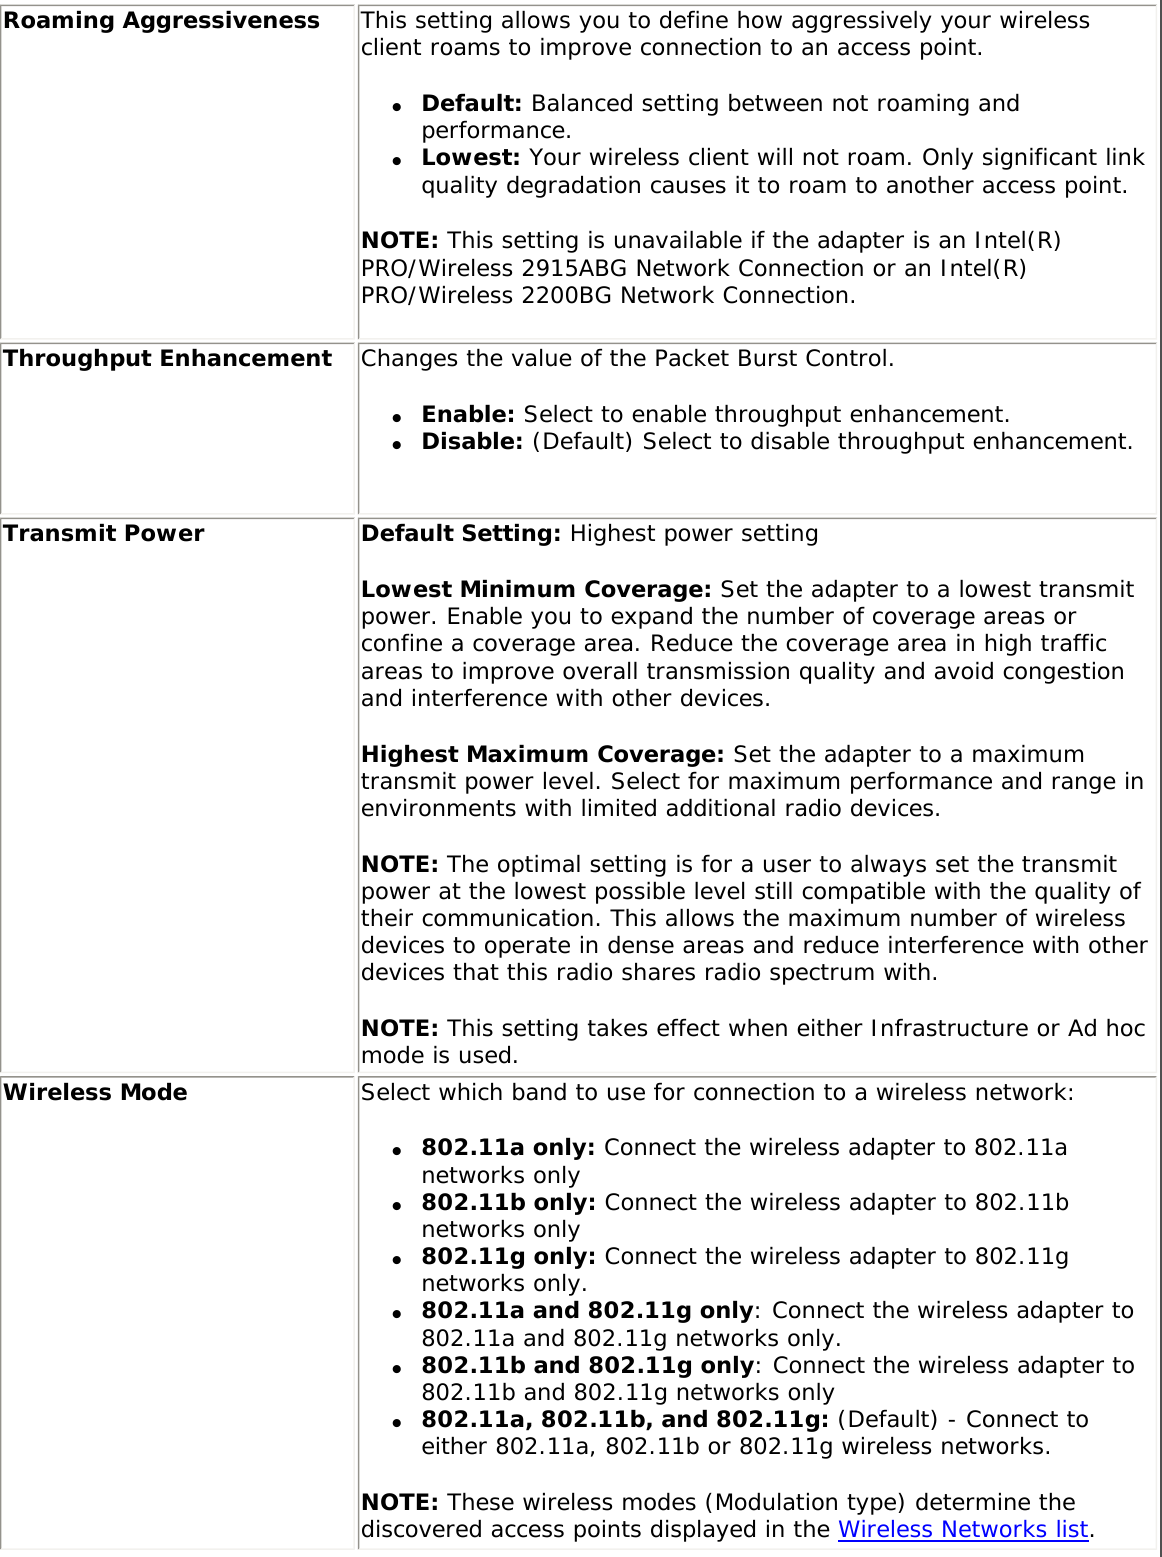
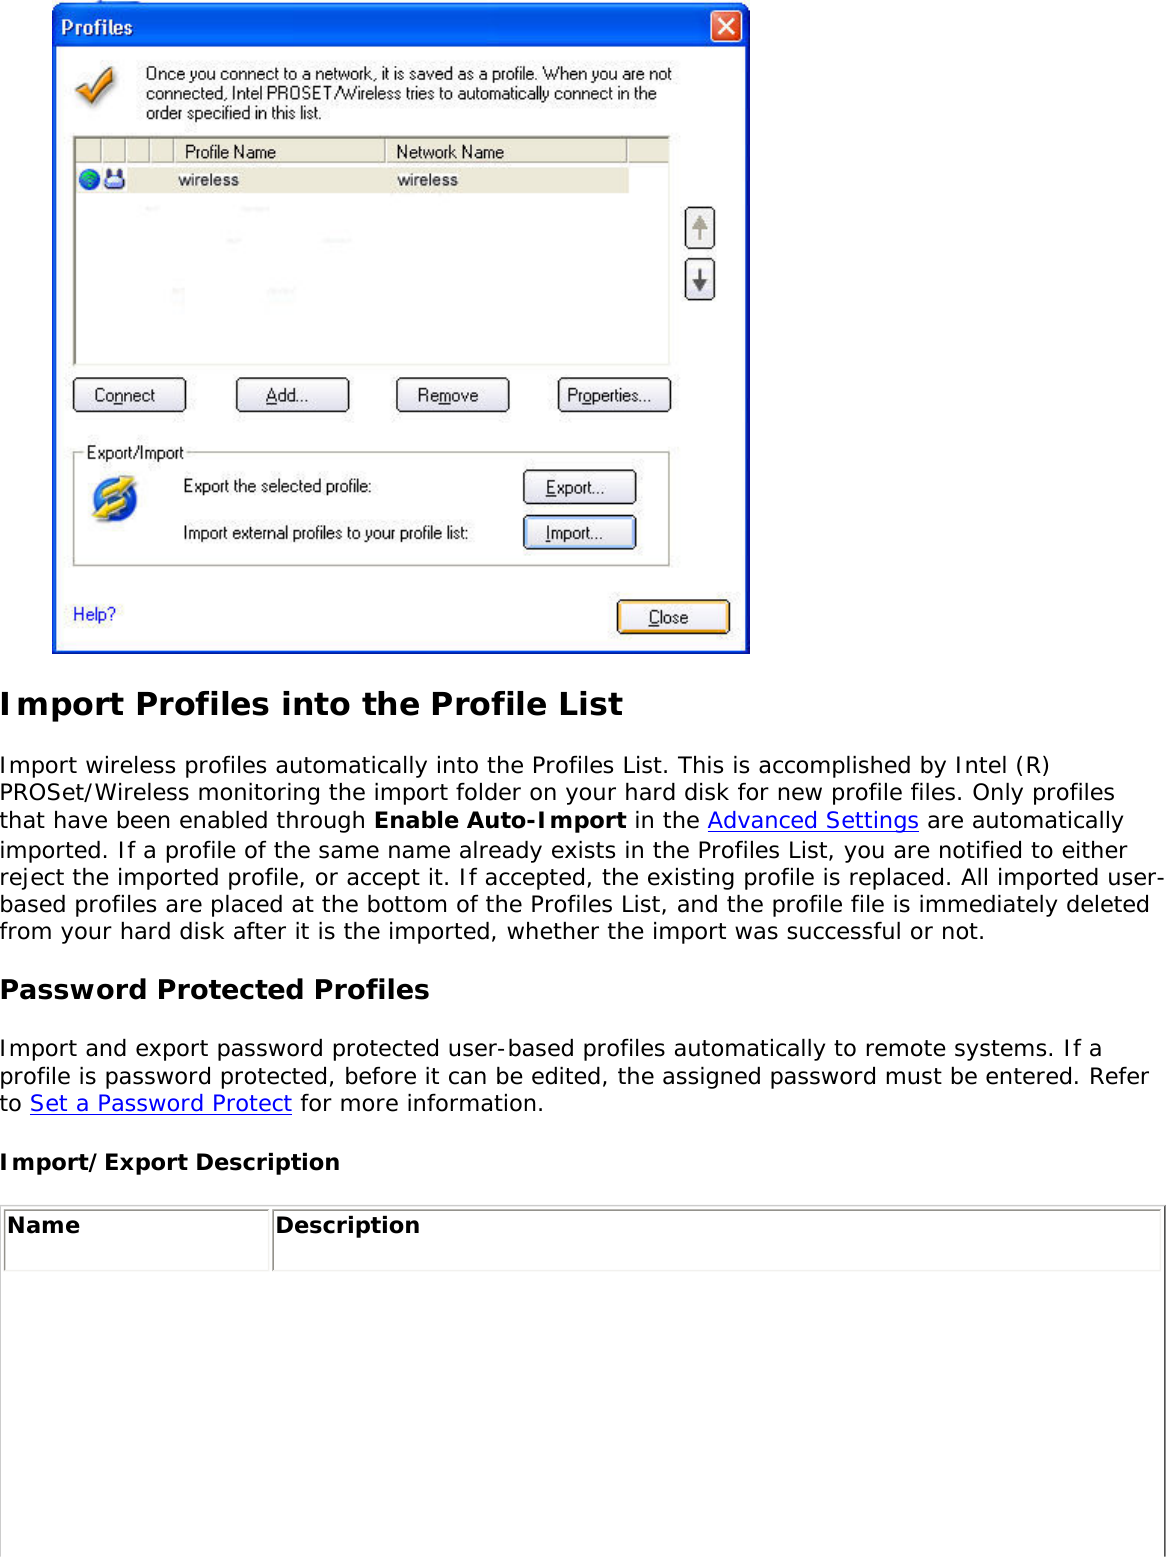
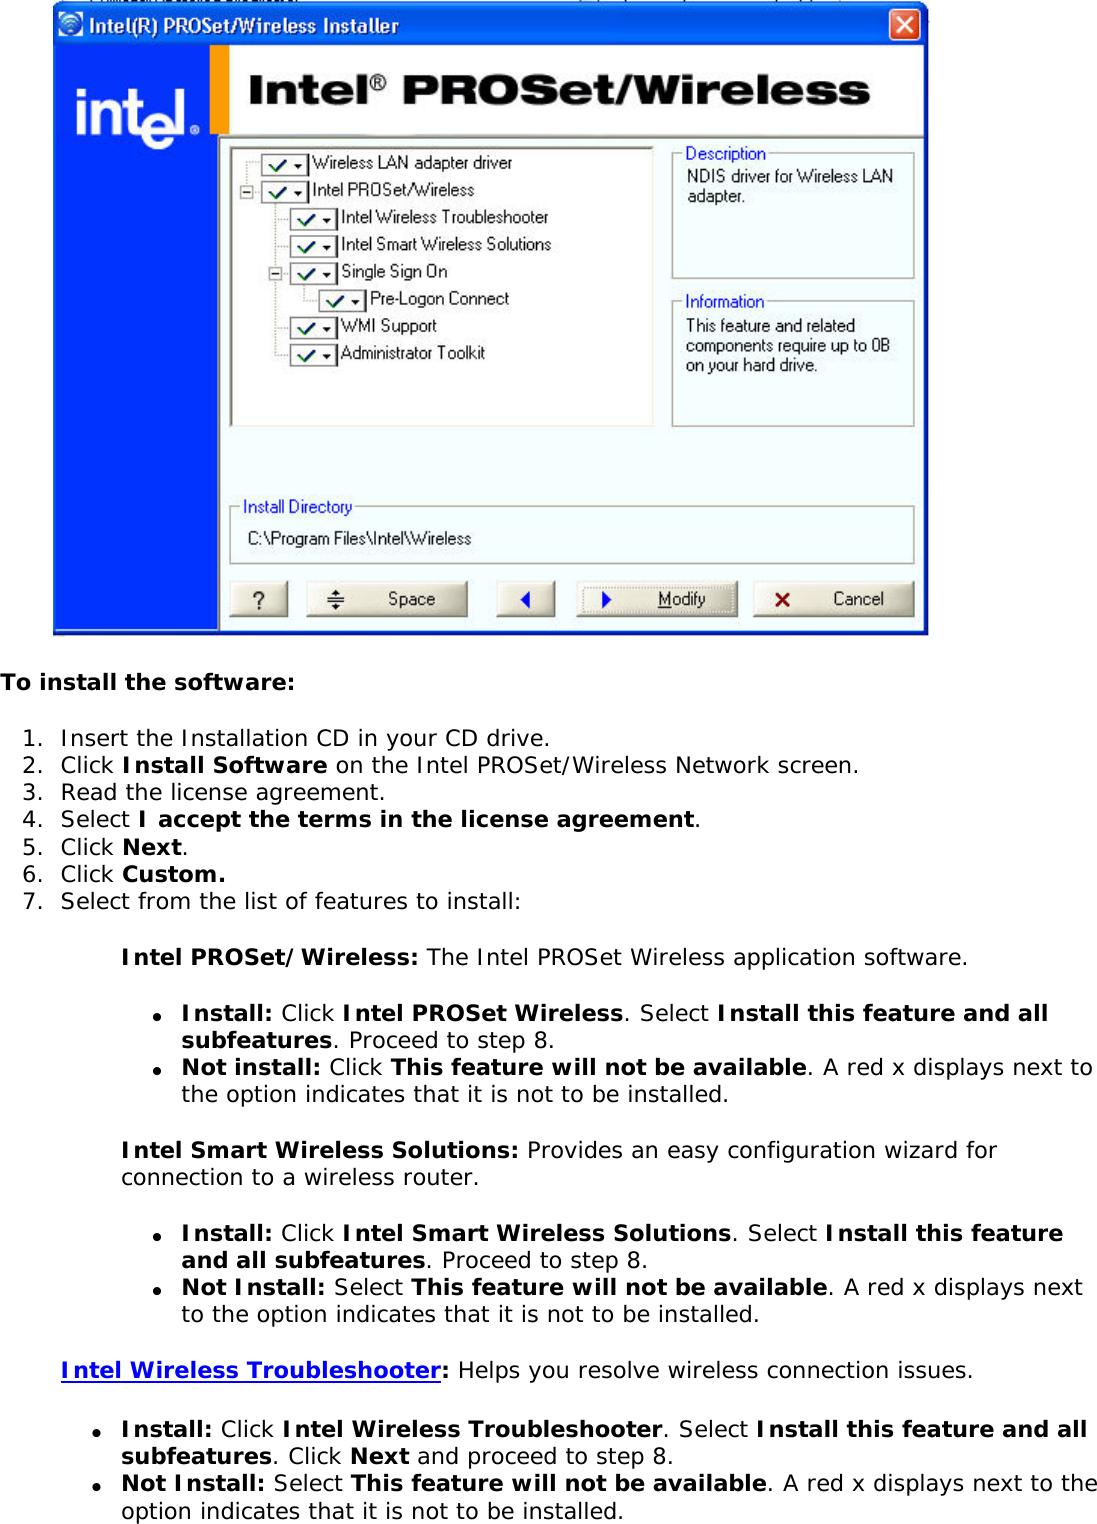


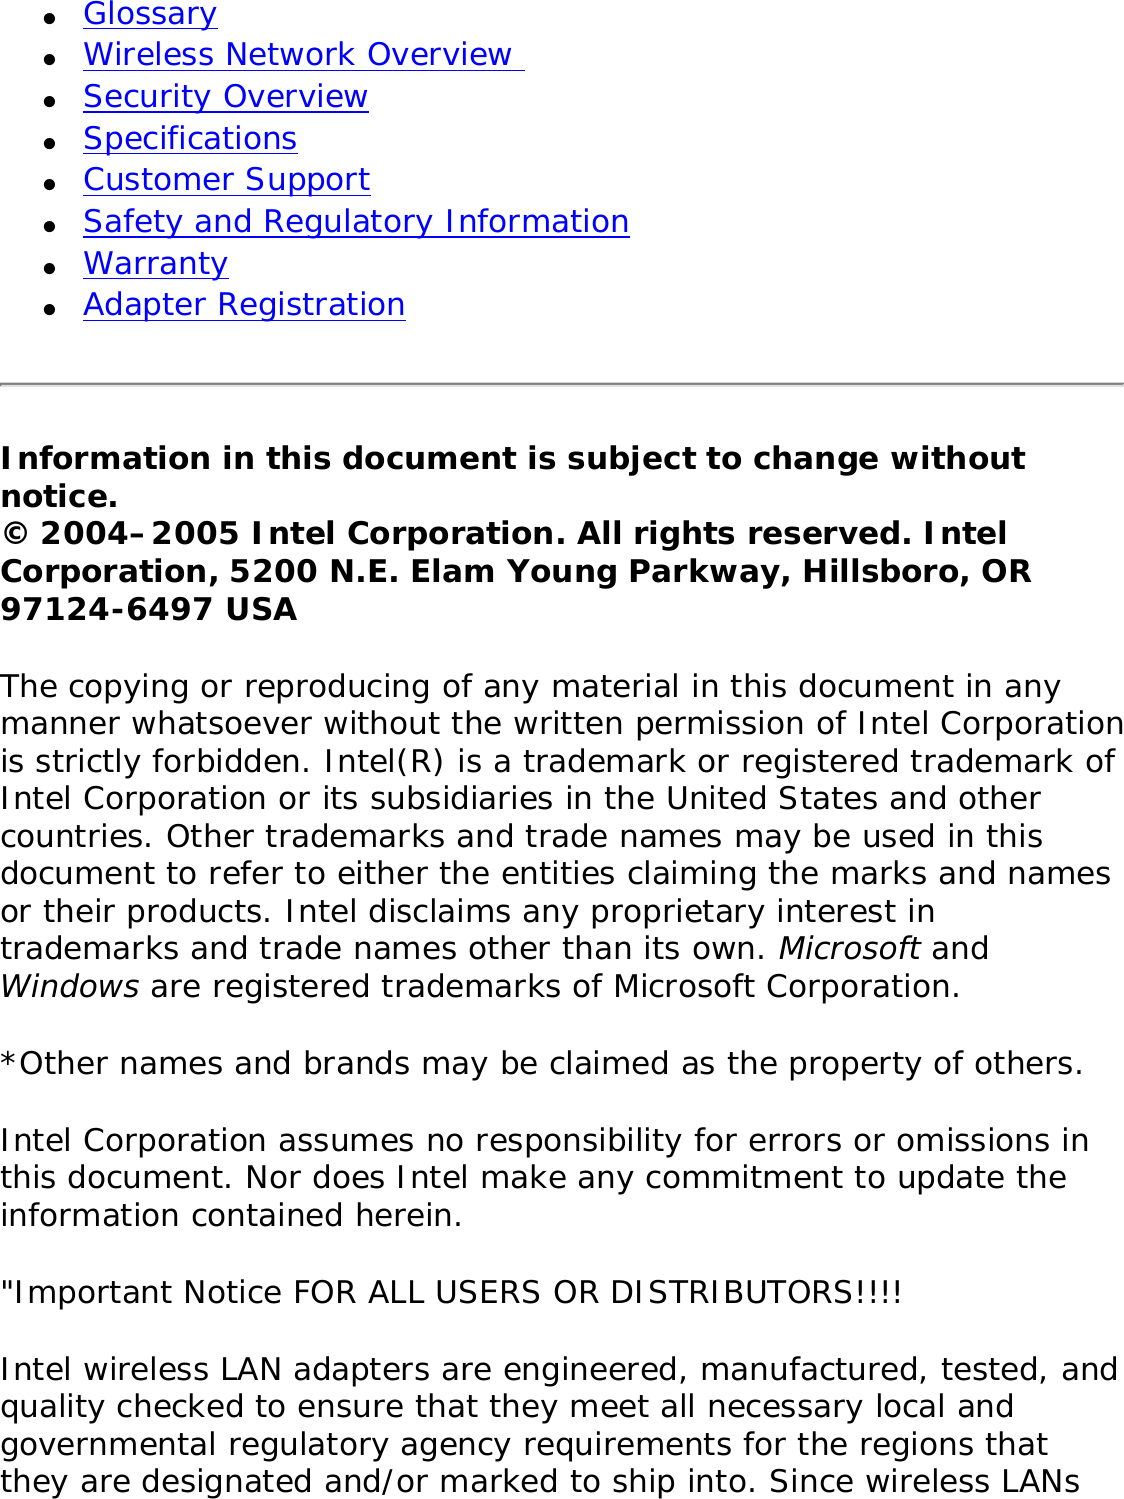
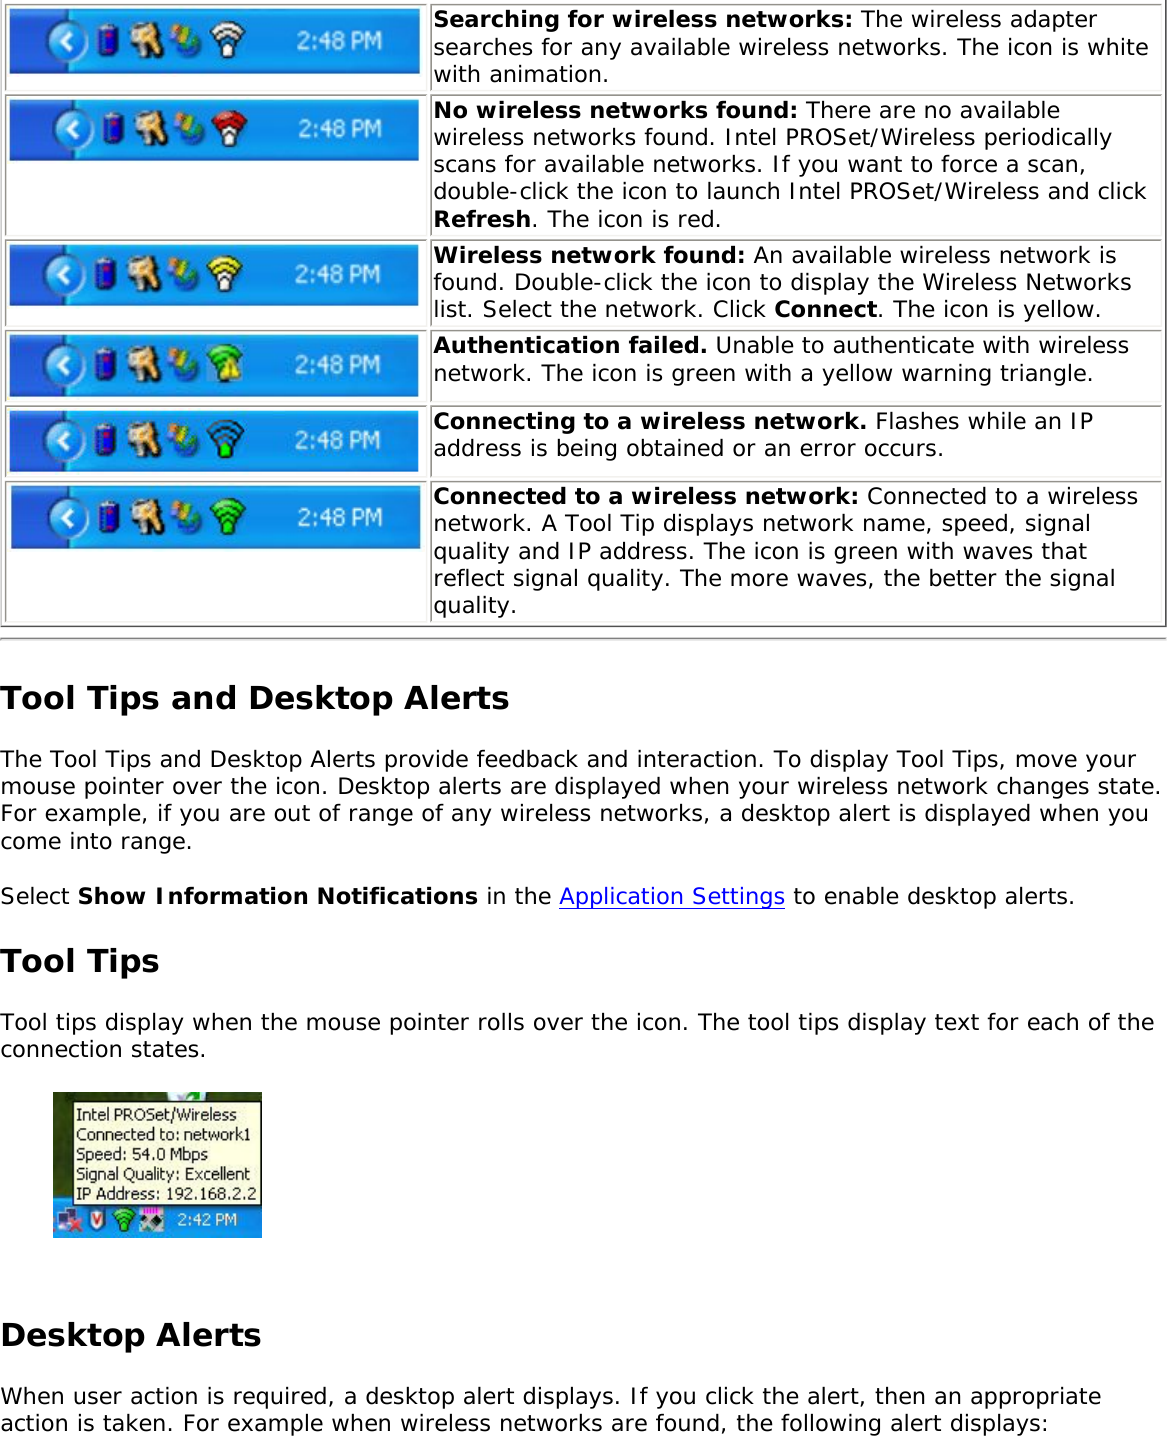
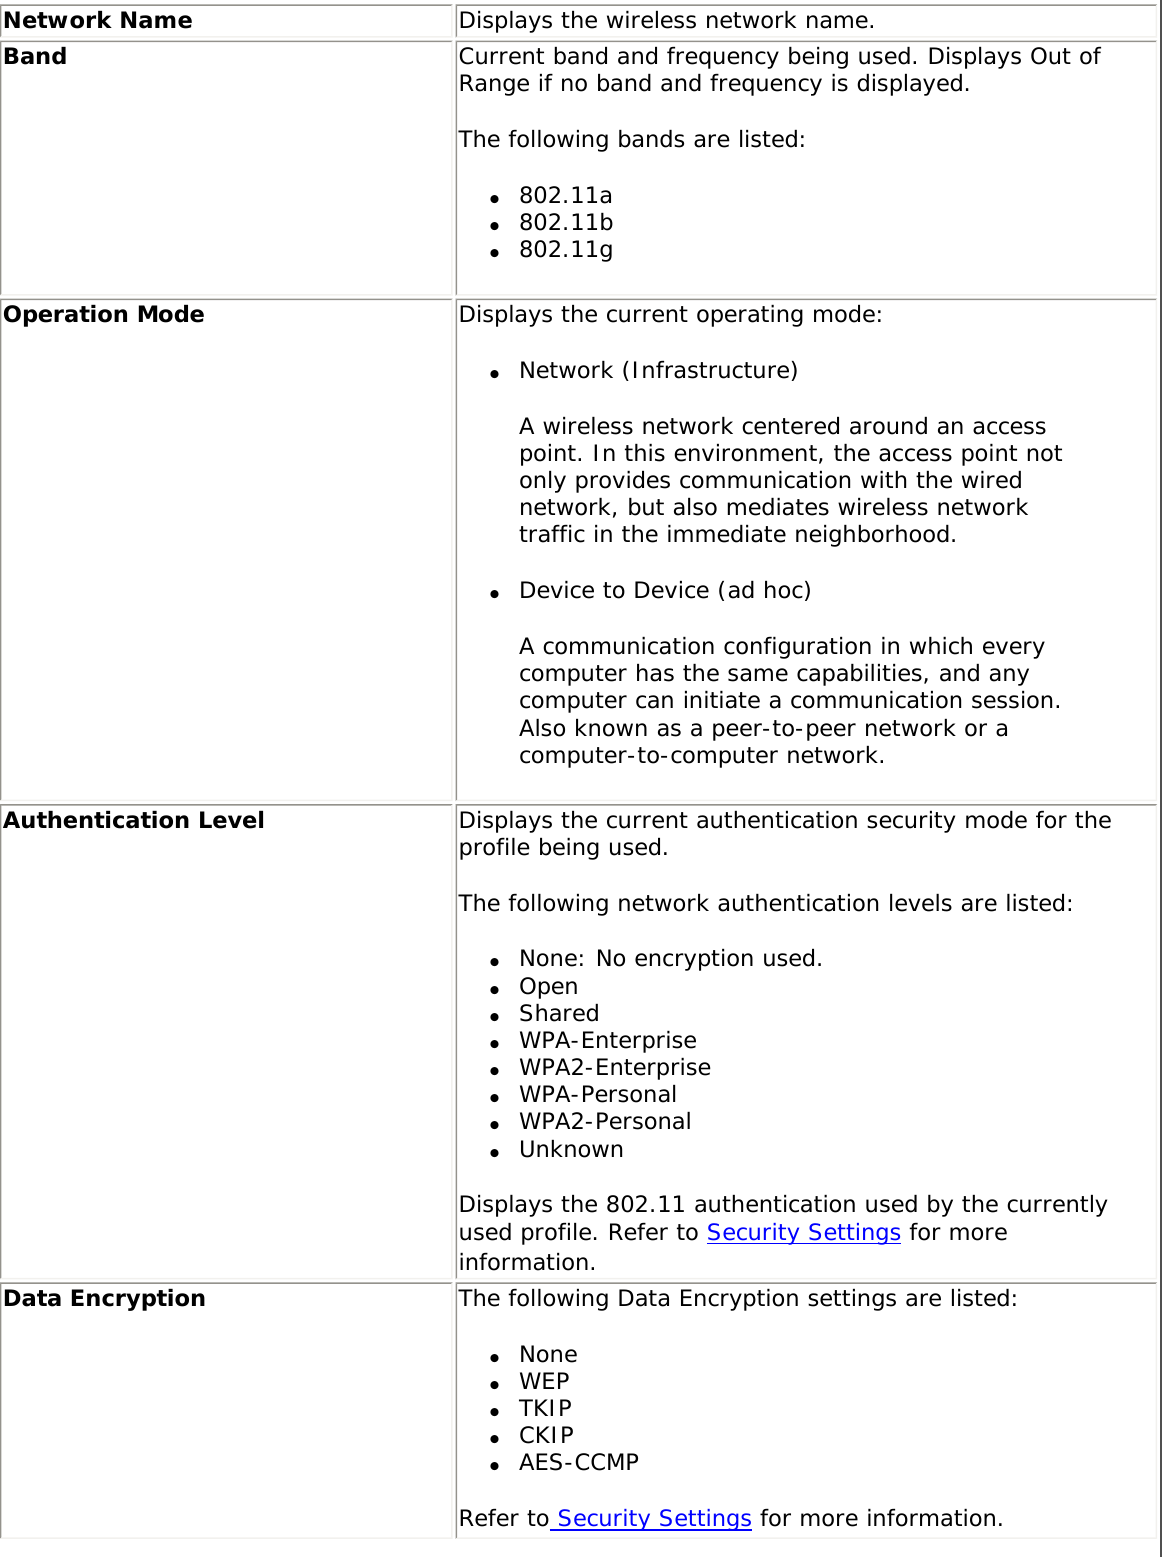
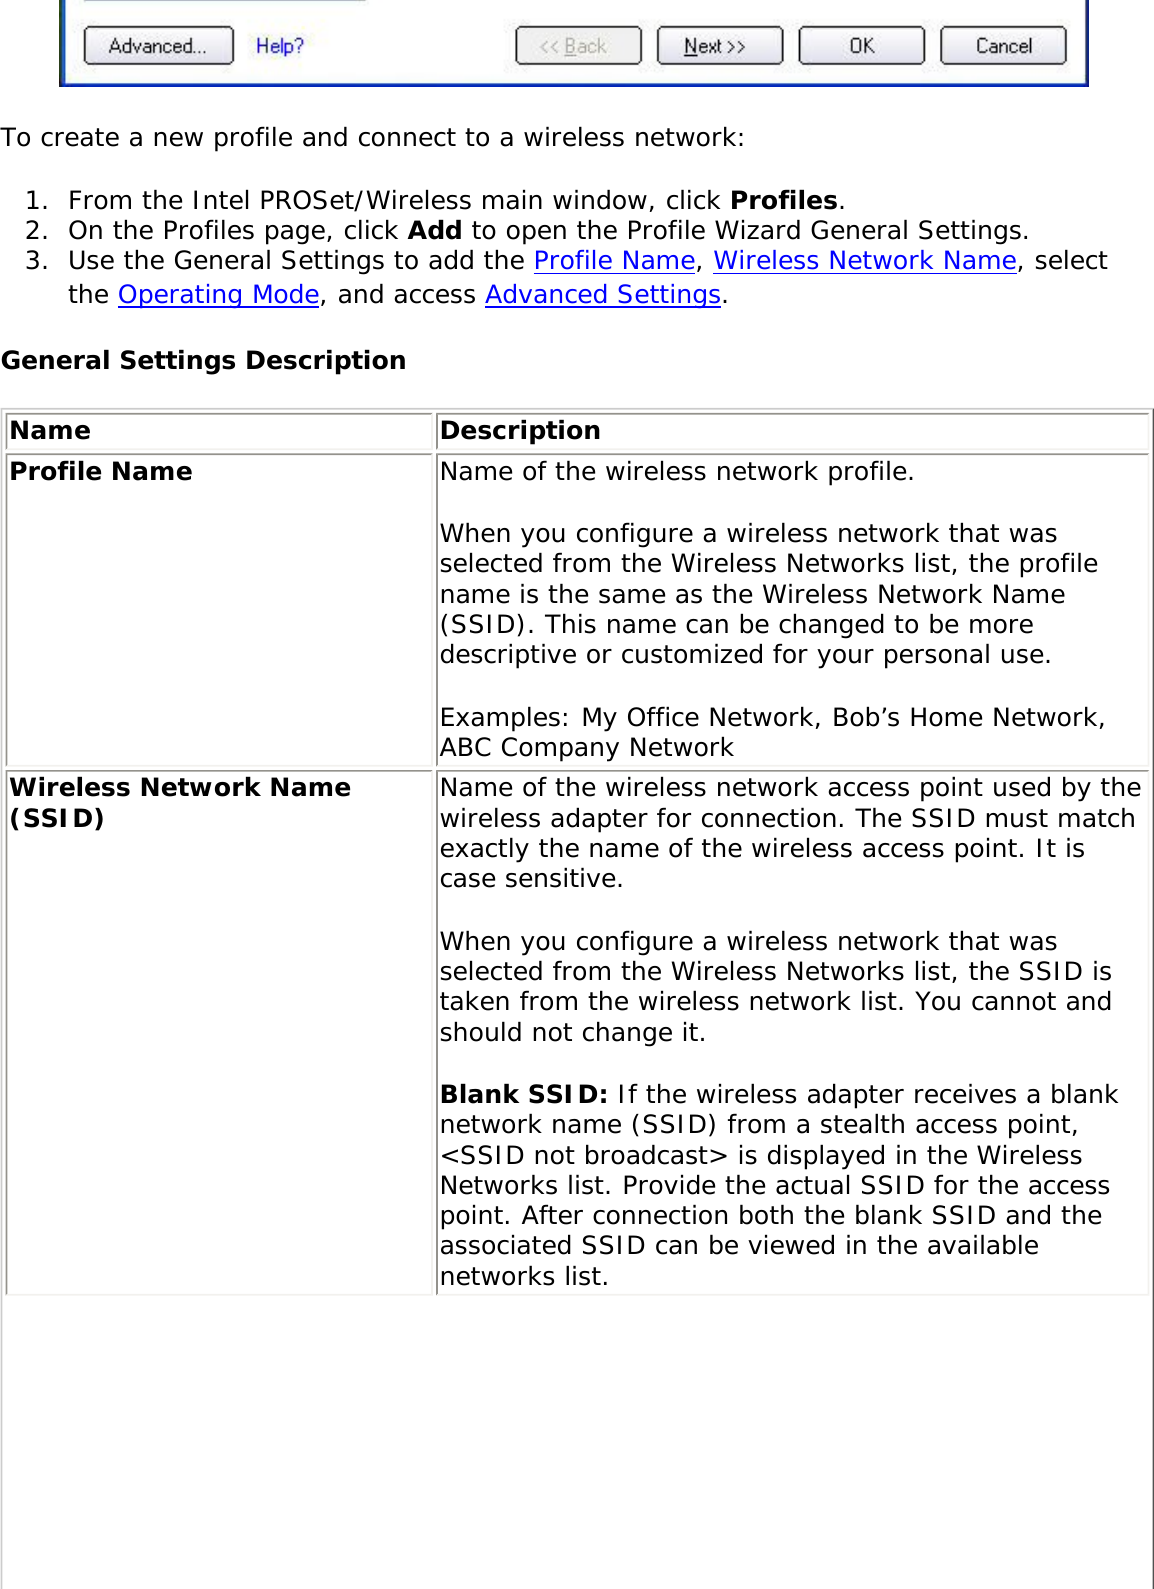
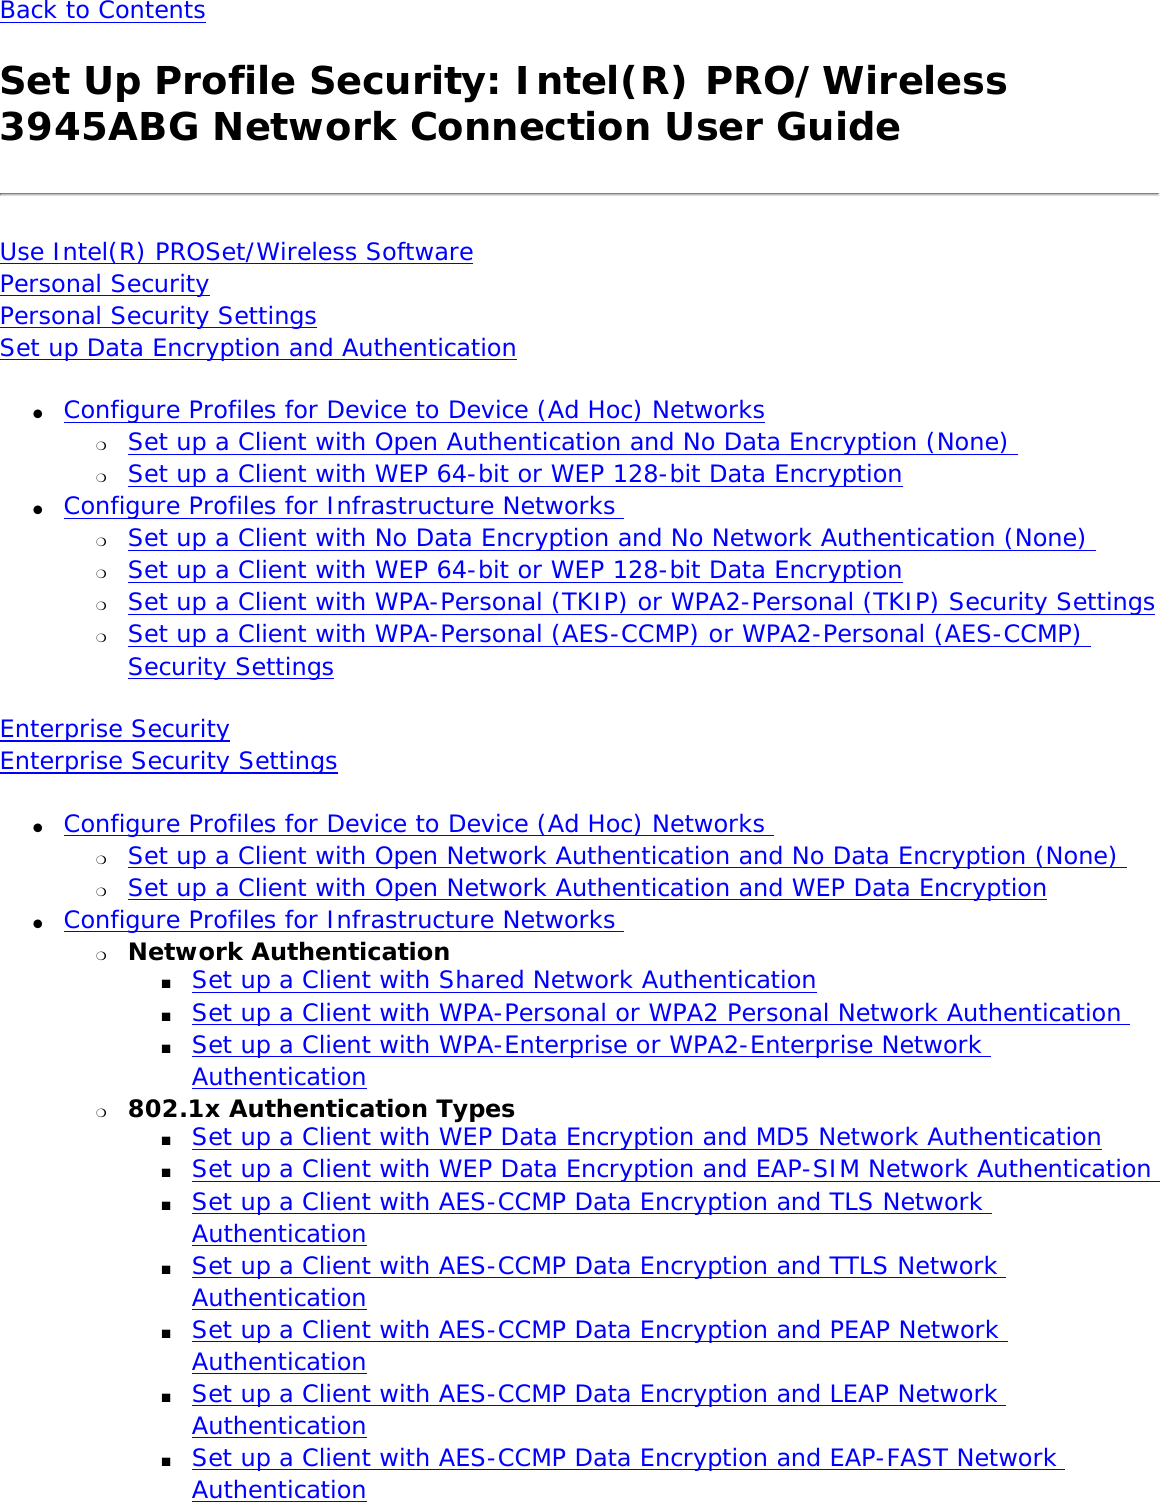
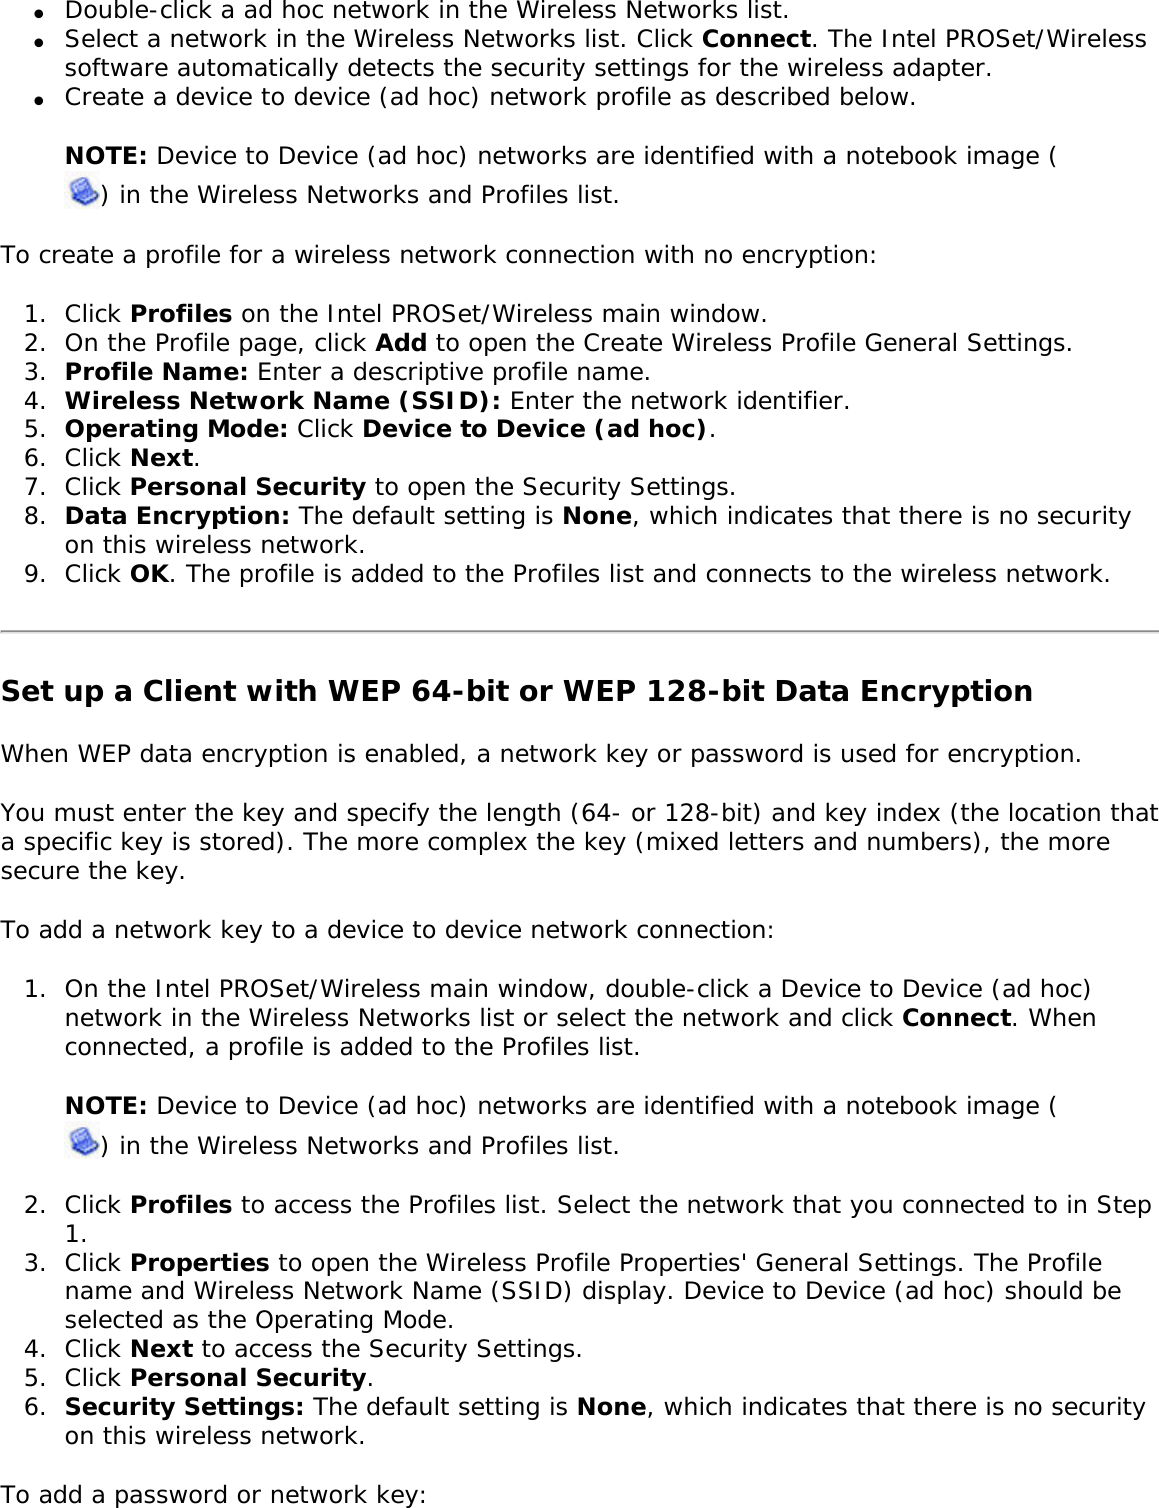
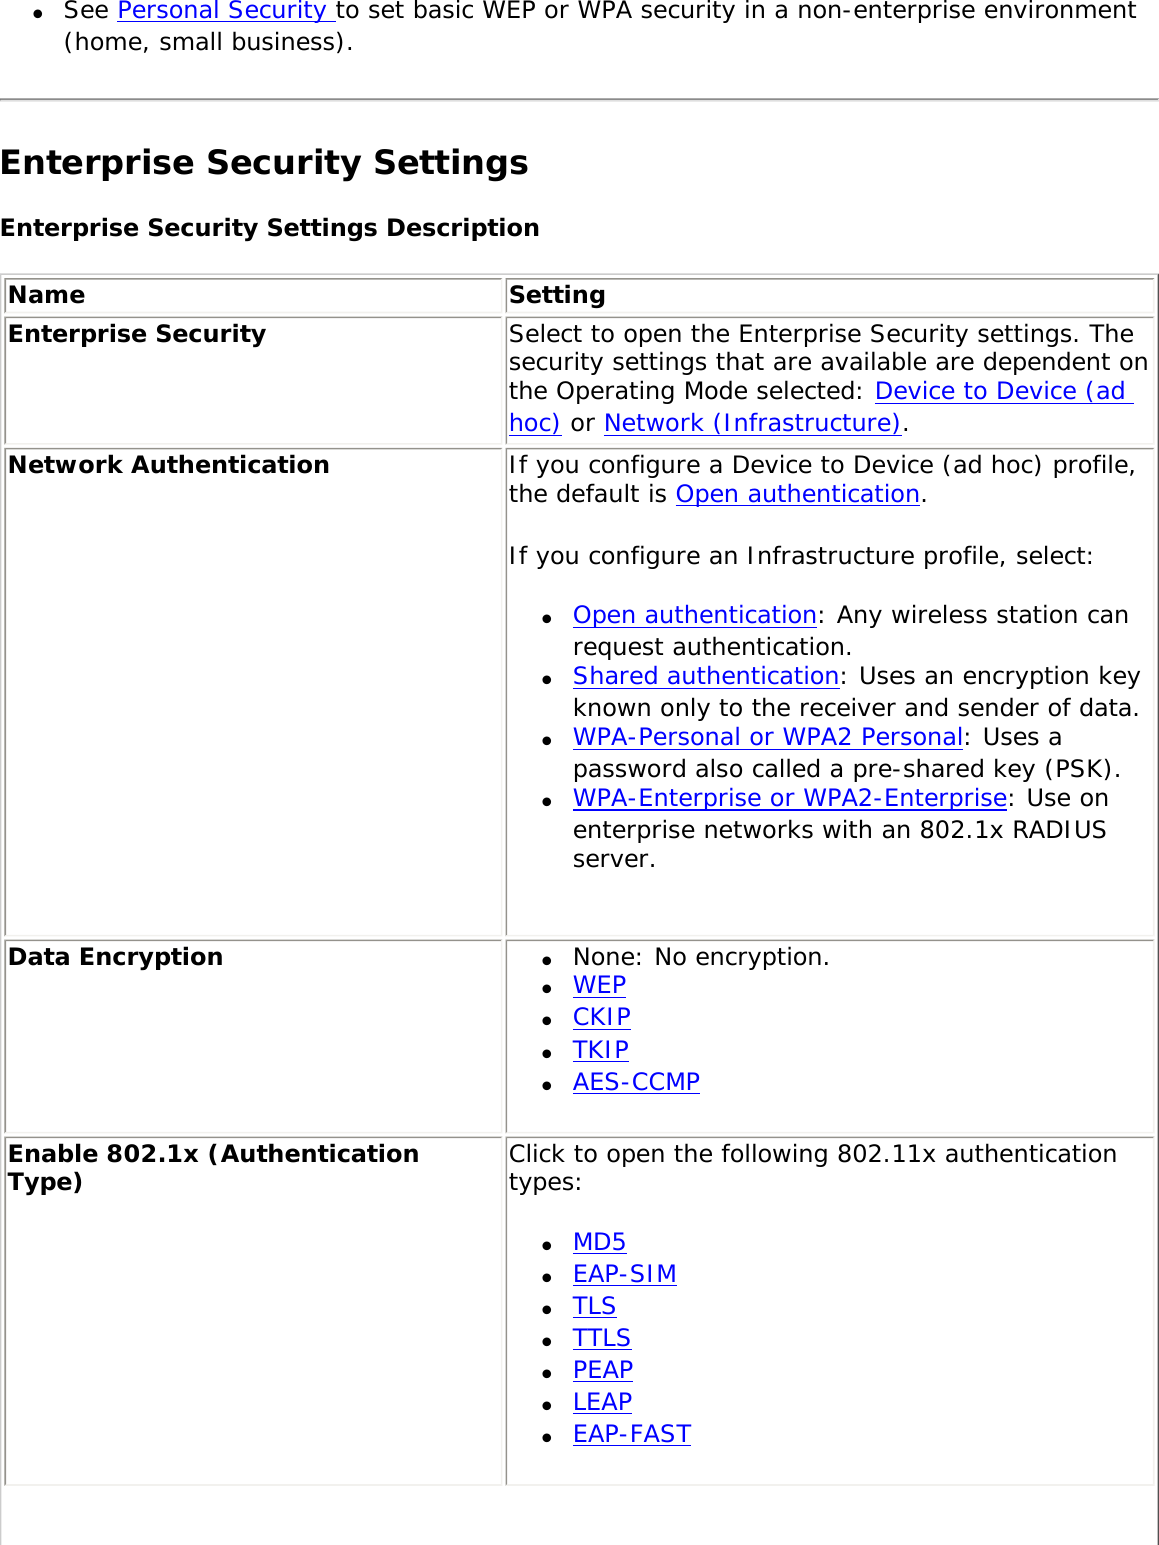
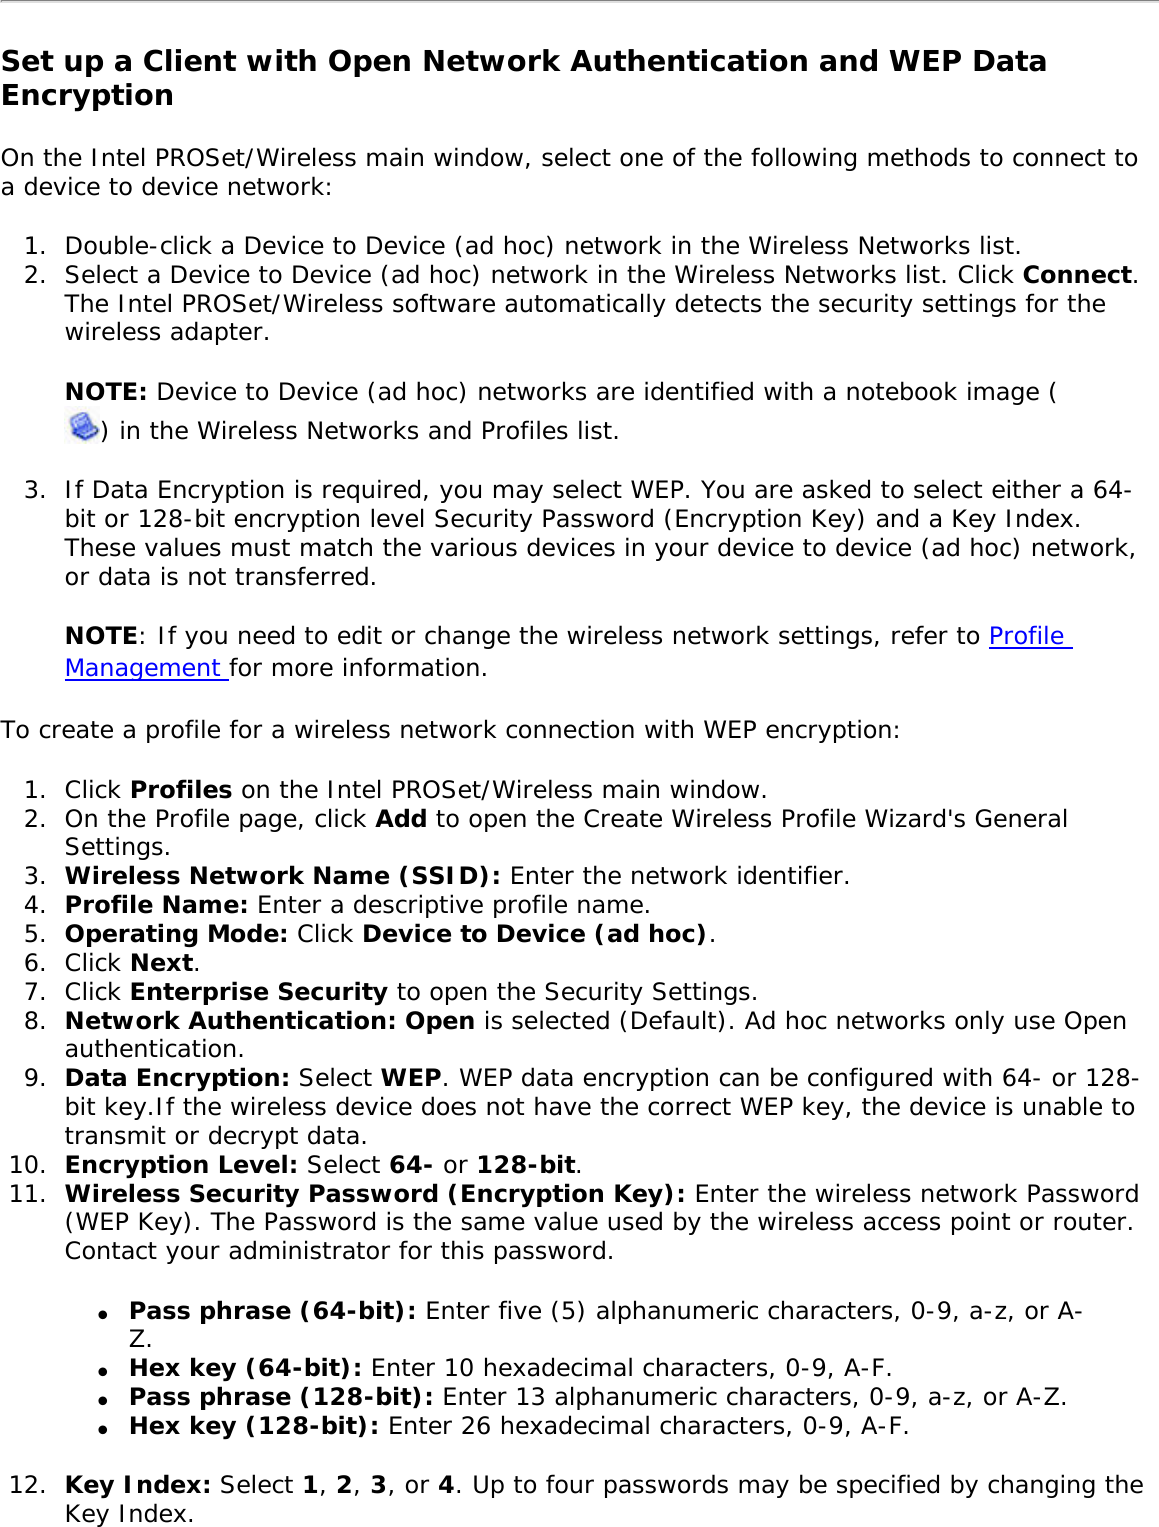
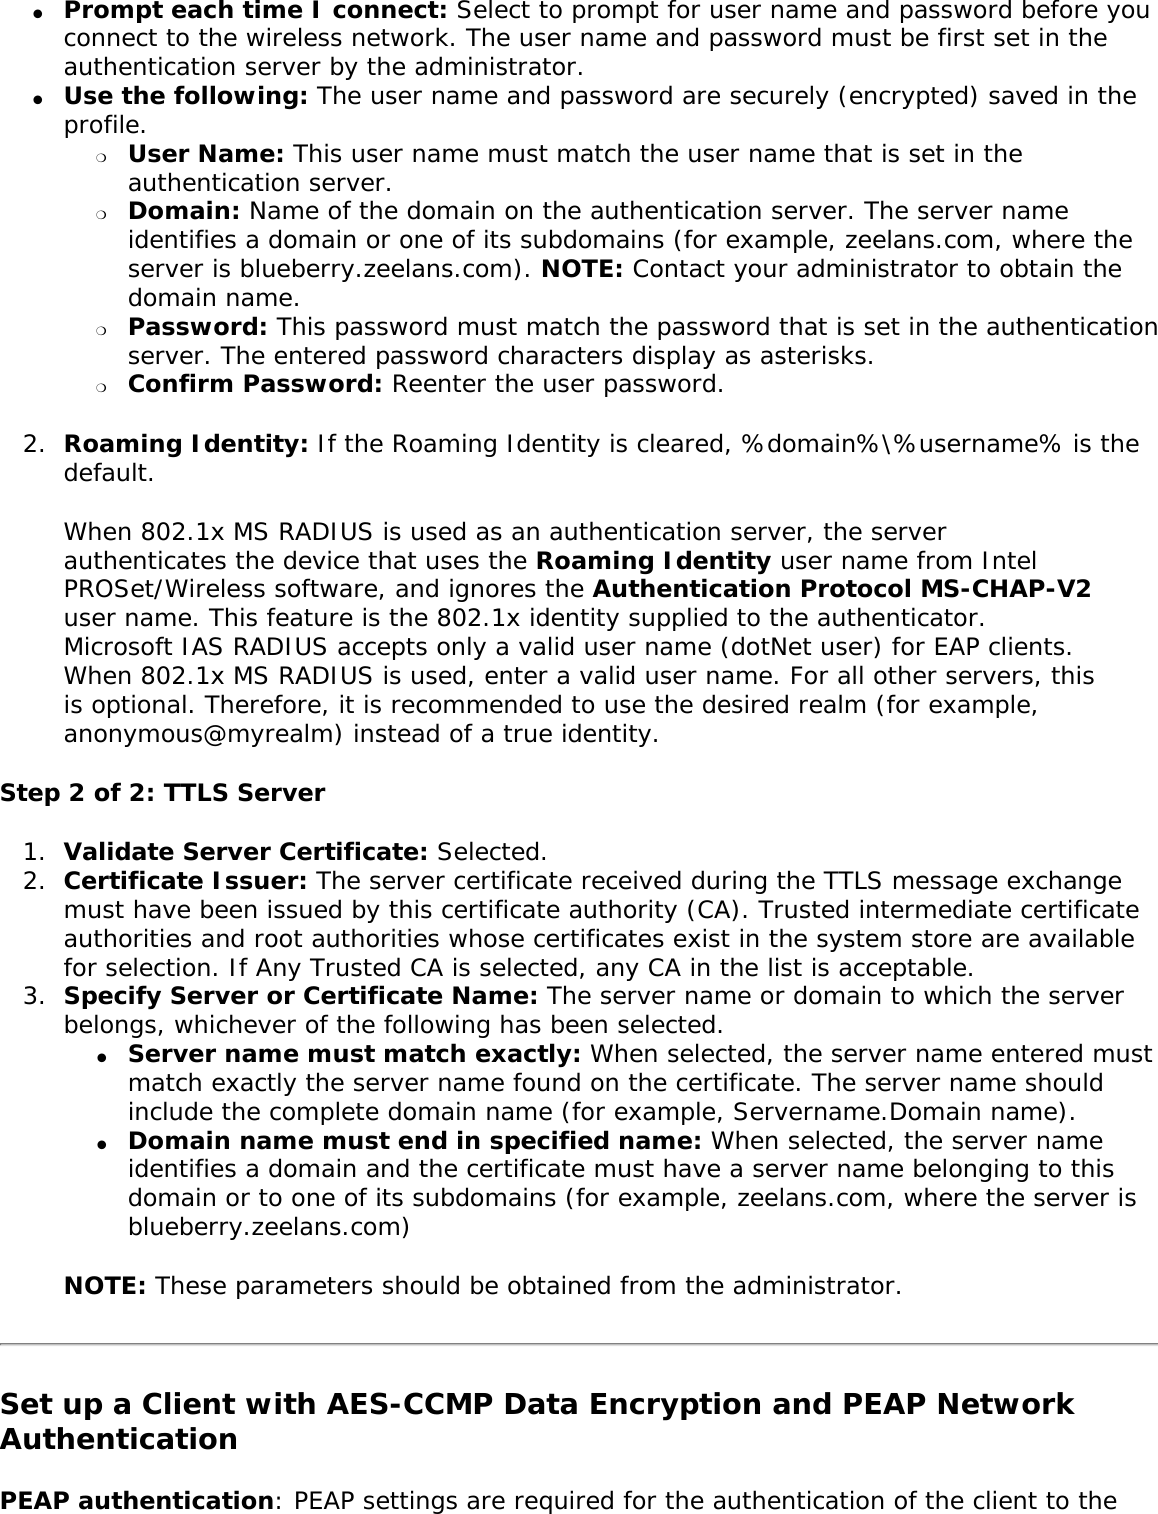
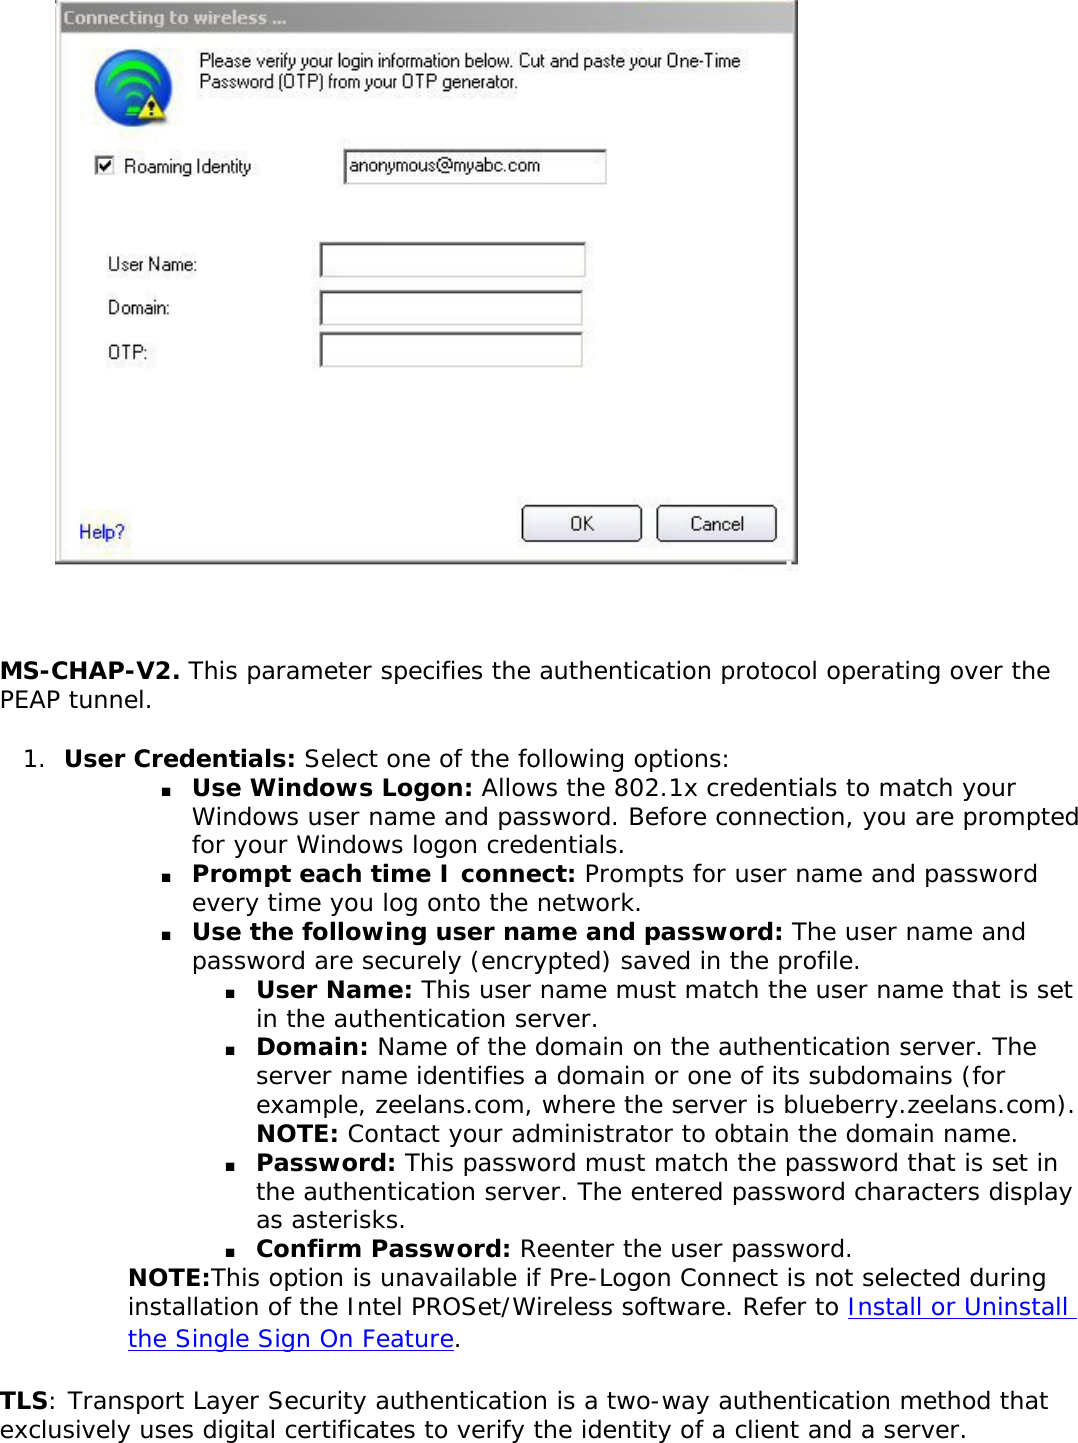
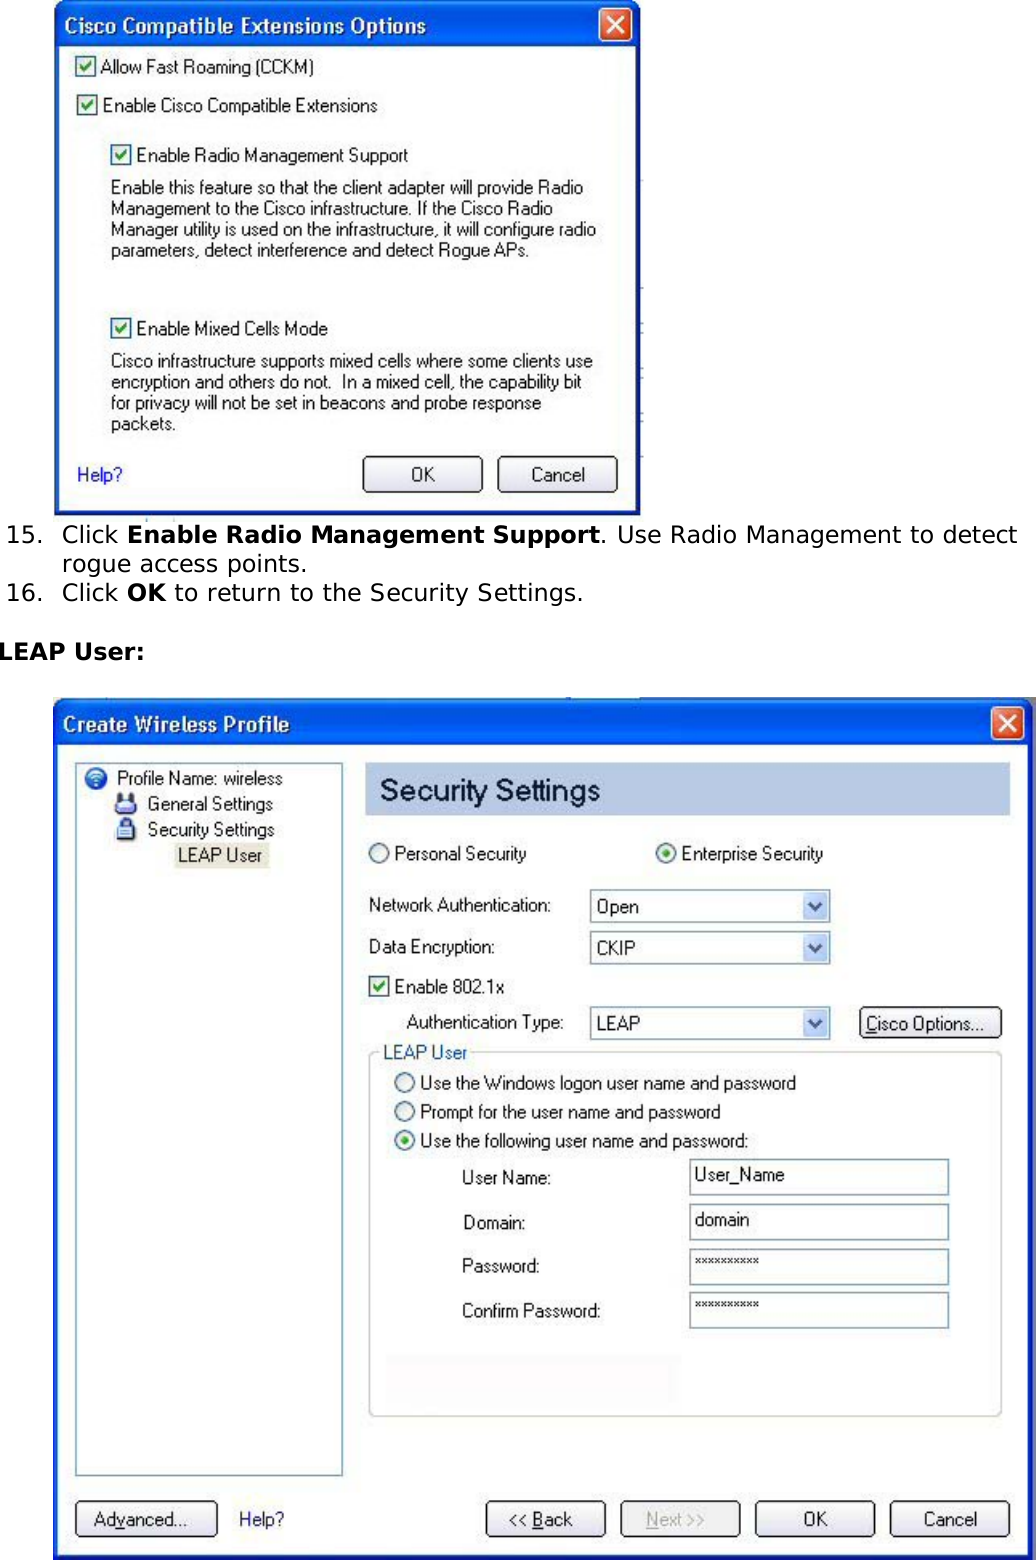
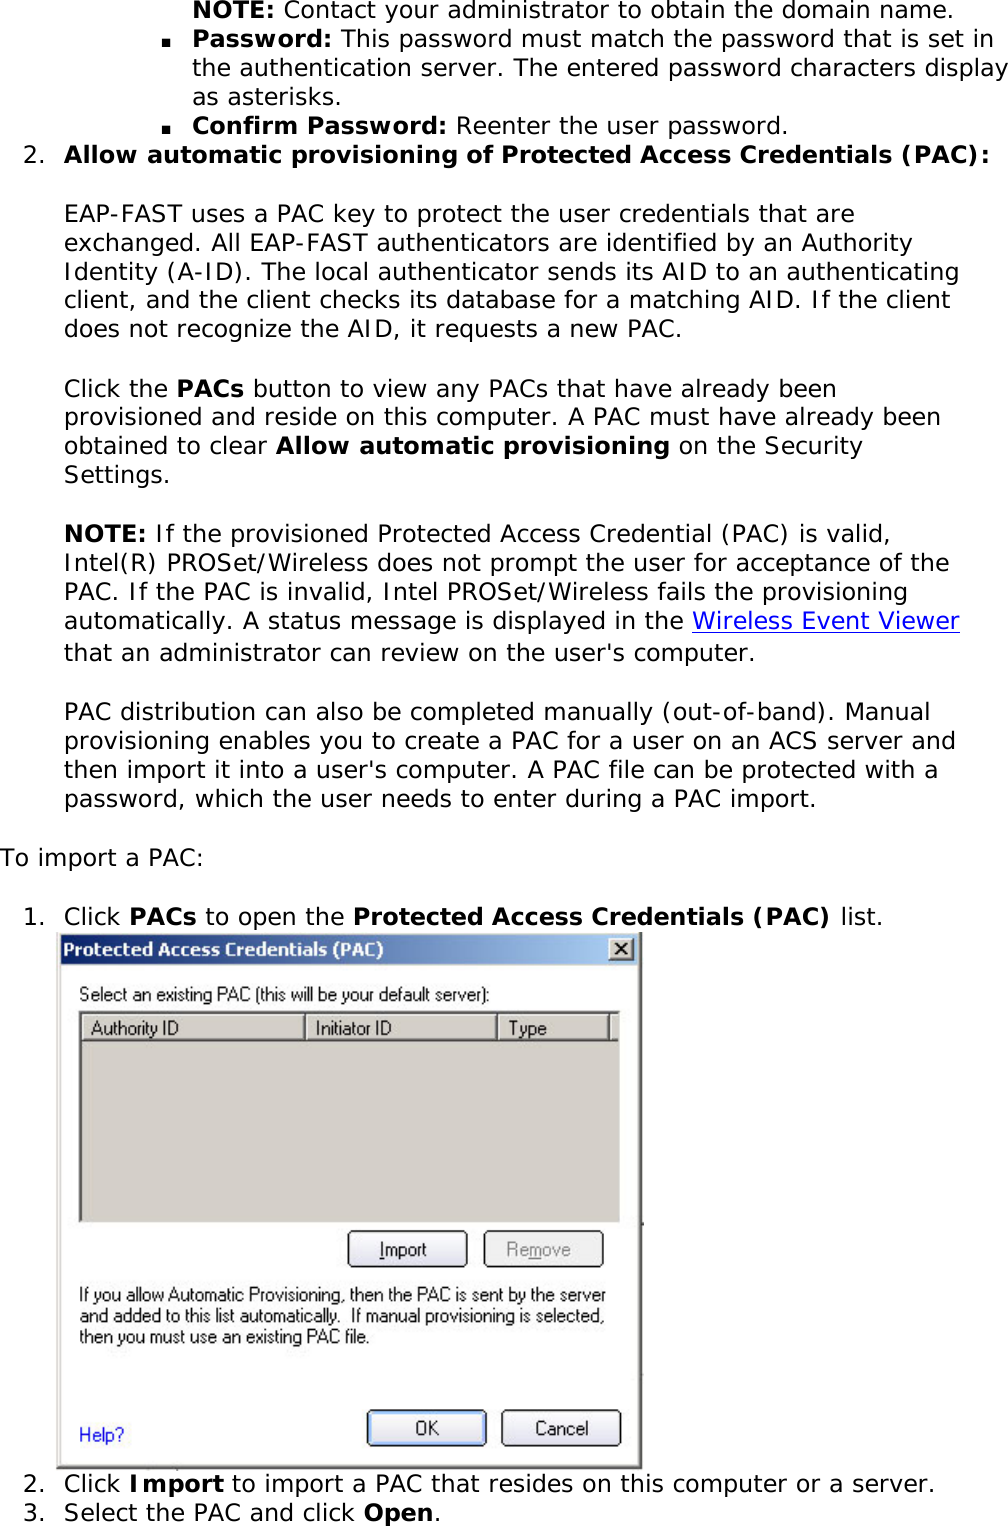
![Profile List Priority Arrows● Use the up-arrow to move the position of a selected profile up in the profiles list.● Use the down-arrow to move the position of a selected profile down in the profiles list.Profiles List Icons The network profile status icons indicate if the adapter is associated with a network, the type of operating mode being used, and if security encryption is enabled. These icons display next to the profile name in the profile list. Name DescriptionProfile Name Profiles are network settings that allow your wireless adapter to connect to a network access point (Infrastructure mode) or computer (device-to-device [Ad hoc] mode) which does not use an access point. Network Name Name of the wireless network (SSID) or computer.](https://usermanual.wiki/ASUSTeK-Computer/R1F.User-Manual-WLAN-1/User-Guide-648377-Page-37.png)
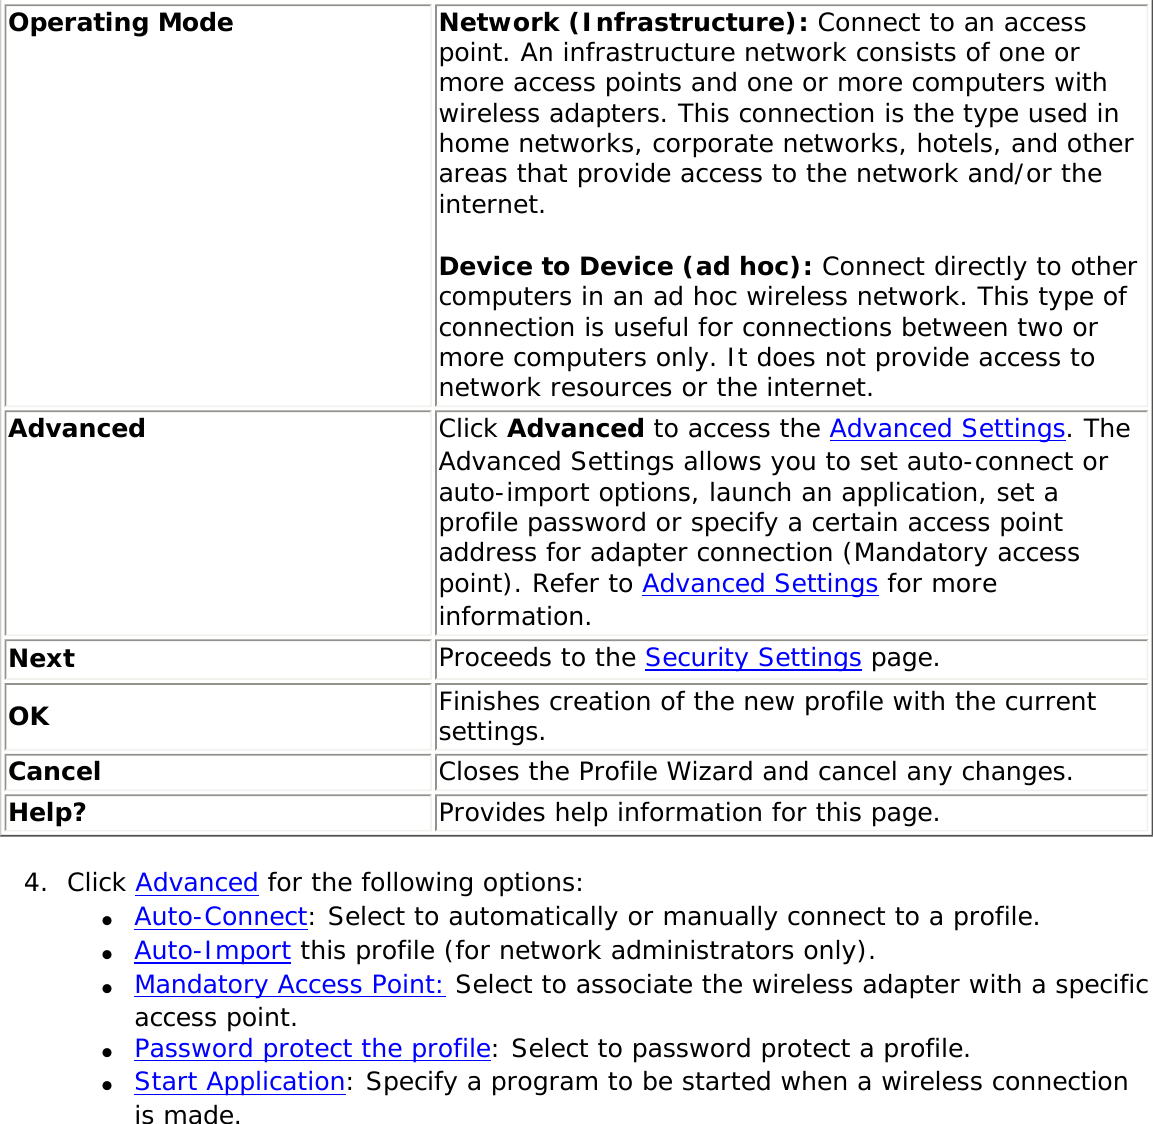
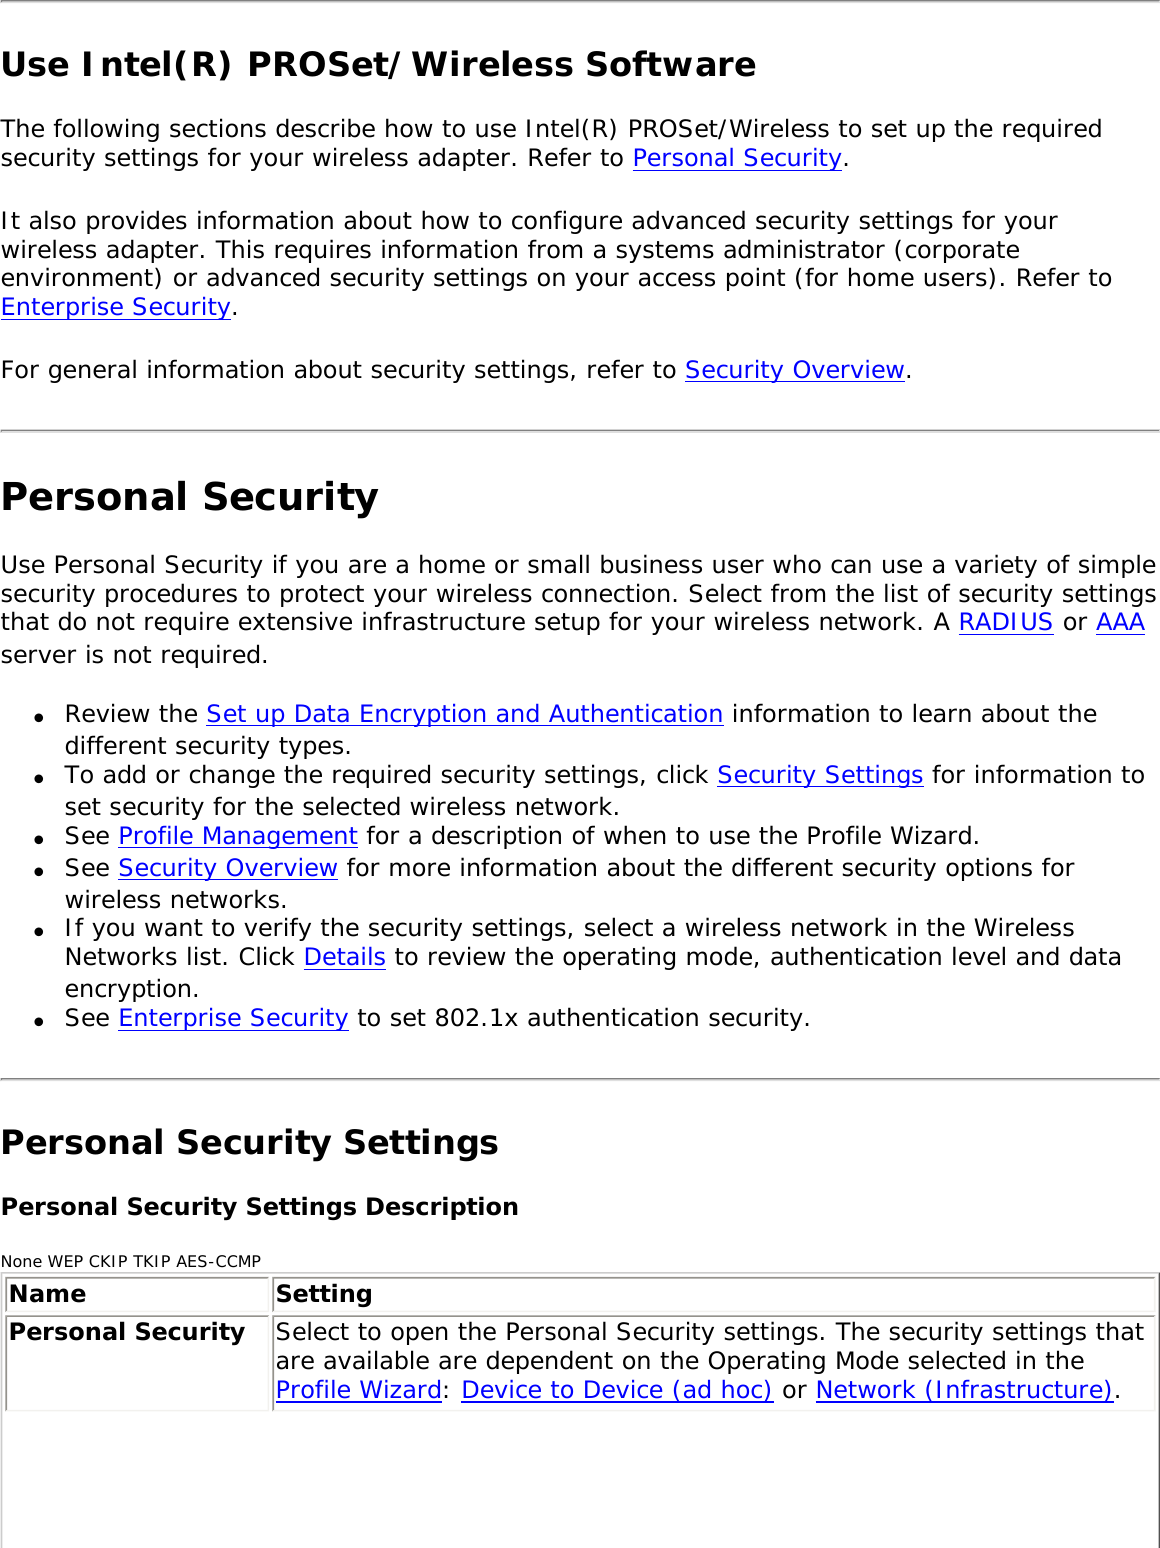
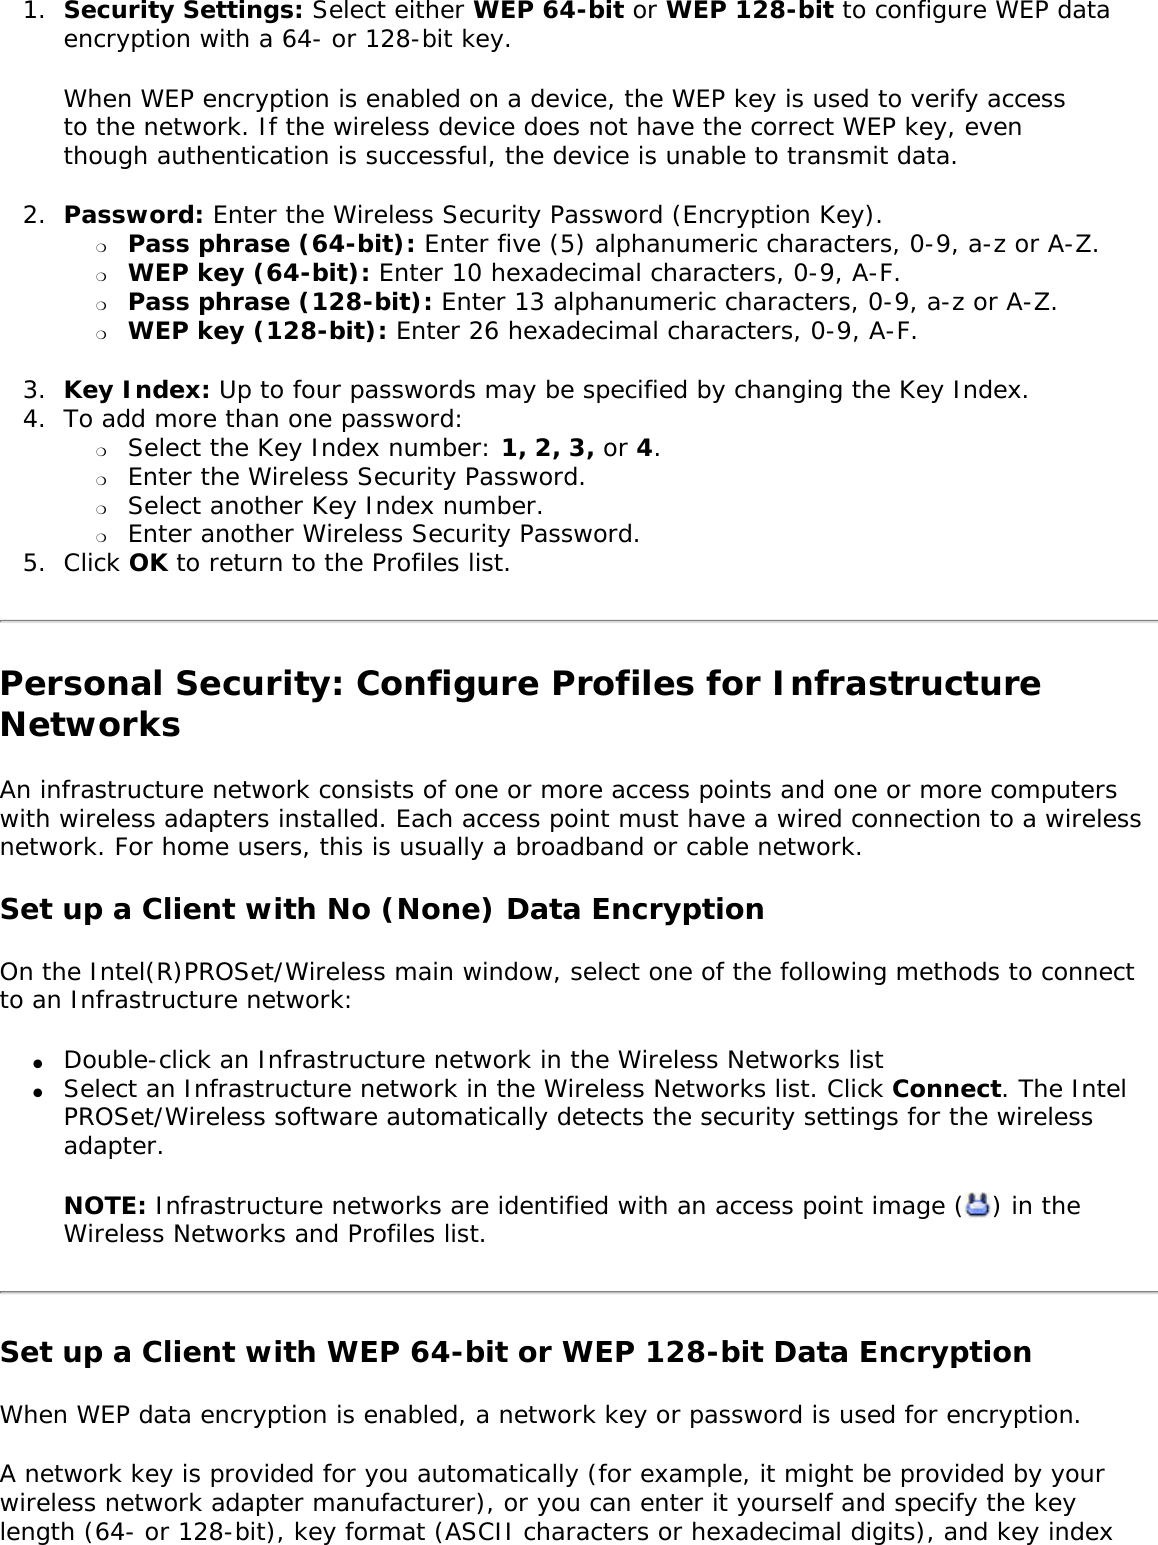

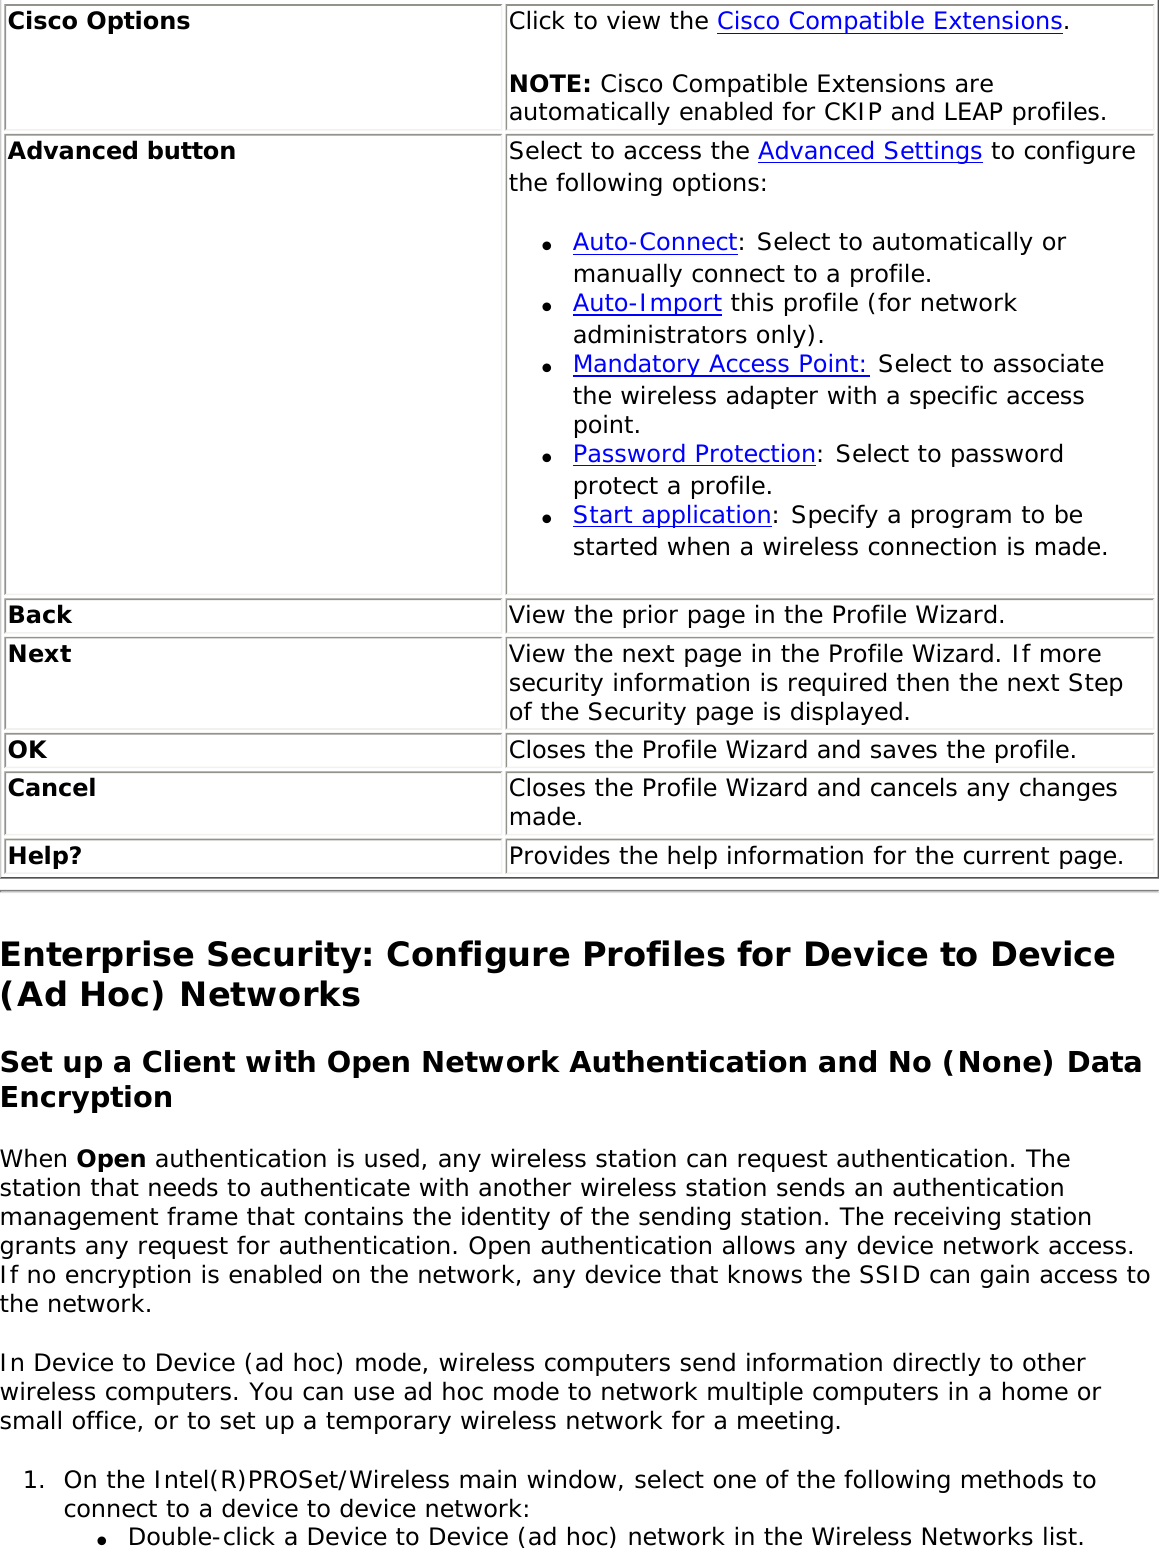
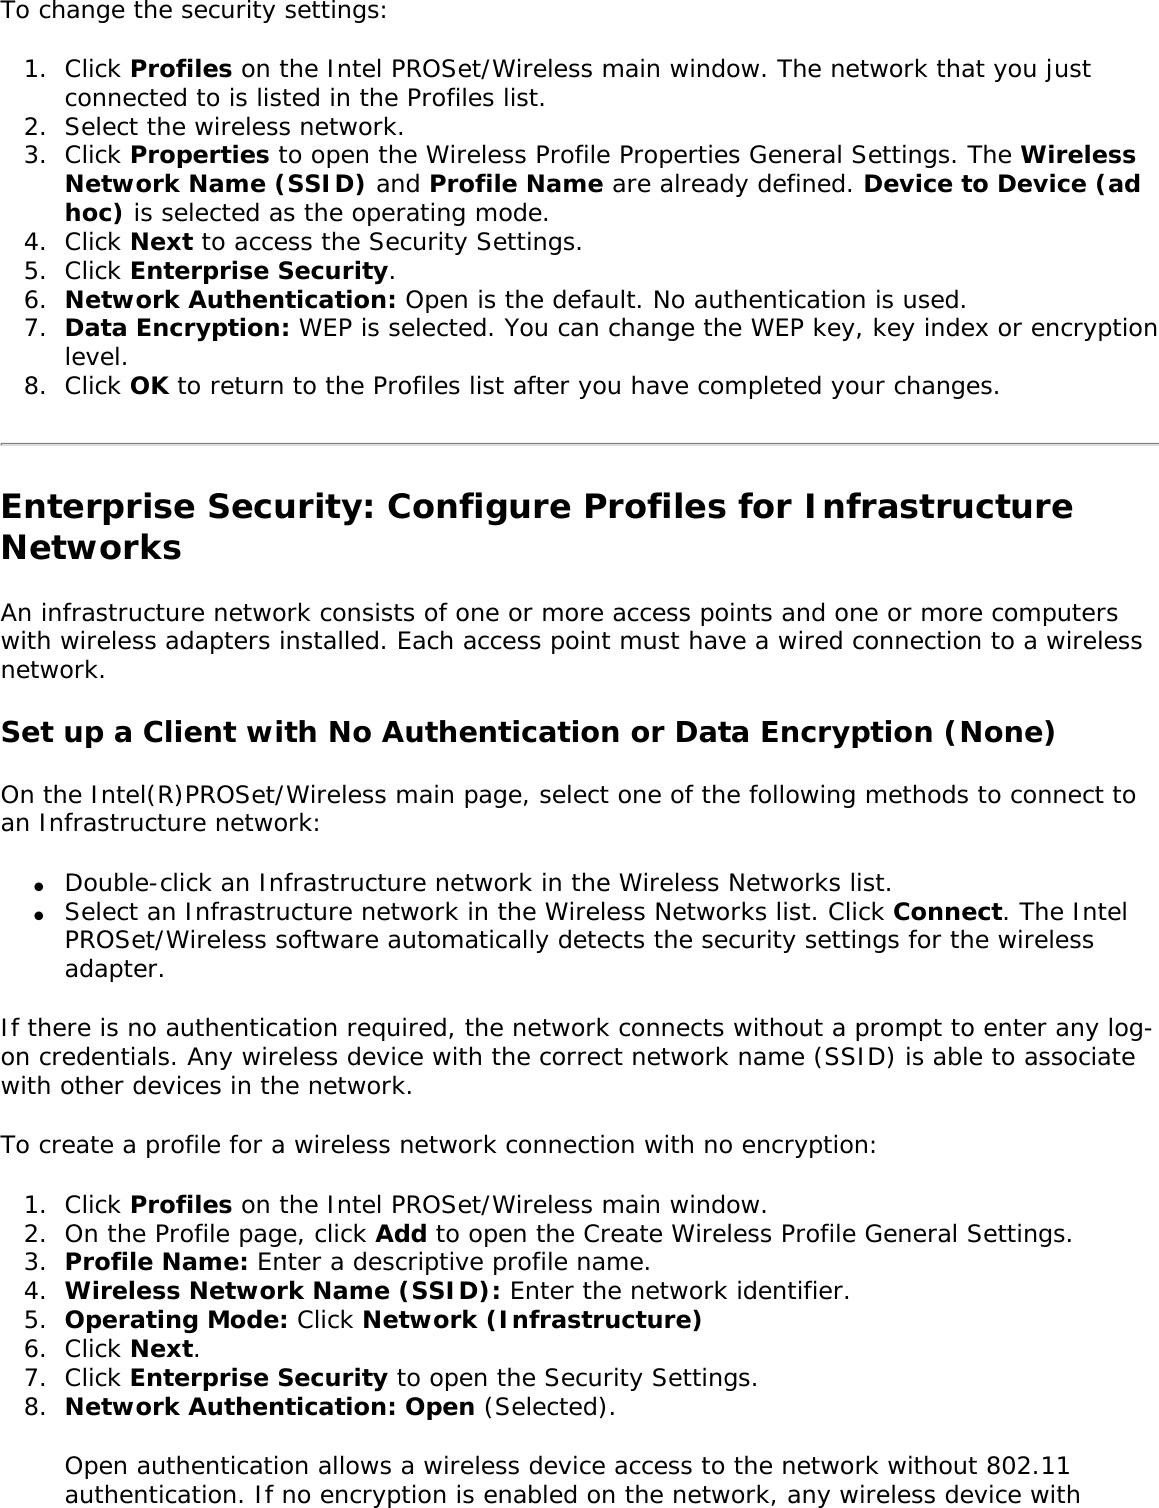
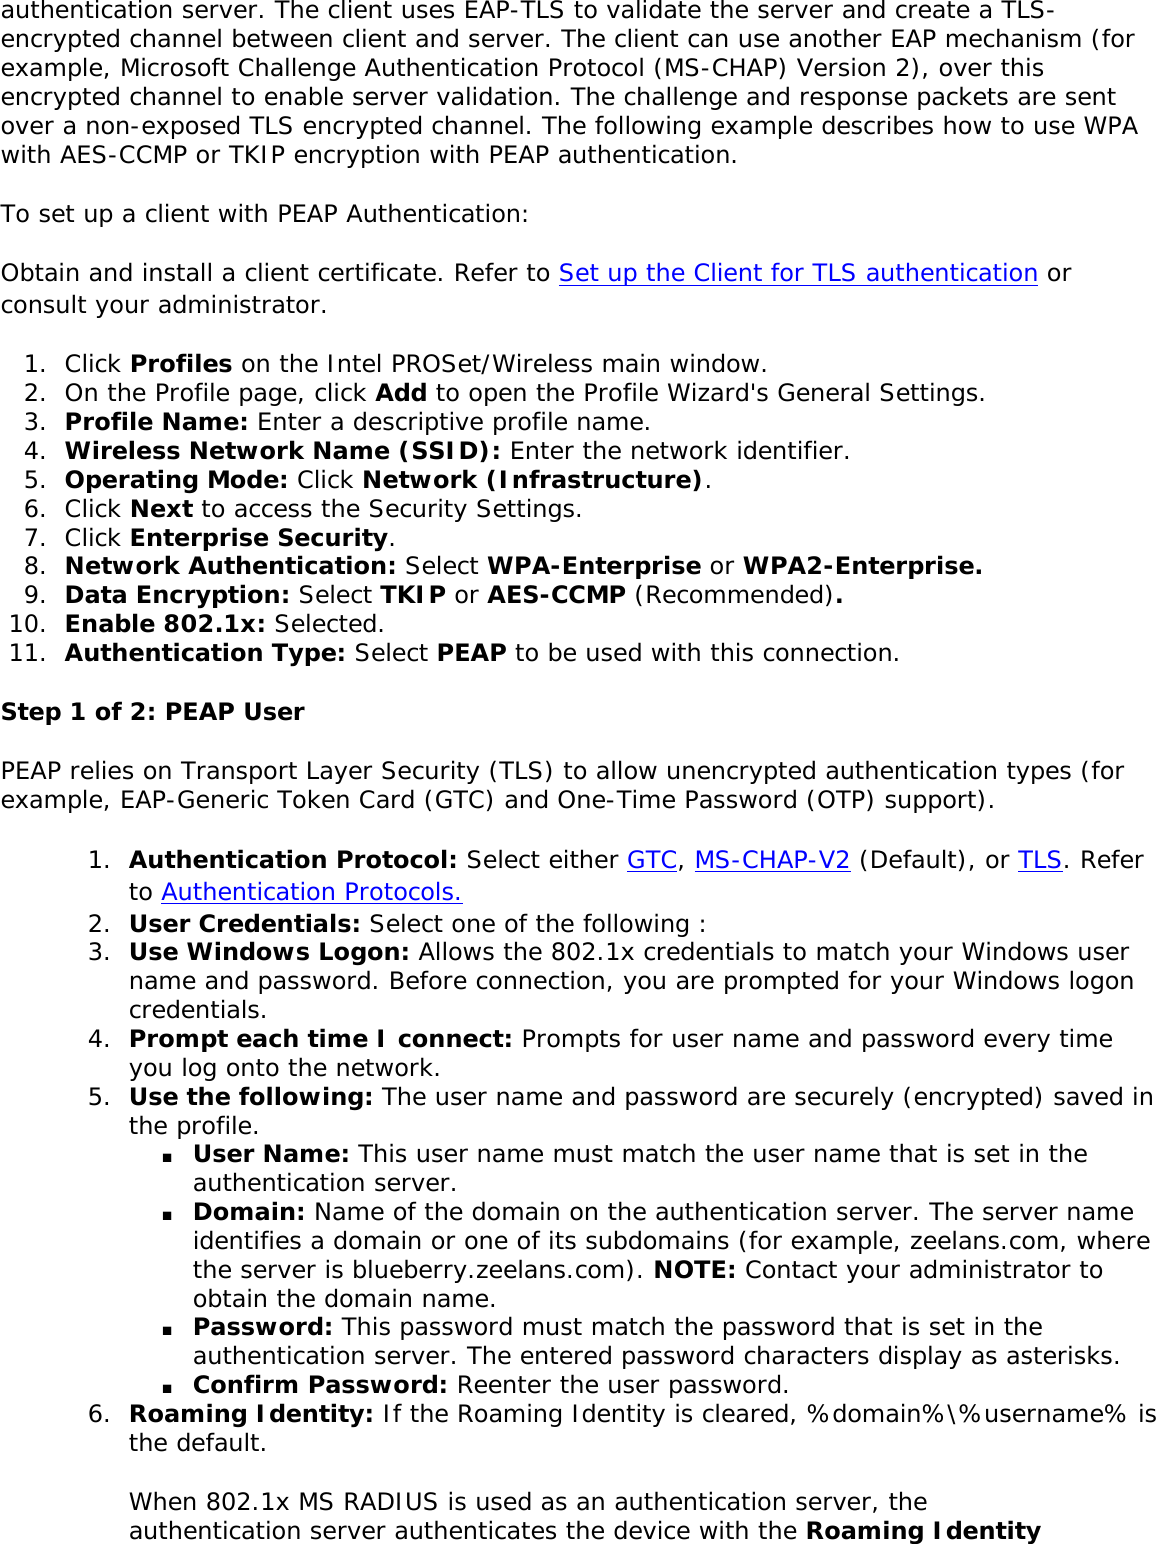
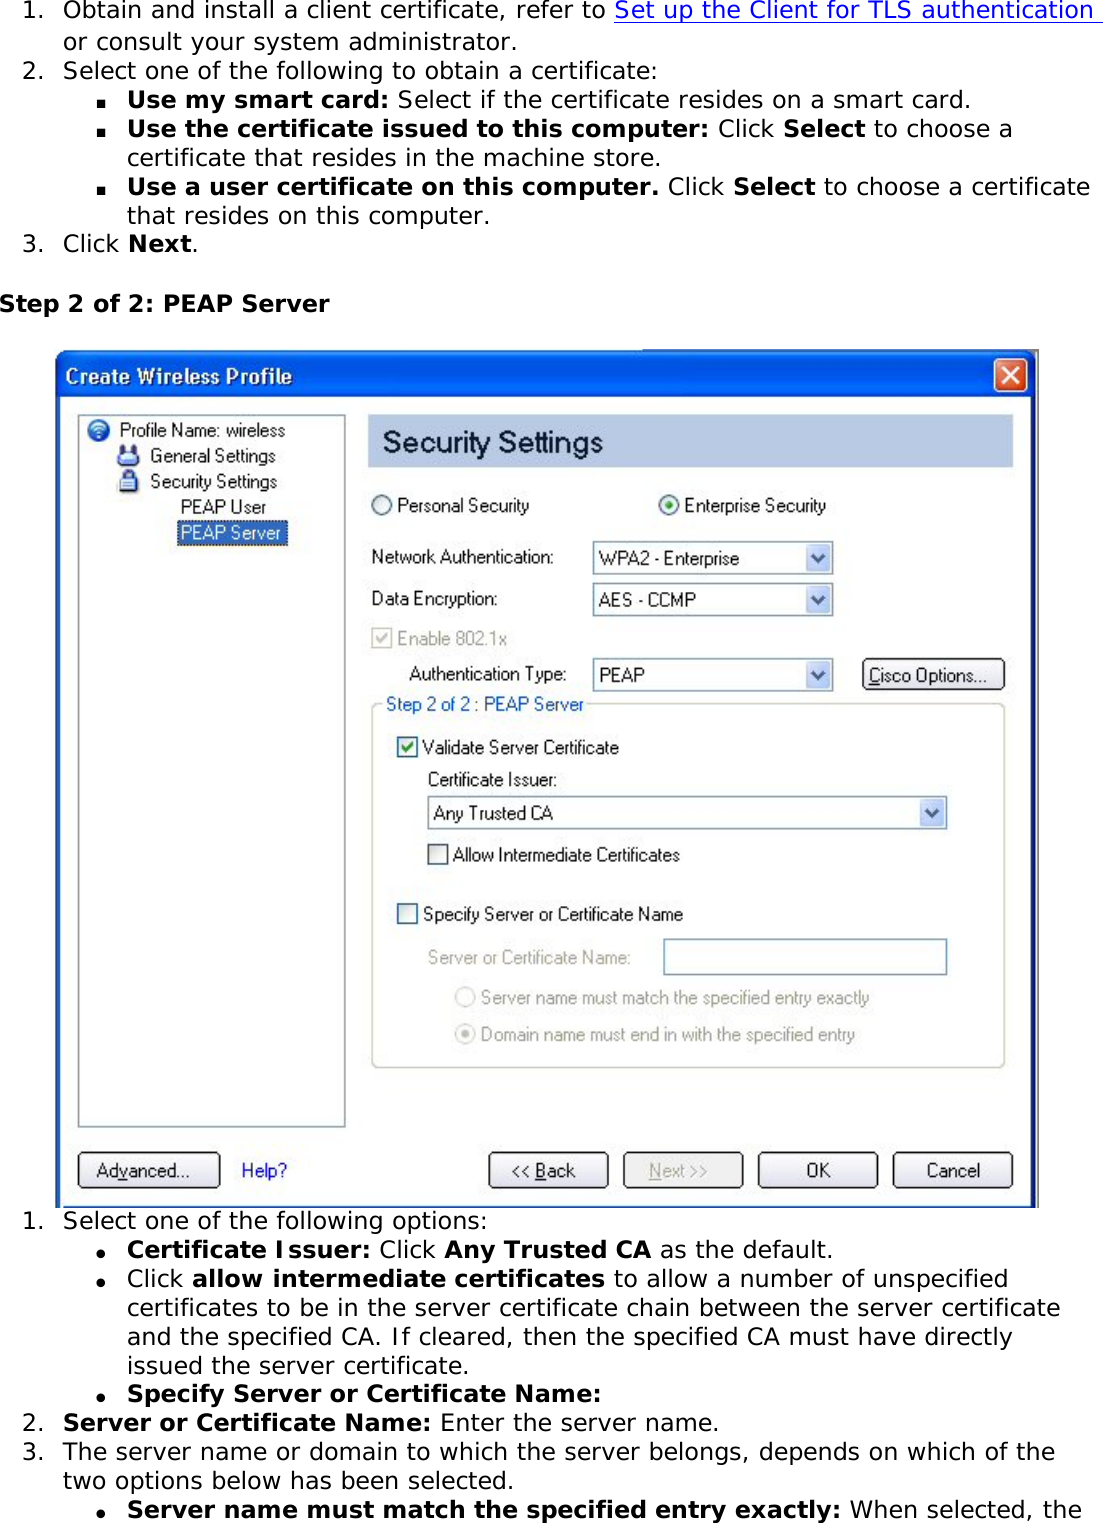
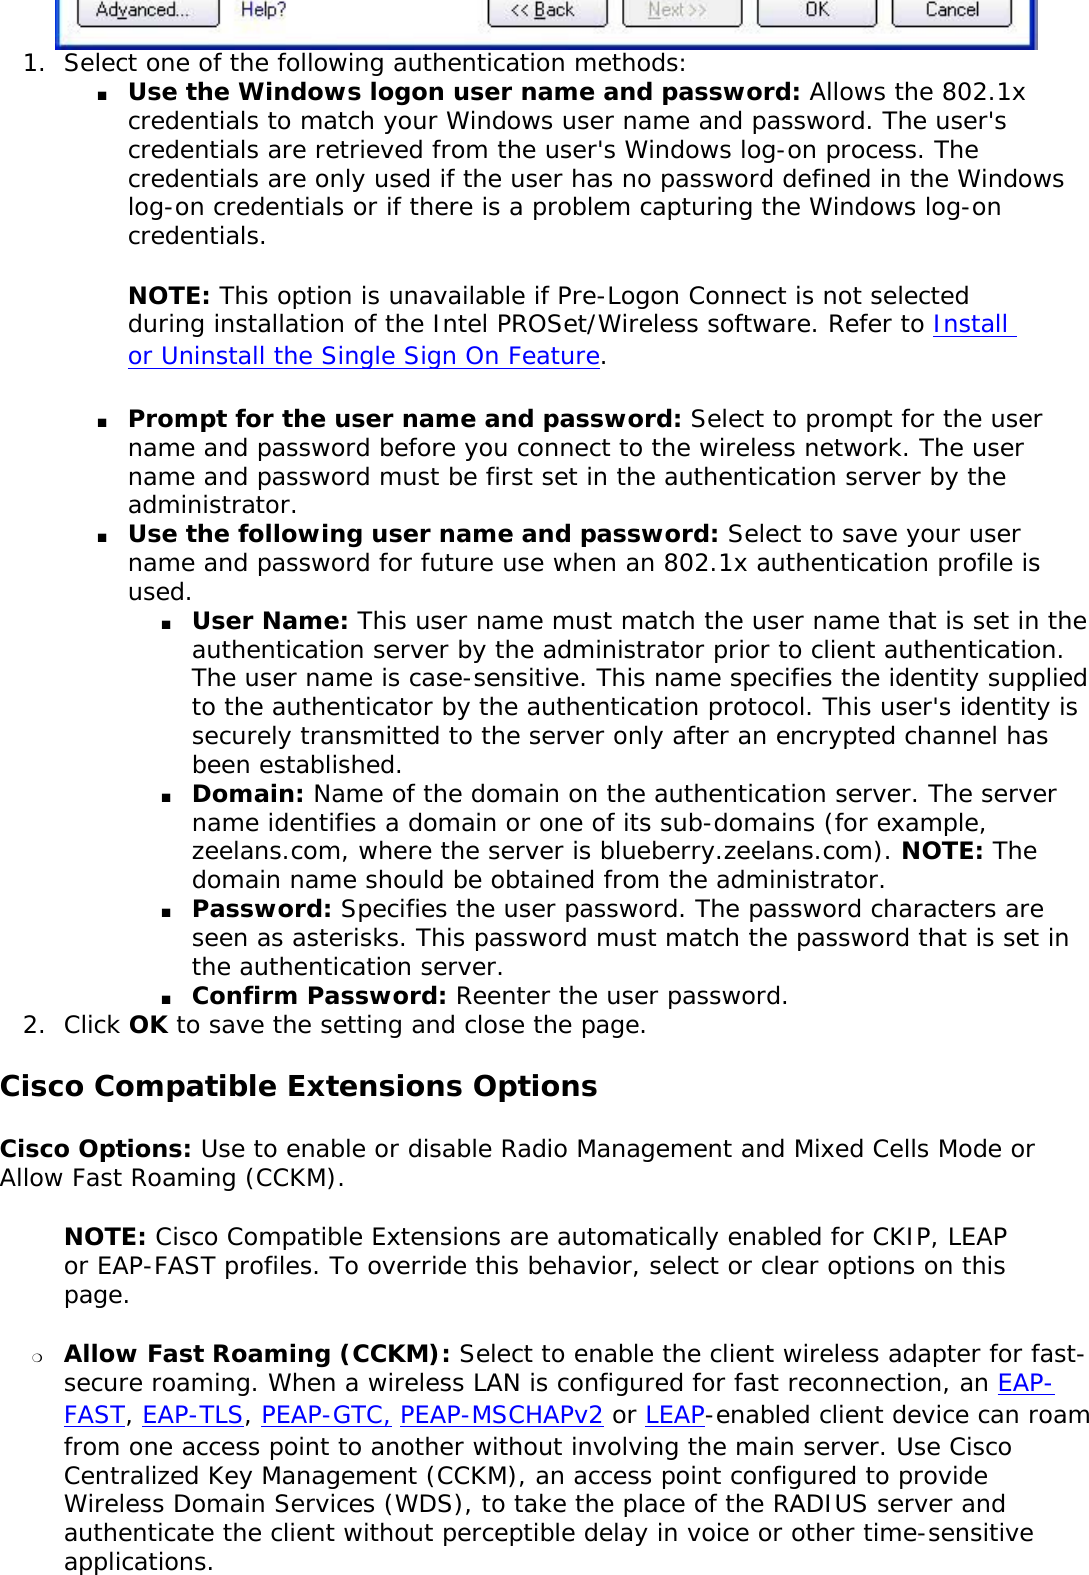
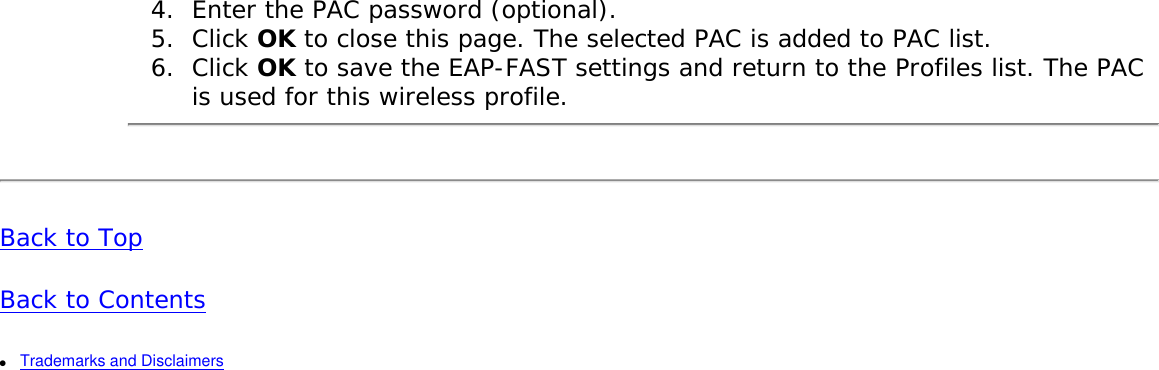
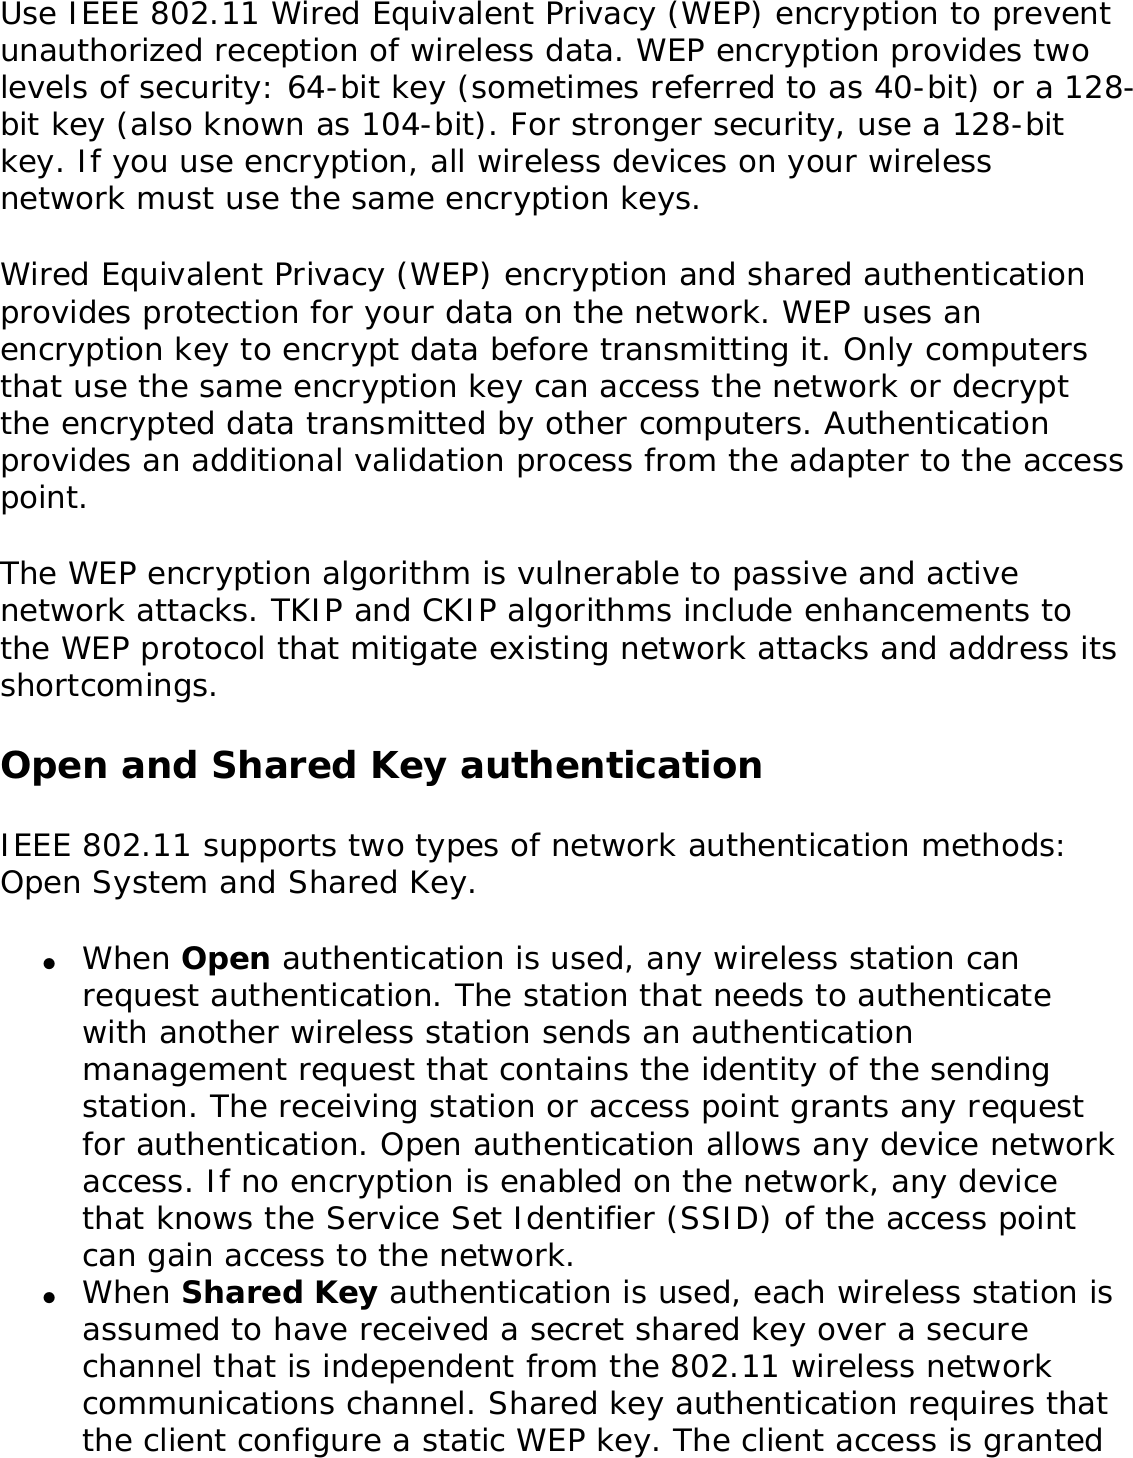
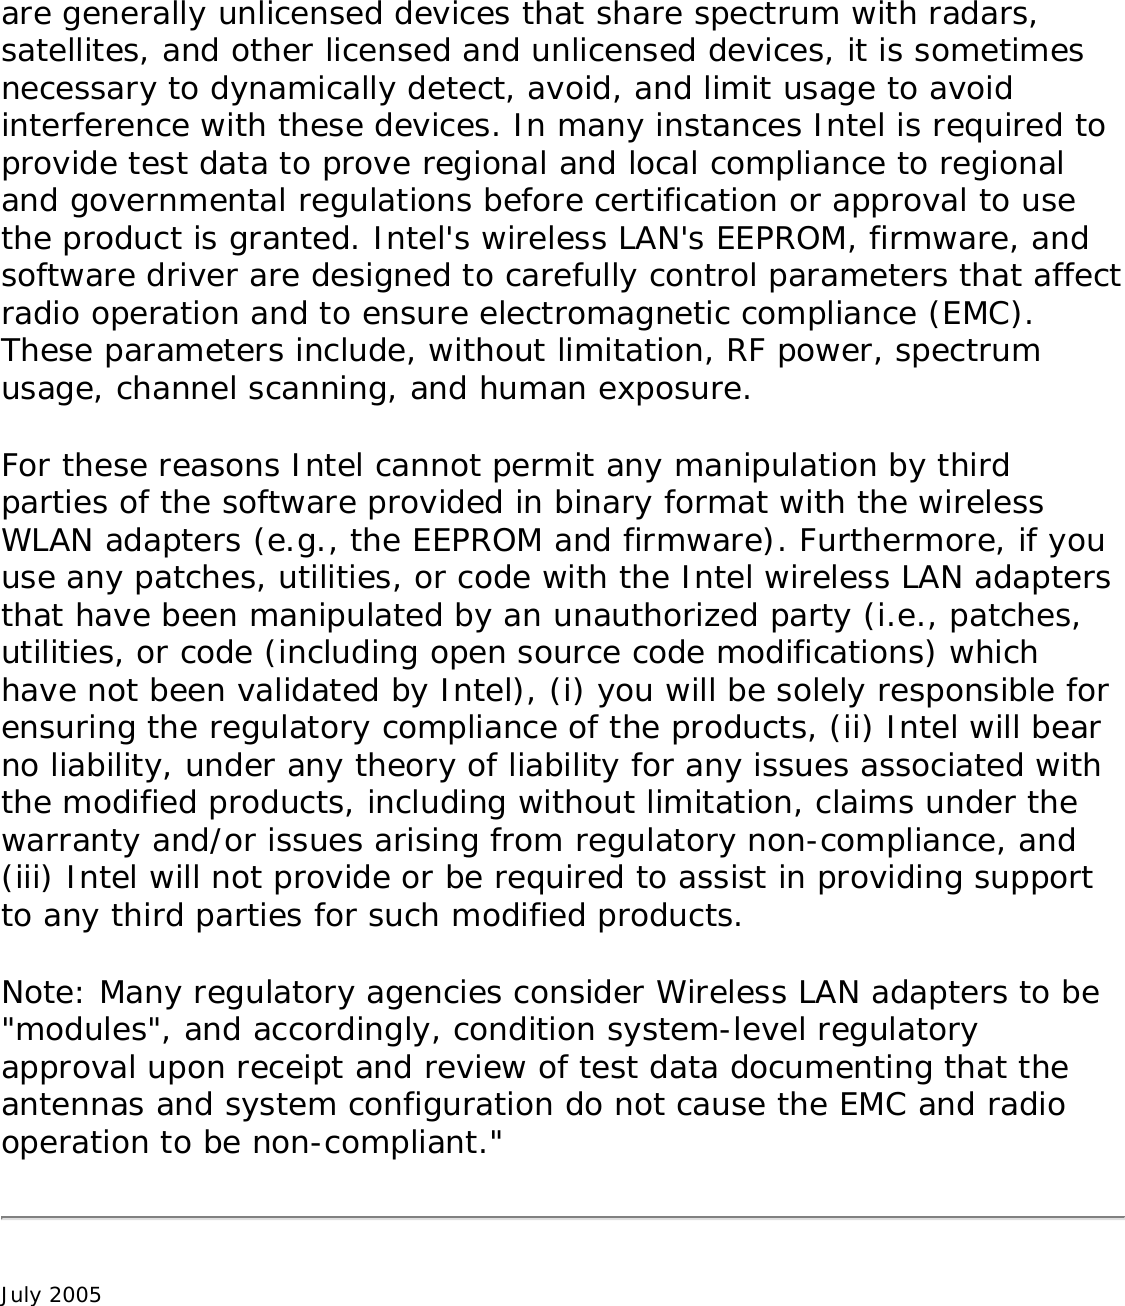
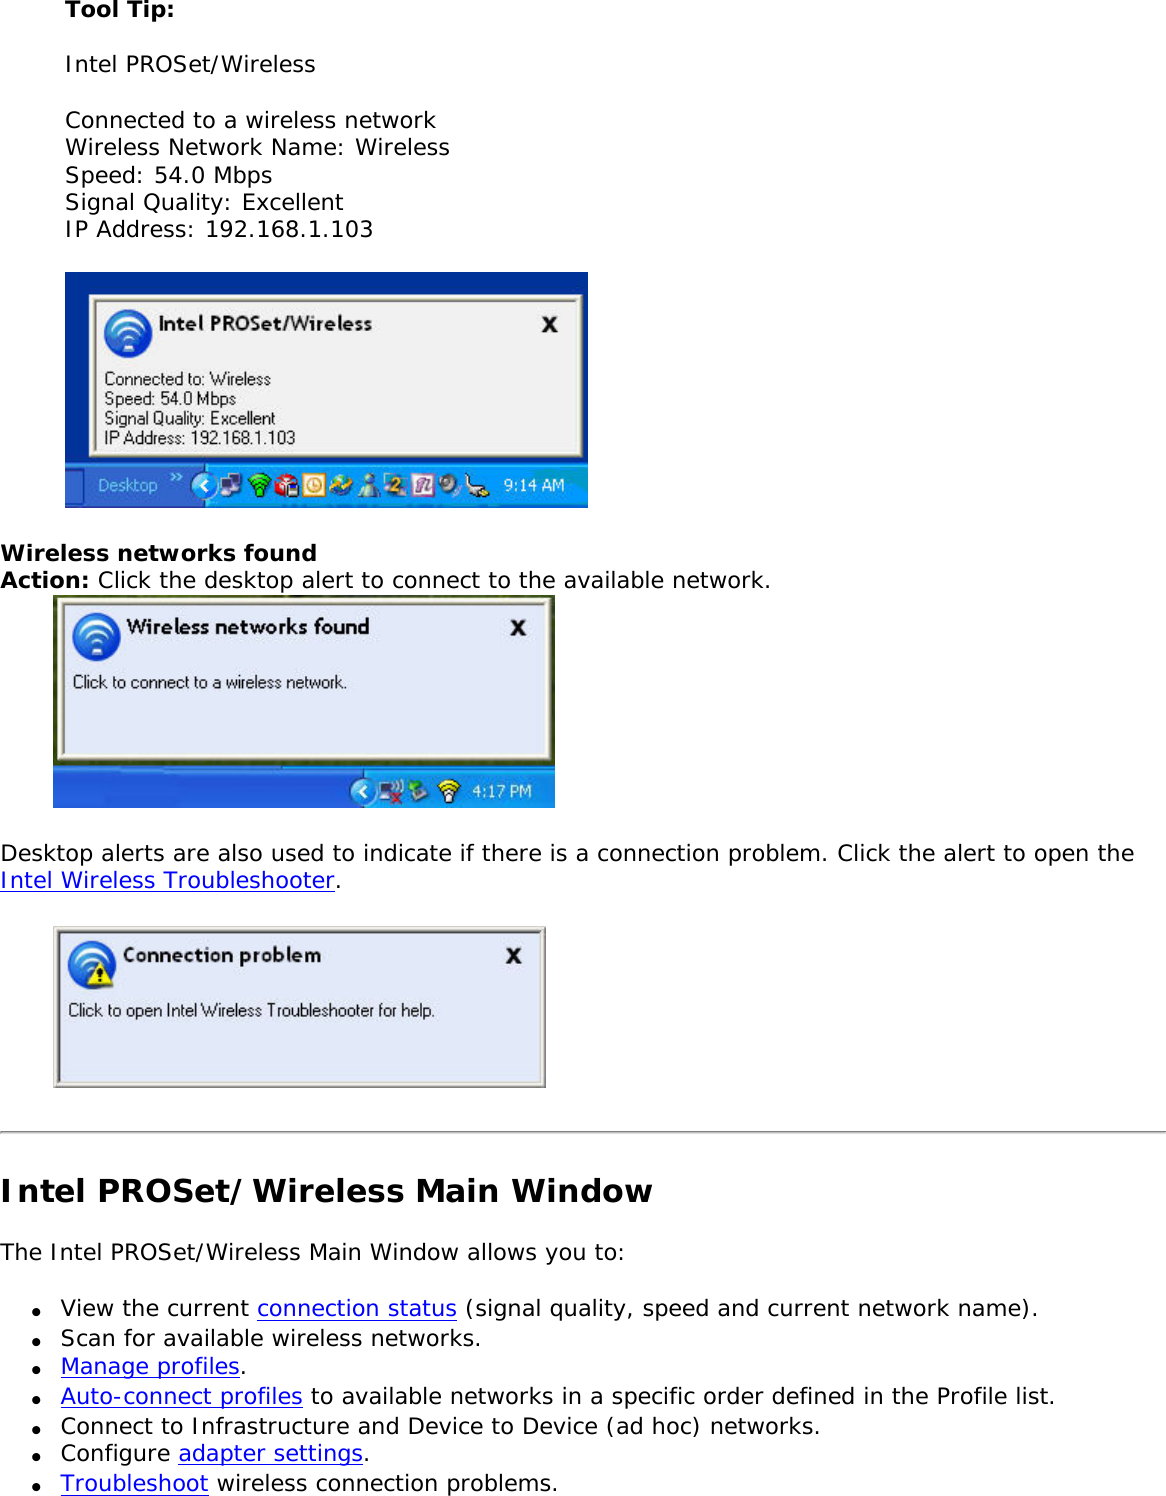
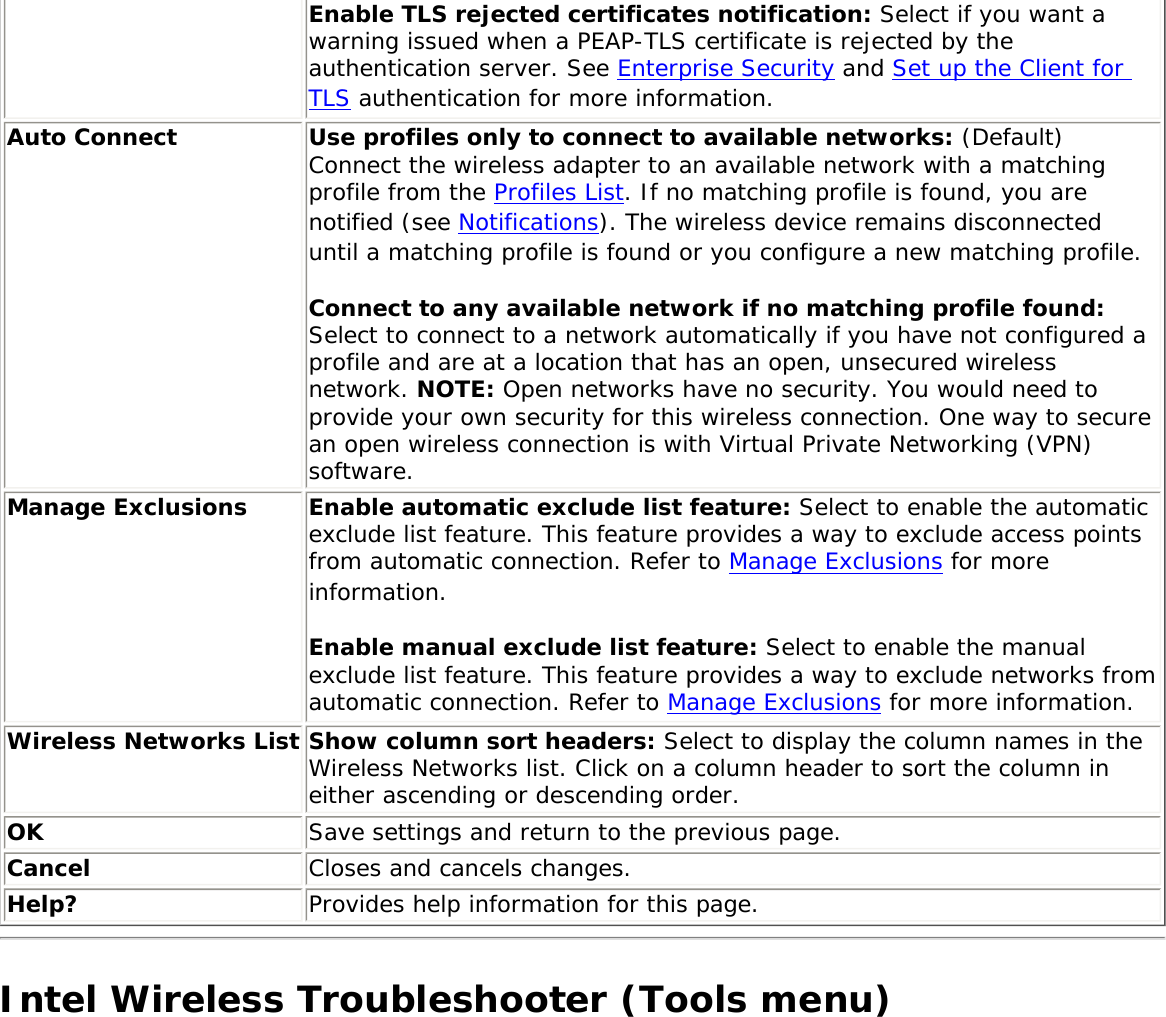
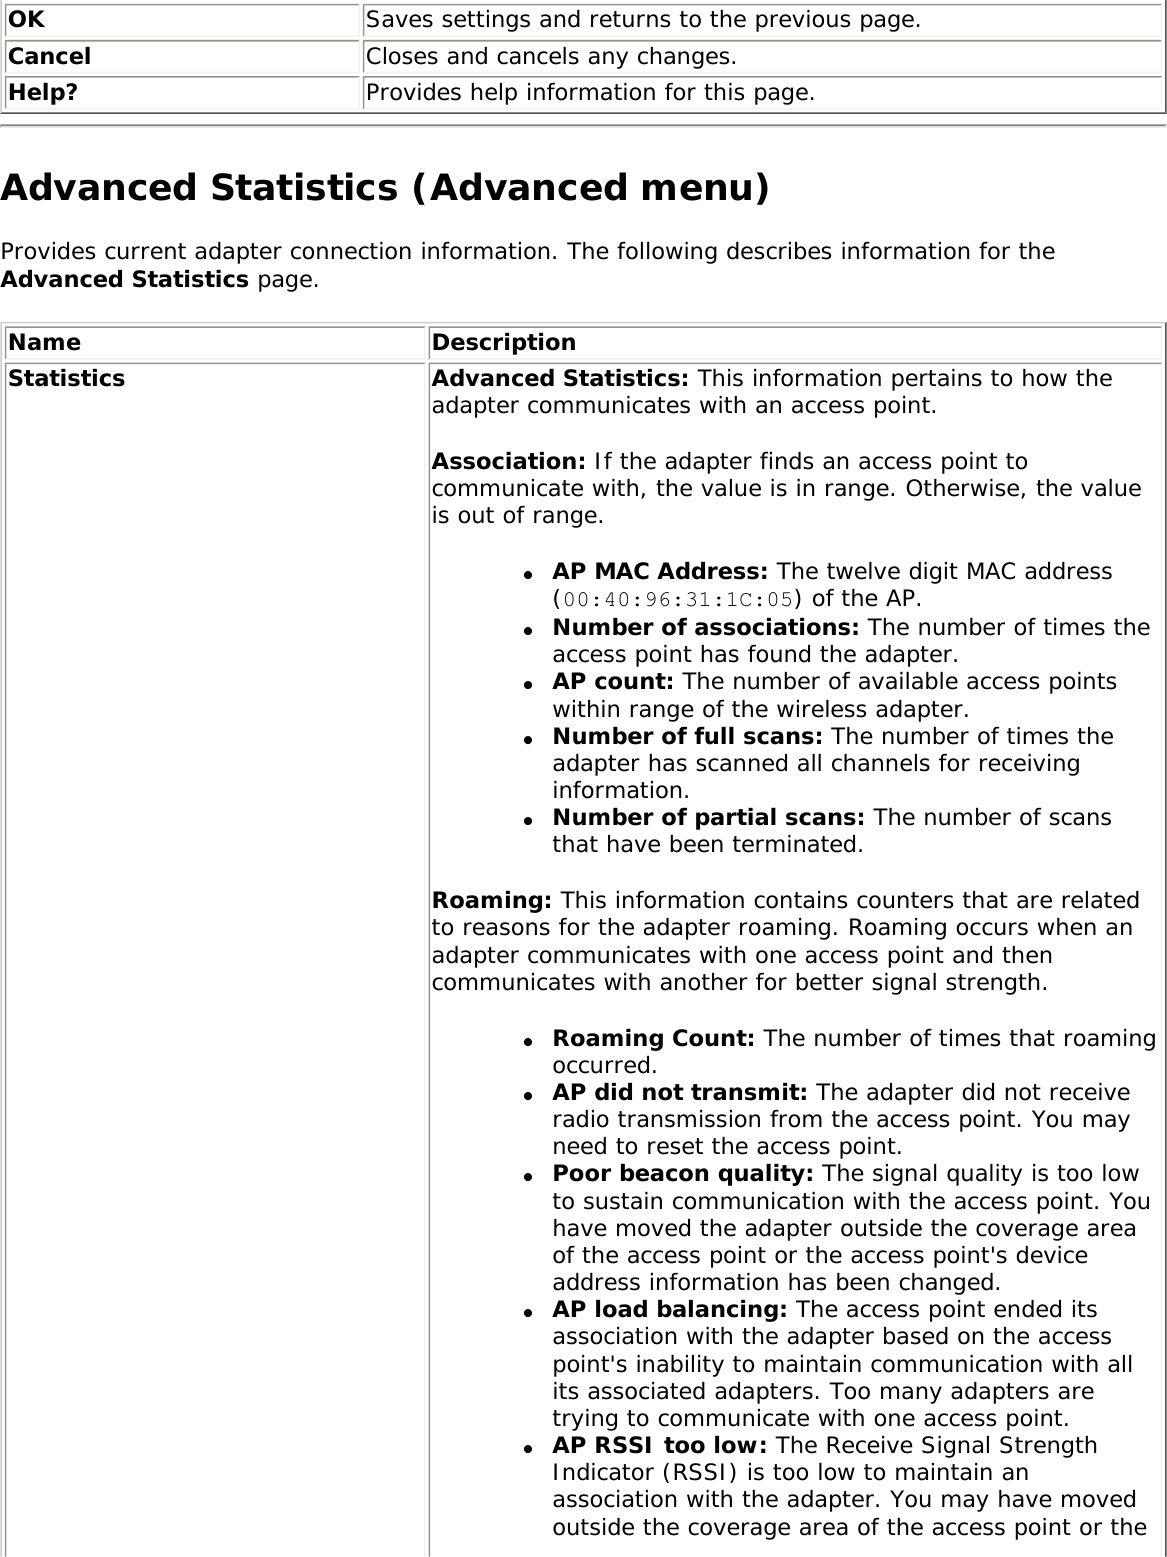
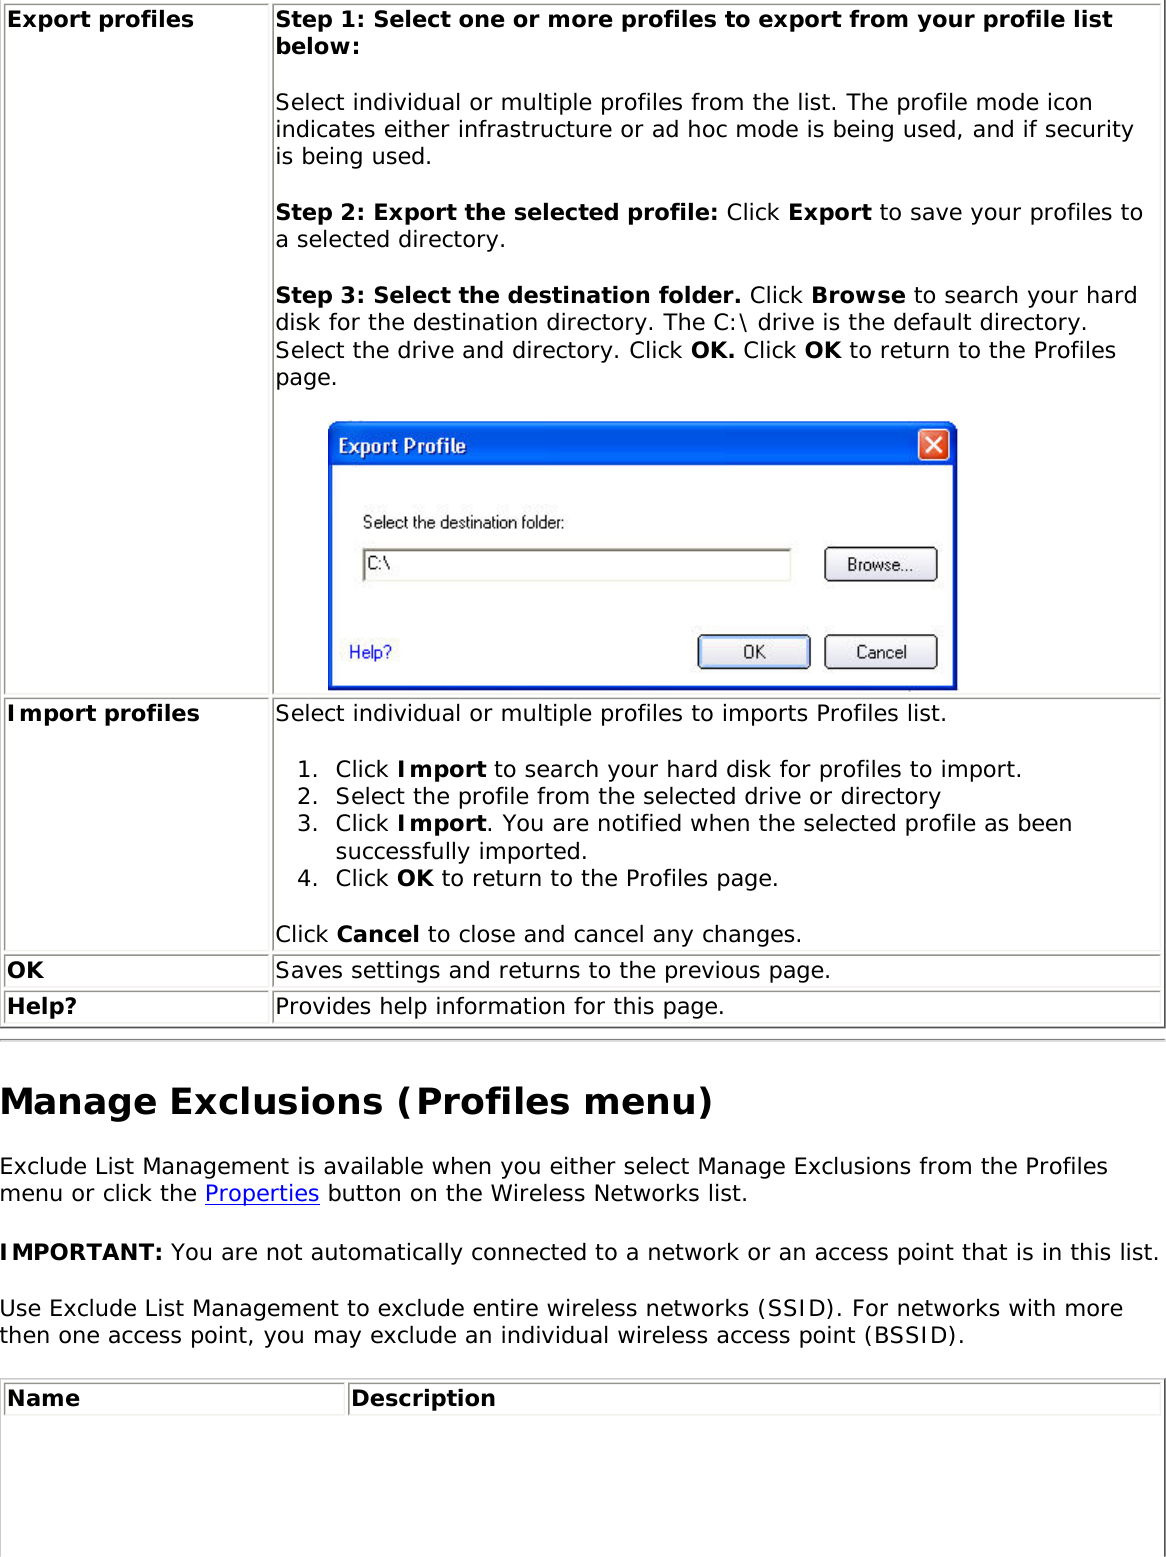
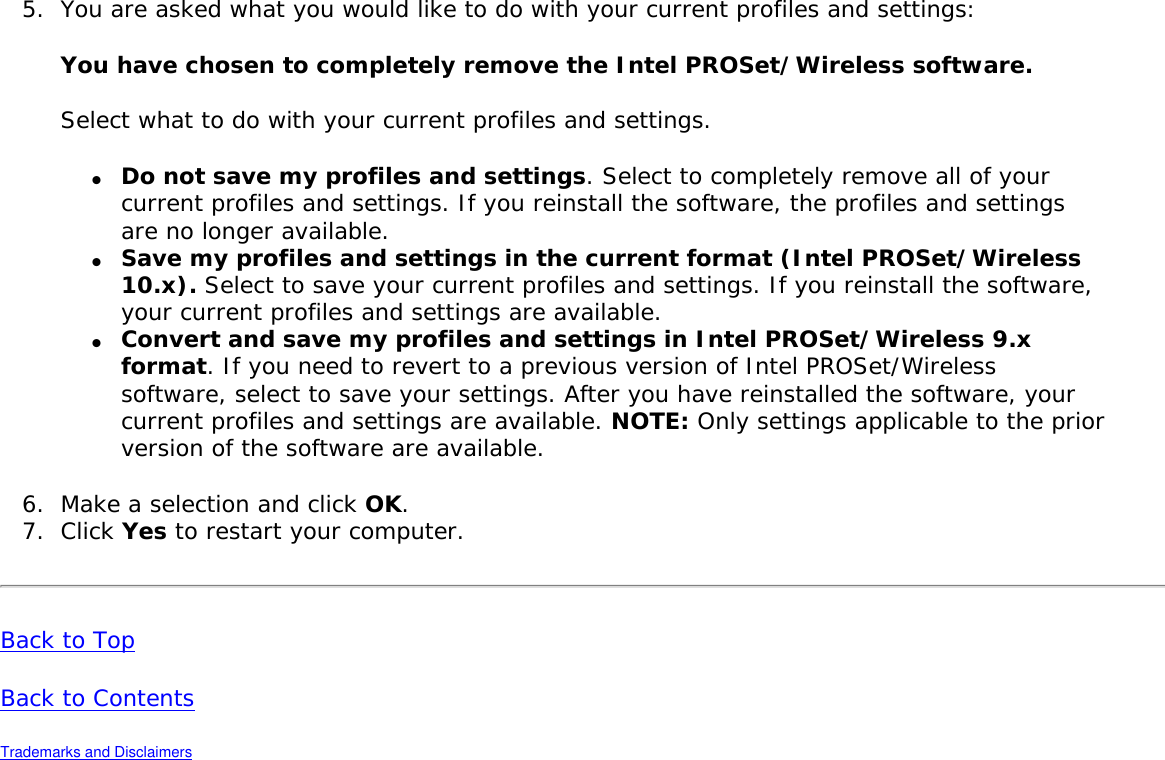
![only if it passes a challenge-based authentication.802.1x AuthenticationHow 802.1x Authentication Works802.1x Features Overview802.1x authentication is independent of the 802.11 authentication process. The 802.1x standard provides a framework for various authentication and key-management protocols. There are different 802.1x authentication types, each provides a different approach to authentication but all employ the same 802.1x protocol and framework for communication between a client and an access point. In most protocols, upon the completion of the 802.1x authentication process, the supplicant receives a key that it uses for data encryption. Refer to How 802.1x authentication works for more information. With 802.1x authentication, an authentication method is used between the client and a Remote Authentication Dial-In User Service (RADIUS) server connected to the access point. The authentication process uses credentials, such as a user's password that are not transmitted over the wireless network. Most 802.1x types support dynamic per-user, per-session keys to strengthen the static key security. 802.1x benefits from the use of an existing authentication protocol known as the Extensible Authentication Protocol (EAP). 802.1x authentication for wireless LANs has three main components: ● The authenticator (the access point)● The supplicant (the client software)● The authentication server (a Remote Authentication Dial-In User Service server [RADIUS])802.1x authentication security initiates an authorization request from the wireless client to the access point, which authenticates the client to an Extensible Authentication Protocol (EAP) compliant RADIUS server.](https://usermanual.wiki/ASUSTeK-Computer/R1F.User-Manual-WLAN-1/User-Guide-648377-Page-89.png)