ASUSTeK Computer R1F Notebook PC User Manual 1
ASUSTeK Computer Inc Notebook PC 1
UserManual.wiki
>
ASUSTeK Computer
>
R1F User Manual
>
User Manual 1
Contents
1.
User Manual WLAN 1
2.
User Manual WLAN 2
3.
User Manual 1
4.
User Manual 2
5.
User manual WLAN 1
6.
User manual WLAN 2
7.
User manual 1
8.
User manual 2
9.
Revised user manual part 1
10.
Revised user manual part 2
11.
user manual rev 1
12.
user manual rev 2
13.
user manual 1 rev
14.
user manual 2 rev
User Manual 1
Navigation menu
Upload a User Manual
Namespaces
Wiki Guide
HTML
PDF
Info
Views
User Manual
Discussion / Help
Navigation


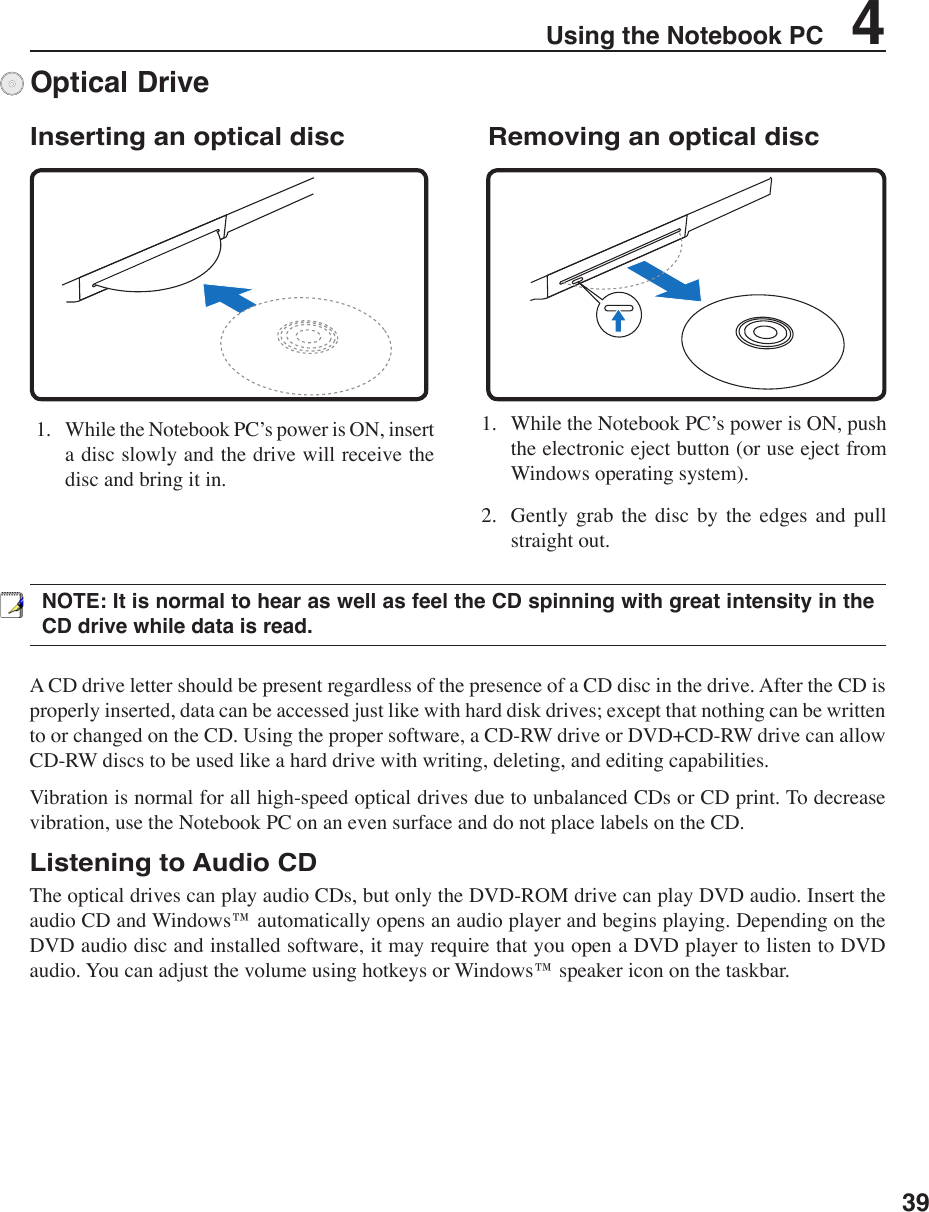
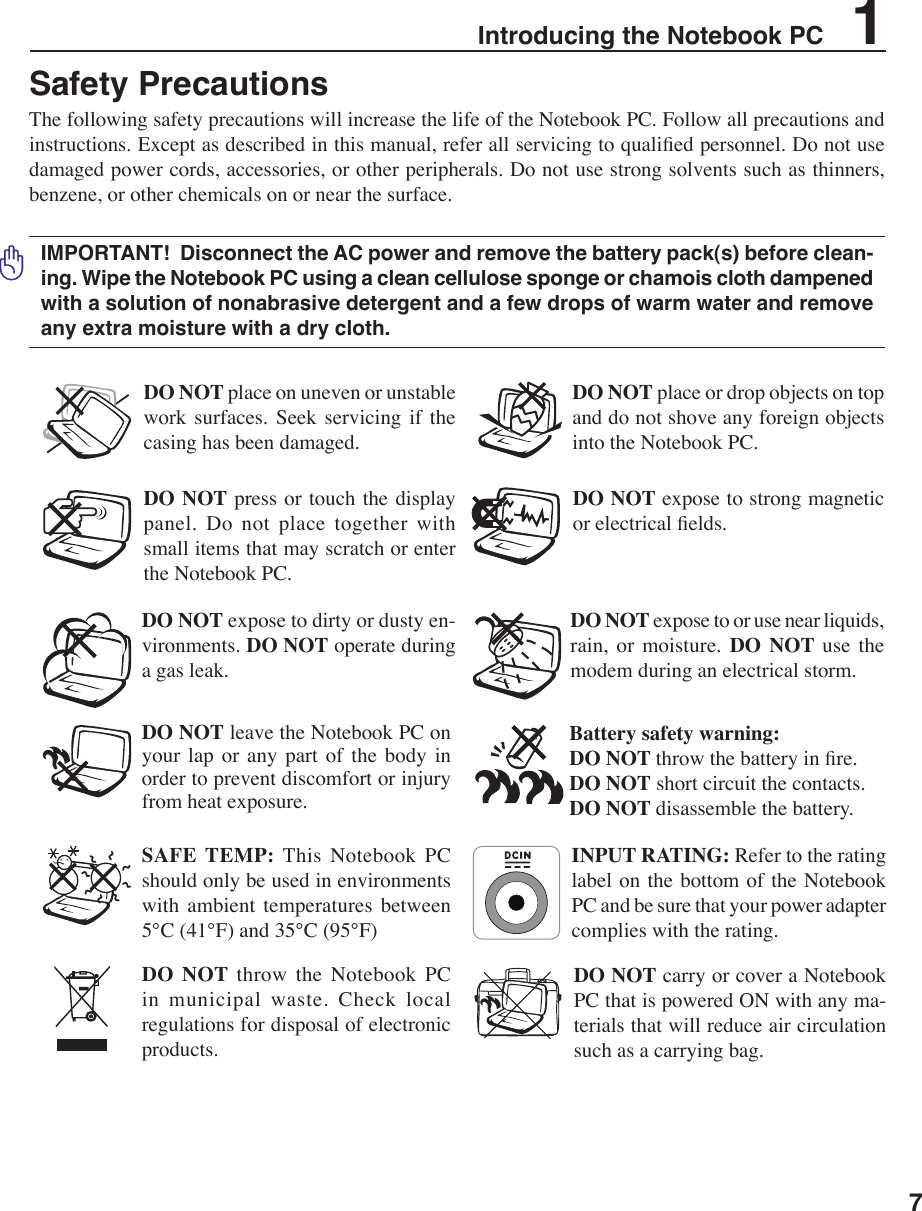
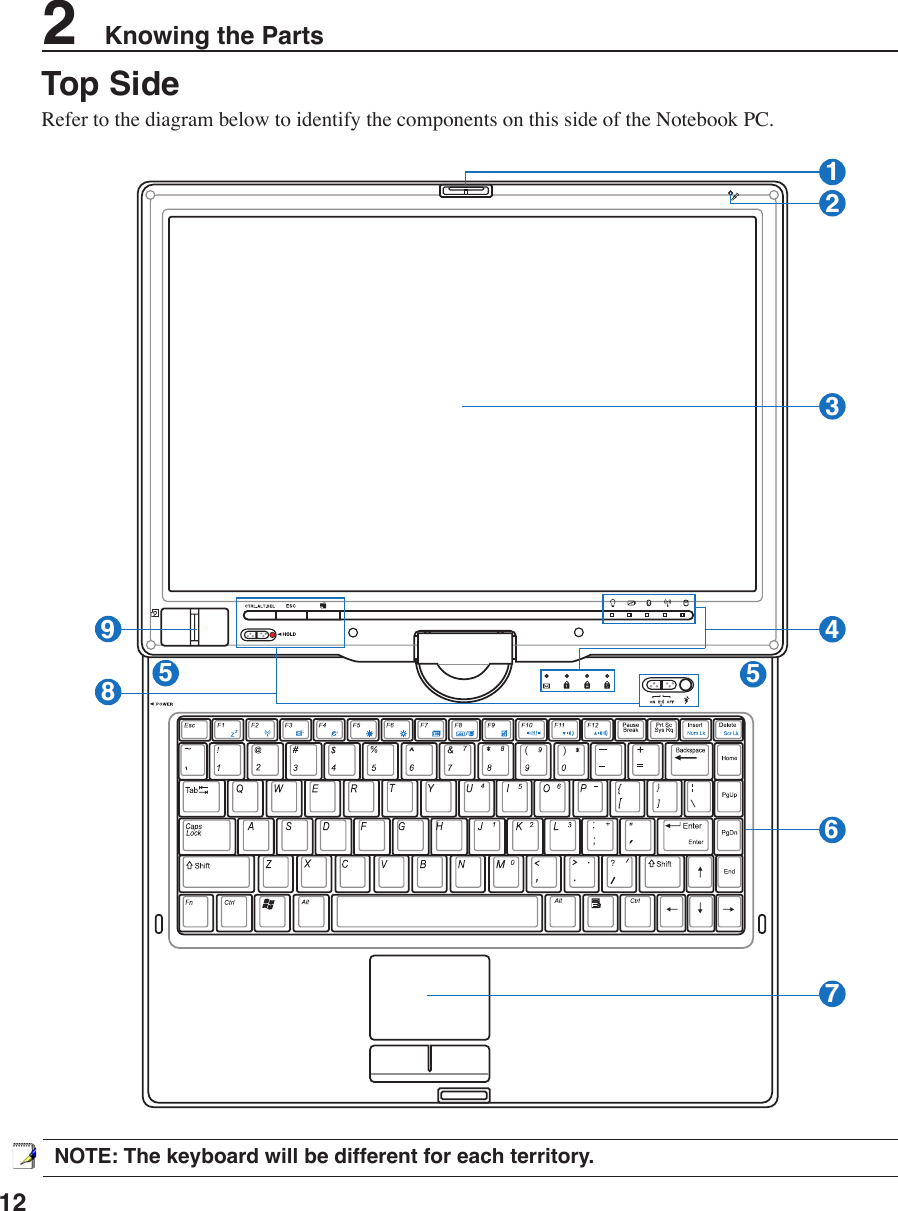
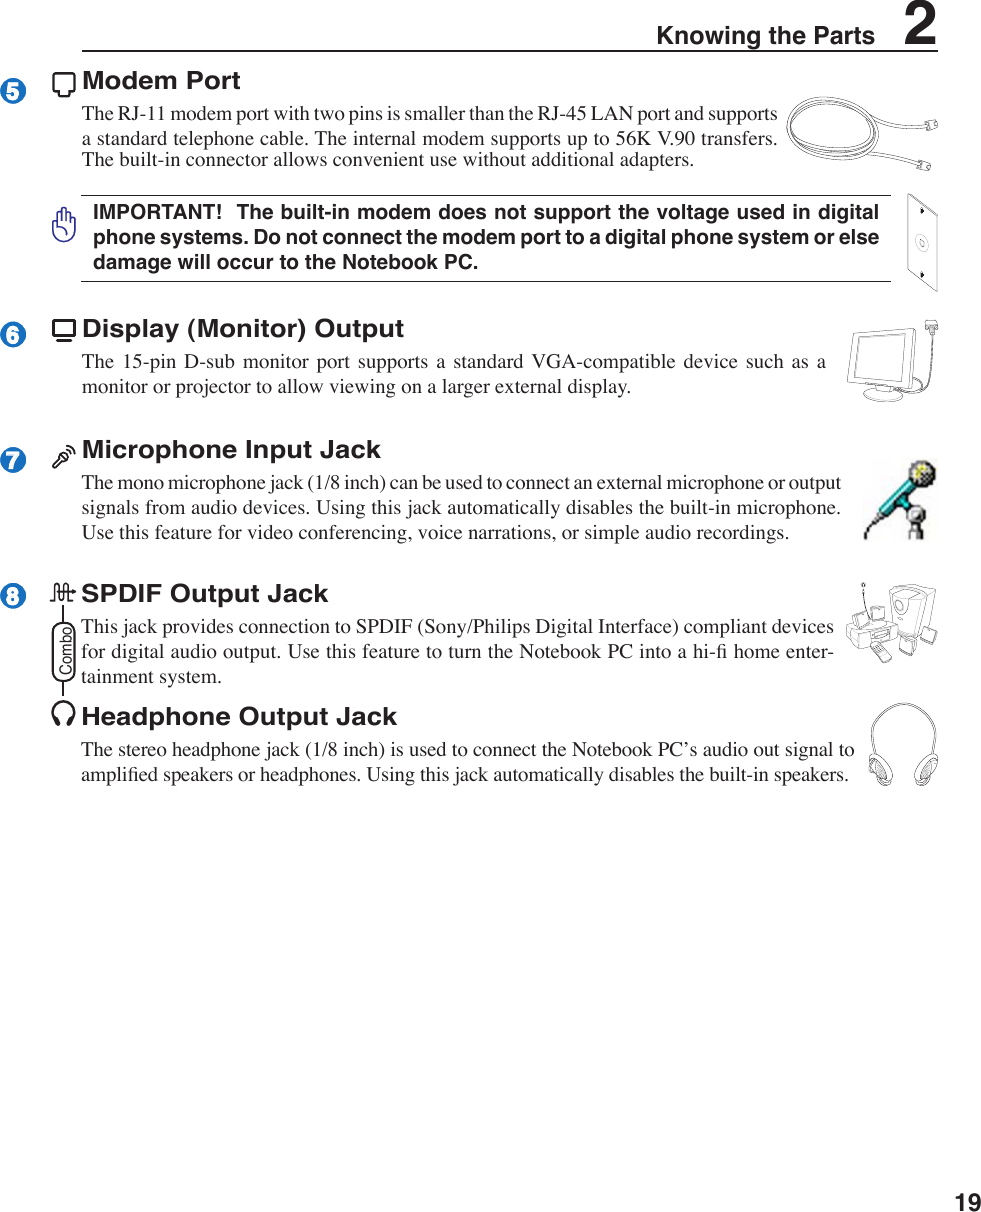
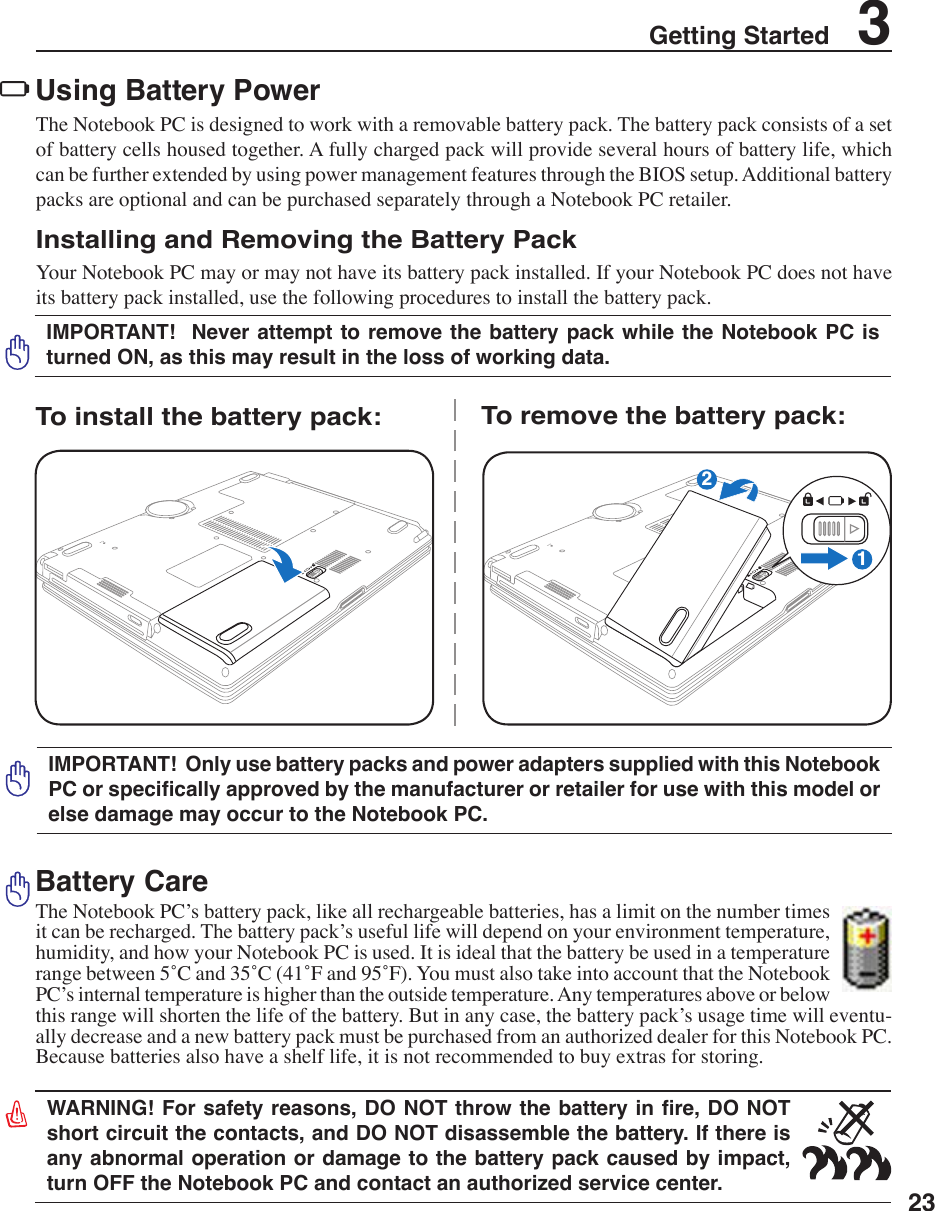
![61 Introducing the Notebook PCAbout This User’s ManualYou are reading the Notebook PC User’s Manual. This User’s Manual provides information on the various components in the Notebook PC and how to use them. The following are major sections of this User’s Manuals:1. Introducing the Notebook PC Introduces you to the Notebook PC and this User’s Manual.2. Knowing the Parts Gives you information on the Notebook PC’s components.3. Getting Started Gives you information on getting started with the Notebook PC.4. Using the Notebook PC Gives you information on using the Notebook PC’s components.5. Appendix Introduces you to optional accessories and gives additional information. Notes For This ManualA few notes and warnings in bold are used throughout this guide that you should be aware of in order to complete certain tasks safely and completely. These notes have different degrees of importance as described below:NOTE: Tips and information for special situations.TIP: Tips and useful information for completing tasks.Text enclosed in < > or [ ] represents a key on the keyboard; do not actually type the < > or [ ] and the enclosed letters. < >[ ]WARNING! Important information that must be followed for safe operation.IMPORTANT! Vital information that must be followed to prevent damage to data, components, or persons.](https://usermanual.wiki/ASUSTeK-Computer/R1F.User-Manual-1/User-Guide-648379-Page-6.png)

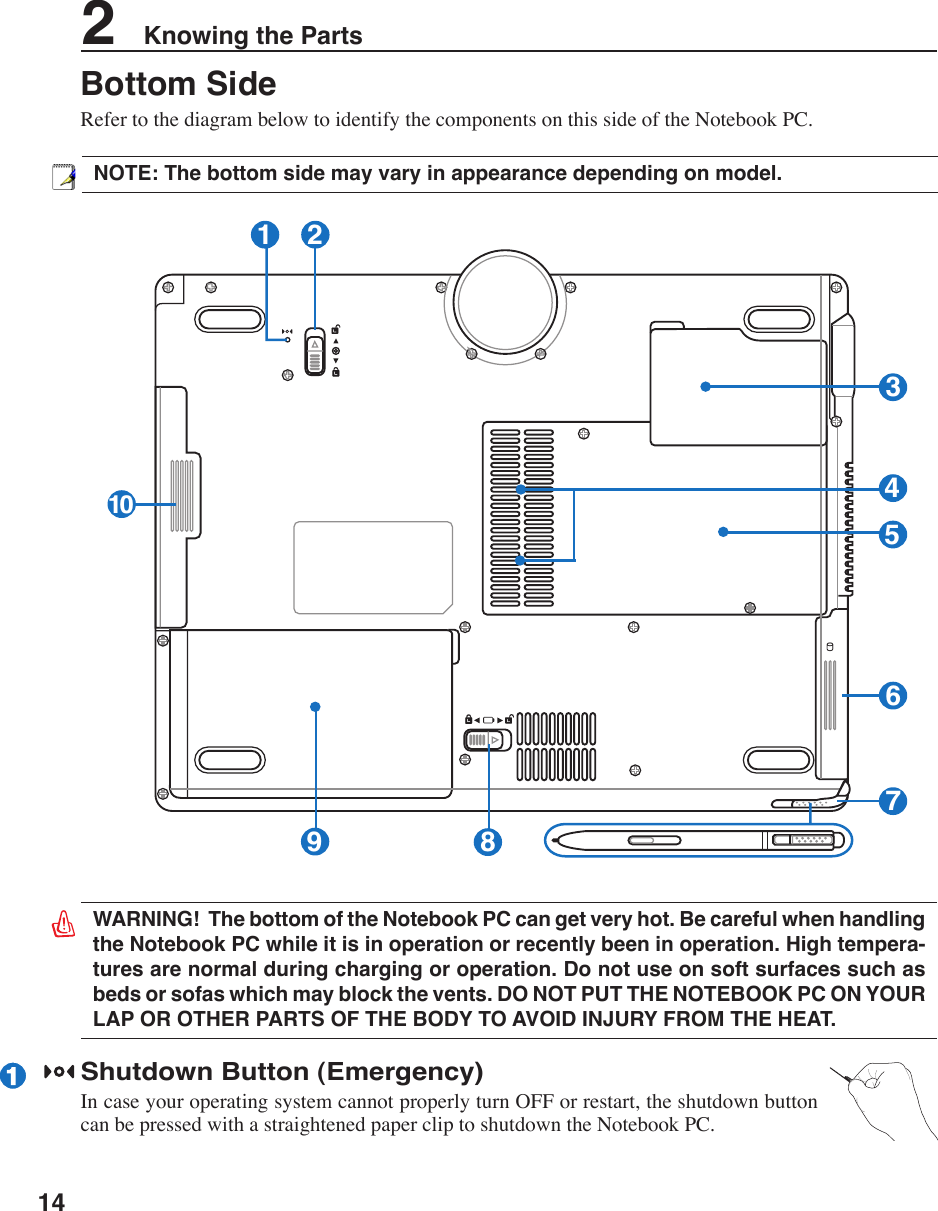
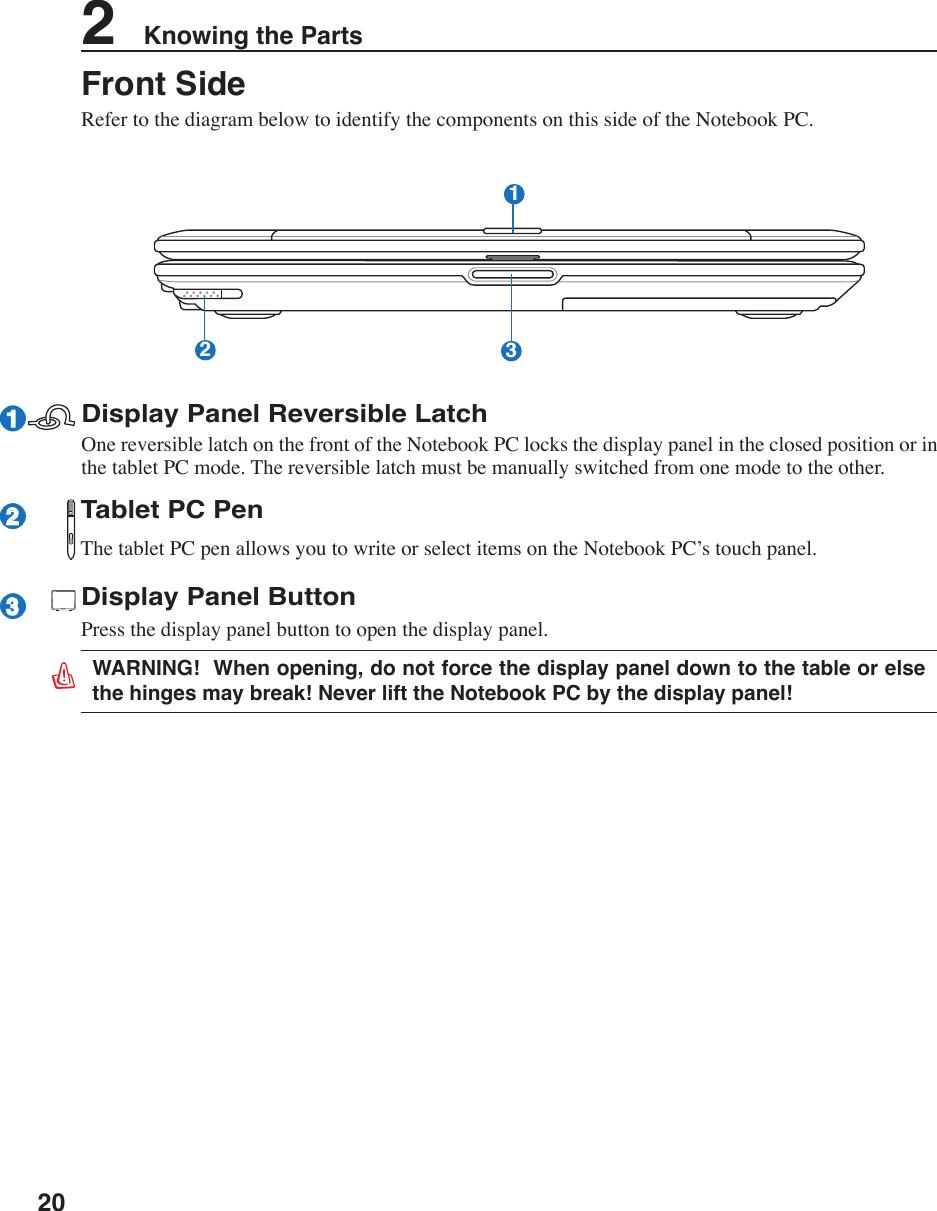
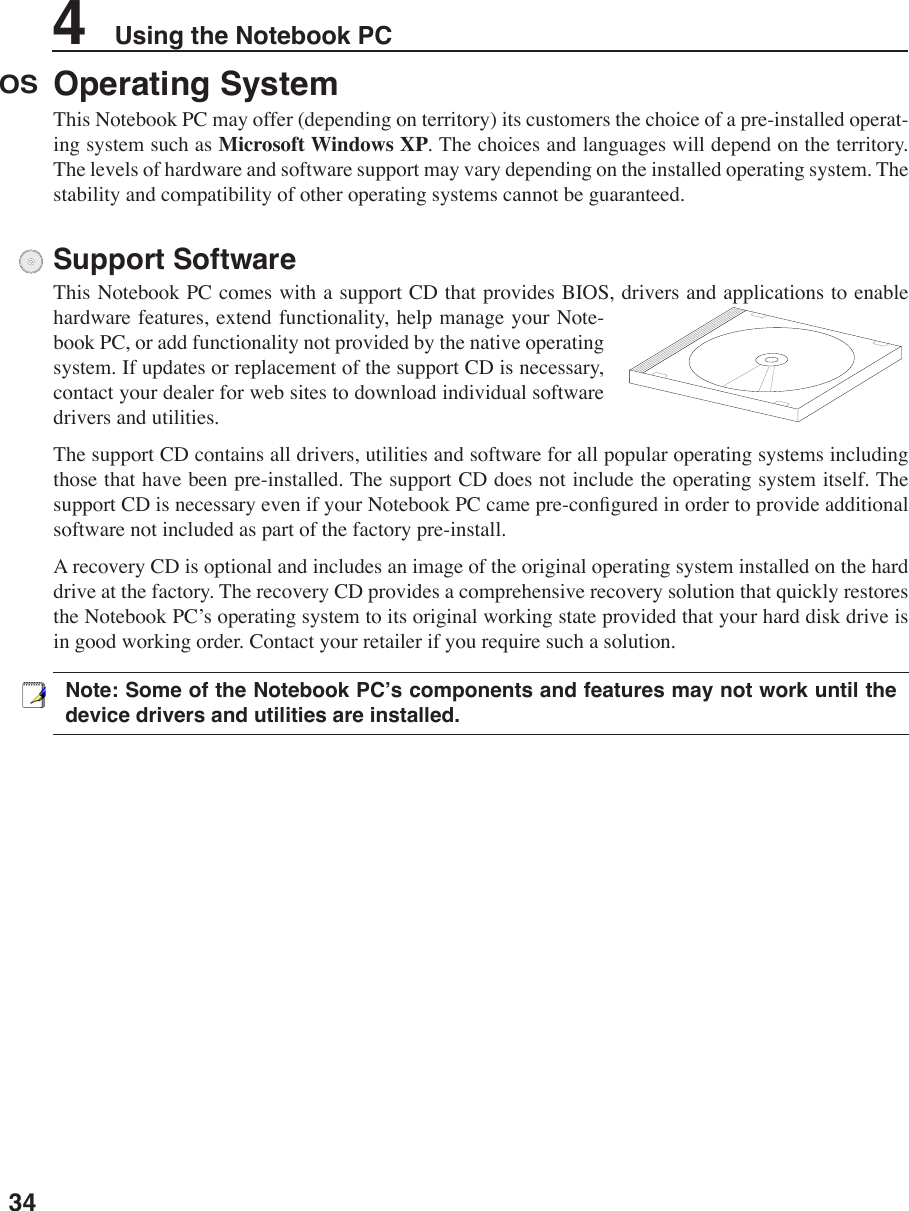
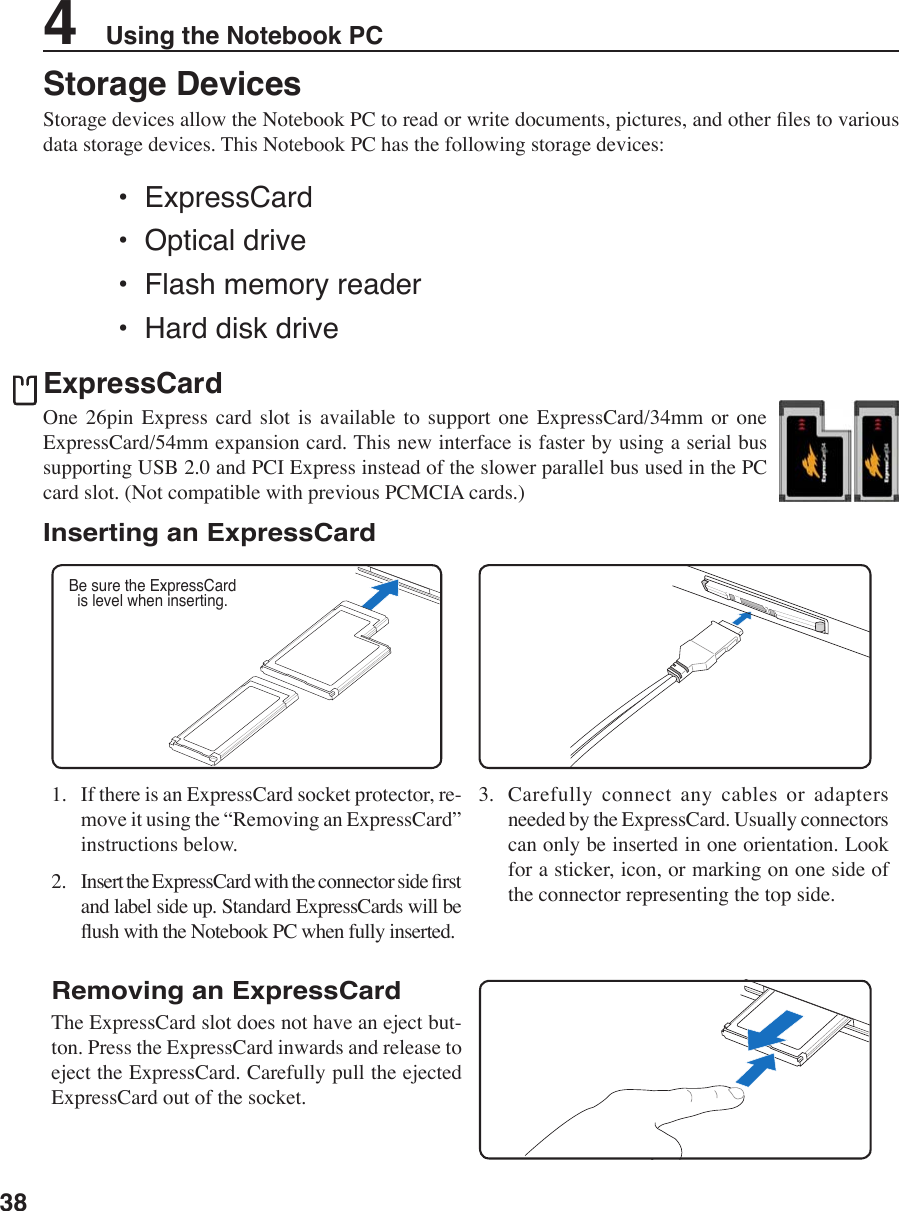
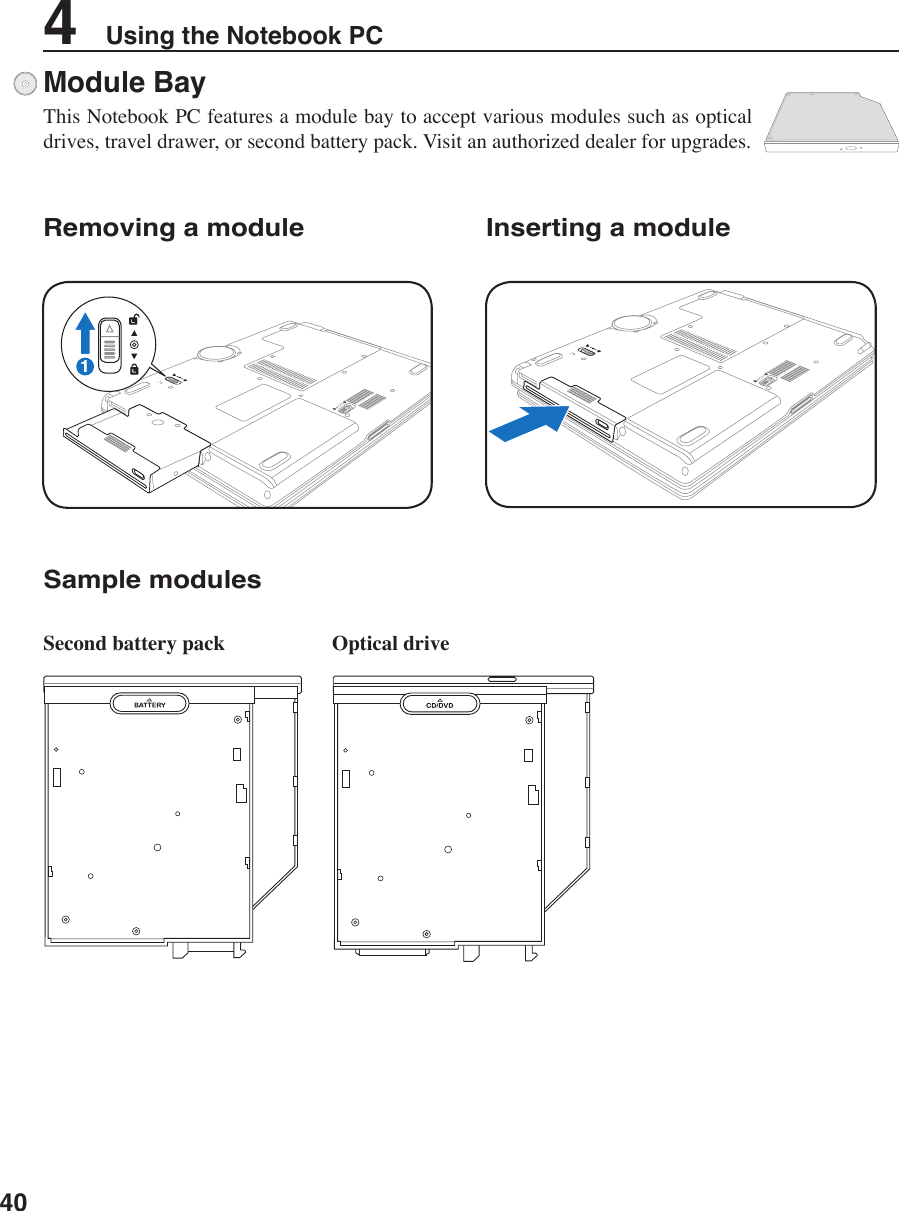
![243 Getting StartedPowering ON the Notebook PCThe Notebook PC’s power-ON message appears on the screen when you turn it ON. If necessary, you may adjust the brightness by using the hot keys. If you need to run the BIOS Setup to set or modify the system conguration, press [F2] upon bootup to enter the BIOS Setup. If you press [Tab] during the splash screen, standard boot information such as the BIOS version can be seen. Press [ESC] and you will be presented with a boot menu with selections to boot from your available drives.IMPORTANT! To protect the hard disk drive, always wait at least 5 seconds after turn-ing OFF your Notebook PC before turning it back ON. NOTE: Before bootup, the display panel ashes when the power is turned ON. This is part of the Notebook PC’s test routine and is not a problem with the display.WARNING! DO NOT carry or cover a Notebook PC that is powered ON with any materi-als that will reduce air circulation such as a carrying bag.The Power-On Self Test (POST)When you turn ON the Notebook PC, it will rst run through a series of software-controlled diagnos-tic tests called the Power-On Self Test (POST). The software that controls the POST is installed as a permanent part of the Notebook PC’s architecture. The POST includes a record of the Notebook PC’s hardware conguration, which is used to make a diagnostic check of the system. This record is created by using the BIOS Setup program. If the POST discovers a difference between the record and the exist-ing hardware, it will display a message on the screen prompting you to correct the conict by running BIOS Setup. In most cases the record should be correct when you receive the Notebook PC. When the test is nished, you may get a message reporting “No operating system found” if the hard disk was not preloaded with an operating system. This indicates that the hard disk is correctly detected and ready for the installation of a new operating system.The S.M.A.R.T. (Self Monitoring and Reporting Technology) checks the hard disk drive during POST and gives a warning message if the hard disk drive requires servicing. If any critical hard disk drive warning is given during bootup, backup your data immediately and run Windows disk checking program. To run Window’s disk checking program: (1) right-click any hard disk drive icon in “My Computer”, (2) choose Properties, (3) click the Tools tab, (4) click Check Now, (5) select a hard disk drive, (6) select Thorough to also check for physical damages, and (7) click Start. Third party disk utilities such as Symantec’s Norton Disk Doctor can also perform the same functions but with greater ease and more features.IMPORTANT! If warnings are still given during bootup after running a software disk checking utility, you should take your Notebook PC in for servicing. Continued use may result in data loss.](https://usermanual.wiki/ASUSTeK-Computer/R1F.User-Manual-1/User-Guide-648379-Page-24.png)
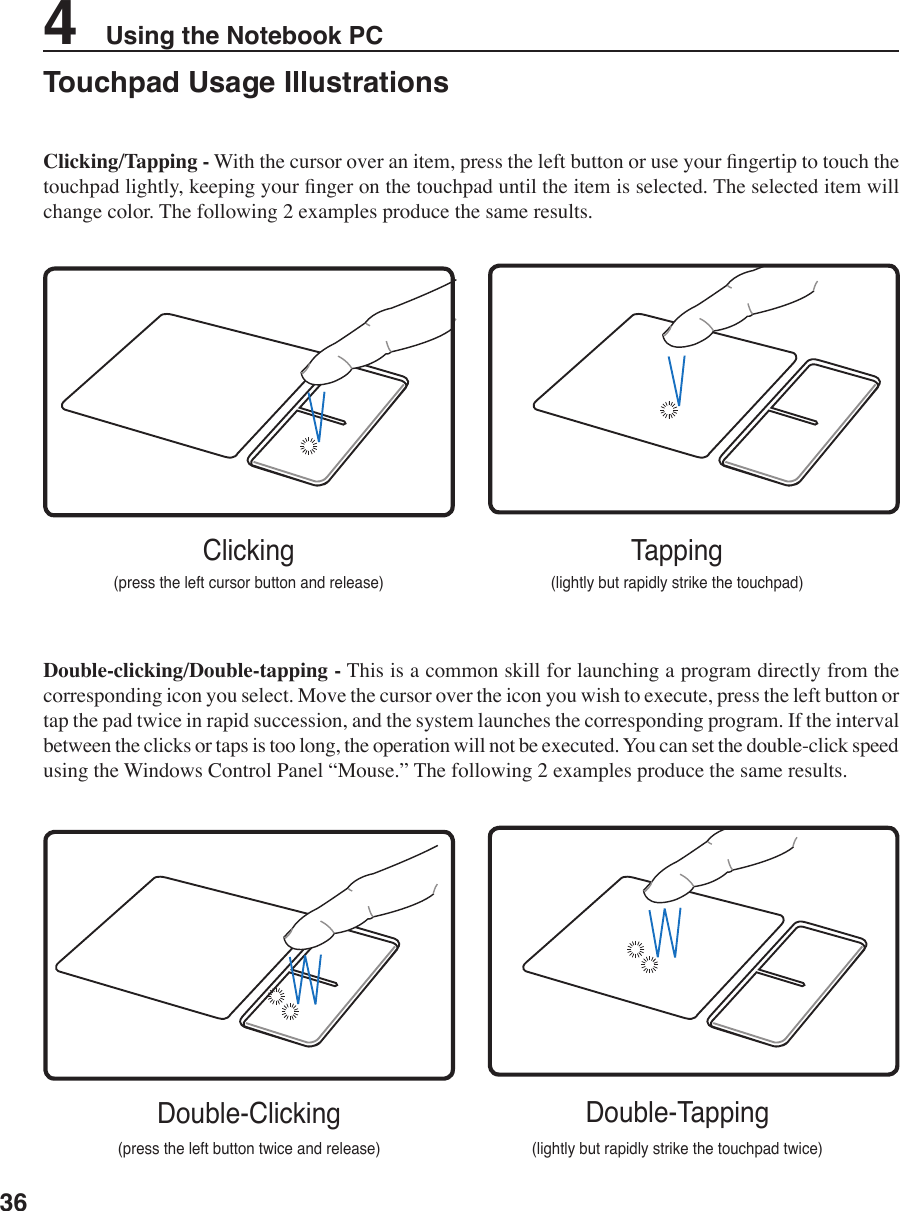
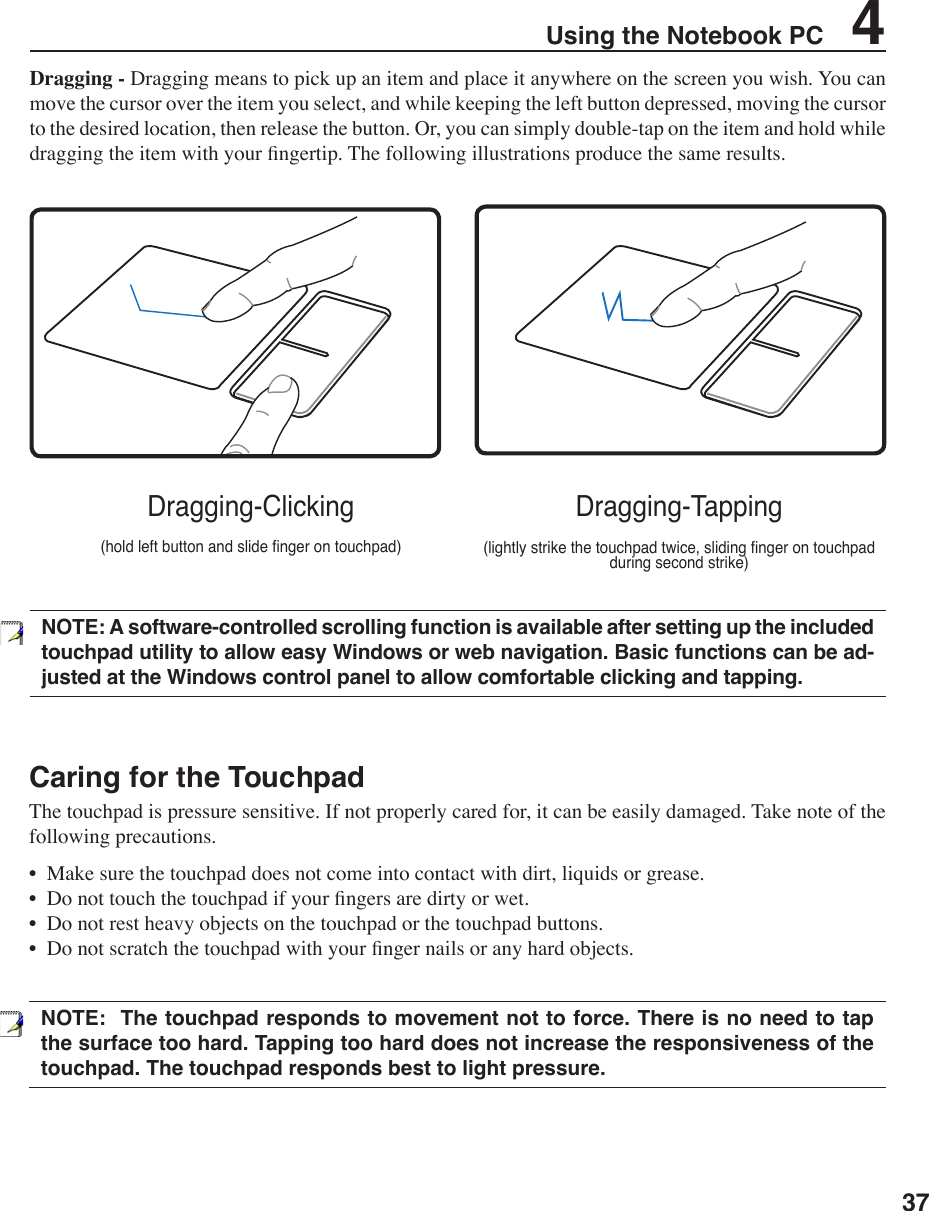
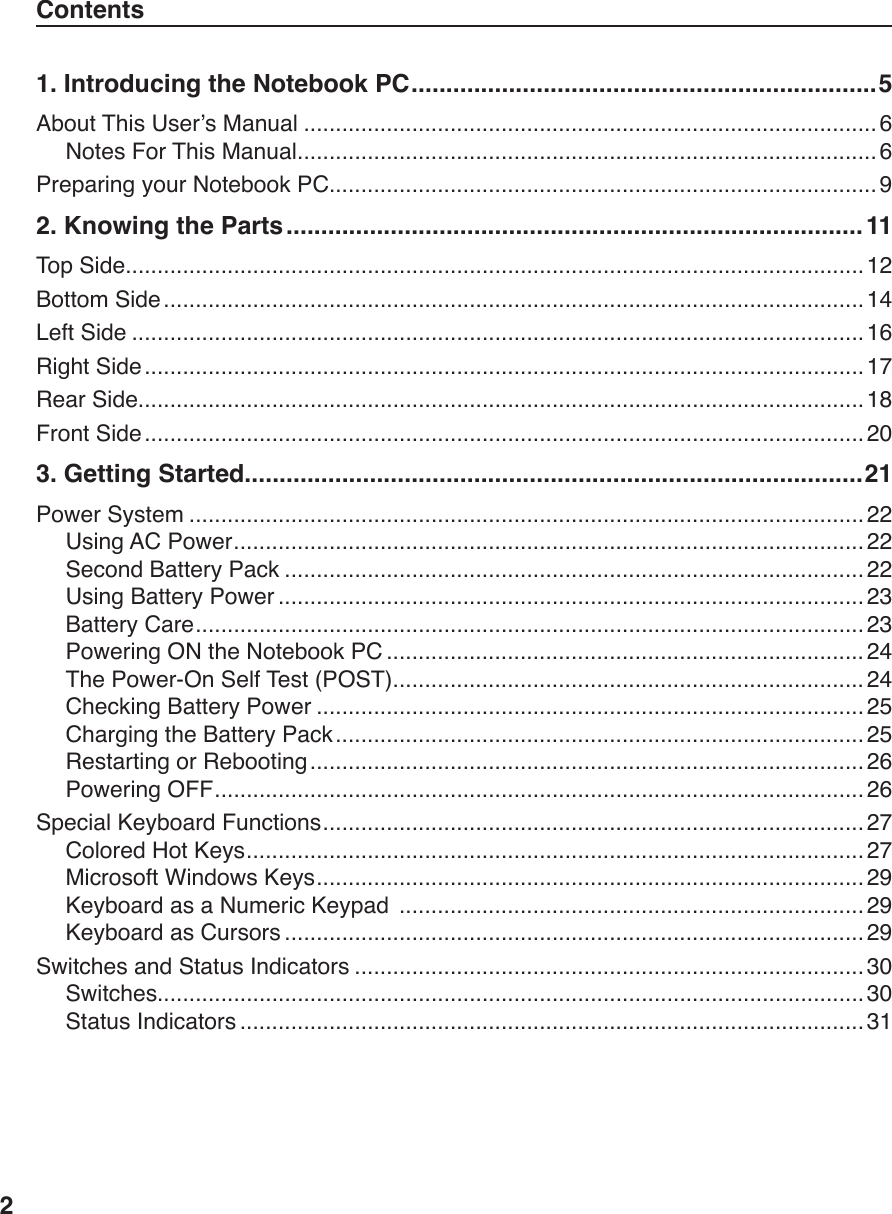
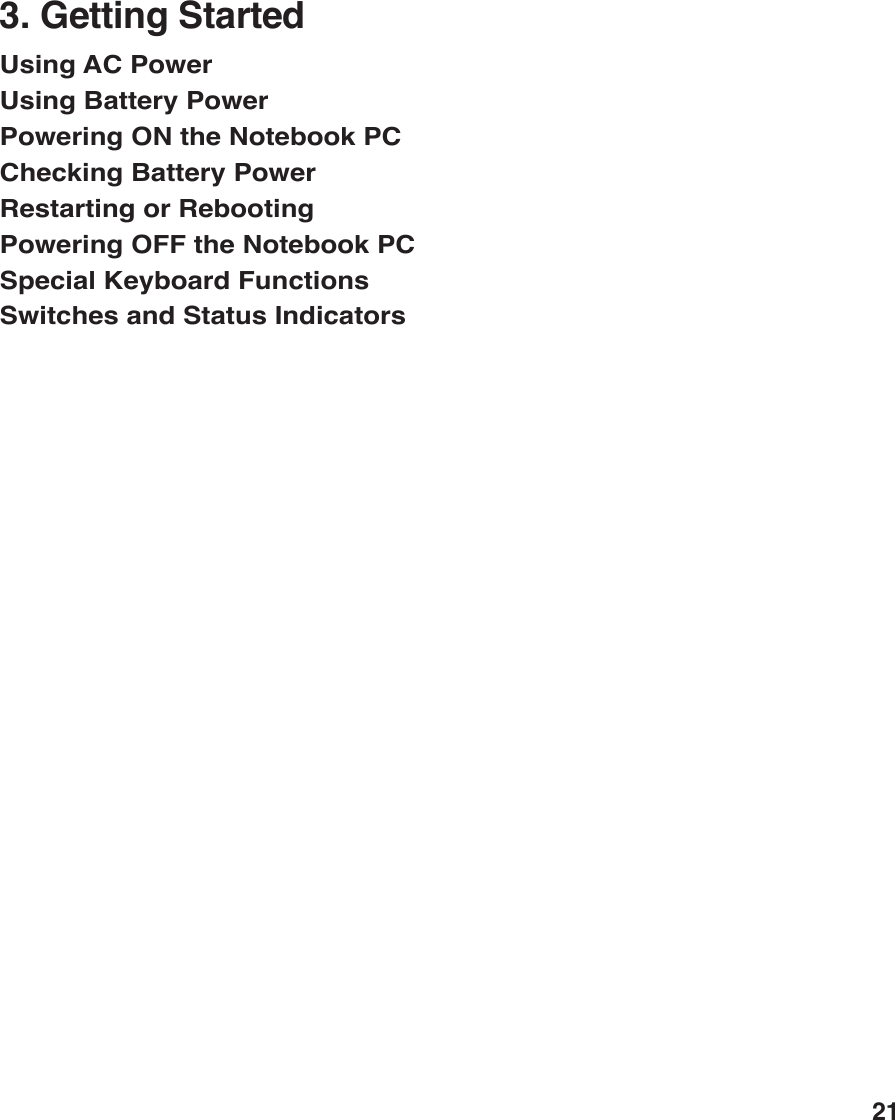
![29Getting Started 3Microsoft Windows KeysThere are two special Windows keys on the keyboard as described below.The key with the Windows Logo activates the Start menu located at the bottom left of the Win-dows desktop.The other key, that looks like a Windows menu with a small cursor, activates the properties menu and is equivalent to pressing the right mouse button on a Windows object. Keyboard as a Numeric Keypad The numeric keypad is embedded in the keyboard and consists of 15 keys that make number intensive input more convenient. These dual-purpose keys are labeled in orange on the key caps. Numeric assignments are located at the upper right hand corner of each key as shown in the gure. When the numeric keypad is engaged by pressing [Fn][Ins/Num LK], the number lock LED lights up. If an external keyboard is connected, pressing the [Ins/Num LK] on the external keyboard enables/disables the NumLock on both keyboards simultaneously. To disable the numeric keypad while keeping the keypad on an external keyboard activated, press the [Fn][Ins/Num LK] keys on the Notebook PC.Keyboard as CursorsThe keyboard can be used as cursors while Number Lock is ON or OFF in order to increase navigation ease while entering numeric data in spreadsheets or similar applications.With Number Lock OFF, press [Fn] and one of the cursor keys shown below. For example [Fn][8] for up, [Fn][K] for down, [Fn][U] for left, and [Fn][O] for right. With Number Lock ON, use [Shift] and one of the cursor keys shown below. For example [Shift][8] for up, [Shift][K] for down, [Shift][U] for left, and [Shift][O] for right.NOTE: The arrow symbols are illustrated here for your reference. They are not labeled on the keyboard as shown here.](https://usermanual.wiki/ASUSTeK-Computer/R1F.User-Manual-1/User-Guide-648379-Page-29.png)
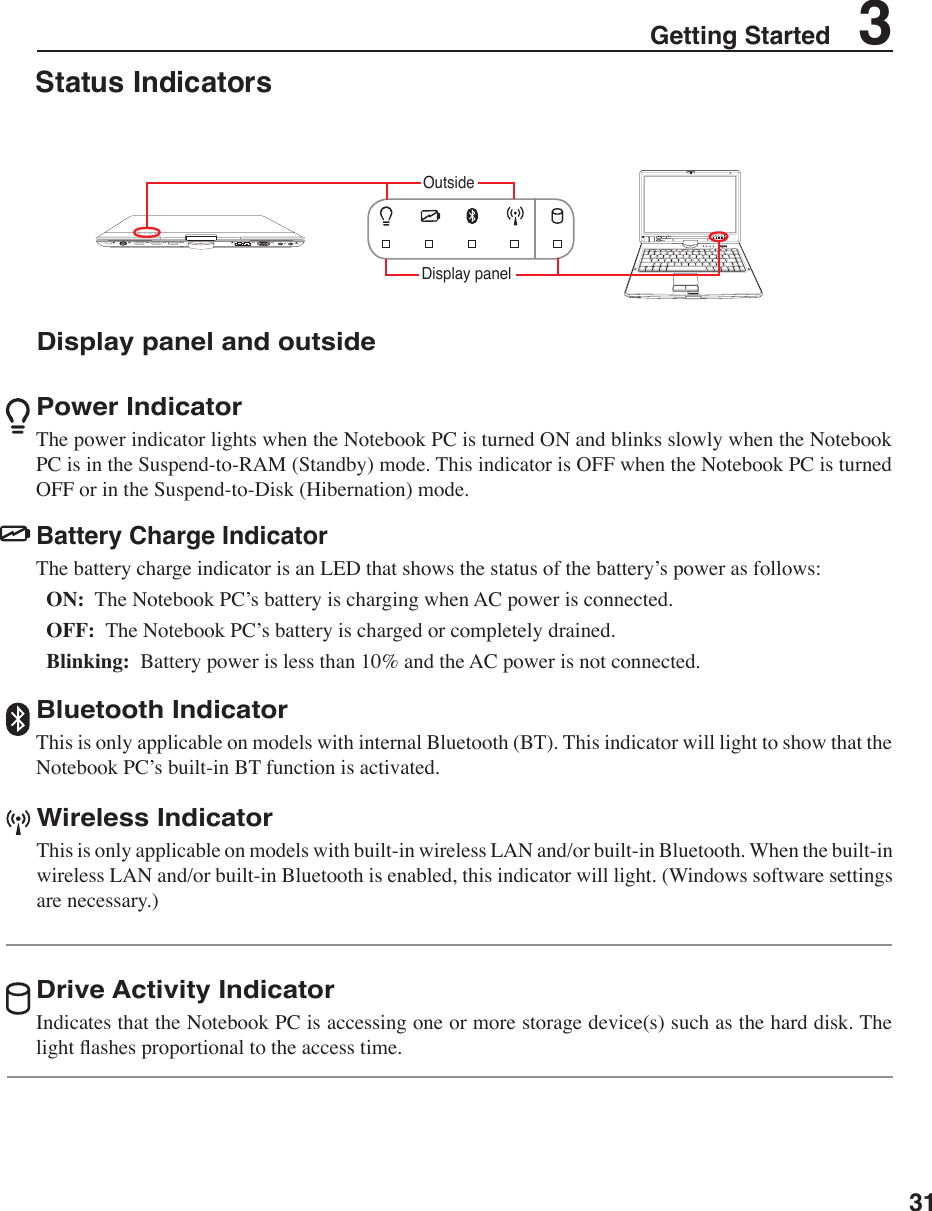
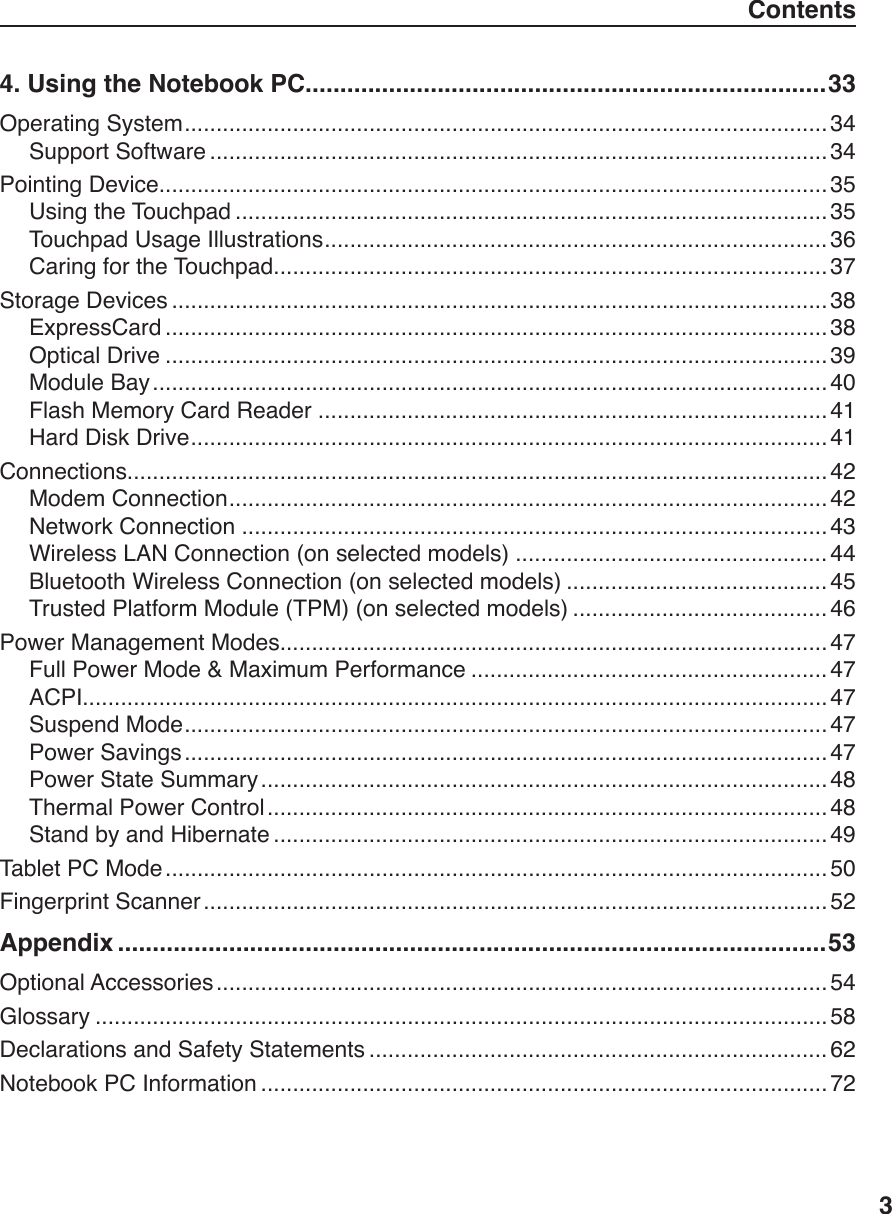
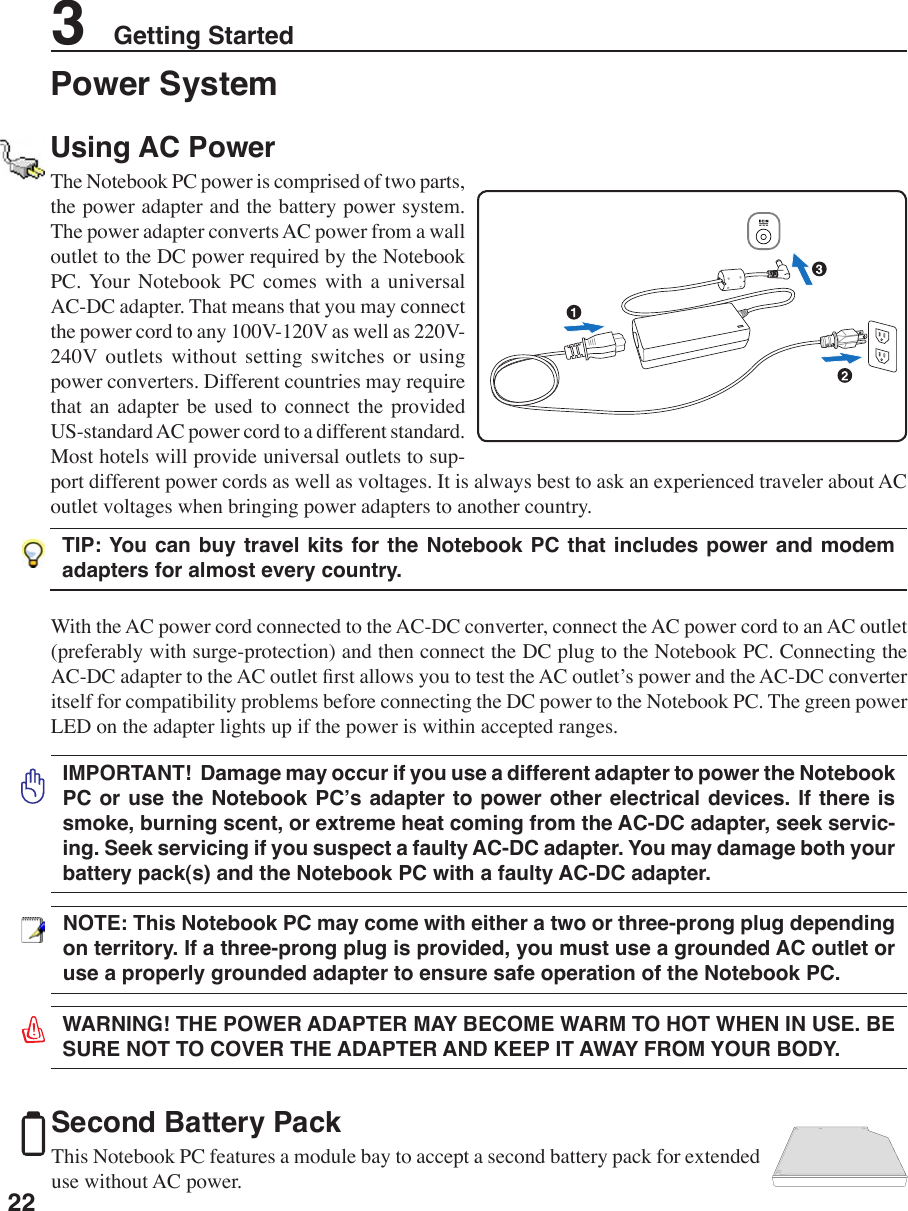
![323 Getting StartedScroll Lock IndicatorIndicates that scroll lock [Scr Lk] is activated when lit. Scroll lock allows some of the keyboard letters to act as direction keys in order to allow easier navigation when only a part of the keyboard is required, such as for playing games.Email IndicatorFlashes when there is one or more new email(s) in your email program’s inbox. This function requires software setup and may not be currently congured on your Notebook PC. This function is designed for Microsoft email software only and may not work with email software from other companies.Number Lock IndicatorIndicates that number lock [Num Lk] is activated when lighted. Number lock allows some of the key-board letters to act as numbers for easier numeric data input.Capital Lock IndicatorIndicates that capital lock [Caps Lock] is activated when lighted. Capital lock allows some of the key-board letters to type using capitalized letters (e.g. A, B, C). When the capital lock light is OFF, the typed letters will be in the lower case form (e.g. a,b,c). Top of keyboardStatus Indicators (Cont.)Top of keyboard](https://usermanual.wiki/ASUSTeK-Computer/R1F.User-Manual-1/User-Guide-648379-Page-32.png)