ASUSTeK Computer R2E Ultra Mobile PC (UMPC) User Manual R2E USerMan part1
ASUSTeK Computer Inc Ultra Mobile PC (UMPC) R2E USerMan part1
UserManual.wiki
>
ASUSTeK Computer
>
R2E User Manual
>
Part 1
Contents
1.
Part 1
2.
Part 2
3.
Manual Part 1
4.
Manual Part 2
Part 1
Navigation menu
Upload a User Manual
Namespaces
Wiki Guide
HTML
PDF
Info
Views
User Manual
Discussion / Help
Navigation
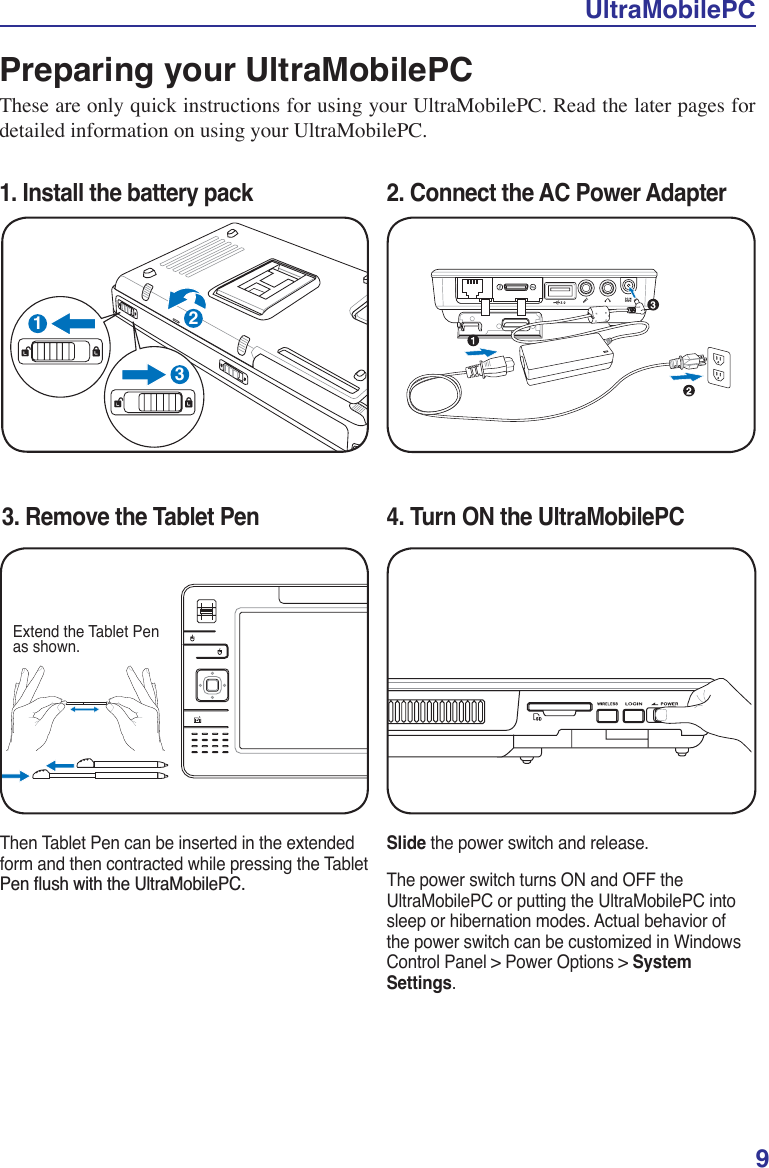


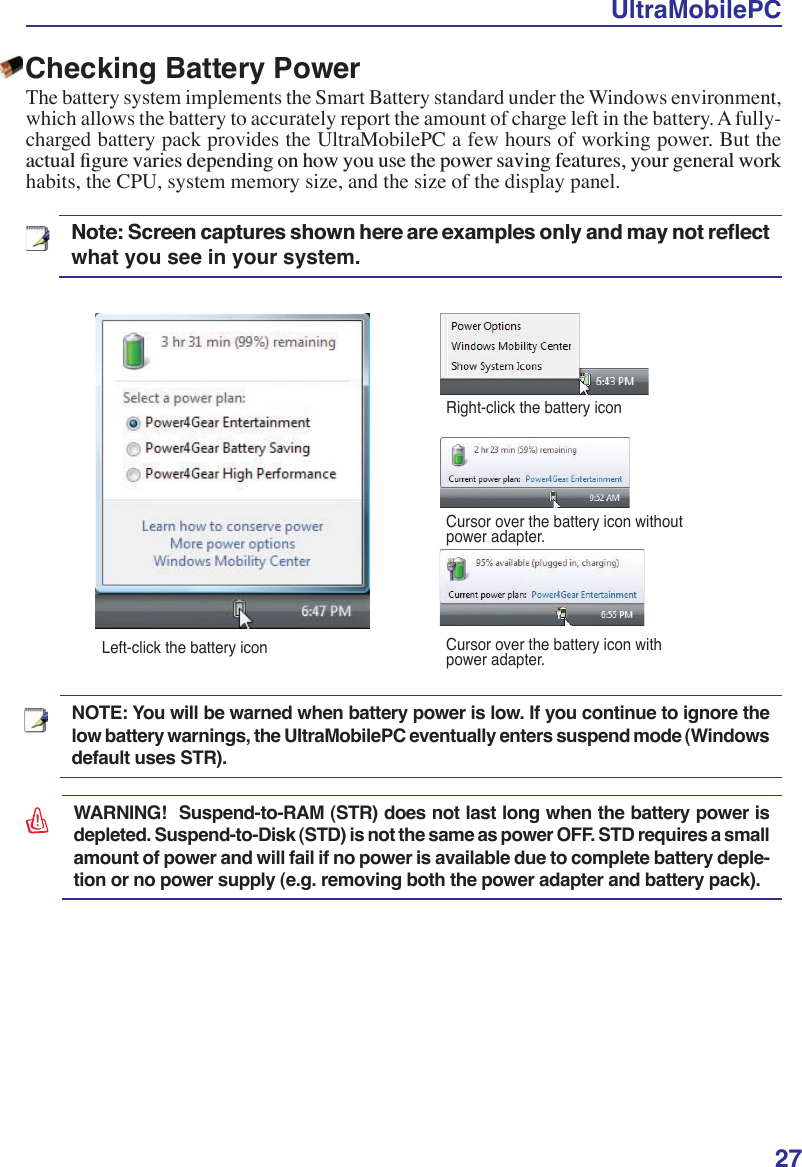
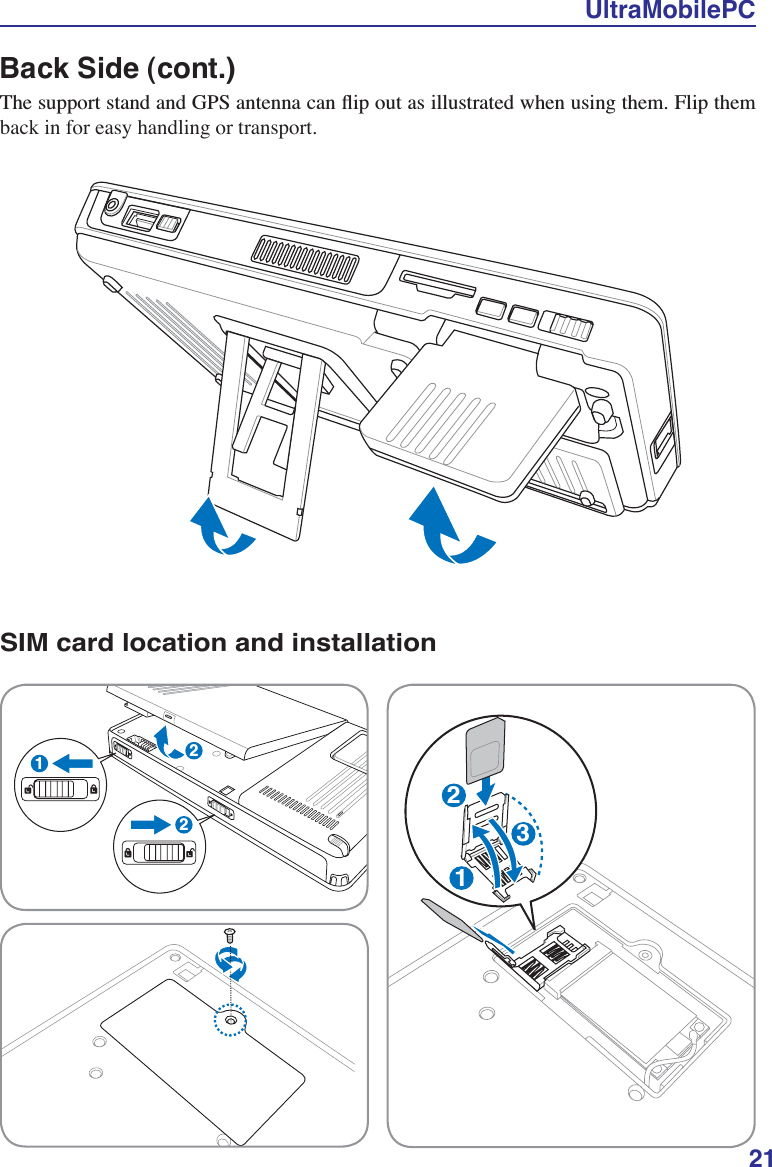
![UltraMobilePC17867Power SwitchThe power switch turns ON and OFF the UltraMobilePC or putting the Ul-traMobilePC into sleep or hibernation modes. Actual behavior of the power switch can be customized in Windows Control Panel “Power Options.” POWERLOGIN ButtonThe LOGIN button sends a [Ctrl][Alt][Del] keyboard combination to the operating system to show Windows Security for logging in/off, locking, shutting down, showing task manager, or changing passwords. This special login feature is also known as Secure Attention Sequence (SAS).LOGINWireless SwitchEnables or disables the built-in wireless LAN and Bluetooth (selected models). When enabled, the wireless status indicator will light. Windows software settings are necessary before use.WIRELESS](https://usermanual.wiki/ASUSTeK-Computer/R2E.Part-1/User-Guide-876666-Page-17.png)
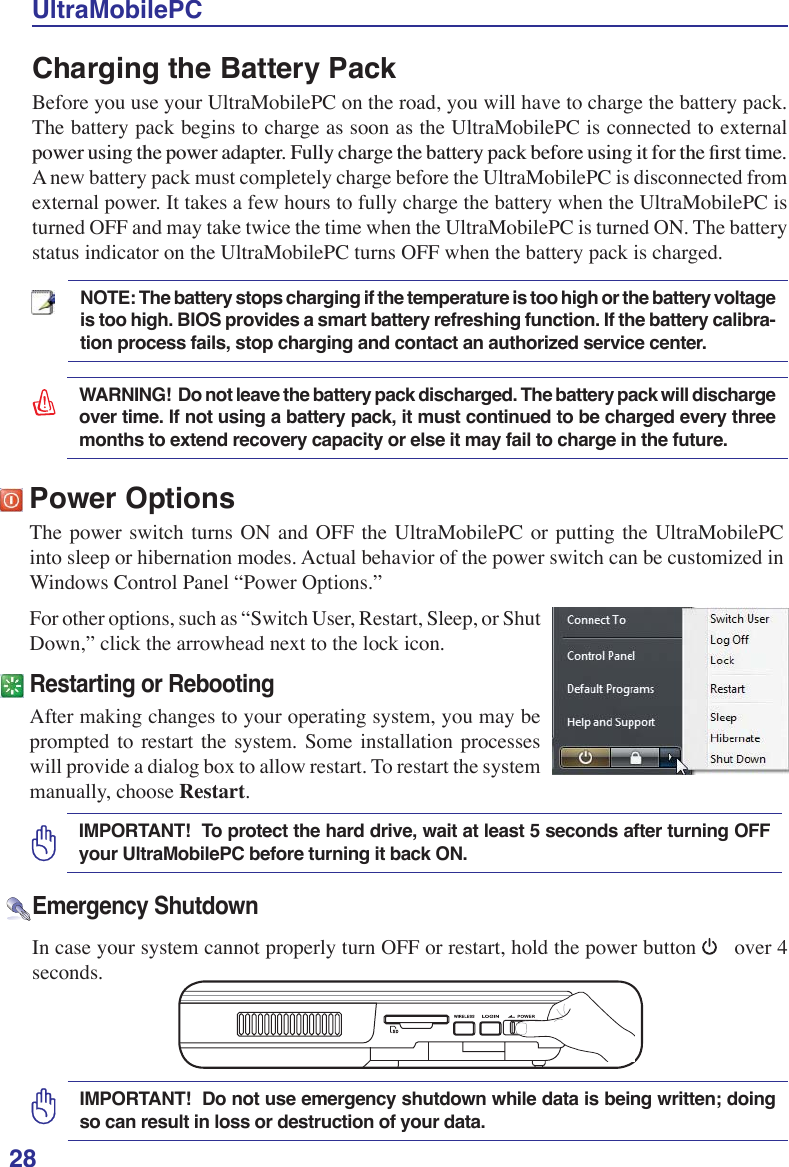
![26UltraMobilePCPowering ON the UltraMobilePCThe UltraMobilePC’s power-ON message appears on the screen when you turn it ON. If necessary, you may adjust the brightness by using the hotkey. If you need to run the BIOS 6HWXSWRVHWRUPRGLI\WKHV\VWHPFRQÀJXUDWLRQSUHVV>)@XSRQERRWXSWRHQWHUWKH%,26Setup. If you press [Tab] during the splash screen, standard boot information such as the BIOS version can be seen. Press [ESC] and you will be presented with a boot menu with selections to boot from your available drives.127(%HIRUHERRWXSWKHGLVSOD\SDQHOÁDVKHVZKHQWKHSRZHULVWXUQHG217KLVis part of the UltraMobilePC’s test routine and is not a problem with the display.IMPORTANT! To protect the hard disk drive, always wait at least 5 seconds after turning OFF your UltraMobilePC before turning it back ON. WARNING! DO NOT carry or cover a UltraMobilePC that is powered ON with any materials that will reduce air circulation such as a carrying bag.The Power-On Self Test (POST):KHQ\RXWXUQ21WKH8OWUD0RELOH3&LWZLOOÀUVWUXQWKURXJKDVHULHVRIVRIWZDUHFRQWUROOHGdiagnostic tests called the Power-On Self Test (POST). The software that controls the POST is installed as a permanent part of the UltraMobilePC’s architecture. The POST includes a UHFRUGRIWKH8OWUD0RELOH3&·VKDUGZDUHFRQÀJXUDWLRQZKLFKLVXVHGWRPDNHDGLDJQRVWLFcheck of the system. This record is created by using the BIOS Setup program. If the POST discovers a difference between the record and the existing hardware, it will display a mes-VDJHRQWKHVFUHHQSURPSWLQJ\RXWRFRUUHFWWKHFRQÁLFWE\UXQQLQJ%,266HWXS,QPRVWcases the record should be correct when you receive the UltraMobilePC. When the test is ÀQLVKHG\RXPD\JHWDPHVVDJHUHSRUWLQJ´1RRSHUDWLQJV\VWHPIRXQGµLIWKHKDUGGLVNZDVnot preloaded with an operating system. This indicates that the hard disk is correctly detected and ready for the installation of a new operating system.The S.M.A.R.T. (Self Monitoring and Reporting Technology) checks the hard disk drive during POST and gives a warning message if the hard disk drive requires servicing. If any critical hard disk drive warning is given during bootup, backup your data immediately and run Windows disk checking program. To run Window’s disk checking program: (1) right-click any hard disk drive icon in “My Computer”, (2) choose Properties, (3) click the Tools tab, (4) click Check Now, (5) select a hard disk drive, (6) select Thorough to also check for physical damages, and (7) click Start. Third party disk utilities such as Symantec’s Norton Disk Doctor can also perform the same functions but with greater ease and more features.IMPORTANT! If warnings are still given during bootup after running a software disk checking utility, you should take your UltraMobilePC in for servicing. Continued use may result in data loss.](https://usermanual.wiki/ASUSTeK-Computer/R2E.Part-1/User-Guide-876666-Page-26.png)