ASUSTeK Computer RTN10UB ASUS RT-N10U_BLACK User Manual
ASUSTeK Computer Inc ASUS RT-N10U_BLACK
UserManual.wiki
>
ASUSTeK Computer
>
RTN10UB User Manual
Users Manual
Navigation menu
Upload a User Manual
Namespaces
Wiki Guide
HTML
PDF
Info
Views
User Manual
Discussion / Help
Navigation
![2Copyright © 2011 ASUSTeK Computer Inc. All Rights Reserved.No part of this manual, including the products and software described in it, may be reproduced, transmitted, transcribed, stored in a retrieval system, or translated into any language in any form or by any means, except documentation kept by the purchaser for backup purposes, without the express written permission of ASUSTeK Computer Inc. (“ASUS”).3URGXFWZDUUDQW\RUVHUYLFHZLOOQRWEHH[WHQGHGLIWKHSURGXFWLVUHSDLUHGPRGLÀHGRUDOWHUHGXQOHVVVXFKUHSDLUPRGLÀFDWLRQRIDOWHUDWLRQLVDXWKRUL]HGLQZULWLQJE\$686RUthe serial number of the product is defaced or missing.ASUS PROVIDES THIS MANUAL “AS IS” WITHOUT WARRANTY OF ANY KIND, EITHER EXPRESS OR IMPLIED, INCLUDING BUT NOT LIMITED TO THE IMPLIED WARRANTIES OR CONDITIONS OF MERCHANTABILITY OR FITNESS FOR A PARTICULAR PURPOSE. IN NO EVENT SHALL ASUS, ITS DIRECTORS, OFFICERS, EMPLOYEES OR AGENTS BE LIABLE FOR ANY INDIRECT, SPECIAL, INCIDENTAL, OR CONSEQUENTIAL DAMAGES (INCLUDING DAMAGES FOR LOSS OF PROFITS, LOSS OF BUSINESS, LOSS OF USE OR DATA, INTERRUPTION OF BUSINESS AND THE LIKE), EVEN IF ASUS HAS BEEN ADVISED OF THE POSSIBILITY OF SUCH DAMAGES ARISING FROM ANY DEFECT OR ERROR IN THIS MANUAL OR PRODUCT.SPECIFICATIONS AND INFORMATION CONTAINED IN THIS MANUAL ARE FURNISHED FOR INFORMATIONAL USE ONLY, AND ARE SUBJECT TO CHANGE AT ANY TIME WITHOUT NOTICE, AND SHOULD NOT BE CONSTRUED AS A COMMITMENT BY ASUS. ASUS ASSUMES NO RESPONSIBILITY OR LIABILITY FOR ANY ERRORS OR INACCURACIES THAT MAY APPEAR IN THIS MANUAL, INCLUDING THE PRODUCTS AND SOFTWARE DESCRIBED IN IT.Products and corporate names appearing in this manual may or may not be registered WUDGHPDUNVRUFRS\ULJKWVRIWKHLUUHVSHFWLYHFRPSDQLHVDQGDUHXVHGRQO\IRULGHQWLÀFDWLRQRUH[SODQDWLRQDQGWRWKHRZQHUV·EHQHÀWZLWKRXWLQWHQWWRLQIULQJHOffer to Provide Source Code of Certain SoftwareThis product contains copyrighted software that is licensed under the General Public License (“GPL”), under the Lesser General Public License Version (“LGPL”) and/or other Free Open Source Software Licenses. Such software in this product is distributed without any warranty to the extent permitted by the applicable law. Copies of these licenses are included in this product.Where the applicable license entitles you to the source code of such software and/or other additional data, such data should have been shipped along with this product.You may also download it for free from http://support.asus.com/download.The source code is distributed WITHOUT ANY WARRANTY and licensed under the same license as the corresponding binary/object code.ASUSTeK is eager to duly provide complete source code as required under various Free Open Source Software licenses. If however you encounter any problems in obtaining the IXOOFRUUHVSRQGLQJVRXUFHFRGHZHZRXOGEHPXFKREOLJHGLI\RXJLYHXVDQRWLÀFDWLRQWRWKHemail address gpl@asus.com, stating the product and describing the problem (please do NOT send large attachments such as source code archives etc to this email address).E6688First EditionJune 2011E6688_RT-N10U BLACK_Manual.indd 2 7/6/11 9:00:58 AM](https://usermanual.wiki/ASUSTeK-Computer/RTN10UB/User-Guide-1514518-Page-2.png)
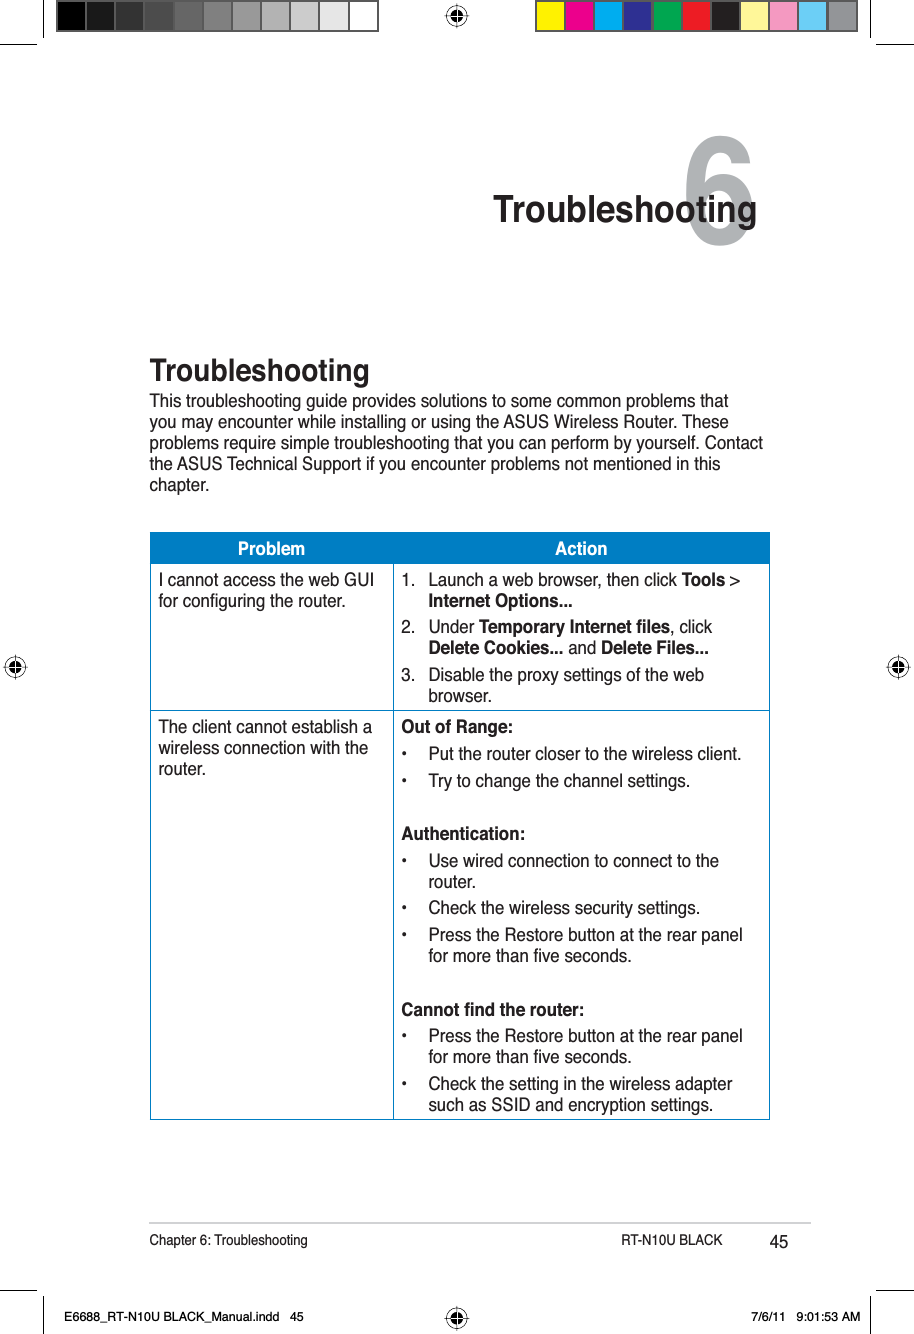
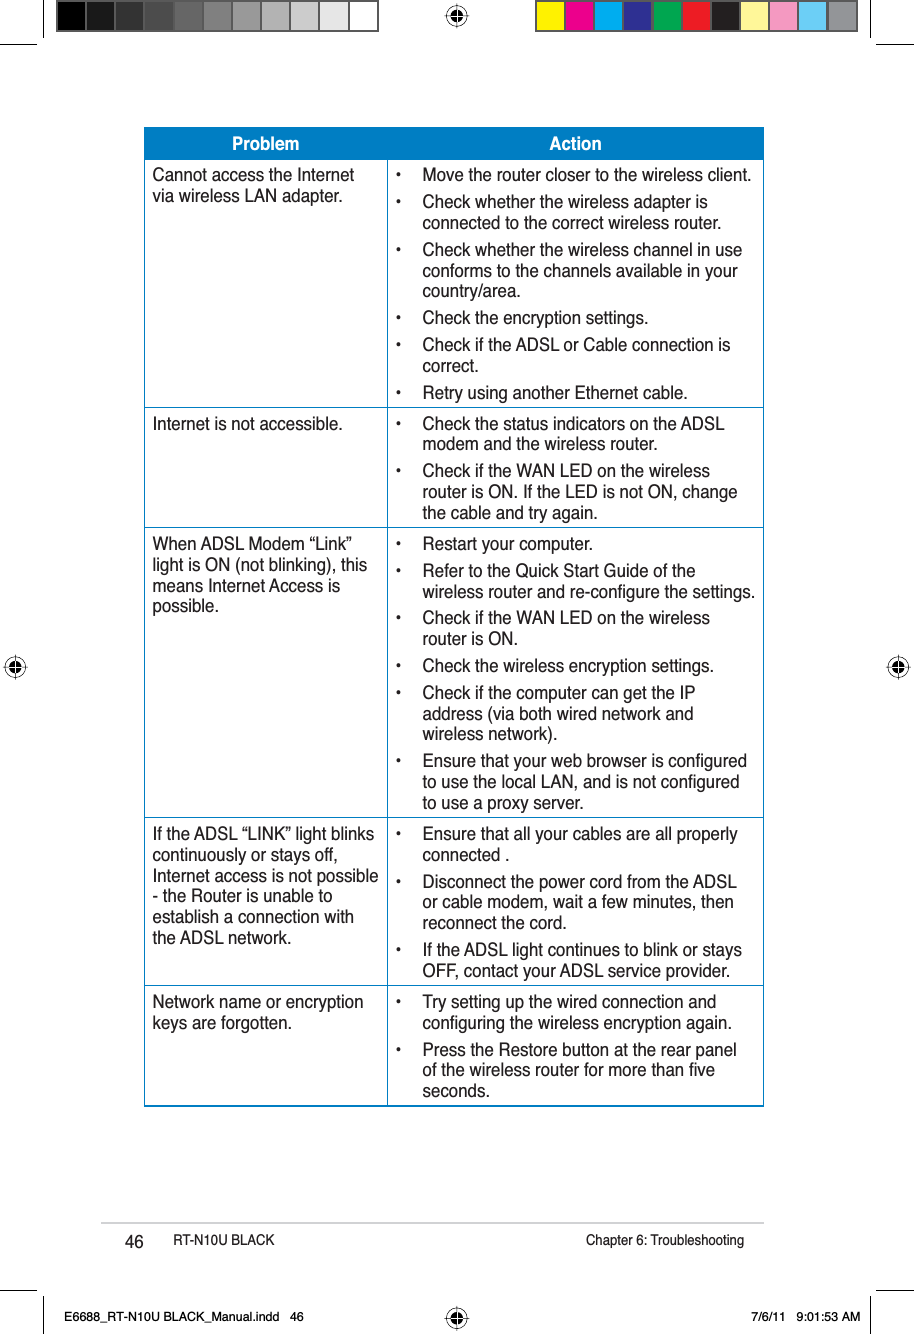
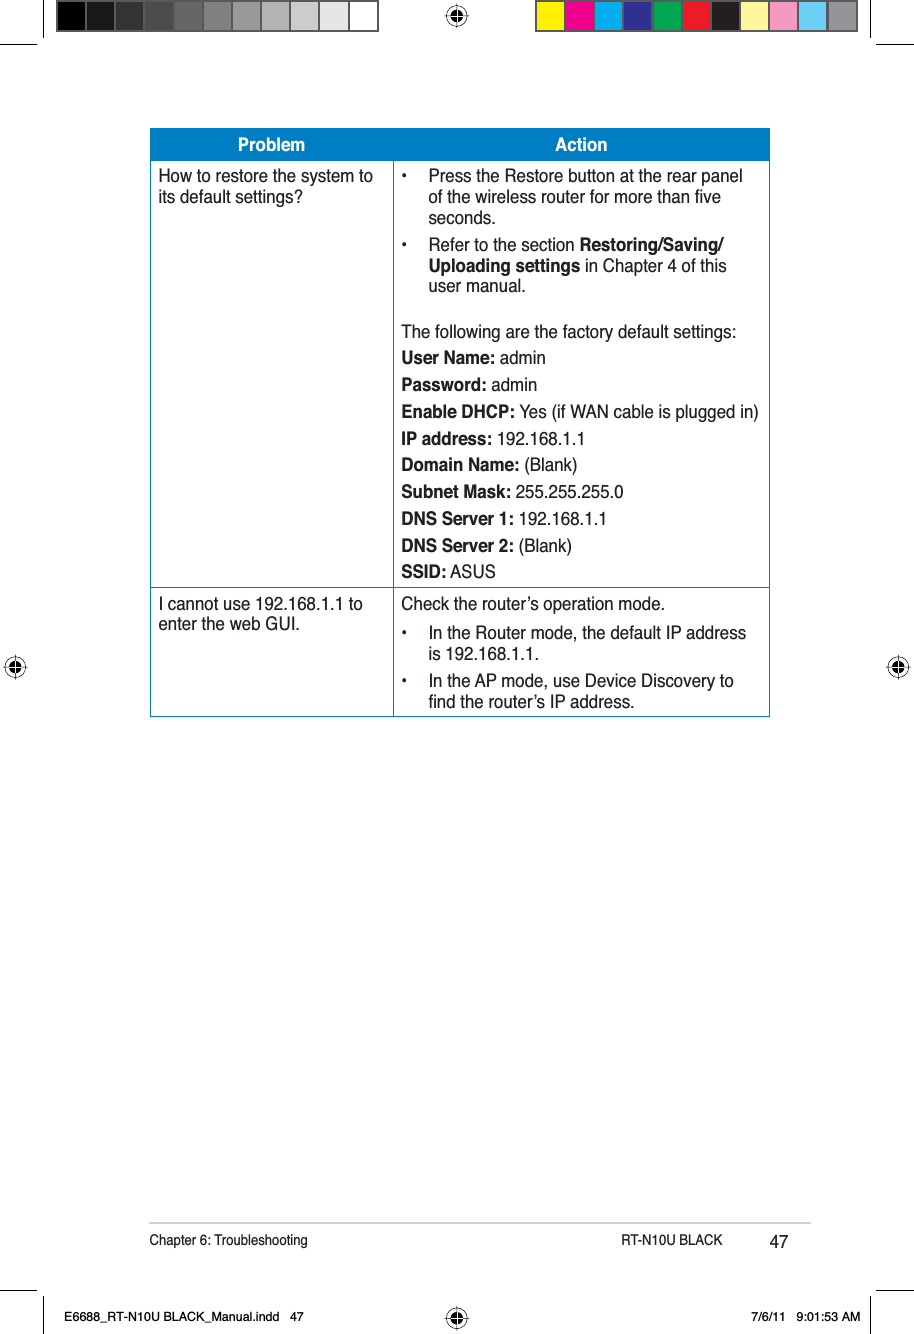
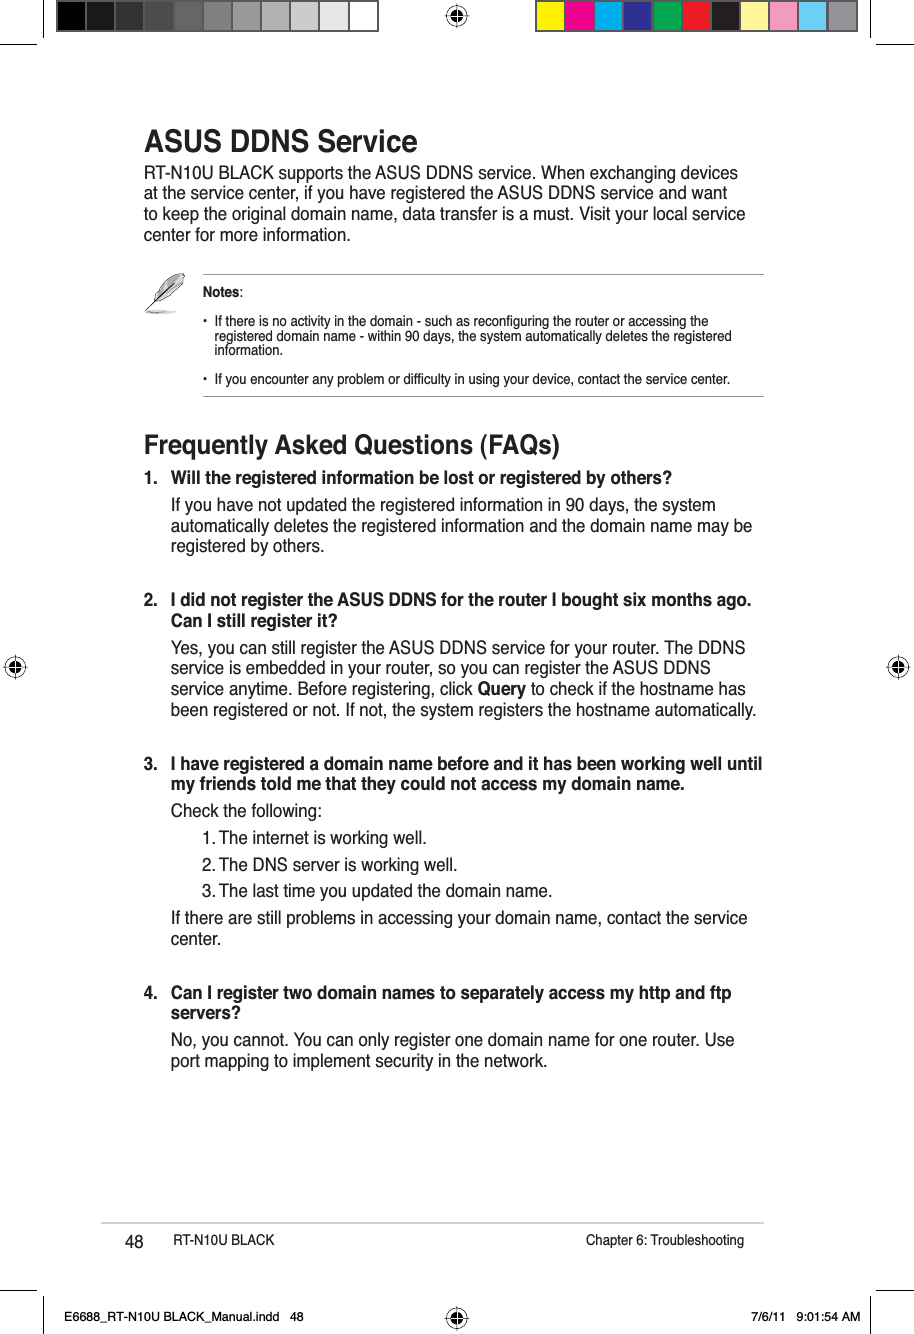
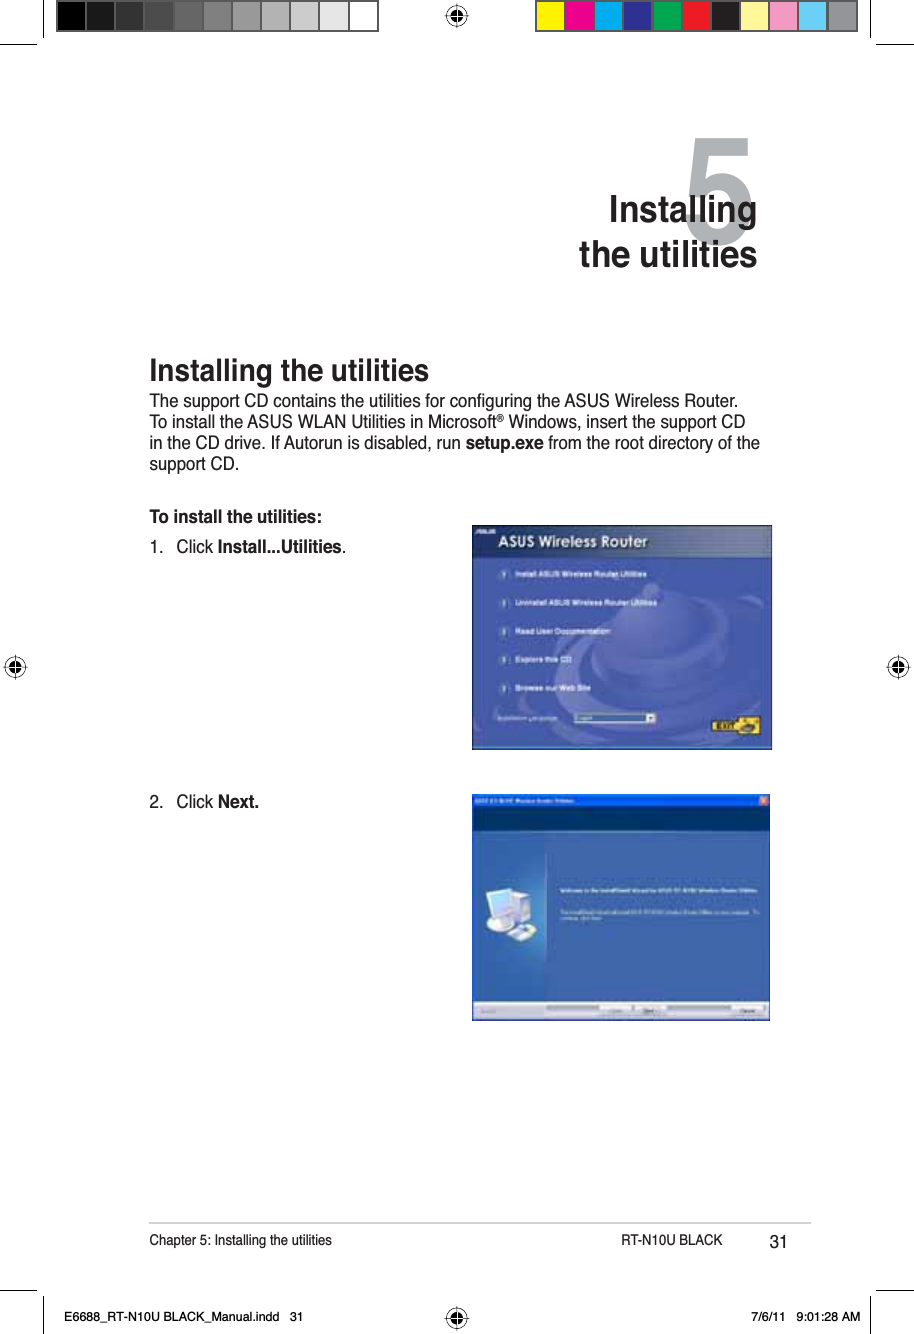
![4Table of contentsAbout this guide7KLVXVHUJXLGHFRQWDLQVLQIRUPDWLRQWKDW\RXQHHGWRLQVWDOODQGFRQÀJXUHWKHASUS Wireless Router.How this guide is organizedThis guide contains the following parts:• Chapter 1: Knowing your wireless routerThis chapter provides information on the package contents, system requirements, hardware features, and LED indicators of the ASUS Wireless Router.• Chapter 2: Getting startedThis chapter provides instructions on setting up the Router and Access Point modes of the ASUS Wireless Router. &KDSWHU&RQÀJXULQJWKHQHWZRUNFOLHQWVThis chapter provides instructions on setting up the clients in your network to work with your ASUS Wireless Router.Chapter 5: Installing the utilitieInstalling the utilitiesInstalling the utilities........................................................................... 31Device Discovery................................................................................. 33Firmware Restoration.......................................................................... 34WPS Wizard.......................................................................................... 358VLQJ:36:L]DUG.......................................................................... 35Setting up your network printer ......................................................... 41Chapter 6: TroubleshootingTroubleshooting................................................................................... 45ASUS DDNS Service............................................................................ 48Frequently Asked Questions (FAQs)............................................... 48AppendicesNotices.................................................................................................. 51ASUS Contact Information.................................................................. 59E6688_RT-N10U BLACK_Manual.indd 4 7/6/11 9:00:59 AM](https://usermanual.wiki/ASUSTeK-Computer/RTN10UB/User-Guide-1514518-Page-4.png)
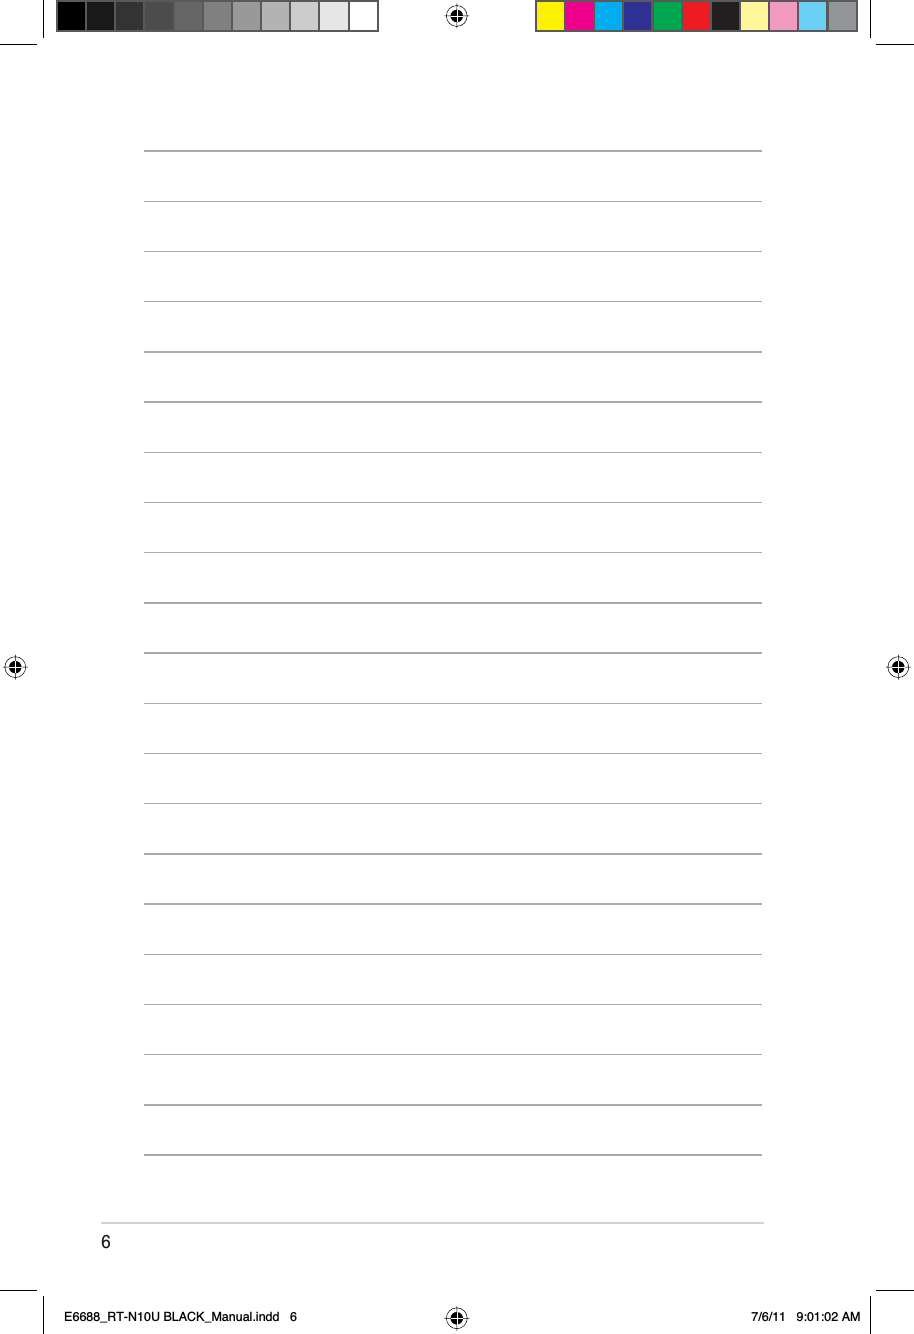

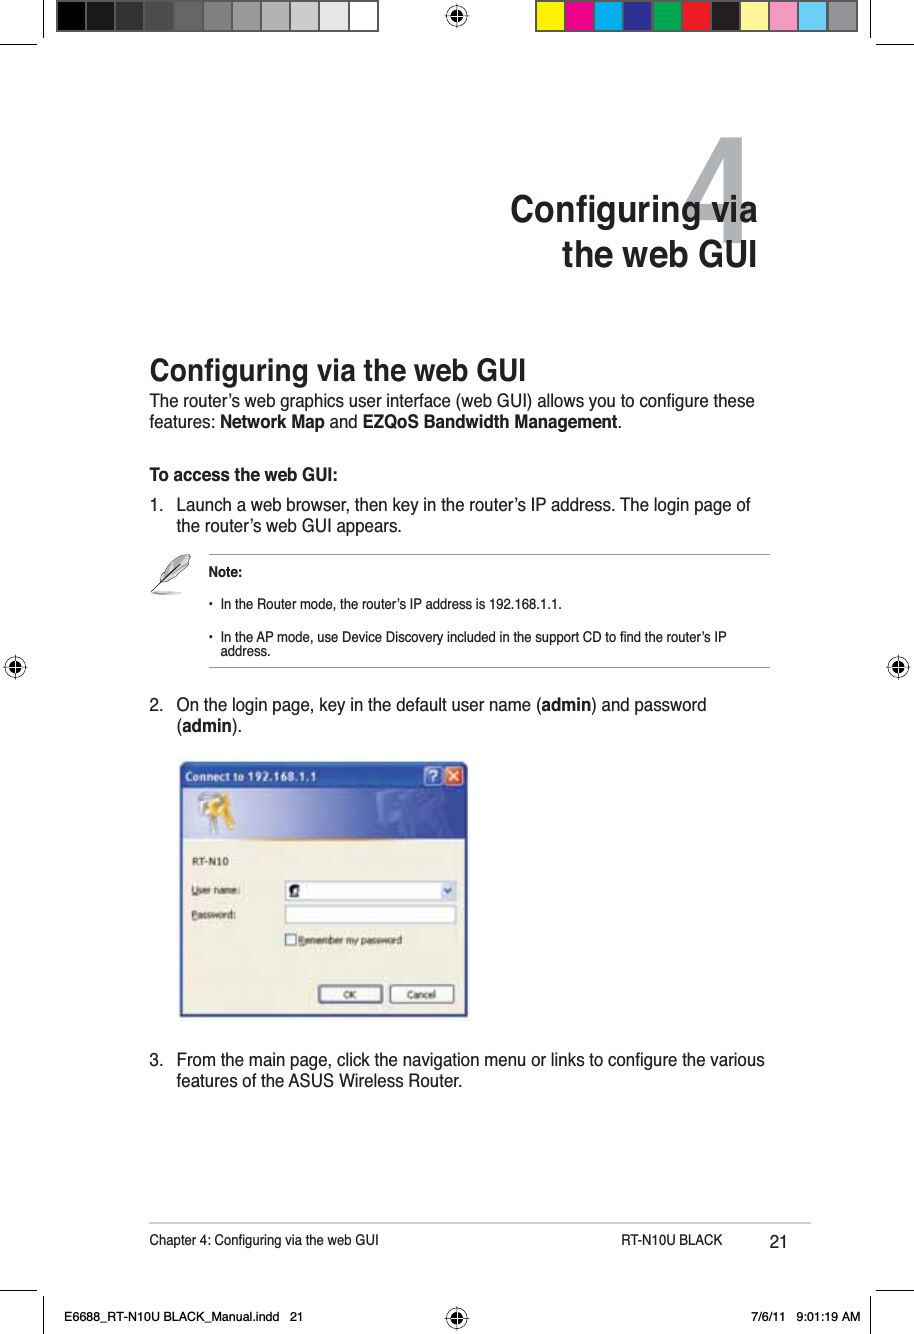
![22 5718%/$&. &KDSWHU&RQÀJXULQJYLDWKHZHE*8,Using the Network Map1HWZRUN0DSDOORZV\RXWRYLHZWKHVWDWXVDQGFRQÀJXUHWKHFRQQHFWLRQVHWWLQJVof the Internet, system, and clients in your network. It enables you to quickly set up your Wide Area Network (WAN) using the Quick Internet Setup (QIS) feature, or to TXLFNO\VHWXS\RXU/RFDO$UHD1HWZRUN/$1XVLQJWKH:36:L]DUGNote:)RUPRUHGHWDLOVRQWKH:36:L]DUGUHIHUWRWKHVHFWLRQWPS Wizard in Chapter 5 of this user manual.7RYLHZWKHVWDWXVRUFRQÀJXUHWKHVHWWLQJVFOLFNDQ\RIWKHVHLFRQVGLVSOD\HGRQthe main page:Icon DescriptionInternet statusClick this icon to display information on the Internet connection status, WAN IP address, DNS, connection type, and gateway address. From the Internet status screen, use the Quick Internet Setup (QIS) feature to quickly set up your WAN.System statusClick this icon to display information on the SSID, authentication and encryption methods, LAN IP, MAC address, or turn the wireless radio on/off. Enable the WPS mode from the System status screen.Client statusClick this icon to display information about the clients or computers in the network, and allows you to block/unblock a client.E6688_RT-N10U BLACK_Manual.indd 22 7/6/11 9:01:20 AM](https://usermanual.wiki/ASUSTeK-Computer/RTN10UB/User-Guide-1514518-Page-22.png)
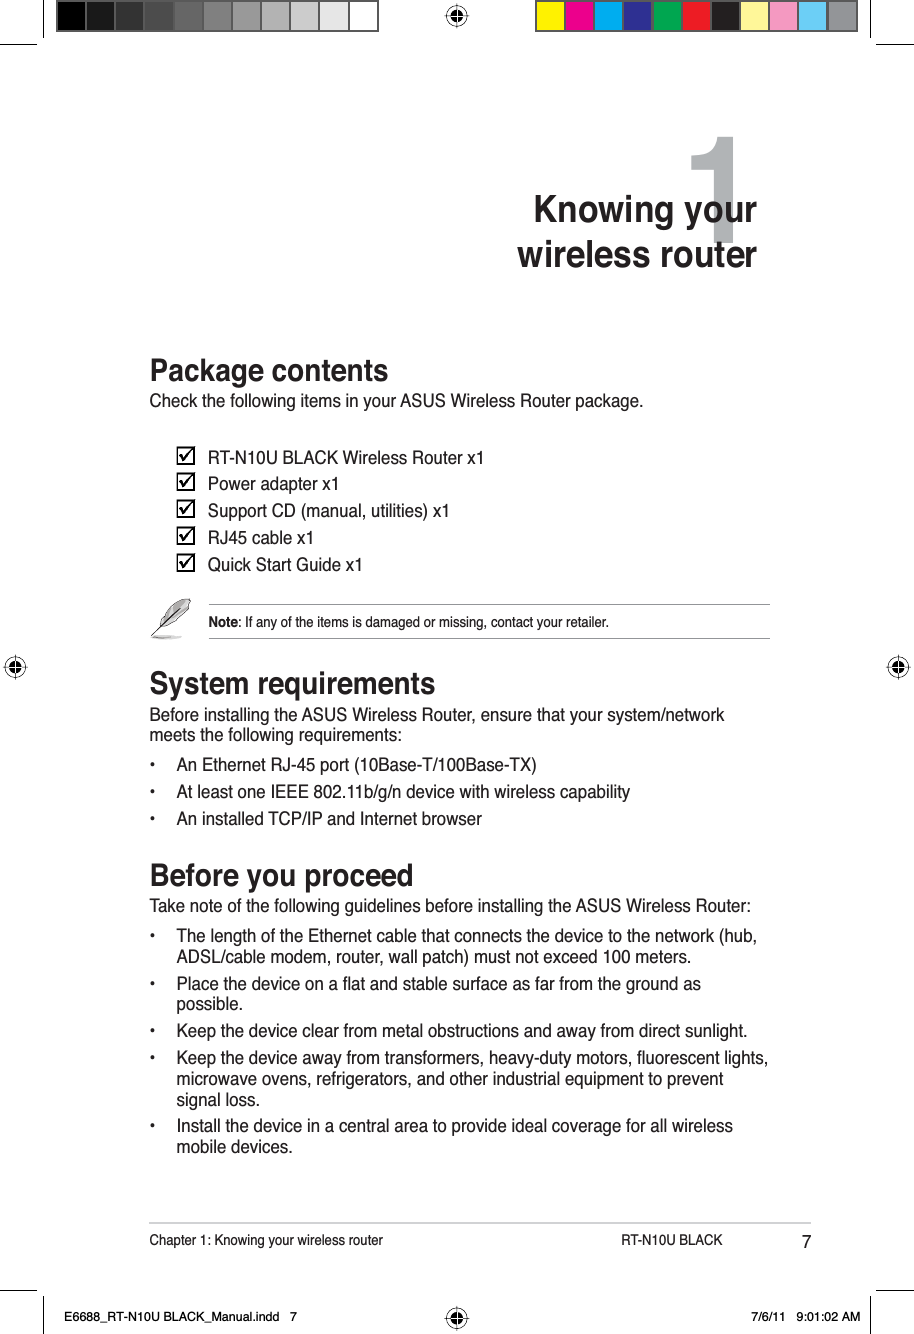
![24 5718%/$&. &KDSWHU&RQÀJXULQJYLDWKHZHE*8,Managing bandwidth with EzQoS(]4R6%DQGZLGWK0DQDJHPHQWHQDEOHV\RXWRVHWWKHEDQGZLGWKSULRULW\DQGPDQDJHWKHQHWZRUNWUDIÀFTo set up the bandwidth priority:1. Click EzQoS Bandwidth Management from the navigation menu at the left side of your screen.2. Click each of these four applications to set the bandwidth priority:Icon DescriptionGaming Blaster7KHURXWHUKDQGOHVJDPLQJWUDIÀFDWÀUVWSULRULW\Internet ApplicationThe router handles the e-mail, web browsing and other Internet DSSOLFDWLRQVWUDIÀFDWÀUVWSULRULW\FTP7KHURXWHUKDQGOHVDWÀUVWSULRULW\WKHWUDIÀFRIGRZQORDGLQJuploading data to/from the FTP server.Voip/Video Streaming7KHURXWHUKDQGOHVWKHDXGLRYLGHRWUDIÀFDWÀUVWSULRULW\3. Click SaveWRVDYHWKHFRQÀJXUDWLRQVHWWLQJVE6688_RT-N10U BLACK_Manual.indd 24 7/6/11 9:01:23 AM](https://usermanual.wiki/ASUSTeK-Computer/RTN10UB/User-Guide-1514518-Page-24.png)
![35Chapter 5: Installing the utilities RT-N10U BLACKWPS WizardWPS (Wi-Fi Protected Setup) allows you to set up a secure and protected wireless network easily.Note:• Ensure that you use a wireless LAN adapter with WPS function.• Windows® operating systems and wireless LAN cards/adapters that support WPS:Using WPS WizardOS Support Wireless Adapter SupportVista 32/64Intel wireless LAN cardASUS 167gv2 driver v3.0.6.0 or laterASUS 160N/130N driver v2.0.0.0 or laterXP SP2Intel wireless LAN cardASUS 167gv2 driver v1.2.2.0 or laterASUS 160N/130N driver v1.0.4.0 or laterXP SP1 and 2000ASUS LAN card with ASUS WLAN UtilityASUS 167gv2 driver v1.2.2.0 or laterASUS 160N/130N driver v1.0.4.0 or laterTo use WPS Wizard:1. Follow the onscreen instructions to set up your hardware. When done, click Next.Note:8VHWKH:36:L]DUGZLWKRQHZLUHOHVVFOLHQWDWDWLPH,IWKHZLUHOHVVFOLHQWFDQQRWdiscover the wireless router, shorten the distance between the client and the router.E6688_RT-N10U BLACK_Manual.indd 35 7/6/11 9:01:31 AM](https://usermanual.wiki/ASUSTeK-Computer/RTN10UB/User-Guide-1514518-Page-35.png)
![36 RT-N10U BLACK Chapter 5: Installing the utilities2. Press the WPS button on your router. 2QWKH:36:L]DUGFOLFNNext to continue.Notes: :KHQUXQQLQJ:36WKH,QWHUQHWFRQQHFWLRQSDXVHVEULHÁ\WKHQUHHVWDEOLVKHVWKHFRQQHFWLRQ ,IWKH:36EXWWRQLVSXVKHGZLWKRXWUXQQLQJWKH:36:L]DUGWKH3:5LQGLFDWRUÁDVKHVDQG ,QWHUQHWFRQQHFWLRQSDXVHVEULHÁ\DQGWKHQUHHVWDEOLVKHVWKHFRQQHFWLRQResetPower WAN LAN4 LAN3 LAN2 LAN1 WPS USBWPS buttonE6688_RT-N10U BLACK_Manual.indd 36 7/6/11 9:01:34 AM](https://usermanual.wiki/ASUSTeK-Computer/RTN10UB/User-Guide-1514518-Page-36.png)

![38 RT-N10U BLACK Chapter 5: Installing the utilities :KHQÀQLVKHGFOLFNSave or print settings for future reference or SaveVHWWLQJVWRD86%ÁDVKGULYH to add other devices to the network. Click Nextto connect to the Internet. <RXKDYHFRQQHFWHGWRWKHZLUHOHVVURXWHU,I\RXZDQWWRFRQÀJXUHWKH,QWHUQHWsettings, click Setup. Click FinishWRFORVHWKH:36:L]DUGNote:)RUPRUHGHWDLOVRQDGGLQJGHYLFHVWRWKHQHWZRUNXVLQJD86%ÁDVKGULYHUHIHUWRWKHsection $GGLQJQHWZRUNGHYLFHVXVLQJD86%ÁDVKGULYH on the next page.E6688_RT-N10U BLACK_Manual.indd 38 7/6/11 9:01:42 AM](https://usermanual.wiki/ASUSTeK-Computer/RTN10UB/User-Guide-1514518-Page-38.png)
![39Chapter 5: Installing the utilities RT-N10U BLACK$GGLQJQHWZRUNGHYLFHVXVLQJD86%ÁDVKGULYH:LWKWKH:36XWLOLW\\RXFDQDGGGHYLFHVWR\RXUQHWZRUNXVLQJD86%ÁDVKGULYH7RDGGQHWZRUNGHYLFHVXVLQJD86%ÁDVKGULYH ,QWKH:36:L]DUGFOLFN6DYHVHWWLQJVWRD86%ÁDVKGULYH. ,QVHUWD 86% ÁDVK GULYH LQWR \RXU FRPSXWHUV 86% SRUW WKHQ VHOHFW WKH GULYHfrom the dropdown list. When done, click Next.E6688_RT-N10U BLACK_Manual.indd 39 7/6/11 9:01:46 AM](https://usermanual.wiki/ASUSTeK-Computer/RTN10UB/User-Guide-1514518-Page-39.png)