ASUSTeK Computer RTN13U WIRELESS N ROUTER WITH ALL-IN-ONE PRINTER SERVER User Manual 2
ASUSTeK Computer Inc WIRELESS N ROUTER WITH ALL-IN-ONE PRINTER SERVER Users Manual 2
Contents
- 1. Users Manual 1
- 2. Users Manual 2
- 3. Users Manual 3
- 4. Users Manual 4
Users Manual 2
21
Chapter 4: Conguring via the web GUI RT-N13U
4
Conguring via
the web GUI
Conguring via the web GUI
The router’s web graphics user interface (web GUI) allows you to congure these
features: Network Map, AiDisk, and EZQoS Bandwidth Management.
To congure via the web GUI:
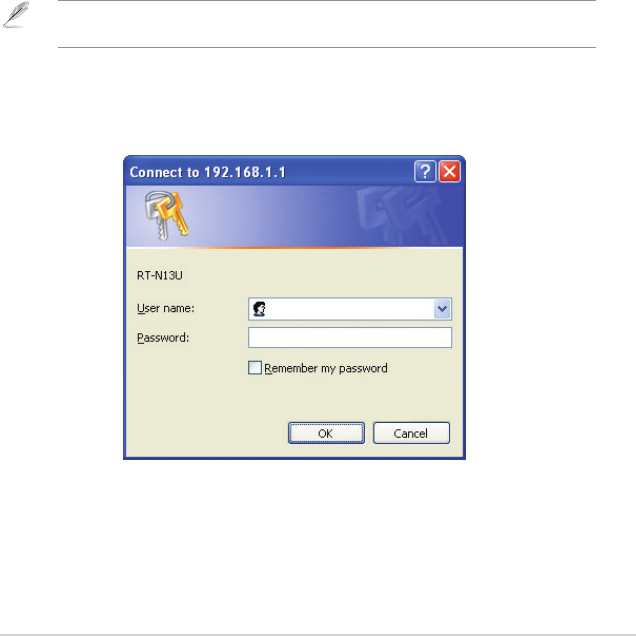
1. After setting up a wired or wireless connection, launch a web browser. The
login page automatically launches.
Note: You may also manually key in the router’s default IP address (192.168.1.1) to launch the
router’s web interface.
2. On the login page, key in the default user name (admin) and password
(admin).
22 RT-N13U Chapter 4: Conguring via the web GUI
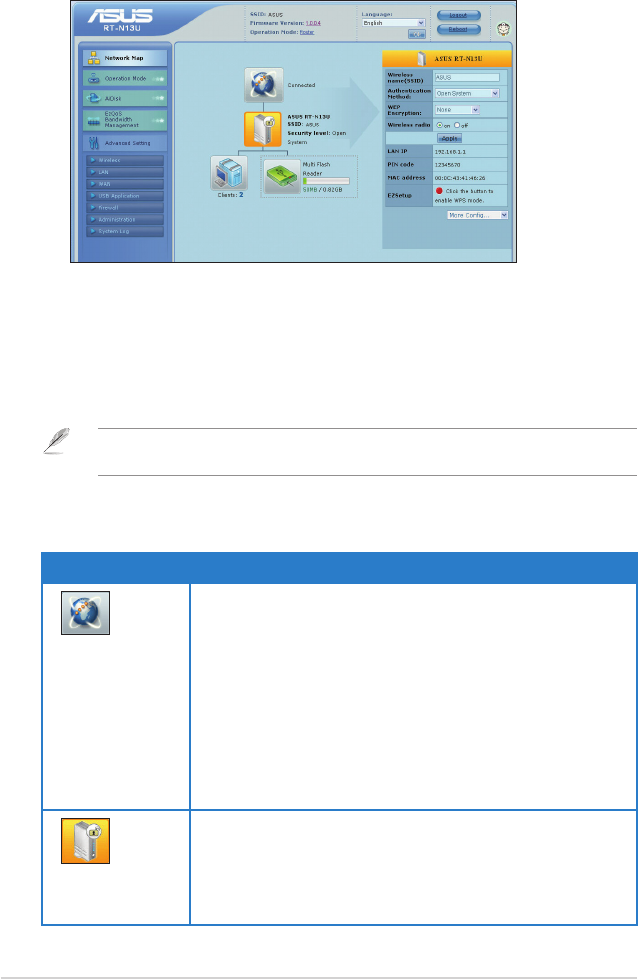
3. From the main page, click the navigation menu or links to congure the various
features of the ASUS Wireless Router.
Using the Network Map
Network Map allows you to view the status and congure the connection settings
of the Internet, system, and clients in your network. It enables you to quickly set up
your Wide Area Network (WAN) using the Quick Internet Setup (QIS) feature, or to
quickly set up your Local Area Network (LAN) using the WPS Wizard.
Note: For more details on WPS, refer to the section WPS Wizard in Chapter 5 of this user
manual.
To view the status or congure the settings, click any of these icons displayed on
the main page:
Icon Description
Internet status
Click this icon to display information on the Internet
connection status, WAN IP address, DNS, connection
type, and gateway address. From the Internet status
screen, use the Quick Internet Setup (QIS) feature to
quickly set up your WAN.
Note: For more details on the QIS feature, refer to the
section Setting up WAN using the Quick Internet Setup
(QIS) on the next page.
System status
Click this icon to display information on the SSID,
authentication method, WEP encryption, LAN IP, PIN
code, MAC address, or turn the wireless radio on/off.
Launch the WPS wizard from the System status screen.
23
Chapter 4: Conguring via the web GUI RT-N13U
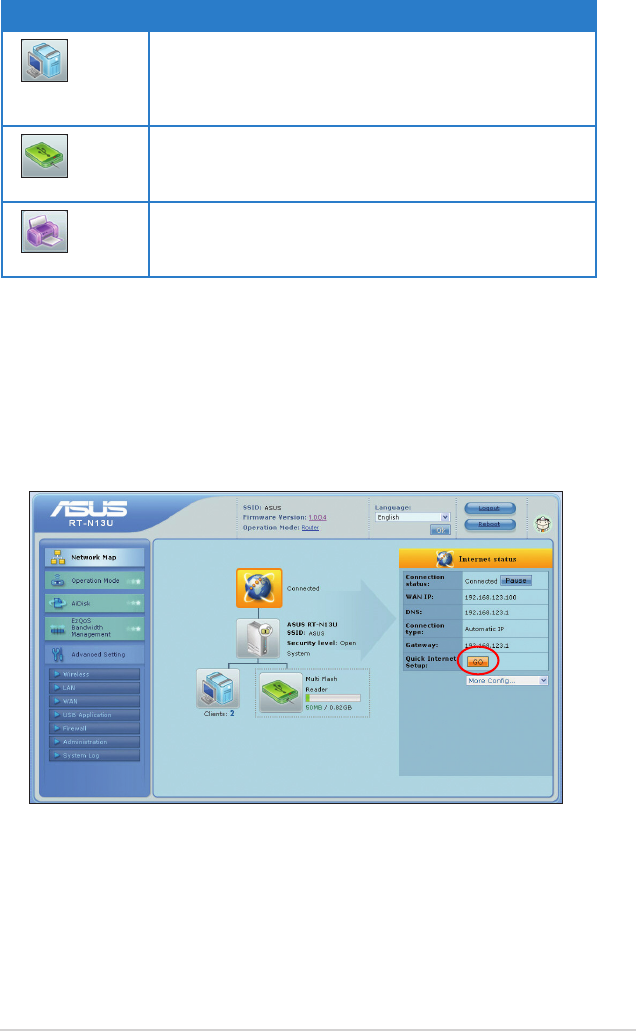
Setting up WAN using the Quick Internet Setup (QIS)
The Quick Internet Setup (QIS) function automatically detects the Internet
connection type. It guides you in setting up your WAN when encountering special
Internet connection types.
To set up your WAN using QIS:
1. Under Internet status, click GO in the QIS eld.
2. Select your connection type from these types of ISP services: Dynamic IP,
PPPoE, PPTP, L2TP, and Static IP.
3. Click Apply all settings to save the settings.
Icon Description
Client status
Click this icon to display information about the clients or
computers in the network, and allows you to block/unblock
a client.
USB disk status
Click this icon to display information about the USB disk
connected to the wireless router.
USB printer status
Click this icon to display information about the USB printer
connected to the wireless router.
24 RT-N13U Chapter 4: Conguring via the web GUI
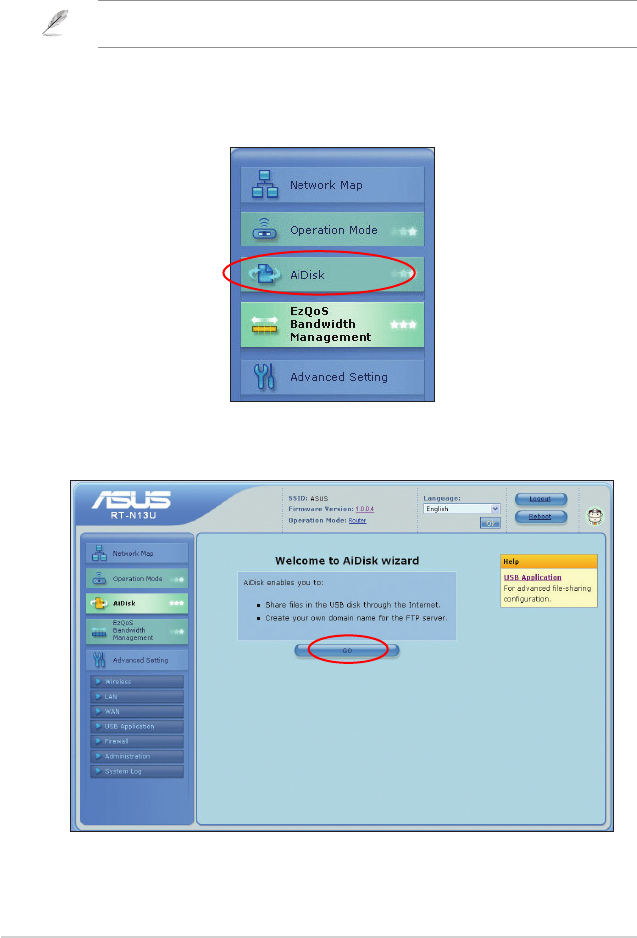
Using AiDisk
AiDisk allows you to set up an FTP server and share the content of a USB disk to
the clients in your network.
Note: Before using AiDisk, ensure that you have inserted a USB disk into the USB port of your
wireless router.
To use AiDisk:
1. Click AiDisk from the navigation menu at the left side of your screen.
2. From the Welcome to AiDisk wizard screen, click Go.

25
Chapter 4: Conguring via the web GUI RT-N13U
3. Select the access rights that you want to assign to the clients accessing your
shared data.
4. If you want to create your own domain name for your FTP site via the ASUS
DDNS services, select I will use the service and accept the Terms of
service. Otherwise, select Skip ASUS DDNS setting. Click Next to nish the
setup.
5. When done, click Finish.
6. To access the FTP site that you created, launch a web browser and key in the
ftp link (ftp://<domain name>).
26 RT-N13U Chapter 4: Conguring via the web GUI
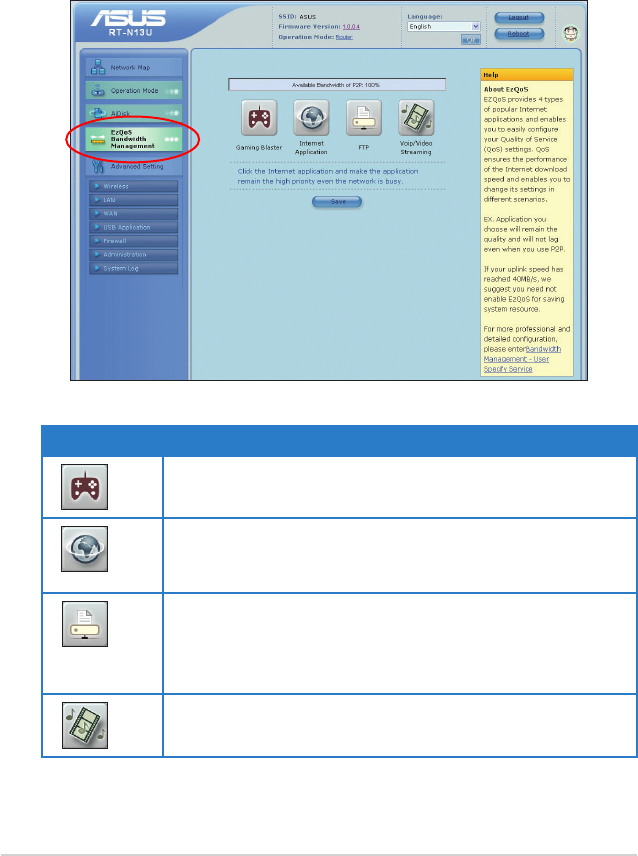
Managing EzQoS bandwidth
EzQoS Bandwidth Management enables you to set the bandwidth priority and
manage the network trafc.
To set up the bandwidth priority:
1. Click EzQoS Bandwidth Management from the navigation menu at the left
side of your screen.
2. Click each of these four applications to set the bandwidth priority:
Icon Description
Gaming Blaster
The router handles gaming trafc at rst priority.
Internet Application
The router handles the e-mail, web browsing and other
Internet applications trafc at rst priority.
FTP
The router handles at rst priority the trafc of downloading/
uploading data to/from the FTP server.
Voip/Video Streaming
The router handles the audio/video trafc at rst priority.
3. Click Save to save the conguration settings.
27
Chapter 4: Conguring via the web GUI RT-N13U
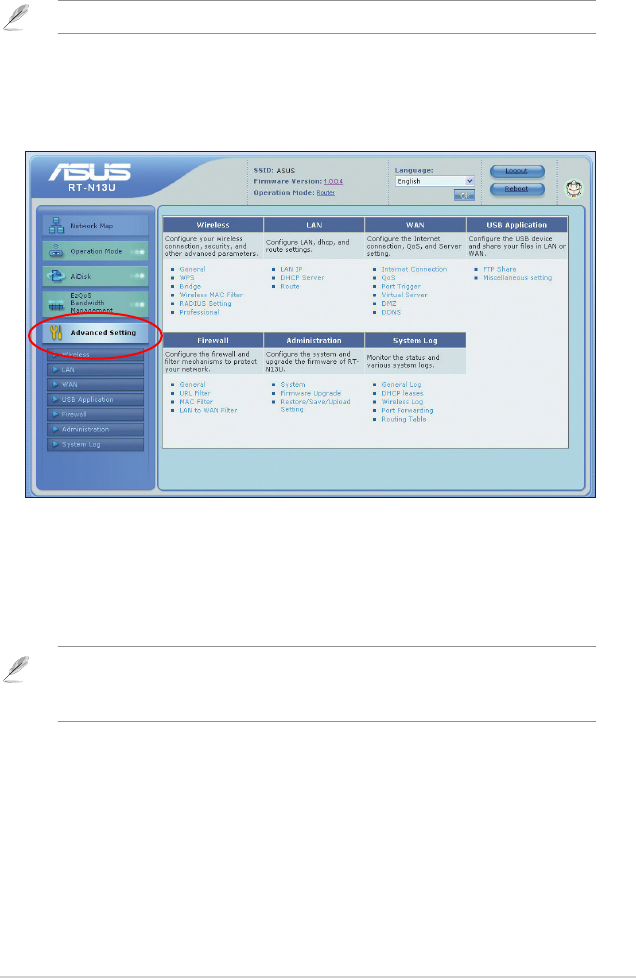
Upgrading the rmware
Note: Download the latest rmware from the ASUS website at http://www.asus.com
To upgrade the rmware:
1. Click Advanced Setting from the navigation menu at the left side of your
screen.
2. Under the Administration menu, click Firmware Upgrade.
3. In the New Firmware File eld, click Browse to locate the new rmware on your
computer.
4. Click Upload. The uploading process takes about three minutes.
Note: If the upgrade process fails, the wireless router automatically enters the rescue mode and
the power LED indicator at the front panel ashes slowly. To recover or restore the system, use
the Firmware Restoration utility. For more details on this utility, refer to the section Firmware
Restoration in Chapter 5 of this user manual.
28 RT-N13U Chapter 4: Conguring via the web GUI
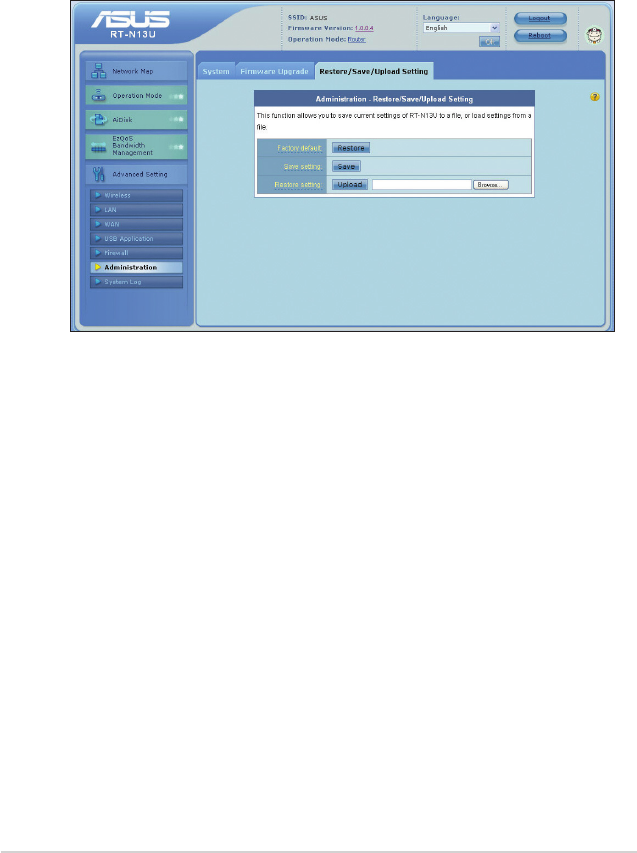
Restoring/Saving/Uploading settings
To restore/save/upload the settings:
1. Click Advanced Setting from the navigation menu at the left side of your
screen.
2. Under the Administration menu, click Restore/Save/Upload Setting.
3. Select the tasks that you want to do:
• To restore to the default factory settings, click Restore, and click OK in the
conrmation message.
• To save the current system settings, click Save, and click Save in the le
download window to save the system le in your preferred path.
• To restore previous system settings, click Browse to locate the system le that
you want to restore, then click Upload.
29
Chapter 4: Conguring via the web GUI RT-N13U
Using the USB application
The ASUS Wireless Router provides two USB 2.0 ports for connecting USB
devices such as a USB storage device and USB printer, to allow you to monitor the
working environment, share les, and printer with clients in your network.
Note: To use this feature, you need to plug a USB storage device, such as a USB hard disk or
USB ash drive, to the USB 2.0 port on the rear panel of your wireless router. Ensure that the
USB storage device is formatted and partitioned properly. Refer to the ASUS website at
www.asus.com for the HD le system support table.
Creating a user account
You need to create user accounts before you can share the les or data in the USB
storage device.
To create a user account:
1. Click Advanced Setting > USB Application from the navigation menu at the
left side of your screen.
2. Click Share with account, and click OK to enable the sharing feature.
3. Click the Add account icon.
4. In the Account and Password elds, key in the name and password of the
client/computer in your network. Retype the password to conrm. Click Add to
add the account to the list.
30 RT-N13U Chapter 4: Conguring via the web GUI
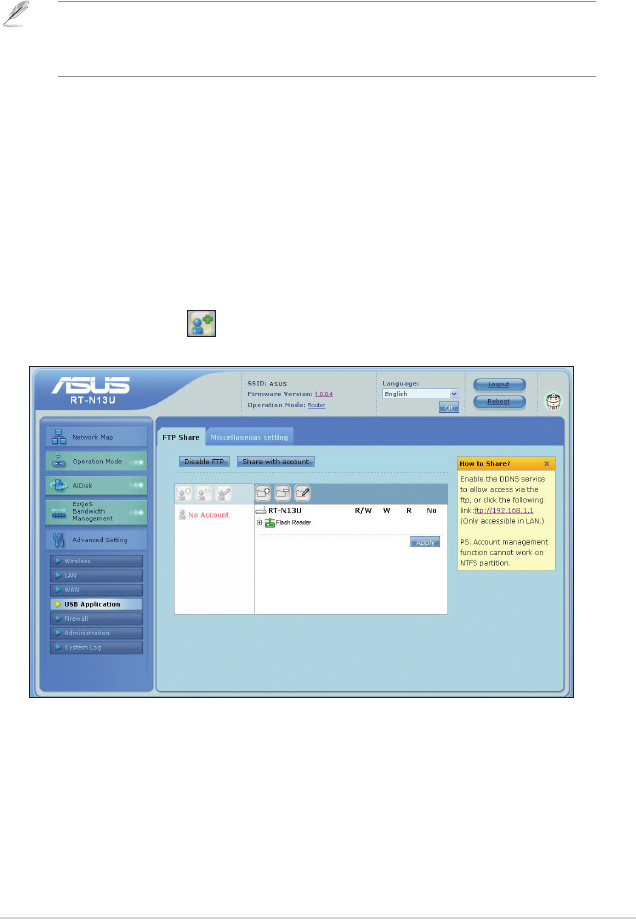
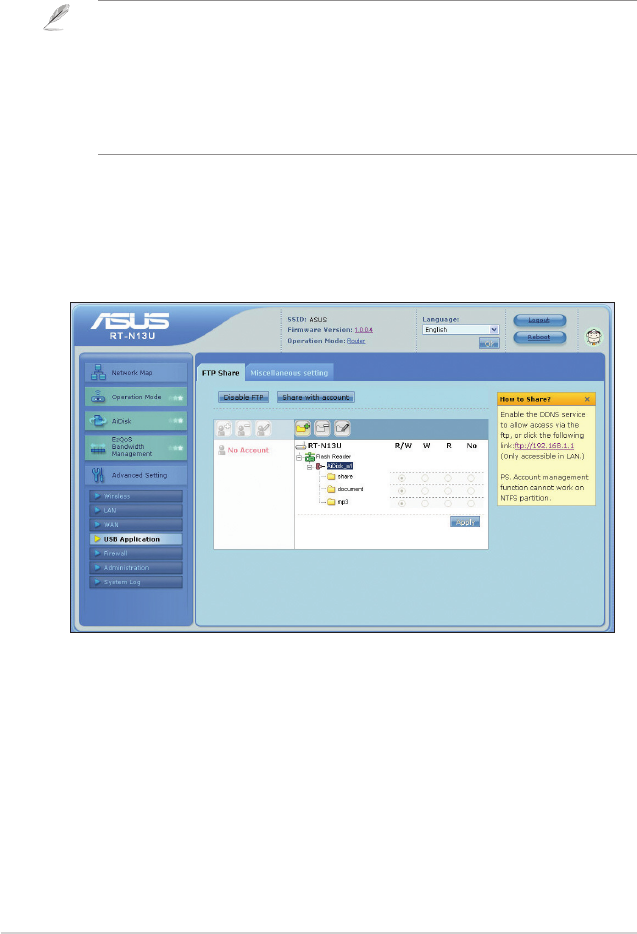
Setting up an FTP site
The ASUS Wireless Router enables you to share les from your USB storage
device with computers in LAN or through the Internet.
Notes:
• To use this feature, you need to insert a USB storage device, such as a USB hard disk or USB
ash drive, to the USB2.0 port on the rear panel of your wireless router. Ensure that the USB
storage device is formatted and partitioned properly. Refer to the ASUS website at
www.asus com for the HD le system support table.
• To access the FTP, you may either enable the DDNS service or key in the ftp link
ftp://192.168.1.1 from any computer in LAN.
To set up an FTP site:
1. Click Advanced Setting > USB Application from the navigation menu at the
left side of your screen.
2. From the FTP Share tab, select the account that you want to assign access
rights to.
3. From the list of le folders, select the type of access rights that you want to
assign for specic le folders:
• R/W: Select this option to assign read/write access for a specic le folder.
• W: Select this option to assign write only access for a specic le folder.
• R: Select this option to assign read only access for a specic le folder.
• No: Select this option if you do not want to share a specic le folder.
4. Click Apply to apply the changes.
5. From any LAN computer, key in ftp://192.168.1.1 on a web browser.