ASUSTeK Computer RTN13U WIRELESS N ROUTER WITH ALL-IN-ONE PRINTER SERVER User Manual 3
ASUSTeK Computer Inc WIRELESS N ROUTER WITH ALL-IN-ONE PRINTER SERVER Users Manual 3
Contents
- 1. Users Manual 1
- 2. Users Manual 2
- 3. Users Manual 3
- 4. Users Manual 4
Users Manual 3
31
Chapter 4: Conguring via the web GUI RT-N13U
Connecting a USB printer
Connect a compatible USB printer to the USB 2.0 port of the ASUS Wireless
Router and share the USB printer with your LAN clients.
Note: Visit the ASUS Website at http://www.asus.com for compatible printer vendor and models.
To connect a USB printer:
1. Plug your USB printer to the USB 2.0 port on the rear panel of the wireless
router.
2. Install the printer driver for your computer’s operating system.
Note: Refer to the section below to install the printer on Windows® XP.
Installing the printer on Windows® XP
To install the printer on Windows® XP:
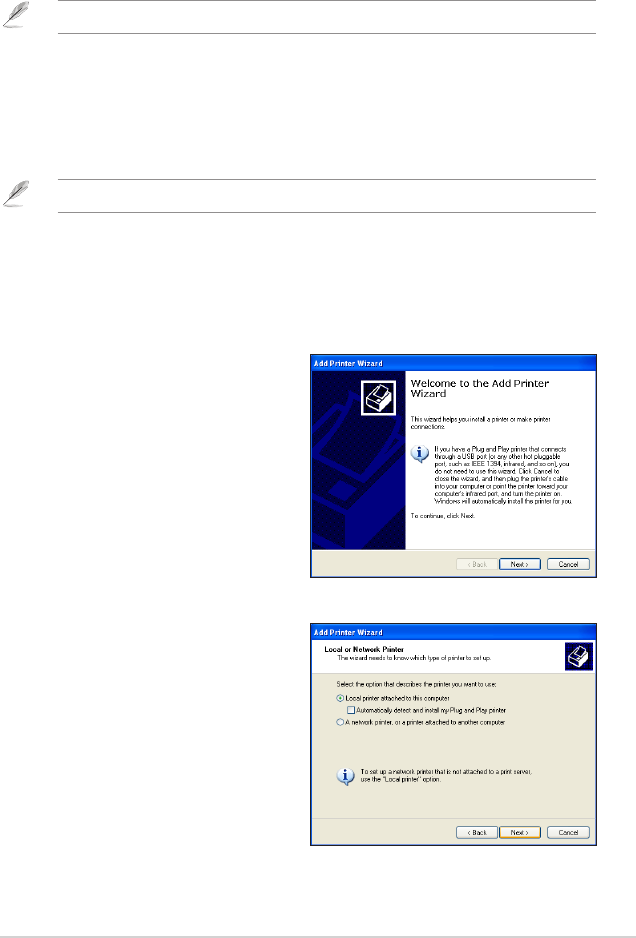
1. Run the Add Printer Wizard from
Start > Printers and Faxes > Add
a printer.
2. Select Local printer attached to
this computer and click Next.
32 RT-N13U Chapter 4: Conguring via the web GUI
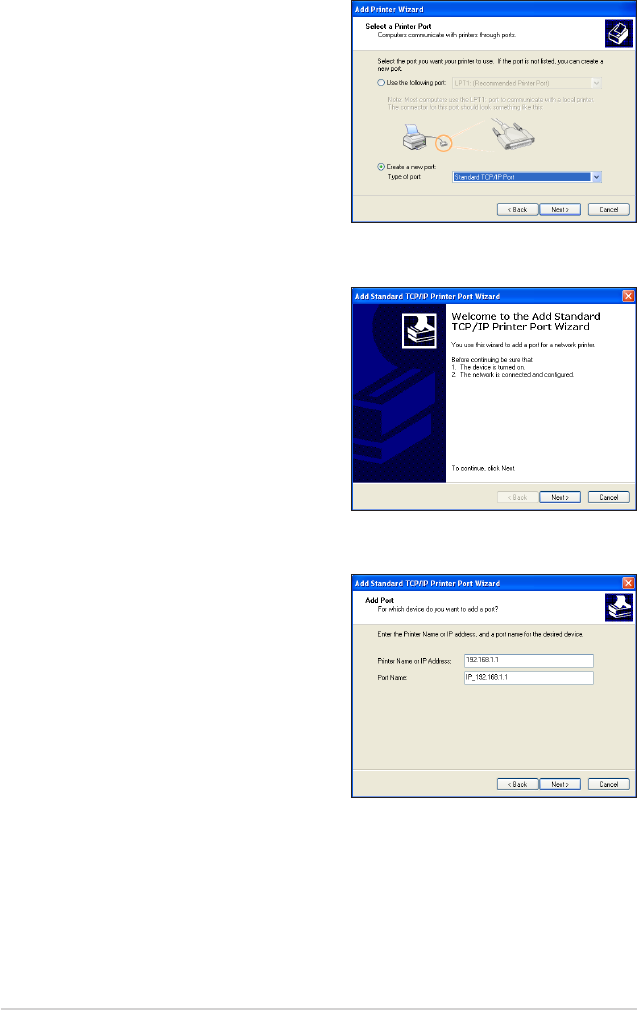
3. Select Create a new port and set
Type of port to Standard TCP/IP
Port, then click Next.
4. Click Next to set up the TCP/IP port
for accessing the network printer.
5. Key in the IP address of the
wireless router in the Printer Name
of IP Address eld and click Next.
33
Chapter 4: Conguring via the web GUI RT-N13U
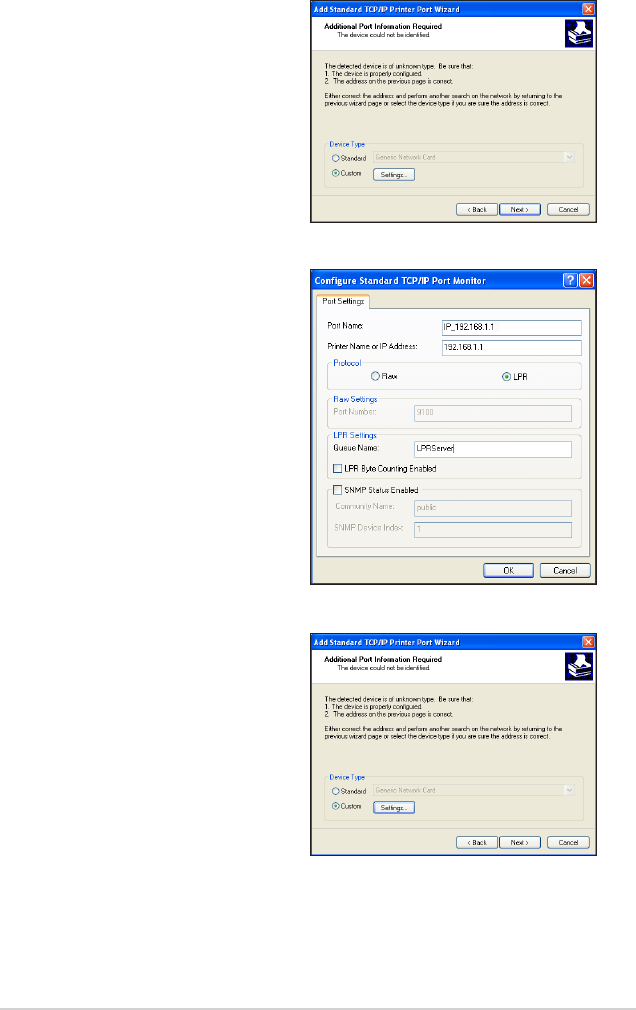
6. Select Custom and click Settings...
7. Set Protocol to LPR and type
LPRServer in Queue Name eld.
Click Next to continue.
8. Press Next to nish the standard
TCP/IP port setting.
34 RT-N13U Chapter 4: Conguring via the web GUI
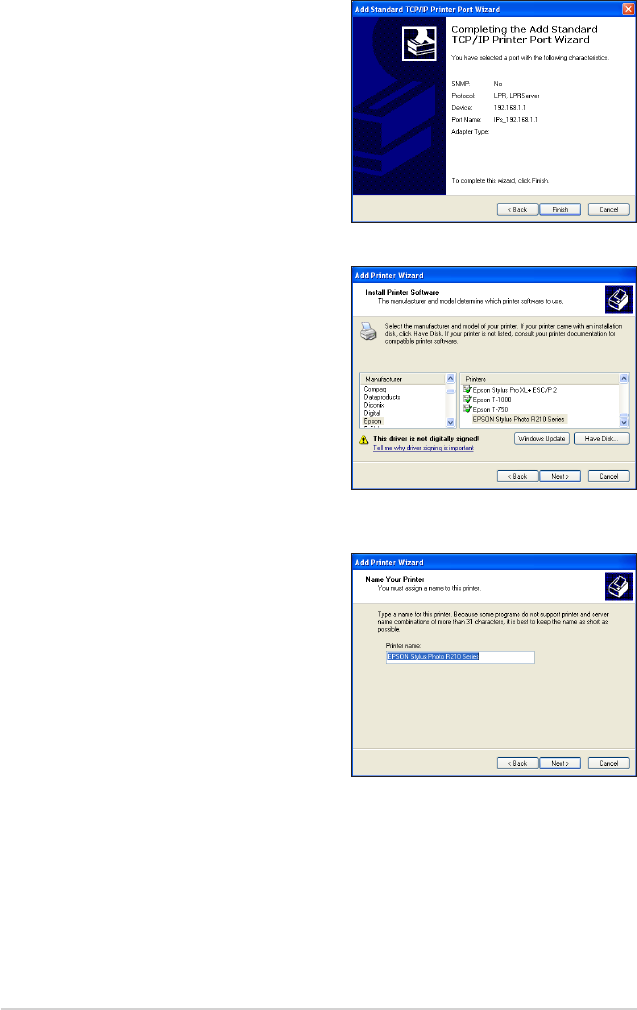
9. Press Finish to complete the
settings and return to the Add
Printer Wizard.
10. Install printer driver from the
vendor-model list. If your printer
is not in the list, click Have Disk
to manually assign the location of
driver.
11. Click Next to accept the default
name for the printer.
35
Chapter 4: Conguring via the web GUI RT-N13U
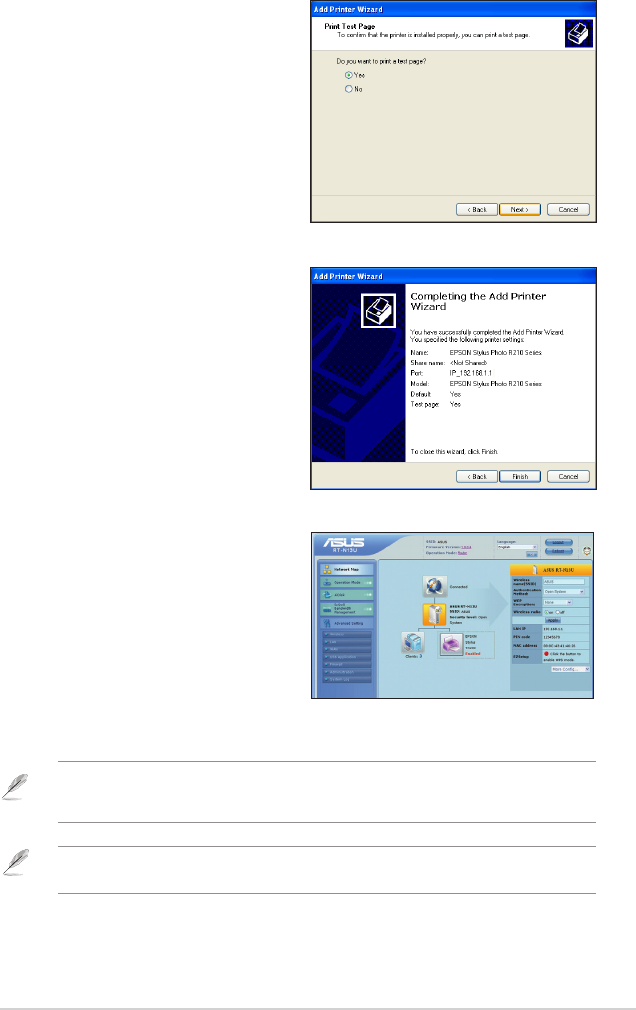
12. Select Yes to print a test page.
Click Next to print.
13. The installation is complete. Click
Finish to quit the Add Printer
Wizard.
Note: If you have already installed the printer locally on your computer, right click the printer
icon and select Property > Port tab to add a standard TCP/IP port. Click Add Port then select
Standard TCP/IP Port and click New Port button. Refer to steps 5-8 for setting procedures.
Note: If you use Windows® 98 or ME which does not support Standard TCP/IP port, you need to
use Remote Port which is supported by the ASUS Wireless Router.
14. After connecting your USB printer
and installing the printer driver, you
can now see the printer name and
status on the wireless router’s web
GUI.
36 RT-N13U Chapter 5: Installing the utilities
5
Installing the
utilities
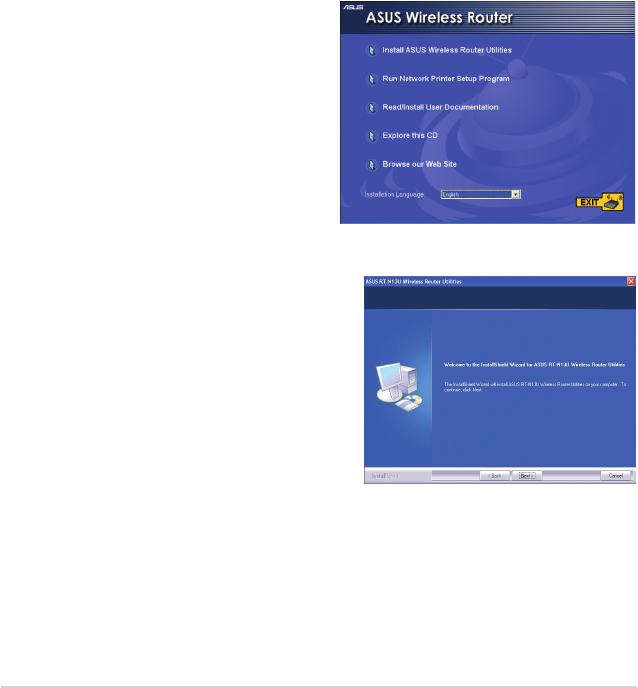
2. Click Next.
Installing the utilities
The support CD contains the utilities for conguring the ASUS Wireless Router.
To install the ASUS WLAN Utilities in Microsoft® Windows, insert the support CD
in the CD drive. If Autorun is disabled, run setup.exe from the root directory of the
support CD.
To install the utilities:
1. Click Install...Utilities.

37
Chapter 5: Installing the utilities RT-N13U
3. Click Next to accept the default
destination folder or click Browse to
specify another path.
4. Click Next to accept the default
program folder or enter another
name.
5. Click Finish when setup is
completed.
38 RT-N13U Chapter 5: Installing the utilities
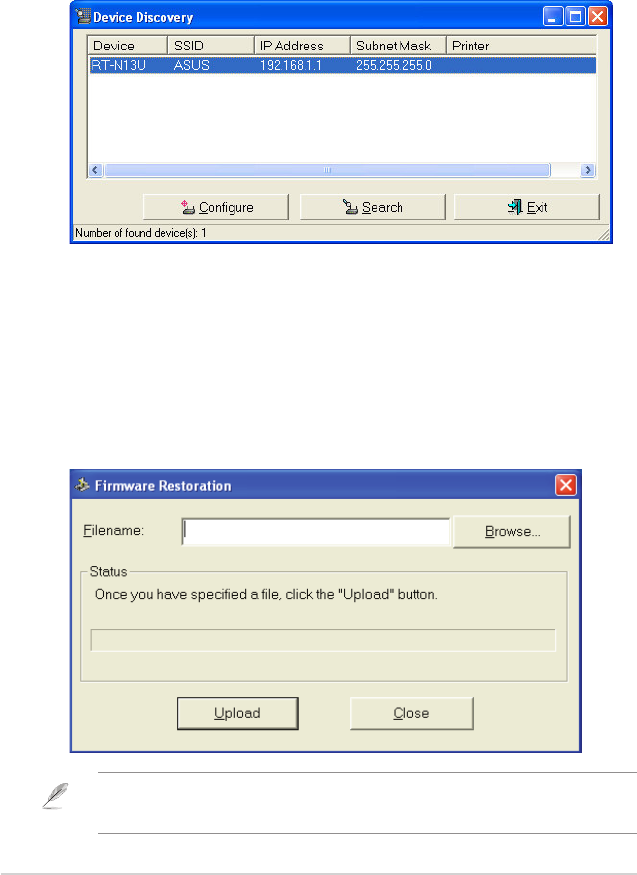
Device Discovery
Device Discovery is an ASUS WLAN utility that detects an ASUS wireless router
device, and enables you to congure the device.
To launch the Device Discovery utility:
• From your computer’s desktop, click Start > All Programs > ASUS Utility
> RT-N13U Wireless Router > Device Discovery.
Firmware Restoration
Firmware Restoration is a utility that searches for an ASUS Wireless Router that
failed during its rmware upgrading process, then restores or re-uploads the
rmware that you specify. The process takes about three to four minutes.
To launch the Firmware Restoration utility:
• From your computer’s desktop, click Start > All Programs > ASUS Utility
RT-N13U Wireless Router > Firmware Restoration.
Note: This is not a rmware upgrade utility and cannot be used on a working ASUS Wireless
Router. Normal rmware upgrades must be done through the web interface. Refer to Chapter 4:
Conguring via the web GUI for more details.

39
Chapter 5: Installing the utilities RT-N13U
WPS Wizard
WPS (Wi-Fi Protected Setup) allows you to set up a secure and protected wireless
network easily.
• Ensure that you use a wireless LAN dapter with WPS function.
• Windows® operating systems and wireless LAN cards/adapters that support WPS:
Using WPS Wizard
OS Support Wireless Adapter Support
Vista 32/64
Intel wireless LAN card
ASUS 167gv2 driver v3.0.6.0 or later
ASUS 160N/130N driver v2.0.0.0 or later
XP SP2
Intel wireless LAN card
ASUS 167gv2 driver v1.2.2.0 or later
ASUS 160N/130N driver v1.0.4.0 or later
XP SP1 and 2000
ASUS LAN card with ASUS WLAN Utility
ASUS 167gv2 driver v1.2.2.0 or later
ASUS 160N/130N driver v1.0.4.0 or later
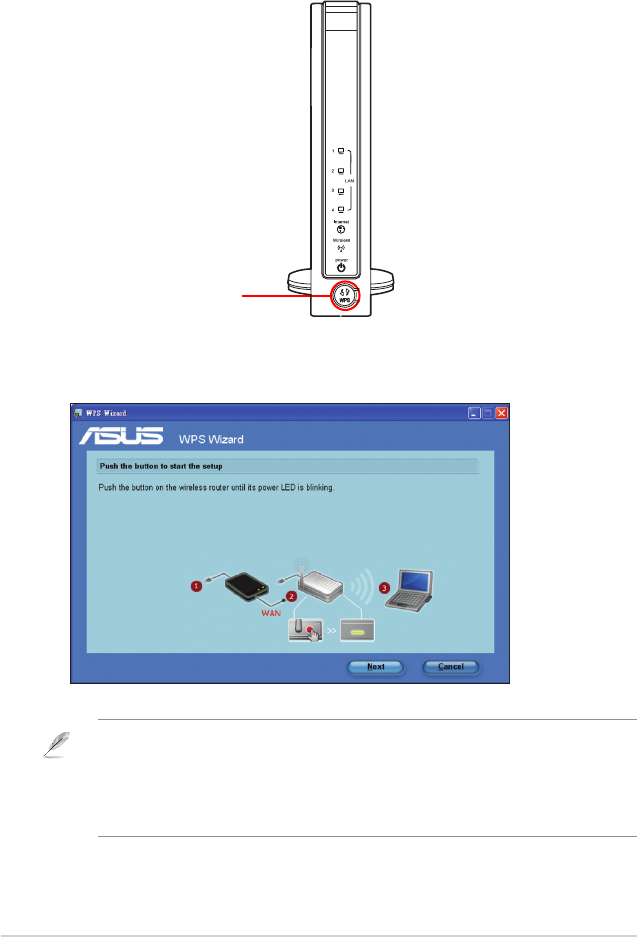
To use WPS Wizard:
1. Follow the onscreen instructions to set up your hardware. When done, click
Next.
Note: Use the WPS Wizard with one wireless client at a time. If the wireless client
cannot discover the wireless router, shorten the distance between the client and the
router.
40 RT-N13U Chapter 5: Installing the utilities
2. Push the WPS button on the front panel of the wireless router for more than
ve seconds.
WPS button
3. On the WPS Wizard, click Next to continue.
Notes:
• When running WPS, the Internet connection pauses briey then reestablishes the
connection.
• If the WPS button is pushed without running the WPS Wizard, the PWR
indicator ashes and Internet connection pauses briey and then reestablishes the
connection.
41
Chapter 5: Installing the utilities RT-N13U
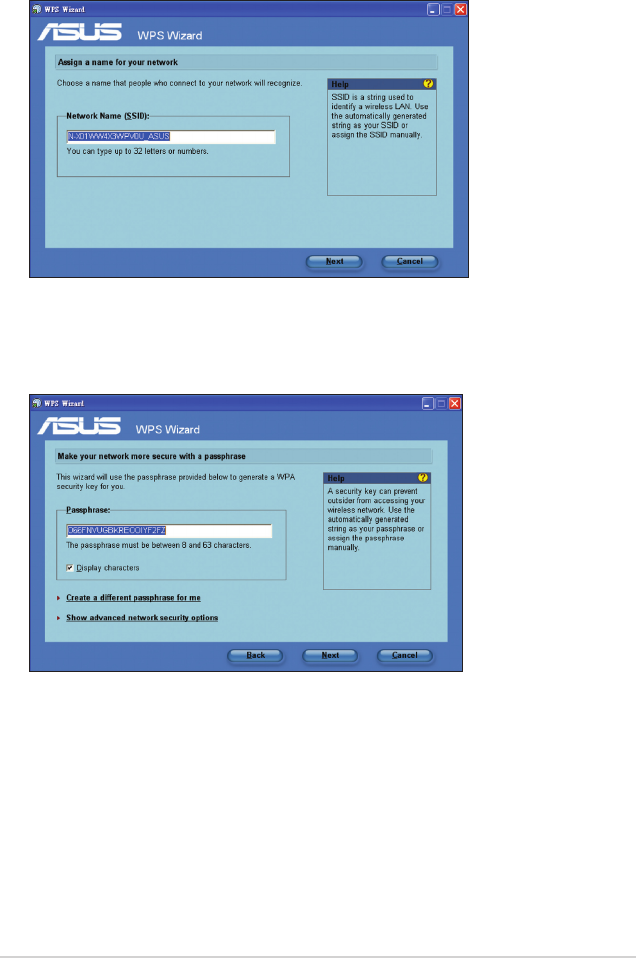
4. Assign a name to your network, then click Next.
5. Use the auto-generated passphrase as your network’s security key or manually
assign a passphrase containing between 8 and 63 characters. Click Next.
42 RT-N13U Chapter 5: Installing the utilities
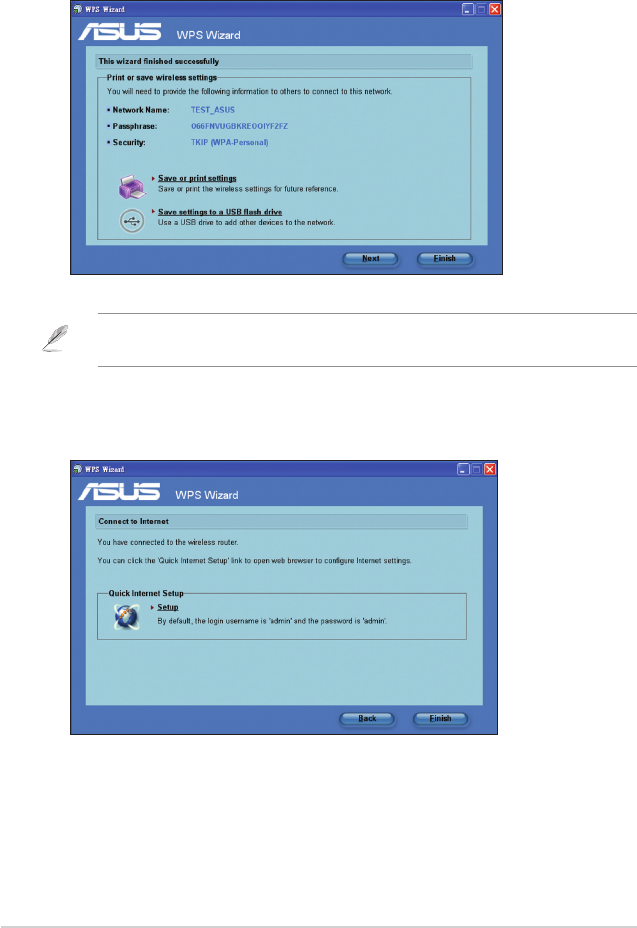
6. Installation is completed. Click Save or print settings for future reference or
Save settings to a USB ash drive to add other devices to the network. Click
Next to connect to the Internet.
Note: For more details on adding devices to the network using a USB ash drive, refer to the
section Adding network devices using a USB ash drive on the next page.
7. You have connected to the wireless router. If you want to congure the Internet
settings, click Setup. Click Finish to close the WPS Wizard.