ASUSTeK Computer USBN10 ASUS EZ N NETWORK ADAPTER User Manual 2
ASUSTeK Computer Inc ASUS EZ N NETWORK ADAPTER Users Manual 2
Contents
- 1. Users Manual 4
- 2. Users Manual 1
- 3. Users Manual 2
- 4. Users Manual 3
Users Manual 2
16 ASUS USB-N10 Chapter 3: Connecting to the wireless network
Adding network devices using a USB ash drive
With the WPS Wizard utility, you can add devices to your network using a USB
ash drive.
To add network devices using a USB ash drive:
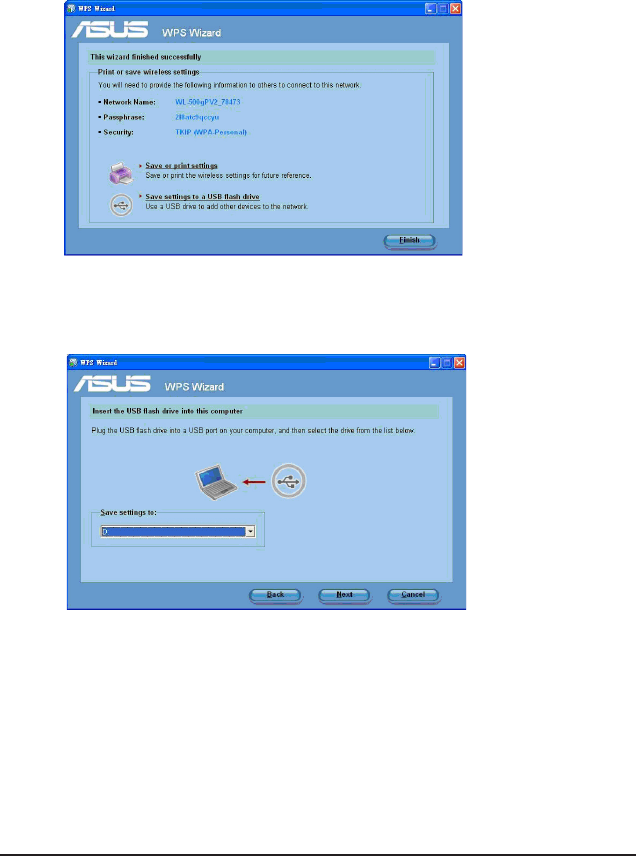
1. In the WPS Wizard, click Save settings to a USB ash drive.
2. Plug a USB ash drive into the USB port on your computer, and then select the
drive from the dropdown list. When done, click Next to continue.
ASUS USB N-10 Chapter 3: Connecting to the wireless network 17
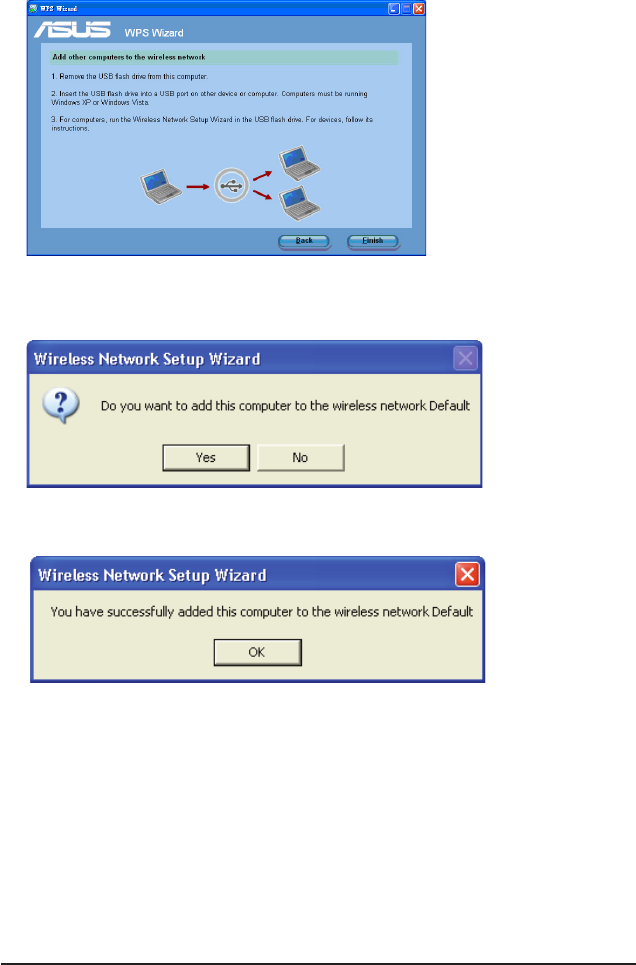
3. Remove the USB ash drive from this computer, and then plug to the computer
that you want to add to the wireless network.
4. Locate the SetupWireless.exe from the USB drive, and double-click to run it.
Click Yes to add the computer to the wireless network.
5. Click OK to exit the Wireless Network Setup Wizard.
18 ASUS USB-N10 Chapter 3: Connecting to the wireless network
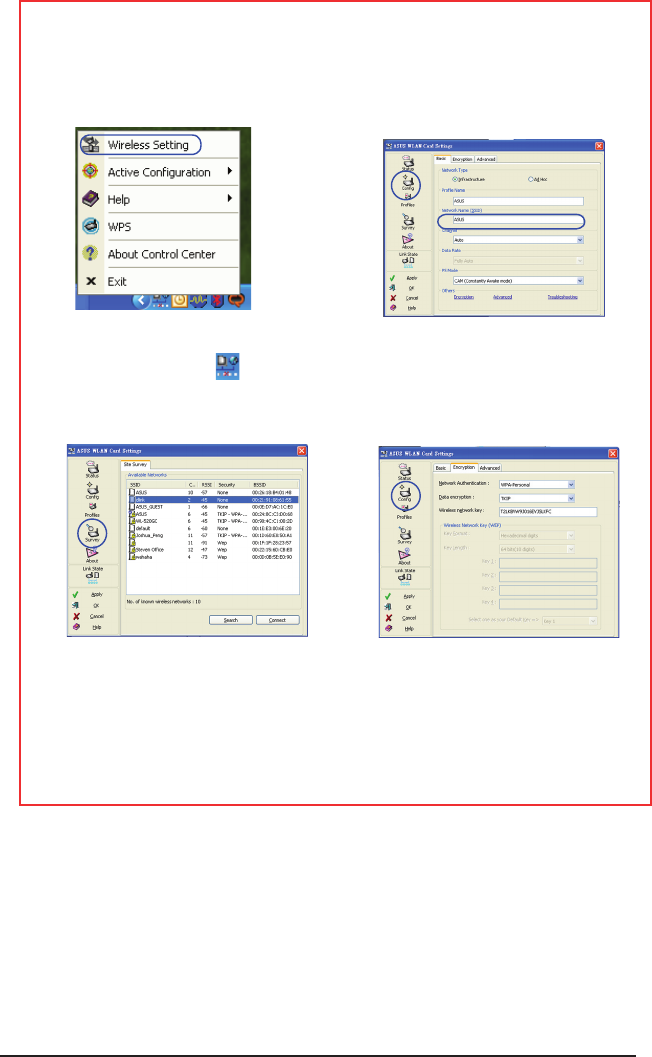
Conguring with the WLAN utility (Infrastructure)
Use the ASUS WLAN utility to connect with an existing wireless network.
3. Use Site Survey if you do not know
the SSID of your access point.
4. Encryption settings must match
those at the access point. Ask your
network administrator about settings
if necessary. Click Apply to activate
the settings.
2. Check the Config page to set the
SSID (network name) to that of your
wireless AP.
1. From the Windows® taskbar, right-
click the WLAN icon , then select
Wireless Setting.
ASUS USB N-10 Chapter 3: Connecting to the wireless network 19
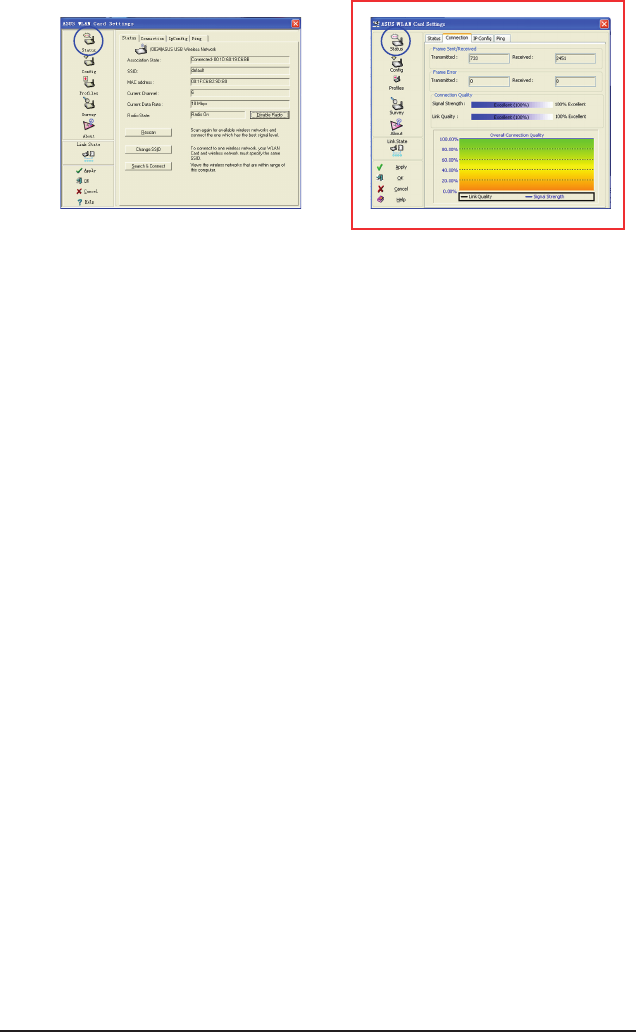
6. Check the Connection tab to see
the signal strength. Click OK to exit
the utility.
5. Check the Status page to see the
association state. If connection
is established, the box shows
“Connected - xx:xx:xx:xx:xx:xx”.
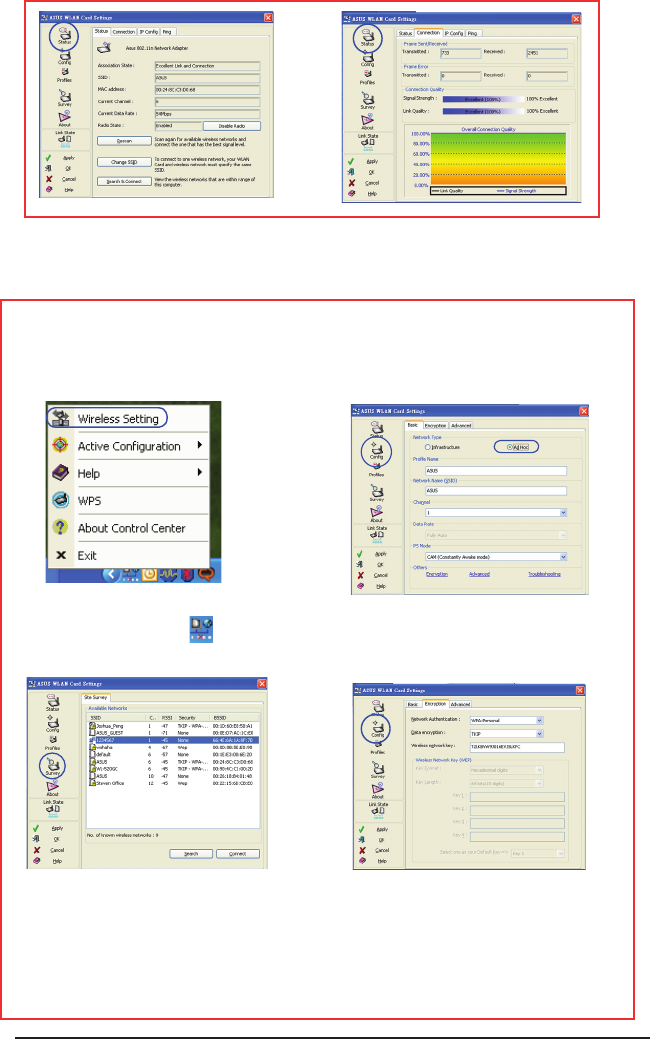
Conguring with the WLAN utility (Ad Hoc)
The Network adapter supports Ad Hoc mode that allows communication between
wireless stations without an AP.
2. Click the Config button and set the
Network adapter to Ad Hoc connection
mode.
3. Click the Survey button to scan for
Ad Hoc nodes. Select the node you
want to communicate with and press
Connect.
4. If the encryption settings of your
WLAN Adapter are different from
those of the other Ad Hoc nodes, you
are prompted to make the encryption
of the two nodes identical. Click Apply
to activate the settings.
1. From the Windows® taskbar, right-
click the WLAN icon , then select
Wireless Setting.
20 ASUS USB-N10 Chapter 3: Connecting to the wireless network
5. Check the Status page to see the
association state. If connection is
established, the box shows “Connected
- xx:xx:xx:xx:xx:xx”.
6. Check the Connection tab to see
the signal strength. Click OK to exit
the utility.
ASUS USB-N10 21
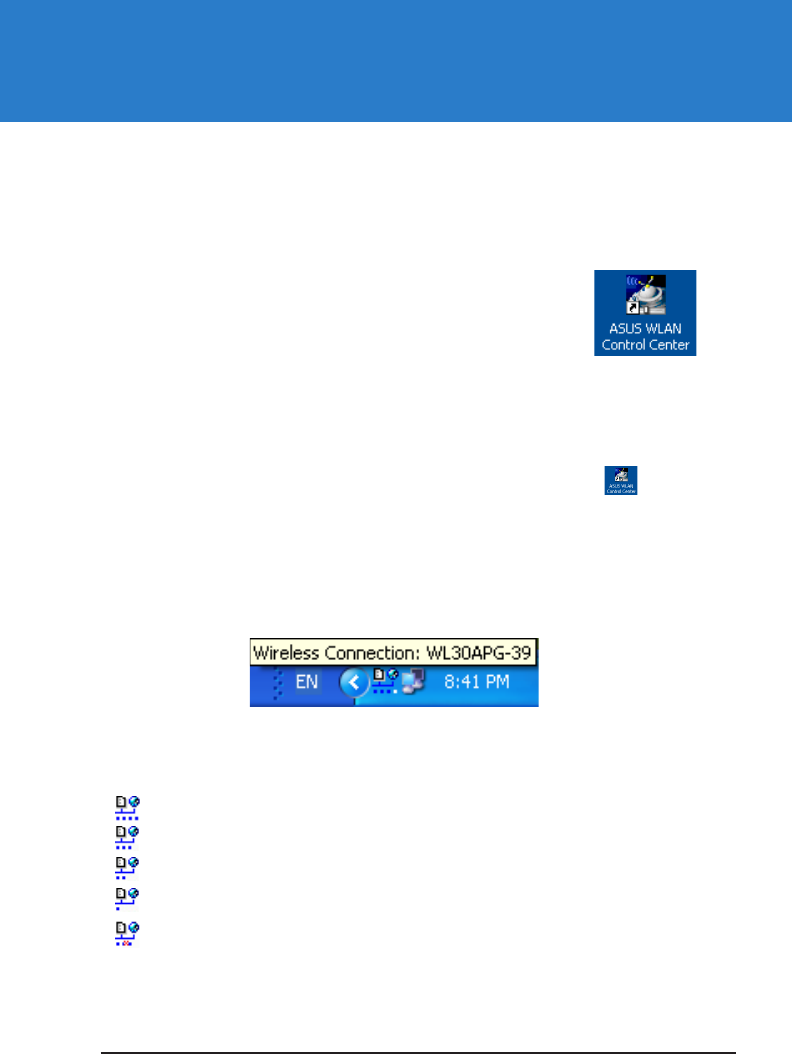
Launching the ASUS WLAN Control Center
ASUS WLAN Control Center is an application that makes it easier
to launch WLAN applications and activate the network location
settings.It starts automatically when system boots up. When WLAN
Control Center is running, you can see a Control Center icon on
the Windows® desktop.
To launch the ASUS WLAN Control Center, do any of the following:
• Click Start > All Programs > ASUS WLAN Control Center > ASUS WLAN
Control Center.
• From Windows® desktop, click the ASUS WLAN Control Center icon .
The Control Center taskbar icon displays the following information:
• Link quality of the Network adapter (Excellent, Good, Fair, Poor, Not Linked)Link quality of the Network adapter (Excellent, Good, Fair, Poor, Not Linked)
• Whether the NetwoWhether the Network adapter is connected to a network (Blue: Connected,
Gray: Not Connected)
Taskbar Icon and Status
Wireless Status Icons (on the taskbar)
Excellent link quality and connected to Internet (Infrastructure)
Good link quality and connected to Internet (Infrastructure)
Fair link quality and connected to Internet (Infrastructure)
Poor link quality and connected to Internet (Infrastructure)
Not linked but connected to Internet (Infrastructure)
Chapter 4
Using the ASUS WLAN Control Center
ASUS USB-N10 Chapter 4: Using the ASUS WLAN Control Center
22
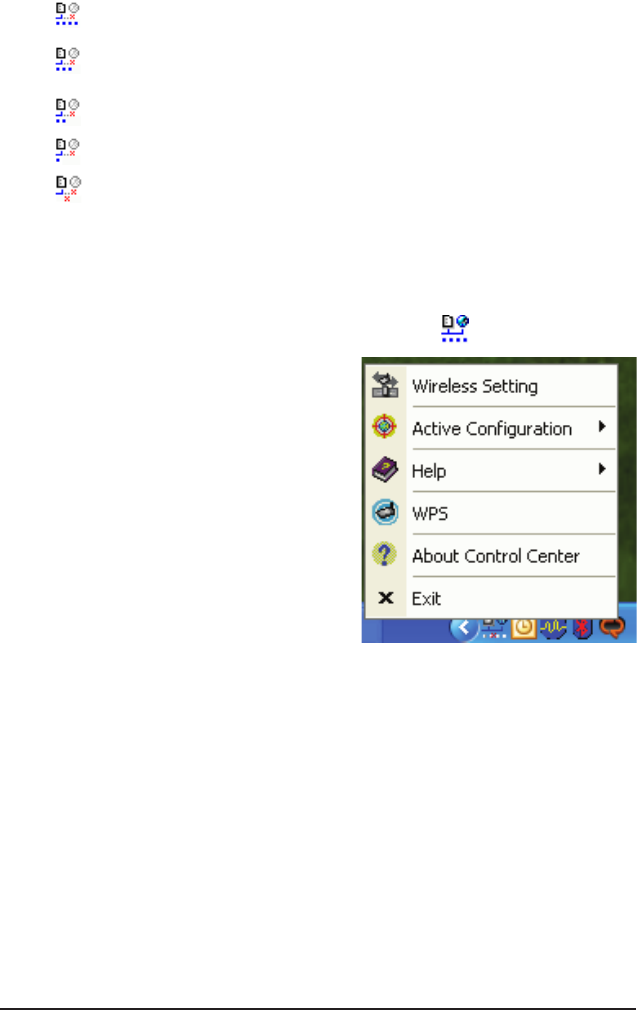
Using the Wireless Settings right-click menu
To use the Wireless Settings right-click menu:
From the Windows® desktop, right-click the WLAN icon to display the Wireless
Settings right-click menu.
The menu contains the following items:
• Wireless Setting: Click to launch
Wireless Setting application.
• Activate Conguration: Click to
choose a preset prole.
• Help: Click to launch the help le.
• WPS: Click to launch Wireless
Protected Setup Wizard.
• About Control Center: Shows the
version of Control Center.
• Exit: Click to close the Control Center
program.
Excellent link quality but not connected to Internet (Infrastructure)
Good link quality but not connected to Internet (Infrastructure)
Fair link quality but not connected to Internet (Infrastructure)
Poor link quality but not connected to Internet (Infrastructure)
Not linked and not connected to Internet (Infrastructure)
ASUS USB-N10 Chapter 4: Using the ASUS WLAN Control Center 23
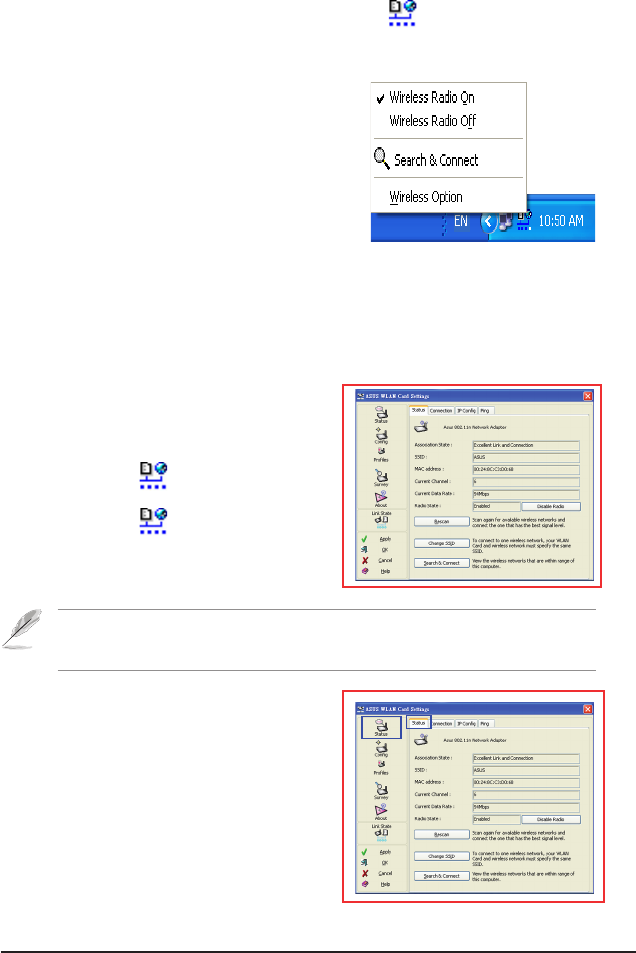
Using the Wireless Settings left-click menu
To use the Wireless Settings left-click menu:
From the Windows® desktop, left-click the WLAN icon to display the Wireless
Settings left-click menu.
The menu contains the following items:
• Wireless Radio On: Click to turn the wireless
radio ON.
• Wireless Radio Off: Click to turn the wireless
radio OFF.
• Search & Connect: Click to view theview the
properties of available access points.
• Wireless Option (Windows® XP only): Click to
choose Windows® Wireless Zero Conguration
(WZC) service or ASUS utilities to congure
your Network adapter.
Using the ASUS WLAN Card Settings utilities
Launching the ASUS WLAN Card Settings screen
To launch the ASUS WLAN Card Settings
screen, do any of the following:
• From the Windows® desktop, double-click
the WLAN icon .
• From the Windows ® desktop, right-click
the WLAN icon , then select Wireless
Settings.
Note: If you have more than one ASUS WLAN device installed on your computer, you may see
a device selection window when you launch the “Wireless Settings” utility. Select the device you
want when such situation occurs.
Status - Status
The Status page provides information about
the 802.11n network adapter. The status elds
are blank if the 802.11n network adapter is not
installed.
To turn off the 802.11n network adapter, click
Disable Radio.

ASUS USB-N10 Chapter 4: Using the ASUS WLAN Control Center
24
• Association State: Displays the connection status:
• Connected: The network adapter is now associated with one wireless LAN
device. When operating in Infrastructure mode, this eld shows the access
point's MAC address that the network adapter is is communicating with.
When operating in Ad Hoc mode, this eld shows the virtual MAC address
used by computers participating in the Ad Hoc network.
• Scanning... : The station is trying to authenticate and associate with an
access point or Ad Hoc node.
• Disconnected: The network adapter is installed to the system, but not yet
connected to a wireless device.
• SSID: Displays the Service Set Identifier (SSID) of the device that the
network adapter is either associated with or intending to join.
• MAC address: Shows the hardware address of the network adapter. MAC
address is a unique identier for networking devices (typically written as
twelve hexadecimal digits from 0 through 9 and A through F separated by
colons, i.e. 00:E0:18:F0:05:C0).
• Current Channel: Displays the radio channel to which the network adapter
is currently tuned. This number changes as the radio scans the available
channels.
• Current Data Rate: Displays the current data rate in megabits per second
(Mbps).
NOTE: For 802.11n performance, select 40MHz bandwidth in wireless router. Channel option
depends on the bandwidth that you select.
• Radio State: Shows the wireless radio status: ON or OFF.
• Radio On: When the wireless radio is turned ON, the icon on the right appears
in the upper left of the Status page.
• Radio Off: When the wireless radio is turned OFF, the icon on the right appears
in the upper left of the Status page.
• Rescan: Make the Network adapter rescan all available devices. If the current
link quality or signal strength is poor, rescanning can be used to push the radio
off a weak access point and search for a better link with another access point.
This function usually takes several seconds.
• Change SSID: Click this button to set the SSID to that of the AP you want to
connect.
• Search & Connect: Click this button to connect to an available wireless AP.
ASUS USB-N10 Chapter 4: Using the ASUS WLAN Control Center 25
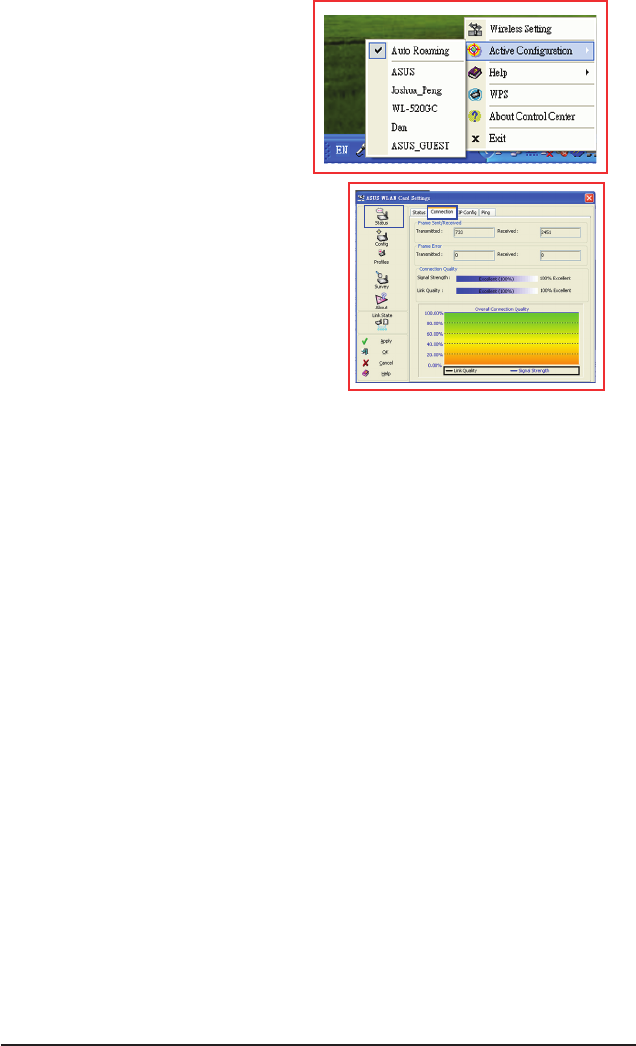
Activate Conguration
Auto roaming is enabled by default and
makes the adapter automatically switch to
APs with better signal. You can uncheck it if
you want to connect to a specied AP using
a particular prole.
Status - Connection
You can view the current link statistics about the
Network adapter. These statistics are updated once
per second and are valid if the Network adapter is
correctly installed.
Throughput
• Transmitted: The number of frames that
were transmitted.
• Received: The number of frames that were received.
Frame Error
• Transmitted: The number of frames that were not successfully transmitted
• Received: The number of frames that were not successfully received.
Connection Quality
• Signal Strength/Link Quality: Shows the signal strength/link quality of the
access point or Ad Hoc node the Network adapter is currently connected to.
Ratings are: Excellent, Good, Fair, and Poor.
Overall Connection Quality
The overall connection quality is derived from the current signal strength. A graphic
chart uses percentage to show signal quality.