ASUSTeK Computer WL600G ALL-IN1 WIRELESS ADSL2/2+ HOME GATEWAY User Manual A5468060352
ASUSTeK Computer Inc ALL-IN1 WIRELESS ADSL2/2+ HOME GATEWAY A5468060352
UserManual.wiki
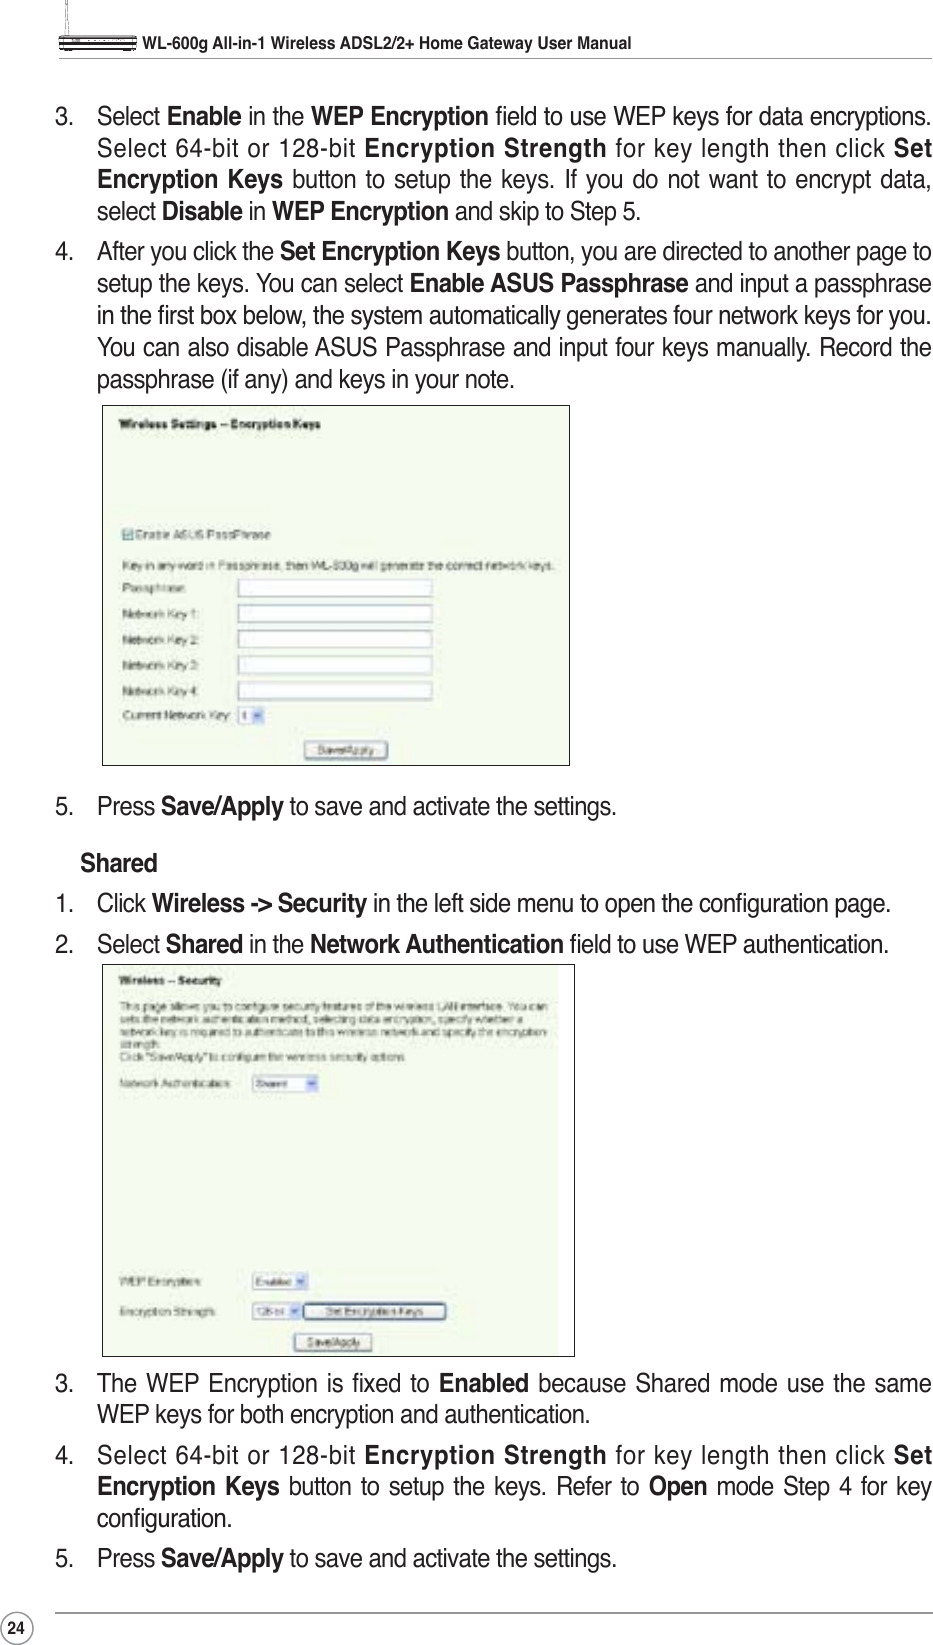
>
ASUSTeK Computer
>
WL600G User Manual
USERS MANUAL
Navigation menu
Upload a User Manual
Namespaces
Wiki Guide
HTML
PDF
Info
Views
User Manual
Discussion / Help
Navigation

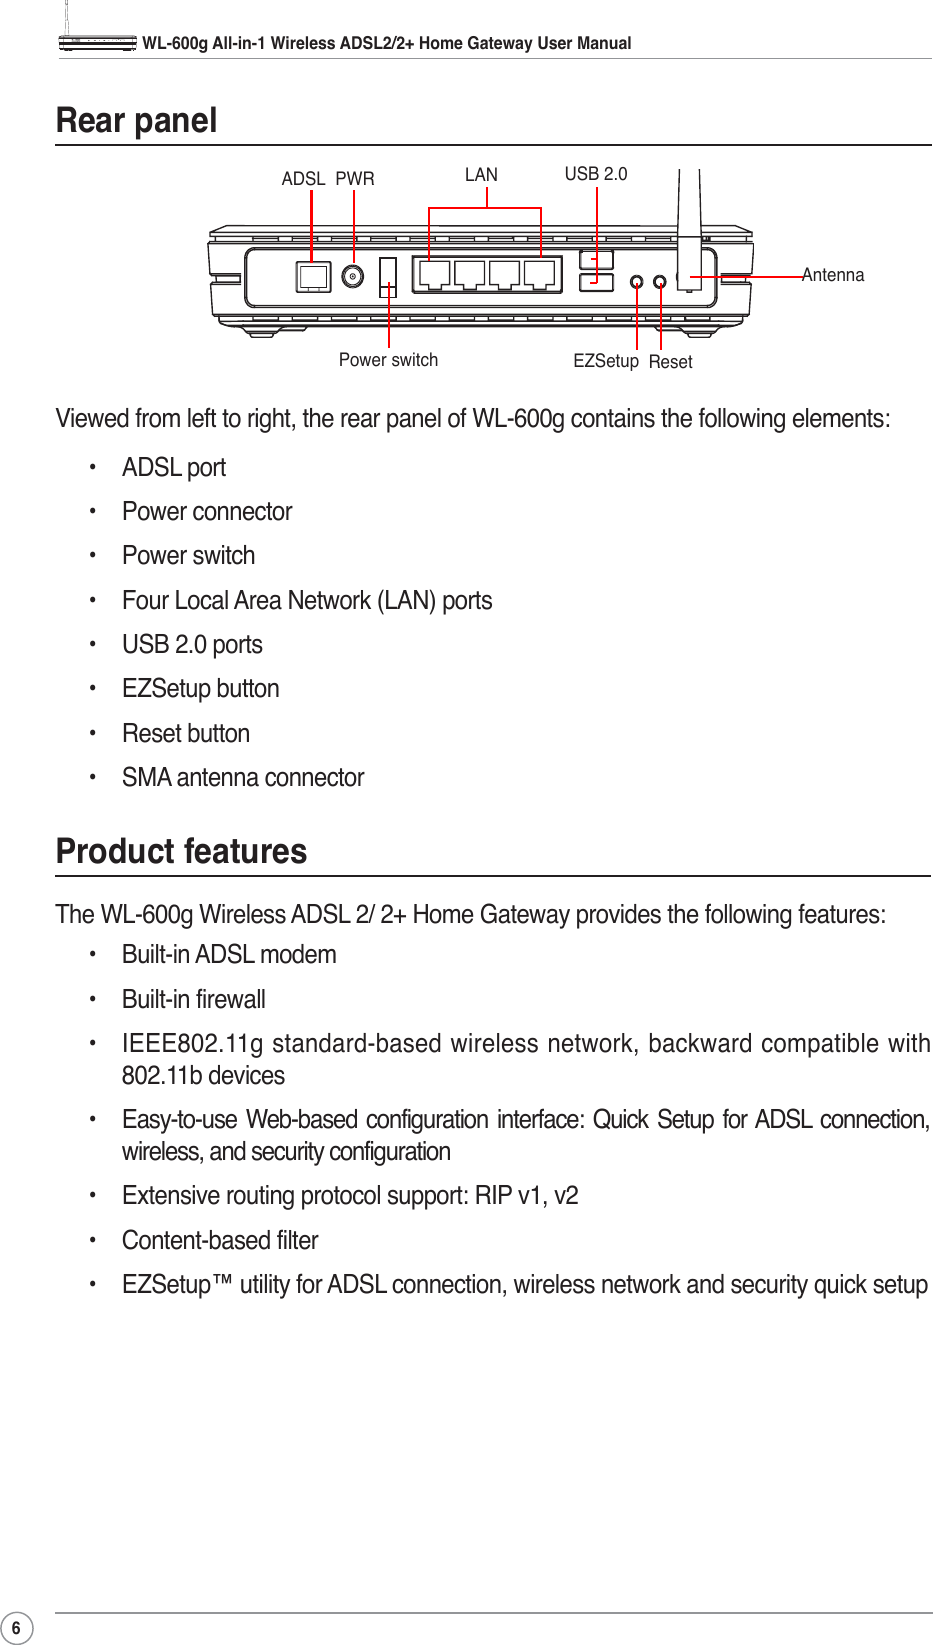

![WL-600g All-in-1 Wireless ADSL2/2+ Home Gateway User Manual20Connecting WL-600g with ASUS WLAN Card&RQÀJXULQJ$686:/$1&DUGZLWK2QH7RXFK:L]DUGWe recommend you use ASUS WLAN card (WL-100gD, WL-100gE, Wl-107g, WL-167g, WL-169gE) for better wireless connection. If you have installed ASUS wireless card together with its utilities and drives on your PC, click Start -> All Programs ->ASUS Utility-> WLAN Card -> One Touch Wizard to launch the One Touch Wizard utility.3. Set the authentication and encryption of your WLAN card the same with those at WL-600g. Click Next to continue.1. Select Connect to an existing wireless/$16WDWLRQ radio button and click Next to continue.2. One Touch Wizard searches and displays the available APs in the AvailableNetworks list. Select WL-600g and press Next to continue.4. It takes several seconds for the wireless card to associate with WL-600g. Press Next to setup TCP/IP.](https://usermanual.wiki/ASUSTeK-Computer/WL600G/User-Guide-692646-Page-22.png)


![WL-600g All-in-1 Wireless ADSL2/2+ Home Gateway User Manual51Reset to factory defaultTo clear all settings and return to the factory default settings, you can press the Resetbutton on the rear panel of the wireless router for 10 seconds; or click Management-> Settings -> Restore Default WRRSHQWKHFRQÀJXUDWLRQSDJHDQGFOLFNWKHRestoreDefault Settings button.Setting up time server<RXFDQFRQÀJXUHWKHWLPHVHWWLQJVRWKDW:/JFDQDOZD\VV\QFKURQL]HZLWKDWLPHserver from Internet. Click Management -> Time settings and check Automaticallysynchronize with International servers. Select a time server from the drop-down list DQGVHW\RXUWLPH]RQH:KHQÀQLVKHGFOLFNSave/Apply.Firmware update7RXSGDWH ÀUPZDUHFOLFN0anagement -> Update Software. Click Browse to locate WKH ÀUPZDUH ÀOH WKHQ FOLFN Update Software EXWWRQ WR VWDUW XSORDGLQJ WKH ÀUPZDUHThe update process takes about two minutes.](https://usermanual.wiki/ASUSTeK-Computer/WL600G/User-Guide-692646-Page-53.png)