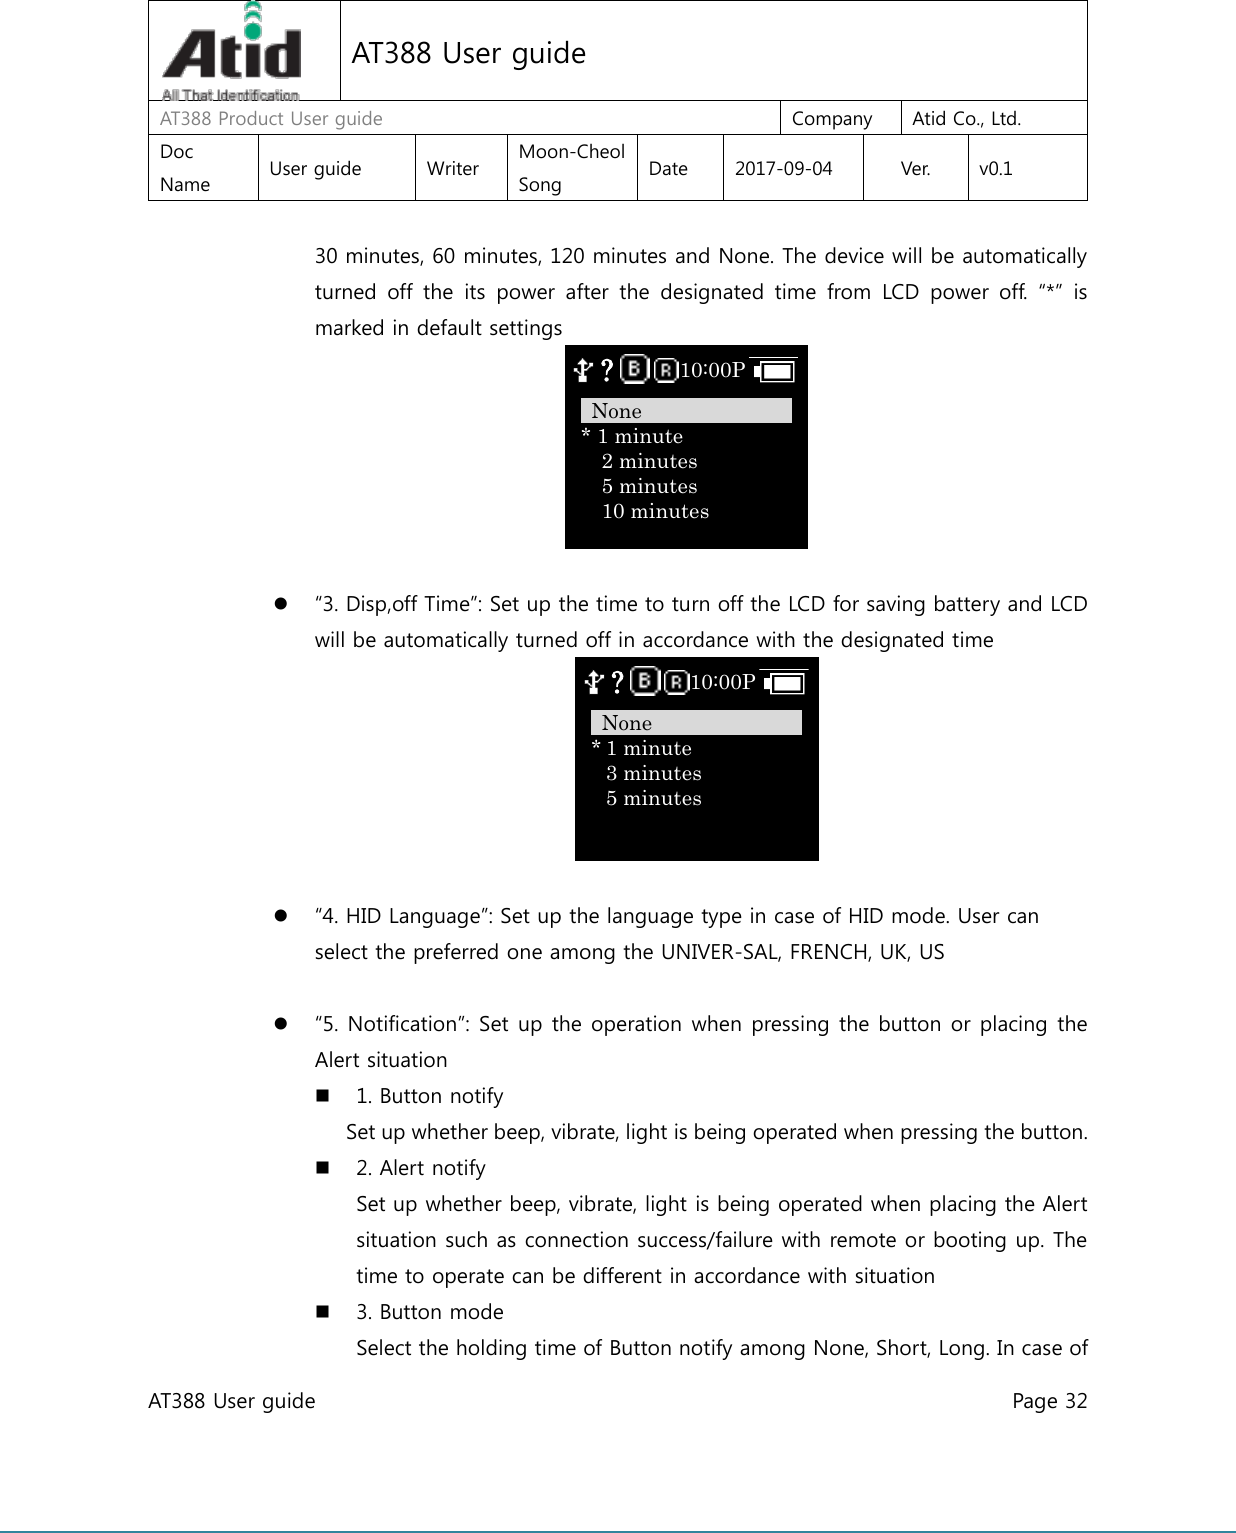
ATID AT388 UHF Reader User Manual AT388 User guide
ATID Co., Ltd UHF Reader AT388 User guide
UserManual.wiki
>
ATID
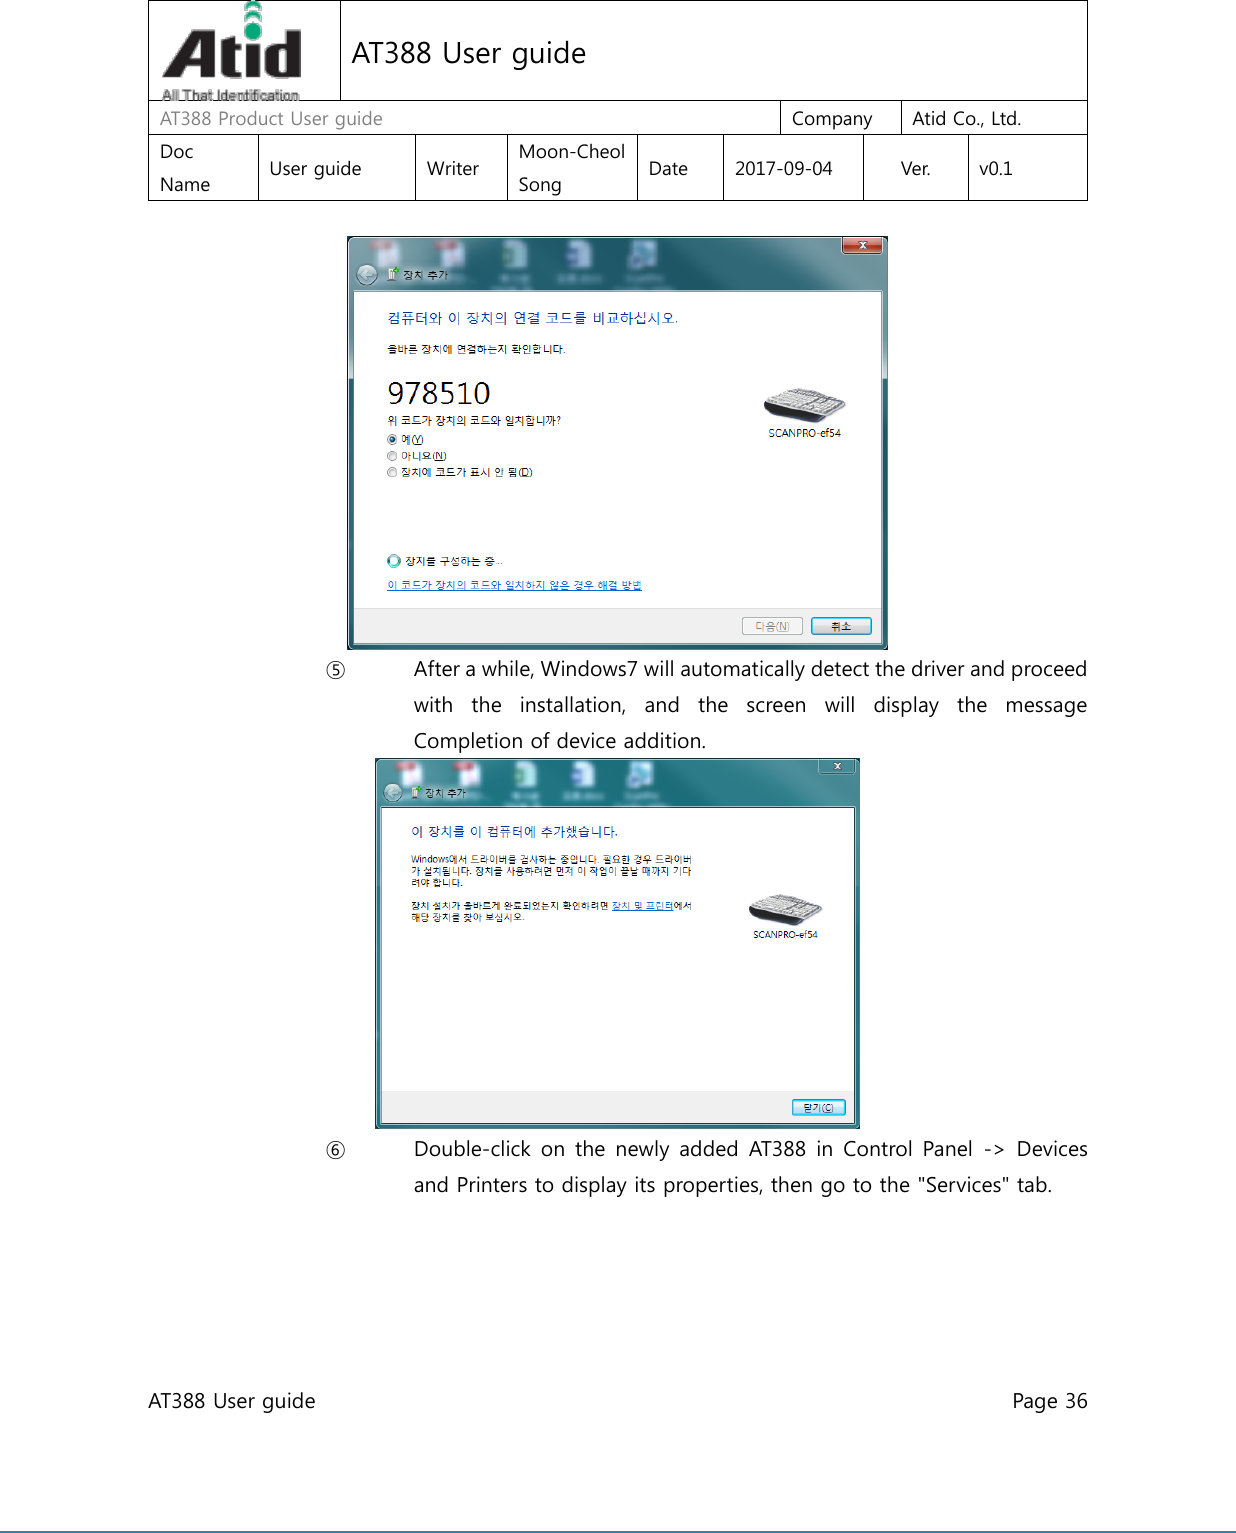
>
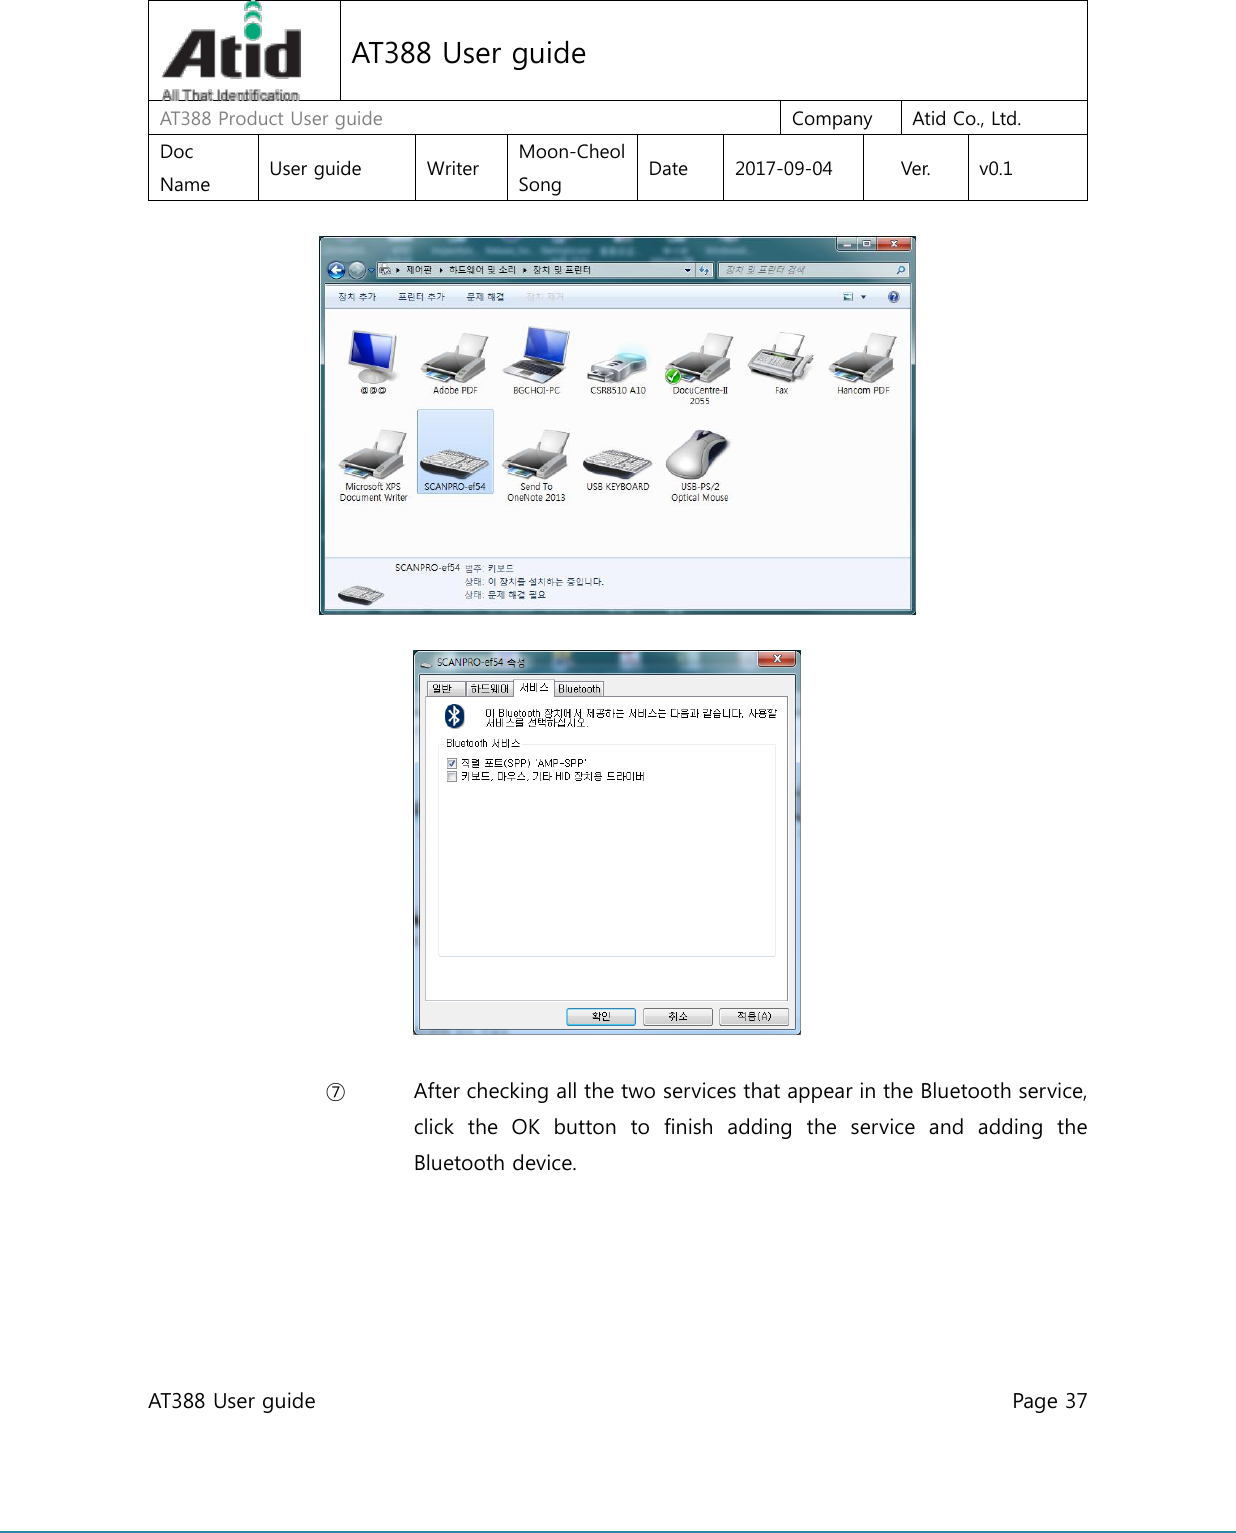
AT388 User Manual
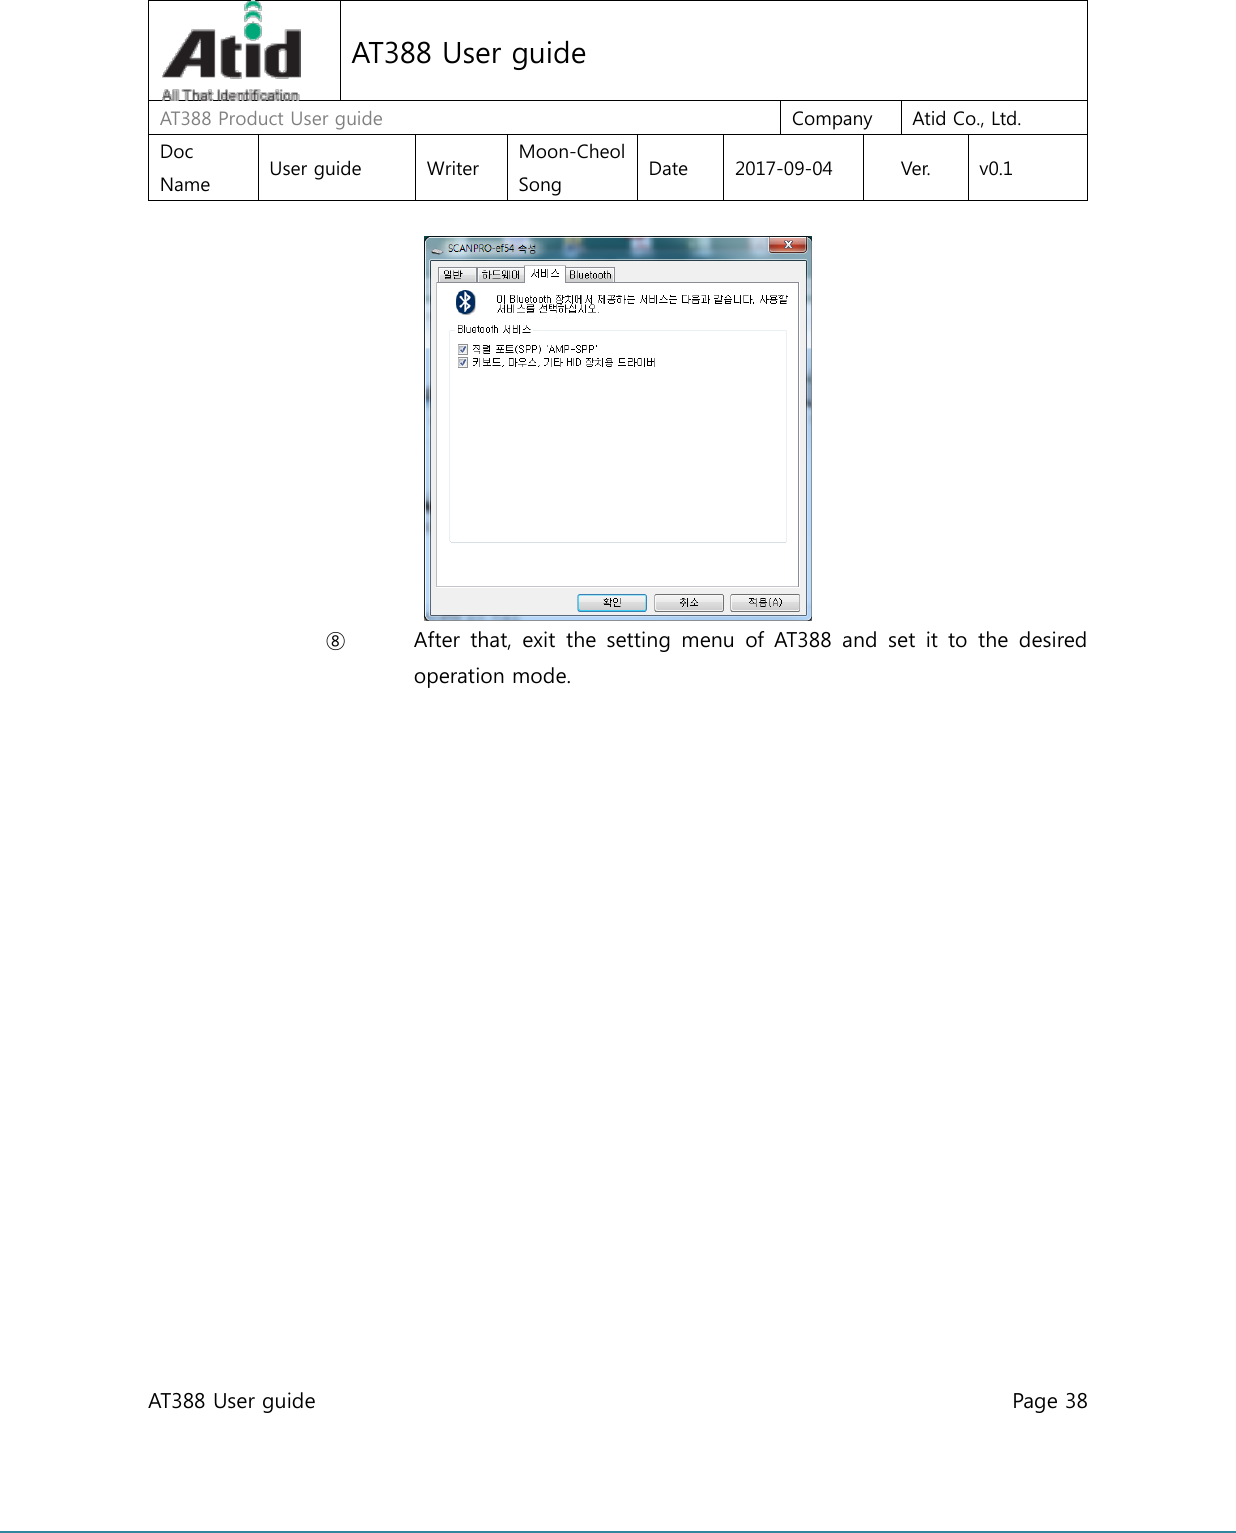
User Manual
Navigation menu
Upload a User Manual
Namespaces
Wiki Guide
HTML
PDF
Info
Views
User Manual
Discussion / Help
Navigation

![Caution: Use the Product in the environment with the temperature Between -20℃ and 40℃; Otherwise, it may damage your product. It can be Operating under 2000m。 For the following equipment: Product Name: UHF Reader Model: AT388 Brand Name: ATID ATID CO., LTD E-mail: djlee@atid1.com hereby declares that this [Name: UHF Reader, Model: AT388] is in compliance with the essential requirements and other relevant provisions of Directive 2014/53/EU. The product shall only be connected to a USB interface of version USB2.0 or higher, and that the connection to a power USB is allowed. Adapter shall be installed near the equipment and shall be easily accessible. Only can use deceive with Output: 5.0V 2A which comply with CE for charging The RF distance between body and Mobile Phone is 0mm This product is intended for sale and application in a business environment. RED Article 10 2 Manufacturers shall ensure that radio equipment shall be so constructed that it can be operated in at least one Member State without infringing applicable requirements on the use of radio spectrum. -This product can be used across EU member states 10 In cases of restrictions on putting into service or of requirements for authorisation of use, information available on the packaging shall allow the identification of the Member States or the geographical area within a Member State where restrictions on putting into service or requirements for authorisation of use exist. Such information shall be completed in the instructions accompanying the radio equipment. The Commission may adopt implementing acts specifying how to present that information. Those implementing acts shall be adopted in accordance with the advisory procedure referred to in Article 45(2). -The product is class 1 product, No restrictions](https://usermanual.wiki/ATID/AT388/User-Guide-3657333-Page-47.png)