ATID AT870N Industrial PDA User Manual AT870N WinMB User Guide v 1 2 Eng
ATID Co., Ltd Industrial PDA AT870N WinMB User Guide v 1 2 Eng
UserManual.wiki
>
ATID
>
AT870N User Manual
>
Users Manual_Part 3
Contents
1.
Users Manual-1
2.
Users Manual-2
3.
Users Manual-3
4.
Users Manual_Part 1
5.
Users Manual_Part 2
6.
Users Manual_Part 3
Users Manual_Part 3
Navigation menu
Upload a User Manual
Namespaces
Wiki Guide
HTML
PDF
Info
Views
User Manual
Discussion / Help
Navigation
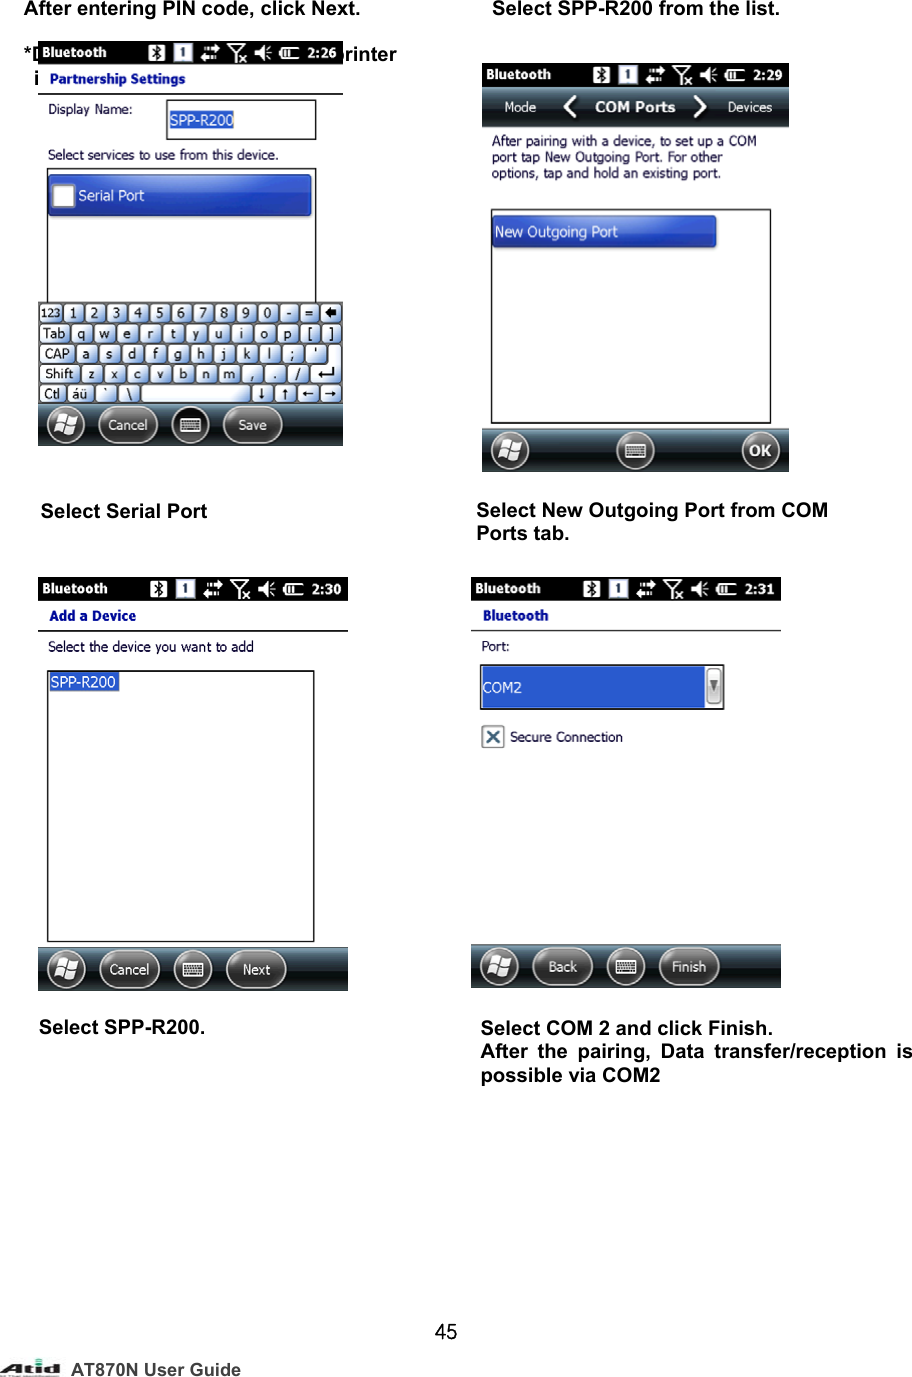
![4. 4.1 T 1.2.3. 4.2M AT870N UPhone Turn on the [Home] -> [Start]->[P Press Making a ph The speeUser Guide e phone [Phone] Phone] from thhone call ed dial numhe keypad. ber is press47Icon DSbsaCTased for a fewDelete the nuSpeed dial cay pressing oave up to 98Call History.Talk enables tw seconds fDescmbers. an be used toon according8 numbers.)the calling.or the speecription o call the preg number. (Sd dial calls. e-stored numSpeed dial cmber can](https://usermanual.wiki/ATID/AT870N.Users-Manual-Part-3/User-Guide-3262934-Page-3.png)
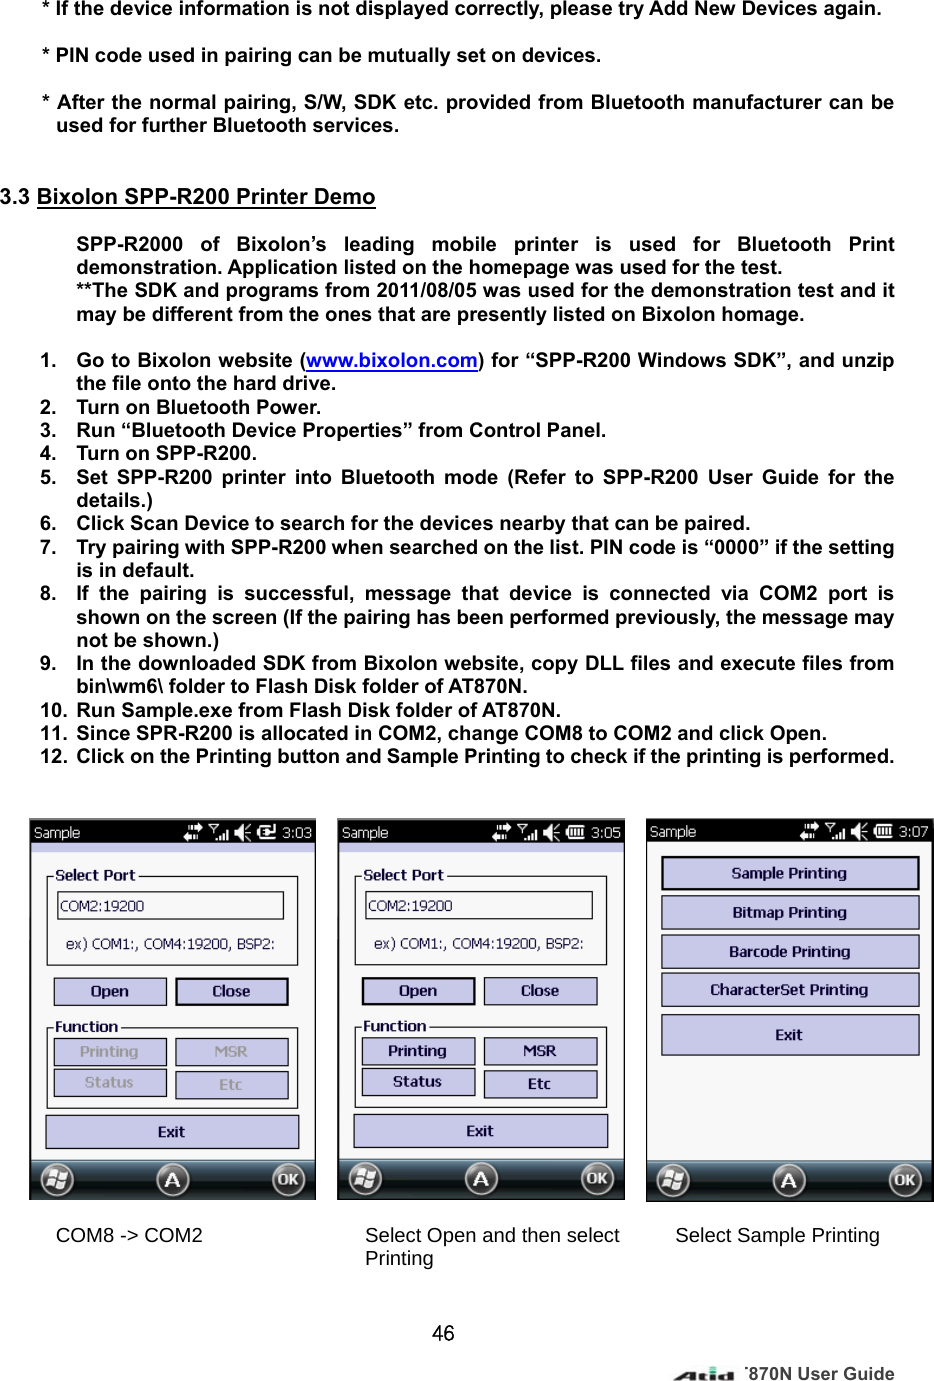
![AT870N User Guide 494.5Switching calls 5. Contacts 5.1Contacts 1. [Home] -> [Contacts] 2. [Start]->[Contacts] Icon Description Put the current call on hold and the call that was on hold back to call state.](https://usermanual.wiki/ATID/AT870N.Users-Manual-Part-3/User-Guide-3262934-Page-5.png)
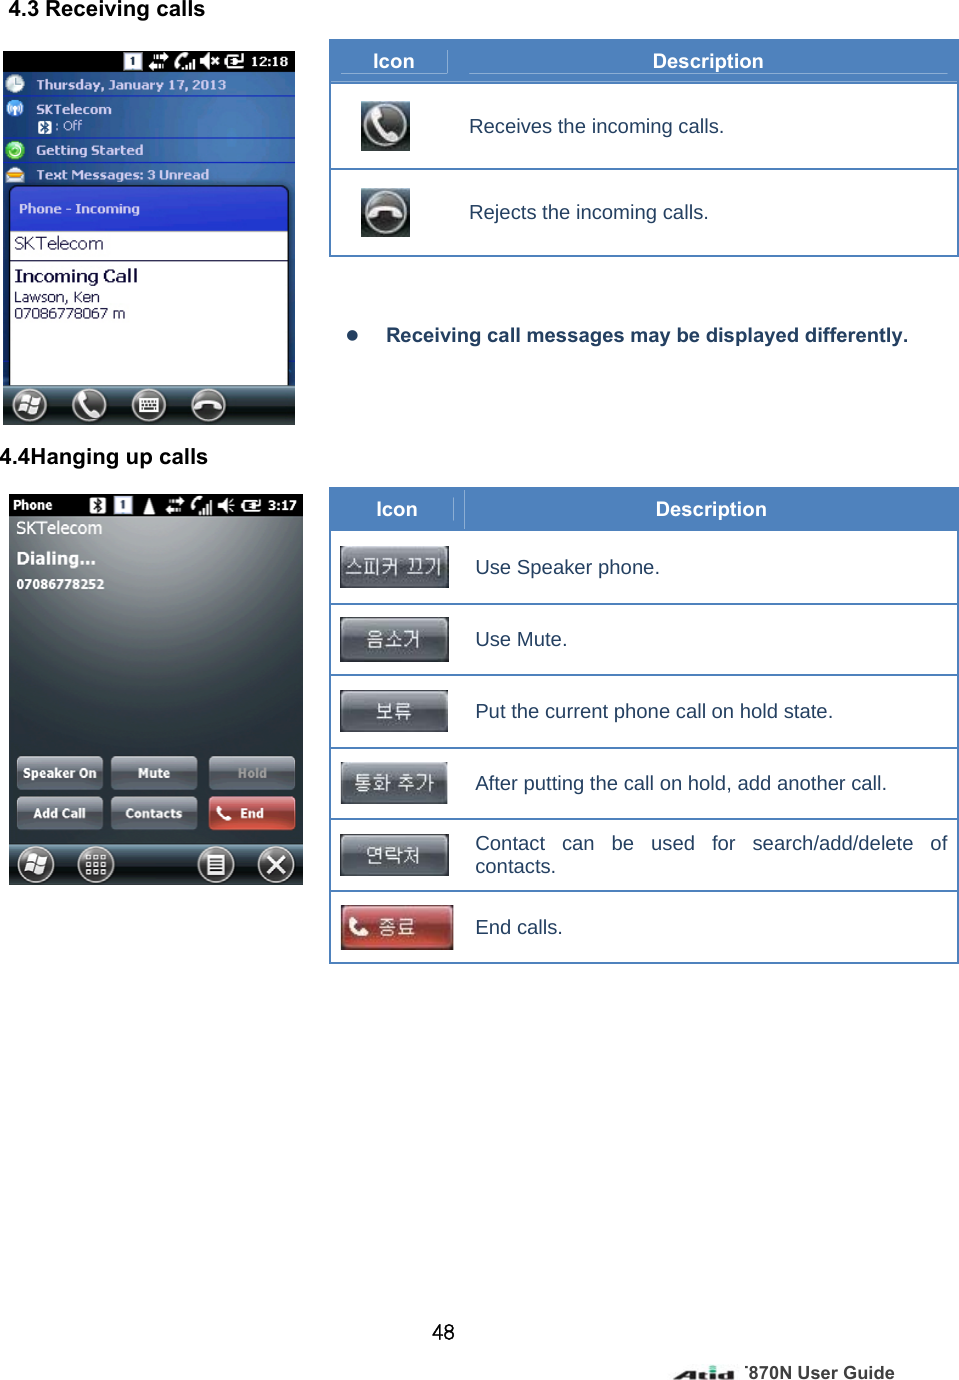
![AT870N User Guide 527. GPS Module GPS Module can be selected as an option in AT870N, and GPS Module is built-in at the top of the handheld. GPS program port: GPD1 GPS hardware port: COM6, 9600 7.1GPS Demo Program Run application - [Start Button] -> [DEMO_GPS_WM] Main Window - Start: Start receiving GPS Data - Stop: Stop receiving GPS Data 8. Camera The handheld can be equipped with 3.0-megapixel camera with functions of adjusting brightness and resolution, capture, video etc. Checking on GPS Data Reception: 1. The reception has to be checked in an open area. 2. The reception time for GPS Data can be different depending on the environments. (About 3~10 minutes) After the receiving the GPS data at first, it may take less time for reconnection/reception of GPS data next time.](https://usermanual.wiki/ATID/AT870N.Users-Manual-Part-3/User-Guide-3262934-Page-8.png)
![AT870N User Guide 53 8.1 Camera Run application - [Start Button] -> [Pictures & Videos] -> [Camera] Main Window - Thumb…: Close the main window and go to Pictures & Videos screen. - Menu: Menu popup - To save screen, press “Enter” from the keypad. 9. HF13.56MHz The handheld can be equipped with HF13.56Mhz module internally. According to ISO standards, it can read tags from 3~8.5cm distance (For Mifare, the distance is 1~3.5cm). 9.1RF13.56 Demo Program Run application - [Start Button] -> [DEMO_HF] Mifare Window](https://usermanual.wiki/ATID/AT870N.Users-Manual-Part-3/User-Guide-3262934-Page-9.png)
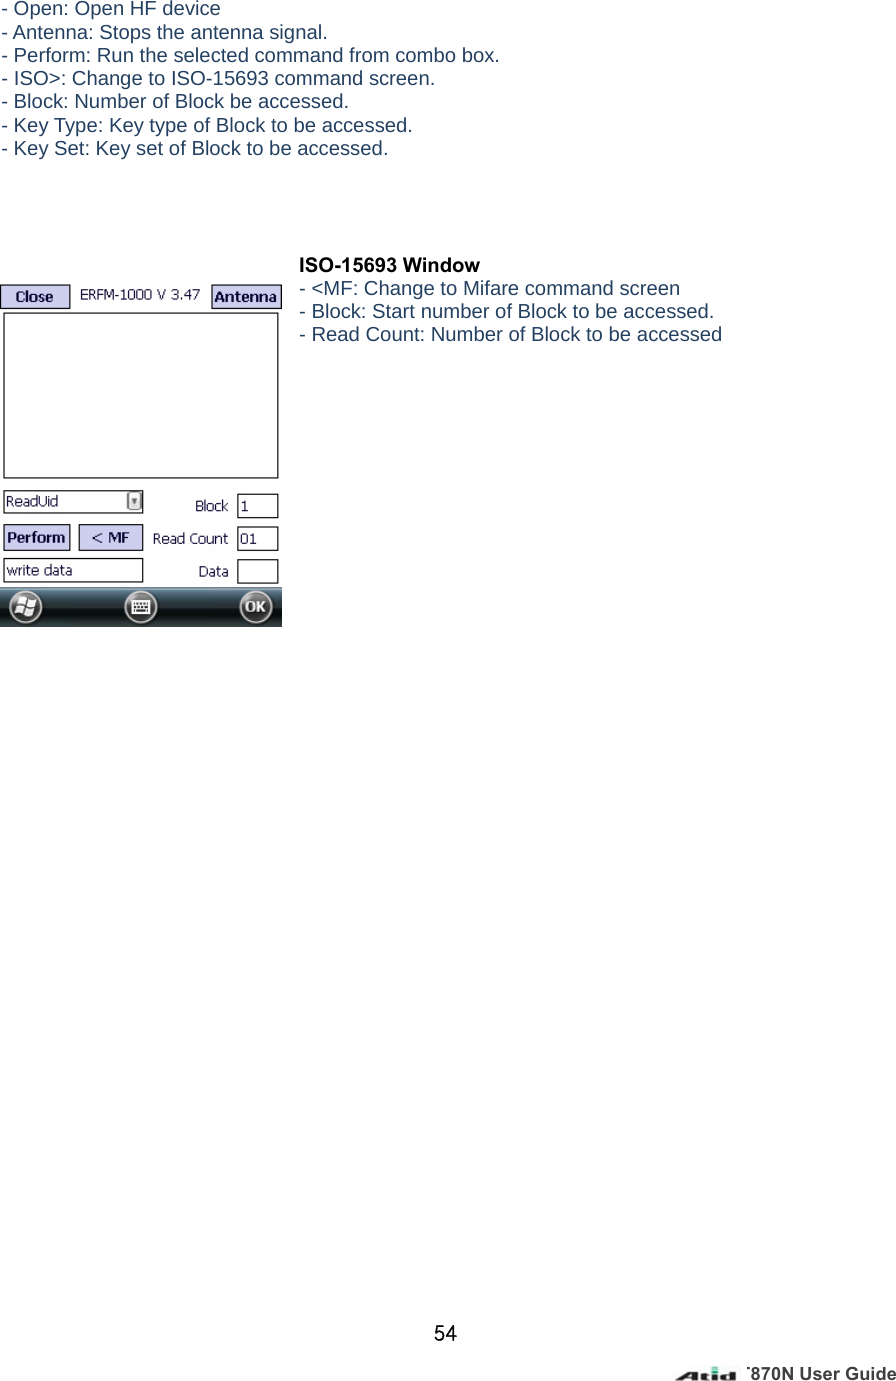
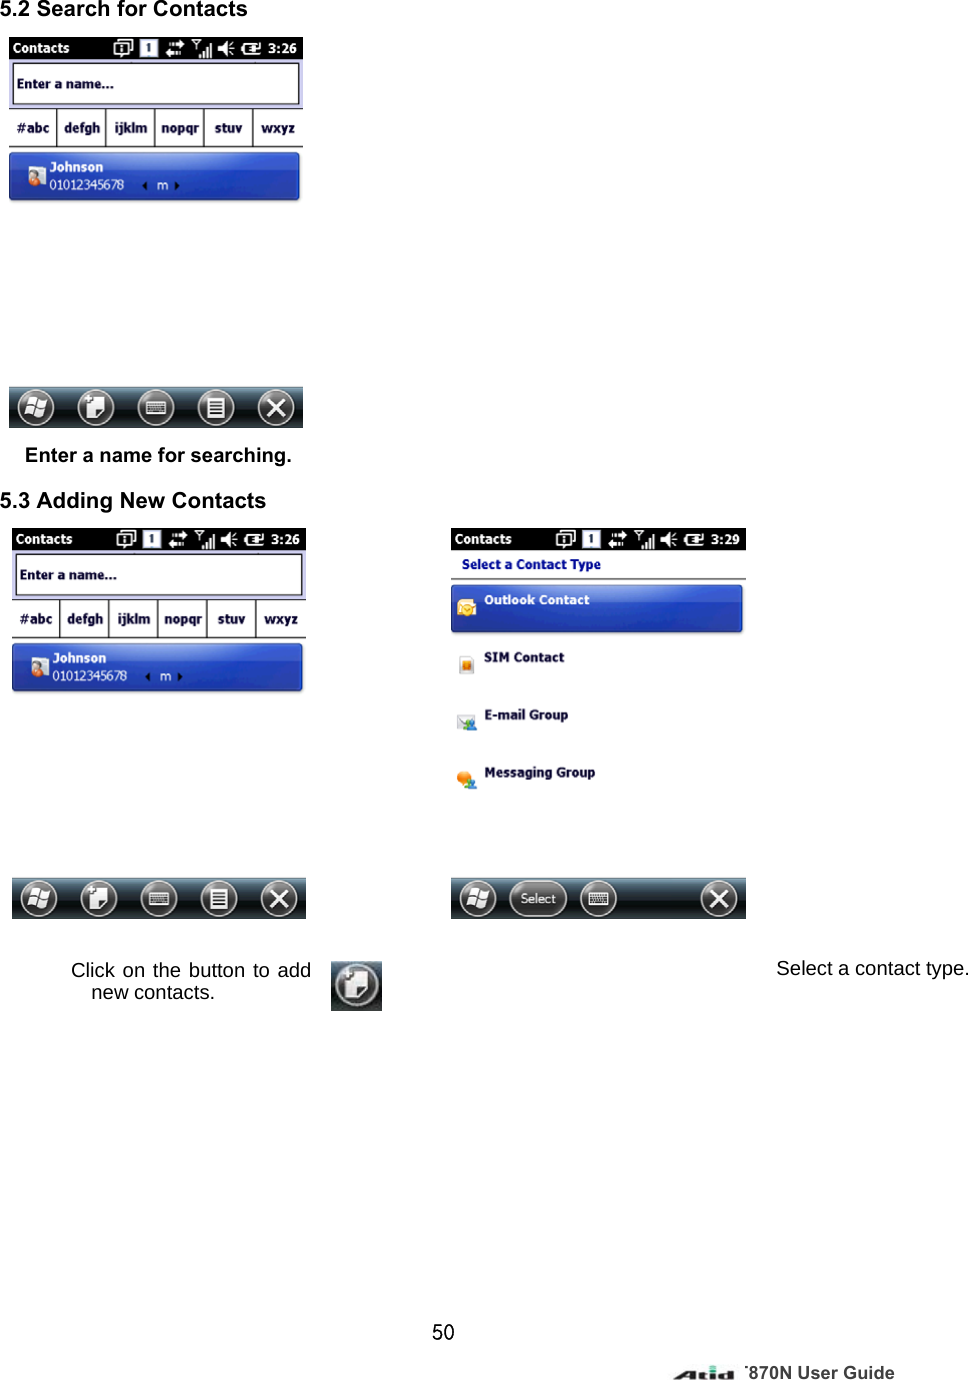
![AT870N User Guide 5510. Smart Card Device The handheld can communicate with IC Card via ISO-7816. 10.1Smartcard Program Run application - [Start Button] -> [DEMO_SAM] Main Window - Slot Status: Check the status of the slot. - PowerOn: Authorize the power of smart card device. - PowerOff:Unauthorize the power of smart card device. - SetParam: Set protocol type, clock rate, bit rate etc. of the card device. - GetParam: Read protocol type, clock rate, bit rate etc. of the card device. - Default: Set to default settings. - TxBlock: Transfer APDU Command to the card device. - FwVersion: Read the firmware version of the card device.](https://usermanual.wiki/ATID/AT870N.Users-Manual-Part-3/User-Guide-3262934-Page-11.png)
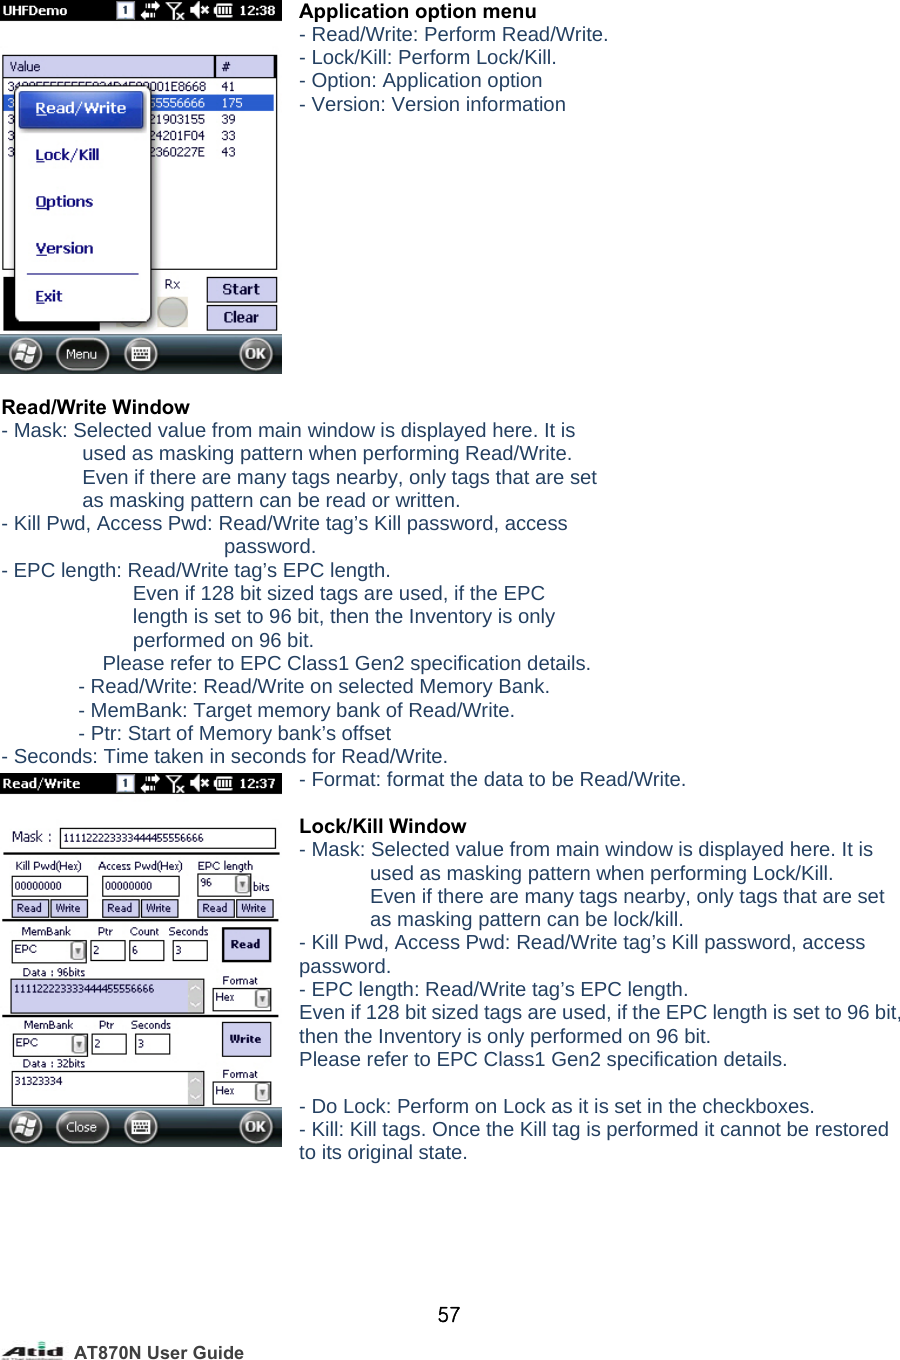
![11. The RFIDcoun 11.1 UHF 900handheld cD tags. The ntries. UHF 900MUHF Reader 0Mhz an be equipfrequency Mhz Programpped with Urange is 85m Run app- [Start B Main Wi - Start: S- Clear: C- Menu: 56UHF 900Mh50 ~ 960Mhplication Button] -> [DEindow Start the InveClear all the Main menuz. It can reahz which caEMO_UHF]entory. tag informatad or write Ean be adjusttion shown oAT870N UEPC GEN2ted accordin the screenUser Guide 2 protocol ng to the n.](https://usermanual.wiki/ATID/AT870N.Users-Manual-Part-3/User-Guide-3262934-Page-12.png)