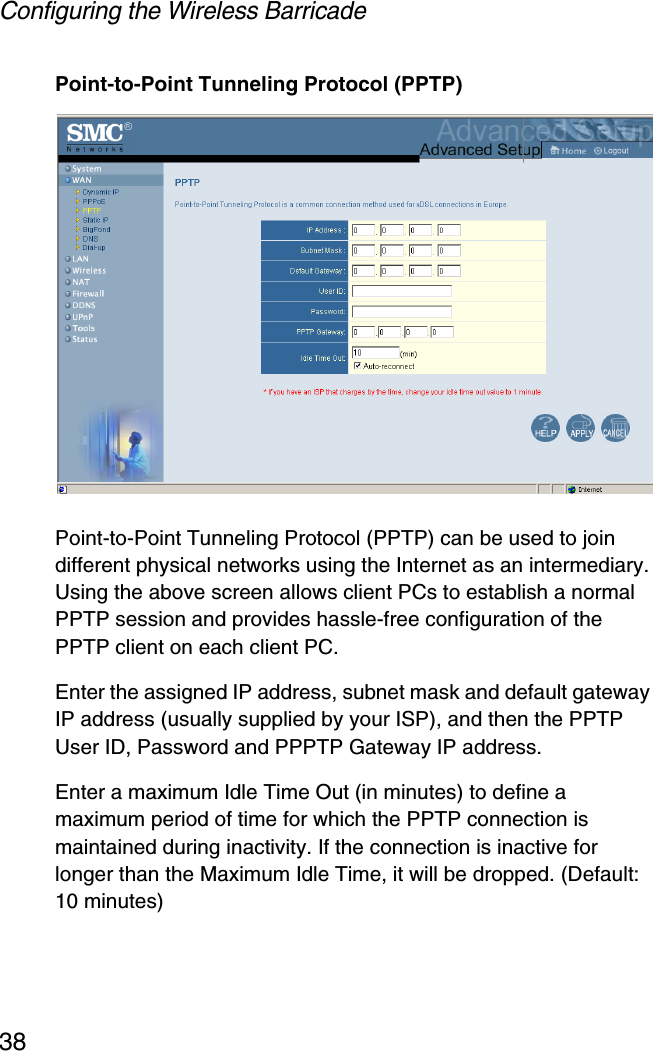
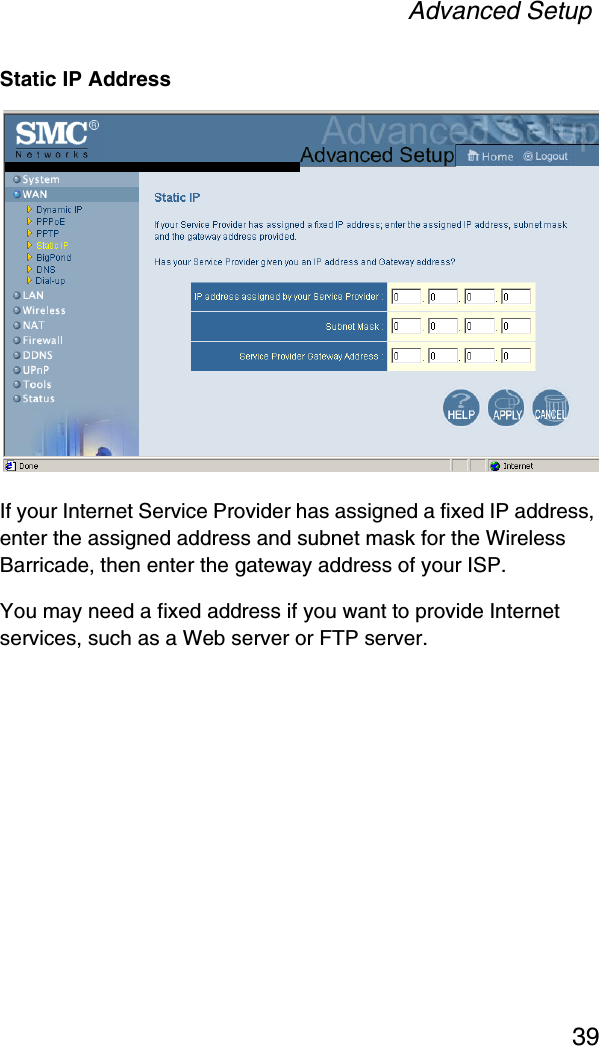
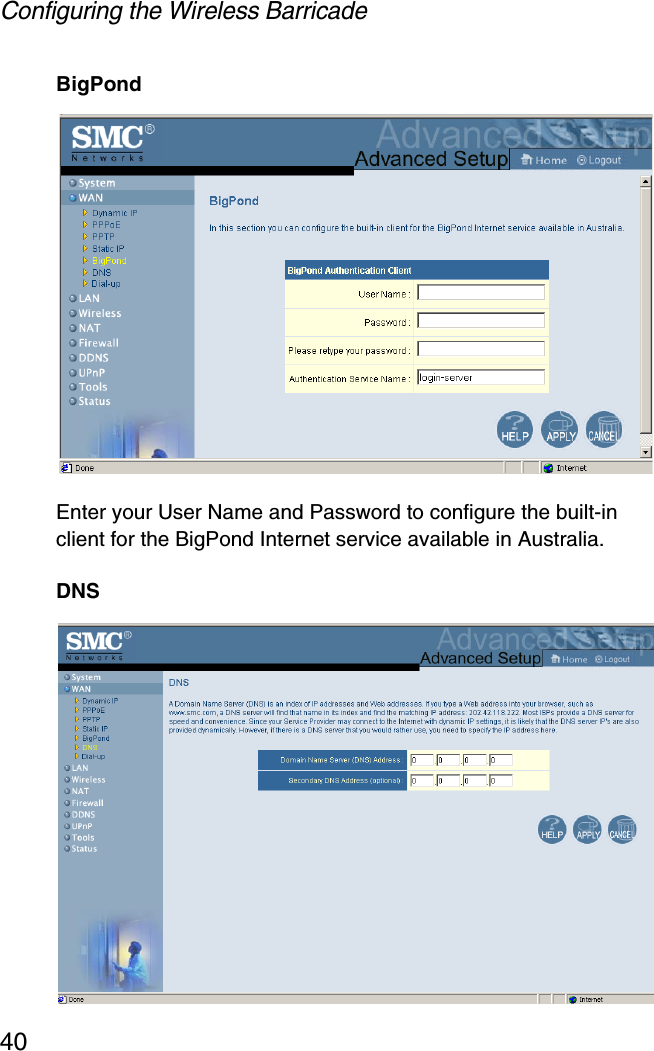
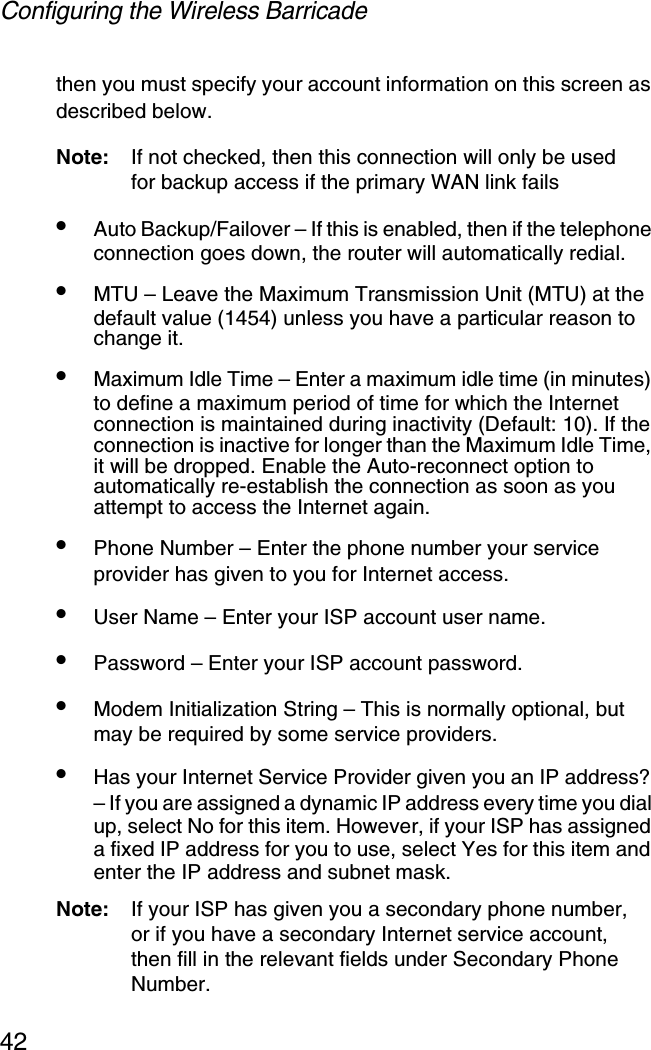
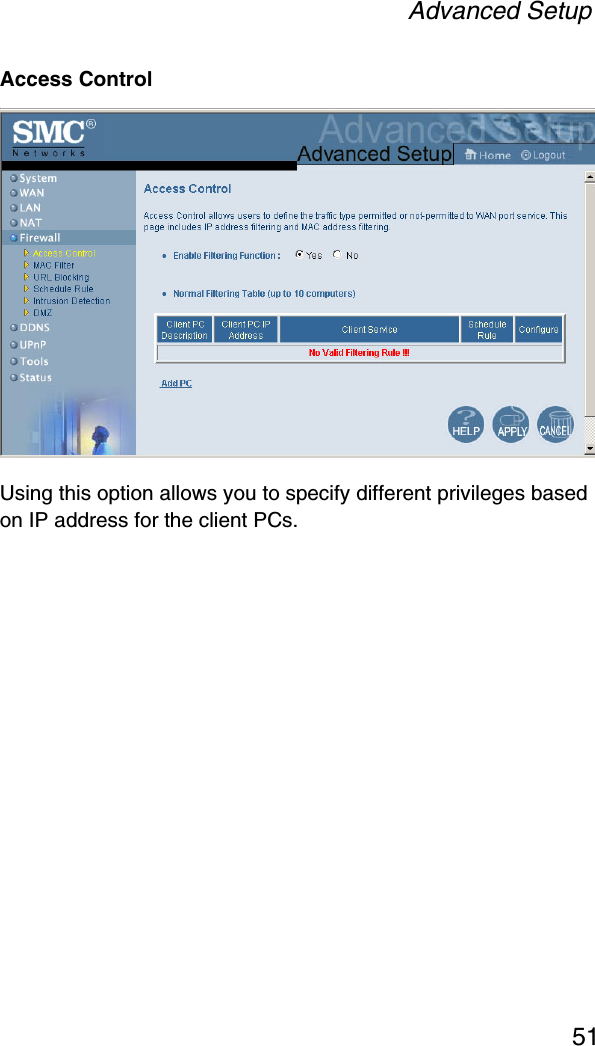
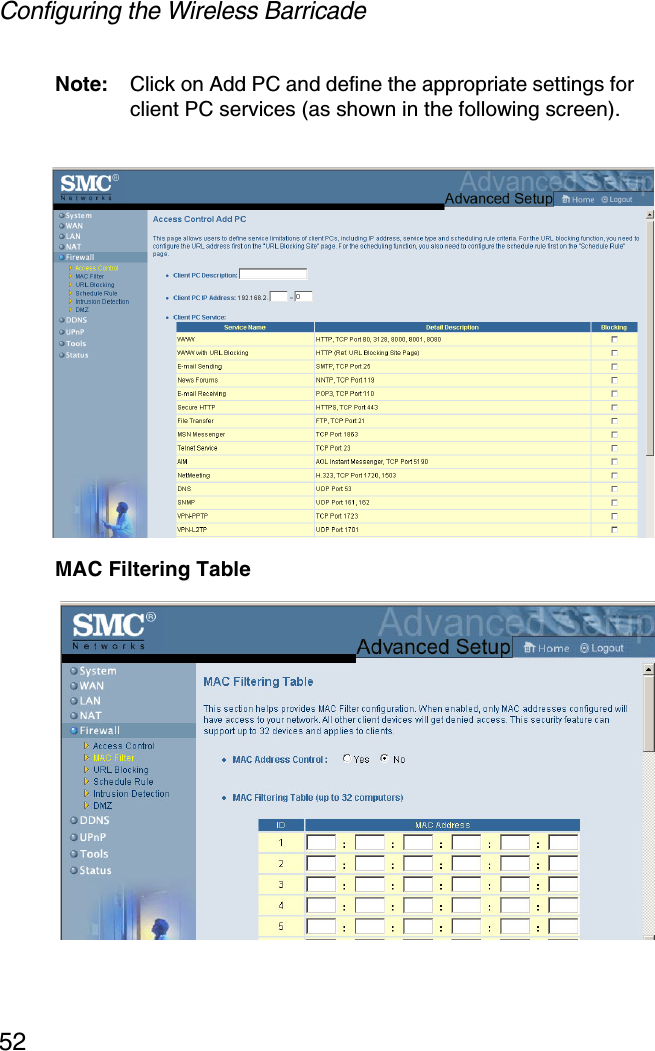
Accton Technology 7004ACC Barricade 2.4GHz 11Mbps Wireless Cable/DSL Router User Manual SMC7004AWBRV2
Accton Technology Corp Barricade 2.4GHz 11Mbps Wireless Cable/DSL Router SMC7004AWBRV2
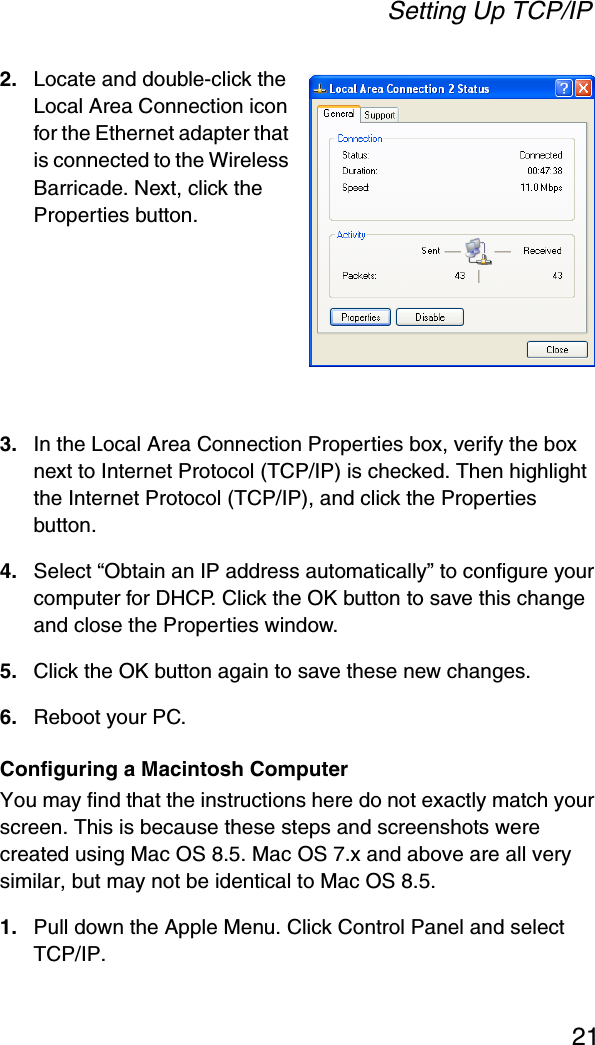
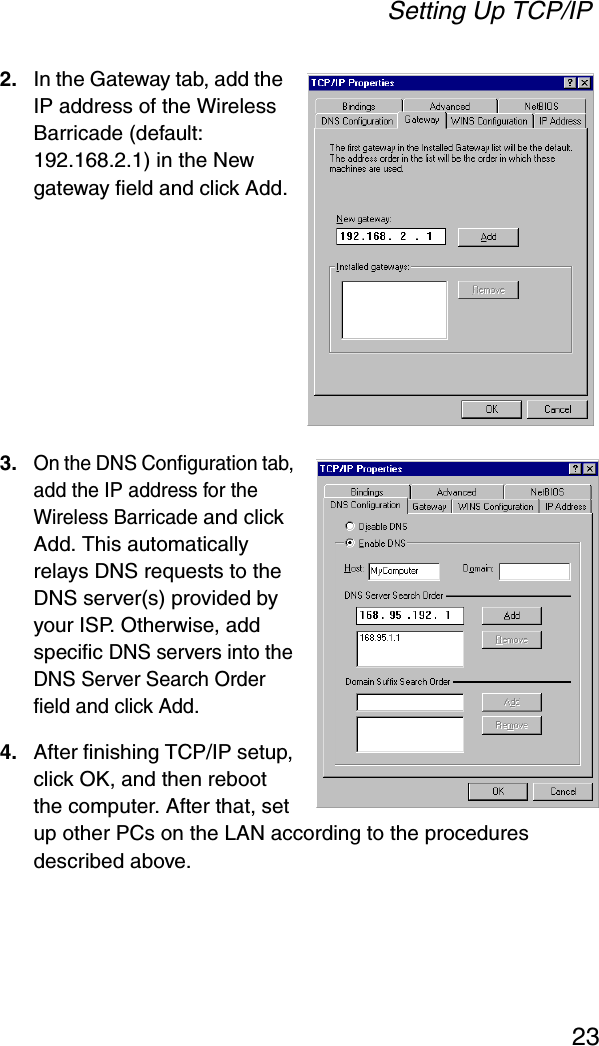
Contents
- 1. User Manual Part 1
- 2. User Manual Part 2
User Manual Part 1


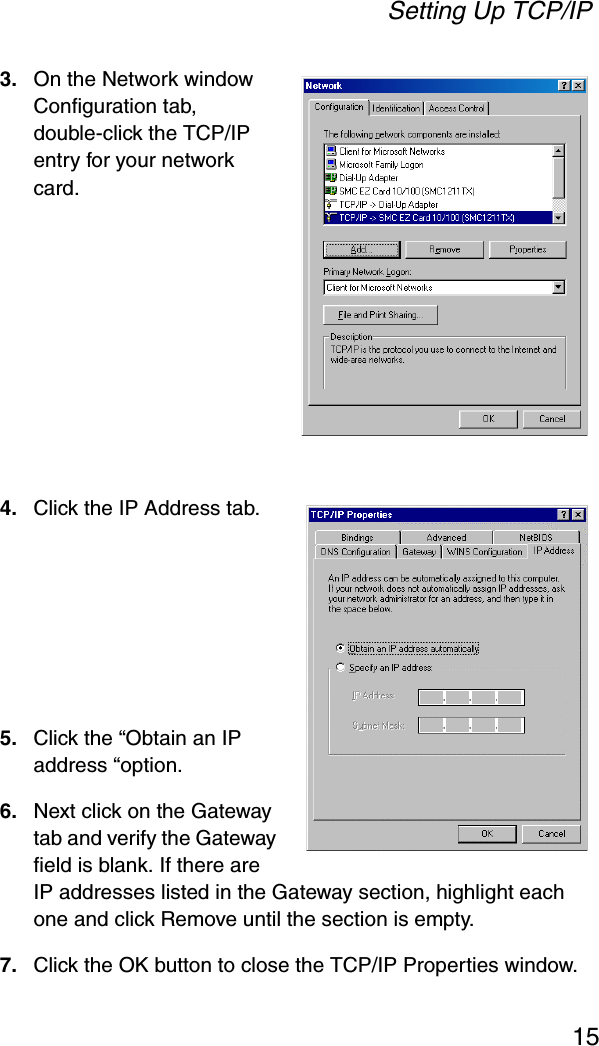

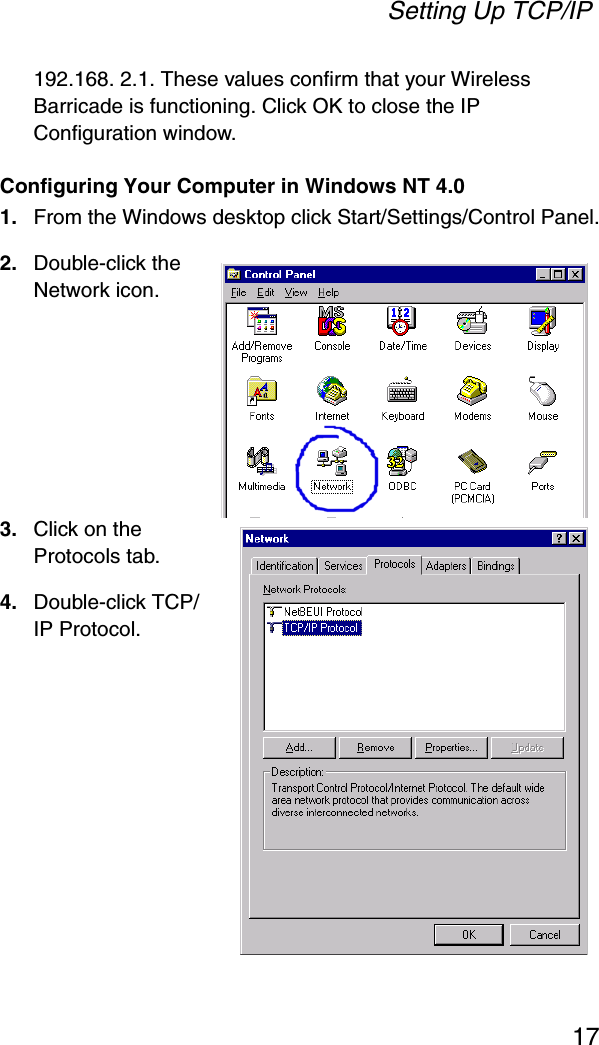
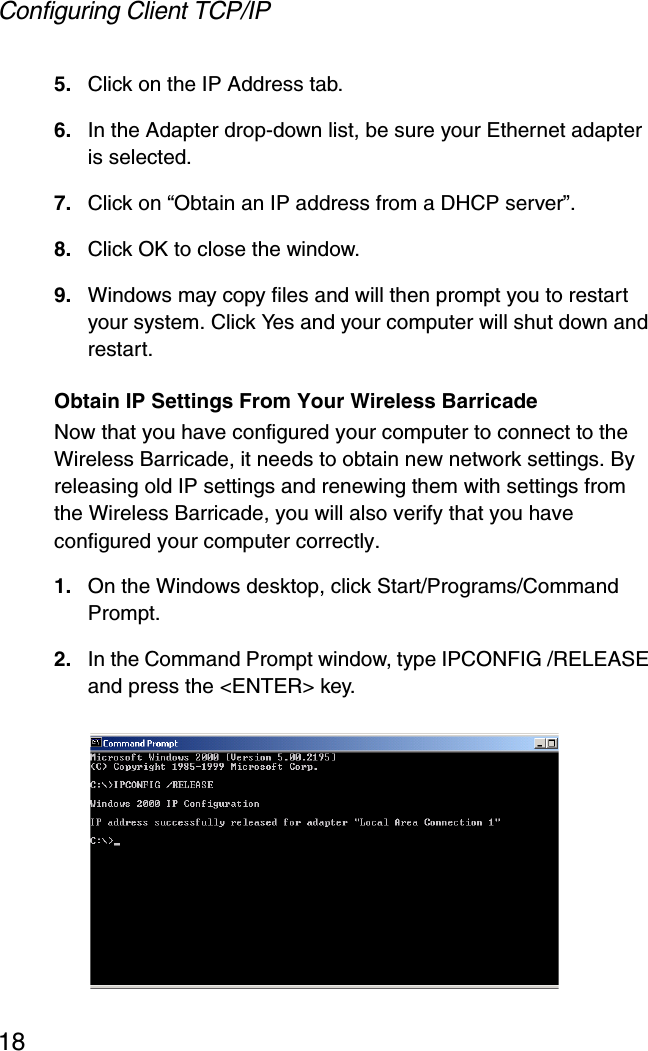
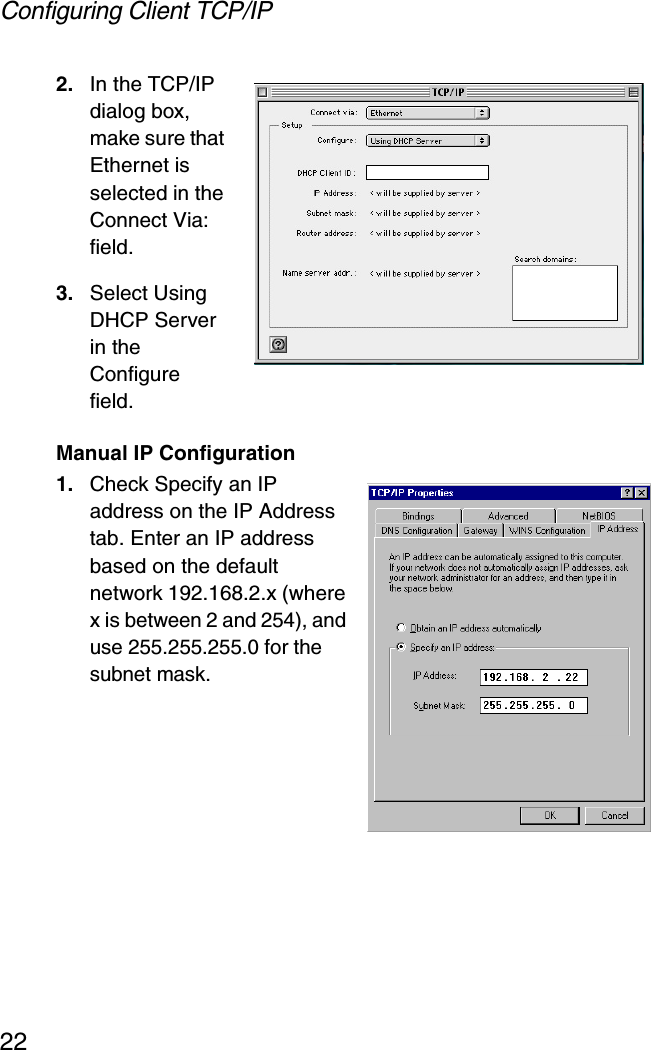
![Configuring Client TCP/IP203. Locate and double-click the Local Area Connection icon for the Ethernet adapter that is connected to the Wireless Barricade. When the Status dialog box window opens, click the Properties button.4. In the Local Area Connection Properties box, verify the box next to Internet Protocol (TCP/IP) is checked. Then highlight the Internet Protocol (TCP/IP), and click the Properties button. 5. Select “Obtain an IP address automatically” to configure your computer for DHCP. Click the [OK] button to save this change and close the Properties window. 6. Click the OK button again to save these new changes. 7. Reboot your PC. 8. To obtain new network settings see “Obtain IP Settings from Your Wireless Barricade” on page 16.Configuring Your Computer in Windows XPThe following instructions assume you are running Windows XP with the default interface. If you are using the Classic interface (where the icons and menus look like previous Windows versions), please follow the instructions for Windows 2000 outlined above.1. Access your Network settings by clicking Start, choose Control Panel, select Network and Internet Connections and then click on the Network Connections icon.](https://usermanual.wiki/Accton-Technology/7004ACC.User-Manual-Part-1/User-Guide-325884-Page-28.png)