Acrowave Systems AAP-1100E 2.4GHz Wireless LAN User Manual users manual 2
Acrowave Systems Co., Ltd 2.4GHz Wireless LAN users manual 2
Contents
users manual 2

AcroLAN Access Point User’s Guide Version 2000.12.10
Copyright© Acrowave Systems 2000 DOC – xxx - yyy
Page 11 of 11
!
!!
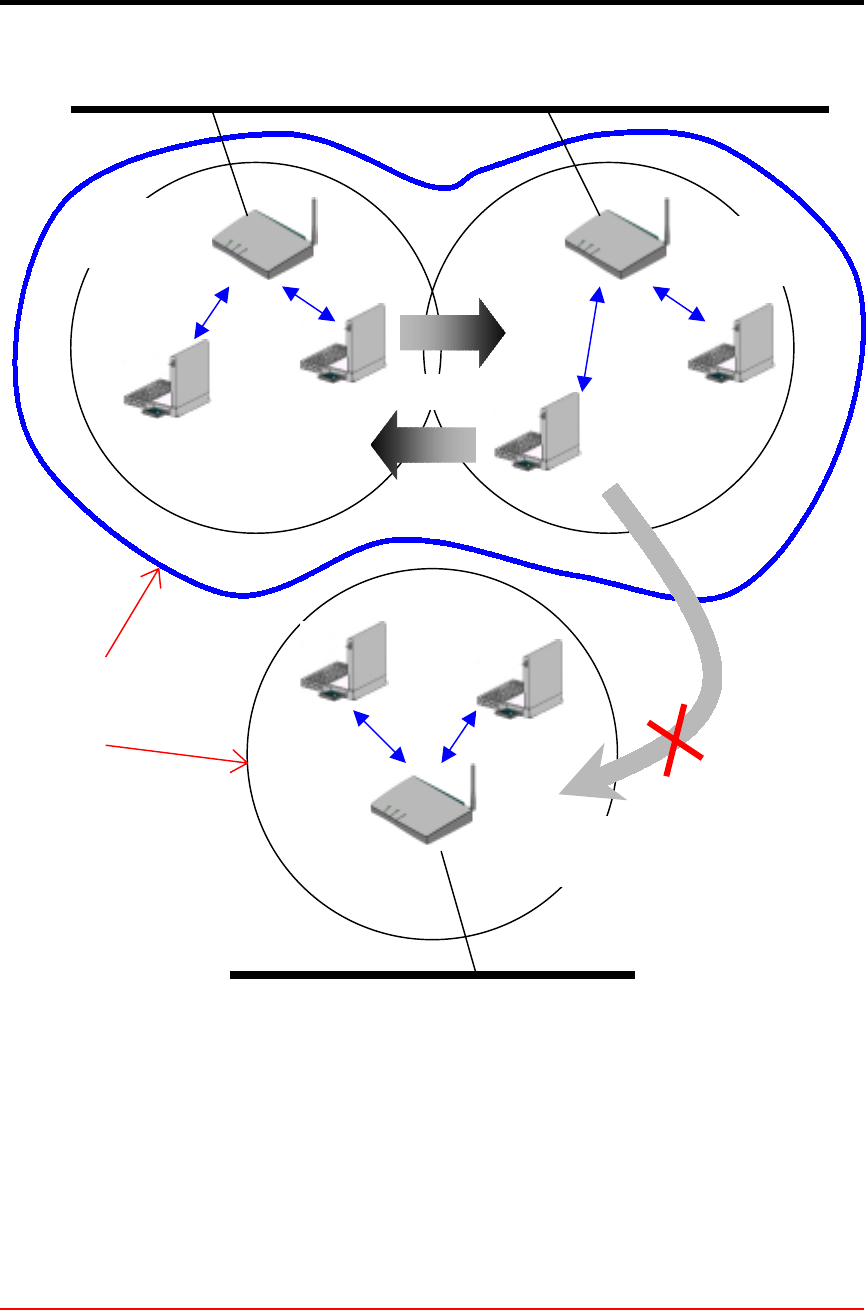
! BSS, ESS and SS ID
The basic service set (BSS) is the basic building block of WLAN network. Minimum
WLAN BSS may be consist of only two stations. Using access point (AP) and network
distribution systems (DS), WLAN service set can be extended arbitrary size – extended
service set (ESS). Each service set has its network ID (SSID). All the service sets within
an ESS network can have same service ID so that the ESS can support inter-cell
ROAMING.
AcroLAN Access Point User’s Guide Version 2000.12.10
Copyright© Acrowave Systems 2000 DOC – xxx - yyy
Page 12 of 12
Figure 4. SSID and Roaming
Backbone Network
AP #`2 SS ID
= Acrowave
ROAMING
AP #`1 SS ID
= Acrowave
AP #`3 SS ID
= Acro
ESS
BSS
Backbone Network
Re-Configuration
Required

AcroLAN Access Point User’s Guide Version 2000.12.10
Copyright© Acrowave Systems 2000 DOC – xxx - yyy
Page 13 of 13
Chapter 2 Setup AcroLAN Access Point
2.1 Before You Begin Installation
The Acrowave AcroLAN AWL-1100 Series Access Point is a wireless LAN transceiver
that can act as the center point of a stand-alone wireless LAN network or as the
connection point between wireless and wired networks. In multiple installations, the
roaming functionality provided by multiple Access Points allows wireless users to move
freely throughout the facility while maintaining seamless, uninterrupted access to the
network. The Access Point supports Access Point management software. The system
settings are contained on the Access Point's firmware.
Before setting up your Access Point, ask your network system administrator for the
following information:
! If your network does not use a DHCP server, you need an IP (Internet Protocol)
address for the Access Point. If your network uses a DHCP server, an IP address will
be assigned automatically. Each station or device on your network must have a
unique IP address.
! If there is some Access Points are already installed, SSID and channel allocation
strategy.
! WEP key allocation
Caution
You should configure the Access Point before mounting it on a pole or a ceiling. Some
configuration steps, such as communicating with the Access Point through a serial cable,
may be difficult if the Access Point is inaccessible.
Before you begin installation, make sure that you have the following items:

AcroLAN Access Point User’s Guide Version 2000.12.10
Copyright© Acrowave Systems 2000 DOC – xxx - yyy
Page 14 of 14
! The Acrowave AcroLAN AWL-1100 Series Access Point
! The Access Point power supply
! The Acrowave AcroLAN AWL-1100 Series Installation CD
If any of these items are missing from the package, contact your Access Point supplier.
You will also need:
! A computer that is connected to the same network as the Access Point
! A 9-pin, straight-through, male-to-female serial cable
AcroLAN Access Point User’s Guide Version 2000.12.10
Copyright© Acrowave Systems 2000 DOC – xxx - yyy
Page 15 of 15
2.2 Installing The Acrowave AcroLAN AWL-1100 Series Access Point
Follow the instructions below to install the Access Point.
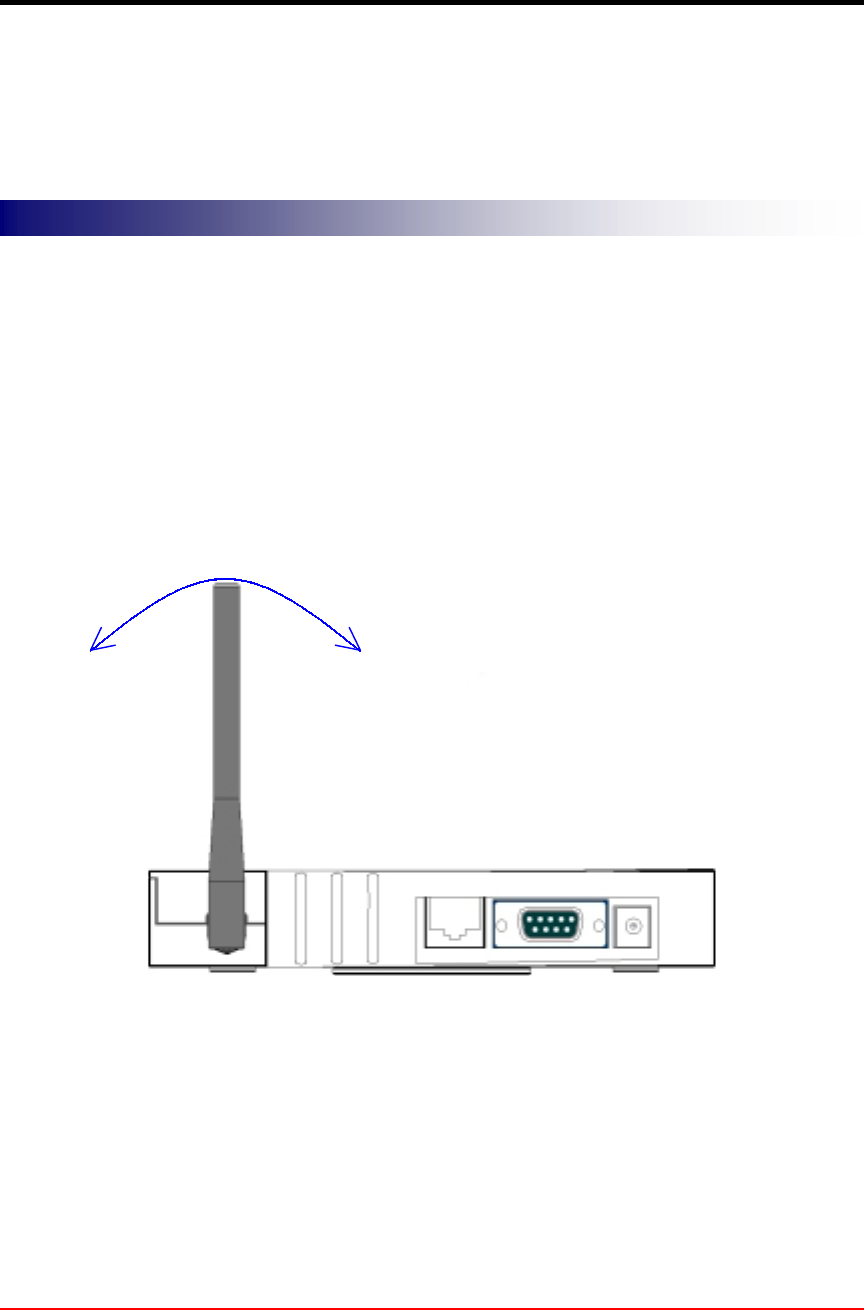
For maximum range, make sure the antennas on your Access Point straight up or
straight down, no matter where your Access Point is mounted.
If you keep your Access Point on a table or a desk, turn the antennas so they point
straight up. If you mount your Access Point on a wall or a pole, turn the antennas so they
are vertical, even though the Access Point is on its side. If you mount your Access Point
on the ceiling, turn the antennas so they point straight down.
Antenna configurations can be varied depending on the Access Point model, cell
coverage or cell plan.
STEP 1 Adjust the antennas
AcroLAN Access Point User’s Guide Version 2000.12.10
Copyright© Acrowave Systems 2000 DOC – xxx - yyy
Page 16 of 16
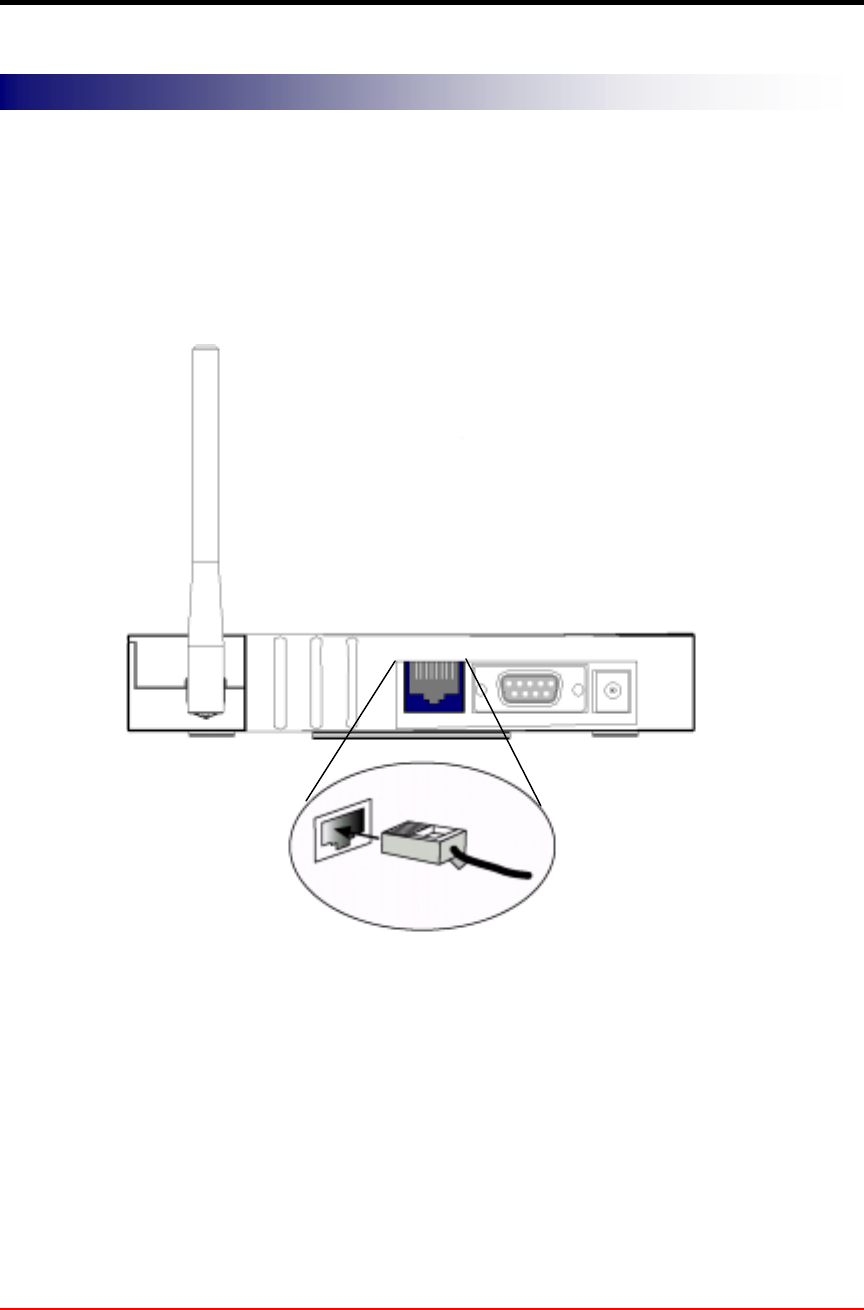
Connect the Ethernet cable from your wired LAN to your Access Point.
Make sure the unit is not powered up when you connect your network cable.
STEP 2 Ethernet Cable Connection

AcroLAN Access Point User’s Guide Version 2000.12.10
Copyright© Acrowave Systems 2000 DOC – xxx - yyy
Page 17 of 17
Plug the Power Pack into a wall outlet or a power strip, and plug the connector into the
power receptacle on the back of the Access Point.
All three indicators on top of the access point will be bright green.
During normal operation, the indicators will be bright green. If the indicators does not
display a solid color or blink, see the “Top Panel Indicator Descriptions” in this manual.
Caution
If you have already installed Acrowave AcroLAN AWL-1100 series client card, you can
easily configure Access Point through air connection between your computer and
Access Point. You may skip next step and go to Access Point Management section.
STEP 3 Connect The Power Pack
AcroLAN Access Point User’s Guide Version 2000.12.10
Copyright© Acrowave Systems 2000 DOC – xxx - yyy
Page 18 of 18
If you have a DHCP server, the server automatically assigns an IP address to the
Access Point when you connect it to your network. To use the Access Point’s
management system, you need to find out the assigned IP address.
If you have access to the DHCP server, you can look on the server to find the IP address
assigned to the Access Point.
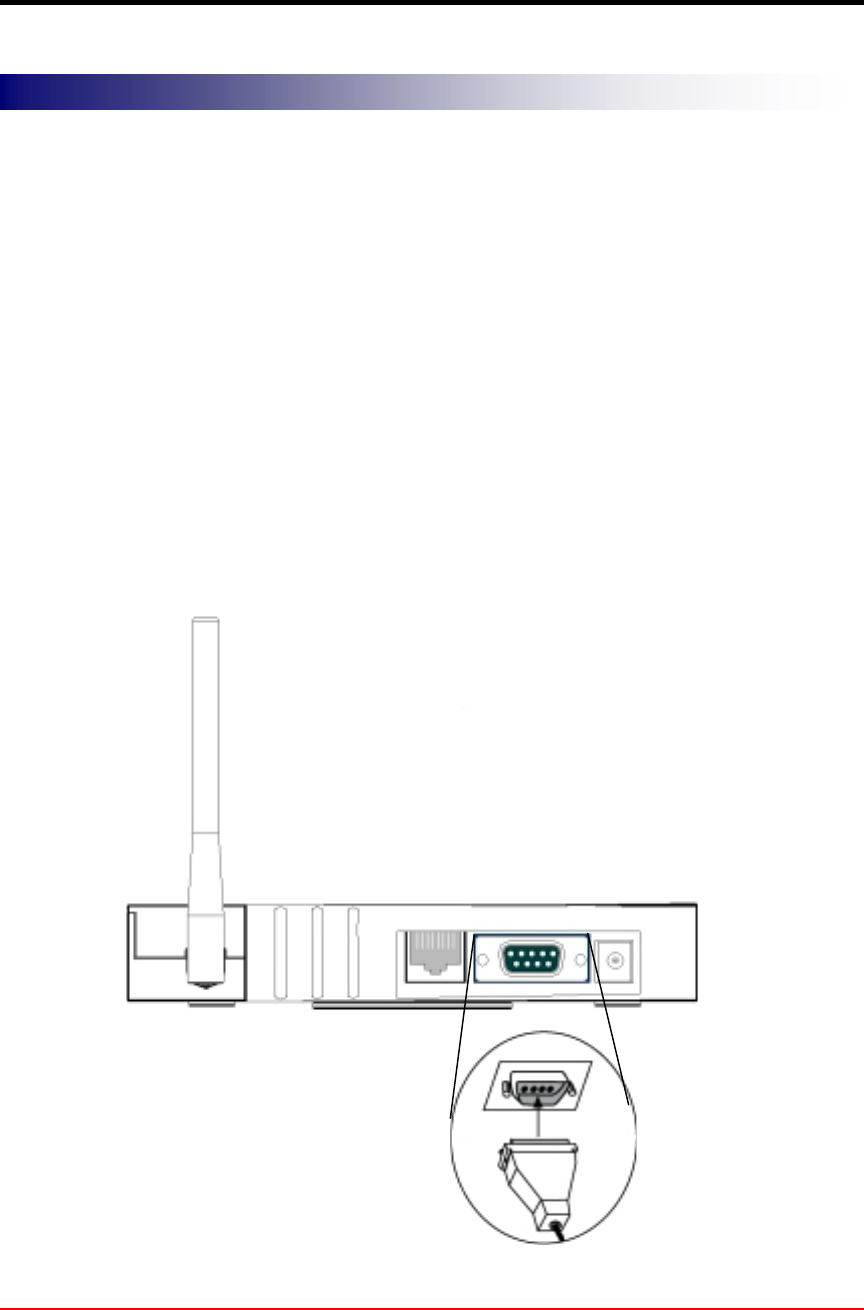
If you cannot access the DHCP server, use a 9-pin, straight-through, male-to-female
serial cable to connect the COM 1 or 2 port on your computer to the RS-232 on the back
of the access point. After you find the assigned IP address, you can remove this cable.
You might need the cable again if you need to update the Access Point’s configuration in
the future.
STEP 4 Connect Serial Cable
AcroLAN Access Point User’s Guide Version 2000.12.10
Copyright© Acrowave Systems 2000 DOC – xxx - yyy
Page 19 of 19
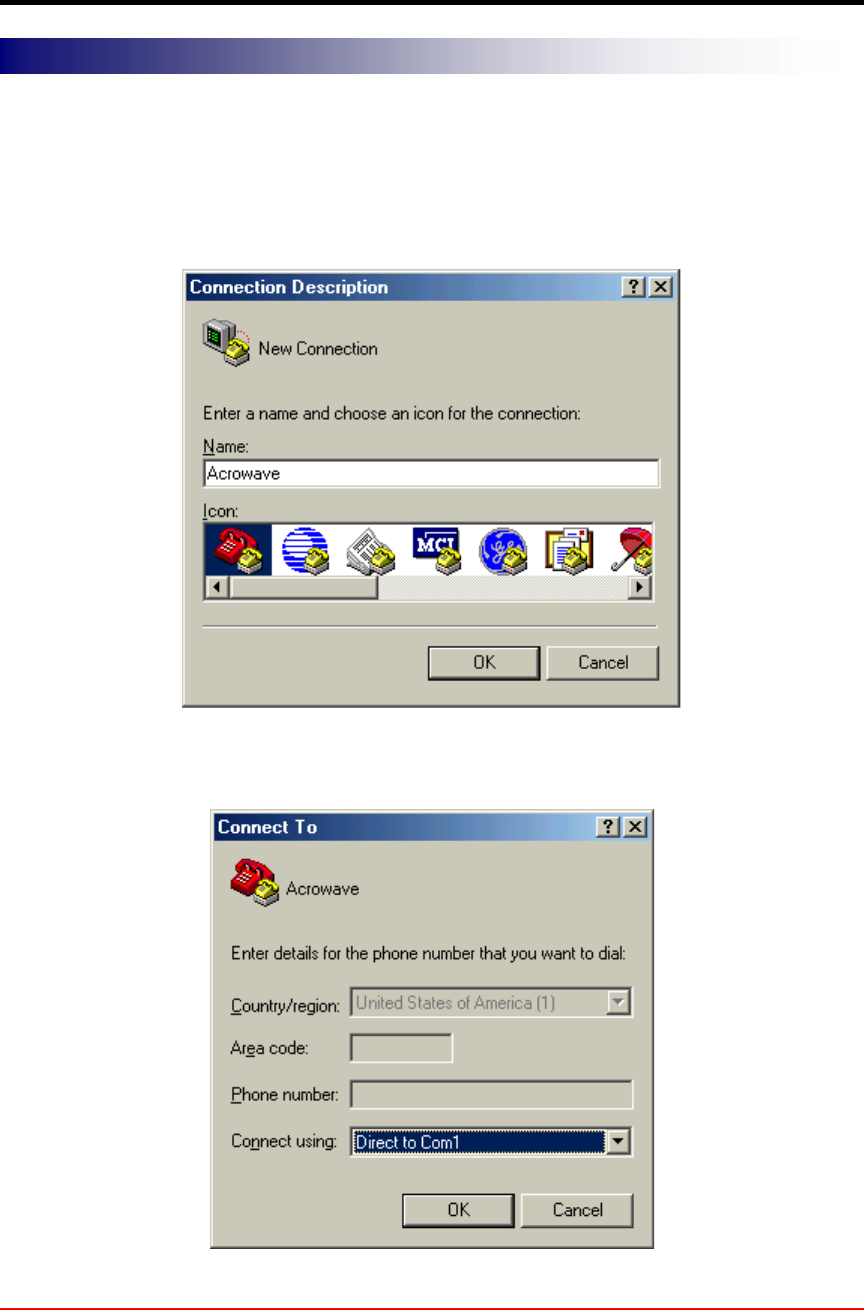
Open the HyperTerminal program on the workstation attached to the Access Point.
These instructions describe HyperTerminal for example, but you can use any terminal-
emulation program to communicate with the Access Point. This window appears:
Type a name for the connection and click OK. The Connect To window appears:
STEP 5 Open Terminal Program
AcroLAN Access Point User’s Guide Version 2000.12.10
Copyright© Acrowave Systems 2000 DOC – xxx - yyy
Page 20 of 20
Choose the port on your computer to which the serial cable is connected. Click OK.
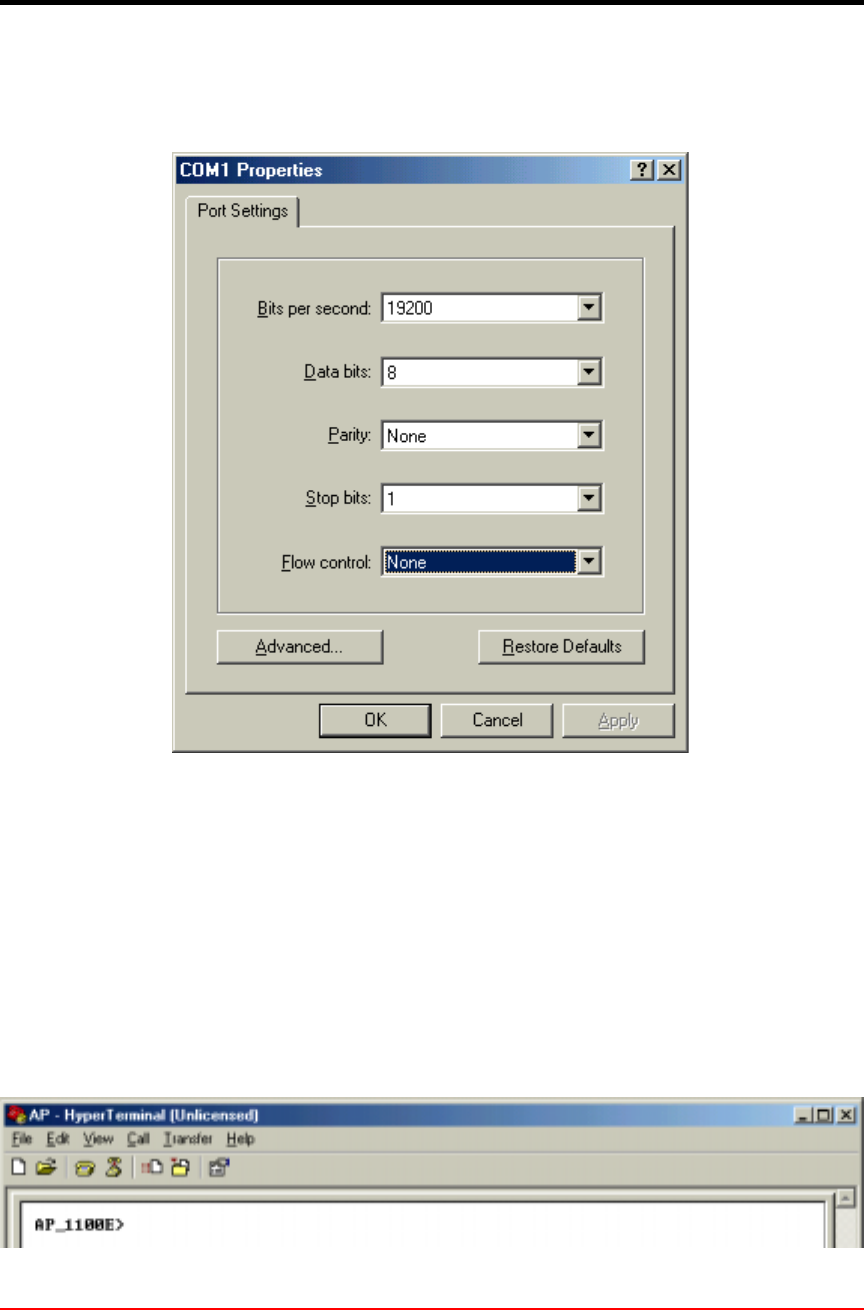
The port settings window appears:
Set Bits per second (baud rate) to 19200, Data bits to 8, Parity to None, Stop bits to 1,
and Flow control to None. Click OK.
The Setup screen appears in the HyperTerminal window. If the text does not appear
immediately, press Enter.
If the Access Point has no problem, you can find prompt on the terminal program’s
display box: