Advance Multimedia Internet Technology CPE-IDUNG-4D1W Wireless 11g Networking product User Manual Part 2
Advance Multimedia Internet Technology Inc. Wireless 11g Networking product Users Manual Part 2
Contents
- 1. Users Manual Part 1
- 2. Users Manual Part 2
Users Manual Part 2
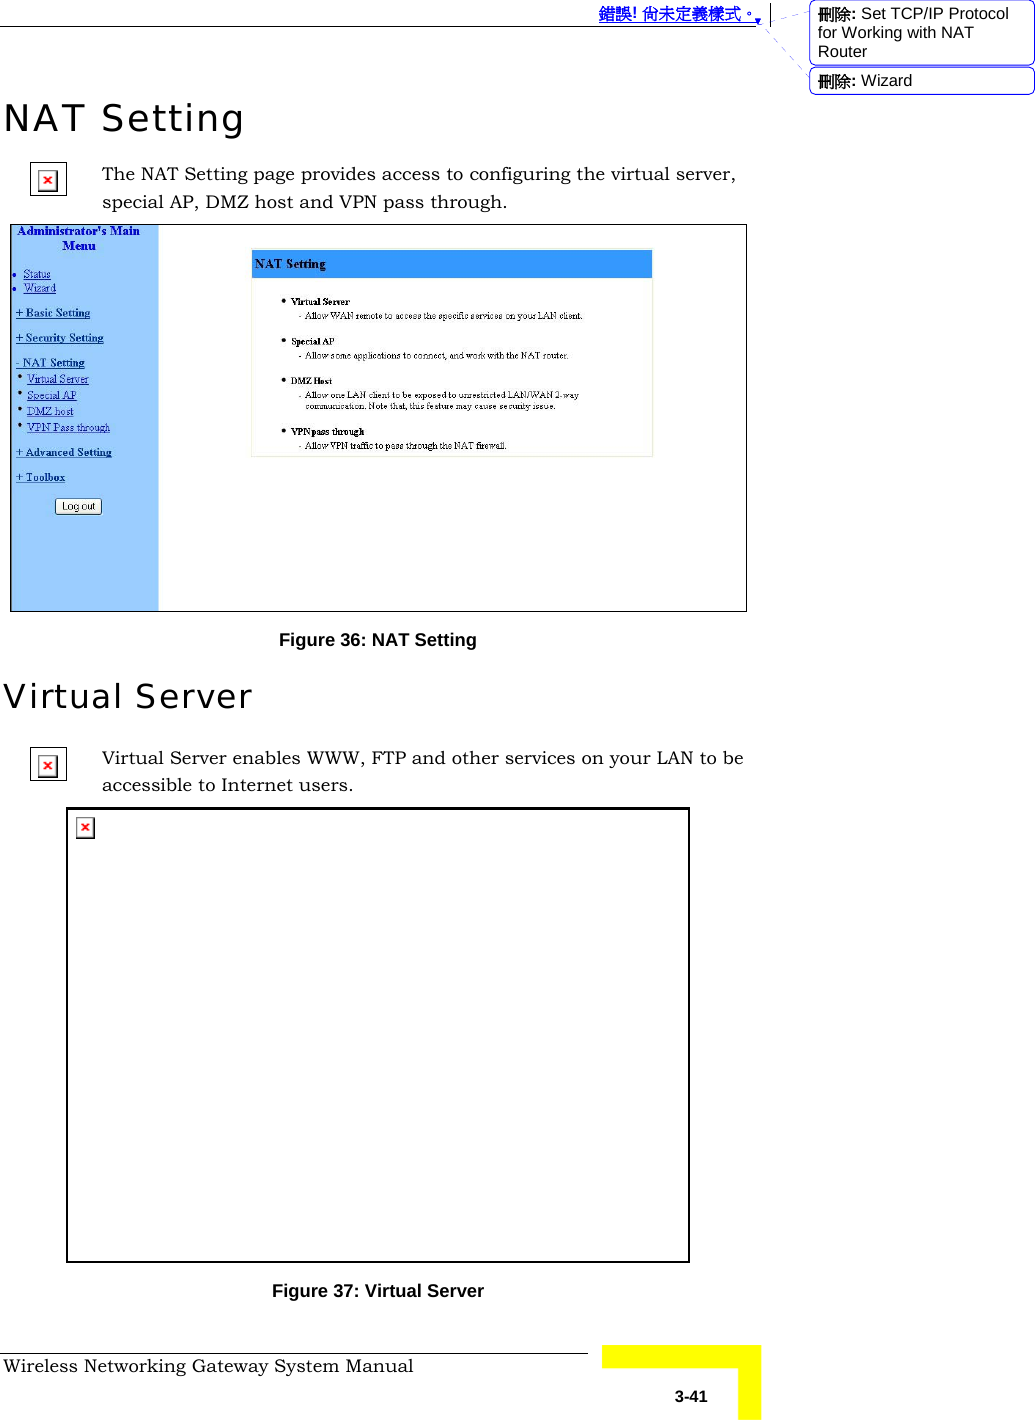


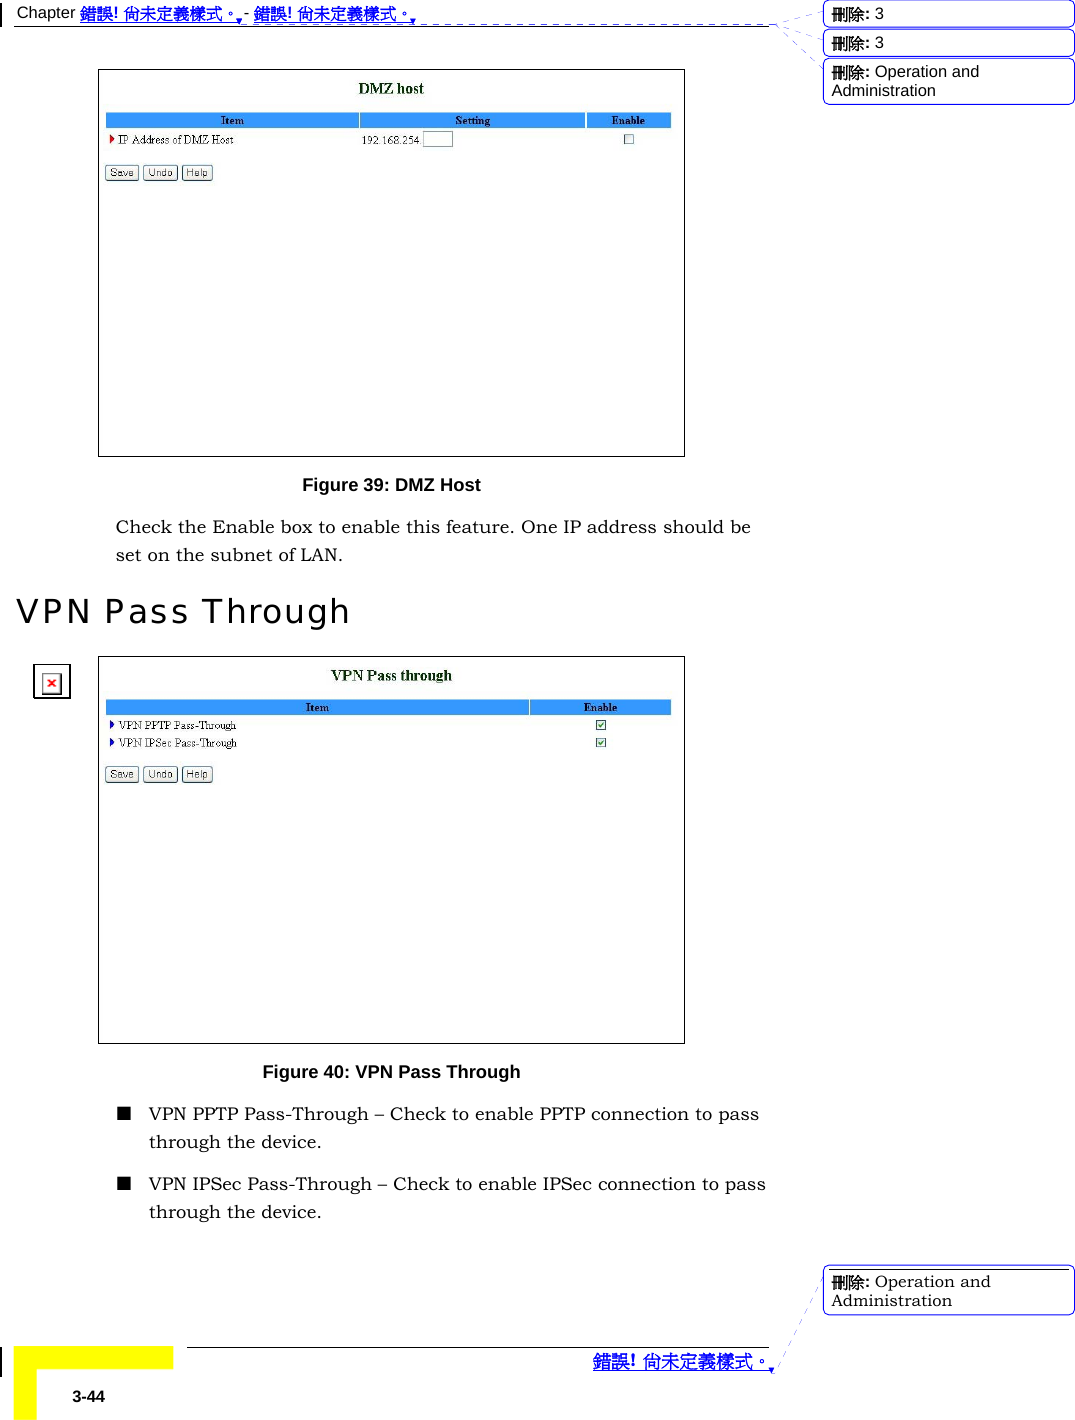
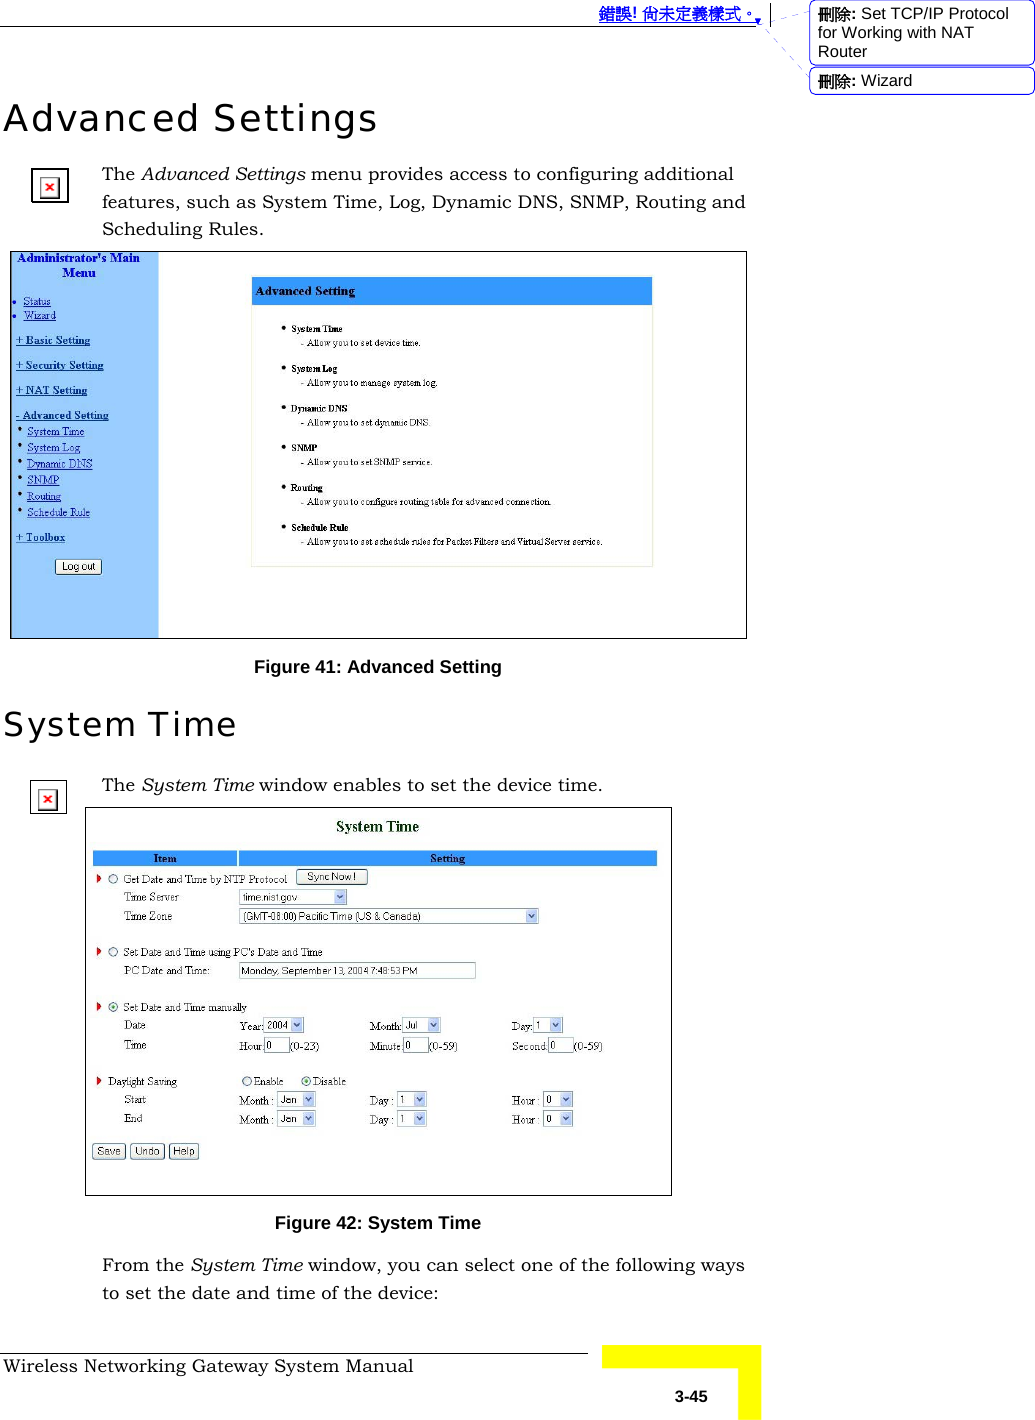
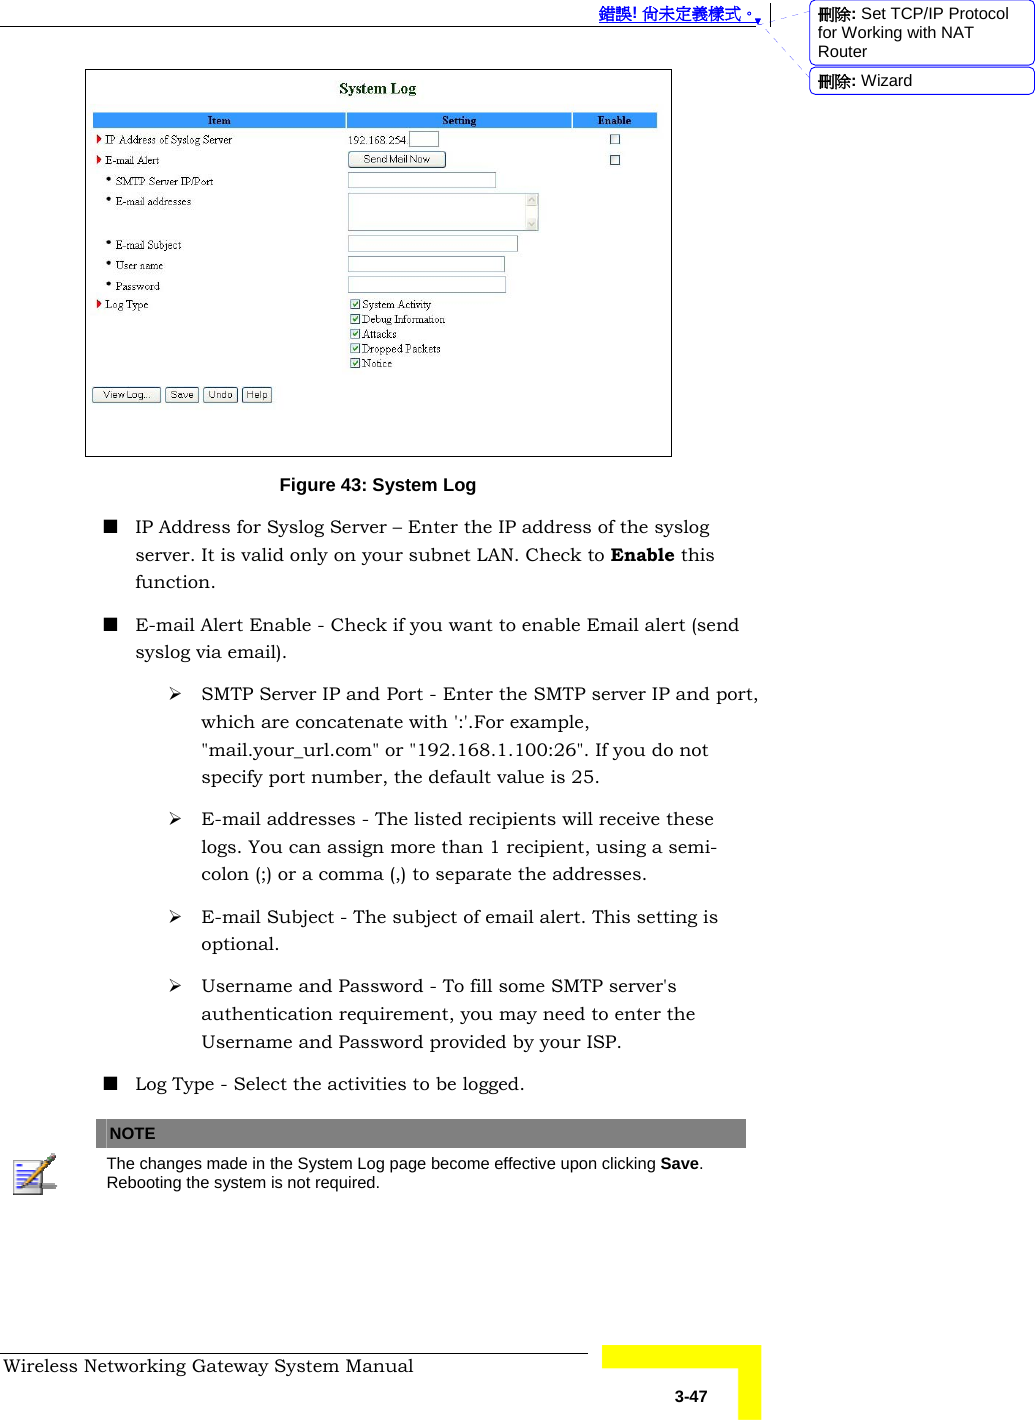
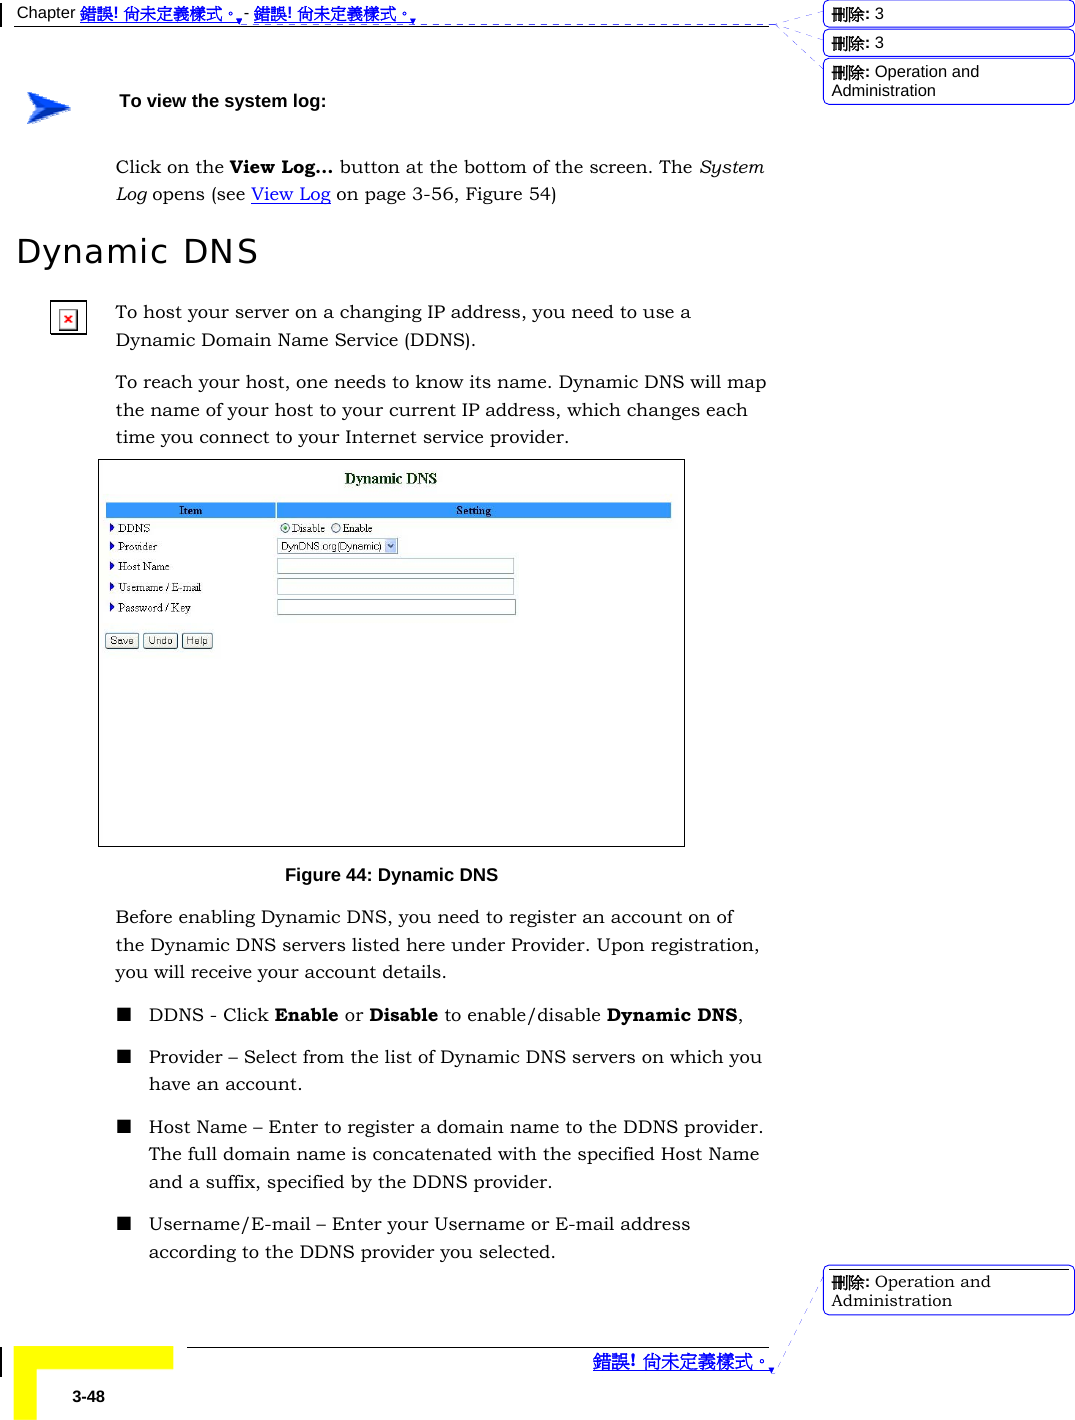
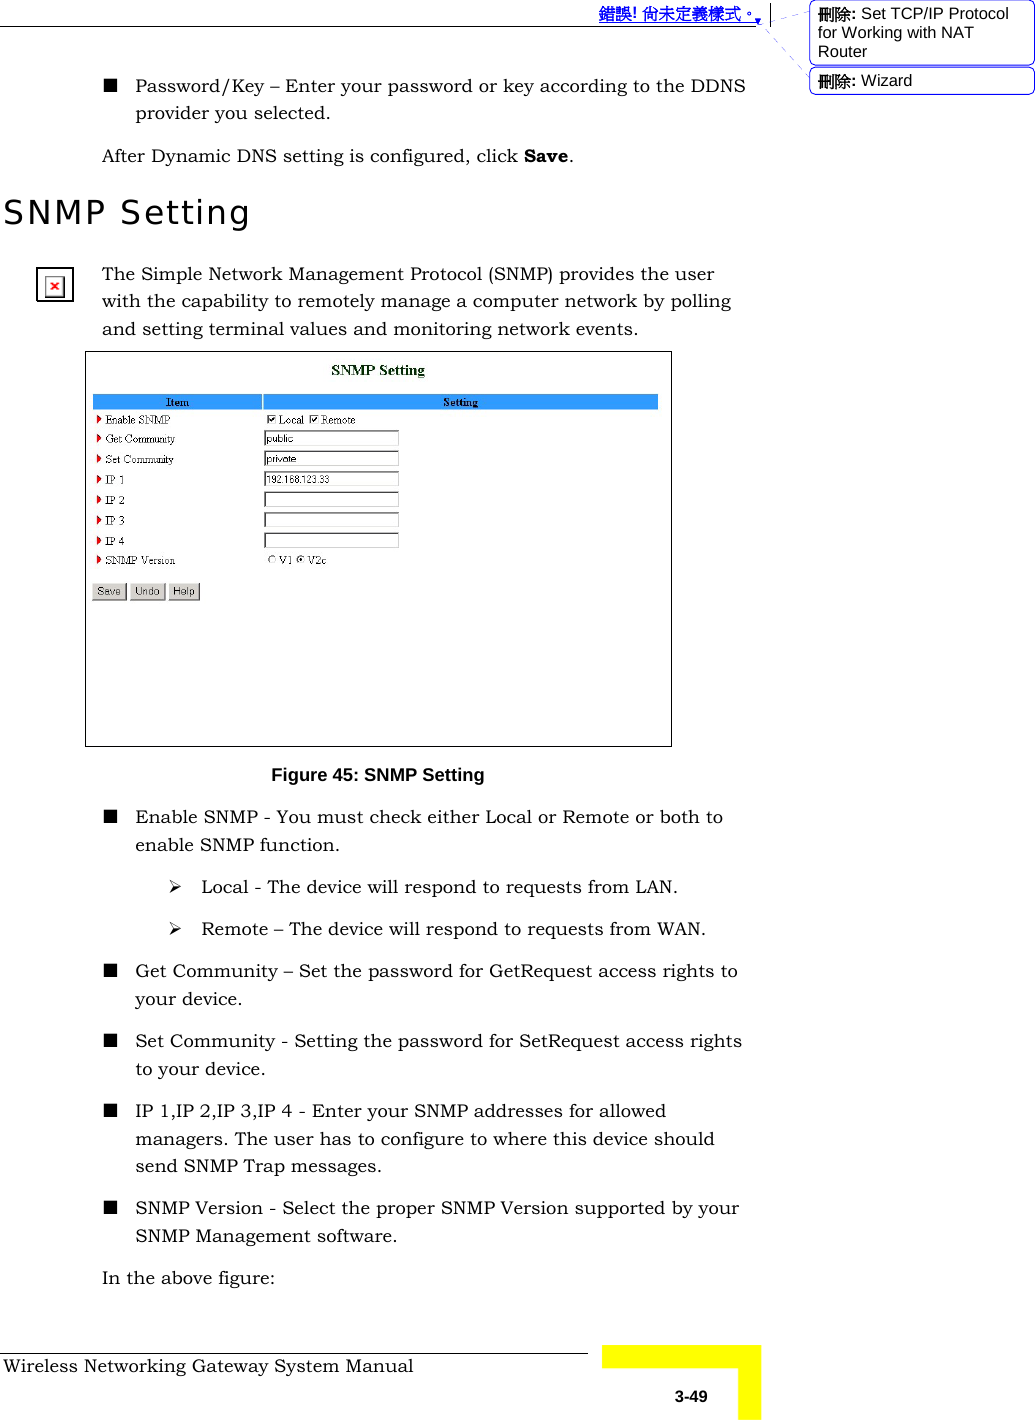


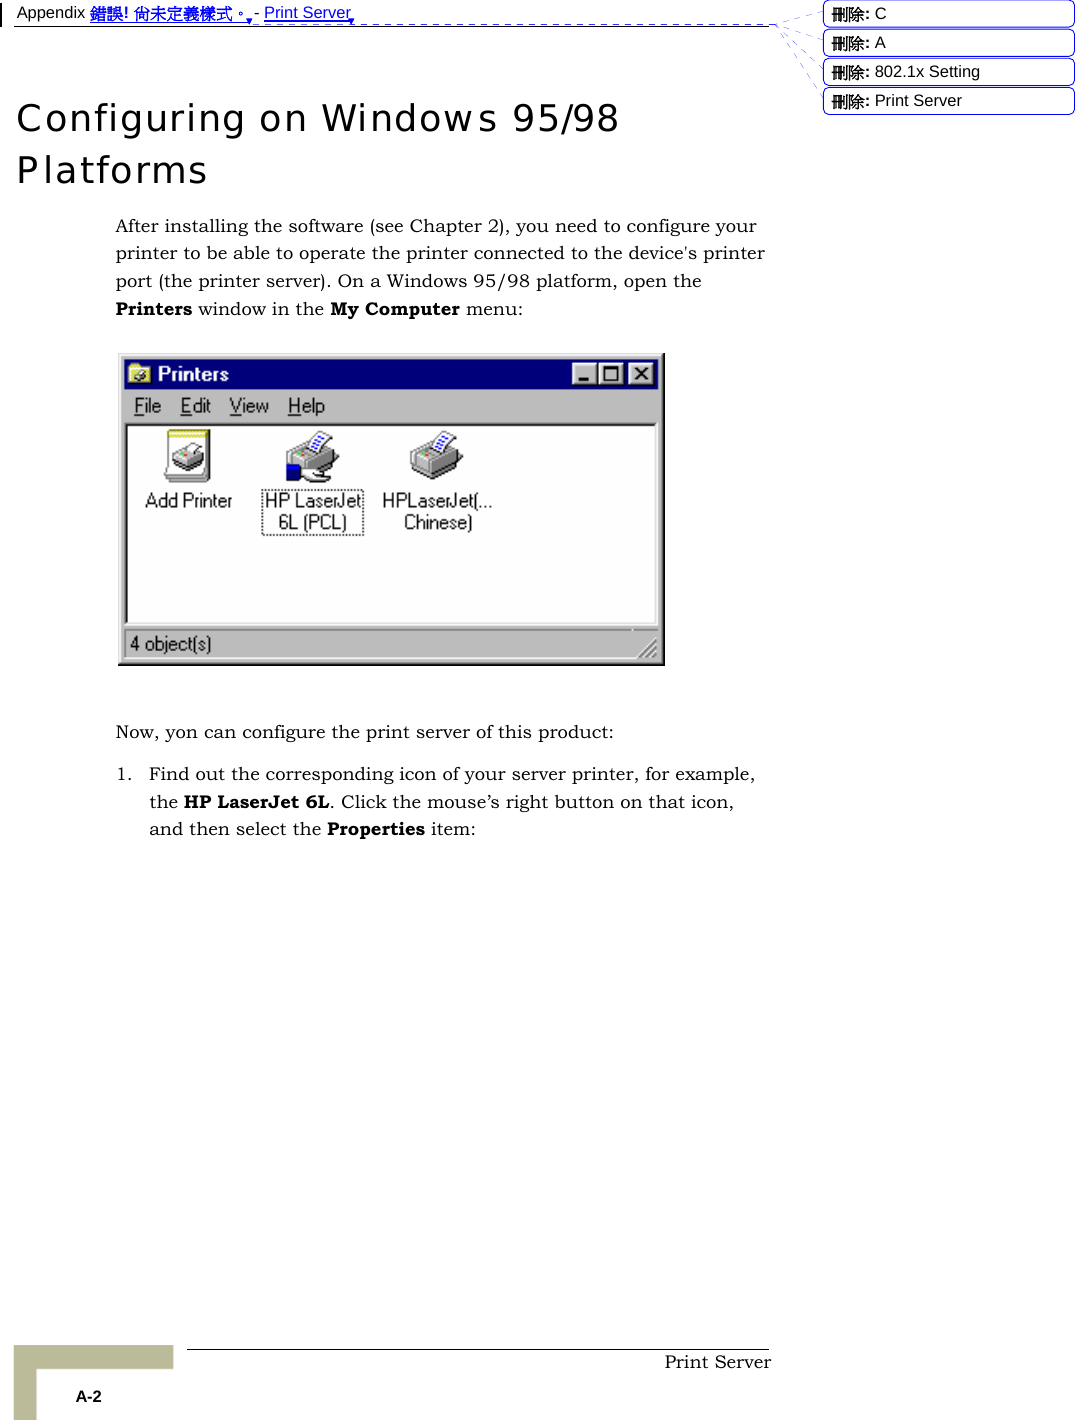
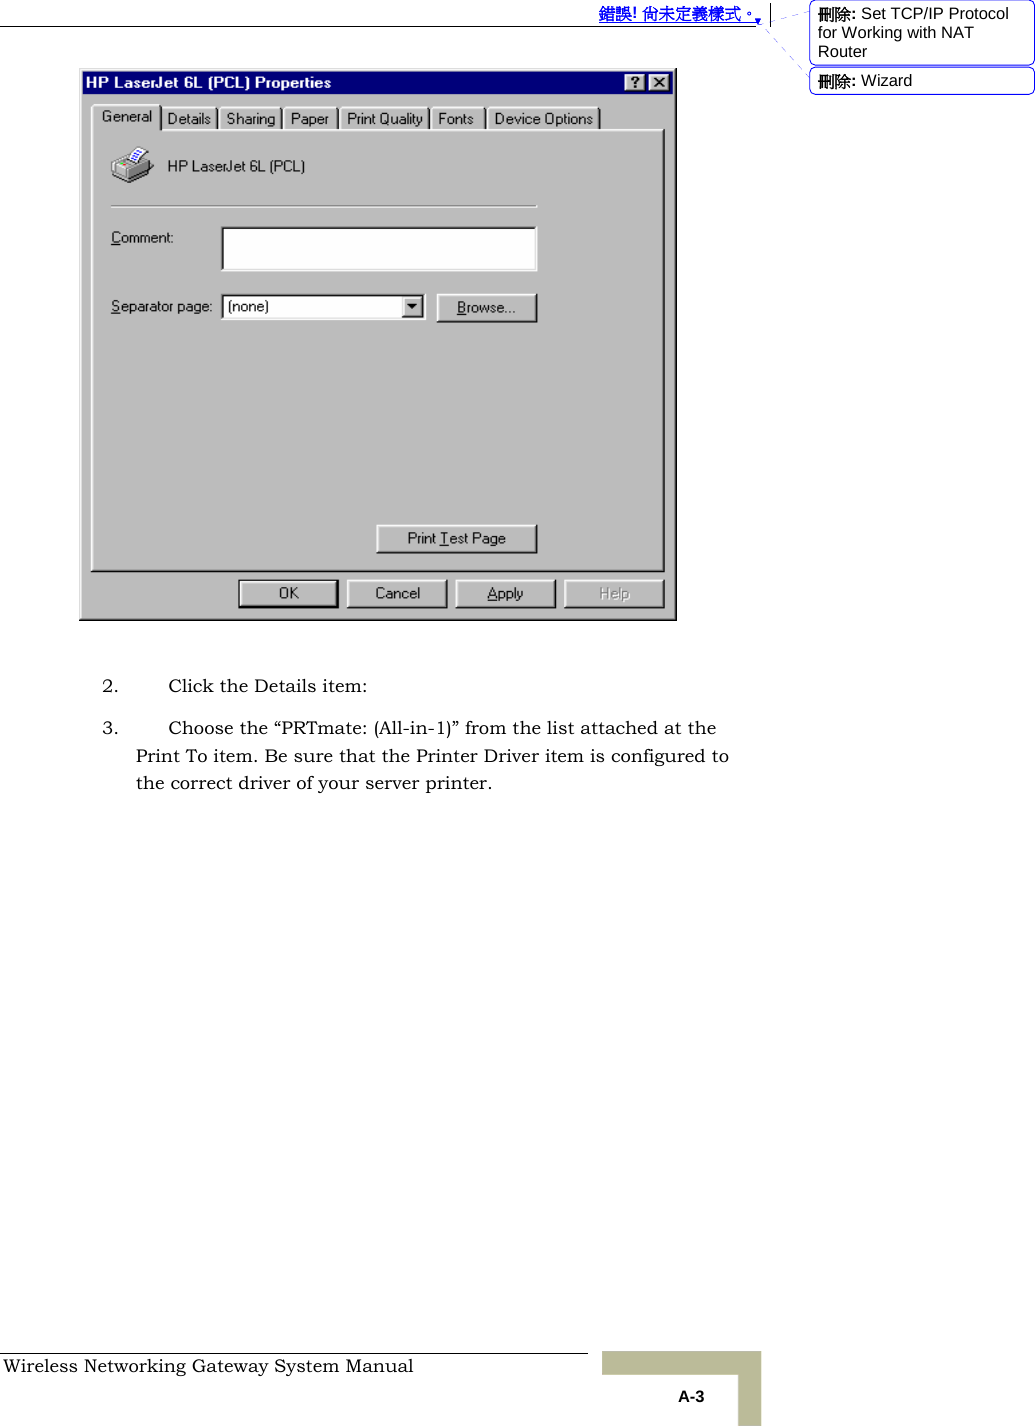
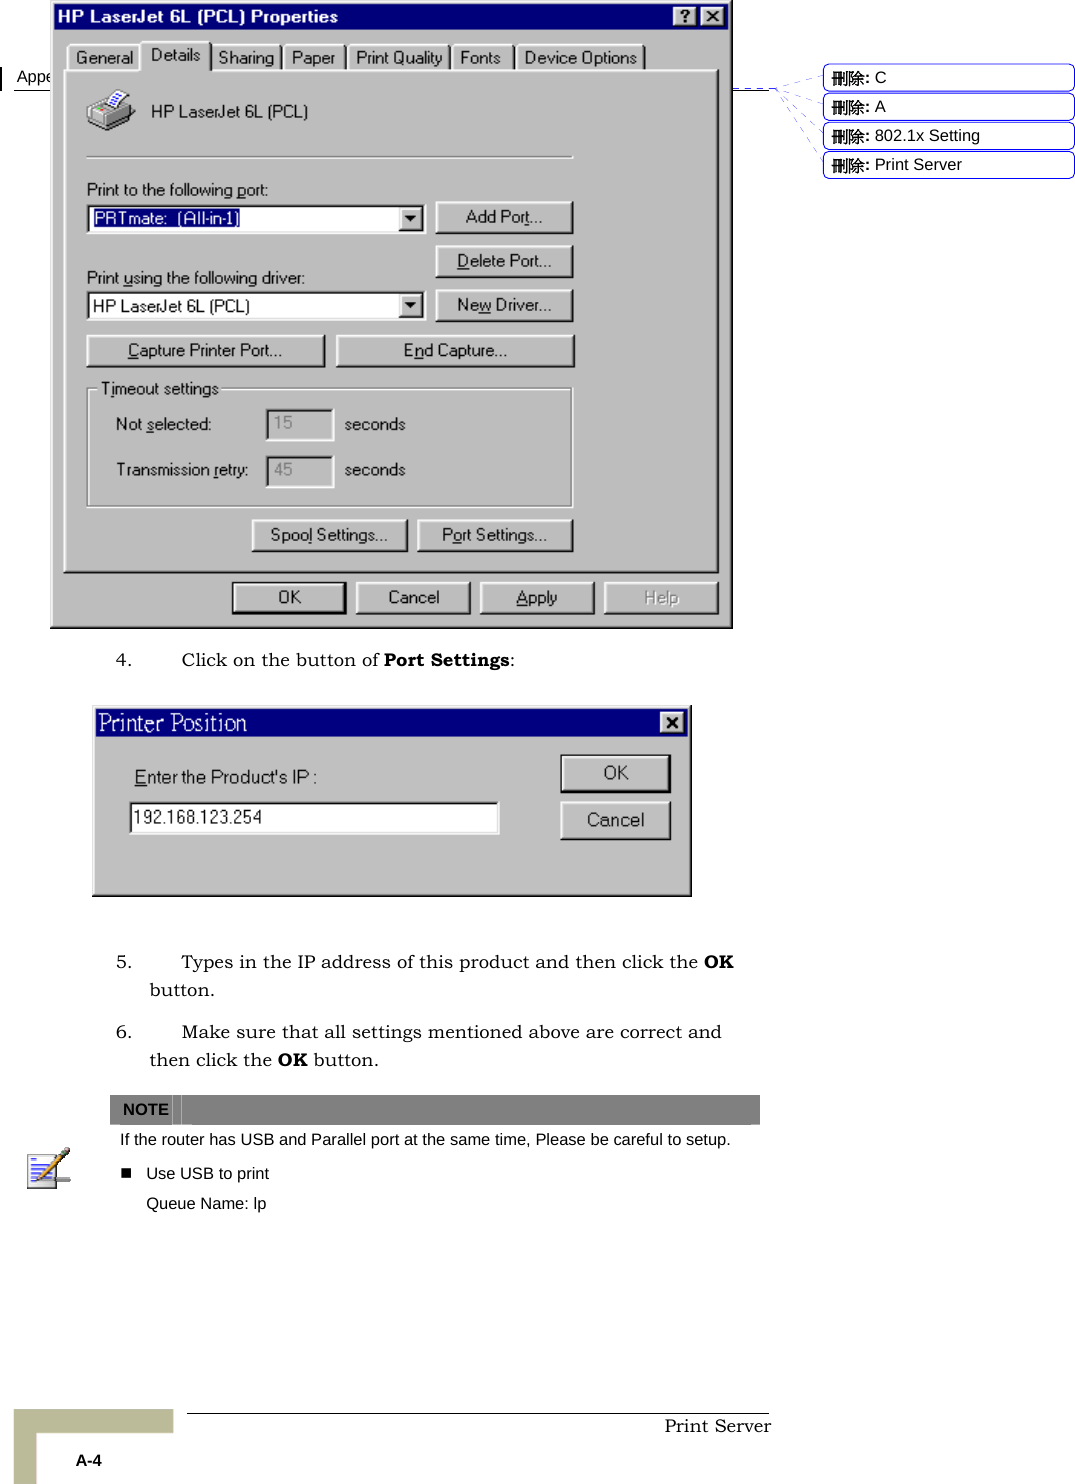
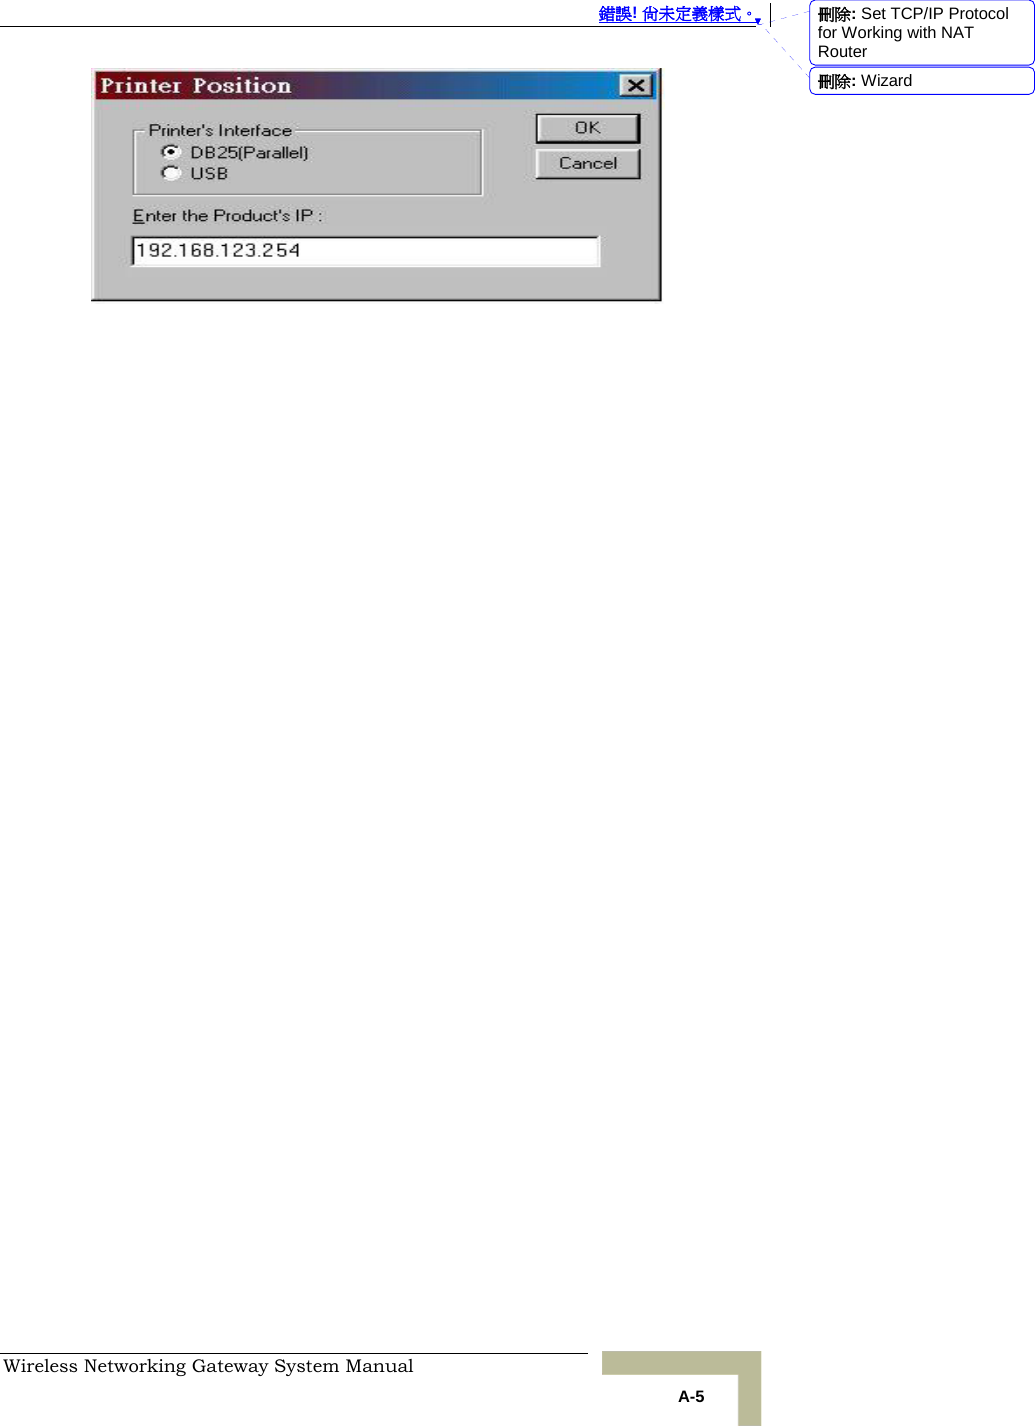
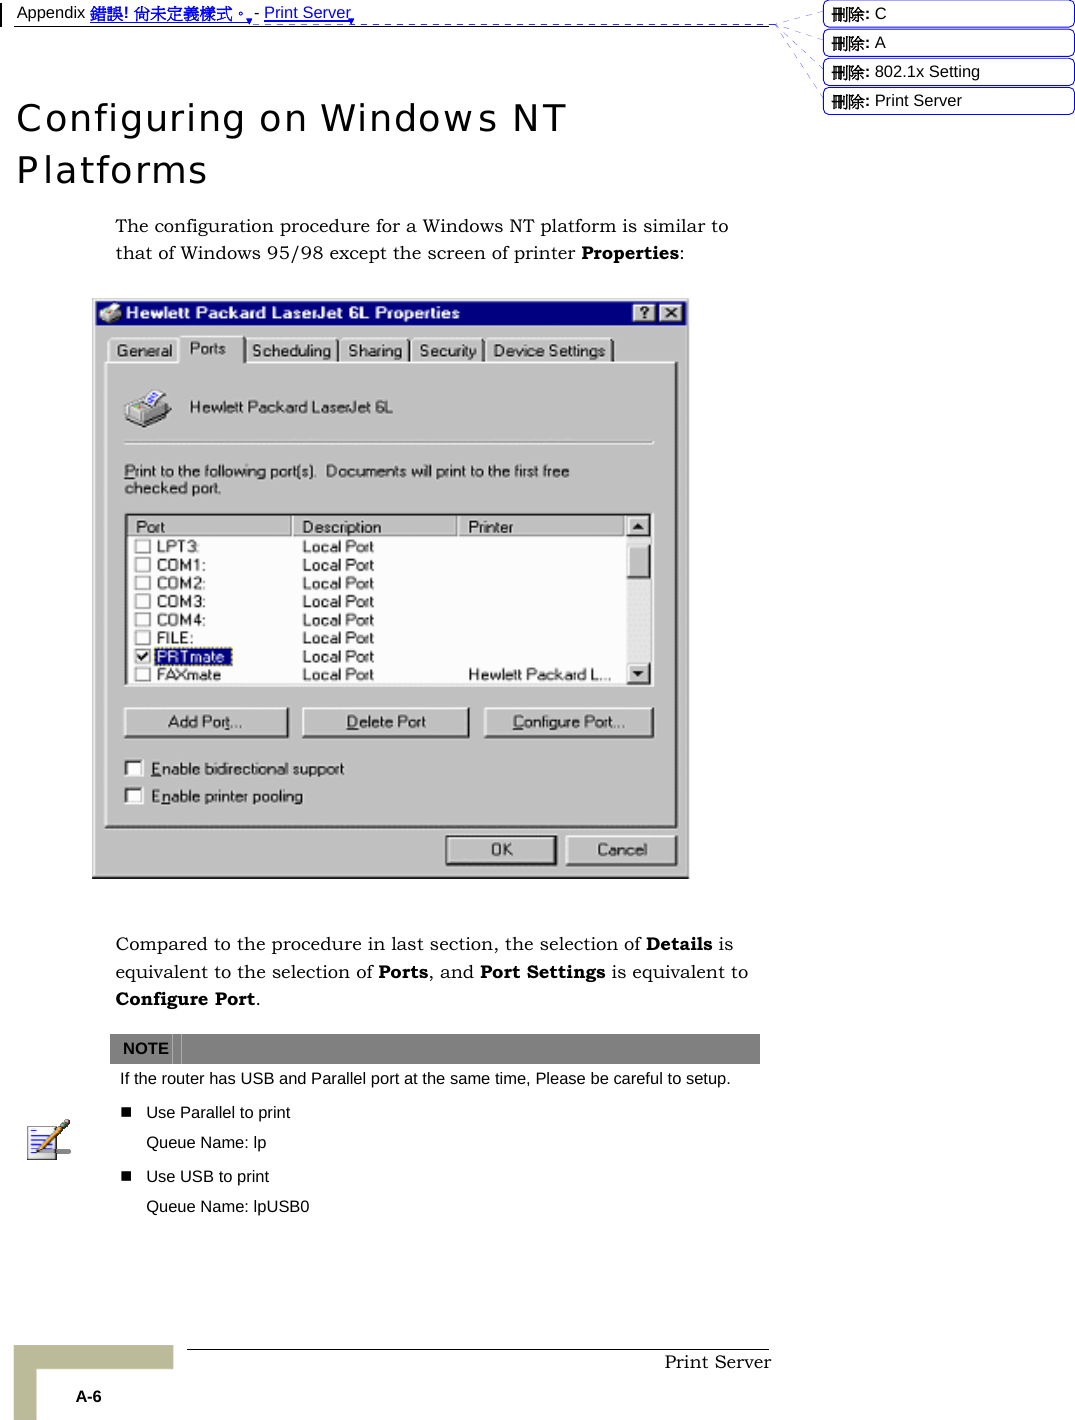
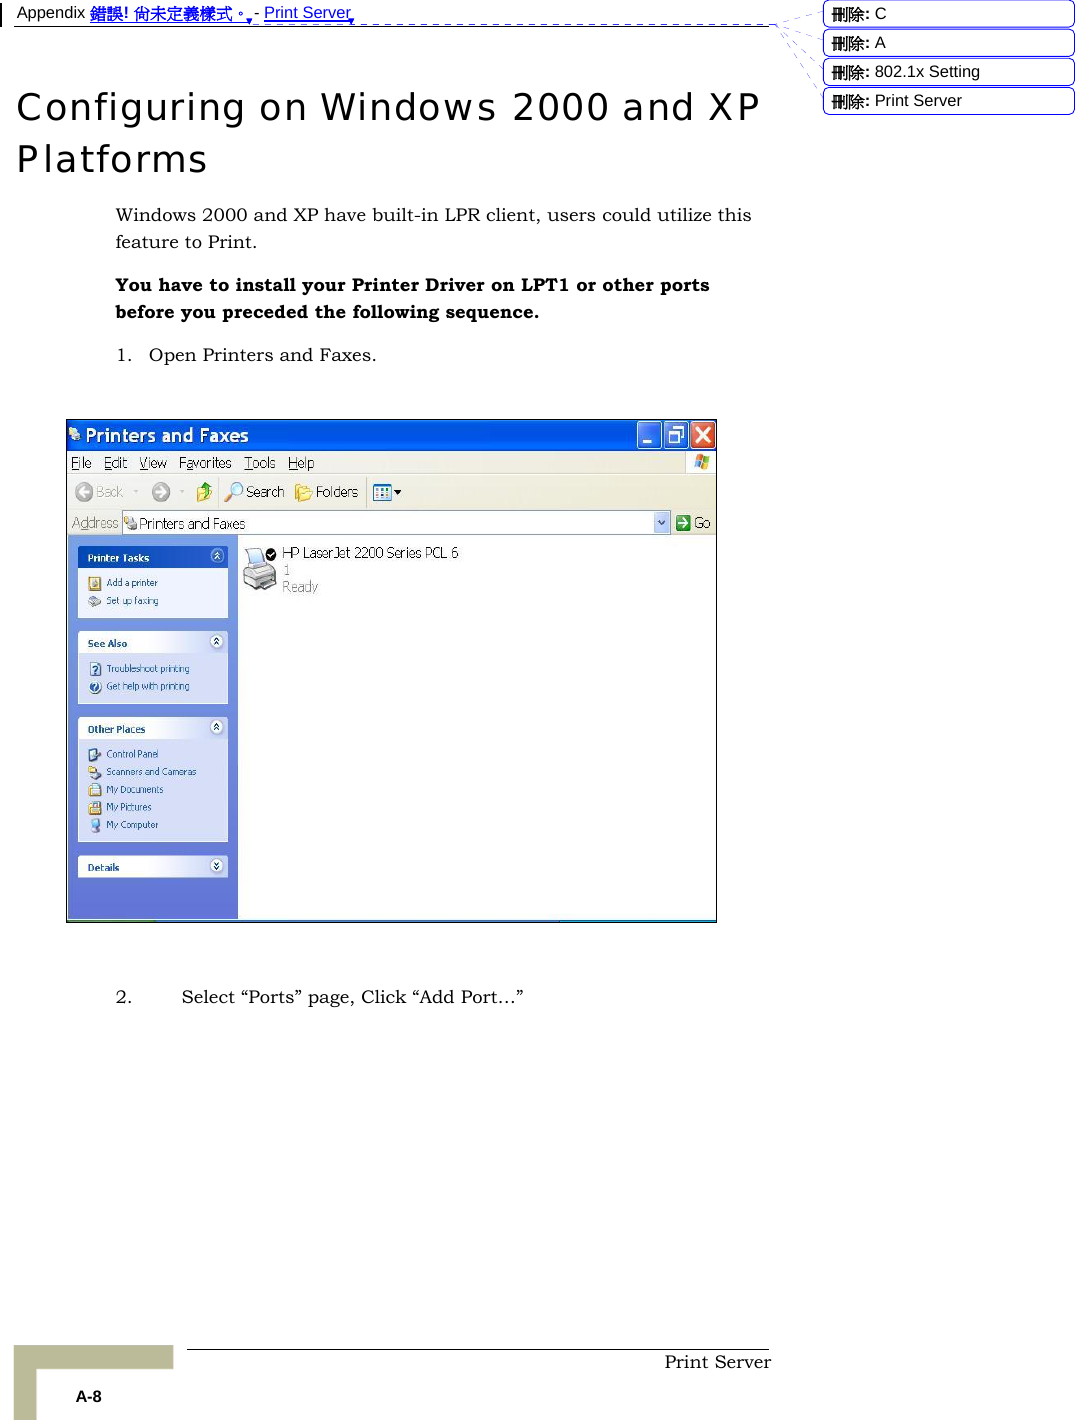
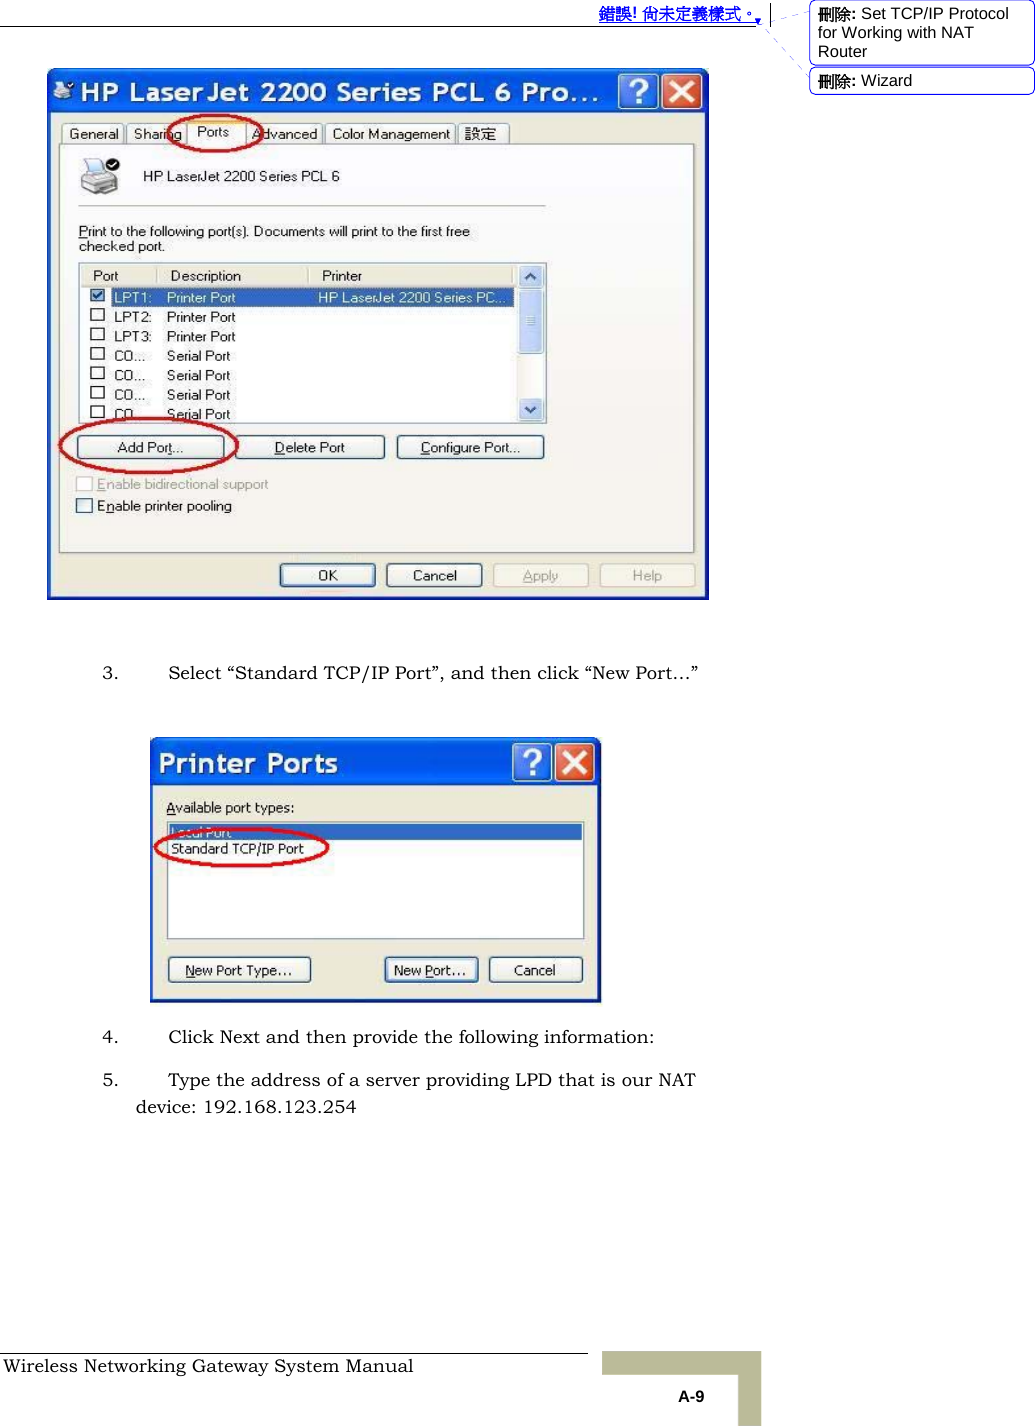
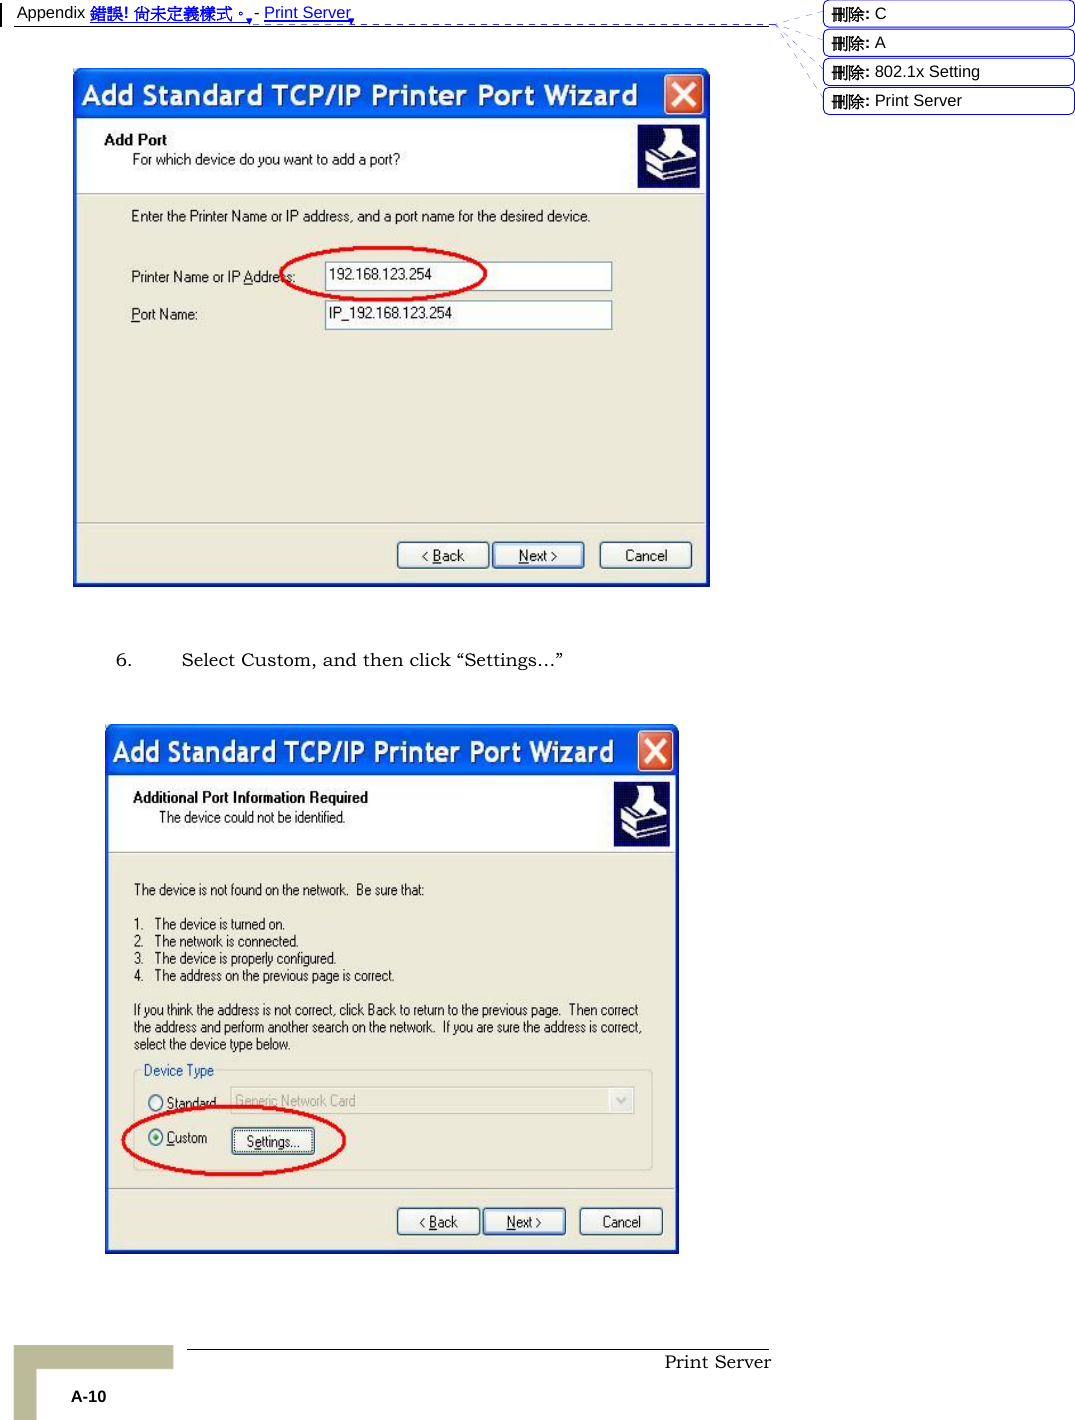
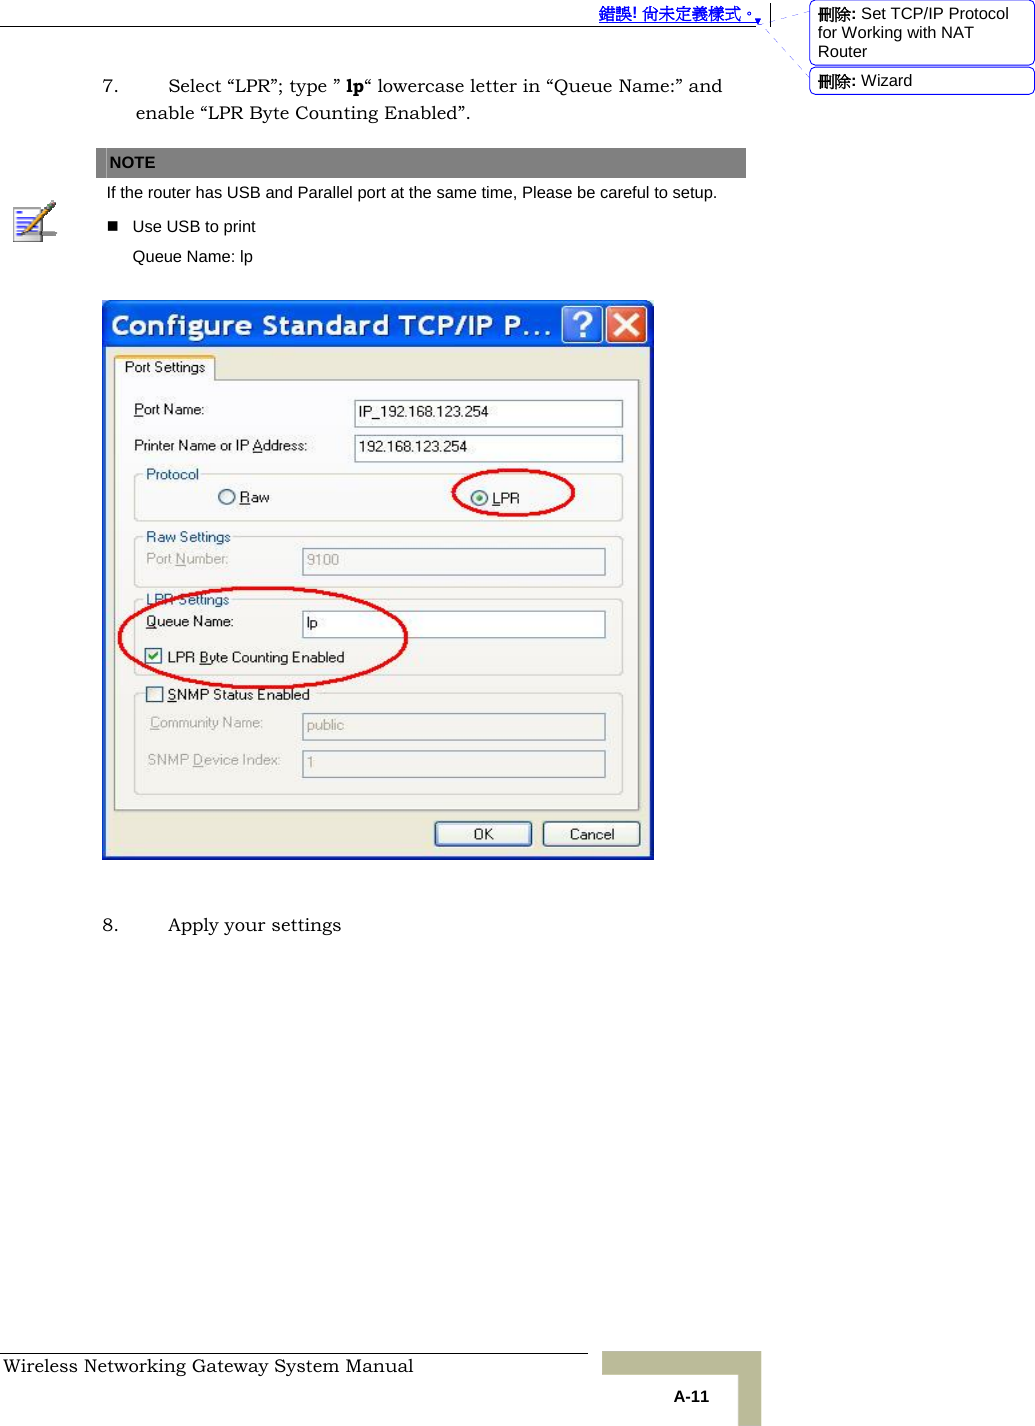
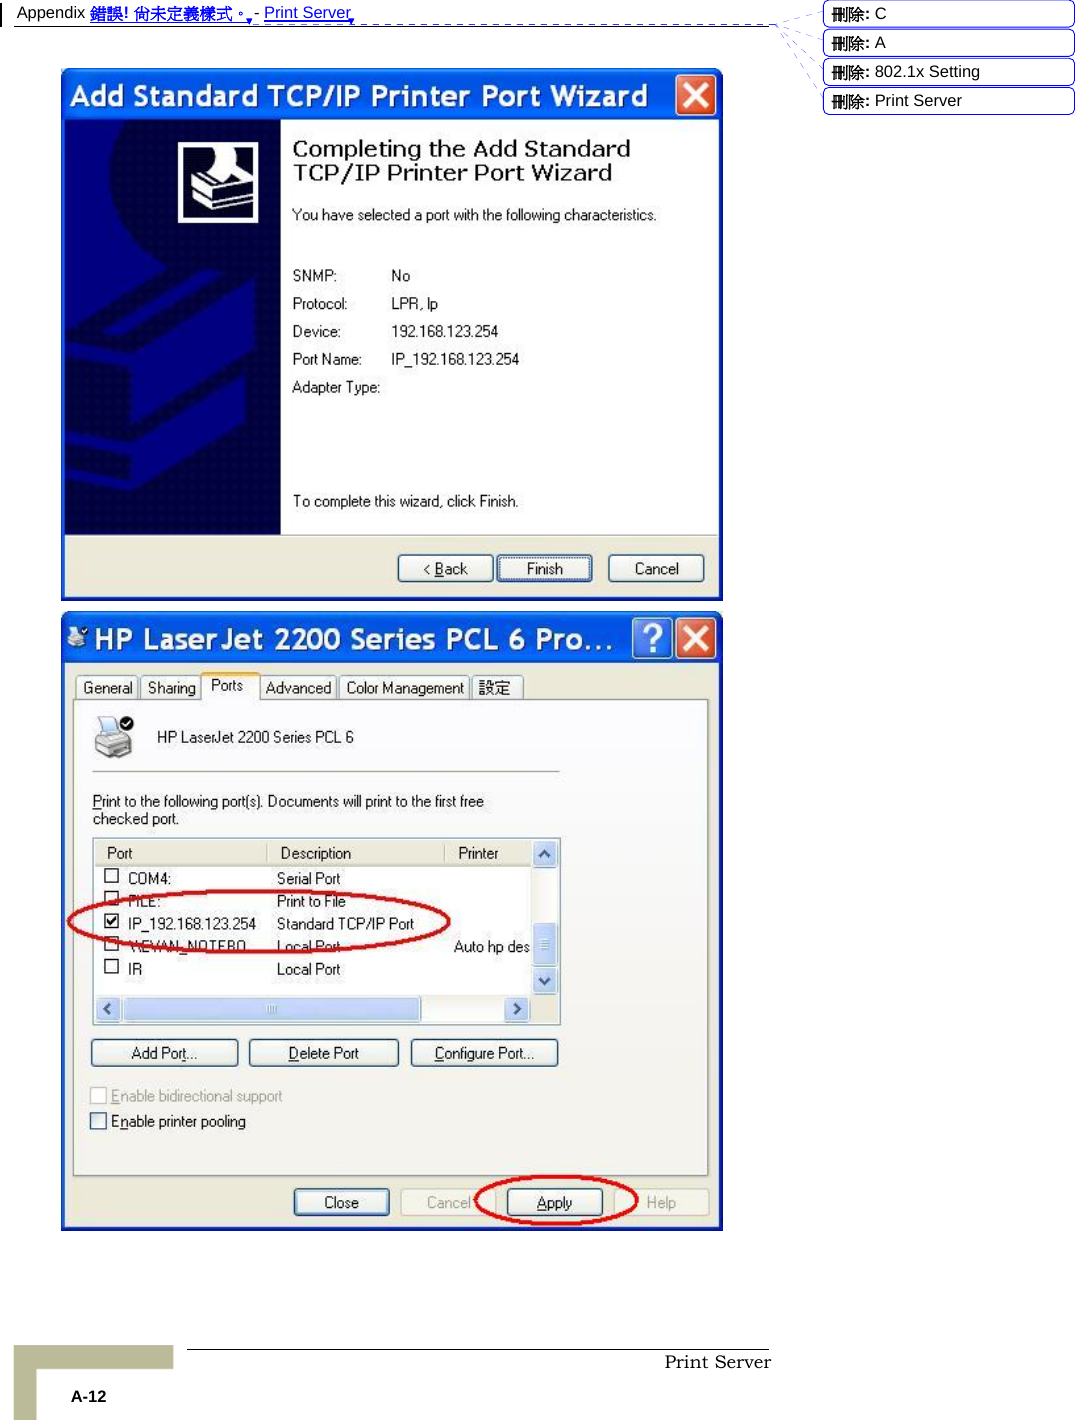
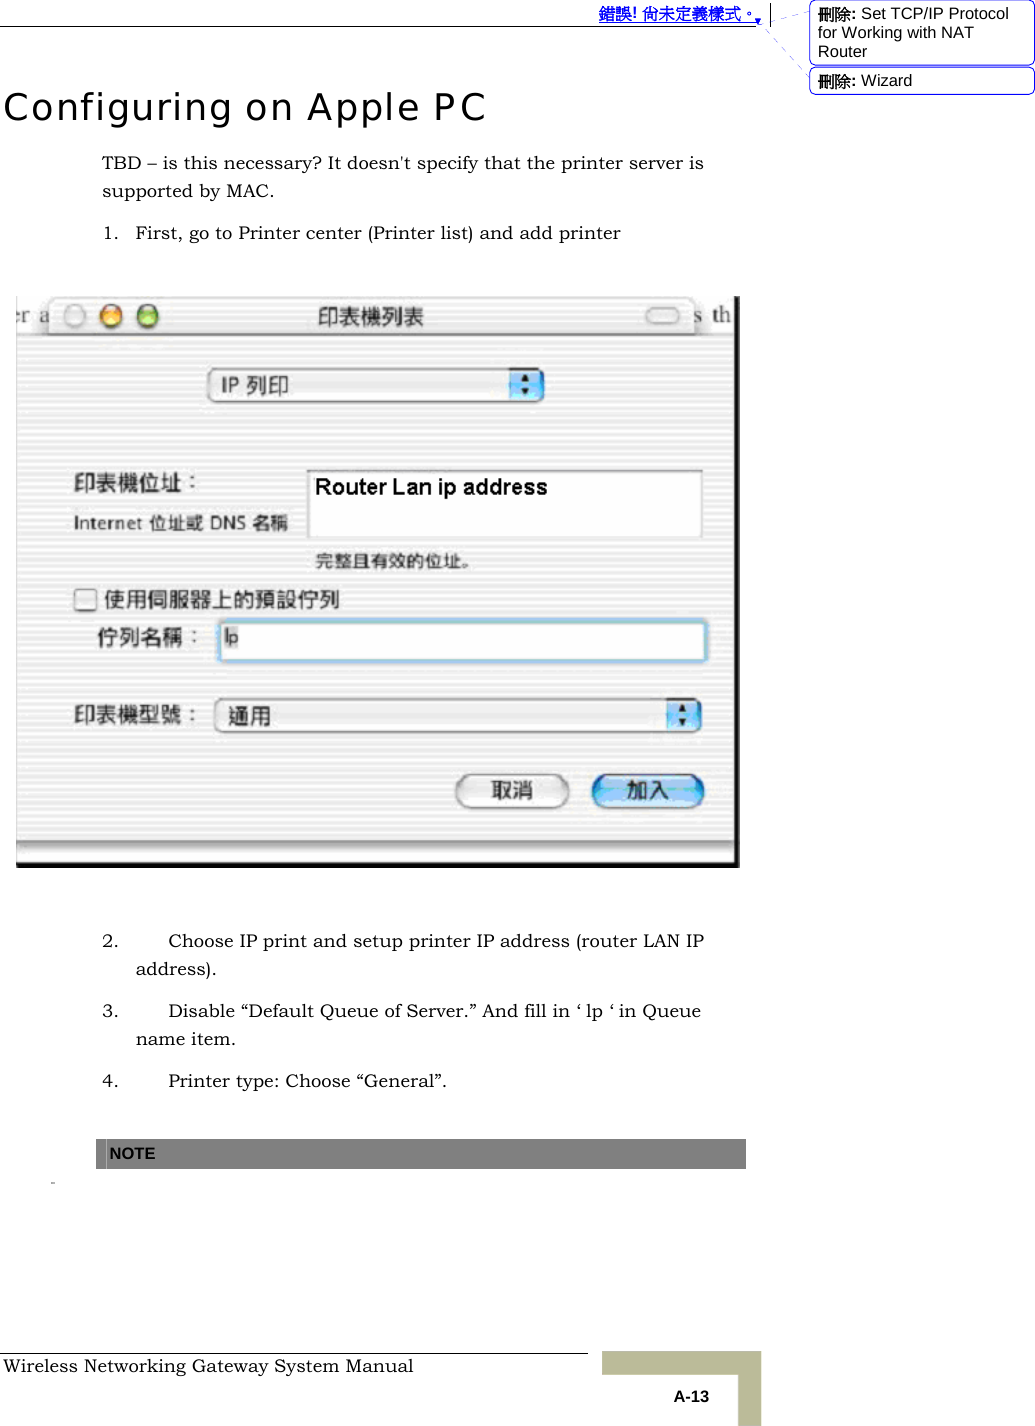
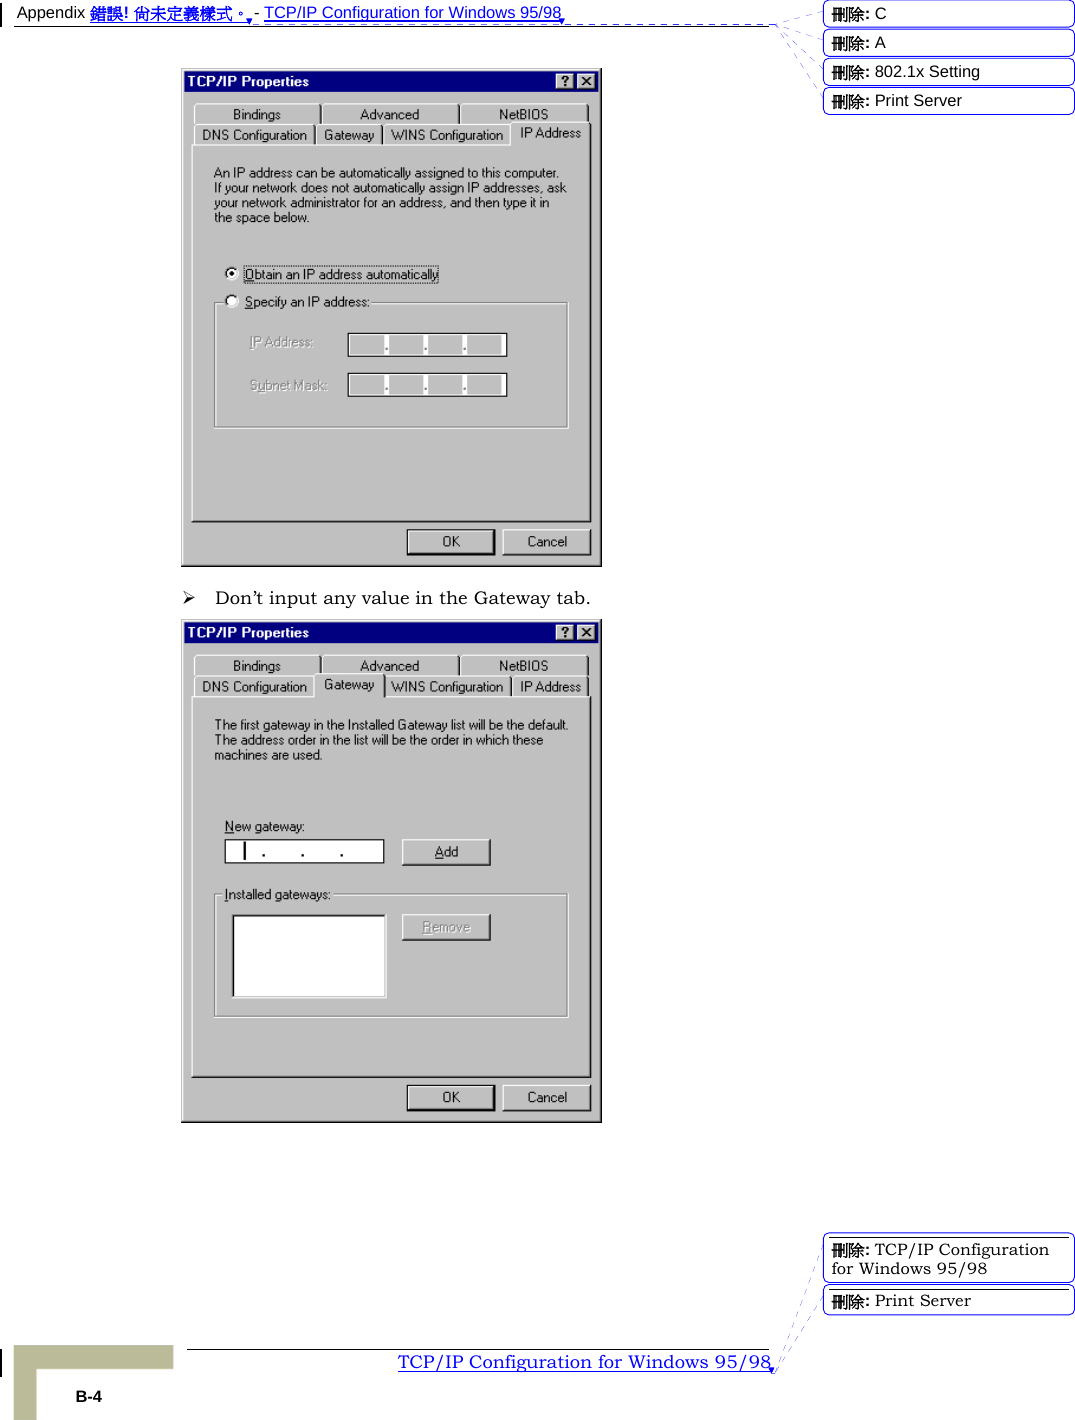
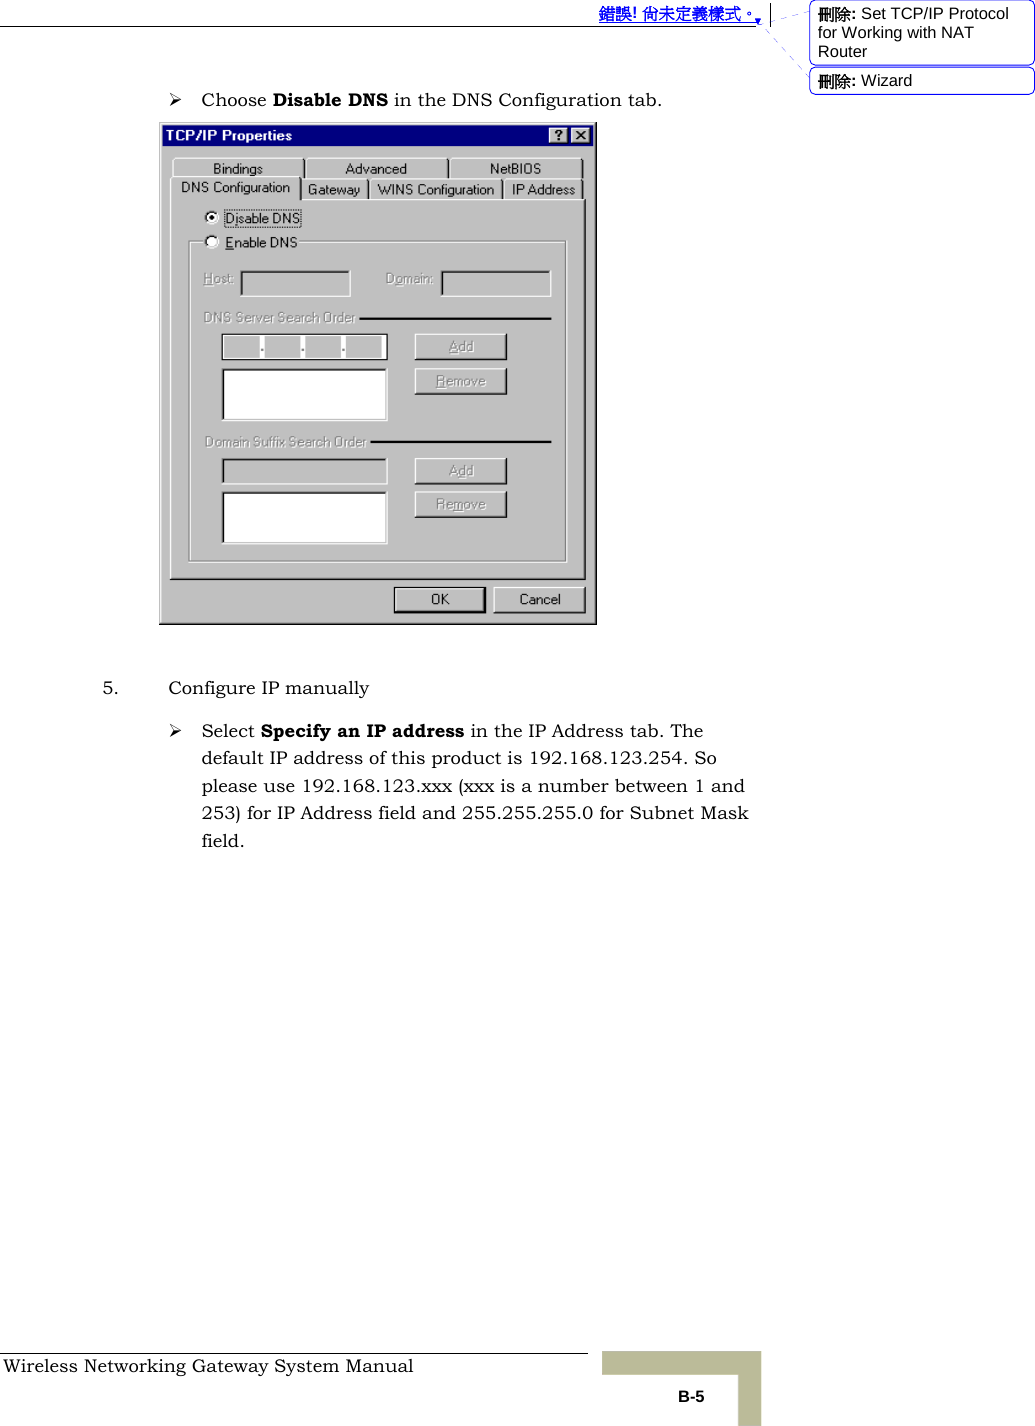
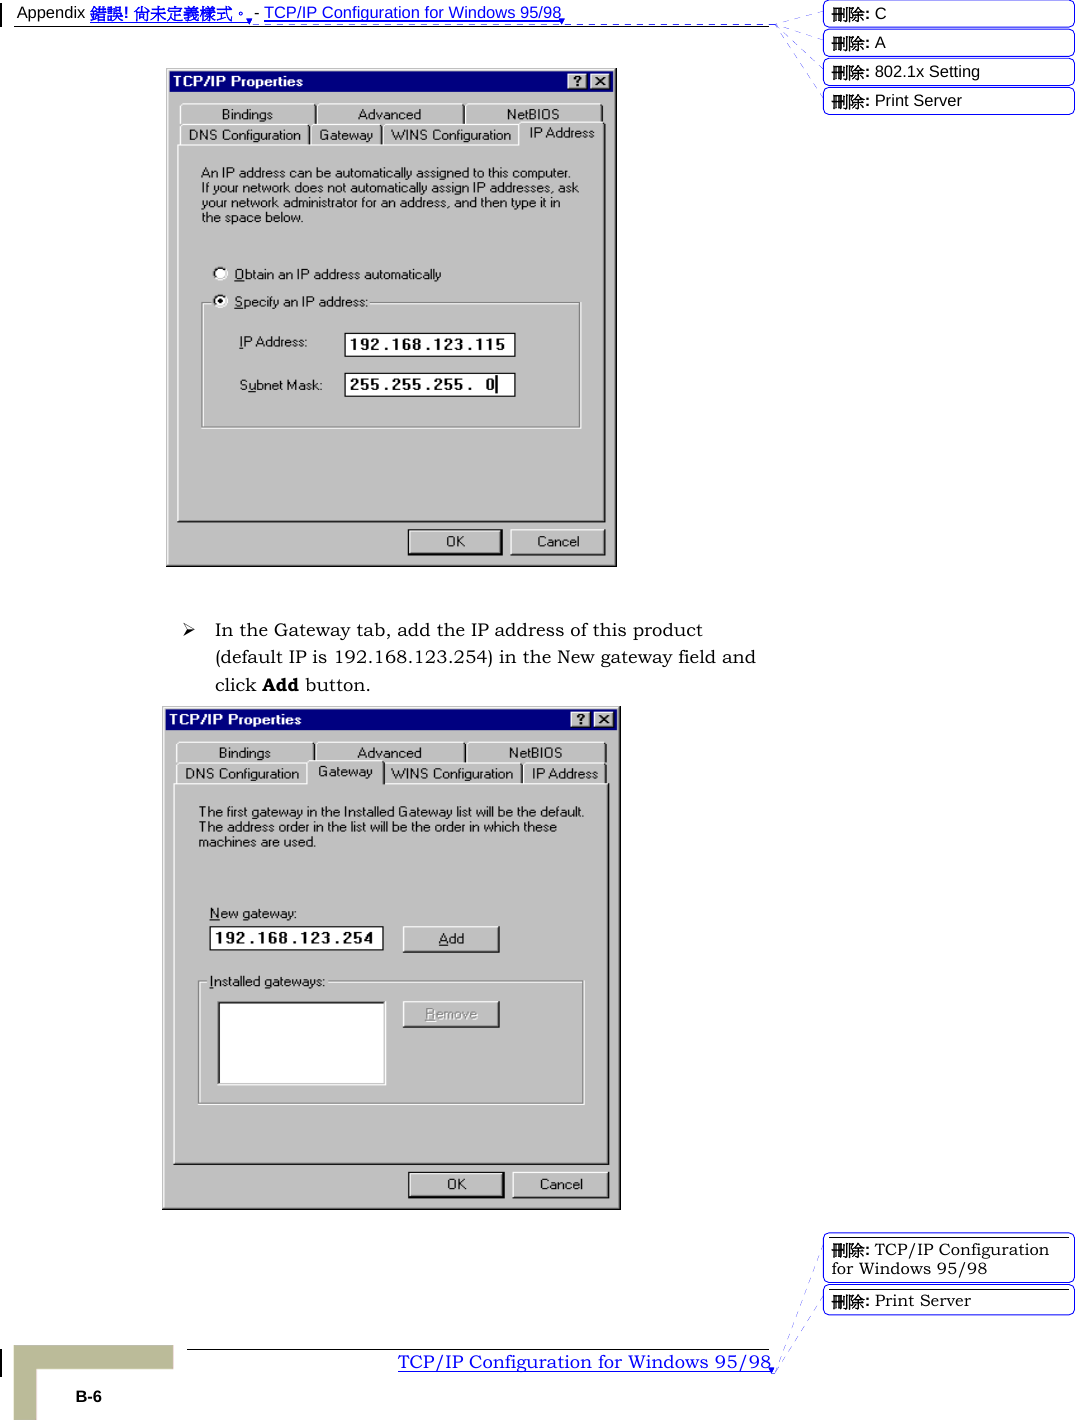
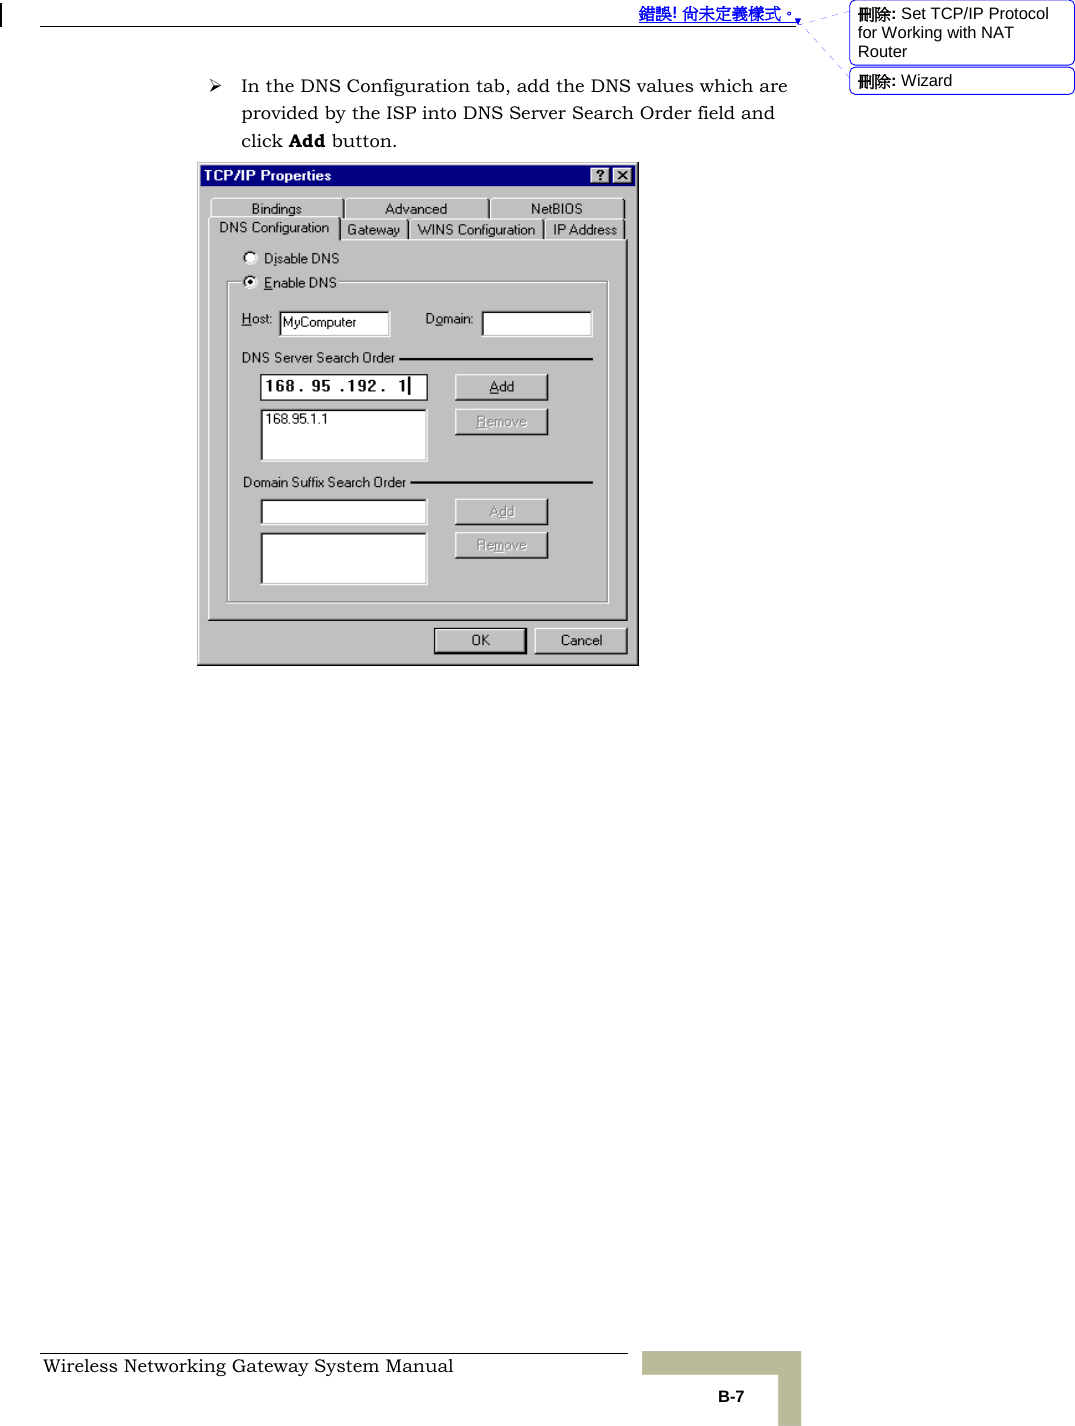
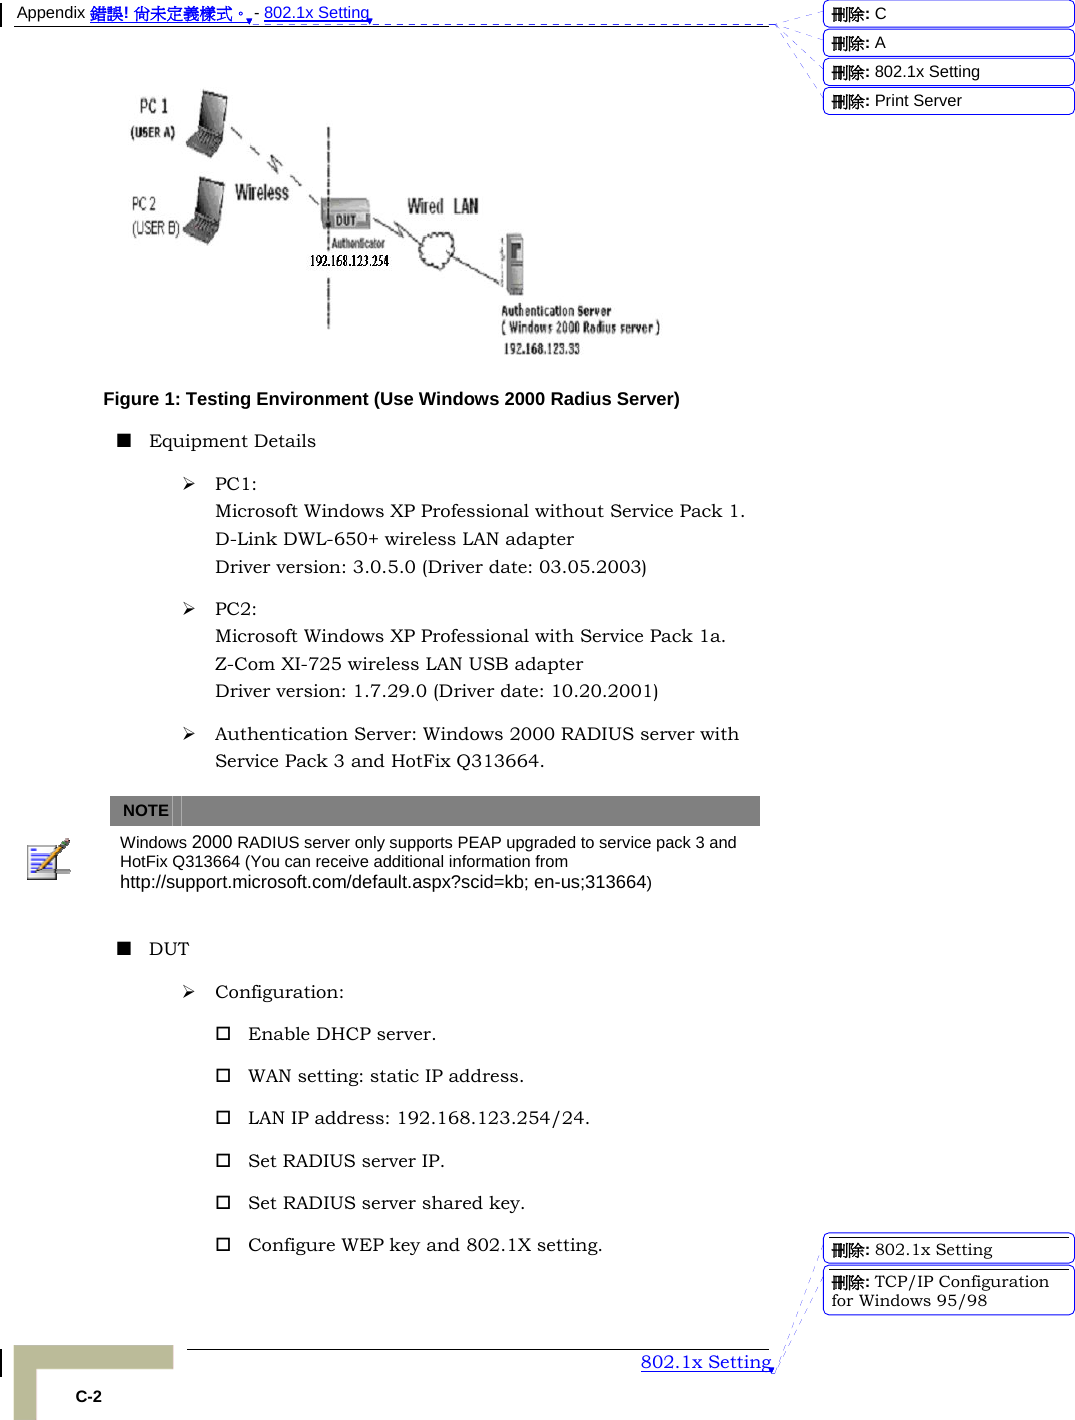
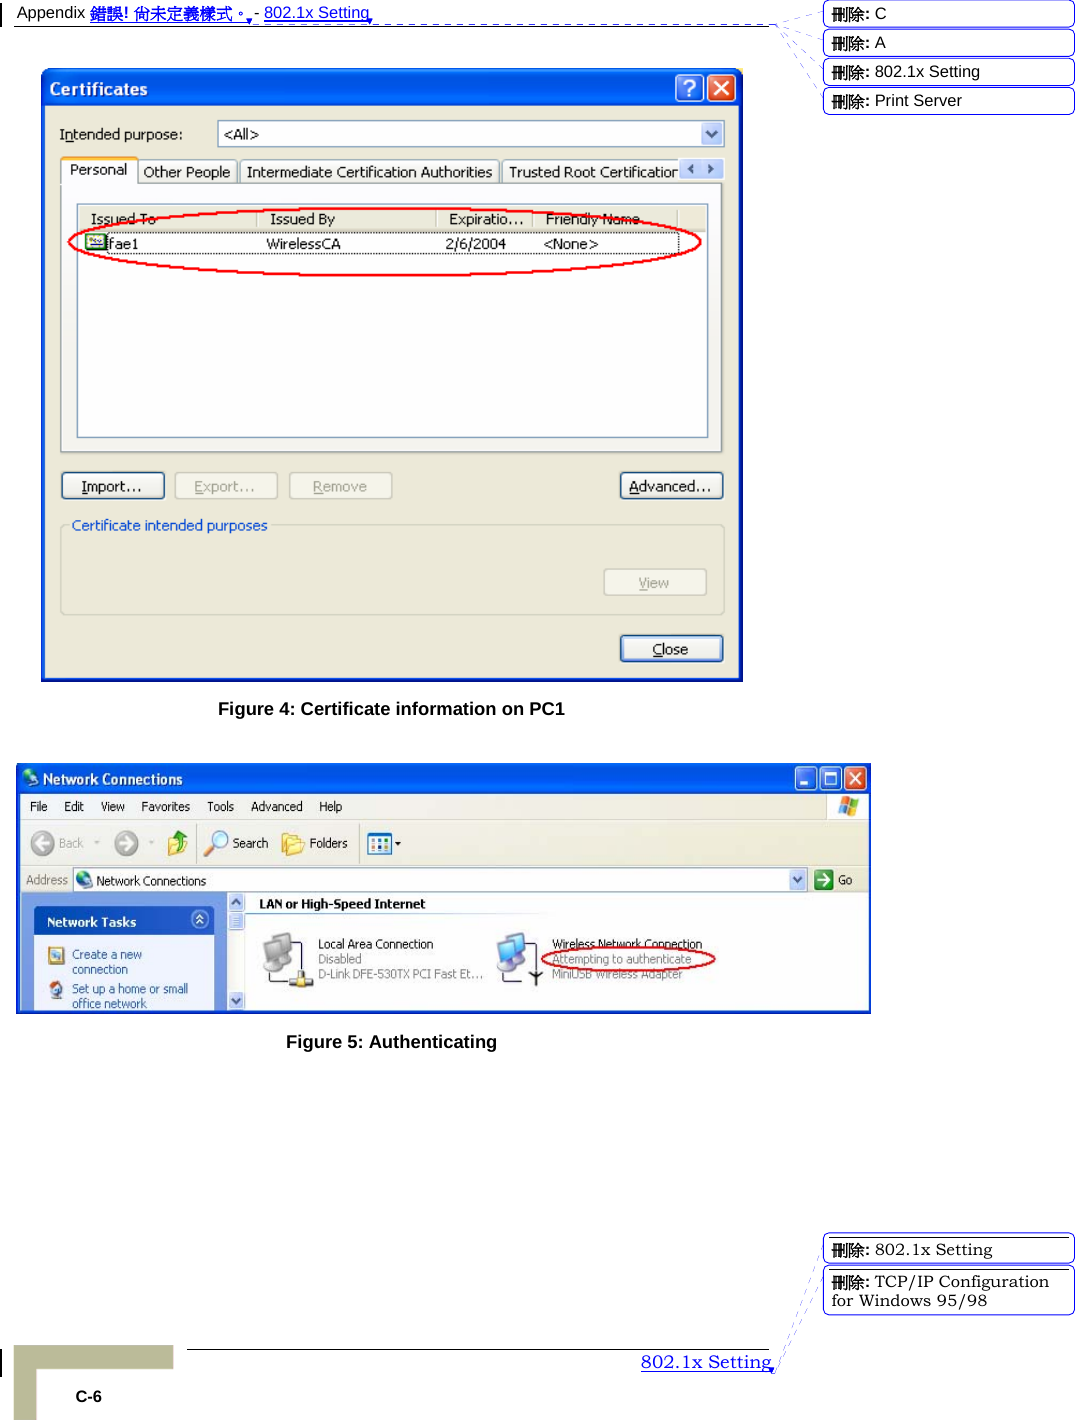
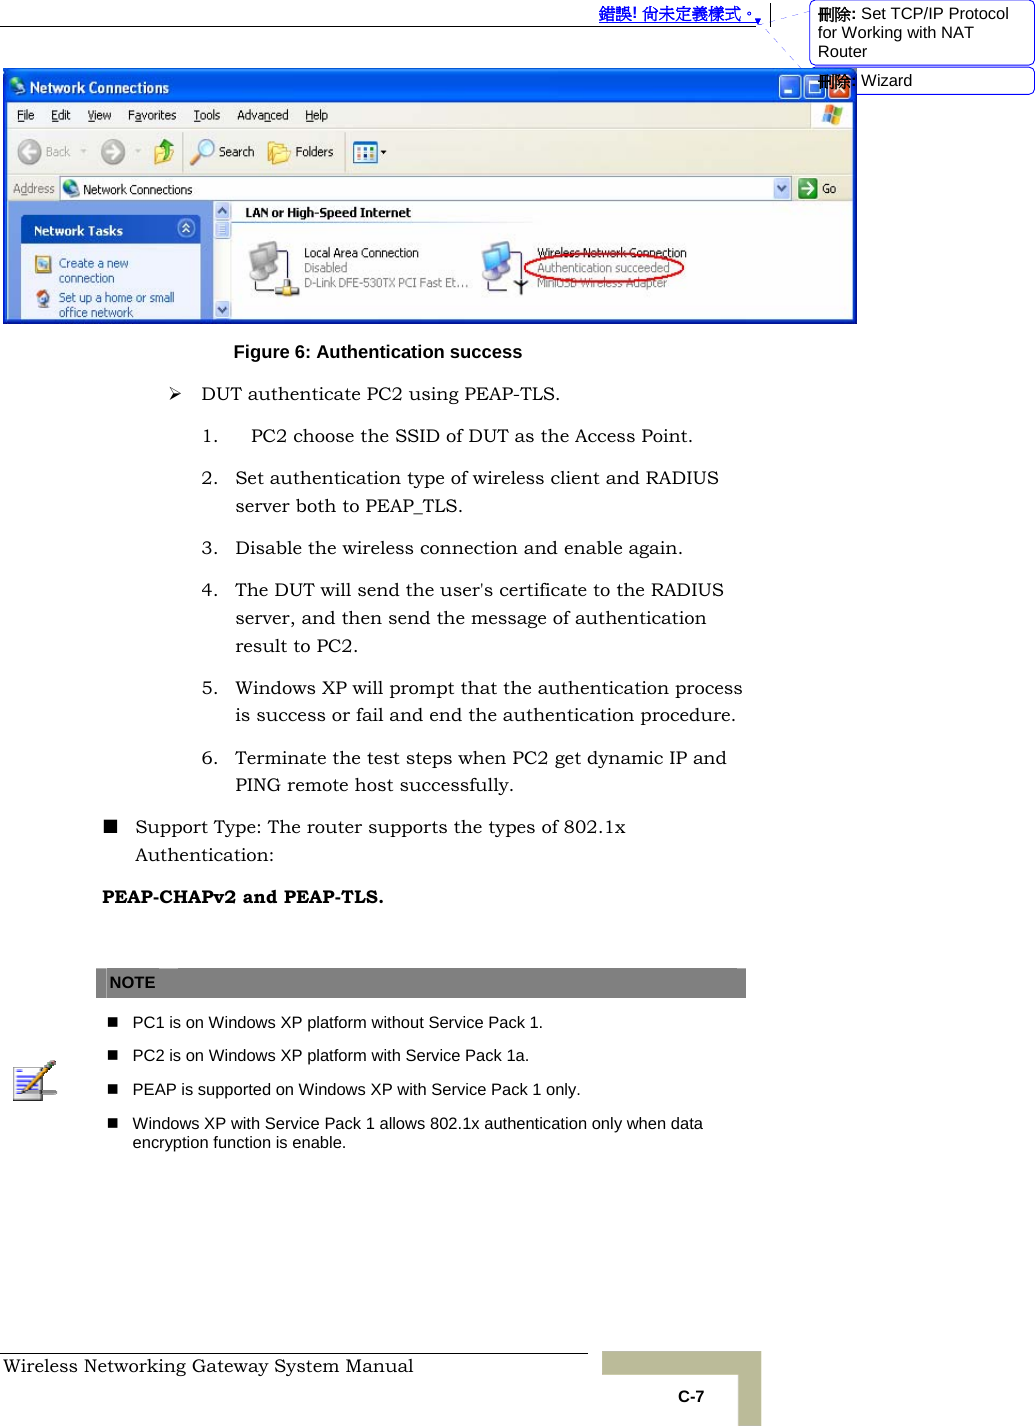
![A Appendix A - Print Server This Wireless Networking Gateway provides the function of network print server for MS Windows NT/2000/XP and Unix based platforms [TBD – what about Windows 2003]. The device comes with a USB port for connecting the printer. This Appendix will guide you through configuring the Print Server. (If the product you purchased does not have a USB port, skip this chapter. TBD – are there such devices?)](https://usermanual.wiki/Advance-Multimedia-Internet-Technology/CPE-IDUNG-4D1W.Users-Manual-Part-2/User-Guide-516598-Page-38.png)