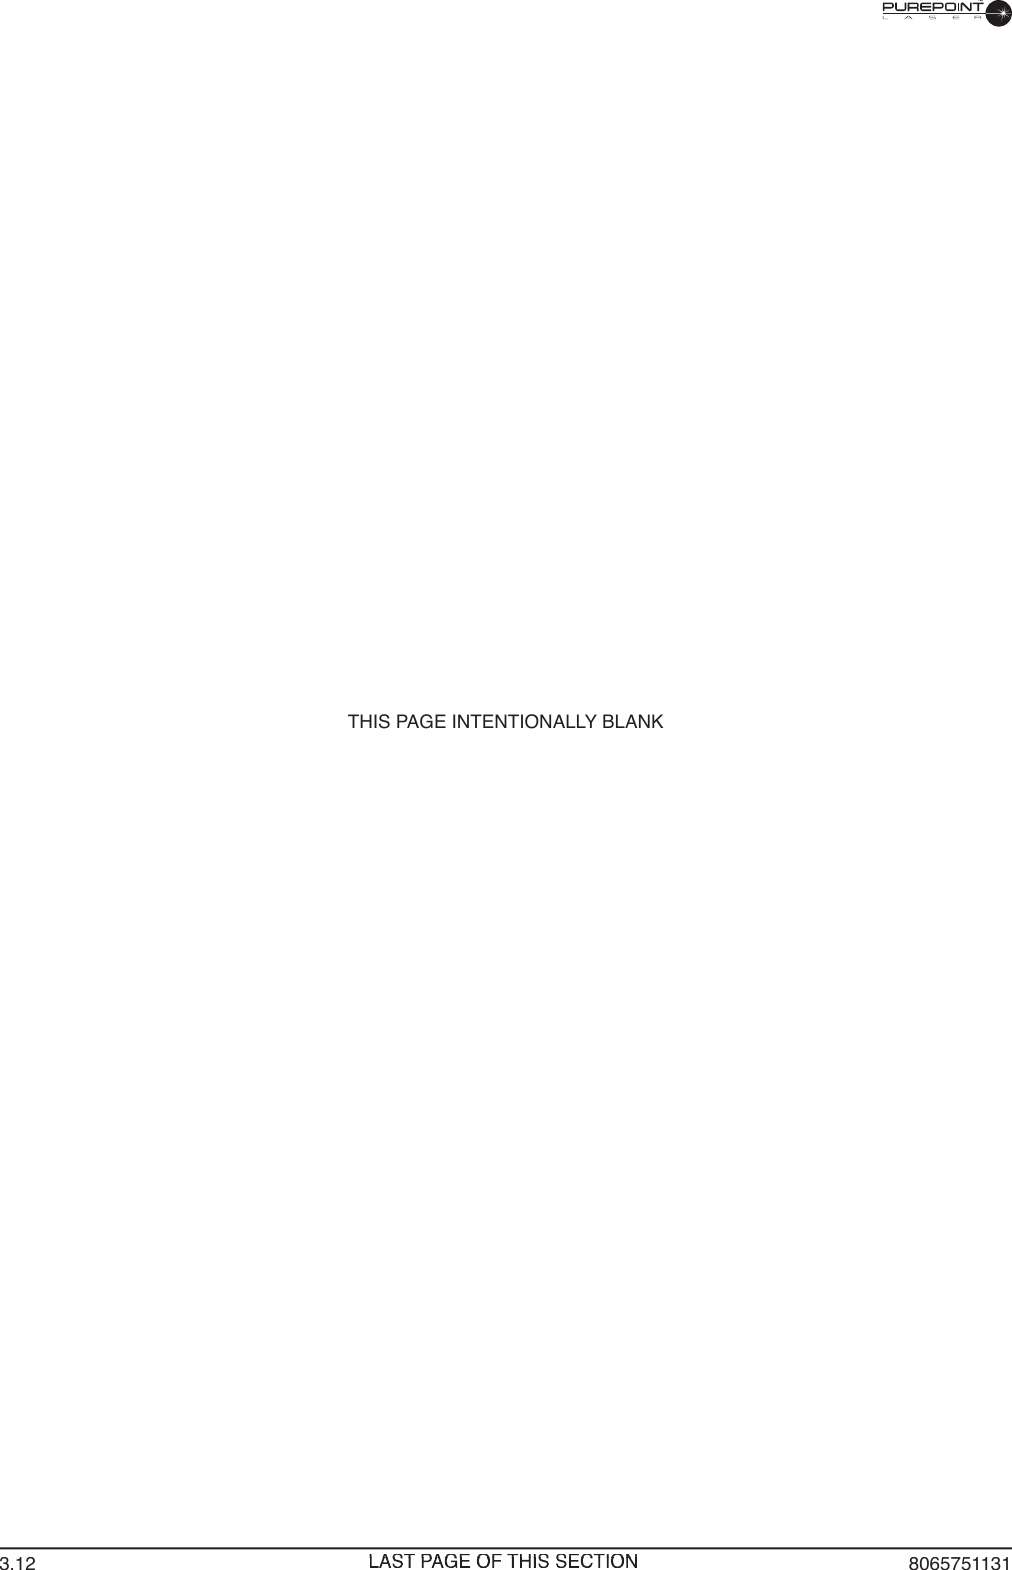
Alcon Research PUREPT1 PurePoint User Manual NGL Book 1 indb
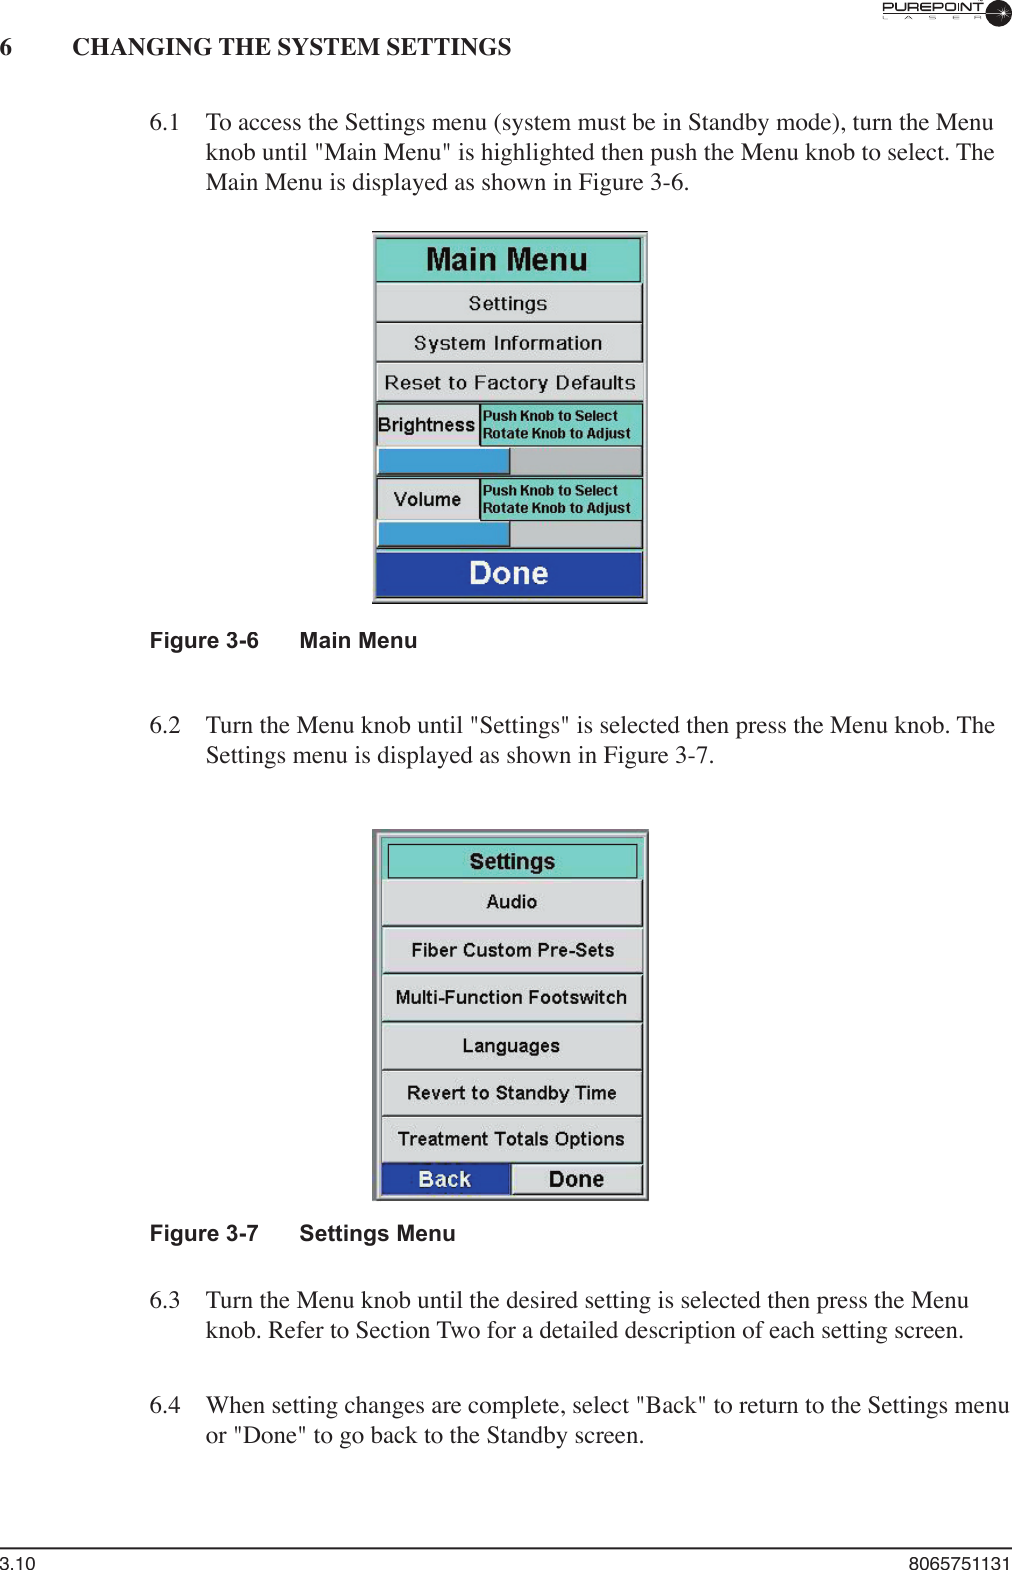
Alcon Research Ltd. PurePoint NGL Book 1 indb
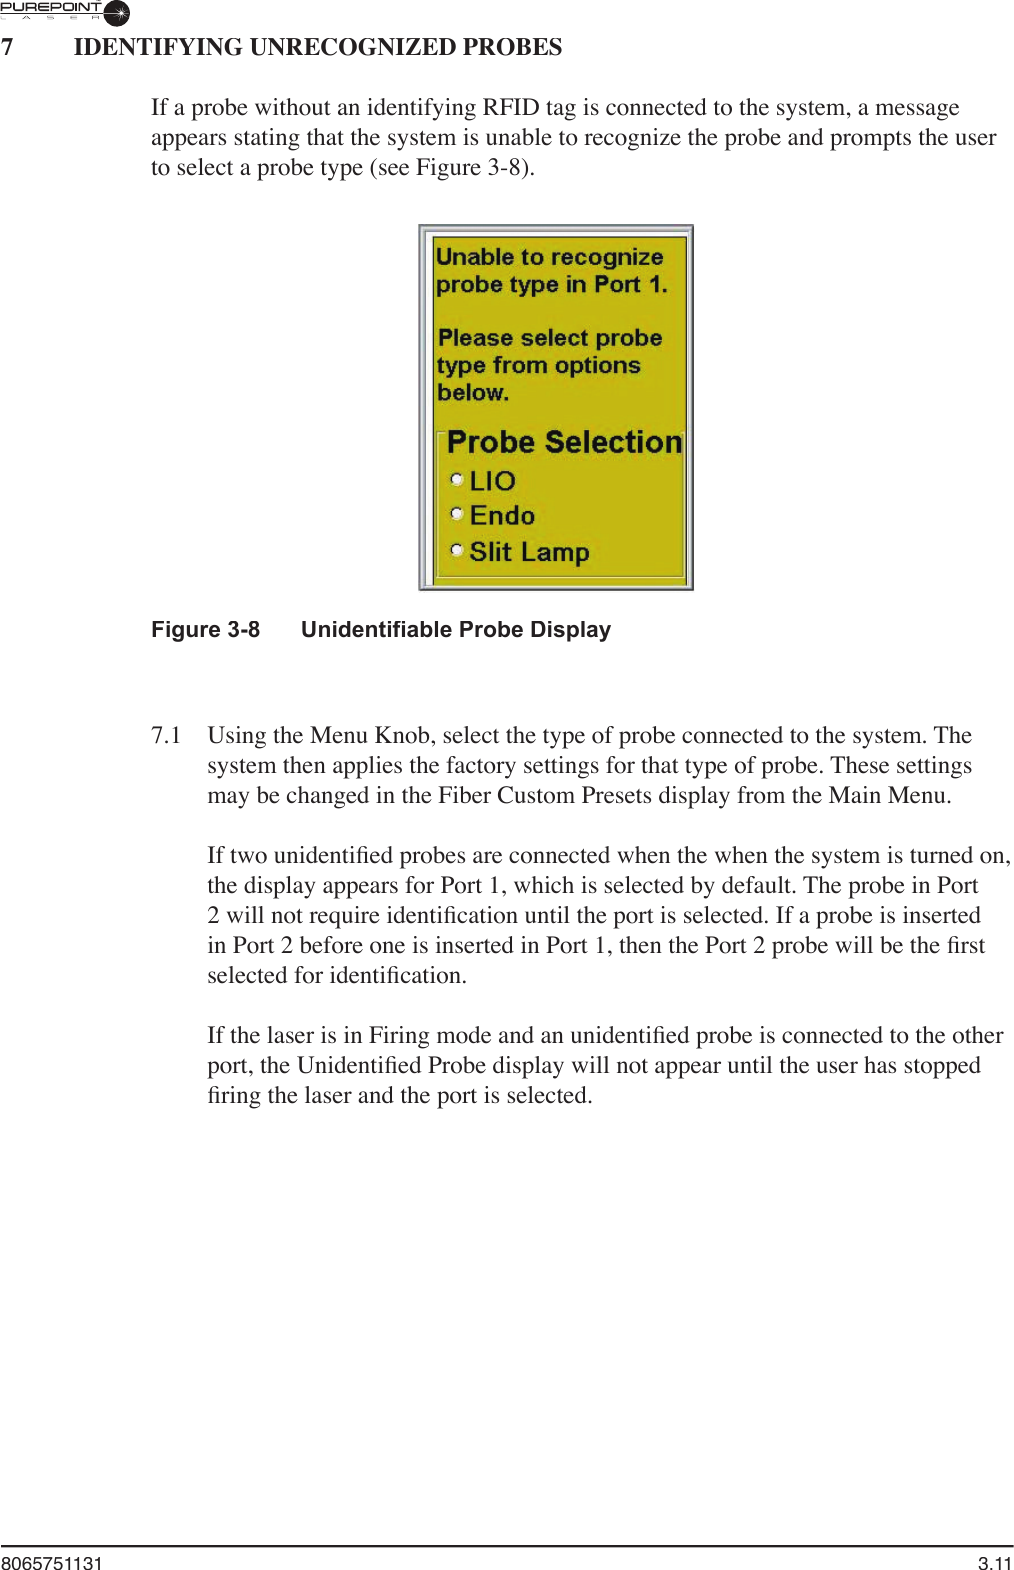
Contents
- 1. User Manual part 1 of 5
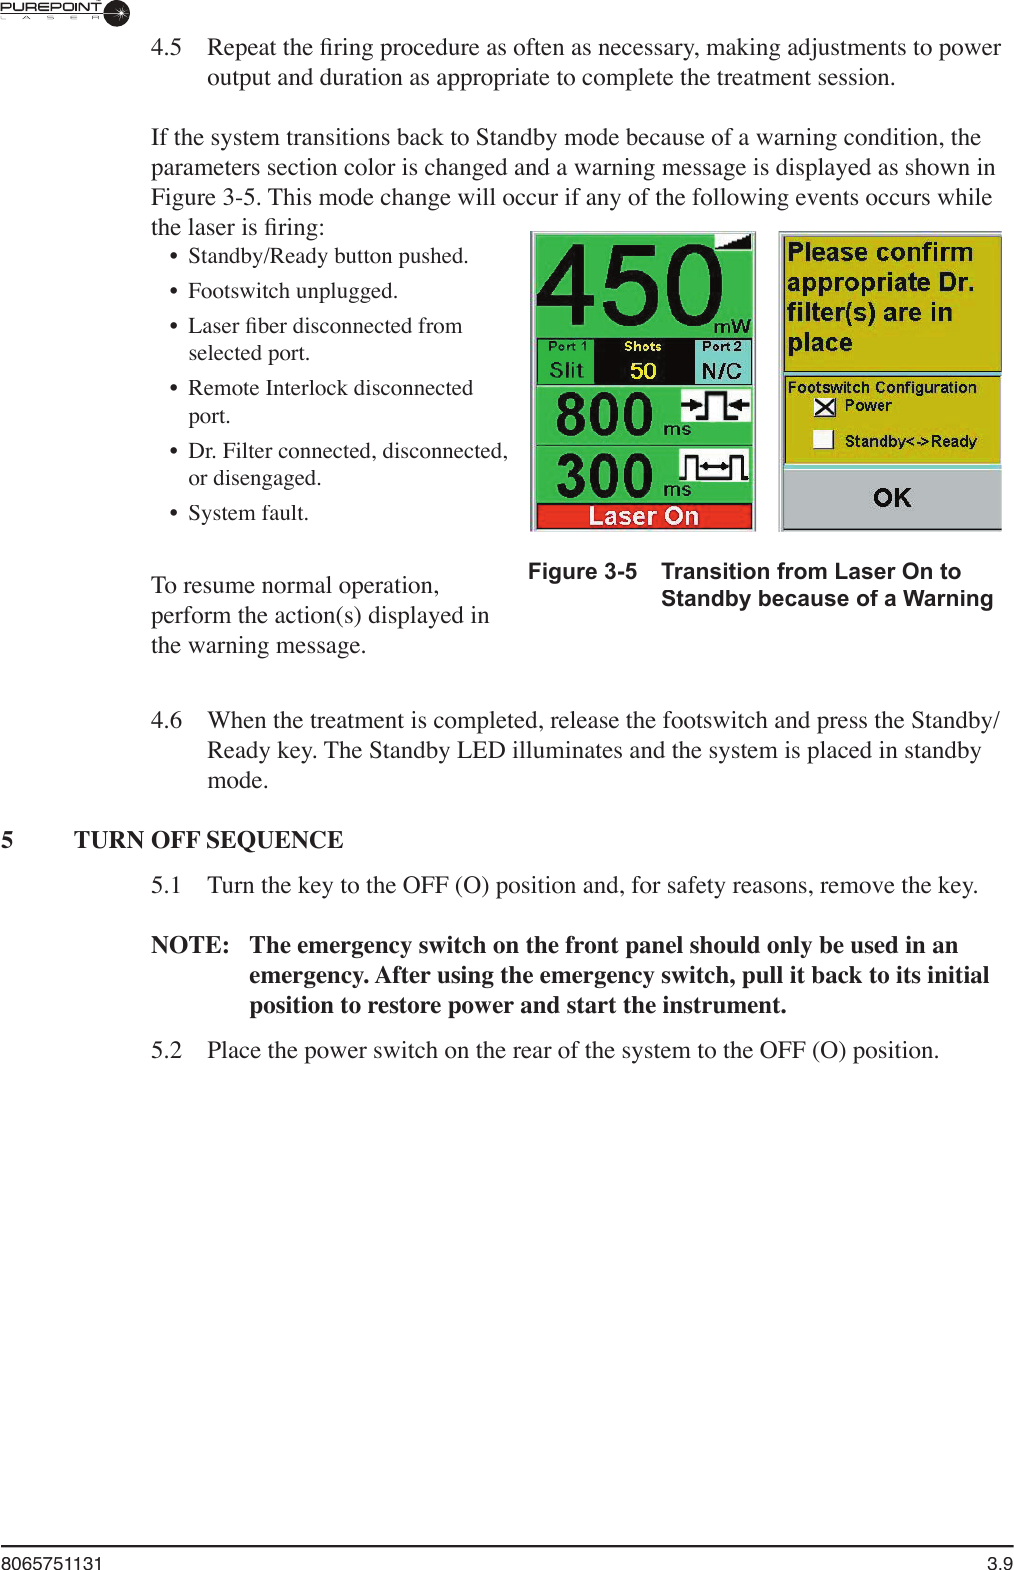
- 2. User Manual part 2 of 5
- 3. User Manual part 3 of 5
- 4. User Manual part 4 of 5
- 5. User Manual part 5 of 5
User Manual part 3 of 5