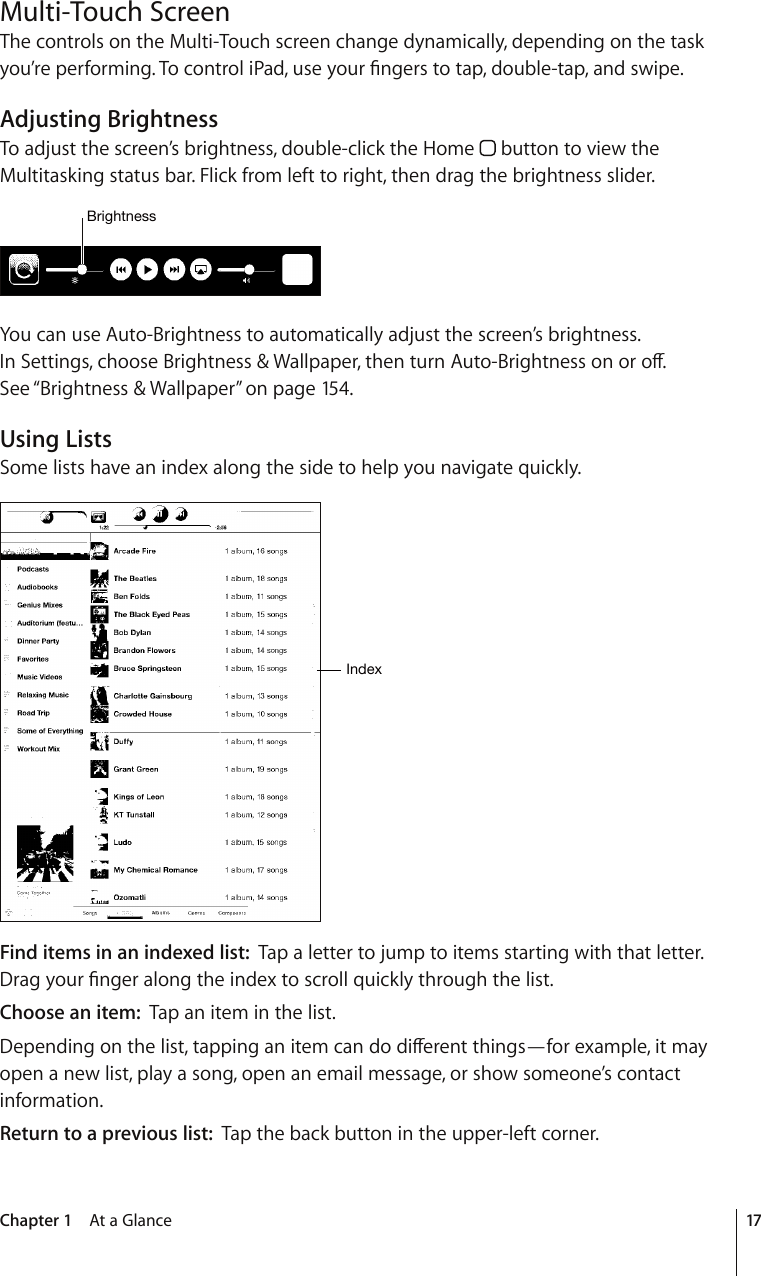
Apple A1397 iPad User Manual iPad User Guide
Apple Inc. iPad iPad User Guide
UserManual.wiki
>
Apple
>
A1397 User Manual
>
Users Guide 2
Contents
1.
Users Guide 1
2.
Users Guide 2
3.
Manual pages 1-50
4.
Manual Pages 51-100
5.
Manual pages 101-150
6.
Manual pages 151-198
7.
Manual Product Info
Users Guide 2
Navigation menu
Upload a User Manual
Namespaces
Wiki Guide
HTML
PDF
Info
Views
User Manual
Discussion / Help
Navigation


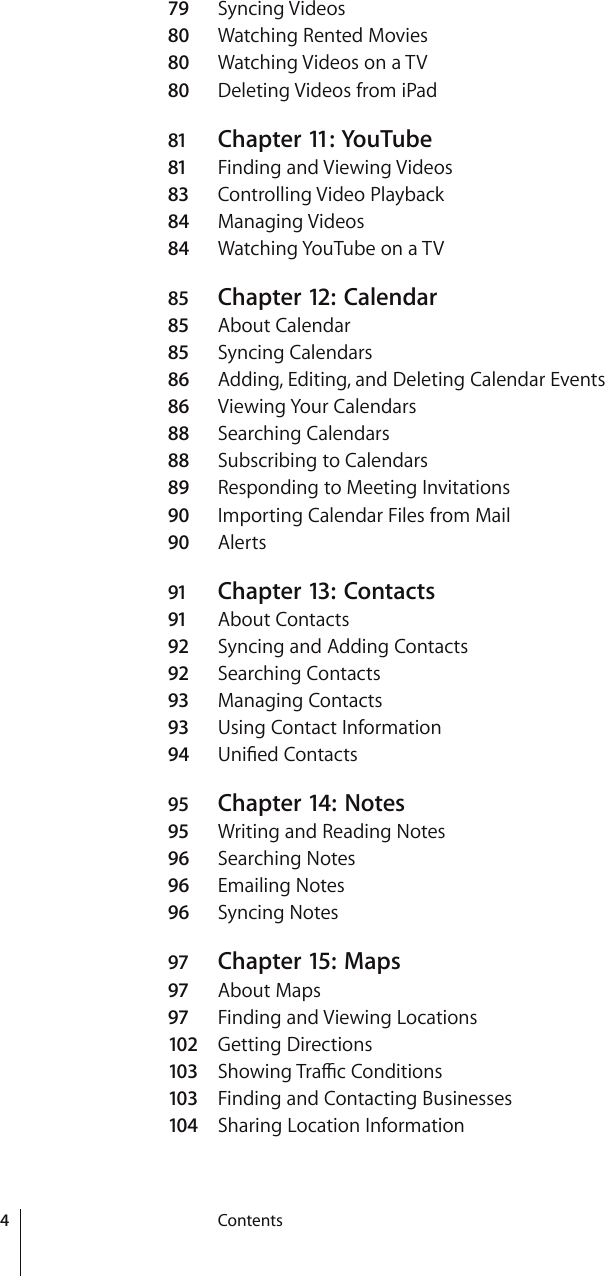

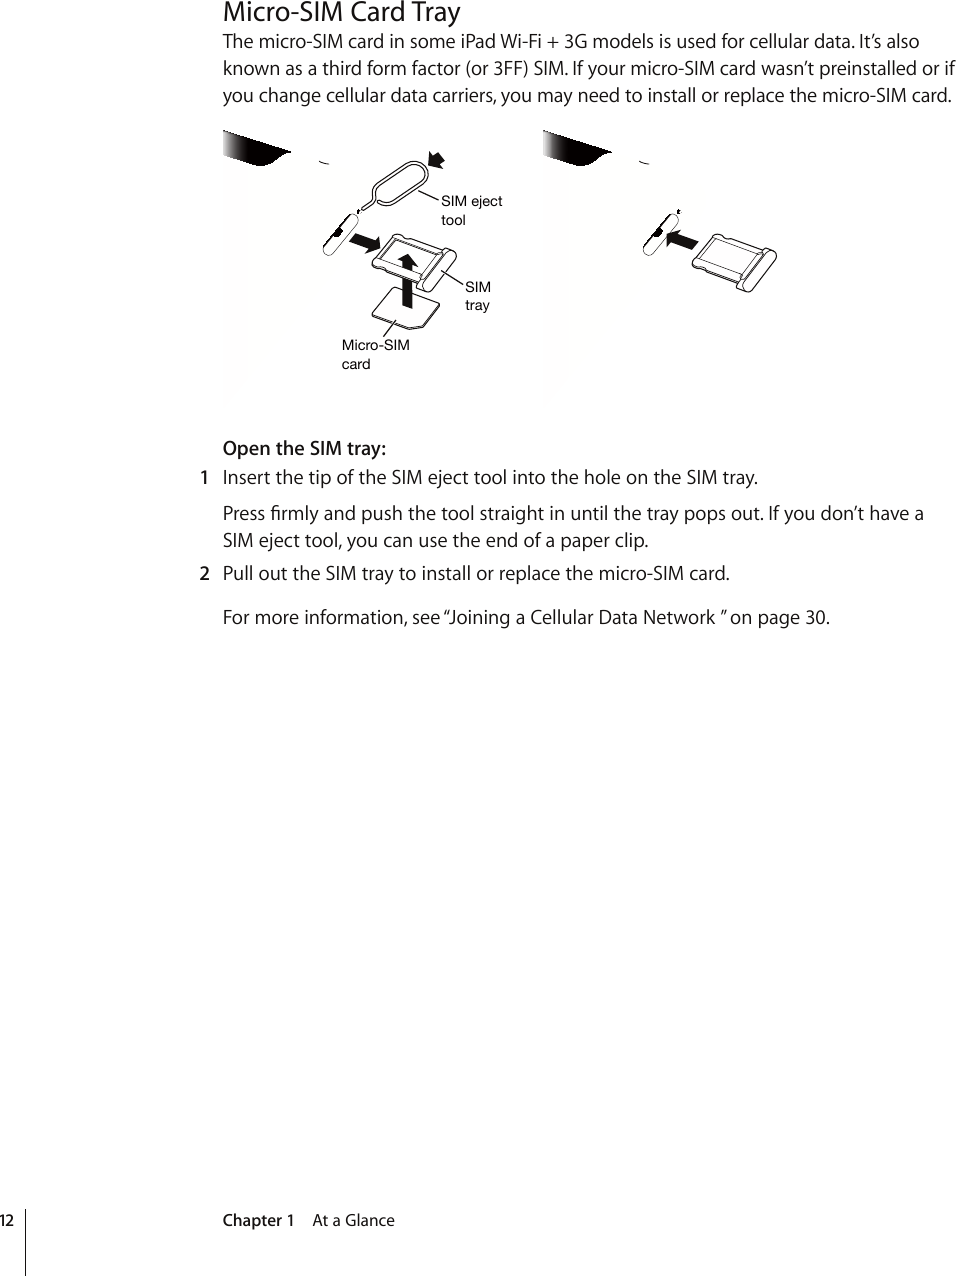

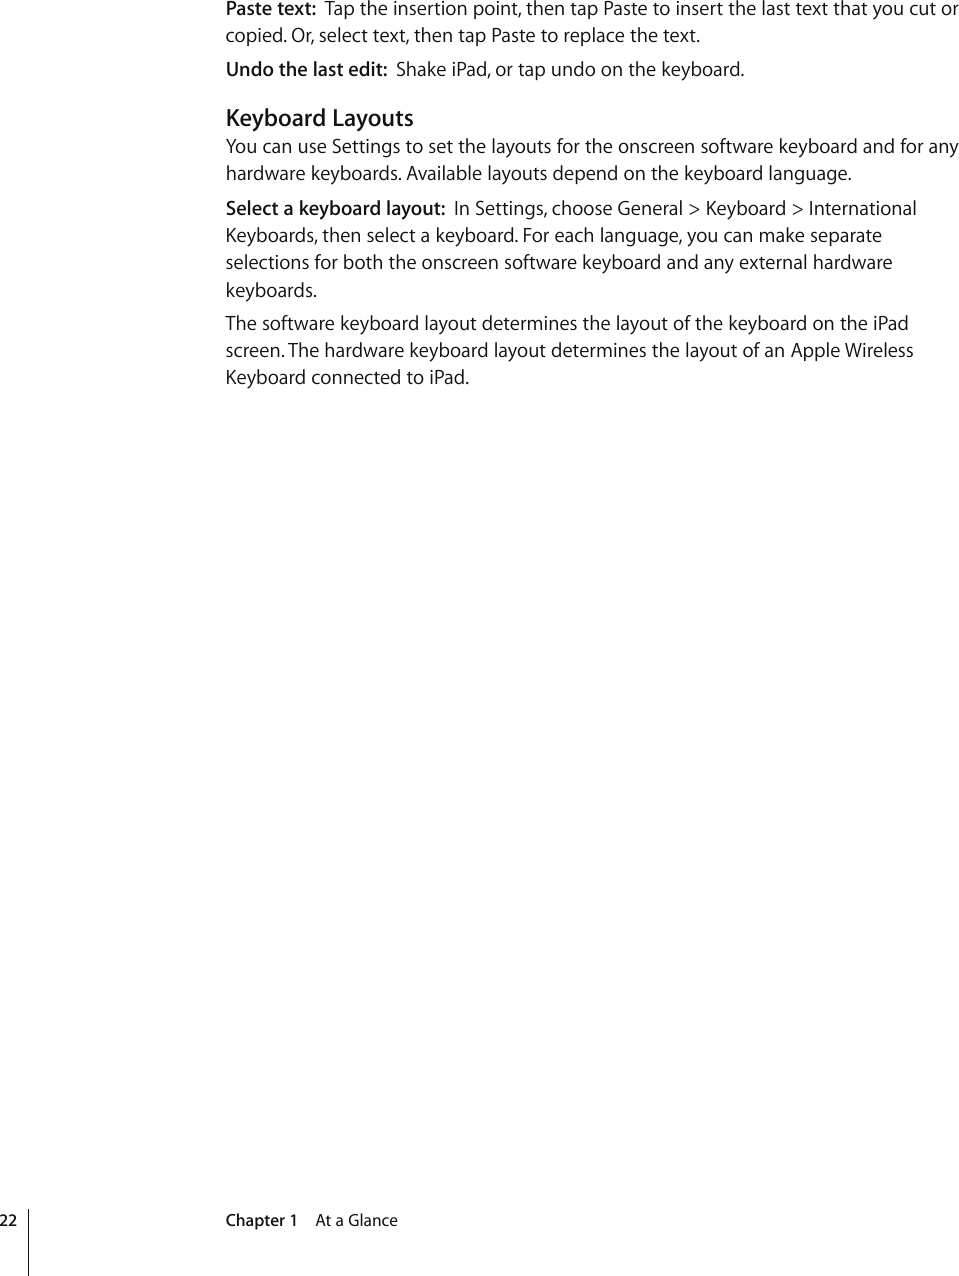


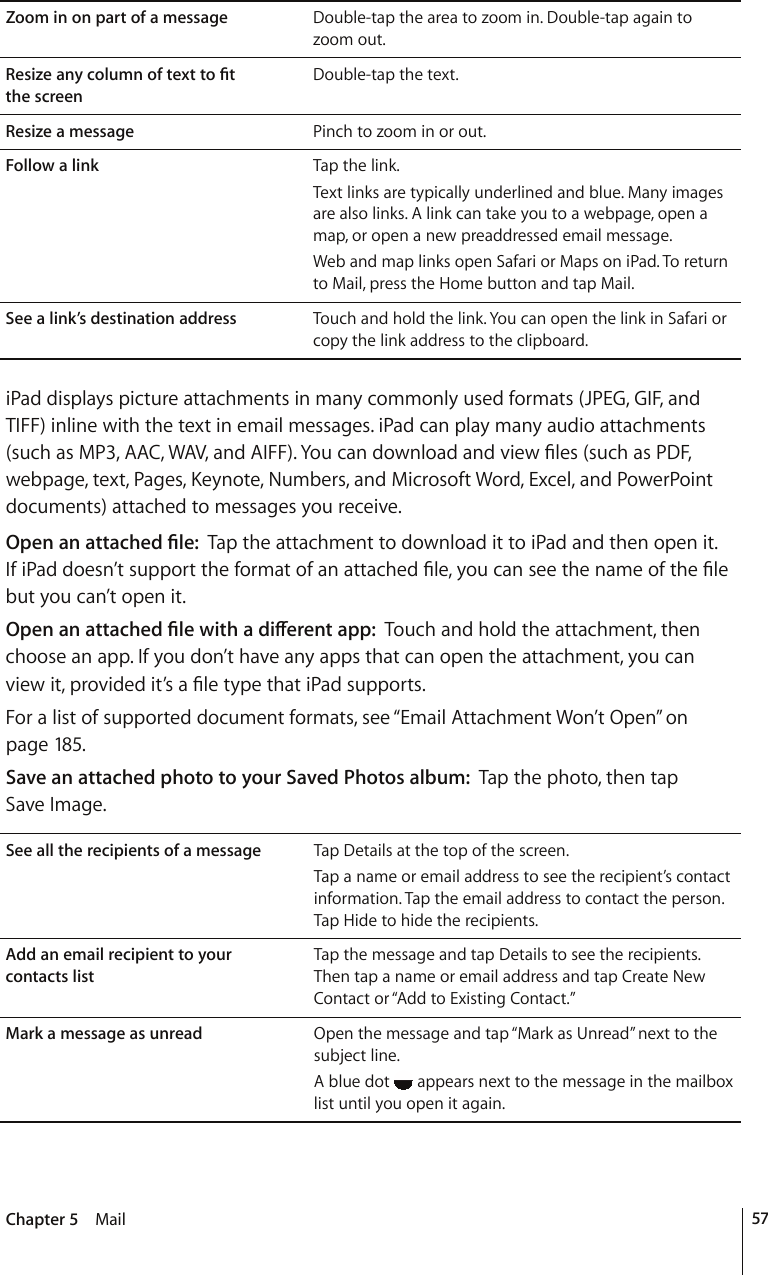

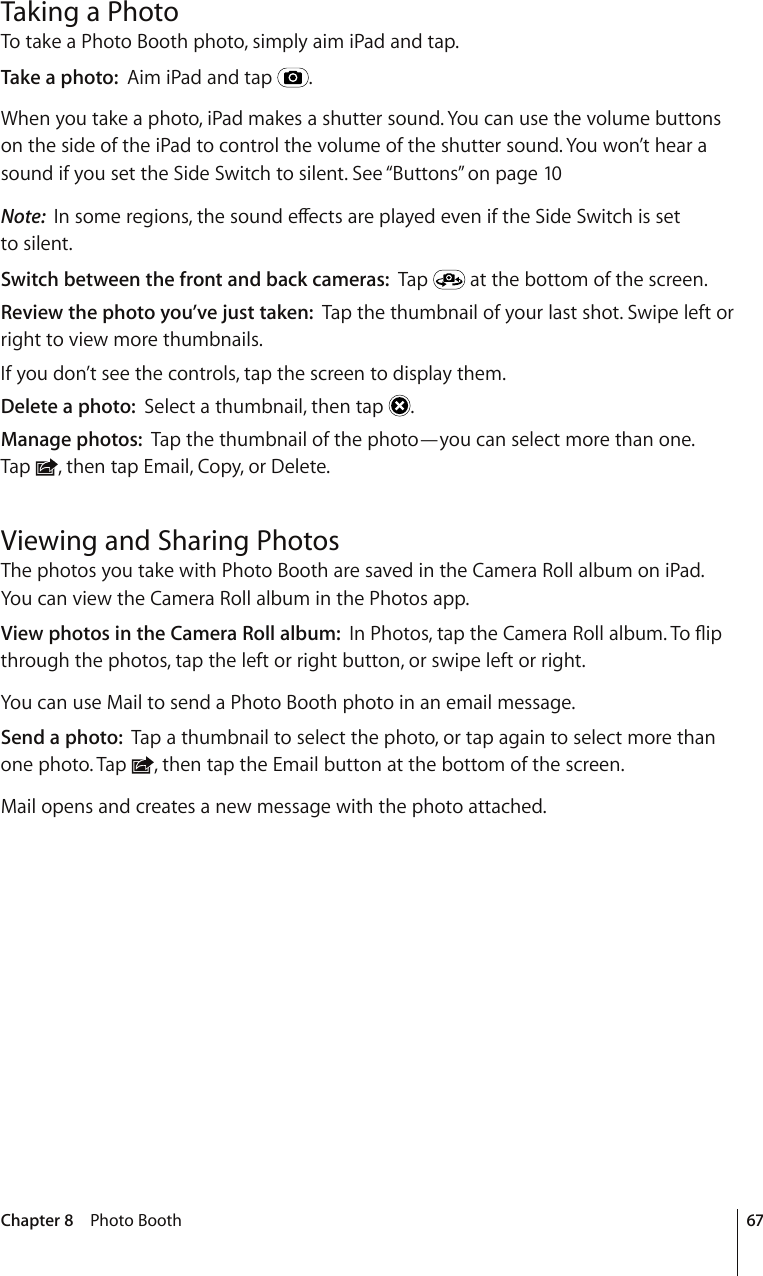
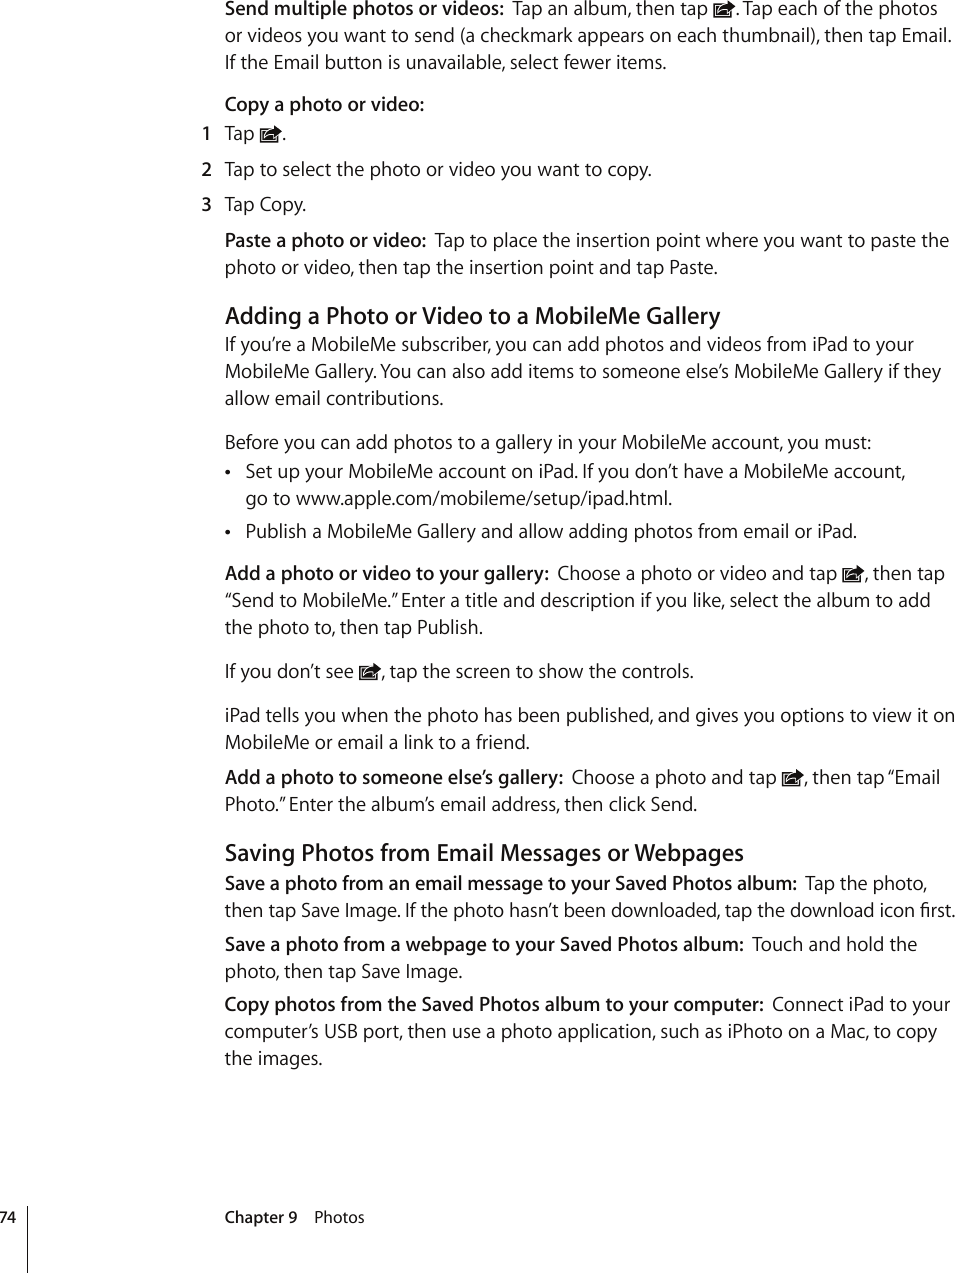


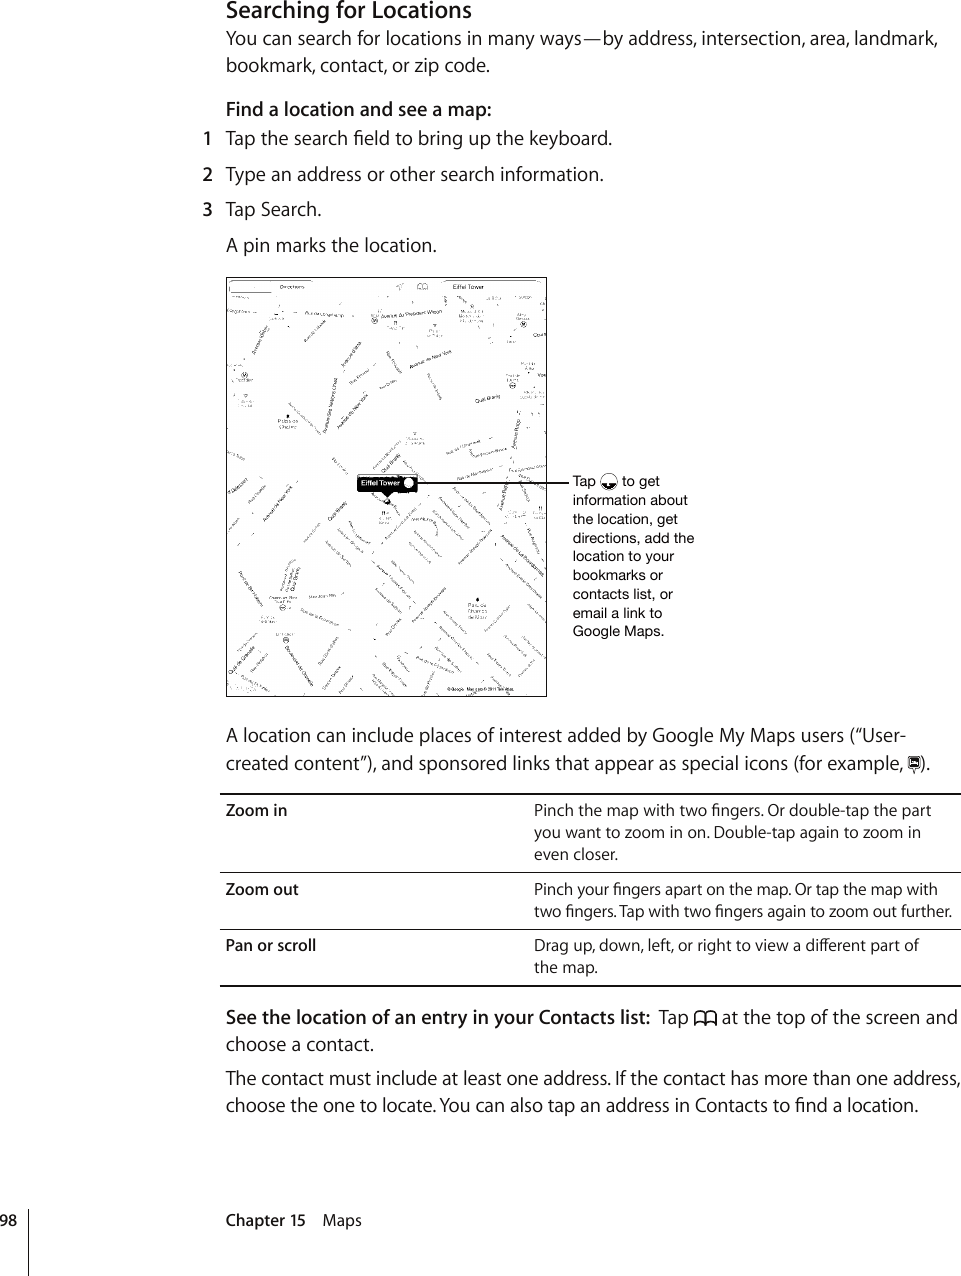
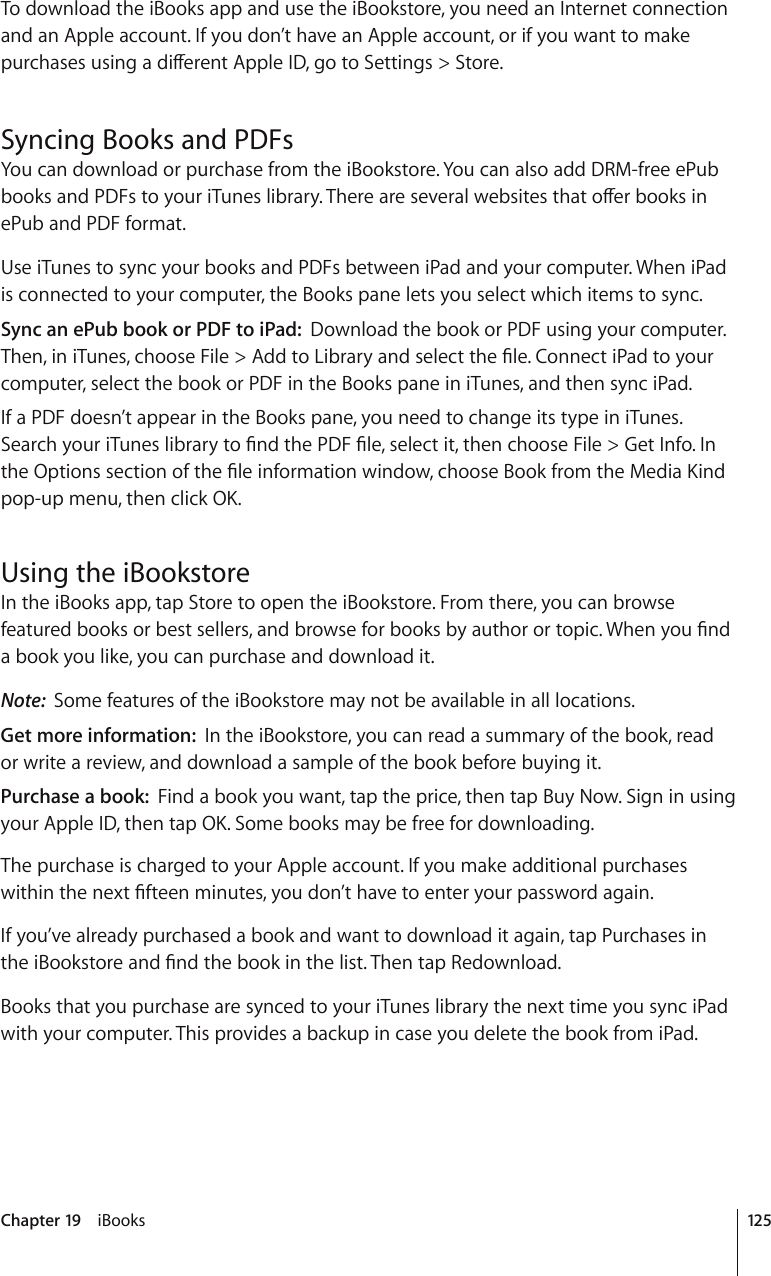
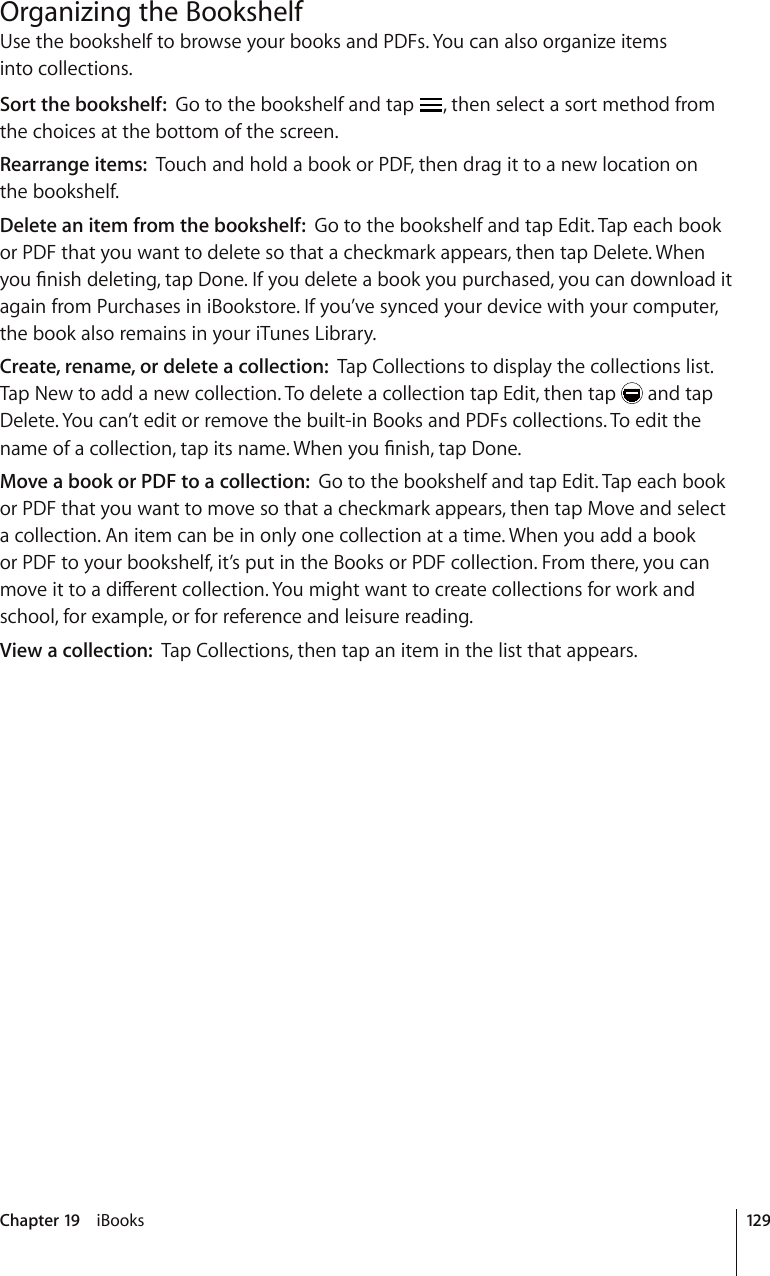
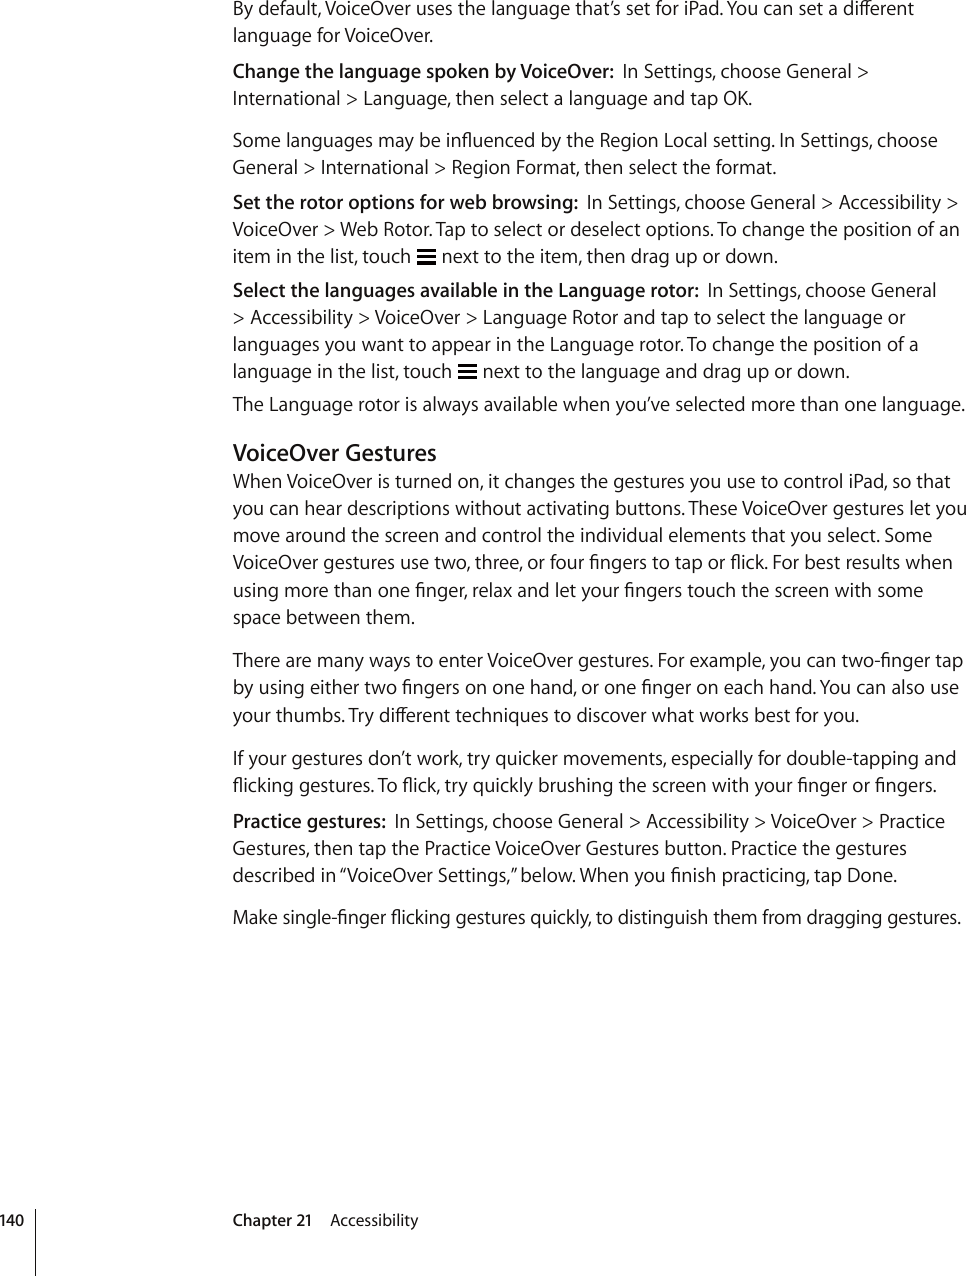
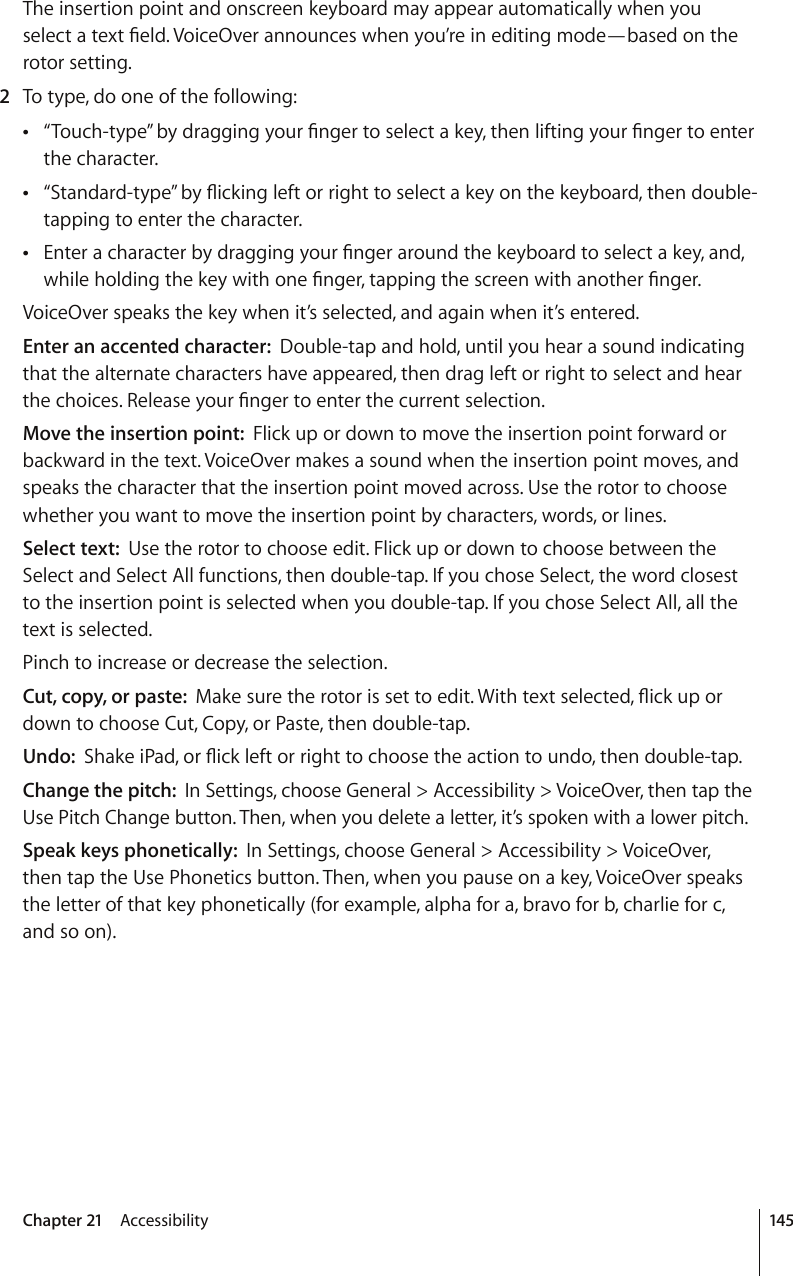
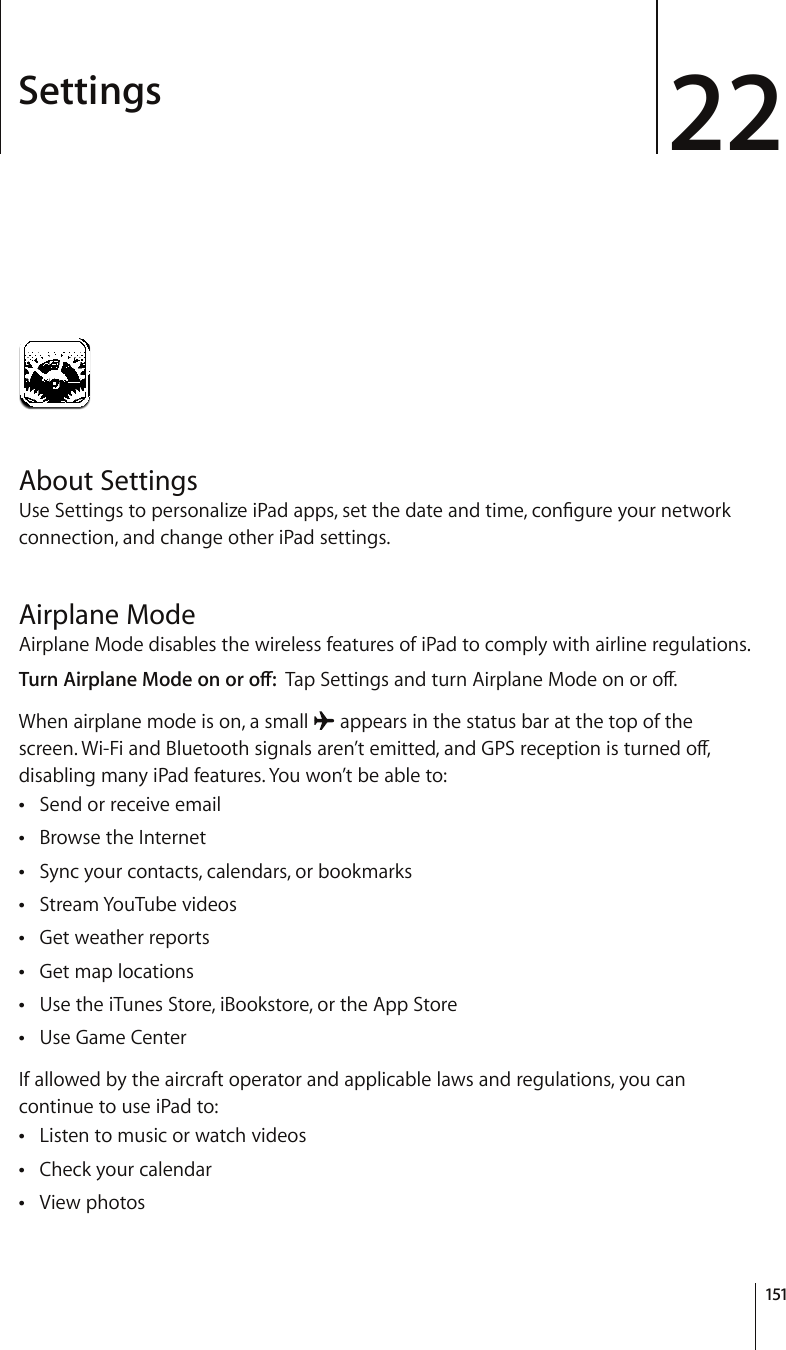
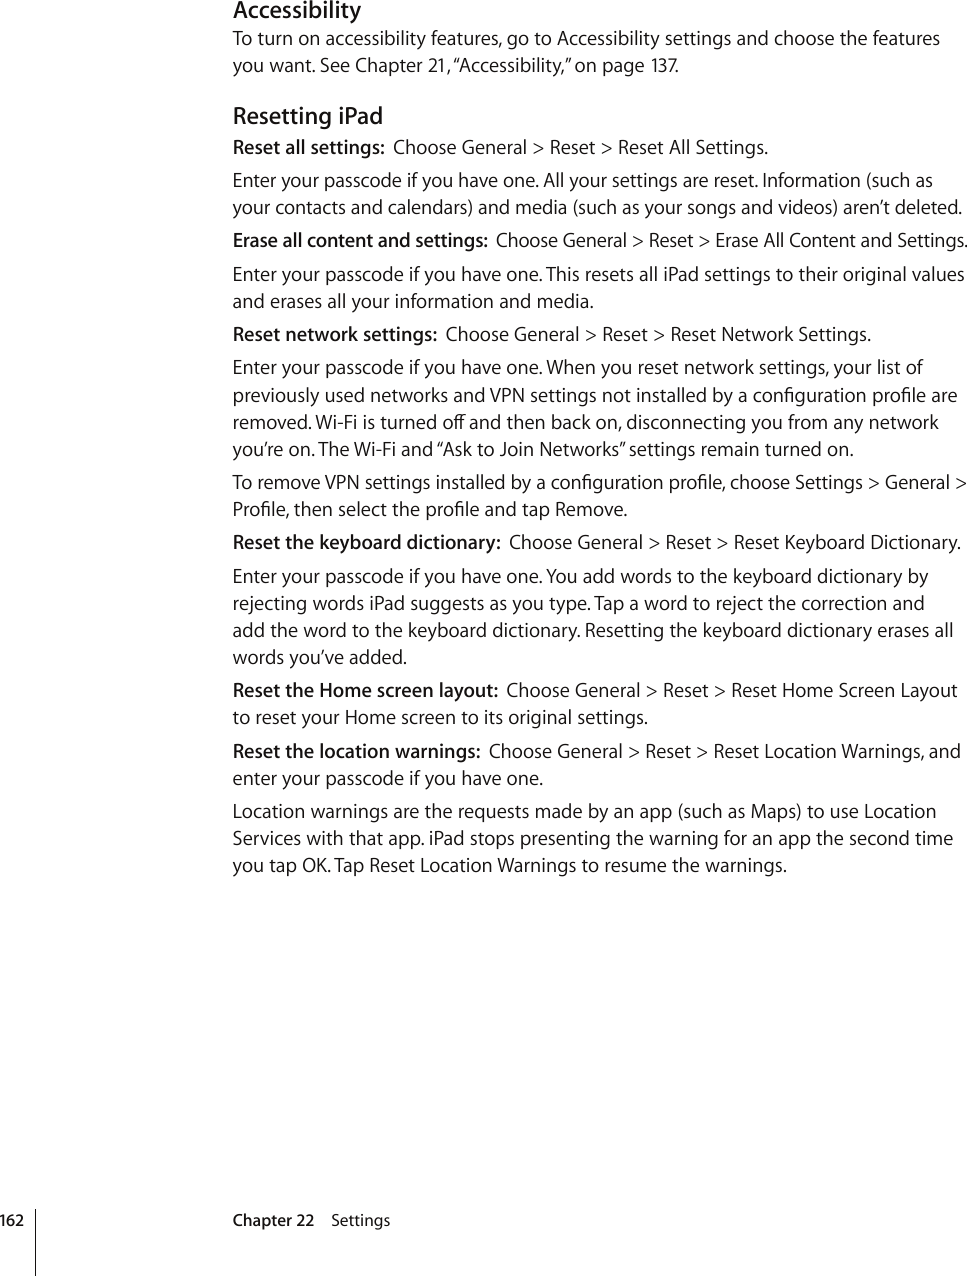
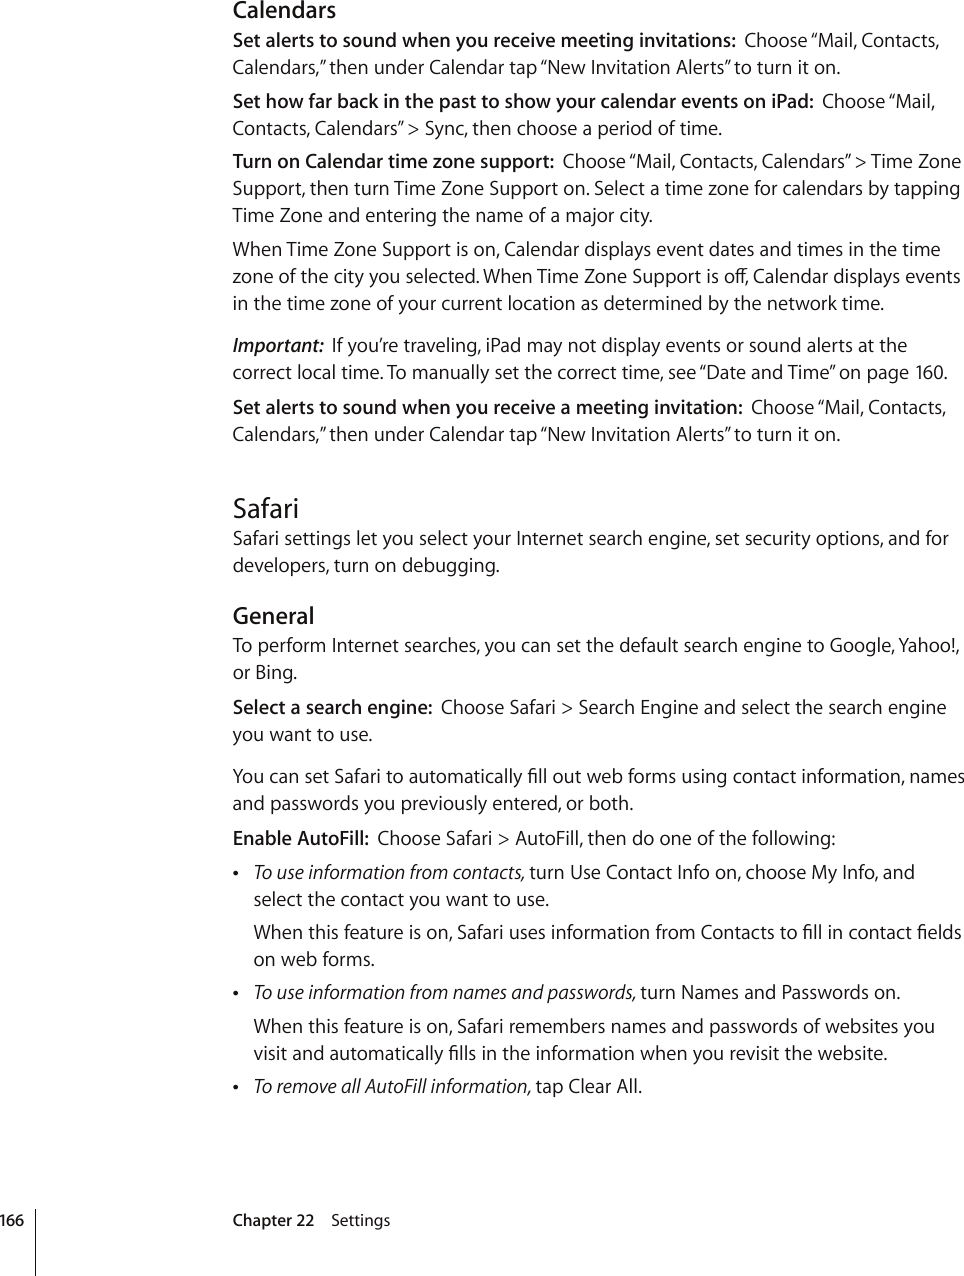
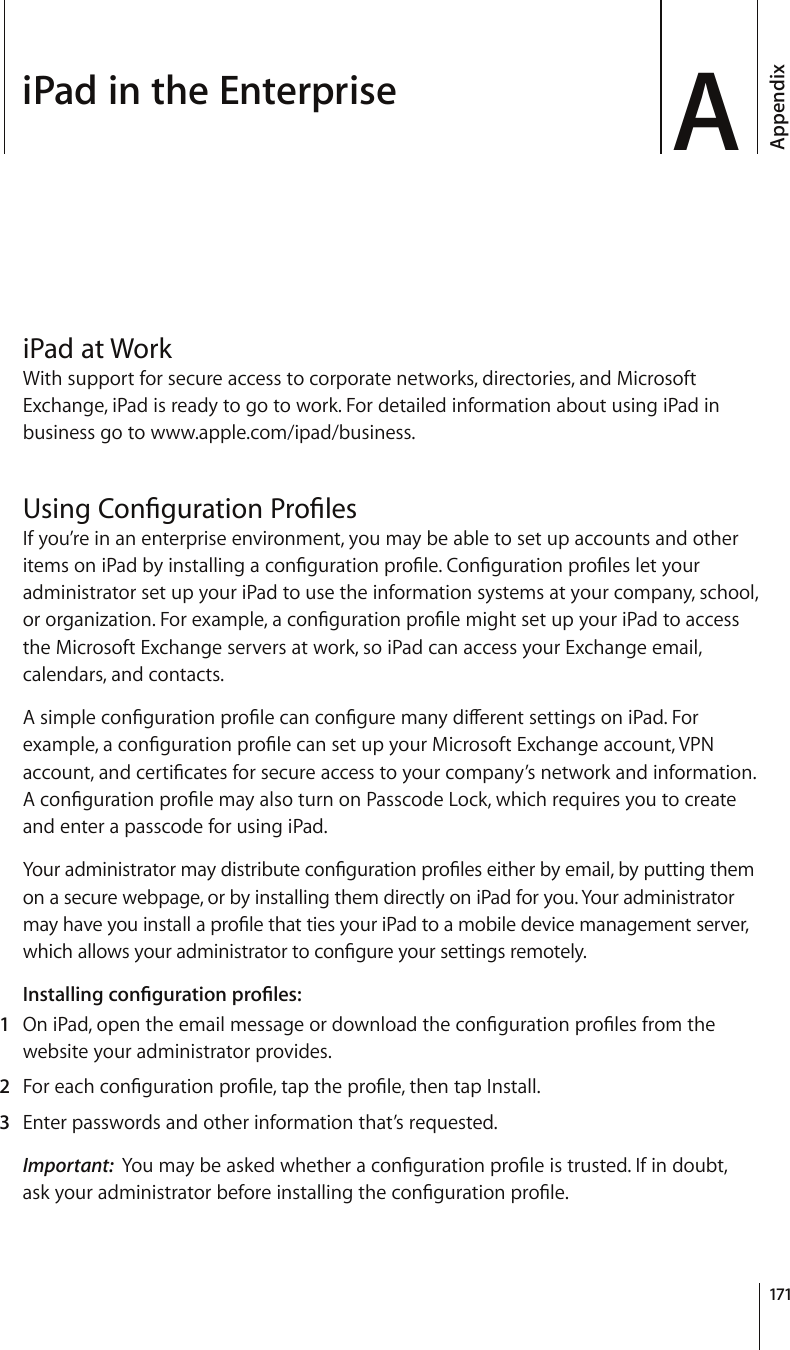
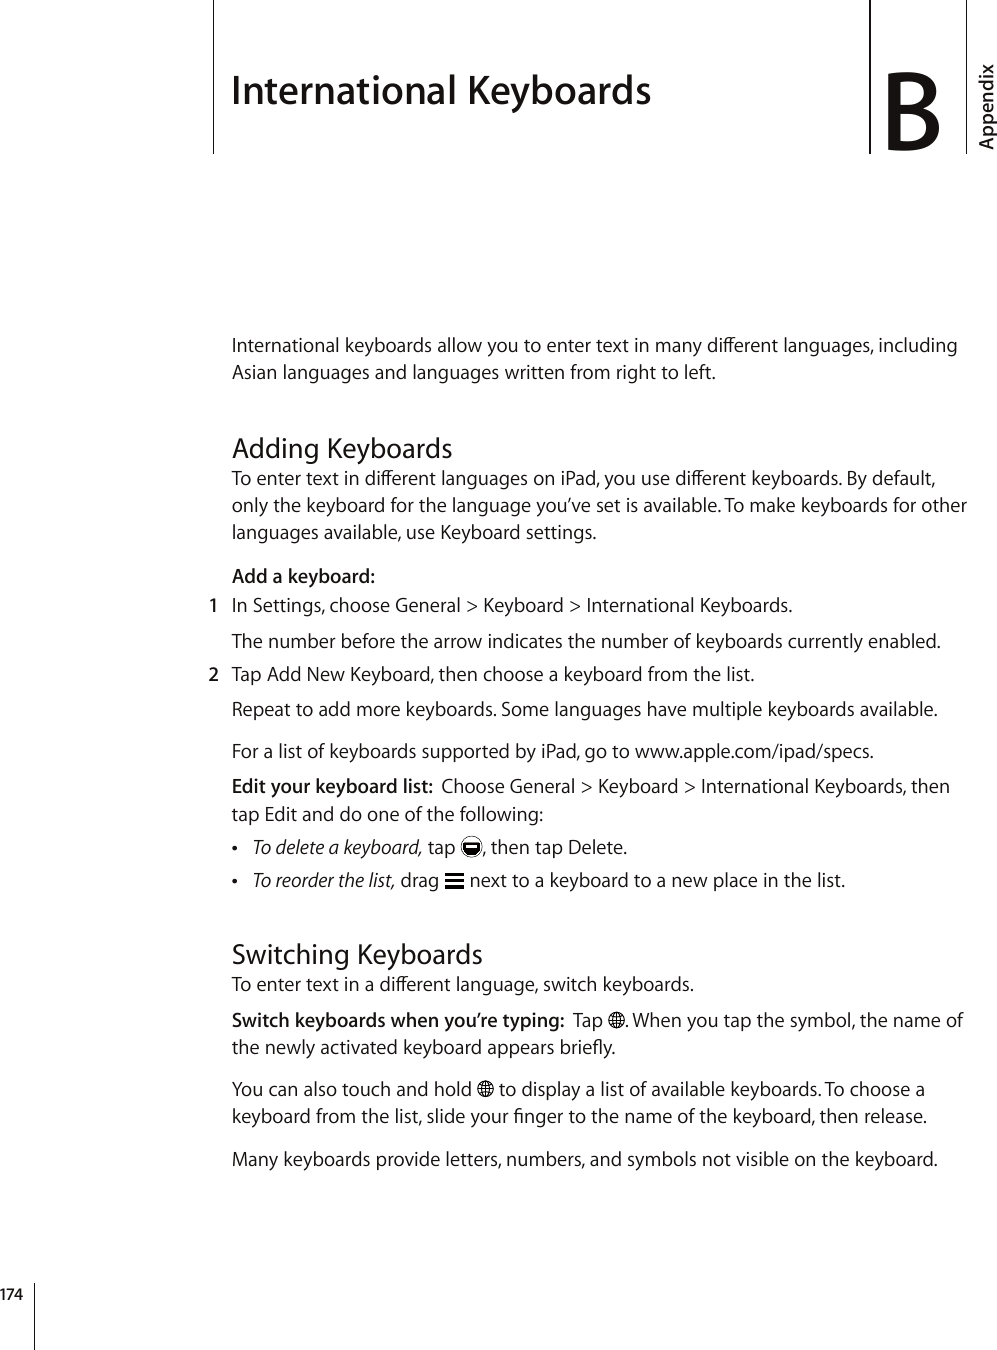
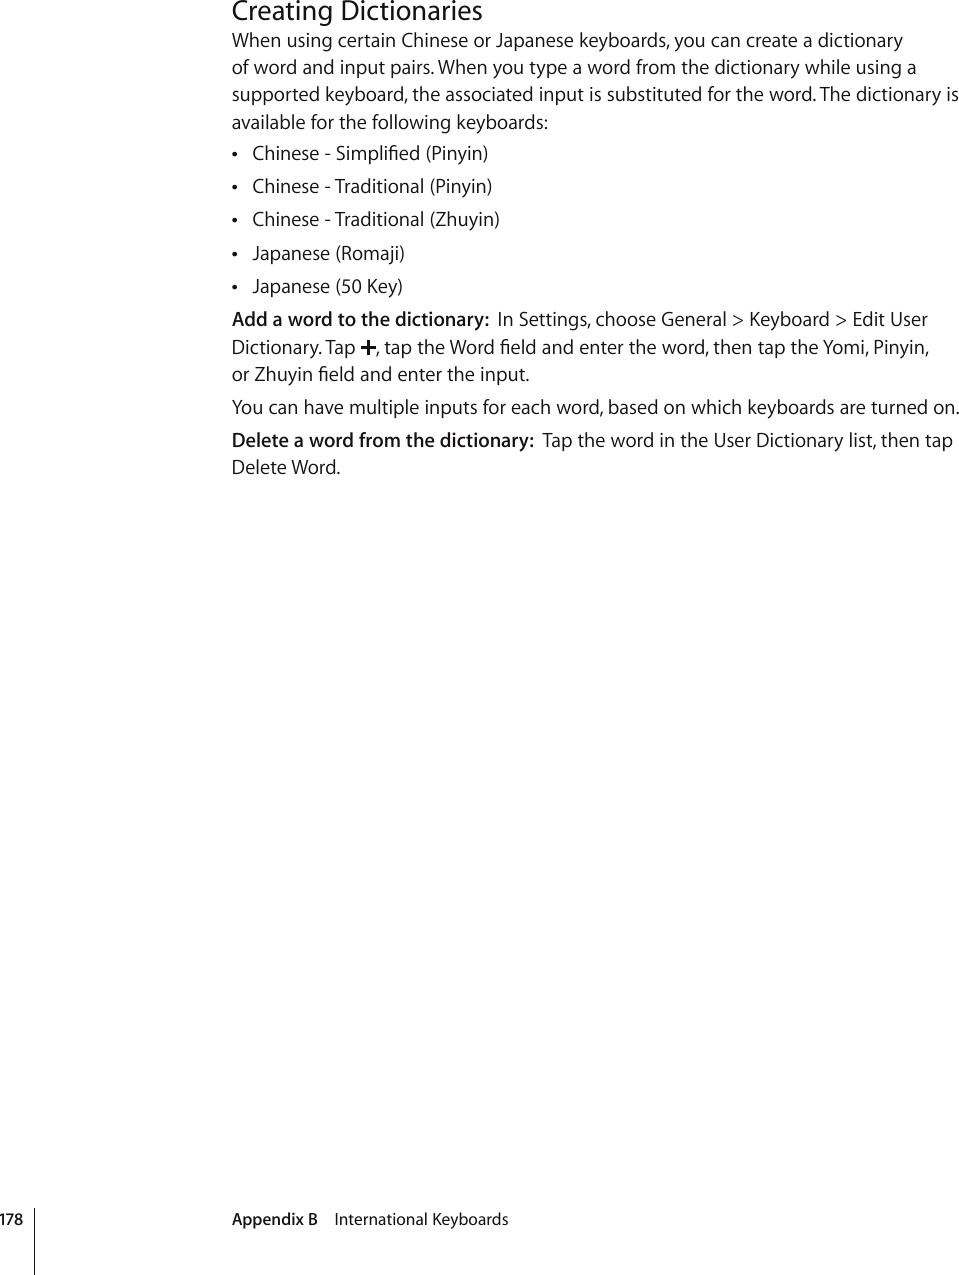
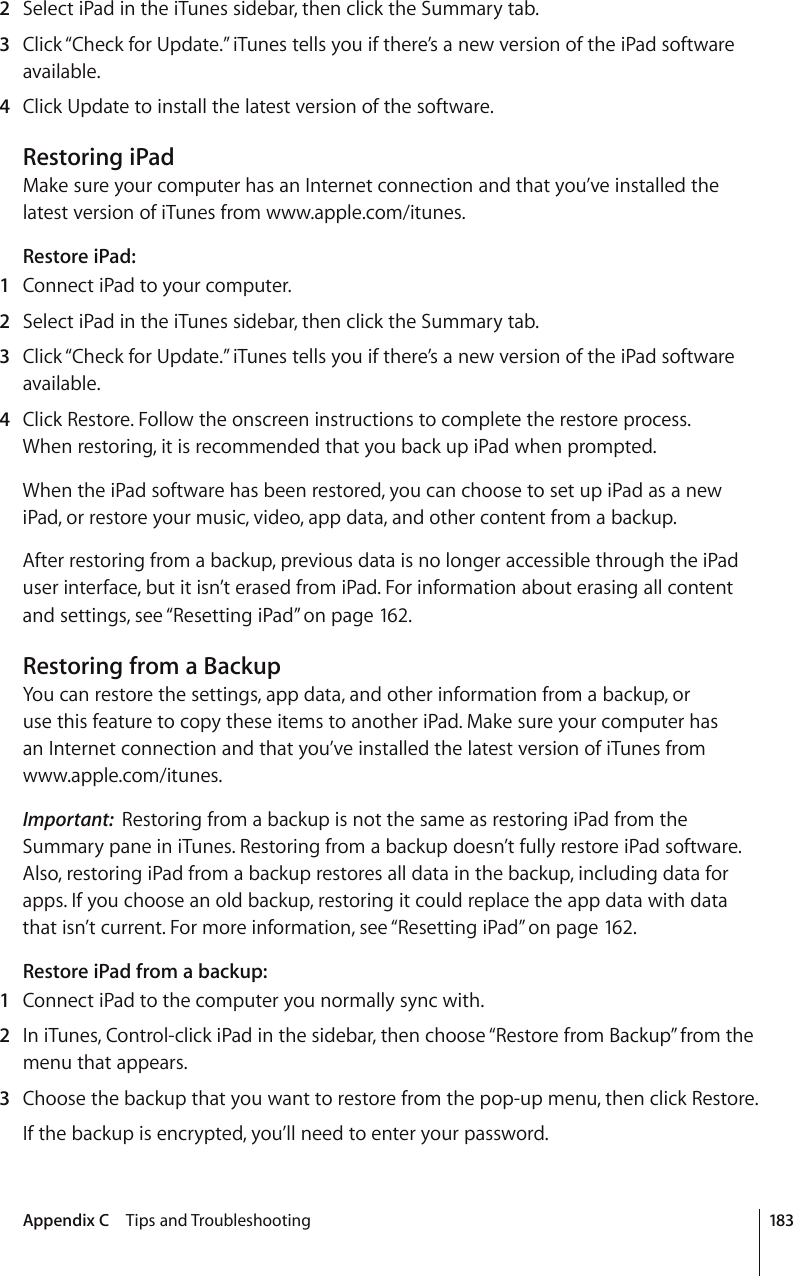
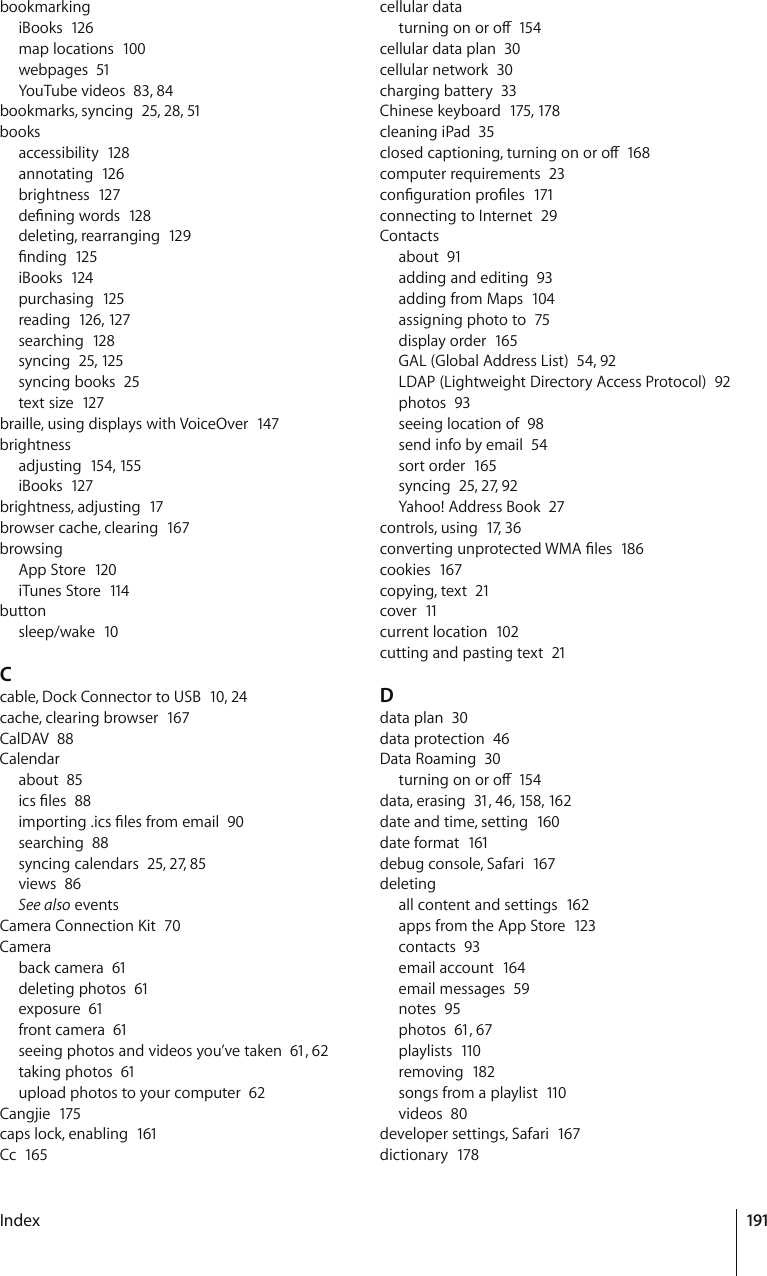
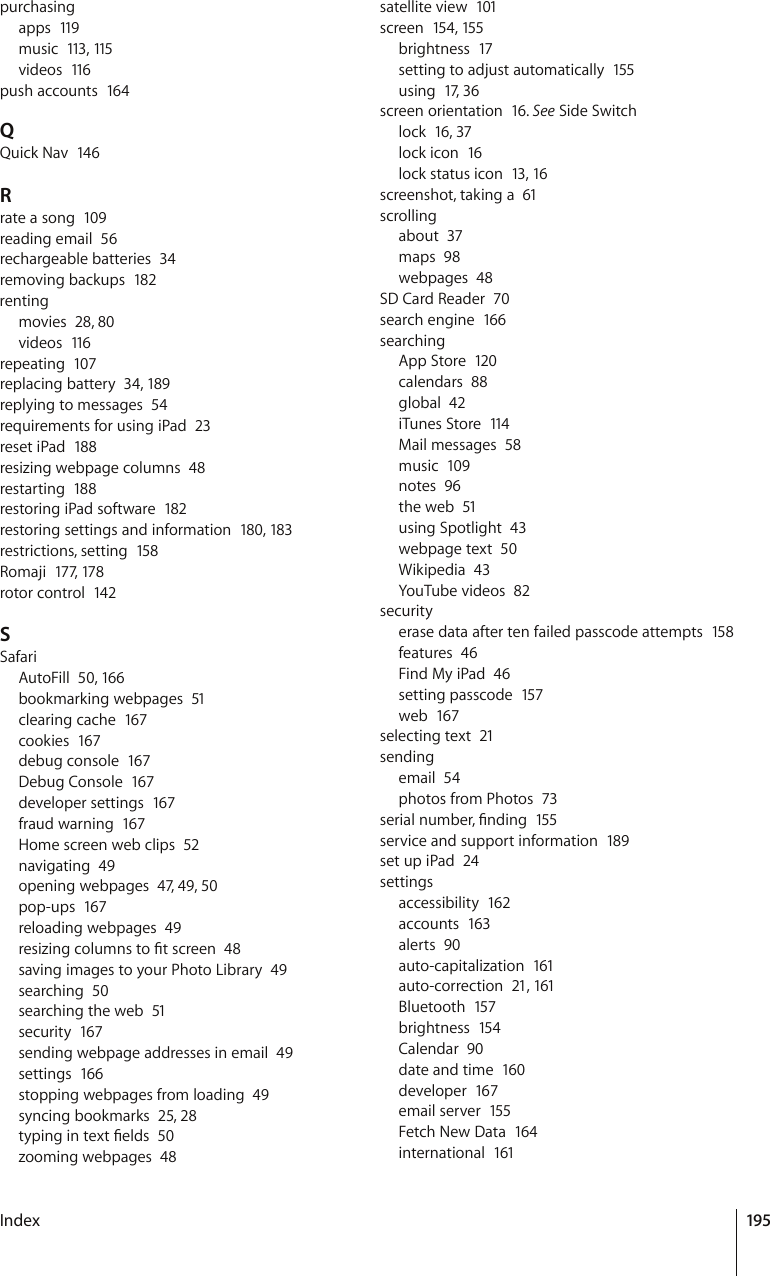
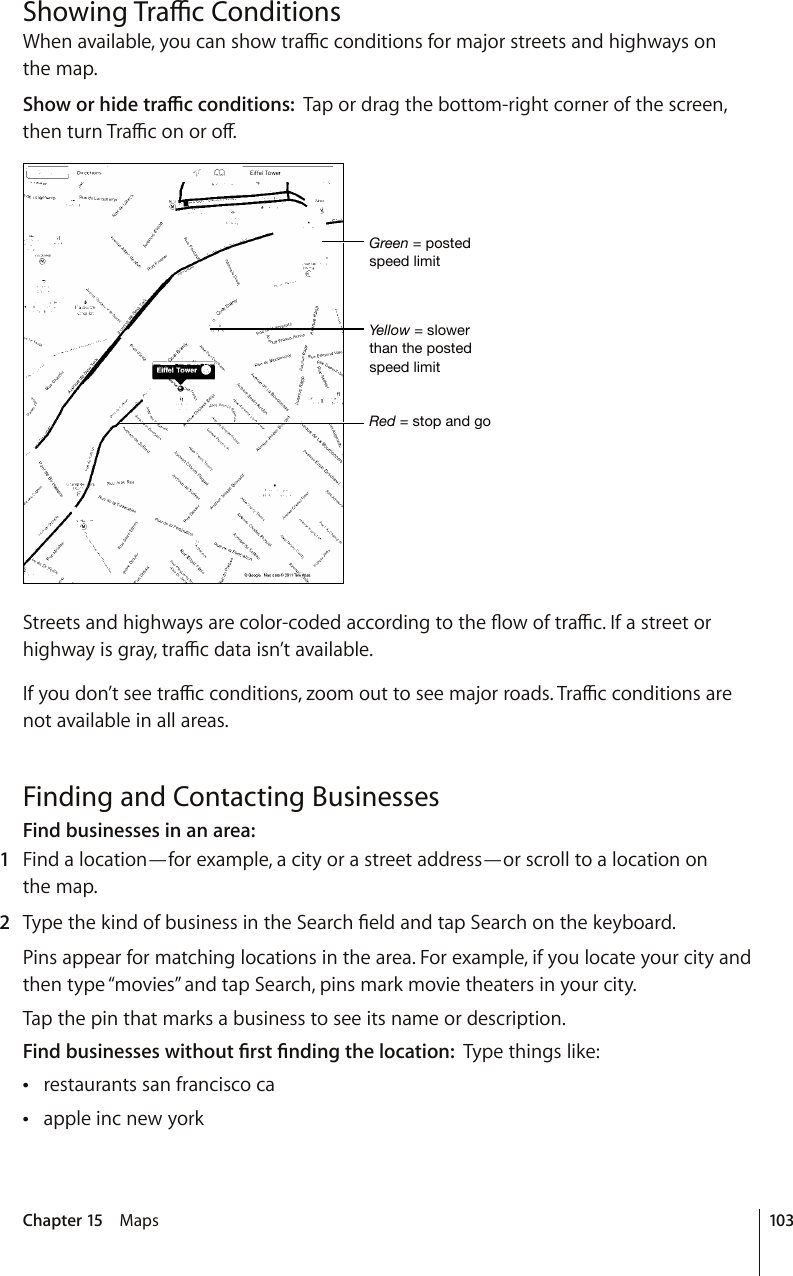
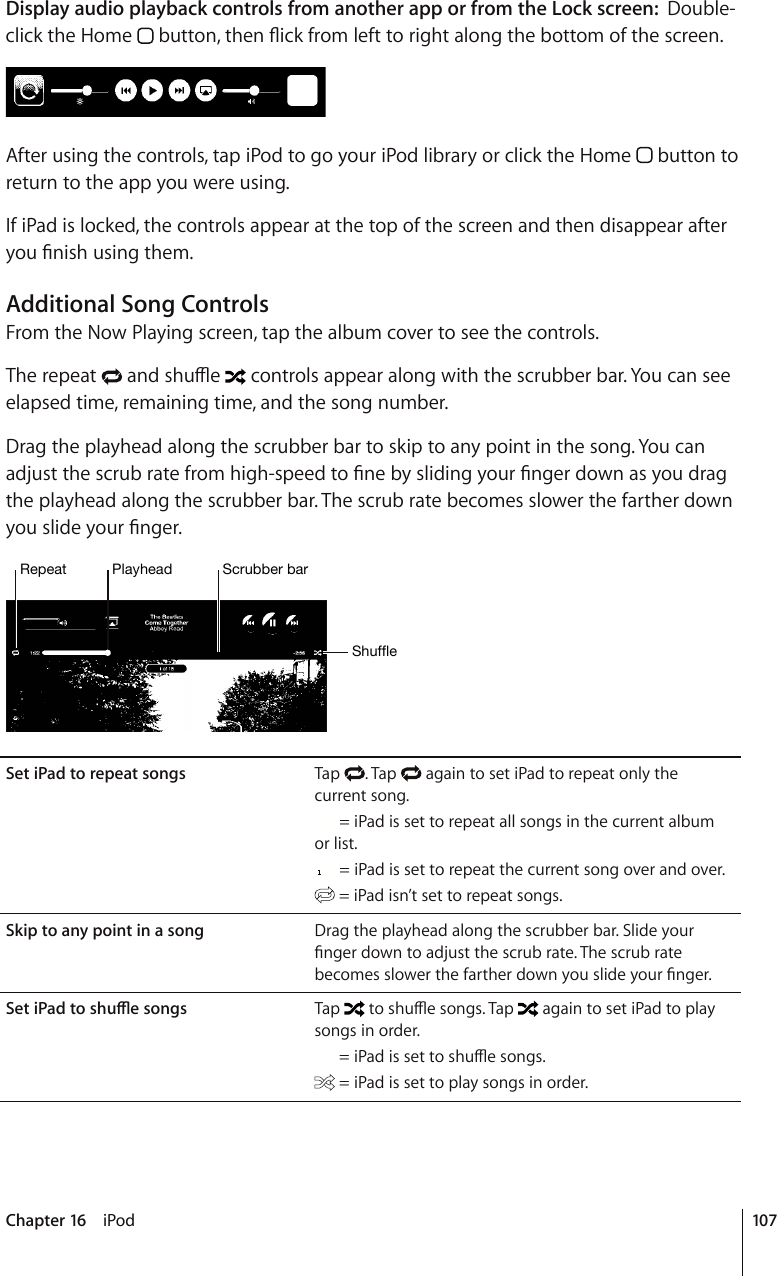
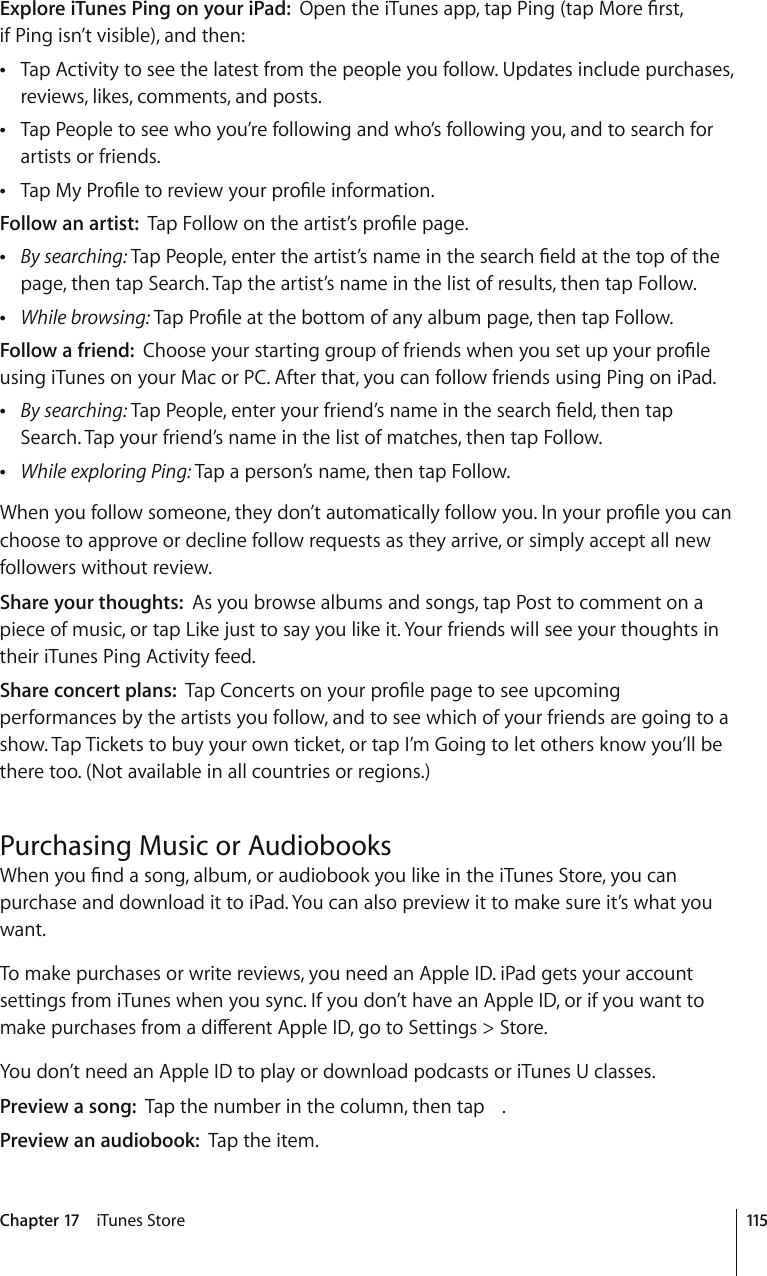
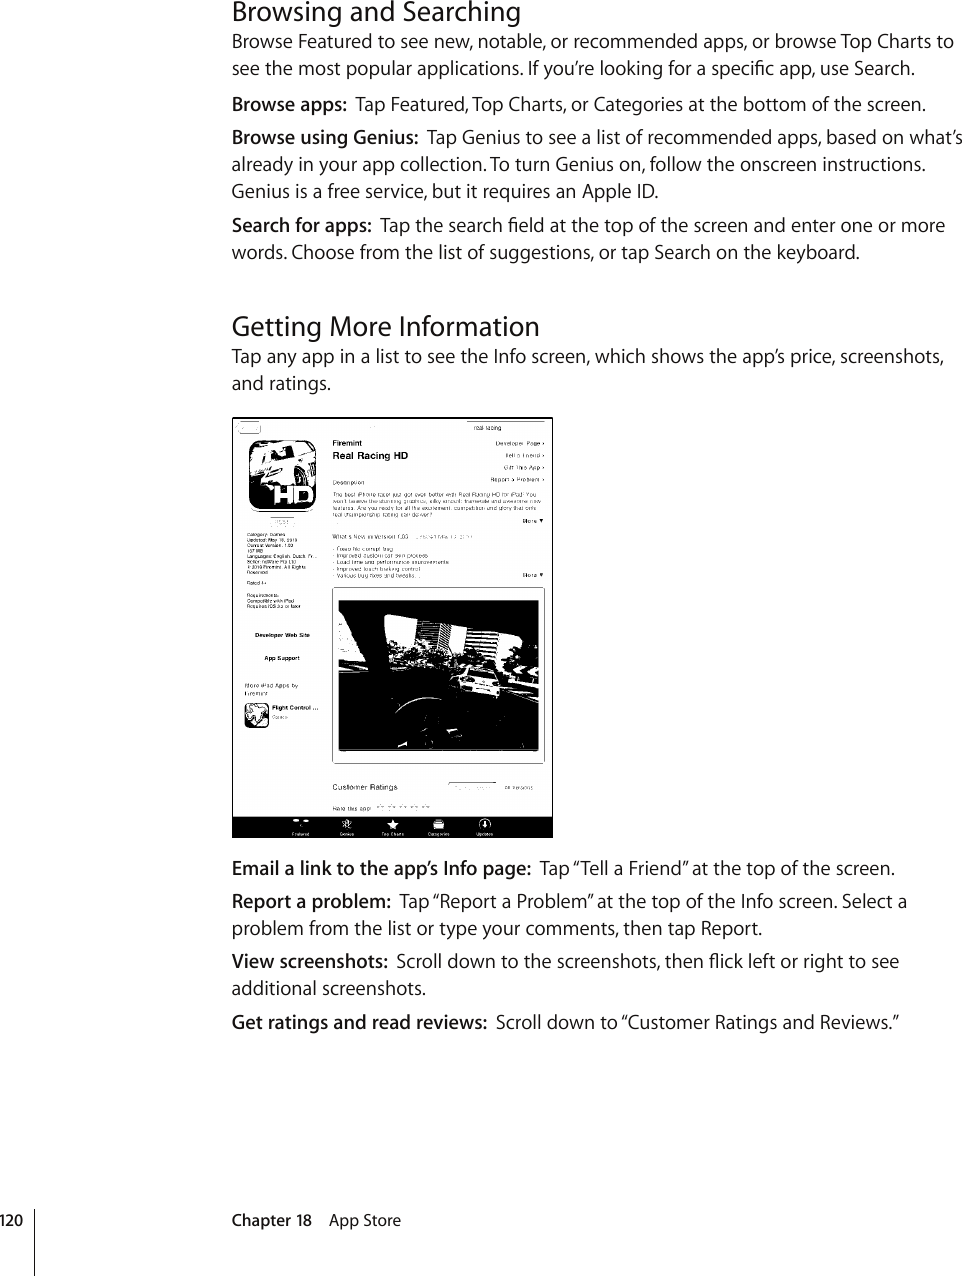
![Map ViewsYou can choose classic, satellite, hybrid, or terrain view. You can also see a location in street view, when available.Change the view: Tap or drag the bottom-right corner of the screen, then tap Classic, Satellite, Hybrid, or Terrain.See a street view: Tap a drop pin, then tap ;QWECP±KEMWRQTFQYPQTNGHVQTright, to pan through the 360° panoramic view. The inset in the lower-right corner shows your current view. Tap an arrow to move down the street. Street view isn’t available in all areas.To return to map view, tap the inset. ;HW[VYL[\YU[VTHW]PL^101Chapter 15 Maps](https://usermanual.wiki/Apple/A1397.Users-Guide-2/User-Guide-1423172-Page-101.png)
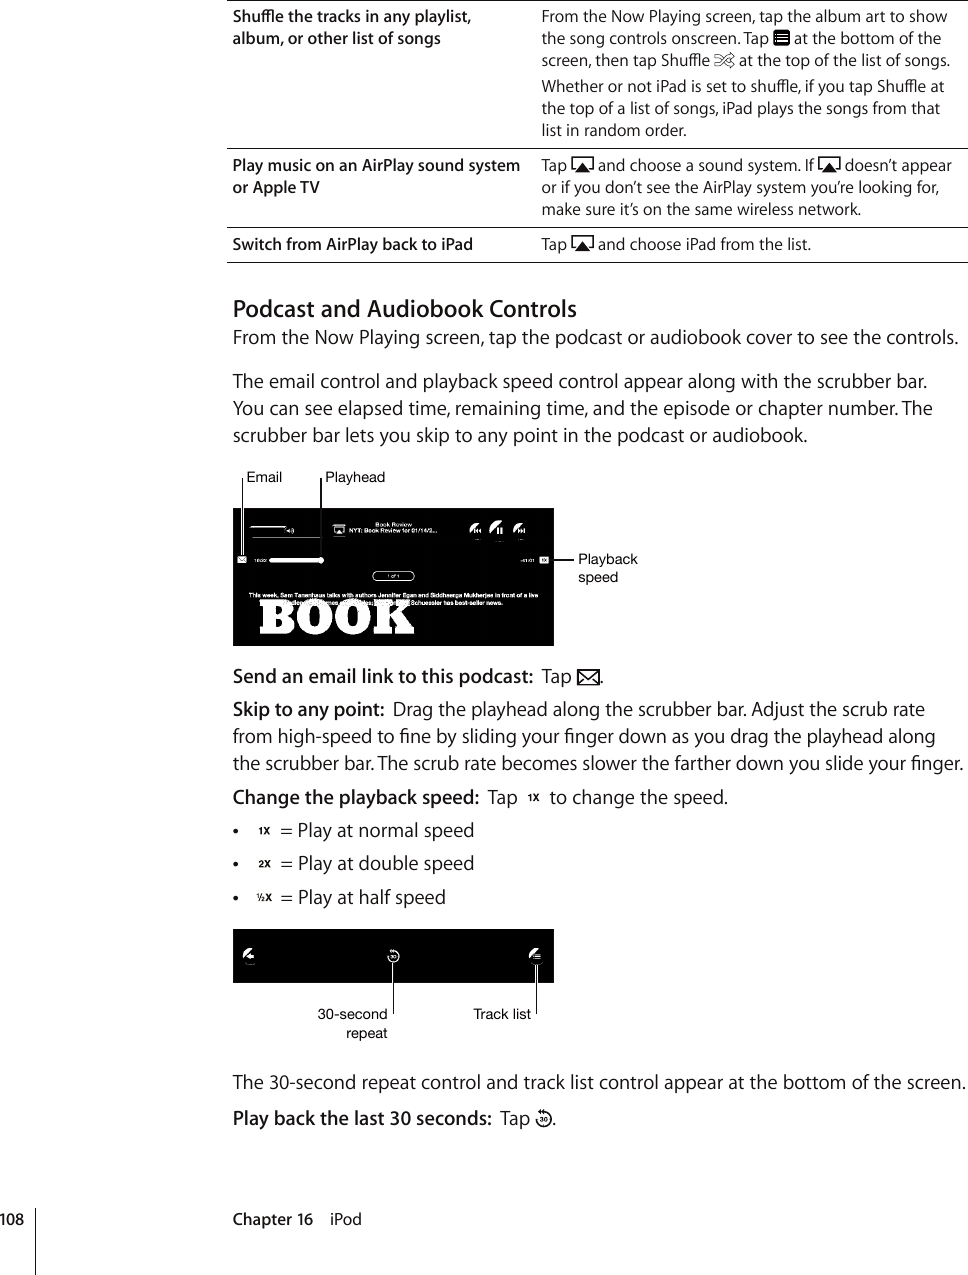
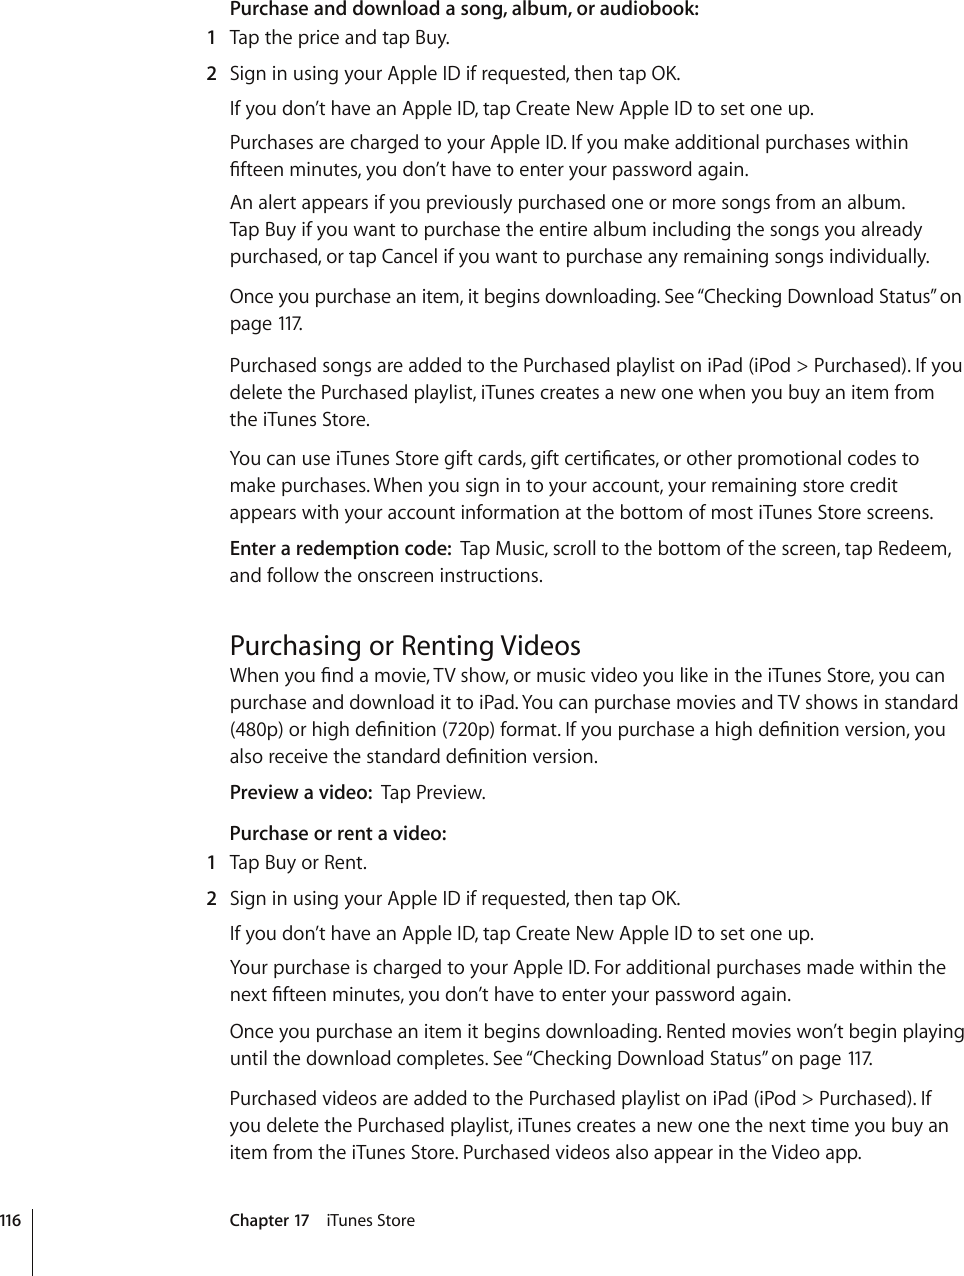
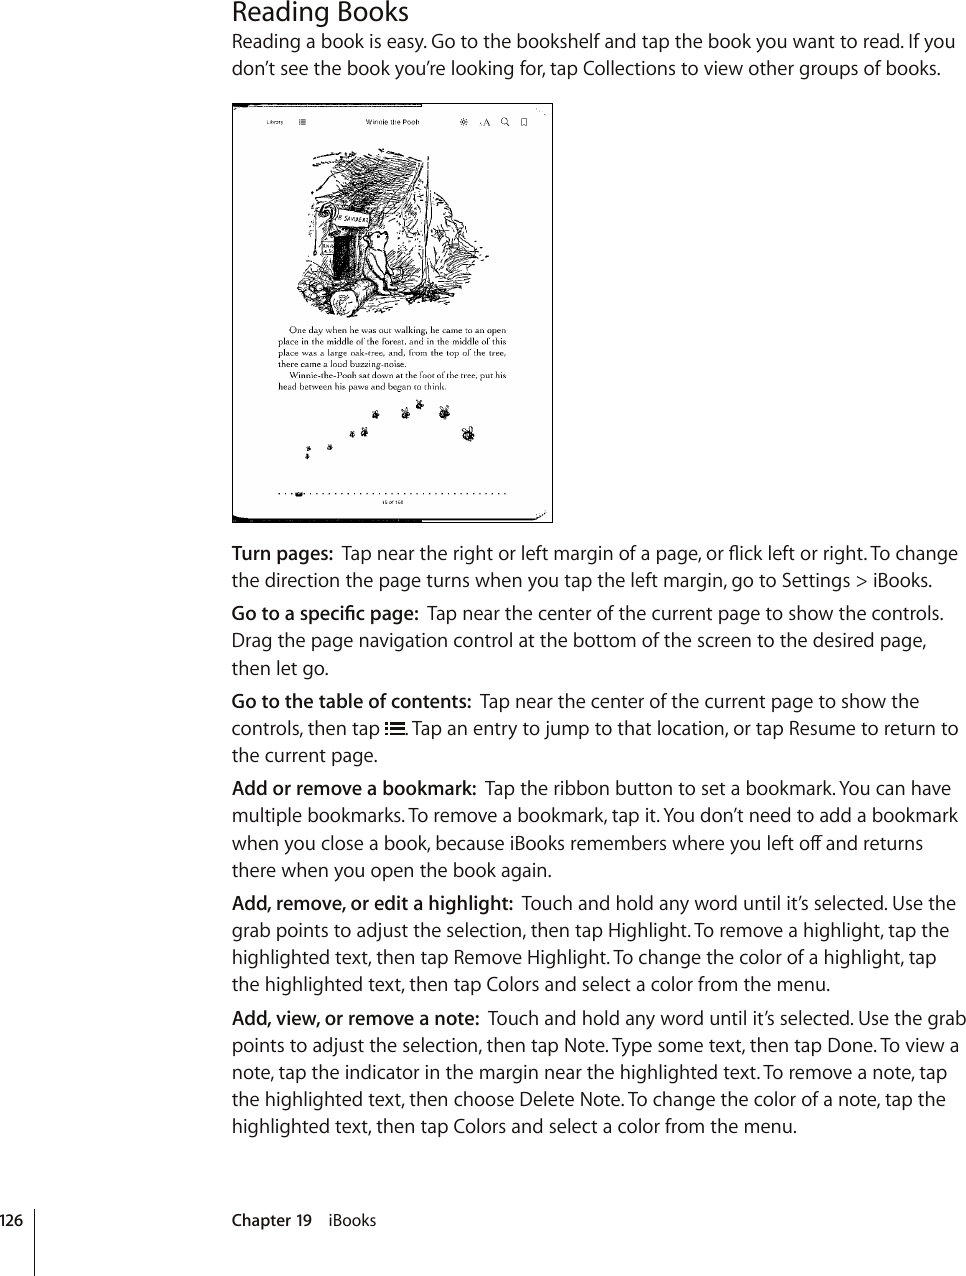
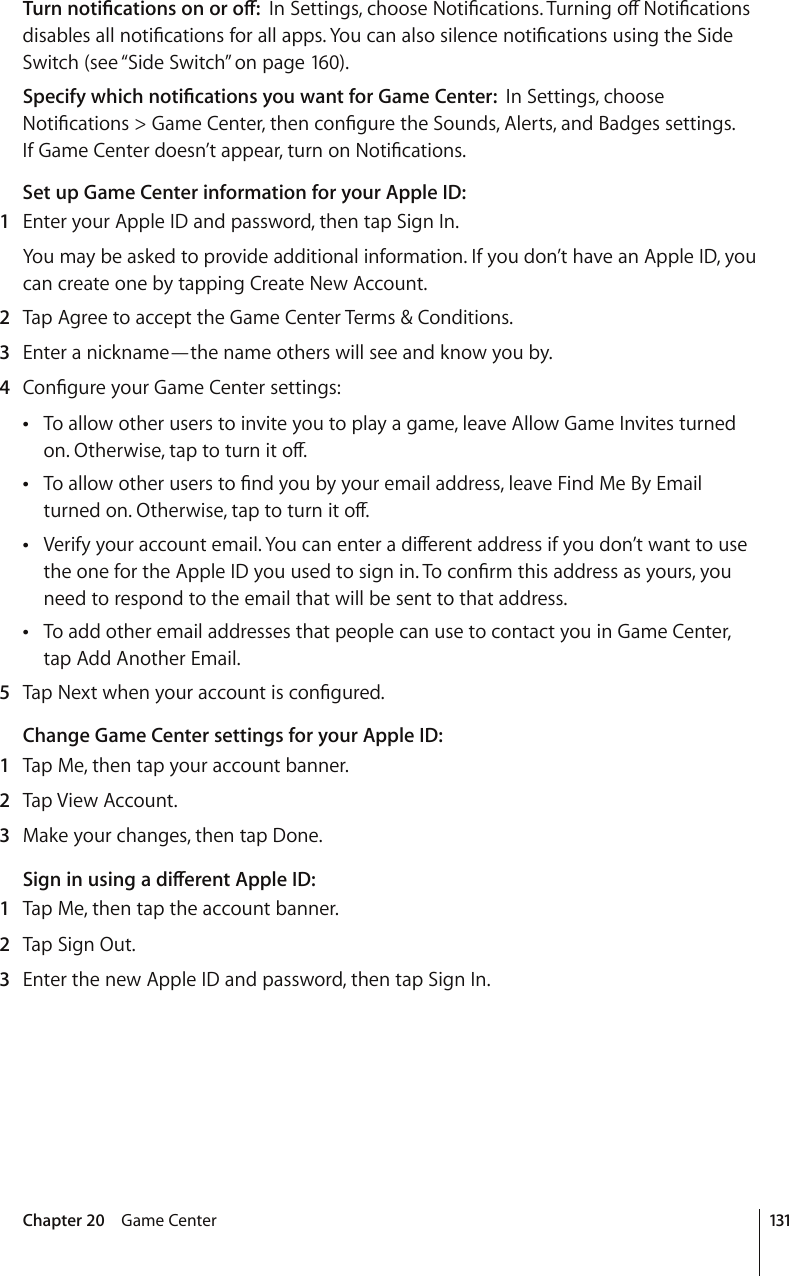
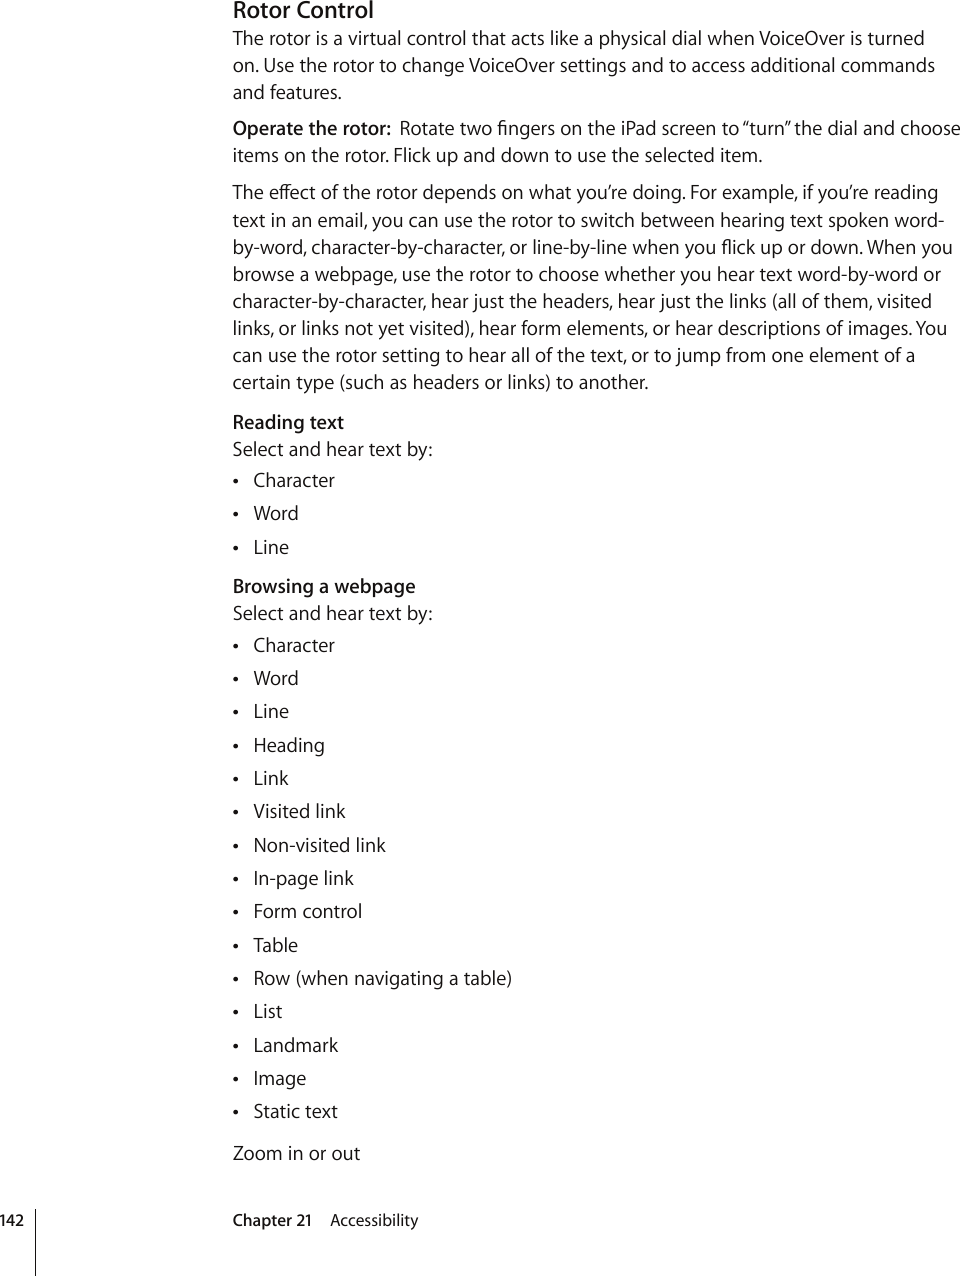
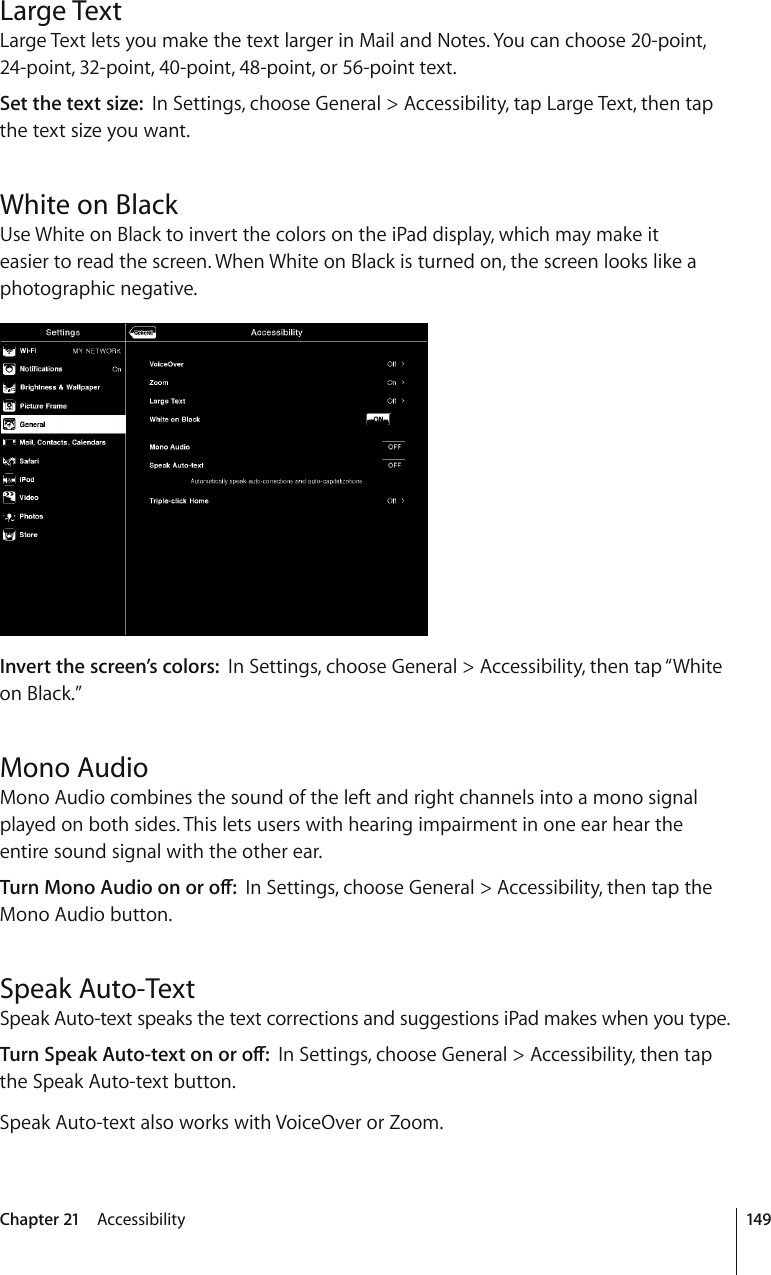
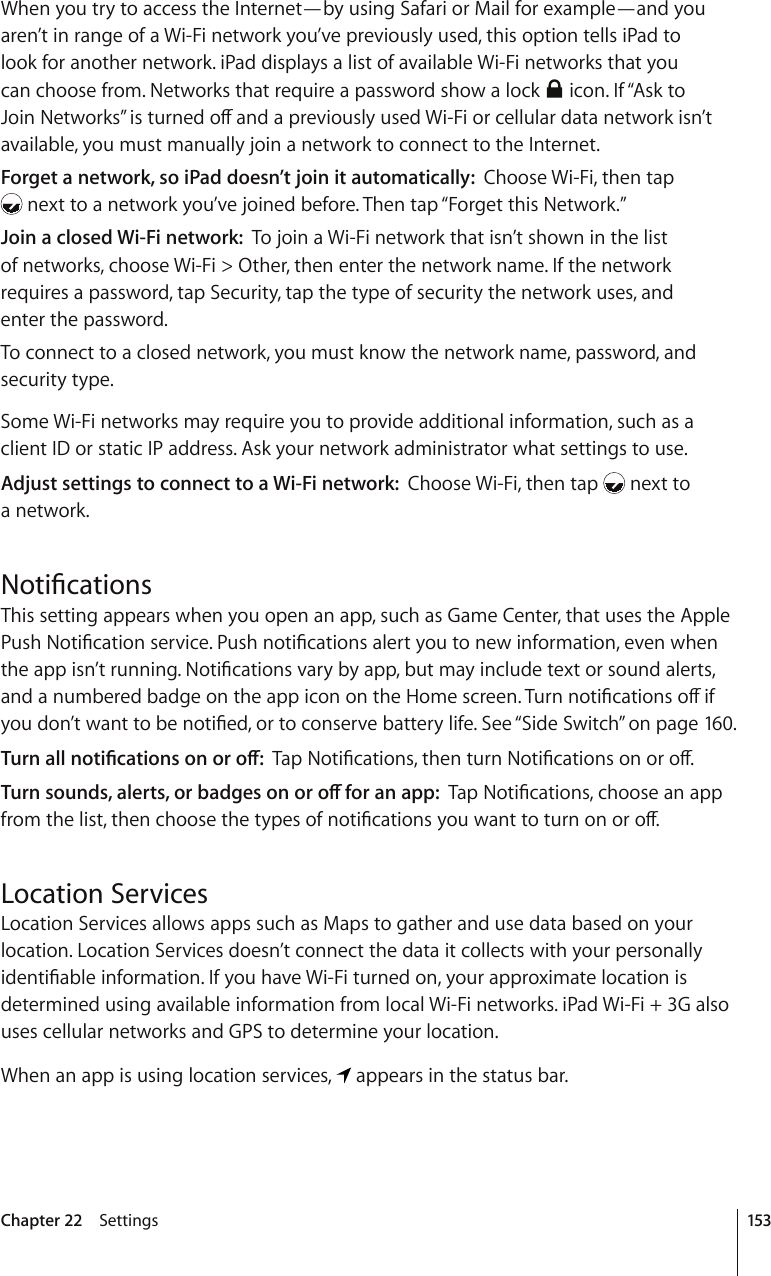
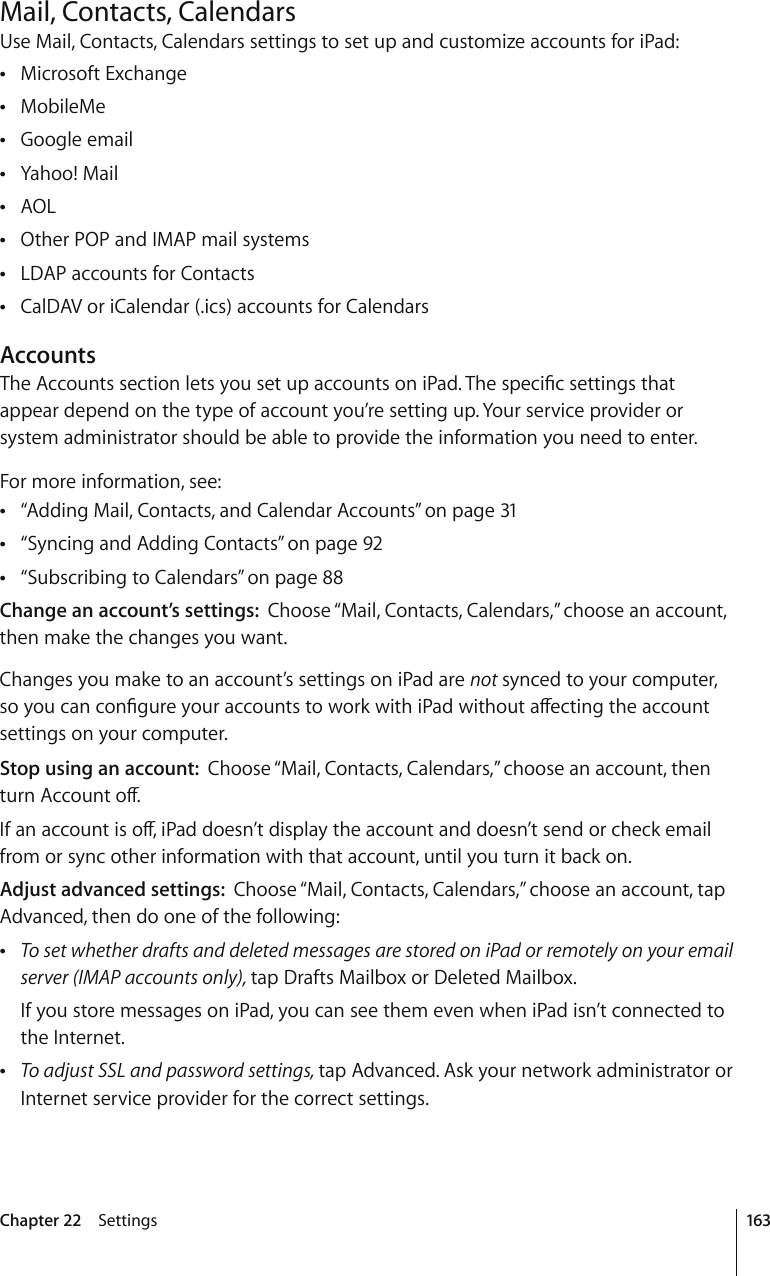
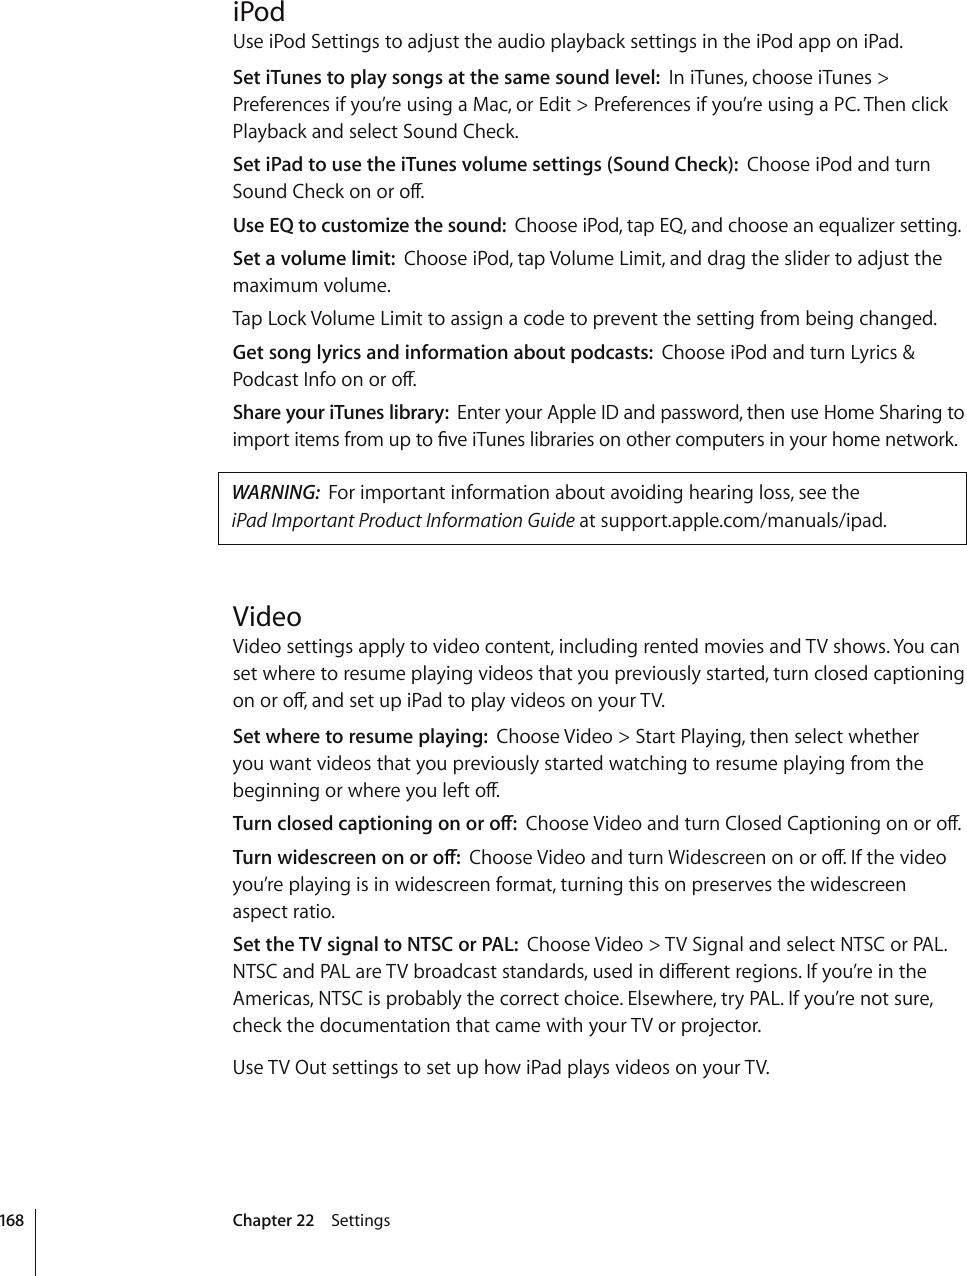
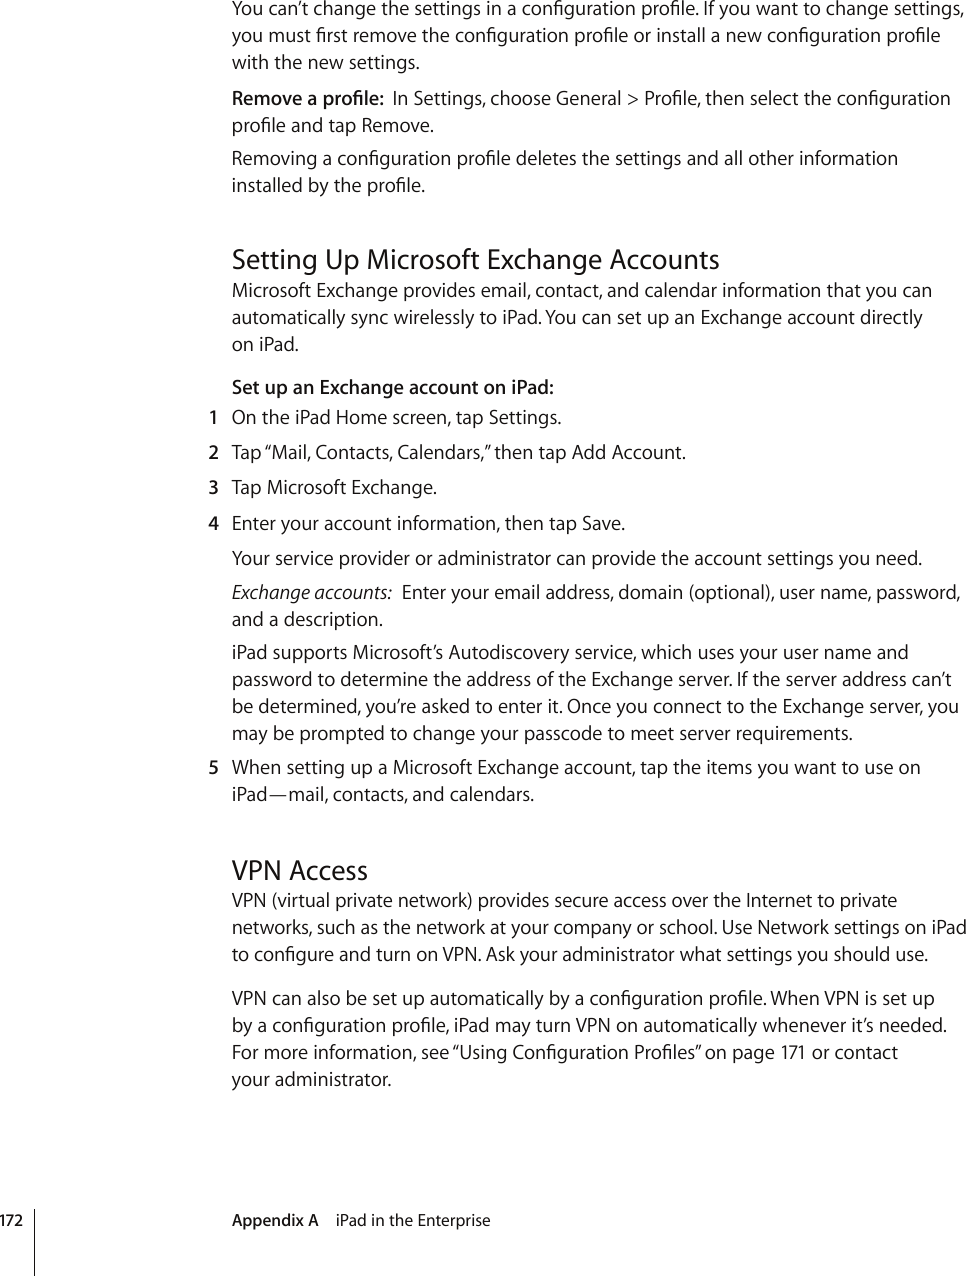
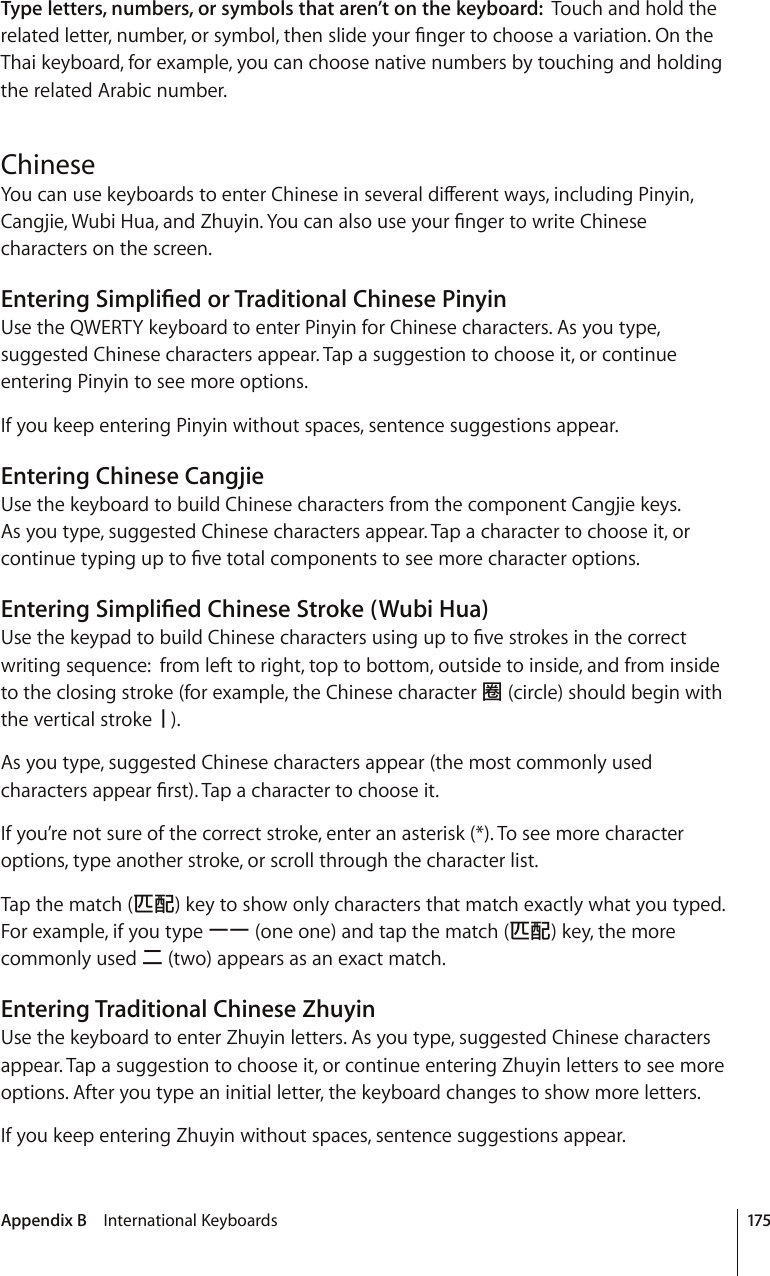
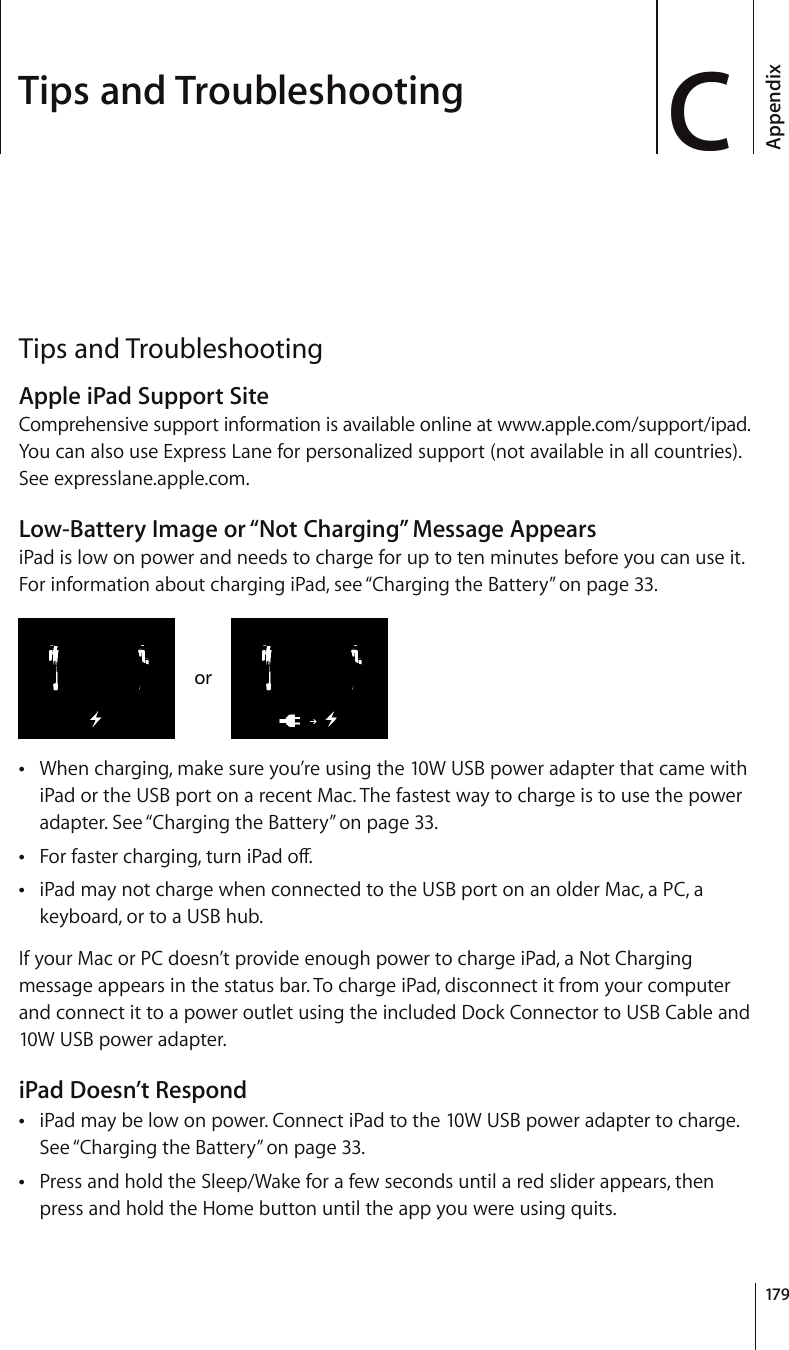
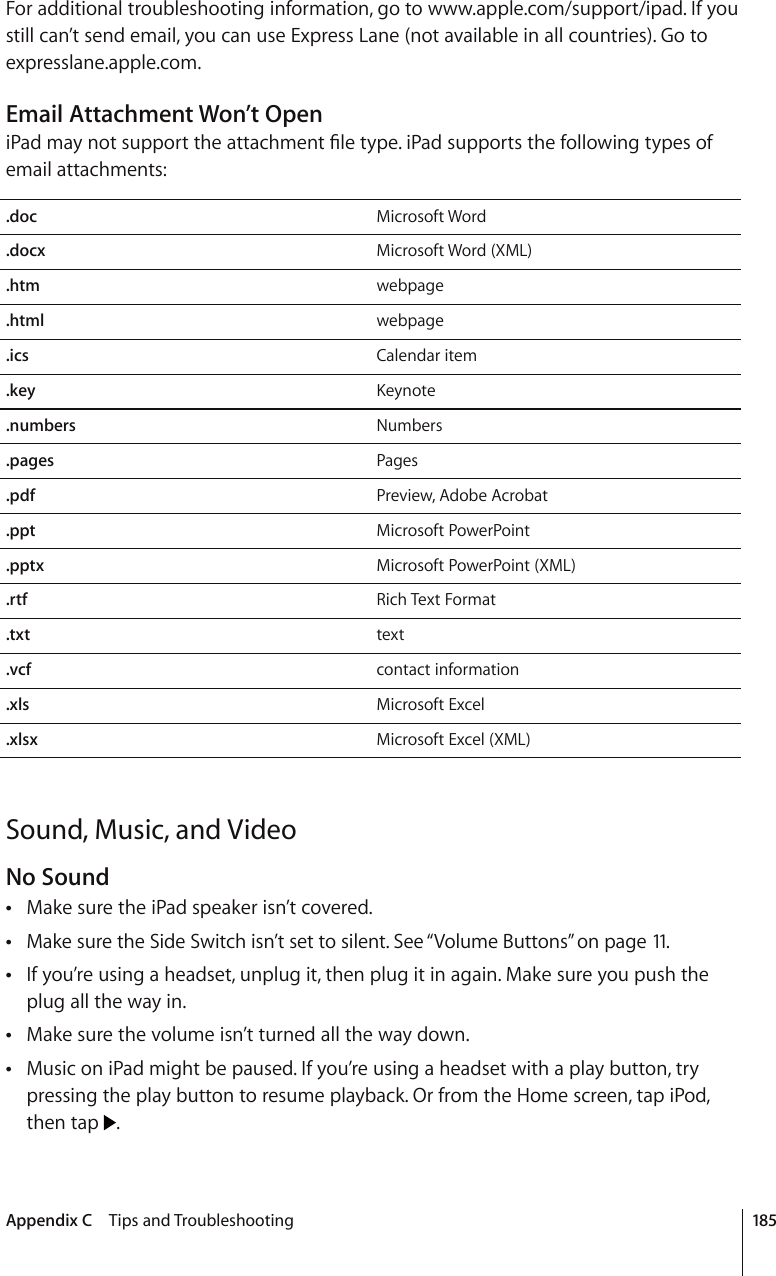
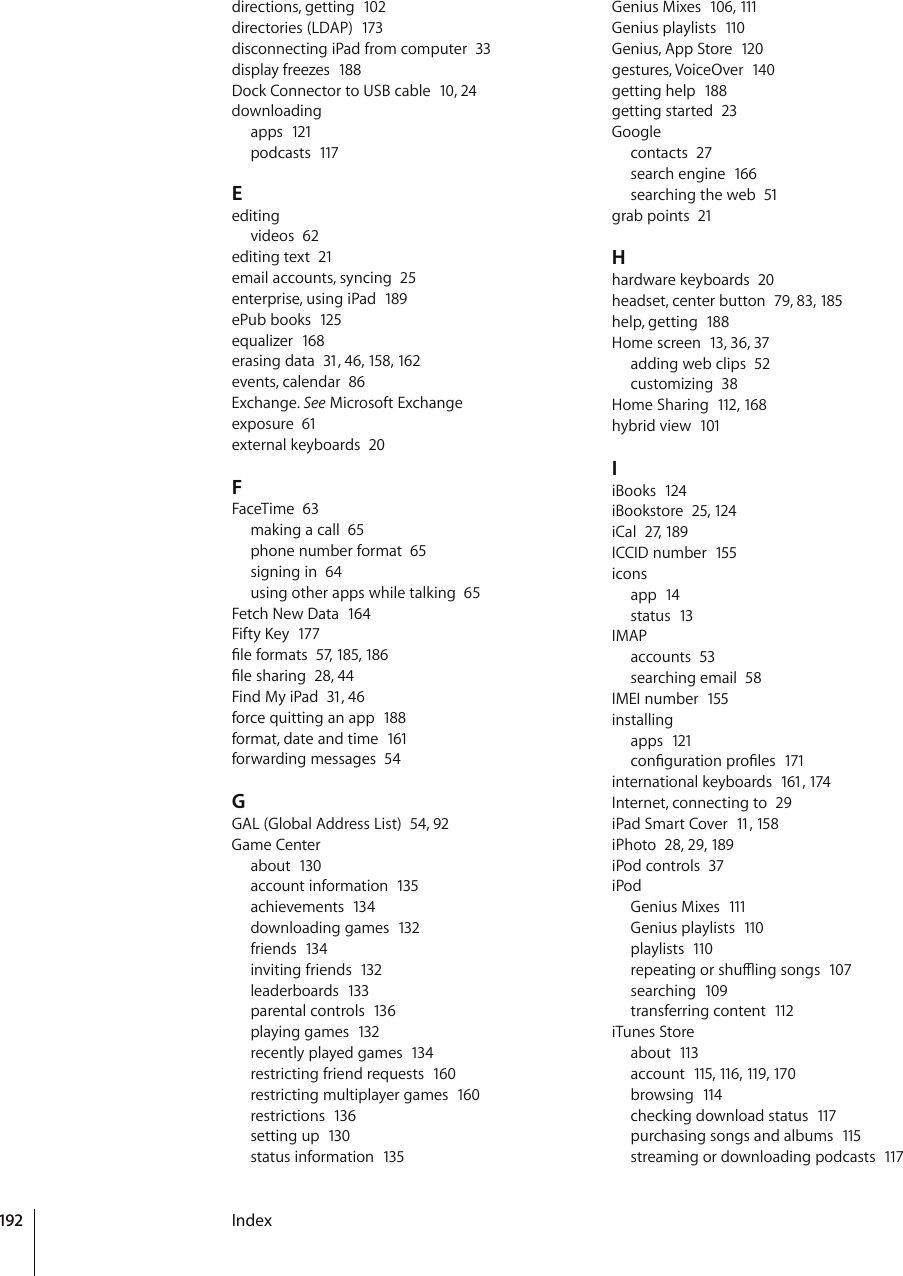
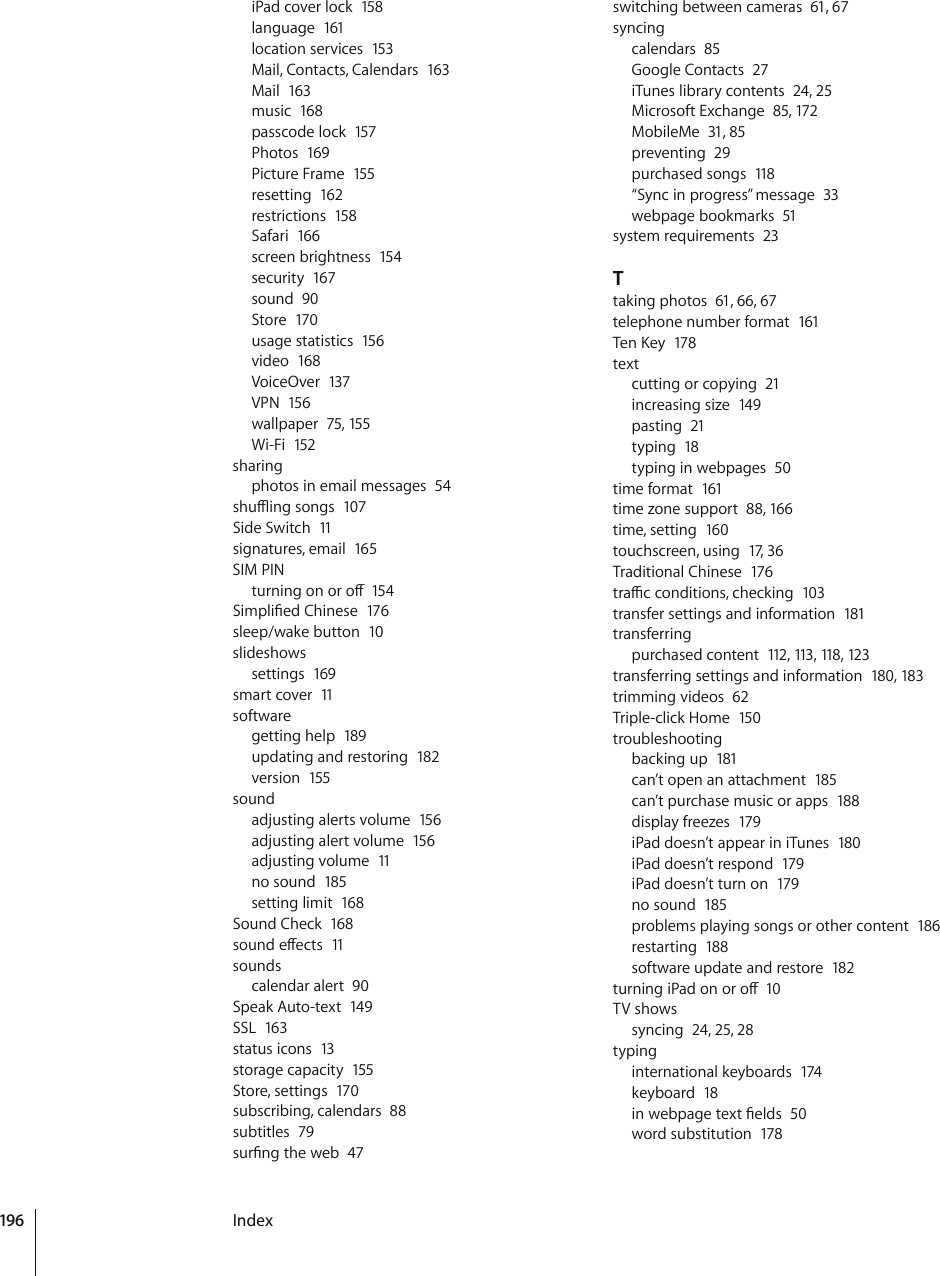
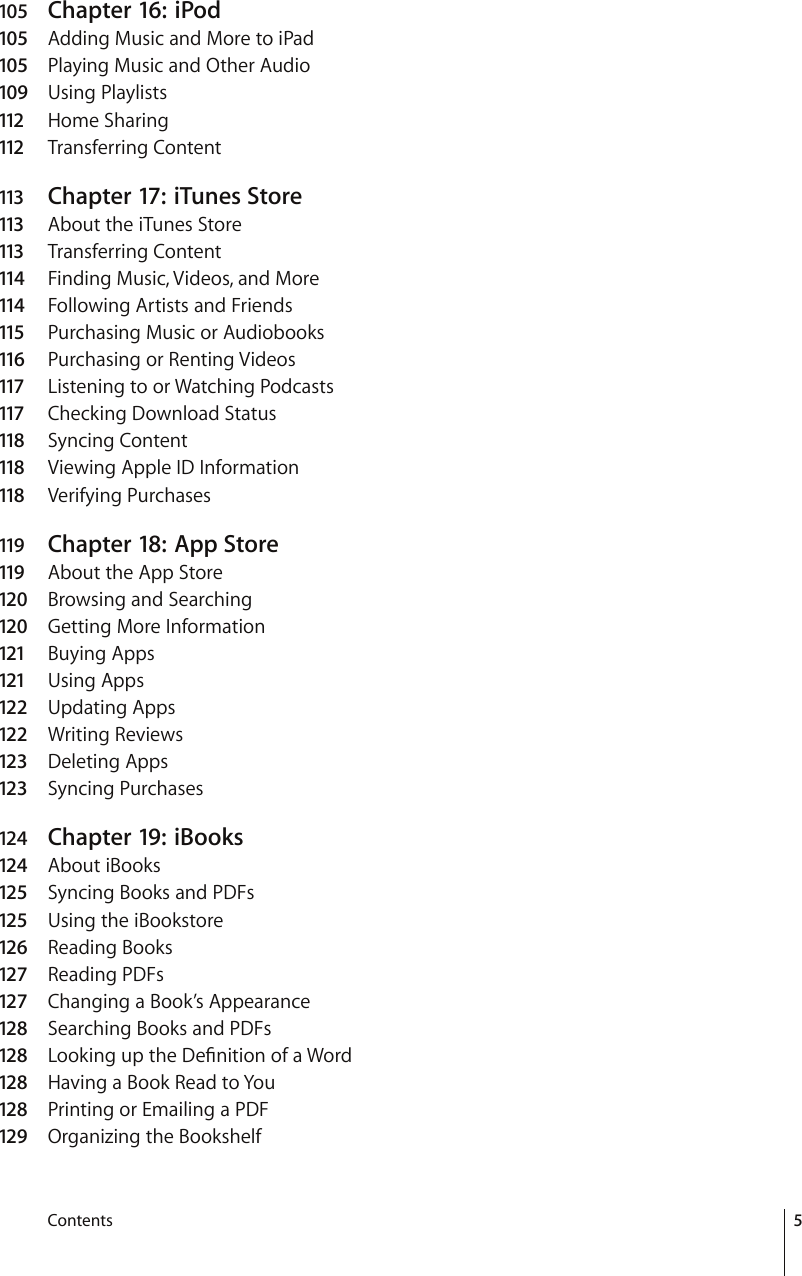
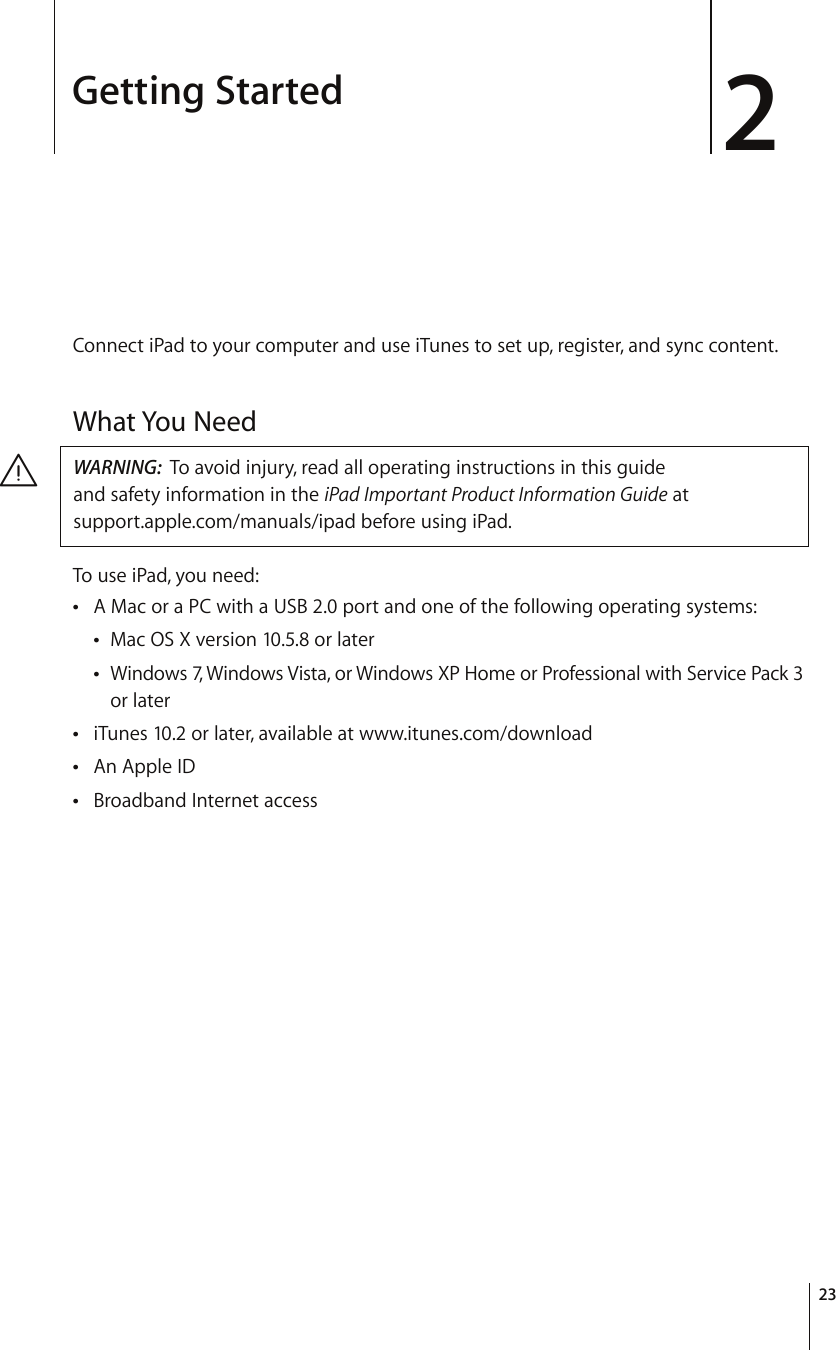
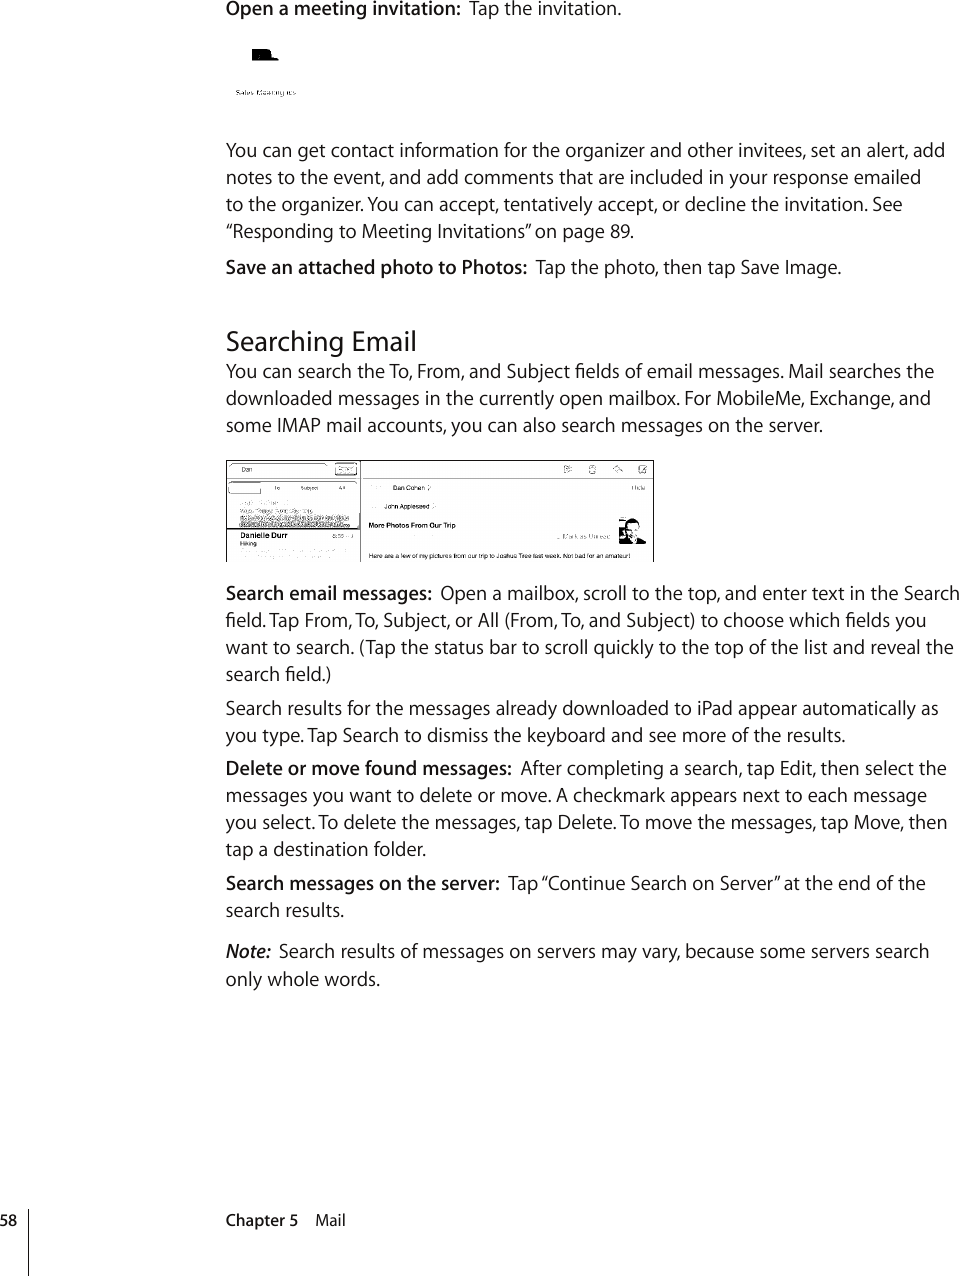
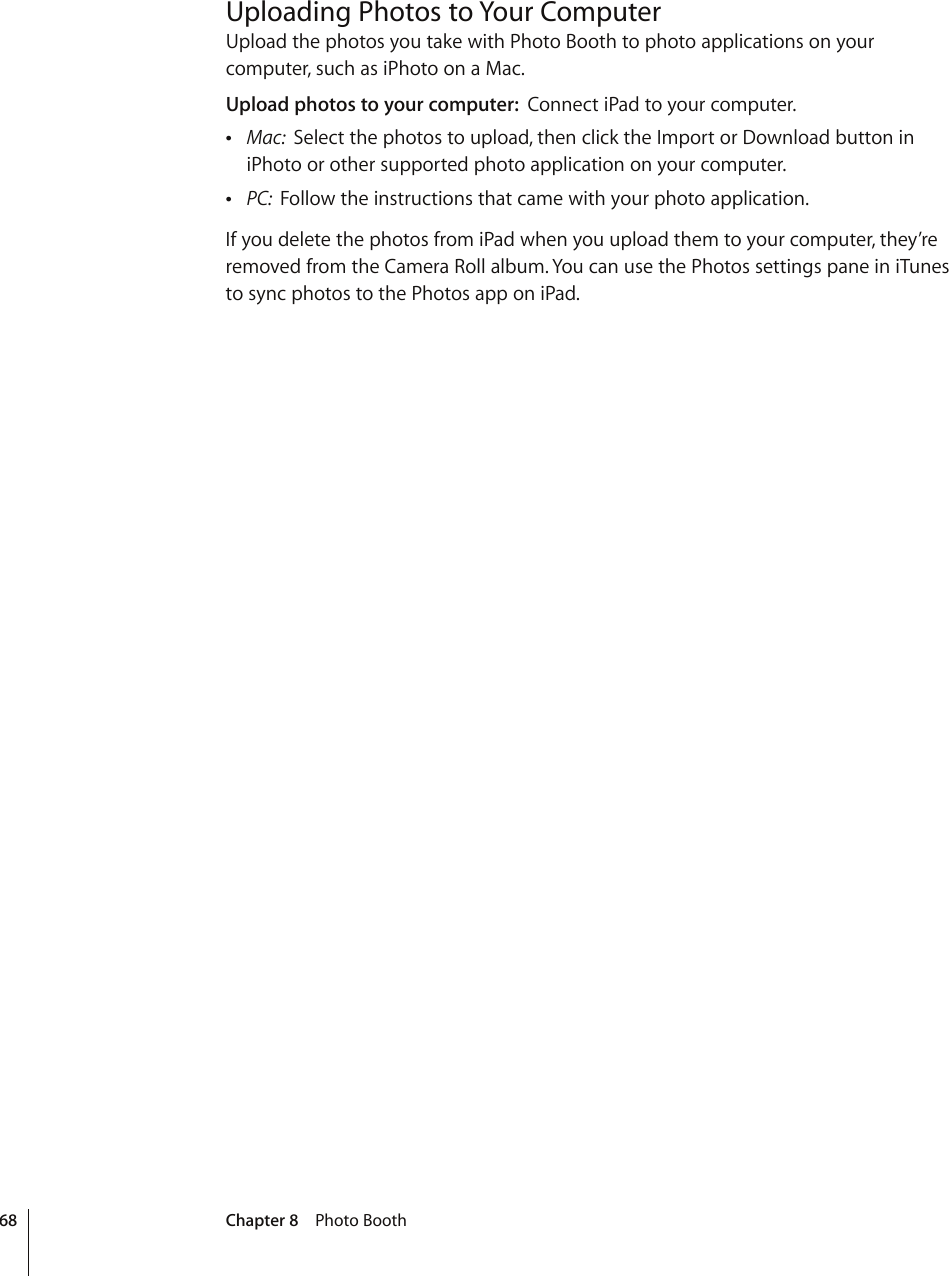
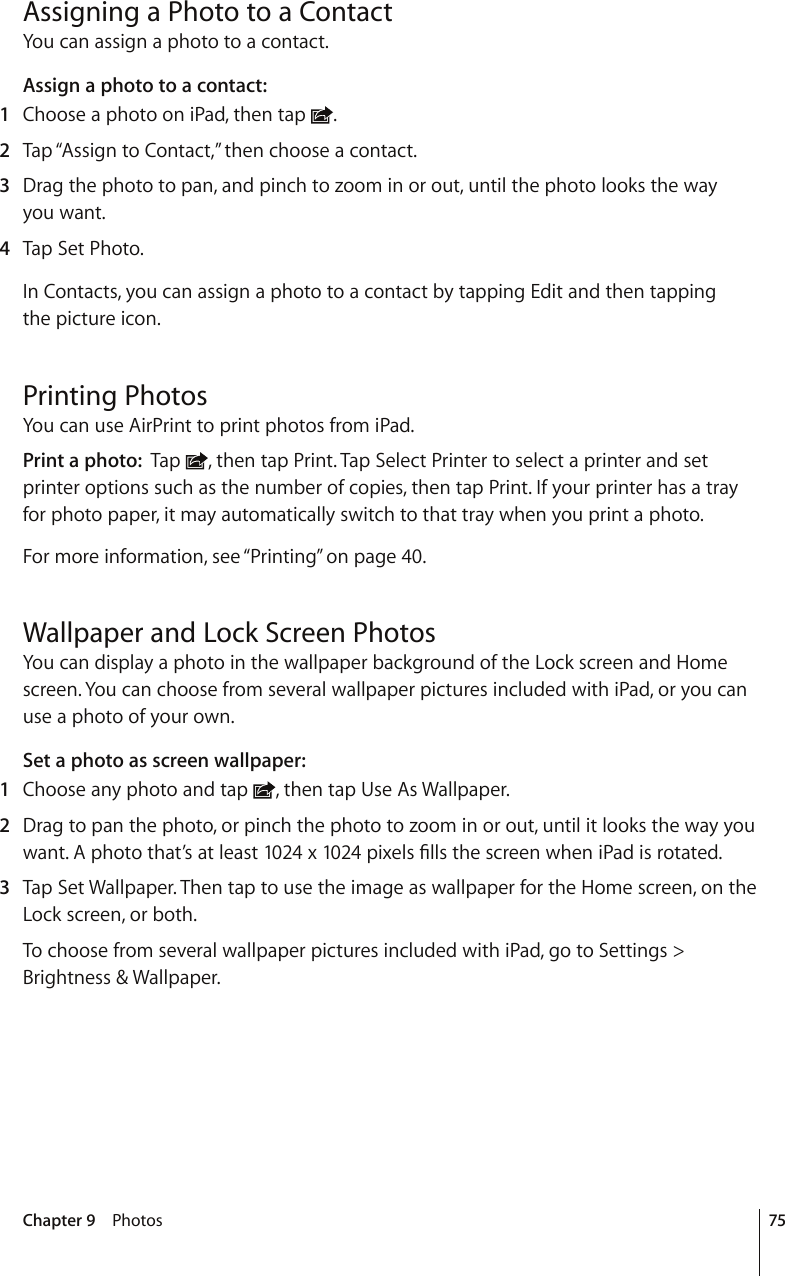
![iBooks 19About iBooksiBooks is a great way to read and buy books. Download the free iBooks app from the App Store, and then get everything from classics to best sellers from the built-in iBookstore. Once you download a book, it’s displayed on your bookshelf.Add ePub books and PDFs to your bookshelf using iTunes. Then tap a book to start TGCFKPIK$QQMUTGOGODGTU[QWTNQECVKQPUQ[QWECPGCUKN[TGVWTPVQYJGTG[QWNGHVQÒA wide range of display options makes the books easy to read.iBooks and the iBookstore aren’t available in all languages and locations.(]HPSHISLVU[OLP)VVRZ[VYL;P[SLH]HPSHIPSP[`PZZ\IQLJ[[VJOHUNL124](https://usermanual.wiki/Apple/A1397.Users-Guide-2/User-Guide-1423172-Page-124.png)