Apple A1538 Tablet Device User Manual A1538 User Manual v1 0 Part1
Apple Inc. Tablet Device A1538 User Manual v1 0 Part1
Apple >
Contents
- 1. A1538_User_Manual_v1.0_Part1
- 2. A1538_User_Manual_v1.0_Part2
- 3. A1538_User_Manual_v1.0_Part3
- 4. A1538_User_Manual_v1.0_Part4
A1538_User_Manual_v1.0_Part1
![iPadUser GuideFor iOS 8.4 SoftwareApple Confidential](https://usermanual.wiki/Apple/A1538.A1538-User-Manual-v1-0-Part1/User-Guide-2731522-Page-1.png)
![Contents8 Chapter 1: iPad at a glance8 iPad overview9 Accessories10 Multi-Touch screen10 Sleep/Wake button11 Home button11 Volume buttons and the Side Switch12 SIM card tray 13 Status icons15 Chapter 2: Get started15 Set up iPad15 Sign up for cellular service16 Connect to Wi-Fi16 Connect to the Internet16 Apple ID17 iCloud18 Set up other mail, contacts, and calendar accounts19 Manage content on your iOS devices19 Connect iPad to your computer20 Sync with iTunes20 Date and time21 International settings21 Your iPad name21 View this user guide on iPad21 Tips for using iOS 822 Chapter 3: Basics22 Use apps25 Continuity27 Customize iPad28 Type text32 Dictate33 Search34 Control Center34 AlertsandNoticationCenter36 Sounds and silence36 Do Not Disturb36 Sharing39 iCloud Drive39 Transferles40 Personal Hotspot2Apple Confidential](https://usermanual.wiki/Apple/A1538.A1538-User-Manual-v1-0-Part1/User-Guide-2731522-Page-2.png)
![40 AirPlay40 AirPrint41 Apple Pay41 Bluetooth devices42 Restrictions42 Privacy43 Security46 Charge and monitor the battery47 Travel with iPad48 Chapter 4: Siri48 Use Siri49 Siri and apps49 Tell Siri about yourself49 Make corrections49 Siri settings51 Chapter 5: Messages51 iMessage service52 Send and receive messages53 Manage conversations53 Share photos, videos, your location, and more54 Messages settings55 Chapter 6: Mail55 Write messages56 Get a sneak peek56 Finish a message later57 See important messages58 Attachments58 Work with multiple messages58 See and save addresses59 Print messages59 Mail settings60 Chapter 7: Safari60 Safari at a glance60 Search the web61 Browse the web62 Keep bookmarks63 Save a reading list for later63 Shared links and subscriptions64 Fill in forms65 Avoid clutter with Reader65 Privacy and security65 Safari settings67 Chapter 8: Music67 Music at a glance67 Get music67 Apple MusicContents 3Apple Confidential](https://usermanual.wiki/Apple/A1538.A1538-User-Manual-v1-0-Part1/User-Guide-2731522-Page-3.png)
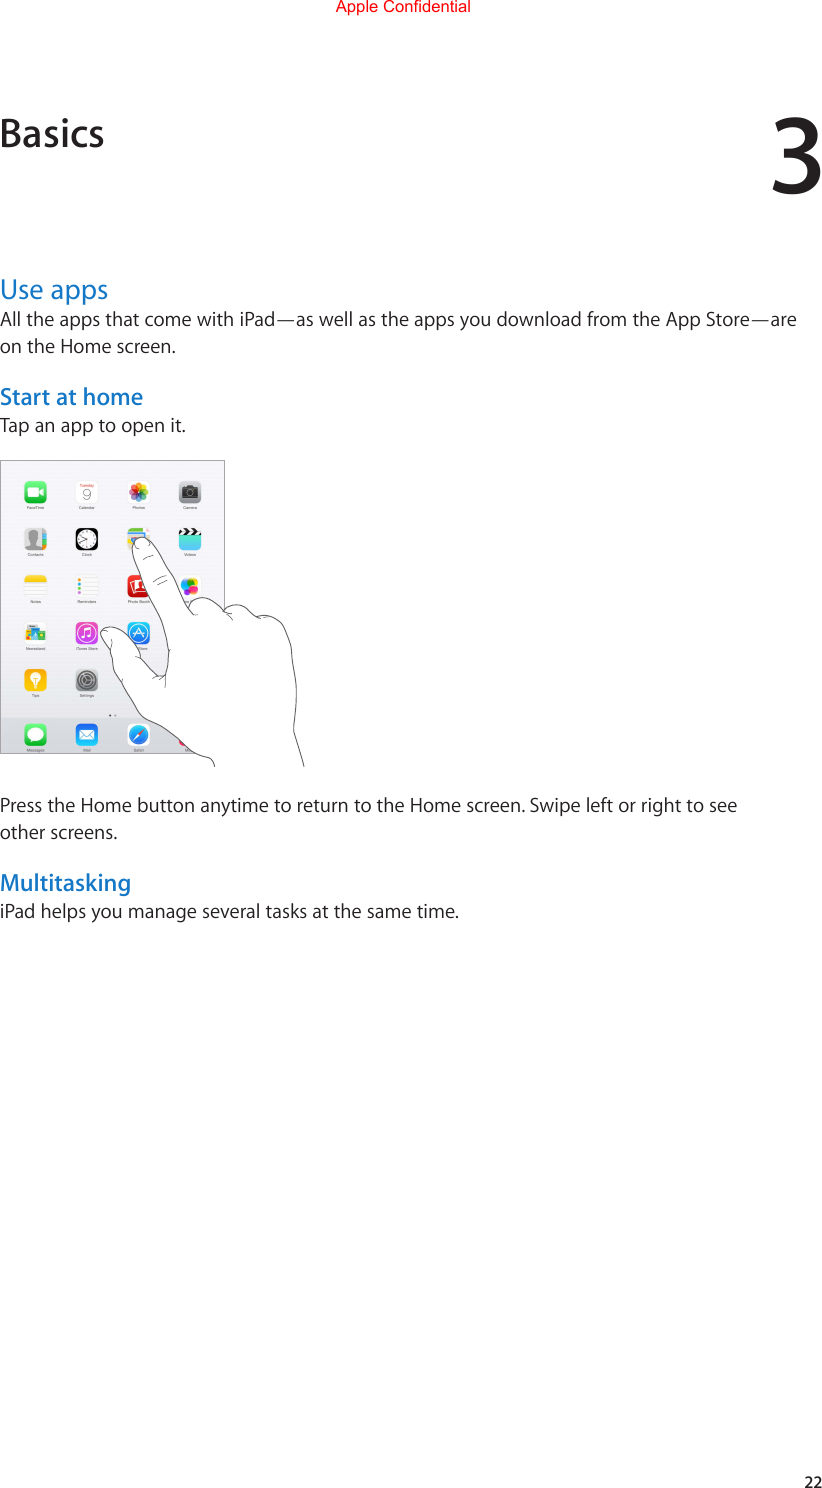
![68 Tune your tastes68 For you68 Search for music69 Add Apple Music69 Play music70 New70 Radio71 Connect72 Playlists72 iCloud and iTunes Match73 My Music74 Siri74 Home Sharing [TK]74 Music settings76 Chapter 9: FaceTime76 FaceTime at a glance77 Make and answer calls77 Manage calls78 Settings79 Chapter 10: Calendar79 Calendar at a glance80 Invitations80 Use multiple calendars81 Share iCloud calendars81 Calendar settings82 Chapter 11: Photos82 View photos and videos83 Organize photos and videos84 iCloud Photo Library84 My Photo Stream85 iCloud Photo Sharing86 Other ways to share photos and videos87 Edit photos and trim videos88 Print photos88 Import photos and videos89 Photos settings90 Chapter 12: Camera90 Camera at a glance91 Take photos and videos93 HDR93 View, share, and print93 Camera settings94 Chapter 13: Contacts94 Contacts at a glance95 Add contacts95 Unify contactsContents 4Apple Confidential](https://usermanual.wiki/Apple/A1538.A1538-User-Manual-v1-0-Part1/User-Guide-2731522-Page-4.png)
![95 Contacts settings97 Chapter 14: Clock97 Clock at a glance98 Alarms and timers99 Chapter 15: Maps99 Find places100 Get more info100 Get directions101 3D and Flyover101 Maps settings102 Chapter 16: Videos102 Videos at a glance103 Add videos to your library103 Control playback104 Videos settings105 Chapter 17: Notes105 Notes at a glance106 Use notes in multiple accounts107 Chapter 18: Reminders107 Reminders at a glance108 Scheduled reminders108 Location reminders109 Reminders settings110 Chapter 19: Photo Booth110 Take photos111 Manage photos112 Chapter 20: Game Center112 Game Center at a glance113 Play games with friends113 Game Center settings114 Chapter 21: Newsstand115 Chapter 22: iTunes Store115 iTunes Store at a glance116 Browse or search117 Purchase, rent, or redeem117 iTunes Store settings119 Chapter 23: App Store119 App Store at a glance119 Find apps120 Purchase, redeem, and download121 App Store settingsContents 5Apple Confidential](https://usermanual.wiki/Apple/A1538.A1538-User-Manual-v1-0-Part1/User-Guide-2731522-Page-5.png)
![122 Chapter 24: iBooks122 Get books122 Read a book123 Interact with multimedia124 Study notes and glossary terms124 Listen to an audiobook125 Organize books125 Read PDFs126 iBooks settings127 Chapter 25: Podcasts127 Podcasts at a glance127 Get podcasts and episodes129 Control playback130 Organize your favorites into stations130 Podcasts settings131 Appendix A: Accessibility131 Accessibility features132 Accessibility Shortcut132 VoiceOver143 Zoom144 Invert Colors and Grayscale144 Speak Selection144 Speak Screen145 Speak Auto-Text145 Large, bold, and high-contrast text145 Button Shapes145 Reduce screen motion145 On/oswitchlabels145 Assignable tones146 Video Descriptions146 Hearing aids147 Mono audio and balance147 Subtitles and closed captions147 Siri147 Widescreen keyboards147 Guided Access148 Switch Control152 AssistiveTouch153 Accessibility in OS X154 Appendix B: iPad in Business154 iPad in the enterprise154 Mail, Contacts, and Calendar154 Network access154 Apps156 Appendix C: International Keyboards156 Use international keyboards157 Special input methodsContents 6Apple Confidential](https://usermanual.wiki/Apple/A1538.A1538-User-Manual-v1-0-Part1/User-Guide-2731522-Page-6.png)
![159 Appendix D: Safety, handling, and support159 Important safety information161 Important handling information162 iPad Support site162 Restart or reset iPad163 Reset iPad settings163 Anappdoesn’tllthescreen163 Onscreen keyboard doesn’t appear163 Get information about your iPad164 Usage information164 Disabled iPad164 VPN settings165 Prolessettings165 Back up iPad166 Update and restore iPad software166 Cellular settings167 Sell or give away iPad167 Learn more, service, and support168 FCC compliance statement168 Canadian regulatory statement169 Disposal and recycling information170 ENERGY STAR® compliance statement170 Apple and the environmentContents 7Apple Confidential](https://usermanual.wiki/Apple/A1538.A1538-User-Manual-v1-0-Part1/User-Guide-2731522-Page-7.png)
![18iPad overviewThis guide describes iOS 8 for: •iPad mini (all models) •iPad Air (all models) •iPad (3rd generation and 4th generation) •iPad 2iPad mini 3Multi-TouchdisplayMulti-TouchdisplayFaceTimeHD cameraFaceTimeHD cameraApp iconsApp iconsStatus barStatus barHome button/Touch ID sensorHome button/Touch ID sensorLightning connectorLightning connectorSpeakersSpeakersHeadset jackHeadset jackSleep/Wake buttonSleep/Wake buttoniSightcameraiSightcameraVolumebuttonsVolumebuttonsNano-SIM tray (cellular models)Nano-SIM tray (cellular models)Side SwitchSide SwitchMicrophonesMicrophonesiPad at a glanceApple Confidential](https://usermanual.wiki/Apple/A1538.A1538-User-Manual-v1-0-Part1/User-Guide-2731522-Page-8.png)
![Chapter 1 iPad at a glance 9iPad Air 2Multi-TouchdisplayMulti-TouchdisplayFaceTimeHD cameraFaceTimeHD cameraHome button/Touch ID sensorHome button/Touch ID sensorApp iconsApp iconsStatus barStatus barLightning connectorLightning connectorSleep/Wake buttonSleep/Wake buttoniSightcameraiSightcameraVolumebuttonsVolumebuttonsNano-SIM tray (cellular models)Nano-SIM tray (cellular models)Headset jackHeadset jackSpeakersSpeakersMicrophonesMicrophonesYour features and apps may vary depending on the model of iPad you have, and on your location,language,andcarrier.Tondoutwhichfeaturesaresupportedinyourarea,seewww.apple.com/ios/feature-availability/.Note: Apps and services that send or receive data over a cellular network may incur additional fees. Contact your carrier for information about your iPad service plan and fees.AccessoriesThe following accessories are included with iPad:USB power adapter. Use with the Lightning to USB Cable or the 30-pin to USB Cable to charge the iPad battery. The size of your adapter depends on the iPad model and your region.Apple Confidential](https://usermanual.wiki/Apple/A1538.A1538-User-Manual-v1-0-Part1/User-Guide-2731522-Page-9.png)
![Chapter 1 iPad at a glance 10Lightning to USB Cable. Use this to connect iPad (4th generation or later) or iPad mini to the USB power adapter or to your computer. Earlier iPad models use a 30-pin to USB Cable.Multi-Touch screenA few simple gestures—tap, drag, swipe, and pinch—are all you need to use iPad and its apps.Sleep/Wake buttonYou can lock iPad and put it to sleep when you’re not using it. Locking iPad puts the display to sleep, saves the battery, and prevents anything from happening if you touch the screen. You still getFaceTimecalls,textmessages,alarms,andnotications,andcanlistentomusicandadjustthe volume.Sleep/WakebuttonSleep/WakebuttonLock iPad. Press the Sleep/Wake button.Unlock iPad. Press the Home button or the Sleep/Wake button, then drag the slider that appears onscreen.For additional security, you can require a passcode to unlock iPad. Go to Settings > Touch ID & Passcode (iPad models with Touch ID) or Settings > Passcode (other models). See Use a passcode with data protection on page 43.Turn iPad on. Hold down the Sleep/Wake button until the Apple logo appears.Turn iPad o. Hold down the Sleep/Wake button for a few seconds until the slider appears onscreen, then drag the slider.Apple Confidential](https://usermanual.wiki/Apple/A1538.A1538-User-Manual-v1-0-Part1/User-Guide-2731522-Page-10.png)
![Chapter 1 iPad at a glance 11If you don’t touch the screen for two minutes, iPad locks itself. You can change how long iPad waits to lock itself, or set a passcode to unlock iPad.Set the auto-lock time. Go to Settings > General > Auto-Lock.Set a passcode. Go to Settings > Passcode.An iPad Smart Cover or iPad Smart Case, sold separately, can lock or unlock iPad for you (iPad 2 or later).Set your iPad Smart Cover or iPad Smart Case to lock and unlock iPad. Go to Settings > General, then turn on Lock/Unlock.Home buttonThe Home button takes you back to the Home screen at any time. It also provides other convenient shortcuts.Go to the Home screen. Press the Home button.On the Home screen, tap an app to open it. See Start at home on page 22.See apps you’ve opened. Double-click the Home button when iPad is unlocked, then swipe left or right.Use Siri (iPad 3rd generation or later). Press and hold the Home button. See Use Siri on page 48.YoucanalsousetheHomebuttontoturnaccessibilityfeaturesonoro.SeeAccessibility Shortcut on page 132.On iPad models with Touch ID, you can use the sensor in the Home button, instead of using your passcode or Apple ID password, to unlock iPad or make purchases in the iTunes Store, App Store, and iBooks Store. See Touch ID on page 44. You can also use the Touch ID sensor for authentication when using Apple Pay to make a purchase from within an app. See Apple Pay on page 41.Volume buttons and the Side SwitchUsetheVolumebuttonstoadjustthevolumeofsongsandothermedia,andofalertsandsoundeects.UsetheSideSwitchtosilenceaudioalertsandnoticationsortopreventiPadfromswitching between portrait and landscape orientation. (On iPad models without a side switch, use Control Center.) WARNING: For important information about avoiding hearing loss, see Important safety information on page 159.VolumebuttonsVolumebuttonsSideSwitchSideSwitchApple Confidential](https://usermanual.wiki/Apple/A1538.A1538-User-Manual-v1-0-Part1/User-Guide-2731522-Page-11.png)
![Chapter 1 iPad at a glance 12Lock the ringer and alert volumes. GotoSettings>Sounds,thenturnoChangewithButtons.To limit the volume for music and videos, go to Settings > Music > Volume Limit.Note: In some European Union (EU) countries, iPad may warn that you’re setting the volume above the EU recommended level for hearing safety. To increase the volume beyond this level, youmayneedtobrieyreleasethevolumecontrol.Tolimitthemaximumheadsetvolumeto this level, go to Settings > Music > Volume Limit, then turn on EU Volume Limit. To prevent changes to the volume limit, go to Settings > General > Restrictions.Use Control Center to adjust the volume. When iPad is locked or when you’re using another app, swipe up from the bottom edge of the screen to open Control Center.Do Not Disturb, also available in Control Center, is an easy way to keep iPad silent. See Do Not Disturb on page 36.Mute the sound. Press and hold the Volume Down button.You can also use either volume button to take a picture or record a video. See Take photos and videos on page 91.Mute notications, alerts, and sound eects. Slide the Side Switch toward the Volume buttons.The Side Switch doesn’t mute the audio from music, podcasts, movies, and TV shows.Use the Side Switch to lock the screen orientation. Go to Settings > General, then tap Lock Rotation.SIM card tray The SIM card in iPad Wi-Fi + Cellular models is used for your cellular data connection. If your SIM card isn’t installed or if you change carriers, you may need to install or replace the SIM card.Nano-SIMcardNano-SIMcardSIM traySIM traySIM ejecttoolSIM ejecttoolOpen the SIM tray. InsertaSIMejecttool(soldseparately)intotheholeontheSIMtray,thenpressrmlyandpushthetoolstraightinuntilthetraypopsout.PullouttheSIMtraytoinstallorreplacetheSIMcard.Ifyoudon’thaveaSIMejecttool,trytheendofasmallpaperclip.Important: A SIM card is required to use cellular services when connecting to GSM networks andsomeCDMAnetworks.YouriPadissubjecttoyourwirelessserviceprovider’spolicies,whichmay include restrictions on switching service providers and roaming, even after conclusion of any required minimum service contract. Contact your wireless service provider for more details. Availability of cellular capabilities depends on the wireless network.For more information, see Cellular settings on page 166.Apple Confidential](https://usermanual.wiki/Apple/A1538.A1538-User-Manual-v1-0-Part1/User-Guide-2731522-Page-12.png)
![Chapter 1 iPad at a glance 13Status iconsThe icons in the status bar at the top of the screen give information about iPad:Status icon What it meansWi-Fi iPad has a Wi-Fi Internet connection. The more bars, the stronger the connection. See Connect to Wi-Fi on page 16.Cell signal iPad (Wi-Fi + Cellular models) is in range of the cellular network. If there’s no signal, “No service” appears.Airplane Mode Airplane Mode is on—you can’t access the Internet, or use Bluetooth® devices. Non-wireless features are available. See Travel with iPad on page 47.LTE iPad (Wi-Fi + Cellular models) is connected to the Internet over a 4G LTE network.4G iPad (Wi-Fi + Cellular models) is connected to the Internet over a 4G network.3G iPad (Wi-Fi + Cellular models) is connected to the Internet over a 3G network.EDGE iPad (Wi-Fi + Cellular models) is connected to the Internet over an EDGE network. GPRS iPad (Wi-Fi + Cellular models) is connected to the Internet over a GPRS network. Do Not Disturb Do Not Disturb is turned on. See Do Not Disturb on page 36.Personal Hotspot iPad is providing a Personal Hotspot for other iOS devices. See Personal Hotspot on page 40.Syncing iPad is syncing with iTunes. See Sync with iTunes on page 20.Activity There is network or other activity. Some third-party apps use this icon to show app activity.VPN iPad is connected to a network using VPN. See Network access on page 154.Lock iPad is locked. See Sleep/Wake button on page 10.Alarm An alarm is set. See Chapter 14, Clock, on page 97.Orientation lock Screen orientation is locked. See Change the screen orientation on page 24.Location Services An app is using Location Services. See Privacy on page 42.Bluetooth Blue or White icon: Bluetooth is on and paired with a device, such as a headset or keyboard. Gray icon: Bluetooth is on and paired with a device, but the device is outofrangeorturnedo.No icon: Bluetooth is not paired with a device. See Bluetooth devices on page 41.Bluetooth battery Shows the battery level of a supported paired Bluetooth device.Battery Shows the battery level or charging status. See Charge and monitor the battery on page 46.Apple Confidential](https://usermanual.wiki/Apple/A1538.A1538-User-Manual-v1-0-Part1/User-Guide-2731522-Page-13.png)
![Chapter 1 iPad at a glance 14Apple Confidential](https://usermanual.wiki/Apple/A1538.A1538-User-Manual-v1-0-Part1/User-Guide-2731522-Page-14.png)
![215Set up iPad·WARNING: Toavoidinjury,readImportant safety information on page 159 before using iPad.With only a Wi-Fi connection, you can easily set up iPad. You can also set up iPad by connecting it to a computer and using iTunes (see Connect iPad to your computer on page 19). Set up iPad. Turn on iPad, then follow the Setup Assistant.The Setup Assistant guides you through the setup process, including: •Connecting to a Wi-Fi network •Signing in with or creating a free Apple ID (needed for many features, including iCloud,FaceTime, the iTunes Store, the App Store, and more) •Entering a passcode •Setting up iCloud and iCloud Keychain •Turning on recommended features, such as Location Services •Activating iPad with your carrier (cellular models)You can also restore iPad from an iCloud or iTunes backup during setup. See Back up iPad on page 165.Note: Find My iPad is turned on when you sign in to iCloud. Activation Lock is engaged to help prevent anyone else from setting up your iPad, even if it is completely restored. Before you sell orgiveawayyouriPad,youshouldresetittoeraseyourpersonalcontentandturnoActivationLock. See Sell or give away iPad on page 167.Sign up for cellular serviceIf your iPad has an Apple SIM card (available on iPad models with cellular and Touch ID), you can choose a carrier and sign up for cellular service right on iPad. Depending on your home carrier and your destination, you may also be able to travel abroad with iPad and sign up for cellular service with a carrier in the country you’re visiting. This isn’t available in all areas and not all carriers are supported; contact your carrier for more information.Sign up for cellular service. Go to Settings > Cellular Data, then tap Set Up Cellular Data and follow the onscreen instructions.Set up cellular service in another country. When traveling to another country, you can choose a local carrier rather than roaming. Go to Settings > Cellular Data, tap Choose a Data Plan, then select the plan you want to use. Apple SIM card kits are available for purchase at Apple Retail locations in countries with participating carriers.Get startedApple Confidential](https://usermanual.wiki/Apple/A1538.A1538-User-Manual-v1-0-Part1/User-Guide-2731522-Page-15.png)
![Chapter 2 Get started 16Connect to Wi-FiIf appears at the top of the screen, you’re connected to a Wi-Fi network. iPad reconnects anytime you return to the same location.Congure Wi-Fi. GotoSettings>Wi-Fi,thenturnWi-Fionoro.(YoucanalsoturnWi-Fi on oroinControlCenter.) •Choose a network: Tap one of the listed networks, then enter the password, if asked. •Ask to join networks: Turn on Ask to Join Networks to be prompted when a Wi-Fi networkisavailable.Otherwise,youmustmanuallyjoinanetworkwhenapreviouslyusednetworkisn’t available. •Join a closed network: Tap Other, then enter the name of the network. You need to know thenetwork name, security type, and password. •Adjust the settings for a Wi-Fi network: Tap next to a network. You can set an HTTP proxy,denestaticnetworksettings,turnonBootP,orrenewthesettingsprovidedbyaDHCPserver. •Forget a network: Tap nexttoanetworkyou’vejoinedbefore,thentapForgetthisNetwork.Set up your own Wi-Fi network. IfyouhaveaneworunconguredAirPortbasestationturnedon and within range, you can use iPad to set it up. Go to Settings > Wi-Fi, then look for Set up an AirPort base station. Tap your base station and Setup Assistant does the rest.Manage your AirPort network. If iPad is connected to an AirPort base station, go to Settings > Wi-Fi, tap next to the network name, then tap Manage this Network. If you haven’t yet downloaded AirPort Utility, tap OK to open the App Store, then download it (this requires an Internet connection).Connect to the InternetiPad connects to the Internet whenever necessary, using a Wi-Fi connection (if available) or your carrier’s cellular network. For information about connecting to a Wi-Fi network, see Connect to Wi-Fi, above.When an app needs to use the Internet, iPad does the following, in order: •Connects over the most recently used available Wi-Fi network •Shows a list of Wi-Fi networks in range, and connects using the one you choose •Connects over the cellular data network, if availableNote: If a Wi-Fi connection to the Internet isn’t available, apps and services may transfer data over your carrier’s cellular network, which may result in additional fees. Contact your carrier for information about your cellular data plan rates. To manage cellular data usage, see Cellular settings on page 166.Apple IDYourAppleIDistheaccountyouuseforjustabouteverythingyoudowithApple,includingstoring your content in iCloud, downloading apps from the App Store, and buying music, movies, and TV shows from the iTunes Store.IfyoualreadyhaveanAppleID,useitwhenyourstsetupiPad,andwheneveryouneedtosignin to use an Apple service. If you don’t already have an Apple ID, you can create one whenever you’re asked to sign in. You only need one Apple ID for everything you do with Apple. For more information, see appleid.apple.com.Apple Confidential](https://usermanual.wiki/Apple/A1538.A1538-User-Manual-v1-0-Part1/User-Guide-2731522-Page-16.png)
![Chapter 2 Get started 17iCloudiCloudoersfreemail,contacts,calendar,andotherfeaturesthatyoucansetupsimplybysigning in to iCloud with your Apple ID, then making sure that the features you want to use are turned on.Set up iCloud. Go to Settings > iCloud. Create an Apple ID if needed, or use your existing one.iCloud stores your photos and videos, documents, music, calendars, contacts, and more. Content stored in iCloud is pushed wirelessly to your other iOS devices and computers signed in to iCloud with the same Apple ID. iCloud is available on devices with iOS 5 or later, on Mac computers with OS X Lion v10.7.5 or later, and on PCs with iCloud for Windows 4.0 (Windows 7 or Windows 8 is required). You can also sign in to iCloud.com from any Mac or PC to access your iCloud information and features like Photos, Find My iPhone, Mail, Calendar, Contacts, iWork for iCloud, and more.Note: iCloud may not be available in all areas, and iCloud features may vary by area. For more information, go to www.apple.com/icloud/.iCloud features include: •Music, Movies, TV Shows, Apps, and Books: Automatically get iTunes purchases on all yourdevices set up with iCloud, or download previous iTunes music and TV show purchases forfree, anytime. With an iTunes Match subscription, all your music, including music you’veimported from CDs or purchased somewhere other than the iTunes Store, can also be storedin iCloud and played on demand. See iCloud and iTunes Match on page 72. Downloadprevious App Store and iBooks Store purchases to iPad for free, anytime. •Photos: Use iCloud Photo Library to store all your photos and videos in iCloud, and accessthem from any iOS 8.1 or later device, Mac with OS X Yosemite v10.10.3 or later, and oniCloud.com using the same Apple ID. Use iCloud Photo Sharing to share photos and videoswithjustthepeopleyouchoose,andletthemaddphotos,videos,andcomments.SeeiCloudPhoto Library on page 84. See iCloud Photo Sharing on page 85. •Family Sharing: Up to six family members can share their purchases from the iTunes Store,App Store, and iBooks Store. Pay for family purchases with the same credit card and approvekids’ spending right from a parent’s device. Plus, share photos, a family calendar, and more. SeeFamily Sharing on page 37. •iCloud Drive: Safely store your presentations, spreadsheets, PDFs, images, and other documentsin iCloud, and access them from your iPad, iPhone, iPod touch, Mac, or PC. See About iCloudDrive on page 39. •Documents in the Cloud: For iCloud-enabled apps, keep documents and app data up to dateacross all your devices set up with iCloud. •Mail, Contacts, Calendars: Keep your mail, contacts, calendars, notes, and reminders up to dateacross all your devices. •Safari Tabs: See the tabs you have open on your other iOS devices and OS X computers. SeeBrowse the web on page 61. •Backup: Back up iPad to iCloud automatically when connected to power and Wi-Fi. iCloud dataand backups sent over the Internet are encrypted. See Back up iPad on page 165.Apple Confidential](https://usermanual.wiki/Apple/A1538.A1538-User-Manual-v1-0-Part1/User-Guide-2731522-Page-17.png)
![Chapter 2 Get started 18 •Find My iPad: Locate your iPad on a map, display a message, play a sound, lock the screen,temporarily suspend or permanently remove your credit and debit cards in Passbook &Apple Pay settings used for Apple Pay, or remotely wipe your iPad data. Find My iPad includesActivationLock,whichrequiresyourAppleIDandpasswordinordertoturnoFindMyiPad or erase your device. Your Apple ID and password are also required before anyone canreactivate your iPad. See Find My iPad on page 45. •Find My Friends: Share your location with people who are important to you. Download the freeapp from the App Store. •iCloud Keychain: Keep your passwords and credit card information up to date across all yourdesignated devices. See iCloud Keychain on page 44.You must have an iCloud account and be signed in to iCloud to use Apple Pay. See Apple Pay on page 41.With iCloud, you get a free email account and 5 GB of storage for your mail, documents, photos, and backups. Your purchased music, apps, TV shows, and books, as well as your photo streams, don’t count against your available space.Upgrade your iCloud storage. Go to Settings > iCloud > Storage, then tap Change Storage Plan. For information about upgrading your iCloud storage, see help.apple.com/icloud/.View and download previous purchases, or get purchases shared by your family. •iTunes Store: You can access your purchased songs and videos in the Music and Videos apps.Or, in the iTunes Store, tap Purchased . •App Store: Go to the App Store, then tap Purchased . •iBooks Store: Go to iBooks, then tap Purchased .Turn on Automatic Downloads for music, apps, or books. Go to Settings > iTunes & App Store.For more information about iCloud, see www.apple.com/icloud/. For support information, see www.apple.com/support/icloud/.Set up other mail, contacts, and calendar accountsiPad works with Microsoft Exchange, and many of the most popular Internet-based mail, contacts, and calendar services.Set up another account. Go to Settings > Mail, Contacts, Calendars > Add Account.You can add contacts using an LDAP or CardDAV account, if your company or organization supports it. See Add contacts on page 95.You can add calendars using a CalDAV calendar account, and you can subscribe to iCalendar (.ics) calendars or import them from Mail. See Use multiple calendars on page 80.For information about setting up a Microsoft Exchange account in a corporate environment, see Mail, Contacts, and Calendar on page 154. Apple Confidential](https://usermanual.wiki/Apple/A1538.A1538-User-Manual-v1-0-Part1/User-Guide-2731522-Page-18.png)
![Chapter 2 Get started 19Manage content on your iOS devicesYoucantransferinformationandlesbetweeniPadandyourotheriOSdevicesandcomputers,using either iCloud or iTunes. •iCloud stores your photos and videos, documents, music, calendars, contacts, and more. It allgets pushed wirelessly to your other iOS devices and computers, keeping everything up todate. See iCloud on page 17. •iTunes syncs music, videos, photos, and more between your computer and iPad. Changesyou make on one device are copied to the other when you sync. You can also use iTunes tocopyaletoiPadforusewithanapp,ortocopyadocumentyou’vecreatedoniPadtoyourcomputer. See Sync with iTunes on page 20, next.You can use iCloud or iTunes, or both, depending on your needs. For example, you can use iCloud Photo Stream to automatically keep your contacts and calendars up to date on all your devices, and use iTunes to sync music from your computer to iPad.Important: To avoid duplicates, keep contacts, calendars, and notes in sync using iCloud or iTunes, but not both.You can also choose to manually manage content from iTunes by selecting that option in the iPad Summary pane. Then you can drag songs or videos from your iTunes library to iPad in iTunes.ThisisusefulifyouriTuneslibrarycontainsmoreitemsthancantonyouriPad.Note: If you use iTunes Match, you can manually manage only video.Connect iPad to your computerConnecting iPad to your computer lets you sync content using iTunes. You can also sync with iTunes wirelessly. See Sync with iTunes, above.To use iPad with your computer, you need: •An Internet connection for your computer (broadband is recommended) •A Mac with a USB 2.0 or 3.0 port, or a PC with a USB 2.0 port, and one of the followingoperating systems: •OS X version 10.6.8 or later •Windows 8, Windows 7, Windows Vista, or Windows XP Home or Professional with ServicePack 3 or later •iTunes, available at www.itunes.com/download/Connect iPad to your computer. Use the included Lightning to USB Cable or 30-pin to USB Cable.Apple Confidential](https://usermanual.wiki/Apple/A1538.A1538-User-Manual-v1-0-Part1/User-Guide-2731522-Page-19.png)
![Chapter 2 Get started 20Unless iPad is actively syncing with your computer, you can disconnect it at any time. Look at the top of the iTunes screen on your computer or on iPad to see if syncing is in progress. If you disconnect iPad while it’s syncing, some data may not get synced until the next time you connect iPad to your computer. Sync with iTunesSyncing with iTunes copies information from your computer to iPad, and vice versa. You can sync by connecting iPad to your computer, or you can set up iTunes to sync wirelessly using Wi-Fi. You can set iTunes to sync music, videos, apps, photos, and more. For help syncing iPad, open iTunes on your computer, choose Help > iTunes Help, then select Sync your iPod, iPhone, or iPad. iTunes is available at www.itunes.com/download/.Set up wireless syncing. Connect iPad to your computer. In iTunes on your computer, select your iPad, click Summary, then select Sync with this iPad over Wi-Fi.If Wi-Fi syncing is turned on, iPad syncs when it’s connected to a power source, both iPad and your computer are on and connected to the same wireless network, and iTunes is open on your computer.Tips for syncing with iTunes on your computerConnectiPadtoyourcomputer,selectitiniTunes,thensetoptionsinthedierentpanes. •If iPad doesn’t appear in iTunes, make sure you’re using the latest version of iTunes, check thatthe included cable is correctly connected, then try restarting your computer. •In the Summary pane, you can set iTunes to sync iPad automatically when it’s attached to yourcomputer. To temporarily prevent syncing when you attach the device, hold down Commandand Option (Mac) or Shift and Control (PC) until you see iPad appear in the iTunes window. •If you want to encrypt the information stored on your computer when iTunes makes a backup,select “Encrypt iPad backup” in the Summary pane. Encrypted backups are indicated by a lockicon , and a password is required to restore the backup. If you don’t select this option, otherpasswords (such as those for mail accounts) aren’t included in the backup and you’ll have toreenter them if you use the backup to restore iPad. •In the Info pane, when you sync mail accounts, only the settings are transferred from yourcomputer to iPad. Changes you make to an account on iPad don’t sync to your computer. •In the Info pane, click Advanced to select options that let you replace the information on iPadwith the information from your computer during the next sync. •In the Music pane, you can sync music using your playlists. •In the Photos pane, you can sync photos and videos from a supported app or folder onyour computer. •If you use iCloud to store your contacts, calendars, and bookmarks, don’t also sync them toiPad using iTunes. •If you turn on iCloud Photo Library, you can’t use iTunes to sync photos and videos to iPad.Date and timeThe date and time are usually set for you based on your location—take a look at the Lock screen to see if they’re correct.Apple Confidential](https://usermanual.wiki/Apple/A1538.A1538-User-Manual-v1-0-Part1/User-Guide-2731522-Page-20.png)
![Chapter 2 Get started 21Set whether iPad updates the date and time automatically. Go to Settings > General > Date & Time,thenturnSetAutomaticallyonoro.IfyousetiPadtoupdatethetimeautomatically,itgets the correct time over the network and updates it for the time zone you’re in. Some networks don’t support network time, so in some areas iPad may not be able to automatically determine the local time.Set the date and time manually. GotoSettings>General>Date&Time,thenturnoSetAutomatically. Set whether iPad shows 24-hour time or 12-hour time. Go to Settings > General > Date & Time, thenturn24-HourTimeonoro.(24-HourTimemaynotbeavailableinallareas.)International settingsGo to Settings > General > Language & Region to set: •The language for iPad •The preferred language order for apps and websites •The region format •The calendar format •Advanced settings for dates, times, and numbersTo add a keyboard for another language, go to Settings > General > Keyboard > Keyboards. For more information, see Use international keyboards on page 156.Your iPad nameThe name of your iPad is used by iTunes and iCloud.Change the name of your iPad. Go to Settings > General > About > Name.View this user guide on iPadYou can view the iPad User Guide on iPad in Safari, and in the iBooks app.View the user guide in Safari. In Safari, tap , then tap the iPad User Guide bookmark. Or go to help.apple.com/ipad/. •Add an icon for the guide to the Home screen: Tap , then tap Add to Home Screen. •View the guide in a dierent language: Tap Change Language at the bottom of the home page.View the user guide in iBooks. Open iBooks, then search for “iPad user” in the iBooks Store.For more information about iBooks, see Chapter 24, iBooks, on page 122.Tips for using iOS 8The Tips app helps you get the most from iPad. Get Tips. Open the Tips app. New tips are added weekly.Get notied when new tips arrive. GotoSettings>Notications>Tips.Apple Confidential](https://usermanual.wiki/Apple/A1538.A1538-User-Manual-v1-0-Part1/User-Guide-2731522-Page-21.png)
![322Use appsAll the apps that come with iPad—as well as the apps you download from the App Store—are on the Home screen.Start at homeTap an app to open it.Press the Home button anytime to return to the Home screen. Swipe left or right to see other screens.MultitaskingiPad helps you manage several tasks at the same time.BasicsApple Confidential](https://usermanual.wiki/Apple/A1538.A1538-User-Manual-v1-0-Part1/User-Guide-2731522-Page-22.png)
![Chapter 3 Basics 23View contacts and open apps. Double-click the Home button to reveal the multitasking screen. Swipe left or right to see more. To switch to another app, tap it. To connect with a recent or favorite contact, tap the contact’s picture or name, then tap your preferred method of communication.Close an app. If an app isn’t working properly, you can force it to quit. Drag the app up from the multitasking screen. Then try opening the app again.Ifyouhavelotsofapps,youcanuseSpotlighttondandopenthem.DragdownthecenteroftheHomescreentoseethesearcheld.SeeSpotlight Search on page 33.Look aroundDrag a list up or down to see more. Swipe to scroll quickly; touch the screen to stop it. Some lists haveanindex—tapalettertojumpahead.Drag a photo, map, or webpage in any direction to see more.Toquicklyjumptothetopofapage,tapthestatusbaratthetopofthescreen.Apple Confidential](https://usermanual.wiki/Apple/A1538.A1538-User-Manual-v1-0-Part1/User-Guide-2731522-Page-23.png)
![Chapter 3 Basics 24Zoom in or outPinch open on a photo, webpage, or map for a close-up—then pinch closed to zoom back out. In Photos, keep pinching to see the collection or album the photo’s in.Or double-tap a photo or webpage to zoom in, then double-tap again to zoom out. In Maps, double-taptozoomin,thentaponcewithtwongerstozoomout.Multitasking gesturesYou can use multitasking gestures on iPad to return to the Home screen, reveal the multitasking display, or switch to another app. Return to the Home screen. Pinchfourorvengerstogether.Reveal the multitasking display. Swipeupwithfourorvengers.Switch apps. Swipeleftorrightwithfourorvengers.Turn multitasking gestures on or o. Go to Settings > General > Multitasking Gestures.Change the screen orientationManyappsgiveyouadierentviewwhenyourotateiPad.Lock the screen orientation. Swipe up from the bottom edge of the screen to open Control Center, then tap .The orientation lock icon appears in the status bar when the screen orientation is locked.YoucanalsosettheSideSwitchtolockthescreenorientationinsteadofsilencingsoundeectsandnotications.GotoSettings>Generalthen,under“UseSideSwitchto,”tapLockRotation.Apple Confidential](https://usermanual.wiki/Apple/A1538.A1538-User-Manual-v1-0-Part1/User-Guide-2731522-Page-24.png)
![Chapter 3 Basics 25App extensionsSome apps let you extend the functionality of your apps on iPad. An app extension may appear asasharingoption,actionoption,awidgetinNoticationCenter,aleprovider,oracustomkeyboard. For example, if you download Pinterest to iPad, Pinterest becomes another option for sharing when you click .Sharing optionsSharing optionsAction optionsAction optionsApp extensions can also help you edit a photo or video in your Photos app. For example, you can downloadaphoto-relatedappthatletsyouapplylterstophotosfromyourPhotosapp.Install app extensions. Download the app from the App Store, open the app, then follow the onscreen instructions.Turn sharing or action options on or o. Tap , then tap More (drag options to the left if necessary).Turnothird-partysharingoractionoptions(theyareonbydefault).Organize sharing and action options. Tap , then tap More (drag icons to the left if necessary). Touch and drag to rearrange your options.FormoreinformationaboutNoticationCenterwidgets,seeNoticationCenter on page 35. For more information about Sharing options, see Share from apps on page 36.ContinuityAbout Continuity featuresContinuity features connect iPad with your iPhone, iPod touch, and Mac so they can work together as one. You can start an email or document on iPad, for example, then pick up where youleftoonyouriPodtouchorMac.OrletiPaduseiPhonetomakephonecallsorsendSMSor MMS text messages.Continuity features require iOS 8 or OS X Yosemite, and work with iPhone 5 or later, iPod touch (5th generation) or later, iPad (4th generation) or later, and supported Mac computers. For more information, see support.apple.com/kb/HT6337.HandoPickupononedevicewhereyouleftoonanother.YoucanuseHandowithMail,Safari,Pages,Numbers, Keynote, Maps, Messages, Reminders, Calendar, Contacts, and even some third-party apps.ForHandotowork,yourdevicesmustbesignedintoiCloudusingthesameAppleID,and they must be within Bluetooth range of one another (about 33 feet or 10 meters).Apple Confidential](https://usermanual.wiki/Apple/A1538.A1538-User-Manual-v1-0-Part1/User-Guide-2731522-Page-25.png)
![Chapter 3 Basics 26Switch devices. Swipe up from the bottom-left edge of the Lock screen (where you see the app’s activity icon), or go to the multitasking screen, then tap the app. On your Mac, open the app you were using on your iOS device.Disable Hando on your devices. GotoSettings>General>Hando&SuggestedApps.Disable Hando on your Mac. GotoSystemPreferences>General,thenturnoAllowHandobetween this Mac and your devices set up with iCloud.Phone callsWith Continuity, you can make and receive phone calls on your other iOS devices and Mac computers. Calls are relayed through your iPhone, which must be turned on and connected to a cellular network. All devices must be on the same Wi-Fi network, and signed in to FaceTime and iCloud using the same Apple ID. (On iPhone, make sure Allow Wi-Fi Calls, if that setting appears, isturnedo.GotoSettings>Phone>Wi-FiCalls.)Make a phone call on iPad. Tap a phone number in Contacts, Calendar, FaceTime, Messages, Spotlight, or Safari. You can also tap a recent contact in the multitasking screen.Disable iPhone Cellular Calls. OnyouriPhone,gotoSettings>FaceTime,thenturnoiPhoneCellular Calls.MessagesIf your iPhone (with iOS 8) is signed into iMessage using the same Apple ID as your iPad, you can also send and receive SMS and MMS messages on your iPad. Charges may apply to the text messaging service for your iPhone.Instant HotspotYou can use Instant Hotspot on your iPhone (with iOS 8) or iPad (cellular models with iOS 8) to provide Internet access to your other iOS devices and Mac computers (with iOS 8 or OS X Yosemite) that are signed into iCloud using the same Apple ID. Instant Hotspot uses your iPhone or iPad Personal Hotspot, without you having to enter a password or even turn on Personal Hotspot.Use Instant Hotspot. Go to Settings > Wi-Fi on your iOS device without cellular capabilities, then simply choose your iPhone or iPad network under Personal Hotspots. On your Mac, choose your iPhone or iPad network from your Wi-Fi settings.When you’re not using using the hotspot, your devices disconnect to save battery life. For more information about ways to set up a Personal Hotspot see Personal Hotspot on page 40.Note: This feature may not be available with all carriers. Additional fees may apply. Contact your carrier for more information.Apple Confidential](https://usermanual.wiki/Apple/A1538.A1538-User-Manual-v1-0-Part1/User-Guide-2731522-Page-26.png)
![Chapter 3 Basics 27Customize iPadArrange your appsArrange apps. TouchandholdanyappontheHomescreenuntilitjiggles,thendragappsaround.DraganapptotheedgeofthescreentomoveittoadierentHomescreen,ortotheDock at the bottom of the screen. Press the Home button to save your arrangement.Create a new Home screen. While arranging apps, drag an app to the right edge of the last Home screen. The dots above the Dock show which of your Home screens you’re viewing.When iPad is connected to your computer, you can customize the Home screen using iTunes. In iTunes, select iPad, then click Apps.Start over. Go to Settings > General > Reset, then tap Reset Home Screen Layout to return the Home screen and apps to their original layout. Folders are removed and the original wallpaper is restored.Organize with foldersCreate a folder. While arranging apps, drag one app onto another. Tap the name of the folder to renameit.Dragappstoaddorremovethem.PresstheHomebuttonwhenyounish.You can have multiple pages of apps in a folder.Apple Confidential](https://usermanual.wiki/Apple/A1538.A1538-User-Manual-v1-0-Part1/User-Guide-2731522-Page-27.png)
![Chapter 3 Basics 28Delete a folder. Drag out all the apps—the folder is deleted automatically.Change the wallpaperWallpaper settings let you set an image or photo as wallpaper for the Lock screen or Home screen. You can choose from dynamic and still images.Change the wallpaper. Go to Settings > Wallpaper > Choose a New Wallpaper.When choosing an image for new wallpaper, the Perspective Zoom button determines whether your selected wallpaper is zoomed. For wallpaper you already set, go to the Wallpaper setting, then tap the image of the Lock screen or Home screen to see the Perspective Zoom button.Note: The Perspective Zoom button doesn’t appear if Reduce Motion (in Accessibility settings) is turned on. See Reduce screen motion on page 145.Adjust the screen brightnessDim the screen to extend battery life, or use Auto-Brightness.Adjust the screen brightness. Go to Settings > Display & Brightness, then drag the slider. If Auto-Brightnessison,iPadadjuststhescreenbrightnessforcurrentlightconditionsusingthebuilt-inambientlightsensor.YoucanalsoadjustthebrightnessinControlCenter.Type textThe onscreen keyboard lets you enter text when needed.Apple Confidential](https://usermanual.wiki/Apple/A1538.A1538-User-Manual-v1-0-Part1/User-Guide-2731522-Page-28.png)