Apple A1954 Tablet Device User Manual iPad User Guide
Apple Inc. Tablet Device iPad User Guide
UserManual.wiki
>
Apple
>
A1954 User Manual
>
Users Manual 4
Contents
1.
Users Manual 1
2.
Users Manual 2
3.
Users Manual 3
4.
Users Manual 4
5.
Users Manual 5
6.
Users Manual 6
7.
Users Manual 7
8.
Users Manual 8
9.
Users Manual 9
Users Manual 4
Navigation menu
Upload a User Manual
Namespaces
Wiki Guide
HTML
PDF
Info
Views
User Manual
Discussion / Help
Navigation

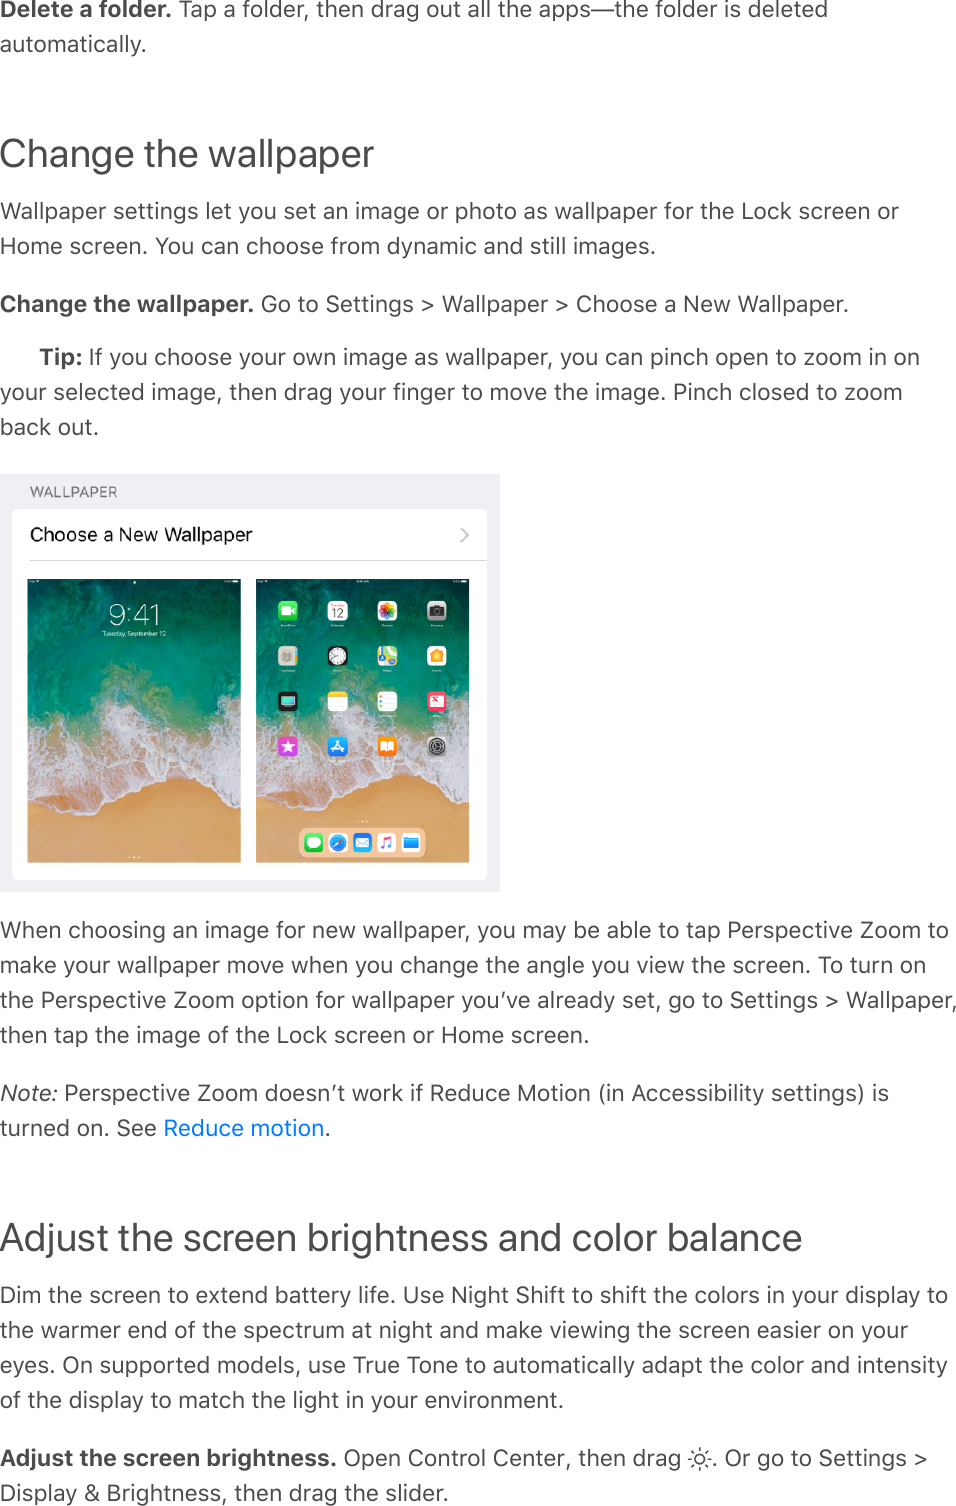

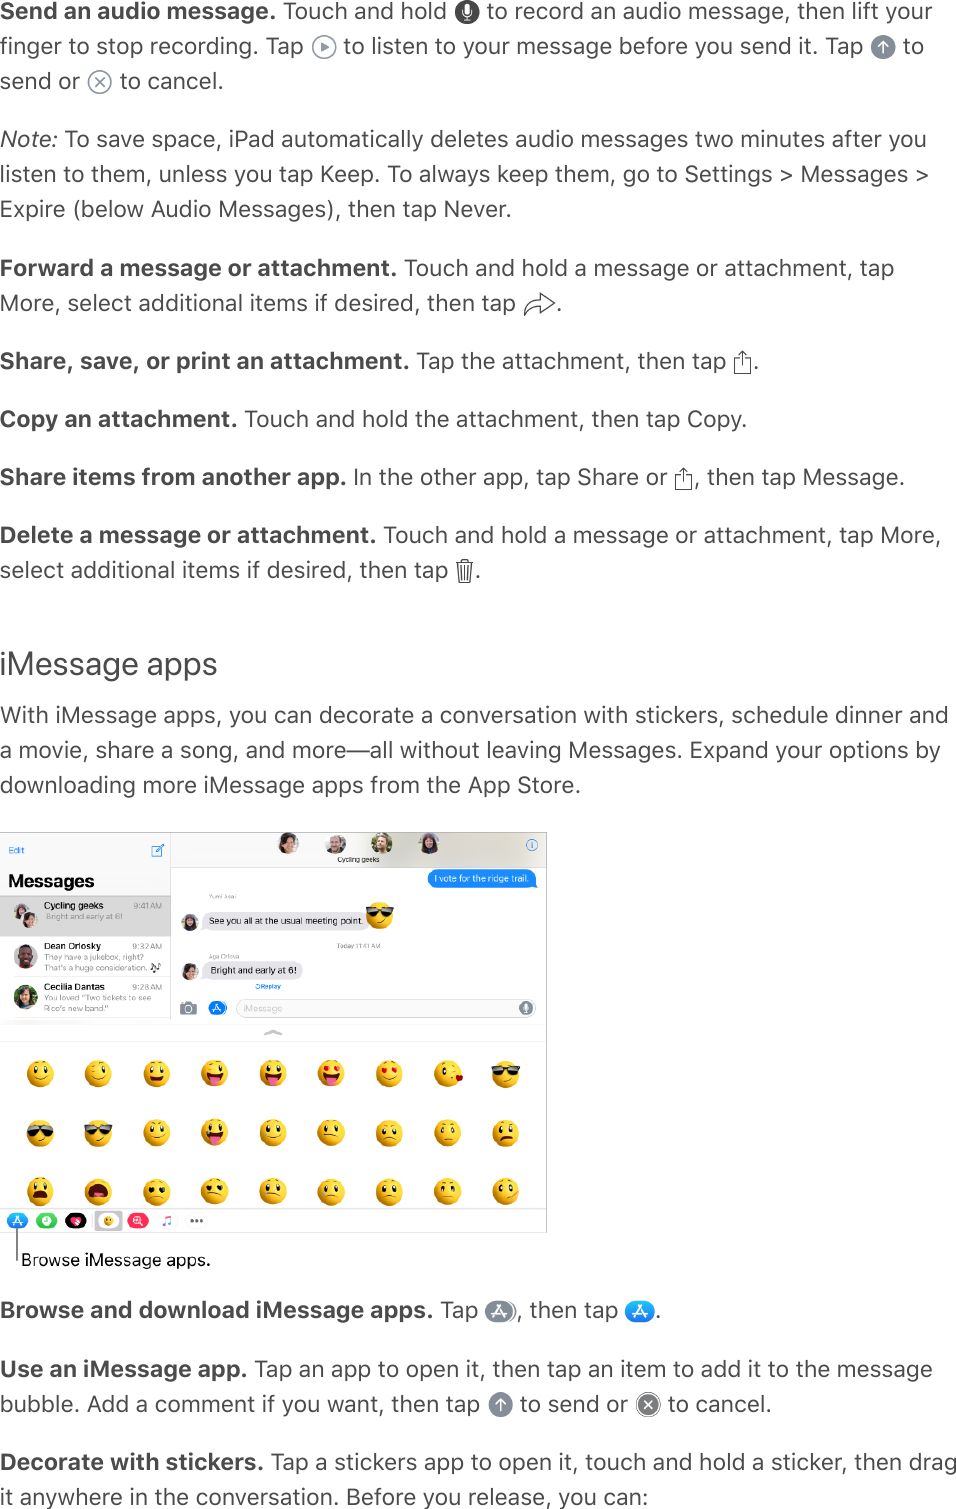
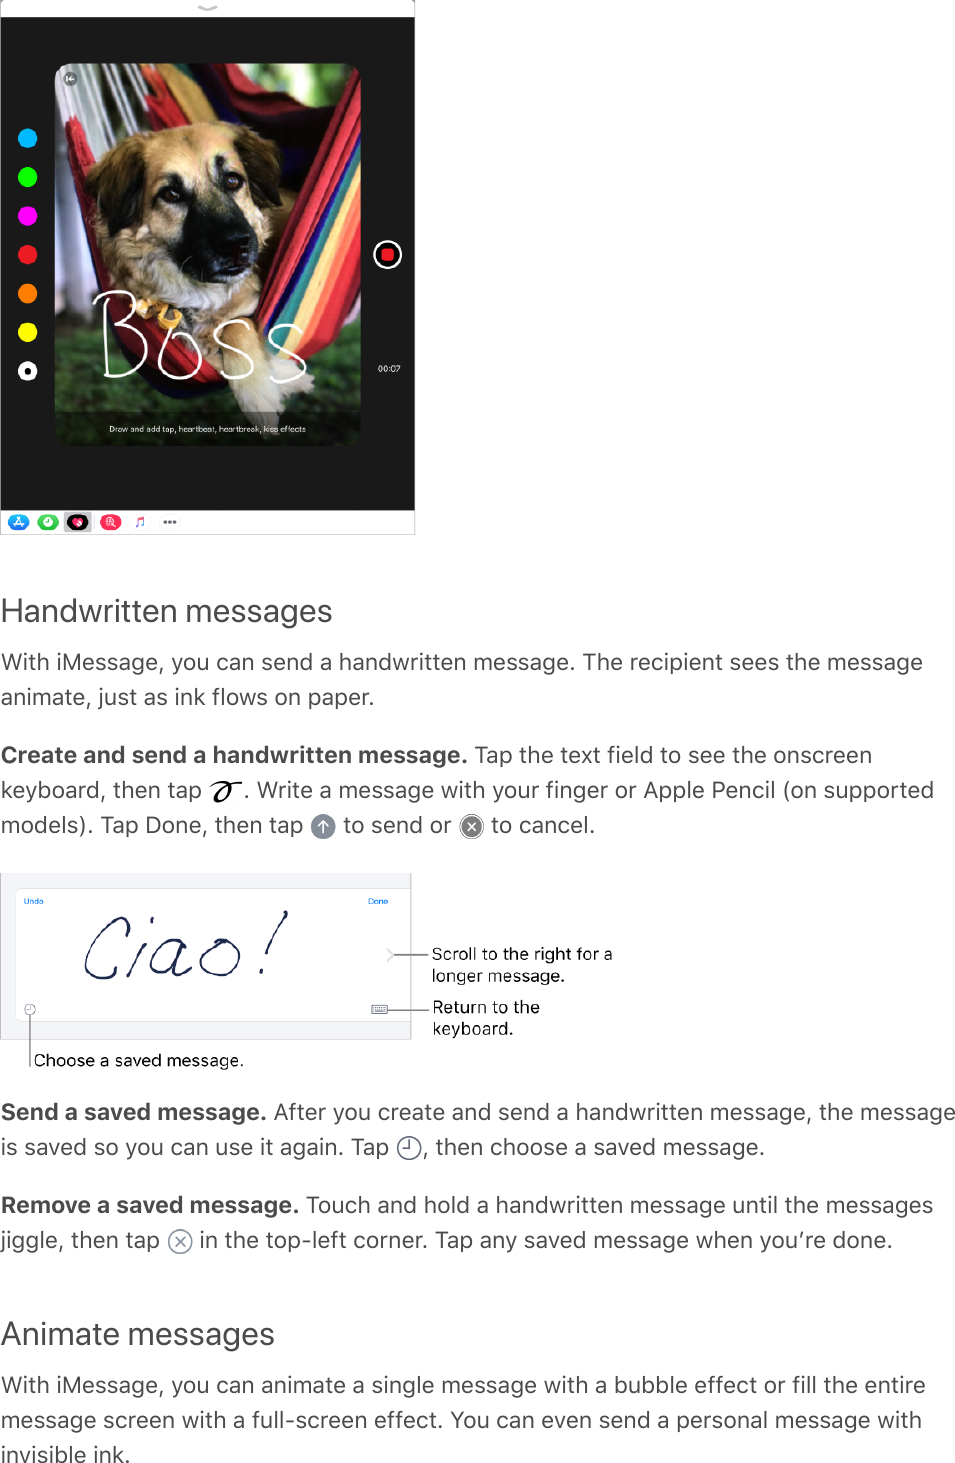
![Use Messages in iCloud. Go to Settings > [your name] > iCloud, then turn on Messages(if itʼs not already turned on).Using Messages in iCloud frees up space on your iPad by storing your messages iniCloud, along with the accompanying photos and other attachments. With Messages iniCloud turned on, all the messages you send and receive on iPad appear on your otherApple devices where youʼre signed in to iMessage with the same Apple ID. Messages youdelete from iPad are removed from your other Apple devices.Share photos, videos, and audioWith iMessage or MMS, you can send messages with photos, videos, and audio. Yourcarrier determines the size limit of attachments; iPad may compress photo and videoattachments when necessary.Send a photo or video. Tap . You can:Take a photo within Messages: Frame the shot in the viewfinder, then tap .Choose a recent photo or video: Swipe left to browse through recent shots.Take a photo or video using Camera: Tap Camera.Choose a photo or video from your Photo Library: Tap Photos.Then, tap to send or to cancel.Mark up a photo. Tap the photo in the message bubble, then tap Markup. Draw on thephoto with the Markup tools. See .Find and share trending photos and videos from the web. See .Use MarkupiMessage apps](https://usermanual.wiki/Apple/A1954.Users-Manual-4/User-Guide-3766077-Page-16.png)
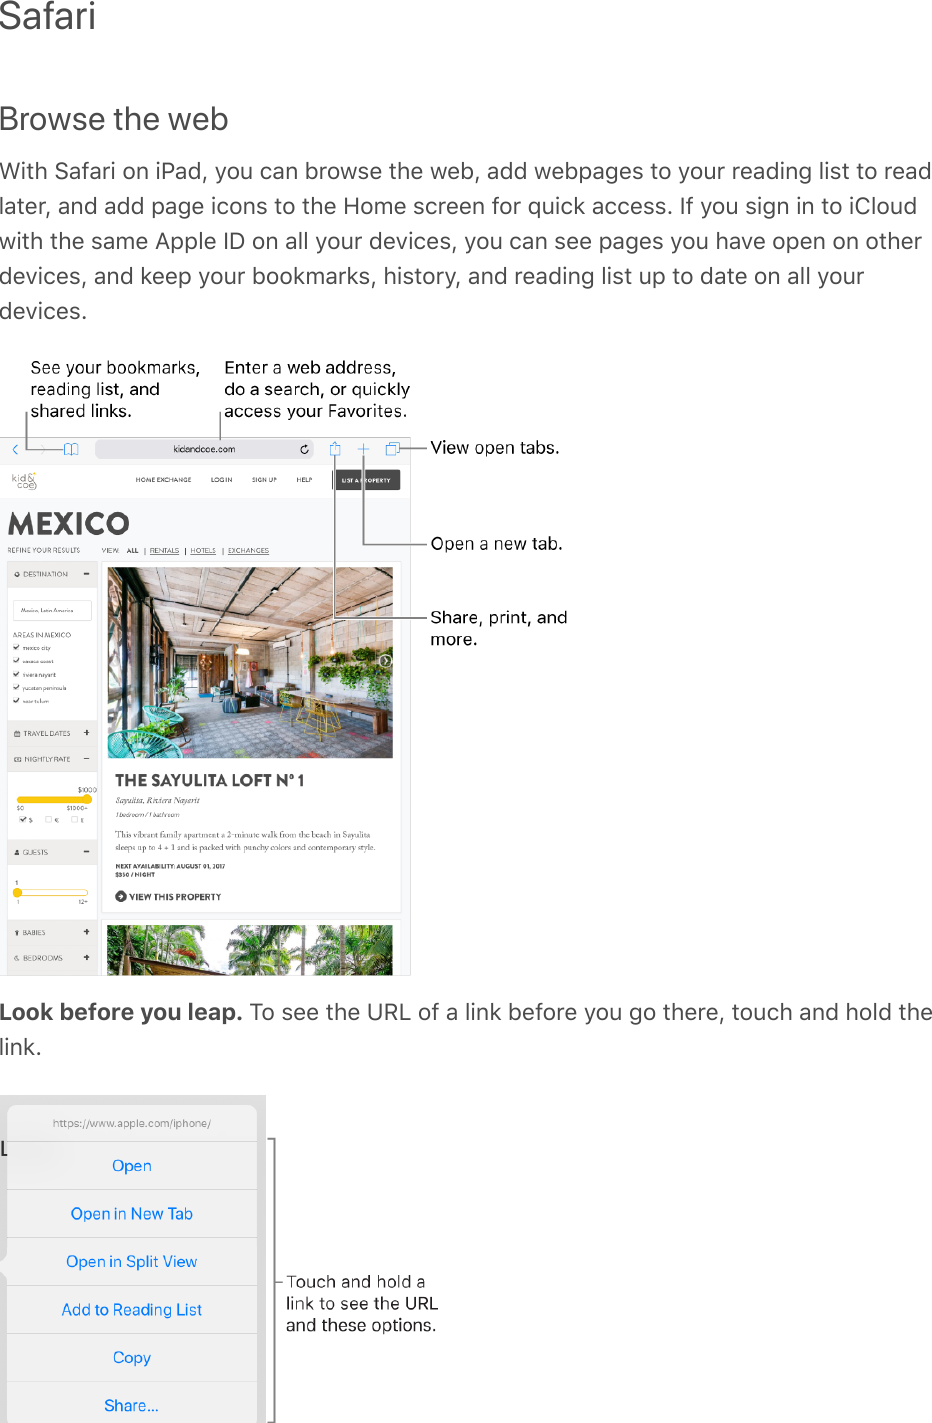
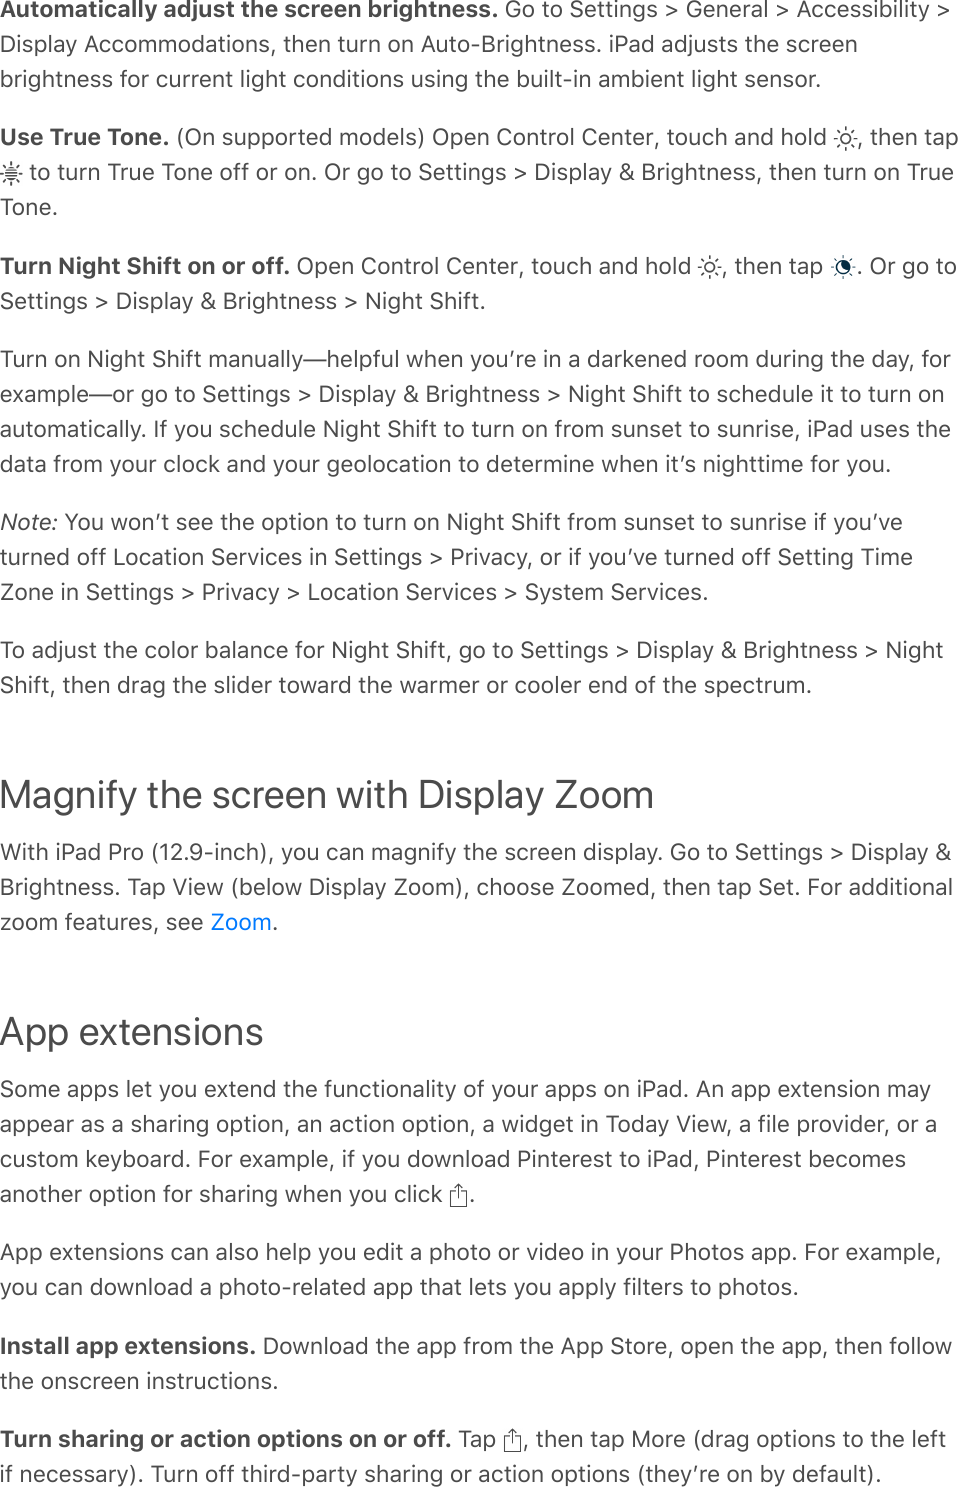
![Open a link in a new tab. Touch and hold the link, then tap Open in New Tab. Or, tap thelink with two fingers. To automatically switch to the new tab whenever you open a link in anew tab, go to Settings > Safari, then turn off Open New Tabs In Background.View two pages side-by-side. Turn iPad to landscape orientation. You can:Open a link in Split View: Touch and hold the link, then tap Open in Split View.Open a blank page in Split View: Touch and hold , then tap Open Split View.Move a tab to the other side of Split View: Drag the tab left or right from the tab bar.Merge or close all tabs: Touch and hold .Browse open tabs. Tap , or pinch closed with three fingers to view all your open tabs.If you have several open tabs, tabs for the same site are stacked.Close a tab: Tap in the upper-left corner, or swipe left on the tab.Return to viewing a single tab: Tap a tab, tap Done, or pinch open with three fingers.View tabs that are open on your other devices. If you sign in to iCloud with the sameApple ID on all your devices, and you turn on Safari in Settings > [your name] > iCloud oniPad, you can view tabs that are open on your other devices. Tap , then scroll to the listat the bottom. To close a tab, swipe left, then tap Close.Reopen a recently closed tab. Touch and hold , then choose from the list of recentlyclosed tabs.Get back to the top. Double-tap the top edge of the screen to quickly return to the topof a long page.See more of the page. Turn iPad to landscape orientation.Refresh the page. Tap next to the address in the search field.See a tabʼs history. Touch and hold or .Share links. Tap .View the desktop version of a site. To see the full desktop version of a site instead ofthe mobile version, tap , then tap Request Desktop Site.Show or hide the tab bar. Go to Settings > Safari, then turn Show Tab Bar on or off.Block pop-ups. Go to Settings > Safari, then turn on Block Pop-ups.](https://usermanual.wiki/Apple/A1954.Users-Manual-4/User-Guide-3766077-Page-25.png)
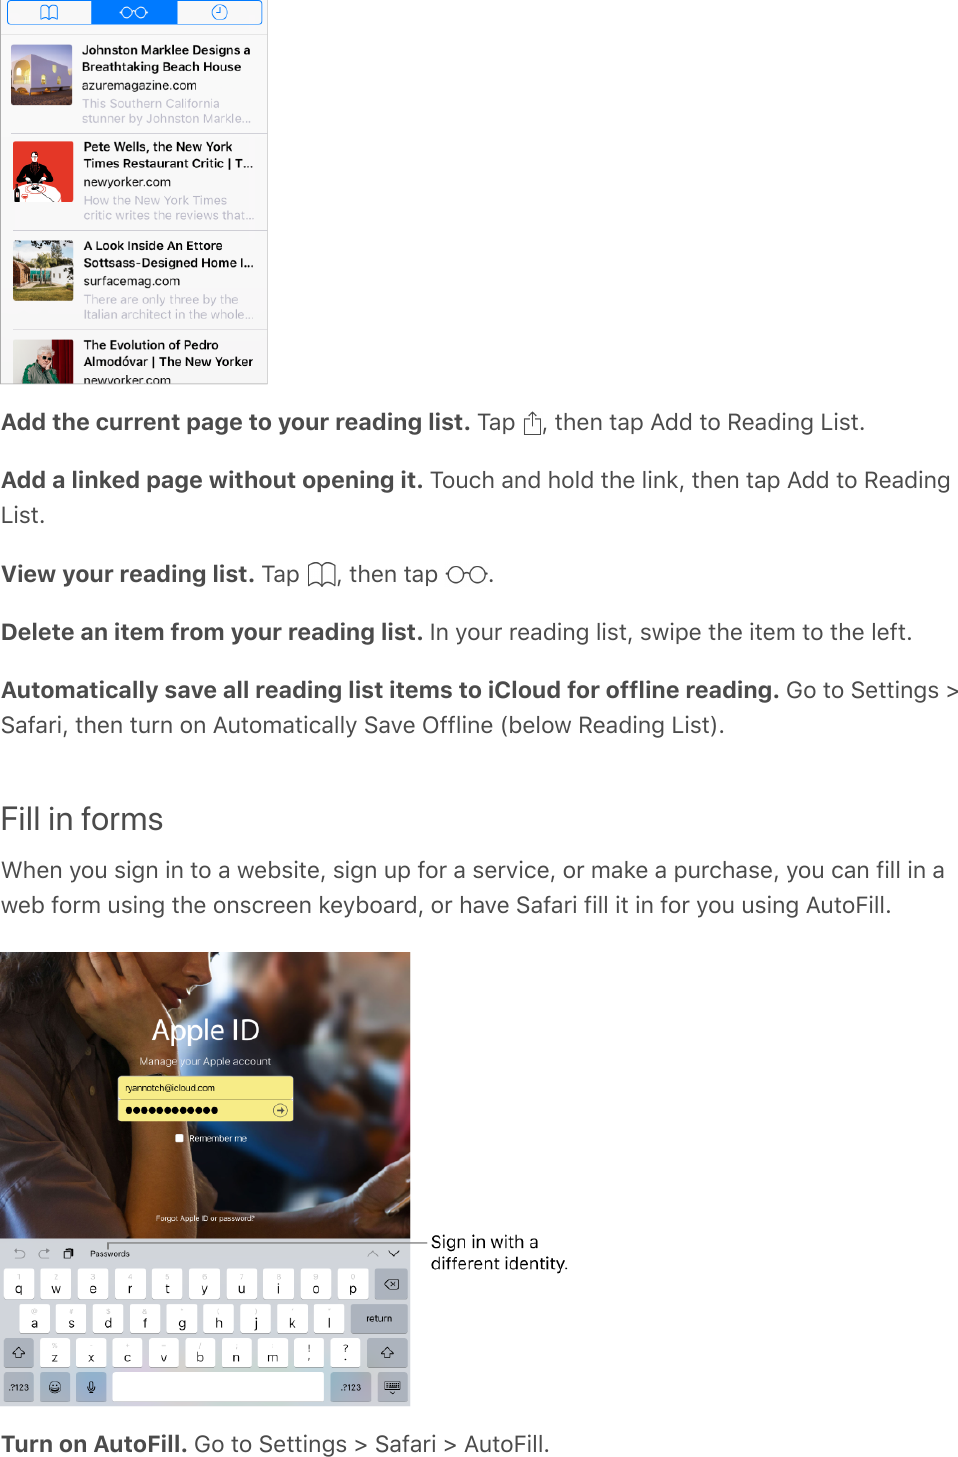
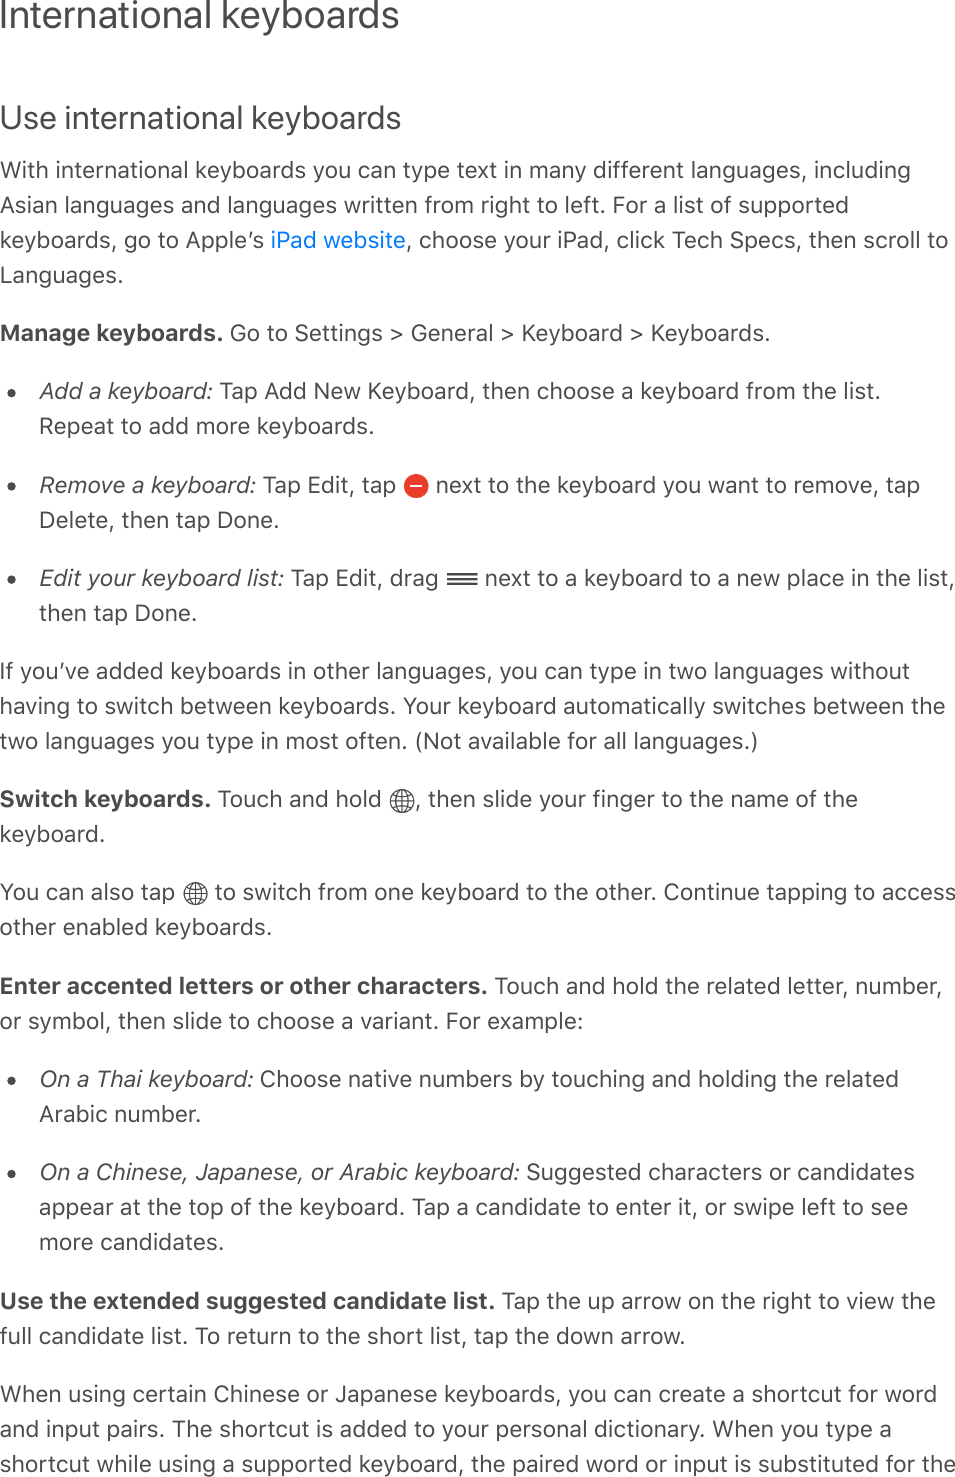
![Add bookmarks and favoritesBookmark the current page. Touch and hold , then tap Add Bookmark.View and organize your bookmarks. Tap , then tap the Bookmarks tab. To create anew folder or delete, rename, or reorder bookmarks, tap Edit.Add a webpage to your favorites. Open the page, tap , then tap Add to Favorites.Quickly see your favorite and frequently visited sites. Tap the search field to see yourfavorites. Scroll down to see frequently visited sites. (To avoid seeing a list of these sites,go to Settings > Safari, then turn off Frequently Visited Sites.)Edit your favorites. Tap , tap the Bookmarks tab, tap Favorites, then tap Edit todelete, rename, or rearrange your favorites.See your Mac bookmarks on iPad. Go to Settings > [your name] > iCloud, then turn onSafari.Add an icon for the current page to your Home screen. To quickly access the pagefrom your Home screen, tap , then tap Add to Home Screen. The icon appears only onthe device where you add it.Save a reading list for laterSave interesting items in your reading list so you can revisit them later. You can even savethe items in your reading list to iCloud and read them later when youʼre not connected tothe Internet.](https://usermanual.wiki/Apple/A1954.Users-Manual-4/User-Guide-3766077-Page-27.png)