Apple A1954 Tablet Device User Manual iPad User Guide
Apple Inc. Tablet Device iPad User Guide
UserManual.wiki
>
Apple
>
A1954 User Manual
>
Users Manual 7
Contents
1.
Users Manual 1
2.
Users Manual 2
3.
Users Manual 3
4.
Users Manual 4
5.
Users Manual 5
6.
Users Manual 6
7.
Users Manual 7
8.
Users Manual 8
9.
Users Manual 9
Users Manual 7
Navigation menu
Upload a User Manual
Namespaces
Wiki Guide
HTML
PDF
Info
Views
User Manual
Discussion / Help
Navigation
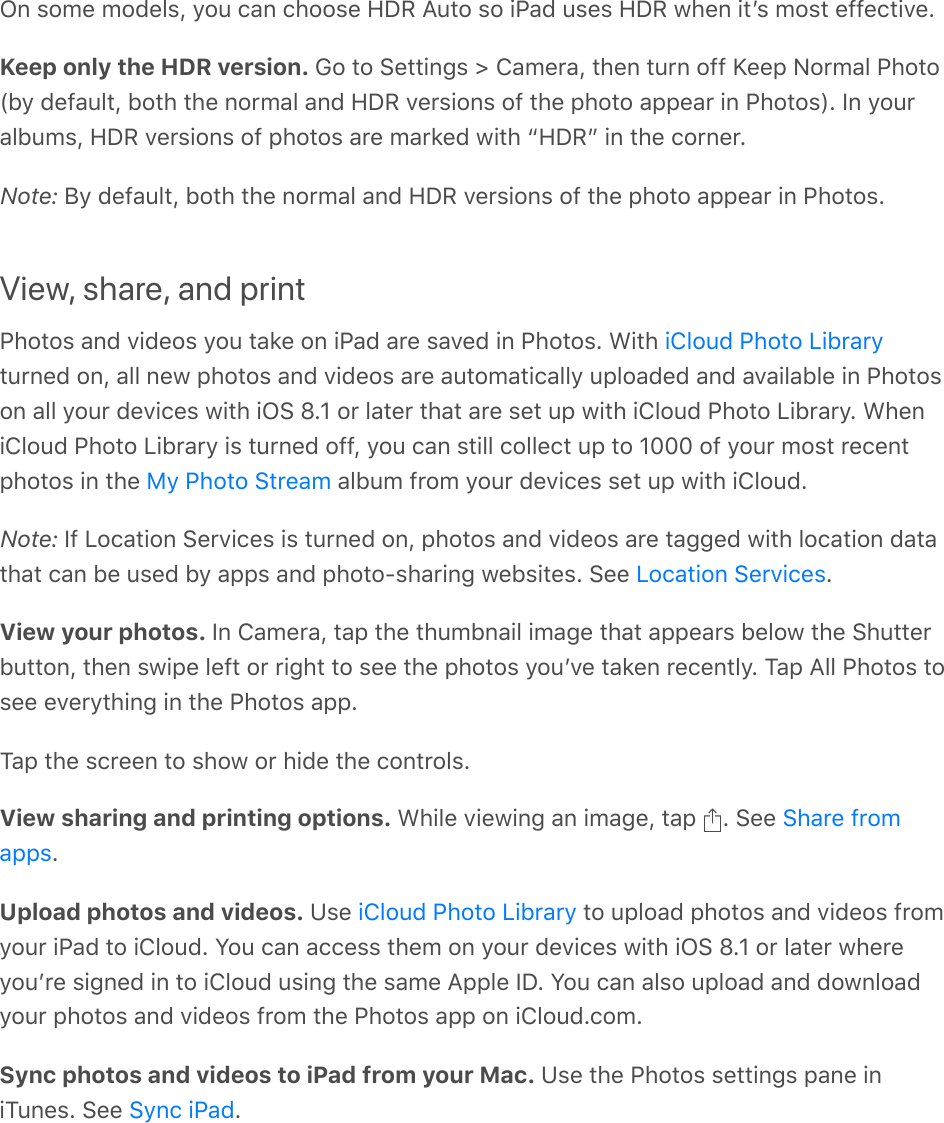
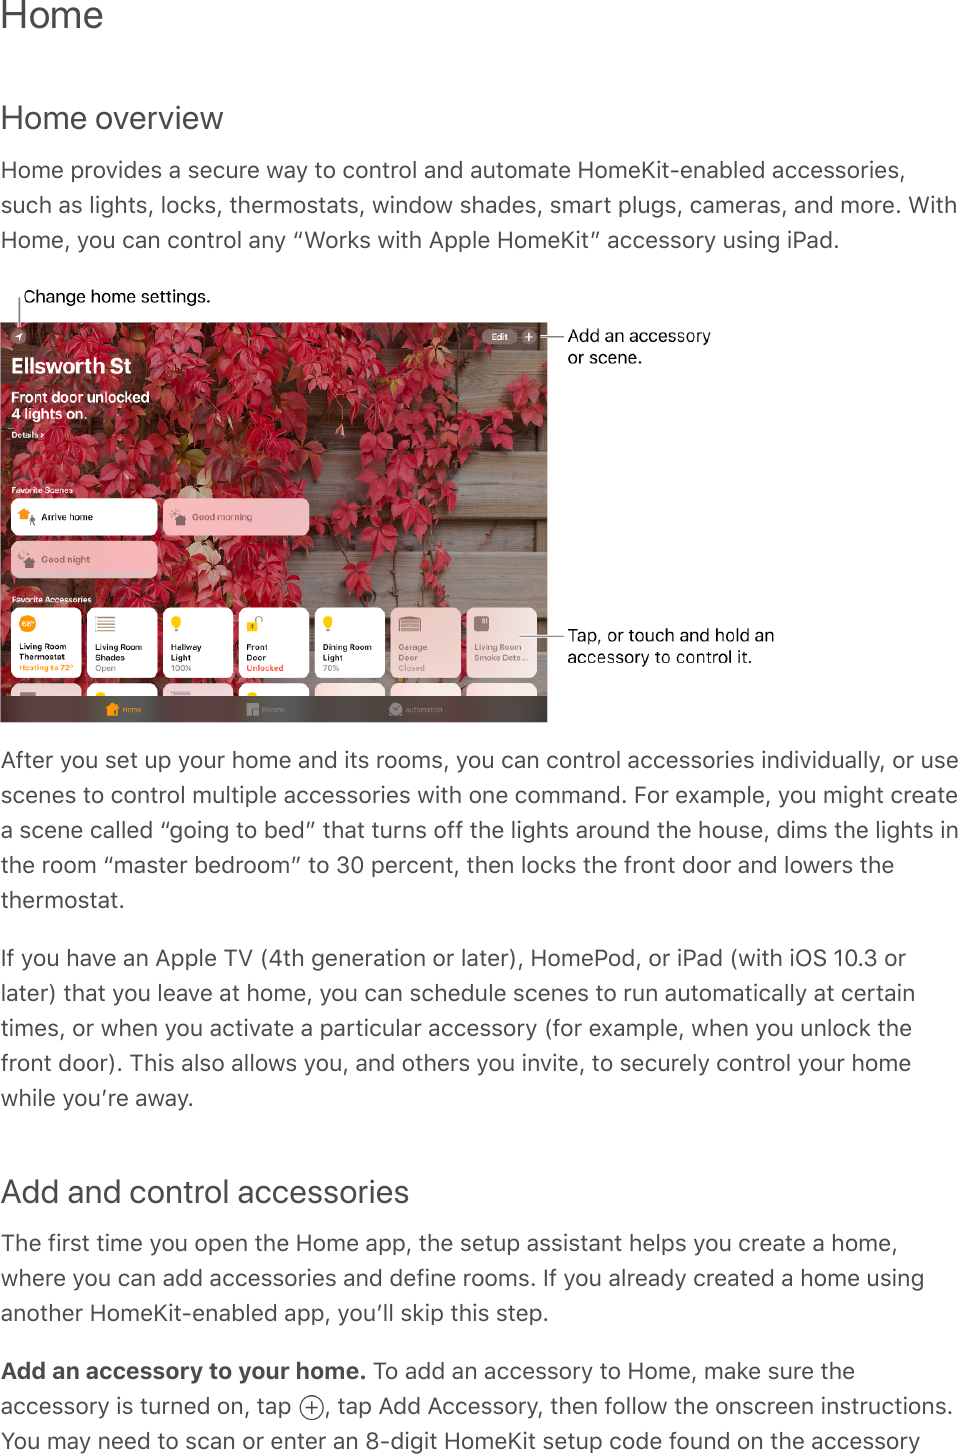
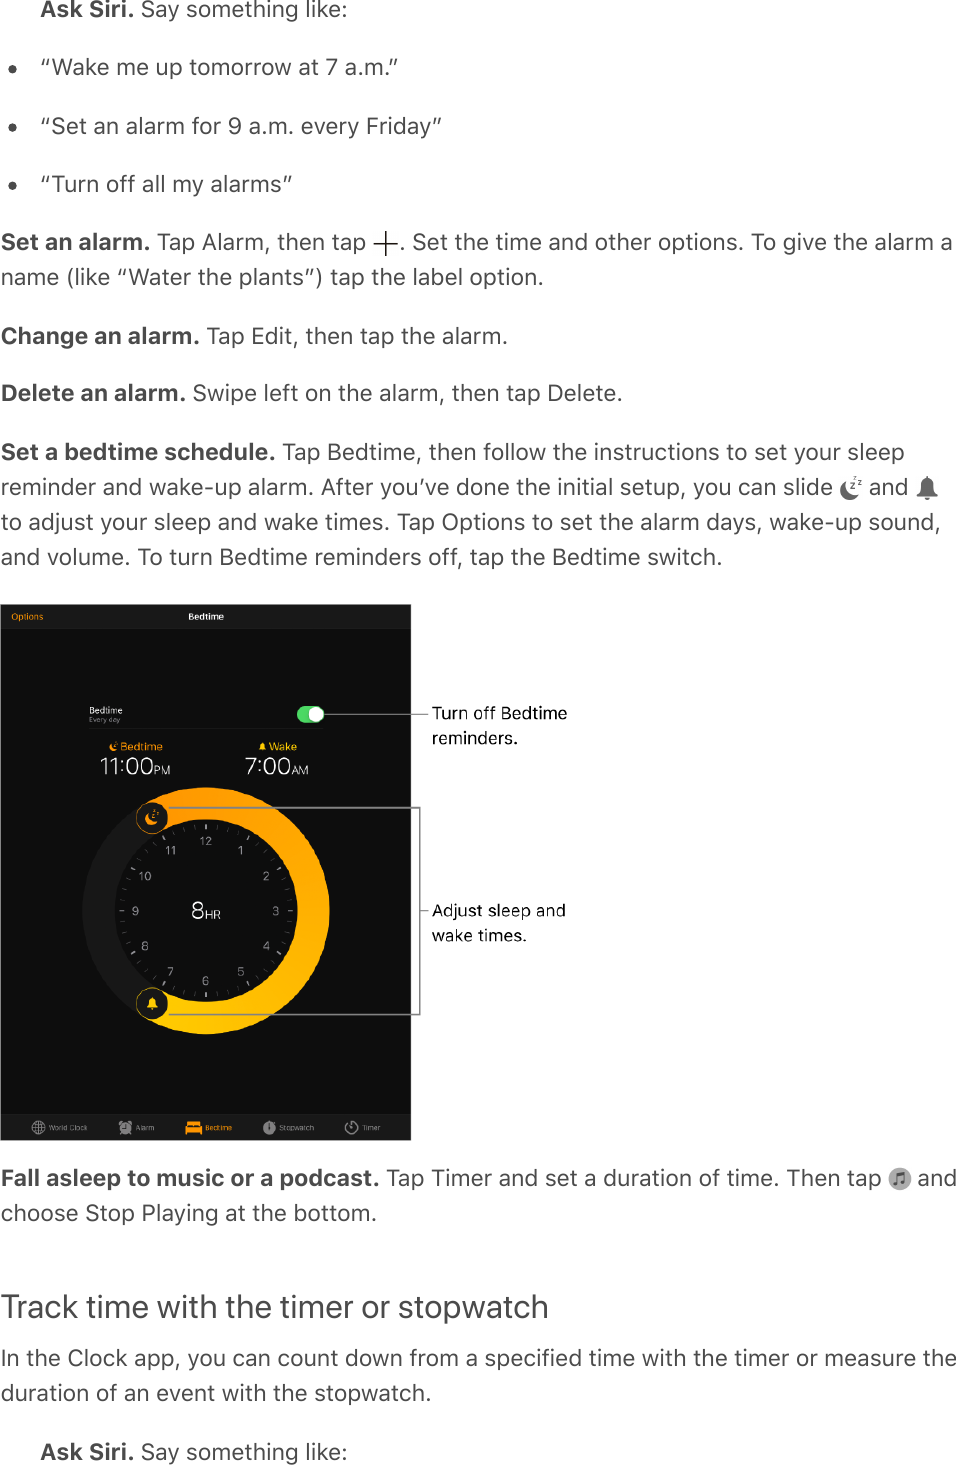
![Quickly reach a contact. Tap one of the buttons below the contactʼs name to start amessage, call, video call, or email. To change the default contact method (for a call, forexample), touch and hold the call button, then tap a phone number.If you use a third-party app to make video or audio calls, send messages, or send email,you may be able to set that app as the default.Change how your contacts are sorted and displayed. Go to Settings > Contacts.Share a contact. Tap a contact, then tap Share Contact. See . Sharing acontact shares all the info from the contactʼs card.Assign a photo to a contact. Tap a contact, tap Edit, then tap “add photo.” You can takea photo or add one from the Photos app.Change a label. If a field has the wrong label, such as Home instead of Work, tap Edit.Then tap the label and choose one from the list, or tap Custom Field to create one of yourown.Add your friendsʼ social profiles. While viewing a contact, tap Edit, then tap “add socialprofile.”Delete a contact. Go to the contactʼs card, then tap Edit. Scroll down, then tap DeleteContact.Add your contact infoiPad uses your Apple ID to create your My Card, but you may need to provide yourcontact information to complete it.Complete your My Card. Open Contacts, tap My Card at the top of your contacts list,then tap Edit. Contacts suggests addresses and phone numbers to help you set up yourMy Card.If there is no My Card, tap , then enter your information. To create a My Card with thisinformation, go to Settings > Contacts, tap My Info, then tap your name in the Contactslist.Edit your My Card. In Contacts, tap My Card at the top of your contacts list, then tapEdit.Add contact accountsBesides adding contacts individually, you can:Use your iCloud contacts: Go to Settings > [your name] > iCloud, then turn onContacts.Share from apps](https://usermanual.wiki/Apple/A1954.Users-Manual-7/User-Guide-3766080-Page-6.png)
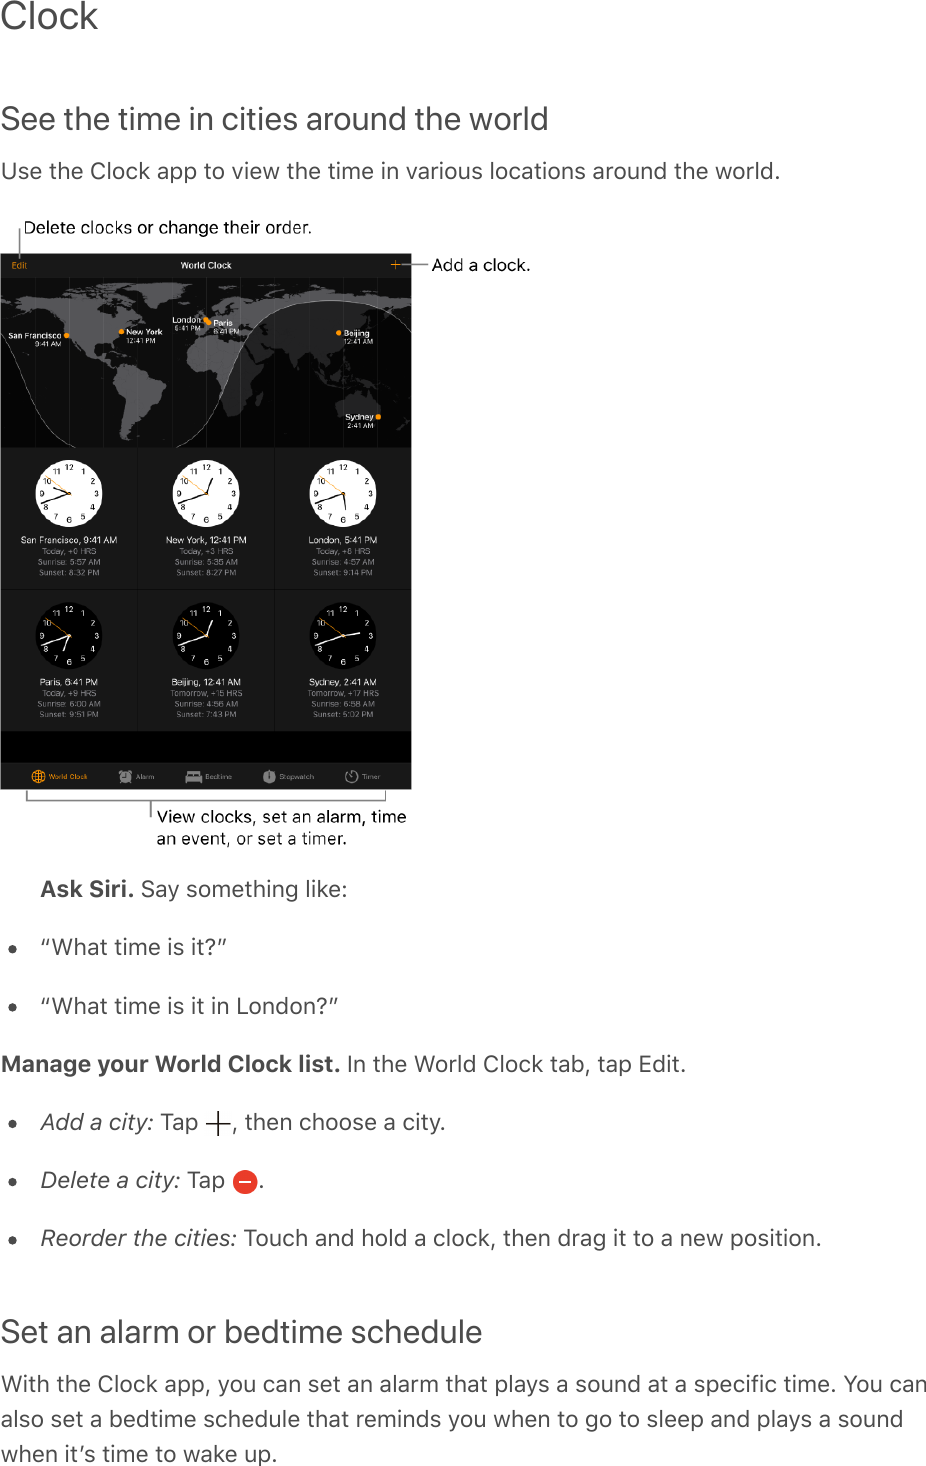
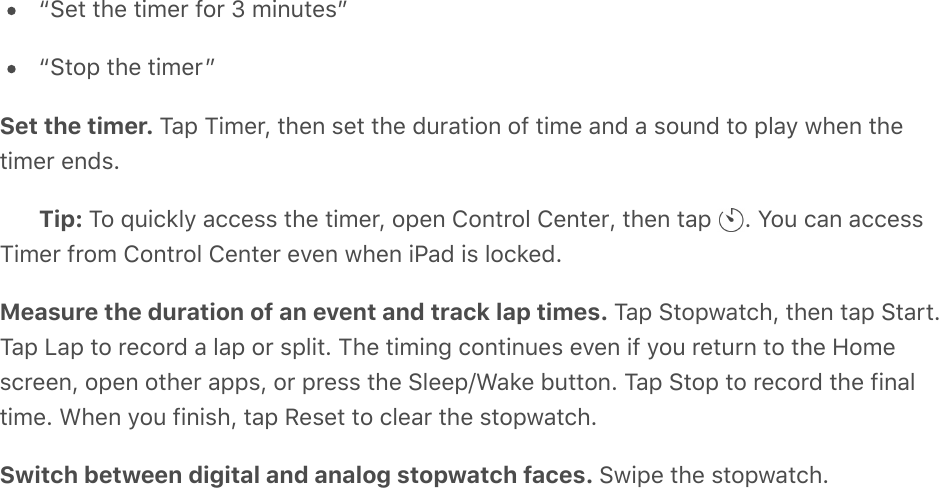
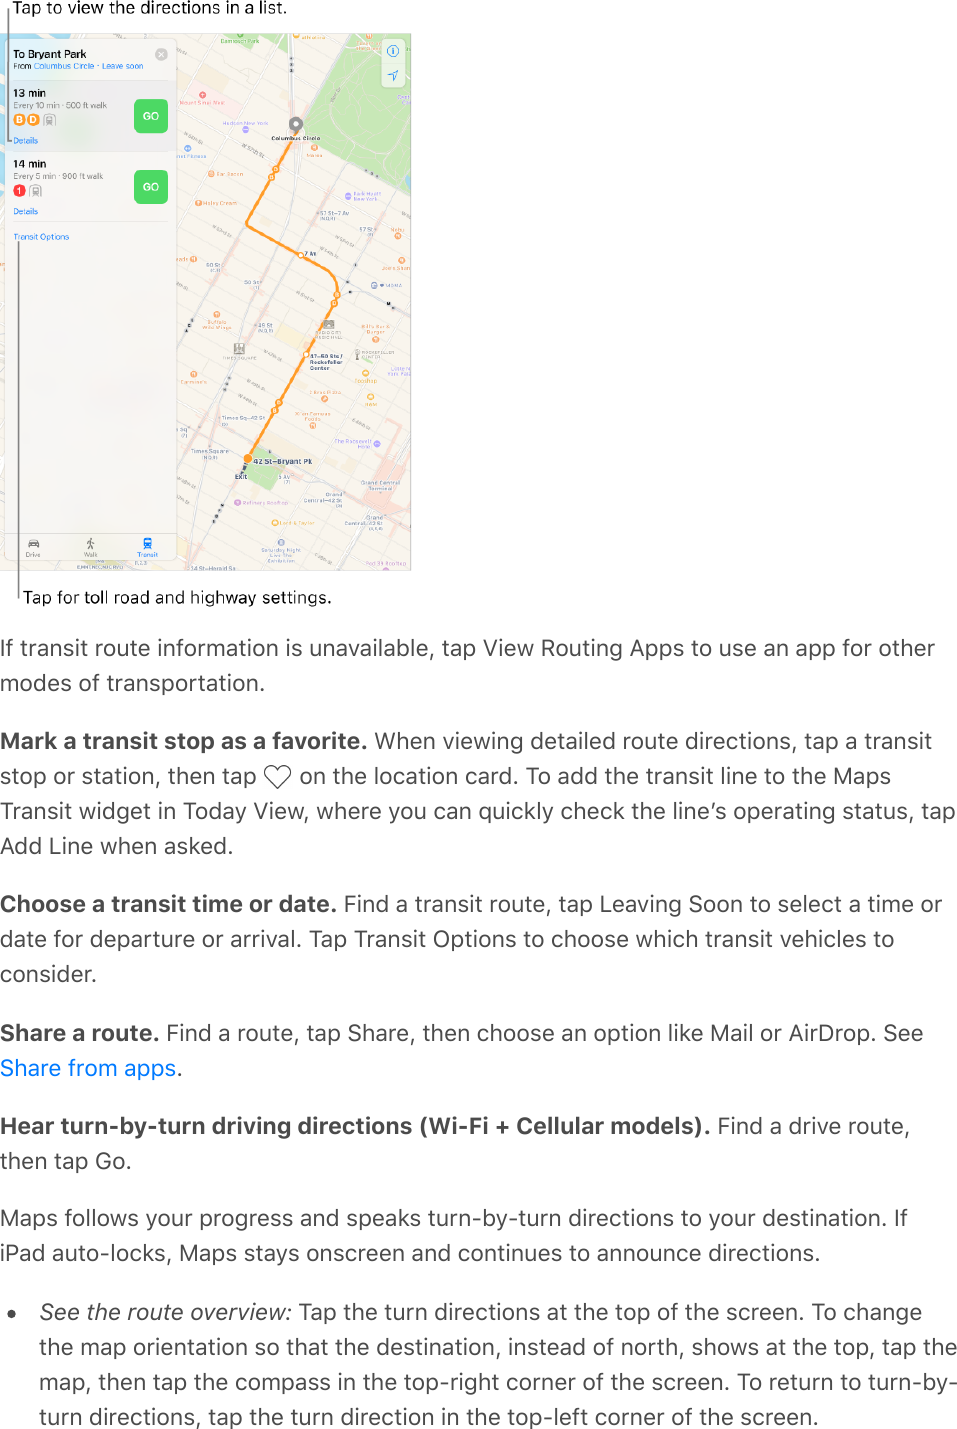
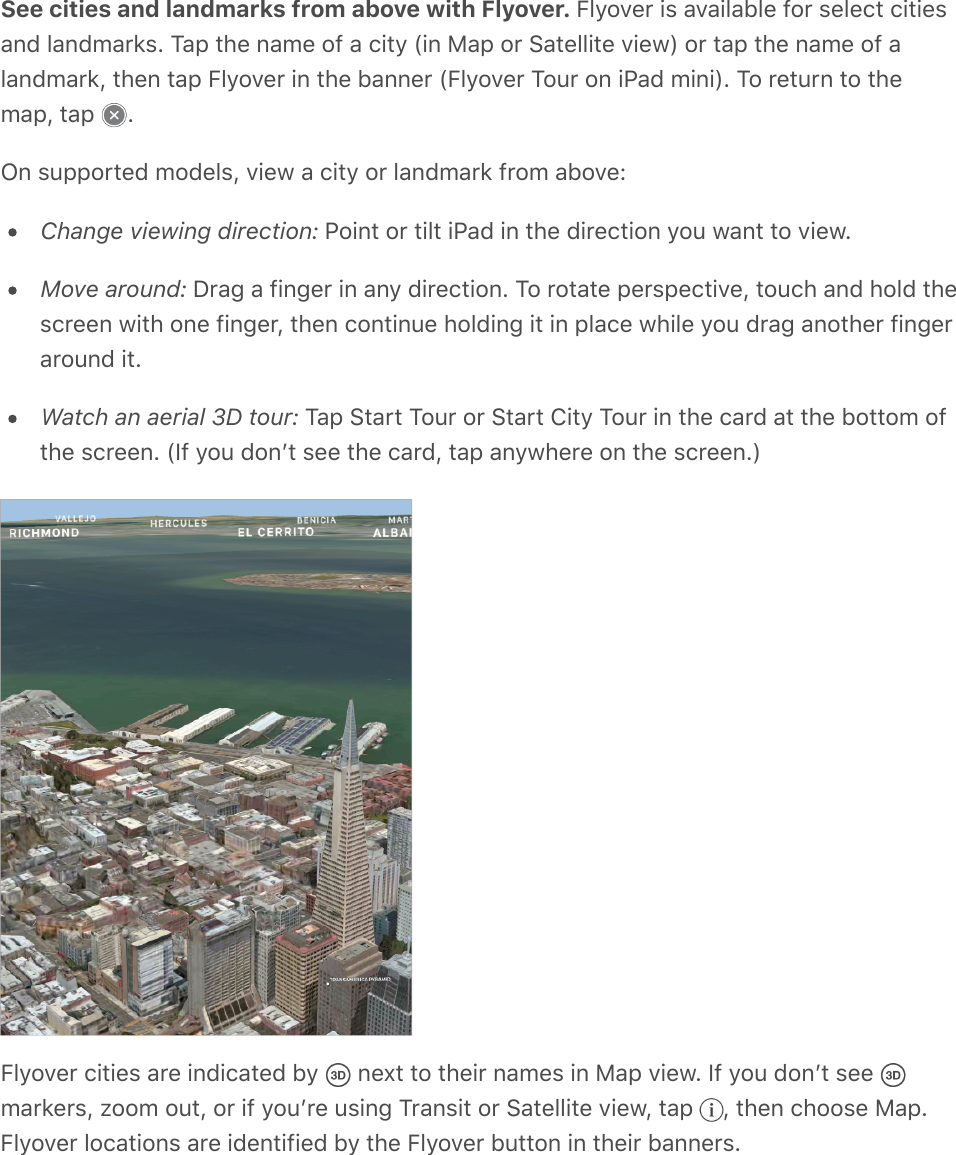
![View directions as a list: Tap the route card at the bottom of the screen, then tapDetails.Even if you open another app, Maps continues to give you turn-by-turn directions. Toreturn to Maps, tap the banner across the top of the screen.View turn-by-turn or stop-by-stop directions. Find a walk, transit, or (on Wi-Fi-onlymodels) drive route, tap Go, then swipe each instruction left.See the route overview: Tap the route card at the bottom of the screen, then tapOverview. To zoom in, tap the route card, then tap Turn-by-turn (for drive and walkdirections) or Zoom In (for transit directions).View directions as a list: Tap the route card at the bottom of the screen, then tapDetails.Stop turn-by-turn directions. Tap End.Ask Siri. Say something like: “Stop navigating.”Make a quick detour. To add a stop along your route, tap the route card, then tap one ofthe suggested services, such as gas stations. Tap Go to add one to your route.Use Maps on your Mac to get directions. Open Maps on your Mac (OS X 10.9 or later),get directions for your trip, then choose File > Share > Send to [your device]. Your Macand iPad must both be set up with iCloud to use the same Apple ID.You can also use Handoff to send directions from iPad to Mac. See .Remove markers and routesRemove a marker. Tap the marker, tap Edit Location, then tap Remove Marker.Delete a route. Past routes are listed below the Search field. To remove one, swipe it tothe left.3D and FlyoverWith 3D and Flyover, you can see three-dimensional views of, and even fly over, many ofthe worldʼs major cities.View a 3D map. Drag two fingers up. (Zoom in for a closer look if the 3D map doesnʼtappear.) For best effect, use the satellite view. Tap , then tap Satellite.Adjust the angle. Drag two fingers up or down.Handoff](https://usermanual.wiki/Apple/A1954.Users-Manual-7/User-Guide-3766080-Page-15.png)