Apple A1954 Tablet Device User Manual iPad User Guide
Apple Inc. Tablet Device iPad User Guide
UserManual.wiki
>
Apple
>
A1954 User Manual
>
Users Manual 8
Contents
1.
Users Manual 1
2.
Users Manual 2
3.
Users Manual 3
4.
Users Manual 4
5.
Users Manual 5
6.
Users Manual 6
7.
Users Manual 7
8.
Users Manual 8
9.
Users Manual 9
Users Manual 8
Navigation menu
Upload a User Manual
Namespaces
Wiki Guide
HTML
PDF
Info
Views
User Manual
Discussion / Help
Navigation
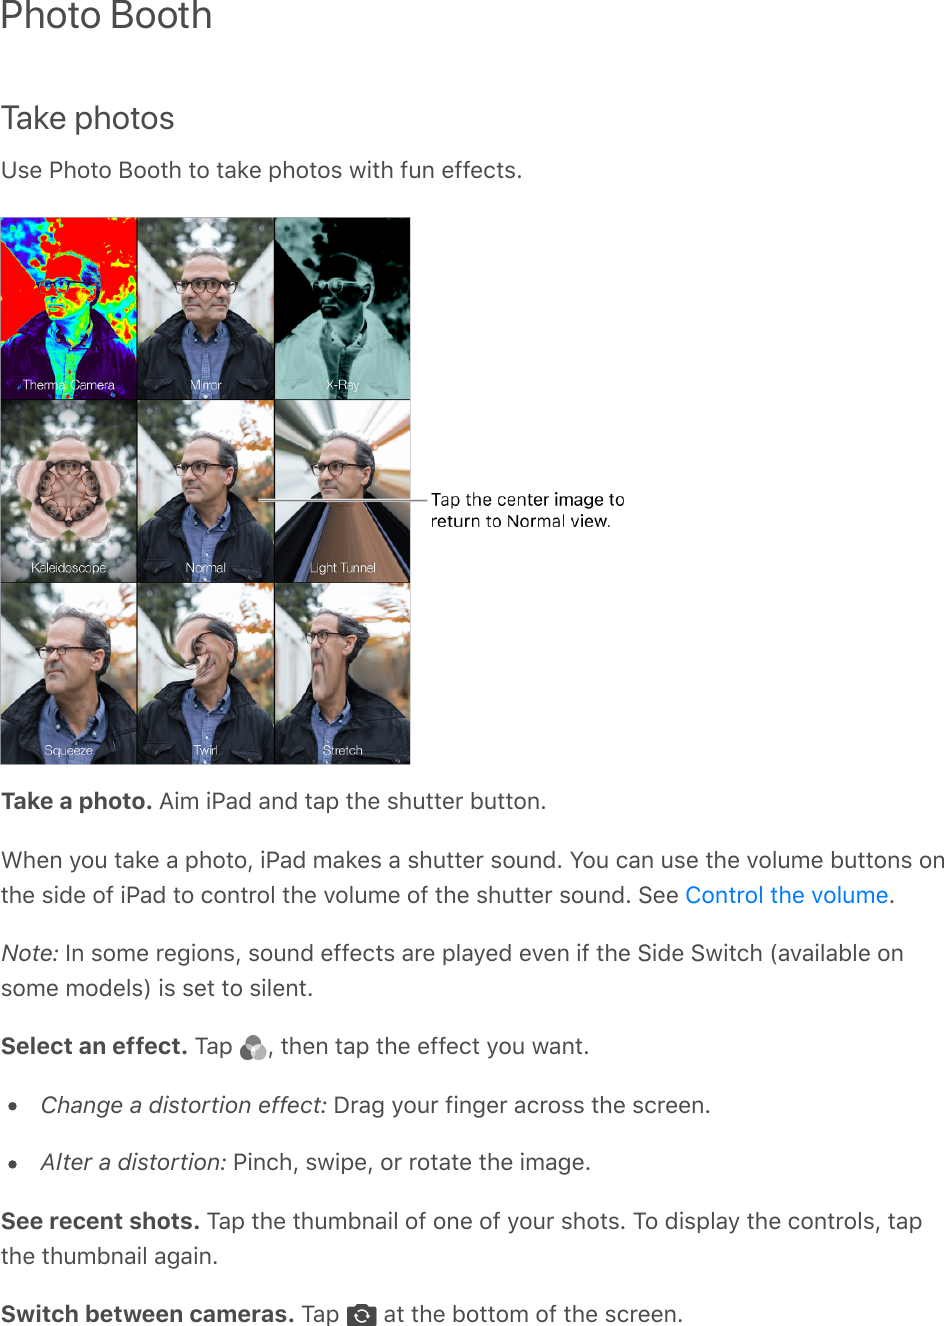
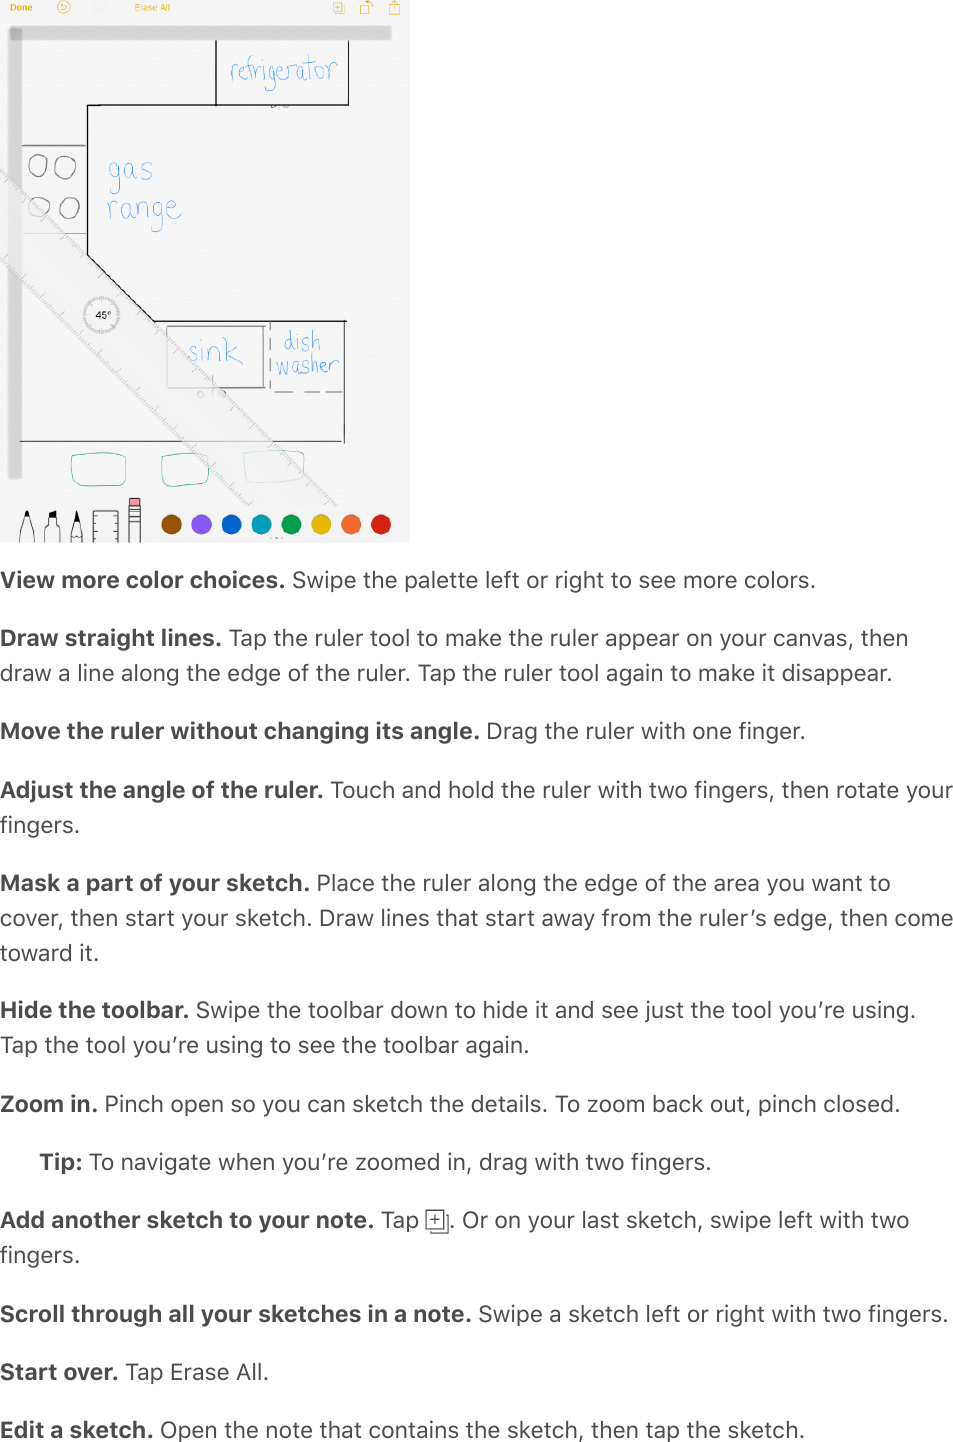
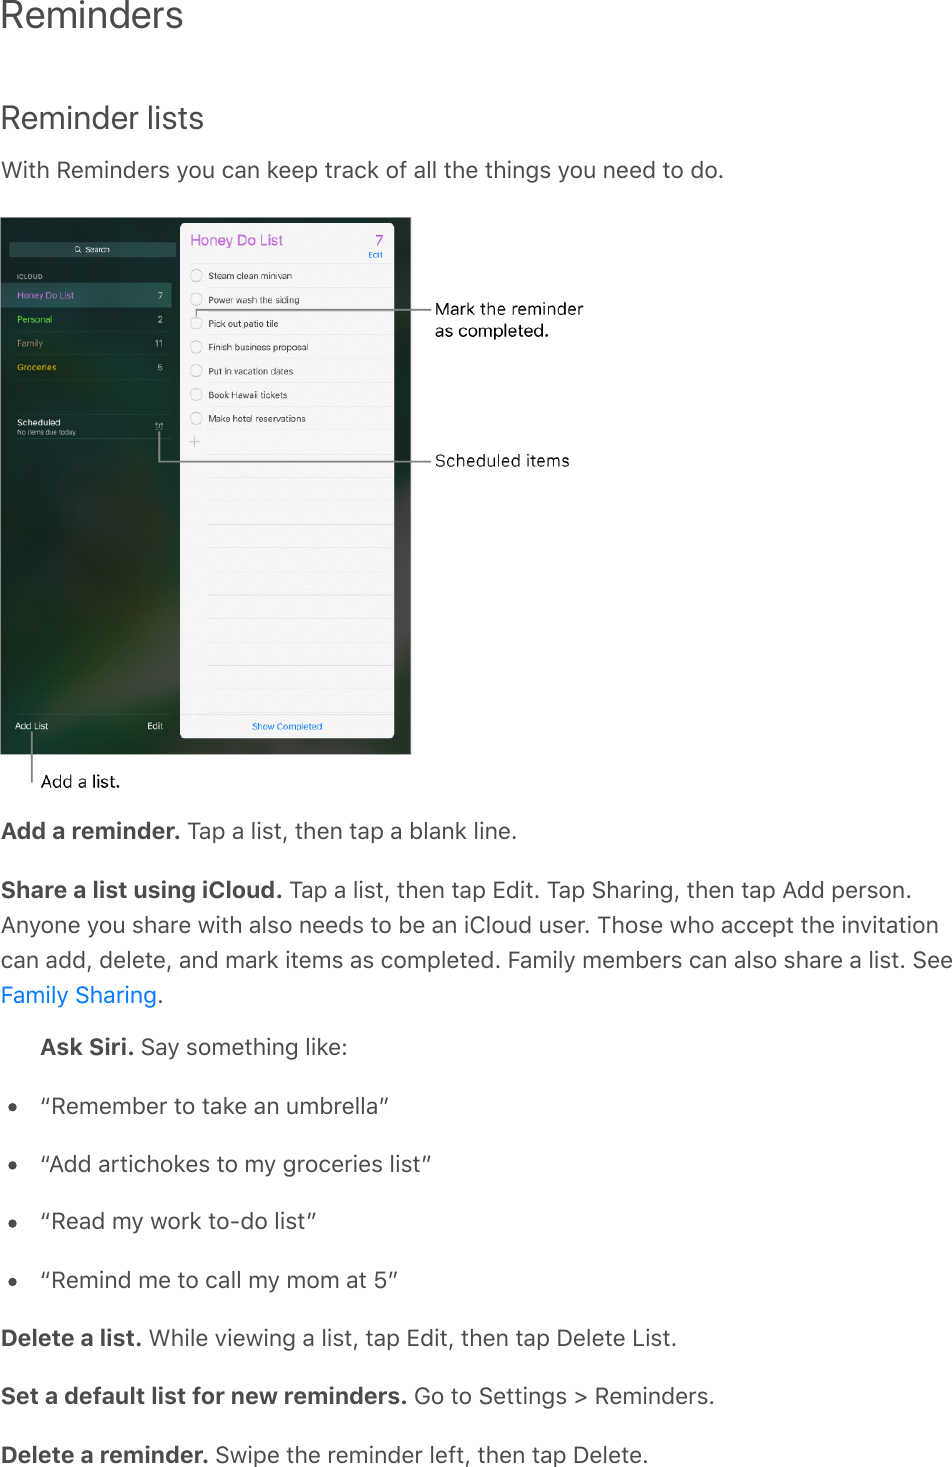
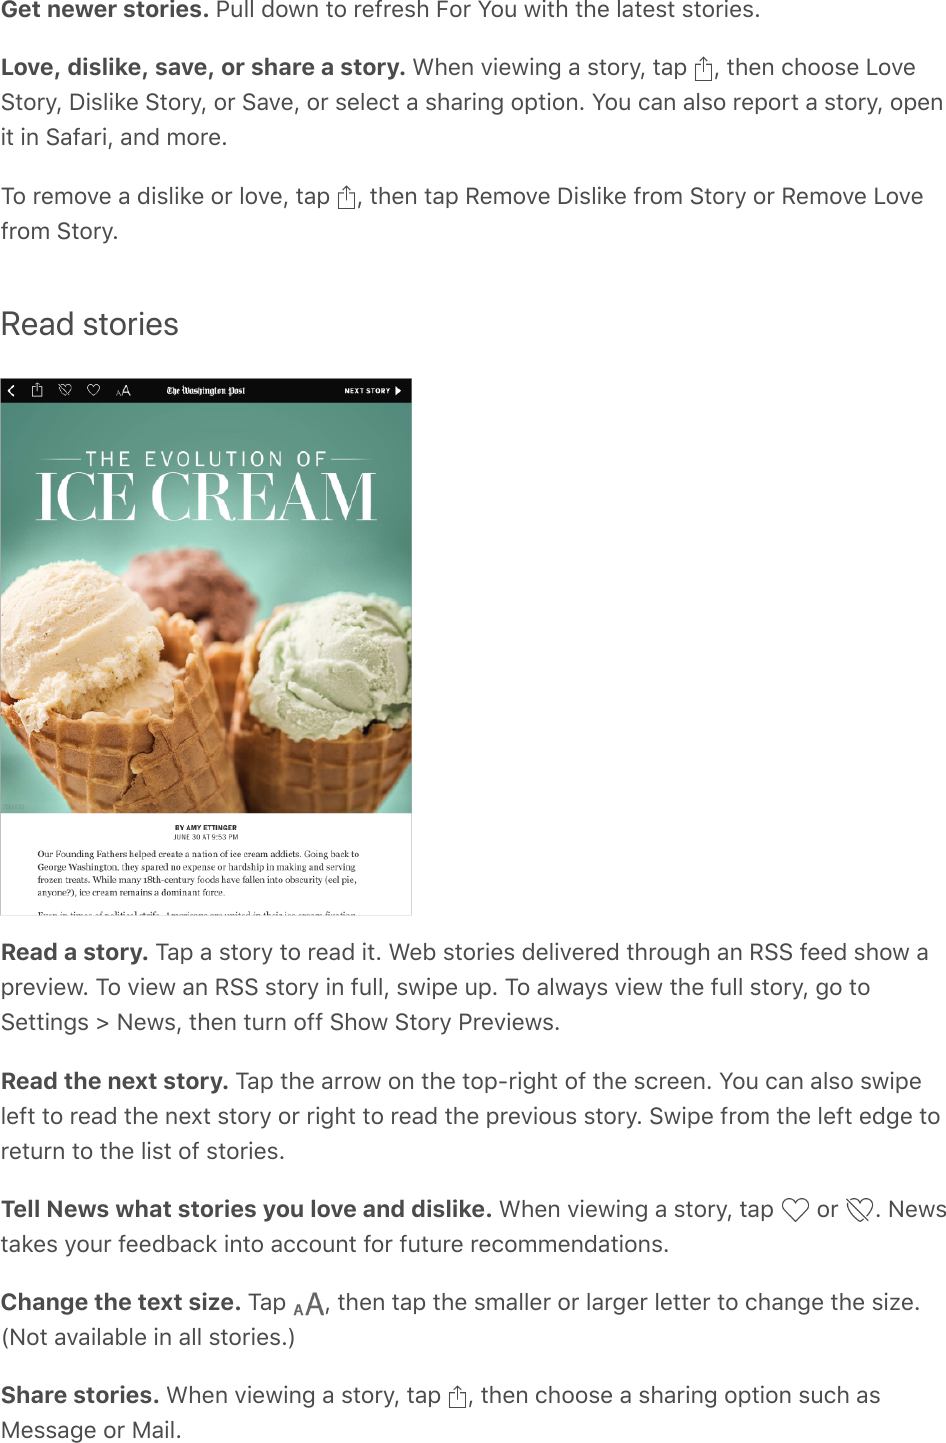
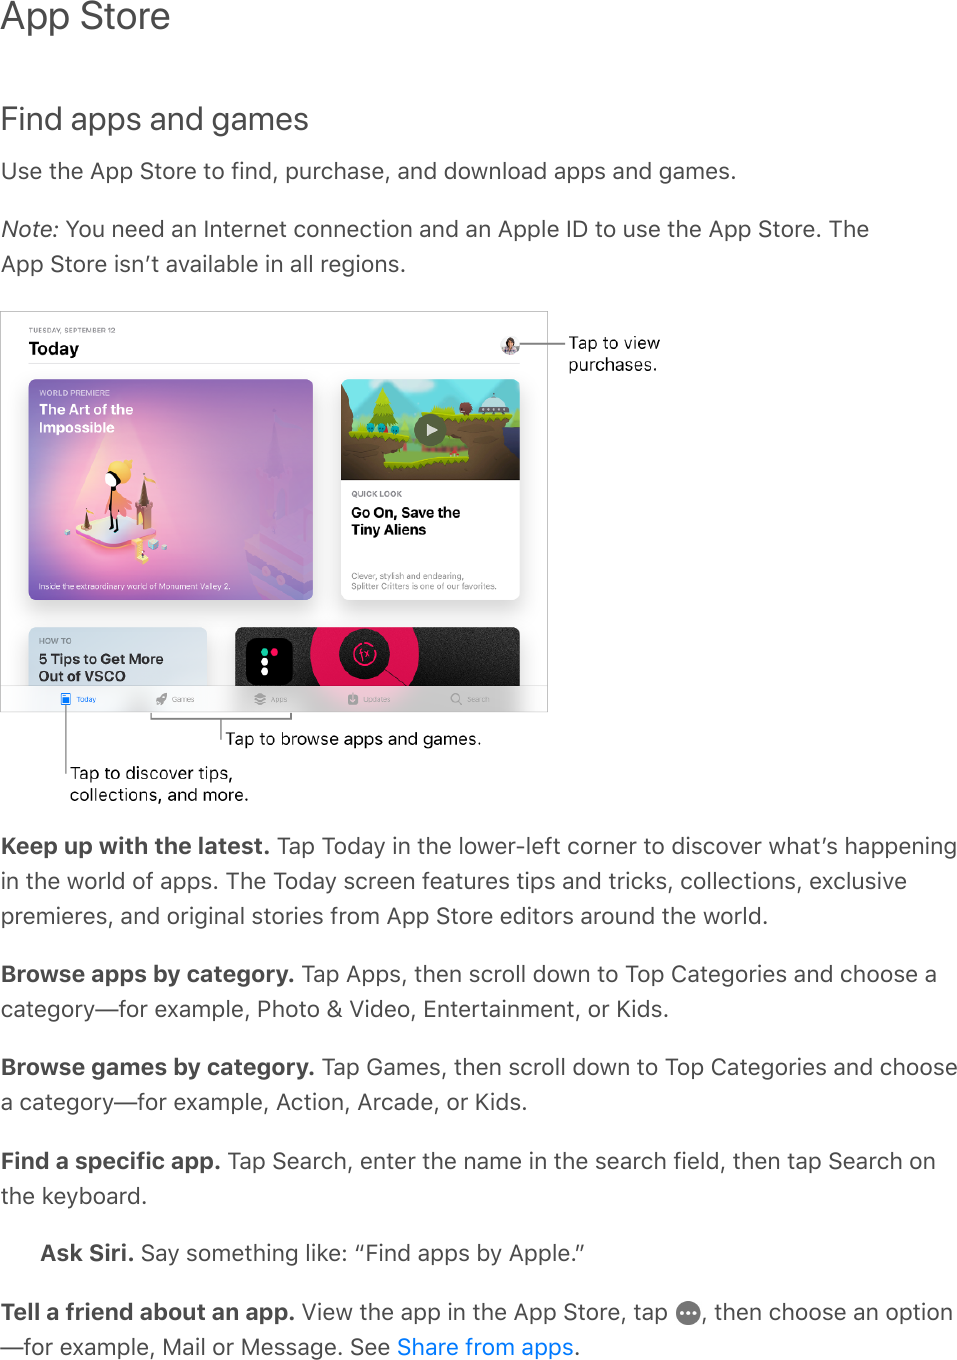
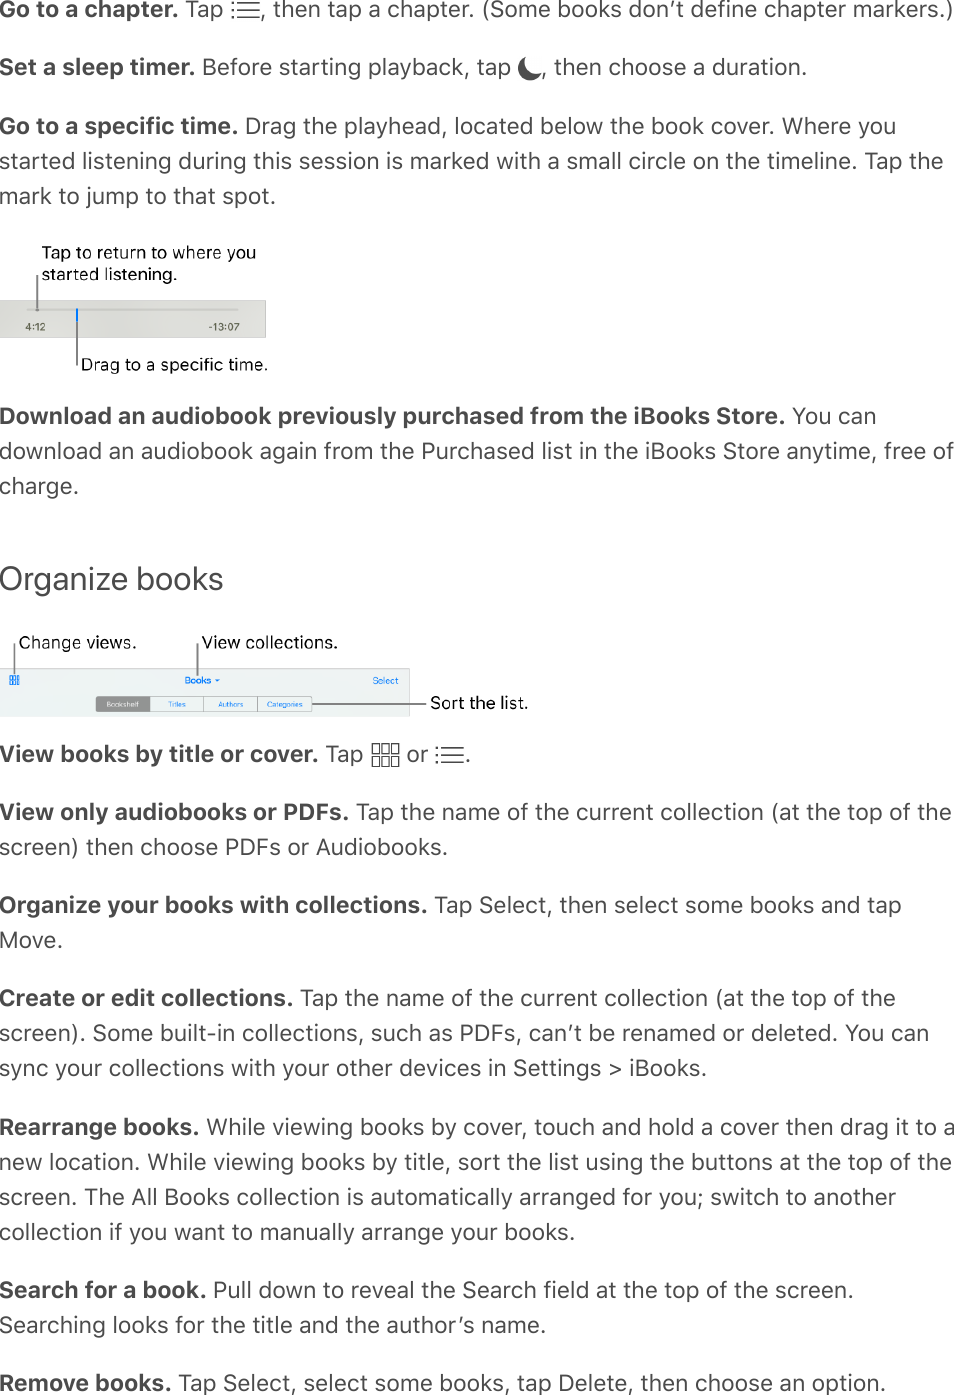
![NotesTake notesUse Notes to jot down important information, sketch ideas, and keep things organized.You can add attachments—like photos, scanned documents, web links, and maps—to anote, and you can lock a note to keep it private. You can also share a note so others canview and edit it.Store your notes securely in iCloud. Go to Settings > [your name] > iCloud, then turnon Notes. Your iCloud notes—and any changes you make to them—appear on all your iOSdevices and Mac computers where youʼre signed in to iCloud with the same Apple ID.Note: If youʼve been using an earlier version of Notes, you may need to upgrade youriCloud notes to use all the features—sketching, checklists, paragraph styles, passwordprotection, adding people, and more. See the website.Store certain notes only on your iPad. Go to Settings > Notes, then turn on “On MyiPad” Account. Notes in this account appear only on your iPad. Your notes in iCloud wonʼtbe affected.Create a new note. Tap . The first line of the note becomes the noteʼs title.Ask Siri. Say something like: “Create a new note.”Tip: You can quickly create a note or resume work on your last note by tapping theLock screen with Apple Pencil (on supported models). On other iPad models, you can dothis if you . To change the Lock screen behavior,go to Settings > Notes > Access Note from Lock Screen.Upgrade your notesadd the Notes control to Control Center](https://usermanual.wiki/Apple/A1954.Users-Manual-8/User-Guide-3766081-Page-1.png)
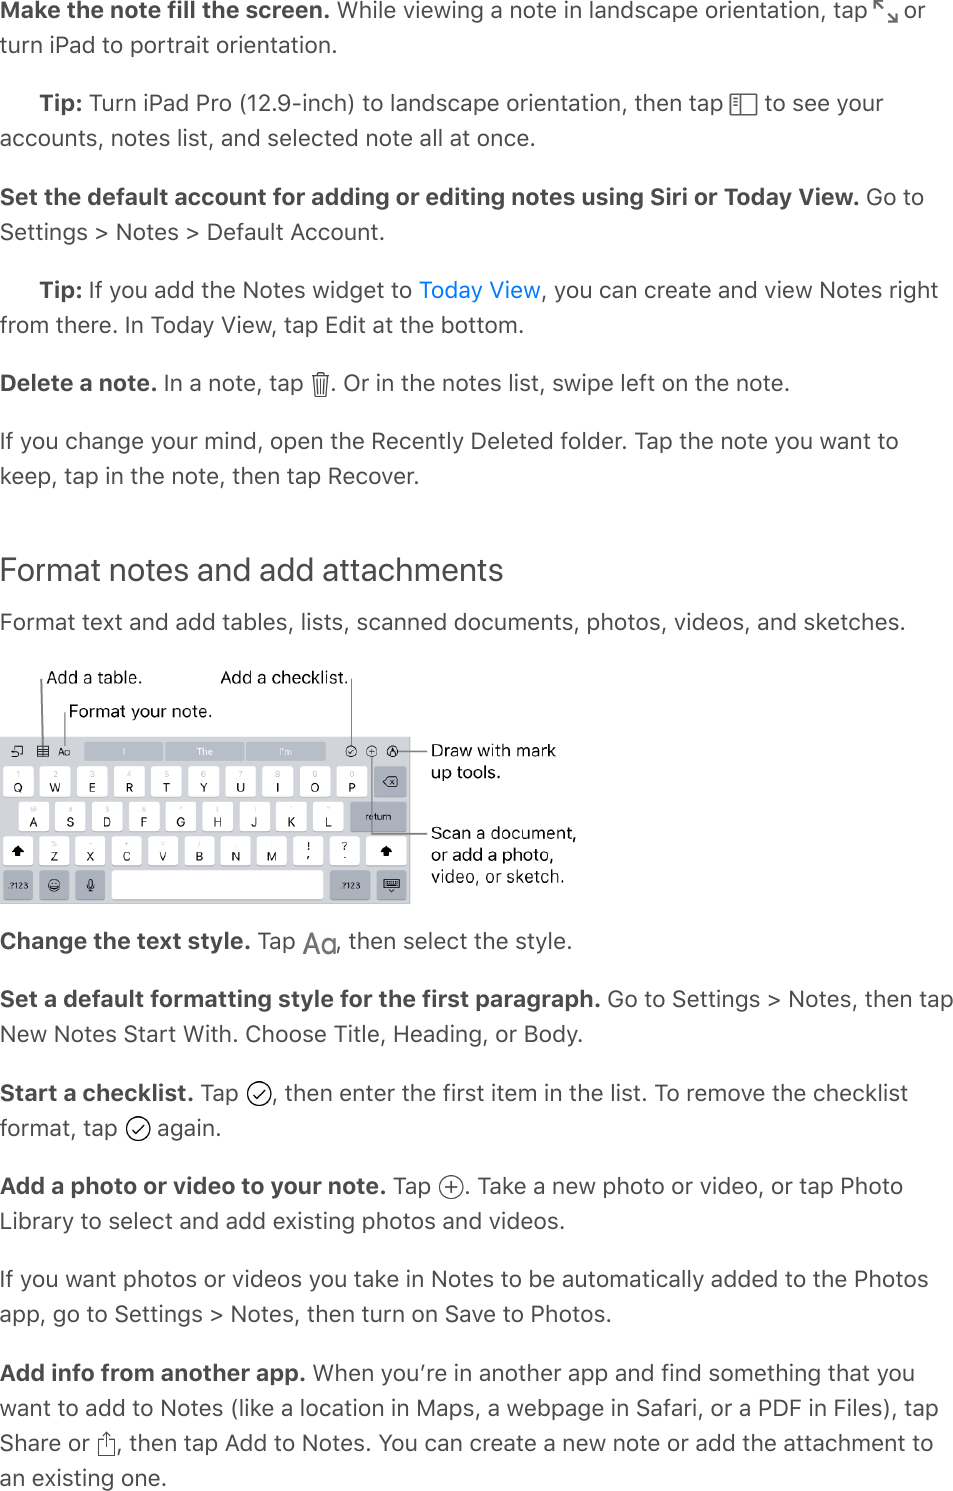
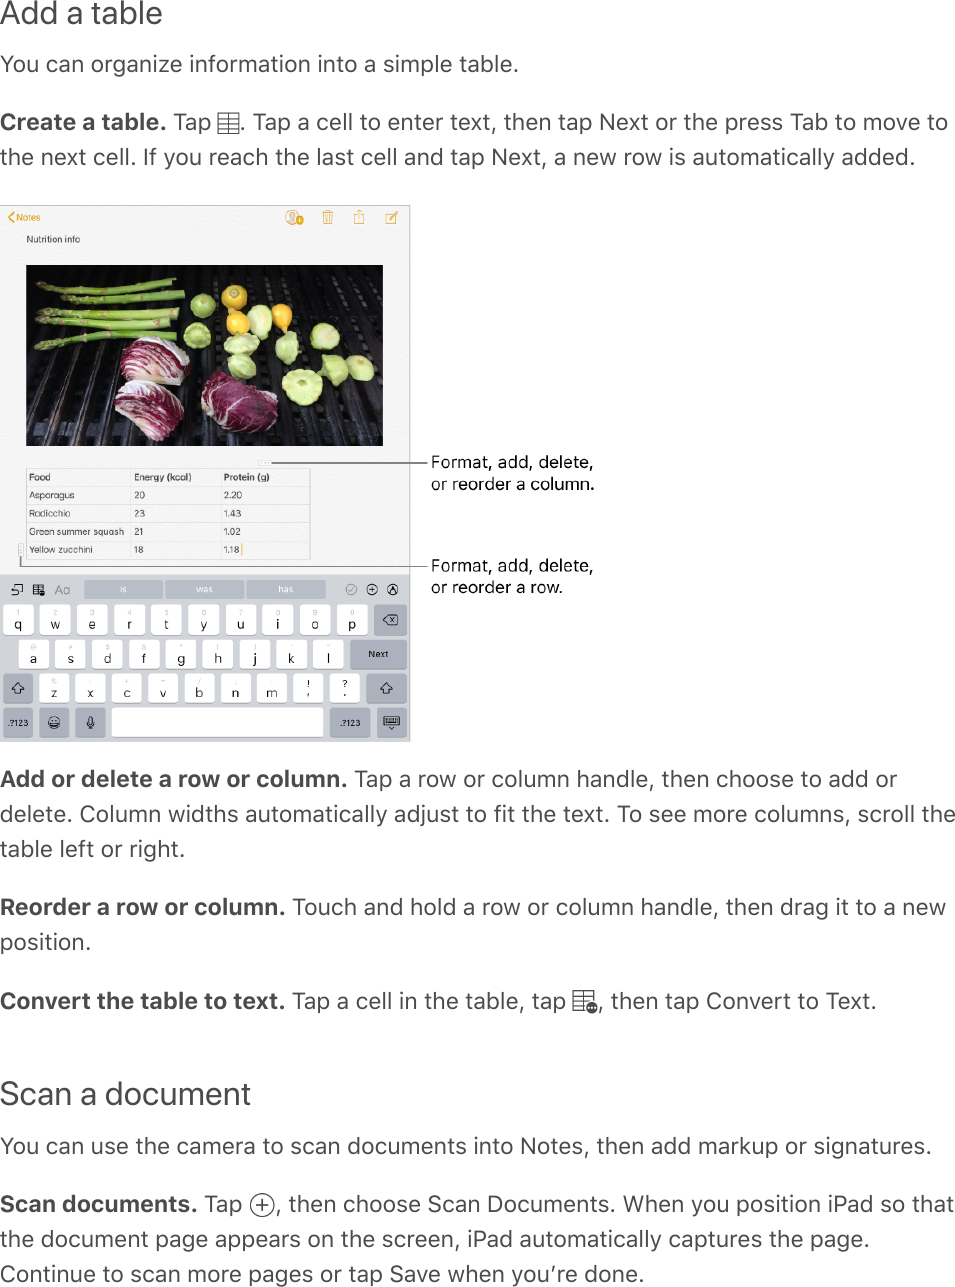


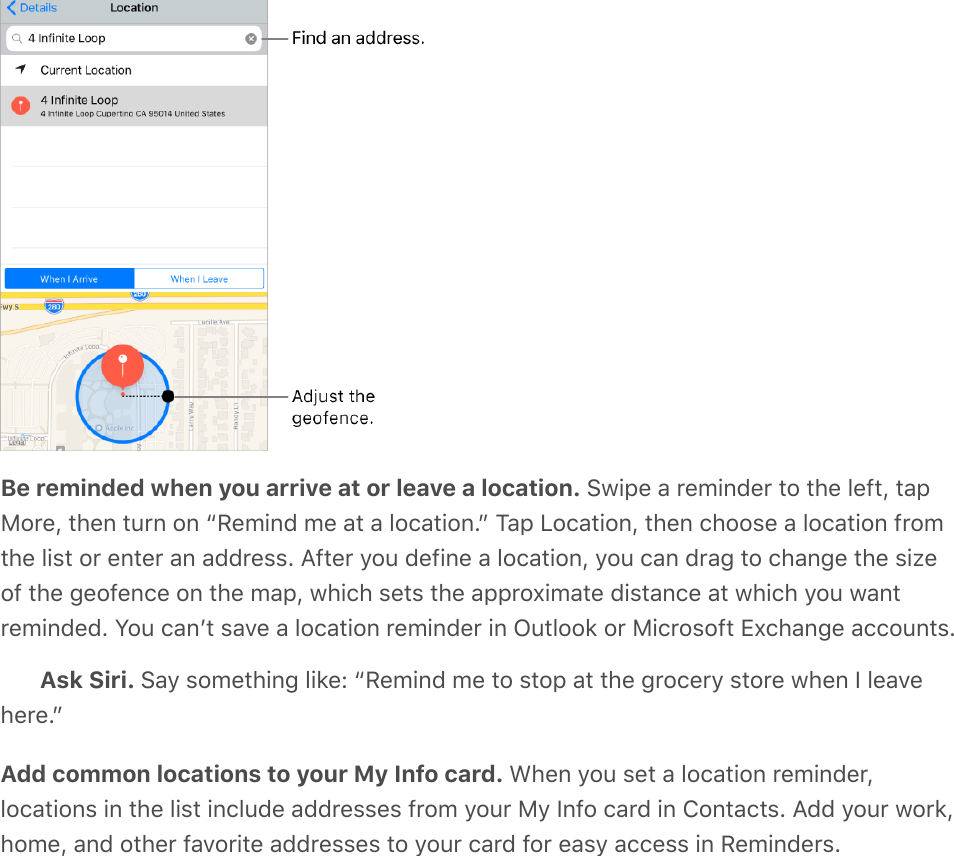
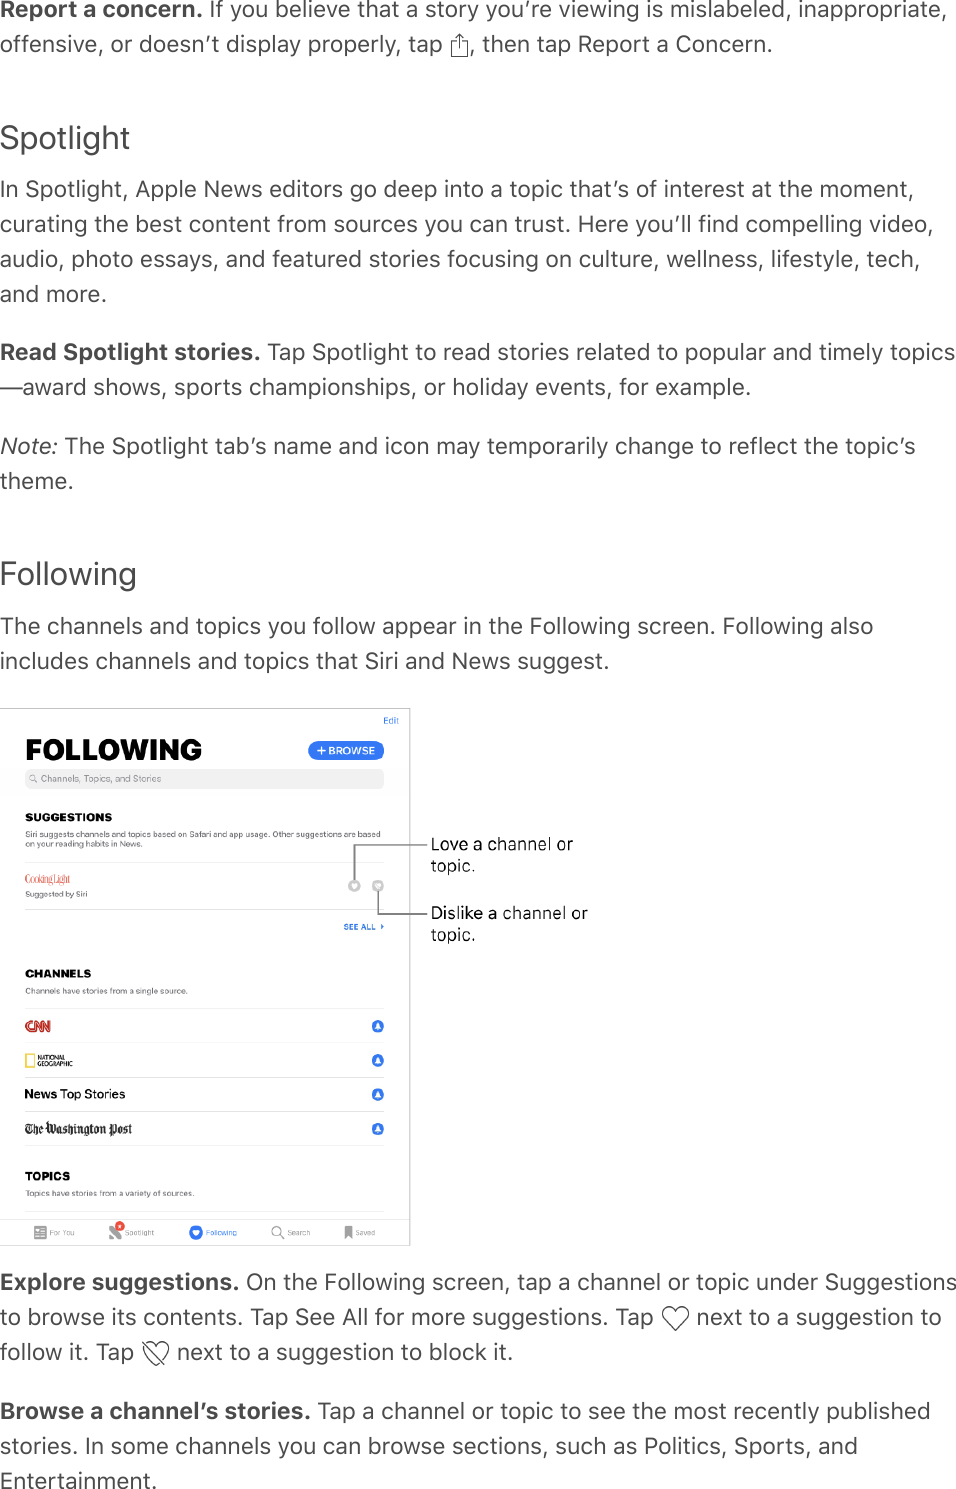
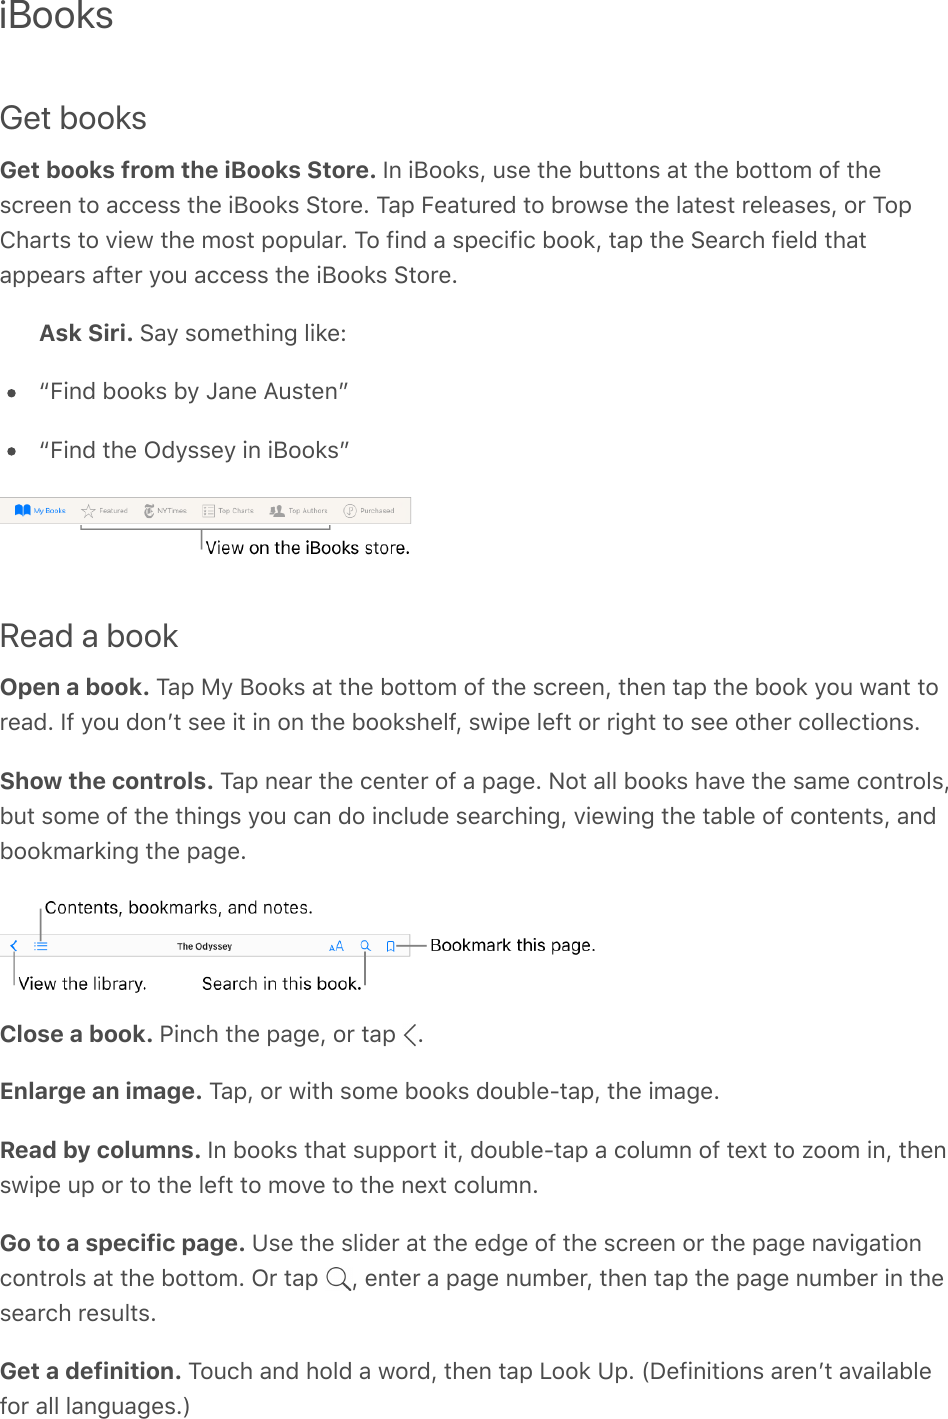
![Change the order of lists or reminders. Tap Edit, then touch and move the item.Search for a reminder. In the search field, enter the name of the reminder youʼre lookingfor.Keep your reminders up to date on other devices. Go to Settings > [your name] >iCloud, then turn on Reminders. Some other types of accounts, such as Exchange, alsosupport Reminders. You can change how reminders in the past are synced in Settings >Reminders.With OS X 10.10 or later, you can hand off reminders youʼre editing between your Macand iPad. See .Scheduled remindersScheduled reminders notify you when theyʼre due.Ask Siri. Say something like: “Remind me to take my medicine at 6 a.m. tomorrow.”Schedule a reminder. Swipe a reminder to the left, tap More, then turn on “Remind meon a day.” Tap Alarm to set the date and time. Tap Repeat to schedule the reminder forregularly occurring intervals.Donʼt bother me now. You can turn off Reminders notifications in Settings >Notifications. To silence notifications temporarily, turn on Do Not Disturb.Location-based remindersOn iPad Wi-Fi + Cellular models, Reminders can alert you when you arrive at or leave alocation.Handoff](https://usermanual.wiki/Apple/A1954.Users-Manual-8/User-Guide-3766081-Page-12.png)
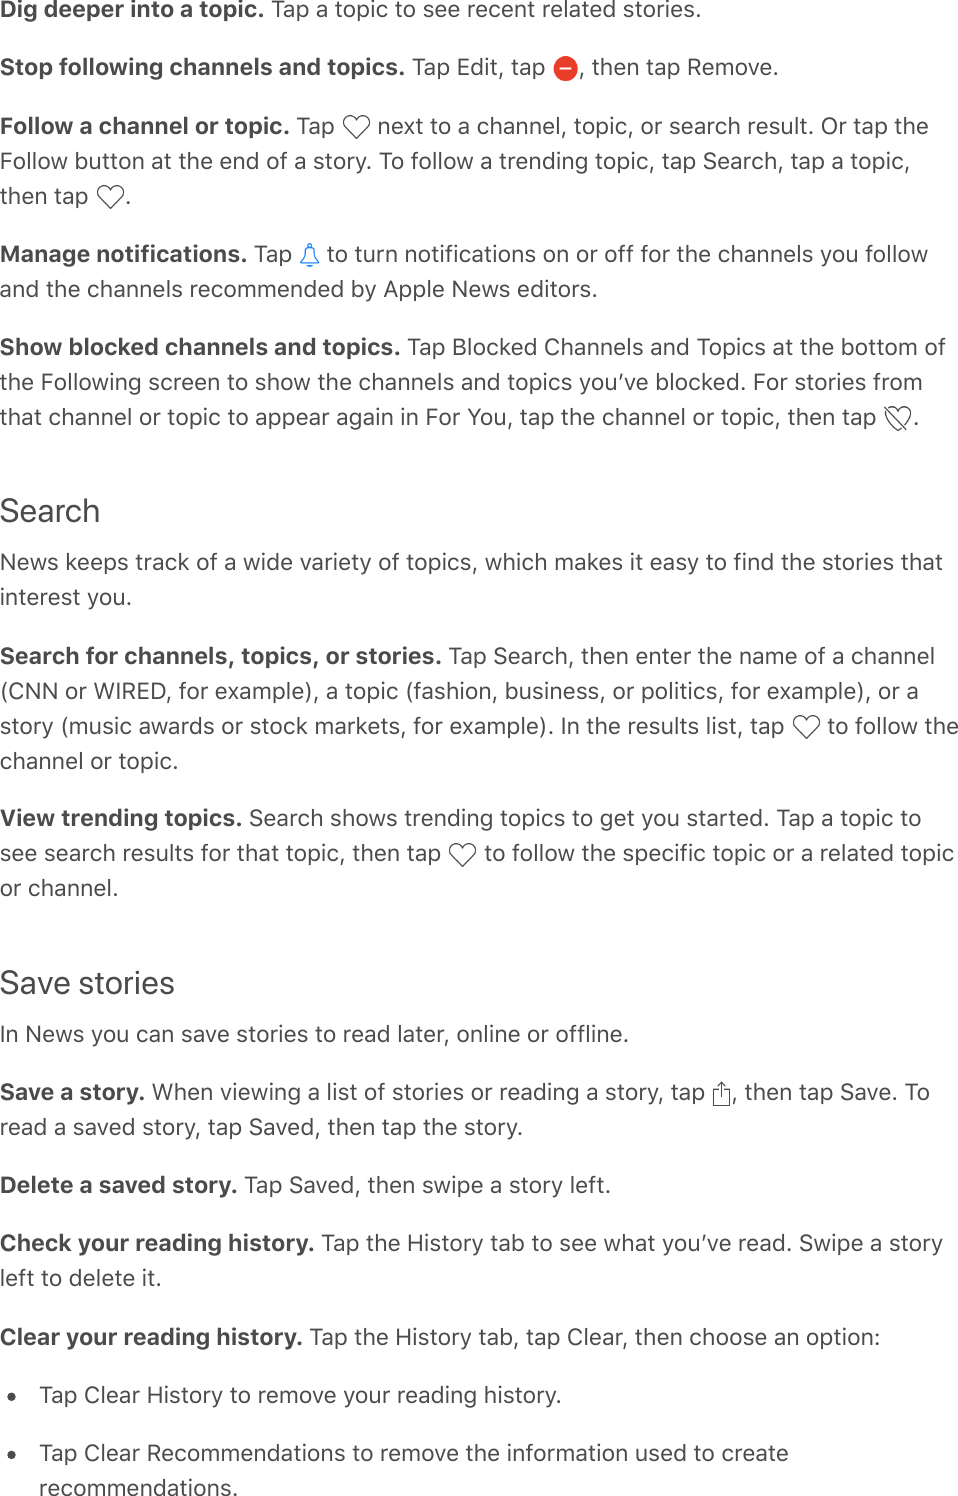
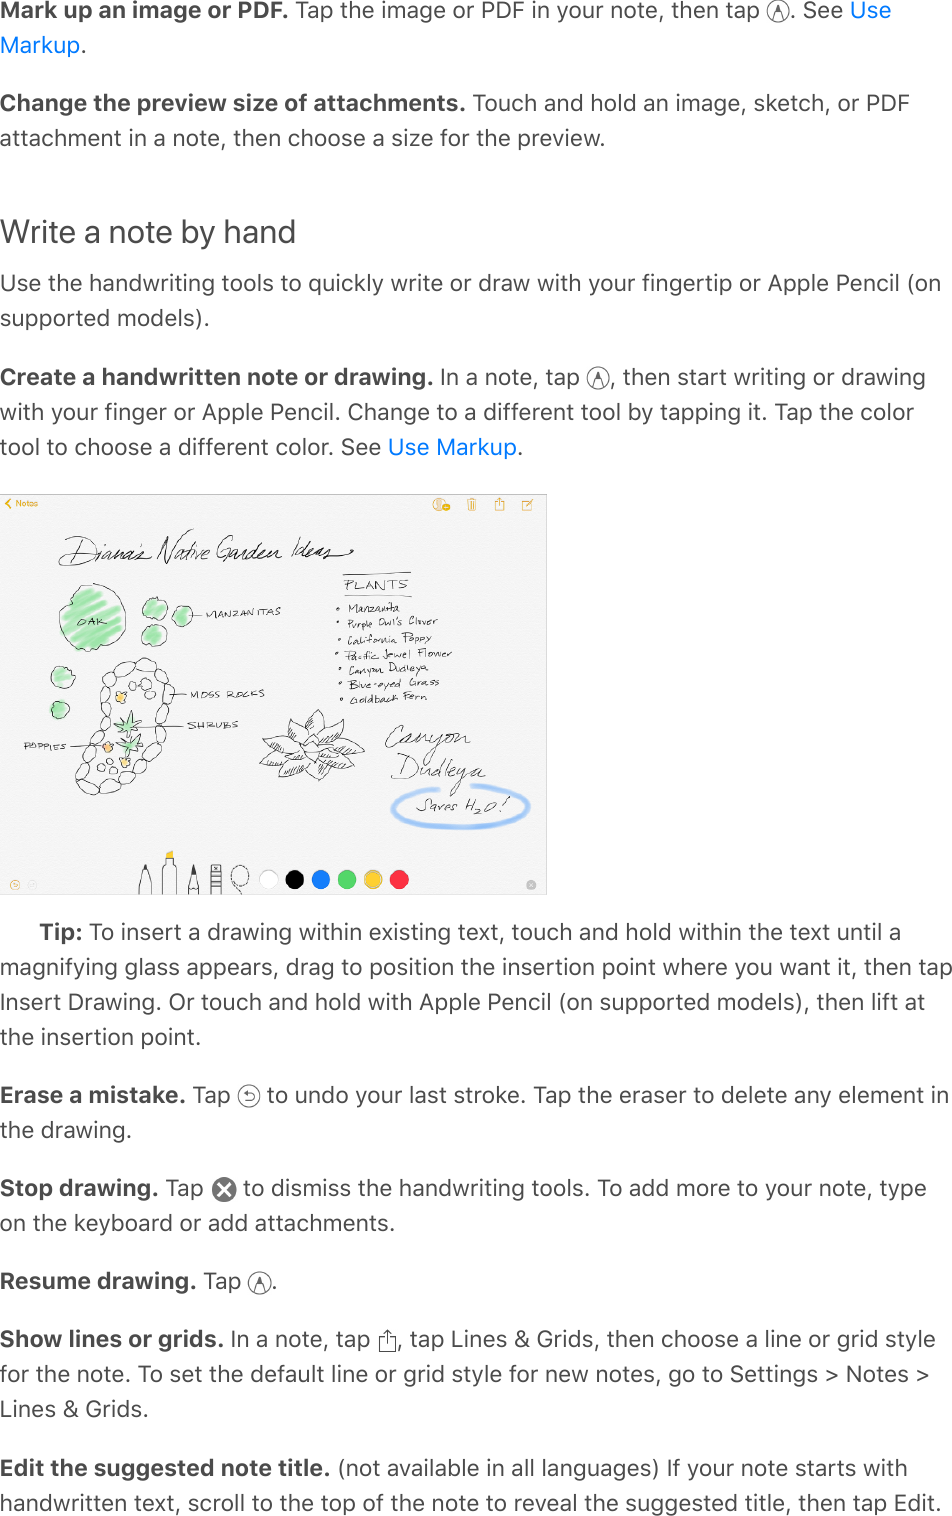
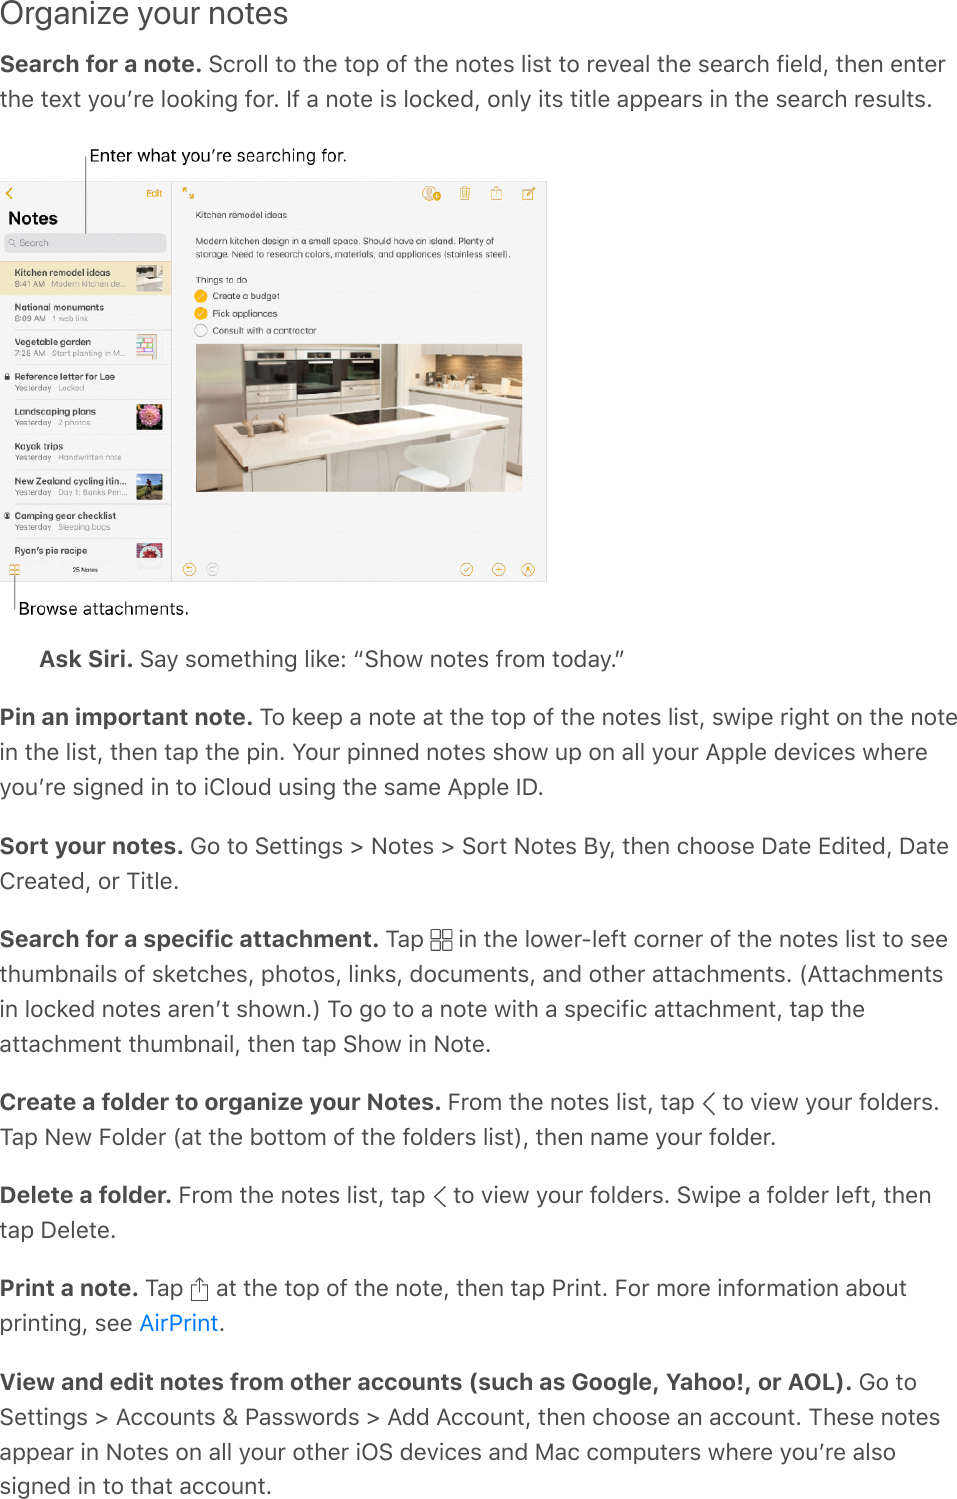
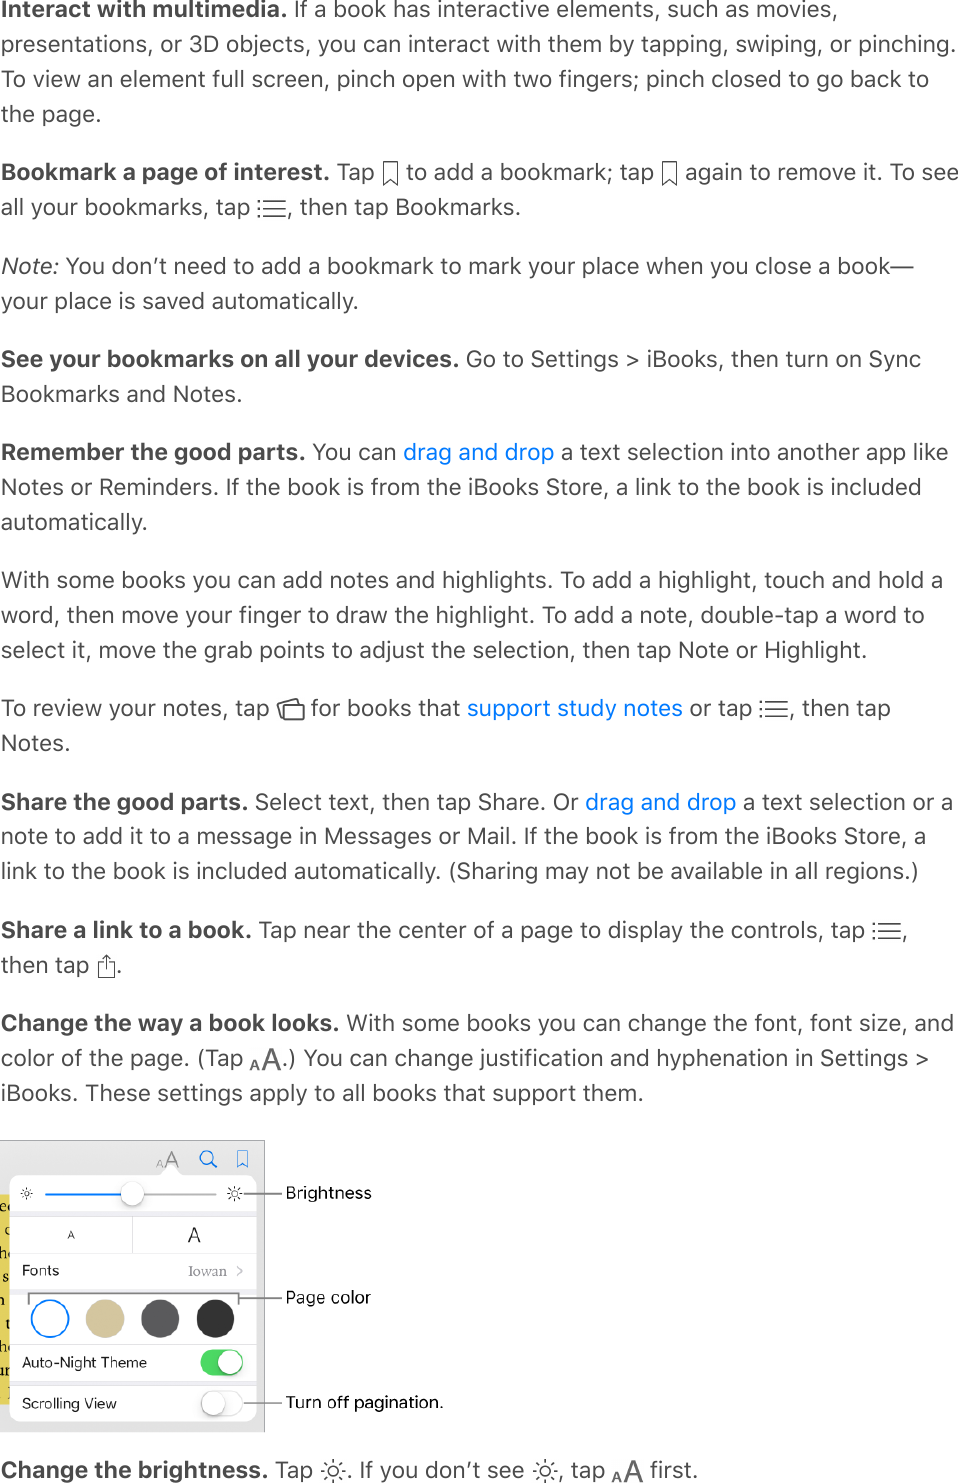
![iTunes StoreFind music, movies, TV shows, and moreUse the iTunes Store to add music, movies, TV shows, and ringtones to iPad.Note: You need an Internet connection and an Apple ID to use the iTunes Store. TheiTunes Store isnʼt available in all regions.Browse by category or genre. Tap a category (Music, Movies, or TV Shows). To refinethe list, tap Genres.Ask Siri. Say something like: “Look for kidsʼ shows in iTunes.”If you know what youʼre looking for, tap Search. You can tap a search term thatʼstrending among other iTunes users, or enter info in the search field, then tap Search onthe keyboard.Ask Siri to tag it. When you hear music playing around you, ask Siri “What song isplaying?” Siri tells you the name and artist of the song and gives you an easy way topurchase it. The song is also tagged so you can preview or buy it later. To see your list oftagged songs, tap Music, tap , then tap Siri.Preview a song or video. Tap it.Add to your Wish List. To track a song you might want to buy later, add it to your WishList. View the song, tap , then tap Add to Wish List. To view your Wish List, tap , thentap Wish List.Purchase, rent, or redeemSign in with your Apple ID. If you arenʼt signed in with your Apple ID, the iTunes Storeasks you to do so before you make a purchase. To view or edit your Apple ID, go toSettings > [your name] > iTunes & App Store, then tap your Apple ID. If you donʼt have anApple ID, you can create one at the time of purchase.Buy and download an item. Tap the itemʼs price, then tap Buy. If the item is free, tapGet.If you see instead of a price, youʼve already purchased the item, and you candownload it again without a charge.](https://usermanual.wiki/Apple/A1954.Users-Manual-8/User-Guide-3766081-Page-20.png)
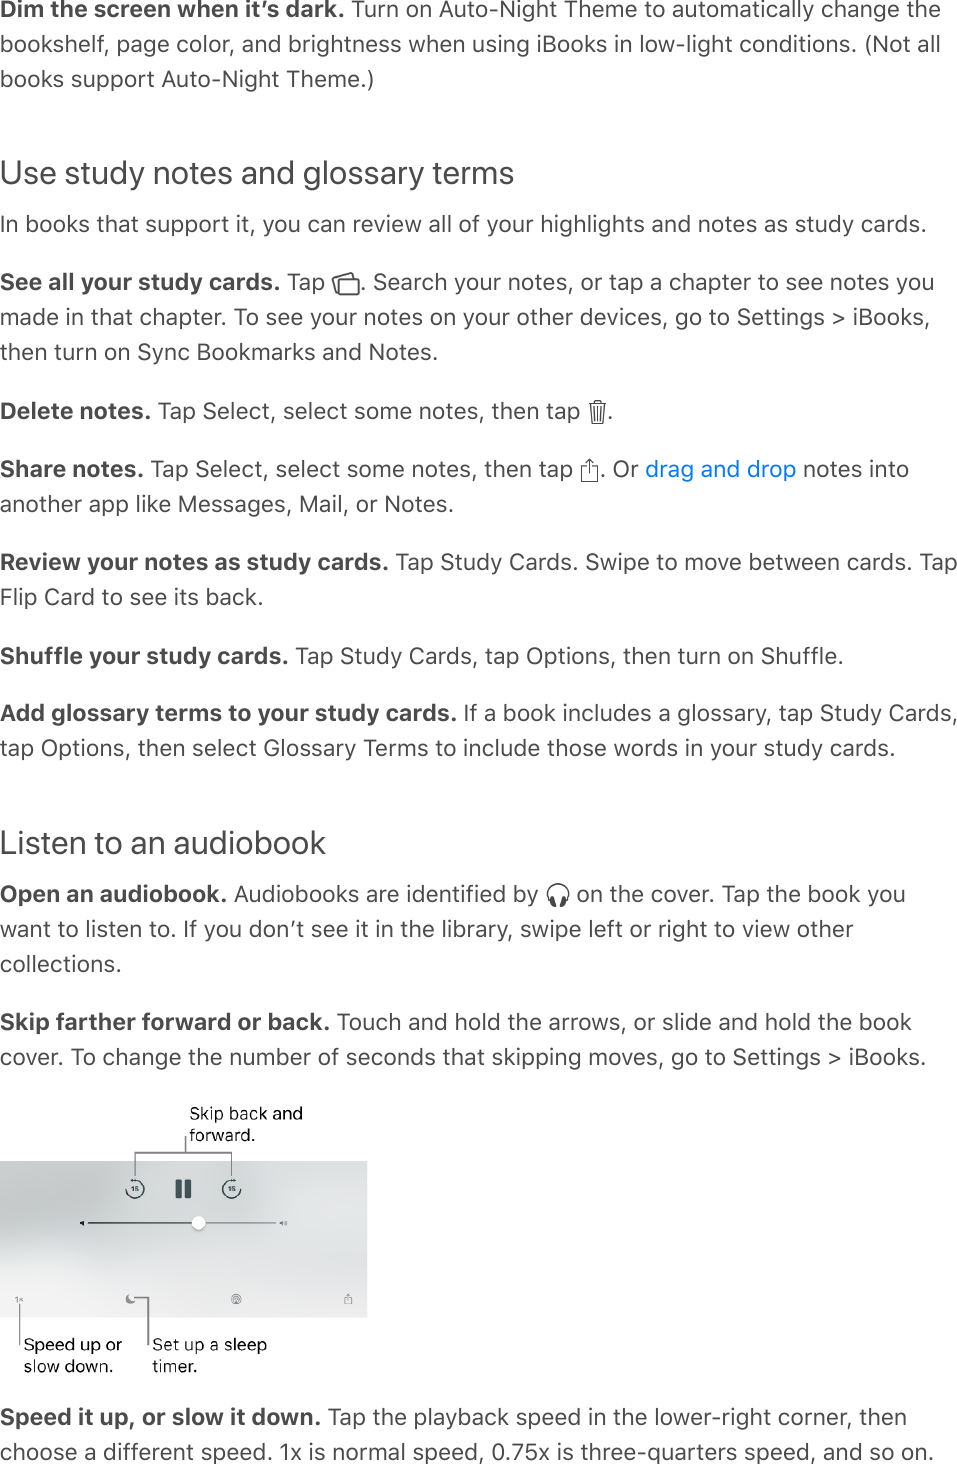
![Ask Siri. Say something like: “Purchase [song title] by [artist].”View and download your previous purchases. Tap Purchased. To automaticallydownload items that you purchased on other Apple devices, go to Settings >[your name] > iTunes & App Store, then turn on Automatic Downloads.Limit downloads to Wi-Fi connections (Wi-Fi + Cellular models). To preventdownloads from using cellular data, go to Settings > [your name] > iTunes & App Store,then turn off Use Cellular Data.See the progress of a download. Tap Downloads.Rent a movie. Tap the movieʼs rental price, then tap Rent. You can stream the movie toiPad or download the movie to play when youʼre offline. To start or continue the movie onanother iOS device (iOS 10.3 or later), Apple TV (tvOS 10.3 or later), or Mac (with iTunes12.6 or later), make sure youʼre signed in to the iTunes Store with the same Apple ID oneach device.When you rent a movie, you have 30 days to start watching it. After you start watchingthe movie, you can play it as many times as you want for 48 hours, after which the rentalperiod ends. When the rental period ends, the movie is deleted.Note: Movie rentals and streaming arenʼt available in all regions or for all movies. See theApple Support article Approve purchases with Family Sharing. With Family Sharing set up, the familyorganizer can review and approve purchases made by family members under a certainage. For more information, see .View and download family membersʼ purchases. With Family Sharing set up, you canview and download songs, TV shows, and movies purchased by your family members.Tap Purchased, tap My Purchases, then choose a family member.Hide individual purchases. Using iTunes on a computer, family members can hide any oftheir purchases so other family members canʼt view or download them.See your purchase history. To get a list of apps, songs, movies, TV shows, books, orother items you bought with your Apple ID, go to Settings > [your name] > iTunes &App Store. Tap your Apple ID, then tap View Apple ID; you might be asked to authenticateyour Apple ID. Scroll down, then tap Purchase History.Send a gift. To give an item, view it, tap , then tap Gift. To give an iTunes giftcertificate, tap a category (Music, Movies, or TV Shows), scroll to the bottom, then tapSend Gift.Redeem a gift card or code. Tap Music, scroll to the bottom, then tap Redeem.Ask Siri. Say something like: “Redeem an iTunes Store gift card.”What can I buy from the iTunes Store in my country or region?Family Sharing](https://usermanual.wiki/Apple/A1954.Users-Manual-8/User-Guide-3766081-Page-21.png)
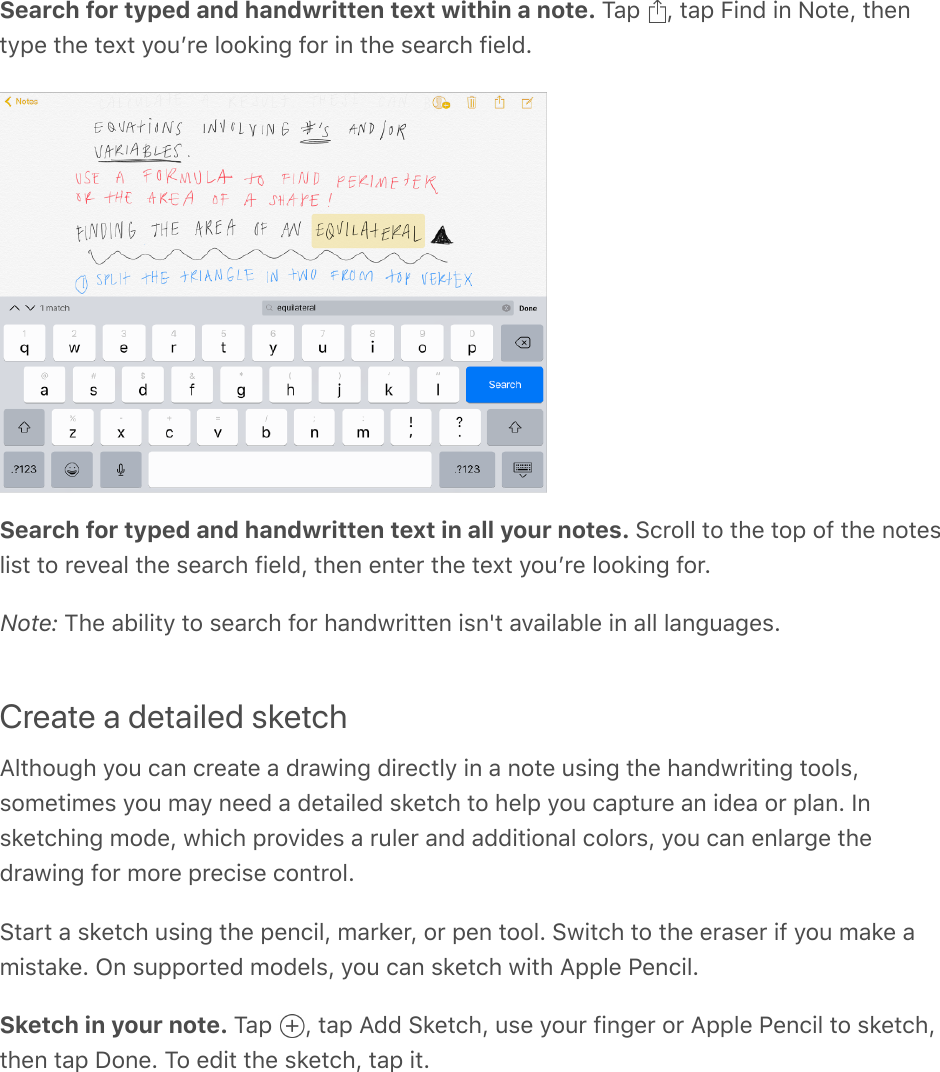
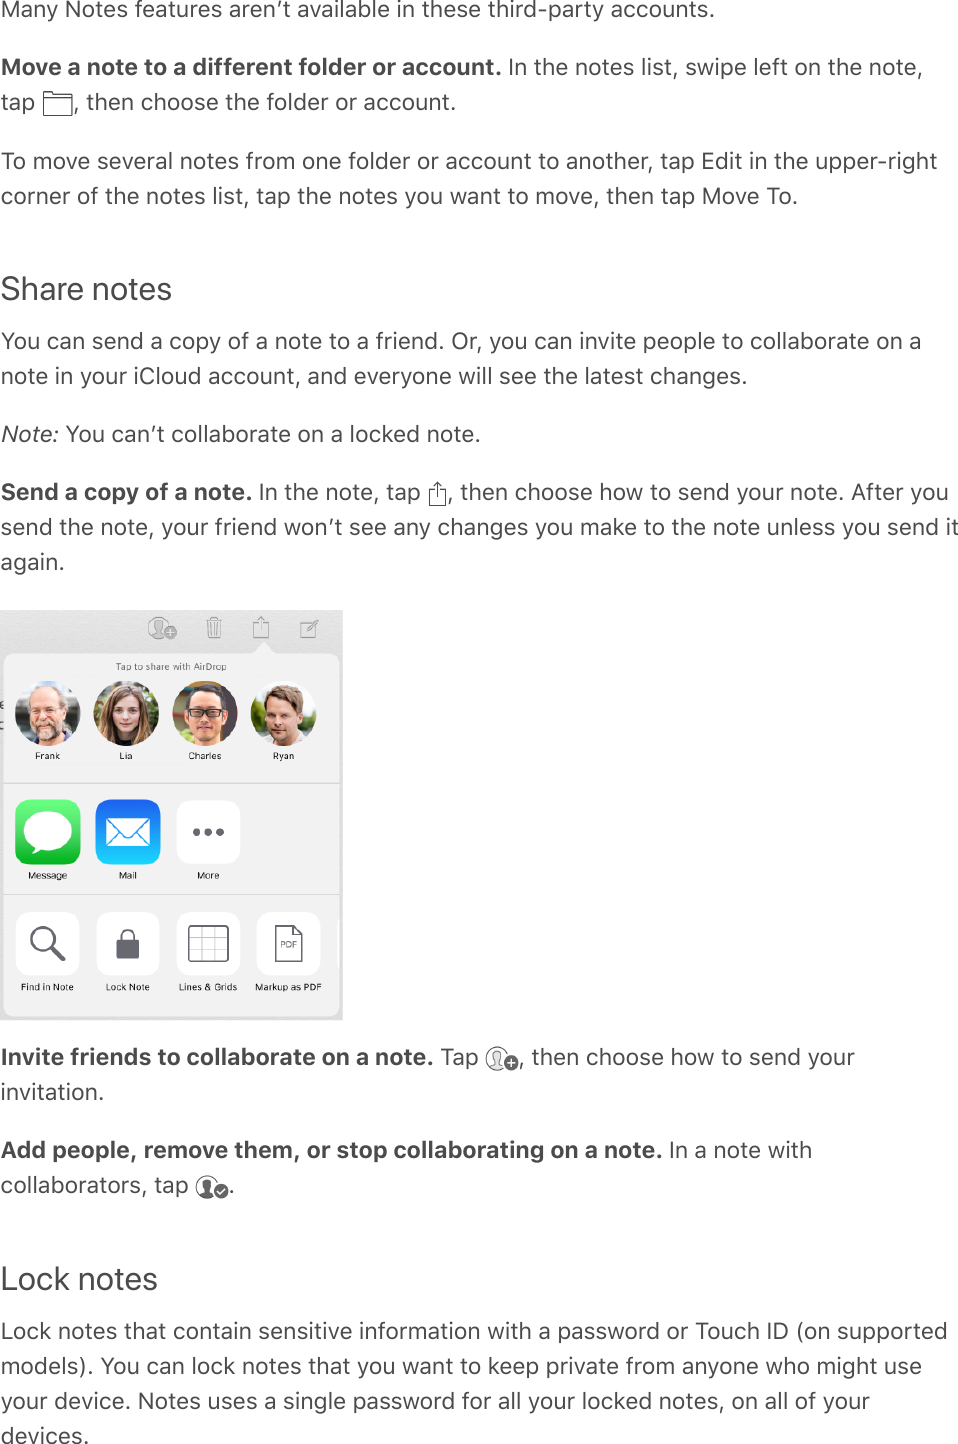
![Purchase, redeem, and downloadSign in with your Apple ID. If you arenʼt signed in with your Apple ID, the App Store asksyou to do so before you make a purchase. To view or edit your Apple ID, go to Settings >[your name] > iTunes & App Store, then tap your Apple ID. If you donʼt have an Apple ID,you can create one at the time of purchase.Buy and download an app. Tap the appʼs price, then follow the instructions. If the app isfree, tap Get.If you see instead of a price, youʼve already purchased the app and you can downloadit again without a charge. While the app is downloading or updating, its icon appears onthe Home screen with a progress indicator.Your app updates automatically over Wi-Fi, so you can keep up with the latestimprovements and features. (To turn off automatic updates, go to Settings >[your name] > iTunes & App Store, then turn off Updates.)Ask Siri. Say something like: “Purchase [app name].”View and download your previous purchases. Tap Updates, tap your profile picture inthe upper right, then tap Purchased. To automatically download apps that you purchaseon other Apple devices, go to Settings > [your name] > iTunes & App Store, then turn onApps (below Automatic Downloads).Limit downloads to Wi-Fi connections (Wi-Fi + Cellular models). To preventApp Store downloads from using cellular data, go to Settings > [your name] > iTunes &App Store, then turn off Use Cellular Data.Approve purchases with Family Sharing. With Family Sharing set up, the familyorganizer can review and approve purchases made by other family members under acertain age. For more information, see .View and download family membersʼ app purchases. With Family Sharing set up, youcan view and download apps purchased by your family members who choose to sharetheir purchases. Tap Updates, tap your profile picture in the upper right, then choose afamily member to see their purchases. (Purchases made in an app shared with FamilySharing may not be accessible after the family member leaves the family group.)Restrict in-app purchases. Many apps provide extra content or enhancements for a fee.To prevent in-app purchases, go to Settings > General > Restrictions, make sureRestrictions is enabled, then turn off In-App Purchases. You can also , such as limiting app downloads by age ratings.Give an app. View the app, tap , then tap Gift (not available for all apps).Family Sharingset otherrestrictions](https://usermanual.wiki/Apple/A1954.Users-Manual-8/User-Guide-3766081-Page-23.png)

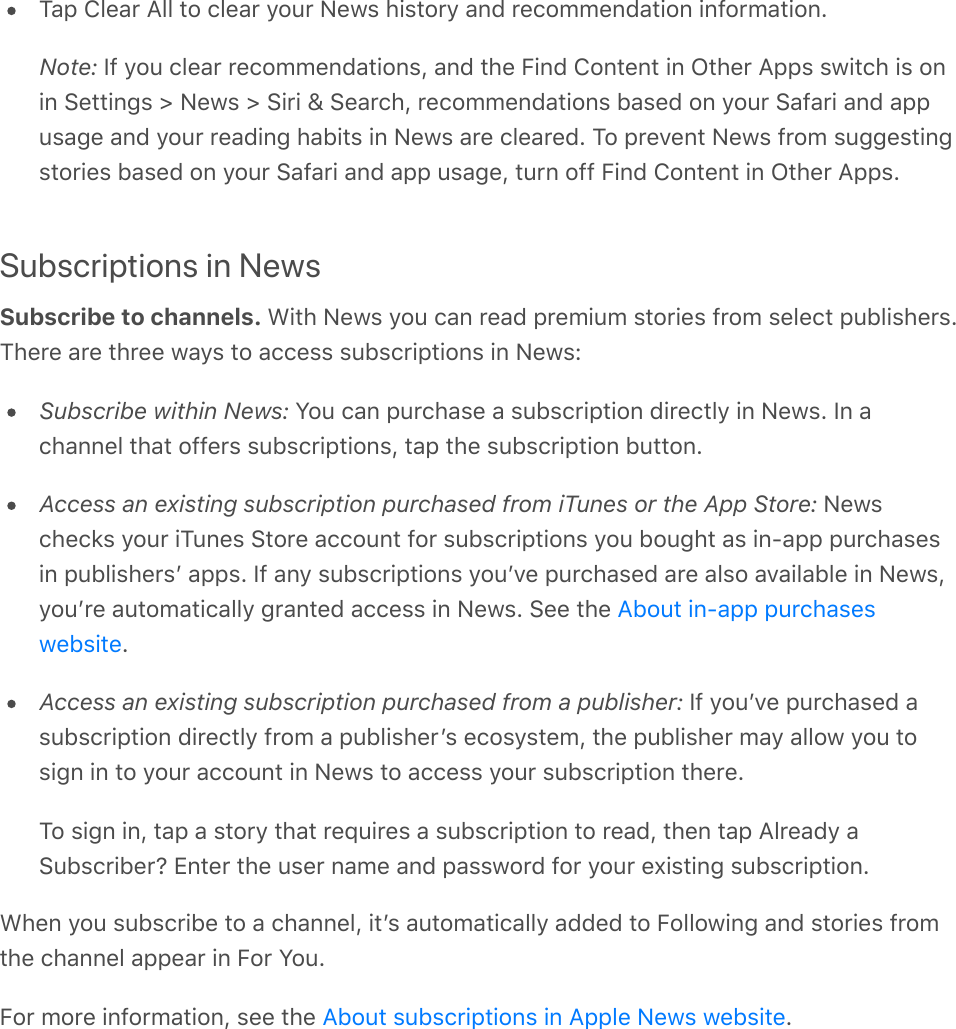
![Hide books you havenʼt downloaded. If you see on a cover or next to a title, you candownload the book again without charge. To remove from view the books that arenʼtdownloaded, tap the name of the current collection (at the top of the screen), then turnon Hide iCloud Books.Cite a book in another app. the book from your library to add its citationto a document in another app. In most apps, the citation for a book from the iBooks Storeincludes a link to the book.Note: When you drag and drop a PDF document from your library, the entire document—not a citation—is copied into the app.Read PDF documentsAdd a PDF email attachment to iBooks. Open the email message, touch and hold thePDF attachment in the message, then tap Copy to iBooks. Or, tap the PDF attachment toopen it, tap any page, tap , then tap Copy to iBooks.Print a PDF document. With the document open, tap , then choose Print (you need anAirPrint-compatible printer). For more about AirPrint, see .Mark up a PDF document. Tap , then use the drawing and annotation tools. (Tap nearthe center of a page if you donʼt see .) For more information, see .Email a PDF document. the document from your library into a message.Or, with the document open, tap , then choose Mail.Copy a PDF document into another app. the document from your libraryto add it to another app, such as Notes or Reminders.Access your entire library in iCloudYou can store your PDF files and other books in iCloud and access them on your otherdevices.Turn on iCloud for iBooks. Go to Settings > [your name] > iCloud > iCloud Drive >iBooks.After you turn on iCloud for iBooks, whenever you add a PDF file (or a book that doesnʼtcome from the iBooks Store) to iBooks, the document is uploaded to iCloud. Thedocument is also added to your other devices where youʼve turned on iCloud for iBooksand youʼre signed in to iCloud with the same Apple ID.To change whether to use iCloud for iBooks, go to Settings > iCloud > iCloud Drive, thenturn iBooks on or off.Drag and dropAirPrintUse MarkupDrag and dropDrag and drop](https://usermanual.wiki/Apple/A1954.Users-Manual-8/User-Guide-3766081-Page-29.png)