Arima Communication 2718 Arima 2718 User Manual NEC e132 EN
Arima Communication Corporation Arima 2718 NEC e132 EN
Contents
- 1. Users Manual
- 2. Users Manual II
- 3. Users Manual I
Users Manual II
27
e132 MENU STRUCTURE
•Valid time: Set the length of time for which your text messages
will be stored at the SMS centre.
•Format: Send different types of messages if supported by your
network provider.
•Delivery report: Get reports informing you if your message has
been delivered or not.
•Reply path: Allow the recipient of your SMS message to send
you a reply through your message centre.
•Broadcast: This is a network service that allows you to receive
text messages on various topics, such as the weather or traffic.
Note: Broadcast must be supported by your network provider.
MMS (Multimedia message)
MMS allows you to send messages that contain text, sound and
pictures. Depending on the network, you may receive a text
message that includes an internet address where you can view the
multimedia message.
Note: A message with pictures is made up of several text
messages. Therefore, sending a message with pictures may
cost more than sending one text message.
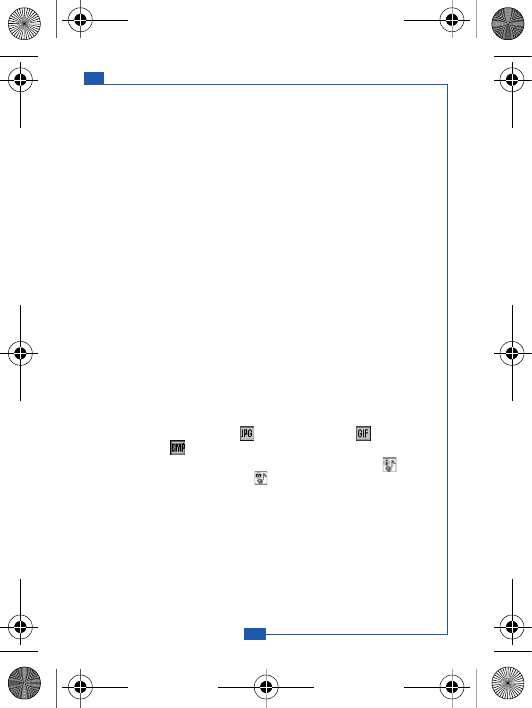
Your phone supports the following MMS formats:
•Picture: JPG (indicate by ), GIF(indicated by ), and BMP
(indicated by ).
•Sound: monophonic ringing tones (indicated by ) and
polyphonic Midi (indicated by ).
Note: You are not able to receive multimedia messages during a
call, a game, or any active WAP connection over GPRS data.
Do not rely upon multimedia messages for essential
communication since delivery of multimedia messages can
fail for a variety of reasons.
NEC_e132_EN.book Page 27 Thursday, June 29, 2006 2:01 PM
28
MENU STRUCTURE e132
To write a MMS
For MMS availability, contact your network operator or service
provider.
1. In the
Message
menu, select
MMS
.
2. Select
Compose
.
3. In edit mode, press
Option
and select
Add text
.
You can insert one picture or a sound in a multimedia message.
To insert a picture, press
Option
and select
Add Picture
. The list
of available folders in the Gallery is shown.
Note: To send and receive picture messages, MMS must be
supported by your network provider.
Your phone provides the following options:
•Add text: Edit the text content.
•Add image: Add a picture or a melody in your message.
•Add audio: Add a melody in your message.
•Add page: Add a page in multimedia messages.
•Preview: Preview your message before sending it.
•Page time: Set a page scroll time when you view the content.
•Send: Send your message.
•Save: Save a message and send it later.
To send multimedia messages
1. Press
Option
and select
Send
.
2. Choose
Phone number
or
E-mail
and press
Select
.
3. Enter the recipient's phone number (or e-mail address) or search
for it in the phone book.
1st MMS size MMS size
Option Back
NEC_e132_EN.book Page 28 Thursday, June 29, 2006 2:01 PM

29
e132 MENU STRUCTURE
3. Select a phone number and press
OK
.
Unsent and Outbox multimedia messages
Your phone saves the multimedia messages that have been
received in the Inbox folder of the MMS menu.
Multimedia messages that have not been sent will be saved in the
Unsent folder, messages that have been sent are saved in the
Outbox folder of the MMS menu.
MMS memory full
If the message memory is full, a dialog is shown on the display. You
will not be allowed to compose or receive any more messages until
old messages have been deleted.
MMS setting
Your phone allows you to set up default settings within MMS.
1. In the
Message
menu, select
MMS
.
2. Select
Settings
.
Your phone provides the following setting options:
•Valid time: Set the length of time for which your text messages
will be stored at the SMS centre.
•Delivery report: Get reports informing you whether your
message has been delivered or not.
Complete the MMS edit.
Sub menu for sending MMS.
Shift the cursor in text edit mode.
Press and hold to change input method.
Press to switch upper case and lower case.
Press and hold to insert symbol.
Keypad information
NEC_e132_EN.book Page 29 Thursday, June 29, 2006 2:01 PM
30
MENU STRUCTURE e132
•Reply path: Allow the recipient of your SMS message to send
you a reply through your message centre.
•Auto reception: Set whether complete or partial message can
be downloaded.
•WAP profile: Select or create WAP settings specifically for MMS.
See the ‘WAP’ section on page 52 for further details.
•MMS server: Set up the MMS server address (information from
your network provider).
Template
If you use one or more messages that you send often, you can save
these messages as templates in your phone.
1. In Standby mode, press
Menu
and select
Message
.
2. Select
Template
.
3. Choose a Template and press
Select
.
4. Enter the content of the template. Press
Option
and select
Save
to
save the message.
Voice mail
If supported by your network provider, your phone allows you to
access your voice mailbox quickly.
• In standby mode, press and hold to access your voice mail
server directly.
Note: To use this function, you may need to enter the voice mail
number from your service provider.
Call Record
Your phone can save information on missed, received and dialled
calls, plus the length and cost of your calls.
Note: Once the call list exceeds the memory limit, the oldest record
is deleted.
NEC_e132_EN.book Page 30 Thursday, June 29, 2006 2:01 PM

31
e132 MENU STRUCTURE
Missed calls/Received calls/Outgoing calls
Your phone allows you to view the last ten unanswered calls. You
can also edit the number or delete the number from the call list.
1. In Standby mode, press
Menu
.
2. Scroll to
Call record
and press
Select
.
3. In the
Call record
menu, choose an item and press
Select
to view
the content.
3. Select a menu and press
Select
.
4. Select the number you want and press
Select
.
5. The call record is displayed. Press
Option
.
Your phone provides the following options:
•Call: Call the number that is shown on the screen.
•Delete: Erase the number from the list.
•Save: Save the number in the phone book.
Call duration
Your phone allows you to view the timers for calls made and
received.
1. In the
Call record menu
, select
Call duration
.
2. Choose an item and press
Select
.
Your phone provides the following options:
•Total
• Last
• Received
• Dialled
• Clear
Call cost
This function allows you to view the cost of calls.
NEC_e132_EN.book Page 31 Thursday, June 29, 2006 2:01 PM

32
MENU STRUCTURE e132
To view the call cost
1. In the
Call record
menu, select
Call cost
.
2. Choose a selection and press
Select
.
Your phone provides the following options:
•Total: Total timers of all calls you have made. If the total cost
exceeds the maximum cost set through Call cost limit, you
will not be able to make any calls. (Does not affect calls to
the emergency services).
•Last: Cost of the last call made.
•Balance: Shows the remaining balance for calls.
•Reset: Reset cost counter. PIN2 code is needed.
•Call Cost Limit and Setting: See below.
To set the Call cost
1. In the
Call record
menu, select
Call cost
.
2. Choose
Call cost limit
, and press
Option
to Activate/Cancel.
3. In the
Call cost
menu, choose
Call cost setting
. Choose a
selection and press
Select
.
This phone provides the following options:
•Unit: Set the cost of one unit.
•Currency: Set the currency type for the cost of your calls.
Note: To activate, you may need the PIN2 code.
Note: Your network provider must support Call Cost Setting.
Data counter
This function allows you to check the data size whilst browsing the
Internet content through GPRS.
Your phone provides the following options:
•Last data
•All data
•Clear
NEC_e132_EN.book Page 32 Thursday, June 29, 2006 2:01 PM

33
e132 MENU STRUCTURE
Settings
Time & Date
This function allows you to view and change the date and time
settings of your phone.
To set the Time
1. In Standby mode, press
Menu
and select
Settings
.
2. In the
Settings
menu, select
Time & Date
.
3. Choose
Set time
and press
Select
. Select
Set time
.
4. Enter the time and press
OK
.
To set the Time format
1. In the
Settings
menu, select
Time & Date
.
2. Choose
Set Time
and press
Select
. Select
Set time format
.
3. Select
12 Hours
or
24 Hours
and press
OK
.
To set the Date
1. In
Settings
menu, select
Time & Date
.
2. Choose
Set Date
and press
Select
. Select
Set Date
.
3. Enter the date and press
OK
.
Melody
Melody allows you to select ring tone volume, choose from different
ring tones or compose your own ringtones.
Ring setting
1. In the
Settings
menu, select
Melody
.
2. Choose
Ring setting
and press
Select
. Choose a selection and
press
Select
.
3. Choose a melody and press
Select
.
You can assign different melodies to the following:
•Incoming call
NEC_e132_EN.book Page 33 Thursday, June 29, 2006 2:01 PM
34
MENU STRUCTURE e132
•Message
•Alarm
•Calendar
•Time Countdown
Ring volume
You can adjust the ring volume to one of six levels.
1. In the
Settings
menu, select
Melody
.
2. Select
Ring volume
.
3. Use to adjust the ring volume and press
OK
.
Ring or Vibrate
You can set the phone to ring or vibrate during an incoming call.
1. In the
Settings
menu, select
Melody
.
2. Select
Ring or Vibrate
.
3. Choose an item and press
OK
.
Your phone provides the following options:
1. Ring only: The phone rings using the ring tone set in the Melody
Ring setting
menu.
2. Vibrate only: The phone vibrates but doesn't ring.
3. Ring & vibrate: The phone rings and vibrates.
4. Vibrate first: The phone vibrates for a few seconds before
ringing.
Key tone
Select a different keypad tone.
1. In the
Settings
menu, select
Melody
.
2. Choose
Key tone
and press
Select
. Select
Key sound
.
3. Choose a key tone and press
Select
.
Display settings
Your phone allows you to alter the display to suit your preference.
NEC_e132_EN.book Page 34 Thursday, June 29, 2006 2:01 PM
35
e132 MENU STRUCTURE
Wallpaper
Set a wallpaper for the LCD display in standby mode.
1. In the
Settings
menu, select
Display
.
2. Select
Wallpaper
.
3. Choose a wallpaper from either the
Default picture
or
Saved
picture
lists.
4. Press
Select
and then
OK
to confirm.
Greeting
This phone allows you to set a greeting animation or briefly
display a message when the phone is switched on.
1. In
the Settings
menu, select
Display
.
2. Select
Greeting
, then choose
Animation
,
Text
or
Off
.
3. Press
OK
to save.
Backlight time
This specifies the screen backlight duration.
1. In the
Settings
menu, select
Backlight time
.
2. Select
Short
,
Medium
or
Long
.
Note: A longer backlight duration will shorten battery life.
Contrast
This specifies the colour contrast on the main display.
1. In the
Settings
menu, select
Main display
.
2. Select
Contrast
.
3. Use to adjust the contrast rate, then press
OK
.
Brightness
You can adjust the contrast of the LCD screen.
1. In the
Settings
menu, select
Brightness
.
2. Select the desired brightness level and press
OK
to confirm.
NEC_e132_EN.book Page 35 Thursday, June 29, 2006 2:01 PM

36
MENU STRUCTURE e132
Language
Your phone allows you to change the displayed language.
1. In Standby mode, press
Menu
. Select
Settings
.
2. In the
Settings
menu, select
Language
.
3. Choose a
Language
, and press
Select
.
Network selection
Network selection allows you to indicate whether the network
used when roaming is selected automatically or manually.
1. In the
Settings
menu, press
Select
.
2. Choose
Network select
and press
Select
.
3. Choose
Auto
or
Manual
and press
Select
.
Note: You can select a network other than your home network only
if it has a valid roaming agreement with your home network.
Call settings
Reject list
This allows you to reject calls from certain numbers. To activate,
you need to save the numbers that you want to reject in the
Reject list. The numbers must first be saved in your phone book.
To activate Reject calls
1. In Standby mode, press
Menu
and select
Setting
.
2. In the
Settings
menu, select
Call setting
.
3. Select
Reject list
.
4. Select
Activate
and set to
ON
.
To add numbers to the Reject list
1. In the
Reject list
, select
Edit
and choose an empty slot to add a
number, then press
Select
.
2. Select
Assign single
or
Assign group
. Enter or search for the
number and press
Select
to save.
NEC_e132_EN.book Page 36 Thursday, June 29, 2006 2:01 PM
37
e132 MENU STRUCTURE
Time alert
This allows you to set a time reminder during a call.
1. In the
Settings
menu, select
Call setting
.
2. Select
Time alert
.
3. Choose an item, and press
Select
.
Your phone provides the following time alert options:
•Off
• Each minute
•User setting
Note: The minimum time for
User setting
is 30 seconds.
Speed dial
You can set the digit keys ( to ) as speed dialling
numbers for fast shortcut access.
To activate speed dial
1. In the
Settings
menu, select
Call setting
.
2. Select
Speed dial
, and set to
On
. press
Select
to save.
Note: Digit key is already used as a shortcut for your voice
mailbox.
Call waiting
This network service enables you to be informed when someone
is trying to reach you during another call.
1. In the
Settings
menu, select
Call setting
.
2. Select
Call waiting
.
3. Choose
Activate
,
Cancel
or
Status
. Press
Select
to confirm.
Call divert
You can set the conditions by which calls are diverted to other
numbers.
NEC_e132_EN.book Page 37 Thursday, June 29, 2006 2:01 PM

38
MENU STRUCTURE e132
To Set call divert
1. In the
Settings
menu, select
Call setting
.
2. Select
Call divert
.
3. Choose when to divert calls and press
Select
. Select
Activate
.
4. Enter the number your calls will be diverted to and press
OK
.
Your phone provides the following divert options:
•Any time: All calls are diverted.
•When busy: Calls are diverted when your phone is engaged.
•No reply: Calls are diverted when the call is not answered.
•Unreachable: Calls are diverted when you have no reception.
•Cancel all: Cancels all call diverts.
Security
The phone and SIM card are protected against misuse by several
security codes.
PIN (4 to 8 digits)
The PIN (Personal Identification Number) code protects your SIM
card against unauthorised use. The PIN code is usually supplied
with the SIM card.
To activate or cancel the PIN code
1. In the
Settings
menu, select
Security
.
2. Select
PIN
.
3. Choose
On
or
Off
and press
Select
.
Note: The PIN code will be required if you are changing the setting.
Phone code
The phone code protects the phone against unauthorised use.
1. In the
Settings
menu, select
Security
.
2. Select
Phone code
.
3. Choose
On
or
Off
and press
Select
.
NEC_e132_EN.book Page 38 Thursday, June 29, 2006 2:01 PM

39
e132 MENU STRUCTURE
Note: The phone code will be required if you are changing the
setting.
Auto keylock
This will activate the key lock automatically in idle mode.
1. In the
Settings
menu, select
Security
.
2. Select
Auto keylock
.
3. Choose
On
or
Off
and press
Select
.
Call barring
This network service allows you to restrict your calls.
To activate call barring:
1. In the
Settings
menu, select
Security
.
2. Select
Call barring
.
3. Make your choice and press
Select
.
Your phone provides the following call barring options:
•Outgoing: All outgoing calls are barred.
•Int'l calls (international calls): International calls are barred.
•ICEH (Internal Call Except Home): When abroad, calls can be
made within the current country and to your home country, where
your home network provider is located.
•Incoming: All incoming calls are barred.
•Incoming (Roaming): Incoming calls are barred while using the
phone outside your country.
•Code Change: Change call barring code.
Note: Call barring is a network service. A password is needed to
change the settings.
FDN (Fixed Dial Number)
This allows you to restrict your outgoing calls to a limited set of
phone numbers.
NEC_e132_EN.book Page 39 Thursday, June 29, 2006 2:01 PM

40
MENU STRUCTURE e132
To set FDN
1. In the
Settings
menu, select
Security
.
2. Select
FDN
, enter the PIN2 code and press
OK
.
3. Make your choice and press
Select
.
Your phone provides the following options:
•Activate
• Member list
• Add member
• Delete all
Note: To activate, you may need to enter the PIN2 code.
Change codes
This allows you to change your current code to a new one. To
change the code, you need to enter the current code before you
can specify a new one.
To change the codes
1. In the
Settings
menu, select
Security
.
2. Select
Change codes
.
3. Make your choice and press
Select
.
Your phone provides the following code options:
• Change PIN
• Change PIN2
• Phone code
Note: Please refer to
Security
on page 38 for further details.
Reset all
This allows you to reset your phone to its default configuration. Before
resetting, you may need to enter the phone’s code.
1. In the
Settings
menu, select
Security
.
2. Select
Reset all
.
3. Key in the phone code and press
OK
.
NEC_e132_EN.book Page 40 Thursday, June 29, 2006 2:01 PM

41
e132 MENU STRUCTURE
Camera
You can use this phone to take photos with the phone's built-in
camera and adjust the camera settings.
The camera lens is on the back of the phone, and the display of the
phone works as a viewfinder.
If there's not enough memory for new pictures, you need to delete
old photos to free up space for new ones.
Note: Do not use the camera when it violates local laws.
Camera indications
: Save the photo or video
: Shutter the photo and take video
:Back
: Default zoom size
:Zoom in
: Flash light
: Option menu
: Photo mode
: Multi-shot mode
: In video mode
: Video play
: Video record
: Stop recording video
: Pause
: Self timer
Photo
To take a photo:
1. In standby mode, press and hold the camera key to enter camera
mode. Select
Photo
.
2. To take a photo, press the camera or key.
3. To save the photo, press the
key
. When taking a photo, a
shutter sound is heard. The photo is saved in the
Picture gallery
in
the
My Data
menu.
NEC_e132_EN.book Page 41 Thursday, June 29, 2006 2:01 PM
42
MENU STRUCTURE e132
4. Select to take another photo or press to enter the
Option
menu.
Note:
When you are in photo mode, the screen will show the icon.
Multi-shot
To take multi-shot:
1. In standby mode, press and hold the camera key to enter
Camera mode. Select
Photo
.
2. Press , and choose Multi-shot.
3. Select
On
or
Off
.
Note: When you are in multi-shot mode, the screen will show the
icon.
Your phone provides the following items for camera settings.
•Self-timer: Set the camera self time. Once the time has elapsed, the
camera takes the photo and saves it in the
My data > Picture Gallery
menu. While the self-timer is running, a beeping sound is heard.
•Date: Show the date in photos.
•Digital Effect: Set your favourite effect in your photos. This
phone provides Monochrome, Negative and Sepia effects.
•Quality: Set the photo quality. This phone provides Excellent,
Fine and Basic options. Excellent provides the best quality but
takes up more memory.
•Picture size: This phone provides Large (640x480) and Normal
(128x160) for your options. Large takes more memory.
•Flash light: Turn the flash light On or Off.
Video
To t ak e V id eo
1. In standby mode, press the camera key to enter camera mode.
Select
Video
.
2. To take video, please press to start recording. Press to
stop recording.
NEC_e132_EN.book Page 42 Thursday, June 29, 2006 2:01 PM
43
e132 MENU STRUCTURE
3. Press to see the video you have just recorded. To save it,
press the key.
4. When recording video, a shutter sound is heard. The video is
saved in the
Video gallery
in the
My data
menu.
5. Select to take another video or to enter the Camera
menu.
Note:
When you are in video mode, the screen will show the icon.
Profile
Your phone has the following profiles:
•Normal: Phone is set to the standard profile, which is the factory
setting.
•Meeting: Ring volume is set to low and the key tone is switched off.
•Outdoor: Ring and key tone volume are set to loud.
•My profile: Set your preferred settings in this profile.
Note: To quickly access Profiles, press in standby mode.
To activate a Profile
1. In standby mode, press
Menu
. Select
Profile
.
2. Choose a profile and press
Select
.
3. Select
Activate
.
To edit a Profile
You can personalise the profile settings:
1. In the
Profile
menu, select a profile.
2. Select
Personalize
.
Your can personalise the following options:
• Ring or vibrate
• Incoming
• Message
• Ring volume
•Key tone
NEC_e132_EN.book Page 43 Thursday, June 29, 2006 2:01 PM
44
MENU STRUCTURE e132
Note: Press and hold the key when in standby to activate Silent
mode. Silent mode overrides any profile currently activated.
Press and hold the key again to turn Silent mode OFF.
Accessories
Bluetooth
Your phone supports Bluetooth wireless connections. You can set up
a wireless link with a Bluetooth-enabled handset accessory,
speakerphone, or handsfree car kit.
Bluetooth on/off
To turn the Bluetooth function on/off.
1. In standby mode, press
Menu
. Select
Accessories
.
Or long press of right navigation key.
2. Select
Bluetooth
.
3. Choose
Bluetooth
on
or
Bluetooth
off
, press Select.
My device
Your phone allows you to search for new Bluetooth devices. It
displays a list of device(s) located within range of the phone. If your
phone is already connected to a device, your phone will list the
connected device name for types.
: Bluetooth handsfree/earphone
: Bluetooth-enabled computer
: Bluetooth handset
Note: For more information about Bluetooth wireless connections,
refer to the user's guides for your Bluetooth devices.
Search and add a Bluetooth device to your phone
1. In standby mode, press
Menu
. Select
Accessories
.
2. Select
Bluetooth
.
3. Choose
Bluetooth
on
, press Select.
NEC_e132_EN.book Page 44 Thursday, June 29, 2006 2:01 PM
45
e132 MENU STRUCTURE
4. Select
My
device
.
Note: If there is no device in the list, It will display a prompt "No
device, search around?". You can search for a device by pressing
Yes.
Your phone provides the following options:
Add: Search around bluetooth device.
Connect: Connect with a device. The device may need the
passcode to pair with your phone.
Set as authorised: Setting the device as authorised will enable it
to automatically connect without confirmation.
Rename: Change the device name.
Delete: Delete one device in the list.
Delete all: Delete all devices in the list.
Accept a file from the other device
1. When you receive a vCard/Picture via bluetooth, A prompt
"Receive vCard/Picture from (Device's name)" will be displayed.
2. You can select left soft key for "Accept", right soft key for
"Reject".
Note: A vCard will automatically save in the phone book. A picture
file will save in Public Picture. Fine format via Bluetooth is restricted
to BMP, JPG, and GIF files. The file size cannot exceed 30KB.
Handsfree
Answer an incoming call using a Bluetooth speakerphone or
handsfree car kit.
1. Pick up the incoming phone by answer key of handset or
Bluetooth speakerphone.
2. You may switch the phone by pressing
Option
.
3. Select
In
handsfree
or
In
phone
.
Your phone provides the following options:
Add: Search around for handsfree equipment.
NEC_e132_EN.book Page 45 Thursday, June 29, 2006 2:01 PM

46
MENU STRUCTURE e132
Connect: Connect with the searched handsfree. You will need
the passcode to connect with the device.
Incoming call: Select to answer the incoming call by phone or by
handsfree equipment.
My Phone
You can turn your phone's visibility On or Off.
1. In standby mode, press Menu. Select Accessories.
2. Select Bluetooth, press Select.
4. Select My Phone.
Your phone provides the following options:
Visibility: Set visibility on or off .
Rename: Change your phone's name.
Note: If the visibility is off, the other bluetooth devices will not find
your phone.
Calendar
In the calendar you can add notes for things such as meetings,
birthdays and reminders. The phone sounds an alarm tone when the
set date and time arrives.
To add a note and reminder in the Calendar
1. In standby mode, press
Menu
. Select
Accessories
.
2. Select
Calendar
.
3. Choose a day and press
Option
. Select
Make a note
.
4. Key in the note and press
Option
and then
Save.
Confirm the
date and time.
5. Select
Reminder
. A dialog confirming the note has been saved is
displayed.
Your phone provides the following calender options:
•View today: View the notes for the specified day.
•View all: View all notes made in the calendar.
NEC_e132_EN.book Page 46 Thursday, June 29, 2006 2:01 PM
47
e132 MENU STRUCTURE
•Make a note: Add a note for a specified day.
•Delete: Delete a note or all notes made in the calendar.
To delete a note
1. In the
Calendar
menu, select
Delete
.
2. Select
Delete today
,
One by one
or
All
.
3. Select
Yes
to confirm.
Calculator
The calculator in this phone adds, subtracts, multiplies, divides, and
converts currency values.
To use the calculator
• In the
Accessories
menu, select
Calculator
.
Your phone provides the following options:
• Four way key
Left
: ÷ (Divide)
• Four way key
Right
: * (Multiply)
• Four way key
Up
: + (Add)
• Four way key
Down
: - (Subtract)
• Left soft key
(OK)
: = (Equals)
• : Make number ‘minus’ (e.g. -5)
• : Decimal point.
Note: Rounding errors may occur, especially in long divisions.
Stopwatch
The stopwatch allows you to time an event or record times.
To use the stopwatch
1. In the
Accessories
menu, select
Stopwatch
.
2. Select
Start
and then press
Start
.
3. Press
Split
when you want to take an intermediate time.
Intermediate timers are listed below the display.
4. Press
Stop
to stop the stopwatch.
5. Press
Menu
to
Save
or
Reset
the stopwatch.
NEC_e132_EN.book Page 47 Thursday, June 29, 2006 2:01 PM
48
MENU STRUCTURE e132
Note: Using the stopwatch consumes battery power and the
phone's operating time will be reduced.
Time count down
Set a timer in your phone. The last three seconds are indicated by a
beep, at the end a special beep sounds.
To use the Time count down
1. In the
Accessories
menu, select
Time count down
.
2. Enter the length of the countdown and press
Start
.
Alarm
Set the alarm to ring at the time specified. The alarm clock works
even when the phone is switched off.
To set the alarm
1. In the
Accessories
menu, select
Alarm
.
2. Enter the time for the alarm and press
OK
.
3. Select
Once Alarm
or
Repeat Alarm
.
Note: If
Repeat Alarm
is selected, you need to enter the days that
you wish the alarm to go off. Select each day with the
key.
When the alarm rings
Press the left soft key to set
Snooze
or the right soft key to turn off
the alarm.
Game
New game options.
•Play: Start a new game.
•Music: Enable or disable music.
•High scores: Show the highest scores.
•Help: Show the rules of the game.
NEC_e132_EN.book Page 48 Thursday, June 29, 2006 2:01 PM
49
e132 MENU STRUCTURE
My data
Picture gallery
This folder saves all videos that have been saved from MMS, WAP
download or the camera. The videos are automatically saved in the
Video gallery. The camera produces video files in Motion JPEG format.
To edit the images
1. In standby mode, press
Menu
, and select
My data
.
2. Select the required
Picture Folder
.
3. Choose a picture and press
Select
.
4. Choose an item and press
Select
to edit.
Your phone provides the following edit options:
•View: View the pictures saved in the gallery.
•Send MMS: Select a picture and use the MMS function to send it
to your friends.
•Send via Bluetooth: Select a picture and send it via Bluetooth.
•Rename: Rename a picture.
•Save to My picture: Forward the picture to My picture (you will
need to enter the password).
•Delete: Delete the picture.
•Information: View the file type and size.
•Delete All: Delete all pictures.
Note: When sending pictures via MMS, the file size cannot exceed
100KB. When sending pictures via Bluetooth, the file size
cannot exceed 300KB. For Bluetooth transmission, the
picture formats is restricted to GIF and JPEG.
Your phone provides the following picture formats:
:BMP
:EMS
:GIF
NEC_e132_EN.book Page 49 Thursday, June 29, 2006 2:01 PM
50
MENU STRUCTURE e132
:JPG
:WBMP
Note: If you download any document which cannot be forwarded by
MMS or data cable, the Icon will be highlighted by a red mark.
Video gallery
This folder contains all videos that have been saved. The videos are
automatically saved in the Video Folder. The camera produces
Motion JPEG video.
Note: Only the Motion JPEG format can be played or saved.
To edit the images
1. In the standby mode, press
Menu
and select
My data
.
2. Select the required
Video Folder
.
3. Choose a picture and press
Select
.
4. Choose an item and press
Select
to edit.
Your phone provides the following edit options:
•View: View the videos saved in the gallery.
•Rename: Rename a video.
•Save to My video: Forward the video to My video (you will need
to enter the password).
•Delete: Delete video.
•Information: View the file size and type.
•Delete All: Delete all videos.
Your phone provides the following video format:
: Motion JPEG
Melody gallery
This folder contains all melodies that have been saved. The
melodies are automatically saved in the Melody gallery. You can also
send these melodies to your friends in a multimedia message as an
e-mail attachment.
NEC_e132_EN.book Page 50 Thursday, June 29, 2006 2:01 PM
51
e132 MENU STRUCTURE
To edit the melody
1. In standby mode, press
Menu
and select
My data
.
2. Select
Melody gallery
.
3. Choose a melody to listen to.
Your phone provides the following selections edit options:
•Rename: Rename a melody name.
•Send MMS: Select a melody and use the MMS function to send it
to your friends.
•Send via bluetooth: Select a melody and send it via bluetooth.
•Delete: Delete the melody.
•Information: View the file size and type.
Note: When sending pictures via MMS, the file size cannot exceed
30KB. For bluetooth function, the melody size cannot excess
300KB.
Memory Status
This function shows how much memory has been used. The total
user memory is 2713KB.
WAP service
Your phone supports a Web Browser. You can obtain various
services such as up-to date news, weather, sport, and other
information as well as use e-mail and other Internet services. These
services are designed and maintained by WAP service providers.
WAP services use Wireless Markup Language (WML) on their WAP
pages. You may not view the normal Internet pages on your phone.
Note: To activate the WAP service, you may need to contact your
service provider.
Note: Do not switch the phone on when use is prohibited or when it
may cause interference or danger.
NEC_e132_EN.book Page 51 Thursday, June 29, 2006 2:01 PM
52
MENU STRUCTURE e132
WAP setting
• If the settings have already been made by the Service Provider,
you may browse immediately.
• If access profiles have already been assigned by your Service
Provider, select a profile and activate it.
• Otherwise you may key in the setting manually. For the correct
settings, contact your network operator or service provider.
Key in the service settings manually
1. In the WAP menu, select
WAP Profile
.
2. Choose a profile, press
Select
, and then select
Edit
to edit the
settings.
You need to enter Homepage, User ID, Password and IP address
information in to your phone. To get the information, you may need
to contact your service provider.
Dial type:
You can access WAP via GSM or GPRS.
1. In the WAP menu, select
WAP profile
.
2. Choose a profile, press
Select
, and then select
Edit
.
3. Select
Dial type
, and then choose either
GSM
or
GPRS
.
To get the GPRS access point, you may need to contact your service
provider for the service.
Activate WAP settings
After you complete all WAP settings, select
Activate
from the
WAP
profile
menu.
Homepage
To launch the browser from standby mode, press the key. Once
connected, the homepage is displayed. Content depends on the
service provider.
To exit the browser, press the key.
NEC_e132_EN.book Page 52 Thursday, June 29, 2006 2:01 PM

53
e132 MENU STRUCTURE
Bookmark
You can save the addresses of up to five Internet sites for easy
access using the Bookmark feature.
Go to
Open any web page by entering its URL address.
Edit bookmark
Create or edit a local bookmark.
1. Choose a bookmark and press
Select
.
2. Select
Edit
.
3. Enter the URL address and press
OK
.
Your phone also provides you the following options:
•Delete: Delete the selected bookmark.
•Send address: Open the selected page.
Push inbox
Your phone is able to receive service messages sent by your service
provider. Service messages are notifications of headlines or content,
and they may contain the address of a WAP service.
To access the Push inbox in standby mode, press
Read
when you
receive a service message. The message is moved to the Push
inbox when you exit the message.
To Set the Push inbox
1. In the
WAP
menu, select
WAP profile
.
2. Select a profile.
3. Choose
Edit
and then
Push access
.
4. Choose
Push access
and press
OK
.
5. Select
On
.
Note: If you select
Off
, the phone will not receive service messages.
To access the Push inbox menu
• In the
WAP
menu, select
Push inbox
.
NEC_e132_EN.book Page 53 Thursday, June 29, 2006 2:01 PM
54
MENU STRUCTURE e132
To access the Push inbox while browsing
1. Press
Option
, and select
Push inbox
.
2. Choose a message and press
Select
.
Your phone provides the following options:
•View: View detailed information on service notification.
•Delete: Delete the selected service notification.
•Load: Download the displayed content.
Certificates
In the Certificate management list, you can see a list of authority
certificates that have been stored in your phone. Use to see a
list of user certificates, if available.
Clear cache
The services you have accessed are saved in the cache of your
phone. A cache is a buffer memory, which is used to temporarily
save data.
To clear the cache
• While browsing, press
Option
and select
Clear the cache
, or
• In the
WAP Menu
, select
Clear cache
and confirm by selecting
Yes
.
STK
SIM toolkit
In addition to the functions available in the phone, your service
provider may offer additional applications such as weather or stock
market information via the SIM card.
To set up the STK service
•Select
STK
in the main menu.
Note: For availability, you need to register for the services with your
service provider.
Note: Accessing these services may involve sending an SMS
message for which you may be charged.
NEC_e132_EN.book Page 54 Thursday, June 29, 2006 2:01 PM
55
e132 GPRS
GPRS (General Packet Radio Service) is a technology used for
sending and receiving data over mobile networks. The applications
that use GPRS are WAP services, MMS and SMS messaging, Java
application downloading and GPRS dial-up (such as Internet and
e-mail). You can set the phone to automatically register to a GPRS
network when you switch the phone on.
Note: To use GPRS function, you may need to register for the
service with your service provider.
To get the GPRS service
1. In the WAP menu, select
WAP profile
.
2. Choose a profile, press
Select
, and then select
Edit
.
3. Select
Dial type
, and then
GPRS
.
Transfer any stored data from the phone to PC or vice versa. The
tools to operate this function are available as accessories and are
not included in the box. Please contact the outlet where you
purchased the product from for availability.
GPRS
PC sync
NEC_e132_EN.book Page 55 Thursday, June 29, 2006 2:01 PM