Avaya J179 IP Phone User Manual Using Avaya D6 D7 IP Phones SIP
AVAYA IP Phone Using Avaya D6 D7 IP Phones SIP
UserManual.wiki
>
Avaya
>
J179 User Manual
User Manual
Navigation menu
Upload a User Manual
Namespaces
Wiki Guide
HTML
PDF
Info
Views
User Manual
Discussion / Help
Navigation

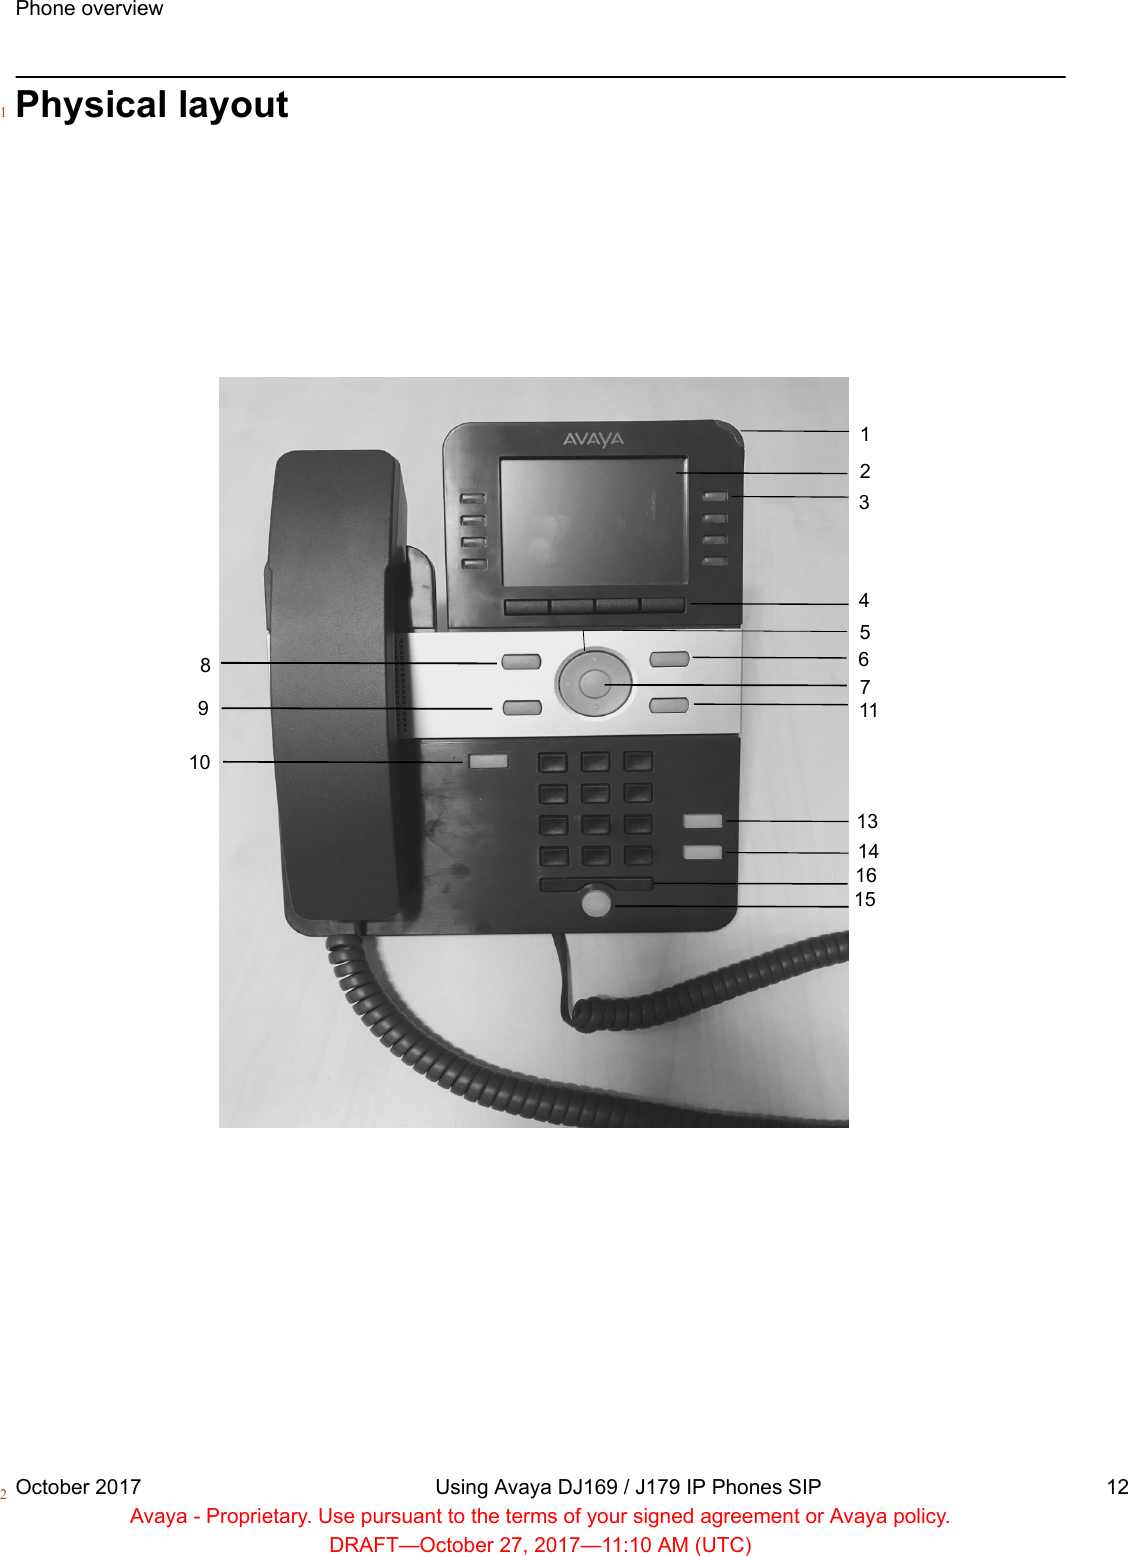

![The deskphone displays a list of enhanced call forwarding rules.12. Select the required rules from the following list, and enter the corresponding numbers.2• Forward all calls:3• Internal [Enter Number]4• External [Enter Number]5• Forward when busy:6• Internal [Enter Number]7• External [Enter Number]8• Forward when no answer:9• Internal [Enter Number]10• External [Enter Number]11If you have configured a number for any of the rules, the deskphone displays that number in12place of the text Enter Number.133. Press Save to save the destination number.144. Perform one of the following actions:15• To activate forwarding for a rule, press Turn on for that rule.16• To activate forwarding for all the rules, press All on.17Editing a rule18Procedure191. Access the Enhanced Call Forward feature from the Features screen.202. Select the rule that you want to edit and press Edit.213. Enter the destination number using the numeric keypad.224. Press Save.23Turning off a rule24Procedure251. Access the Enhanced Call Forward feature from the Features screen.262. Select the rule that you want to turn off.273. Press Turn off.284. To turn off all the active rules, press All off.295. Press Exit.30Customizing SettingsOctober 2017 Using Avaya J169 / J179 IP Phones SIP 56Avaya - Proprietary. Use pursuant to the terms of your signed agreement or Avaya policy.DRAFT—October 27, 2017—11:10 AM (UTC)](https://usermanual.wiki/Avaya/J179/User-Guide-3721064-Page-56.png)