Avery Dennison Retail Information Services SDCCF20G Summit WLAN radio Module User Manual Summit Data Communications
Avery Dennison Retail Information Services, LLC Summit WLAN radio Module Summit Data Communications
Contents
- 1. Module User Manual
- 2. Host User Manual
- 3. Use manual Regulatory Info
Module User Manual
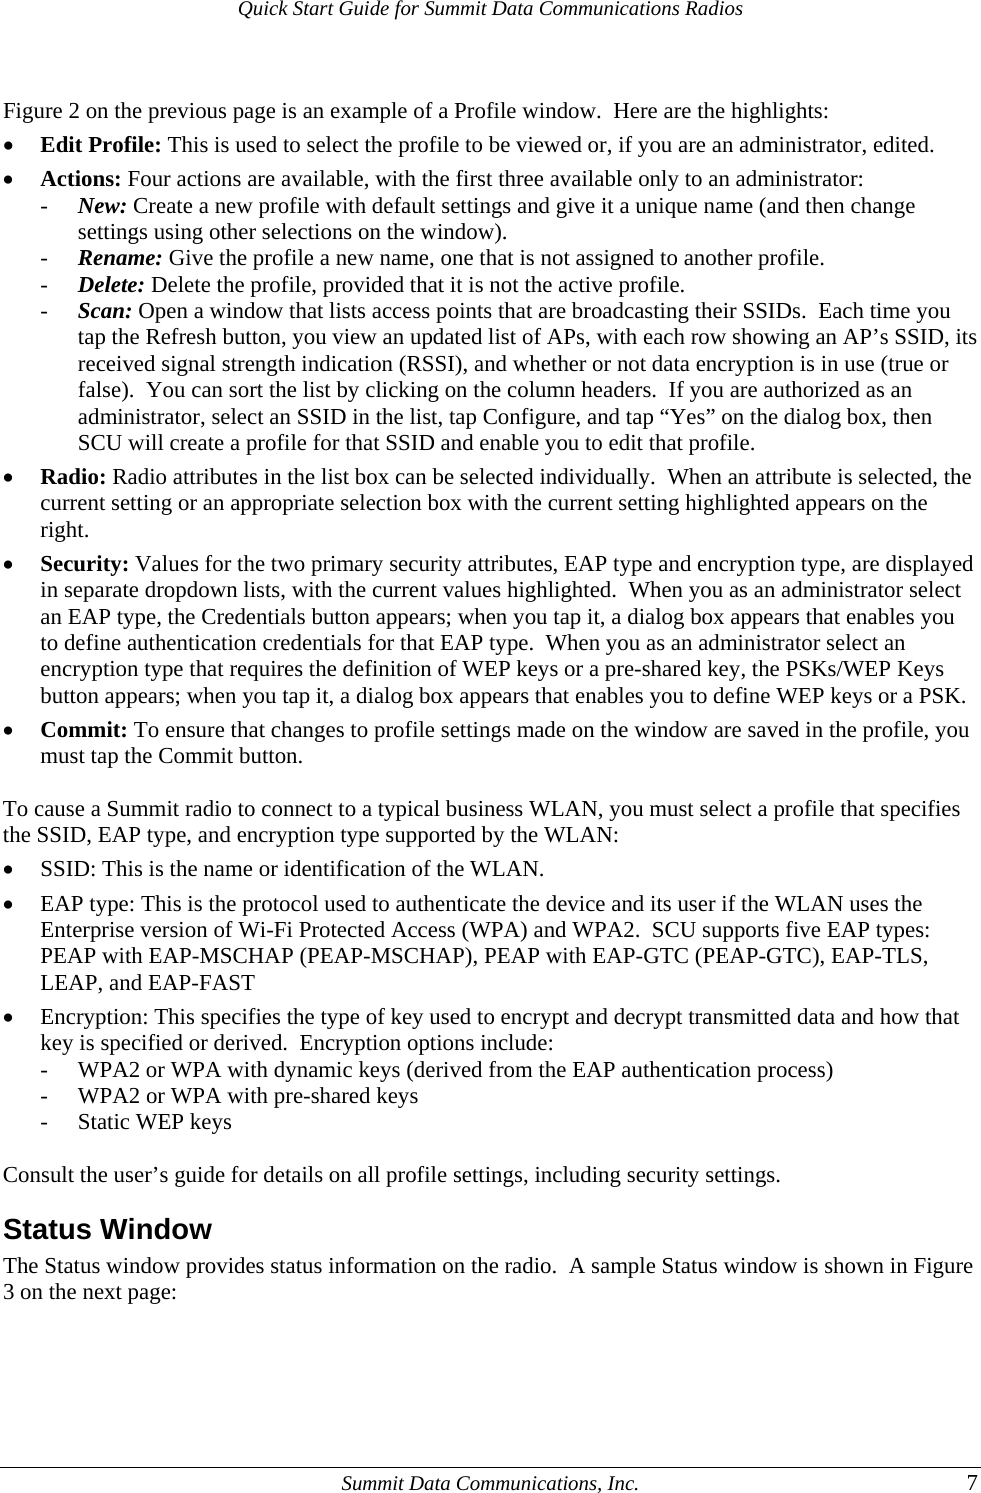
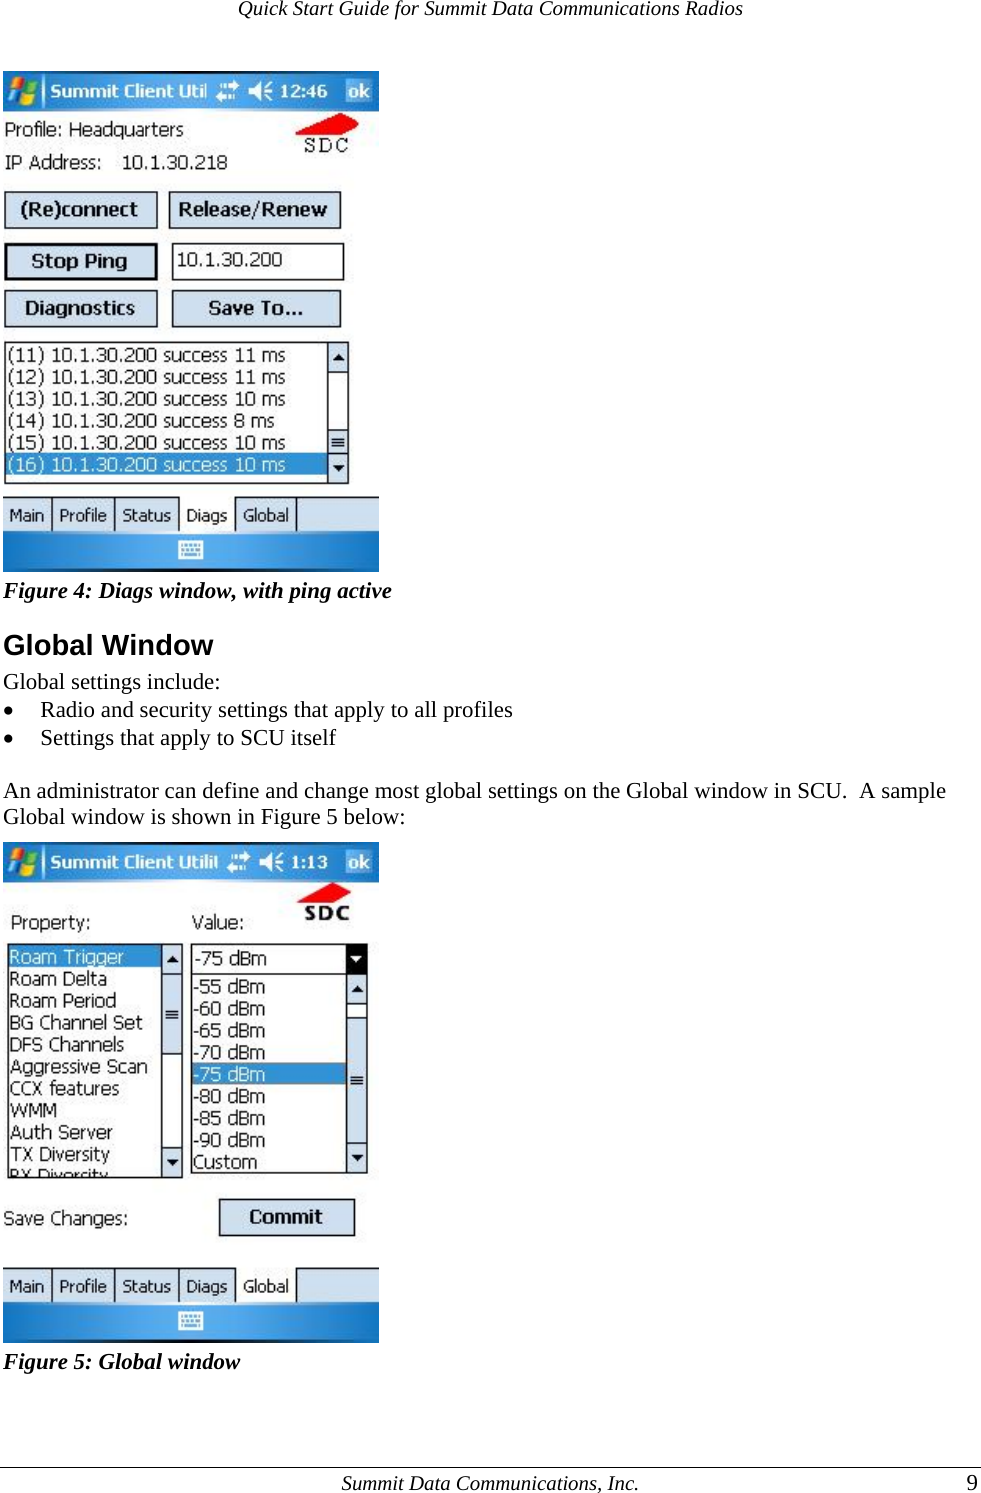
![Quick Start Guide for Summit Data Communications Radios Figure 3: Status window Here are the highlights: • Active profile • Radio’s status: Down (not recognized), Disabled, Not Associated, Associated, or [EAP type] Authenticated • Client info: Name, IP address, and MAC address • AP info: Name, IP address, MAC address, beacon period, and DTIM interval • Connection info: Channel, data rate, transmit power, signal strength, and signal quality Diags Window A sample Diags, or troubleshooting, window is shown in Figure 4 on the next page. Here are the functions available on the Diags window: • (Re)connect: Disable and enable the radio, apply or reapply the current profile, and attempt to associate and authenticate to the wireless LAN, logging all activity in the output area at the bottom. • Release/Renew: Obtain a new IP address through DHCP release/renew, and log all activity in the output area at the bottom. • Start Ping: Start a continuous ping to the address in the edit box next to it. Once the button is clicked, its name and function will change to Stop Ping. Moving to an SCU window other than Status or Diags also will stop the ping, as will Pings will continue until you tap the Stop Ping button, move to an SCU window other than Diags or Status, exit SCU, or remove the radio. • Diagnostics: Attempt to (re)connect to an AP, and provide a more thorough dump of data than is obtained with (Re)connect. The dump will include radio state, profile settings, global settings, and a BSSID list of APs in the area. • Save To...: Save the diagnostics output to a file. Summit Data Communications, Inc. 8](https://usermanual.wiki/Avery-Dennison-Retail-Information-Services/SDCCF20G.Module-User-Manual/User-Guide-1211294-Page-9.png)