BUFFALO 09101577-0 Air Station (High Power Wireless Router) User Manual WHR HP G54 Manual indd
BUFFALO INC. Air Station (High Power Wireless Router) WHR HP G54 Manual indd
BUFFALO >
Contents
- 1. Manual 1
- 2. Manual 2
- 3. Manual 3
- 4. Manual 4
- 5. Manual 5
Manual 3
31
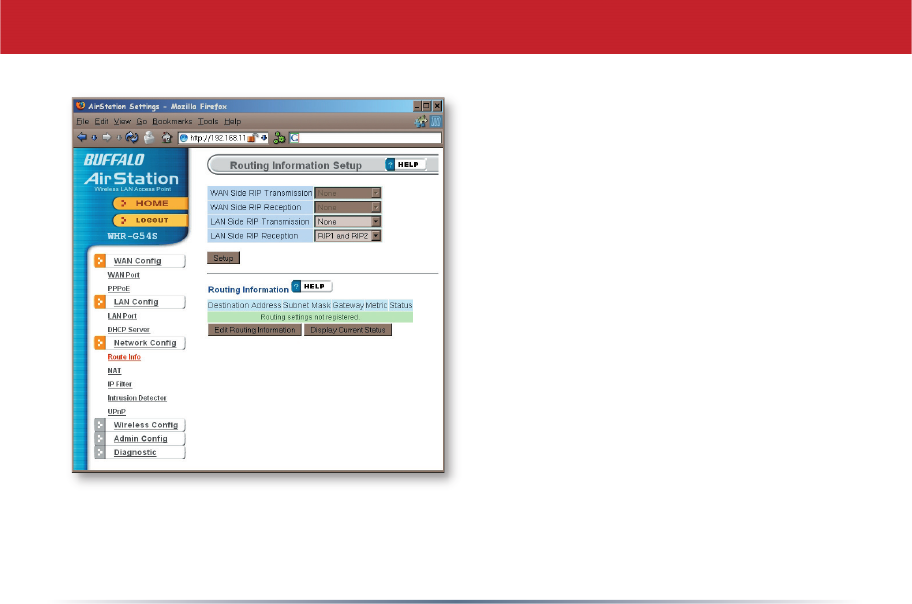
By default, the AirStation receives RIP
(Route Information Protocol) informa-
tion only from your local network, and
doesn’t broadcast RIP at all. For large,
complicated network confi gurations,
you may wish to modify this behavior.
Click Apply when you have your desired
confi guration.
Lower on the page, routing information
is displayed. Click Edit Routing Informa-
tion to add a new route manually.
Network Confi g (Route Info)
32
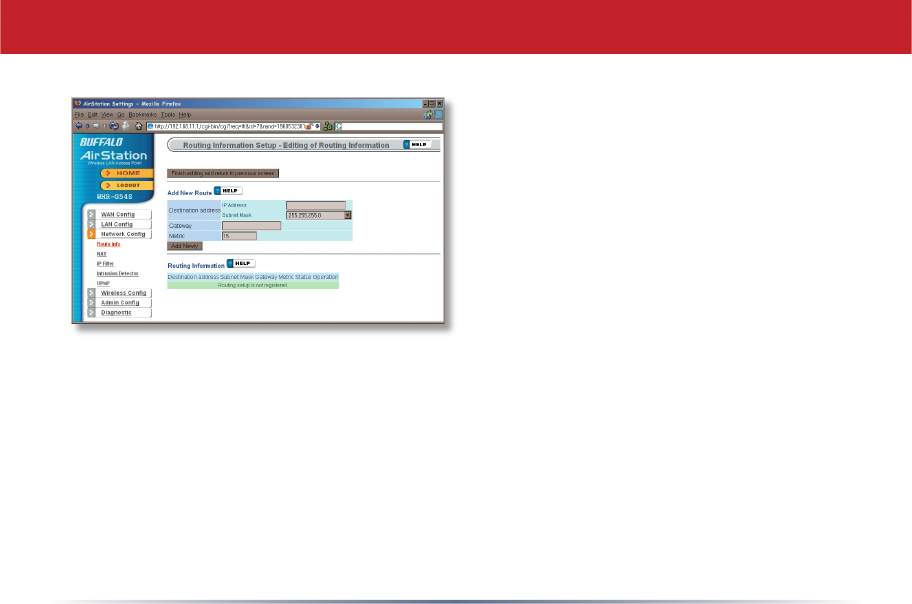
To confi gure a route manually, enter its
Destination Address and Gateway. Enter
a maximum number of hops allowable in
Metric and click Add.
Network Confi guration (Edit Routing Information)
33
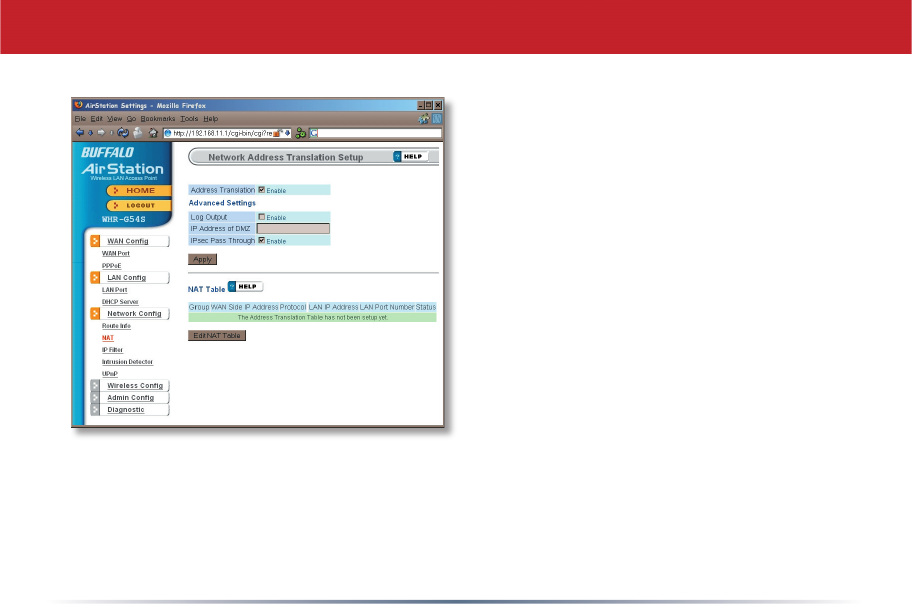
NAT
You may disable Network Address
Translation and IPsec passthrough by
unchecking the appropriate Enable boxes.
If you have a DMZ, enter its IP address
in the IP Address of DMZ box. Incoming
packets containing no recognizable
destination port information will be
redirected to the DMZ’s IP address.
Click Apply when done.
To set a NAT table entry manually, click
Edit NAT Table.
34
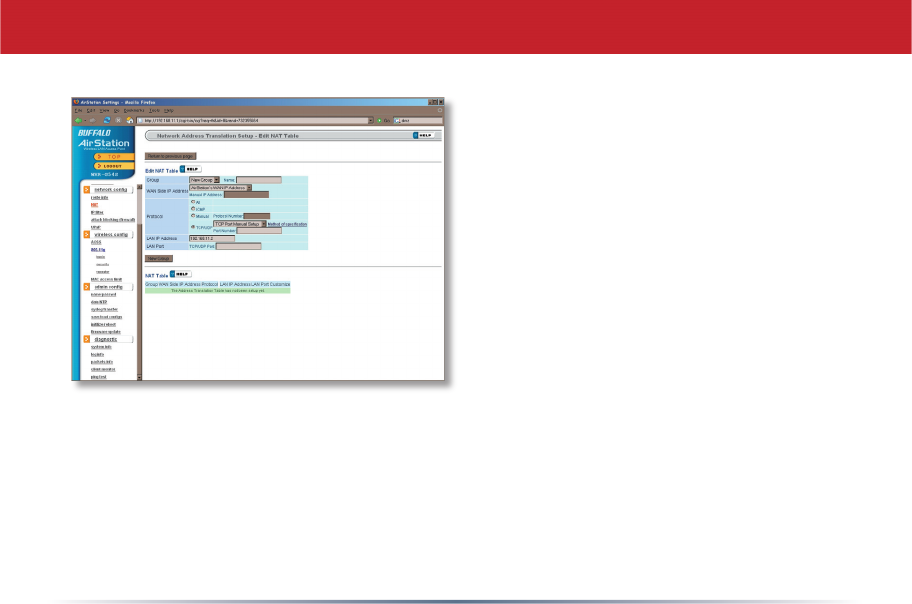
NAT (Manual Entry)
From this page you may manually add
entries into the Address Translation
Table. Click Add New Group when each is
complete.

35
Your AirStation comes pre-confi gured
with basic rules. You may choose which
of these to use by clicking on Add/Delete
Basic Rules and turning to page 36.
To make a custom rule, click on Confi gure
IP Filter (page 37).
IP Filter
36
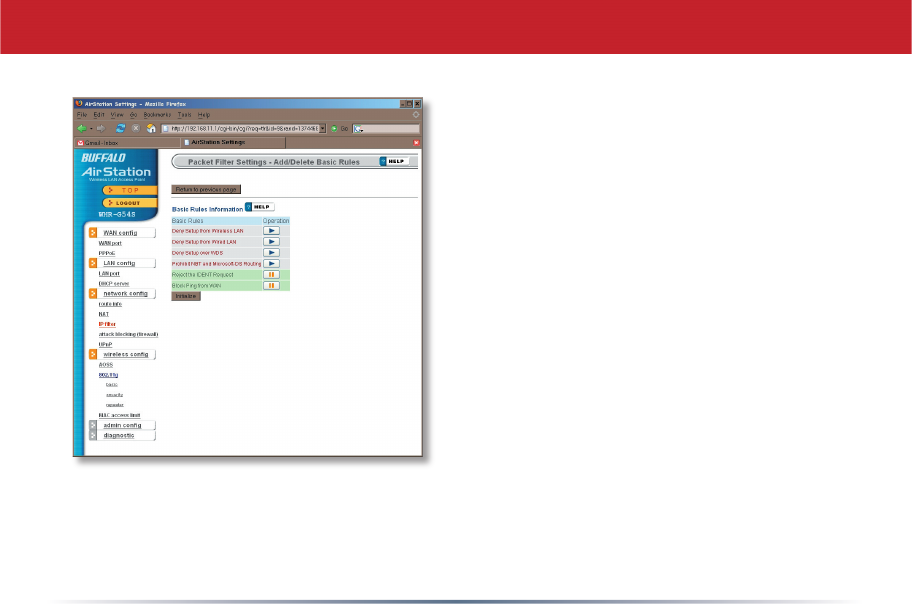
Get here by clicking on Add/Delete Basic
Rules (see page 35). You may choose which
of AirStation’s preconfi gured basic rules
are enabled or disabled. Active rules are
displayed with a green background, and
disabled rules are shown in red. Choose
the rules you want to use by clicking under
Operation. When your choices are complete,
click on Initialize.
IP Filter (Add/Delete Basic Rules)
37
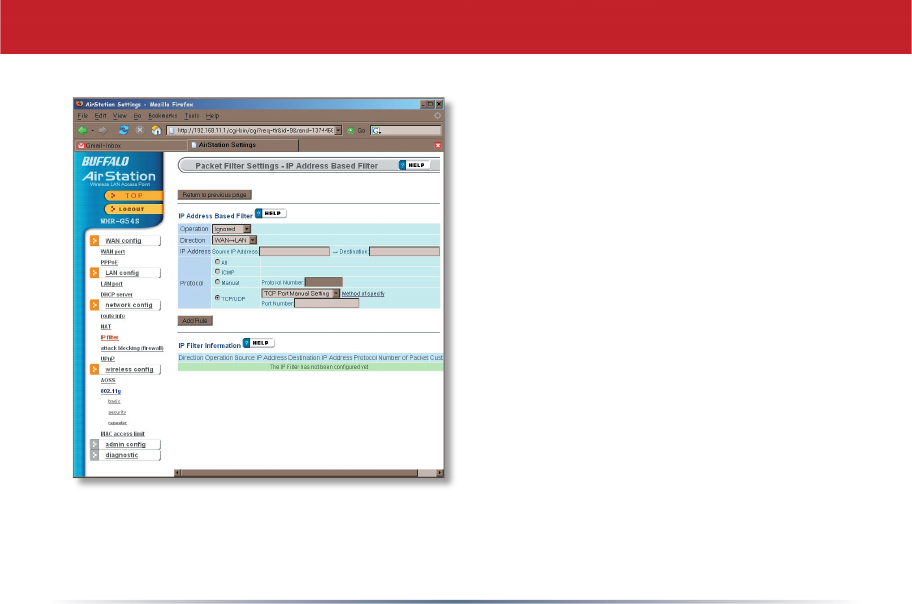
Clicking on Confi gure IP Filter from the IP
fi lter page (page 35) will bring you to this
page, where you can make your own rules.
Click Add Rule when you have each rule
confi gured the way you want it.
IP Filter (Confi gure IP Filter)
38
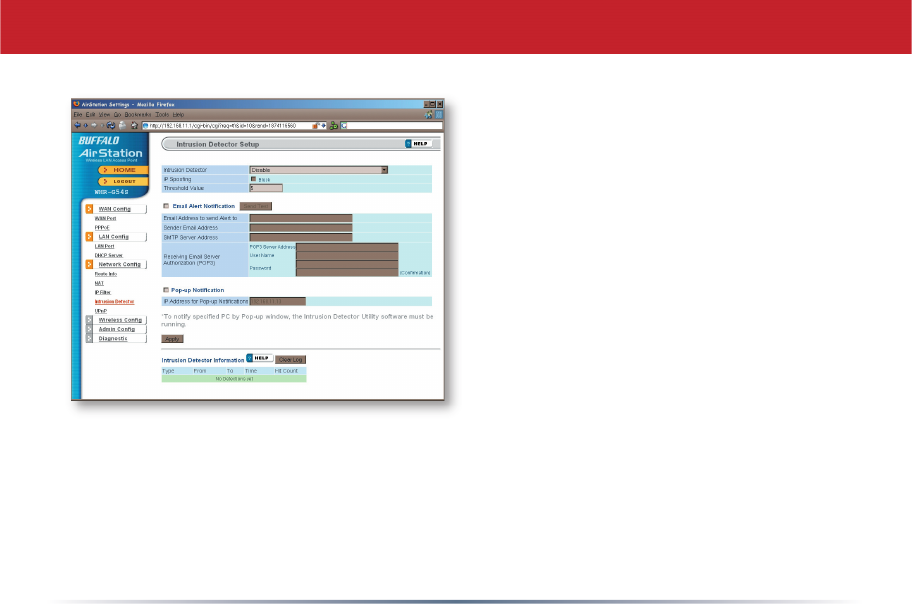
Network Confi guration (Intrusion Detector)
To enable intrusion detector, choose
Enable or Enable (Apply packet fi lter rules)
from the Intrusion Detector drop-down
box. If packet fi lter rules are applied,
packets will be fi ltered with packet fi lter
rules before Intrusion Detector is applied.
Blocking IP spoofi ng blocks packets from
devices using an IP address that is not
their own.
In the Threshold Value box, enter the
number of times an event has to occur
before you receive notifi cation.
To confi gure your email alerts, enter your
email address and mail server information.
You may make up a sender email address,
such as “alert@router.com”. Alert emails will appear to come from this address.
Intrusion detector also blocks unauthorized access attempts and suspicious traffi c from
WAN-side devices (the internet).
39
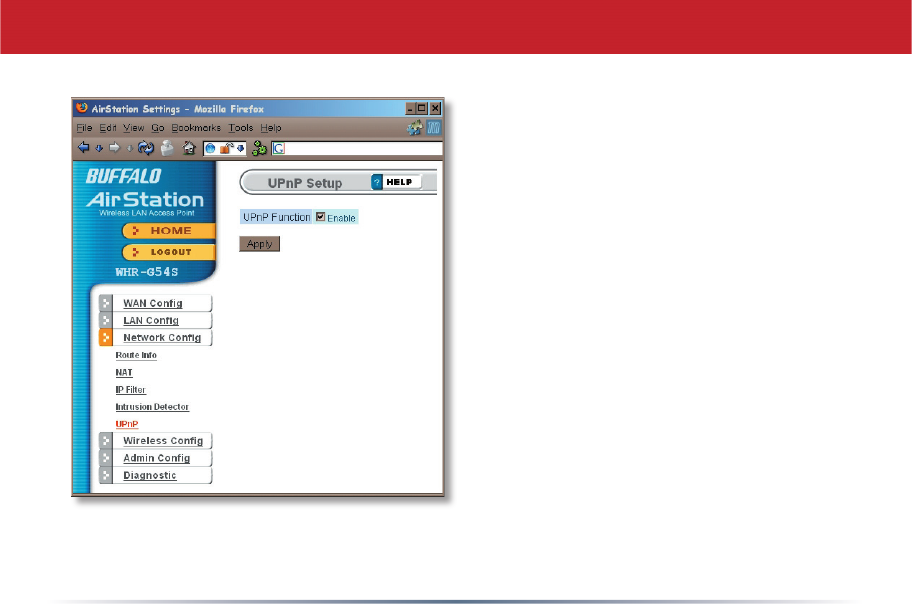
You may disable Universal Plug and
Play functionality by unchecking
Enable here. Note that Windows (MSN)
Messenger will not function correctly
with UPnP disabled.
UPnP
40
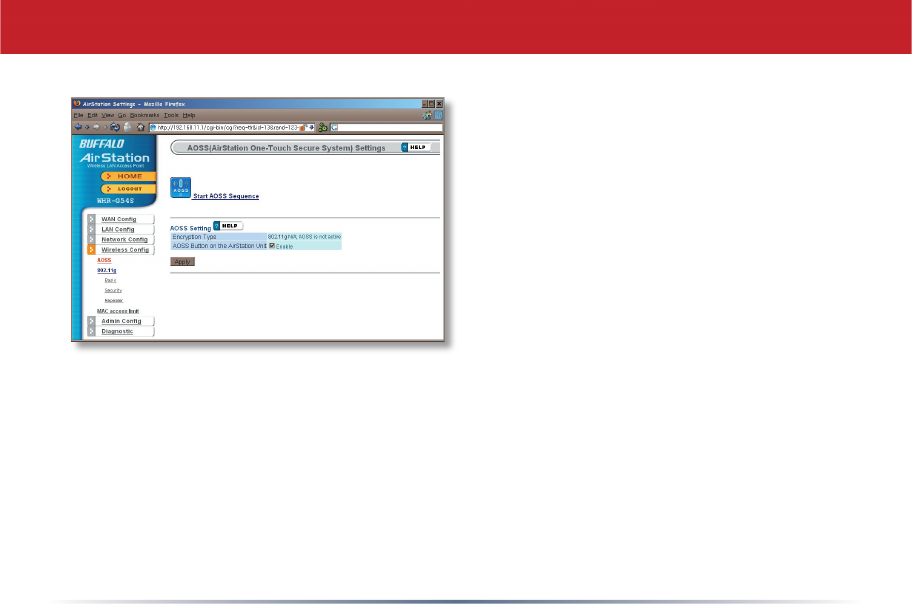
Clicking Start AOSS Sequence has the same
function as pushing the AOSS button on the
router: it initiates the AOSS process.
If all your clients support AOSS, it’s very
simple to set them up. Press the AOSS
button on the router, or the one on this
page, and then push the AOSS button on
the client device.
Each client device will have to be set up
seperately. Wait for each AOSS process to
fi nish before starting the next one.
Consult your client device’s documentation
for the location of its AOSS button.
AOSS