BUFFALO 09101577-0 Air Station (High Power Wireless Router) User Manual WHR HP G54 Manual indd
BUFFALO INC. Air Station (High Power Wireless Router) WHR HP G54 Manual indd
BUFFALO >
Contents
- 1. Manual 1
- 2. Manual 2
- 3. Manual 3
- 4. Manual 4
- 5. Manual 5
Manual 4
41
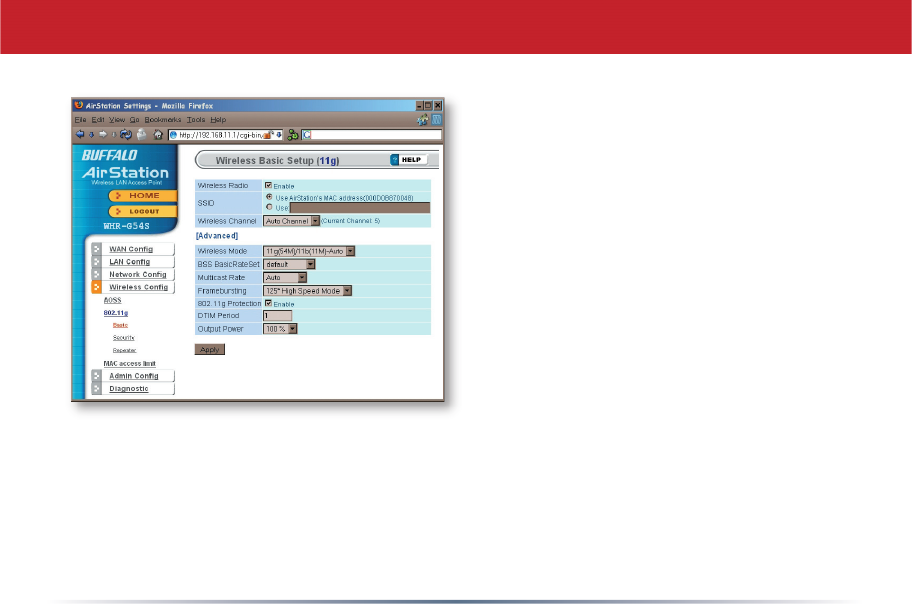
If you have a mixed mode network,
with both 802.11b and 802.11g clients,
it’s recommended that you check 11g
protection to ensure that slower 11b clients
don’t hog all available bandwidth.
Choosing Auto for Wireless mode lets both
802.11b and 802.11g clients connect to the
network. If you would prefer to allow only
one or the other, you have those options as
well.
Two different framebursting modes are
available. These can double throughput in
your network if all clients are confi gured
to use them. 125* High Speed Mode is an
improved version of Framebursting and is
highly recommended if your clients support
it. If a framebursting mode is enabled and
some of your clients don’t support it, it
simply won’t be used.
Reducing the Output Power below 100%
will reduce the range of your router.
802.11g (Basic)
42
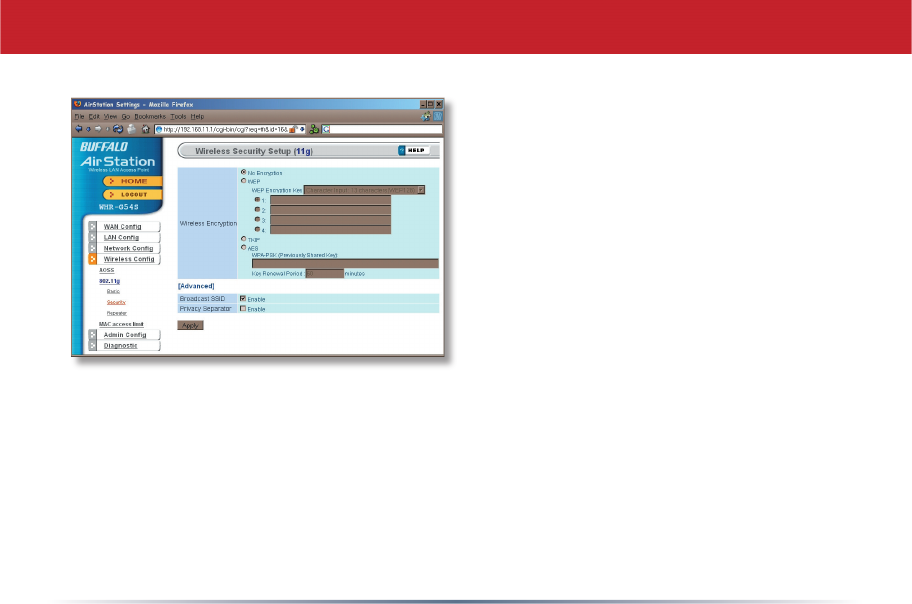
Buffalo recommends that you choose
the strongest form of encryption that’s
supported by all your client devices.
• WEP is a lot better than nothing, and
almost every wireless device ever made
supports it.
• TKIP is slower than WEP but much more
secure.
• AES is the most secure of all, and the
quickest as well. Use it if you can.
Setting the key renewal period too short
can decrease network performance.
802.11g (Security)
43
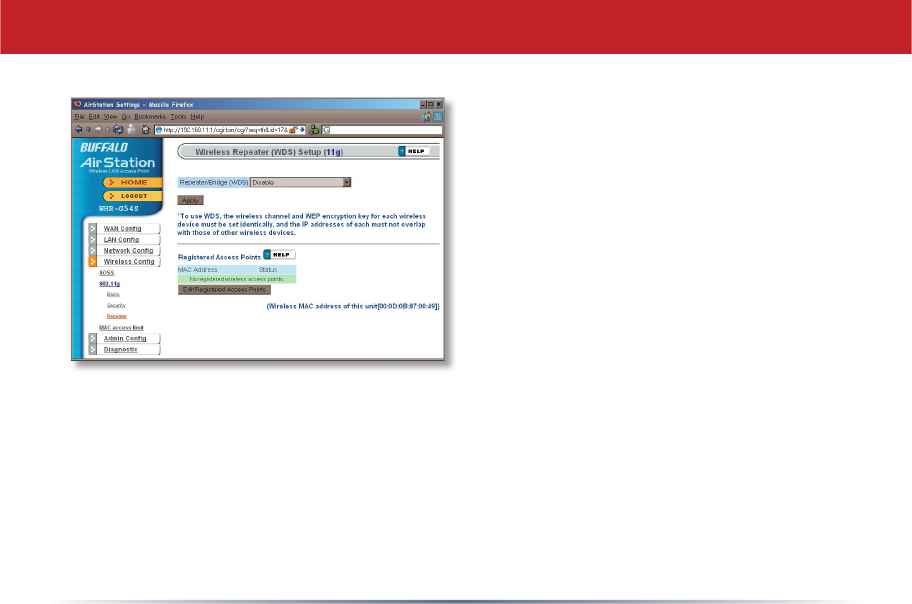
To setup a bridge between two or
more wireless access points, select
Enable and click on Apply.
For more on setting up WDS, see
page 67, or click on Help at the top
right corner of the screen.
Bridge/Repeater (WDS Bridging)
44
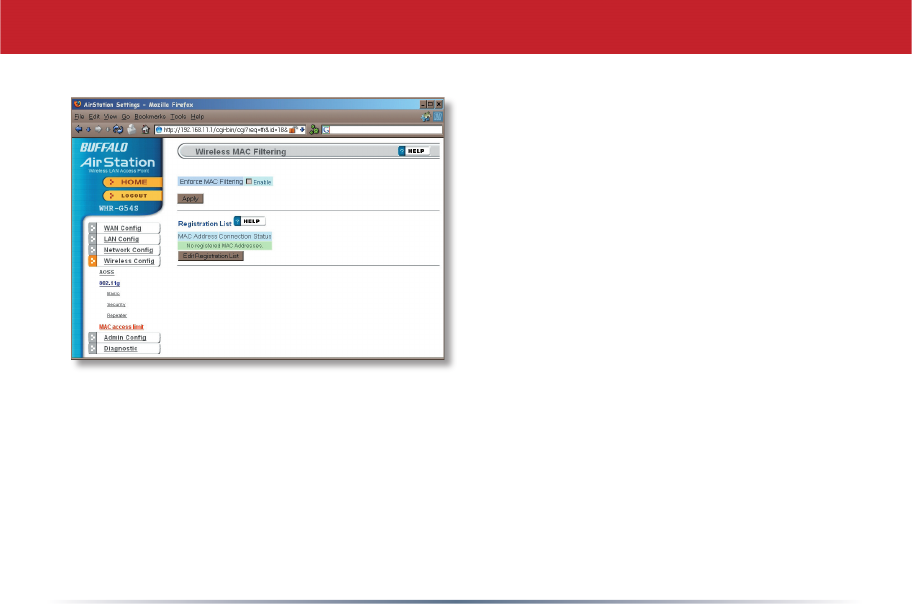
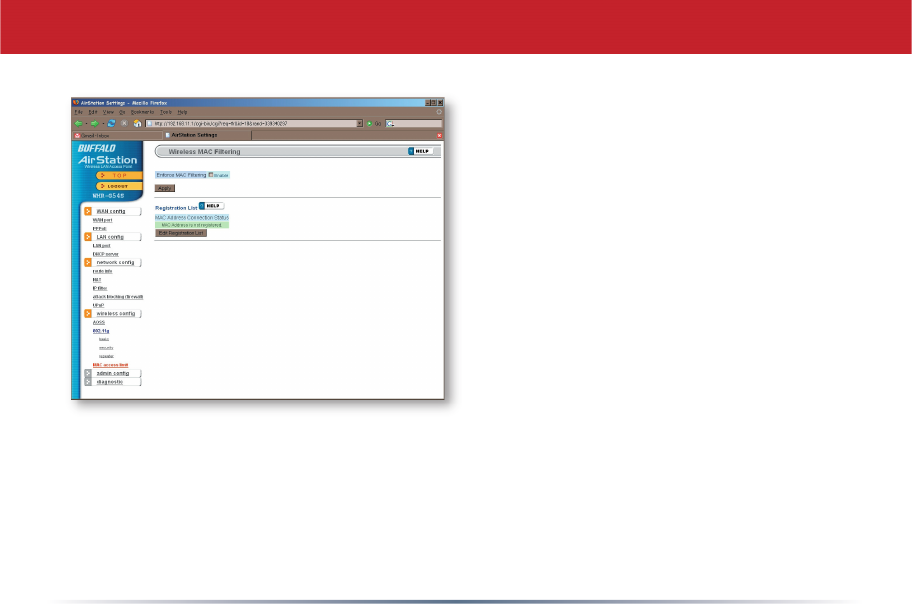
MAC Access Limit
You may limit access to your wireless
network to specifi c computers.
Computers not listed on your MAC
Registration List will not be able to
connect to the network. If you enable
this, click Edit Registration List to add
MAC addresses to your registration
list.
45
MAC Access Limit (Edit Registration List)
Advanced Settings
Enter a MAC address and click Apply
for each client that’s going to be
accessing the network.
46
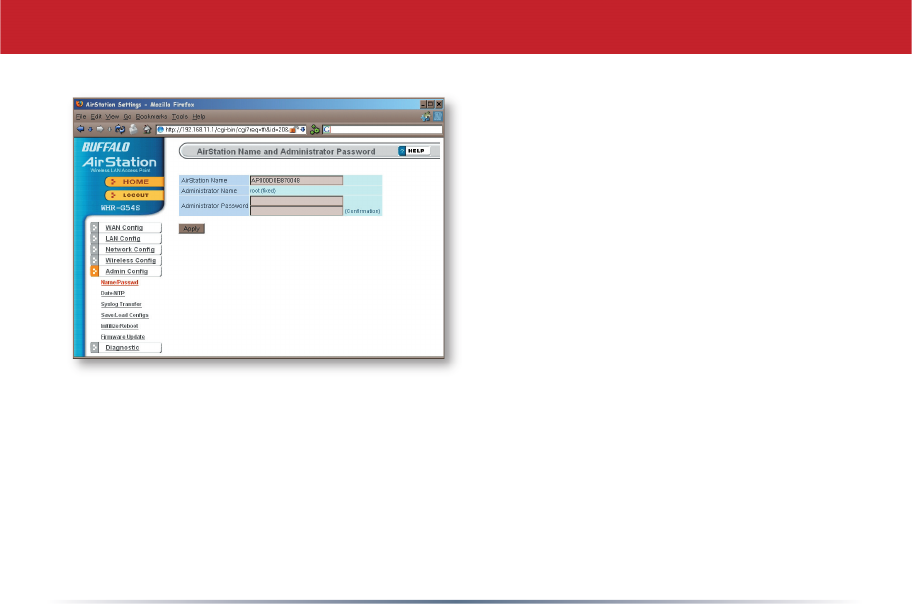
Here, you can change your AirStation’s
name on your network and the
administrator password. The name of
the administrator account is fi xed as
“root”. If you have many AirStations on
your network, having clear, descriptive
names for each can make them much
easier to administrate.
Admin Confi guration (Name/Password)
47
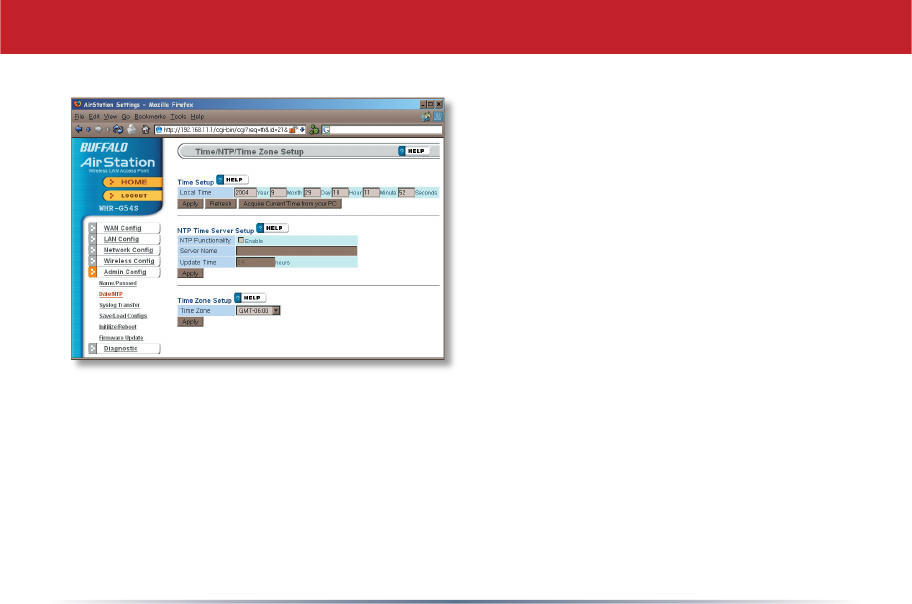
You may set the time and date on your
AirStation by entering it manually, and
then clicking Apply.
You may also click Acquire Current
Time from your PC to set time and date
automatically to match the PC you’re
using to set it up.
If you have an NTP time server on your
network, Enable NTP functionality and
enter your NTP Server Name. Choose how
often you want time updated and click
Apply.
If you’re setting time manually, you’ll need
to select your Time Zone and click Apply.
Admin Confi g (Date/NTP)
48
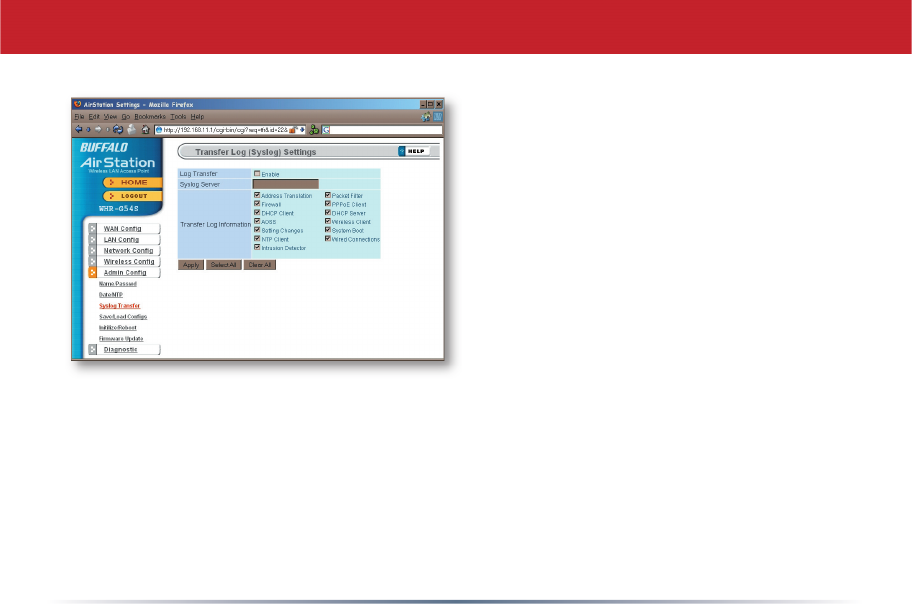
If you have a syslog server on your
network, you may send logs to it.
Check Enable to have logs transferred.
Enter the address of your Syslog
Server, check the logs you want
transferred, and click Apply.
Syslog Transfer
49
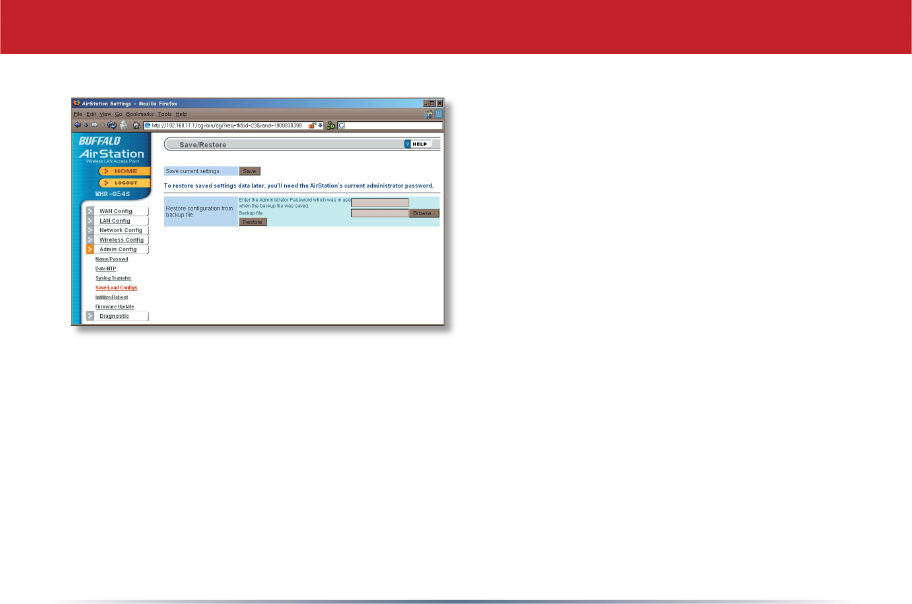
Once your AirStation’s confi gured
the way you want it, you can save
the confi guration here. You’ll need
the current administrator password
to restore the confi guration from the
backup fi le later.
Click Help at the top right corner
of the page for more information on
backing up and recovering system
confi guration fi les.
Save/Load Confi guration
50
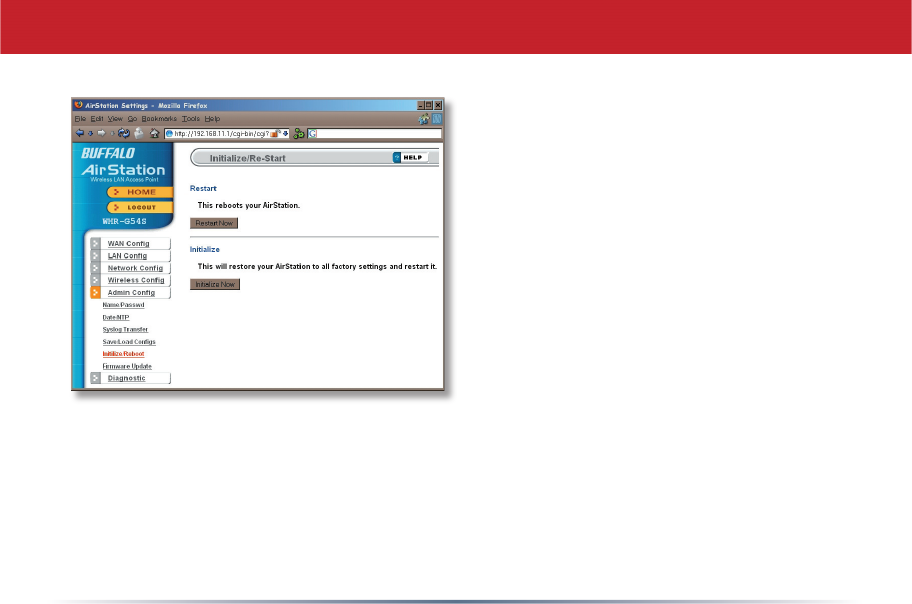
Click Restart Now to restart your
AirStation. Click Initialize Now to
restore your AirStation to factory
defaults and restart it.
Initialize/Reboot